HOLIDAY DONATION DRIVE - SUPPORT MSW - DO YOUR PART TO KEEP THIS GREAT FORUM GOING! (Only 20 donations so far - C'mon guys!)
×


Bill Brown
-
Posts
65 -
Joined
-
Last visited
Content Type
Profiles
Forums
Gallery
Events
Everything posted by Bill Brown
-
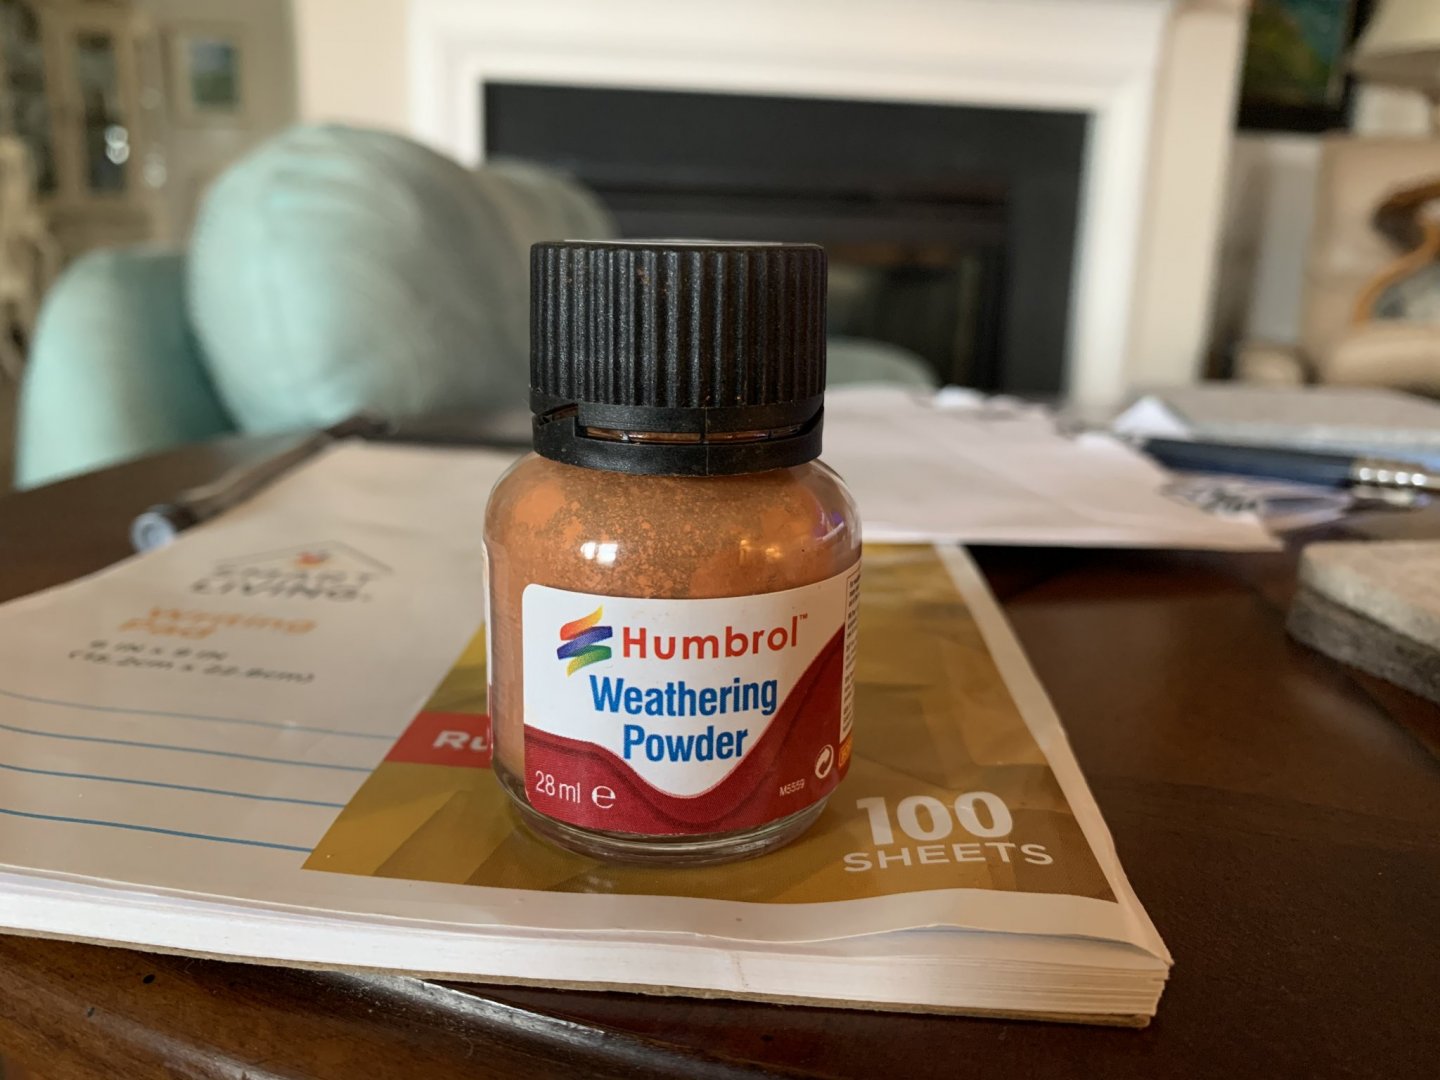
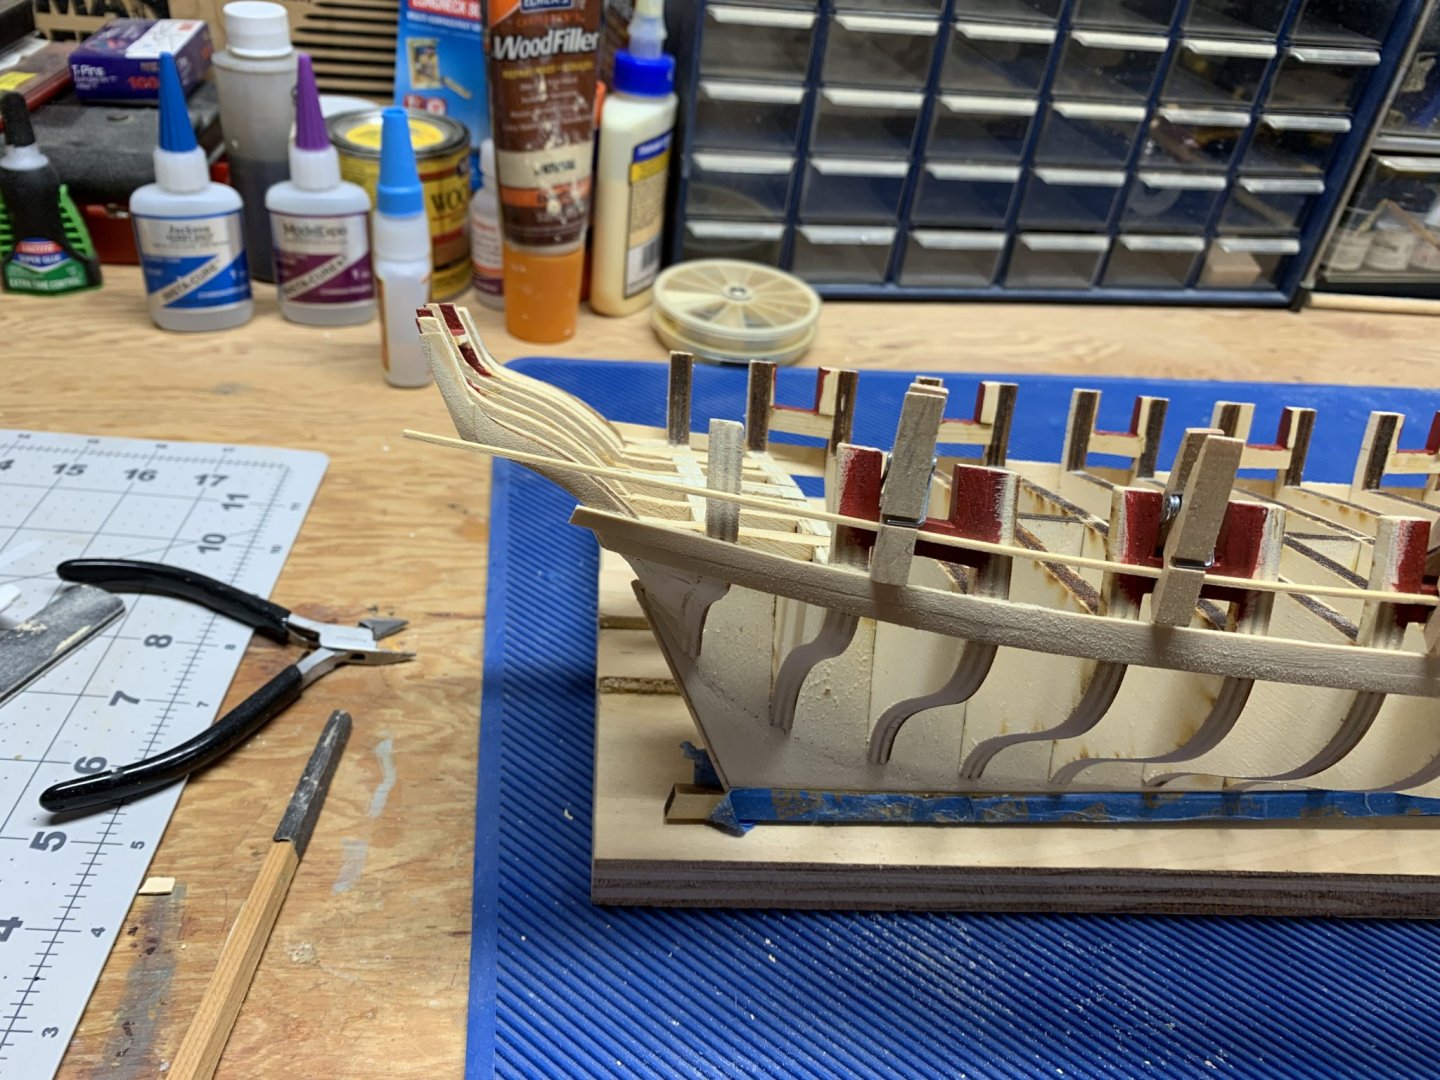
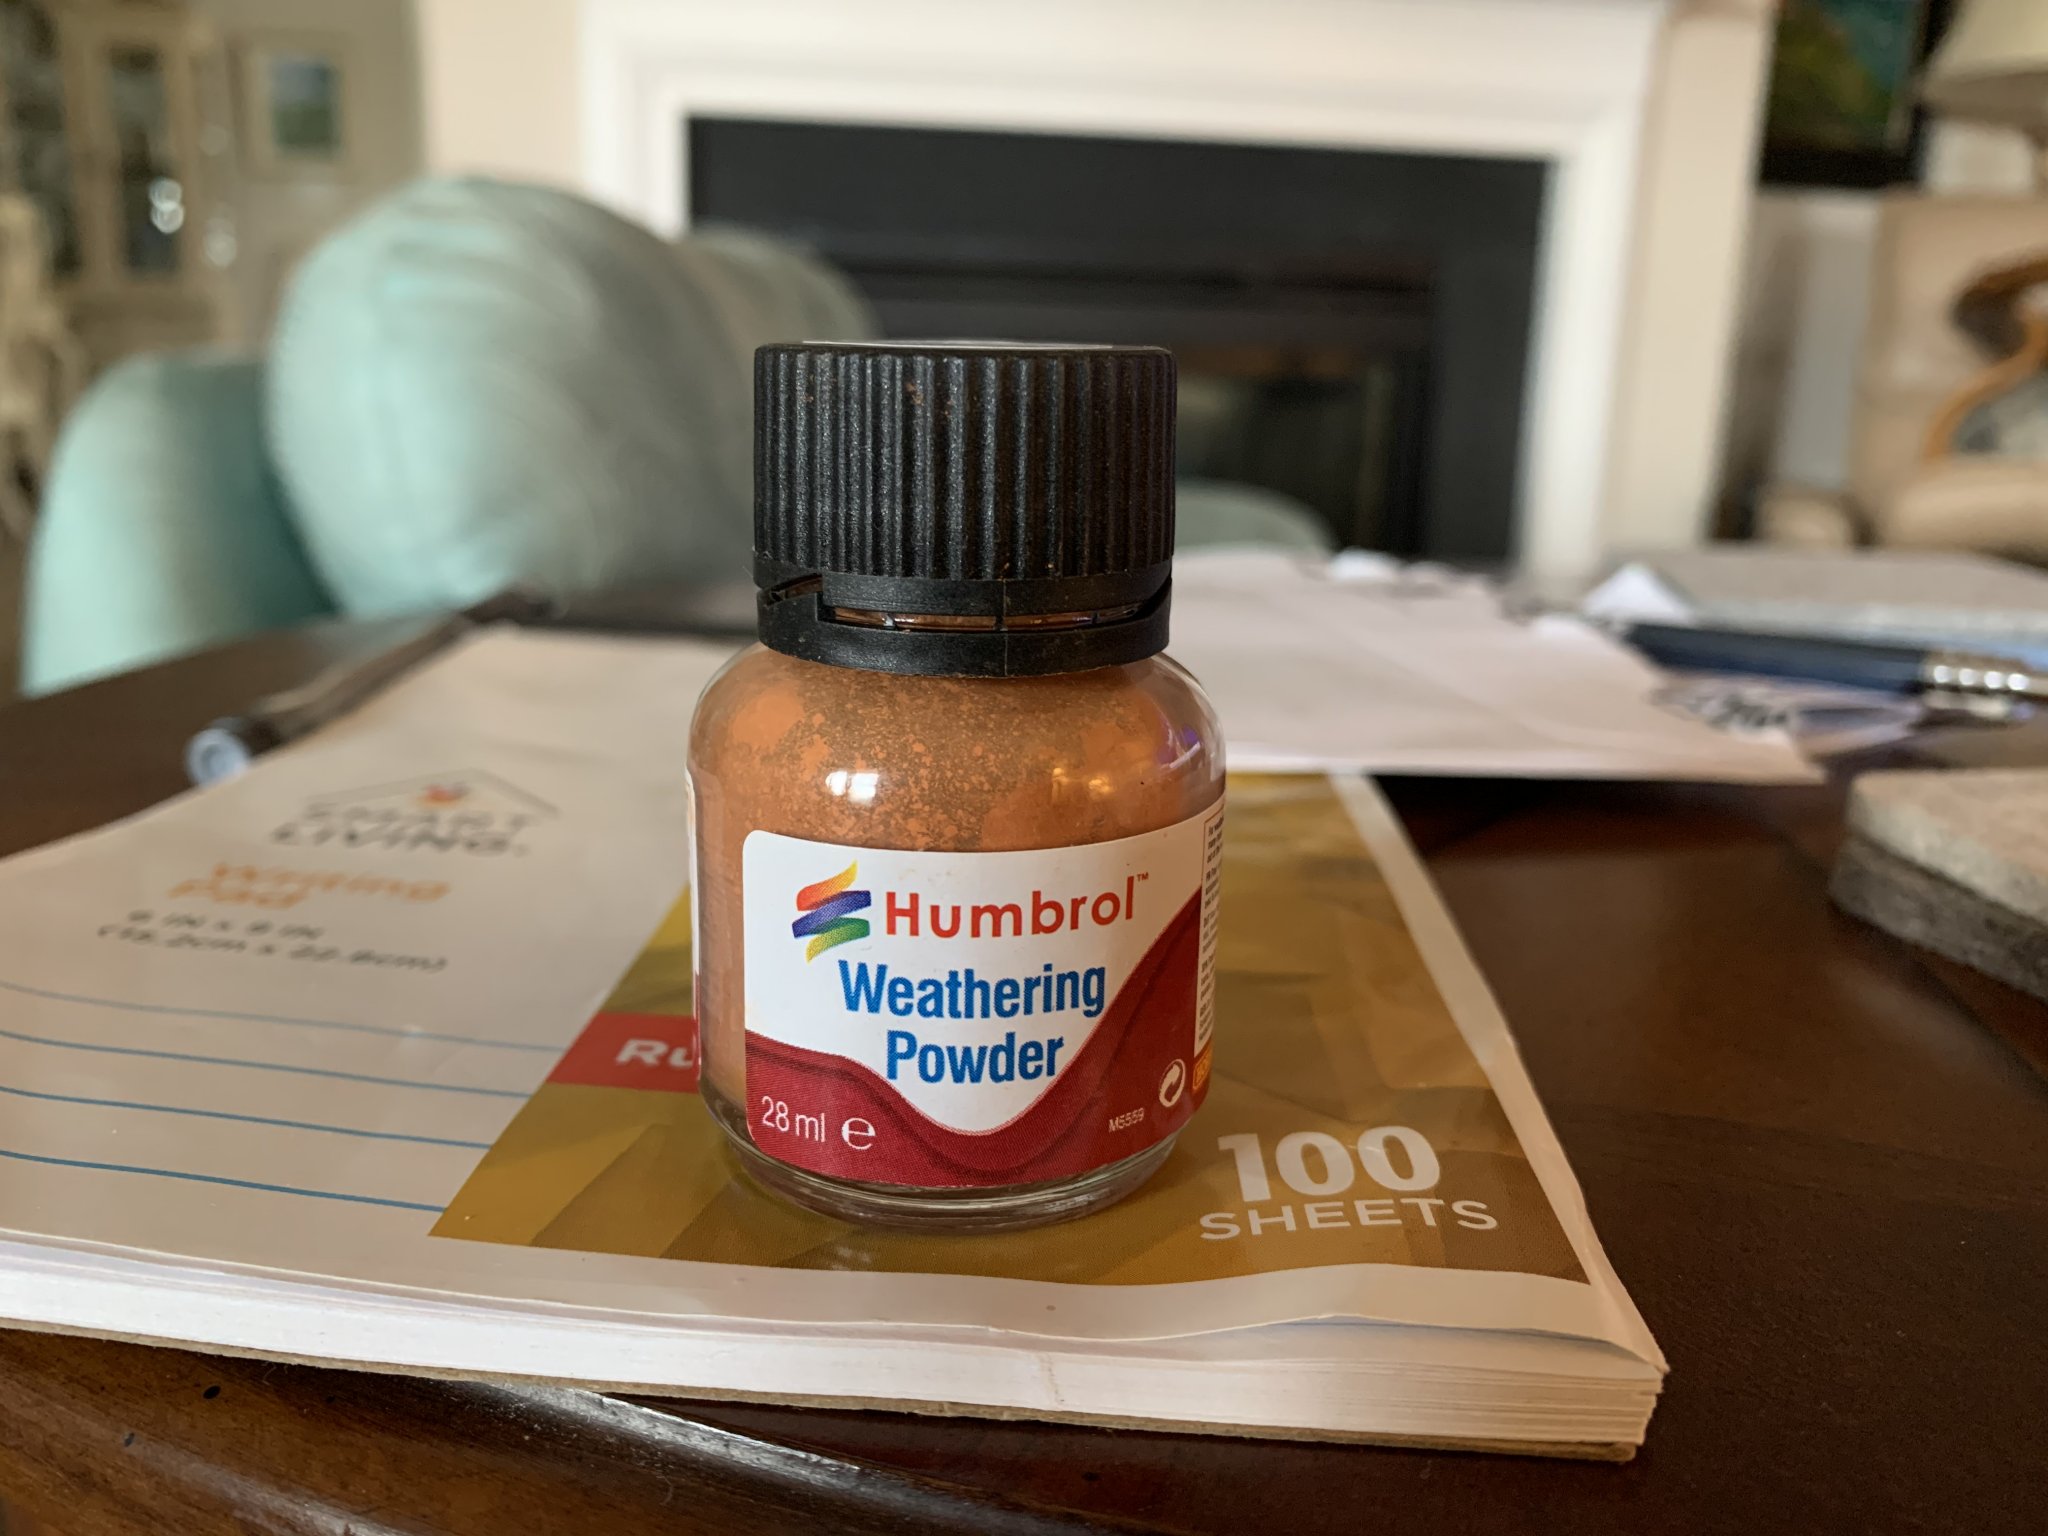
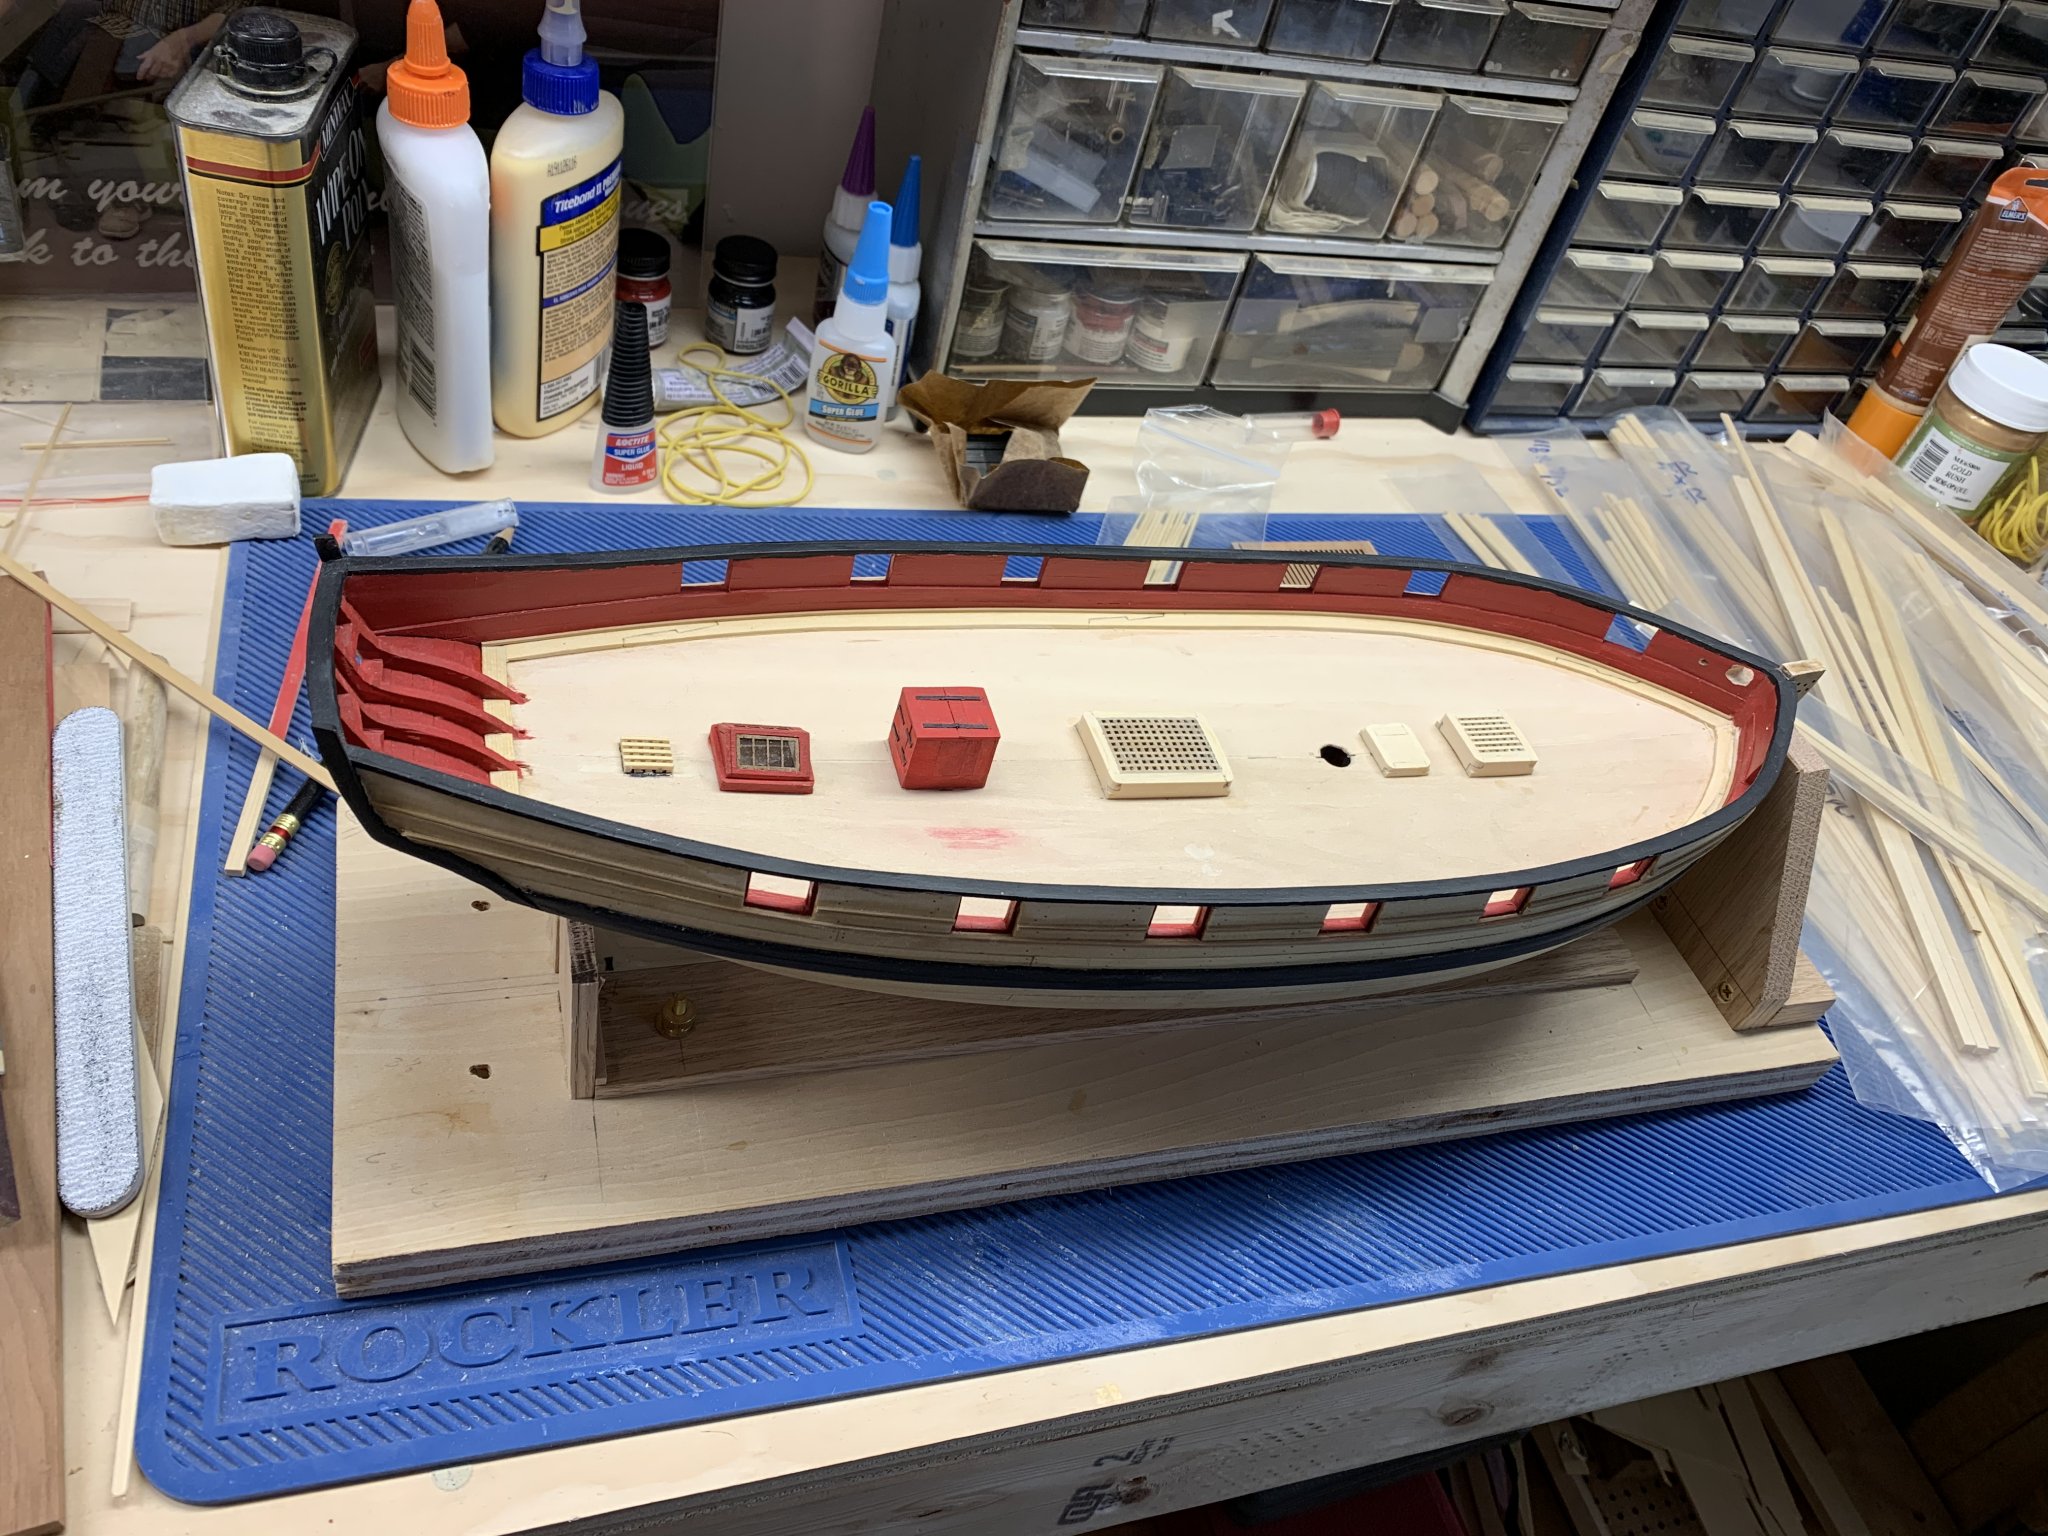
 Time to make the pumps and winch. Once again I used Syren's mini kit for the pumps. For the galley stack, I used a thin piece of veneer I had, about 30 mil thick to form the side walls. After assembly the stack was painted flat black and then some rust weathering powder applied to simulate a metal structure. The Winch was pretty straight forward. The instructions do a nice job in describing how best to achieve it. The ships rudder. Here again, Syren's plans and instructions do a great job in describing how to build Cheerful's rudder. I used Syren's mini kit for the gudgeons and pintels which consists of very precise laser cut parts. These worked extremely well. Some black painters tape cut in strips simulated some of the iron bands on the top part of the rudder. One of the last major deck structures prior to stepping the mast is the bowsprit step. Syren has yet another mini kit which I took advantage of in my build. The precision laser cut parts in the mini kit make its creation pretty straight forward. It gets painted red prior to stepping the bowsprit. At this stage, all the major deck structures are complete and the ship is ready to embark on the next major building phase, the mast, bowsprit, gaffs and spars. So until next time, be well, safe and Happy Modeling! Bill In hindsight: I would say the biggest issue I encountered during this build phase is not really shown in any of the pictures above and in fact may be more appropriate for my next installment, but I had difficulty stepping the bowsprit. I wanted to have the bowsprit hole provide as tight a fit to the bowsprit as possible. This was fine but my hole was at a slightly different angle then what the plans required. The result was that when the bowsprit was installed it did not want to sit flush against the bottom of the bowsprit step top cross piece. I had to do a bit of adjusting before I was satisfied with how it installed. Doing it again, a few dry fits of the hole and bowsprit is warranted and greater care to make sure the hole drill angle is correct. I noticed the issue late in the game and it became tougher to fix. Other than that, the mini kits really make the deck structures go smoothly for the novice. Well done Syren!
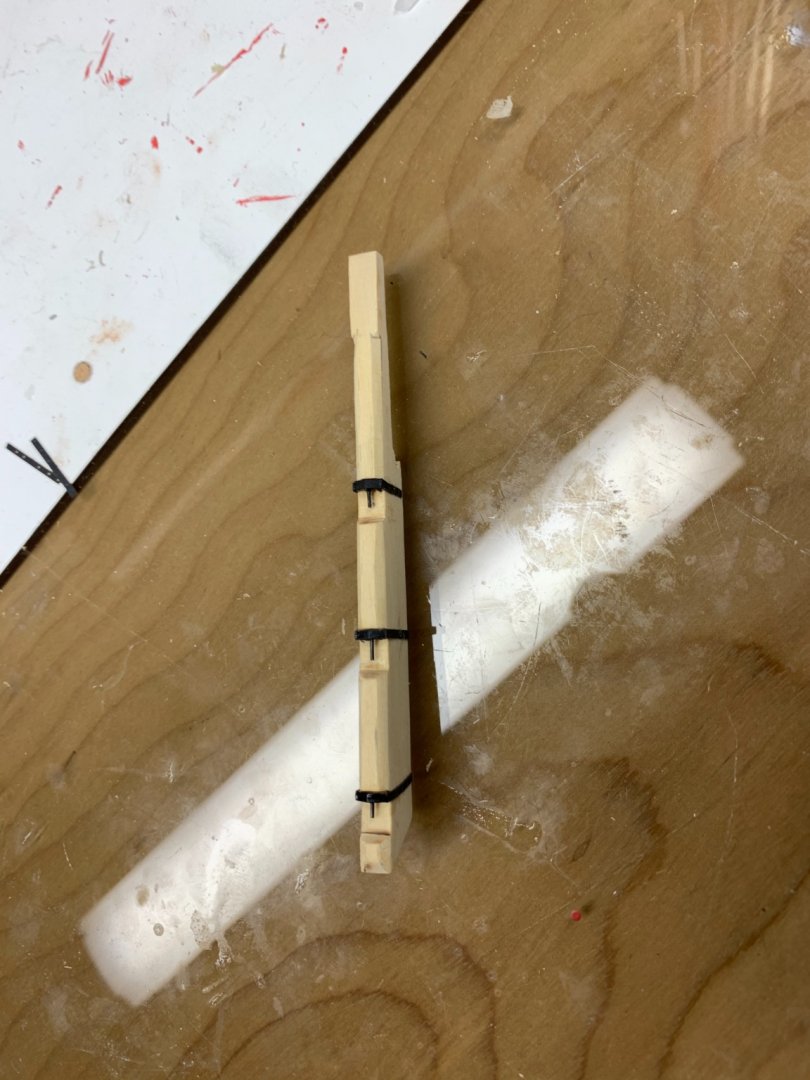

- 54 replies
-
- 11
-

-
- cheerful
- Syren Ship Model Company
- (and 1 more)
-
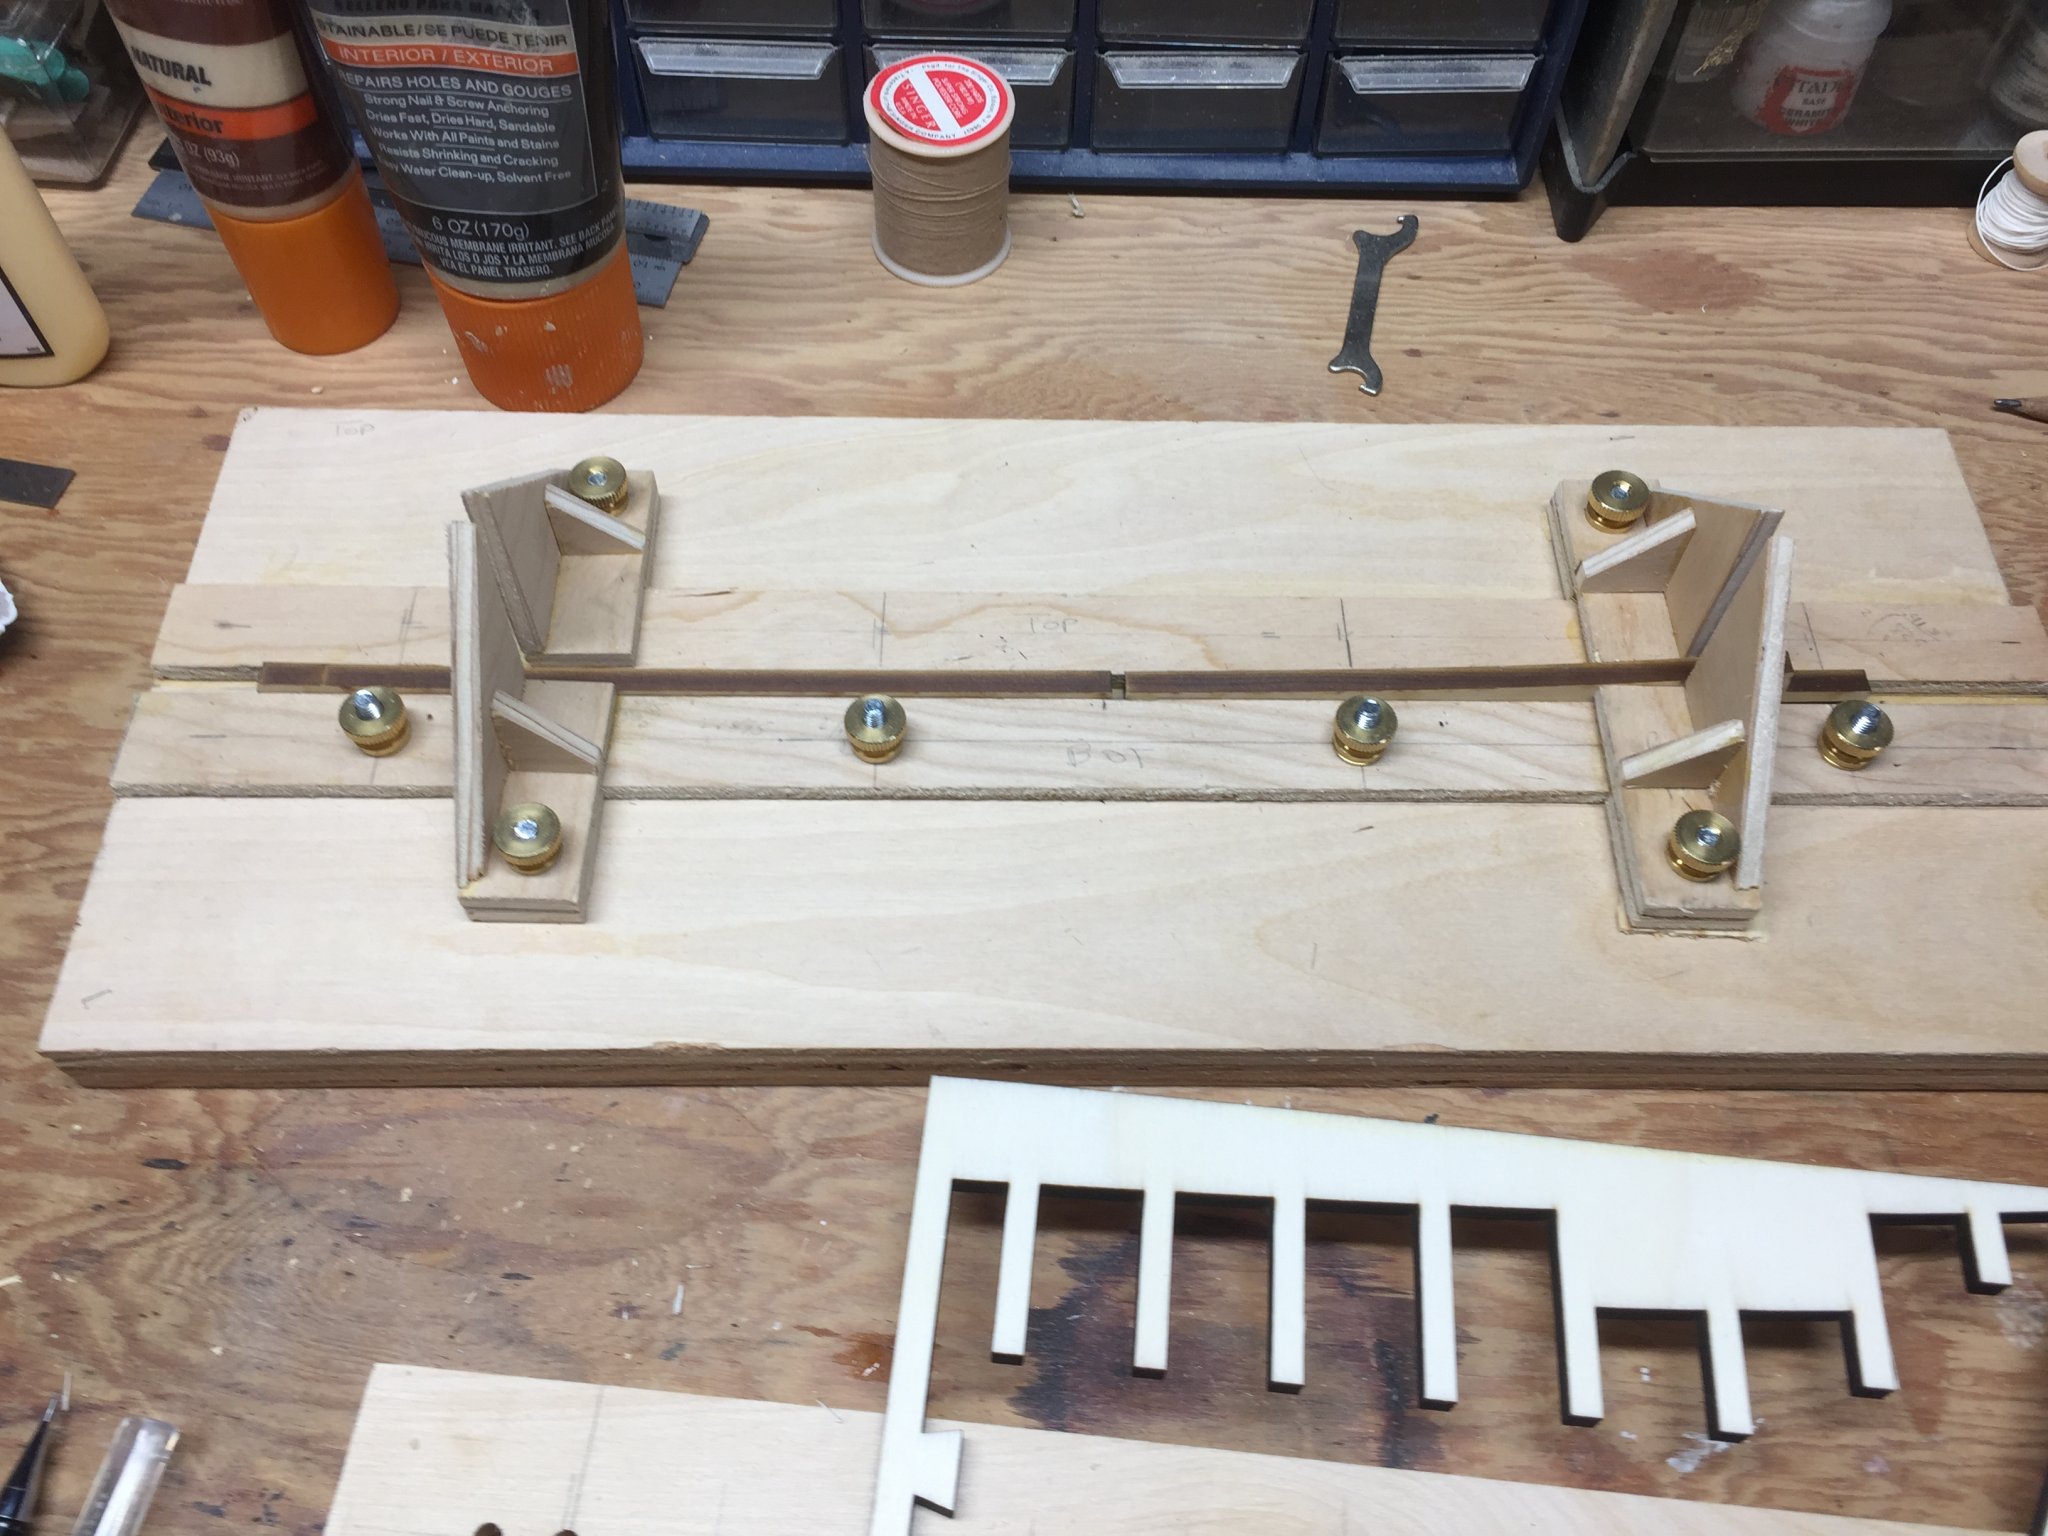
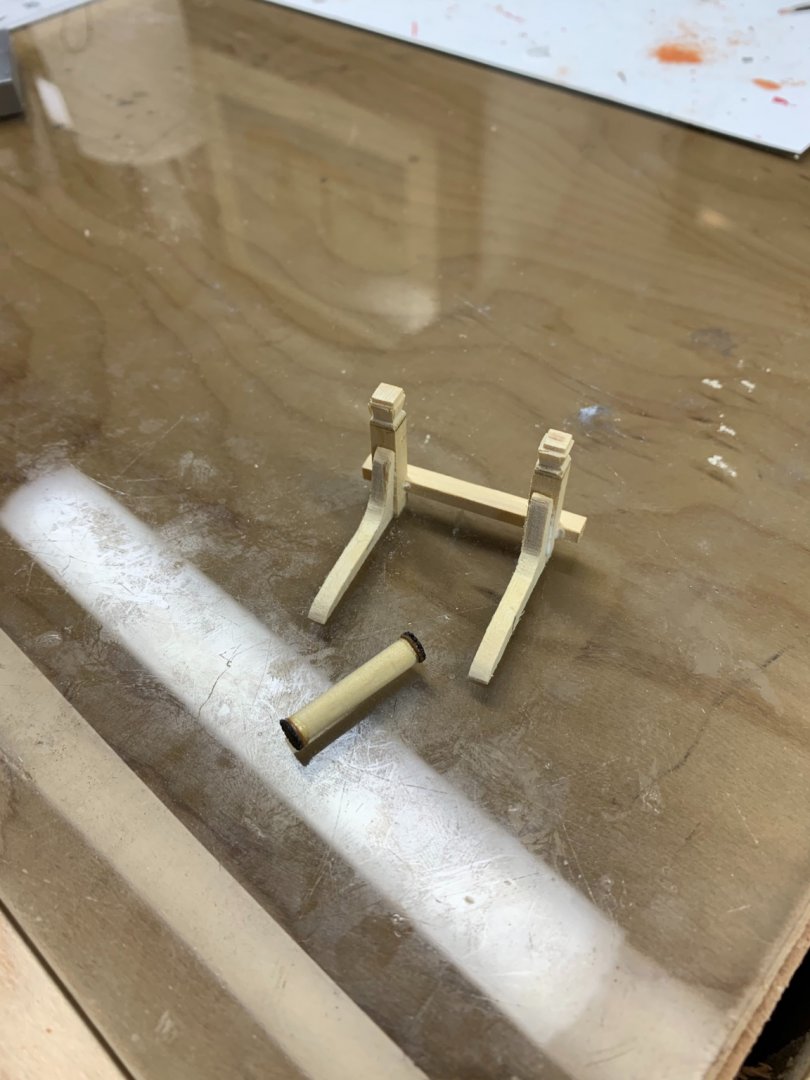
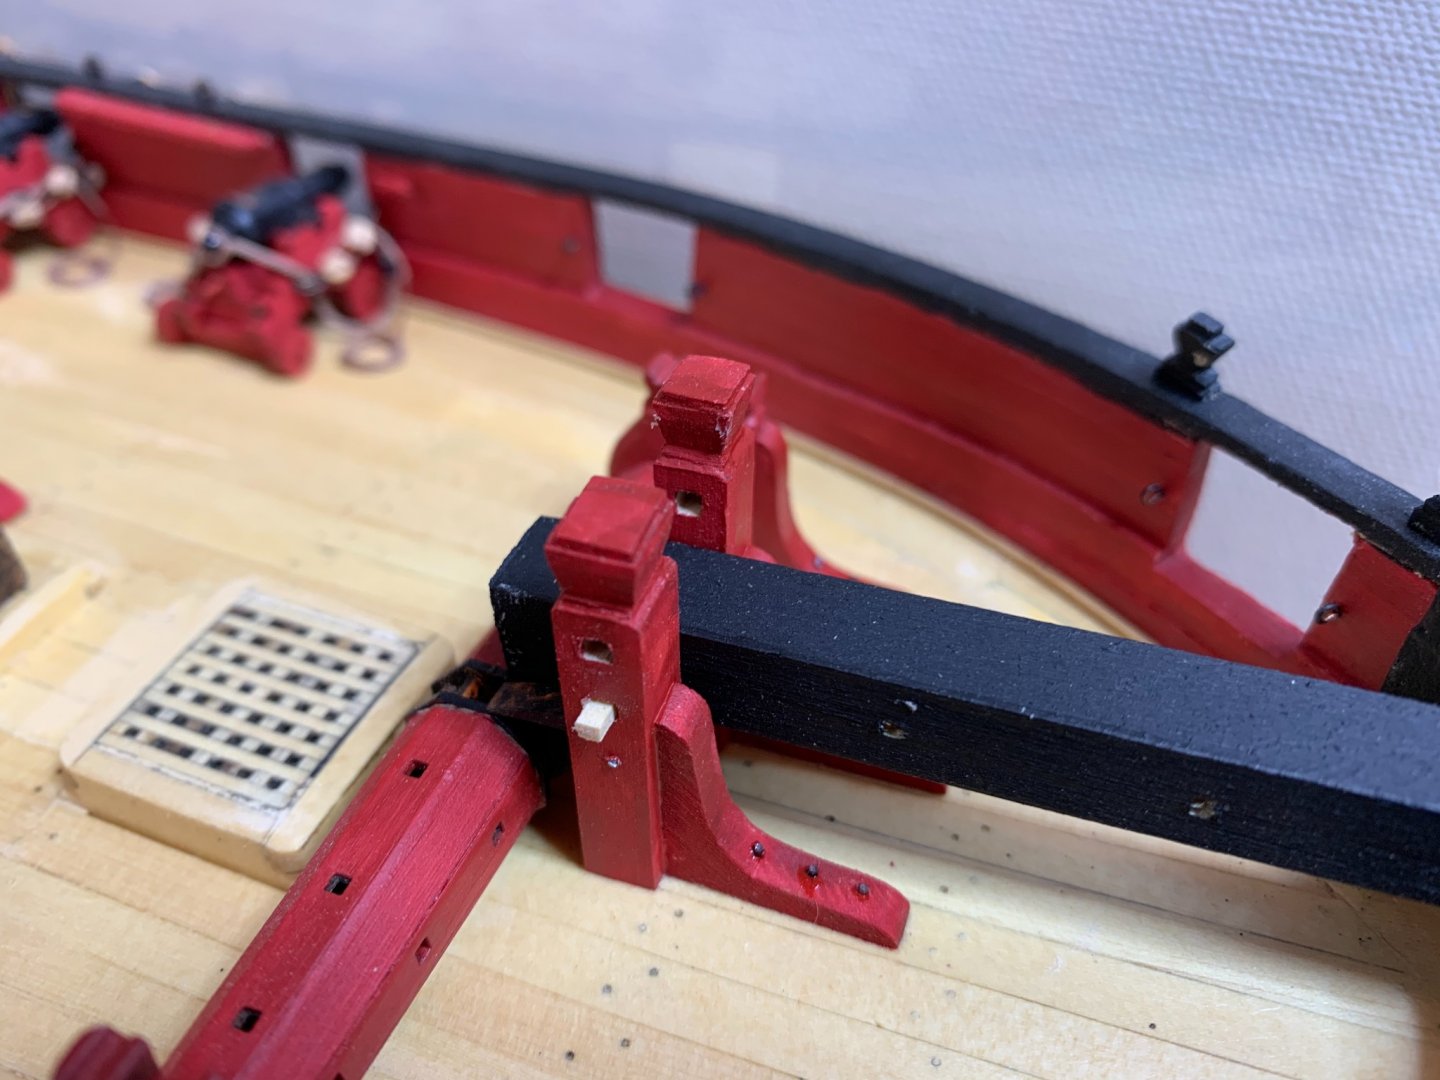
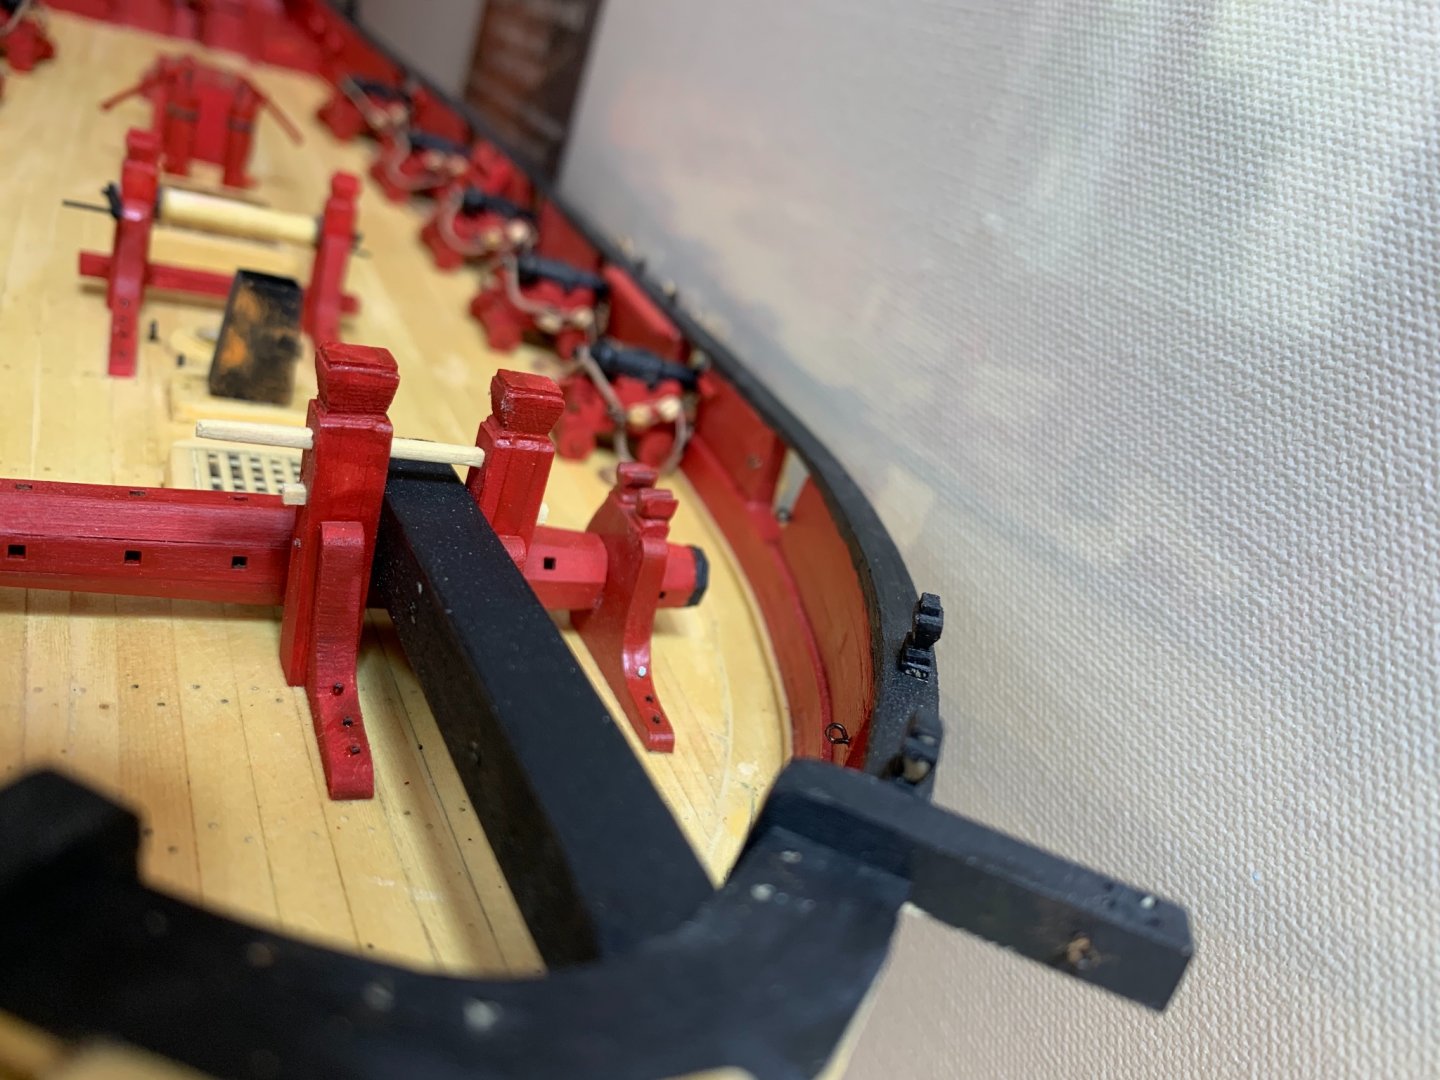
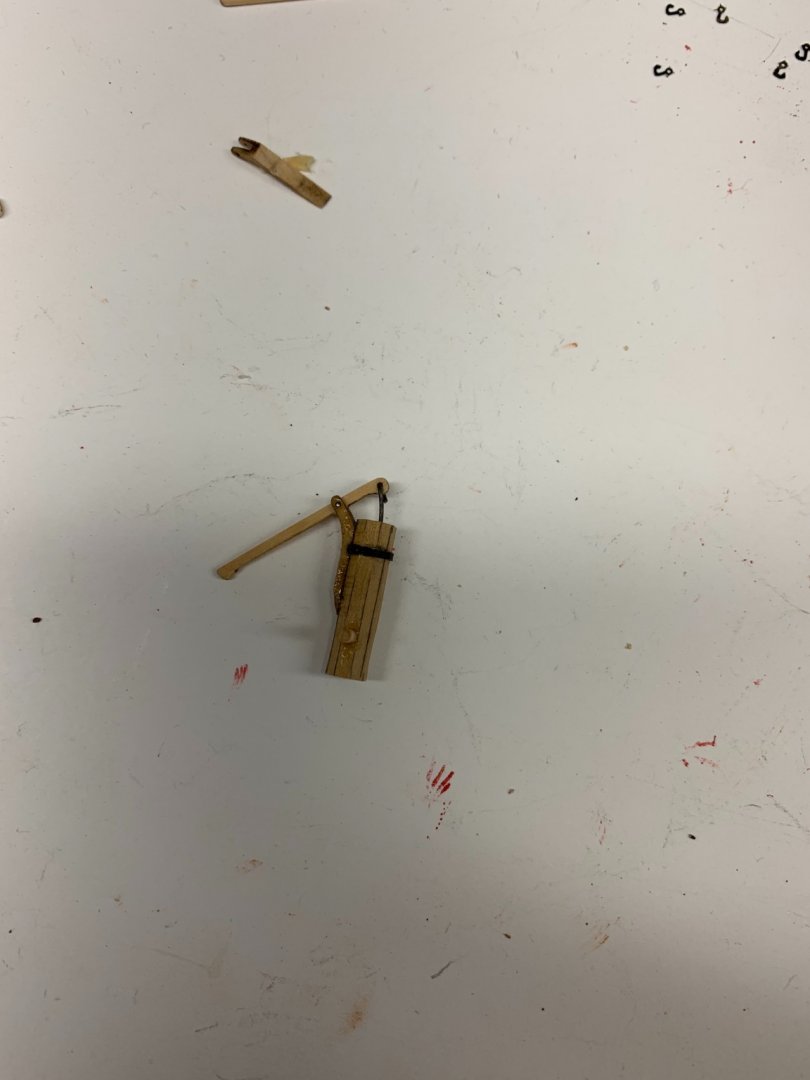
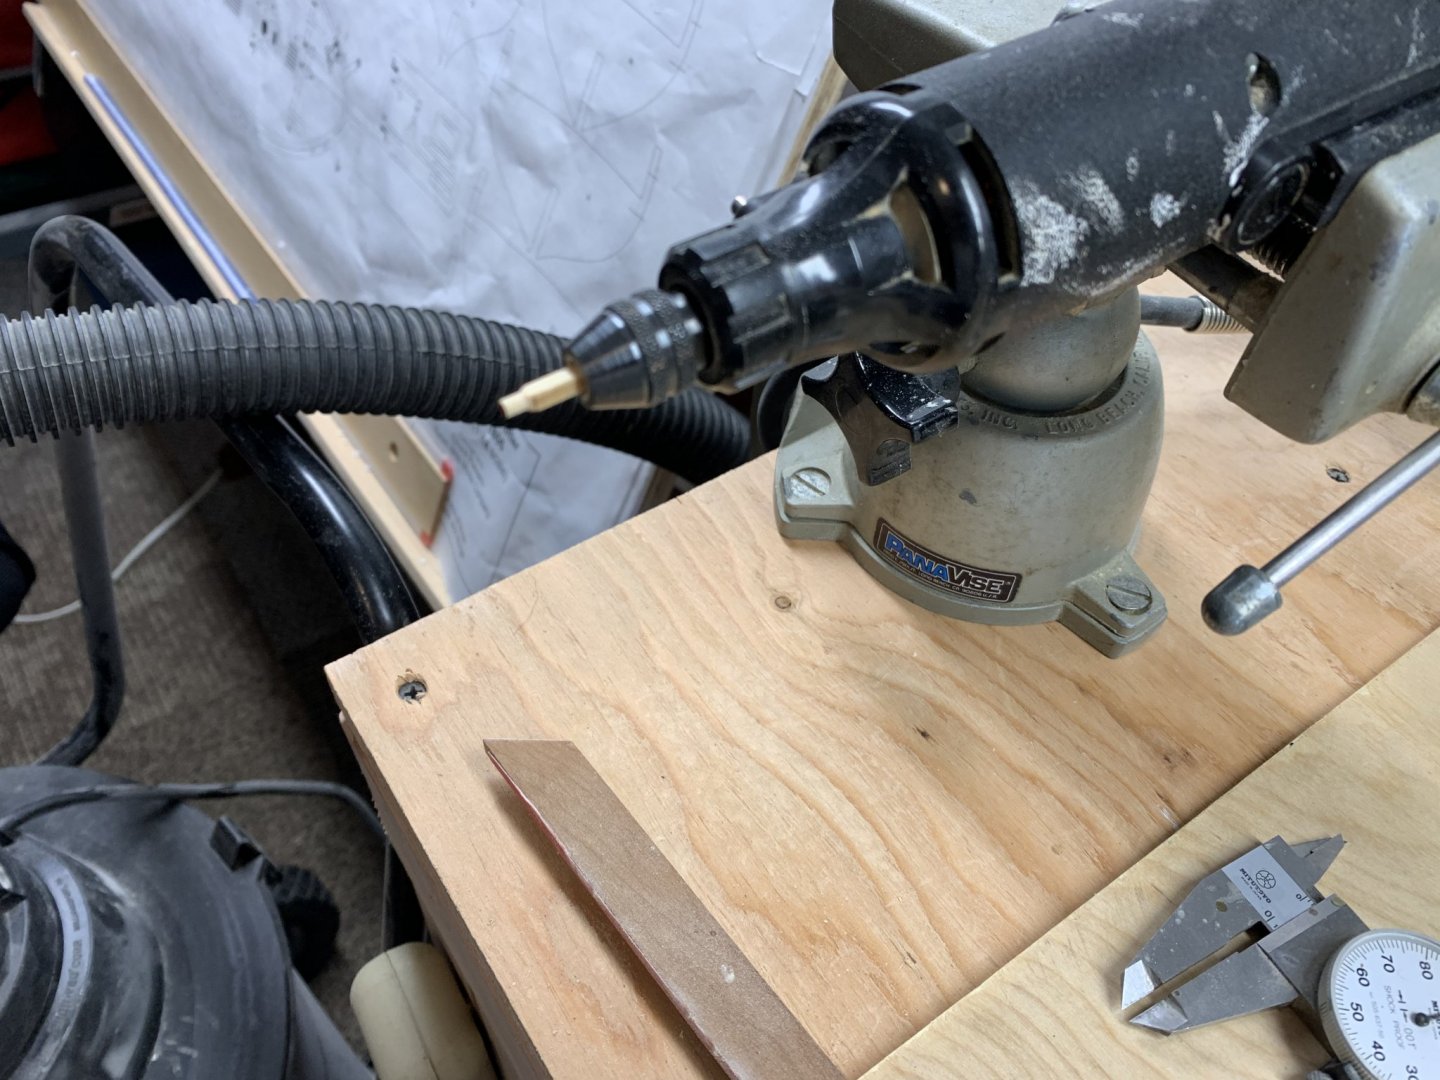
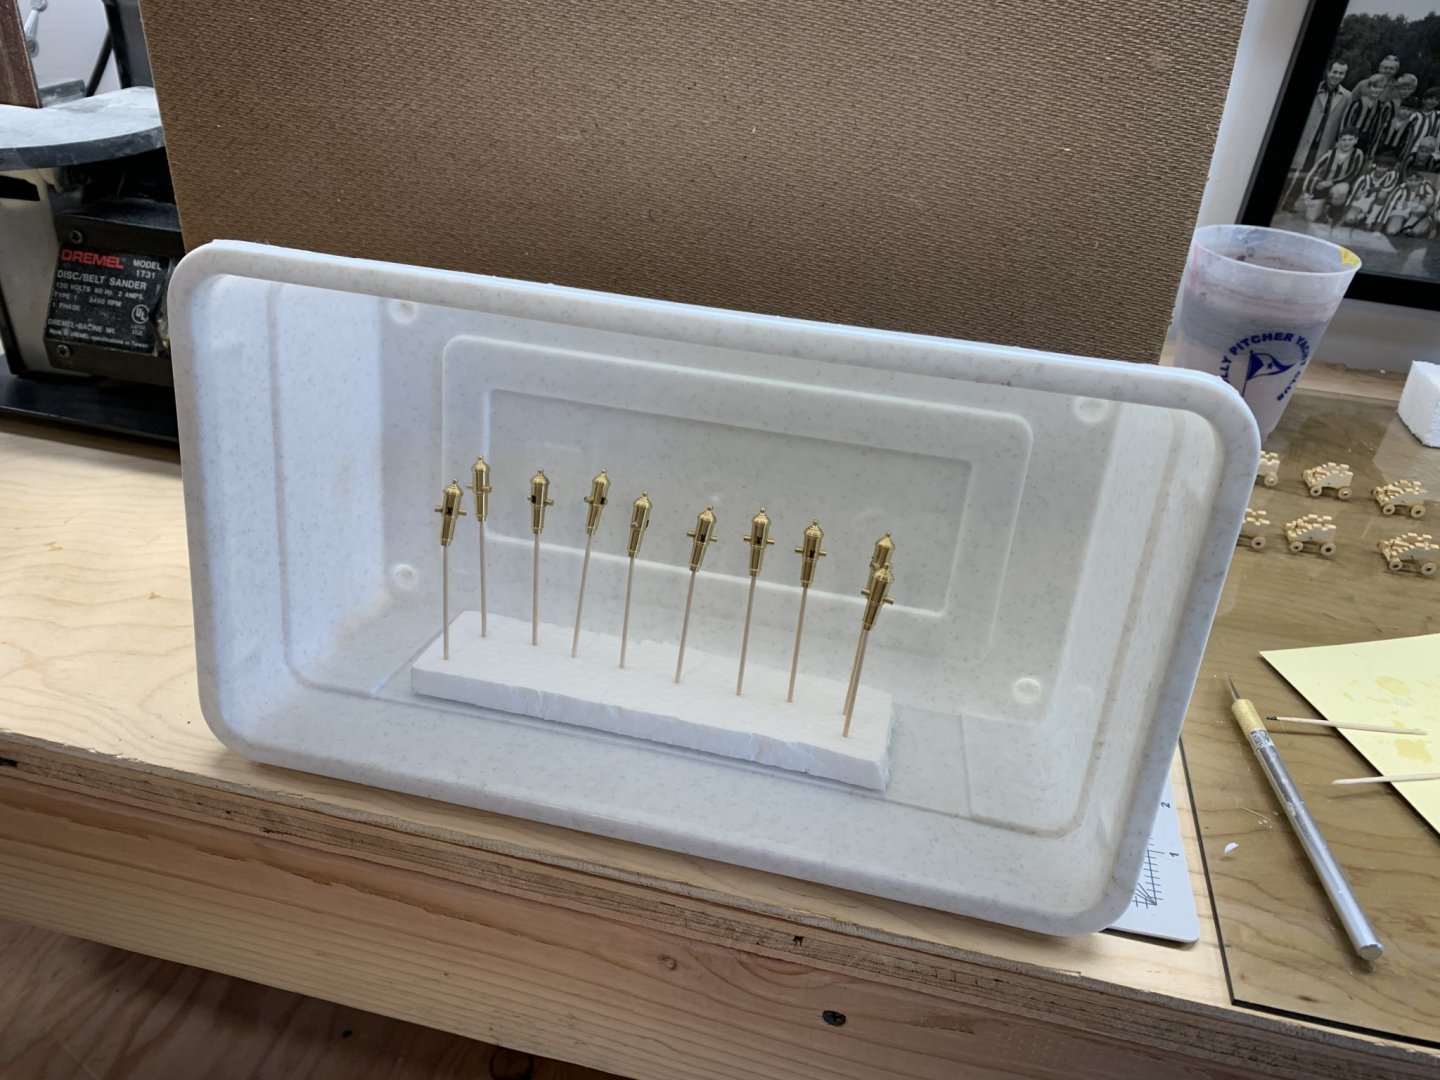
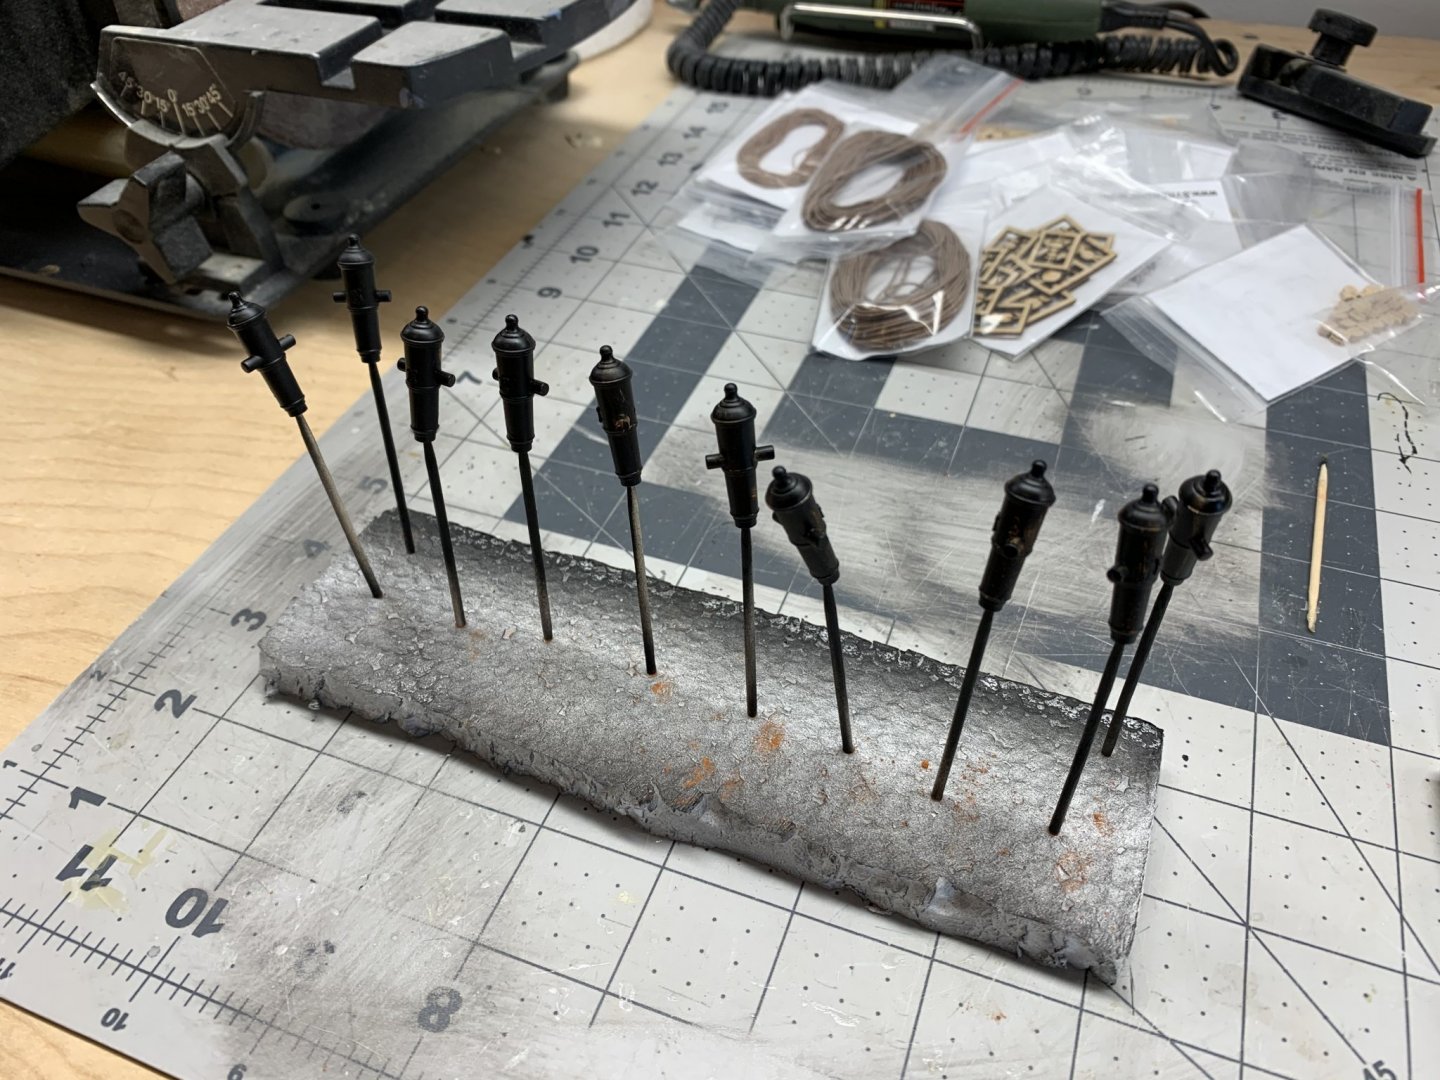
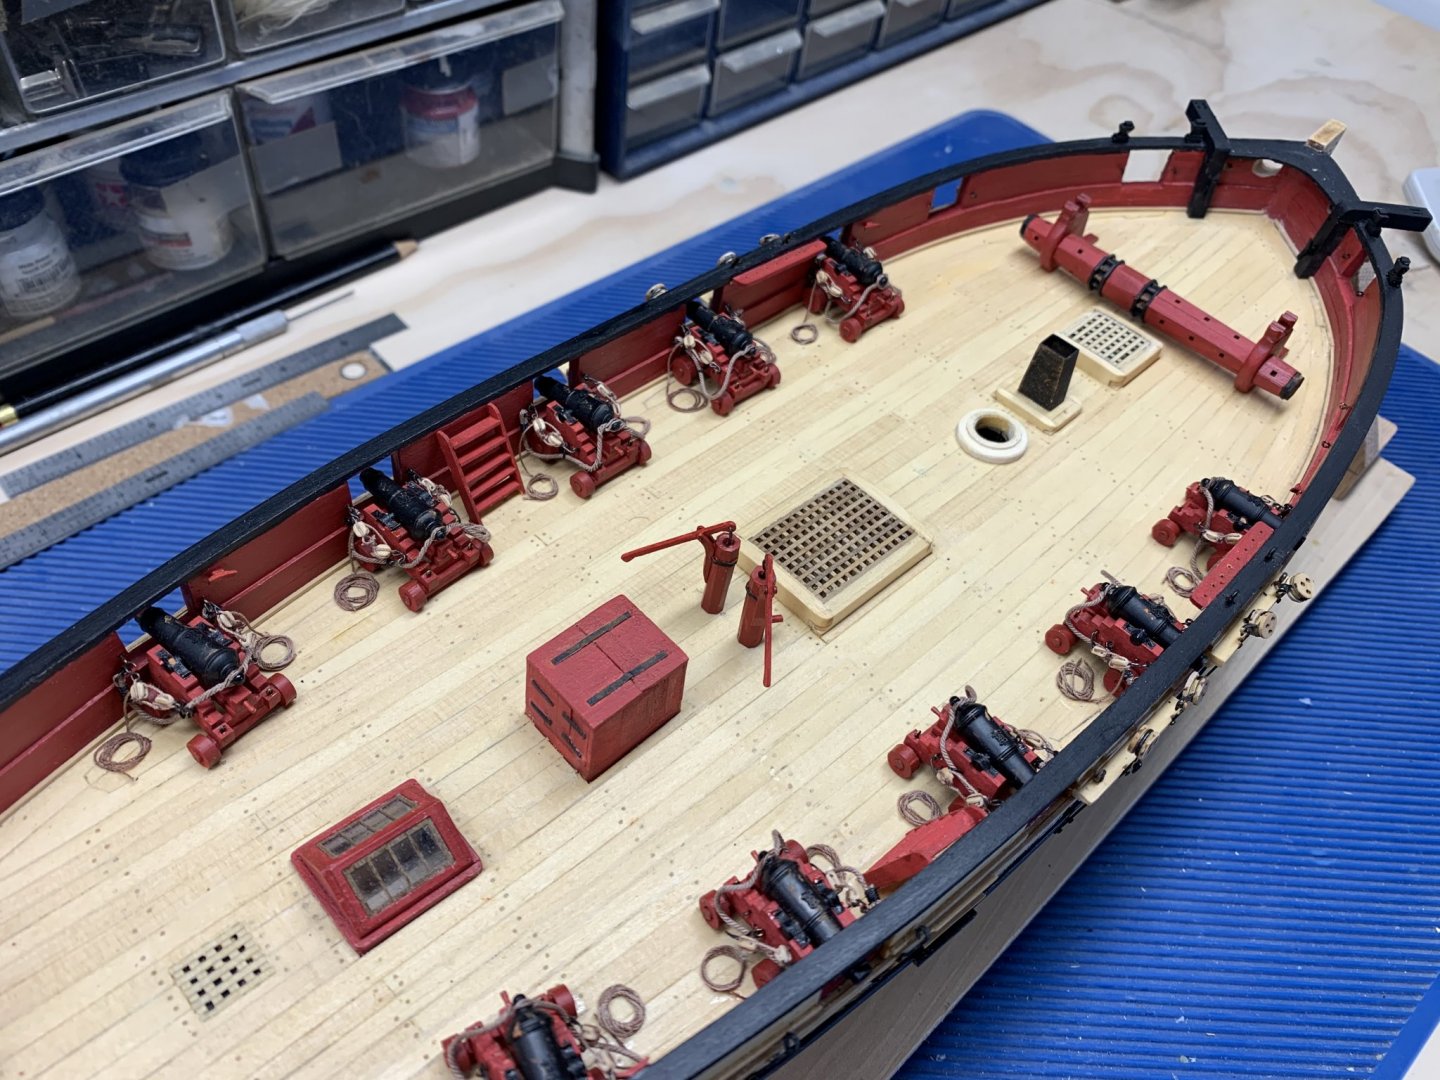
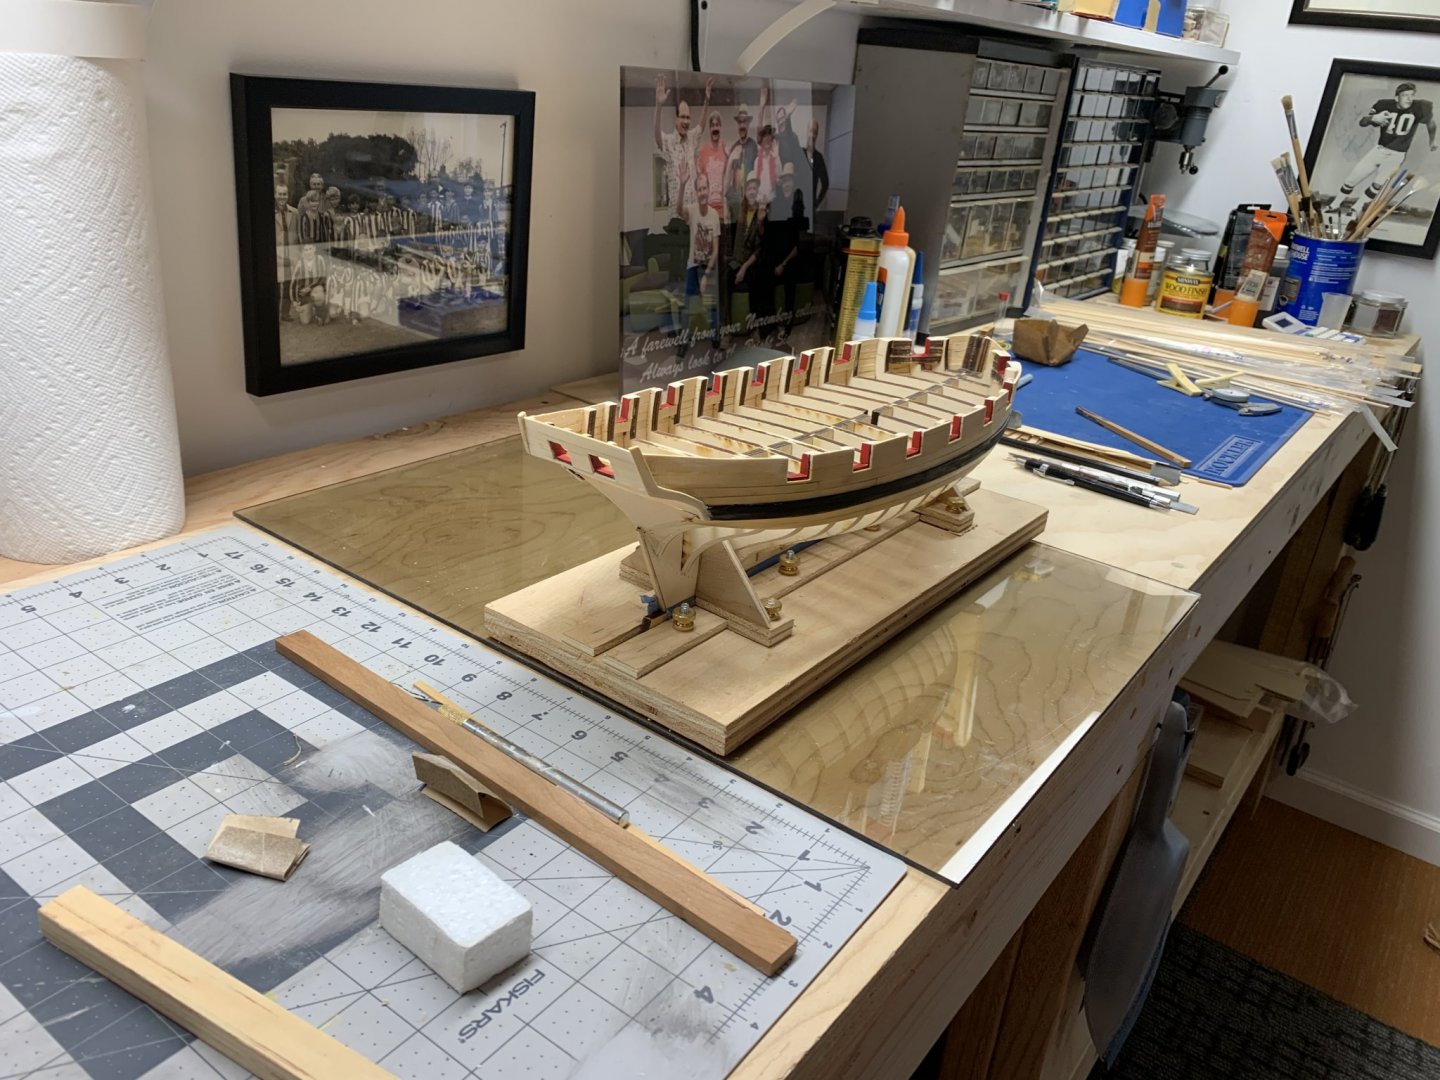
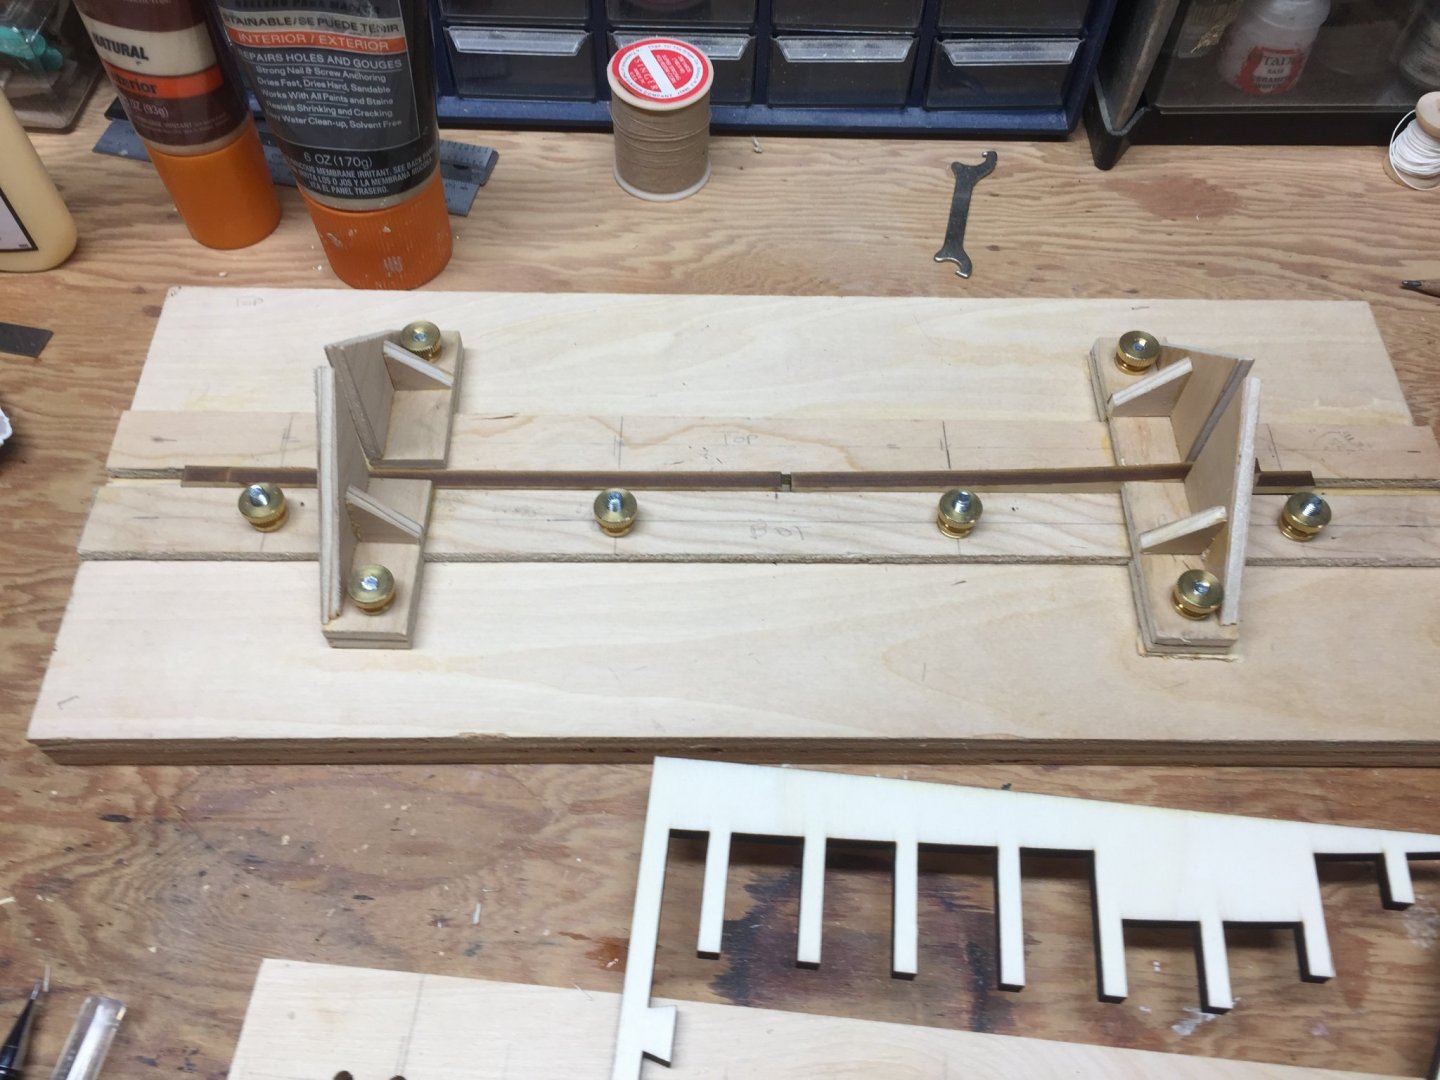
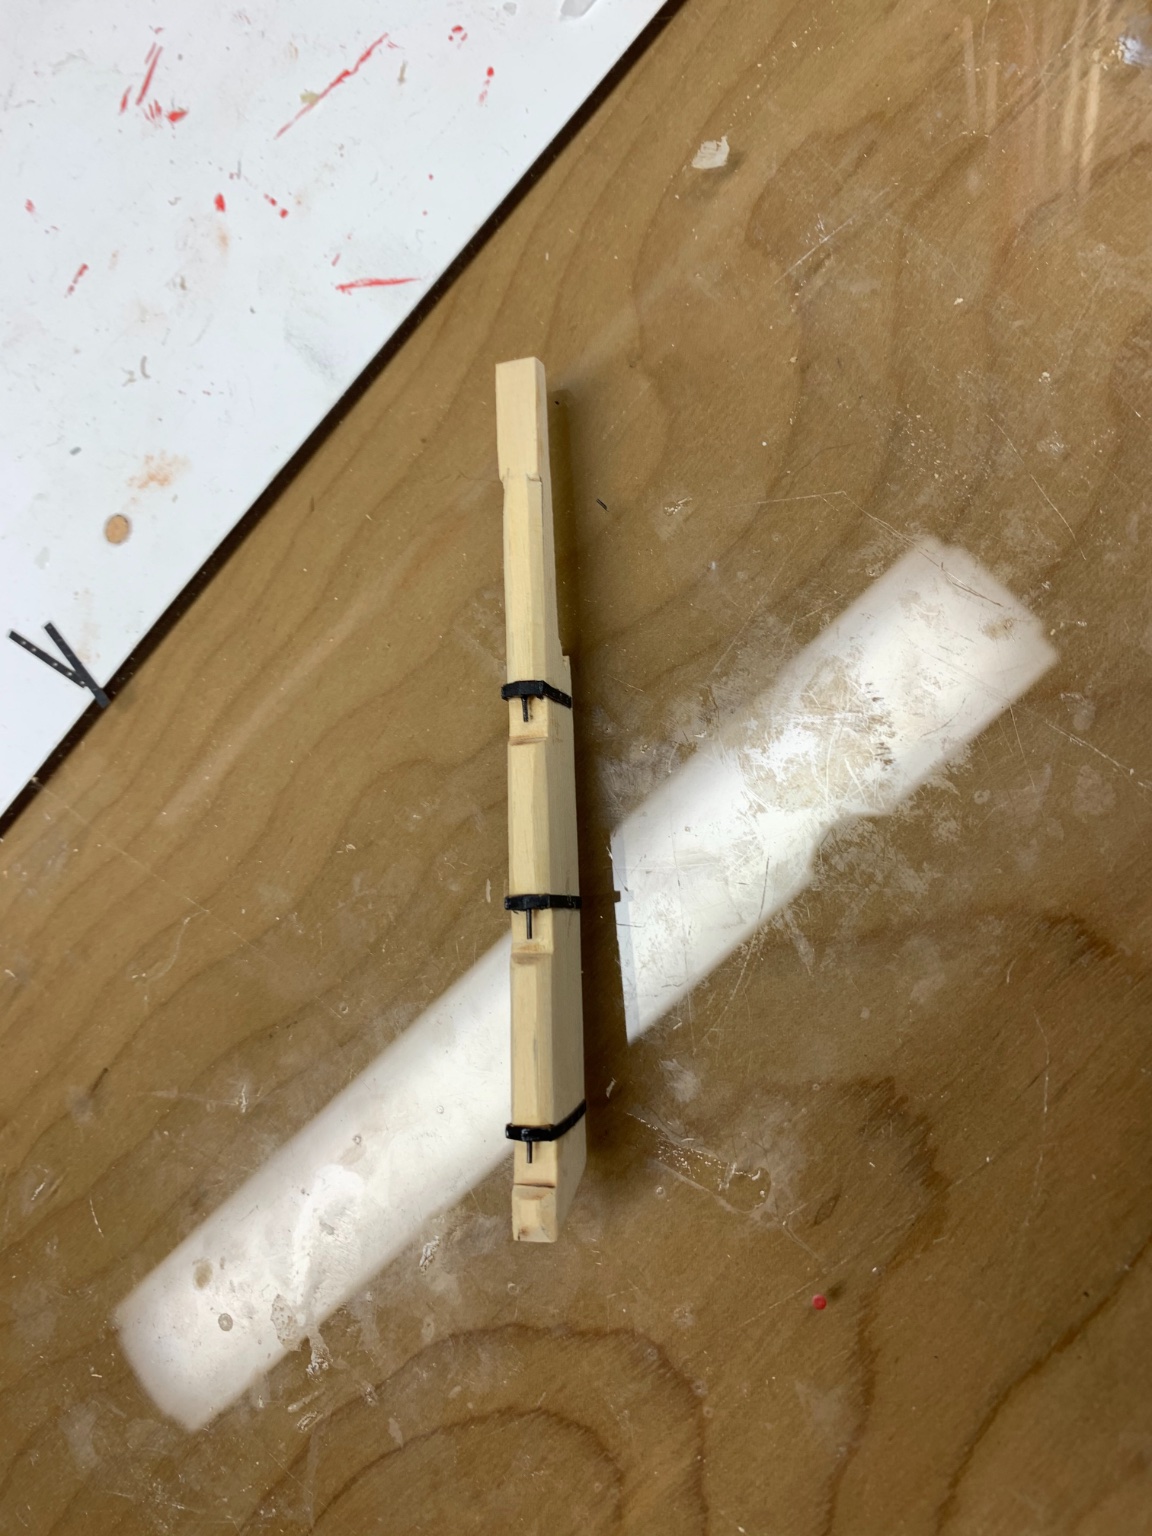
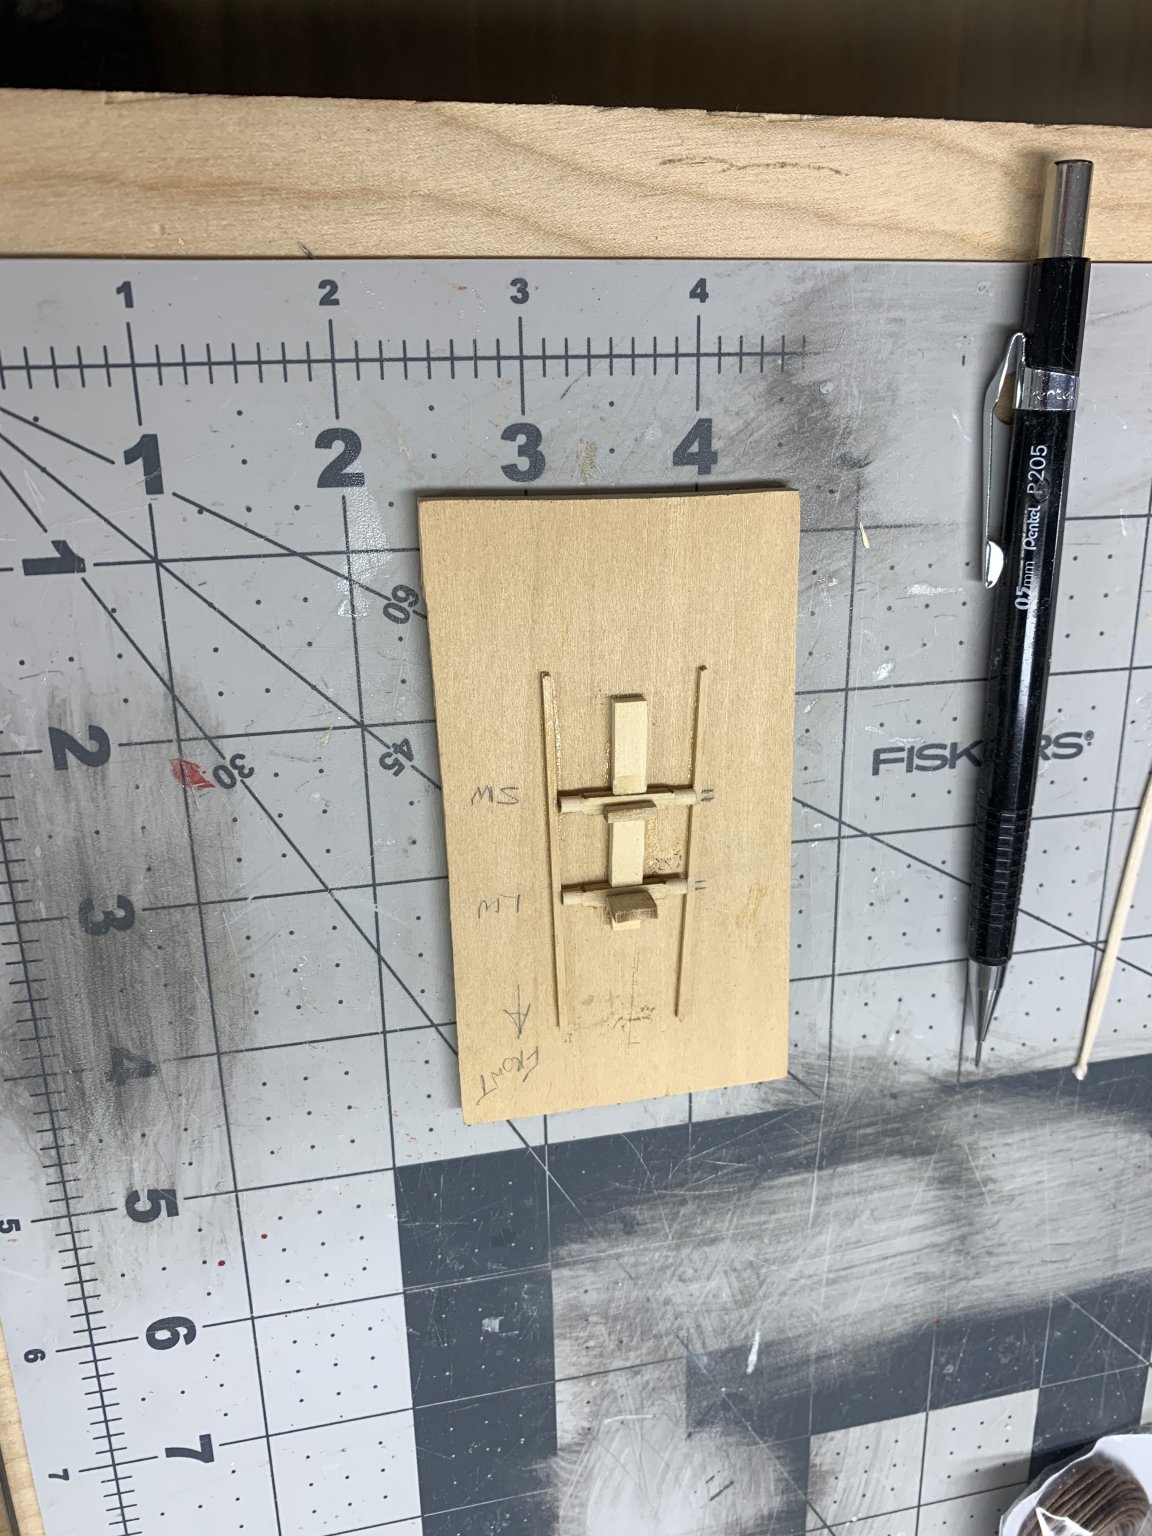
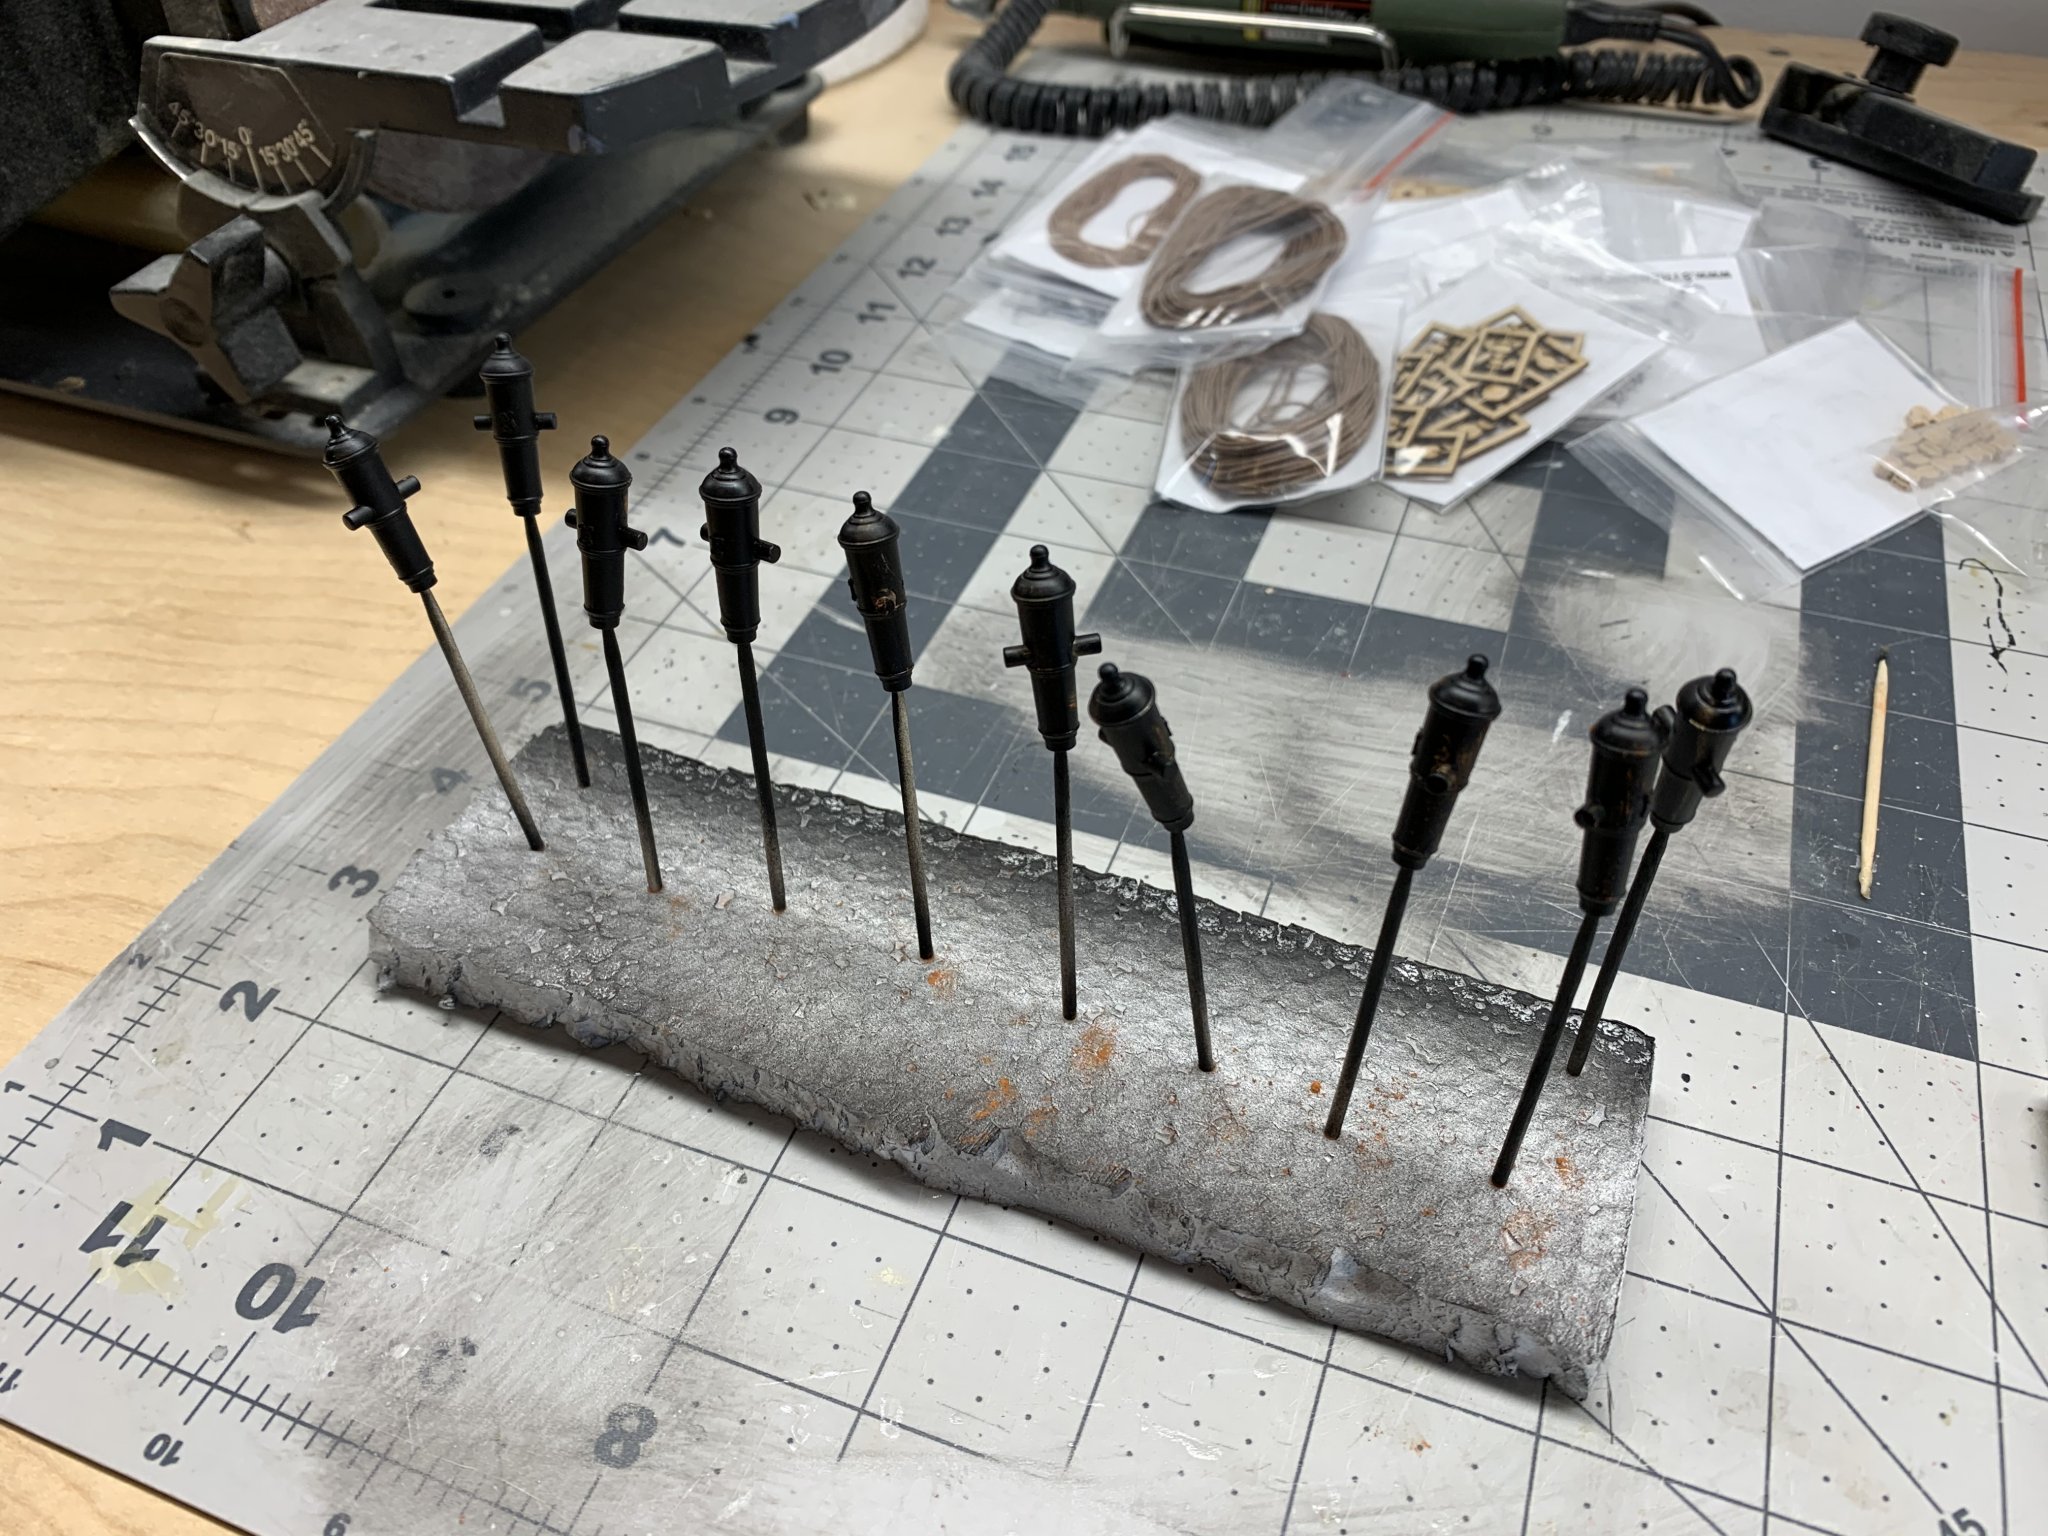
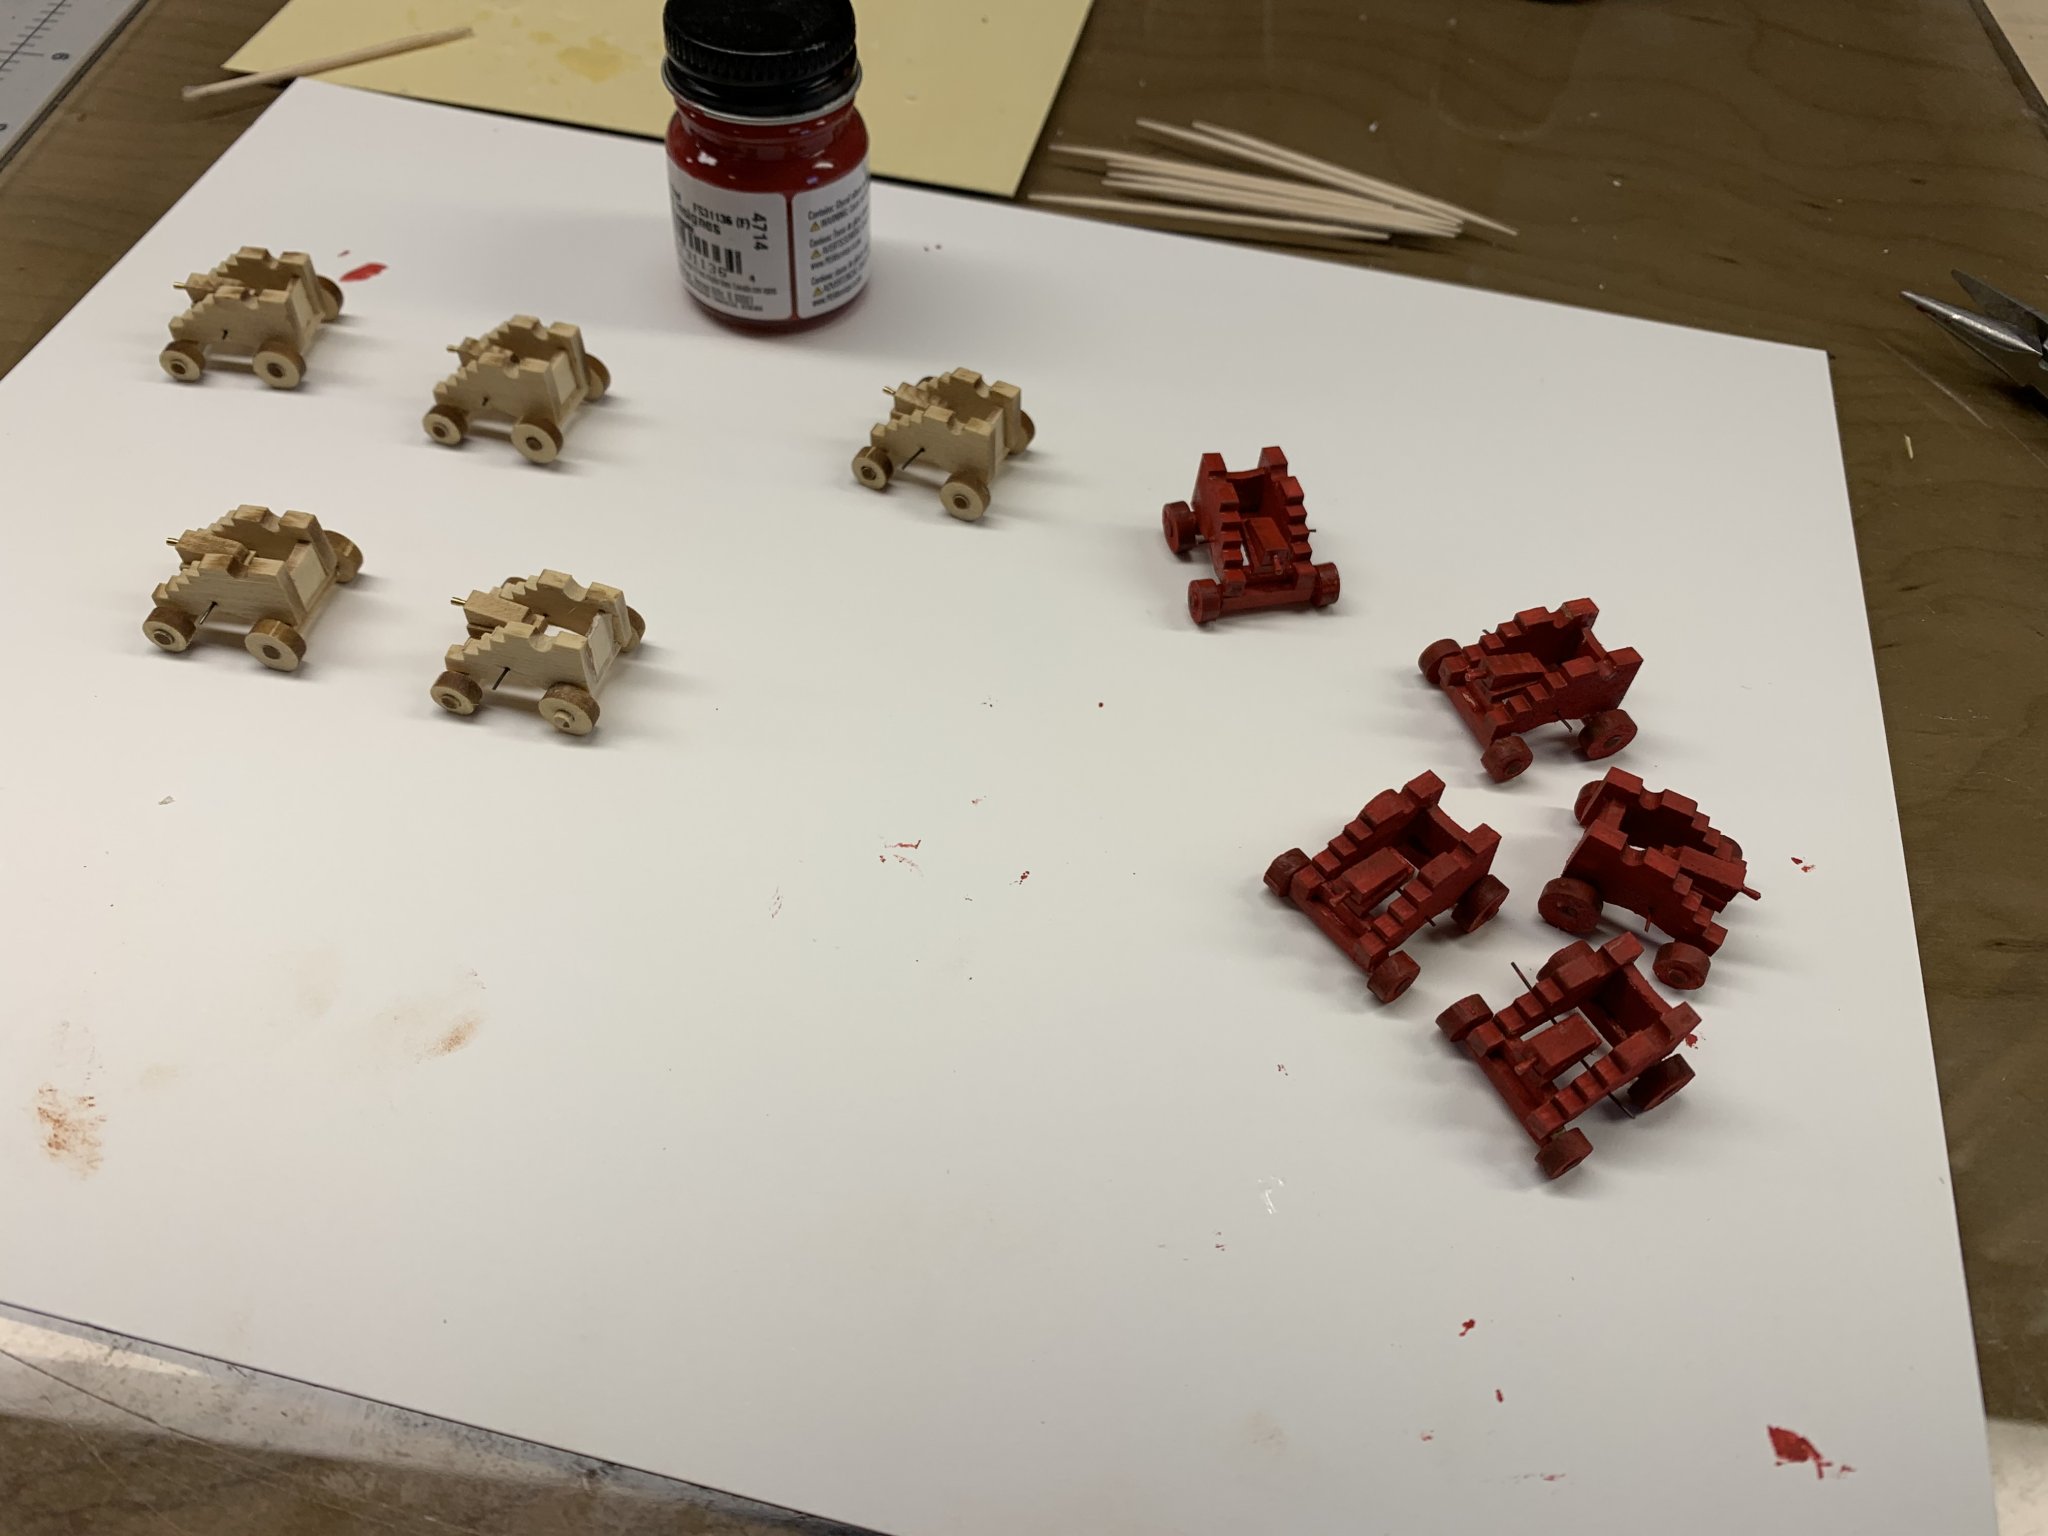
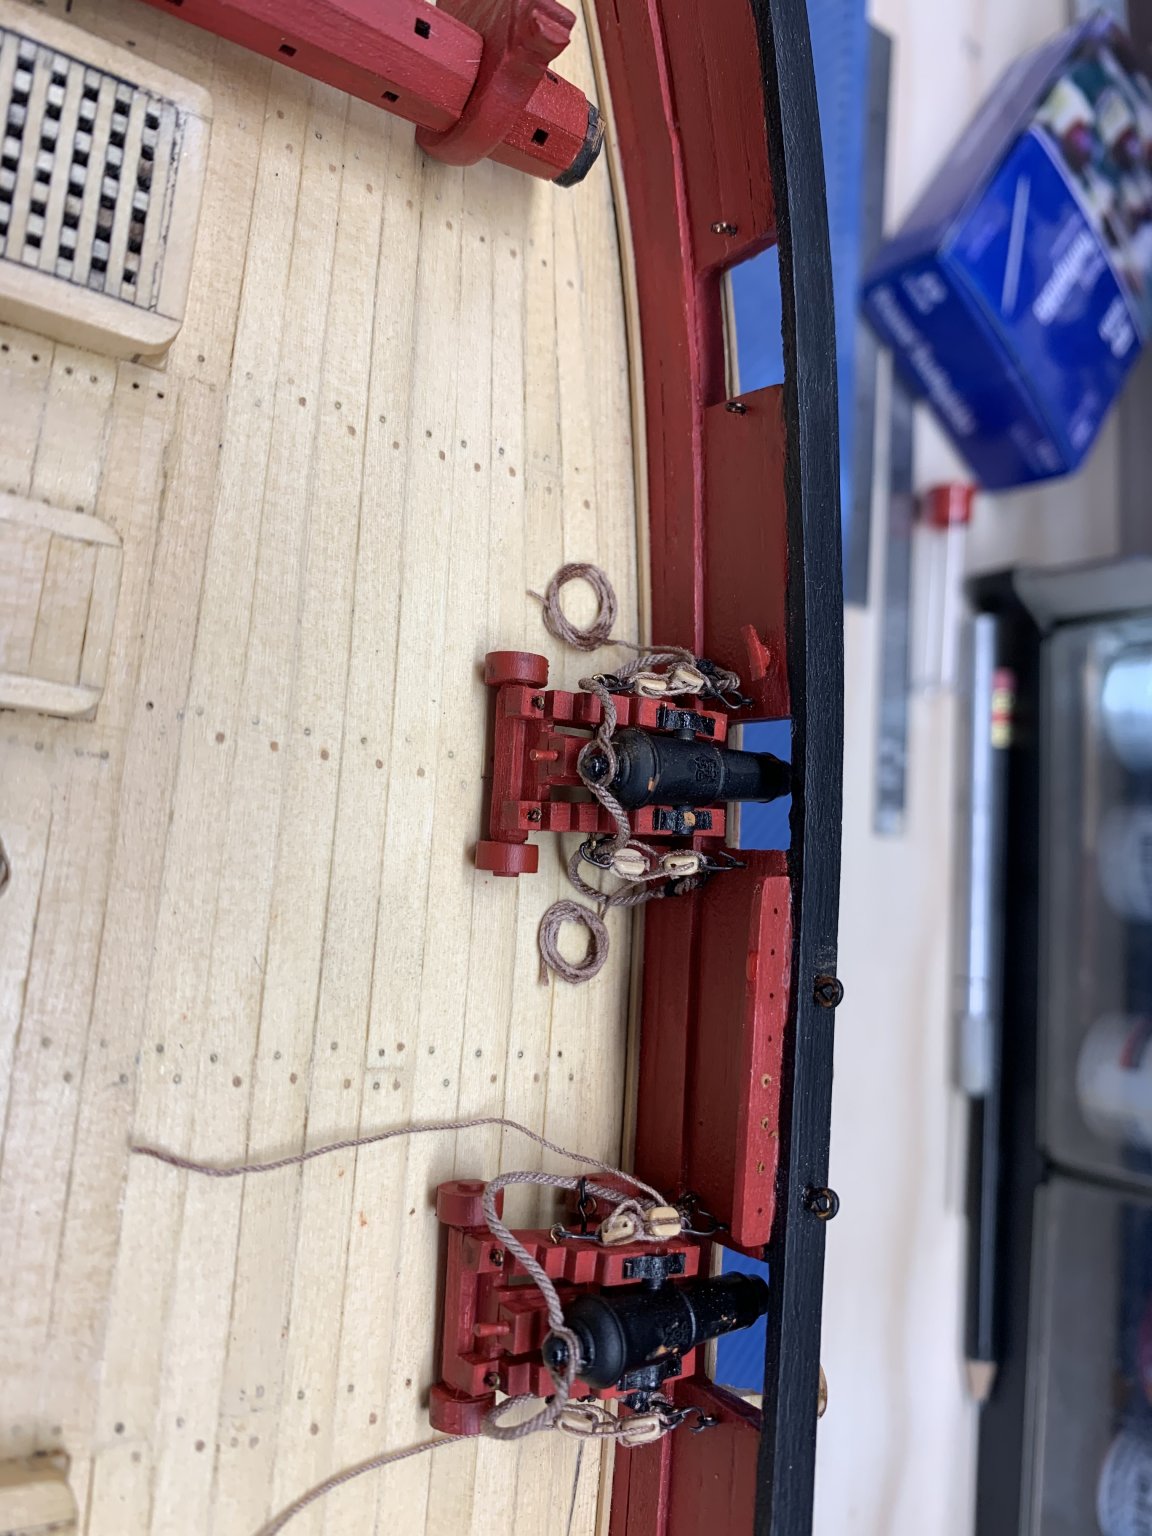
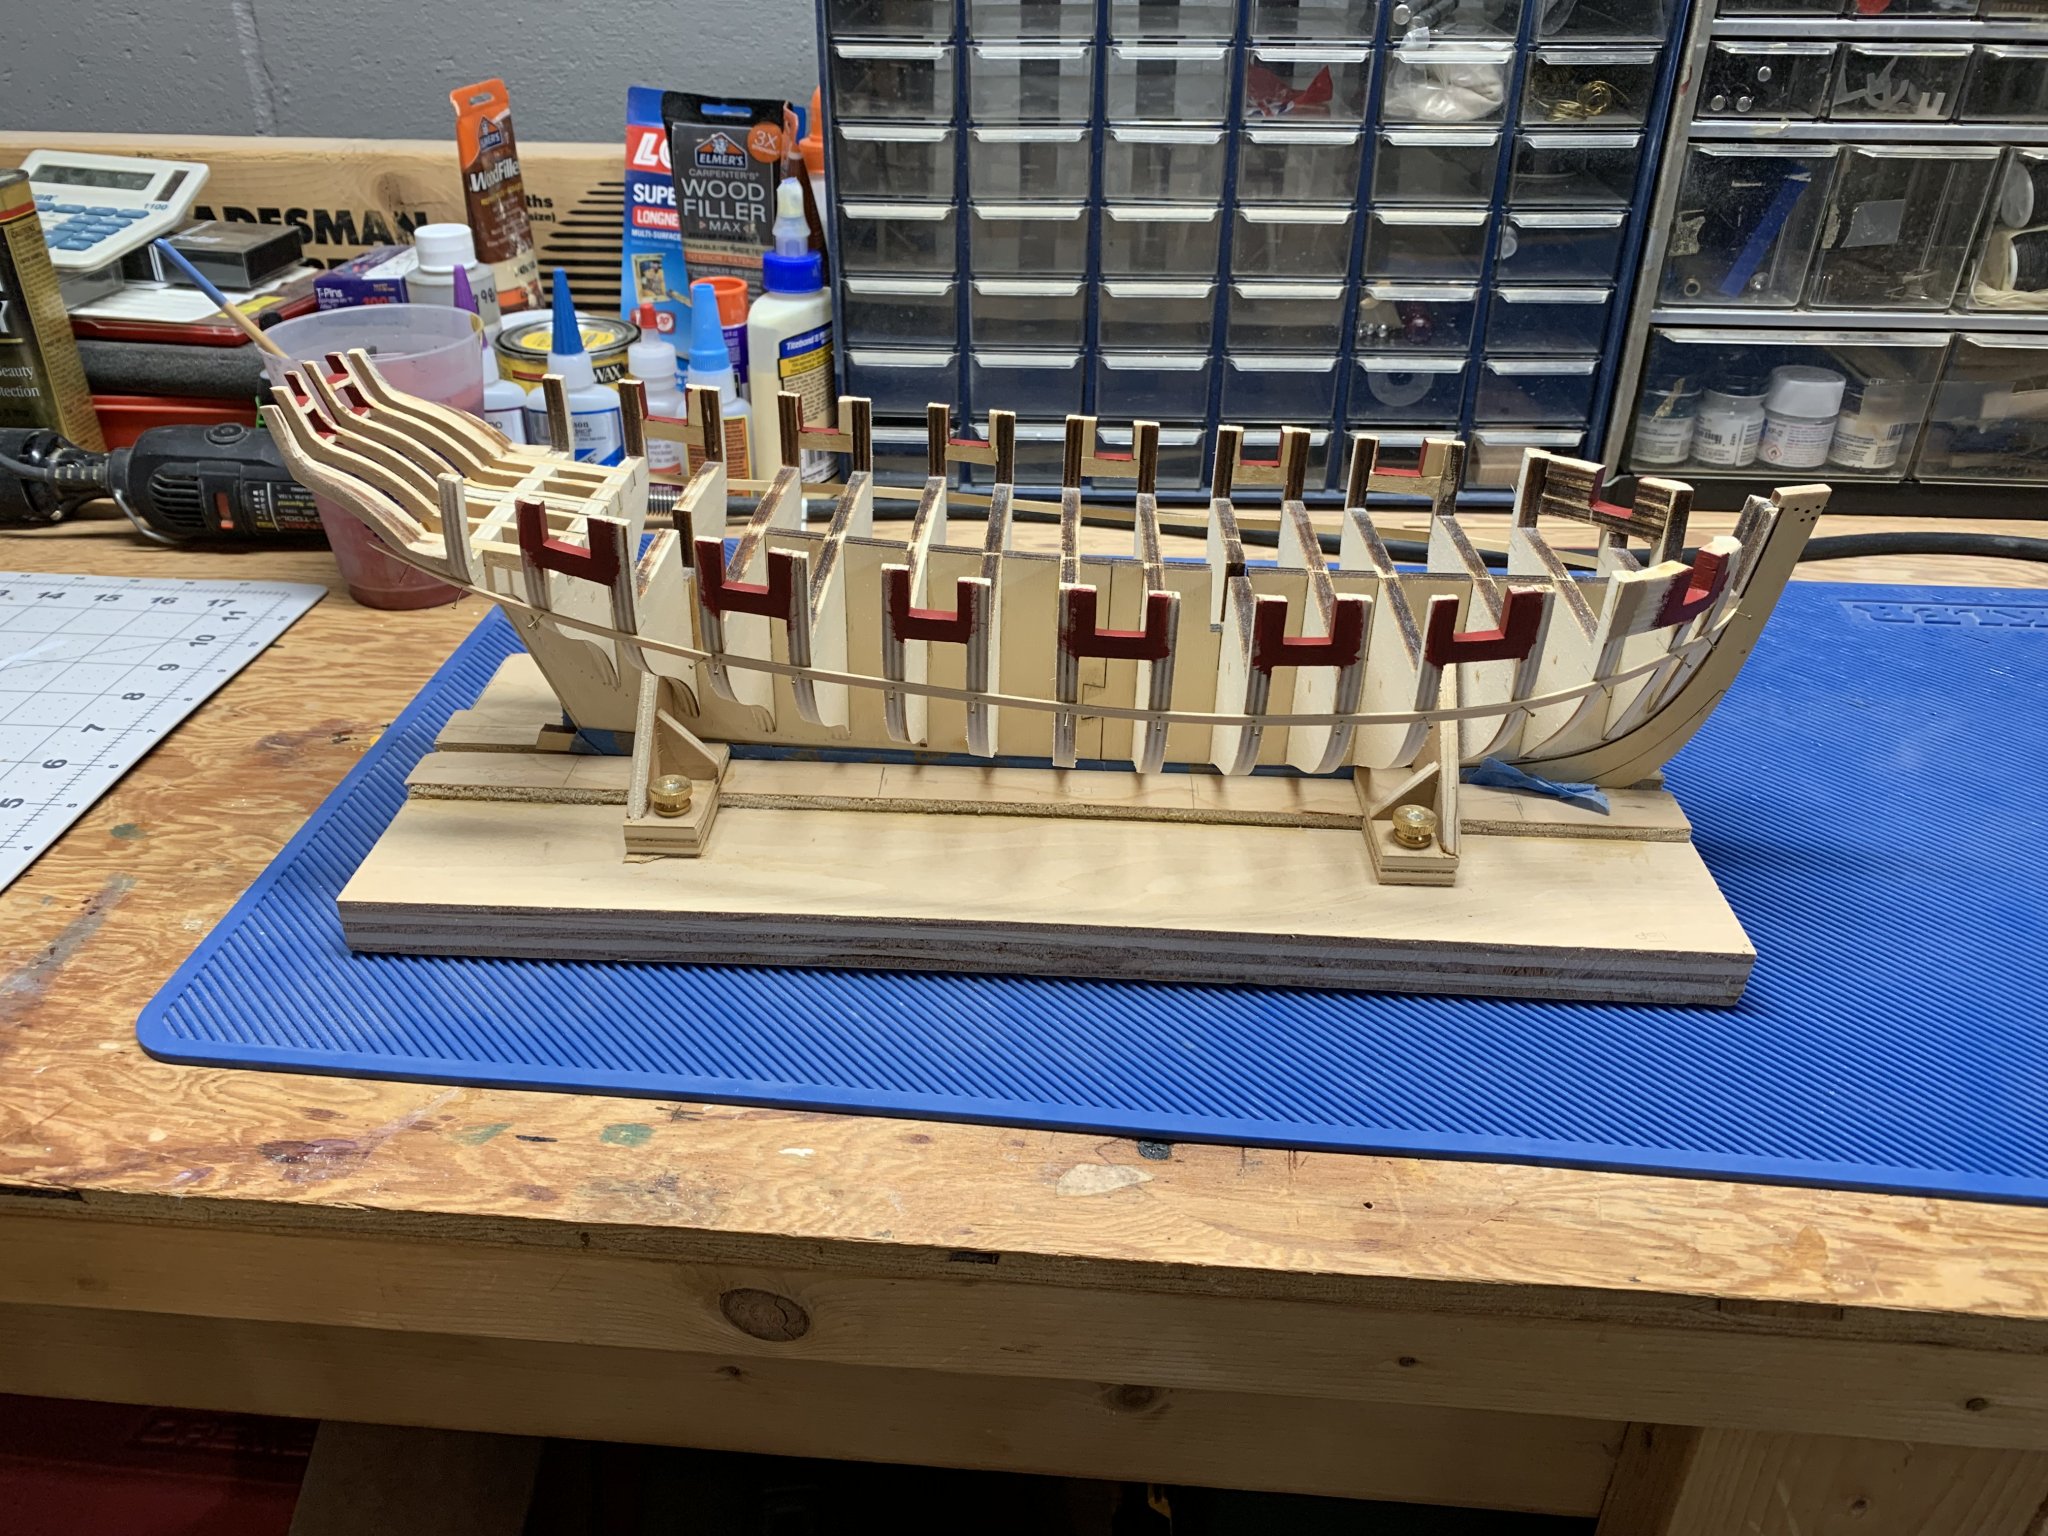
The Armament There are 10 Carronade that have to be made for the Cheerful so you need to set up an assembly line. I purchased the mini kits from Syren for all my armament. First I had to set up my high end lathe (tongue in cheek) to help make the axles: This is just your basic Dremel with a $10 3 jaw check attachment. I use a sanding stick and needle file as the rounding tools. Second, you need a jig as this is repetitious. From here on its turning them out one by one. I then set up my high end painting station, Tongue in Cheek again I used a spray can of flat black for painting the brass. I would later add some rust powder to simulate metal in a salt environment. Once the sub assemblies are completed with the various rings and bolts and simulated hinges you can rig them in place on deck. And finally you have all 10 in place. Time for an adult beverage. Until next time. Be well folks. Bill


- 54 replies
-
- 13
-
-
- cheerful
- Syren Ship Model Company
- (and 1 more)
-
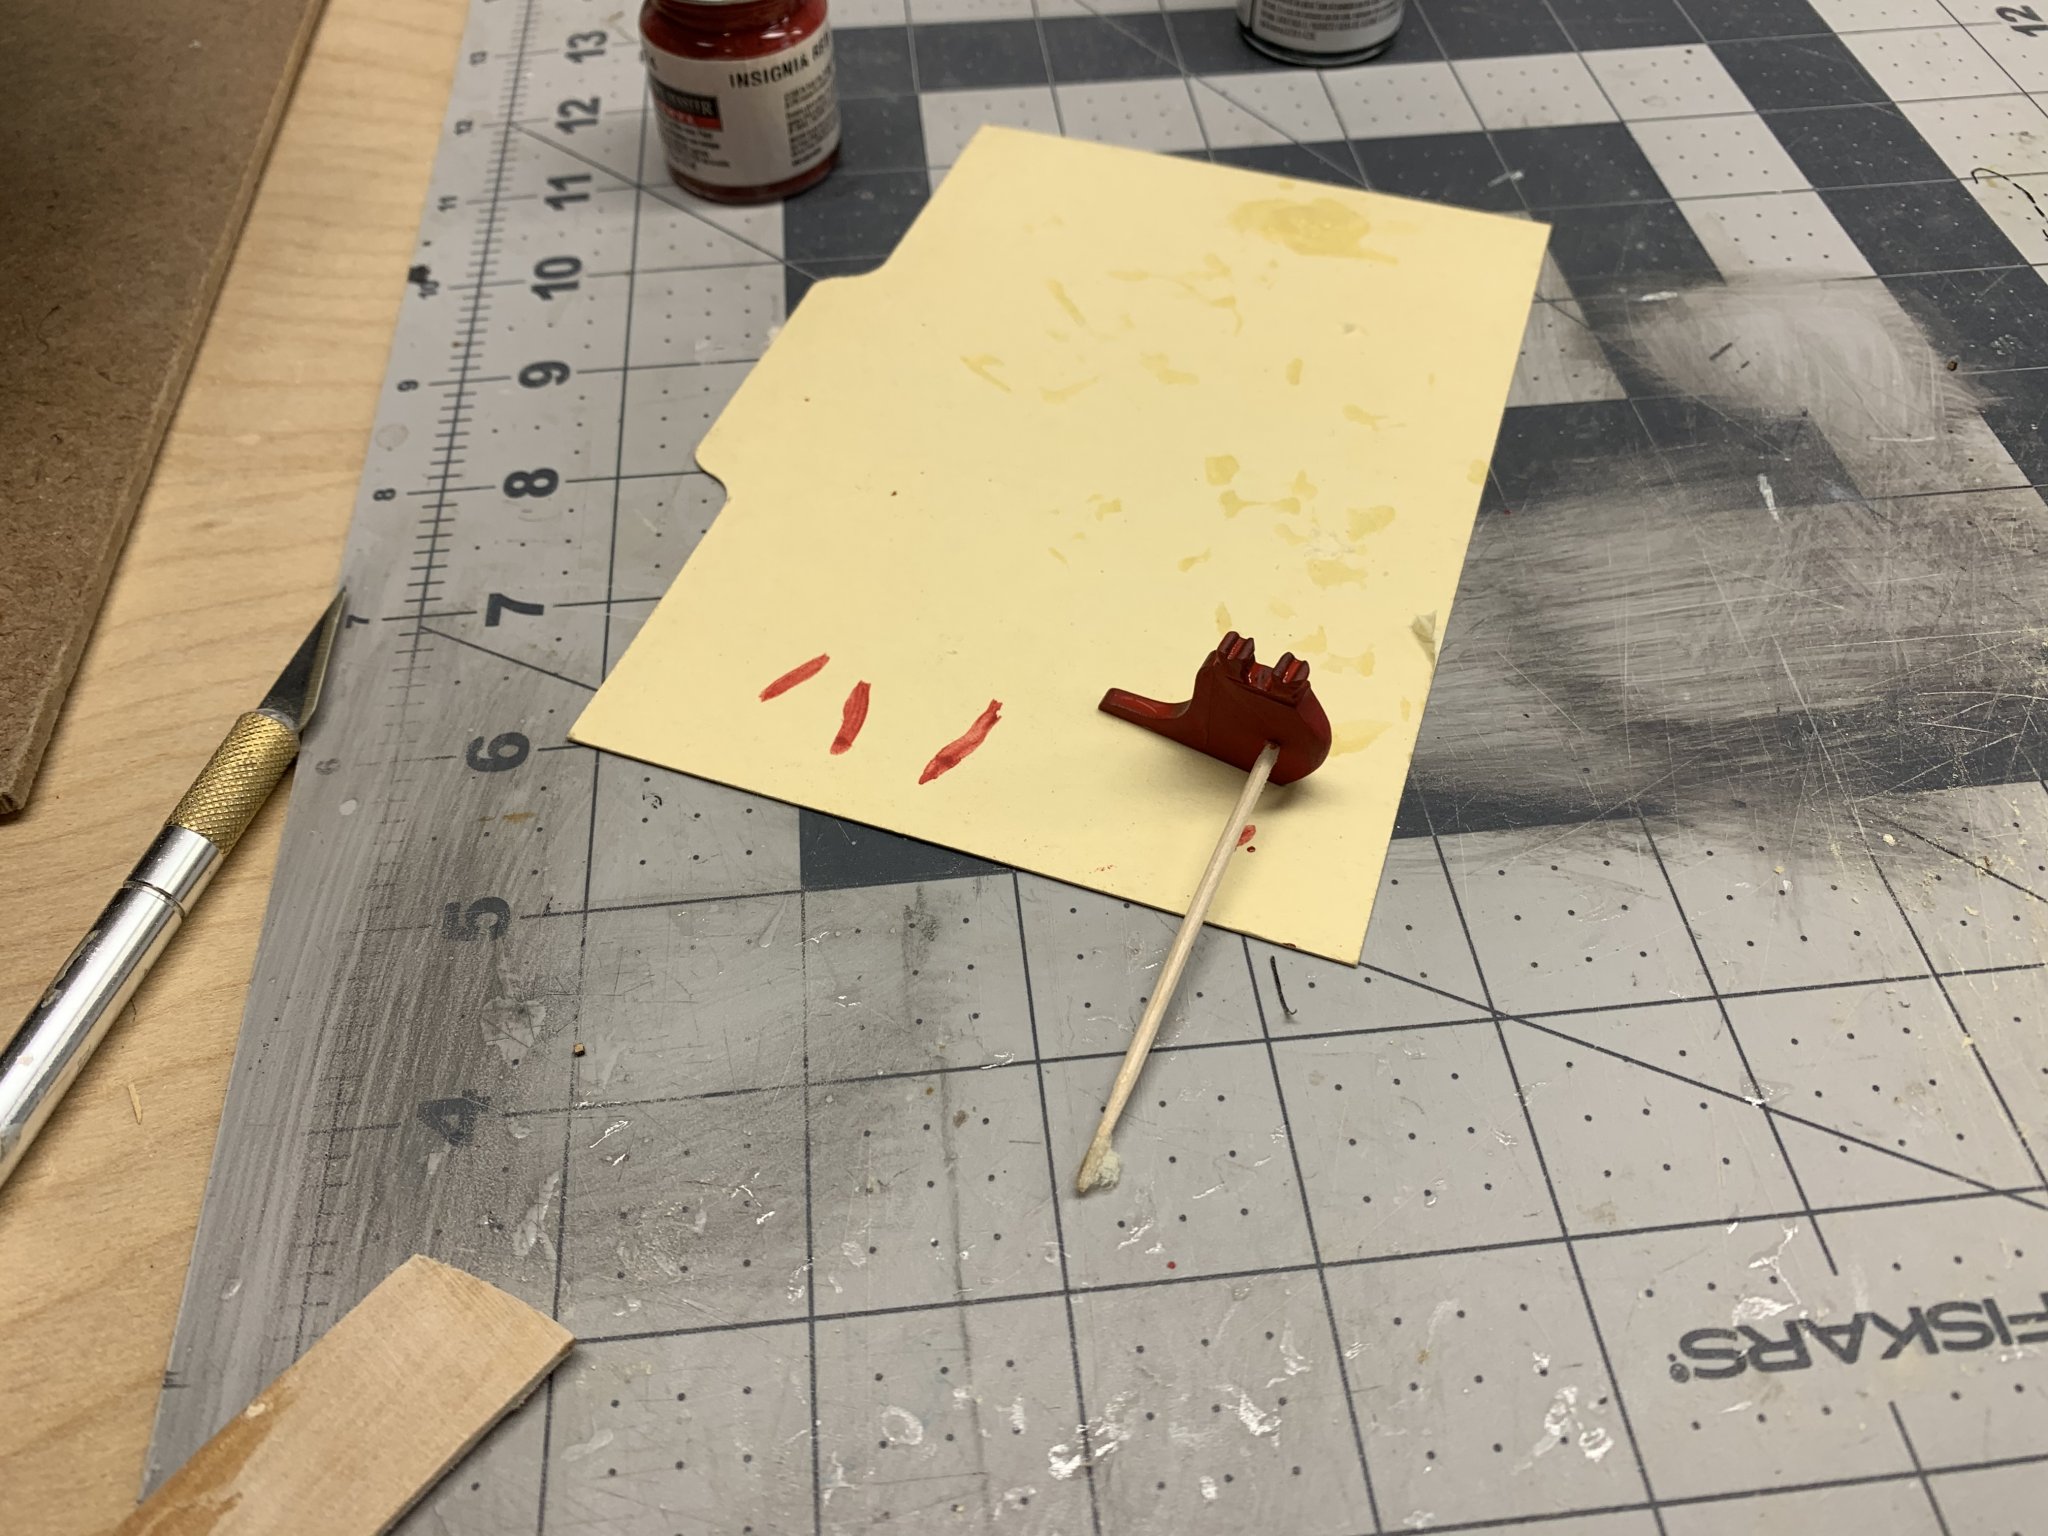
Baydreamer, I use Model Master Acrylic Paint. The red is their “Insignia Red” which I apply slightly watered down with a good quality artist brush. These paints are readily available at your local Hobby Store or online. Thunder, I very much appreciate your comments. I say novice as this was my first attempt at a plank on bulkhead project. Previous builds were all kits comprised of solid hulls. With that said as a member of the Ship Model Society of New Jersey, which includes several members that have already built this very ship as well as the kit’s designer and supplier, I certainly have an advantage. These folks all served as a mentor to me. Helping me when I struggled with things or made mistakes that needed fixing. I can’t recommend joining a club enough. A lot of clubs are meeting virtually these days which has removed some of the geographical limitations of members.
- 54 replies
-
- 4
-
-
- cheerful
- Syren Ship Model Company
- (and 1 more)
-
Thanks Bossman for your kind words. As I stated in the beginning of my log, my postings have been retrospective as I am currently at the point where I have completed all the rigging and just have the anchors and flag to make and she is complete. I will continue to post my progress up to this point trying to highlight some of the things I wished I did differently. I hope this provides some assistance, especially to the novice builder like me, of this beautiful ship. Bill
- 54 replies
-
- 1
-
-
- cheerful
- Syren Ship Model Company
- (and 1 more)
-
Thanks Glenn, I have been following your build, and noticing your skill and workmanship, you should have far less issues than I had. For some reason they just gave me headaches. Looking forward to seeing your deck.
- 54 replies
-
- 1
-
-
- cheerful
- Syren Ship Model Company
- (and 1 more)
-
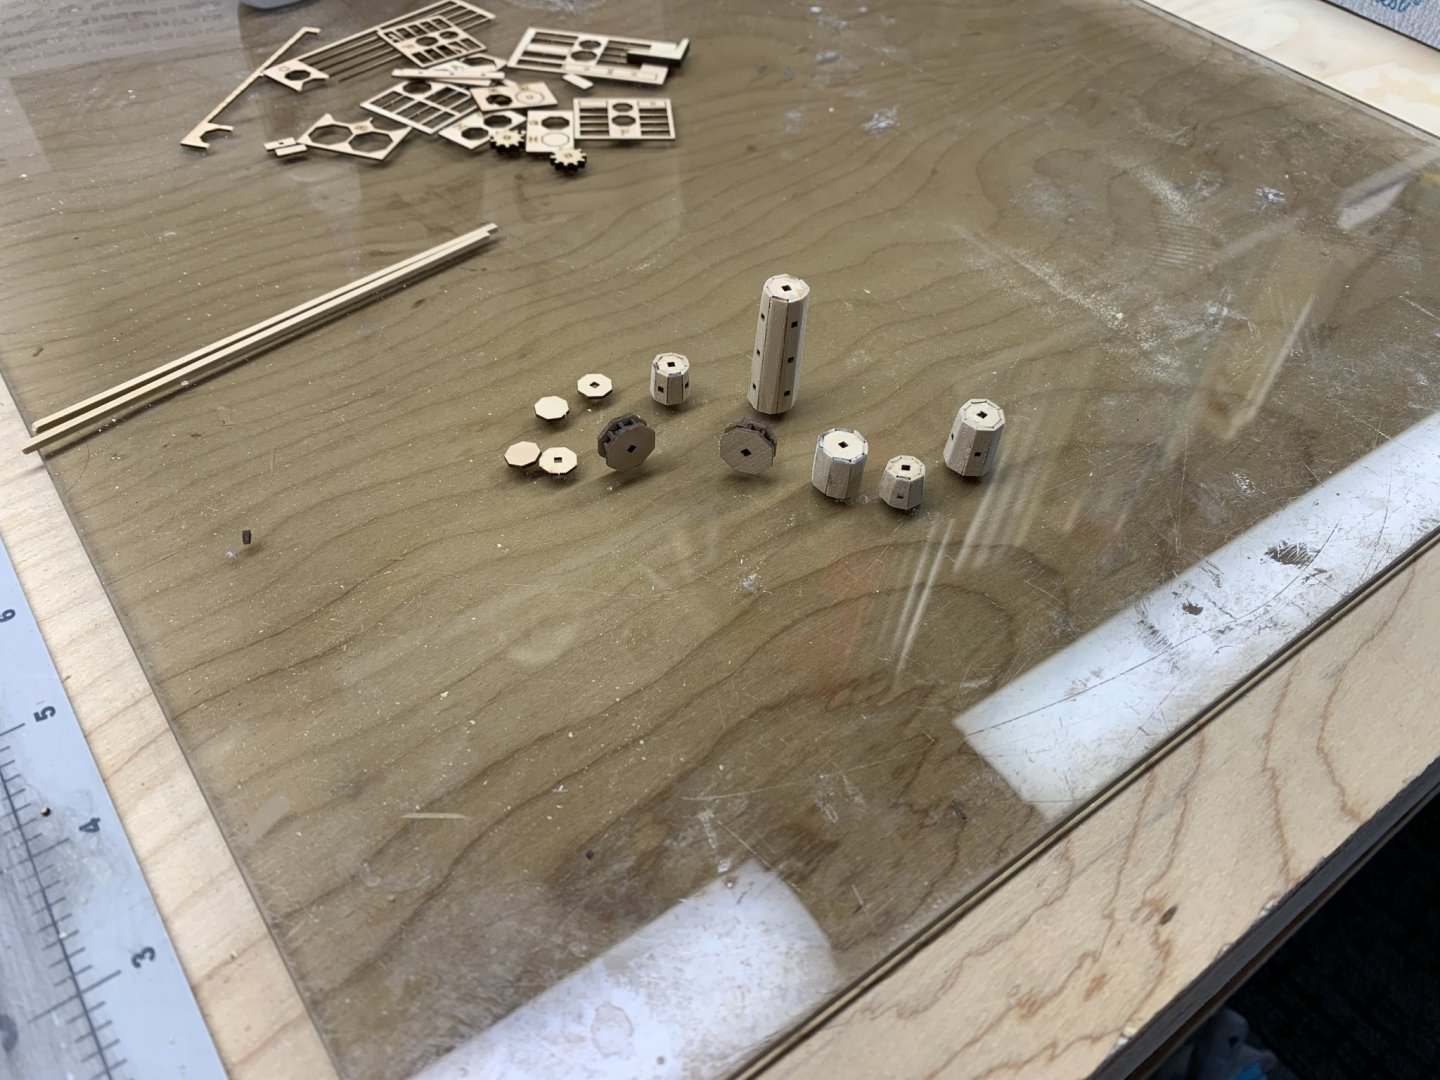
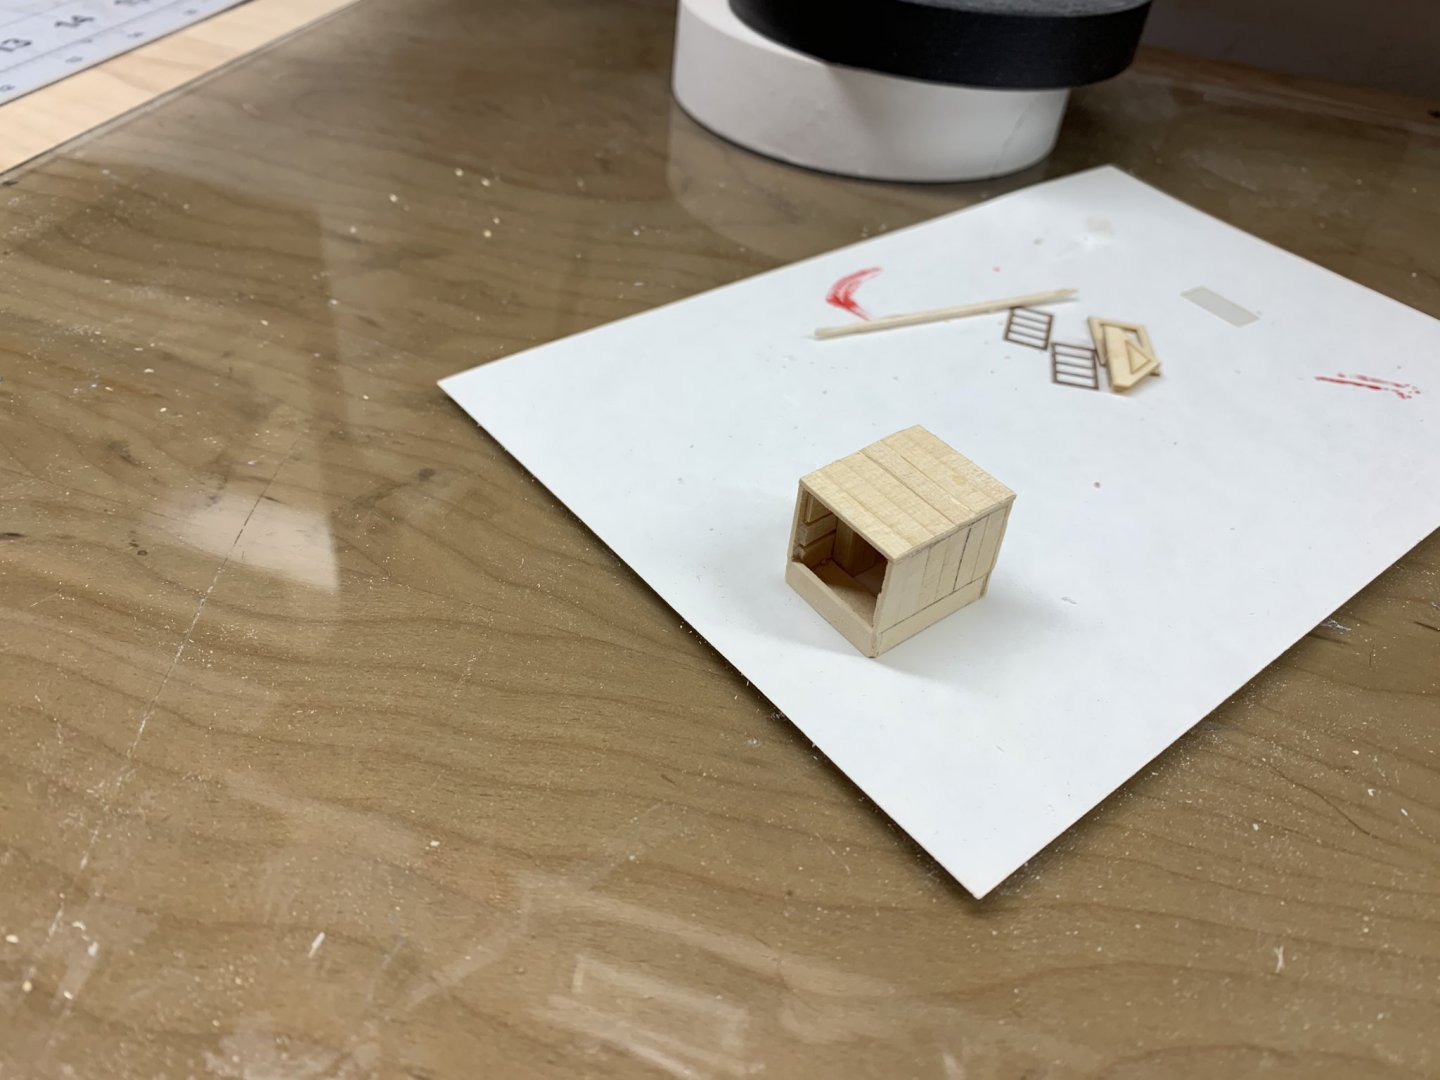
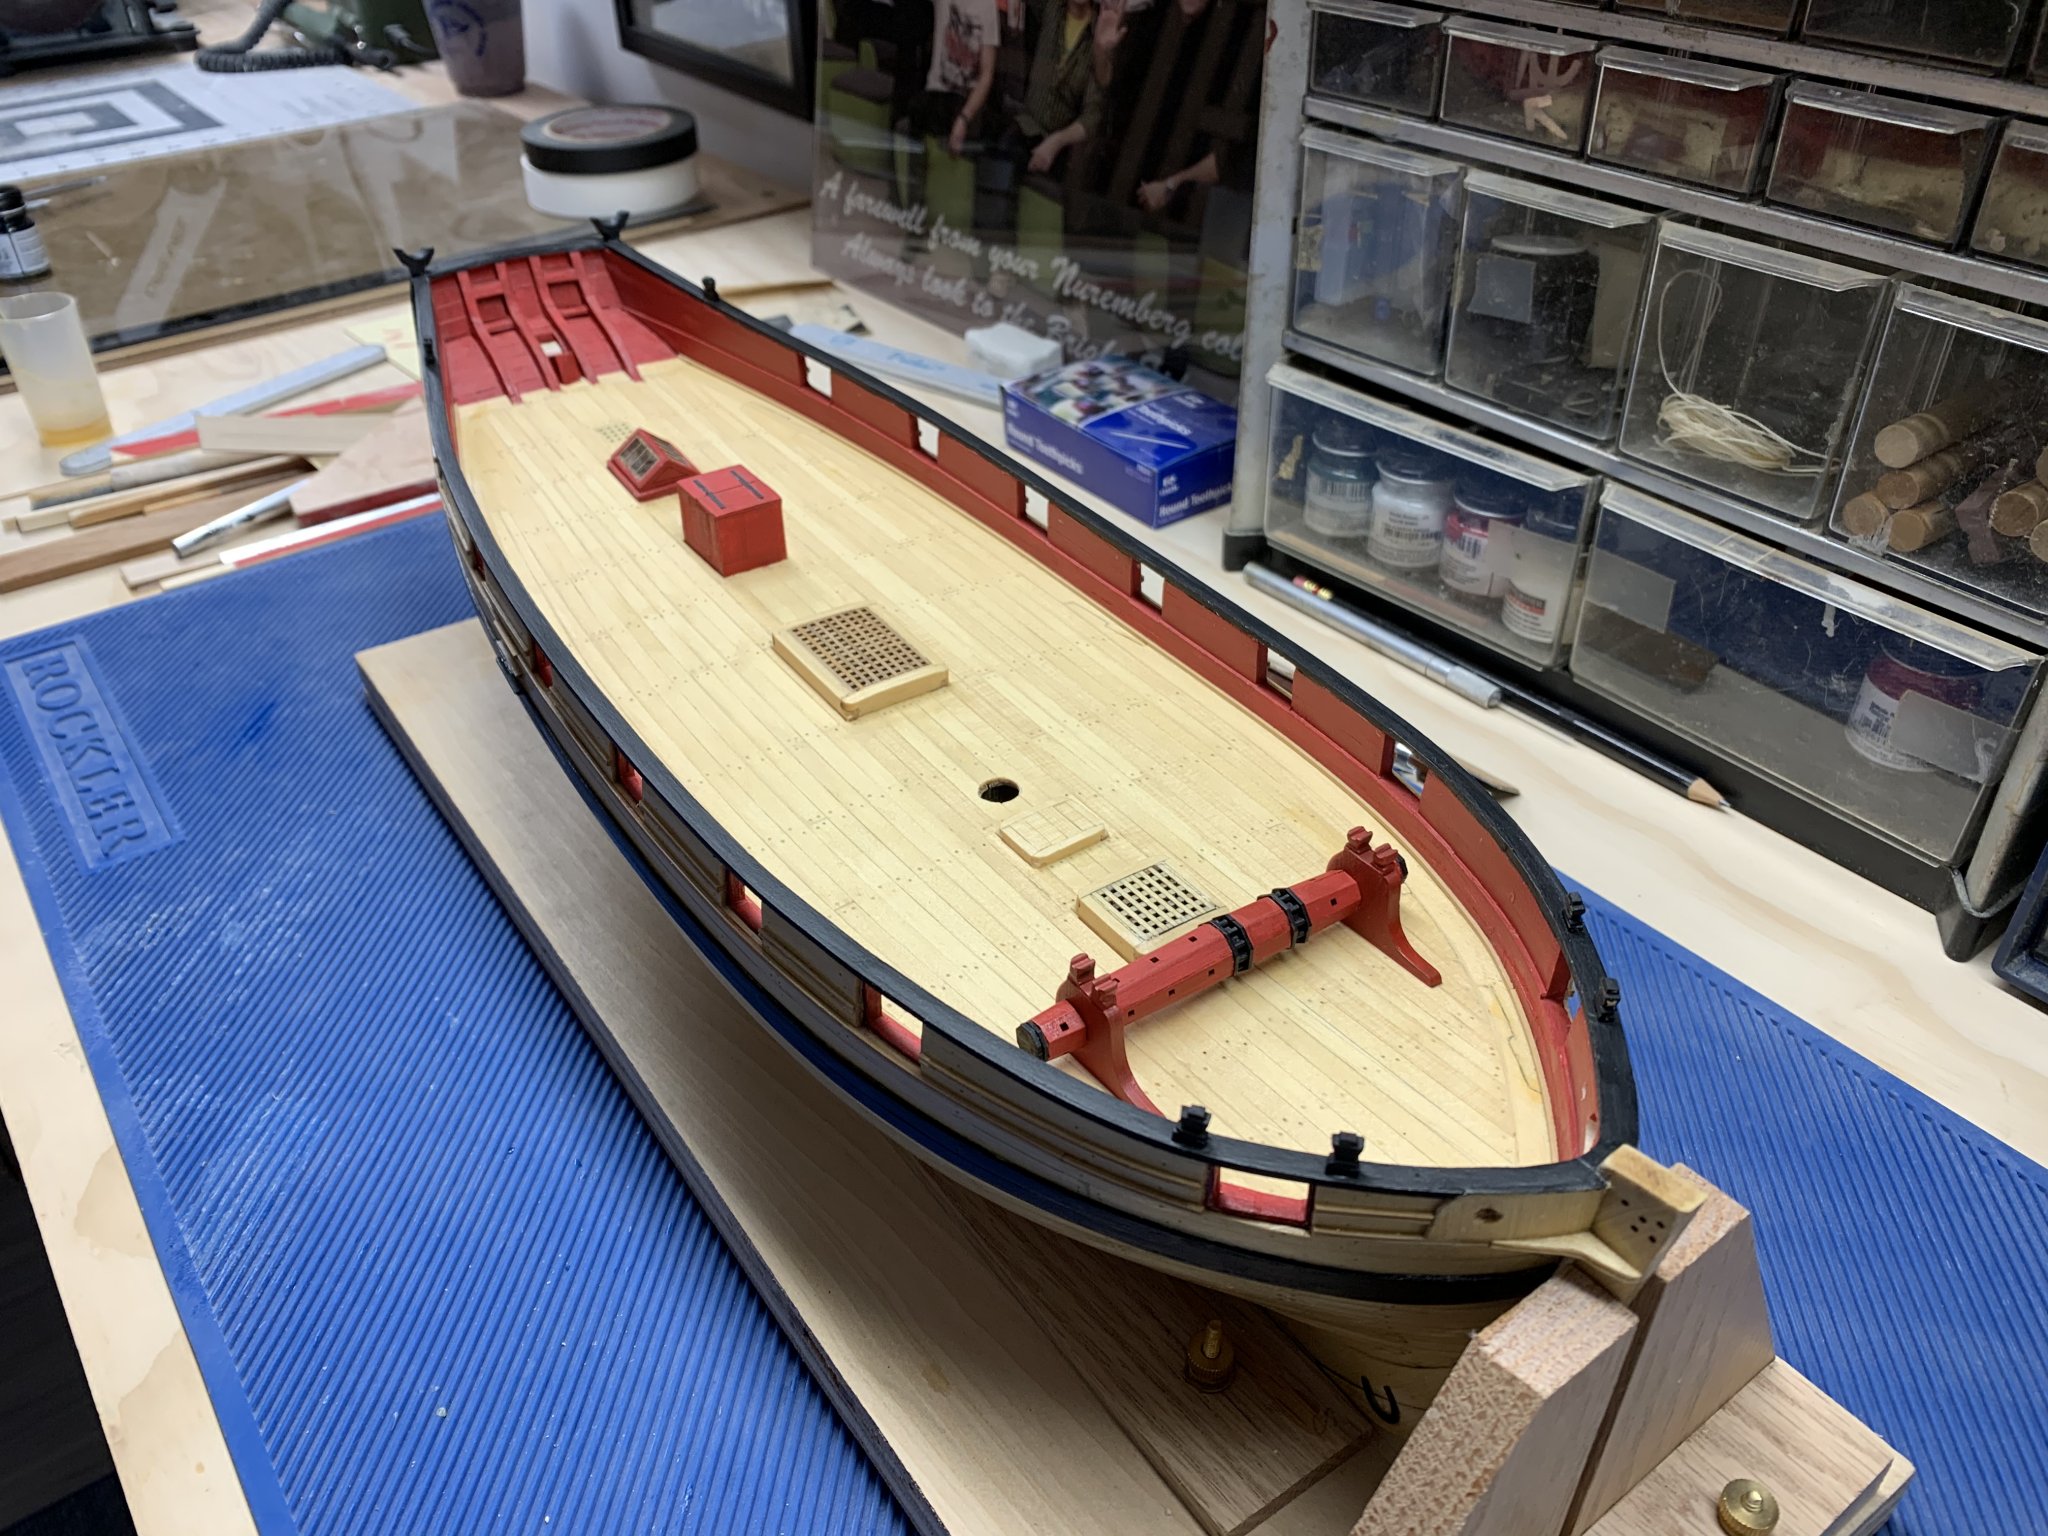
The Windlass and Seats Syren has a very nice Windlass Sub Kit that I purchased for Cheerful. There are many pieces that make up this piece of gear and it is very well engineered in my opinion. You need to bevel the pieces for a tight fix and I used a small sanding stick to accomplish this task. Having a glass work top helps with assembly of small parts like this as it provides a nice flat surface and excess glue can easily be removed with a sharp scraper. Once you have all the sub pieces assembled you can put them all together along the square axis strip provided as shown: And finally a coat of Insignia Red and Flat Black paint to complete the Windlass Assembly. For all the metal parts that were painted Flat Black, I added some rust powder to simulate what a salt water environment does all so well to metal. The seats were then tackled at the stern of the ship. Next time, the Armament. This boat for its size was heavily armed. Till then, be well Bill


- 54 replies
-
- 12
-
-
- cheerful
- Syren Ship Model Company
- (and 1 more)
-
Cutting and shaping masts: tips on how to do it.
Bill Brown replied to Peterhudson's topic in Masting, rigging and sails
Definitely agree with Vince, I think it’s better to start from square stock. It’s easier to drill all your holes first prior to rounding. You can use the 7-10-7 rule to turn your square stock into an octagon. I typically just use a hand drill for rounding as I don’t have a lathe but a lathe is better still. Best of luck Bill -
Thanks BE, you are one of the modelers that I was referring to above 😊 Your Cheerful build log was an inspiration to me as well as a constant source of reference.
-
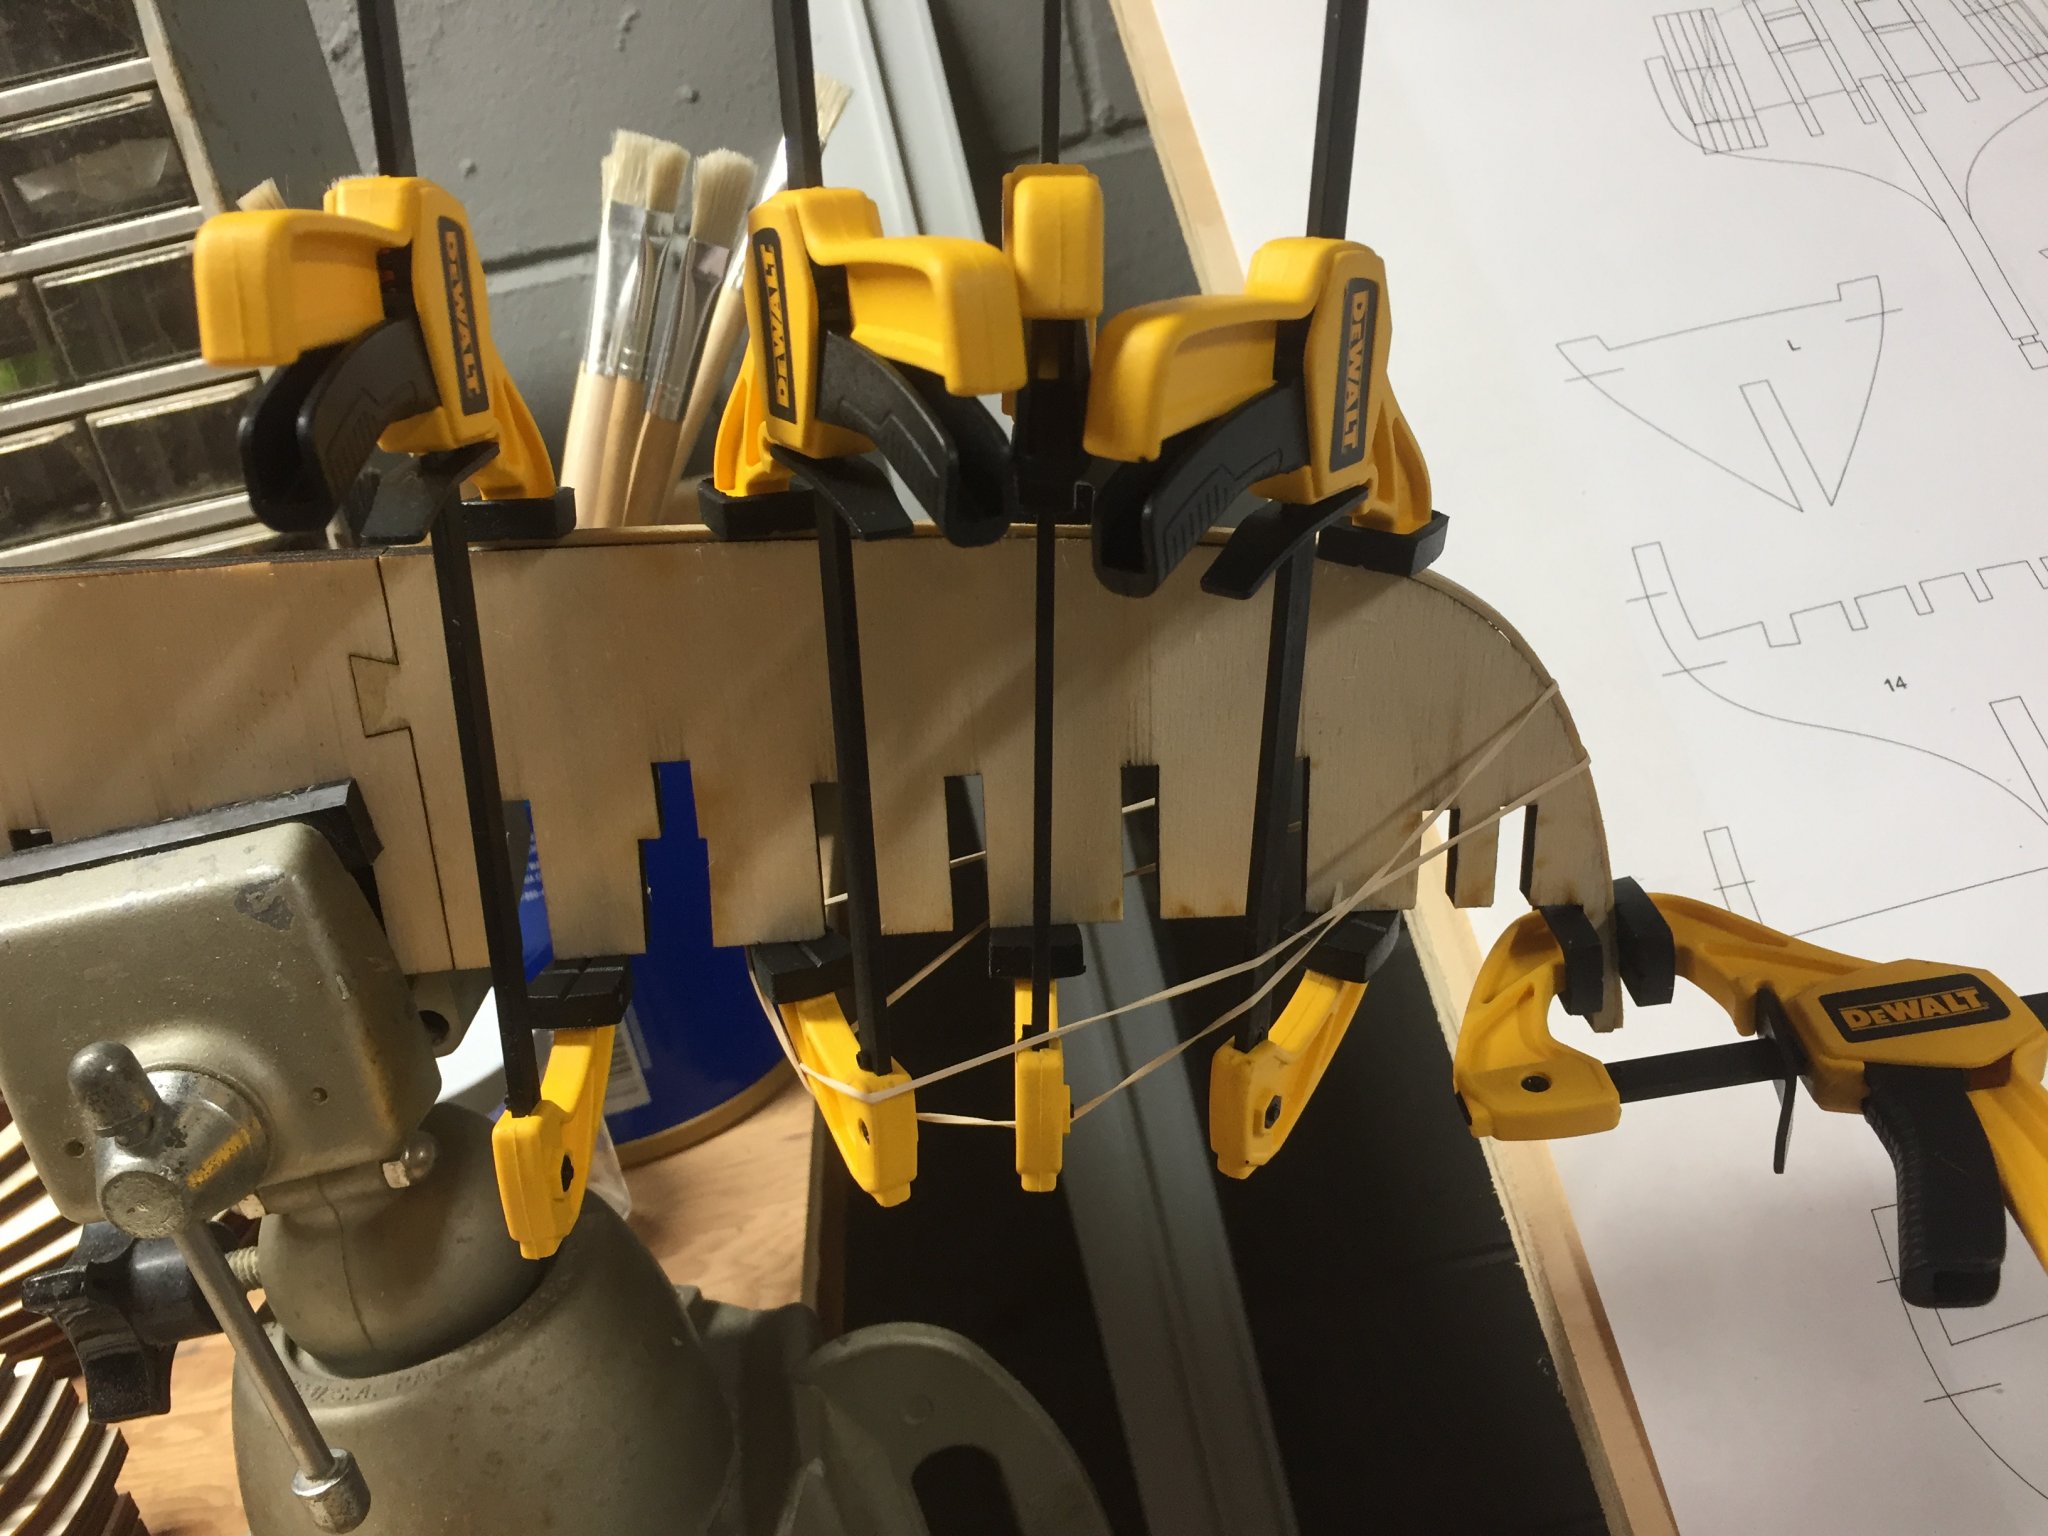
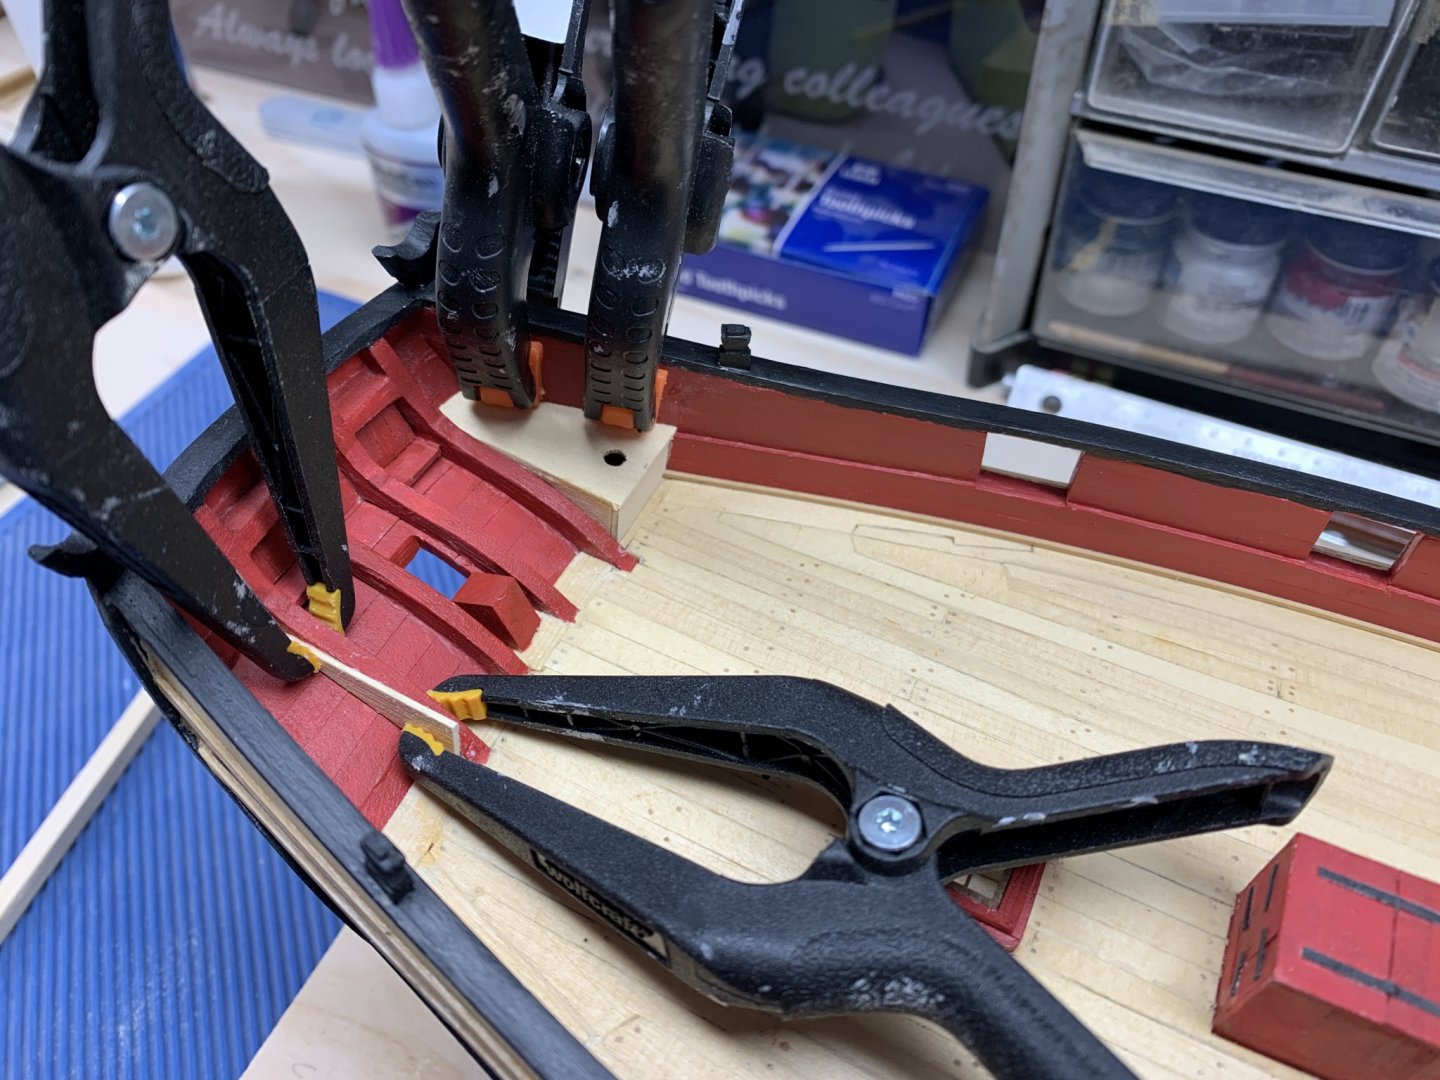
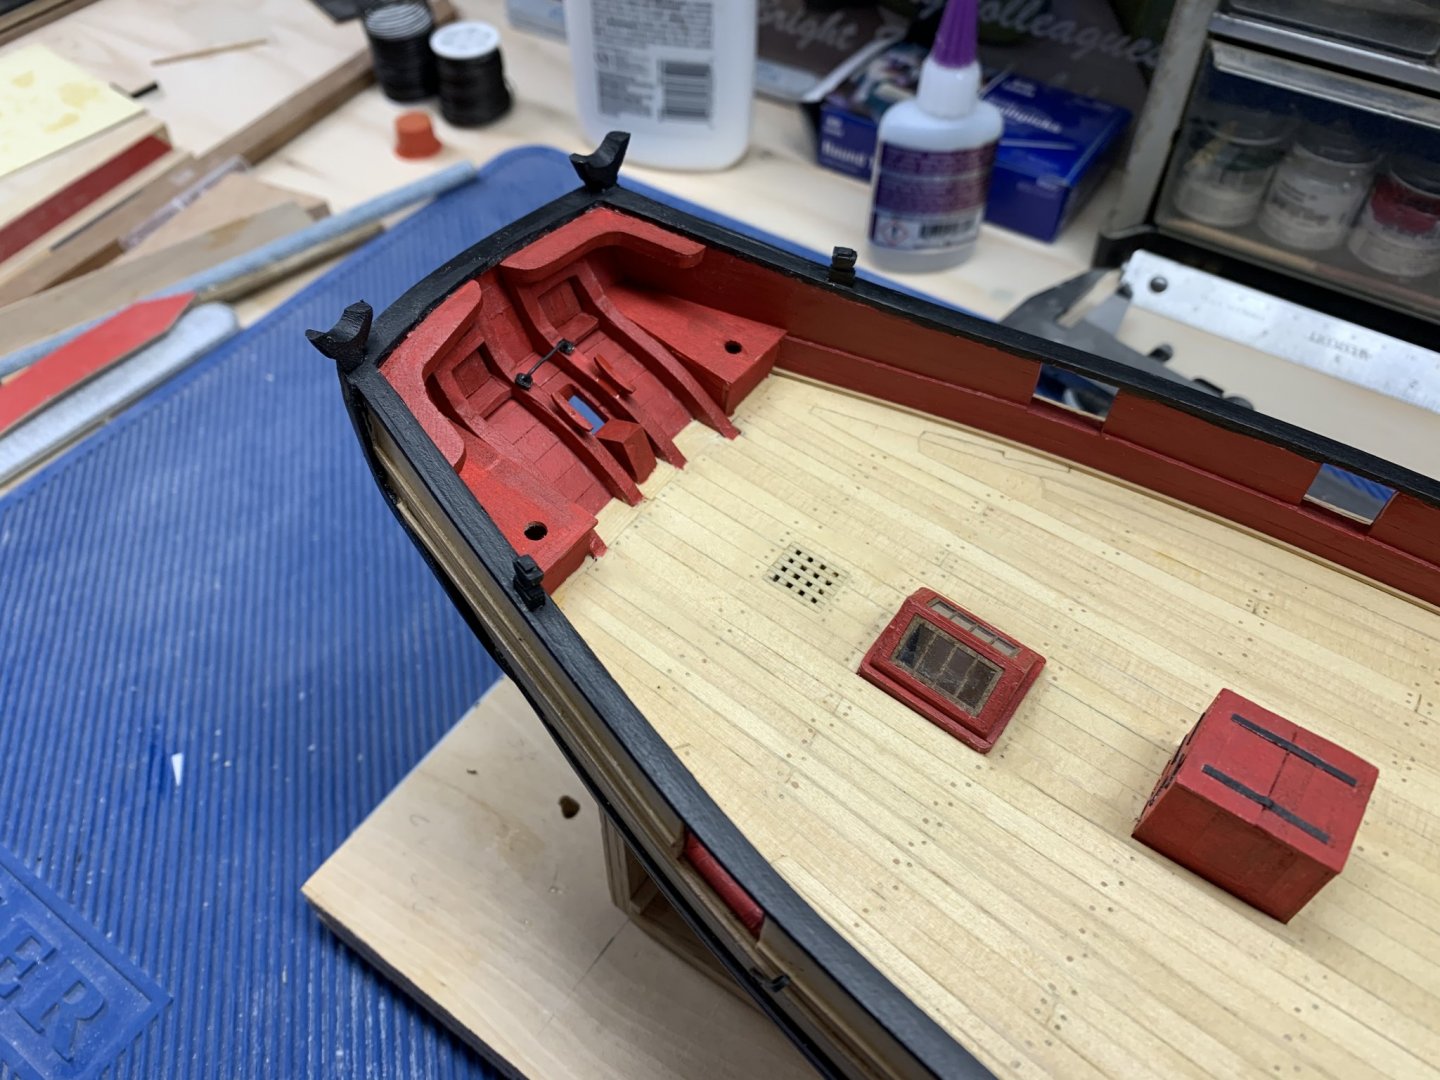
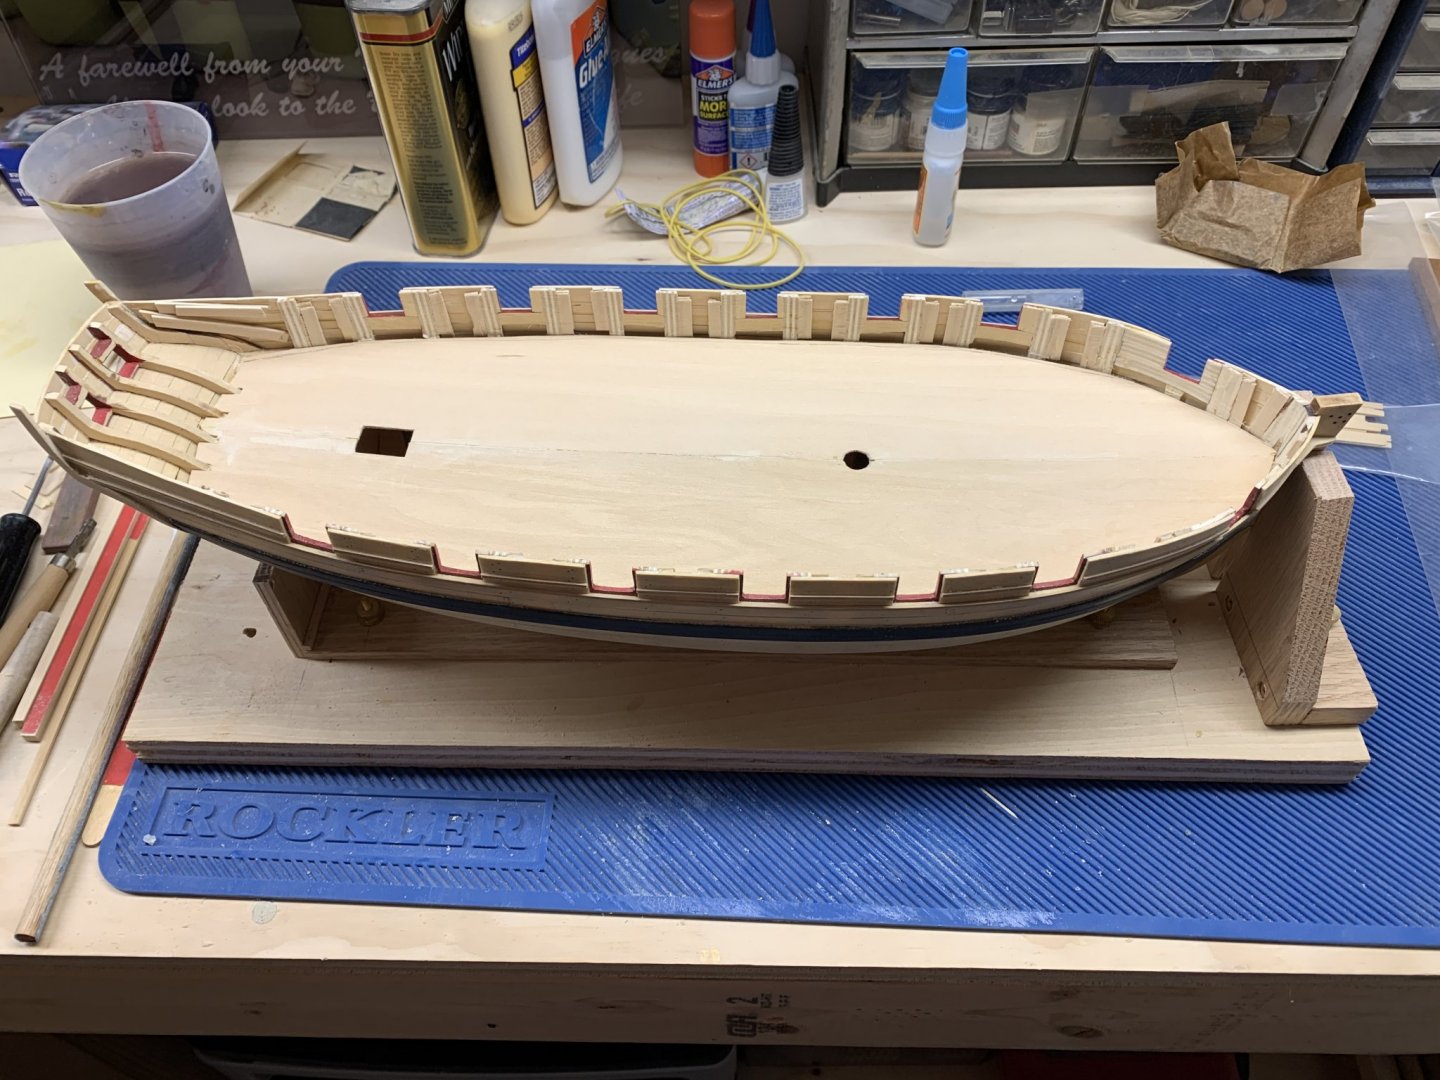
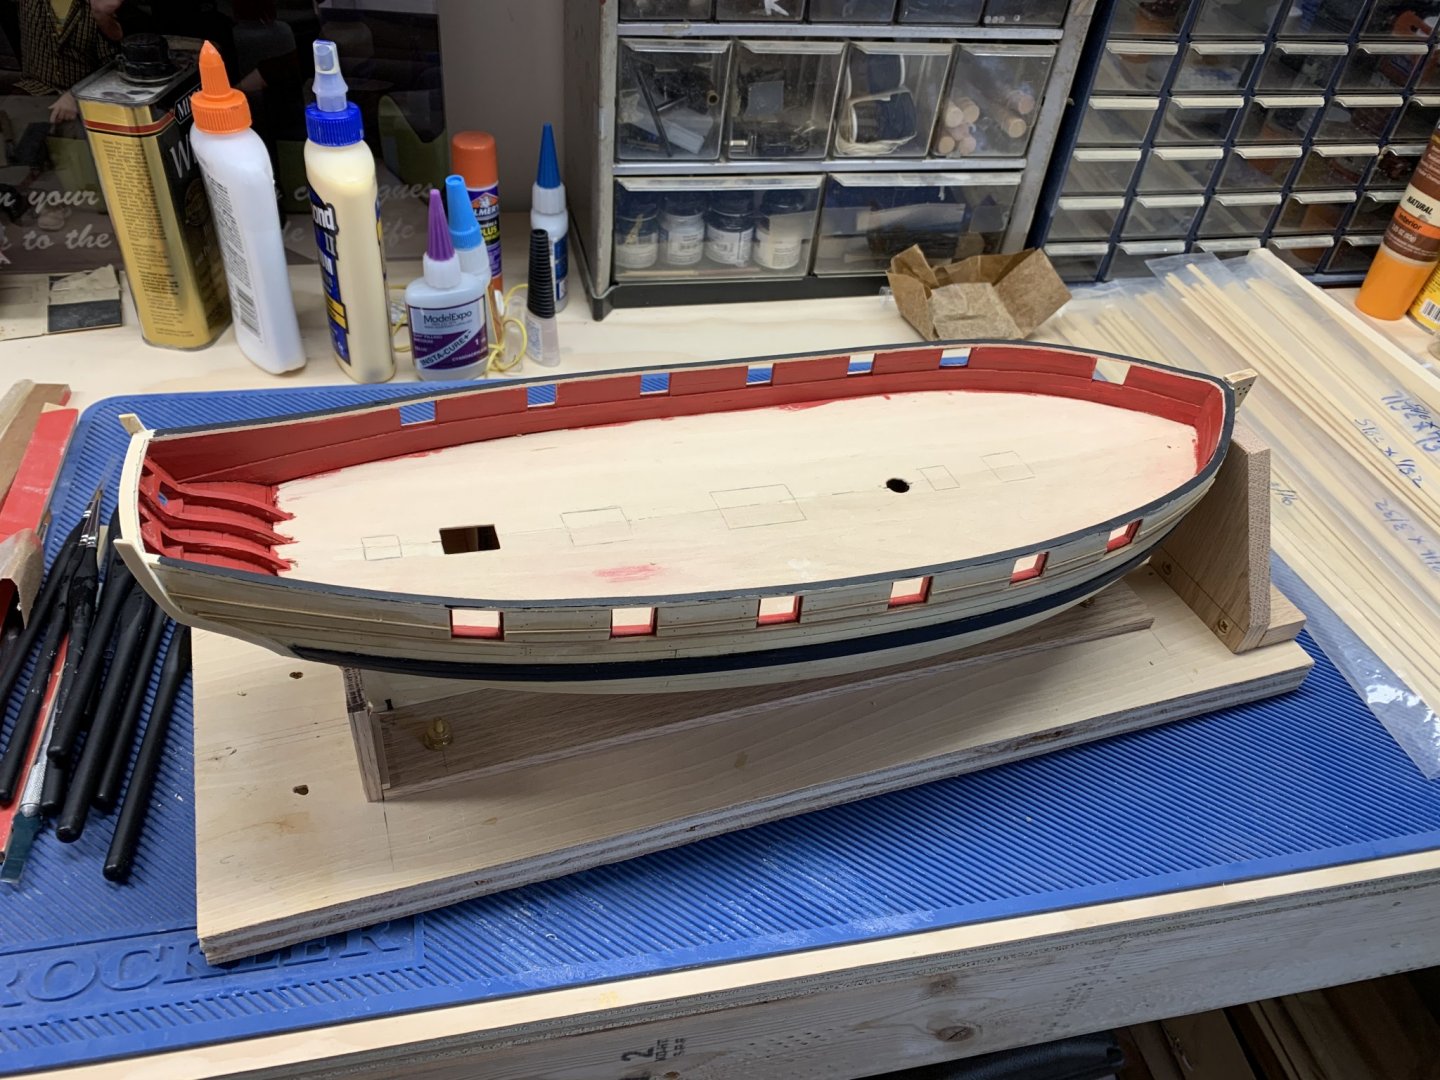
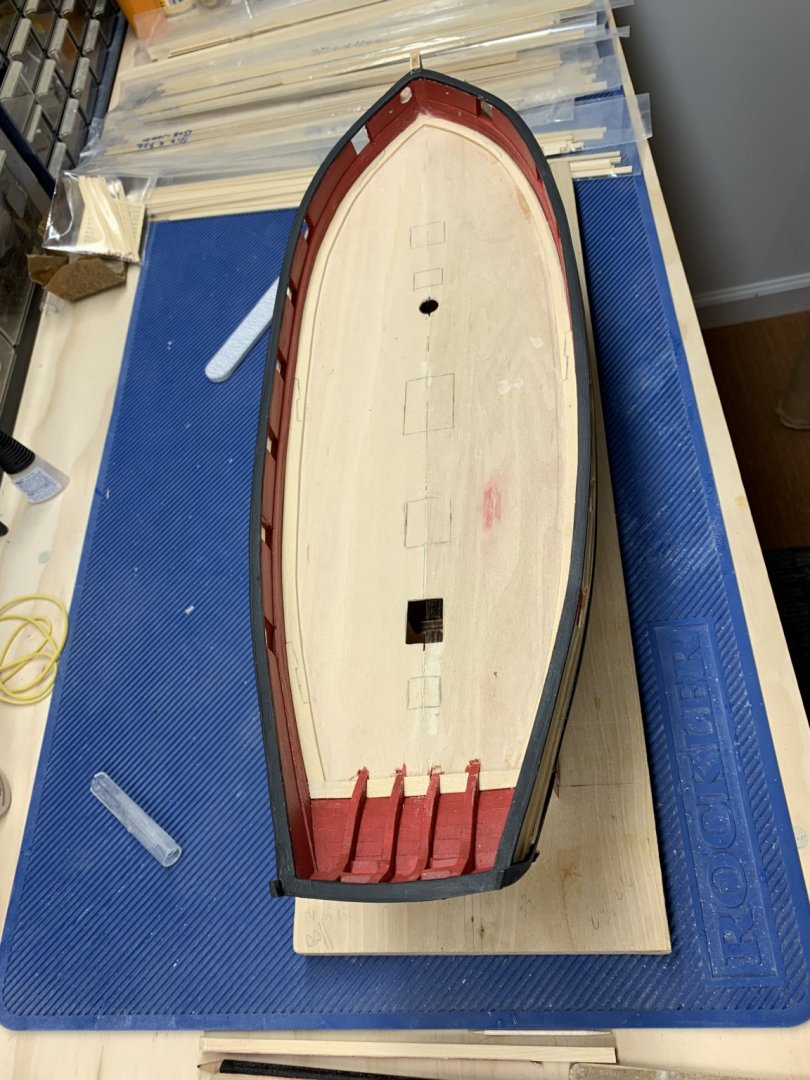
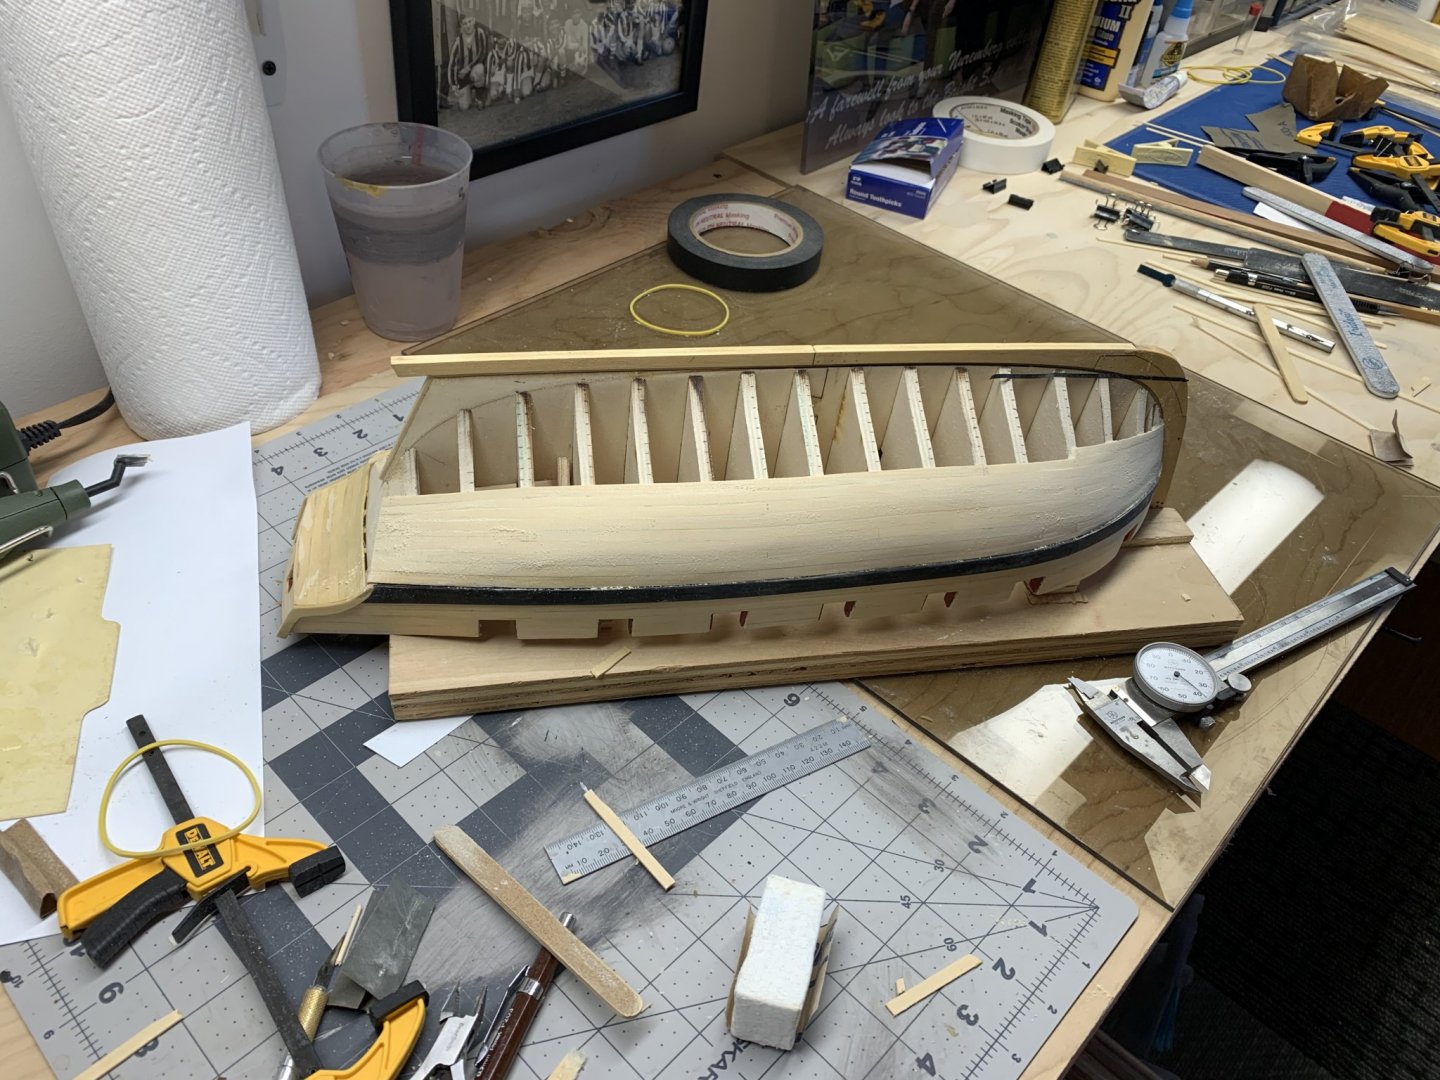
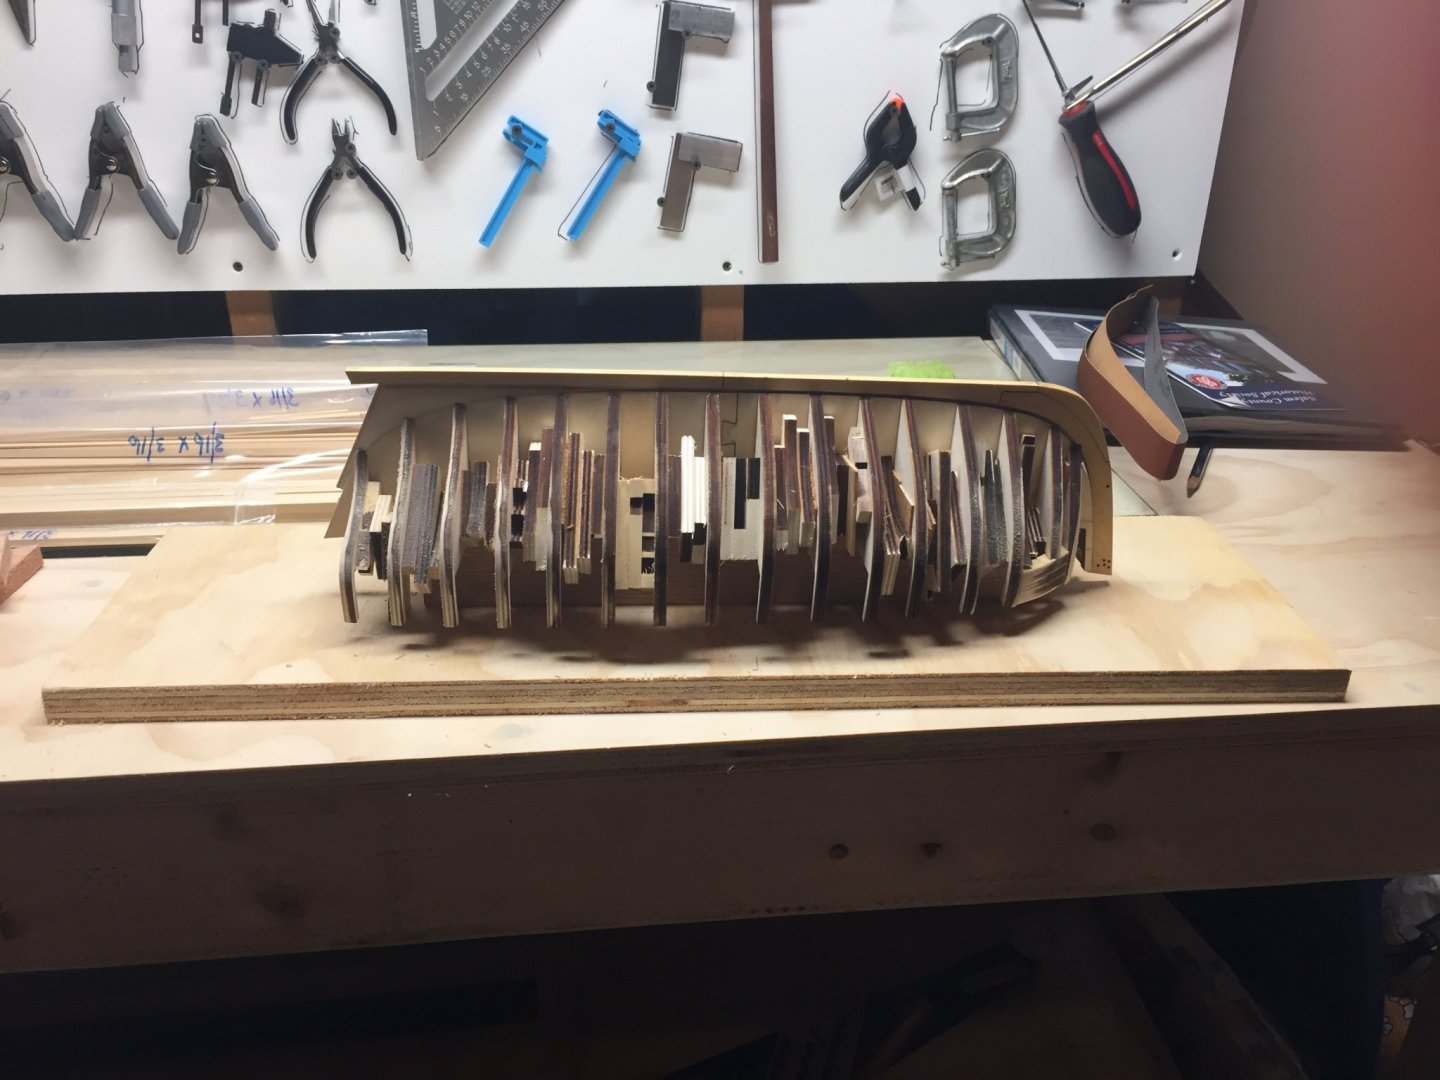
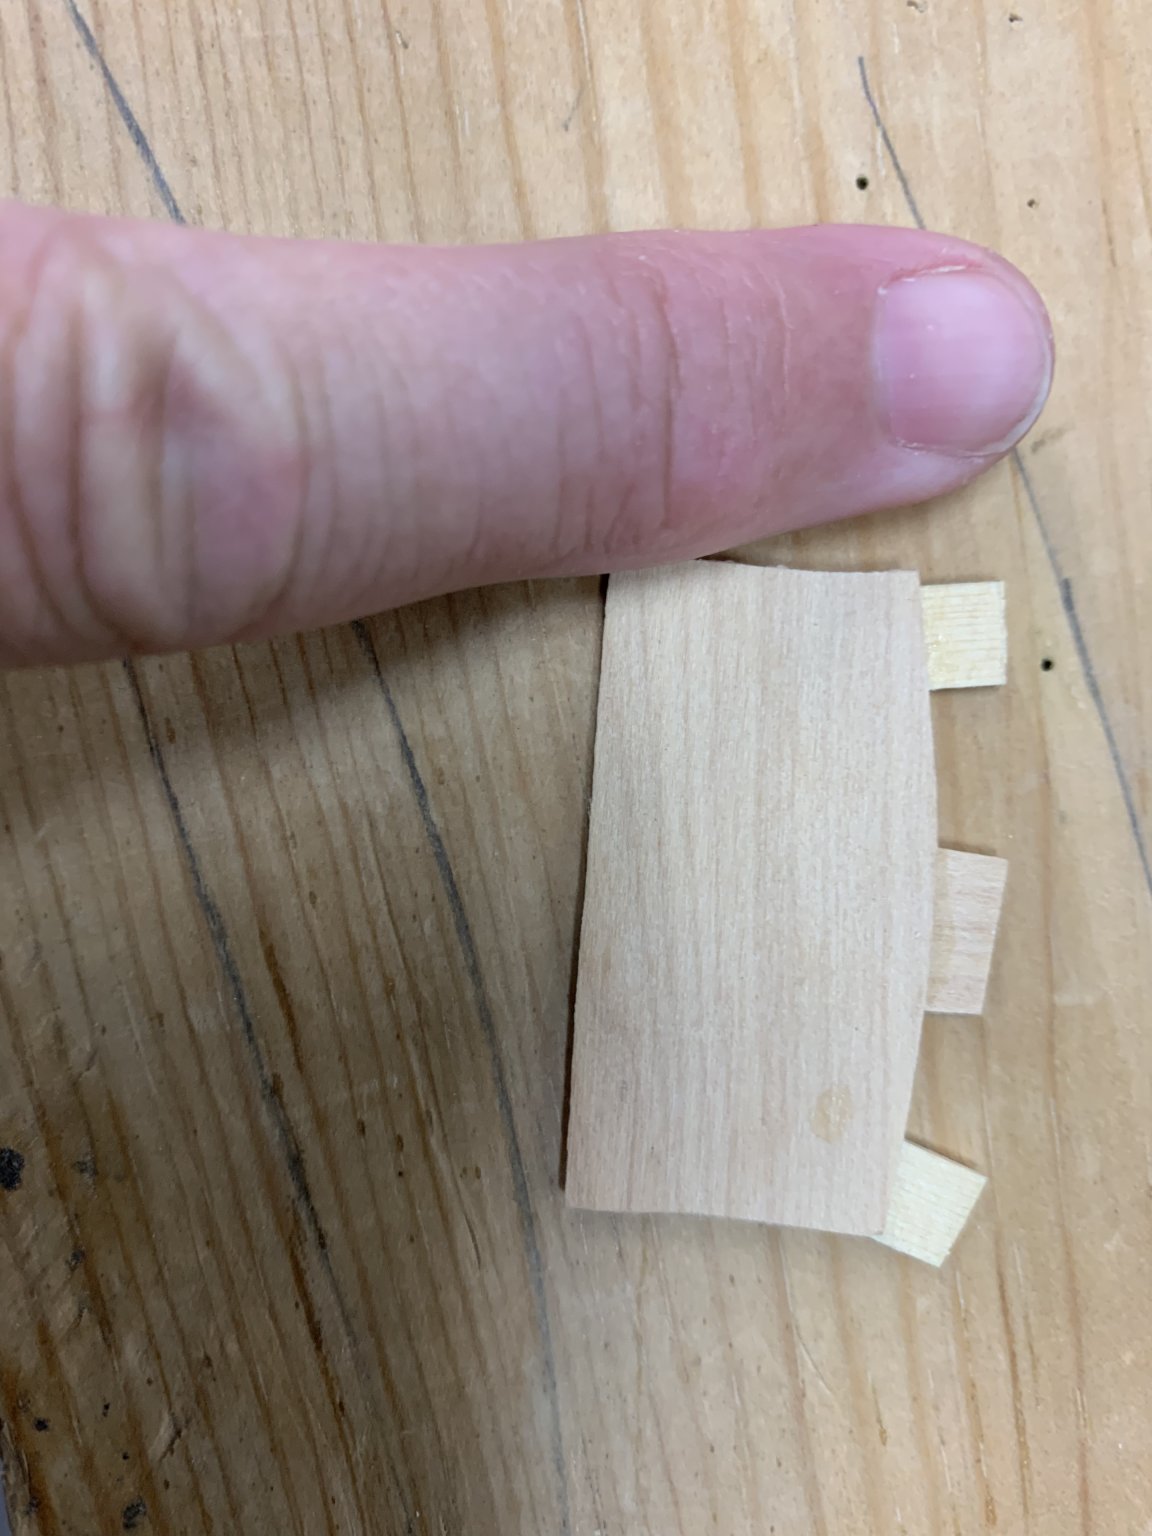
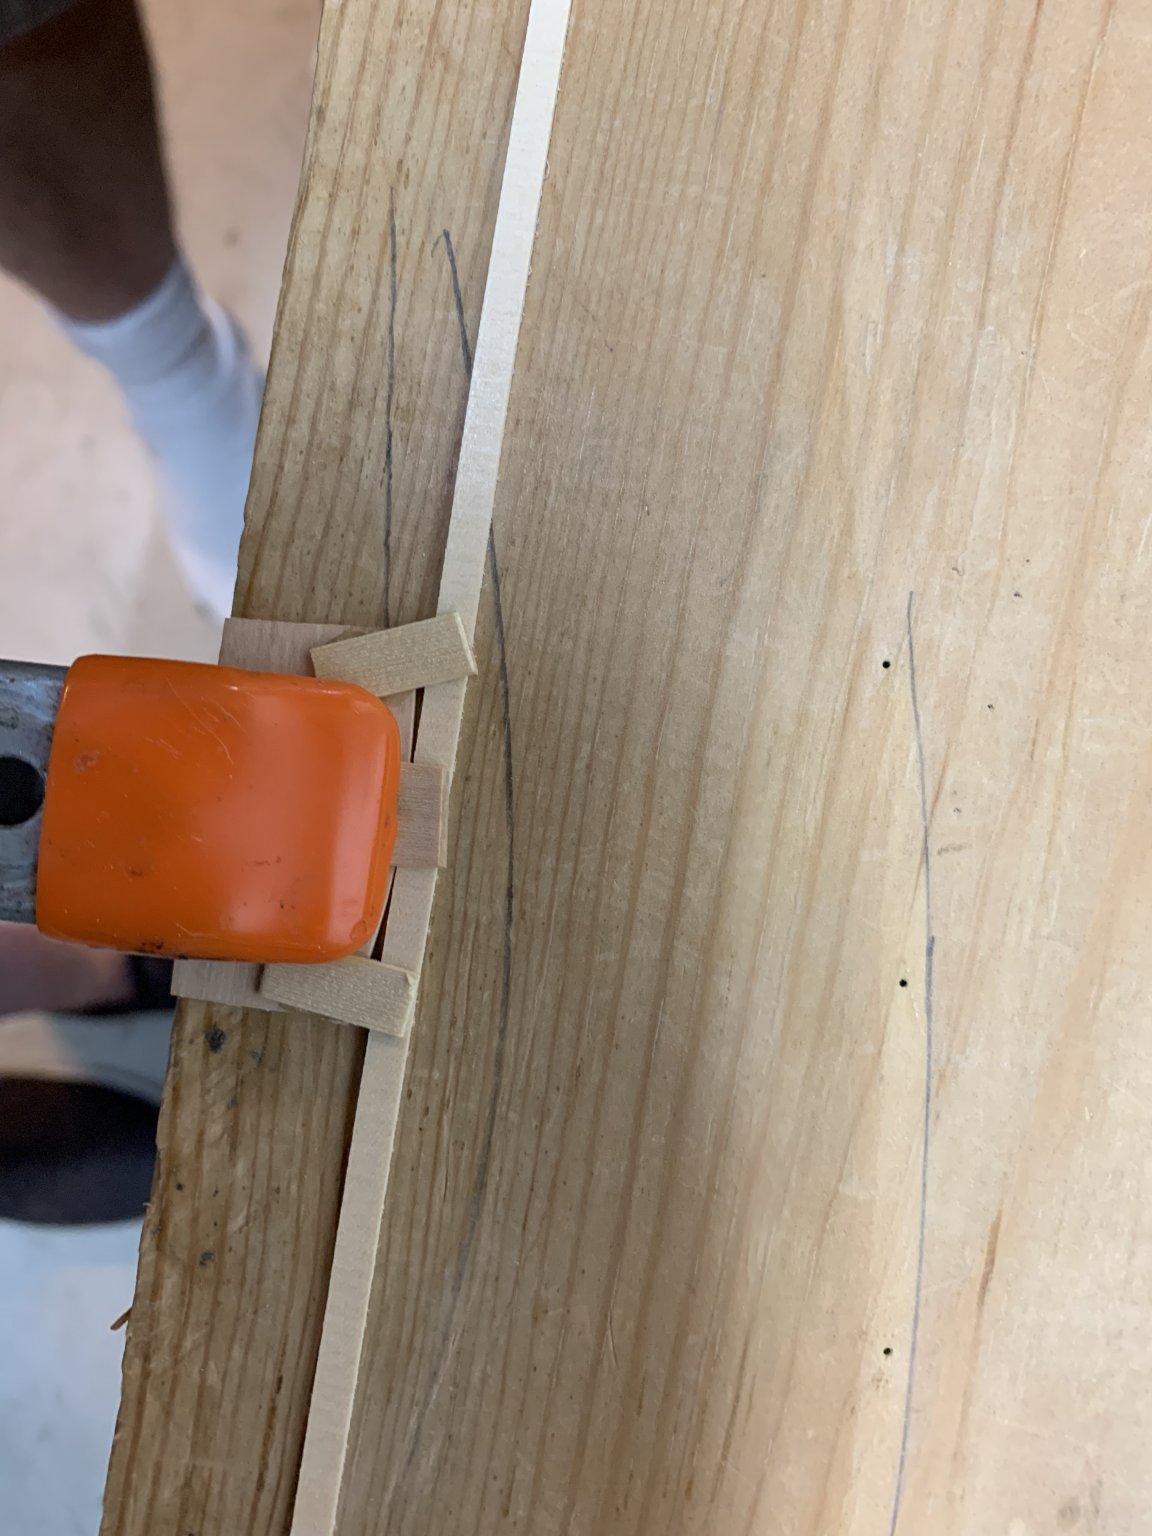
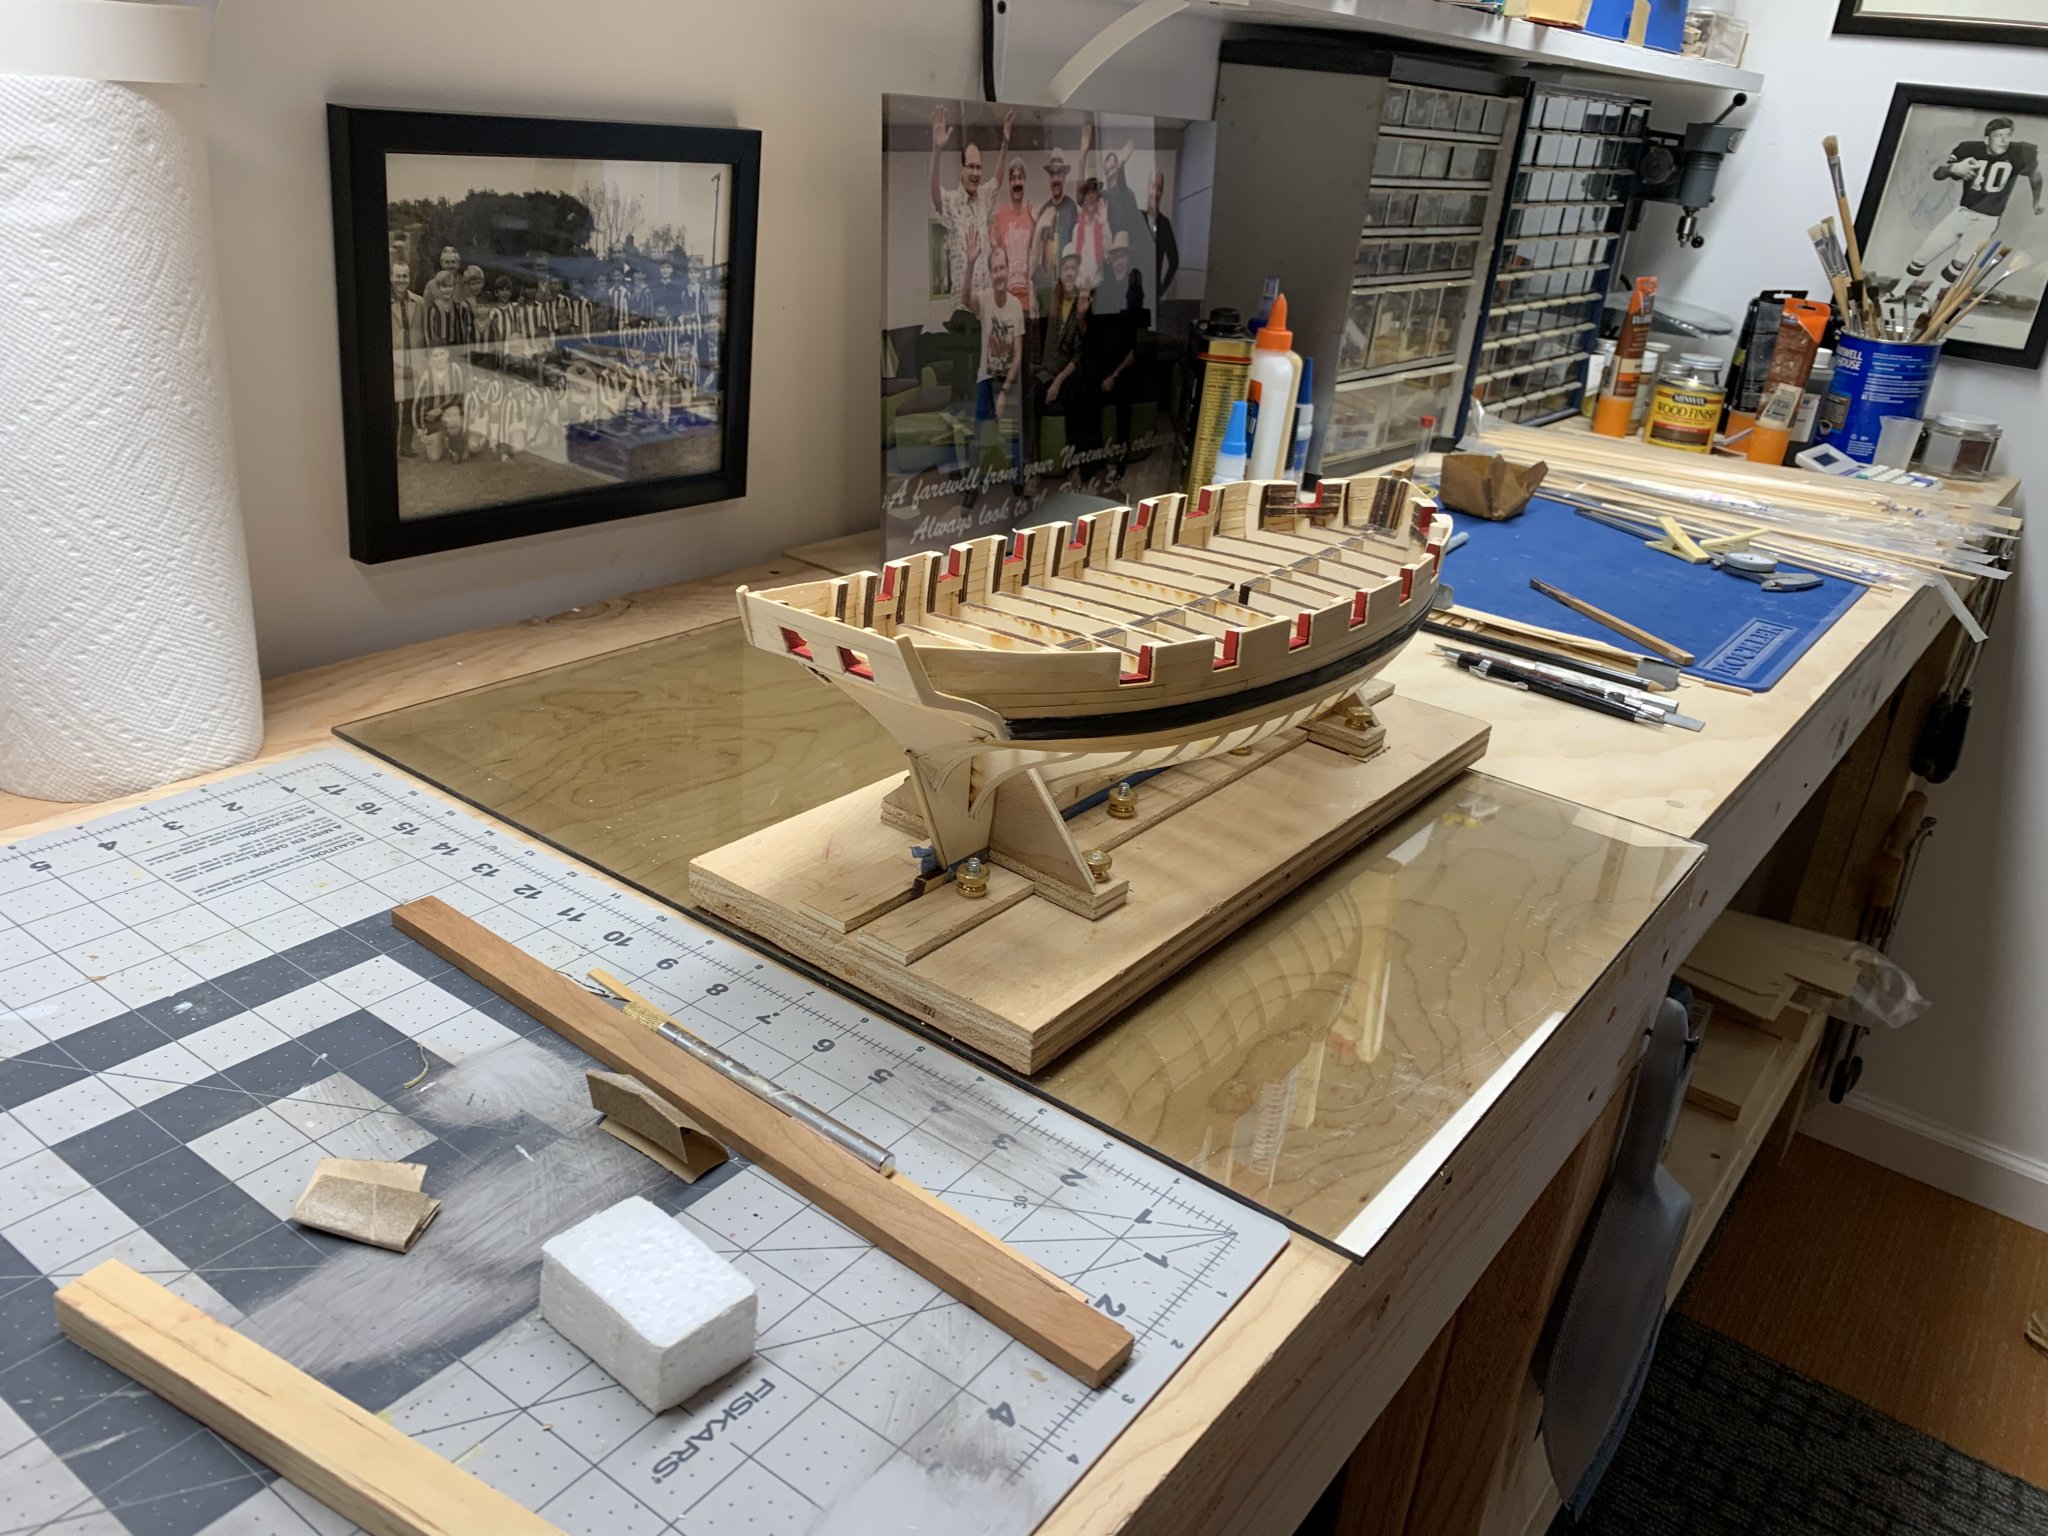
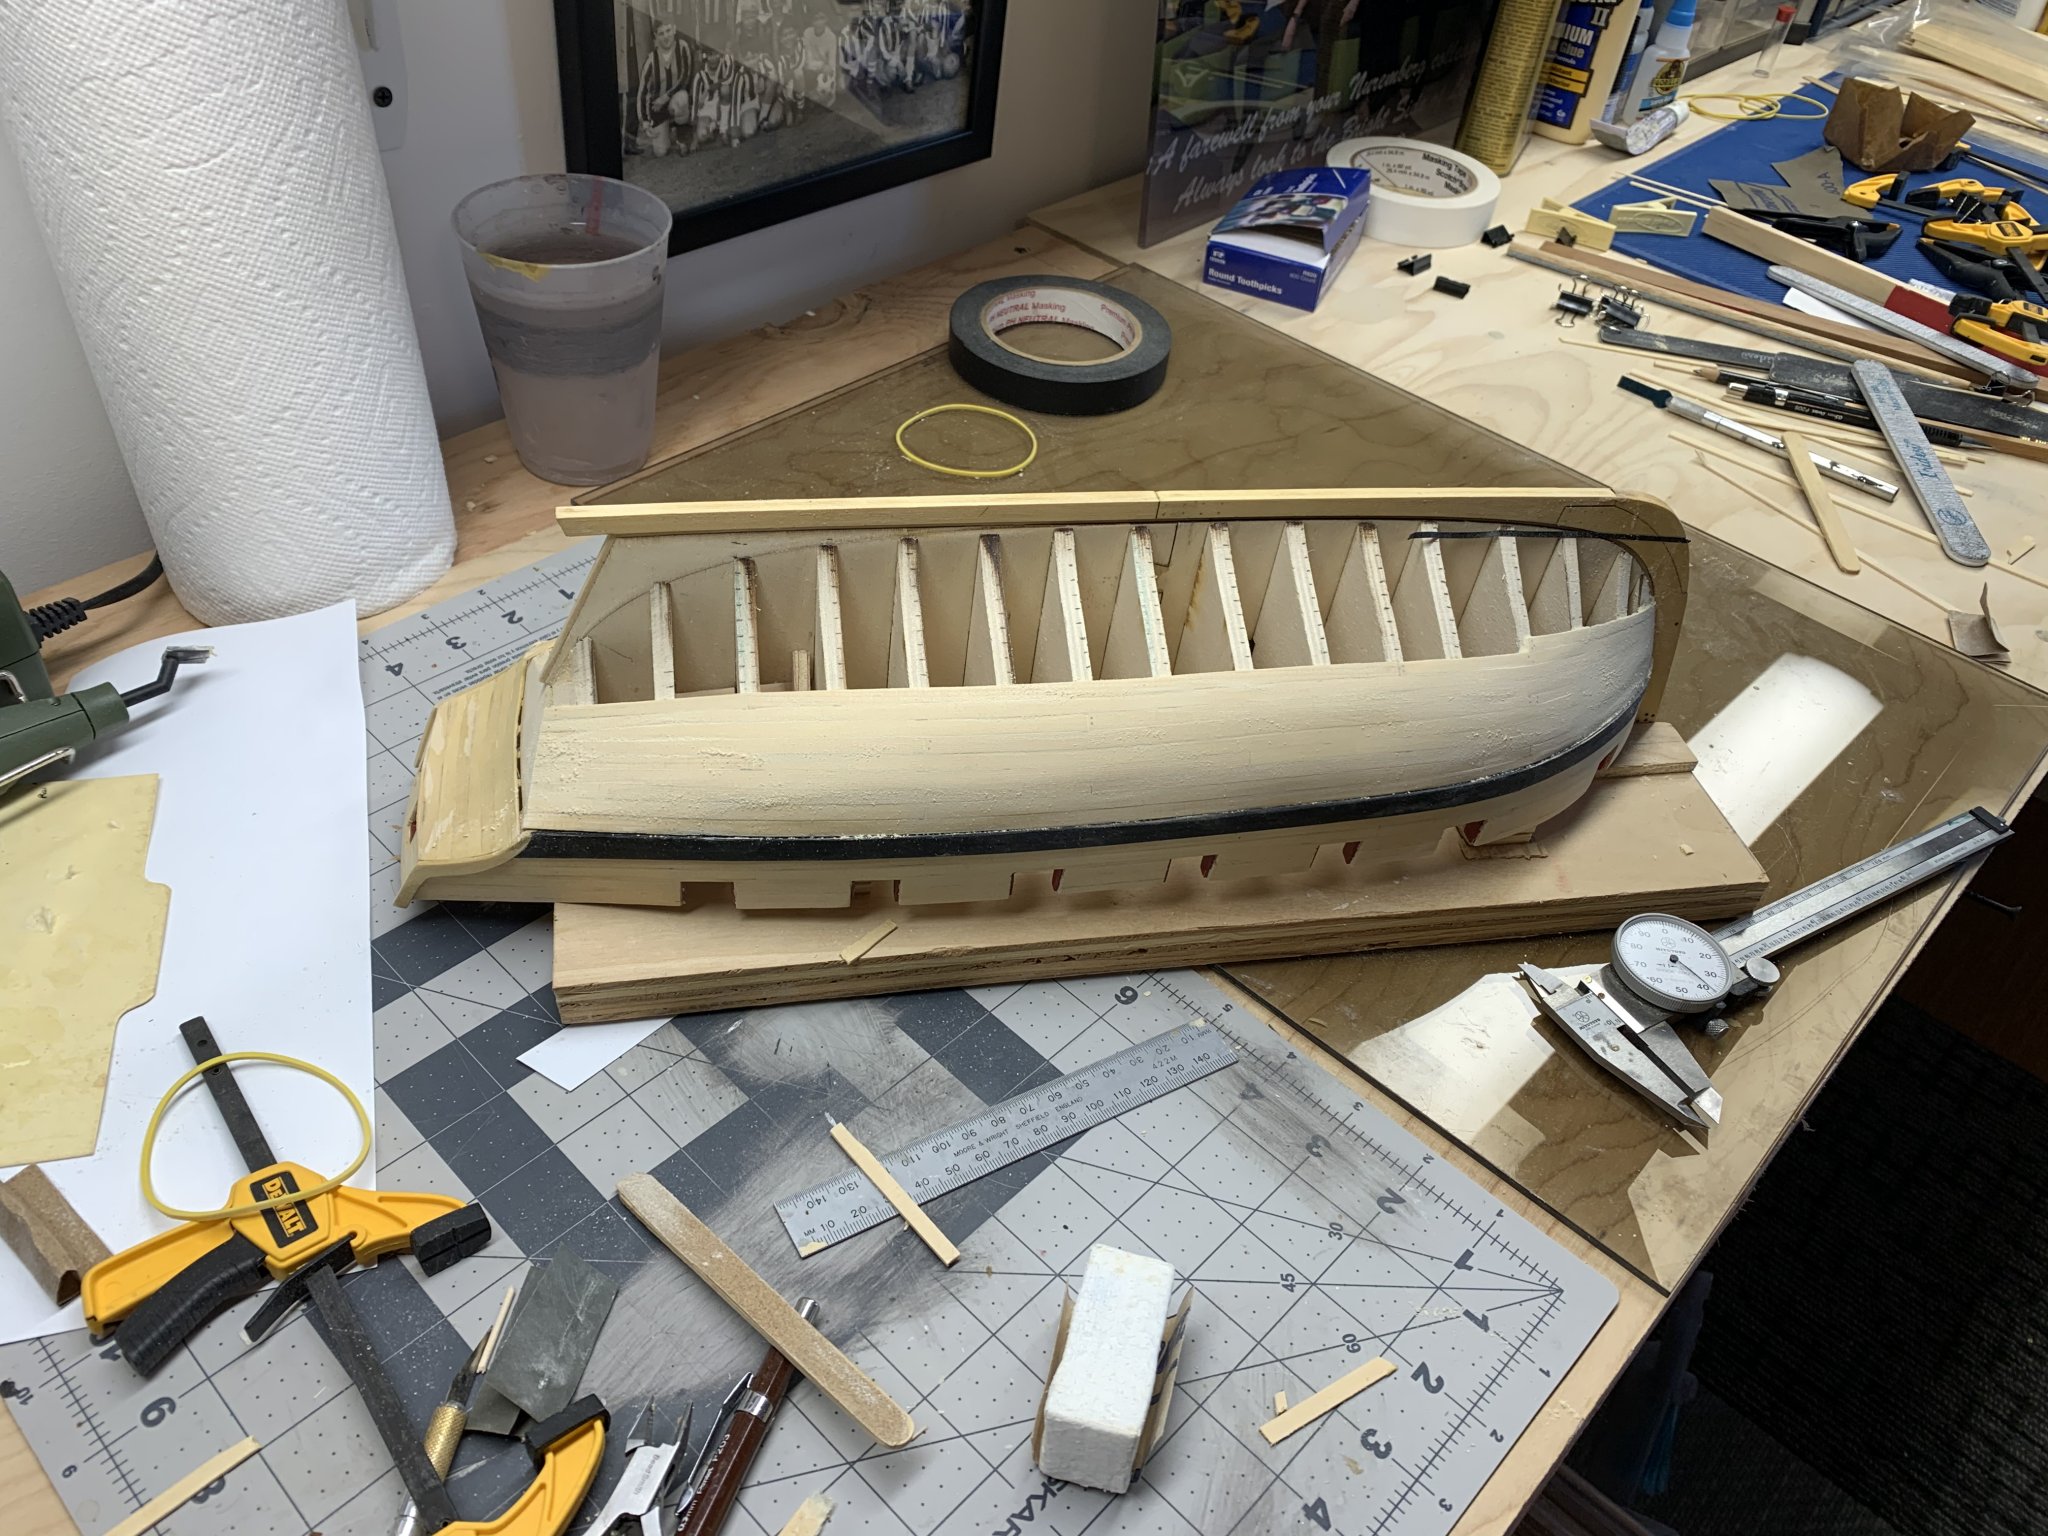
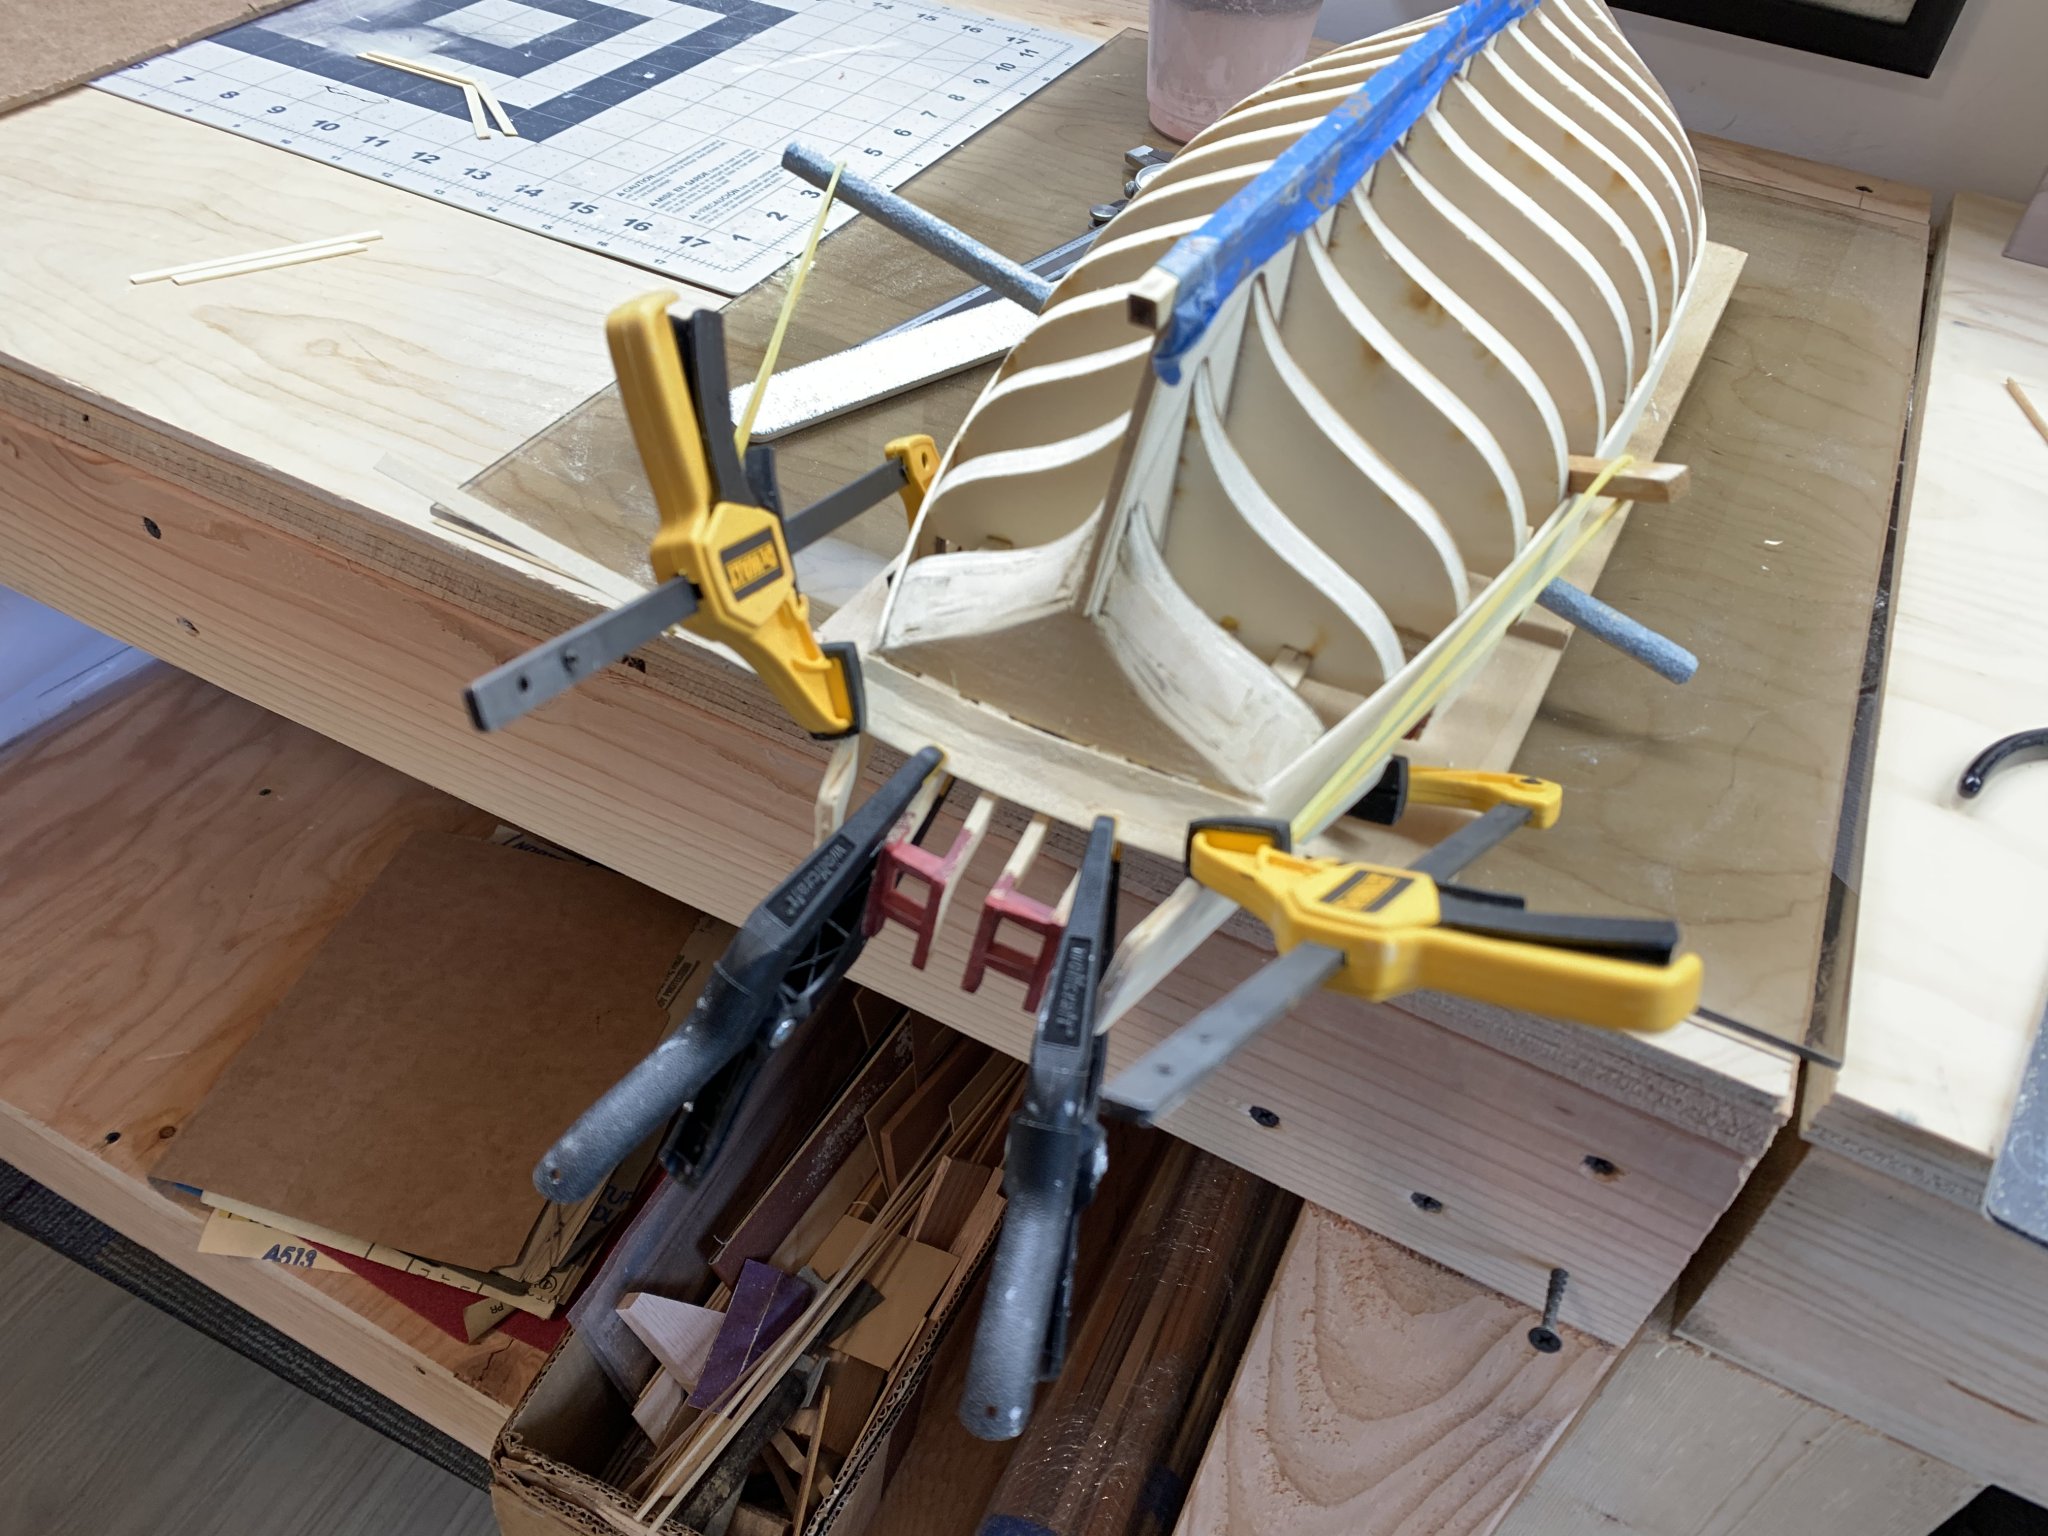
With the planking finally complete, I now moved to the interior of the ship. The inner frames are taken down to their final thickness. This was scary. I used a Z blade Xacto #17 as well as a Dremel with drum sander attachment in certain areas. You have to watch the drum sander, as you can get in to trouble quickly. The false floor was laid in place using the template from the plans. Once the false floor was in place I started to plank the interior bulwarks. When the interior bulkhead planking was completed, I painted them red and added the cap rails which I painted flat black. The lower bulkheads get reinforced planking (spirketing) . I believe this was necessary to handle the ships armament. The next step was adding the scarf jointed margin planks. I found these to be extremely challenging in getting everything to fit just right. At this point there are certain deck structures that need to be placed prior to the general planked floor installation. One of them was the companionway. The others are the gratings and the skylight. I used Syren's kit for the skylight as well as the grating tool and kit. These are well engineered and go together very nicely. In hindsight: I struggled with the margin planking, having to redo them several times before I finally found them to be acceptable to me. These scarf jointed planks are such a prominent and beautiful feature on a model that you want to try to get them to look as best you can. They are far from perfect but I am glad I spent some extra time here. But, they still don't come close to others who have build logs of this ship on this forum. These folks have my utmost respect for their talents and craftmanship. Up next time will be the floor install and the completion of the remaining deck structures. Until then, stay safe and be well, oh yeah and happy modeling!

- 54 replies
-
- 6
-
-
- cheerful
- Syren Ship Model Company
- (and 1 more)
-
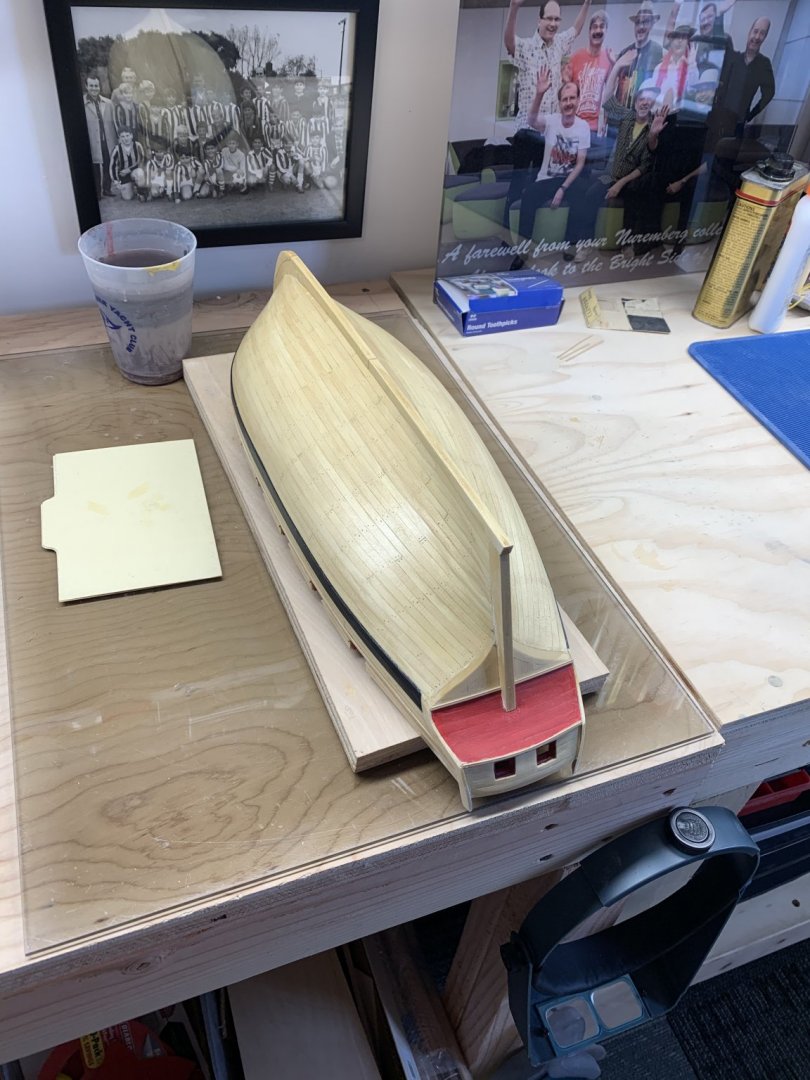
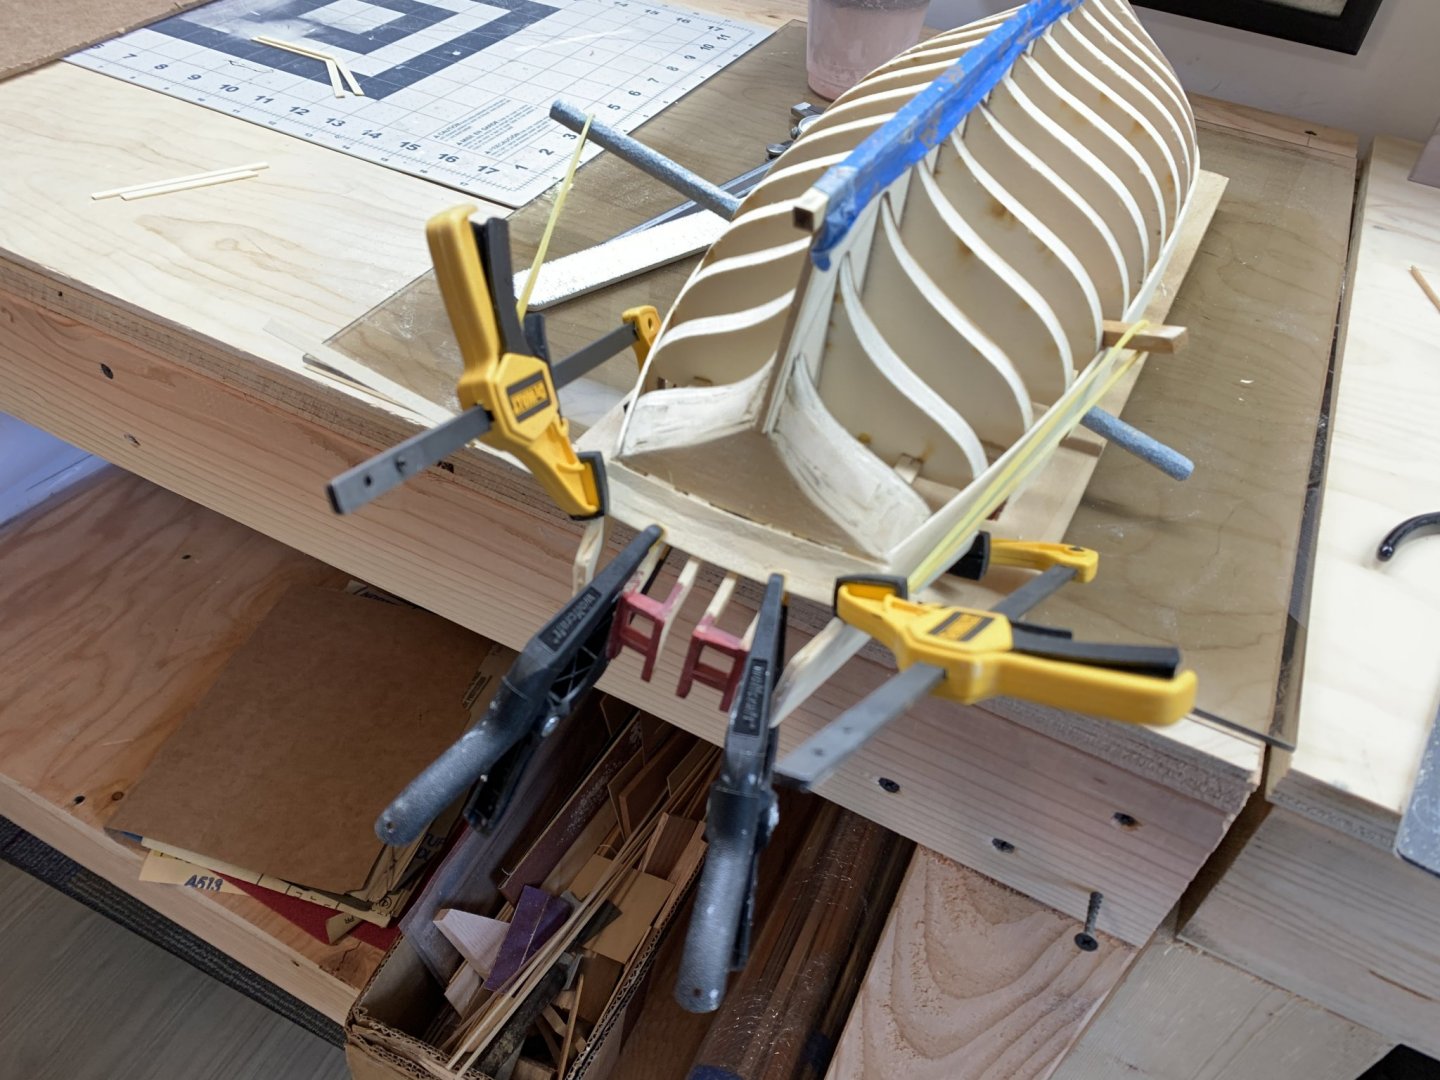
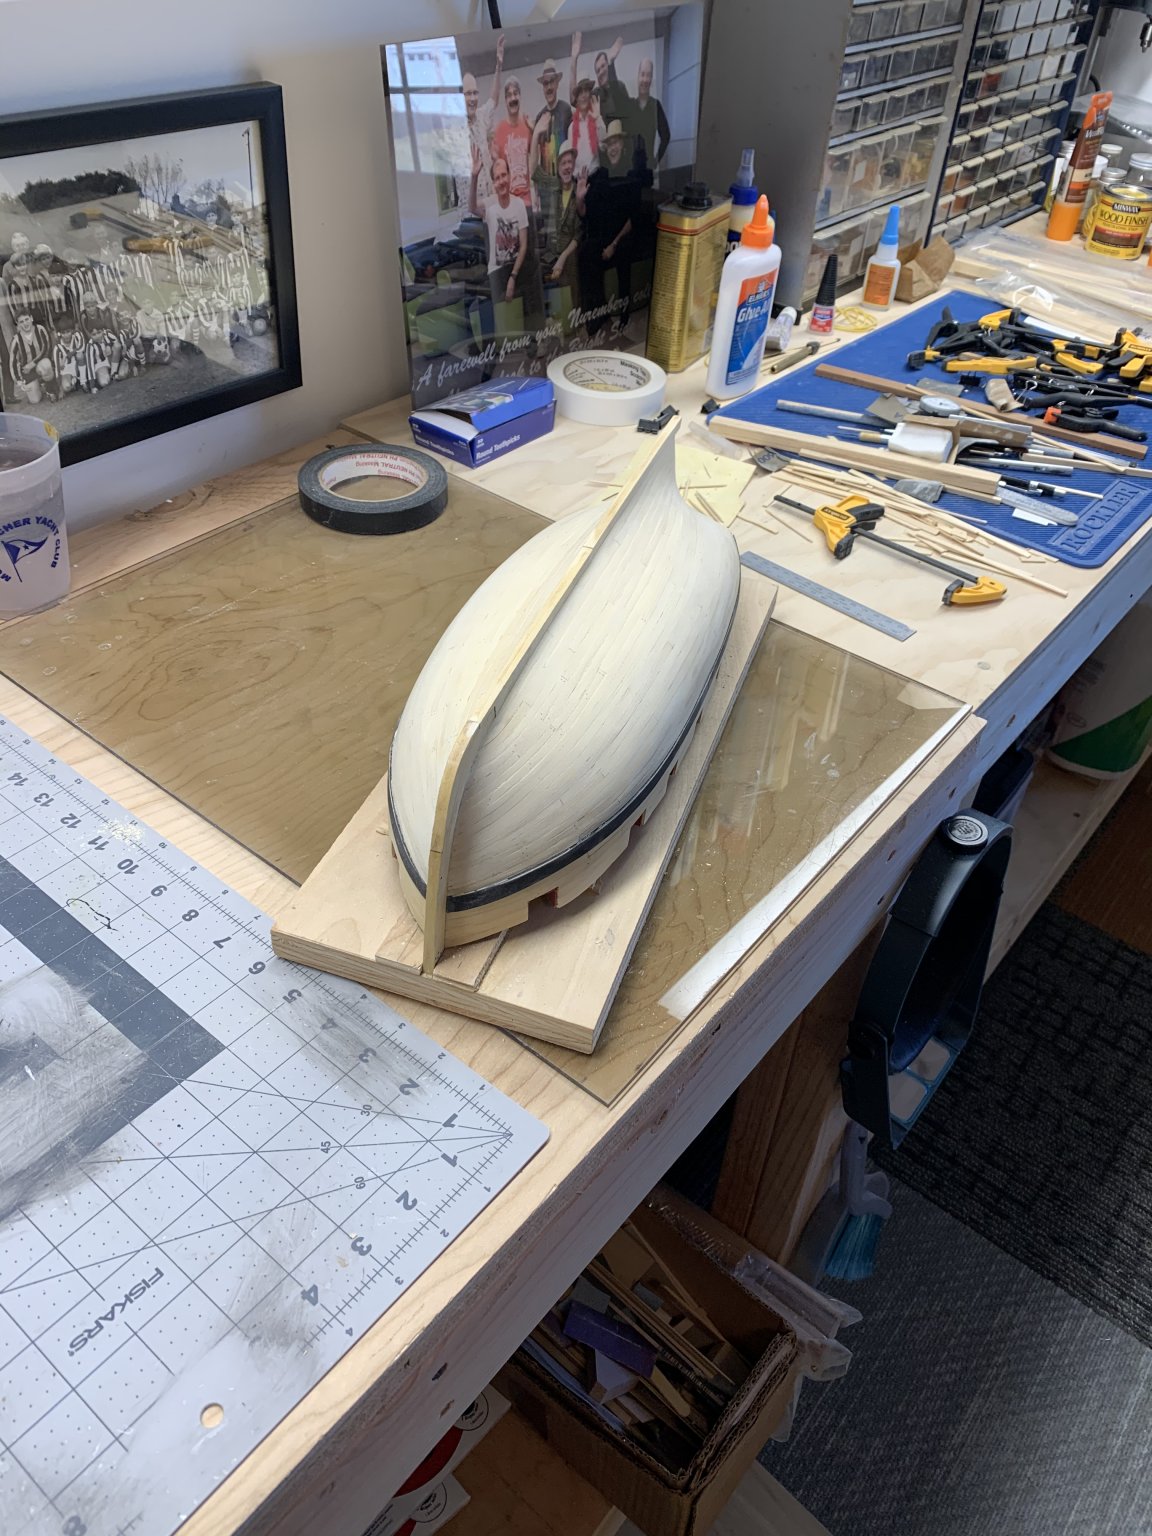
The hull planking complete, now it just needs a good sanding. In hindsight: This was my first time planking a bulkhead hull and although it went better than I thought it would, it did underscore the importance of properly fairing the bulkheads prior to laying any planking. In my next project, much more care will be taken in that step. The hull has been sanded and given a coat of wipe-on satin poly. I also painted the stern. This is also a good shot of the square tuck. This was challenging but Chuck's Practicum really provided a nice guideline for its construction. In general, the guidelines for the Cheerful project are superior in my opinion. This is especially true for the novice builder like me. It is well though out, complete, and provides the modeler with techniques that make the most daunting tasks workable. In my next post I will move to the interior and lay the false floor. Until then happy modeling ..

- 54 replies
-
- 16
-
-
- cheerful
- Syren Ship Model Company
- (and 1 more)
-
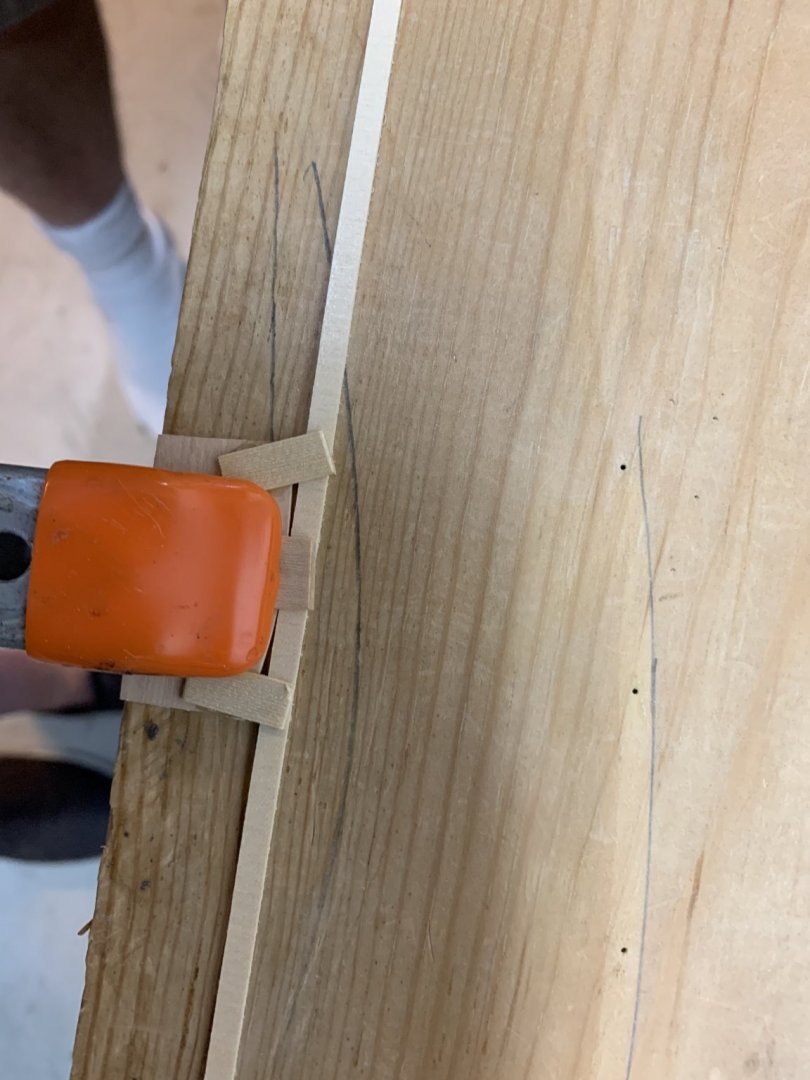
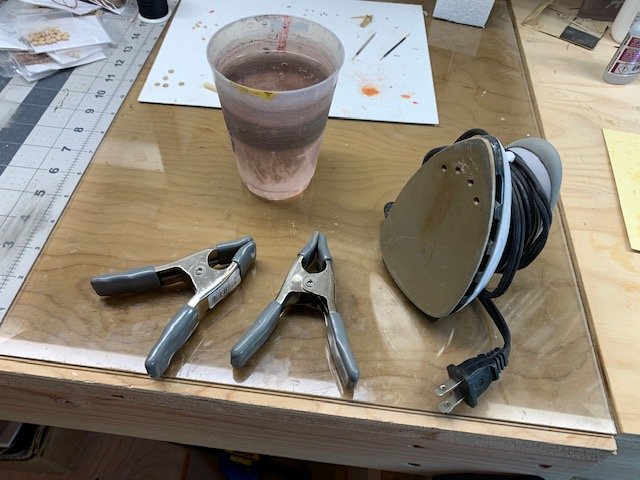
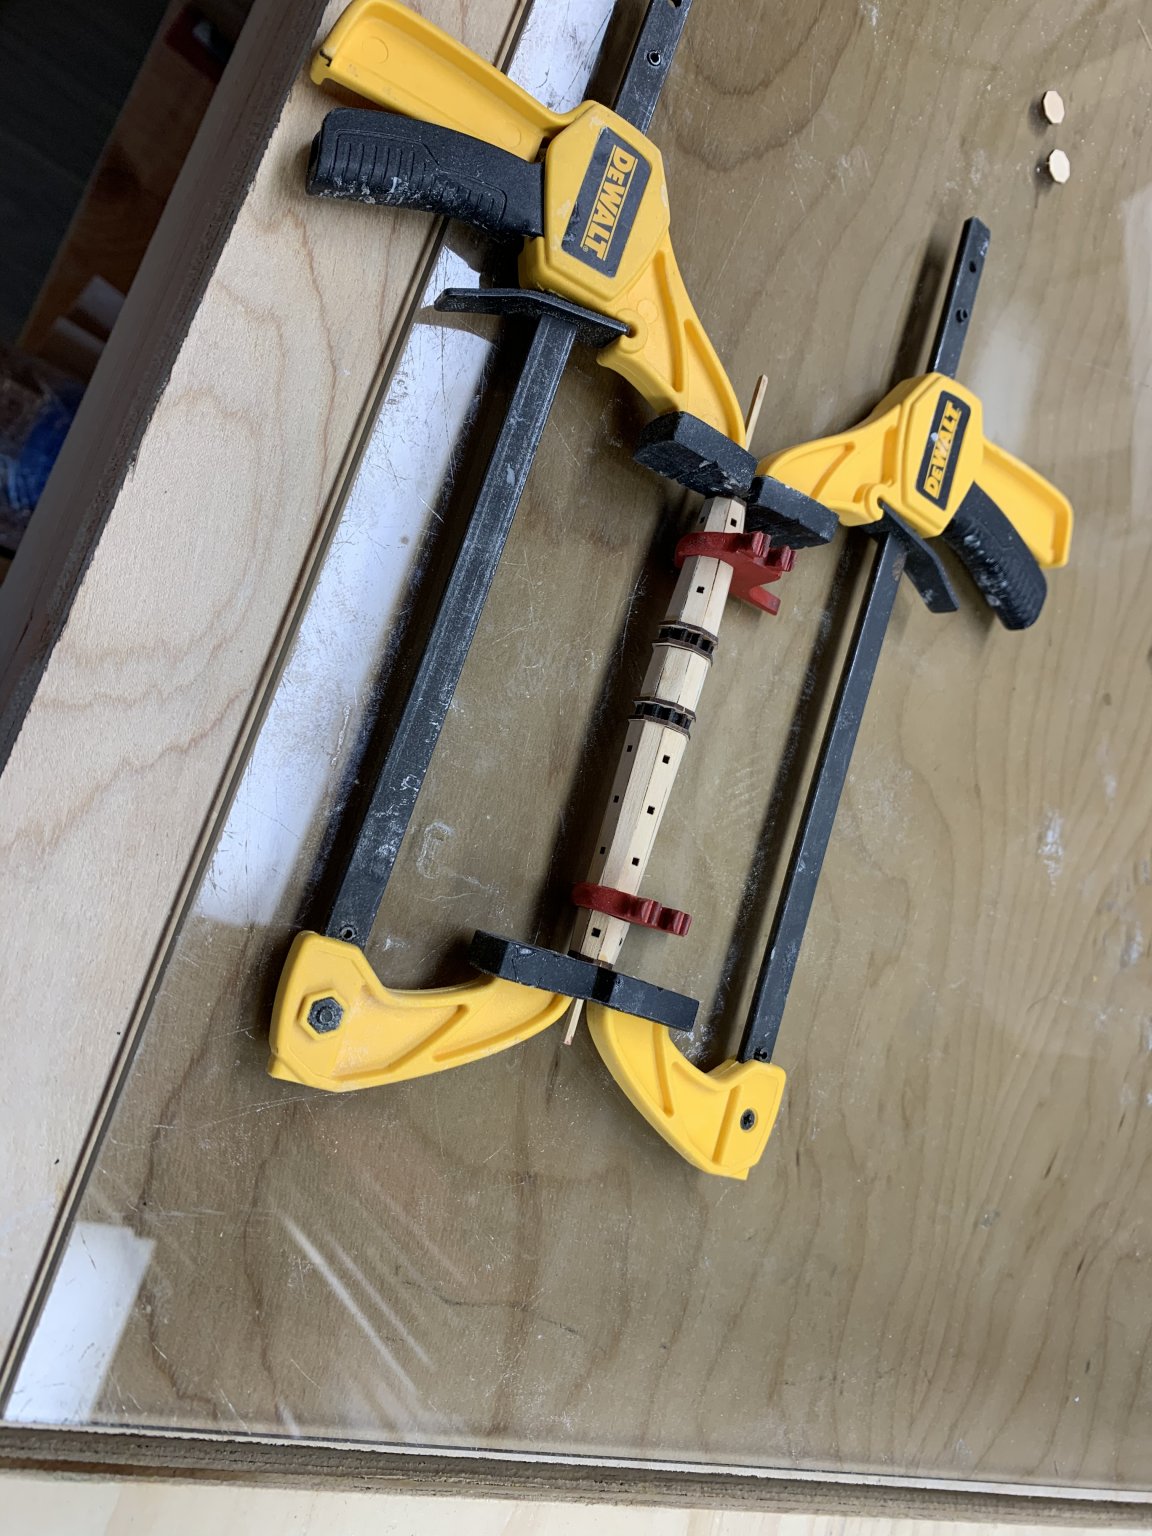
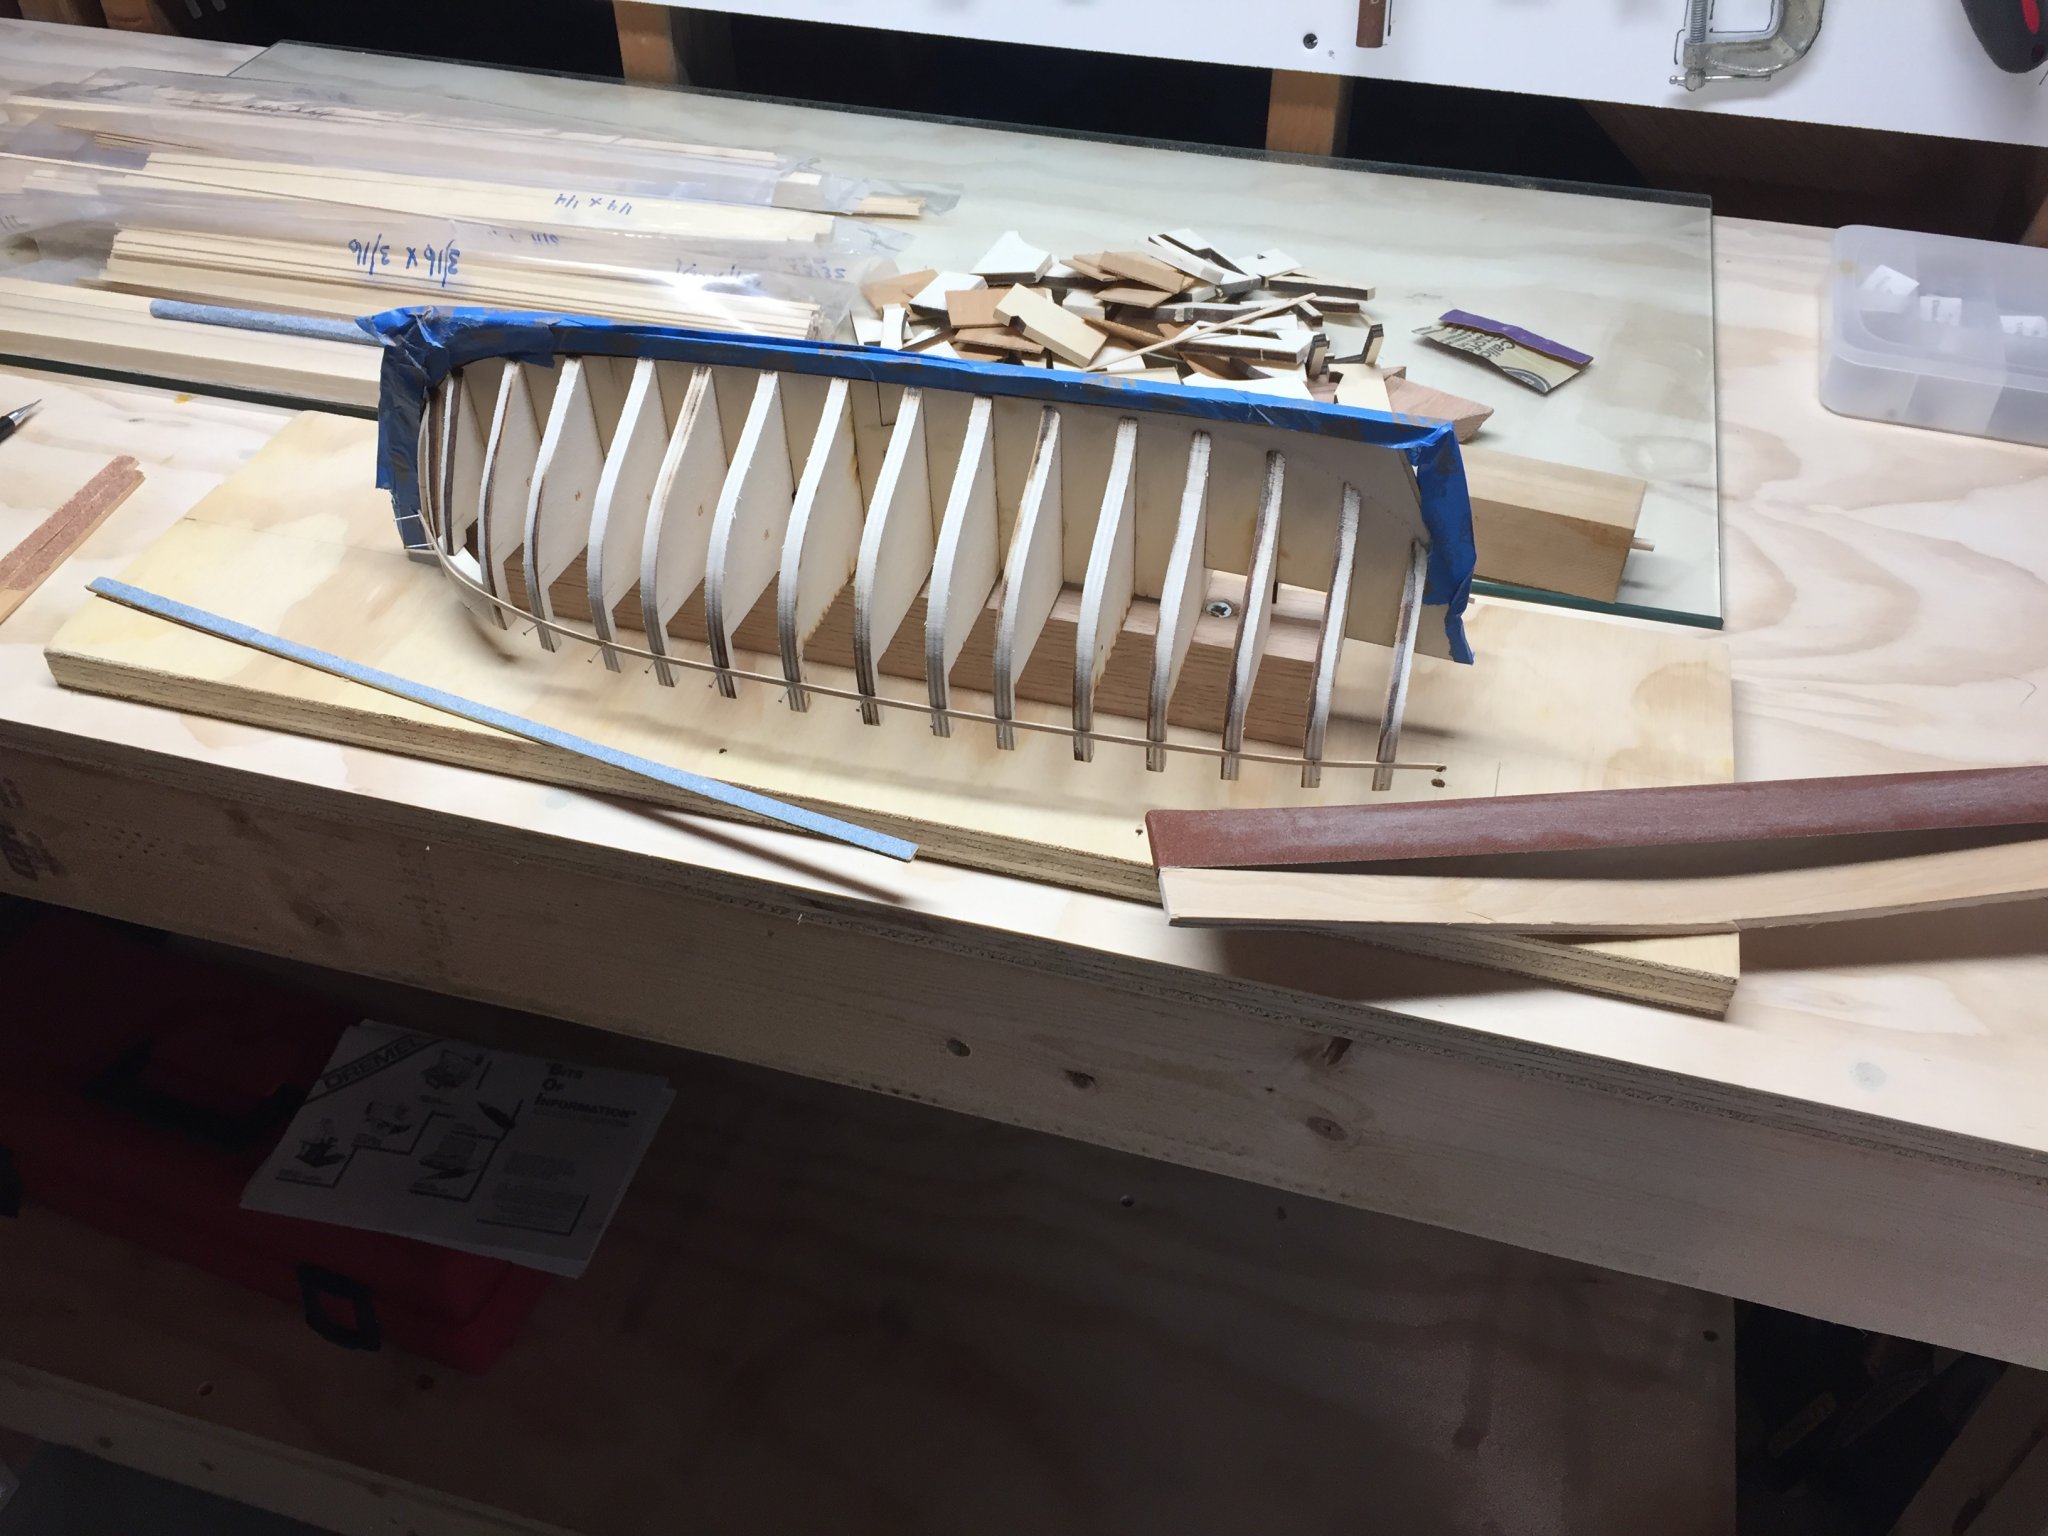
Planking the hull. Above the Wales the planking is pretty straight forward. In hindsight: I wish I took more care in sizing the plank lengths that ran between the gun ports. A lot of cleanup was necessary to get it into a somewhat presentable form. Its below the Wales that require a bit more planning, bending in multiple dimensions, and shaping. I followed Chuck Passaro's method of spiling which has been well documented on the NRG site. You need to line the hull and this was done by creating tick strips for each section and marking the plank locations with a very sharp pencil. I also used artist tape to form the sectors of planking from bow to stern. As Chuck describes in the Cheerful documentation, the planks will narrow down as they approach the bow. You will need to make a drop plank as well in this area. At the stern they can widen a bit. My plank bending set up which I learned from Chuck: This is a small jig that is the same thickness as your planks and has a built in curve to provide a bending form. To help the bending process I use a small cup of water to add some moisture to the plank and a small travel iron that provides the heat. The clamps are used to help define the bend required. Its a pretty simple method that is extremely effective in my opinion.

- 54 replies
-
- 11
-
-
- cheerful
- Syren Ship Model Company
- (and 1 more)
-
Sea Witch 1846 by Zooker - RESTORATION
Bill Brown replied to Zooker's topic in - Build logs for subjects built 1801 - 1850
I believe this to be the Marine Model Kit No. 1079 from he photograph. About 2 years ago I acquired a partially built model from this kit that had damage from a move. I started the restoration but decided to not fully rig the ship leaving it as it may have been when launched. The plans were originally drawn in the 30s. It was a quality kit and well worth restoring if you have the time and passion. From time to time these kits show up on eBay. -
The stern frames are installed as are the stern ports. The ports are all painted now as it is easier to do now than later as Chuck points out in his build notes. The first layer of wales are placed as is the molding strip that sits just below the gun ports. This will define the planking runs above the wales. The blue mat you see in some of my photos is something I got from Rockler Woodworking. It limits the movement of what is placed on top of it and does not allow glue to adhere well, so it can be easily cleaned. I not only find it very useful while model building (especially for sanding) but also when I am in need of transporting a model to a club meeting or event. The transom piece is fitted as is some filler wood at the stern. The photo also shows the first stern plank being fitted. In hindsight: I was not happy with the dents in the stern plank which I caused by my handling and clamping and I think I ended up replacing this one sometime afterwards or I may have been able to sand them out, just not sure. Yellow Cedar is a wonderful wood for ship modeling, it bends well, sands well, is cost effective, has a nice color, has a wonderful smell, BUT IT IS SOFT. Next time around I need to take much more care in handling the wood especially while clamping. You should always use some sort of clamp protection with this wood or it will mark and sometimes mark deep enough where you can't effectively sand it out.


- 54 replies
-
- 6
-
-
- cheerful
- Syren Ship Model Company
- (and 1 more)
-
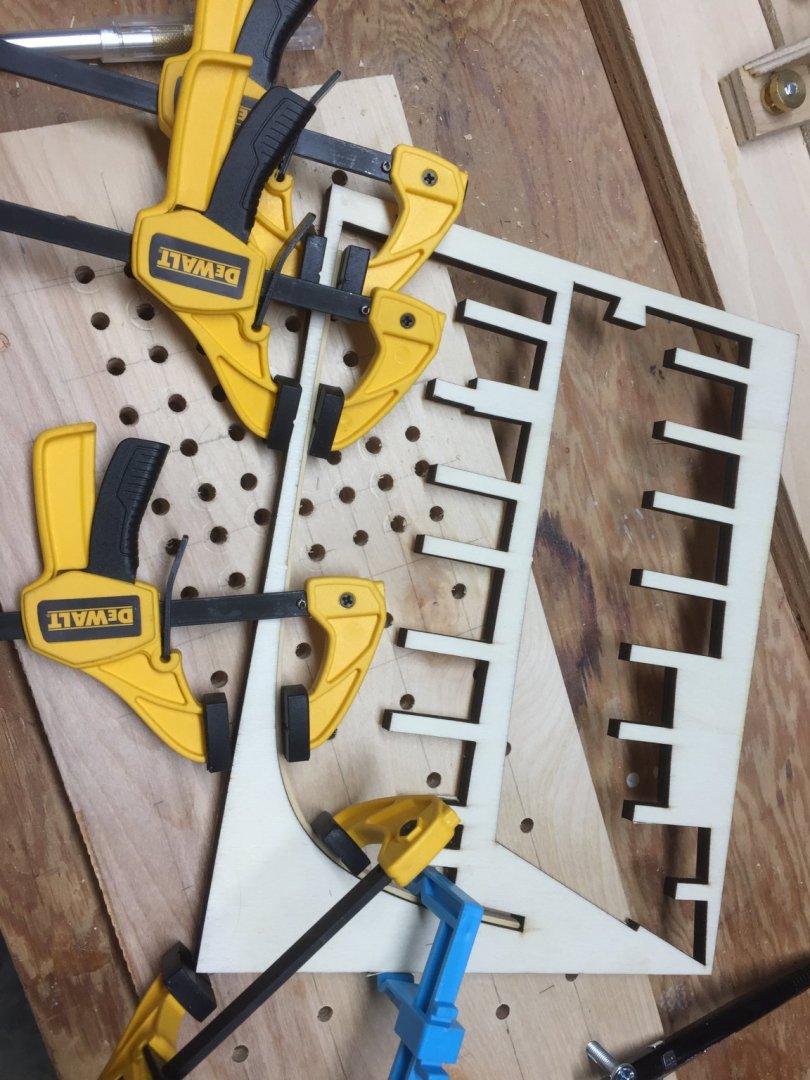
Thanks folks! Glenn, I have seen your Cheerful from your log and you are doing a great job! So one of the disadvantages of starting a build log of a project that actually commenced 2 years ago is that I cannot solicit nor incorporate real-time comments at these early stages. It is what it is so to speak, errors and all. What I can do is have an in hindsight section for things I wished I did differently. I will try to do this as much as possible until I catch up with where I am today on the build. Fairing the bulkheads: In preparation for the fairing process I used some scrap pieces of wood that formed a tight fit between the bulkheads to minimize lateral movement which helped in the sanding process. Note some of my sanding tools. On the left is a sanding stick that I made up and on the right is another sanding tool made from a thin piece of plywood and a spare 1x30 sanding belt. The plywood is cut slightly longer than the belt forming a bow effect. This was a tip I got from TomShipModel who I think got it from another member of our Ship Model Society of New Jersey Club. Stuntflyer gave me the tip on the sanding sticks. Here is my full sanding arsenal. The black one on the right is actually used by nail salons. In hindsight: I can't emphasize enough the importance of this step in the build process. If you don't fair the bulkheads properly, it will come back to haunt you in the future. You should really take your time and use battens to make sure you have a good flow from bow to stern at all angles. Don't be afraid to put down your sand paper and use a very sharp chisel in the areas like the bow that have more dramatic fairing needs. There were a few spots where I did not fair enough and a few where I over did it. In the latter, I used some thin pieces of material to serve as shims in order to get the geometry I ultimately needed. A brief note on ship model clubs. In my opinion, a good ship model club is by far your best tool in the workshop. As a novice, I would not have attempted a project like this without the support of fellow club members. I don't think you can find a better set of plans and instructions out there than Syren's but there is no substitute to having experienced fellow club members offer real-time advice and hands-on workshops. (Especially when one of the members is the kit developer ; ) So fellow modelers, I strongly recommend a ship model club. I travel almost 2 hours to mine but its well worth it. With today's Covid19 restrictions, many clubs have temporarily gone to virtual meetings. Although there is no substitute to face to face meetings, one advantage of a virtual meeting is that you can join from a distance. Some clubs may even consider continuing to have virtual meeting access as part of their face to face gatherings in the future. Be well and stay safe...

- 54 replies
-
- 10
-
-
- cheerful
- Syren Ship Model Company
- (and 1 more)
-
Beautiful job Rich! Hope to see you at Tuesday’s Virtual Club Meeting Bill.
-
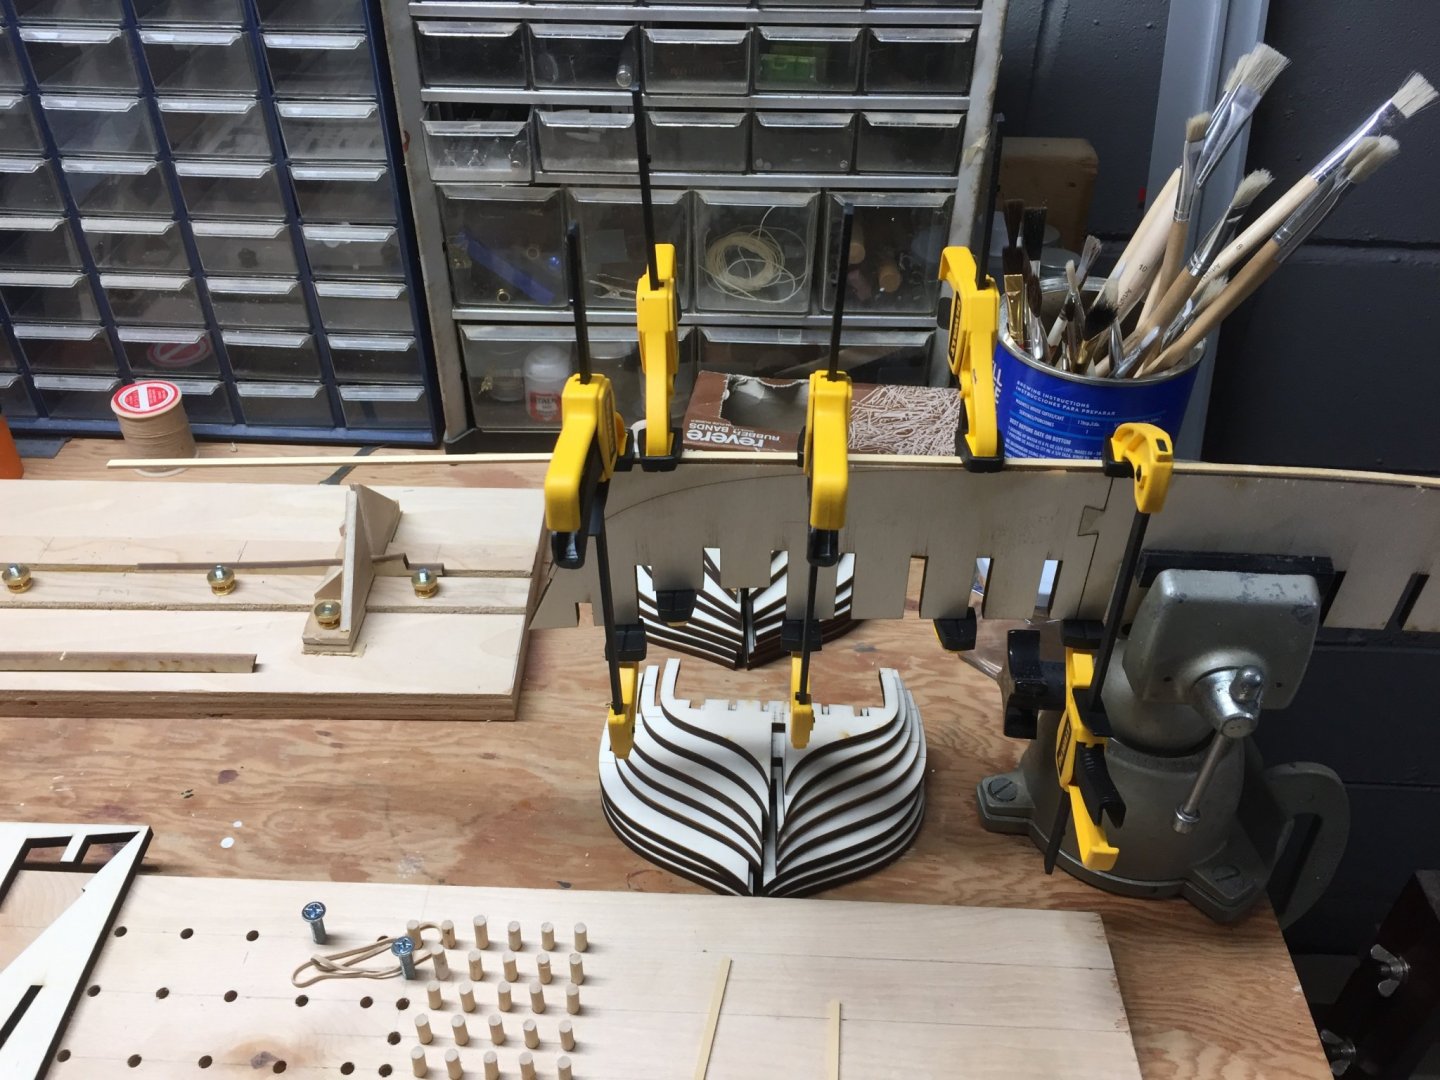
I actually started this build in April 2018 having had a few sidetracks along the way. Fortunately I had taken some build progress photos at various stages, as I am currently at the point of finishing the deck fittings, but that will be for a future post. This is my first attempt at a plank on frame model having only built solid hull kits from either Model Shipways or Bluejacket in the past. I consider myself a novice, at best, but I am extremely fortunate to be a member of the Ship Model Society of New Jersey and have had much help and guidance from the members along the way. Special thanks to Stuntflyer, TomShipModel, Kurt Johnson, and Chuck for there everlasting patience with a novice. With that said, here goes nothing ... Using the laser cut out as a template for the bend, I have a glass sheet that I use for insuring things are flat, the log wedges were the heaviest thing I had around at the time. You can't have enough of these small bar clamps in my opinion The peg board above was made to help with bends. The pegs are removable and can be positioned in various positions to get a desired bend. (I ended up using a very different method when it came to making plank bends.) I stole this cradle design from Kurt J. who was also building Cheerful. His is much cleaner and precise.
.thumb.jpg.50ac1edc95a70f355dada8c775b2fbfd.jpg)

- 54 replies
-
- 9
-
-
- cheerful
- Syren Ship Model Company
- (and 1 more)
-
A true thing of beauty Ryland! Masterful work! Bill
- 263 replies
-
- 3
-
-
- Medway Longboat
- Syren Ship Model Company
- (and 1 more)
-
Looking great Rich! Can’t wait to see these in person once we have our meetings again. Bill
-
Looking really nice Eric! I would love to see this at our next club meeting. Bill.
- 155 replies
-
- 2
-
-
- opium smuggler
- Authentic Models
- (and 1 more)
-
I totally support what Chuck says with regards to the need for a scroll saw assuming you are using yellow cedar and purchase the laser precut frames. I am currently building the Cheerful in cedar and even was able to use a sharp xacto knife to cut out the thicker square tuck at the stern. This is my first scratch build and I am really enjoying it as I am sure you will. The plans and instructions are far superior in my opinion as they are well suited for the novice as well as the advanced modeler. Enjoy!
- 310 replies
-
- 4
-
-
- cheerful
- Syren Ship Model Company
- (and 1 more)
-
Recommendation - First scratch build
Bill Brown replied to Bill Hill's topic in New member Introductions
Bill, No I don’t have a saw. I was fortunate to get all the Cheerful wood precut from Chuck before he stopped providing precut strips. For my next project I will most likely invest in a Byrnes Saw and possibly a thickness sander unless I can borrow their use from some of my ship model club members. That’s one of the real perks of being part of a great ship modeling club. 😉 Bill -
Recommendation - First scratch build
Bill Brown replied to Bill Hill's topic in New member Introductions
Bill, I am also building my first scratch build and I selected Syrens Cheerful. The plans and instructions are stellar. Chuck has the instructions on line so have a look. I think it is a good first step in the scratch build world with the Winchelsea as a nice second step up in complexity. Imho. Bill B. -
Beautiful Mike! Your planking work is some of the nicest I have ever seen Bill
- 607 replies
-
- 5
-
-
- winchelsea
- Syren Ship Model Company
- (and 1 more)
-
2019 NRG Conference Coverage
Bill Brown replied to TomShipModel's topic in NAUTICAL RESEARCH GUILD - News & Information
Great photos Tom! Thanks for sharing them, it really looks like it was a truly great conference. Bill SMSNJ


.jpg.549a1ab91b6009971c78ca56ca2684e2.jpg)