


DSiemens
-
Posts
1,060 -
Joined
-
Last visited
Content Type
Profiles
Forums
Gallery
Events
Posts posted by DSiemens
-
-
An example of the frame method.
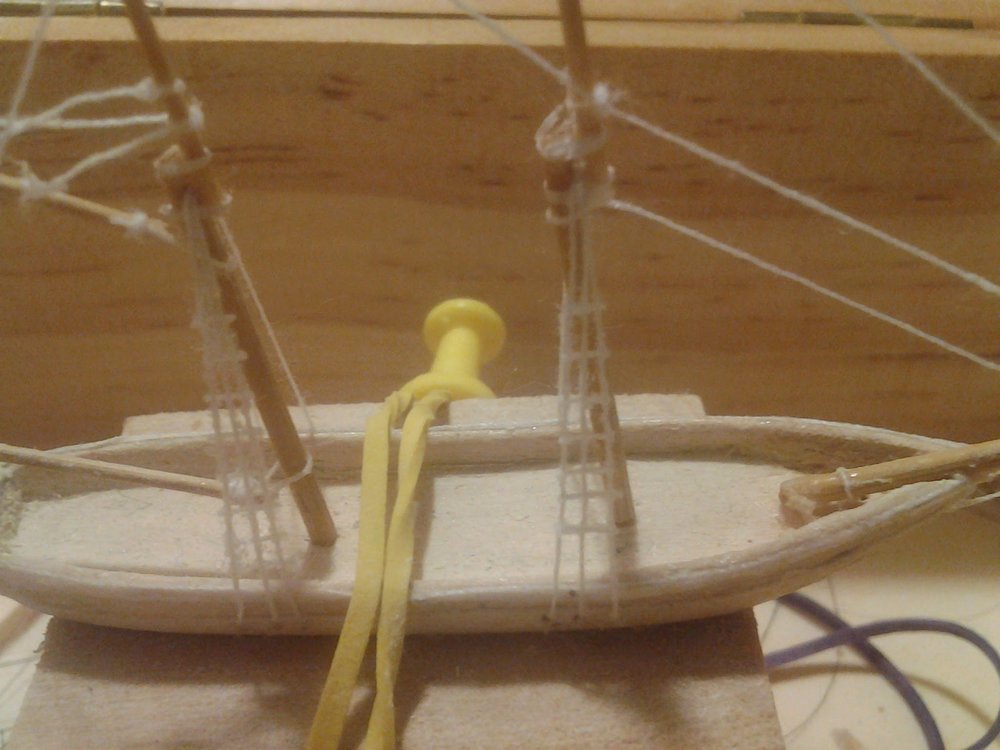
This was used on this ship. This was a old build from a long time ago unfortunately it wrecked going into the bottle and was not rebuilt. It's an occupational hazzard.
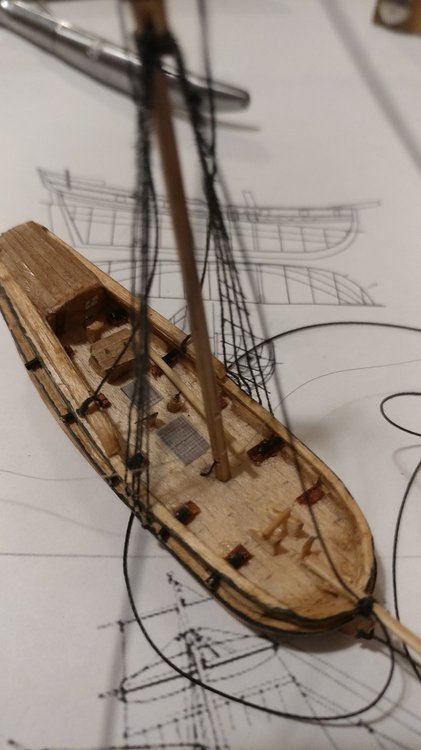
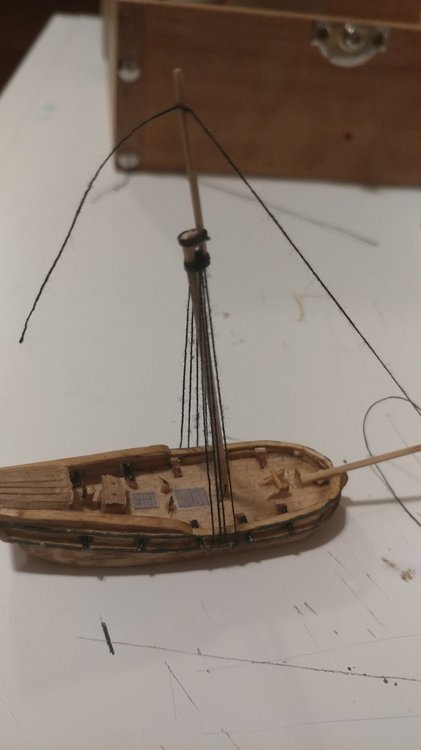
Time to get into yards arms and running rigging. This is a little tricky since parts of the running rigging works off of other parts but little by little it comes together. First lets start with the gaff. When it some to yard arms I prefer to tie them on instead of drilling holes. This keeps the overall strength of the model while enabling the use of parts that are more to scale. One of the primary knots I use for this is the cow hitch.
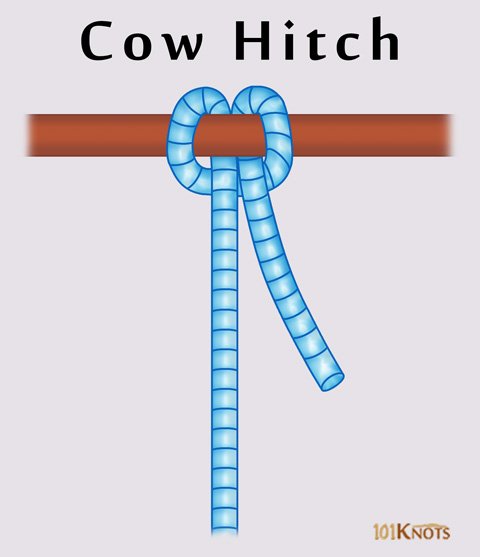
This is particularly useful for square rigged sails. You can tie a cow hitch on the yard arm and then use the ends to tie the yard arm onto the mast. I used this same method for the gaff. Tie a cow hitch on the gaff and use the ends to tie it to the mast. I find it easier to tie the knot around the base of the mast then slide it up into place and glue the string to the mast. The gaff should be able to raise up and down and move side to side on the knot.
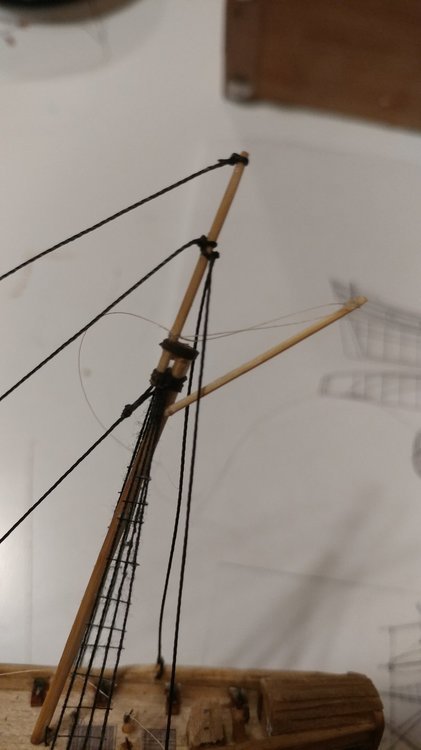
For the halyard on the gaff tie a thread block on the end end of the gaff. Then tie a string to the mast just above the cross trees. Run it through the thread block the tie it to the mast at the spot you started. Cut off the excess. If you want it to be slightly more realistic you can run it down to the bulwarks where it would be tied off. This is a bit over kill so I just cut it off. The important part here is the length of the gaff halyard. You want the halyard to be tight with the gaff at the angle it is on the plans.
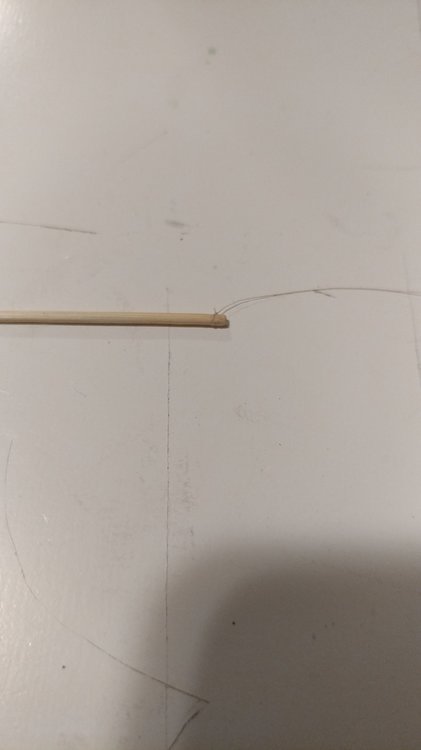
Now we move on to the boom. Remember the hole we drilled in the mast while putting it together? This is where its used. You could use a thread block for this as well but since near the base of the mast, where it is thickest, I determined a hole would be fine.
Tie a line to the end of the boom that will be next to the mast. That line will go through the hole in the mast and out of the bottle. The idea is the boom will be able to separate from the ship and allow the sail to roll up. Since I'm planning paper sails this is important to the sails don't crumple up.
From here I tied a couple thread blocks on the other end of the boom. As I simplified the rigging I found you only need one. This is where the rigging on the plans can differ from the rigging on a ship in bottle. With some effort you can copy the rigging in the plans exactly. This is supposed to be a simple model though so I'm going use a mixture of planned rigging and simplified ship in bottle rigging.
According to the plans there is some blocks on the transom that help control the boom. I made a small eye bolt for this block and glued it in a hole drilled into the transom.
Now we move on to the boom. Remember the hole we drilled in the mast while putting it together? This is where its used. You could use a thread block for this as well but since near the base of the mast, where it is thickest, I determined a hole would be fine.
Tie a line to the end of the boom that will be next to the mast. That line will go through the hole in the mast and out of the bottle. The idea is the boom will be able to separate from the ship and allow the sail to roll up. Since I'm planning paper sails this is important to the sails don't crumple up.


From here I tied a couple thread blocks on the other end of the boom. As I simplified the rigging I found you only need one. This is where the rigging on the plans can differ from the rigging on a ship in bottle. With some effort you can copy the rigging in the plans exactly. This is supposed to be a simple model though so I'm going use a mixture of planned rigging and simplified ship in bottle rigging.
According to the plans there is some blocks on the transom that help control the boom. I made a small eye bolt for this block and glued it in a hole drilled into the transom.

I did two on either side of the Windows. You can do one in the middle as well. I suspect the actual ships would have two so they can quickly adjust the boom while tacking. I decided to use two for mine but one central eyebolt would work.
Here's another place I differ from the plans. It appears on the plan that the line runs from the block at the transom to the block at the end of the boom, back to the transom block, then back to the boom block then it runs to the bulwark. I initially tried this but I couldn't pull the lines tight very easily. The added lines add a lot of strength on the real ship at a point that holds a lot of pressure. This isn't needed on a ship in bottle so I reduced the number of lines running back and forth. I tied the first line to the thread block on the boom, ran it through the transom block, back to the boom block then to the hole drilled in the bulwark. With one less line it pulls tight more smoothly. The line going in the bulwarks then runs out of the bottle. It will be tightened and glued down after the ship is in the bottle. If you only have one block in the transom you only have to do this once. I opted for putting lines on either side.
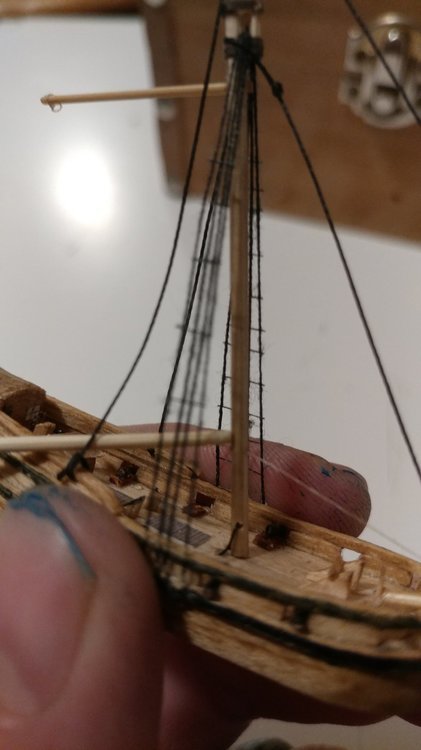
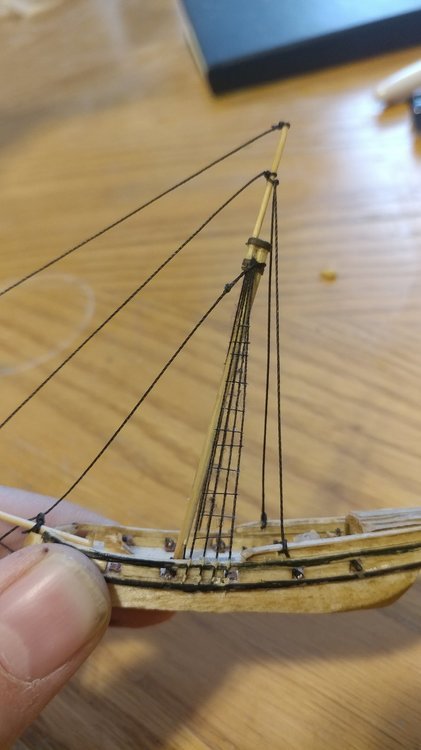
One more part that differs from the plans. Technically there is separate lines used to pull the gaff tight and lift the boom up. Both these lines can be added but I decided to keep it simple. The two sets of lines can be consolidated by tying a line from the gaff to the boom. This also tightens up all of the lines. You can see how the yards will be set at this point.
-
When it comes to trimming lines there is a special tool I use that makes for a really close cut. Follicle clippers from the grocery store. They run around $8.
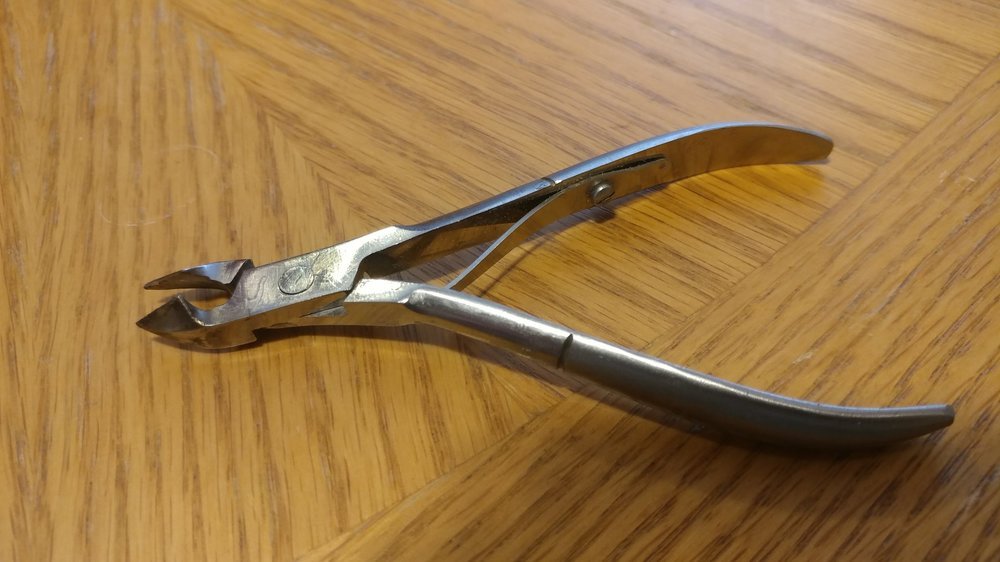
Note how straight the edge is and that it cuts off to the side.
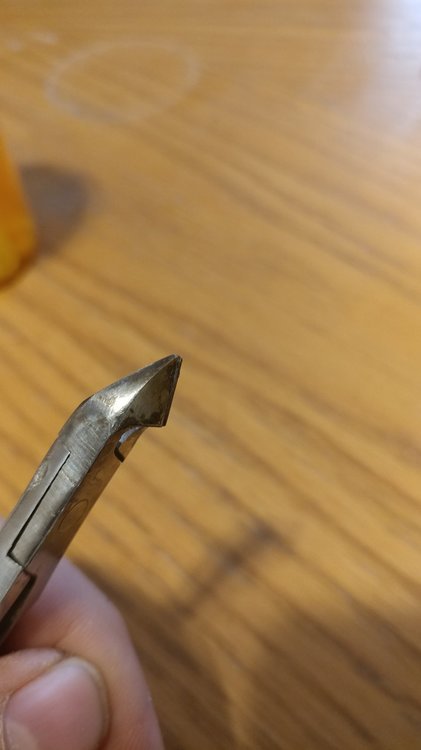
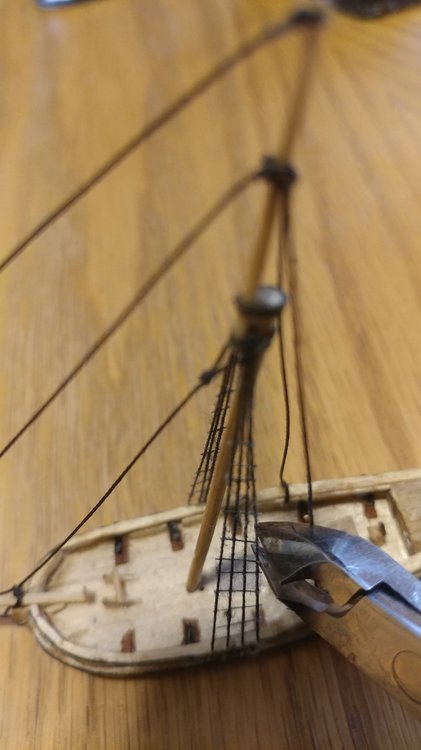
I can place that edge right on the shroud and cut the ratline super close with out cutting the shroud line. To show this look at how close the ratlines are cut at the edges of the shrouds.
Something to note with these clippers. Treat the like your mothers sewing scissors. Once you use them for anything but thread the edges get bent and they will not cut thread cleanly. I have an old pair I use for wire and a new pair I use for thread. When I buy a new pair I mark my thread ones as my wire ones and throw out the oldest pair. I use these for cutting all of my lines specifically because I can control exactly where I make my cuts.
Also for dead eyes I applied a mall amount of paint on the lines. I let it dry and applied more and slowly built it up.
- mtaylor and GrandpaPhil
-
 2
2
-
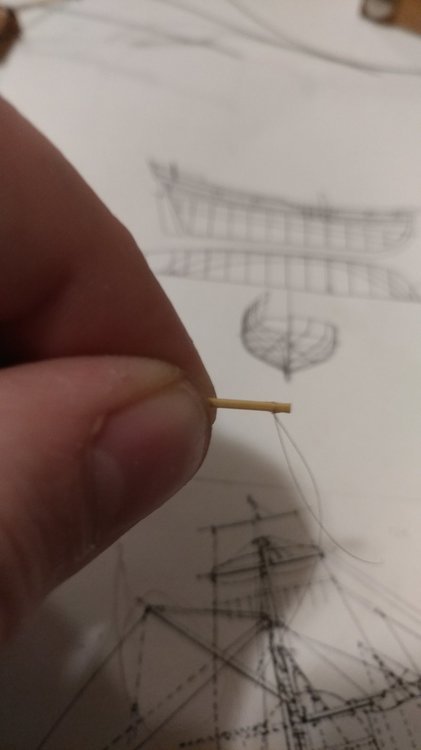
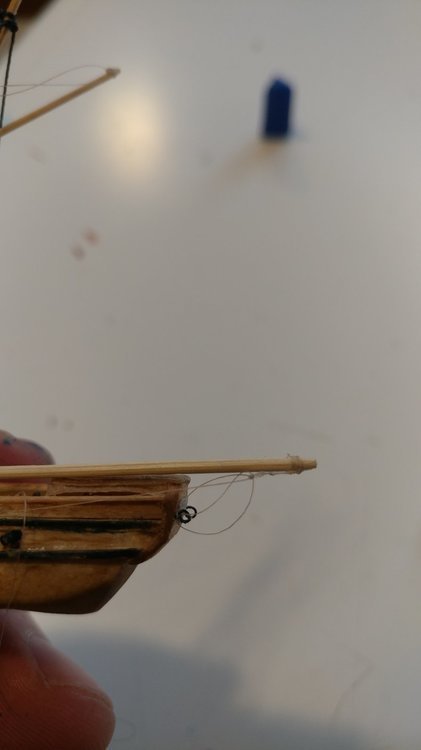
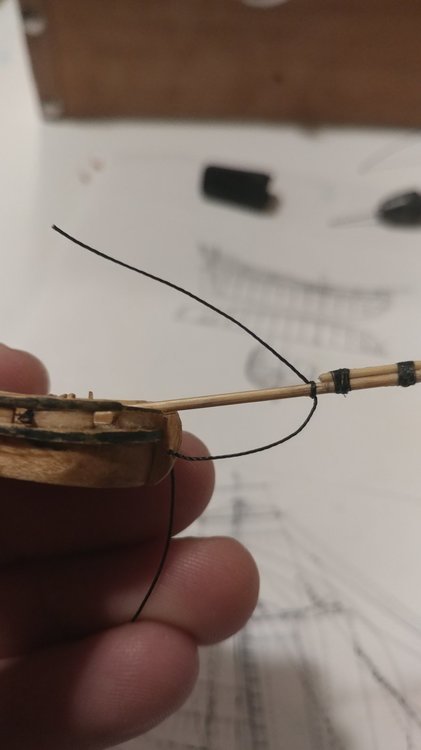
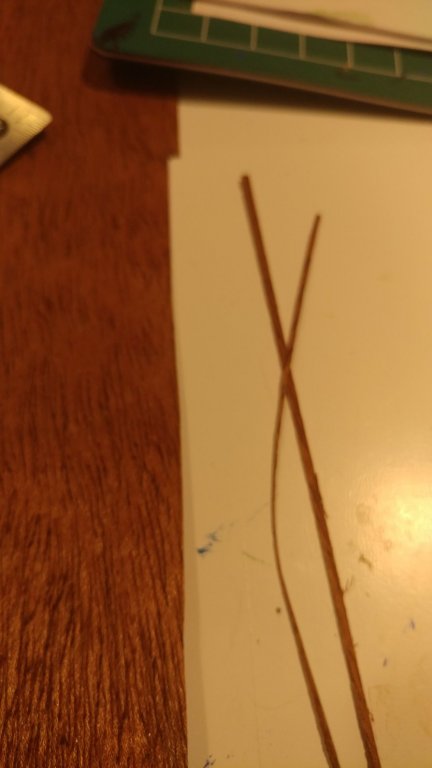
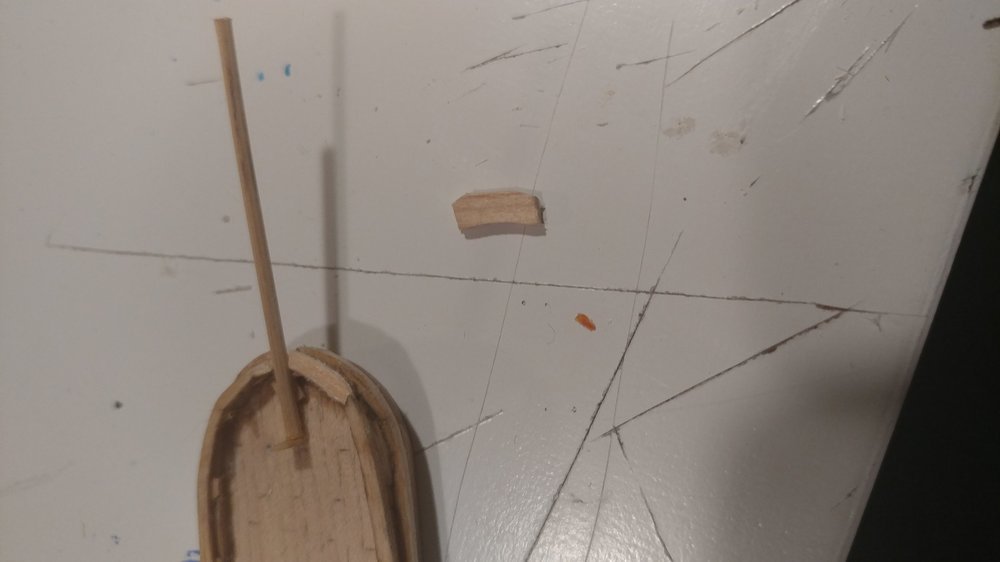
For the rest of the bowsprit whittle out a really thin piece of bamboo cut it to size from the plans and then taper the end.
With a pencil mark where the end of where the two bowsprit pieces overlap. Then glue them together.
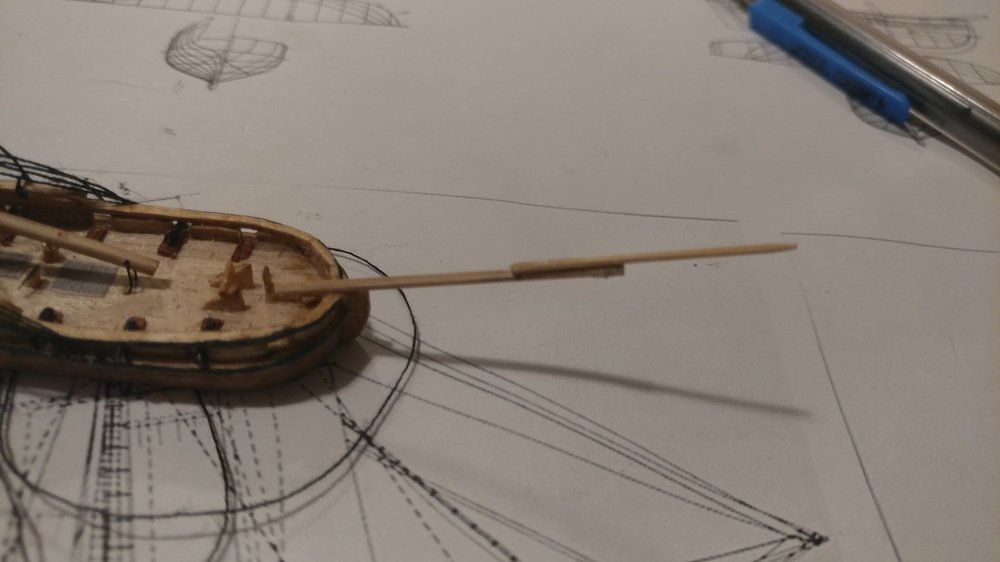
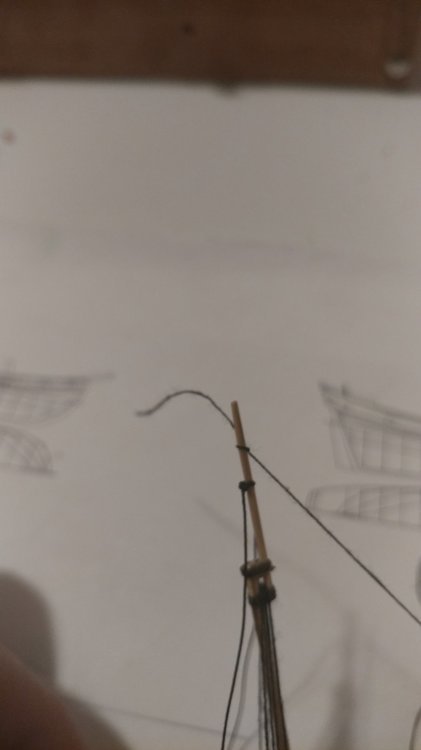
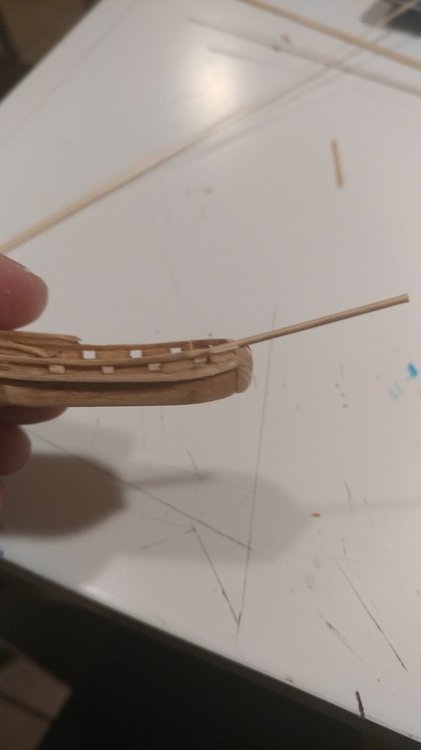
I got some 8/0 fly tying thread and tied a knot around one end of where the bowsprit pieces connect.
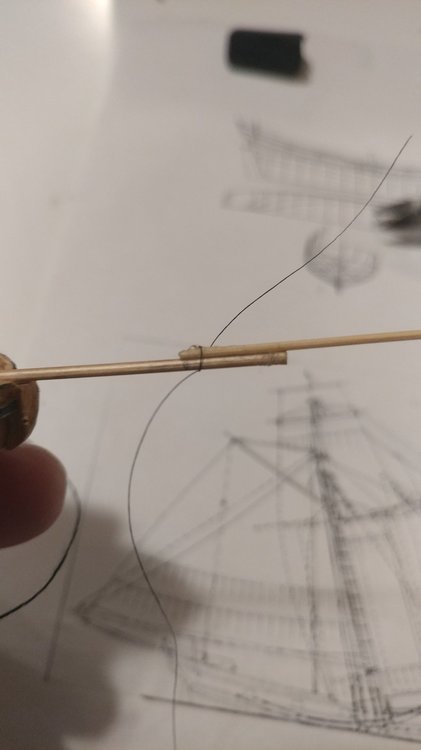
Then I wrapped that thread around glued it down tied it off glued the knot and cut off the ends. It will look like this.
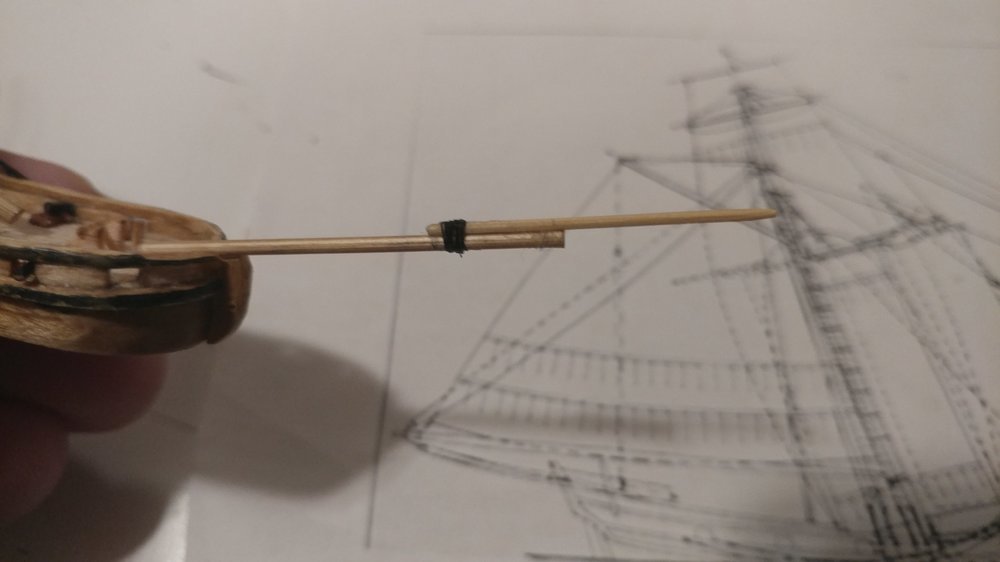
Then I did the same on the other end.
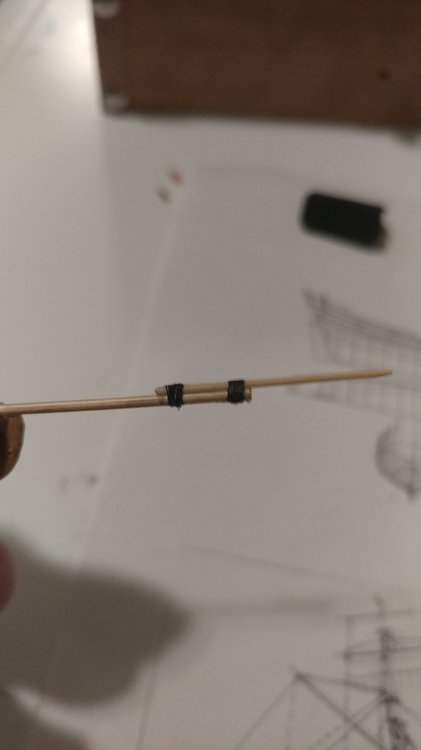
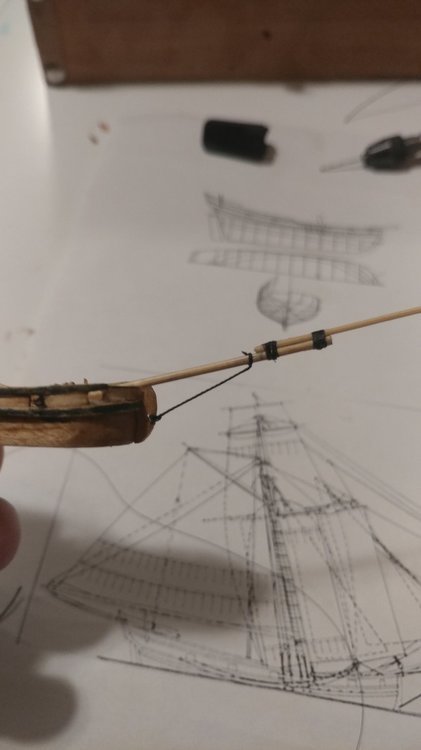
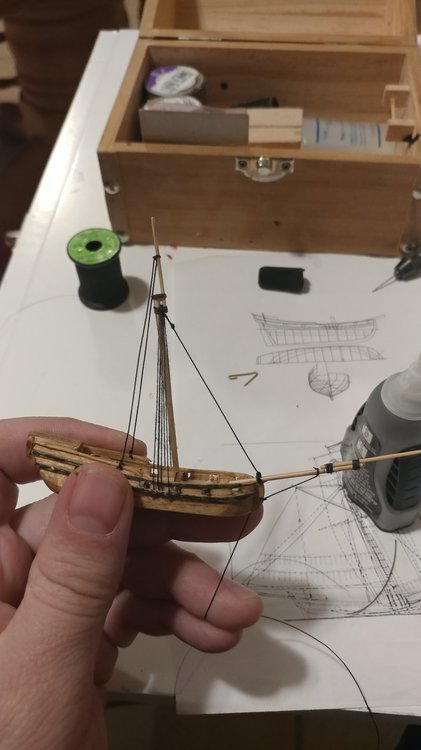
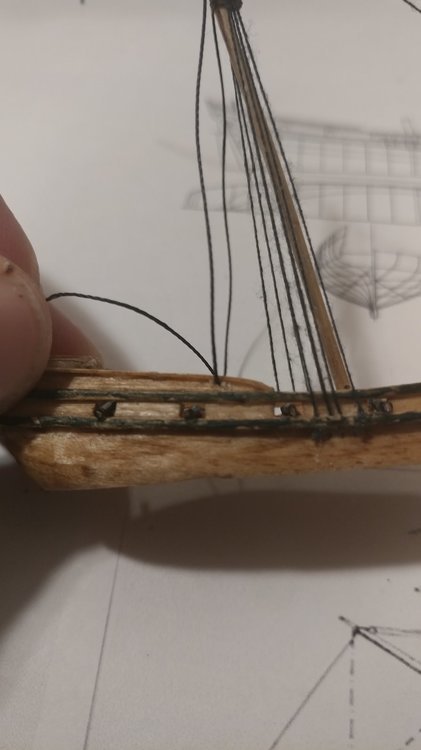
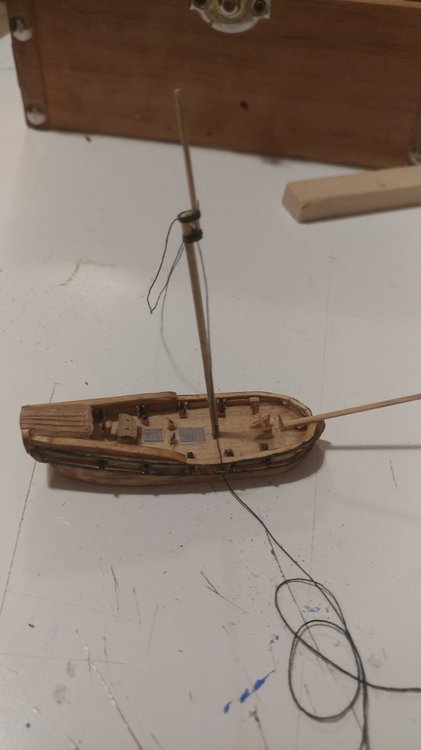
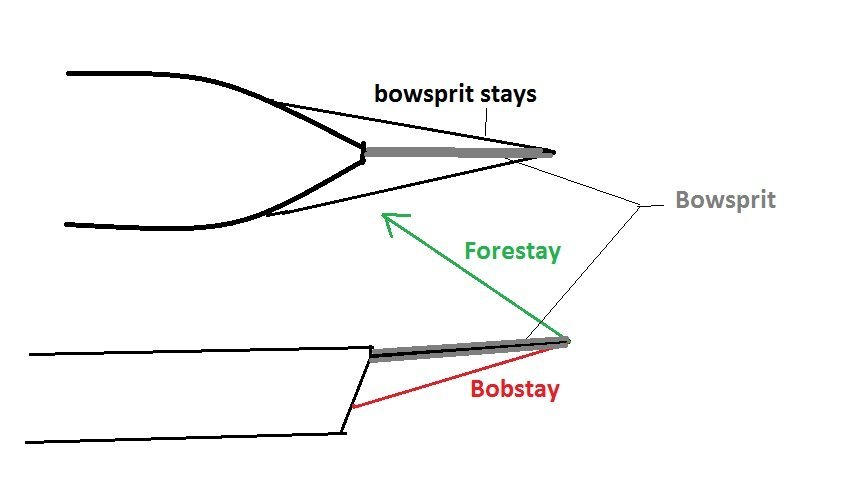
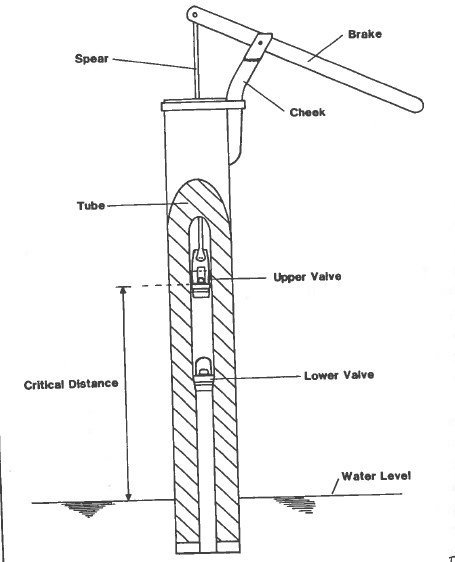
Now its ready for the bobstay. The bobstay strengthens the bowsprit even at this scale. I've had ships where I put on the forestay before the bobstay and the whole bowsprit bent upwards and almost broke. The bobstay keeps the bowsprit straight when the forestays are pulling on it.
First drill a hole in the keel.
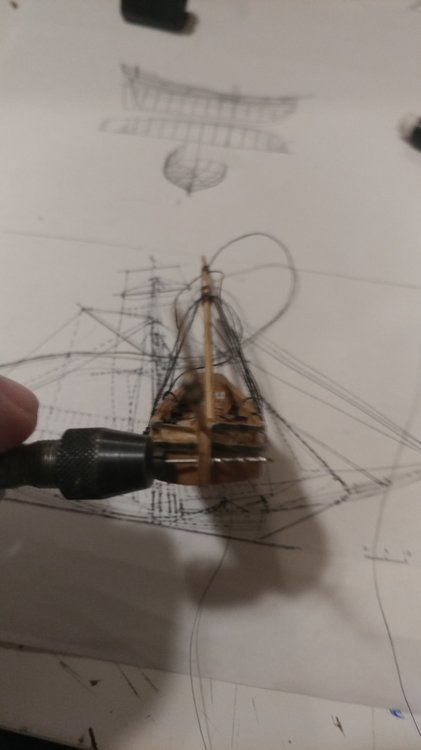
The plans shows where this stay will connect. Then tie a knot on the bowsprit and run the line through the keel.
Glue the knot down and put a dab of glue on the line your about to pull through the keel then pull it through. Once that sets tie it off glue the knots and cut off the excess.
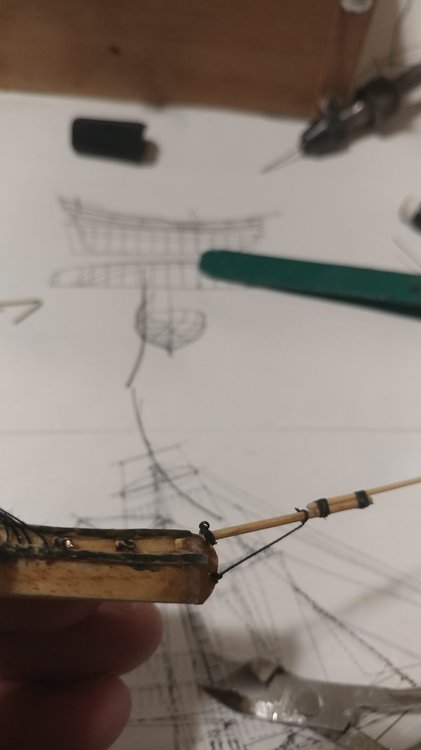
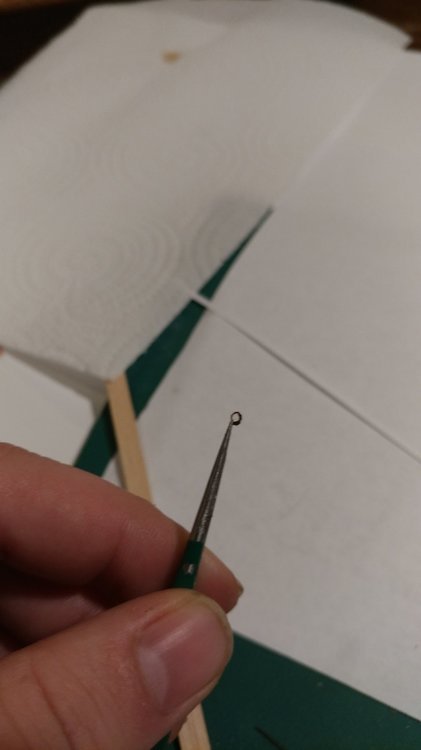
Now its time for some forestays. First tie a thread block. See the video above. The hole of the block should be wide enough for your thread. I used wire instead of a needle for this one.
Tie the thread block to the bowsprit. So that I don't run into forestays as I complete them, I'm starting with the inner most one.
For the rest of the bowsprit whittle out a really thin piece of bamboo cut it to size from the plans and then taper the end.
With a pencil mark where the end of where the two bowsprit pieces overlap. Then glue them together.
I got some 8/0 fly tying thread and tied a knot around one end of where the bowsprit pieces connect.

Then I wrapped that thread around glued it down tied it off glued the knot and cut off the ends. It will look like this.

Then I did the same on the other end.

Now its ready for the bobstay. The bobstay strengthens the bowsprit even at this scale. I've had ships where I put on the forestay before the bobstay and the whole bowsprit bent upwards and almost broke. The bobstay keeps the bowsprit straight when the forestays are pulling on it.
First drill a hole in the keel.

The plans shows where this stay will connect. Then tie a knot on the bowsprit and run the line through the keel.

Glue the knot down and put a dab of glue on the line your about to pull through the keel then pull it through. Once that sets tie it off glue the knots and cut off the excess.

Now its time for some forestays. First tie a thread block. See the video above. The hole of the block should be wide enough for your thread. I used wire instead of a needle for this one.
Tie the thread block to the bowsprit. So that I don't run into forestays as I complete them, I'm starting with the inner most one.

Tie the thread block on with the block facing upwards. Tie it and glue it as usual.
Now for a little more added realism I tied a slip knot around the mast just above the lower cheek. I tightened the knot until it looked right leaving it slightly loose. I glued the knot down and put a dab of glue where the line connects with the back of the mast.
Cut off the excess and then thread the other end of the line through the thread block. Note this line should be long as it runs out of the bottle.

-
First one more set of back stays. Following the plans I drilled a hole in the bulwark. I then tied a line to the top mast about mid way down. I gave it a little glue so it doesn't move then ran the lines through the holes on the bulwarks.
I then tied my temporary forestay on and set the rake angle. These back most back stays are the most important in setting the rake so the must be perfect. Once the rake is set I secured my temporary forestay on the bowsprit with a tiny amount of glue. Enough its easy to pull off but also enough to hold the rake while I adjust my back stays.
From there I pulled one backstay tight and tested the rake and strength of the forestay. Once all was secure I pulled the line out just a little, then put a little glue on the end going into the hole and pulled it back tight. Once the glue set I did the same on the other side. The glue holds the line in place while I tie a knot around the bulwarks. Once the knot is secured I glue them down and cut off the ends.
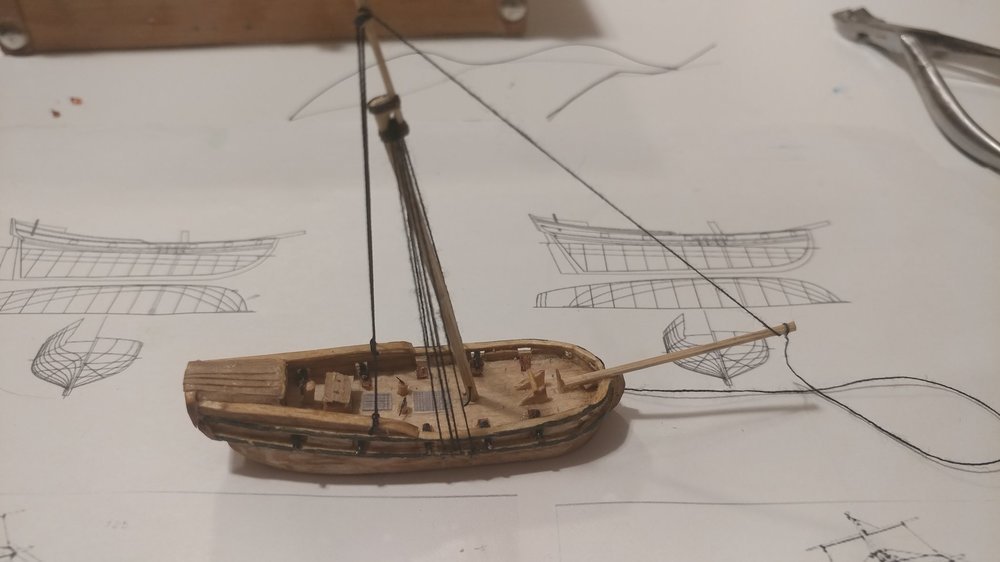
Once done in can take off the temporary line and prep the bowsprit for the fore stays.
-
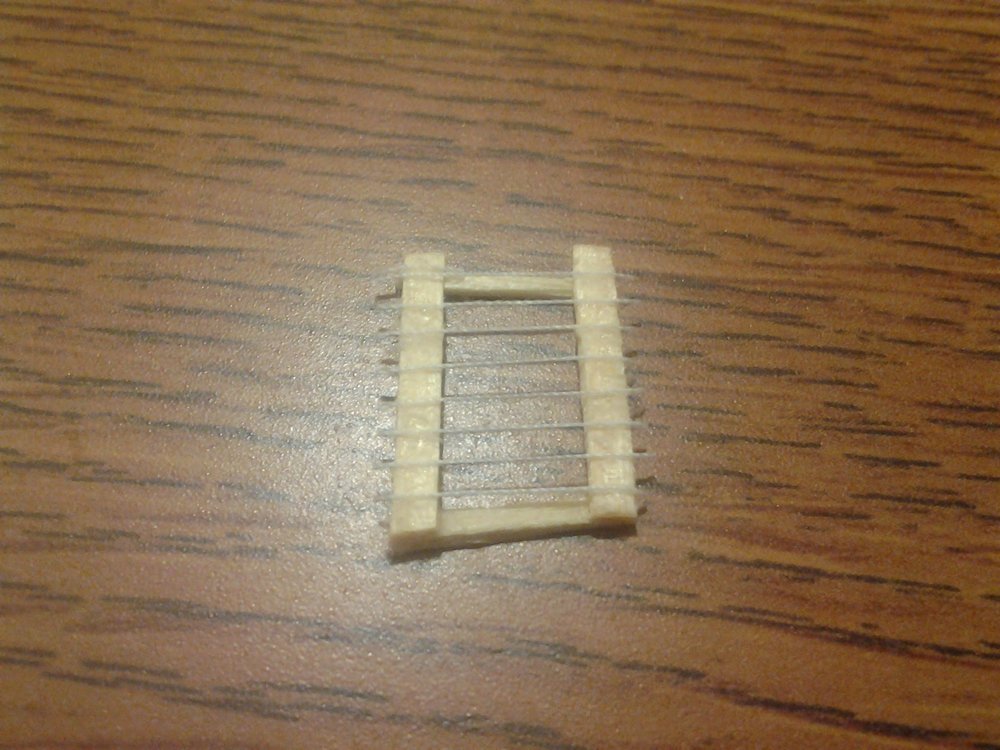
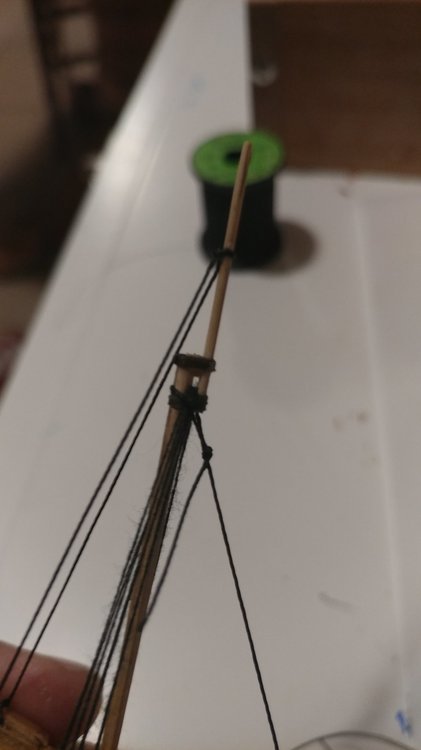
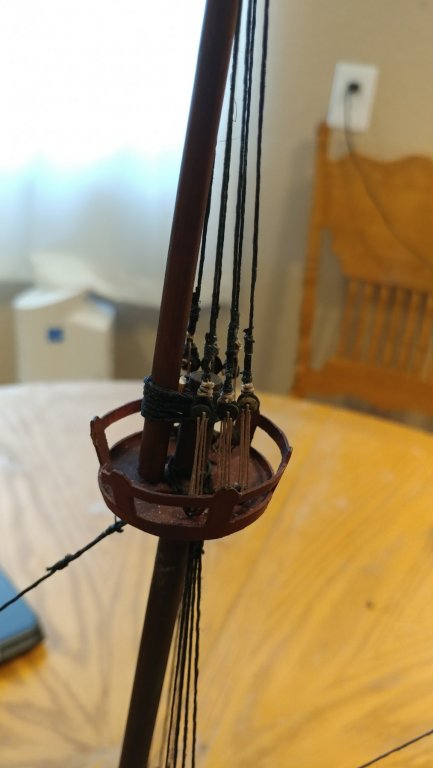
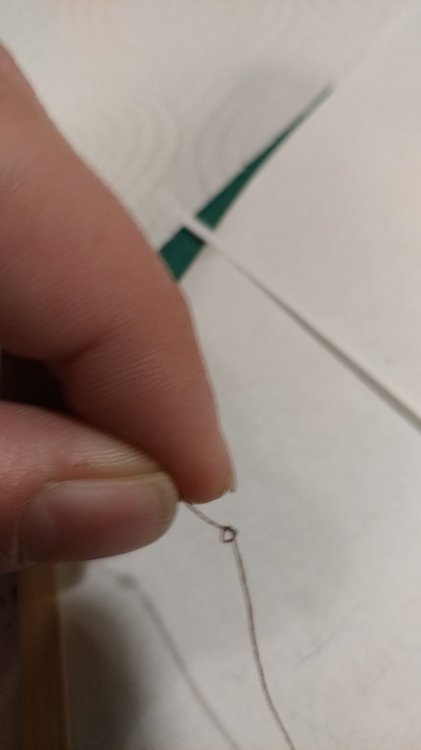
For some of the next parts I'm going to use what called a thread block. John Fox III has created an excellent video demonstrating how this works.
This thread block is how I get away with thinner, somewhat closer to scale masts and yards. The smaller the dowels get the harder it is to drill holes and the holes compromise the integrity of the mast and yards. Tying thread blocks creates places for lines to pass with out compromising the strength of the mast and yards.
-
To give a better idea on this style of rigging, the following link is where I first discovered it. Jim Goodwin shared it a long with a lot of other tricks on the PBS show the Woodwrights Shop.
https://www.pbs.org/video/woodwrights-shop-ship-bottle/
Honestly the ship he demonstrates in this show maybe a better beginners model than this Bermuda Sloop.
-
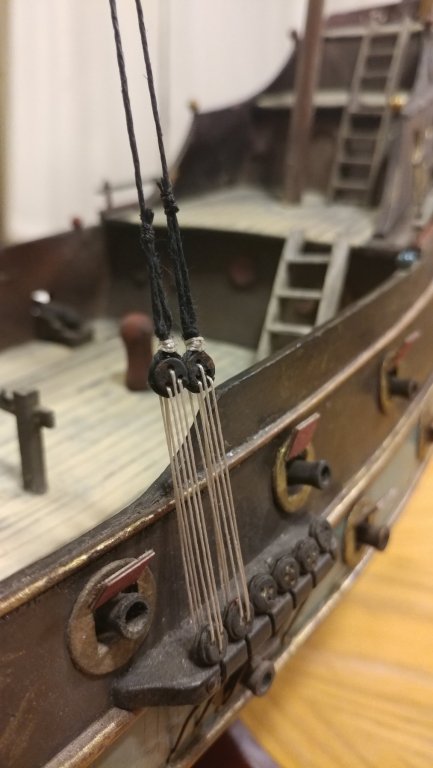
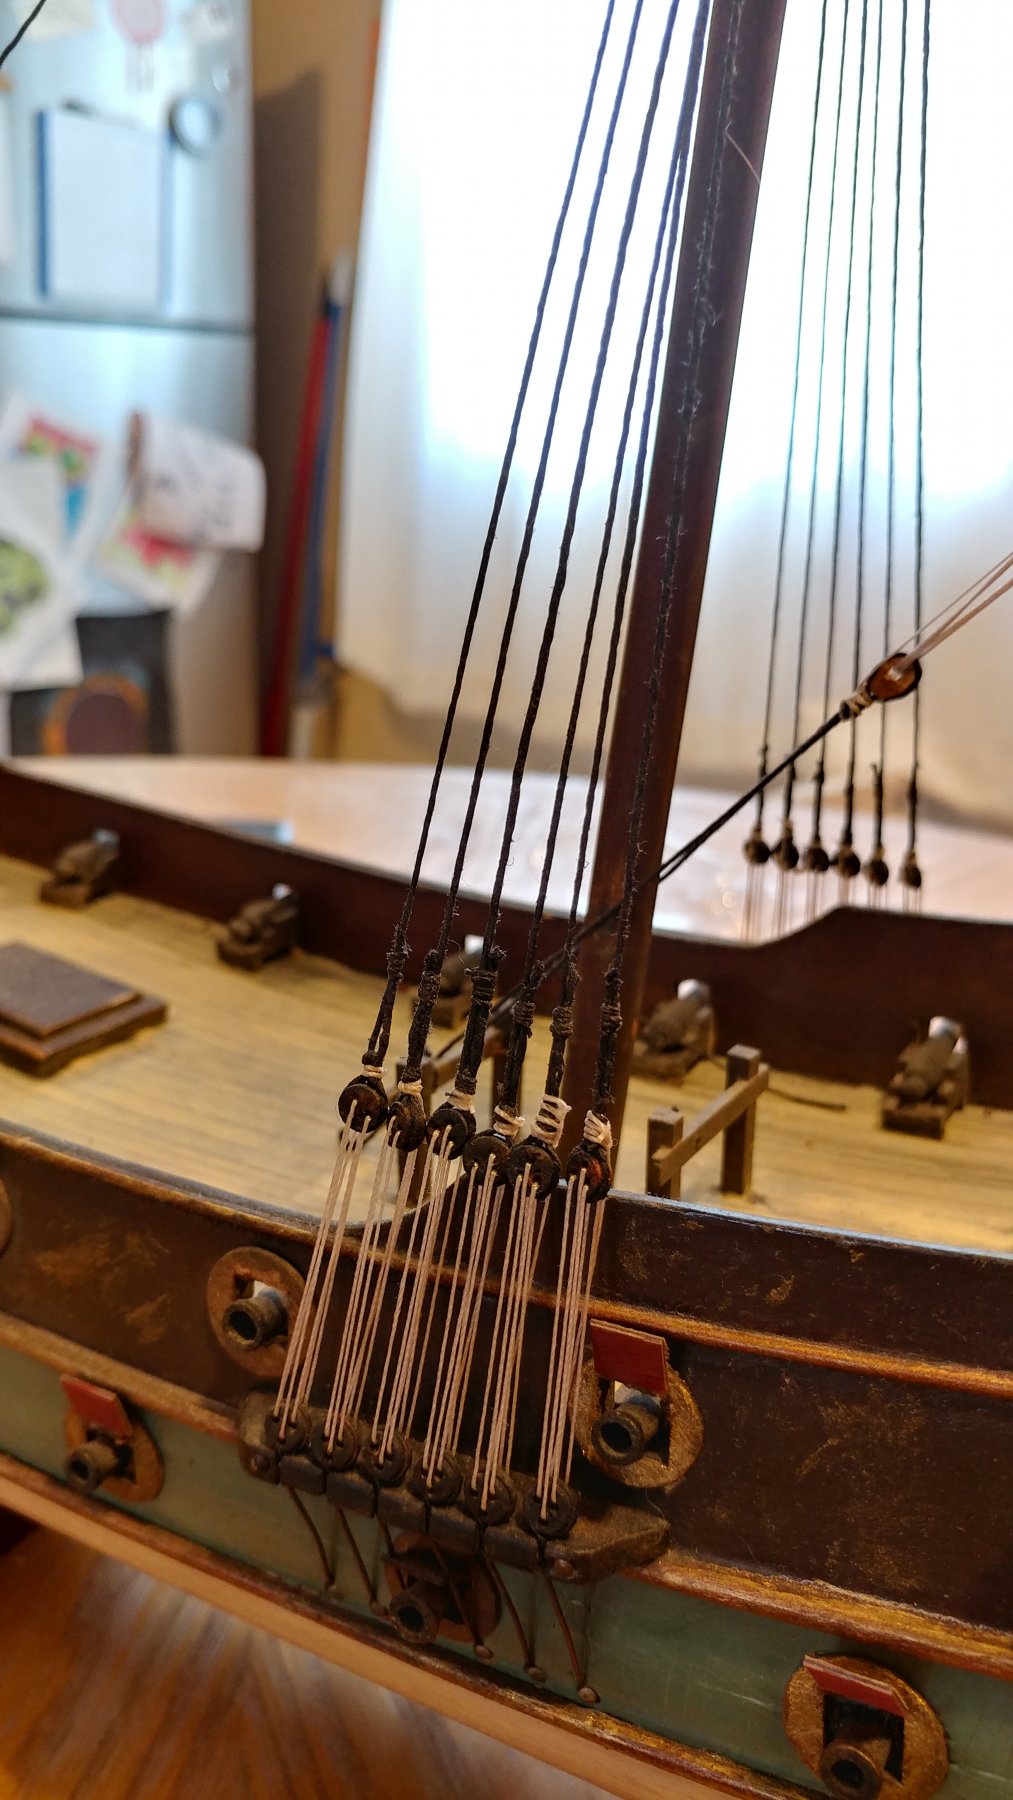
Time to get into the rigging. First thing I start with is the back stays. There's a lot of different methods for this. Use what ever method works best for you. This method has worked for me.
Typically I create a channel specifically for the backstays and glue it onto the channel where the stays connect to the ship. Since I mismeasured a tad my ship is a little to wide for that. So I drilled my holes through the existing channels. When drilling these holes be careful not to make them to wide or to close together. They need to be wide enough for the thread but not much more. The reason is as the thread is tightened it can break through the channel. The strength and integrity of the small parts is always something to be careful of in builds this small.
The backstays will be created using a single piece of thread. Pass the thread through through the channel and up through the gap in the two masts. Then done to the holes in the channel on the other side.
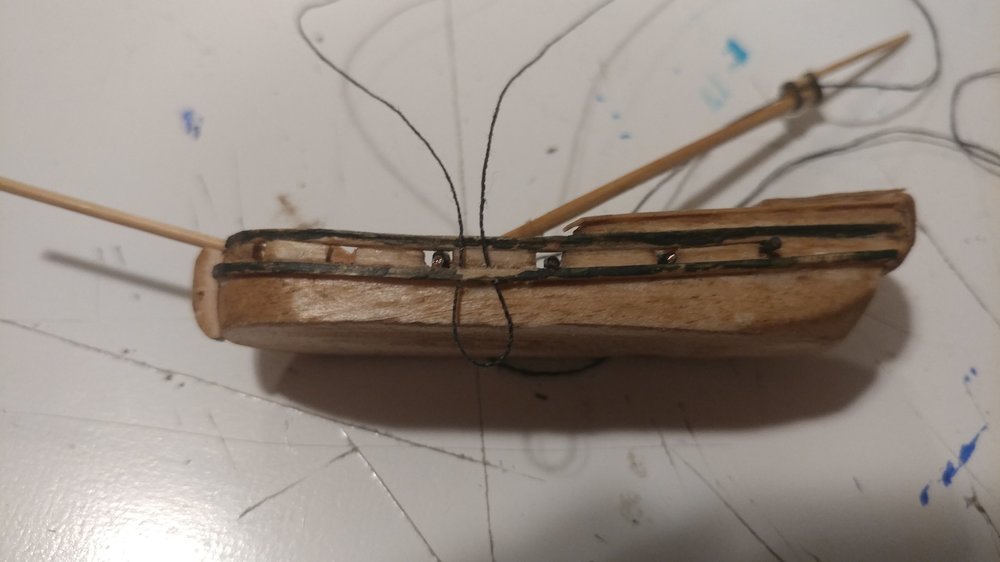
The thread will pass down one hole and up the next. Then it will run up to the gap in the mast and down to the first channel.
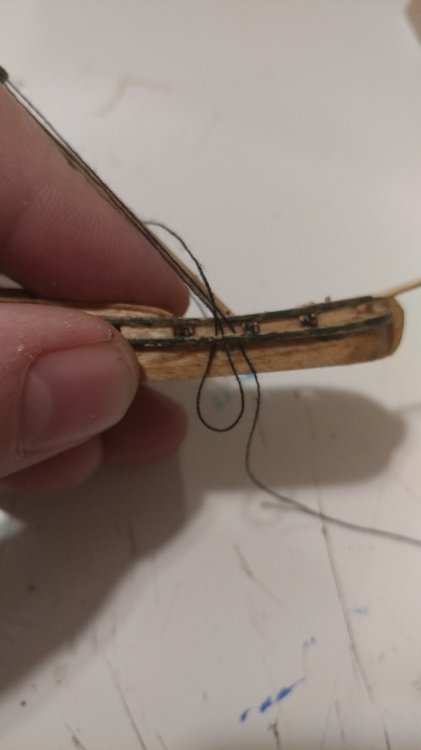
In this way the thread weaves back and for between the two channels and through the mast. Once you go through the last hole tie a stopping not, put a dab of glue on it and pull it into the channel. This is where the size of the holes and length between them matters. You can easily pull the thread out between the two holes if they are to close or the wood isn't strong enough. This is partially why I like having a separate glued on channel. If it breaks it can be cut off and remade. Its not so easy with the longer channel. It also looks more accurate.
I tied two to make it thick enough and you can see I missed once. No worries that piece will be cut off. Once the stopper not is in place, pull on the other end of the string to tighten up the lines. Keep in mind that with the folding method the tension on the backstays will set the rake or angle of the mast. Tighten up the lines to get the right mast angle. Then on the loose end I put a little glue on the thread and pull it through the channel. This helps keep the tension right as I tie it off. Once the glue sets I tie a knot around the channel, glue it down and cut off the excess.
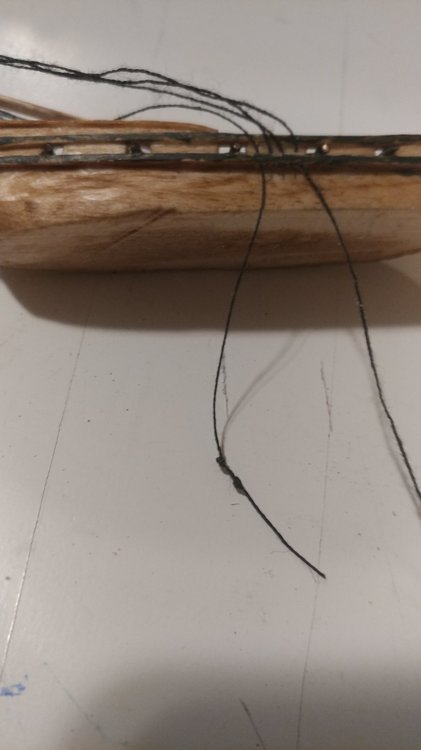
This is the result. My thread is more frayed than I like but hopefully a little more wax will cure that. The forestay thread is temporary for now. One more set of backstays will go up to the top mast but after that we move on to the fore stays.
-
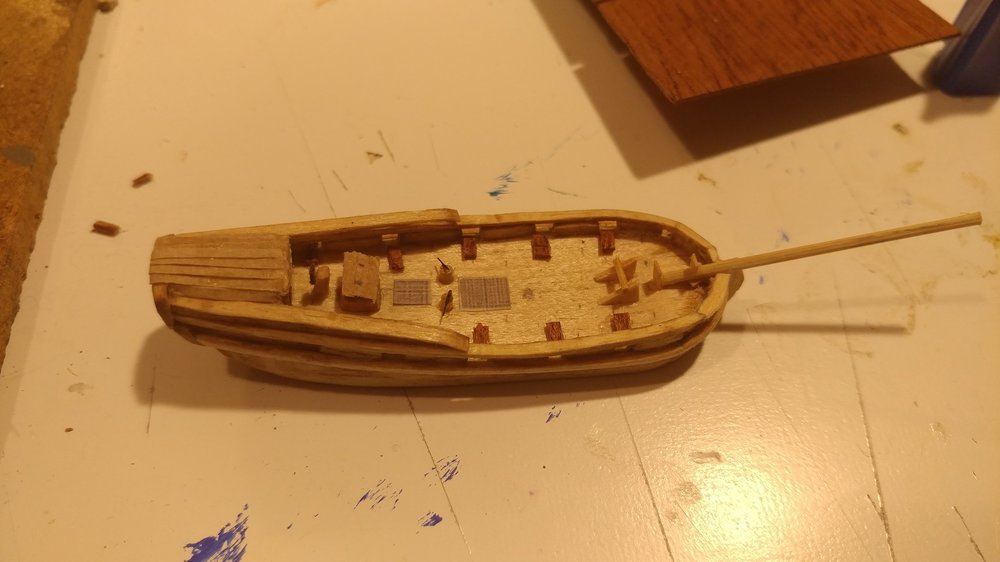
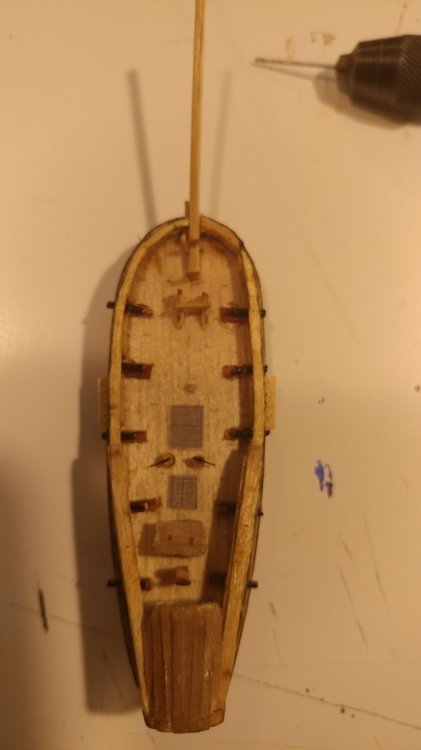
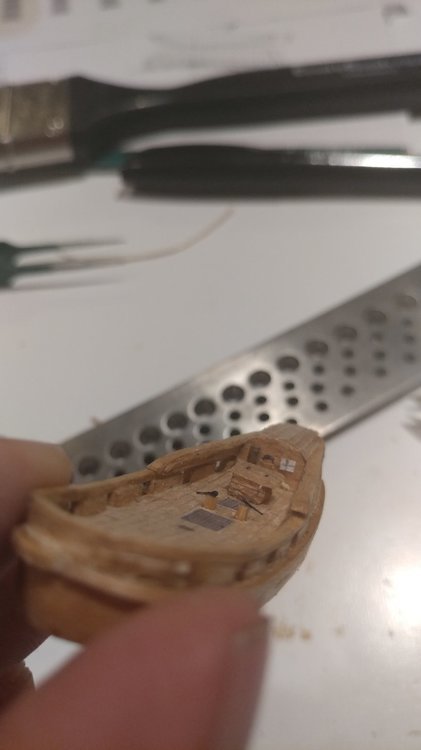
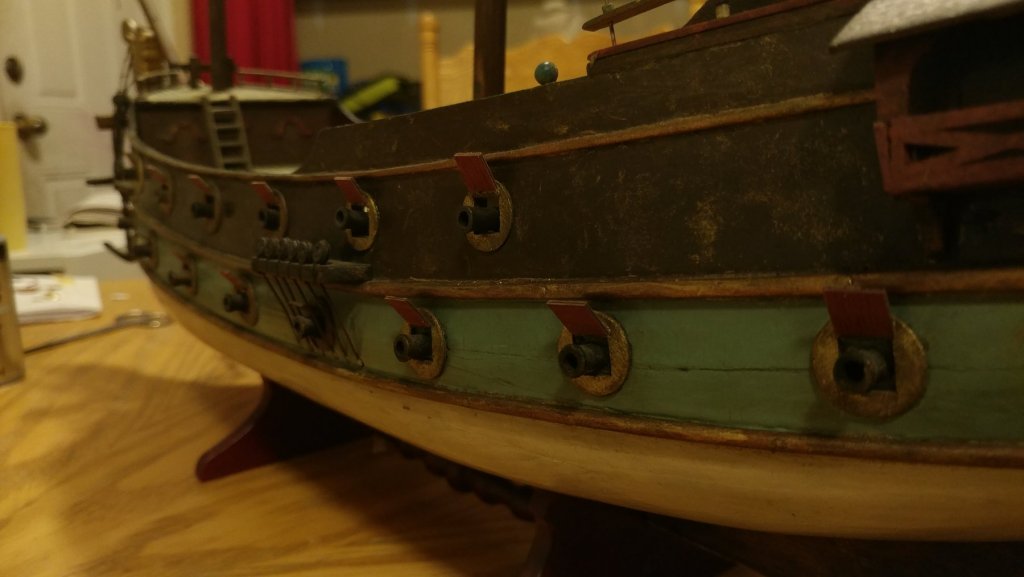
Time to put some cannons in. Going back to the concept of putting together shapes a cannon consists of a cylinder sitting on a rectangle. For the cylinder I opened up an old cell phone charger cable and pulled out the black wire. For the rectangle I found a nice dark veneer and cut strips. I still had to thin it a bit to fit the cannons in the gun ports. Good to be aware of sizing on this part.
Here it is with all the carriages glued in.
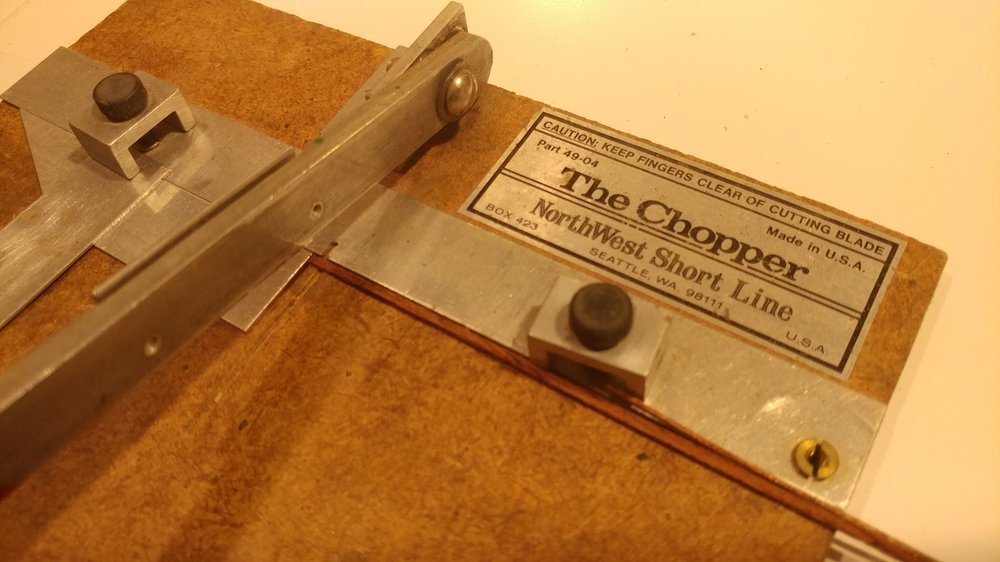
If you can get a hold of or build this tool I highly recomend it. It really helps keep my length cuts consistent.
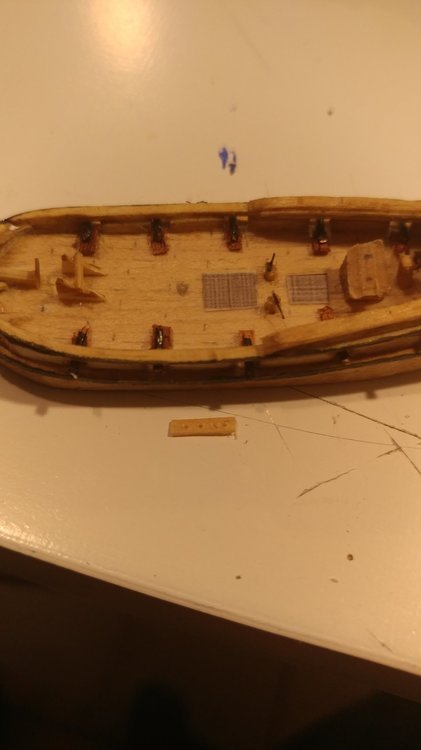
Here it is with cannons.
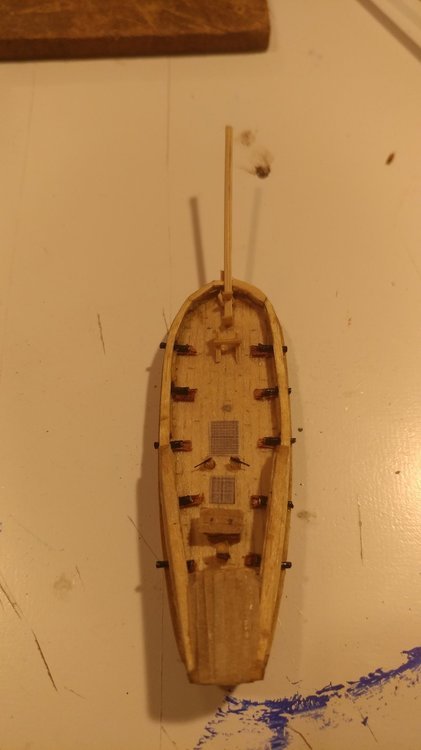
One of the last parts the hull needs is the channels for the rigging. This is the piece chain plates and deadeyes attach to on real ships. For this I cut a piece of veneer, drilled four holes and glued it to the side of the hull where the back stays will attach. This piece will be used for those back stays.
Starting to get into masts and rigging. More to come.
")
-
-
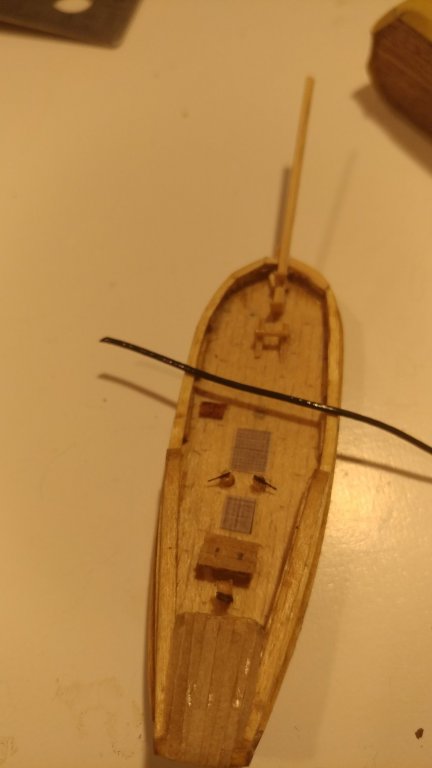
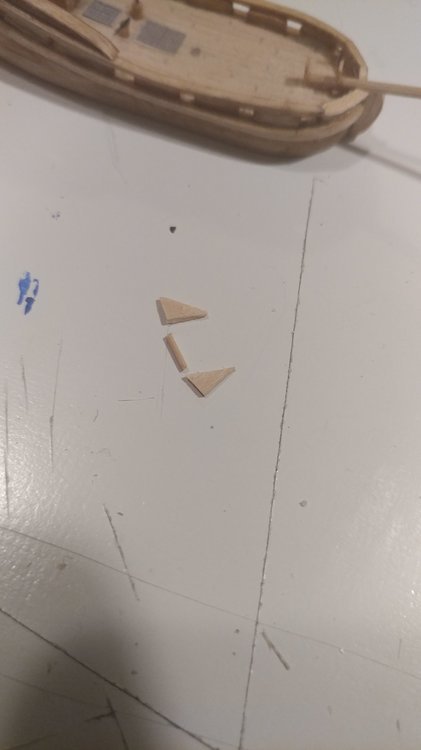
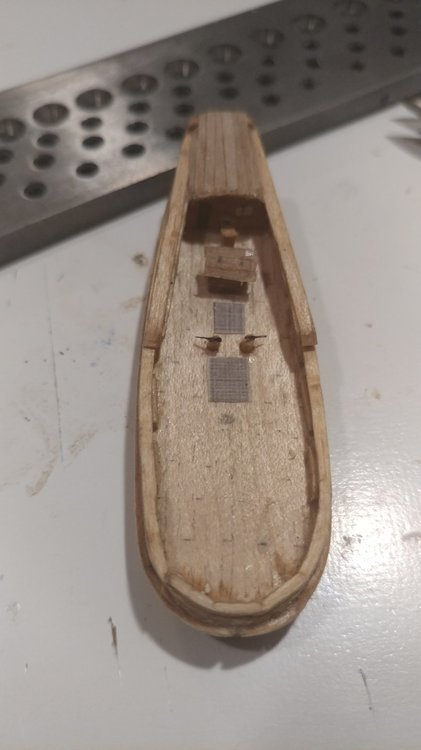
Next part is the windlass. The windlass is used to haul anchors and other heavy things on and of the ship. Breaking it down the simplest form is two triangles and a cylinder.
Glue those right on deck just behind the bowsprit. Also another couple small pieces. I put in a couple rectangular pieces one just behind the bowsprit and one on the bowsprit. Looking at the photo of the other model it looks like theres a block on a stand just behind the bowsprit and a ships bell on the bowsprit. I did a ships bell this small on the Scavenger but being a beginners build I thought a rectangle on the bowsprit would work. I'll put a dot of gold paint where the bell goes.
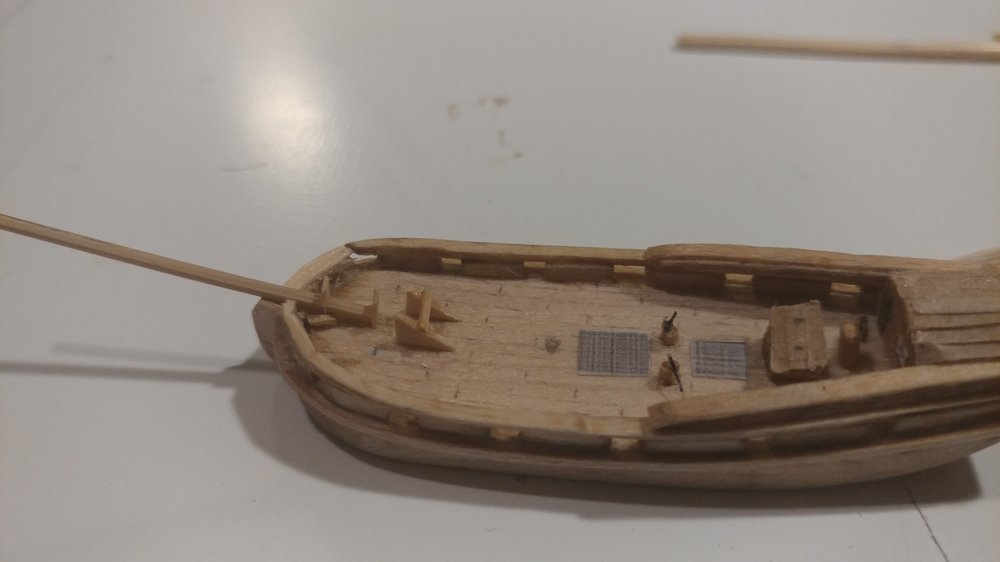
From here I need to add cannons and then start on masts and rigging.
-
To make sure I have the right spacing for the bowsprit and the windlass I'm putting the bowsprit in next. I cut a notch in the front bulwarks to get the angle of the bowsprit according to the plans.
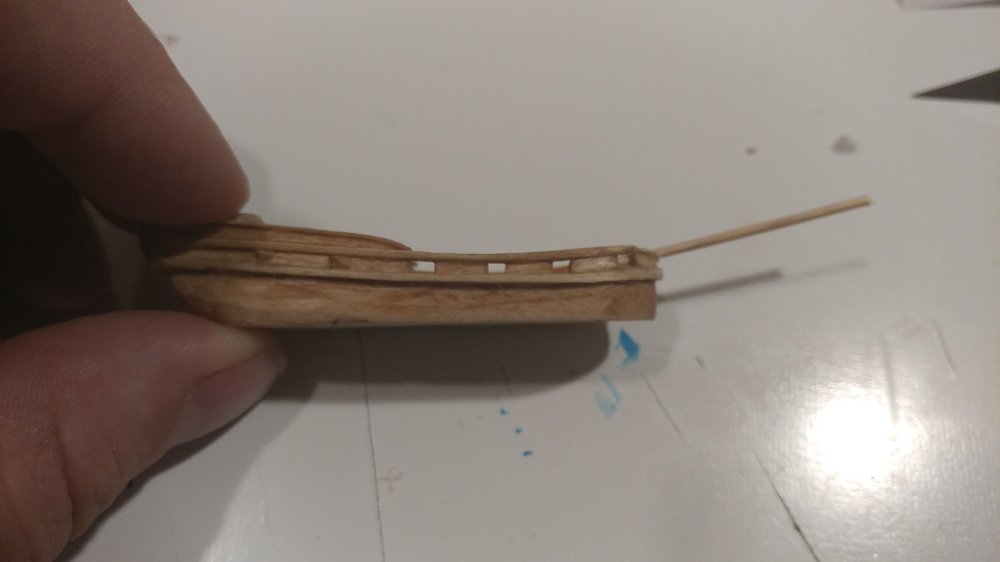
I glue the bowsprit in the notch and to the deck. I'm not worried about the bowsprit being pulled up by the rigging because of the bobstay. The bobstay runs from the bowsprit to the stem. As the bowsprit is pulled up the bobstay pulls it back and creates a fulcrum. As the end of the bowsprit is pulled up the end attached to the hull will be pushed down.
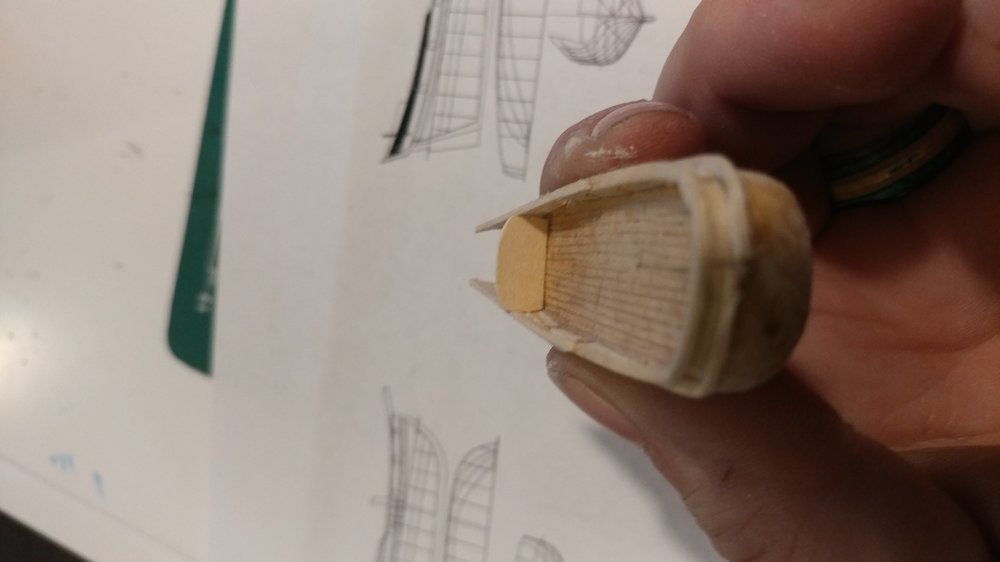
In order to attach a bobstay to a stem I gotta have a stem. Starting out I round out a piece of wood to match the hull. I cut the top to match the angle of the bowsprit then round out what will be the front of the stem.
Little more sanding to shape it and the stem is good to go. I'm not doing the bobstay just yet but its something to keep in mind.
-
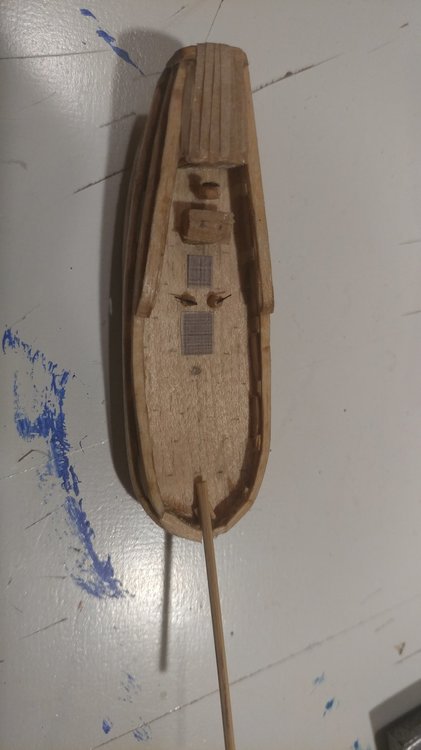
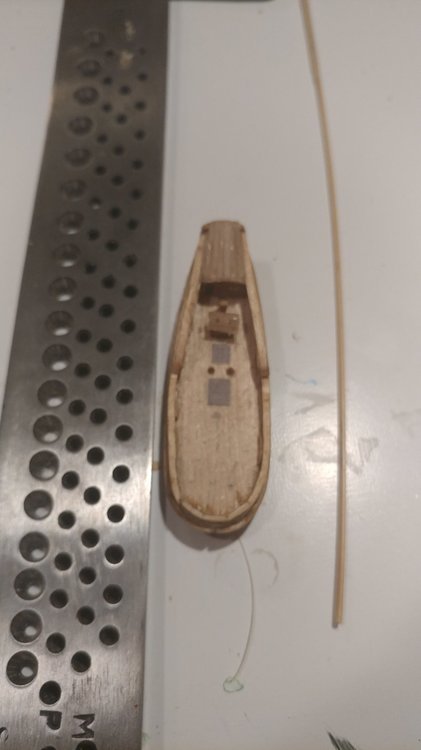
Time to add in the bilge pumps. Basically this piece.
Breaking this down its a cylinder with a handle on top. First I drilled a couple holes. That ensures they aren't going anywhere.
I like to use booboo scewers on round objects particularly masts and yards. Its a sturdy material and it works well pulling through a draw plate. Another great method is putting the scewer into a drill and turning it until its smaller. I don't suggest turning in a Dremel though. Dremels turn to fast which makes bamboo into a projectile. Drills are slower and more controlled.
Once I have the skewers whittled down I cut off a piece and glue it in making sure they are the right hieght.
The handle I make out of a paint brush bristle. Its thin and stays straight. A little black paint gives it a good look. Glue it on at an angle to look like the handle is sitting at rest.
-
Thanks every one. This has been a fun build. Work is slow but sure. I finished the transom and I think it turned out nice.

I wish I could say I did all the wood carving on this but the reality is its not wood. I saw some one on this forum say they used polymer clay for the intricate carvings. So I decided to try it out. Its not to bad.
The transom was slightly different then it is in the book so I couldn't just copy the book directly but I got it pretty close.
Work on the rigging continues.

-
Now for some deck furniture. Before I start I'd like to point out that the technique I use I learned from John Fox III. He told me to break down the objects into their individual shapes. For instance when you look at a cannon the main shapes are a cylinder that sits on a rectangular box. By breaking down the shapes of objects it makes them easier to model at a small scale.
One other note. One thing I do starting out with deck furniture is mark where the mast is going. You don't want to put a hatch or a deck house right where the mast is supposed to be. So I put a small pencil mark where the mast will be.
The first piece I'll work on for this ship is the helm. Breaking down the shapes for this helm, it will have a rectangular box that holds the helm and a circular object that is the helm. The box is easy enough I cut a piece of wood into a tiny box that fits the size I want and glue it in place. The circular piece it harder. It's hard to get circles small enough to fit the scale. One of the great techniques of ship in bottle building though is to use found objects that fit the pieces you need. Just as old sailors used bottles and wood scraps that were otherwise garbage on the ship, there is often objects lying around that can work for ships in bottles. One technique I like a lot for helms is going down to the watch repair store and asking for spare gears. Watch gears make very good helms. We'll cover found objects more when I get to the cannons.
If you don't have access to a watch store there is another method that can be done with string. Take a piece of string and tie loose knot.
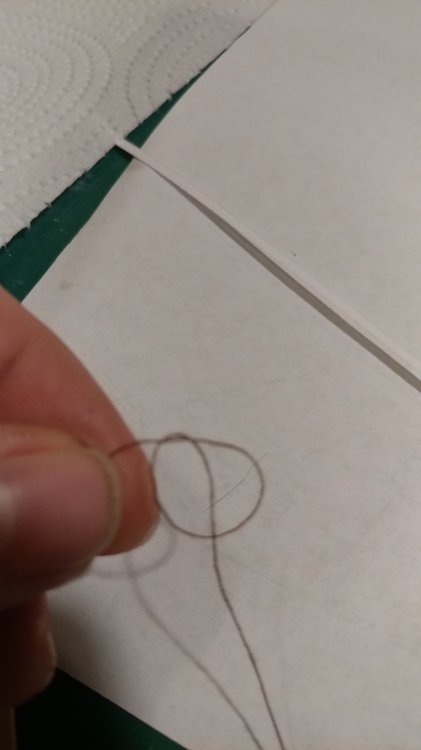
Then slowly tighten that knot into a loop that is the size of the helm.
Glue it down and trim off the edges. Any left over edges glue into the circle so you have a nice round piece of string.
Then the piece of string is glued on to the rectangular box that holds up the helm.
Now for some deck furniture. Before I start I'd like to point out that the technique I use I learned from John Fox III. He told me to break down the objects into their individual shapes. For instance when you look at a cannon the main shapes are a cylinder that sits on a rectangular box. By breaking down the shapes of objects it makes them easier to model at a small scale.
One other note. One thing I do starting out with deck furniture is mark where the mast is going. You don't want to put a hatch or a deck house right where the mast is supposed to be. So I put a small pencil mark where the mast will be.
The first piece I'll work on for this ship is the helm. Breaking down the shapes for this helm, it will have a rectangular box that holds the helm and a circular object that is the helm. The box is easy enough I cut a piece of wood into a tiny box that fits the size I want and glue it in place. The circular piece it harder. It's hard to get circles small enough to fit the scale. One of the great techniques of ship in bottle building though is to use found objects that fit the pieces you need. Just as old sailors used bottles and wood scraps that were otherwise garbage on the ship, there is often objects lying around that can work for ships in bottles. One technique I like a lot for helms is going down to the watch repair store and asking for spare gears. Watch gears make very good helms. We'll cover found objects more when I get to the cannons.
If you don't have access to a watch store there is another method that can be done with string. Take a piece of string and tie loose knot.

Then slowly tighten that knot into a loop that is the size of the helm.

Glue it down and trim off the edges. Any left over edges glue into the circle so you have a nice round piece of string.

Then the piece of string is glued on to the rectangular box that holds up the helm.


One thing to keep in mind is you don't need a perfect helm. With the location and size chances are no one will even notice how the helm is modeled. When it comes to modeling ships this size the details can be left out. Often I find the mind has a way of recognizing the shapes and filling in the details. So how far you take those details is up to you. Personally I like the challenge. In reality you could glue in the rectangular box with no helm and chances are no one would know the difference.
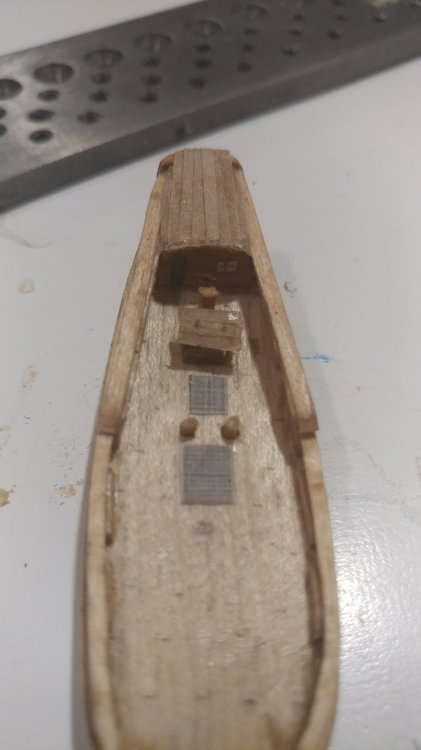
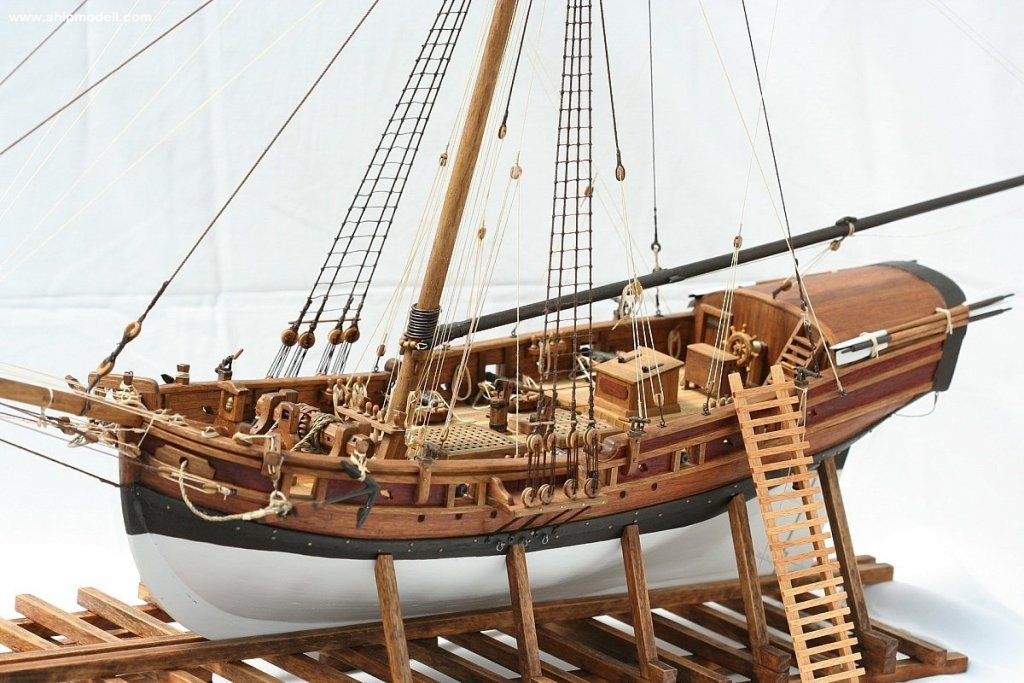
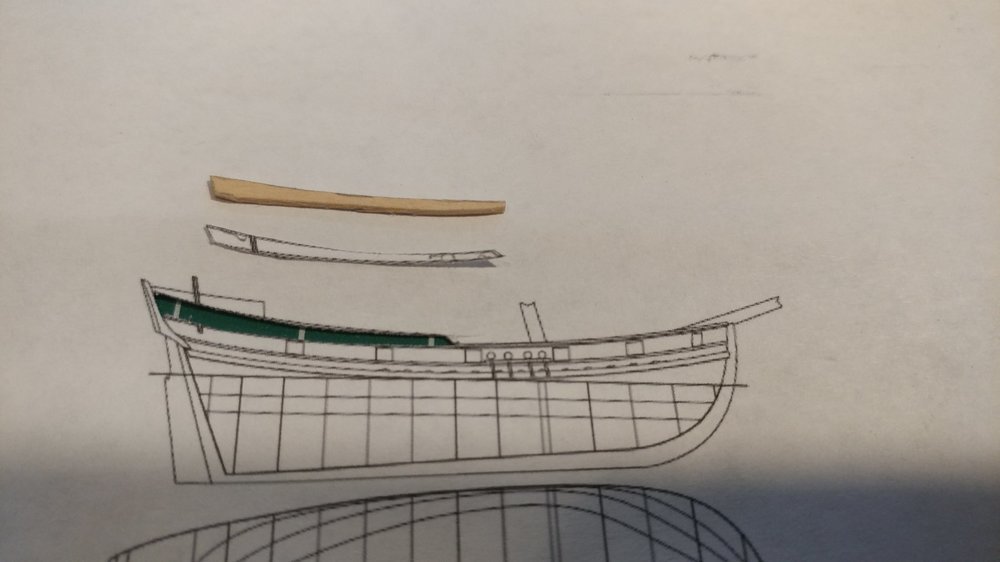
Moving forward I modeled a small deck house. It's more of a raised hatch on this ship. The picture below is a good example of what this looks like and the Bermuda sloop deck in general. The hatch just forward of the helm is made up of a box with a tilted top. This top stick out over the edges slightly. So to model it I cut a piece of wood into a box, sand the top down and glue on some paper strips on top. Then with a pencil I made a mark for the hinges.
Looking at this photo know I think I have the helm in the wrong place. All well it's already glued in. Another important tip. You are the captain of this ship and things go where you want them to go. You can follow my instructions or do it your own way. What ever makes you the captain the happiest with your work.
After the deck house I put in a couple hatches. I can't remember if this is a Jim Goodwin technique or a Greg Alvey technique. I learned it from one of them. Any way, first I find some plans for hatches. I googled it and found some that I pasted into word and copied and resized the photo to a lot of various sizes. With the varied sizes I can makes hatches for a variety of ships by printing one page of hatches. The word file I used for this ship is attached. Once I have the hatches printed I turn the page over and lightly stain the back of the page. That way the ink doesn't run. The wood stain gives it a wood color and the ink makes it look like a hatch. Then I cut out the hatch and glue it on the hull. For this I use white glue. This allows me plenty of time to put the hatch in position. If you use super glue and the hatch goes down crooked it becomes a big mess.
- Warnerade, GrandpaPhil, IgorSky and 3 others
-
6
-
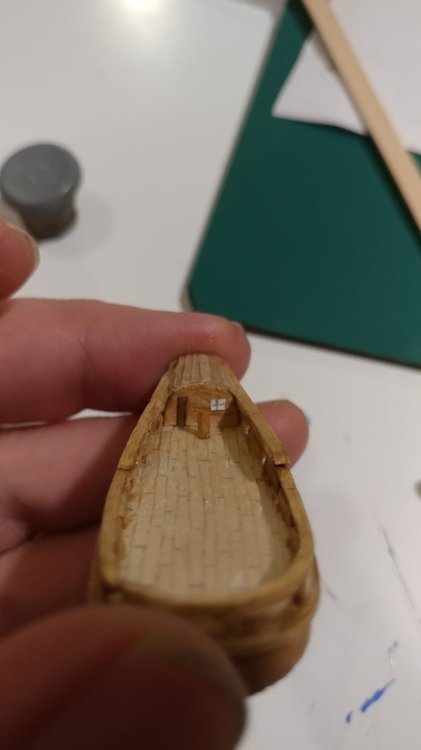
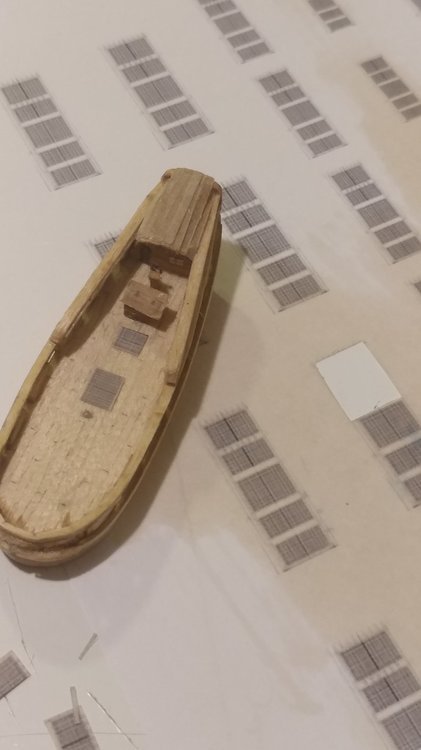
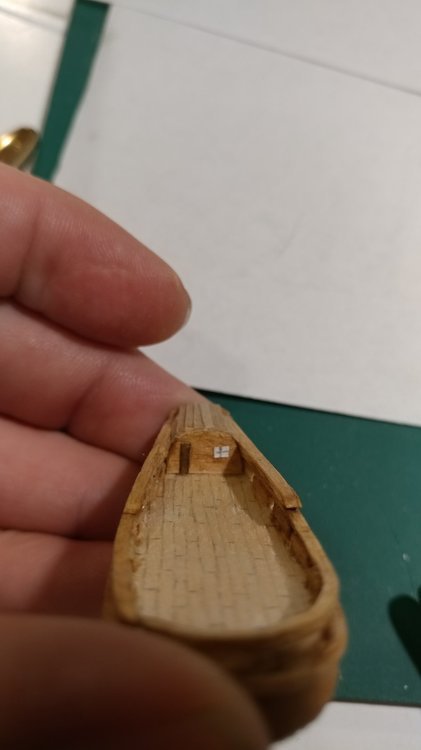
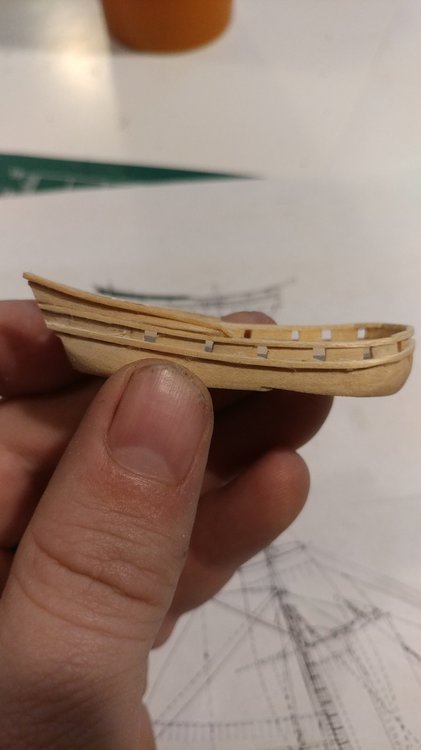
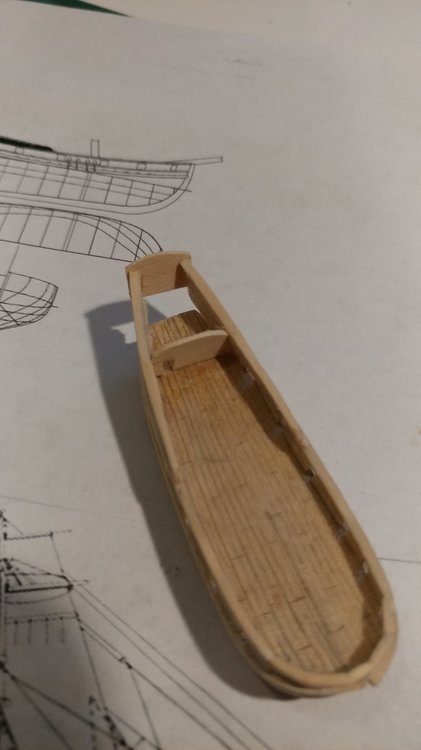
The planking method works well and I think it looks good. I cut some paper at 1.5 mm stained it with golden oak and glued it in place. I started from the outside edges and worked in. I also stained the hull with golden oak.
From there I did the windows. One of the best ways to do windows is to print off windows from plans and glue them onto the model. My printers down at the moment so I hand drew some windows. I took a darker stain and stained a strip of paper for the door.
-
Thanks Carl.
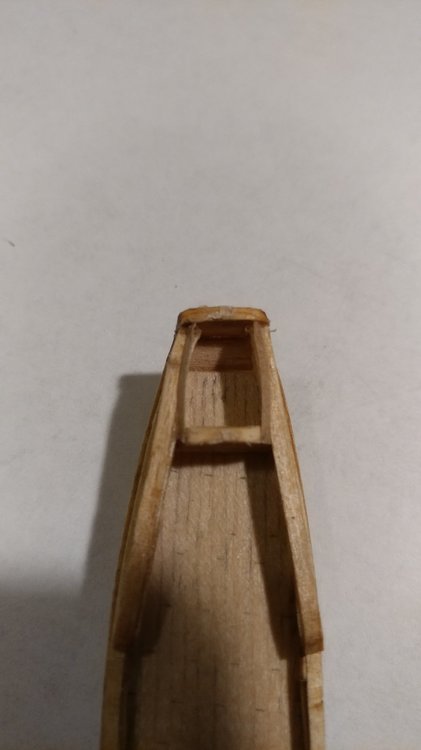
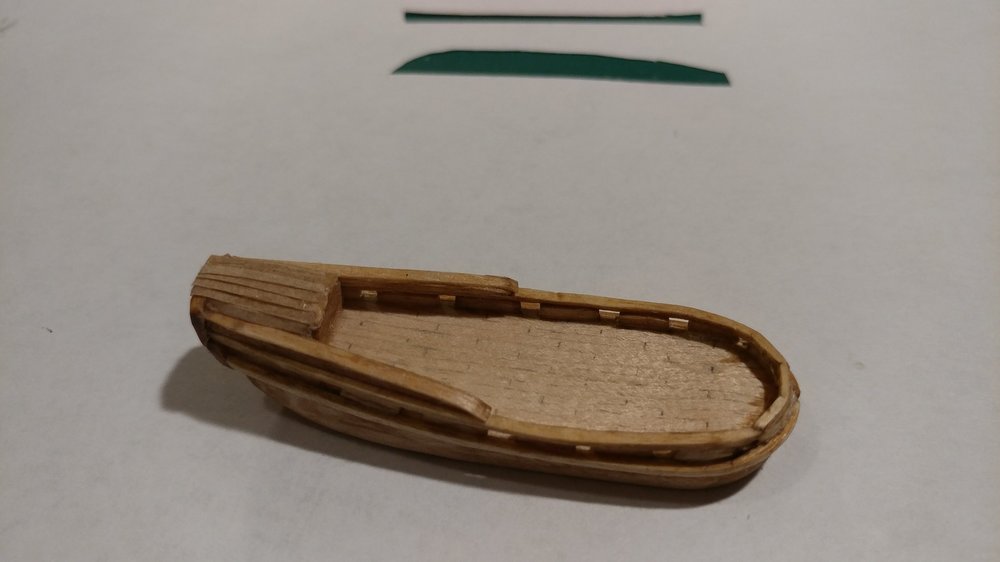
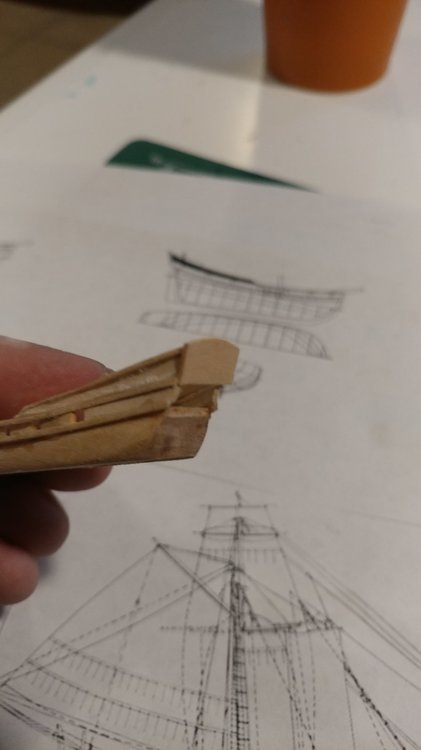
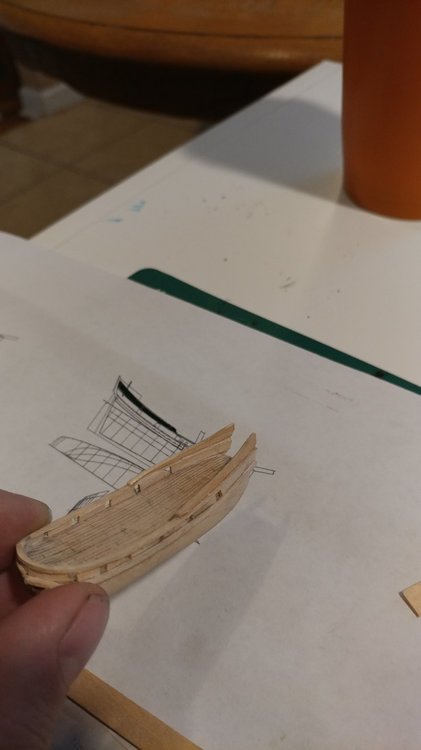
So the next part is adding on to the stern bulwarks. I cut out part of the plans to get the sizing that I needed and then cut out a piece of wood to glue in place. I soak the wood for a couple minutes and then glued it to the top of the bulwark.
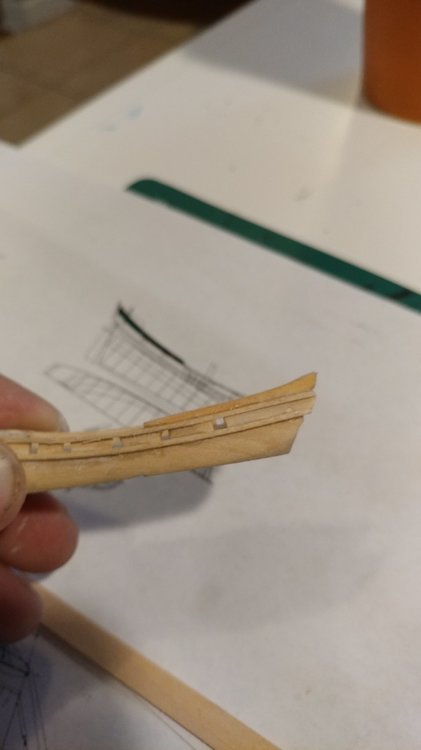
After I send the bulwark down I work on the rail to go on top of the stern bulwark. I cut out another 1.5 mm piece soak it for a a few minutes and then do a grain break at the very end to give that lip between the two rails. Then I glue it in place.
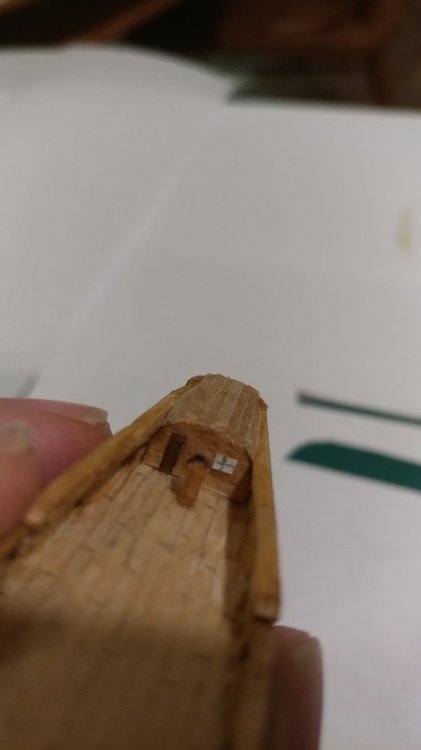
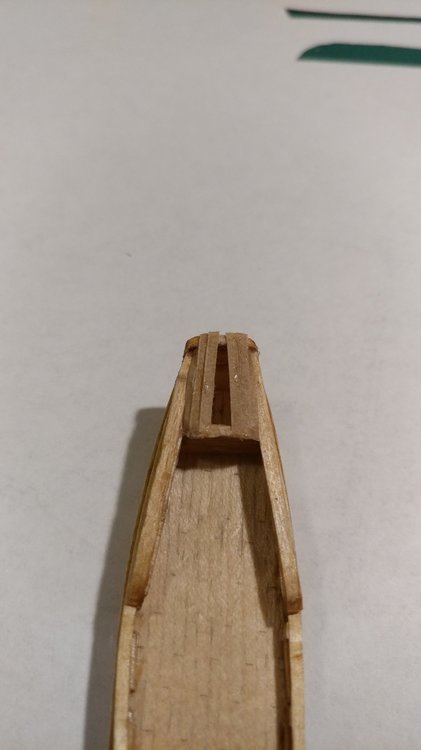
I sand that piece down to thin it out and then move on to the stern cabin. I start with the front of the cabin that will be on deck cut out a piece that fits in the place where the cabin will be and then sand the top edges to round it out.
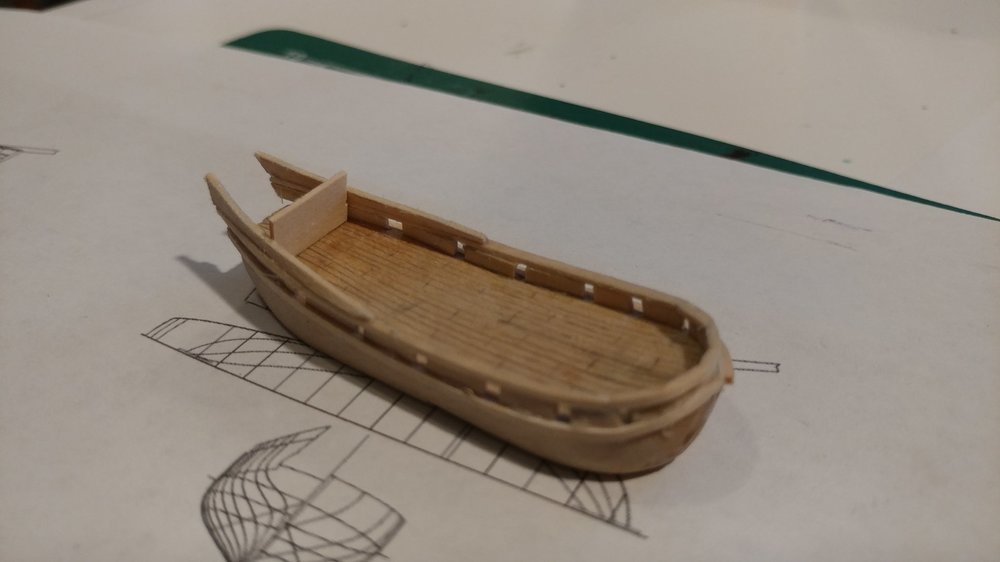
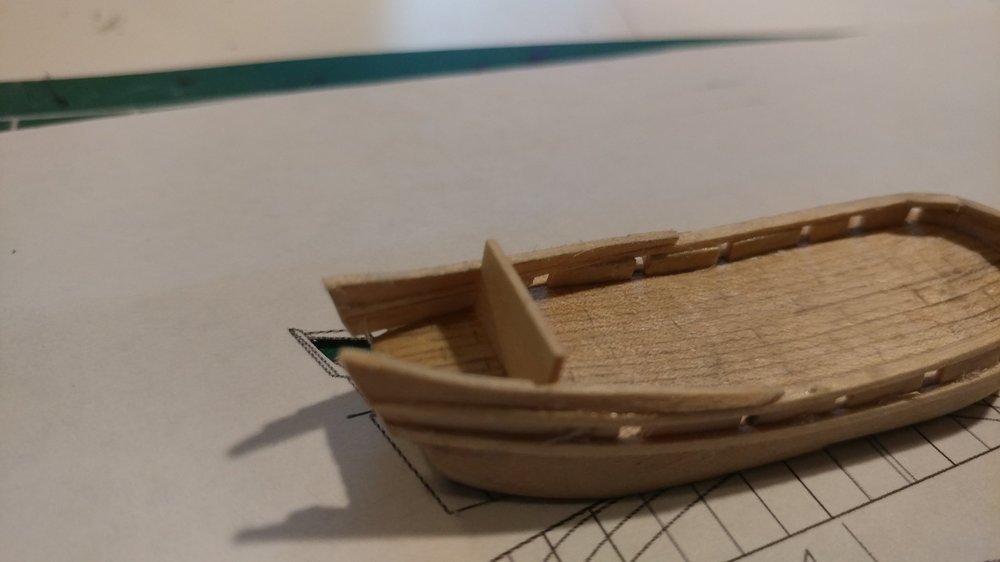
I decided to cut out the door on this model this is more for my own experimentation it doesn't have to be done as part of the beginners build. For the door typical I'd go out a piece of paper paint it and then glue it in place I wanted to try this out since the cabin is open and I will glue the door hinged open so that it looks like you can walk inside.
After the front of the cabin was placed I put in the back of the cabin this is kind of the same thing placing the piece sanding off the top edges to round them out and gluing it on.
-
-
-
A little more progress....
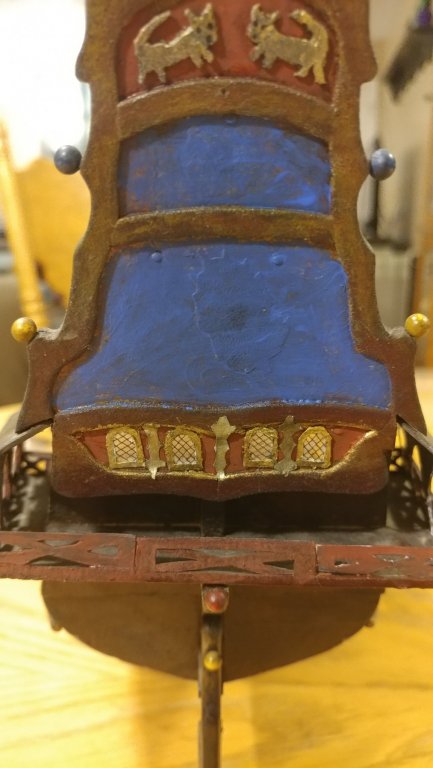
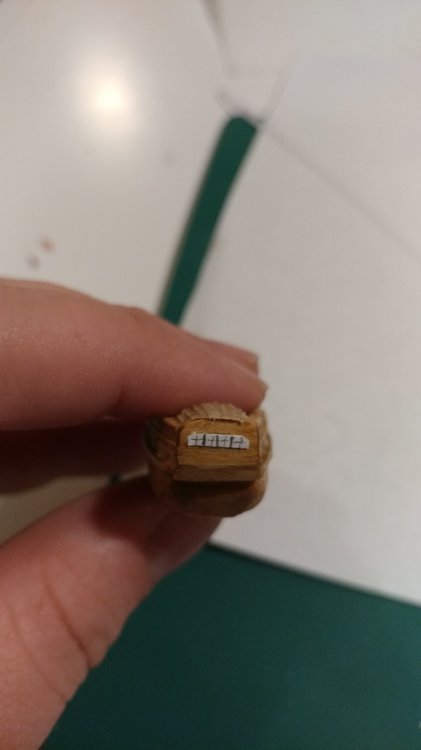
In regards to the windows the book calls for tin foil painted with transparent blue paint. I didn't have any transparent blue and paint didn't seem to stick to the aluminum foil so I just used the foil as is. I had thought I saw the window cross hatch pattern before and found it again in some lace. I ended up cutting the windowsills out of paper and then glueing them onto the foil with the lace inbetween. Once the glue dried I cut the window out of the foil, painted the sills and put it on the ship.

-
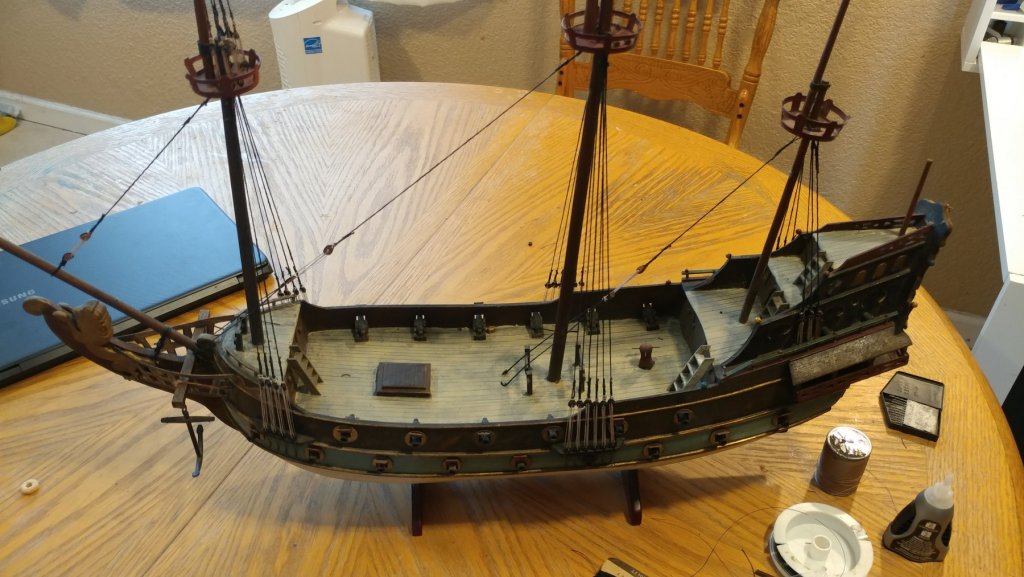
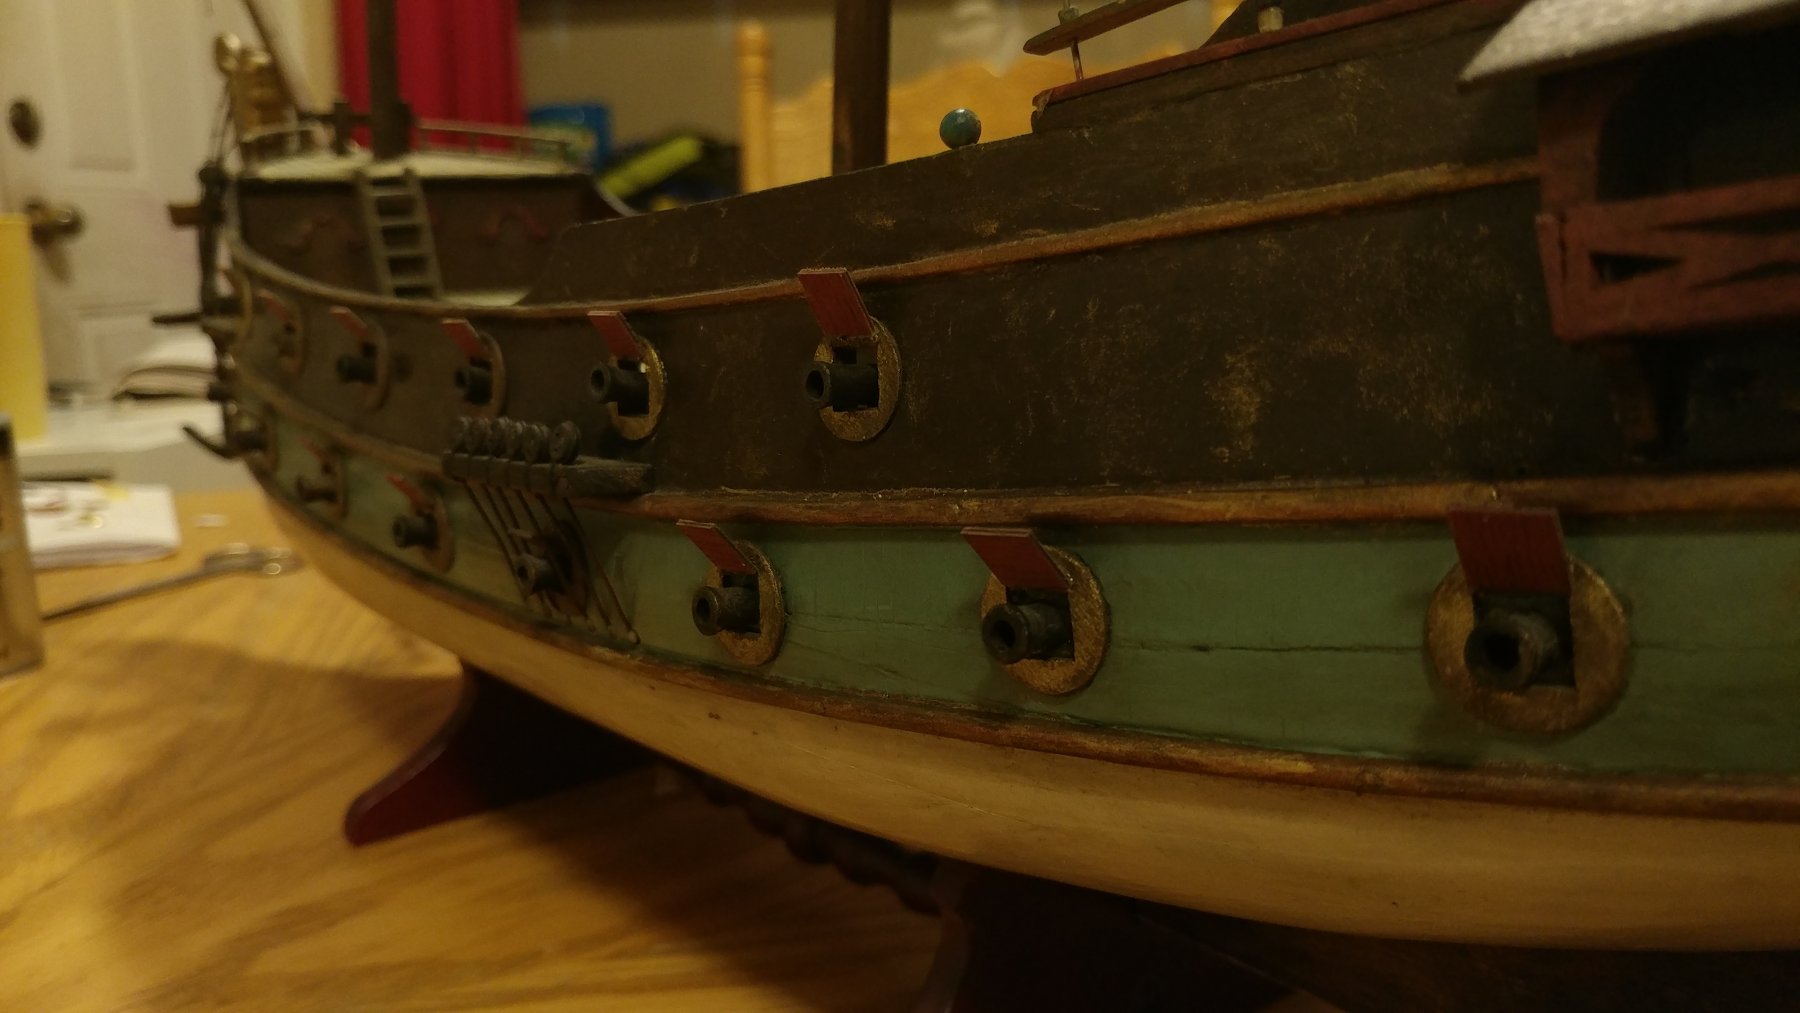
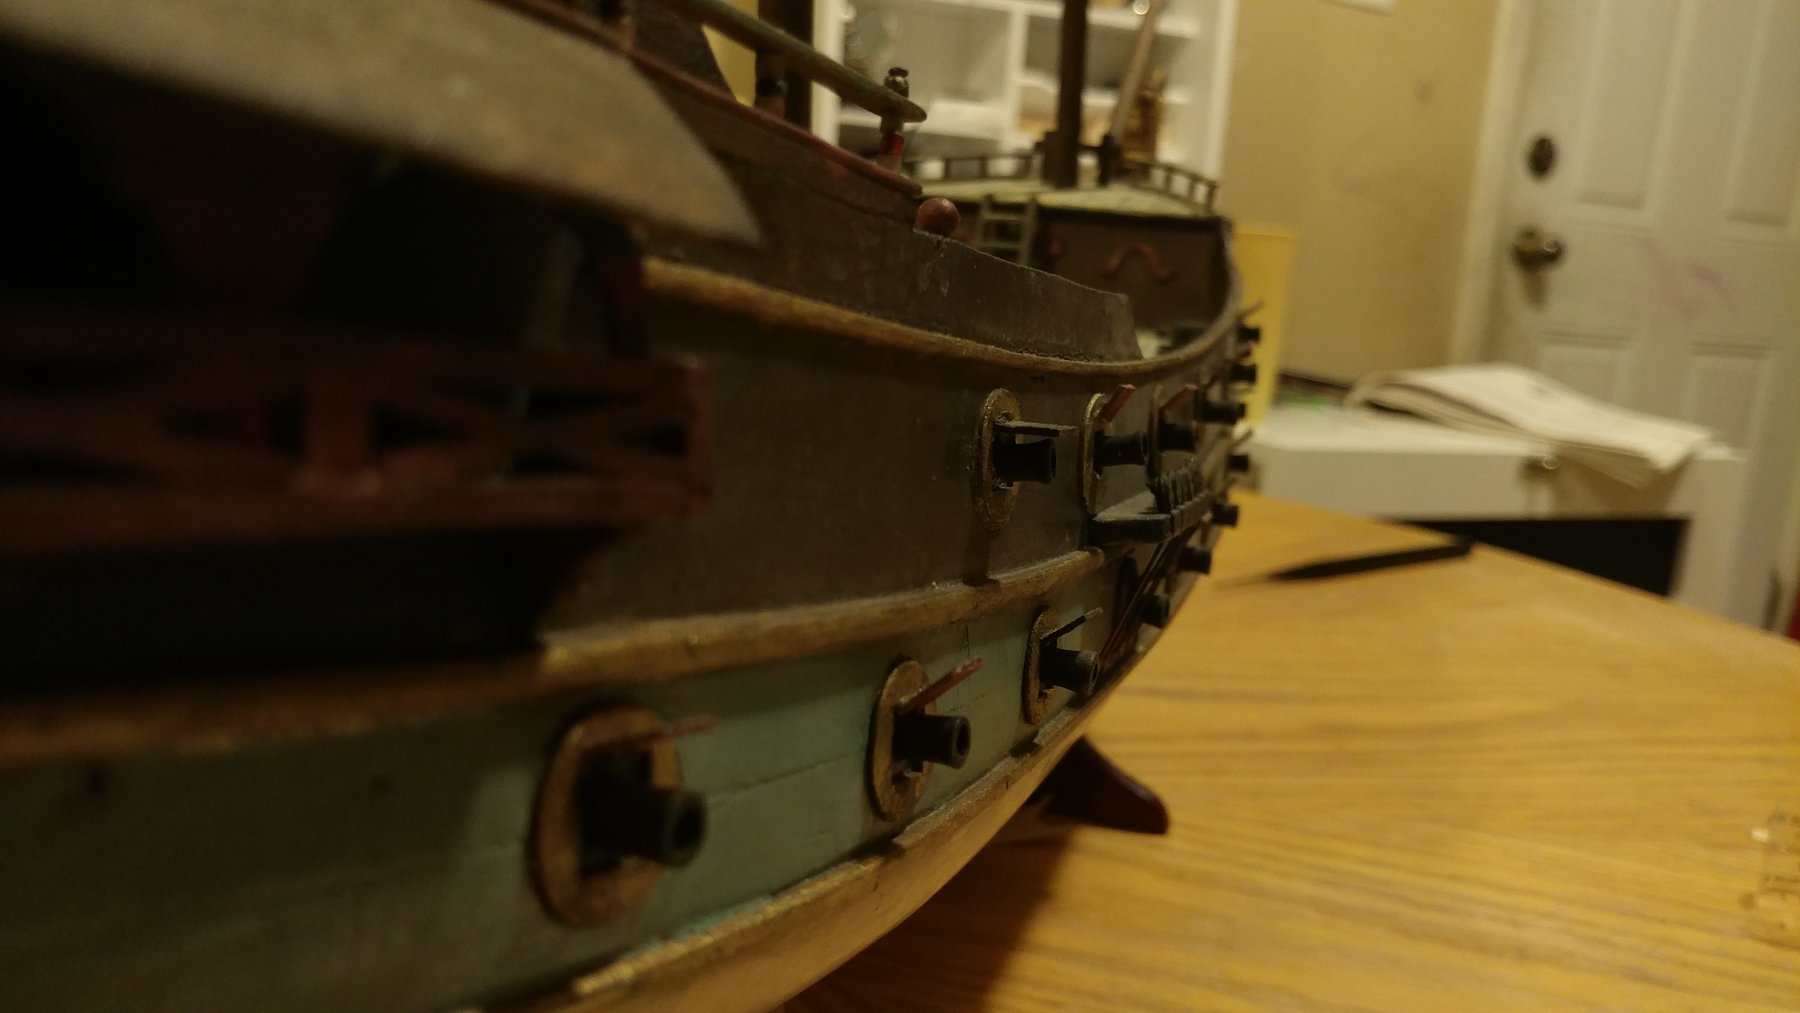
A bit more work done. I decided to go with paint on deck. I could have planked it but I figured id follow the book on this one. I went light so that it still has an aged look. The lighter deck does make the rest of the ship pop out more. Got the head boards redone and in place as well as the cat heads. Interestingly enough the book caled for a touch of silver on the head boards so ibpainted that on. It does give a little more depth. Got all the gun port lids replaced. With the exception of the stern I'm about ready for rigging. I've been cutting off the old rigging here and there saving the dead eyes and blocks, at least those that don't fall apart.


- Old Collingwood, druxey, Ondras71 and 4 others
-
7
-
Thank you for the comments. I agree bdb accuracy is not the goal here at all. Ours funny because McCann mentions that in his book. Instead of building cross trees he has the builder use thread to tie the masts together. He called it throwing seaman ship to the wind. He meant it to be simple not accurate.
Actually after reading through the book I'm somewhat surprised there aren't any McCann style builds on this forum. For some one wanting to learn scratch building its a great start.
I picked up a bit of paint and went to touching up some spots. I want to keep the model looking old so I used a dry brush technique. Wetting the brush the painting on a piece of paper until the paint was almost gone and then painting the model.

I need better lighting but you can see how the colors come out but not by to much.
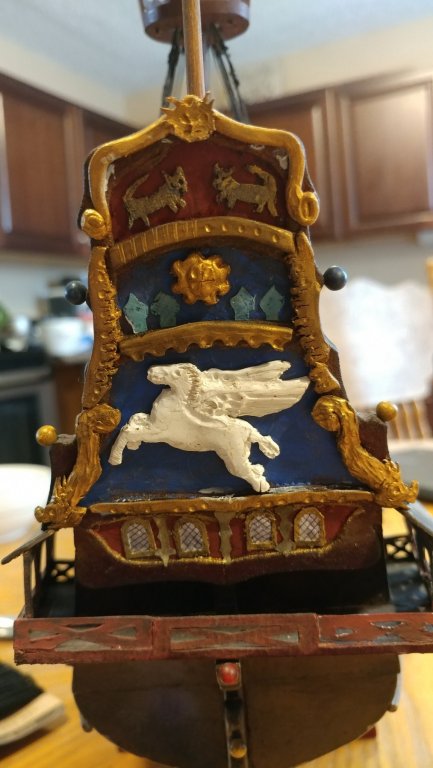
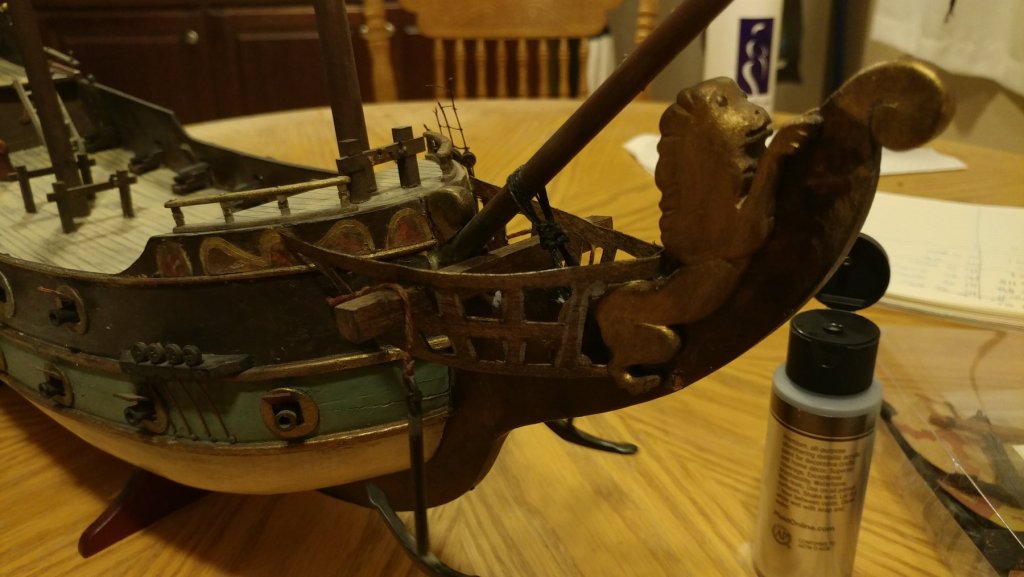
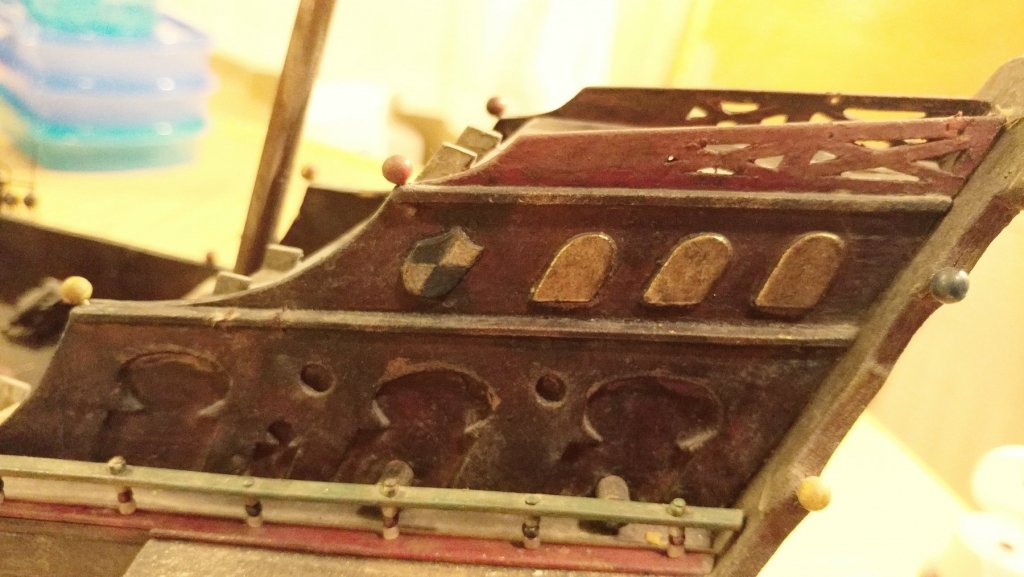
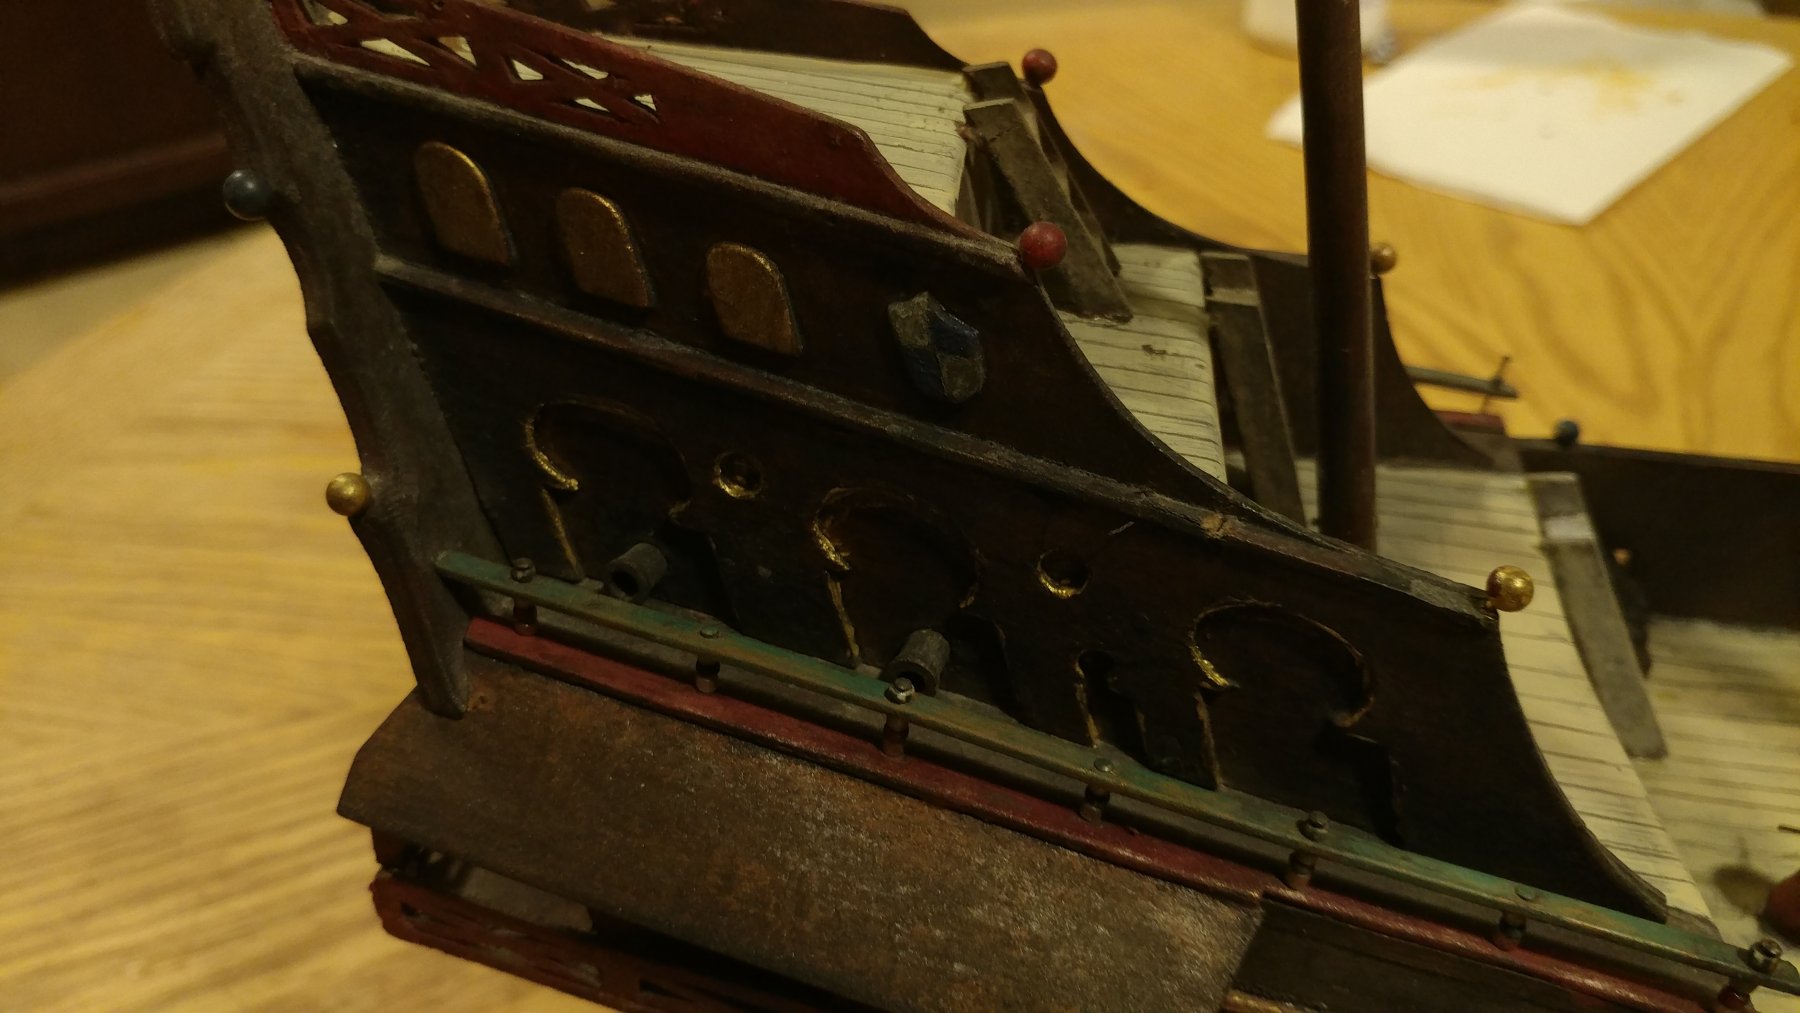
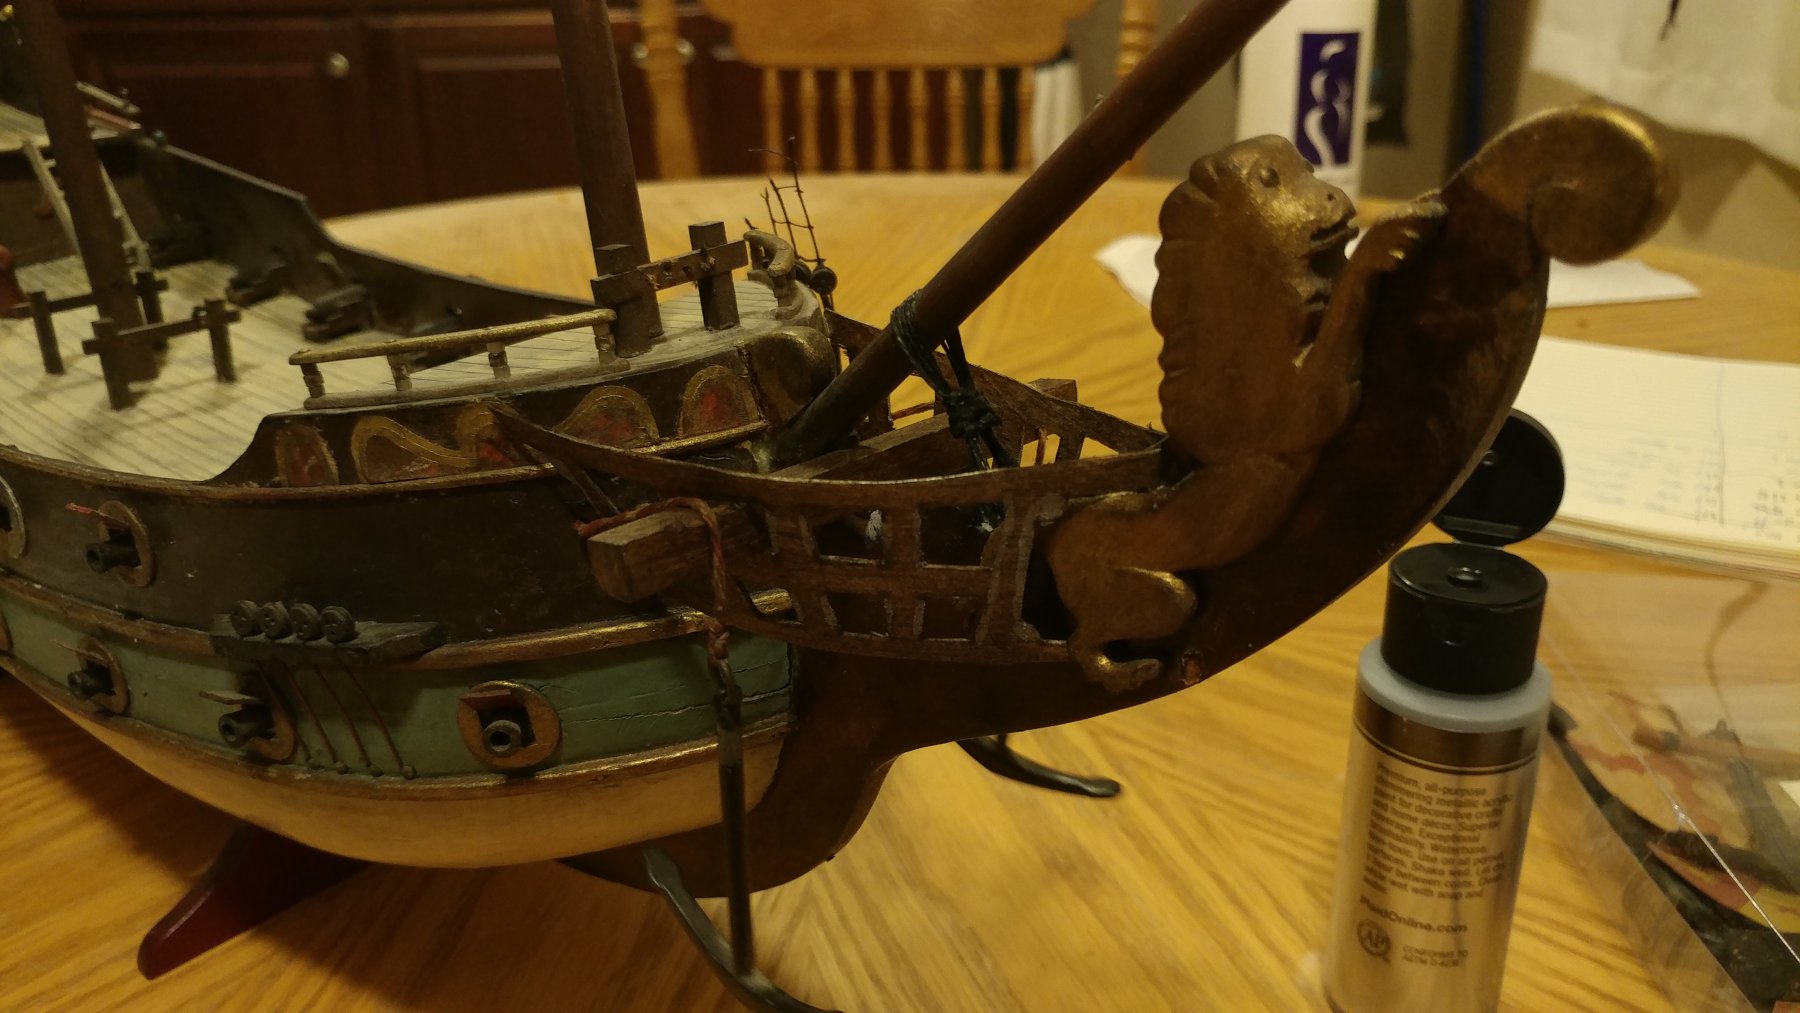
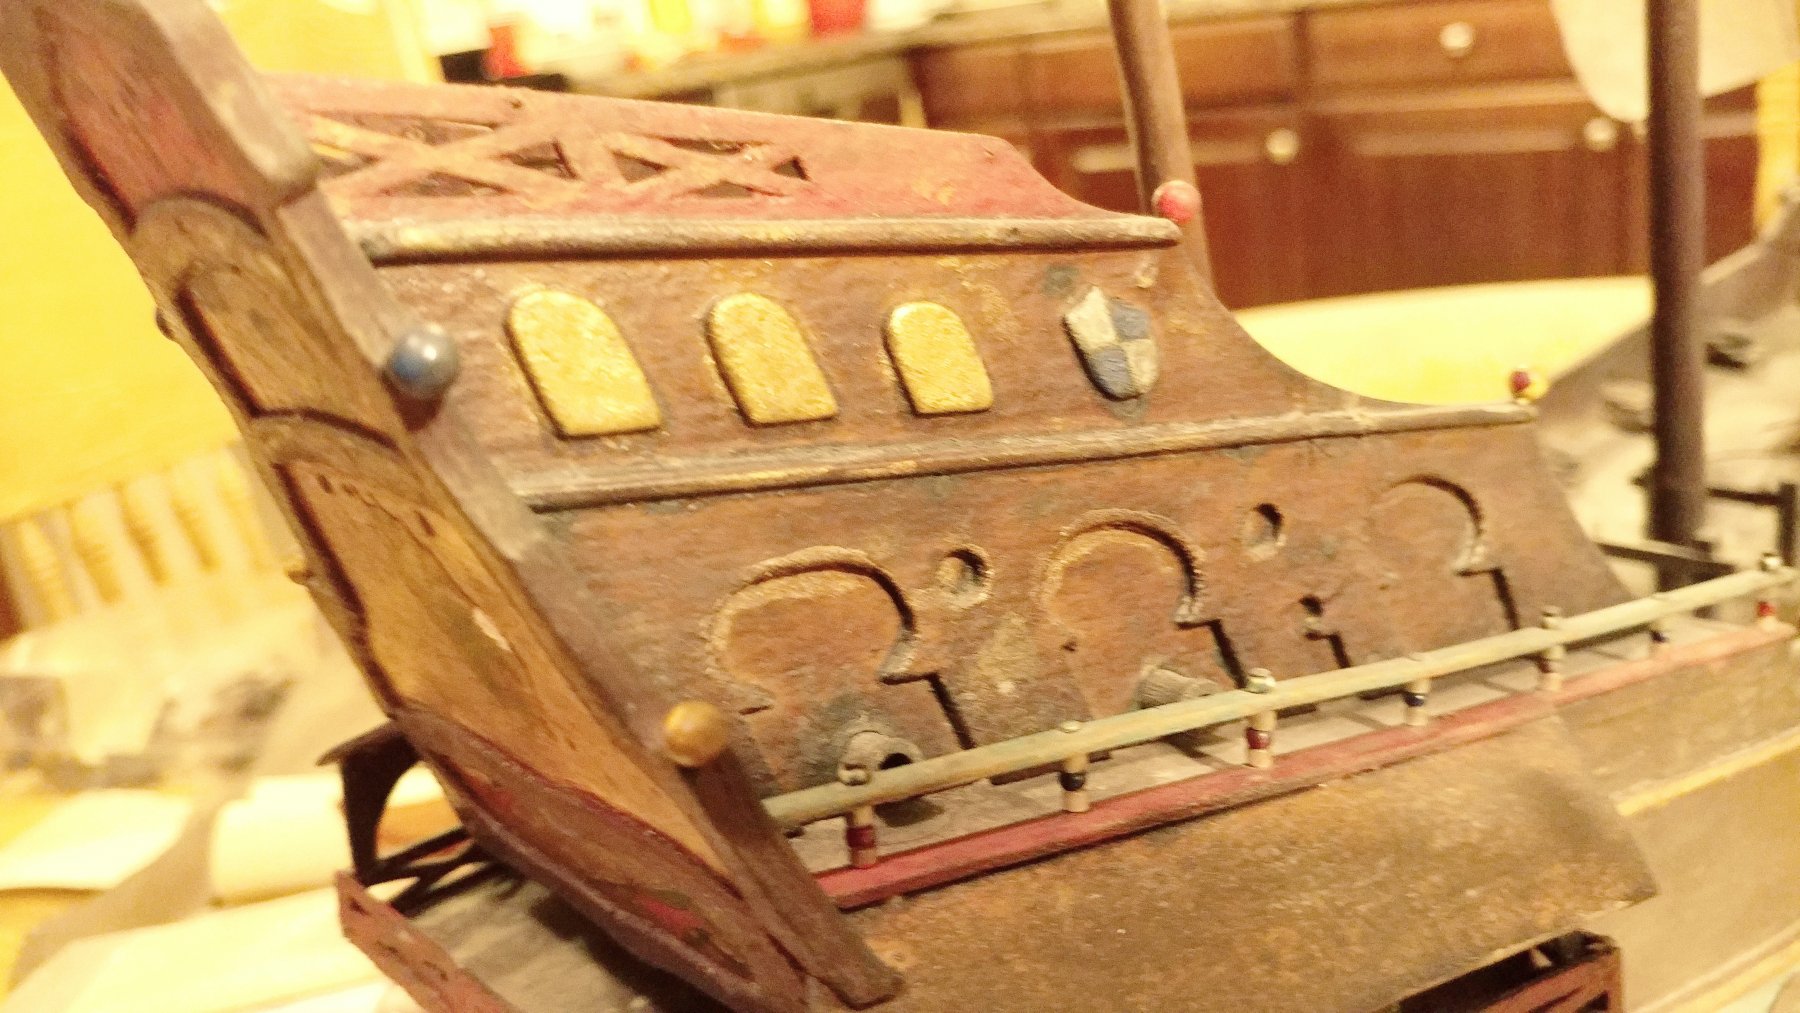
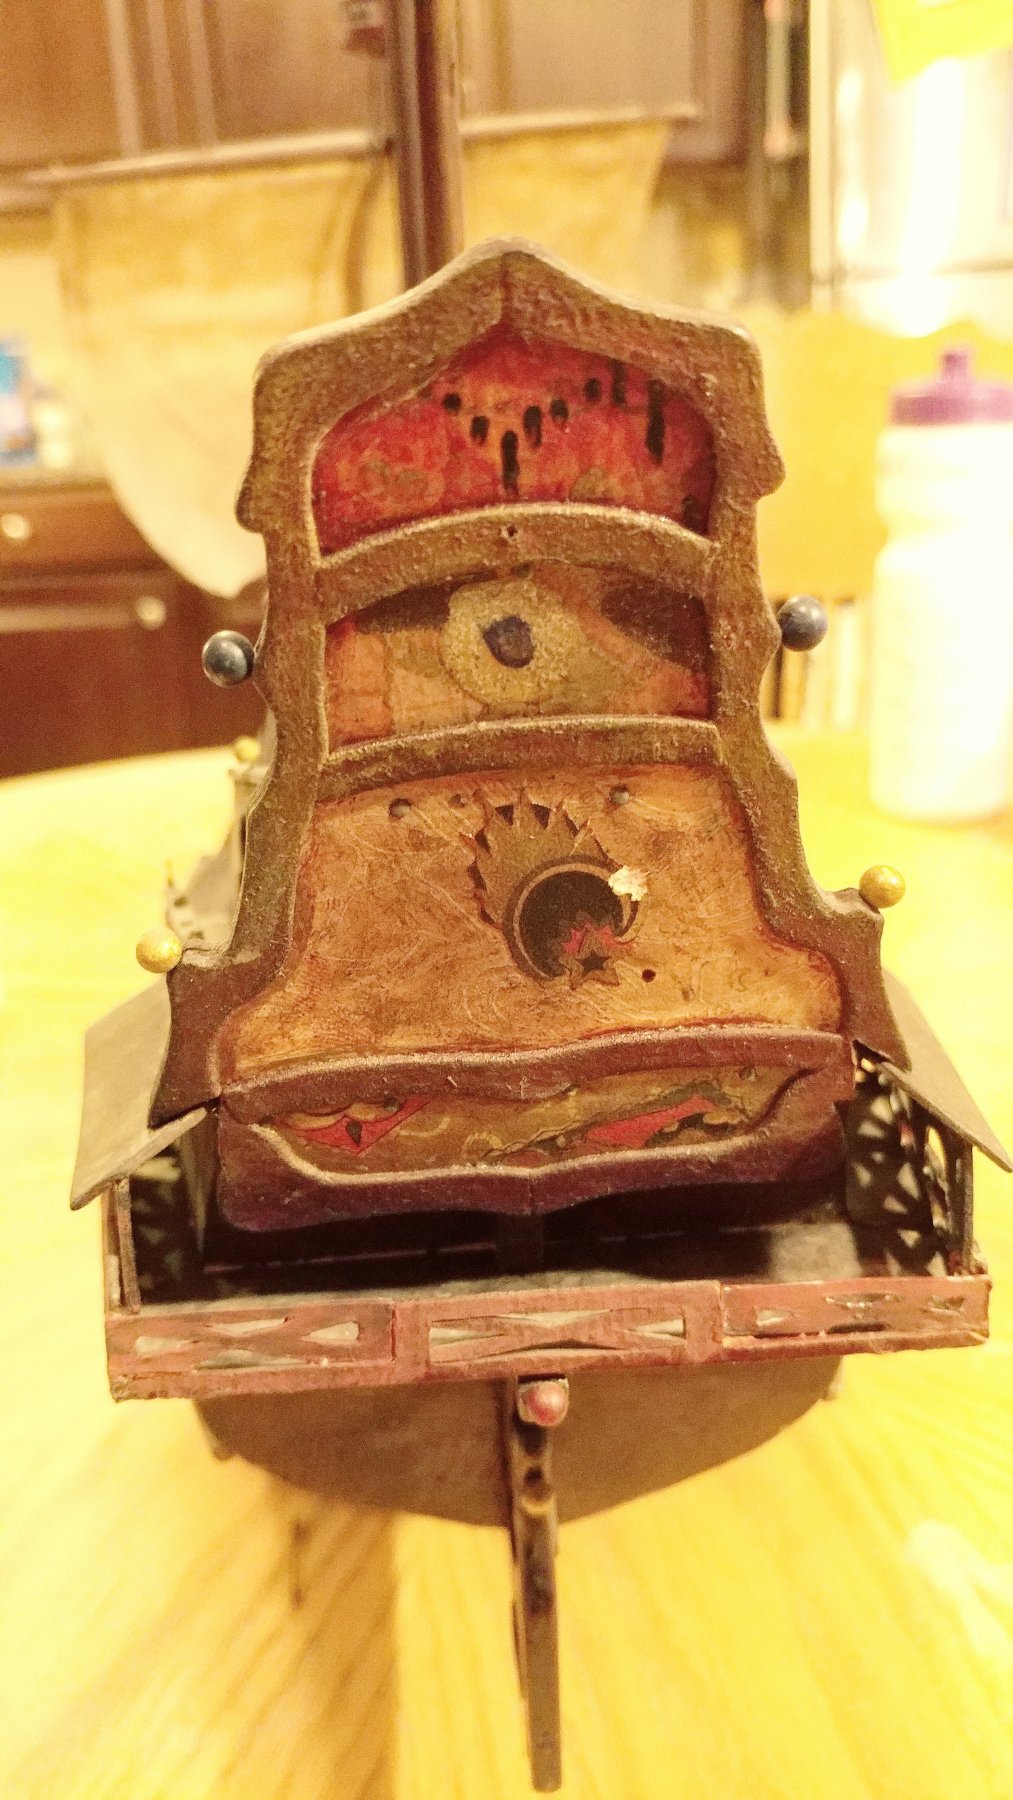
I then turned my attention to the stern. I'm not sure what the original artist was going for.

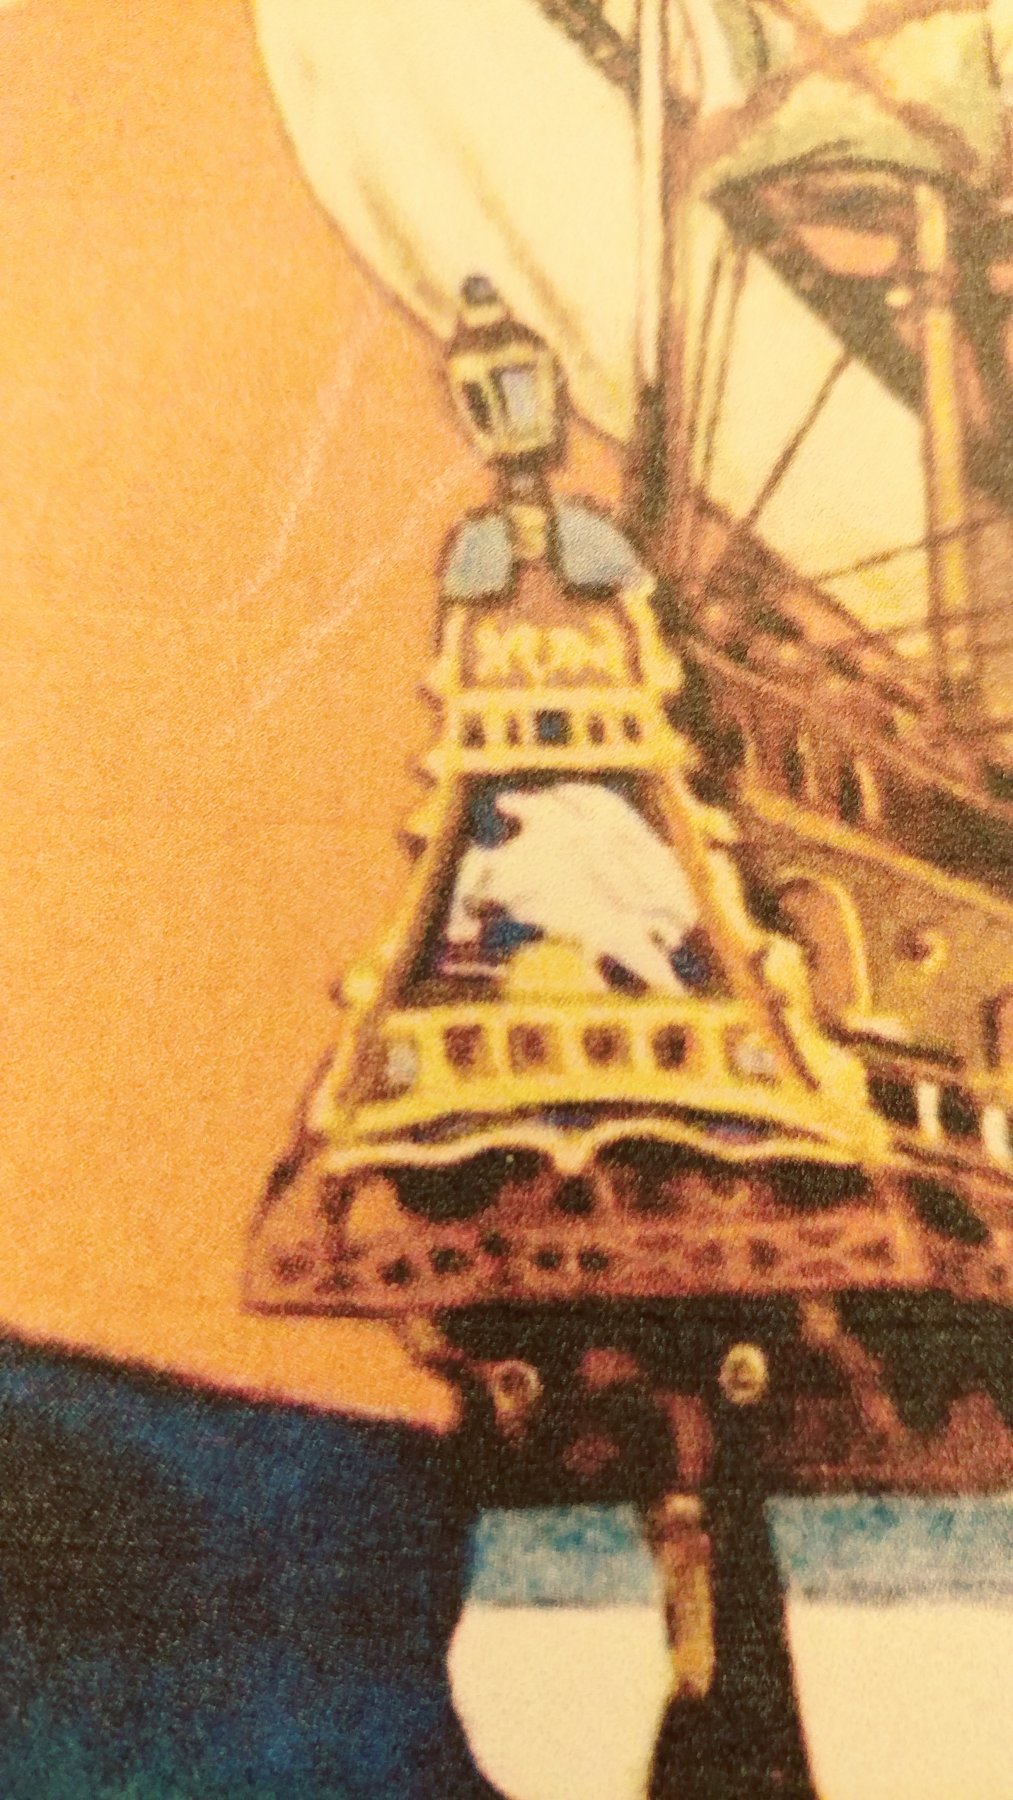
I decided to change this up all together. I was given a color photo of a magazine cover for this ship.


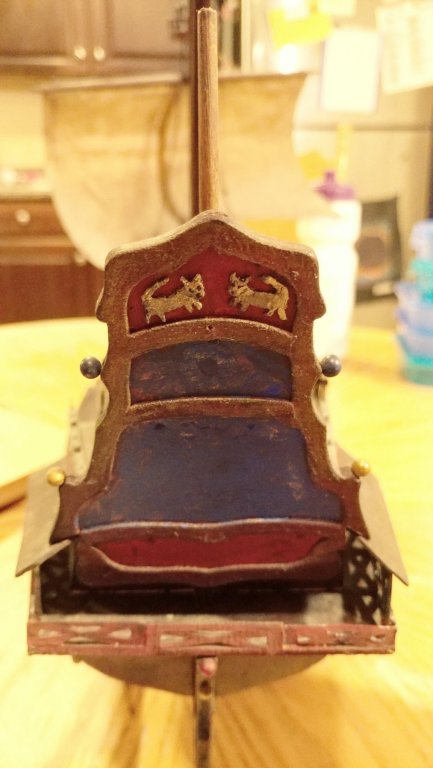
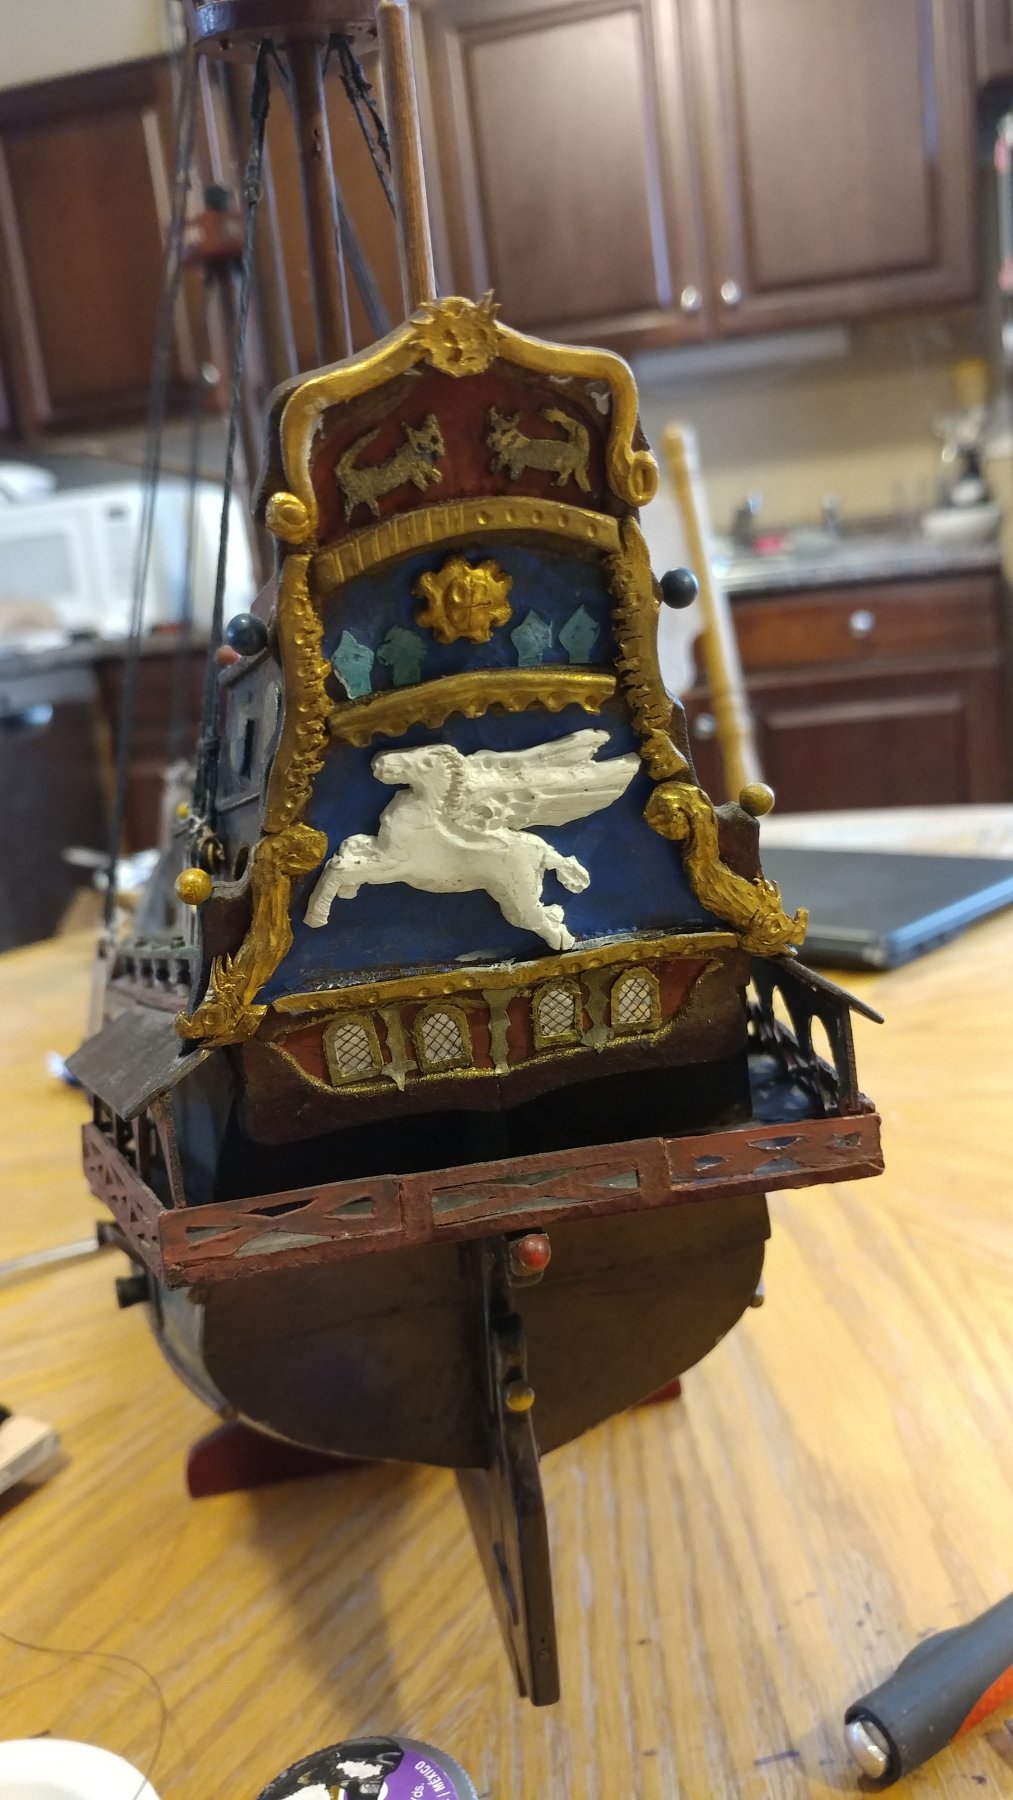
Here you can see the two lions on top per the book and a pegasus. The book says to get a picture from a cigar box or catholic literature. I looked at some from the 1930s and got some good ideas. I like the pegasus though so I looked up 1930 pegasus. What I found was interesting.

This pegasus looks very similar to the one on the magazine cover. So I think that's what I'll use.
I went ahead and painted the stern and added the two lions per the book. The stern is somewhat different as built but I think I can mix the book plans in just enough to look good.
-
Theres a lot of phrases in this book like that. Like belt pins. Captain McCann made a lot of use of belt pins. From what I can tell I think they are called straight pins today. I could be wrong.
-
That is true. The one commonly attributed to Blackbeard is described as one flown by a Francis Spriggs. Some of the flags did exist in one form or other. It just takes a lot of research to find the historical evidence. The clickbate prone internet makes it very difficult.
- thibaultron and mtaylor
-
2
-
There is little historical evidence for a lot of the flags that are attributed to pirates. Historians traced the appearance of the common flags to the 1950's.
http://www.piratesurgeon.com/pages/surgeon_pages/memento_mori6.html
- thibaultron and mtaylor
-
2


Bermuda Sloop by DSiemens - Aprox: 1:300 - BOTTLE - How-to
in - Build logs for subjects built 1751 - 1800
Posted
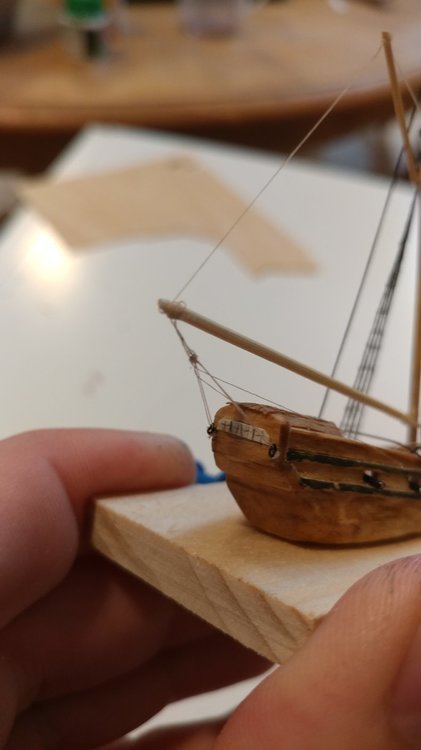
This next part has a lot of options all depending on how detailed you want to go. If you want to keep it simple leave off the topsails all together. In higher winds these would have been removed and it looks fine with out them. Here's an example.
If you want to add more detail though the top sails look great. To put on the yard arms use the cow hitch and tie the yards to the mast.
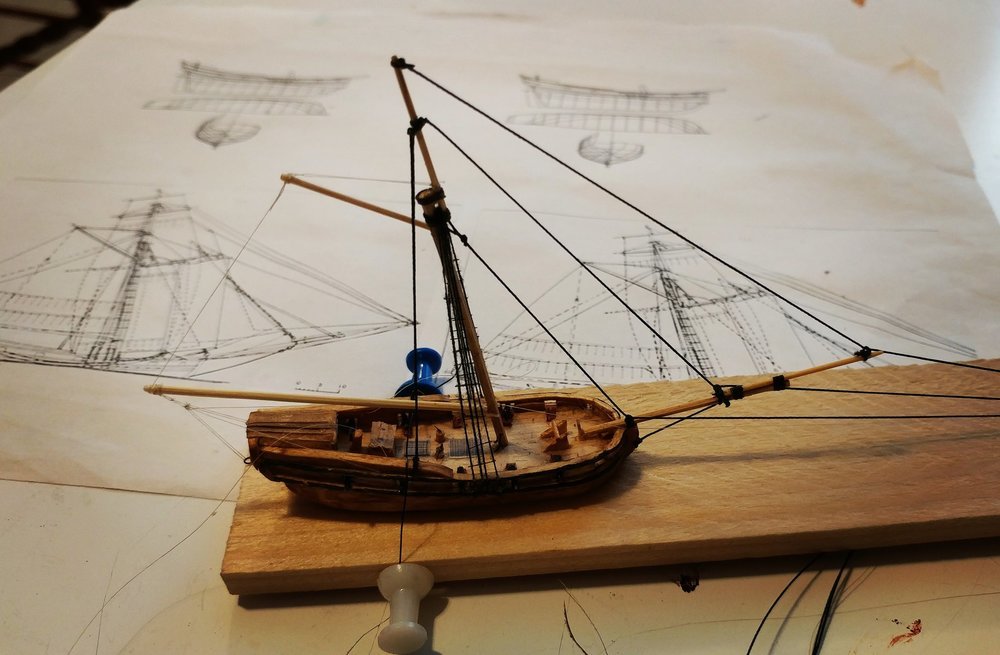
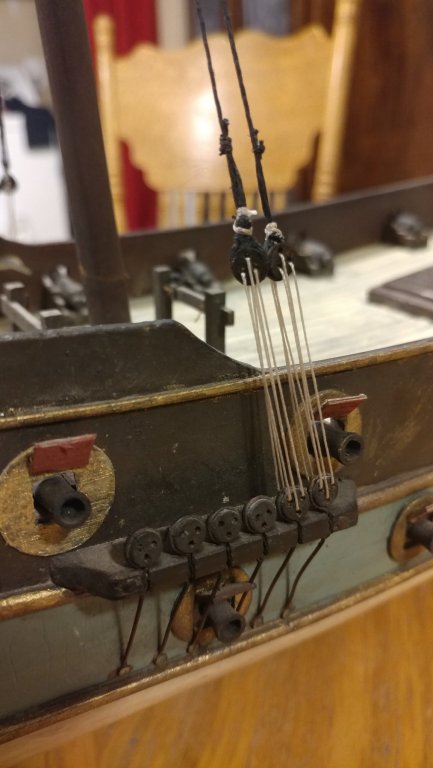
Running rigging will be used to keep the yards straight. There's a lot of options on this part as well. The Bermuda sloop is interesting because the running rigging is rigged forward instead of aftward like most bigger ships. This picture is a great example.
For my ship I decided to rig the top two yards on the same lines. This is somewhat more advanced but it shows the type of things you can do in rigging ships.
First you'll need a few thread blocks. One just behind the middle thread block on the bowsprit, one on the stay line at about the same height as the cross trees, two on the ends of the middle yard arm.
Here you can see where the running rigging is going to go. Start it at the ends of the top yard arm, run it through the thread block on the stay line, then through the thread blocks on the middle yard arm, then through the thread block on the bowsprit.
There's a trick you can do on this part. Its less realistic but reduces the lines coming out of the bottle. Tie the running lines to the end of the top yard arm, then pull them through the thread block on the stay line, last tie the ends to the middle yard arm and cut them off. Letting the lines slide through the thread block you can adjust the tack of of the yardarms.
If you want to go more realistic run the lines down to the bowsprit then drill a couple holes through the hull just behind the front bulwark and on either side of where the bowsprit attaches to the deck. Run the lines through these holes and under the ship. The advantage to this method is you don't have to be precise in cutting these lines because they will be under the sea.
For the bottom yard tie lines to the end and through the same block on the bowsprit and then back to the holes in the hull.
At this point the ship is ready for sails.