


DSiemens
-
Posts
1,060 -
Joined
-
Last visited
Reputation Activity
-

 DSiemens got a reaction from popeye the sailor in German Cutter 1910 by DSiemens - FINISHED - 1:300 - BOTTLE
Seems as though I need to run into a rough patch before I hit some inspiration. Or maybe I'm just better at the 1:300 to 500 scale. In either case my current bottle build was giving me a lot of trouble and I hit a road block. So while I was thinking of how to fix that I went on to another project. I chose this one because I think I need to get back to basics again before proceeding. Also like so many of my best work it's for some one else. I may explain the story behind that later. Here's the ship.
She's simple but beautiful. The only one in existence today is the Mariquita which I have based a lot of this model on. Still debating if I should break down and just call her the Mariquita but we'll see.
I actually tried some thing new and did some rough measuring. The ship is a bit thin but she needs to fit in the bottle. I'm off less then a millimeter so I think it's okay even for this scale. This was actually pretty fascinating to see and I suggest trying it out just for fun. I measured out the center line and then lines on the plans. I counted twelve on the plans but the photo now shows more like 16. It's 1:300 scale kind of hard to see. Any ways. I divided the ships length by twelve and drew a line for each section. I then drew the center line. From there I went back and forth from the plans measuring each line from the center line and marking it on both sides of the center line on the wood. As I progressed the deck shape just appeared. This is probably the most fun I've ever had with a set of plans.
I then carved out the hull and I apologize for not having more pictures because I tried a new technique for that as well. I've been looking at pictures of some of my favorite ship in bottle builders for a long time. One that has always intrigued me is Heather Rogers. I've posted a few pictures of her work and if you would like to see more click link.
As I looked at her photo's I've found she carves ships very differently. She also did a model of the Mariquita so being I had a reference I decided to try it her way. What I found was incredible. I cut out the large pieces around the hull and then went to my usual dremel work. The proved difficult as the base got in the way. So I looked back and found that she uses chisels. I pulled out my chisels and started working with it. The grove between the base and the ship created a perfect guide. I place one end of the chisel in the groove, angled it to where I wanted to cut and slid the chisel against the hull. It was almost to easy. This hull is almost completely cut from a chisel and touched off with some sanding. I noticed though that Heather uses what appears to be harder woods. I think I may try that in the future as the bass wood is soft and dents easily.
I then added the trim on the sides and the deck furniture. The ships wheel is made from a piece of a watch I bought from a jeweler for the spare parts. The deck house, hatches, skylights and dory are cut from match sticks.
What's also interesting is that I'm about four hours into this build and I'm ready for masts yards and rigging. She's a quick fun build. Actually if any one wants to try ship in bottle building for the first time this ship would be a good one to start on.
-
 DSiemens reacted to maggsl_01 in Half Moon by maggsl_01 - FINISHED - Corel - 1:50 - First wooden modelship
Hello again... another little update, mostly pics
I do the standing rigging at the mainmast, all works out very fine. The shrouds are taut - but not too much. The ratlines...hmmm... a not so much exciting job, I will do tomorrow. After this I will color the standing rigging black as I did with the foremast. I prepared the yards too but I am a little bit disappointed by the results. The wood (Ramin) is not so good to be used on a lathe... I think I will buy some oak or beech - if I can get it in a fitting diameter, If anyone has got an idea what Wood the best is for yards... pls tell me.
well - thats it for today
to be continued
Cheerio
Max
btw... besides of modelling another important passion for me is photography... so I tried out some perspectives and differnet light situations
-
DSiemens reacted to guillemot in Scottish Maid by guillemot - FINISHED - 1/8" scale - Hall's 1839 Clipper Schooner
Thank you! OK...nearly at the end of the rigging now. WHEW! All of the sails ( at least all it's getting...) are up now. There's a bit of fettling left and the main mast shrouds need rattling down... I think a couple of days off and then start on her boat and anchors. Now, before anyone says anything, I know that there are undoubtedly errors and omissions in my rigging. It's been a bit of a struggle finding out what where and when. Since this is my first scratchbuilt sailing ship, I'm reasonably pleased with how it's going.
-
DSiemens reacted to qwerty2008 in Byzantium by qwerty2008 - Scale 1:20 - RADIO - based on the Pride of Baltimore
I sealed the hull with thinned fiberglass resin yesterday and today I applied the first coats of paint. The red beneath the waterline is just a temporary placeholder until I get copper.
Lextin
-
DSiemens reacted to qwerty2008 in Byzantium by qwerty2008 - Scale 1:20 - RADIO - based on the Pride of Baltimore
I made the beakhead'ish thing, I made it by cutting grooves into my mockup version then setting small pieces of square stock into the grooves which were then glued onto the sides with some CA, I temporarily glued each halve into place then glued two pieces of square stock between them to hold them together.
Should I go straight along the top edge or have a curve like the one I marked on it in the last two pictures?
Lextin.
-
DSiemens reacted to qwerty2008 in Byzantium by qwerty2008 - Scale 1:20 - RADIO - based on the Pride of Baltimore
I took some pictures of today, overalls and closeups.
A closeup of the stem showing a mockup of the proposed beakhead'ish trim piece.
A closeup showing one of the gunport sills.
The inside.
Lextin.
-
DSiemens reacted to JesseLee in Scottish Maid by JesseLee - FINISHED - Artesania Latina - 1:50
Thought I would try Keith's tip. I used scrap pieces of planking to space where the other planks will fit. Pre-drew lines where the plank will lay. Glued plank at the stem. When it was dry I wet the plank on both sides then used an old hair straighteners outside edge to steam & dry the plank into shape. It works very well. Thanks for the tip Keith!
-
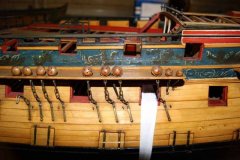
DSiemens reacted to Sjors in San Ildefonso by Sjors - FINISHED - OcCre - 1:70
Here I'am again with something that I have done.
The lower shrouds are on .....
Still turning deadeyes but ok, I think they are straight now.
The first shroud is totally served and I have the deadeyes make a little higher then the other ones.
So you will see it better that it is a shroud without ratlines.
I don't know the name of it so maybe someone can tell me that ?
I also make the futtock stave.
That's a job I really want that left behind but then it's not correct ( I think ).
After a few words who are not te be translated, there on.
It don't deserve maybe a beauty price but I keep it this way.
Next thing to do are the little shrouds that goes from the top deadeye to the end of the serving and then.....ratlines !
-
 DSiemens got a reaction from Aussie048 in German Cutter 1910 by DSiemens - FINISHED - 1:300 - BOTTLE
Some rigging completed. Put in a couple back stays. The rest is temporary just to hold everything in place for now.
-
DSiemens got a reaction from popeye the sailor in German Cutter 1910 by DSiemens - FINISHED - 1:300 - BOTTLE
Some rigging completed. Put in a couple back stays. The rest is temporary just to hold everything in place for now.
-
 DSiemens got a reaction from mtaylor in German Cutter 1910 by DSiemens - FINISHED - 1:300 - BOTTLE
Some rigging completed. Put in a couple back stays. The rest is temporary just to hold everything in place for now.
-
 DSiemens got a reaction from bhermann in German Cutter 1910 by DSiemens - FINISHED - 1:300 - BOTTLE
Some rigging completed. Put in a couple back stays. The rest is temporary just to hold everything in place for now.
-
 DSiemens got a reaction from seafarermiami in German Cutter 1910 by DSiemens - FINISHED - 1:300 - BOTTLE
Seems as though I need to run into a rough patch before I hit some inspiration. Or maybe I'm just better at the 1:300 to 500 scale. In either case my current bottle build was giving me a lot of trouble and I hit a road block. So while I was thinking of how to fix that I went on to another project. I chose this one because I think I need to get back to basics again before proceeding. Also like so many of my best work it's for some one else. I may explain the story behind that later. Here's the ship.
She's simple but beautiful. The only one in existence today is the Mariquita which I have based a lot of this model on. Still debating if I should break down and just call her the Mariquita but we'll see.
I actually tried some thing new and did some rough measuring. The ship is a bit thin but she needs to fit in the bottle. I'm off less then a millimeter so I think it's okay even for this scale. This was actually pretty fascinating to see and I suggest trying it out just for fun. I measured out the center line and then lines on the plans. I counted twelve on the plans but the photo now shows more like 16. It's 1:300 scale kind of hard to see. Any ways. I divided the ships length by twelve and drew a line for each section. I then drew the center line. From there I went back and forth from the plans measuring each line from the center line and marking it on both sides of the center line on the wood. As I progressed the deck shape just appeared. This is probably the most fun I've ever had with a set of plans.
I then carved out the hull and I apologize for not having more pictures because I tried a new technique for that as well. I've been looking at pictures of some of my favorite ship in bottle builders for a long time. One that has always intrigued me is Heather Rogers. I've posted a few pictures of her work and if you would like to see more click link.
As I looked at her photo's I've found she carves ships very differently. She also did a model of the Mariquita so being I had a reference I decided to try it her way. What I found was incredible. I cut out the large pieces around the hull and then went to my usual dremel work. The proved difficult as the base got in the way. So I looked back and found that she uses chisels. I pulled out my chisels and started working with it. The grove between the base and the ship created a perfect guide. I place one end of the chisel in the groove, angled it to where I wanted to cut and slid the chisel against the hull. It was almost to easy. This hull is almost completely cut from a chisel and touched off with some sanding. I noticed though that Heather uses what appears to be harder woods. I think I may try that in the future as the bass wood is soft and dents easily.
I then added the trim on the sides and the deck furniture. The ships wheel is made from a piece of a watch I bought from a jeweler for the spare parts. The deck house, hatches, skylights and dory are cut from match sticks.
What's also interesting is that I'm about four hours into this build and I'm ready for masts yards and rigging. She's a quick fun build. Actually if any one wants to try ship in bottle building for the first time this ship would be a good one to start on.
-
DSiemens reacted to SaturnV in SaturnV's 1:48 Full Framed Triton Build
Hello all,
Had a warm stint over the past weekend and so managed to do some rotary work on the hawse timbers which in turn allowed me to glue them in on the one side of the bow. They are only roughed in at the moment and still require quite a bit of sanding to finish them off. It is good to finally see some progress.
Richard
-
DSiemens got a reaction from popeye the sailor in Red Dragon by Vivian Galad - Artesania Latina - 1:60 - modified
I should rephrase that. I've used them to build not to put a ship into the bottle.
-
DSiemens got a reaction from popeye the sailor in Red Dragon by Vivian Galad - Artesania Latina - 1:60 - modified
Popeye there's a SIB bidder in another forum that always says if the ship won't fit in the bottle get a bigger hammer.
I've used them just not very often.
-
 DSiemens got a reaction from CaptainSteve in Red Dragon by Vivian Galad - Artesania Latina - 1:60 - modified
Popeye there's a SIB bidder in another forum that always says if the ship won't fit in the bottle get a bigger hammer.
I've used them just not very often.
-
 DSiemens got a reaction from jct in German Cutter 1910 by DSiemens - FINISHED - 1:300 - BOTTLE
Masts and yards are coming together.
-
 DSiemens got a reaction from Vivian Galad in Red Dragon by Vivian Galad - Artesania Latina - 1:60 - modified
I should rephrase that. I've used them to build not to put a ship into the bottle.
-
DSiemens got a reaction from Aussie048 in German Cutter 1910 by DSiemens - FINISHED - 1:300 - BOTTLE
Masts and yards are coming together.
-
DSiemens got a reaction from popeye the sailor in German Cutter 1910 by DSiemens - FINISHED - 1:300 - BOTTLE
Masts and yards are coming together.
-
 DSiemens got a reaction from augie in German Cutter 1910 by DSiemens - FINISHED - 1:300 - BOTTLE
Seems as though I need to run into a rough patch before I hit some inspiration. Or maybe I'm just better at the 1:300 to 500 scale. In either case my current bottle build was giving me a lot of trouble and I hit a road block. So while I was thinking of how to fix that I went on to another project. I chose this one because I think I need to get back to basics again before proceeding. Also like so many of my best work it's for some one else. I may explain the story behind that later. Here's the ship.
She's simple but beautiful. The only one in existence today is the Mariquita which I have based a lot of this model on. Still debating if I should break down and just call her the Mariquita but we'll see.
I actually tried some thing new and did some rough measuring. The ship is a bit thin but she needs to fit in the bottle. I'm off less then a millimeter so I think it's okay even for this scale. This was actually pretty fascinating to see and I suggest trying it out just for fun. I measured out the center line and then lines on the plans. I counted twelve on the plans but the photo now shows more like 16. It's 1:300 scale kind of hard to see. Any ways. I divided the ships length by twelve and drew a line for each section. I then drew the center line. From there I went back and forth from the plans measuring each line from the center line and marking it on both sides of the center line on the wood. As I progressed the deck shape just appeared. This is probably the most fun I've ever had with a set of plans.
I then carved out the hull and I apologize for not having more pictures because I tried a new technique for that as well. I've been looking at pictures of some of my favorite ship in bottle builders for a long time. One that has always intrigued me is Heather Rogers. I've posted a few pictures of her work and if you would like to see more click link.
As I looked at her photo's I've found she carves ships very differently. She also did a model of the Mariquita so being I had a reference I decided to try it her way. What I found was incredible. I cut out the large pieces around the hull and then went to my usual dremel work. The proved difficult as the base got in the way. So I looked back and found that she uses chisels. I pulled out my chisels and started working with it. The grove between the base and the ship created a perfect guide. I place one end of the chisel in the groove, angled it to where I wanted to cut and slid the chisel against the hull. It was almost to easy. This hull is almost completely cut from a chisel and touched off with some sanding. I noticed though that Heather uses what appears to be harder woods. I think I may try that in the future as the bass wood is soft and dents easily.
I then added the trim on the sides and the deck furniture. The ships wheel is made from a piece of a watch I bought from a jeweler for the spare parts. The deck house, hatches, skylights and dory are cut from match sticks.
What's also interesting is that I'm about four hours into this build and I'm ready for masts yards and rigging. She's a quick fun build. Actually if any one wants to try ship in bottle building for the first time this ship would be a good one to start on.
-
DSiemens got a reaction from seafarermiami in German Cutter 1910 by DSiemens - FINISHED - 1:300 - BOTTLE
Masts and yards are coming together.
-
 DSiemens got a reaction from prutser in German Cutter 1910 by DSiemens - FINISHED - 1:300 - BOTTLE
Masts and yards are coming together.
-
DSiemens got a reaction from popeye the sailor in Half Moon by maggsl_01 - FINISHED - Corel - 1:50 - First wooden modelship
Max black is a good color for the rigging and one I use often. The reason these lines are black and running lines are tan is because the standing rigging doesn't move and is constantly exposed to the weather. To protect the lines from wearing out they would cover them with tar and sap which turned them black. The running lines on the other hand need to move through block and tackle and tar would gunk them up so they were left as is. As the lines wore out they would have to replace them. Which is why they keep big coils of rope below decks.
Great work on your model she's really beautifully done.