MORE HANDBOOKS ARE ON THEIR WAY! We will let you know when they get here.
×

Kenneth Powell
-
Posts
276 -
Joined
-
Last visited
Content Type
Profiles
Forums
Gallery
Events
Everything posted by Kenneth Powell
-
 Thanks Russ, I'll take a closer look at it and see what I can do.
- 152 replies
-
- 1
-

-
- rattlesnake
- Model Shipways
- (and 1 more)
-
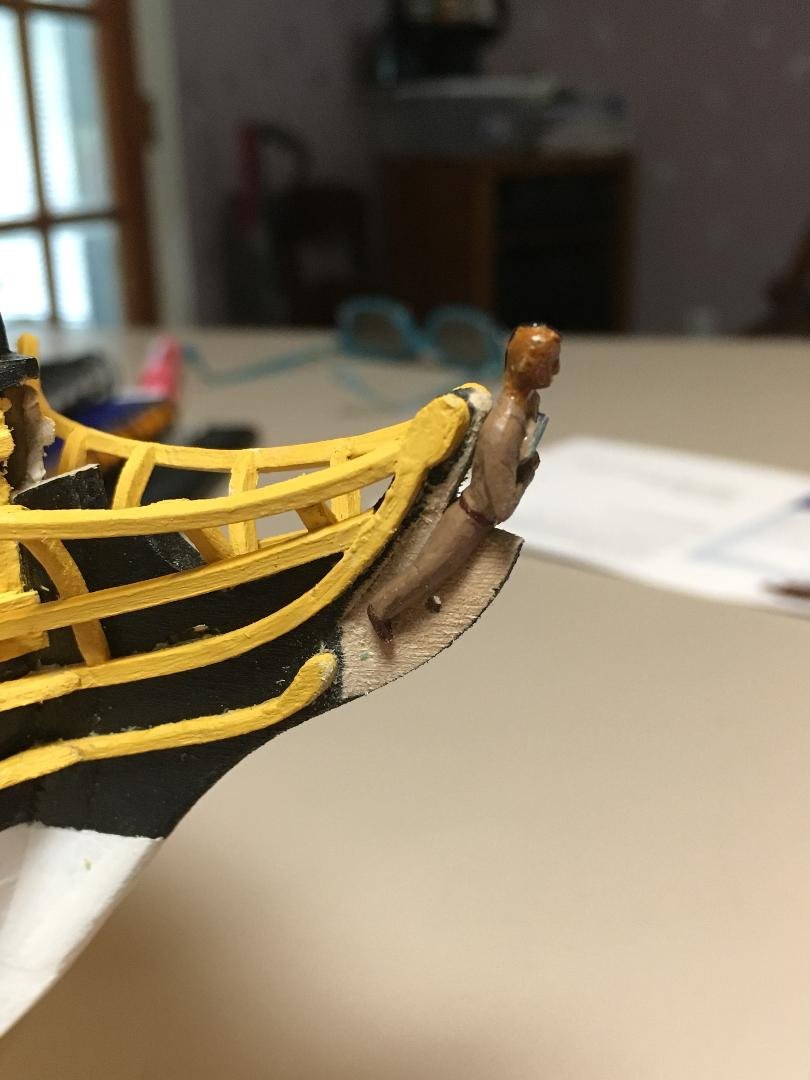
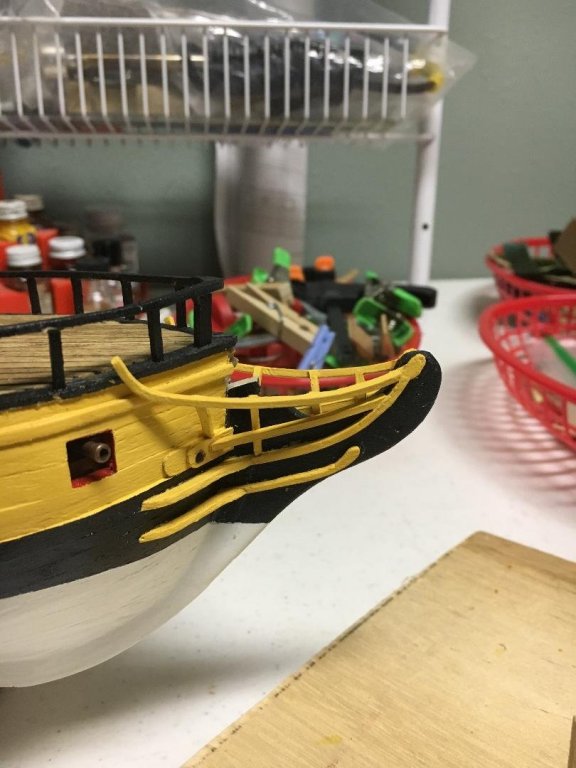
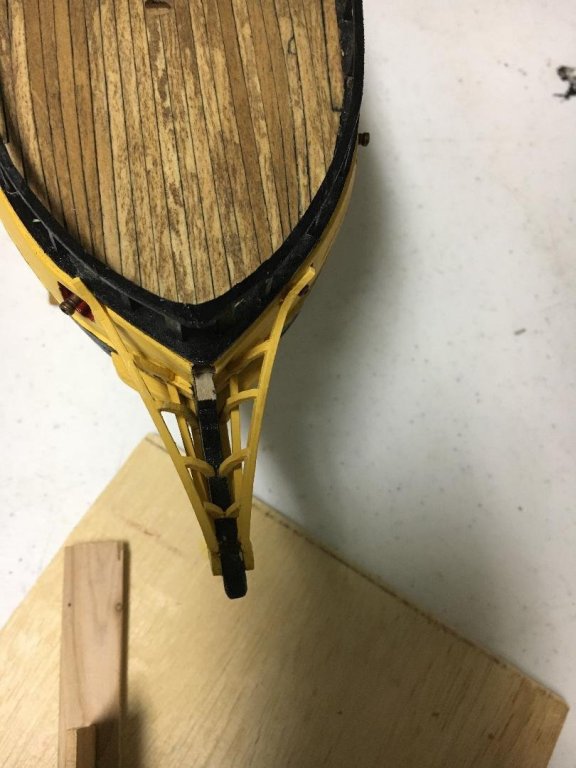
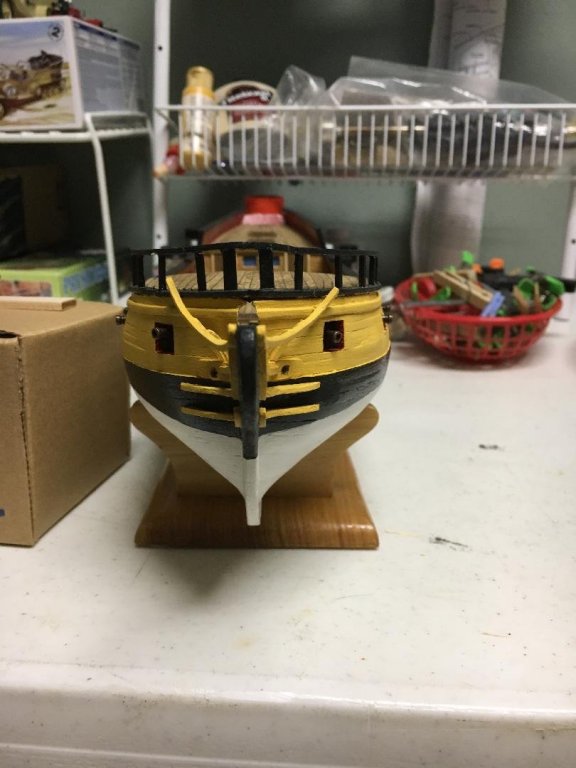
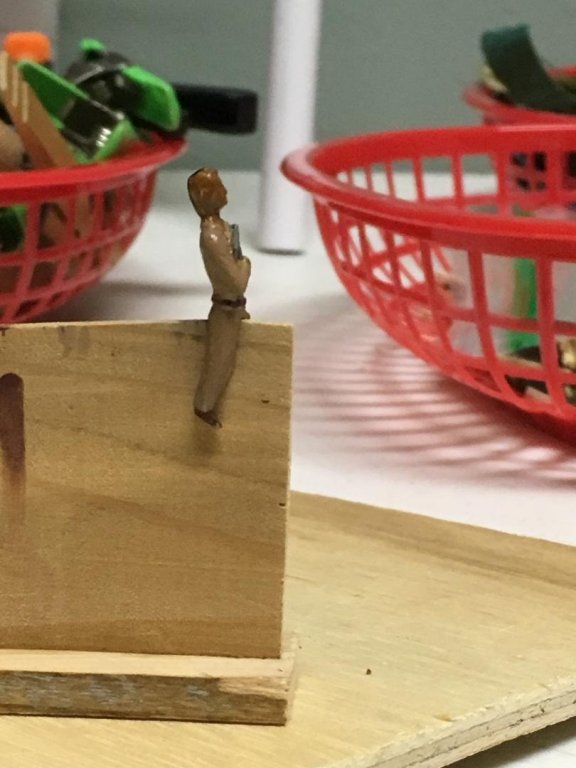
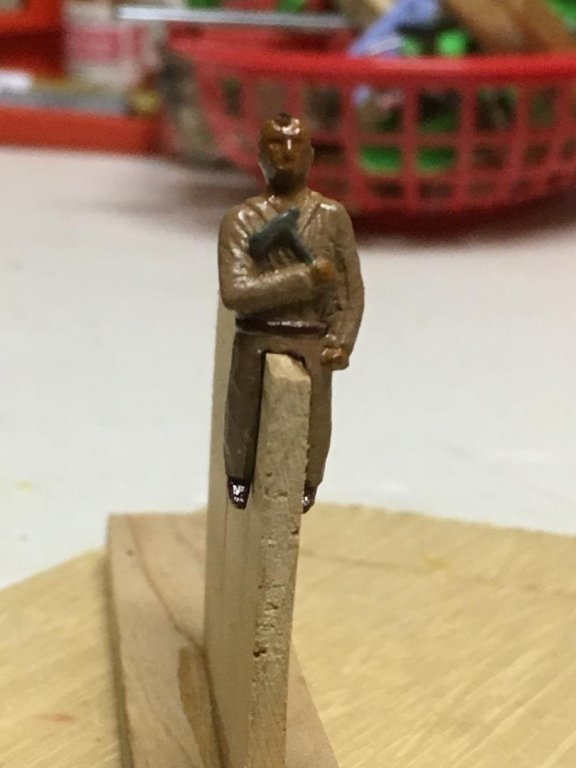
I finished the head rails. The instruction book said they are tricky little buggers and they are correct. I also painted the little dude figure head I used the admiral's craft paint then sealed him with a coat of satin varnish. Tan for the leather of his clothes, brown for his leather belt and moccasins, his flesh tone for head and hands, pewter for his tomahawk, and black for his Mohawk. I trimmed and sanded his sitting area. This is him dry fit. Let me know what you think and especially any ways I can improve. Thanks - Kenneth

- 152 replies
-
- 3
-
-
- rattlesnake
- Model Shipways
- (and 1 more)
-
We built the Pyro models and put small rocks in the hull for ballast before closing up. I didn't shoot mine because I wanted to see it go down the street at the next rain - but my brothers did.
-
Thanks everyone for the likes and comments. JSG - It was indeed a sickening feeling as her life flashed in front of my eyes for those slow motion moments. If we can build them then we can fix them. Kenneth
- 152 replies
-
- 1
-
-
- rattlesnake
- Model Shipways
- (and 1 more)
-
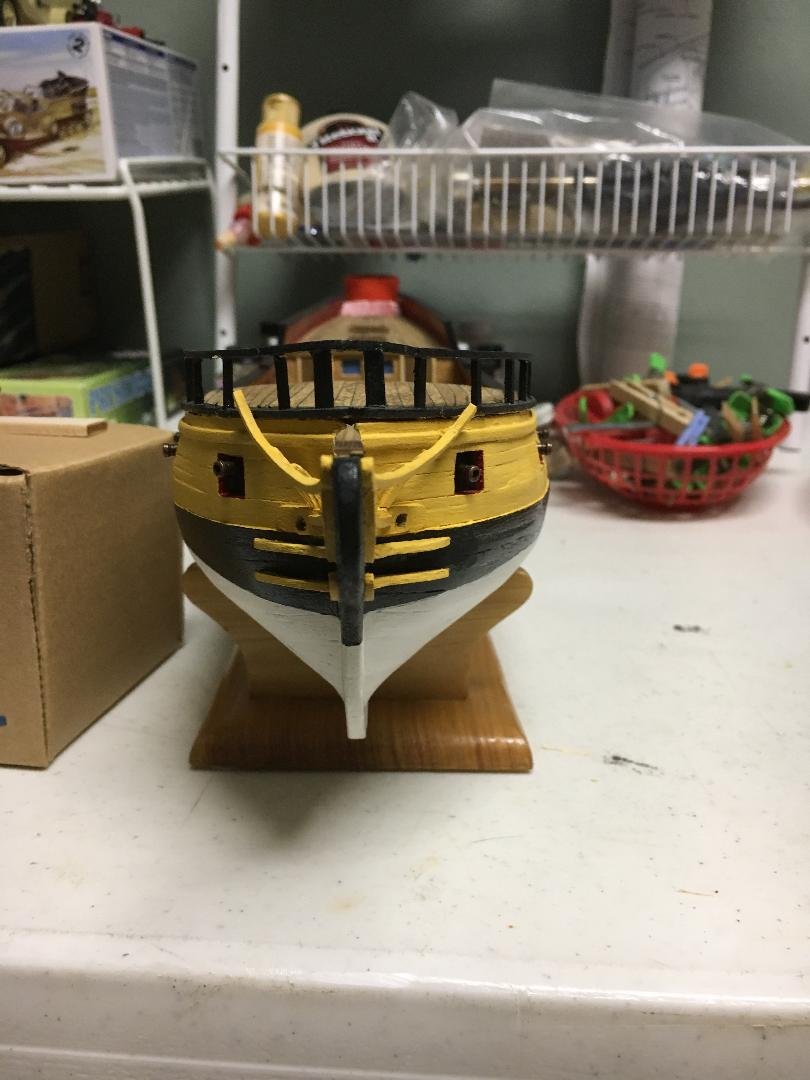
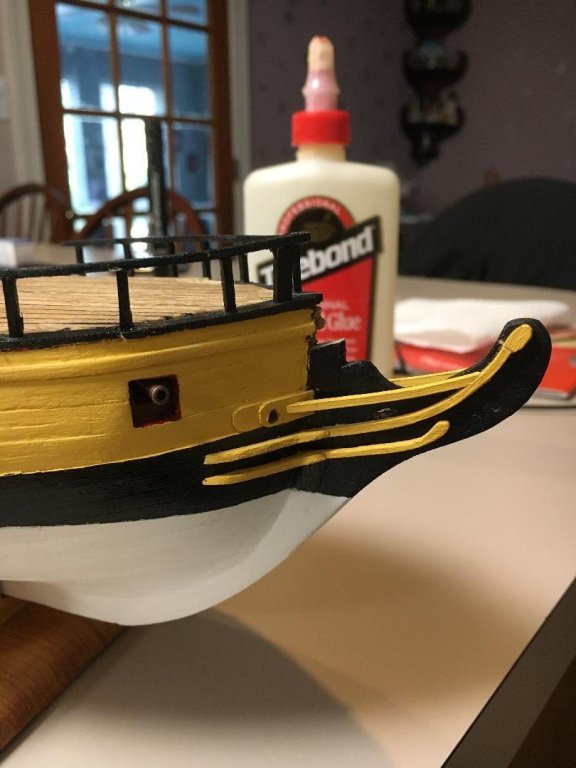
Hurricane Damage: While preparing for hurricane Nate and making room for guest from the lower lying areas I sped past and my sleeve caught the stem. I had my hands full and couldn't catch her. But I was fast enough to stick my leg out just enough for her to land on and slide down more gently to the floor. Lucky more damage didn't occur. Easy fix. Repaired and paint touched-up. All the pieces that broke were large enough to handle and glue to the original spot. I'll call it battle damage or war wounds. Gives character especially to the rail. I did get started on the head rails. Still working on them. Please tell me what you think Thanks - Kenneth
- 152 replies
-
- 4
-
-
- rattlesnake
- Model Shipways
- (and 1 more)
-
Excellent build. Midwest makes a good kit and you are certainly doing it justice. Looking forward to more posts. Kenneth
-
I can only repeat what others are saying: excellent use of a jig. Keep on Goin Russ Kenneth
- 420 replies
-
- 2
-
-
- captain roy
- lugger
- (and 2 more)
-
Aren't we our own worst critic? But that's the only way to improve. Keep on goin Russ Kenneth
- 420 replies
-
- 4
-
-
- captain roy
- lugger
- (and 2 more)
-
Very, Very Nice, Russ Looks like you've taken up any room for improvement. Kenneth
- 420 replies
-
- 1
-
-
- captain roy
- lugger
- (and 2 more)
-
Thanks guys for your input. I did try the clamp-to-jig approach but they popped too much once released. When I tried to cut directly they broke. Maybe I need more practice, but I have them now. Painting is next then attaching. Thanks - Kenneth
- 152 replies
-
- 1
-
-
- rattlesnake
- Model Shipways
- (and 1 more)
-
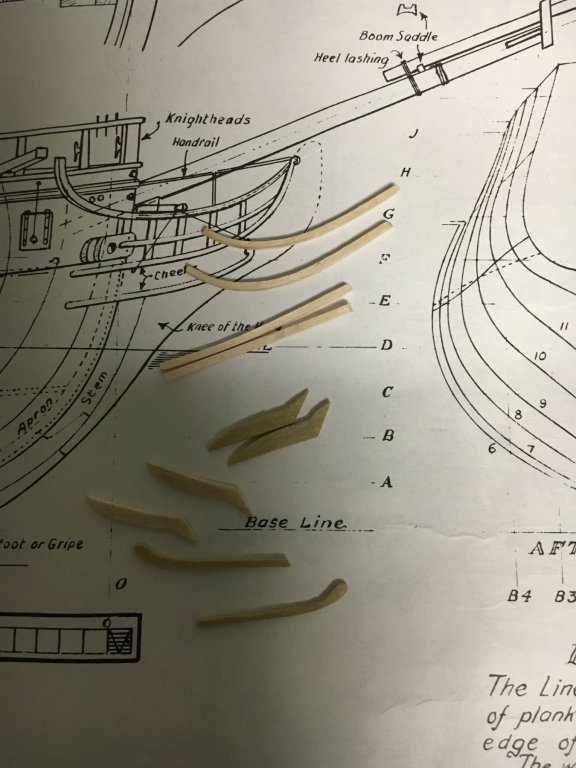
Pieces Parts. I tried to cut these out but the kit-supplied basswood kept splitting. I then heat bent them. Let me know what you think Kenneth
- 152 replies
-
- 3
-
-
- rattlesnake
- Model Shipways
- (and 1 more)
-
Moving right along, Russ. Always a pleasure to see your work. A few of the older boats with similar lines were out at the annual Blessing of the Fleet yesterday in Biloxi. I was on the 1931 Doris Mae. Keep up the good work - Kenneth
- 420 replies
-
- 2
-
-
- captain roy
- lugger
- (and 2 more)
-
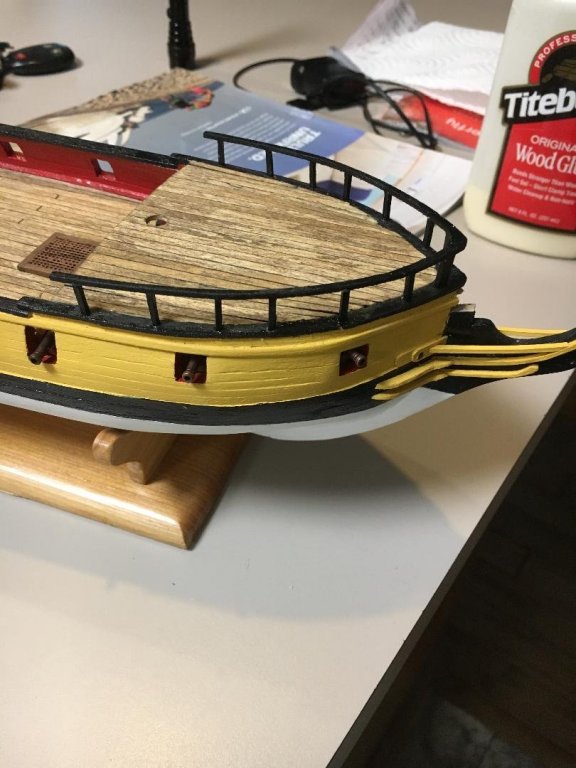
Thanks guys. I will add a thin coat of satin finish to match the other decks and move on the head rails. Just following the book. Kenneth
- 152 replies
-
- 3
-
-
- rattlesnake
- Model Shipways
- (and 1 more)
-
Outstanding building technique and patience pays off with great looking margin planking. Keep up the good work Kenneth
- 420 replies
-
- 2
-
-
- captain roy
- lugger
- (and 2 more)
-
Please let me know what you think
-
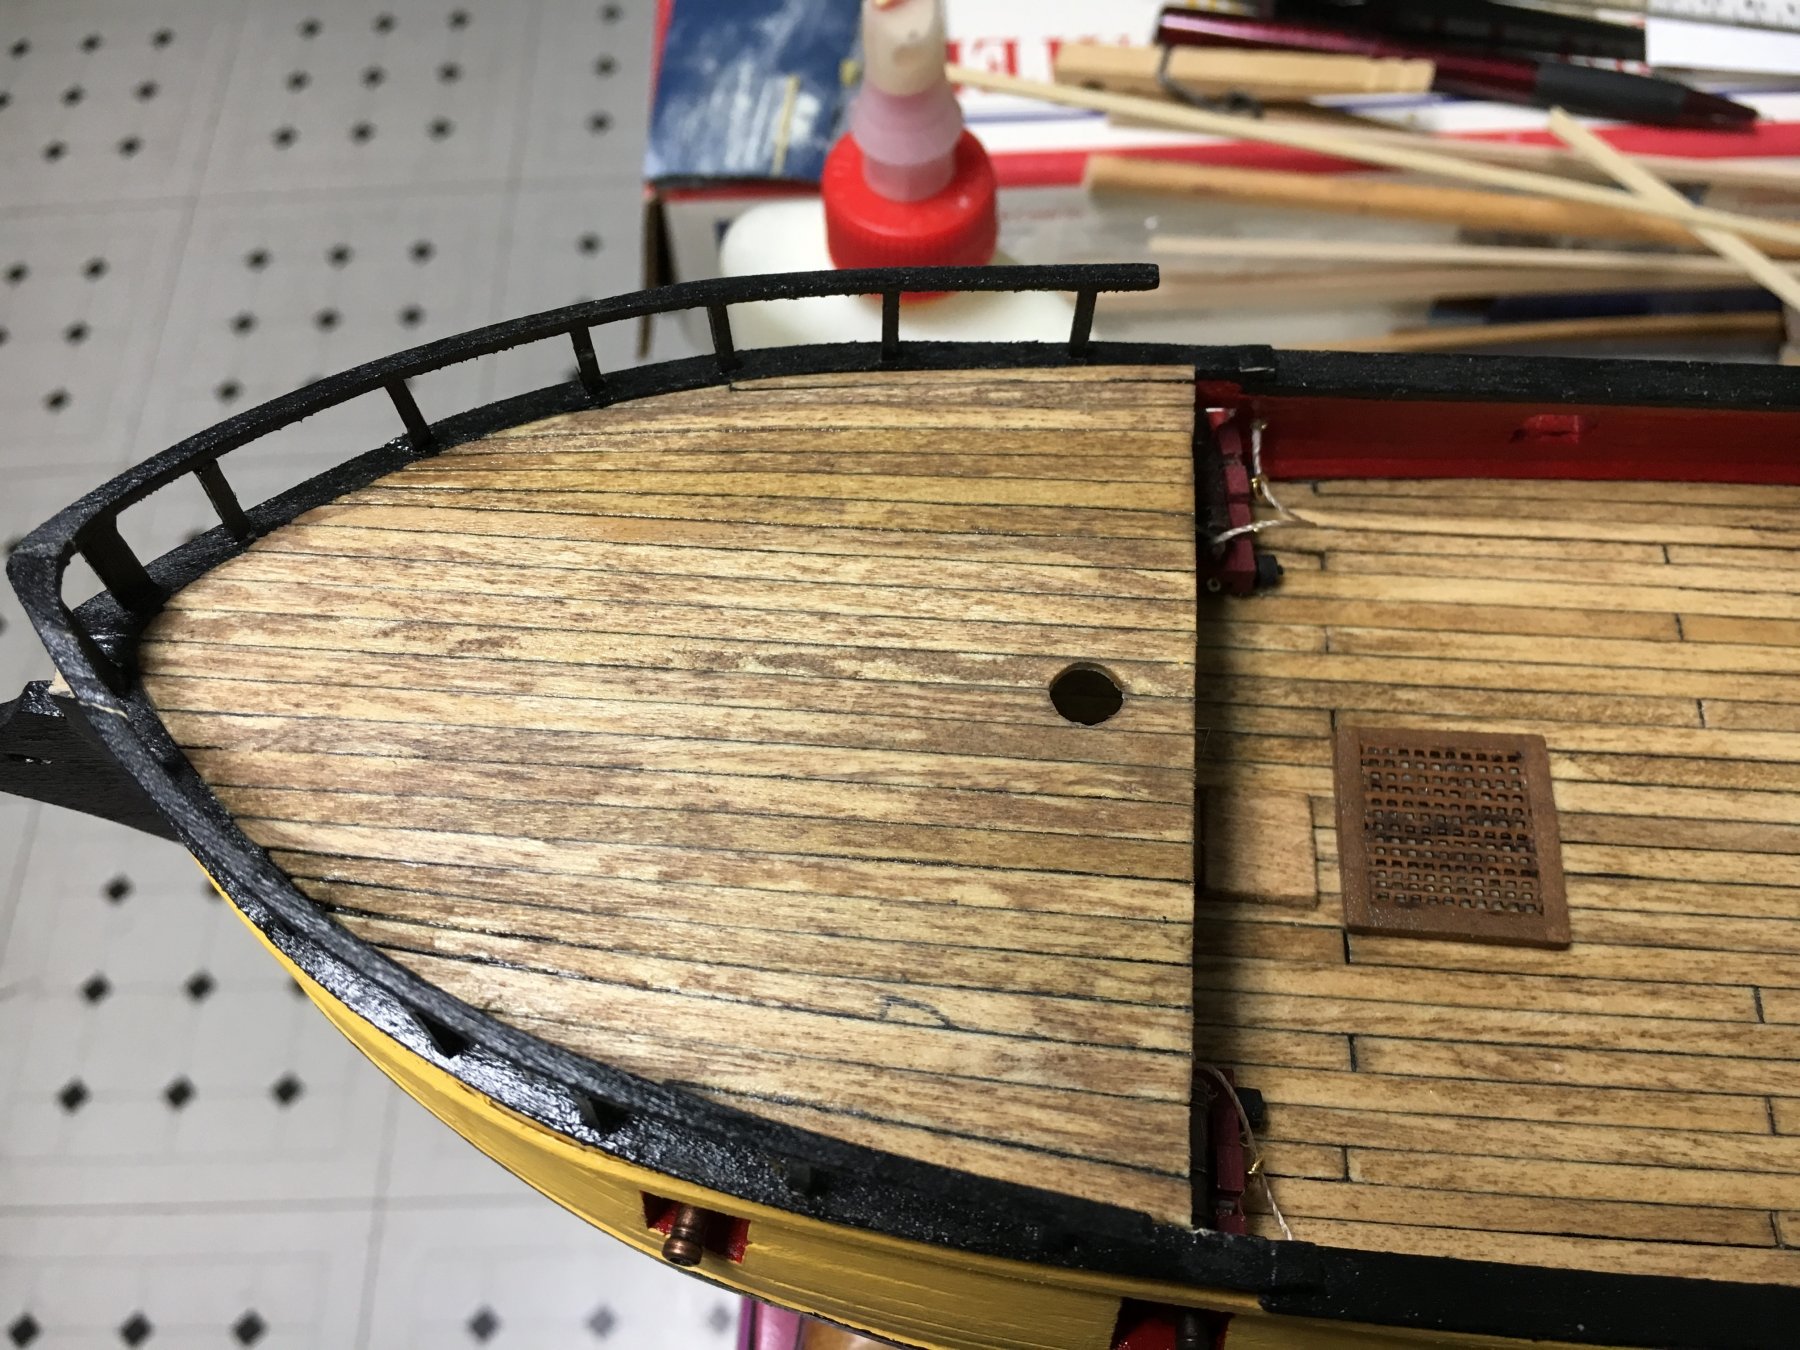
Photos I said I would post. I got busy. Trimmed and sanded with my little boot. Then a little stain - just like the other decks


- 152 replies
-
- 5
-
-
- rattlesnake
- Model Shipways
- (and 1 more)
-
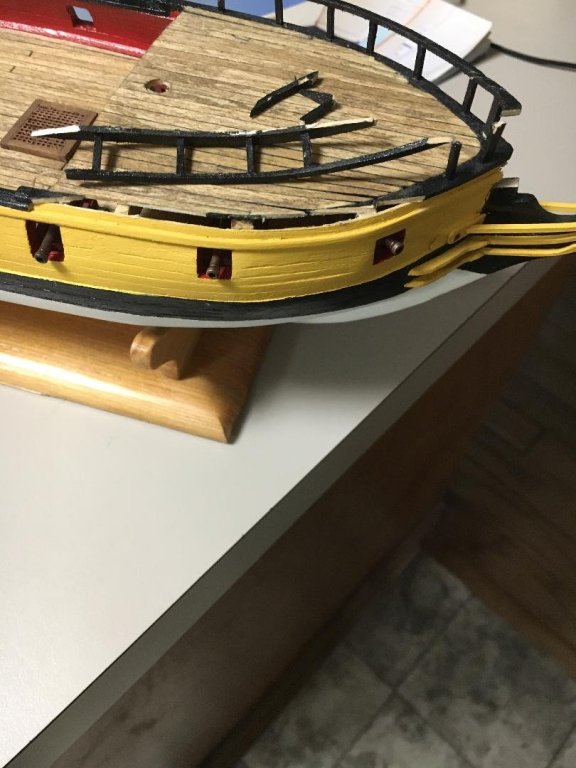
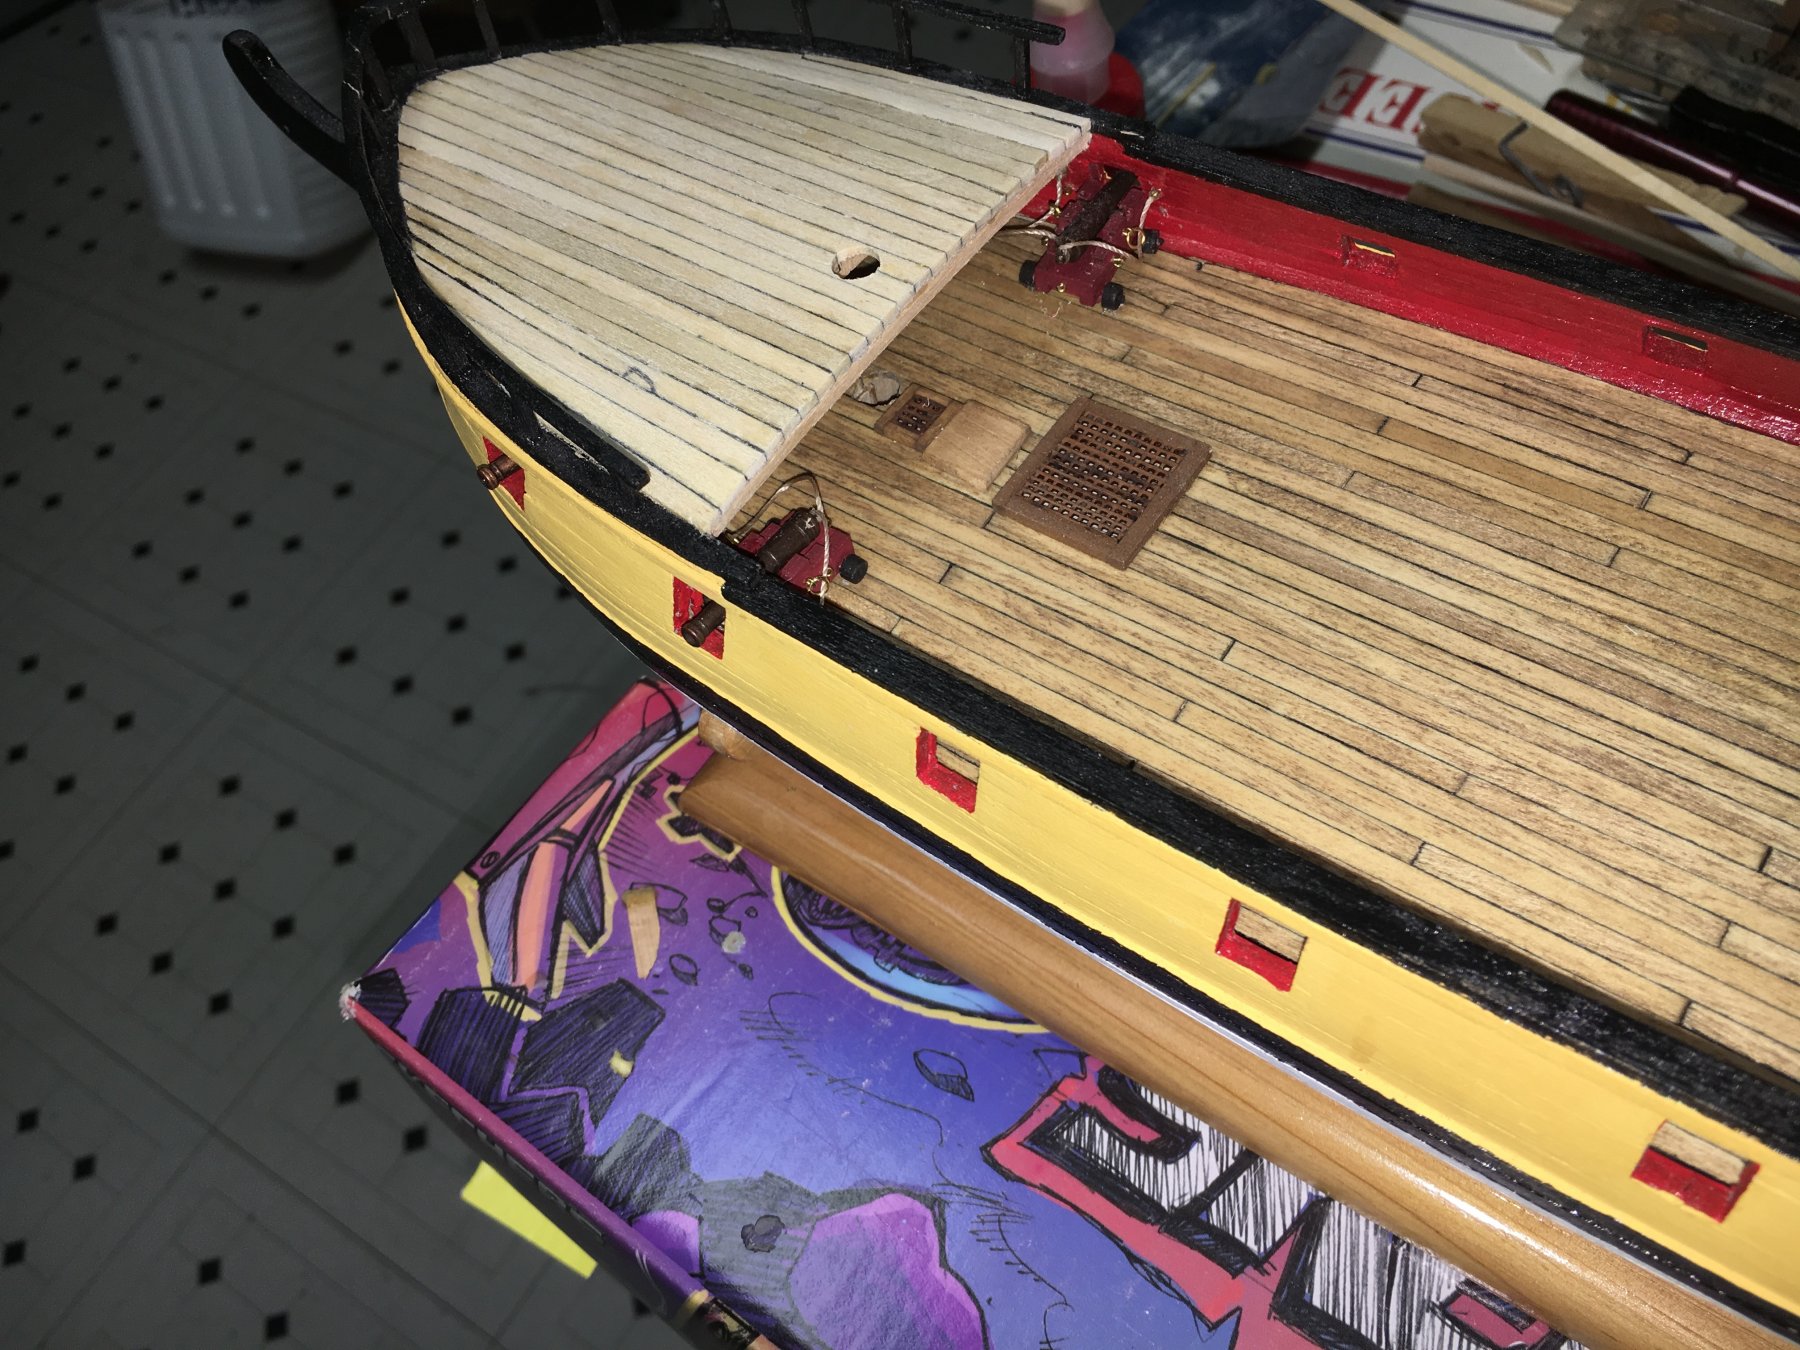
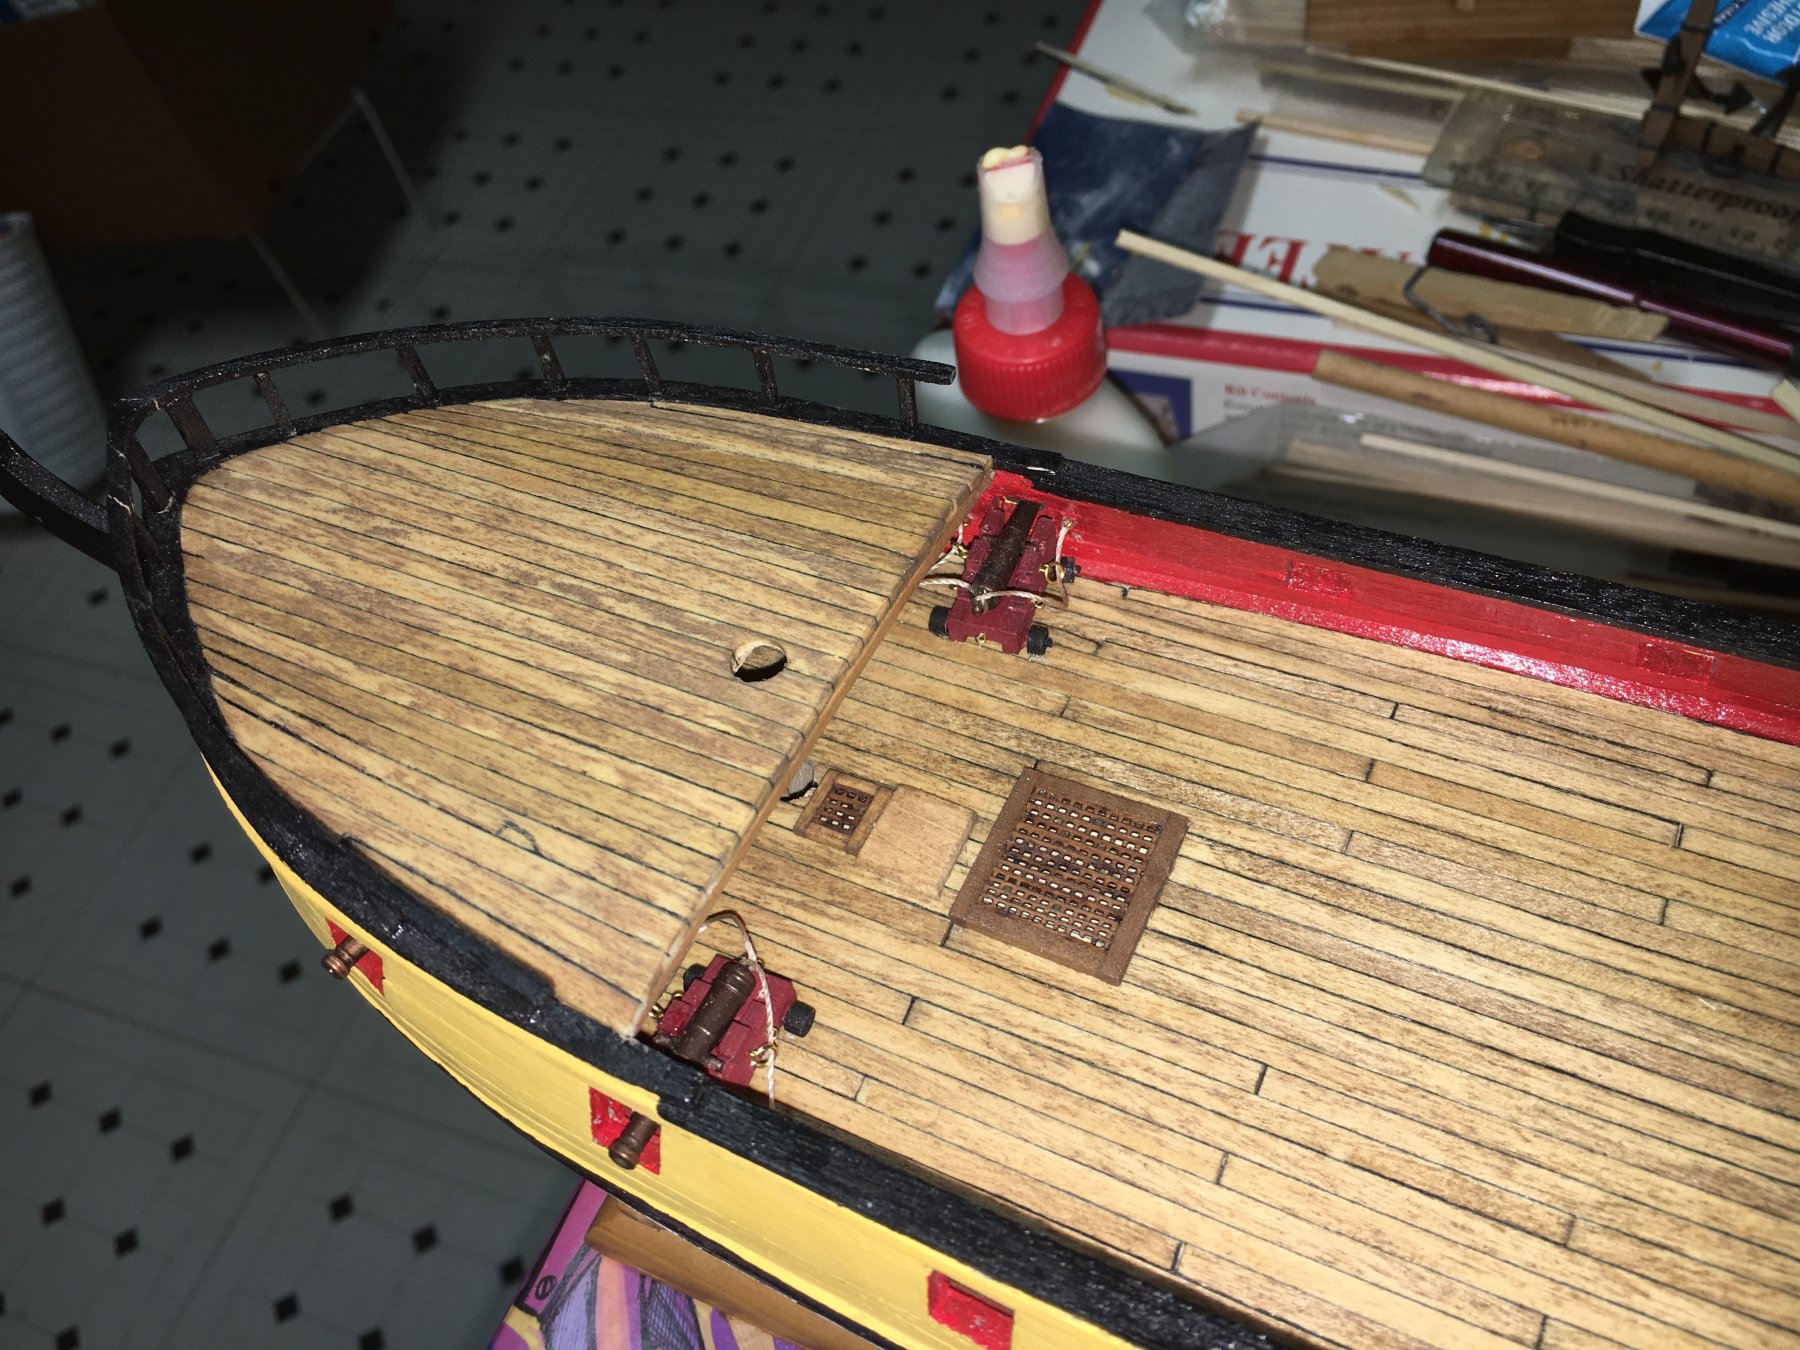
Well it's been a while, work has picked up a bit and I added more exercise time for better general health. I was at a point of rigging 2 of the guns under the upper deck and just got stuck. I don't like the rigging line that came with the kit - it has a memory and is not very flexible. I did well on the breech lines and may do those only on the model to reduce clutter on deck. Please tell me what you think. I planked the upper deck but I will pull a few off and add more nibbing. My photos are blurry so I will take more soon (relatively). Comments Welcome Thanks - Kenneth
- 152 replies
-
- 1
-
-
- rattlesnake
- Model Shipways
- (and 1 more)
-
Russ - It was good to see you at the wooden boat show last weekend. I really like your use of building jigs you had on display. Too bad the rain put a damper on the sailing. Everyone - This is a great little lugger. The lines are clean and hull shape shows the fine lines of an original Biloxi shrimp boat. Thanks - Kenneth
- 420 replies
-
- 3
-
-
- captain roy
- lugger
- (and 2 more)
-
Russ - I'm sure Mr. Baker would enjoy going over a set of lugger model plans. He hopes to build one someday. Kenneth
-
Very Good, Russ. She does look polished up for the regatta. And what a wonderful gift. Same question ... What's next? Kenneth
-
She really looks good - an excellent representation of a working vessel with pretty lines. Kenneth
-
Another good use of a jig, Russ. You say it became easy, but it started out smart. Kenneth