
HOLIDAY DONATION DRIVE - SUPPORT MSW - DO YOUR PART TO KEEP THIS GREAT FORUM GOING! (Only 24 donations so far out of 49,000 members - C'mon guys!)
×
PhilB
-
Posts
71 -
Joined
-
Last visited
Content Type
Profiles
Forums
Gallery
Events
Everything posted by PhilB
-
 Wow! That hull is looking good! Planning all the strakes with CAD really pays off. I'm eager to see the next steps.
 -
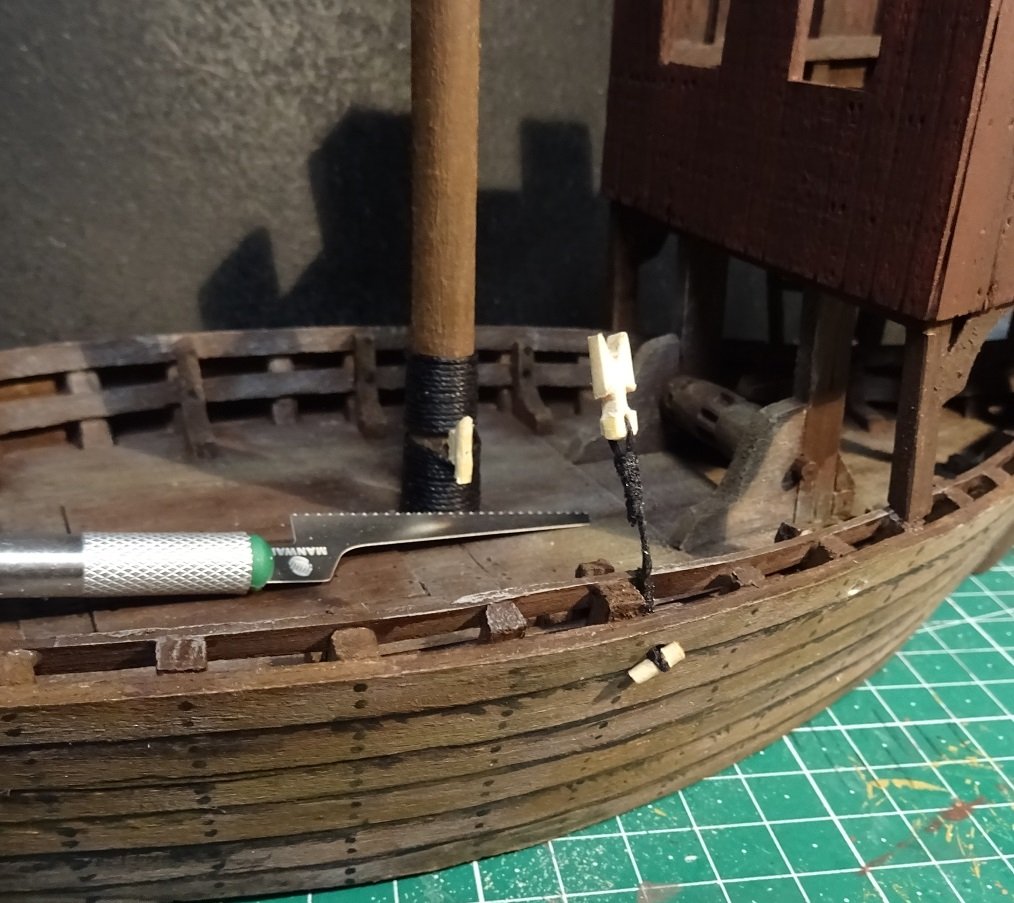
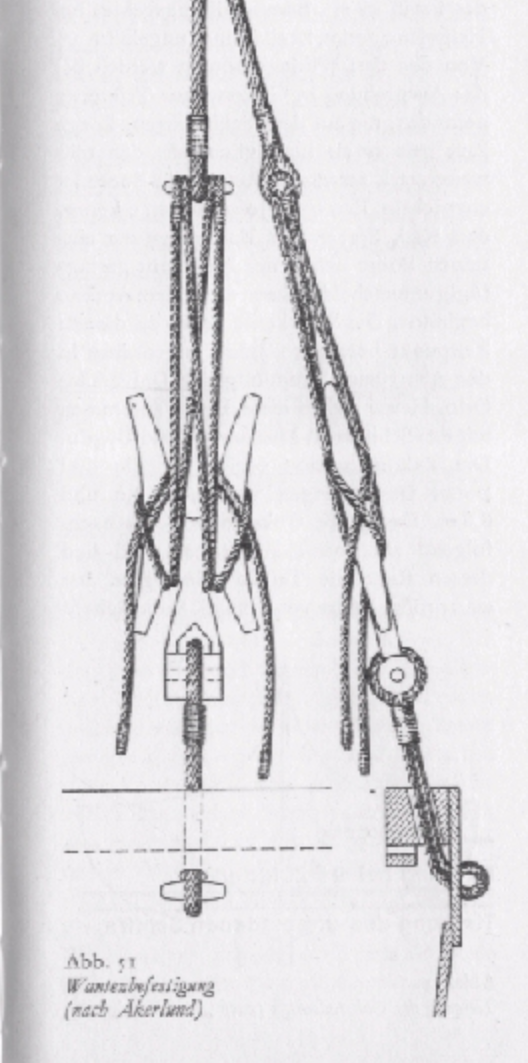
I should hasten to add that the forestay picture is not mine, I grabbed it off google to illustrate the idea of replacing the "butterfly cleats" with heart blocks. I hope that mine looks almost as good when it's done. Edit: on a related note, should I add some shoulder pieces near the top of the mast where the stays are attached? It's the forestay attachment on the borrowed heart block picture that made me think of it.
-
Well, as a test, I tried to make one "butterfly cleat". The key to getting the right shape without splitting the wood was to shape it first with a small Xacto saw. Still, it looks a little on the over-large and clunky side. Probably best to go with heart blocks - easier to shape, and less clunky-looking. So I'm thinking I should try something like this, though slightly smaller:
-
I suppose I could call it a "butterfly cleat" or a "dragonfly cleat" or something like that. I think I'll need another one on the forestay, at the very least. Or I could chicken out and use heartblocks. My first attempts at carving this double cleat all resulted in the basswood splitting down the middle. I may need to run a pin through the center to strengthen each piece before cutting the deep "V" in between the two cleats.
-
Looking great! I'm jealous of this wonderfully planked and framed hull. Will the frame still be visible once the ship gets a deck?
-
Actually, the windlass can still be used for anchor duty, as long as the rope is belayed around an appropriately placed beam. Surely there something there which can serve.
-
It's hard to tell if that is in fact a depiction of a stern rudder, or simply a failed attempt at perspective, as you often see in this period.
- 179 replies
-
- 2
-

-
- longship
- Helga Holm
- (and 1 more)
-
Same thing happened to me. Three times. The ship ran into something, all right - my clumsy hand. Brilliant weathering on the stempost and strakes.
-
I'm attempting to carve some cleats to set on each side of the mast - it's hard going! But I'll get there. Two questions: 1) I've seen some models with a beam just aft of the mast, and forward of the windlass. Is this beam used primarily for attaching rigging, or as a belaying point for hoisting the mainsail yard? 2) What do you call this double cleat thingy, that looks like a very important part of the longship rigging plan I'm thinking of trying to emulate?
-
How did you come up with the planking template? That's really impressive. Did it simply derive from the CAD work? I'm already thinking of trying to do proper planking on my next ship, but have never tried to use a CAD application.
-
A longship with a stern rudder? That does look unusual. Keep us posted.
- 179 replies
-
- 2
-
-
- longship
- Helga Holm
- (and 1 more)
-
I thought the bowsprit would be used to anchor the forestay for the mast. Is this wrong? Or only a later development? I agree that some of the period depictions appear to have the forestay anchored to the raised end of the bowpost.
-
What size cords for the rigging of a 1/50 medieval nef?
PhilB replied to PhilB's topic in Masting, rigging and sails
My order came in. I ordered: 1mm and 0.75mm in black for standing rigging, and 0.25 and 0.5 in beige for running rigging. At first glance, the 0.25mm is far too light. And even the 1mm is too light for some applications. This, from a complete novice shipbuilder. So I'm going to order some more: black goes up to 1,3mm, beige goes up to 2mm. I think I need black at 2mm, so I'll see if I can locate some. -
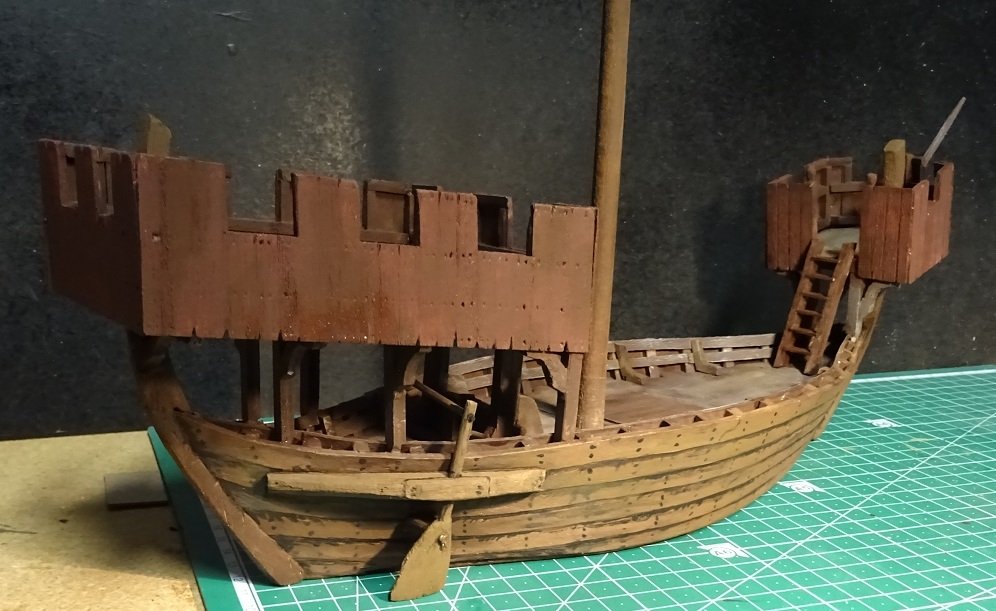
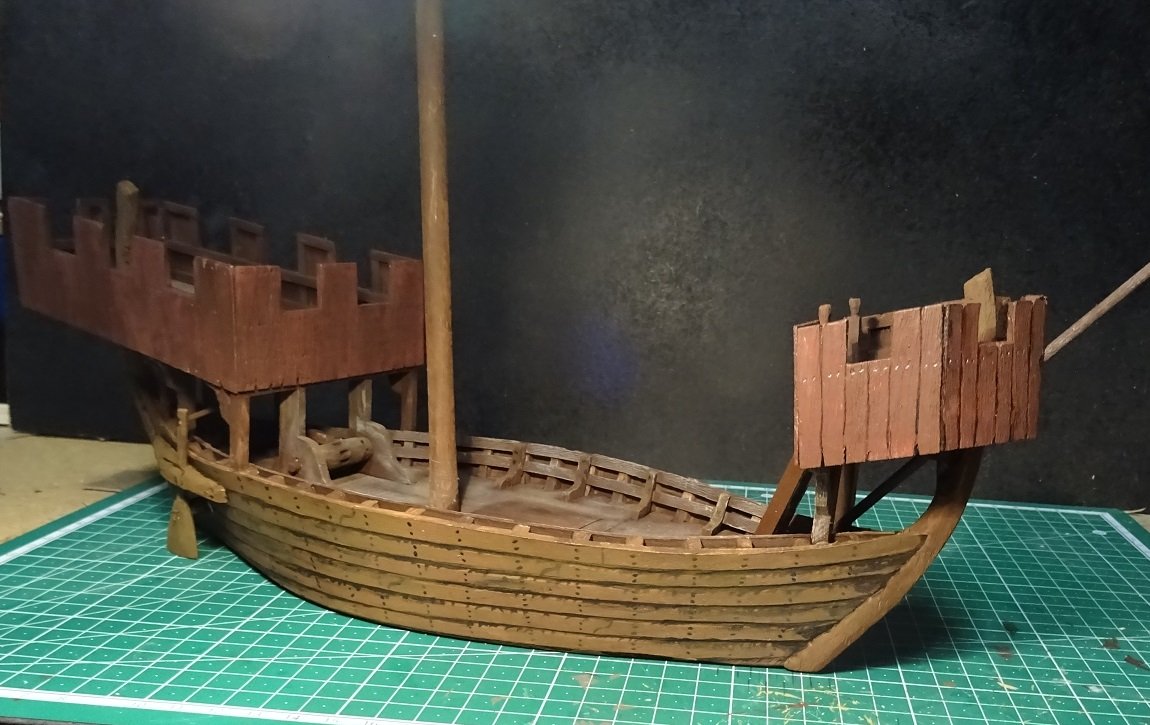
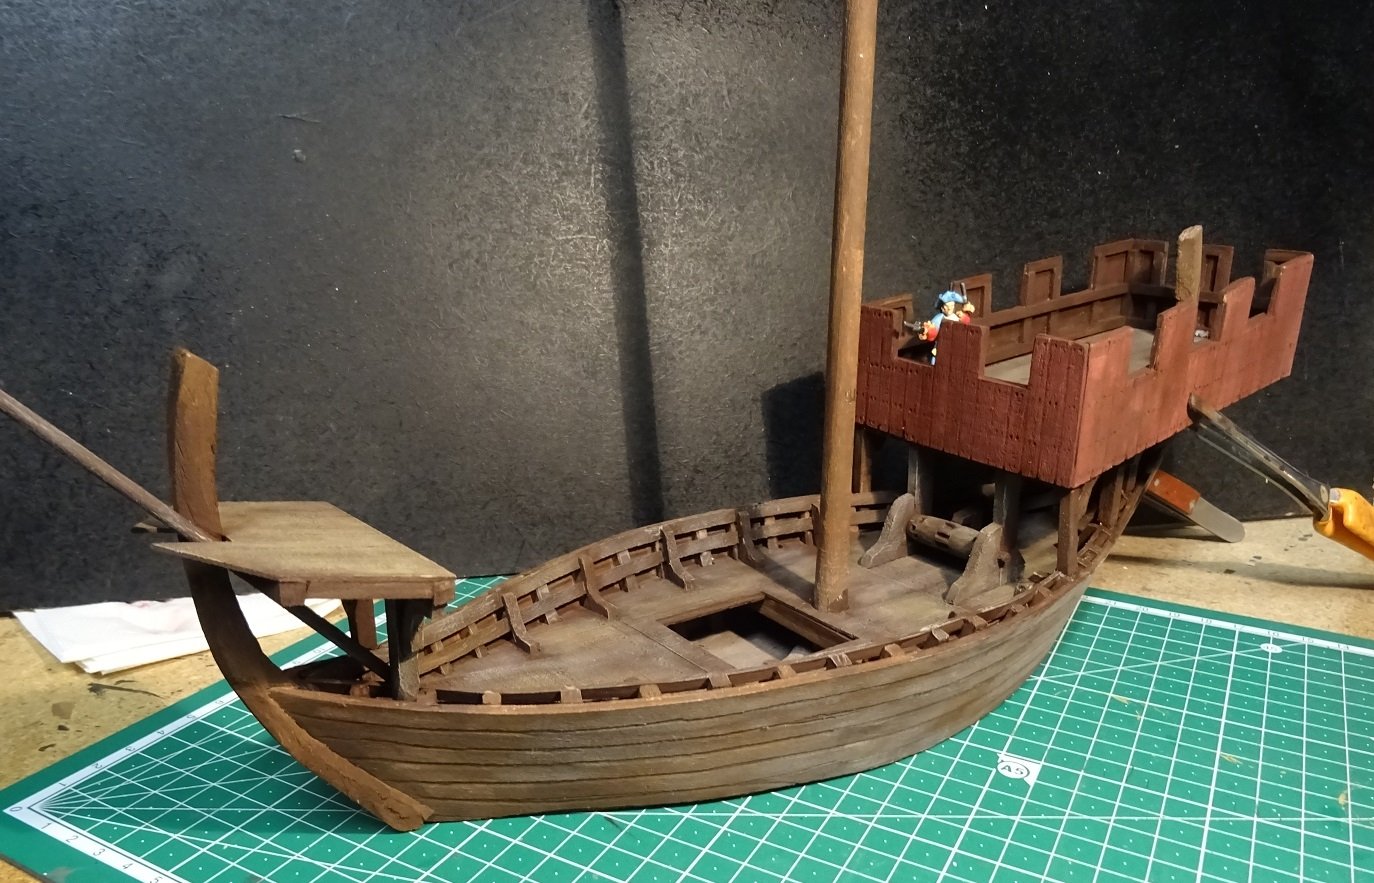
The side rudder is finished, and the glue is drying. I also finished two ladders, but one of them is too uneven and has to be discarded - gotta make another, for the sterncastle. I also gave the hull some painting love: dark caulking, and hundreds of dots for the trenails. A little drybrushing over the top, and it looks much better than before. Also, I received the Amati rope I ordered, looks great, but I can see I'll need some larger sizes. I ordered 0.25mm, 0.5mm and 1mm, but I think some 1.3mm or ever 2mm are in order.
-
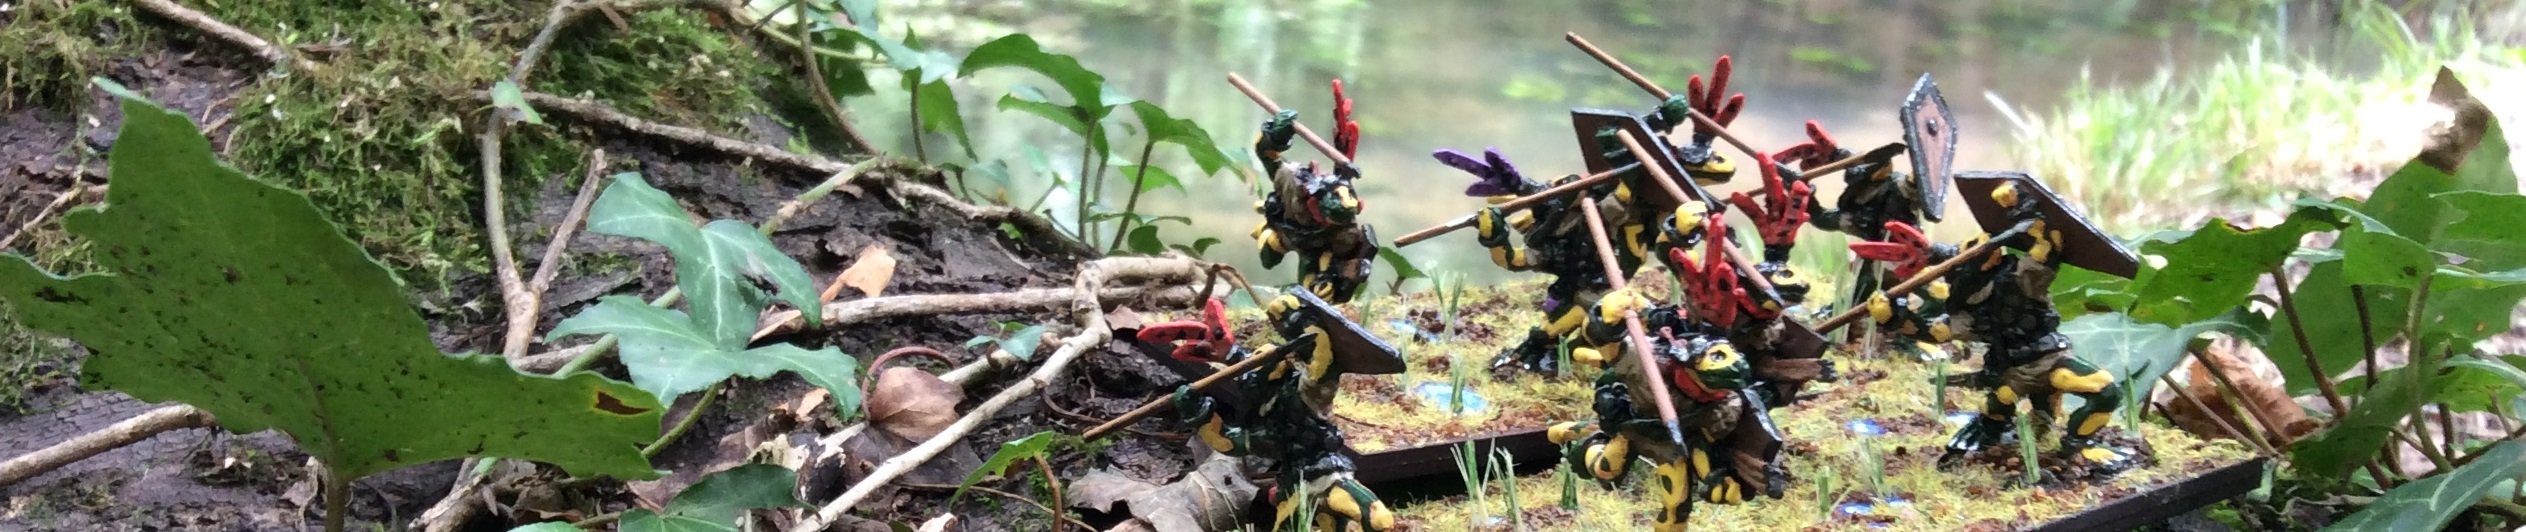
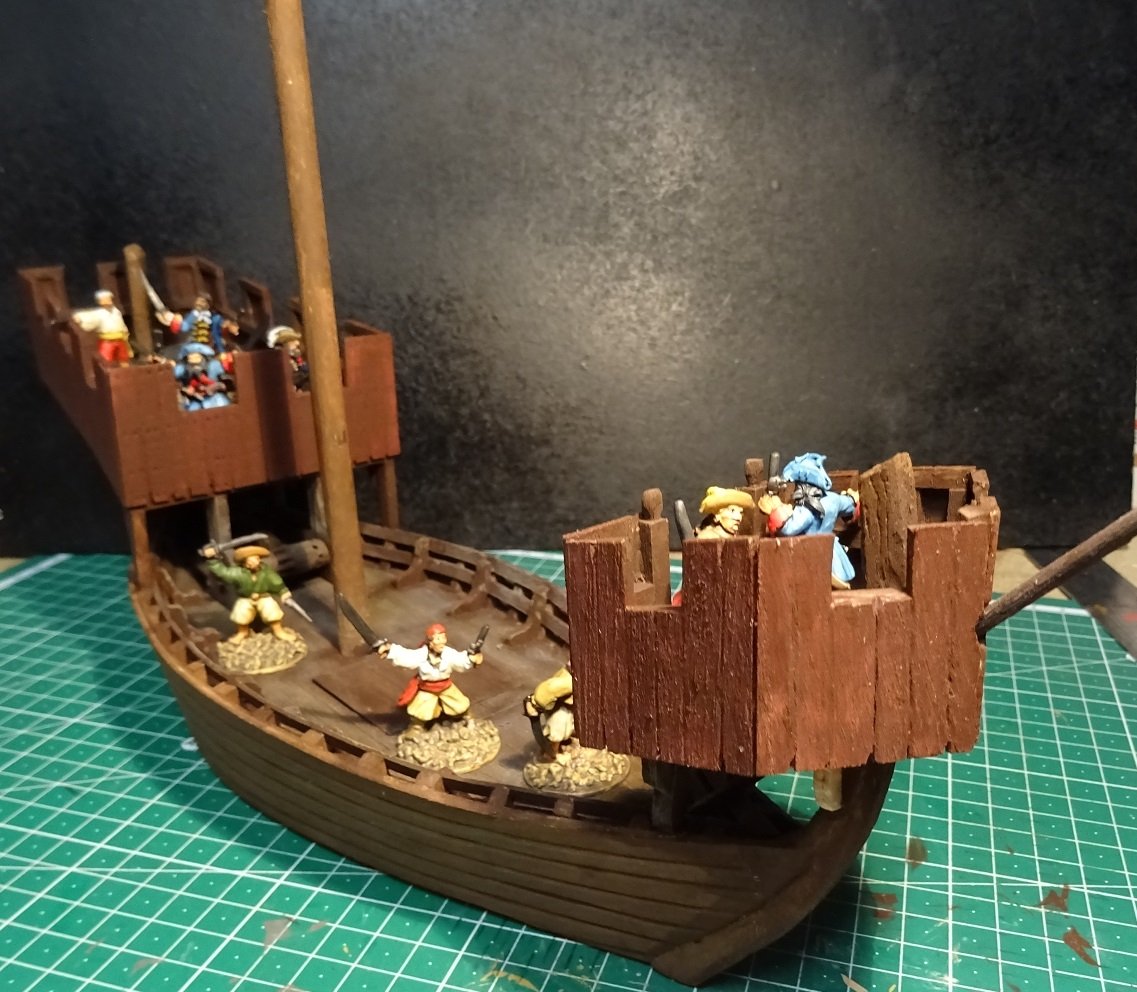
It's just the figures that were at hand. I'll post pics later on with more Norman-looking fellahs. One of my goals with this project was to model a pre-gunpowder era ship. So it would kind of defeat the purpose if I used 18th-century pirates armed with flintlocks.
-
The pirates are celebrating the completion of the forecastle! A little blurry, gotta work on my photography. I also see I forgot to paint two of the supports under the forecastle. Little by little! Next is the ladders (I *hate* scratchbuilding ladders) and then the side rudder and a few hull details. And tomorrow or the next day I should receive the Amati cords I ordered, and I can start tarting up the mast and a few other things, before moving on to rigging. More soon.
-
What size cords for the rigging of a 1/50 medieval nef?
PhilB replied to PhilB's topic in Masting, rigging and sails
Thanks! I'll look into acquiring this gem. Even if I don't read German, as such. In the meantime, I have ordered some Amati cords, and will see what looks right. -
What size cords for the rigging of a 1/50 medieval nef?
PhilB replied to PhilB's topic in Masting, rigging and sails
I'm going to take a stab at it, and try 1mm and 0.75mm in black for standing rigging, and 0.25 and 0.5 in beige for running rigging. It's hard to visualize just how small 0.25mm is, if it proves to be too light for a 1/50 ship, I'll just be out a couple bucks for cords I won't use. Again, this is for a 1/50 medieval nef, some call it a "pre-cog", 11th-12th century, single mast, square sail. I've never rigged a ship (even one with such a simple rigging plan as this). If anyone has any suggestions for the weight of cord to use, I'm eager to hear it. Also, if there are any primers for rigging a single-masted square-sailed vessel like an early cog, I'm a quick learner. -
Aha! So I'll need both if I want to do the rigging halfway right. What weights of cord did you use on your model? I've seen spools at weights going from 0.25mm to 1.3mm.
-
An amazing model. Love the variety of shields. I'm curious, what motivated the choice of dark vs light-colored rope and rigging in various places?
-
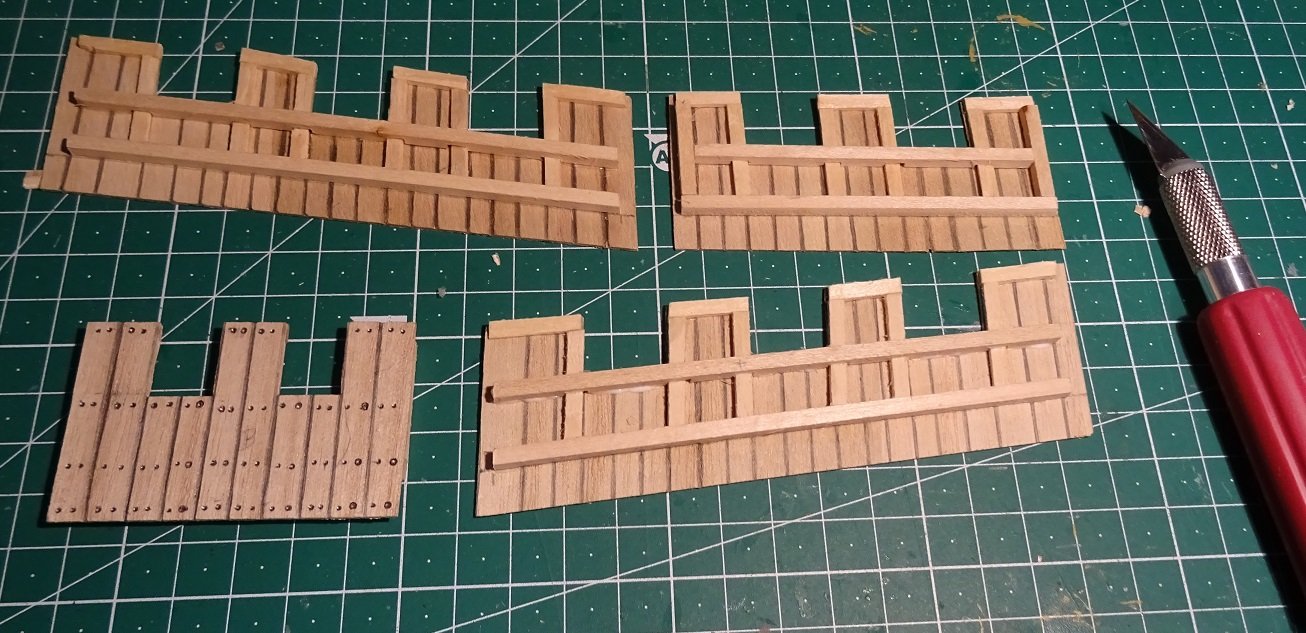
Construction continues! I've finished the aftcastle walls, and although they aren't actually glued in place yet, I took some photos because I was too impatient. <g> There were a lot of fiddly bits to put in place with the interior bracing of the aftcastle walls, but with patience it all came together. The worst was the upper logitudinal brace, which had to be notched for each vertical brace. But now it's done, and I can move on to the forecastle, and then the side rudder, and the ladders, and... all the other details which really make a model shine. I thought about doing a two-tone paint scheme on the aft castle, but the burnt umber color appealed to me more. I'll try to duplicate the mix for the forecastle, knowing full well that I should have painted them both at the same time, to get a match in the shades used. Note that there is no space for a stair/ladder on the front of the aft castle, since there is an open hatch inside that will get a ladder. Now I'm wondering if the mast shouldn't have been slightly forward of center, rather than in the true center of the ship, as I built it. Of course it is far too late to change that. Other details yet to add will be rope wrapped around the mast at suitable intervals and those funky lateral braces on the outside of the hull that seem to be all the rage for attaching the stays that run up to the mast head. Unless I adopt a more conservative method for anchoring the stays, like on this reconstruction of a longship's rigging. I'm determined to rig this one (and probably go back to rig the previous test ship) so now I need to figure out what weight of cord to use on a 1/50 model. I see Amati sells rigging rope in 0.25mm, 0.5mm, 0.75mm, 1mm and 1.3mm weights, and am fairly flummoxed as to what to use. Maybe I'll order some of each, and see what works.
-
Amazing work! I'm struggling with the idea of depicting nailheads at 1/50, but yours at 1/20 are already so small, it's hard to imagine how I would approach the problem at 1/50. I guess the standard method of scribing nail holes in the planks before painting may have to do. Your work is inspiring! Keep the pics coming!
-
I'm getting very close to the rigging stage on my latest model (a 1/50 single-masted medieval nef, or "pre-cog"), and it will be my first foray into the arcane art of rigging. I know that in addition to things like the mainstays running to the mast top, I'll need anchor cord, cord to wrap around the mast, and several coils of rope hanging at opportune points around the ship. I will likely keep the rigging fairly minimalist, since the main purpose of this ship is to serve as eye candy in fantasy medieval roleplaying games (think "D&D" or Lord of the Rings) and eventually for boarding actions. I'll probably try to rig it similar to this diagram from a longship. I see for example 20m spools of various sized of Amati thread on Amazon.fr, at 0.25mm, 0.5mm and 0.75mm, and on other sites like "New Cap Maquettes" they also offer 1mm and 1.3mm size. I'm tempted to order one of each, and try my luck, but thought it wouldn't hurt to get a few pointers here. There also appears to be a choice between black and brown cords. Are there resources on this site to help me in selecting appropriate rigging material for a 1/50 medieval model? I figure it's better to be slightly informed than totally ignorant.
-
It can't have been kitchen paper, as it has a waxy surface that would repel the ink on the printer. I've had good results printing flags on standard printer paper, both sides of the flag on one side of paper, folding them over the flagstaff (or pike or spear) and doing initial gluing with a very small quantity of PVA. Once dry, I curl the paper artistically around a thin pen or xacto knife handle, then soak it in the liquid variety of superglue. The paper becomes almost a plastic composite, and holds the "furl" it was given indefinitely. Luponero, I'm in awe at the quality and detail of your model, and am going to use your build log as personal reference every time I was to add more details to a ship model. I'm curious about one thing, the "falconetti" or small hand canons seem to correspond to what I was calling "falconet" or "couleuvrine" in French or "culverin" in English. Can anyone tell me if it's more appropriate to speak of ship-mounted hand canons like this as "culverins" or as "swivel guns" or if the term "swivel guns" is of a more recent origine? Edit: As I was writing, Luponero posted: it's very light-weight tissue paper taped onto standard printer paper to get it to go through the printer. Great find!
- 197 replies
-
- 1
-
-
- santa maria
- carrack
- (and 1 more)
