
HOLIDAY DONATION DRIVE - SUPPORT MSW - DO YOUR PART TO KEEP THIS GREAT FORUM GOING!
×


CPDDET
-
Posts
1,184 -
Joined
-
Last visited
Content Type
Profiles
Forums
Gallery
Events
Everything posted by CPDDET
-
Welcome aboard!
-
 As always, you're an inspiration.
 -
Welcome aboard. Looking forward to your progress.
-
Welcome. Seems your build is coming along nicely.
-
Welcome!
-
Looks really good!
-
Welcome aboard!
-
As long as one reads well ahead to avoid issues down the road. I have found when working on any step, I have to keep in mind the several upcoming steps.
-
Thank you for the comment. I meant no disrespect toward you as the author of the practicum. This being my second attempt at this model, I just found it easier to change things up a bit. As stated, I'm not suggesting anyone else follow my lead. If it's ones first attempt at this build its probably best to follow the practicum as written. And thank you for your dedication to this craft and helping us all become better at it.
-
I'm sorry that I'm not being very helpful. I reviewed my post on this process and have been banging my 73 year old head against the wall trying to recall the process I used and exactly why I posted what I did back on 3/29/22. But that's almost 2 years ago and I just cant seem to come up with anything. I hope the process goes well for you and please know I'm always available for questions. Dave
-
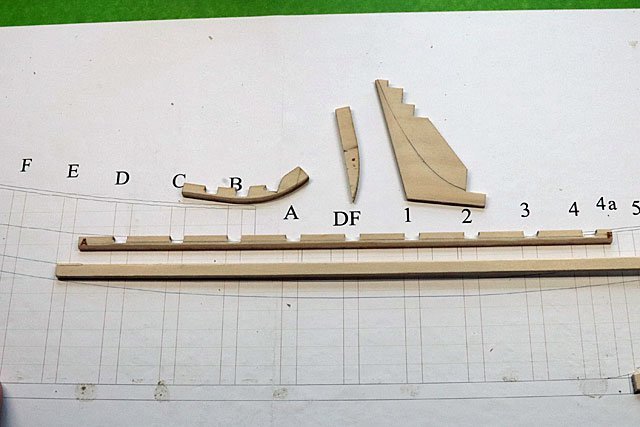
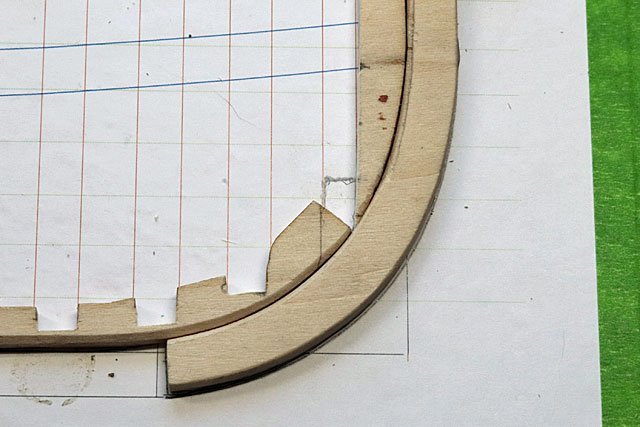
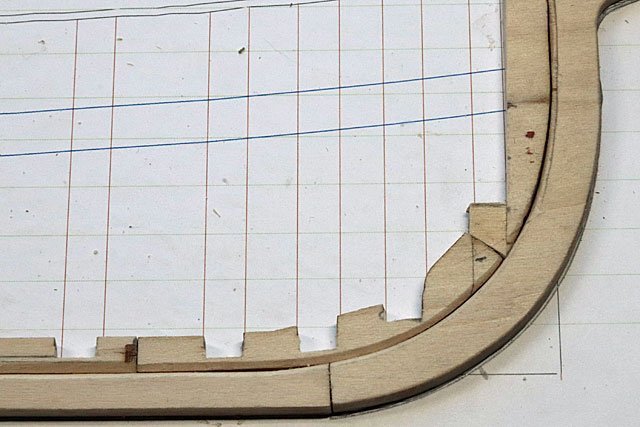
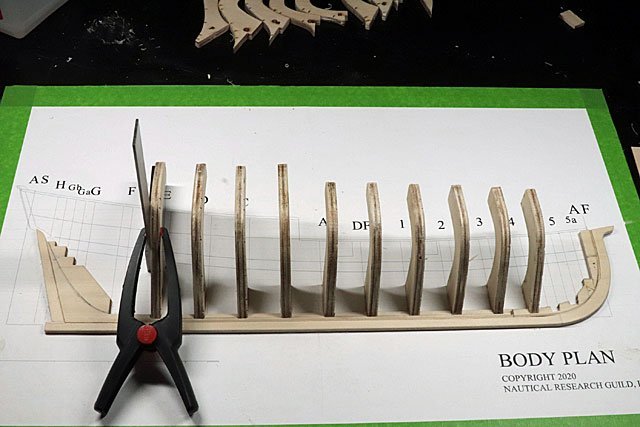
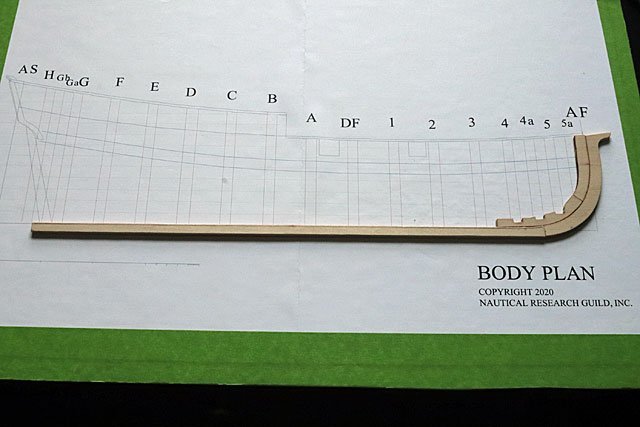
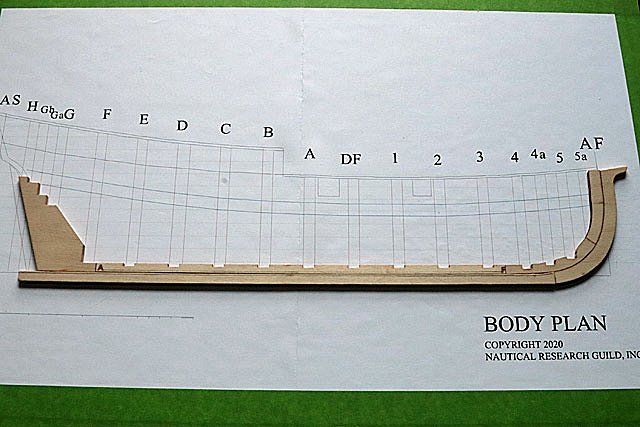
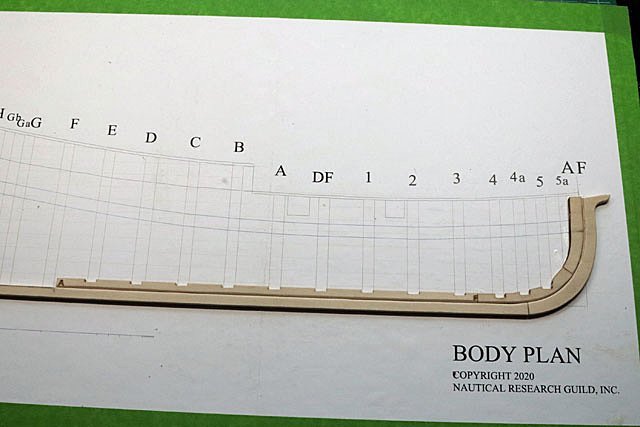
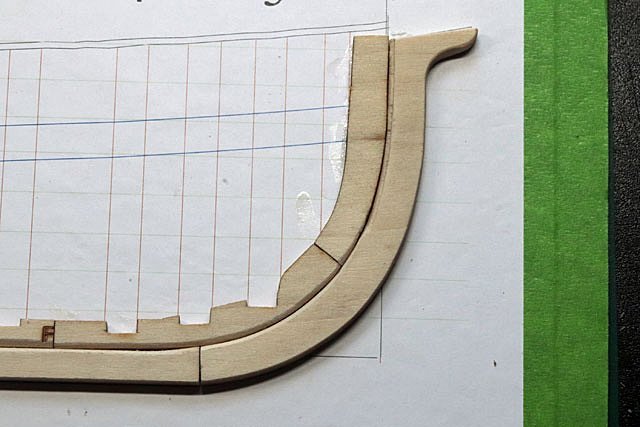
I did a few things in a different order than shown in the practicum. Now I’m not suggesting anyone else do this, I just found it easier for myself. The practicum calls for deepening the slots for the bulkheads, tapering the deadwood, cutting a notch in aft portion of the keel and trimming the stemson in order to fit bulkhead 5A. I found these easier to do these before gluing anything permanently to the build board. It took a lot dry fitting and temp gluing of the keel, keelson, stem and stemson. I found that Elmer’s Rubber Cement worked well for me when temp gluing pieces. The rubber cement takes longer to dry but it’s easy to pop off the pieces and the cement can be easily removed from the build board without damaging the build plan or wood pieces. One can rub it off with their finger or, on the wood, used a bit of rubbing alcohol on a paper towel if needed. Below is a pic of all the finished pieces. My only mistake was made when trimming the stemson for bulkhead 5A. The cut piece should look like a backwards “L” with the lower part of the “L” supporting the bulkhead. I misread the instructions and cut the stemson all the way down creating the following: Lucky this was easy to fix. I just cut a small piece of scrap wood, which was the same thickness, and glued it in place. After the final gluing of the stem, stemson, keel, keelson, deadwood and sternpost, I glued in bulkheads “E” thru “4”. I found by using the Titebond Quick & Thick glue, I could glue in a bulkhead about every 30 minutes. I’ll let this dry overnight and move on to the spacers that go between the bulkheads. Moving on…….
-
Check out page 11 of this build log
-
Welcome aboard! Nice model you have there.
-
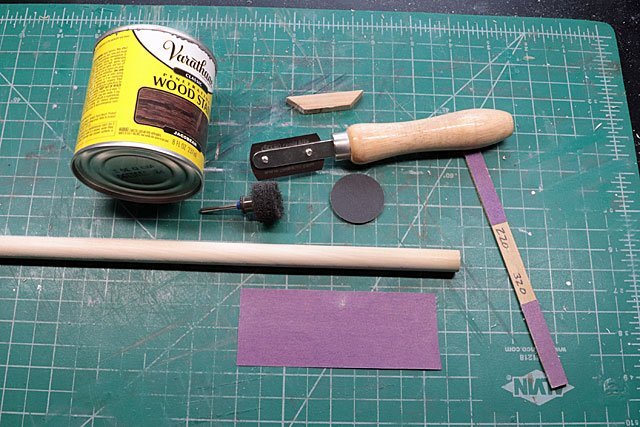
These are the tools I used to remove the parts from the billet (think billet is the correct word) and to remove the char. The razor saw has been my favorite for quite some time to cut the pieces out. Others are sanding sticks, various grits of sand paper and buffing pad. The dowel and can were used to sand curved areas. I included a sanding disk because it was recommended by Toni although I had finished the chore before I got her message. The small piece of wood at the top cut with 45 degree angles was used to make the rabbet. By wrapping a small piece of sandpaper around the angel and sliding it along the keel, keelson, stem and stemson it’s pretty easy to achieve the correct angle; just sand to the drawn pencil line. The wood piece is narrow enough to handle the curves as well. After dry fitting the keel, stem, stemson and keelson pieces and making adjustments, I tacked them down with white glue (later switched to rubber cement) and double checked the joint alignments. Then removed them from the plan and drew the lines for the rabbet. After marking the deadwood portion of the keel, I took a deep breath and sanded the edges using the angle cut wood block and 220 sand paper. The “step” on the upper part of the stem was cut using a #11 blade and small chisels. While the transition of the rabbet as it rises up the stem and stemson isn’t perfect, it’s much better than my first attempt and I’m happy with it. Moving on…….
-
Welcome aboard! Nice looking model.
-
Thanks for the tip!
-
Welcome aboard!
-
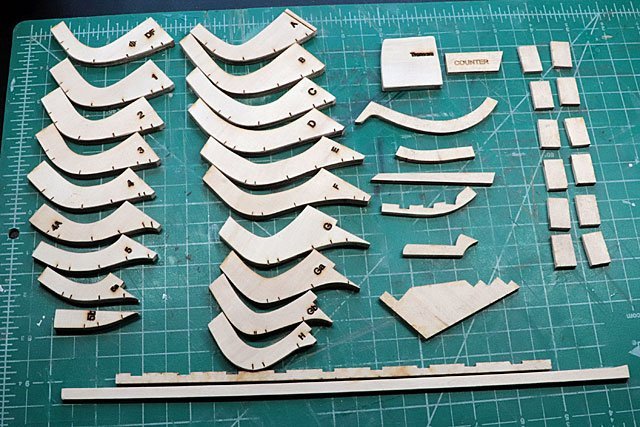
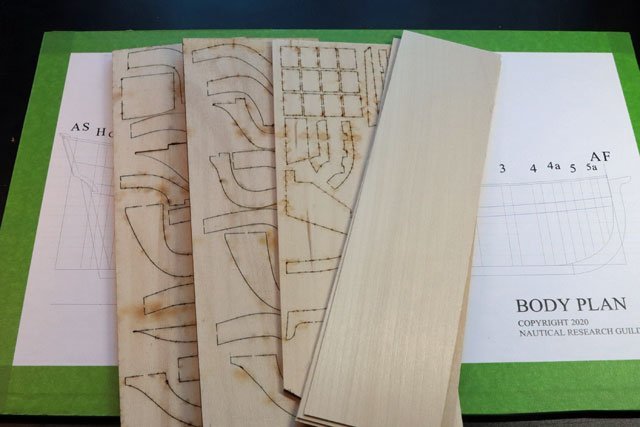
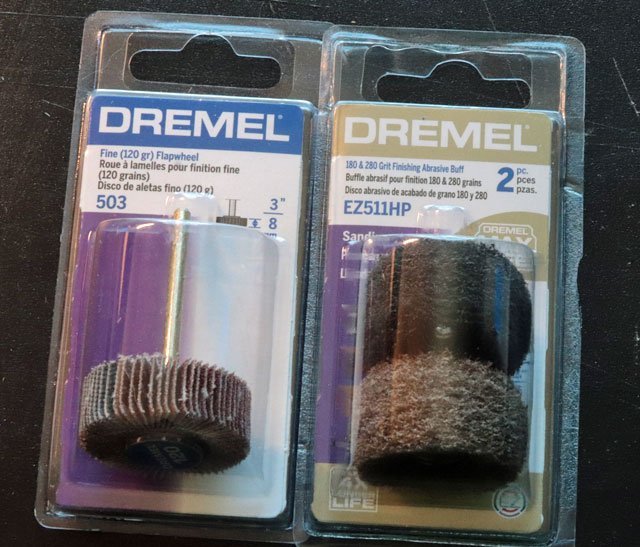
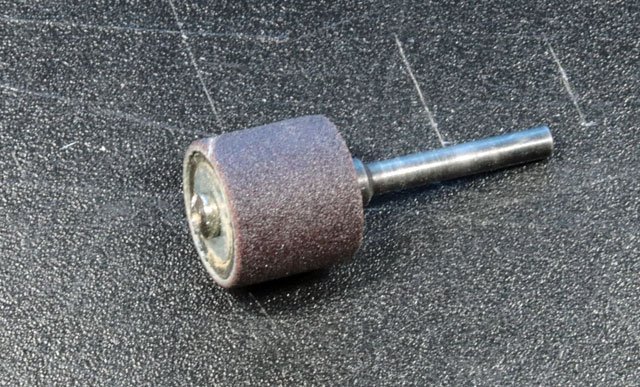
And so we begin again. The build plan is mounted to the foam board using spray adhesive, as suggested in the practicum. I added the tape around the edges because I found the adhesive was letting loose just as I decided to start over. If one finished this build in a reasonable amount of time I doubt that would be a problem. I had taken far too long and that’s what probably caused the issue. Before cutting out the various parts I wanted to do a bit of research into finding an easier way to remove the char. On the previous model I had used a sanding drum (shown below) with a rotary tool. But unless you’re very skillful or very experienced with this method it can cause problems by removing too much wood along with the char and cause deformities in the piece. Looking back, this was one of the first problems I caused myself. So I picked up some abrasive buff wheels and a 120 grit flapper wheel. While they all easily removed the char I found the 120 grit flapper wheel and the 180 grit buff to be too aggressive. The 320 grit buff wasn’t aggressive enough but the 280 grit buff was just right. This weekend I will cut out all the pieces, remove the char and store them away in a safe place.
-
Welcome aboard! You've picked the right port to dock in. Great people here and much experience.
-
For starters, over faring some of the bulkheads and then attempting to add shims to correct. Resulted in uneven curvature of hull. Poor shaping of the deadwood. Both the garboard and broad strake too wide resulting in very narrow planks in the lower band. Poor clamping technique that resulted in deformed broad strake. Poor assembly of counter. And so on. Mistakes add up to bigger problems. Plain to see I'm highly critical of myself and expect better craftsmanship. Take your time, and if you're not sure things are completely correct, stop and research further.
-
Things have not been progressing well. Small mistakes made earlier are now turning into major problems as the build progresses. So I've decided to bite the bullet and begin anew. A replacement kit has been ordered and Ill continue this build log once that arrives. I know this sounds a but drastic, but I'm determined to end up with a half hull model that I'm proud to display. Unfortunately that's not going to happen with the current build.
-
Very nice build! Welcome aboard
-
How to "unstick" this chuck from the mill spindle?
CPDDET replied to rlb's topic in Modeling tools and Workshop Equipment
I use a piece of brass round stock . Same diameter as the sherline knockout bar which didn't come with my sherline mill. I've always been fearful of ruining threads using the bolt method.

