


CPDDET
-
Posts
1,194 -
Joined
-
Last visited
Content Type
Profiles
Forums
Gallery
Events
Everything posted by CPDDET
-
Welcome Eric! Your joining a great group.
-
Welcome, glad to have you aboard!
-

Replacement for 2.6x16mm screw
CPDDET replied to DMM's topic in Modeling tools and Workshop Equipment
Also check Modelmotorcars and MicroMart for miniture hardware. -
Model Shipways Sailing Pram or Lobster Smack?
-
I would rough the old surface, prime and repaint. But I'm no expert in the field.
-
Airbrush Paint
CPDDET replied to CLovehitch's topic in Painting, finishing and weathering products and techniques
Badger Airbrush makes their own line of paints. They come airbrush ready and I have used them with great success. I'm sure Kurt could expound on this product. -
Excellent metal work. Your model is coming along nicely!
- 145 replies
-
- 1
-

-
- Bluenose
- Model Shipways
- (and 1 more)
-
Hope your situation is soon rectified. And welcome to the grouo!
-
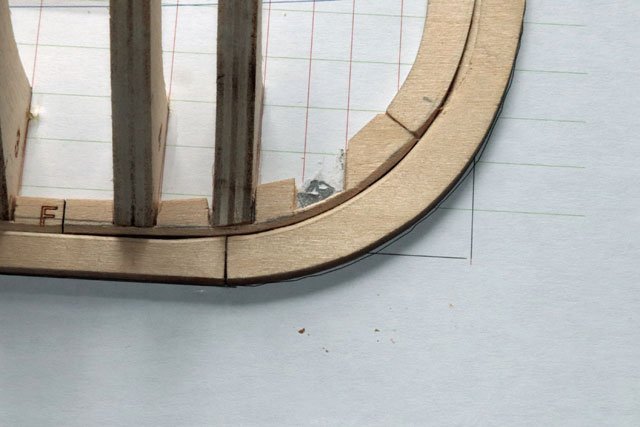
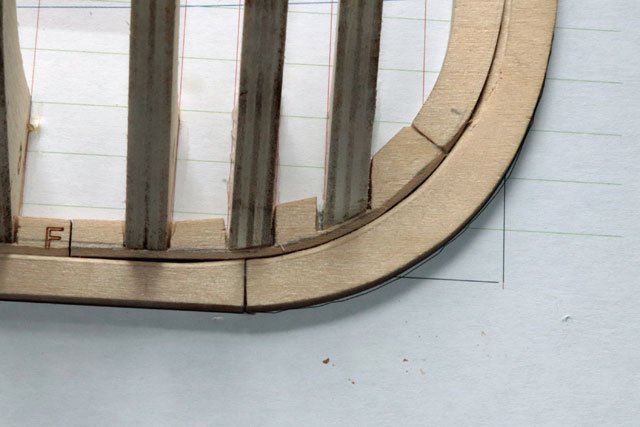
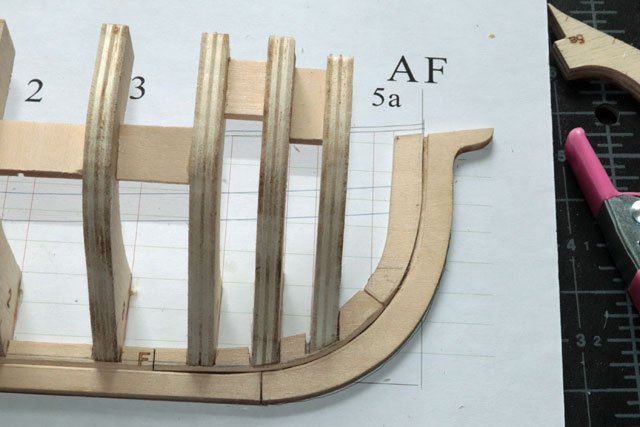
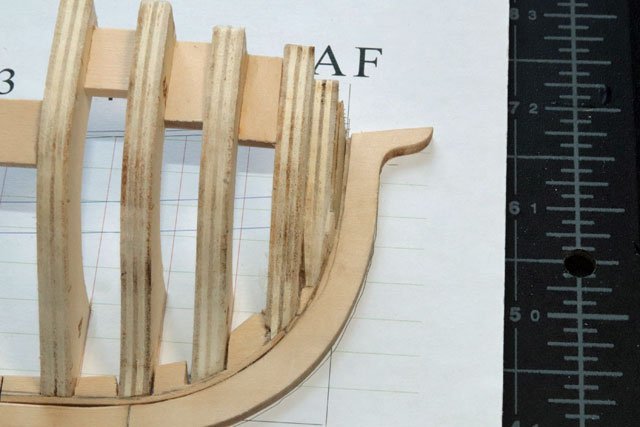
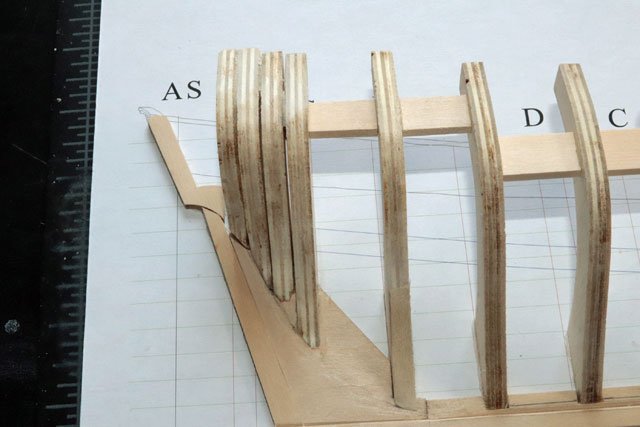
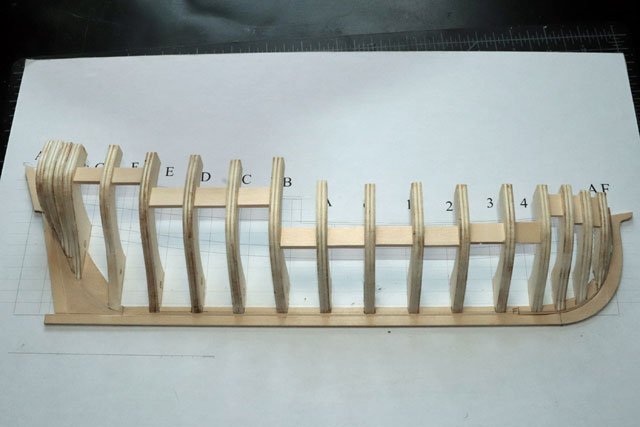
Finished installing all the frames. After cutting the slots for frames 4, 4a, 5 and 5a deeper so the frames would meet the rabbet, I glued these into place. I also glued in 5b and a thin filler piece so they filled the space up to the rabbet. At the aft end I glued in frames Ga, Gb and H This finishes the frame install. Since the transom piece will be a bit delicate, I decided to wait on installing this until after finishing the topline and fairing the frames. So moving on to the topline trimming......
-
Looking good!
-
Welcome!
-
Nice work on your pictured model and welcome to the group. Friendly and helpful people here.
-
Hi, from Balearic Islands, Spain.
CPDDET replied to Miguel Juan Calvo Fürst's topic in New member Introductions
Welcome back to the shipyard! Many of us have taken time away from our models only to return with renewed passion. -
Welcome aboard! I've never seen any derogatory comments here, so don't be hesitant about posting. Everyone here is most helpful and supportive.
-
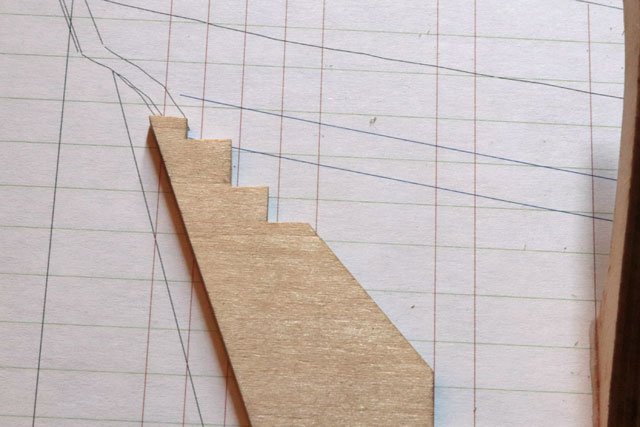
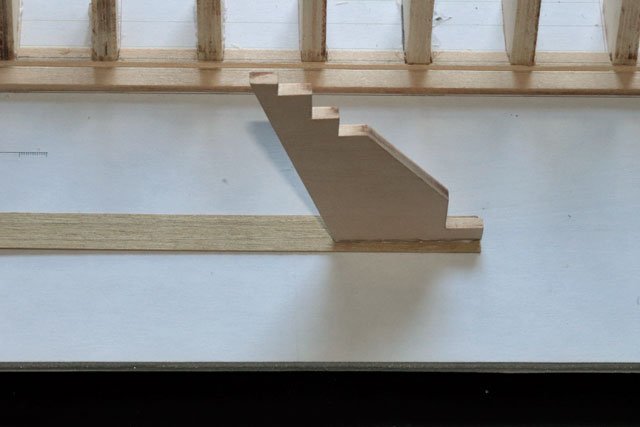
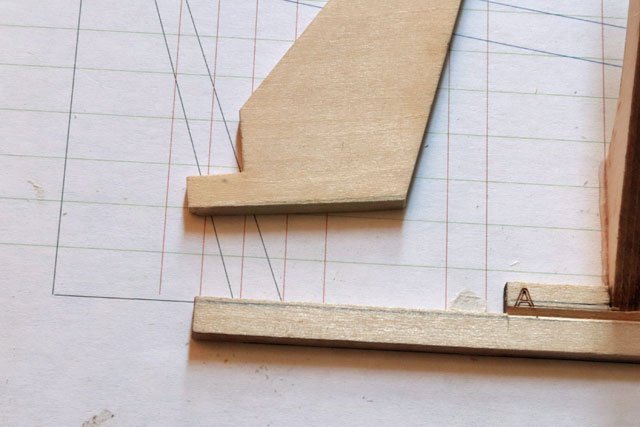
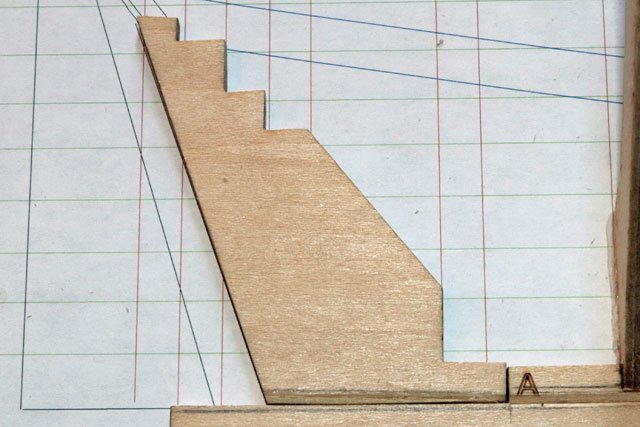
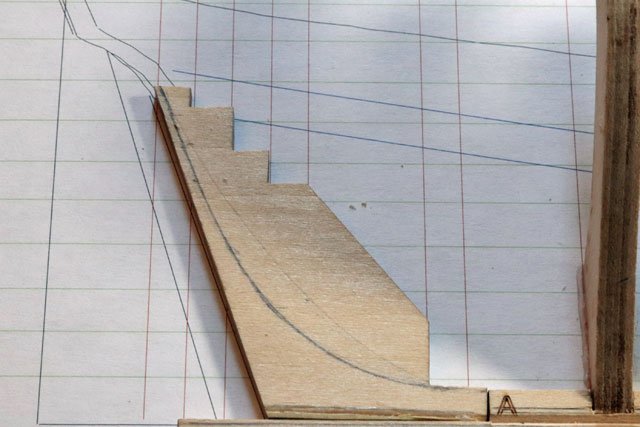
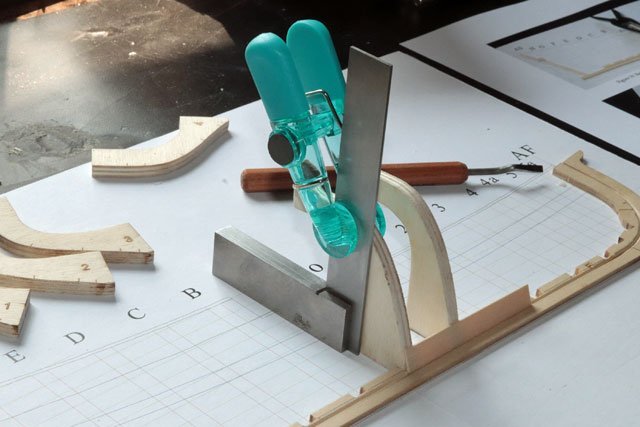
Moving right along today. I noticed that the deadwood wouldn’t align correctly with the red vertical lines on the build board for the frames. Seems like either I didn’t glue the keel absolutely level or the bottom edge of the deadwood wasn’t flat. When I laid it in place it was obviously off. In order to correct this I added a thin shim then sanded it so the shim became a wedge, thickest at the aft end and tapering to the thinnest edge where it meets the keelson. This corrected the problem I was a bit confused about the location of the beard line but looking at figure 34 of the instructions quickly cleared that up. I’m lucky enough to have a Byrnes saw and, setting the blade shallow enough; I was able to cut a 90 degree bevel along the aft side and bottom edge of the deadwood, much like a router. Sanding the deadwood was much like cutting the rabbet (as explained by Toni in the instructions). The further the distance from the edge of the deadwood to the bearding line the mote gentle the angle. The closer the bearding line to the edge of the deadwood, the steeper the angle. I’m sure you can also see my mistakes in these images; mainly, my mistake of extending the rabbet to the aft end of the deadwood and the sternpost. As I move along Ill see how much of an issue this causes. I then glued the deadwood, sternpost and “L-shaped” piece onto the build board after rounding the top a bit. I would like to know the proper term for the “L-Shaped” piece. Camping coming up this weekend so not sure how much I will get done in the coming days.

- 47 replies
-
- 11
-
-
Right you are, Allen. Although the rabbet does stay at 45 degrees for the length of the keel, once the curve of the stem starts things change. My little sanding block was only used for part of the entire rabbet. While I did use a small chisle for the 90 degree rabbet near the top of the stem, my skill with that tool still isn't as good as it could be. Perhaps someday.....
-
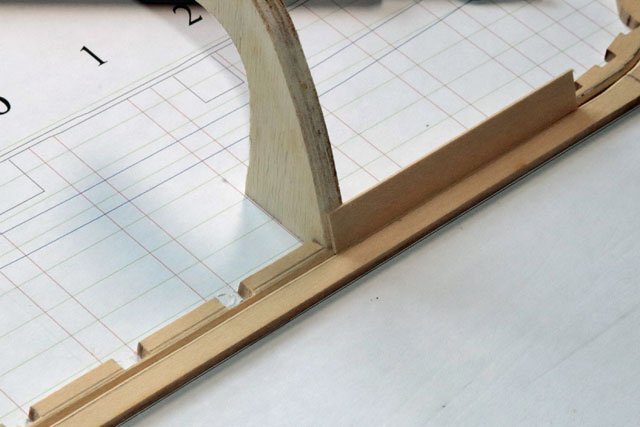
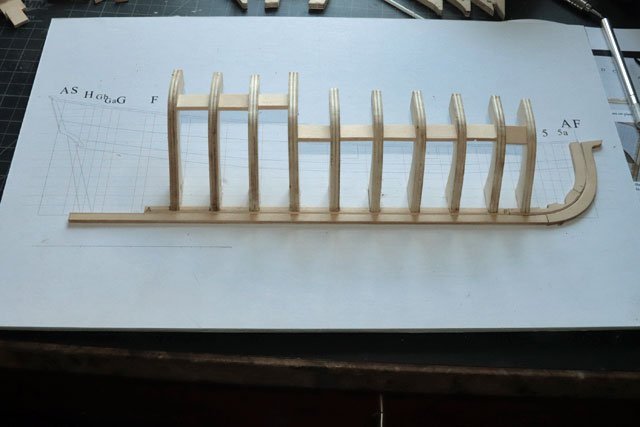
After gluing the keel, keelson, stem and stemson to the build board I deepened the notches for the frames, per the instructions, to the top edge of the rabbet. If I was to do this over I wouldn’t place any glue between the red lines of the build plan which mark the location of the frames. It would have made deepening the frame notches a bit easier as I wouldn’t have had to deal with the dried glue which was holding the keelson to the build board. Then I glued in the frames, using a square and clamp as suggested in the instructions. I’m using Titebond Quick and Thick and allowed an hour between gluing each of the 10 frames. In order not to disturb the frame I previously glued in, I rotated from the left side of the first frame to the right side of the first frame and so on. After all the frames were glued in, and allowing 24 hour dry time for the glue, I glued in the spacers between the frames. Now it’s on to the next step, which I believe is the deadwood.
- 47 replies
-
- 12
-
-
Onward, Tim, onward! Never good to rush things anyway. Your progress looks good!
- 145 replies
-
- 1
-
-
- Bluenose
- Model Shipways
- (and 1 more)
-
Hi, from Balearic Islands, Spain.
CPDDET replied to Miguel Juan Calvo Fürst's topic in New member Introductions
Welcome aboard and welcome back to a wonderful hobby. Lots of help from great people here. -
My mistake, I didn't know the rope was limited to sailing ships.
-
Welcome aboard! I understand there is an organization called The Rope in Japan. Do you belong to it?
-
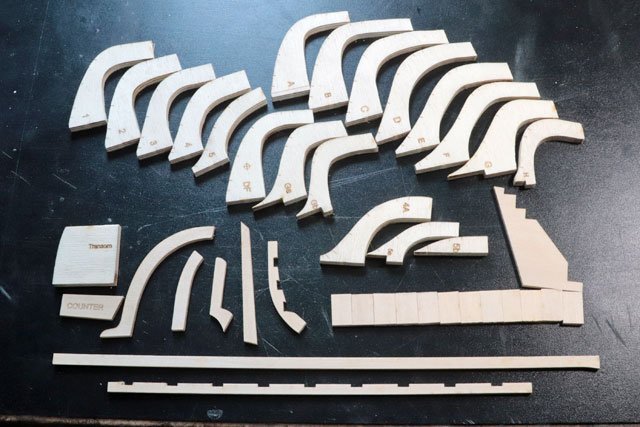
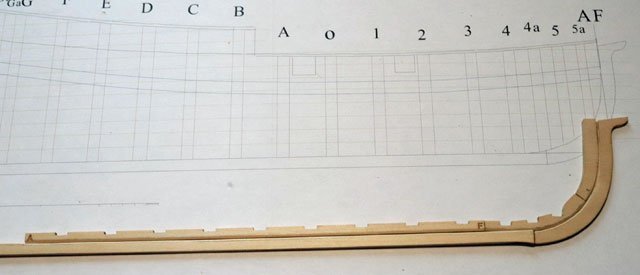
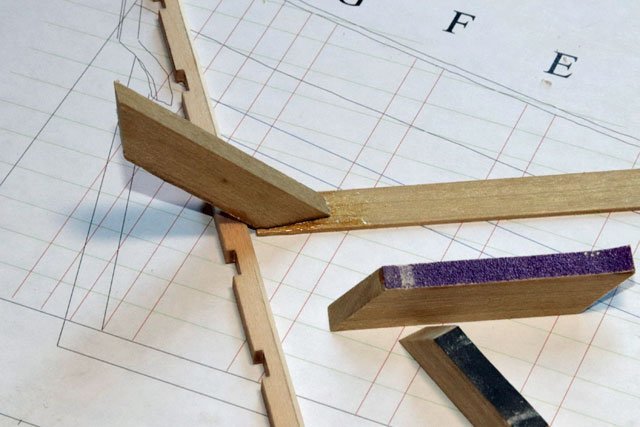
Been a bit since my last update, took a week or so to do some camping. Back in the shipyard now, so here’s the latest. I decided to remove all the pieces from the billets and get them all cleaned up from the char. This way I could get all the sanding and cleanup done at one sitting rather than doing each piece as needed. I think removing the char from all the pieces took 2-3 hours total. I ended up using a variety of tools for this; sanding sticks, files, disk sander and Dremel drum sander. After trimming the curved piece of keelson to the proper length I drew the rabbet line on the keel, keelson, stem and stemson. For the 45 degree angle needed for most of the rabbet I cut some scrap pieces of wood at a 45 degree angle and glued sandpaper to them. The picture below shows this, but since I couldn’t get the sanding block to stand on its own I glued it to a scrap piece to show how it worked. By holding the 45 degree cut side of the block firmly against the table top I could slide it back and forth along the keel and keelson to get a pretty consistent angle. Being the obsessive compulsive person I am, I made the blocks with 3 different grades of sandpaper to get a nice smooth edge. It was a bit tricky transitioning the rabbet from a 45 to 90 degree angle on the stem. Did the best I could and only time will tell if I did it correctly. Time to double check the fit of these pieces and then glue them to the build board.

- 47 replies
-
- 12
-
-
Hello from Admiral Ching Lee
CPDDET replied to Admiral Ching Lee's topic in New member Introductions
Welcome aboard!
