


CPDDET
-
Posts
1,181 -
Joined
-
Last visited
Content Type
Profiles
Forums
Gallery
Events
Everything posted by CPDDET
-
Welcome back, Dan!
-
The main mast on my Bluenose requires a "galvanized sheet metal" wrap. I have some thin aluminum but how to make it look galvanized? Any tips or clues would be appreciated. Dave
-
 Looking very good! Carry on
 -
If using a battery powered mixer, place a toilet paper roll over the bottle of paint before mixing. Sure keeps thinks neater.
-
I've used a piece of nylon stocking / pantyhose with some success
-
I have decided not to finish the masts and rigging on my Bluenose. Instead I will cut the masts off someplace above the booms. This change in my build build plans didnt come lightly and only after viewing several models finished this way and realizing that my space in which to display the finished piece is very limited. Keeping the height of the model to a minimum will allow me enough space to complete and display a second model of similar size on the same, and only, wall space I have available. It will take some time to reorganize my thought and come up with a list of steps needed to finish the piece. Dave
- 389 replies
-
- 2
-

-
- bluenose
- model shipways
- (and 1 more)
-
Thanks for the tip and great instructions, Dave
-
Great! Your on the right path and never too old. I'm still working on my first build, Bluenose. I didn't pick up the hobby till I was 69.
-
Looking very good, Tim!
-
Posting pictures of the project might help. There are some Shipwrights here who specialize in more modern day war ships. Seeing what the project entails would be a big help.
- 1 reply
-
- 4
-
-
Welcome Gill! Great choice on the models. Dave
-
Polaris by JDillon - OcCre
CPDDET replied to JDillon's topic in - Kit build logs for subjects built from 1801 - 1850
Hey JD. To be truthful, I've seen much worse. Don't be too hard on yourself. While the hobby can be very rewarding, it can also be very frustrating. We all live and learn. I'm always thinking about how I can do things better on my next build. Carry on and enjoy yourself! Dave -
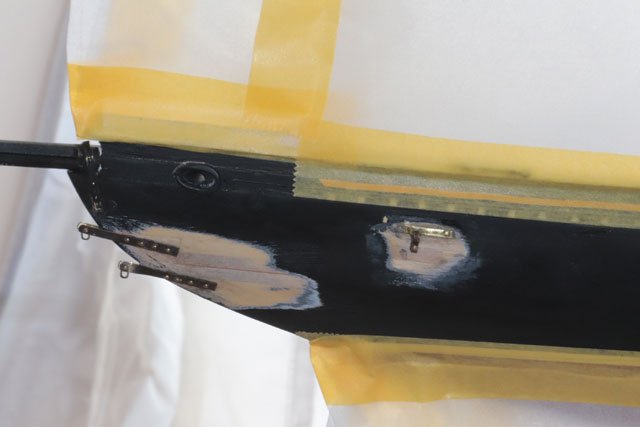
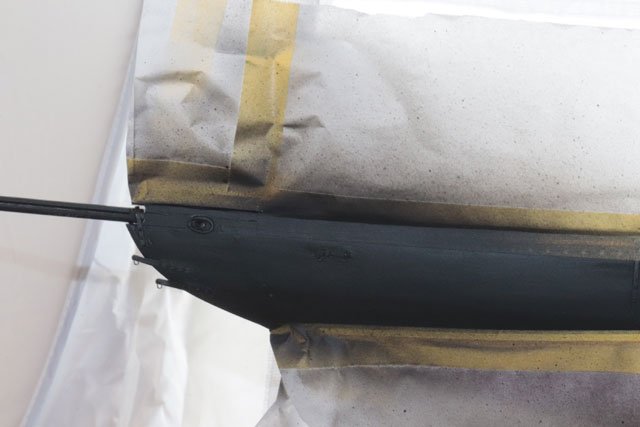
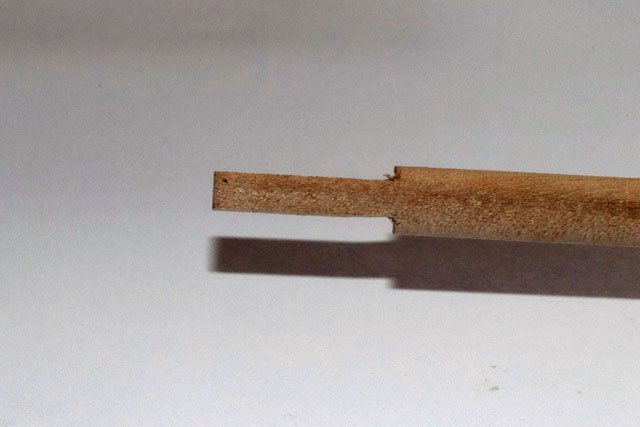
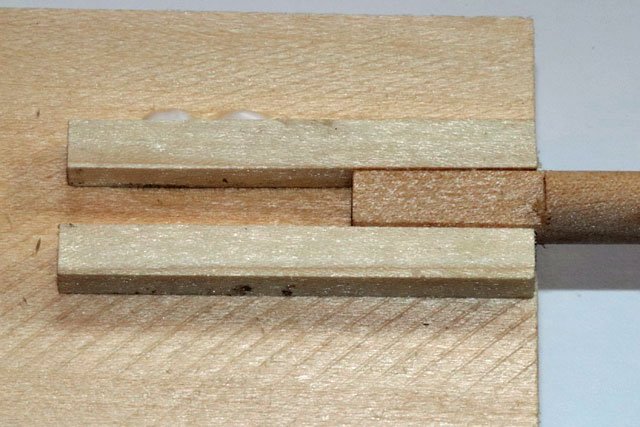
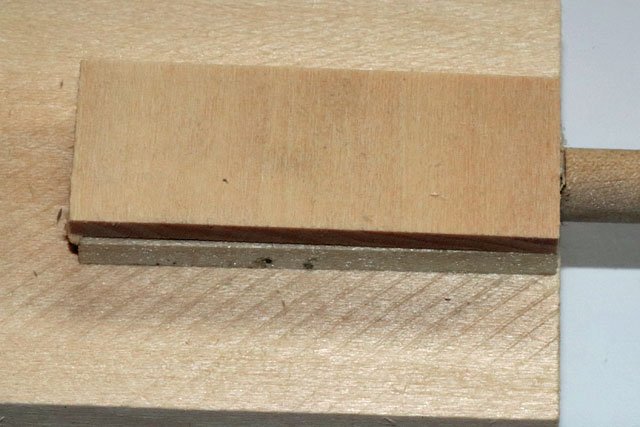
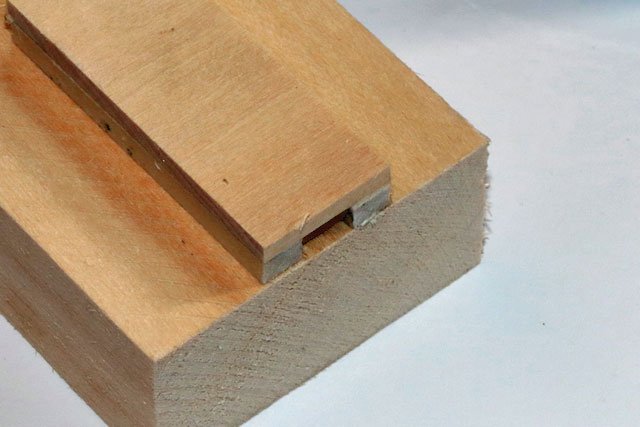
Got the repainting done today. First masked off the area Then used the air brush to spray a few coats of flat black paint and 2 coats of matt acrylic finish Removed the masking material and was pretty satisfied with the result. No perfect by any means but acceptable Since I’m waiting for the new rigging lines I ordered from Ropes of Scale, I decided to start on the main mast. I first cut the doll rod to length and cut the tendon at the base. Next will be the cheeks, but these need to be on the port and starboard sides of the mast. In order to install these correctly on the round mast I decided to build 2 jigs to help hold things in place. The first was a block that would hold the tendon securely. Then a second jig is a block that I can slide along the mast. This will assist in supporting the mast, cutting in the cheeks as well as tapering the tip of the mast. Once the block on the right is where I need it, I can clamp both blocks to my work table. That’s about it for today. Tomorrow I hope to get the mast notched for the cheeks and get those glued in place. Dave


- 389 replies
-
- 3
-
-
- bluenose
- model shipways
- (and 1 more)
-
God willing and the creek don't rise I'll get the bow repainted today. Dave
-
Thanks to everyone for the compliments, support and encouragement. Richard: I suppose I should count up how many shackles I still need but not sure I really want to know. LOL
-
Welcome! Perhaps you would like to view the build logs of others who are working on Victory? While this hobby can be difficult at times, it's something anyone can accomplish with practice and patience. You will find all the help and advice you need here. Good luck and carry on!
-
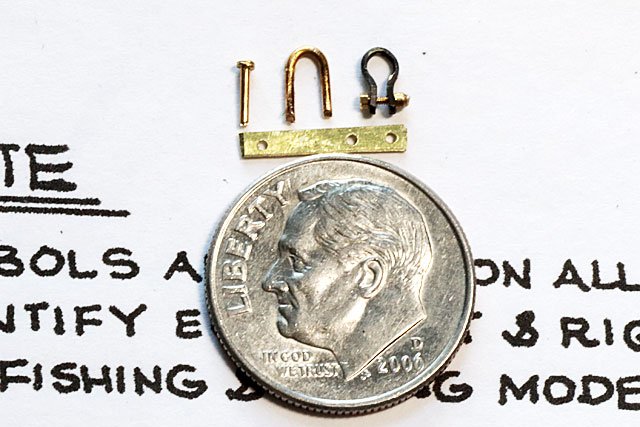
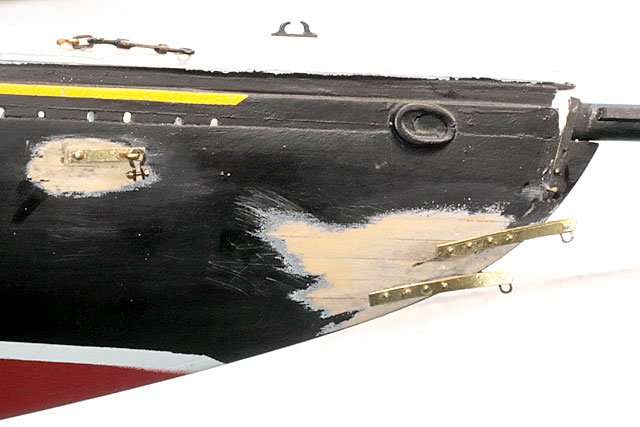
Been awhile since I’ve posted an update on my build. Life just gets busy sometimes and of course its summer so a week long fishing trip to northern Minnesota was in order as well. But I’m back in the shipyard and making some progress. Collected all the pieces needed for the guy plates. All the necessary parts for all these plates were made before hand. Then installed the Bobstay plates with links, Guy plates with staple and shackle and Backrope plates with link and turnbuckles. Got both port and starboard done. Lots of paint touchup to do now as I wanted the plates glued directly to the wood and not just the paint. Plan is to mask and use the airbrush but might brush it, still trying to decide on that. Then I think I will be ready to rig the bowsprit but have to order the needed lines as I don’t want to use those that came with the kit. Dave
- 389 replies
-
- 6
-
-
- bluenose
- model shipways
- (and 1 more)
-
Welcome! You will find a great bunch model Shipwrights here. Very helpful and friendly people.
-
Doing my current build, Bluenose, I have made a few parts from cherry but never bought anything larger that 4 inch X 24 inch X 1/2 inch thick to make these from.
-
One thing I don't own is chisels. Have no idea what sizes I would need.
-
I do have a byrnes saw, byrnes disk sander, sherline mill, sherline lathe and Wen jig saw. Of course many hand tools. Since I plan on using precut lumber, do think I'll need a thickness sander or band saw.
-
Thanks to Dave-E for asking this question. I too am a kit builder who plans on moving to scratch building once my Bluenose is finished.
-
At least for me, that about sums things up. Always nice to learn new things!
-
Email to Ben at Ropes of Scale: Morning Ben, After reading your comments I assume that your cotton line is to be used for running rigging and the polyester for standing rigging. Is this assumption correct? Dave Reply from Ben at Ropes of Scale: Hello Dave, I would just stick with the polyester for all of the rigging. The only reason I keep the cotton line in stock is that I have a few customers that refuse to use polyester for some reason. They begged me to keep selling the cotton rope. Cotton rope is fuzzy and has less texture, the more you work with it on the model the more fuzz comes out. The polyester doesn't do that even if you try. The thread I use for the polyester rope is Gutermann E. It is the strongest and most abrasion-resistant thread I've ever seen. I've used it to replace the slacked rope on some of my old models, It holds the same tension all year round. The cotton sags and tightens with the seasons. I hope this clears things up for you. Regards, Ben
