


CPDDET
-
Posts
1,194 -
Joined
-
Last visited
Content Type
Profiles
Forums
Gallery
Events
Everything posted by CPDDET
-
 Welcome. I'm sure, with help from this community, you will be successful. You may want to seek out advice on the best order of steps to follow. Dave
 -
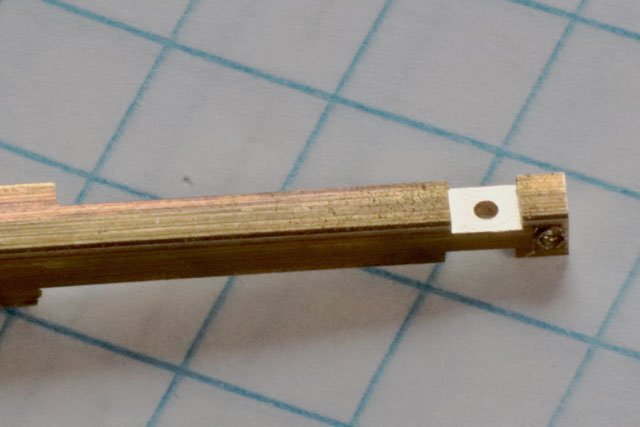
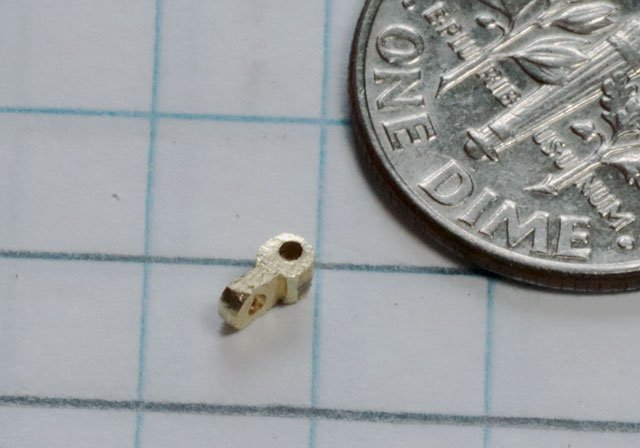
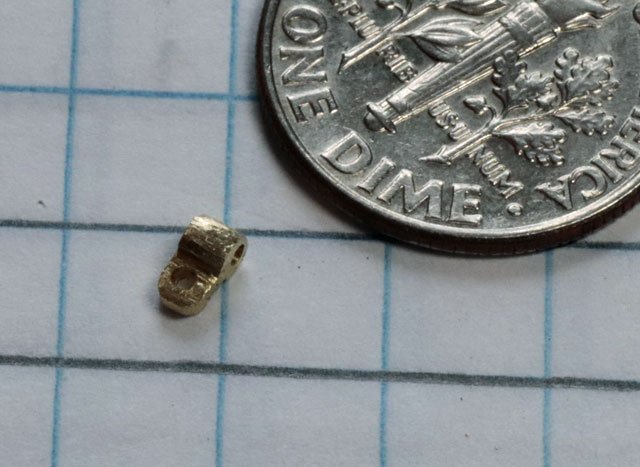
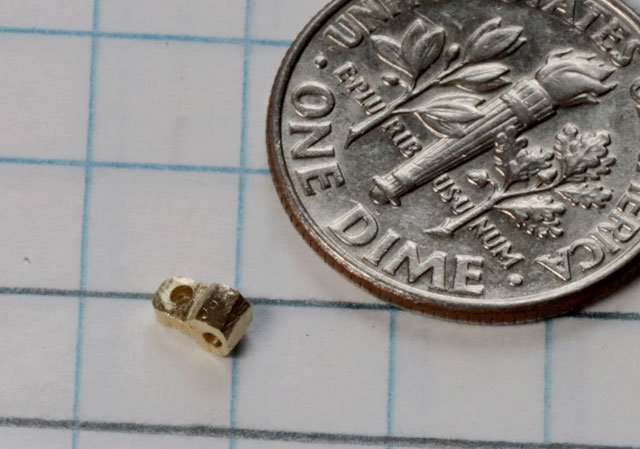
Made the first part of the assembly that will attach the fore boom to the foremast, a small link with opposing holes. After doing measurements I drew out my plan on graph paper at a much larger scale, something I didn’t do at the start of my build but have learned the hard way it’s very necessary for me. I started with a piece of 1/8 inch square brass stock in the mill and drilled opposing holes with a #66 bit. This hole size will accommodate the 1/32 brass round stock which the link slides onto. I then used a small end mill to shape the opposing side to the proper thickness. Then used small escapement files to finish shaping the piece. A handheld vice really helped to hold the small part while filing. Tomorrow is News Years Day, and a football day as well, so probably wont do any further work till Monday at the earliest. Happy New Year to all!!

- 389 replies
-
- 6
-

-

-
- bluenose
- model shipways
- (and 1 more)
-
Luckily your working with wood. Filler, sandpaper, files and such can help you recover. I had to tear out about a third of my hull planking and redo it. Recoveries can be a pain, but also a learning process and very gratifying knowing you have the skill to fix mistakes.
-
Tough to get it out of your blood, so to speak. Welcome back!
-
Google Table Saw books for beginners. Lots to choose from. Many with good reviews.
-
Have you tried YouTube for instructional videos?
-
Sounds like you're going about it the right way: doing research, taking your time and thinking ahead about how current decisions will effect future steps. The stantions on this model can be tricky but looks like you've got a handle on it. Keep up the fine work.
-
Last time I left my "assistant " in the shipyard unattended, I lost part of my transom to her sharp teeth
- 145 replies
-
- 1
-
-
- Bluenose
- Model Shipways
- (and 1 more)
-
Very nice build! And welcome to our little corner of the world. Between your past experience and the help available here, I doubt you'll have any problems with your next project. Dave
-
Next on my list was to make and install the brass inserts and the chafing plate for the boom jaws on the main and foremast. While I have decided to cut the mast short and skip the rigging (in order to save costs on the size of a display case) I did leave the masts long enough to mount the booms. After some careful measurements I cut a piece of .005 aluminum sheet to the proper size (.45 inches high and .87 inches wide). While not photographed, this width left the proper gap on the aft side of the mast. I picked up the aluminum sheets from UMM when I visited the model expo at the Dupage County Fairgrounds. In an attempt to make the aluminum look a bit more like galvanized metal, I scuffed it up with some 400 grit paper and sprayed it with Easy Off Oven Cleaner. Not quite the look I wanted but not too bad either. I toyed with the idea of using a rivet wheel to simulate the nails that would hold the chafing plate to the mast, but at this scale I decided against it. For the brass band inserts I used an automotive feeler gauge to measure the gap. Then cut a .032 wide strip from a .005 brass shim stock I had on hand. This, and the aluminum, cut very easily with a utility knife. I used fast epoxy to attach the plate and band inserts. Now it’s on to building the gooseneck for the foremast, which looks a bit challenging.
- 389 replies
-
- 4
-
-
- bluenose
- model shipways
- (and 1 more)
-
Welcome! You'll find lots of help here if you ask for it. Looking forward to your build log. Dave
-
Welcome, you're at the right place for a positive learning experience. Dave
-
Welcome! Looking forward to seeing your work.
-
Nice workmanship there! Welcome to the forum. Dave
-
Welcome!
-
Welcome! Anytime is a good time to resume work on a model. You may find putting aside a project for a short or extended time is more common than you think. I sometimes go for weeks without getting anything done in the shipyard. I find forcing myself to work on my model usually ends up in inferior workman ship. Better for me to wait until I'm really ready and looking forward to the task.
-
Welcome, you've come to the right place for help in learning.
-
Welcome Chuck! Trust me, no matter what level anyone here is at we are all learning from each other. Doing is learning.
-
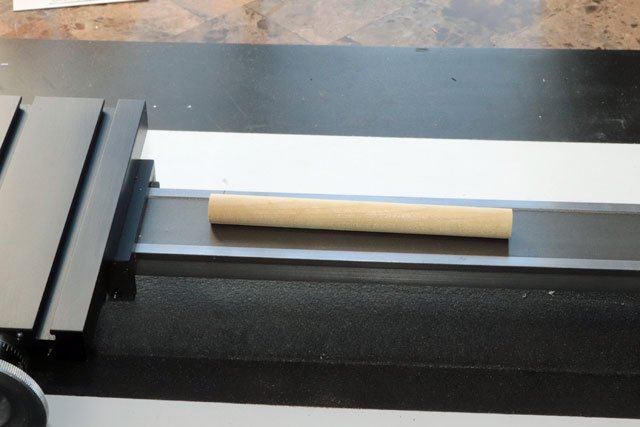
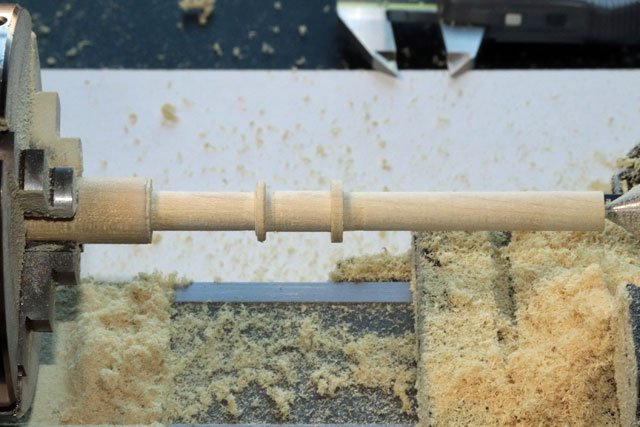
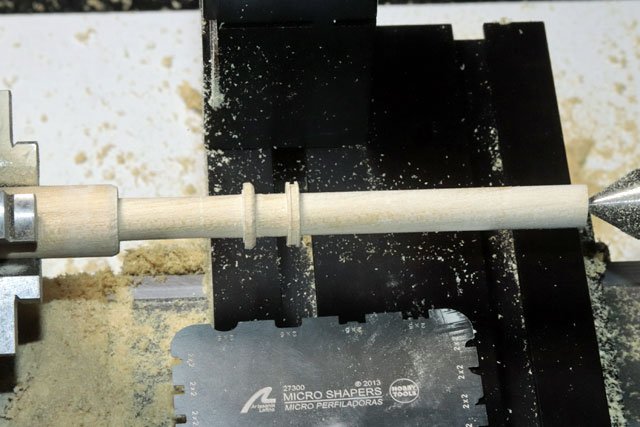
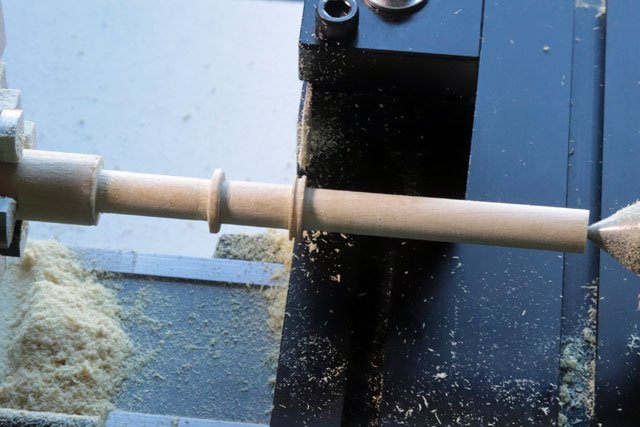
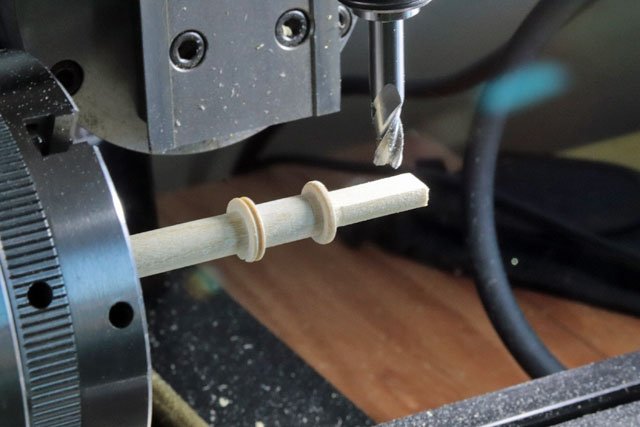
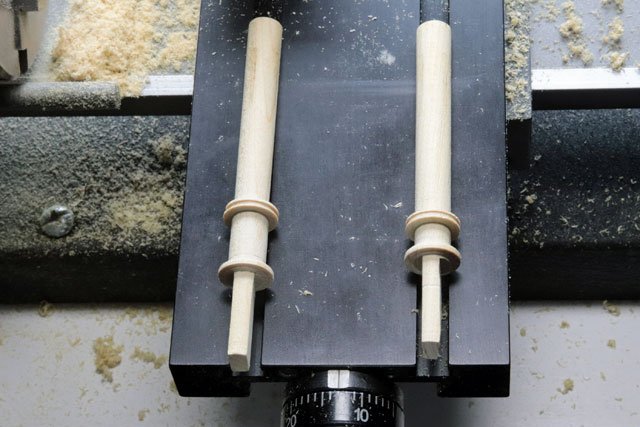
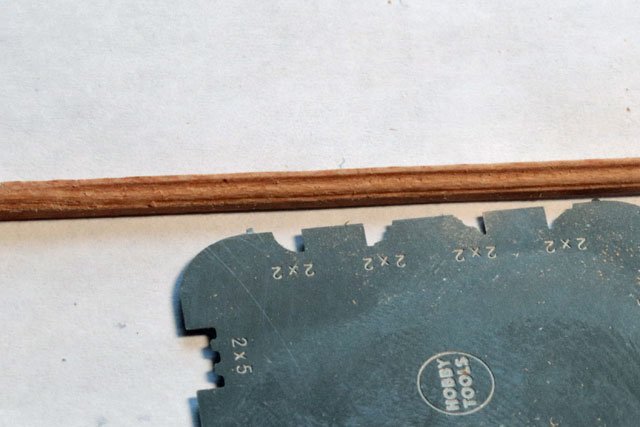
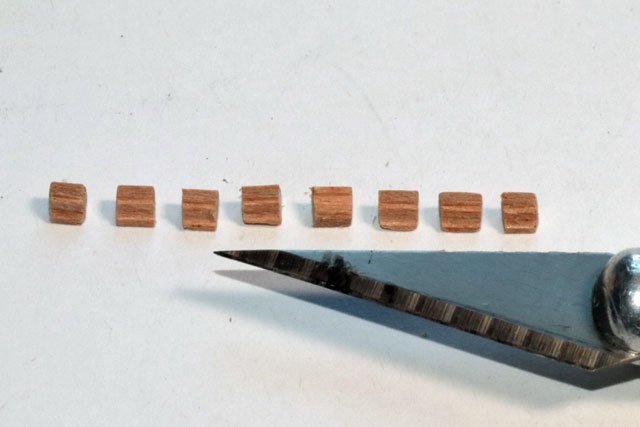
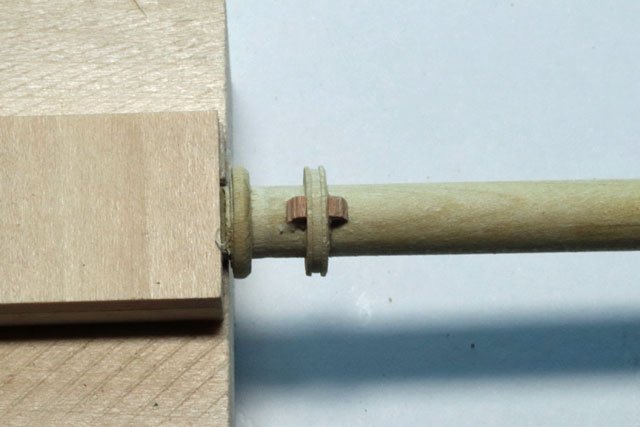
Well, it’s been quite some time since my last update, but I’m fully recovered from surgery now, Christmas décor is up, lawn is put away for the winter and snow blower is ready to go. As mentioned in my previous post, I've decided not to do the entire masts so I can save some money on the display case. The main and foremast will be cut short allowing me to purchase a much shorter case for the model. I’m really limited for display space. I now have a good start of both the main mast and foremast. Poplar isn’t the best wood to work with as it fuzzes up a lot like basswood. But at this stage of my experience I wanted to use what I have on hand. I will be moving on to better woods on future models. I started with a ½ inch poplar dowel rod for each, about 5 inches long. I turned these on the lathe. I used a shaping tool to get the slight taper on the lower band which will sit on the desk. Then used a cut off tool to make the grove in the upper band Then mounted the piece in the mill to form the tendon which will fit into the block below deck that was installed when building the hull. Here is the main mast (on the left) and the foremast (on the right) For the supports blocks I cut a piece of cherry into a 2 mm X 2 mm square and then used a scraper to make the shape I wanted. The cherry is much easier to work with and will add some detail highlights to the model. My bluenose is quite a mixture of woods, shiny brass and blackened brass, but I've already succumbed to the fact that this build is more of a learning process than anything else. My next build will be more uniform. Cutting the length of cherry into individual pieces was accomplished by using an X-ACTO blade to mark the cut and then using my jewelers saw to complete the cut. After trying a razor saw and an X-ACTO saw blade, I found the jewelers saw made the cleanest cut. Using Titebond Quick and Thick, I glued the support blocks (corbels?) into place on both the main mast and foremast. Still have to do the metal bands as well as the “galvanized metal” on the main mast. But first will finish both masts with amber shellac first. Moving along…….

- 389 replies
-
- 6
-
-
-
- bluenose
- model shipways
- (and 1 more)
-
Slipping in from Massachusetts and Minnesota
CPDDET replied to Janelle's topic in New member Introductions
Welcome! -
Welcome, and best of luck!
-
Welcome aboard! Some fine work there on your model.
-
White glue, yellow glue, epoxy, CA They all have their place when used in the correct application. But never Gorilla Glue. At least for me.