


CPDDET
-
Posts
1,194 -
Joined
-
Last visited
Content Type
Profiles
Forums
Gallery
Events
Everything posted by CPDDET
-
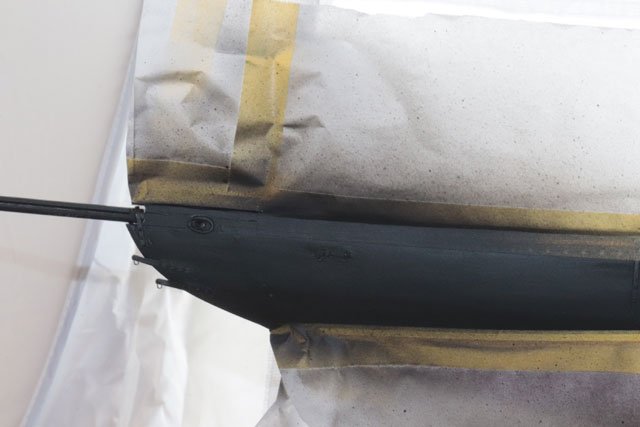
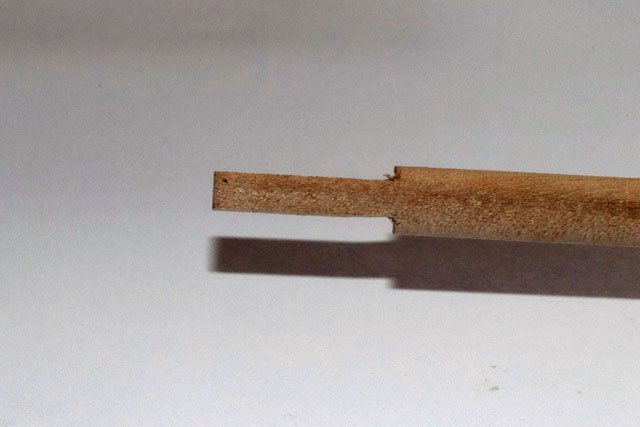
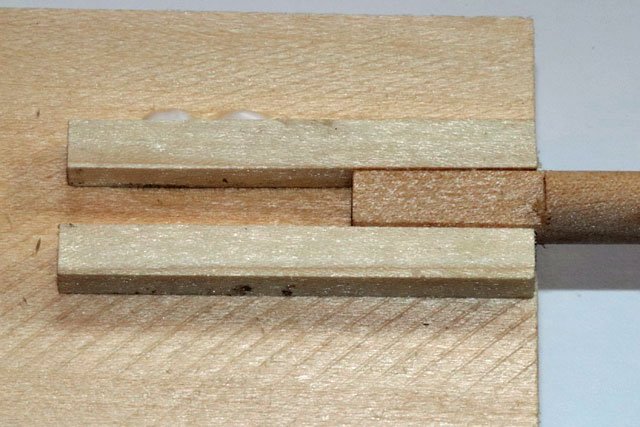
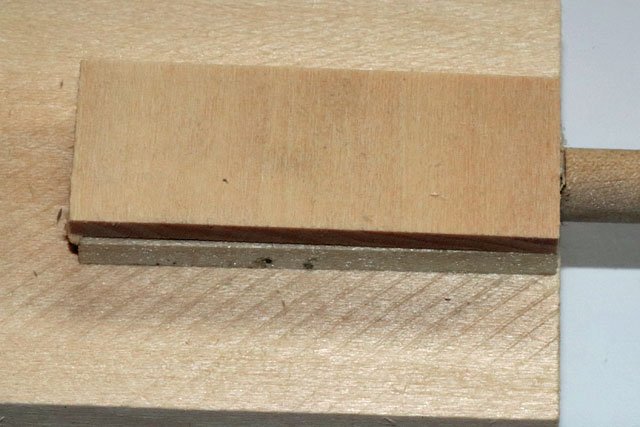
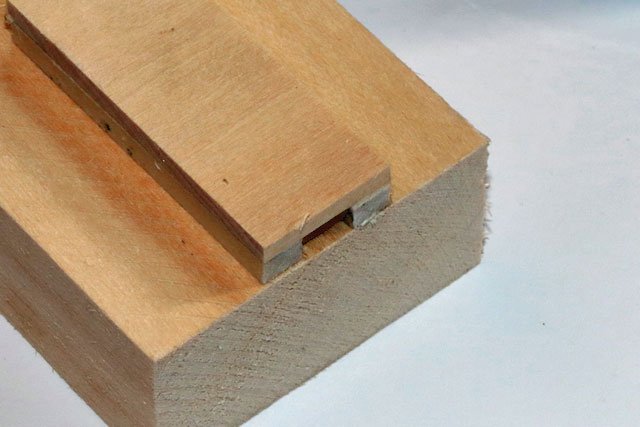
 Got the repainting done today. First masked off the area Then used the air brush to spray a few coats of flat black paint and 2 coats of matt acrylic finish Removed the masking material and was pretty satisfied with the result. No perfect by any means but acceptable Since I’m waiting for the new rigging lines I ordered from Ropes of Scale, I decided to start on the main mast. I first cut the doll rod to length and cut the tendon at the base. Next will be the cheeks, but these need to be on the port and starboard sides of the mast. In order to install these correctly on the round mast I decided to build 2 jigs to help hold things in place. The first was a block that would hold the tendon securely. Then a second jig is a block that I can slide along the mast. This will assist in supporting the mast, cutting in the cheeks as well as tapering the tip of the mast. Once the block on the right is where I need it, I can clamp both blocks to my work table. That’s about it for today. Tomorrow I hope to get the mast notched for the cheeks and get those glued in place. Dave
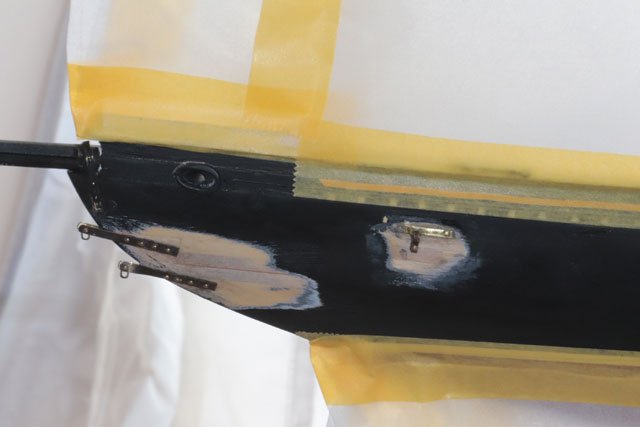


- 389 replies
-
- 3
-

-
- bluenose
- model shipways
- (and 1 more)
-
God willing and the creek don't rise I'll get the bow repainted today. Dave
-
Thanks to everyone for the compliments, support and encouragement. Richard: I suppose I should count up how many shackles I still need but not sure I really want to know. LOL
-
Welcome! Perhaps you would like to view the build logs of others who are working on Victory? While this hobby can be difficult at times, it's something anyone can accomplish with practice and patience. You will find all the help and advice you need here. Good luck and carry on!
-
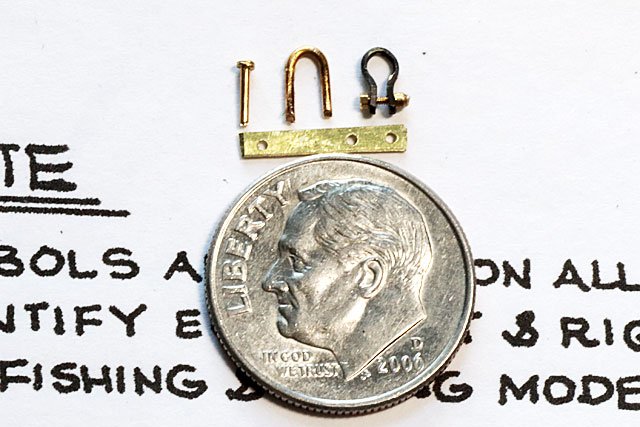
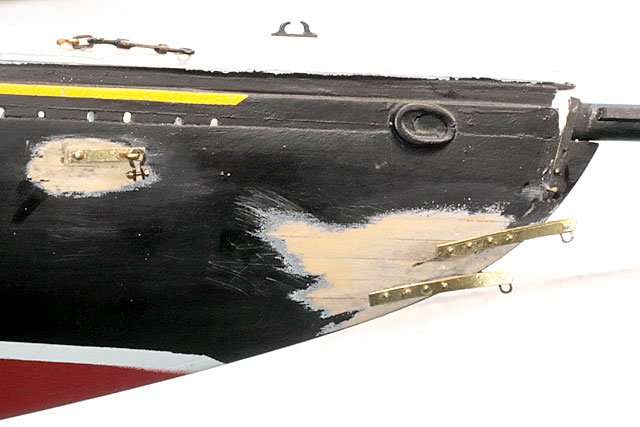
Been awhile since I’ve posted an update on my build. Life just gets busy sometimes and of course its summer so a week long fishing trip to northern Minnesota was in order as well. But I’m back in the shipyard and making some progress. Collected all the pieces needed for the guy plates. All the necessary parts for all these plates were made before hand. Then installed the Bobstay plates with links, Guy plates with staple and shackle and Backrope plates with link and turnbuckles. Got both port and starboard done. Lots of paint touchup to do now as I wanted the plates glued directly to the wood and not just the paint. Plan is to mask and use the airbrush but might brush it, still trying to decide on that. Then I think I will be ready to rig the bowsprit but have to order the needed lines as I don’t want to use those that came with the kit. Dave
- 389 replies
-
- 6
-
-
- bluenose
- model shipways
- (and 1 more)
-
Welcome! You will find a great bunch model Shipwrights here. Very helpful and friendly people.
-
Doing my current build, Bluenose, I have made a few parts from cherry but never bought anything larger that 4 inch X 24 inch X 1/2 inch thick to make these from.
-
One thing I don't own is chisels. Have no idea what sizes I would need.
-
I do have a byrnes saw, byrnes disk sander, sherline mill, sherline lathe and Wen jig saw. Of course many hand tools. Since I plan on using precut lumber, do think I'll need a thickness sander or band saw.
-
Thanks to Dave-E for asking this question. I too am a kit builder who plans on moving to scratch building once my Bluenose is finished.
-
At least for me, that about sums things up. Always nice to learn new things!
-
Email to Ben at Ropes of Scale: Morning Ben, After reading your comments I assume that your cotton line is to be used for running rigging and the polyester for standing rigging. Is this assumption correct? Dave Reply from Ben at Ropes of Scale: Hello Dave, I would just stick with the polyester for all of the rigging. The only reason I keep the cotton line in stock is that I have a few customers that refuse to use polyester for some reason. They begged me to keep selling the cotton rope. Cotton rope is fuzzy and has less texture, the more you work with it on the model the more fuzz comes out. The polyester doesn't do that even if you try. The thread I use for the polyester rope is Gutermann E. It is the strongest and most abrasion-resistant thread I've ever seen. I've used it to replace the slacked rope on some of my old models, It holds the same tension all year round. The cotton sags and tightens with the seasons. I hope this clears things up for you. Regards, Ben
-
Thanks for sharing. I do plan on ordering some samples to work with. I see Ben sells both cotton and polyester lines. Since the cotton will sag over time, I'm assuming that the cotton is used for running rigging and the polyester for standing rigging. But will try and confirm this with Ben
-
That's a bit odd, since we both have the same kit. But at least now I know for sure.
-
The information that the kit lines were a cotton -poly blend came from the parts list that was included with the model. Guess that was wrong.
-
From the Griffin website: Product information "Jewelry Nylon" GRIFFIN Jewelry Nylon is a Nylon bead cord that is twisted once and made from premium nylon with a polished finish, long-lasting highly brilliant colour and supple softness combined with extremely robust thread properties. It is durable and easy to knot as it contracts back to its original length after it has been stretched, making it possible to create precise permanent knots.
-
So I will probably order some line from Ropes of Scale and do some side by side comparisons with the line that came with the kit.
-
Email sent to Ropes of Scale: Sirs, I'm fast approaching the rigging stage of my Bluenose and had some questions. The kit supplies 6 sizes of rigging lines / rope. All of these are cotton poly material. After spending the better part of the day trying to research the most appropriate material for my rigging, I'm more confused than ever. Some say lines should be pre stretched, some say a 50 / 50 mixture of white glue and water should be applied first; some say both. Others claim to use bees wax or even matt finish nail polish. I see you offer both cotton and poly lines. Perhaps you could explain the pros and cons of each material. Of importance to me is avoiding line sag over time, gluing ability, ability to hold knots, UV protection. Since this is my first build I would like to get solid information from an experienced source. Any technical information you could pass along would be much appreciated. Answer received: Hello Dave, I think I read your post on MSW. I can understand the confusion about the whole topic. Everyone has their own approach to rigging and how it should be done. Every type of cordage has its quirks. If you want to avoid sagging lines you should stay away from cotton. My poly rope is really strong, easy to use, and has no fuzz. I've tried PVA and thin CA for gluing knots/seizings and they both work. PVA is the weaker option and it takes the longest since it needs drying. Thin CA is really easy and it penetrates the rope to make a strong bond. For UV protection I would recommend Vallejo Matt Acrylic Varnish diluted 50/50, only use it after you have glued all the knots. If you varnished the rope before using it the glue won't penetrate. Bob Smith Industries has the best CA glues from my experience. The Insta cure super thin is good. The Insta flex thin is also great if you don't want rock-solid joints that stick out at odd angles, it also has less odor than most. You can always try your own experiments and see what you like. I hope I haven't made things more confusing for you. Best regards, Ben
-
Email I sent to Model Expo/ Model Shipways: "I'm in the process of building Bluenose, a kit I purchased from you some time ago. I have a question about the various size lines that came with the kit. Can you tell me what material these lines are made from? Do I need to treat these lines or pre stretch them before using them? I want to avoid any future sagging in the rigging." Answer received: Hello, Dave. The rigging line provided in your Bluenose kit is made in Germany by Griffin.de. They specialize in what they call Jewelry Nylon. This is the premiere line used for stringing pearls and beads. It is almost un-stretchable and knots easily and securely. There is no better thread for rigging model ships. It is unlikely that you'll see any sagging of the line in the future. Marc Mosko, President Model Shipways Inc. dba Model Expo 1155 NW 159th Drive, Miami Gardens, Florida 33169 www.modelexpo-online.com 954-261-7054
-
Enjoy the journey!
-
Just some base information. The kit I'm building is the Model Shipways Bluenose, kit #MS2130. It comes with 6 different size lines. Just found out these are a cotton / poly blend.
-
Thanks for all the tips and clues! I still have some metal work and painting to finish up before rigging the bowsprit. I'll do some trial methods of prepping the line and keep you all posted.
-
I agree that starting with the 3 model series would be the way to go. I would also add the Half Hull Planking Kit offered by the NRG to learn proper planking techniques. Membership in the NRG is a worthwhile investment as well.
-
Will start doing rigging soon on my Bluenose. I understand that the lines should first be coated with a 50 -50 solution of water and white glue . I also read the lines should be pre stretched. Wondered what is the best way to accomplish this. I'm building the MS model #2130 which comes with several different diameter size lines. Not sure what material these lines are made from. Any help would much appreciated. Dave