CPDDET
-
Posts
1,193 -
Joined
-
Last visited
Content Type
Profiles
Forums
Gallery
Events
Everything posted by CPDDET
-
 I have found MSW to be very responsive when I requested replacement items.
 -
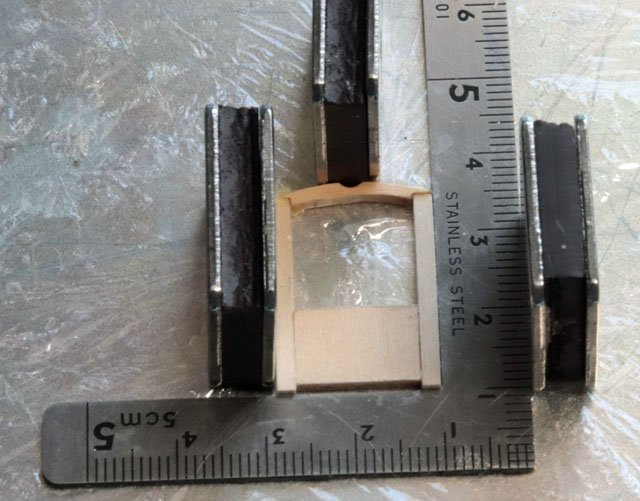
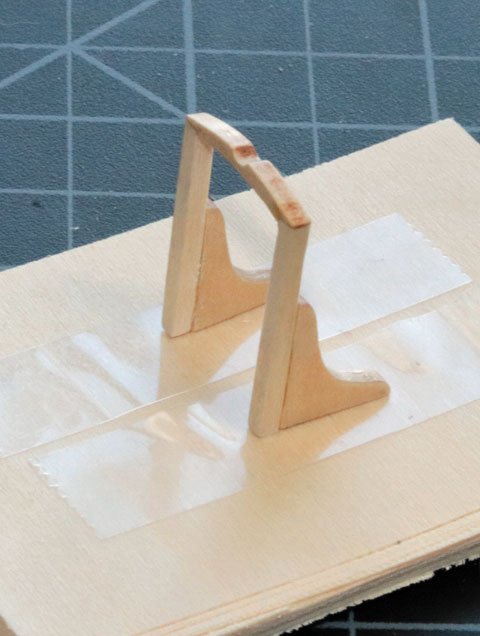
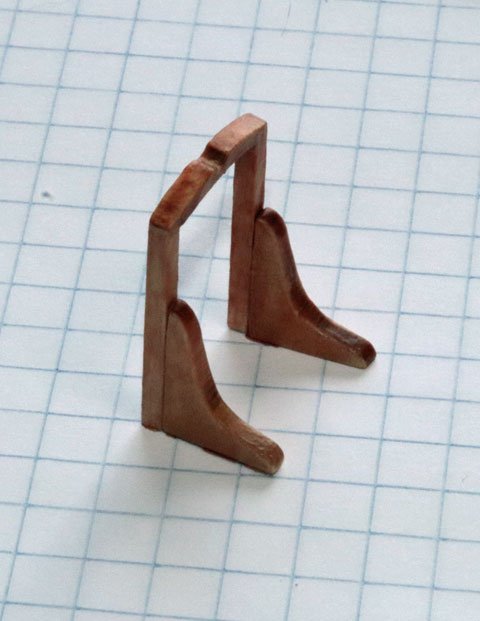
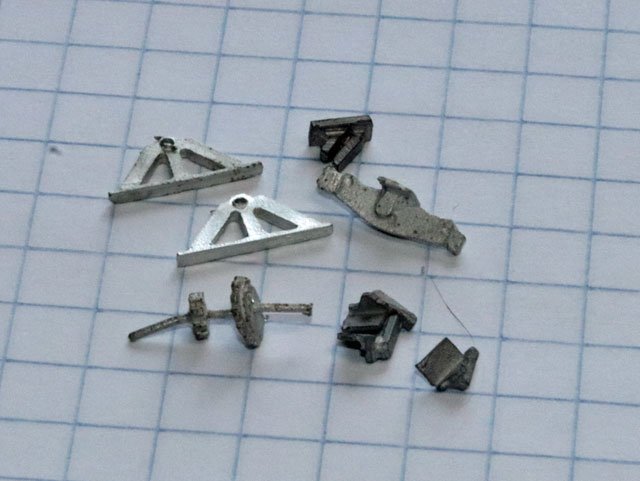
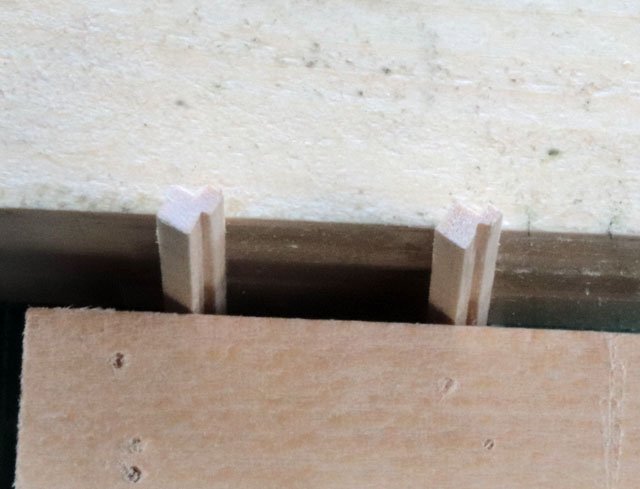
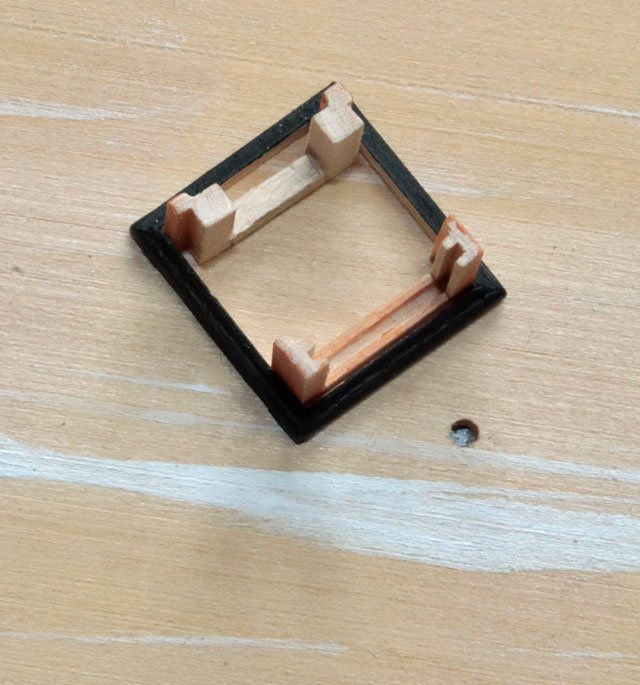
Next up on the build list was the Jumbo Jib Boom Crutch. The top piece and knees are laser cut pieces but the uprights have to be cut from stock. The instructions call for 1/8 square stock but I found the thickness of the laser cut pieces closer to 3/32nds so that’s what I used for the uprights. I cut a scrap piece of wood to place between the uprights in order to keep them at a 90 degree angle while clamping. Using PVA glue I set up clamping on my MicroMark magnetic jig. I have found this 10 ¼ inch square metal tray very useful for clamping various items, especially when it comes to building deck furniture. The ends of the metal plate are bent up at a 90 degree angle which is a big help. In order to keep the glue from bonding to the plate I taped a piece of plastic wrap on it. Plastic wrap (Saran Wrap) seems to work well for PVA and wax paper for CA. After the glue dried I did some sanding and glued on the knees, again with PVA. Then mounted the assembly on a scrap piece of wood with double stick tape. Staying with my color scheme, I put on 3 coats of Varathane Poly Stain instead of painting it white as the plans call for. According to the plans and the instructions that came with the model, the hoisting mechanism attached to the crutch as well as the engine box on the port side of the crutch were removed for racing, so I will be skipping those and install the boom crutch without these parts. As best as I can tell the counter shaft assembly and stand remained on the ship for racing, along with the windlass. So next up will be the countershaft assembly and stand. Some of these parts look usable while others look very rough and will probably have to be remade. And so it continues……
- 389 replies
-
- 5
-

-
- bluenose
- model shipways
- (and 1 more)
-
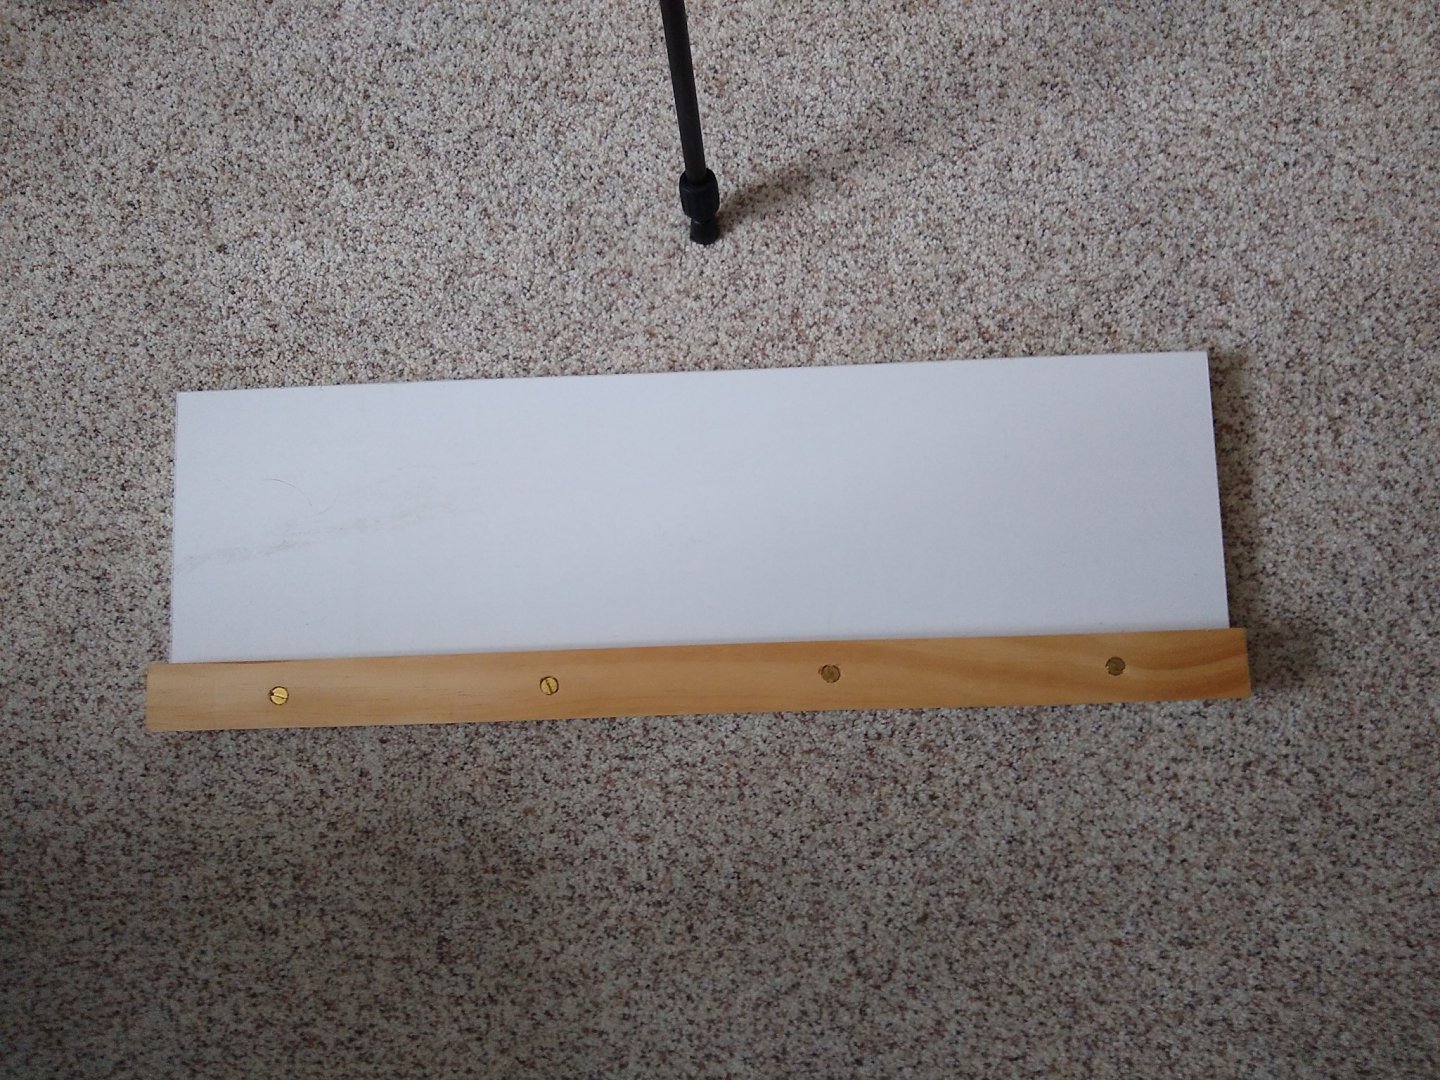
The Book The layout board for the keel It's simply a piece of shelving cut to length and a ledge board screwed down even with the bottom edge of the shelve piece. This allows one to rest the bottom edge of the keel pieces on the shelf and glue them together. Then I placed a second piece of wood on top of the keel and clamped all three layers ( shelf, keel and top board) together. You can use wax paper or index cards over the glued joints.

- 389 replies
-
- 2
-
-
- bluenose
- model shipways
- (and 1 more)
-
Have you measured on the plans?
-
Well said. Progress in technique is what matters.
-
Please be more detailed if you can. There are many people on this site that will help you.
-
Could very well be. In my opinion the Amati is well worth the price, and the wait.
- 389 replies
-
- 1
-
-
- bluenose
- model shipways
- (and 1 more)
-
Lesson learned and moving on, I like that!
-
What's more important at the very start is getting your keel pieces flat and straight. I took a tip from a great book to make mine and I'll pass that along to you ASAP.
-
The homemade keel was used because I already had the ball head and wood to build it. Sort of a cost savings device. It worked fine for the bulkhead installation. But once I got to hull planking stage it became obsolete. I wanted the hull inverted for this step and my homemade keel clamp wouldn't work for that configuration. The clamps on the Amati can be turned from being parallel to the support bar to being at a 90 degree angle to the support bar. This enables one to invert the hull and clamp onto the bulkheabulkheads. So I upgraded and have been extremely pleased with the Amati. I was advised long ago by experienced builders to buy tools as needed and buy the best one can afford, advice I didn't always follow. I now have several hand tools I never use because I was anticipating a need that never happened. Had I researched more and asked experienced builders advice I could have saved myself unnecessary purchases. Buying tools as one proceeds with their first build can really slow things down. But this hobby requires a lot of patience and by the time one finishes their first build they will have acquired a set of quality tools they will actually use. I have to be especially careful as I'm a real tool nut. LOL
- 389 replies
-
- 1
-
-
- bluenose
- model shipways
- (and 1 more)
-
Couldn't agree with you more, Pat. I've learned so much from the other model shipwrights on this site, both from their successes and their mistakes. Knowing I will always find acceptance, help and support enables me to post my failures. And, hopefully, my successes will help others along their journey. Life has taught me there will always be others who are more gifted, or more experienced than myself. But that doesn't mean I'm not making my best effort. If anything, their accomplishments challenge and inspire me. Carry on, mates!
-
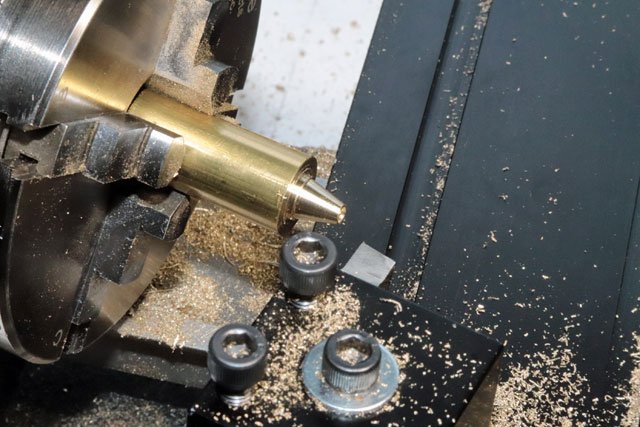
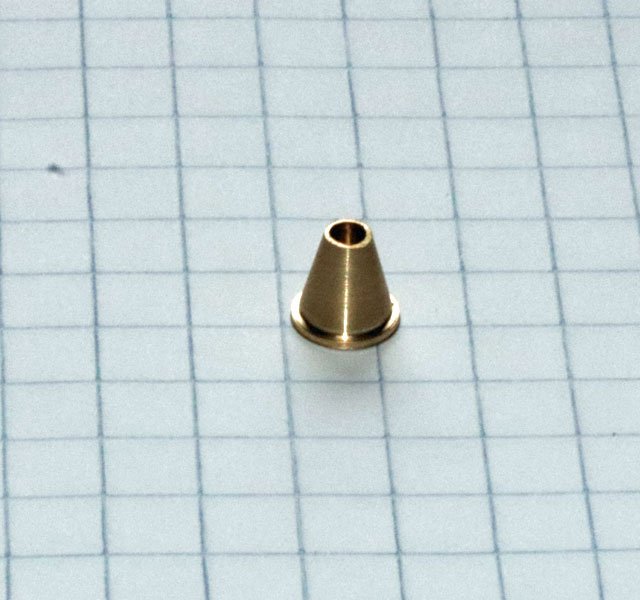
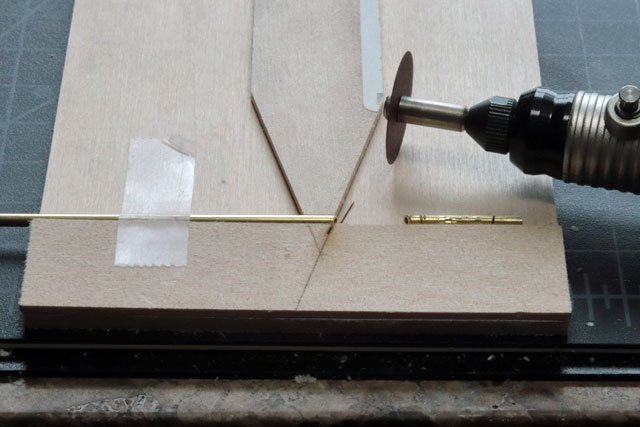
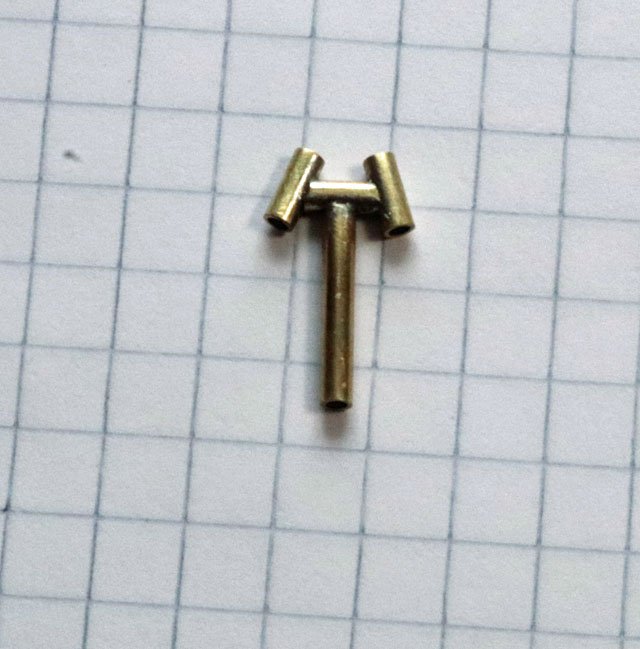
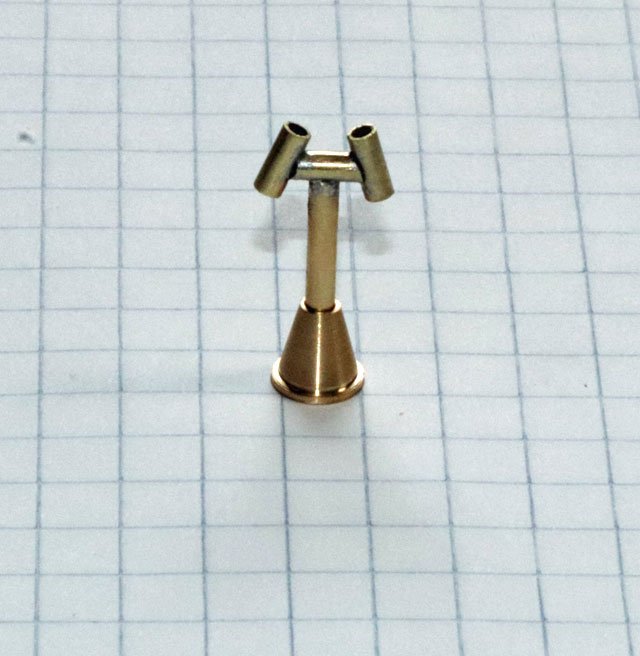
The last item was the dreadnaught stack. Using a piece of brass, I turned the cone shaped base on the lathe by rotating the headstock 15 degrees clockwise. Cutting the upright stack and the 2 side stacks was straight forward. It was the center piece that was tricky. Bothe ends of this piece needed to be cut at a 15 degree angle and they need to be perfectly parallel with each other. Since this was round stock it kept “rolling” slightly when I attempted to make the second cut with a razor saw and then with a jewelers saw. Finally I made a jig to hold the brass tube securely and cut both ends with a high speed tool and cut off disk. (thanks to overworked 247 for the tip on this tool). I filed the top end of the upright and both ends of the center piece with a round file for a better fit and soldered the pieces together and then into the cone shaped base. Moving forward…..
- 389 replies
-
- 7
-
-
- bluenose
- model shipways
- (and 1 more)
-
Next was the companionway. I wanted to do a better build on this this piece than the skylight and really tried to keep everything in scale, including the size of the side and top boards, the width and height of the baseboard and such. I started by building the 2 aft corners, cutting slots in which the companionway boards would fit into. I cut these much longer than needed for “do overs”. Then I fashioned the 2 forward corners like those on the skylight, again longer than needed for any “do overs” Instead of using a simple rectangular piece of wood for the base molding as I did on the skylight, I used a scraper to achieve better detail. I found it much easier to use a 4 inch long by 2 inch wide piece of stock basswood of the proper thickness, locked into a bench vice and scraped before cutting it to the proper height. This also allowed me to have more base molding than needed for “do overs”. Then I mitered and glued the corners. To avoid a gap between the aft base molding and the bottom companionway board I cut a threshold with a groove that the bottom of the companionway board would fit into. Instead of using my usual method of scoring and using a stylus to simulate individual board, I decided to cut individual board of the proper scale and edge glue them. In order to show s bit of separation in the boards I lightly beveled the edges before gluing them together. After getting all the pieces painted and stained I began the assembly by gluing the aft corners with the threshold piece at the base and the forward corners with a stiffener at the base. The threshold and stiffener made sure these corner pieces would form a solid 90 degree angle to the base. After carefully measuring and cutting the pieces I slid the companionway boards and side/top panels into place. Next was to fashion the 2 rails that support the top. After painting these and building the top, I finished the assembly. It isn’t exactly the way I wanted it, but I think at his point it’s my best effort so far. But there is much room for improvement.


- 389 replies
-
- 5
-
-
- bluenose
- model shipways
- (and 1 more)
-
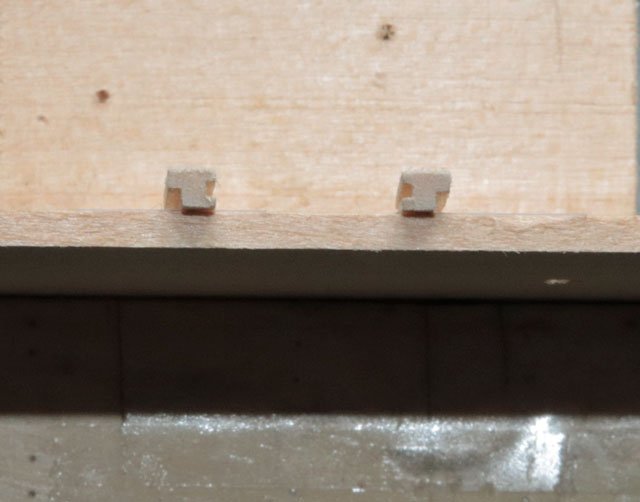
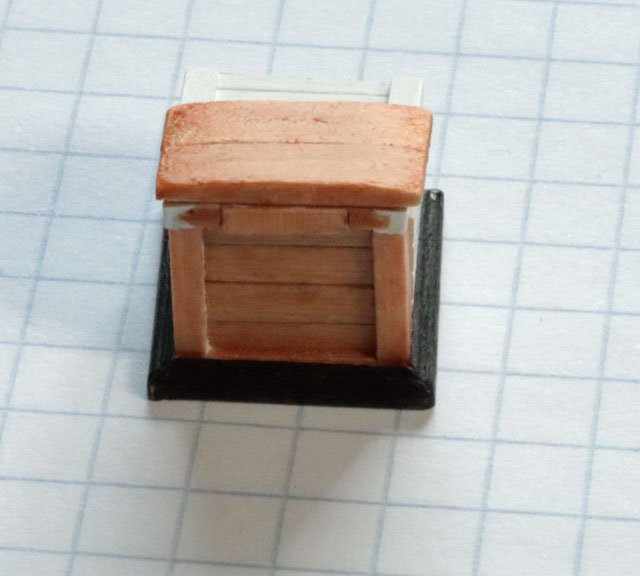
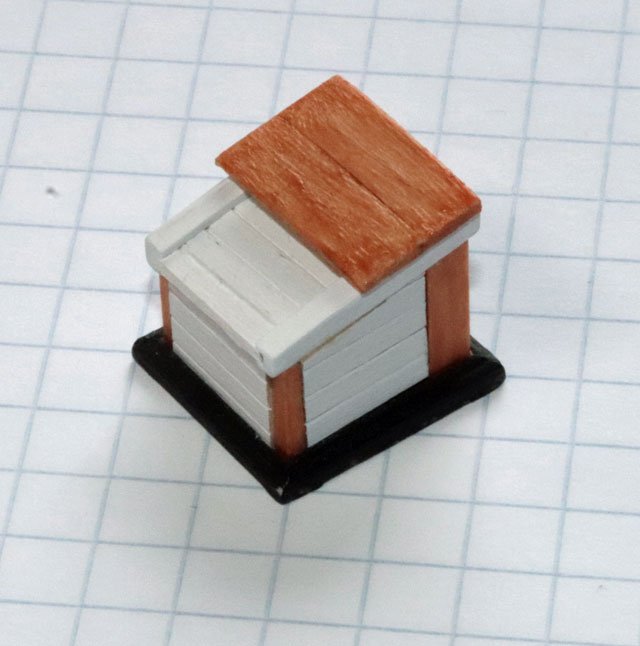
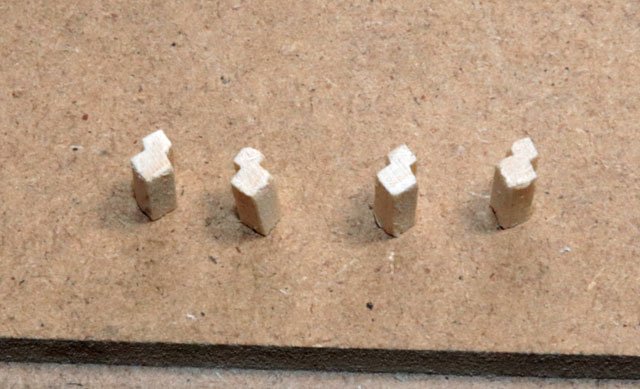
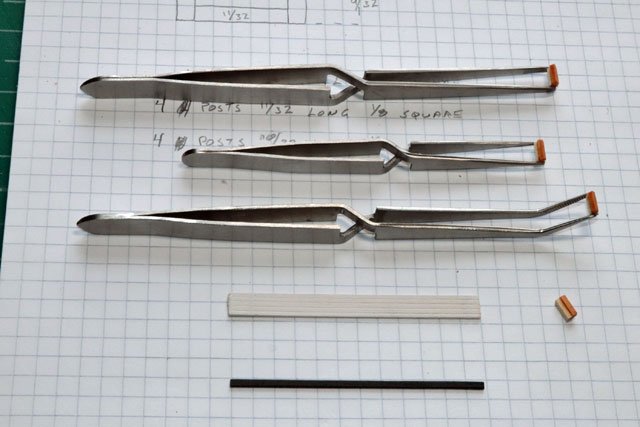
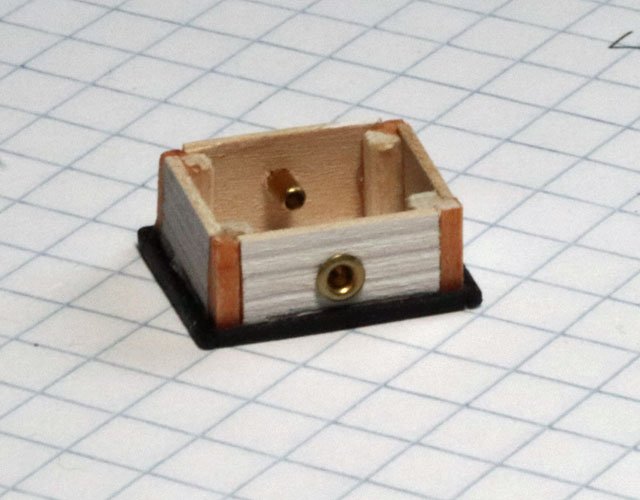
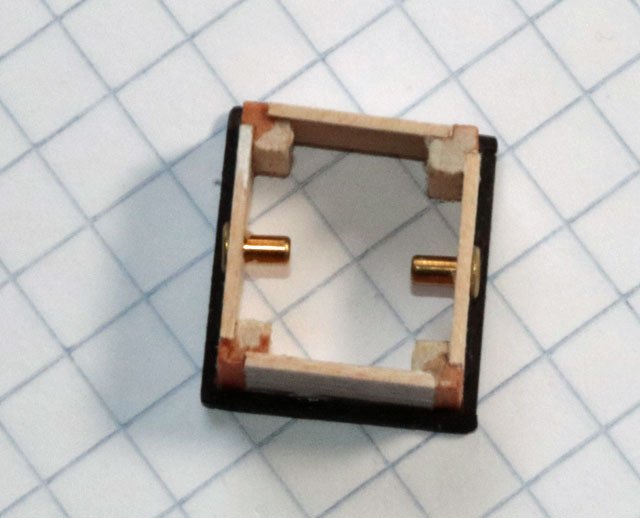
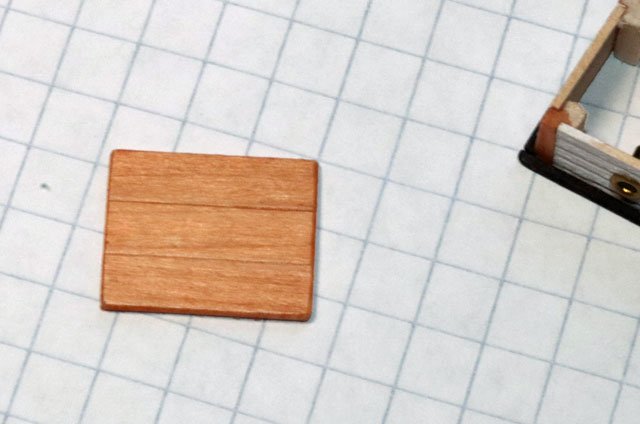
It’s been a while since I posted but I managed to build 3 deck pieces during that time. The first piece is called a skylight on the build plans but is completely different that the skylight over the main cabin. I started by cutting the corner pieces on the Byrnes saw. Then I made the side panels in the same way I have been doing: scoring a shallow line with a very fine tooth saw and widening these with a small, round stylus to simulate the separate boards. I also made a simple baseboard and got everything painted and stained. It was pretty straight forward from there, cutting everything to size and gluing them together. I drilled holes for the port light and installed the brass fittings After fashioning the top piece I glued that on to finish the piece.

- 389 replies
-
- 5
-
-
- bluenose
- model shipways
- (and 1 more)
-
Have a large update ready but having some problems. Every time I attempt to upload the site times out. Trying this short message to see if it works.
-
Won't be ordering the mill until later this month. I've finished the forward skylight and the companionway and will be starting the smoke stack today. Things are moving a bit more slowly than normal as I continue to refine scale, accuracy and technique. My next post will include all three of the above pieces.
- 389 replies
-
- 2
-
-
- bluenose
- model shipways
- (and 1 more)
-
Be brave, Pat. Be brave.
-
Well worth checking out
-
Could cherry or mahogany work? Both are easy to work with and readily available.
-
I always found different woods and their colors attractive on a model. Use it to your advantage, Pat. Looking sweet so far!
-
Looking good, Ron
-
It's your model, build what pleases your eye. If that means historically accurate, fine. If not, that's fine as well.
-
Simply a wonderful work around, Pat. Great job of thinking outside the box.
-
Take your time and enjoy!