


CPDDET
-
Posts
1,194 -
Joined
-
Last visited
Content Type
Profiles
Forums
Gallery
Events
Everything posted by CPDDET
-
 That's the plan. I will experiment with other wood as well besides cedar. Boxwood seems the most desirable, but the scarcity of it troubles me. Lots of research to do before I attempt my first scratch build.
 -
Thanks Patrick, just looking ahead to my next build which will be from scratch. Planning on something small like a dory to perfect my skills before taking on a ship like yours. I appreciate your input. Dave
-
Great information on these posts. Patrick, could you comment further on how cedar is working in other aspects? I see yellow cedar is readily available.
-
Looking good Patrick. I like the idea of using the brass bar as a stop. I'm sure that tip will come in handy for me.
-
Finished building the compass housing, just have some sanding cleanup and painting to do. Really tried to keep things in scale and decided on 1/16 wide by 1/32 thick boards for the top cover. This is equal to 2 inches thick by 4 inches wide. I started by putting two pieces of 1/16 stock together with double stick tape. Copied the shape of the front panel from the plans, cut it out on a scroll saw and sanded the edges of both pieces smooth. After separating the two pieces I drilled the needed hole in the front panel. Using another scrap of 1/16 stock I made a base to join the front and back panels. Then ripped a piece of 1/32 thick stock to make a 1/16 wide plank several inches long. After cutting the plank into 10-12 pieces, which were slightly longer than needed, I glued them in individually to form the cover of the housing. Cutting the planks / boards a bit longer than needed allowed them to slightly overhang both the front and rear panels. Then it was a simple job of sanding them flush. Came out fairly well. When this is done I’ll move on to the vent / smoke stack which I plan to build from brass tubing. Time to gather the needed tools and material for that.


- 389 replies
-
- 5
-

-
- bluenose
- model shipways
- (and 1 more)
-
I've often pondered the use of an alternative to basswood. Got to be a better way and you're convincing me.
-
Wow! Your extra time spent filling and sanding really paid off. Looks very nice and will provide a great canvas for finishing.
-
Looking good, Pat. Forge ahead!
-
Nice job! I struggled for the longest time with the skylight. Dave
-
Historical or not, hull planking is a challenge your doing well with. Congrats on the progress, Pat.
-
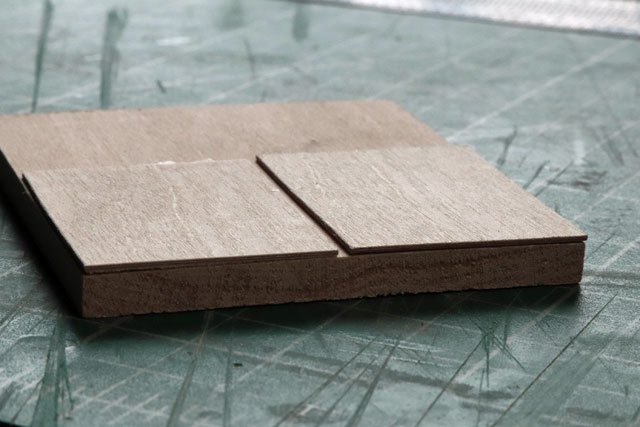
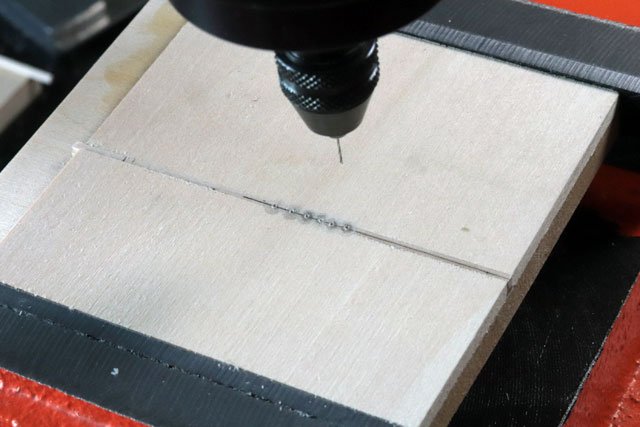
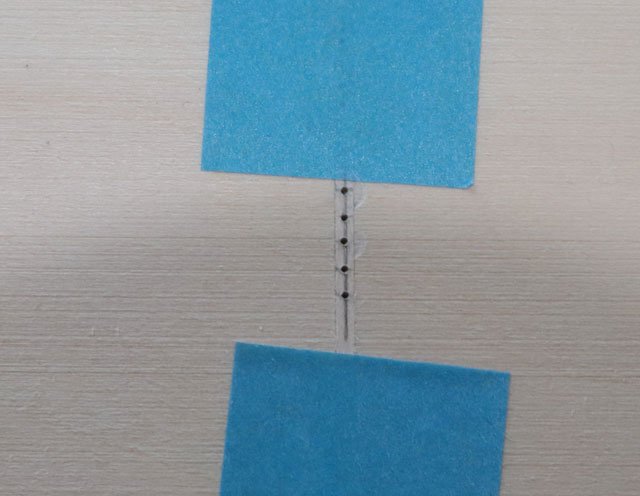
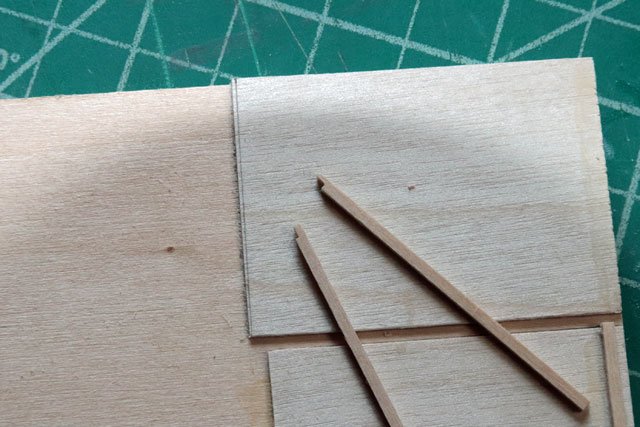
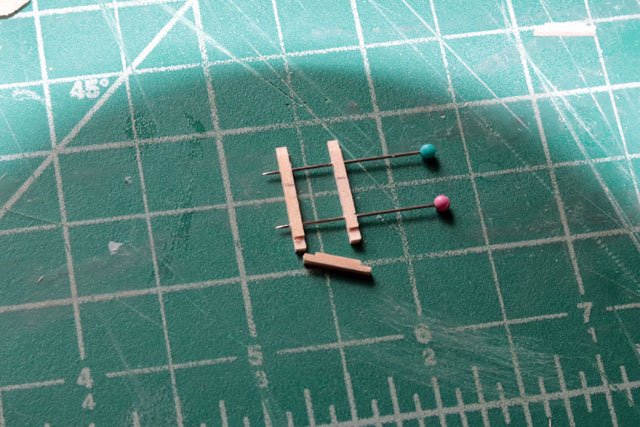
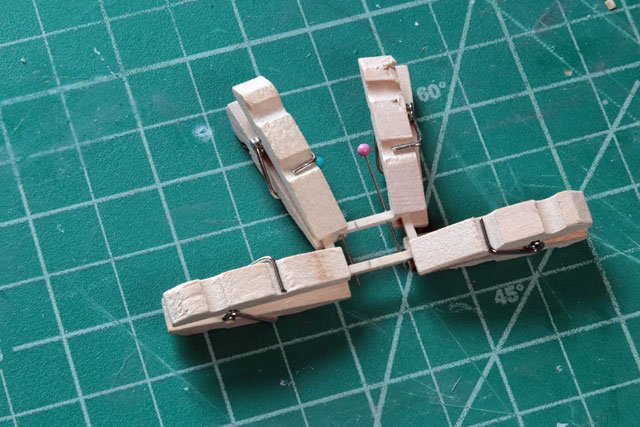
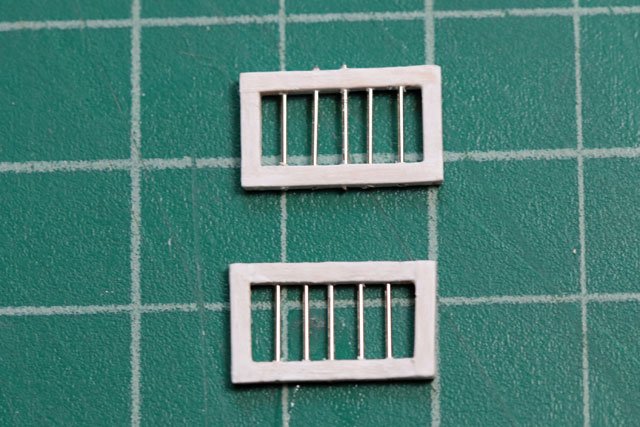
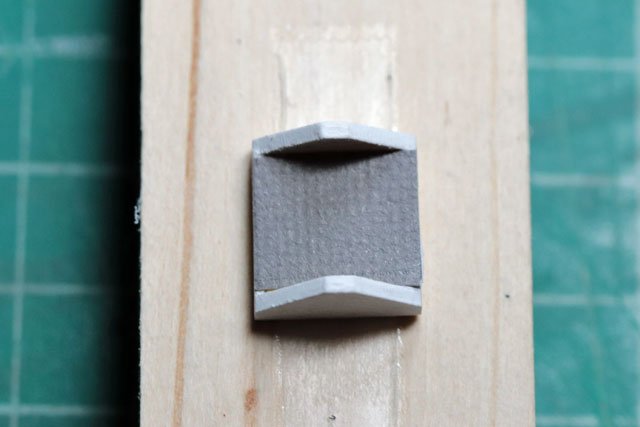
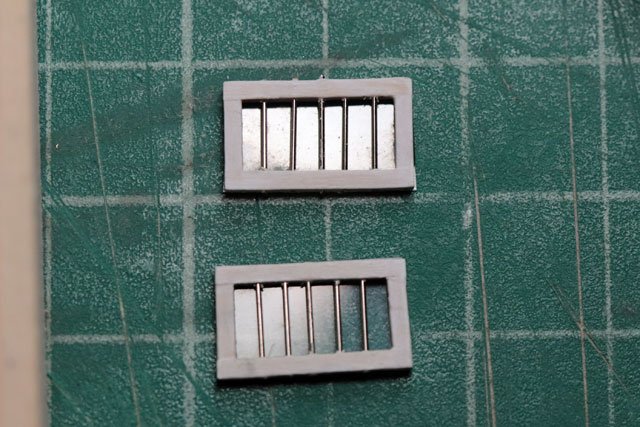
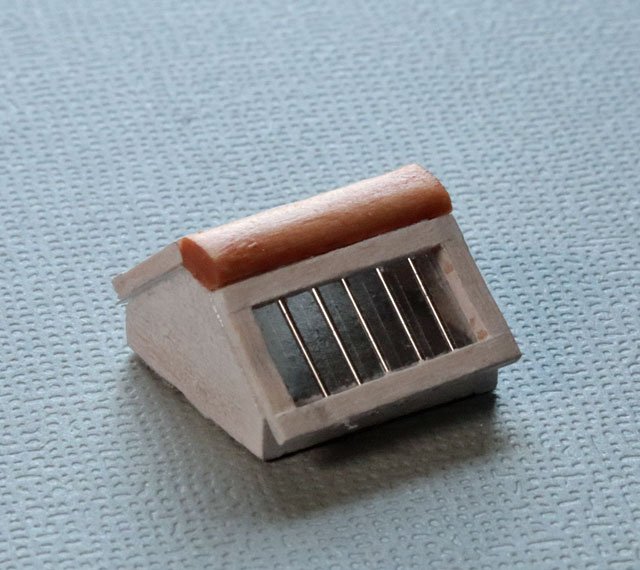
Finally back in the boatyard. Had some emergency medical issues to deal with but back in fine shape now. Also decided to reorganize my work area as things were getting too cluttered. The issues I was having with the skylight are now solved and thought I would go into a bit more detail on how I solved them. The workmanship still isn't what I would like but at this stage of my skill I feel its my best effort. The two problems I was facing was building a strong enough window frame and drilling holes for the bars that would line up from the top frame to the bottom frame so the bars would be straight. I built a jig that would hold 2 pieces of wood stacked on each other. Then, using my Dremel drill press, drilled five 1/64" holes through both pieces. In order to build a stronger window frame I decided to use thicker stock and cut lap joints to give the Titebond something to adhere to. So I made jigs that would limit both my vertical and horizontal cuts. Then carefully cut the 4 sides of each frame. Using pins that would eventually become the bars for alignment, I glued the frames together. After painting the frames I inserted 5 pins in each and trimmed them to fit. For the housing I glued in a piece of craft paper to hide the framing that would show through the skylight. I glued some very thin craft plastic to the back of the frames to serve as windows panes. After gluing the windows to the housing I fashioned the top piece. This took a bit of doing but my new Byrnes disk sander made it much easier, sanding the 40 degree angles to fit. Then stained the piece and glued it in. Now it's on to the compass housing.

- 389 replies
-
- 5
-
-
- bluenose
- model shipways
- (and 1 more)
-
You worked it out nicely!
-
Very nice work!
-
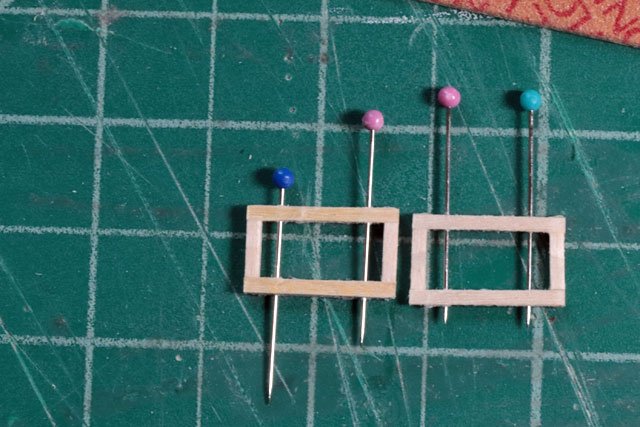
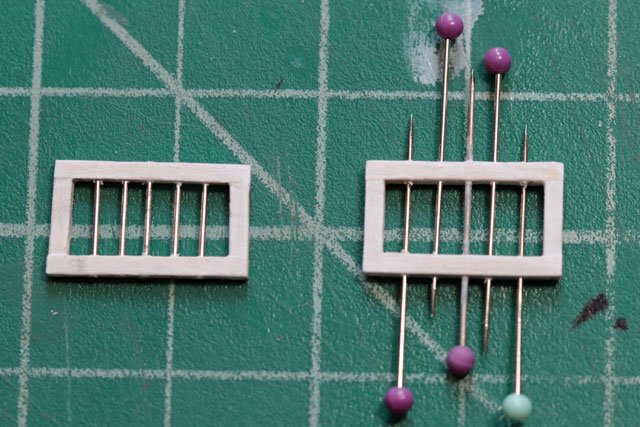
Might be a good solution. I made my frames a bit thicker, 1/32, and drilled holes for the bars. Still have to assemble this. Will try using straight pins for the bars. They are 1/64 diamiter. Wish they were gold instead of silver. Will also try thinning copper wire with a draw plate for the bars.
-
As usual, will have to test different methods on scrap material. Since the "glass" will be below the bars I sure don't want it to come loose. Might be impossible to fix.
-
Still not sure how I will attach it to the painted basswood. I'll test CA but wonder if silicone might work better. Always something.....
-
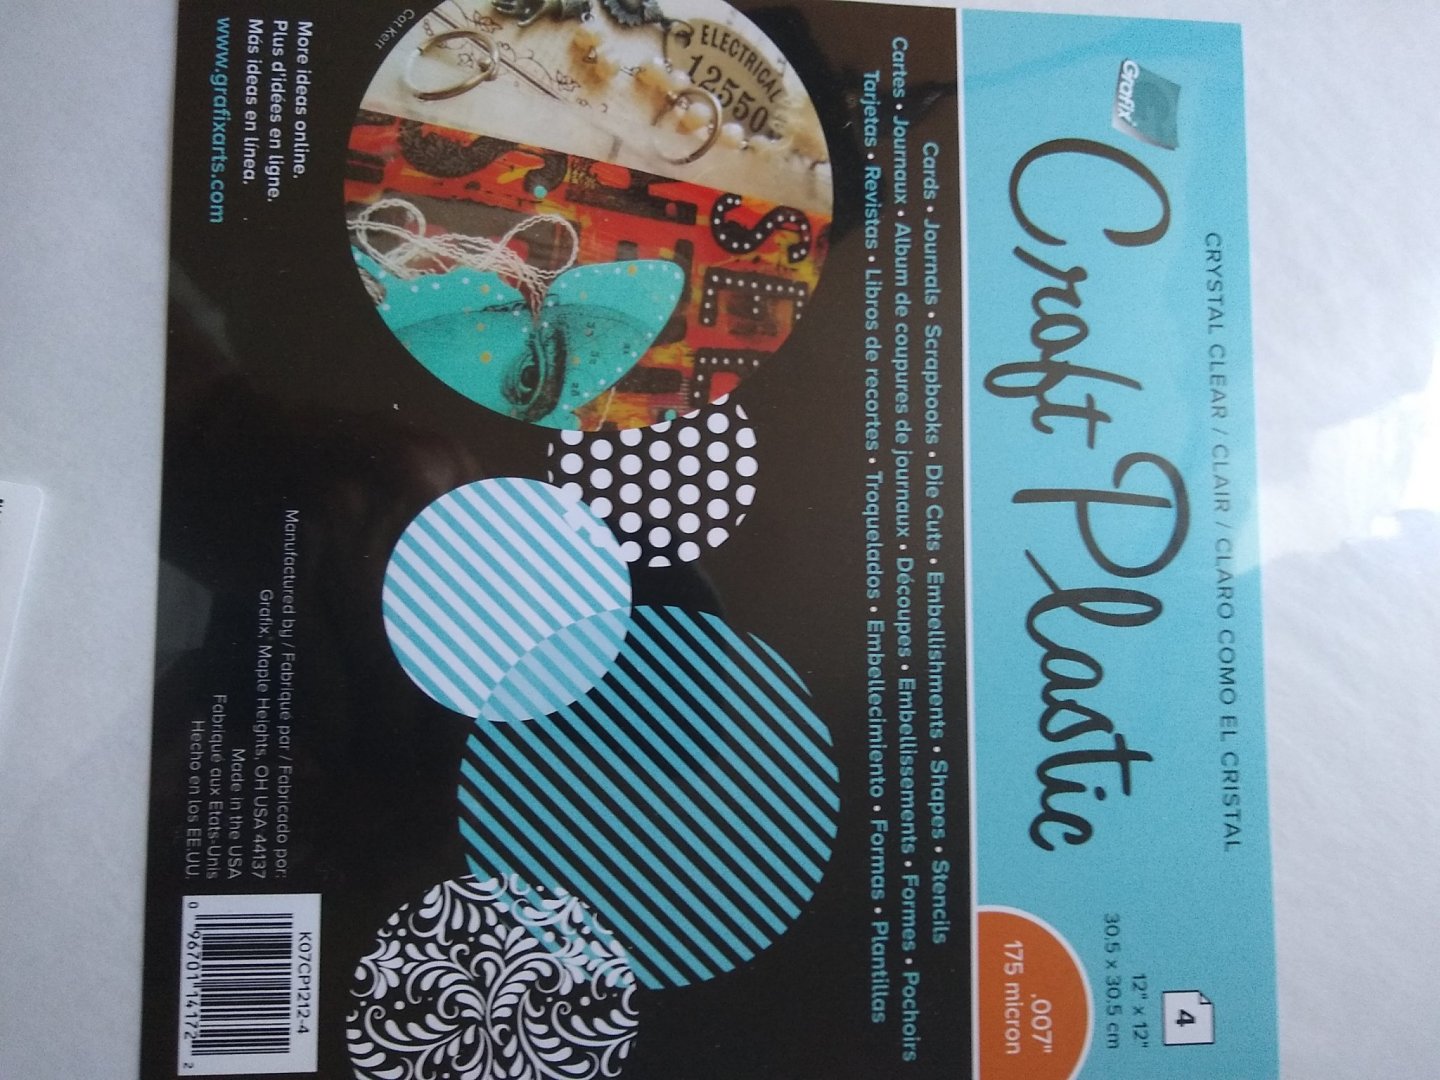
I'm working on the skylight as well. Plan on using Grafix Craft Plastic. Crystal clear .007 thick. Comes in 12" X 12" sheets, 4 to a package.
-
I also had issues with the Model Expo paint and switched to Badger for airbrushing and Tamiya for brushing. You could try to run your current paint through a nylon stocking to remove the lumps. Then use a quality extender or thinner.
-
Welcome to the best site on the web for model shipbuilding. I'll chime in on the scale of the model you choose. I'm on my first build, Bluenose, which is a 1:64th scale. That means 1 inch on the real ship equals 1/64 inch on the model, or 1 foot on the real ship equals 3/16th of an inch on the model. At this scale, details become very small and can be difficult to produce. I would advise a larger scale model for your first build. Check around this site for more information on kits, card builds, scratch builds.
-
Could the cracking be caused by to thick of a blade? I had this happen once when trying to use a utility knife. But if your using a single edge razor blade you can't get much thinner than that. Basswood isn't the easiest stuff to work with for sure. Dents easily, difficult to cut straight and clean, tough to paint, way too absorbant and on and on.
-
Using the half hull kit as a distraction sounds like a good idea. But my work space is a bit limited to have both builds going at the same time. But it is tempting.
-
Byrnes Sander or saw, that is the Question?
CPDDET replied to Nirvana's topic in Modeling tools and Workshop Equipment
I had the luxury of ordering both with my tax refund. But if I had to choose one it would definitely be the saw with attachments. -
The sand paper I used is available at any hardware / home improvement store. It comes in a roll (3 feet long?) And an inch or so wide. It's used by plumbers to clean copper pipe before soldering. I also have the NRG half hull kit waiting for me once I finish my Bluenose. I really need to get a firm grasp on proper hull planking before I attempt any further models. While the painted hull of my Bluenose looks pretty good, I had to use a coating of wood putty over the entire hull to get it than way. I've decided I don't want to paint any future models and only use oils / stains on the wood. But to do that my planking techniques have a long way to go. Carry on, Pat. You're doing good work. D
-
Sorry to hear about your frustrations. But I can easily relate. Sometimes I find it better to just walk away from my build rather than trying to push through the problem. My mind continues to ponder on the problem even away from the shipyard, and sometimes I will come up with an out of the box solution. I know this doesn't answer your question, but I wanted to at least offer some moral support. As for tapering hull planks, and deck planks for that matter, here is what I did. Probably not the best solution but it worked for me. First I took a board of the same thickness and length of the planking boards but 3 to 4 inches wide. Then I took a metal ruler (12-16 inch) and glued a sandpaper strip to the backside. I then drew the taper on the plank, butted it up against the larger board and placed the ruler along the line I drew. The ruler overlapped both the plank and the larger board. I found the sandpaper on the backside of the ruler trapped and held the plank firmly enough to allow me to taper it with a knife. Perhaps there is a way to also get sandpaper below the plank as well and "sandwich" it in to hold it firmly. I think this may work better if the larger board is very slightly thinner (1/64) than the plank. Too much difference may cause the knife to run at an angle. I took the dive and invested my tax return in a Byrne's saw. I would hope this will solve any future problems with tapering. D
-
Byrne's saw accessories question..
CPDDET replied to CPDDET's topic in Modeling tools and Workshop Equipment
While I have owned a radial arm saw many years ago, I've never owned or operated a table saw. Seems to me my Byrne's saw is just a smaller version of the full size machine so the same techniques and safety rules apply. While waiting for delivery of the saw I decided to purchase the following and get some education. https://m.barnesandnoble.com/w/tauntons-complete-illustrated-guide-to-tablesaws-paul-anthony/1103185359

