HOLIDAY DONATION DRIVE - SUPPORT MSW - DO YOUR PART TO KEEP THIS GREAT FORUM GOING! (Only 53 donations so far out of 49,000 members - C'mon guys!)
×


CPDDET
-
Posts
1,188 -
Joined
-
Last visited
Content Type
Profiles
Forums
Gallery
Events
Everything posted by CPDDET
-
 Sorry to hear about your shoulder. Hope the MRI results show nothing major. Hoisting those beers can be tough. But I can relate to your feelings of guilt. Spring cleaning and yard work has my progress delayed and my Bluenose is feeling neglected. Here's wishing you a quick and complete recovery.
 -
If anyone is going to purchase a lathe or mill, or if you have recently purchased either of these I highly recommend viewing these videos. Very well done and very informative. While they are based on Sherline products, many of the topics will apply to other brands as well. http://www.minimachining.com/
-
- 7
-

-
Nice work! Well worth your time and effort. I've learned, and continue to learn from your build log. Thanks for sharing. Dave
-
I believe this process was covered somewhat in an issue of the Nautical Research Journal.
-
I assume your using a lathe. Wood or metal lathe? Brand? I have a Sherline lathe and could be of some assistance if your using that. I set the cutting edge of the tool even with the center of the piece I'm turning. Speed & feed are determined by the material being turned. Your lathe manufacturer should be of help with your questions.
-
Wondering if anyone is using a pantograph to copy sections of build plans? Some items on my build plans are shown at twice scale size. Thought it might work using a pantograph to trace at scale size, cut out the item and then glue / past scale size drawing to whatever medium being used (wood, plastic, metal) before fashioning the item.
-
How wonderful to have such a beautiful hand down. And knowing the history makes it even more precious. A family heirloom for sure! Thanks for sharing.
-
Hand Saw Recommendations
CPDDET replied to Jonathan_219's topic in Modeling tools and Workshop Equipment
I have been very happy with my 2 sided japanese pull saw. One side for soft wood and one for soft wood. It's a flush cut saw so the blade is very flexible. 5 inch blade isn't too cumbersome. Cuts quick and clean. https://www.amazon.com/SUIZAN-Japanese-Flush-Hardwood-Softwood/dp/B07T9K59D1 -
Hey Ed, my first ship build as well. Welcome to the wonderful, tedious, maddening world of model ship building. I'm almost positive I got the port lights at Modelers Central. They are in Australia so took a while to get them. You may want to ask around on one of the forums for someplace in the US. Many years ago I lived in Sugar Grove. Now I'm just south of Huntley. Dave
- 389 replies
-
- 1
-
-
- bluenose
- model shipways
- (and 1 more)
-
Your ability to think outside the box always amazes me. I squirrel away your great ideas as I'm sure I will adapt them to my build at some point. Great work as always!
-
Seems like there is always something that causes work delays. There are many weeks when I only manage a few hours in the shipyard
-
Thanks for posting your findings on the blocks. I'm taking notes.
-
Yep, Richard. I'm really starting to enjoy the challenge. And the satisfaction as well.
- 389 replies
-
- 1
-
-
- bluenose
- model shipways
- (and 1 more)
-
Thanks!
-
Thanks, Pat. And Happy St. Paddy's Day! Now have to decide about the hand brake beam that mounts on the sampson post. Use the white metal one that came with the kit or fashion my own. Decisions, decisions, decisions.......
- 389 replies
-
- 1
-
-
- bluenose
- model shipways
- (and 1 more)
-
Fine work as always, Richard. I just posted yesterday on my windlass and still have to fashion the bilge pumps. Then it's on to the chain plates. I'll be sure to check your previous posts as I proceed. By the way, what type of solder are you using? Dave
-
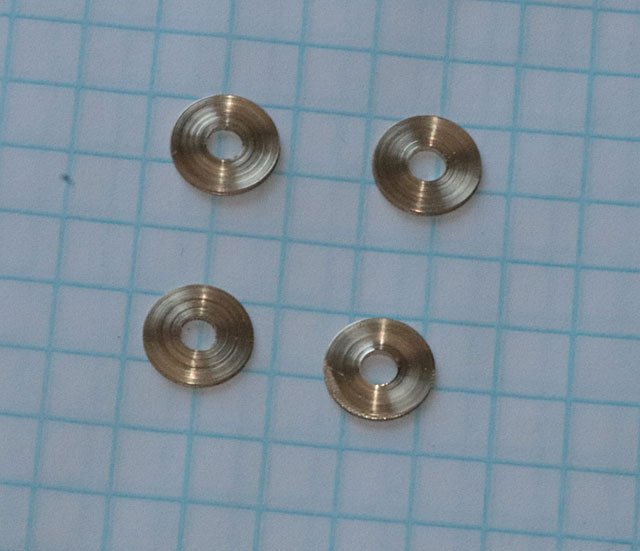
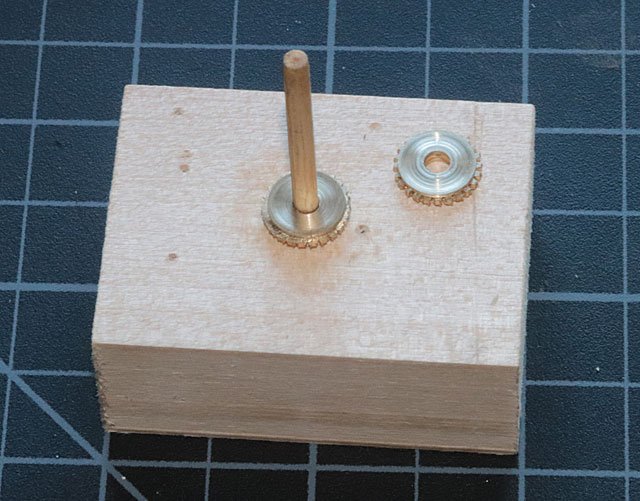
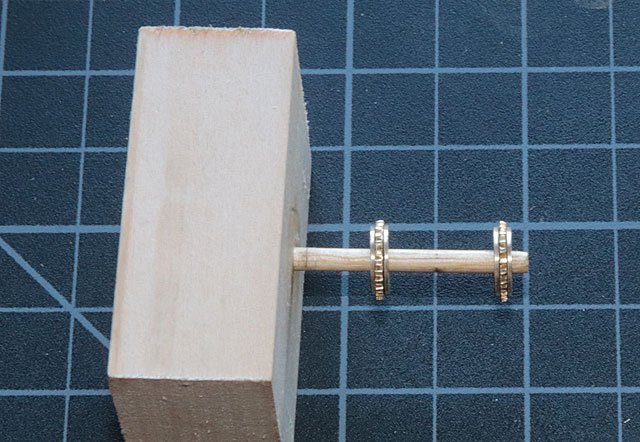
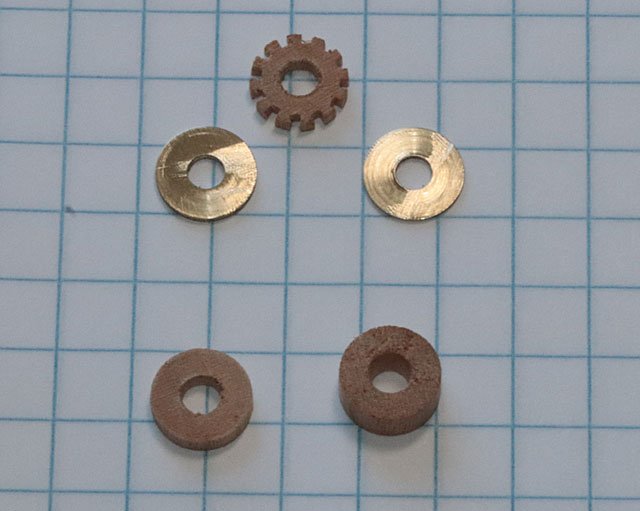
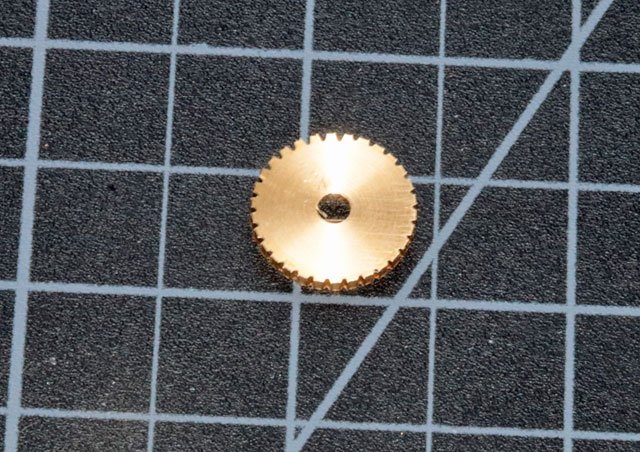
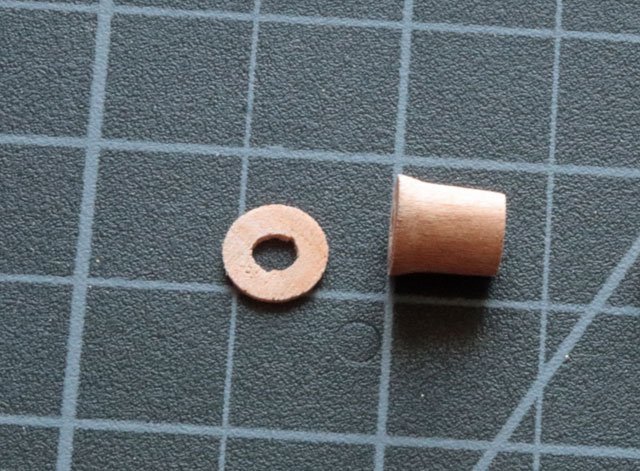
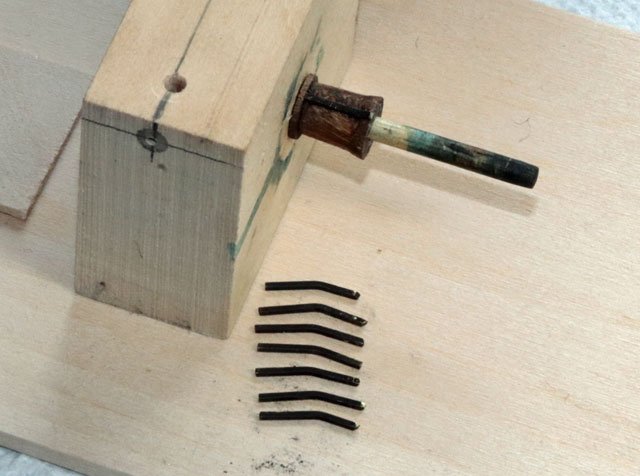
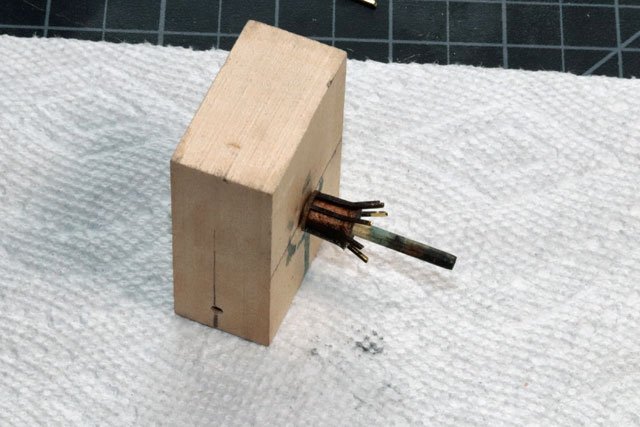
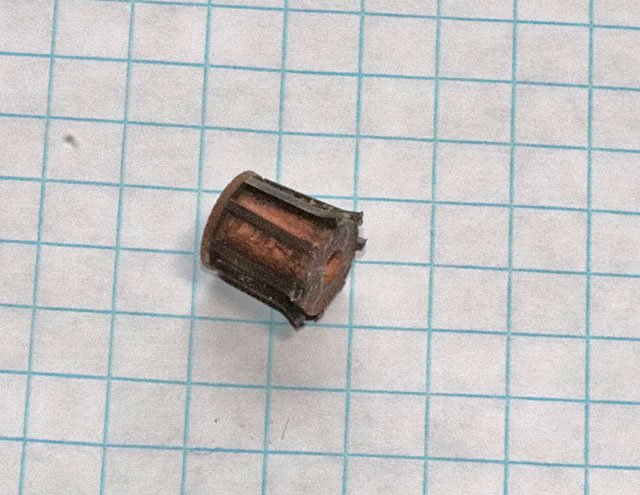
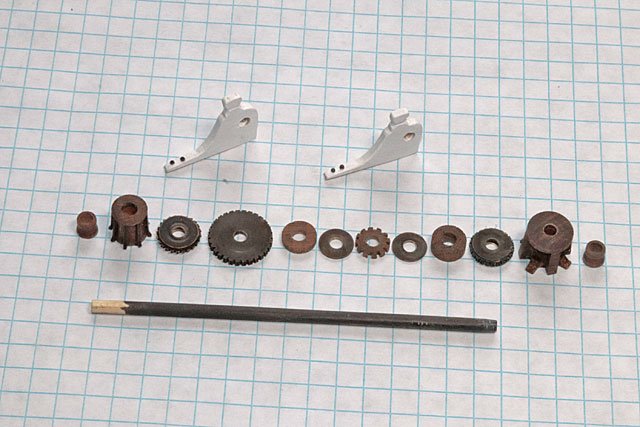
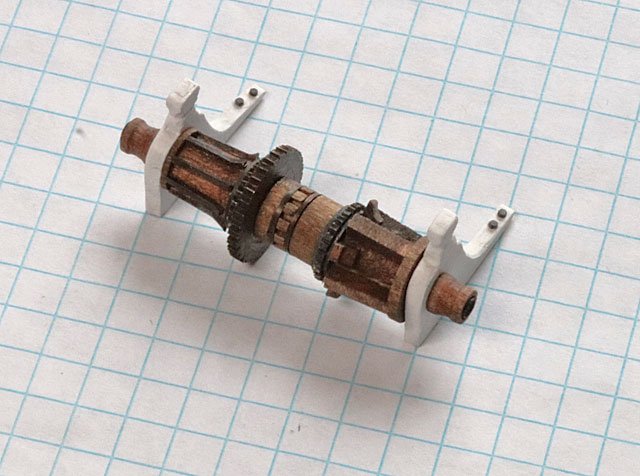
My next step was to make the 3 gears. The 2 smaller ones also needed banding. I made the 2 small gears and the bands for them. Drilled the proper size hole in some stock brass on the lathe, cut them to the proper thickness and cut the bands as well. Then cut the gear teeth on the mill. In order to keep everything aligned during assembly I made a simple jig and glued the gears to their bands. I then made the pawl wheel out of wood and made the brass bands for that as well. Also made the 2 wood spacers that would fit on either side of the pawl wheel. Next I made the large gear wheel, no bands required for this one. The drum for the chain side required some shaping on the lathe as well as an end piece. For the “iron” whelps on the chain drum I used 1/32 square brass bar stock. Cut 8 pieces a bit longer than needed, bent the dog leg in them to accommodate the shape of the drum, blackened them and glued them in place on the drum. Then trimmed off the excess and blackened the cut ends. After staining the cherry wood to make it look a bit aged (Jacobean stain) and blackening all the brass pieces I was ready to assemble the windlass. I used the jig to keep everything in line as I glued. Then transferred the entire piece to the black painted axel, adding the supports as I did. To add some detail I placed 2 small blackened brass bolts on each supports.

- 389 replies
-
- 10
-
-
- bluenose
- model shipways
- (and 1 more)
-
Looking very nice!
-
Just thinking about the cannon pic you posted. There is quite a difference in the bore size. Wondered which is closer to scale?
-
I'm going to butt in here with a question. Being somewhat new to this hobby I'm still learning the terminology as I work on my POB Bluenose. I realize this post refers to a POF build and pretty much understand the question being asked. But what does "R+S" refer to?
-
Thanks for the update. Both chain plates and masts are looking good.
-
That's a shame. Hopefully you can do something with files to clean them up.
-
Looking very nice! Hope my masts turn out as nice.