


CPDDET
-
Posts
1,194 -
Joined
-
Last visited
Content Type
Profiles
Forums
Gallery
Events
Everything posted by CPDDET
-
 Jig was a great idea. When I did my deck o made somewhat of a mess with the graphite. Never worked with boxwood or pear but I'm sure looking forward to it. The hell with the sanding, you can do that when you feel like it. 😄😁
 -
Hopefully just a glue failure and nothing more than that.
-
Looks like the block slipping isn't really a big deal. Inside planking looks very nice. Dave
-
Every time my better half gets her nails done she brings one or two of these home. Due to covid the nail tech can't reuse them. Soft sponge 120 grit great for sanding between coats or finishing. Soft enough to mold to different shapes and can be cut to any shape / size. https://www.nailwholesale.com/products/yellow-nail-buffer-4-way-grit-120.html?gclid=Cj0KCQiAhs79BRD0ARIsAC6XpaWjC9iqQV6ObSwVbVaz_rMsLazMywAO0q3sRmy3TmUoeXFfHsXFJ8UaAp6_EALw_wcB
-
Looking great, Pat! Additional sanding is in all our futures, just comes with the territory I guess.
-
What do I want for Christmas
CPDDET replied to Worldway's topic in Modeling tools and Workshop Equipment
Another option. If you already have a lathe. https://www.sherline.com/product/30503053-vertical-milling-column/ -
What do I want for Christmas
CPDDET replied to Worldway's topic in Modeling tools and Workshop Equipment
I currently have a dremel tool mounted on a dremel work station (drill press). My plan is to upgrade to a mill to replace the drill press. Seems to me you can drill with a mill but can't mill with a drill press. -
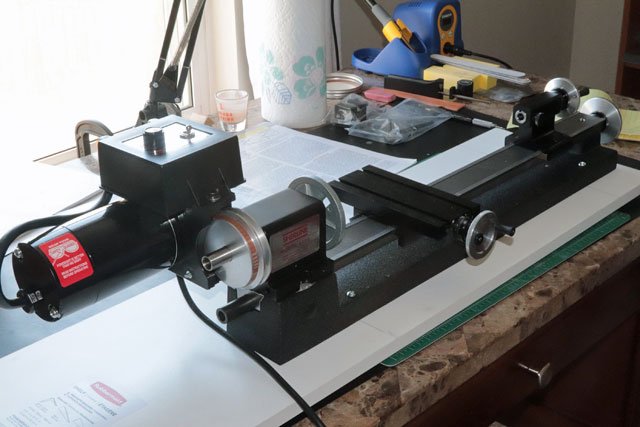
It is. Sherline 4400, 3.5 inch, 17 inches between centers.
- 389 replies
-
- 1
-

-
- bluenose
- model shipways
- (and 1 more)
-
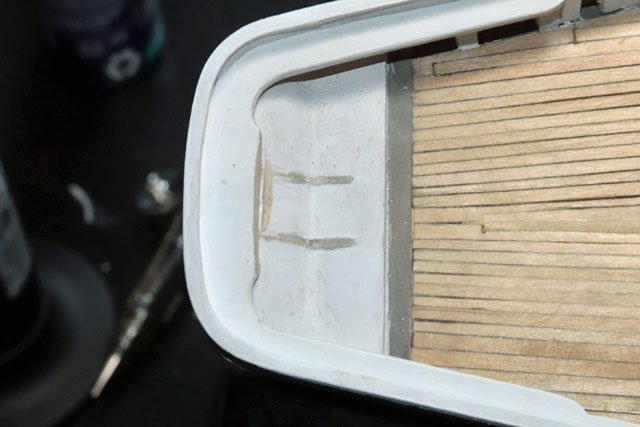
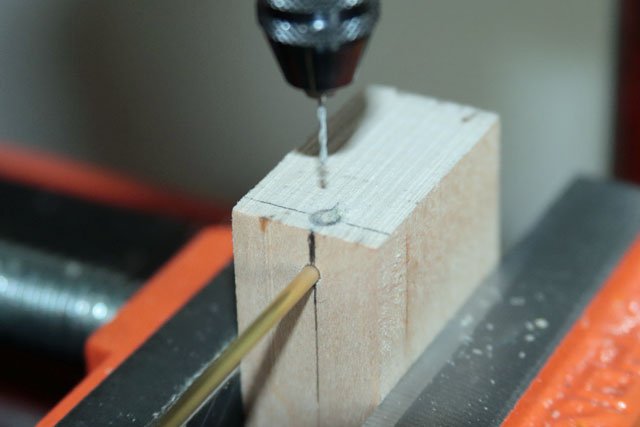
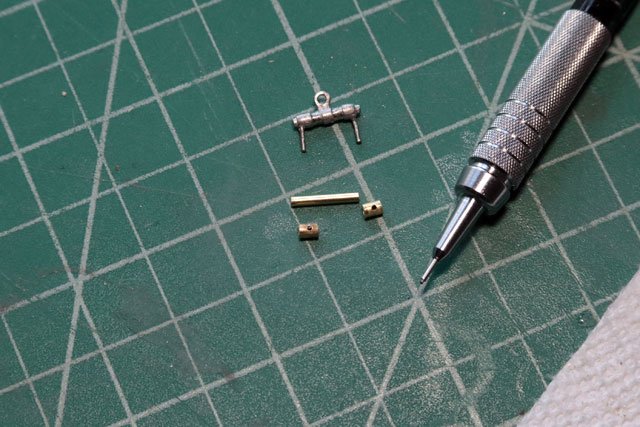
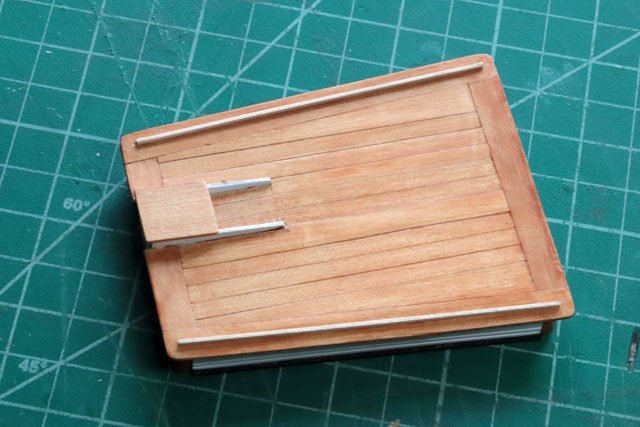
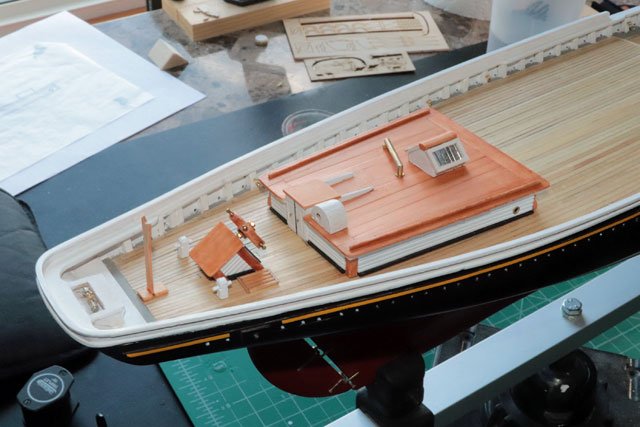
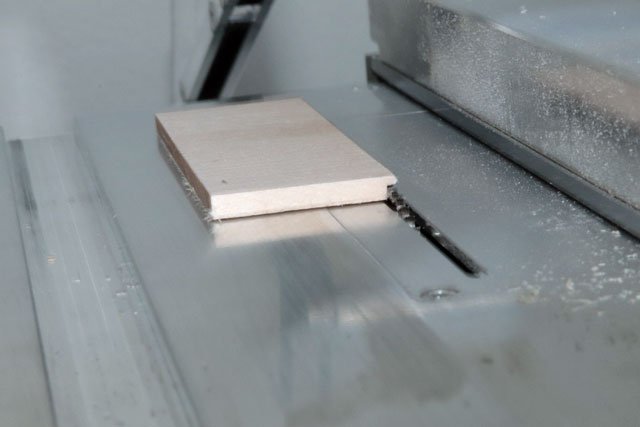
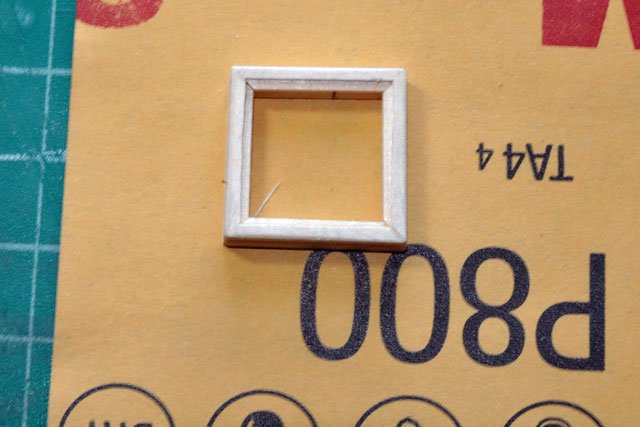
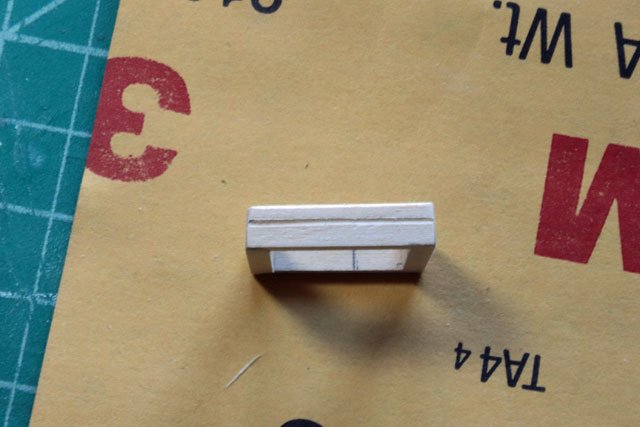
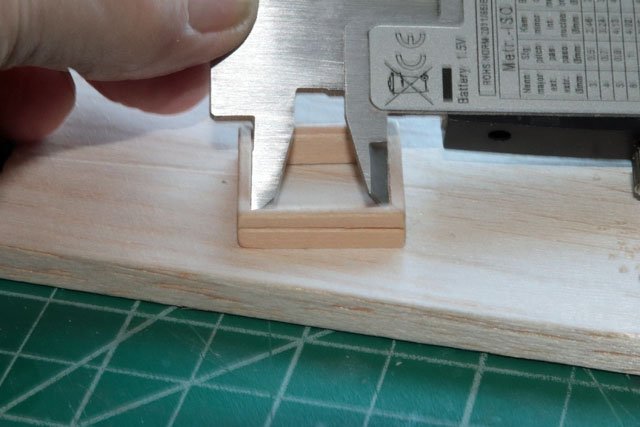
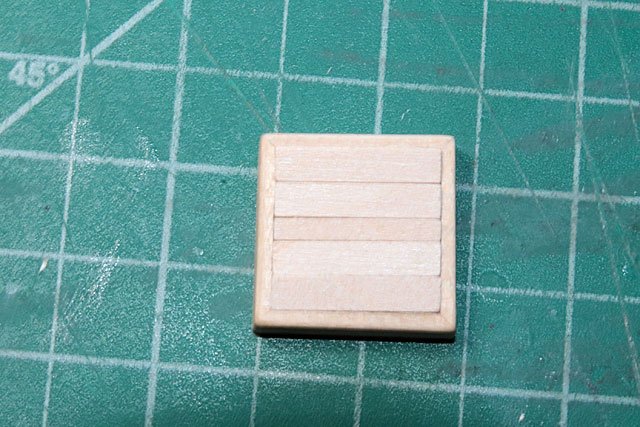
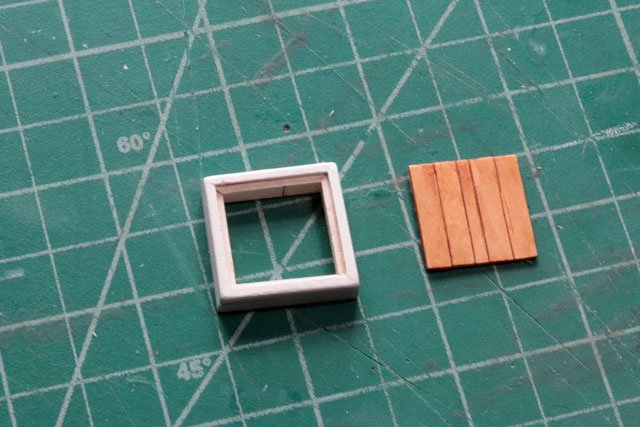
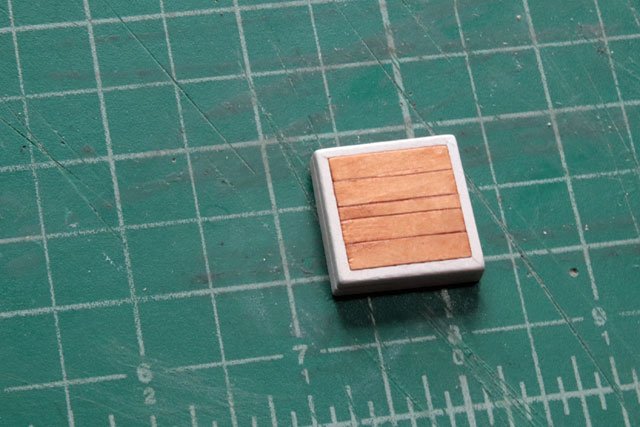
Couldn’t get the boom buffer placed under the aft rail so I decided to tear it out and start over. As others on this site I really didn’t like the white metal buffer that came with the kit so I decided to make my own. A big hats off to Richard (Retiredguy) for all his help. We exchanged many emails and he was kind enough to send me some parts he had left over when he built his boom buffer. While I didn’t use them, I was able to gain some insight and ideas from his expertise. I also borrowed a trick from Pat, (Overworked724) to drill holes in brass tubing. Thanks Pat! I have a Dremel tool mounted to a Dremel workstation drill press. Not the most accurate tool but it will suffice until I get a new mill. Using a block of wood, I drilled a hole to fit the brass tube. Inserting the tube in this hole, I then drilled down through one side of the tube so could attach the “legs”. I cut the tube pieces to proper length after drilling. I used a small piece of tubing for the center and the 2 drilled pieces for the end pieces. Soldered the “legs” on the end pieces and soldered small diameter wire for form loops then added the ring. Before finishing the main cabin I noticed the sailing version of this model required 1/32 solid wood hand rails on both sides of the cabin. I took “solid wood” to mean no stand offs so I cut the hand rails on the Byrnes saw and glued them in place. Since the roof of the cabin was finished with tinted poly, CA glue worked just fine. After staining the handrails and installing the side port lights I mounted the rest of the fixtures on the cabin, then mounted the remaining fixtures to the aft end of the deck. Next up was the aft hatch. First I need to create a “shelf” that would hold the hatch cover flush with the sides of the hatch housing. I did this using the saw. After cutting the four sides to the proper size I mitered the ends and glued them together to form the housing. To create the small cove I made a shallow cut with a razor saw. Using this cut as a guide I used a 1/32 inch ball tip stylus to impress the cove into the wood. The cut with the razor saw keeps the stylus from wanting to follow the grain and wander. To plank the hatch cover I first measured the inside of the housing and transferred that measurement to the saw. I did this for each plank individually. After placing (not gluing) the hatch cover on the housing I sanded it down to match the edge of the housing and removed it for finishing. I could have hand painted the housing but using the airbrush gives a much nicer finish. But have to admit it longer to set up and clean the airbrush than it did to do the actual painting. Used the same tinted poly to finish the hatch cover and once dry I assembled the two pieces and added the eyebolts. Will be taking a few days off from the build to study up on my new power tool, a Sherline lathe.


- 389 replies
-
- 5
-
-
- bluenose
- model shipways
- (and 1 more)
-
What do I want for Christmas
CPDDET replied to Worldway's topic in Modeling tools and Workshop Equipment
My vote goes for the Byrne's sander. Have had mine for a couple months now and find it very useful. If your scratch building, the Byrne's thickness sander is also a great choice. -
Very nice catch there, Pat. Looks like you're all set for a most enjoyable winter.
-
Help with drill press vice
CPDDET replied to CPDDET's topic in Modeling tools and Workshop Equipment
I decided on this vice as I continue to build on upgrading my power tools. https://www.sherline.com/product/3575-milling-vise-w-rotating-base/ -
Help with drill press vice
CPDDET replied to CPDDET's topic in Modeling tools and Workshop Equipment
Thanks to all for the help and advice! Dave -
I have a dremel work station to which I added a XY table. Now I need to purchase a drill press vice or machinist vice. Not sure how to mount this on the XY table or which vice to purchase. There are several options in the Micro Mark catalog but I'm just getting more and more confused. Any specific advice would be greatly appreciated.
-
Super stuff, as always Richard. I'll be waiting for your book to come out.😜
-
Did the lettering come with the kit, Pat?
-
Byrne's saw for cutting thin brass???
CPDDET posted a topic in Modeling tools and Workshop Equipment
Is anyone using their Byrne's saw for cutting thin brass stock? If so, which blade are you using and what is the maximum thickness you're cutting? Dave -
I'll take that compliment, but learning a lot from your techniques. Carry on!
- 389 replies
-
- 1
-
-
- bluenose
- model shipways
- (and 1 more)
-
Thanks for the compliment, Pat. Means a lot coming from someone with your skill and uncanny ability to work out processes. Metal working presents new skill set for me to learn. Not to mention the investment of some new tools.
- 389 replies
-
- 1
-
-
- bluenose
- model shipways
- (and 1 more)
-
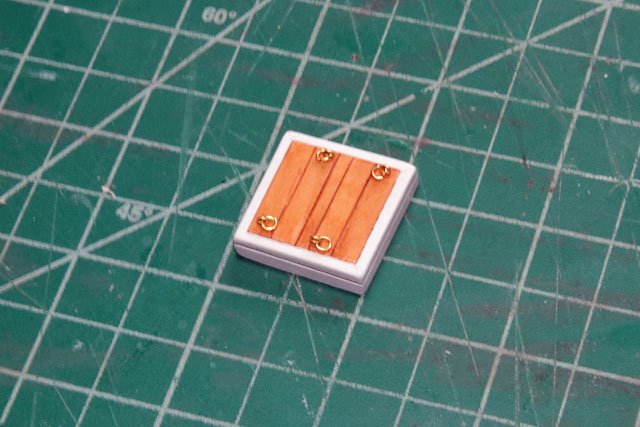
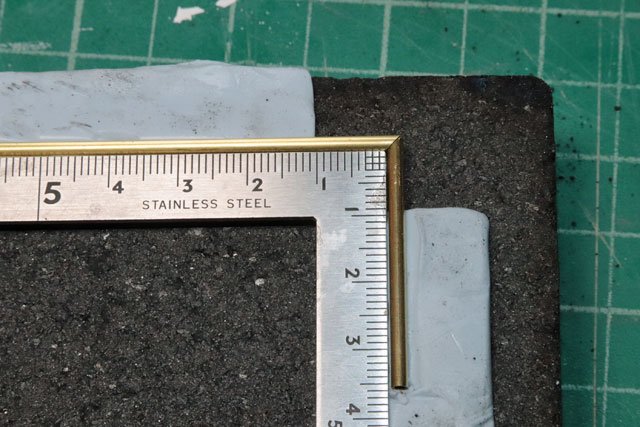
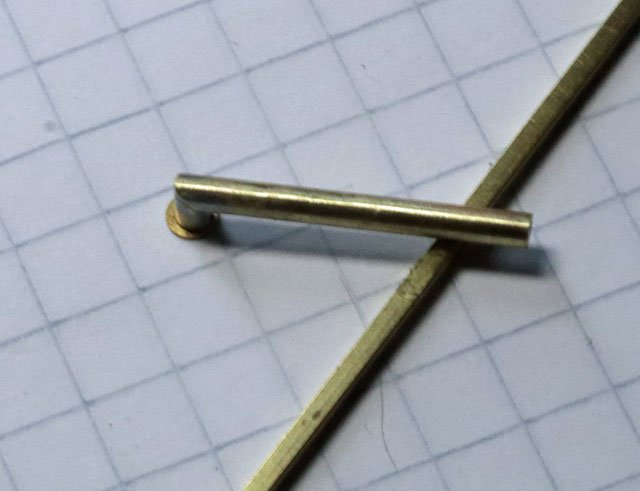
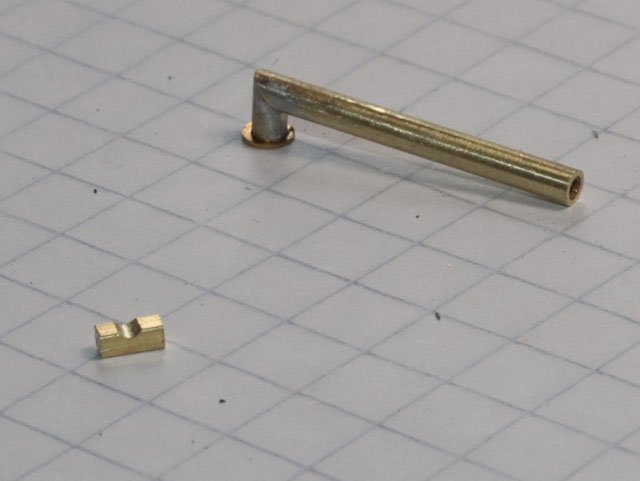
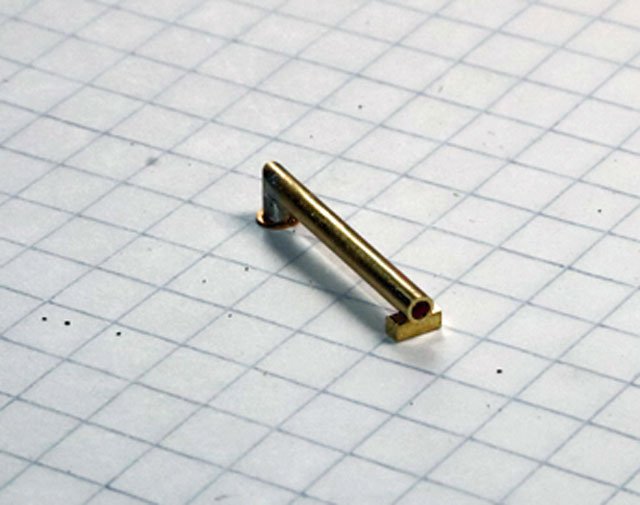
I’ve been working on the smoke stack / vent that mounts on top of the main cabin house. I really wanted this to be copper so again, there was a bit of a learning curve. I started by placing 2 pieces of Blu Tack on a carbon block. Cut a piece of 3/32 brass tube at a 45 degree angle and aligned them for soldering. After soldering I cleaned it up a bit, cut it to proper dimensions and glued a brass washer on the short end where it will meet the cabin top. For the resting block I used a small piece of 1/16 square brass stock and filed a notch for the pipe to rest in. Still have some cleanup to do on this piece. But now that the skylight, vent and compass housing are finished I can finally get everything mounted on the cabin roof.
- 389 replies
-
- 6
-
-
- bluenose
- model shipways
- (and 1 more)
-
Thanks Pat, was wondering what the scale was. And thanks for passing along the process. One to keep in mind for sure.
-
Pat, did you drill the 20 gauge needle in or just press it in? If drilled, any special speed? What is the finished diameter of the nails?
-
Seems like the "blocky" look is something I'm constantly fighting when working at such a small scale. But you're doing a great job. Carry on Pat.
-
I've often wondered about poplar. Easy to obtain, a bit harder than white pine but softer than cherry. Question is how does it take to bending. when the times comes I'll have to pick the brains of the scratch builders on this forum. Right now I have my hands full with my Bluenose.
