


KurtH
-
Posts
425 -
Joined
-
Last visited
Content Type
Profiles
Forums
Gallery
Events
Posts posted by KurtH
-
-
-
I'm back at it again. The task at hand is the preparation of the gun deck planking pattern for installation. I used a 64 pound card stock to make a template. I found that this got me into the ball park, but that more fettling was necessary to get it to fit exactly.

In order to get the planking pattern into position, I found that I had to bend it quite a lot. I wondered if I could bend it enough to get it in without breaking it.
Nope.

This is most embarrassing. It seems I am the only one to have this happen. Obviously, my pattern bending skills need improvement. I considered ordering another from Vanguard, but decided against it for two reasons: First, it is likely that I would break the new one as well, and second, when I laid it out on a flat surface, the cracks disappeared. Unfortunately, when I did finally get it into position, the camber and sheer of the deck opened the cracks up slightly once again. Nonetheless, I decided to go ahead and glue it in. I used highly diluted Elmers filler to repair the cracks, and replaced the bits that broke off during handling, and ended up with this:

Gluing the pattern in now is a departure from the instructions, but it seems to me that since I will be limited to brush painting because I do not have facilities for spray painting, and since I will have the model on its side while I am painting the inner bulwarks, the risk of getting paint on the deck will be minimal. I can also varnish the deck and lay down the varnish base coat on the bulwarks all in one go. I realize that this will mean that I must use CA rather than PVA when gluing things to the deck.
- KARAVOKIRIS, Ronald-V, mtaylor and 4 others
-
 7
7
-
-
The next step is to install the forward inner gundeck bulwark patterns: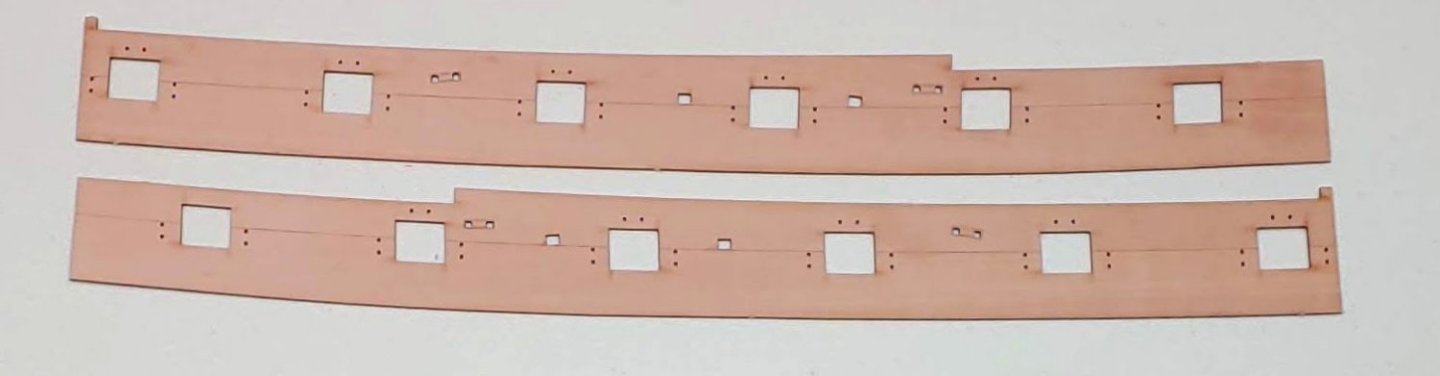
In order to do that the inboard surfaces of the frames need to be faired:

Here is the port side forward inner gundeck bulwark pattern glued in place. Much clamping was needed to make if conform to the curve at the bow:

I thought that it might be easier to apply the masking tape in preparation for subsequent varnishing and painting while the pattern was still off the model.
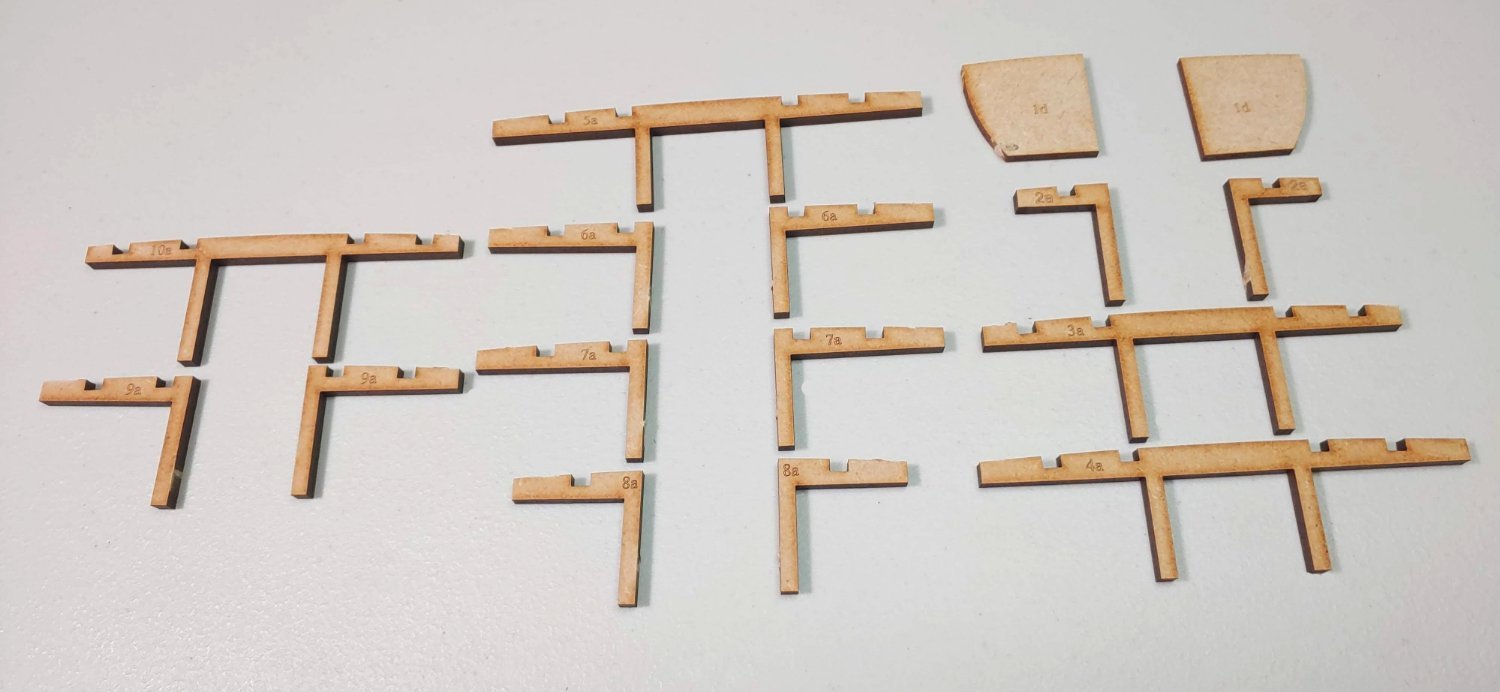
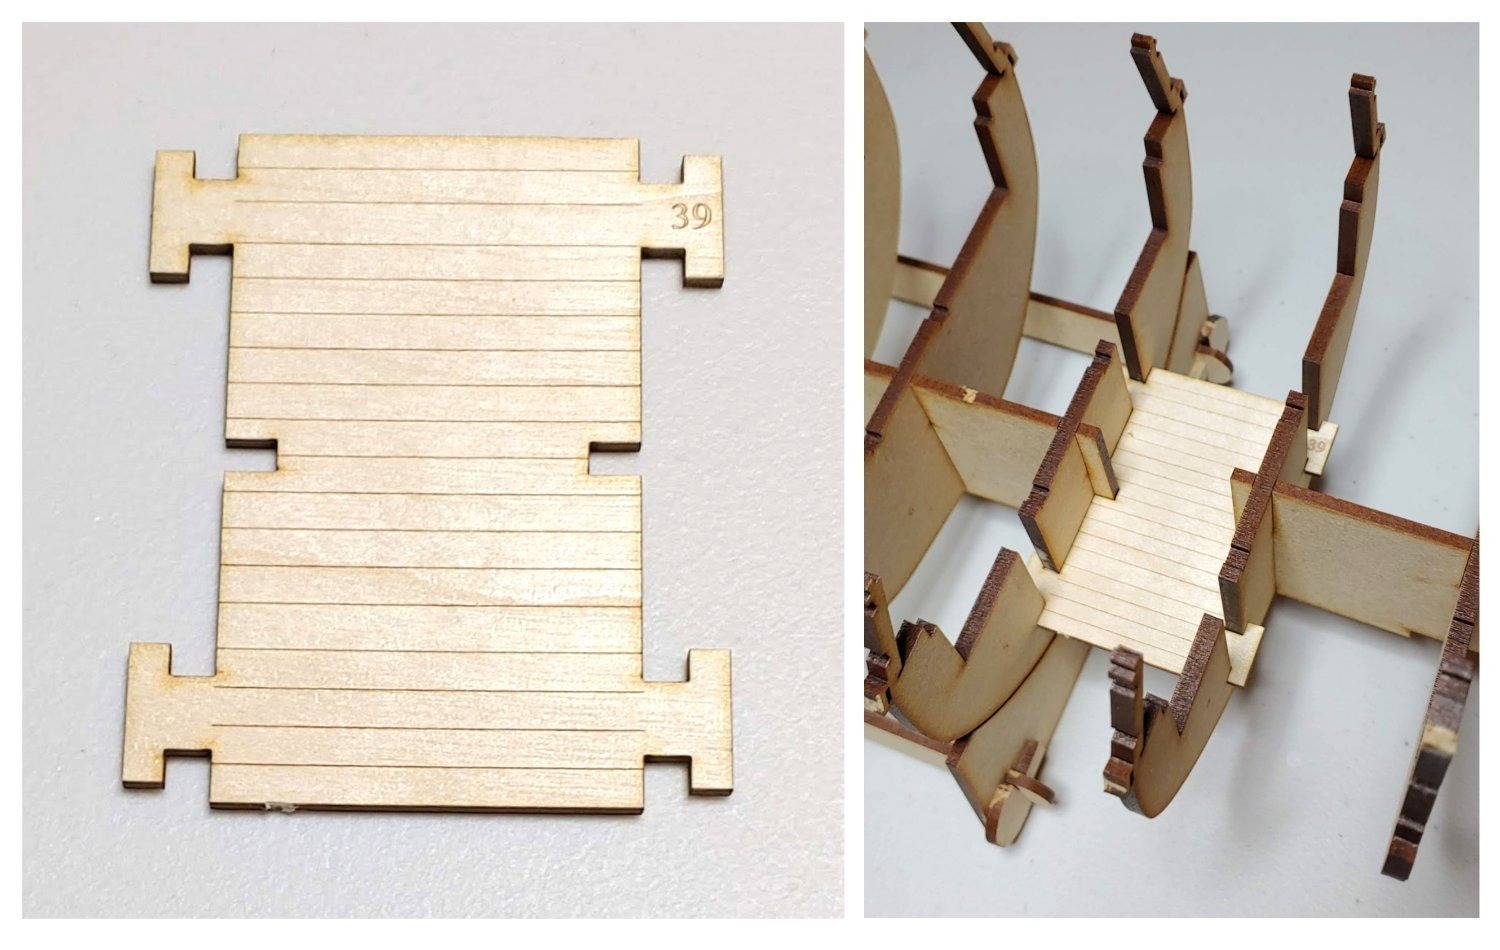
The quarter deck beam spacing patterns are the next to be glued in. Here is the starboard pattern:

I forgot to photograph these until after I had glued in the port pattern. The larger notches slot into the bulkhead ears. The smaller notches are for the quarter deck beams. The letters engraved on this pattern will correspond with letters engraved into the ends of the beams.
They snapped nicely into position, and needed only one clamp to hold them in place. Here they are installed:

Once these are in place, the aft inner gundeck bulwark pattern can be fitted:
Here is the port aft inner gundeck bulwark pattern installed:
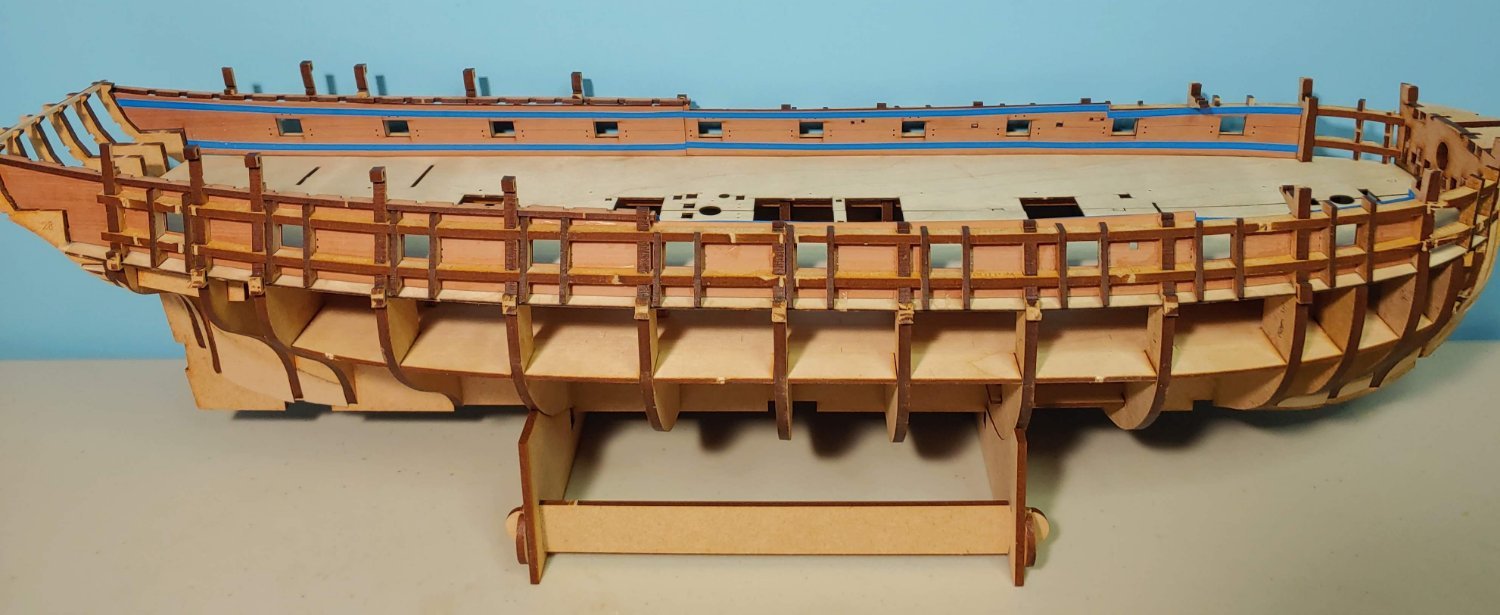
Here is the current state of play:

Tis the season to be doing things other than modeling. I expect to resume after Xmas, or possibly New Years. 'Bye for now.
-
First of all, thanks so much, gentlemen, for your likes. They mean a great deal to me.
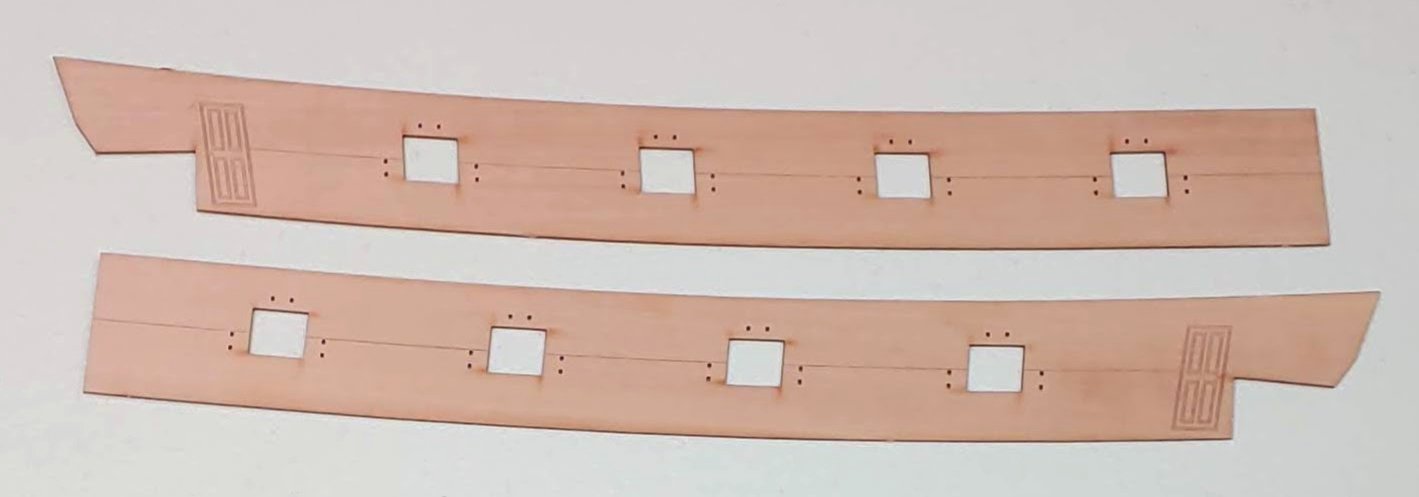
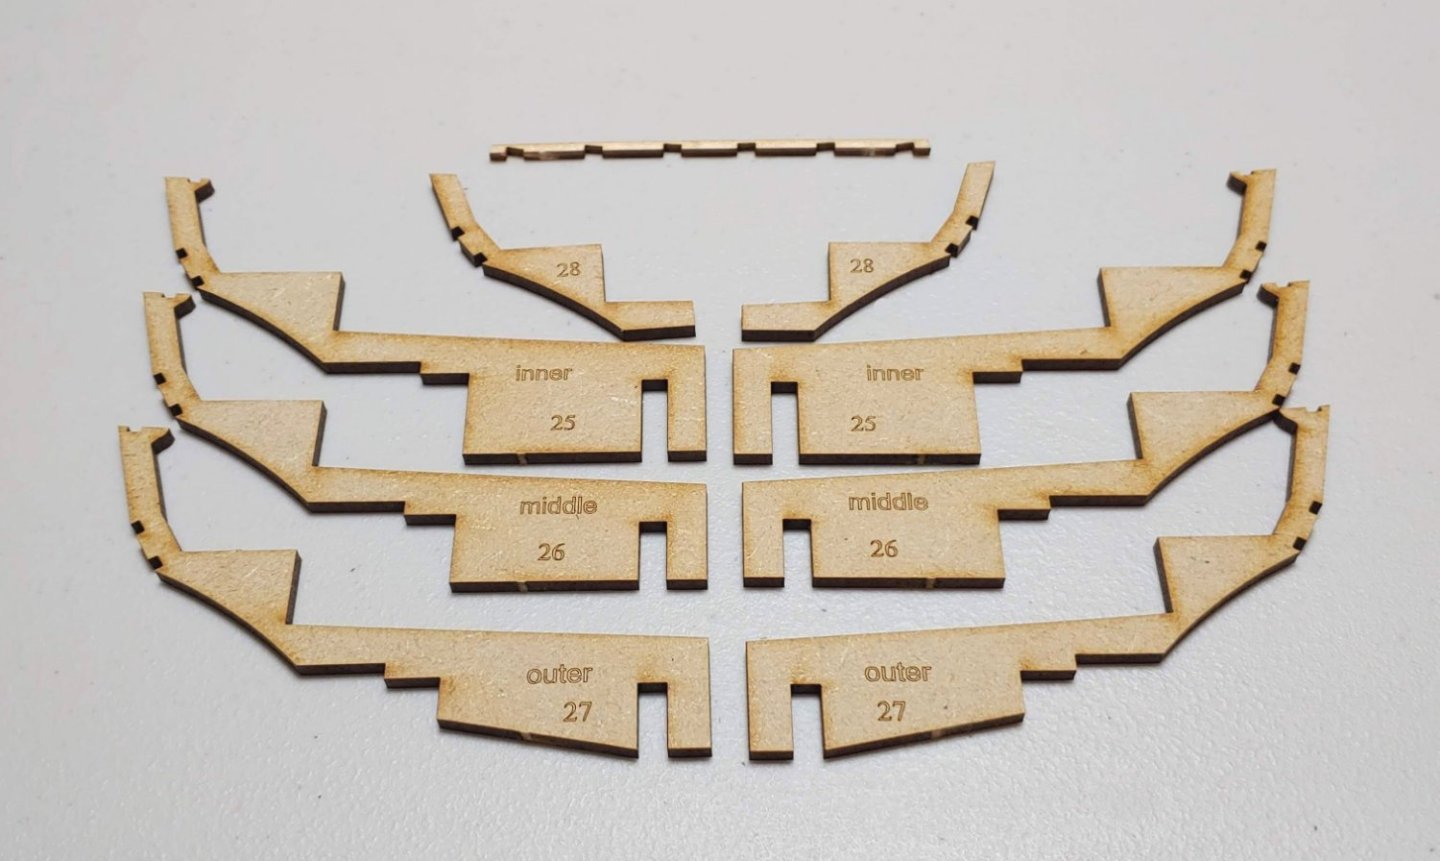
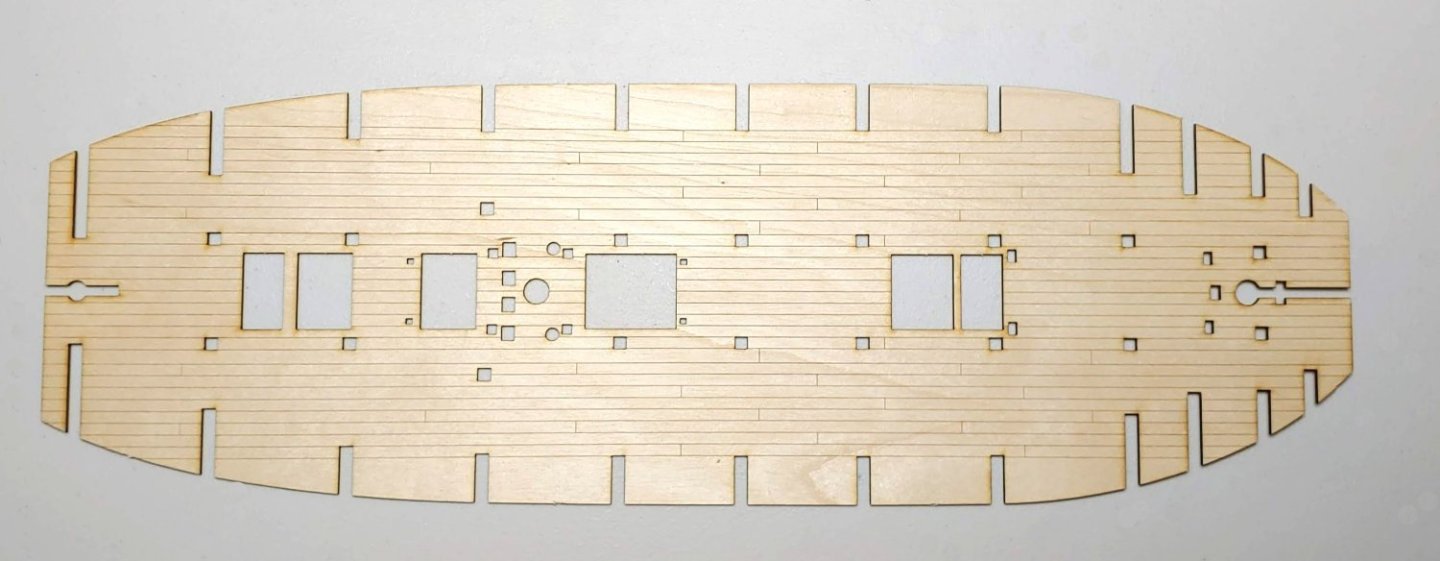
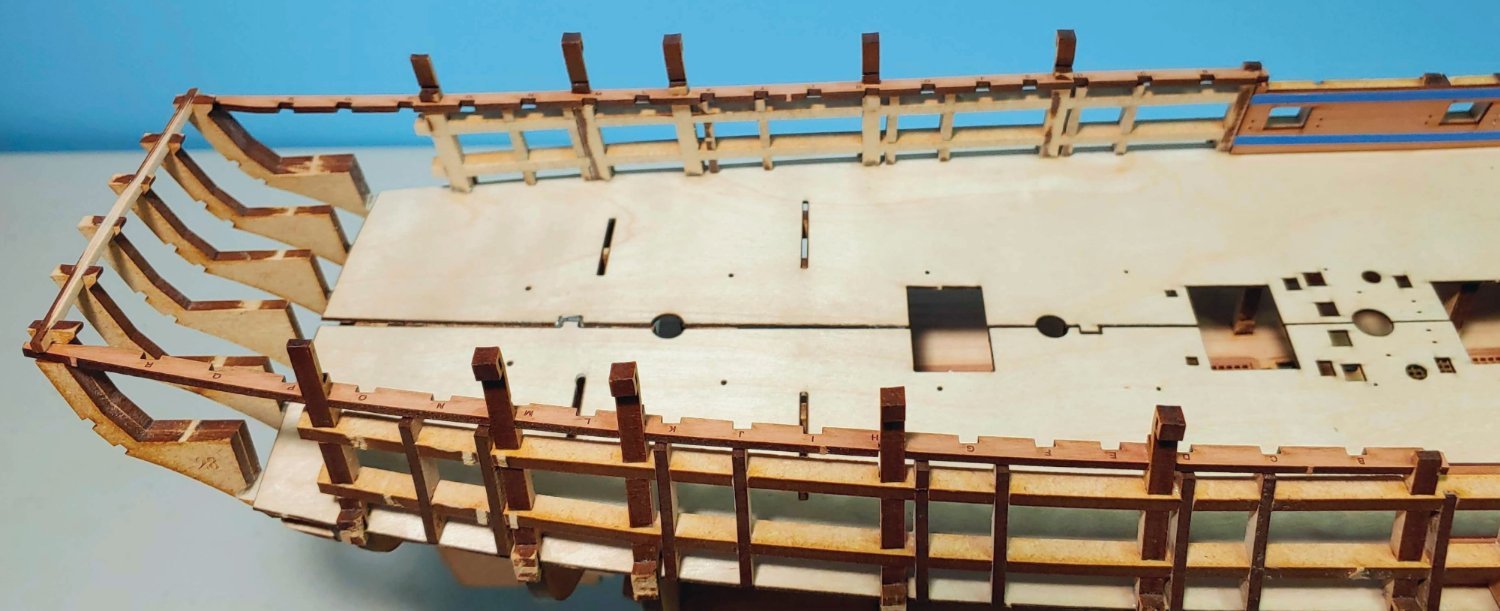
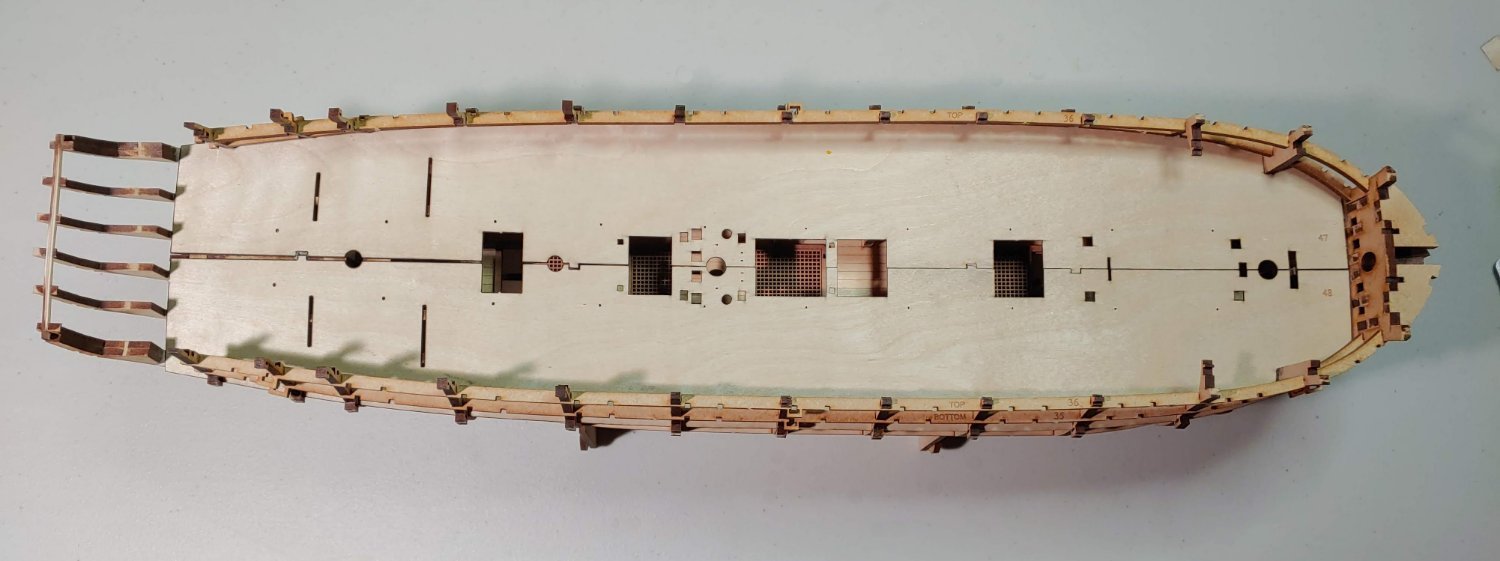
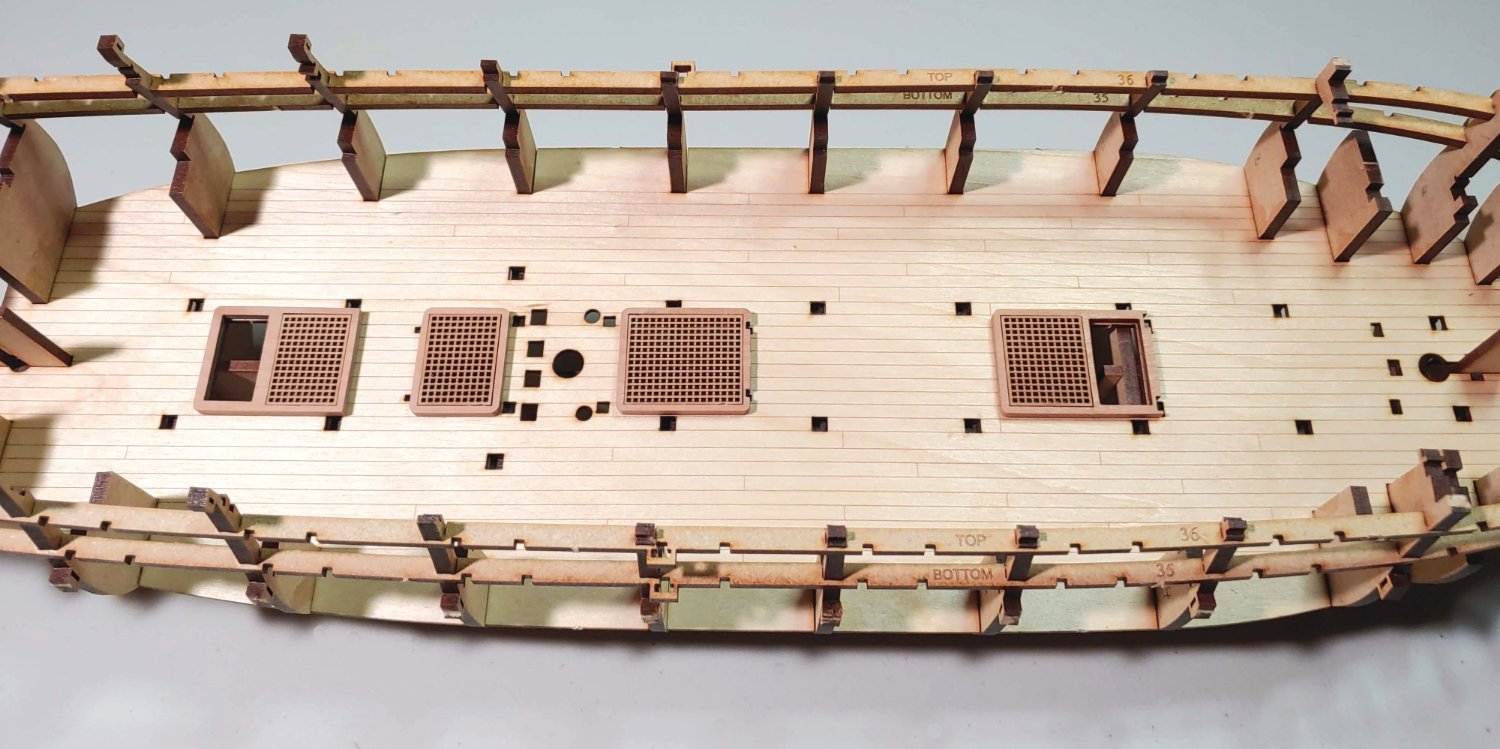
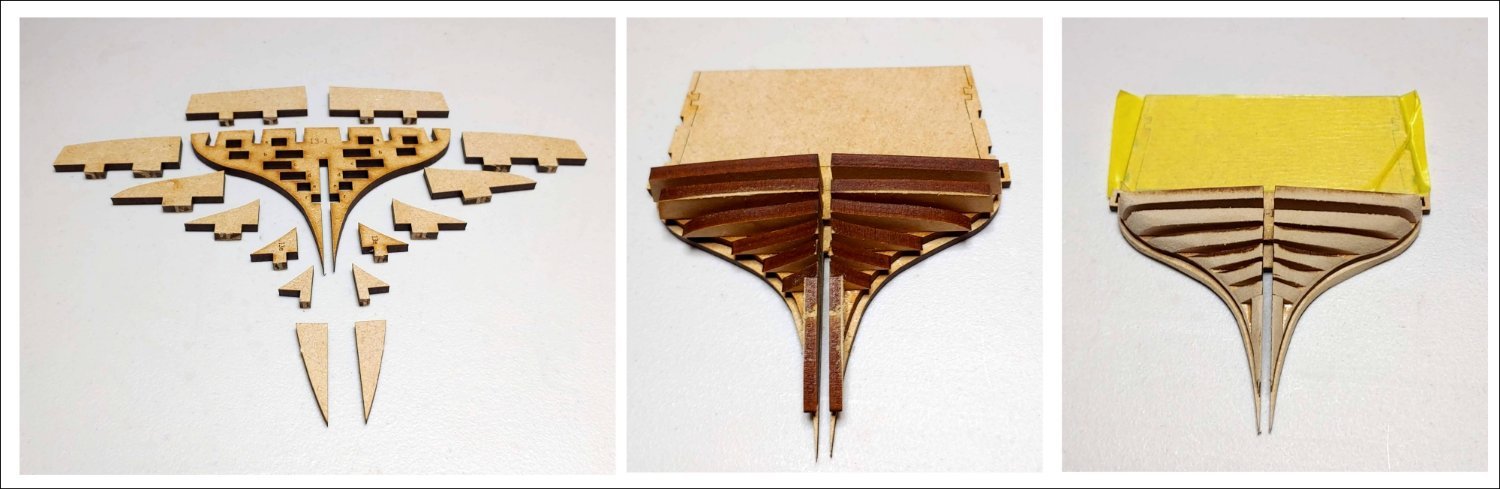
Time to fit the gun deck patterns. In most other kits this is called the false deck, so I will depart from my usual practice of duplicating the terminology in the manual to avoid confusion and call it that. Unlike the planking pattern that will overlay it, it is split longitudinally into two halves to be inserted individually. In preparation for that, I faired the stern counter frames. As the outboard frames canted inward, considerably more material had to be removed than was the case for the inner frames. For no particular reason, I decided to install the port half first. As stated in the manual, it is important that the outer edge of the false deck be fully inserted into the slots as the base of the bulkhead ears. Since the fit is quite tight, it is hard to judge by feel when it is fully inserted. I found that if the outer edge of the false deck is flush with the outboard surface of the bulkhead ears (circle), the inboard edge will be correctly centered.

I then inserted the starboard half of the false deck:
As you can see, the two halves fit tightly in the vicinity of the forward hatch, but diverge slightly at the bow, and considerably at the stern. Using a ruler, I checked the inboard edge of the port half, and found it to be true.
I am not sure how I managed to edge bend the starboard half. I have always thought that edge bending a piece of ply that wide should be nearly impossible. What future difficulties this may cause I do not know. However, as I managed to work may way out of problems far more dire than this in my last build (BJ Constitution), I am hopeful that I will be able to do the same here.
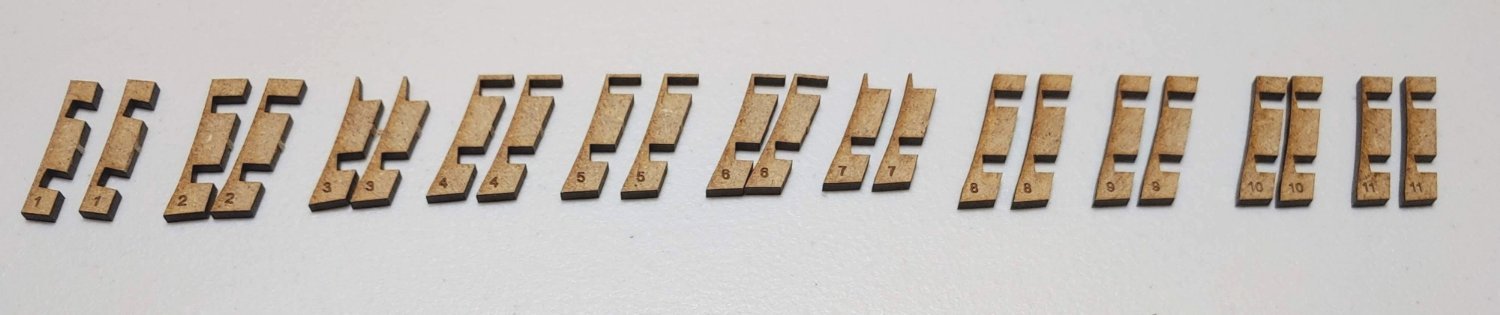
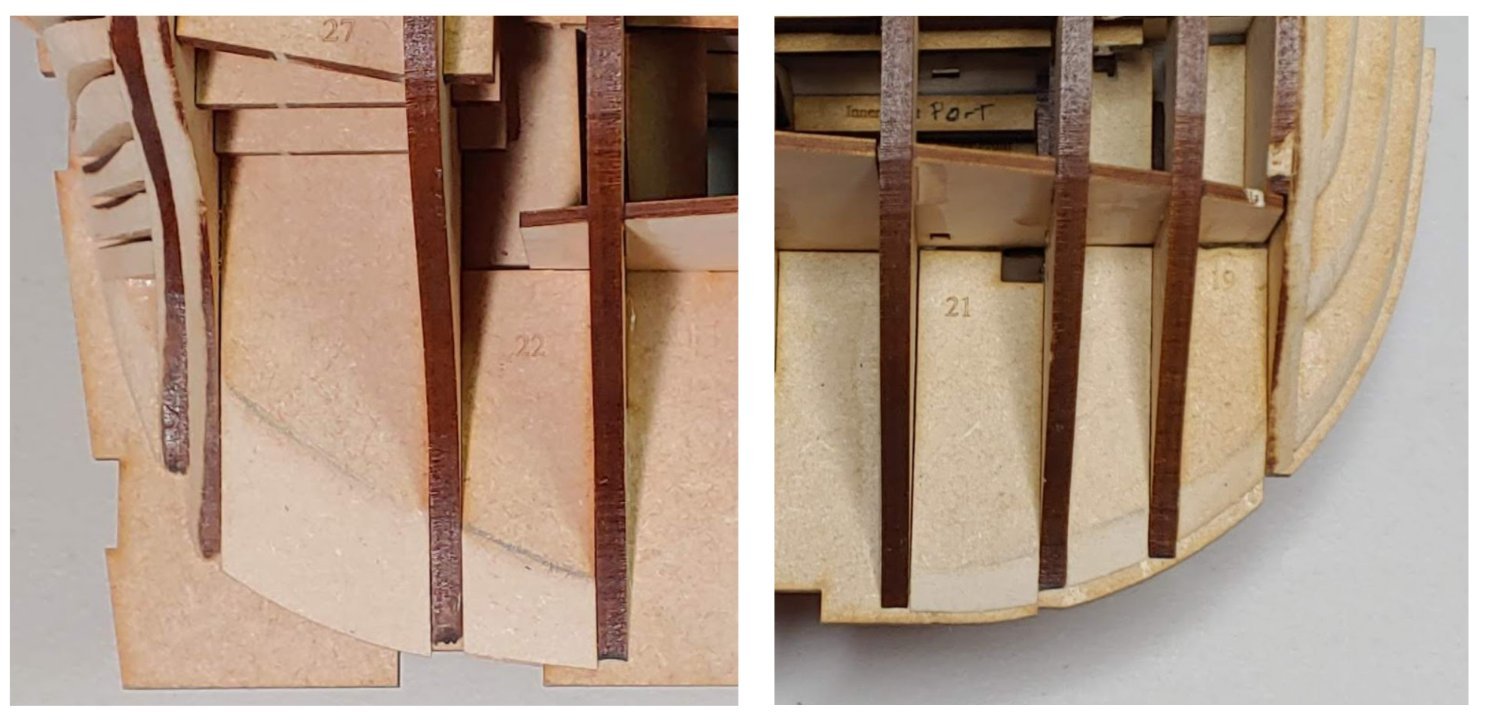
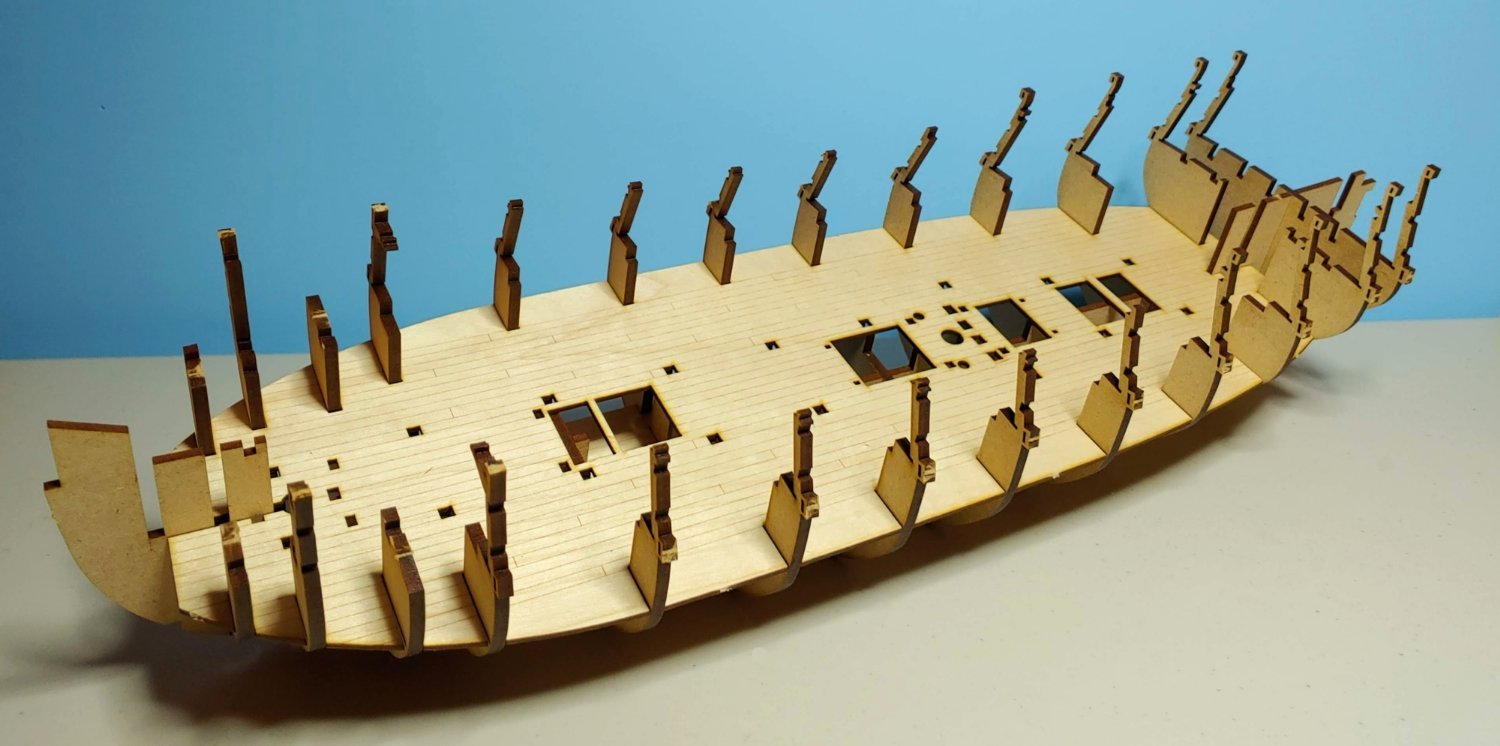
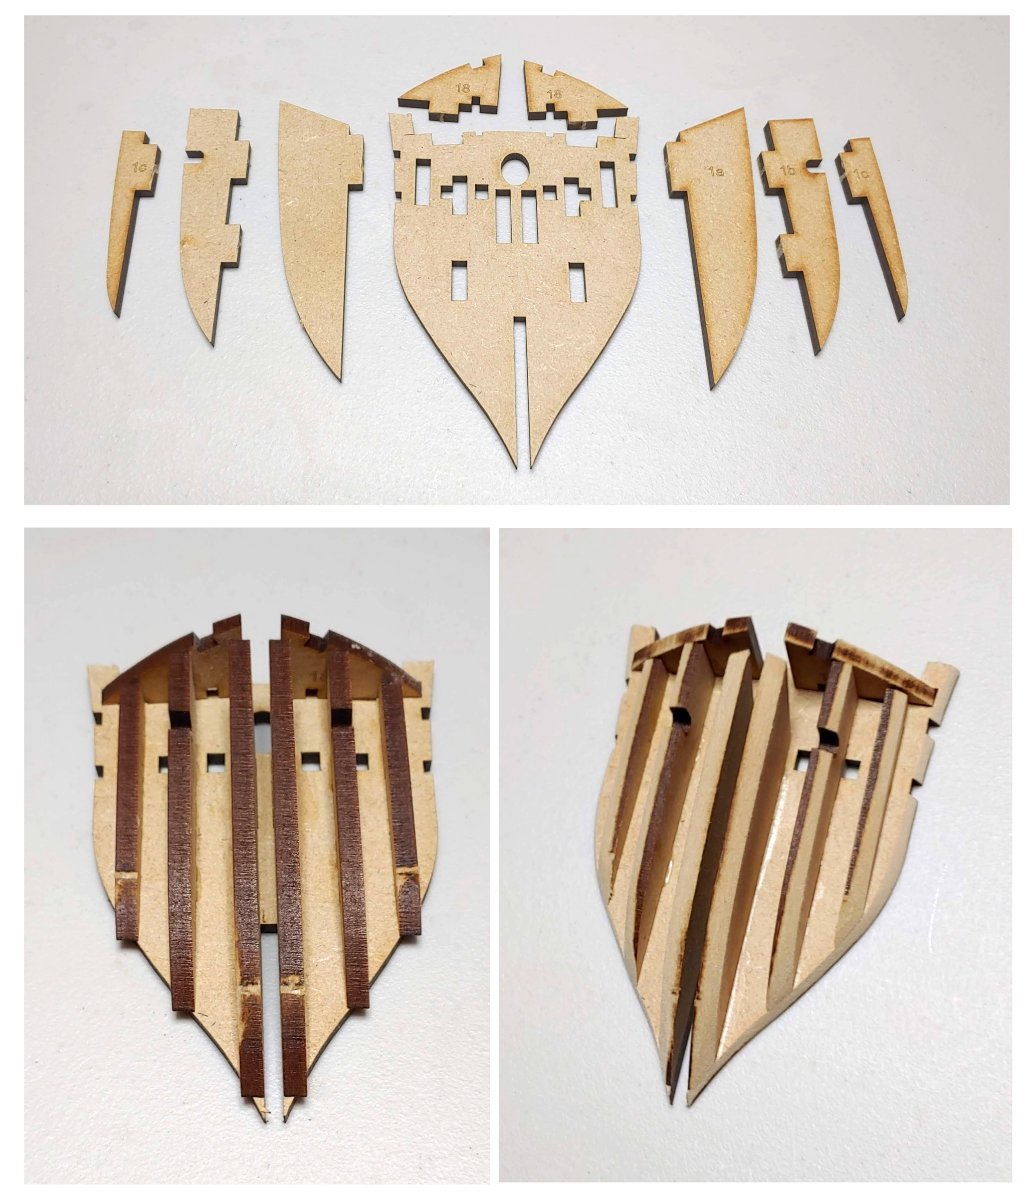
The next step is the installation of the vertical gun port frames:
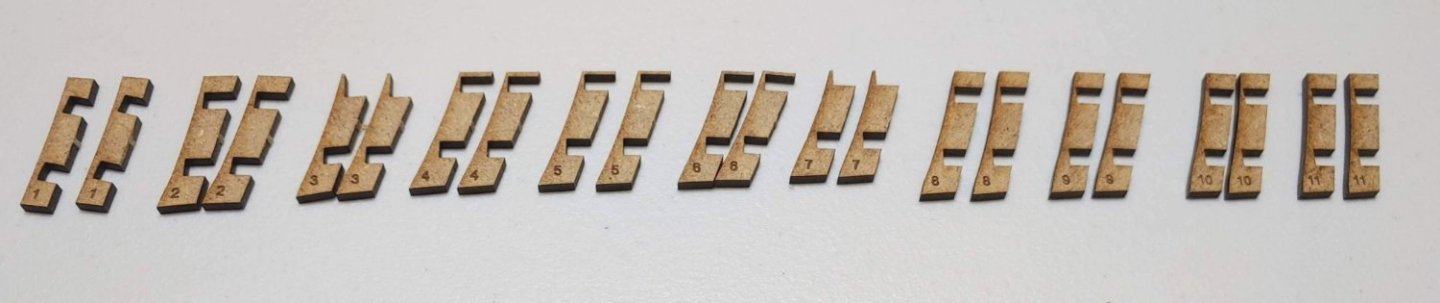
These are numbered from fore to aft. I found that they were a fraction too wide to fit into the notches, so I sanded down the vertical frames just enough so they would fit in on the port side, and filed the char out of the notches on the starboard side, which worked a bit better. Obviously extreme care must be taken not to over do it. There must be no play once they are inserted. Here they are in position:


I hope I did that right. I guess I will find out when I fair the bulwarks and the hull.
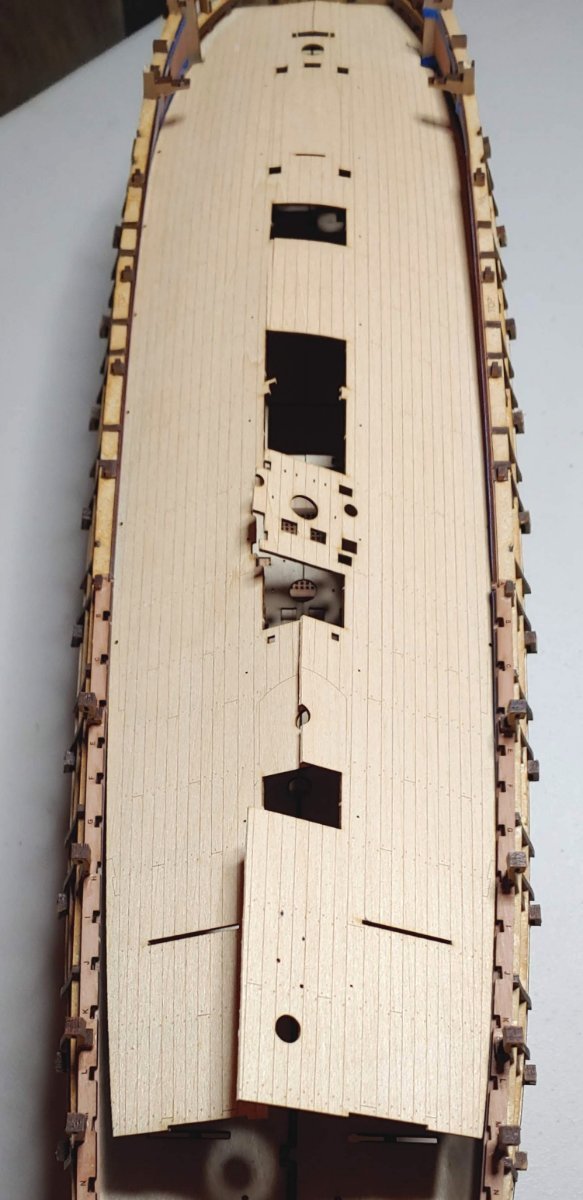
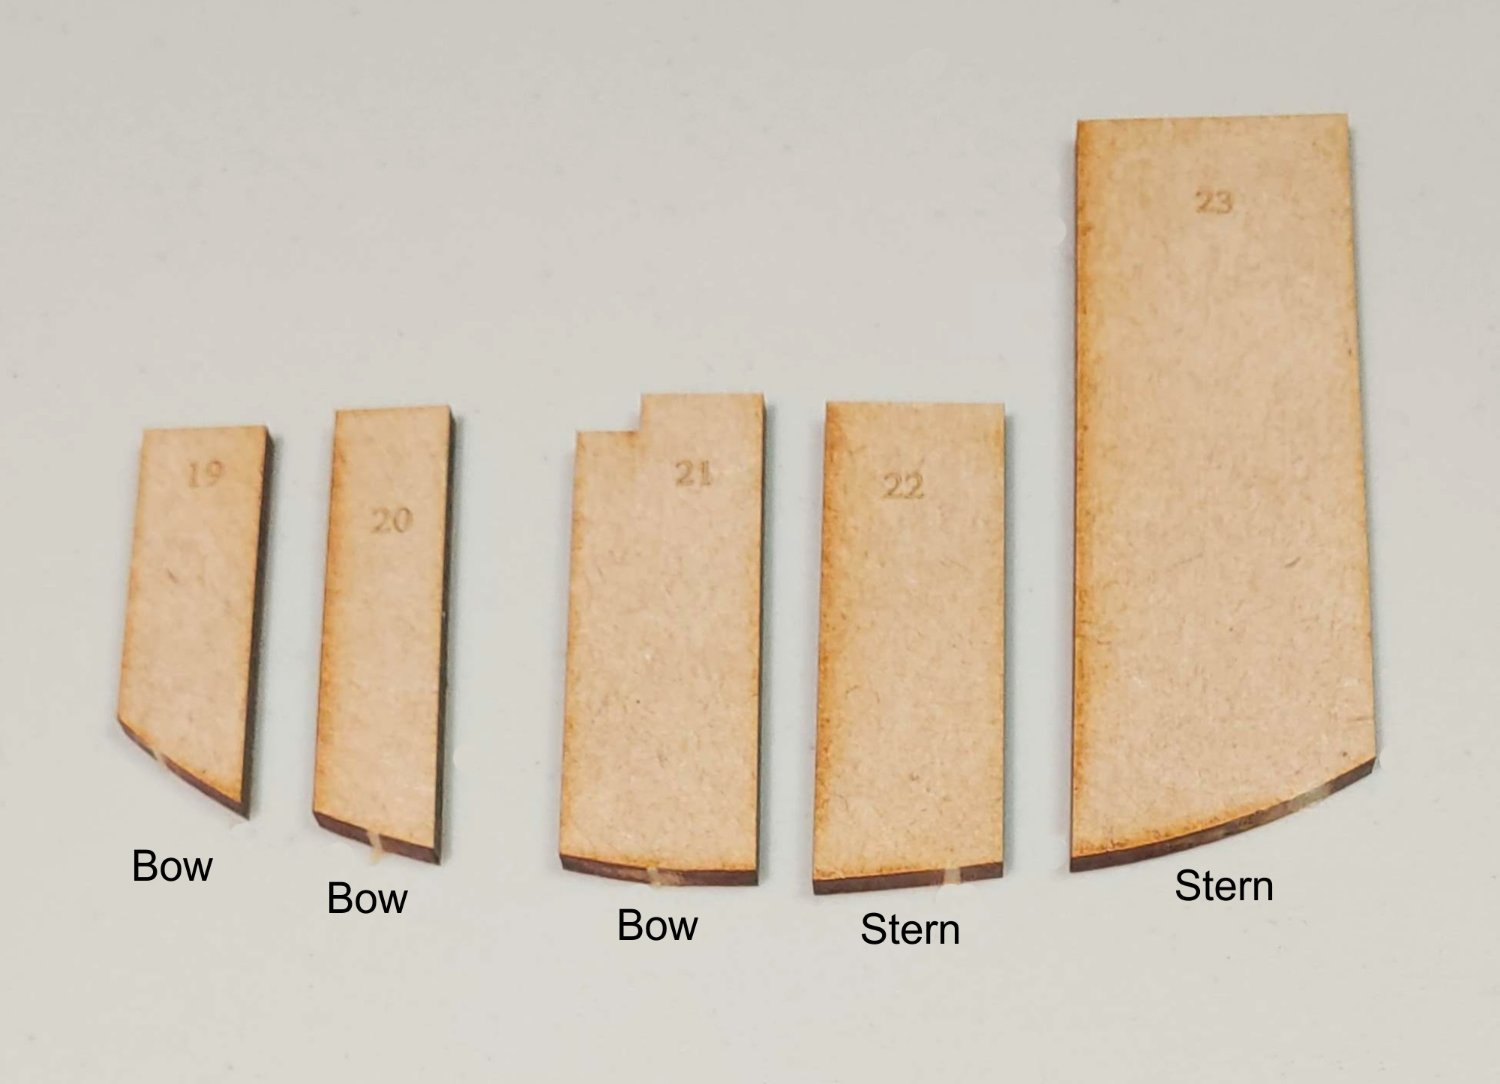
On to the planking patterns:

Here they are dry fitted and marked...

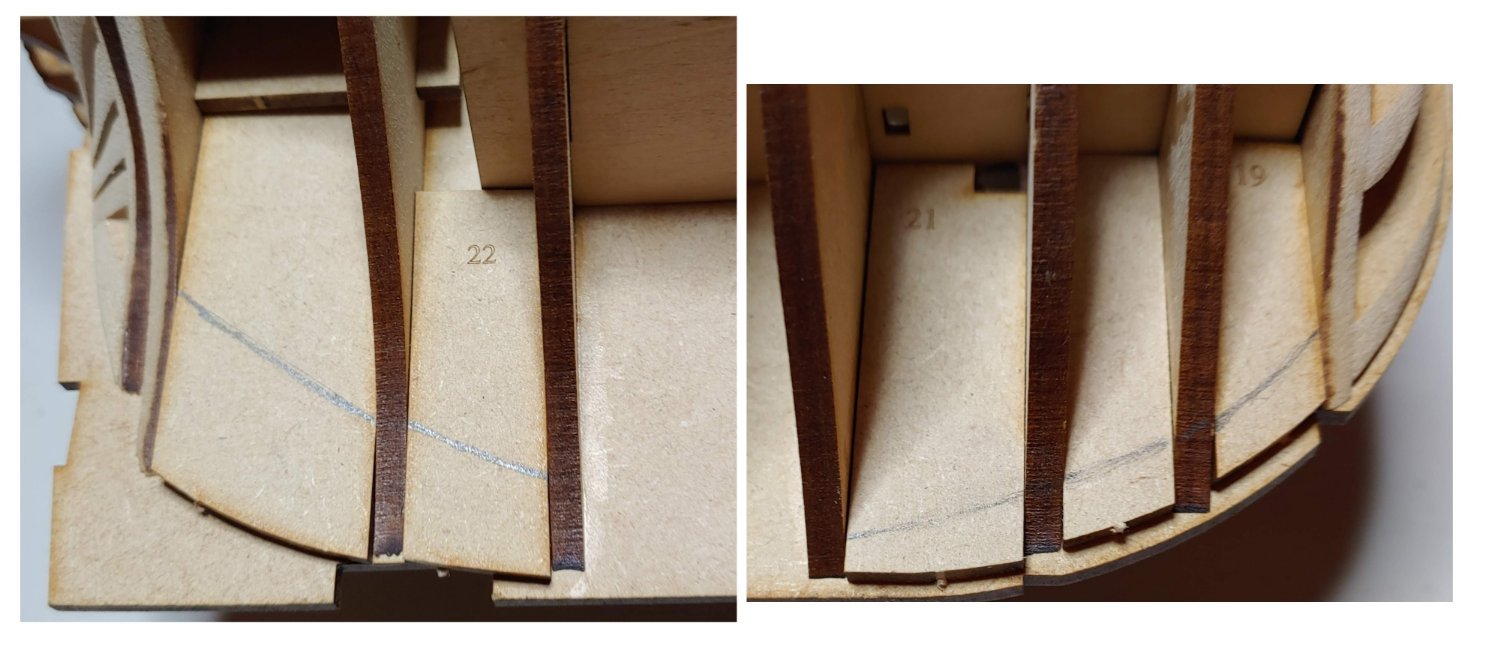
...and here they are beveled and glued into position:

This seems to have gone reasonably well, which hopefully bodes well for the successful completion of the quarter galleries.
Th-th- th-that's all folks.
-
I was going to wait until a bit later in the build to post this, but since it is germane to the preceding conversation, I will do it now. I have just bought a saw toothed razor blade cutter from Micro-Mark (#85853 and #856084) hoping to make cutting parts out of the thicker sheets easier. It may also be dandy for cutting off the gates on the bulkhead ears.

It has 70 teeth, and is .005" thick, so it can fit into the slits made by the laser cutter and saw through the material holding the part in the sheet. I have found that it works well if the slit is straight enough. The cut is smooth and clean. No nibs to file down afterwards. I used it to cut free the stern counter frames:
These frames fit into their slots so tightly that I found that glue was unnecessary. They are not going anywhere. I glued the spacer parts to the outboard surfaces of the outer frames as shown in step 71 of the manual:

The ply spacer piece had to be filed down a bit to make it fit into the notches in the tops of the frames. Here is a shot of what I have done so far:

- schooner, RossR, HardeeHarHar and 9 others
-
12
-
-
Thanks! I put them in today and found that they fit so tightly that once they are in position, they are not going anywhere. That spacer on top was a bit of a challenge for me. It would not fit into the notches in the tops of the stern timber pieces so I had to file it to make it thinner. I got it done though. It will be pictured in my next post. Meanwhile, on to the installation of the gun deck.
-
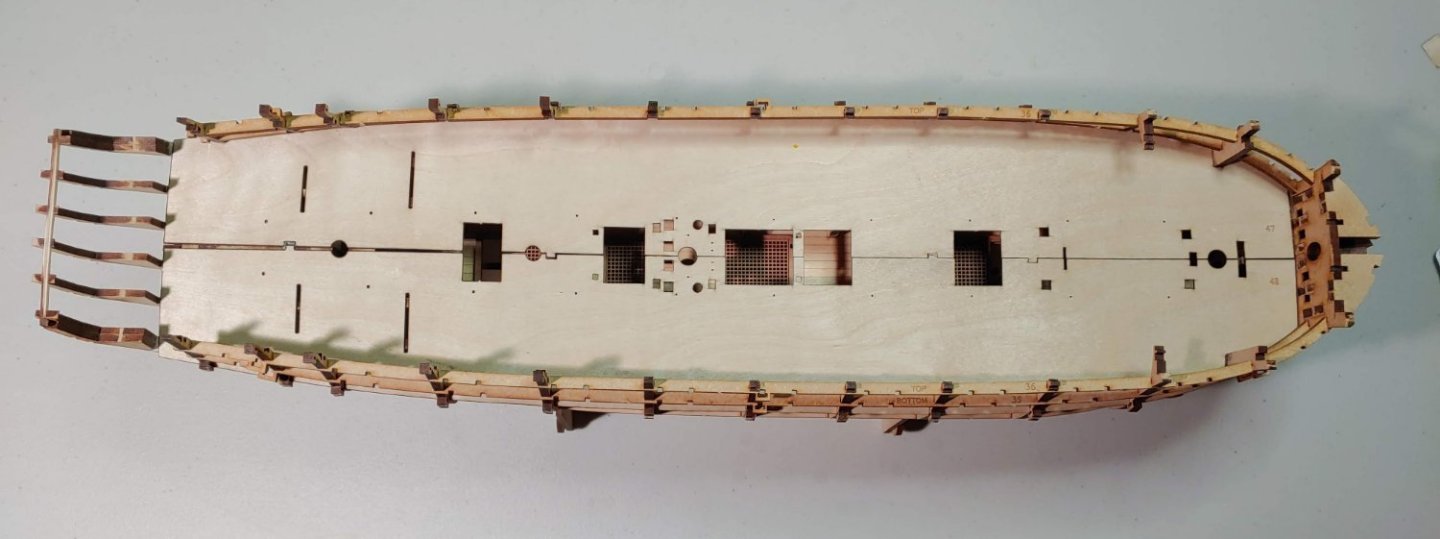
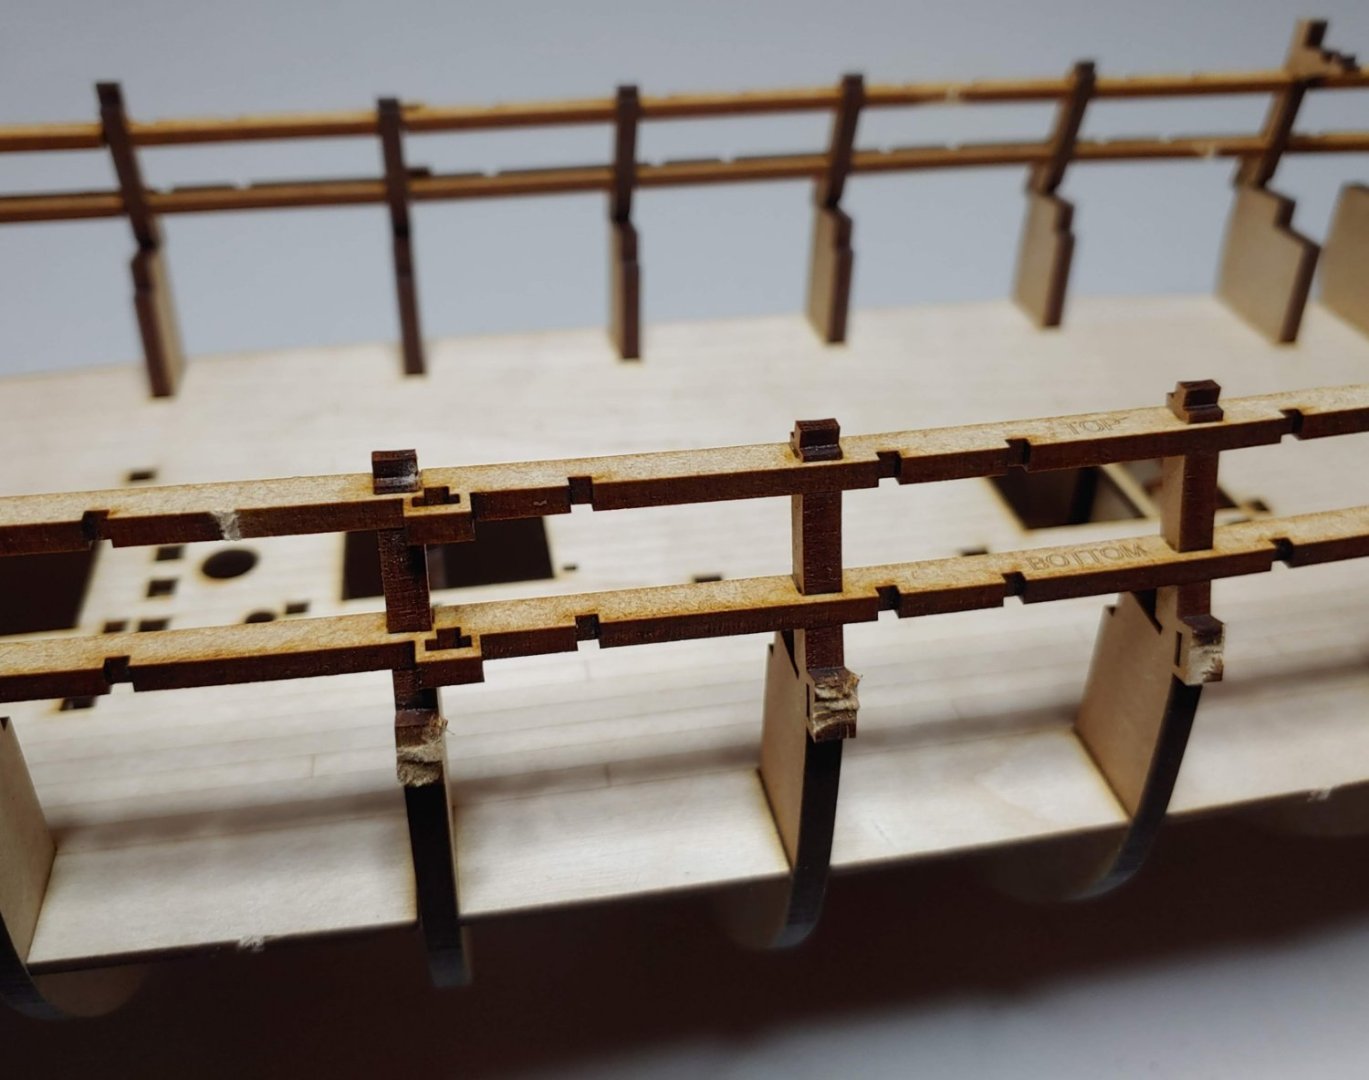
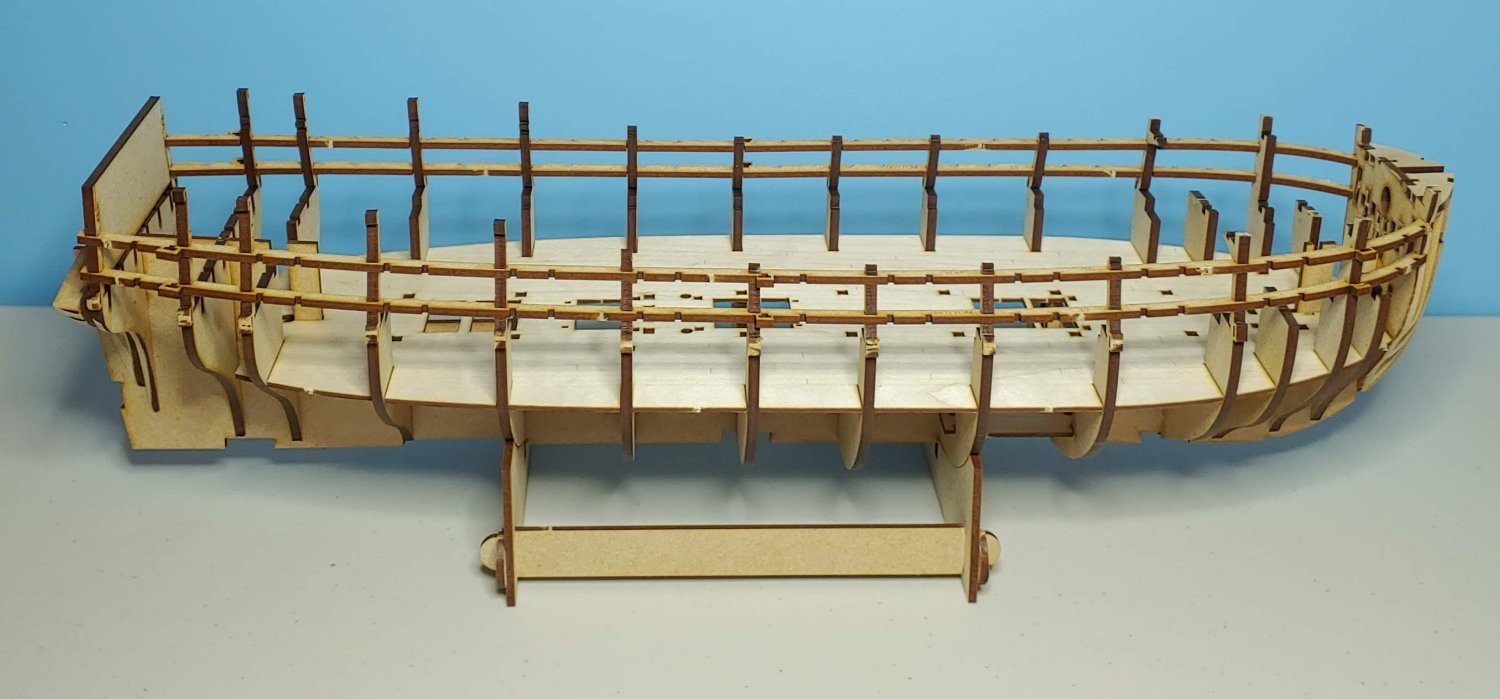
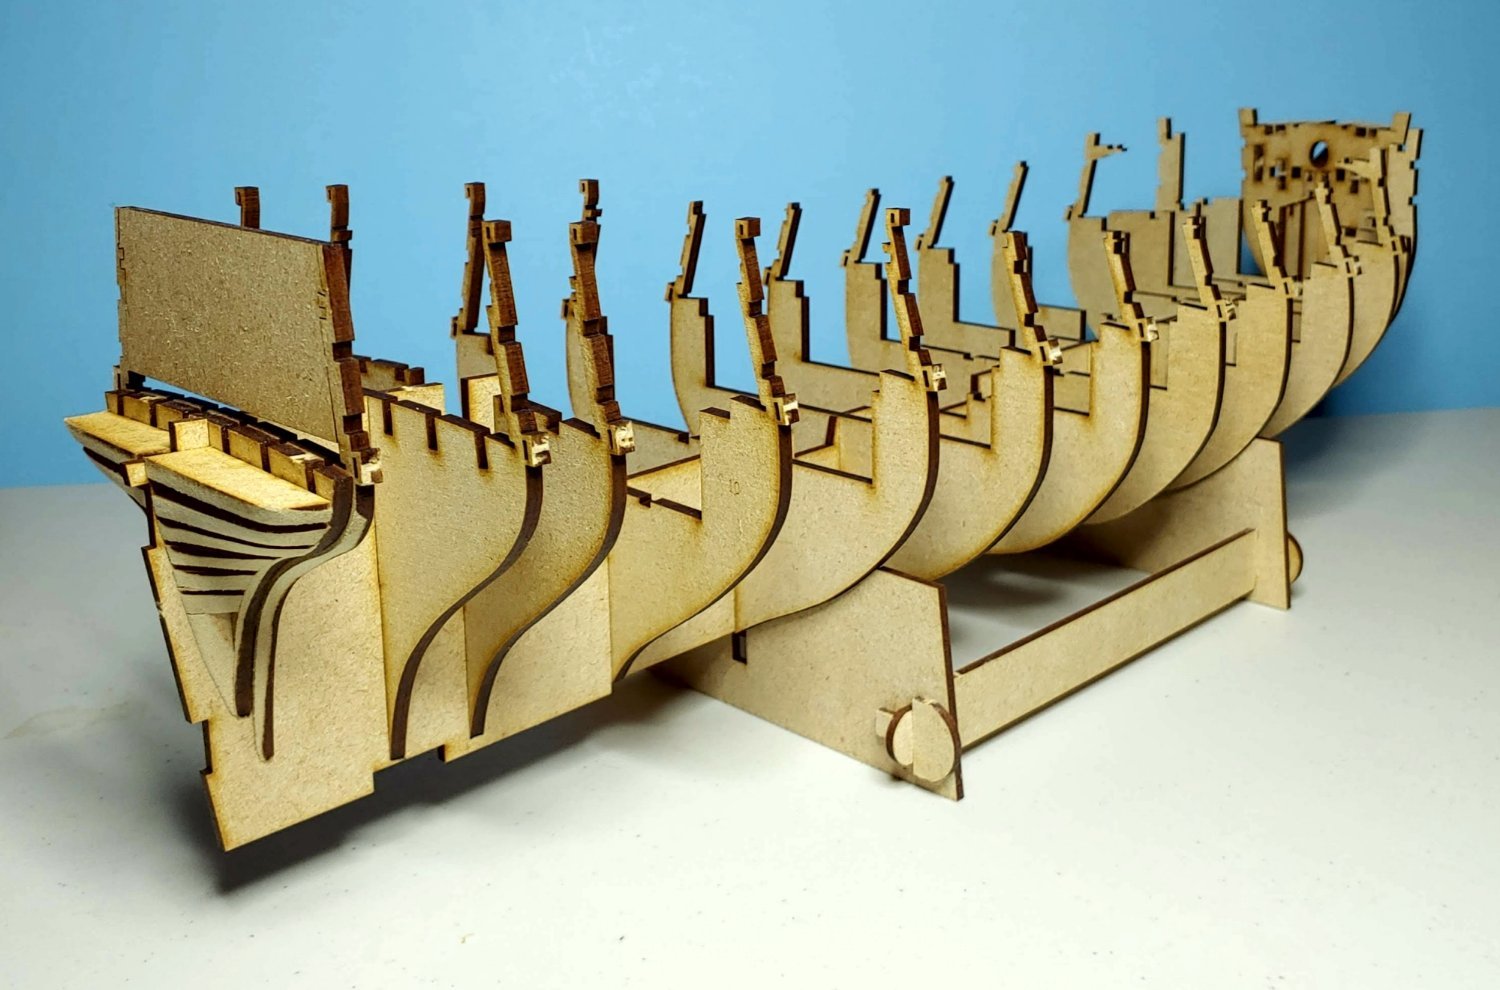
Now to construct the supporting framework for the gun deck. Here are the gun deck support beams:

The numbers printed on these correspond to the bulkhead numbers. These are inserted into the square holes in the lower deck and rest on the top edges of the bulkheads below. The ends of the horizontal arms fit into notches in the bulkhead ears. I found that they would not fit easily into the square holes, so I filed them down a bit, being loath to force them in. Here is the resulting framework:
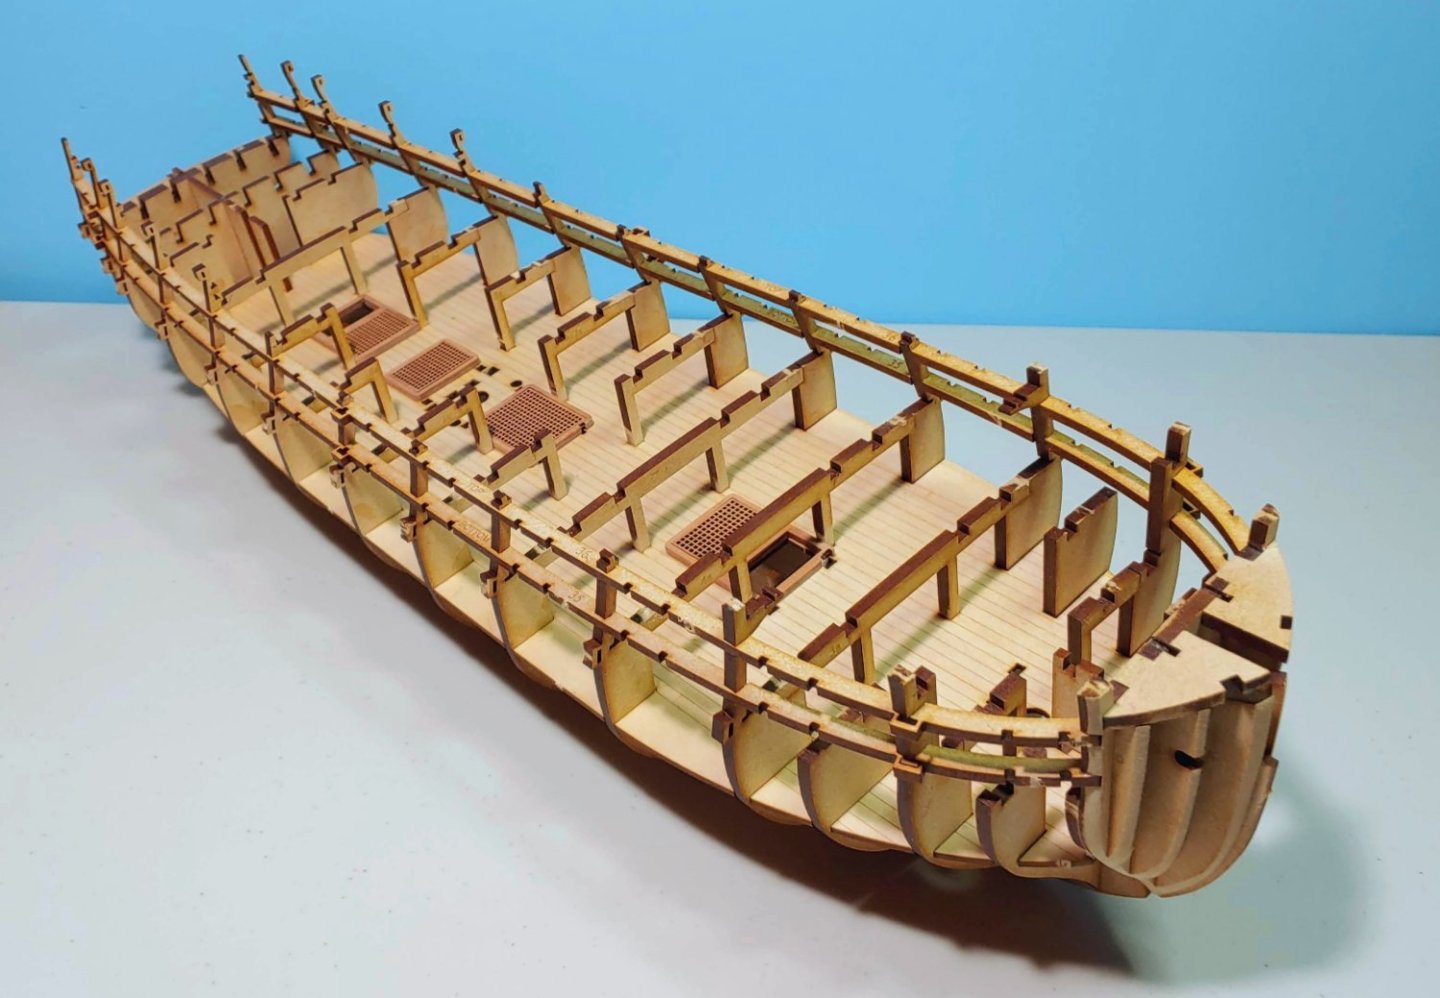
I departed a bit from the prescribed method of making sure that they are properly aligned. I made sure that the foremost support was exactly plumb, then temporarily slotted in the longitudinal deck beams into the notches in each support as I glued it in, assuring an exact match between the spacing of the supports and the notches in the longitudinal beams. Speaking of which...
Here is the result:
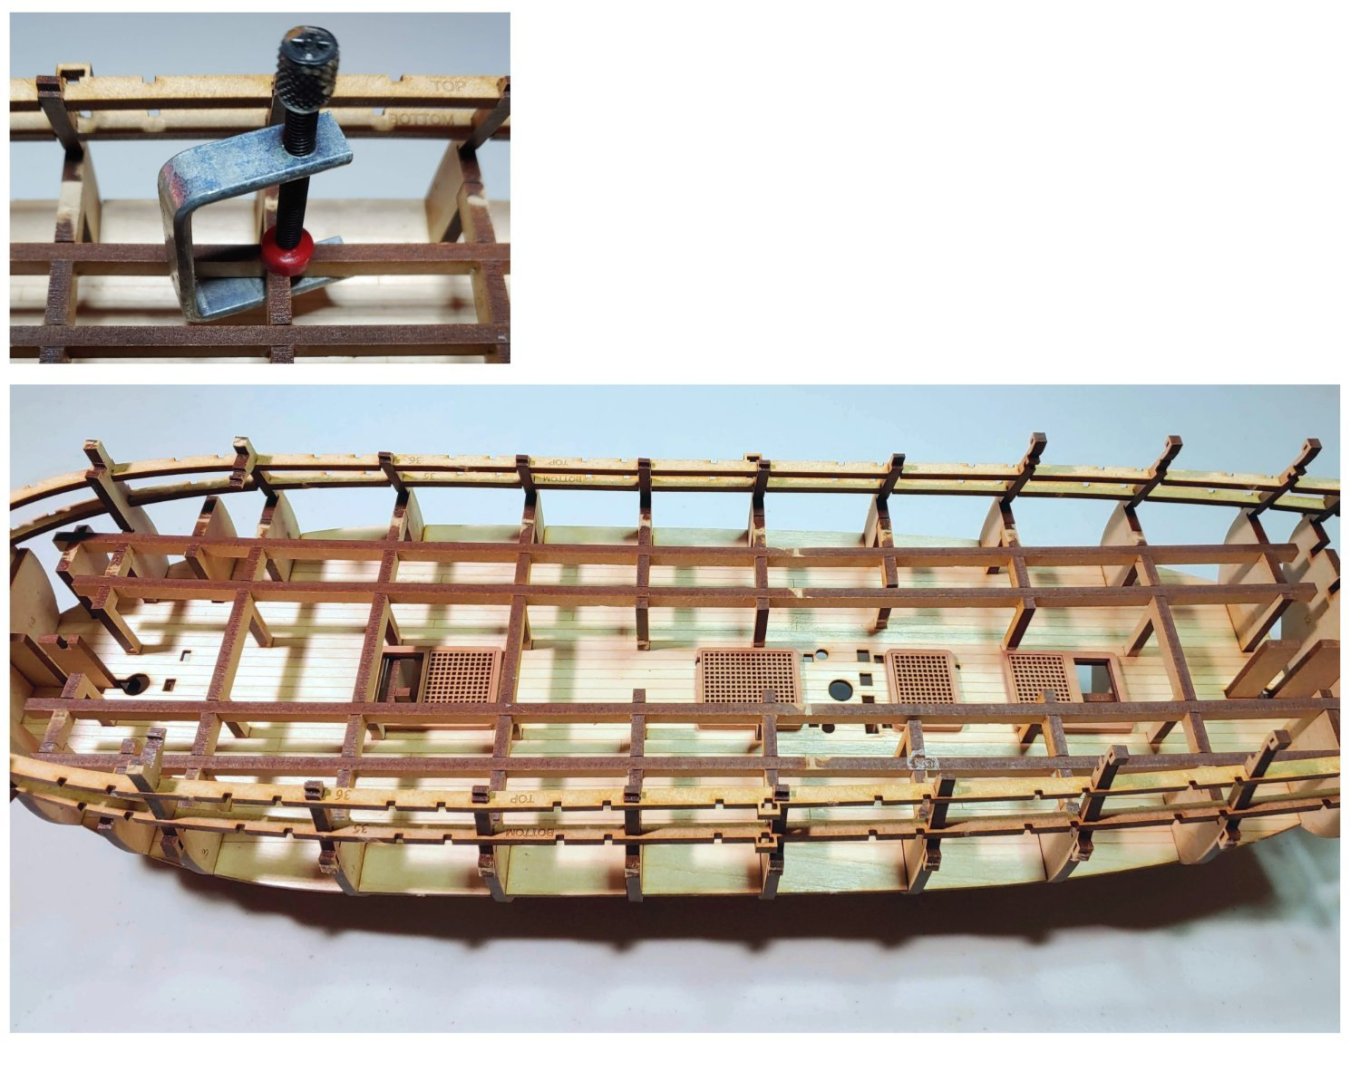
I found that the longitudinal deck beams sprang up a bit from their notches in places, so I used some small C clamps to hold them in place while the glue set.
Next will be the framing of the stern. The instructions say to insert these into their slots, but does not say to glue them. I assume this is because the spacing piece on top which is glued will finalize their alignment. Then glue can be painted into the joints to finish the job. Am I right?
-
-
Thanks Dave! Before long there may be enough Sphinxes on MSW to form a squadron.
- DaveBaxt, DonSangria and mtaylor
-
1
-
 2
2
-
-
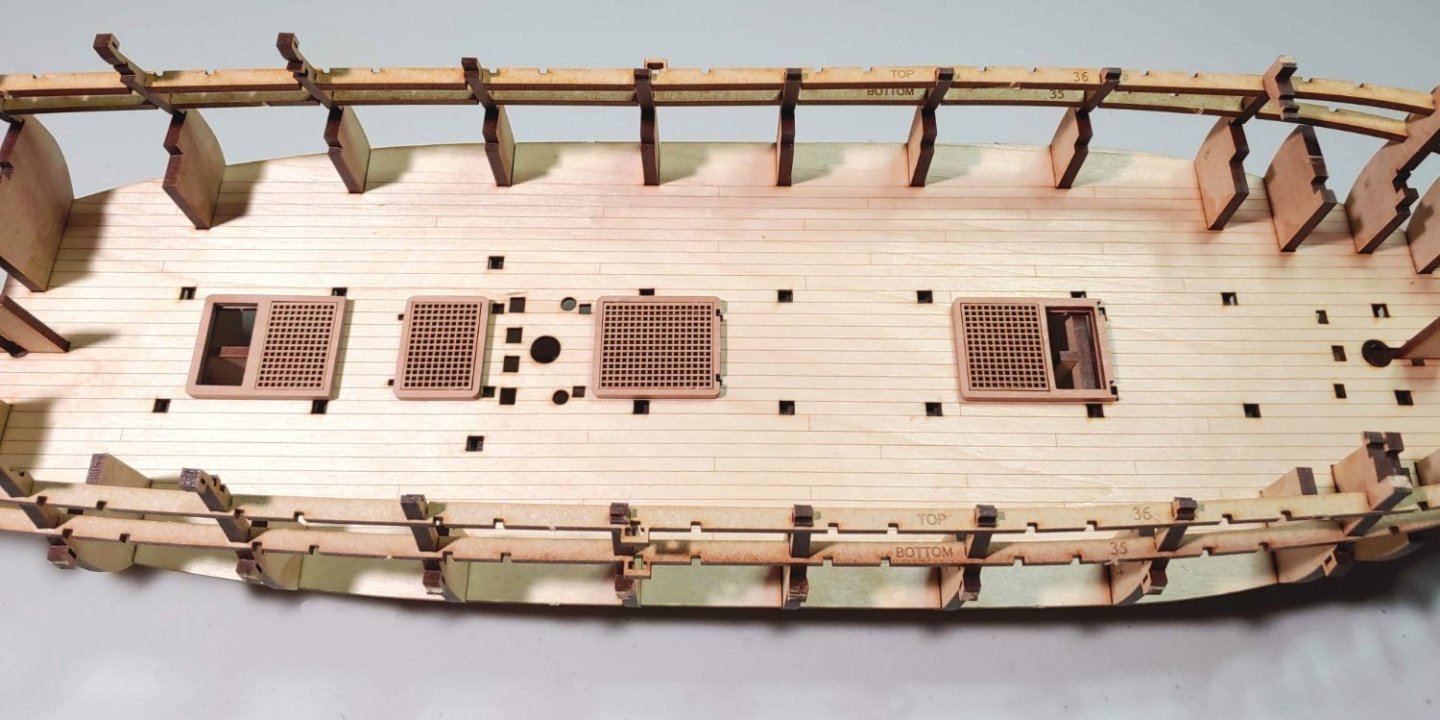
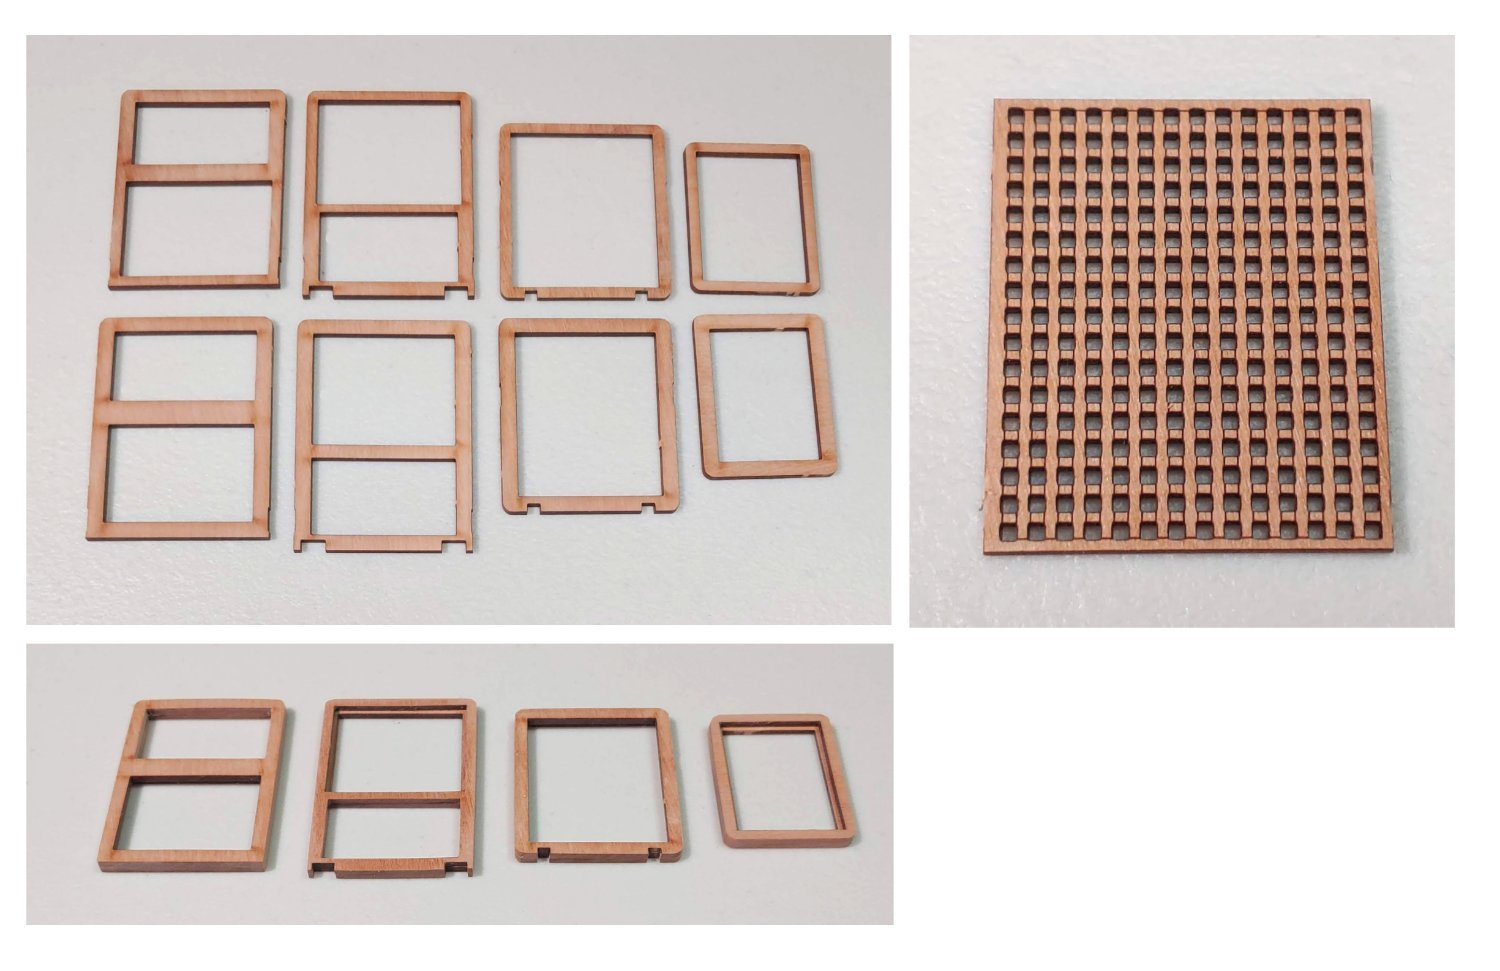
The lower deck hatch coamings come as laser cut components which are assembled to form a two layer unit into which the gratings can be inserted:

Pear is a wonderful material to work with which makes a smooth surface when sanded and varnished. This is novel for me, and helps me to reach my goal of building a model which not only looks good from a normal viewing distance but up close as well. The grates are superbly detailed as you can see. Having looked at many different builds of many different kits from a variety of manufacturers, I have thought that having grates that are in scale is a pipe dream until now. These grates have reached that goal as you can see from this photo of the coamings and grates glued into place:
- mtaylor, DB789, chris watton and 9 others
-
12
-
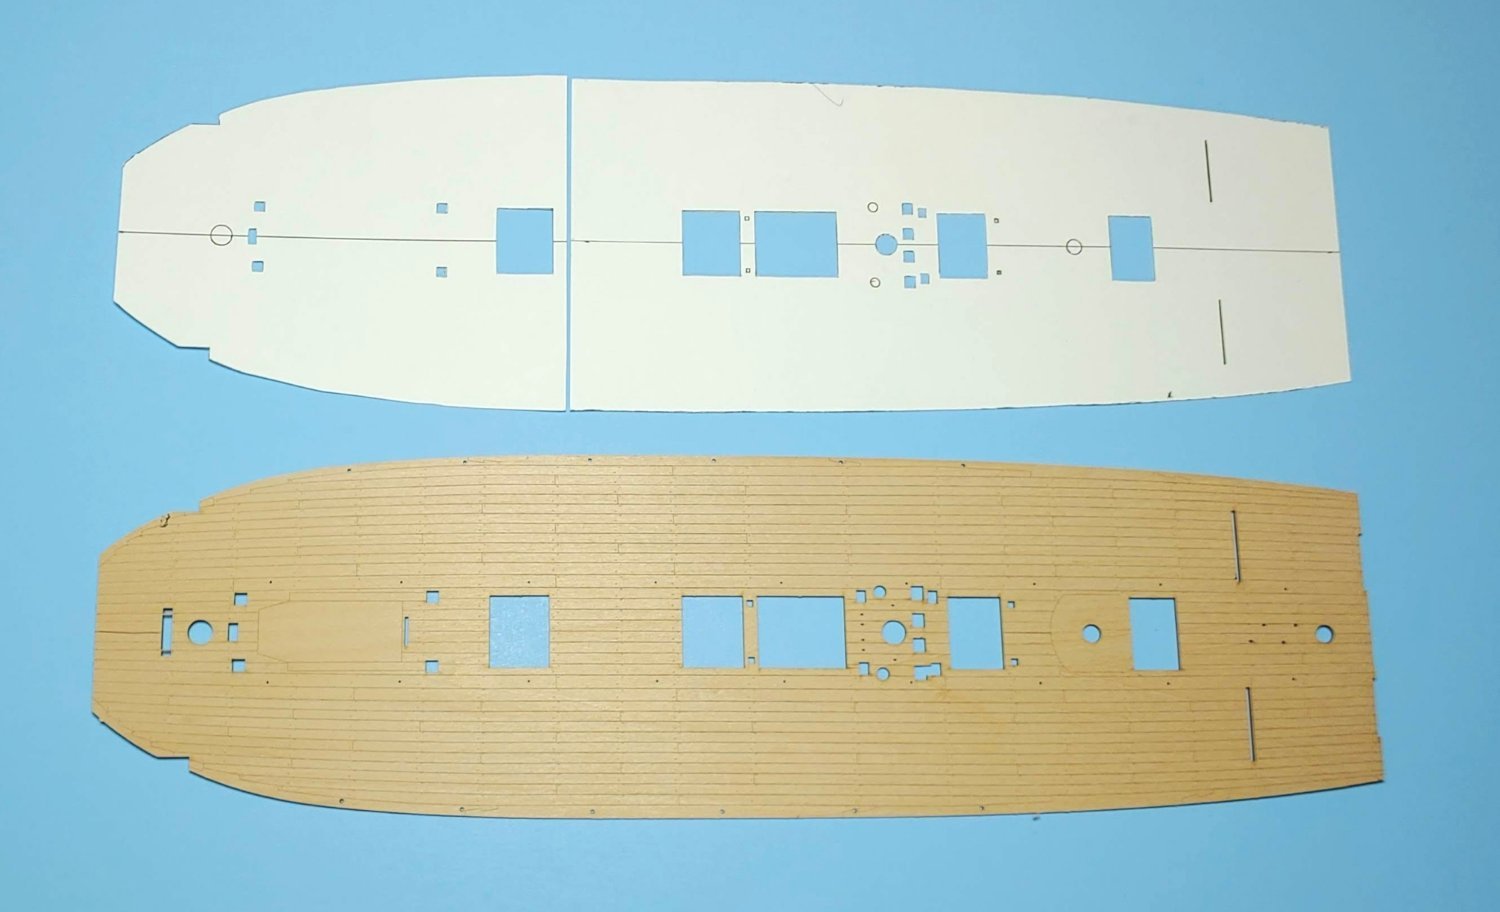
The orlop section piece is removed from the 2 mm ply sheet, then glued into the assembly:

The lower deck is also 2mm ply. I am not sure what wood it is, but it looks like maple to me.
It slots into the keel/bulkheads assembly thus:

This assembly is inverted and PVA brushed into all the joints. Incidentally, PVA and MDF are a good match. The MDF absorbs the PVA quickly, resulting in a quick bond which holds fast when set.
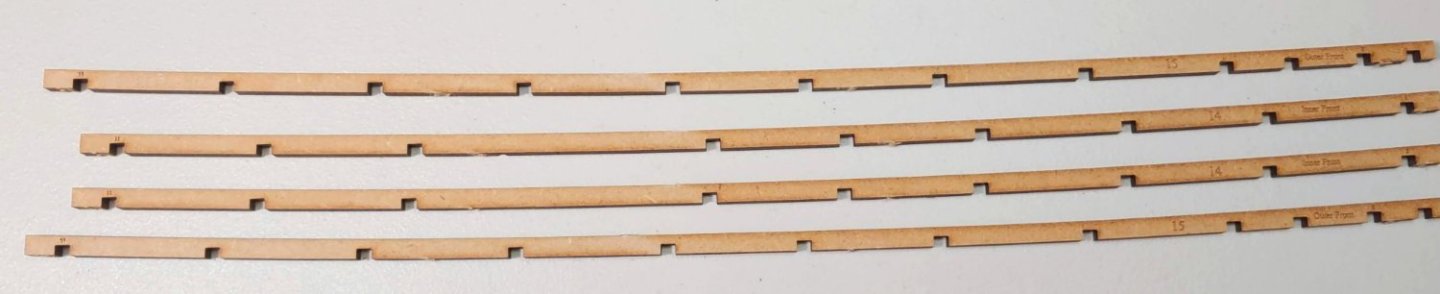
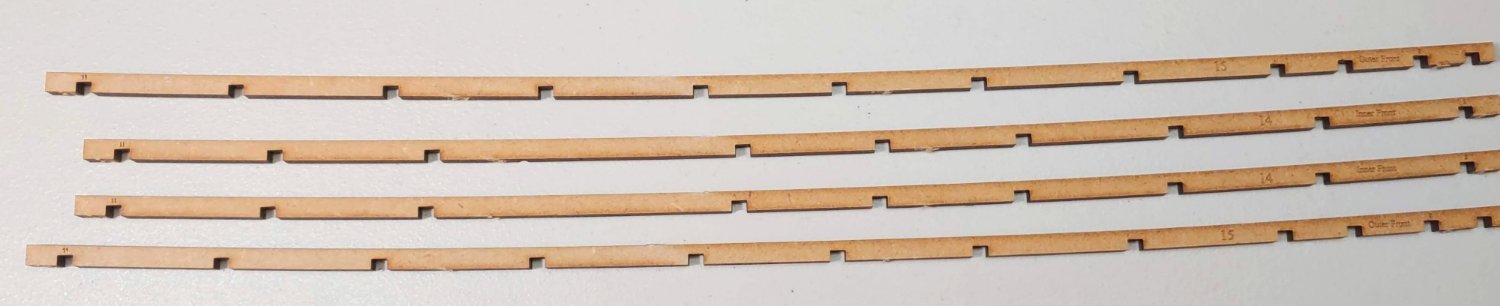
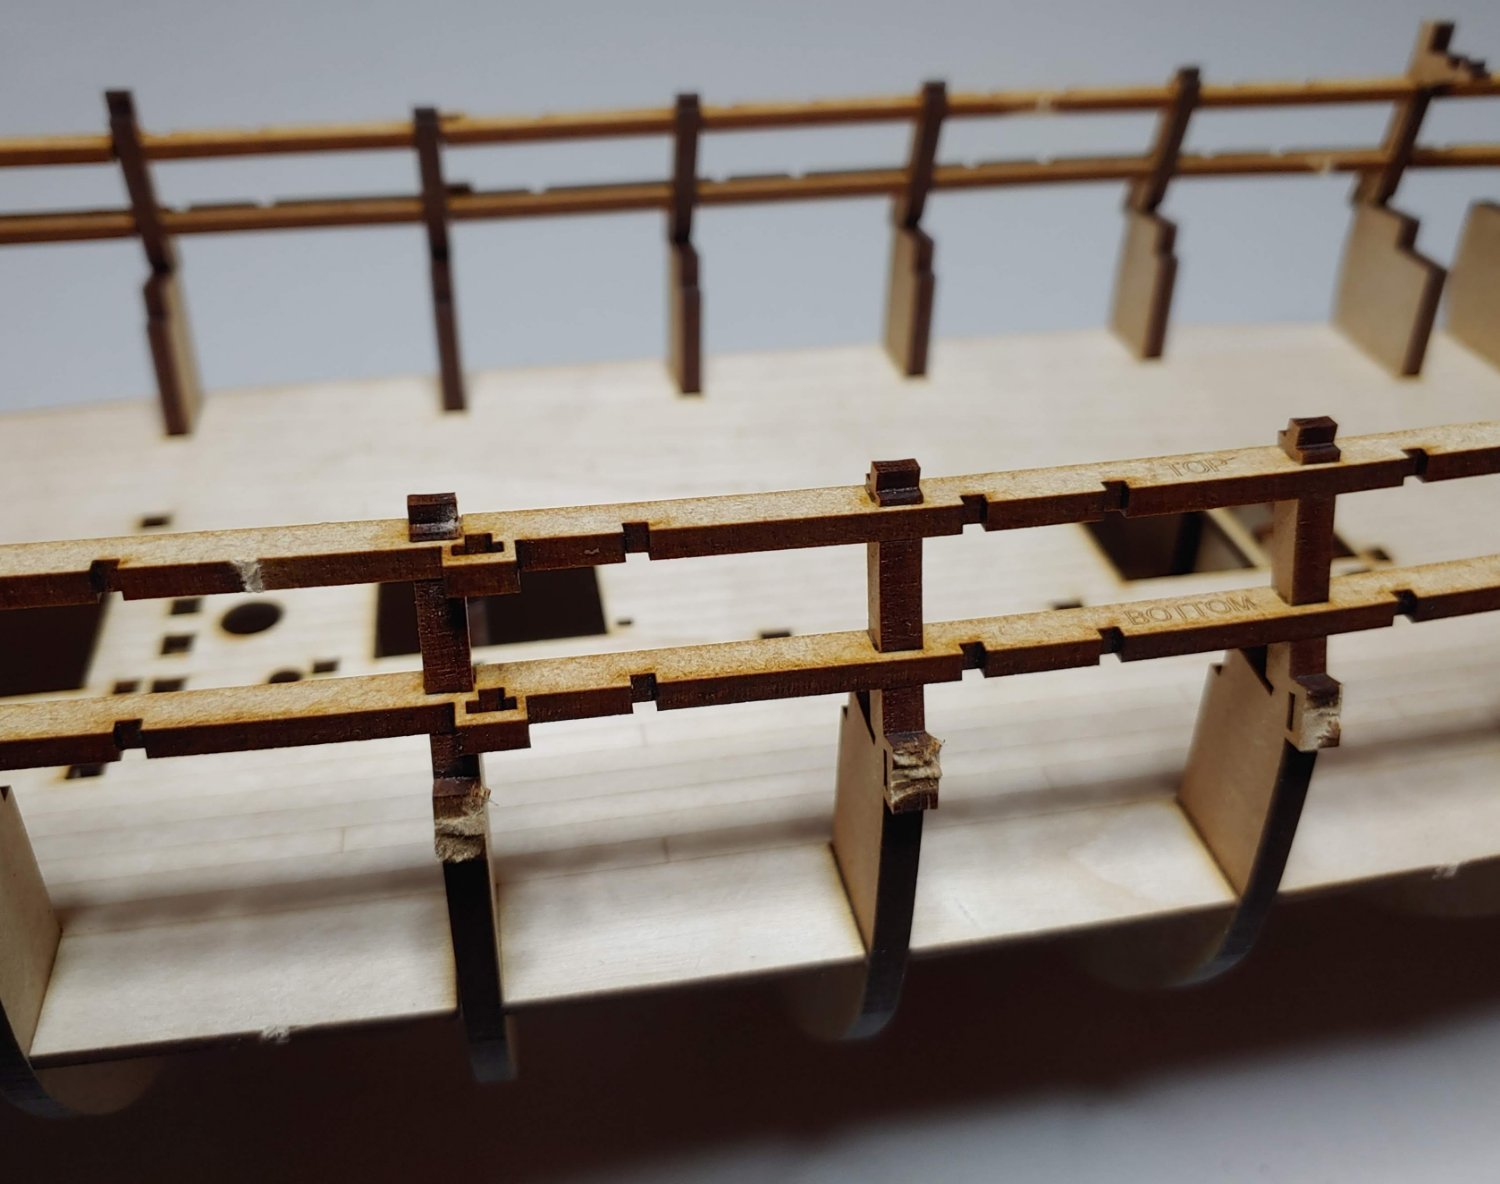
The next step is the installation of the longitudinal gun port frames:
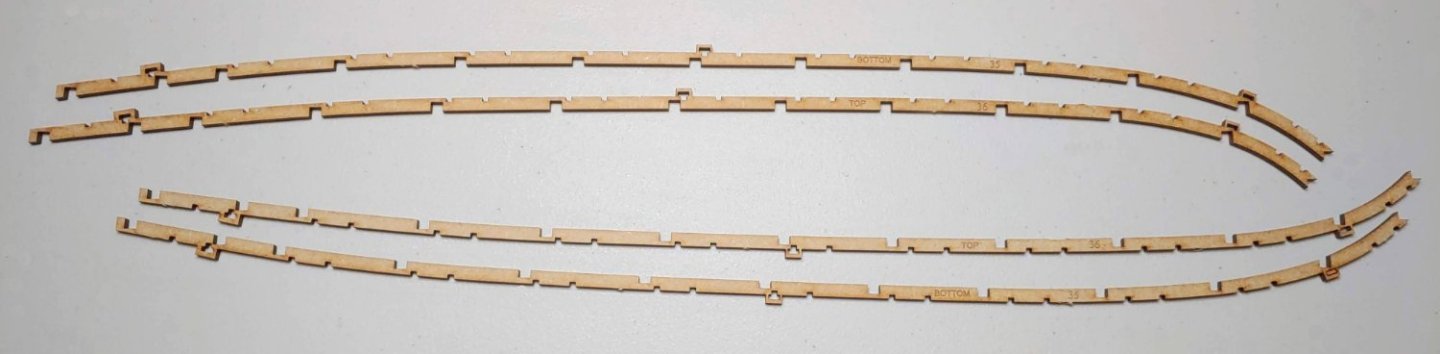
These slot into notches in the bulkhead ears. Labeling them top and bottom assures correct assembly. They tend to spring out a bit from some of the notches, so clamping was used where needed. I have never applied glue to joints after assembly before, but I find that when diluted a bit, the glue wicks nicely into the joints and holds well. I use 3 3/4" (9.2 cm) bamboo skewers I bought at a local grocery store to apply the glue. I like them better than toothpicks because they have a very sharp point and are very smooth, making them ideal for the application of small amounts of glue. If the glue is to be diluted, I can do that with a wet skewer in situ.
Here is the resulting structure:

So far, so good. I have not broken off any bulkhead ears.
-
Looking great! Actually you are ahead of me. I am taking my time with this build, as it is my first POB build. I will be checking in regularly.
-
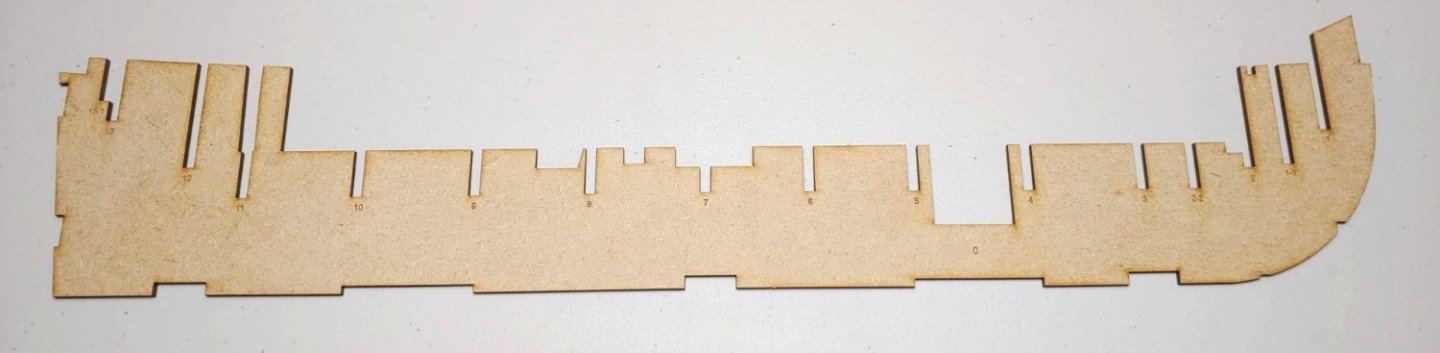
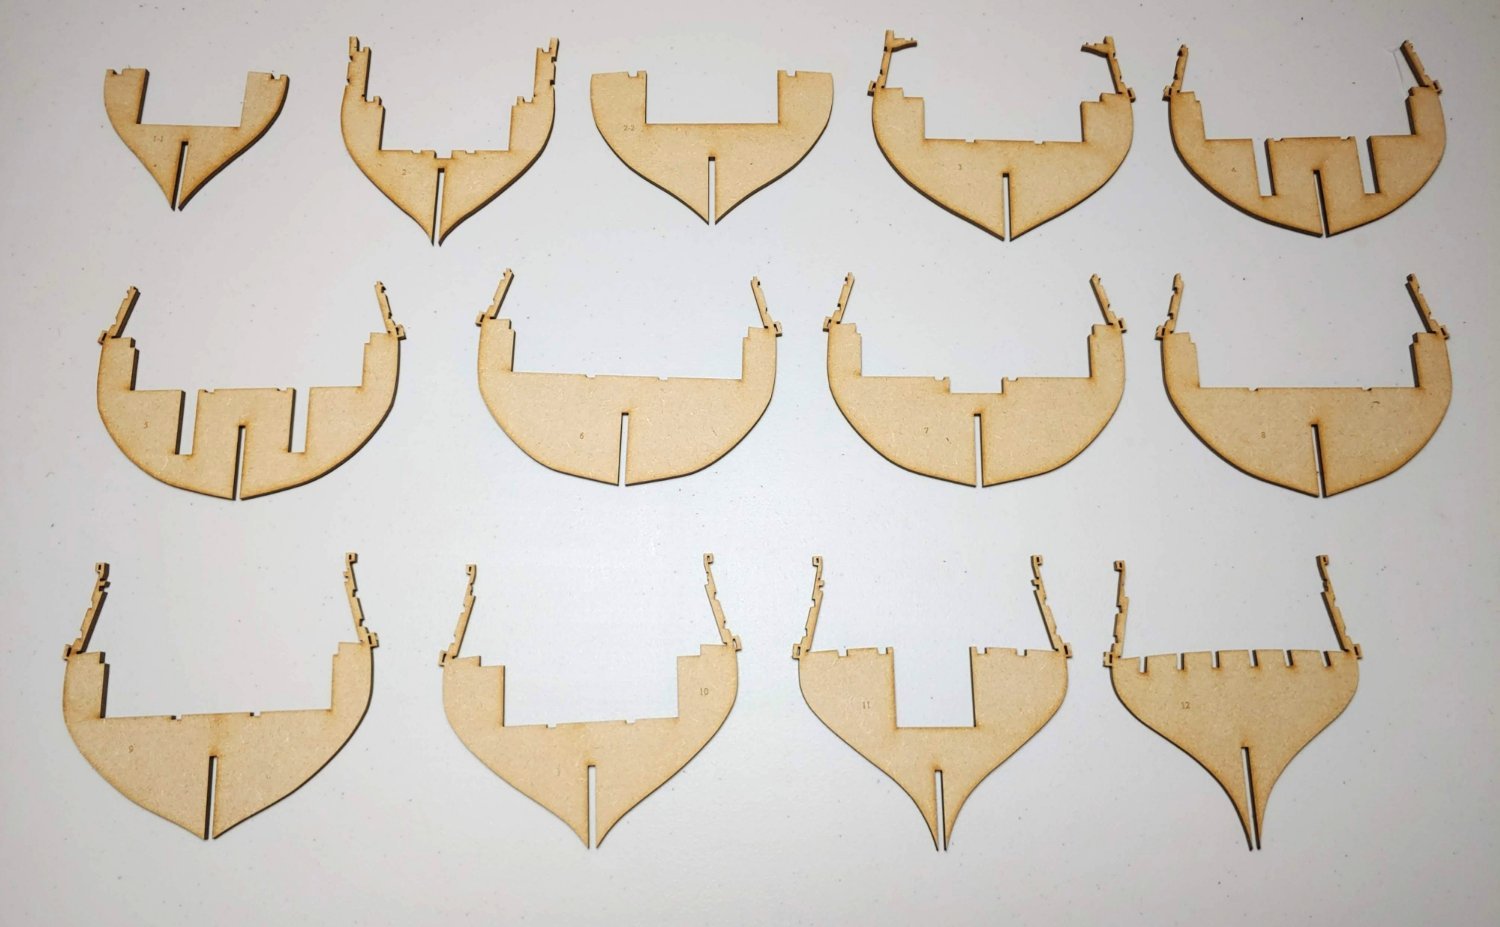
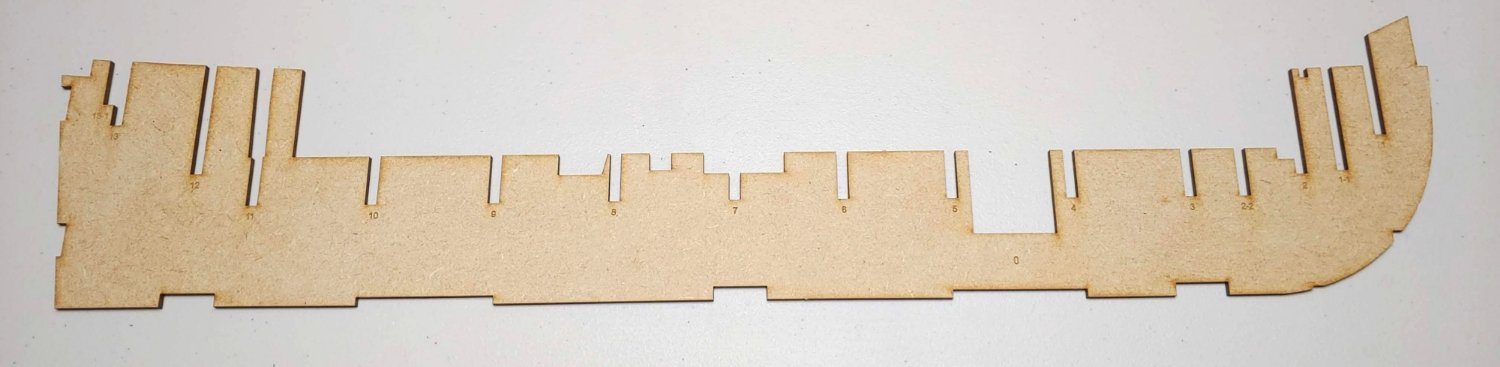
I separated the bulkheads from their MDF sheets:
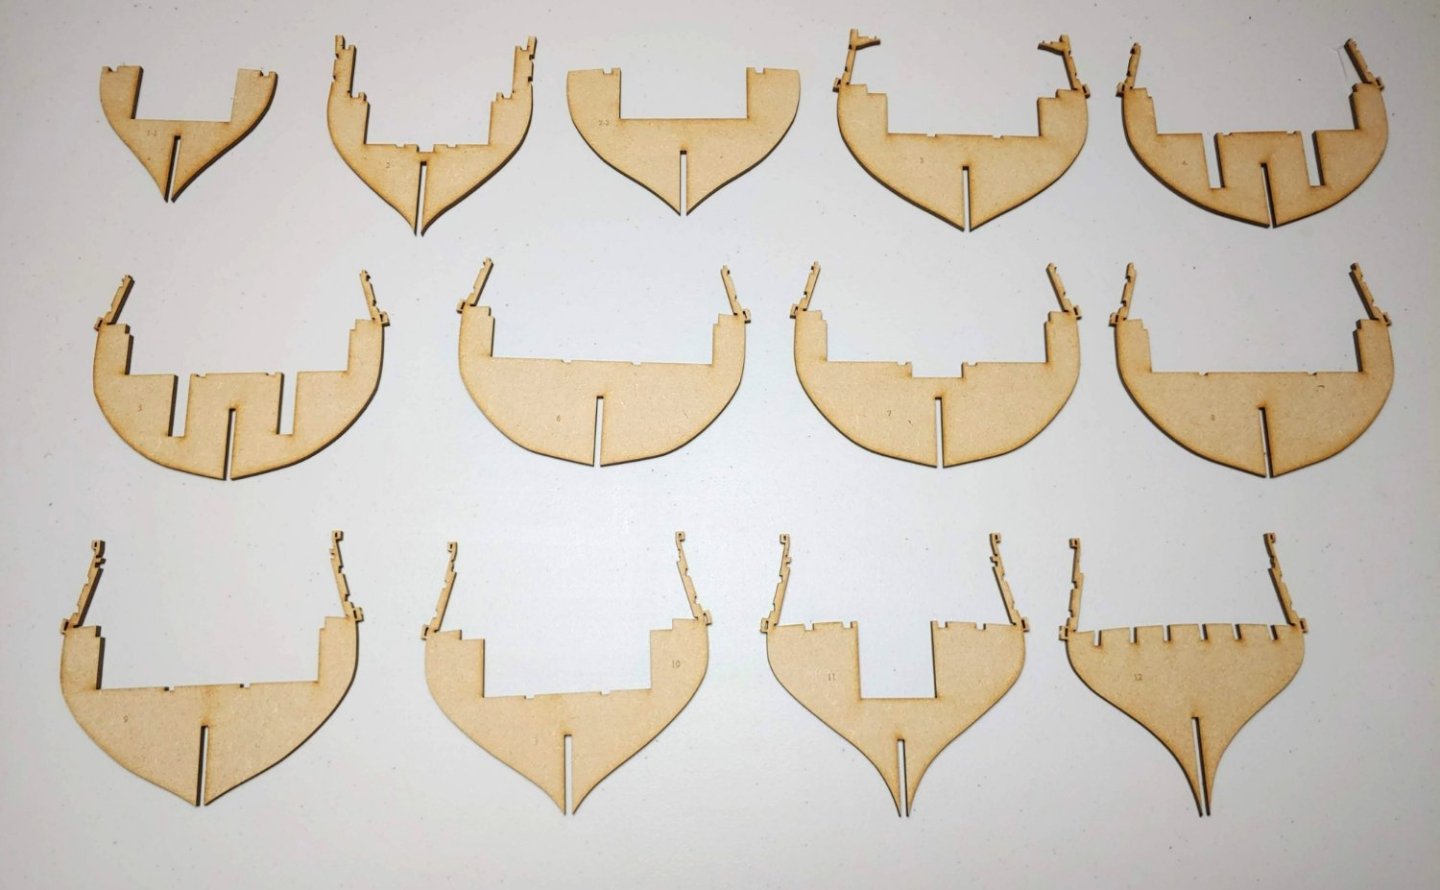
...and the keel pattern:
These pieces slotted together very nicely. I could get used to this! All components are dry fitted for now.
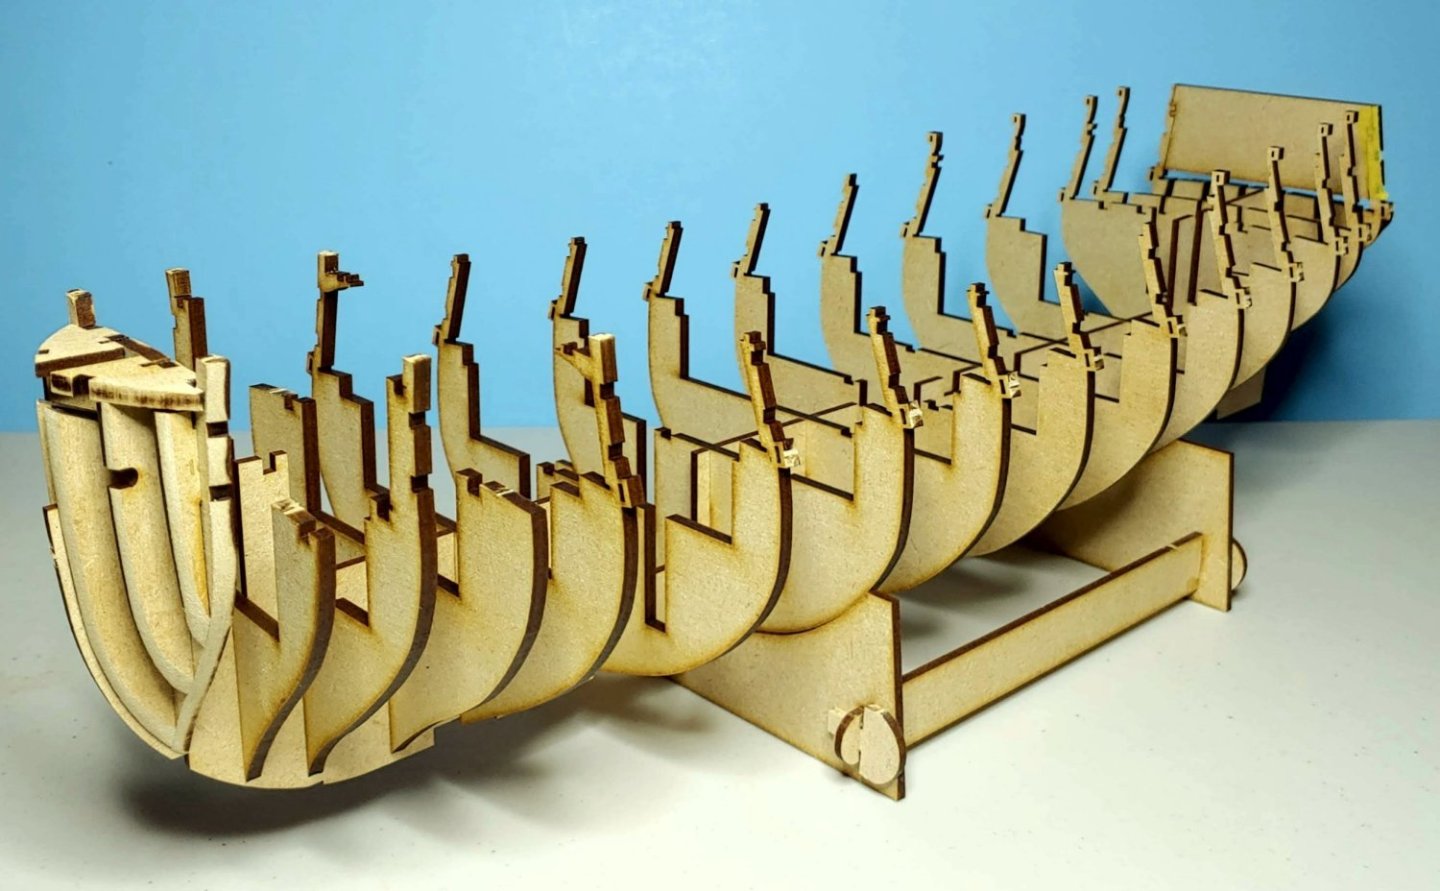

As more components are added, this structure will get a lot stronger. In the meantime, it must be handled with great care.
- mtaylor, Glenn-UK, KARAVOKIRIS and 7 others
-
10
-
-
-
Yes, here is yet another HMS Sphinx build. This is a very popular kit for obvious reasons. While there can never be a kit that is 100% "idiot proof", this kit comes as close to that as you are ever likely to find. Not only are the instructions clearly written and accompanied with a wealth of top quality photos, but there are a great many other builds that I can look at. Since this is my first POB build, this build log is intended to document progress rather than instruct others. I would like to build this model as an Admiralty rather than a fully rigged model. I may add scantling details and open up the quarter deck more, when I get to that phase of the build. We'll see. To begin with, here is a photo of the box:
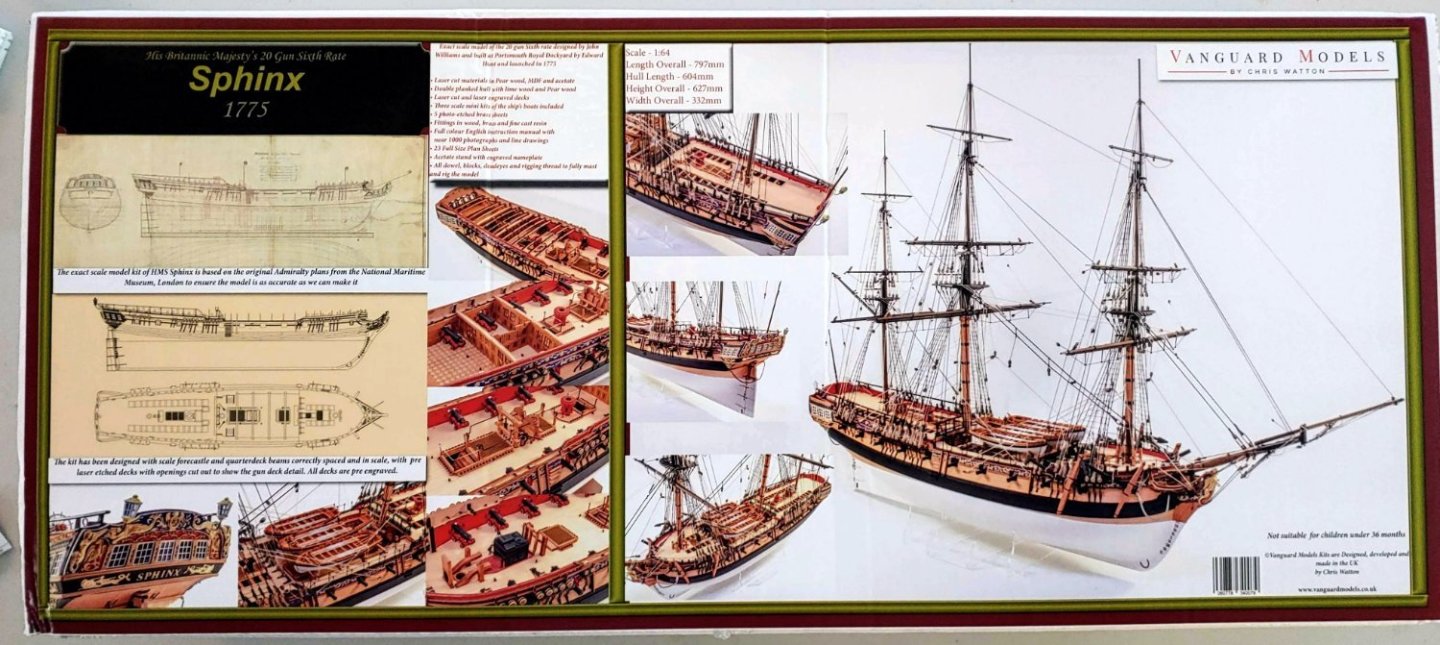
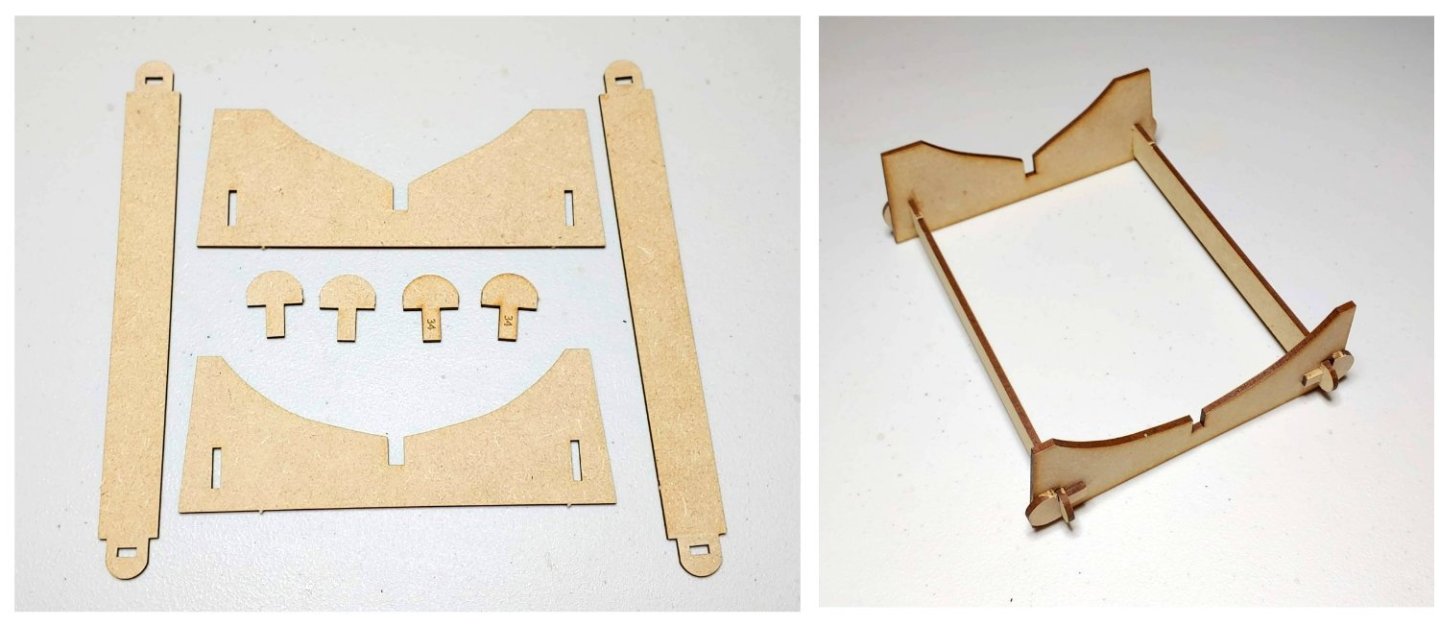
Photos of the contents will be posted as the build progresses. To begin with, I am struck by the quality of the materials that are provided. My last build was done entirely in basswood with a few birch dowels thrown in. It will be fascinating to see how pear, MDF, and maple compare. As far as I can see, only the more recently released kits include a display cradle. This kit not only does that but adds a build cradle to boot! I have never worked with MDF before, and I find it really great. Here are the components of the display cradle, and its appearance when assembled.
The next step is the assembling and shaping of the lower counter:

The parts went together easily and precisely. Looking at the diagrams of the Pandora AOS by McKay & Coleman (the Pandora is nearly identical to the Sphinx), I see that the resulting structure closely resembles the "transoms" in the real ship. Designing this part in this manner makes perfect sense, yet I have never seen it in any kits other than Vanquard. Shaping was done with a sanding block using 100 grit sandpaper. I do not trust myself with a dremel yet. It seems to me than inexpert handling of a Dremel can result in things going very wrong very fast, so I did it the slow way to be safe. Hopefully the planks will like my shaping of this part. We'll see.
The next step is doing the same thing for the bow:
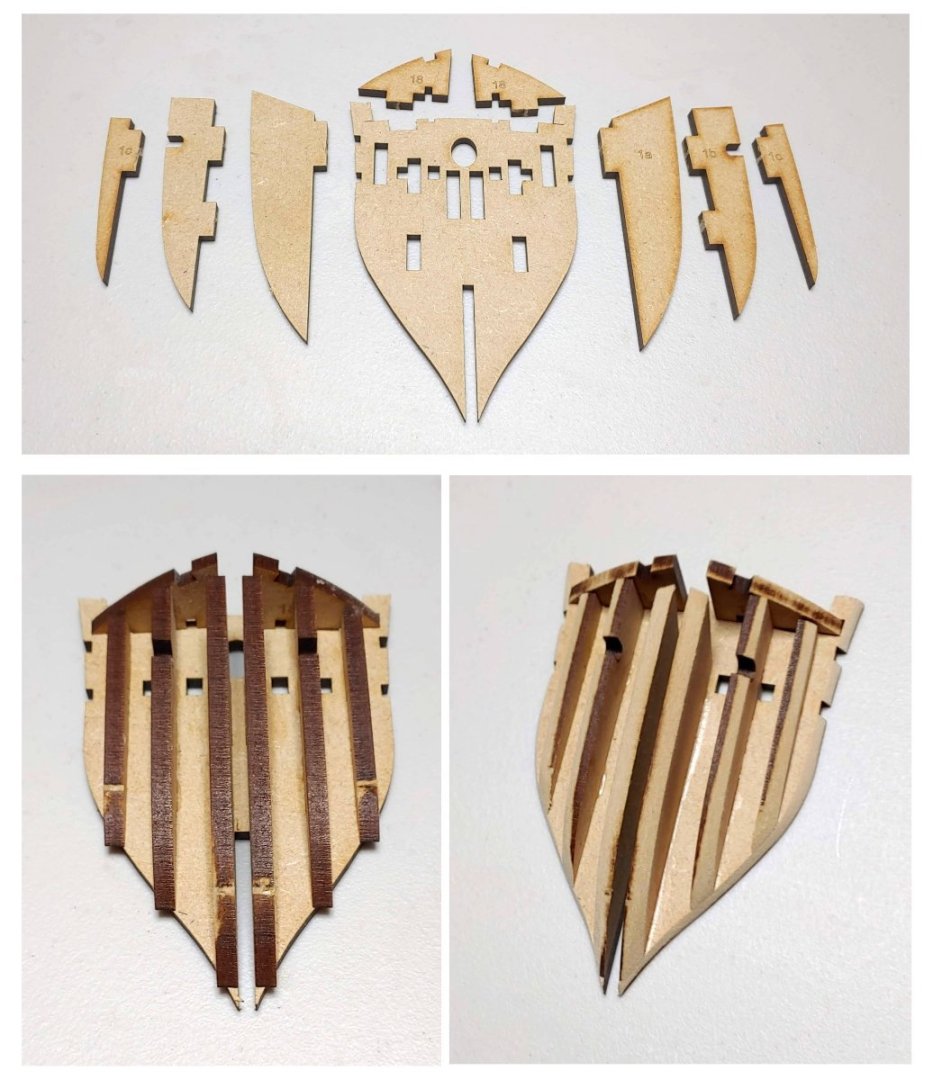
Again, the structure resembles the hawse timbers in the real ship. Again, I have found that the pieces fit together easily and precisely. The MDF sands very well, enabling sanding in any direction with no splintering. In addition I have not seen any signs of warping. The final fairing and planking will reveal how well my shaping will integrate into the hull shape.
Next step is to fit all the bulkheads to the keel unit.
- HardeeHarHar, mtaylor, Ronald-V and 8 others
-
11
-
-
Congratulations on a really beautiful build!
- Keith Black, Knocklouder, mtaylor and 1 other
-
3
-
 1
1
-
Bravo! That is a big, challenging, and complex build. You can be very proud of your work! My heartiest congratulations!
-
Congrats on the completion of a really beautiful model. Well done!
- Keith Black and usedtosail
-
2
-


HMS Sphinx by KurtH - Vanguard Models - 1/64 - First POB Model
in - Kit build logs for subjects built from 1751 - 1800
Posted · Edited by KurtH
One of my ambitions in working with this kit is to improve my skills at painting and finishing. The main bugaboo in my last model was the grain rise issues which made parts that looked OK from a normal viewing distance look ghastly when viewed up close. To that end, I adopted the technique of applying matt varnish as a base, lightly sanding down the grain rise with 400 grit sandpaper, then applying either a second coat of varnish or multiple coats of paint. A note to those modelers who, like me, have never worked with laser engraved parts before. This procedure will seriously compromise those engraved details. I am not sure what to do instead in order to have everything come out looking finished, but this I can tell you - there will be no more sanding of engraved parts in this build!!
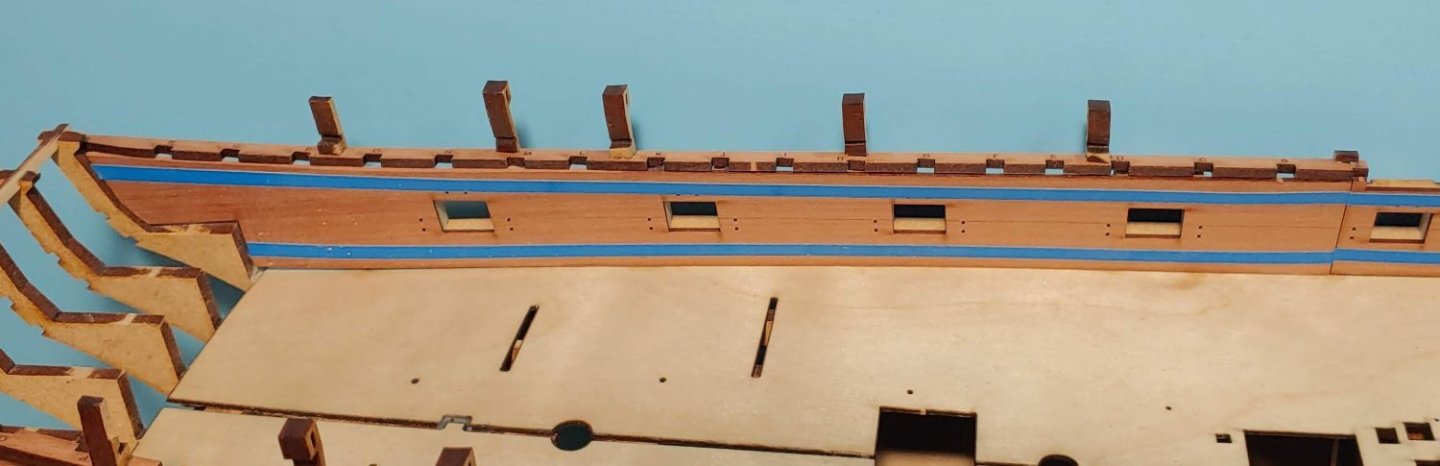
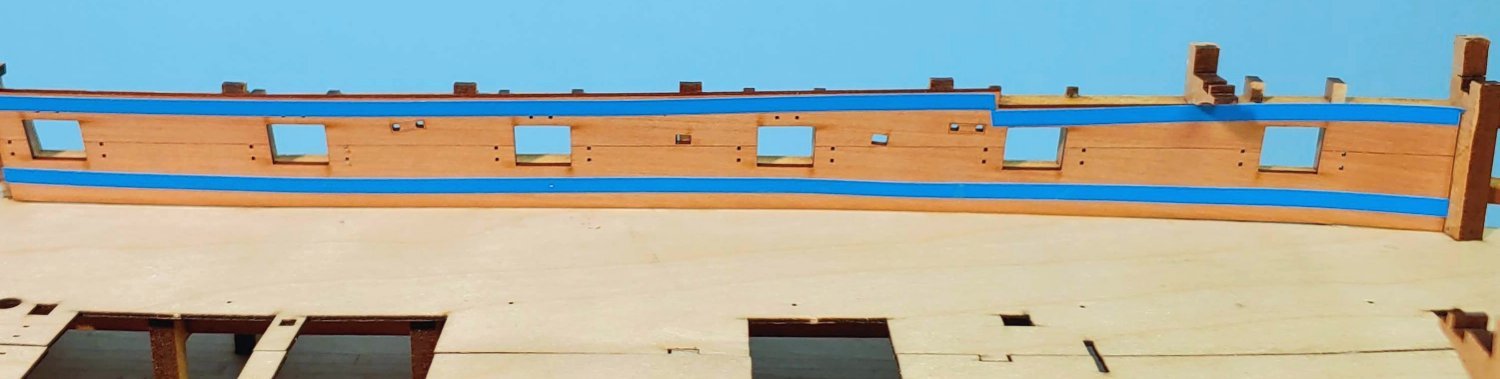
Back to the build. In order to accurately draw the line which divides the painted area of the inner bulwark pattern from the natural area. To get the angle right, I set up the forward cabin bulwark and the fore and aft dividing bulwark and drew the line:
Having masked the unpainted area, I painted the inner bulwarks with Tamiya Flat Red leaving the top and bottom natural as well as the aft section:
The planking detail in the deck does not show up well in these photos, but it is there:
Here are the spirketting pieces:
Here they are painted:
Glued and clamped:
Clamps removed:
Here are the deck clamp patterns:
Painted:
Glued and clamped in place"
Clamps removed: