Valeriy V
-
Posts
1,116 -
Joined
-
Last visited
11 Followers


-
 Valeriy V reacted to a post in a topic:
Billy 1938 by Keith Black - 1:120 Scale - Homemade Sternwheeler
Valeriy V reacted to a post in a topic:
Billy 1938 by Keith Black - 1:120 Scale - Homemade Sternwheeler
-
Valeriy V reacted to a post in a topic:
St Roch by Lecrenb - 1:48 scale - RCMP Schooner rigged as schooner c. 1930/35
-
Valeriy V reacted to a post in a topic:
USS Cape (MSI-2) by Dr PR - 1:48 - Inshore Minesweeper
-
 Canute reacted to a post in a topic:
USS Cape (MSI-2) by Dr PR - 1:48 - Inshore Minesweeper
Canute reacted to a post in a topic:
USS Cape (MSI-2) by Dr PR - 1:48 - Inshore Minesweeper
-
Ras Ambrioso reacted to a post in a topic:
USS Cape (MSI-2) by Dr PR - 1:48 - Inshore Minesweeper
-
KORTES reacted to a post in a topic:
Libertad 1925 by Valeriy V - Scale 1:100 - Spanish Type F Light Cruiser
-
KORTES reacted to a post in a topic:
Libertad 1925 by Valeriy V - Scale 1:100 - Spanish Type F Light Cruiser
-
Valeriy V reacted to a post in a topic:
TWILIGHT 2007-2009 by MAGIC's Craig - Scale 1:16 - RADIO - Pacific Northwest cruising powerboat
-
Valeriy V reacted to a post in a topic:
TWILIGHT 2007-2009 by MAGIC's Craig - Scale 1:16 - RADIO - Pacific Northwest cruising powerboat
-
Valeriy V reacted to a post in a topic:
TWILIGHT 2007-2009 by MAGIC's Craig - Scale 1:16 - RADIO - Pacific Northwest cruising powerboat
-
Valeriy V reacted to a post in a topic:
TWILIGHT 2007-2009 by MAGIC's Craig - Scale 1:16 - RADIO - Pacific Northwest cruising powerboat
-
Valeriy V reacted to a post in a topic:
TWILIGHT 2007-2009 by MAGIC's Craig - Scale 1:16 - RADIO - Pacific Northwest cruising powerboat
-
Valeriy V reacted to a post in a topic:
TWILIGHT 2007-2009 by MAGIC's Craig - Scale 1:16 - RADIO - Pacific Northwest cruising powerboat
-
Valeriy V reacted to a post in a topic:
Billy 1938 by Keith Black - 1:120 Scale - Homemade Sternwheeler
-
MAGIC's Craig reacted to a post in a topic:
Libertad 1925 by Valeriy V - Scale 1:100 - Spanish Type F Light Cruiser
-
KeithAug reacted to a post in a topic:
USS Cape (MSI-2) by Dr PR - 1:48 - Inshore Minesweeper
-
FreekS reacted to a post in a topic:
USS Cape (MSI-2) by Dr PR - 1:48 - Inshore Minesweeper
-
 Paul Le Wol reacted to a post in a topic:
USS Cape (MSI-2) by Dr PR - 1:48 - Inshore Minesweeper
Paul Le Wol reacted to a post in a topic:
USS Cape (MSI-2) by Dr PR - 1:48 - Inshore Minesweeper
-
cotrecerf reacted to a post in a topic:
USS Cape (MSI-2) by Dr PR - 1:48 - Inshore Minesweeper
-
 Hi, Phil! I continue to admire your work. 👍👌 I'd like to say a few words about painting brass. The problem isn't that paint doesn't adhere well to brass, but that brass needs to be degreased before applying primer. Solvents like acetone don't degrease. They only dissolve the grease, but they don't completely remove it from the surface. Even if you dip the part in acetone, the grease dissolves, and when you remove the part and let the acetone dry, the grease reappears. It doesn't change its chemical composition. Completely degreasing brass is done in a caustic soda solution (NaOH). As a result of the chemical reaction, all the grease on the brass surface turns into soap flakes and precipitates. After this, I rinse the part with running water, dry it with a hair dryer, and apply primer.
- 476 replies
-
- 6
-
-
-
- minesweeper
- Cape
- (and 1 more)
-
Mirabell61 reacted to a post in a topic:
Libertad 1925 by Valeriy V - Scale 1:100 - Spanish Type F Light Cruiser
-
Thank you, Nils! I'm flattered by your feedback. I hope your words come true and my photos help someone master brass soldering techniques and perhaps something else altogether. Happy New Year!
-
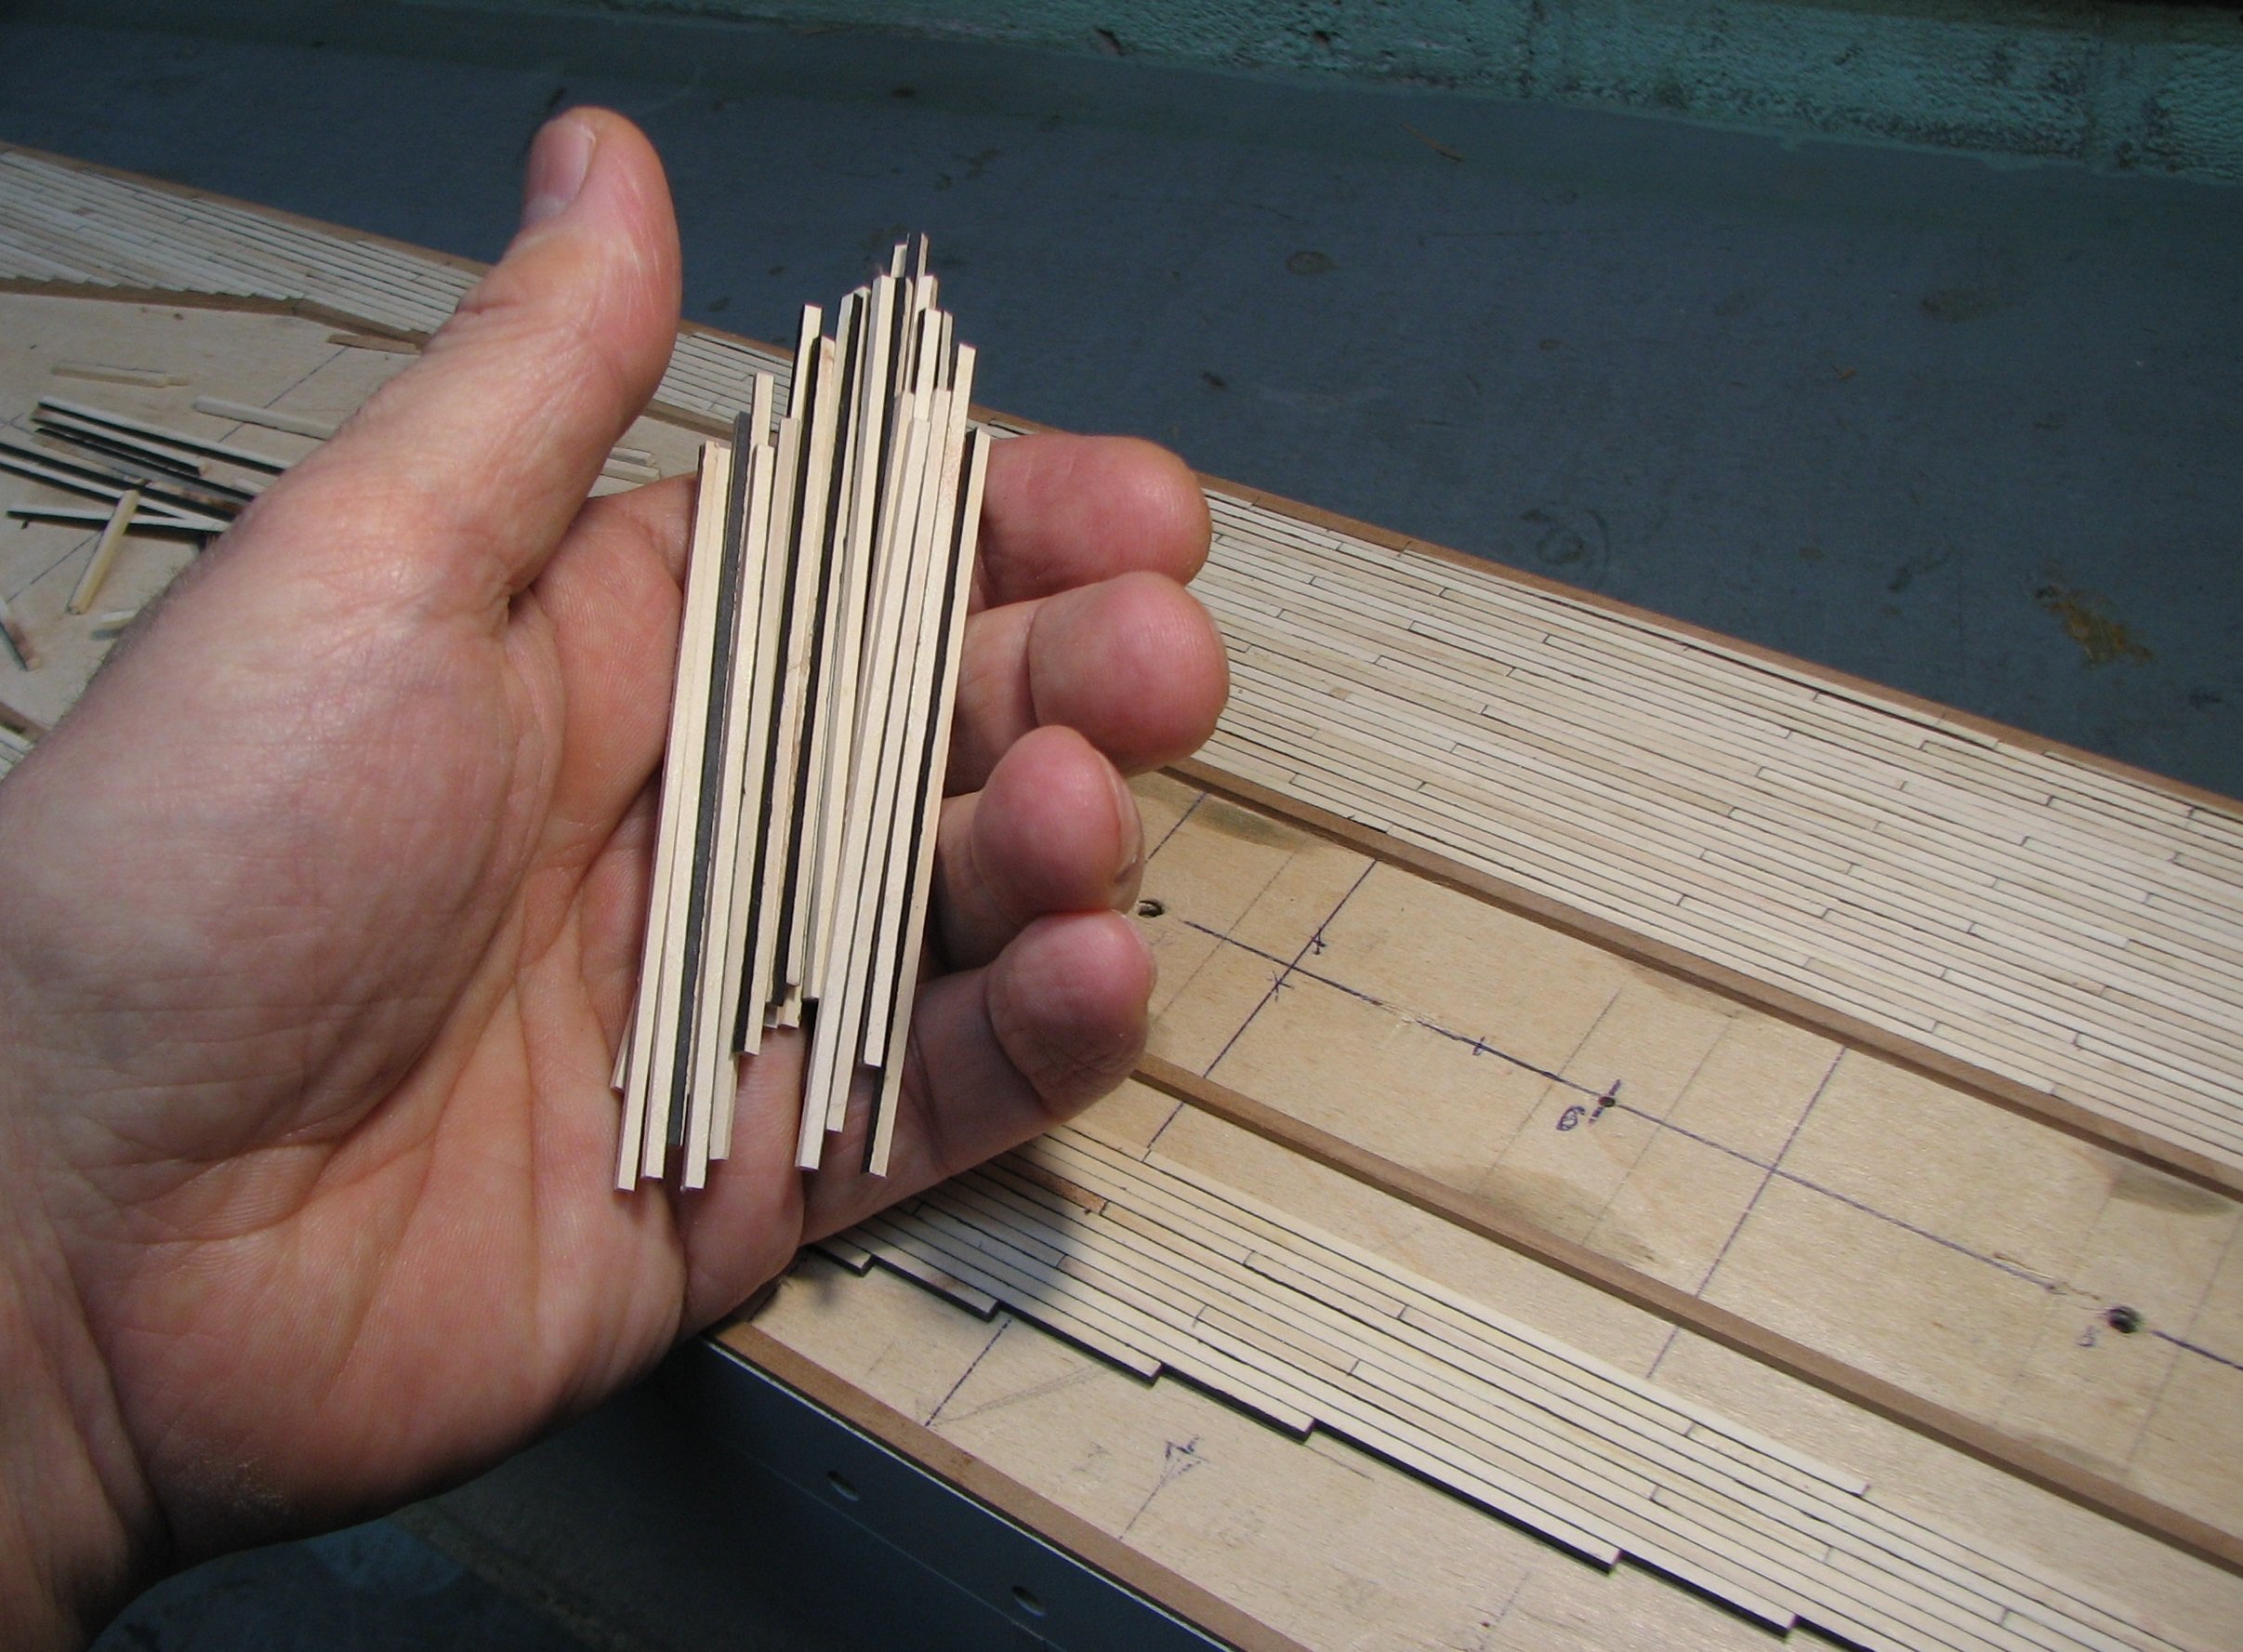
Thank you all for your feedback, likes and congratulations! I made the decking boards from rowan, and the side boards (watersides) from pear. Besides rowan, I also typically use maple and birch for decking. In my opinion, these woods best reflect the color of the decking after exposure to sun and saltwater. I use pear for the watersides because I like the contrast, which visually highlights the fine details. To simulate the seams between the boards, I use black paper.
-
I welcome all forum members to the new year, and I hope it brings only good news. And I'm continuing construction of the cruiser model. Wooden deck planking.


-
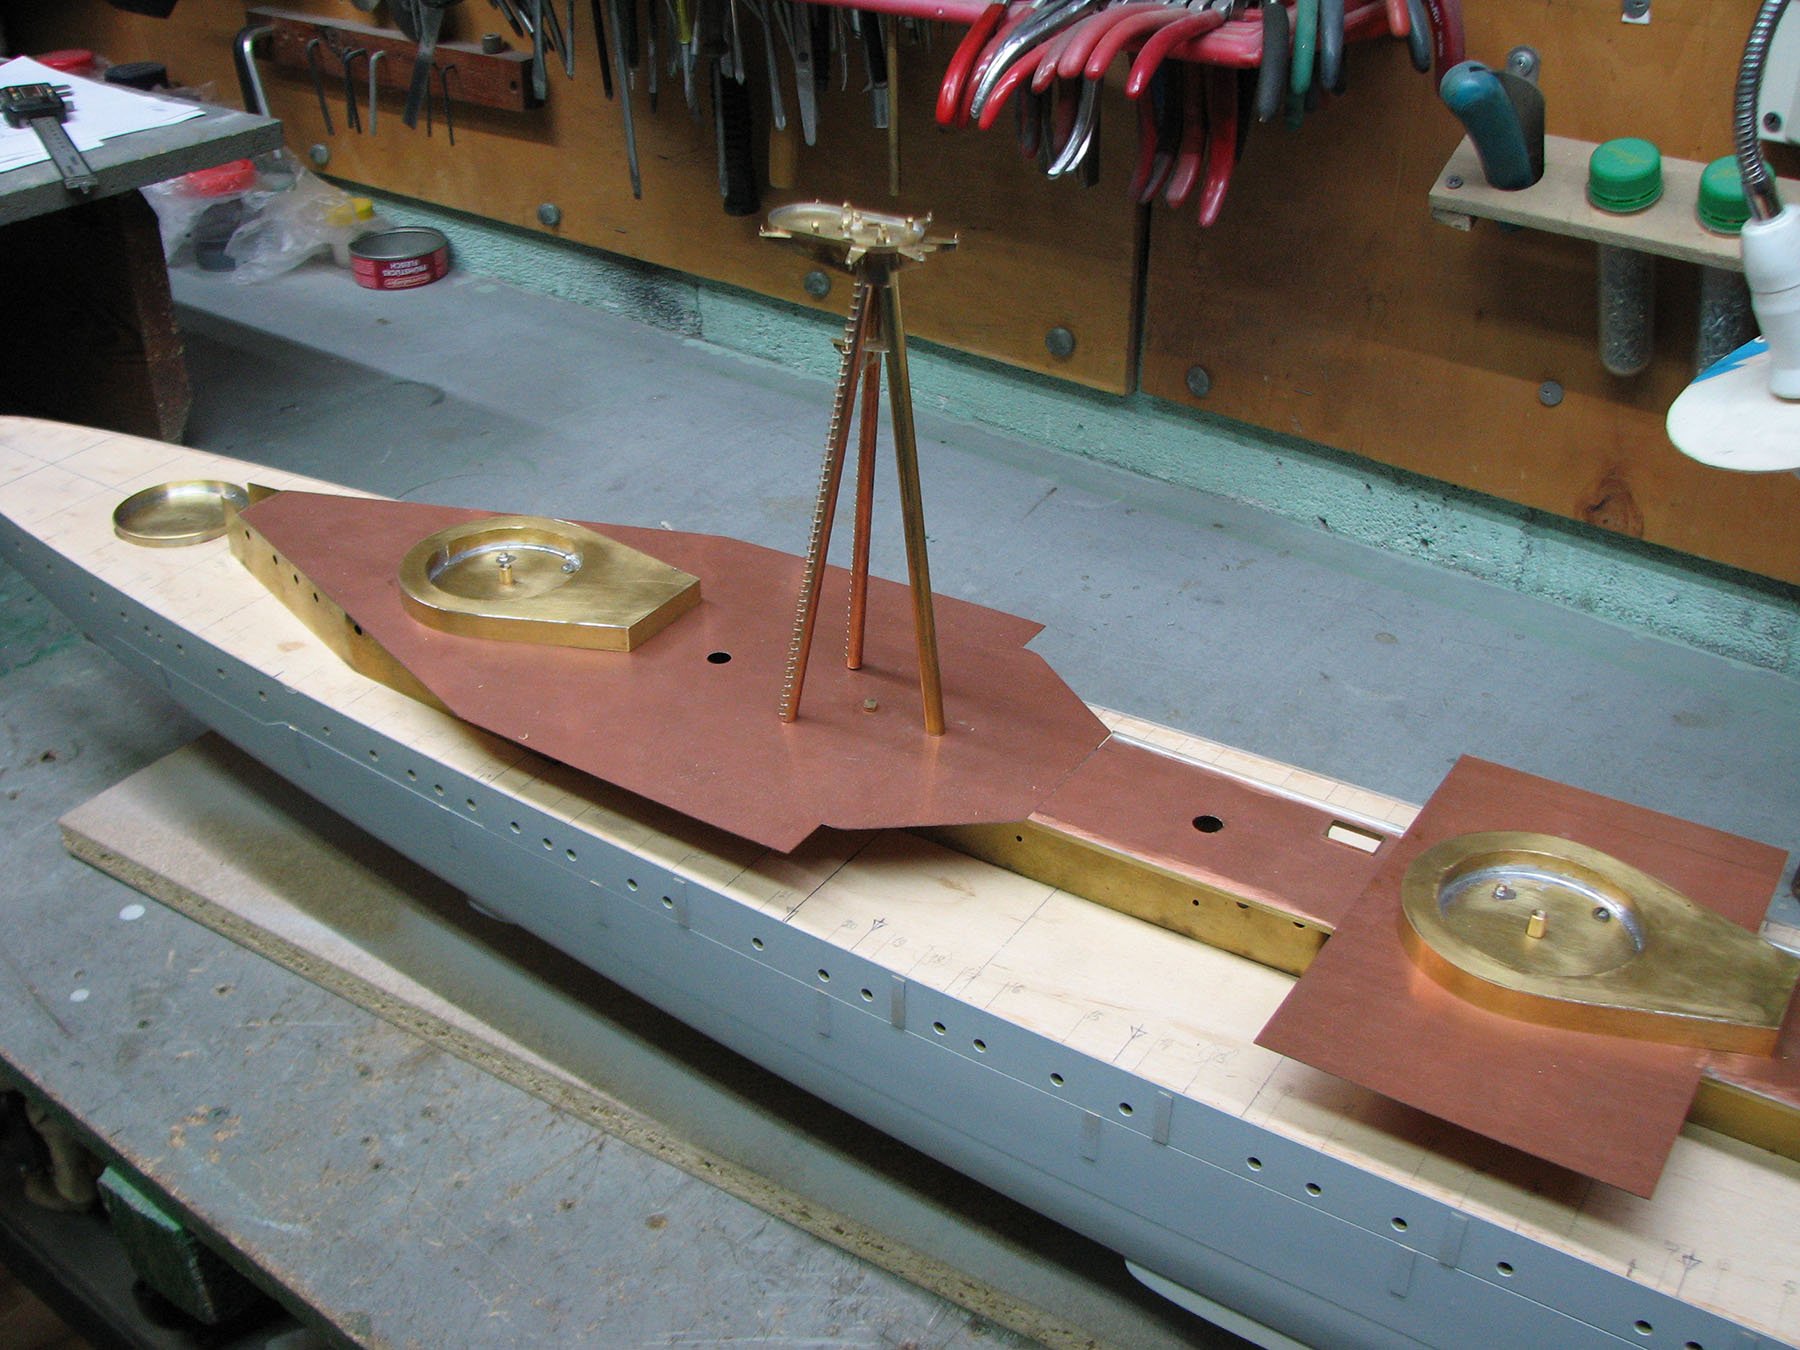
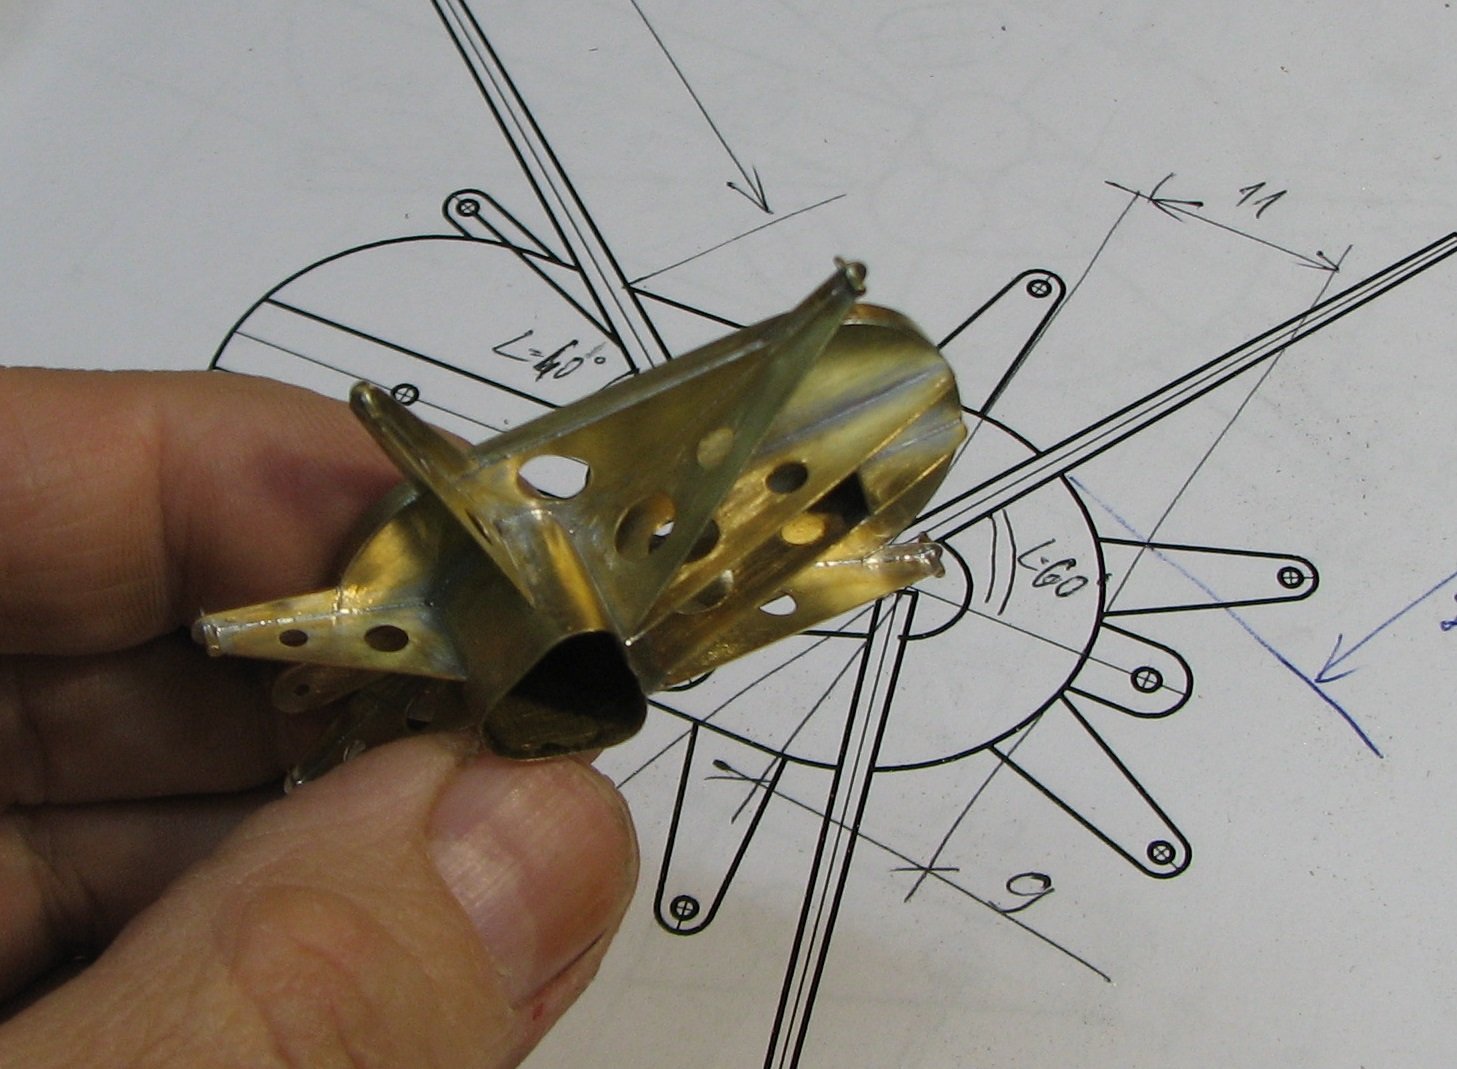
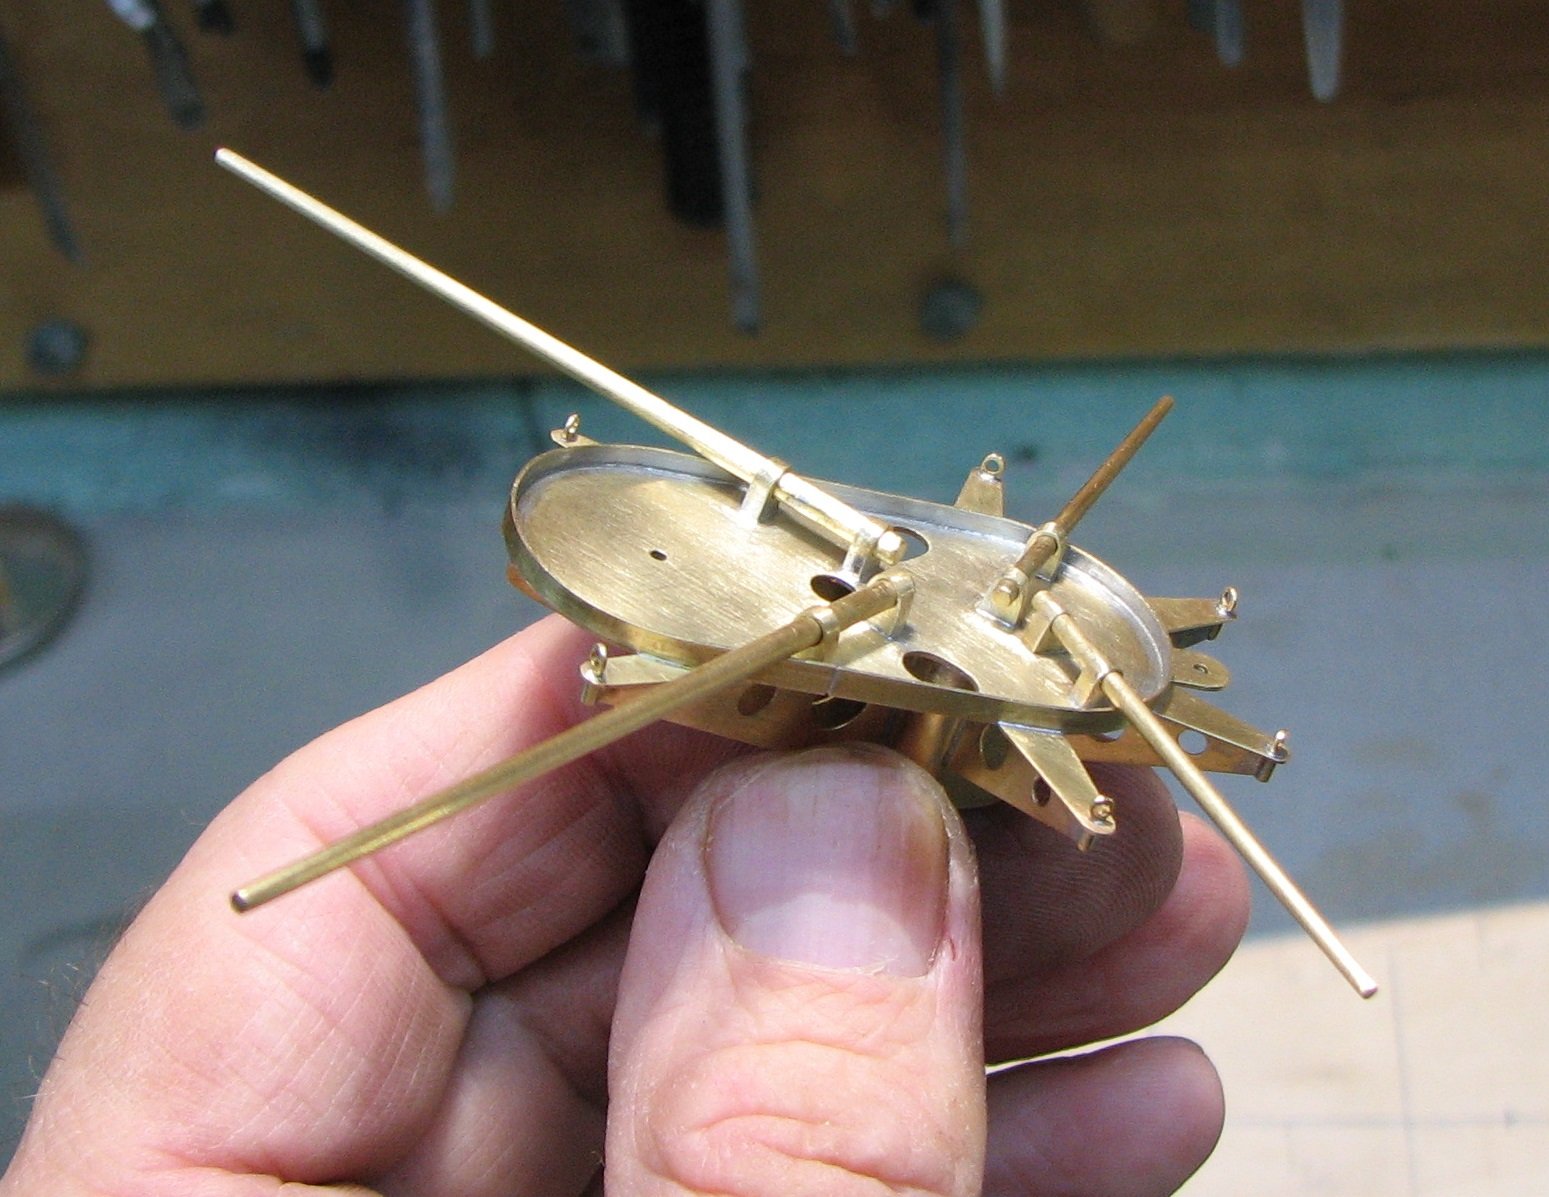
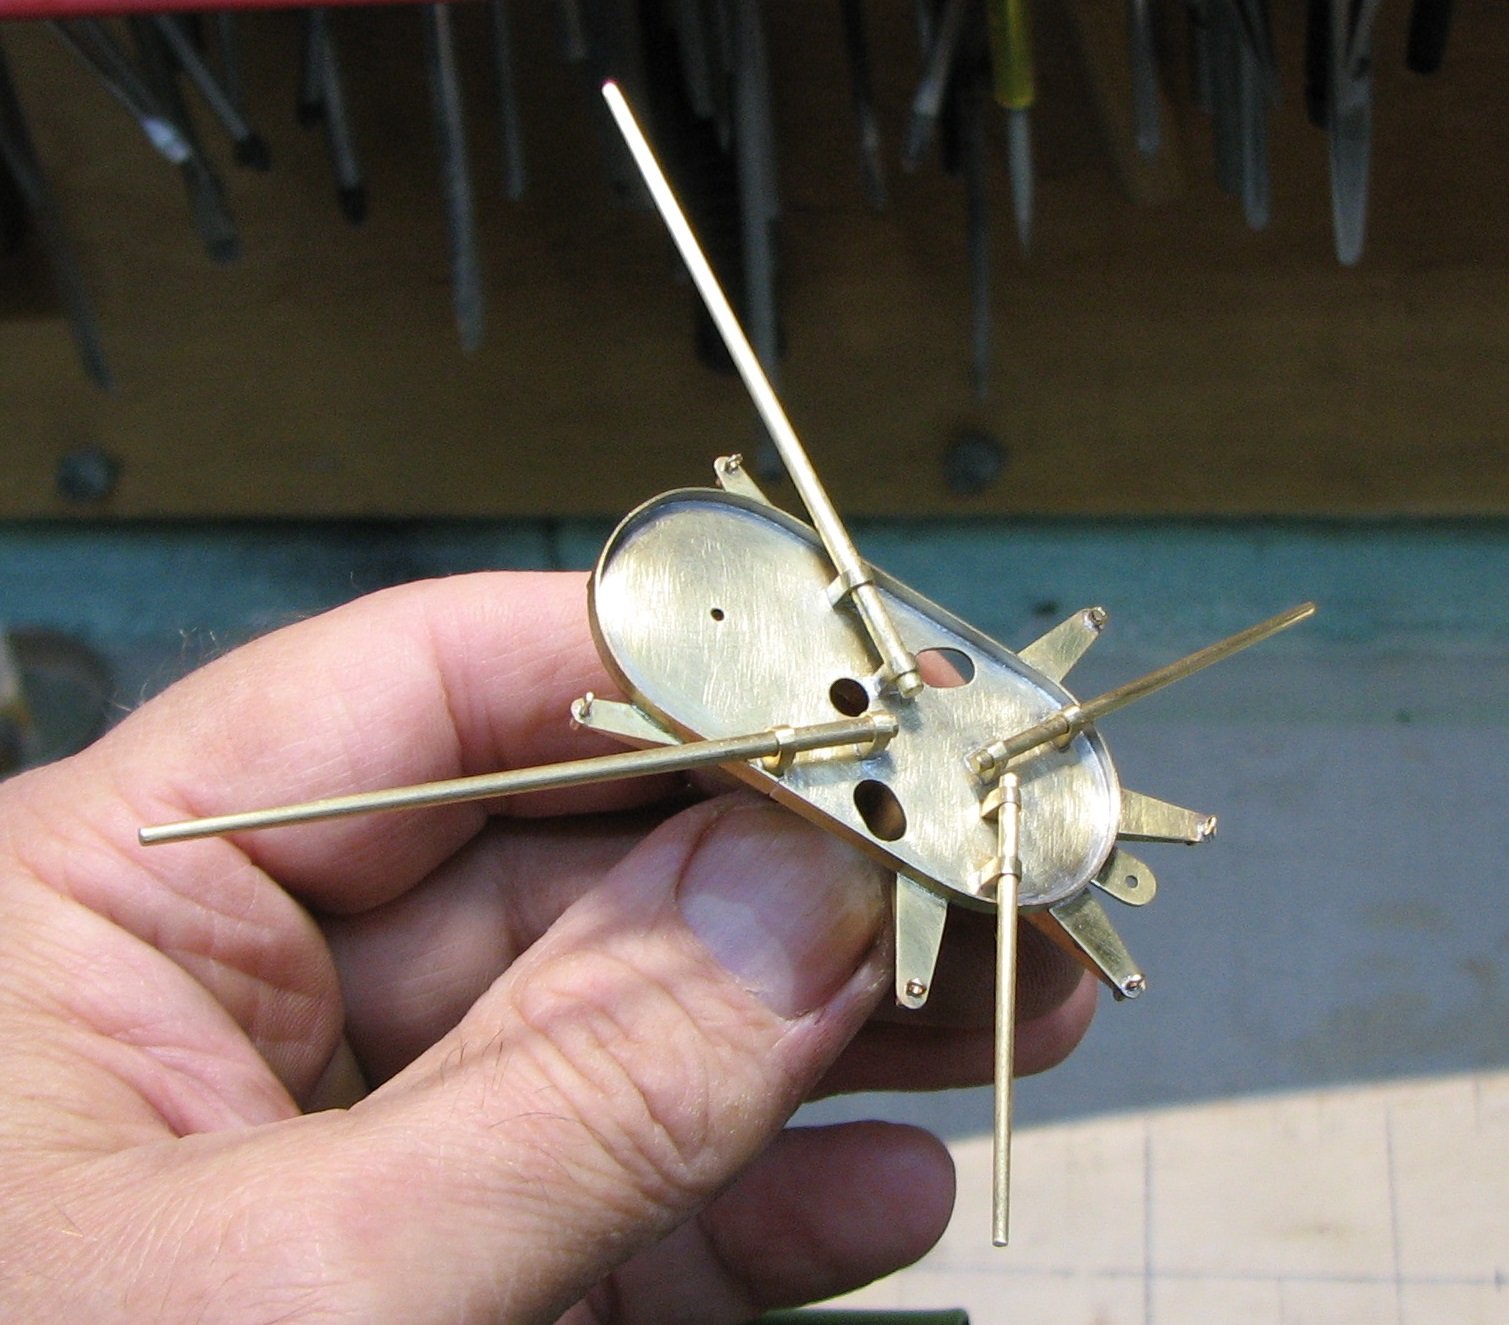
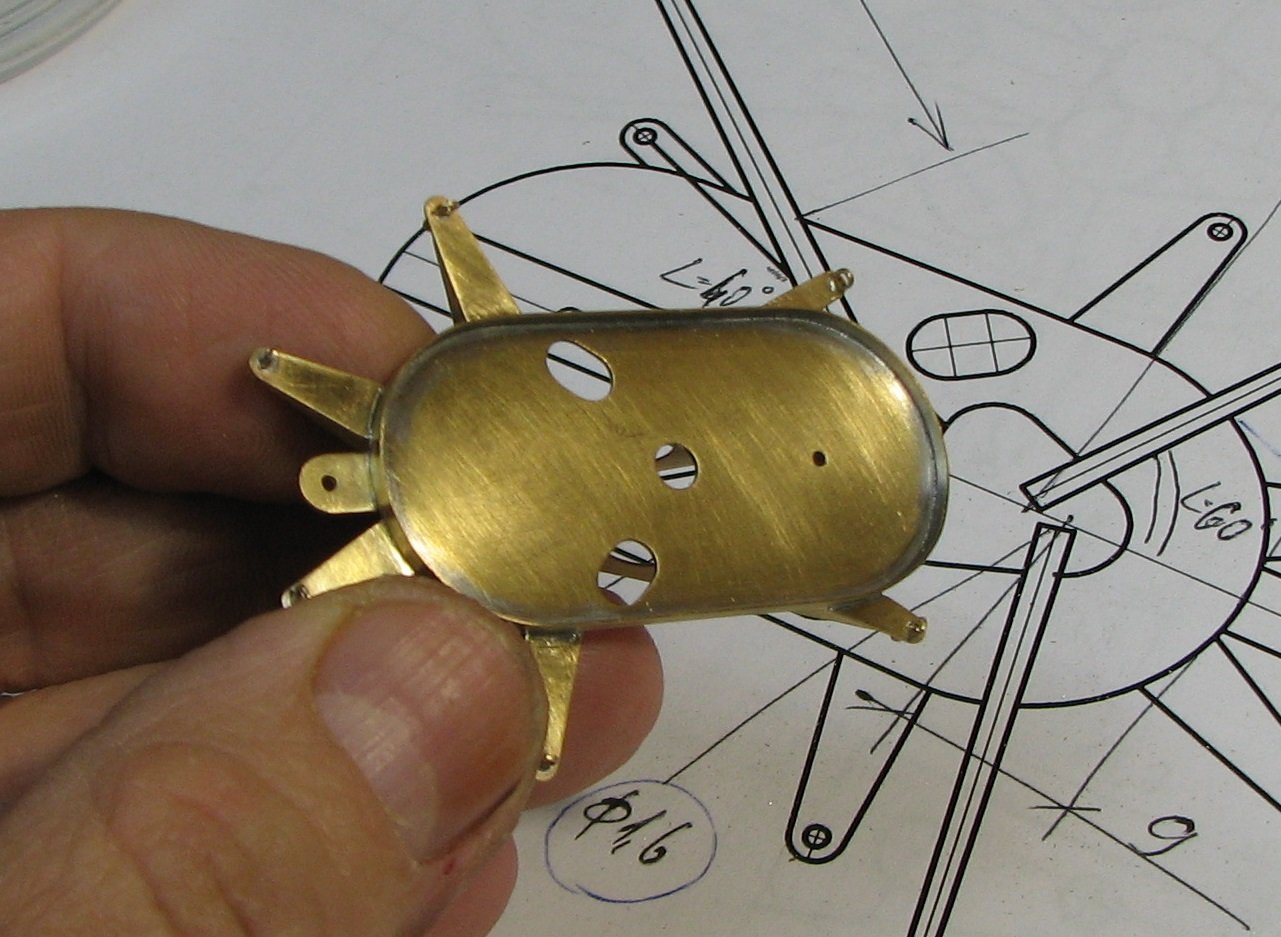
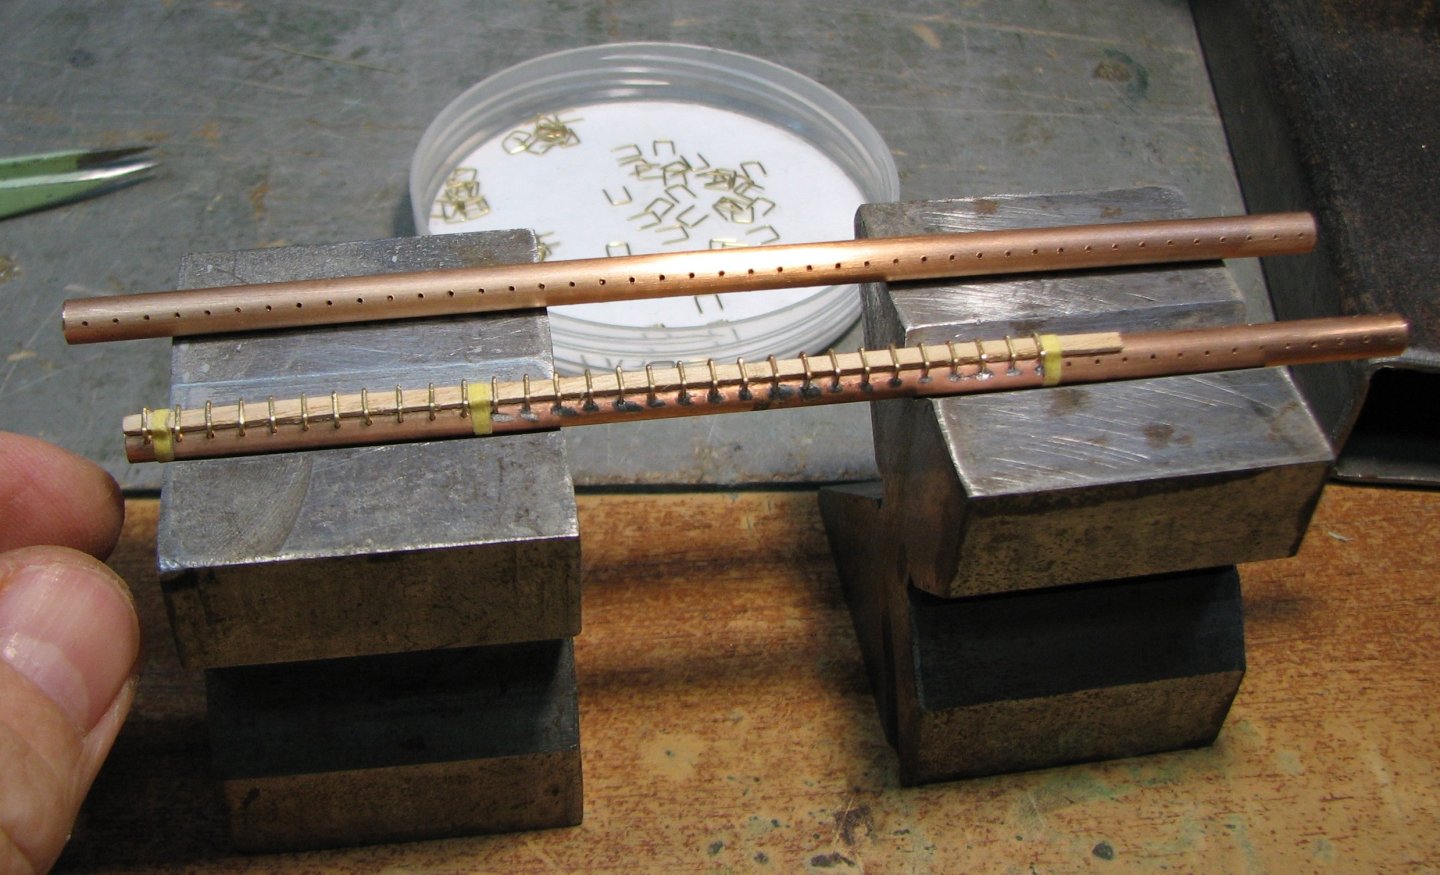
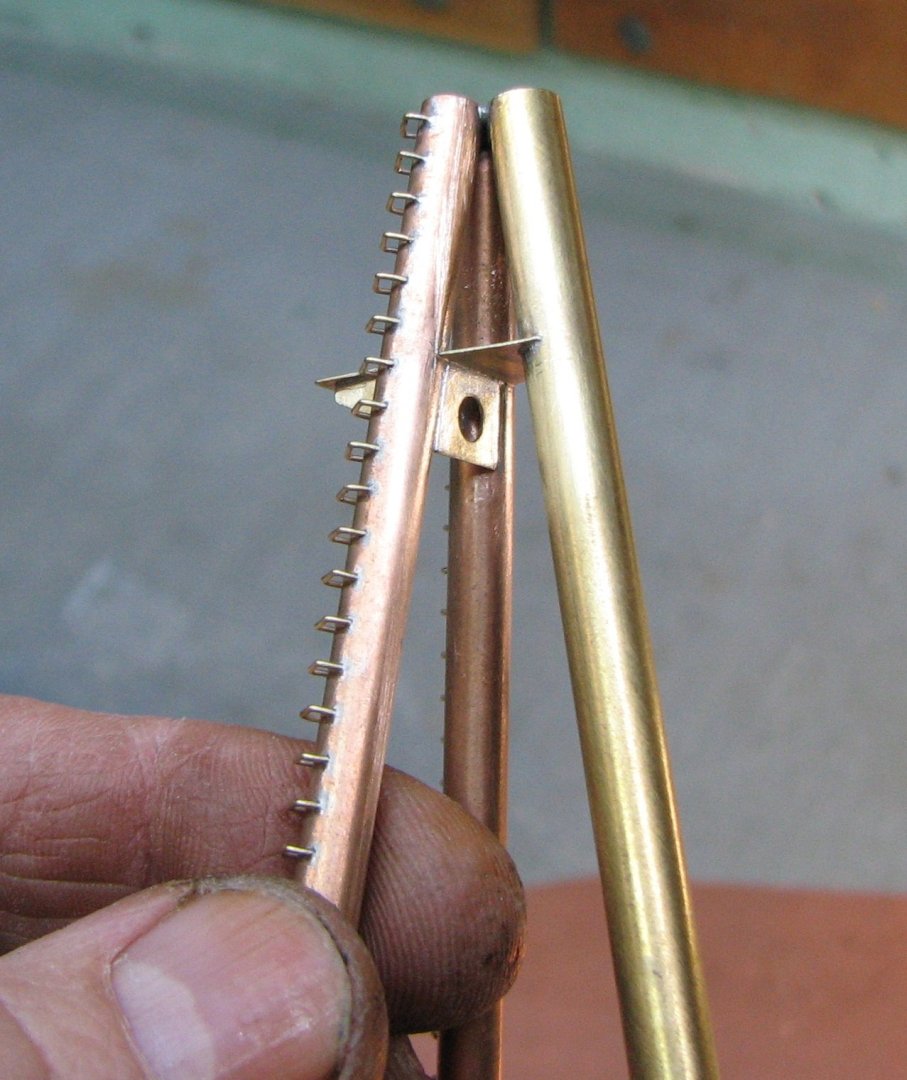
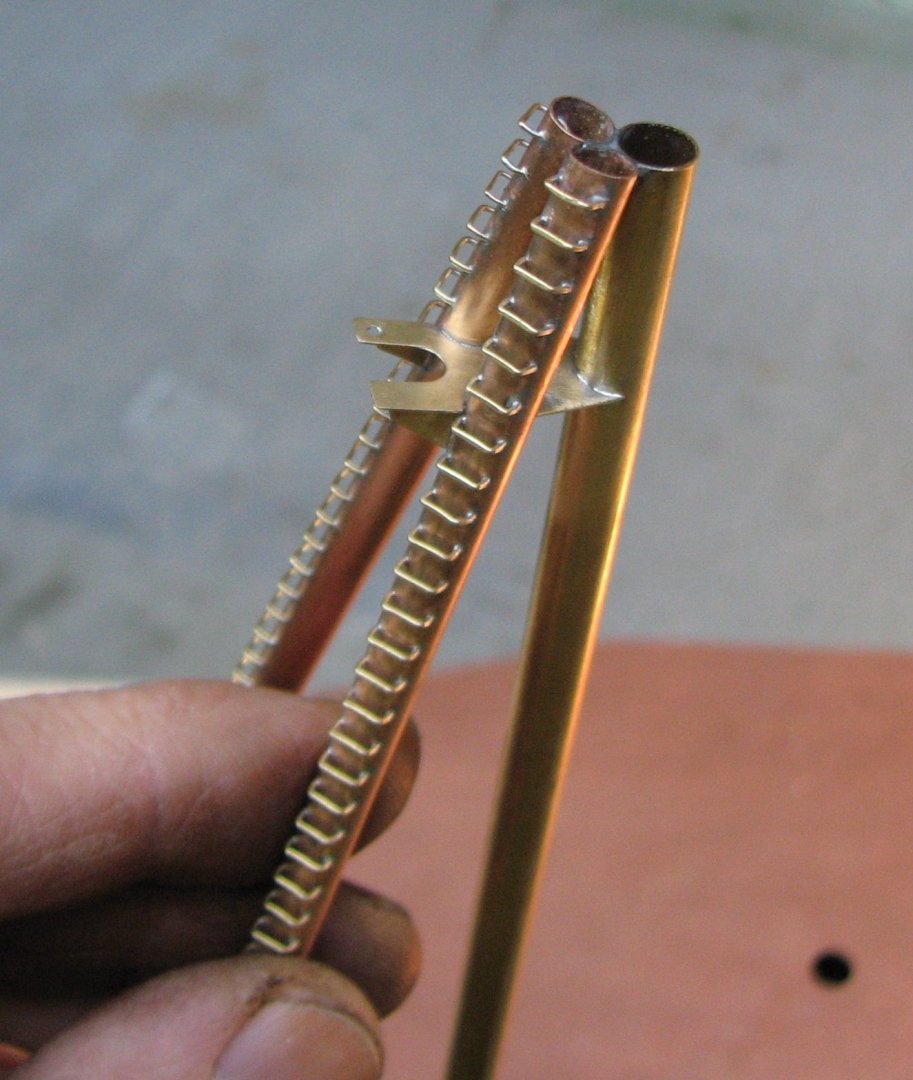
Precision is essential when drilling the holes; this is the most difficult step. This is achieved using a coordinate table on a drilling machine. The brackets themselves are soldered sequentially, using the pre-drilled holes. And there's nothing complicated about that.
-
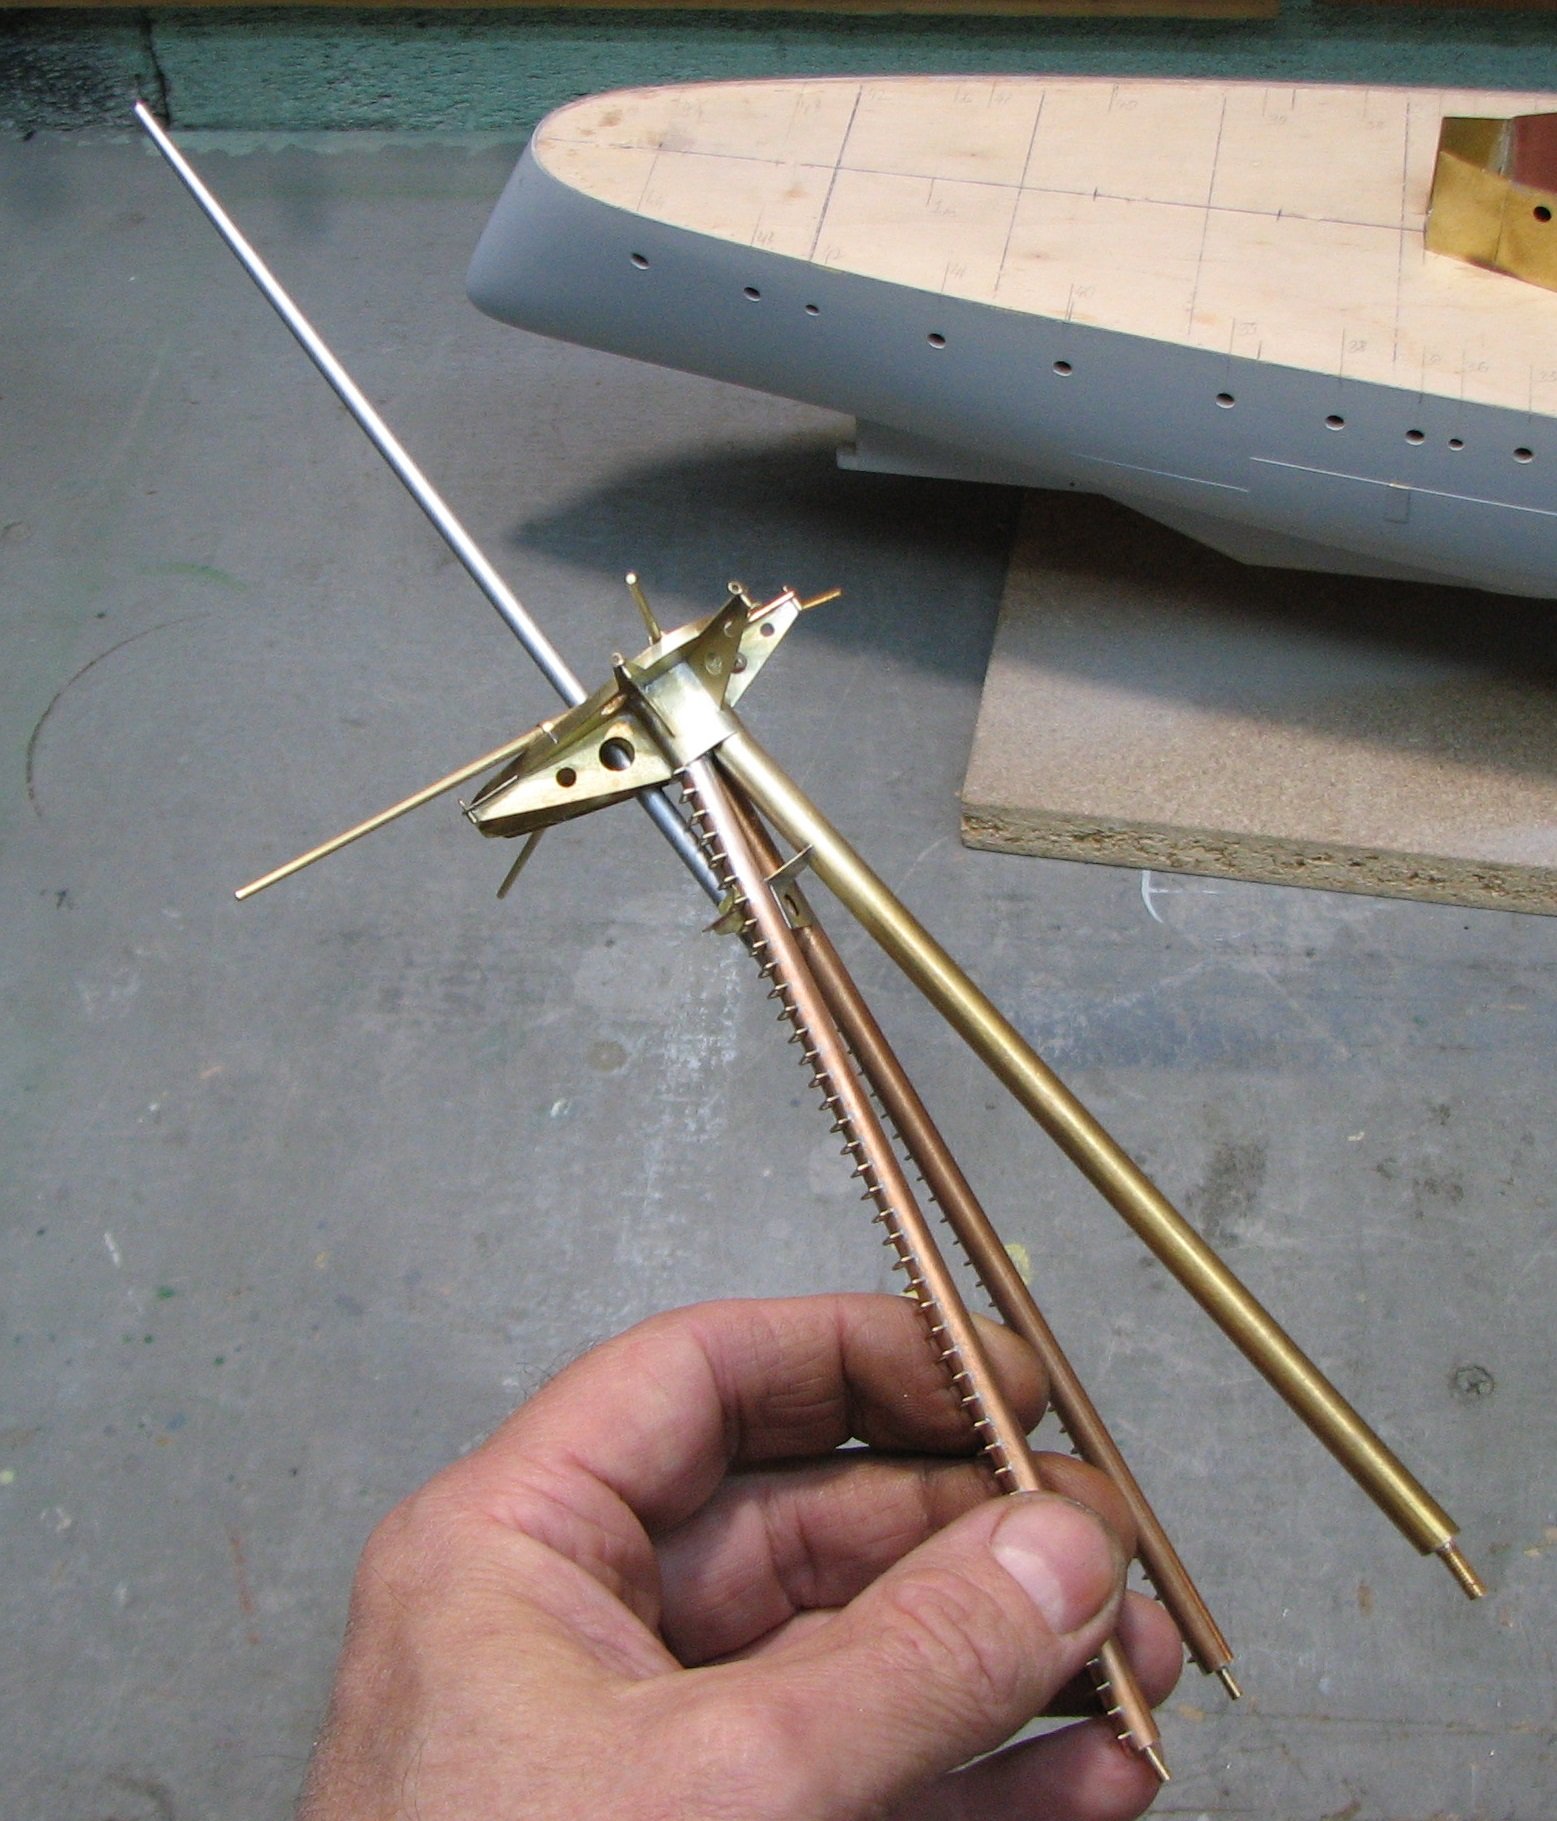
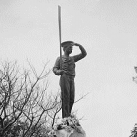
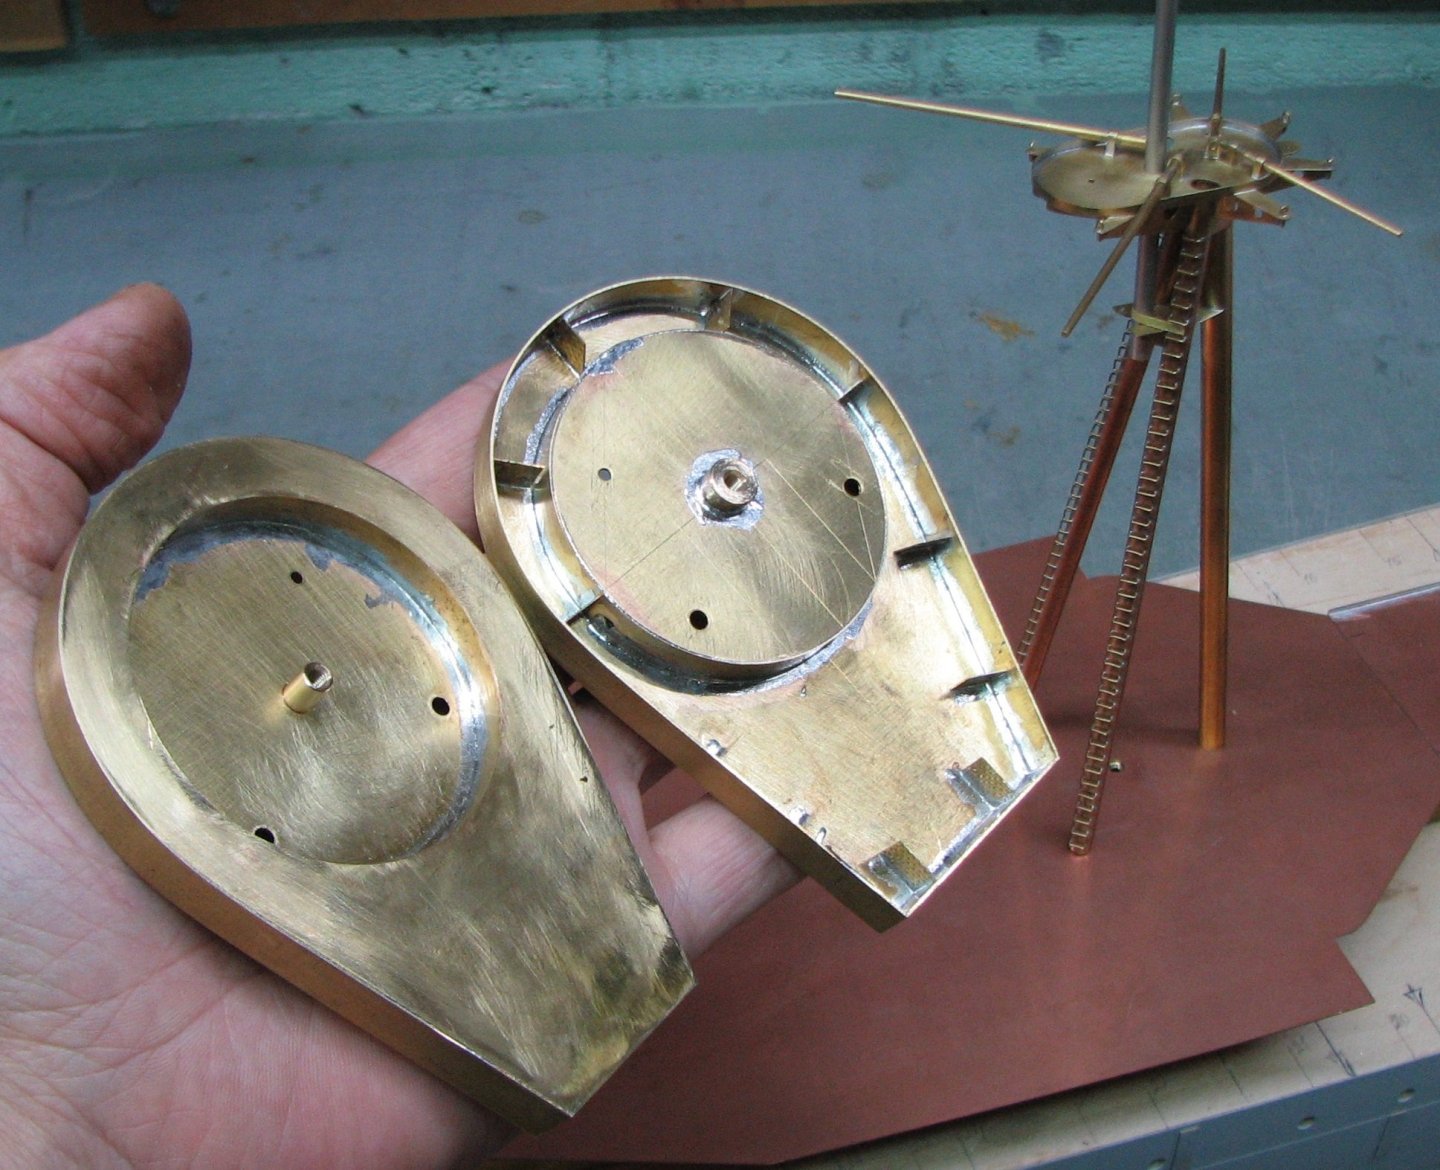
Mounting platforms for main caliber guns.

-
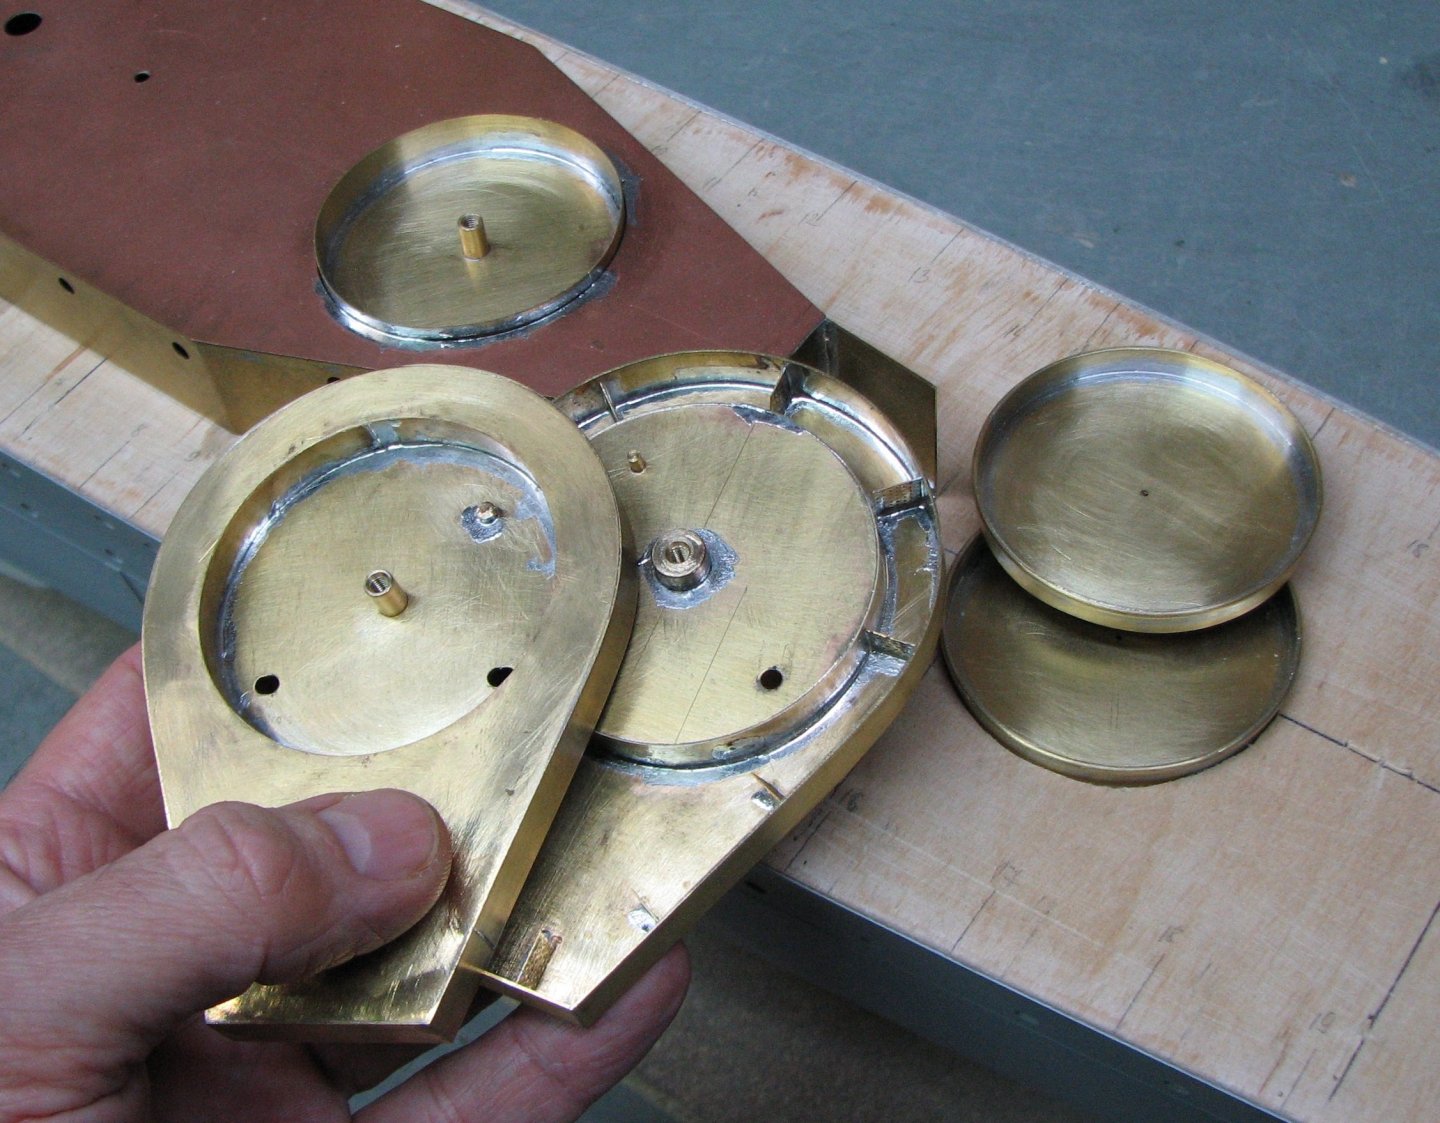
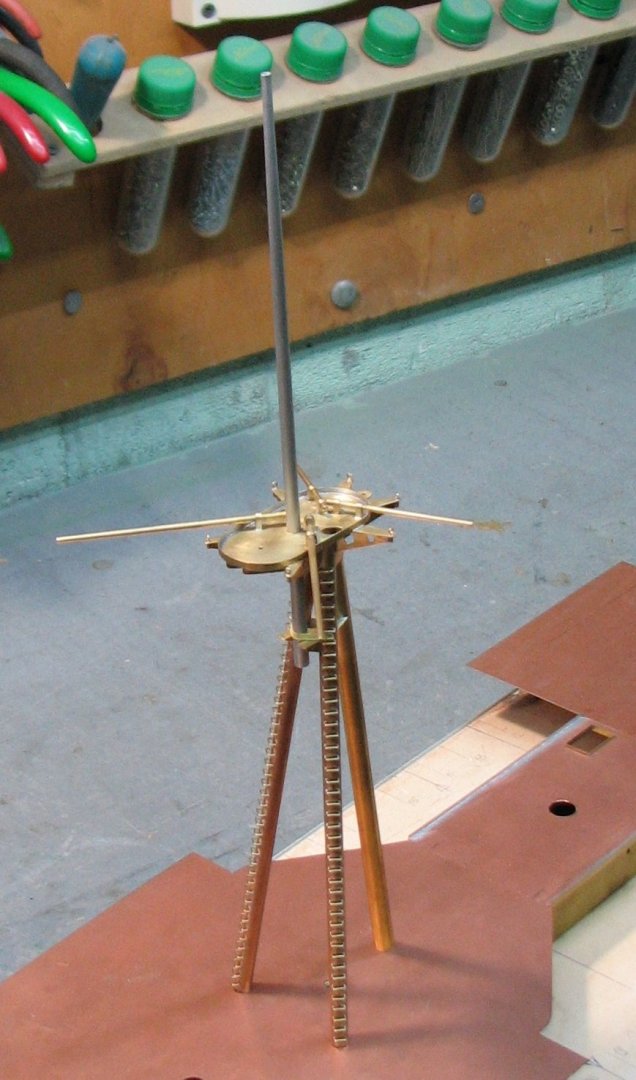
The mainmast is almost completely assembled.


-
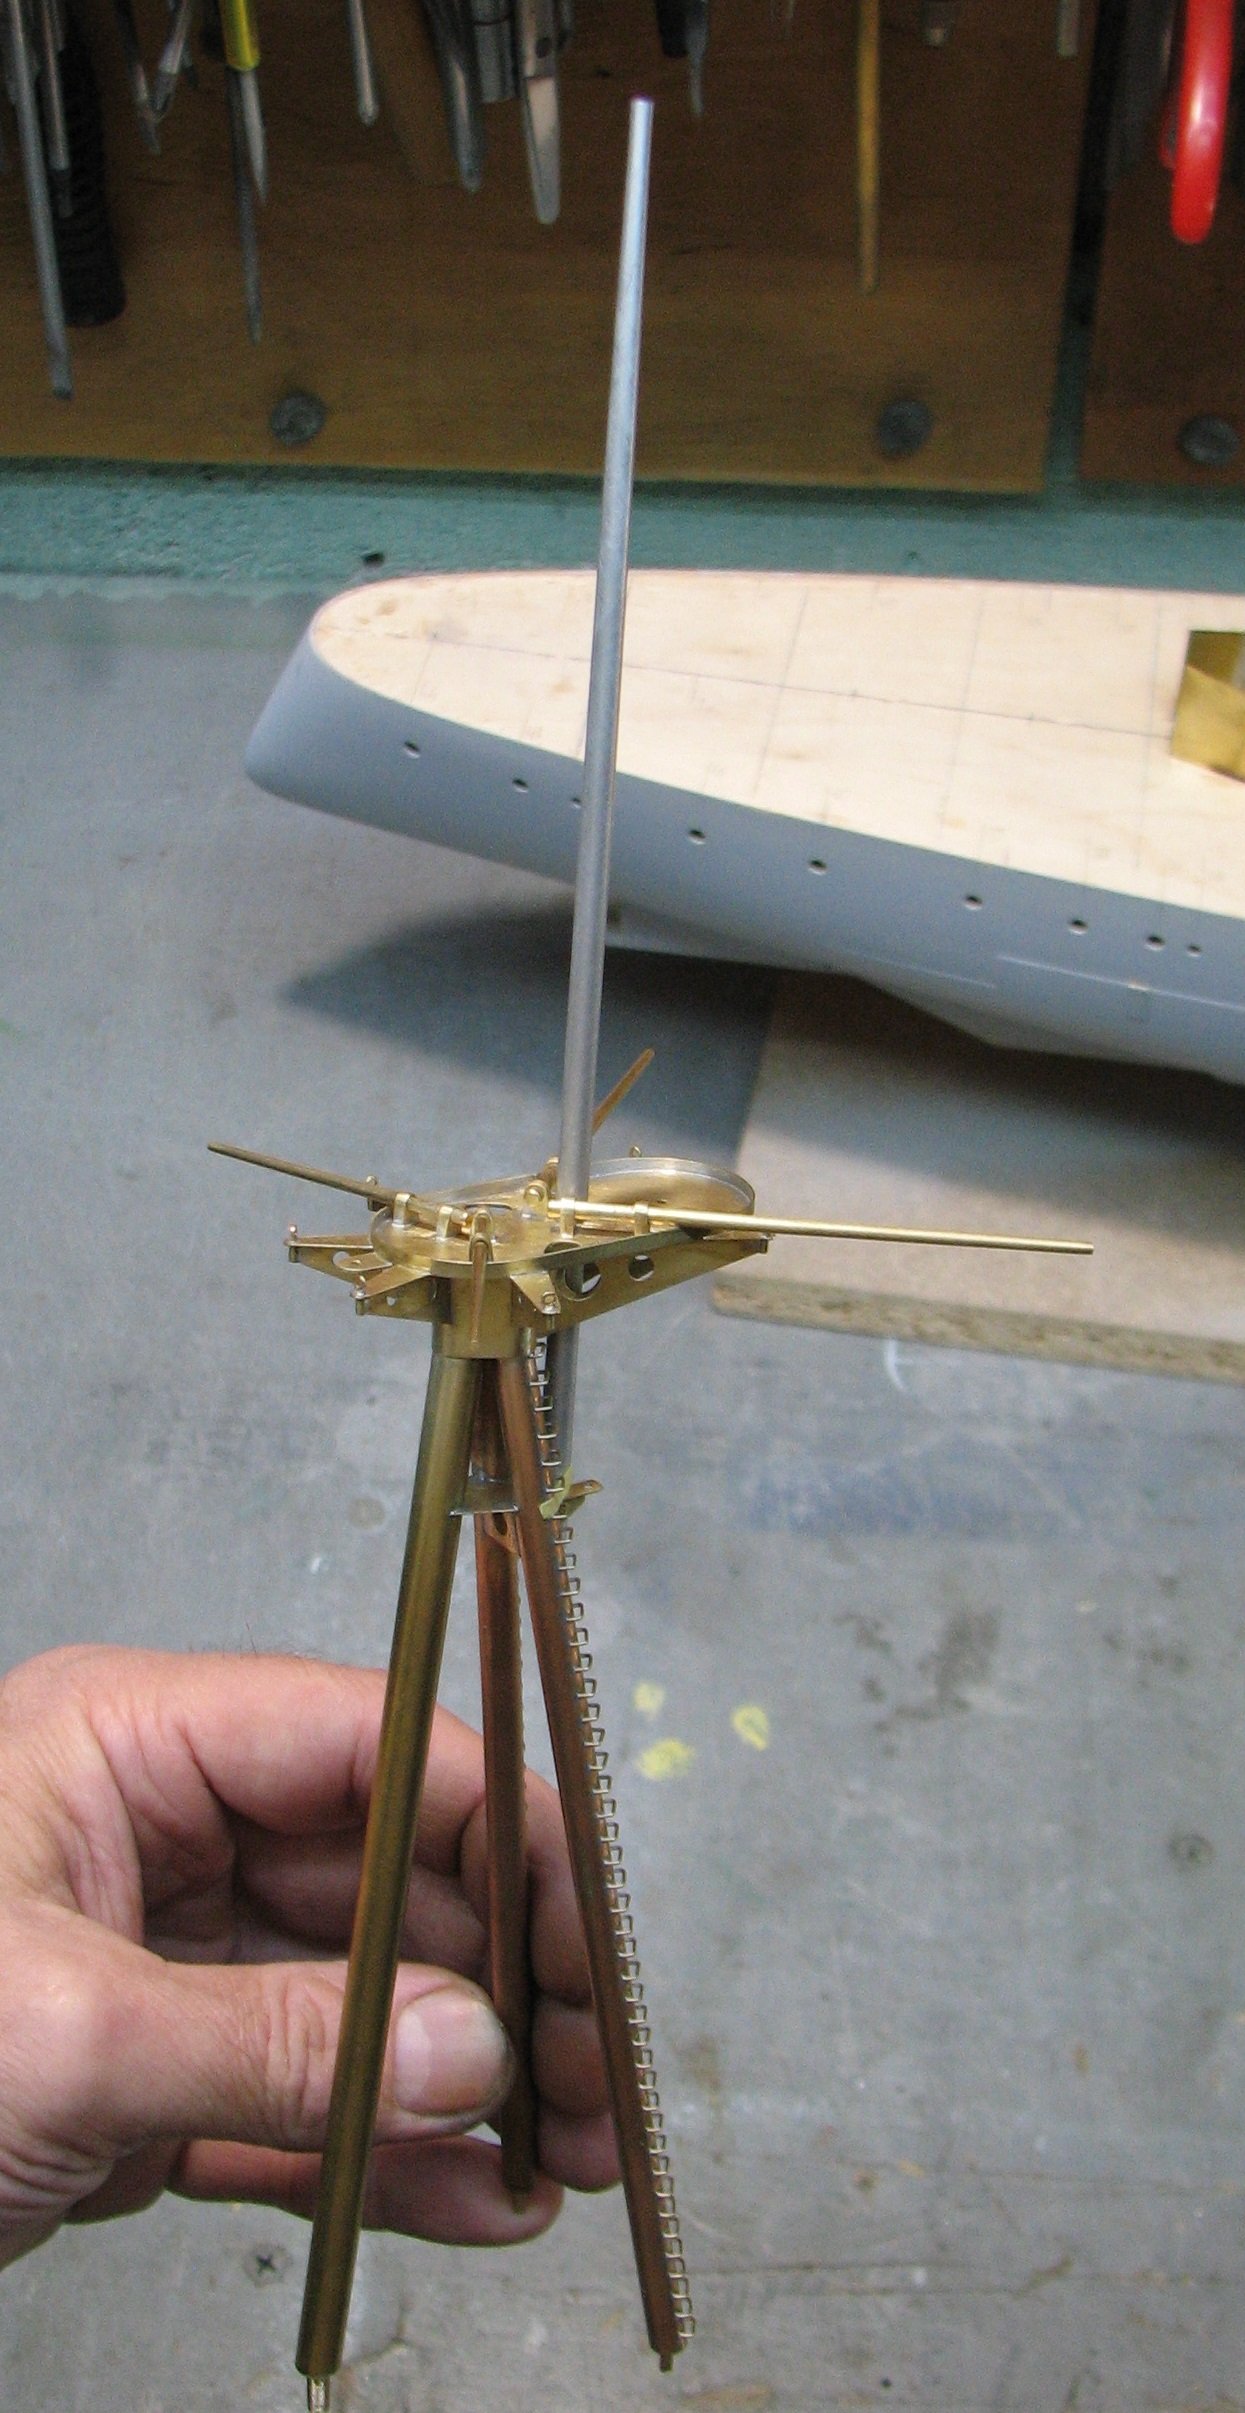
Assembling the upper platform.


-
Thank you all for your feedback and likes, and I continue... Mainmast. Soldering the ladder brackets and assembling the tripod.

-
Yes, I understand you. Apparently, it's something like this machine. On these rollers, the square that is produced is indeed far from ideal.

-
This is an interesting machine. I would like to see it. Can you show it?
-
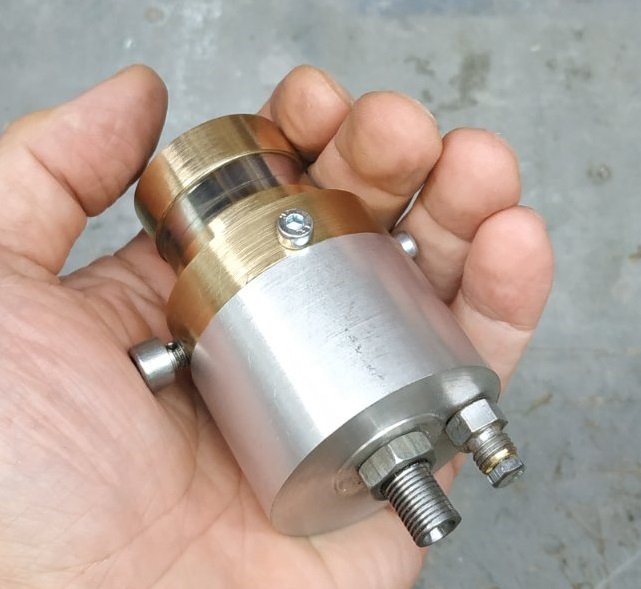
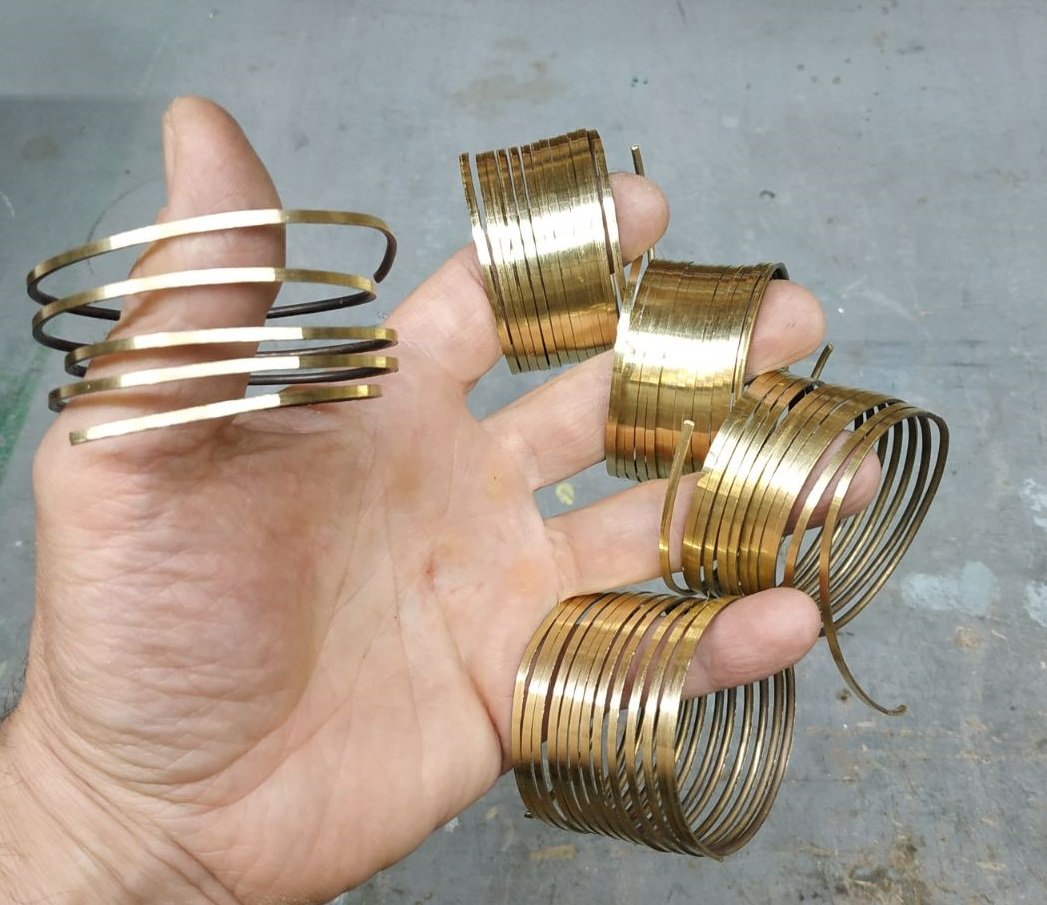
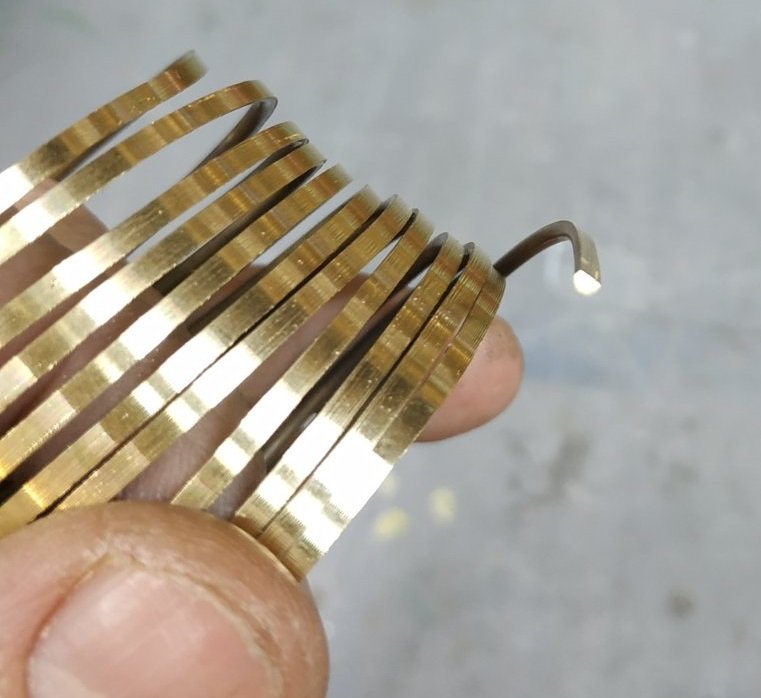
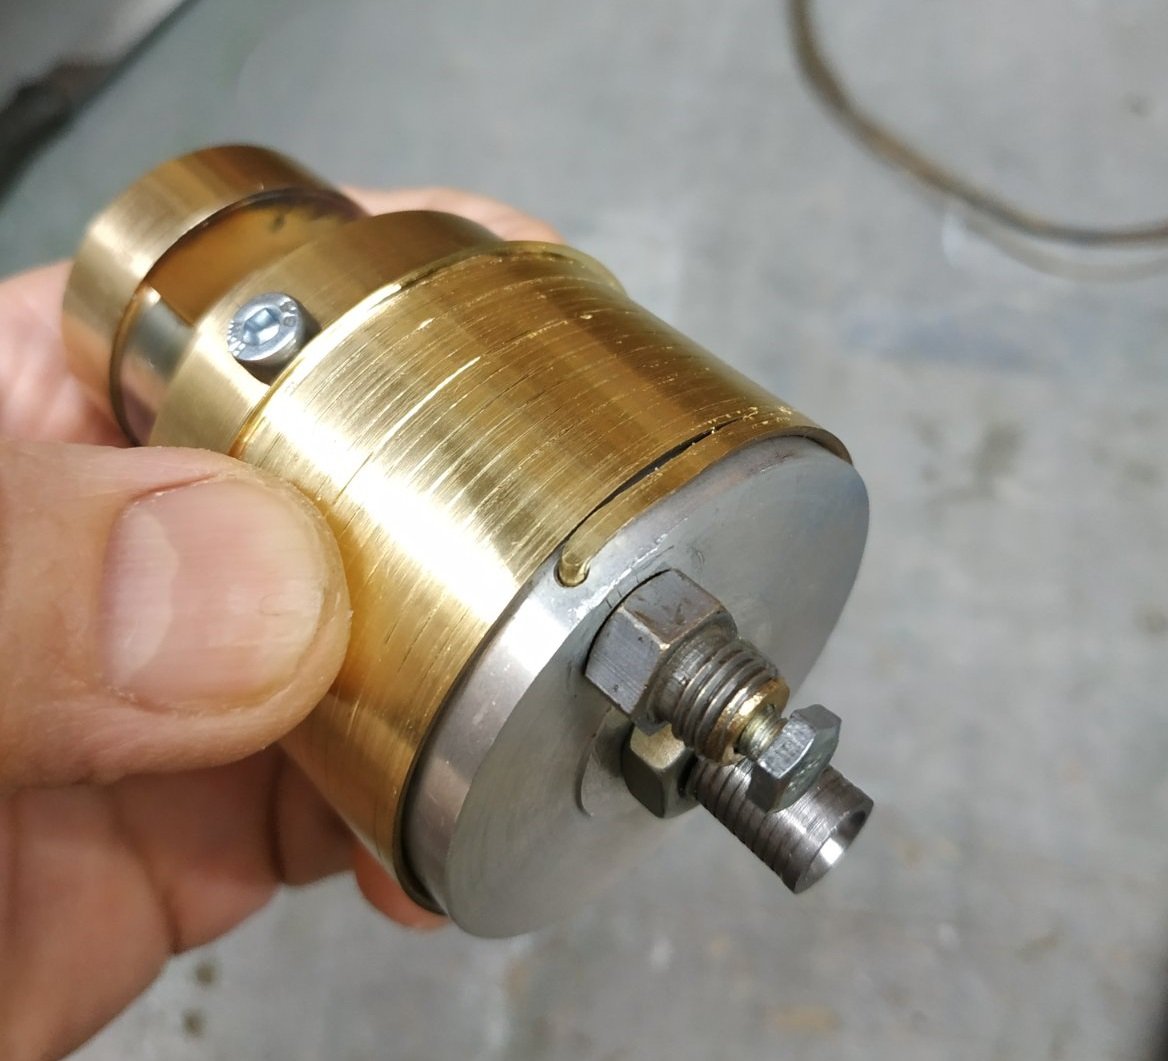
After removing the wire from the drum and removing the manufacturing allowances, I obtained 2.1 m of the semicircular profile I needed. I think that with a little modification to the drum, it could also be used to produce a square profile.
-
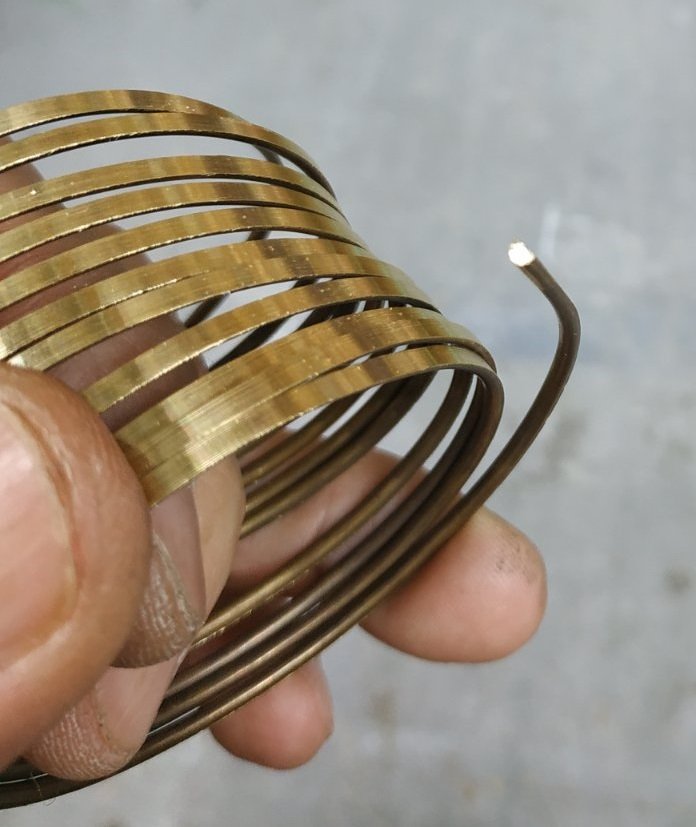
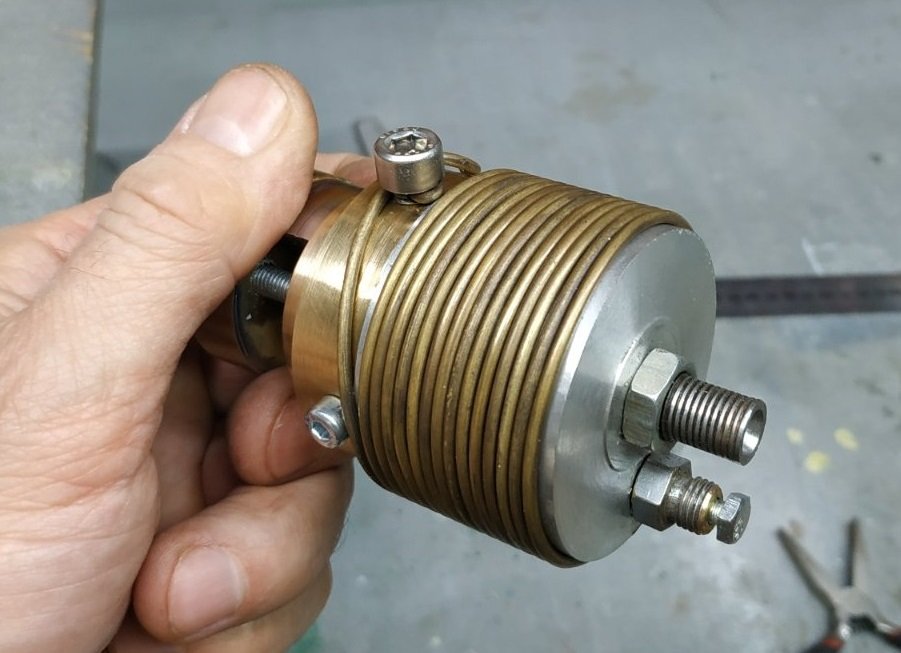
After being sharpened with a cutter, the wire on the drum took on this appearance.
-
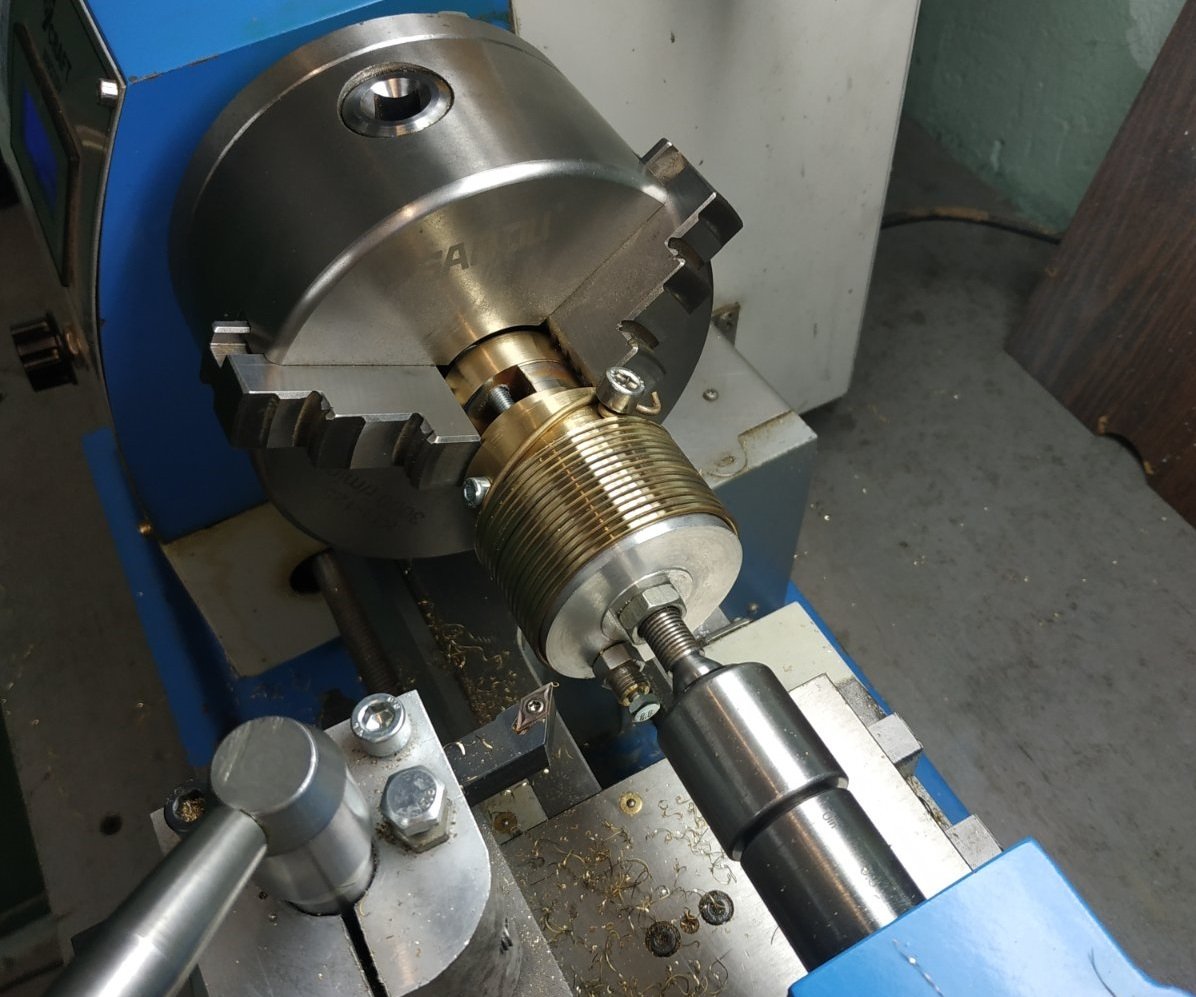
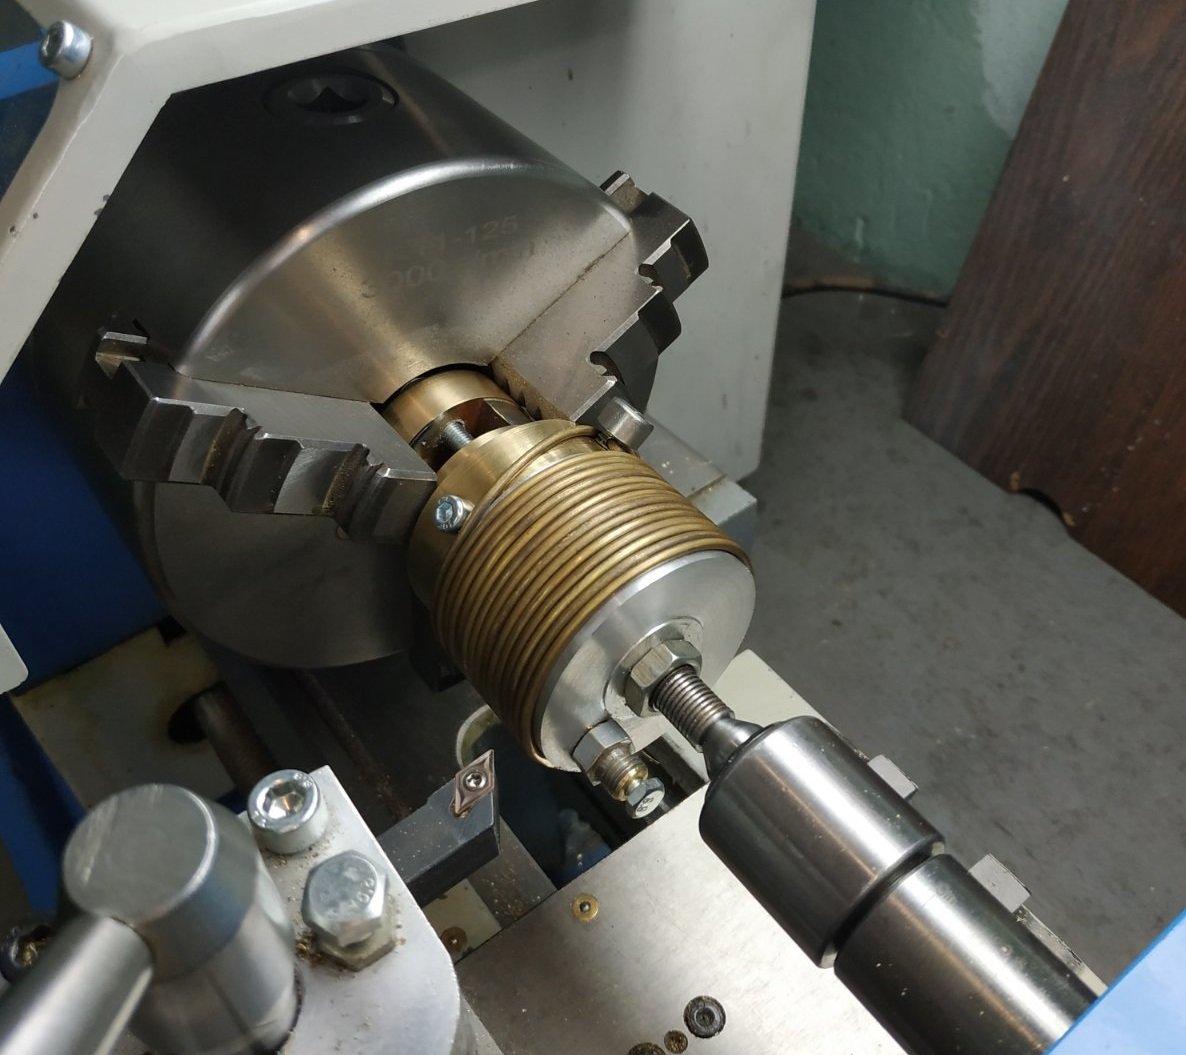
Then I wound it with 2 mm diameter wire and inserted the drum into the lathe. The length of wire that fit onto this drum was 2.3 m.
-
Hello everyone! Today I'll share a method for making a semicircular brass profile. Perhaps this will be useful for someone building models. The simplest way to create a semicircle is with a jewelry die. However, when the wire diameter increases beyond 1.5 mm, significant physical force or a special drawing mechanism is required. I decided to make my life a little easier and made this drum.