Jeffb
-
Posts
59 -
Joined
-
Last visited
Content Type
Profiles
Forums
Gallery
Events
Everything posted by Jeffb
-
Very nice work, John! Nice display room too! Jeff
- 282 replies
-
- 1
-

-
- Bluenose
- Model Shipways
- (and 1 more)
-
PBY-3 Catalina by PvG Aussie - FINISHED - Wolfpack - 1/72
Jeffb replied to PvG Aussie's topic in Non-ship/categorised builds
Nice job, Peter! Lacquer thinner will remove acrylic paint. It is best to use a thinner for enamels and oil paints such as mineral spirits or white spirits. Use an odourless type and use gloves in a well ventilated area. Jeff Betcher -
Good to see you back, David. Can I ask, what are you using for references?
-
I’ve been following your build in the background. Brilliant! Well done!
-
Hi Lee, Another method you can use is to thread a solid wire slightly smaller than the inner diameter of the tube through the tube before you bend it and removing the wire after bending the tube. I have done this with stainless steel tubing used for HO scale (1/87 scale) lights. It is the method used for Ngineering LED lights for railroad models. Provided the bend isn’t too sharp it works well.
-
Sorry to hear that Alan. We’ve had that happen to us earlier this year too. We’re still cleaning up. Puts a real damper on model building.
-
I have now finished the kit. Photos can be seen in the Gallery of Finished Kit Builds. Jeff
- 42 replies
-
- 3
-

-
- lively of baltimore
- lumberyard
- (and 2 more)
-
Hi Kurt, I apologize for not answering this sooner. Yes the rigging line was supplied by Morope. I'm not sure if that is still the case, I bought the kit at the time that your practicum was first published in Ships in Scale. Jeff
-
It's been a while and I've been slowly making progress. I am almost finished the running rigging. Does that mean I'm finished if I'm not doing sails or do I need to rig the sail tackle? It seems to me of the sails are not on the ship that the rigging for the sails would also be off.


- 42 replies
-
- 7
-

-
-
- lively of baltimore
- lumberyard
- (and 2 more)
-
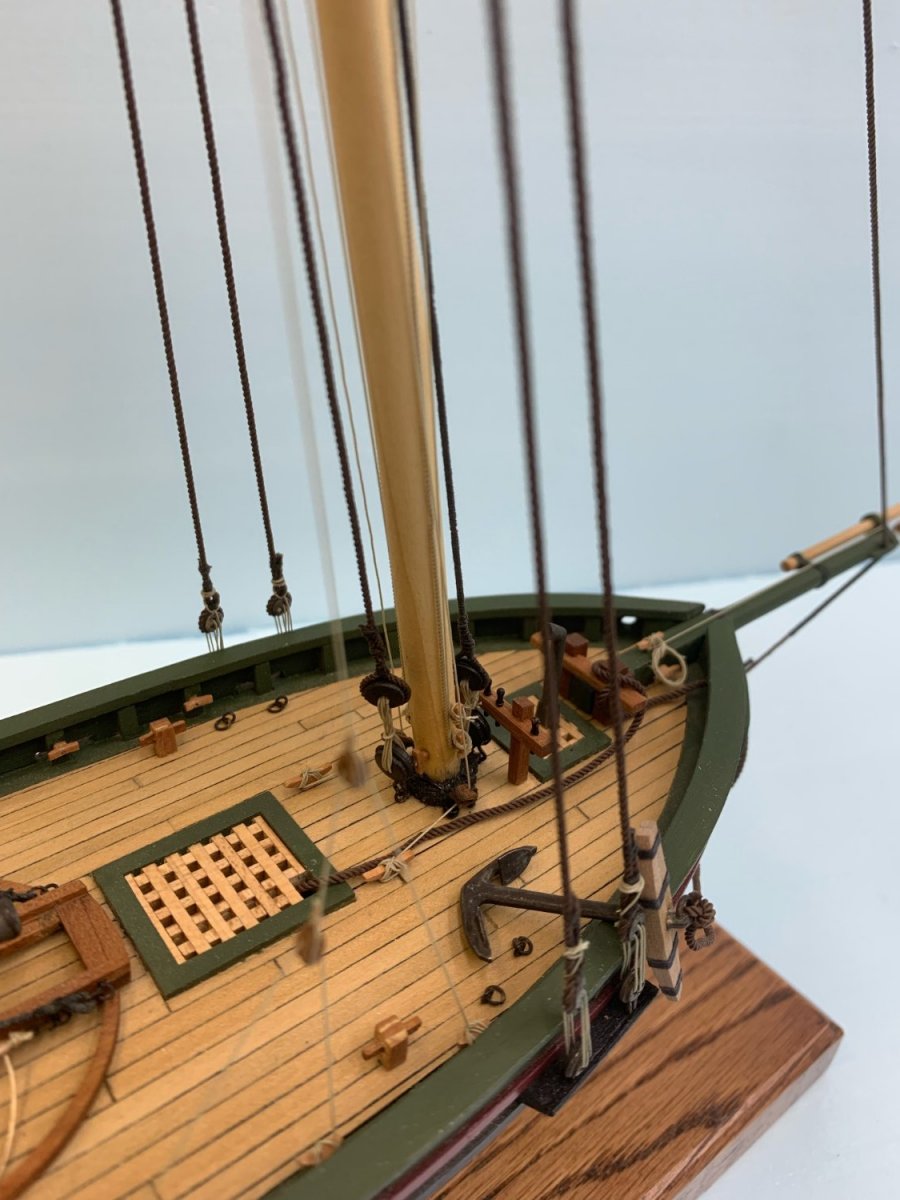
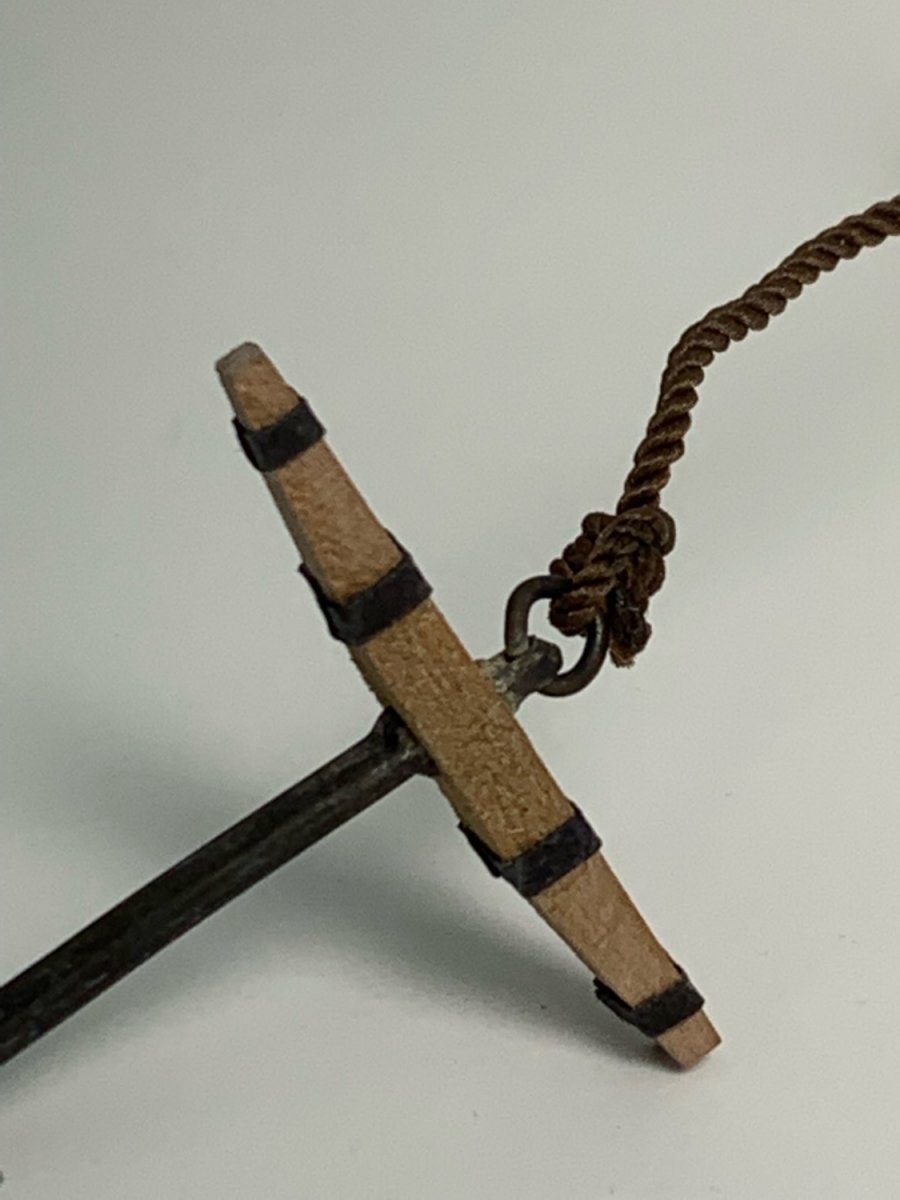
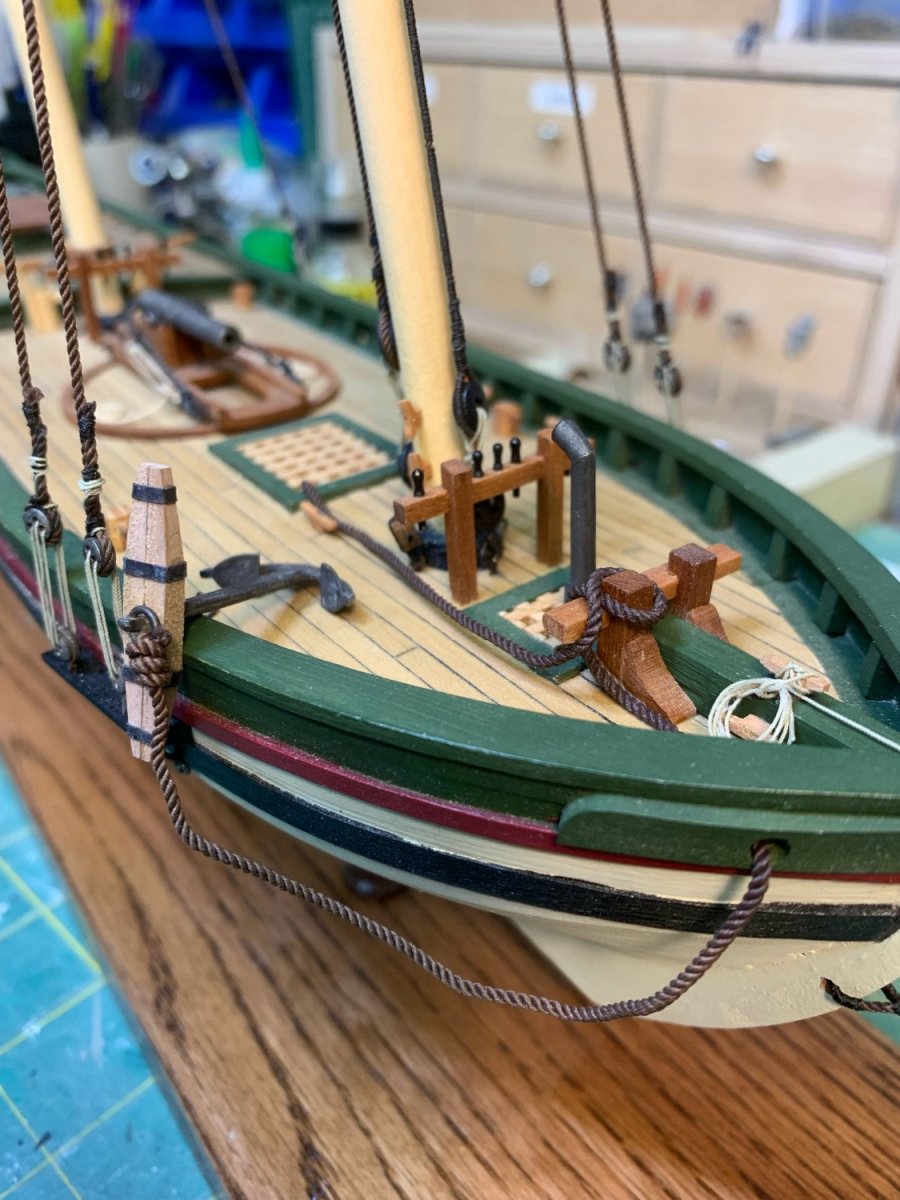
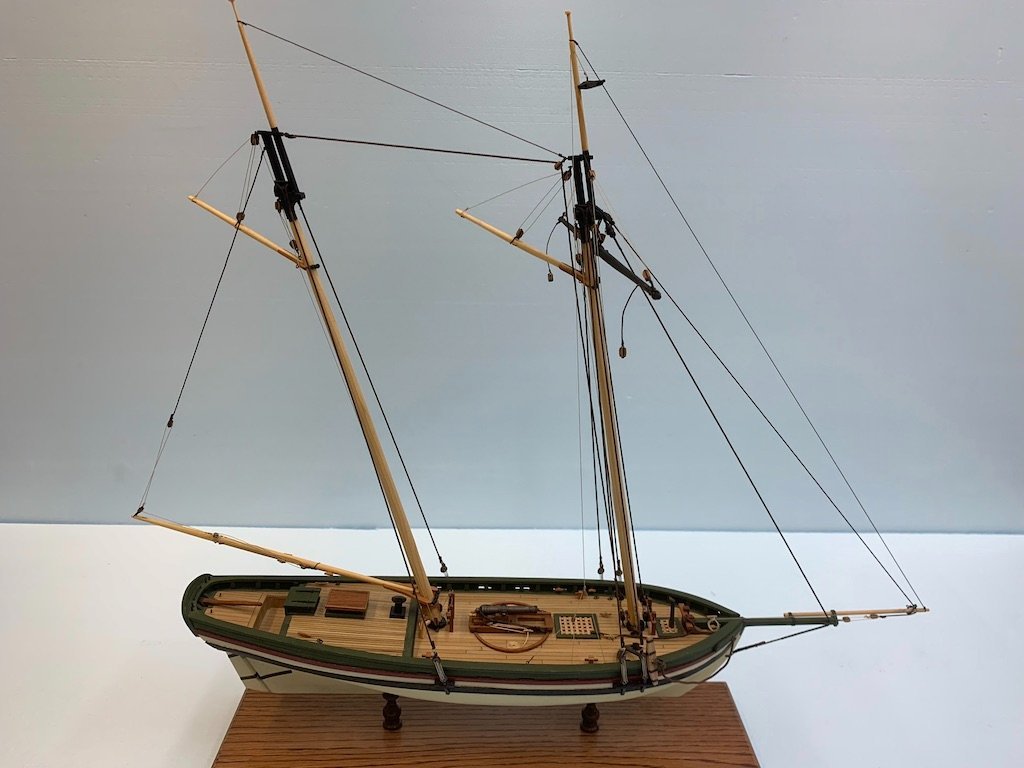
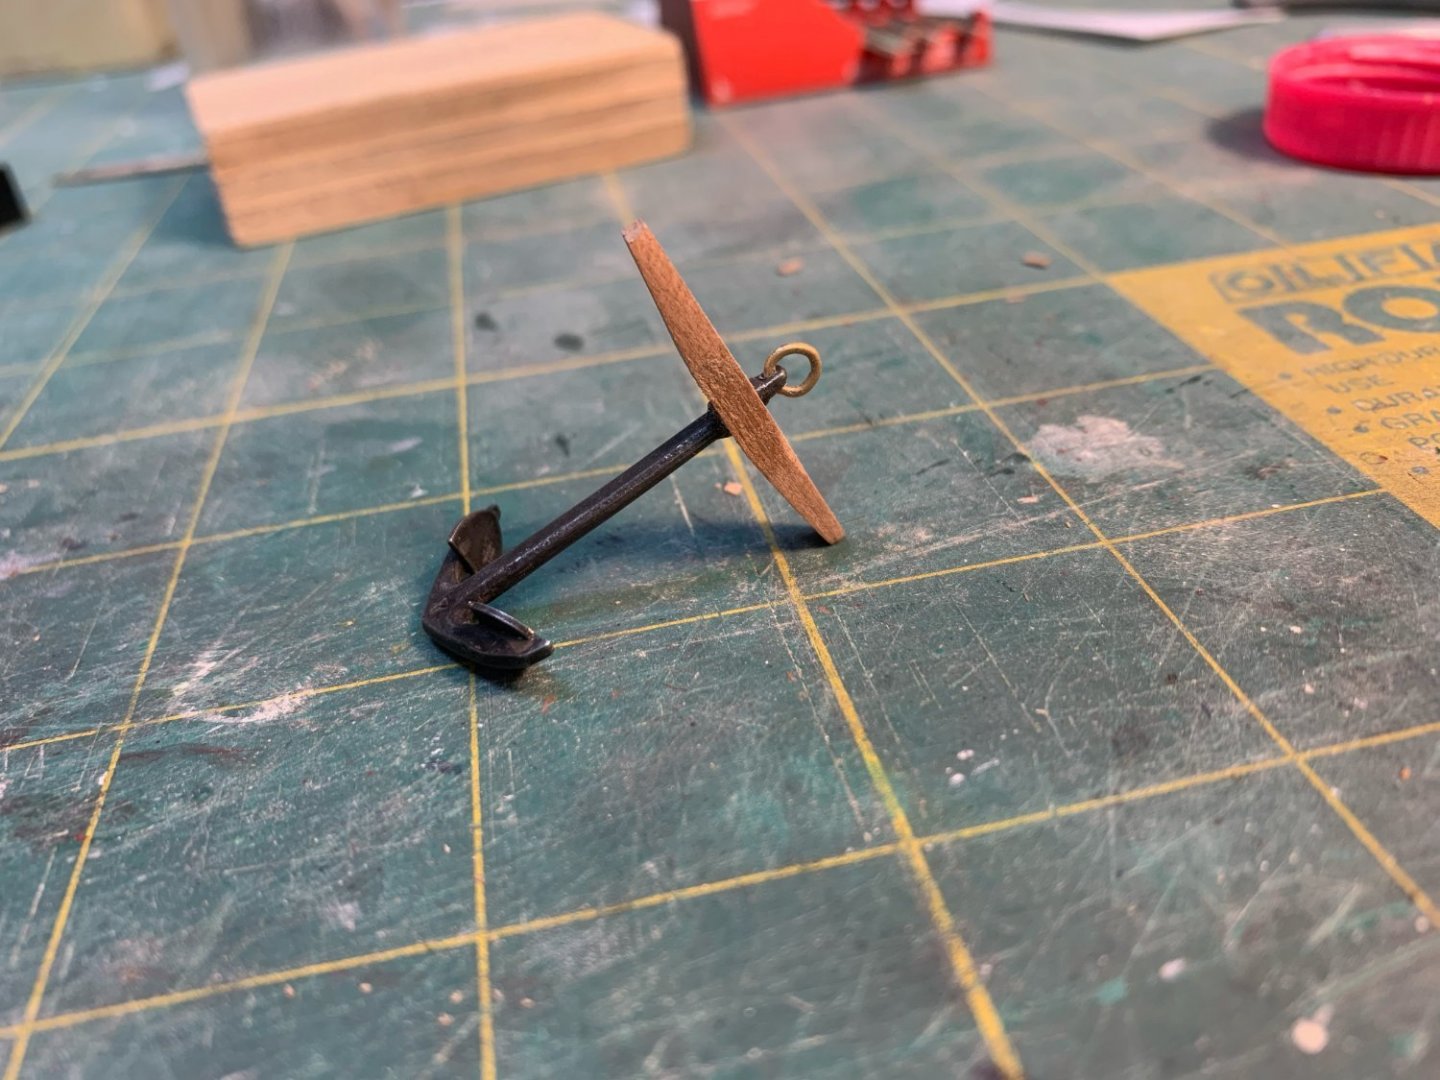
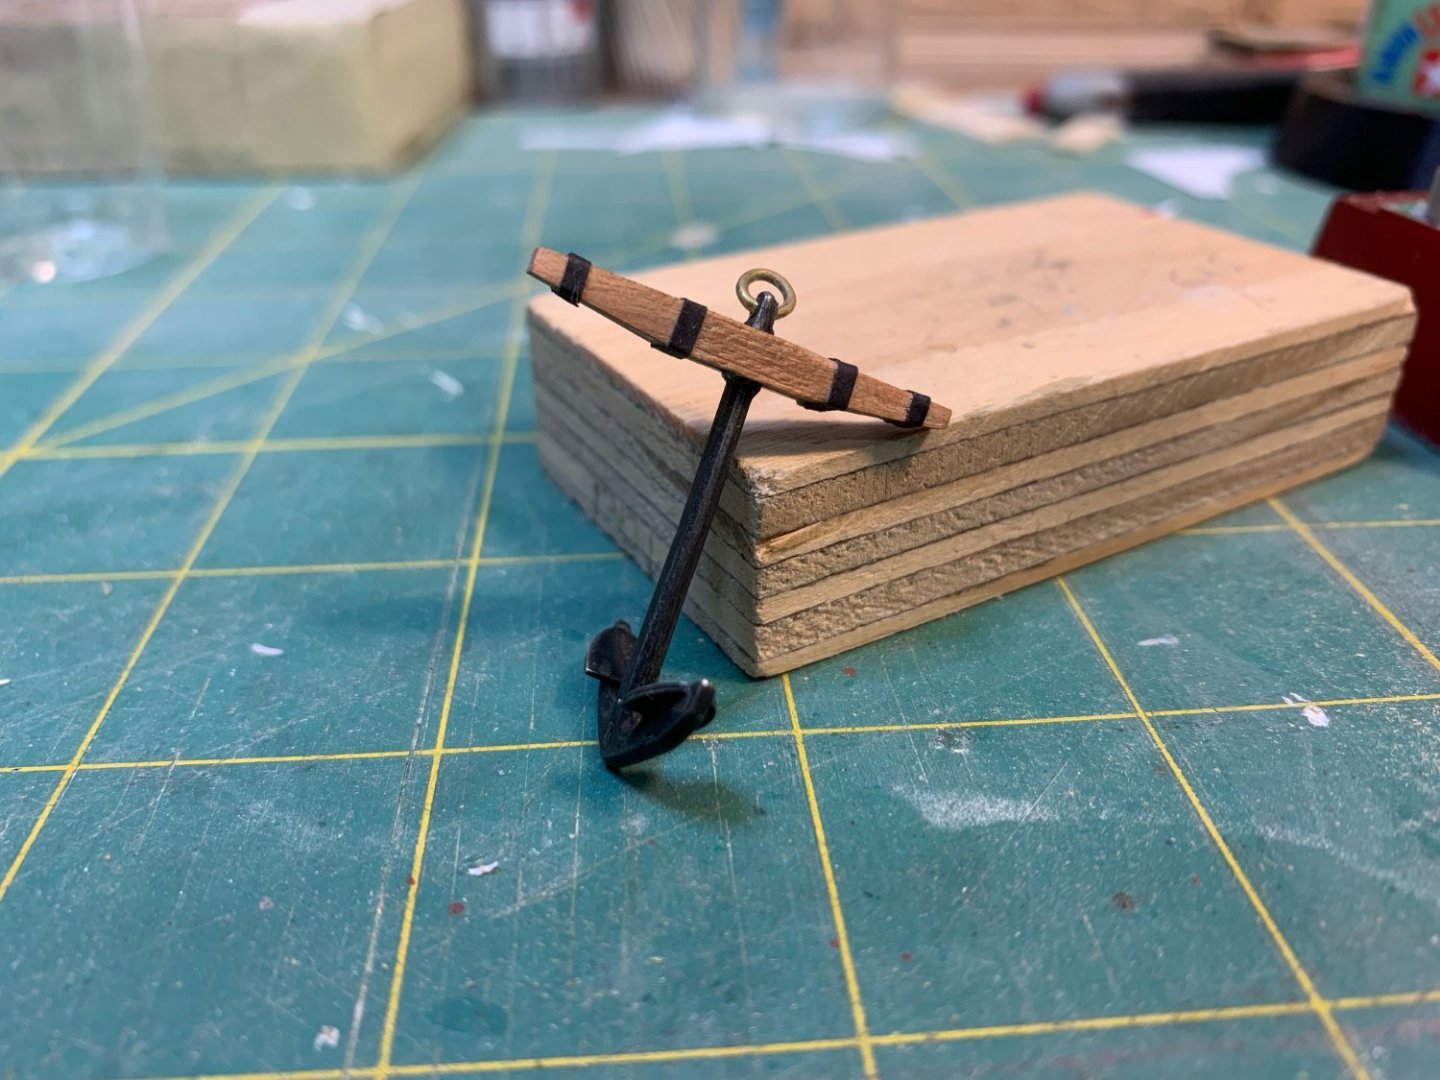
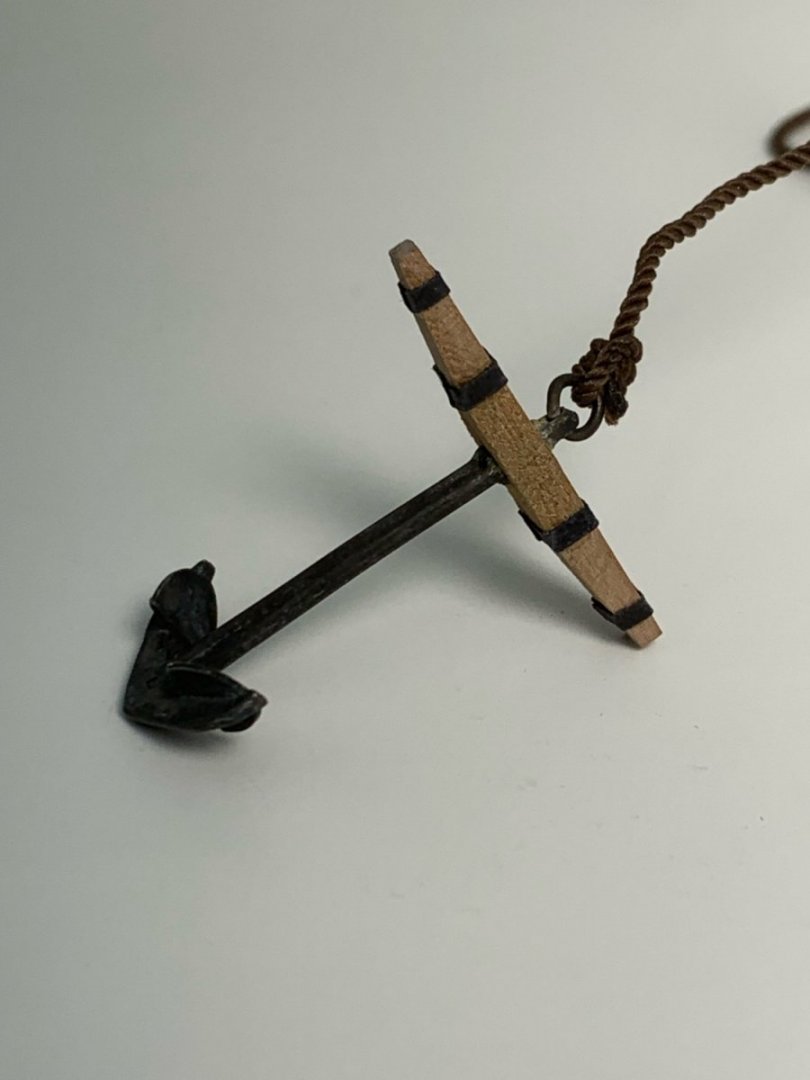
Thanks for your comments, everyone. The anchor is next. There isn't much about the anchor itself in the instructions, just the rigging is covered. This is where the small library of references I have been building has come in handy. After blackening the anchor and fabricating a ring, the stock was made: Bands were made with black construction paper: The ring was blackened and an inside cinch tied the rope to the anchor: The completed anchor on the model: I asked earlier about whether or not the anchor rope would have been tarred or not and there are opinions on both sides so I decided to follow the direction provided for the Model Shipways Armed Virginia Sloop and considered it to be lightly tarred (brown). Thanks for checking in. As always, helpful advice is appreciated. Jeff


- 42 replies
-
- 4
-
-
- lively of baltimore
- lumberyard
- (and 2 more)
-
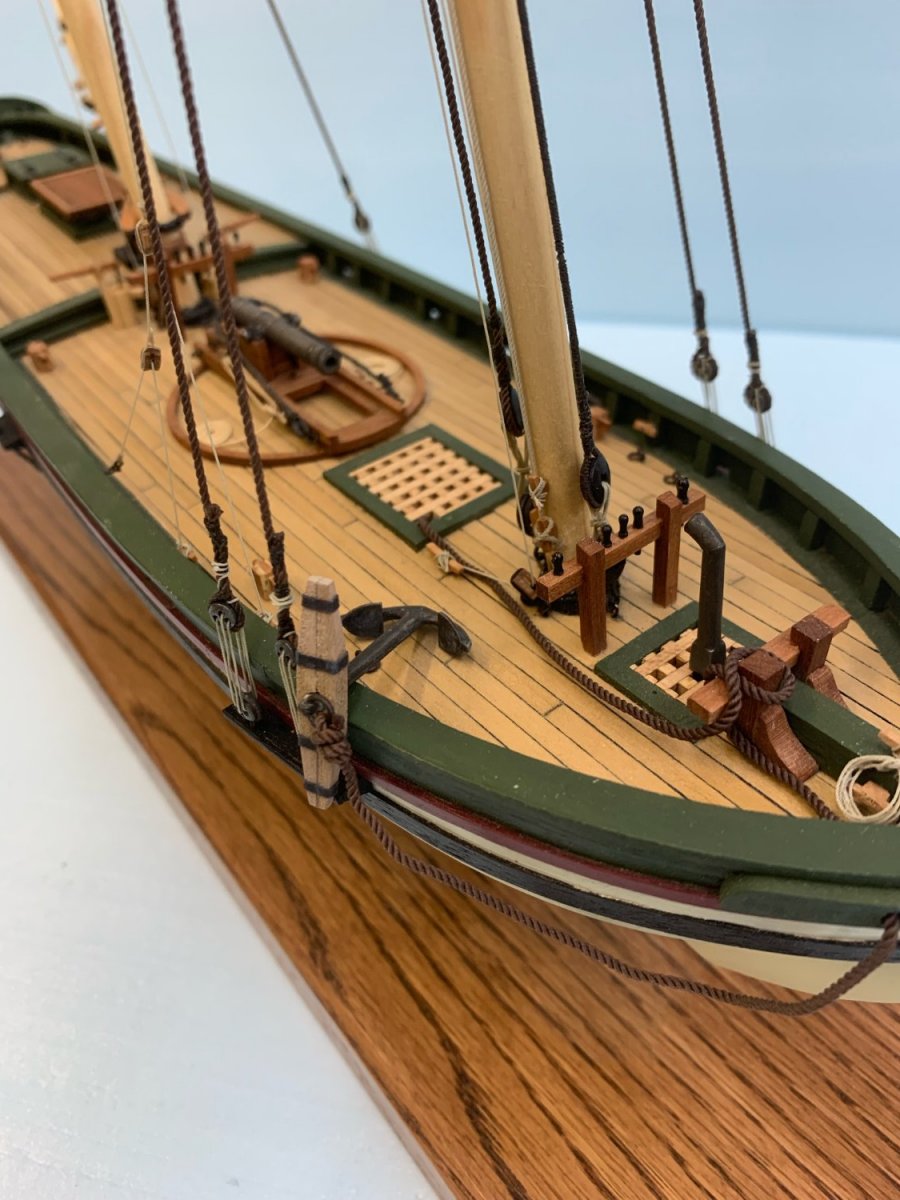
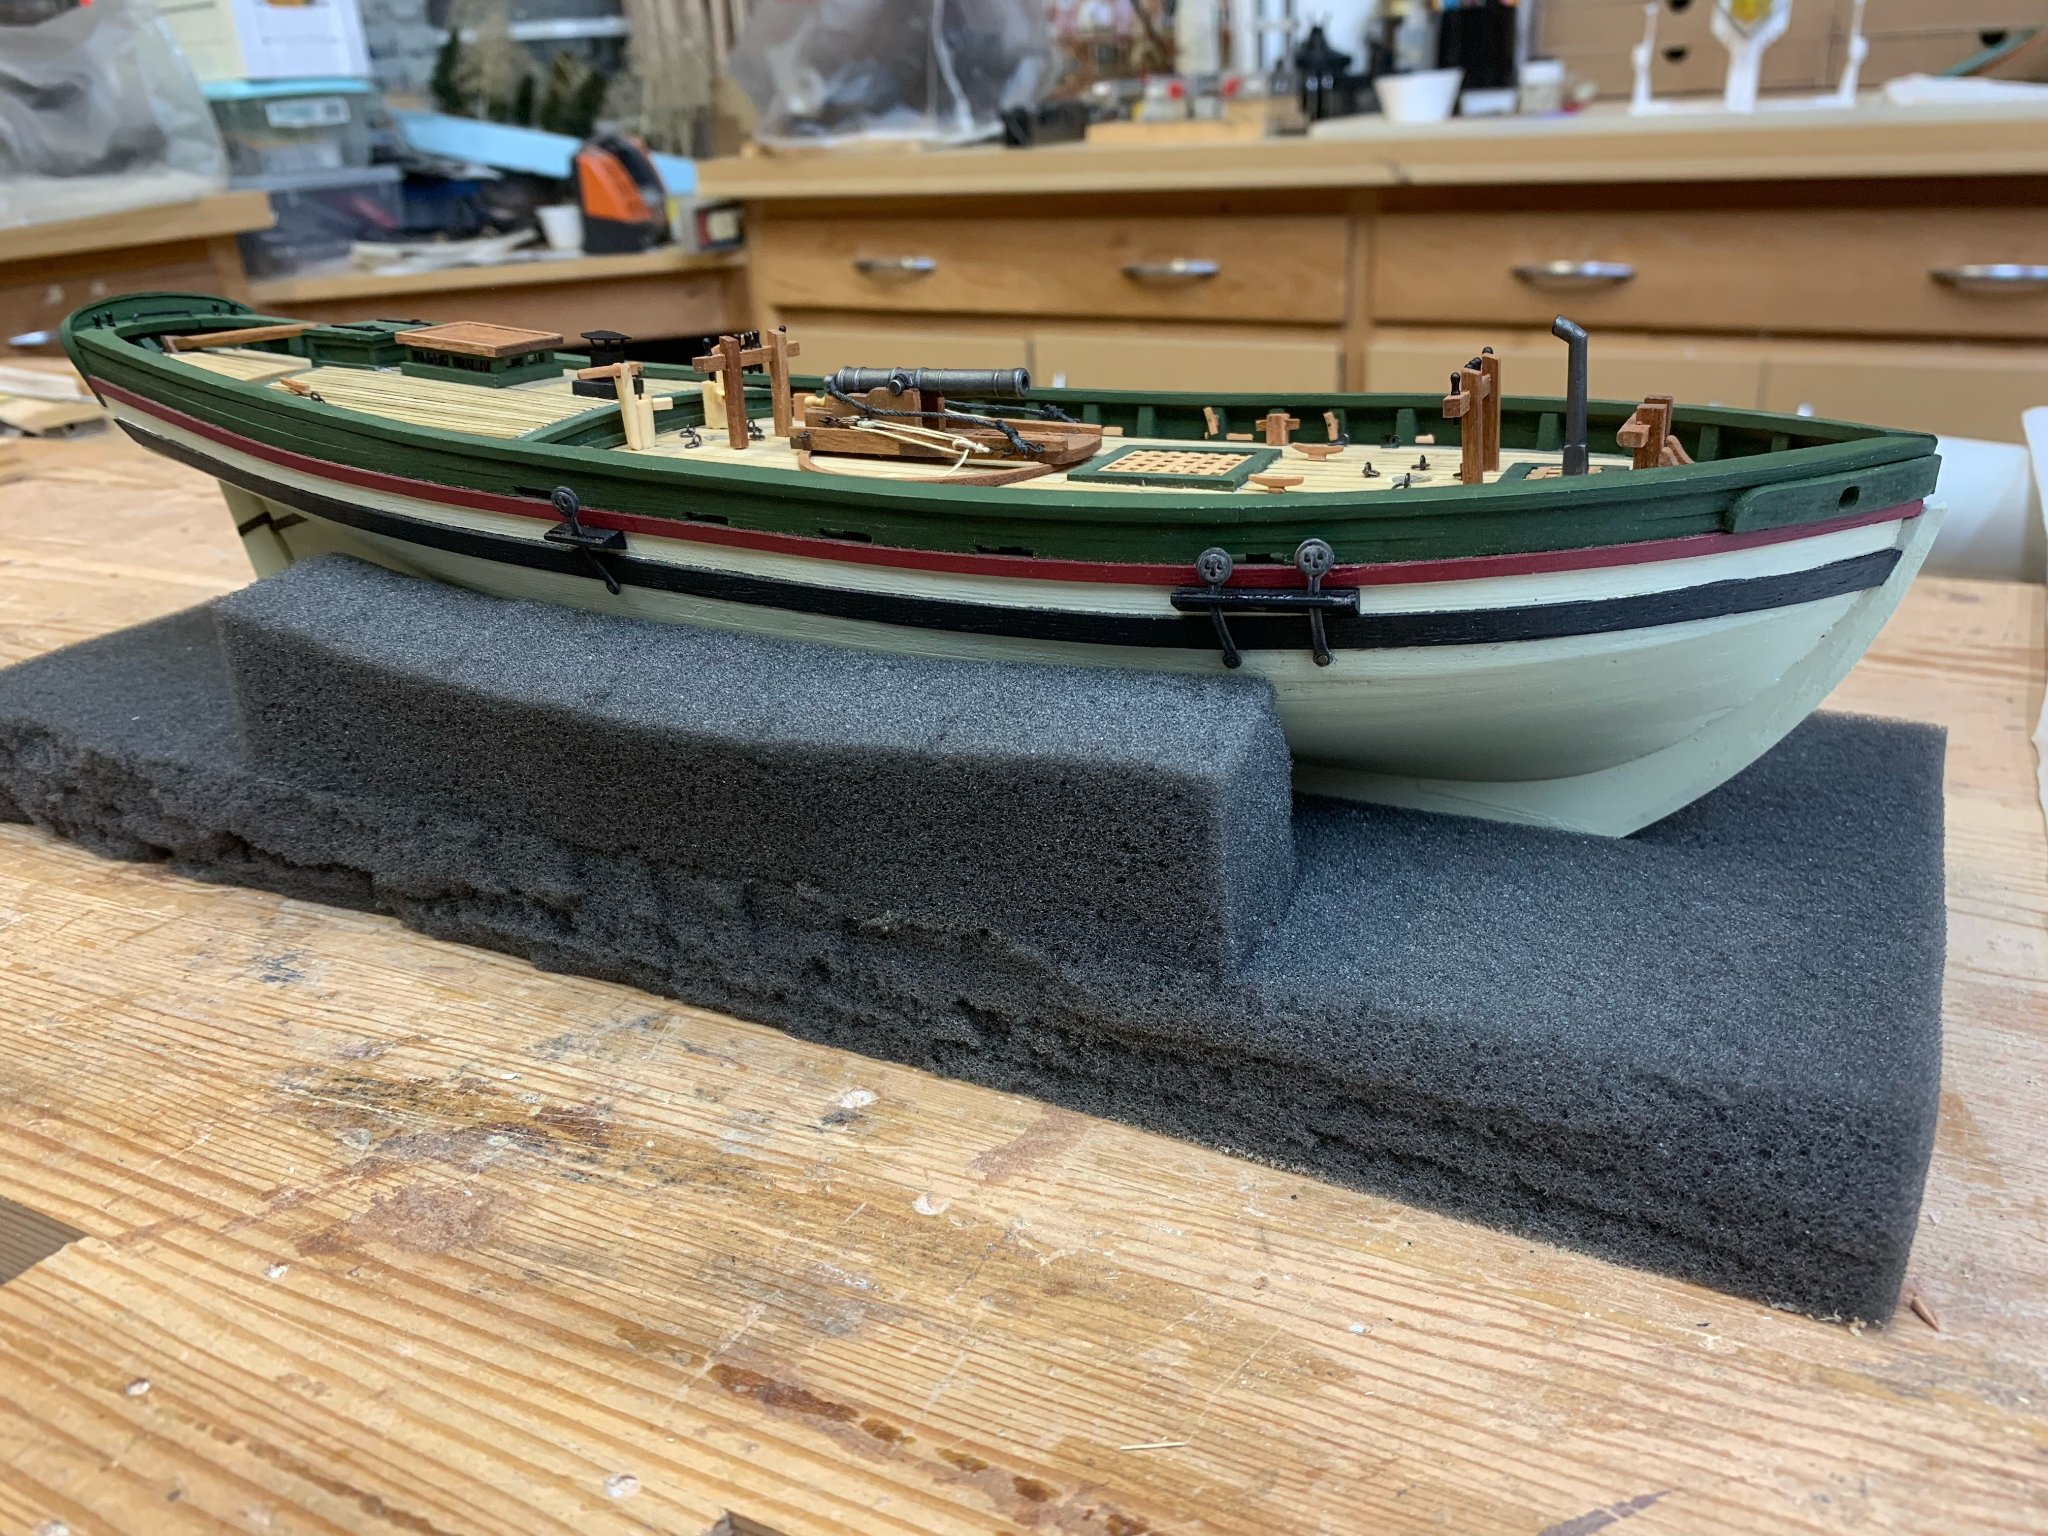
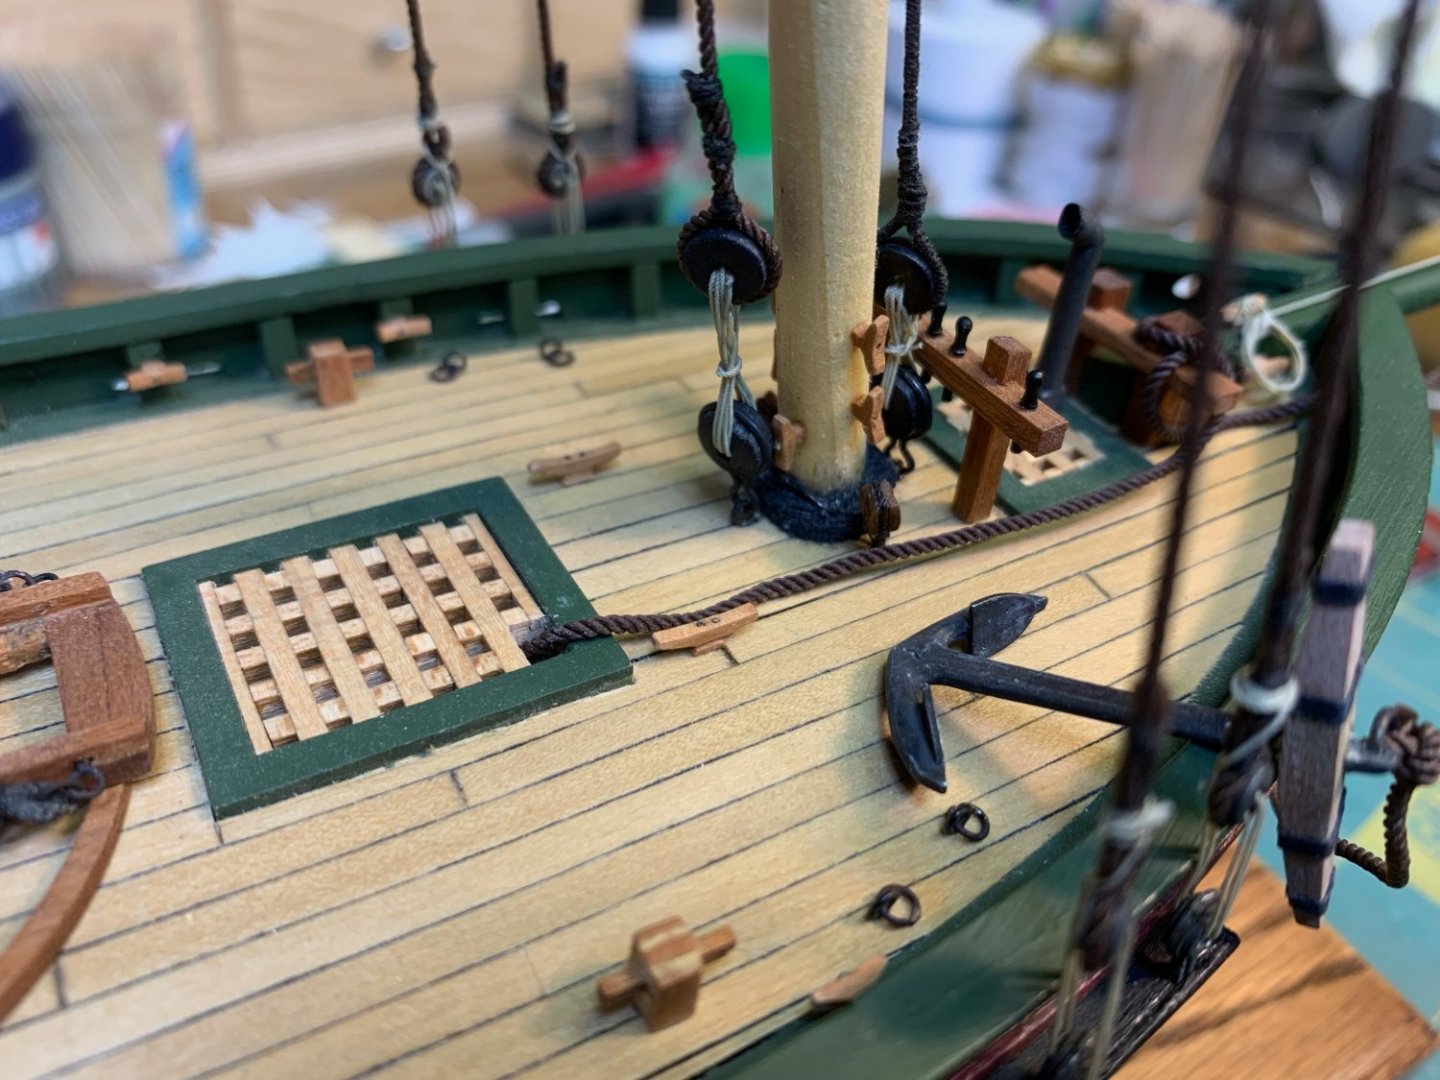
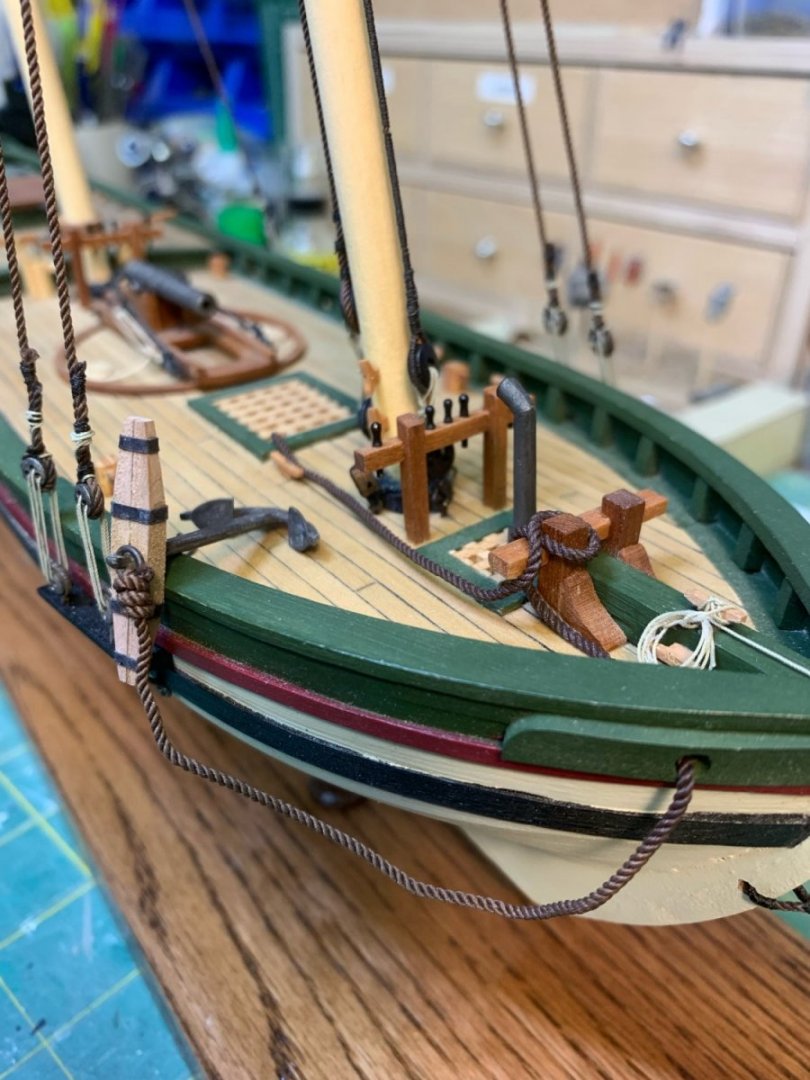
Thanks Allan and Bob. Thanks for pointing out my mistake with the gratings, Allan. The mistake is mine. The plans are correct. Unfortunately, it's too late to change it now but I know for next time. The reason I bought this model was to learn and practice some of the basic techniques I need to know when tackling something more complex. Plastic models are often criticized for their inaccuracies and hard to follow instructions but they don't hold a candle to these models. It is helpful advice from members of this forum and the growing number of references in my library. Bob, I usually have more than one project on the go at the same time and will switch back and forth when I hit a wall. I use to time on one project to contemplate the challenge presented by the first and build up the fortitude to return to it. Here's a few more photos: I'm about to start on the anchor. The rope for the anchor included in the kit is dark brown. It seems to me that the anchor rope should be beige. Am I correct? Thanks for following along with me. Jeff

- 42 replies
-
- 6
-
-
-
- lively of baltimore
- lumberyard
- (and 2 more)
-
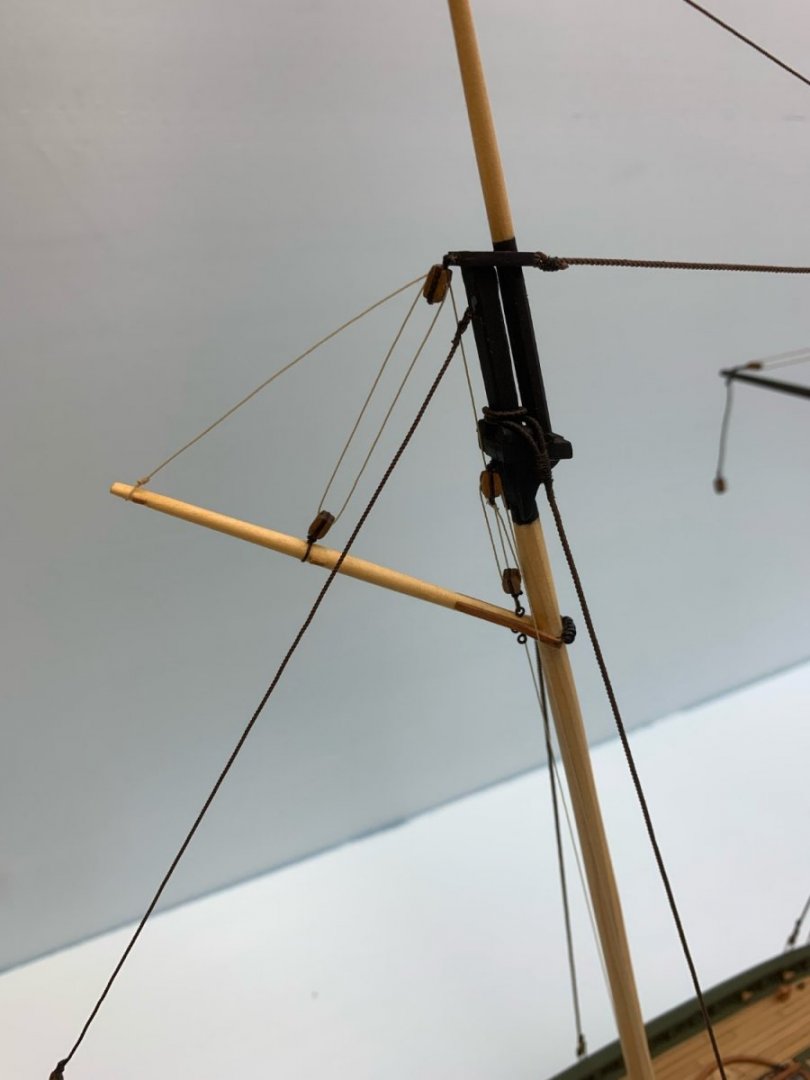
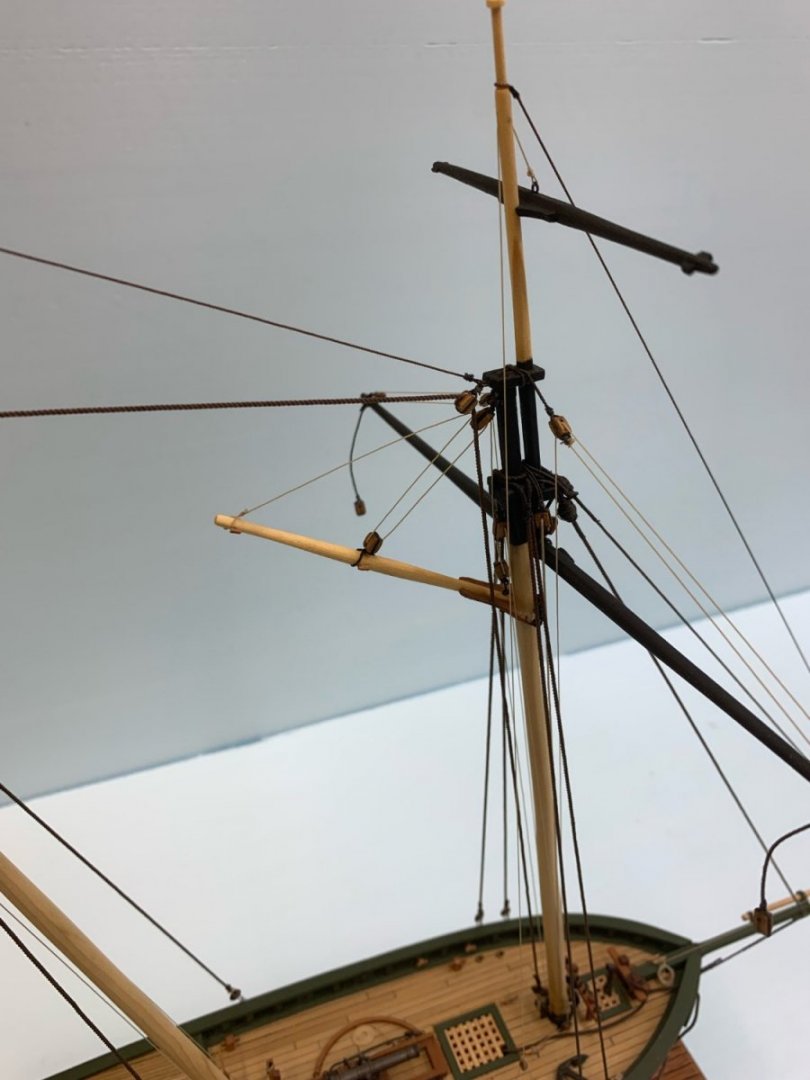
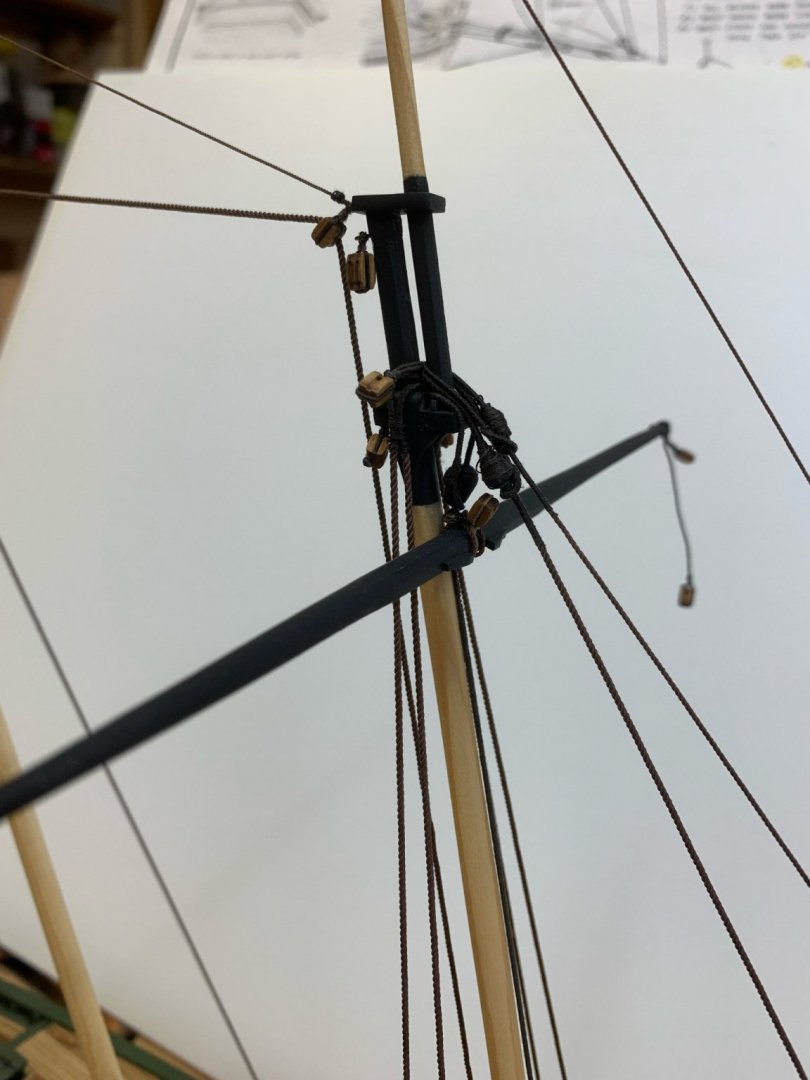
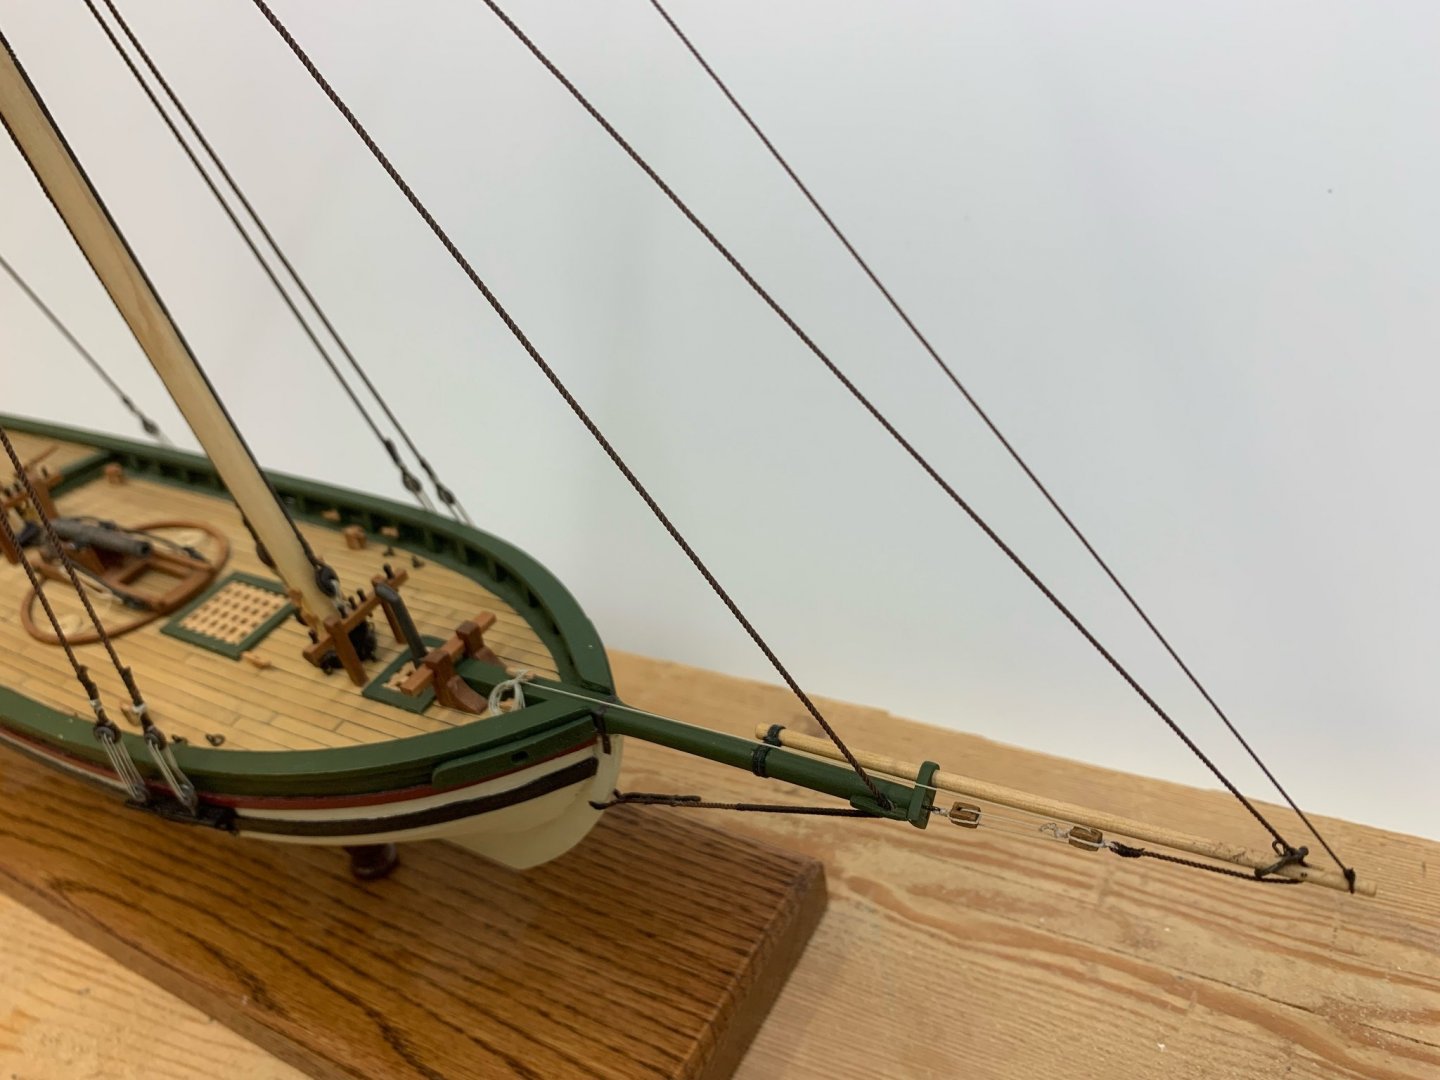
I haven't posted for a while; my apologies. I seem to have hit a wall when I got to the rigging and worked on some other things for a bit while I contemplated the rigging. This forum has been a great resource to get me up and running again as I slowly, oh so slowly, carry on with this build. Here are some progress photos: I've finished the standing rigging at this point and I have to take more photos for an update. This is great fun. Thanks for checking in. Any helpful comments/advice is appreciated. Jeff
- 42 replies
-
- 6
-
-
- lively of baltimore
- lumberyard
- (and 2 more)
-
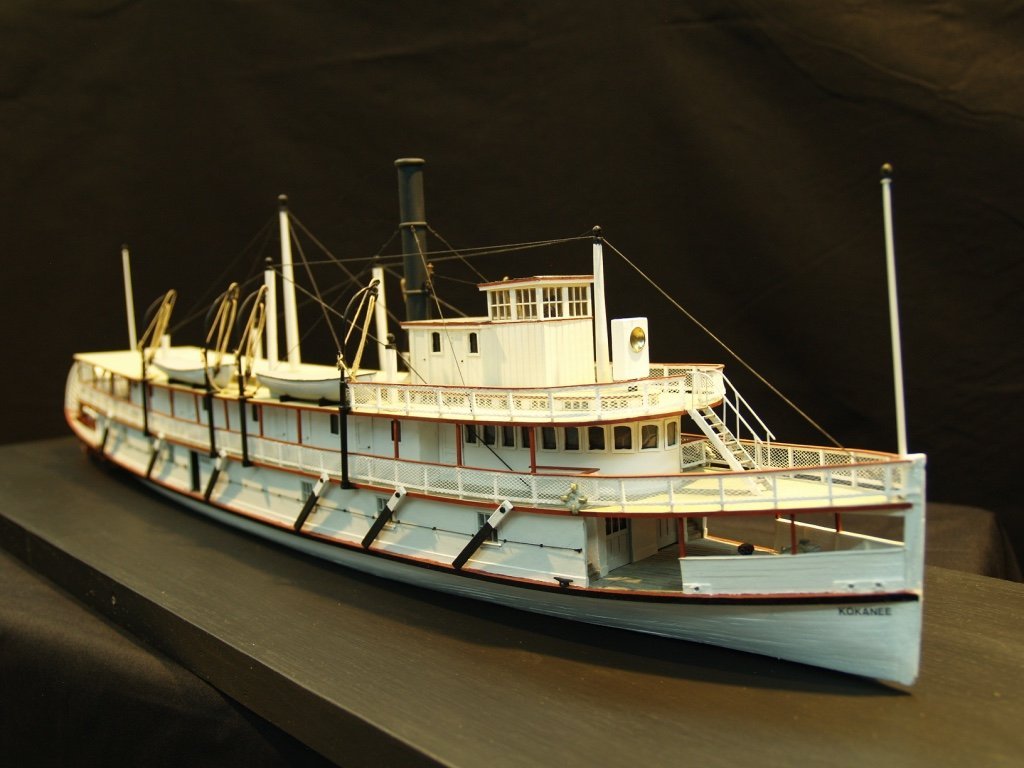
Welcome Blair! I too have a foot in both camps. A few years ago I scratchbuilt a sternwheeler for our club layout which, unfortunately, had to be disassembled as I was completing it. I would like to incorporate it in a module or my home layout in the future. Jeff
-
Welcome to Model Ship World! Jeff Betcher
-
Thanks to those who have liked and commented on the build. Thanks Phil, for directing me to your thread. Wow! I started reading it and realized it's going to take more than a casual sit down to take it all in! I appreciate all the work you put into it and then sharing your learnings. I will definitely being using it as a resource for rigging this model as well as future builds. Jeff
-
Beautiful, Tim. Simply beautiful. I have this kit in my stash and this thread will be a great resource. Jeff
- 171 replies
-
- 2
-
-
- artesania latina
- bounty
- (and 1 more)
-
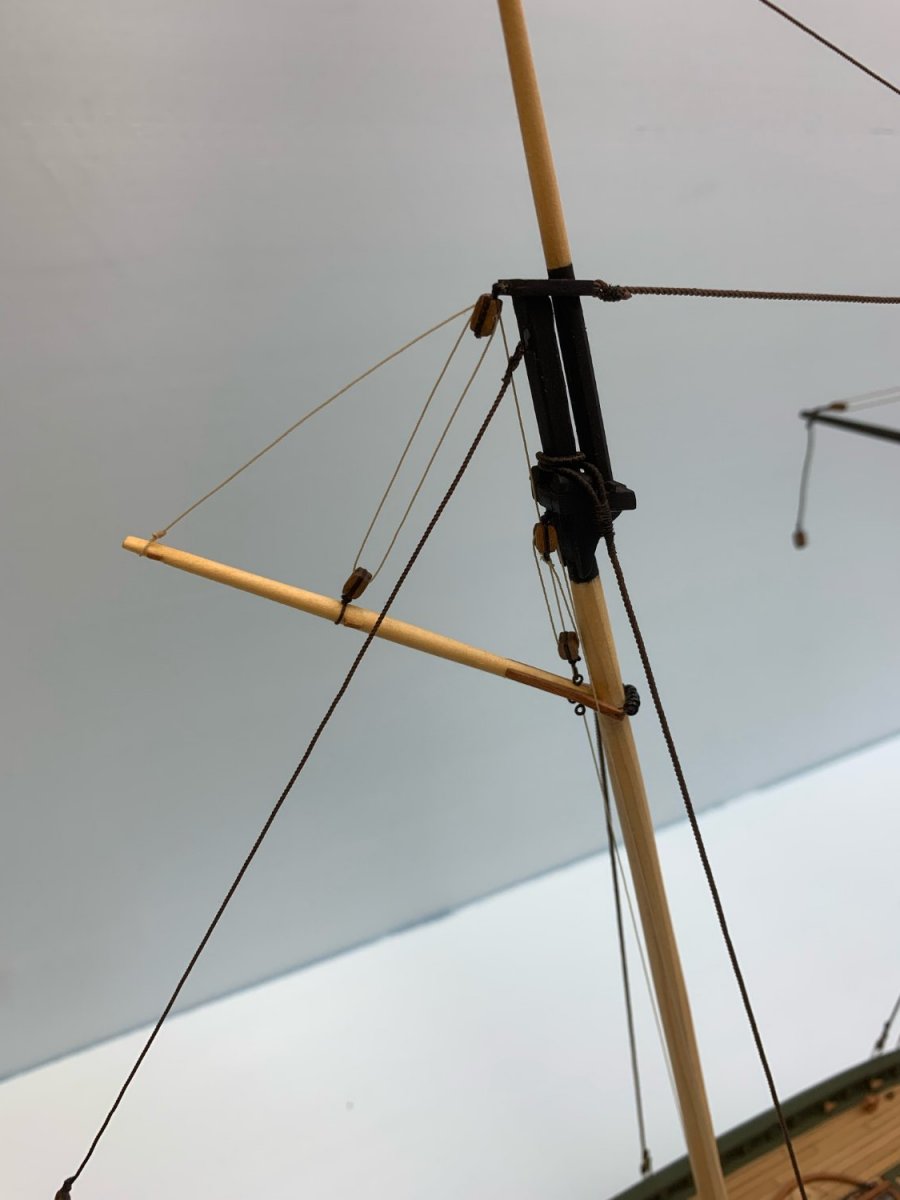
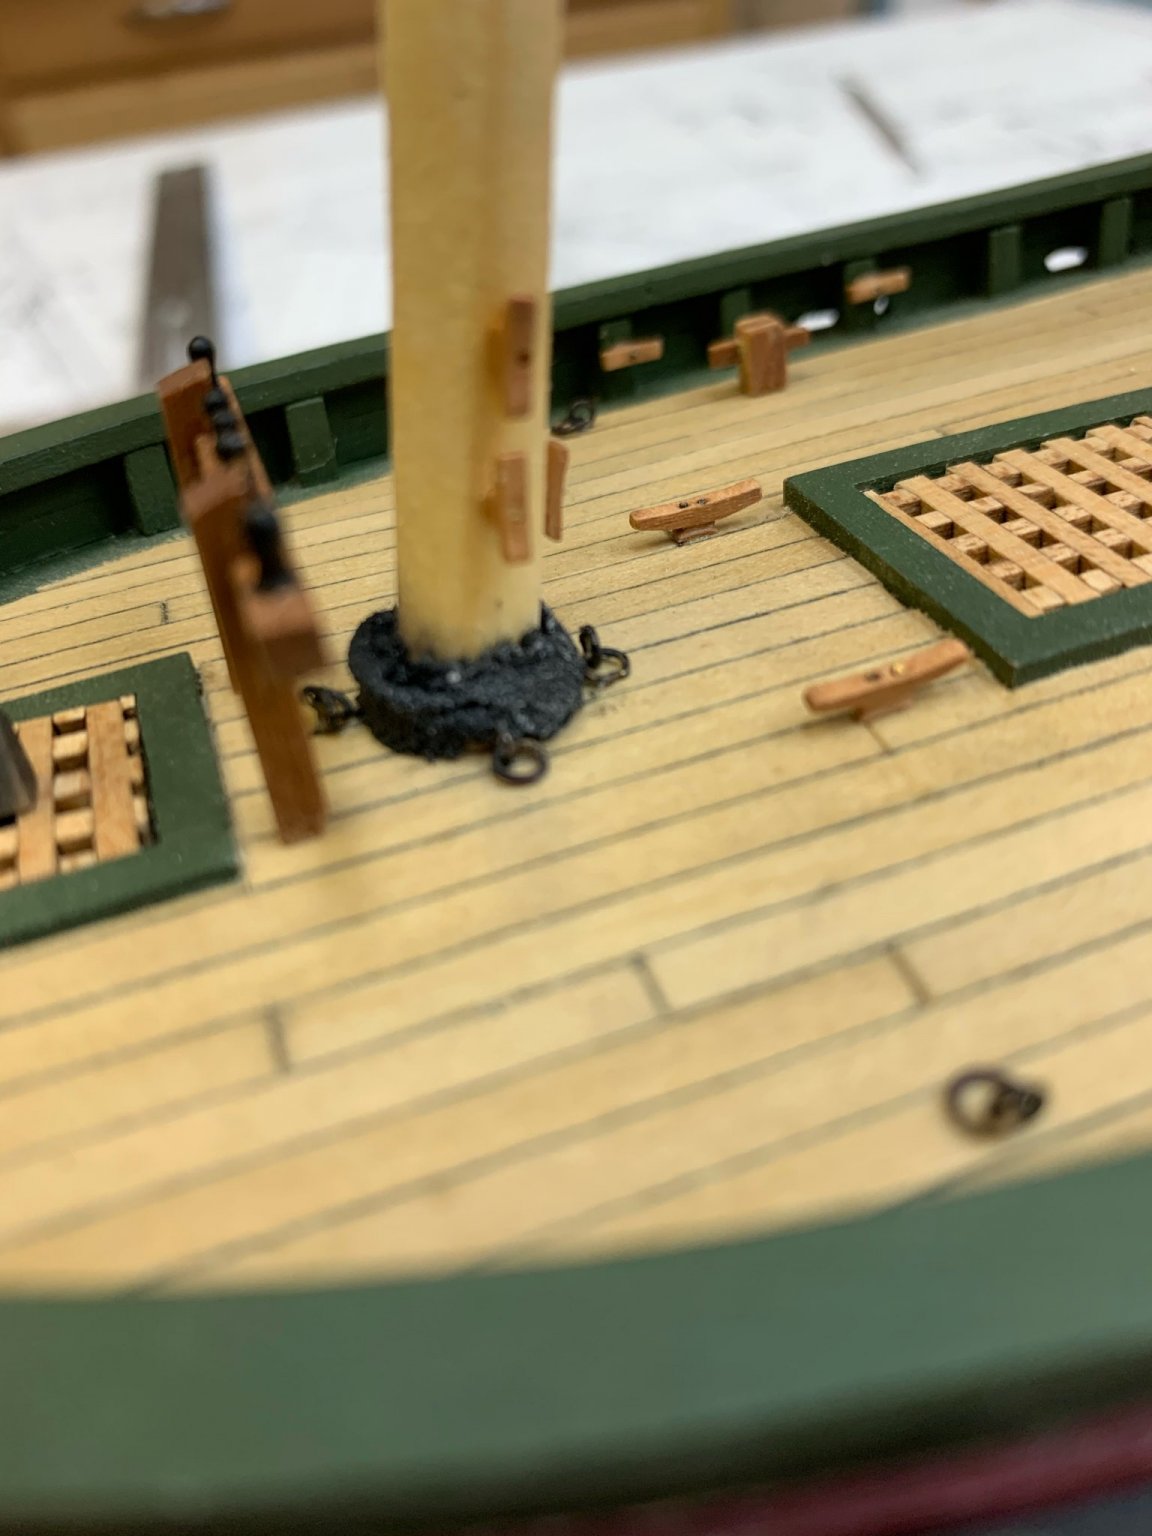
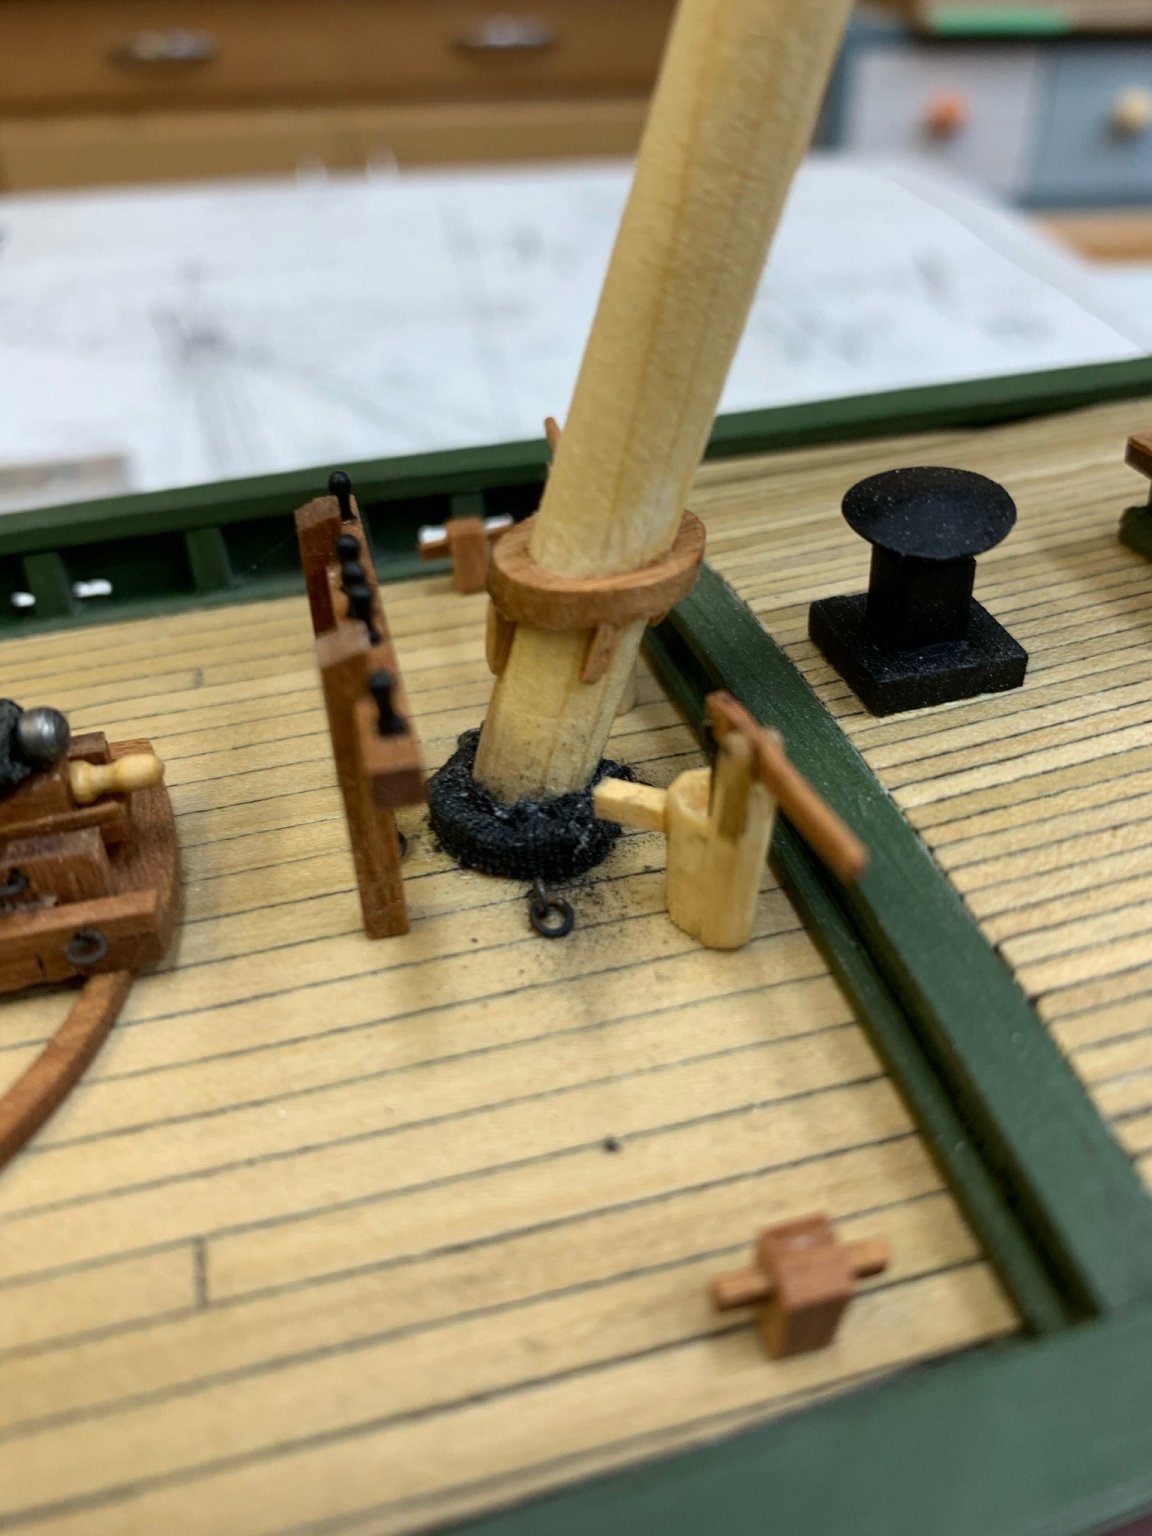
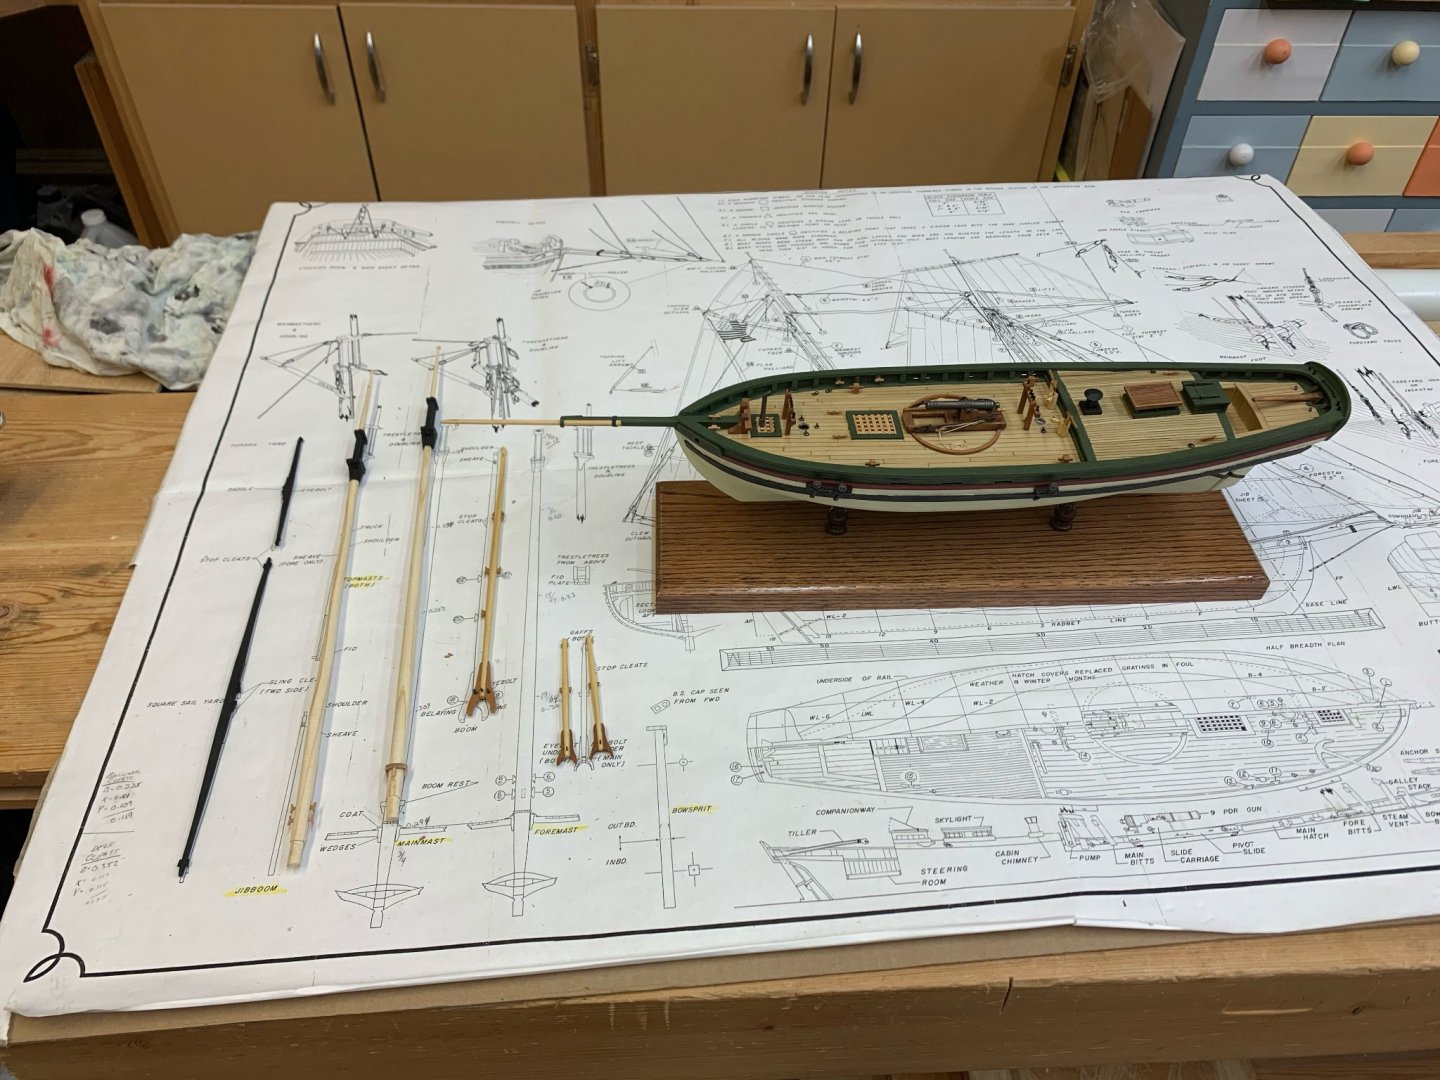
Thanks, Bob! Things have been progressing slowly in the shipyard. I've finished the masts, gaffs, booms, and yards. There's likely differing opinions on this but I went ahead and stepped the masts before rigging. One of the reasons that I stepped the masts before rigging was the way I did the mast coats. After doing some research and reading a number of build threads I thought it would be more authentic this way: I made a wooden ring at the deck level around the masts. I then took a strip of cheese cloth that I painted black and glued it over the ring around the mast to appear like tarred cloth around the base of the mast. This is the result: I have a bit of cleaning up to do where the bowsprit rests on the stem and a few touchups and its on to the rigging. Jeff


- 42 replies
-
- 5
-
-
- lively of baltimore
- lumberyard
- (and 2 more)
-
That's looking very good, Tim. Thanks for the complements on the Lively. I seem to have a hard time focusing on only one project at a time, hence the aircraft build. It helps change things up a bit when I hit a problem spot and need a break. Jeff Betcher
- 171 replies
-
- 1
-
-
- artesania latina
- bounty
- (and 1 more)
-
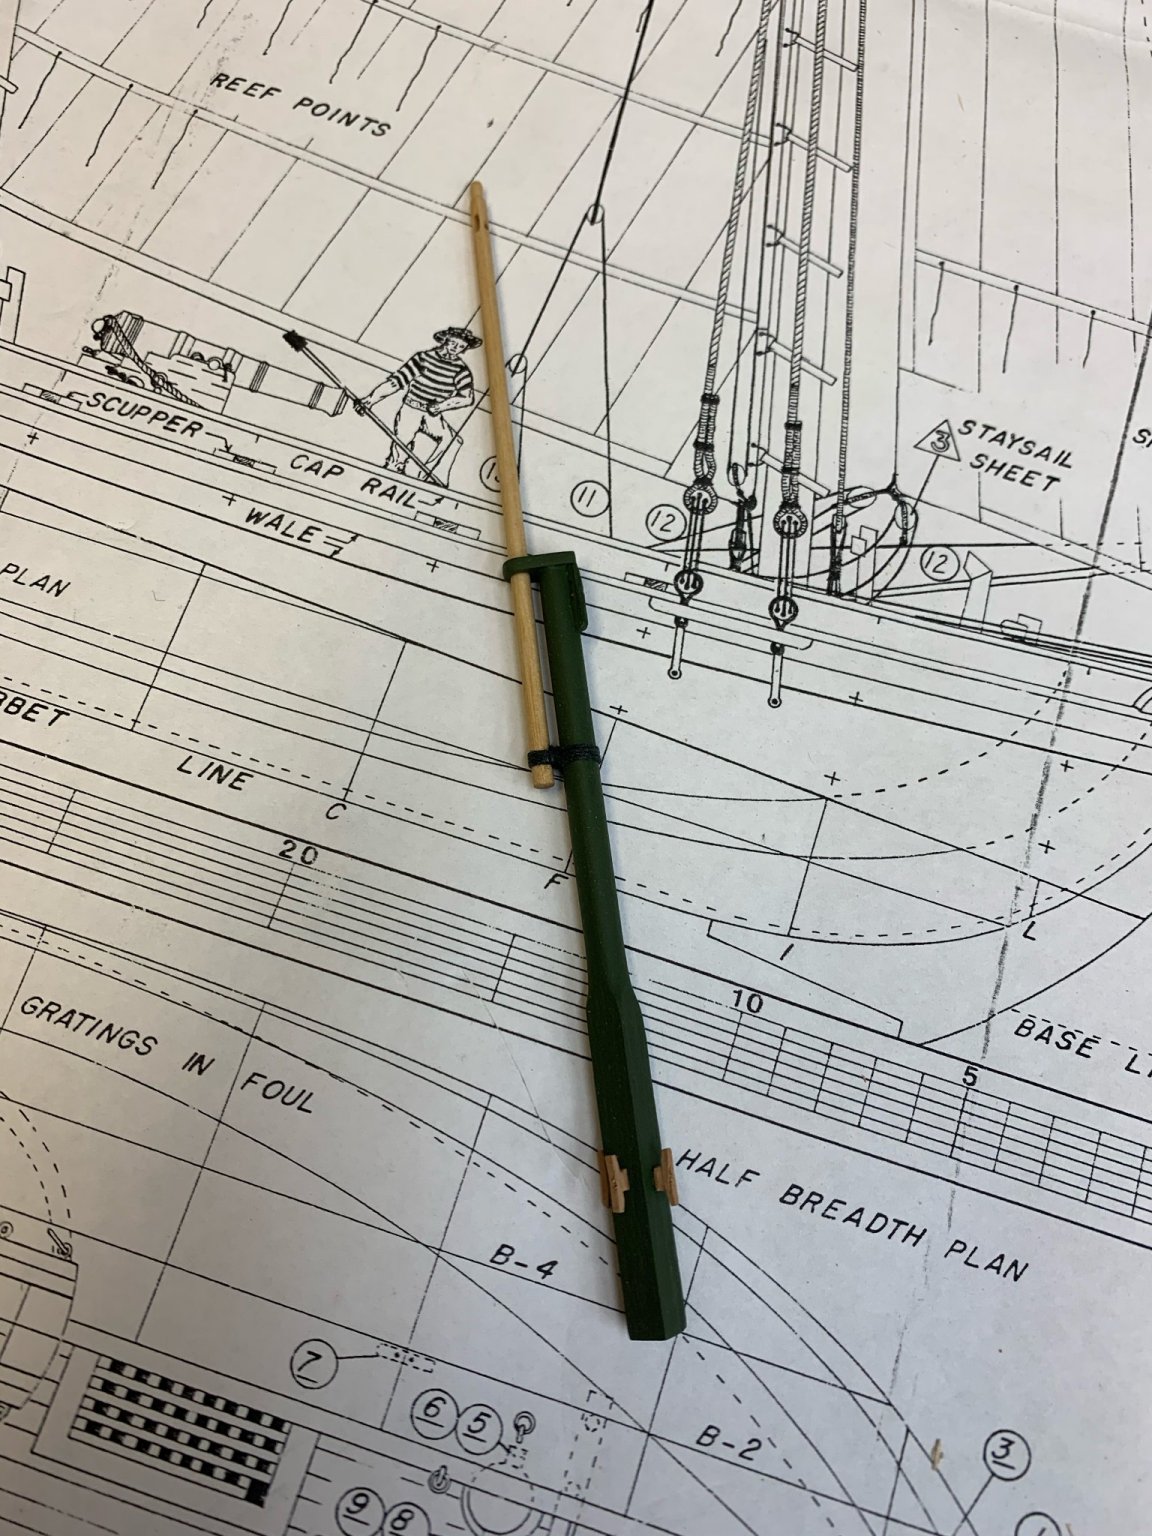
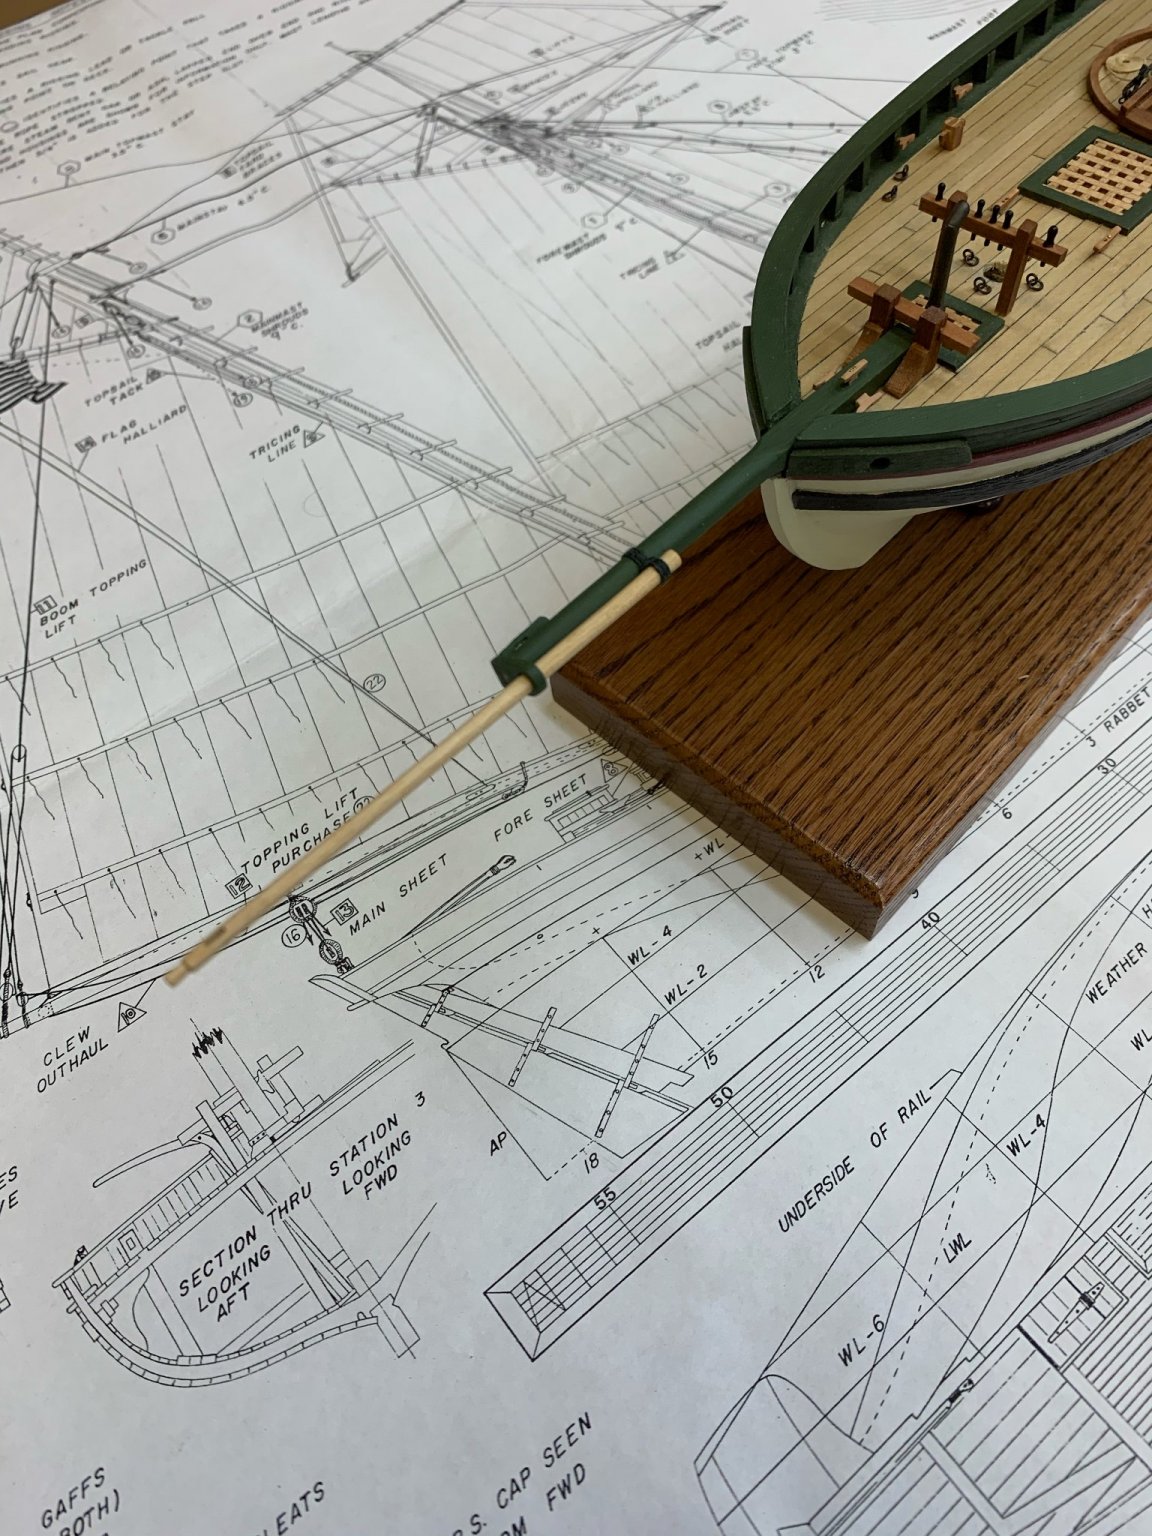
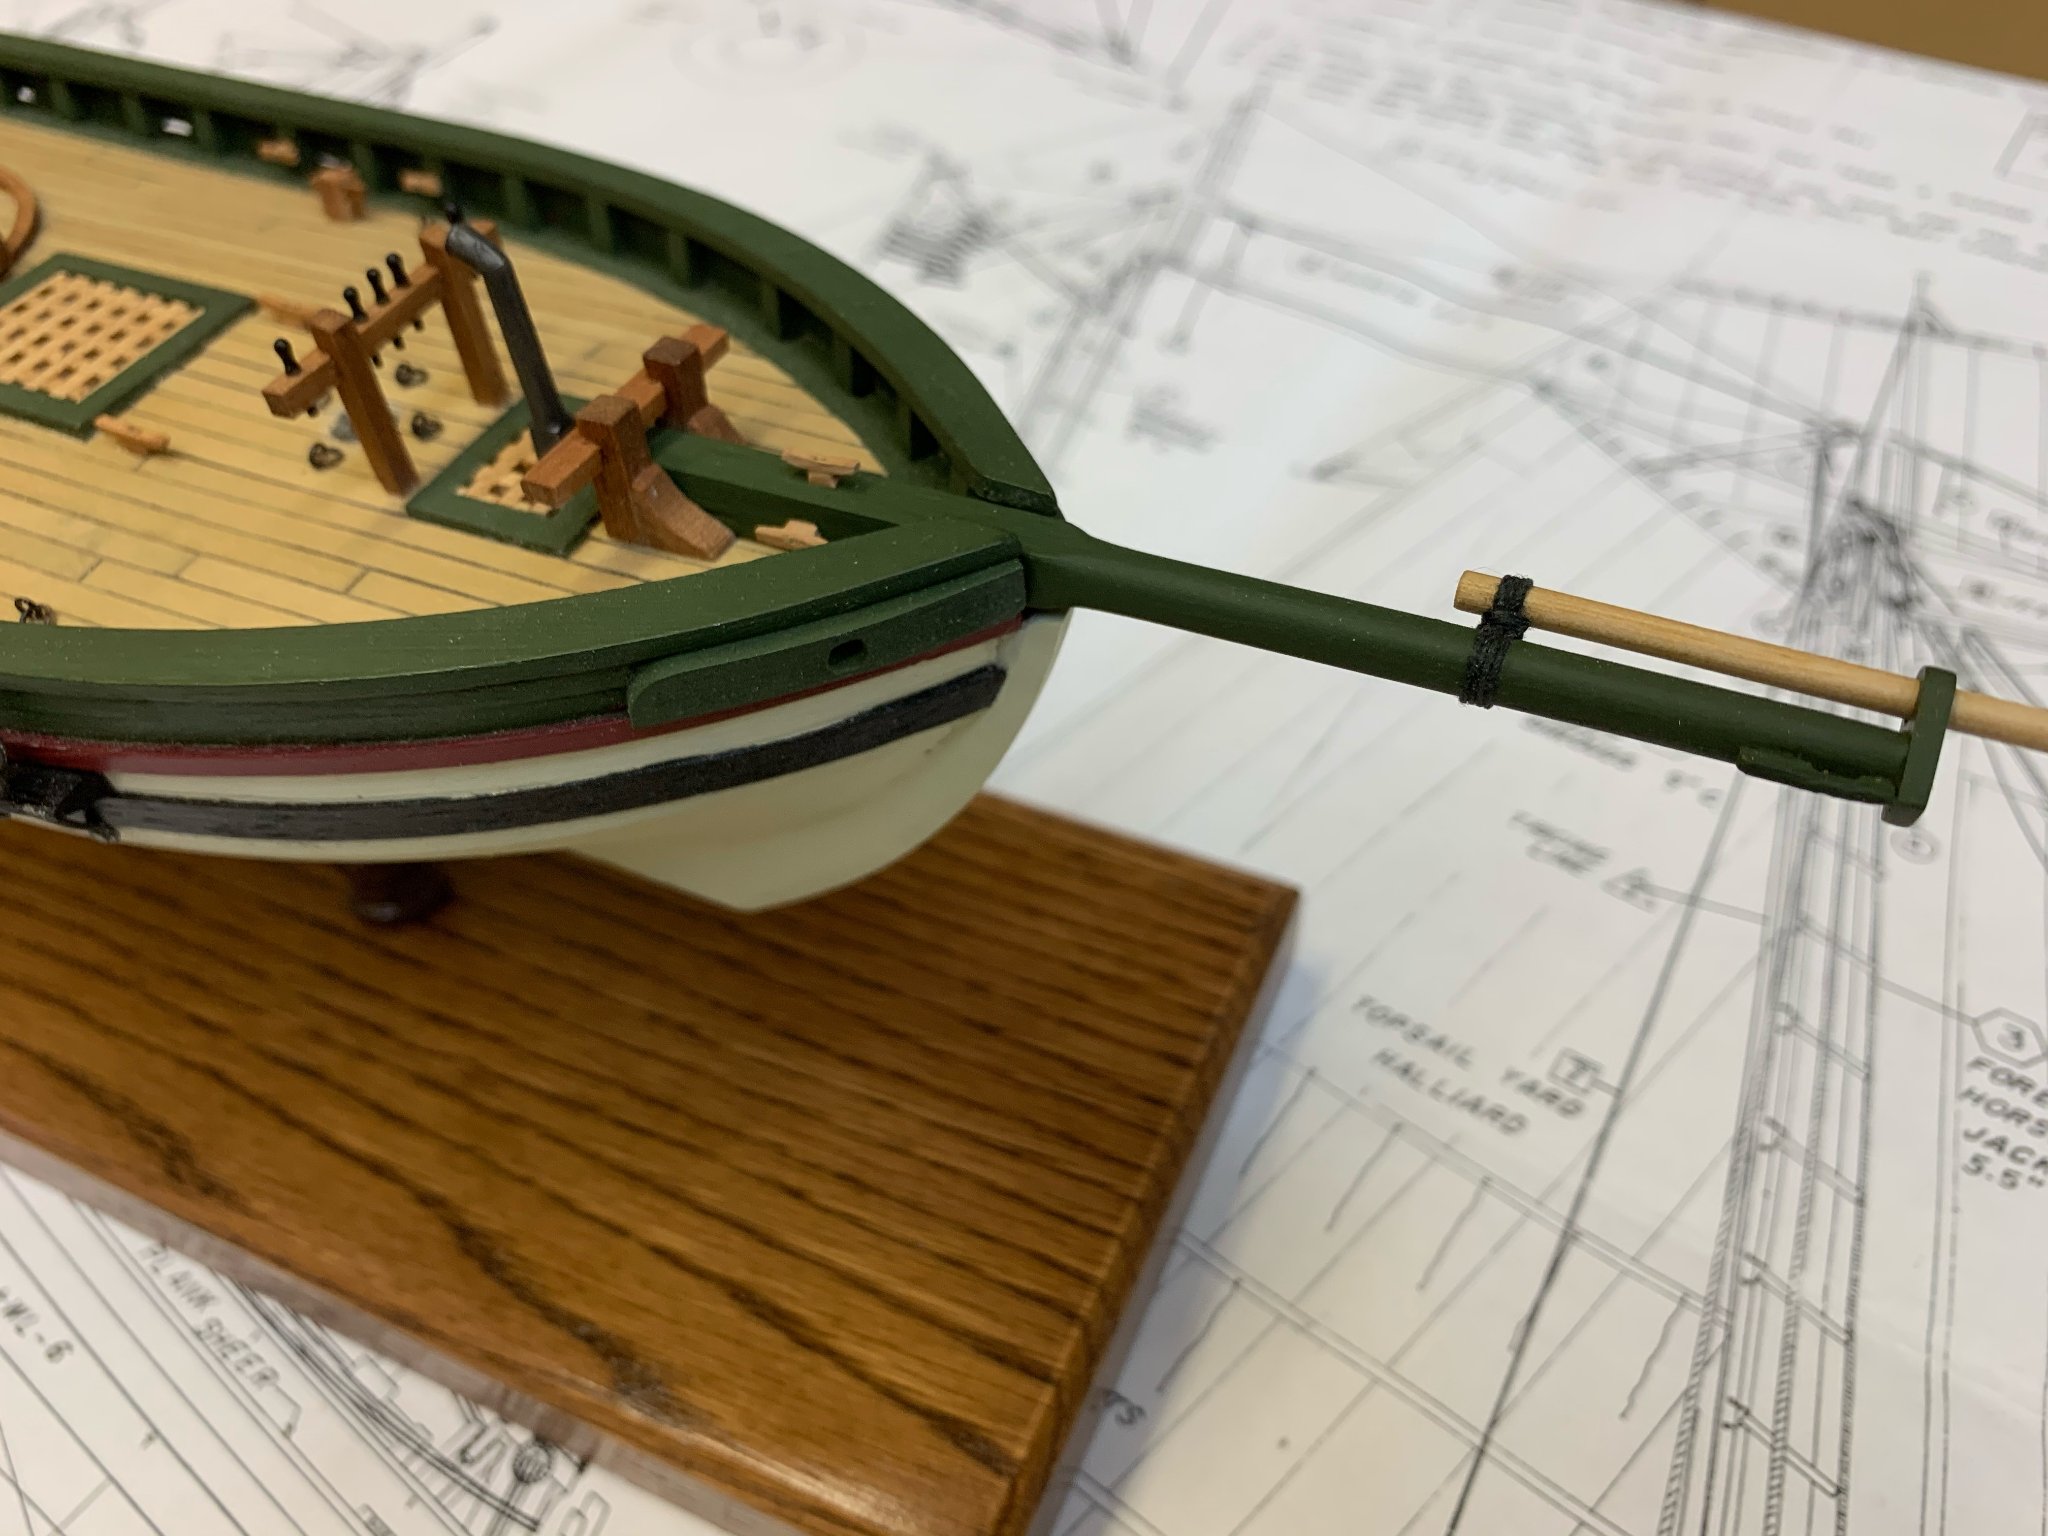
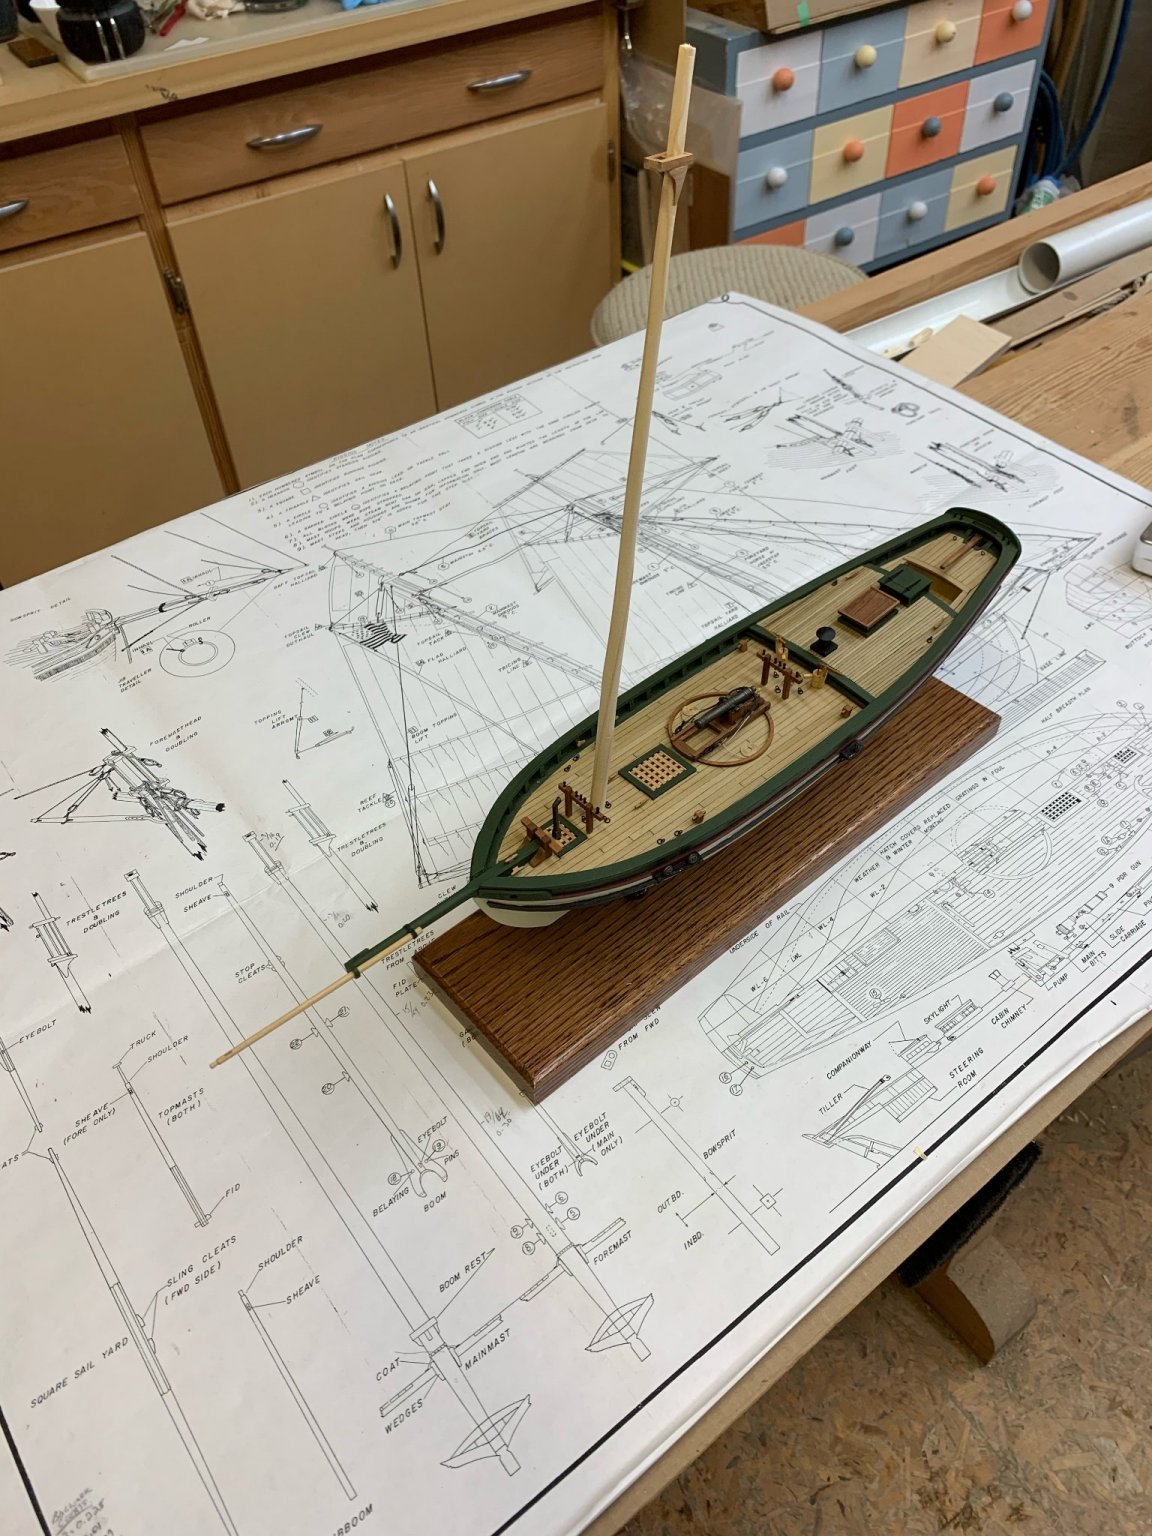
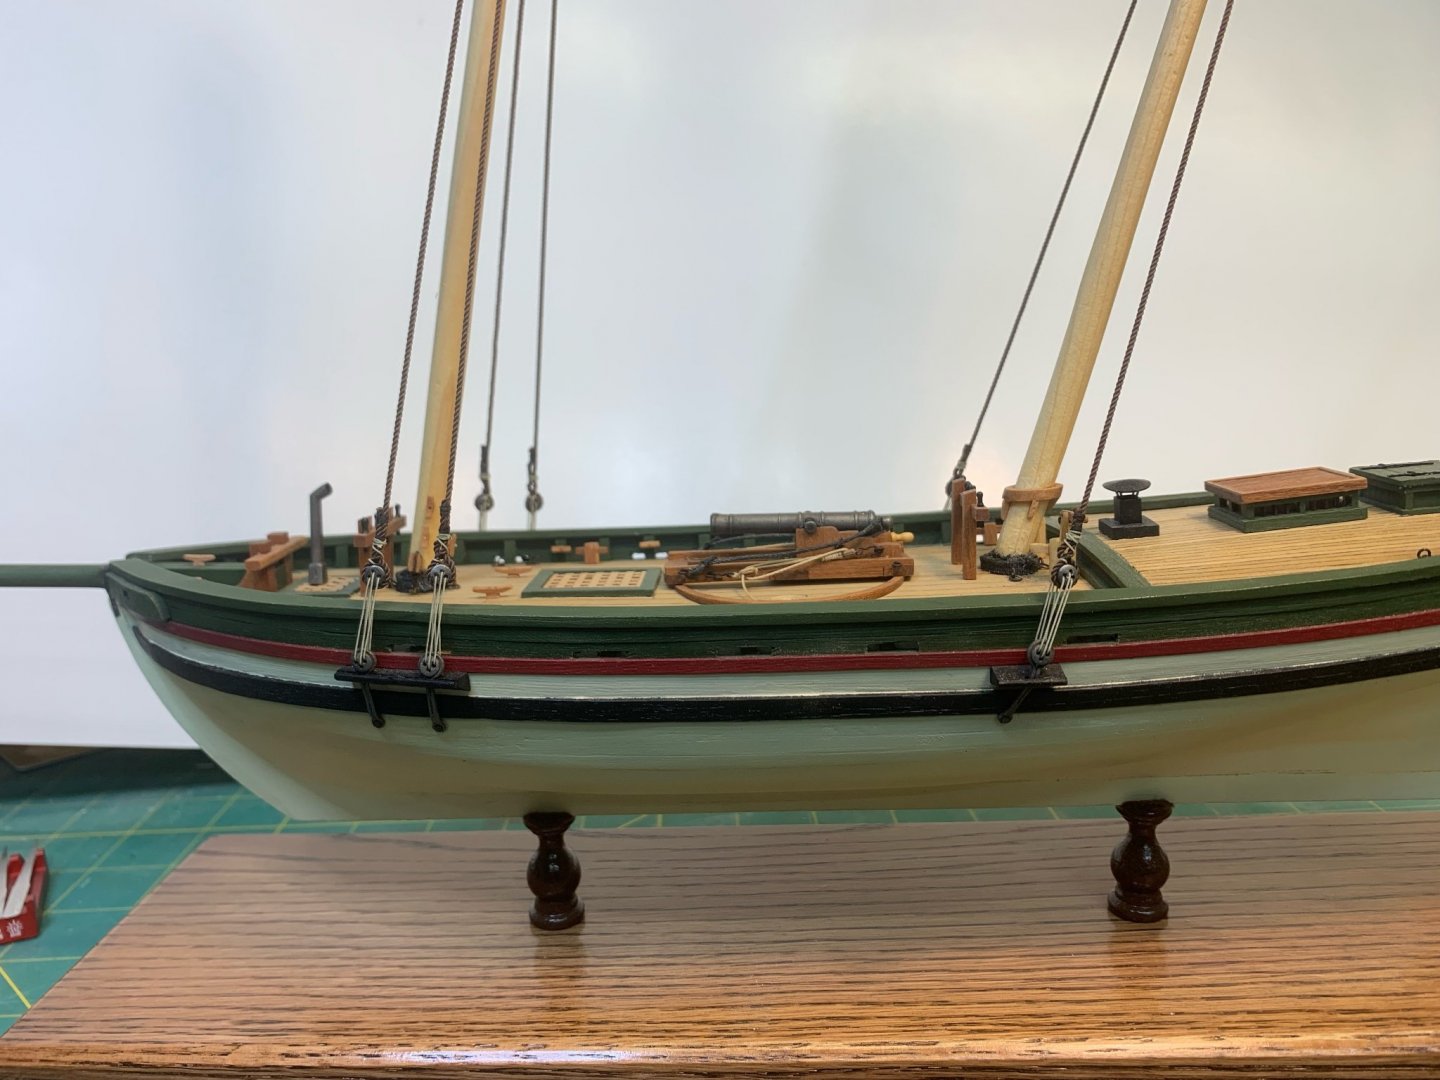
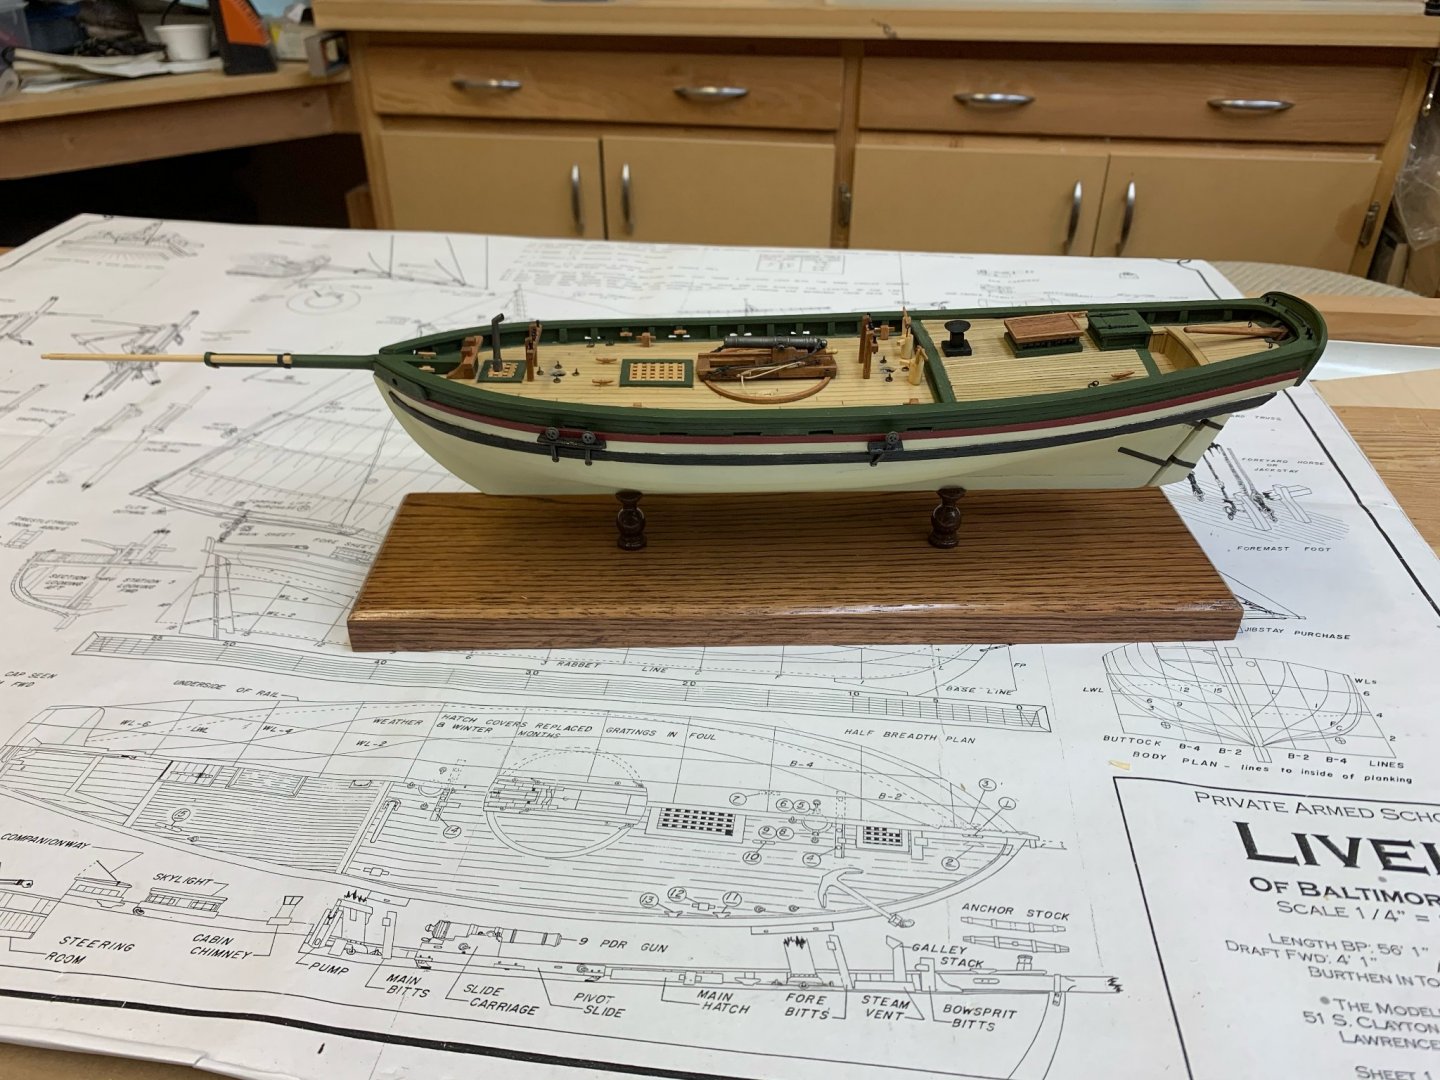
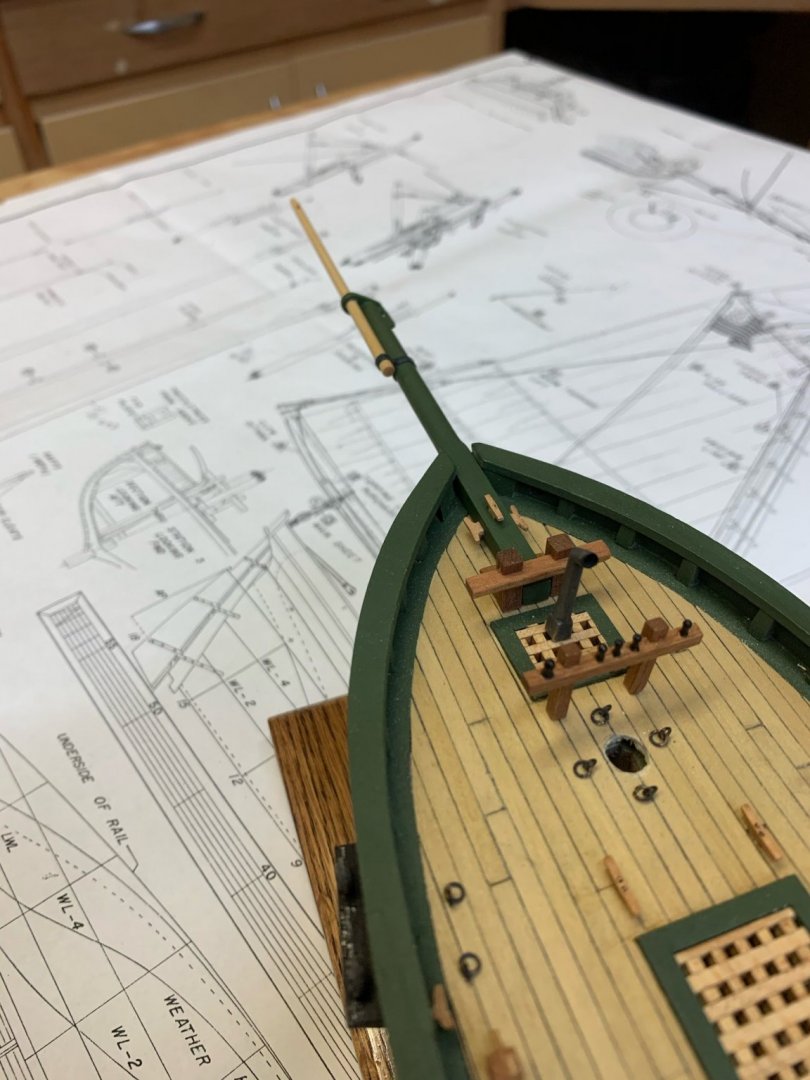
Thanks, Bob. Continuing on with the build, I have made some progress. I have mounted the model on a stand and have started on the masts. The bowsprit and jibboom are not permanently mounted, just set in position. I have also started on the foremast. It is set in place for the photo. That's all for now. Stay safe. Jeff


- 42 replies
-
- 4
-
-
- lively of baltimore
- lumberyard
- (and 2 more)
-
Hi Tim, I've been following along with your build. It's looking great! I have this kit in my stash and I'm working my way up to building it. I hope I can do half as good. Jeff
-
Thanks, Phil. I fixed it. Jeff
-
I have finished constructing the deadeyes and chainplates. The masts are next. Jeff

- 42 replies
-
- 4
-
-
- lively of baltimore
- lumberyard
- (and 2 more)
-
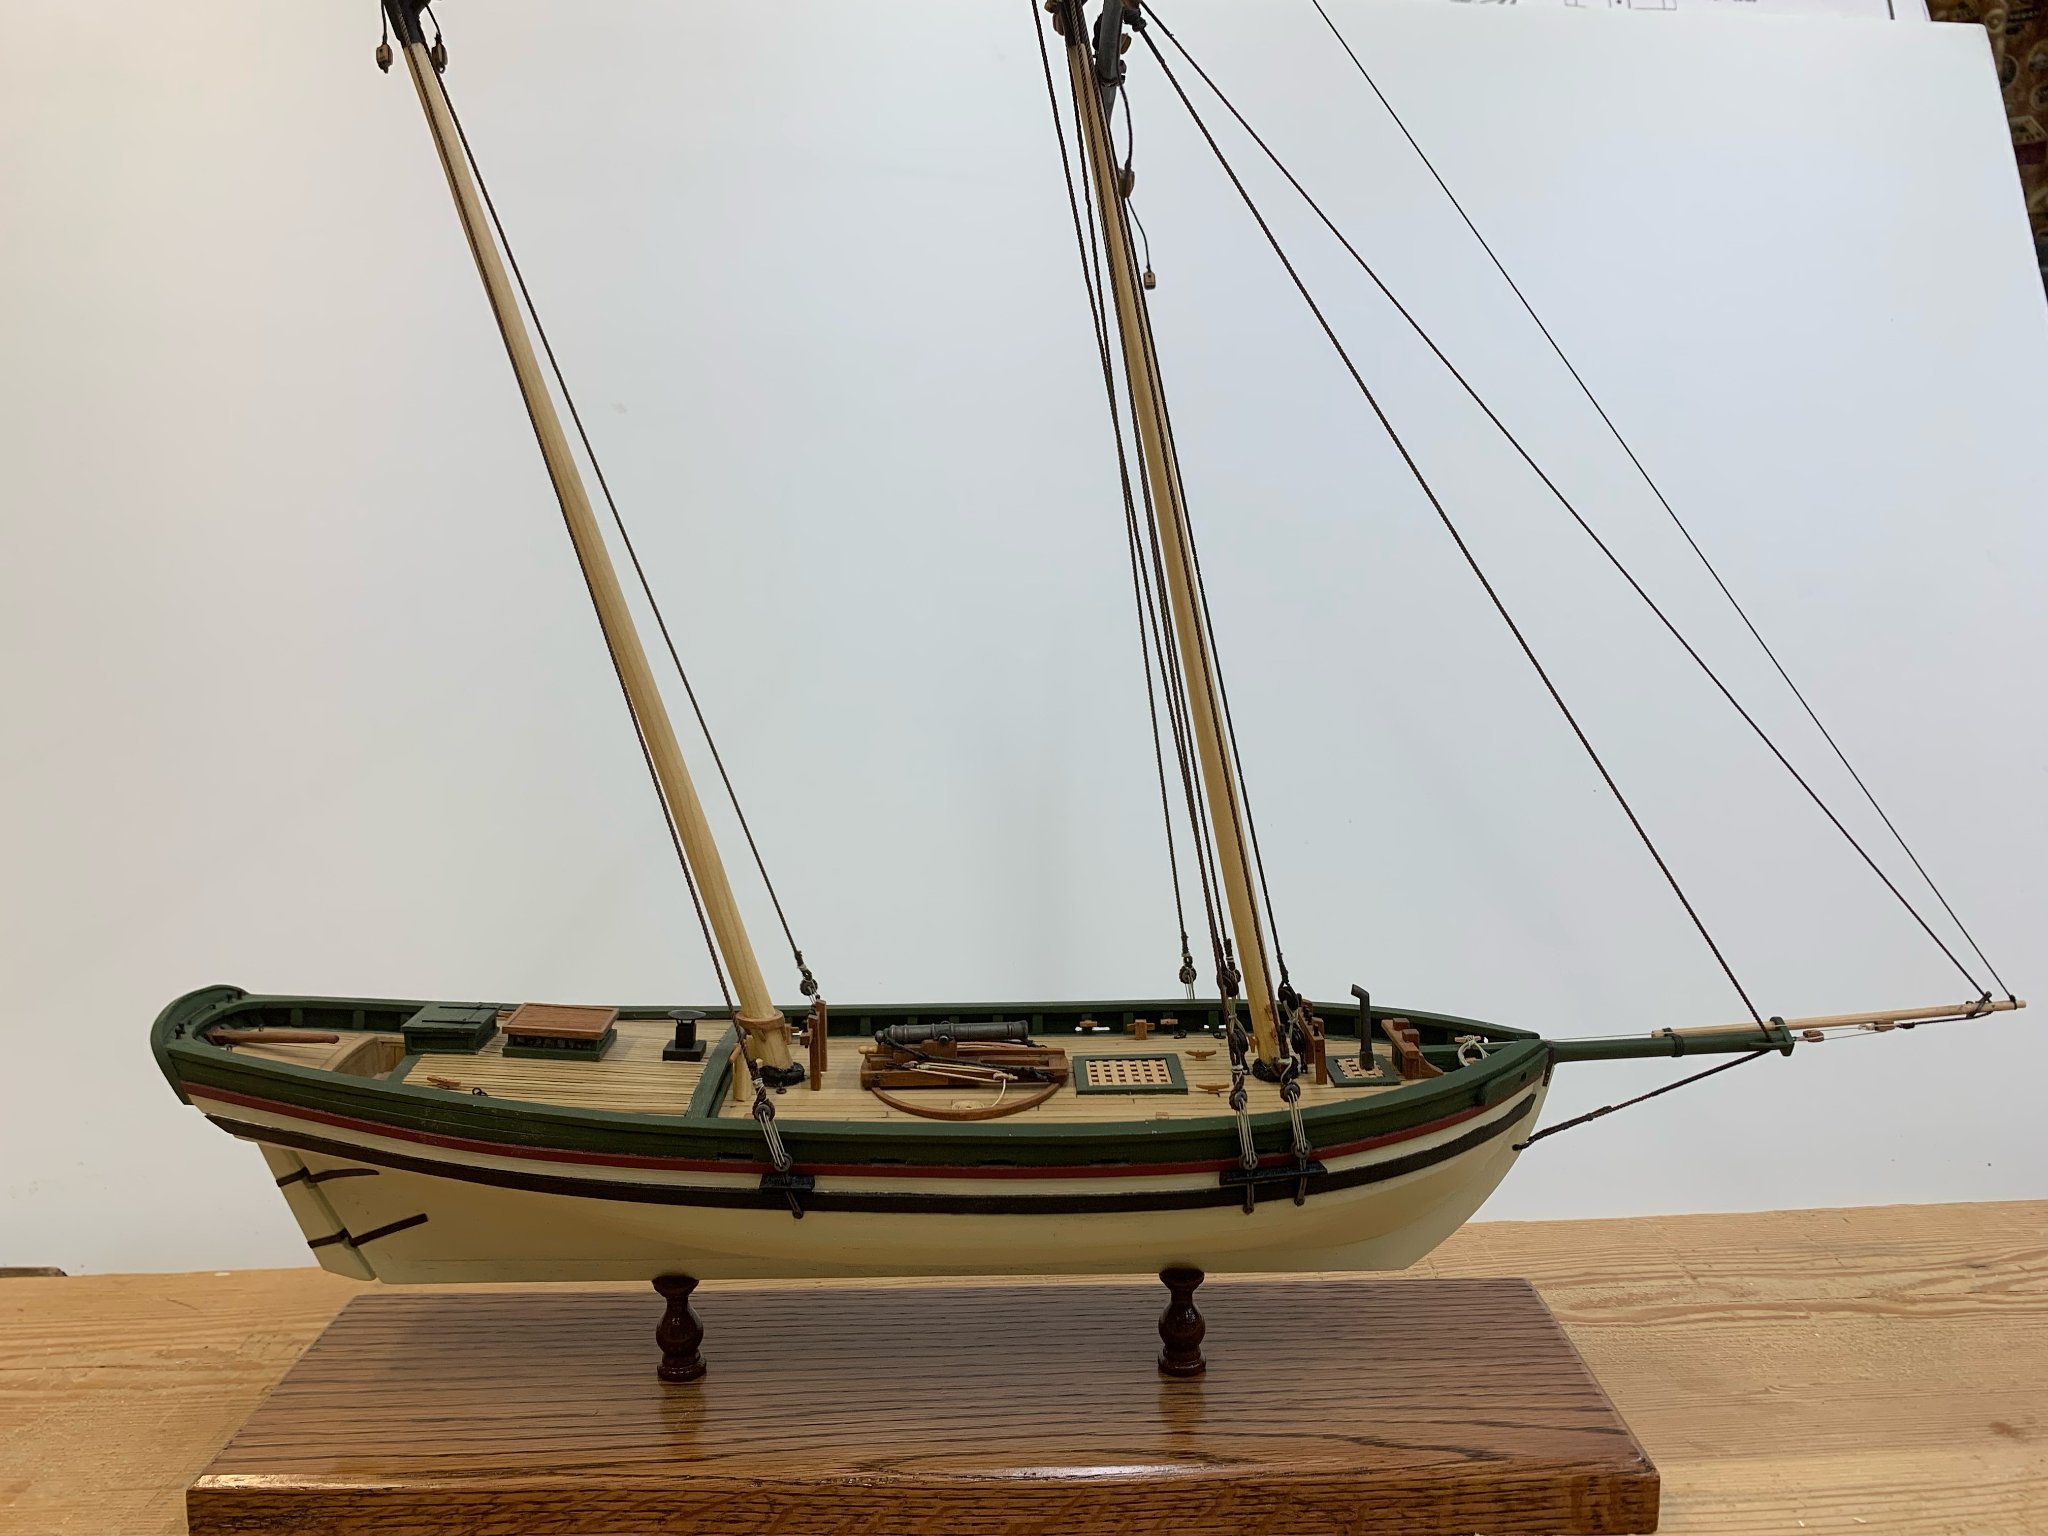
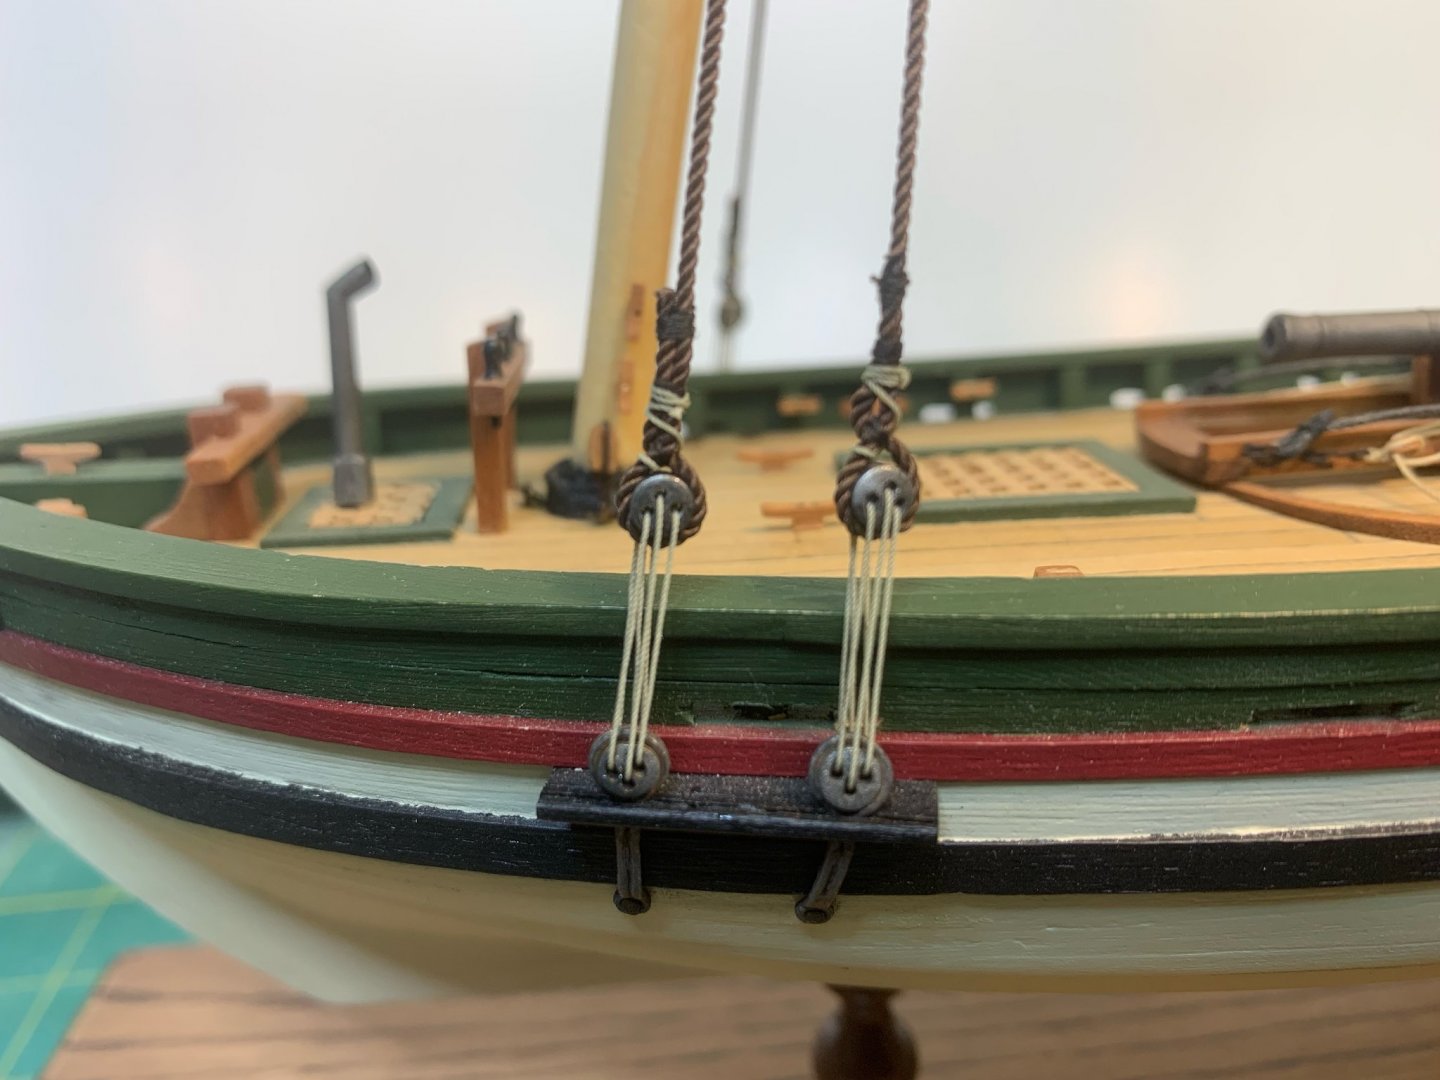
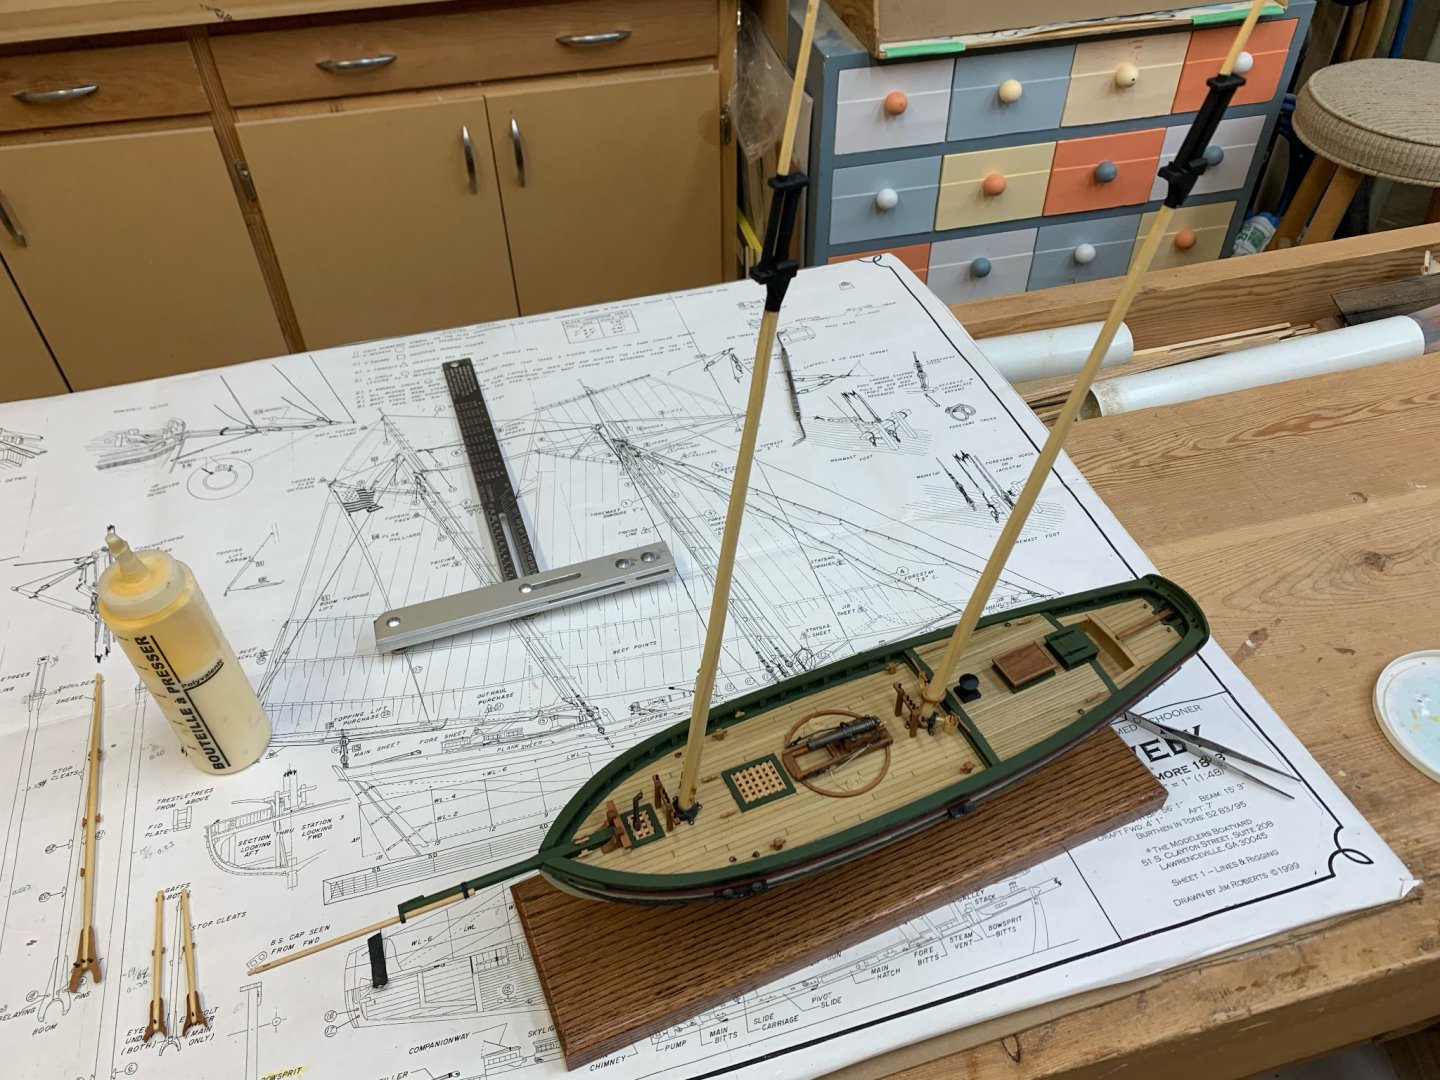
Thank you, Phil. I've just had a look at your build and it is impressive. I will go back and read it in more detail. There is a lot of things I would do differently after seeing yours. Its all about learning from the building process of others and myself with each model being better than the previous. As for this build, the model is 1/48 scale, the hull is 15 inches and the beam is 4 inches. The dimensions on the plans are length BP: 56' 1" and beam 15' 3". The model is not one of an actual ship but is a representation of a small private armed schooner typical of the War of 1812 period. I hope this is helpful. Jeff
-
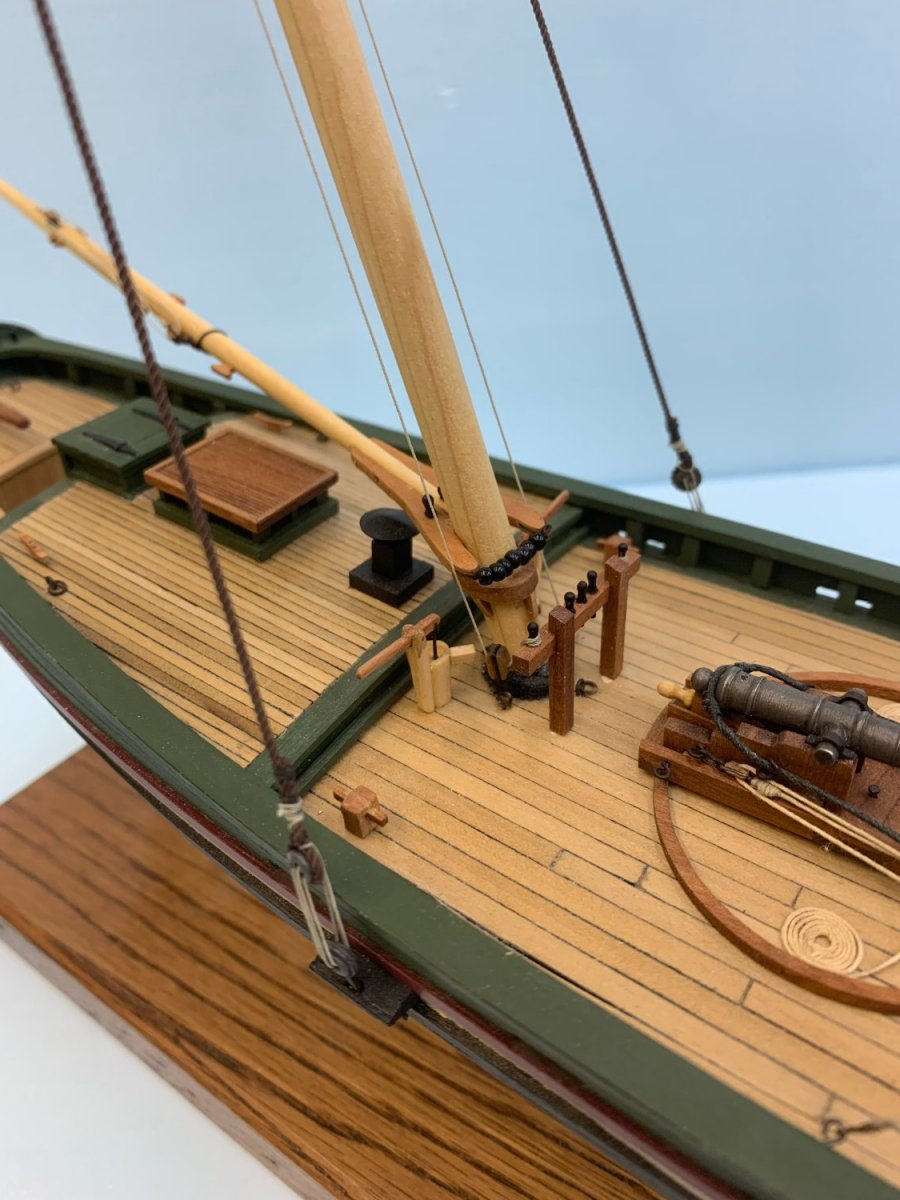
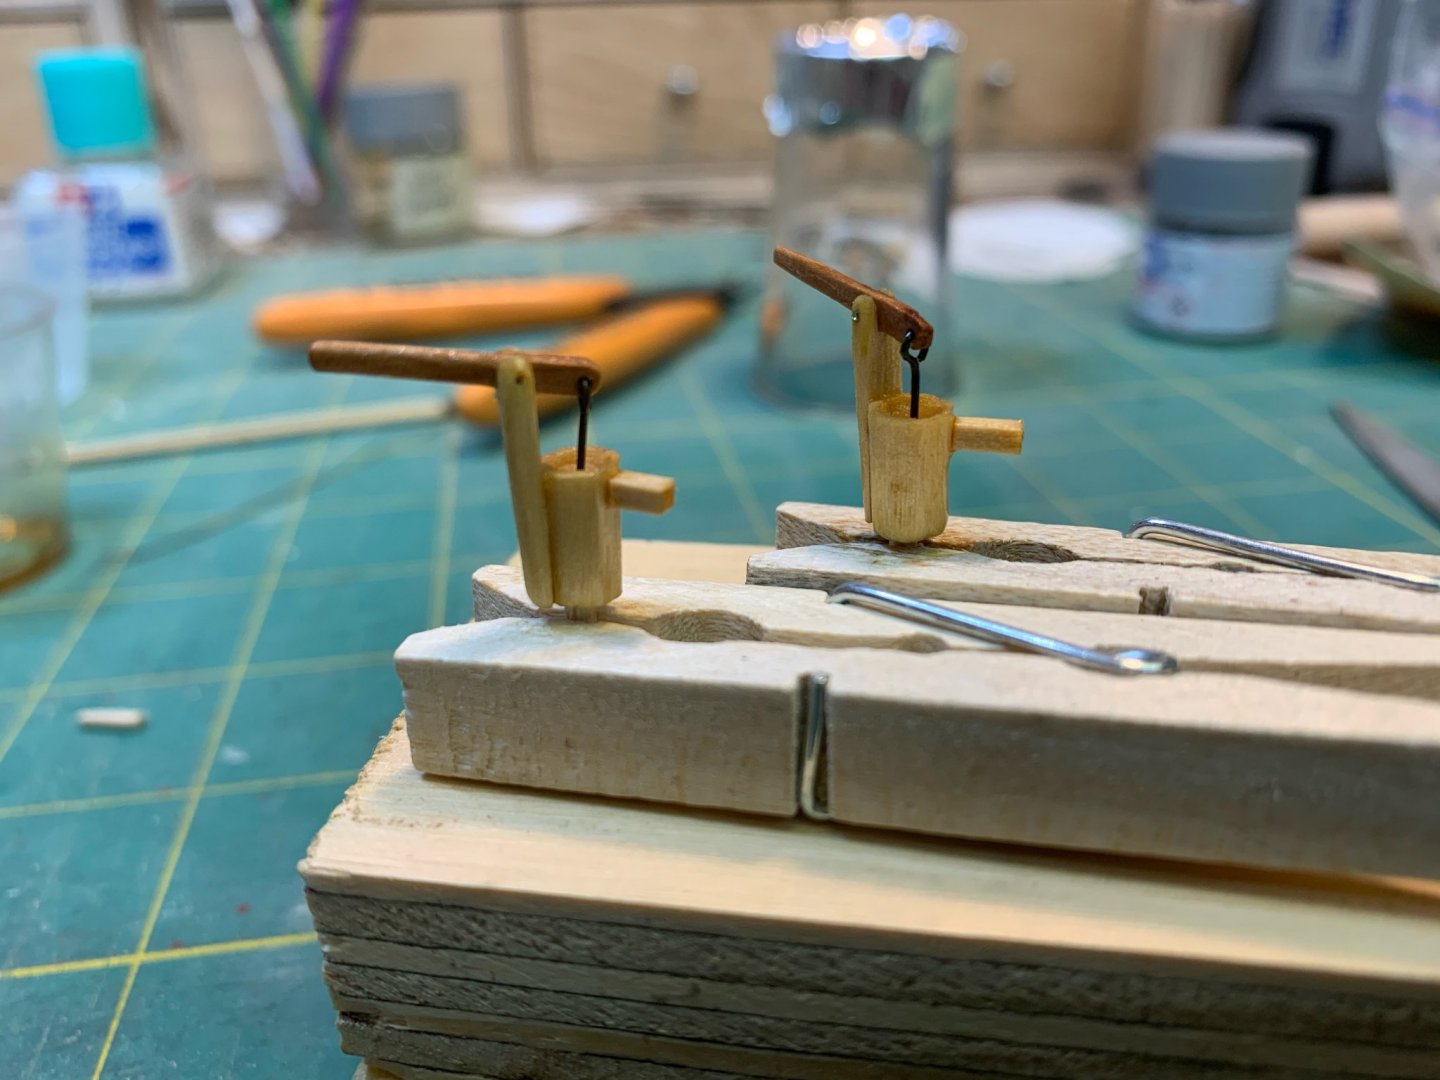
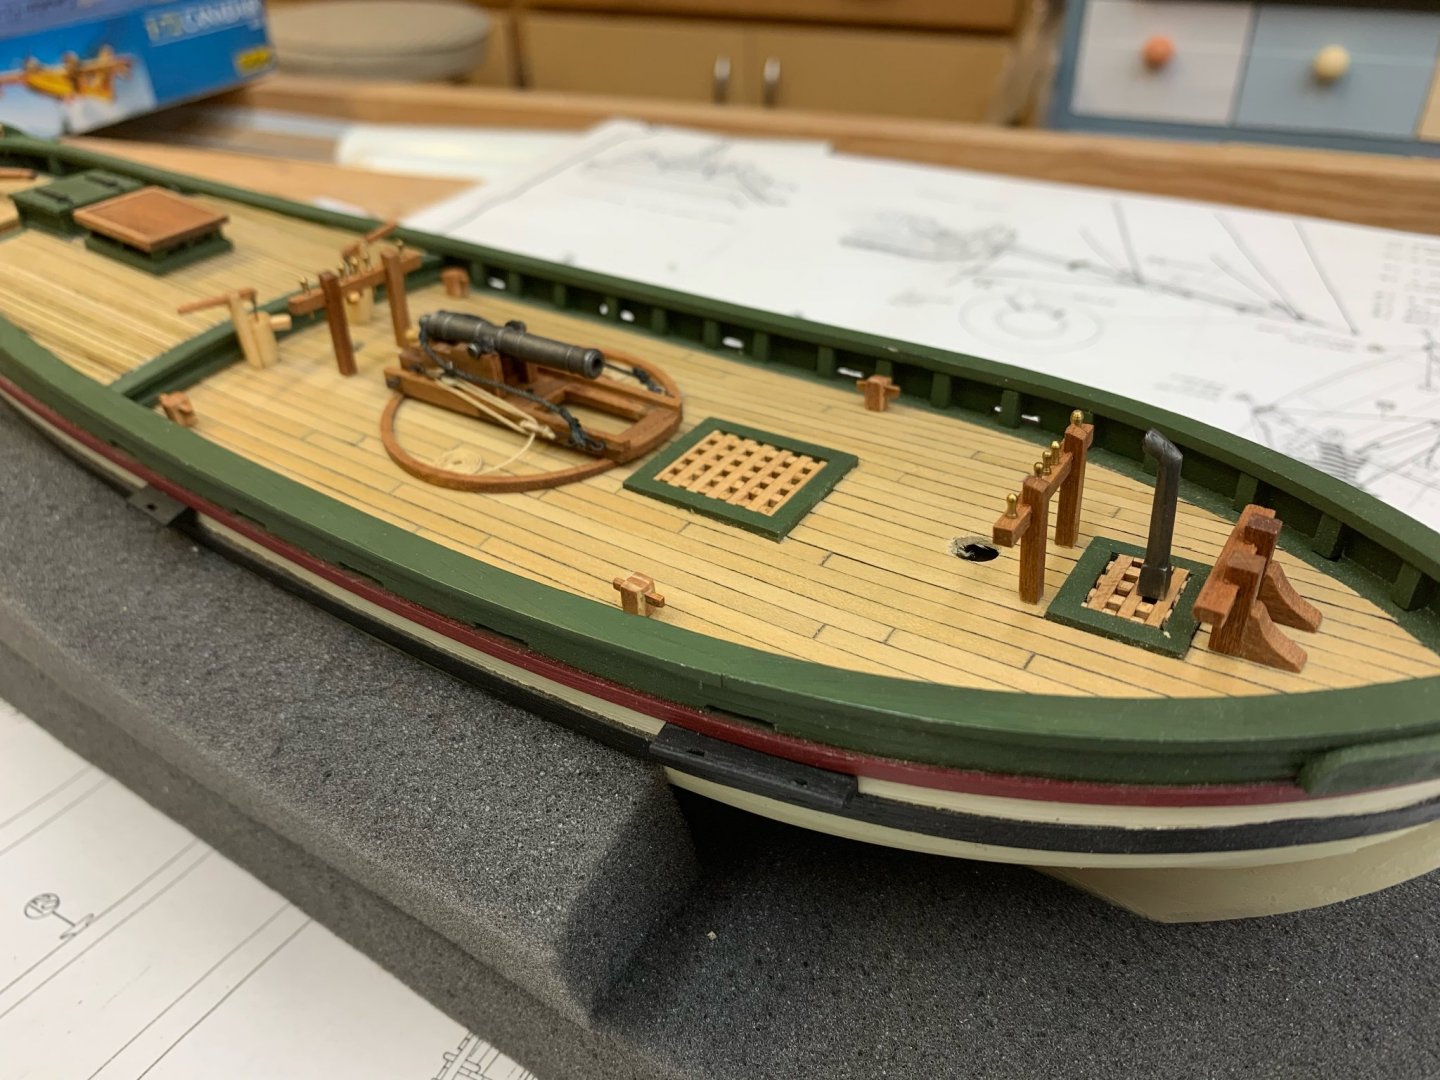
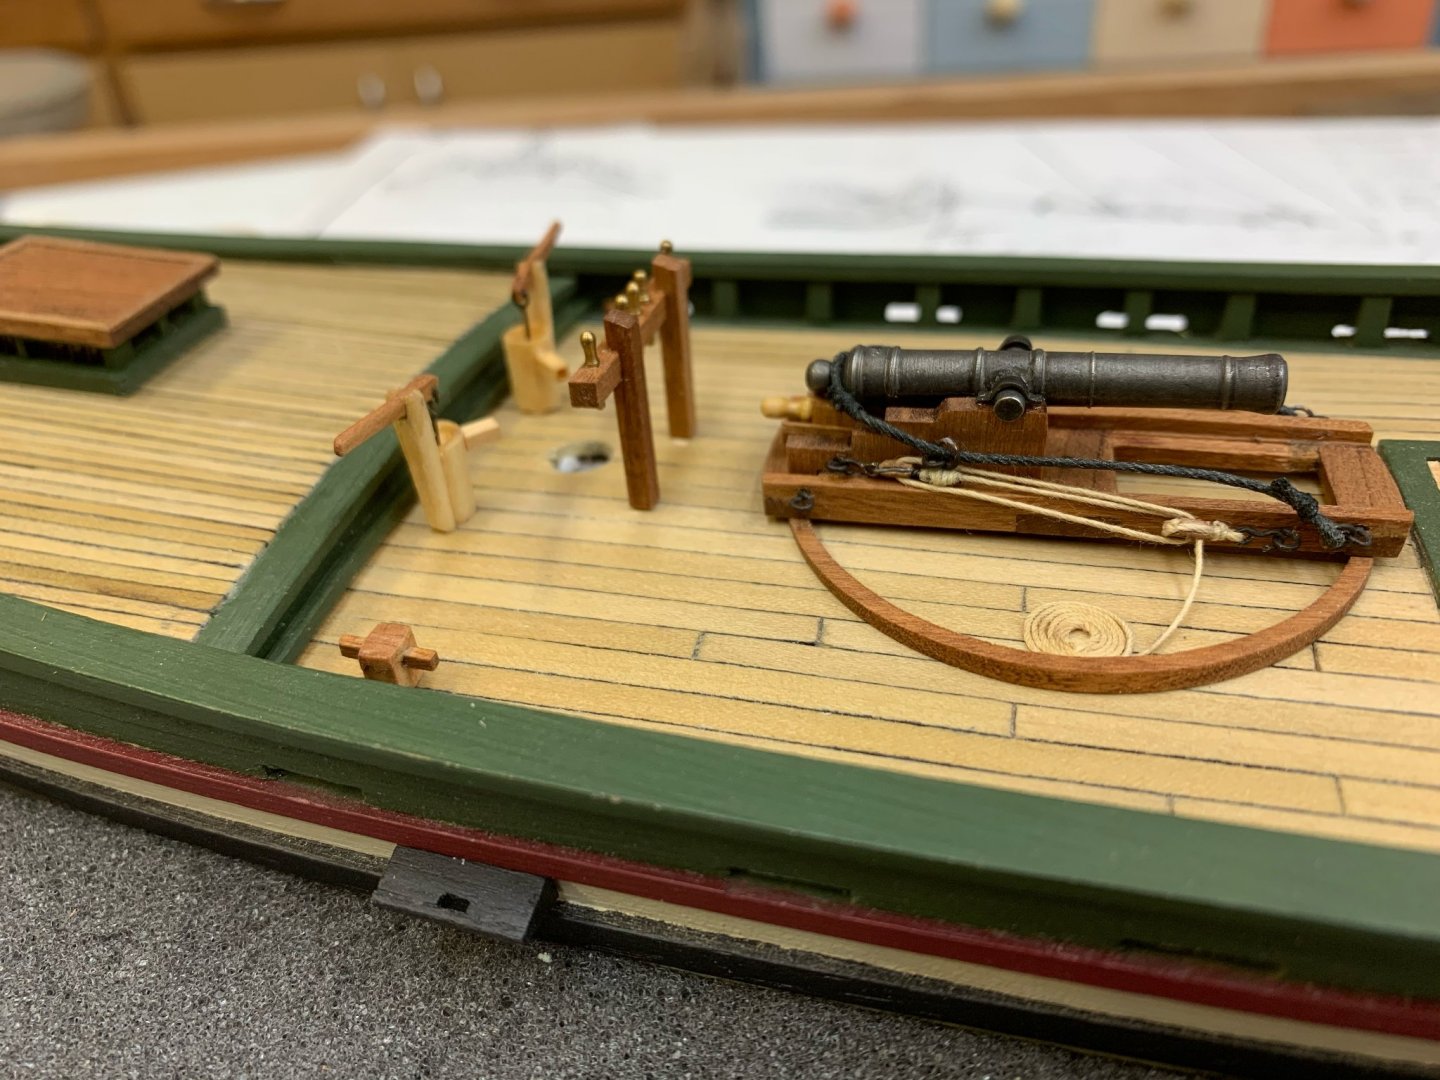
It's been a while since I posted an update. I have made some progress. I scratchbuilt the pumps. They may not be entirely accurate but they are a lot better than those supplied in the kit. I have also completed the deck fixtures.
- 42 replies
-
- 3
-
-
- lively of baltimore
- lumberyard
- (and 2 more)
-
Just read through your build, Vane. This is coming along good. It looks like a great kit.