

abelson
-
Posts
425 -
Joined
-
Last visited
Content Type
Profiles
Forums
Gallery
Events
Posts posted by abelson
-
-
My approach was to cut the joggle in a plank, trace the shape onto the margin plank, notch out the shape with an x-acto knife, and file the notch to get a relatively clean edge. I used the first joggled plank as a template for planks 6, 7 and 8. Thereafter, the diagonal part of each joggle gets longer as you work aft along the margin plank, so each joggle will be different. I rather enjoyed this part of the build. I think once you get into it you'll enjoy it too.
- WalrusGuy and Overworked724
-
 2
2
-
-
I had a similar problem. For me, the simplest solution was to fill it and paint it black. Then it's out of sight, out of mind. I have not regretted it. Black paint covers a multitude of sins. On the other hand, it does covers a lot of detail.
-
-
-
-
-
32 minutes ago, NovaStorm said:
Wow great pics just love what you've done. So it is almost good in a way, you found and were able to enlarge the holes early (ier)
Cheers, Robin ~
Thanks. It's funny how things somehow seem to work out in the end.
-
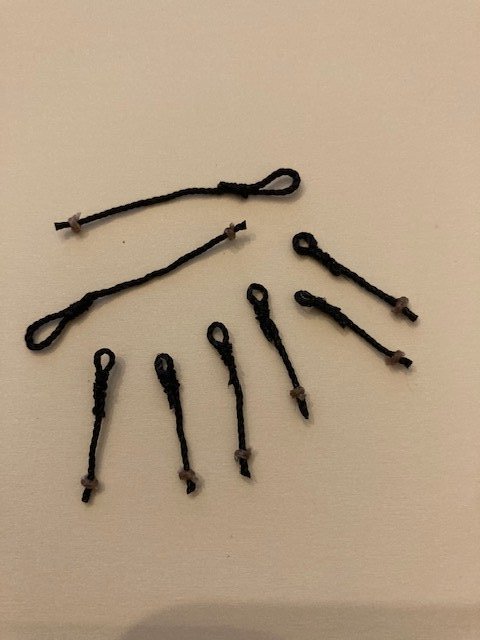
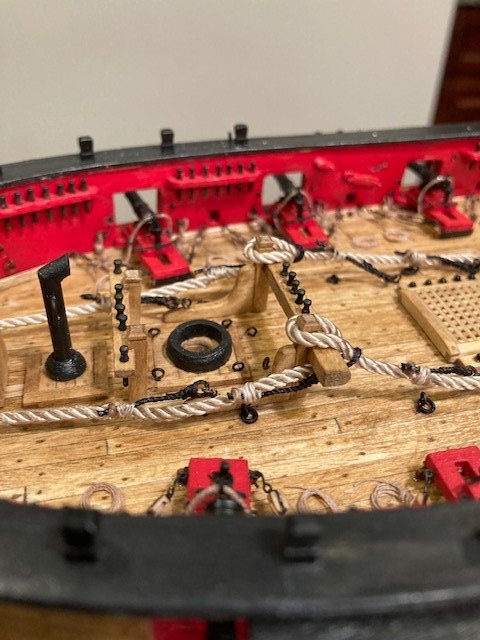
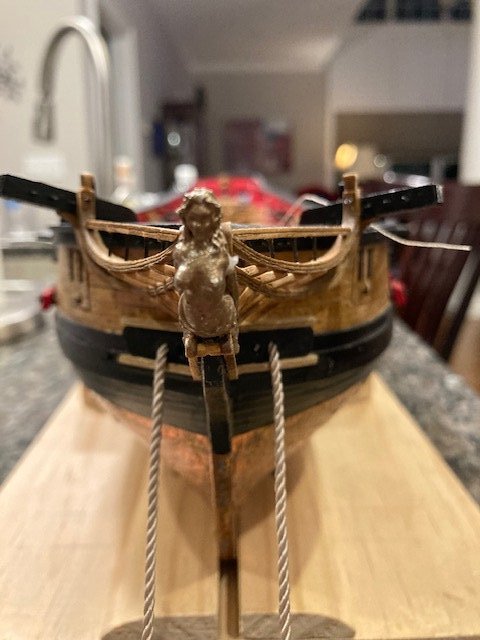
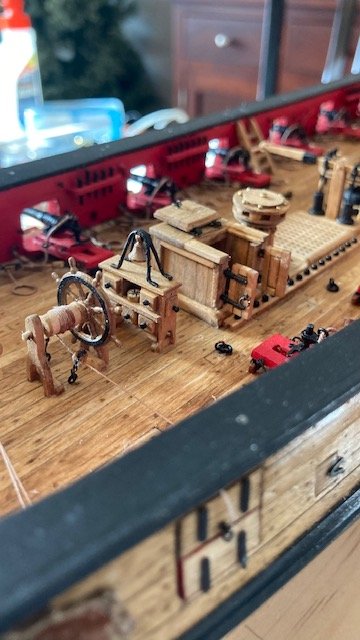
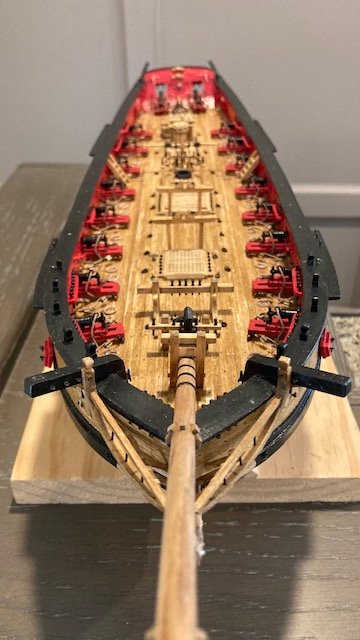
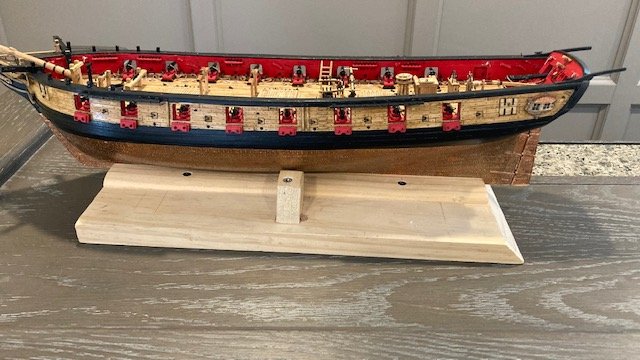
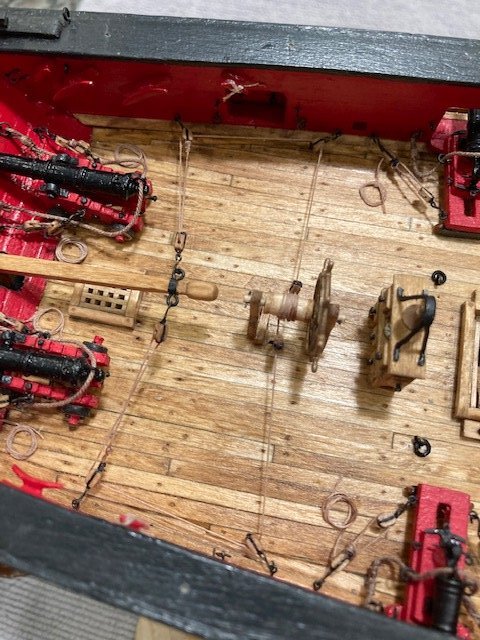
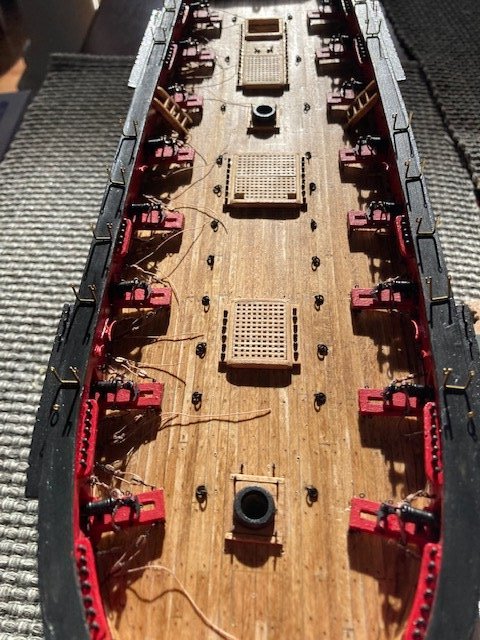
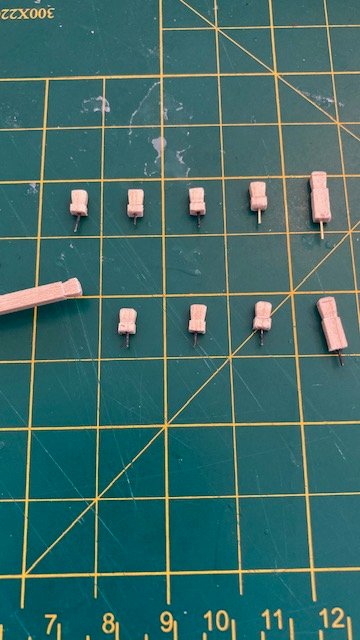
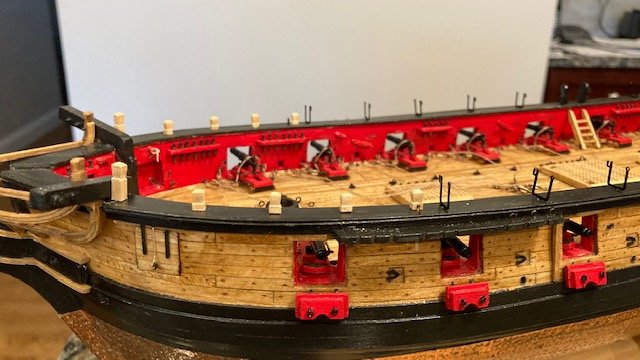
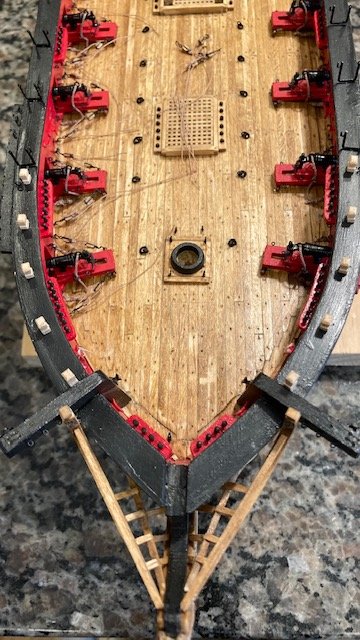
Before embarking on making the longboat, I decided to run the anchor cable and make and install the stoppers ahead of time before all the hammock cranes and rigging are in the way. I had seen the stoppers on some other build logs, i.e., Dubz, Gahm, and JesseLee, and liked the added detail of them. I understand stoppers were used to prevent an anchor from running away if it somehow breaks loose. They are attached to iron rings on the deck (installed in my last post) then secured to the anchor cable. There is no discussion on anchor stoppers in the instruction manual. I have some photos from Dubz’ build log but no description of exactly how the stoppers were made So, I decided to make them from .028” black line. I looped the stopper line around a toothpick and held it in-place with tweezers. I applied CA to stiffen the loop and then seized the line with a few wraps of .008” black line. I cut the line about ¾” long (judging from Dubz’ photos). I made six (6) stoppers. I applied CA to stiffen the line. There are also two other stoppers in Dubz photo that are not attached to iron rings. These have larger loops and appear to be longer. I made them from .028” black line and cut them 1.5” long. Note: I ended up cutting these shorter (1”). The stoppers have a knot at the end, which I made from .018” tan line. The cable is .070” manila hemp supplied with the kit.

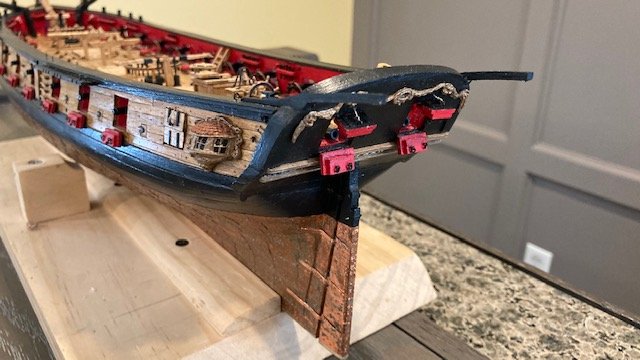
I wanted to run the cable completely though the hawes hole. I discovered the diameter of the hawes hole that I had previously drilled wouldn’t accommodate the .070” cable (shame on me). So, I had to ream it. In so doing, I damaged the hawes hole guides, and had to replace them. I also damaged the layer of wood for the hawse holes on the port side and had to repair that too. I The guides were made from 1/16” basswood sheet. I didn’t give much attention to these the first go around, so I thought I would add some photos this time. In hindsight, I should have left well enough alone. The moral of the story is, drill the hawes hole large enough to accommodate the cable. Anyway, I’m pleased with the new version of the guides.
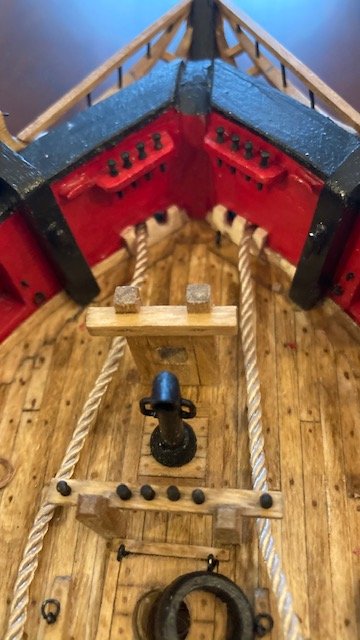
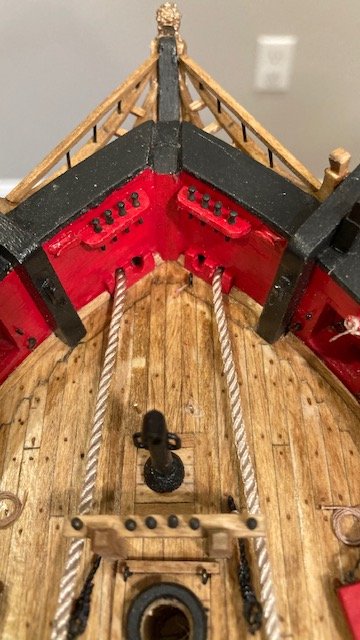
I laid out the cables on the deck. Note: It's important to drill the holes for inserting the cable in the grating deep enough to accommodate enough cable to adjust the cable length as necessary. I attached the stoppers to the iron rings. I attached the stoppers to the cable by tying a length of .008” to each stopper at the knot and applying a dab of CA. I cut off one end the line at the stopper and cut off the other end of the line long enough to be wrapped around the cable and stopper 4 or 5 times. I used a sewing needle to aid in seizing the line. The end of the line was threaded through the cable and cut off. I’m glad I added the stoppers. Now, its on to the longboat.
-
12 hours ago, Overworked724 said:
Steve, I loved how you set up the pins for your fife. The template idea was brilliant! I'll use that! for future........awesome detail work.
Thanks for the compliment, Patrick.
-
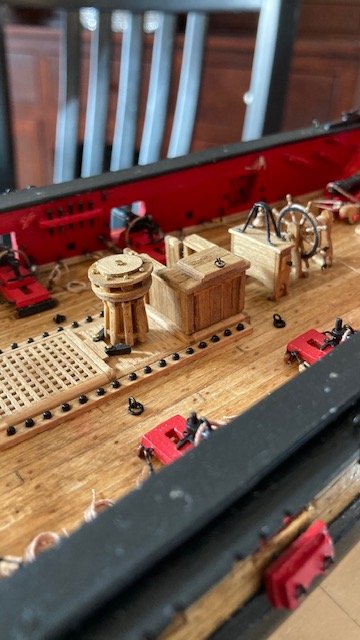
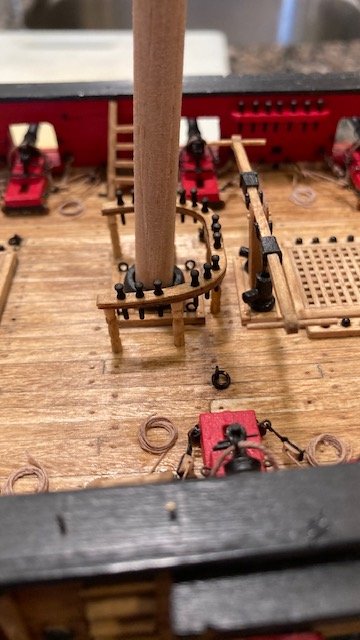
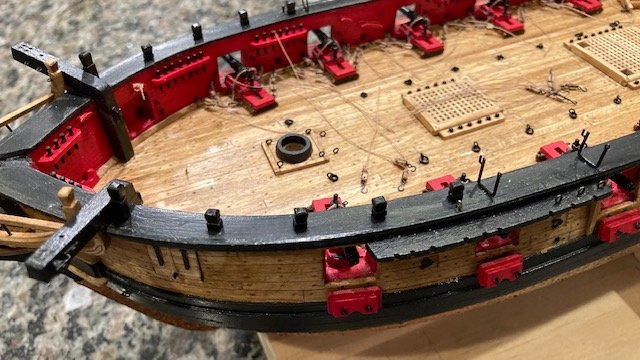
Happy New Year! Frist post of 2021. Completed the rope coils – not one of my favorite tasks or best effort, for that matter. As I described in a prior post, the coils were made by wrapping .008” tan rope around a 3/16” dowel (see photo) 4 or 5 times and applying some watered down carpenters glue to it. When dry, the coil is slid off the dowel, flattened, and the loose ends trimmed. The coils were glued to the deck with dab of white glue.
.jpg.4e50b4f256c2c870afba7a8a814e77b7.jpg)
.jpg.77d23d0fc06f7923e093d4dd42bcdd99.jpg)
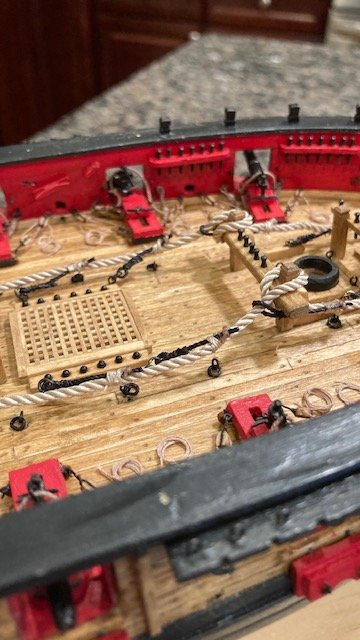
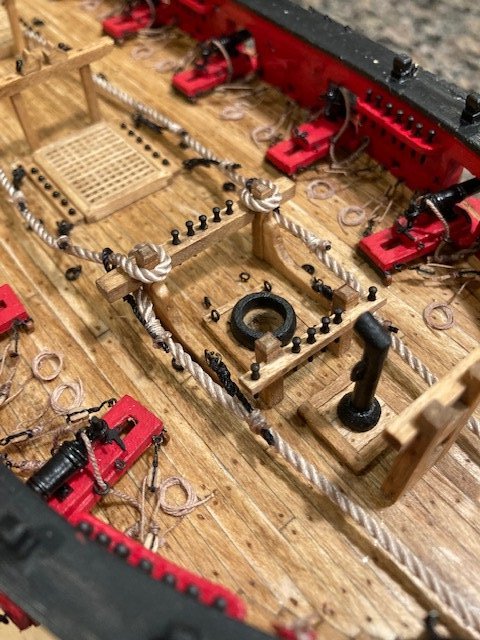
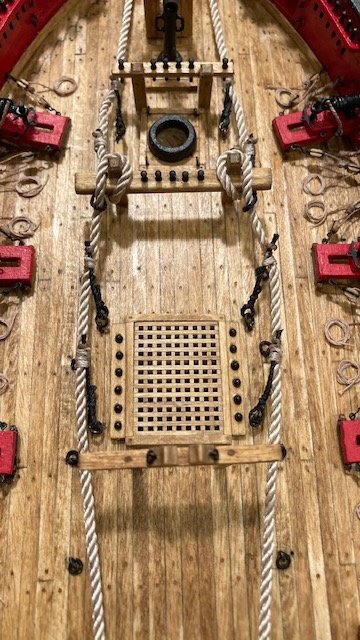
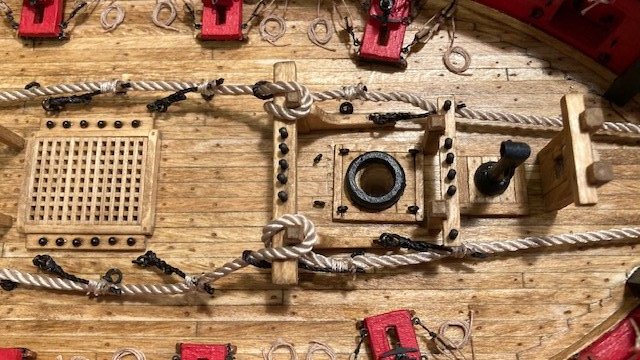
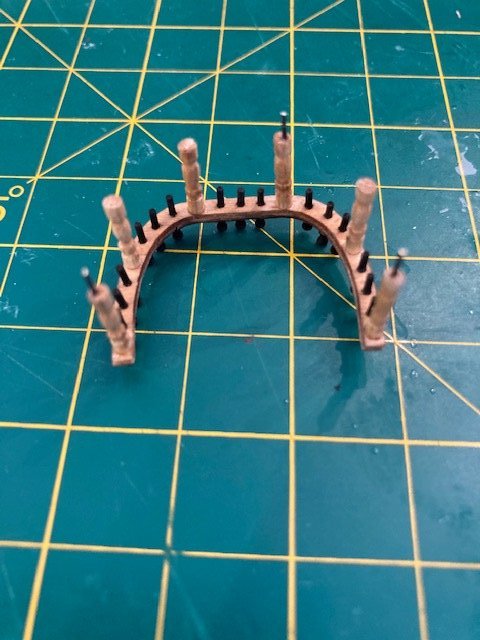
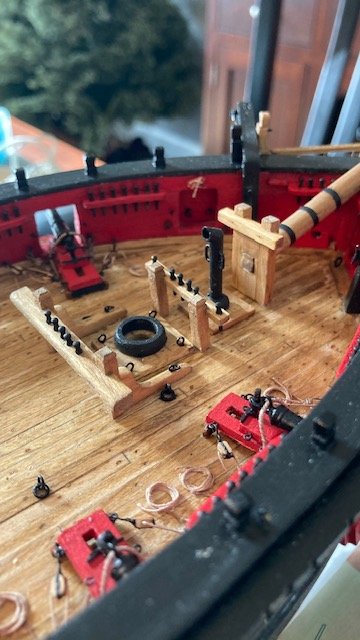
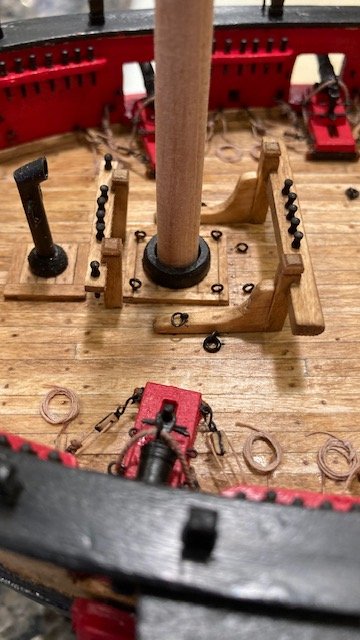
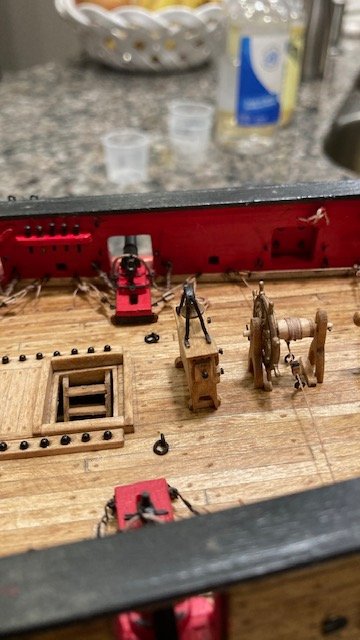
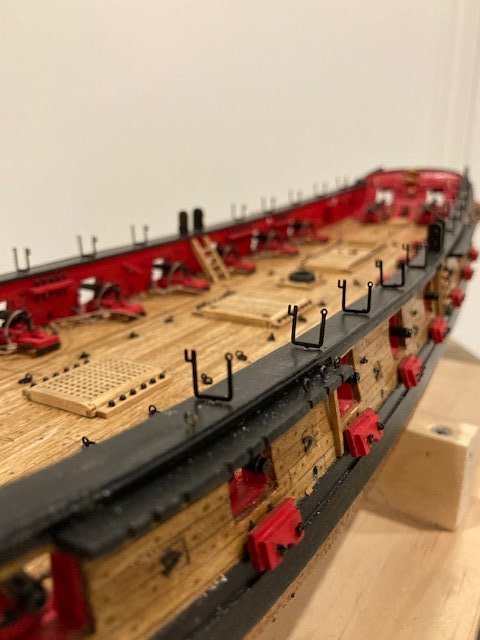
Moved on to permanently installing the deck fittings. I decided to pin the fife rail to the deck. I was hesitant to do this for fear of breaking the stanchions. I only did 3 pins – I didn’t want to press my luck. Alas, I was able to drill the stanchions and insert the pins. For drilling the holes in the deck for the pins, I cut out the plan view of the fife rail from Sheet 1 and transferred it to the deck. I positioned the fife rail on the plan, marked the pin locations, and drilled the holes.
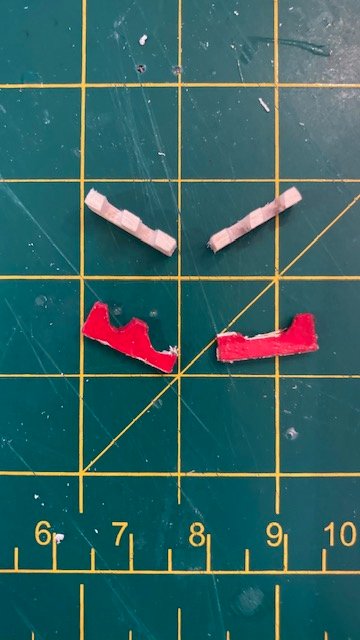
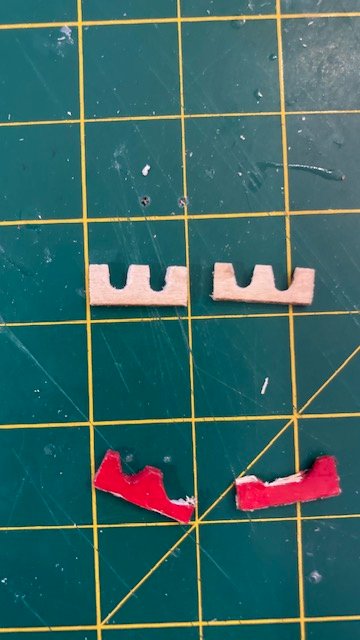
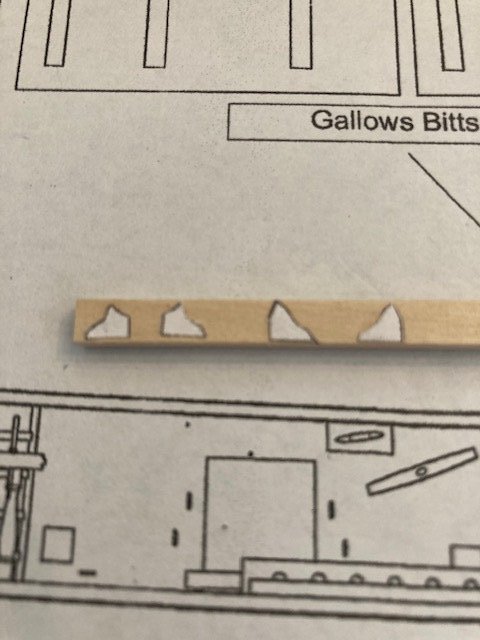
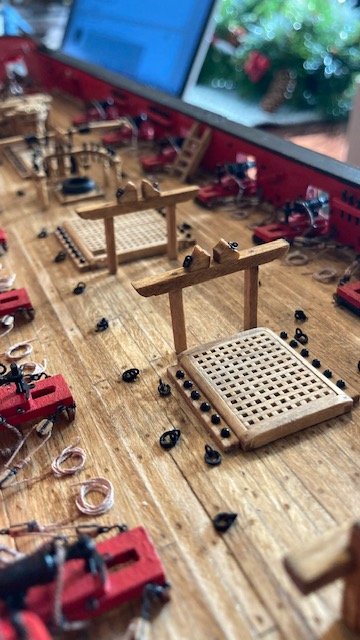
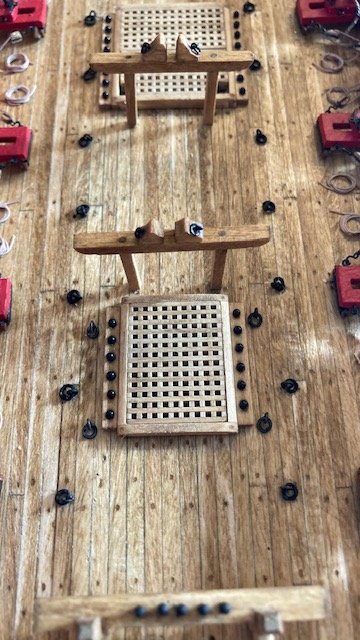
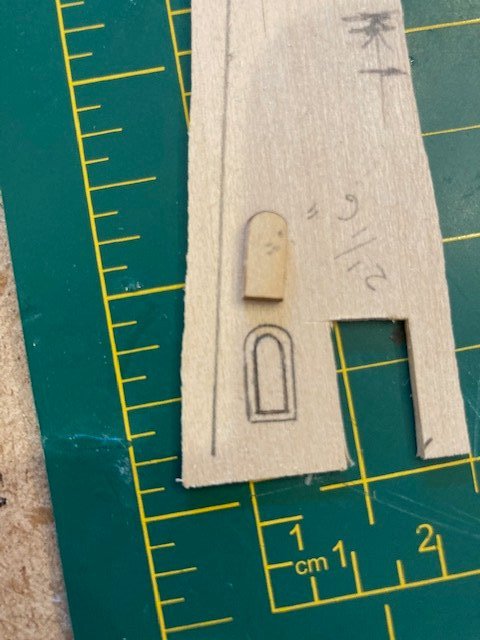
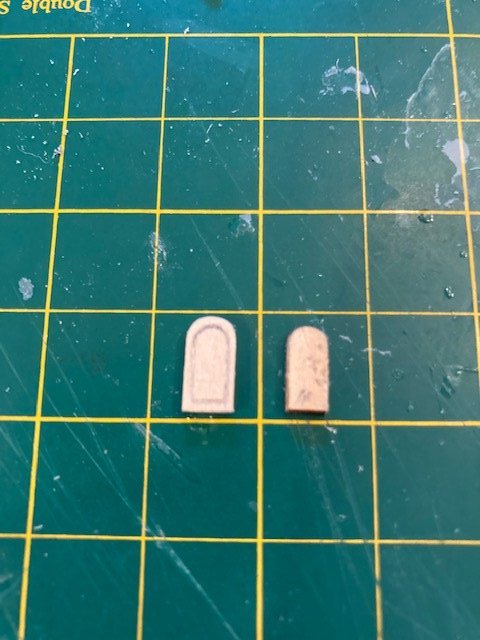
Next, I made the gallows bitts chocks, even though they will be mostly hidden. I haven’t seen much attention, if any, to these on other build logs. The aft-most gallows bitts chocks are different than the stern-most gallows bitts chocks. I cut out the chocks from the Plan Sheet 4 and glued them to a 1/8” x 1/8” boxwood strip. I then shape each chock by cutting, filing, and sanding to the profile line, and then removed the paper template. The chocks were stained Golden Oak and glued to the gallows bitts.
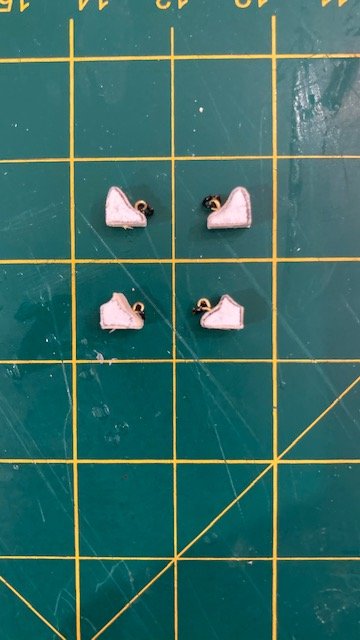
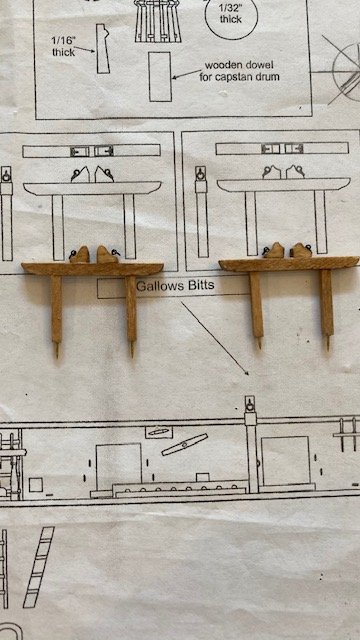
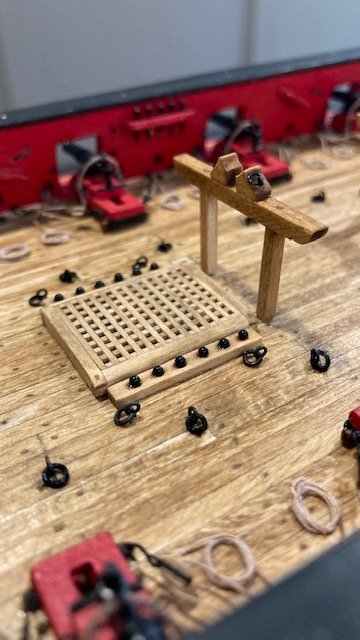
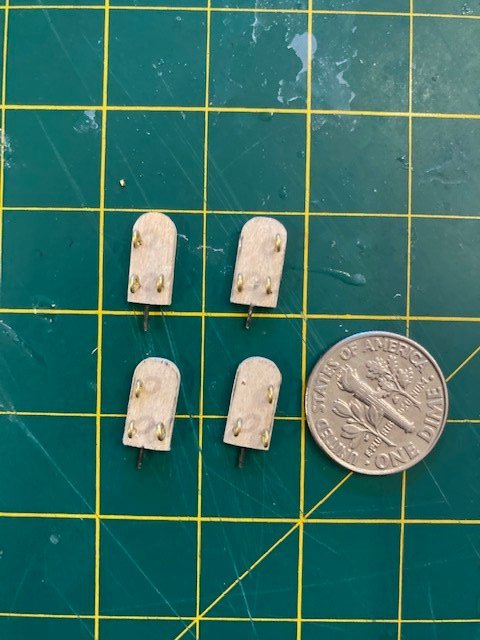
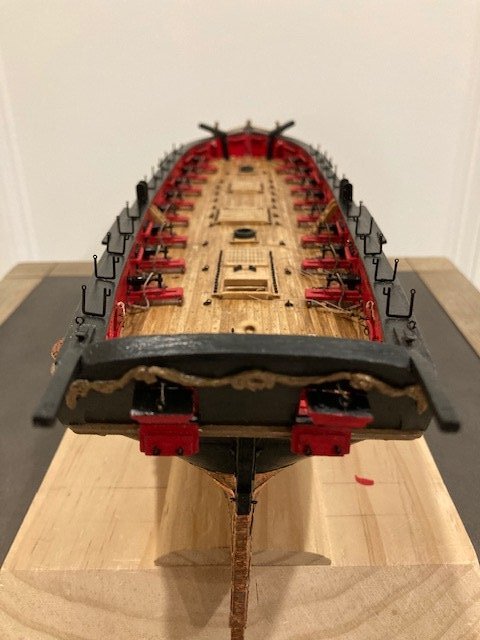
I added an eyebolt and split ring to each chock. The split rings will be used to lash the sweeps to the gallows bitts. A la Gahm’s, Dubz’, and JesseLee’s build logs, I added 2 eye bolts with split ring for the anchor cable stoppers on each side of the aft-most hatch and on each knee of the riding bitts. With that done, I decided to hold off on finishing the hammock cranes until I finish the long boat. This will afford more room to install and lash the long boat. I’ve added a bunch of photos. Next up, the longboat.
- NovaStorm, Overworked724, oneslim and 2 others
-
5
-
-
Been following your build lately. Your carronade rollers look nice. I admire your metal work. Patience is a virtue. I have found that jumping around from chapter to chapter breaks the monotony and is a good diversion. Delaying only puts off the inevitable, though.
-
-
Very innovative approach to making the carronade wheels and brackets.
-
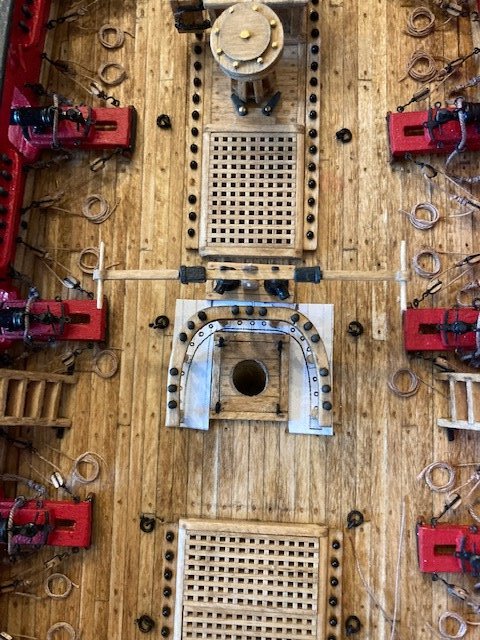
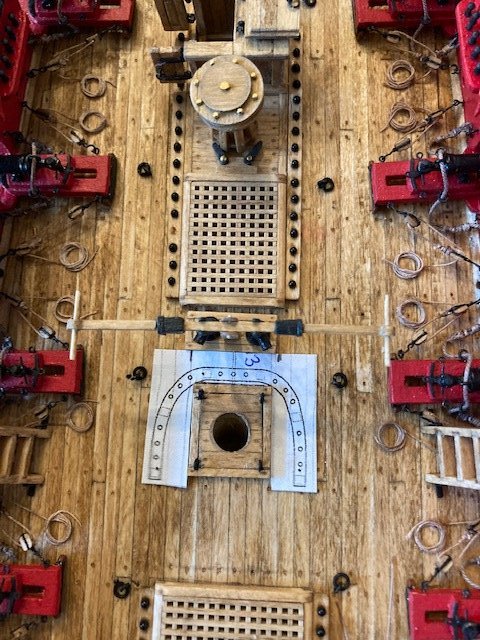
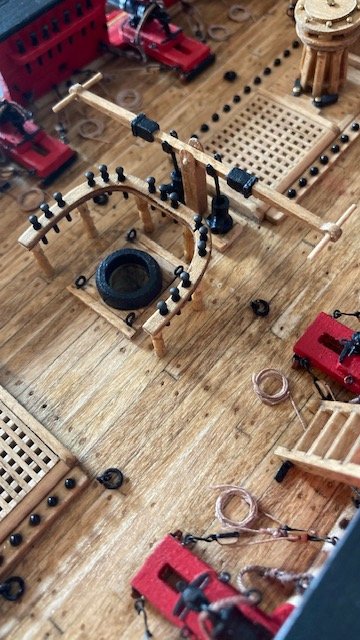
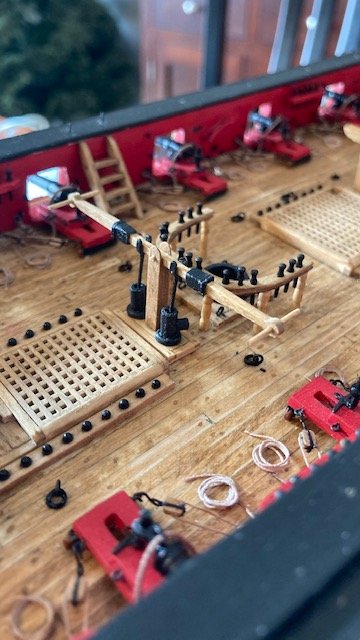
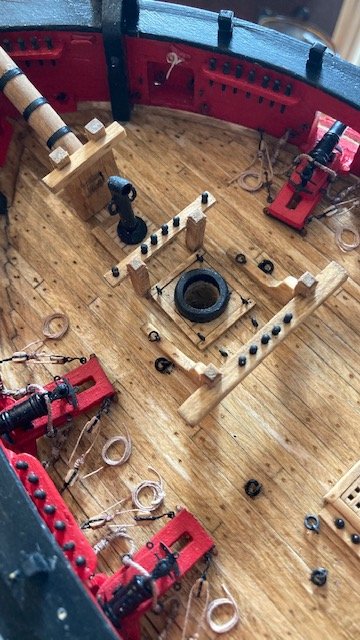
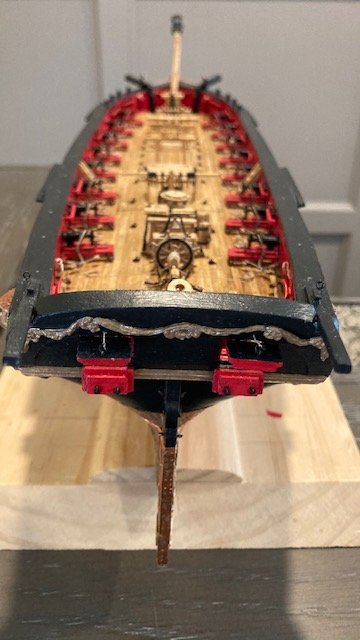
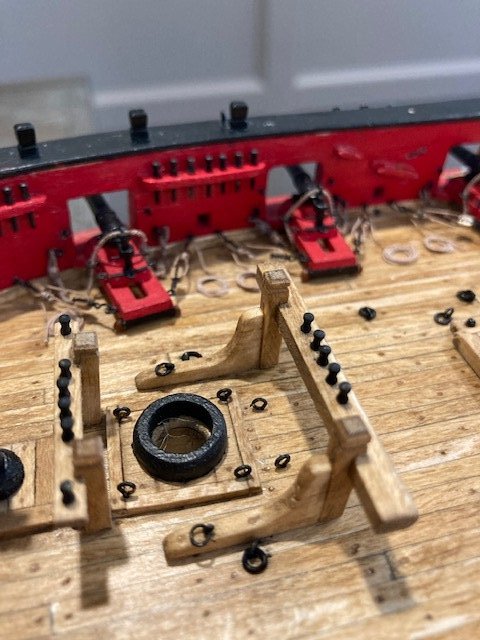
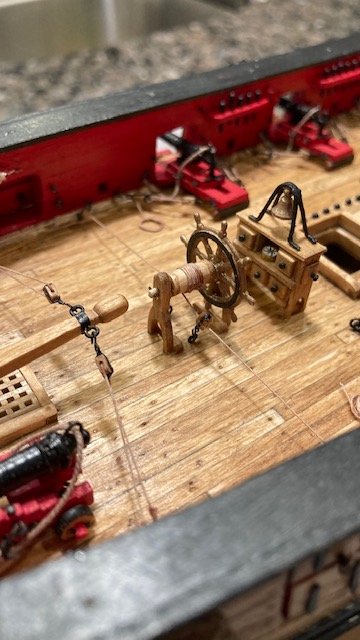
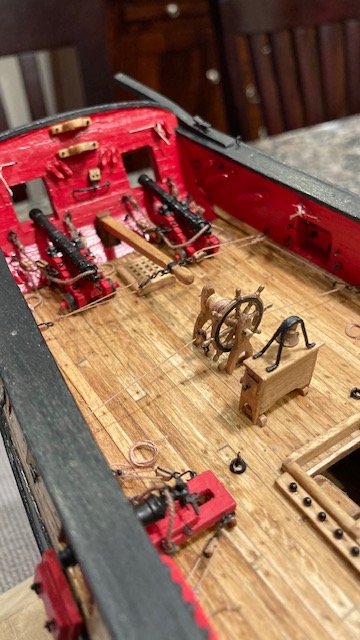
I finished the carronade lower tackles. I had mentioned that I didn’t like the look of the upper tackles because the blocks are too close together with the hooks stropped to the blocks and seizing. So, rather than do the tedious task of making up 64 blocks and tackles, I opted to omit the upper tackles. The loose ends of the lower tackles were glued to the deck and cut off. I made some simple rope coils for the long cannons and glued them to the deck before rigging the steering mechanism. The coils were made by wrapping .008” tan rope around a 3/16” dowel 4 or 5 times and applying some watered down carpenters glue to it. When dry, the coil was slipped off the dowel, flattened, and the loose ends trimmed.
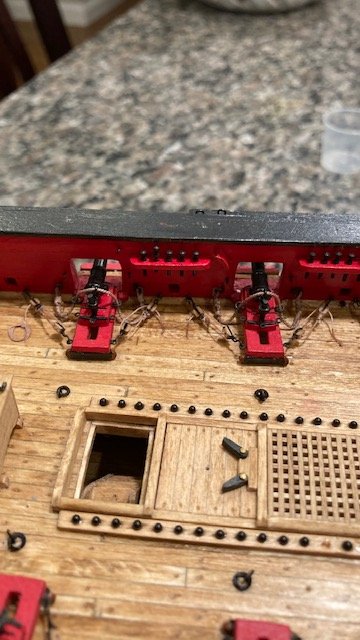
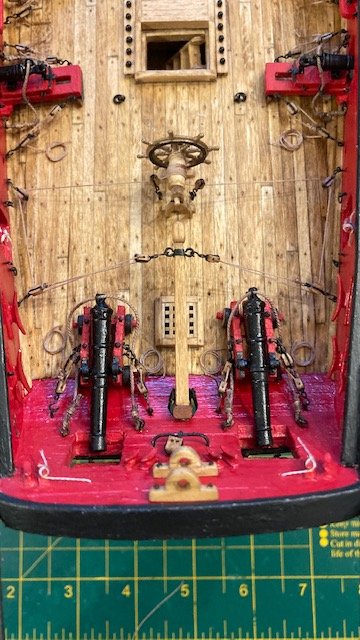
Rigging the steering mechanism: Like some other build logs, I added a block hooked to an eye bolt on each side at the base of the ship’s wheel to keep the line lower to the deck. The rigging was easier than I expected. I stropped hooks to 3/32” blocks. I rigged the steering mechanism as per the instructions except for the blocks at the base of the ship's wheel. I seized a “generous length” .008” tan line to a block hooked to an eye bolt along the port side waterway aft of the last gun port. I reeved the line through a block hooked to a ring on the tiller and then down to the originating block. From there I reeved the line through the blocks and around the drum. I applied a little CA to the blocks to keep the line in tension. I wrapped the line around the drum six (6) times. I applied CA to each wrap to secure the line and make it easier to wrap. I completed the rigging by reeving the line in the reserve order.
Next up, complete the rope coils, permanently attach the deck fittings, and finish the hammock cranes. Merry Christmas to all!
- NovaStorm, Overworked724 and WalrusGuy
-
3
-
-
-
-
-
7 hours ago, Overworked724 said:
Absolutely outstanding!!!
Thanks for the encouragement.
-
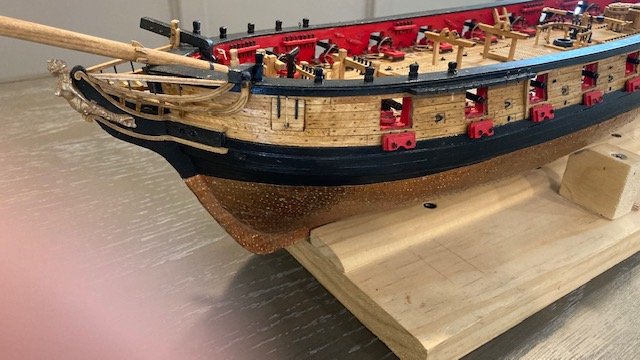
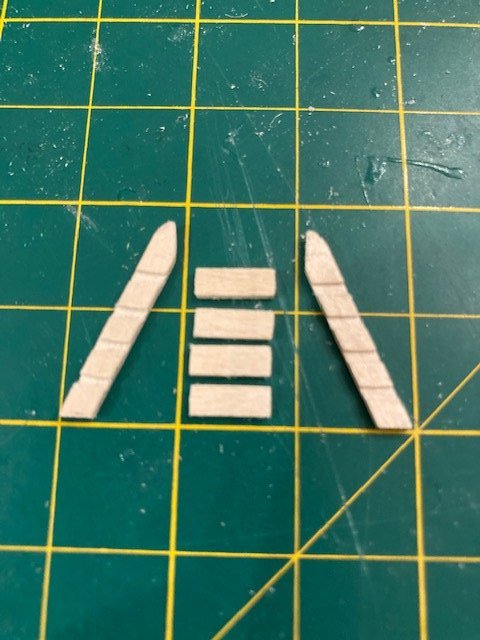
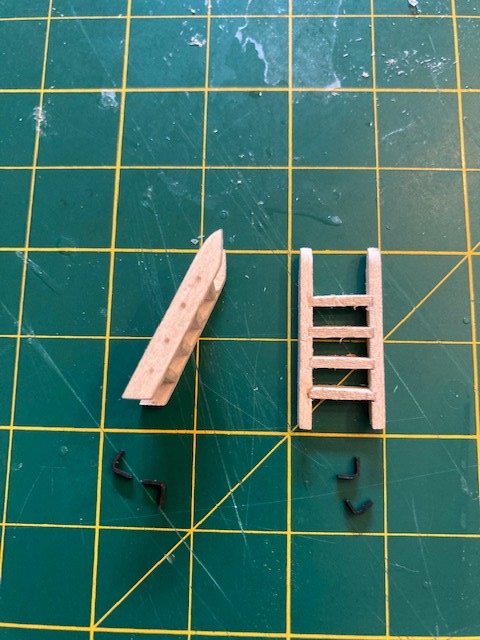
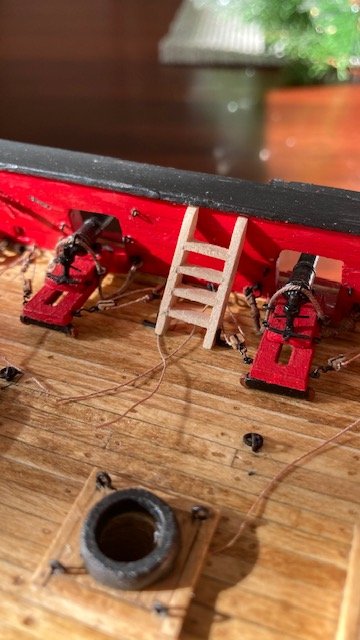
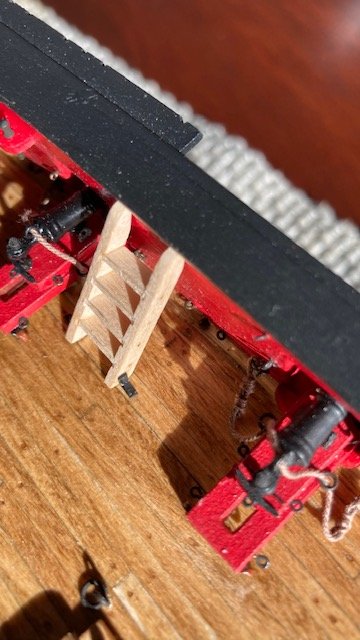
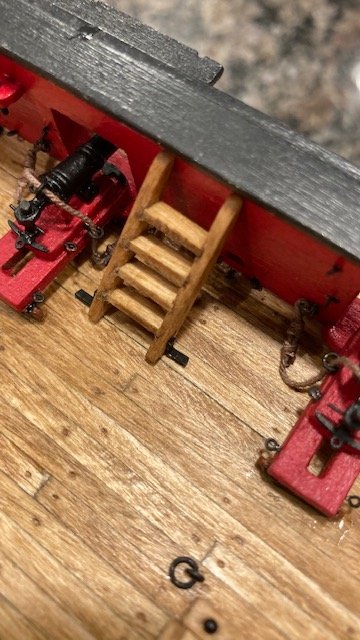
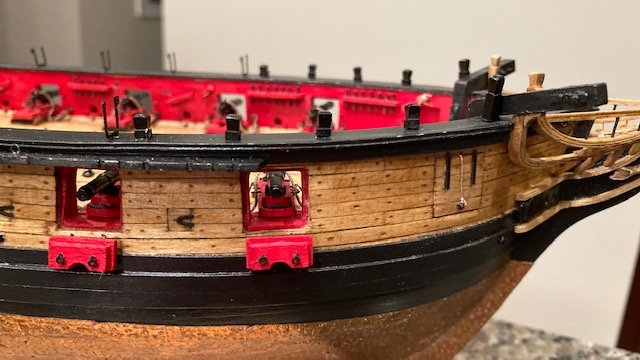
I had to order more .008” rope from Syren to complete the lower carronade tackles. While awaiting delivery of my order, I decided to make the midship boarding ladders. I wanted to beef up the ladders so I made the side rails and steps from a 3/32”x 1/8” basswood strip. I used the detail on Sheet 4 as a guide for marking the steps. Using a knife, I made a vertical cut along each step line. Turning the strip on its side, I made a cut between the two vertical cuts along the midpoint of the strip. I removed the notch with a small square file and then evened the grooves (notches) using a flat file that has teeth on the edges. The steps were then glued in place. I filed the ladder to square up all the edges and rounded the top of the side rails. I added some brass angles (painted black) to the side rails to secure the ladders to the deck. The carronade tackles interfere with the ladders or vice versa. This is not obvious from the plans. The ladders were stained Golden Oak, and will be glued in-place later.

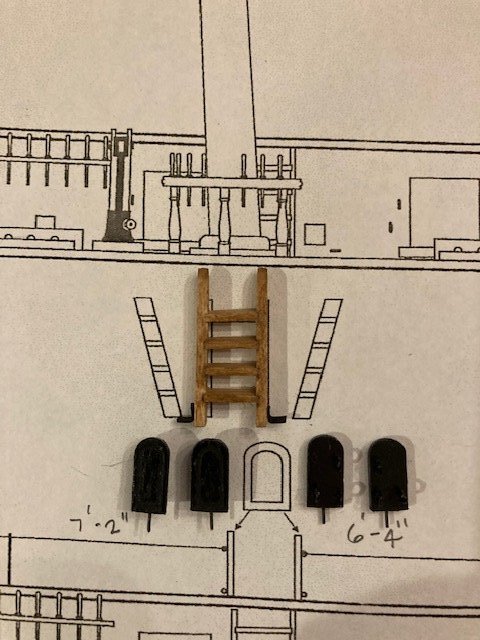
I jumped ahead to Chapter 14 and laid out the photo etched hammock cranes. Using Plan Sheet 4 as a guide, I determined the locations of the boarding panels and marked them on the cap rail. I scaled the distance between the hammock cranes from Plan Sheet 4 and marked them on the cap rail. [Note: Do not use Plan Sheet 5 to locate the hammock cranes as there is a discrepancy between Sheet 4 and Sheet 5 - the spacing of the fore most hammock cranes on Sheet 5 does not agree with Sheet 4.] I drilled a hole mid rail at each hammock crane location. I cut the photo etched hammock cranes free leaving the bottom prong which is inserted into the pre-drilled hole on top of the cap rail. I also pre-drilled holes in the top of the cap rail for the eyebolts that the hammock crane rigging line will be seized to. I test fit, removed, and painted the hammock cranes black. I’m holding off on installing the hammock cranes and boarding panels until I complete rigging the carronades and tiller steering mechanism and installing all of the deck fittings.
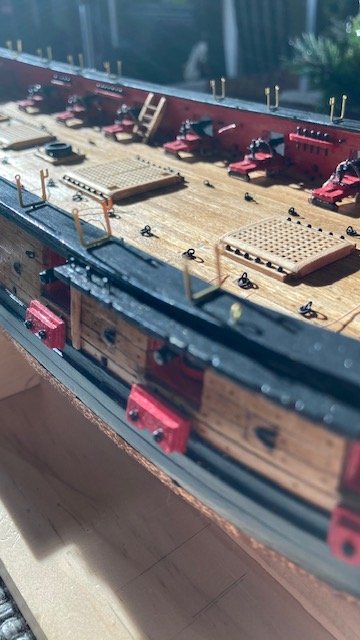
Next, I fabricated the boarding panels. The laser cut panels are 3/16” wide. Because my rail cap is just under 3/8” wide the laser cut panels look too small - I see, now, the importance of keeping the rail cap 3/16” wide. I decided to make the boarding panels slightly wider. I traced the outline of the laser cut panels onto a piece of 1/16” basswood. I cut along the outer edge of the pencil line. The basswood panels are slightly larger than the laser cut panels (see photo).
Next, I traced the profile of the molding around the boarding panel, scored the pencil line with my x-acto knife, and then ran a fine point awl along the scored line to simulate a raised panel. The raised panel effect is not obvious when the boarding panels are painted black. The boarding panels will be pinned to the cap rail. Three (3) eyebolts were glued into pre-drilled holes in each panel. The rigging lines for the hammock netting will be seized to these eye bolts.
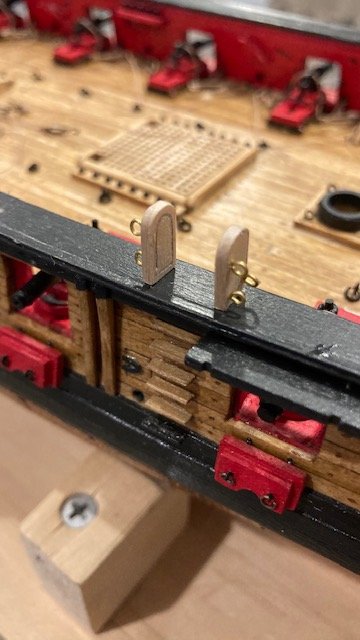
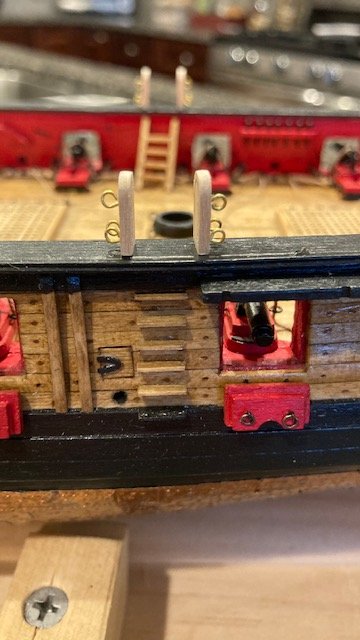
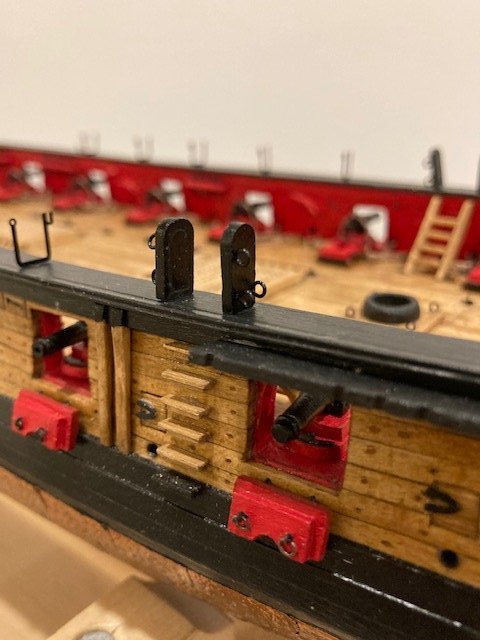
Keeping with Chapter 14, the timberheads were made using a 3/32” x 1/8” basswood strip, as per the instructions. The timberheads were shaped to simulate the profile on the plans. Pins were added to secure them on the cap rail. I cut out the port and starboard side cap rails from the Plans and used them as templates to mark the location of the timberheads. The timber heads were painted black and temporarily pinned to pre-drilled holes in the cap rail. I use an iPhone to take photographs, so the detail in the timberheads is not clear.
My shipment of .008” rope arrived so I plan to jump back to Chapter 11 and complete the lower tackles for the starboard side carronades. Stay tuned for another update.
-
-
Nice detailed work on the cap rail.
US Brig SYREN 1803 by Justin P. - Model Shipways - Scale 1:64
in - Kit build logs for subjects built from 1801 - 1850
Posted
I've yet to experience a model ship build that didn't have a certain level of frustration. Yes, it's good to take a break and regroup.