


Sluicemaster
-
Posts
43 -
Joined
-
Last visited
Content Type
Profiles
Forums
Gallery
Events
Posts posted by Sluicemaster
-
-
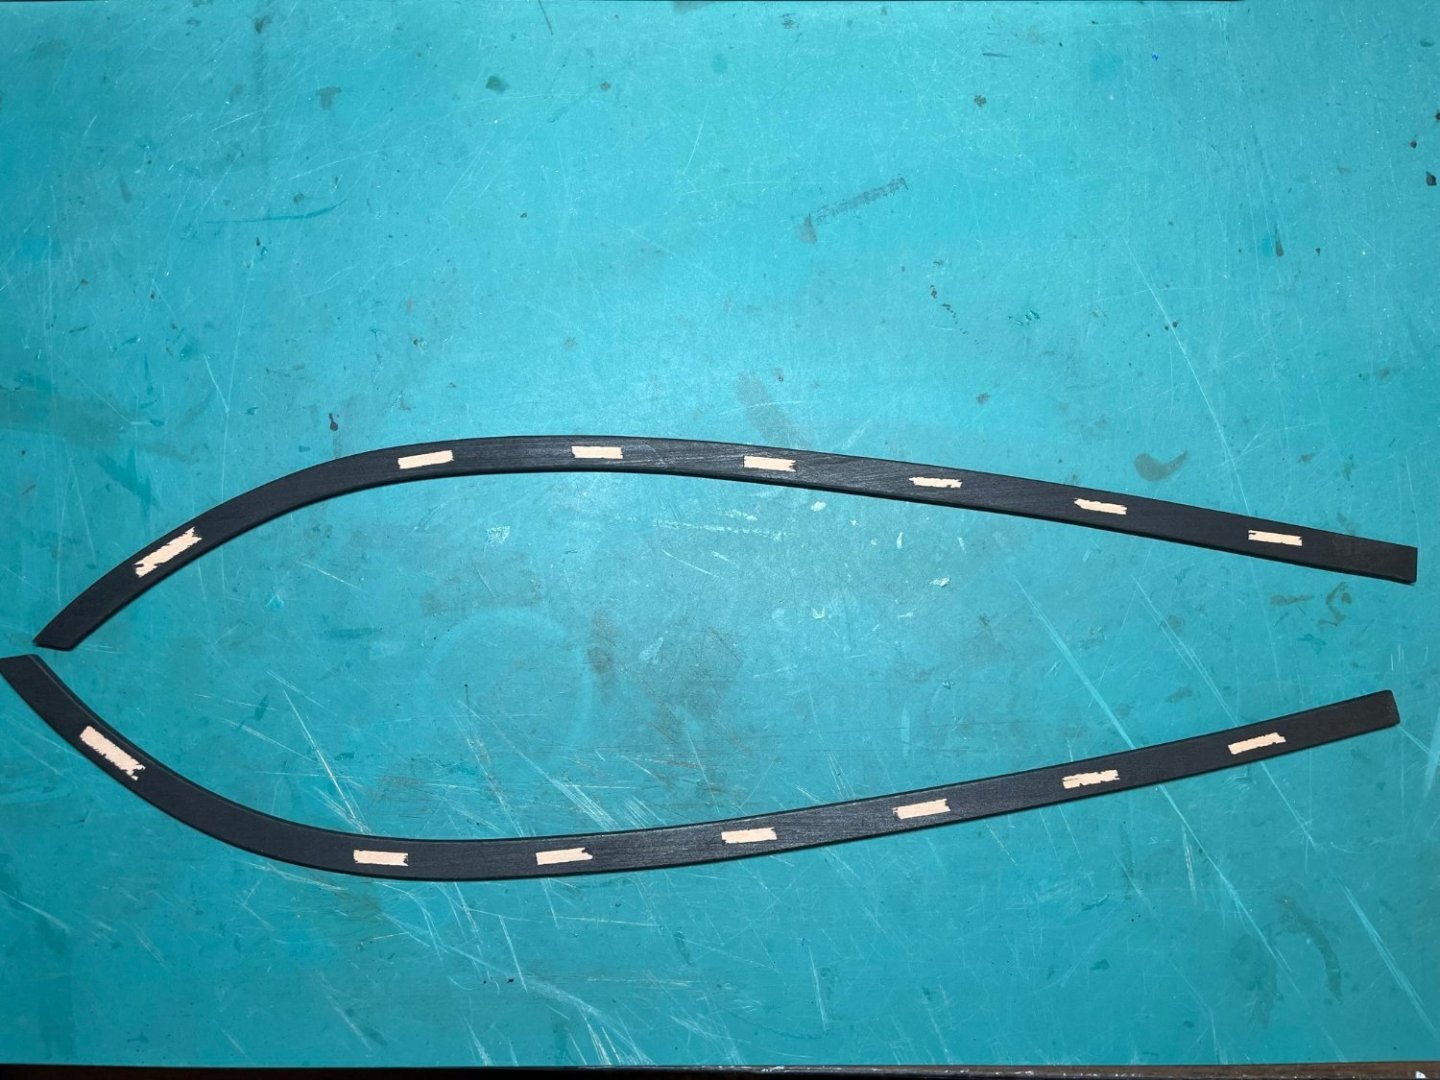
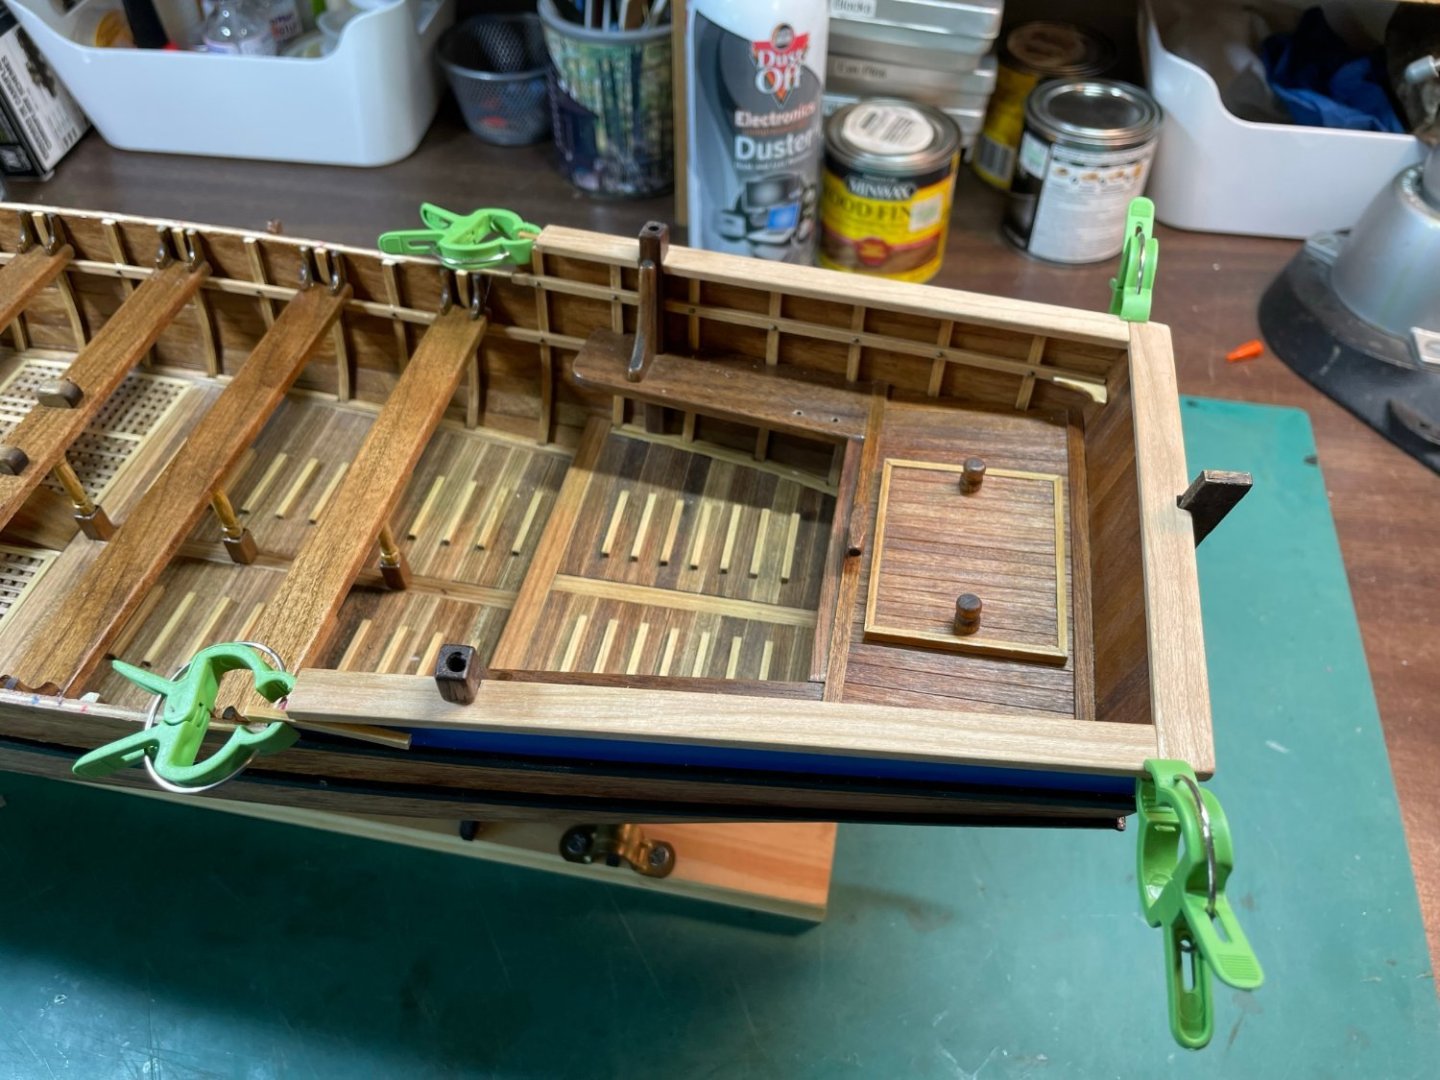
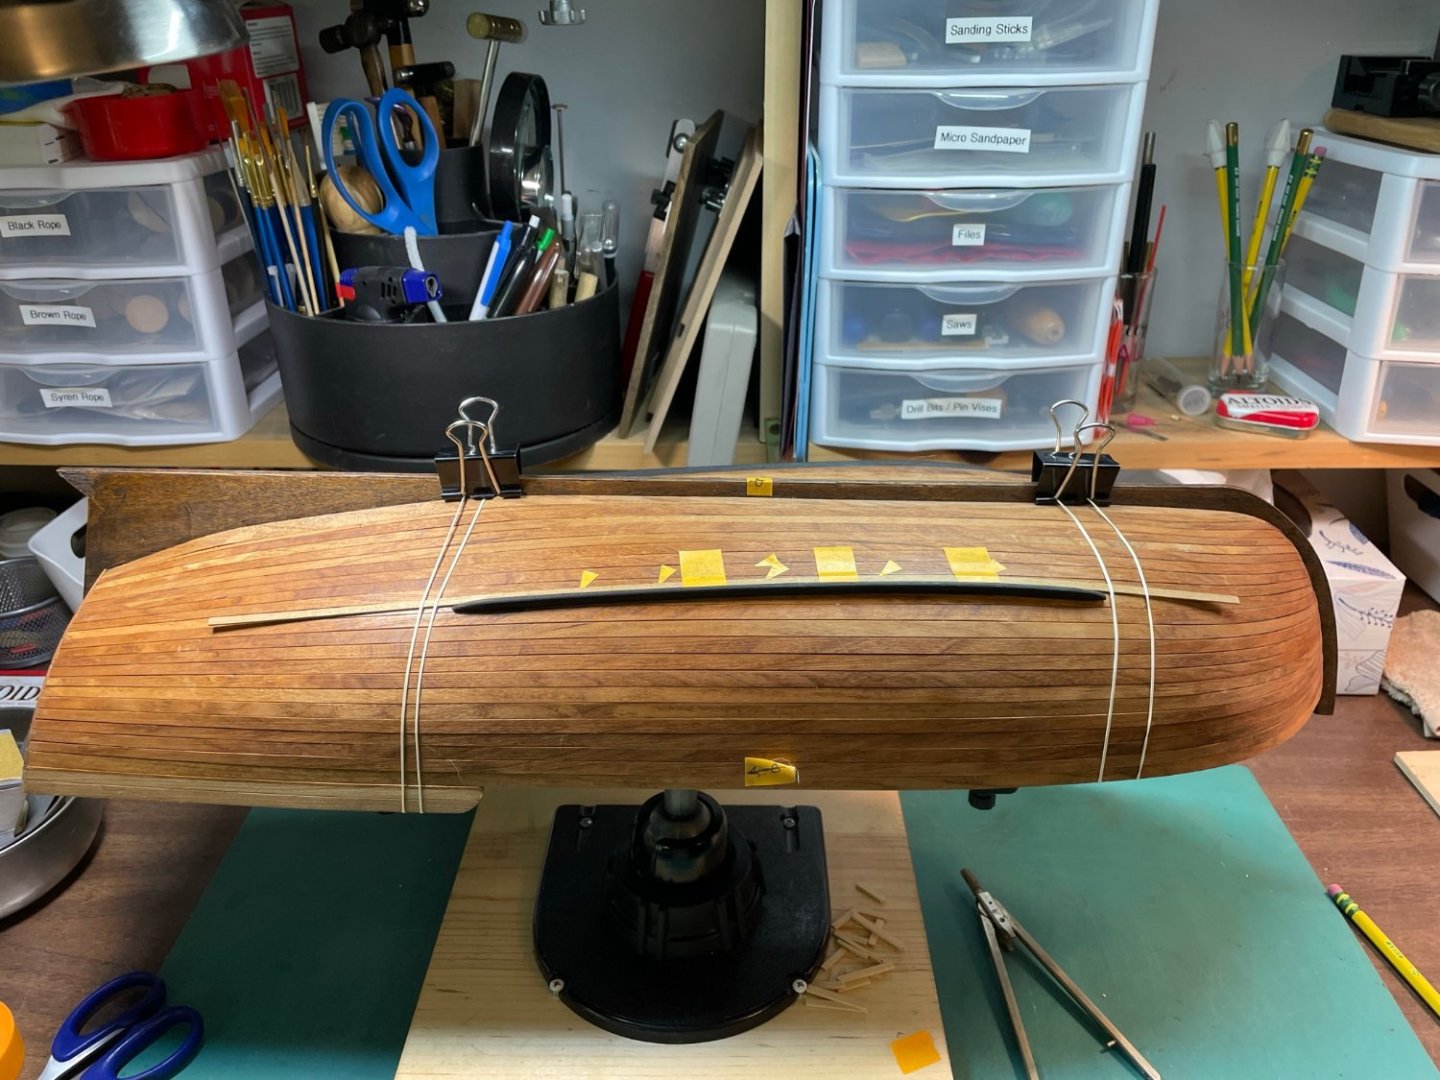
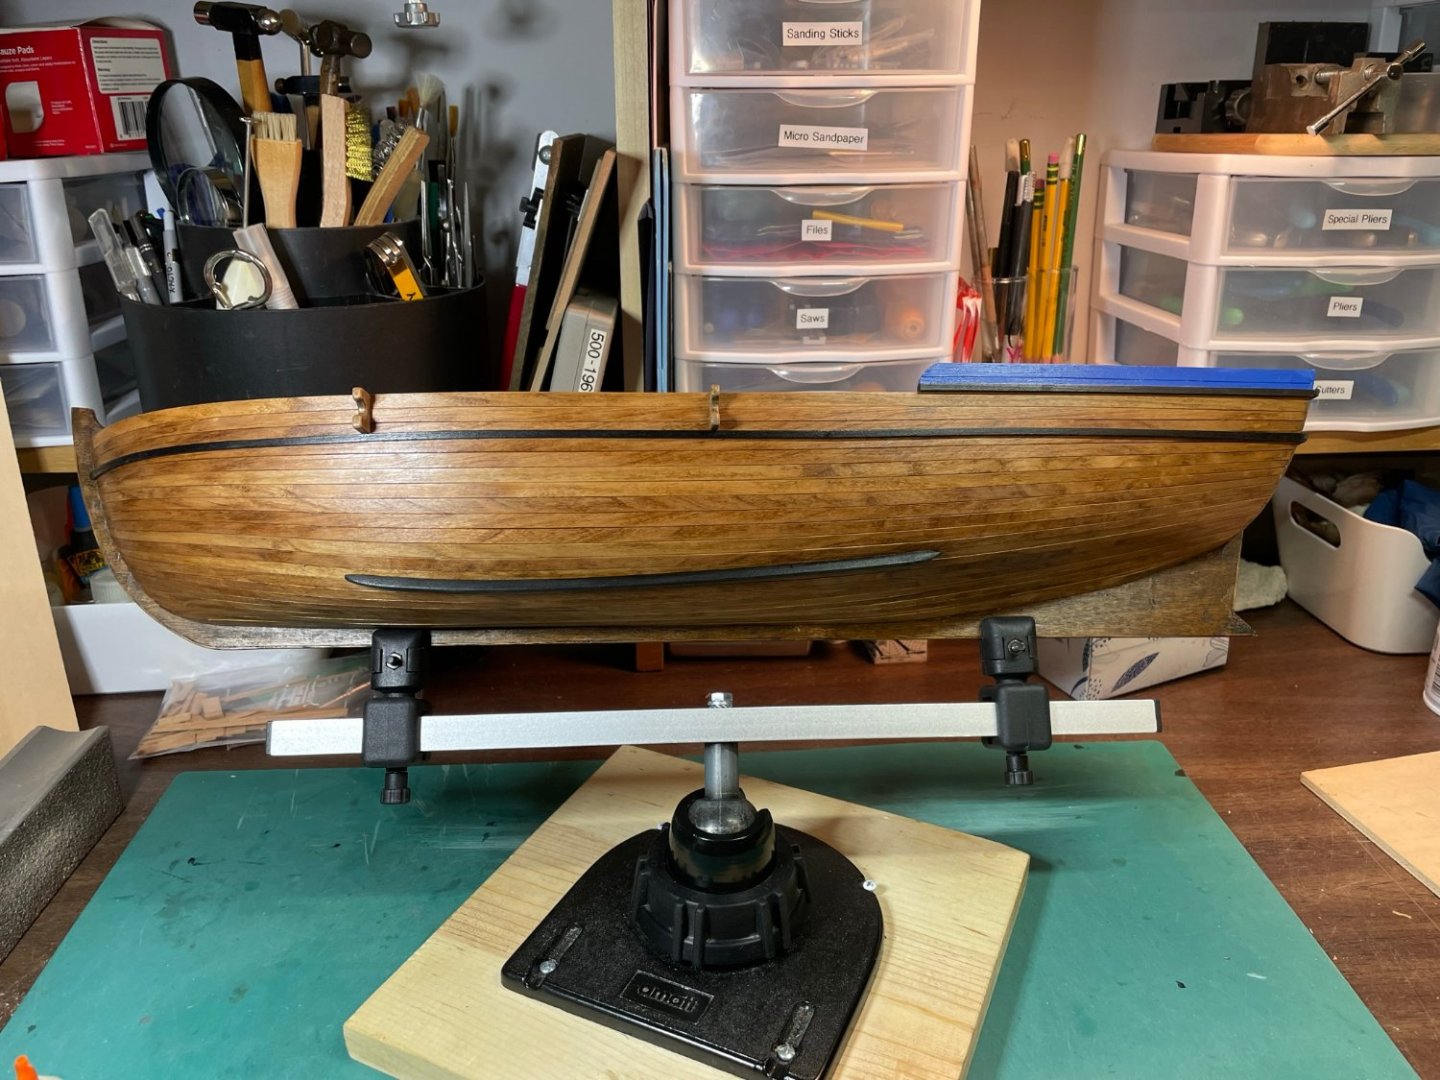
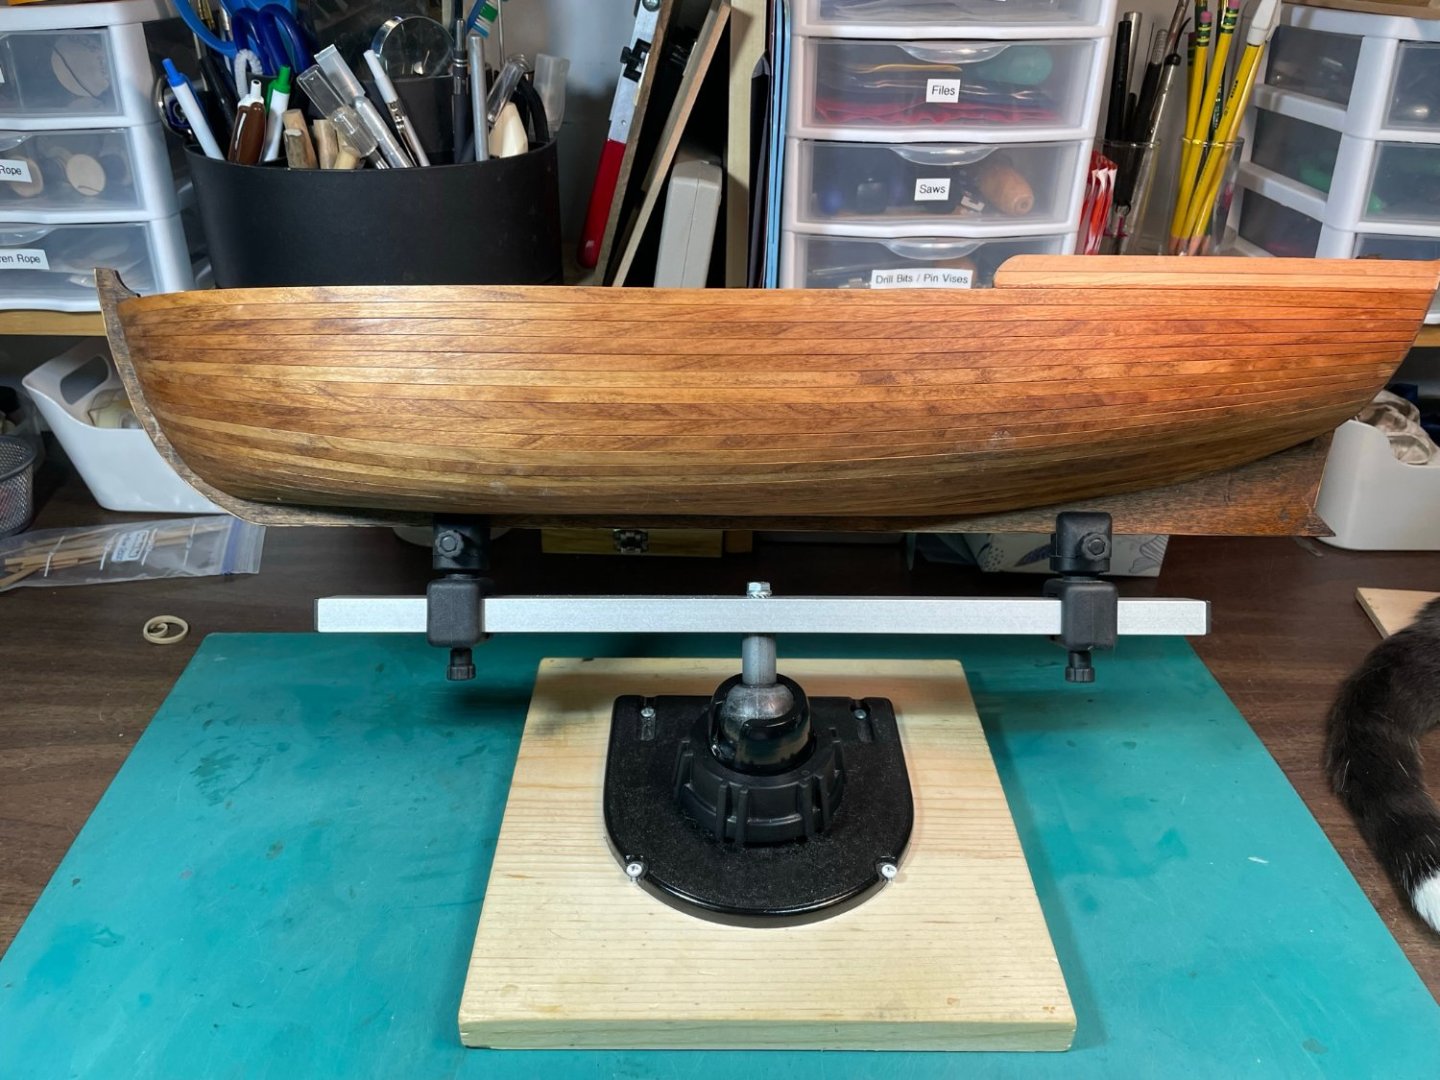
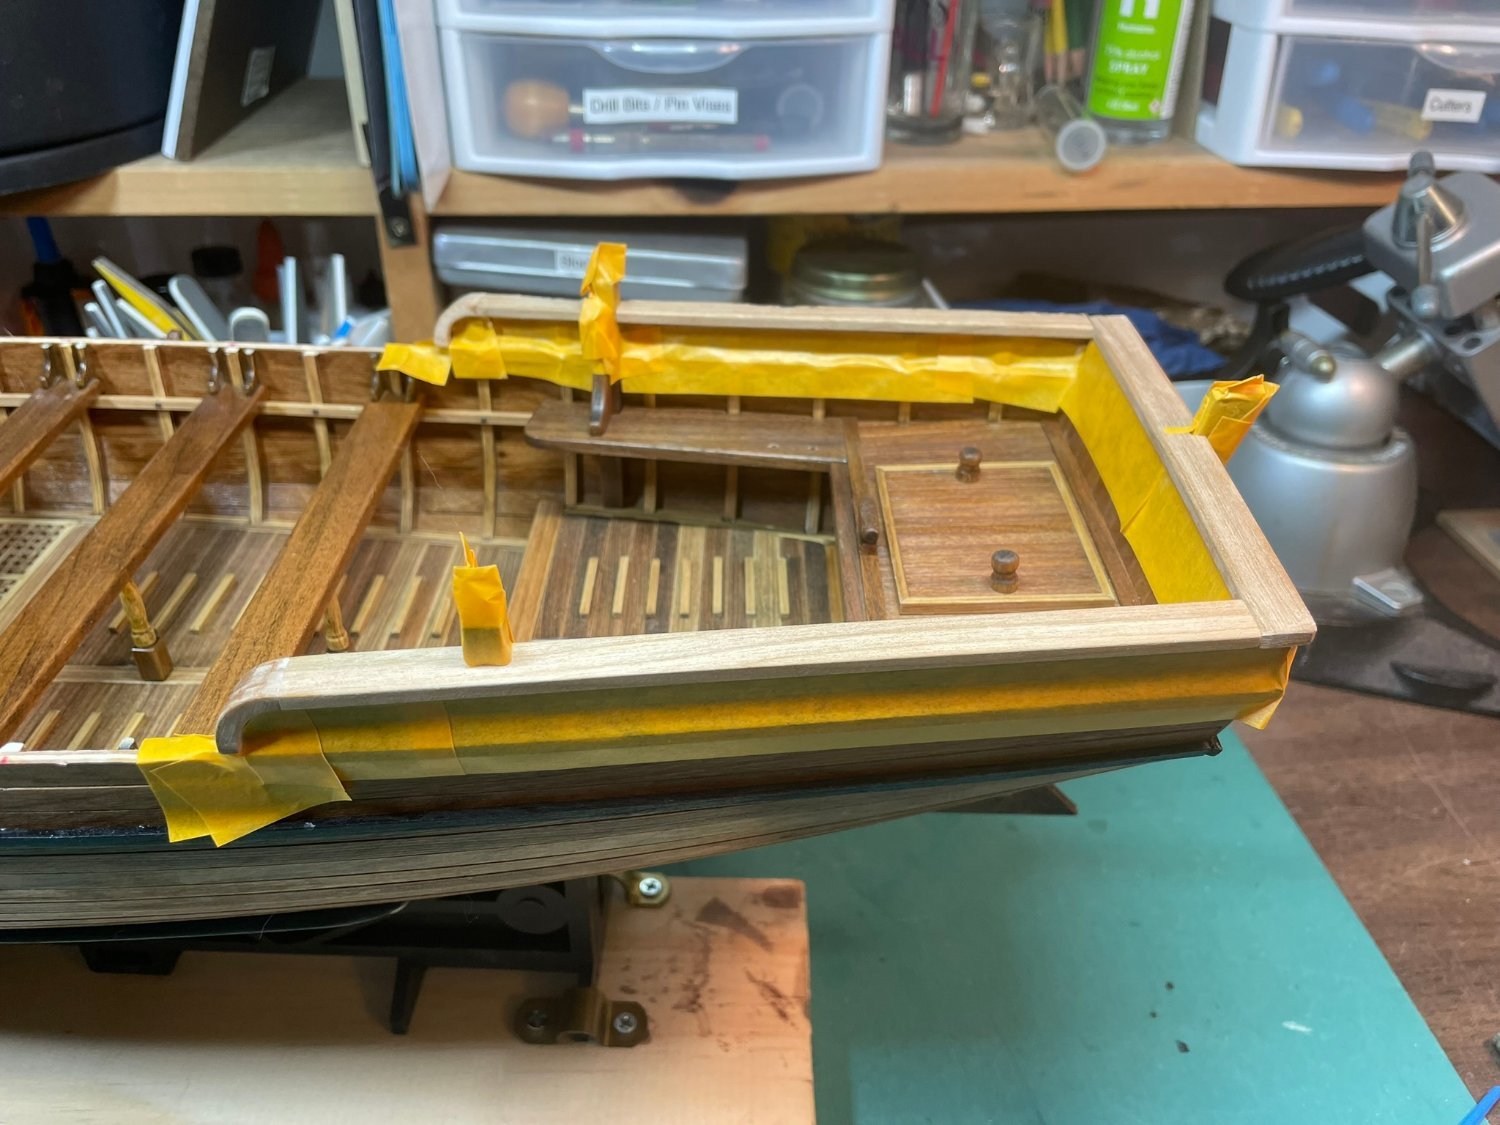
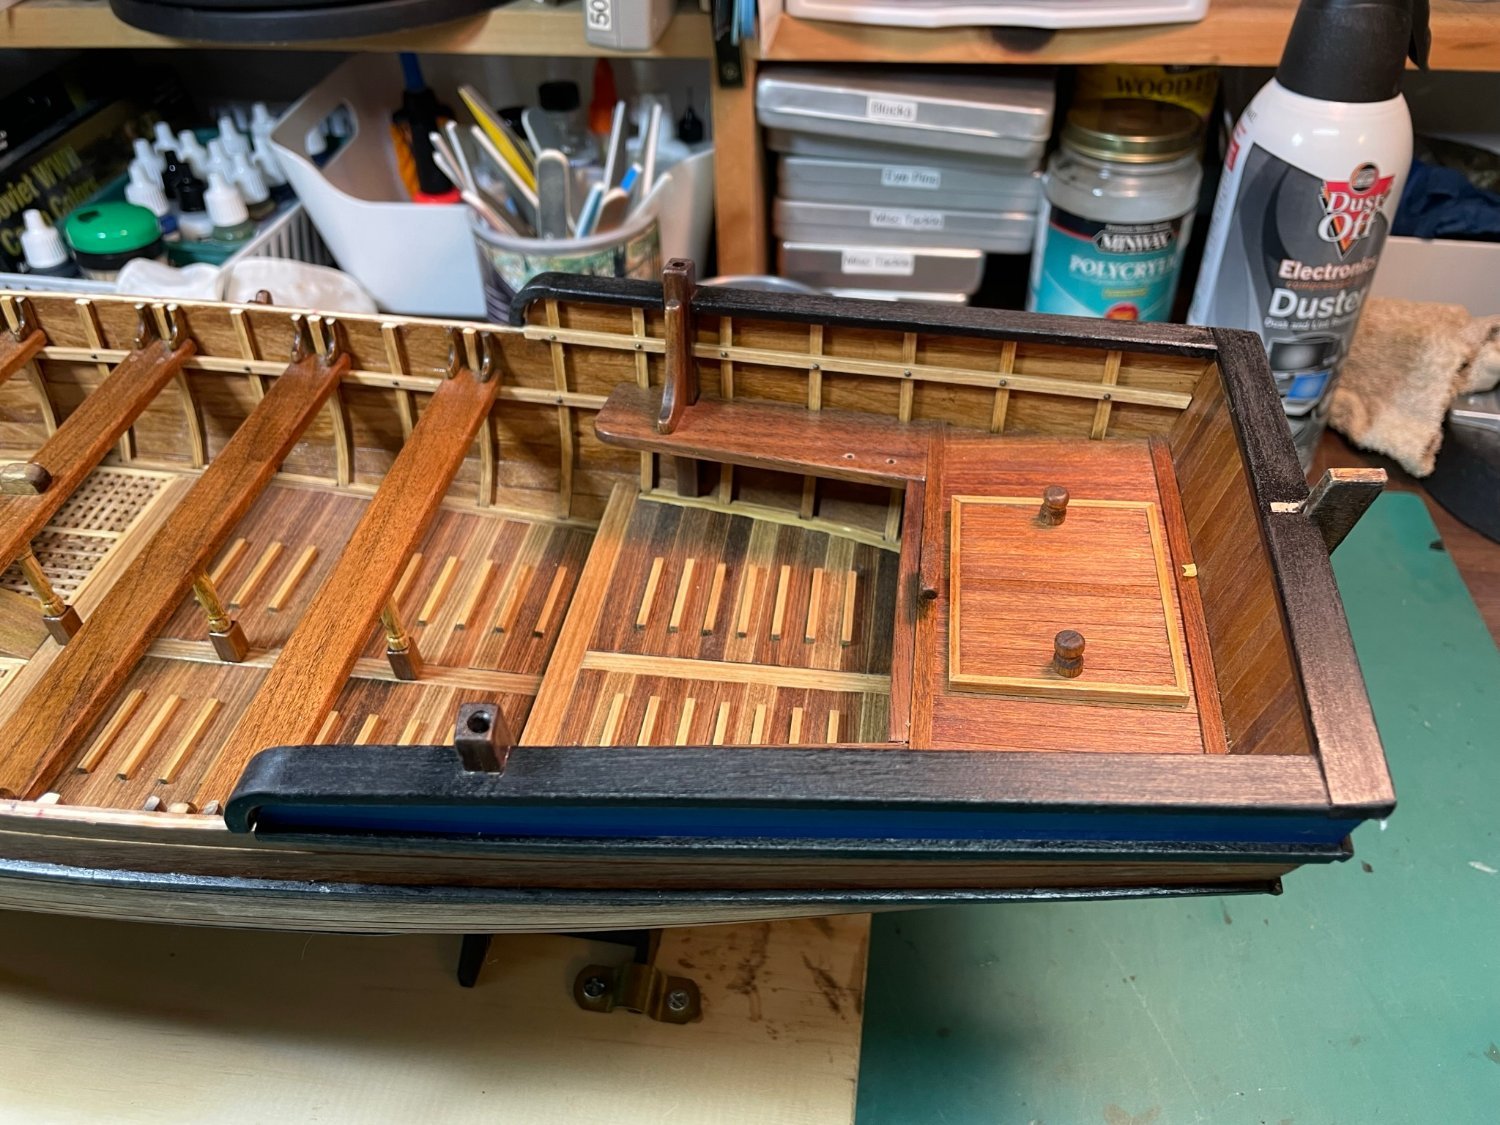
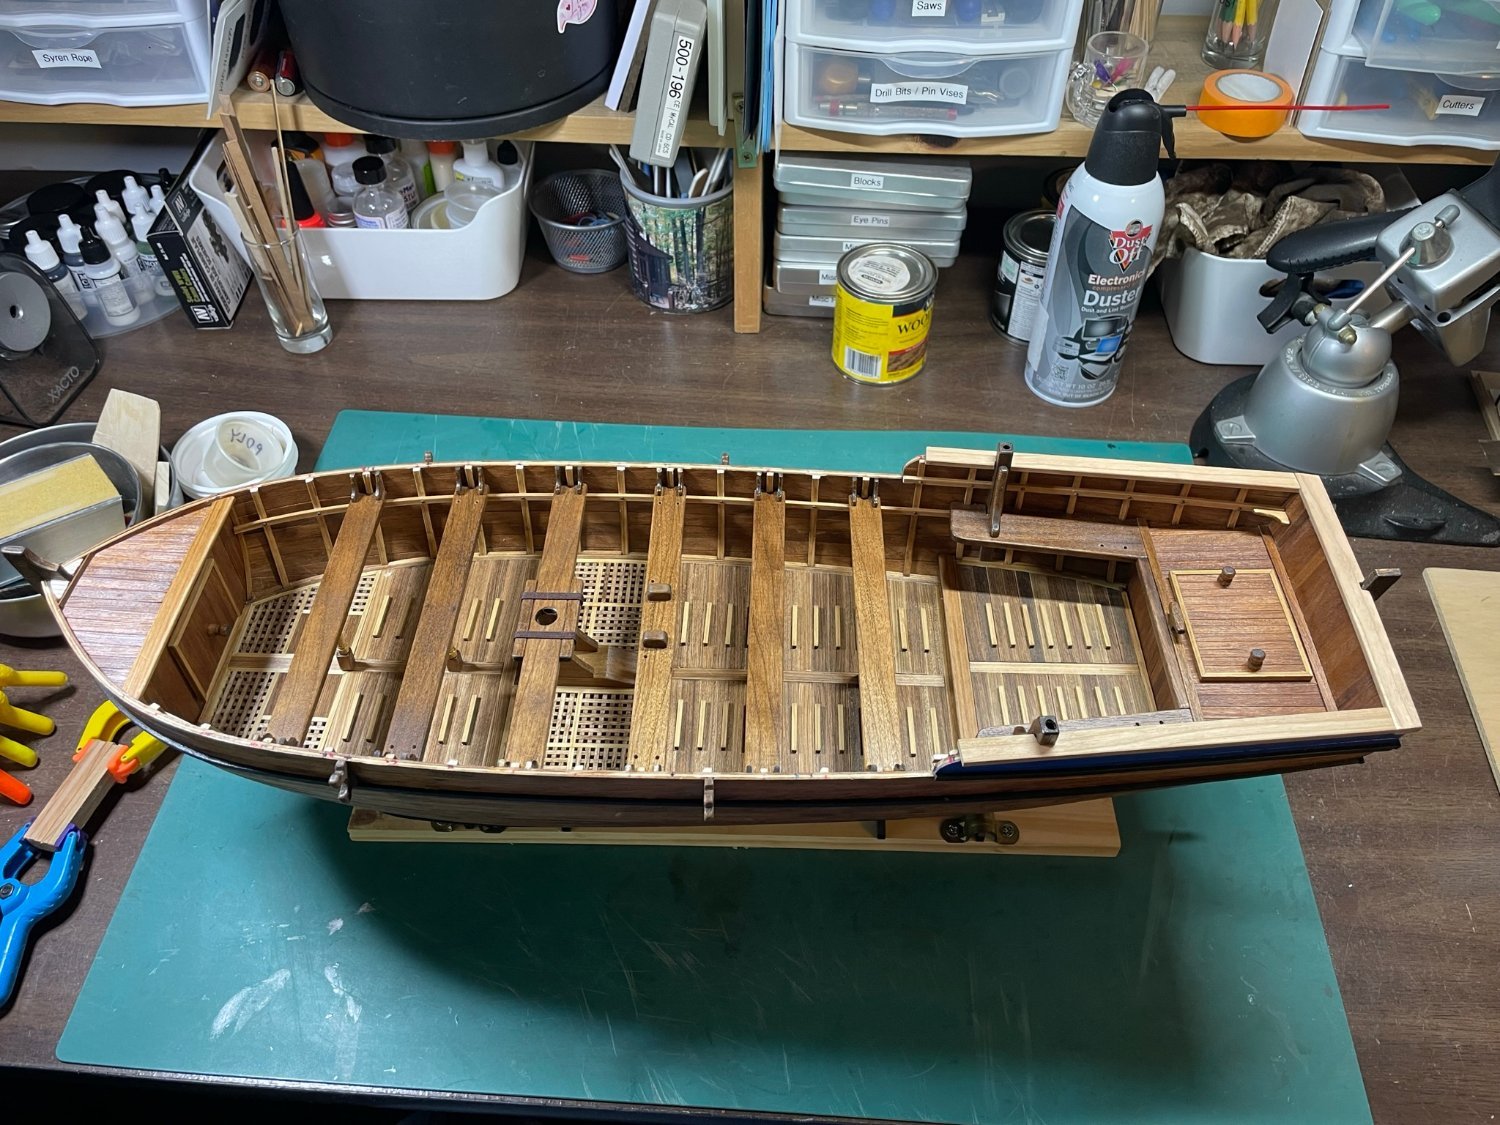
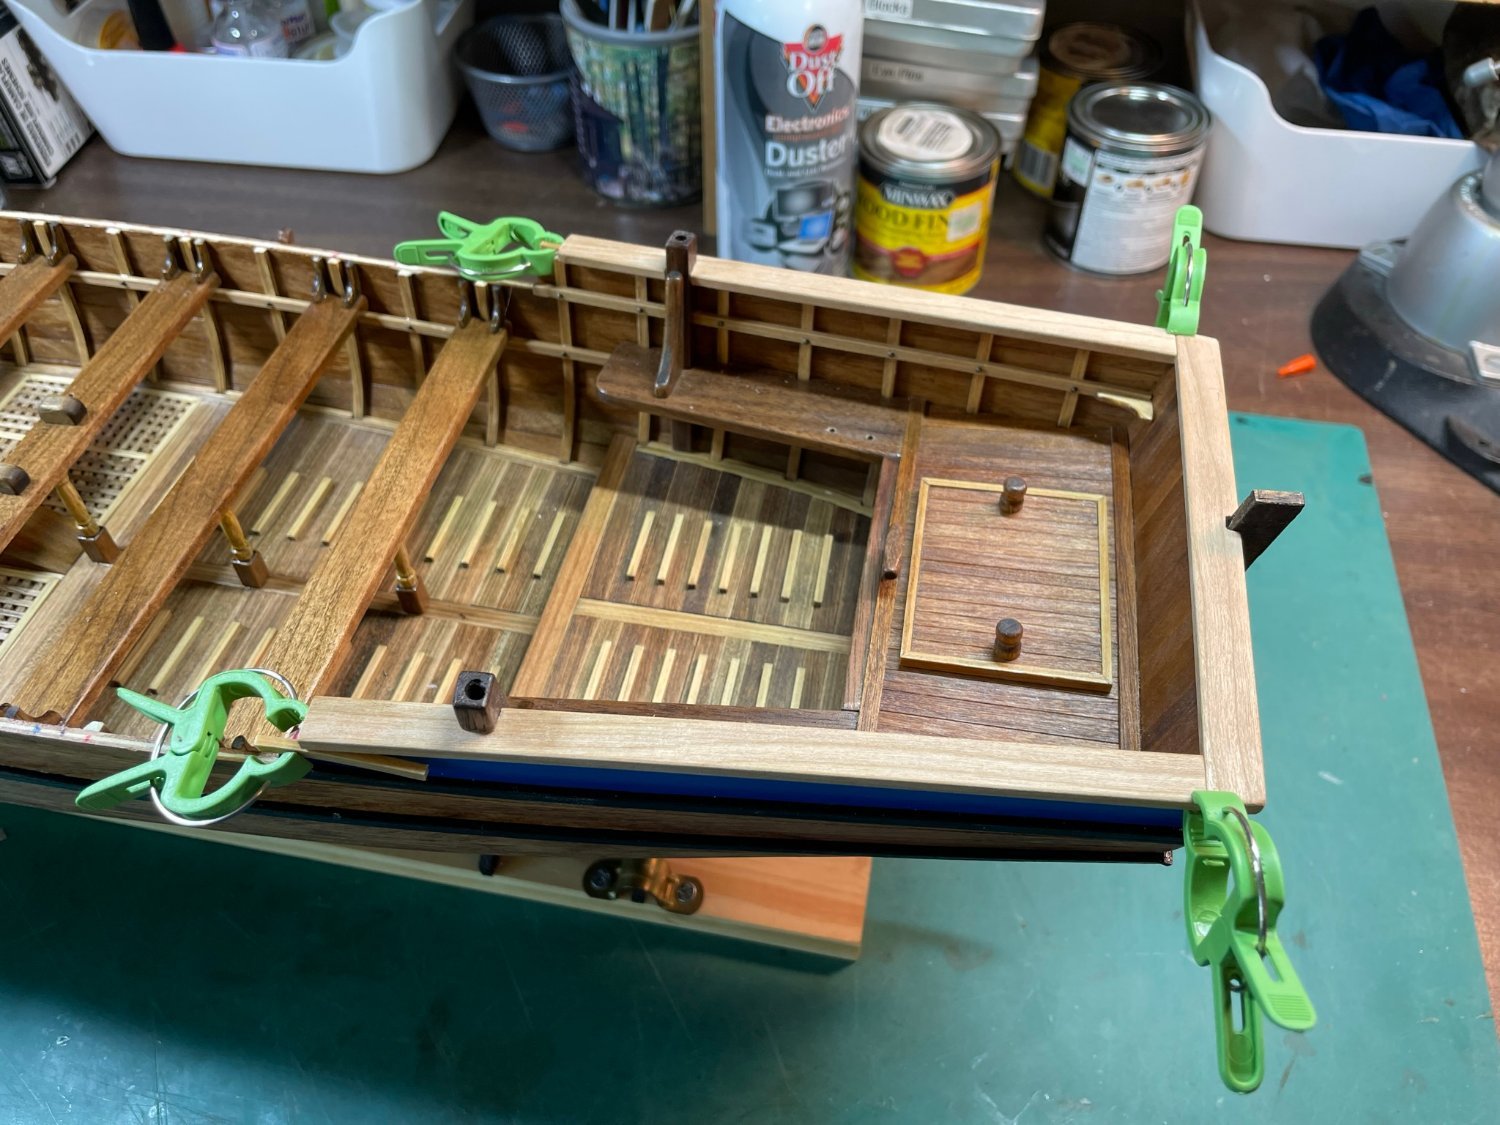
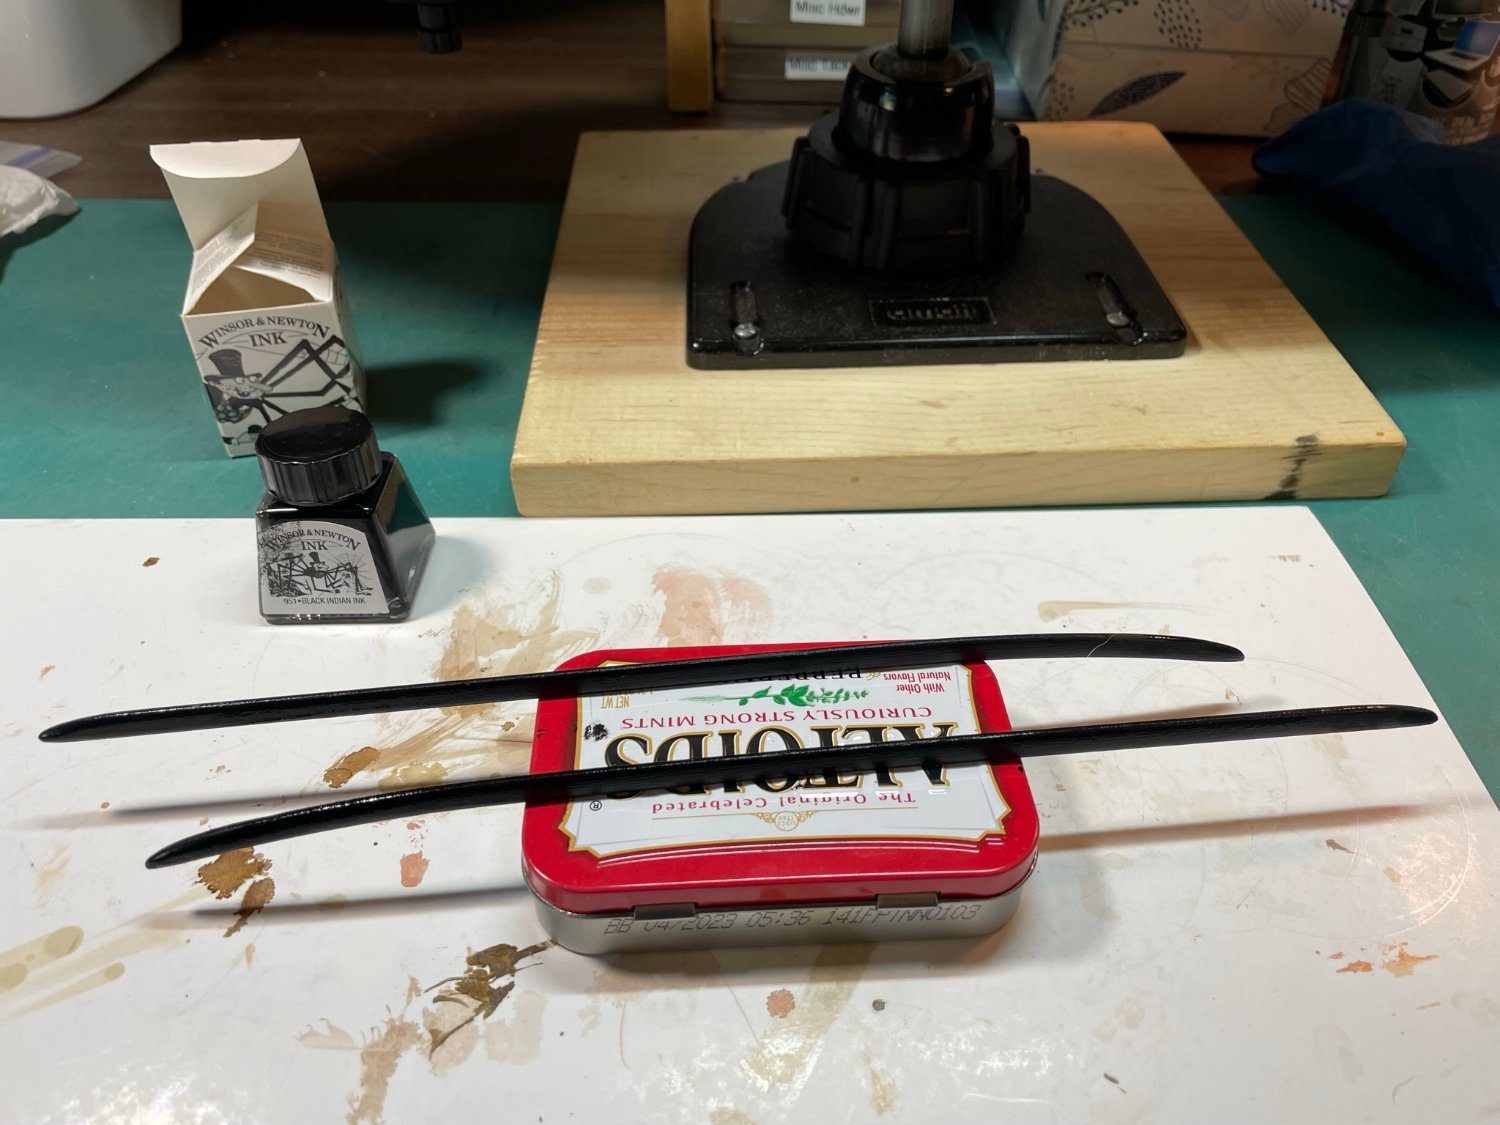
As I worked to finish the tackle on the cannon carriage, it suddenly hit me that I never posted about completion of the rails. They went well, and I’m happy that the India Ink worked so well. I applied two coats topped with a very light, almost a dry brushing, of matte polyacrylic.
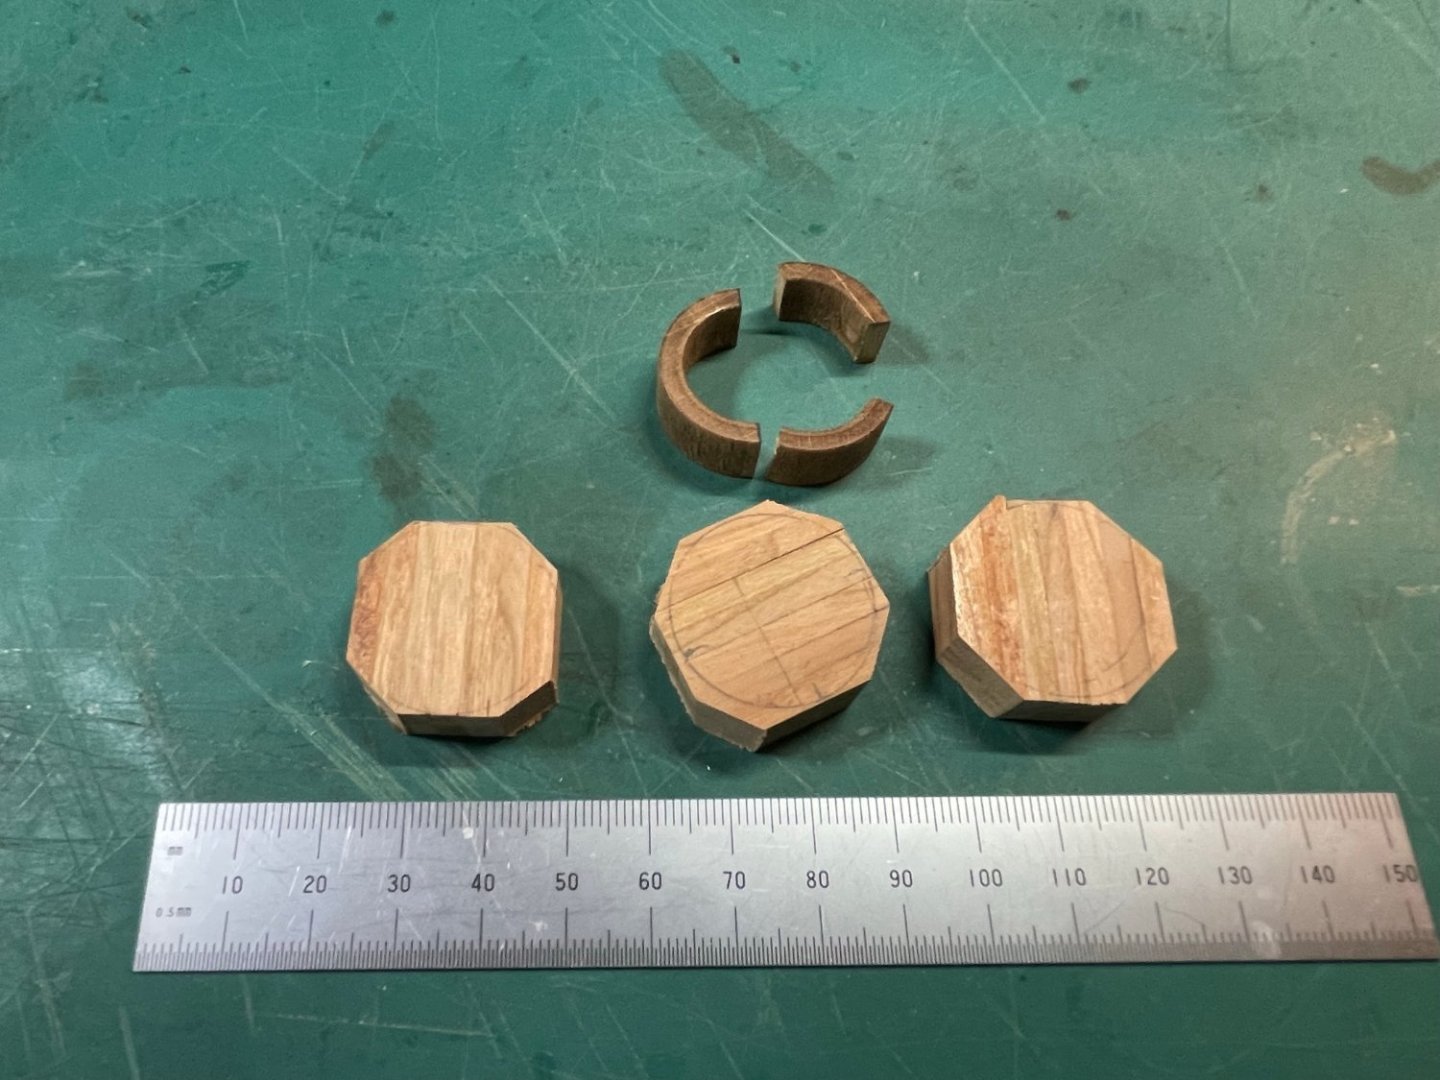
The kit supplied a wood torroid that was to be cut into pieces to do the curved section between the stern and main deck rails. It was a perfect “unfit”, so I laminated sections of cherry strips together, and turned out new ones on my DB-250 lathe.
Thank you for viewing my project.


- Paul Le Wol, Rik Thistle, allanyed and 3 others
-
 6
6
-
Absolutely stunning! You are a master. Thank you for sharing your passion.
- Forlani daniel and mtaylor
-
2
-
Oops! I have John Smith's Shallop, not Carrack, on the shelf.
-
Hello ccoye and rcmdrvr;
Thank you both for your kind words.
Planking this model was quite the task. It took almost a year, with plenty of time outs! When I decided not to use the supplied wood, I chose cherry because that's what was available at Modeler's Sawmill. After doing stain and clear coat tests, I felt that it would be a travesty to cover such nice wood. As I am still a fairly new modeller, there are plenty of awkward spots on the planking and model. As the hull becomes more populated, those issues become kind of hidden.
I notice that Model Expo currently has this model on sale. I hope my reference to ME doesn't offend too many readers. I have been a customer for almost thirty years, and will not abandon them because of a one bad mistake The one offered is by Mantua, while mine was made by PanArt in the mid-1990's. I'm almost tempted to buy it so that I could plank it with the knowlege I've gained. I won't though, because I have the Armed Virginia Sloop, New England Whaleboat, and John Smith's Carrack on the shelf.
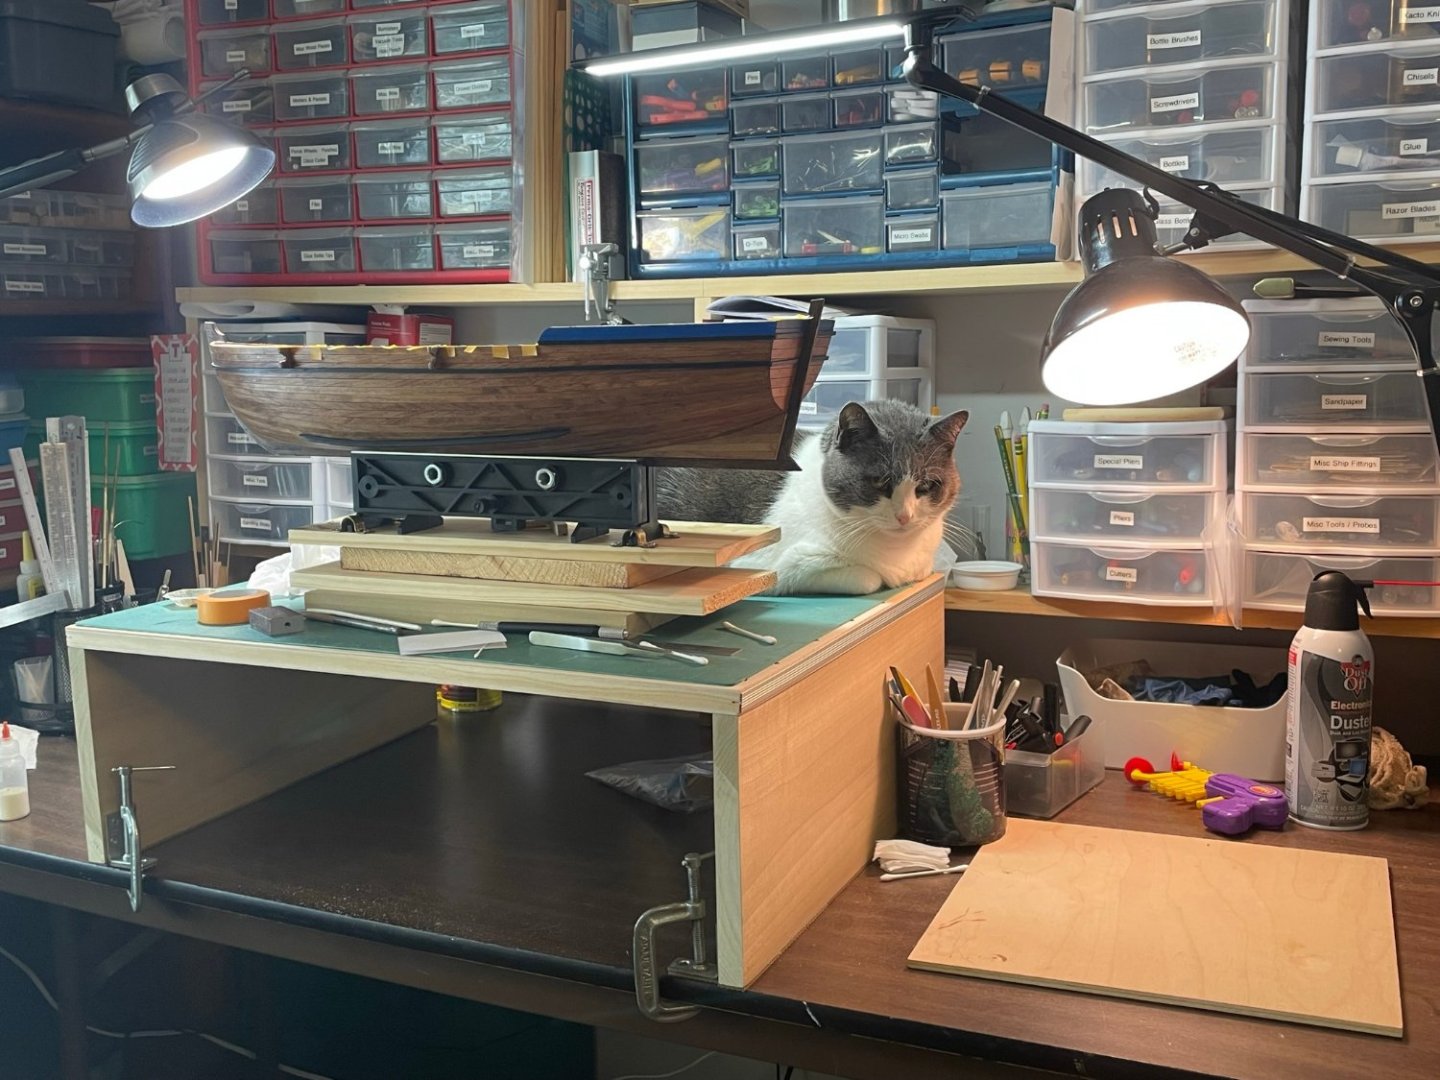
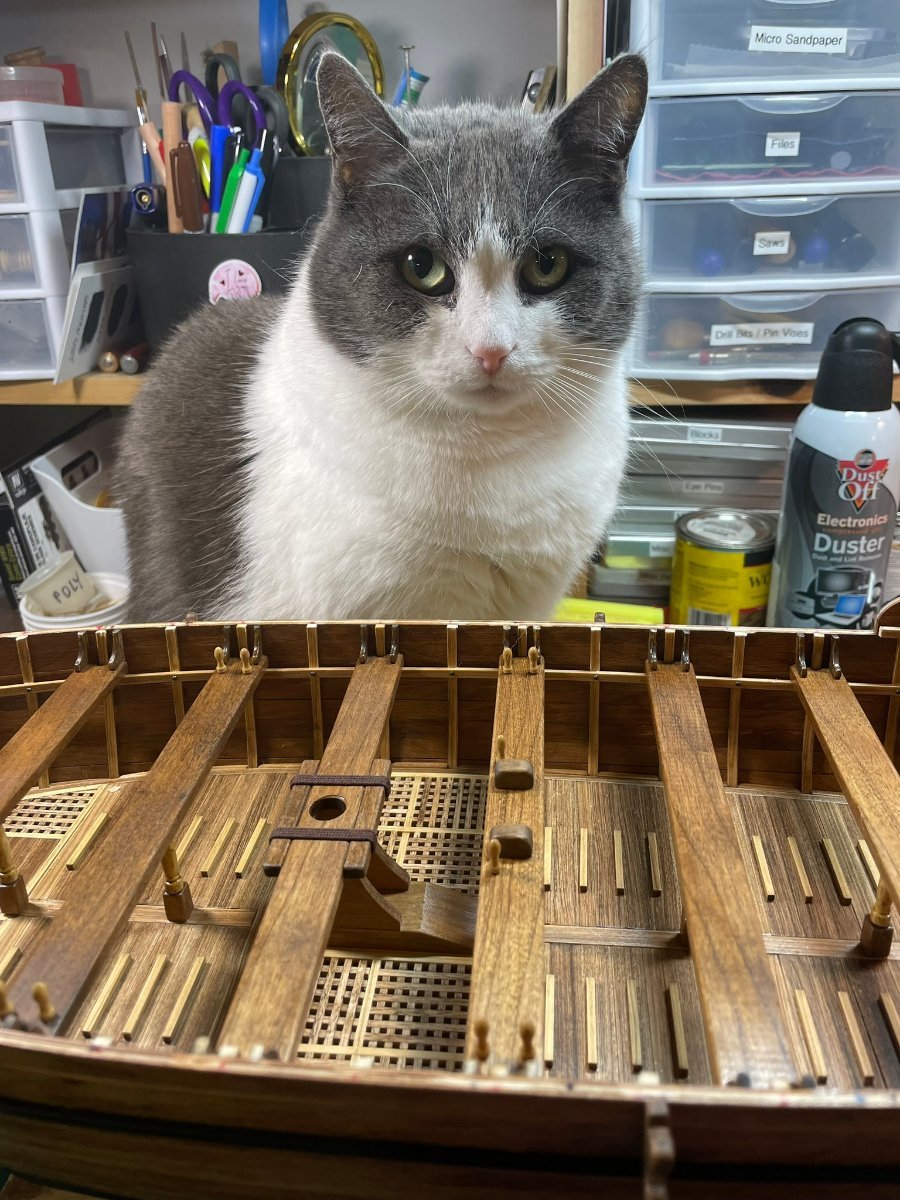
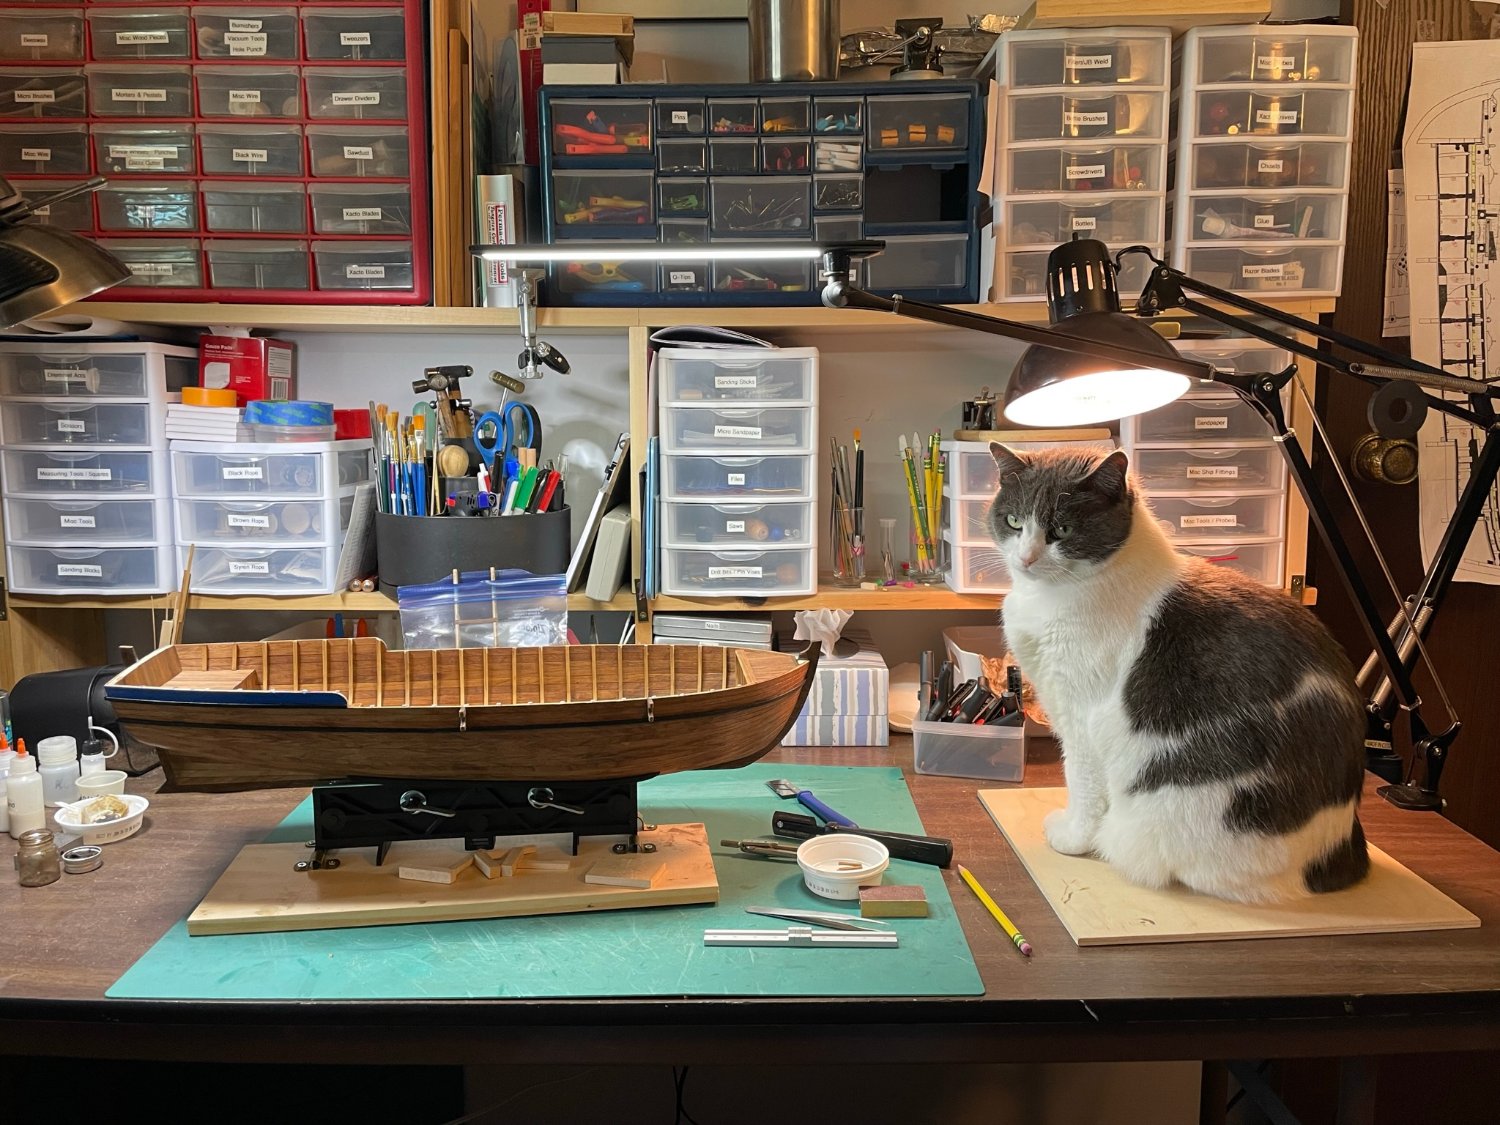
Supervisor Cat, Muffin, is great! She has never once attempted to paw or play with my project. When supervising, she generally sits off to the starboard, and keeps an ever non-blinking gaze on construction.
-
Holy smokes! It’s sure been a long time since I did a post. I should have made more progress in the past four months than I have, but I’m happy with the progress achieved. I had to spend considerable time “ashore” taking care of the homestead, and take a wonderful vacation to Virginia Beach with my wife. Her lifelong dream of seeing the sun rise from the ocean was fulfilled with great sunrises. I got some serious beach metal detecting done, and managed to add one more silver ring to my findings.
While on vacation we went to the Mariner’s Museum in Newport News. I last visited it forty years ago, and was stunned at how it had grown, especially to accommodate the preservation of the Monitor, and provide viewing of its restoration. I’m hoping to take another trip to Virginia Beach, and would plan to spend an entire day at the Museum. The Crabtree collection is what sparked my interest in building ship models.
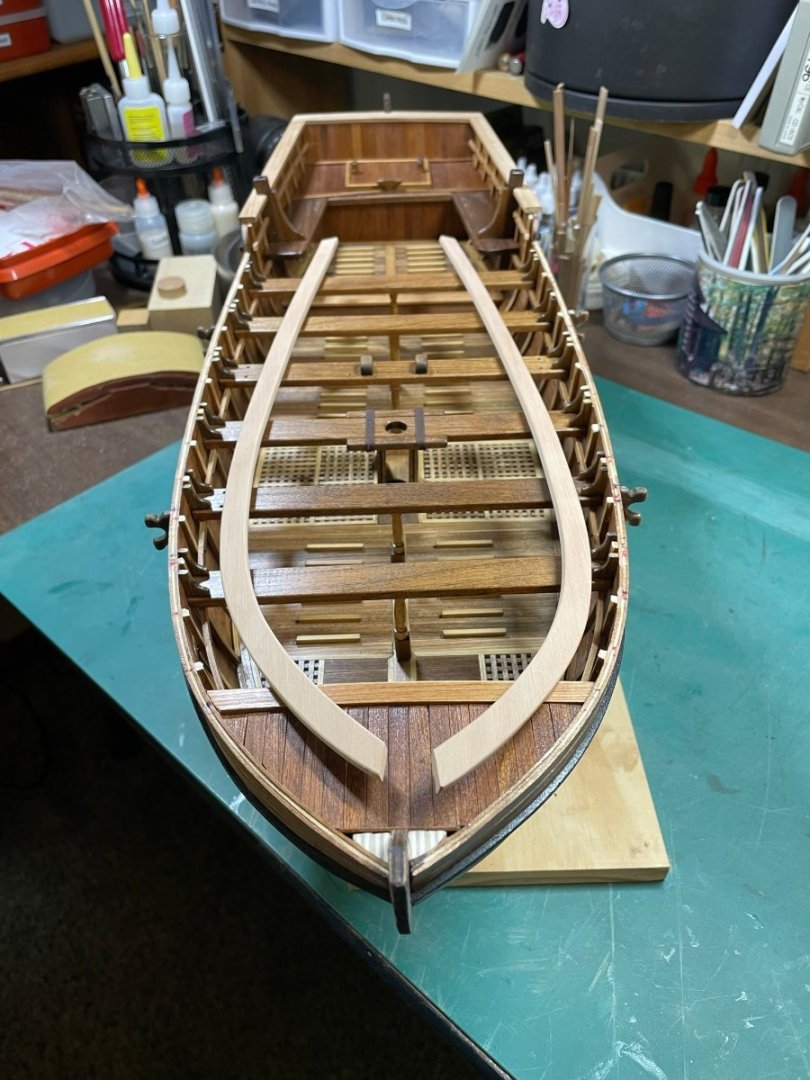
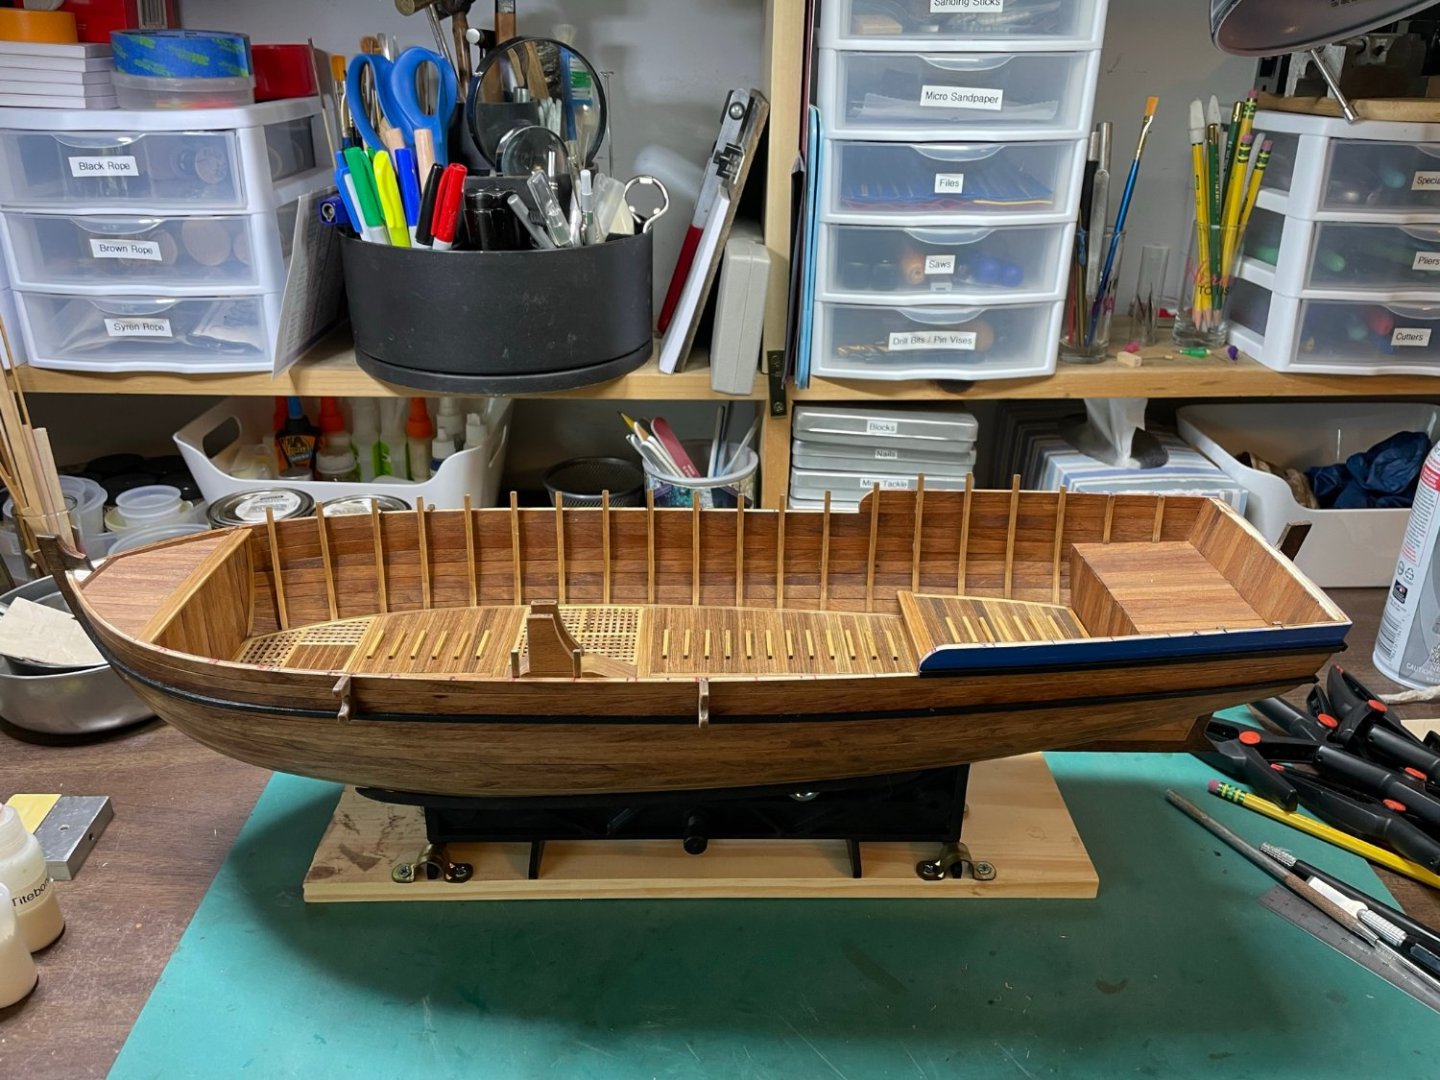
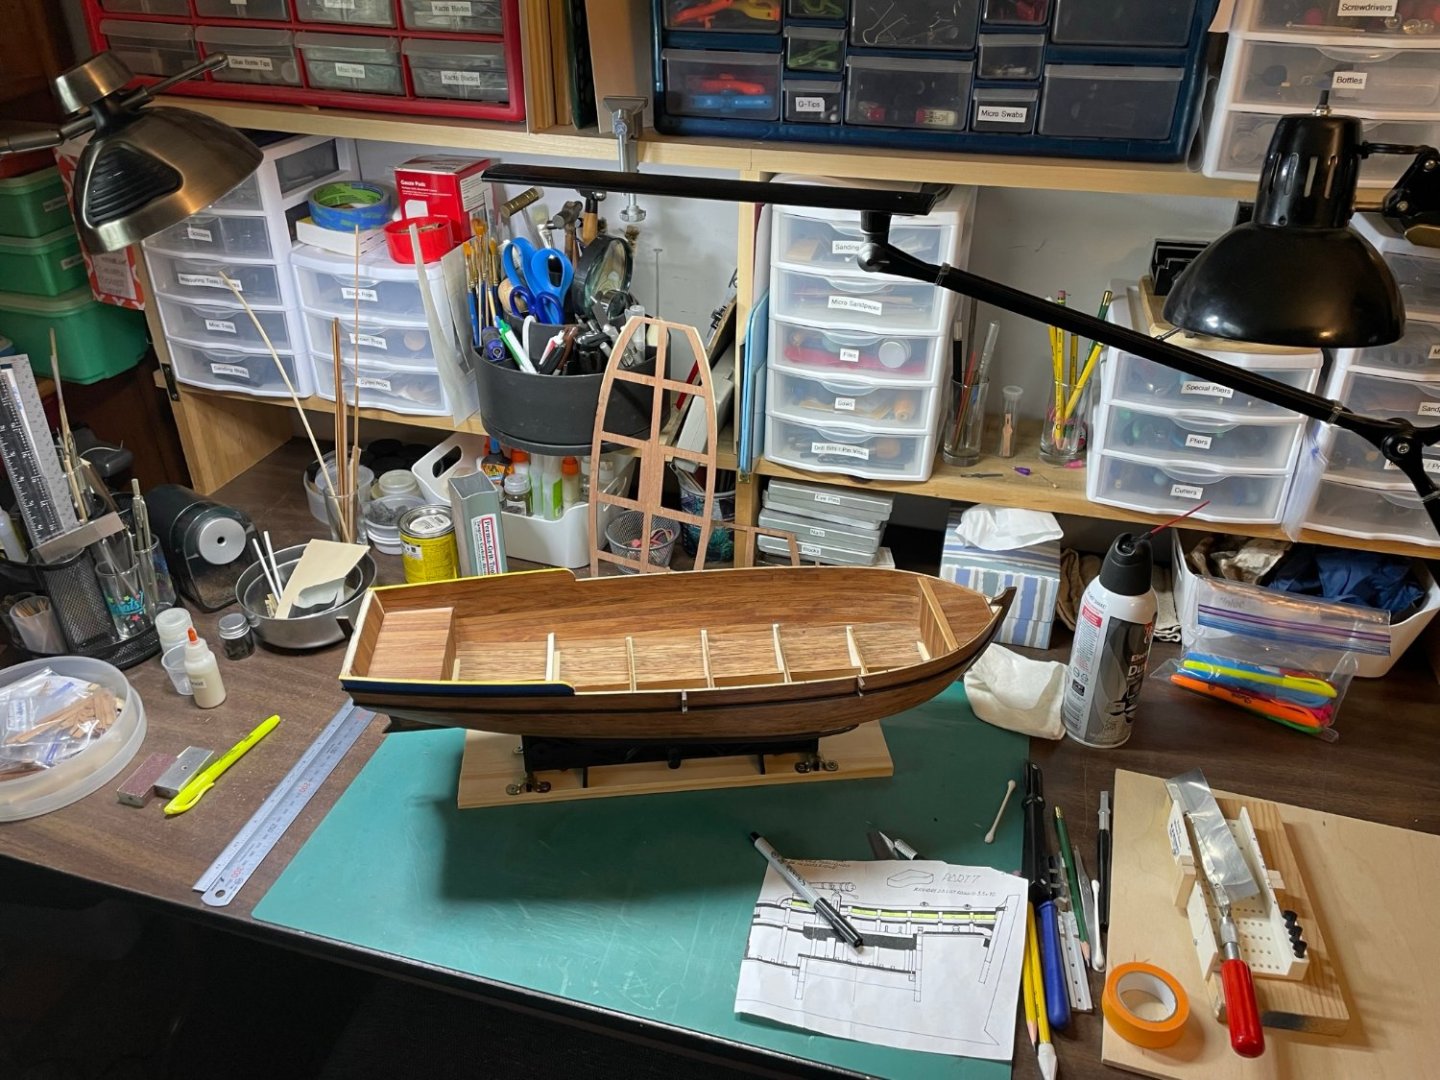
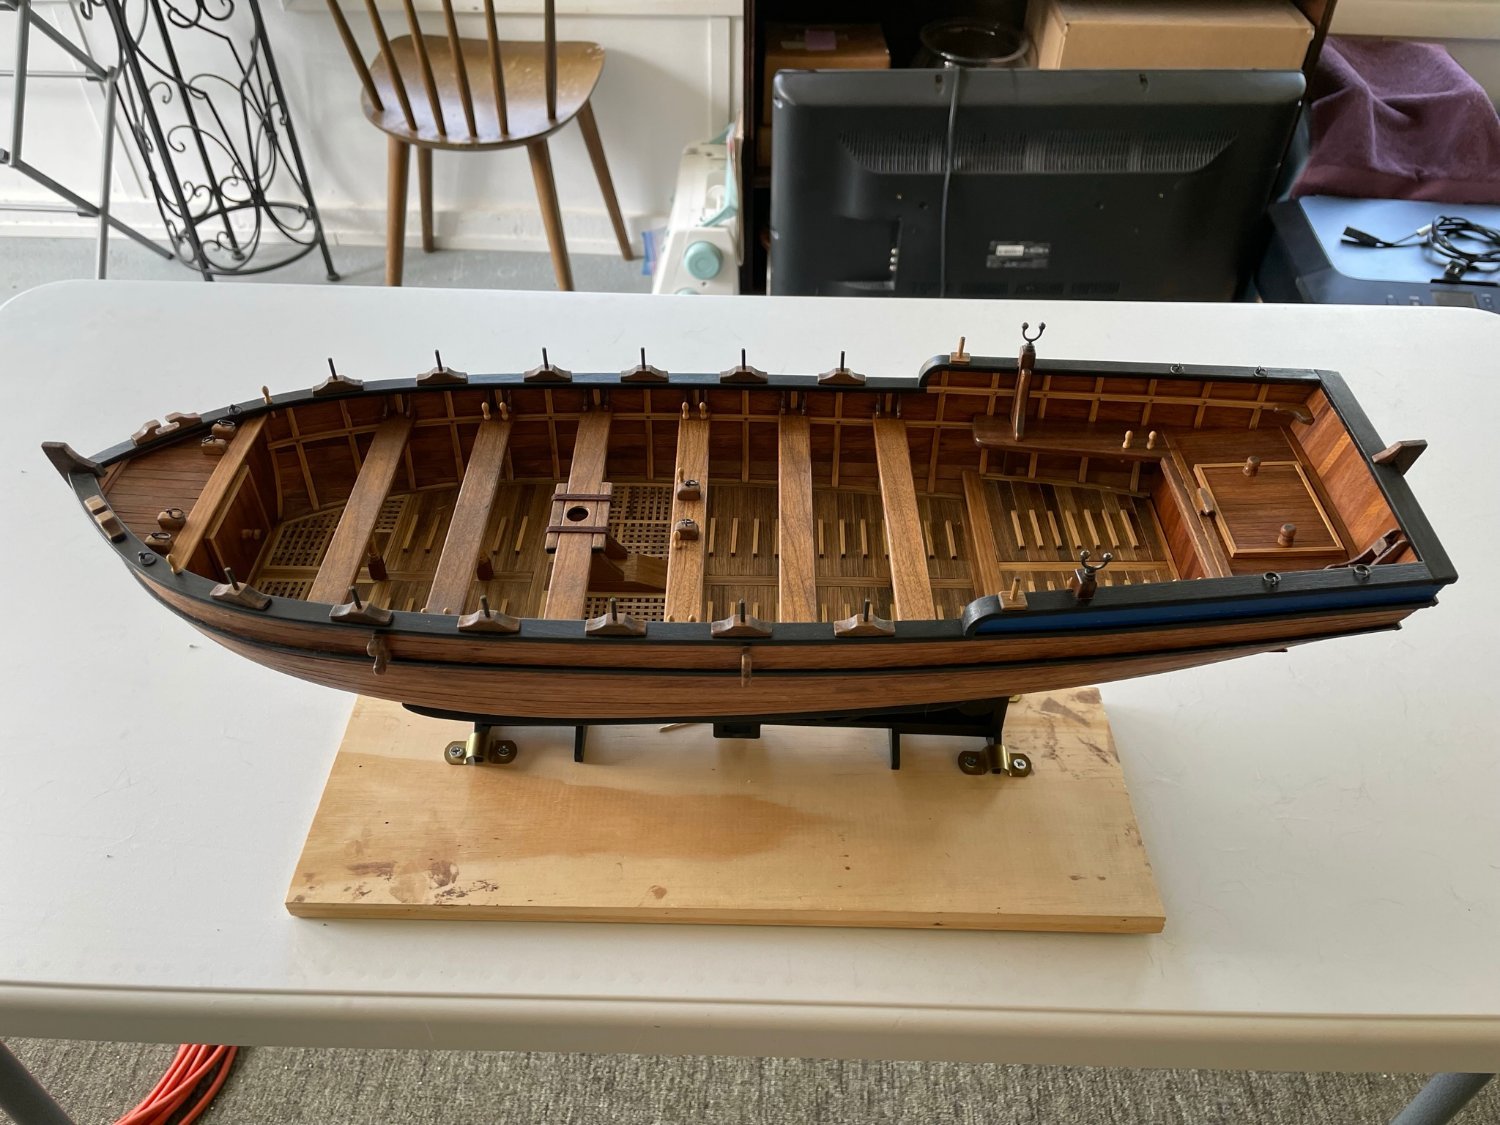
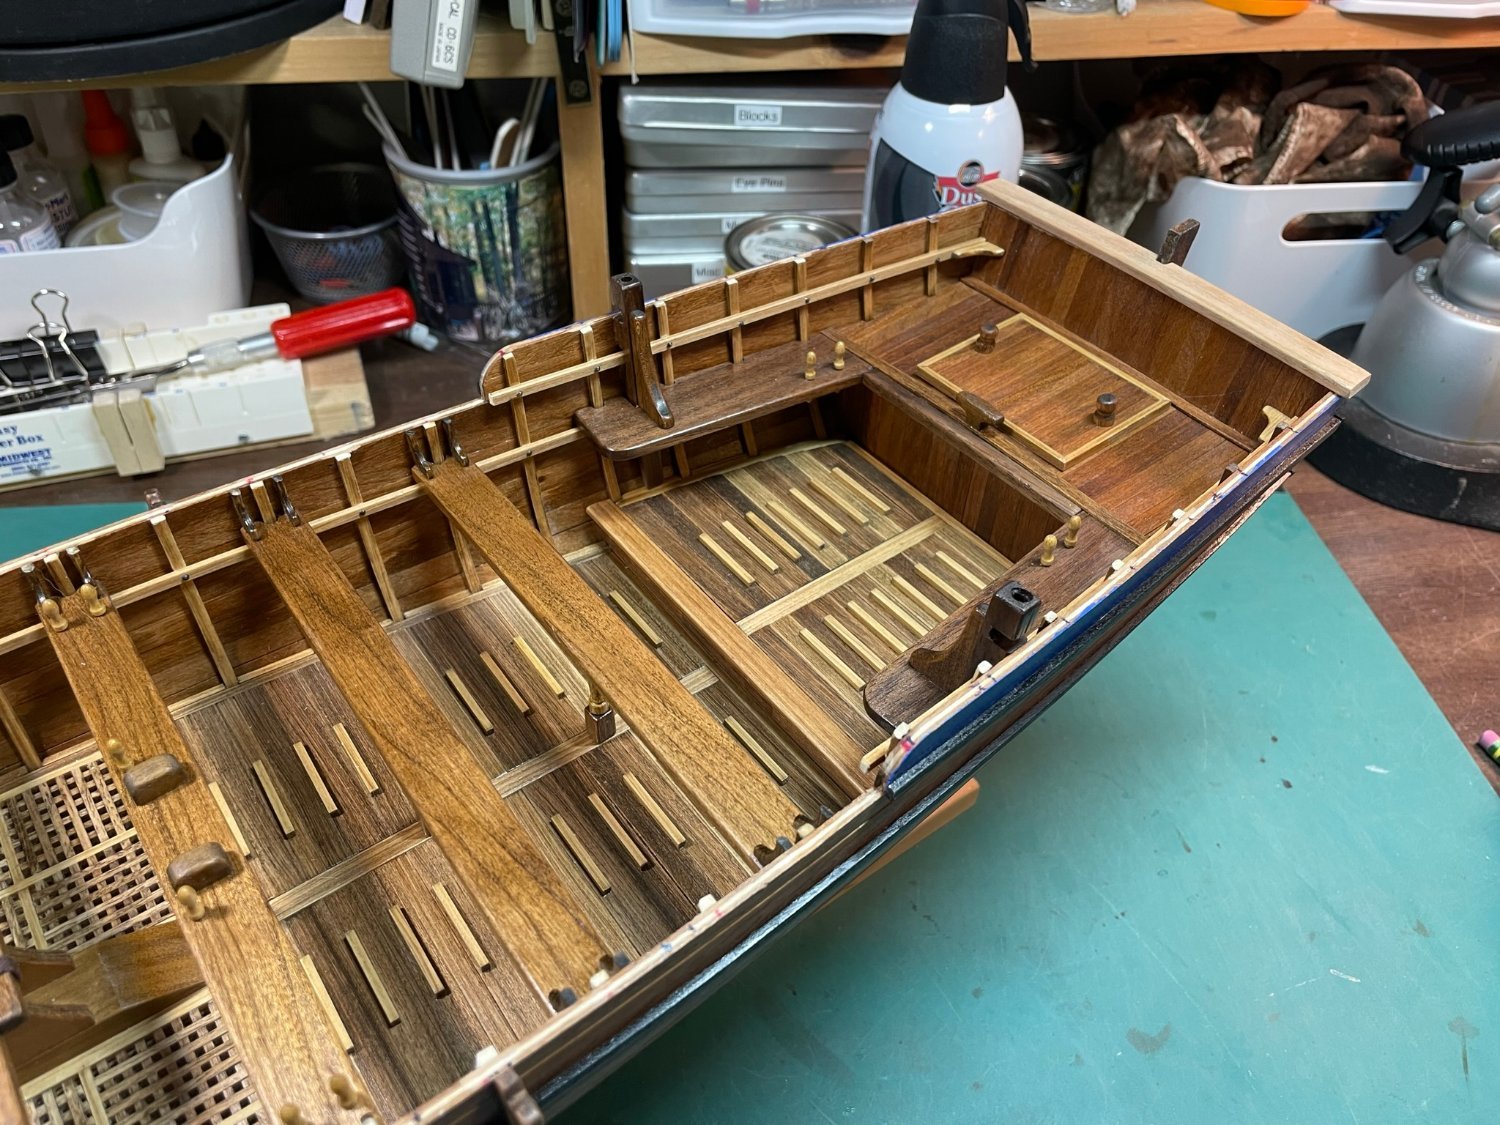
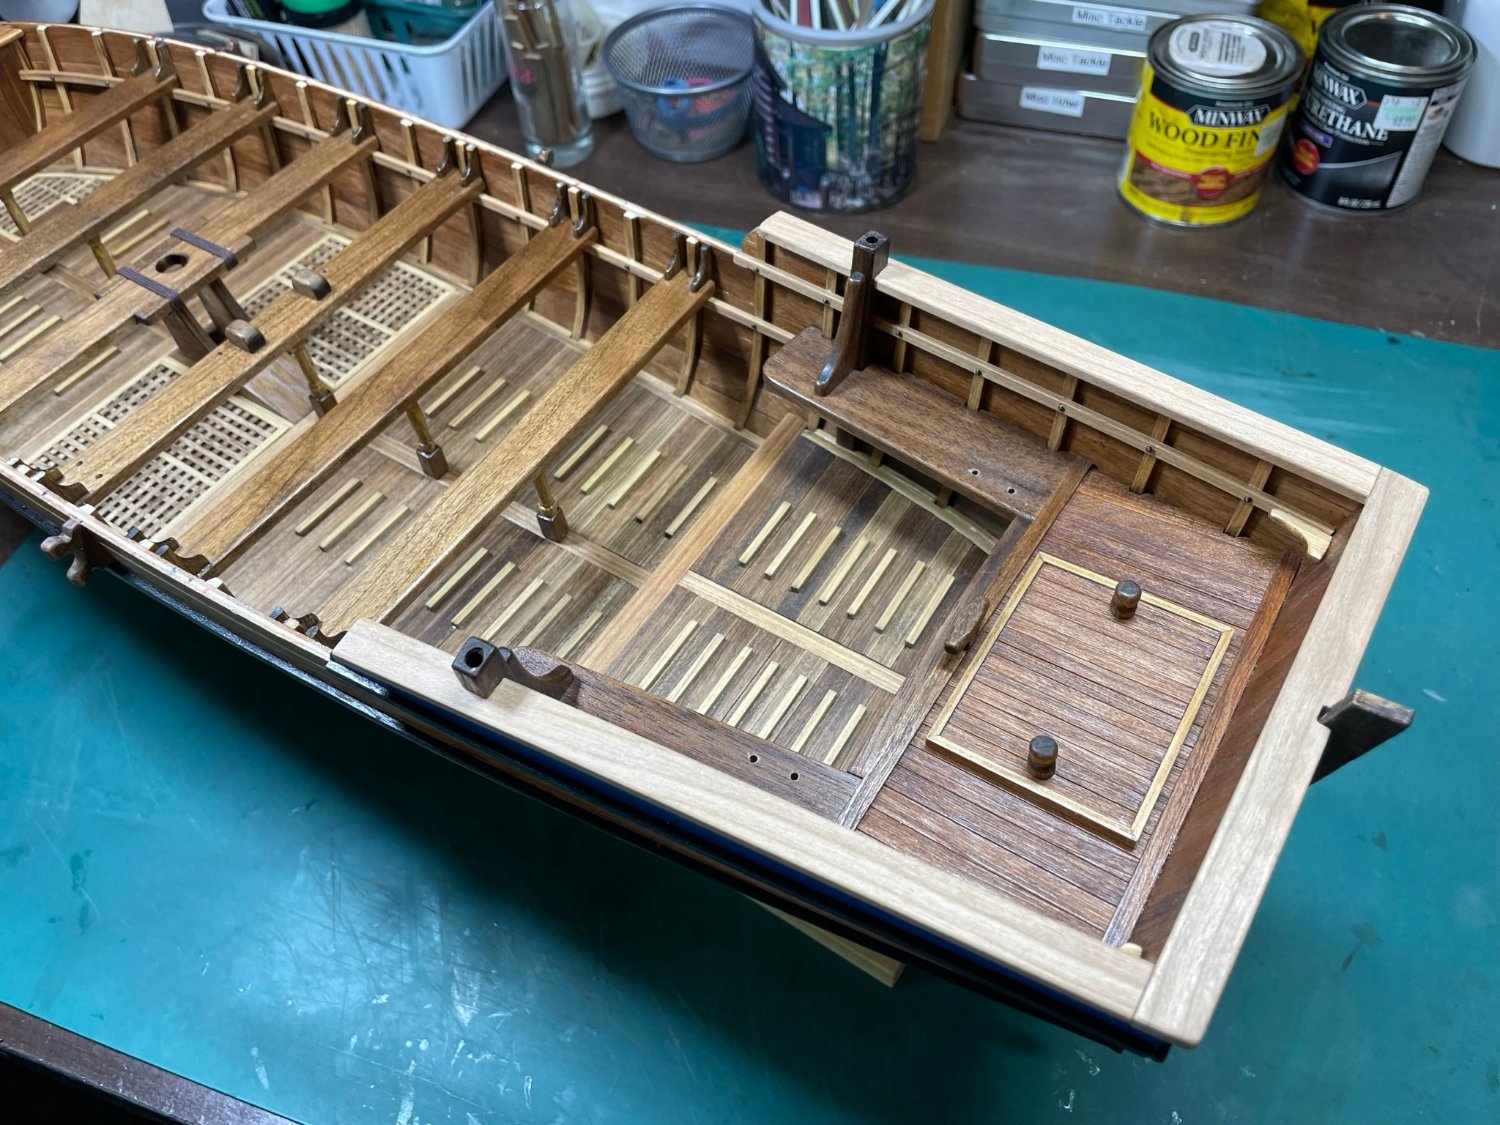
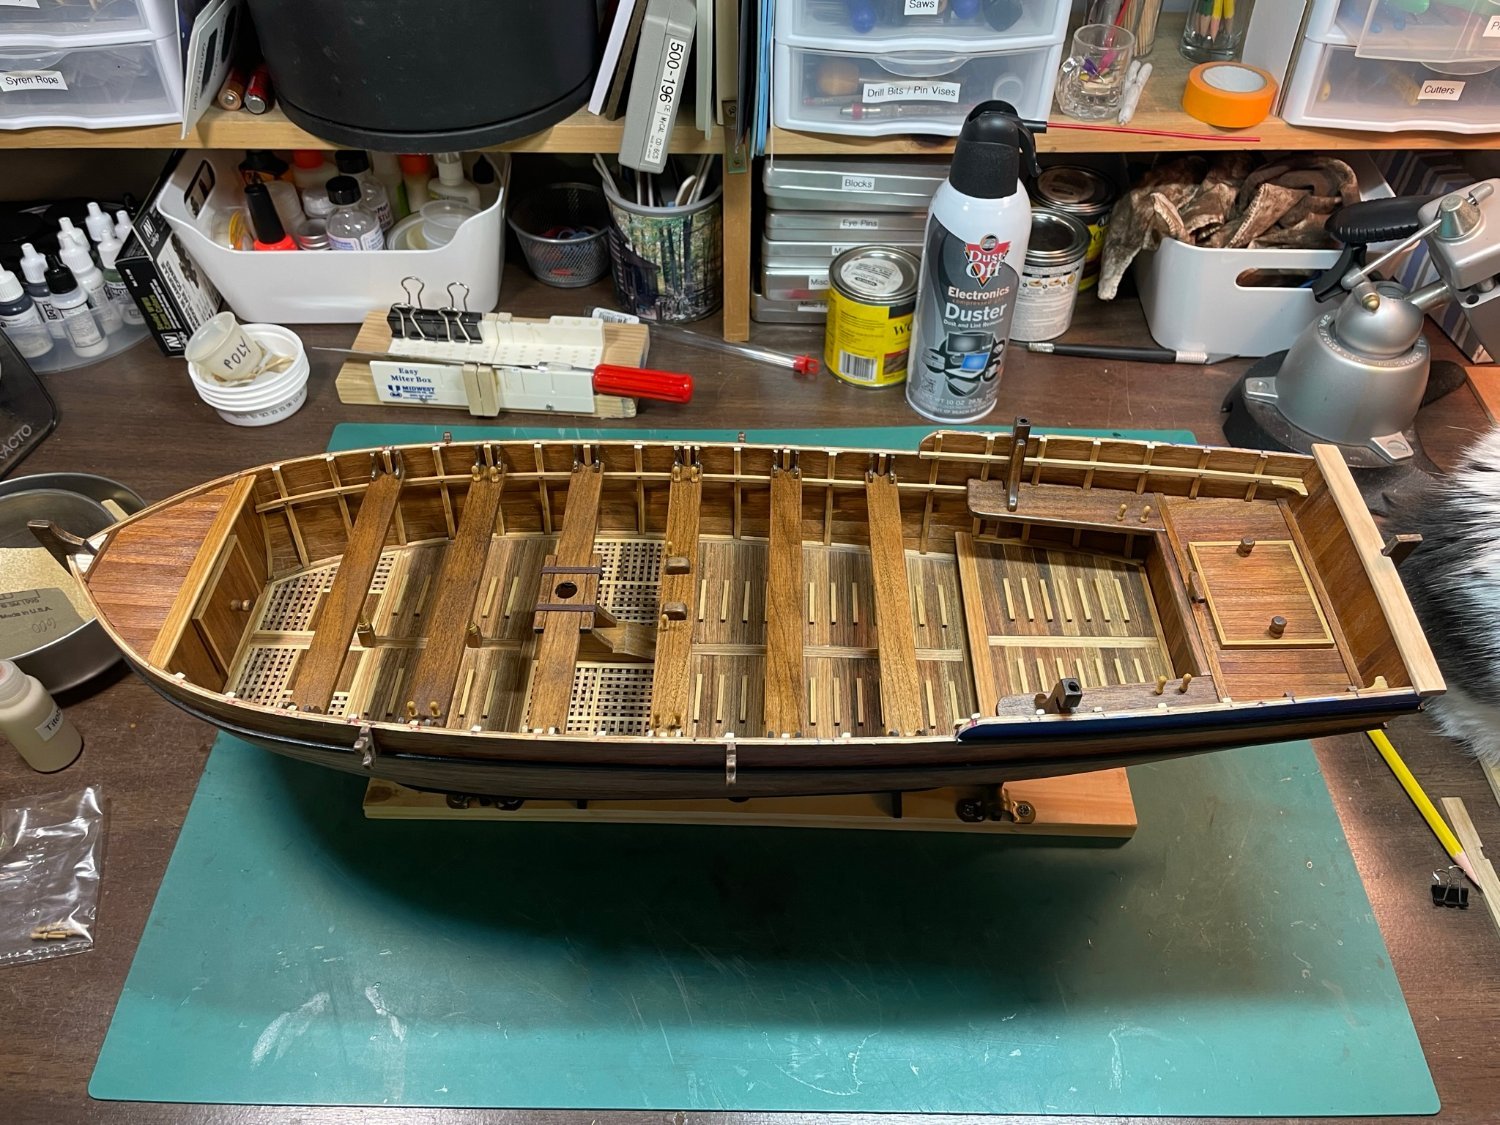
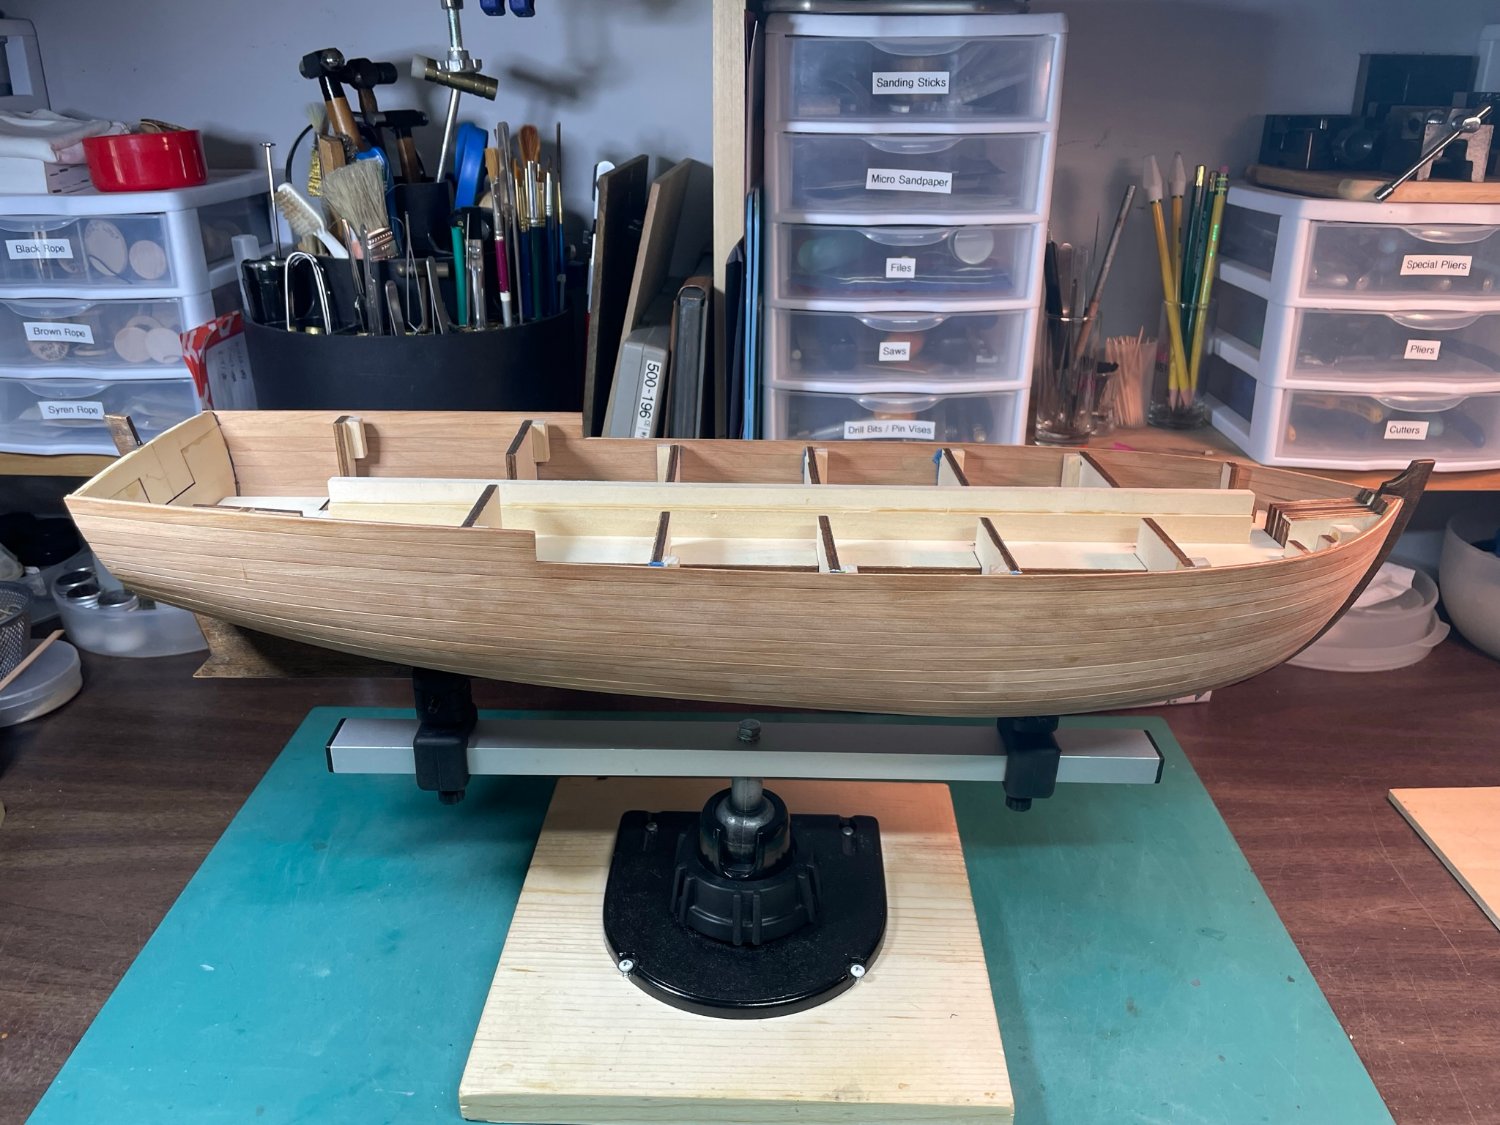
Now, on to the armed launch. I haven’t been taking as many pictures as I should but hope the ones presented here will suffice.
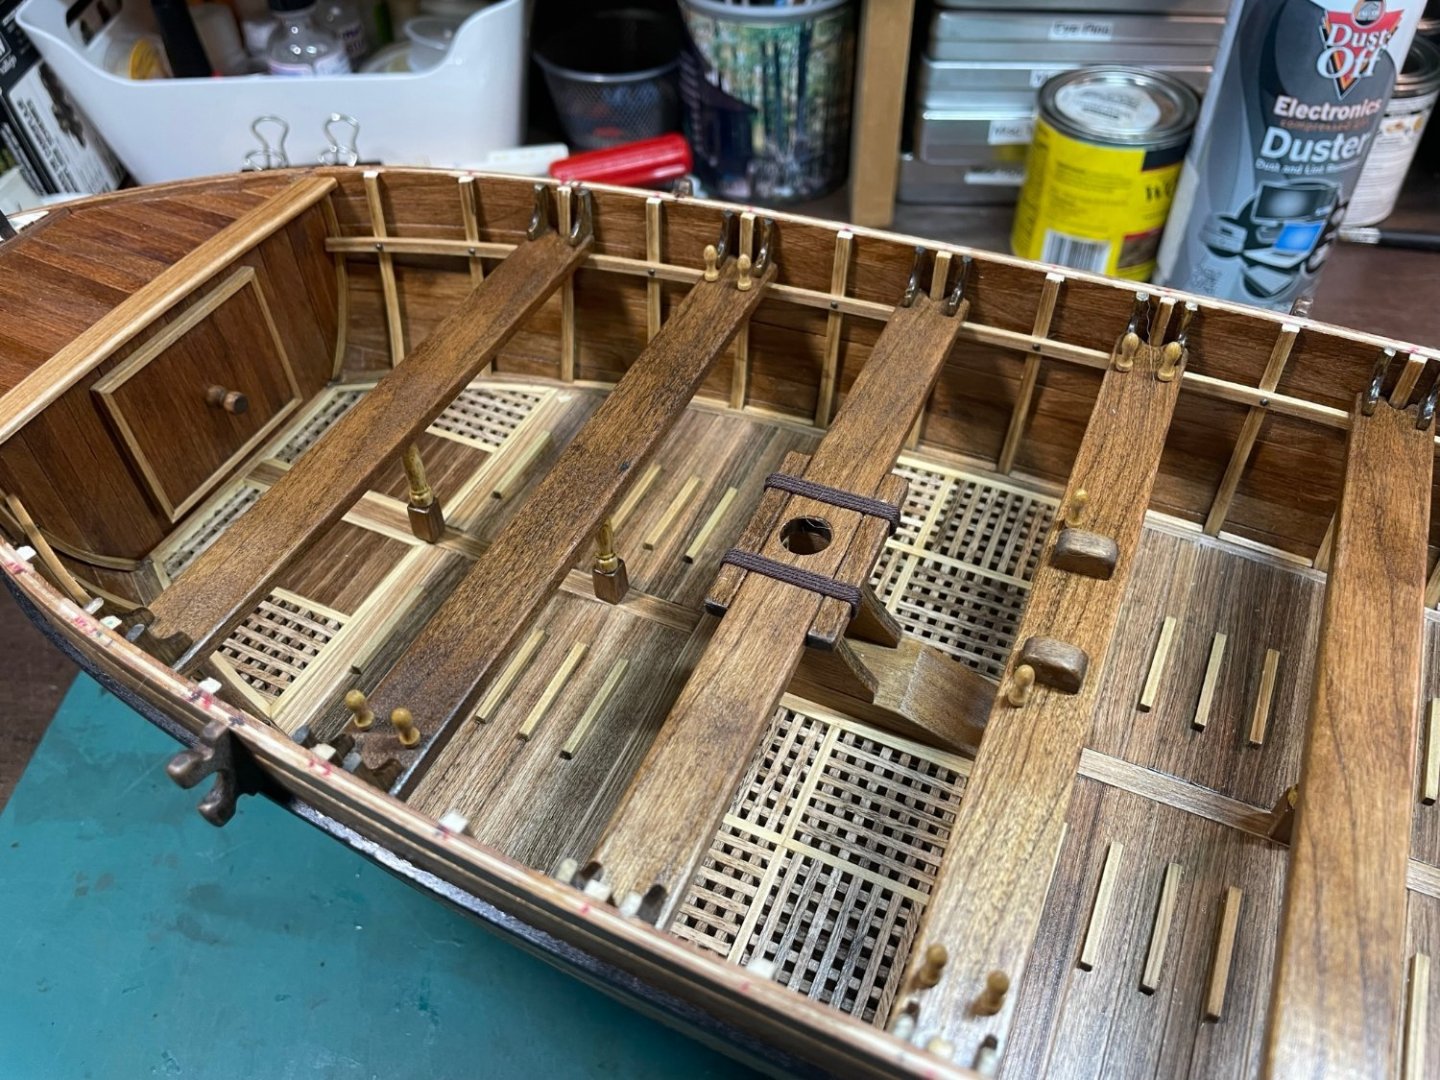
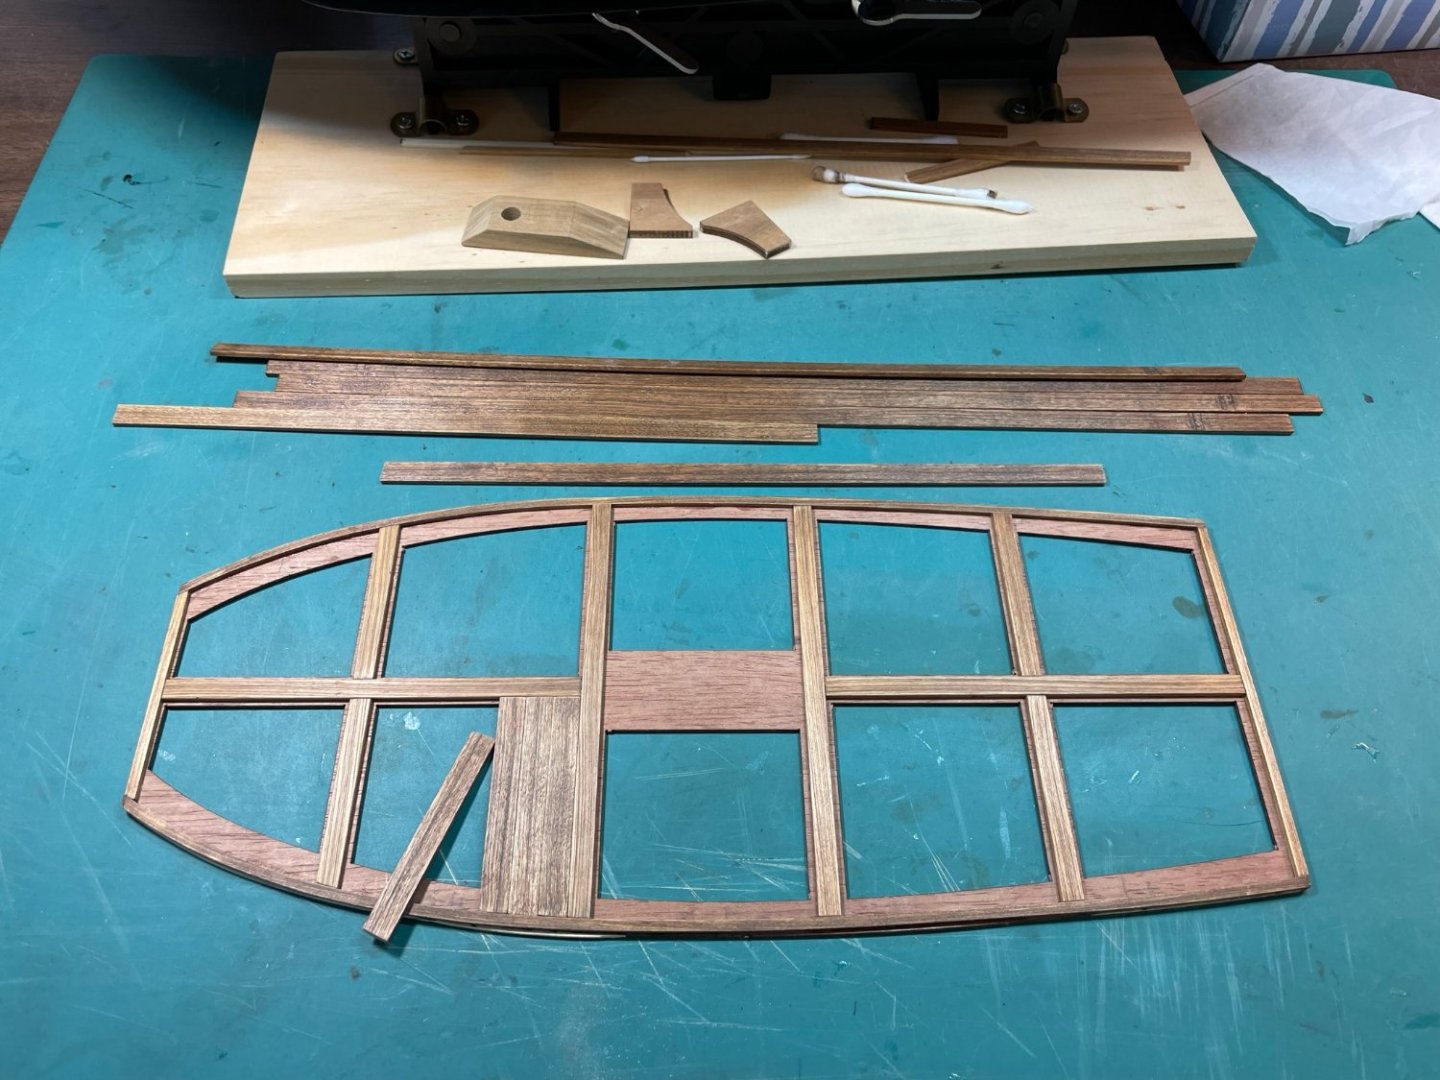
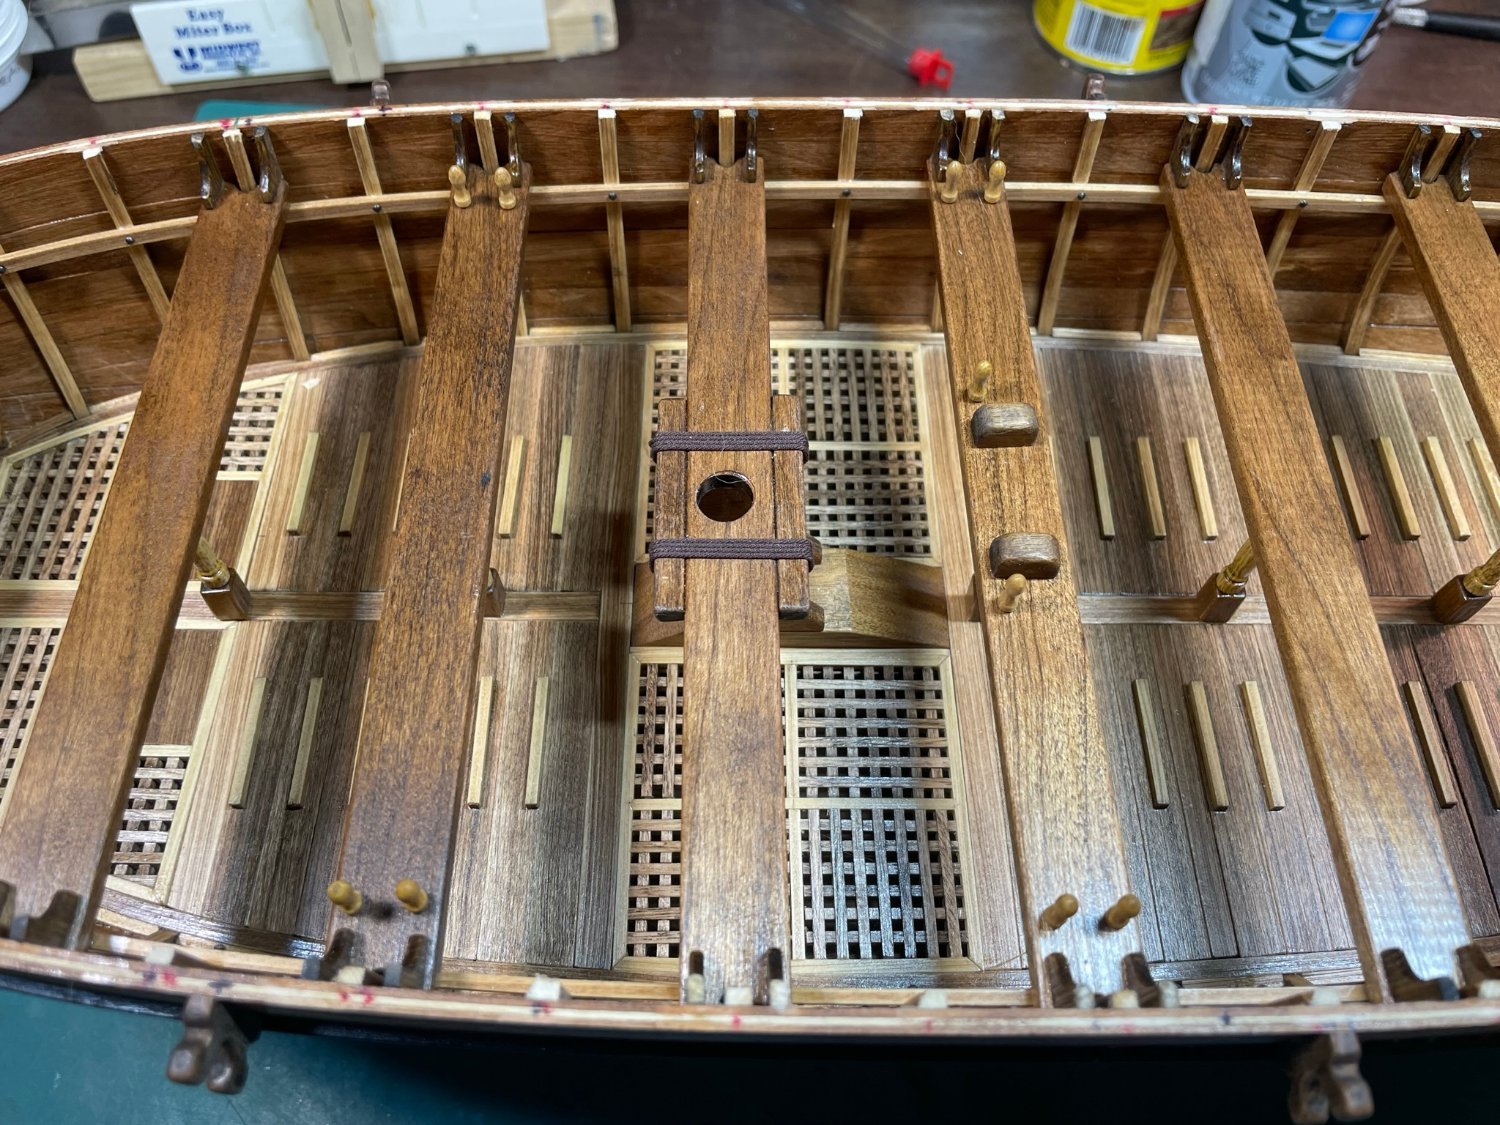
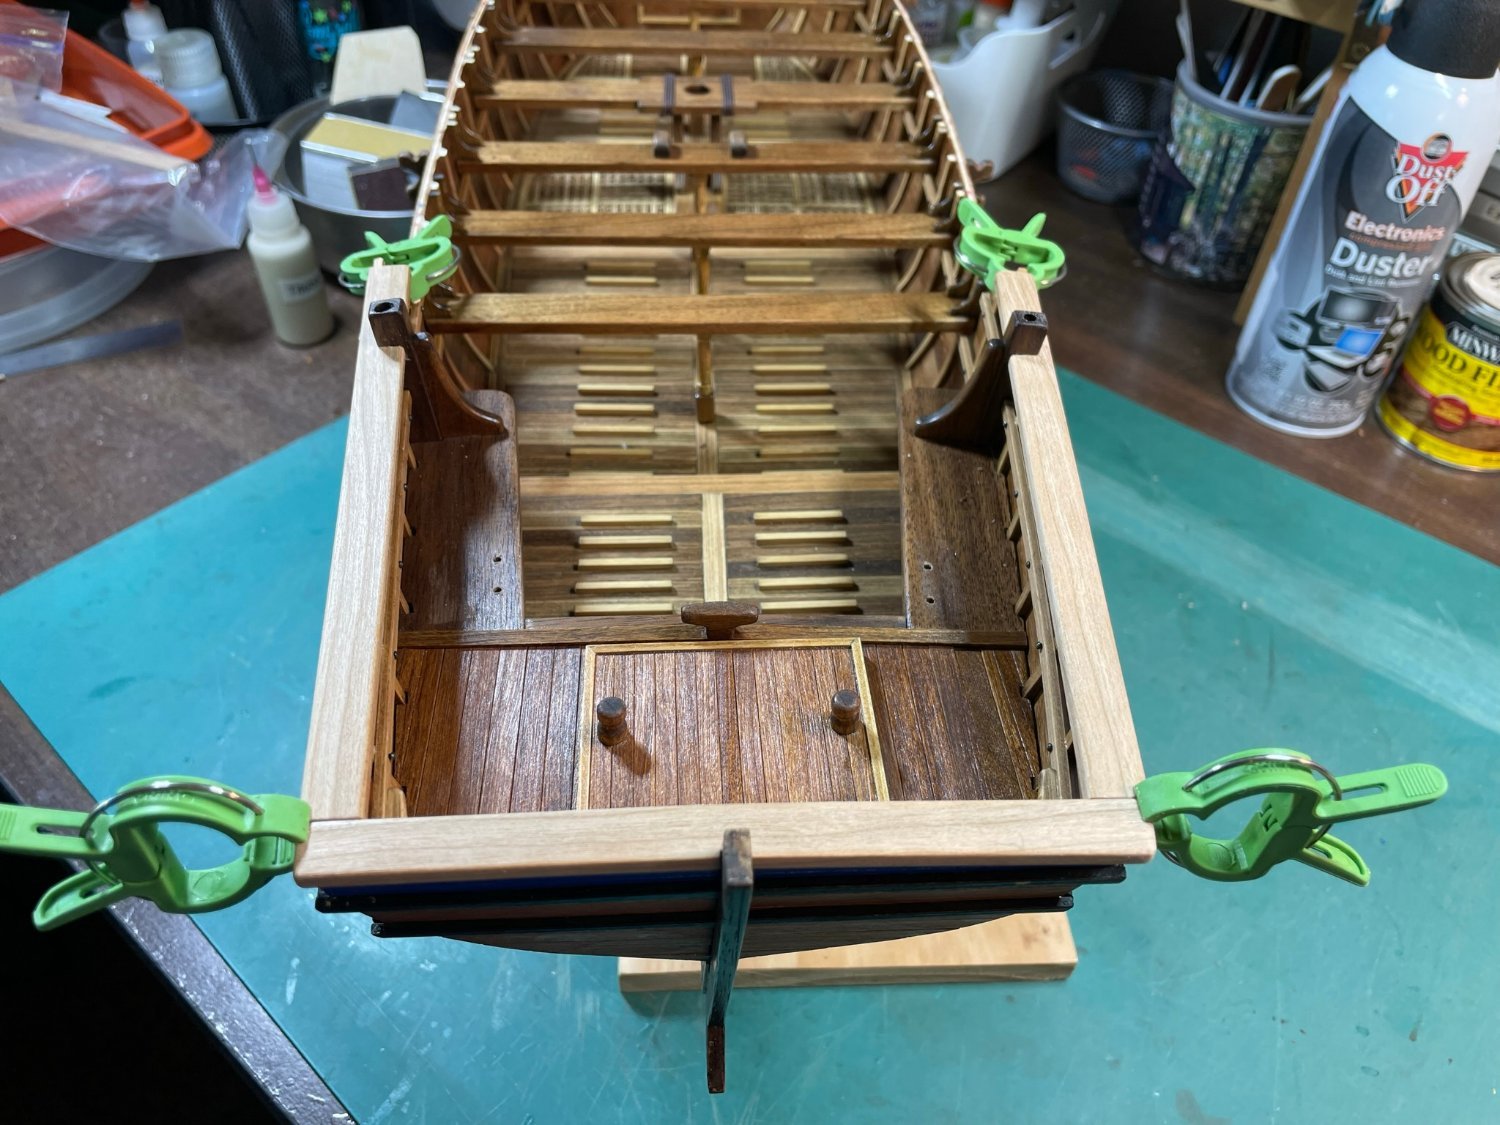
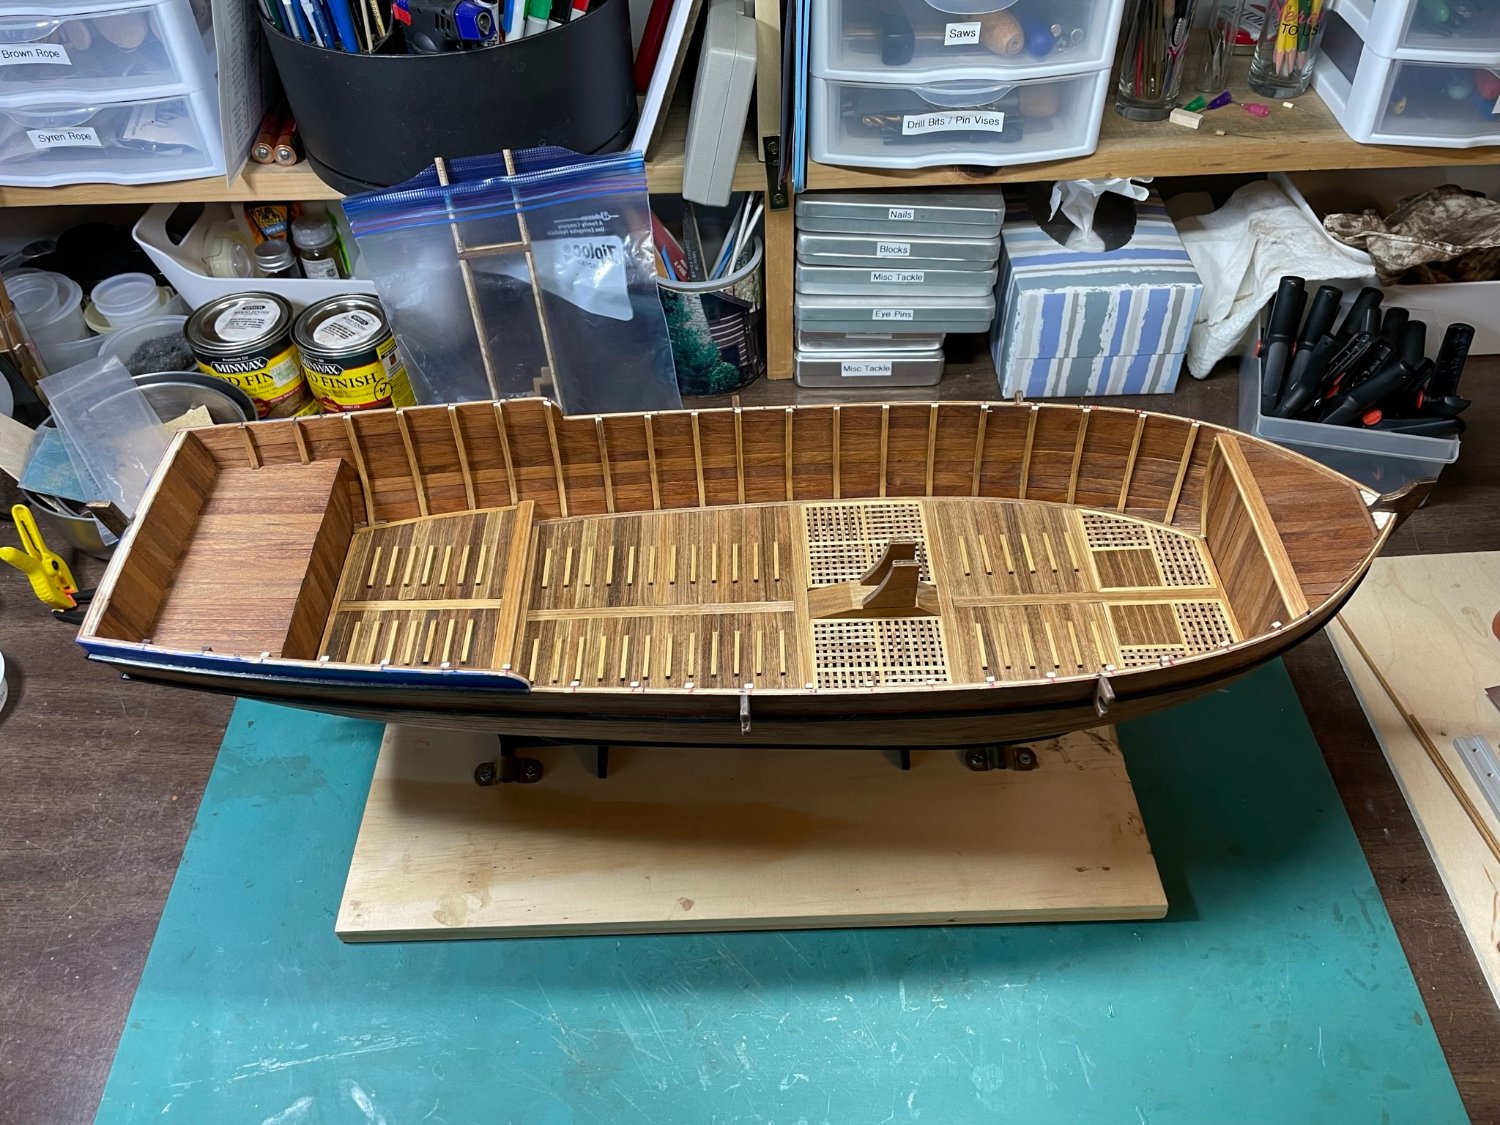
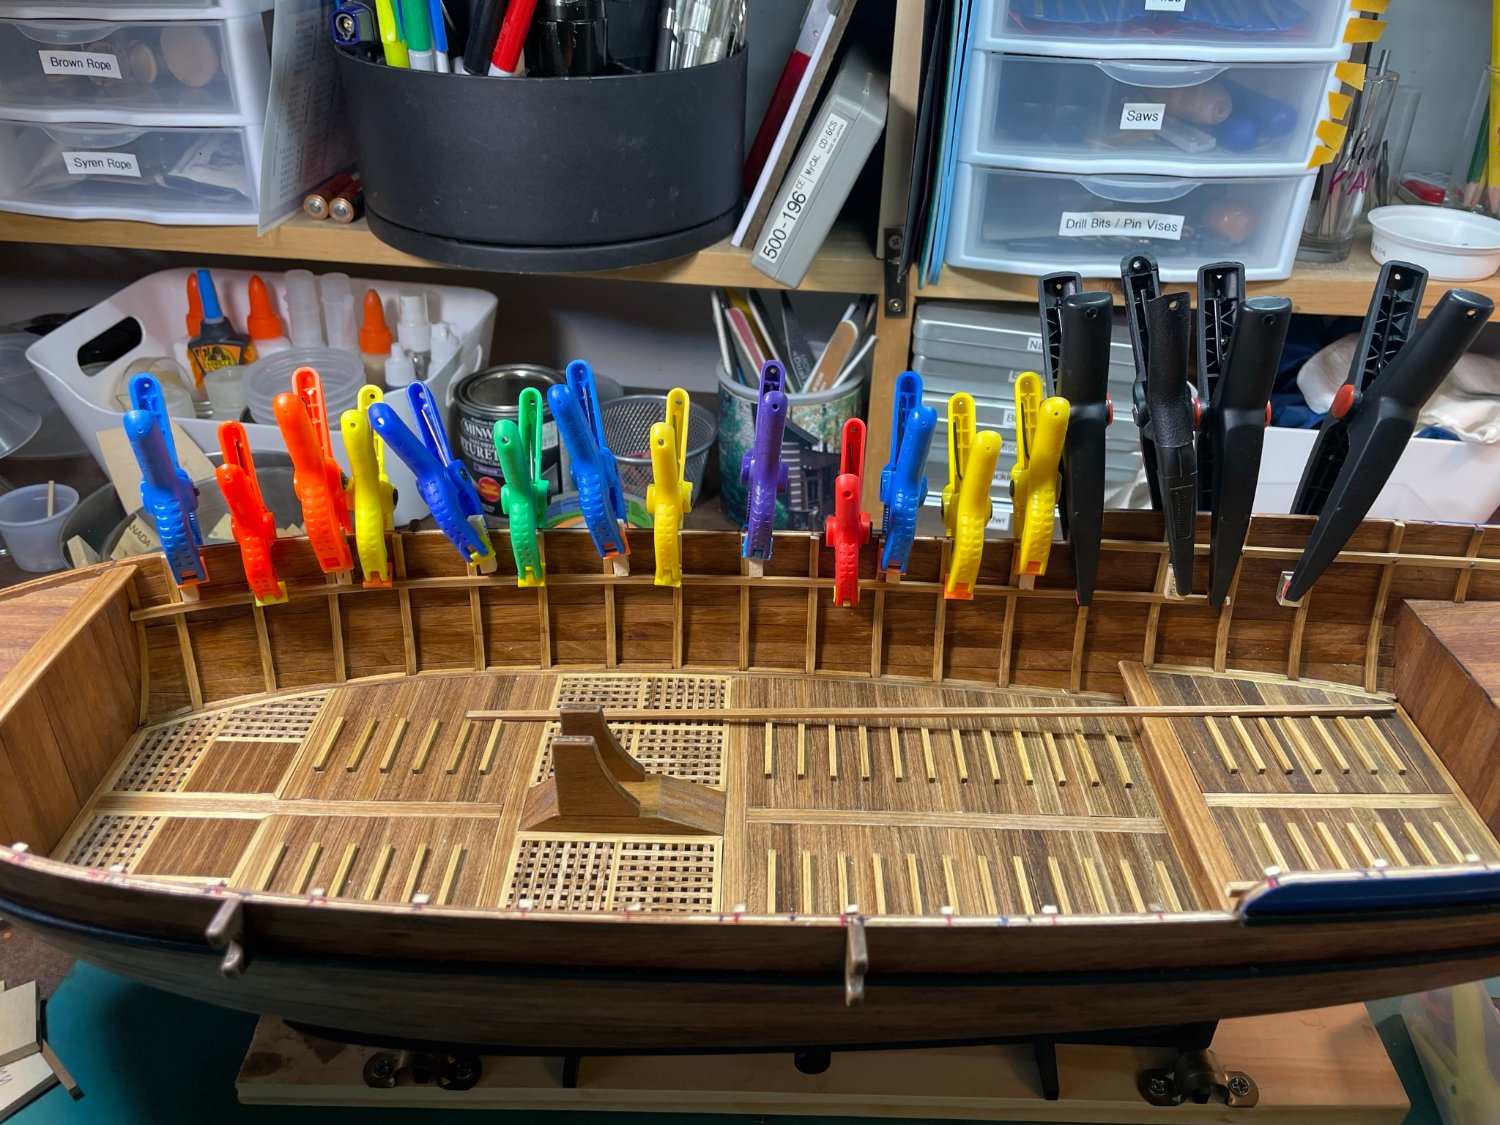
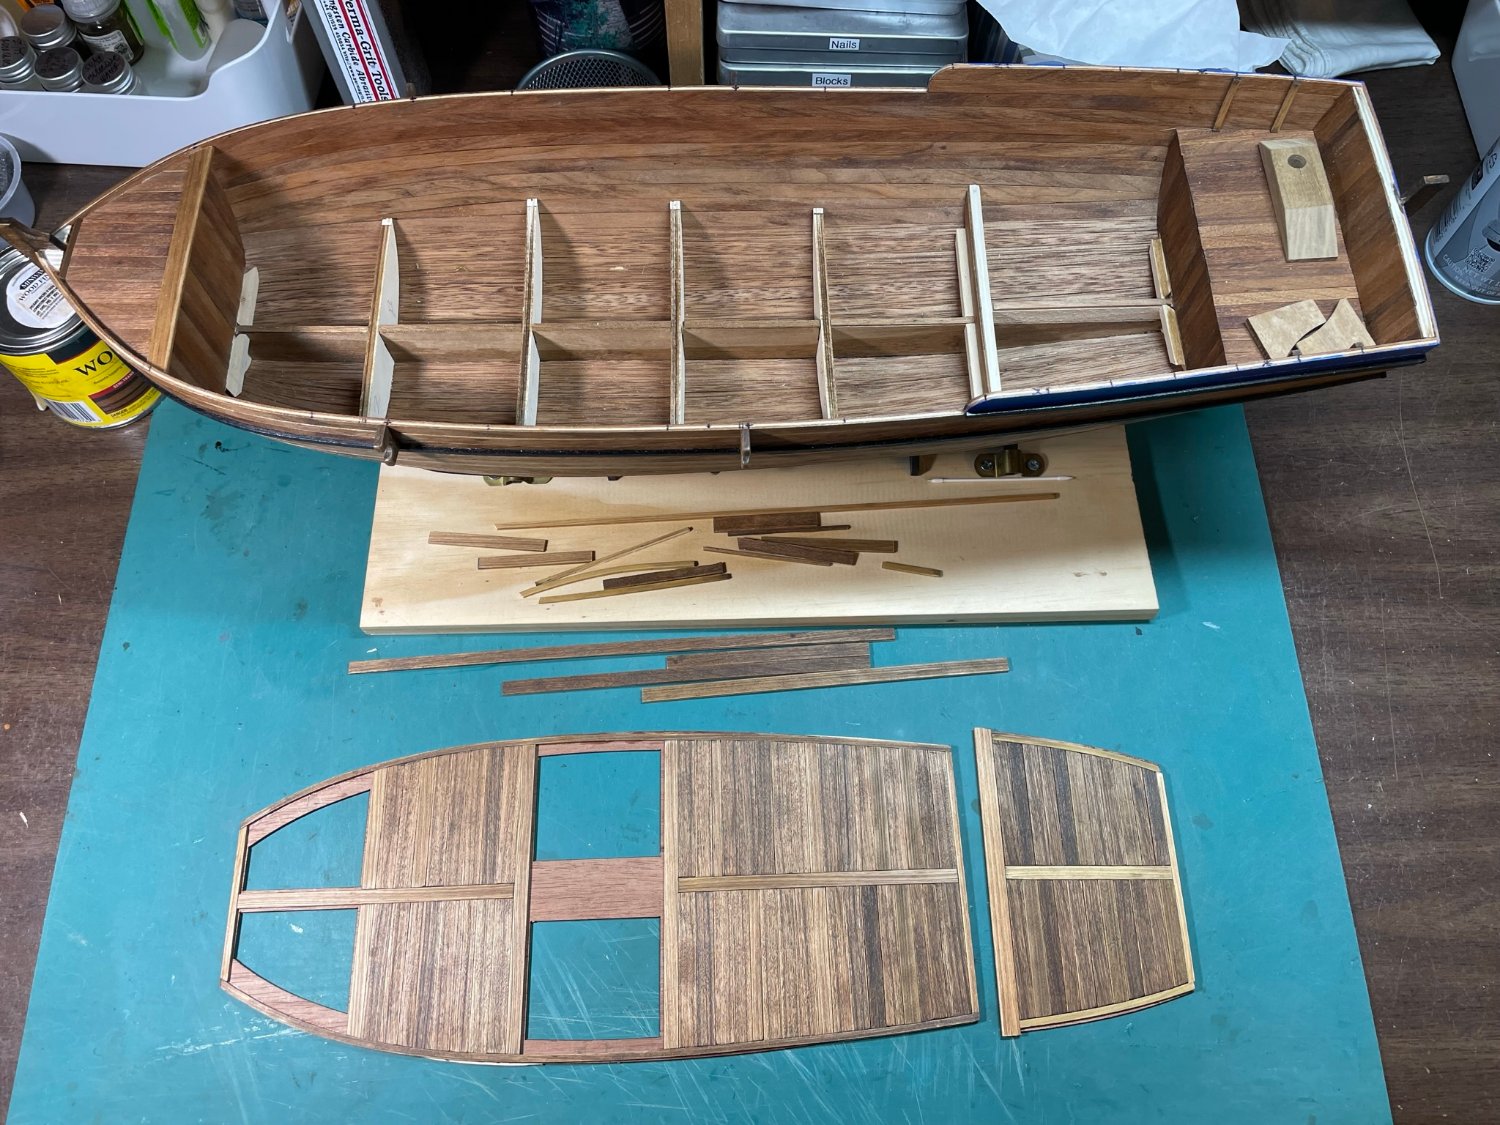
I replaced all of the wood in the kit, so the benches are made of cherry rather than beech. They are stained with MinWax Special Walnut.


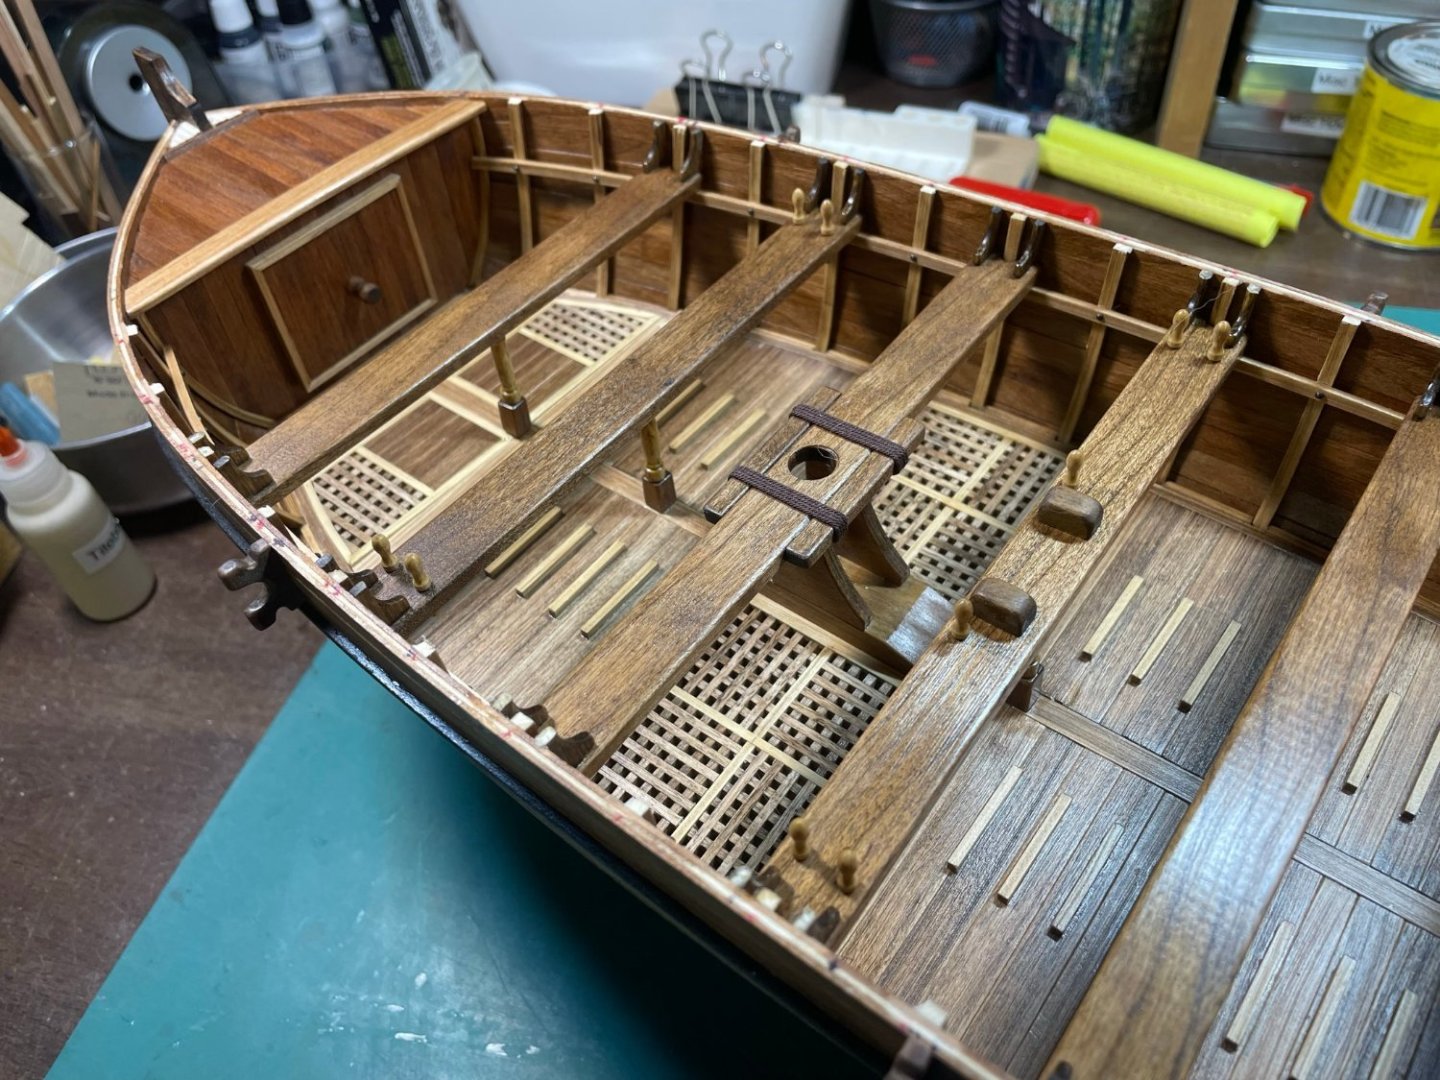

As I expected I would, I had issues making the aft benches, so the replacement walnut that I ordered ahead from Modeler’s Sawmill paid off, and I finally made good benches.


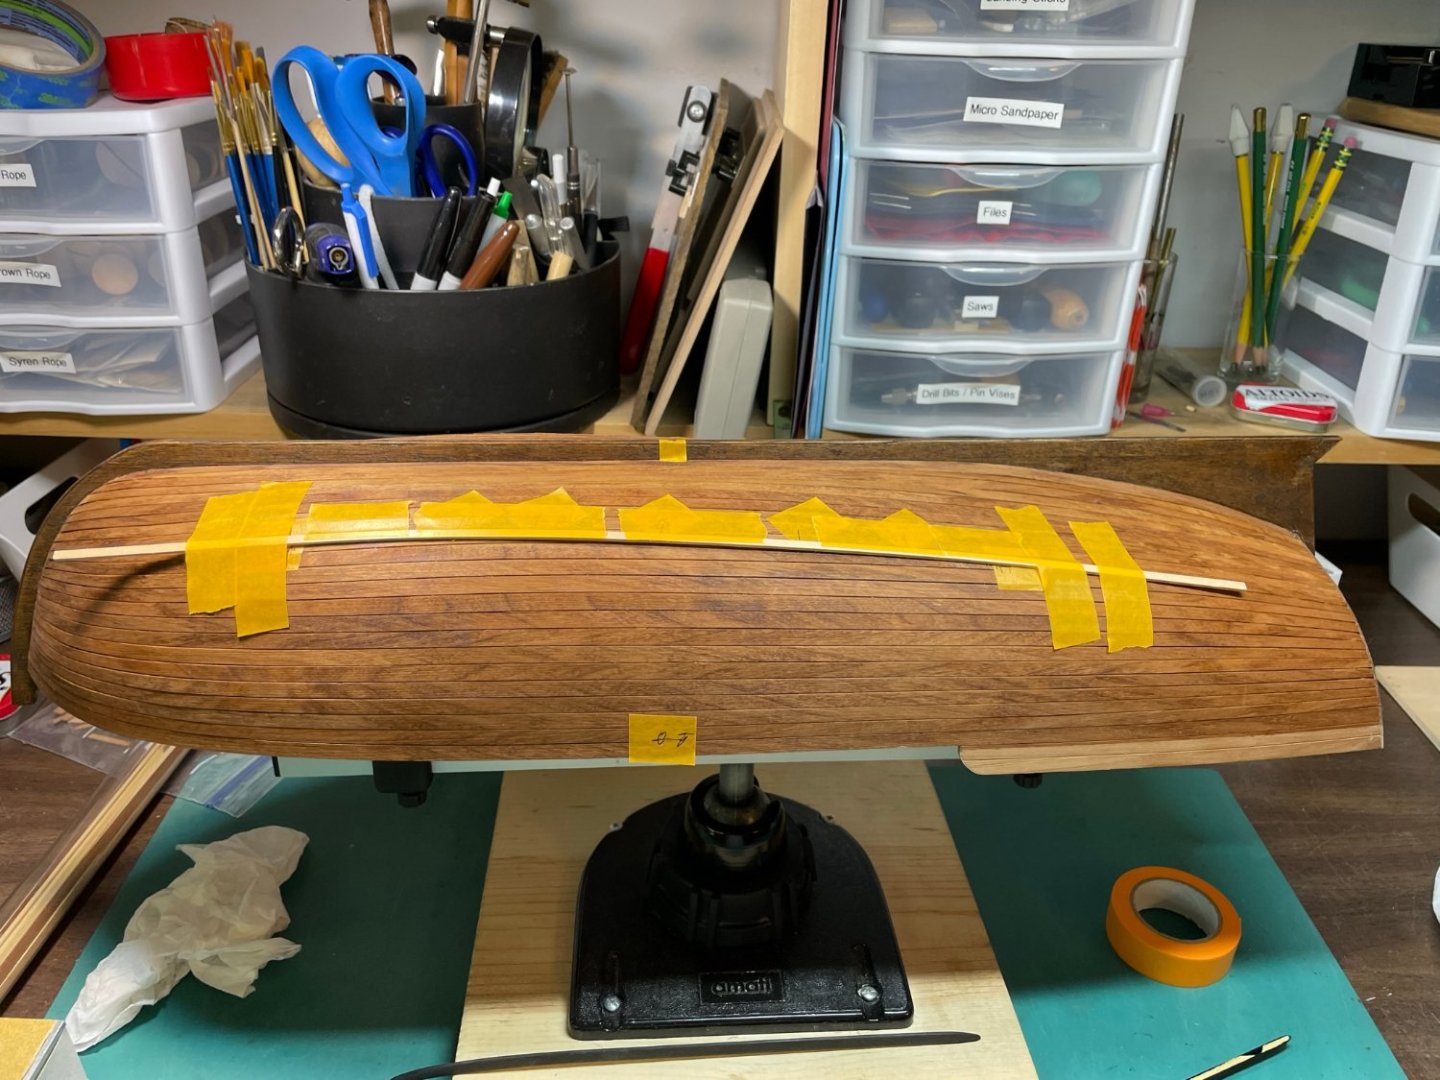
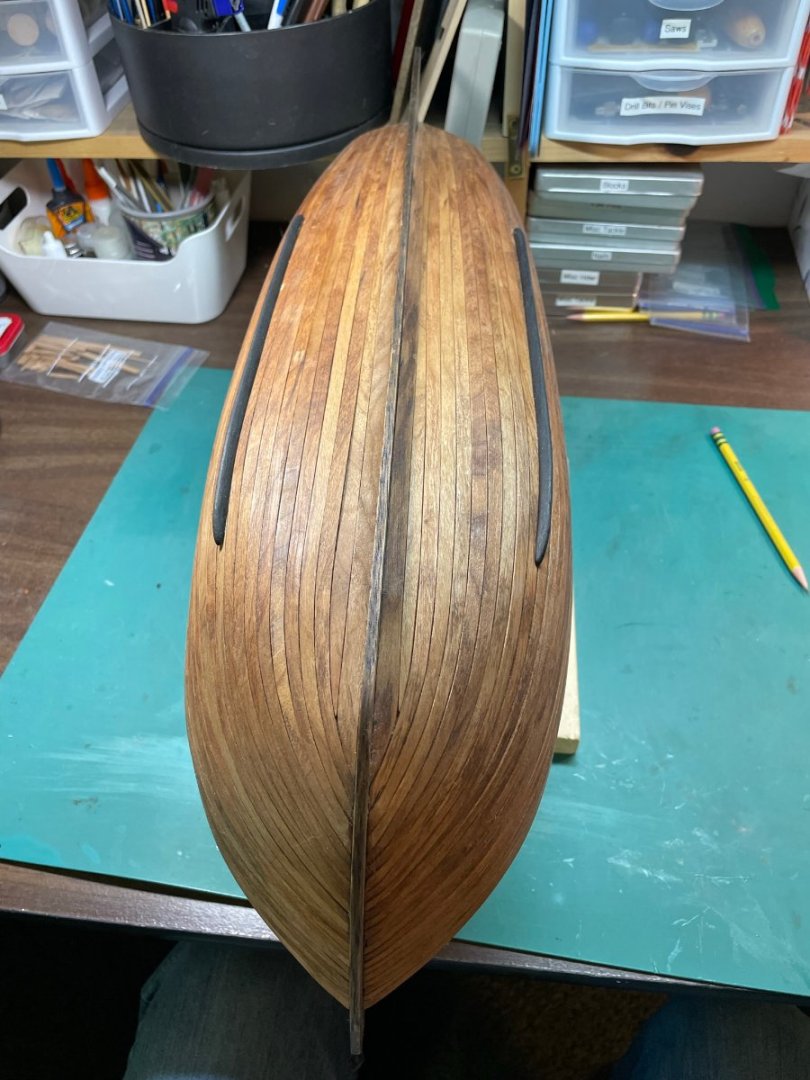
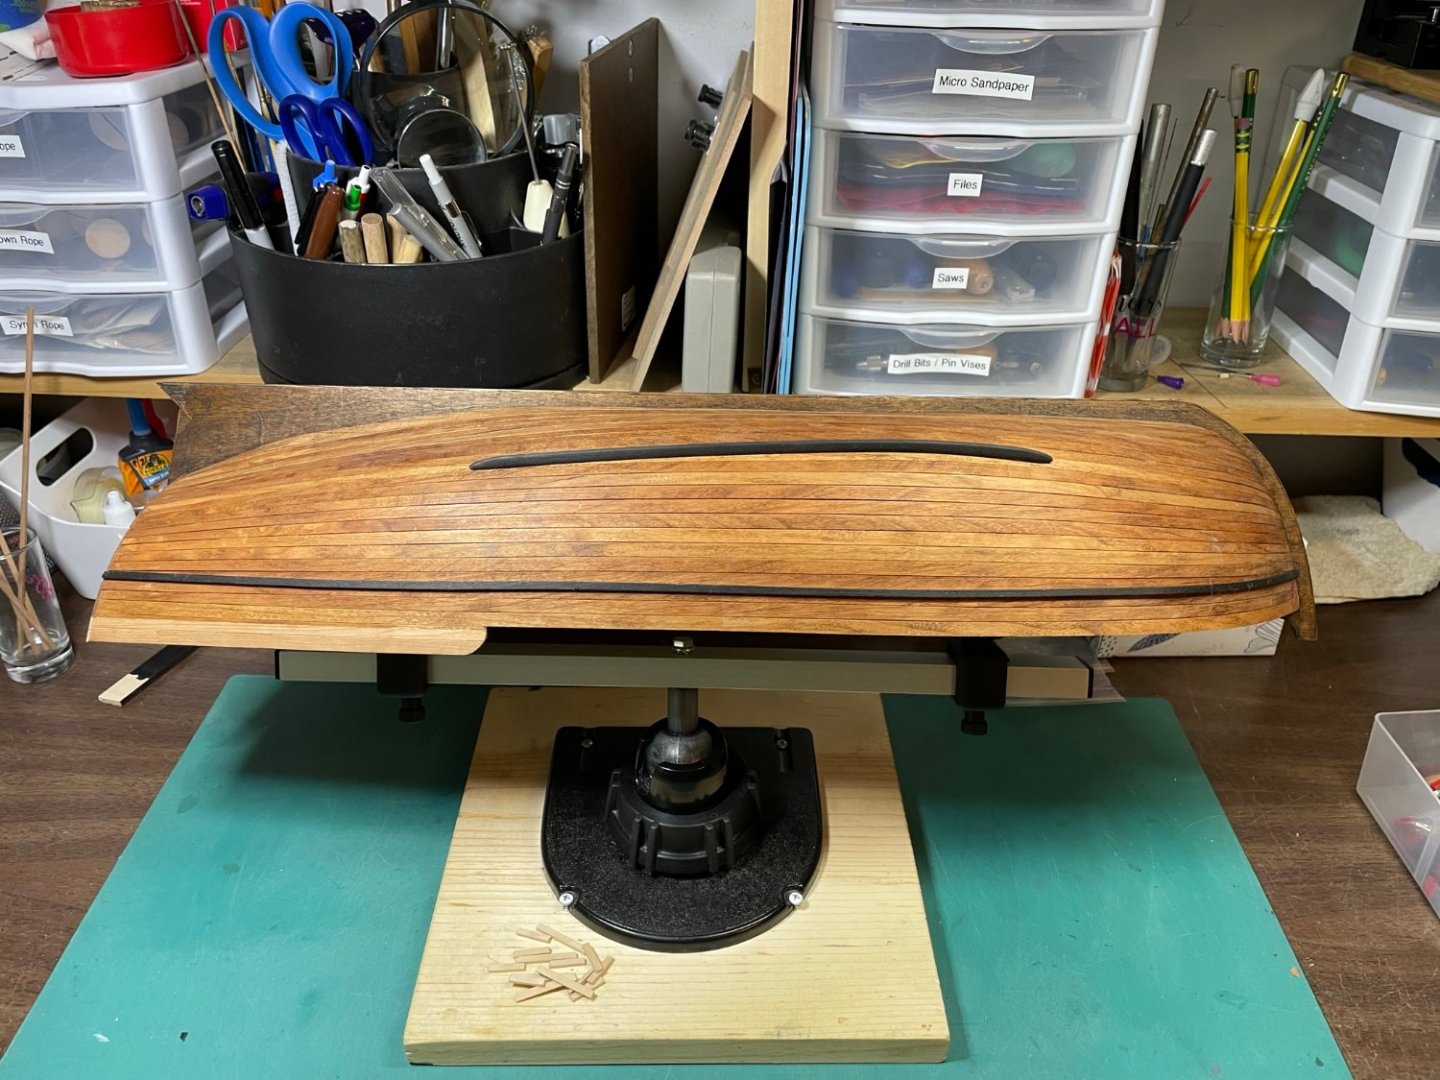
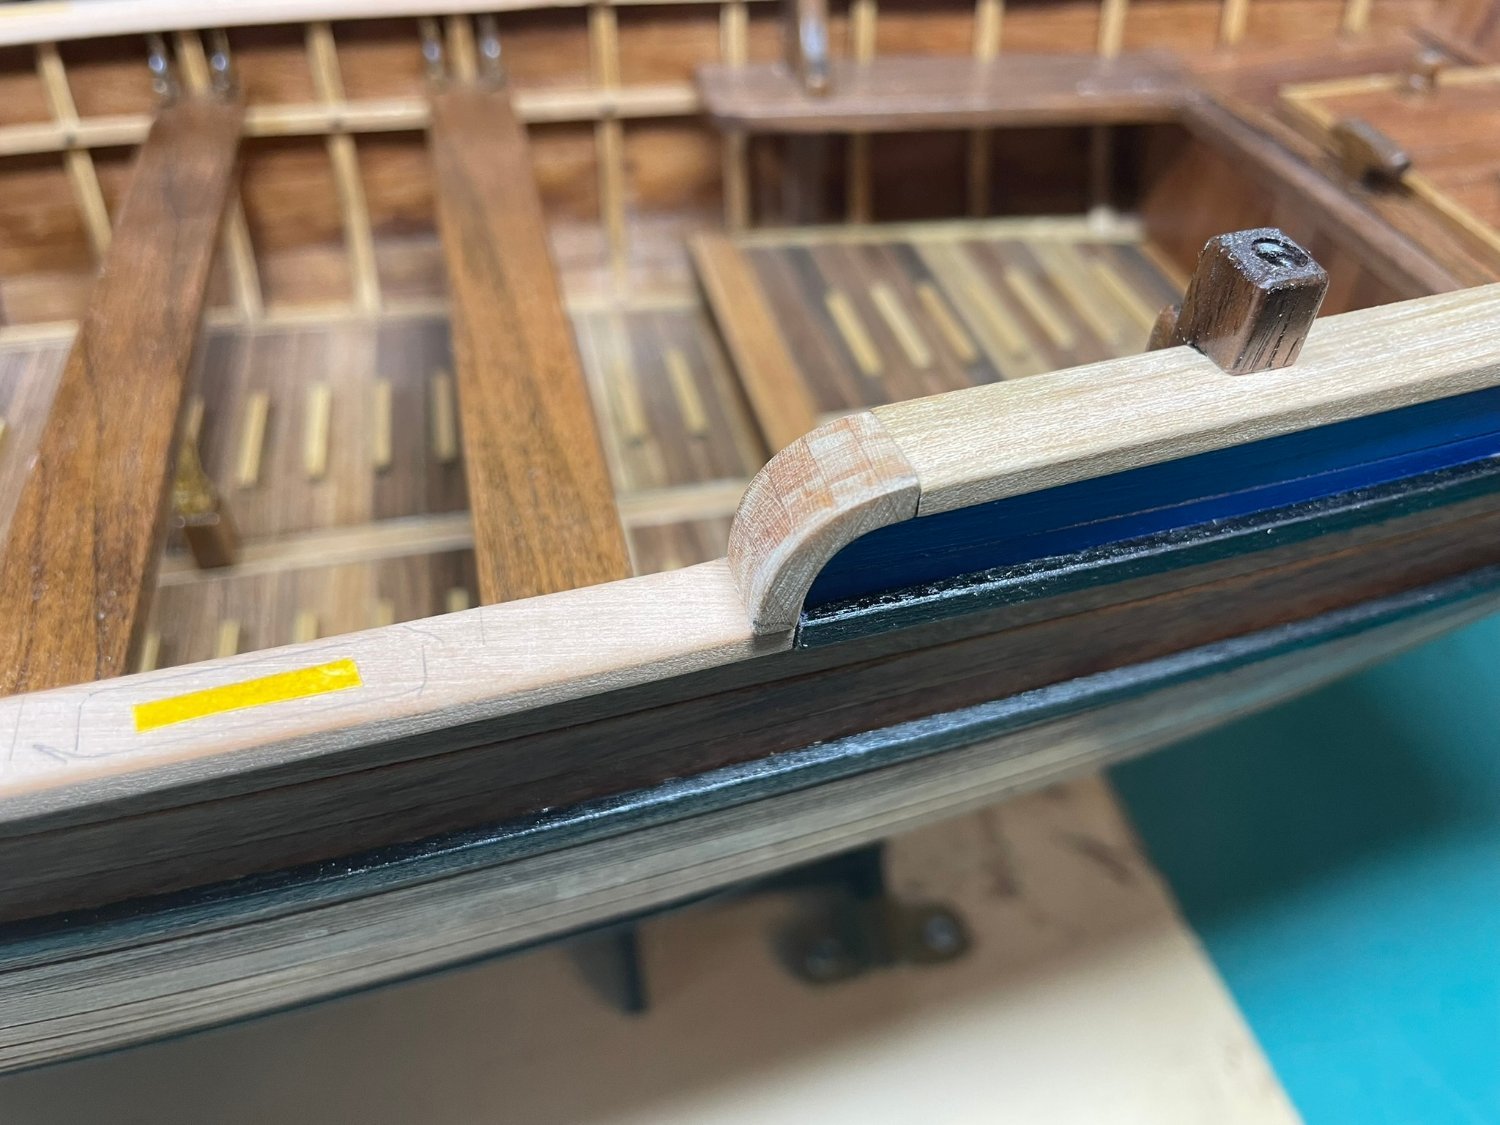
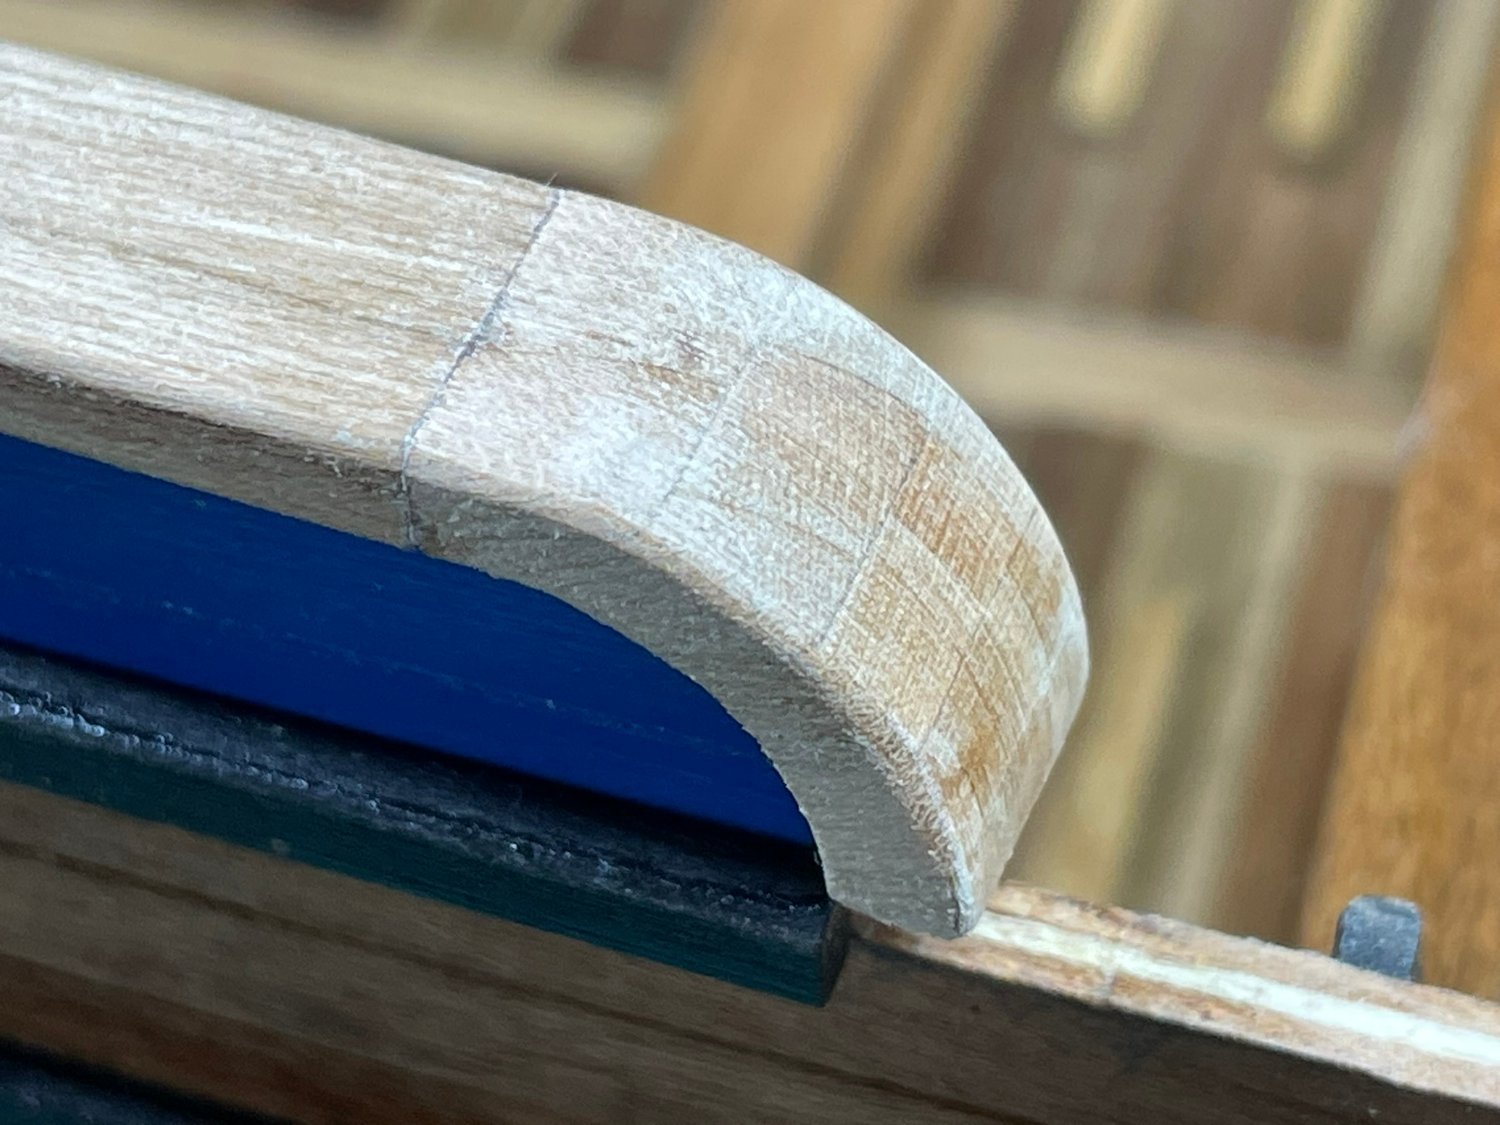
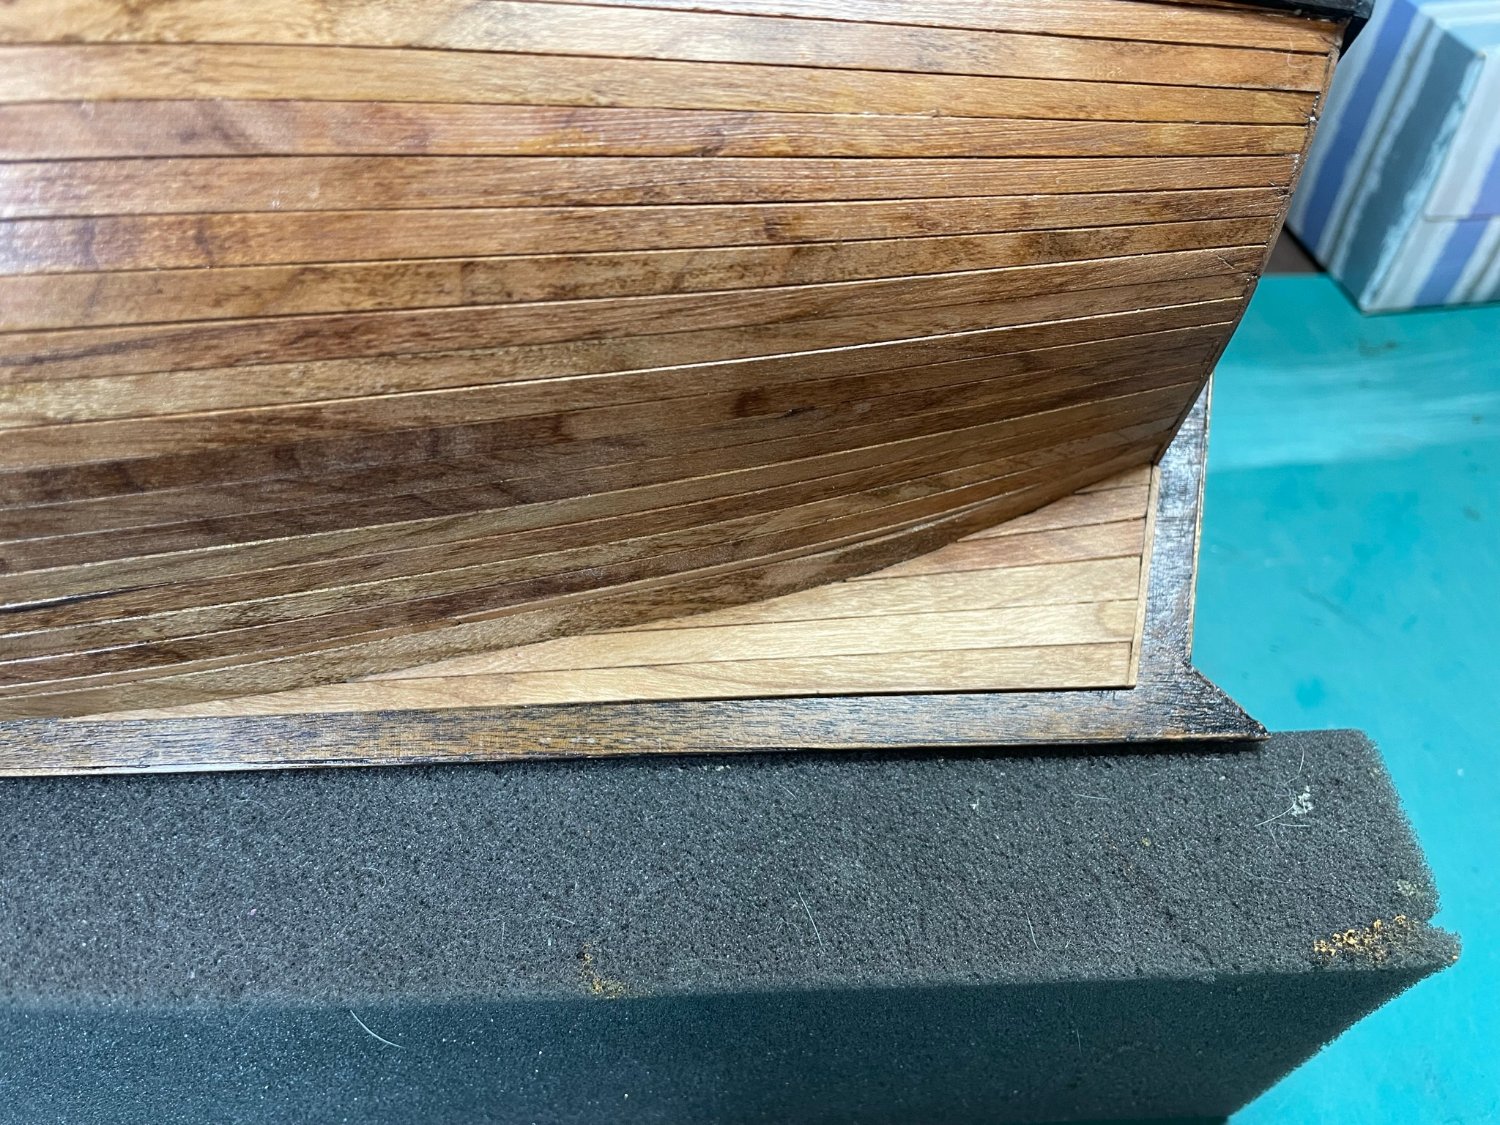
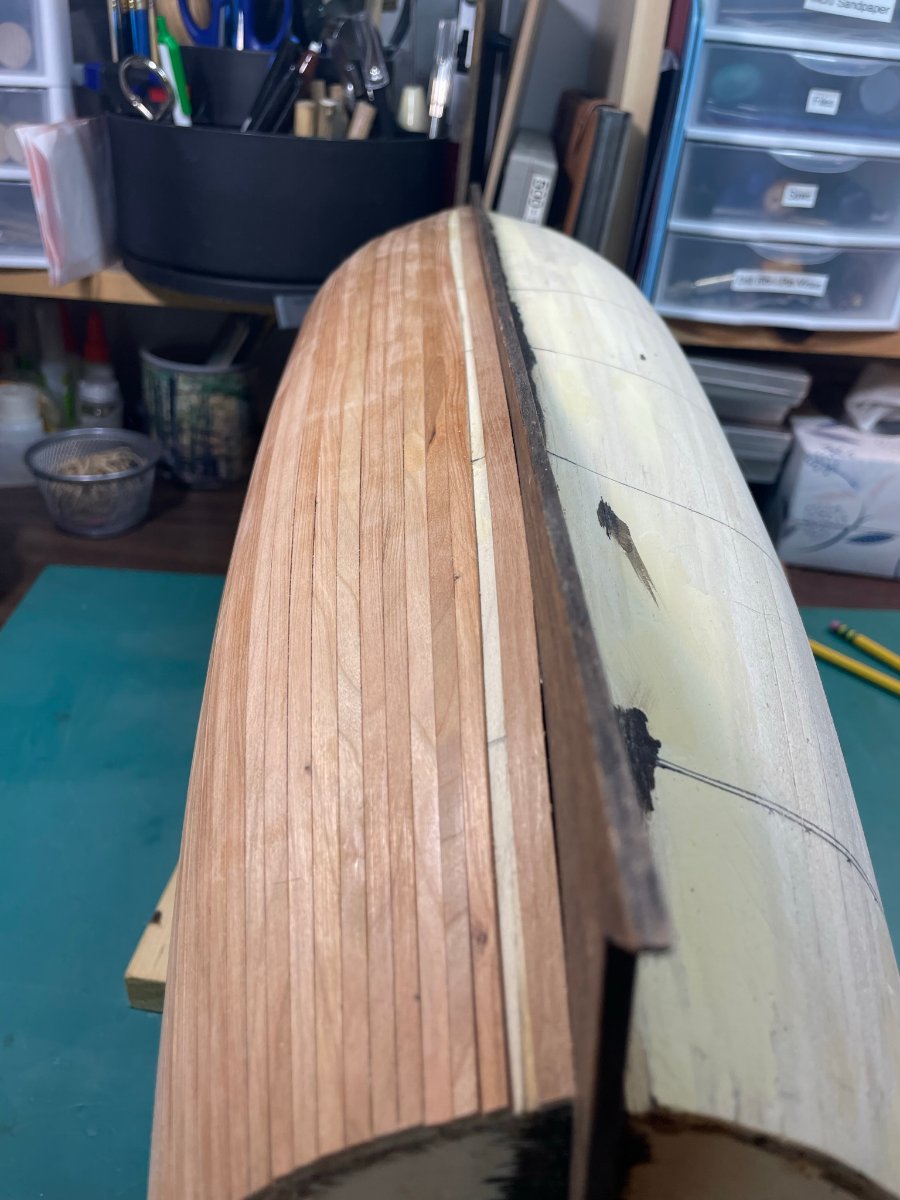
It’s not real apparent from the pictures, but the top profile of the hull was not consistent from side to side and fore and aft. I’m sure its due to a lot of little stresses that built up in the three layers of planking. The cherry was a real bit of work to properly form and bend. Because of this I opted to make the stern side cap rails straight.
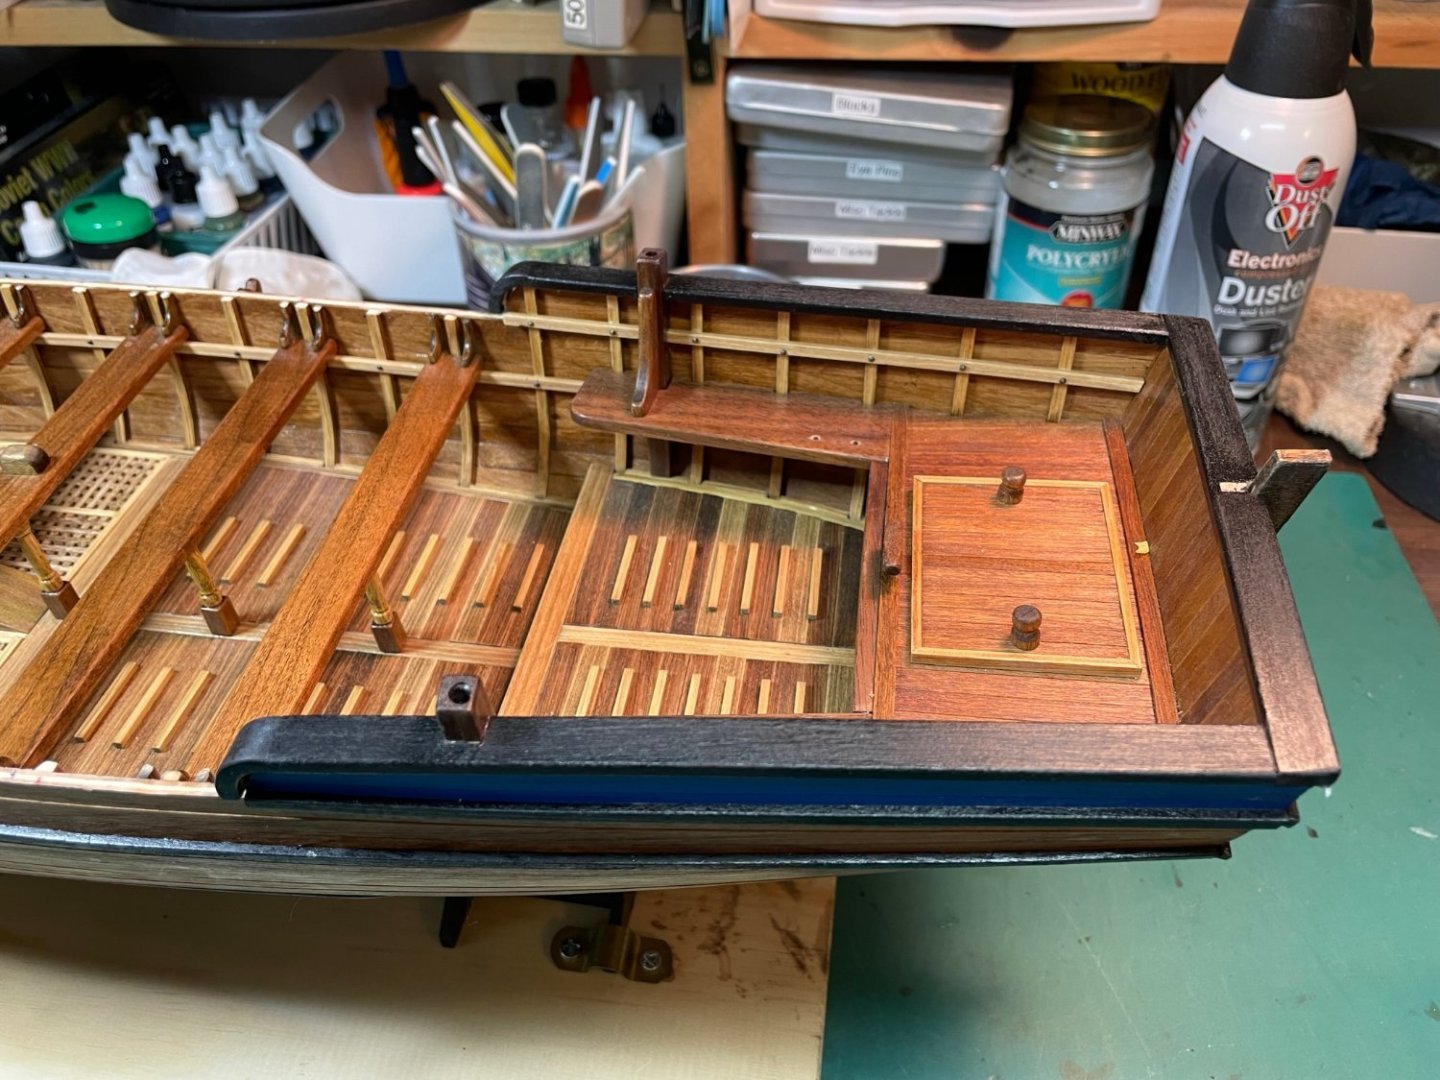
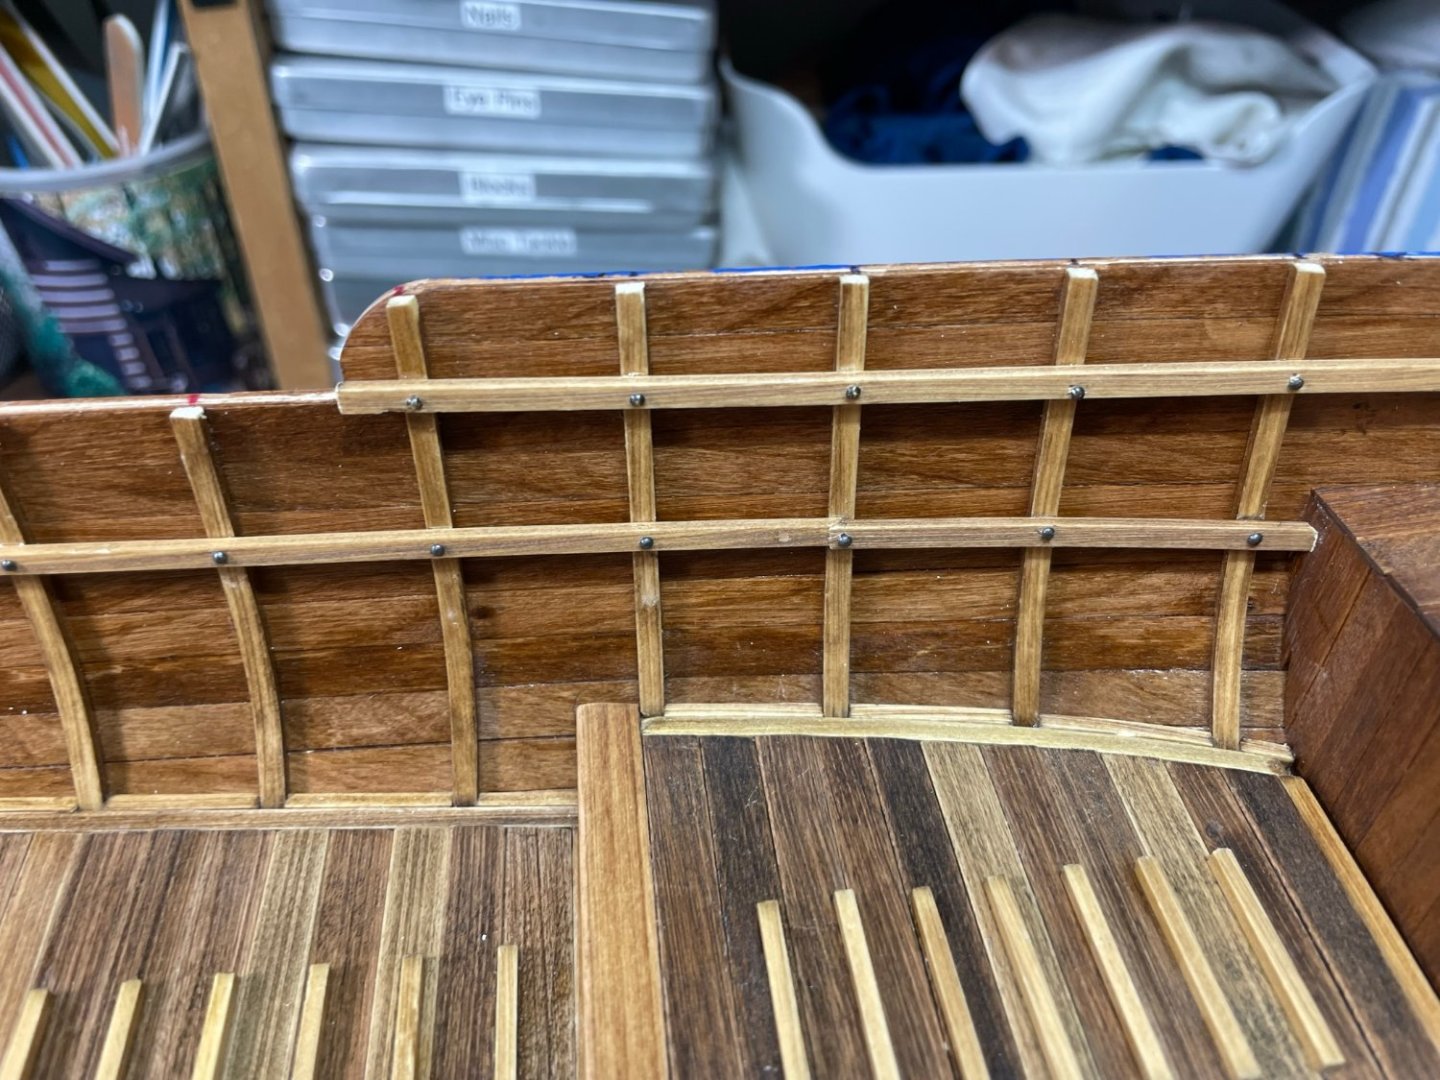
The kit instructions called out a rather awkward way to make the forward cap rails, so I made them in one piece from a pear wood plank 3mm thick. To do it I made a tracing of the contour for each side, then added the appropriate thickness to each side of the line. I’m really pleased how they turned out.
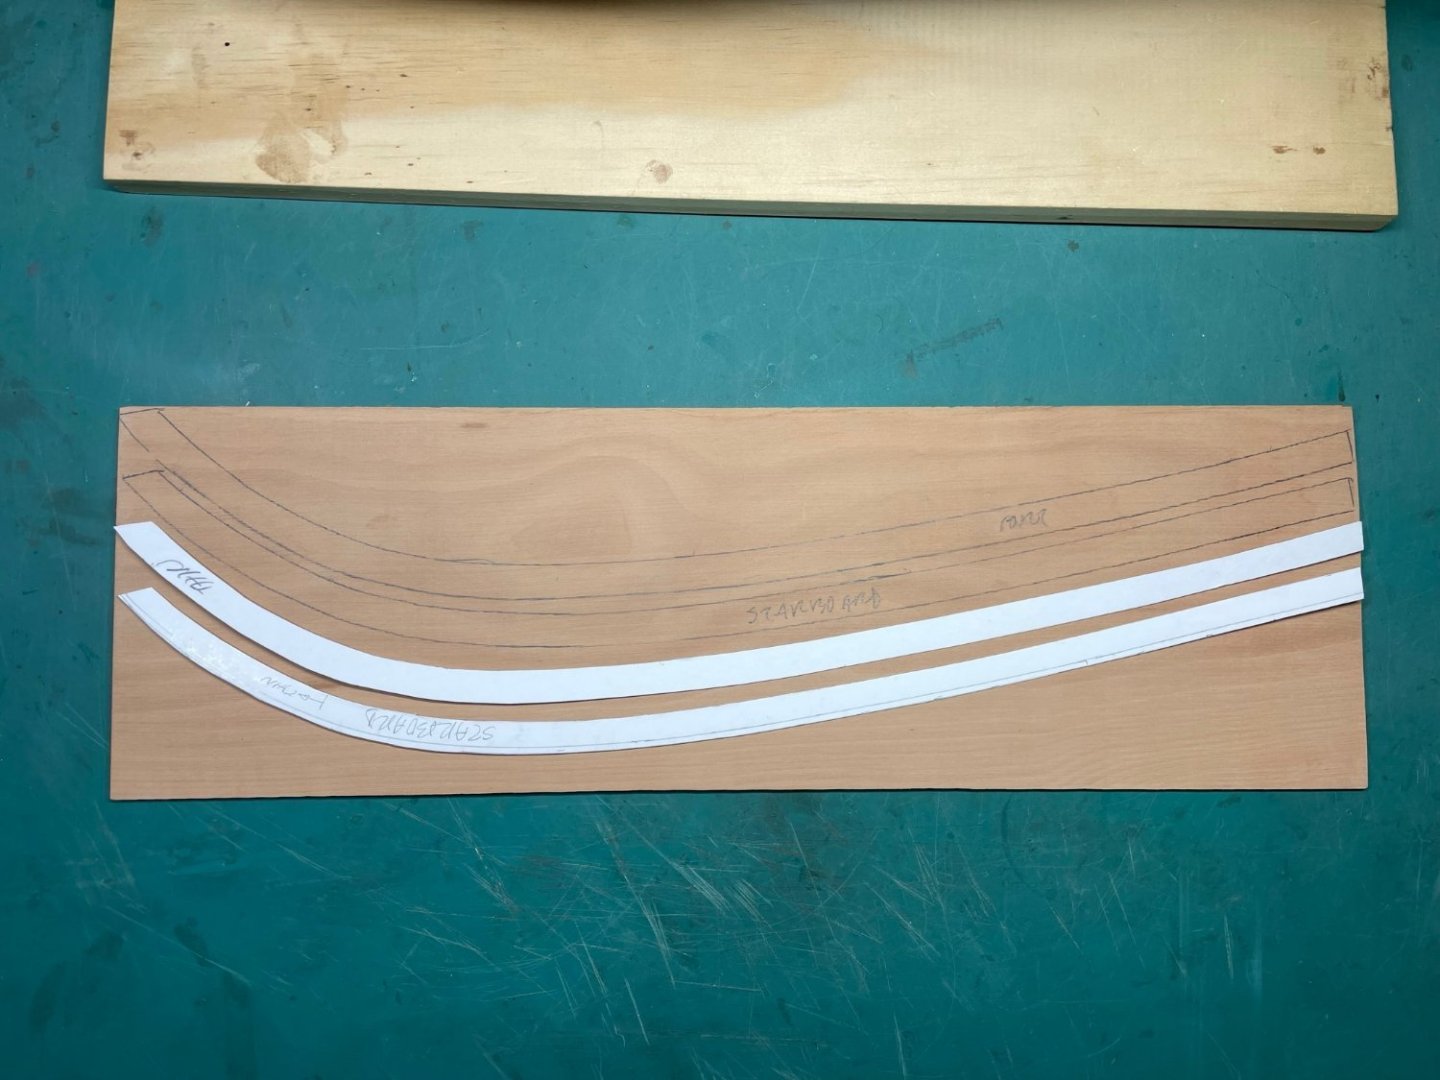

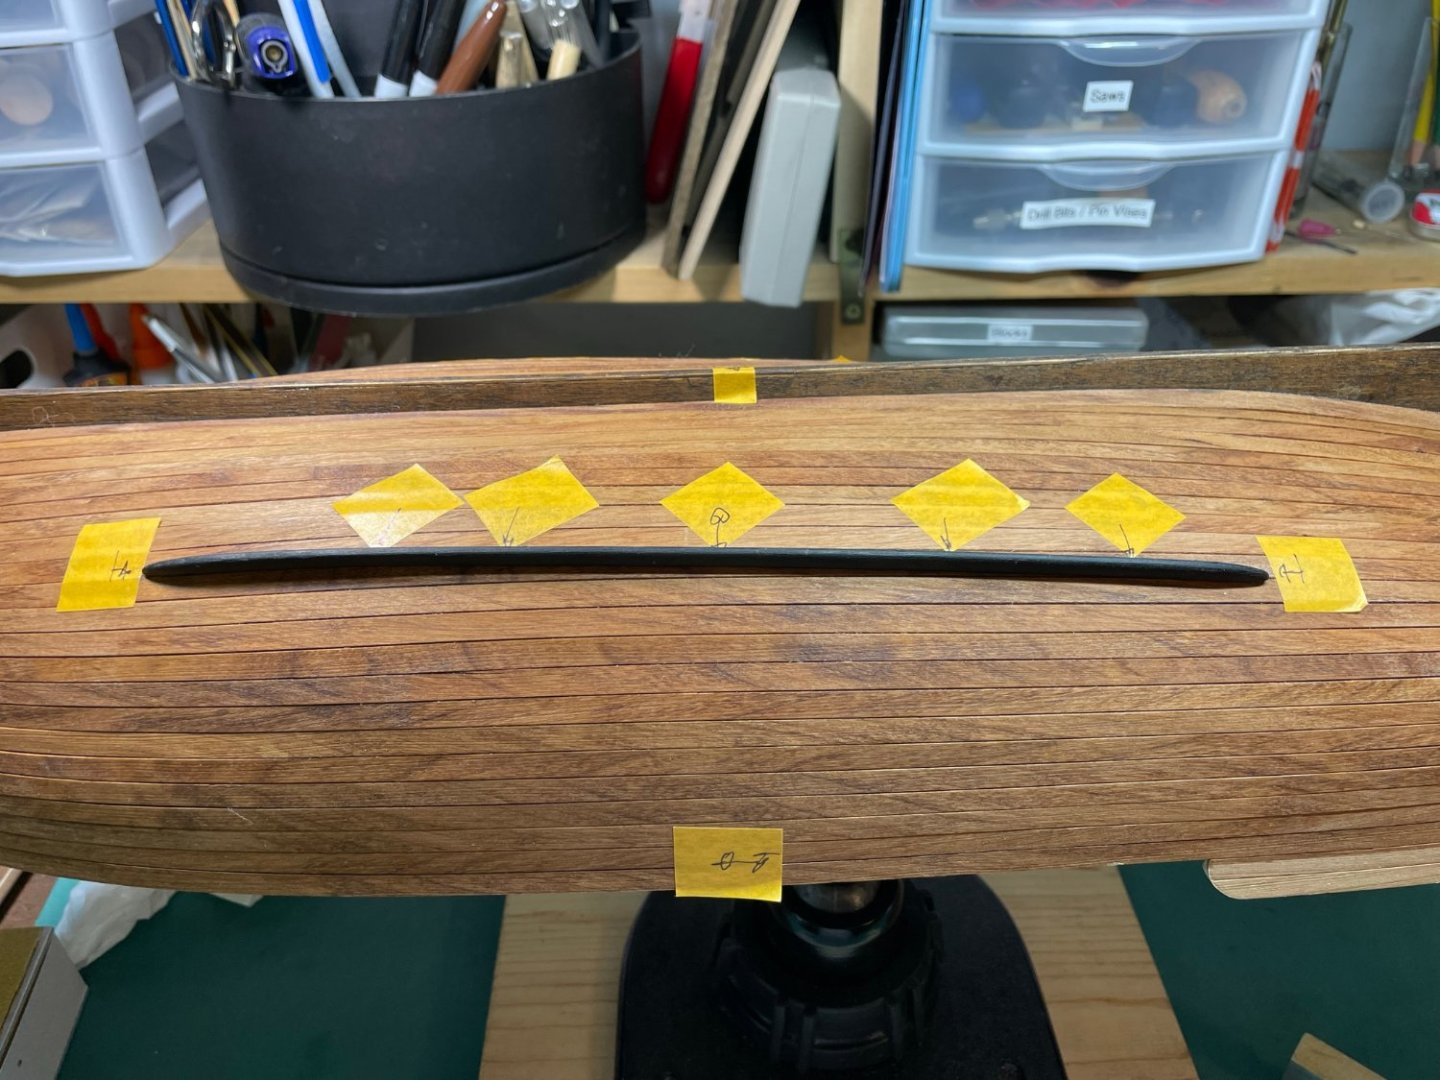
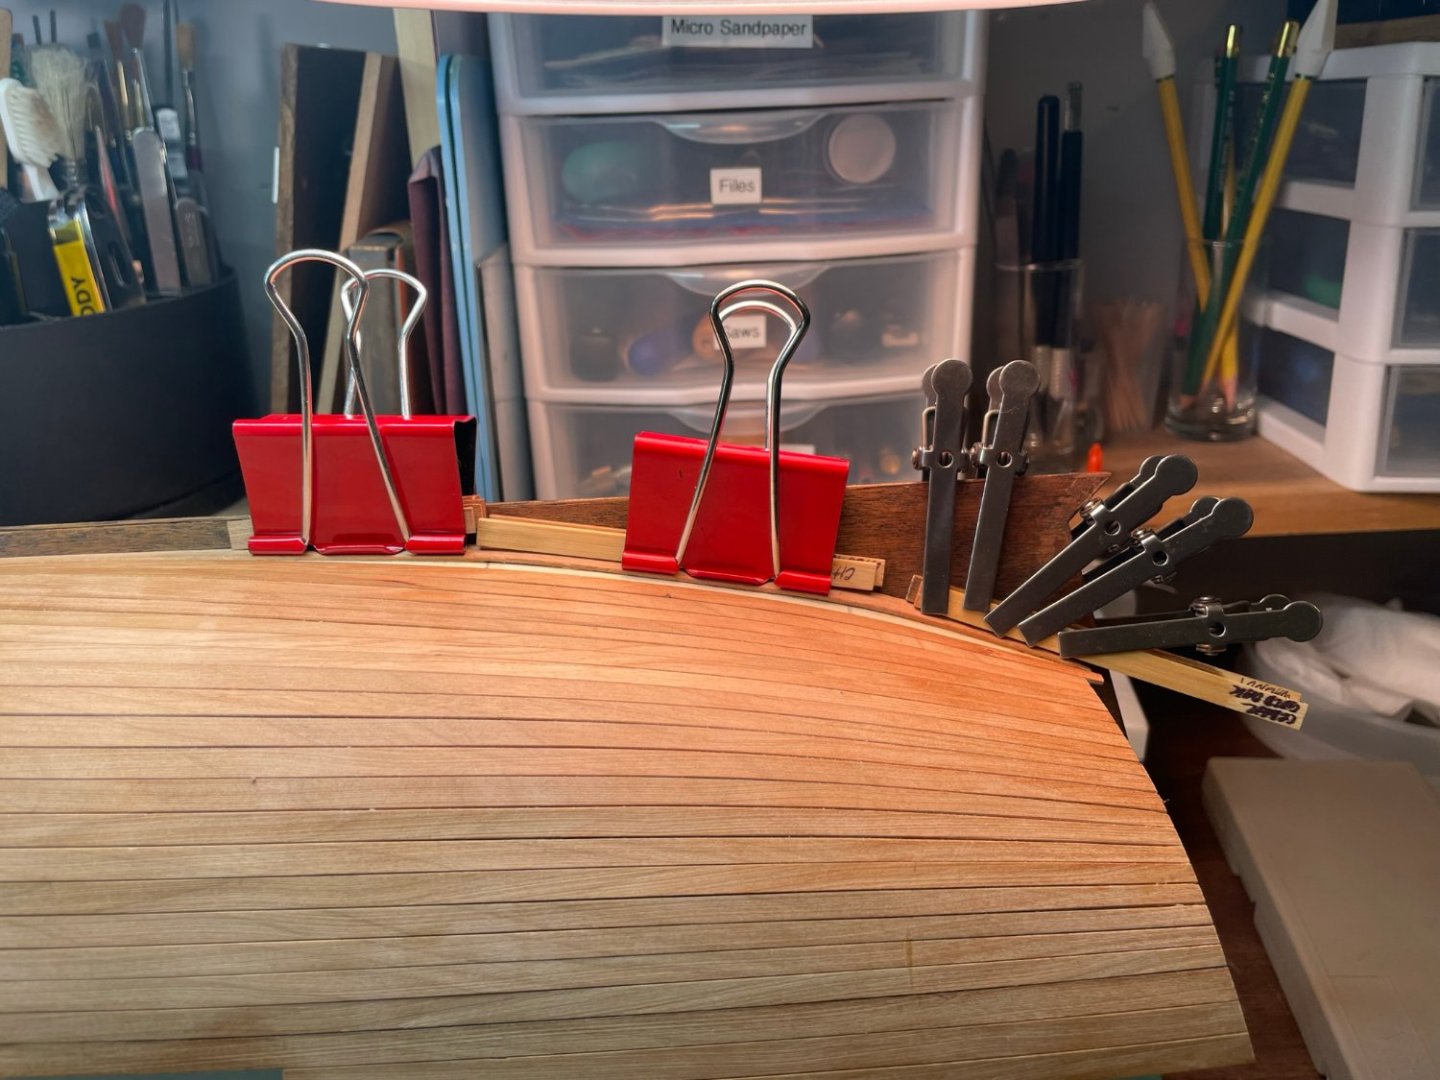
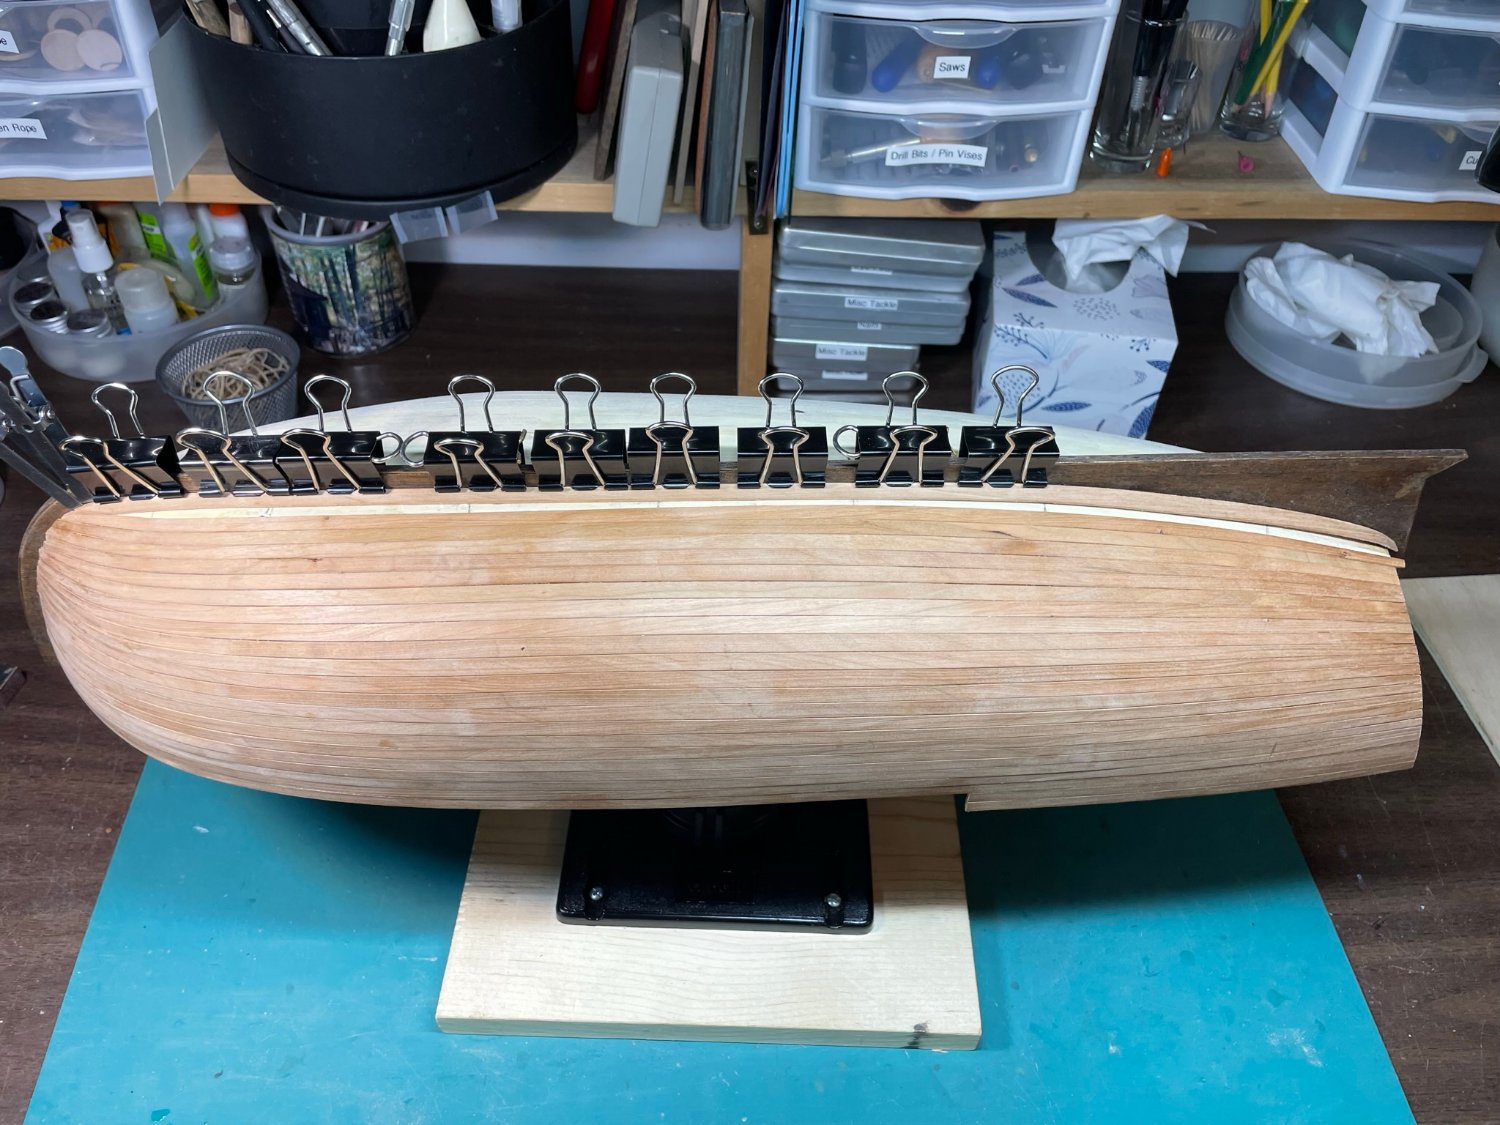
Only the stern cap rails are currently glued in place. All rails will be colored with India Ink, but first I need to mask off future glue sites.


Supervisor cat likes to keep a close eye on me, and sometimes just plops down wherever she wants to.


Thanks for viewing my post and work. The next post will be in a timely manner.

- Rik Thistle, Hartron, Paul Le Wol and 5 others
-
8
-
-
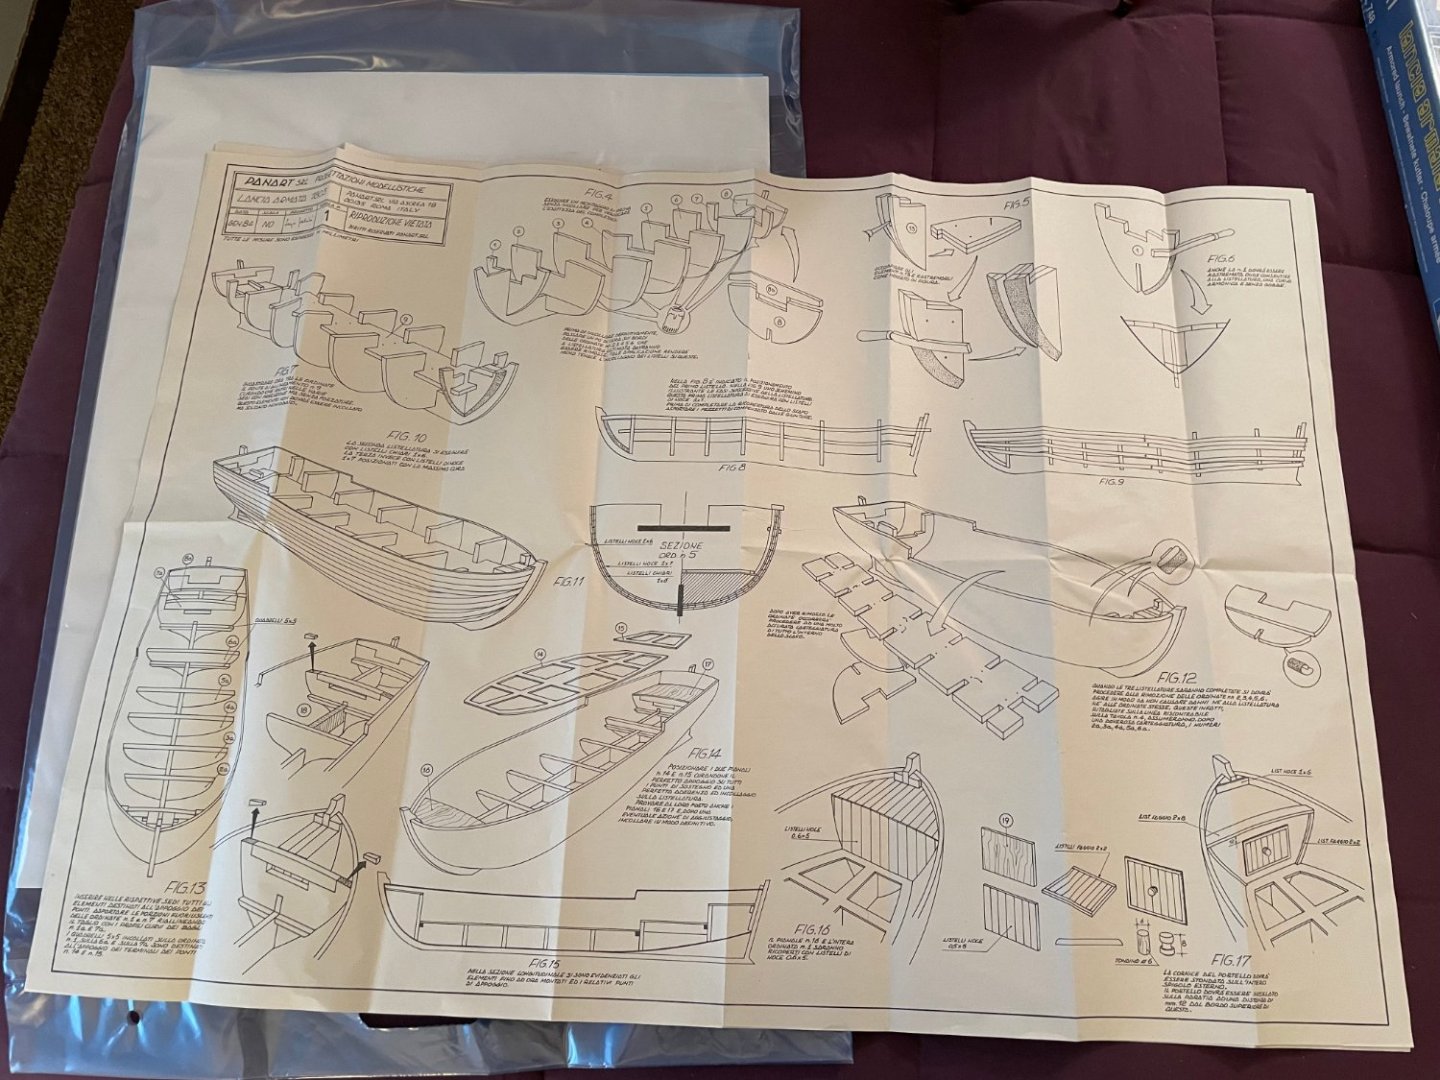
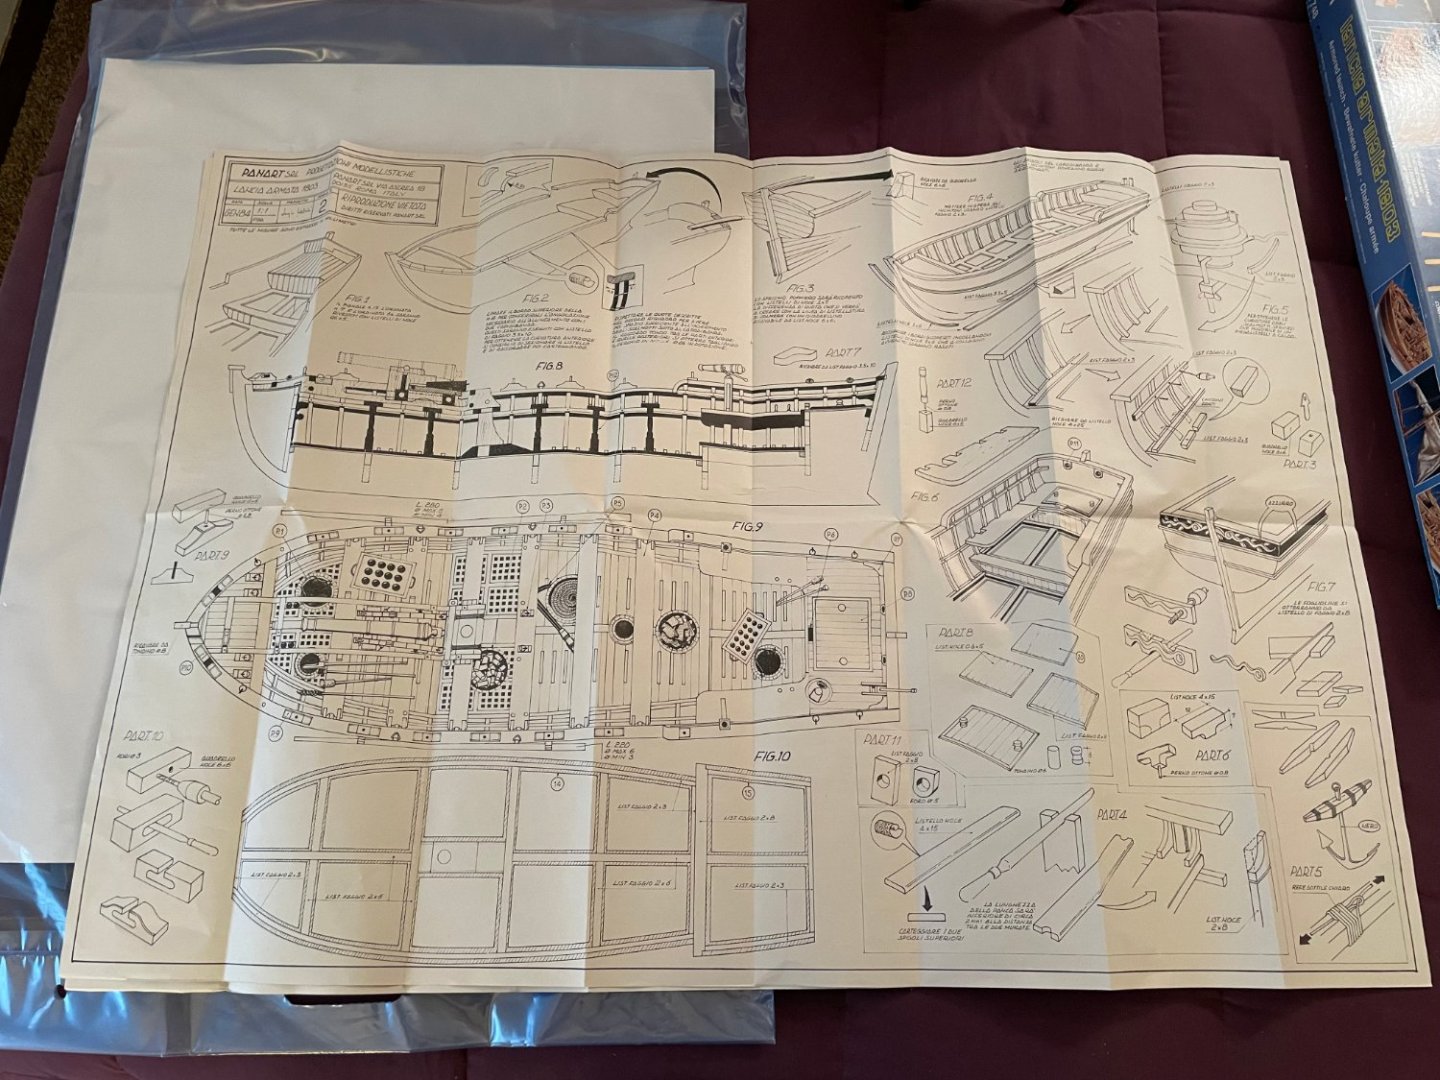
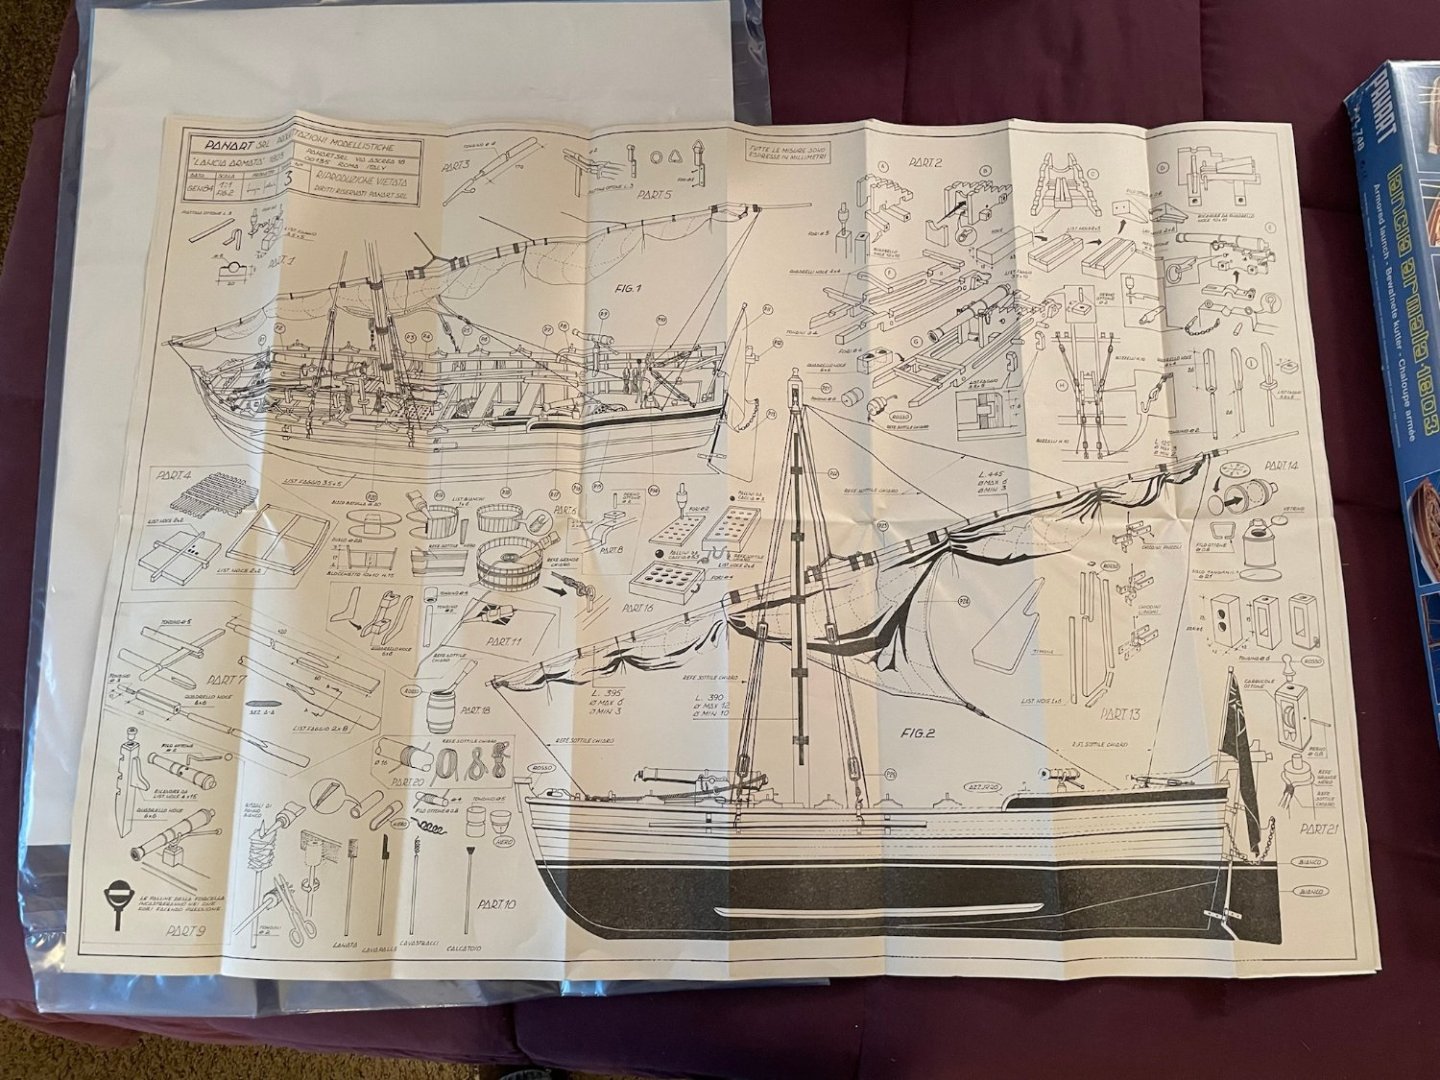
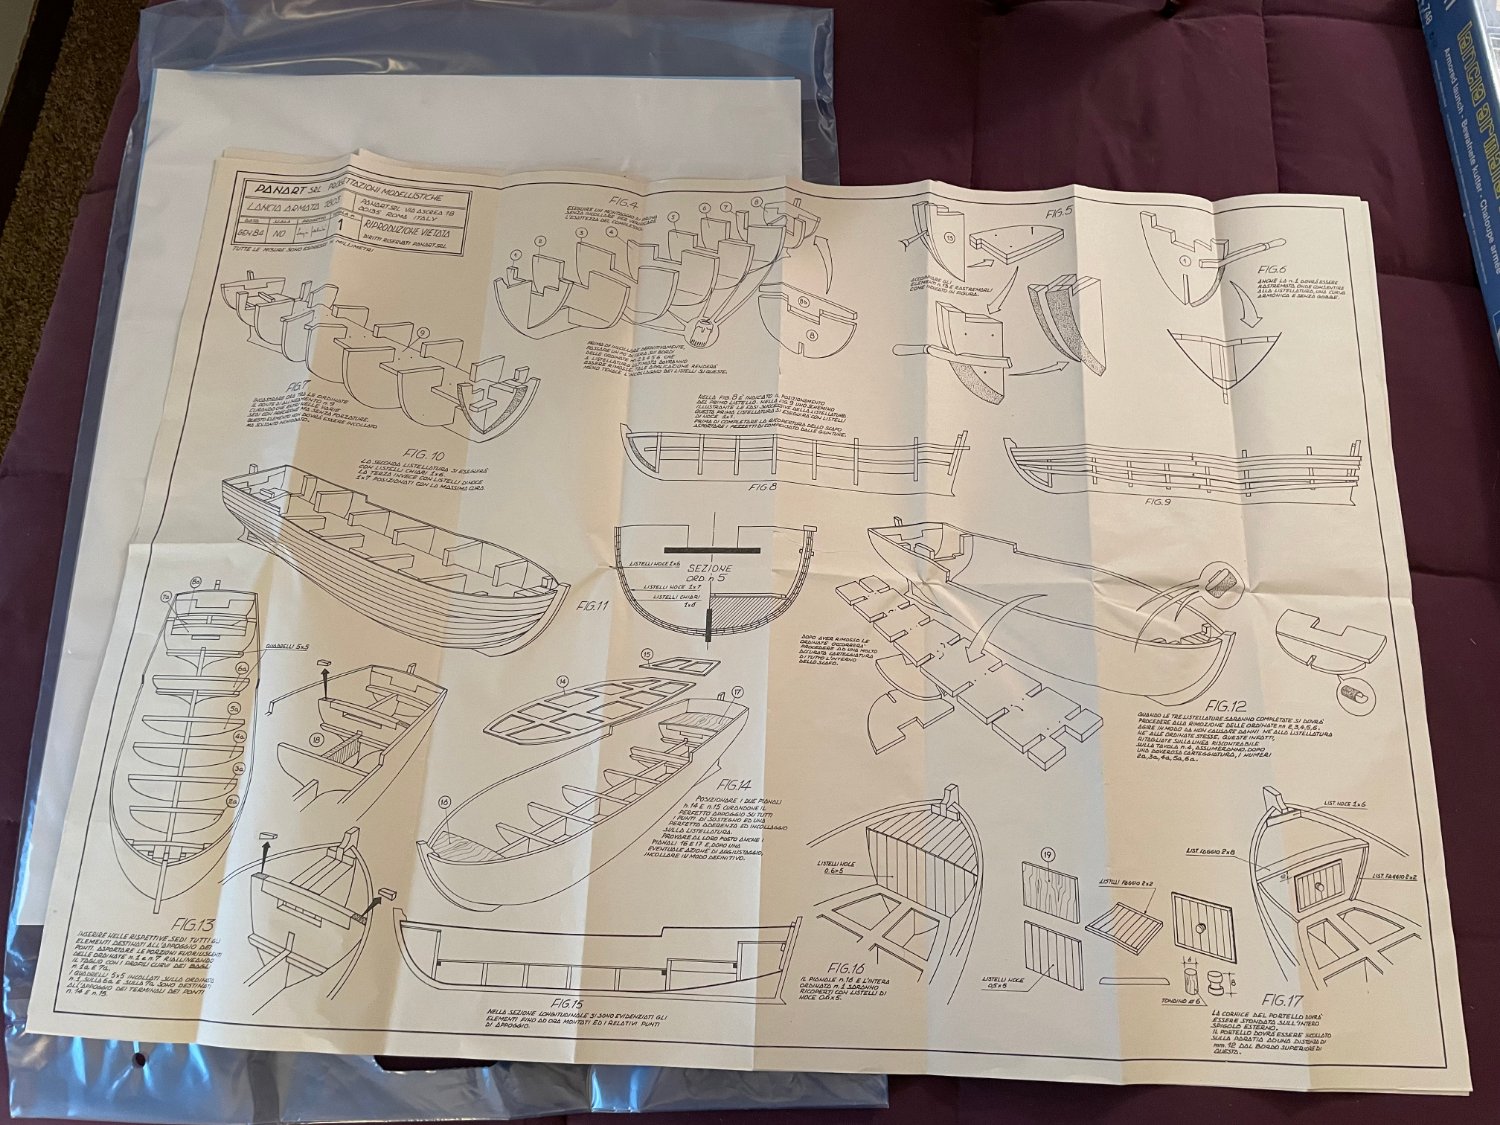
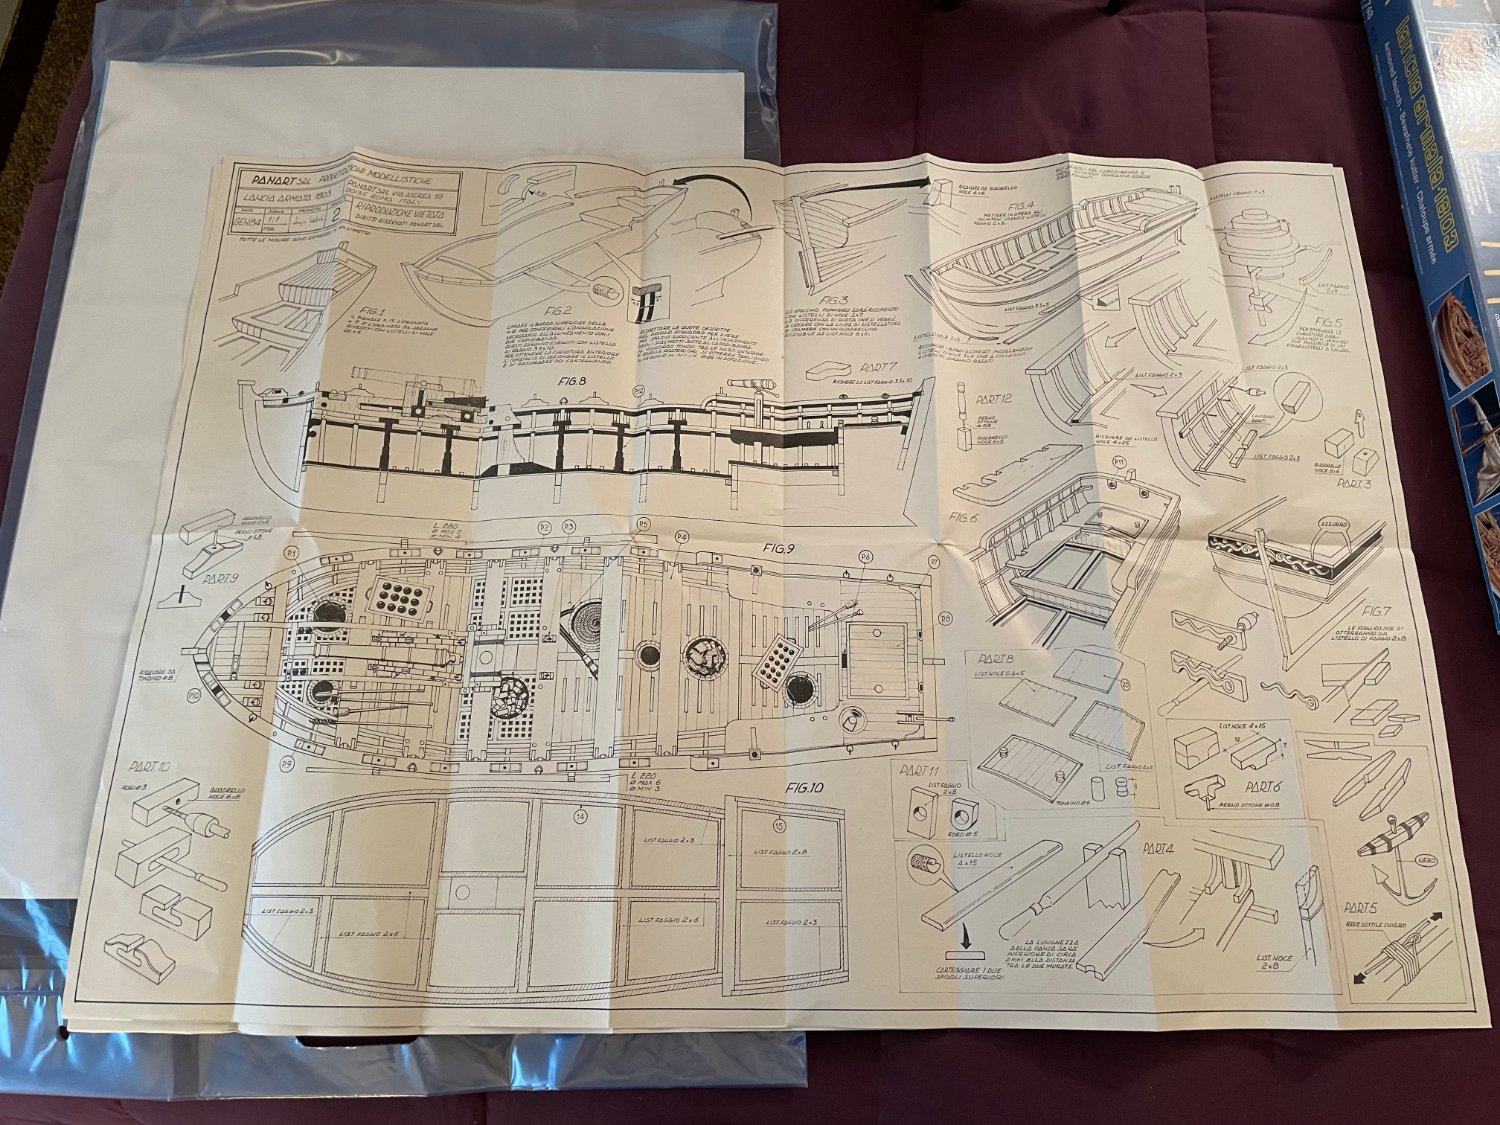
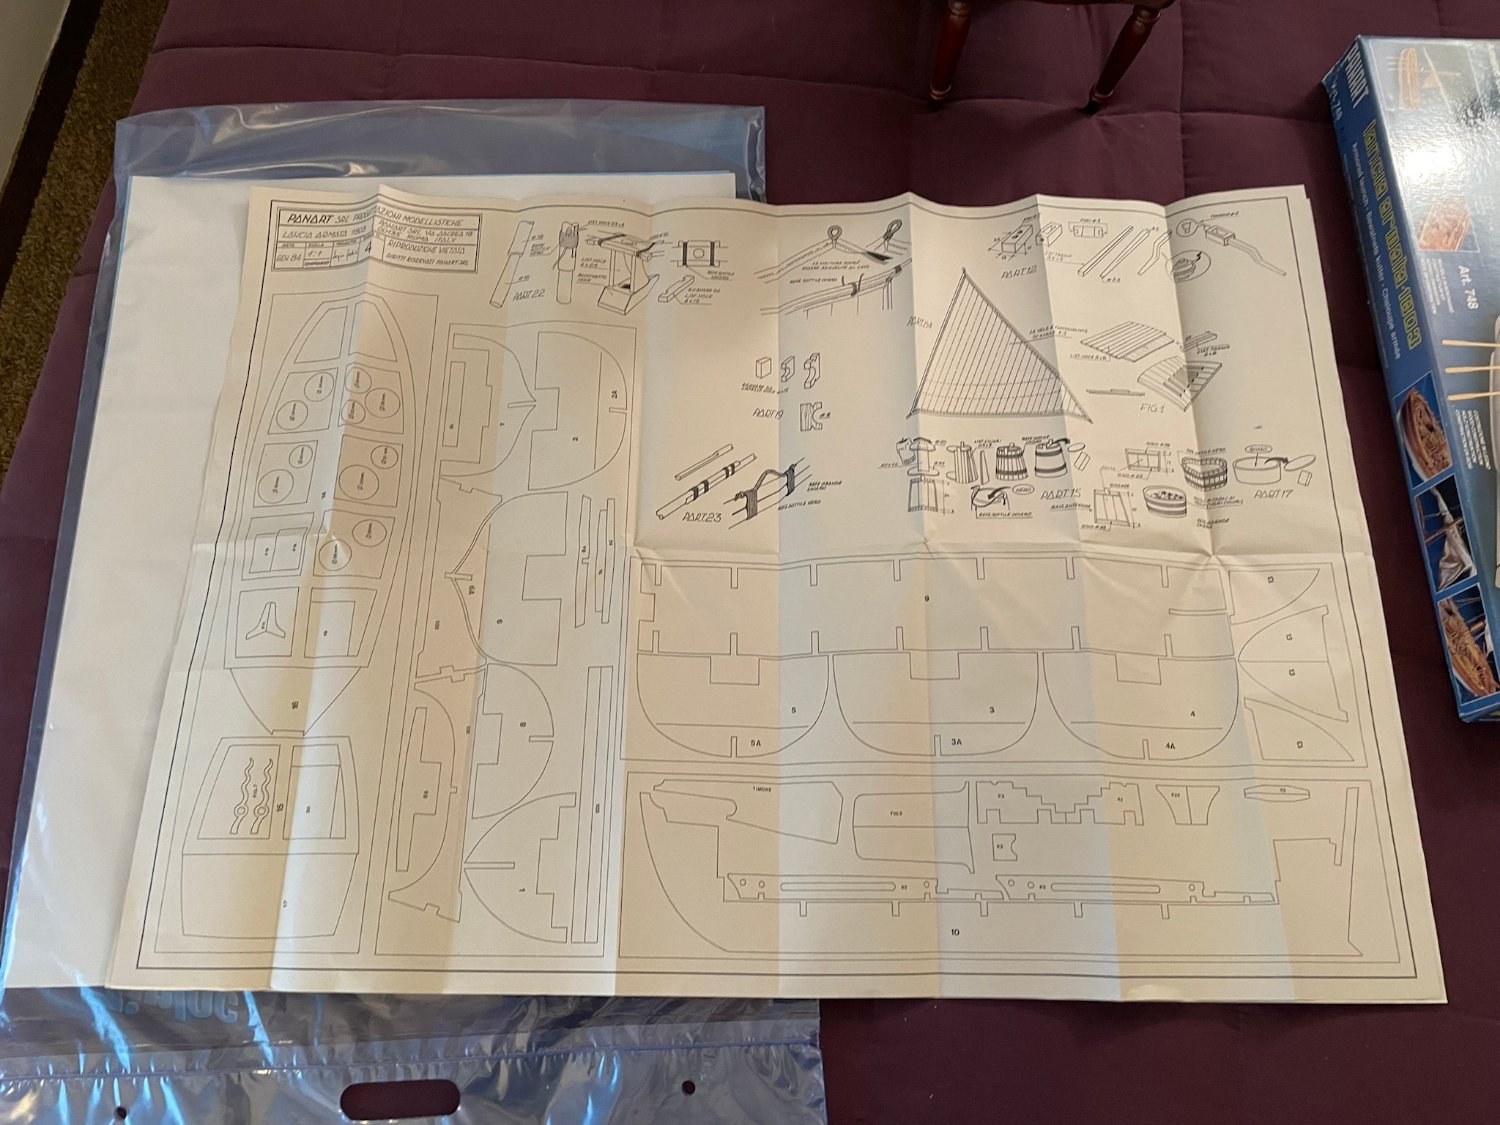
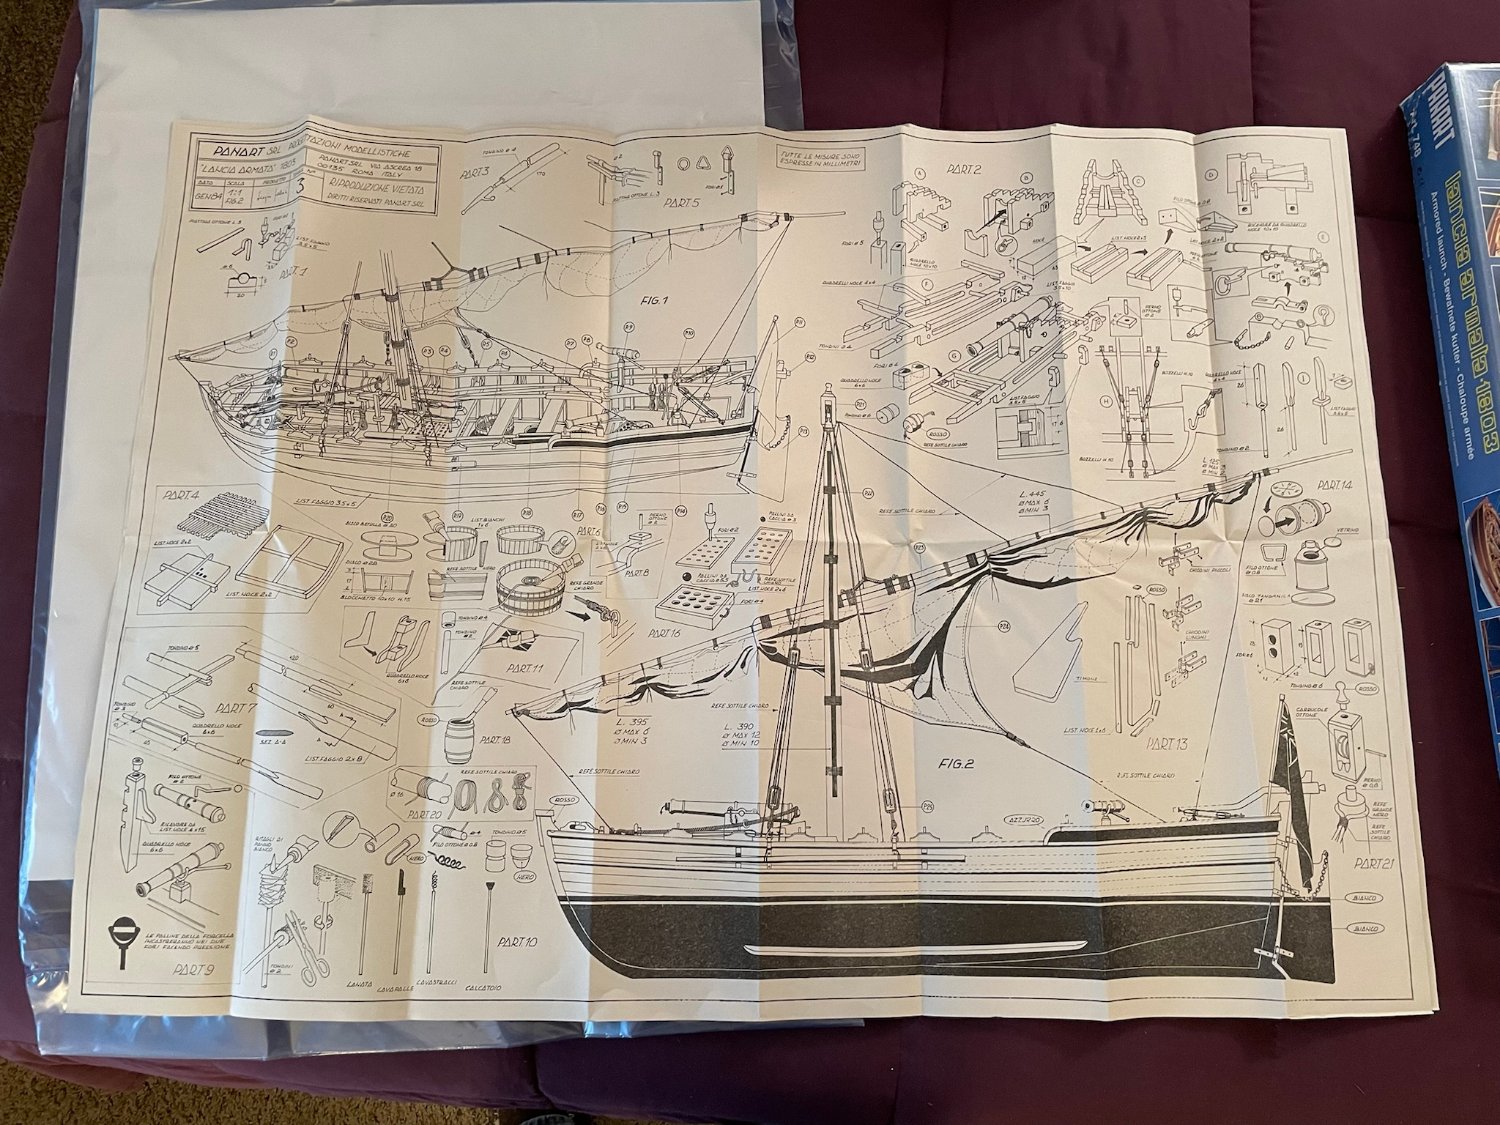
Hello Steve - I am currently working on this kit myself, which I bought 25 years ago. There are two double-sided plan sheets - all in Italian. The manual has several pages of poorly translated English. Without going into details right now, I will say that this is an interesting and challenging model to build. I would be happy to have the plans copied and would send them to you for the cost of the copying, I believe $16. I couldn't do this until next week since I am going out of town for the weekend. I have also attached photos of them. If you would like copies, please reply. I'll get back to you next week, and we can figure out the logistics. Best Regards, Sluicemaster, aka Steve


-
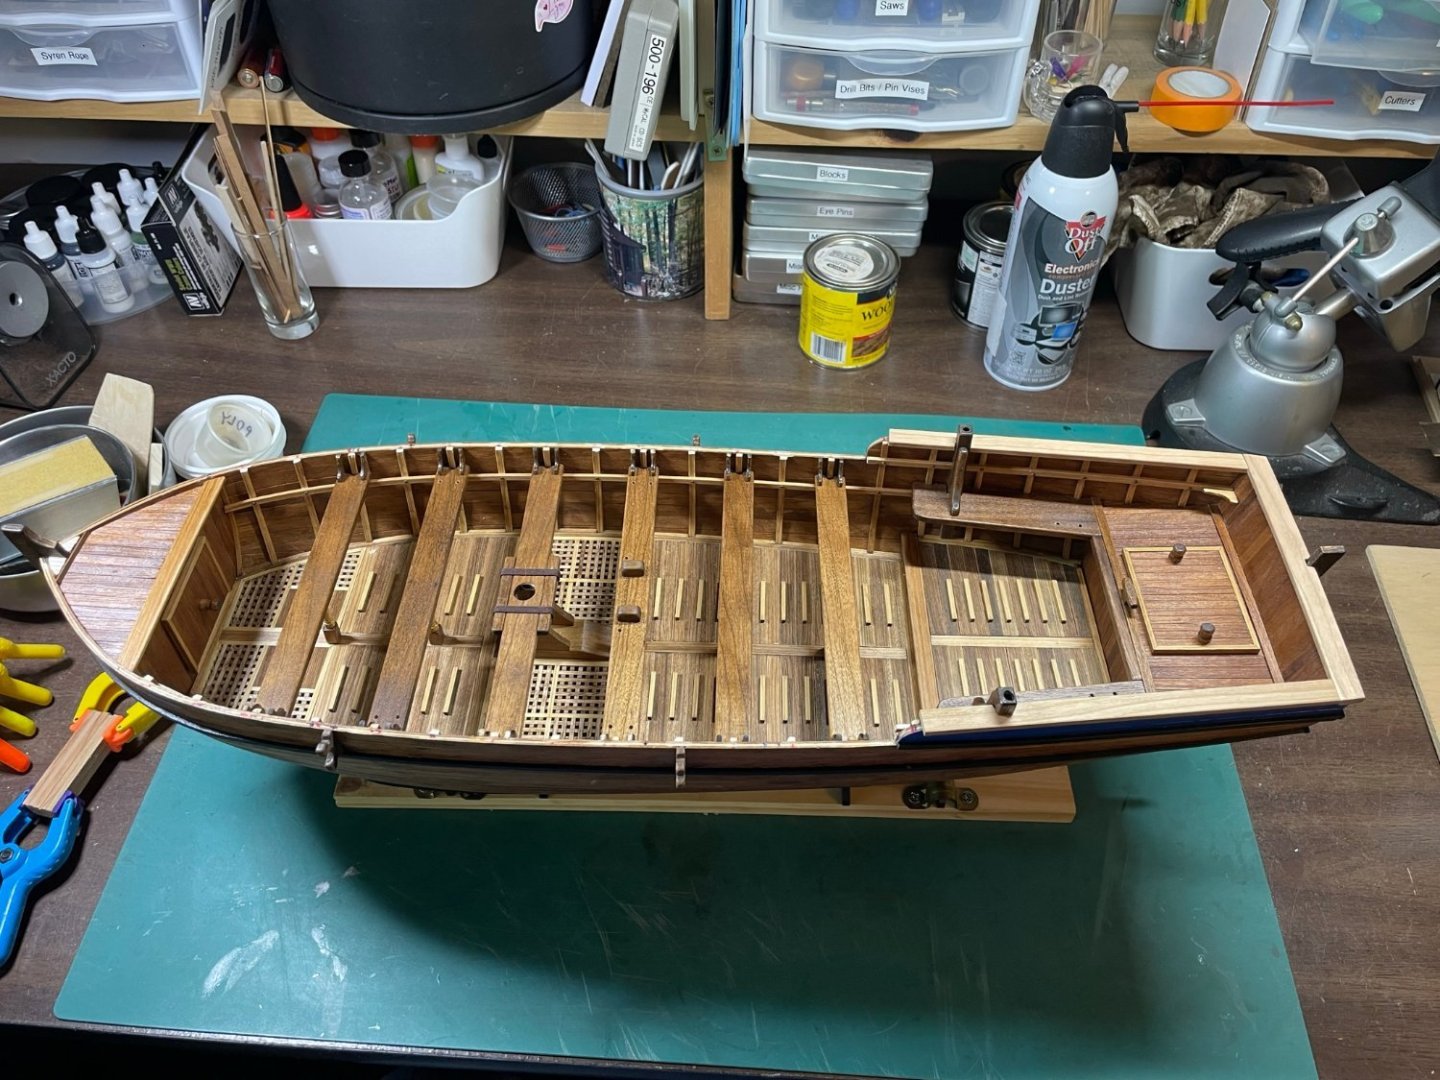
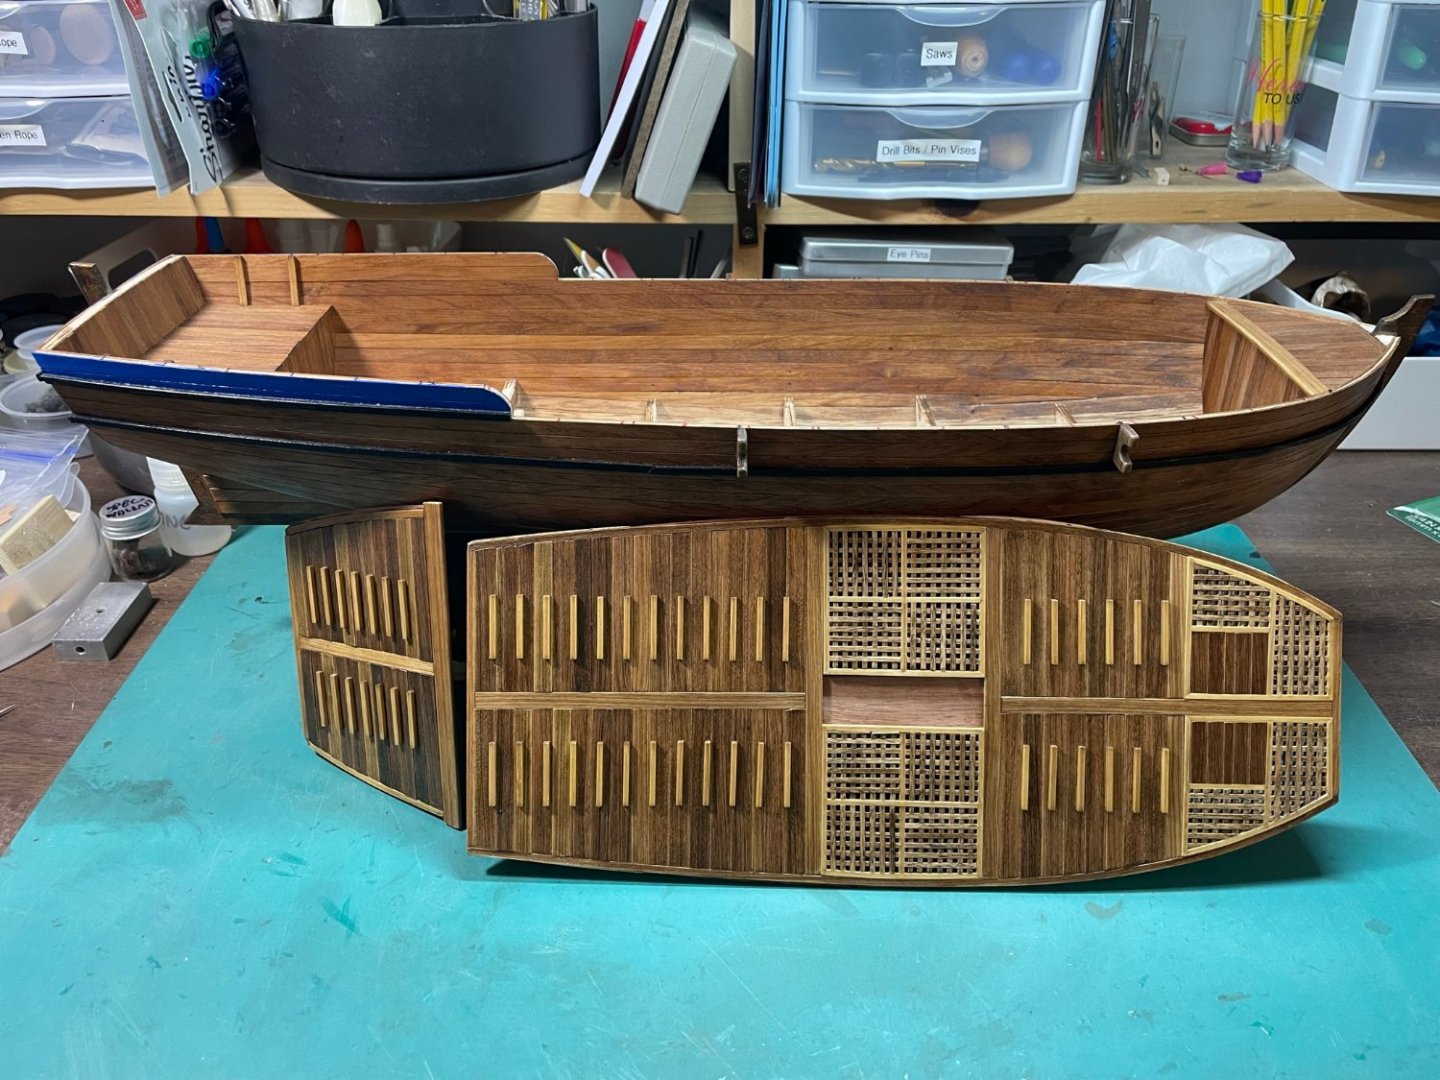
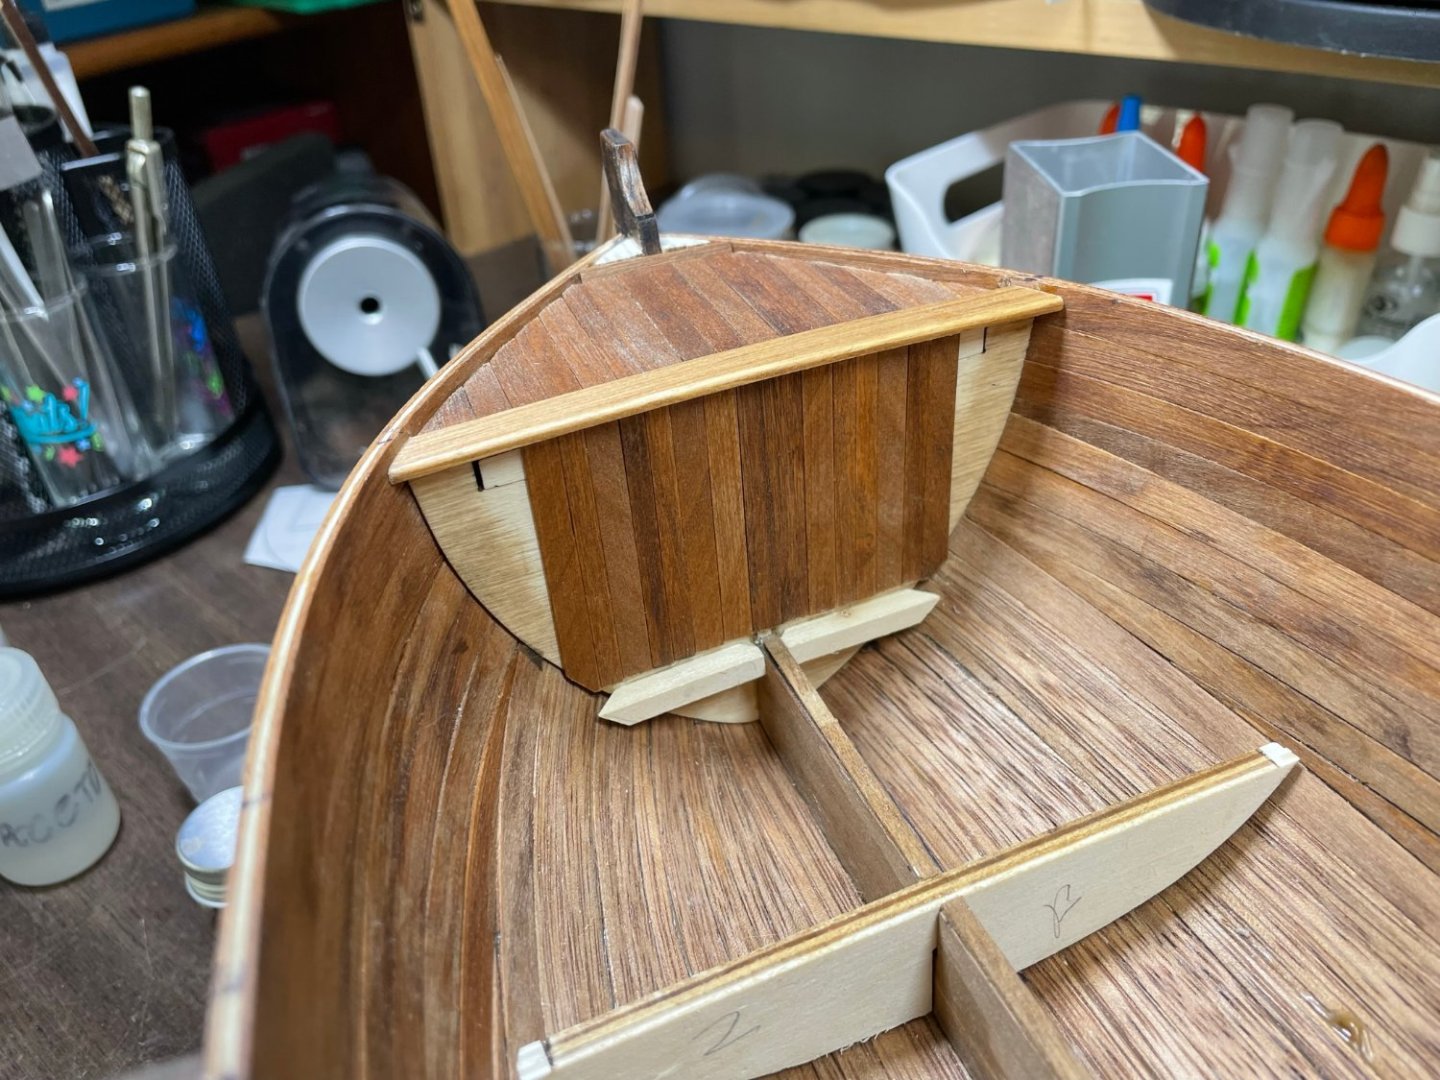
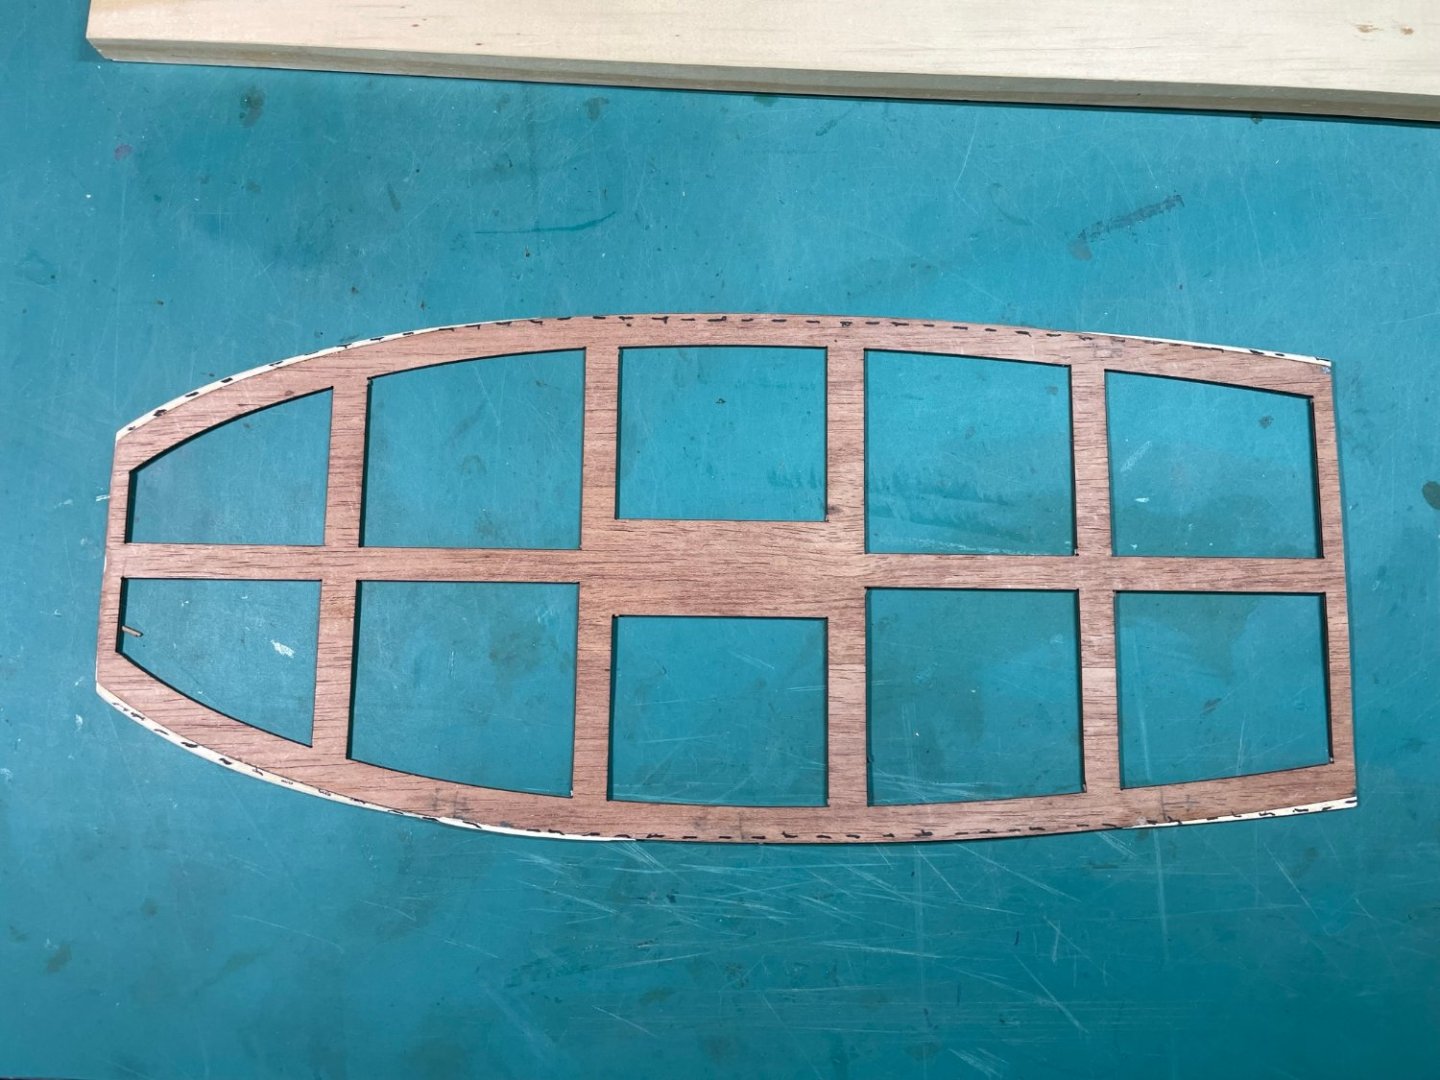
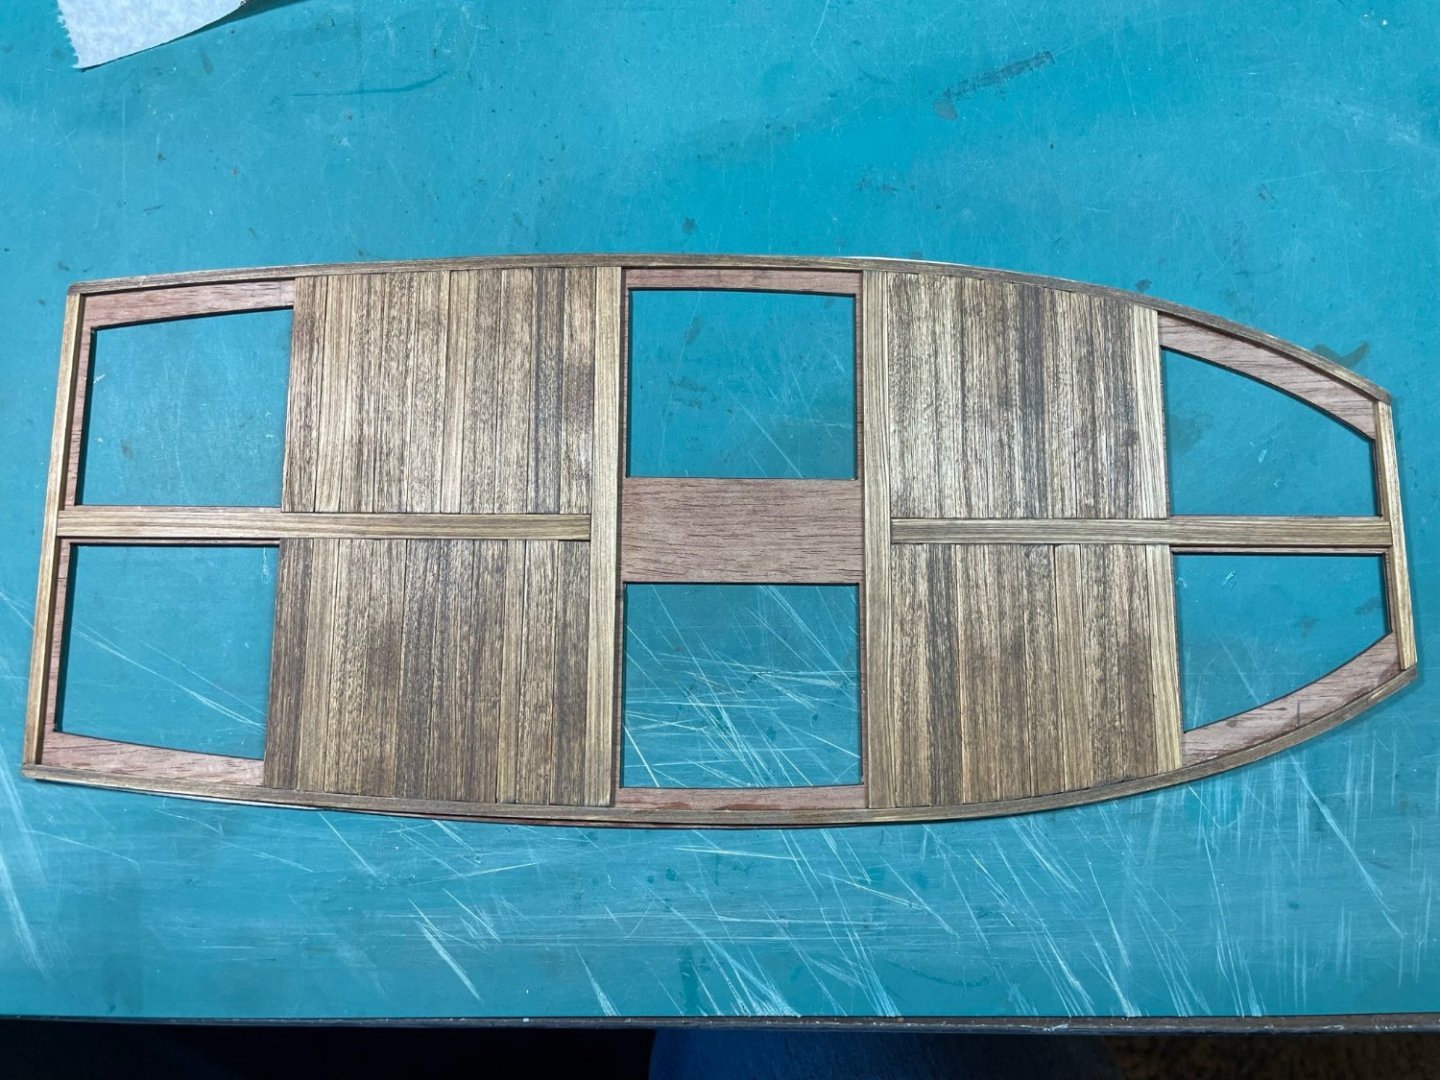
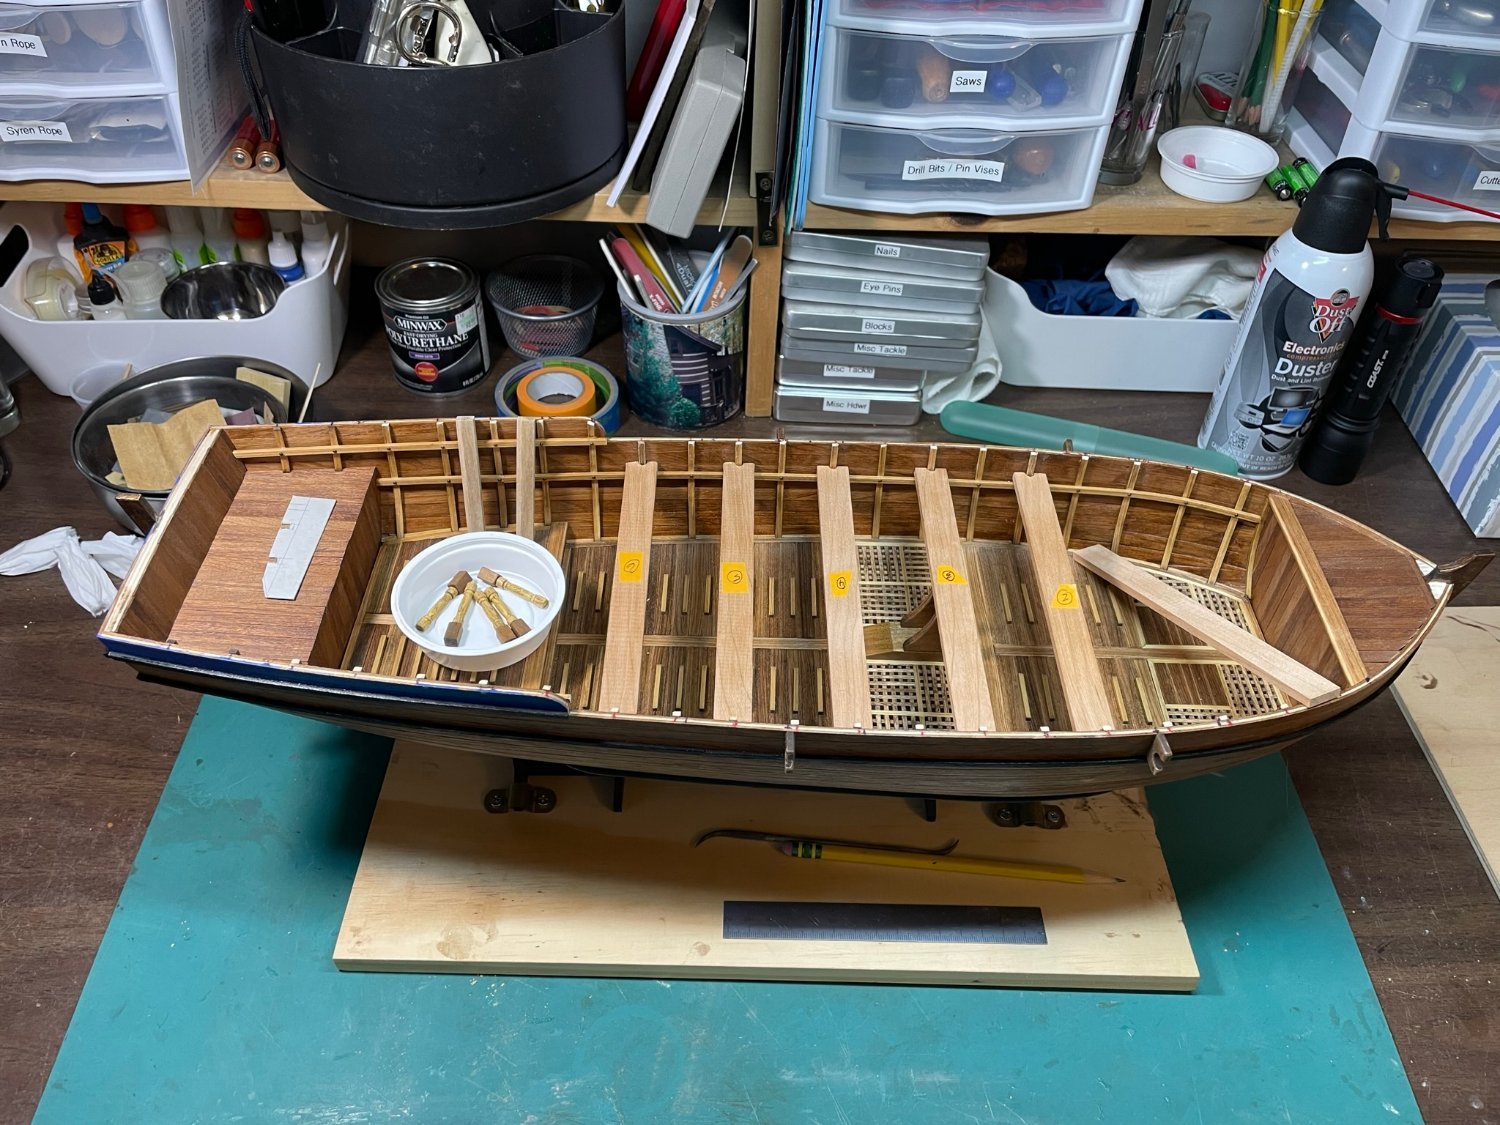
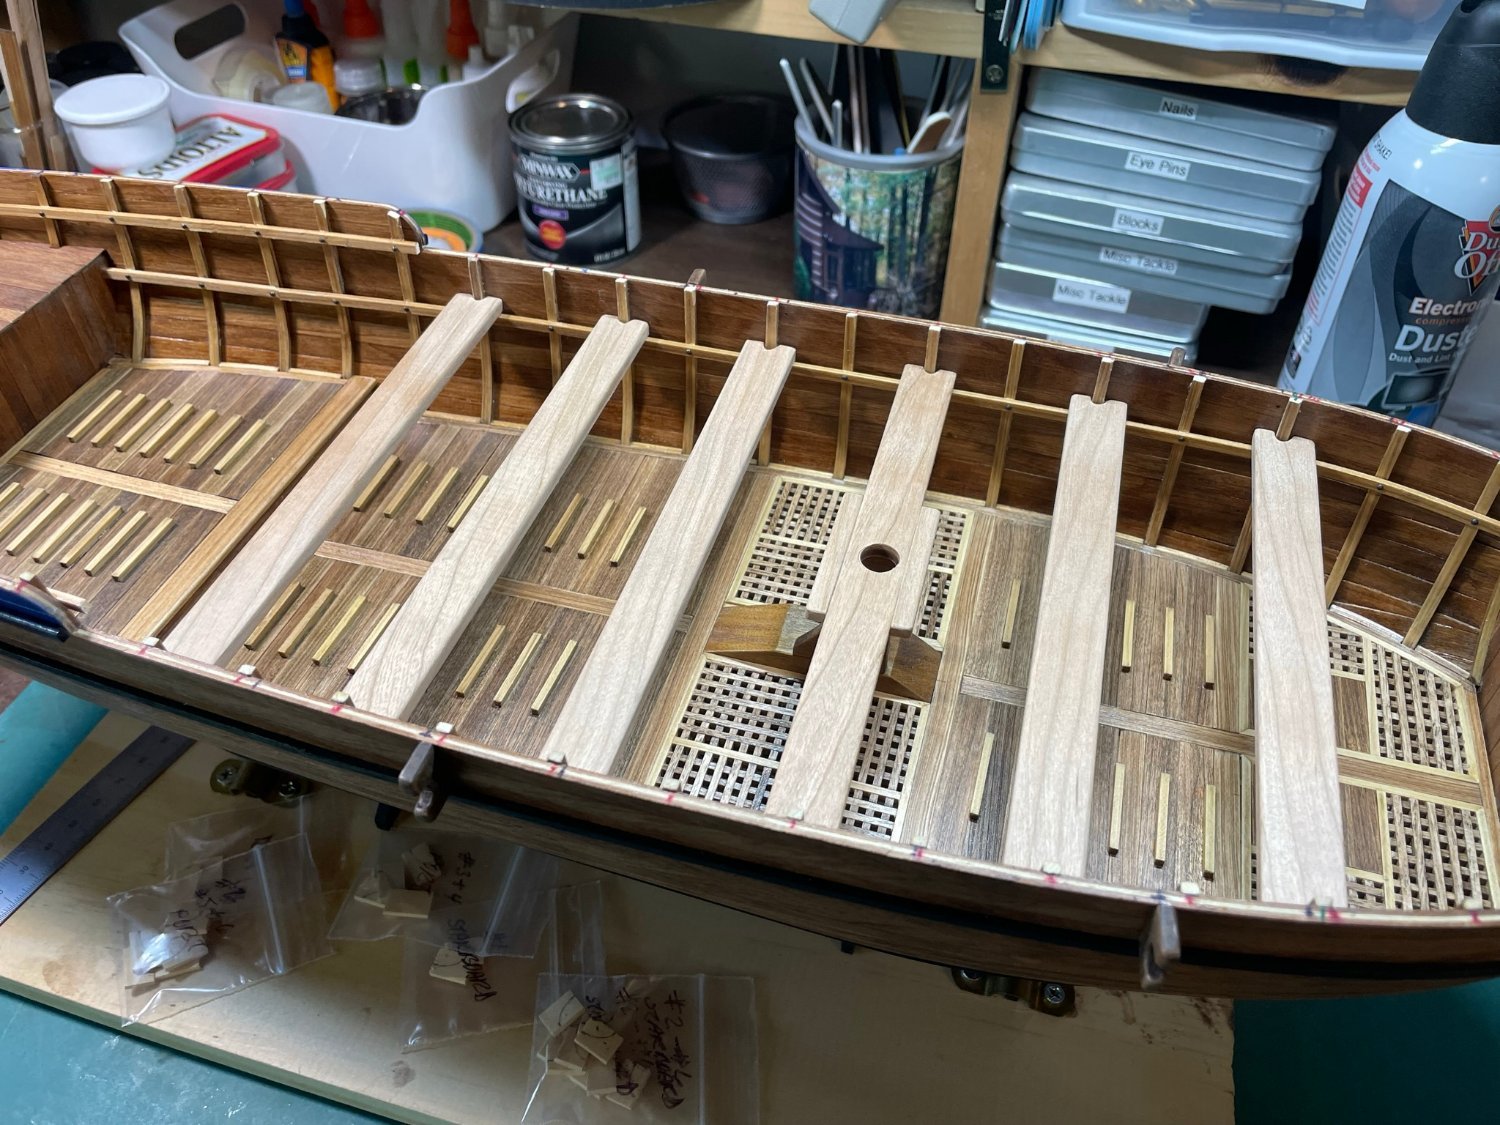
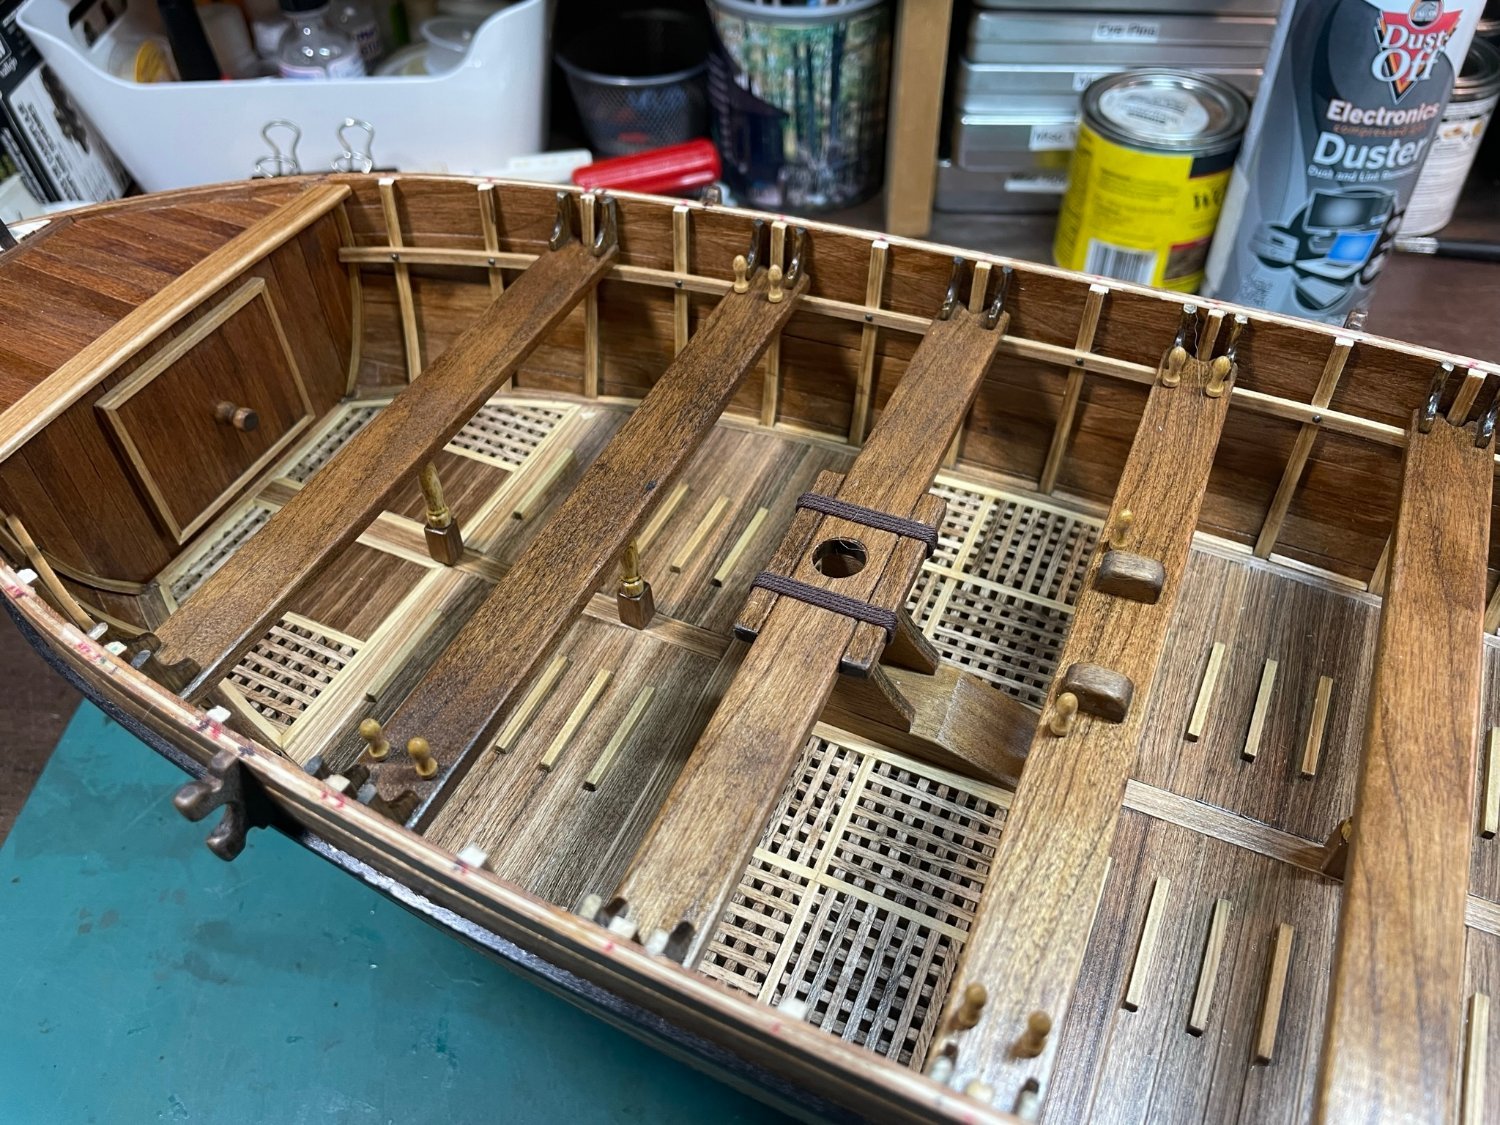
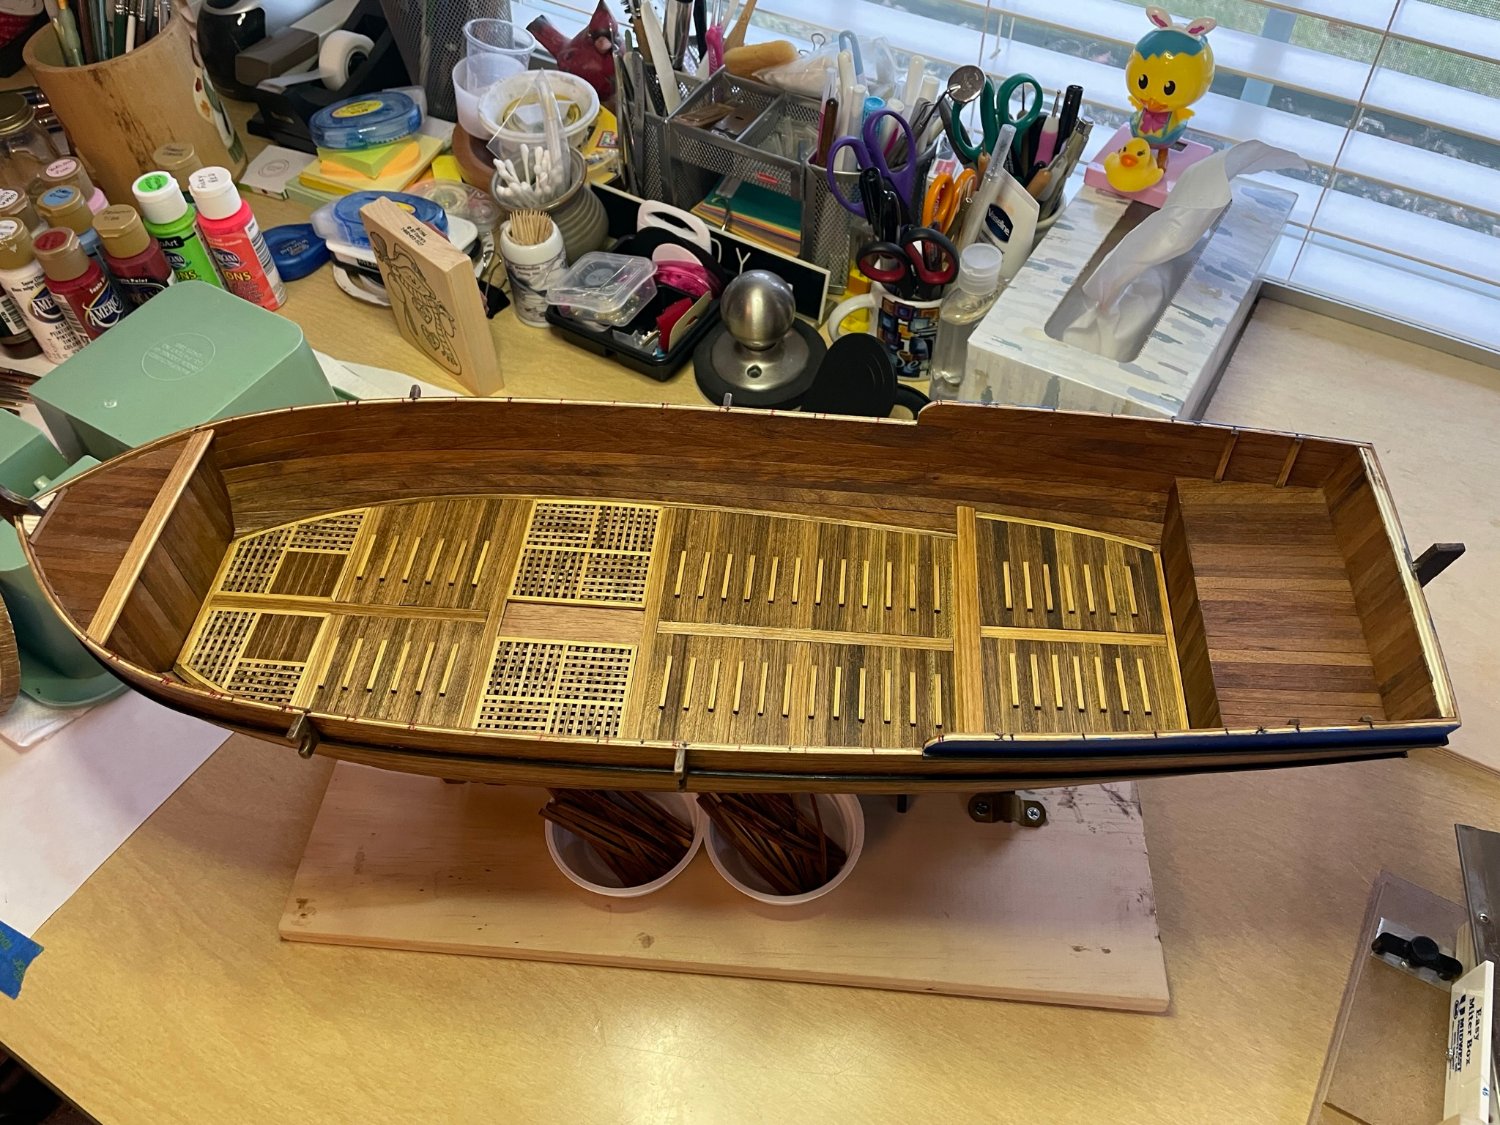
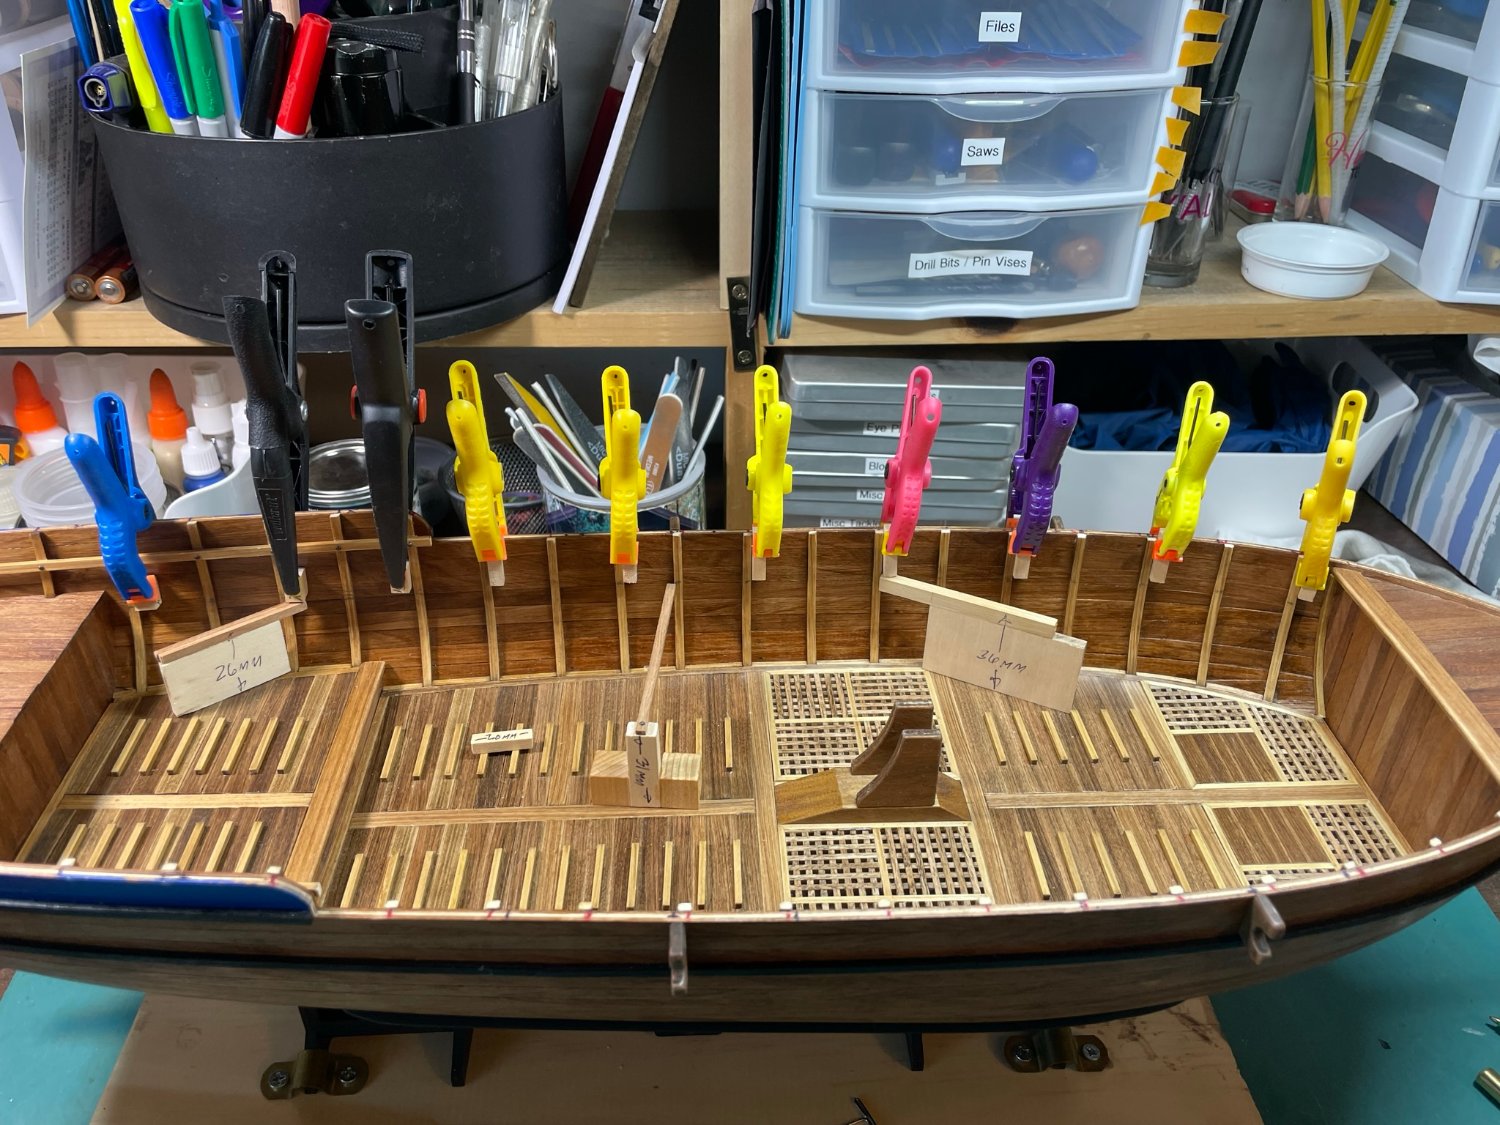
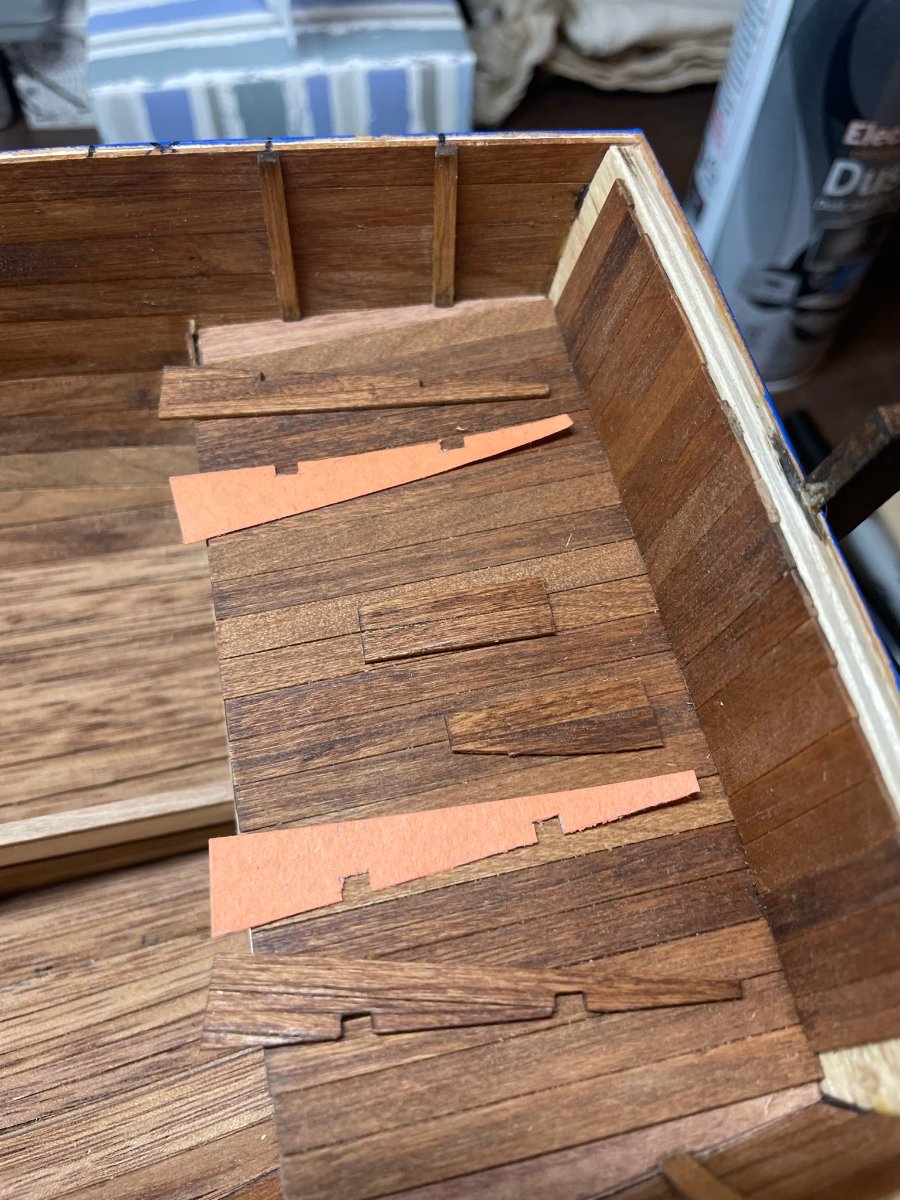
The kit did not supply enough grating strips to construct all of the grates, so I installed planking in two of the forward grate positions. I tried altering and gluing the small left over grate pieces together, but to no avail. The strips are stained with Minwax Honey stain, as well as the frames which are Alaskan cedar. The cedar does not take satin well ofter being formed with a hot iron.
For some reason the stained wood looks washed out in this picture.
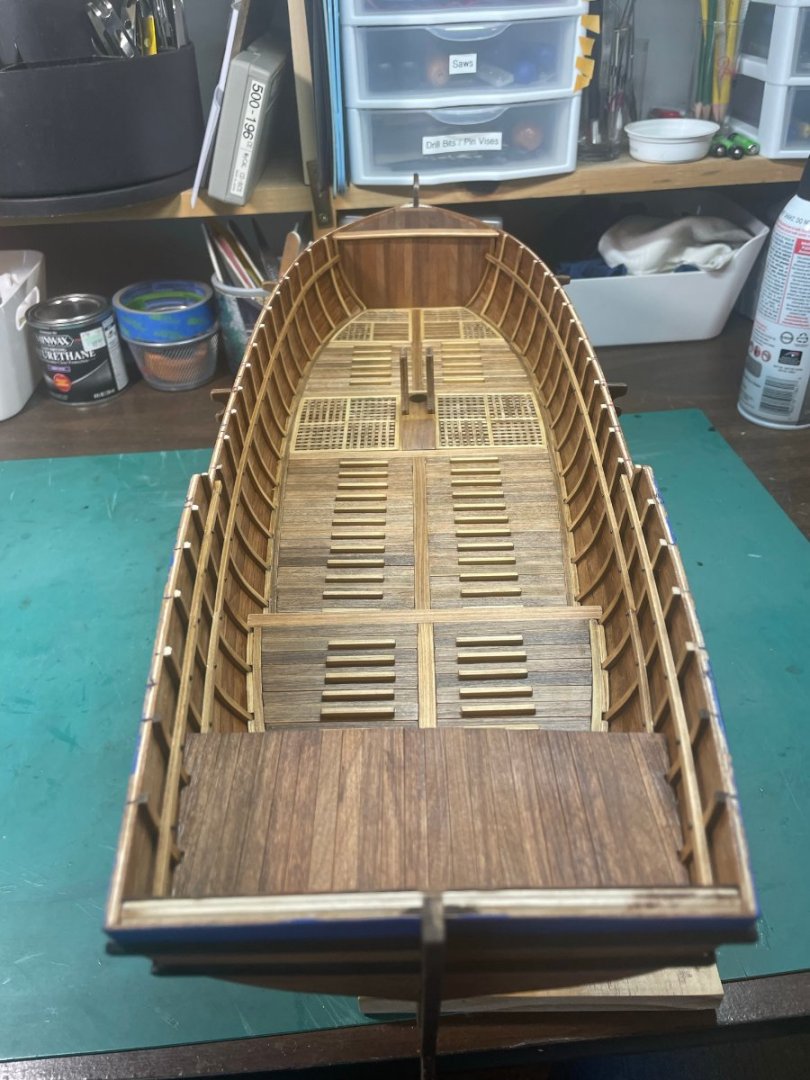
After the decks were installed, there was a two millimeter gap between the framing strips and the hull, just enough room for the ribs to fit snugly.

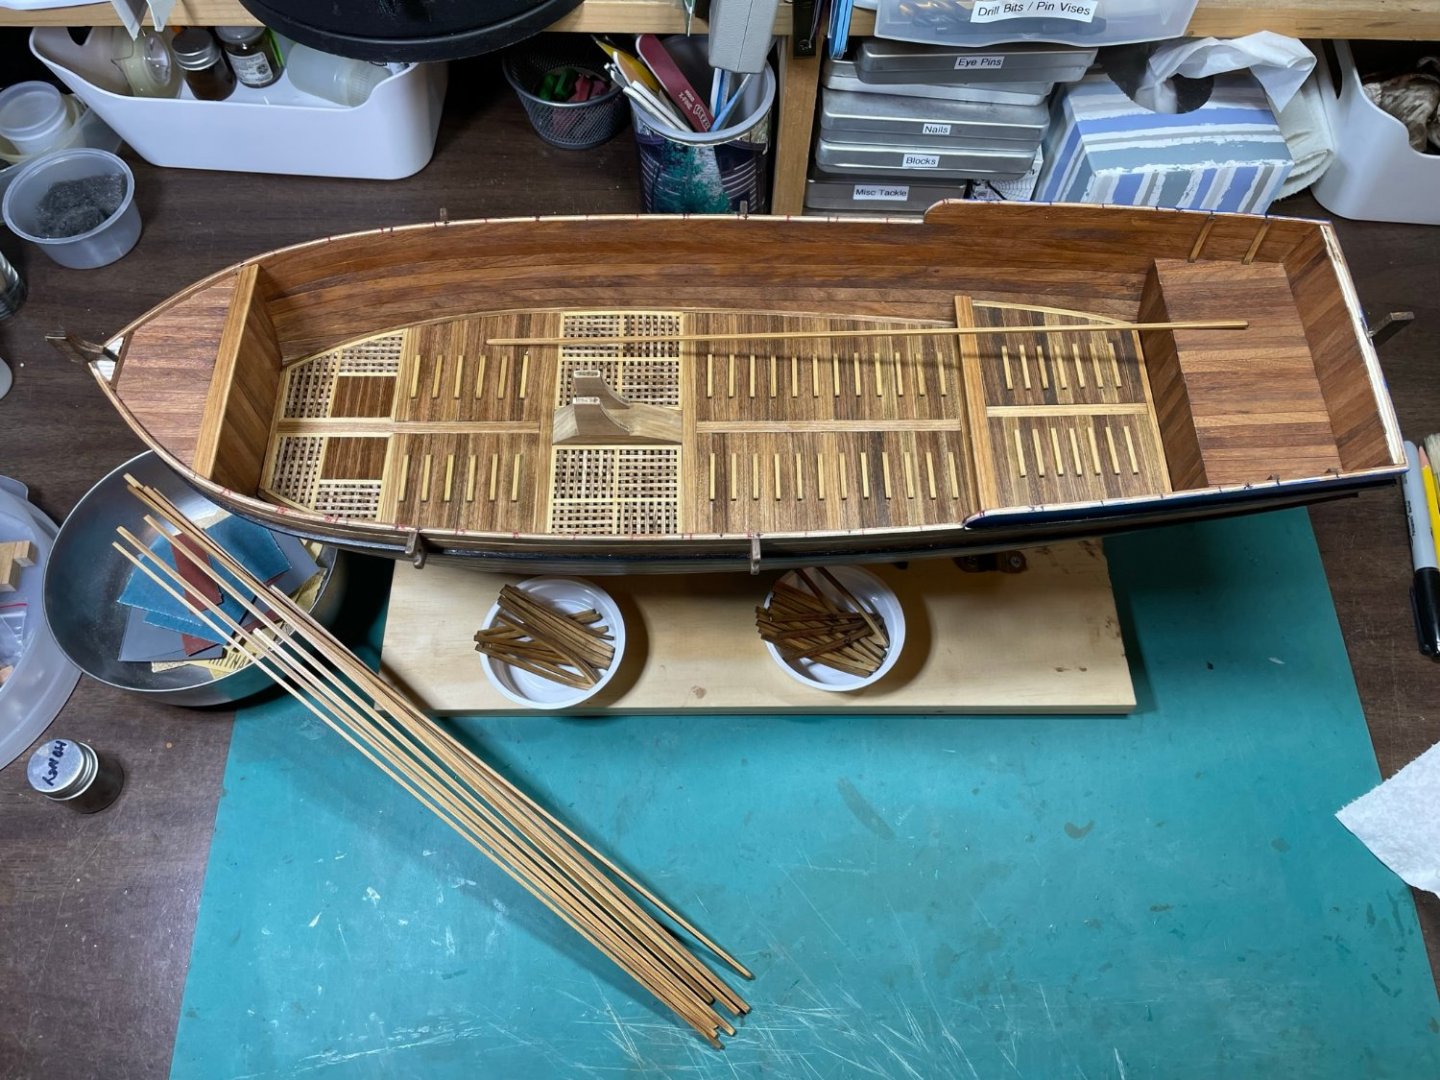
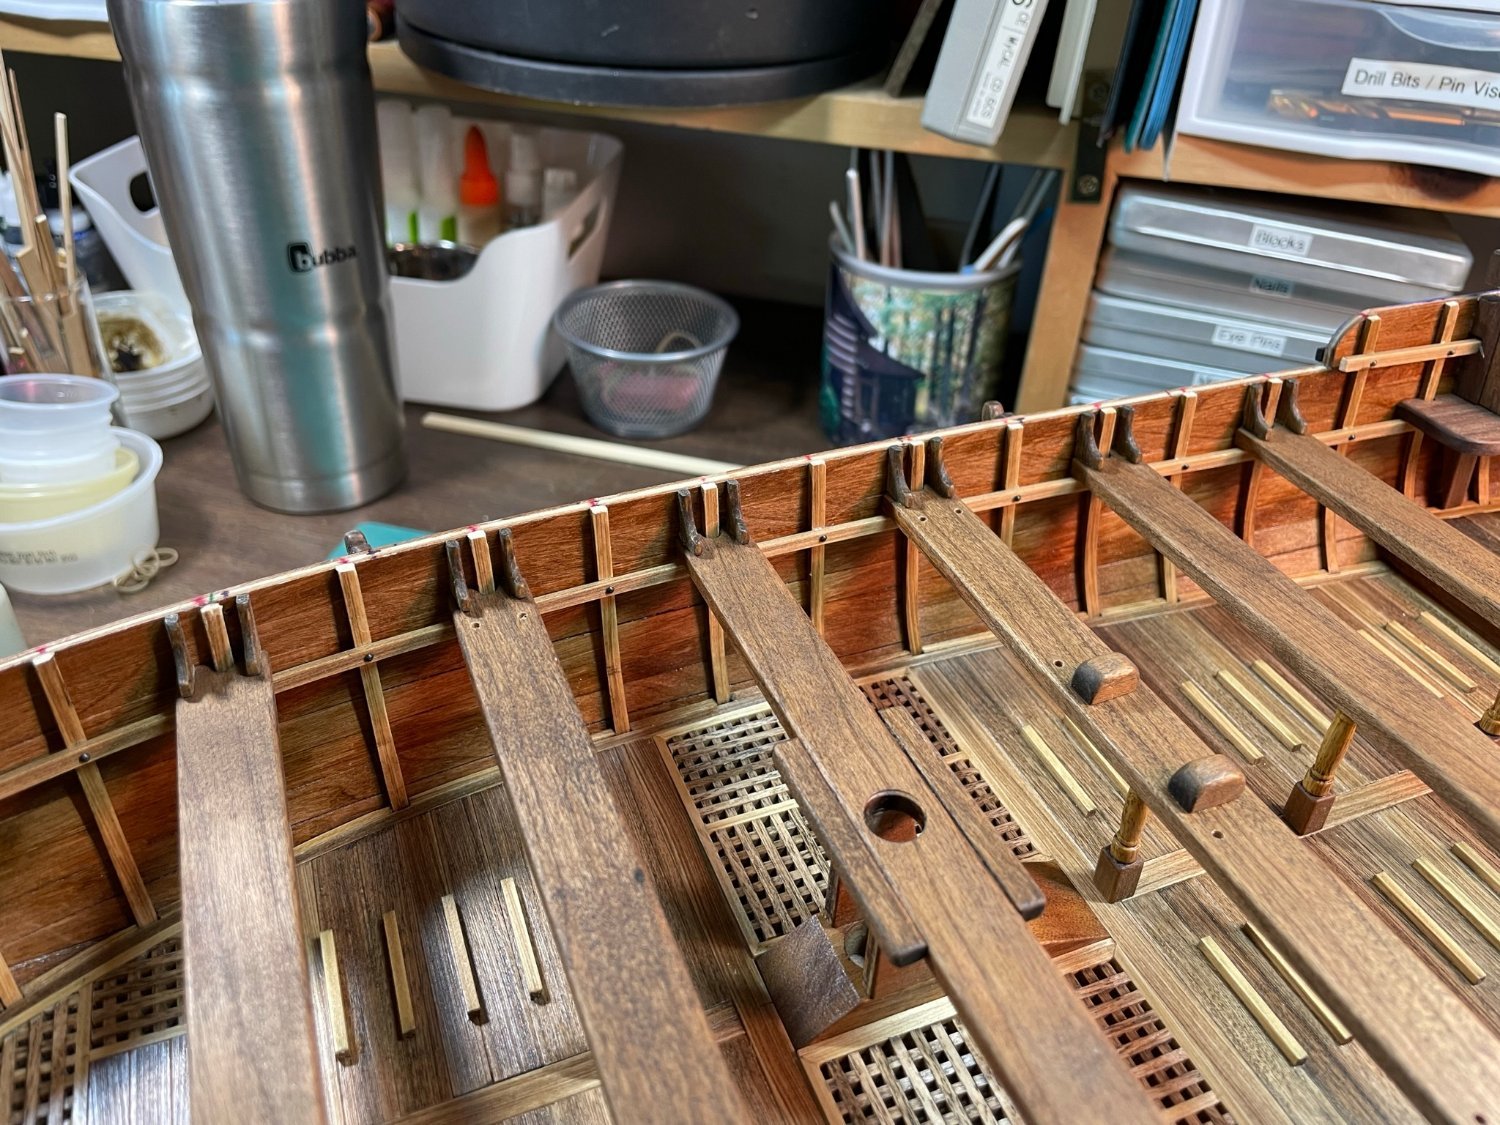
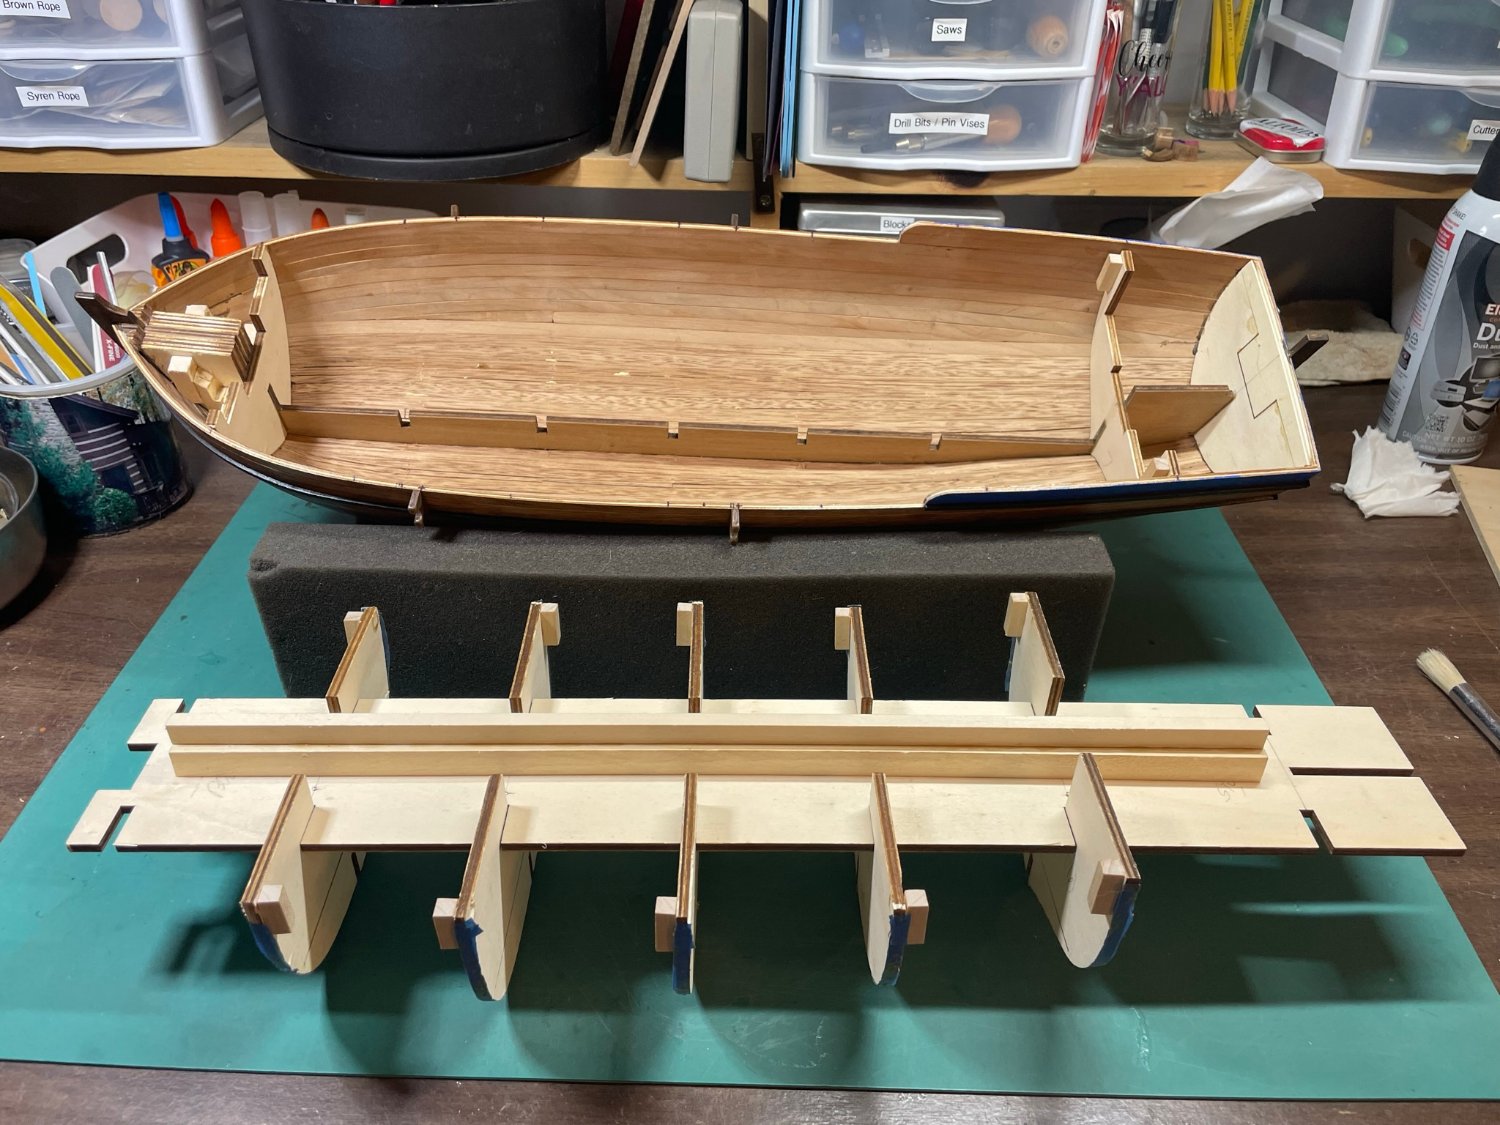
All of the ribs are Alaskan cedar and were individually bent and marked, then stained with Minwax Honey stain. I made small angles and a T-square to assure perpindicularity. At some point my carefully planned rib spacing went awry, and there is some inconsistency in a few places. This may slightly affect the spacing of one seat, but I hope that will not be too noticeable when the model is complete.

My trusty supervisor cat keeps an eye on my progress much of the time. Since there's not much sun in the winter, she takes soaks up rays from the lamp.

I had a lumbar laminectomy in October, and still have an issue with lumbar foraminal narrowing which is sometimes aggravated by sitting for long periods. So I built a platform hoping I could work while standing. It did not work out, so I just take more frequent breaks from sitting. Supervisor cat thought it was pretty cool. Probably more surgery will be needed to fix my "issue." Ahhhh - the joys of old age!?
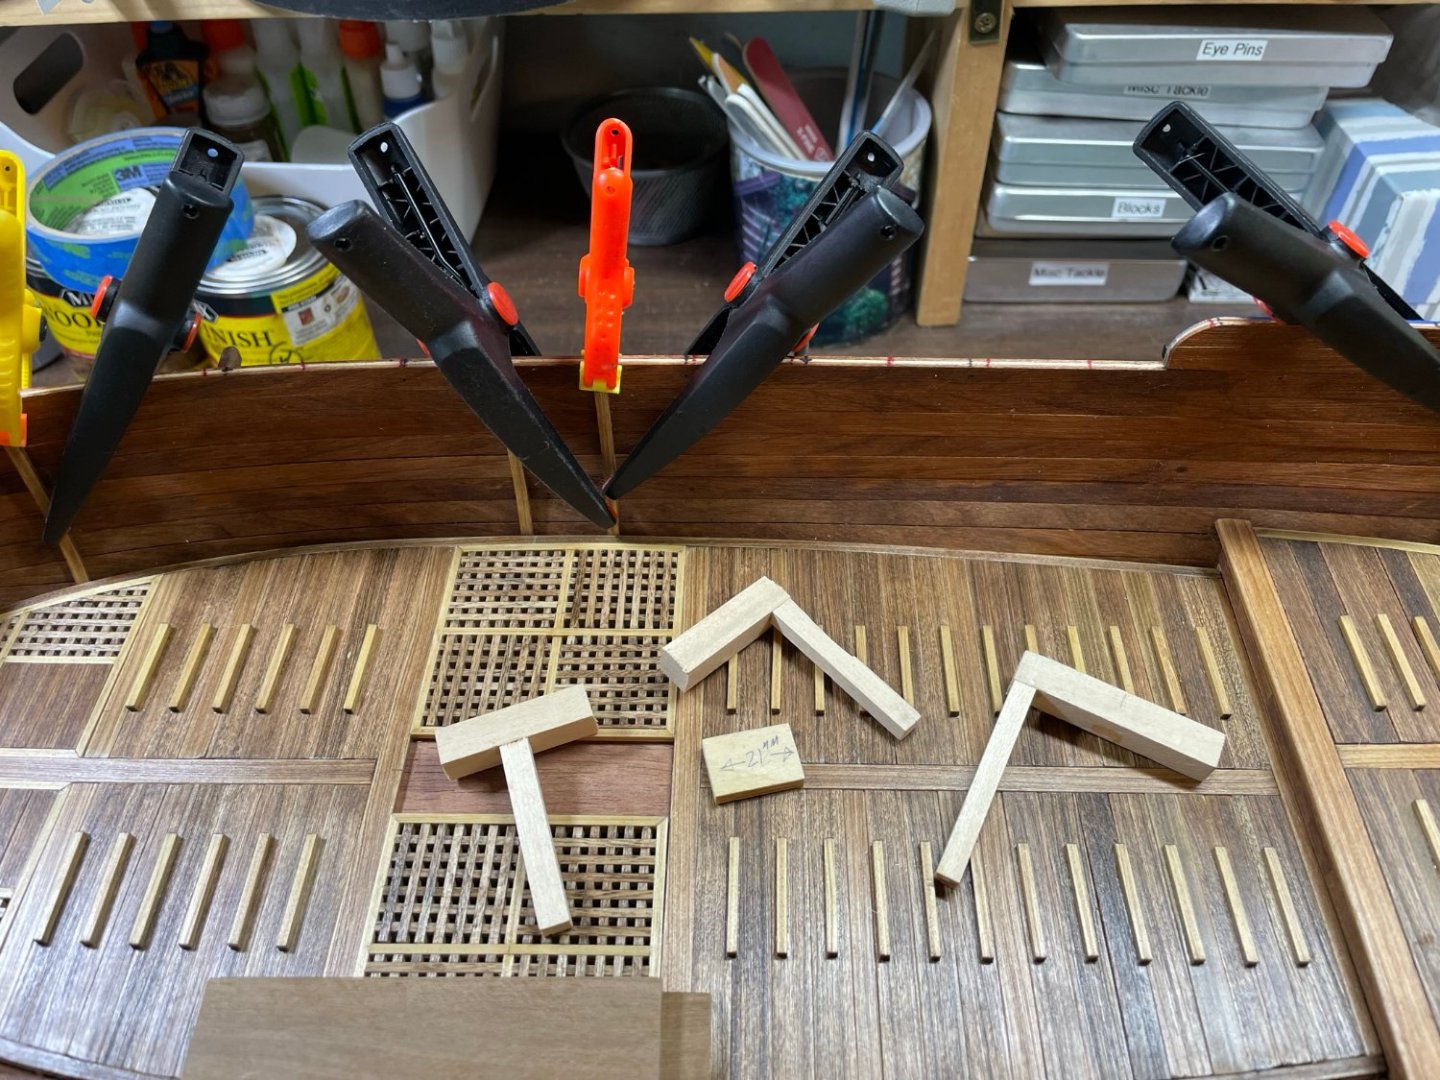
To position the longitudinal strips to the ribs, I made two small height gauges to position small blocks of wood that set the top position of the rail correctly.
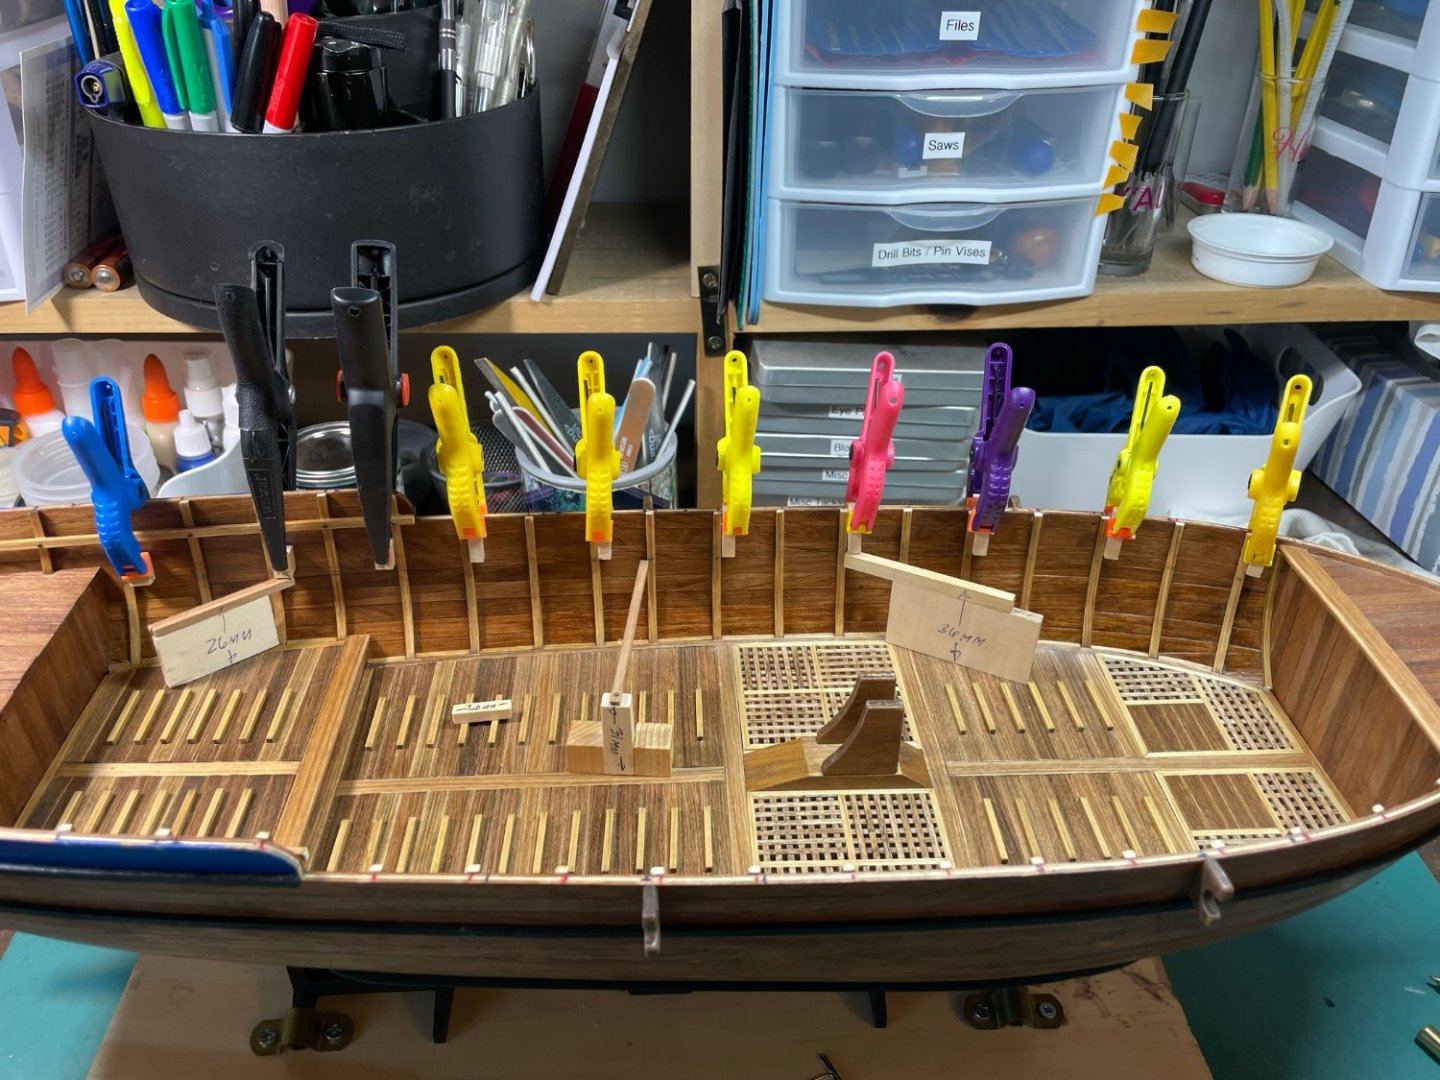

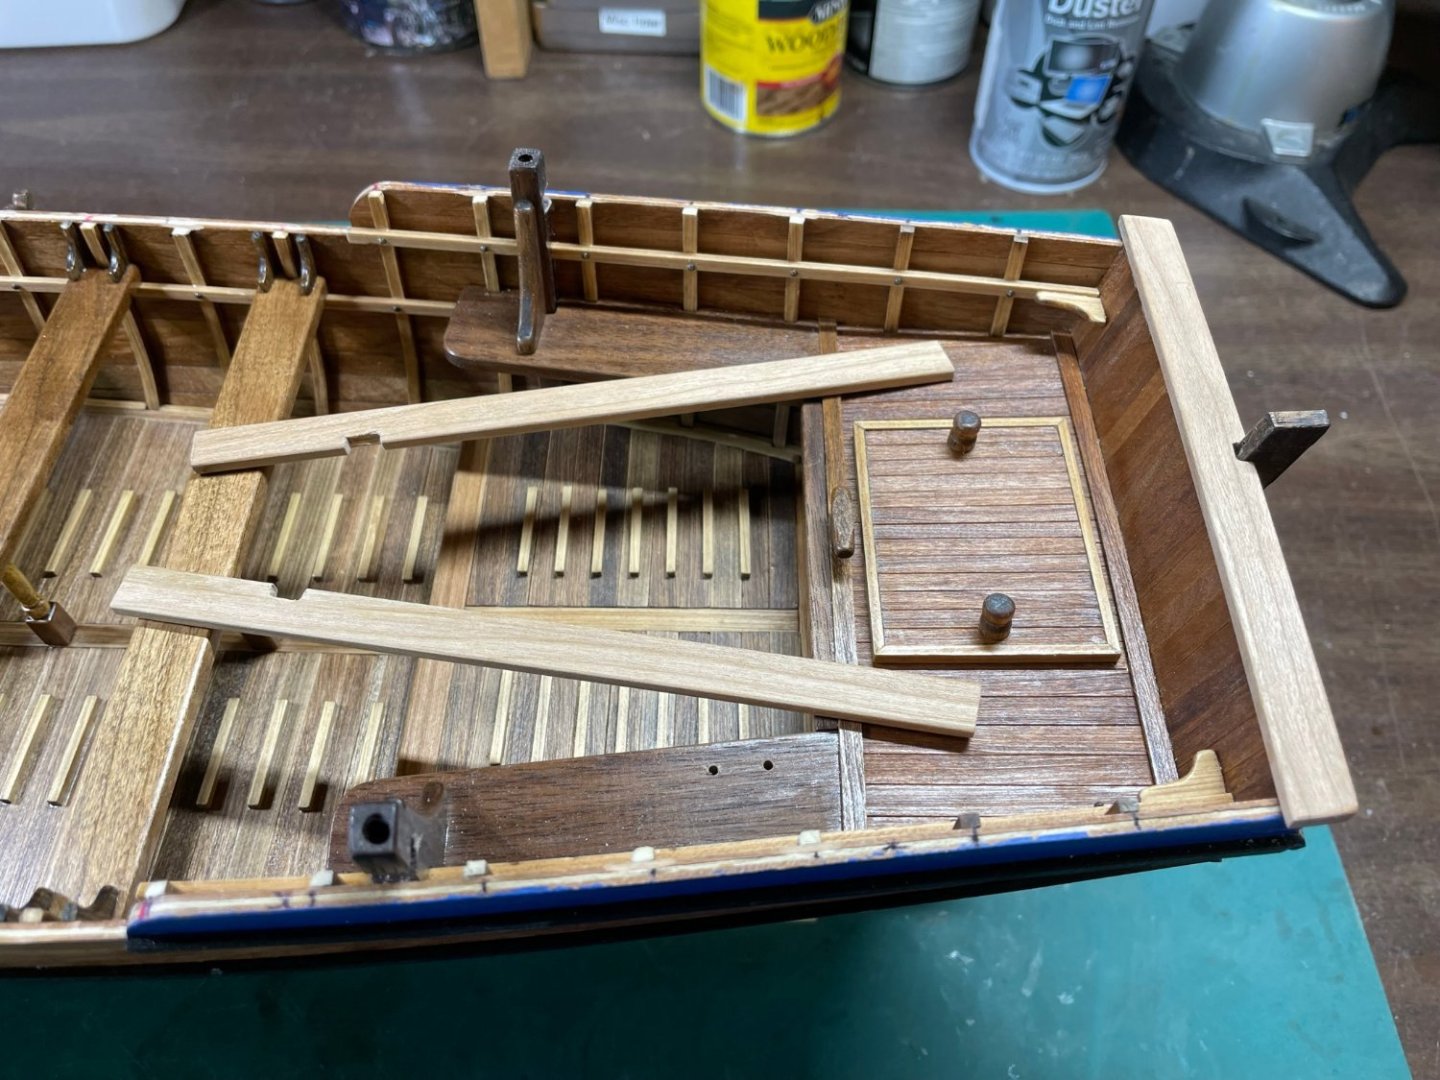
The nails supplied with the kit were too long, so I replaced them with some from MicroMark.
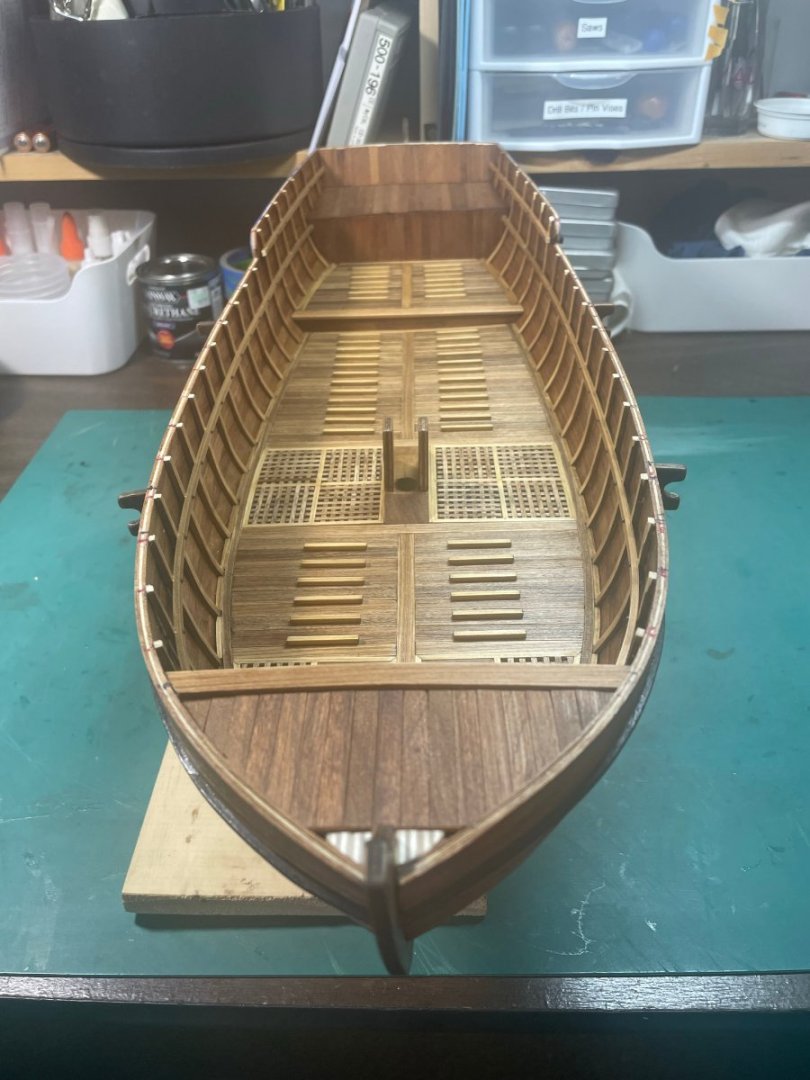
I'm pleased overall with the progress. I took a break from rib installation to work on the cannon assembly, and am looking forward to installing the benches and cannon. The wood called out for the carronades was too small in cross section, so I've ordered new wood from Joe at Modelers Sawmill. I also ordered an extra piece of wood for the aft benches in case I make an error while using the supplied walnut.
Thanks for looking at my project. Happy new year to you all.
- Mr Whippy, CiscoH, Oldsalt1950 and 2 others
-
5
-
-
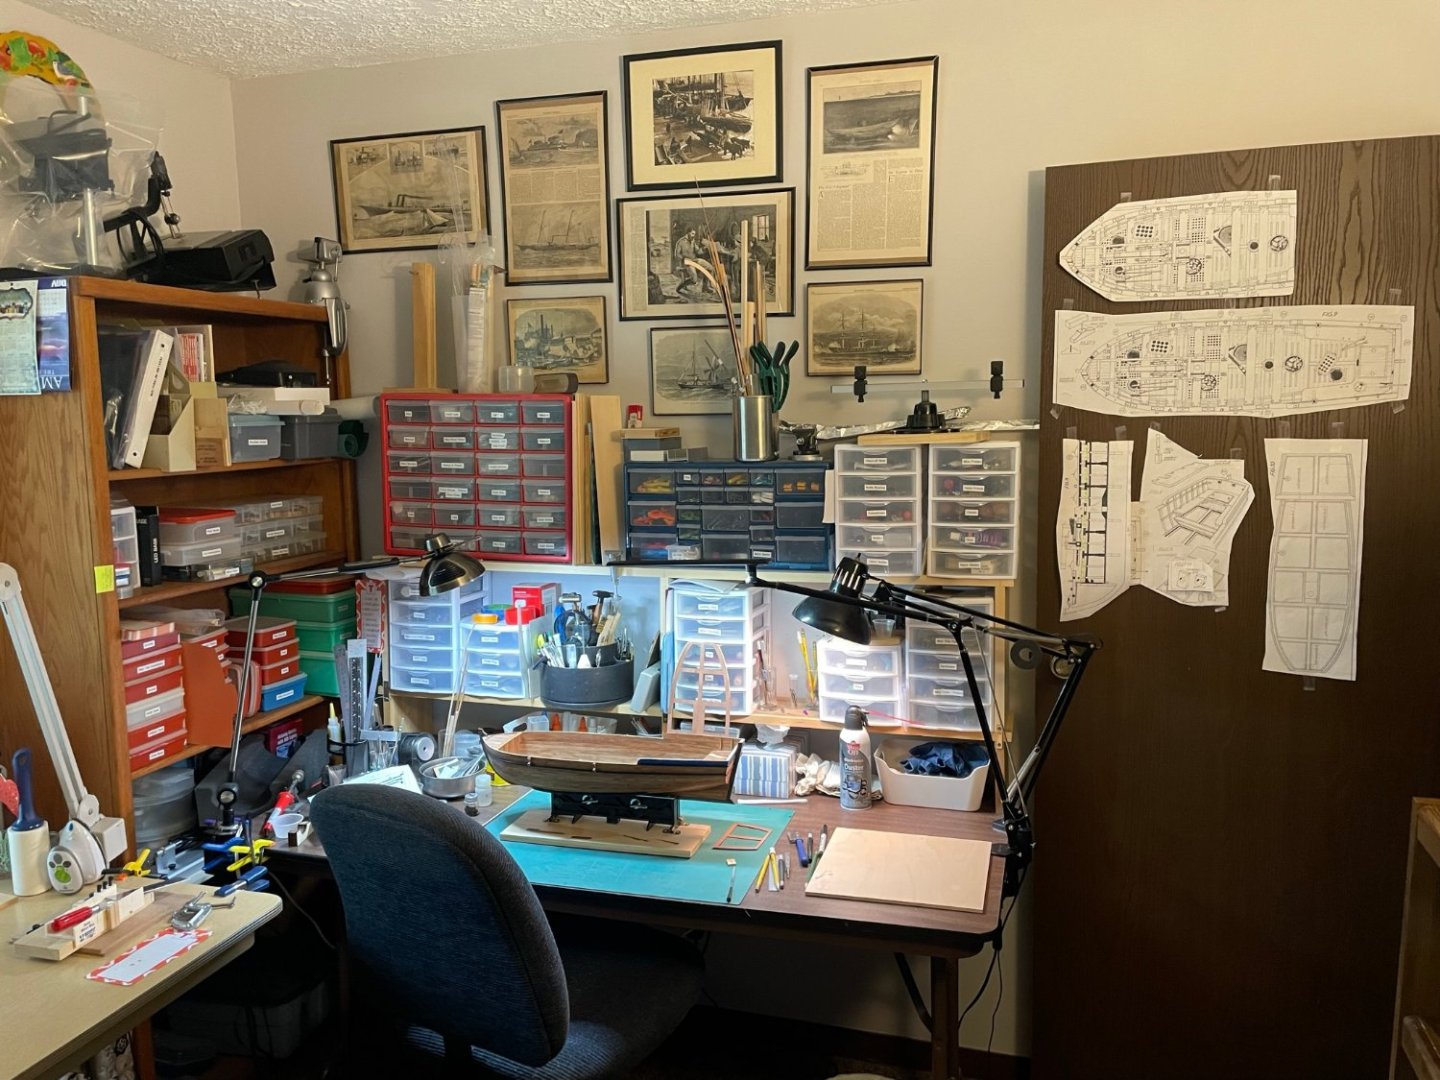
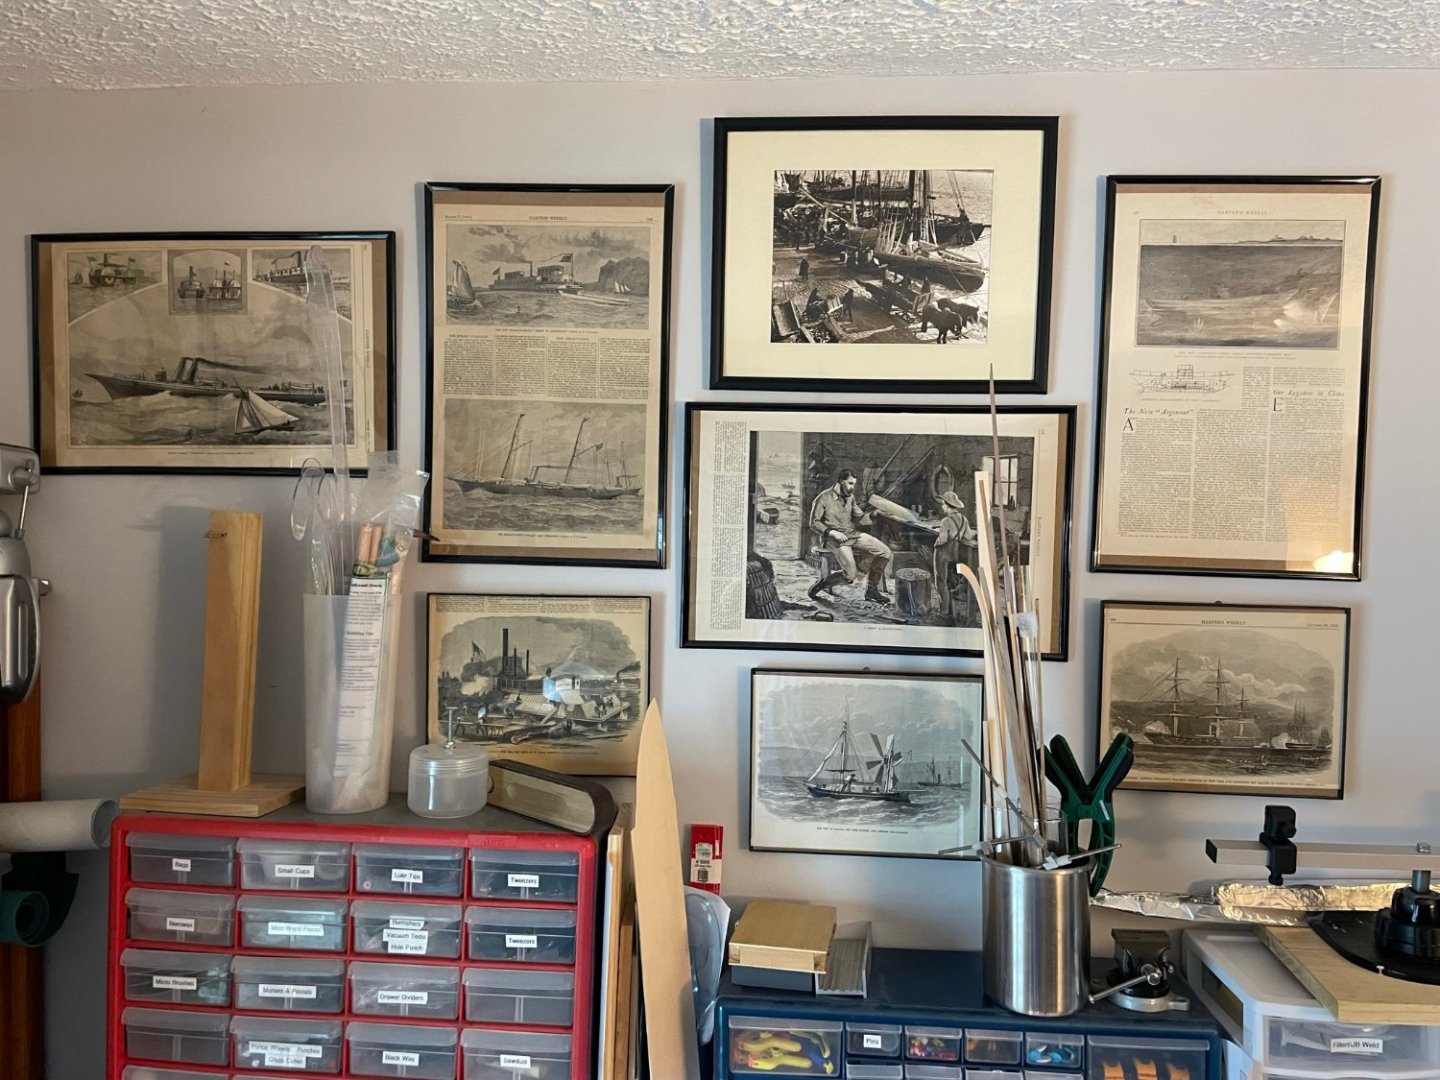
I thought I'd open this post with some photos of my "shipyard." I have one wall of what my wife and I call our "cave", while she has the other three for her crafts. If my wall looks full, you should see her three and the closet! Since I don't have room to spead out the plans, I had copies made so that I could cut sections and hang them on the door. At this point I found out that the plan drawings are not truly to scale as they profess.
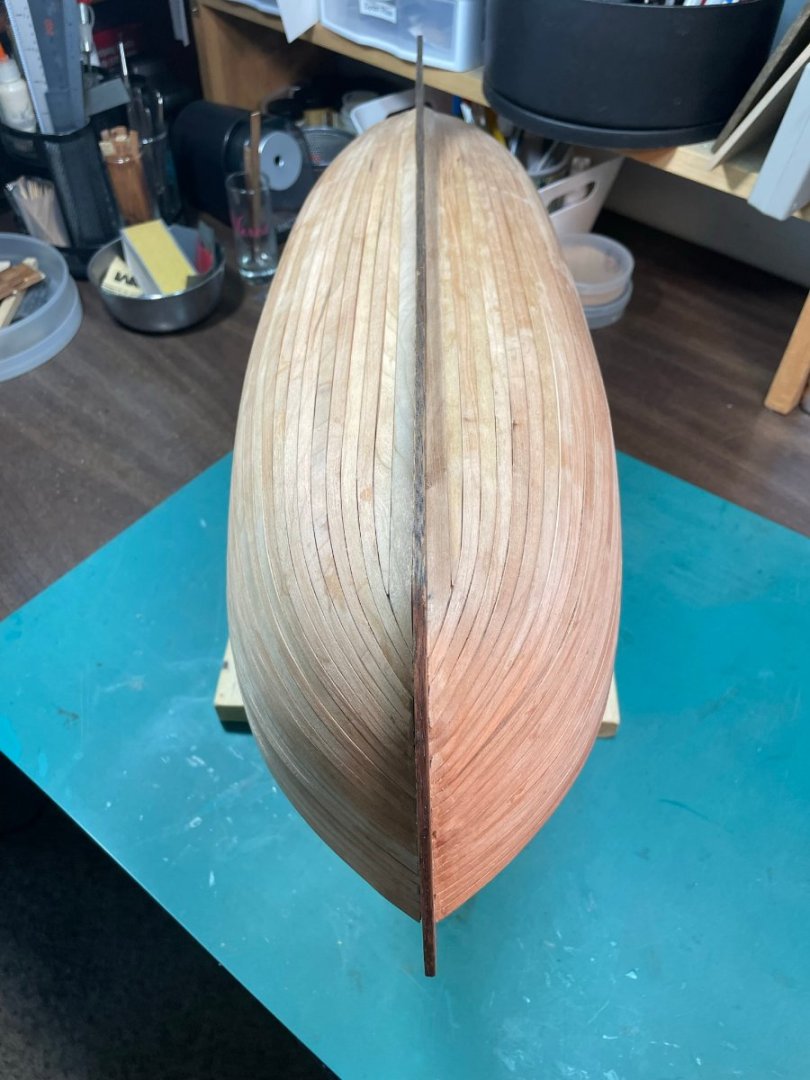
I was so glad to be done with hull planking, and so bummed at how the keel looked, that I almost forgot that the plans called for it to be planked. Since the plans call for the bottom of the hull to be painted, I planked the keel different than what the plans showed.

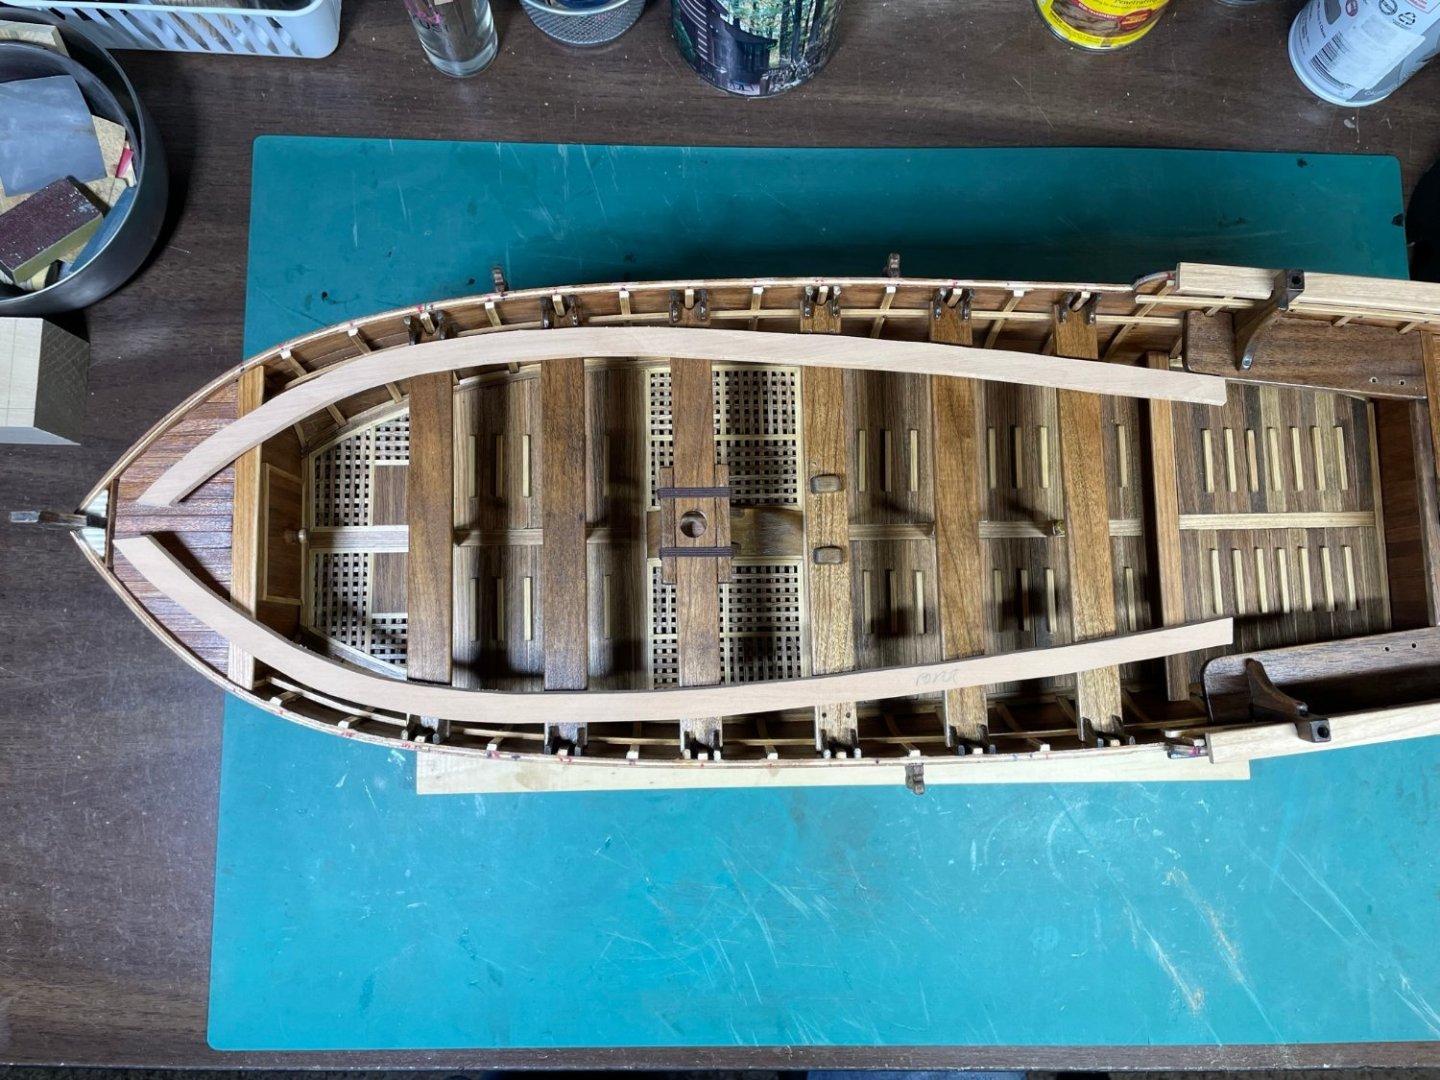
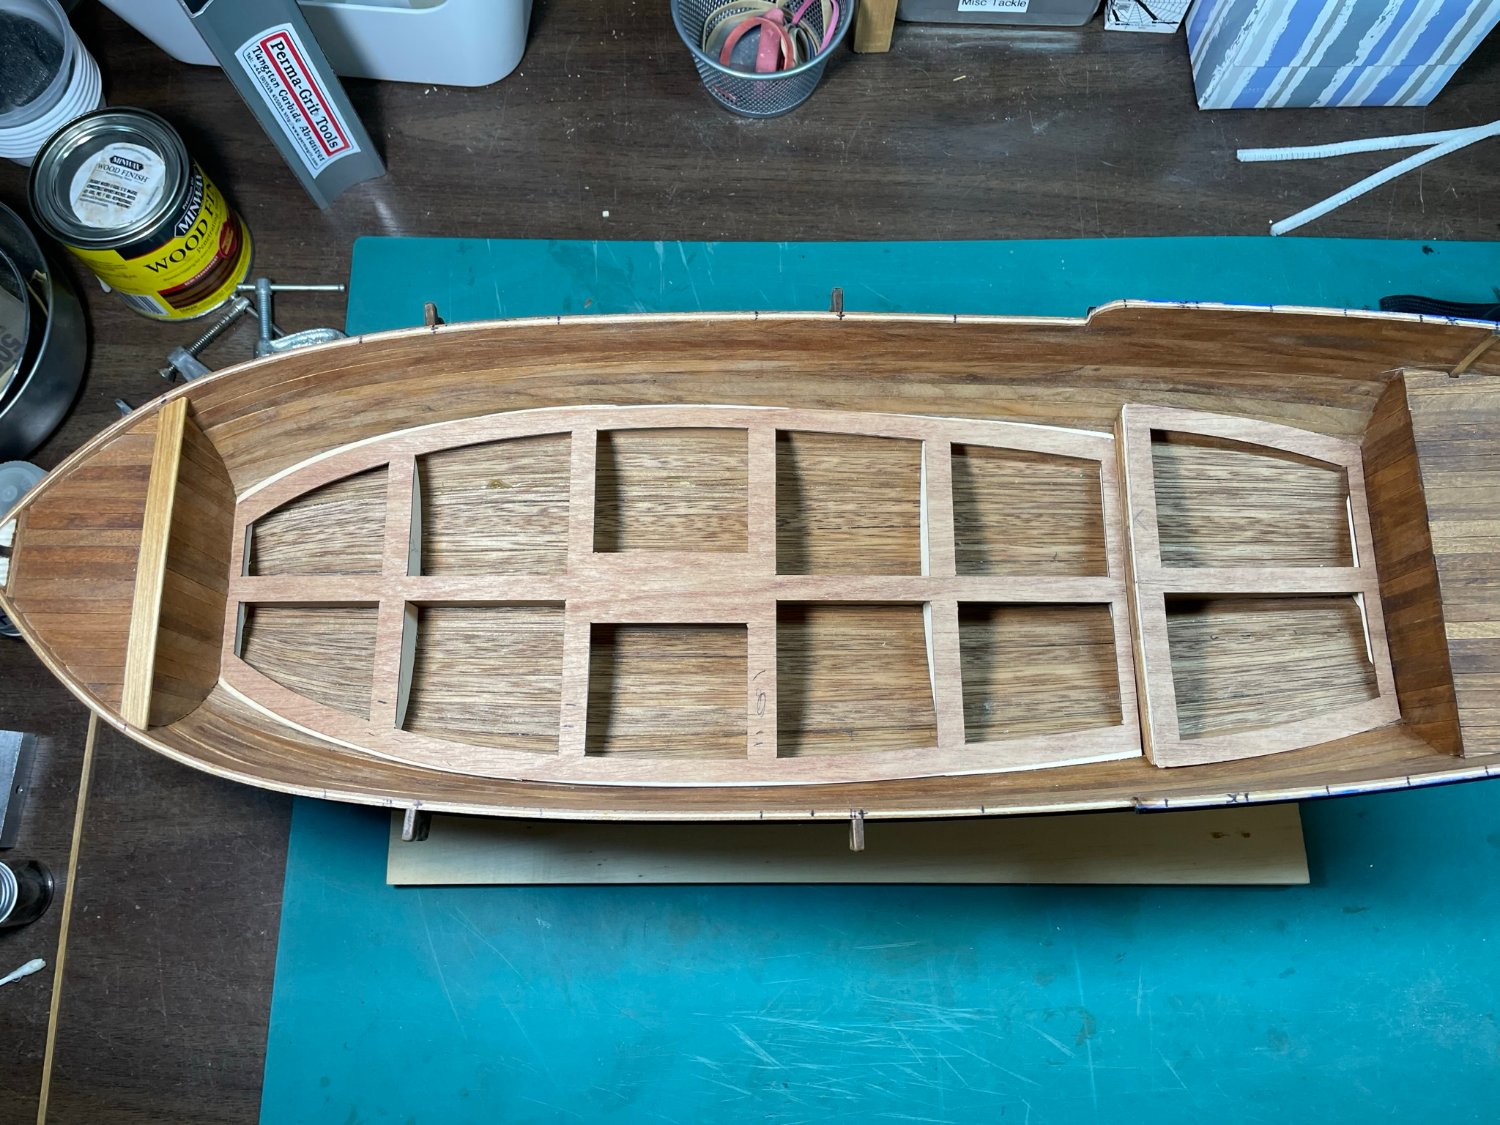
Planking the forward and aft decks went well, but it became apparent that the bow deck is too high for proper mounting of the cannon carriage. I'm guessing that when I get to that point I'll have to raise it on the bench.


The main deck support does not conform to the inner planking so I had to add filler strips. I decided to build the deck outside of the ship so it would be easier to work on. I established where the outer edge planks should sit so that when installed, the ribs would properly meet it. When I stained the outer planks after bending with heat, I found that that they took stain differently than planks that had not been exposed to heat. They are much darker. They and the cross planks are Alaskan Cedar. The fill planking is cherry wood. All are stained with MinWax Honey stain.

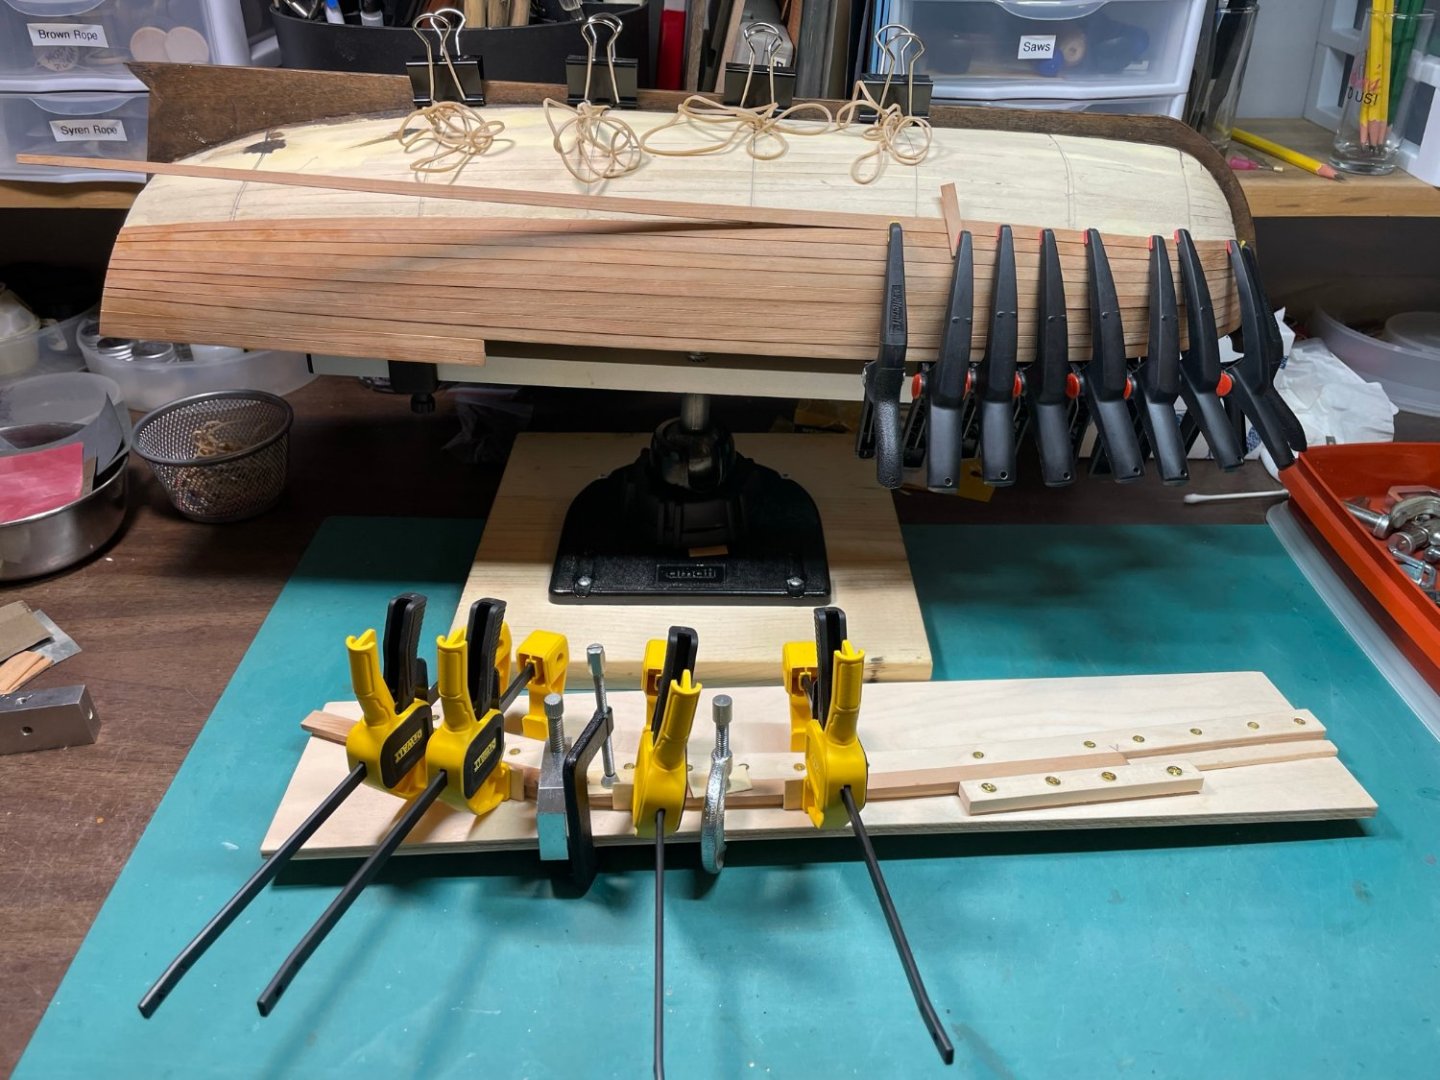
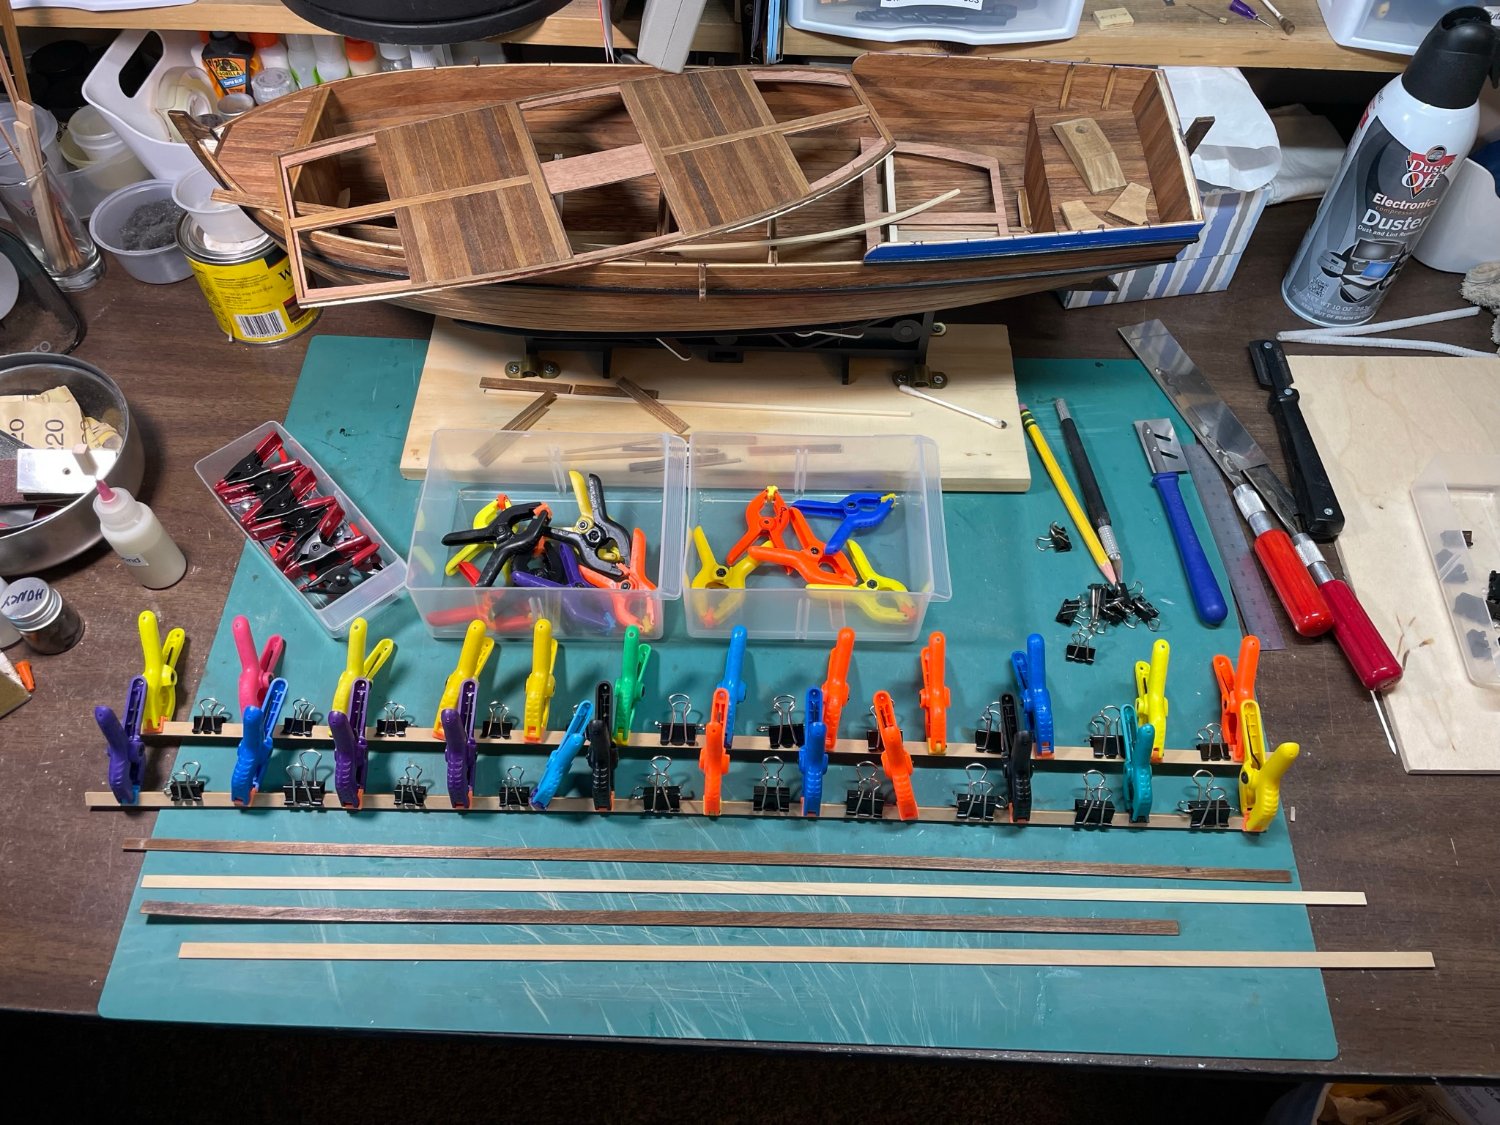
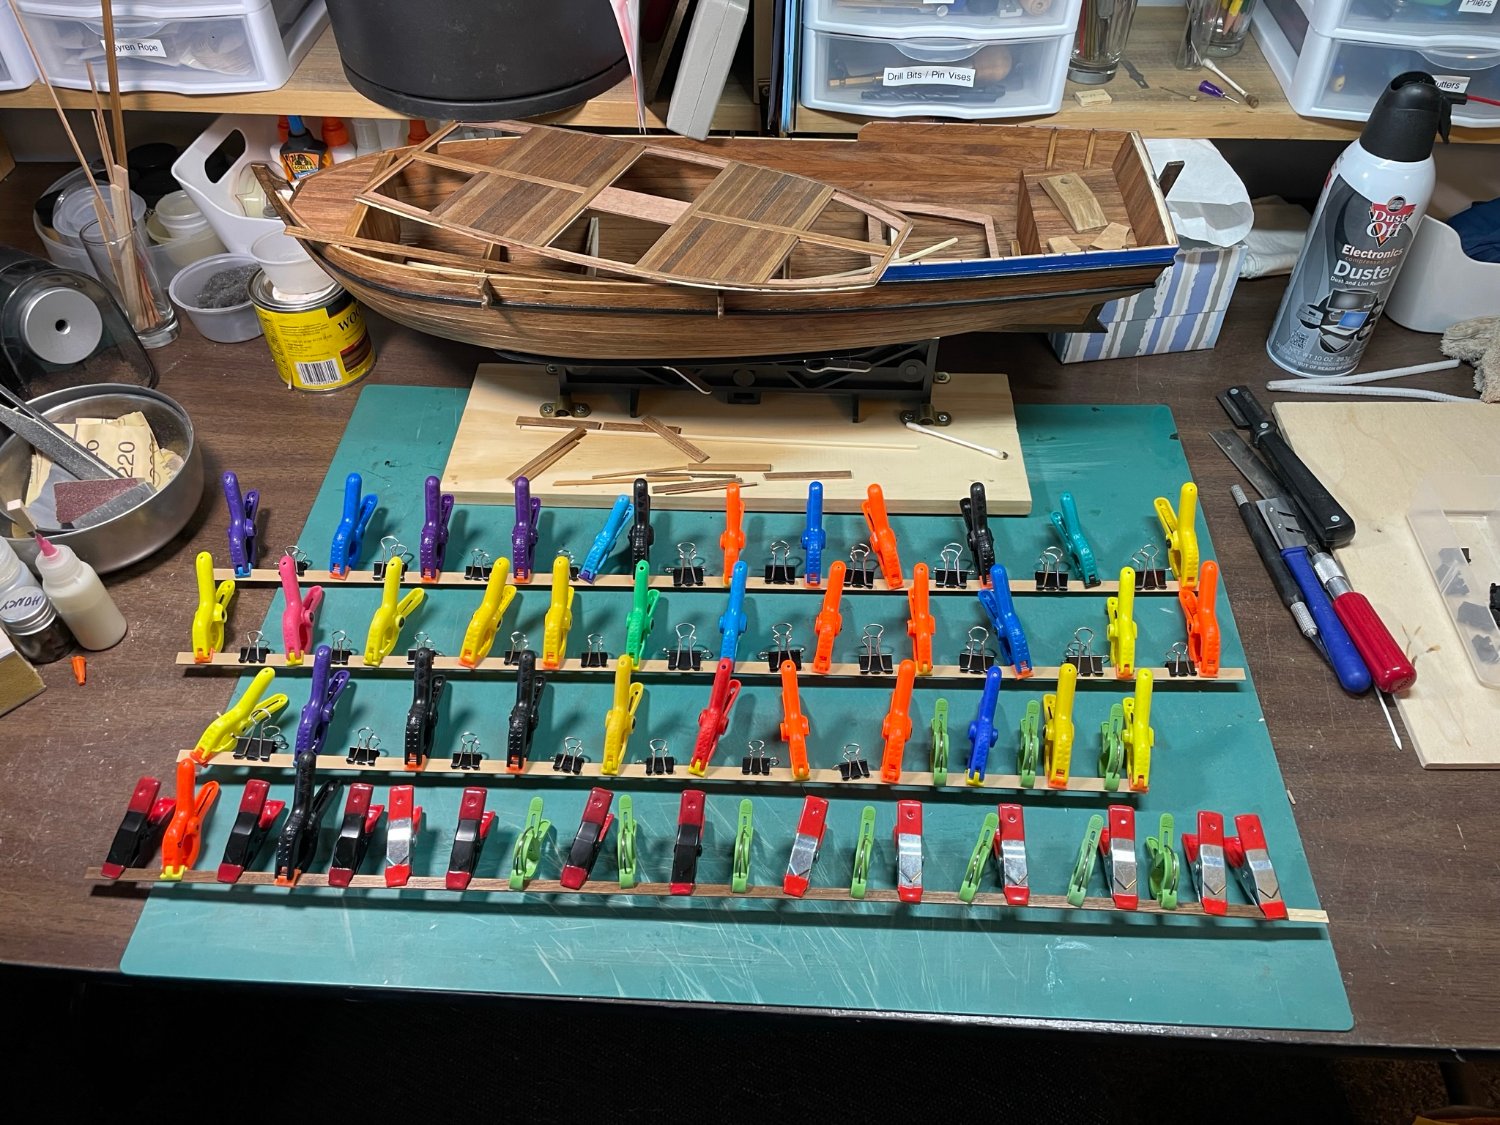
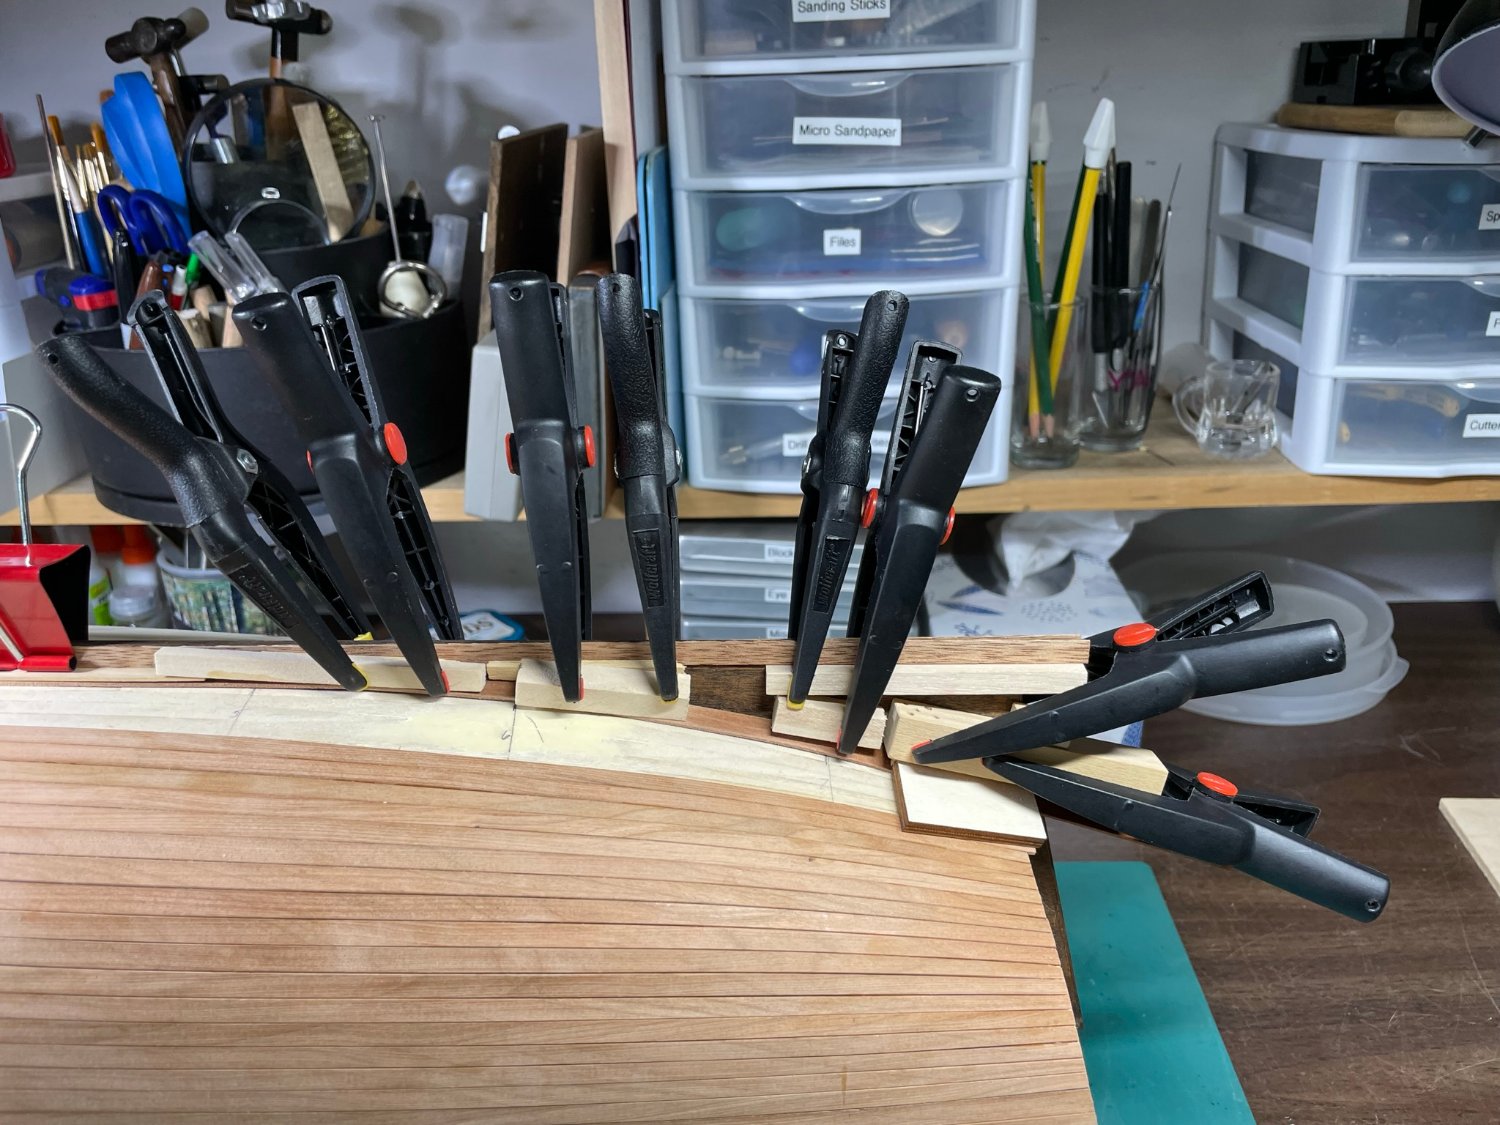
Planking the deck is a delight since I don't have to do any bending and shaping. Soon it became apparent that I did not order enough 2mm x 8mm cherry planks. I couldn't order any more right now because Joe at Modeler's Sawmill is healing from hand surgery. Sooooo - I decided to glue together extra 1mm x 6mm and 1mm x 7mm planks topgether so to get 2mm thick planks. The plans call for 8mm width but these thinner planks will make no real difference. This proved my favorite mantra that one can never have too many clamps.


At this point, planking is going well. I've started making the grating frames, and will post next when the deck is done. Thank you for looking at my project.


-
Hello ajromano;
A coming post picture will be clamp overload!🥴 Stay tuned.
-
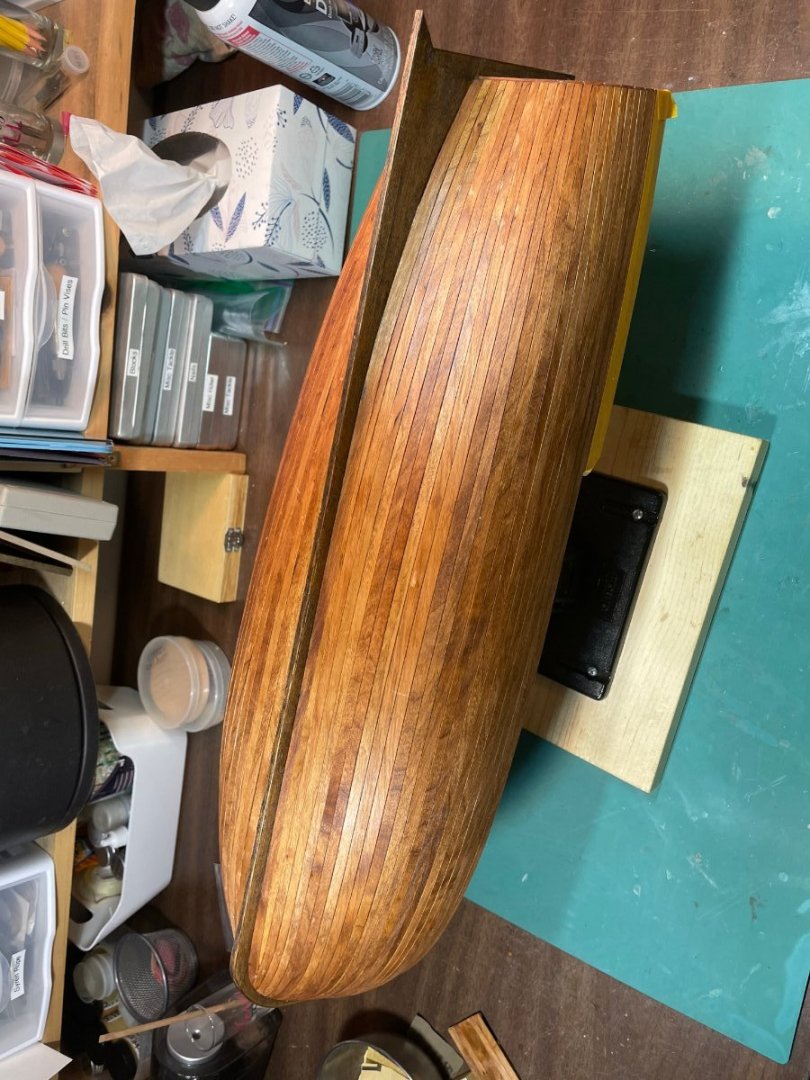
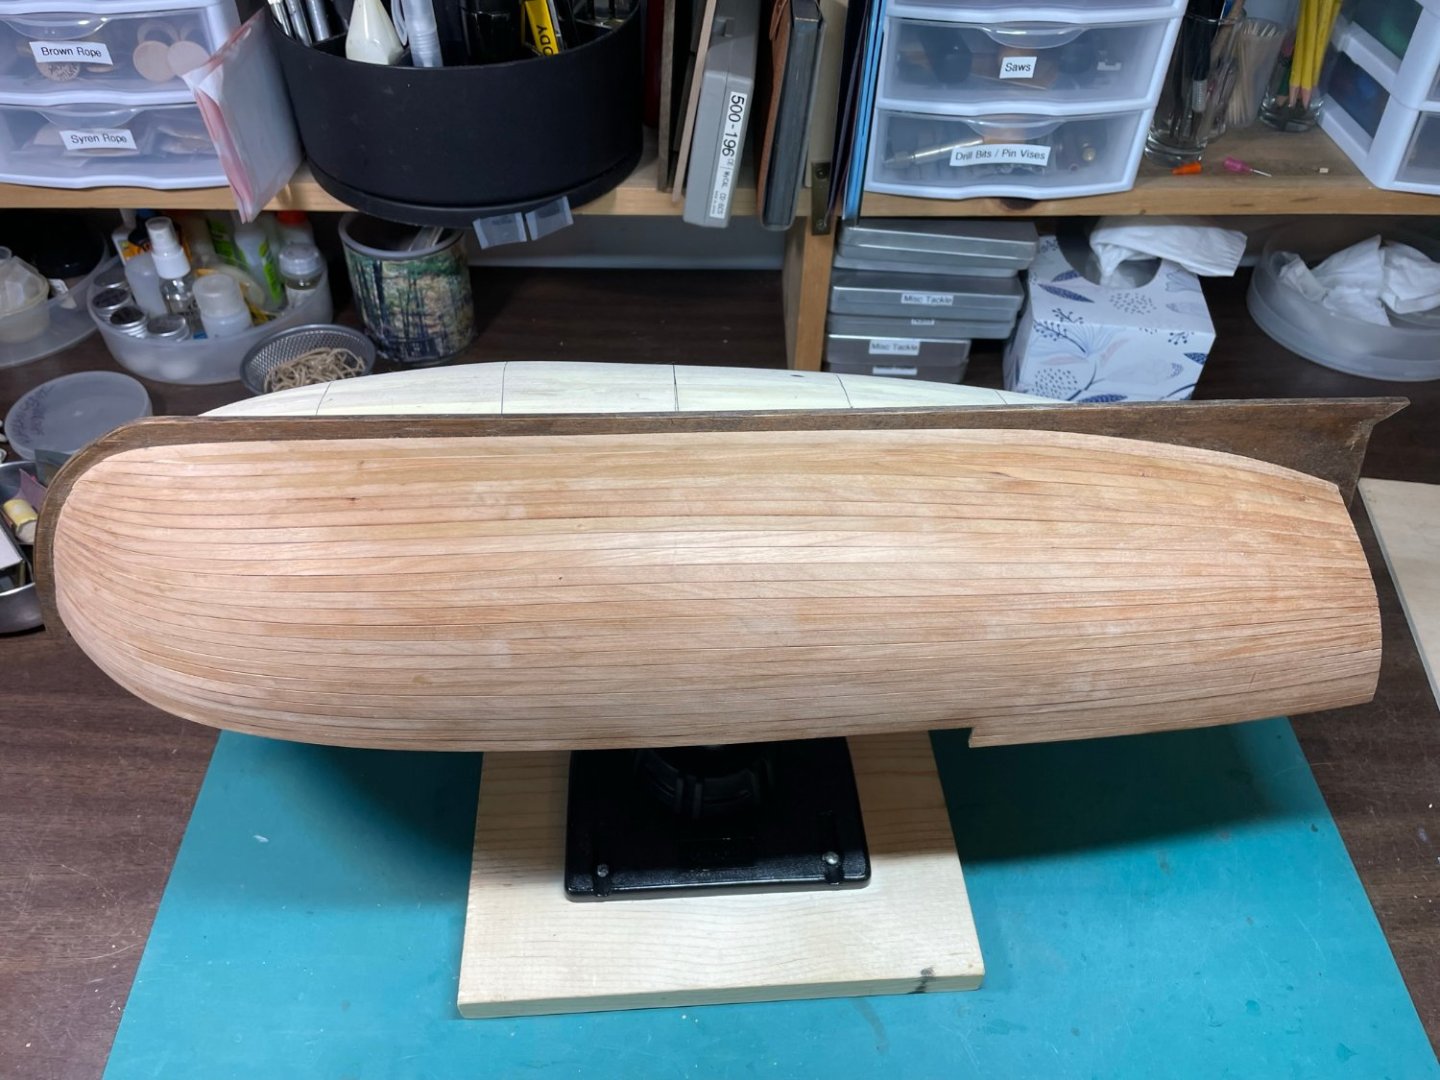
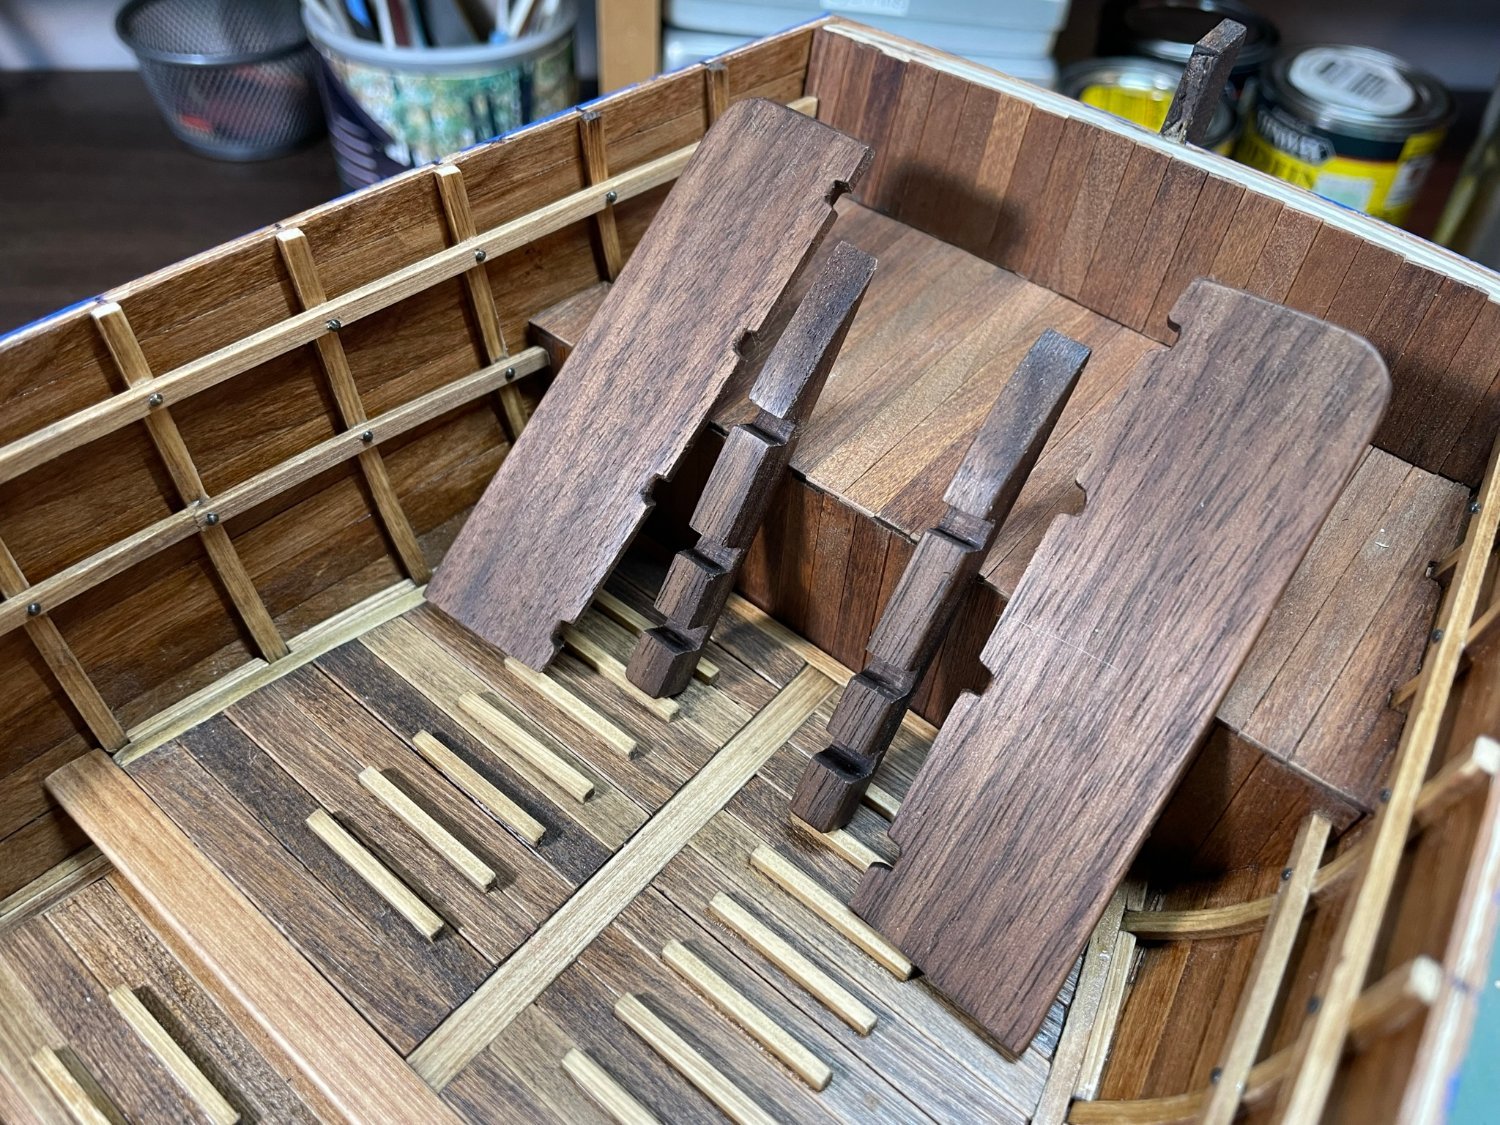
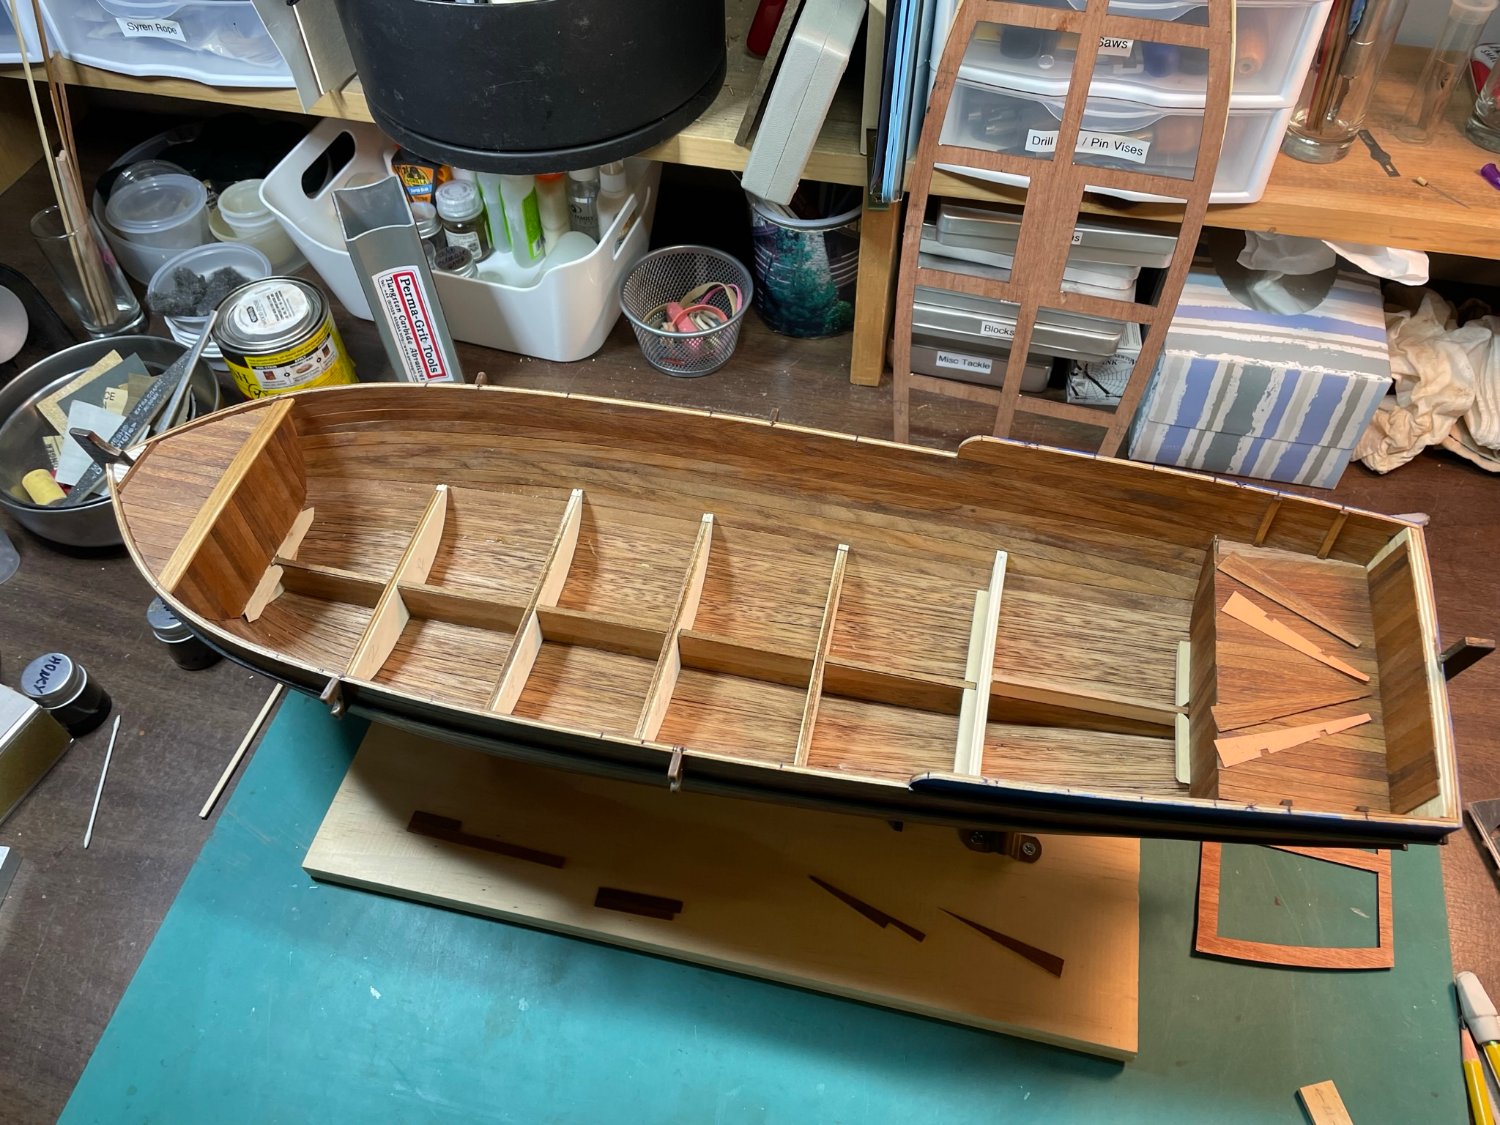
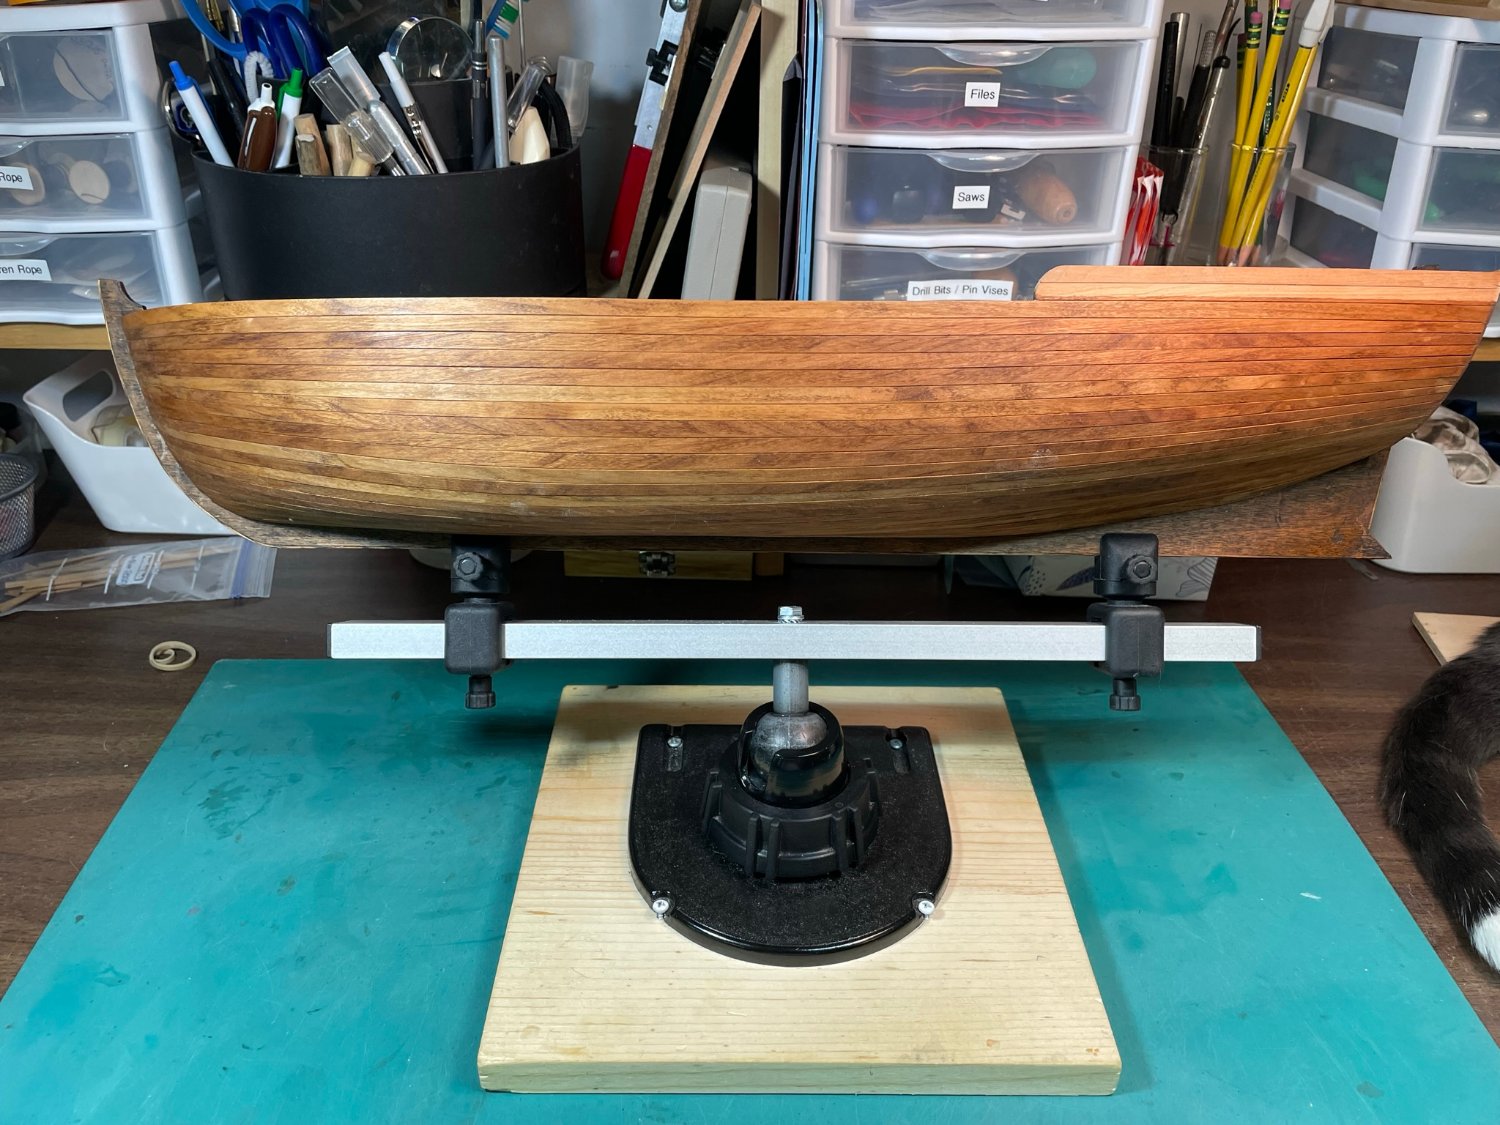
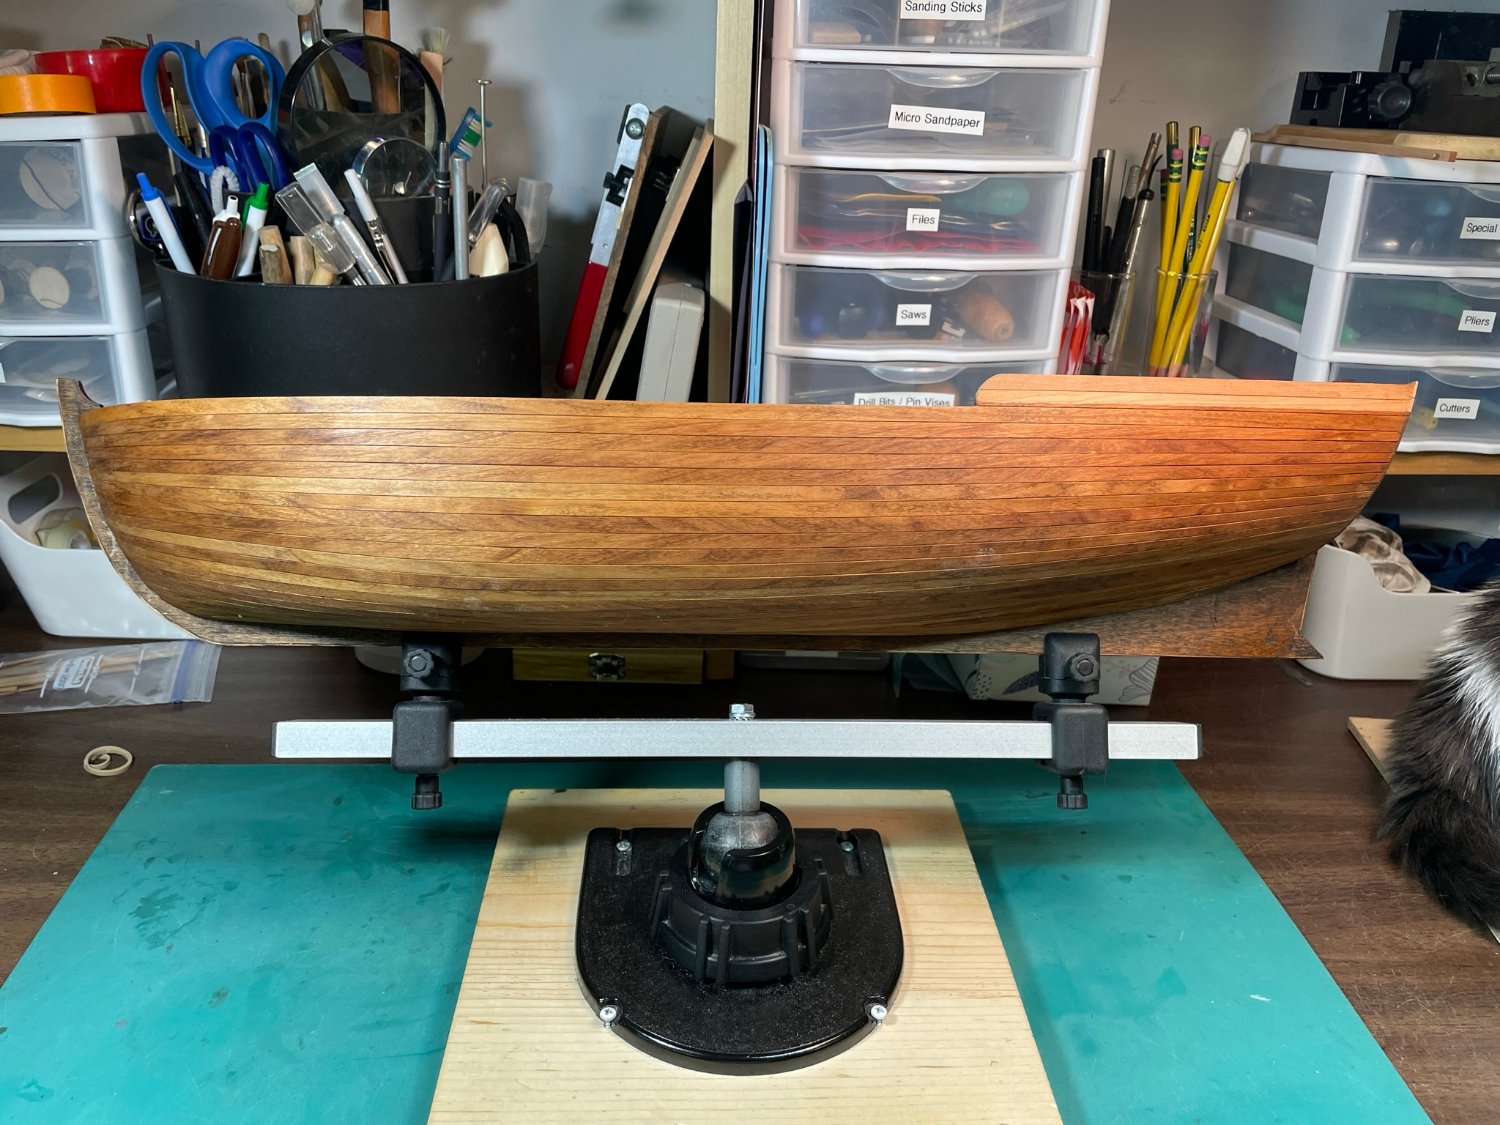
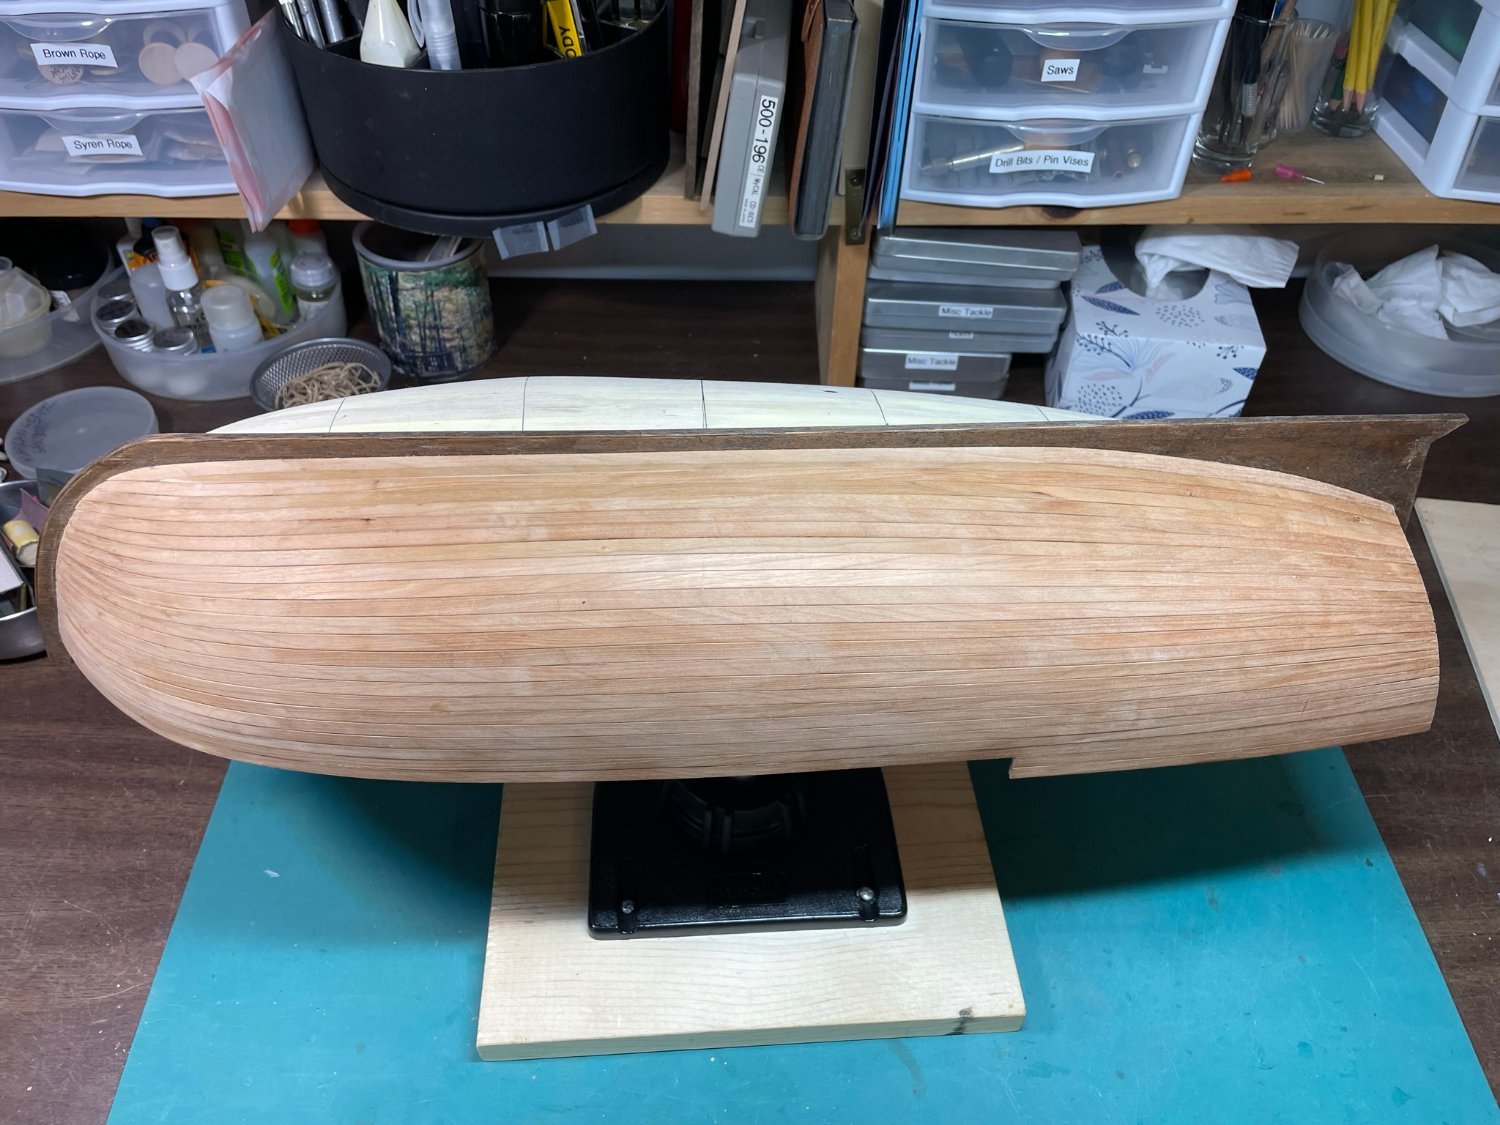
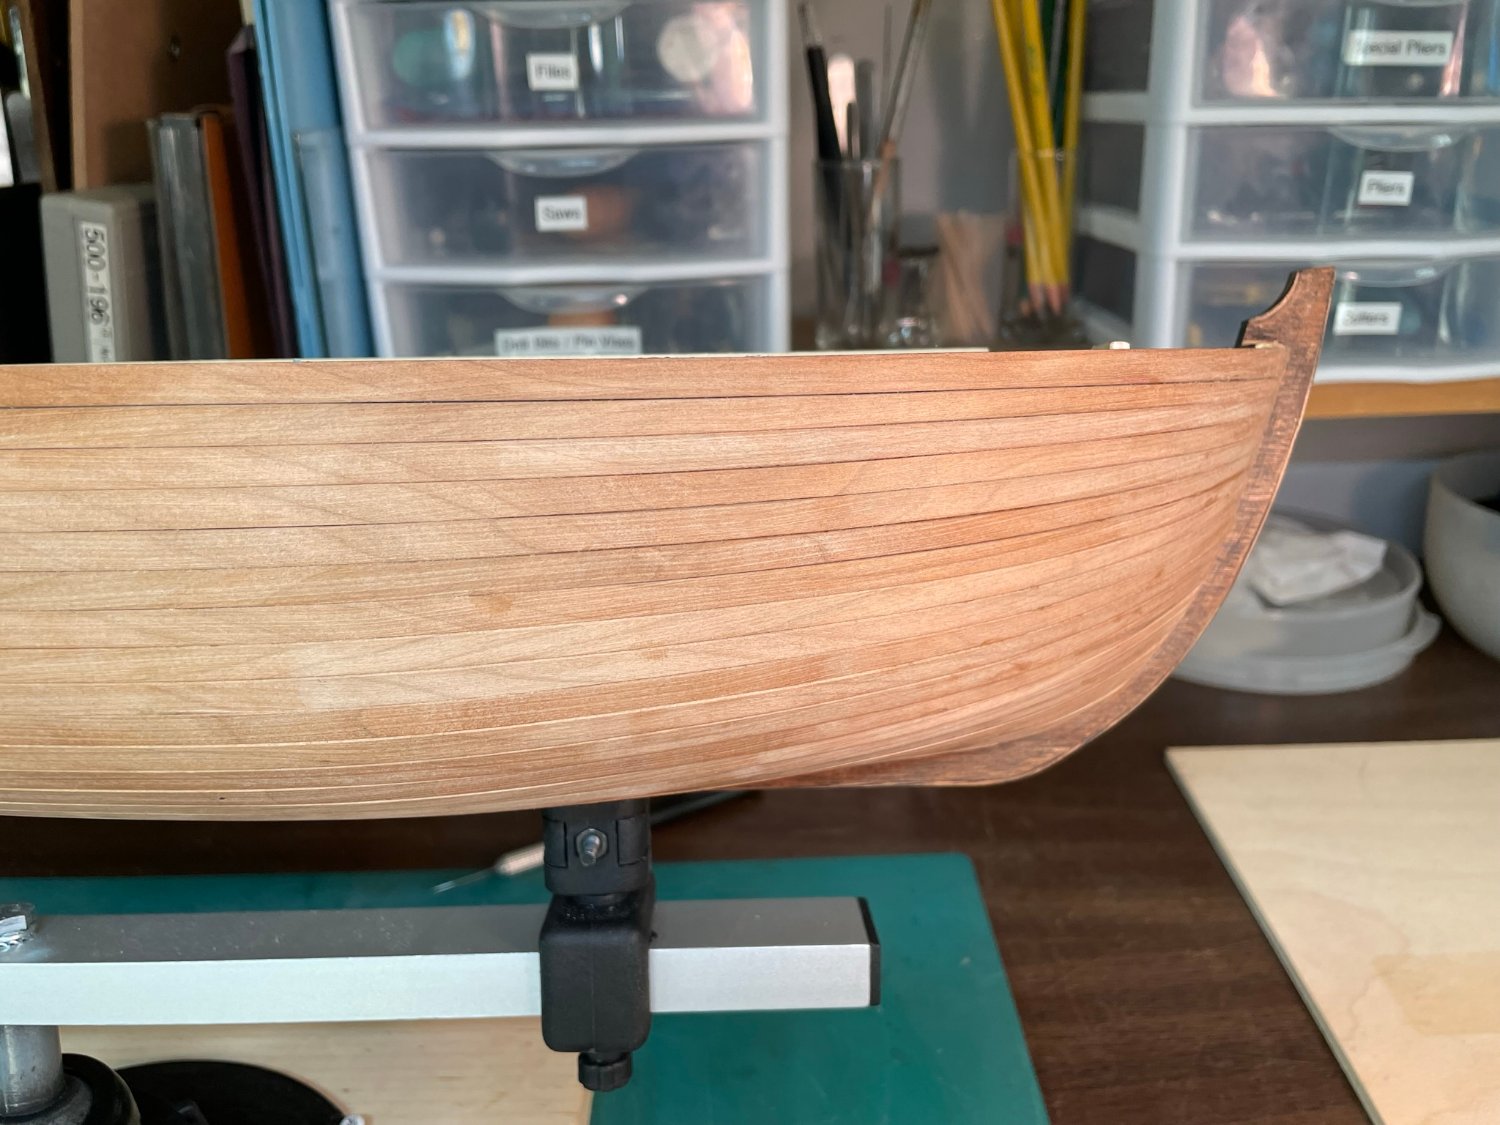
I’ve completed what I wanted to before my back surgery. All of the steps had challenges of their own, but I completed all of them with satisfaction. The biggest and most satisfying task was to finally remove the build form. I was happy to see that no glue seeped through the cherry wood planks. I used the kit supplied wood for planking below the deck surface. Lines of the strange planking diagram supplied on the plans is visible, but I don't think it will be too noticable as the interior is finished off. I did not use the kit offered method on layers two and three.

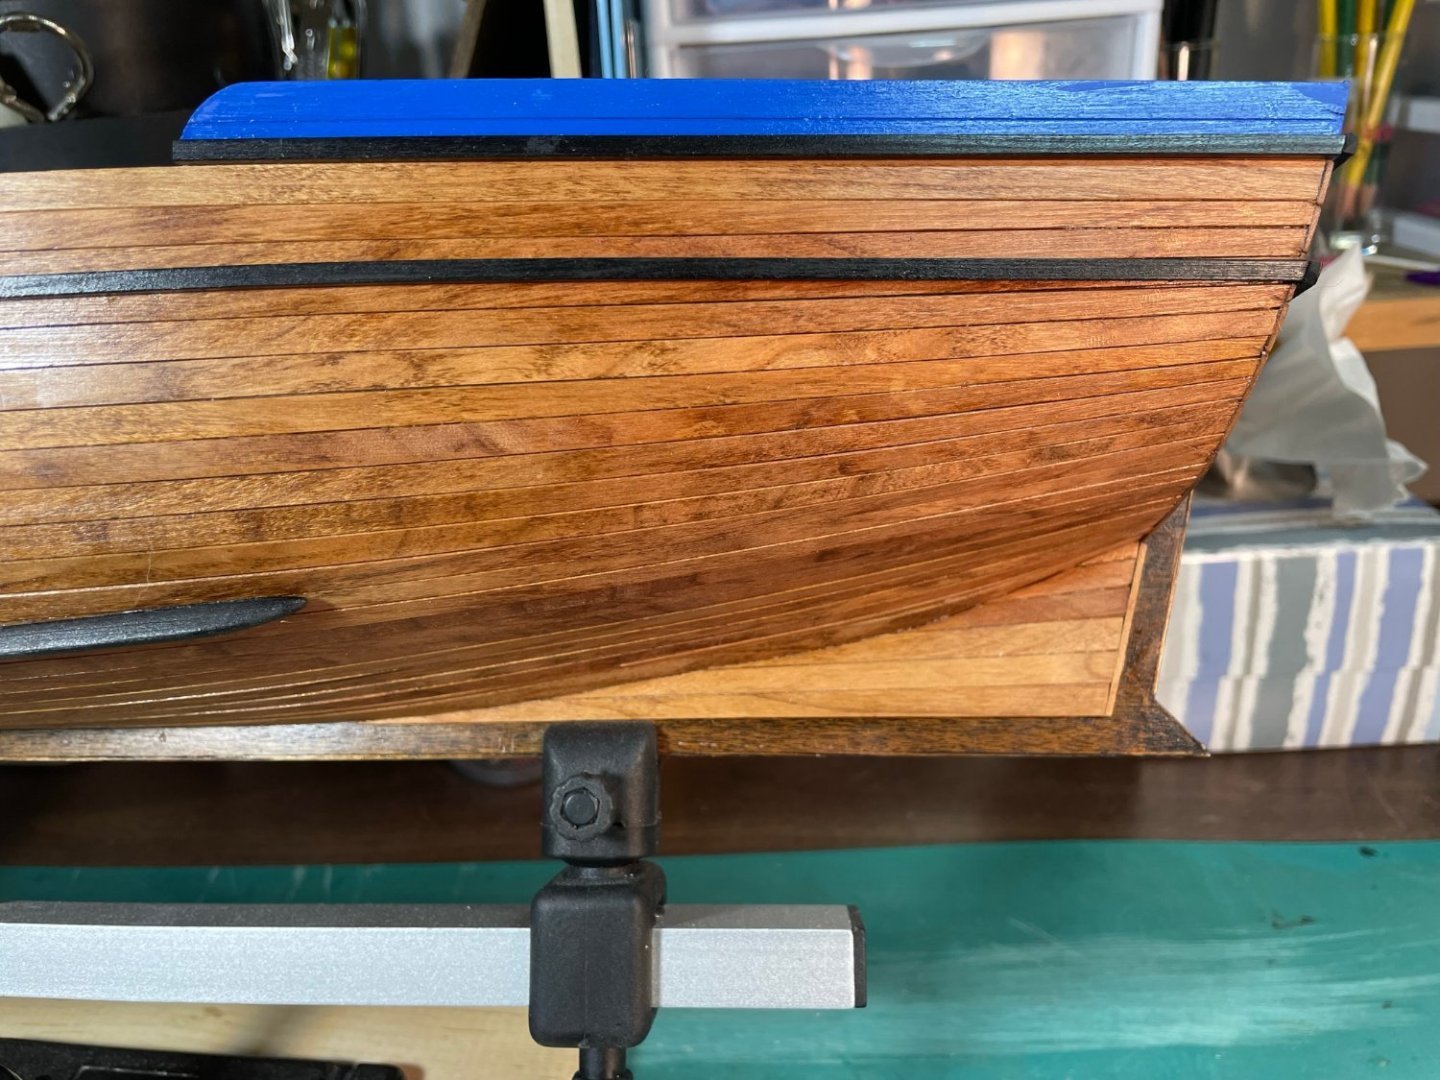
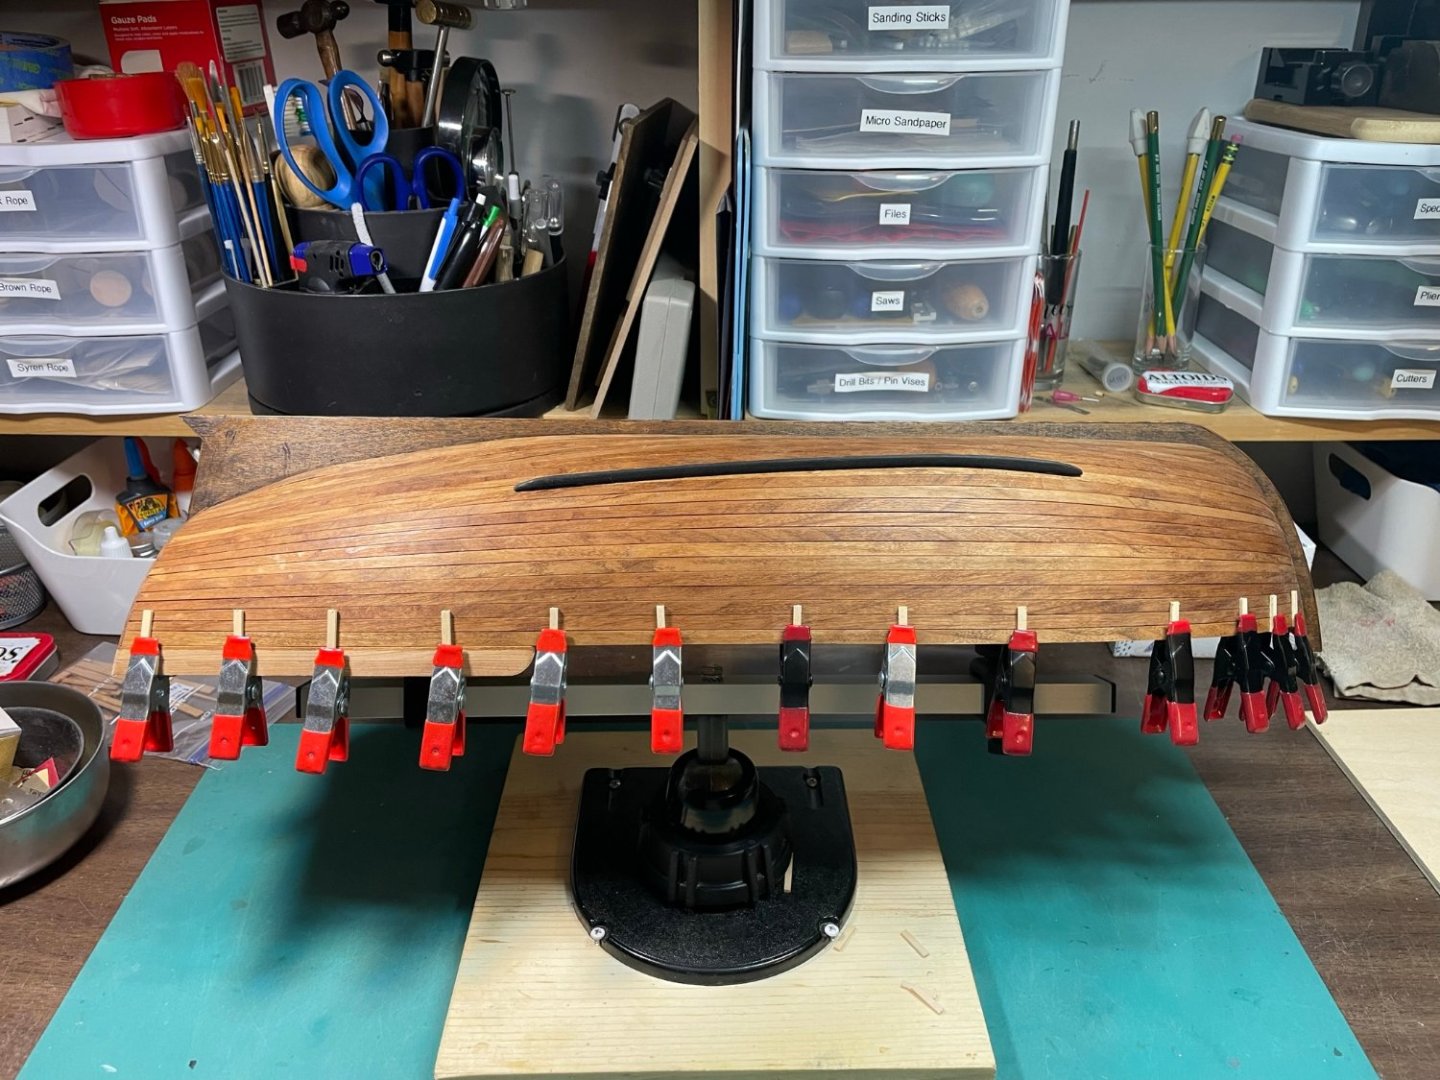
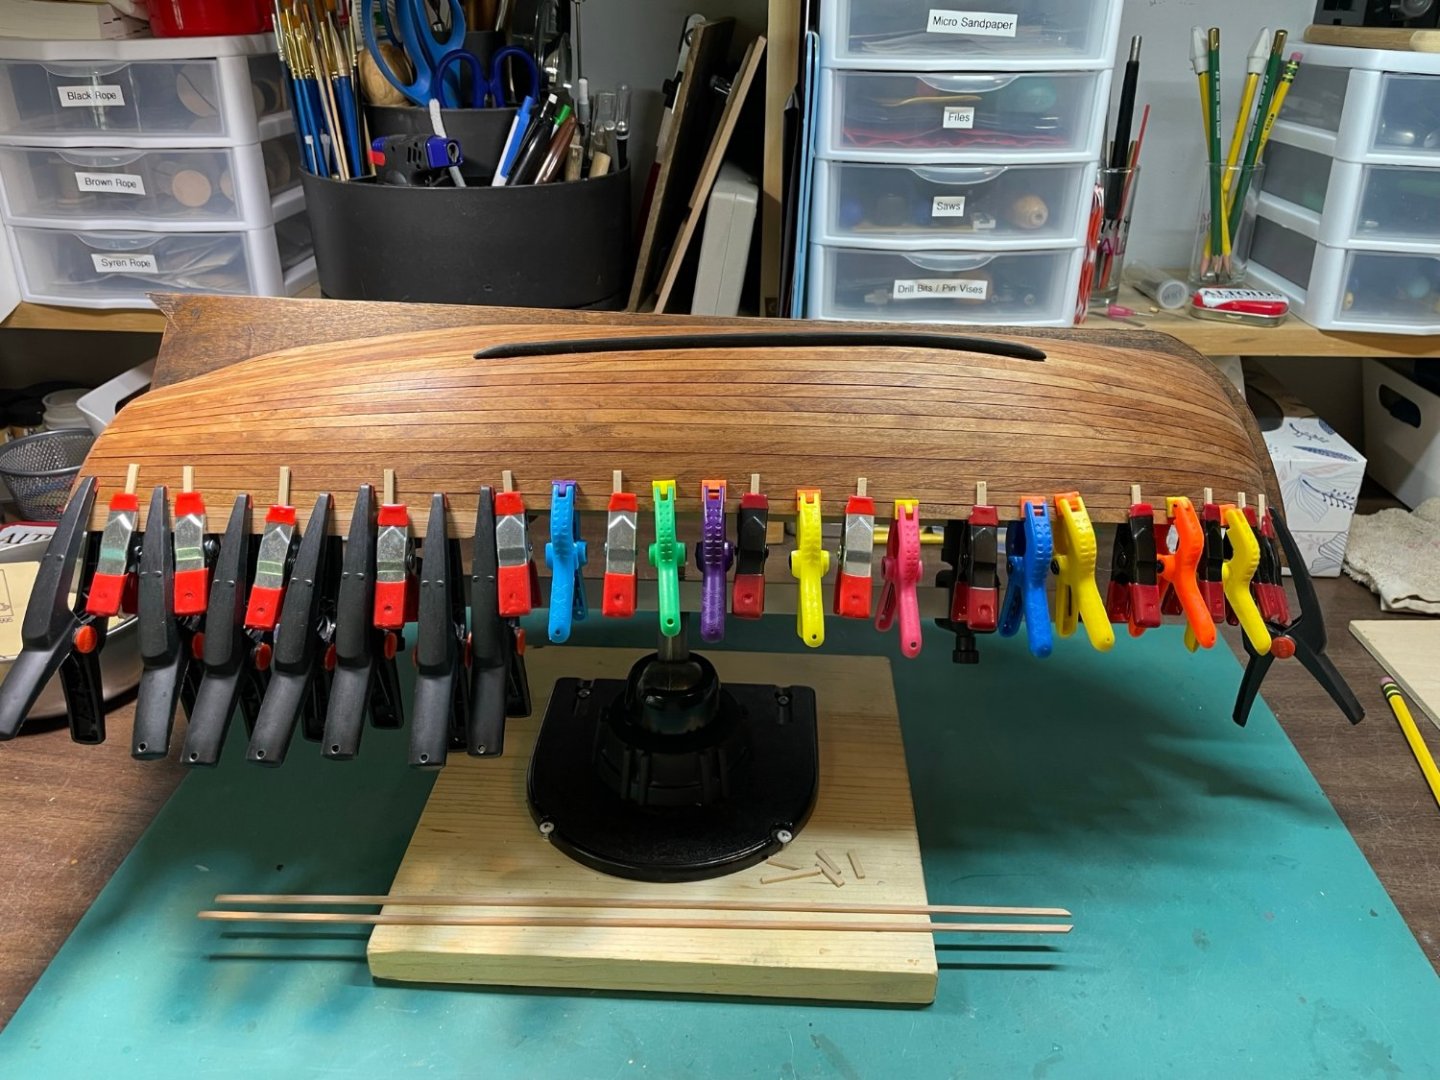
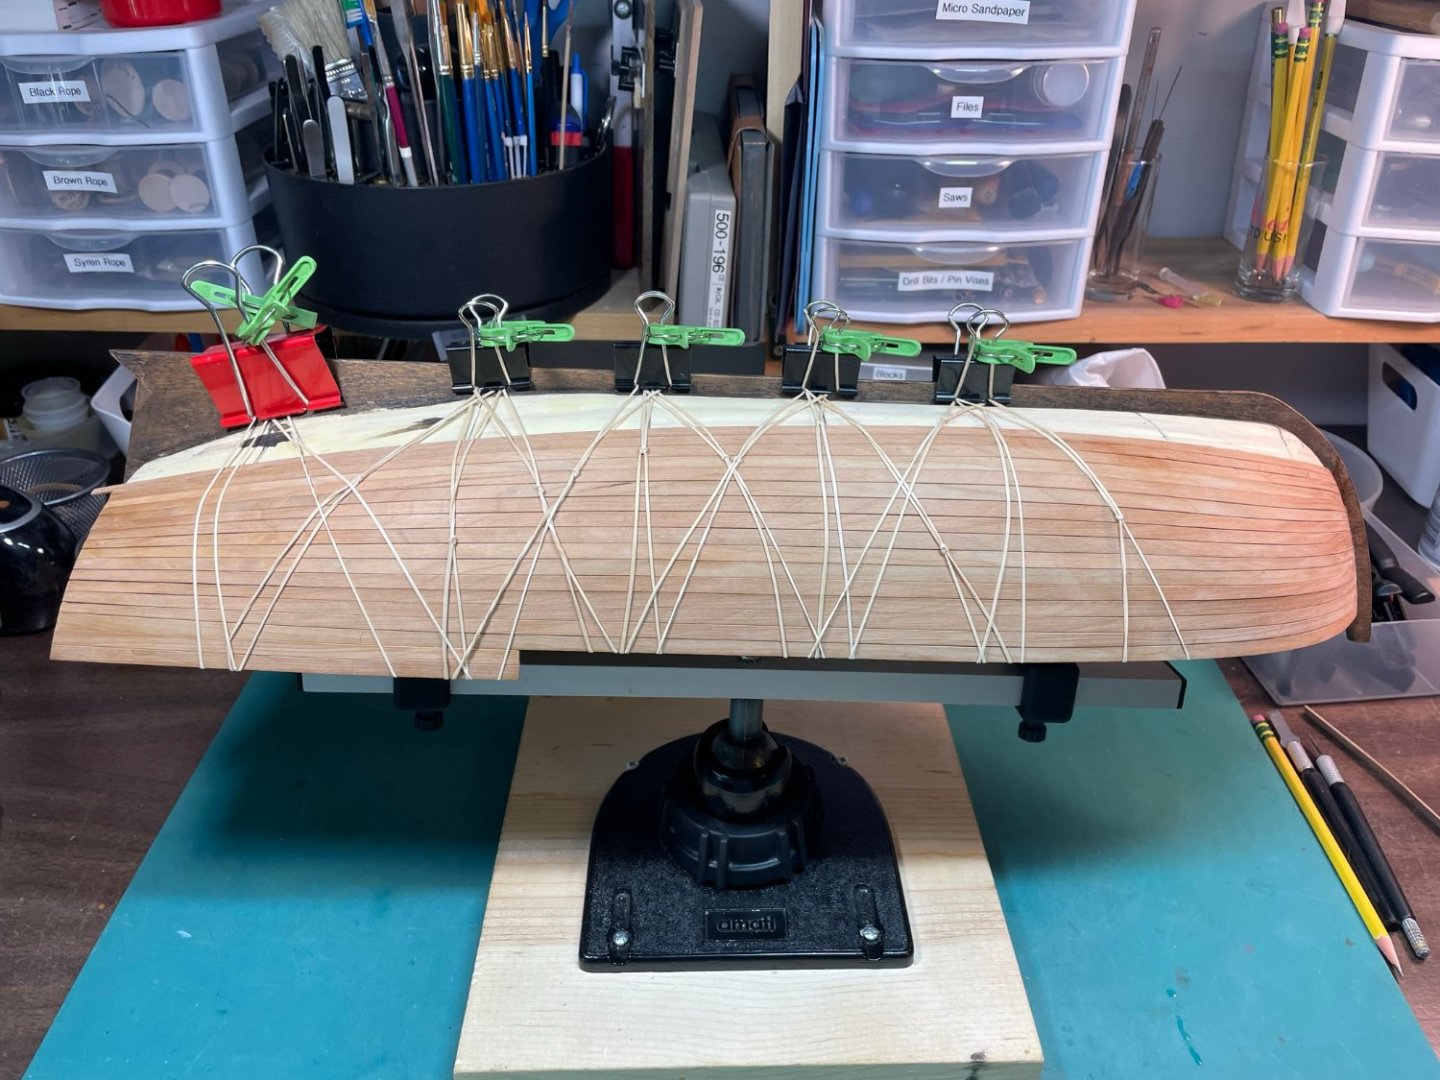
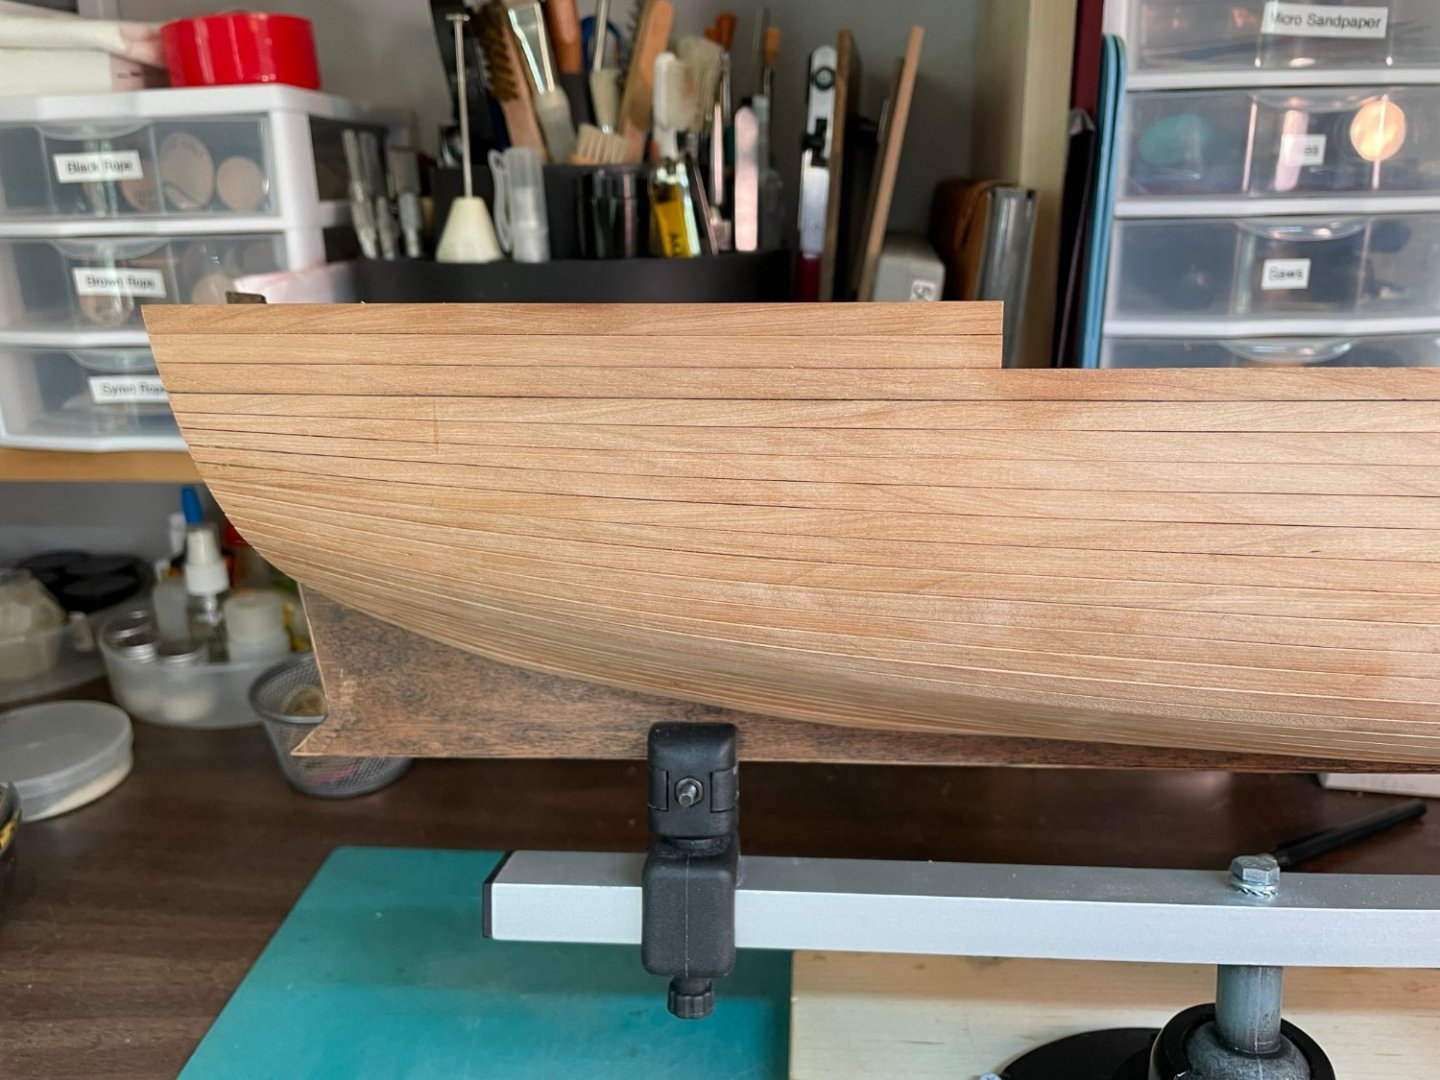
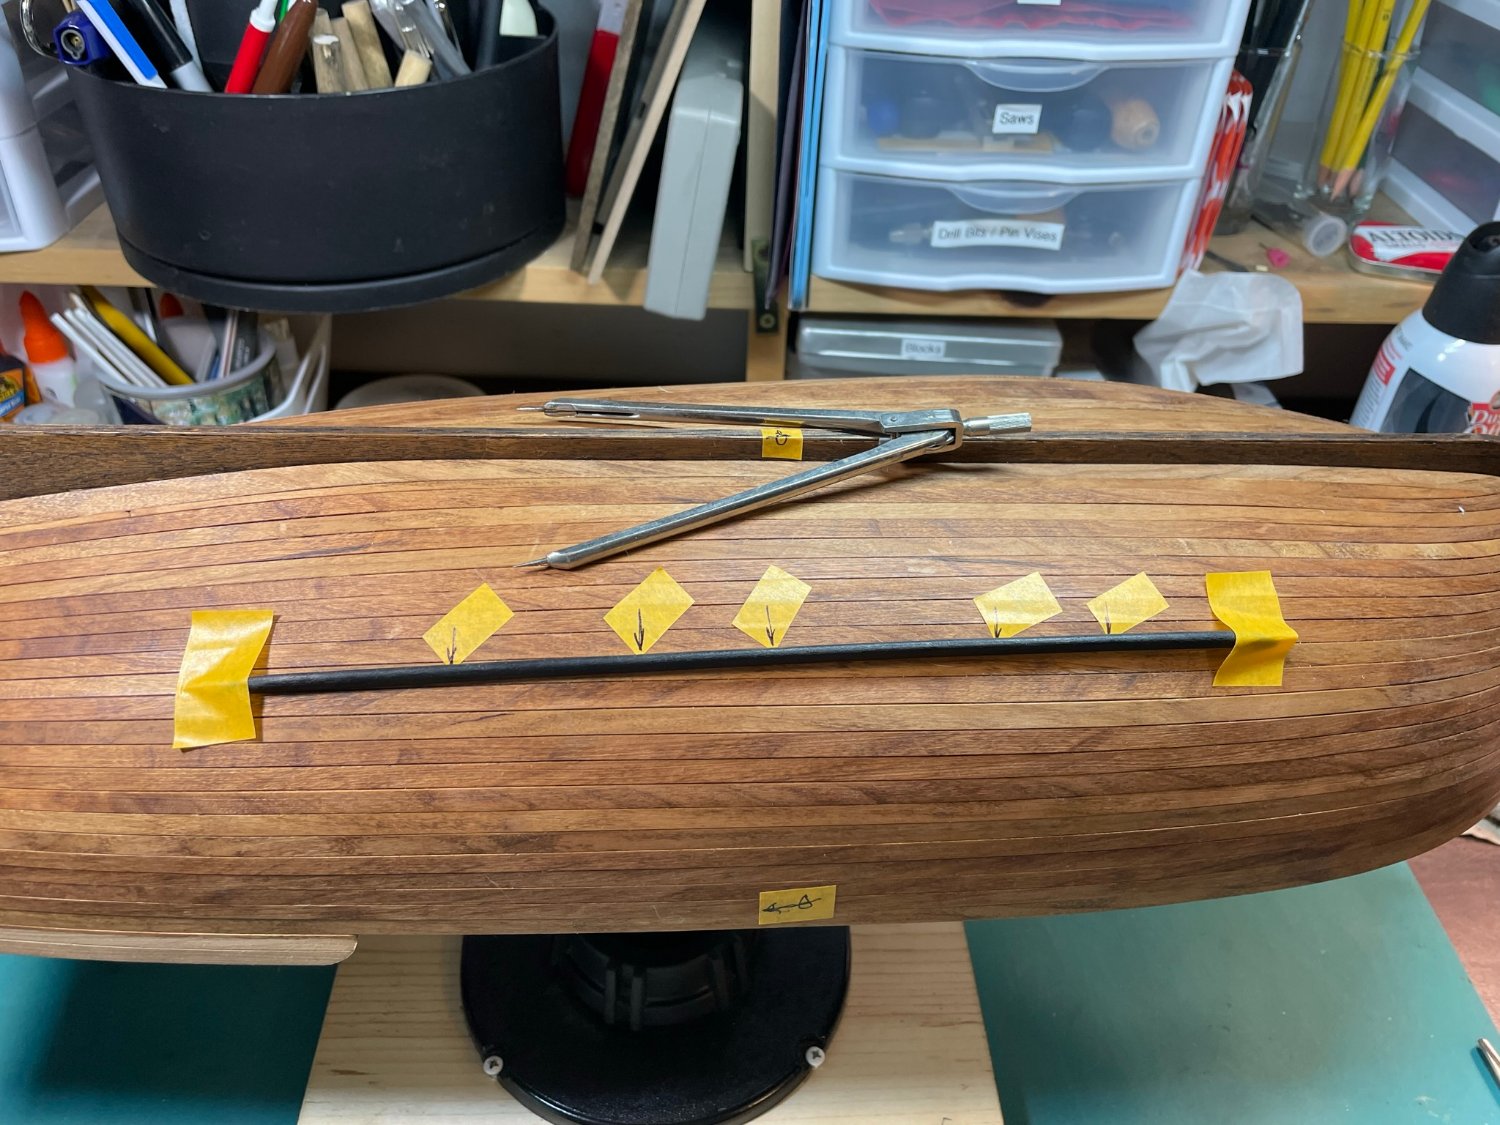
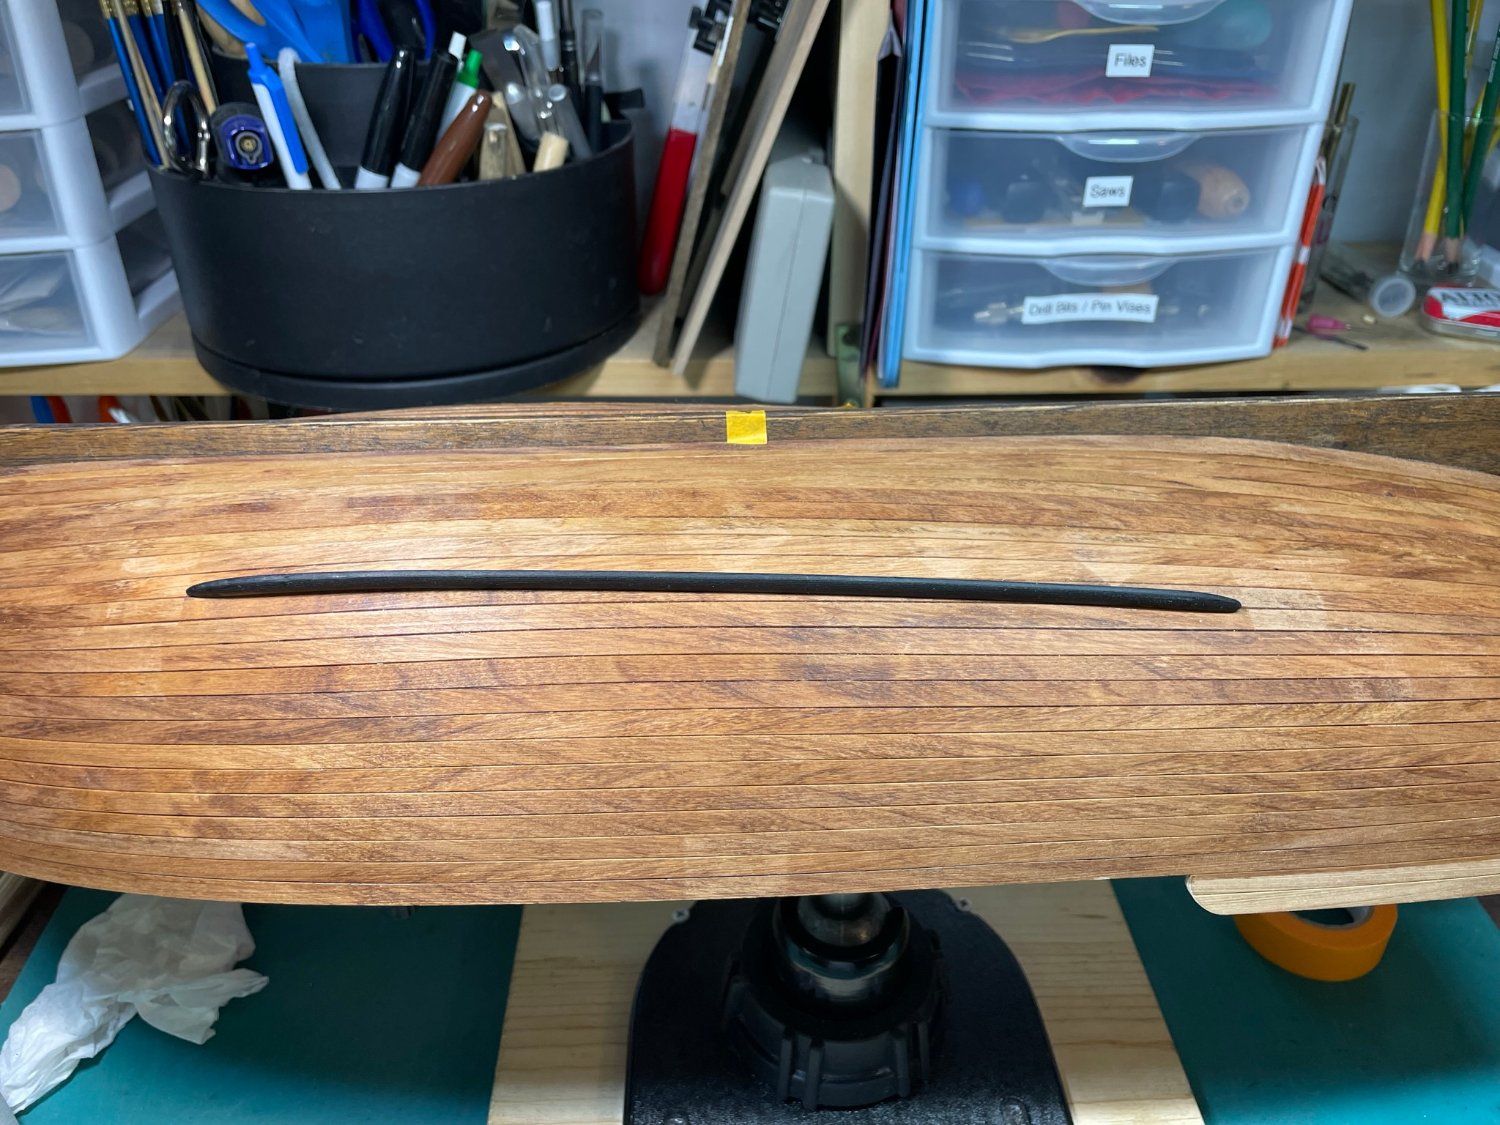
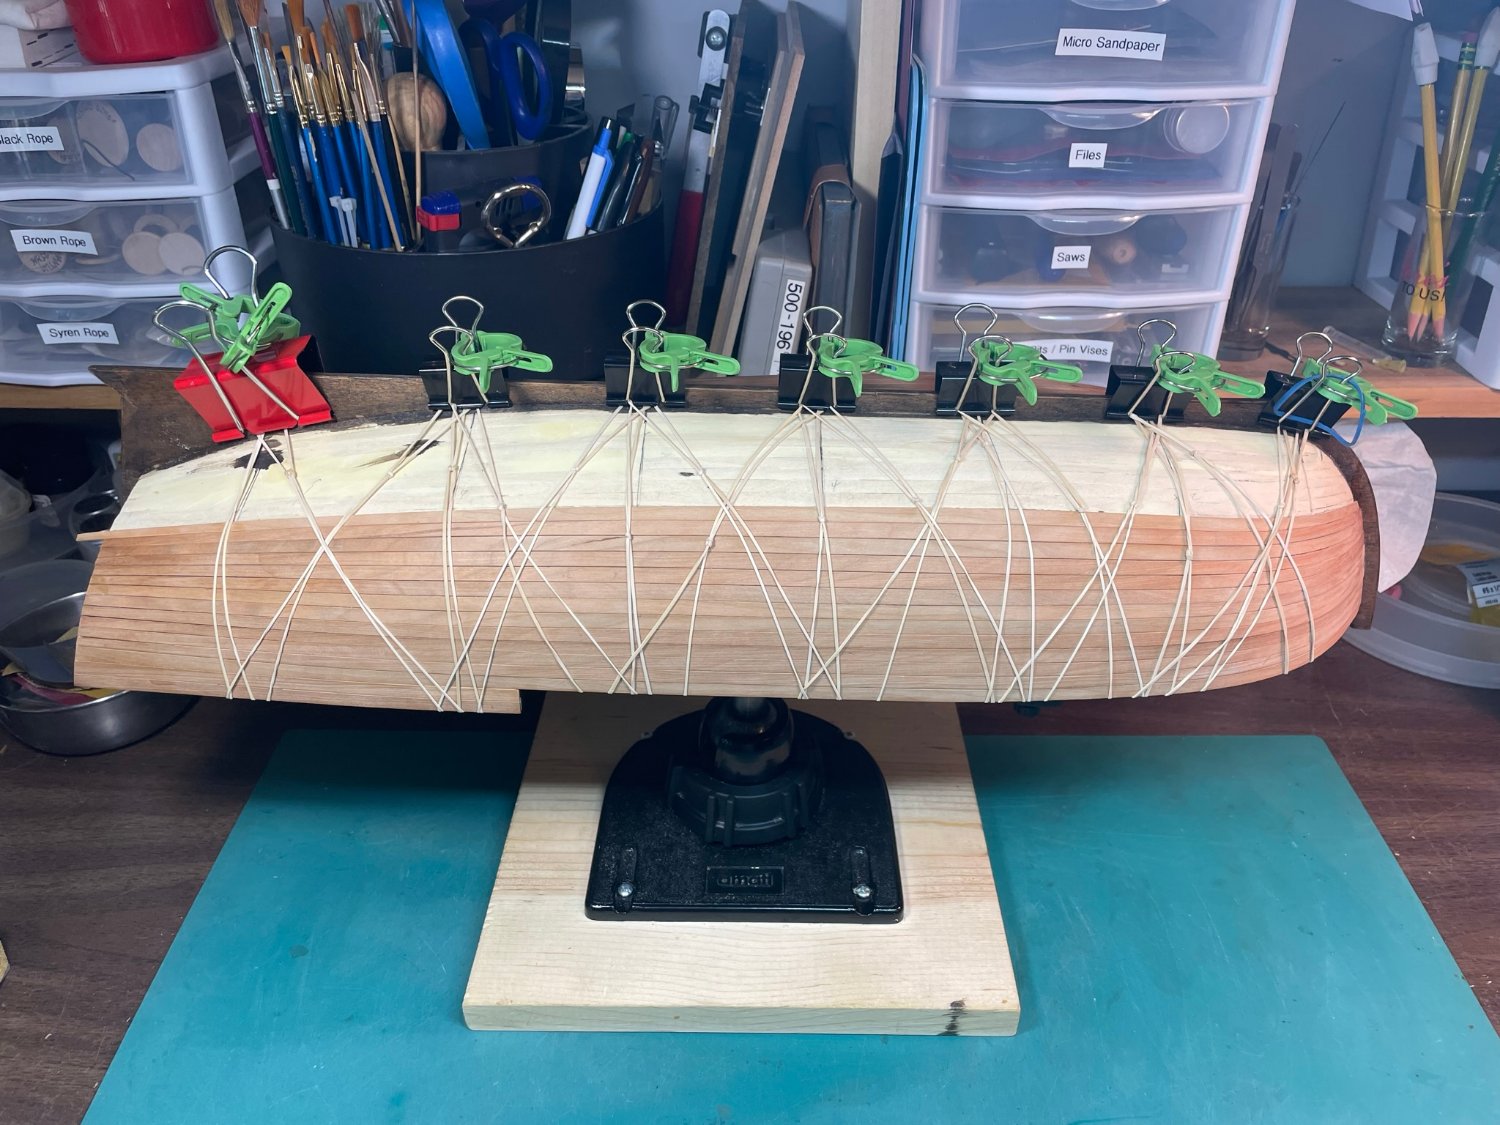
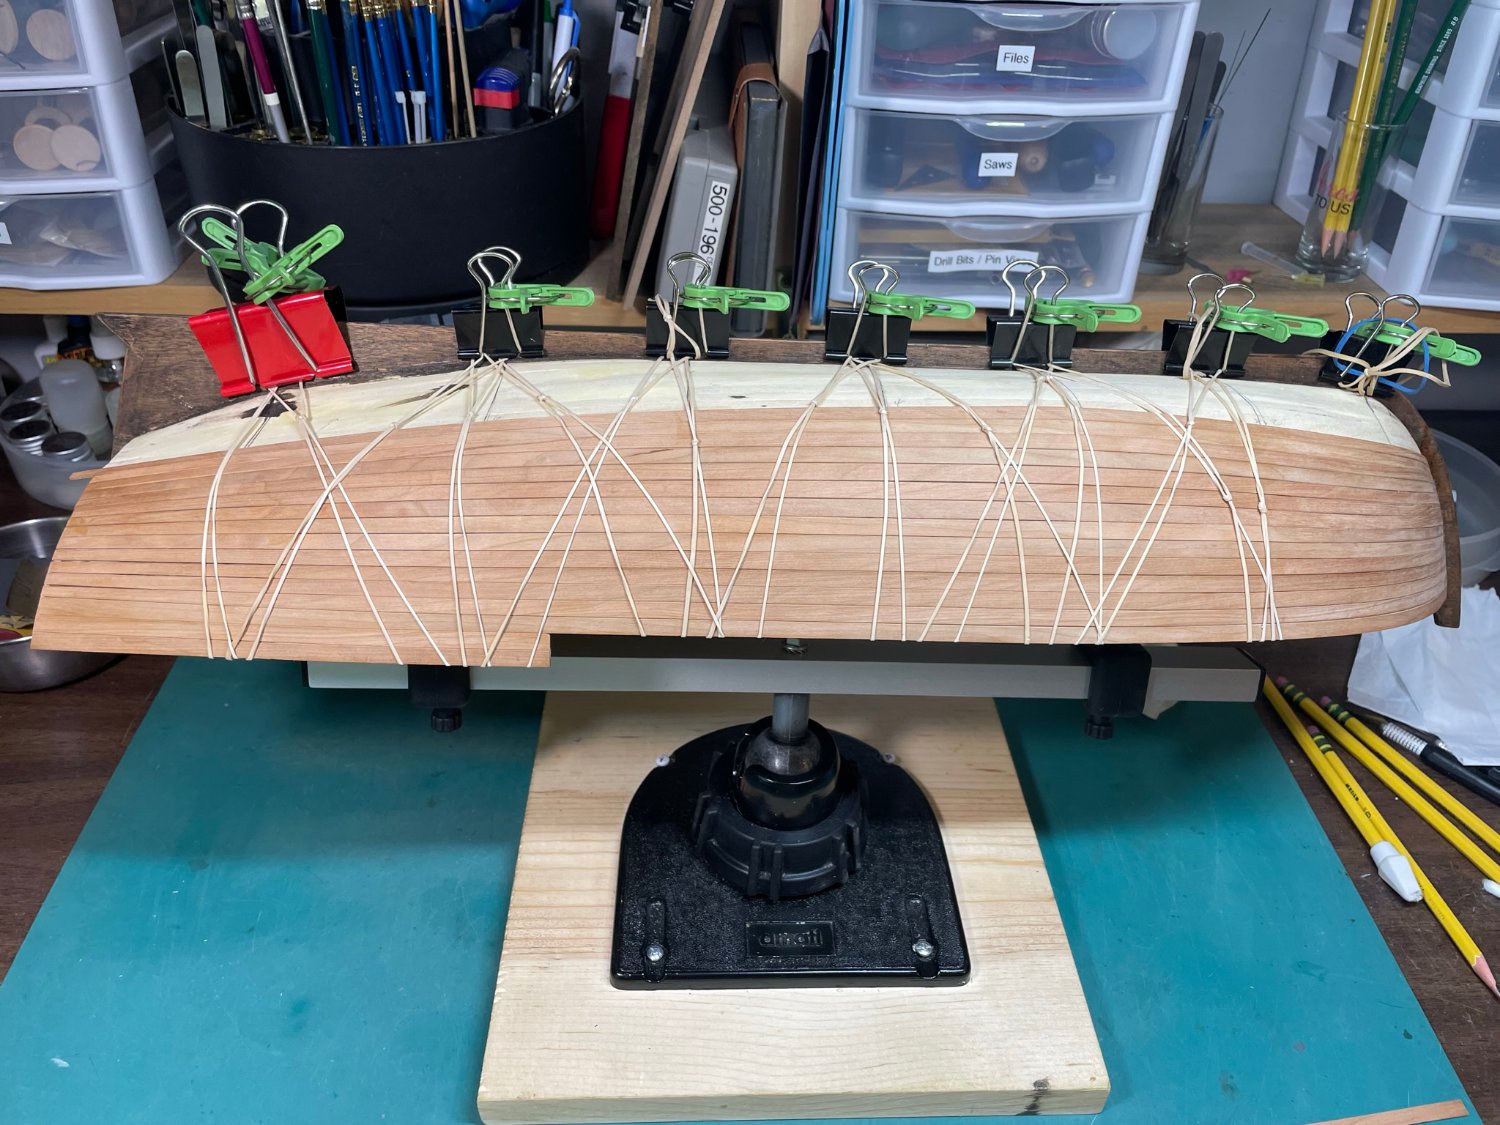
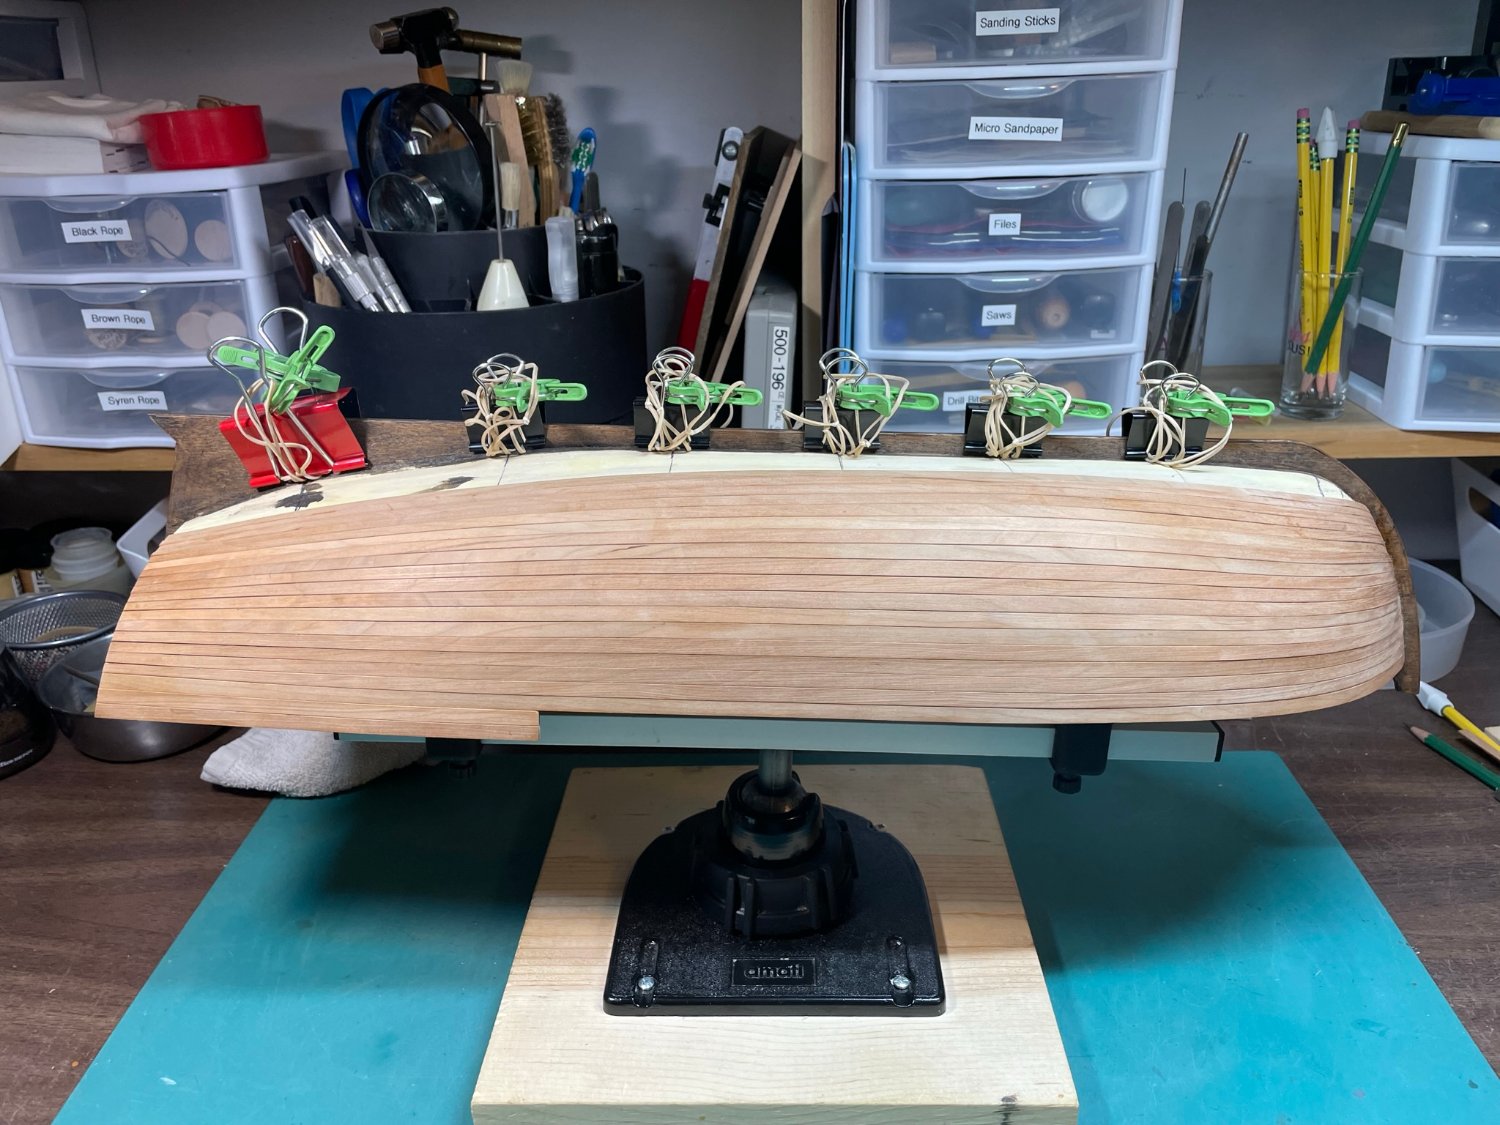
What the instructions called the rubbing boards (The best name I could find was bilge keels) were interesting, though a bit frustrating, project. Positioning them according the plans was sketchy, and aligning them with the keel proved the value of dividers. I tried using a thin stick taped to the hull as an alignment guide for gluing, but the tape pulled up some of the stain. Touching up was not a problem. I then switched to good ol’ rubber bands. I’m not totally pleased with their outcome, but since I used super glue I had to accept it. They are cherry wood brushed with India Ink.


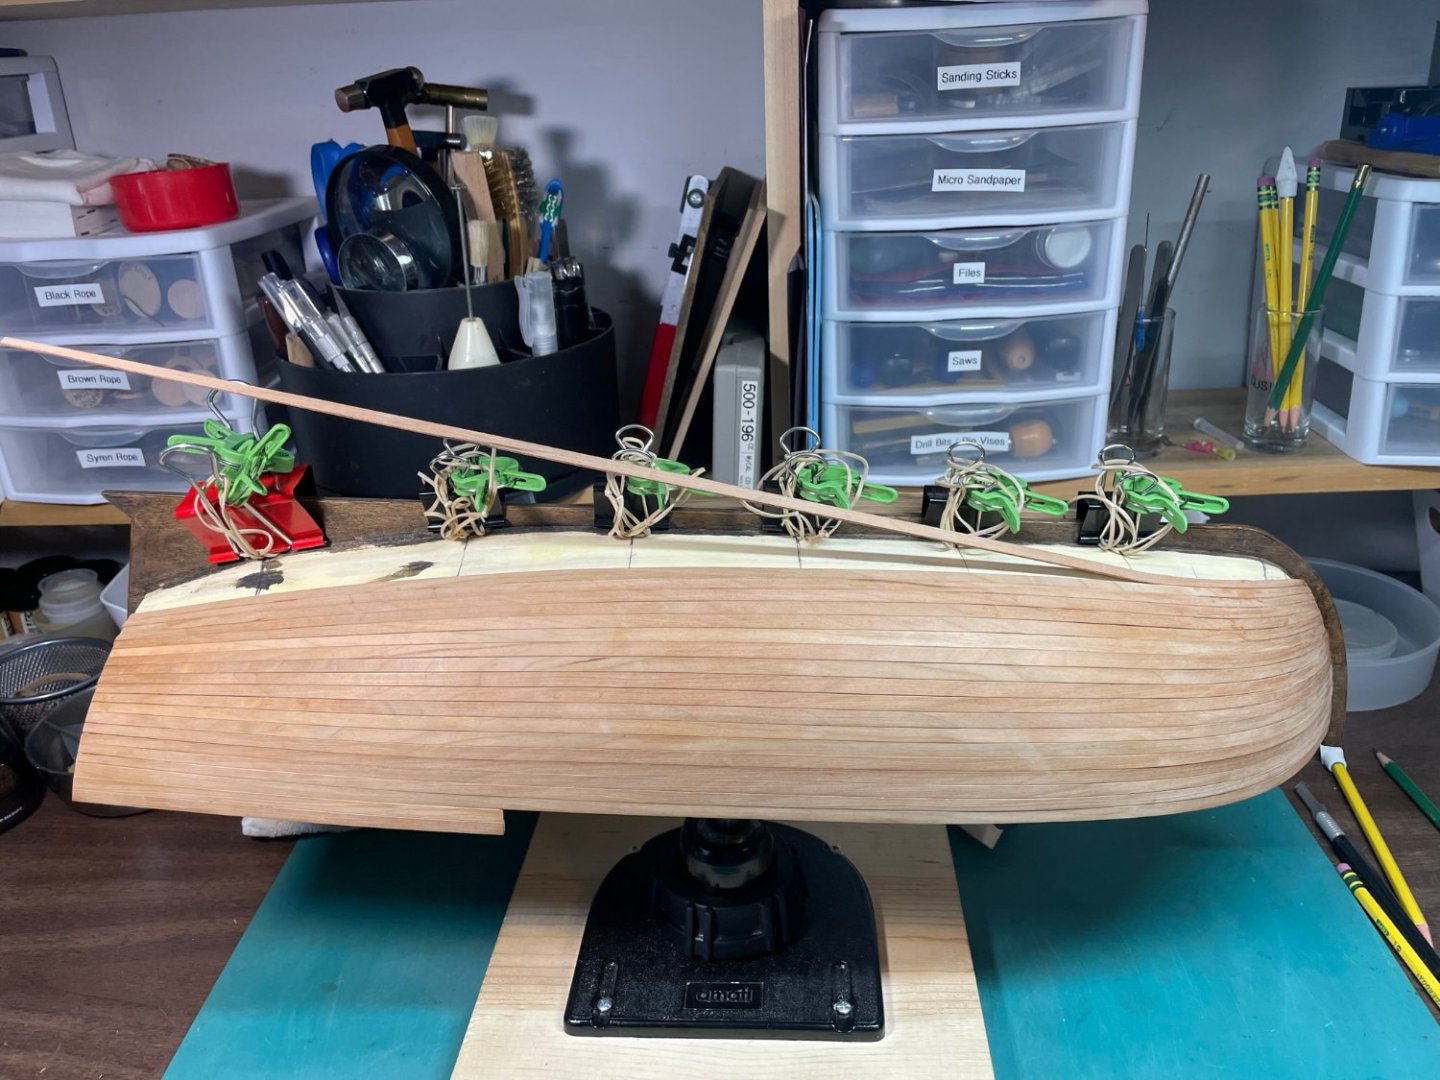
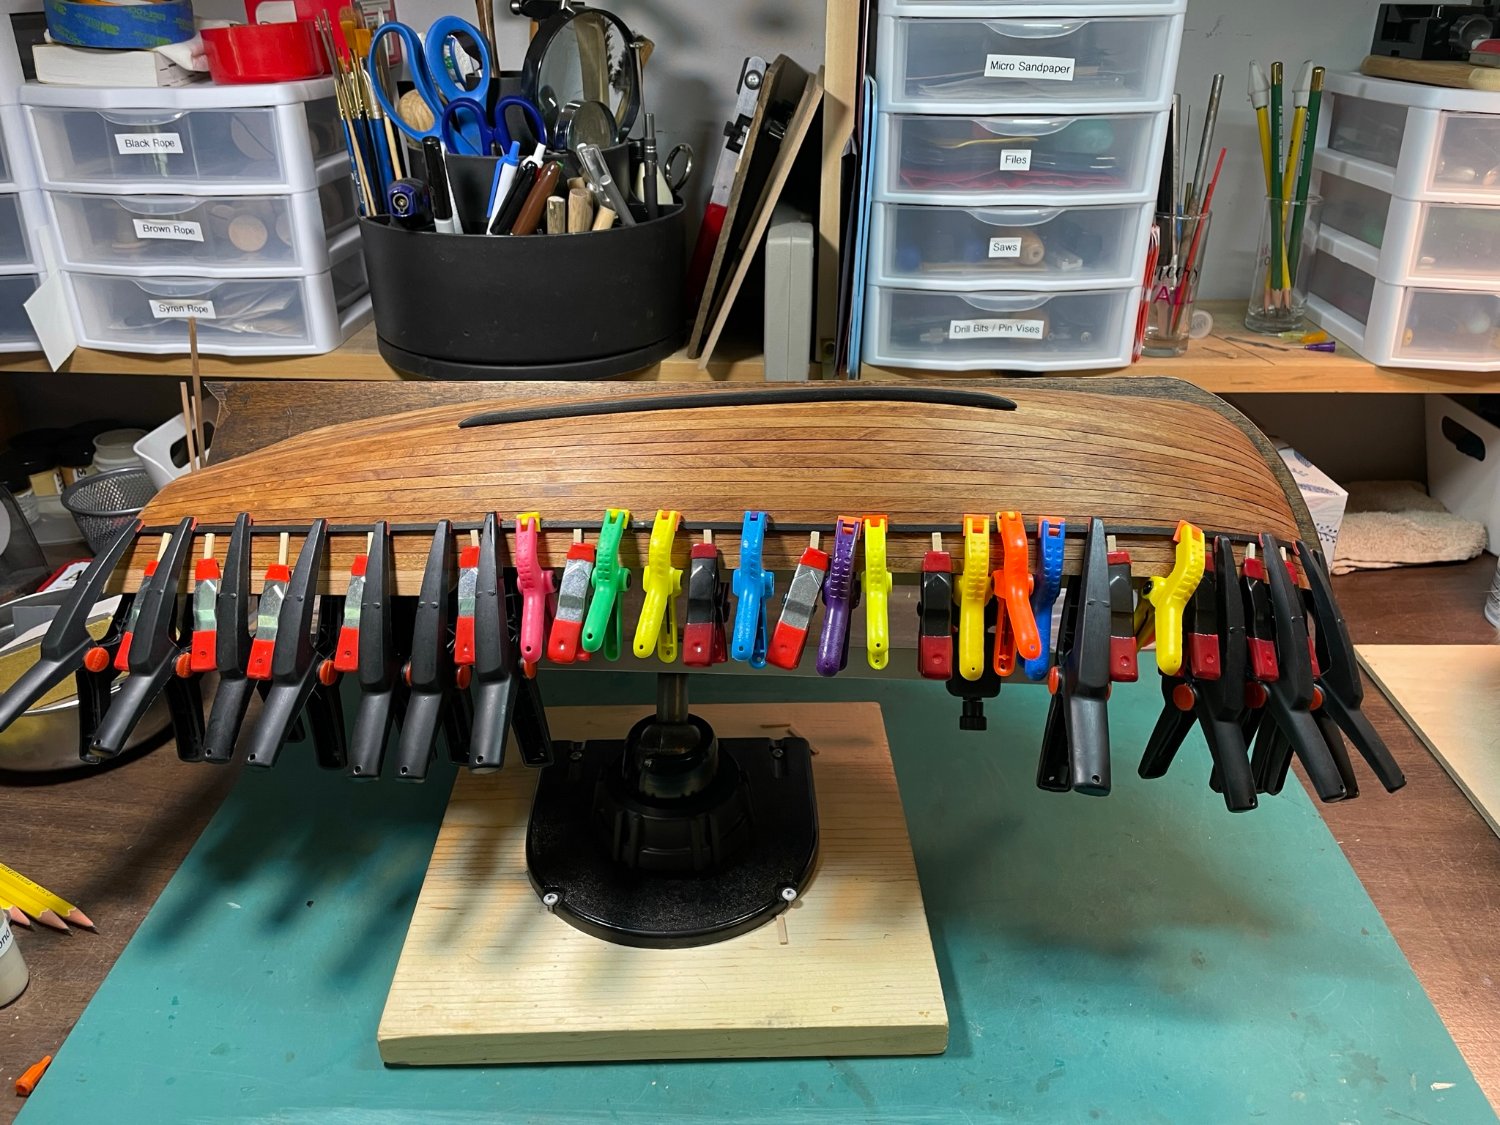
Attaching the rubbing boards on the side of the hull once again showed that one can never have too many clamps. I first used clamps to secure purposely cut wood at a specific distance from the top edge of the hull. Since glue was applied the full length of the board, I pre-positioned clamps to secure the board as I laid it down. The boards are cherry wood brushed with India Ink. Two strips were butt-spliced in order to make a full length piece. The blue paint is dark blue acrylic model paint from Hobby Lobby.
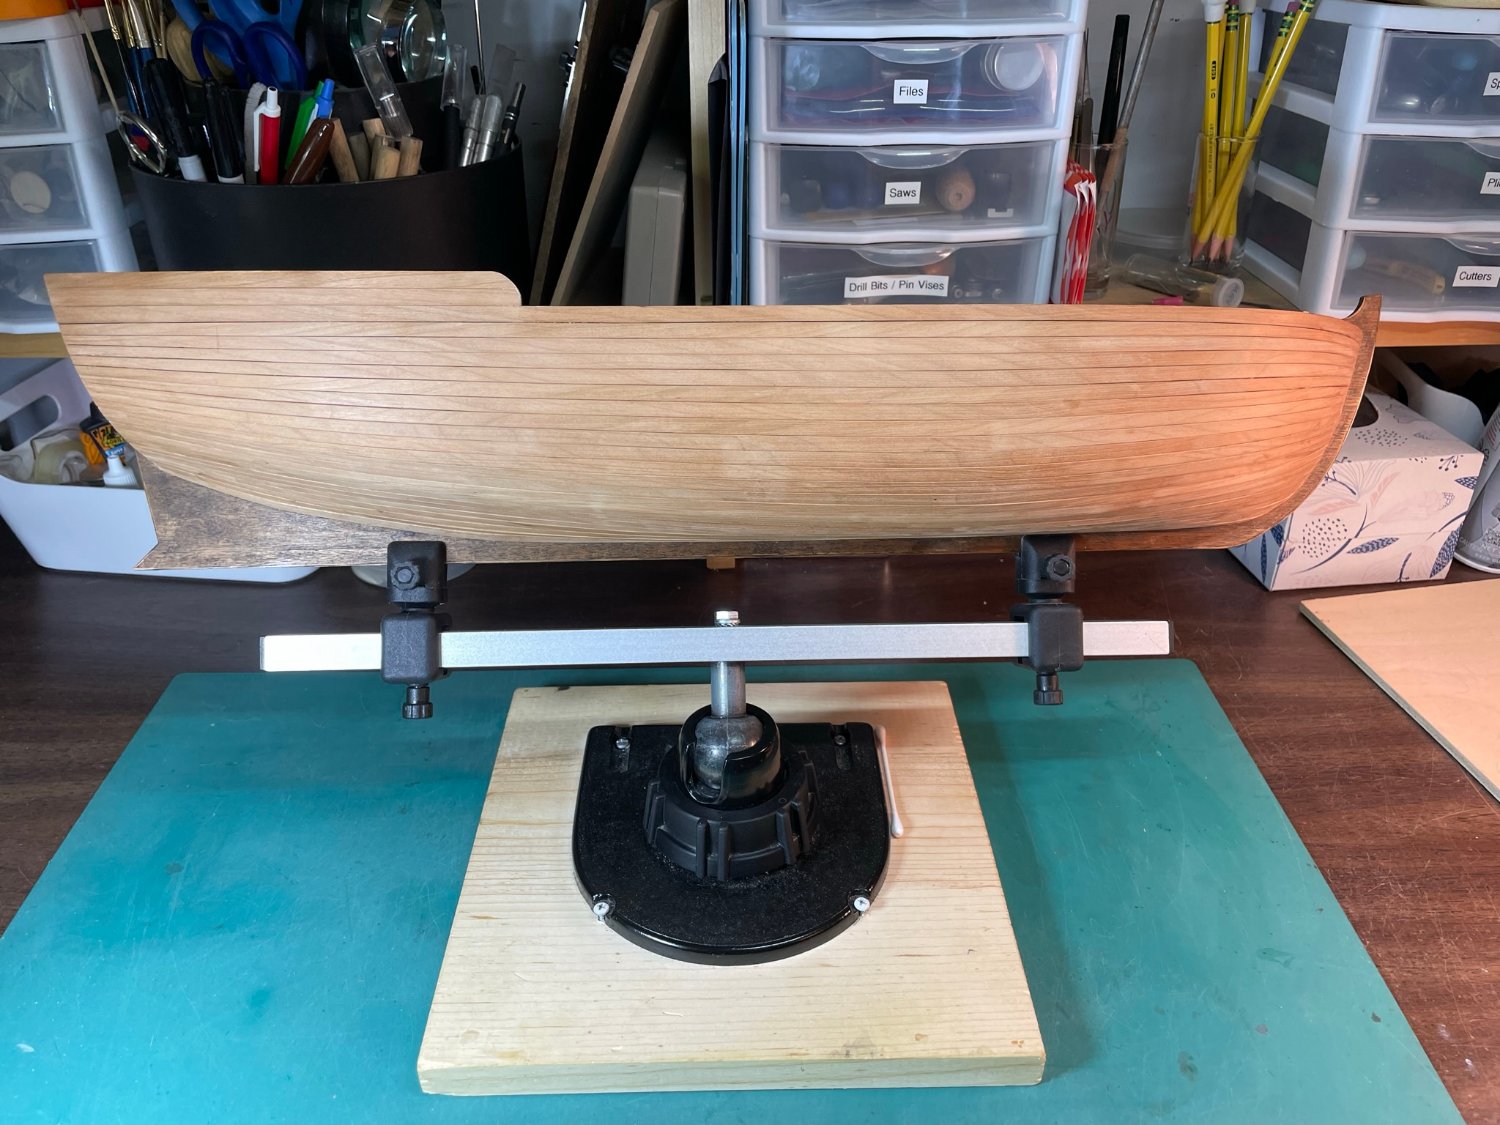
The hull has been quite a project, and I’m really happy to move on to the “innards” of the launch. Every time I look at how badly the plywood keel took stain, I want to scream. I've pondered applying a thin veneer and staining it, but I'll have to sleep on that a day or twenty!?


- Seventynet, Knocklouder, Rik Thistle and 4 others
-
6
-
 1
1
-
Everybody has their personal preferences. On wood models I use CA glue as little as possible, and Titebond Ultimate as much as possible. I strive to use just enough to make a strong bond, and not seep out at the joints. If Tite Bond seeps out clean it immediately. After it fully sets, you darn near nead a jackhammer to remove it. Hobby Lobby has several kinds of dispensing bottles with very fine tips that work well with wood glue. Just remember to clean the tip immediately after using. I use so little CA glue that I just put a drop on a piece of paper and apply it with a pin probe. Welcome to ship modeling.
-
-
Hello Cisco;
Your work on the scarf joints is a real inspiaration for me. As I think and plan ahead on my Armed Launch, I've pondered how to do the cap rails. The method outlined in the plans just won't work for me. I don't like the beech wood supplied with the kit, so I purchased cherry wood 3mm x 10mm strips, and also a sheet of cherry 3mm thick. As I noted in on my Armed Launch posts, bending the whole strip won't work. The sheet wood was purchased with the thought of cutting the rails out in one piece. That would look "Hokey"! After seeing your great handiwork, I'm fairly certain that I can bend the strips enough to cut into short sections and use scarf joints to join them. The most forward section may have to be cut from sheet stock. My primary concern is my skill set to make decent scarfs, so I'll practice with the kit wood because it will be some time until I need them. I note that you are using the Practicum. Would you recommend it? I have two kits on the shelf - the AVS and the New Bedford Whaleboat. I'm a long way from starting either, but I like to plan ahead, so I've already purchased Syren rope and blocks for both kits, and would purchase the Practicum if it is well written and composed.
Best Regards, Sluicemaster
-
Thank you ccoyle for your Like. I appreciate and am thankful for all comments.
-
Hello HardeeHarHar, Mike Collier, Bruce D, CiscoH, Prowler901, and Paul Le Wol;
Thank you, gentlemen, for your likes! They are inspiring when I hit difficult instances doing this model.
Cisco - I tested 14 different stains before settling on special walnut. Boy, I'm set for a stain-fest now! I'm following your AVS build, and must apologize for not leaving comments, sooo - Good Job! I look forward to doing mine if I ever finish the launch, which I hope is in 2023.
Mike - I get the clamps at Menard's. For a while they carried Wolf clamps, the switched to Bessey brand. The are pretty much identical. It'd be really cool if someone made even longer clamps with the same small silhouette.
- Paul Le Wol and CiscoH
-
2
-
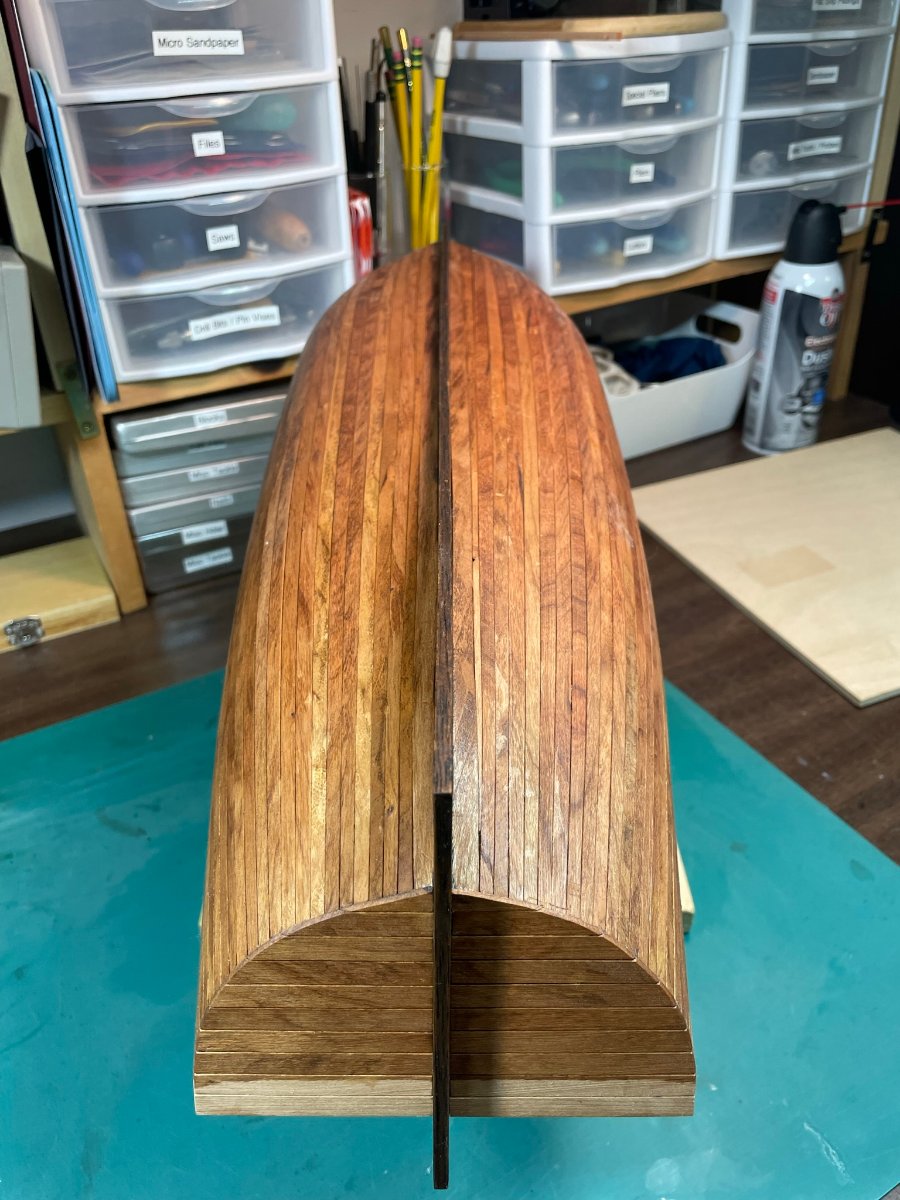
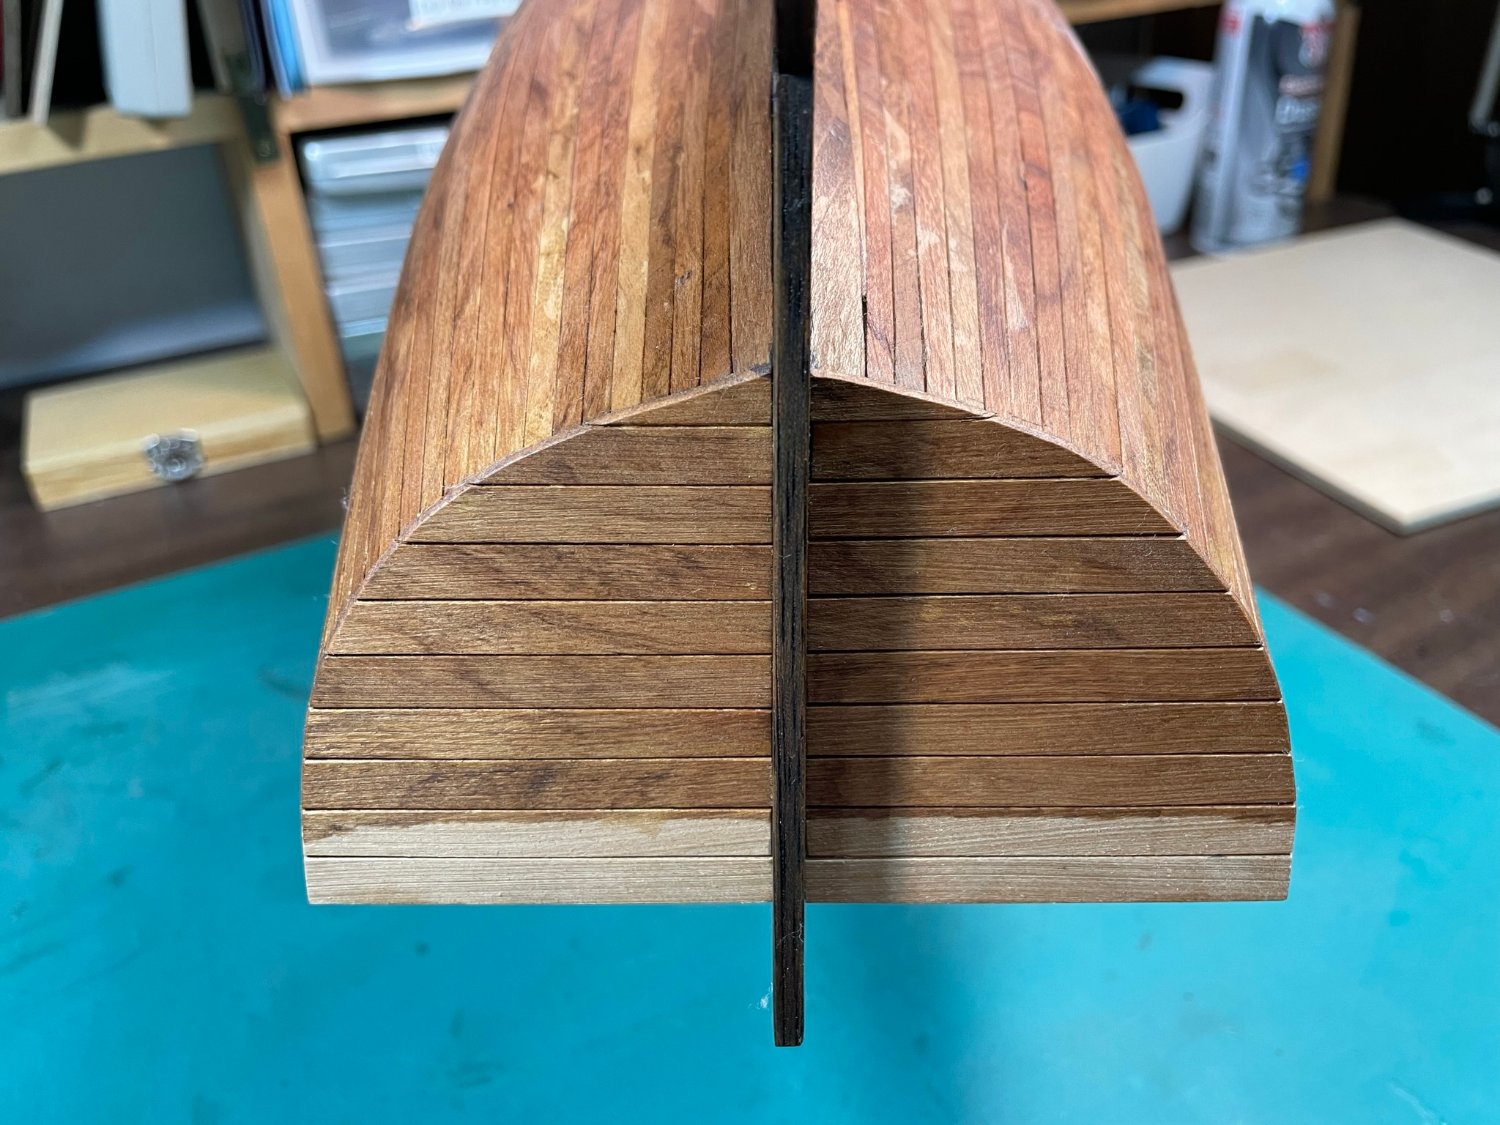
At Last! The planking is done! I started planking in January, hoping to be done by April or May. Boy, was I dreaming. Every plank on each layer was its own lesson in planking. All but nine required shaping. I certainly didn’t plank full time, and took many longish breaks due to plank “burnout.”
Overall, I’m pleased with how the planking turned out. There are glitches, awkward areas, and “oops” that shouldn’t be too apparent when the model is finished. This is only the second model I’ve planked and learned one heck of a lot! I started out following the weird planking diagram in the instructions, then totally disregarded it for the second and third layers. Using cherrywood for most of the interior and all of the exterior presented its own challenges due to its hardness. I used Titebond Ultimate glue as much as possible. Super glue was used very sparingly.
The inner planks that will be visible when the model is complete are of cherry, while the planks that are under the deck are of the sub-par walnut supplied with the kit. They will be stained the same as the exterior. The sub-par walnut plywood supplied for the keel didn't take stain well at all, so I'm not too pleased with it. Sooo - it is what it is. When the model is complete it may not be so noticeable.
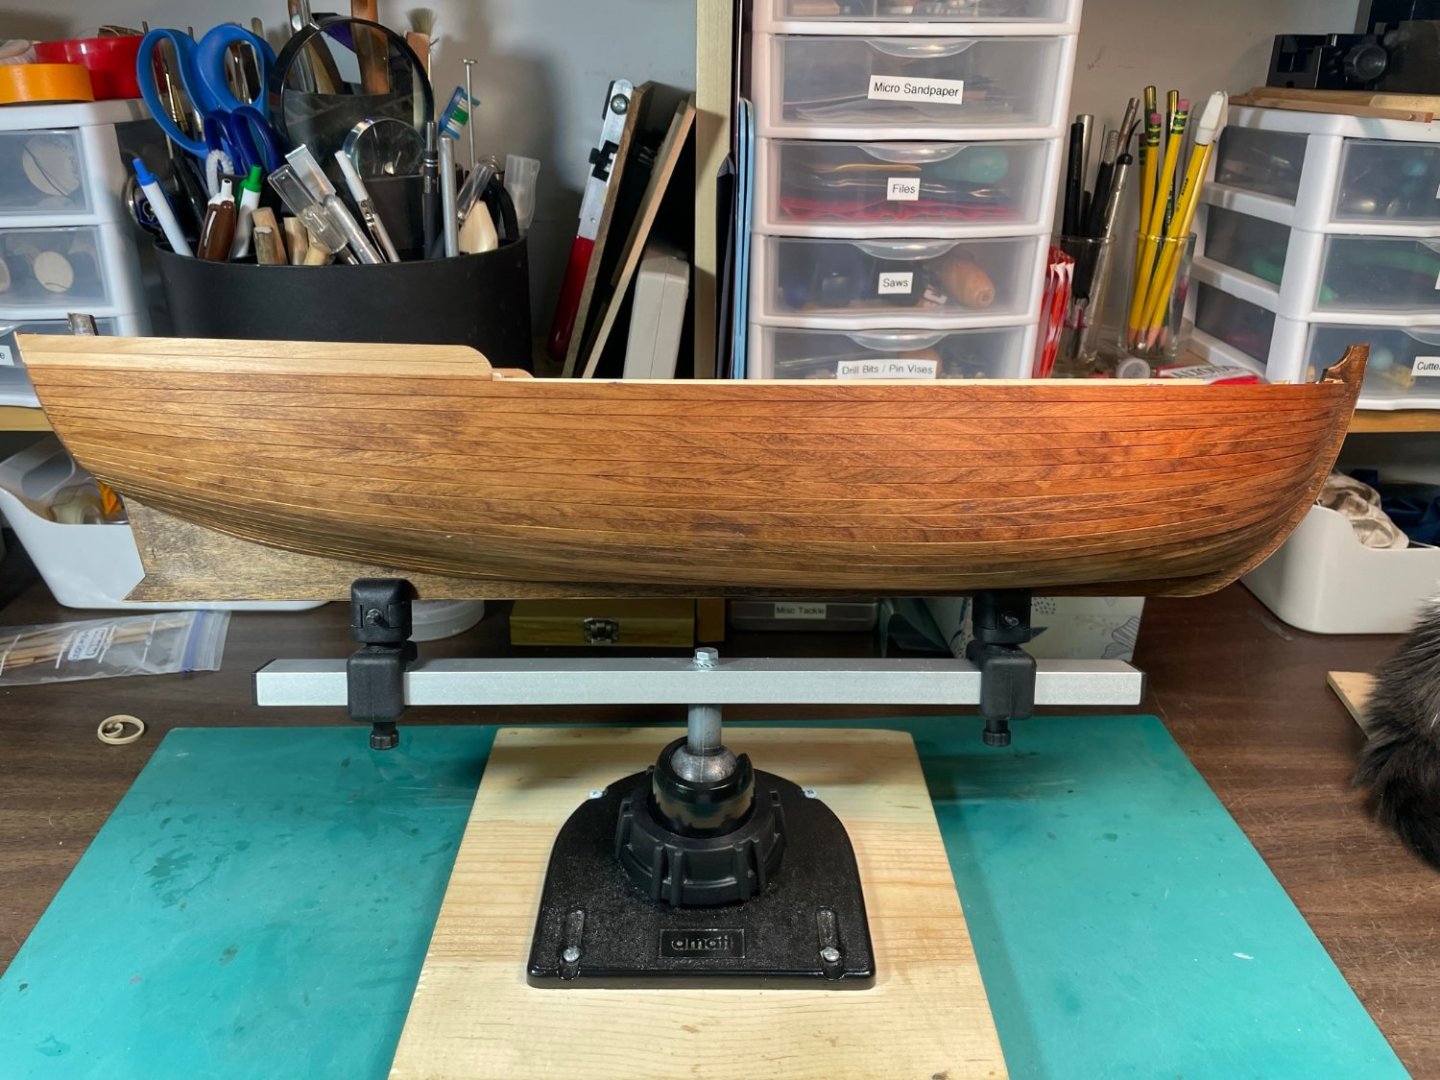
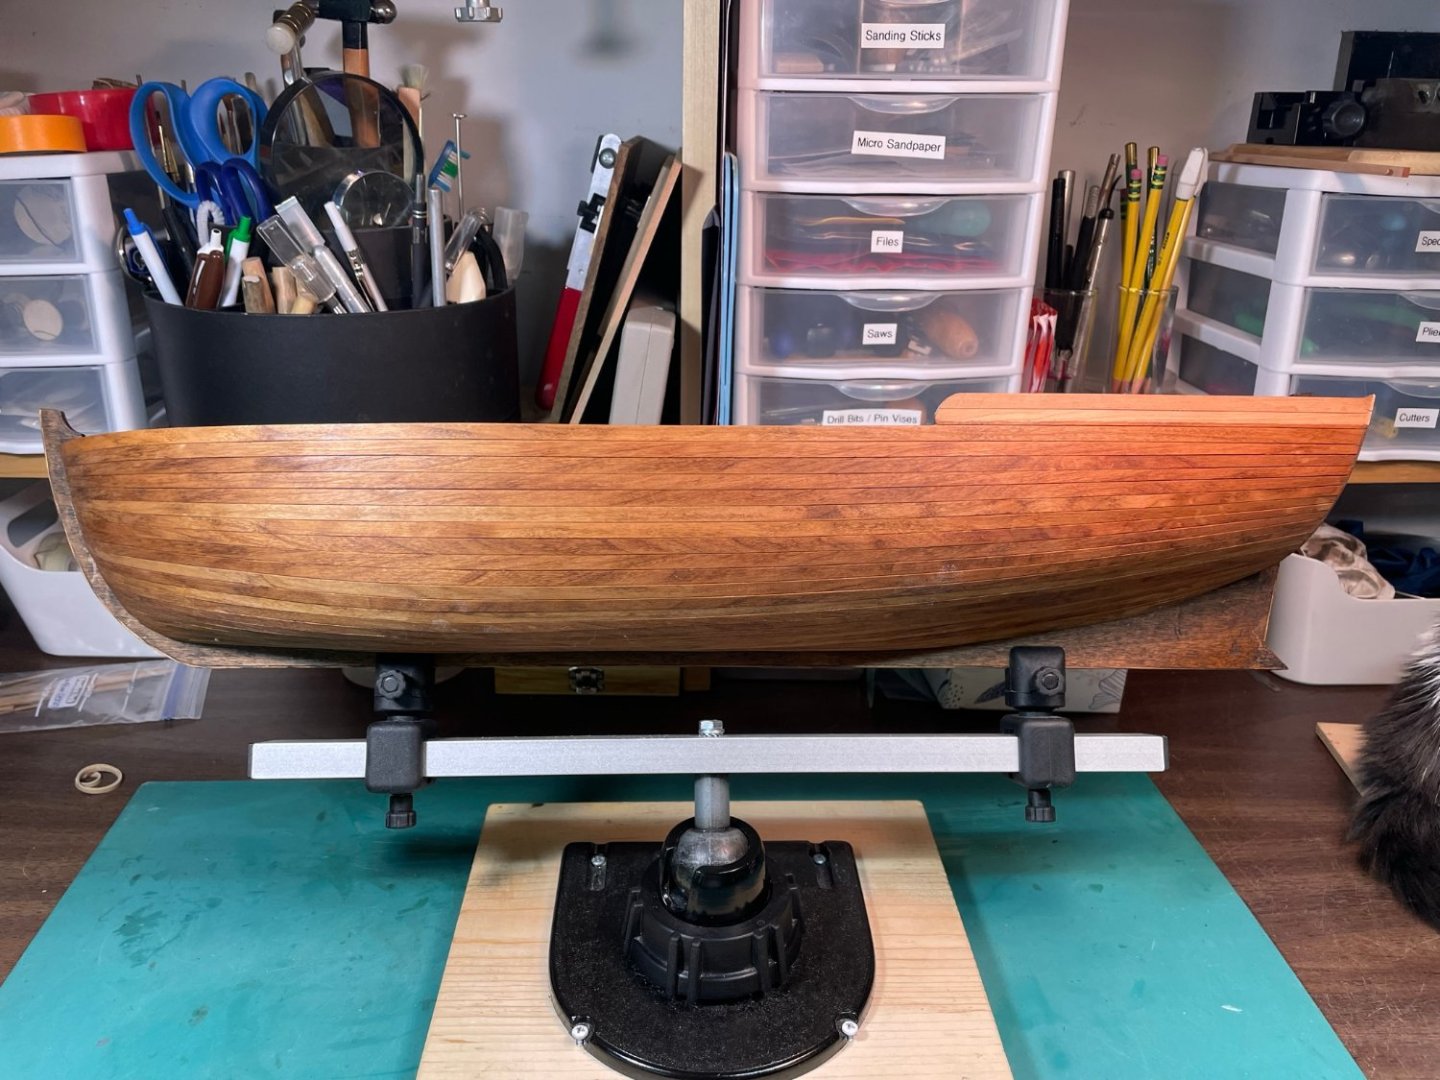
Since I’m not painting the hull, I stained the whole thing with MinWax Special Walnut stain. The interior planking will be the same.
In several weeks I’ll be having back surgery, and will be on limited duty for quite some time. Not having to rake leaves, snow blow, and do other back-stressing chores will free up a lot of time to work on the model, so I hope to make good progress through the fall and winter.


-
Thank you mikiek and allanyed for your helpful and informative comments. The cap rail will be one of the last items attached to the hull. I'll probably start forming the rail pieces in a month or two. I look forward to doing it, and will use the existing jig which I've already modified..
-
Thanks ciscoH. I tried the iron a bit, but since the water didn't soak in much it wasn't working, though it sure works well with the thinner planks. I am going to do the raili in sections and soak the wood for several days instead of over night. That project is now a bit down the road. I hope to finish the planling in the next week.
-
It’s been a while since my last post. I took a bit of time off due to a bit of “planking burnout.” I took much more time for a short vacation, and to do a lot of house and yard chores before upcoming back surgery which will put me on limited duty for some time.
The third layer of planking is almost done, and I’m fairly pleased with it. Planking the stern and keel as per the instructions will be a joy since I won’t have to do any bending.
I’m considering scribing butt joints on the planks in order to create a more realist look to the strakes. Some tests I’ve done show good promise, so now I need to research what length planks would have been done on a vessel this size. It seems the vessel would be about 30 feet long, so my gut guess is that the planks would be about ten feet long. I’m going to check out a Wikipedia site mentioned by “allanyed.“ Planking Techniques for Model Ship Builders” has great information. I welcome any comment or advice on doing this. I briefly thought about simulating nails or pegs, but am not willing to devote the time that it would consume.
My wonderful wife got me the best birthday present ever – a Proxxon DB-250 lathe and attachments from Model Expo. Yeehaaa!!! Now I won’t have to shape masts and spars by hand and hope they come out somewhat proper. She asked what I would use it for when not doing masts, spars and other ship items. I told her that I’d make miniature Nutcracker figures. She hates them and threatened to take the lathe back! Not!!!


Since I’m doing a bit of kit-bashing on this project I decided that I didn’t want to do the cap rail as instructed. I’ve gotten fond of cherry wood, and decided that I wanted to use it for the rail. Soooo – I ordered 3mm x 10mm strips and a 3mm thick sheet from Modeler’s Sawmill. I’ve kind of gotten into testing different stains on a variety of wood, so I also ordered the same sizes in Alaskan cedar and pear. I’m going to do very little painting.
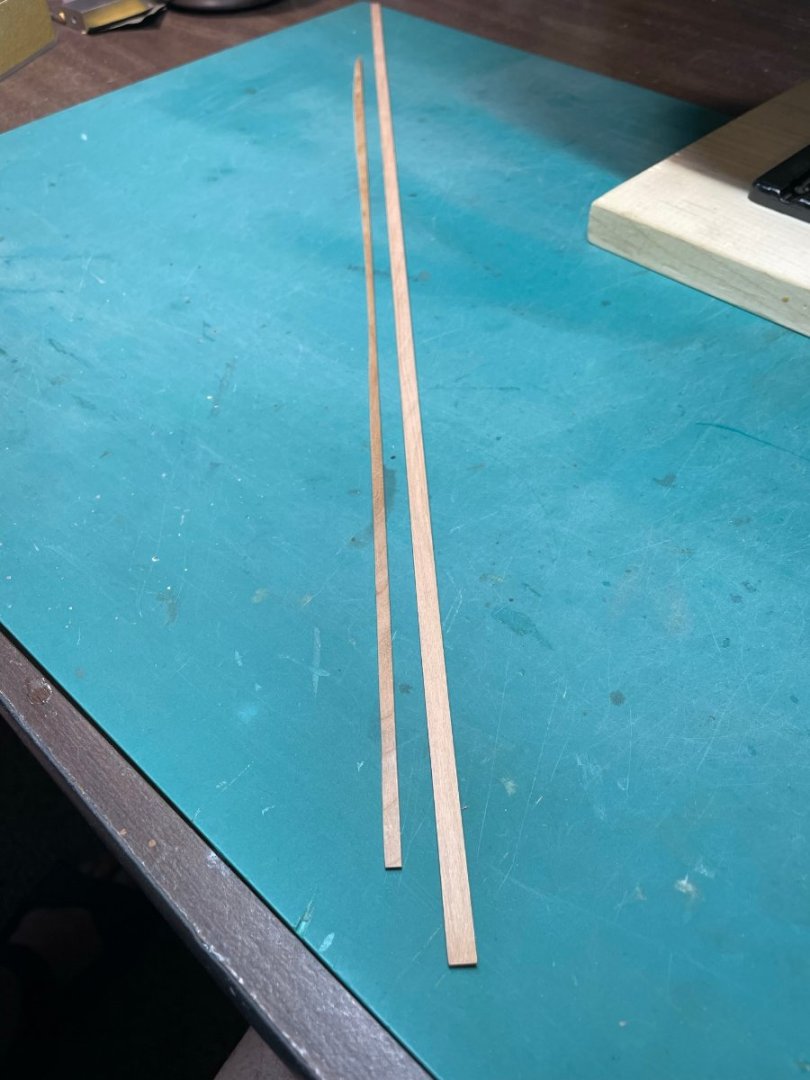
Although I knew it was a very long shot to succeed in bending the cherry wood, I had to try. Long story short – it did not work. Oh well, it was fun trying. The next photos show it. Since I have a lot of time before I attach the rail, I may try bending it in small sections, or I will cut the rail from sheet stock.
.thumb.JPEG.36ce122c3a4bd62fd1e334ea1af7561d.JPEG)
.thumb.JPEG.998079c9e83fbbbdf0272e01ee21090a.JPEG)
.thumb.JPEG.a7458f4e6e28744cb8f6c1afff022c67.JPEG)
.thumb.JPEG.29e957405aa90d627c6ed8087f4a1c6a.JPEG)
.thumb.JPEG.d0dd240887ff8b3a4ae08452704b50ae.JPEG)
-
Thanks mikiek! I appreciate your input amd suggestions. Planking this model has been quite the experience, with every plank adding its own unique challenges. The planking instructions on the plans were bewildering to say the least I did the first layer like that, but abandoned it quickly after that layer. On the next layers I learned a lot of what to, and not to do. The hull will be stained soon after the bulkehead form is removed. It needs to dry before I can begin any gluing. At the moment I'm taking a break to get necessary house and yard chores done. It'll be a relief to get back to model making!!
-
In my last post I mistakenly said that I used a 7mm wide plank below the cap rail.. I did not, alhough I thought briefly about it, then nixed it. That one different plank would have been a bad mistake. I've started planking the port side. The first six planks are a delight because they are so easy to clamp for glueing.
-
Finally finished the third layer of planking on the starboard side. Over all I’m pretty happy with the way it went. Although there are some minor issues with spiling and gap width, I feel that once I’ve stained and lightly applied polyurethane to the hull, it should display fairly well. The port side will be done better, so that will probably be the “show” side.
I didn’t use a fan guide to shape the planks, but rather, at each bulkhead, measured the distance from the keel to the bottom edge of the first plank. There was no way that I would end up with a whole number of planks, and knew a that at some point I’d have to use a partial. I re-calculated half way up the side.
The garboard plank was the second to the last and was a bit difficult to form. I soaked it in hot water, then clamped it to the keel and hull for several days, re-soaking it after a full day. It is a 7mm width, as is the first plank under the cap rail. I did that so that the cherry wood planks would overlap the 6mm lime wood planks to add a bit of extra strength. If they had both been 6mm them perhaps I’d have had a full number of planks.
The last plank was a sort of hourglass shape. I don't know if it would have been done historically, but it had to be. The line of the hull along the keel is a bit out of natural flow at the stern and is the result of error from the first layer progressing upward. The garboard plank pulled away from the keel near the stern while the glue was drying. To be honest, I dropped the ball there. Dang!! The port side will be better. The planking is a bit awkward and off the line at the bow, but I may be able to clean it up.
Since the hull would not be painted, I had to stain the keel before starting planking. It did not go well and looks a bit rough. I'm thinking that whatever light stain I use on the hull, that I will overstain the keel.
Planking this model has been a real adventure and is probably turning my gray hair even grayer. Chuck’s plank bending tutorials were invaluable, and the MicroMark belt sander was the best tool in the house. I found that a plank cannot just fit OK, rather it must fit perfectly before being glued. The cherry wood added its own challenges, but should look pretty good when the model is complete.
Whew – only one side and the stern left to plank.
Forming the garboard plank.

Forming the garboard plank at the stern.


- Diver, Mike Collier, CiscoH and 2 others
-
5


.JPEG.69fc7fe224eeb9e716b6b7aae7926dca.JPEG)
.JPEG.c710ec5654431bb239d6a77e38db9f19.JPEG)
.JPEG.0821ce40d8abde208e94eeb695fed14e.JPEG)
.JPEG.134204c01f2bf6f7a5803ee16fa7effe.JPEG)

.JPEG.4c57ea76c288d8f981da87b75bcc90ef.JPEG)


Great Photo Etched Saw Blades
in NAUTICAL RESEARCH GUILD - News & Information
Posted
These saws are also available through the CMK Kits Eshop at CMKKITS.com/en/.