stuglo
-
Posts
707 -
Joined
-
Last visited
Content Type
Profiles
Forums
Gallery
Events
Everything posted by stuglo
-
Swan-Class Sloop by Stuglo - FINISHED - 1:48
stuglo replied to stuglo's topic in - Build logs for subjects built 1751 - 1800
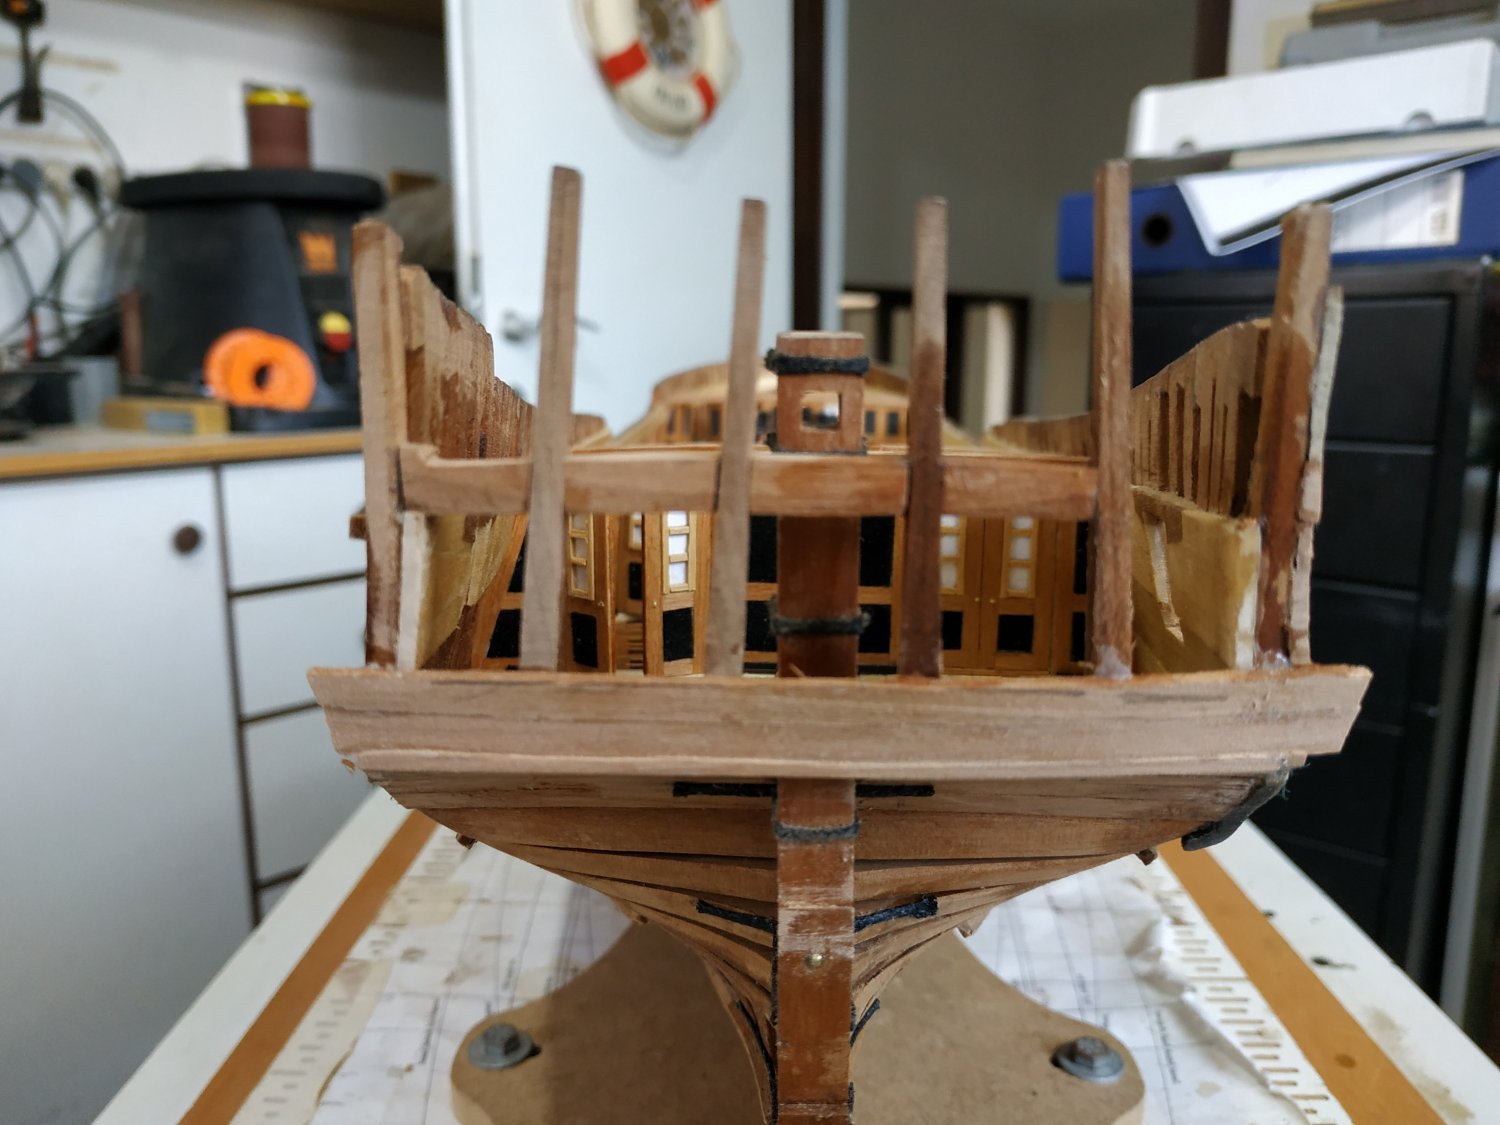
Rudder Head Trunk A group of 6 temporary structures that form a wall around the Stern Post and Rudder as they pass through the Great Cabin. The fore panel fits under the #15 Beam. The first side panel is angled slightly outward to sit on the Helm Port.They extend upwards to the Quarterdeck above (with the top of the Stern post)-exact height to be adjusted after that deck is made. The aft panel is made and fitted. This will sit under the Rudder Head Framing or Partner which is 2.6mm thick and flush with the Quarter Deck Transom. Card Patterns, but I found dry fitting impossible. So I made and glued the fore panel in placefirst. Similarly the first side panel, then the aft and filled the gap. Decided to forego the black panel effect of the Bulwarks, and used 1mm cherry blanks and 0.5mm beech for contrasting edges.
- 475 replies
-
- 10
-

-
Swan-Class Sloop by Stuglo - FINISHED - 1:48
stuglo replied to stuglo's topic in - Build logs for subjects built 1751 - 1800
Framing the Cabin Lights. Not for the first time, I found this confusing. Reading ahead, I realized it was also complicated. After several hours of brain strain, I checked out Dan Vardas.( I don’t do this often enough, but his work is so good, I get depressed at my own poor efforts.) At least I understand, more easily, the steps required. SILLS. Short pieces, between the Counter Timbers,sitting just behind the top edge of the Upper Counter Plank, so that it is proud by 1.6mm. These pieces, although straight, are parallel to the Quarter Deck Transom. Used Blanks of 4mm sq. When fixed, the top surface is made horizontal by file and blade. Innerside Planking- This needs to be cut back to form a rebate for fitting the Frame of the lights. Should really know this depth, but haven’t decided how I will make the Lights yet, but guessed at 2mm, and can modify later. I braced the hull sides before using a chisel and hammer. Also some alcohol applied to make chiseling and separation easier. Counter Timber Linings. The vertical part of the Framing.Thin strips of 0.5. Decided to delay until after Frames are made and trial fitted.
-
Swan-Class Sloop by Stuglo - FINISHED - 1:48
stuglo replied to stuglo's topic in - Build logs for subjects built 1751 - 1800
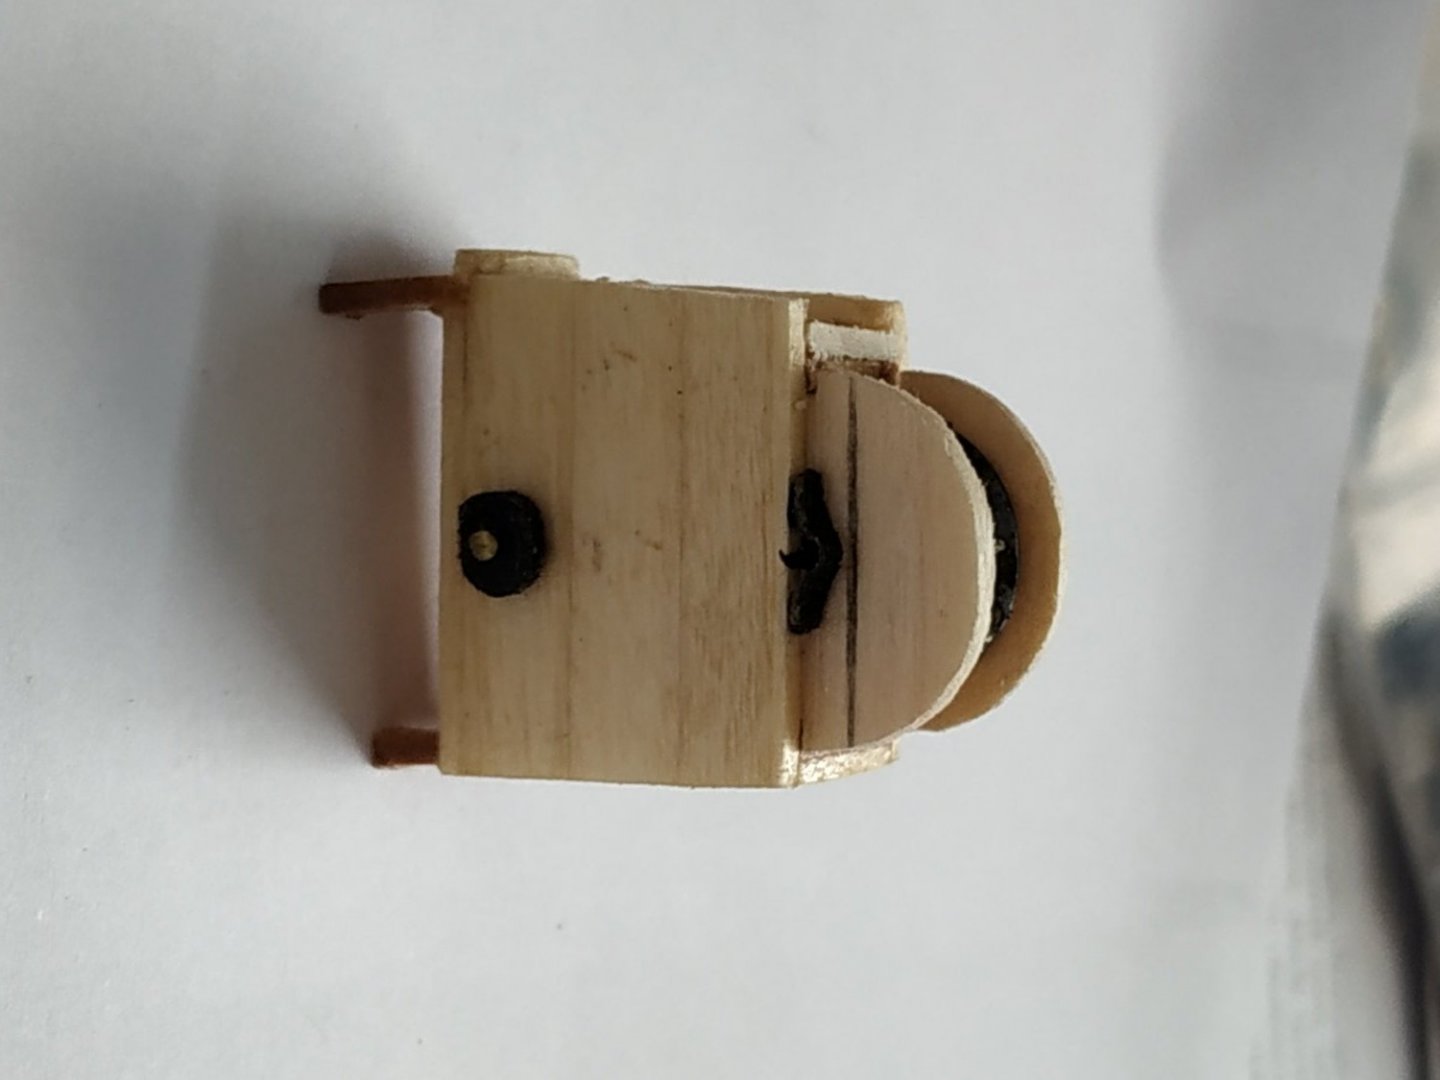
FLUIDS After many mentions of alcohol and sulphur solutions, we tend to forget the other essential liquid for modelling -COFFEE (in my new mug).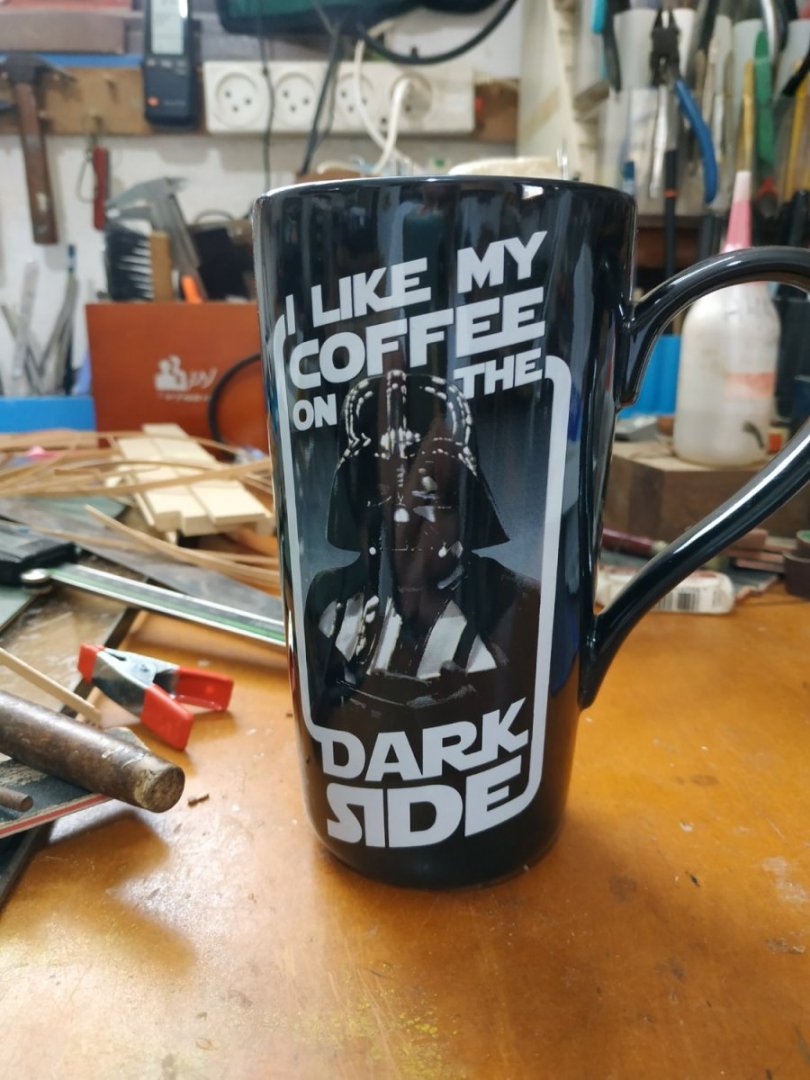
- 475 replies
-
- 10
-
-

-

-
Swan-Class Sloop by Stuglo - FINISHED - 1:48
stuglo replied to stuglo's topic in - Build logs for subjects built 1751 - 1800
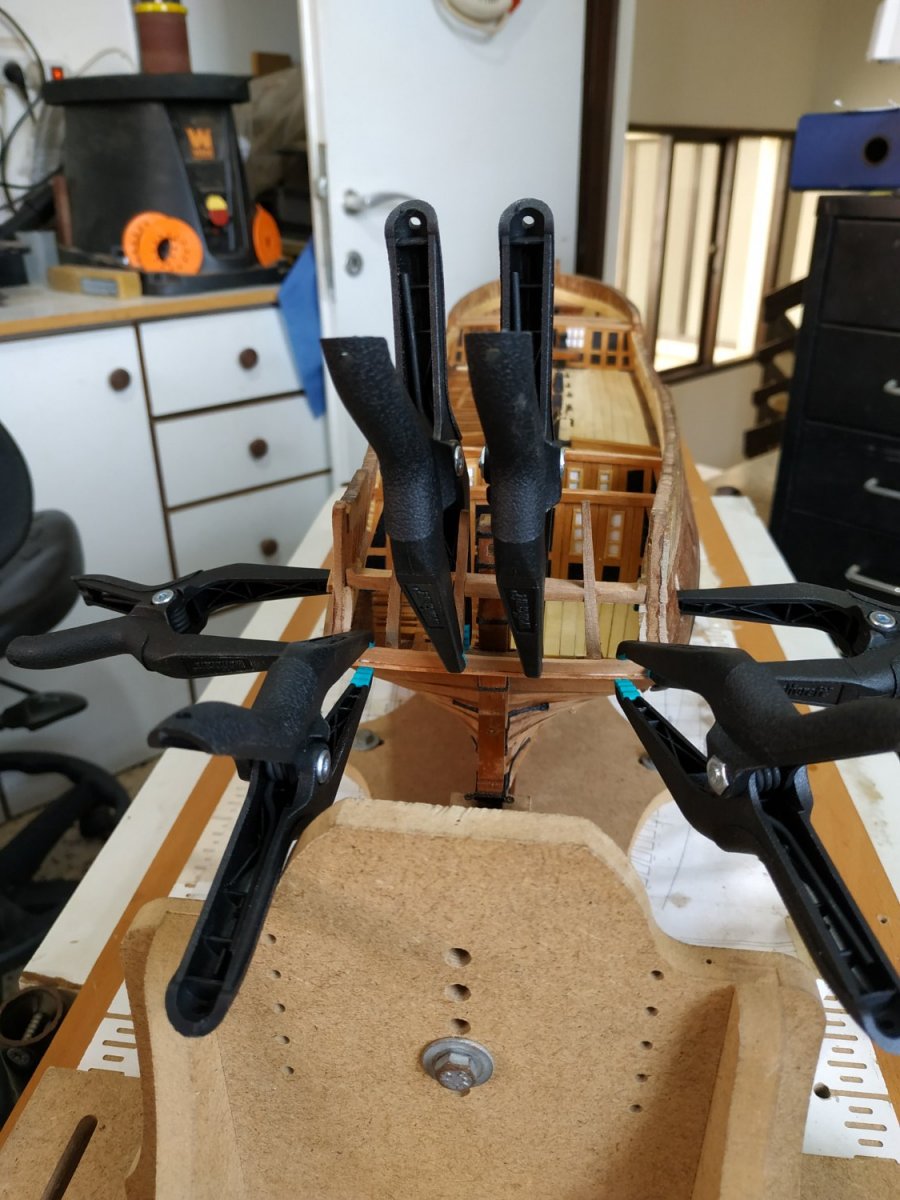
The Upper Counter A pair of planks, 1mm thick,filling between the Lower and Upper Knuckle of the counter timbers. The lower edge sits on the excess left on the upper edge of the top Lower Counter plank. I adapted this pattern for an easier fit. The combined width of the pair of planks is about 10mm/ The upper curve should be parallel with the lower edge of the Quarter Deck Transom. The ends of the planks overlap the Side Planking and are cut flush to them. When made, one side seemed higher than the other. One checking, they were correct, but the starboard side of the Quarter Deck Transom was too low by 1mm. Seems small but is noticeable and would be magnified when fitting the Lights. The part was released with alcohol, unintentionally broke and reset at the correct level. ( After years searching locally for more Wolfcraft clamps - I had only 2 - I ordered more from Amazon, and received them a few days ago.They are the most useful of any clamps I know)


-
Swan-Class Sloop by Stuglo - FINISHED - 1:48
stuglo replied to stuglo's topic in - Build logs for subjects built 1751 - 1800
" Aren't you afraid that the felt will pick up a lot of dust?" Hair dryer, on cold, blows it away. I haven't any other use for a hair dryer. -
Swan-Class Sloop by Stuglo - FINISHED - 1:48
stuglo replied to stuglo's topic in - Build logs for subjects built 1751 - 1800
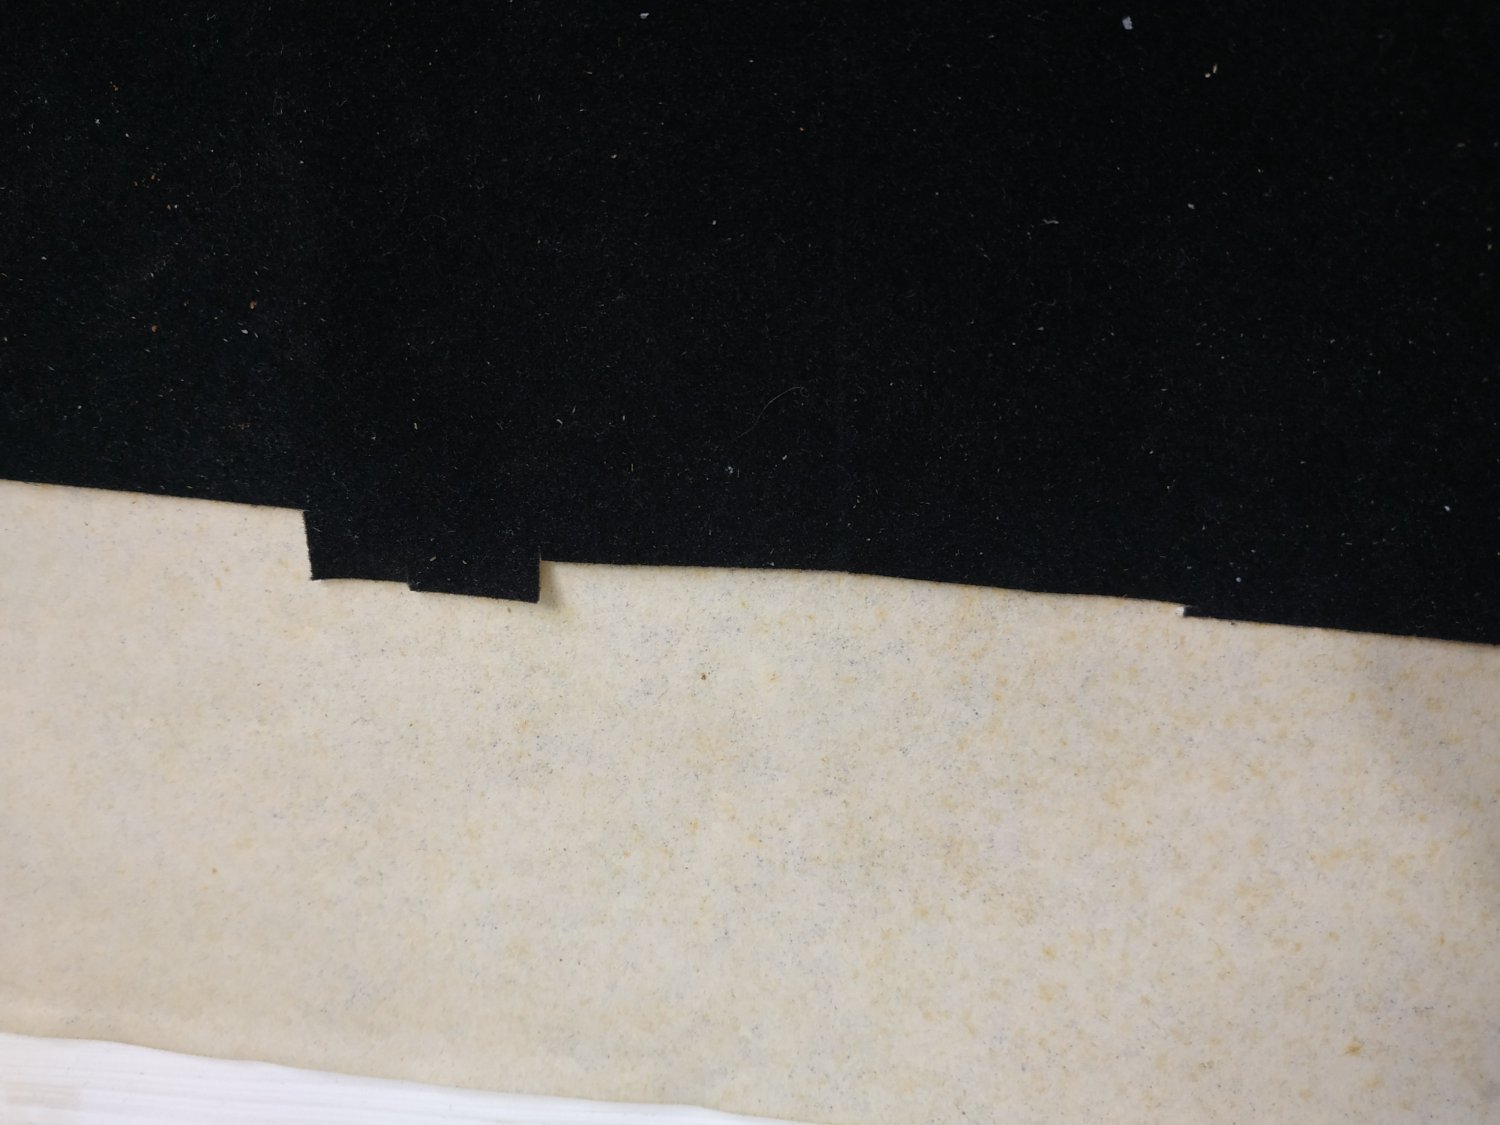
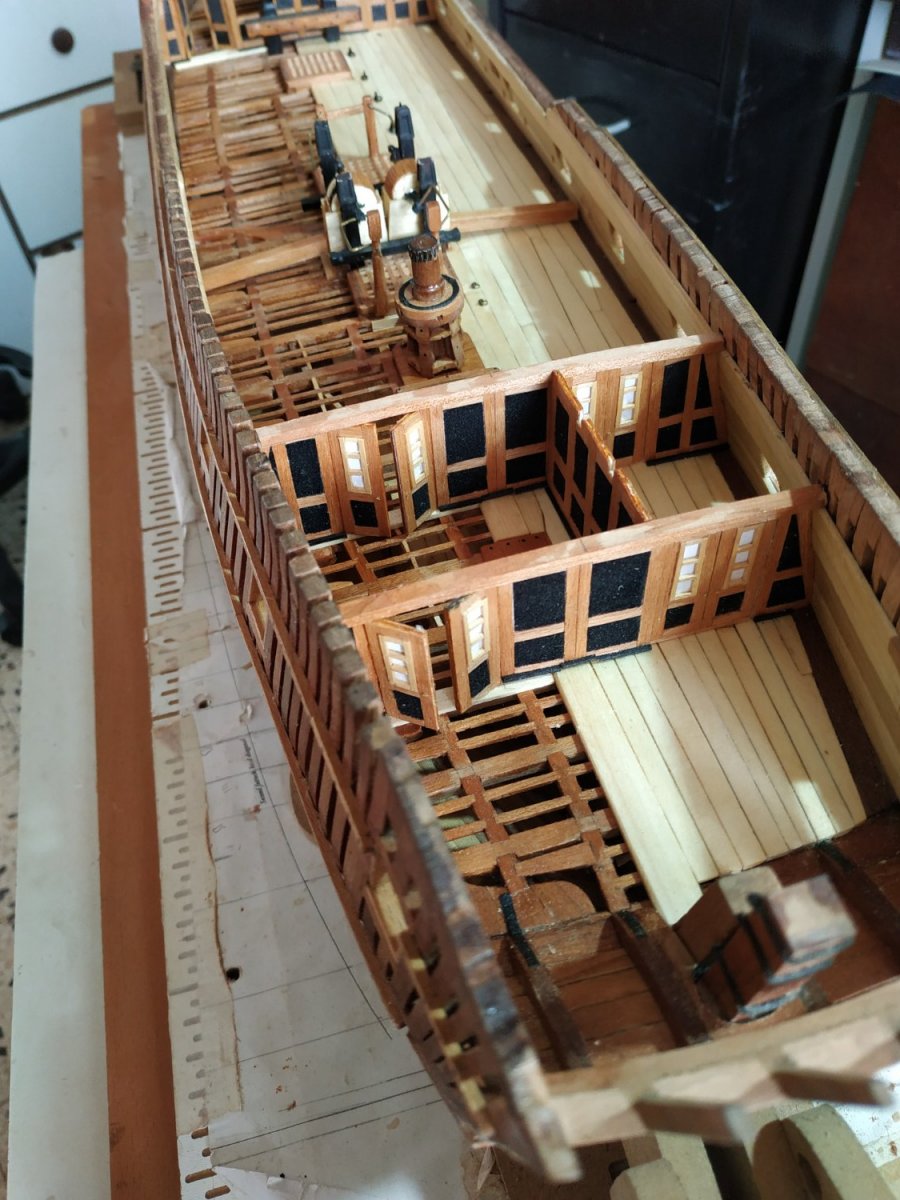
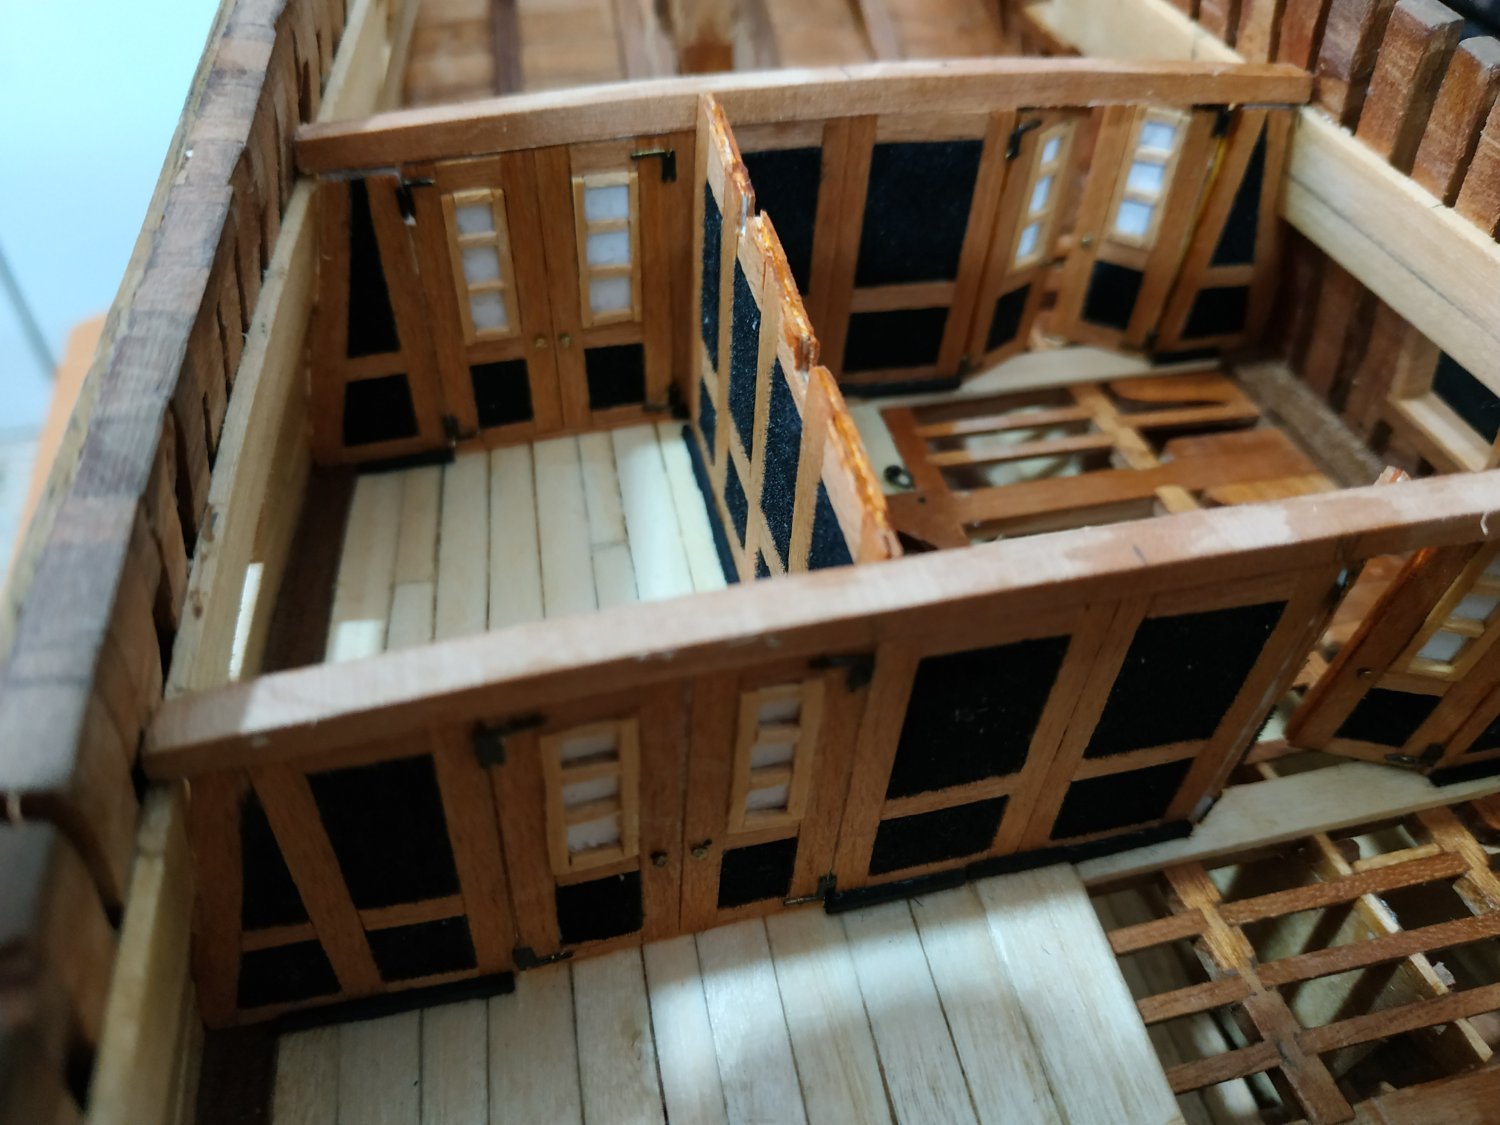
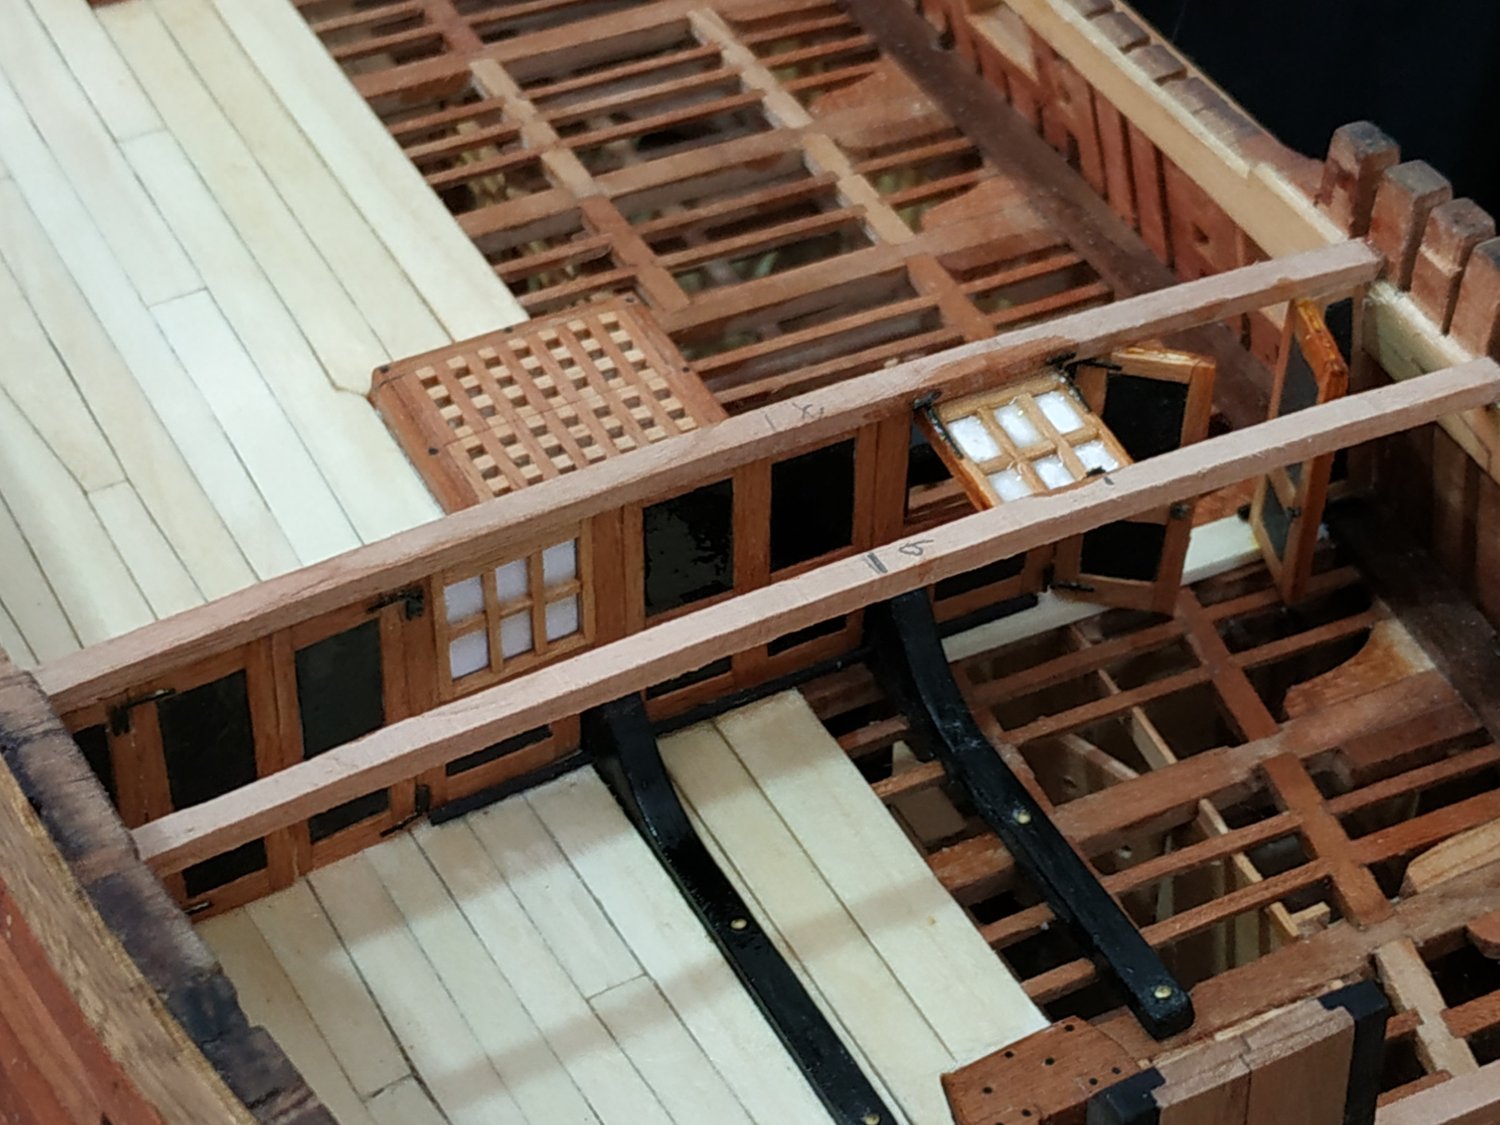
Aft Cabin Bulkheads. 2 transverse Bulkheads. The more forward, unequally divided by a fore/aft Bulkhead into a smaller, starboard Bed Place, and the larger Coach, to the portside. As before, establish position and height by first making the Quarter Deck beams. There are 15 in number, plus a half beam for the 16th.They are NOT let down. They are 3.71x2.92mm except nos. 4 and 5 which are 4.24x2.92mm The transverse Bulkheads sit underneath nos. 8 and 11. The plans seem to show them forward to the beams,but reference books I consulted,and other modelers place them under the beam. The Bulkheads are fitted with the doors opening inwards to the cabin. The hinges are left on the outer (wrong) side because they look nice! Instead of black cartridge paper, I used a black fabric, textured to look like velvet, with a stiff backing- total thickness 0.8mm. Don’t know what it's called or how it's made, but I think it looks good. The fore/aft Bulkhead is made, the inner Deck Cant attached. The outer Deck Cant is glued to the deck in position to receive this Bulkhead, after the Quarter Deck parts are in place.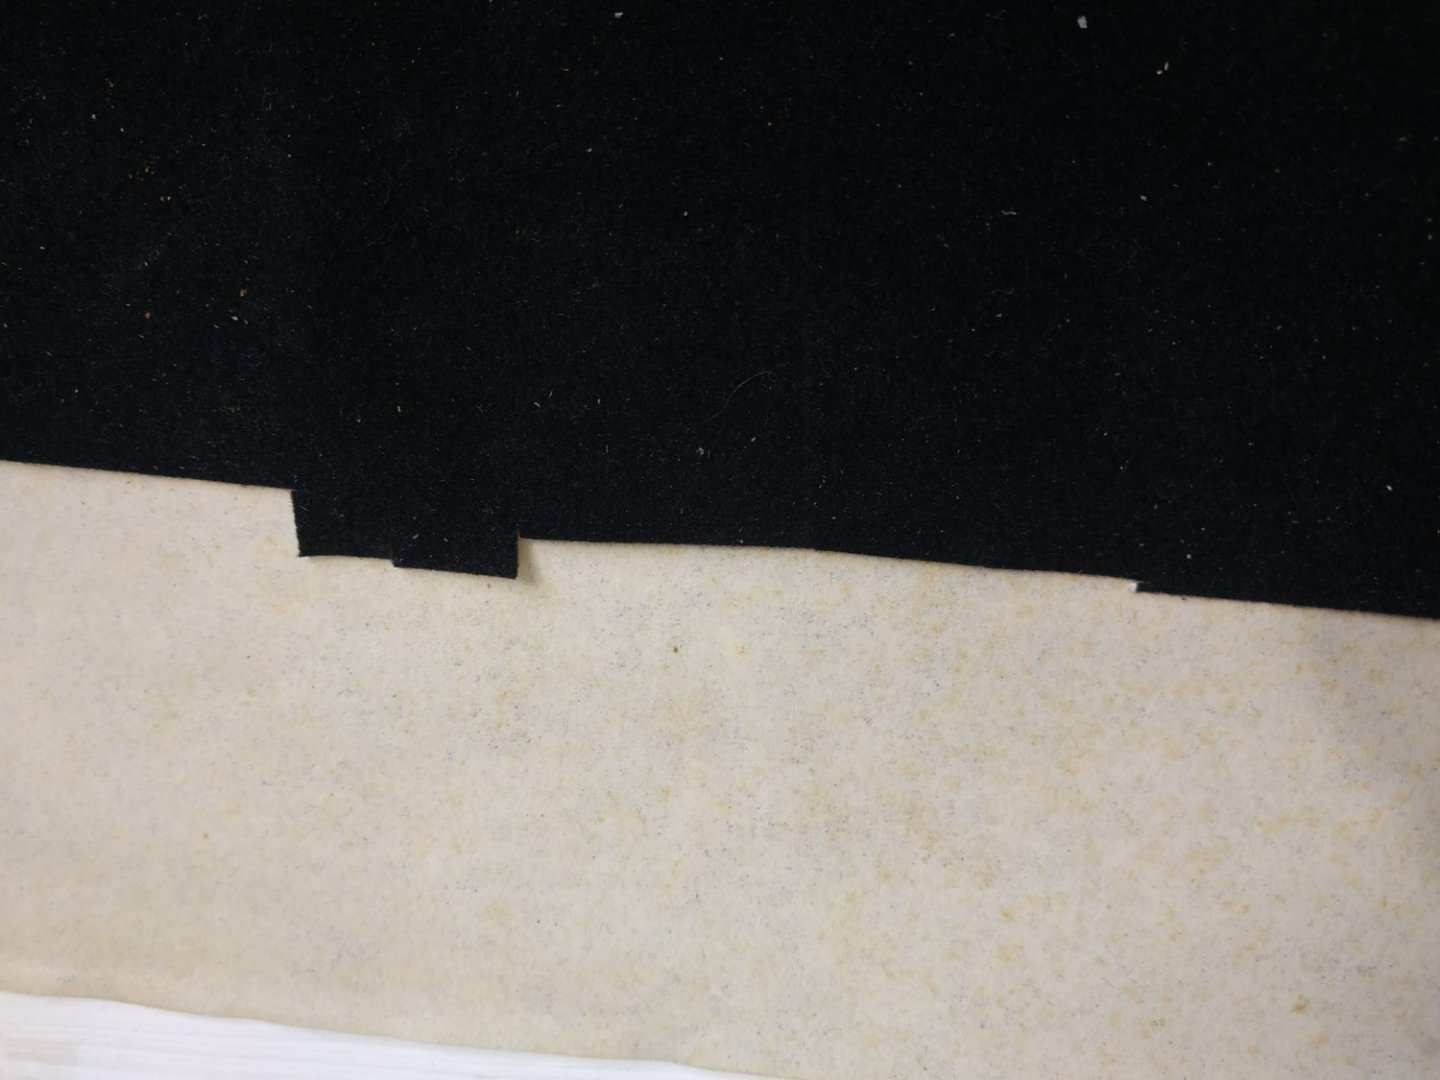


-
Swan-Class Sloop by Stuglo - FINISHED - 1:48
stuglo replied to stuglo's topic in - Build logs for subjects built 1751 - 1800
Google tells me that also know as Bindweed, Morning Glory or Creeping Jenny - news to me. Always figured you for a Genius, druxey- now confirmed. -
Swan-Class Sloop by Stuglo - FINISHED - 1:48
stuglo replied to stuglo's topic in - Build logs for subjects built 1751 - 1800
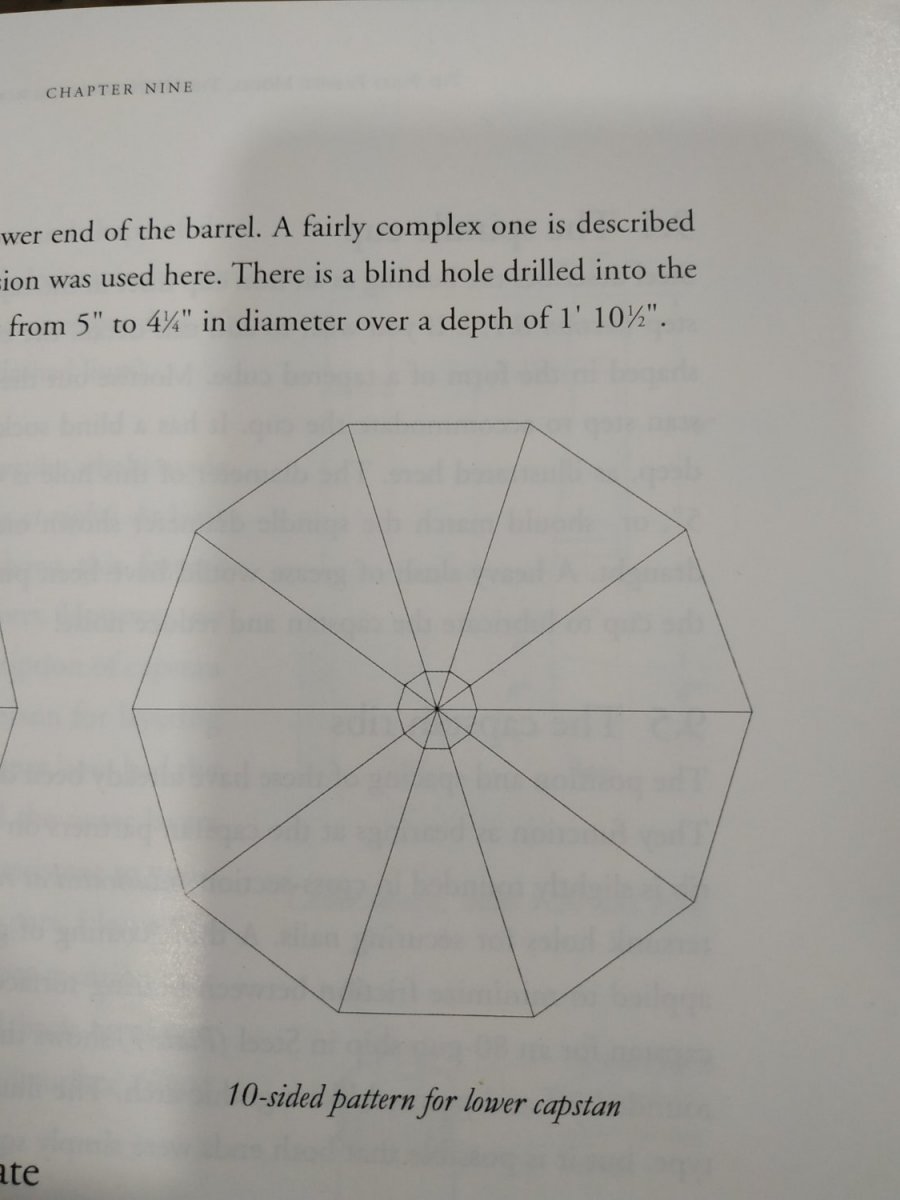
Lower Capstan, postscript. The ten-sided pattern is reflected in a flower that appears in our garden this time of year. I don’t know its name- can someone enlighten me?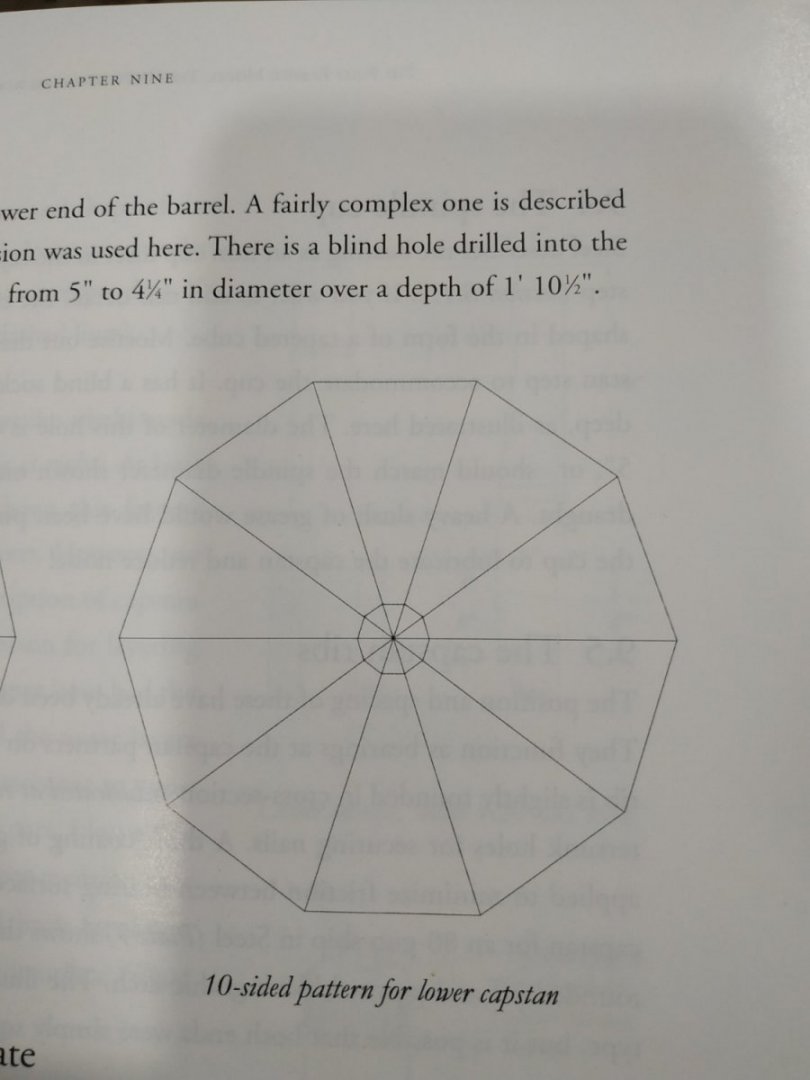

-
Swan-Class Sloop by Stuglo - FINISHED - 1:48
stuglo replied to stuglo's topic in - Build logs for subjects built 1751 - 1800
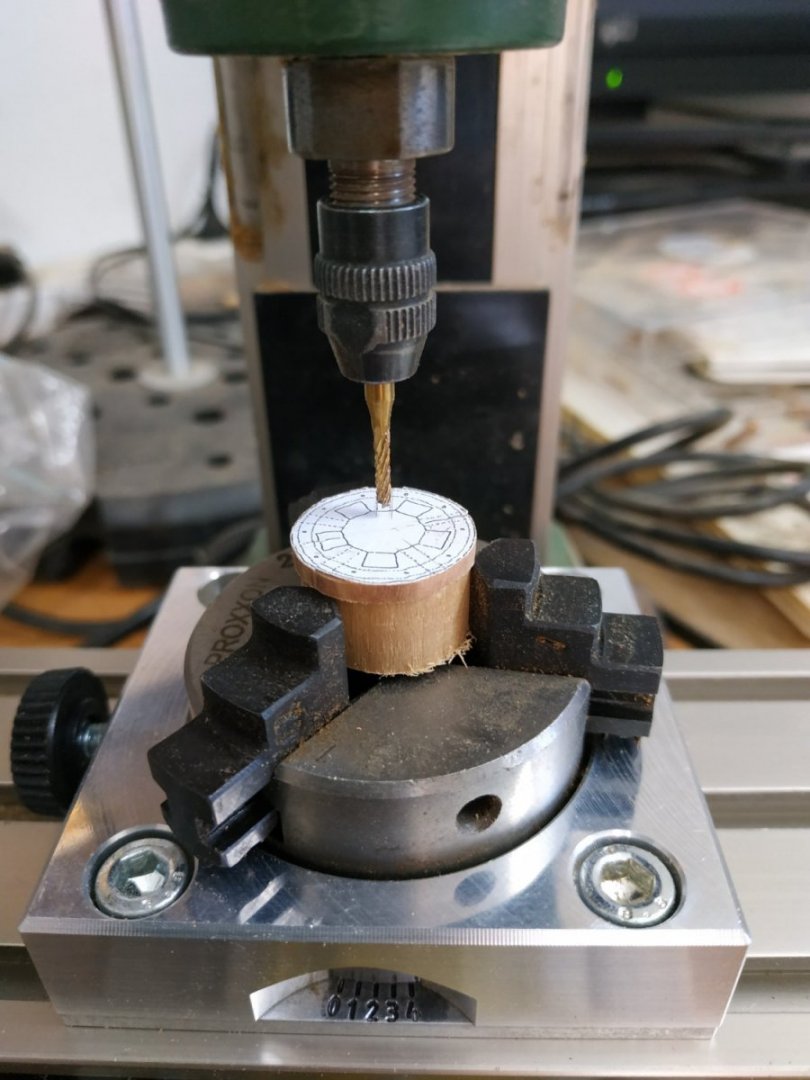
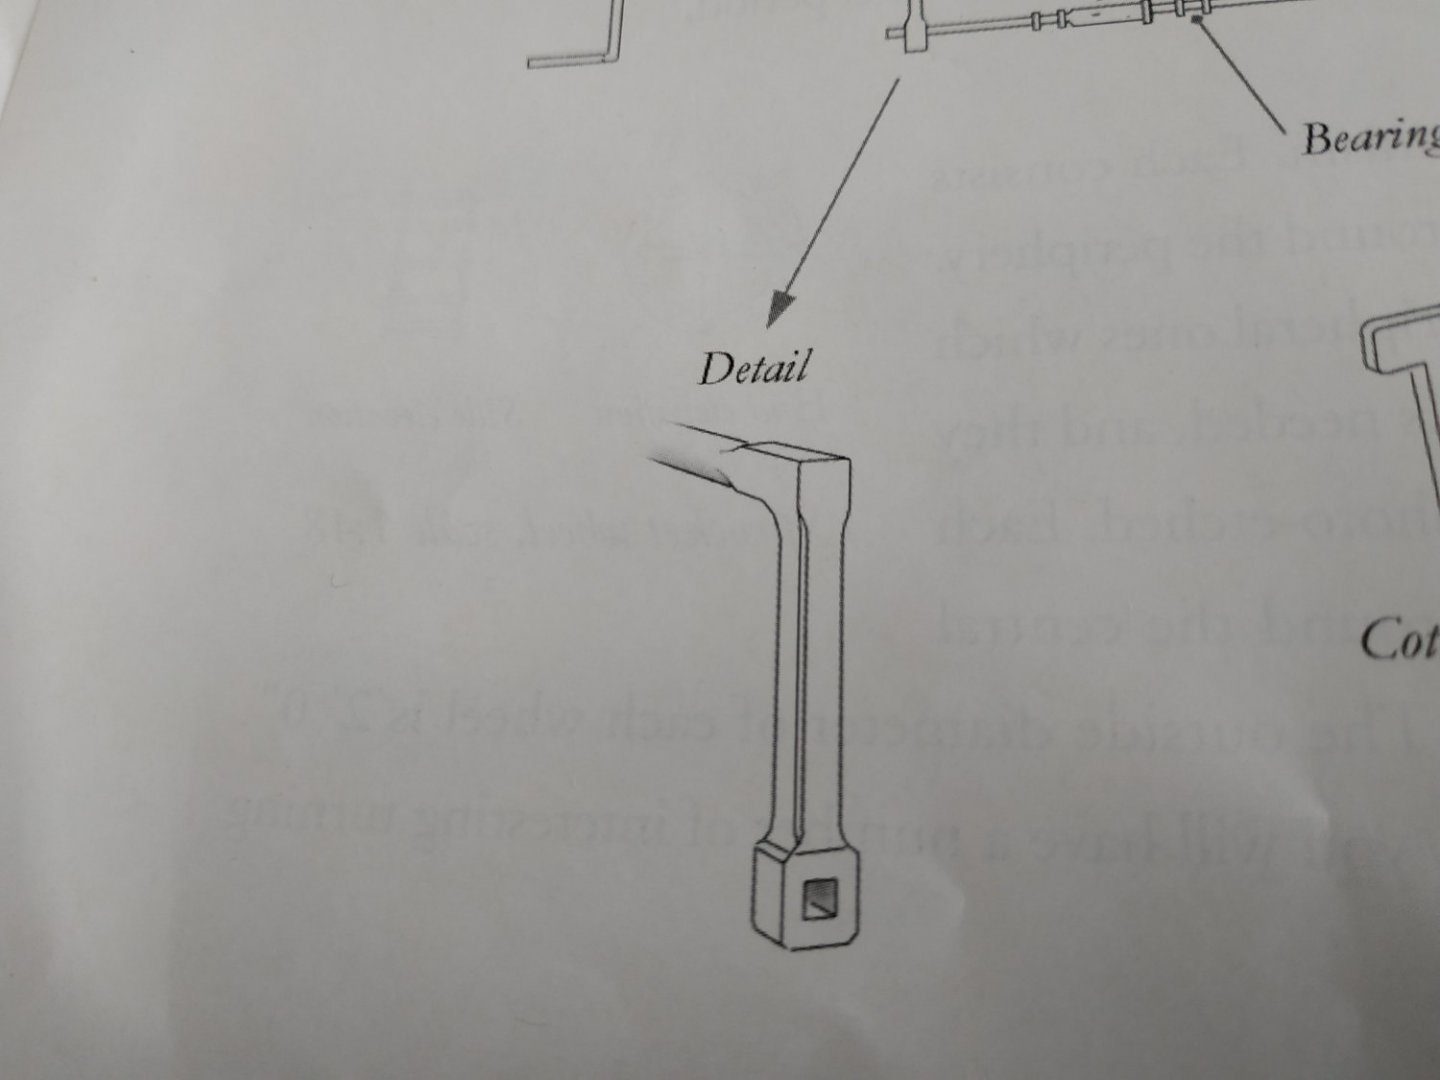
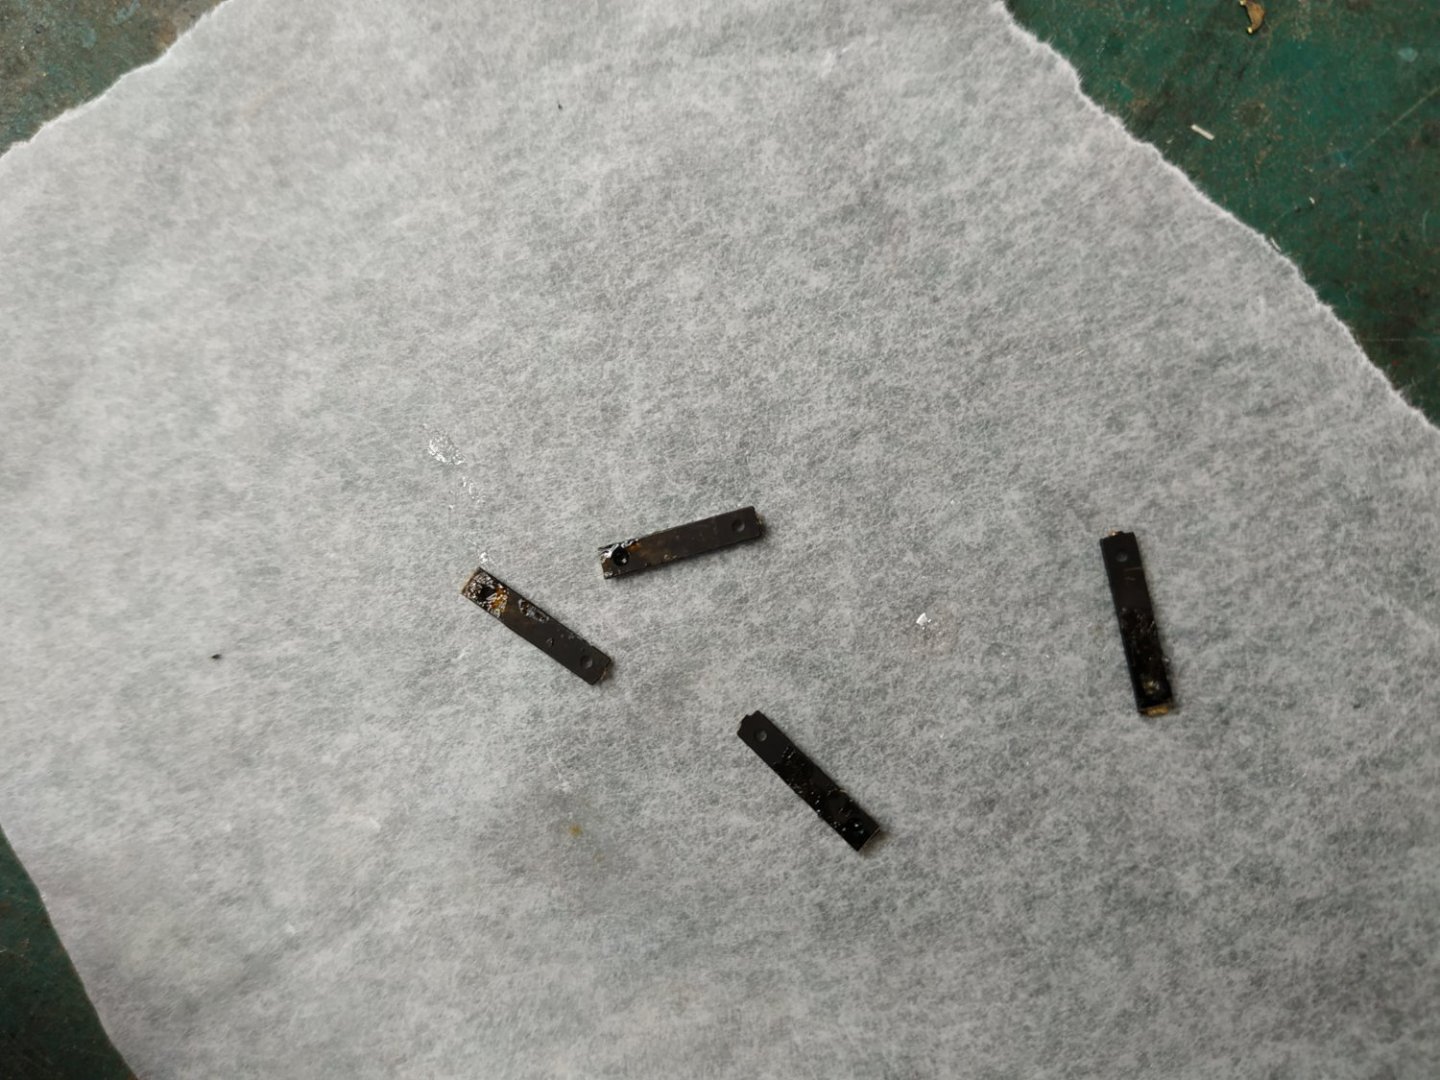
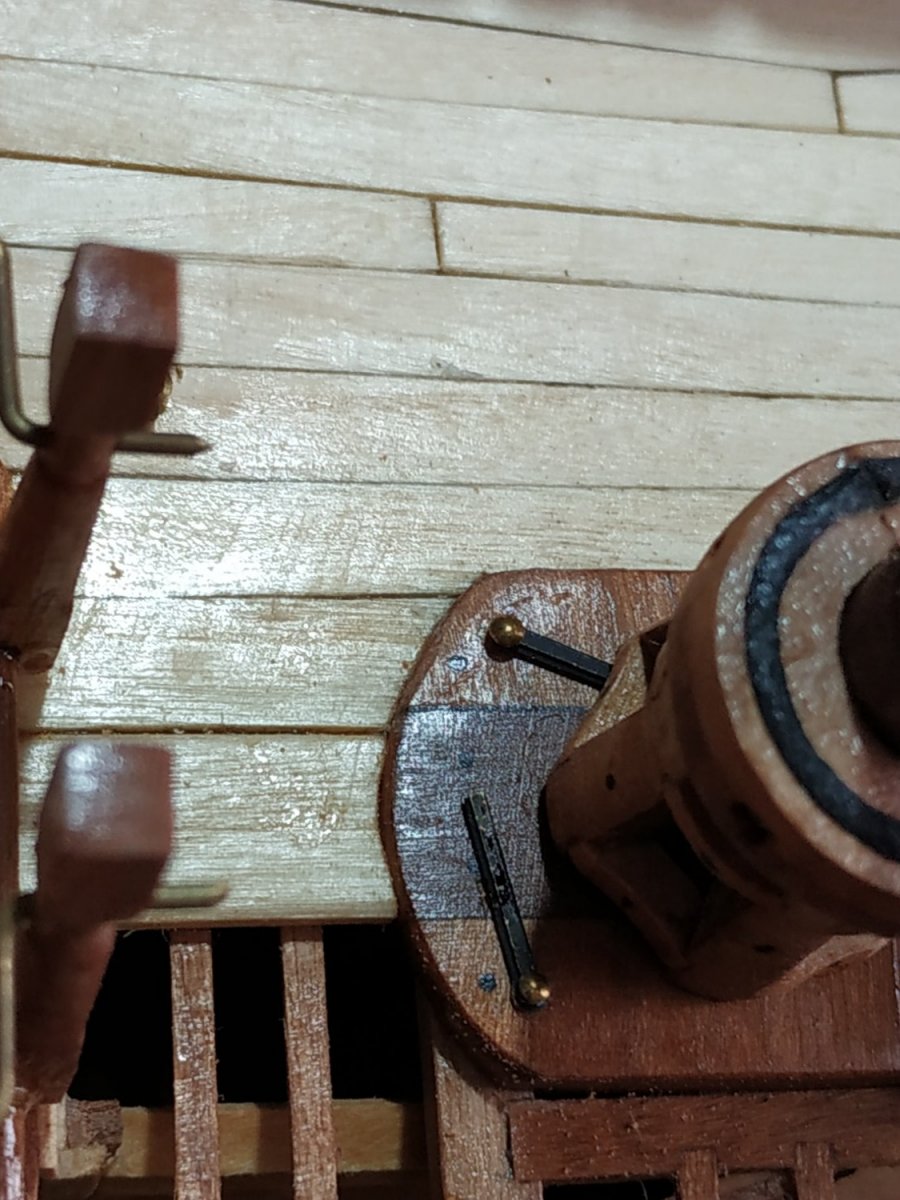
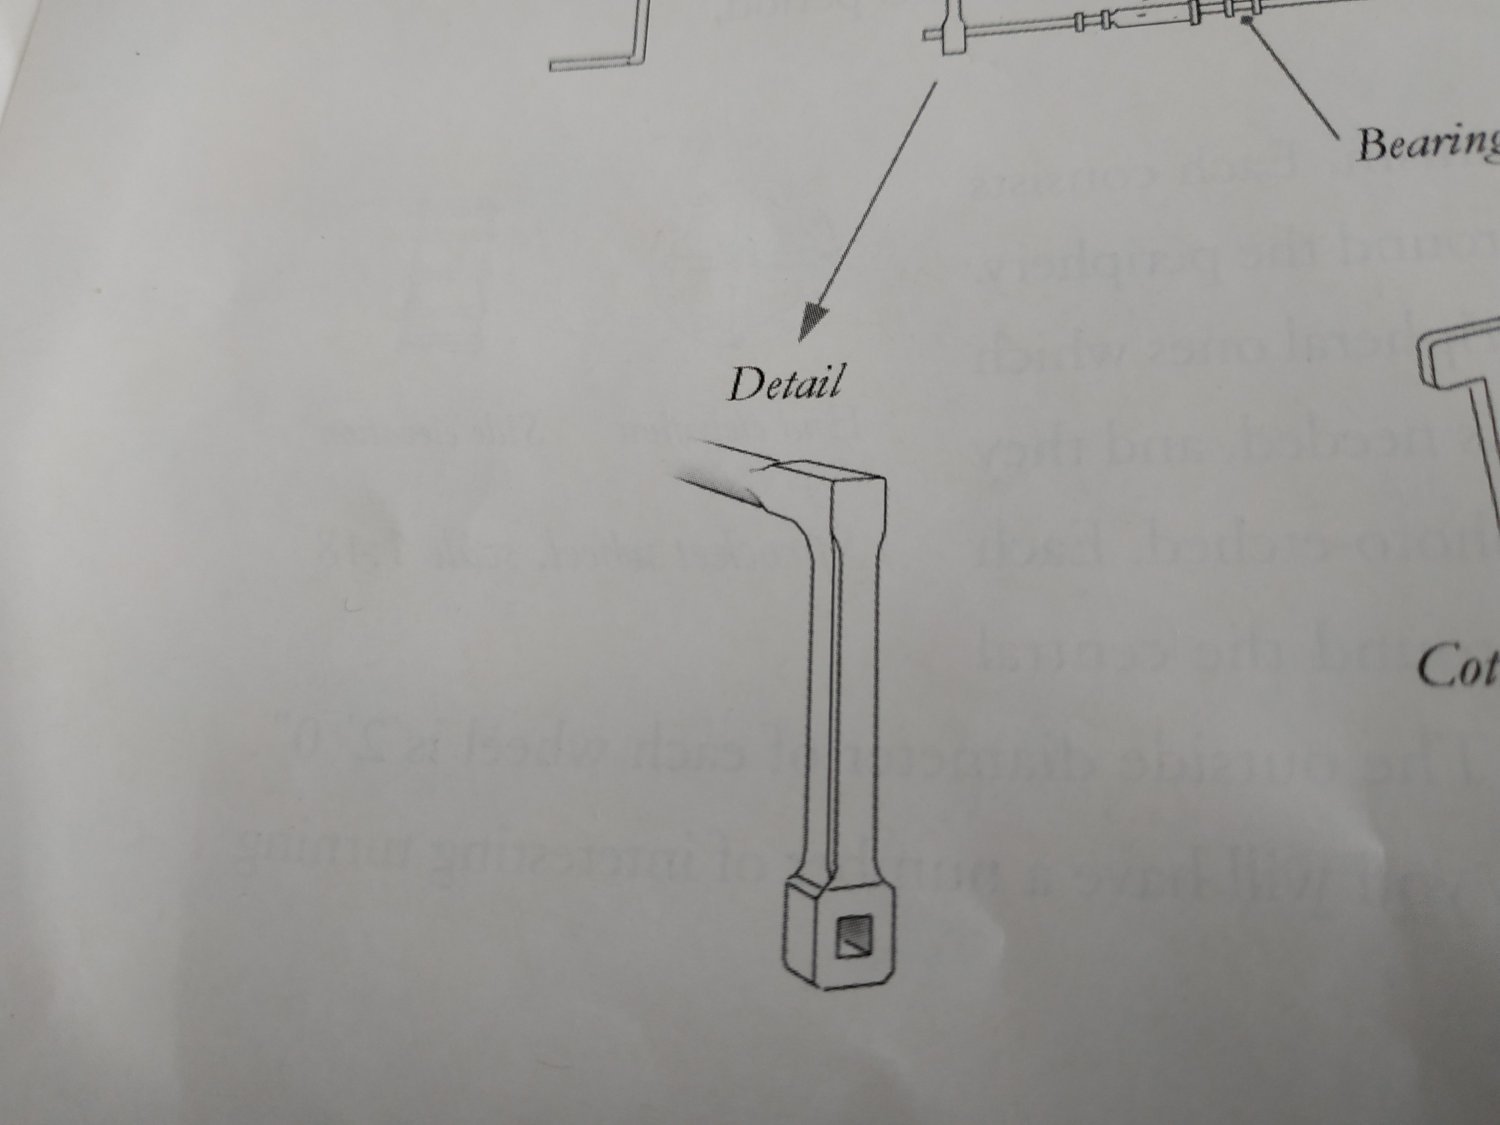
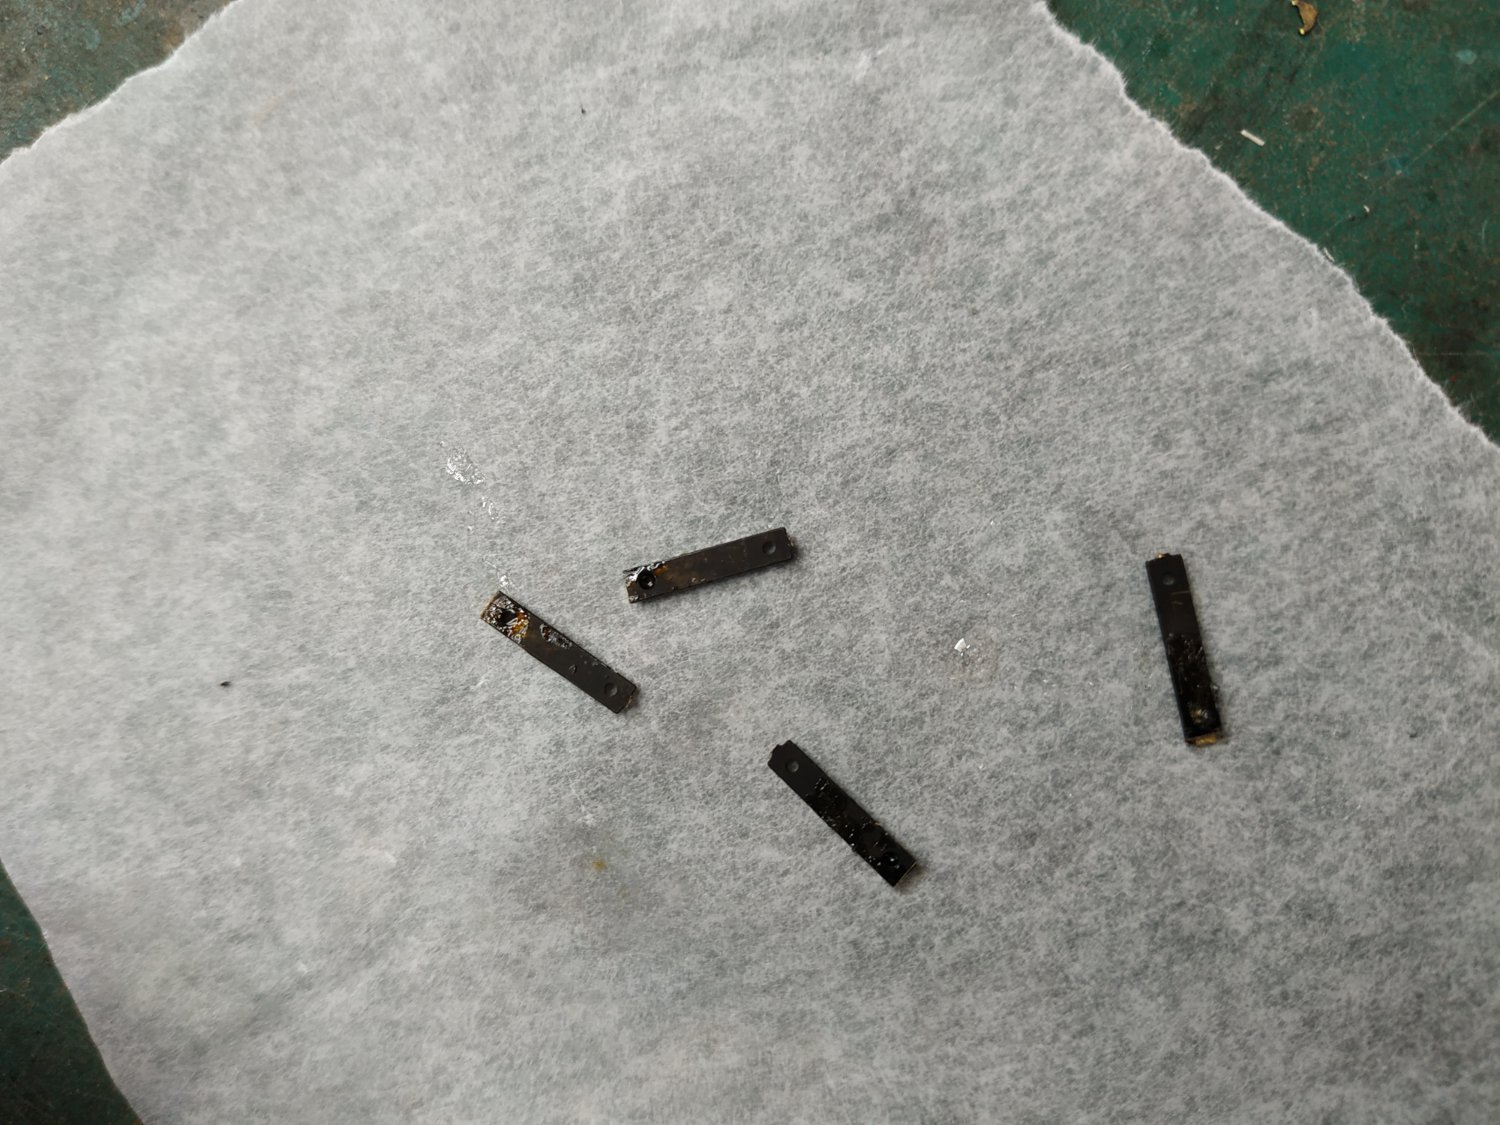
The Trundle Heads. 4 pieces in 2 layers-overlapping semicircles each 2.39mm thick. The central hole is 10 sided to fit the Capstan Barrel. Outside diameter 20.14mm. The shared surfaces are each scored (radiating from center) to form the 5 Capstan Bar Holes-1.86MM sq. The score is therefore 0.93mm each side. After cutting the 4 pieces to size, temporarily stuck them to a thicker disc of wood for easier gripping in the vise when milling. The Dividing Attachment for the Proxxon, again invaluable. The cut-out pattern then stuck, and scores milled. I found that a quick soak in alcohol and use of a hot hair dryer simply separated the pieces from their support. The lower pair turned over and restuck to its support. New pattern placed and mortises for matching the Whelps approximated, at a depth of 0.53. with the mill. Removing from the vise, these were finished more accurately with a chisel blade. The upper pair similarly separated, turned over and reattached to its base. A circular score,1.59mmx0.2mm, milled, with outer edge 0.59 within the outer edge of the Trundle Head. This is for fitting an iron ring inset on the head. Only after this stage, was the central hole roughed-out with the mill to be finished with the chisel blade and fitted individually around the Barrell. This piece was fun to make but the final result was not as good as it should have been. I have seen Dan Vadas’s work- his skill and detail is astounding. I’m tempted to make it again at 1:24 scale. Capstan Pawls. A pair of single iron bars that act as a brake. 11x1.6x0.8mm, bolted at one end to the Capstan Step, allowing each to swivel.

- 475 replies
-
- 10
-
-
Swan-Class Sloop by Stuglo - FINISHED - 1:48
stuglo replied to stuglo's topic in - Build logs for subjects built 1751 - 1800
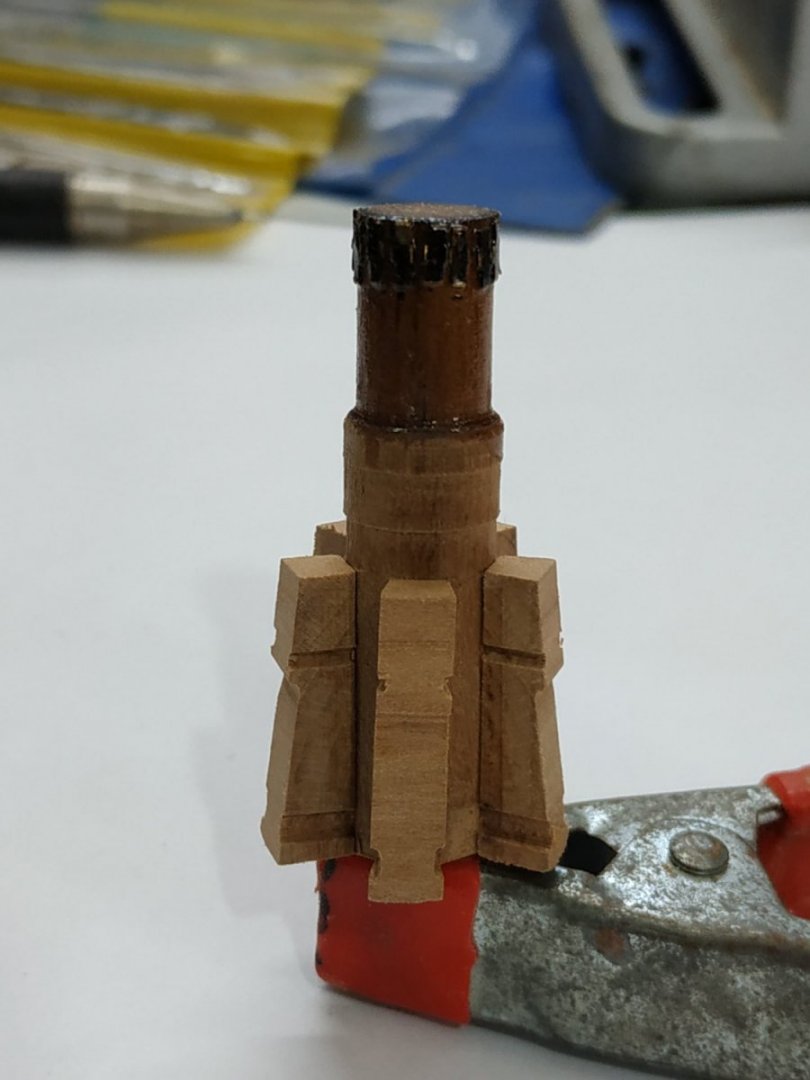
Upper Chocks Wedged shaped pieces 1.06mm thick, fitting in the upper scores of the Whelps. Convex curve follows that of Whelps- formed on lathe Lower Chocks Again wedge shaped but thicker at 1.99mm thick. Outer edge concave -radius as for the Trundle.(Same as a Permagrit sanding stick that I have and used to form the curve. A card pattern was made and it was found easier to size and fit with the Capstan piece upside down.


-
Swan-Class Sloop by Stuglo - FINISHED - 1:48
stuglo replied to stuglo's topic in - Build logs for subjects built 1751 - 1800
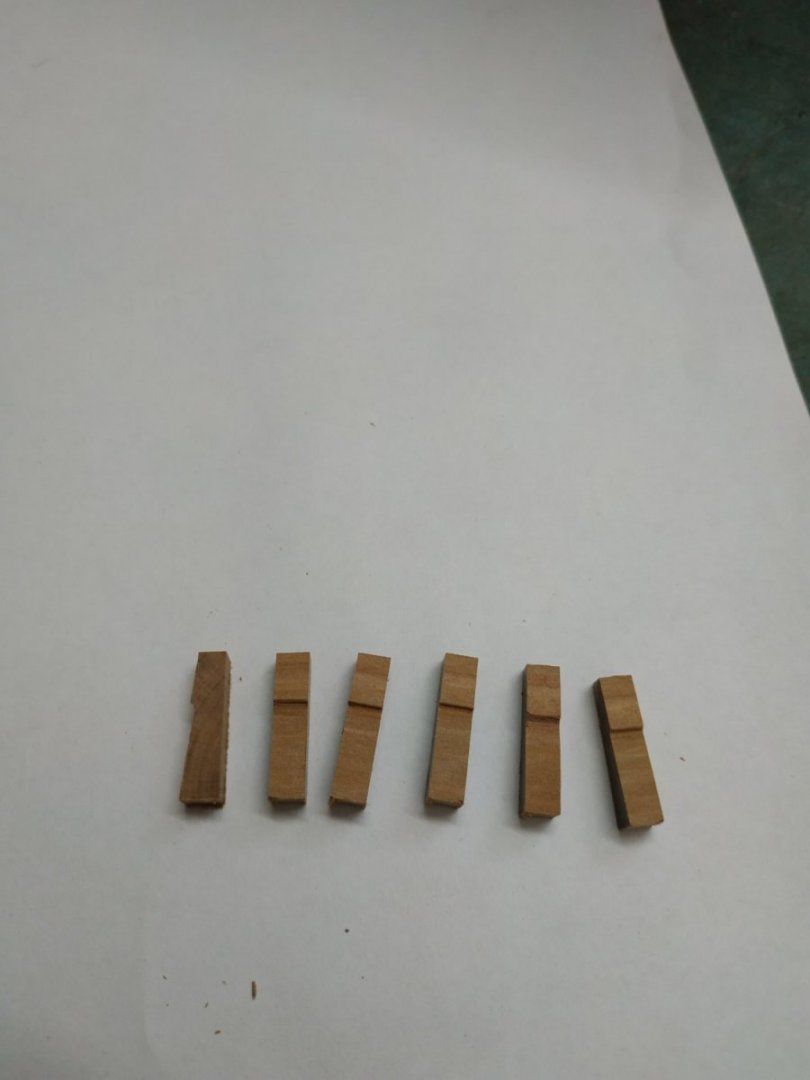
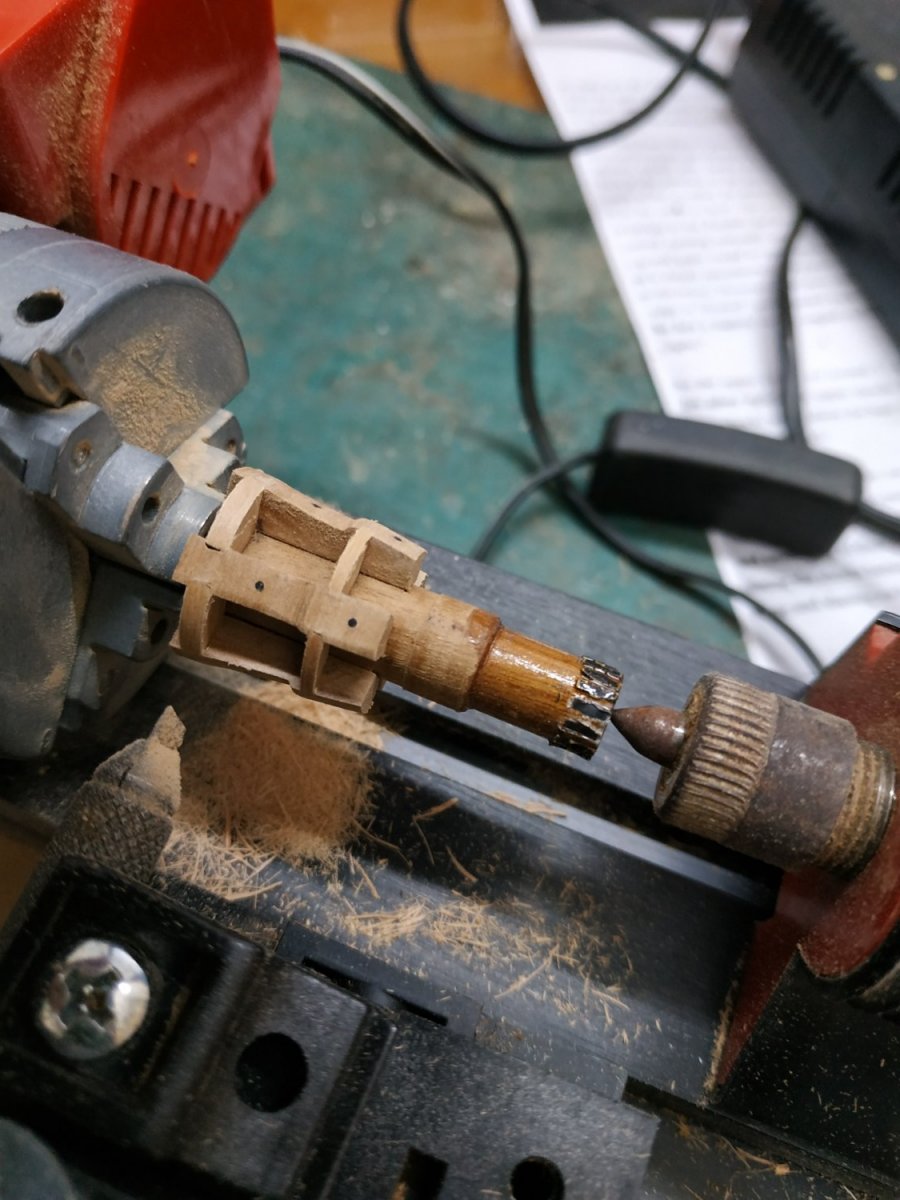
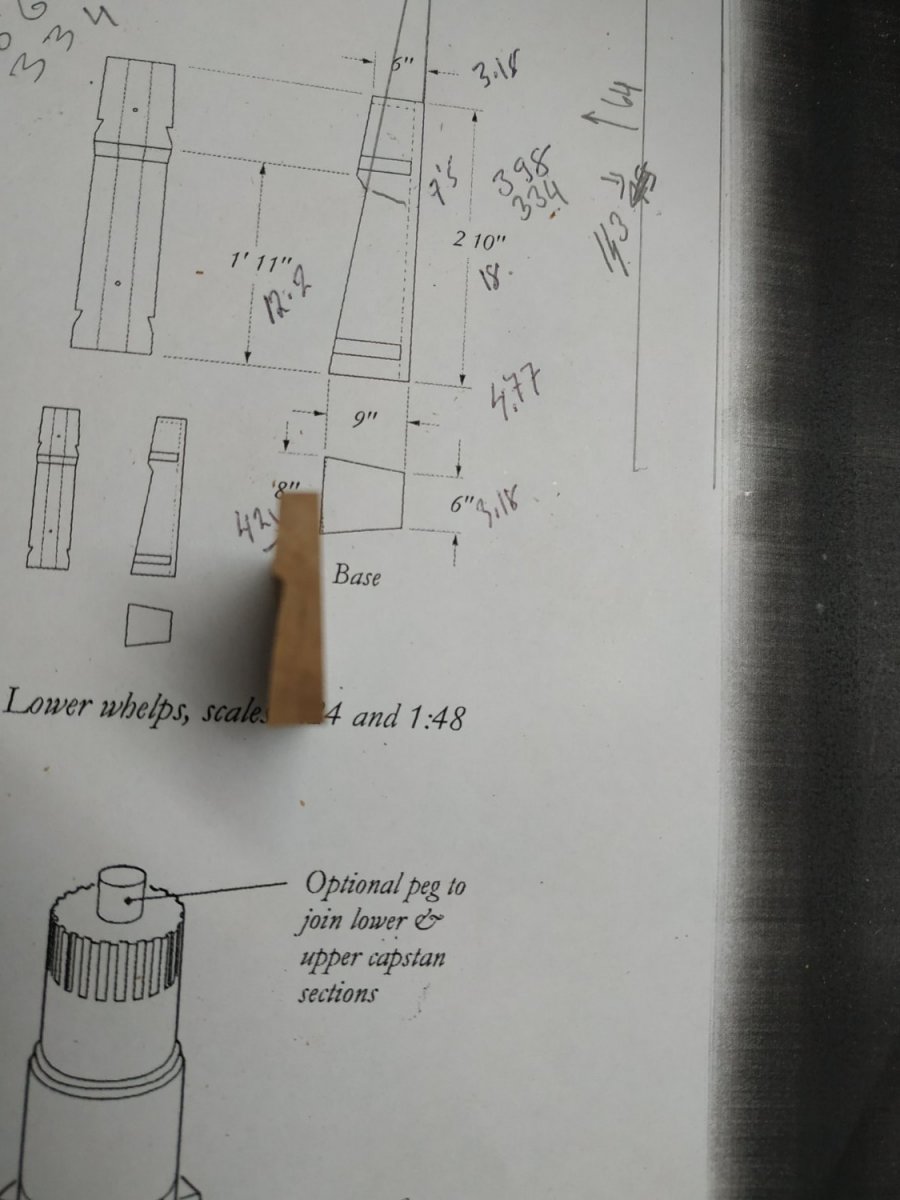
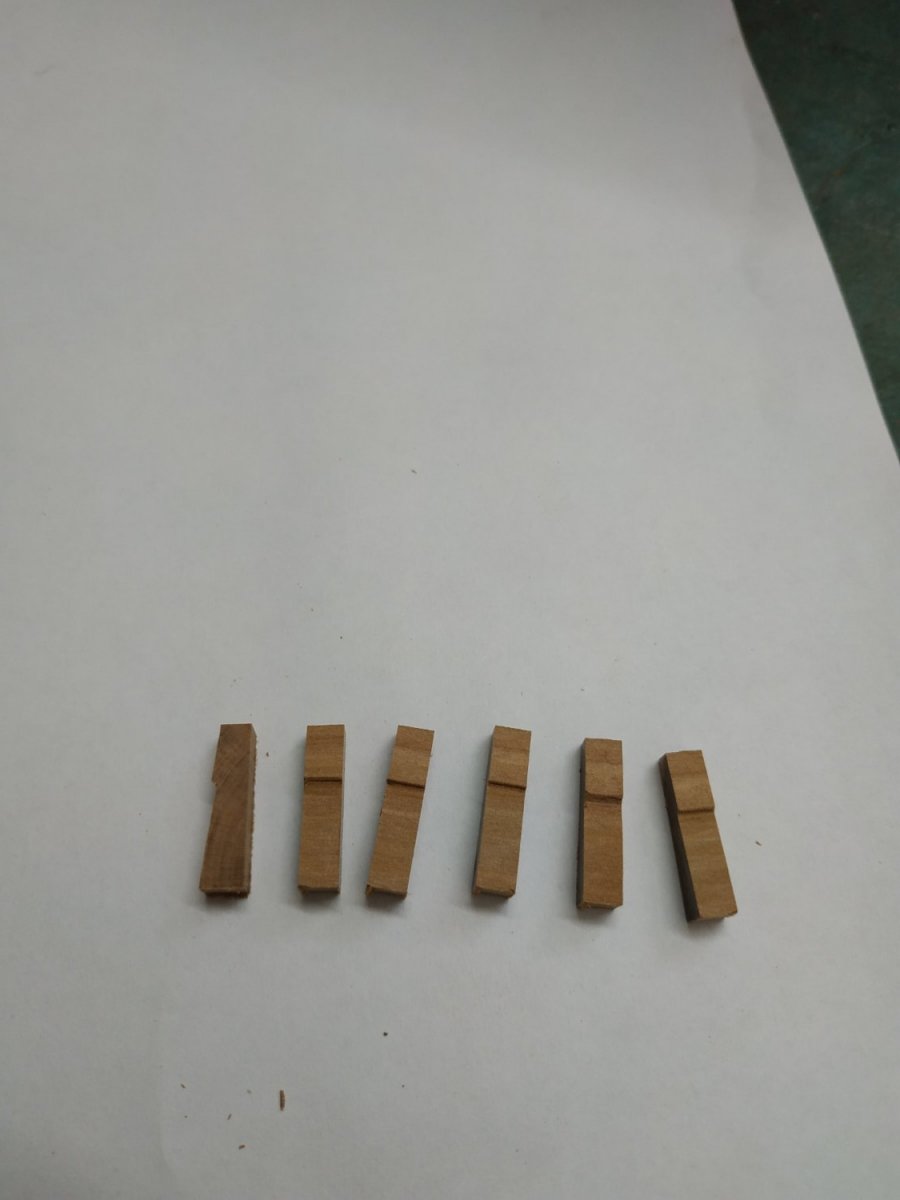
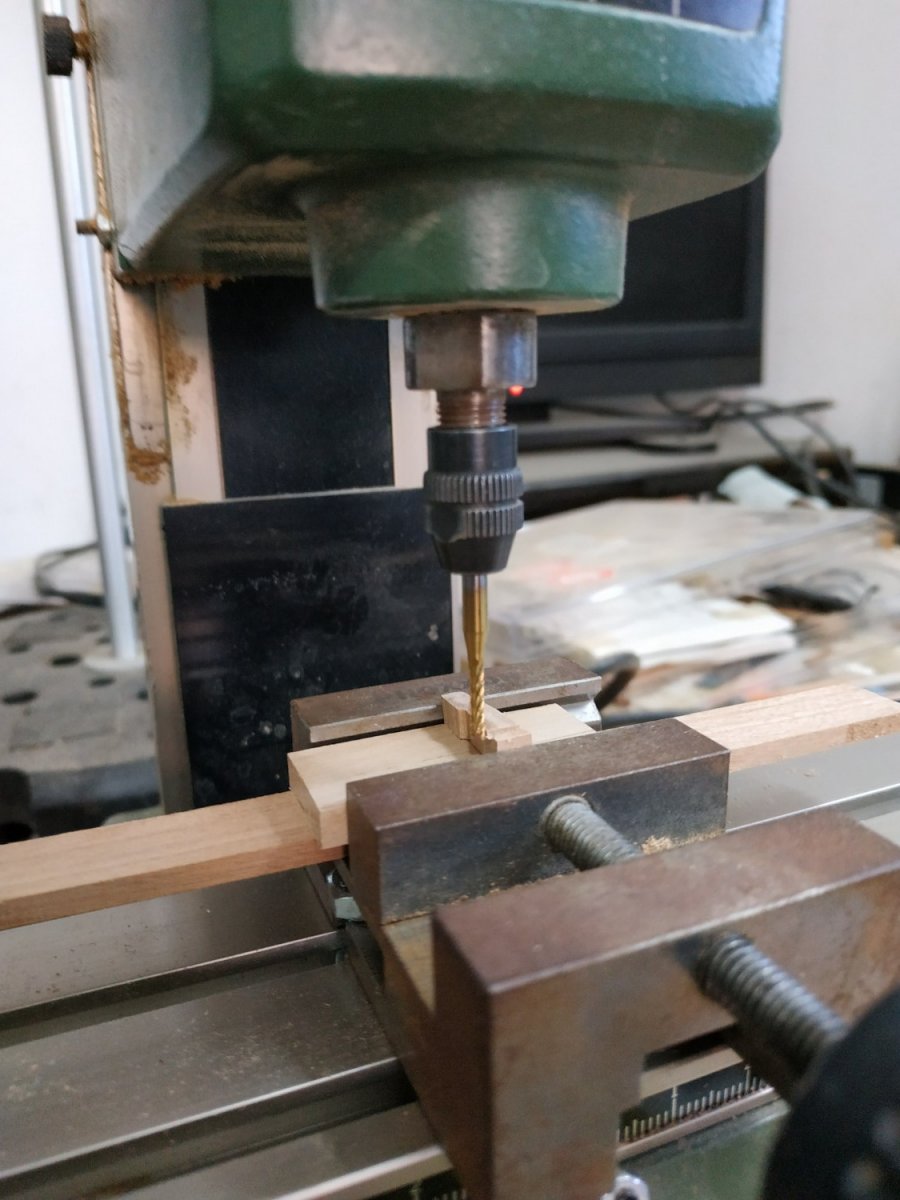
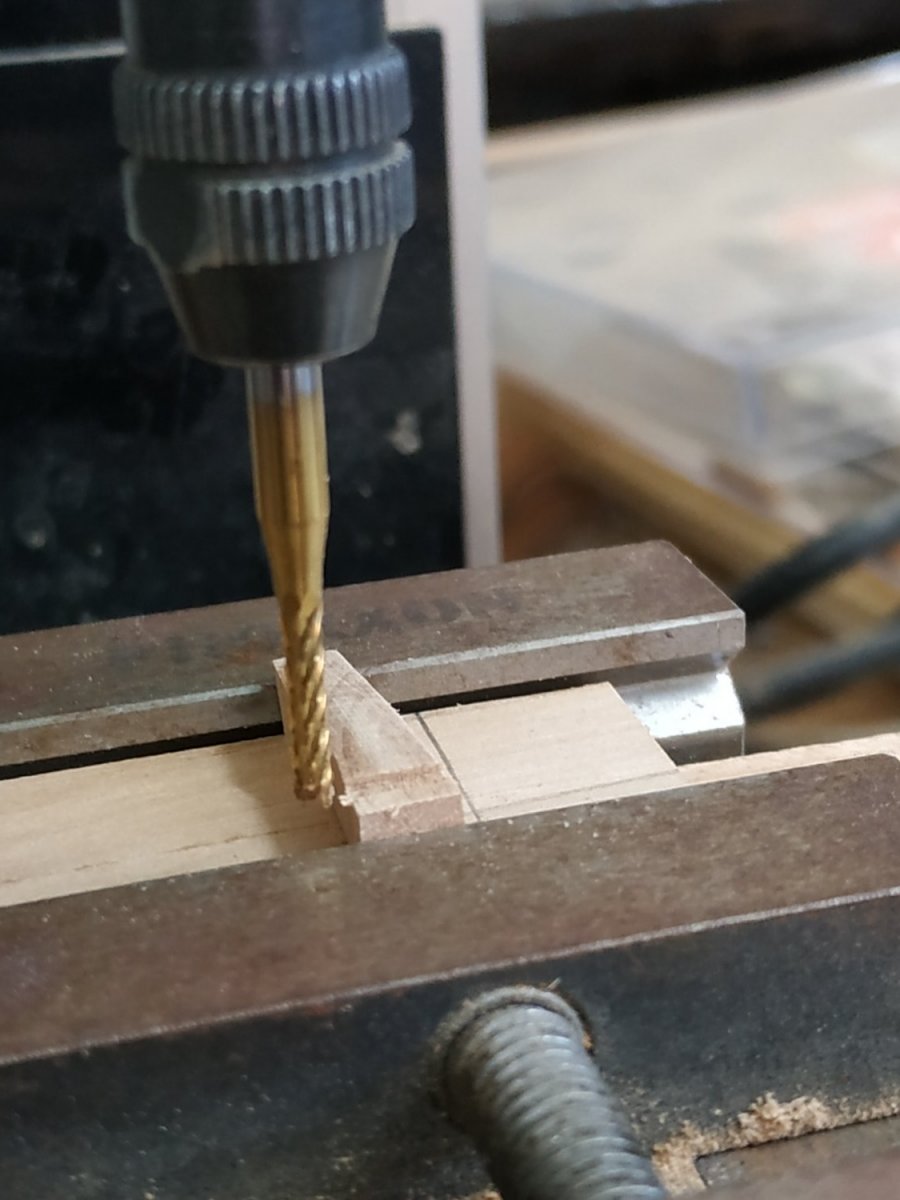
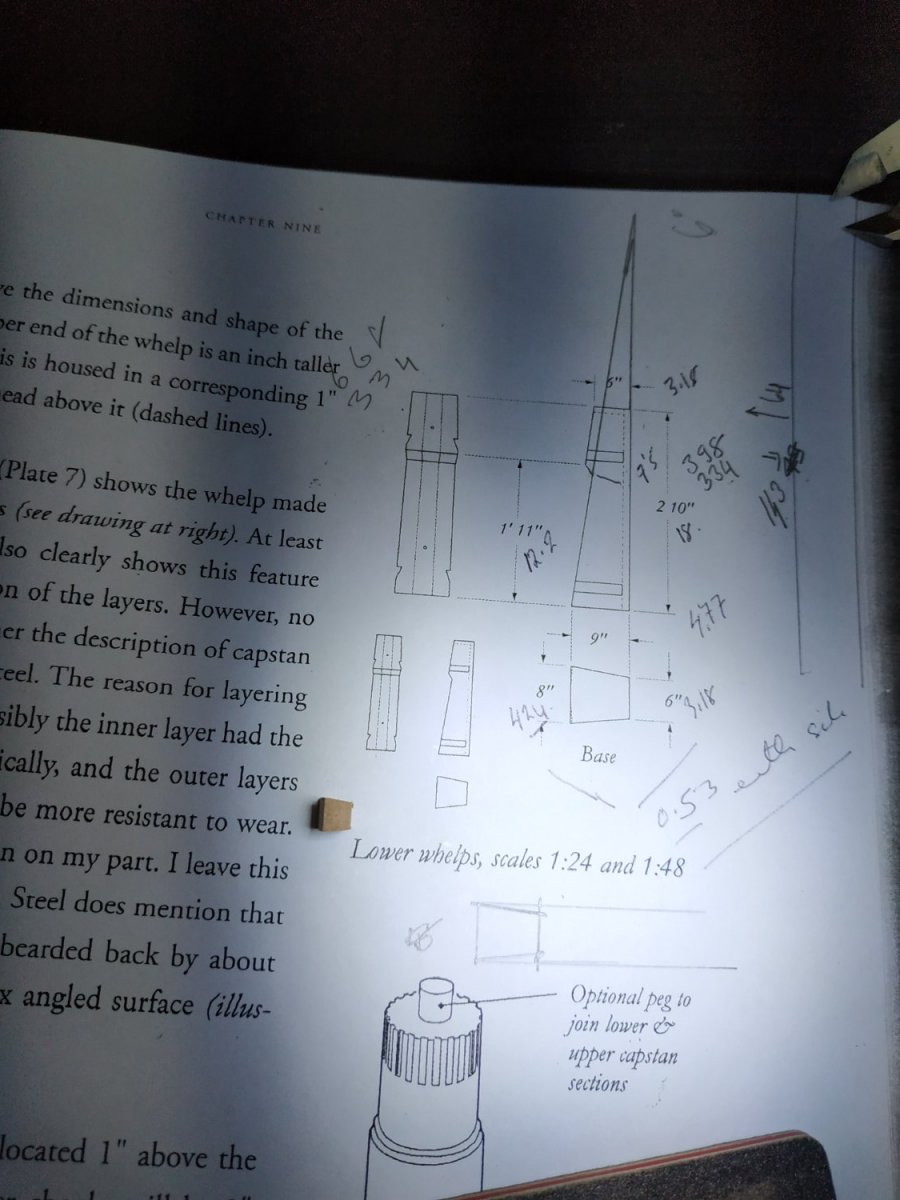
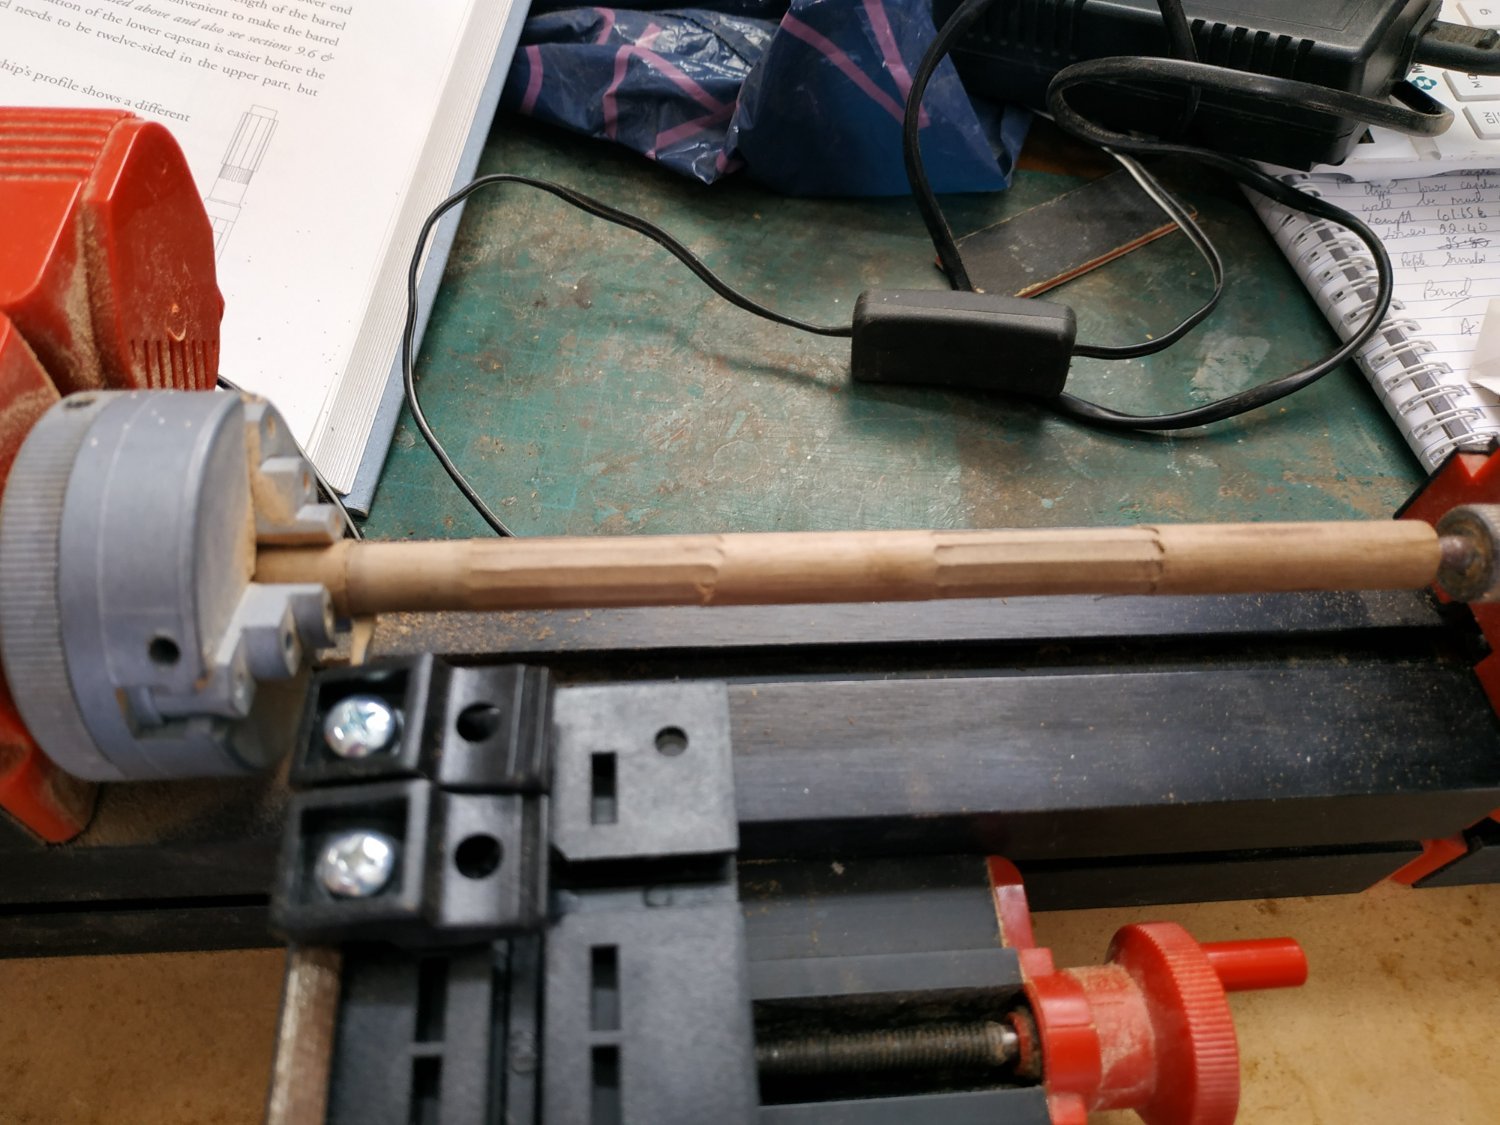
Lower Capstan WHELPS 5 in number- alternate faces on the Barrel. 18mm long.The outer edge tapers upwards - at the base 4.77mm to 3.18mm at the top. At about ⅔ way up, it forms a dog-leg or Surge . Too complicated to calculate, I extrapolated lines on larger scale drawing to give me an angle of 6deg. The width is also wedge-shaped-4.24 at the outer edge, 3.18 wide at the barrel. The section at the top is square, the base trapezoid. Again, drawing it to a large scale, I estimated the “intoeing”angle at 7deg. I thought the pieces were too small to use a cut out pattern. I took a blank 4.8 thick, 32 wide and 20 mm long. Set in the vise at 6deg . Set mill to 1.6mm depth and ⅓ down the length,increased depth by further .64 for the Surge. The Surge was chamfered and the blank sawed to 4.24 widths. In order to make the tapering toward the Barrel, I wedged up the vise to 7 deg. To maintain the individual whelps horizontal across the vise, I made a simple wood support. Eyeballing the ends to be parallel with the vise jaws, the taper is milled to one side and rotating 180 deg, with the end still parallel to jaws, milled the other side. Using the same setup, Scores for the Upper Cheek (0.53mm above the Surge) 1.06 wide and depth 0.53mm, can be made. Similarly, scores for the Lower Cheeks,(2.12 mm above the base) 1.99 wide and 0.53 depth. The Whelps can be glued to the alternate faces of the Barrel, ensuring the scores line up. (Easier said than done !!!) Bolts,one above and one below the Surge, fix the to the Barrel (Advice on an alternative or easier way, will be appreciated)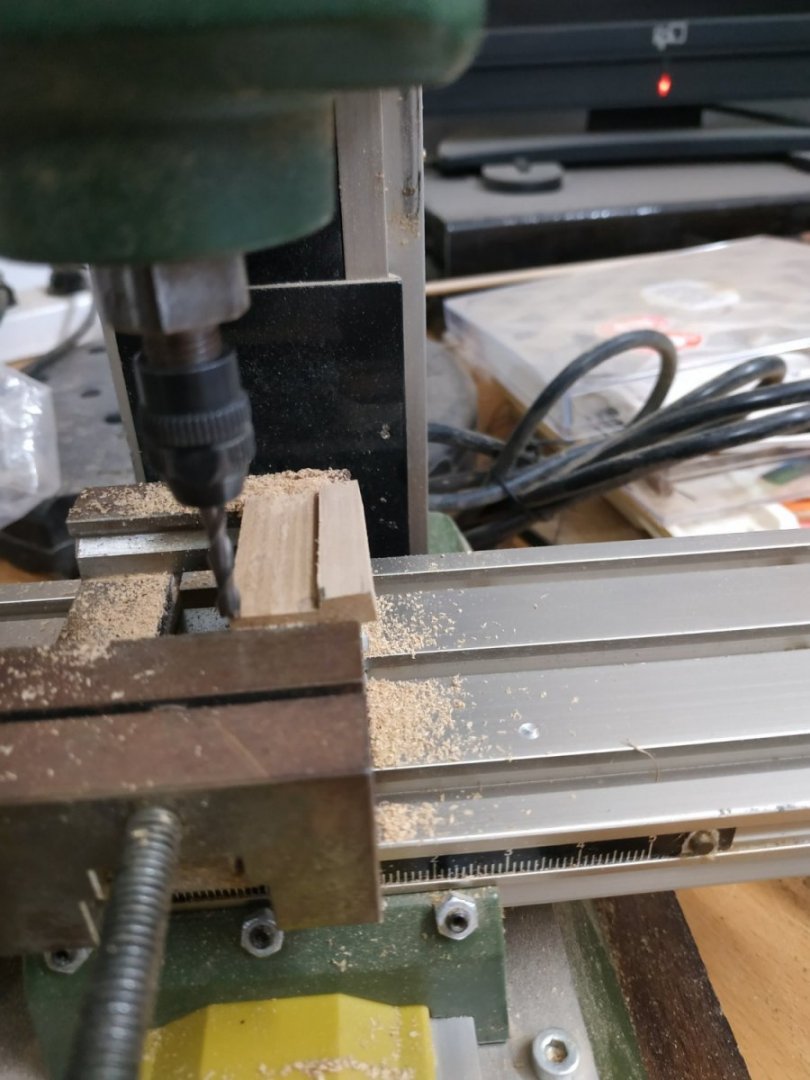

.thumb.jpg.40c9040d9a288d986b9f7c6cb098d7b9.jpg)


-
Swan-Class Sloop by Stuglo - FINISHED - 1:48
stuglo replied to stuglo's topic in - Build logs for subjects built 1751 - 1800
-
Swan-Class Sloop by Stuglo - FINISHED - 1:48
stuglo replied to stuglo's topic in - Build logs for subjects built 1751 - 1800
Capstan Ribs Top of Partner, ring of vertical iron Ribs 4.77x0.8x0.2 mm. Used some sprue which fit the bill almost perfectly. At the base of Barrel is a Spindle- an iron rod 14.31mm long-inserted into matching blind hole-protruding 2.39mm. The rod and hole taper from 2.65 to 2.25 mm- a feature I omitted. There is also a Spindle Plate countersunk into the base- again omitted. (Suffering an attack of laziness)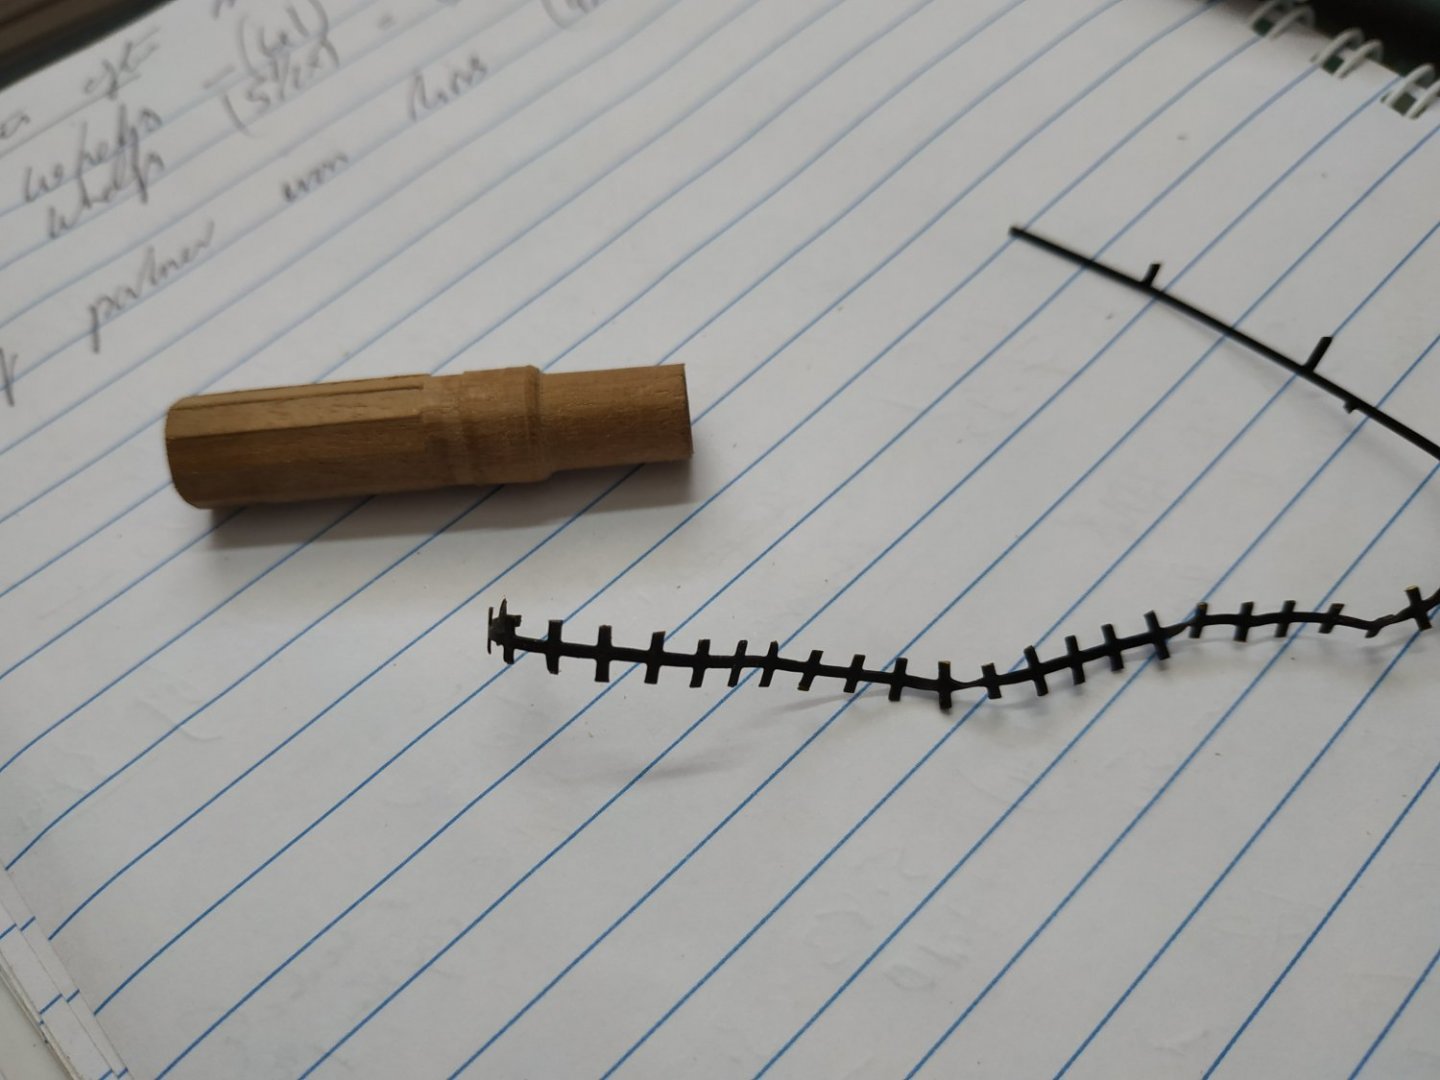
-
Swan-Class Sloop by Stuglo - FINISHED - 1:48
stuglo replied to stuglo's topic in - Build logs for subjects built 1751 - 1800
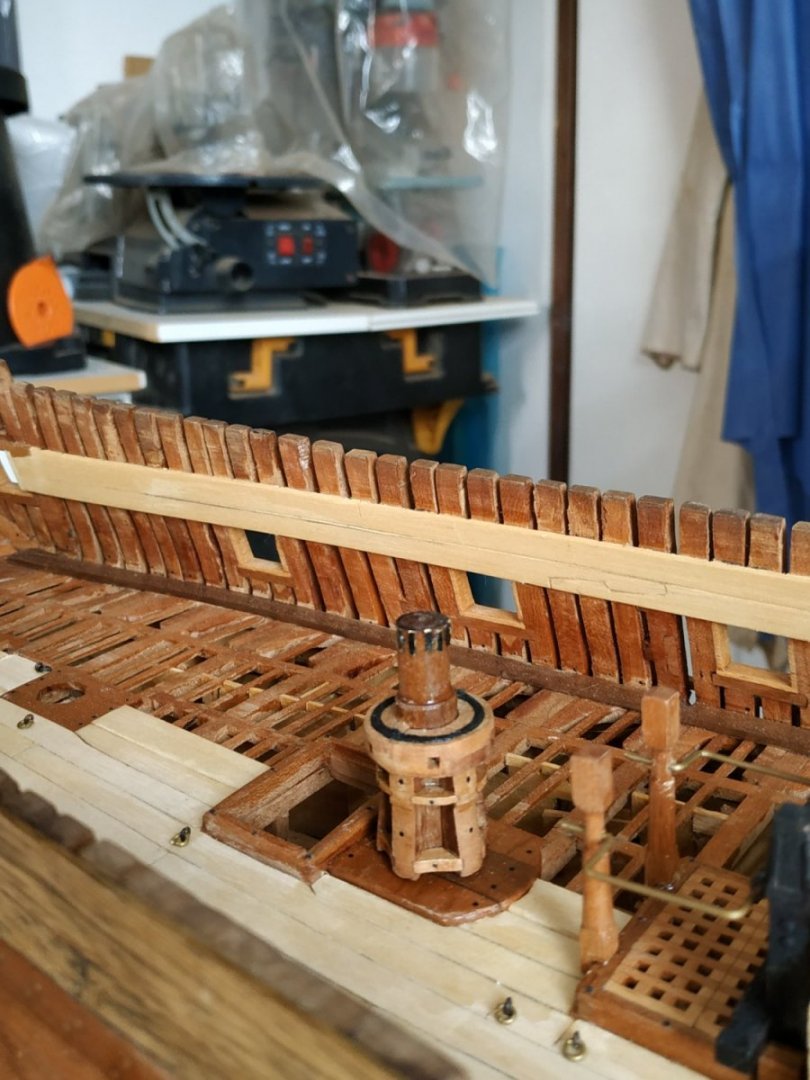
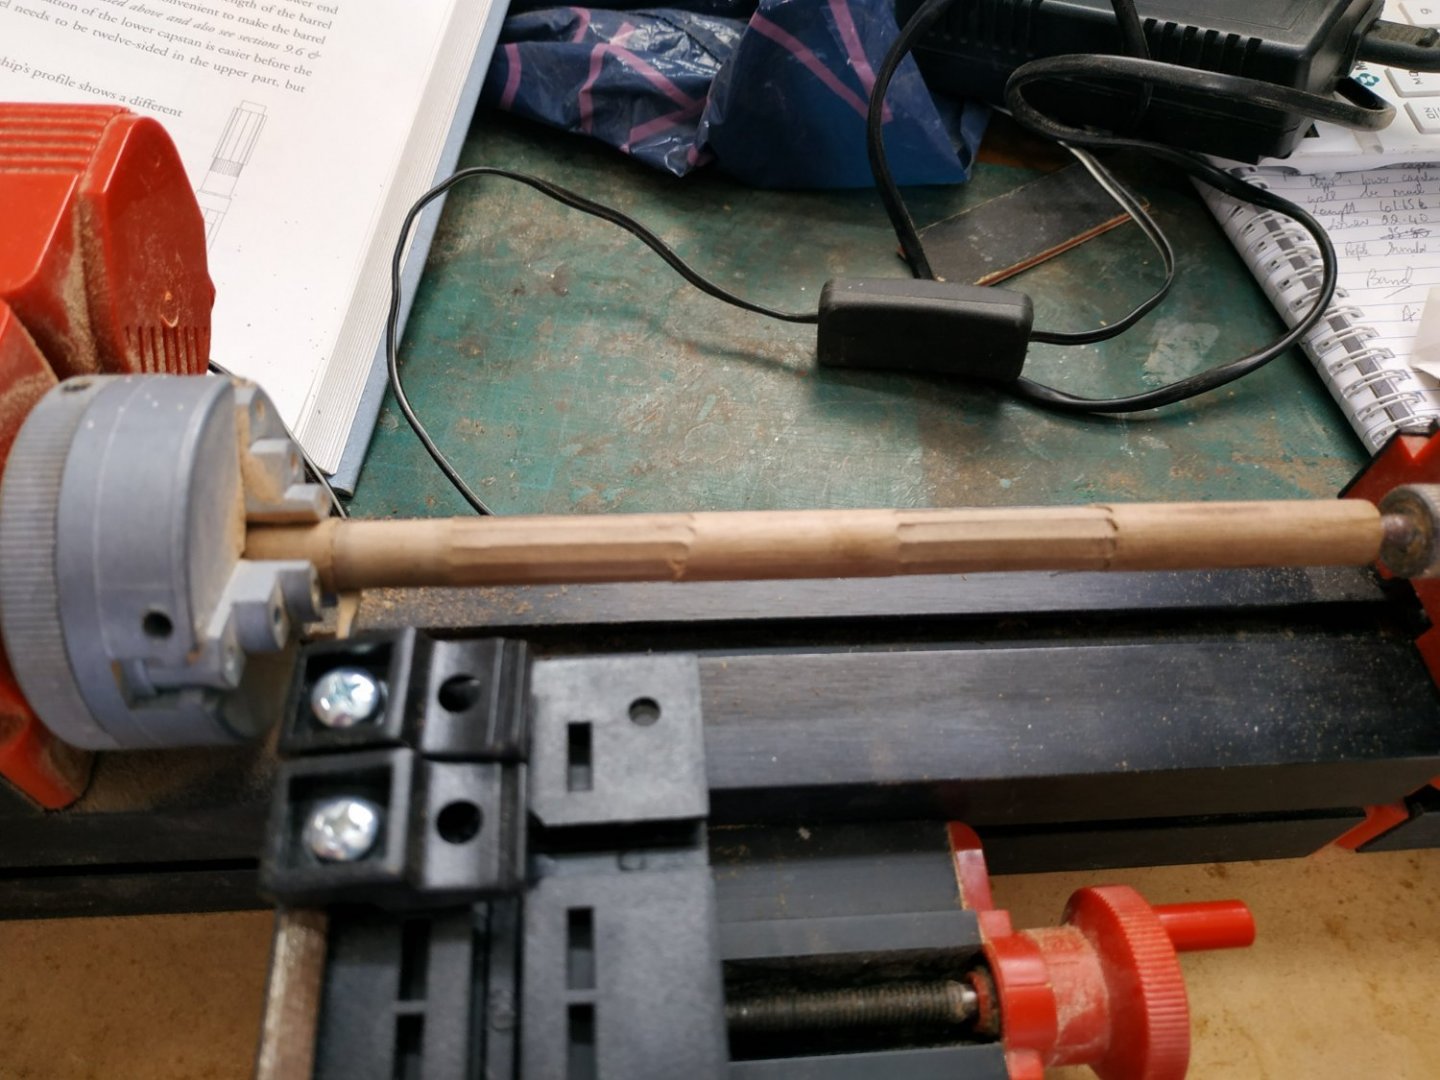
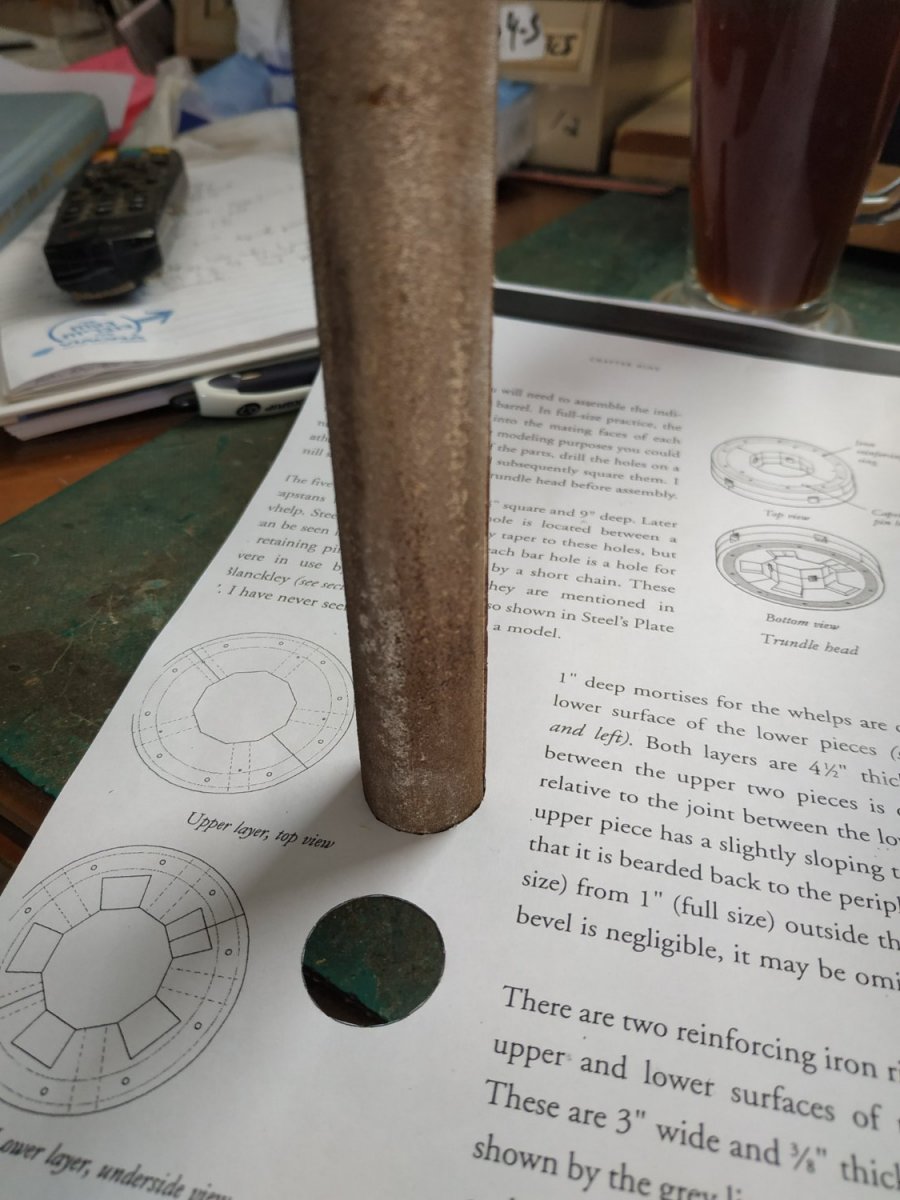
The Capstan. Upper and lower parts built around a central Barrelr. The “Lower” being on the upper deck.The area between them is a Partner Advised to make the Upper capstan separately. Overall length of 61.65 mm. The Barrel has a diameter of 9.54mm- part of the Partner is 7.95mm The Upper Capstan is 23.4mm long plus a Tenon 3.31 Mm height and 5.85mmsq. The Lower Capstan is 22.40mm long plus Parner The Upper Capstan is 12 sided, the Lower 10 sided. Attached to the Capstan Are Whelps. The side against the Barrel, is 3.15mm thick-The Upper is 2.92mm. They are let down by 0.53mm (A fact I noticed only after I finished this stage) Turning a rod to 9.54. I set it in the DIVIDING attachment for the Proxxon Mill. This allows both fixed and moving rotation (horizontal and vertical) with accuracy of less than a degree. Upper section, 12 sides- each with rotation of 30deg. Lower section, 10 sides- each with rotation of 36deg Using a 3mm Mill bit, these sides are easily made to the lengths required. The whole can be transferred back for turning the narrowed part (7.95mm) of the Partner. A “collar” was chamfered at the transition area. The Upper Capstan separated from the whole. The aforementioned Tenon, made with the piece upright in the mill.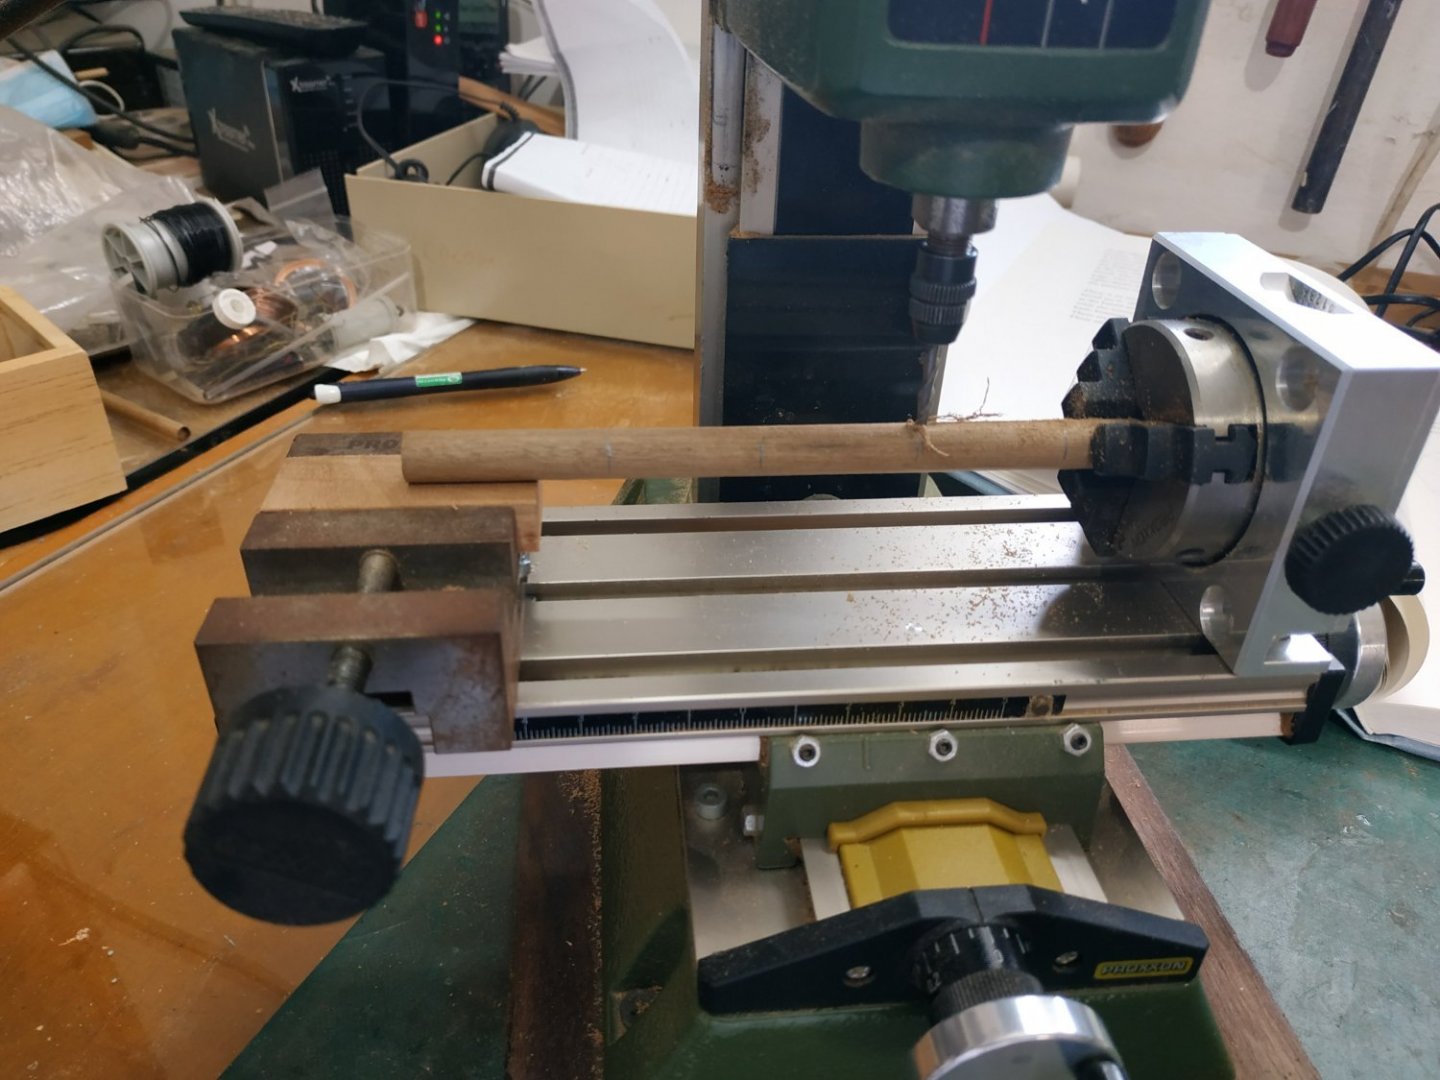
-
Swan-Class Sloop by Stuglo - FINISHED - 1:48
stuglo replied to stuglo's topic in - Build logs for subjects built 1751 - 1800
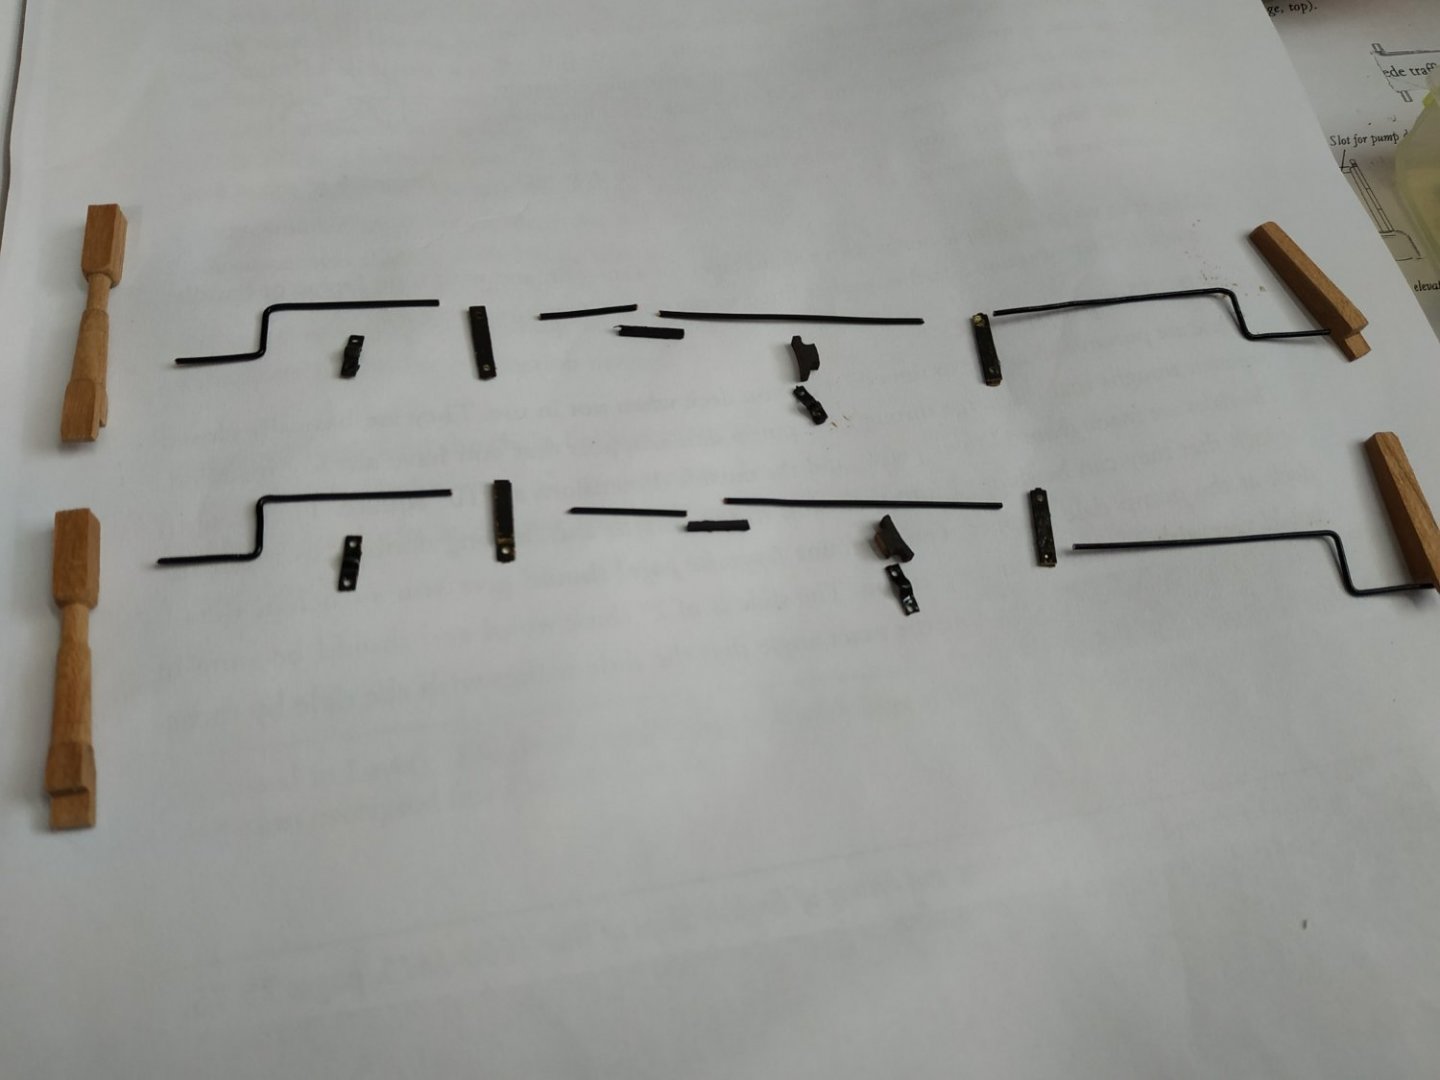
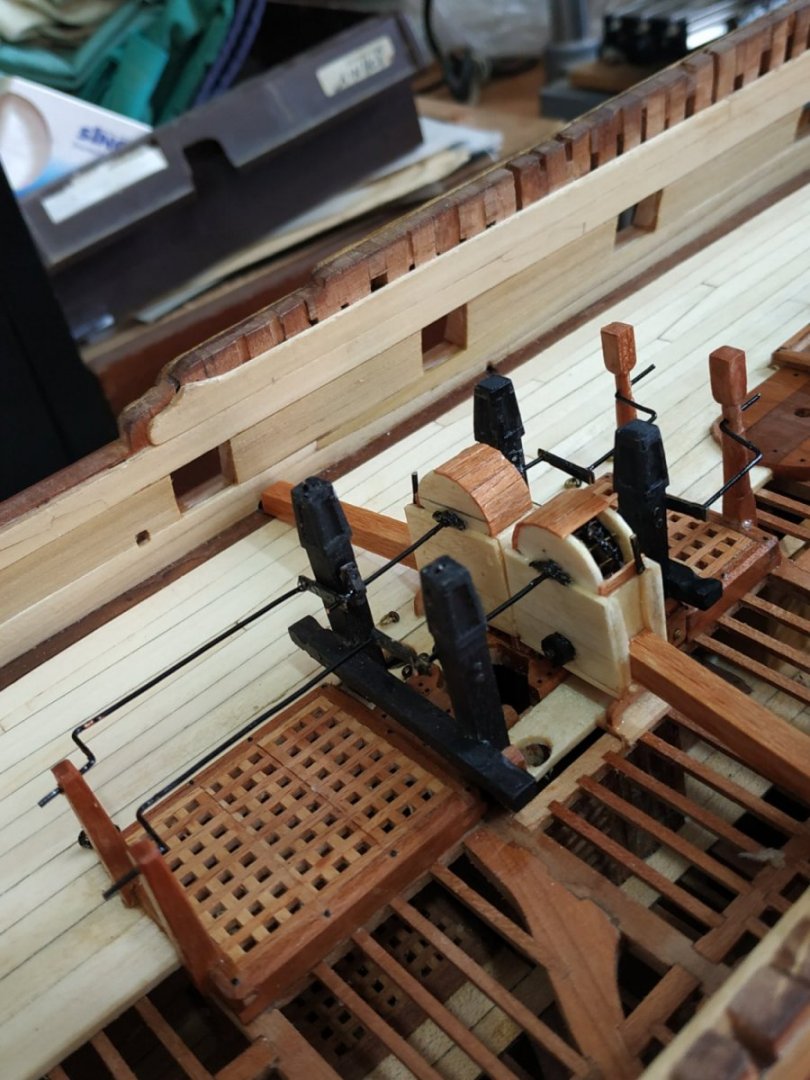
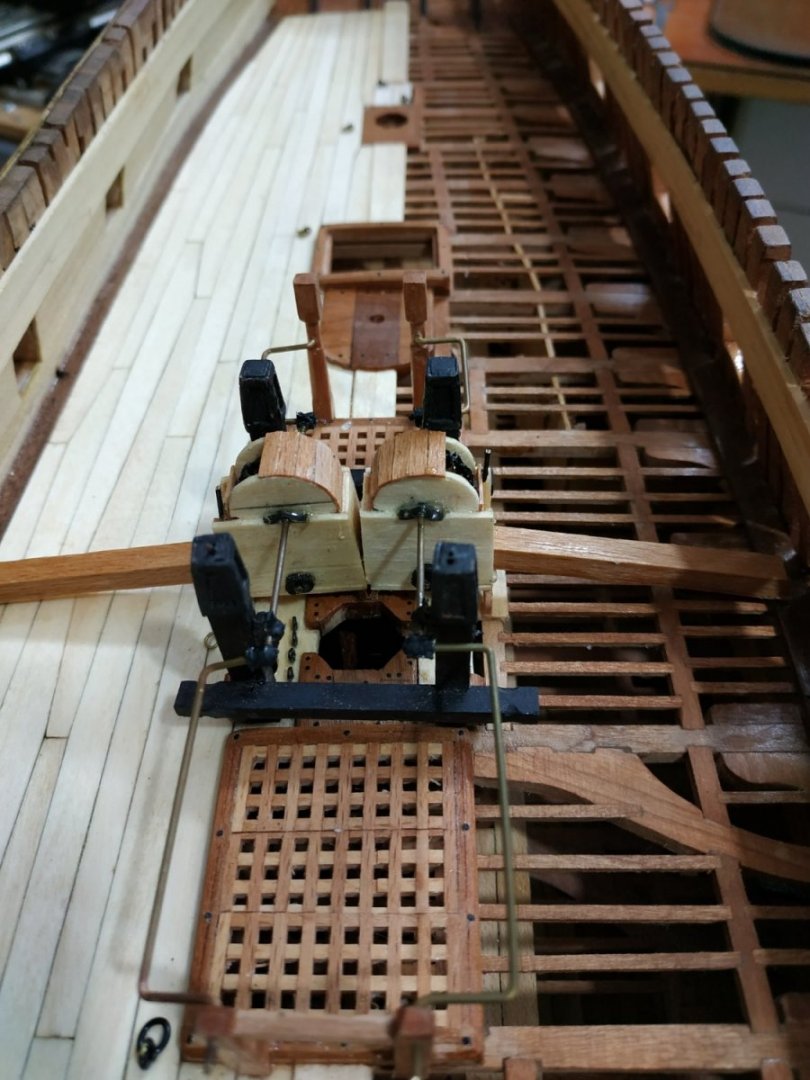
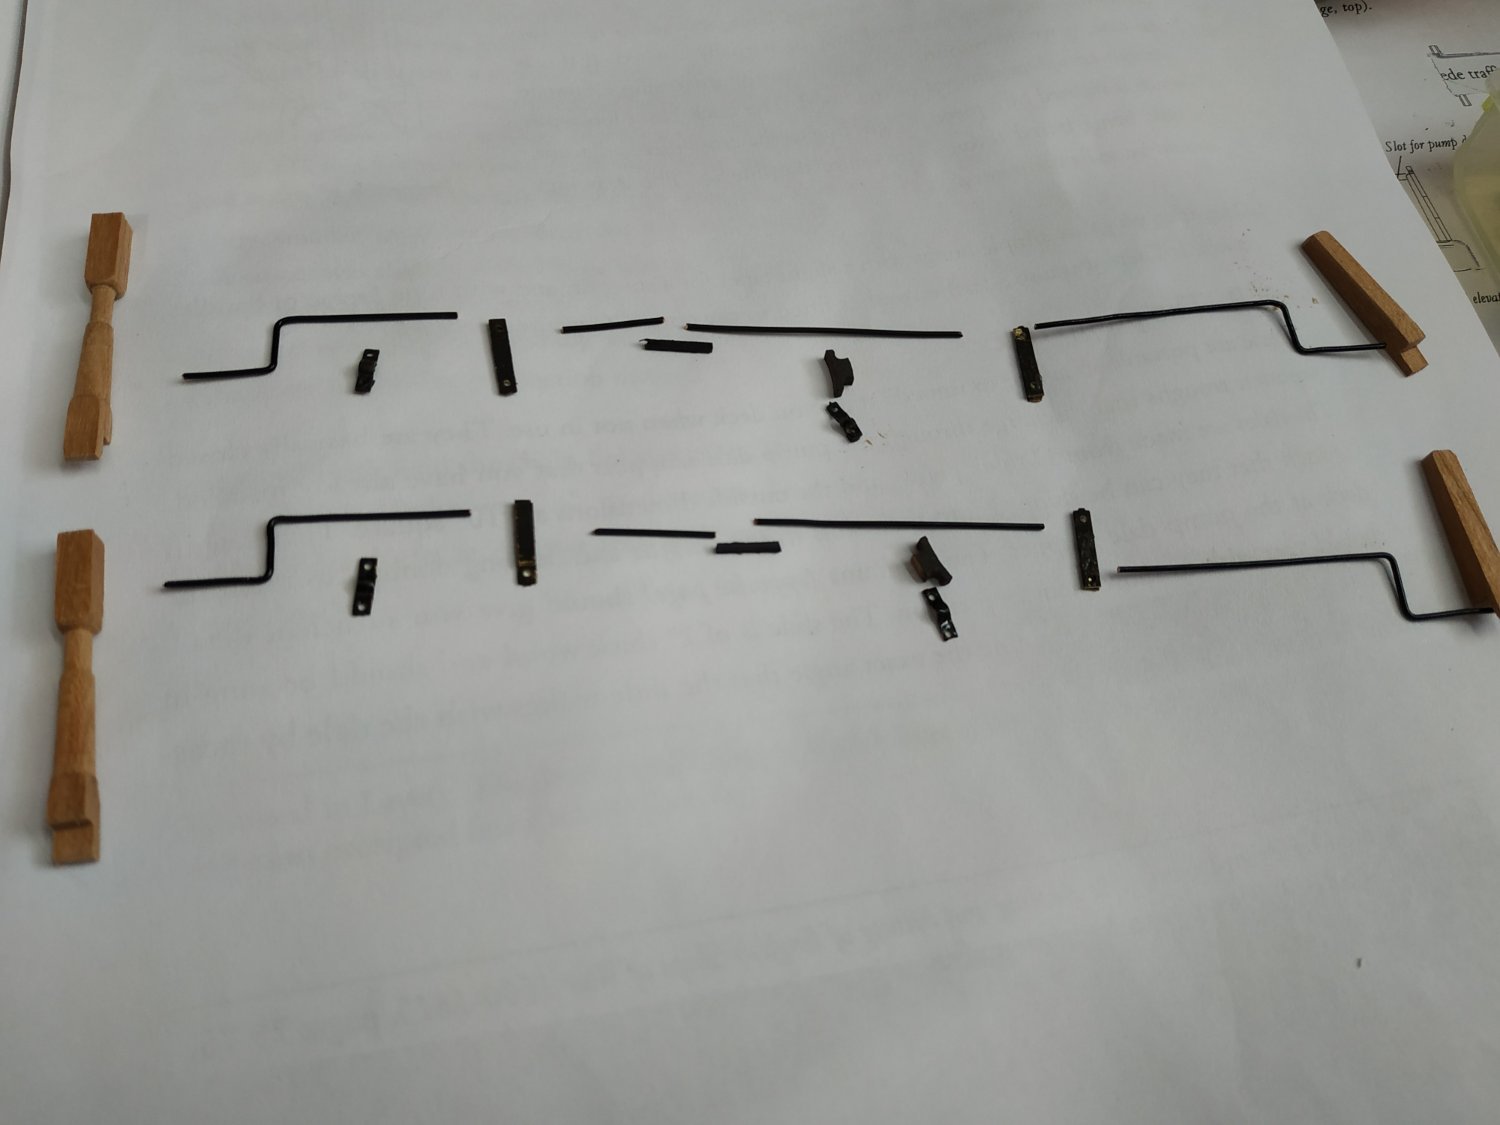
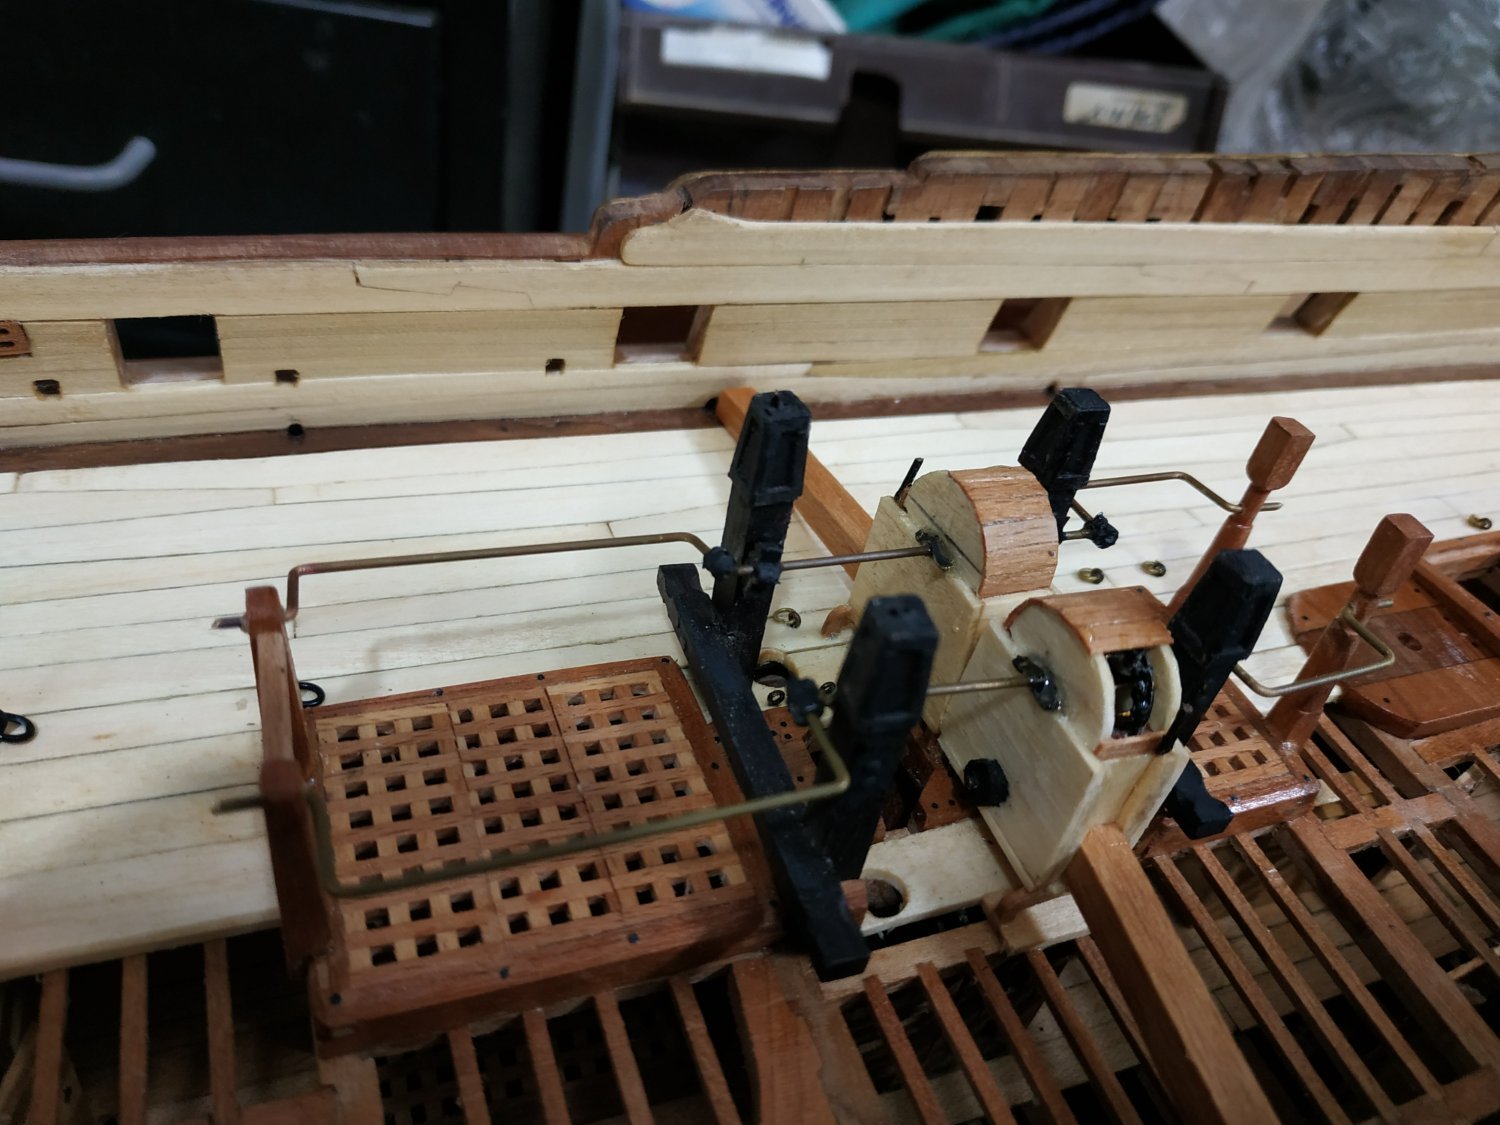
Upper Deck Bolts There are various deck Bolts - Fit these now because access after completion of Axel Trees and Winches is very limited. They are shown on the decking patterns and in ch.9 for those on the Main Mast Partners. AxelTrees and Winches. Can’t find the diameter of these, but if the Rhodings have an inner diameter of 0.8mm, presumably slightly less than this. Tried to use coated copper wire, but after several attempts, the result was unsatisfactory. It is difficult to keep them straight, with all the handling the build requires. I also found my attempts at fabricating the couplings were unsatisfactory. For my last attempt, I used a 0.95mm ?brass rod - more rigid- bending them to 90deg. For the couplings, and making only one joint between the winch and AxelTrees, where it is shown to be enlarged and square. Couldn’t replicate it, so used some tiny barrel shaped bits of soft metal, and drilled holes at right angles. Holding the parts in place while glue dried was very frustrating. Making the whole “off”model and then fixing was tried and failed. Perhaps shortening the Sprocket wheel spindle would allow the winch handles to move into the Cistern Hood while maneuvering the whole into position. I WOULD BE MOST APPRECIATIVE IF SOMEONE CAN ADVISE ME. For the Rhodings, I used some Capsquares from my spares box. The Rhodings on the Main Topsail Bit require a spacer as these Bitts are more widely spaced. (A most frustrating and unsatisfying few days. Next on the build list, is the Capstan. That should really be a test- but at least it's wood!)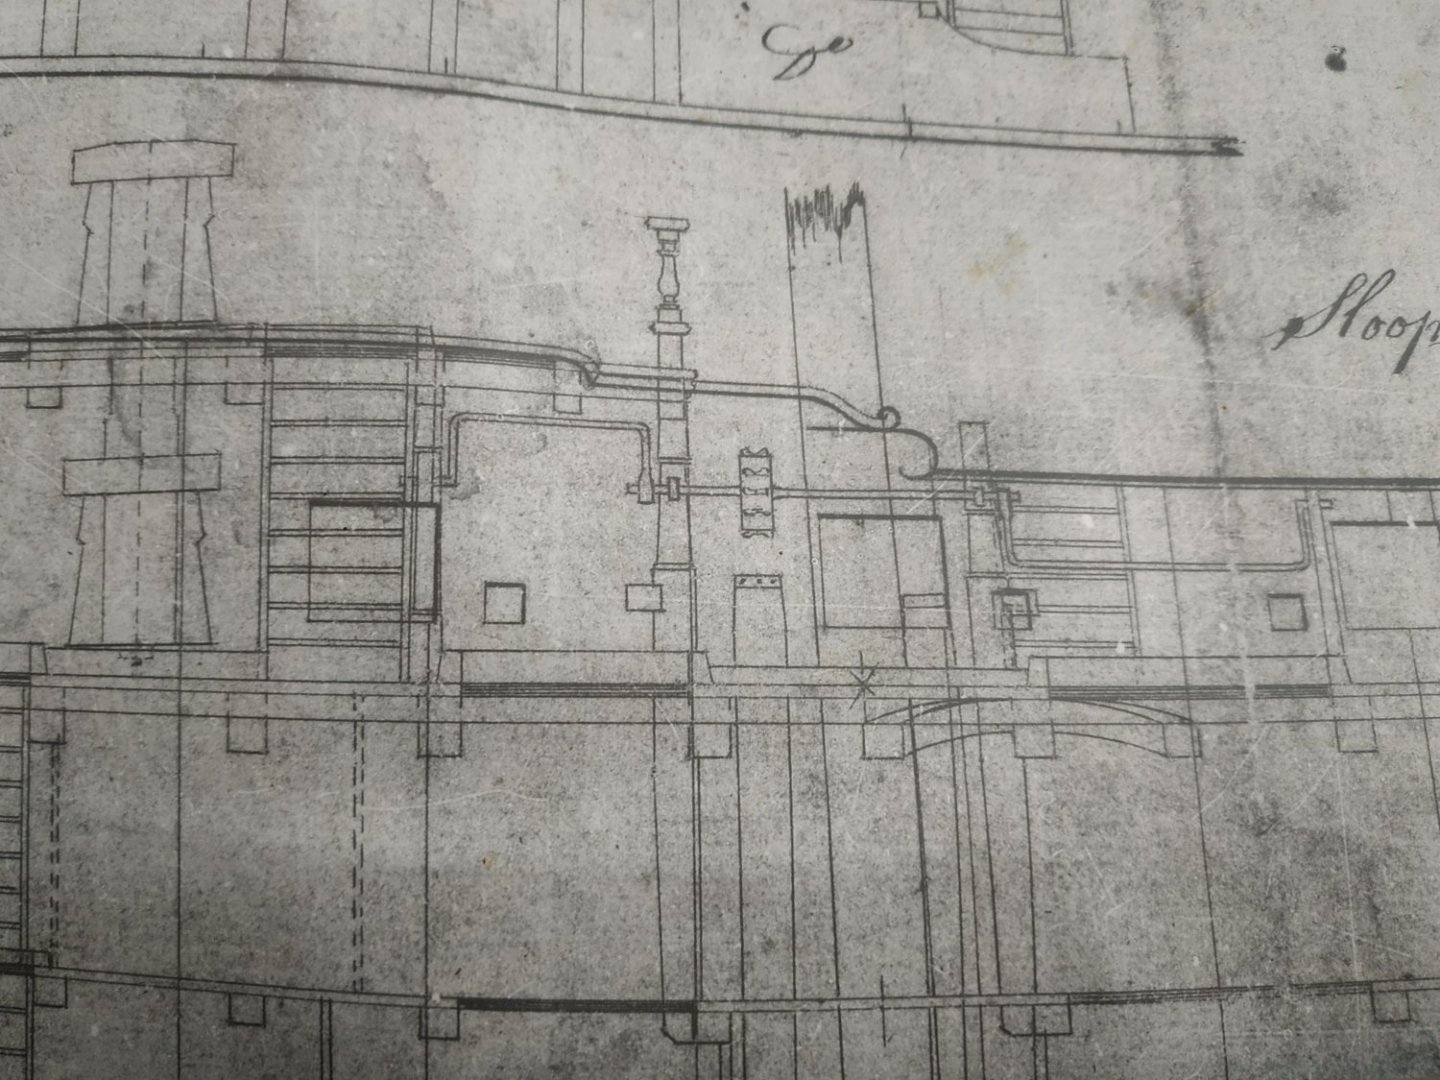

- 475 replies
-
- 12
-
-

-
In my last few posts, most of the pictures appear "sideways". It doesn't happen elsewhere. I've tried turning before loading to no effect. Perhaps coincidence, but a few weeks ago, I had difficulties uploading certain pictures. Nothing in my hard or software has changed. Any ideas apart from looking "askance".
-
Swan-Class Sloop by Stuglo - FINISHED - 1:48
stuglo replied to stuglo's topic in - Build logs for subjects built 1751 - 1800
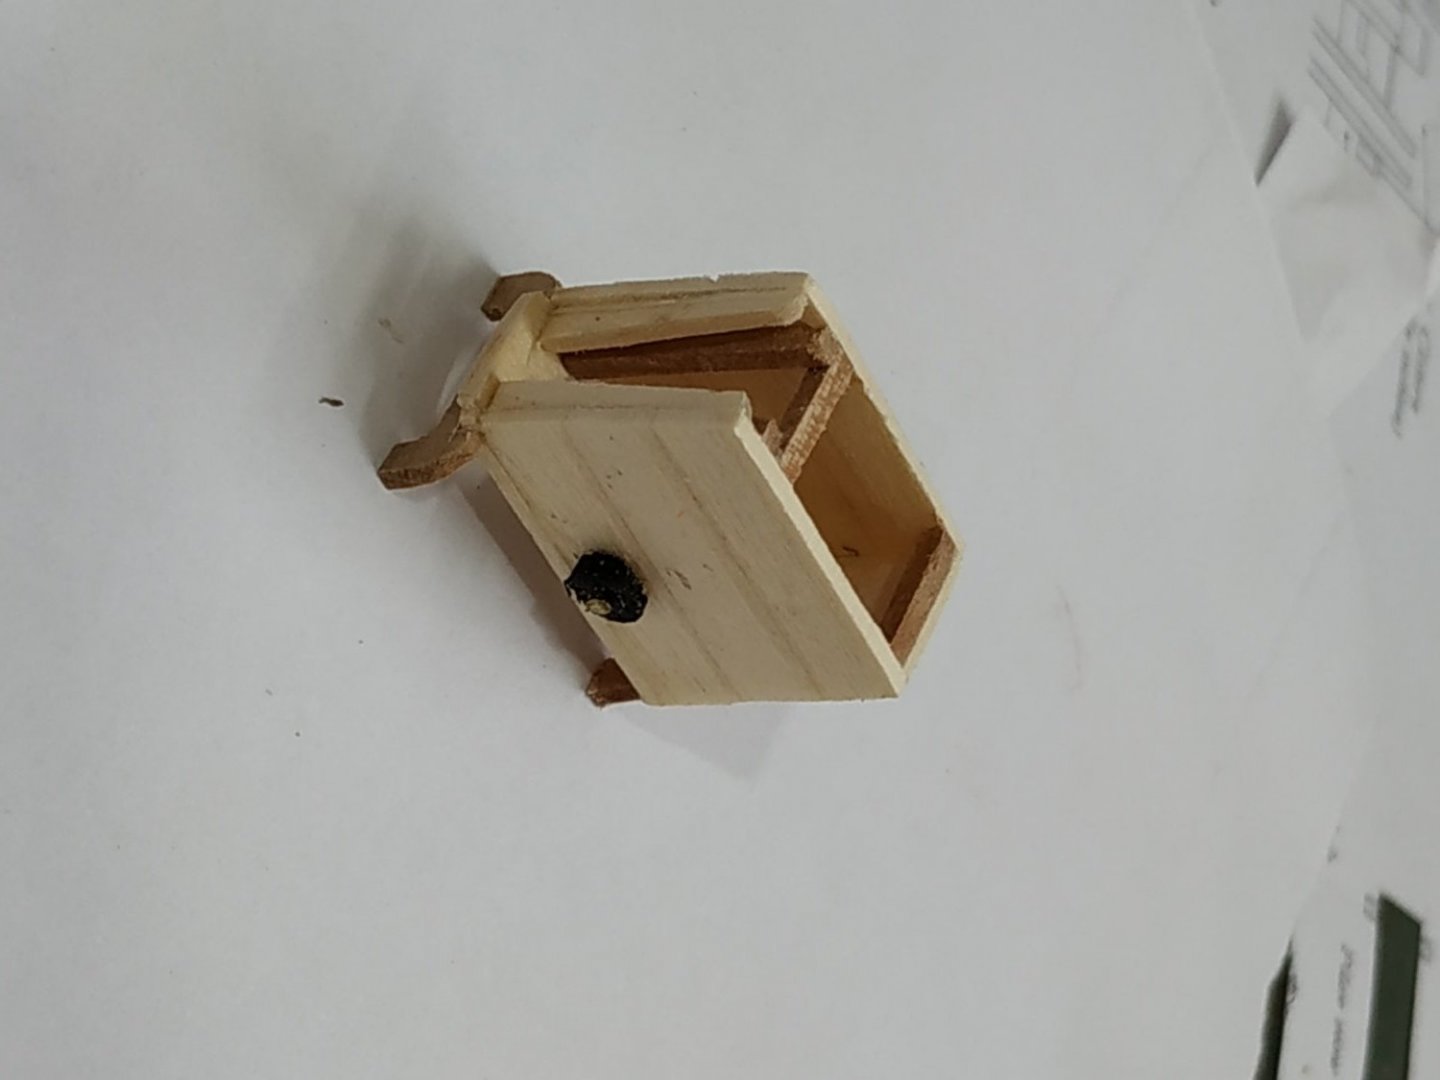
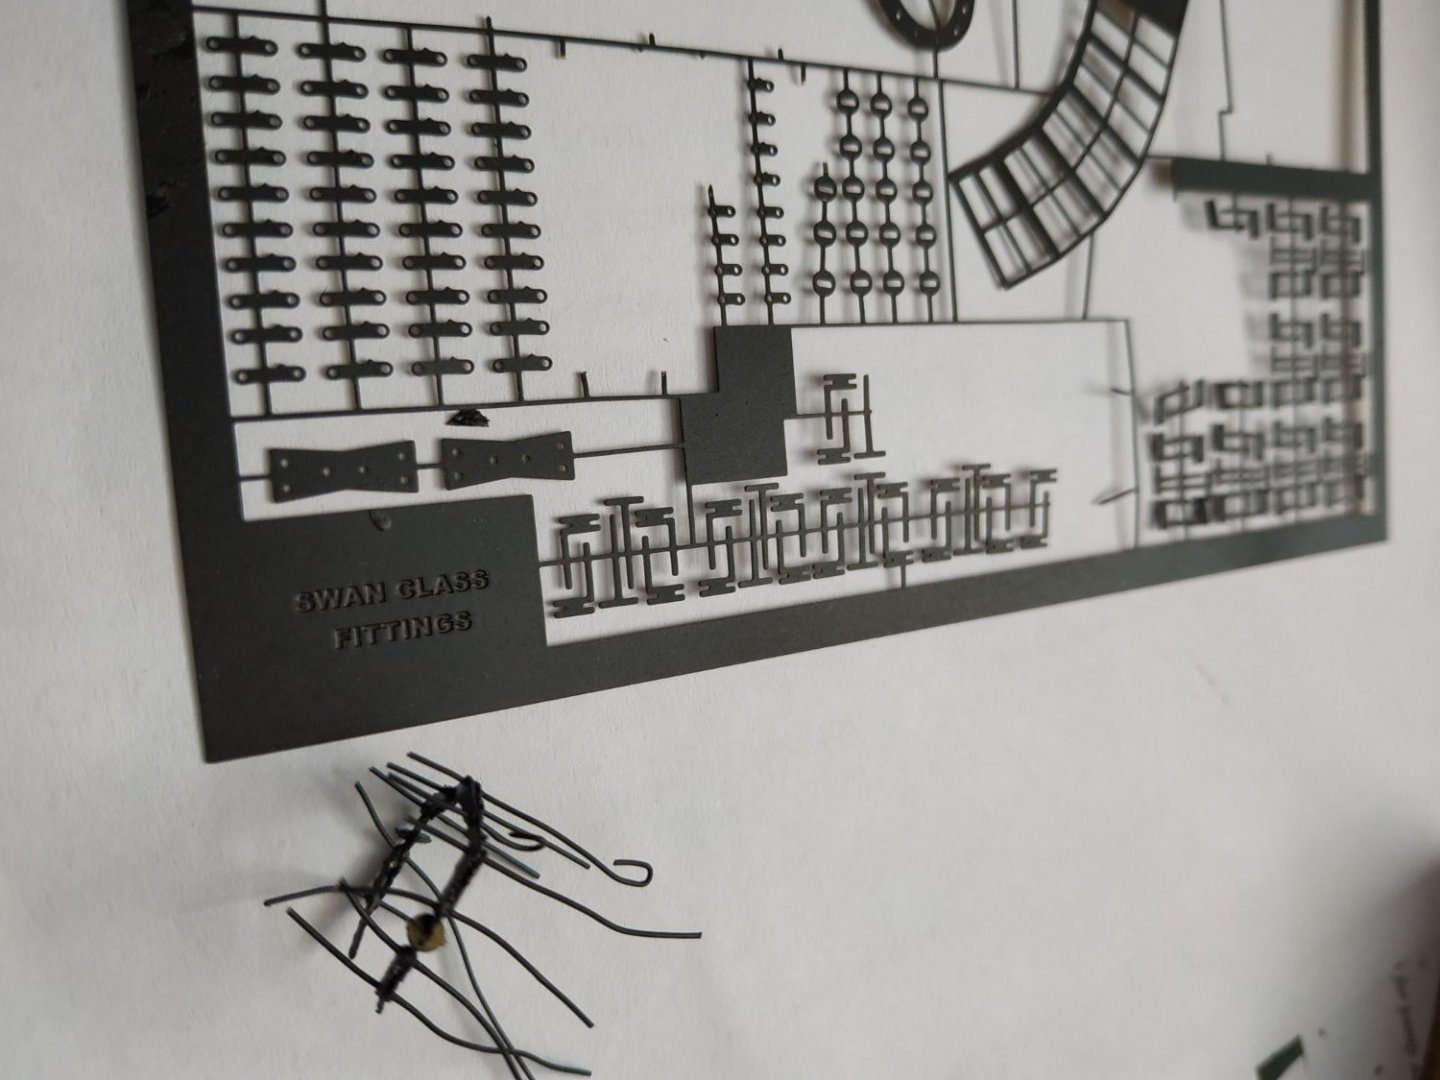
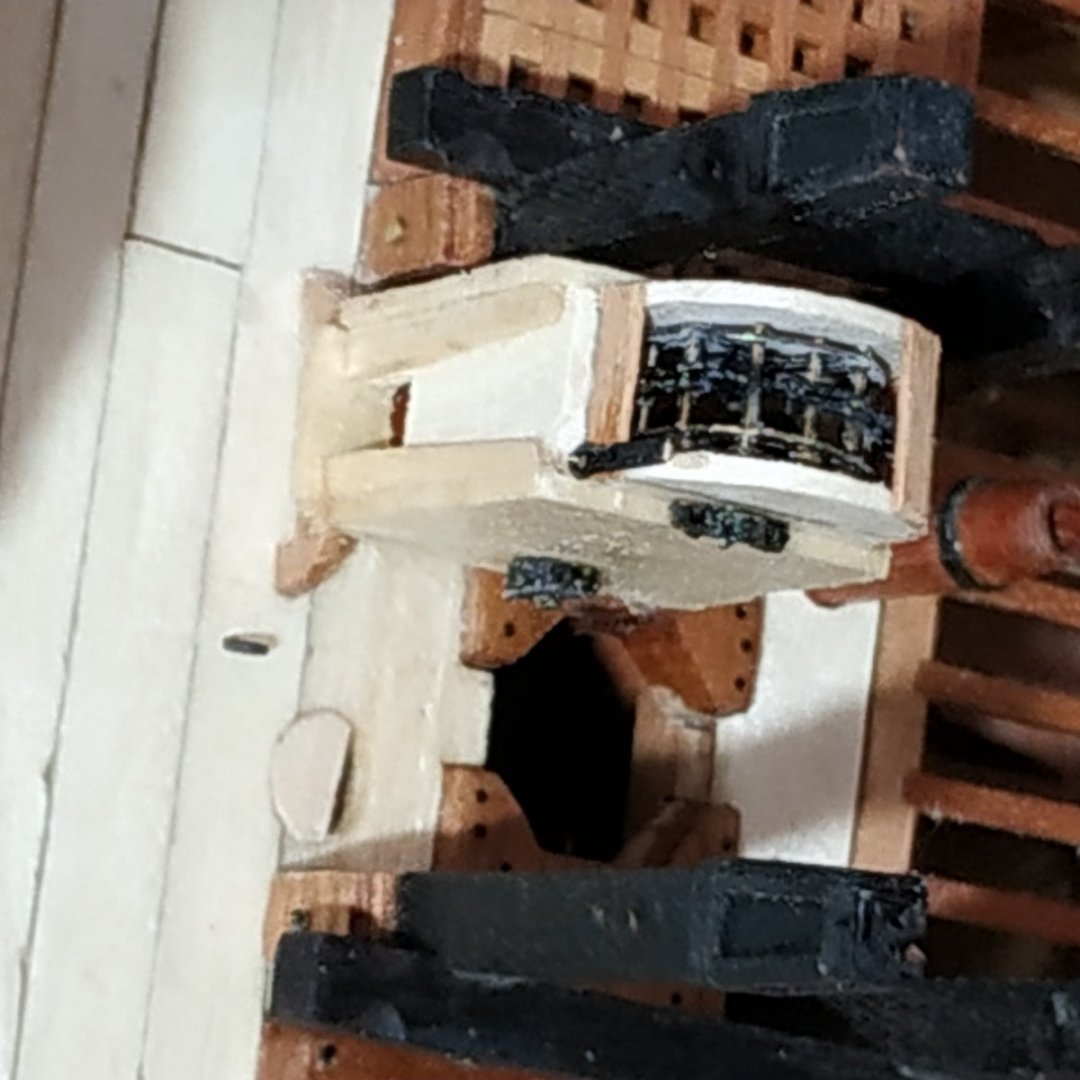
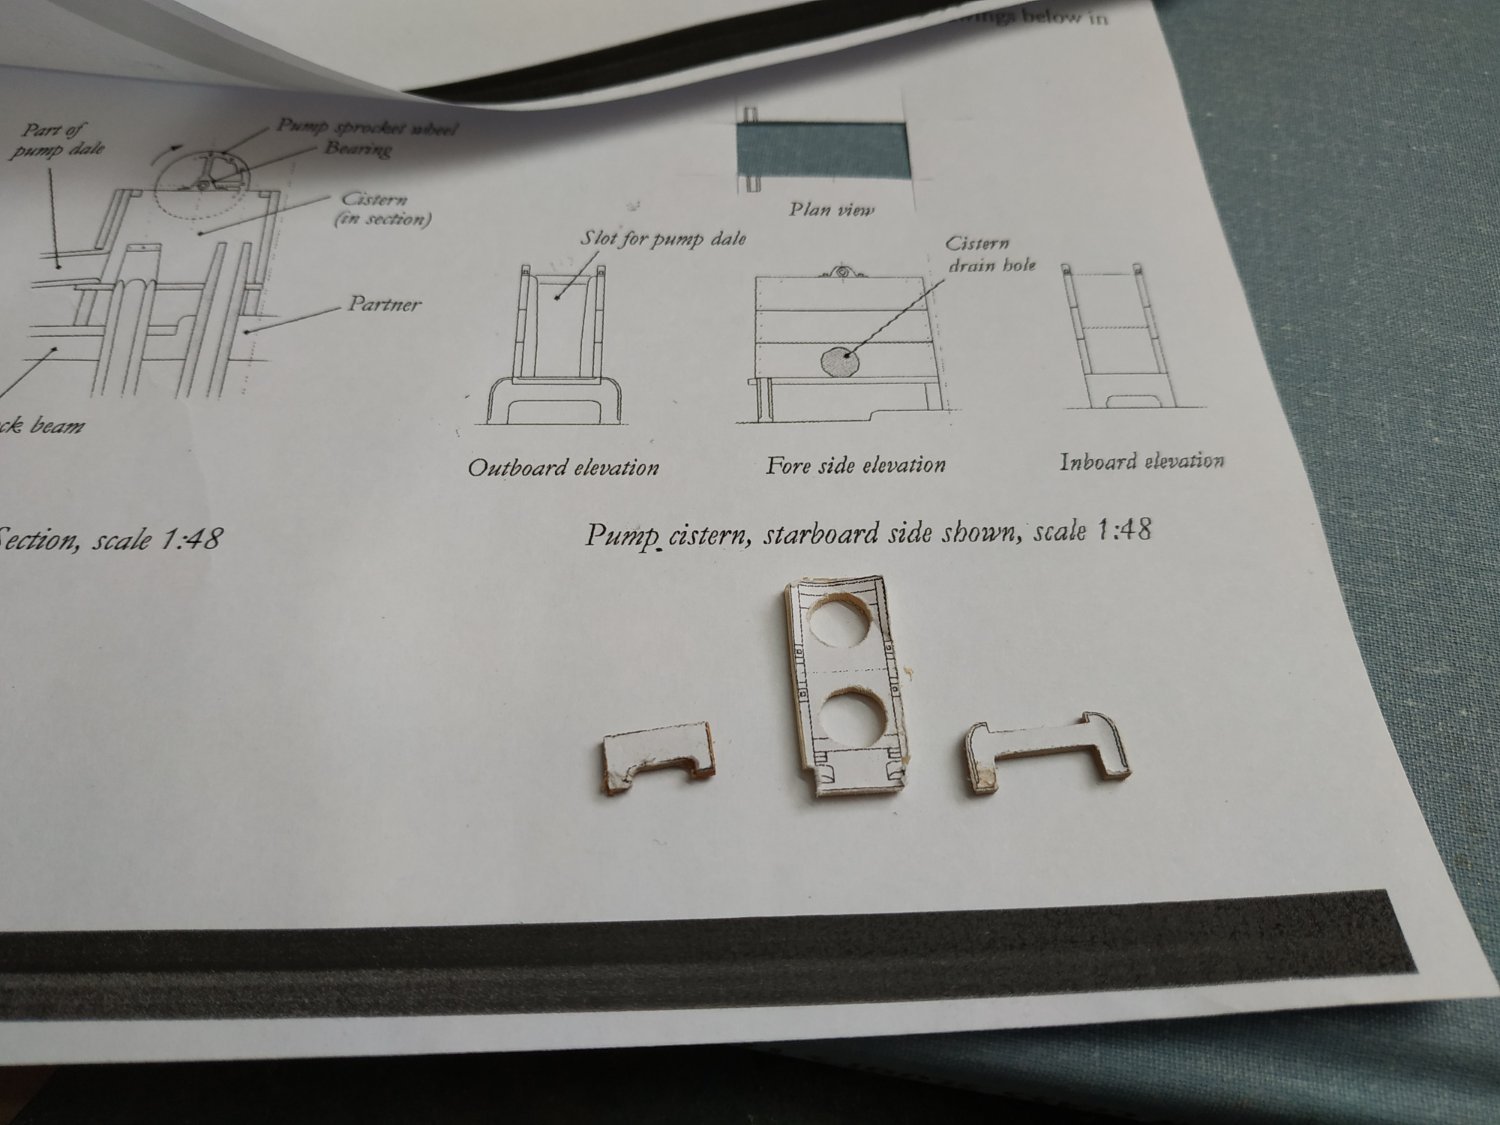
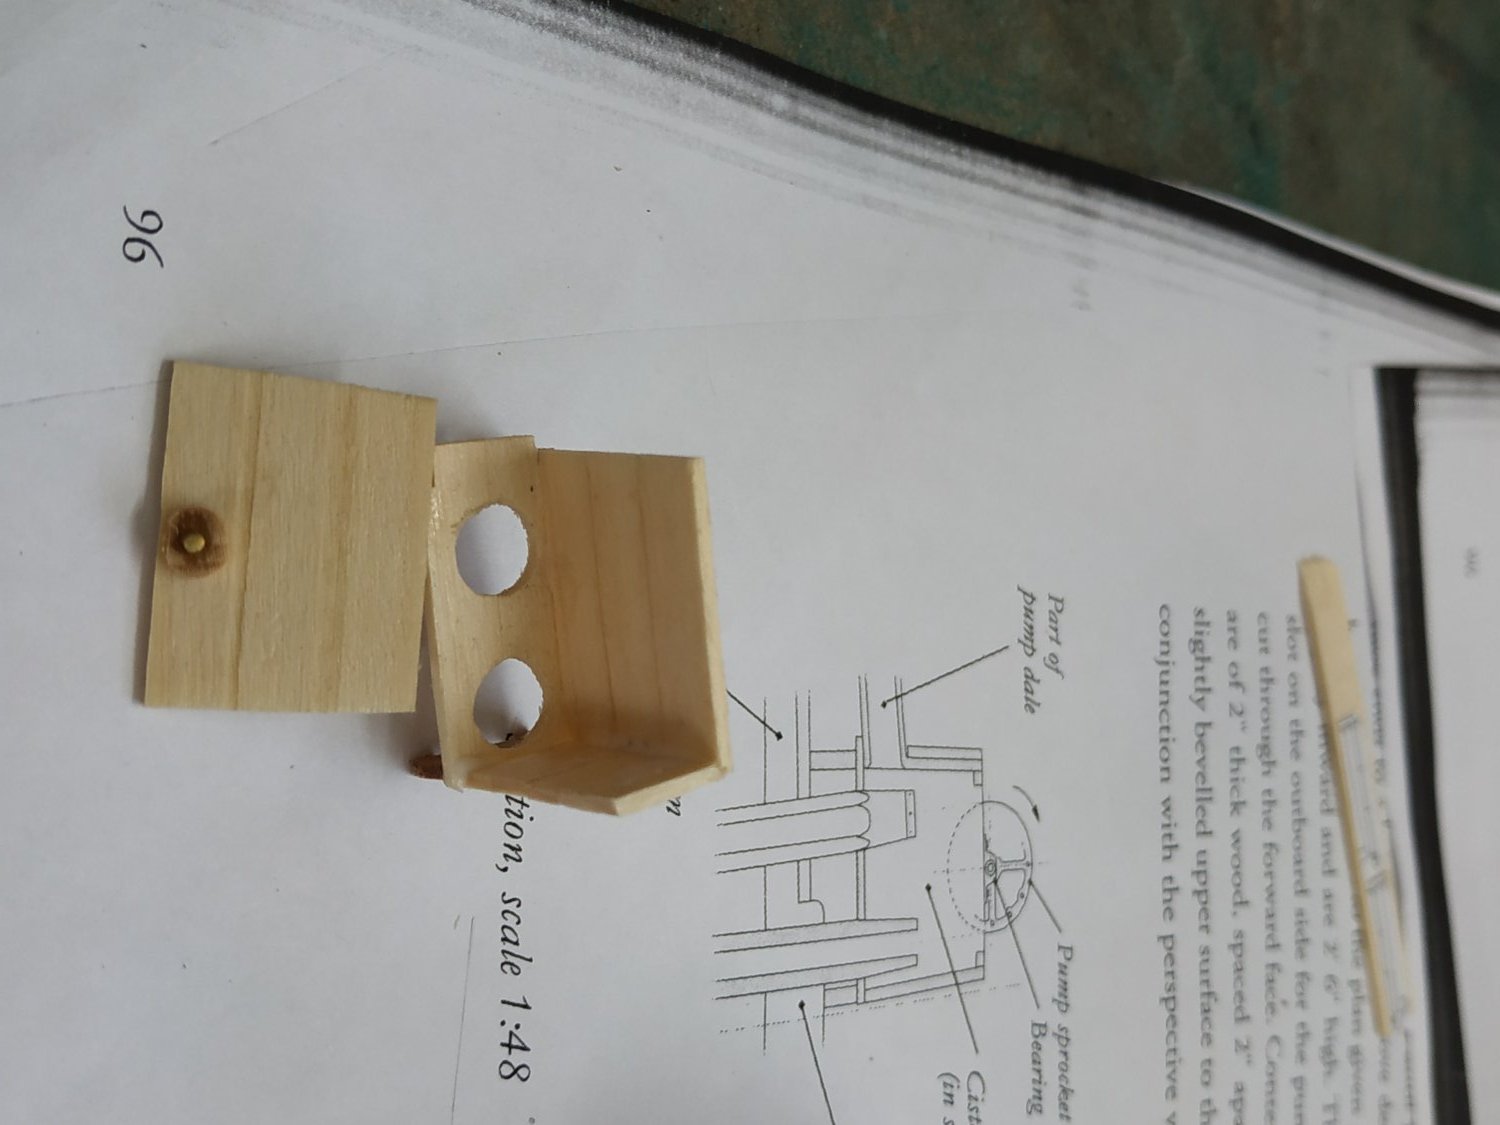
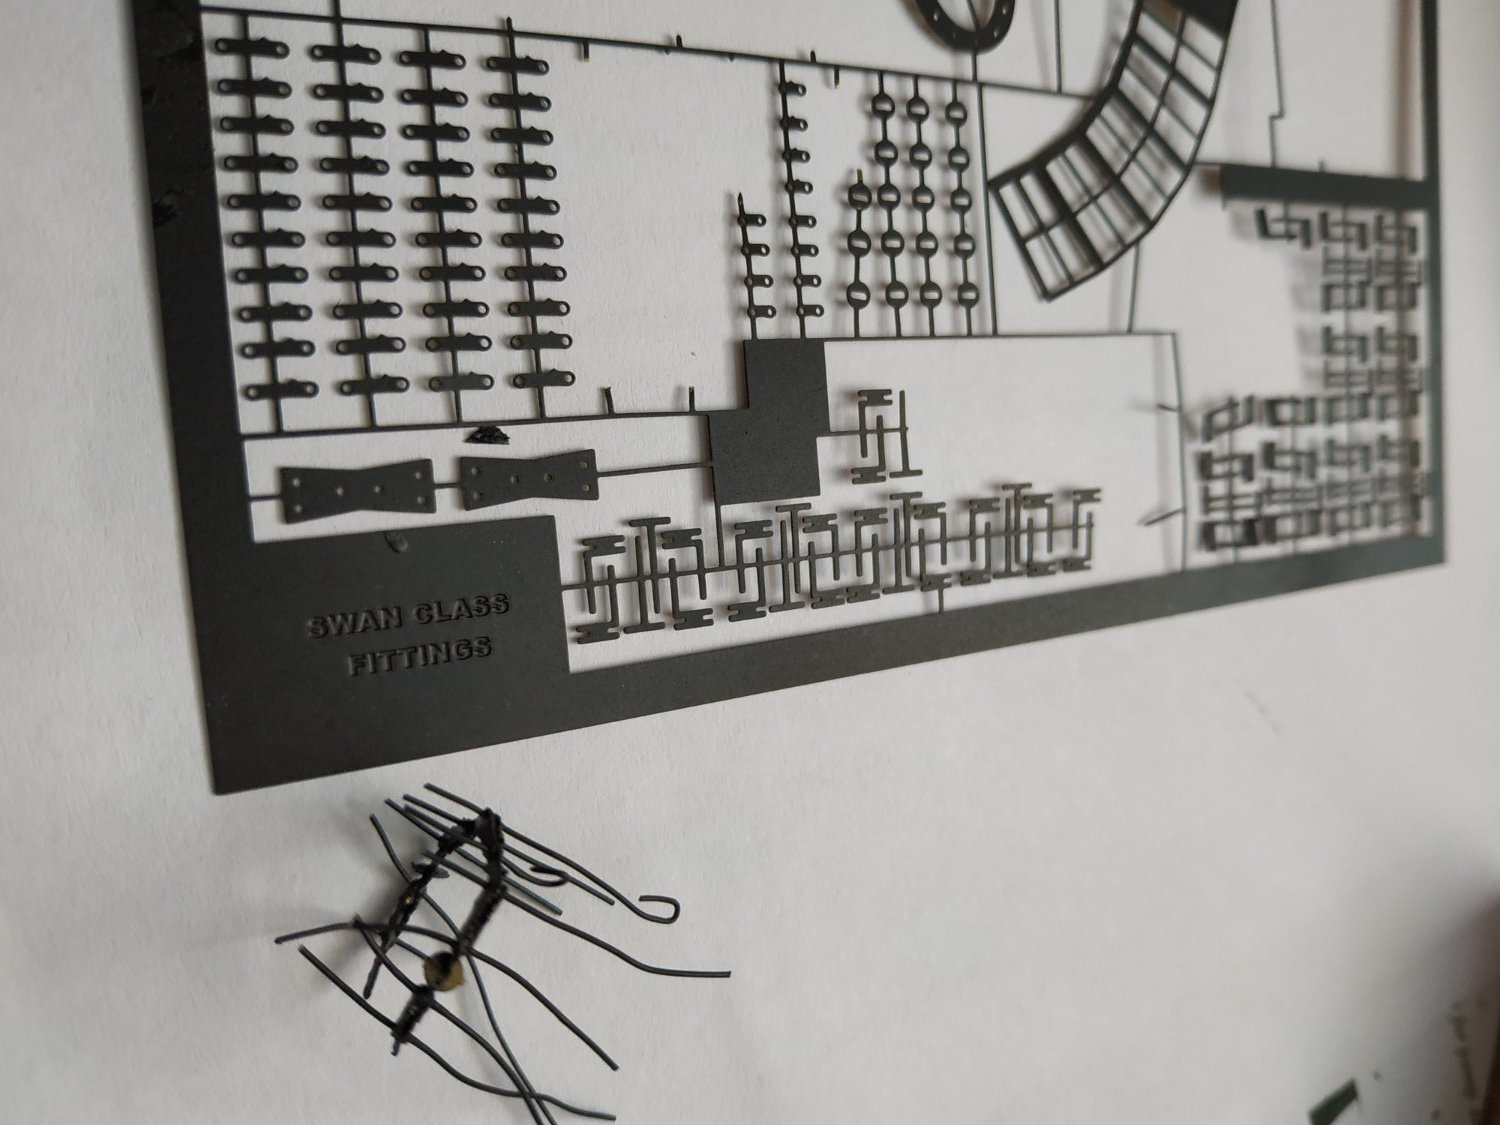
Chain Pump Head Gear The Cisterns. These are wooden boxes covering the Chain Pumps where they protrude through the deck. They sit on curved legs-the inboard which are shorter as they rest on the Main Mast Partner. The base is 1.06mm with holes for the tubes.It should sit 5.83mm above the planks.There is little room for the inwards as the port and starboard Cisterns are “back to back”. The pair of sidewalls are formed by planks of similar thickness.The ends taper slightly inwards. The height is 15.9, the length and width to fit the Base The inboard end is similarly made,and closes the rear of the box. The outboard end is partially open with a shaped pair of “doorposts” tapering upwards. This allows a square drainage tube, the Pump Dale, to fit between. To the side and above the Dale where it enters the Cistern, is a Slide, which is the same hight as the other walls. Behind the Slide, is another pair of “door posts” to hold it in place. These, as well as cross-bracing pieces at both ends, are 1.6mm Overall widths and heights are given for the assembly, 10.6mm and the top edge is maximum 43mm above the deck. This meant some shortening of the legs in my build. On the fore side us a circular DrainHole 4.77. After several failed attempts to drill and file this out, I made the plug and pinned it into position. The Cistern Hood. Semicircular sides, again 1.06 width, fit within the cistern walls. The ends are notched and rest on the Cistern cross pieces. At the lower center on both sides are cut outs to allow the Spindle of the Sprocket wheel to pass through. The Top to be fitted after the Sprocket Wheel. Sprocket Wheel. Suddenly remembered that there were bits on my photo-etched sheet that were for this purpose. The 2 disks are separated by 12 bolts, for which I used particularly thin pins I happened to have. They extend outside the disk by 0.5mm. The whole assembly fitting snugly within the Cistern Hood. CHECK BEFORE GLUING. The spindle itself was 1.6mmsq wood, long enough to support the Wheel on the Cistern side walls. The chain also was made from the pieces on the photo-etched sheet. They consist of thin plates (Links) bolted in pairs, and connected by a 3rd plate between them . Sort of 2-1-2-1-2 formation. For bolts,.25mm, I used copper wire, trimmed after gluing. I cannot solder at any scale, especially this, so I used Cyano super glue. There is fitted a disc, representing a leather washer or Saucer, on a single link every 19mm or so. I did not attempt threading the links down the pump tubes. Rather draped it across the Sprocket Wheel. The Cistern Hood was partially covered to display this mechanism. It was apparently a real feature. The covering slats are 0.4 boards. A vertical metal tongue works a latch to allow this partial opening.

-
Swan-Class Sloop by Stuglo - FINISHED - 1:48
stuglo replied to stuglo's topic in - Build logs for subjects built 1751 - 1800
TFFM- The Fully Framed Model It's time again to give thanks to these volumes and their author David Antscherl. To me, and others, it is an essential base for scratch building model ships in general, and the Swan Class in particular. It isn't just a “how to”, but an education in the vocabulary and often history of the details of ship building as was, and modern model making. Not only is it enjoyable to read and learn, but it makes it possible for someone like myself, with little artistic talent and craftsmanship, to produce something that I could only dream of, when reading the books and blogs of modelmakers. Thank you. -
Swan-Class Sloop by Stuglo - FINISHED - 1:48
stuglo replied to stuglo's topic in - Build logs for subjects built 1751 - 1800
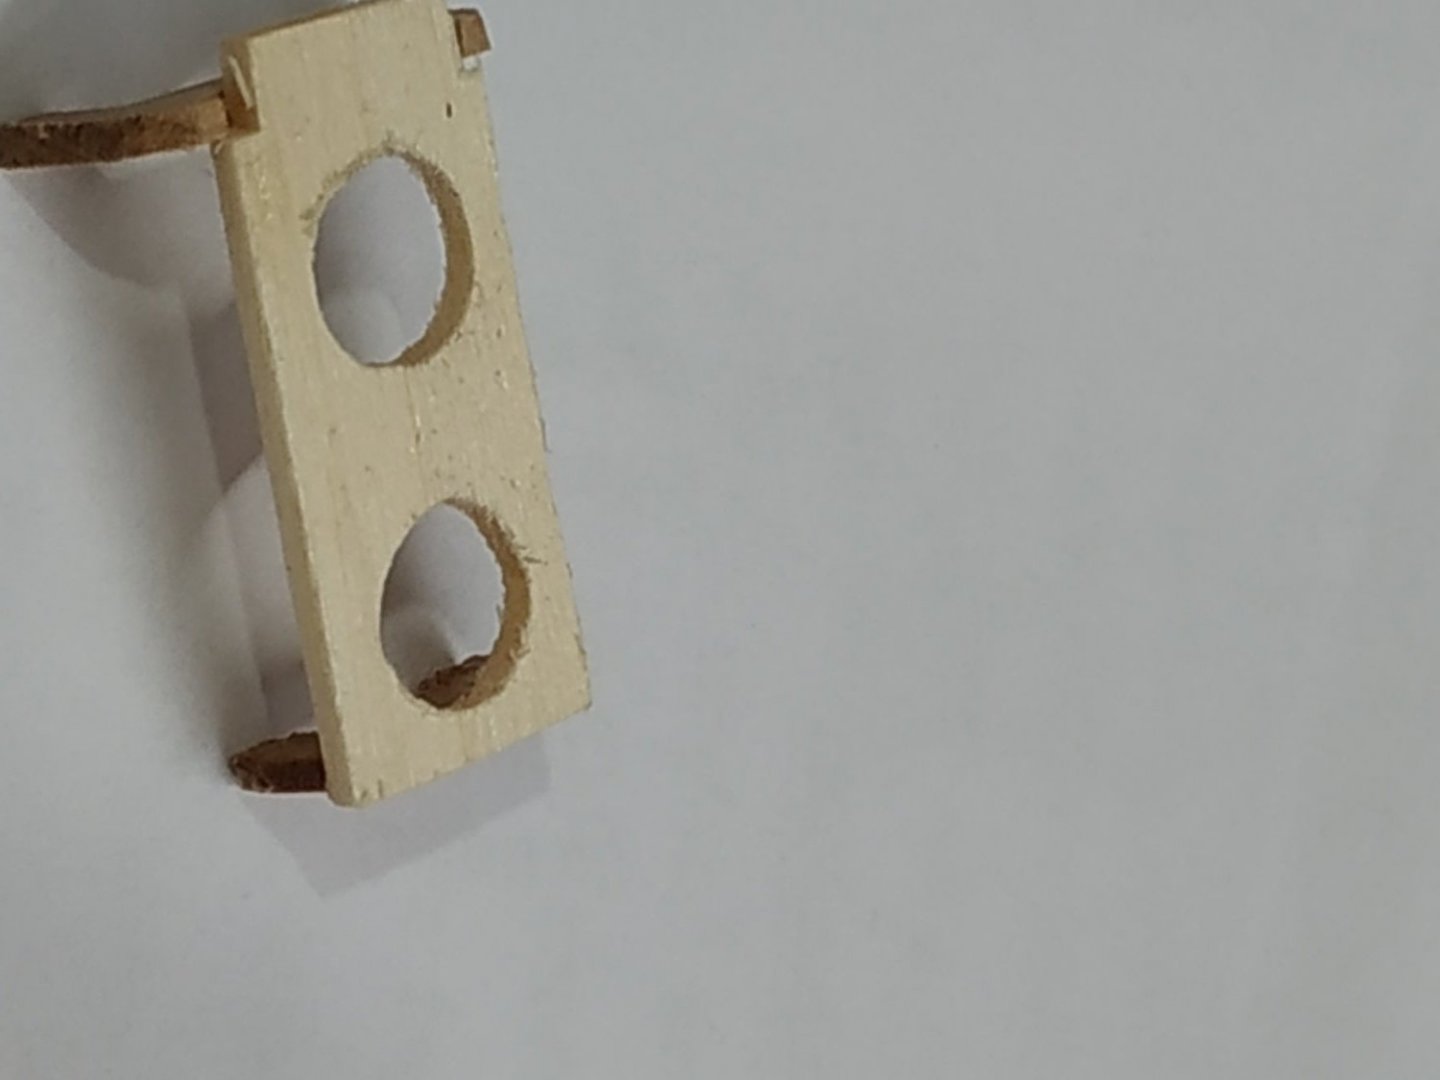
Pillars and Stanchions for the Chain Pump Axletree. 2 pillars aft edge of Aft Hatch Made from 3.71 mm sq stock. Turned as per pattern. Left over long until fitted beneath the deck beam. Hole for passage of Axletree, also left until Axletree made. Note slope of notched foot to match tapering of coaming. 2 corresponding Stanchions at fore of Main Hatch -squared, tapering upward. Options for bracing, will go with wood Cross Brace as mentioned Rhodings. Previously made along with the Bitts. Now they look pretty pathetic. Also will be remade after Axletree determines their position.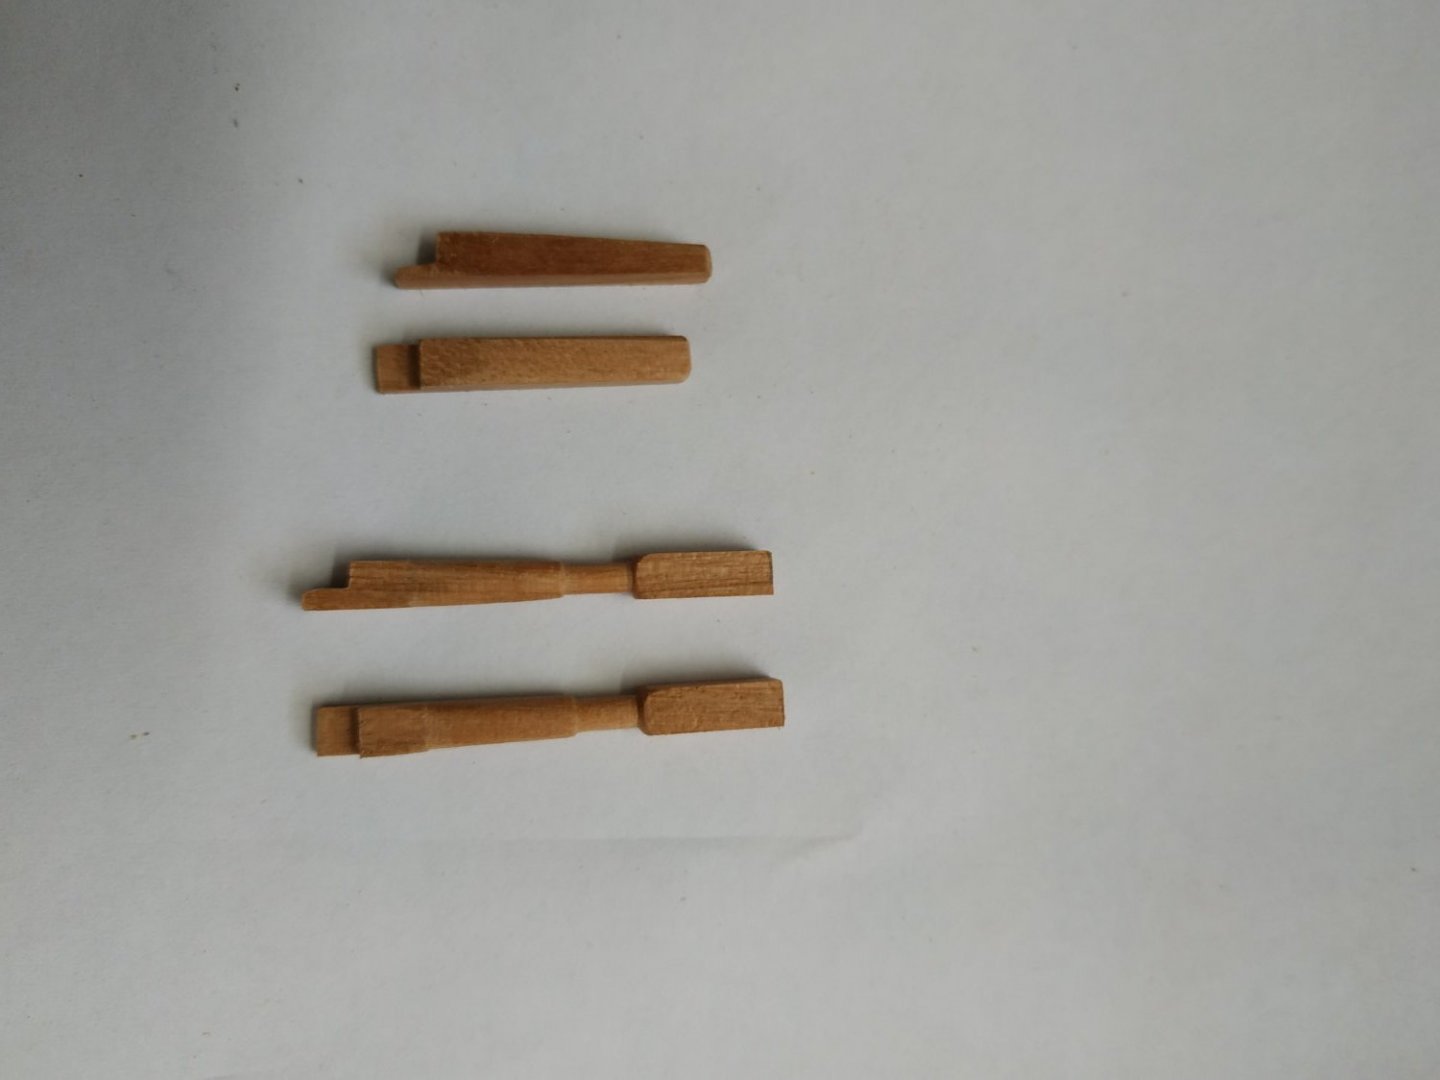
-
Swan-Class Sloop by Stuglo - FINISHED - 1:48
stuglo replied to stuglo's topic in - Build logs for subjects built 1751 - 1800
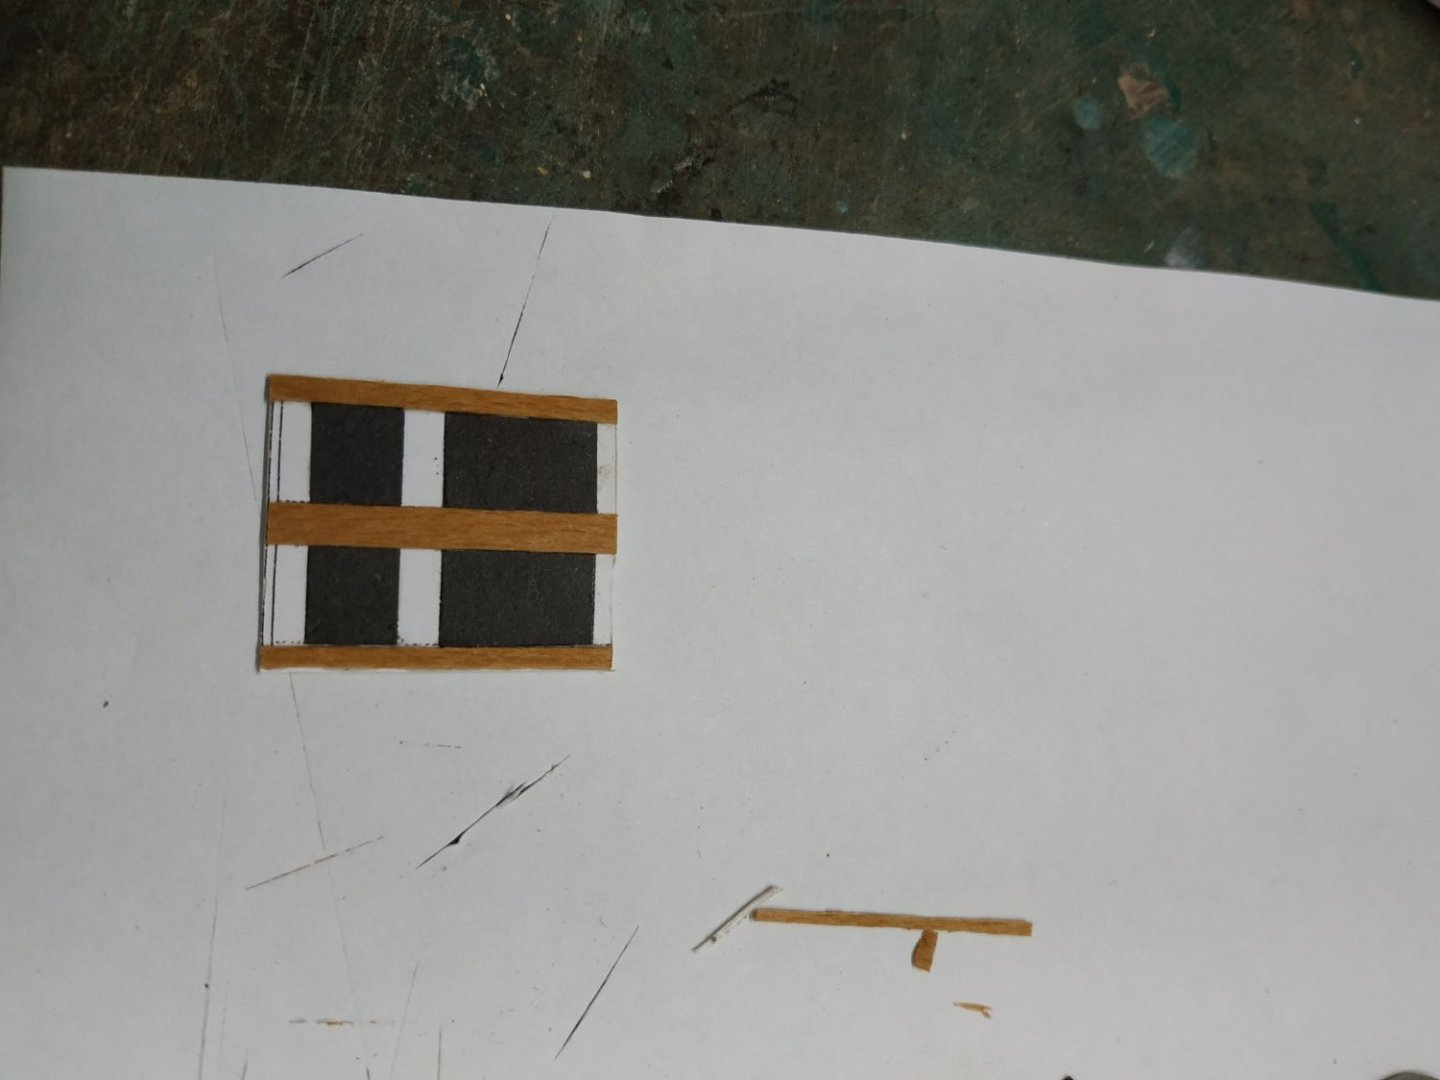
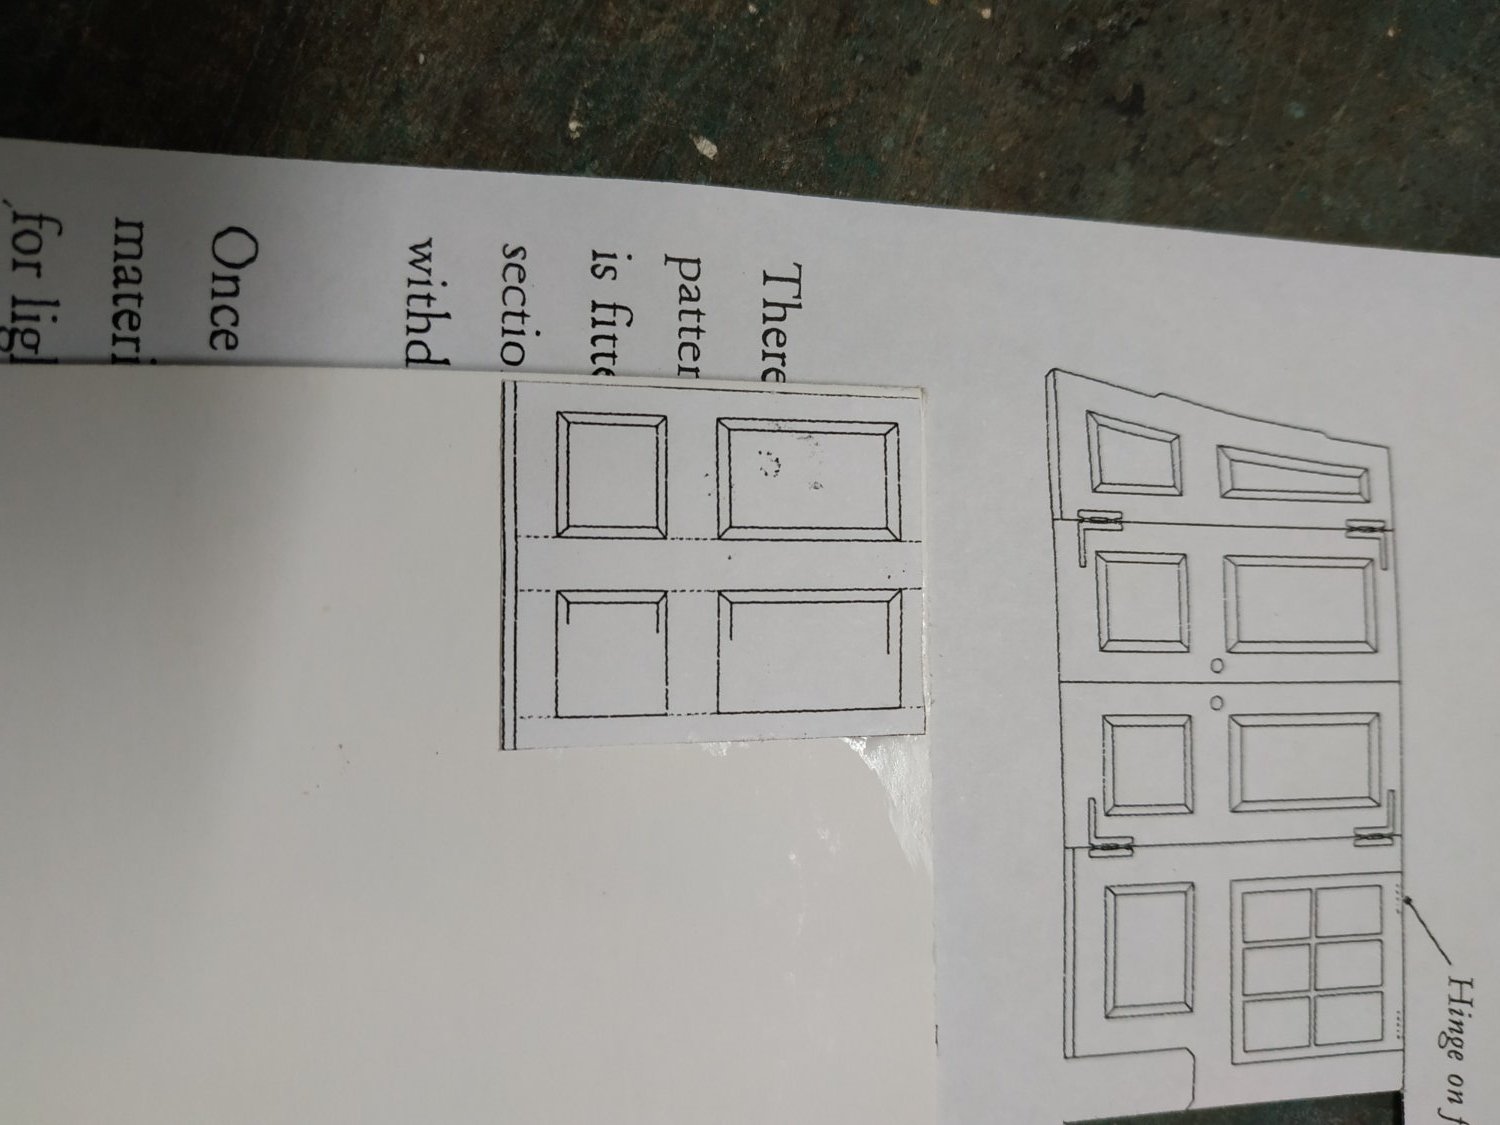
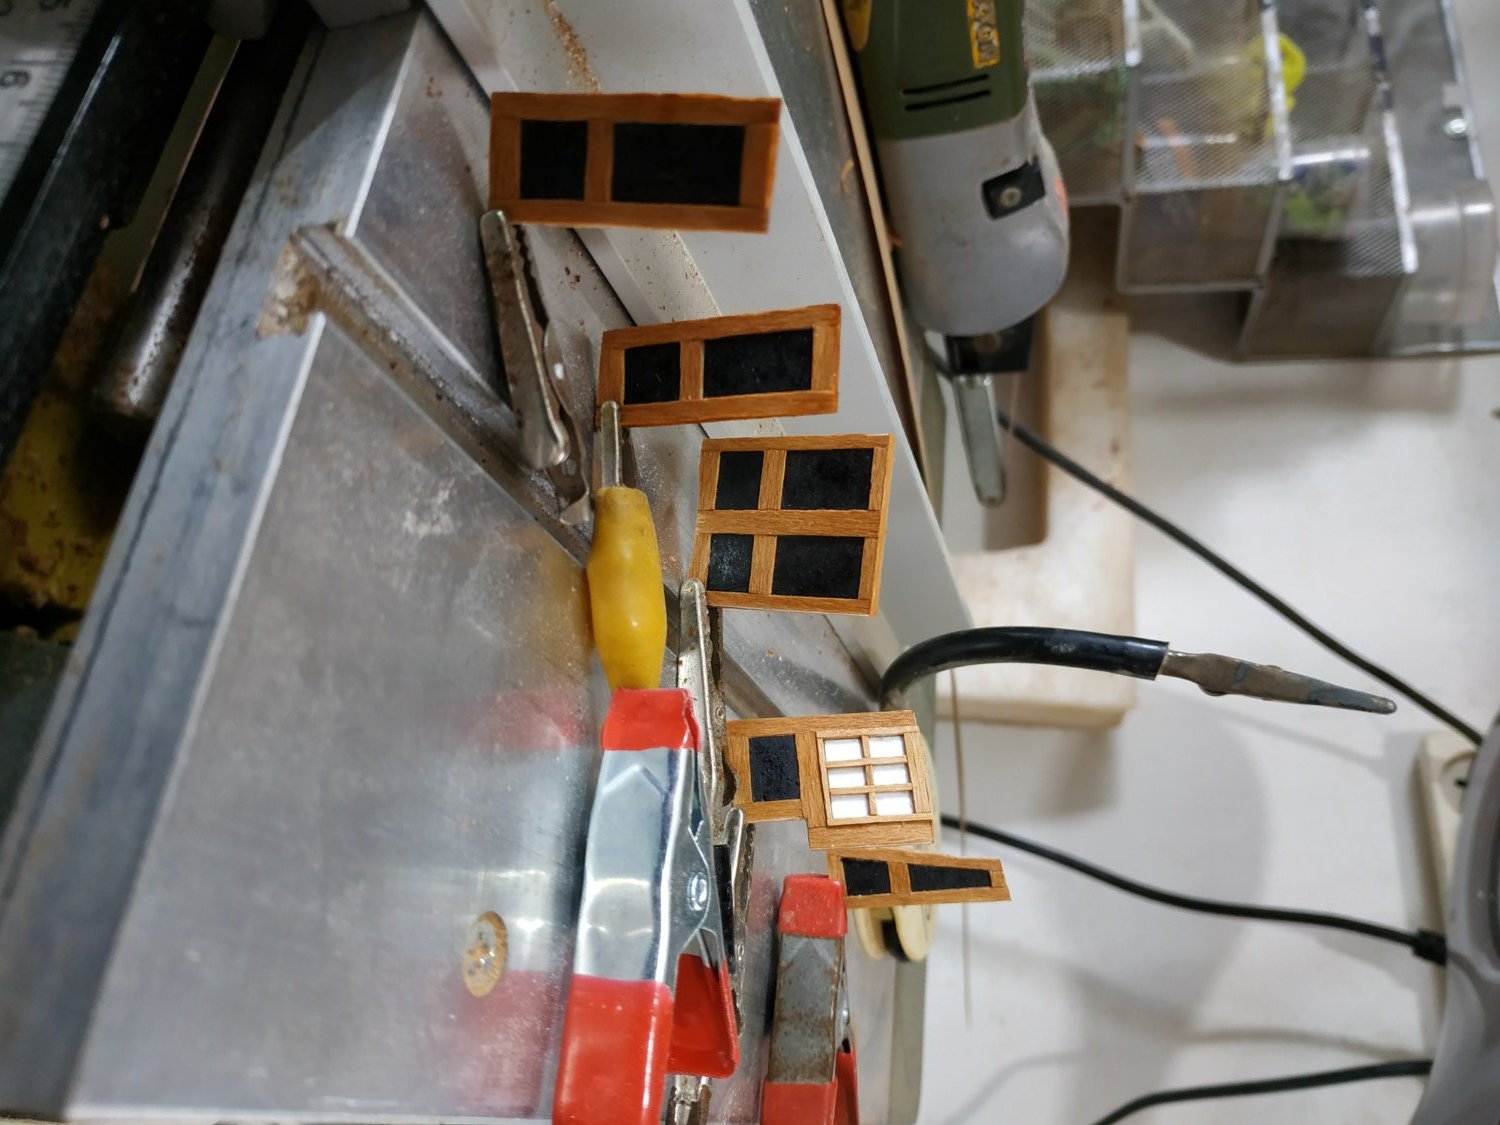
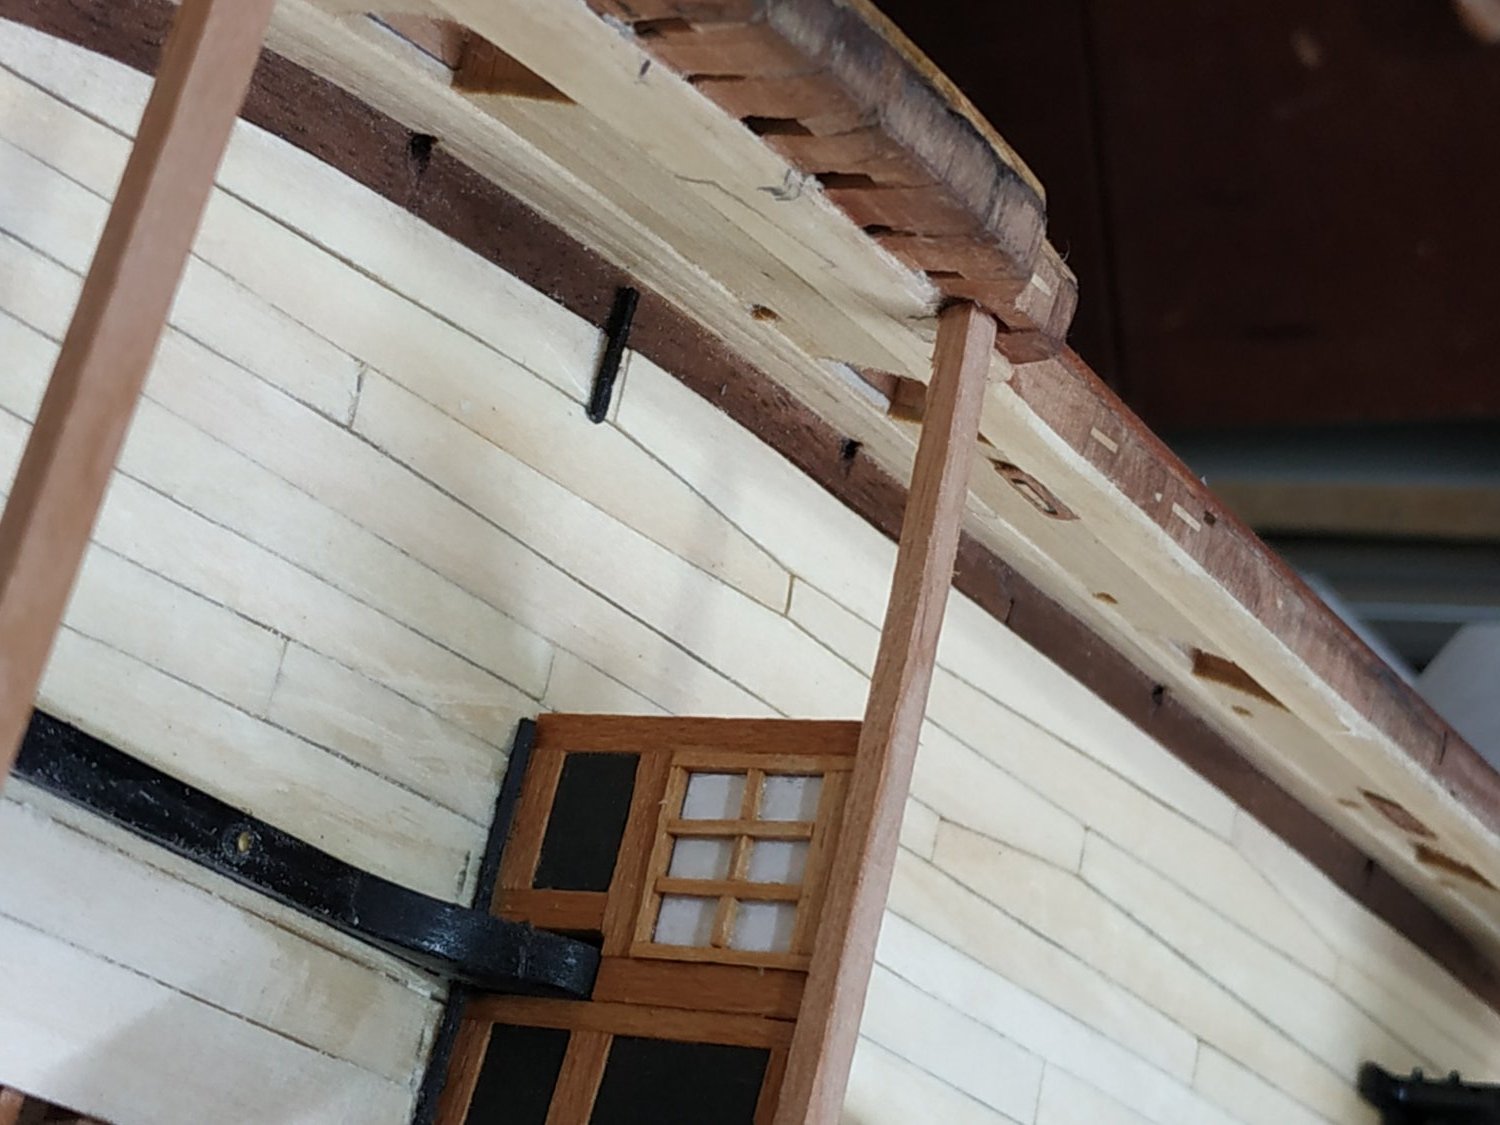
Forecastle Beams. As the Forecastle Bulkhead sits beneath the 7th Beam, worth making the full set (7) now. These are less substantial (presumably need to support less weight). They are 3.45mm wide, and 2.65 deep., rounded up 3.18 over the full span of 14cms. They are NOT Let Down. Beam #3 scored for Bowsprit Chock The Forecastle Bulkhead. ** I found delaying fitting of the Stove made access easier) Sitting athwartships and just forward of Riding Bitts, whose Spurs pass through openings in them. It also sits beneath the 7th forecastle beam to which it is attached, allowing removal as required. The thickness of the Bulkhead is given as 1.6 mm. TFFM suggests using extra thin plywood, which I don't have, so used card as the center of the “sandwich”. The pattern provided fits pretty well except for some adjustment at the wall. So divided into sections, the pattern glued directly to the card. Instead of colouring the panels, used cartridge paper (known locally as “Bristol”). The result is recessed, but looks OK. Framing with beach Veneer (0.55mm).Process repeated on the other side. The panel, other than the doors, sit on a grooved rail or Cant. The suggestion that this is made in halves, the panels resting directly on the deck. Also suggested that the pieces are chamfered, but using 1mm sq. strips, easier said than done. The foremost set was placed before the panel, the aft later. In future I will place both after the Panels are fitted ( A strip of planking used to level up the uncovered deck.) The central panel fitted- the straight sides give good reference to the next “window” panel. This includes the Bitt openings. Windows framed by 1mm sq strip. Choice to cut out the windows and leave open, replace the card with clear plastic before framing or leave with the white of paper pattern.Previous experience sticking wood to clear plastic was messy. I have a problem also with sticking small metal objects, such as hinges, to wood. Minimal cyano often fails. More is messy. The 5 min Epoxy is too thick to use a minimal dot. ADVICE and suggestions required and welcomed. The port window is hinged and held open by a “hook and eye” on the side of the #6 Beam. The doors are made in one piece and then divided down the center. The hinges were part of the photo etched set I bought. The door handle is the head of a pin.


.thumb.jpg.754575ff2c75e1bf6b946e70f59f050d.jpg)
- 475 replies
-
- 13
-
-
For the last few posts, my photos have been sideways. Uploaded elsewhere without problems. Tried rotation before uploading without benefit. I was one of those whose picture were sometimes "refused" but this has not happened recently.
-
Swan-Class Sloop by Stuglo - FINISHED - 1:48
stuglo replied to stuglo's topic in - Build logs for subjects built 1751 - 1800
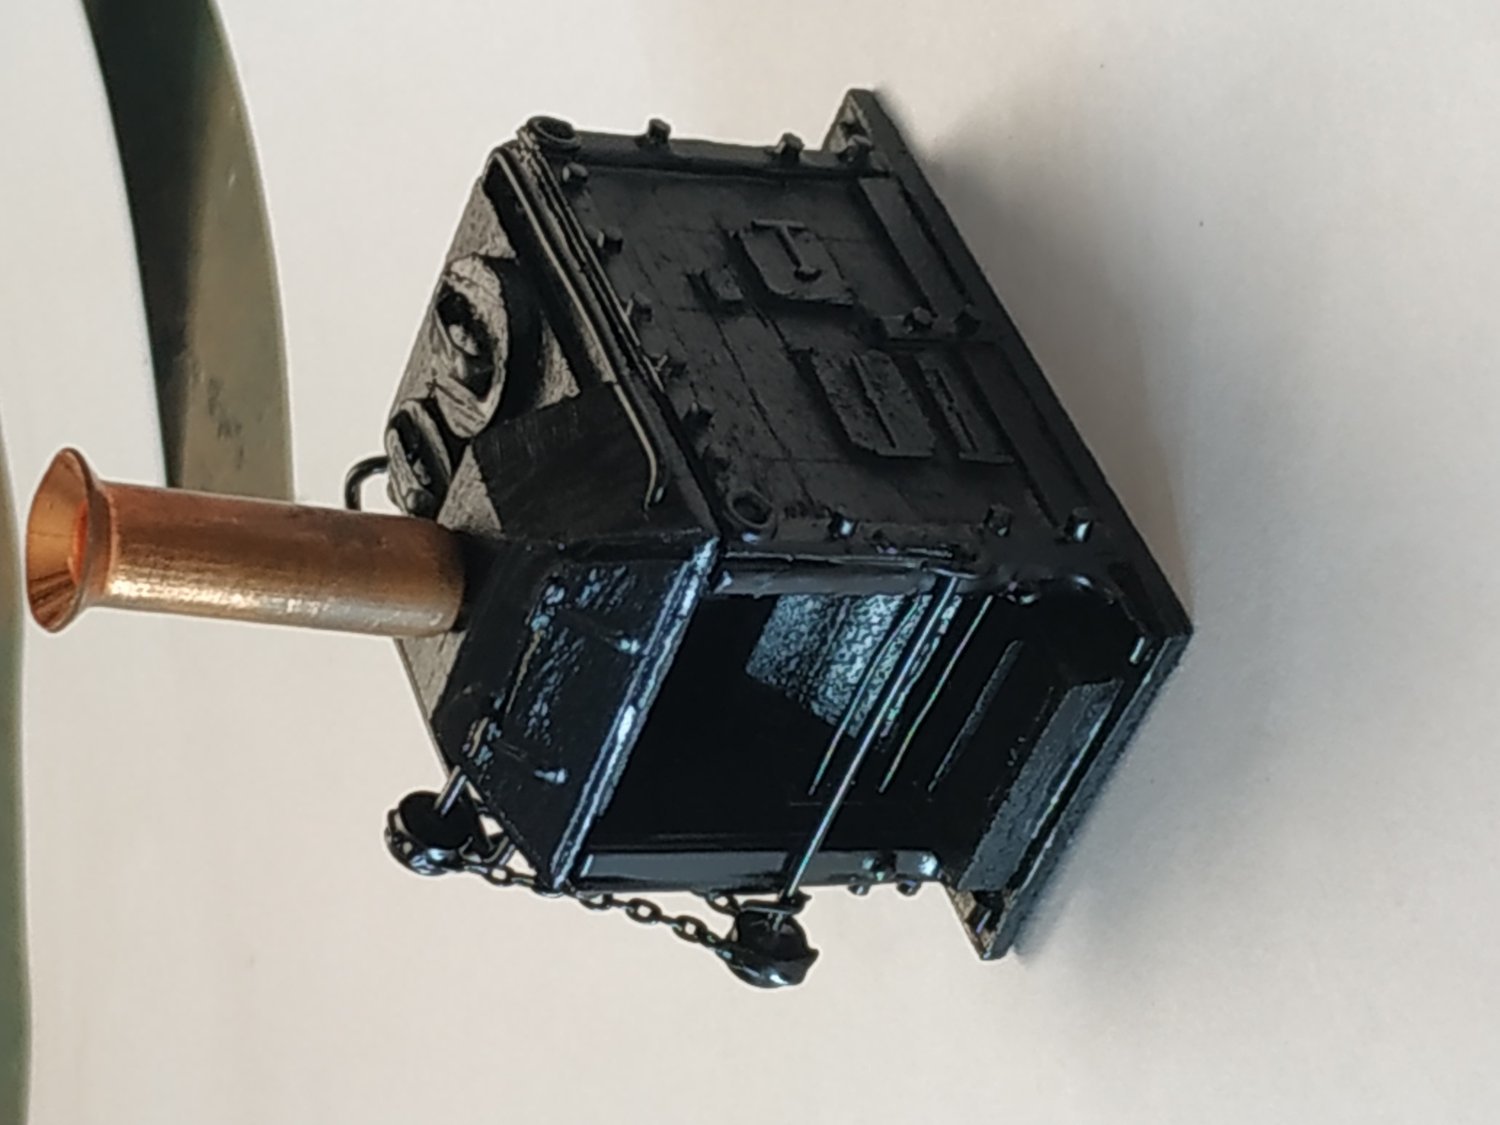
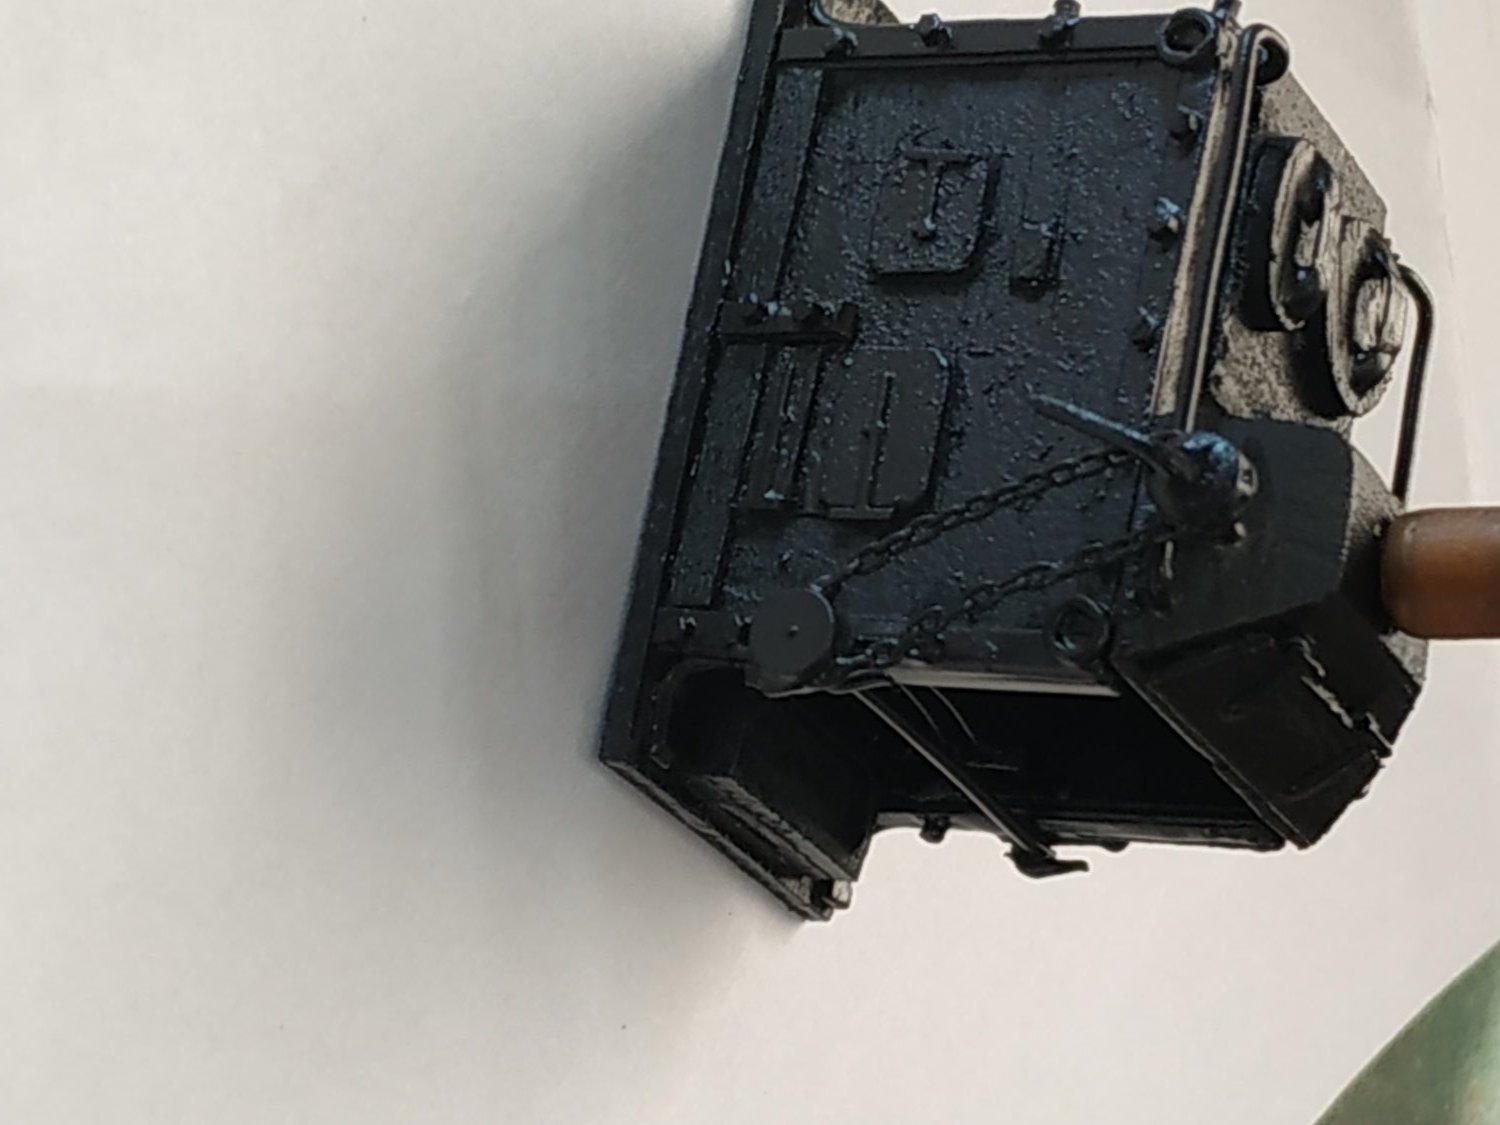
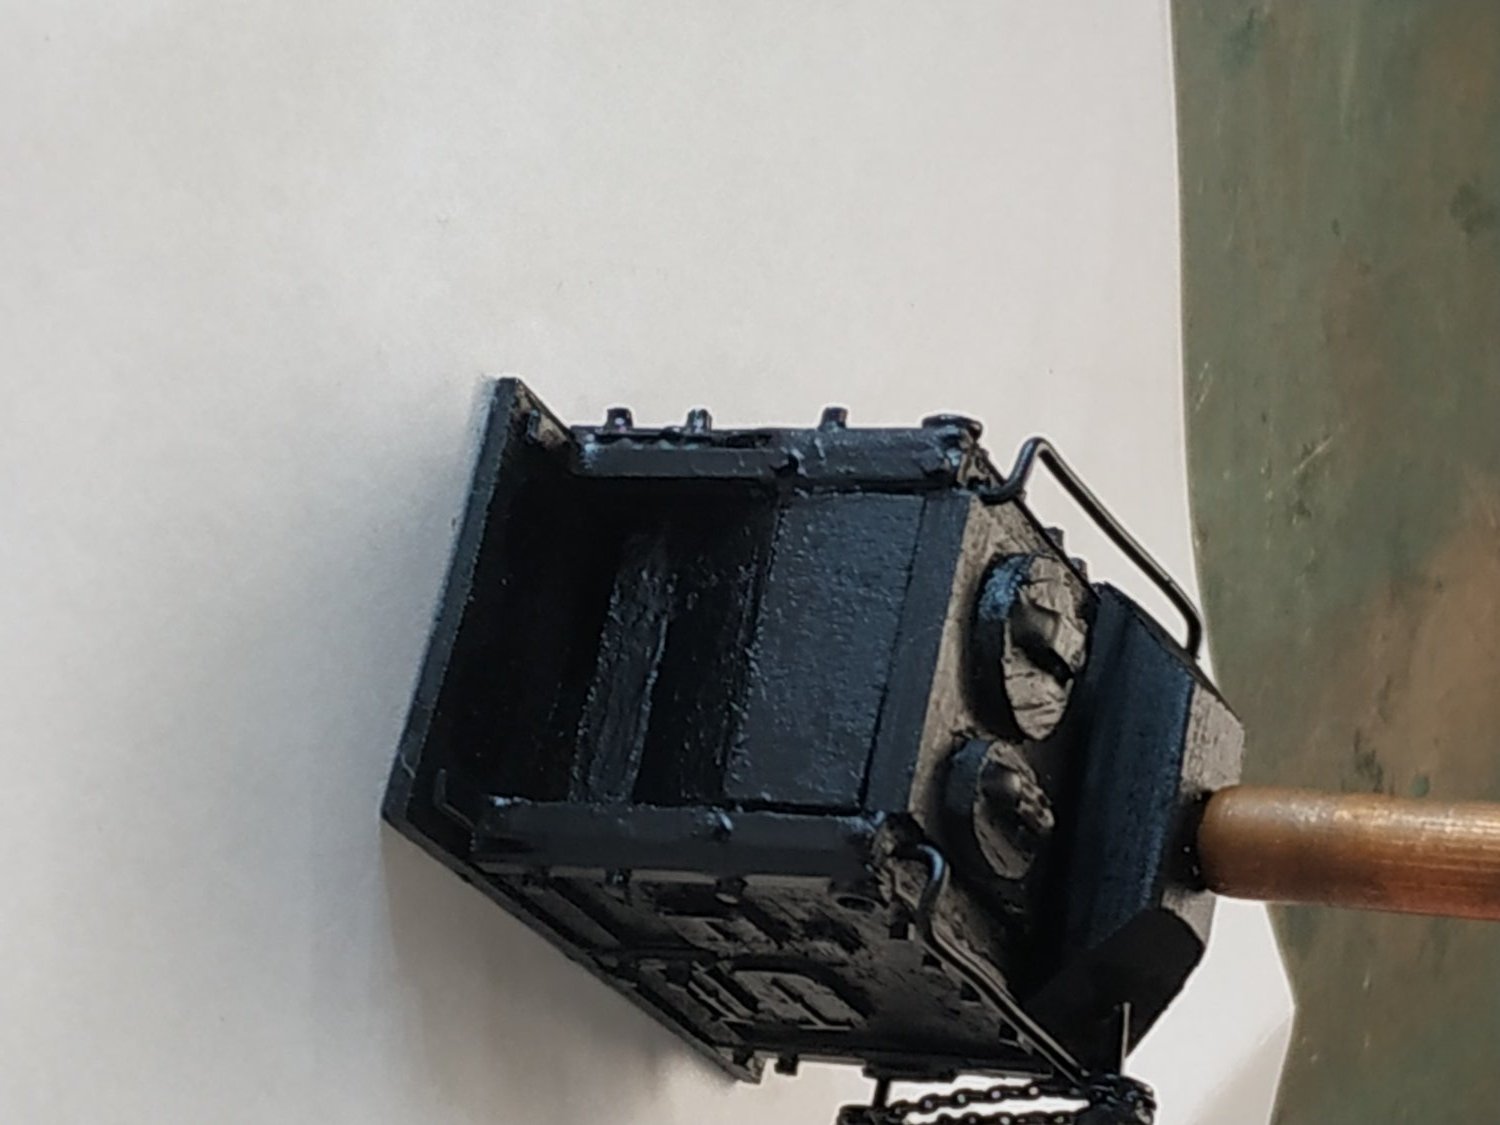
Galley Stove As usual with TFFM read the instructions - 7+ pages. The first suggestion is to study the drawings before reading the text !!!! At first I was totally confused - Google images only made it worse and 3D rendering was too detailed for me to grasp initially. I decided to get started by ignoring the fact that these were metal plates and considering how to get the finished product LOOKING like a stove. The Stove rests on a Base Plate (not bricks) which fits between the Riding Bitt Standards,rests on the aft part of Foremast Partner and aftward according to my plans,43mm It will sit on athwartship strips of wood to compensate for the curve of planking. The 2 sides - I made overly thick (2.4mm), adding doors of 0.55mm veneer. Additional bits, hinges, wheels chain, from my leftovers box from old kits. TFFM says check plan to see if the chimney is fore or aft when fitted. My Atalanta Sheer and Deck plan shows AFT, the Profile Plan , Foreward !!! The forward and aft walls are not solid. Rather with inner partial, sometimes angled plates with a large opening beneath the chimney end.The other end,has the upper half closed, and lower open to recessed plates. These plates I made with1.4mm. The side walls are framed in brass strip with “feet” extending forward and aft. I stuck these walls to the BasePlate and made and placed those internal plates that will be seen from outside. The Drip Tray is milled out wood. Couldn't make hinges small enough for the side doors- so just latches. The top of the stove is divided into ⅔ for the boiler (with a round and an oval lid) and the lower chimney. The boiler is proud, so I used a 2.4 mm strip, milled ⅓ to half thickness, to sit flush to the side walls. The lower Chimney is angled on each side. After several attempts to make this with the 1.4mm wood, simply took a solid piece and sanded it to shape as drawn. The hexagonal nuts were cut from a strip of some plastic stuff, again left over from a kit. Also the Grating Bars and supports from the bit box The copper chimney just rests there temporarily to give the Stove a hat. The whole thing is spray painted - this covers the copper without primer or colouring solution.. My wife thinks it looks OK -so I’m satisfied


- 475 replies
-
- 11
-
-
-
Swan-Class Sloop by Stuglo - FINISHED - 1:48
stuglo replied to stuglo's topic in - Build logs for subjects built 1751 - 1800
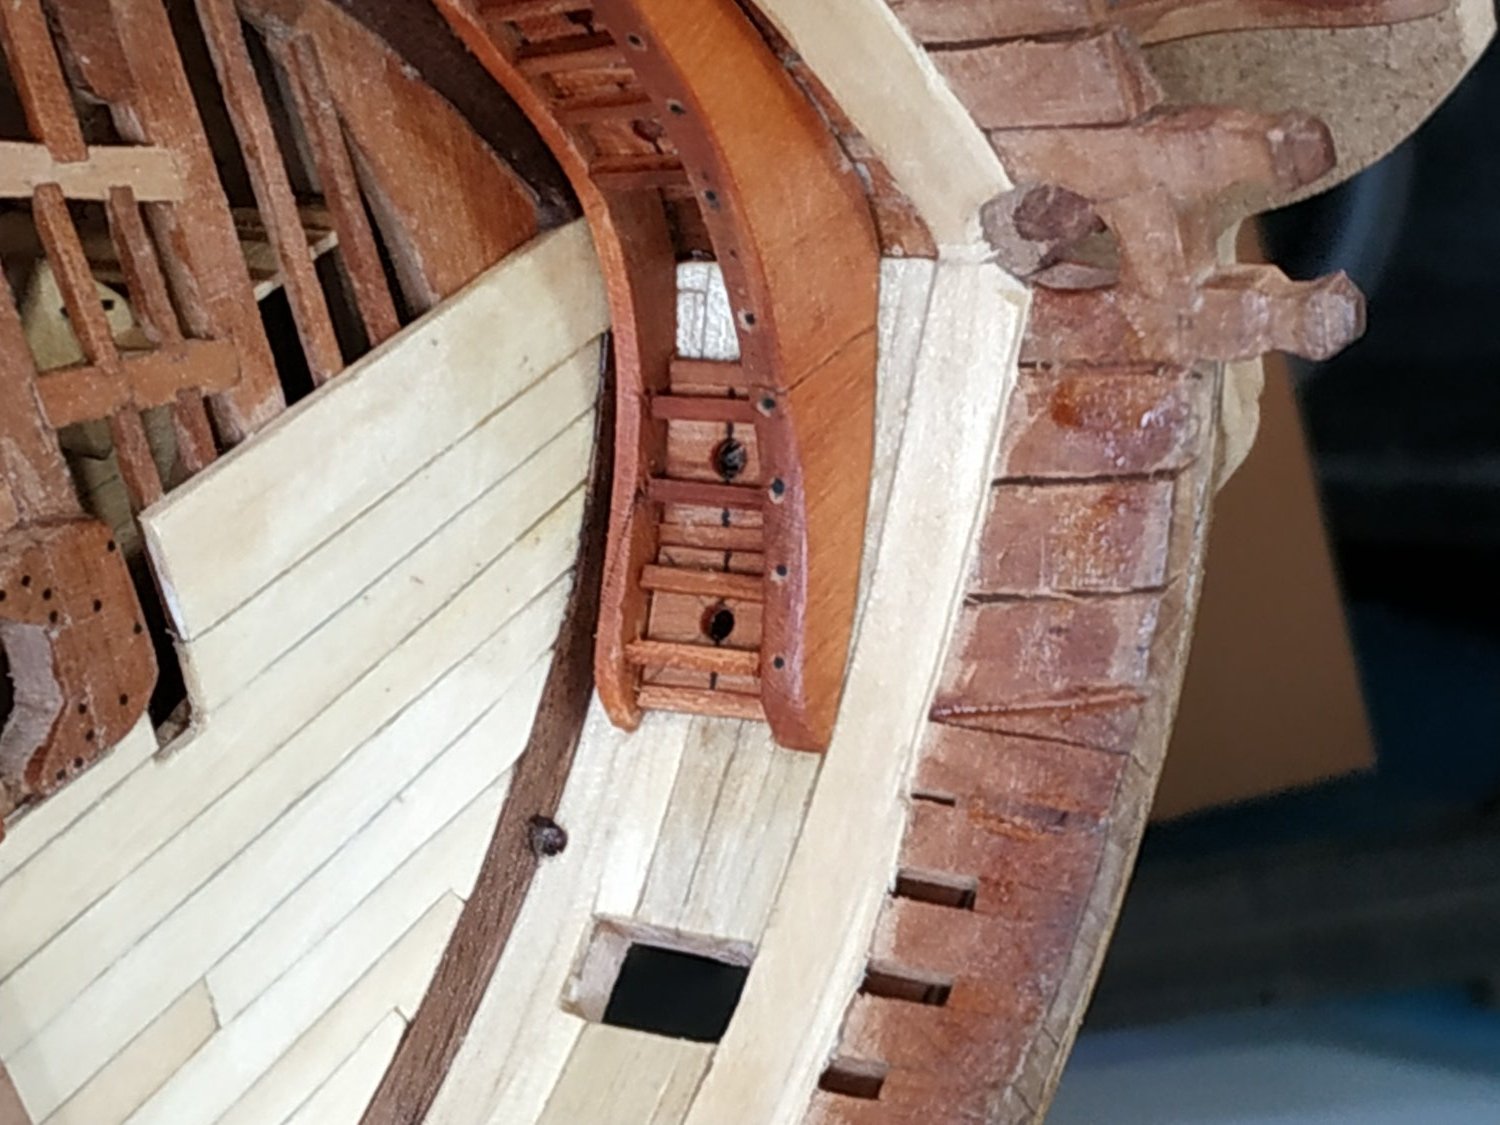
The Manger. An area at the Bow. A low partition angles foreward from the Bowsprit Step Stantion to the Inner Hull planking, where they are fitted into a rabbet on a Cant, a post the height of the middle of the Hawse Hole.(12mm in my build) This cant is 3.71mm sq. and situated just baft of its Scupper. The planks or Manger Boards are 1.6mm thick. They rest on a Rabbeted Manger Waterway which runs from the B.S. Stantion to the Cant. The height of the partition drops about halfway towards the Cant. I therefore made the partition with 2 board, with another of half the height for this taller length. A simple build before tackling the Stove and its complications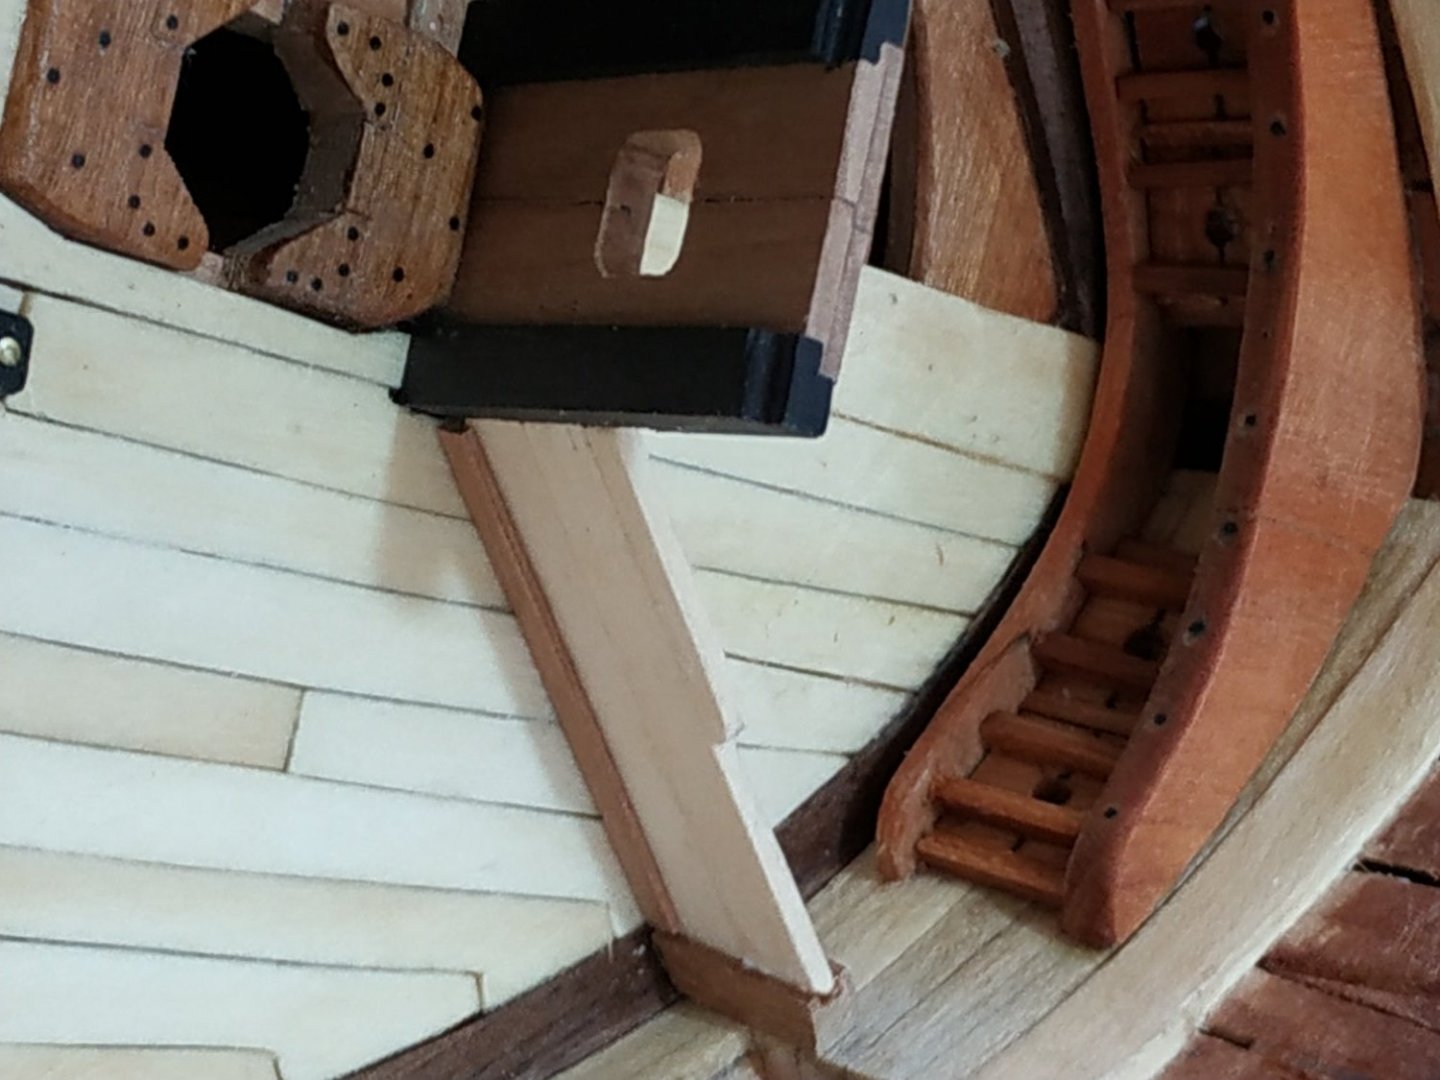
-
Swan-Class Sloop by Stuglo - FINISHED - 1:48
stuglo replied to stuglo's topic in - Build logs for subjects built 1751 - 1800
Hawse Hole Linings. These holes are lined with wooden staves similar to a barrel, then lined with lead. The final diameter of the hole (including lining) is given as 5.57mm. I think I will skip the wooden part and just simulate the lead. Breast Hook. Thickness of 4.24mm, as others, boomerang-shaped. Lies horizontally with lower surface 17.49mm above the deck according to TFFM. This I found confusing as the deck slopes in both directions. Does it mean at the foremost point? Took measurements from plans but will fit after the neighbouring parts are made. The Bucklers (TFFM refers to this as an archaic term meaning shield-but some of us were brought up on “swashbucklers” in films, and I do not consider myself archaic !!) Anyway, these are coverings for the Hawse Holes on the inner Hull. Thickness 1.33mm and horizontally divided into halves. Outside dimensions do not appear to be given but I guessed at 10mm square, which allows holes to be centered and a Cant of 1.6mm sq. to separate the inner and outer Hole. There are also 1.6mm sq.on either side and attached to the inner hull planks. In front of the Bucklers, on either side of the hole, are Buckler Bars, of similar size as the cants. I made a mistake in not converting these holes into metric and made them initially 4.5mm (the rope is given as 4.5 ins). Noticed only when fitted, and remade them to the correct 2.4mm. Bolster This is a boomerang shaped shelf supporting the above structures, 2.12 mm thick- rather like a slimmed down breast hook. The Bucklers Bars are slotted into mortises on its upper surface, which match those of the undersurface of the Breast Hook. I have omitted this feature. I fixed the position and glued the Breast Hook first, then the Bucklers, ensuring their holes align with the Hawse Holes, then the Cants and Bars. The Bolster then fitted beneath them. Can someone tell me why, if the Rope is (real size) 4.5in and the Buckler Hole slightly larger, the Hawse Hole is 10.5in????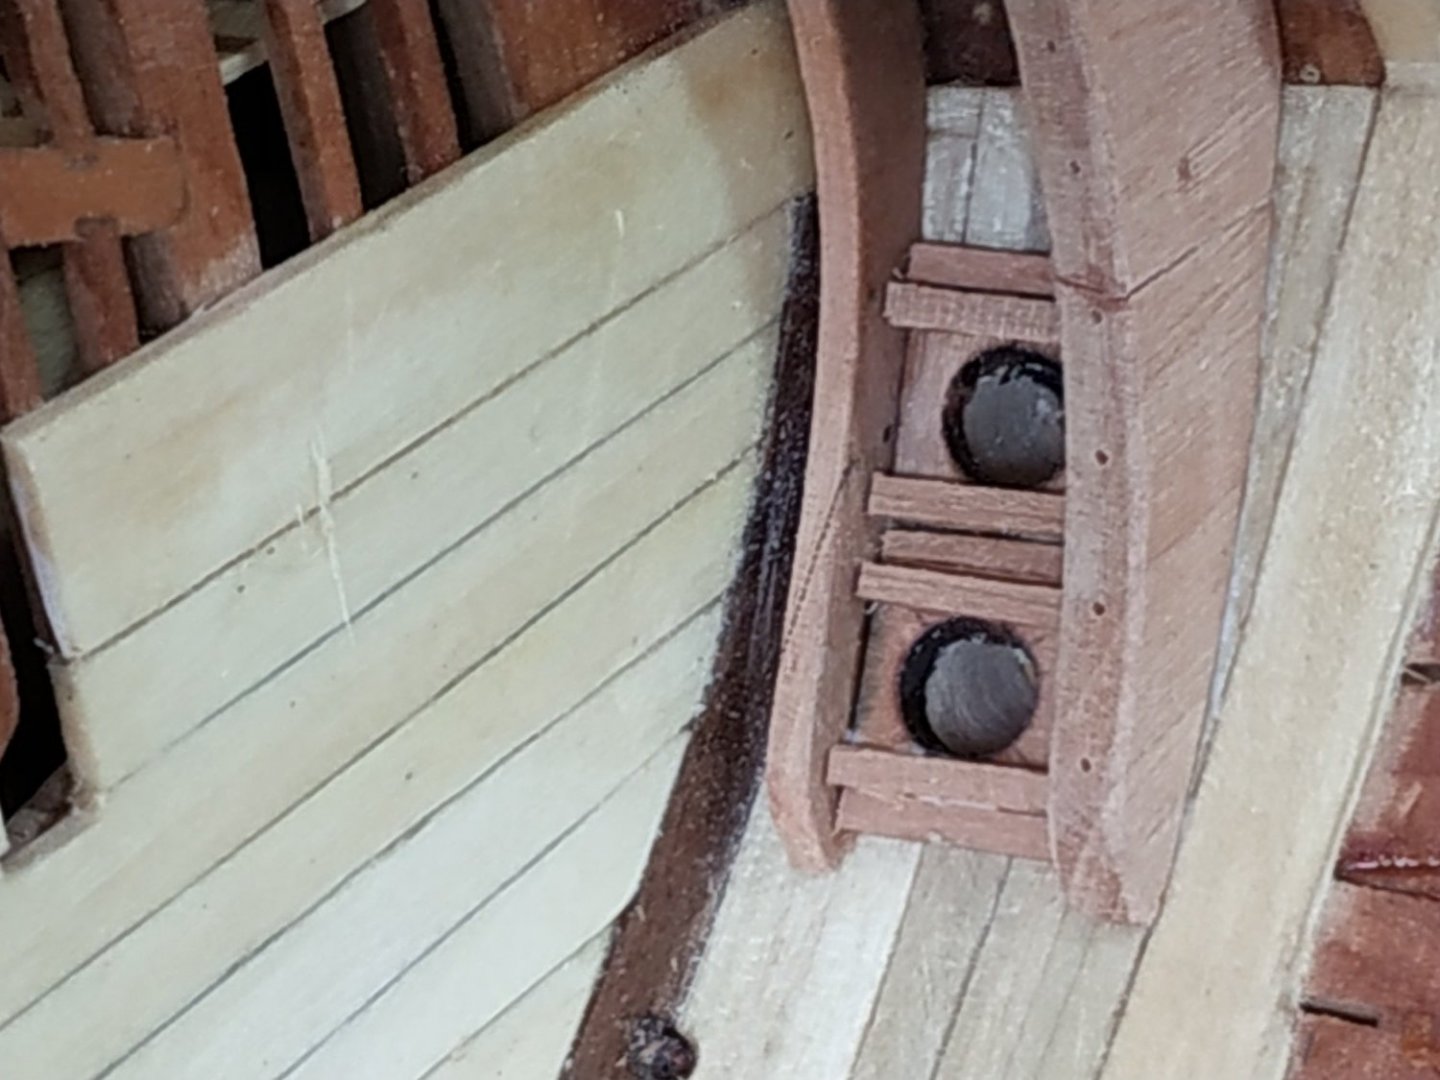

-
Swan-Class Sloop by Stuglo - FINISHED - 1:48
stuglo replied to stuglo's topic in - Build logs for subjects built 1751 - 1800
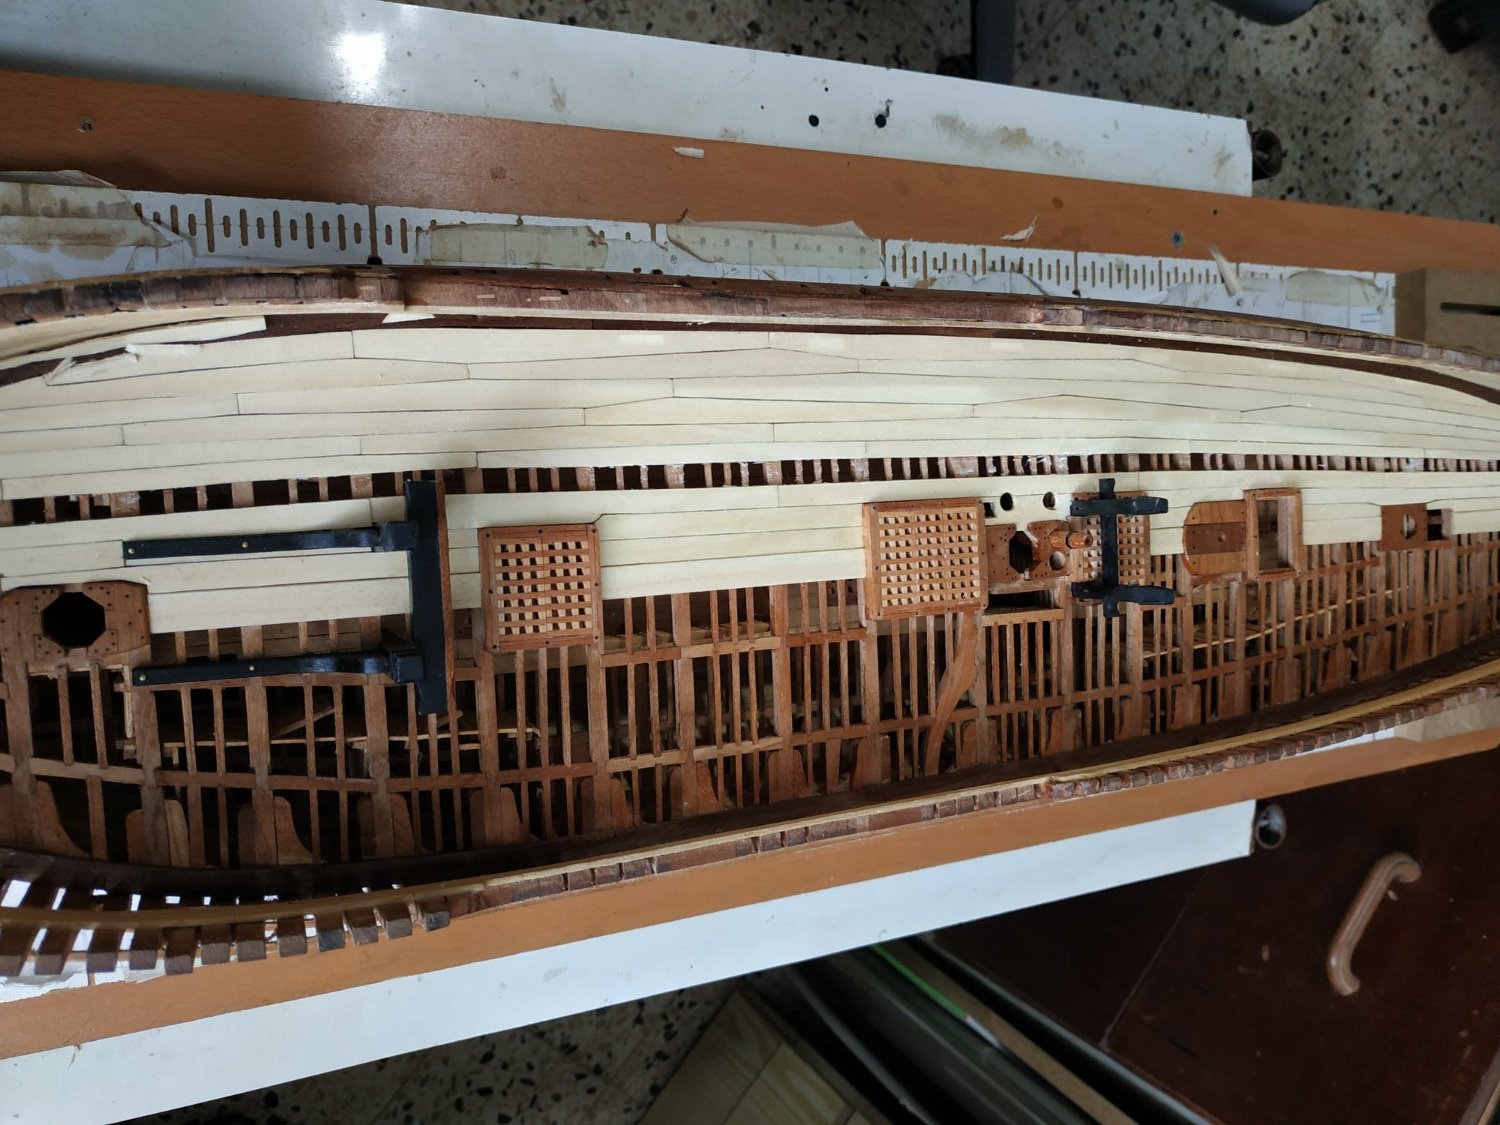
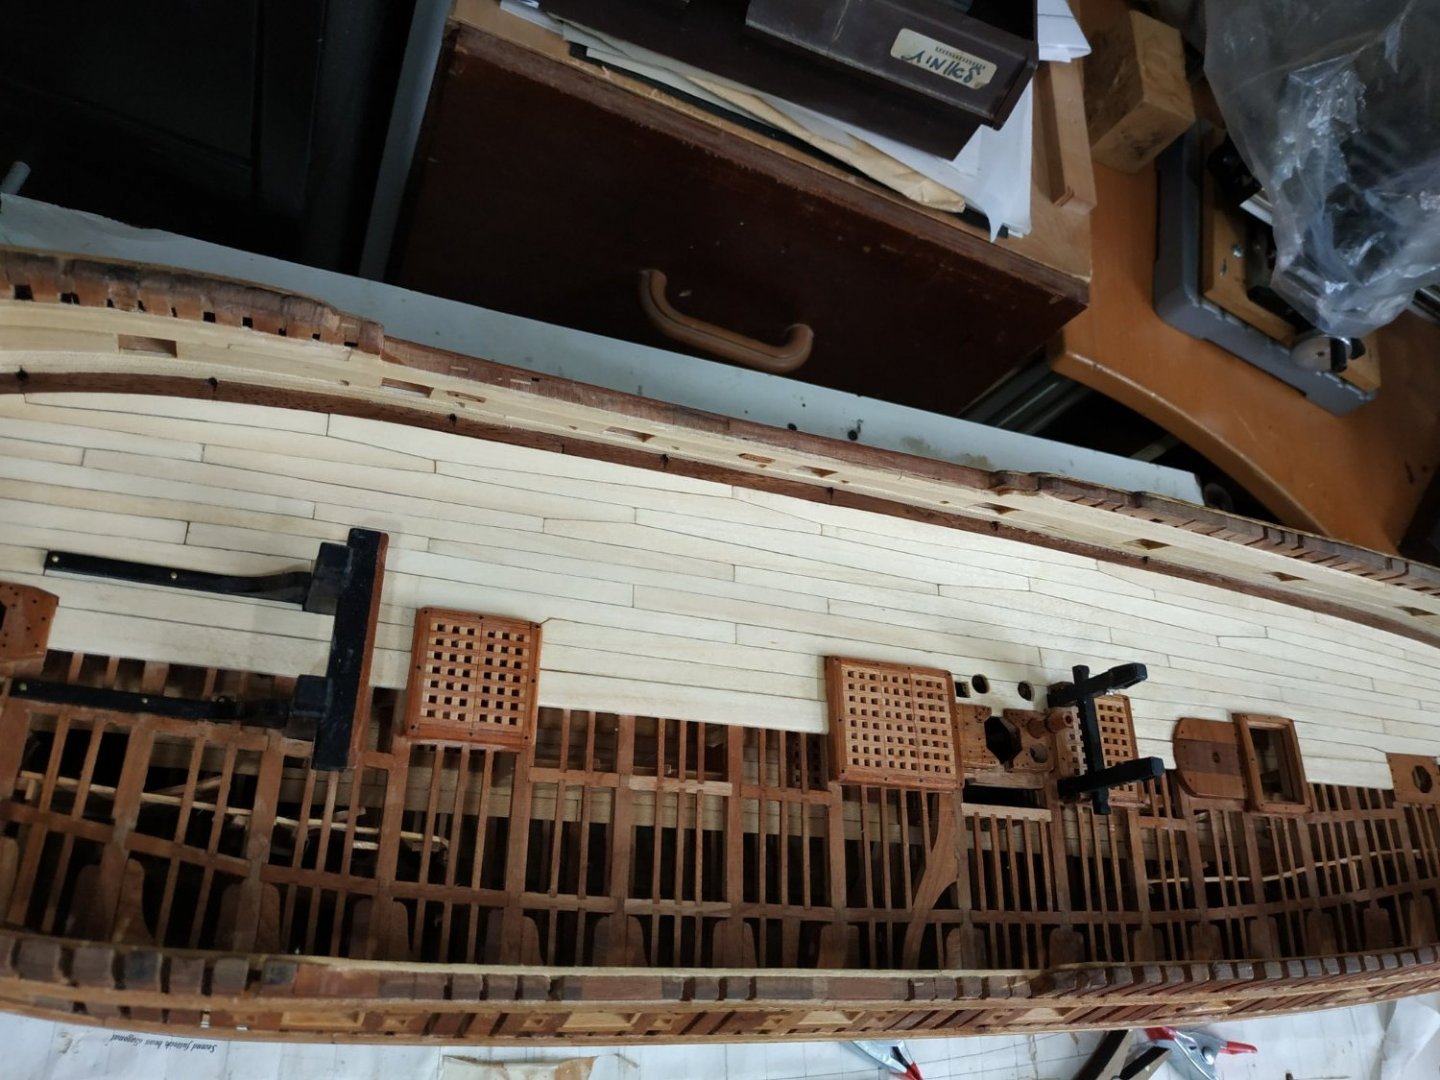
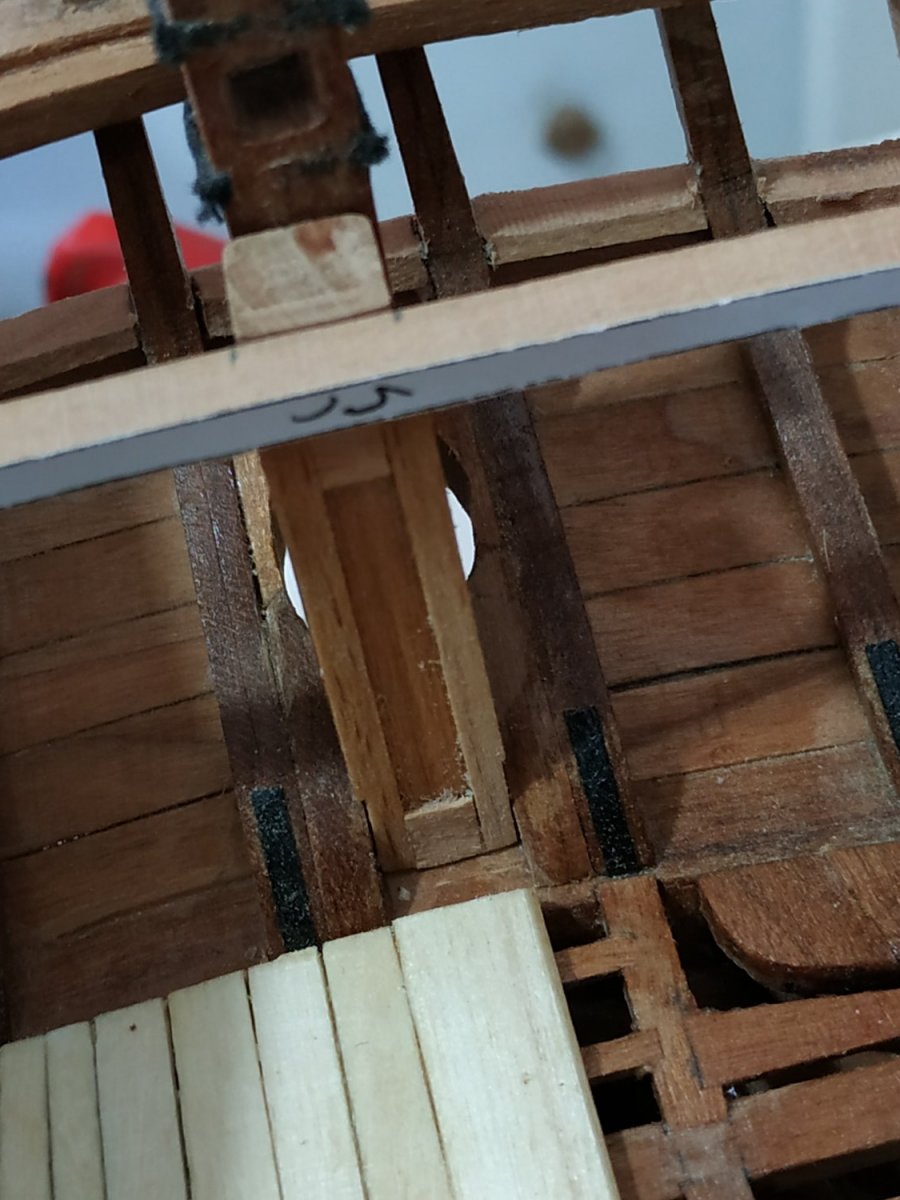
Upper Deck Planking cont. Despite encouraging words my eye is drawn to the mistake like a tongue to a newly filled tooth!! So I changed the outer Binding Strake. The inner one now has a gap issue but I find this less noticeable and my conscience feels better.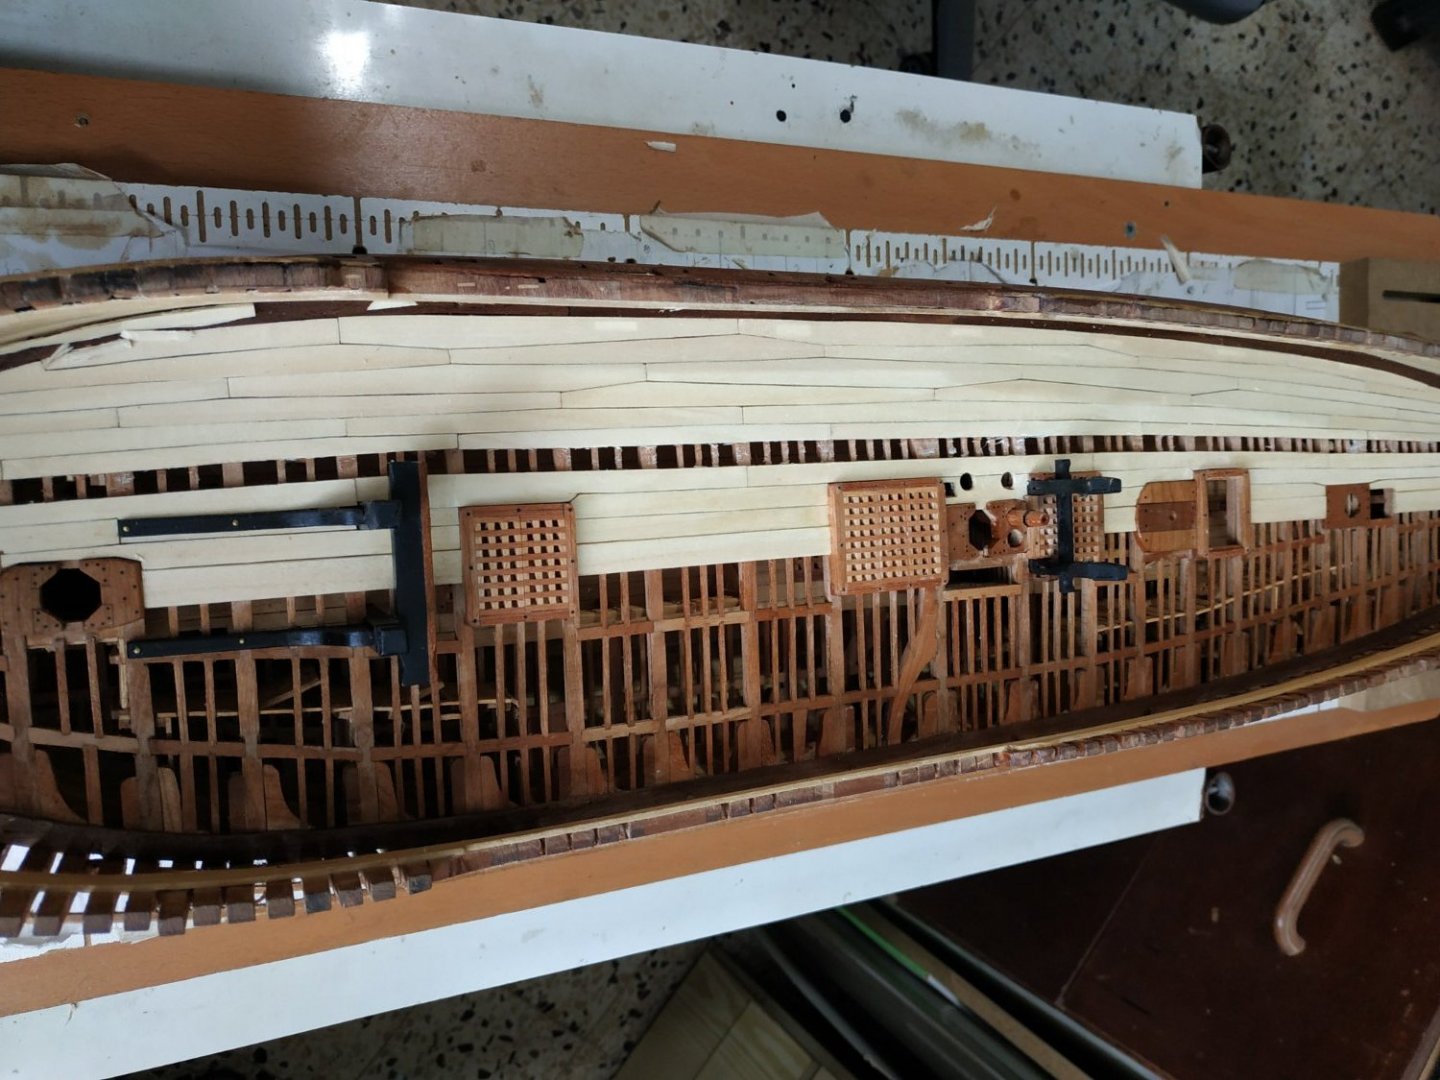


.jpg.f6b45abe7a134e61a0b1c336247ea132.jpg)


.jpg.291c1ea96ce35677be49ea1393fb85c8.jpg)