HOLIDAY DONATION DRIVE - SUPPORT MSW - DO YOUR PART TO KEEP THIS GREAT FORUM GOING! (Only 24 donations so far out of 49,000 members - C'mon guys!)
×


Peter Cane
-
Posts
240 -
Joined
-
Last visited
Content Type
Profiles
Forums
Gallery
Events
Everything posted by Peter Cane
-
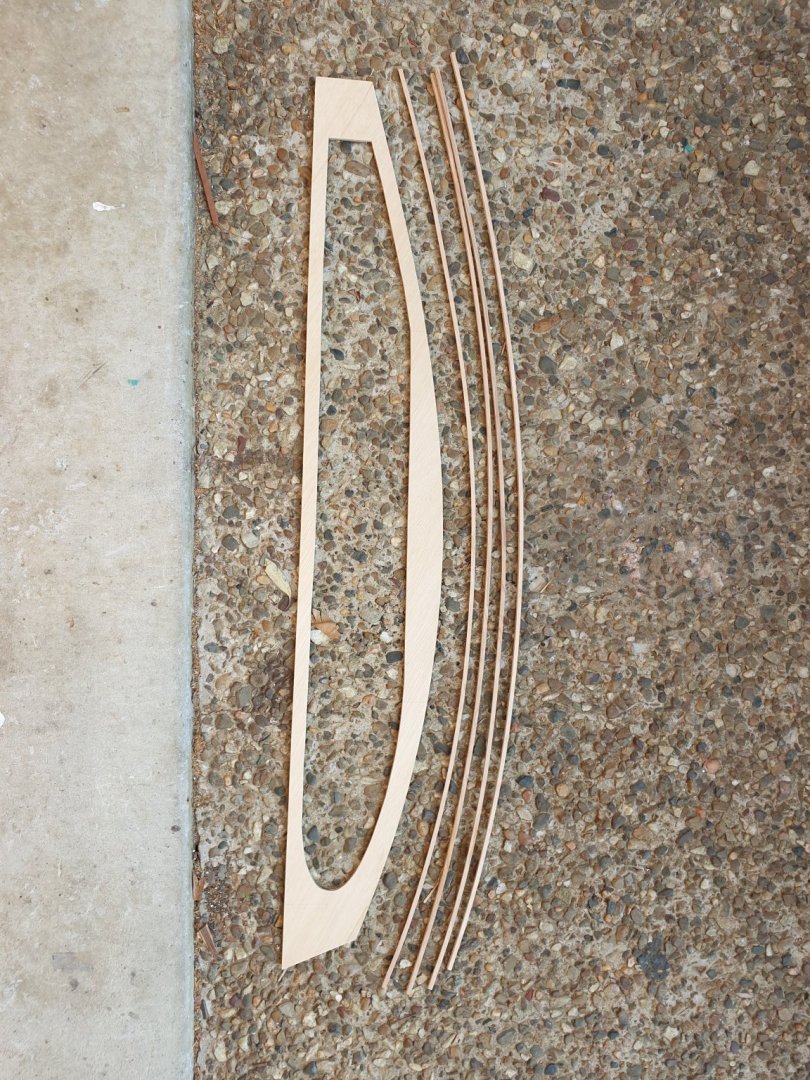
I have started to put the skins on. I keep moaning about the cost of birch ply but it is good stuff to work with. Nice and strong and also hard. The skinning and decks will realise about £100 but I suppose that is normal for a boat of this size. I filed out half of the keel slot so as to make finding it easier after skinning both bottom halves! It makes for a neater job. Nearly got caught out there!!! Pete


-
Hi Peter and thanks. I have to devise something that is not heavy and easy to carry in order to get it to the club by train. A duffle bag sounds a good idea. I have a sewing machine so I will knock something up. I also have a lot of thick bright red leather so Starlet might get treated to a purpose built bag. Its just lying there doing nothing ( as leather does) so the duffle bag sounds great. I am not yet a member of the group but there is a large club with their very own boating lake in Boondall, Brisbane which is an hour and twenty seven minutes away by train. They are called the SSS club. Triple S standing for Sail, Steam and Scale. They even depth charge $5000 worth of rc submarine!. The destroyers all have firing guns which puff smoke, go bang blah blah blah. Underwater videos with G PROs ,the whole nine yards. It seems they have a shed load of fun. Pete
-
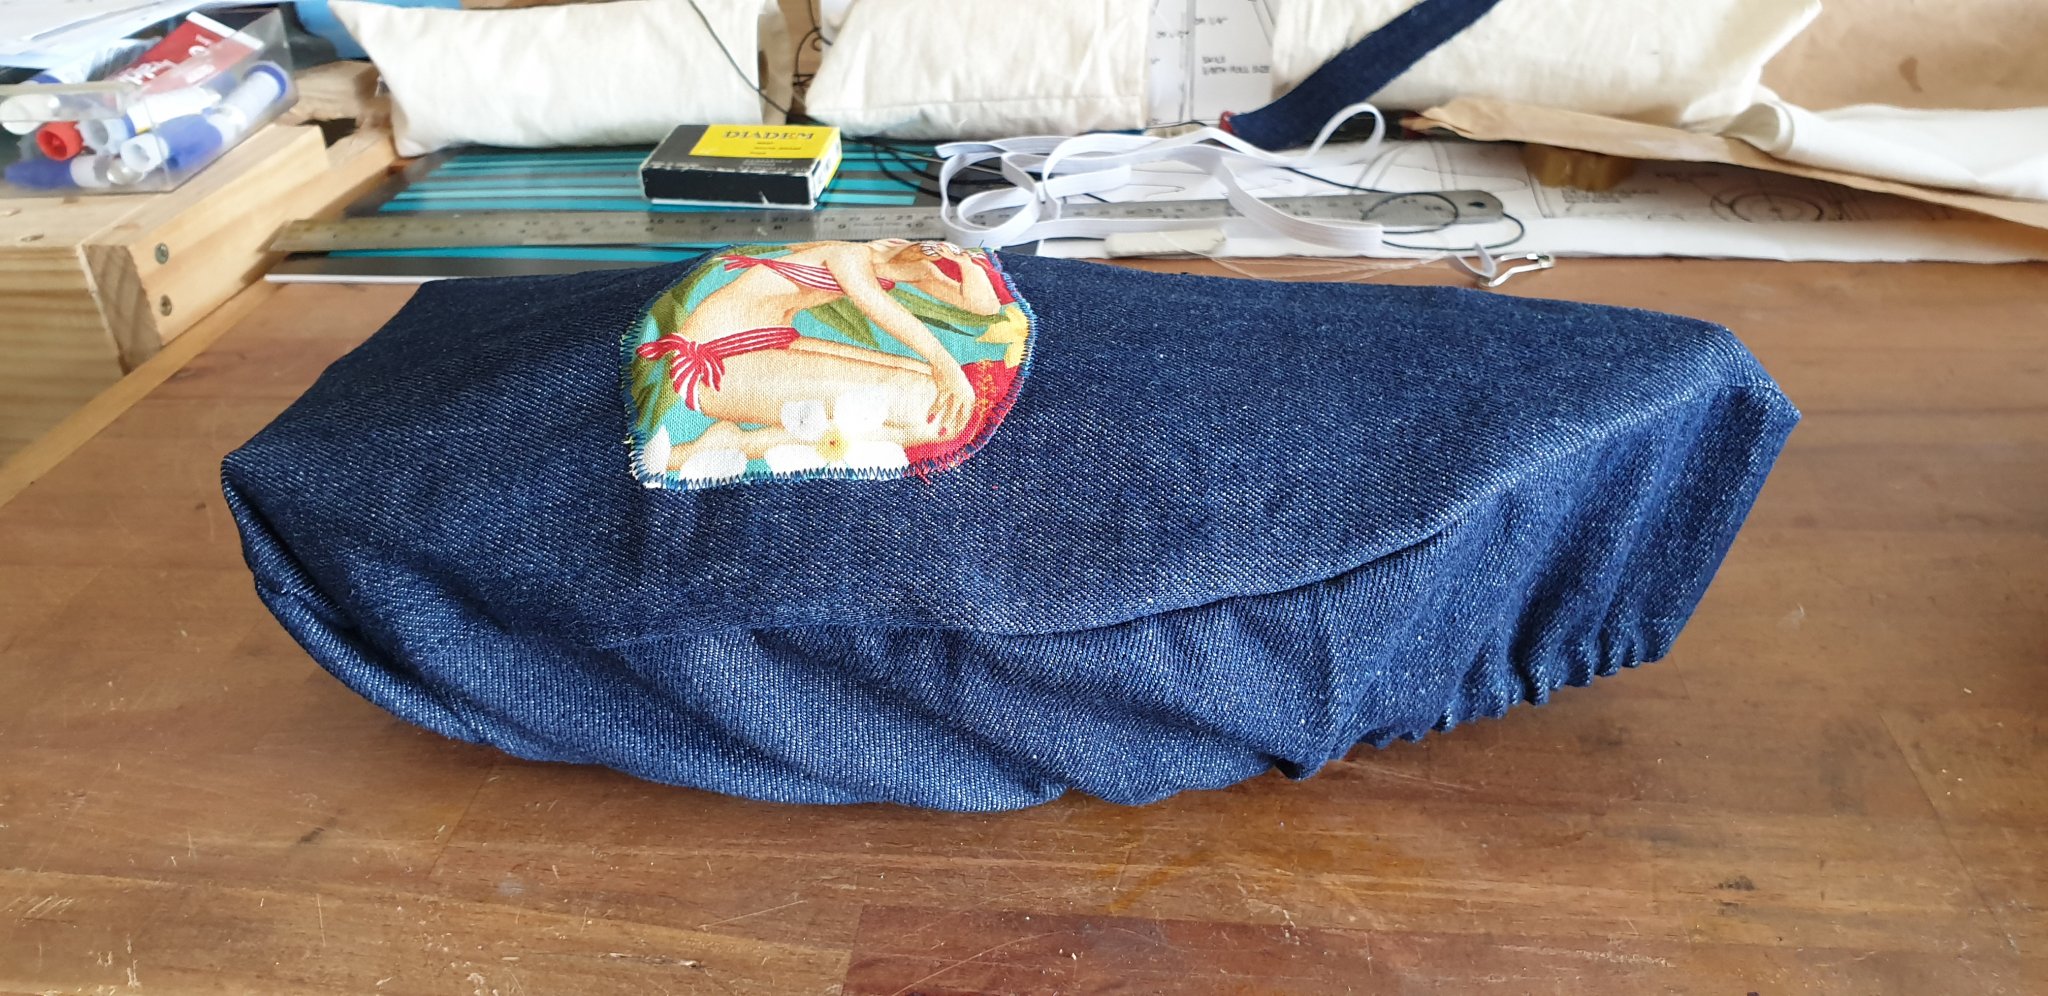
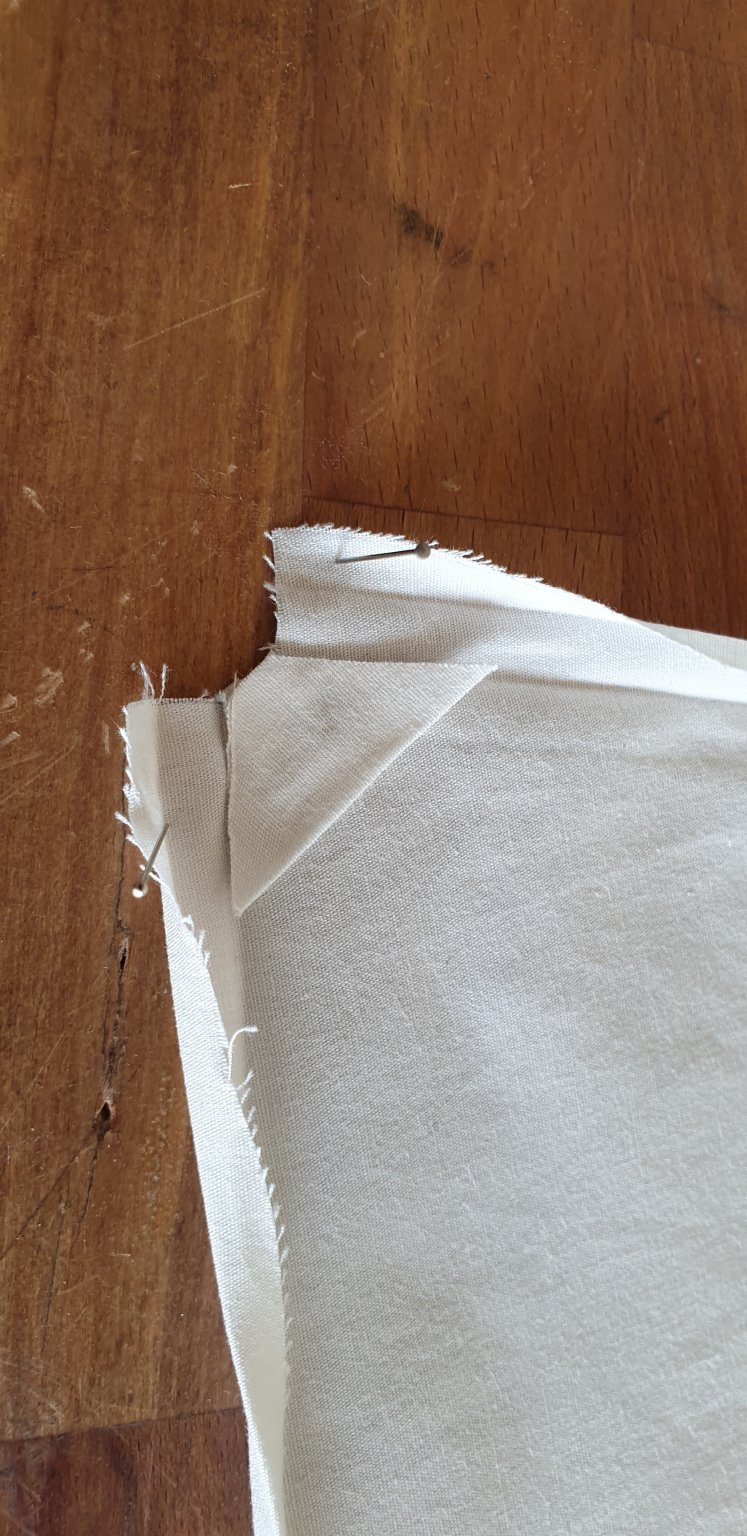
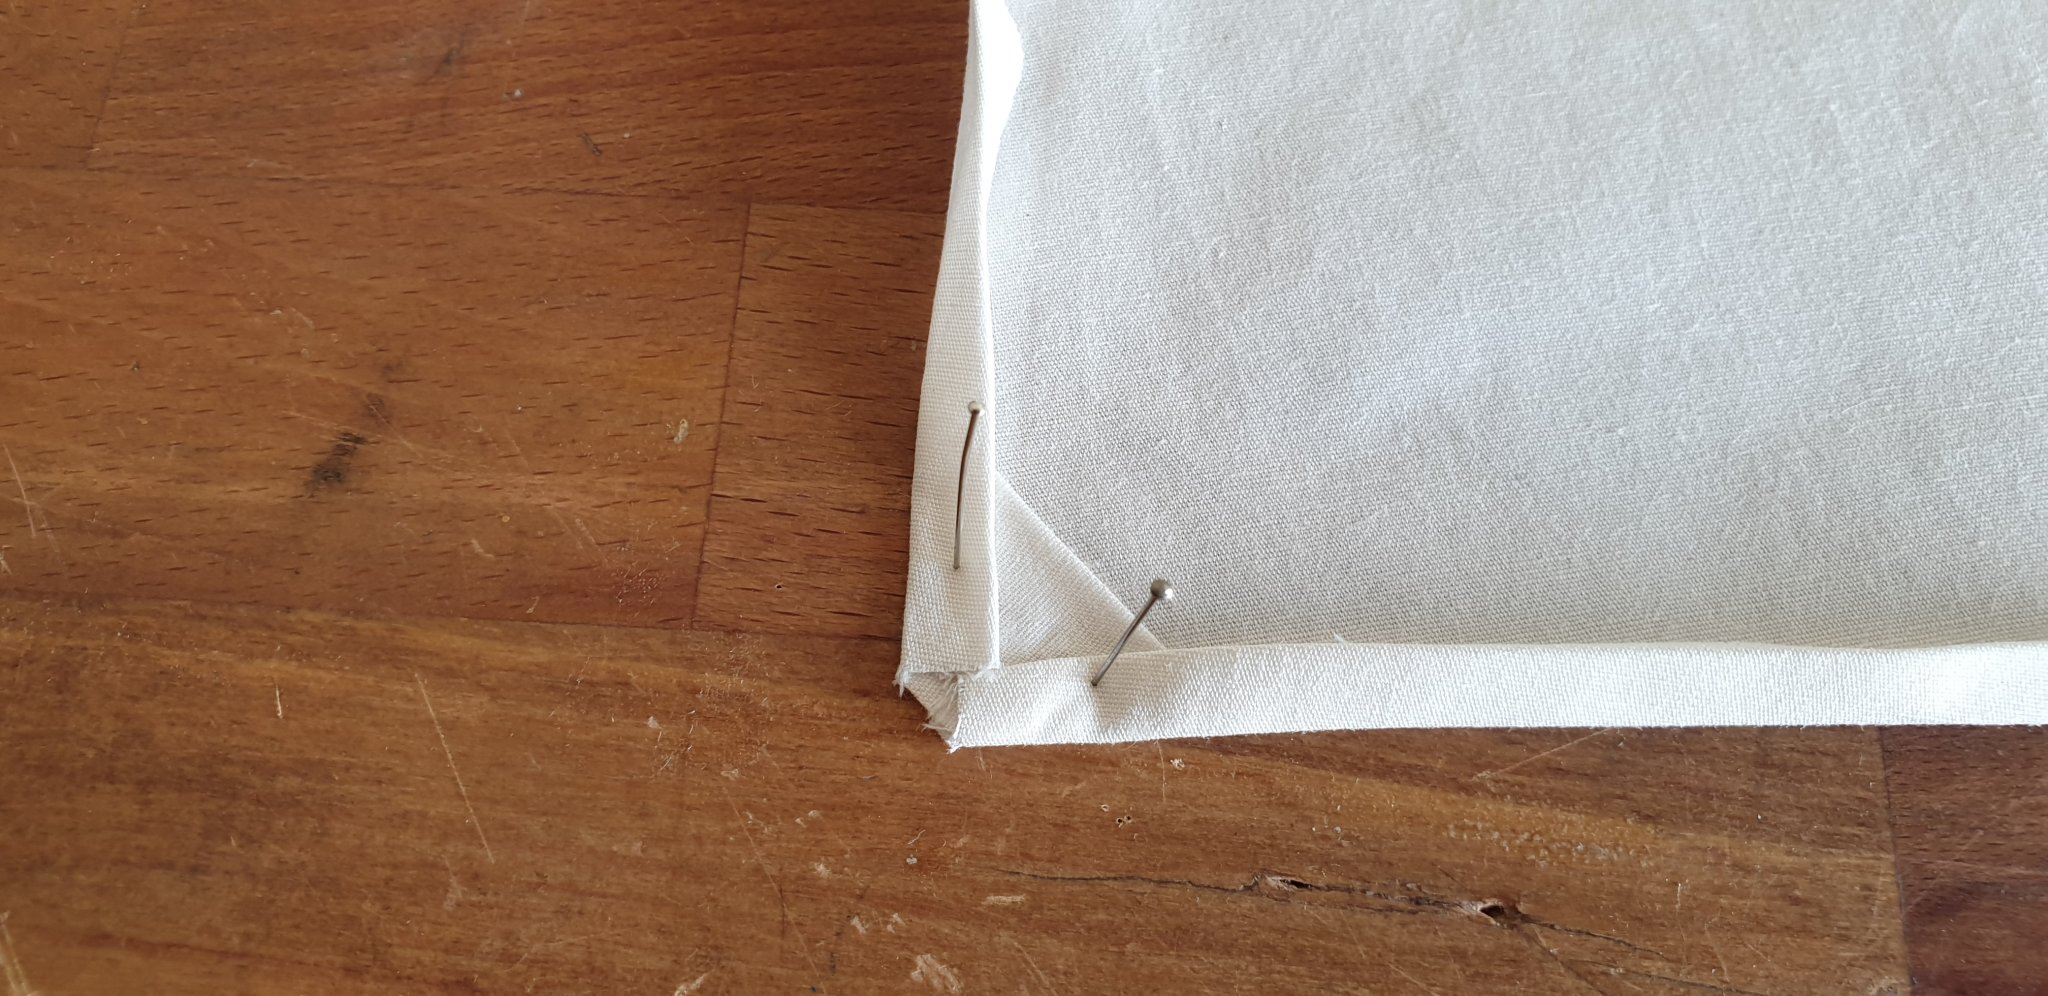
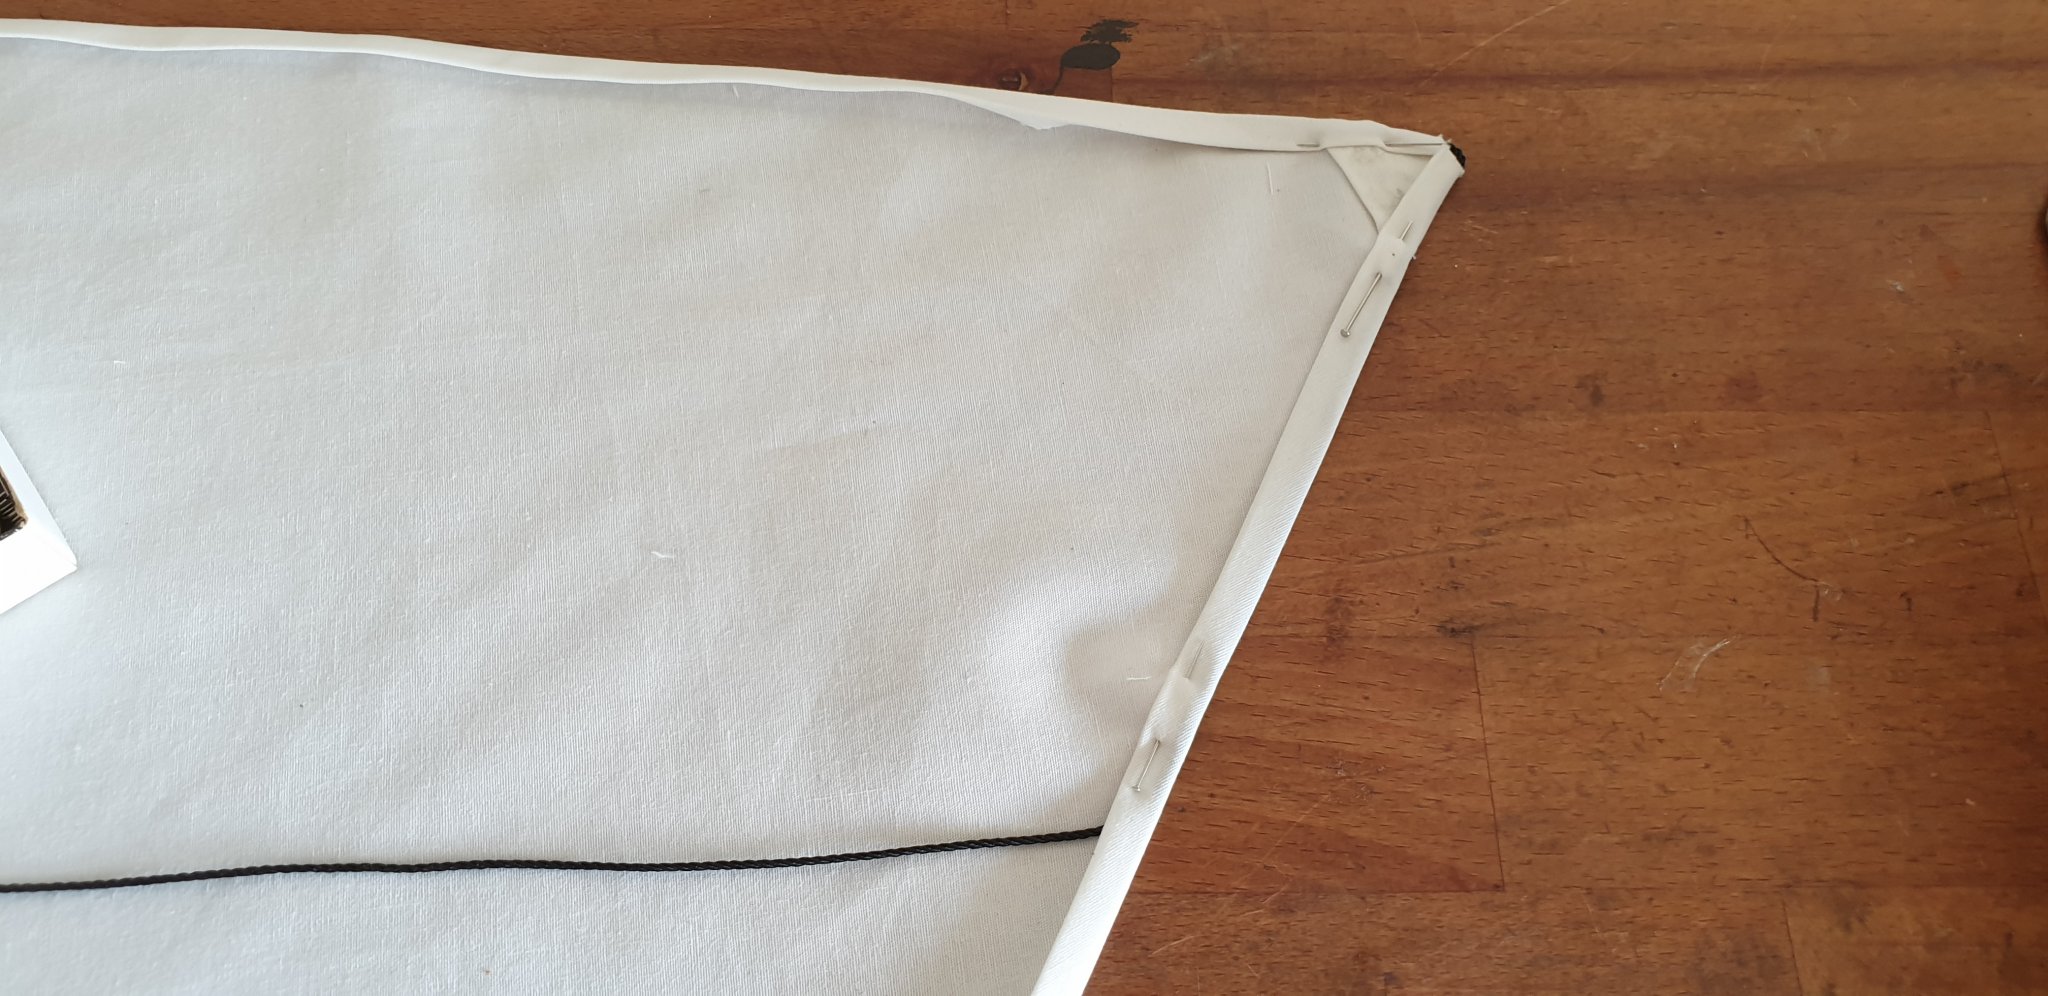
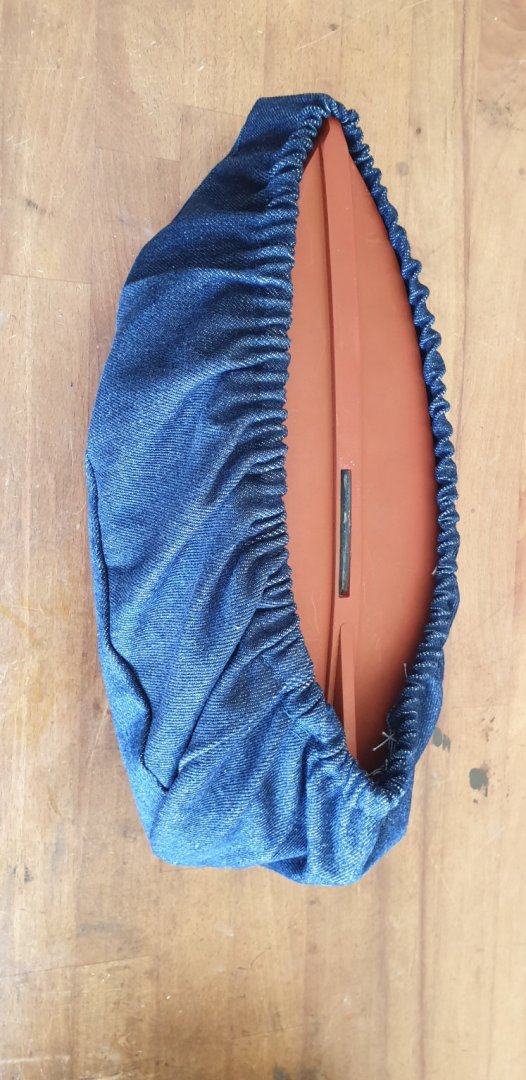
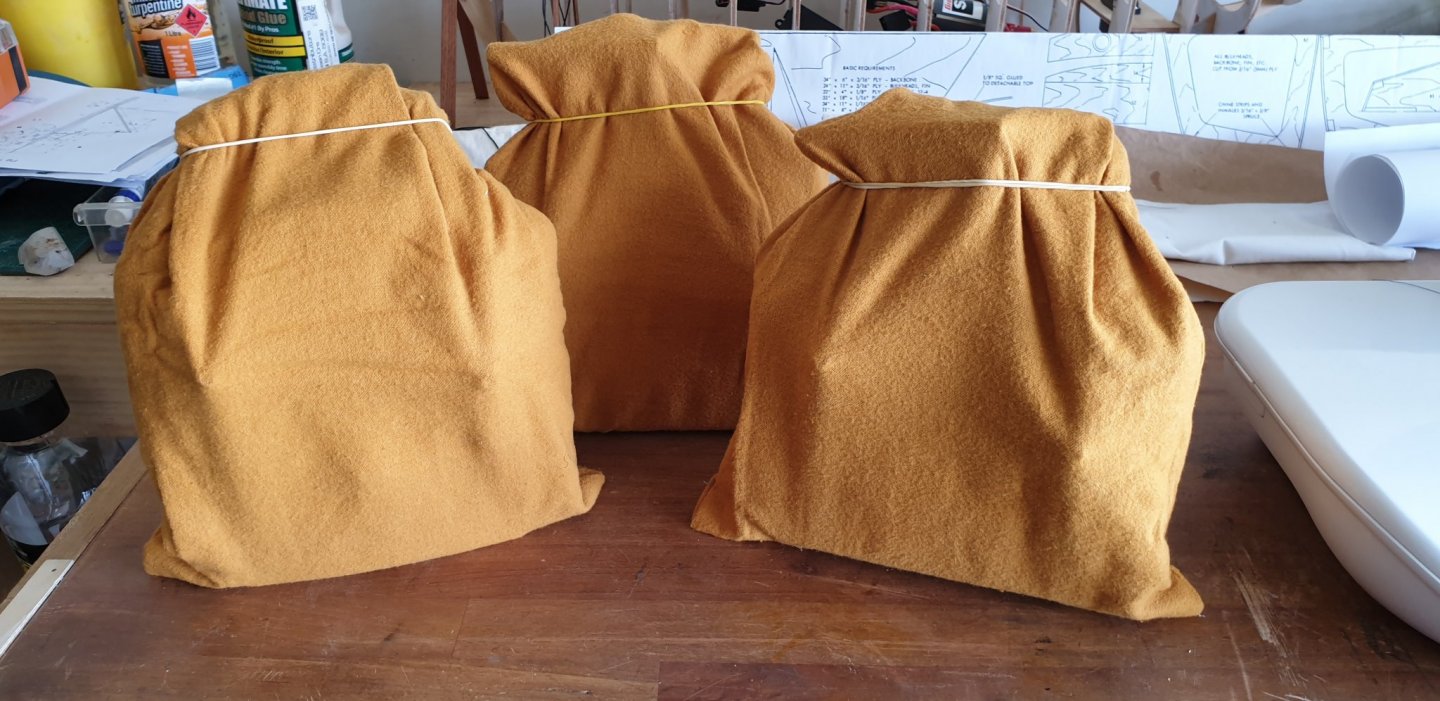
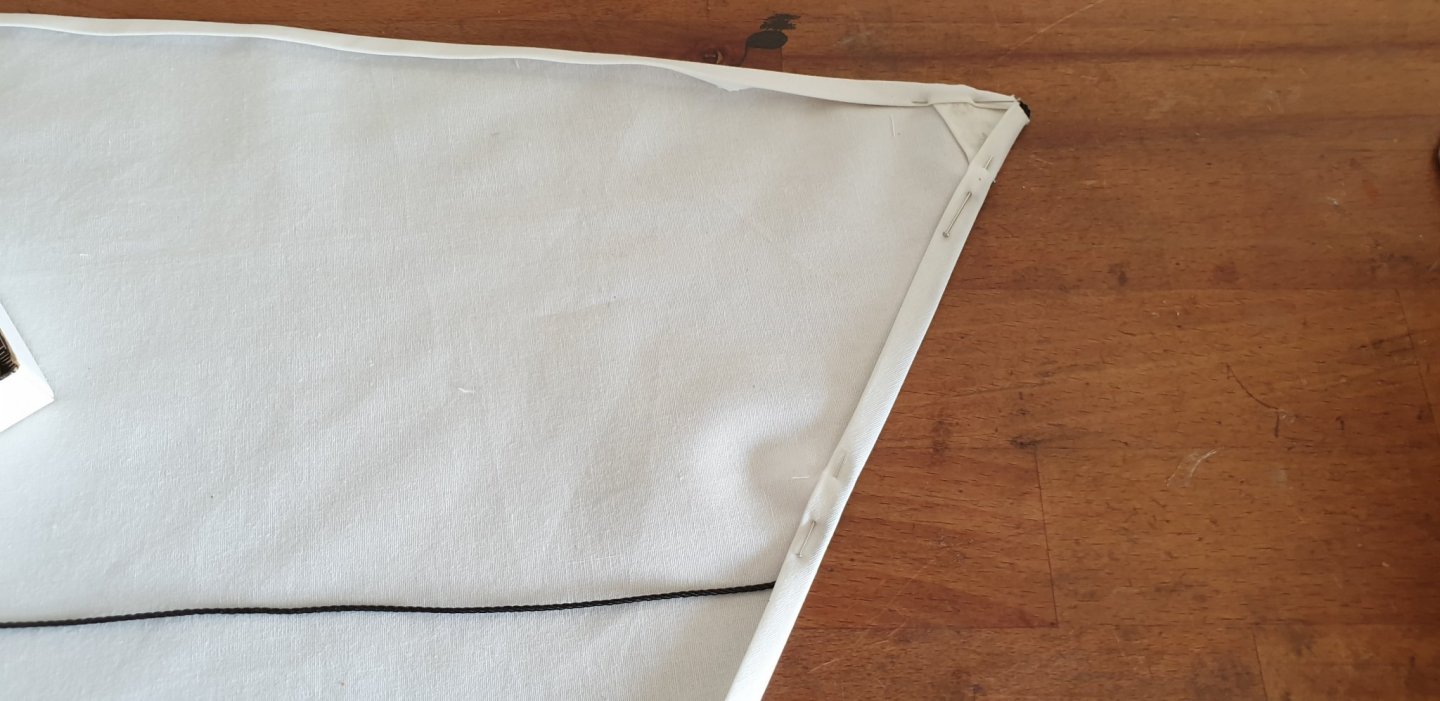
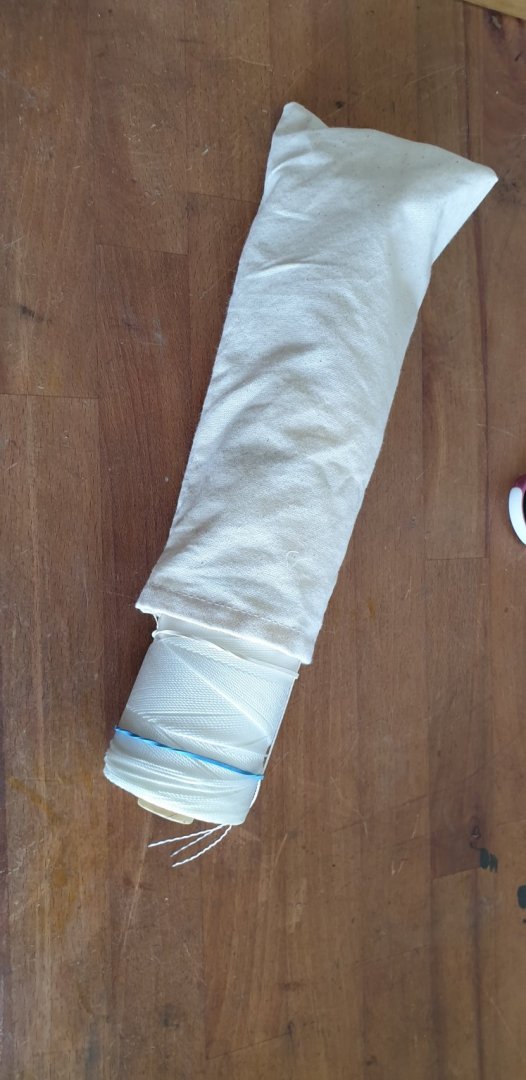
I did say that the Brandos were finished but somehow ( like a model railway ) they always need something else. I do enjoy sewing and indeed like to make my own Grandpa shirts and other clothing. If I can think of a reason to get the machine out then out she comes. Okay!....the two Brandos gather a lot of dust as they live in the same place as I do!....the " shed ". They also needed a bit of protection when they are in their brief case being transported to the pond by train. I also had some thick denim left over from my fabric stash which needed to be used. The result is a Brando Tarpy adorned with a half naked lady sewn on top. I make no apologies as half naked ladies are generally affixed under bow sprits and I believe they are very much desired by most sailors! The method to my madness is that a lady will not allow the dust to settle!!! Out comes the hoover and away she goes. I am hoping my theory proves correct as then the dust levels on Brando now should be reduced as there is a lady presence. We shall see!. I also knocked up a trio of transmitter bags as they were getting very dusty as well. Whilst the machine was out I took the opportunity to make Brando a new sai from cotton poplin. I do not like the nylon sail and also do not like working with nylon. I had a far nicer experience working with close woven cotton poplin. I made the sail as per Gary Webb methods and it worked out great. Two rules applied. The Leech runs parrallel to the run of the fabric. A bolt rope is applied to all edges except the Leech and made fast only at the corners of the sail. Otherwise it is left free running within the sail edges. I liked Gary's method of the cut with all the corners so as the bolt rope can be used to make the sails fast. I also liked his method of applying the reinforcement triangles at each corner of the sail. Clew and Tack etc. I show pictures how he did it ( how I copied ) To stop the twine from unravelling I secured three rubber bands around the roll, top, centre and bottom then made a quick bag to keep the twine clean. This is my sixth attempt at making the Brando sails. Five are in the dustbin and the nylon one will be replaced for a cotton poplin sail. The sails have no camber and not made on sail blocks. I might get into that once I know what I am doing but for the time being I believe KISS must prevail. Gary's boats all sail beautifully with simple cotton sails. They will not win a race but there again I am in no hurry either. Pete


-
Cheers John. I cheated and used my belt/ disc sander ( very carefully ) to do the bow. I cannot wait to skin it. Trouble is I get side tracked into doing something else. My mind is uncontrollable but I do try to practice the " breathing " and calm down. See my " Brando " thread and you will understand. I will need 30 minutes as I am just about to post. Pete
-
Nice to hear from you Nils and many thanks. Pete
-
Thank you John and Druxey for the nice comments. I always thought that there was something amateurish about hard chine hulls until I read up about them. I still do not know the full nine yards but as far as sailing purposes are concerned there is a lot to be said for them. They plane on the water better and are less inclined to " roll ". When we are racing ( and I am not inclined towards that ) then do we want our boat to roll right over to look " cool " or do we want it as upright as possible in order to catch maximum valuable wind? My gut feeling is the latter. I have been reading up and price checking on the International One Metre all singing and dancing carbon and fibre glass hulls together wih custom made sail sets made from the newest " this that and the other " and I have been totally put off by it all. It costs thousands of dollars, nothing is hand made by the person sailing it and I am not set on competition. Back to Vic Smeed and building a nice old model yacht. This IS a hand built boat in the old style. Take a look at the lines of the hull. She is a beauty! Check out the Beam!!...its huge and she will not go over in a hurry. Just looking at it....I was contemplating making another hull the same and planking it out like an old 50s motorised speed boat. It has the lines. The decks are beautifully curved by design. It gives me much pleasure to go back to Vic's days and relive them by building another of his classics. In his instructions he even stipulates that the tracing of all parts takes 20 minutes and all the cutting out just 1 1/2 hours. A full materials list is included. Thats what I call comprehensive. Pete


-
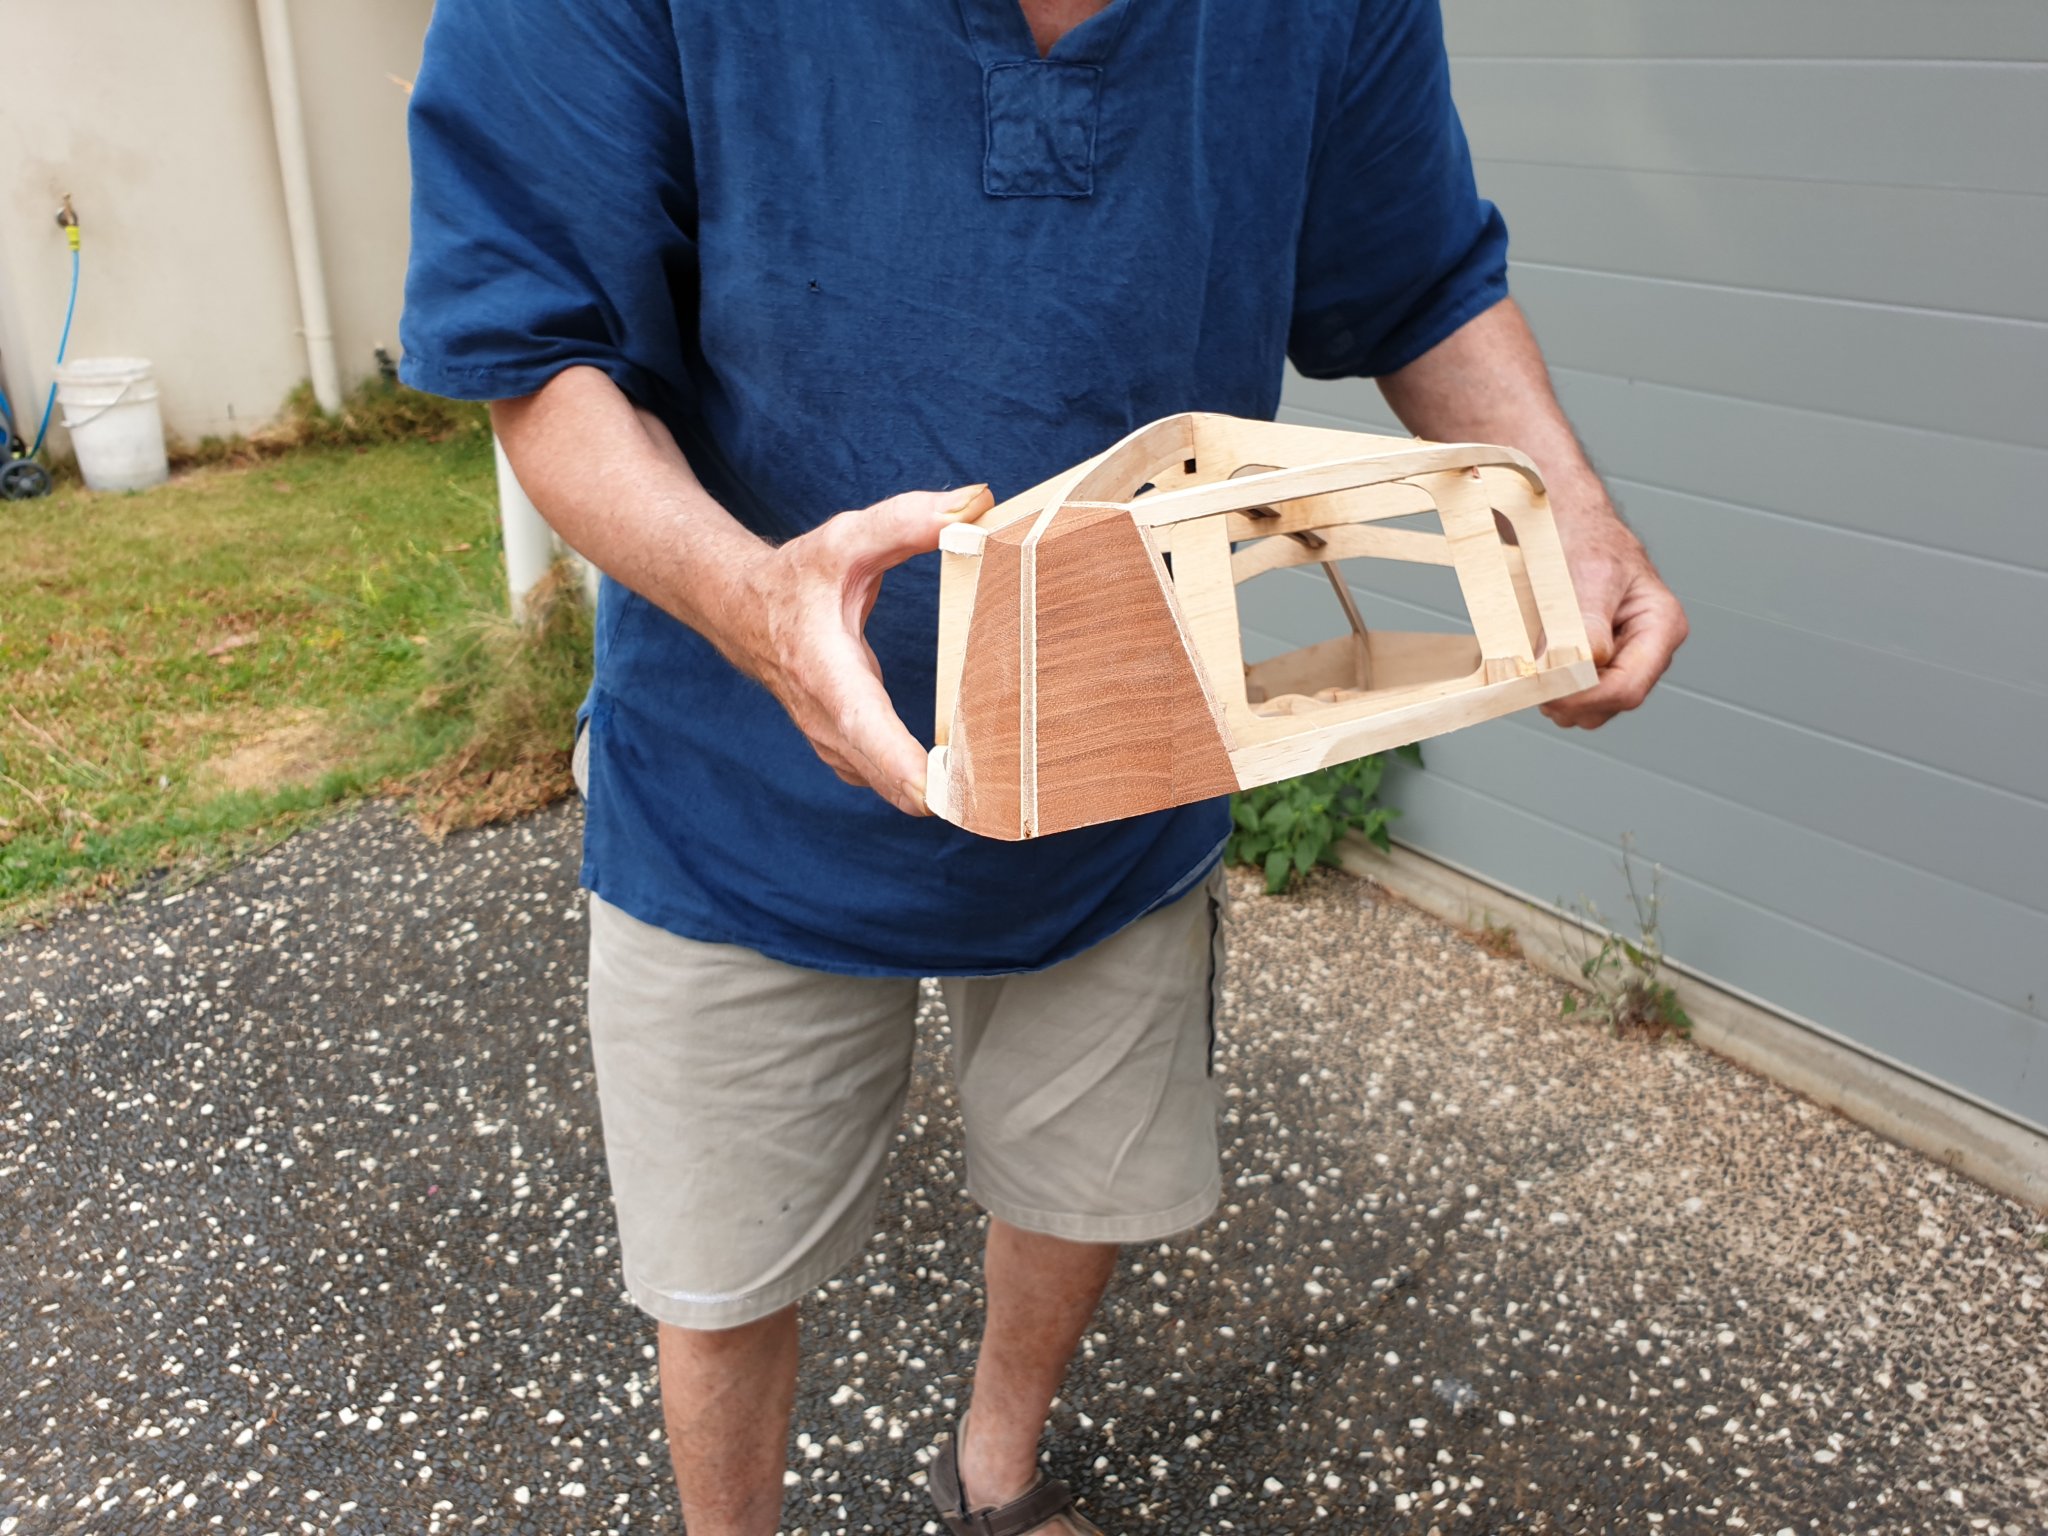
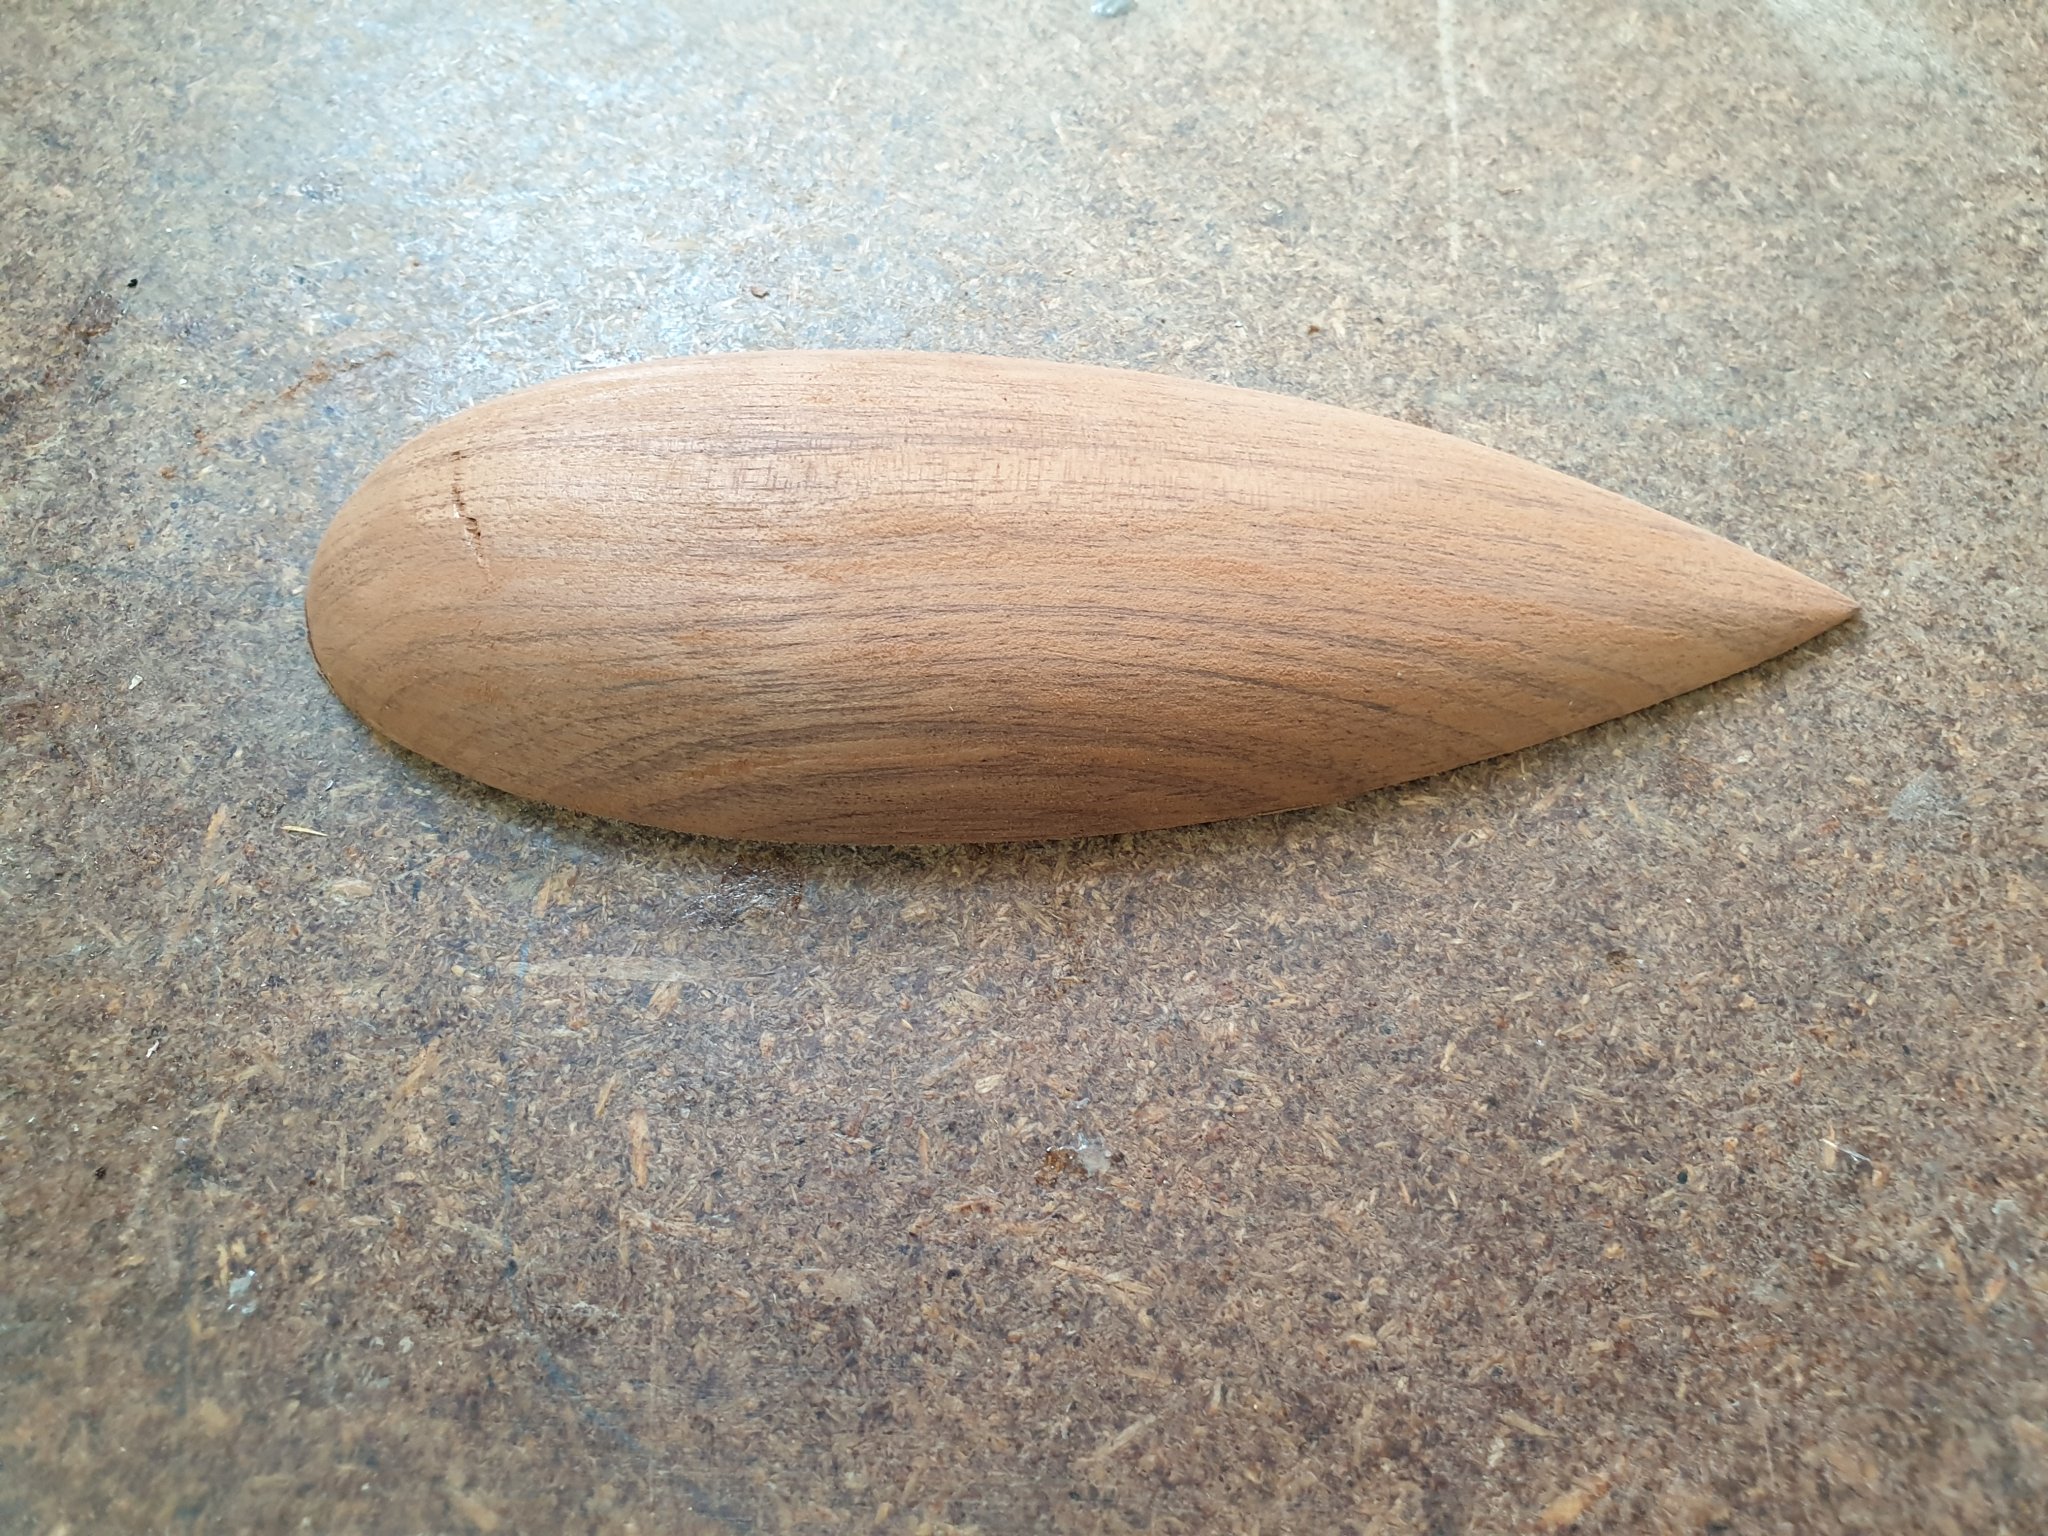
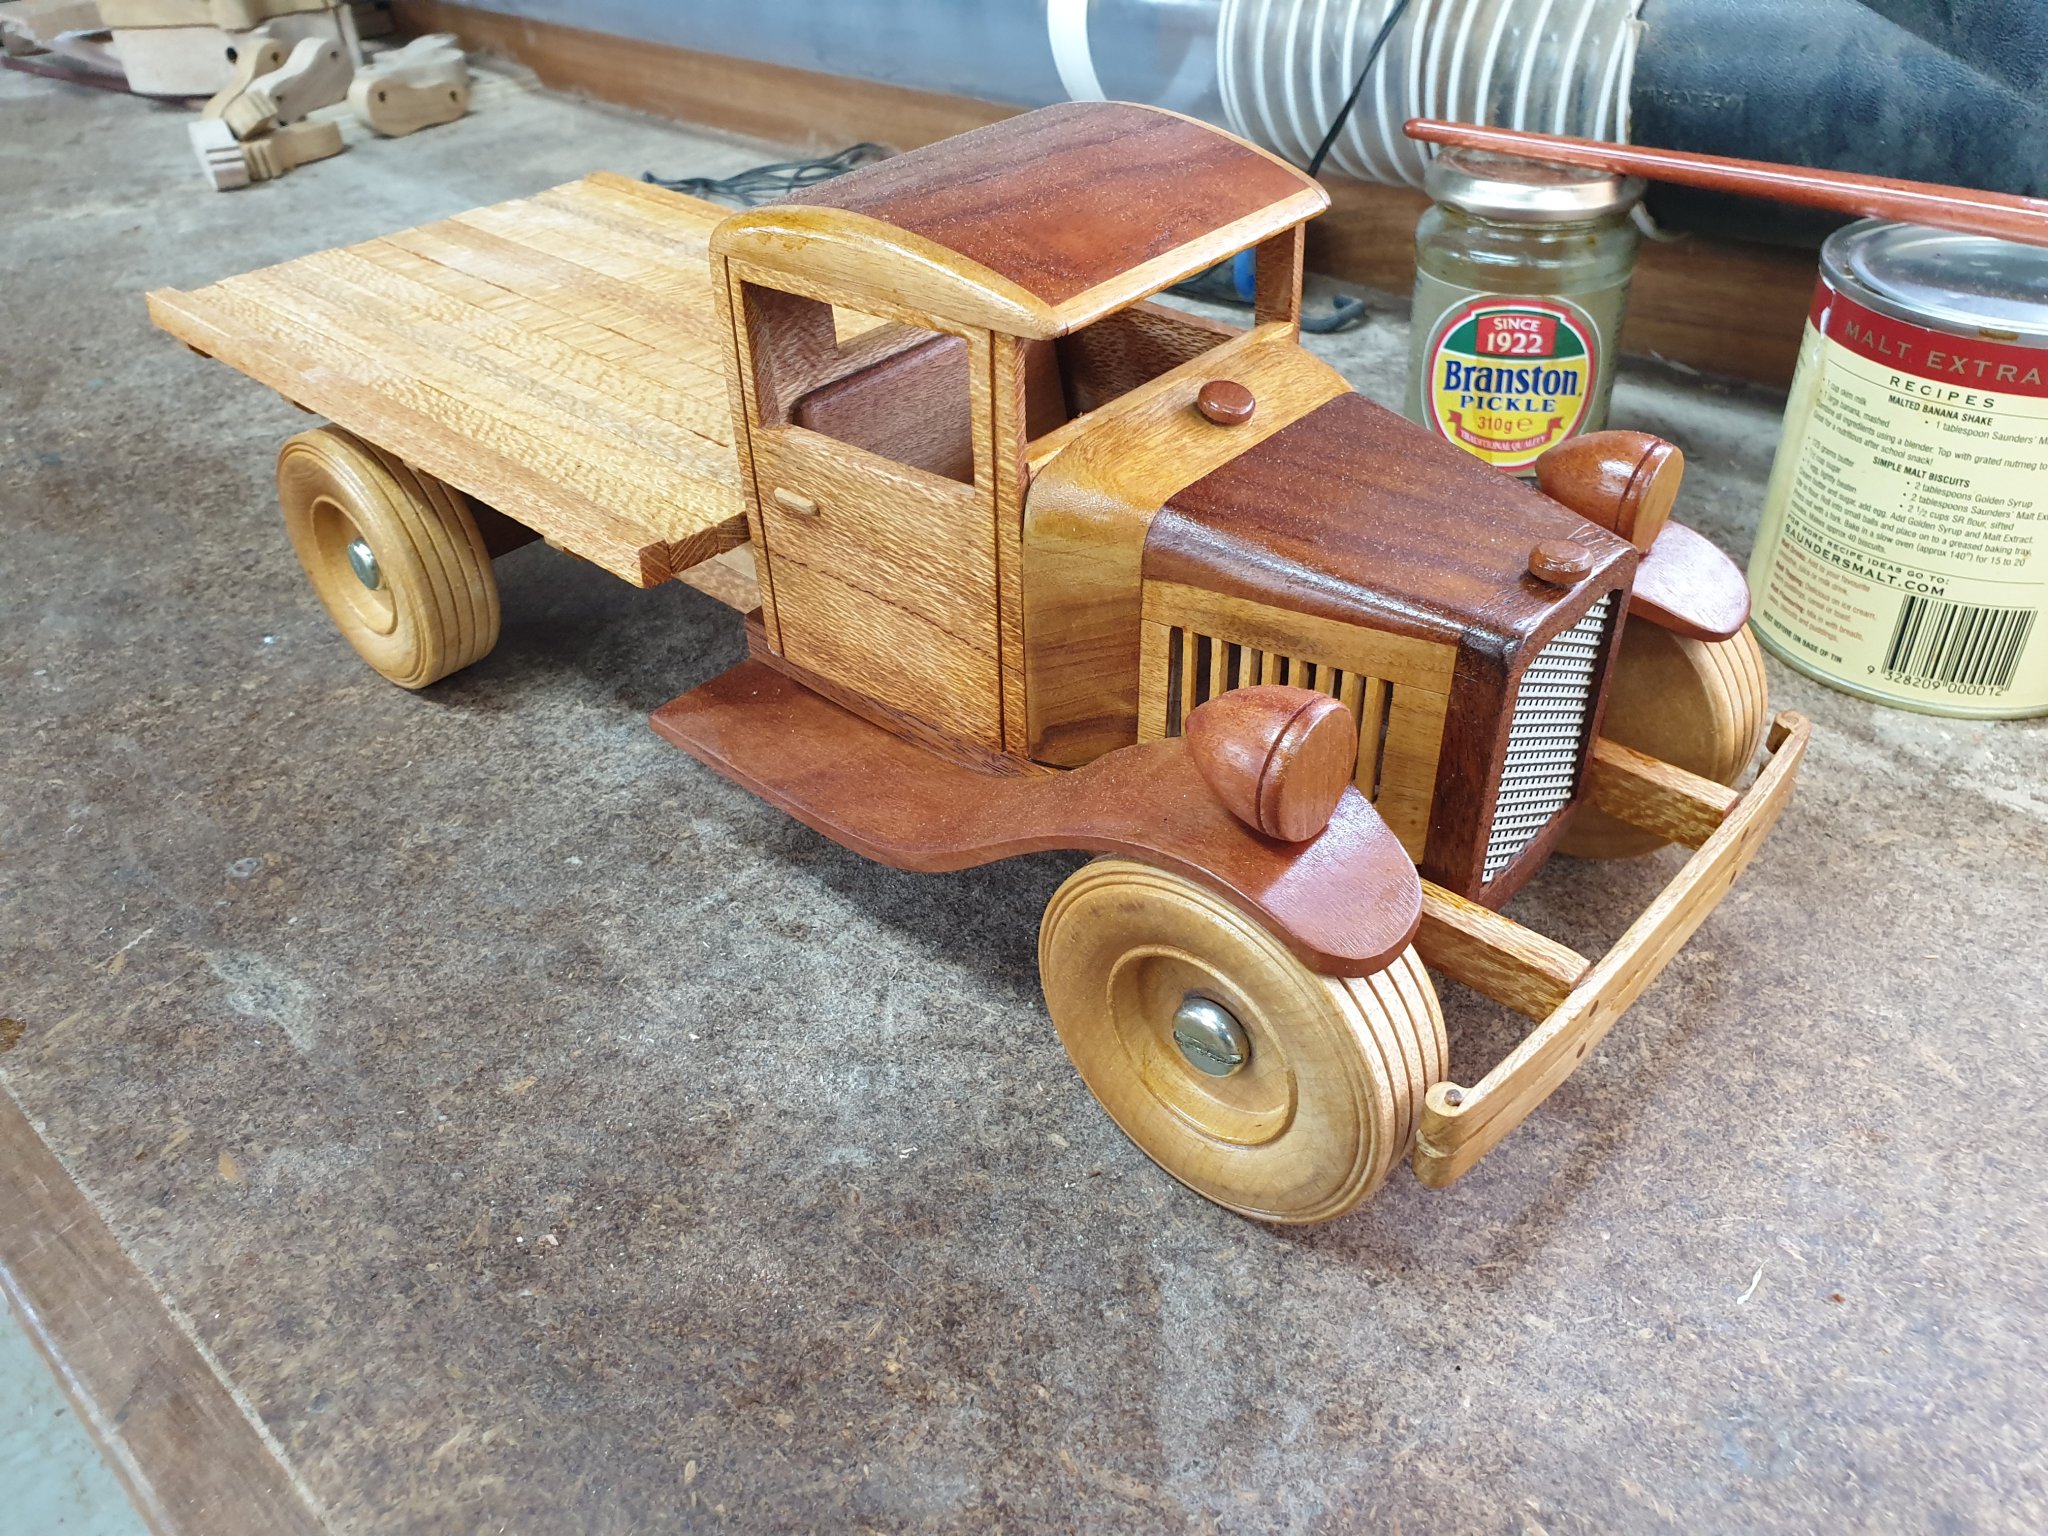
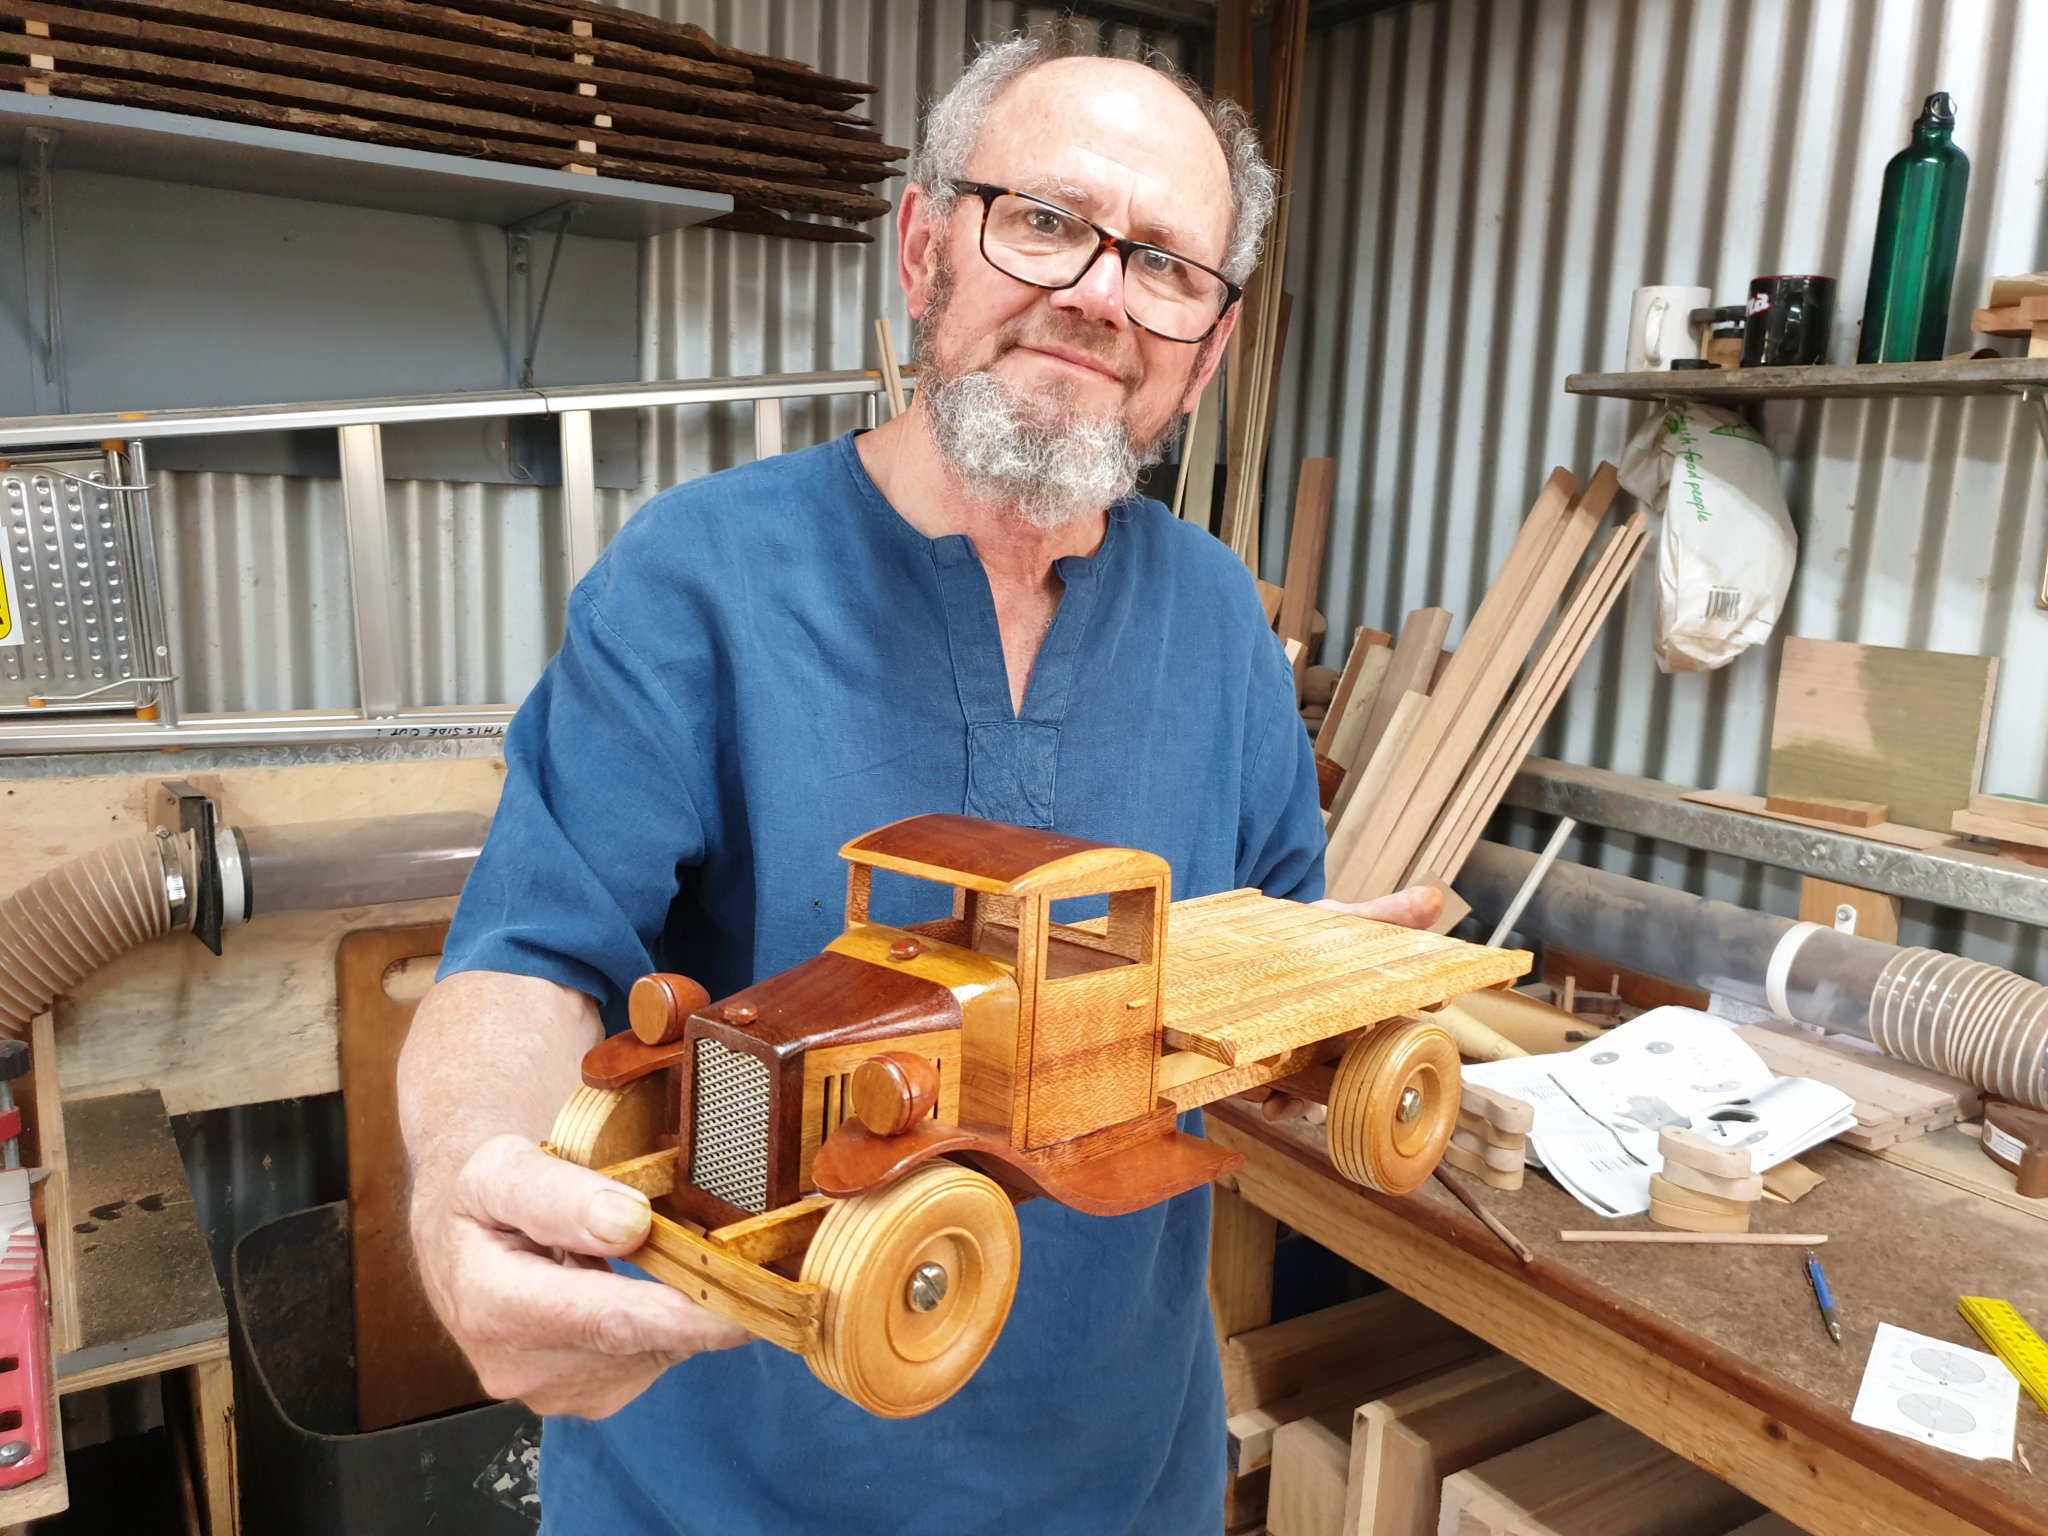
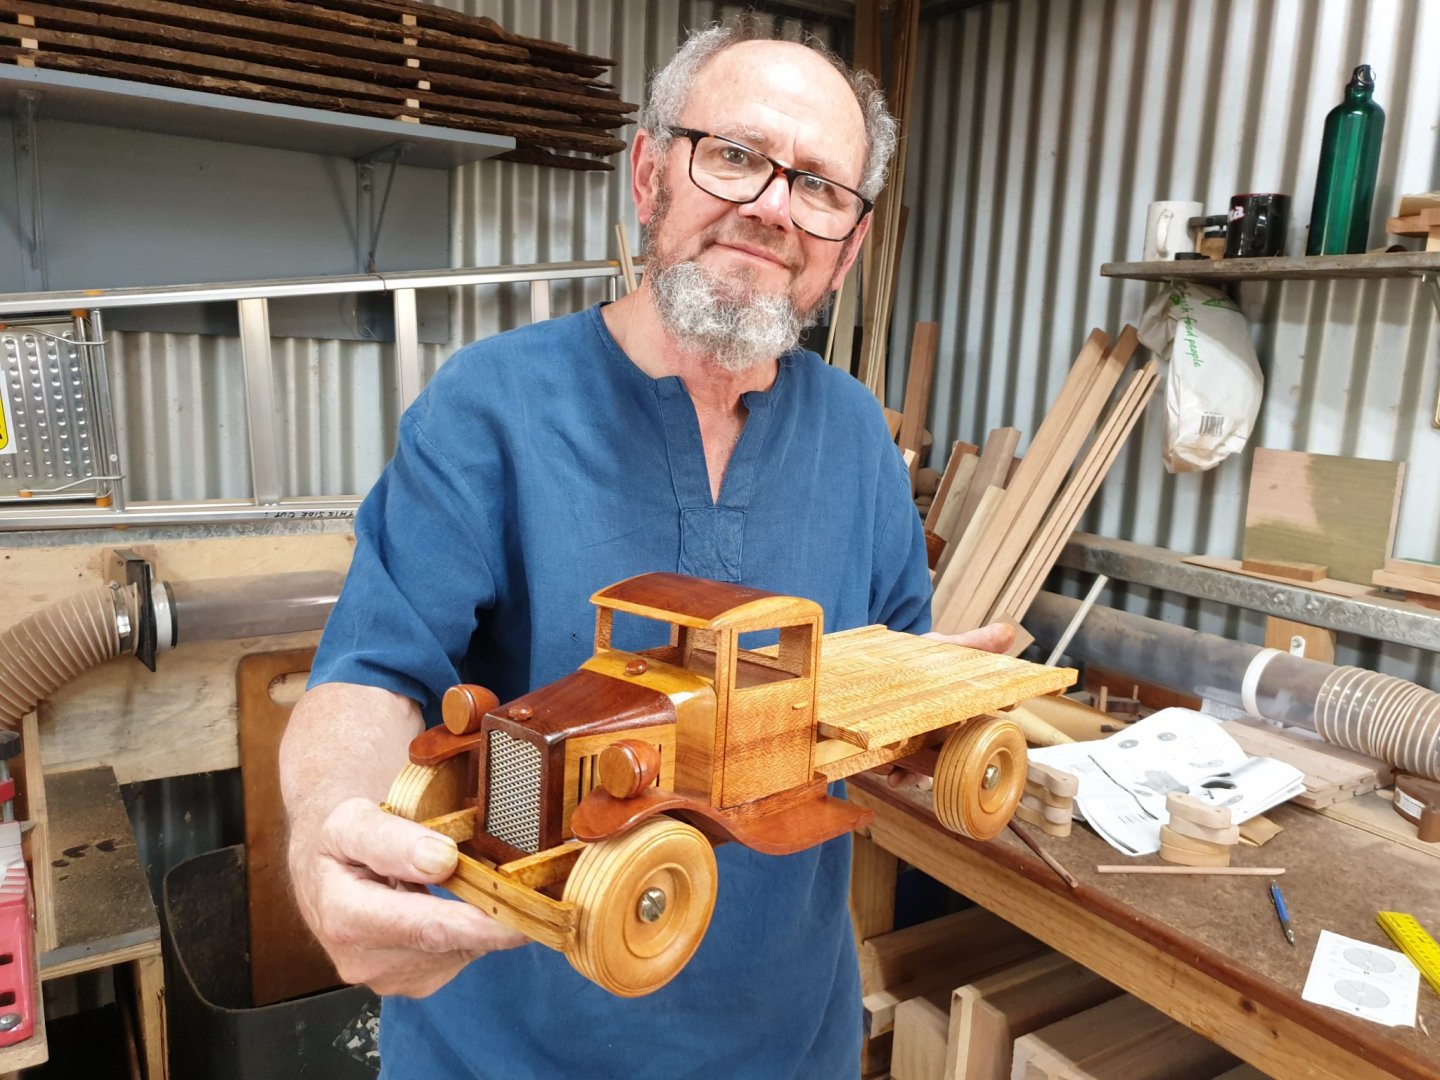
Thanks for all the likes and I do appreciate you putting up with me with my simple craft compared to your works of art with ship building. I just have another take on it all. Well I have had to remove the hull frame from the board because nose blocks had to be made. I have made them now and will post pics tomorrow when daylight arrives. I made the plug today for the two lead halves that form the bulb on the keel. It is now in the hands of my friends at work who will cast it in lead for me. I am a volunteer two days a week and enjoy the workshop facilities there. They have their own foundry and wood work shop where I work/ hang around and make model trucks etc. Here is a pic of the bulb half made from very workable red cedar which I have a good stock of. Also a pic of the truck I finished today after two months of fun. Sorry to digress but I was quite pleased with it. Now you see face to name. The reason behind the mug shot is not to show how irresistably handsom I am but for scale purposes. Its quite a big truck! Pete.


-
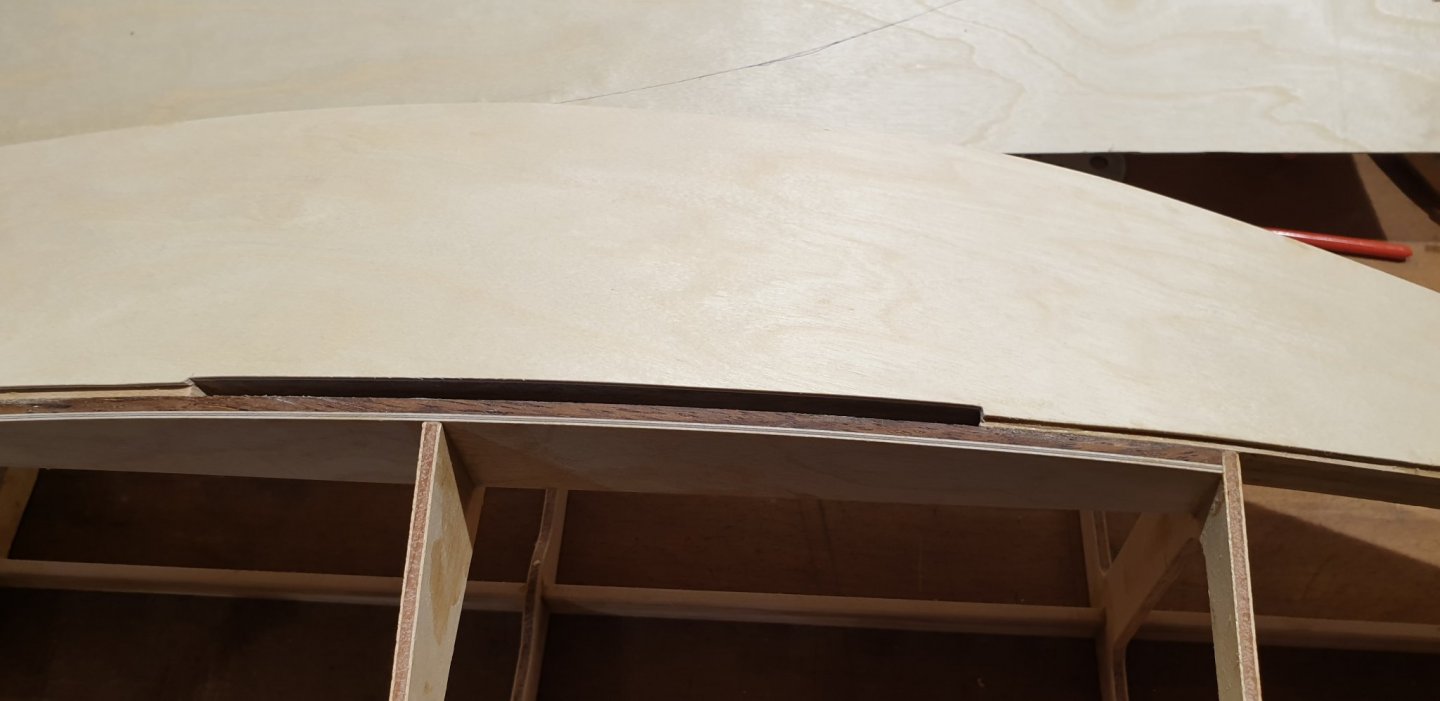
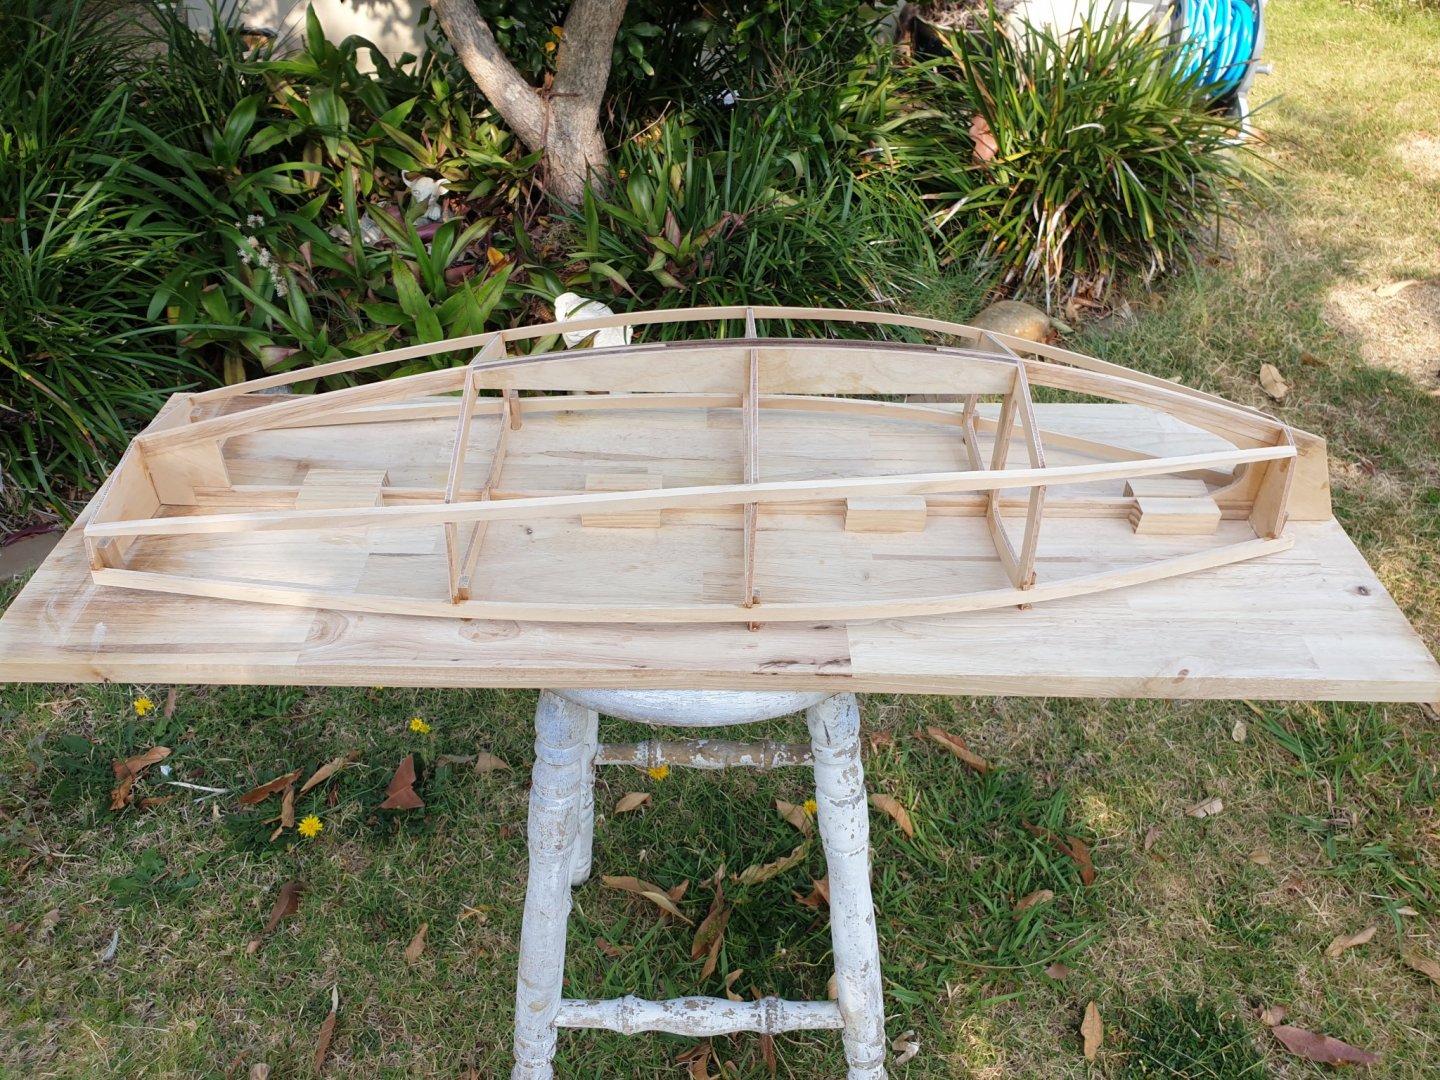
I have glued and chamfered the inwales. Thank goodness for CA! The instruction sheet recommends glueing on the bottom inwales and then to turn the whole over to fit the top ones. I thought it better to keep the boat on the board for as many operations as possible . I do not want it to twist out of shape. I will now start to fit the bottom skins leaving the boat on the board. I think it will have to come off to fit the side skins but by that time she should be rigid and true. Pete.

-
Ha ha. Thanks John. I hope so too. I tend to go at a pace but try to avoid beating time! I l eave that to watches. Pete.
-
Hi John. Here you are looking at the modern day equivelant to a Vic Smeed design. This one is by Gary Webb a very experienced yachtsman, builder and modeller. If you have the inclination you can check out his You Tubes under "Sail Tails ". Gary has designed a number of boats that are all cheap to build and sail well. Pete.
-
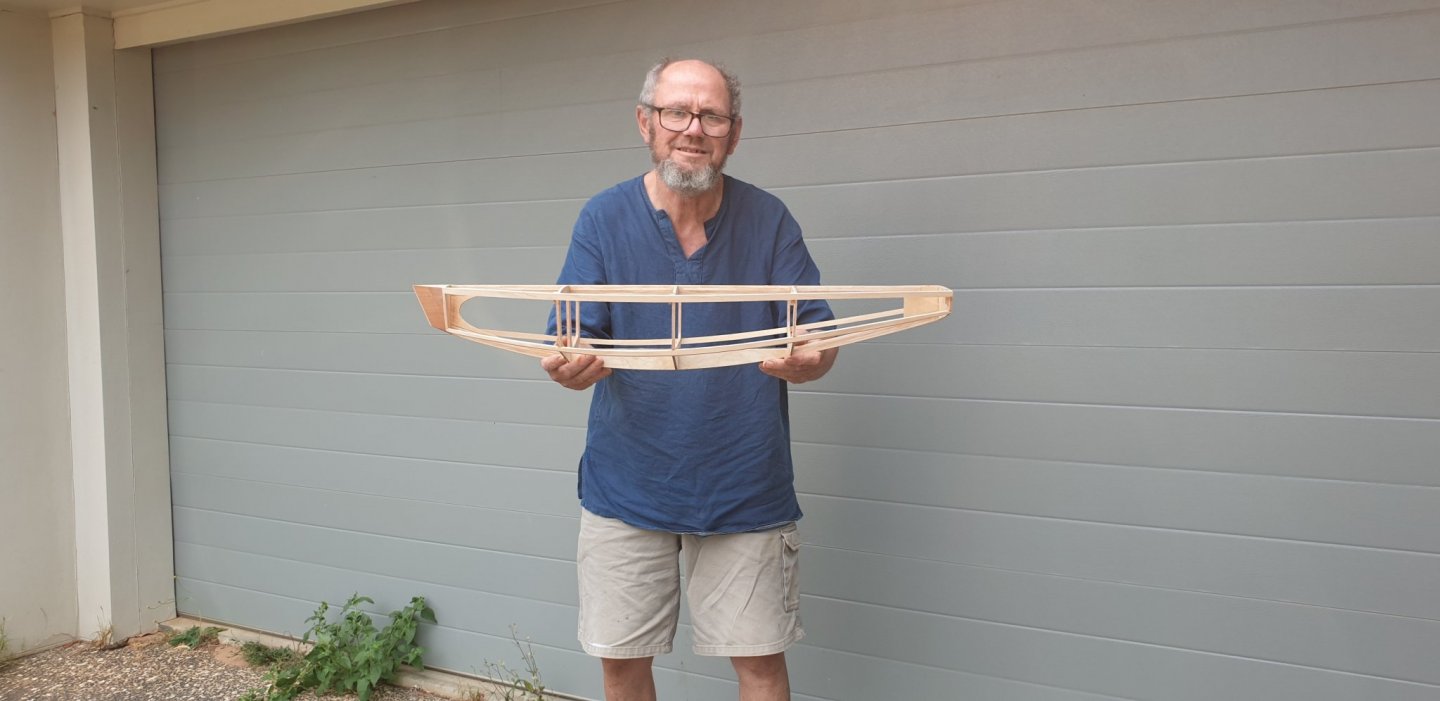
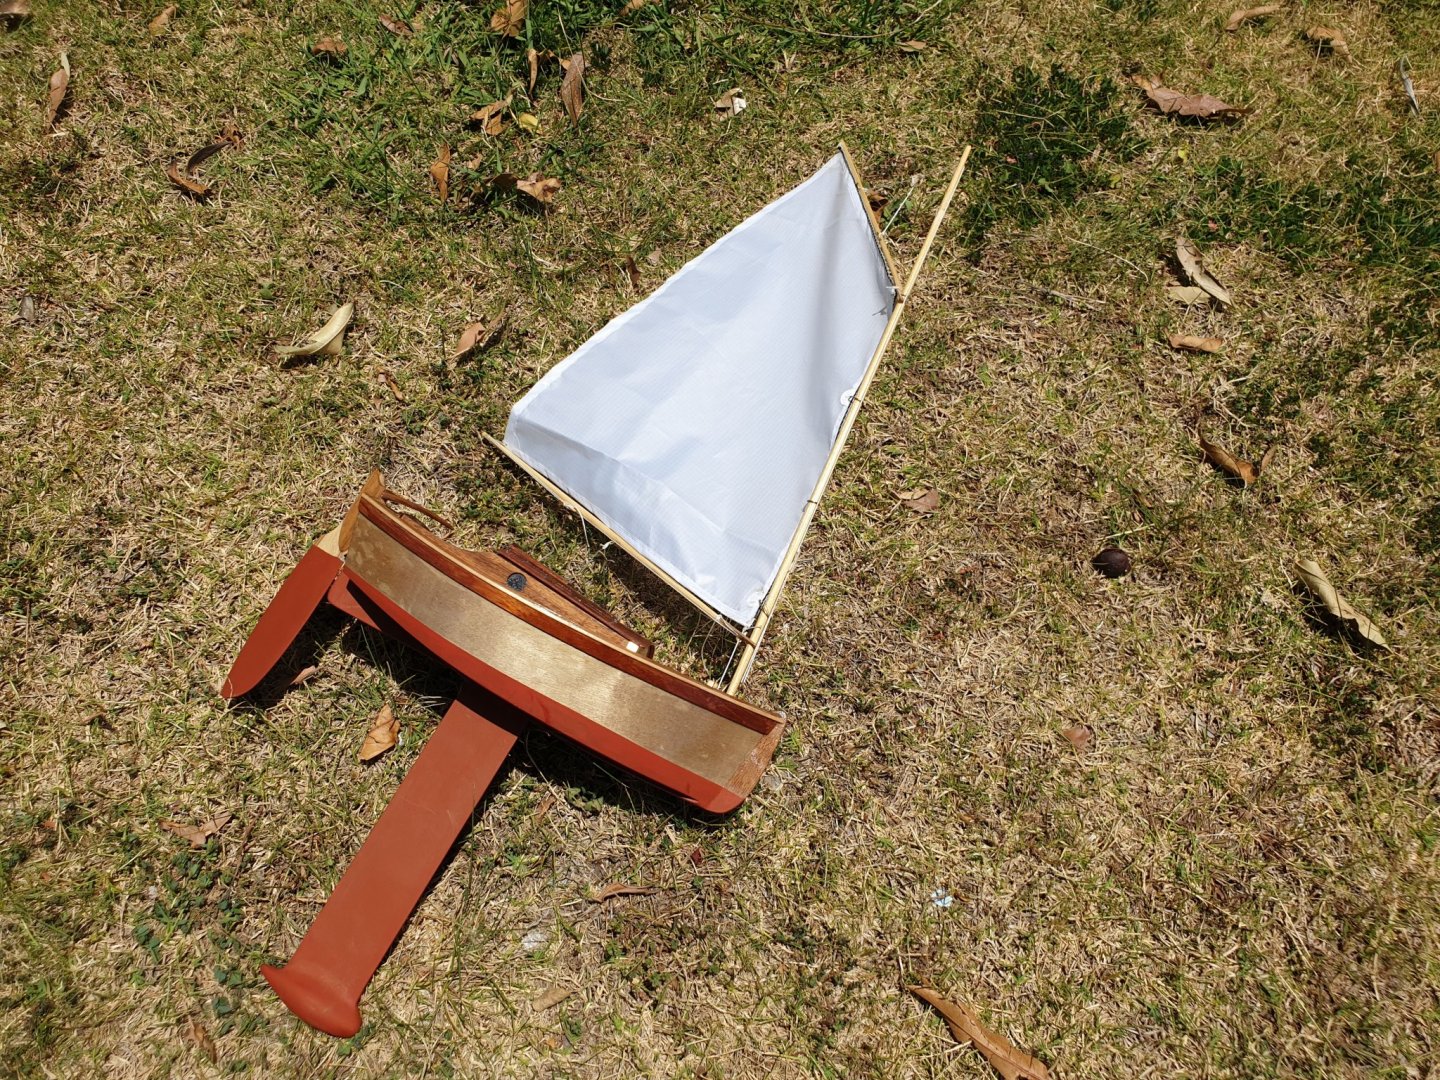
She has quite some beam on her. I like beamy boats!!! Pete
-
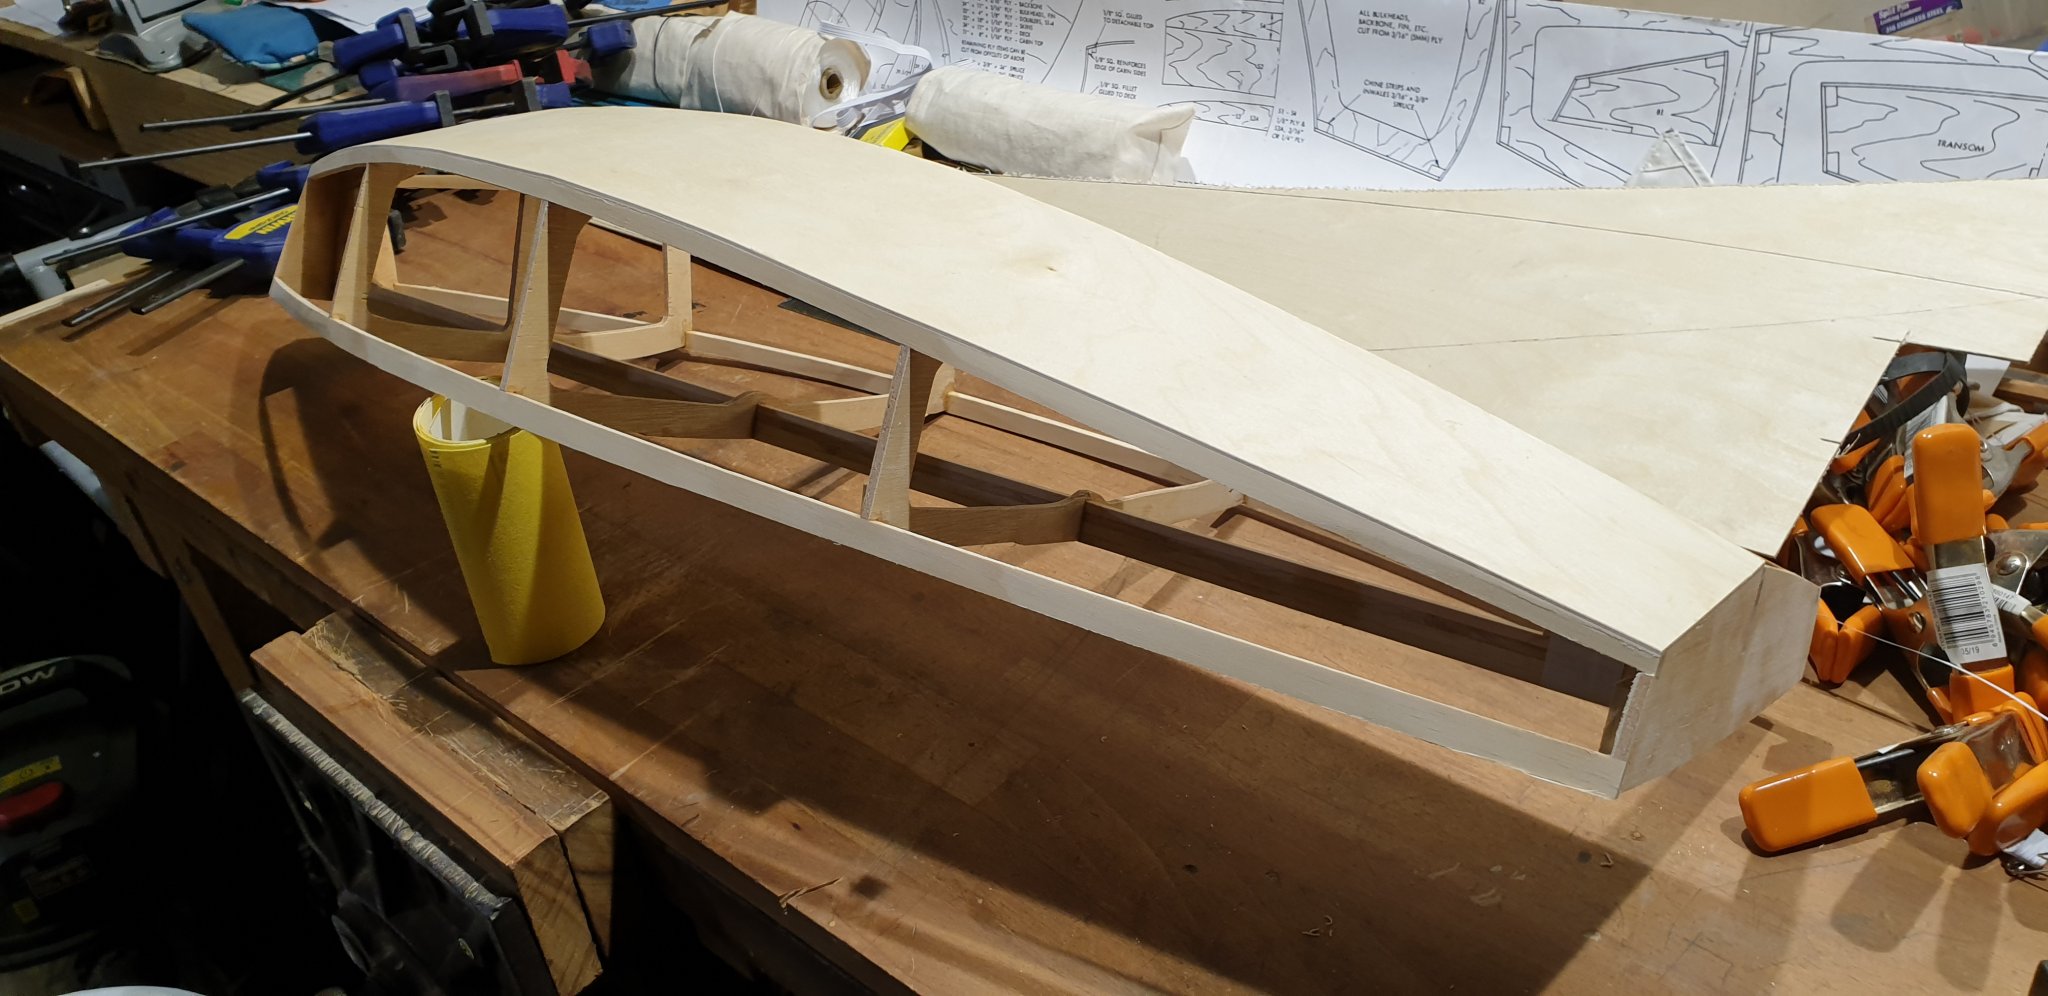
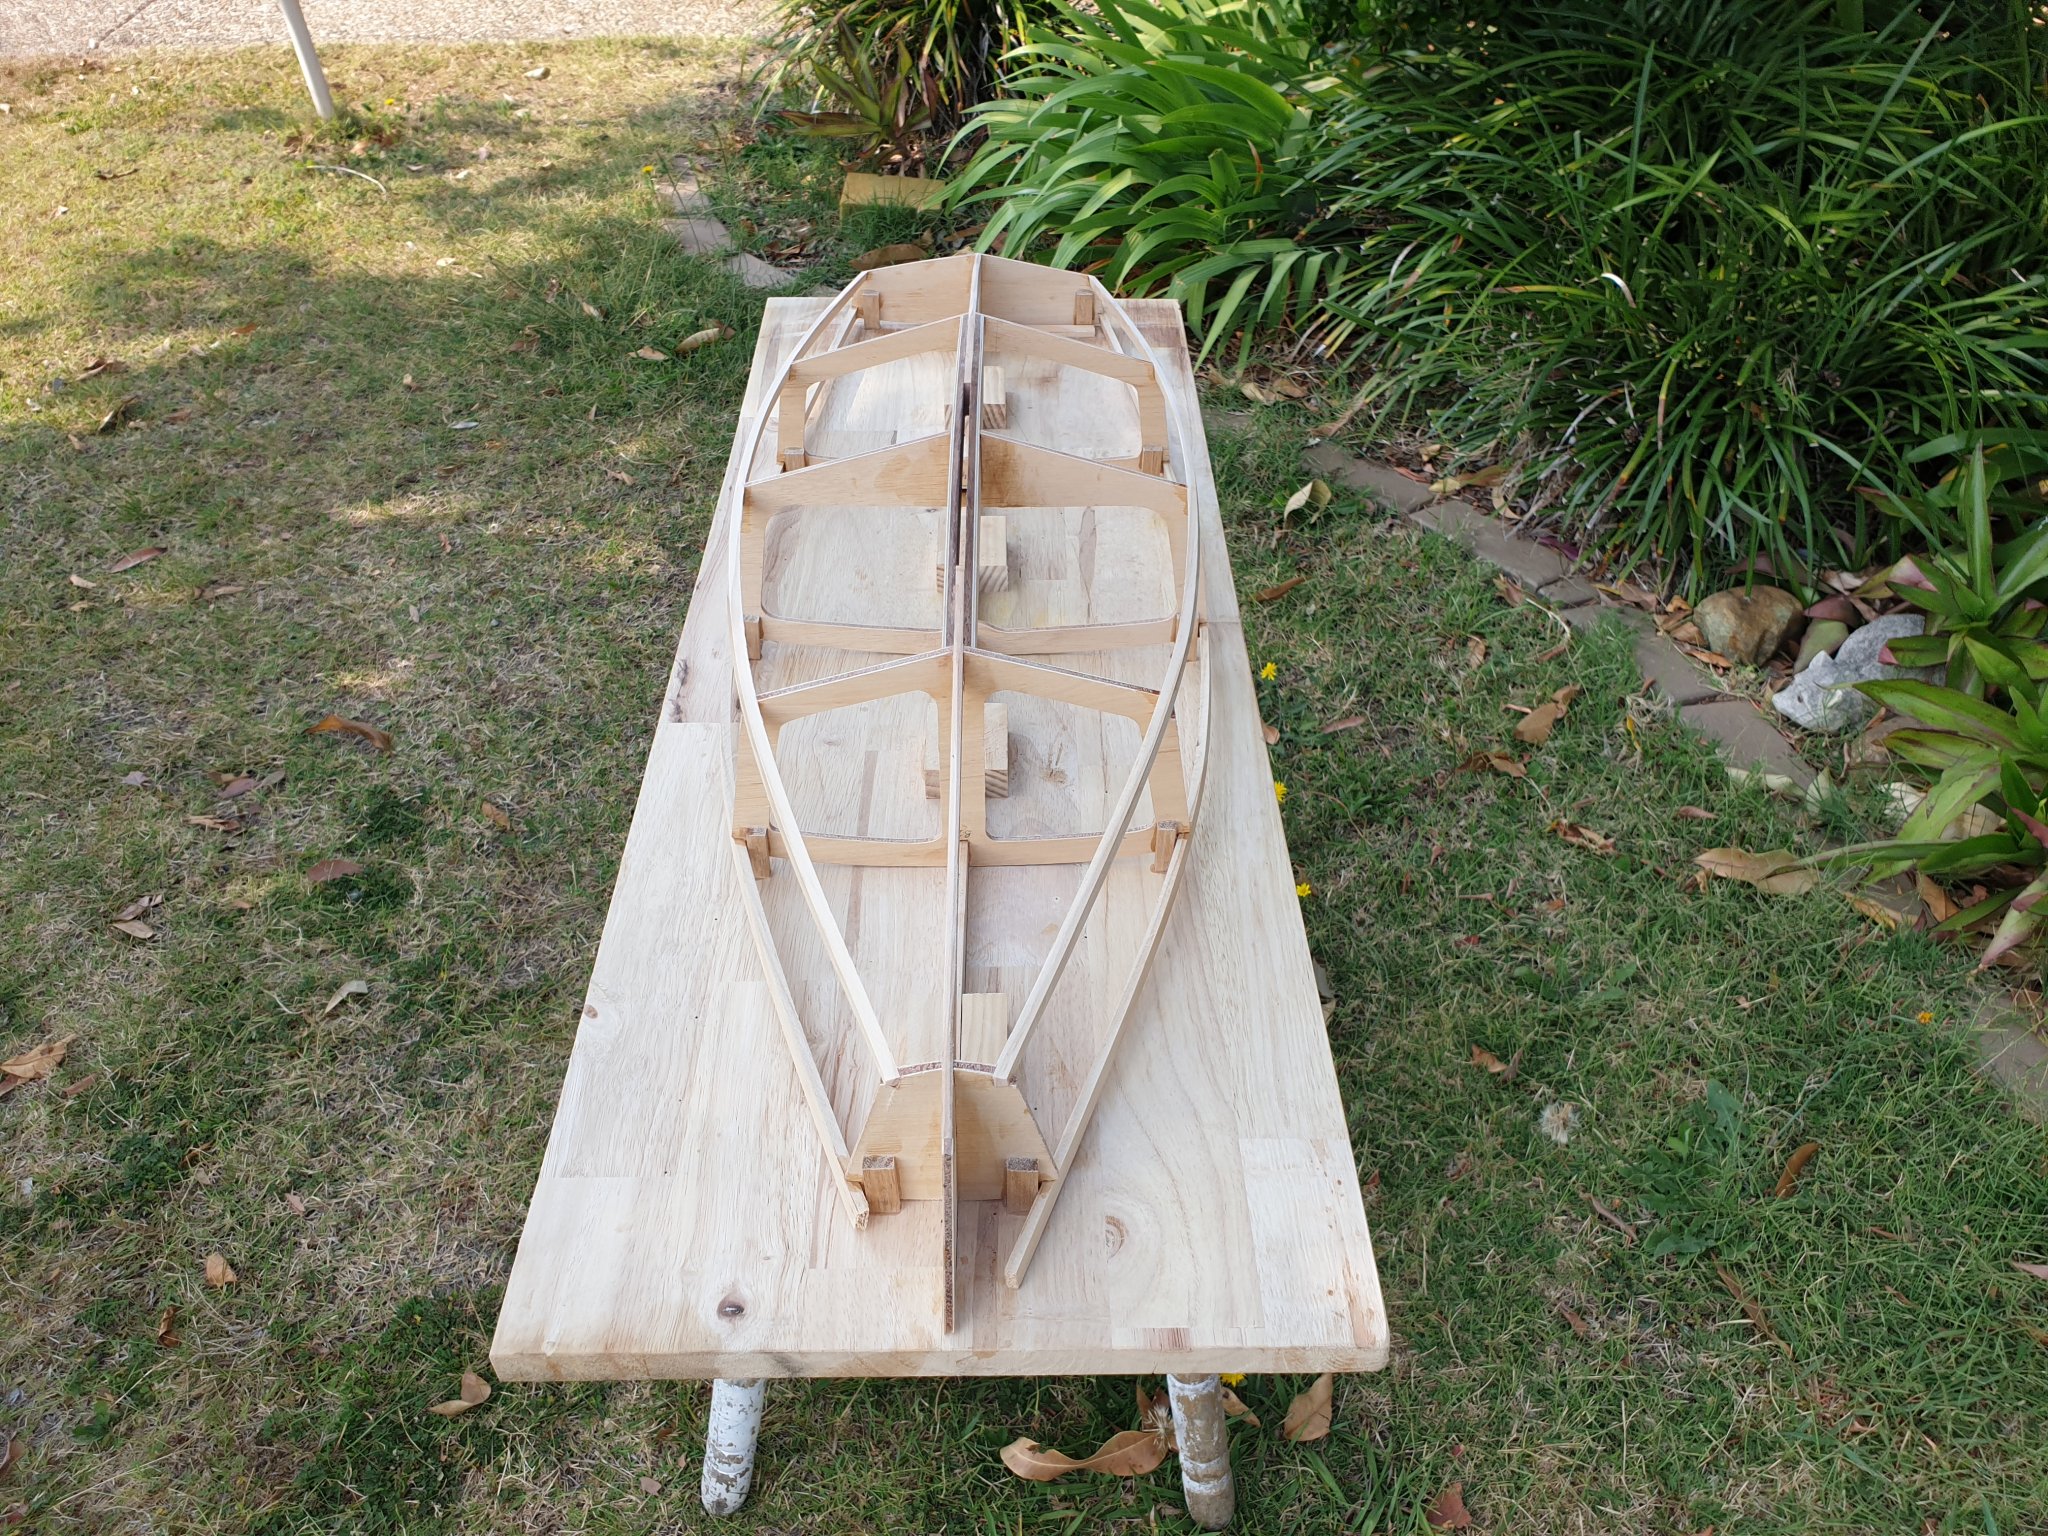
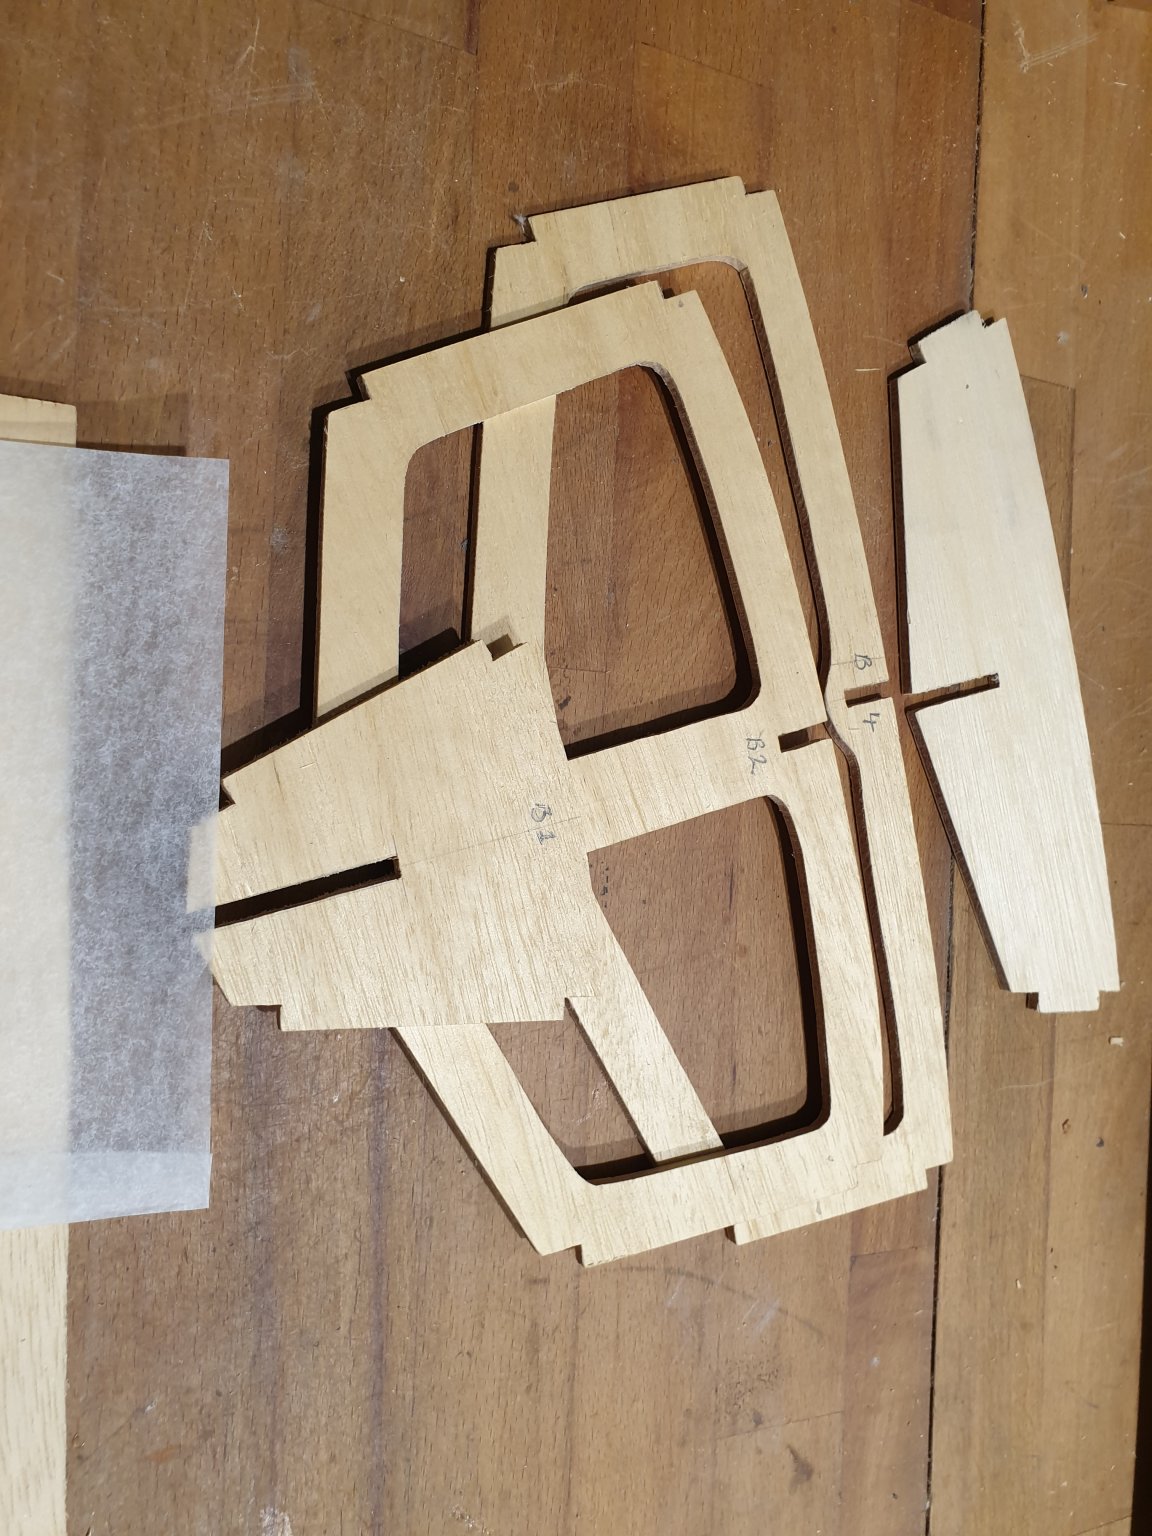
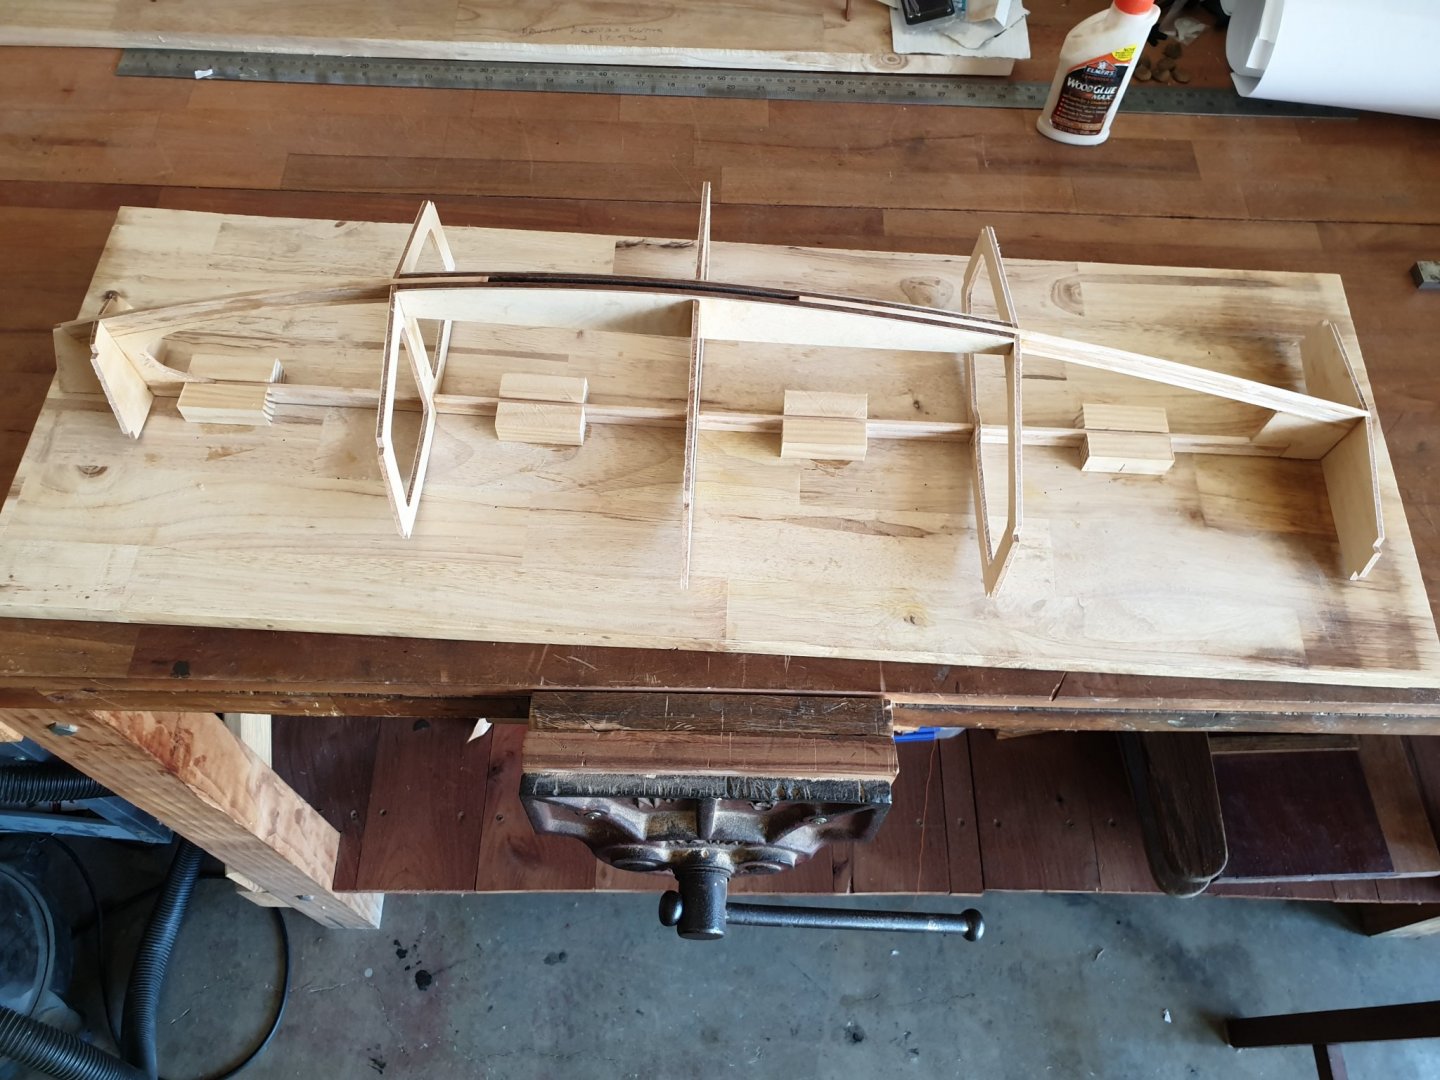
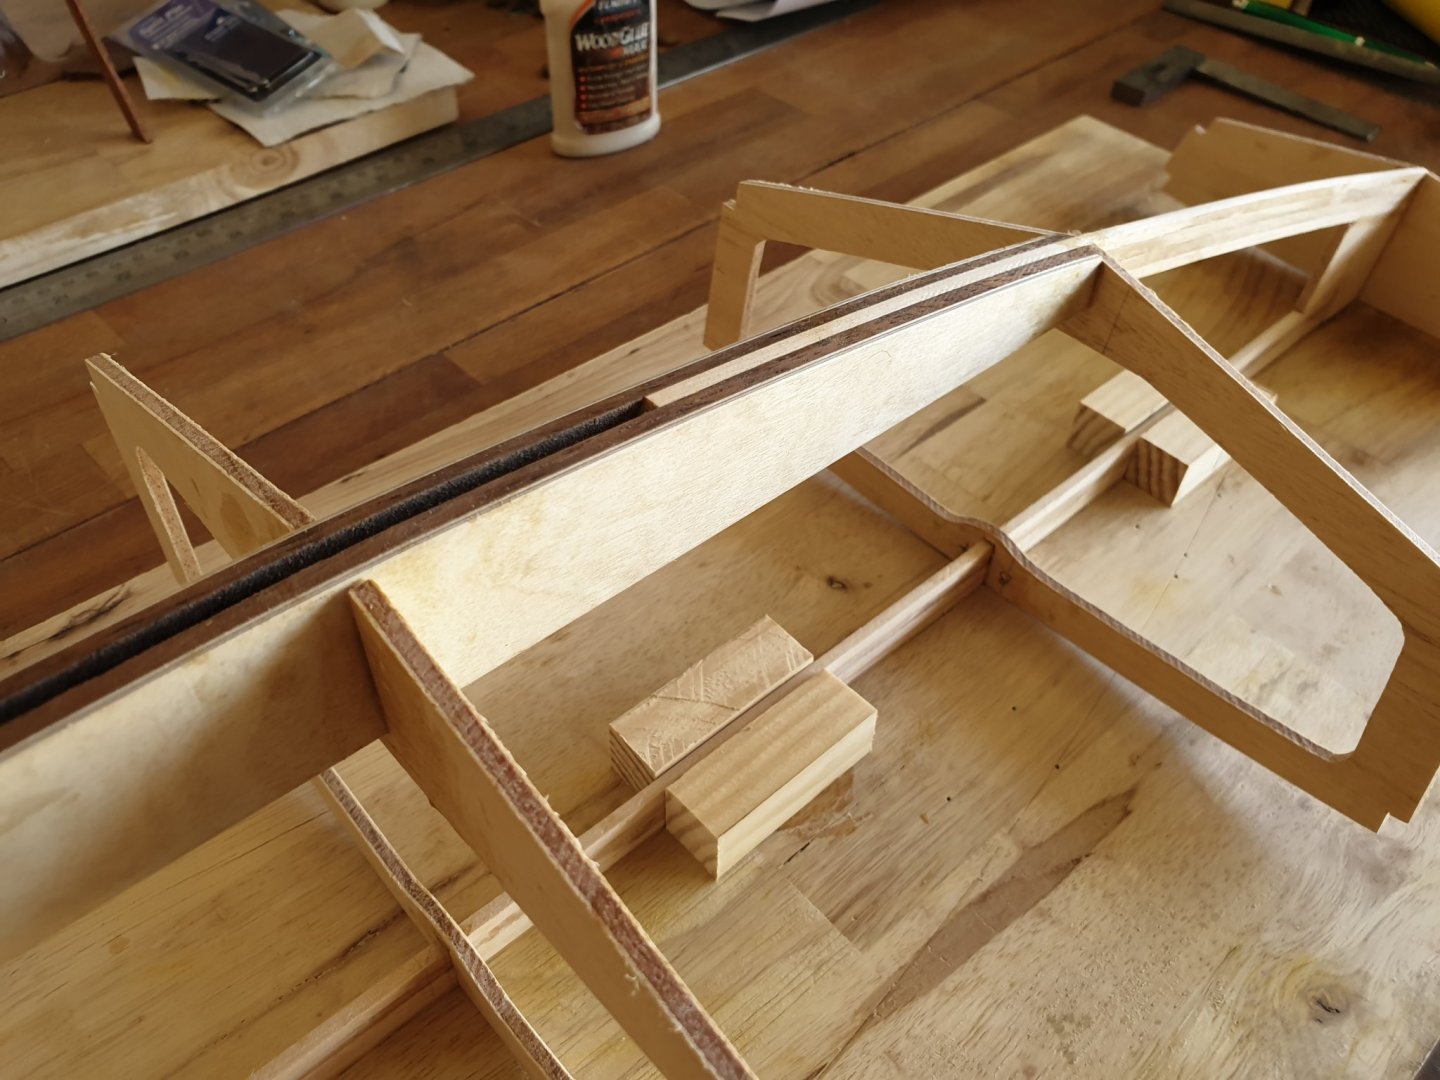
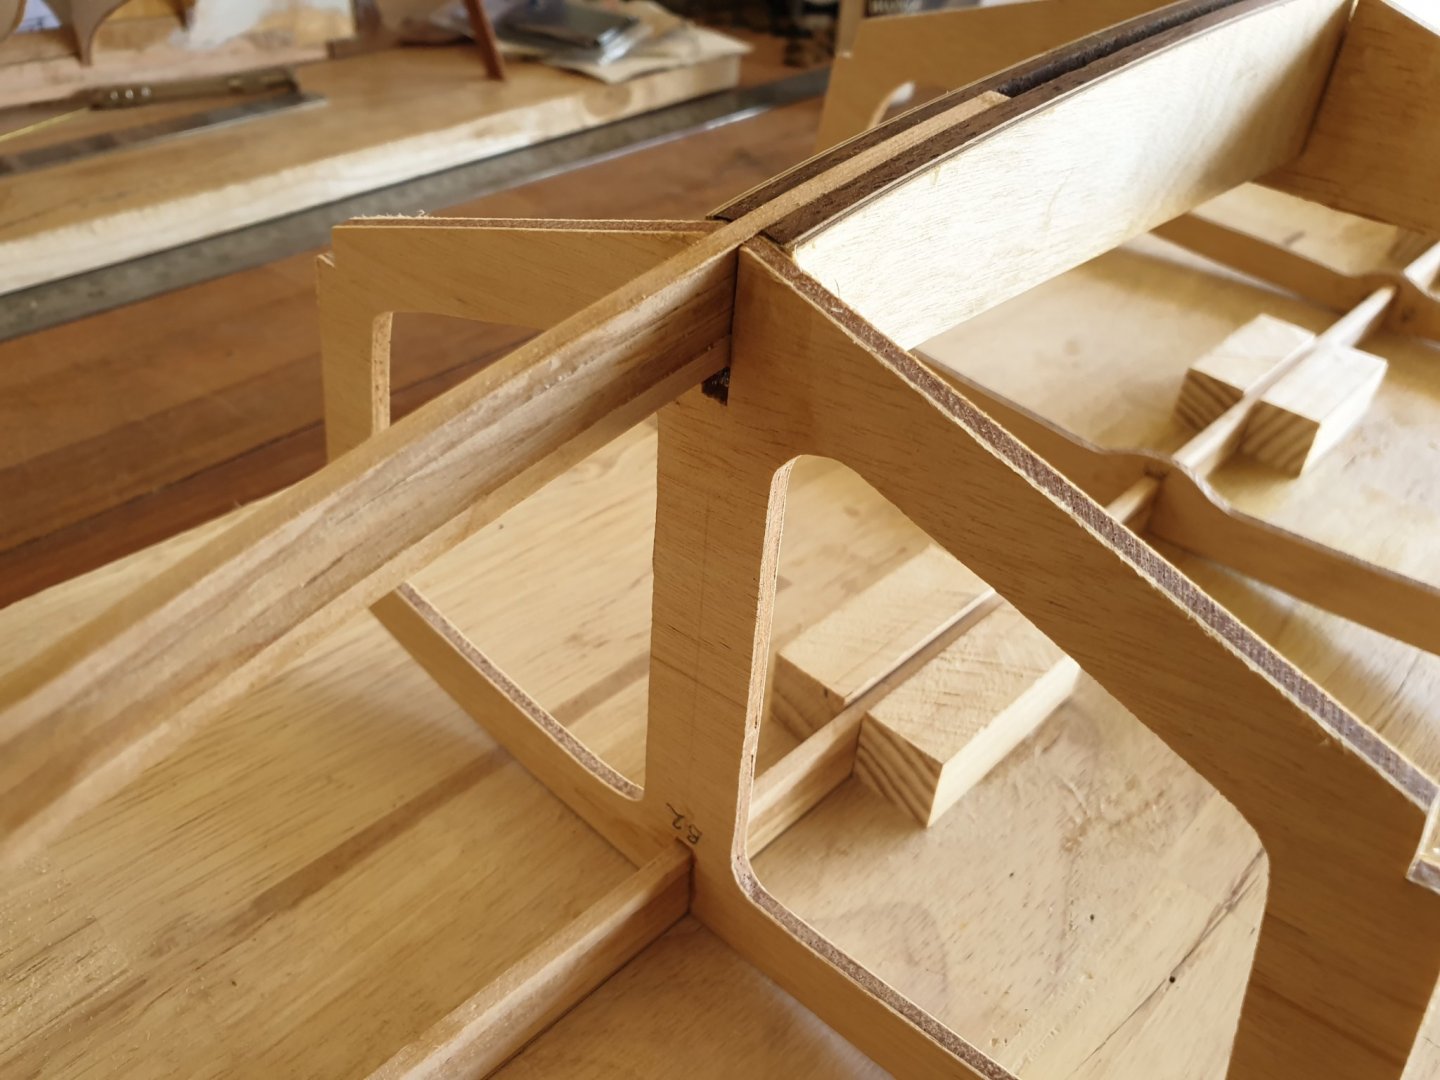
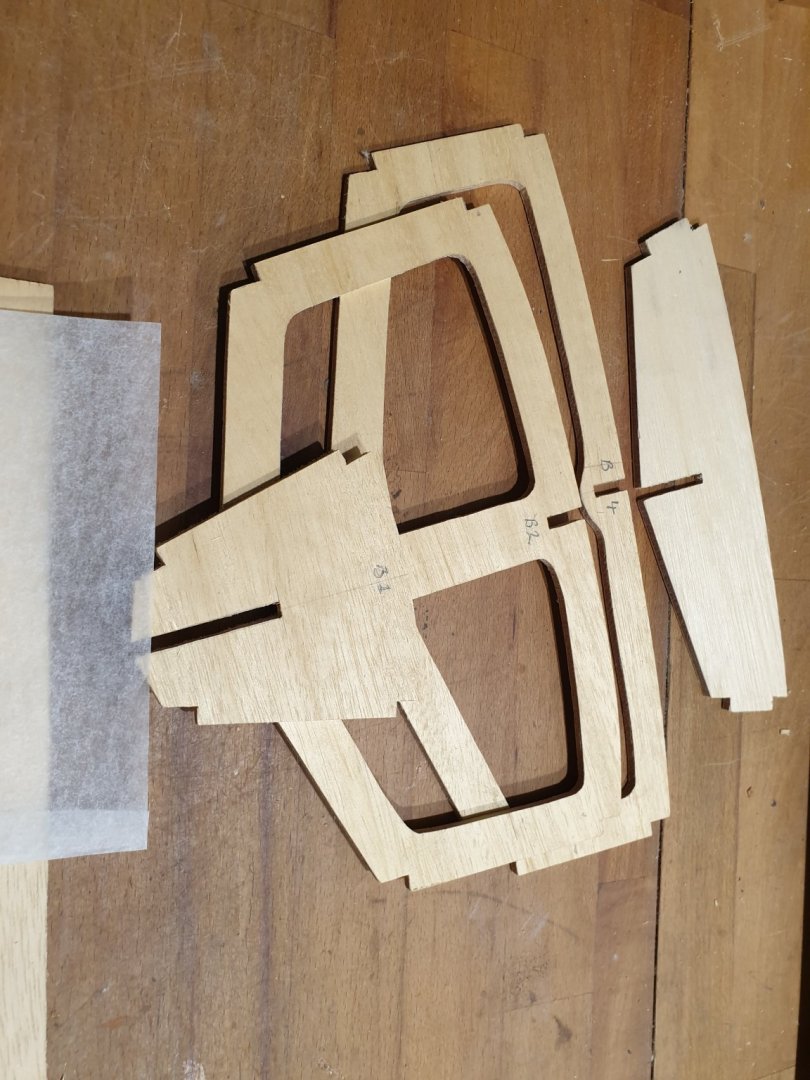
Starlet's spine has now been champfered before the bulkheads were fitted as it is easier this way. A dry fit of all bulkheads and necessary champfering to them to fit the spine was carried out. Spine and bulkheads are now glued up. I will brace the bulkheads left and right before adding the whales. Oops! Little gap seen? I will glue a piece in to give me peace of mind. Pete
-
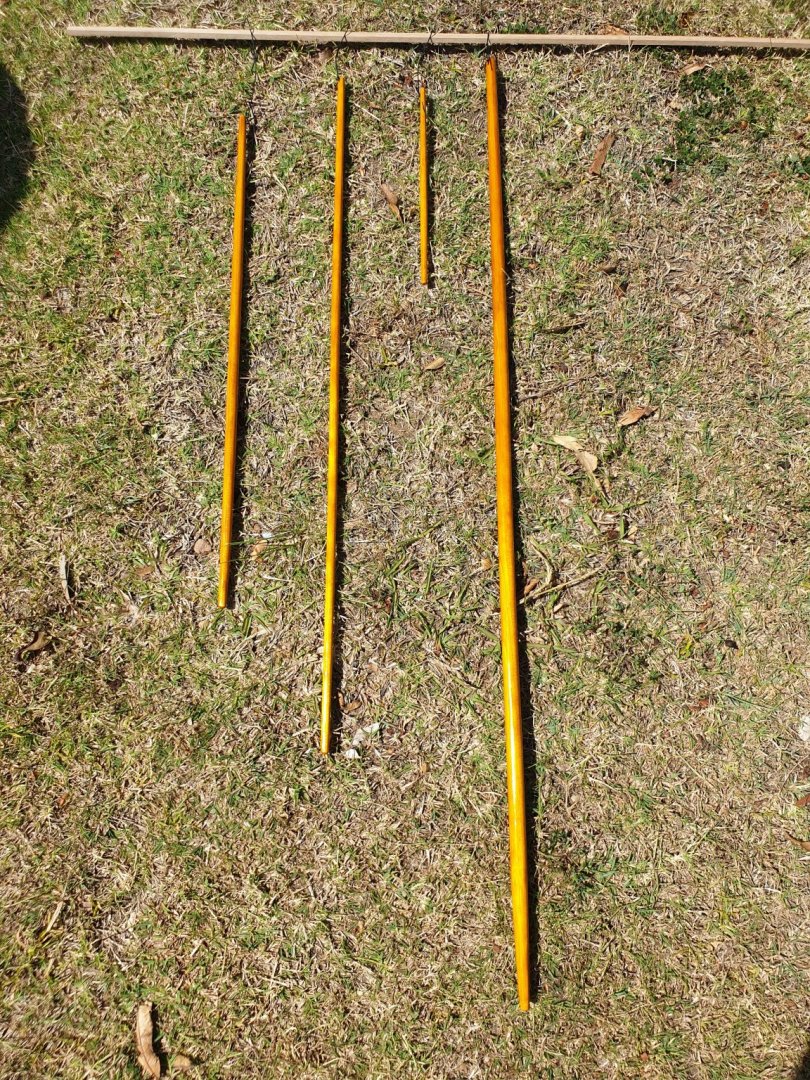
A dangling of Emma mastery! They are all tapered, sanded, stained and two coats of varnish. I remembered what my wood work teacher told me when I was a boy ( still am !!!) Always thin the varnish and apply it thin thin thin. It is a natural mistake to think......" I want this glass finish so I will whack it on as thick as I can " Wrong approach!!! I had my best days varnishing ever!! Today. It has taken 69 years to varnish to this standard with out a brush stroke visible. My guardian angel is with me today. Just a fluke but I am so pleased. Pete
-
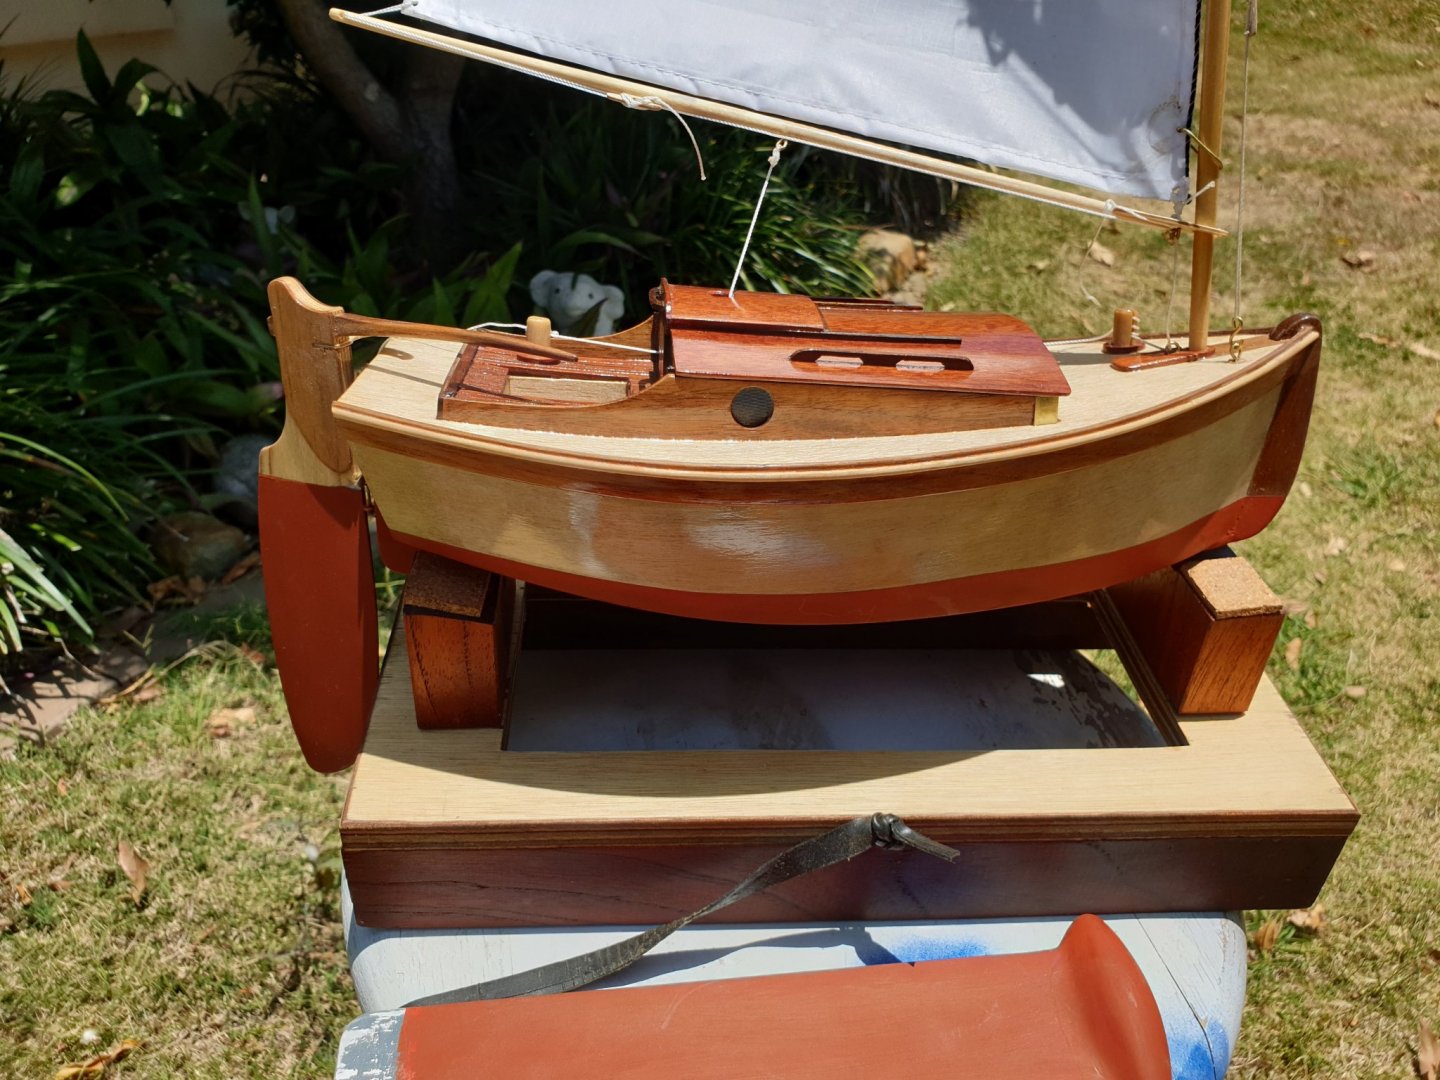
Somehow it seems that the baking hot sun with its UV rays have produced an ideal day for photos. ( Australia ) I went about doing some pics for the firm I bought the Brando plans from and also to send to the Italian designer Flavio. There are in particular two pics I would like you to see as they bring out the wood colours just as they are. Check out the rudder horn! That must be the Ferrarri of rudder horns....( unless you know different and I won't believe you unless you show me!!! ) It is also pertinant I think to come to the arrival that it is not what you build but how you photograph ( capture these days!) It. Here is Brando again in full spendour. I accept no glory for this. It was the right day, right sun, right angle and the trees did the rest! I just hacked and glued it all together. Pete

-
Yep. That is exactly my point John. Ha ha. Oh what joy. Pete
-
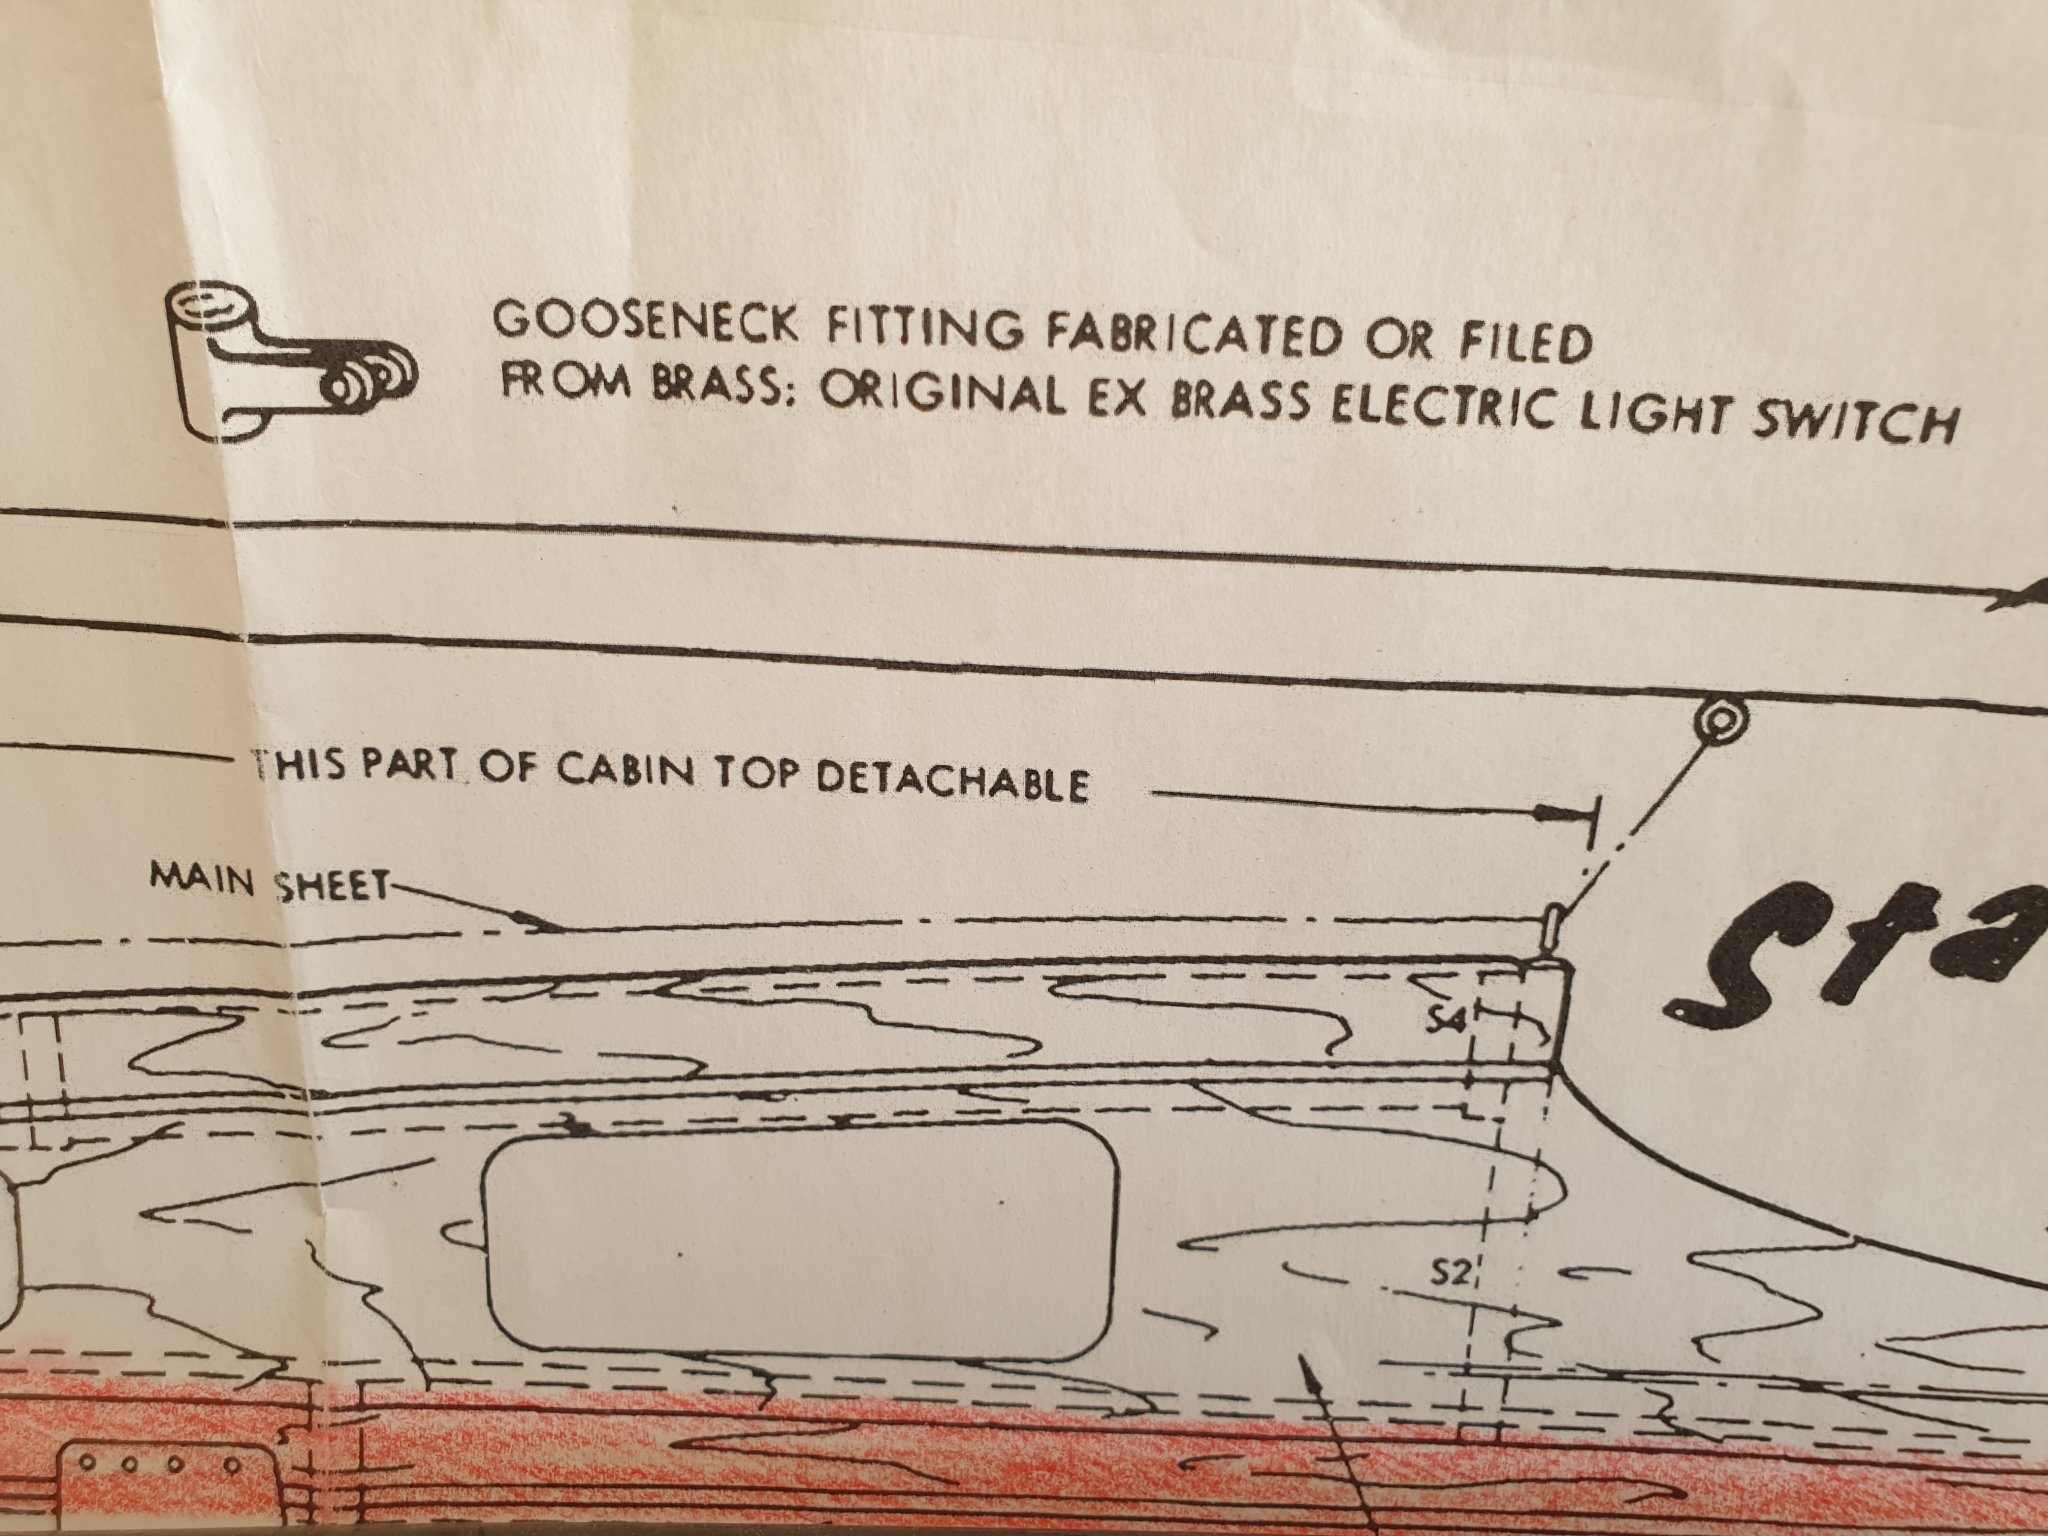
Having a perusal around the Starlet plan and came across this!!! Oh classic!!!! Love it. Pete

-
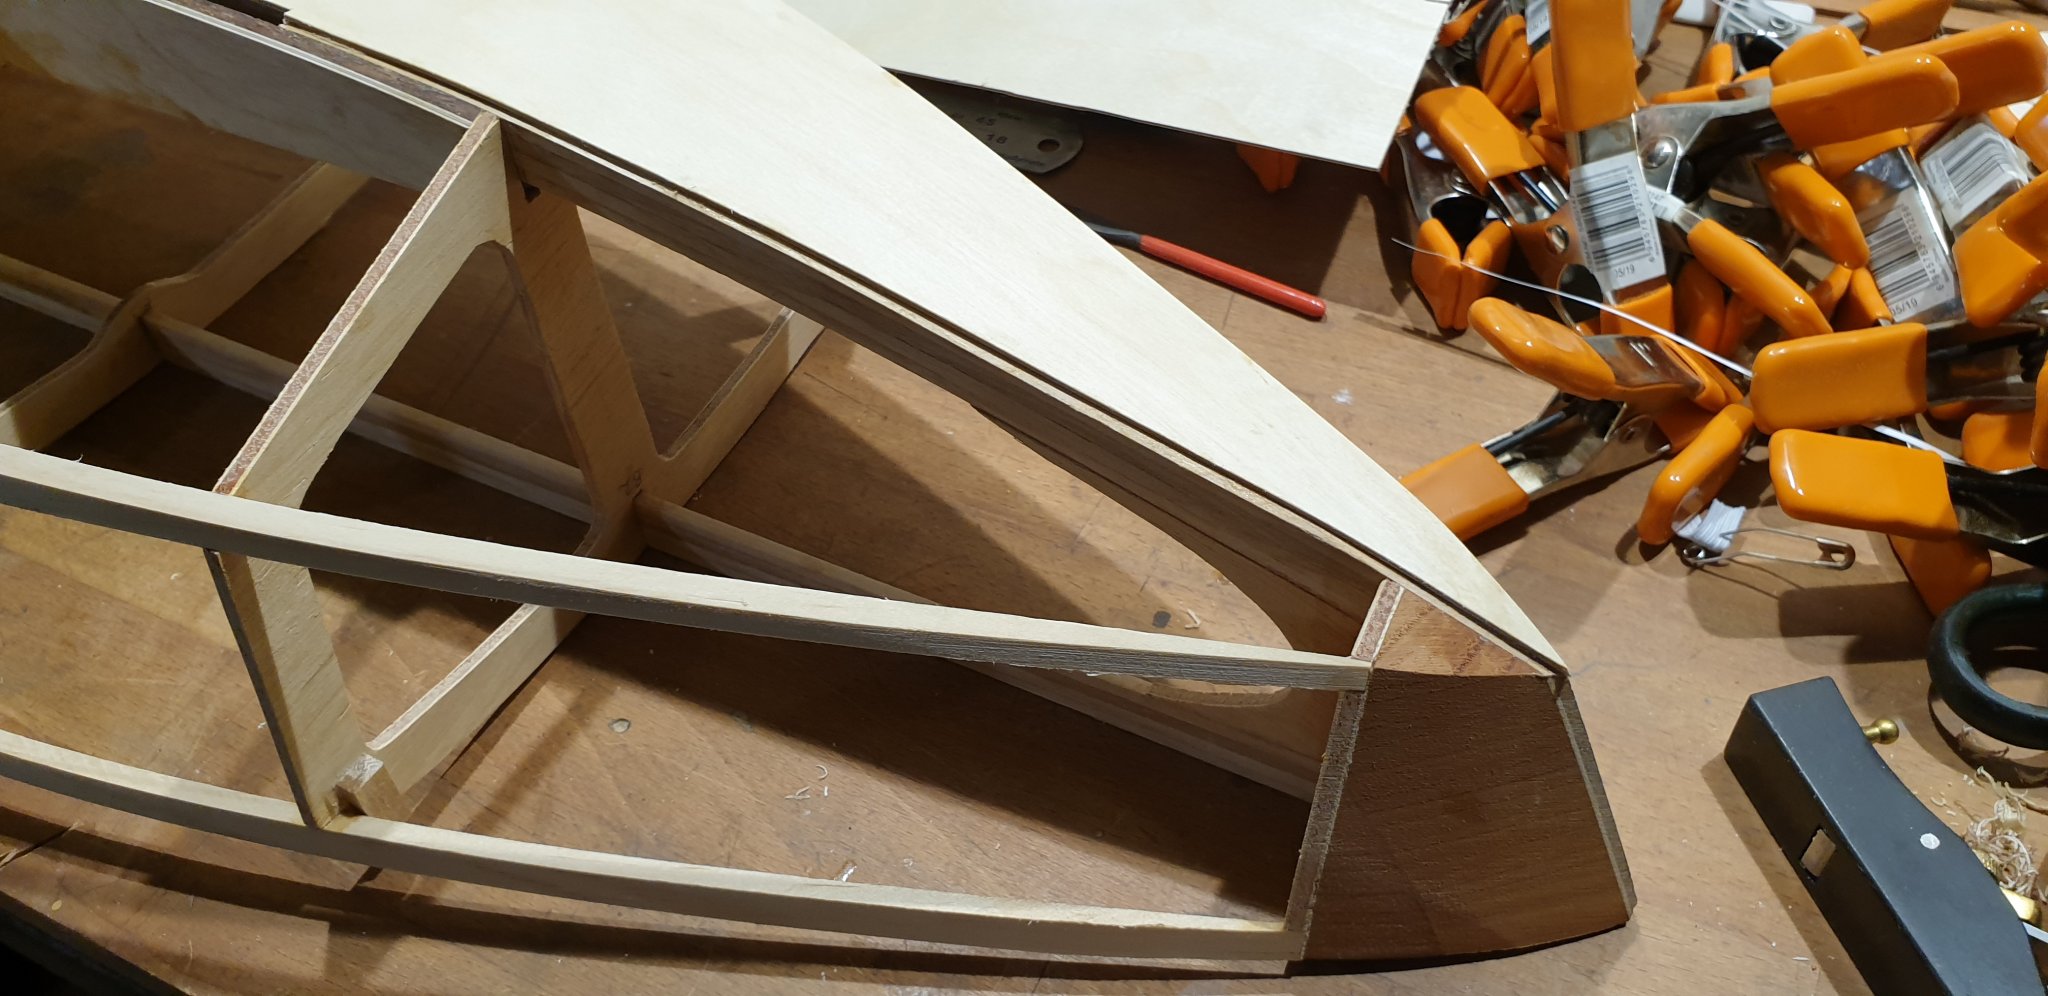
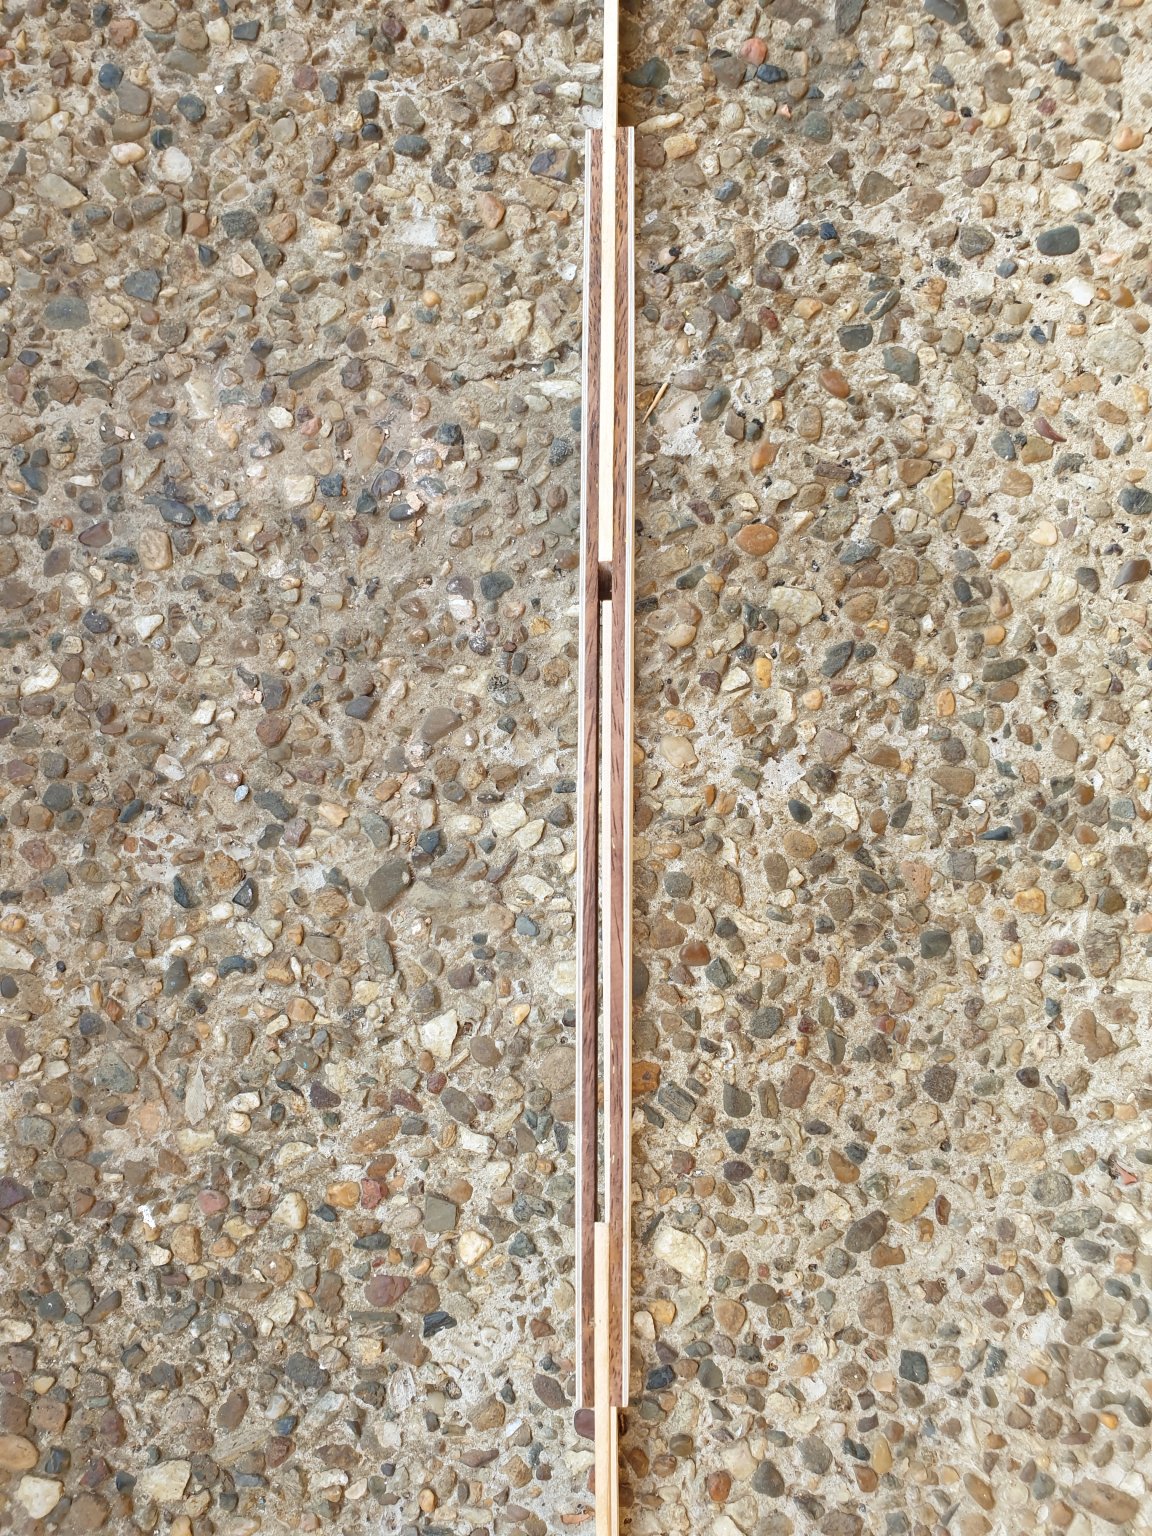
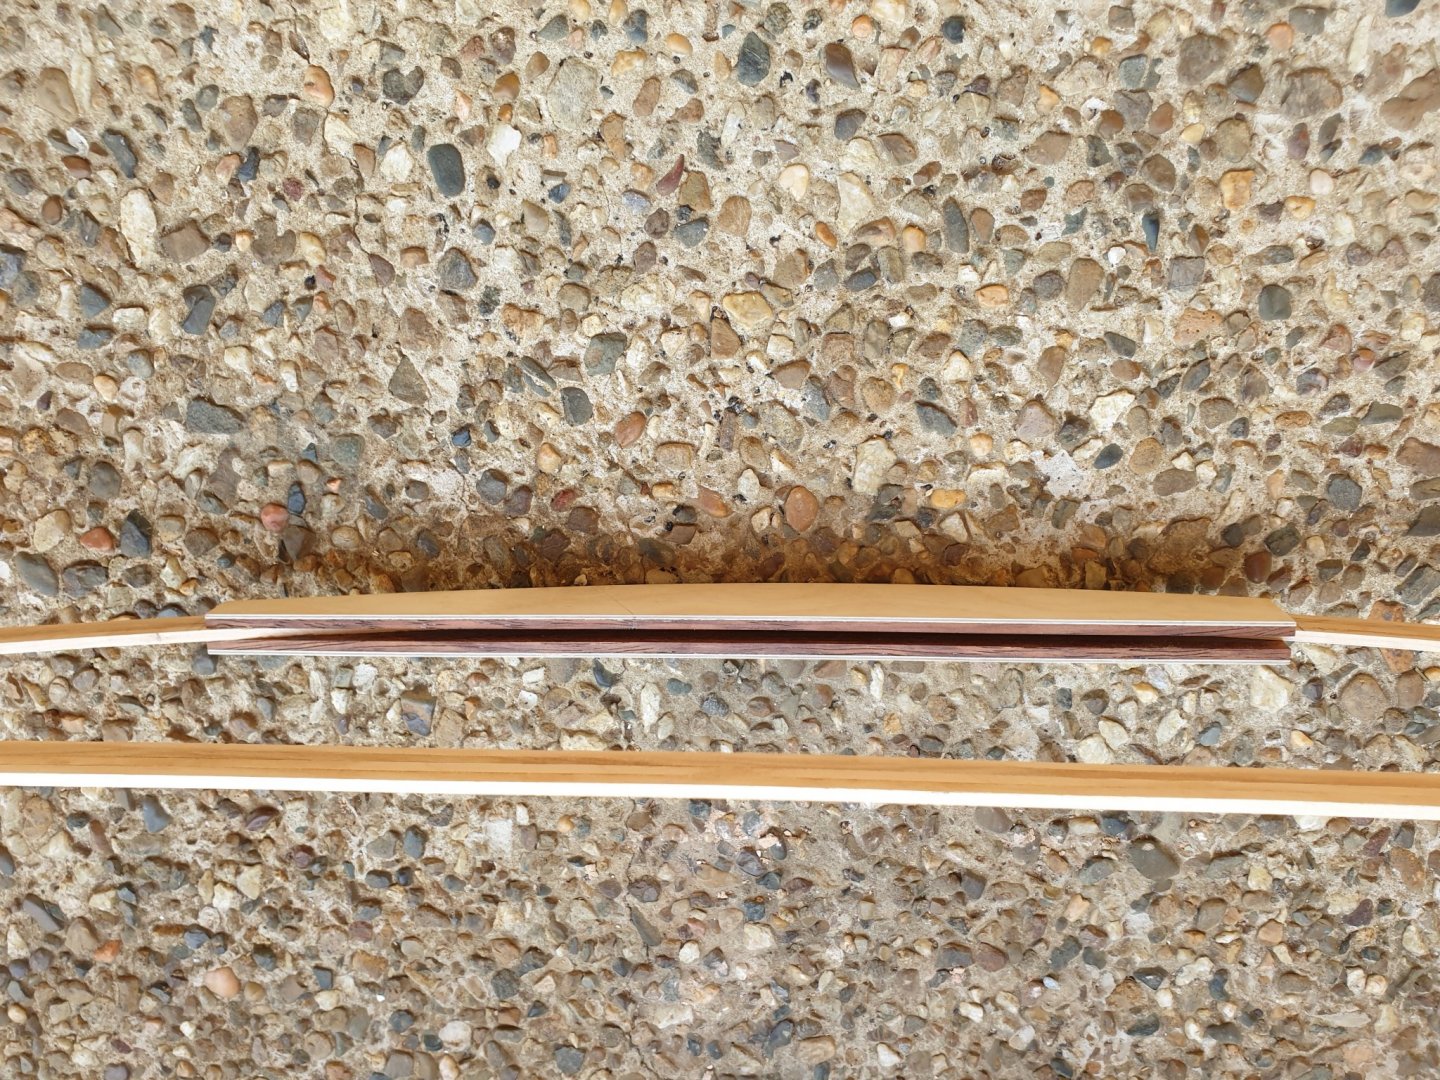
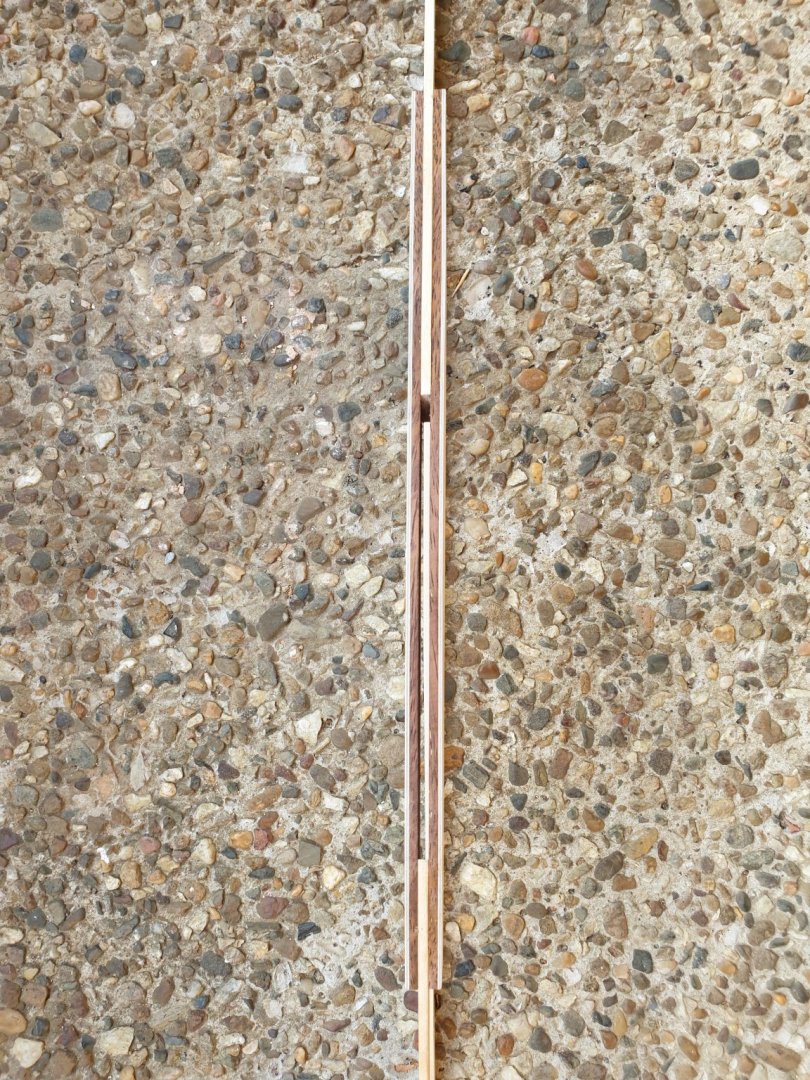
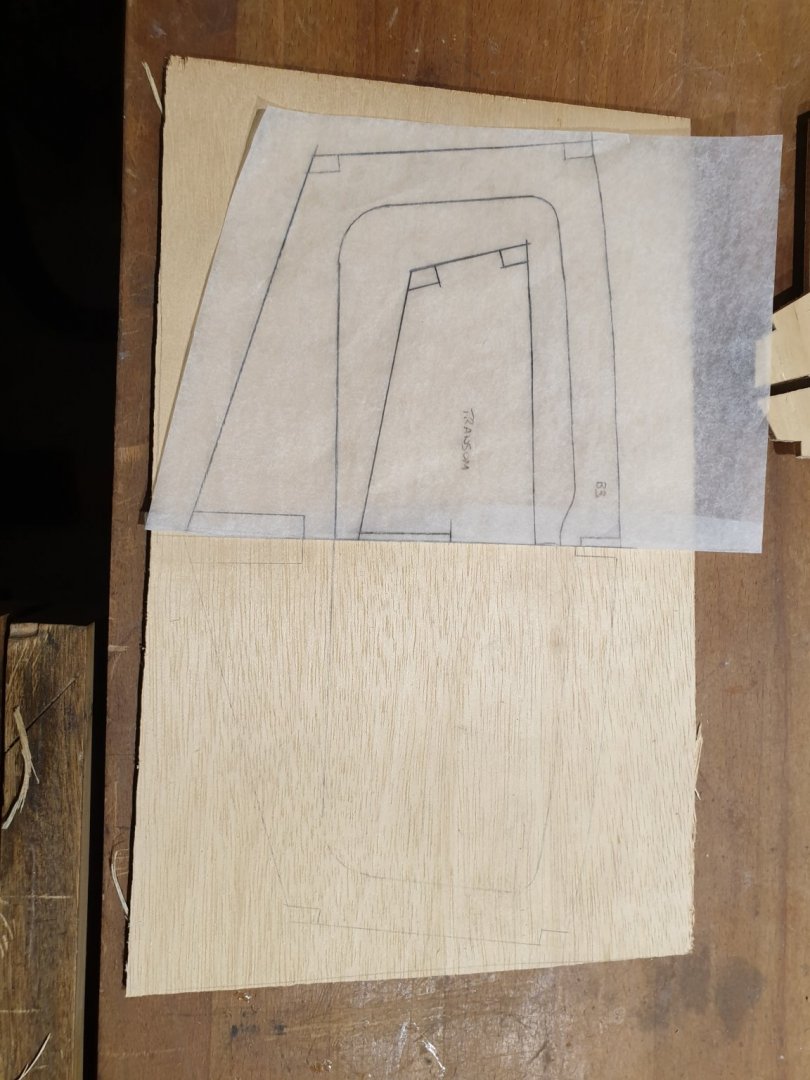
The keel box was constructed from four laminations. The port lamination was of a 1/8" dark red hard wood and 1/16" birch ply. It was then glued to the spine but no glued applied to the marked out area where the keel fits. When dry the portion of the spine where the keel fits was cut out with a tennon saw. The starboard lamination made in the same fashion was then glued to the spine exactly in line so as to form a keel box with an accurately angled slot for the keel to fit into. Pete
-
MT. No I am not using Lite Ply but it flops around as if so. It is normal building ply from Bunnings. The outer plys are too thin to give any strength whatsover on a thing like a long skeleton spine. Okay for solid and hollow bulkheads. I reserve my 1/16" birch ply only for when it is needed as it is so expensive. I have now constructed a really strong spine. When it is daylight tomorrow I will send some pics. It is quite a tad heavier than normal ply but hell...she is strong!. Pete
-
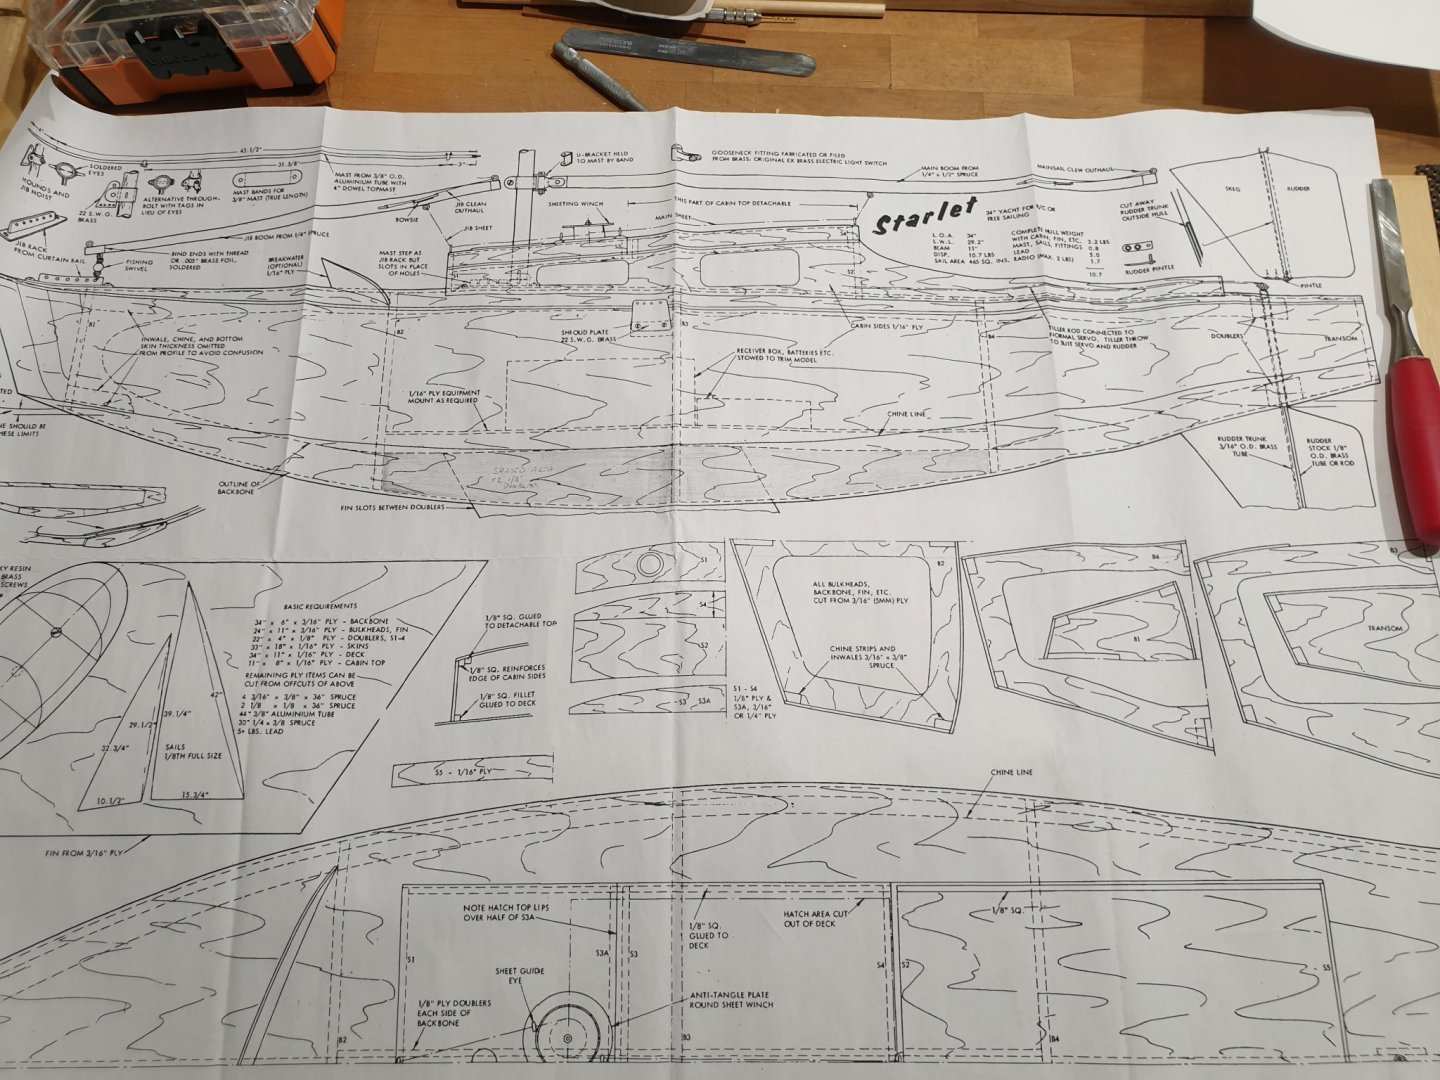
Hi John. Yes she is a classic boat. The keel is quite short as well so she can sail in shallow ponds! I have just won " Model Yachting " by Vic Smeed on ebay. It was obscenely dear on postage but I believe that little book will be a gold mine of information. It will just be a matter of converting certain criteria to suit what us available today. It is fun to think my Starlet will only cost £6 5/6d! Hee hee. It says so on the plan. Pete
-
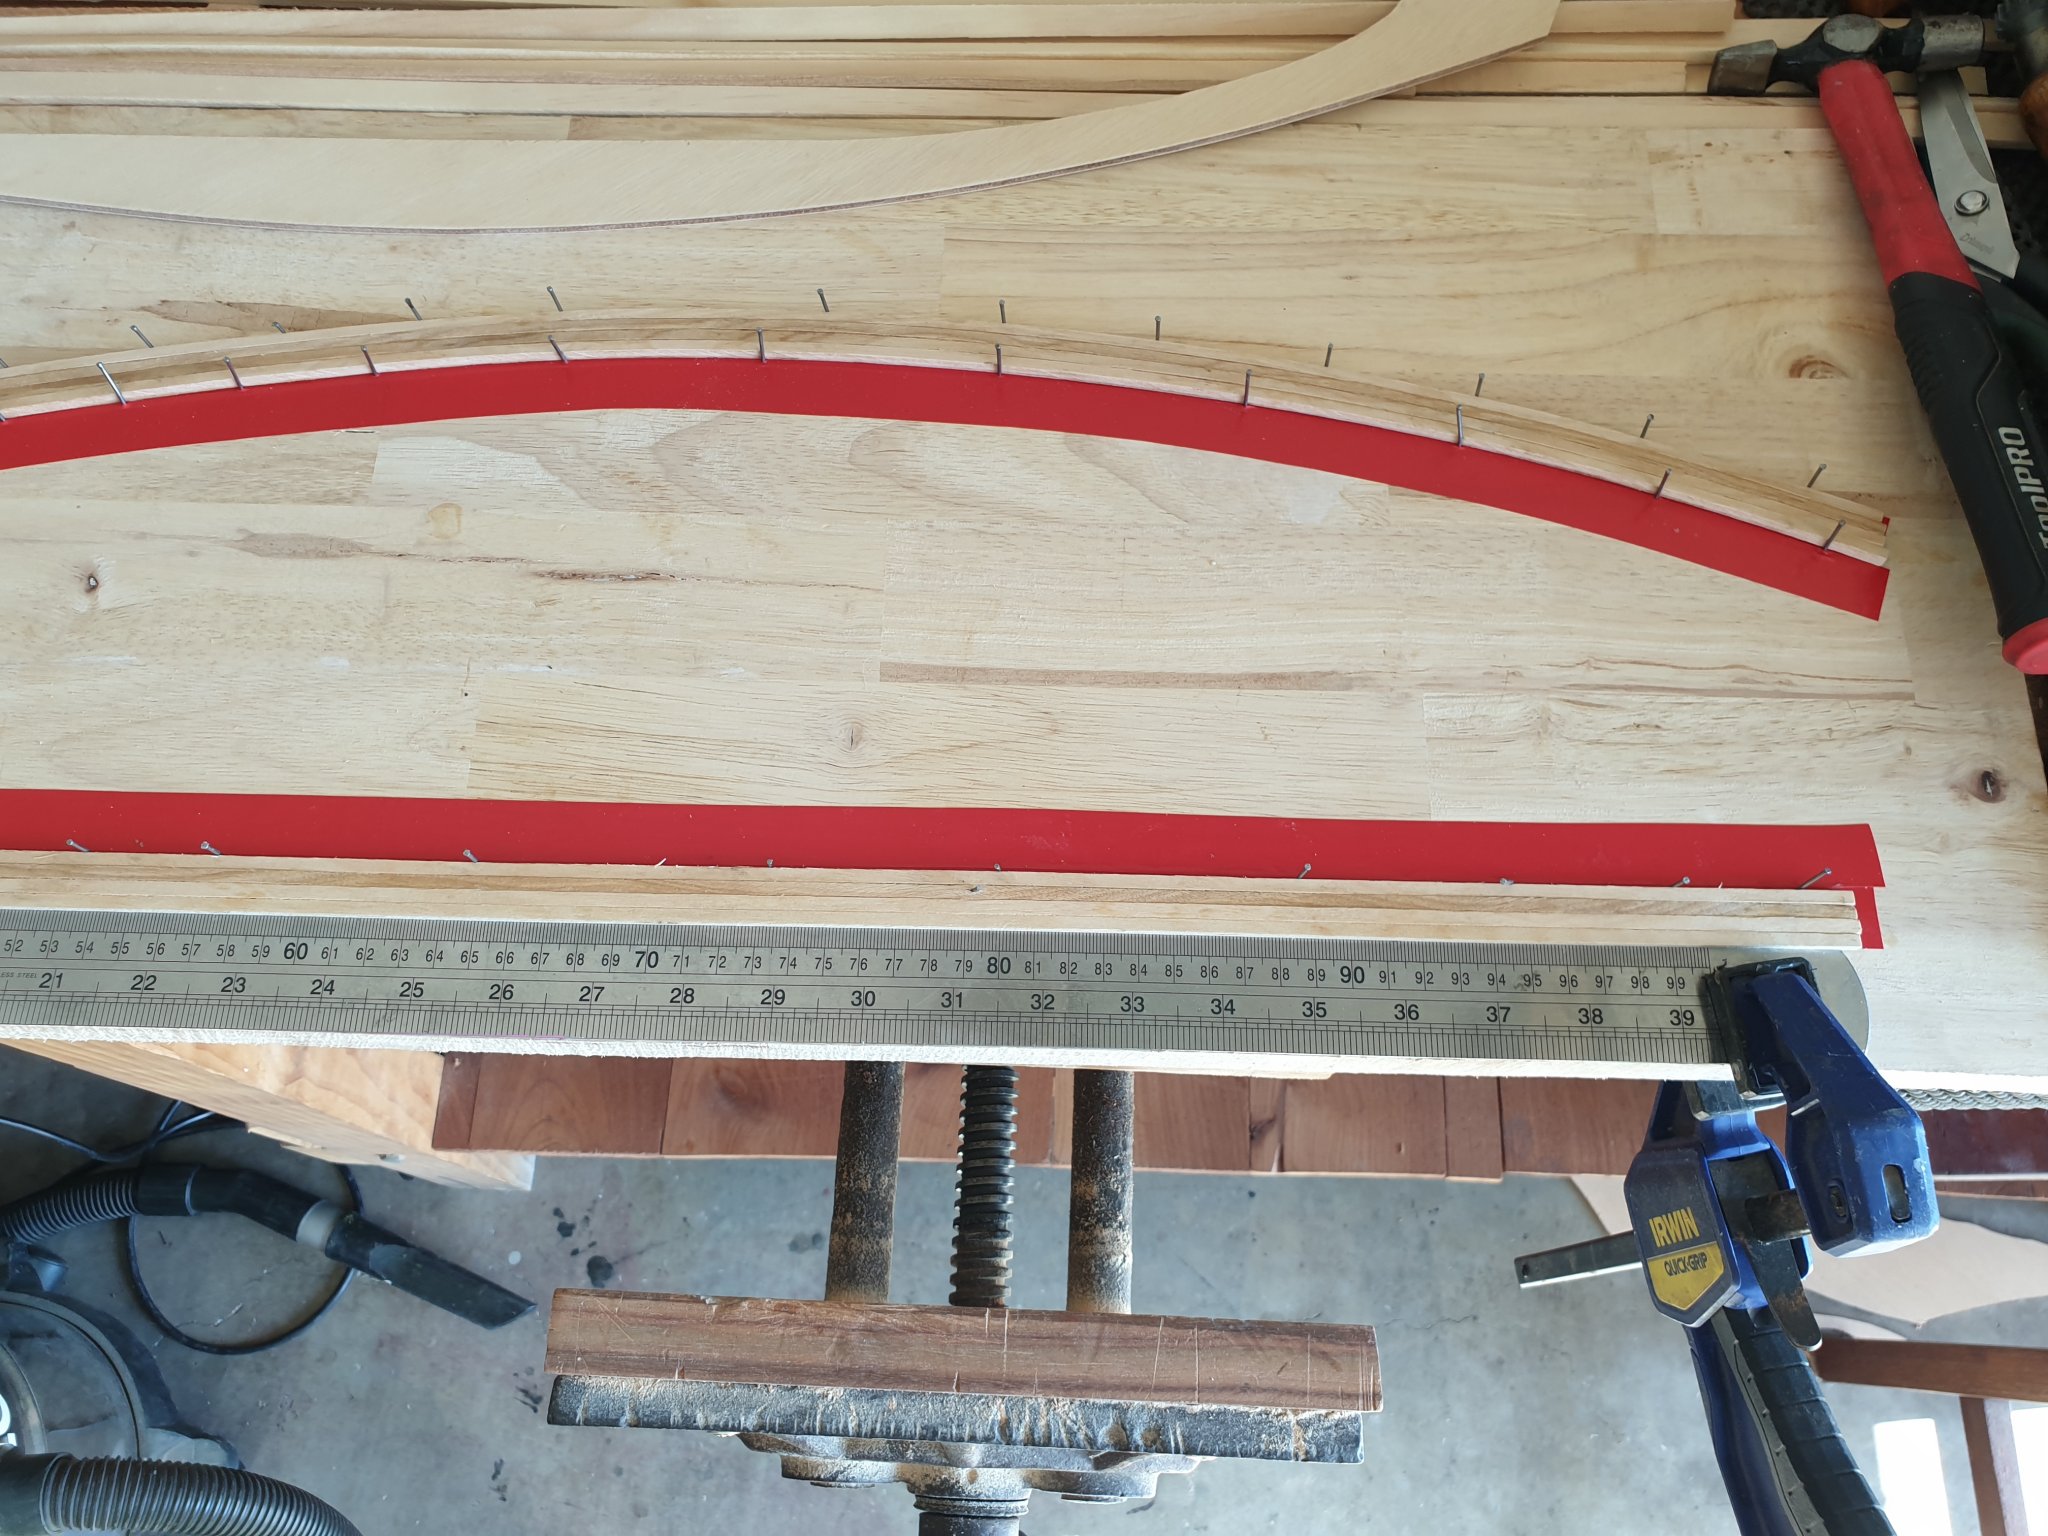
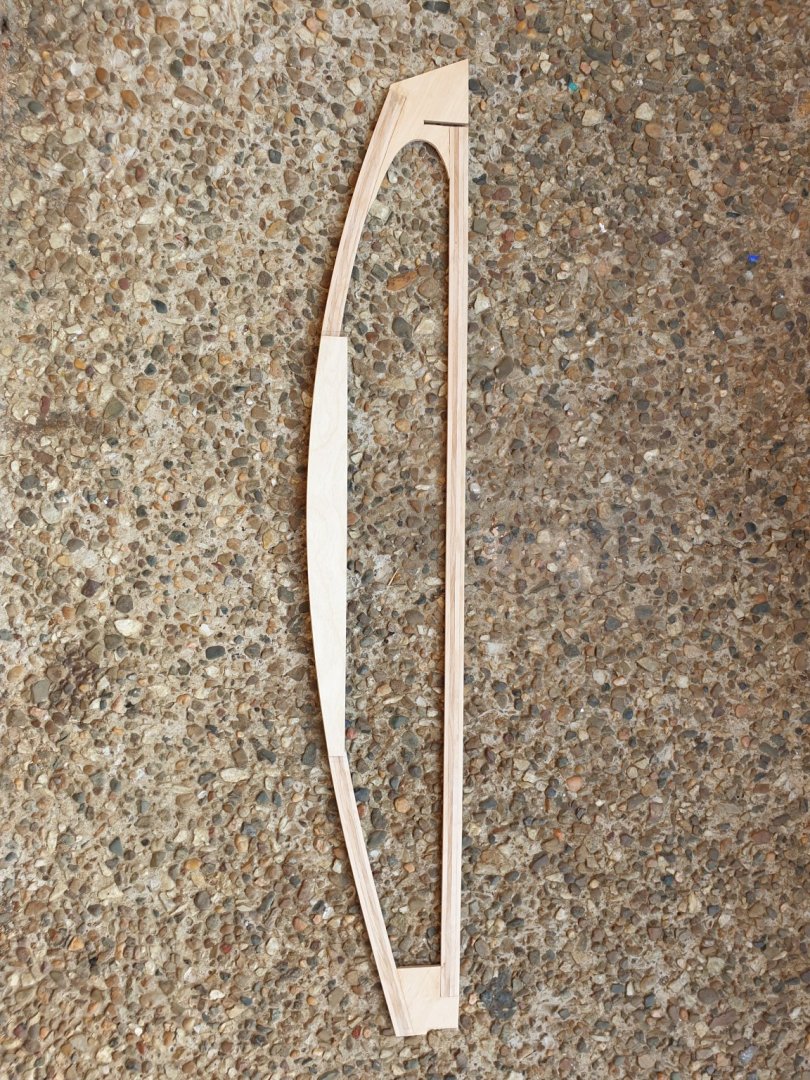
Having made the spine from 3/16" ply I found that it had next to nil strength in it. This is as a result of the poor quality plywood they make today. In Vic Smeed's day plywood had more laminations and was a lot stronger. I remember this myself. Weetabix also remained in a solid block when milk was poured over it but as time goes on we get cheated. Weetabix aside, I decided to make a new spine. If I were to laminate three pieces of 1/16" ply the cost would be formidable. ( birch ply I mean). So I raided the wood stash and found ten lengths of 3/16" sq Birch from the firm Artesania Latina. I used the pattern from the already made spine and drew the curve I needed onto a good strong straight board. I then steamed the lengths to shape and glued up a curved spine using nails to hold everything firm. The deck laminations are glued up using a straight edge to keep things...well.....Straight! I cannot see this failing as this is I believe how they made real boats. I could not see the point in carrying on with a floppy spine which is the crux of the boat. Pete

-
Hi fellas. I am currently building Emma on another thread but I want something just a bit smaller so as to carry it in a bag ( by train) to the model sailing club some 20 ks away. Some of us have to or prefer to do without a car. As a kid ( and older! ) I have built numerous Vic Smeed designs. In fact my claim to fame is that I came second in a " Tomboy " free flight competition at Middle Wallop in the UK some years back. Needless to say the " Tomboy" was a Vic Smeed design and he appeared on that day. THAT!!! was my day bowled over. They are all simple and they all sail/ fly. Vic was a genius. I met him. He was a charming English and very clever Gentleman. Always immaculately dressed mostly in a suit. I have just recently learnt that he was a fighter pilot. This in itself gains even more respect. He has written so much about model aircraft and also model boats. Model boats was always his high. He loved them. Anyway..having obtained my plans and complete building instructions from Canada to Australia ( building instructions written by Vic himself) , I have commenced the build. I just love the way that he has gone to depths of explaining the cost of each material in pounds , shillings and pence! Superb!. This alone has set me on a course of vintage model yacht building. When I tried to explain to the young cashier at Bunnings ( Australia ) that the item should cost 2/6pence as per plan, she looked at me in total disbelief!!! Not really... but just a bit of fun. I have used the old fashioned methods of replicating the drawings to wood by using tracing paper. Yes...they still make tracing paper. The build techniques are archaic but then so am I so it matters not. Here are a few starter pics. Pete
-
Thanks MT. They leave me standing sometimes. When we were kids we also wanted " quick results " Its only as time and experience hits us that we can have an in depth realisation of what it takes and can we give it? Pete
-
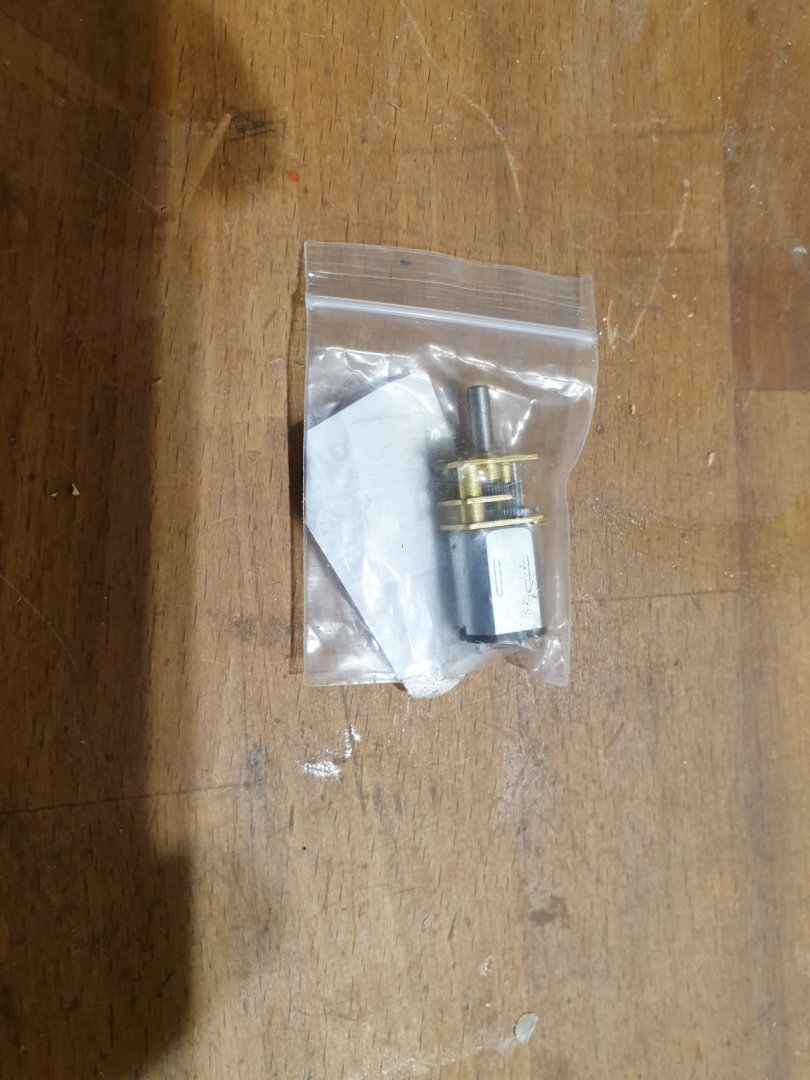
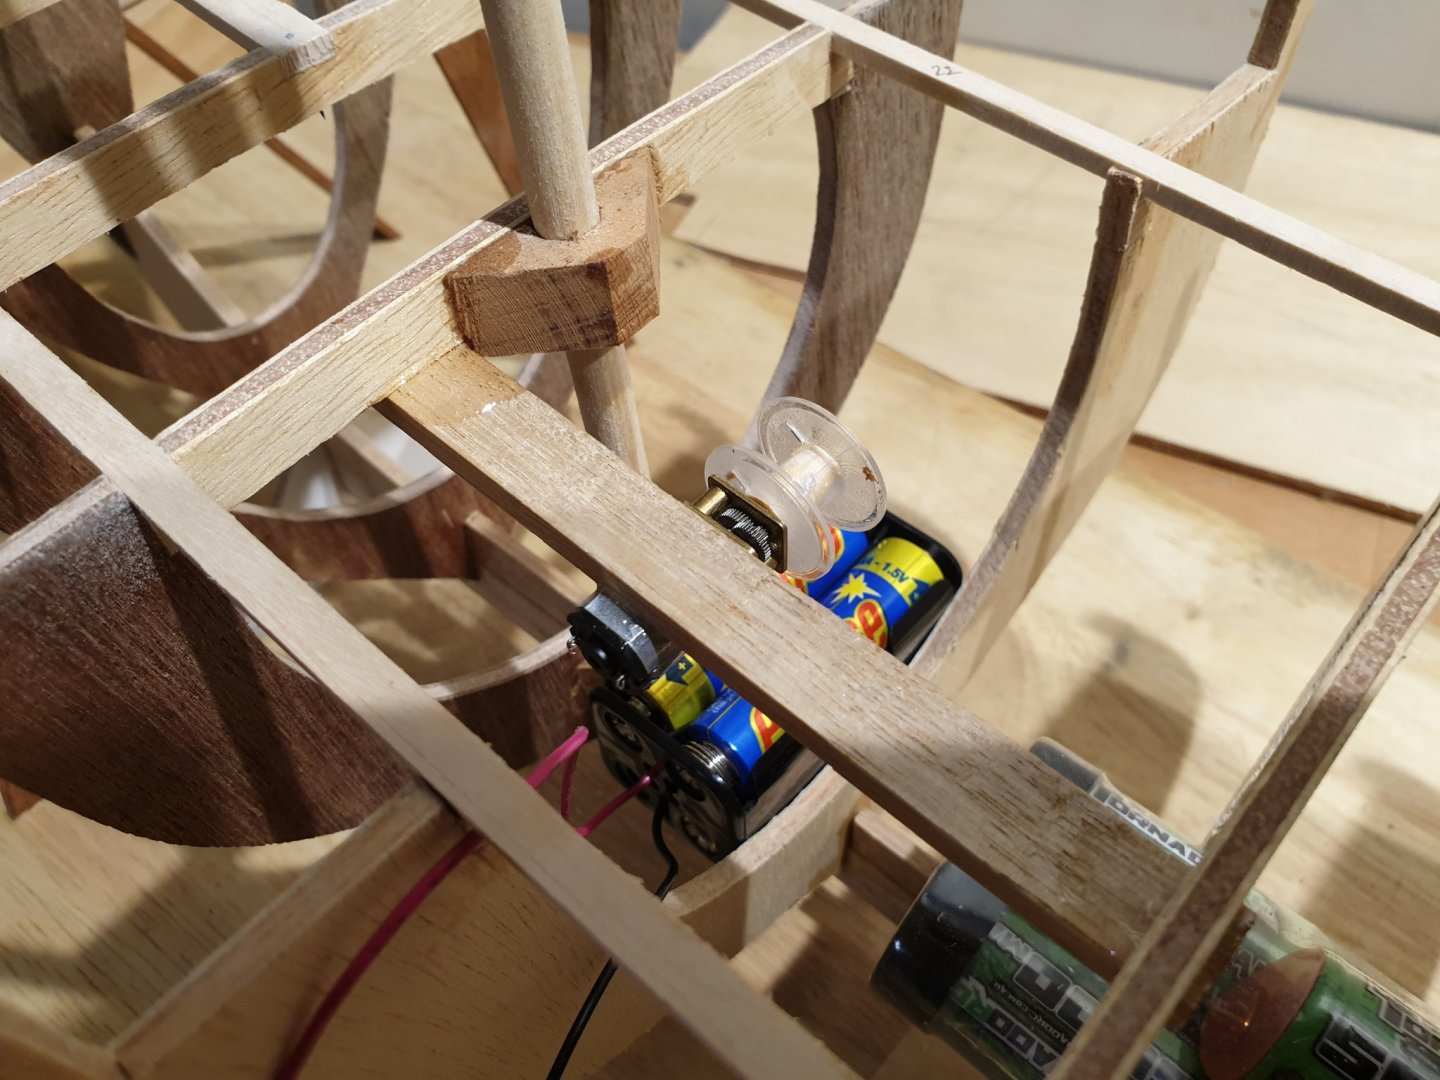
I am currently building a fishing boat for my son. He wanted the two booms that lay the fishing nets port and starboard that are pivoted at the bottom of the mast to fully operate via a winch. So..I suppose it is nothing new but in order to make this ere winch I utilised a standard geared motor ordered from ebay ( China ). These things cost pence now and because they are geared they have high torque. I used a sewing machine plastic bobbin for the winch drum and wedged the difference between the motor shaft and the inside diameter of the bobbin with a piece of pine dowel sanded down on my drum sander. The hole in the middle to house the motor shaft was hand drilled with an old hand drill! It is not exactly concentric but acceptable for me in that it works well. So if you need a low cost miniature winch...here you go! Pete
-
Thanks for your input Yambo. As far as I can conjecture, we make a model sailing boat. All is good and fine but then we come into "sail making " Which is an art in itself. Like said, I am not a racer nor do I wish to win anything. I just want to bimble along with a nice ol boat. I have not yet compared cotton sails to rip stop spinnacker nylon. My thoughts about it are as follows. Purely theory you understand! Whereas nylon sails cannot " breathe ", cotton will do. So when we sail the boat and go " about " or " jibe" I will imagine a nylon sail will react more fiercely than a cotton sail? Do you see what I am getting at? I think that the " old stuff " Is more foregiving ie ( cotton)? I do not actually like the modern Mylar or whatever it is sails, as they are designed for competition. To my mind, a sail should look like a sail and adorn the boat it moves. I know!!...I am old fashioned. And proud of it!!! Re the tube bending and flaring. To flare the tubes ,you need the flaring tool and that is it!. Its a bugger but there is no way around it. Re bending the tube!.... I still cannot understand why the tube kinks when bent cold and does not when annealed. Its all science I guess. But now I know what to do! Pete