HOLIDAY DONATION DRIVE - SUPPORT MSW - DO YOUR PART TO KEEP THIS GREAT FORUM GOING! (Only 24 donations so far out of 49,000 members - C'mon guys!)
×


Peter Cane
-
Posts
240 -
Joined
-
Last visited
Content Type
Profiles
Forums
Gallery
Events
Everything posted by Peter Cane
-
MT . I know you are always busy keeping a check on the forum but it is always nice to hear a few words from you. Don't know about reaching the top of learning but so many thanks mate. Pete
-
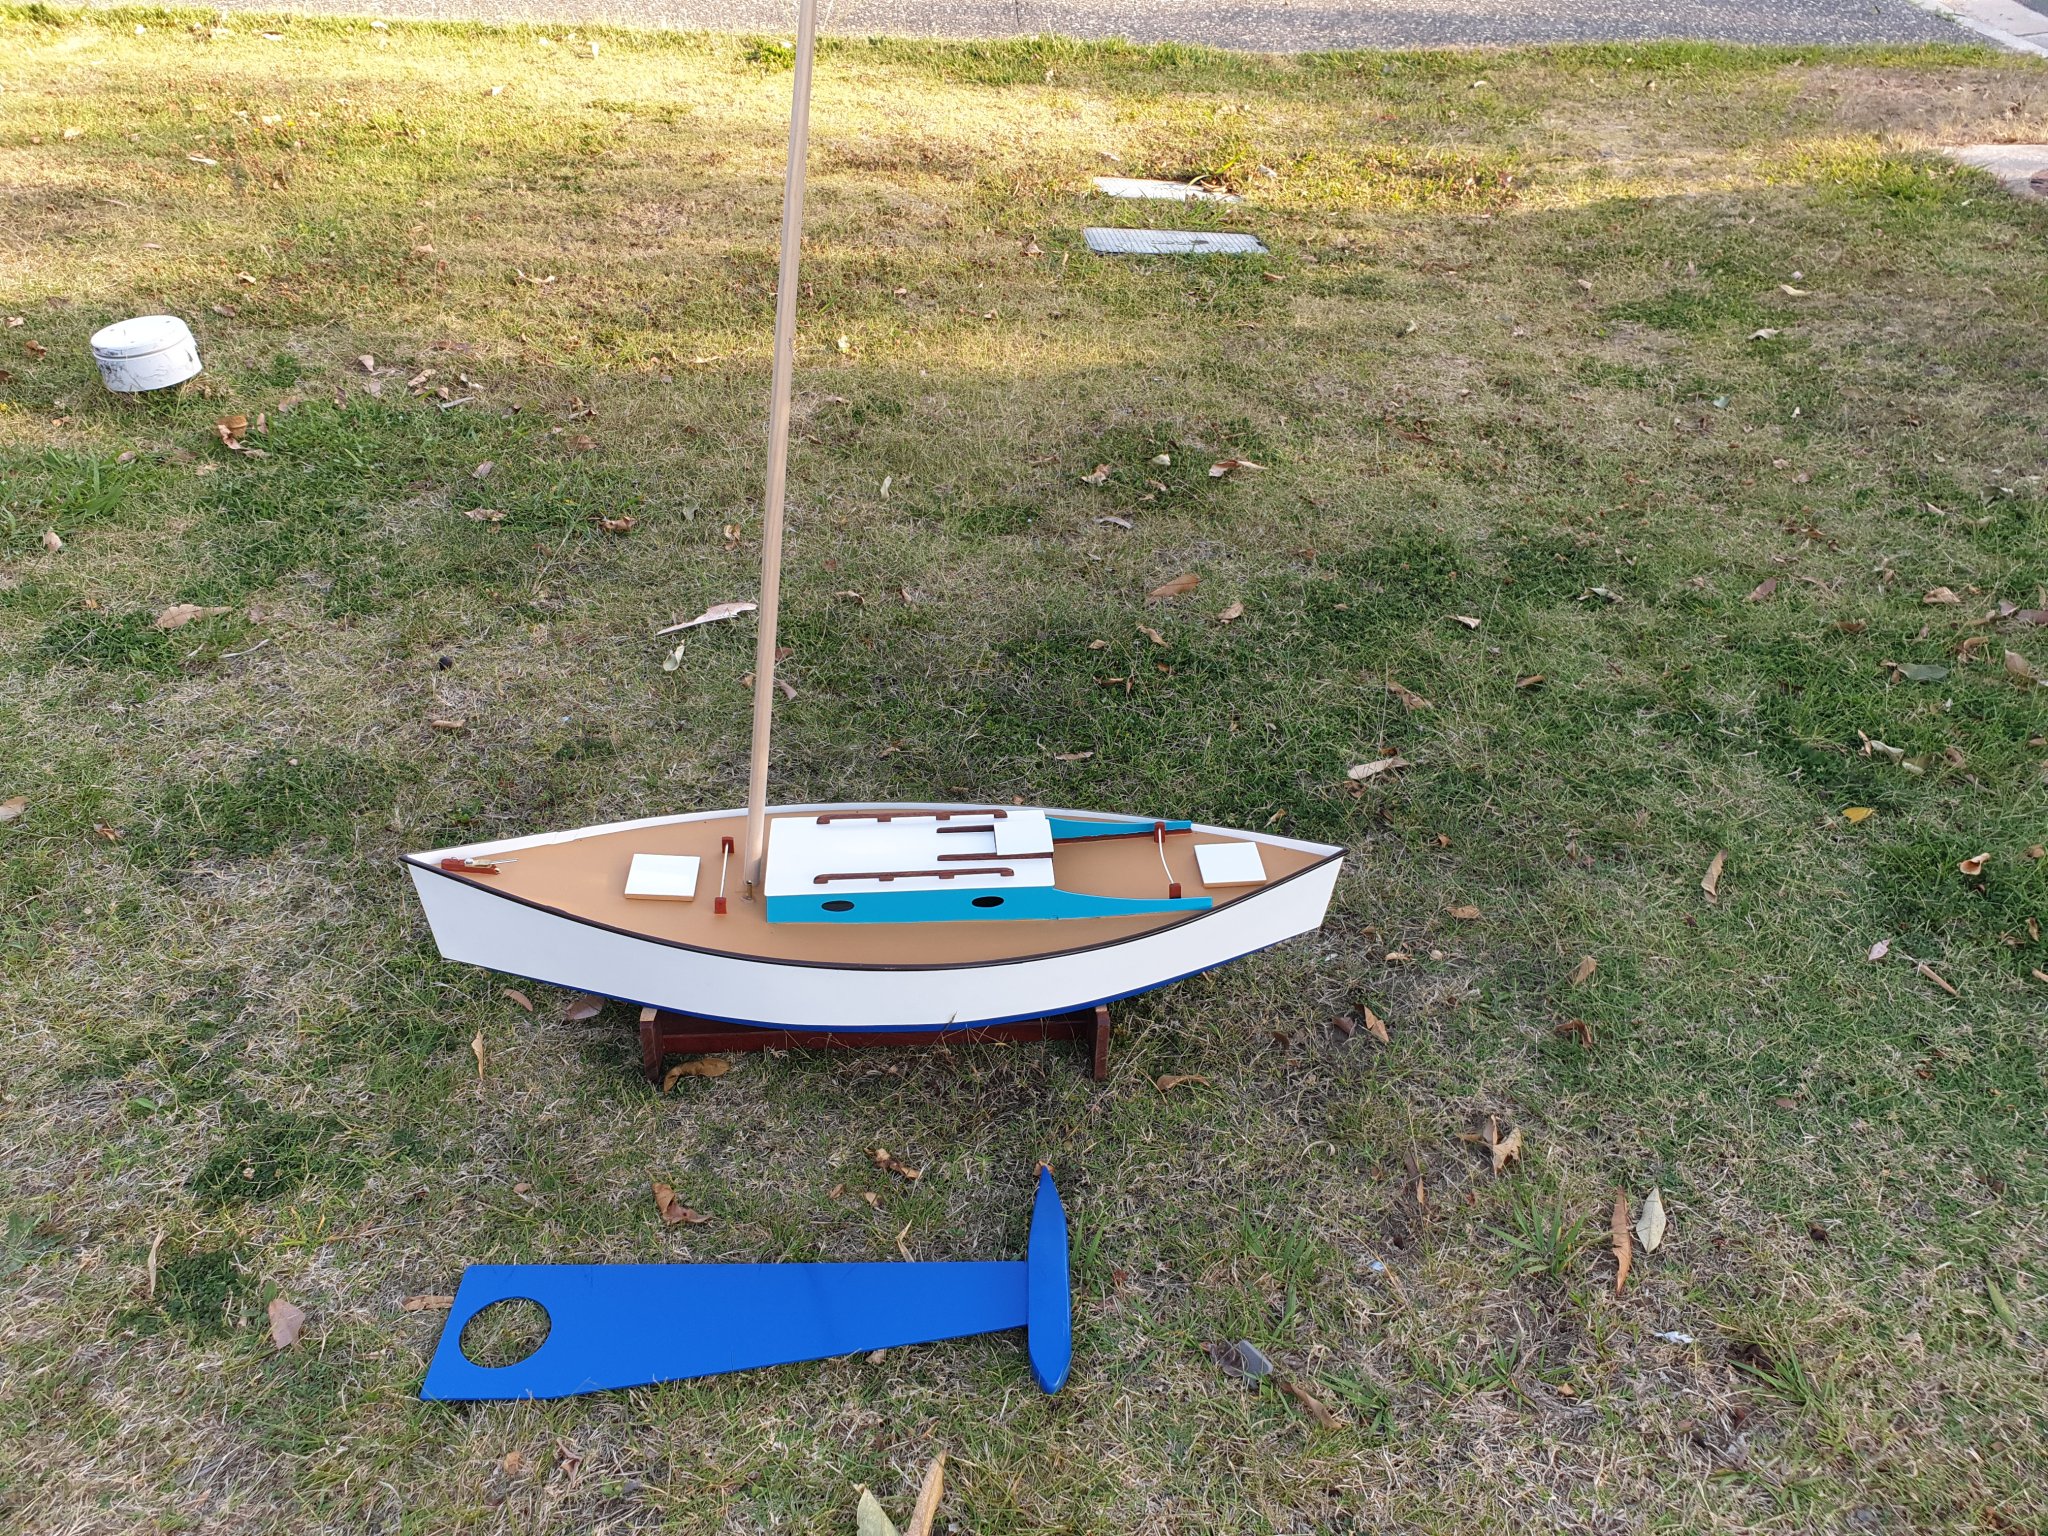
Thanks for the three likes already and especially Chris C who recommended going for something simpler, within limits and can be finished relatively quickly. So here she is!! Nearly there. Sails to make now. I have nylon spinnacker cloth but having browsed the Larry Robinson sail making booklet he does not advocate using it. The book is a bit beyond me at this stage as I am not interested in racing yachts nor plotting out sail camber on a pc. I will leave that to the big boys who know what they are doing and need next. I might just sew them up from cotton poplin as did Gary the designer and brains behind this boat. His all sailed perfectly with hand stitched sails. I might get into using sail blocks and inducing a camber to the sails if I get interested in racing. But this is not a racing boat and I am not bothered if everone sails past her. She is just a nice old boat that sails nicely and that is all I can wish for. Pete
-
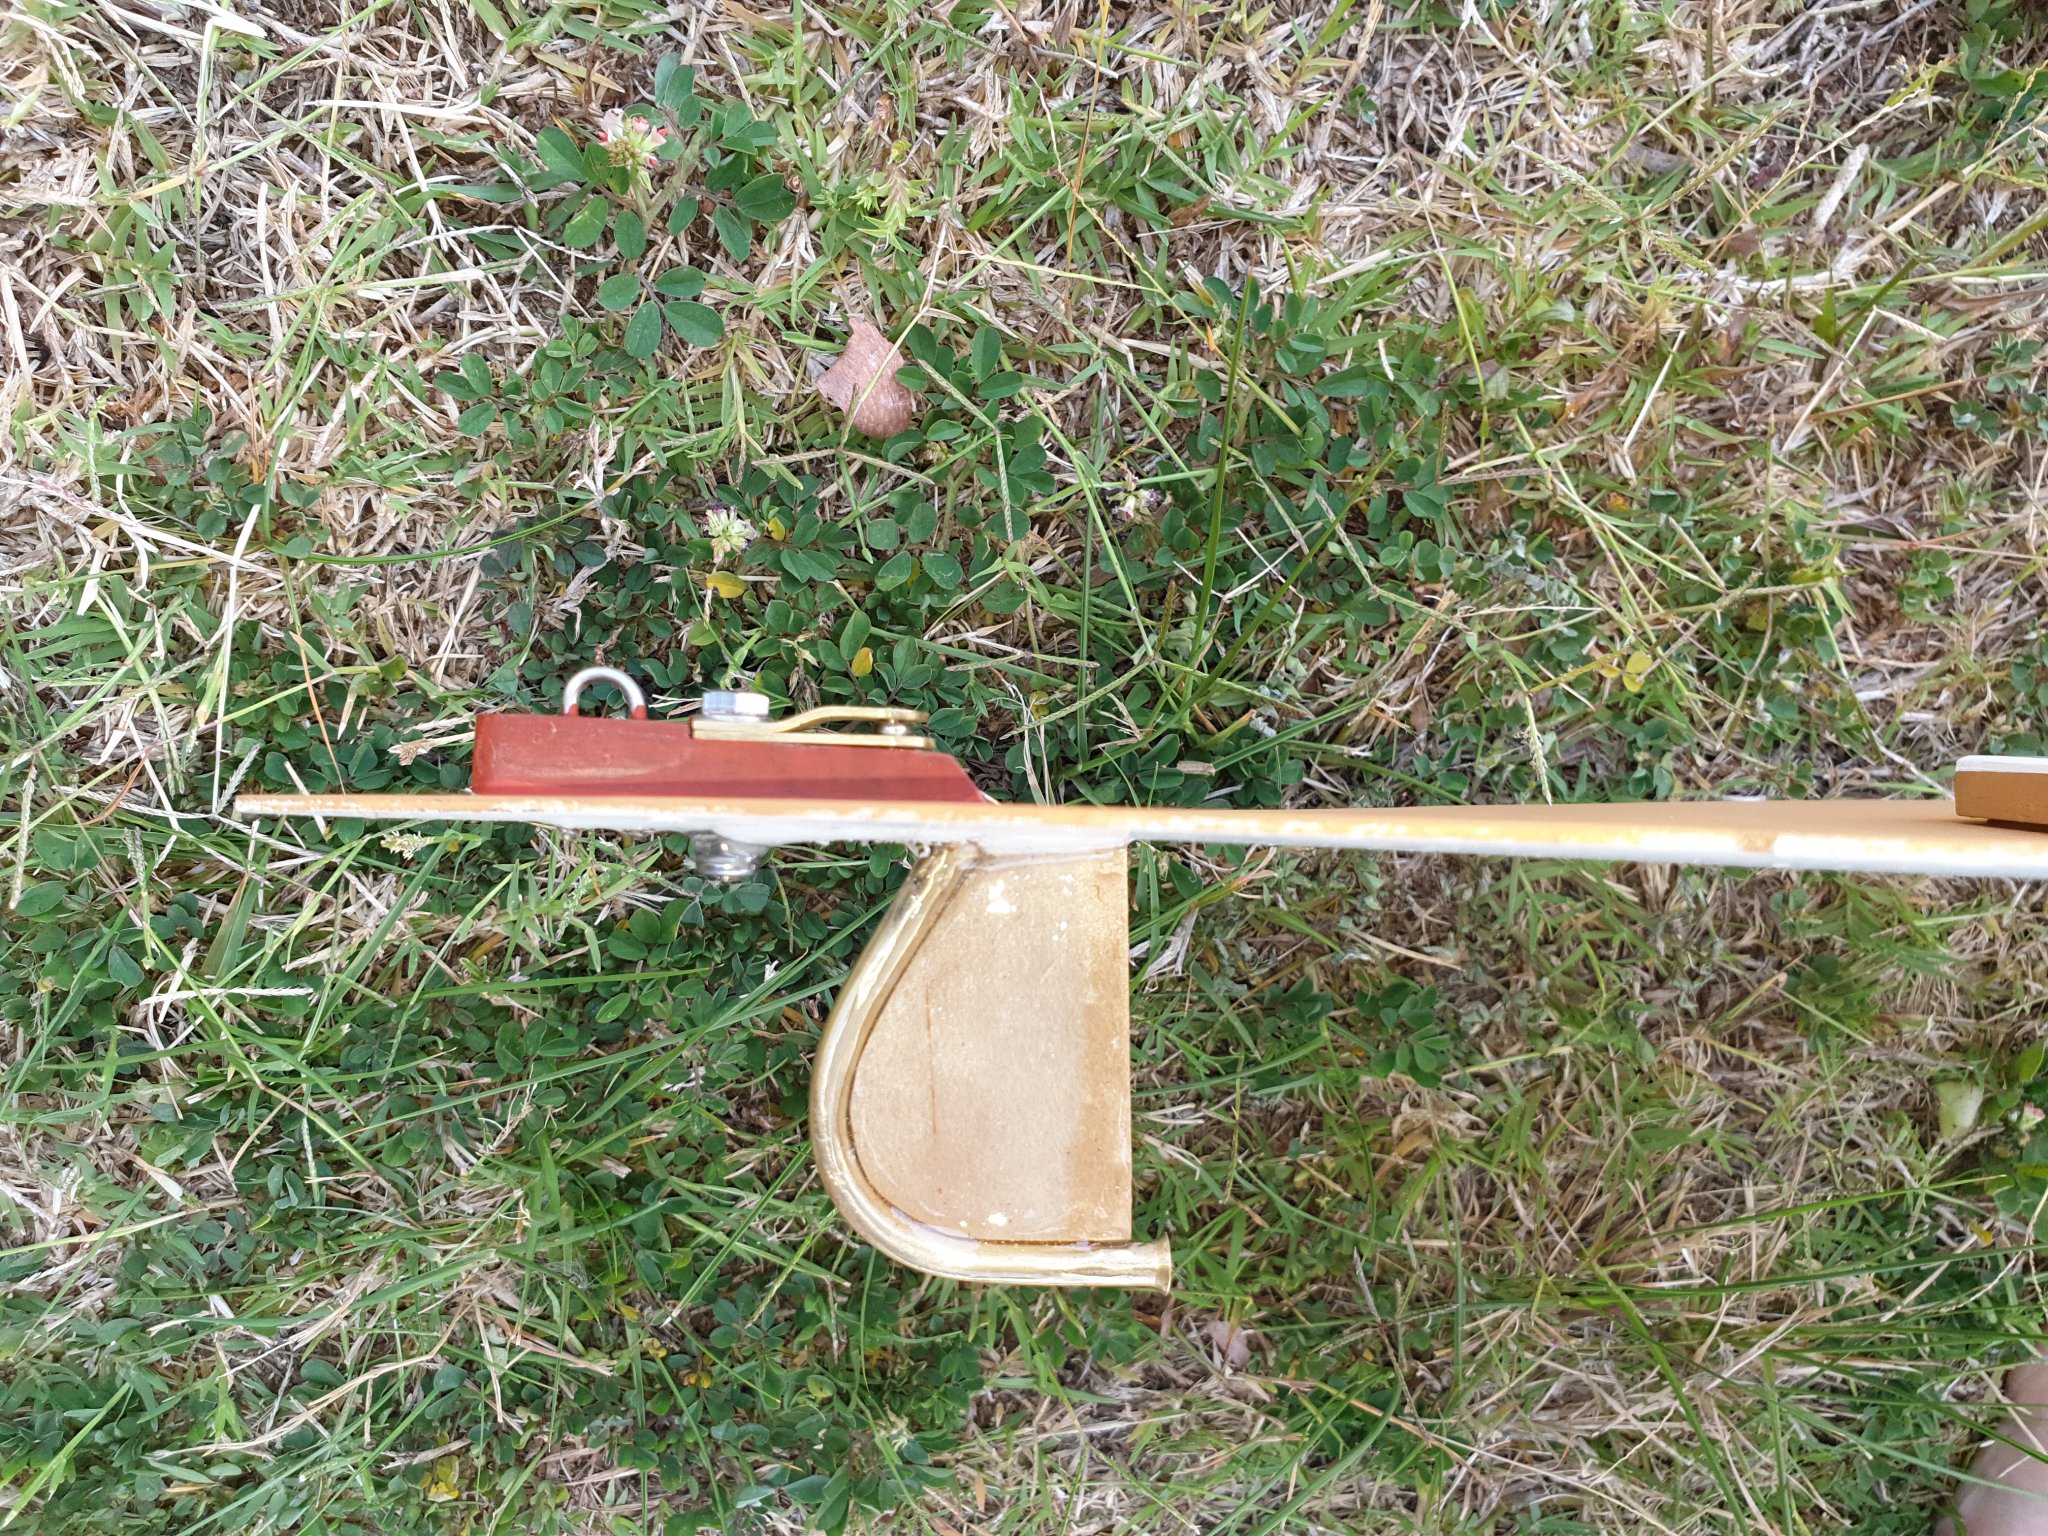
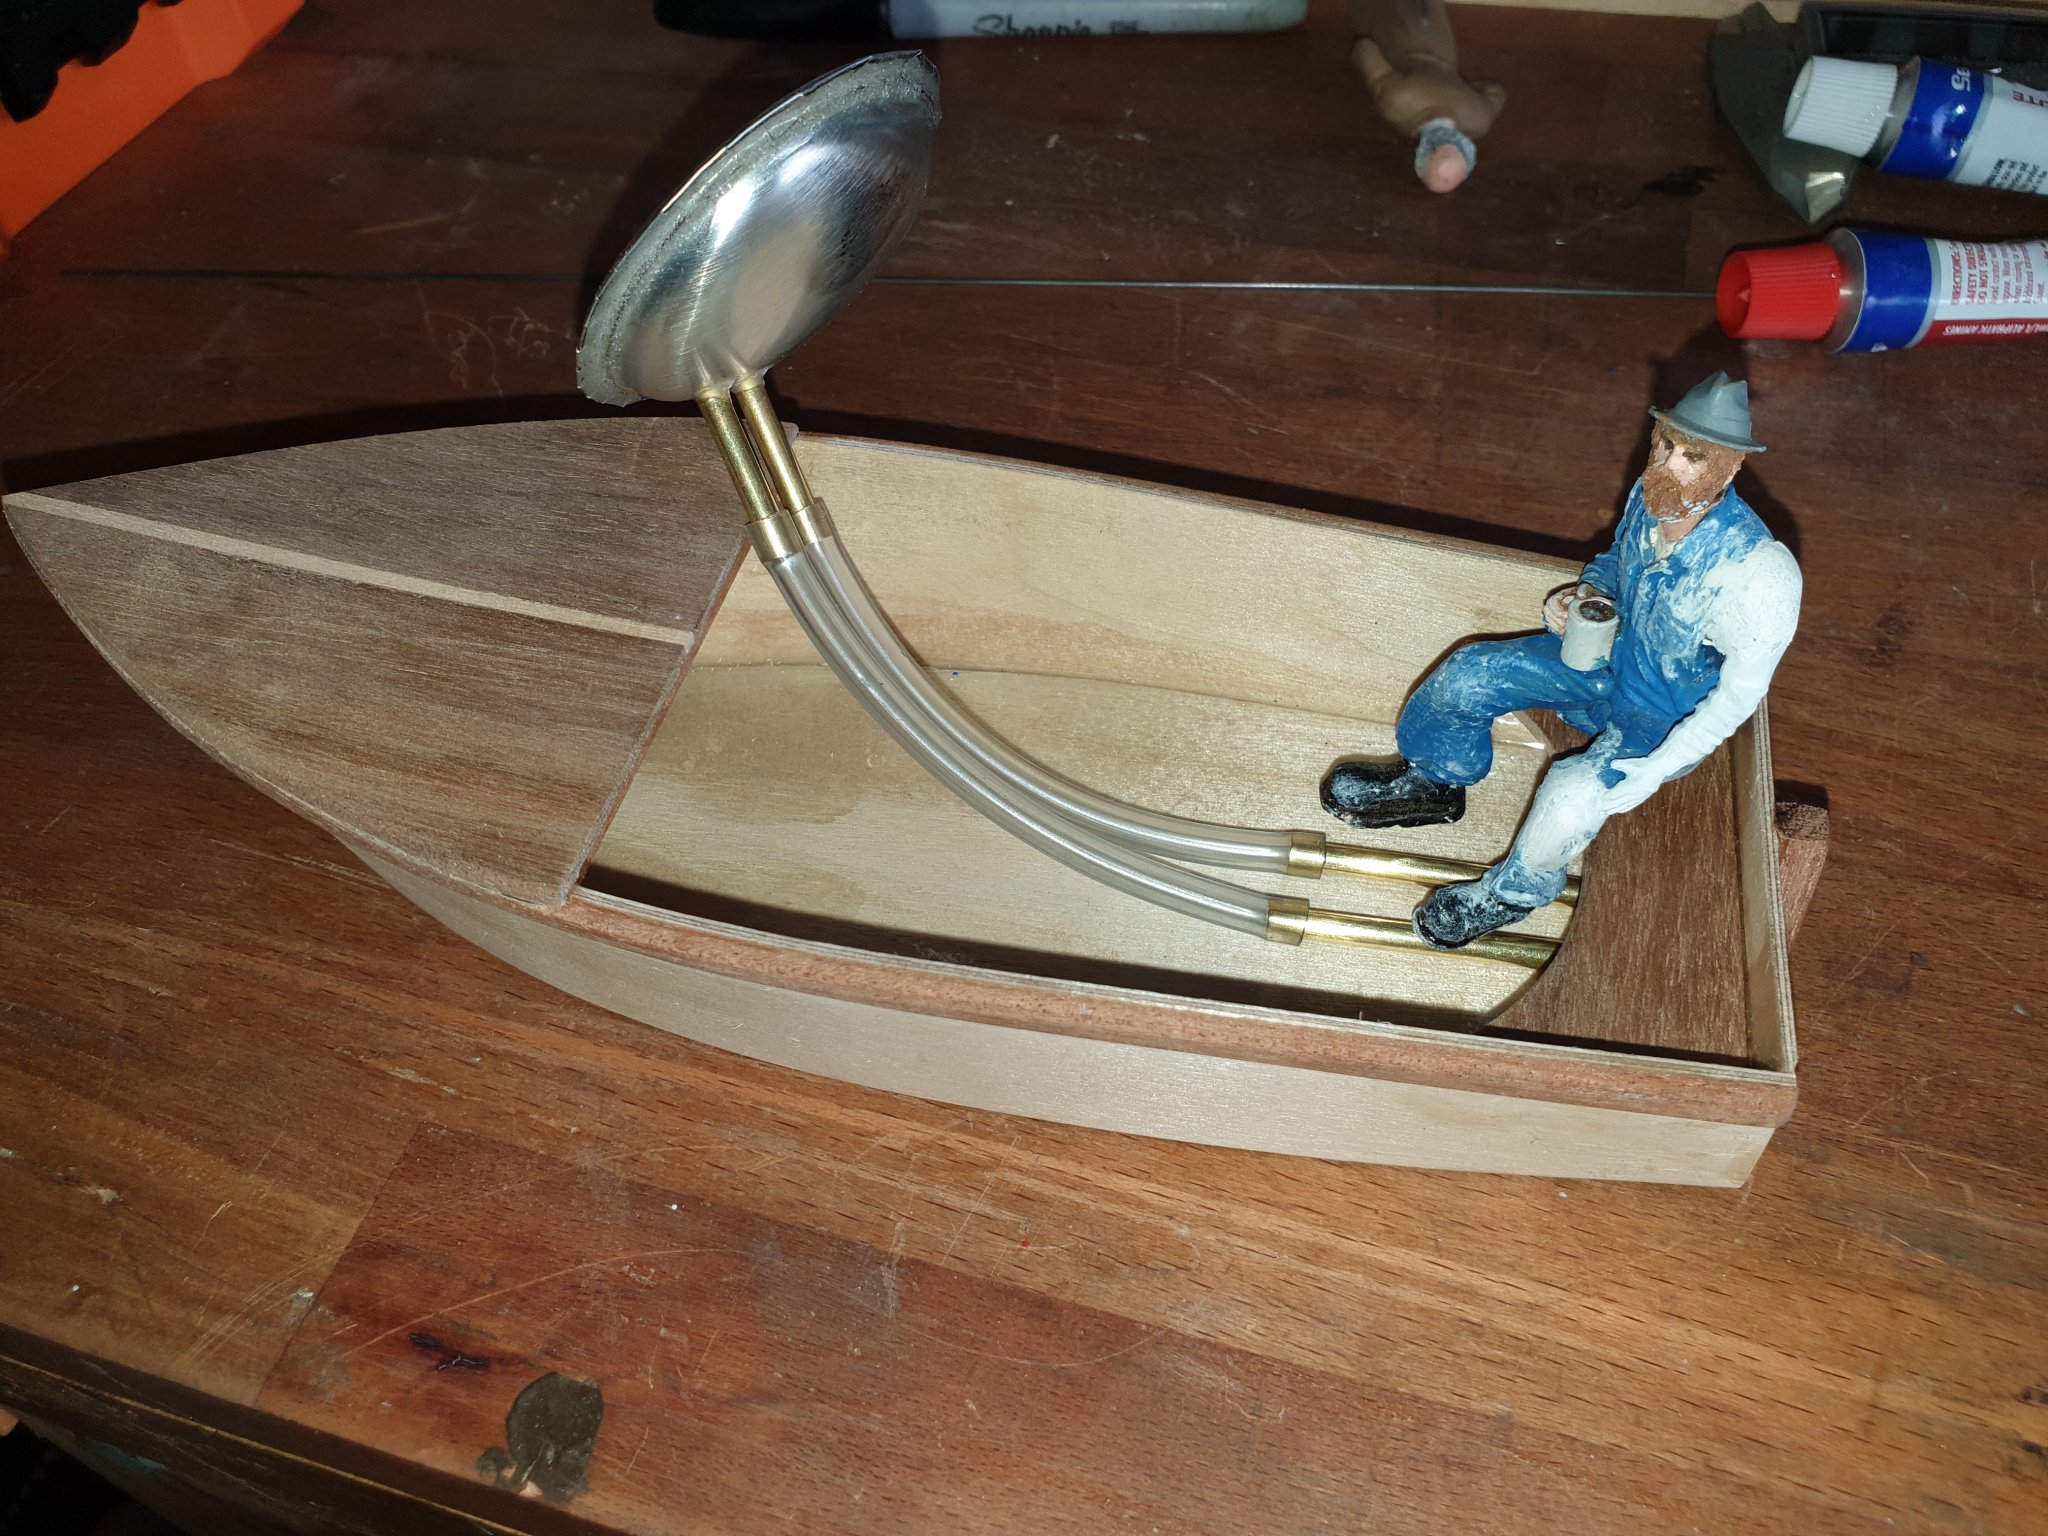
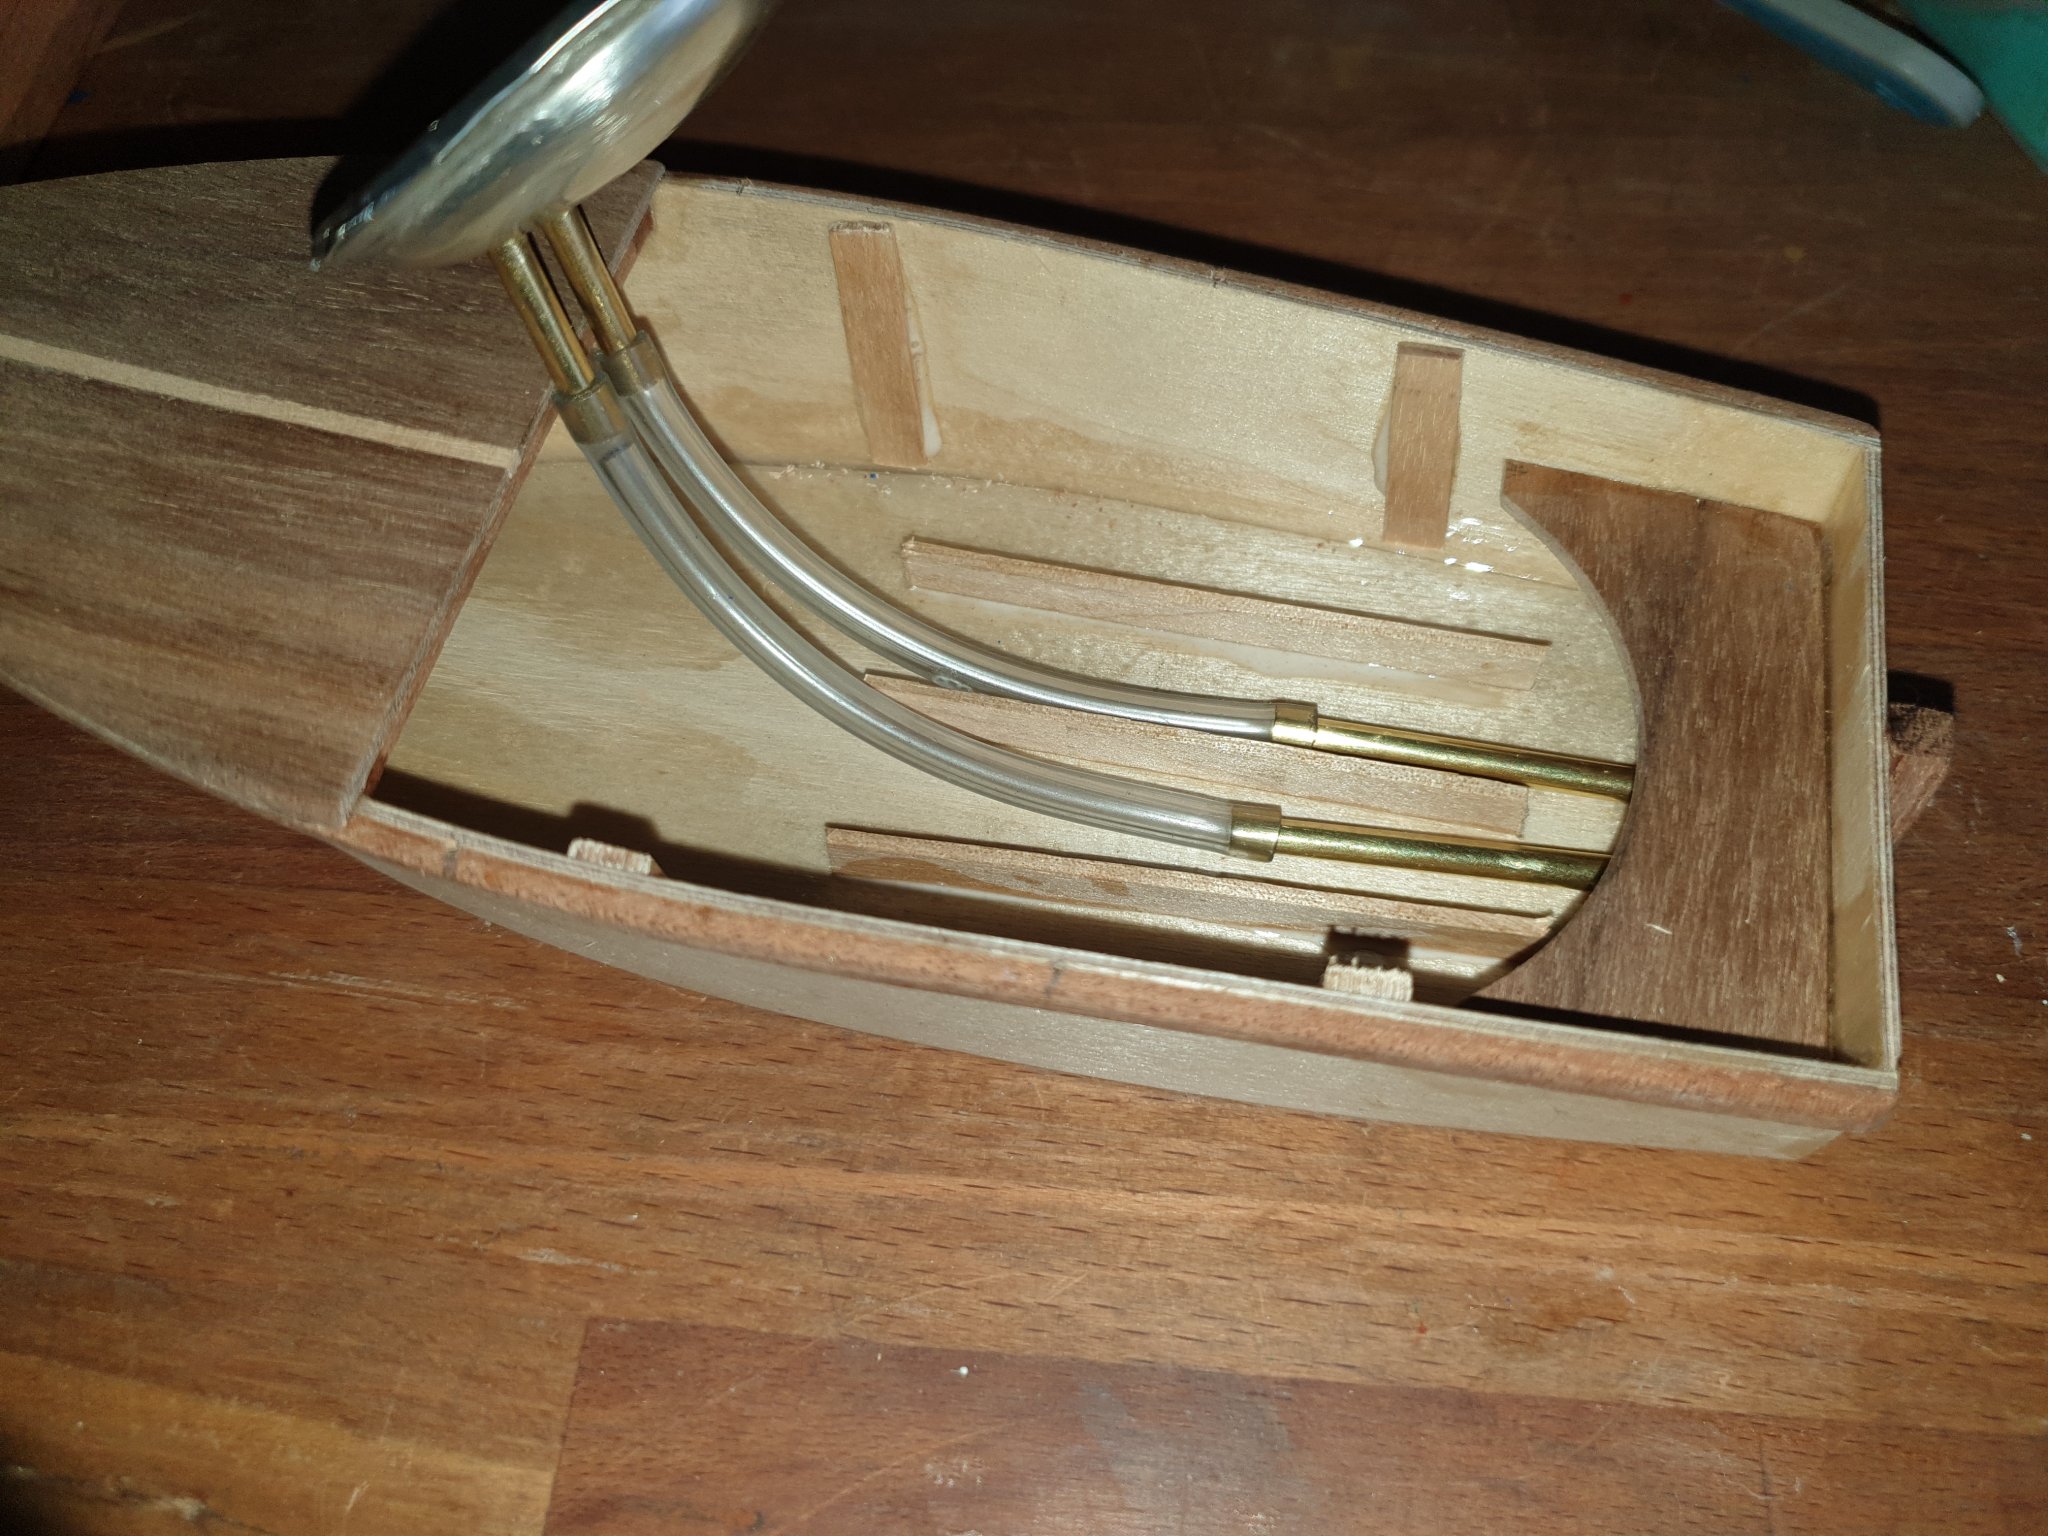
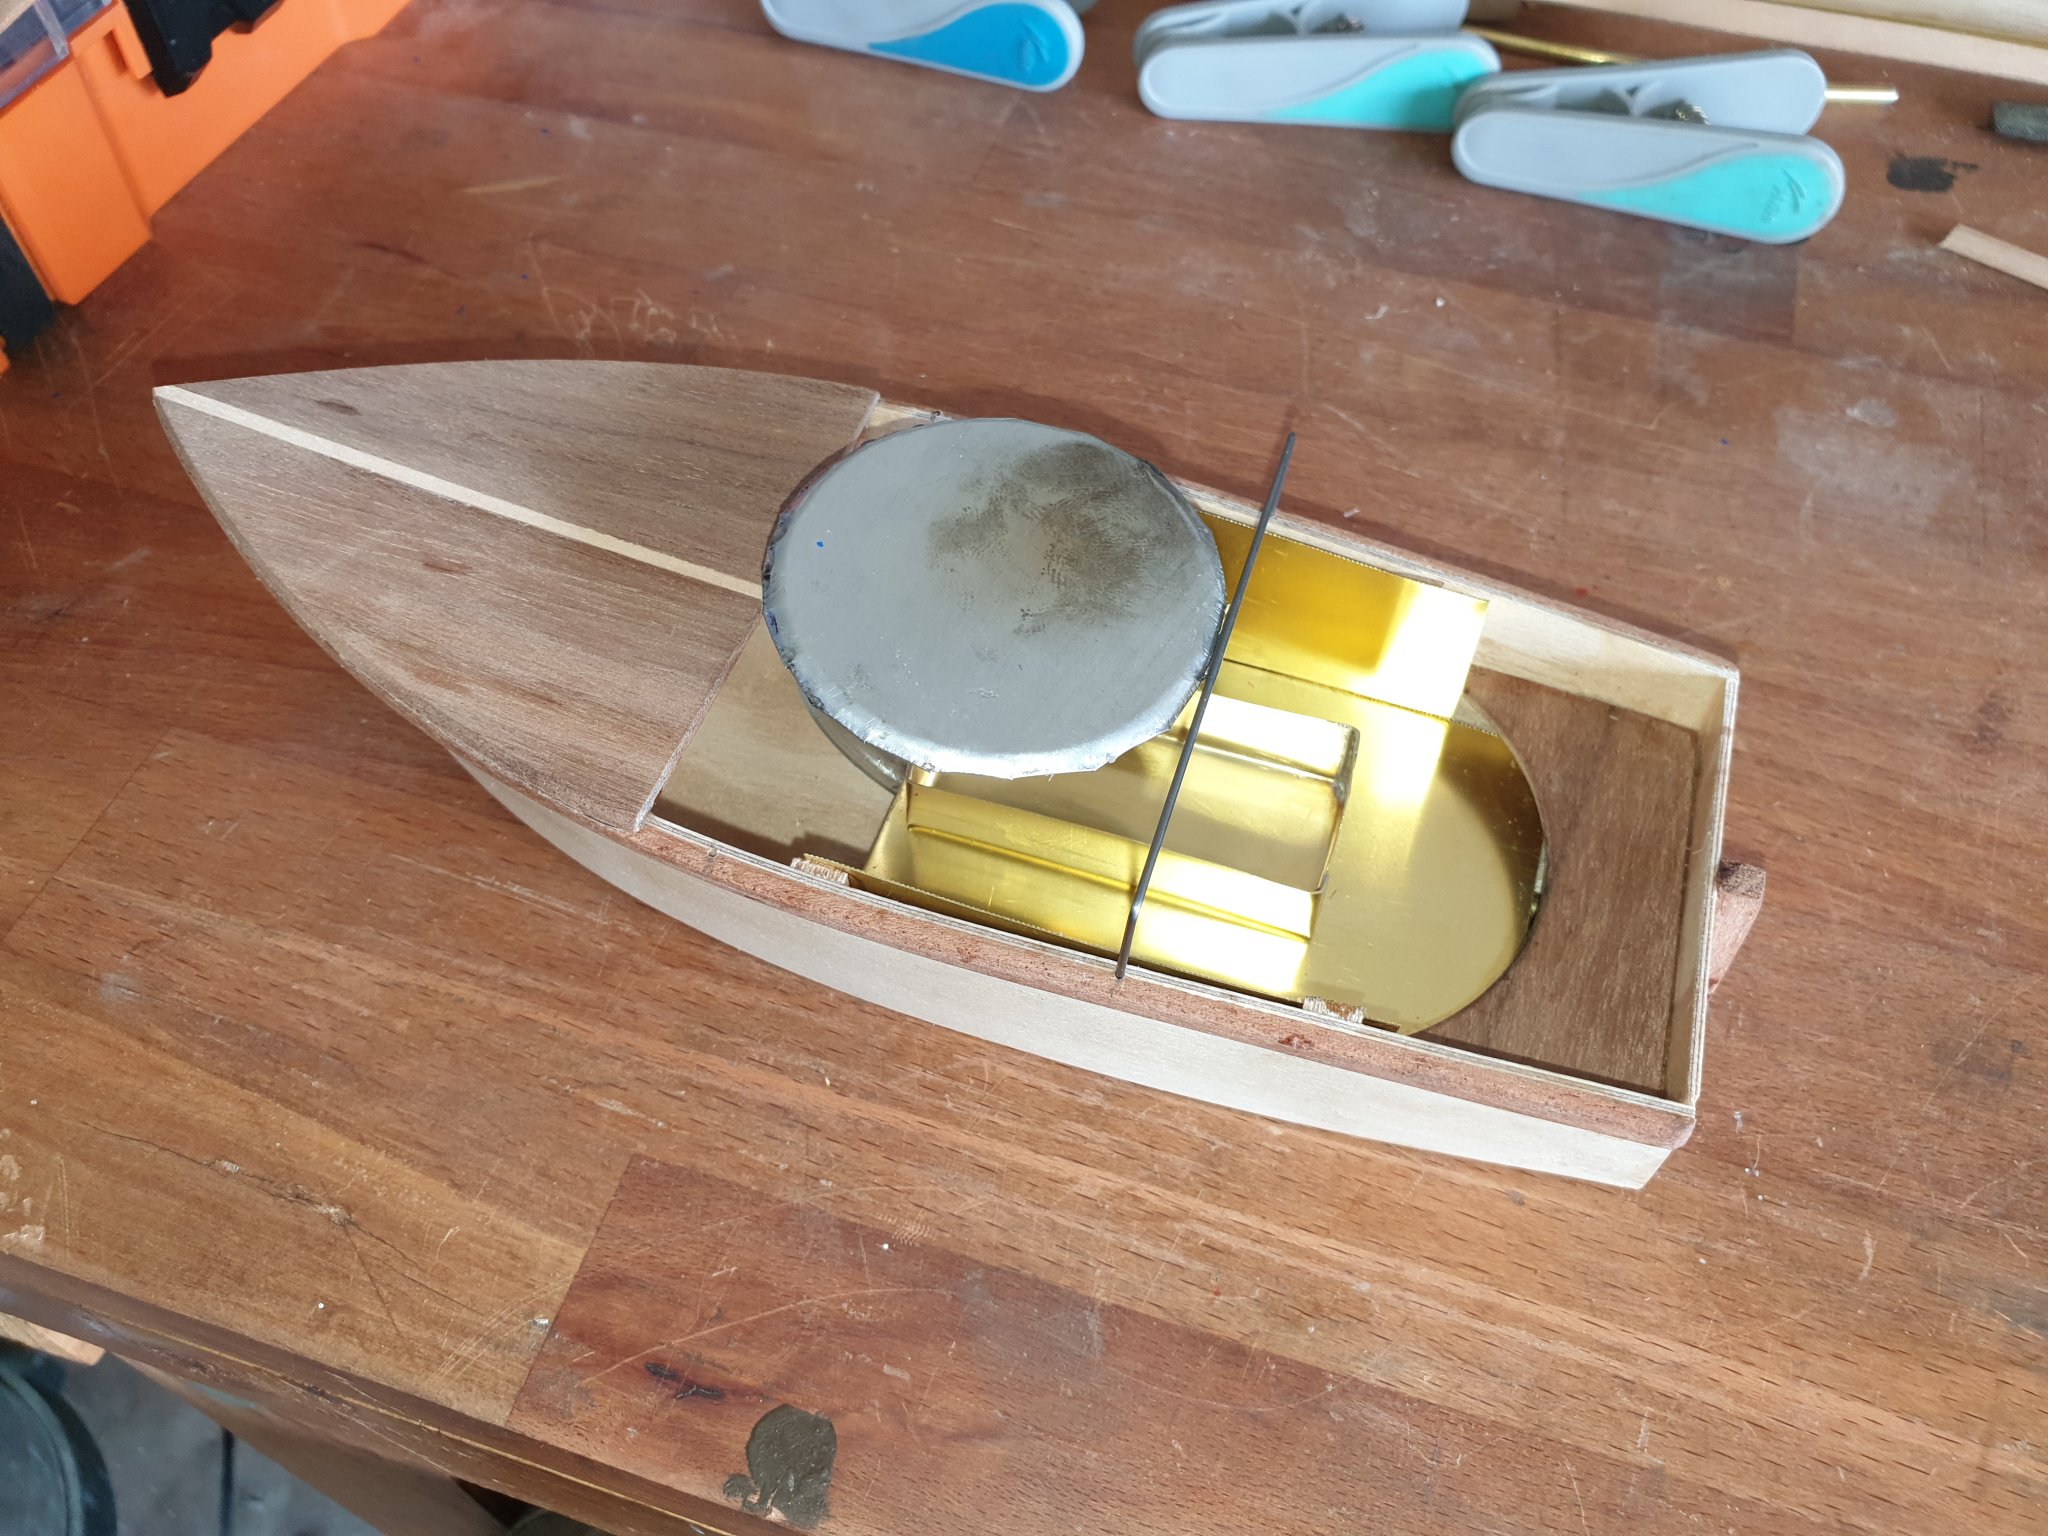
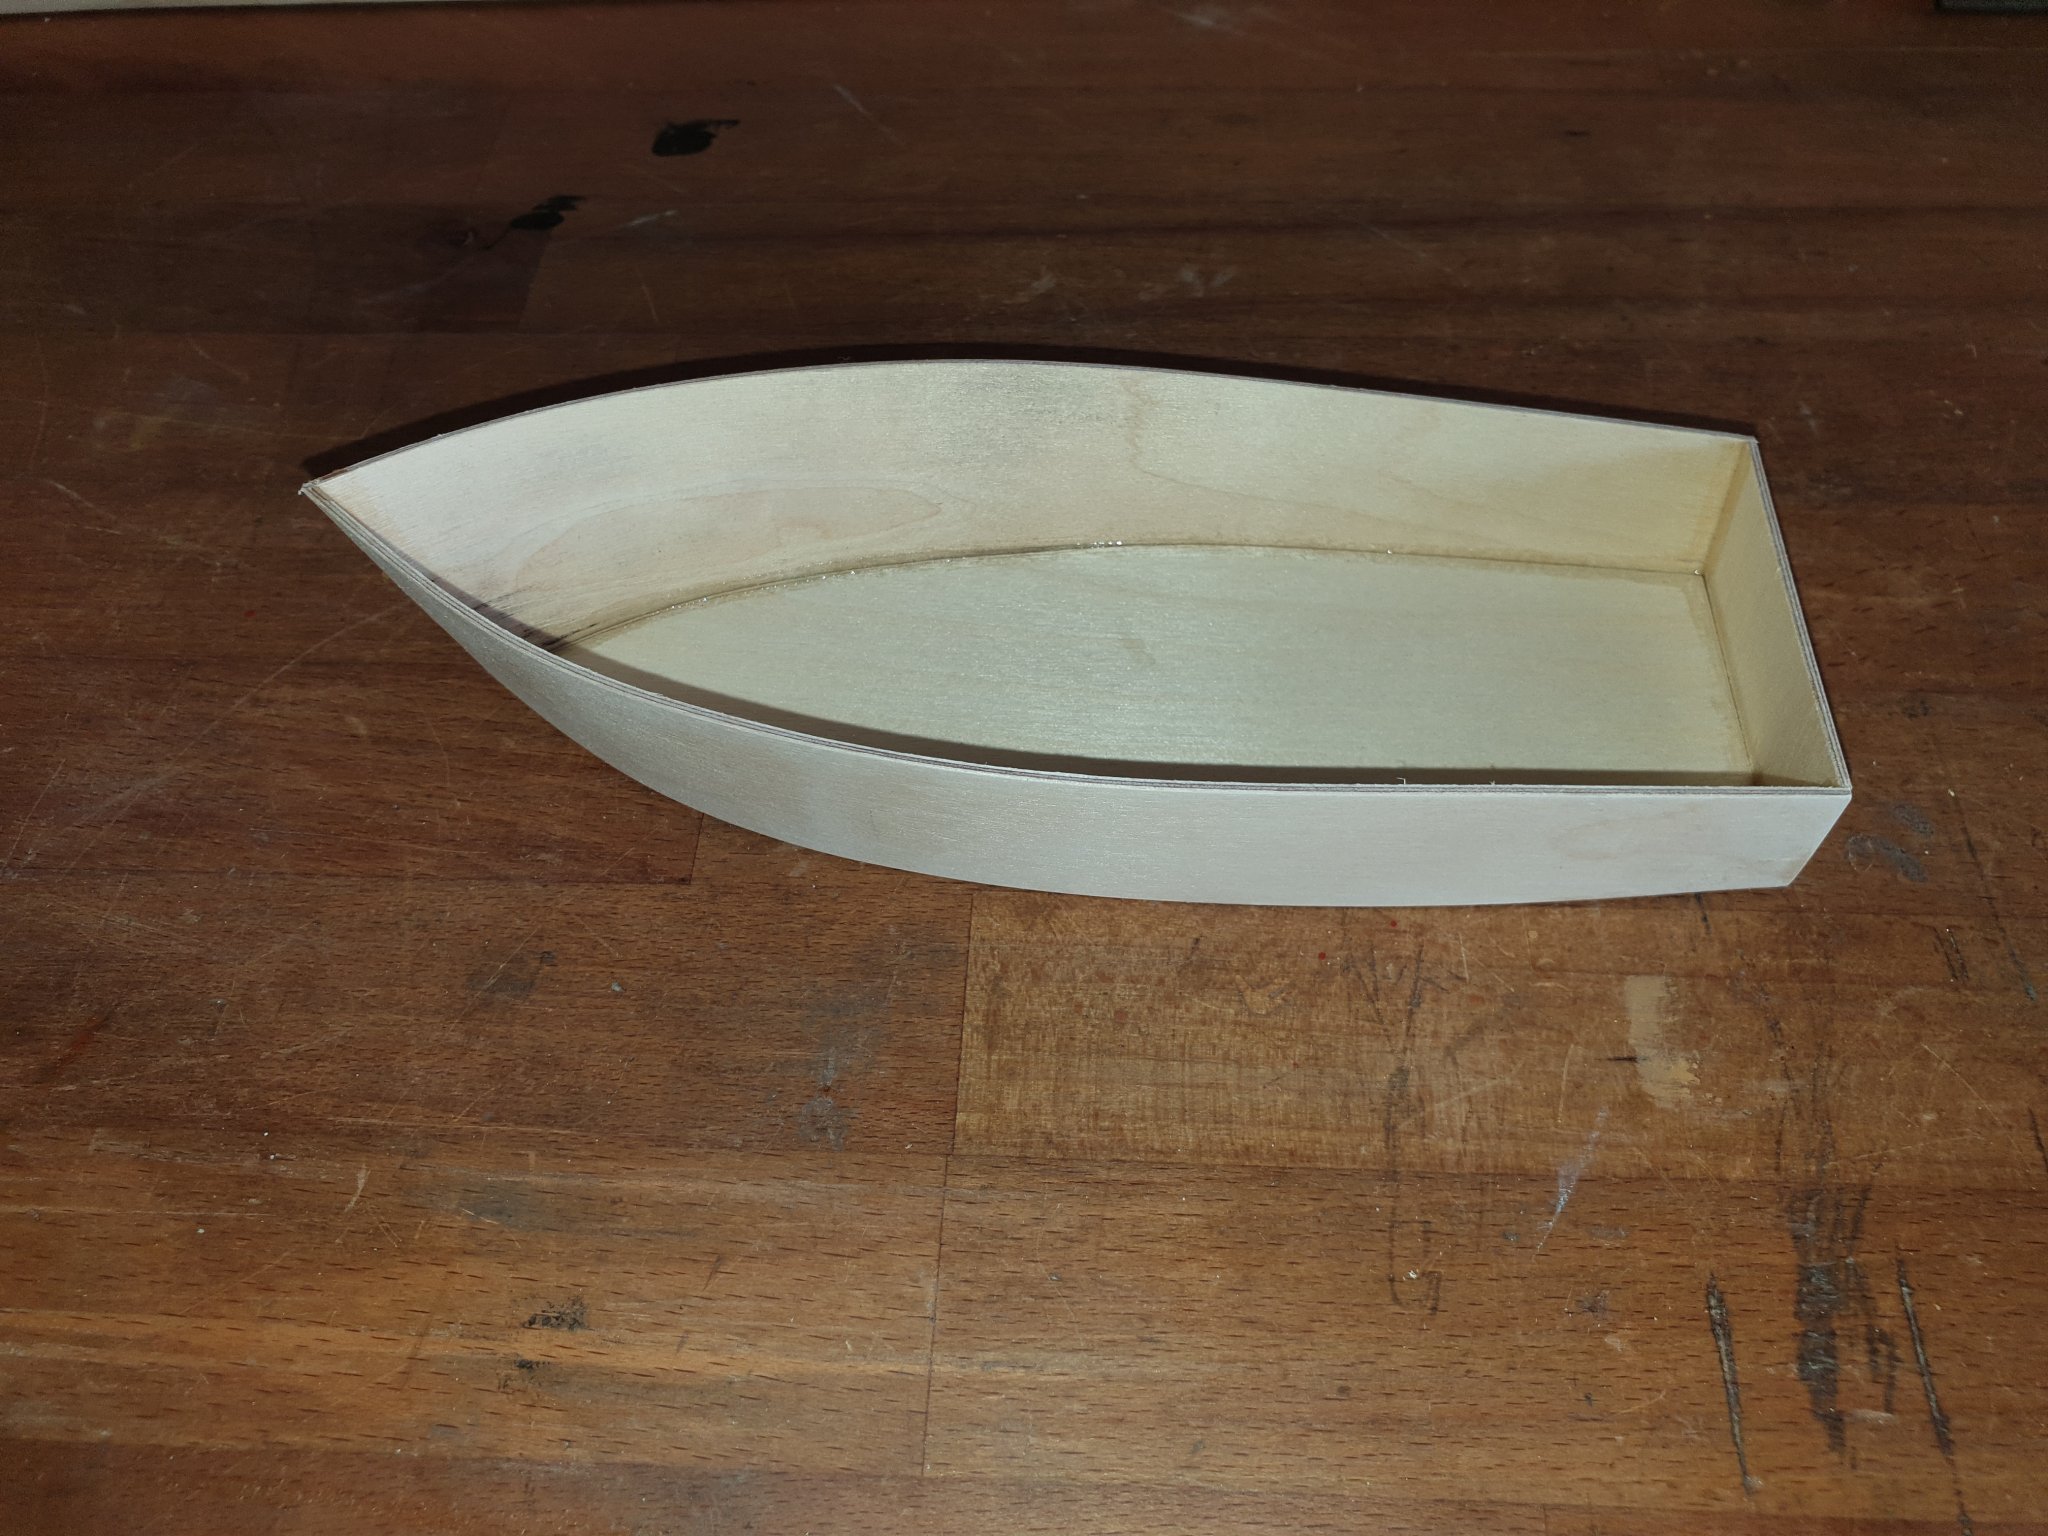
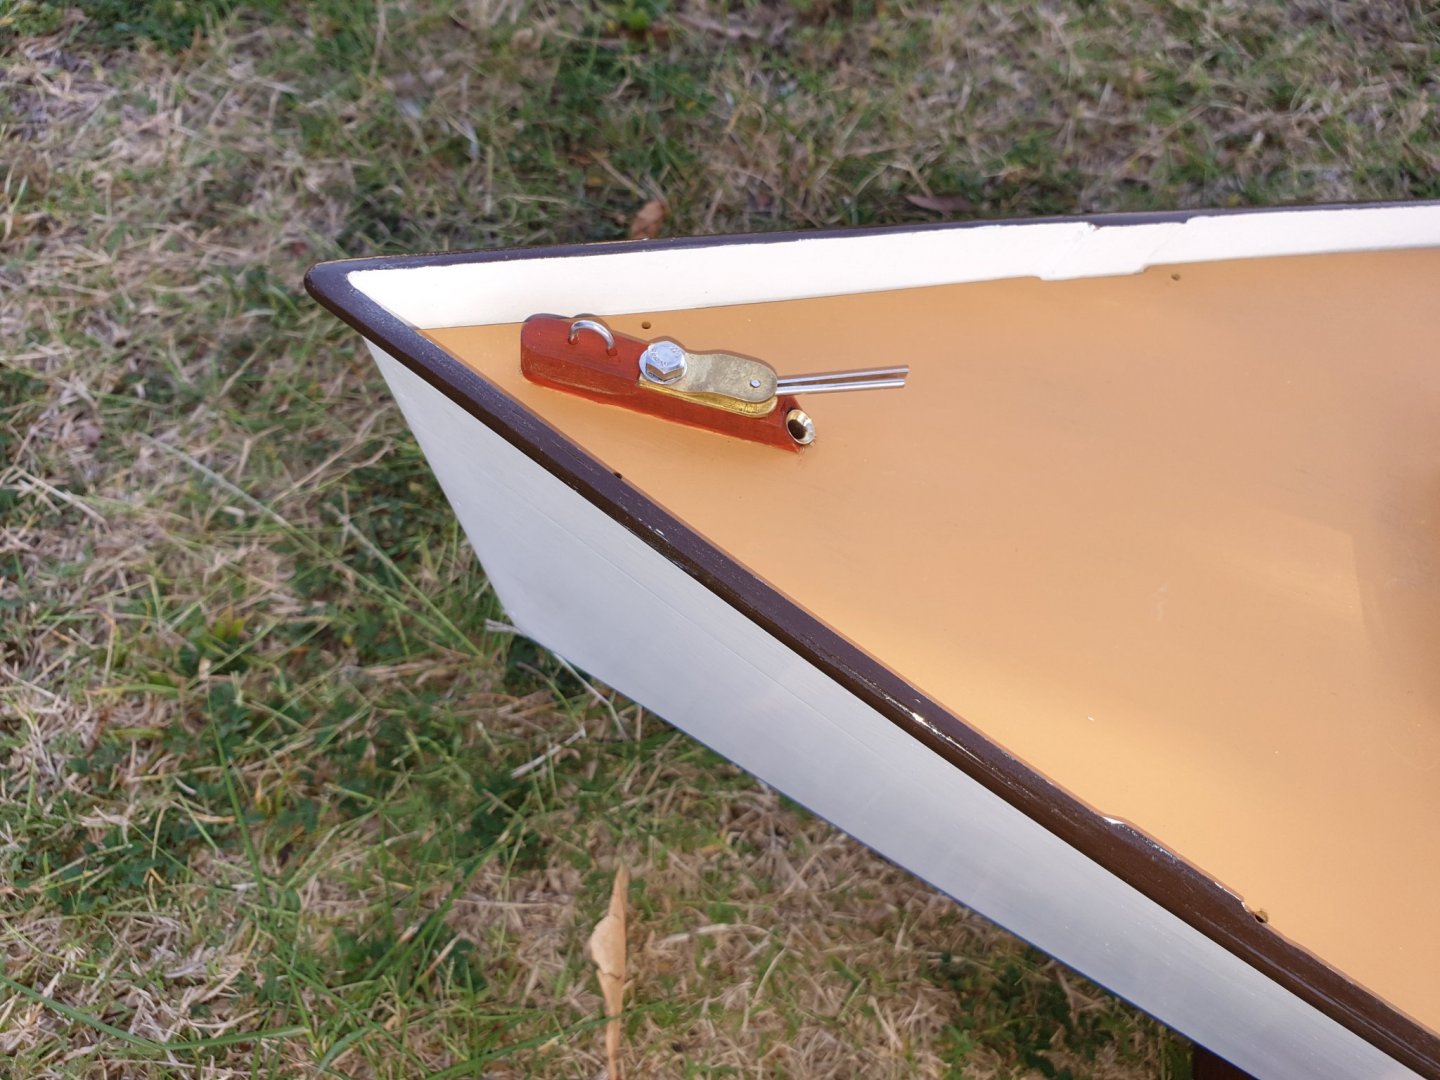
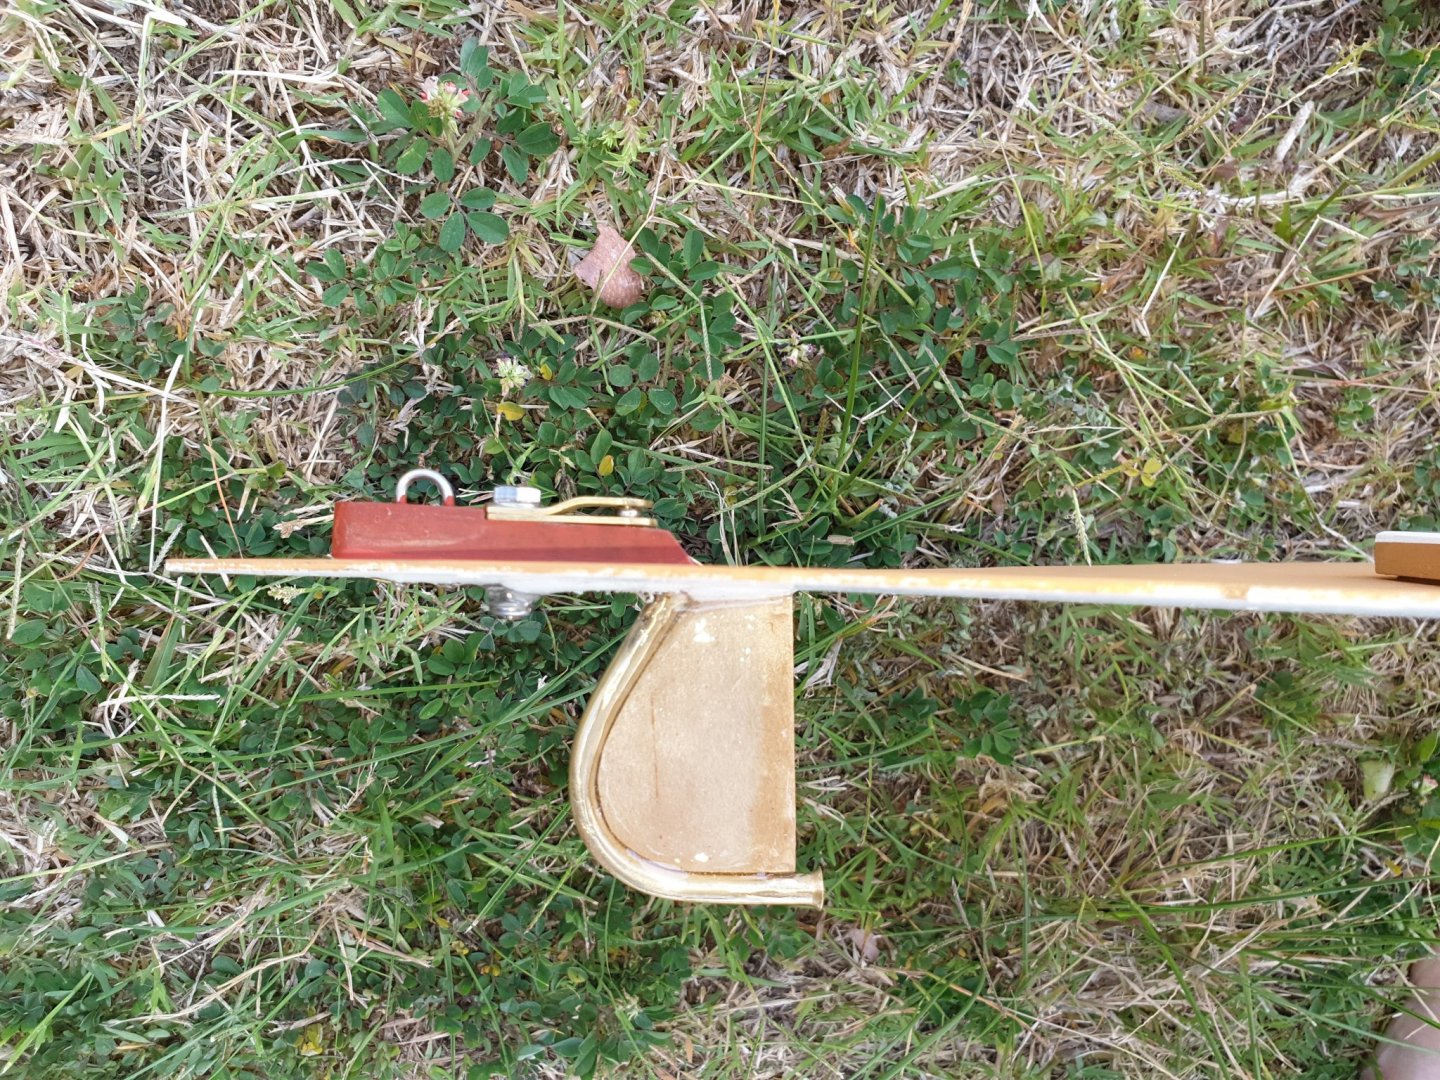
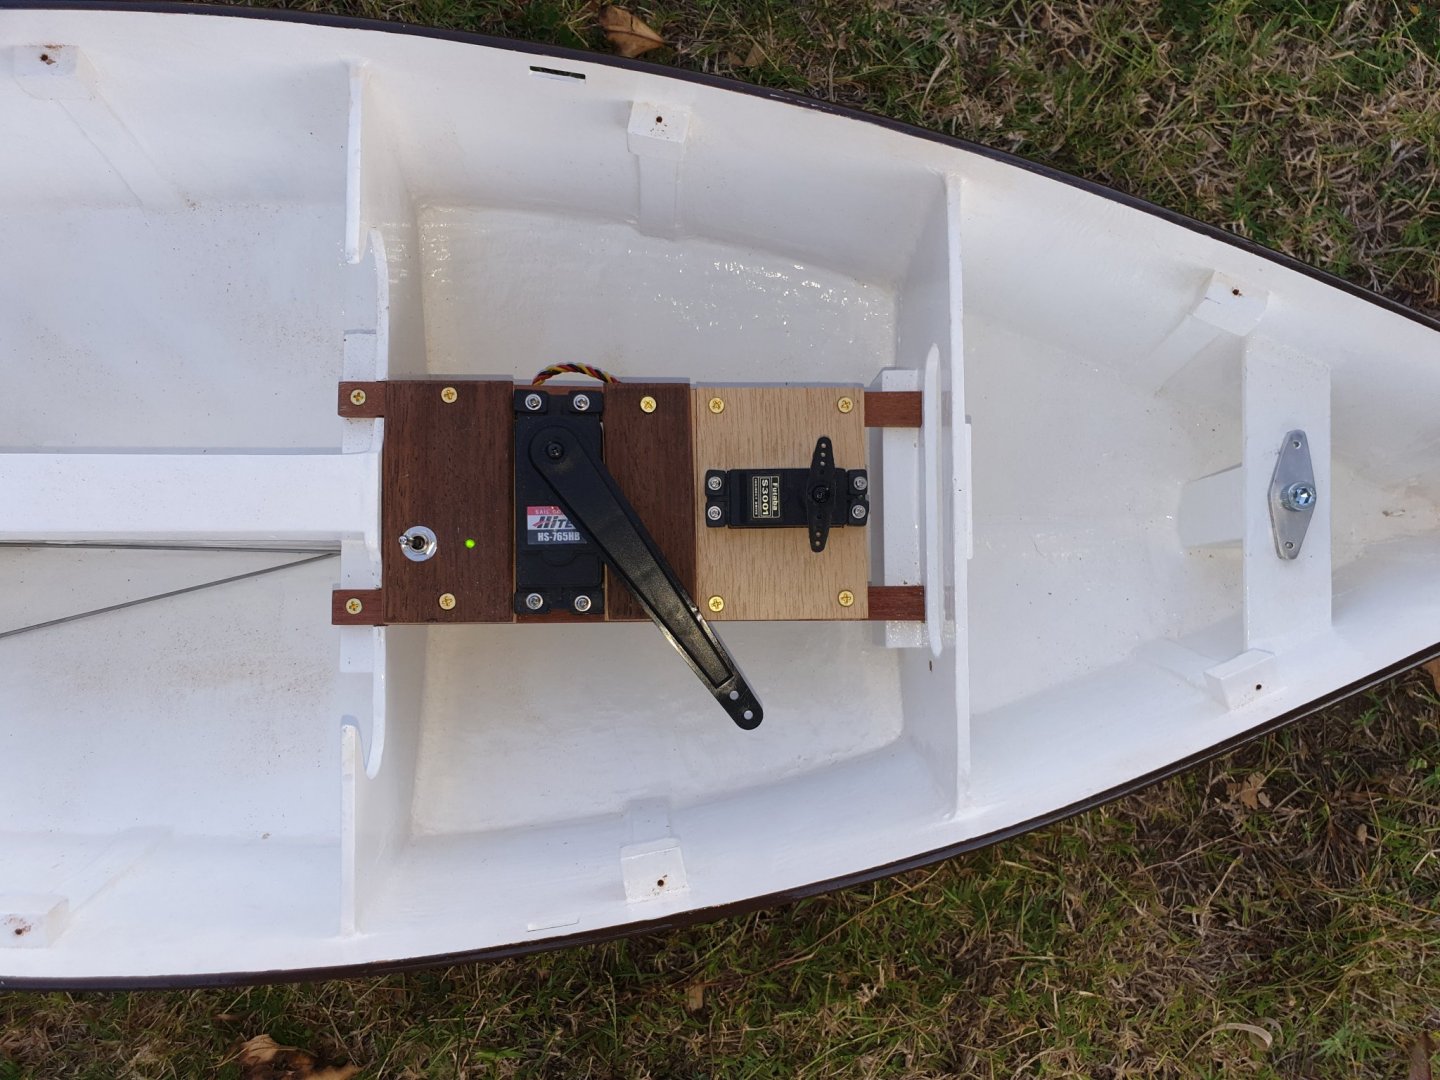
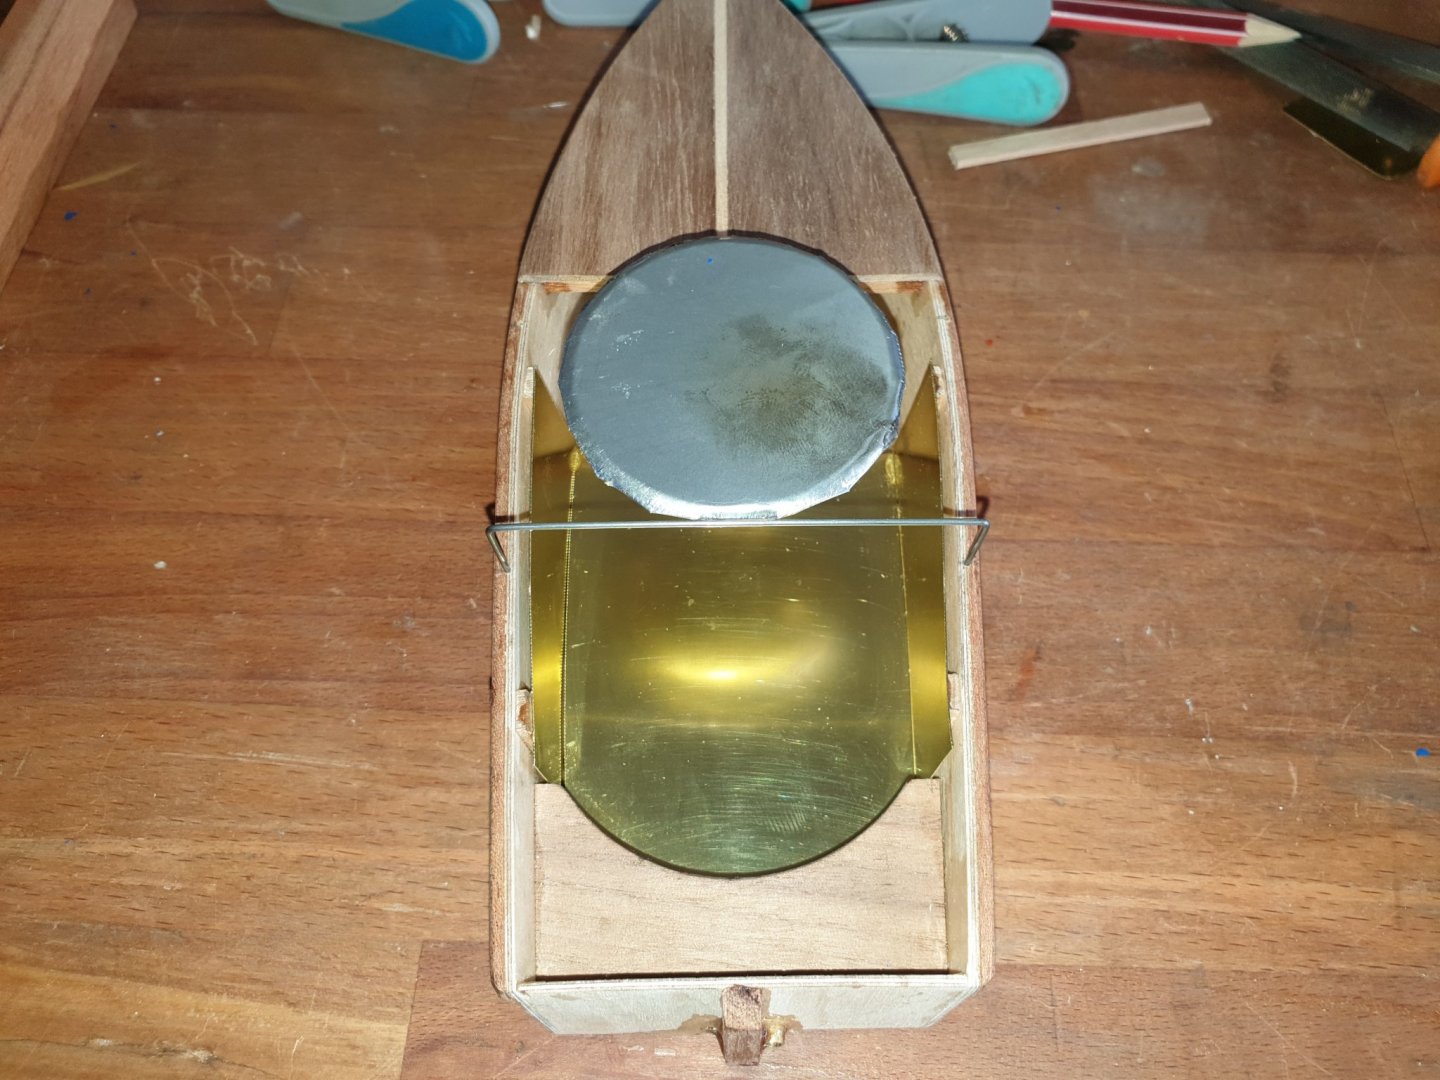
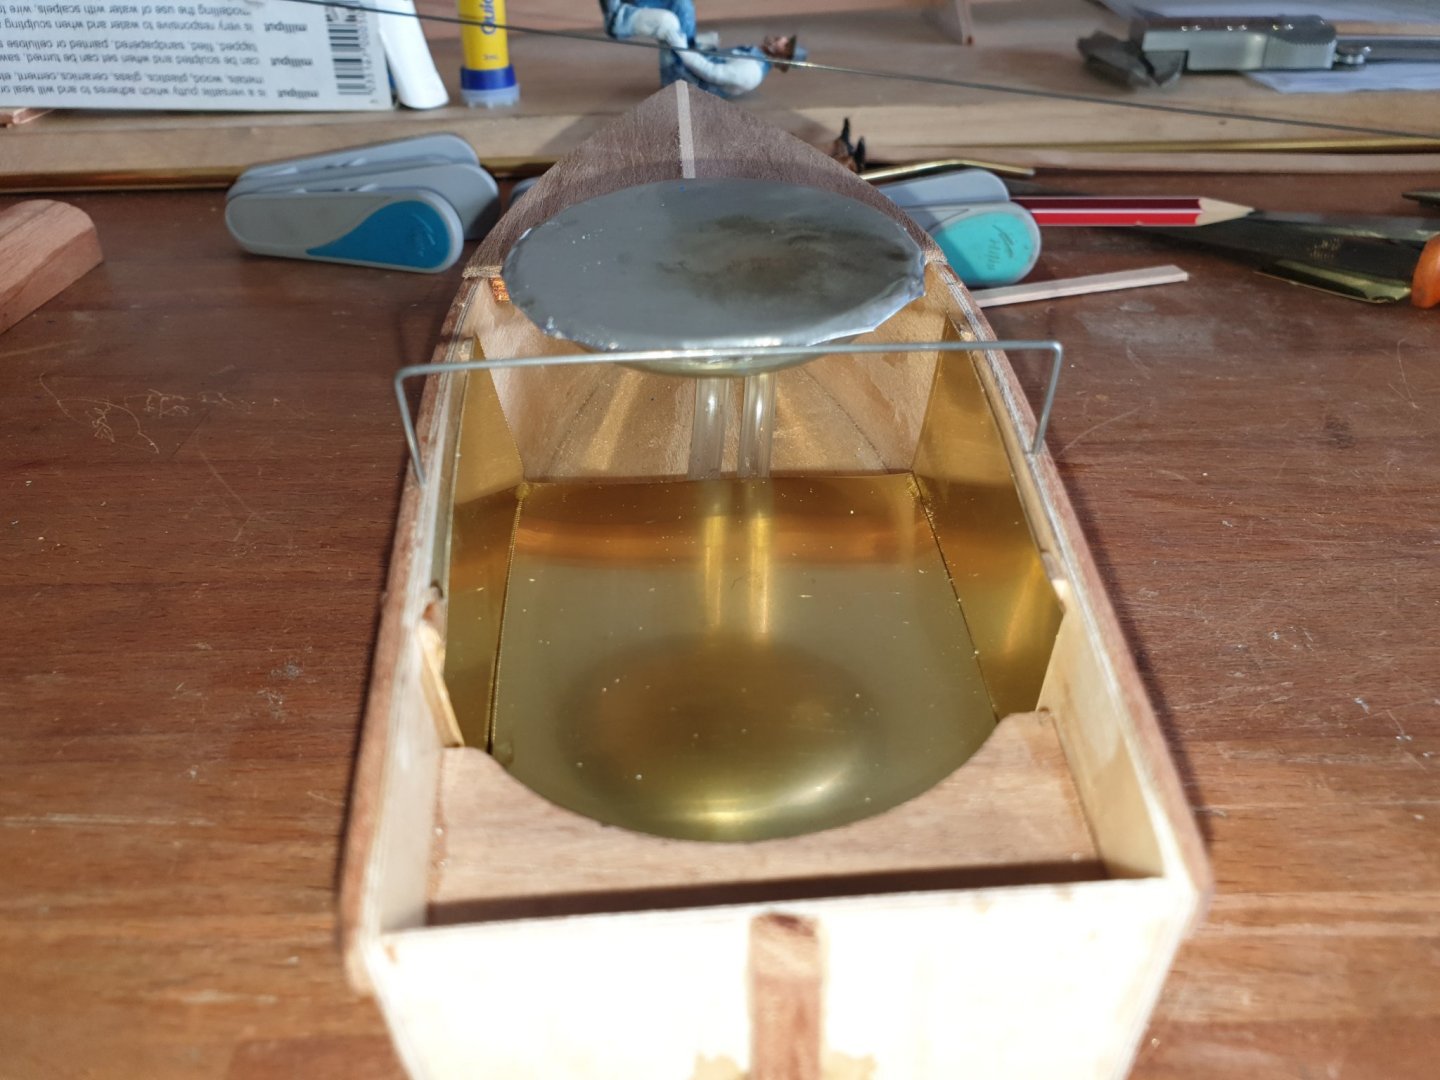
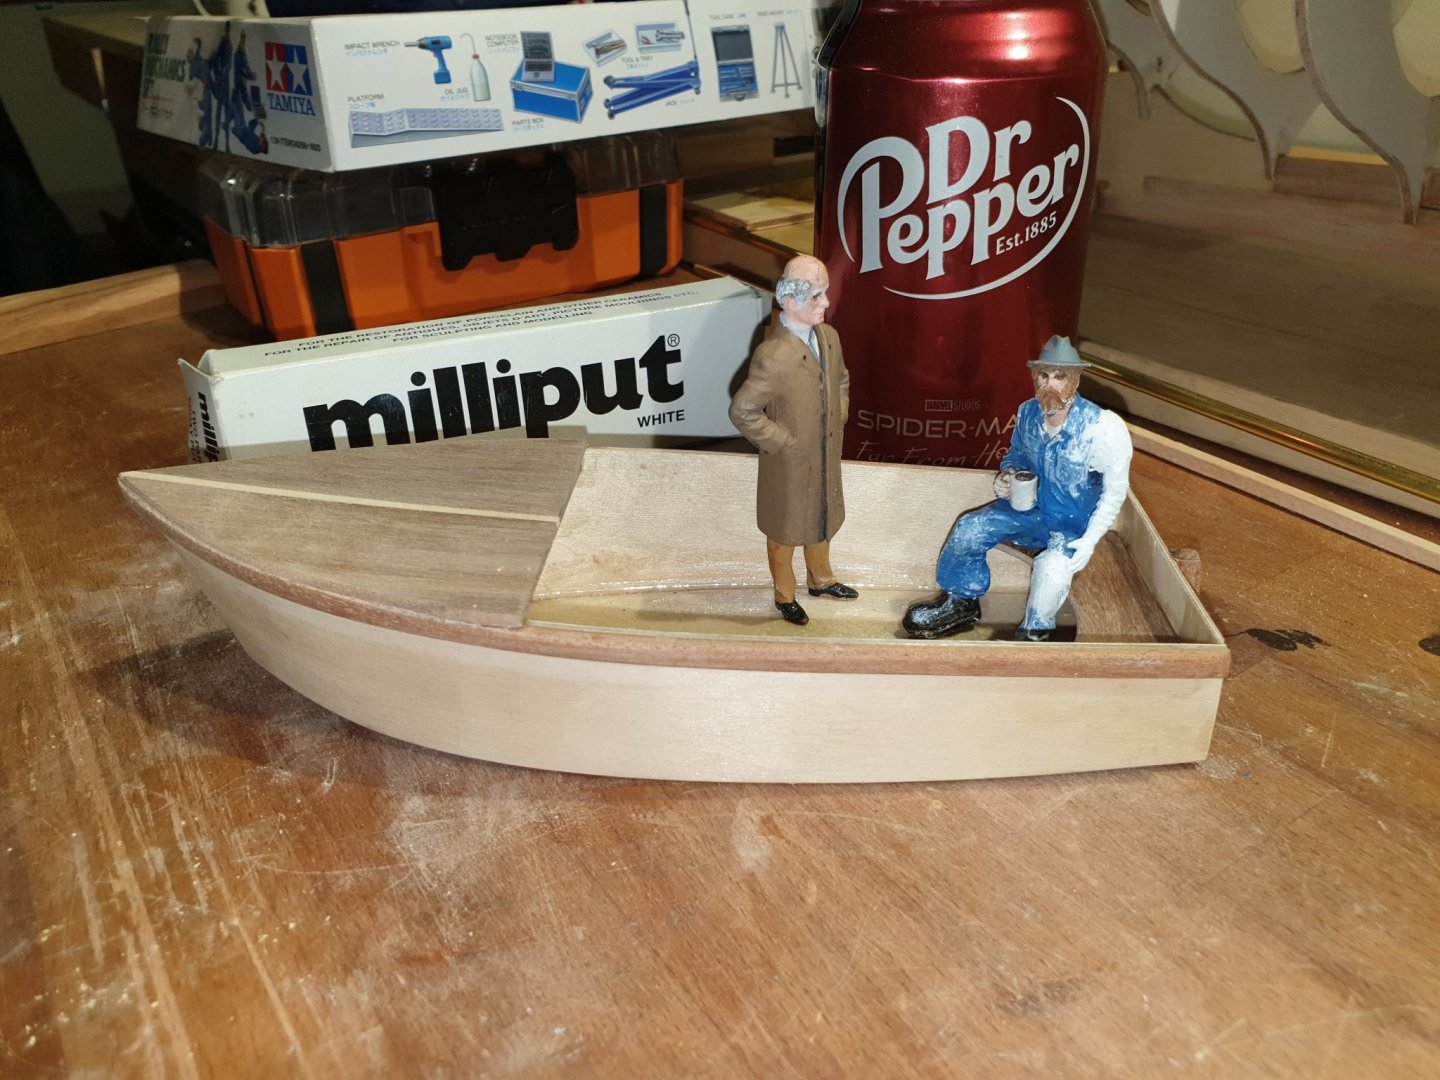
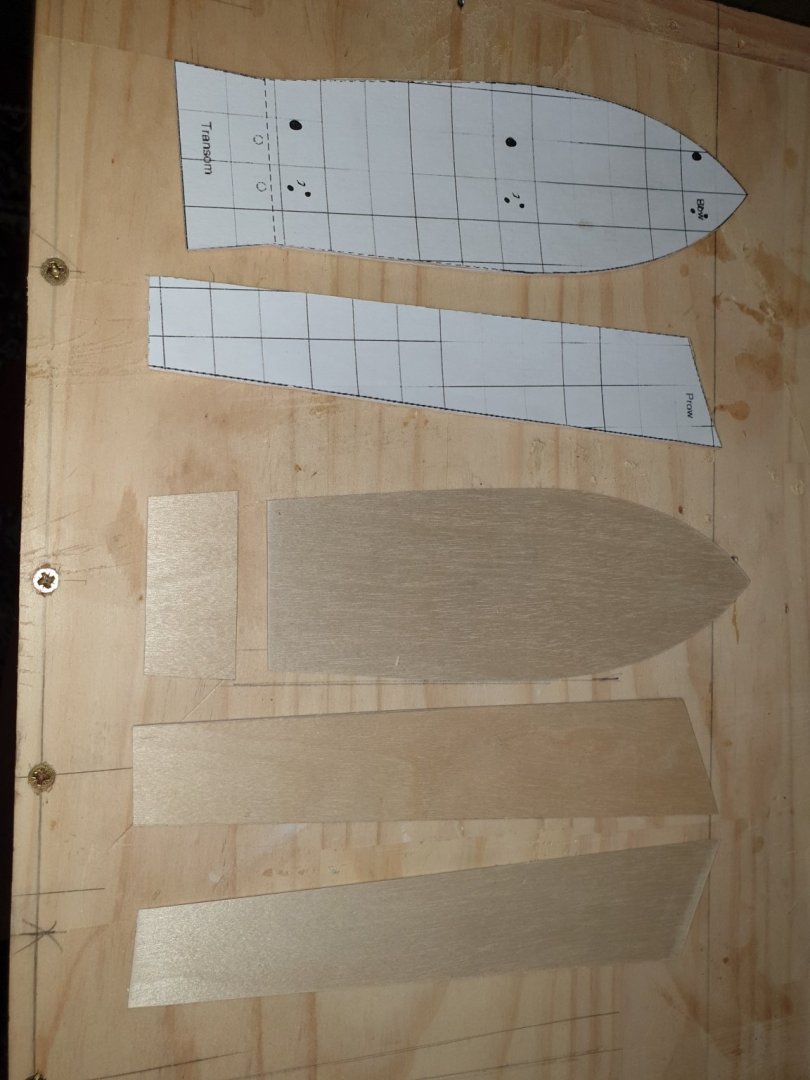
Emma is now painted and a main mast has been fashioned. The radio gear is also installed. The rc gear is all held in by two screws securing the entire rc block. The deck will be screwed on so it can be completely removable. The cast lead bulb on the keel weighs 7 lbs. The cabin roof and both hatches are removable. The flared and bent brass tube is to house the jib stays to the winch. It was a feat of engineering. I had to buy a flaring tool set, a tube bender and a gas torch to anneal the KS brass tube which is hard brass. I had to make several attempts at it. The first was with some copper tube from ebay which arrived at the incorrect size so Slipped through the flaring tool. I tried ks alluminium tube with the bender but that just flattened at the bends. I tried the ks brass tube cold but that also flattened at the bends. I then annealed the brass tube and voila!!! That poxy bit of tube you see caused hours of frustration, many days waiting for stuff to arrive and cost me $150 to make!. I have done it now but there is a lot to be said for kits. Although at the current time there is no kit for Emma. The mast looks to be massively thick and cants aft quite a bit. I have made all as per plans so it should be okay. It is 16mm thick and tapers to 10mm at the top. Only the fore and sides of the mast are tapered. The aft is left as is to coincide with the sail Luff. Pete


-
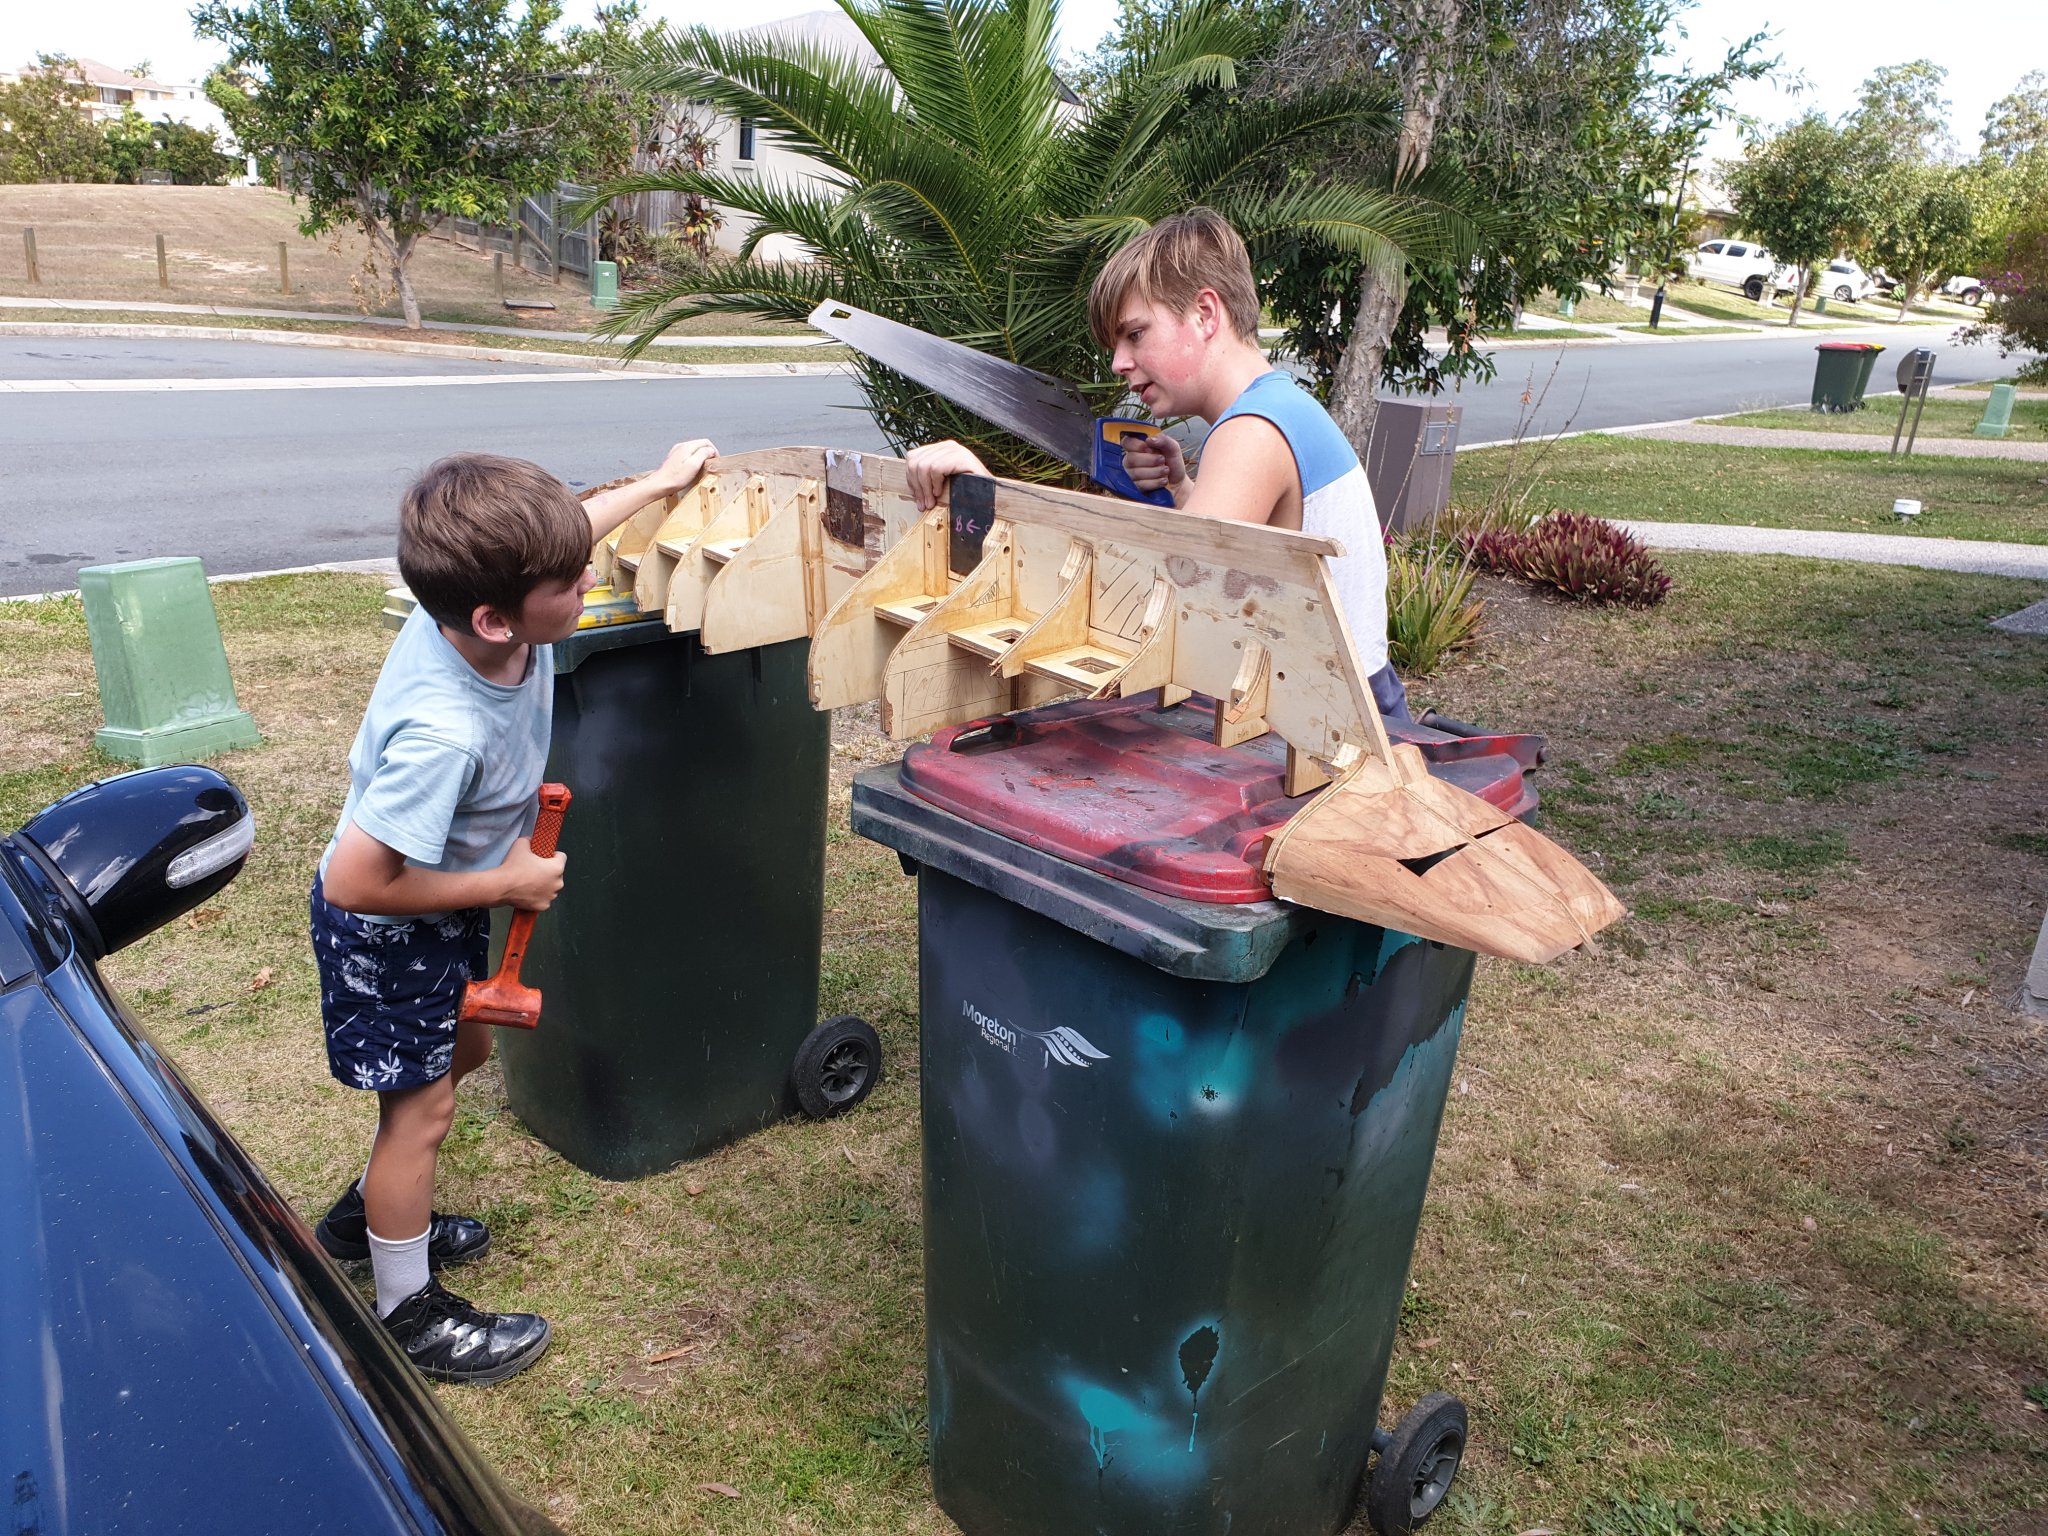
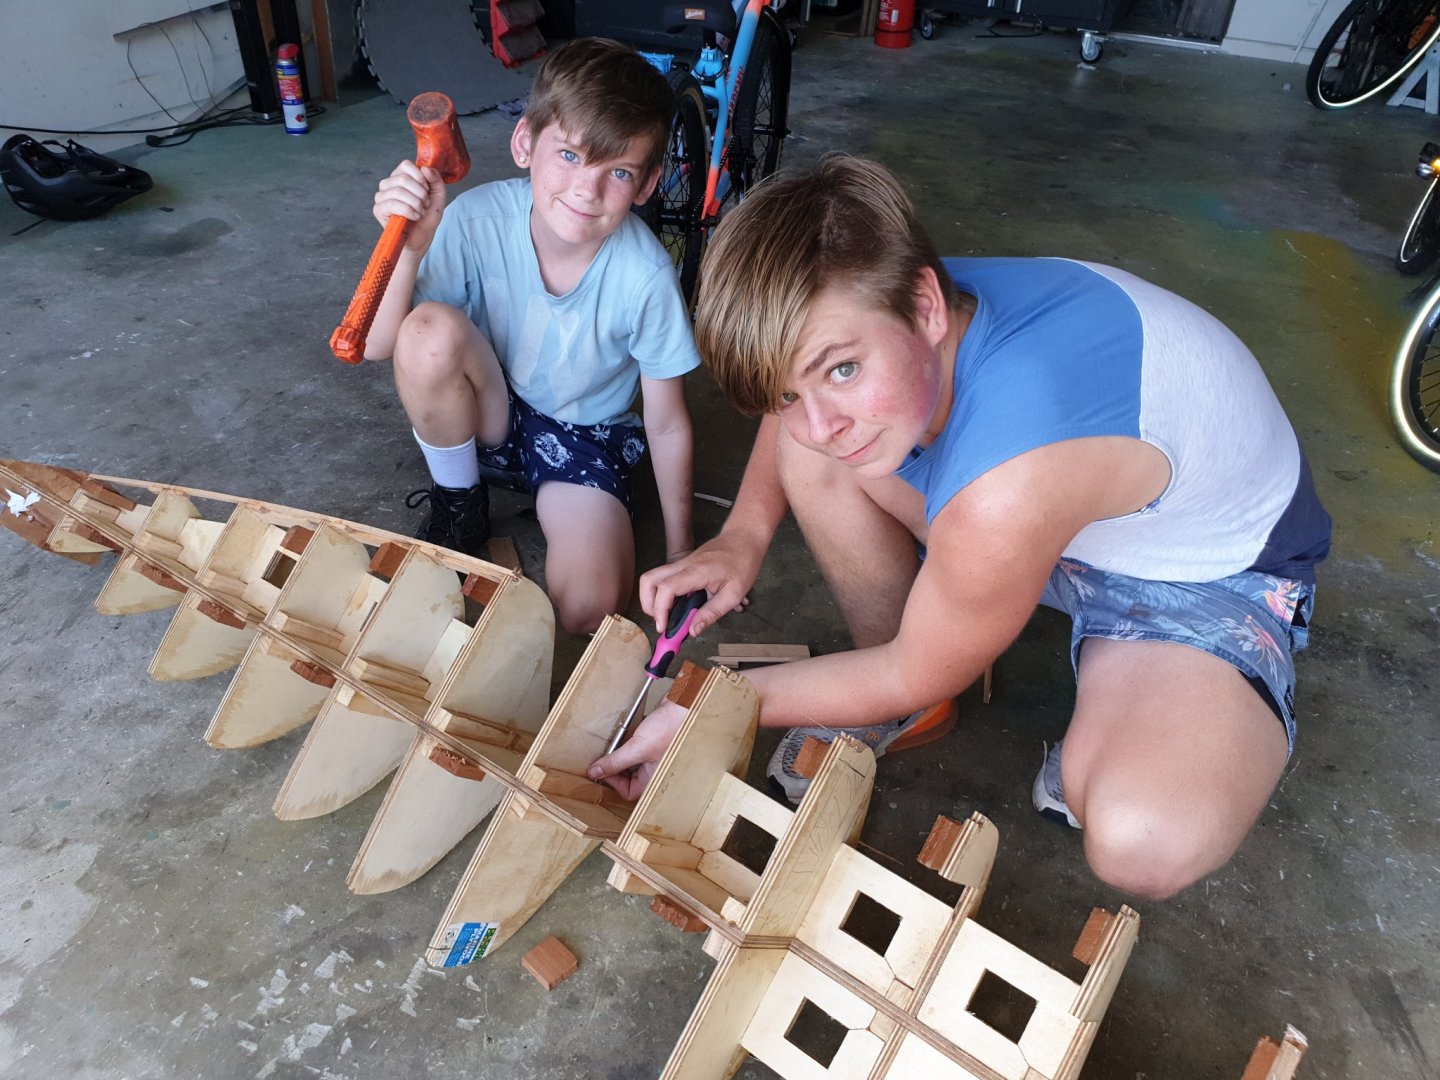
For the record. This is what became of Bluenose. Brandon and his little helper converted it single handed with no help from me save giving him the tools. The screw holes were drilled with a hand drill the hard way!. Pete

-
That is brilliant and thanks for the input. If you would like to I will be delighted if you post more Emma stuff on my Emma thread. The more the merrier. I was worrying about sailing mine in the sea out here in Oz because of losing it if something goes wrong. I would not dare to swim out to rescue it as every living thing wants to sting you to death and/ or eat you!!! Sea snakes, jellyfish and sharks. Yep...we have the bloody lot here!!! How did you bend the brass tube to house the winch lines? I have ordered a mini bending tool. Then I can flare both ends no problem but then the hole into which it fits will be too big? Sometimes I can be clever but I am more often rather dim!!! Pete
-
Thank you for your kind words. If it did not spark with Brandon it did spark with me having now learnt about simple steam engines without any moving parts. The engines that Daryl Foster has made really have left an impression on me. I have read the Hughes patent on the first put put engine that makes a noise with the diaphragm. The water feed should be constant until the flame runs out. I was unaware of this ...so further trials will have to be done...good physics lesson. We may be back with more put puttery!! Oh what fun!!! They can all be made with knowledge, simple metal work and soldering skills. No lathes, no milling machines etc. That is why I am drawn to it. I hope it stays in his memory so that when he is a grandad like me he can say to his grandson..." come on lets make a boat with a steam engine and watch it work ". By that time though it will cost £100 or more to make it!!! Who knows. The seeds are sewn. Pete
-
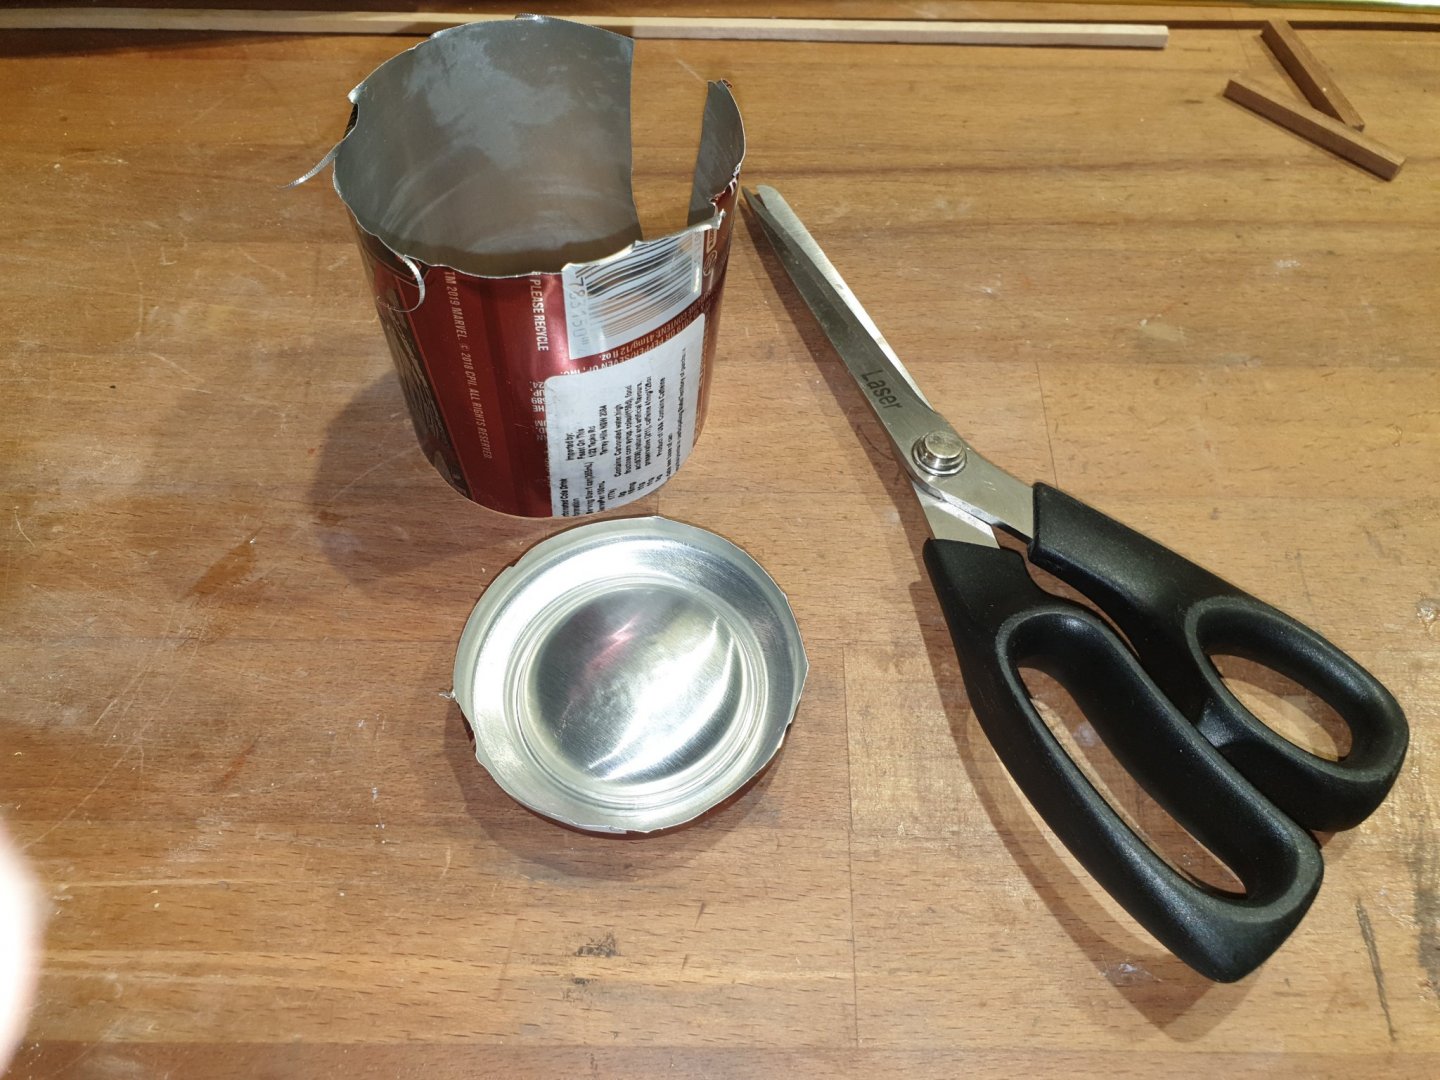
Motor no2 gave us results. A quick bath test proved all was okay. It has run for longer but I think these things have a mind of their own. We fitted a small keel and removable rudder blade. If we use it outdide we may make a cabin for it. I have since delved into this put put thing and there is a certain Daryl Foster who has made dozens of these boats and all and a number of engines with multiple boilers and tubes. He is a serious put put man. I think he may be a science teacher as his knowlege of all this is wide. I like put put motors and my next will be a twin diaphram job with copper tube boiler. Hope you enjoyed our little project. Brandon will be in the bathroom even longer now!!! Pete and Brandon. https://youtu.be/7vfcwVOa2JM
-
Thanks Imagna. I believe you are right on both counts. I only wanted to use the brass tray as we made it and it is posh. Tee lights of course are a good alternative. I did prime the boiler but there was no telling as to whether it was completely full. I assume then that it runs off steam and when it stops popping its time to fill it up again. Today, hopefully will see a new boiler with dished top plate so it can move a lot more. Pete and Brandy.
-
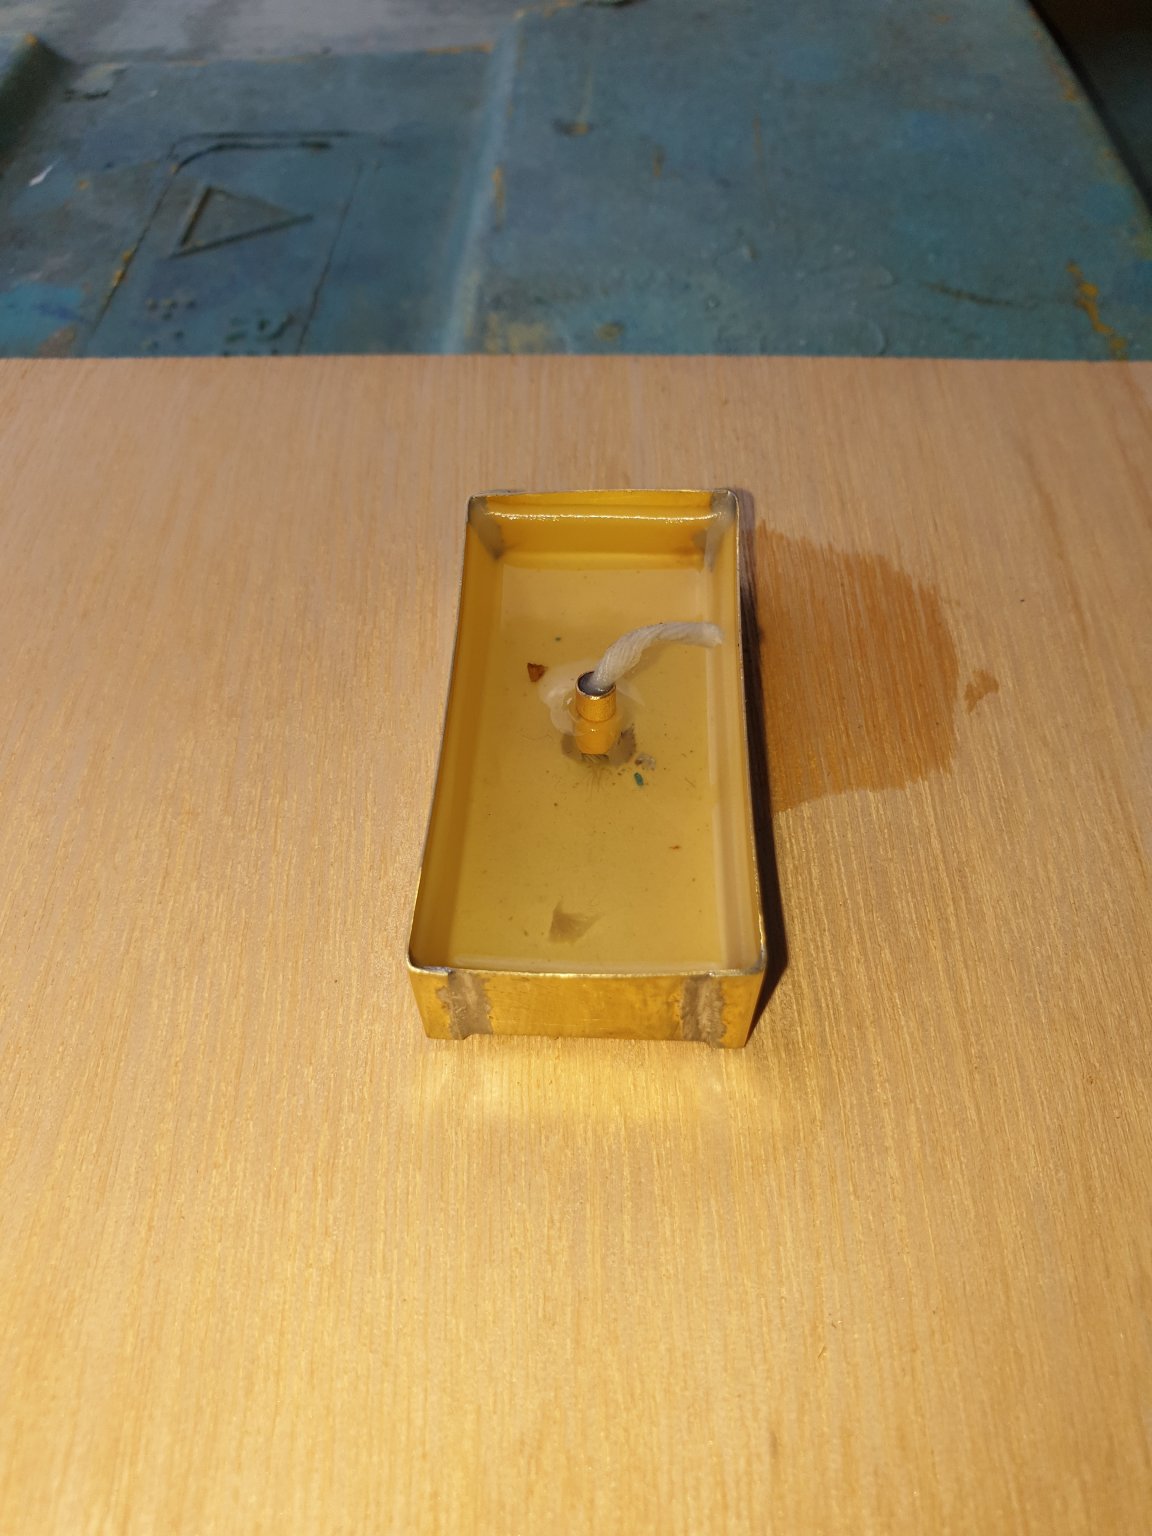
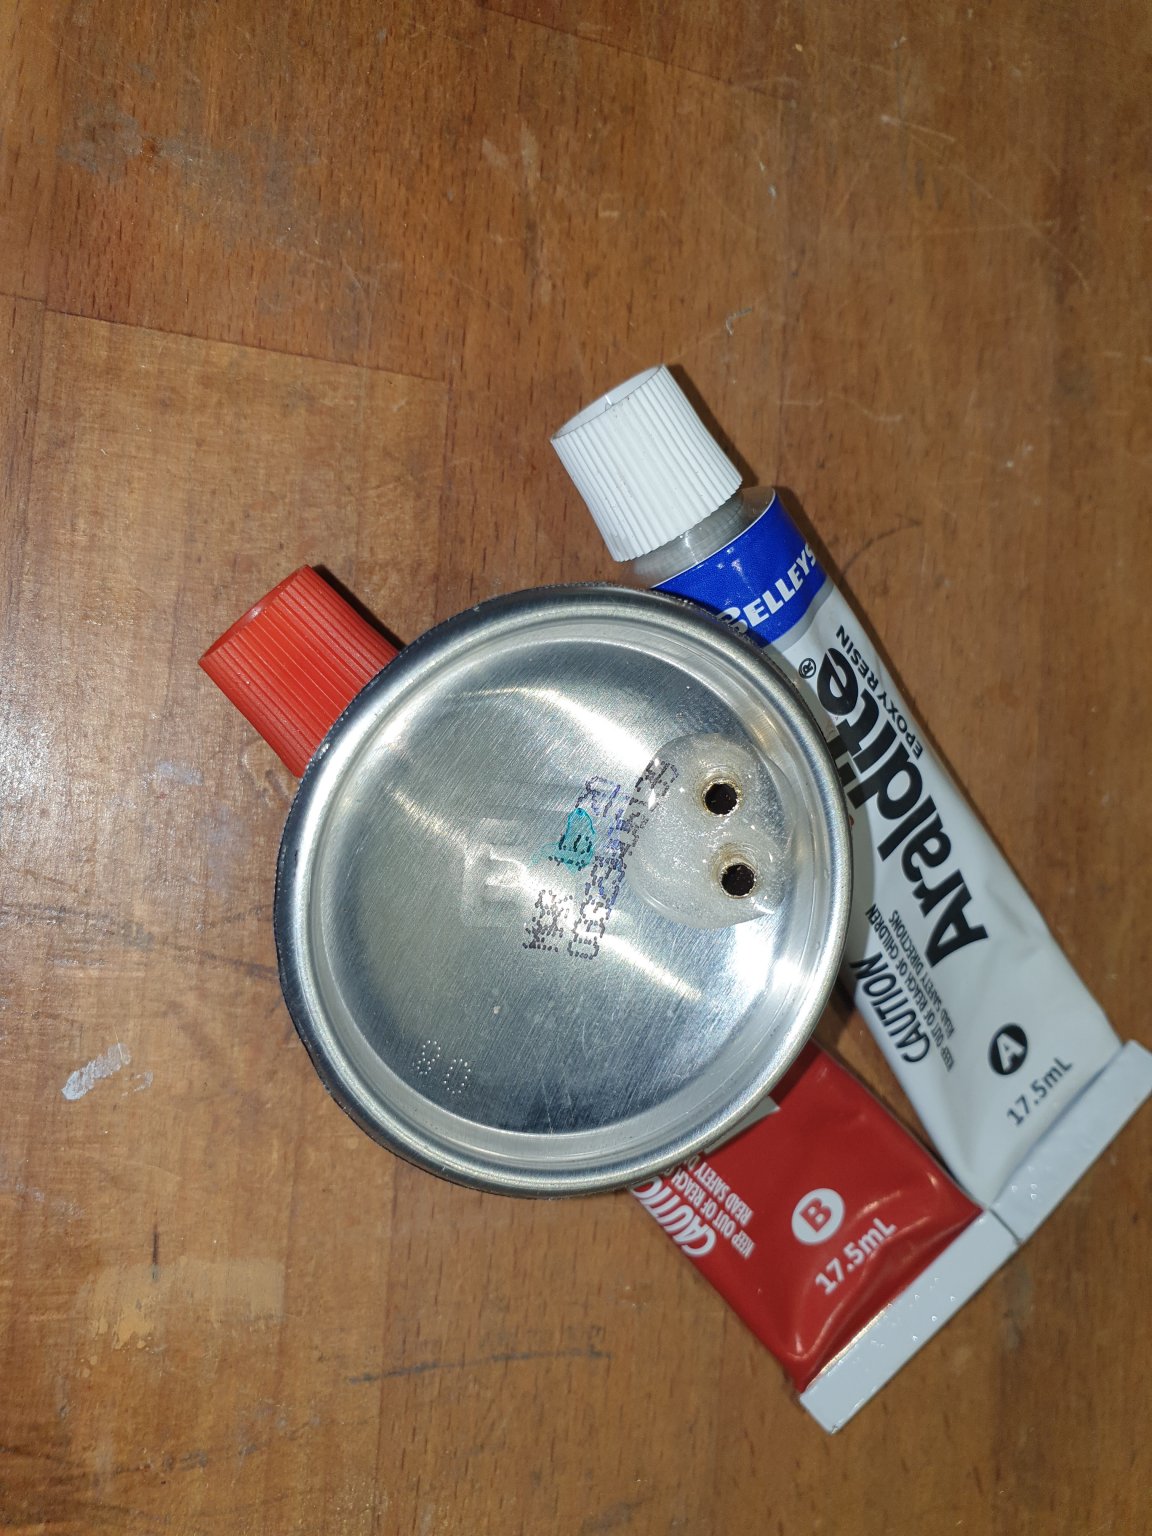
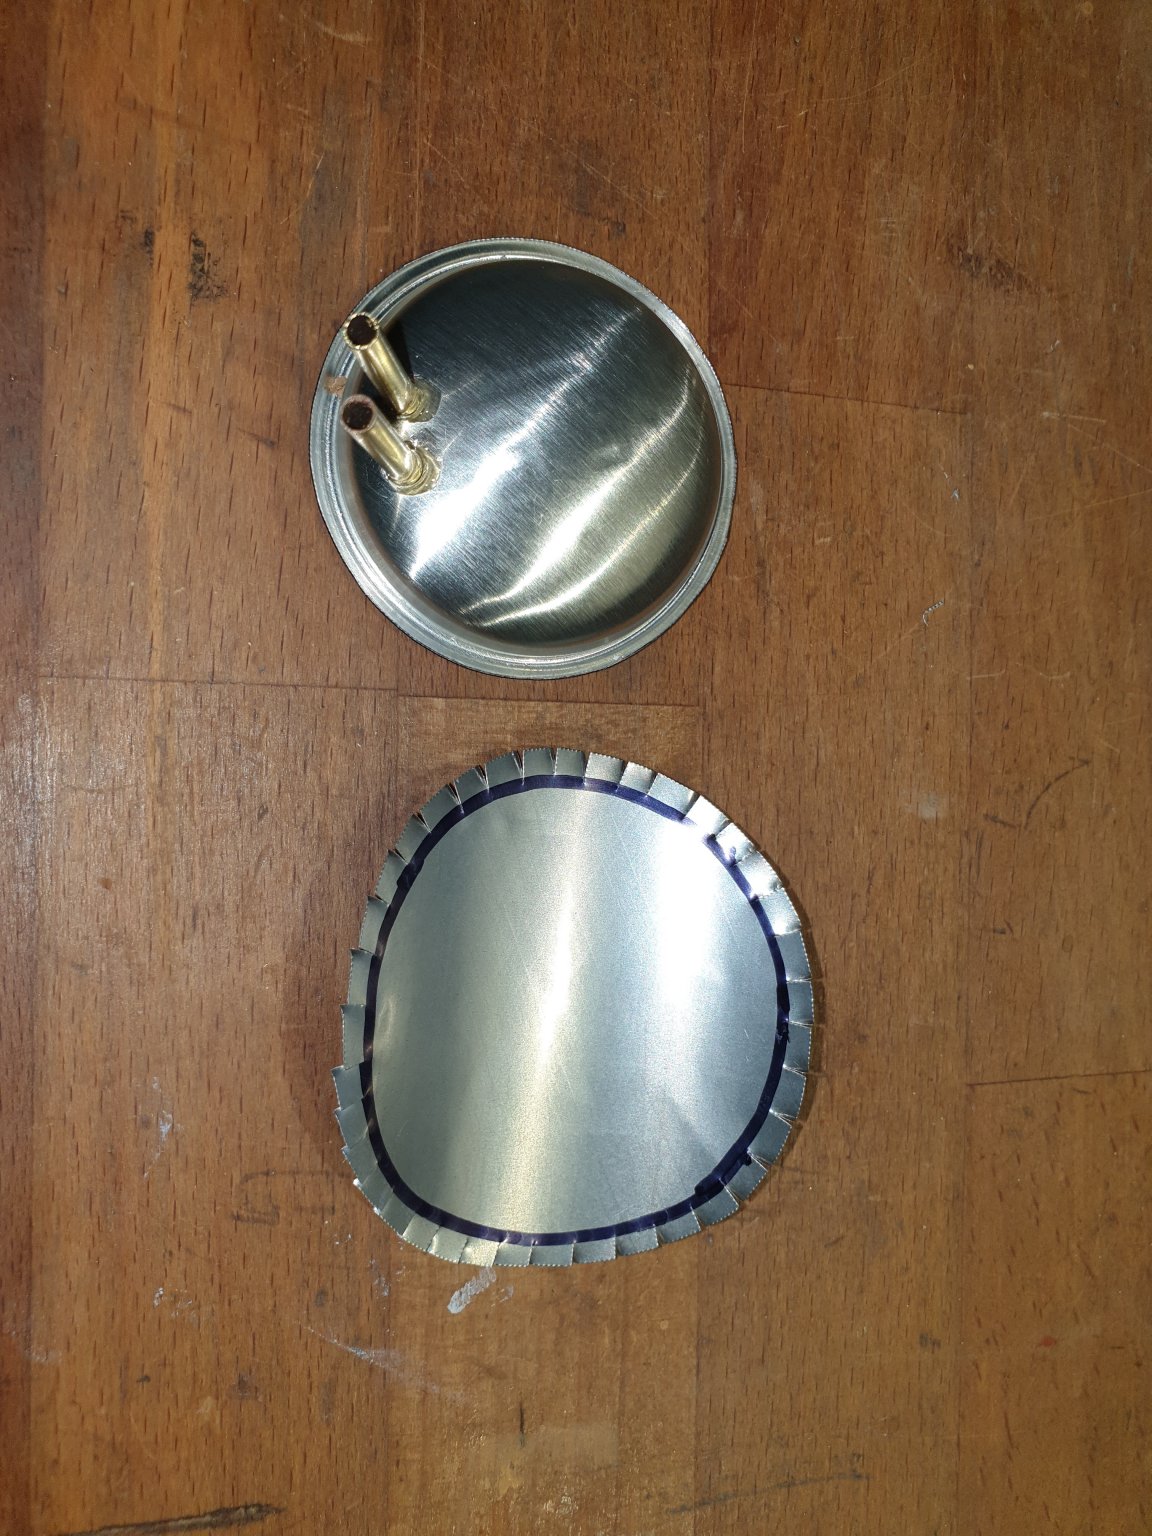
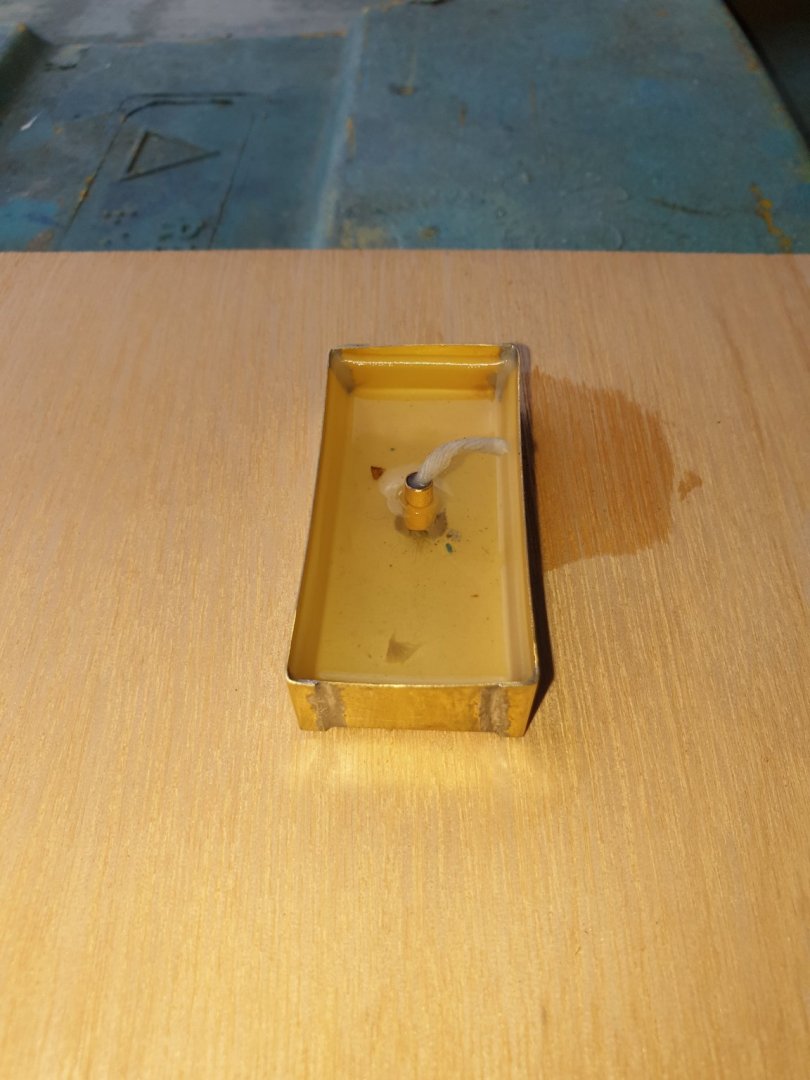
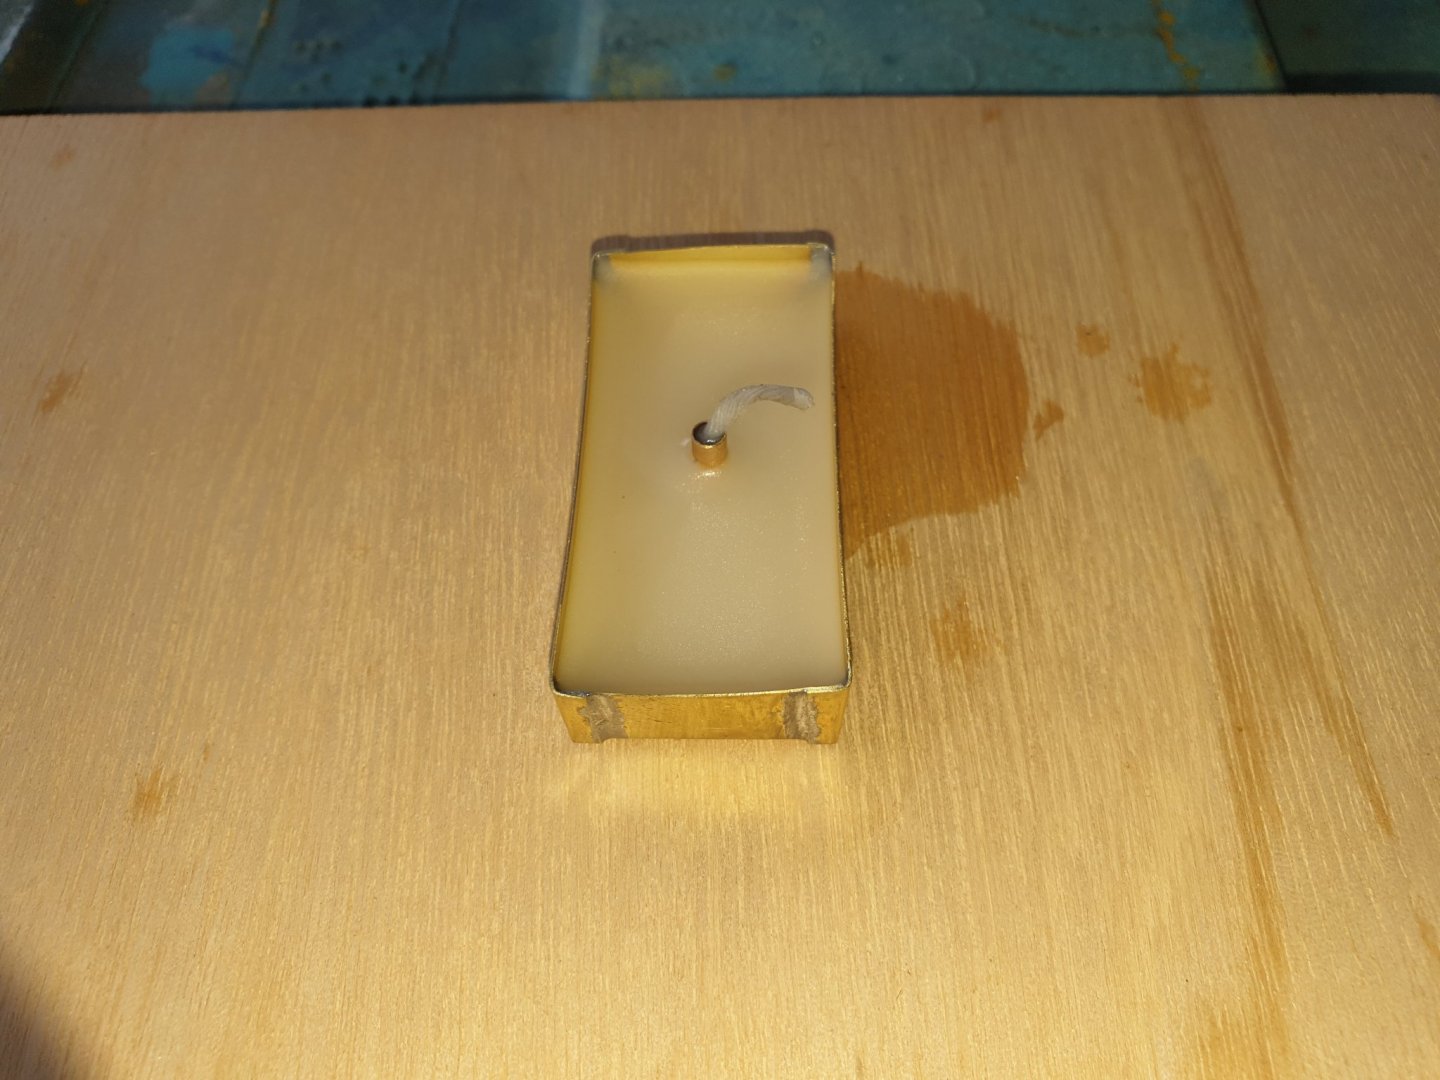
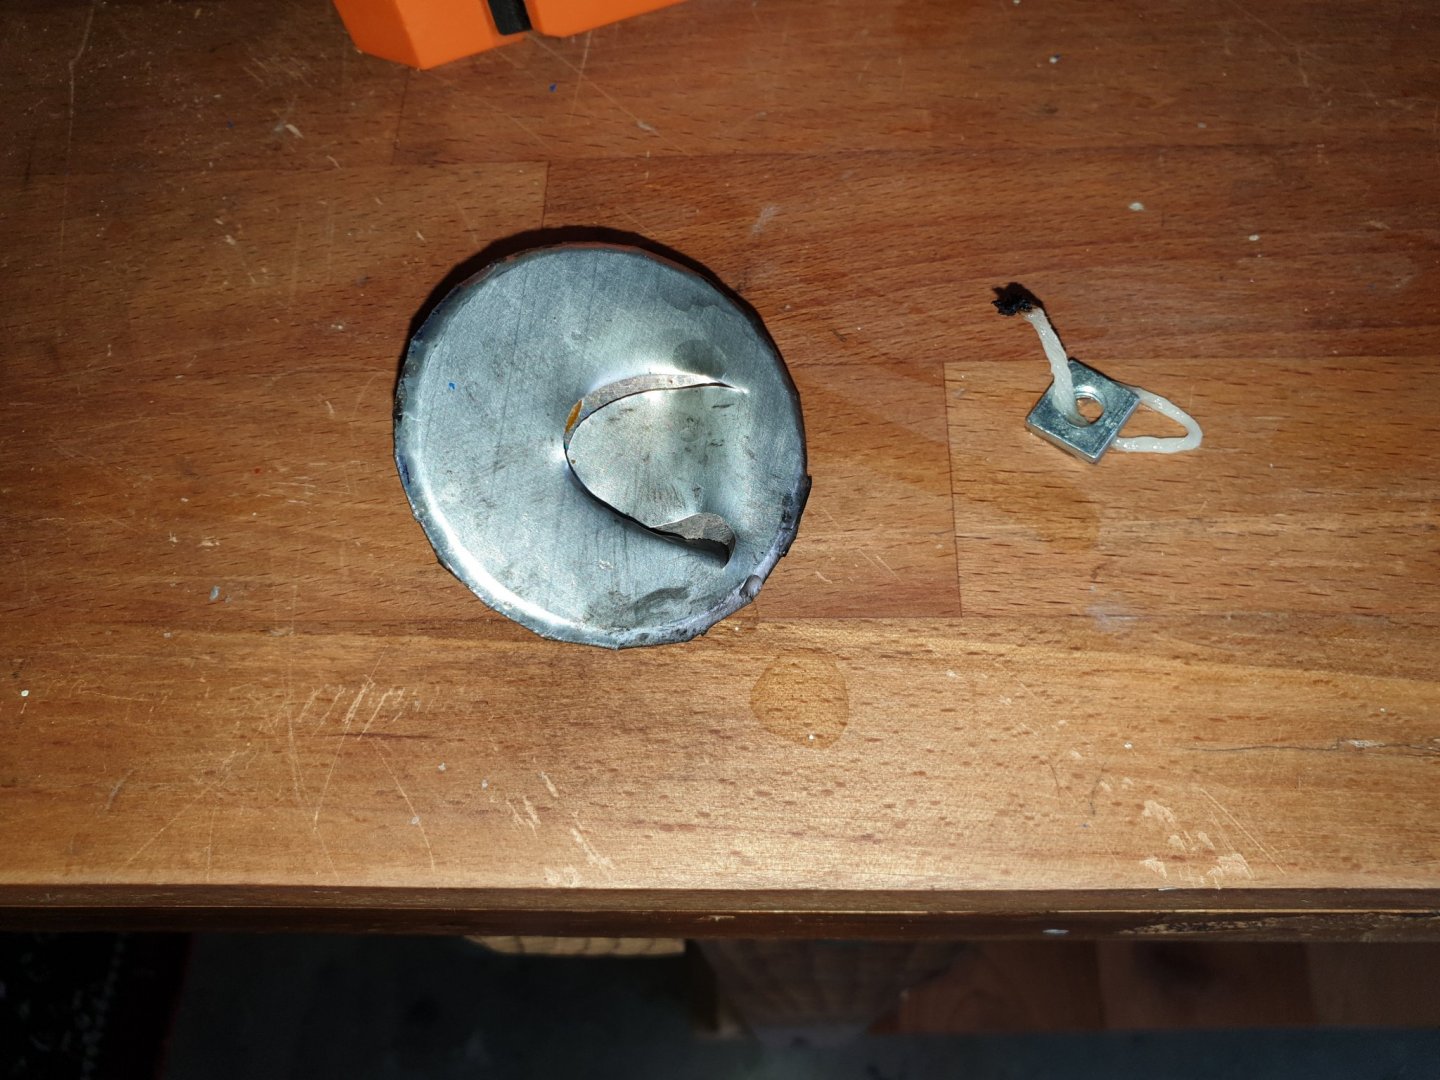
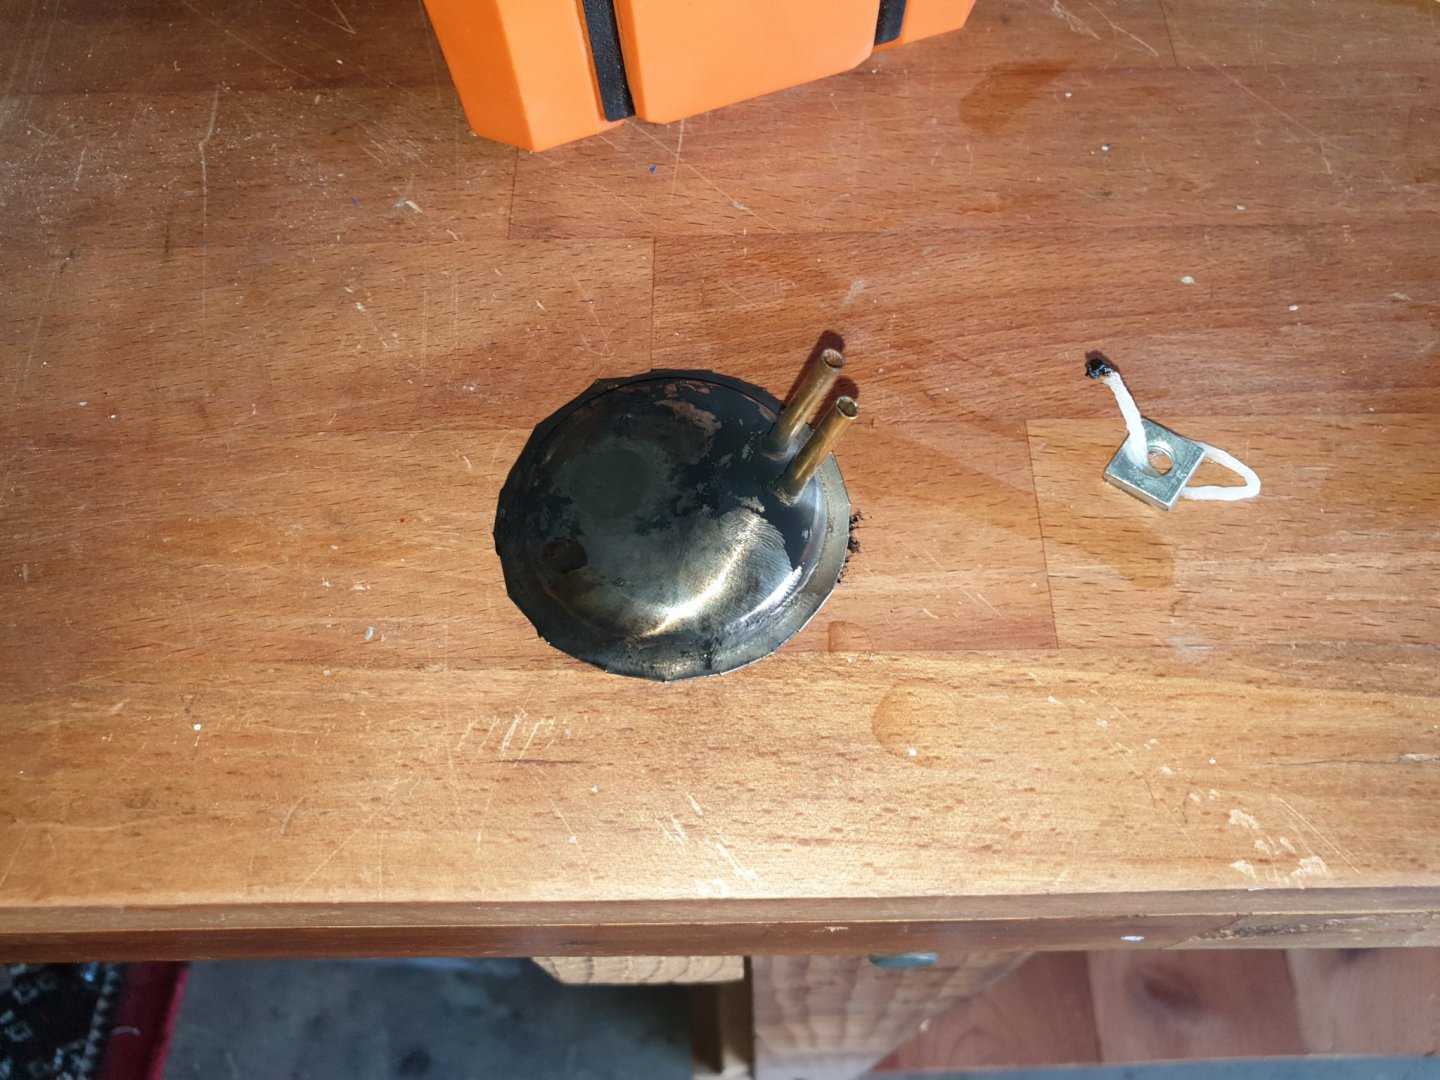
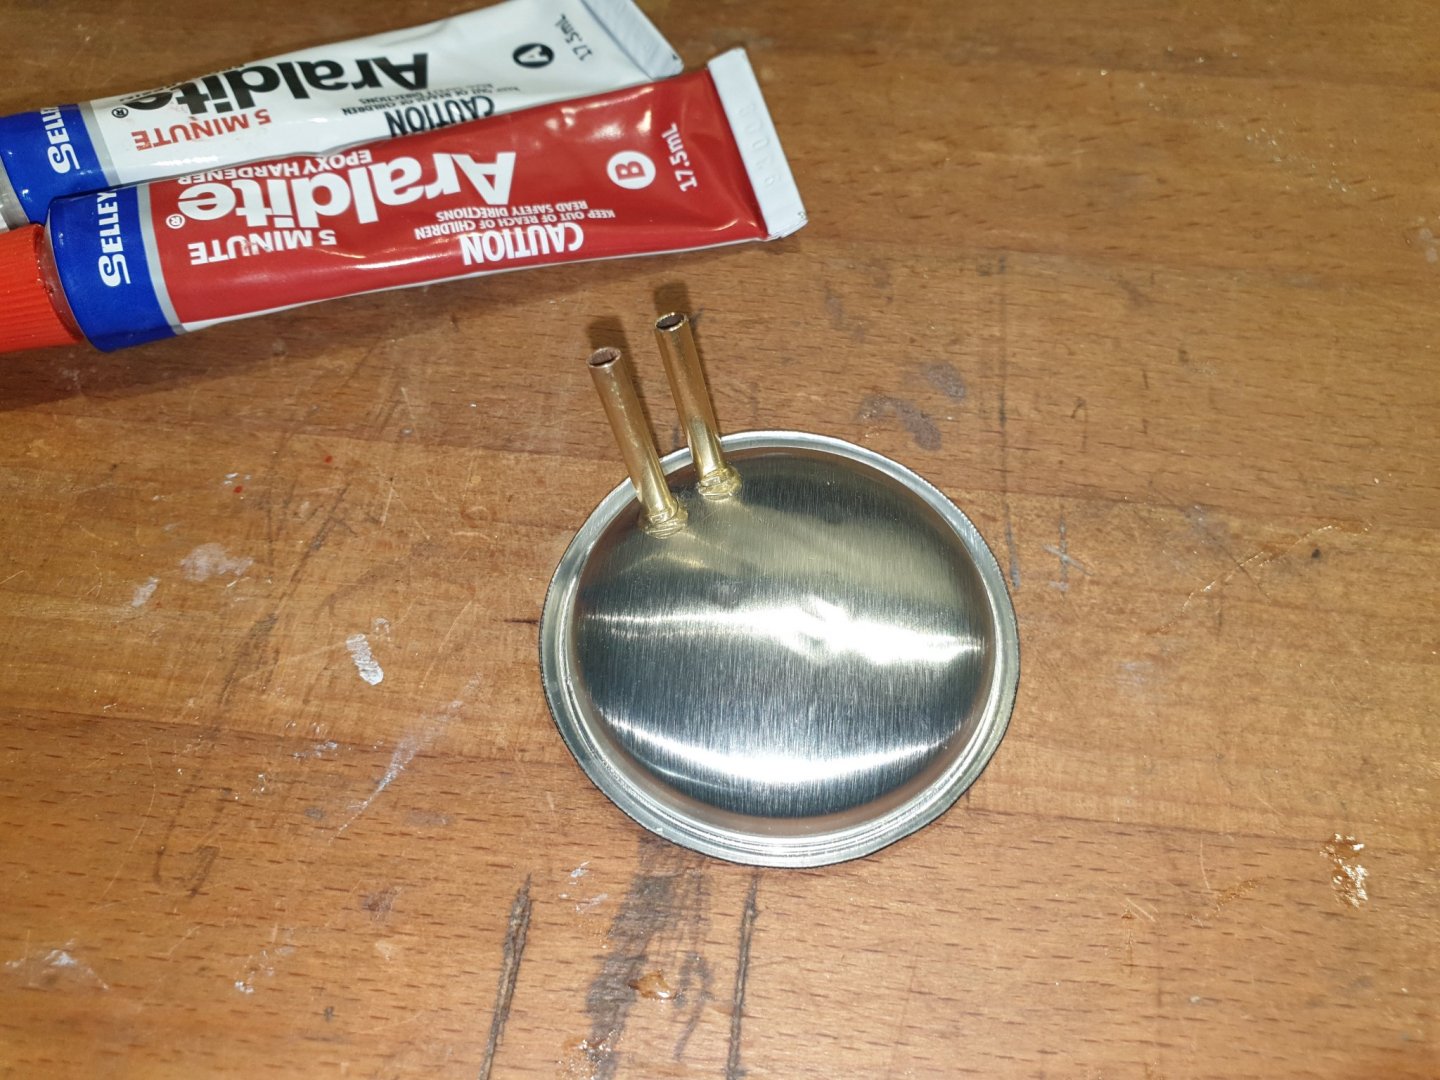
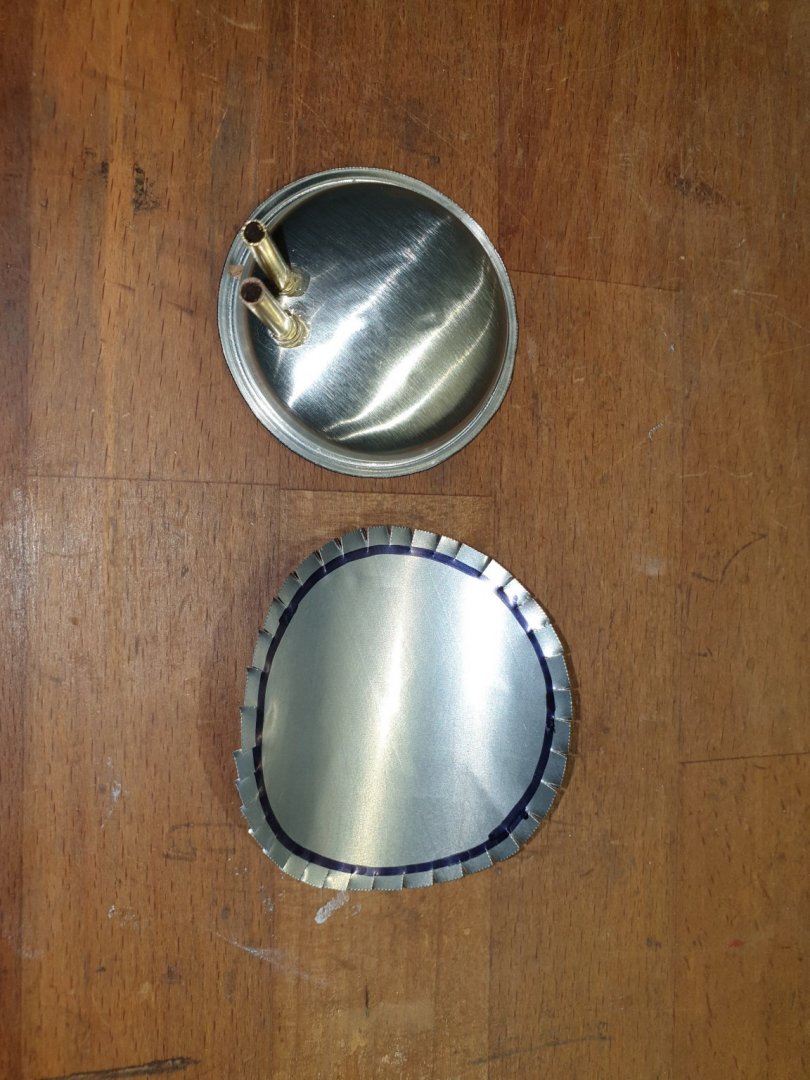
Here is a view of the " burner " unit. It is essentially a brass tray containing a soldered tube to house the wick. There is a slot at the bottom of the tube so that the wick can be inserted from the top and out at right angles to the base of the tray. The whole was then filled with olive oil and the wick set alight. The flame did not last long before dying out. This is due to lack of oxygen to the wick. Trying to find normal string these days made from cotton is a real deal. Everything they sell is made from synthetic material that does not burn like a wick. Trying to buy real string is almost impossible. Then you get the obligatory question from the shop assistant asking..." what do you need cotton " string" for ?"... To try to explain my reasons would be beyond them as they are oblivious to my needs and would surely count me as a total nutter!!! who has no idea what string is!!!! Several bike trips out to obtain a suitable " string " proved futile. Frustrations set in. I then desoldered the wick tube. Tripped out on the bike and bought a box of candles. Trying to strip the candles down to get to the wick was crazy. The wicks were so fragile and weedy. I remember in the 60s pulling out a candle wick in one piece. They just do not make them the same now. So I ended up sawing up a candle to the correct depth, laying pieces of wax all around it within the burner tray and that worked. We then had a constant flame. Boat was duly introduced to bath tub with grandson eager to see what will happen. What happened was....... After a few minutes it did propell itself around the tub but alas and much to our dismay...NO Pop pop. NO POP POP is a no no. After having racked what is left of my brain I came to the conclusion that the diaphraghm ( sorry for the spelling but it is near!) Was too drum tight and therefore was unable to " click " ...a la " pop". I pressed my thumb into the dia...thingey!!! And went too far causing a total rupture as you can see. Bugger!!! As we say out here in Oz! So I got on my bike again and went to the local Liquor store to buy a bottle of Tawny and a can of coke! The Tawny to drown my sorrows and the coke for my grandson to drink and then give me back the can in order to build another pop pop motor. We are relieved that the motor itself is removable by two plastic bendy tubes. I was going to bend two brass pipes and epoxy them to the motor....I am glad I did not!! This time I will make sure that the diaphram thing, dude,will pop with some flex. My conclusions? There is more to a Pop Pop than you think! Thank you all for your likes. It is incredible that so many have given us a " like". Mhhh..... The science bit is now down to Grandad. I am at a loss whether these motors are primed with water and operate off " steam " or pure reciprocal air pressure. I think the latter. Apparently it is quite a complex science and stretches back as far as the second world war with the German doodle bugs. Pete and Brandy.
-
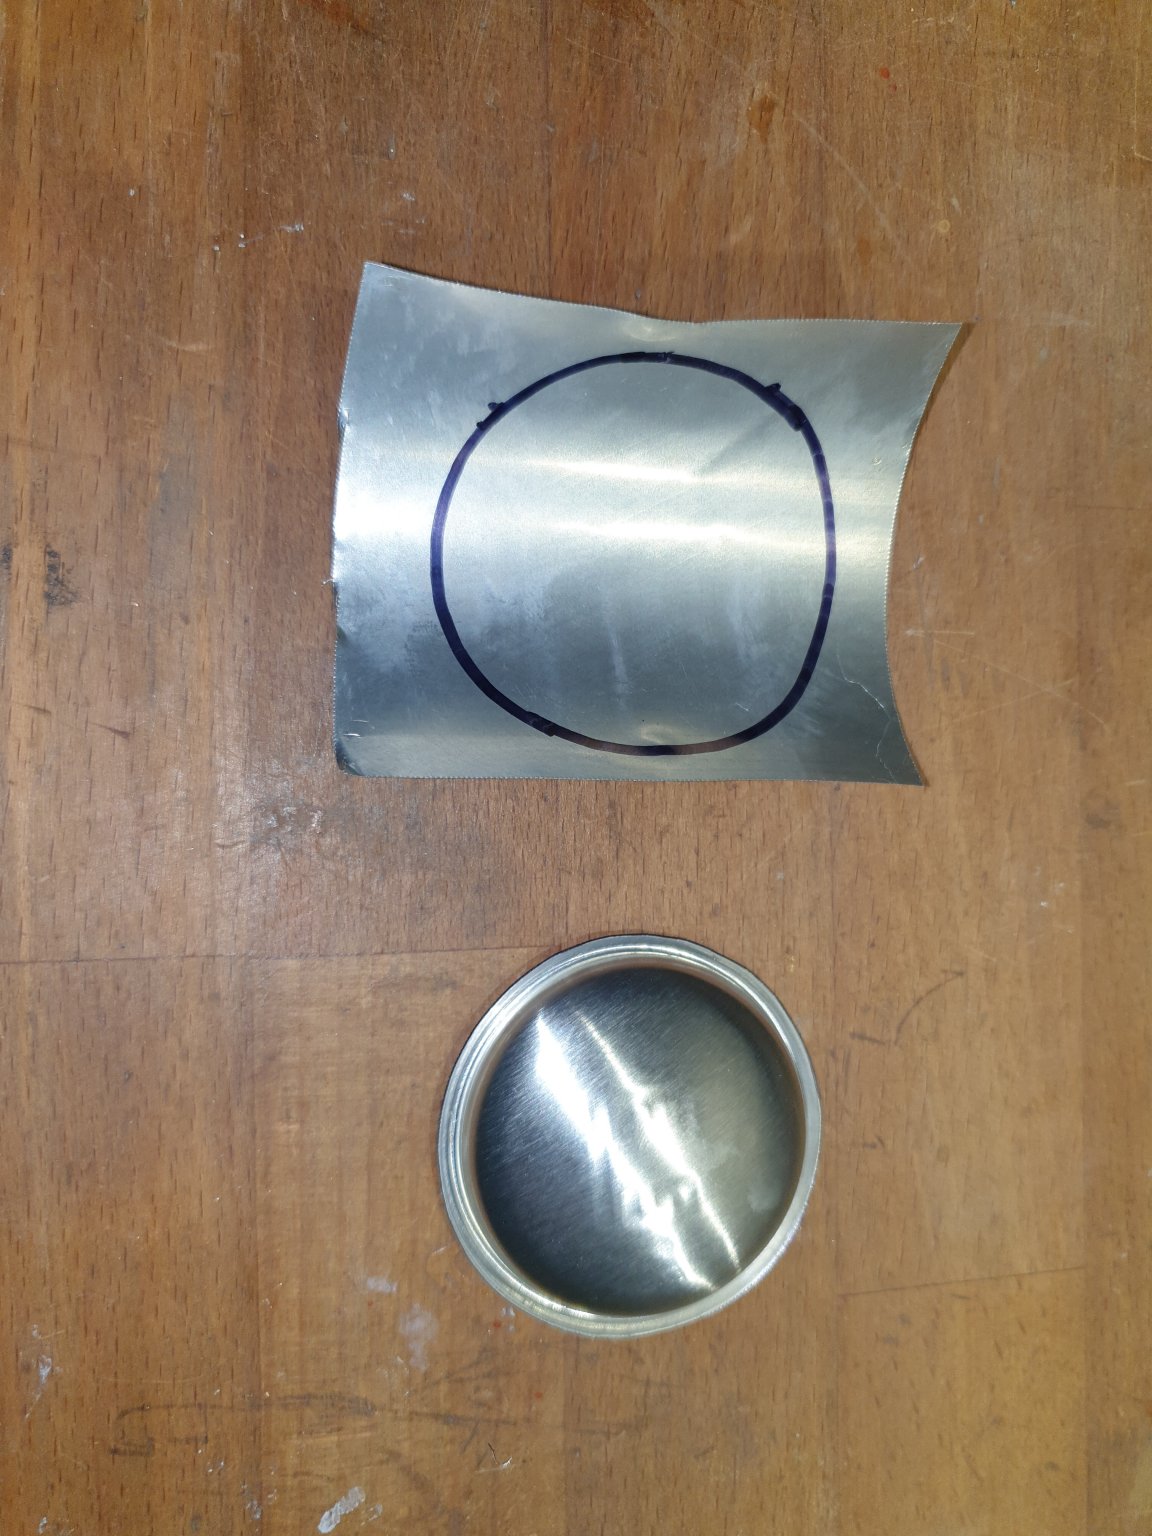
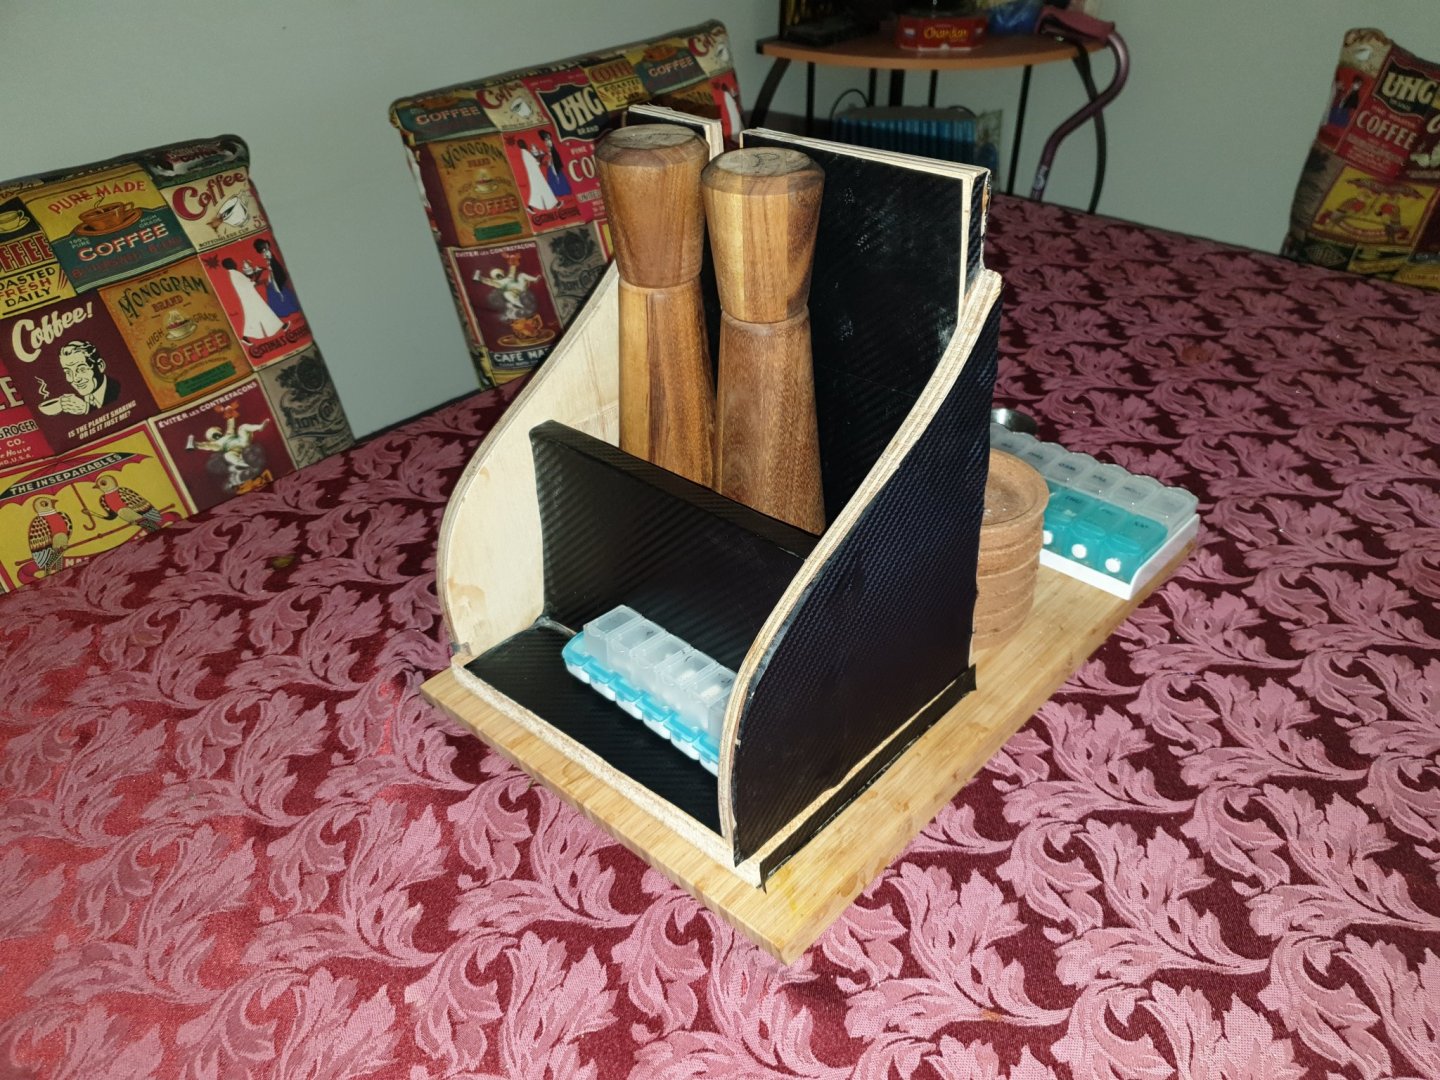
This is our boiler under construction. Hope it pops!!! Brandy brought it to my attention that the boat may get hot and catch fire which was a fair assumption so we created a fire wall from strips of wood and sheet brass that I had left over from my model locomotive building stash. We then made the burner from sheet brass. The helmsperson ( ahem ) crazy correctness!!! Had a coat of paint and the boat, a coat of varnish before testing. It is on the dustbin drying in the sun. Grandad and Brandy.


-
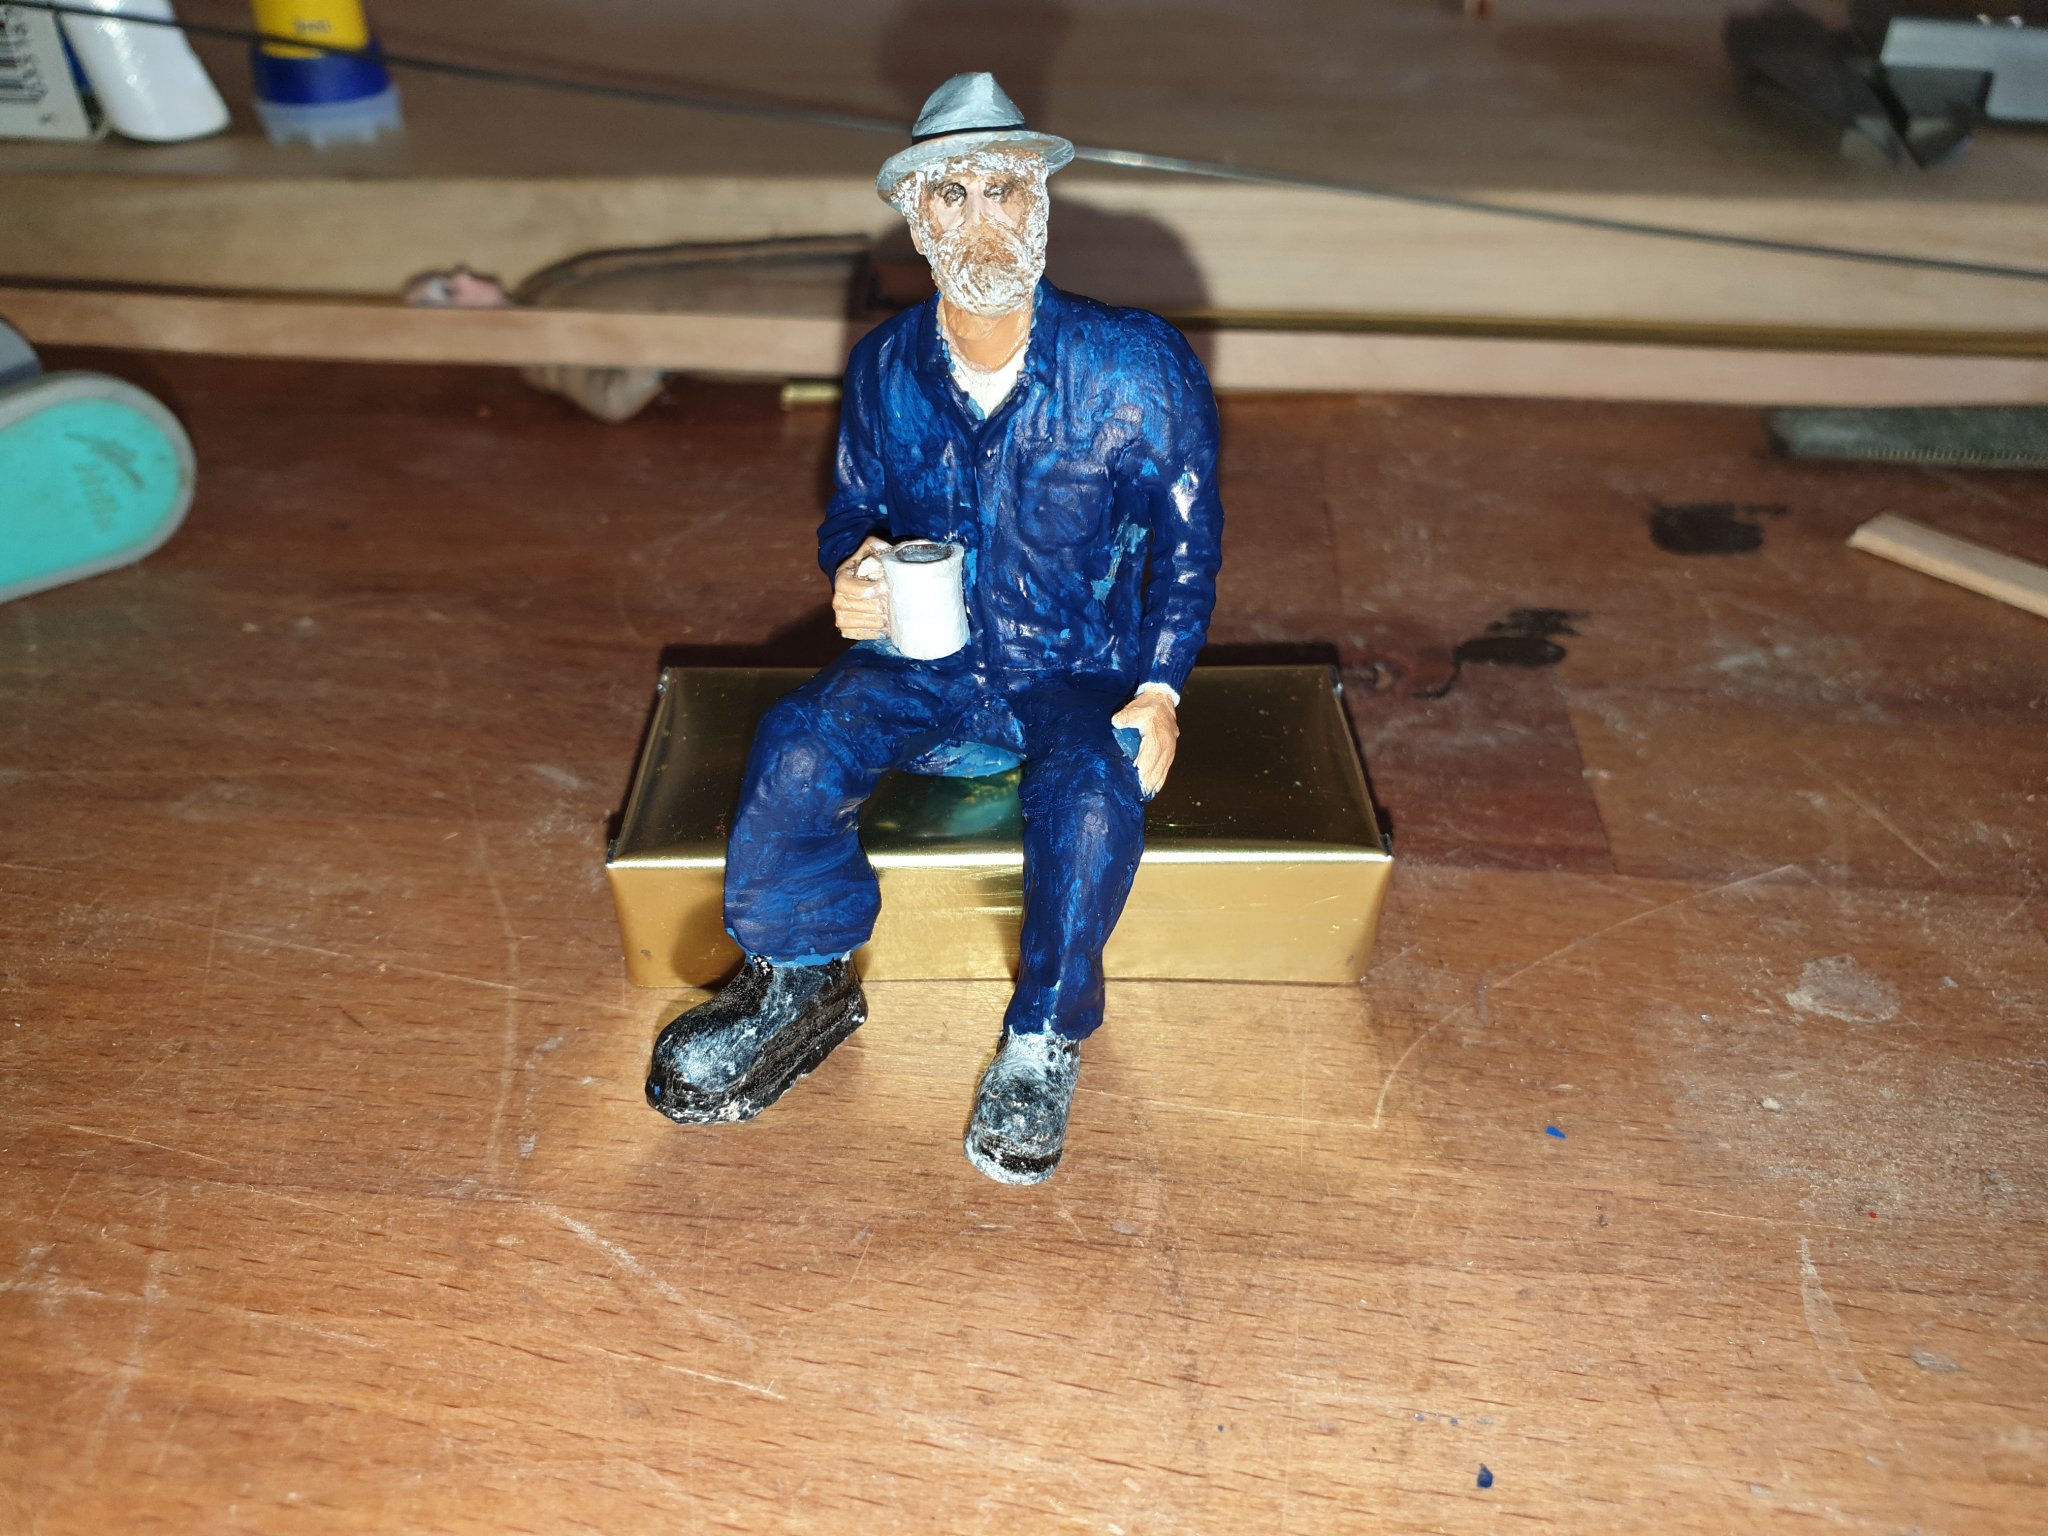
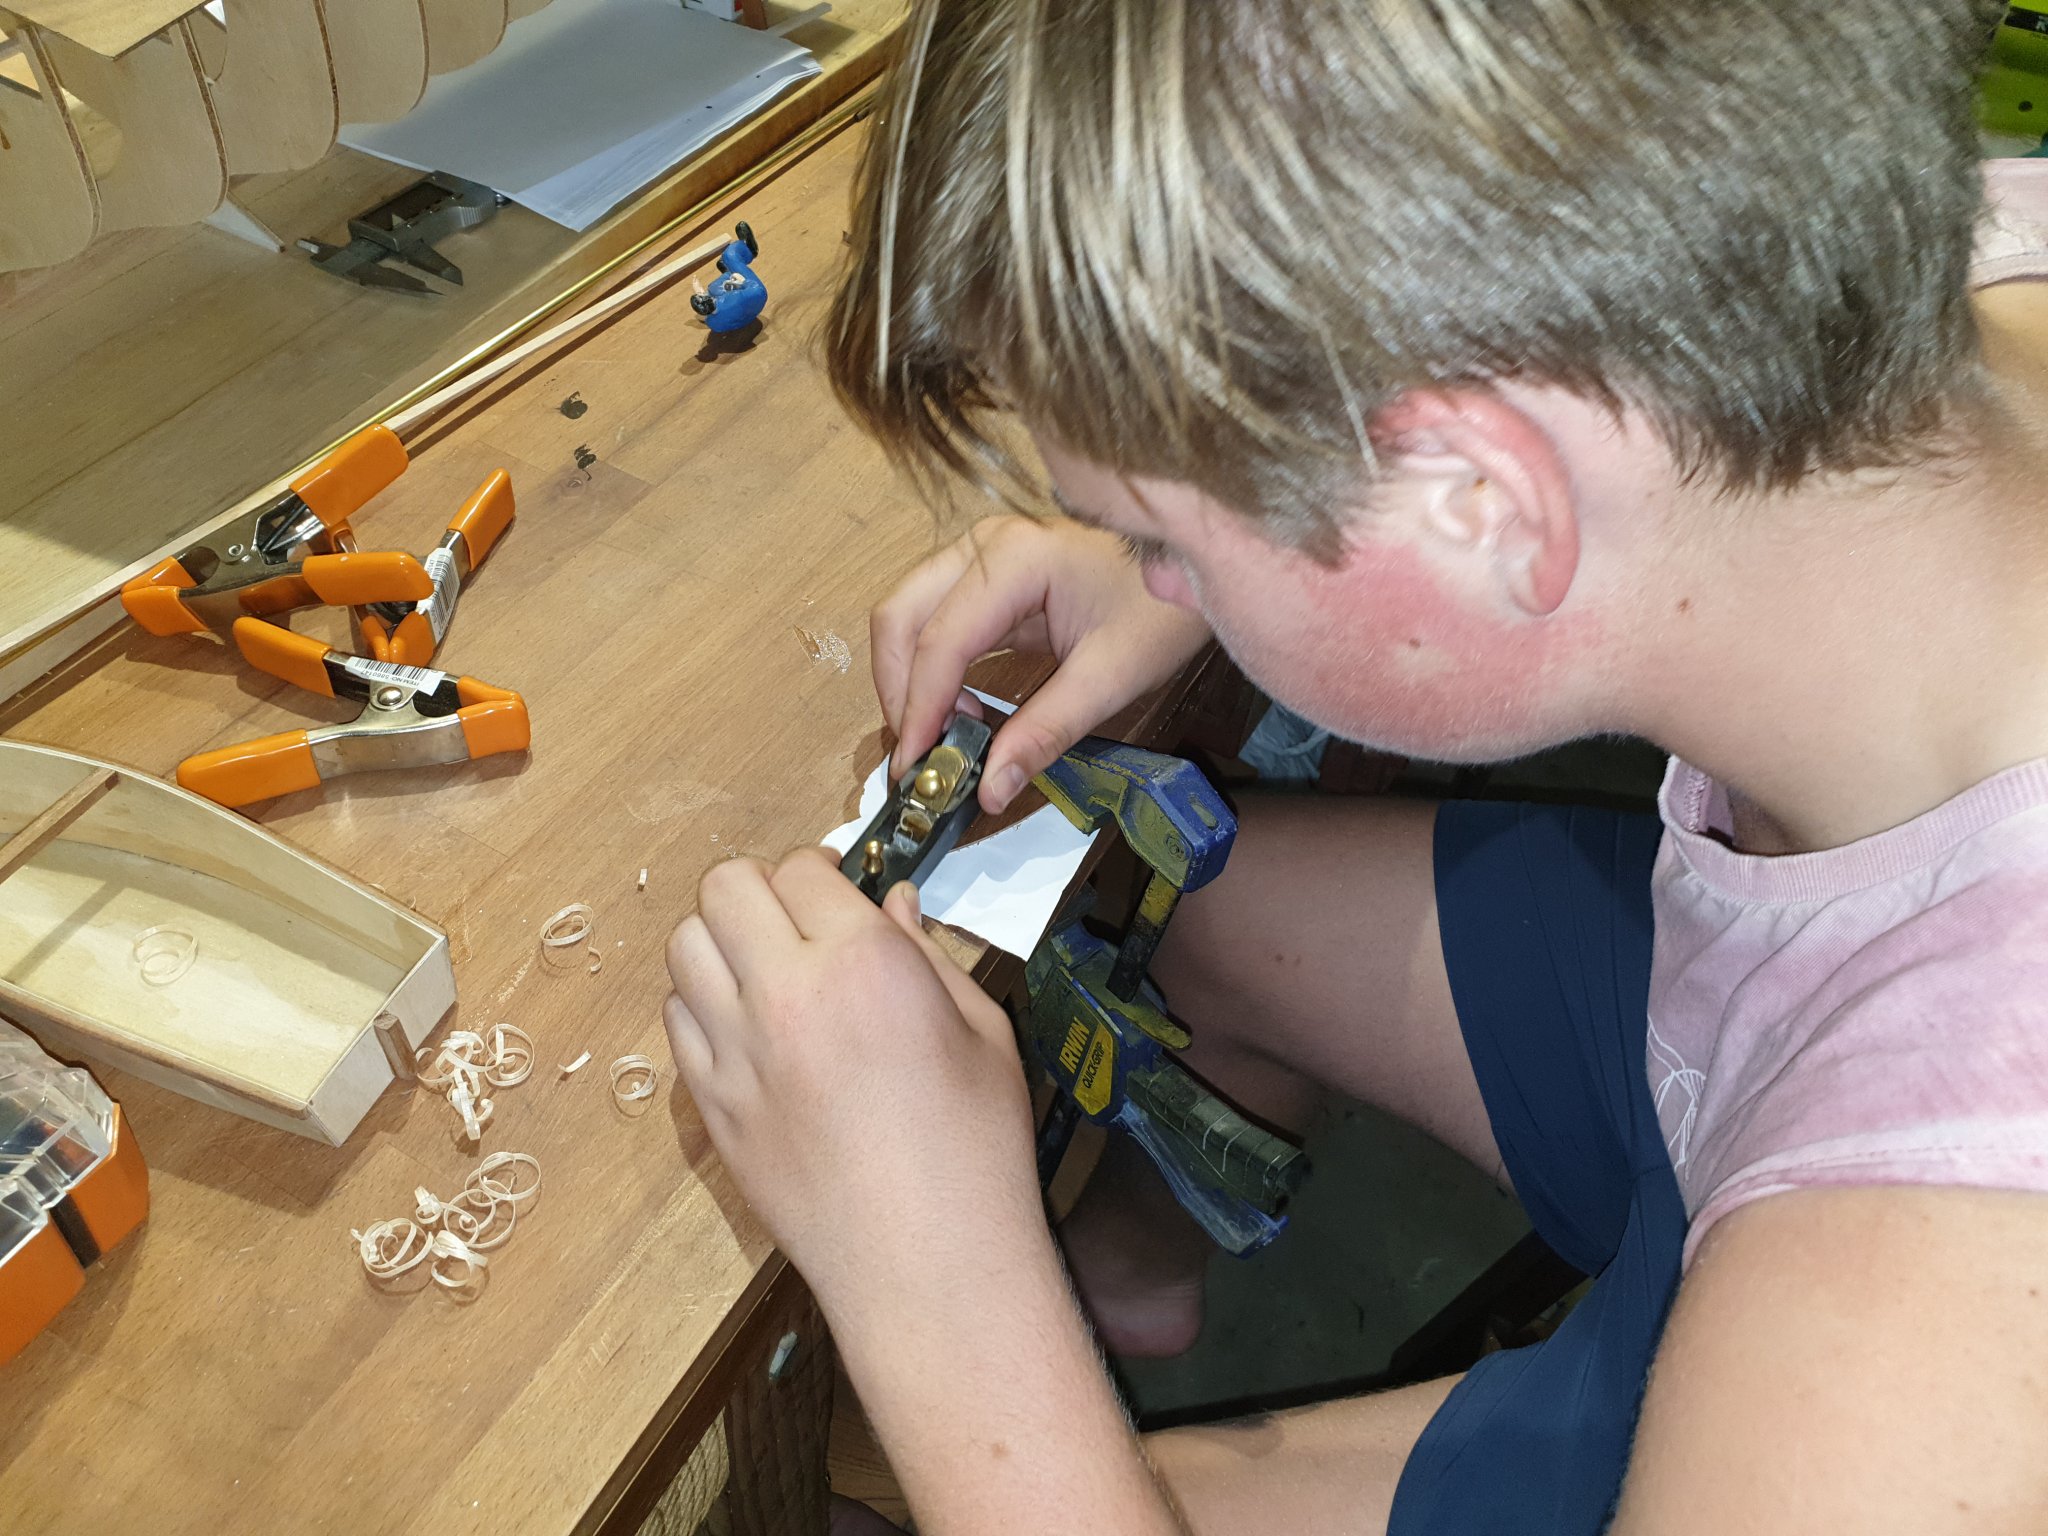
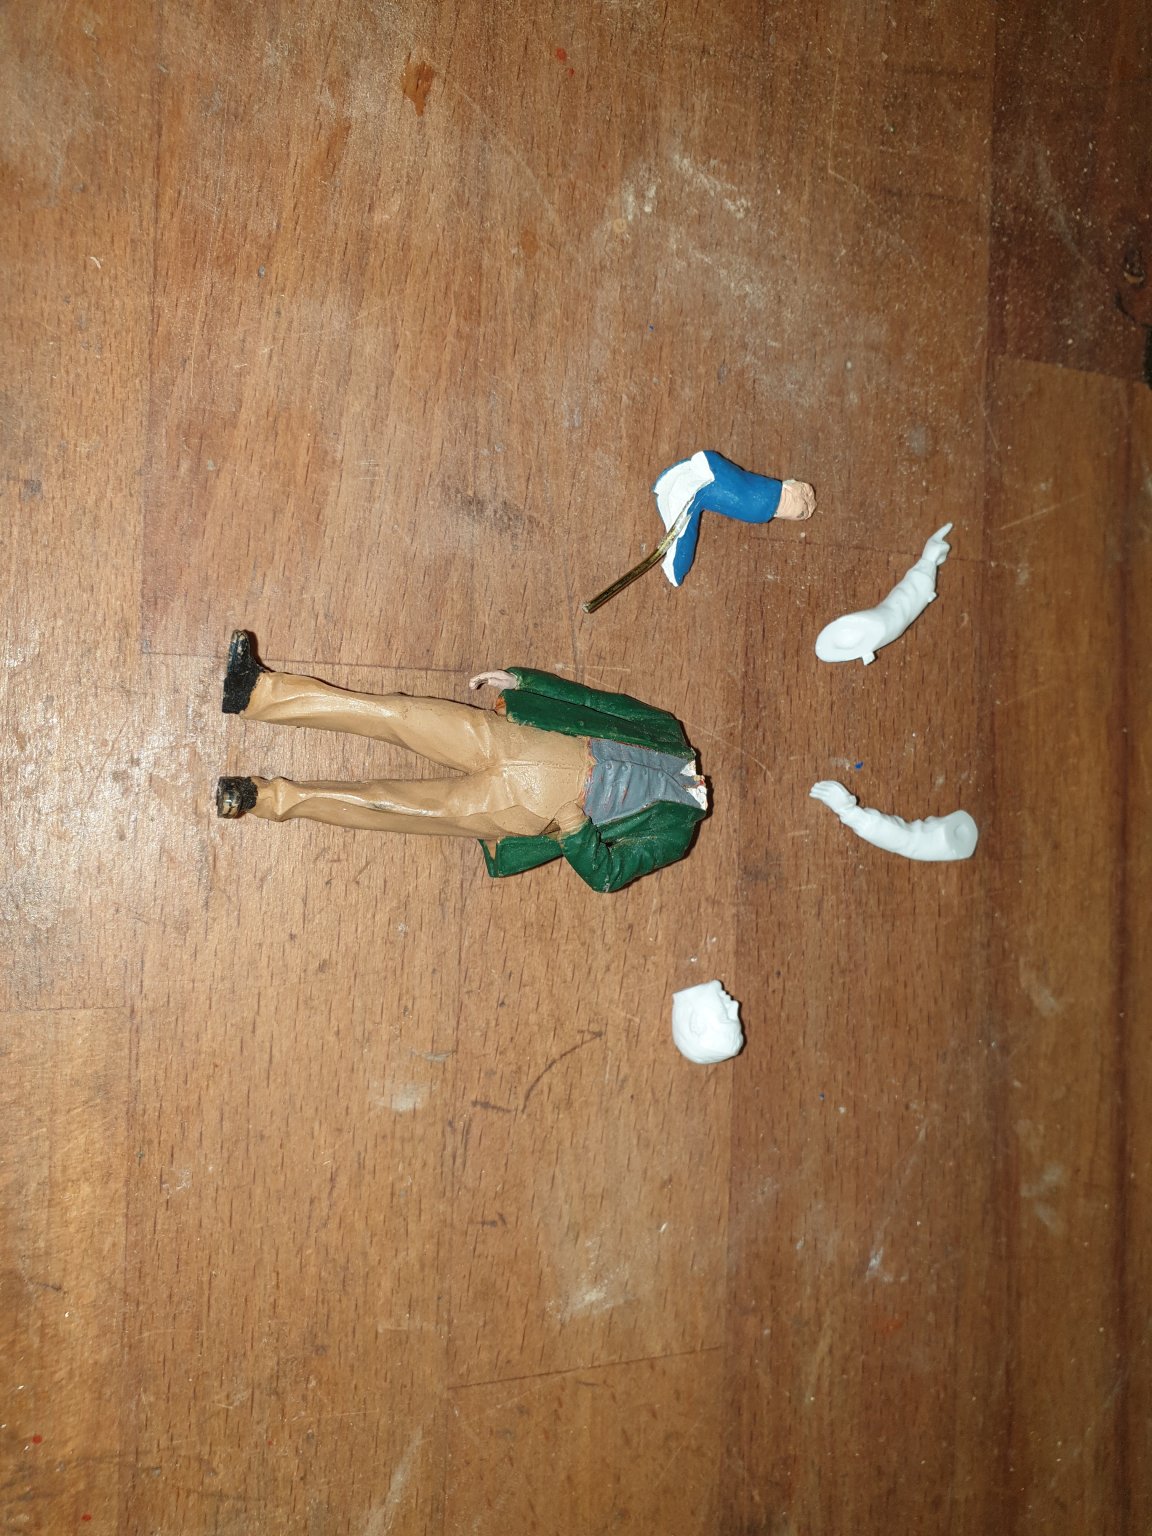
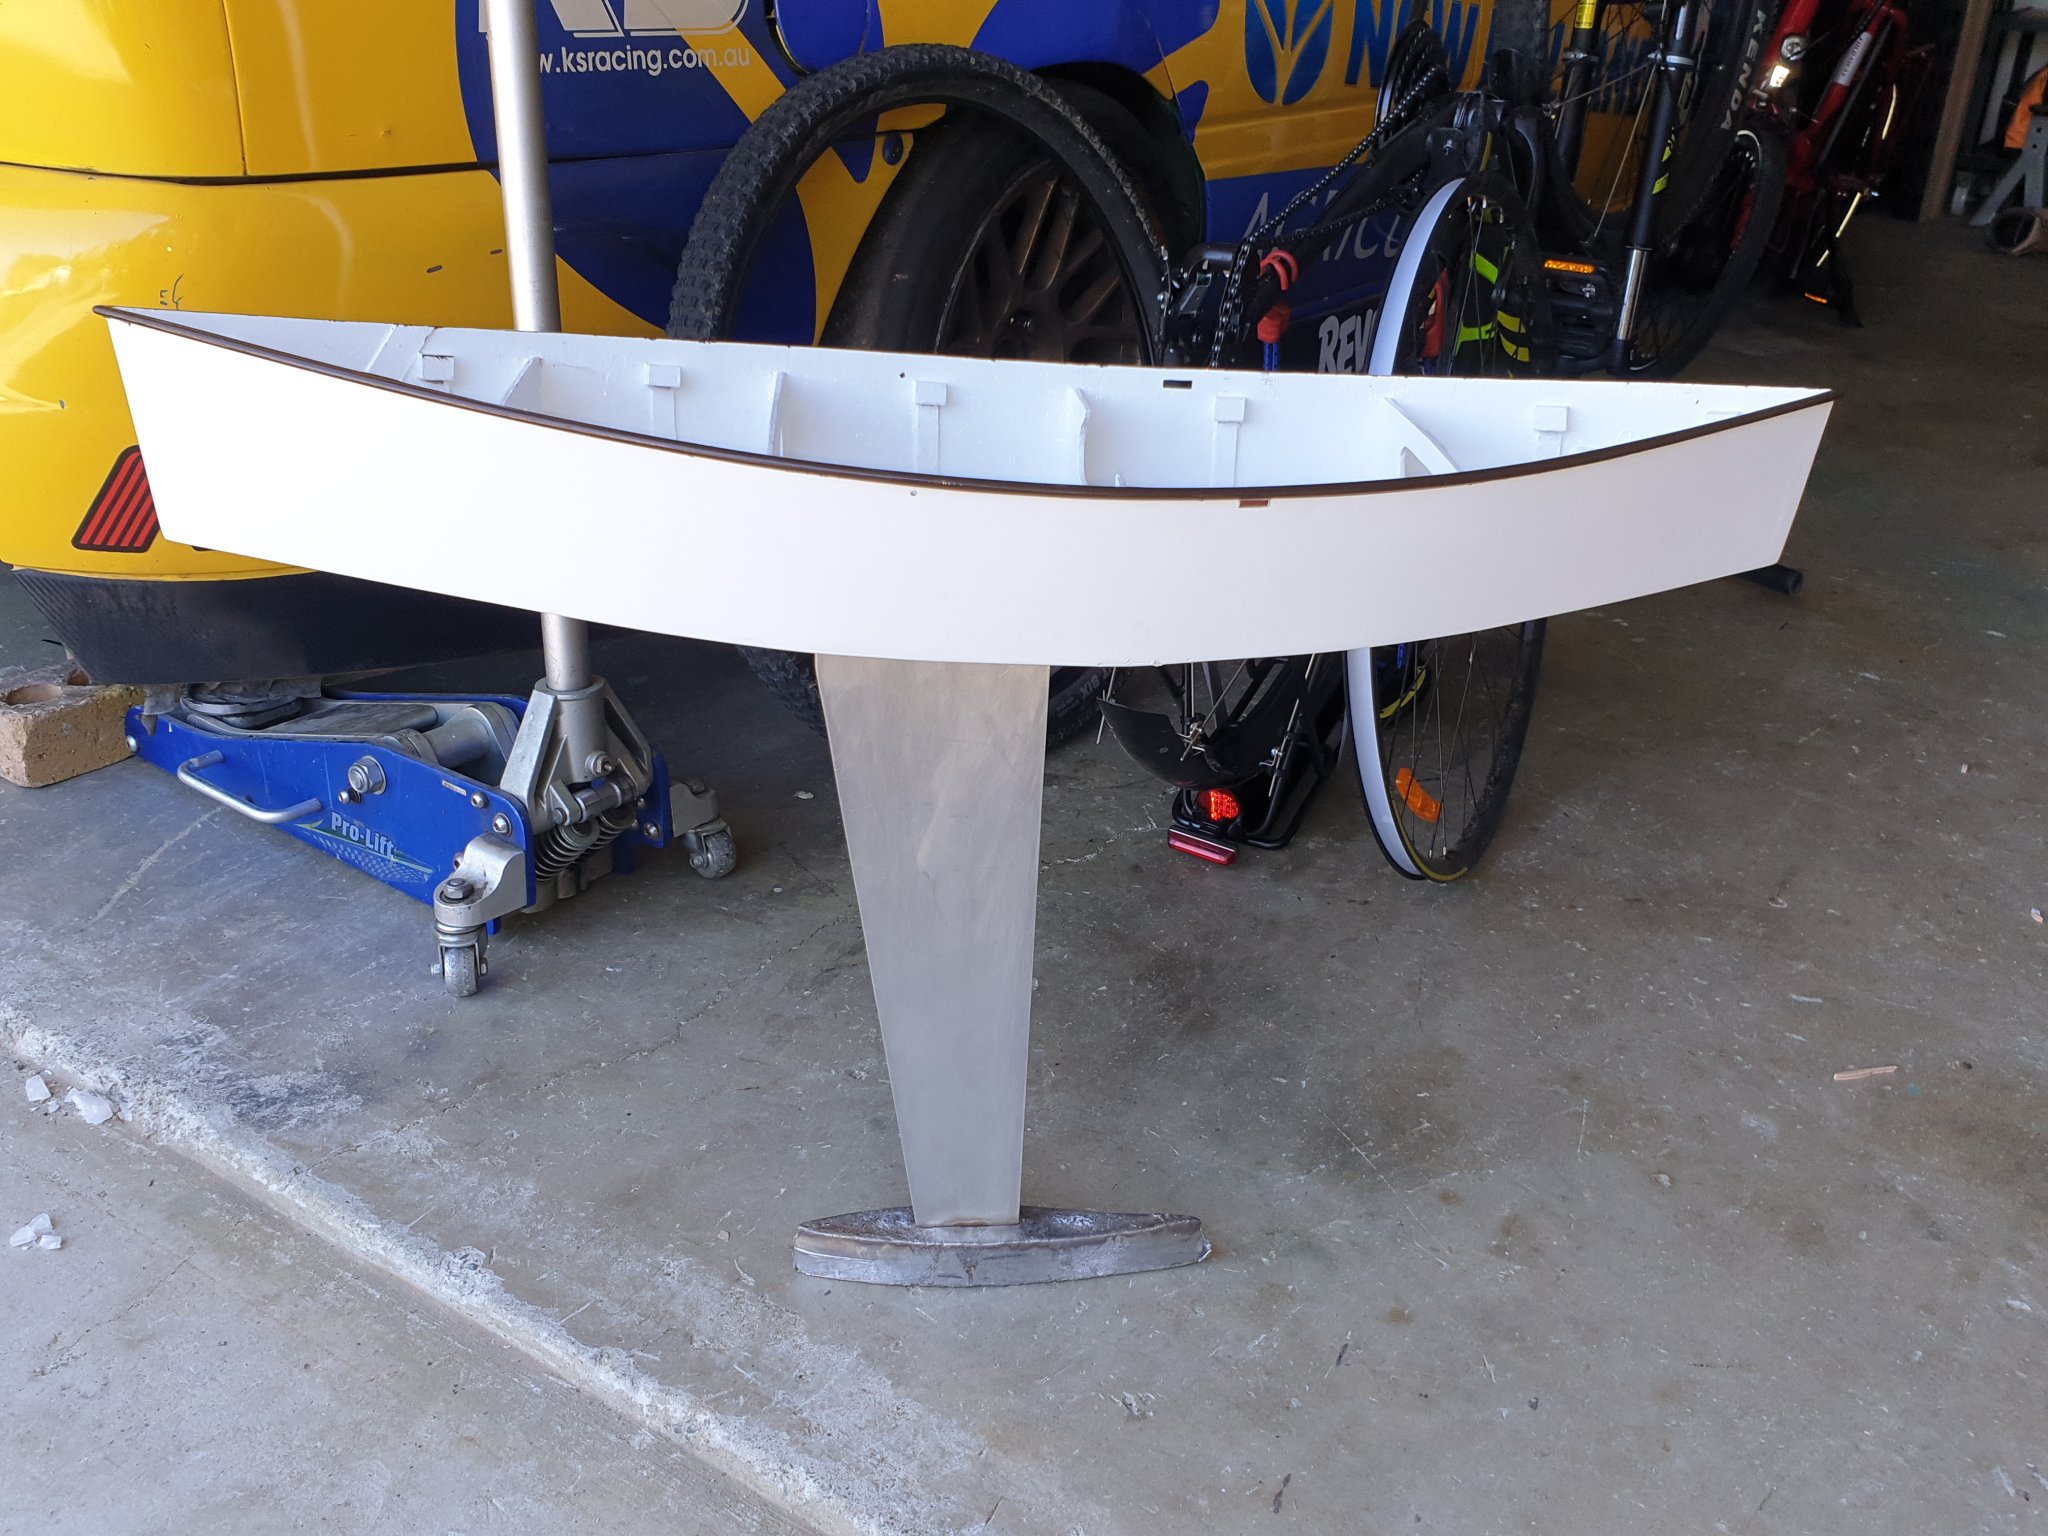
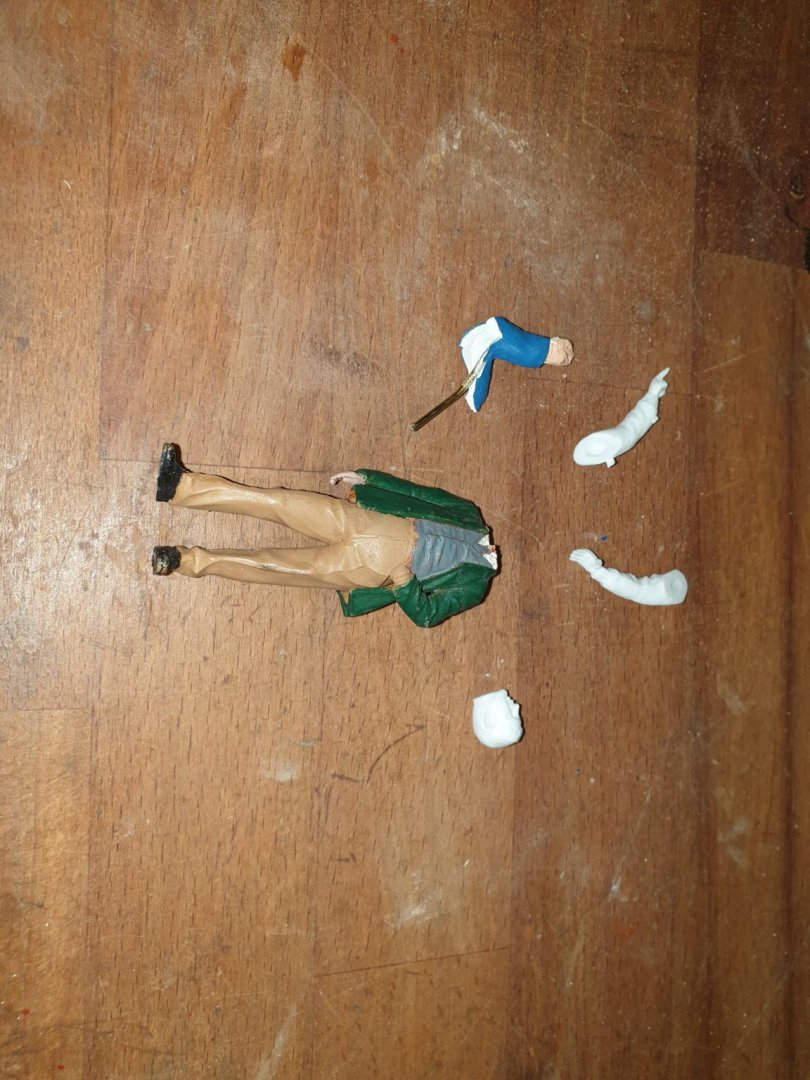
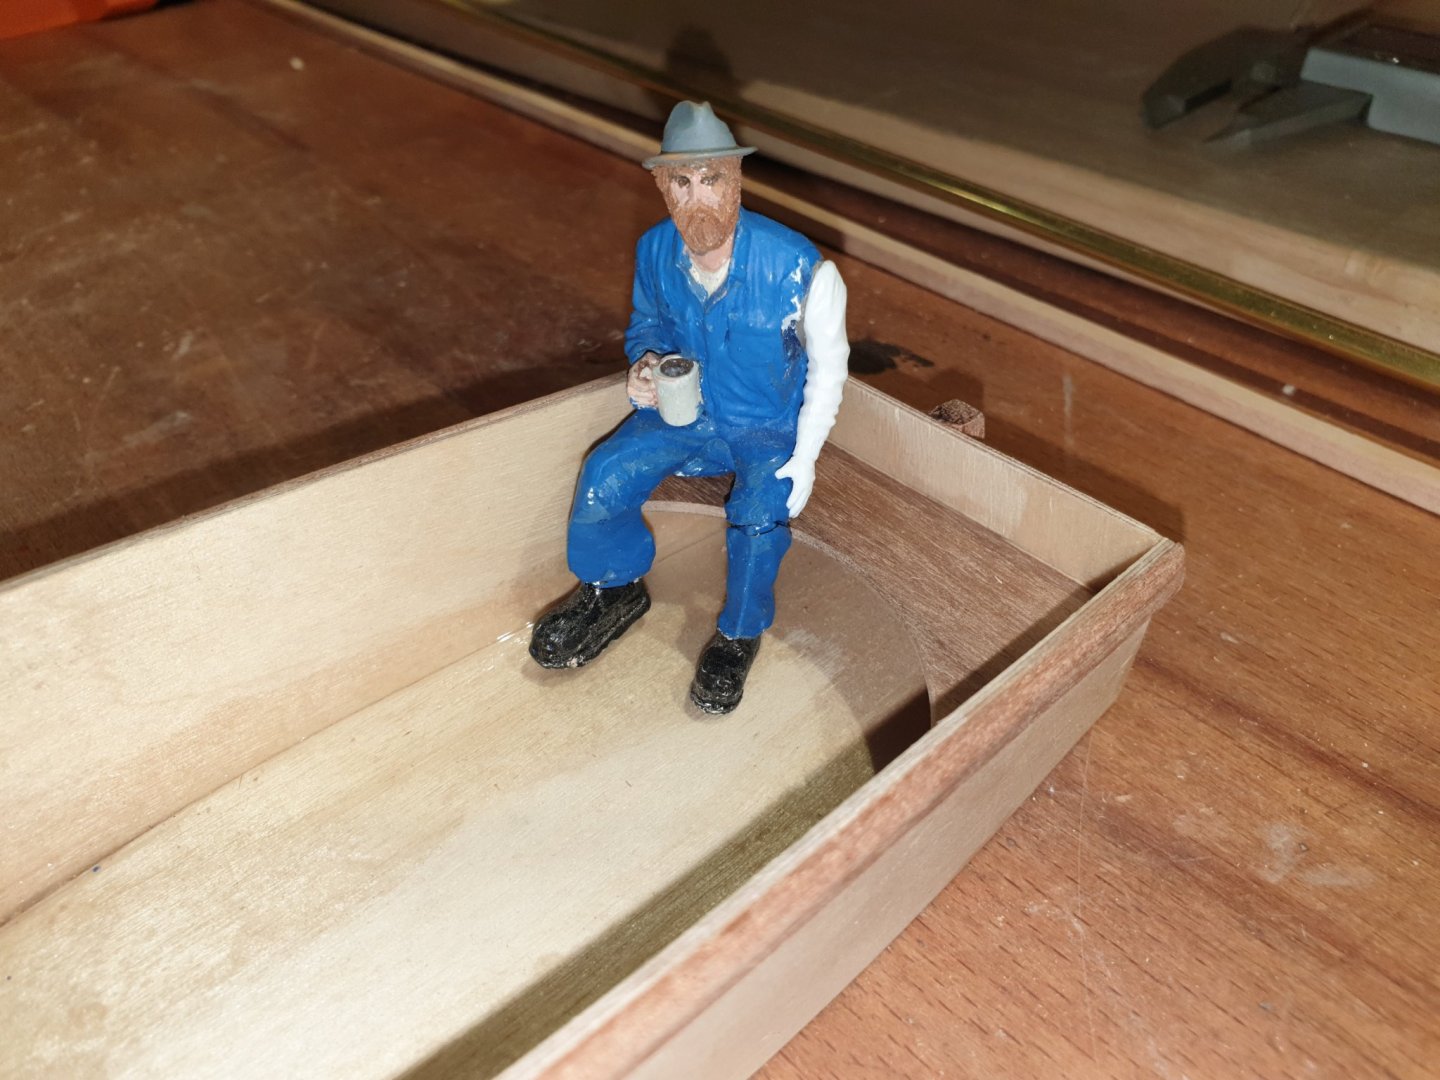
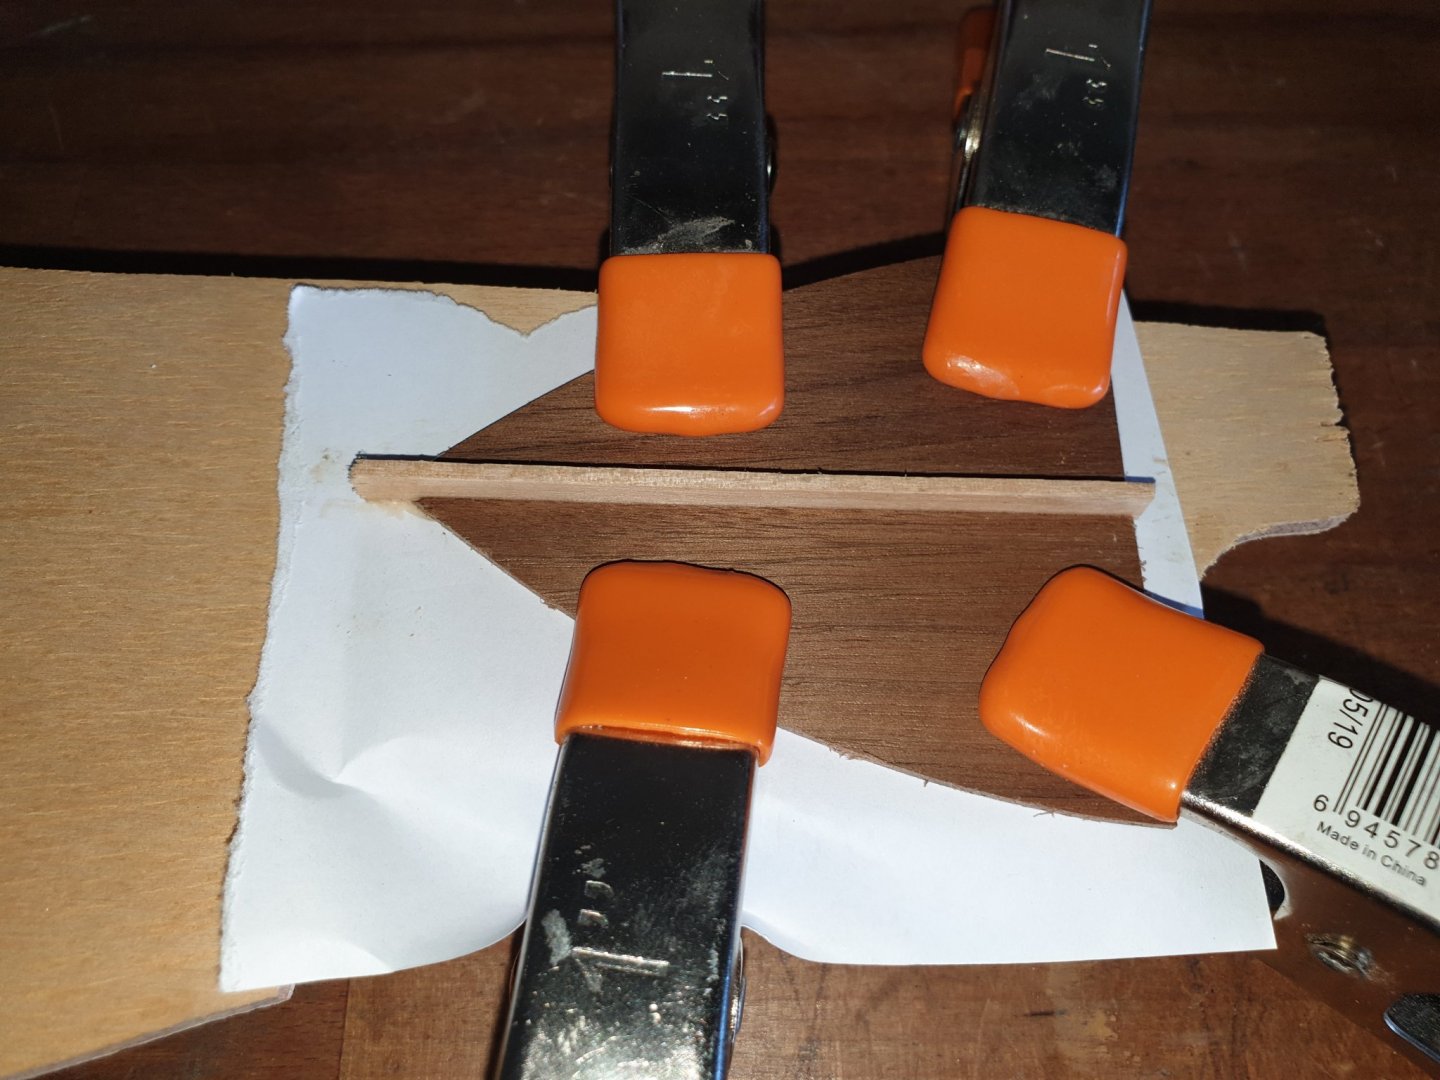
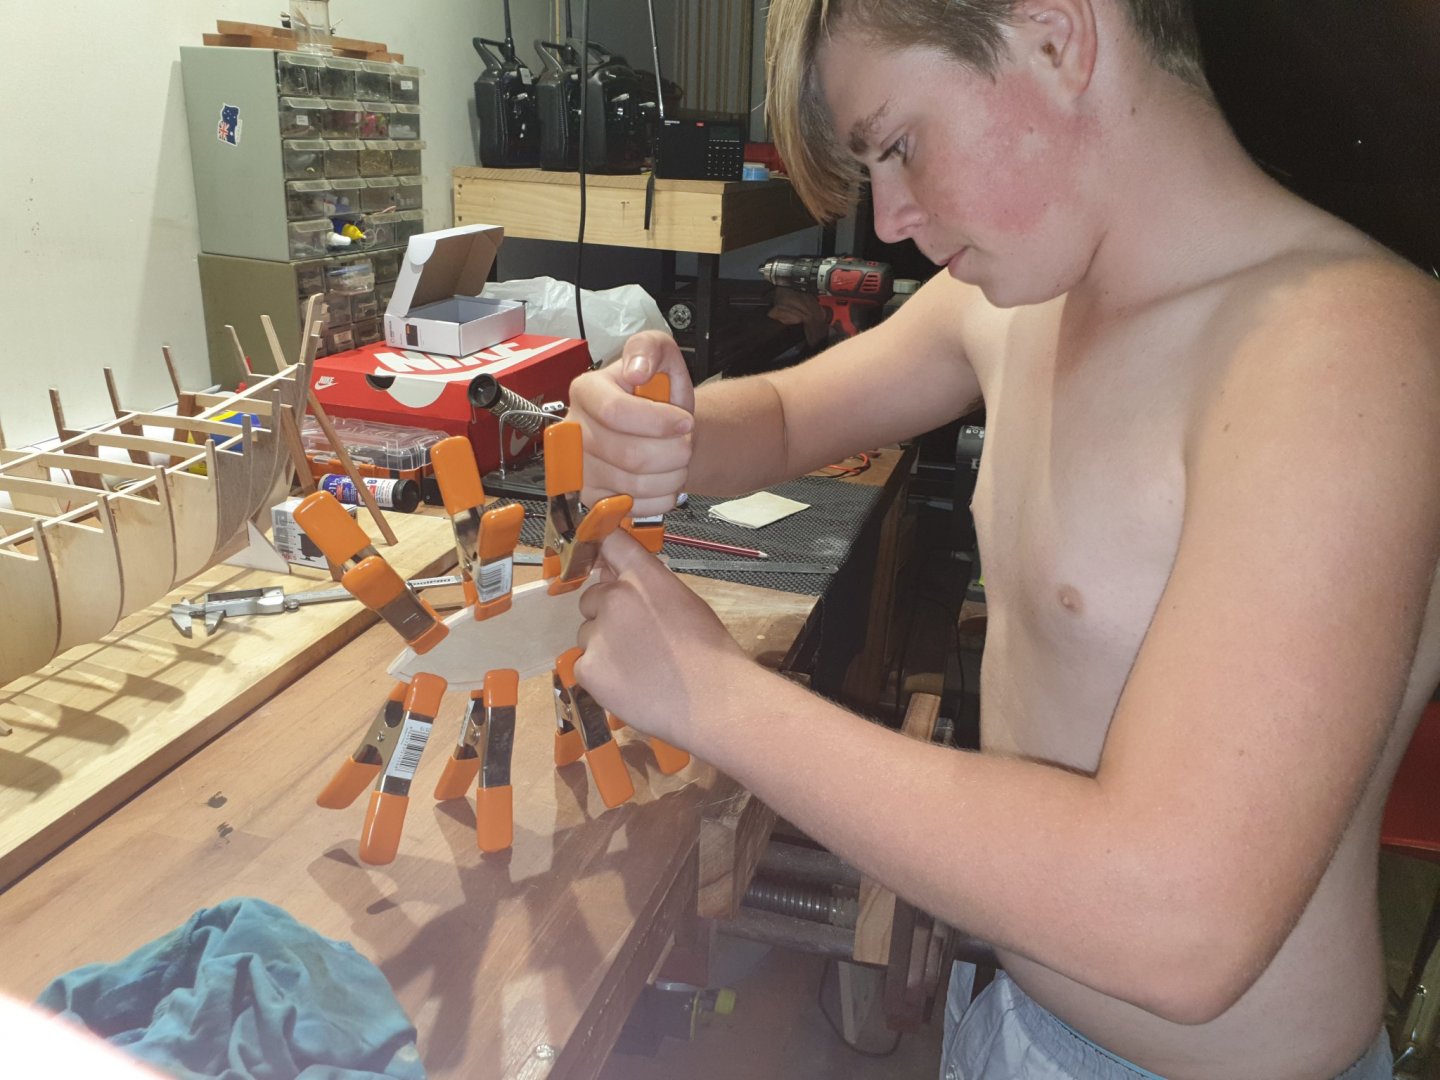
Brandy is now planing down the front deck. He then glued it onto the hull with a clamp and three clothes pegs then sanded it nice and smooth with a sanding block I gave him. We fashioned a thwart from walnut and glued that in. Of course no self respecting pop pop would be complete without a helmsman so out came my 1:24 scale railway figures and we set about dismembering them to produce something reasonable. At last we can get on with the motor which will be made from the drinks can you can see. Oh what fun. Pete and Brandy.

-
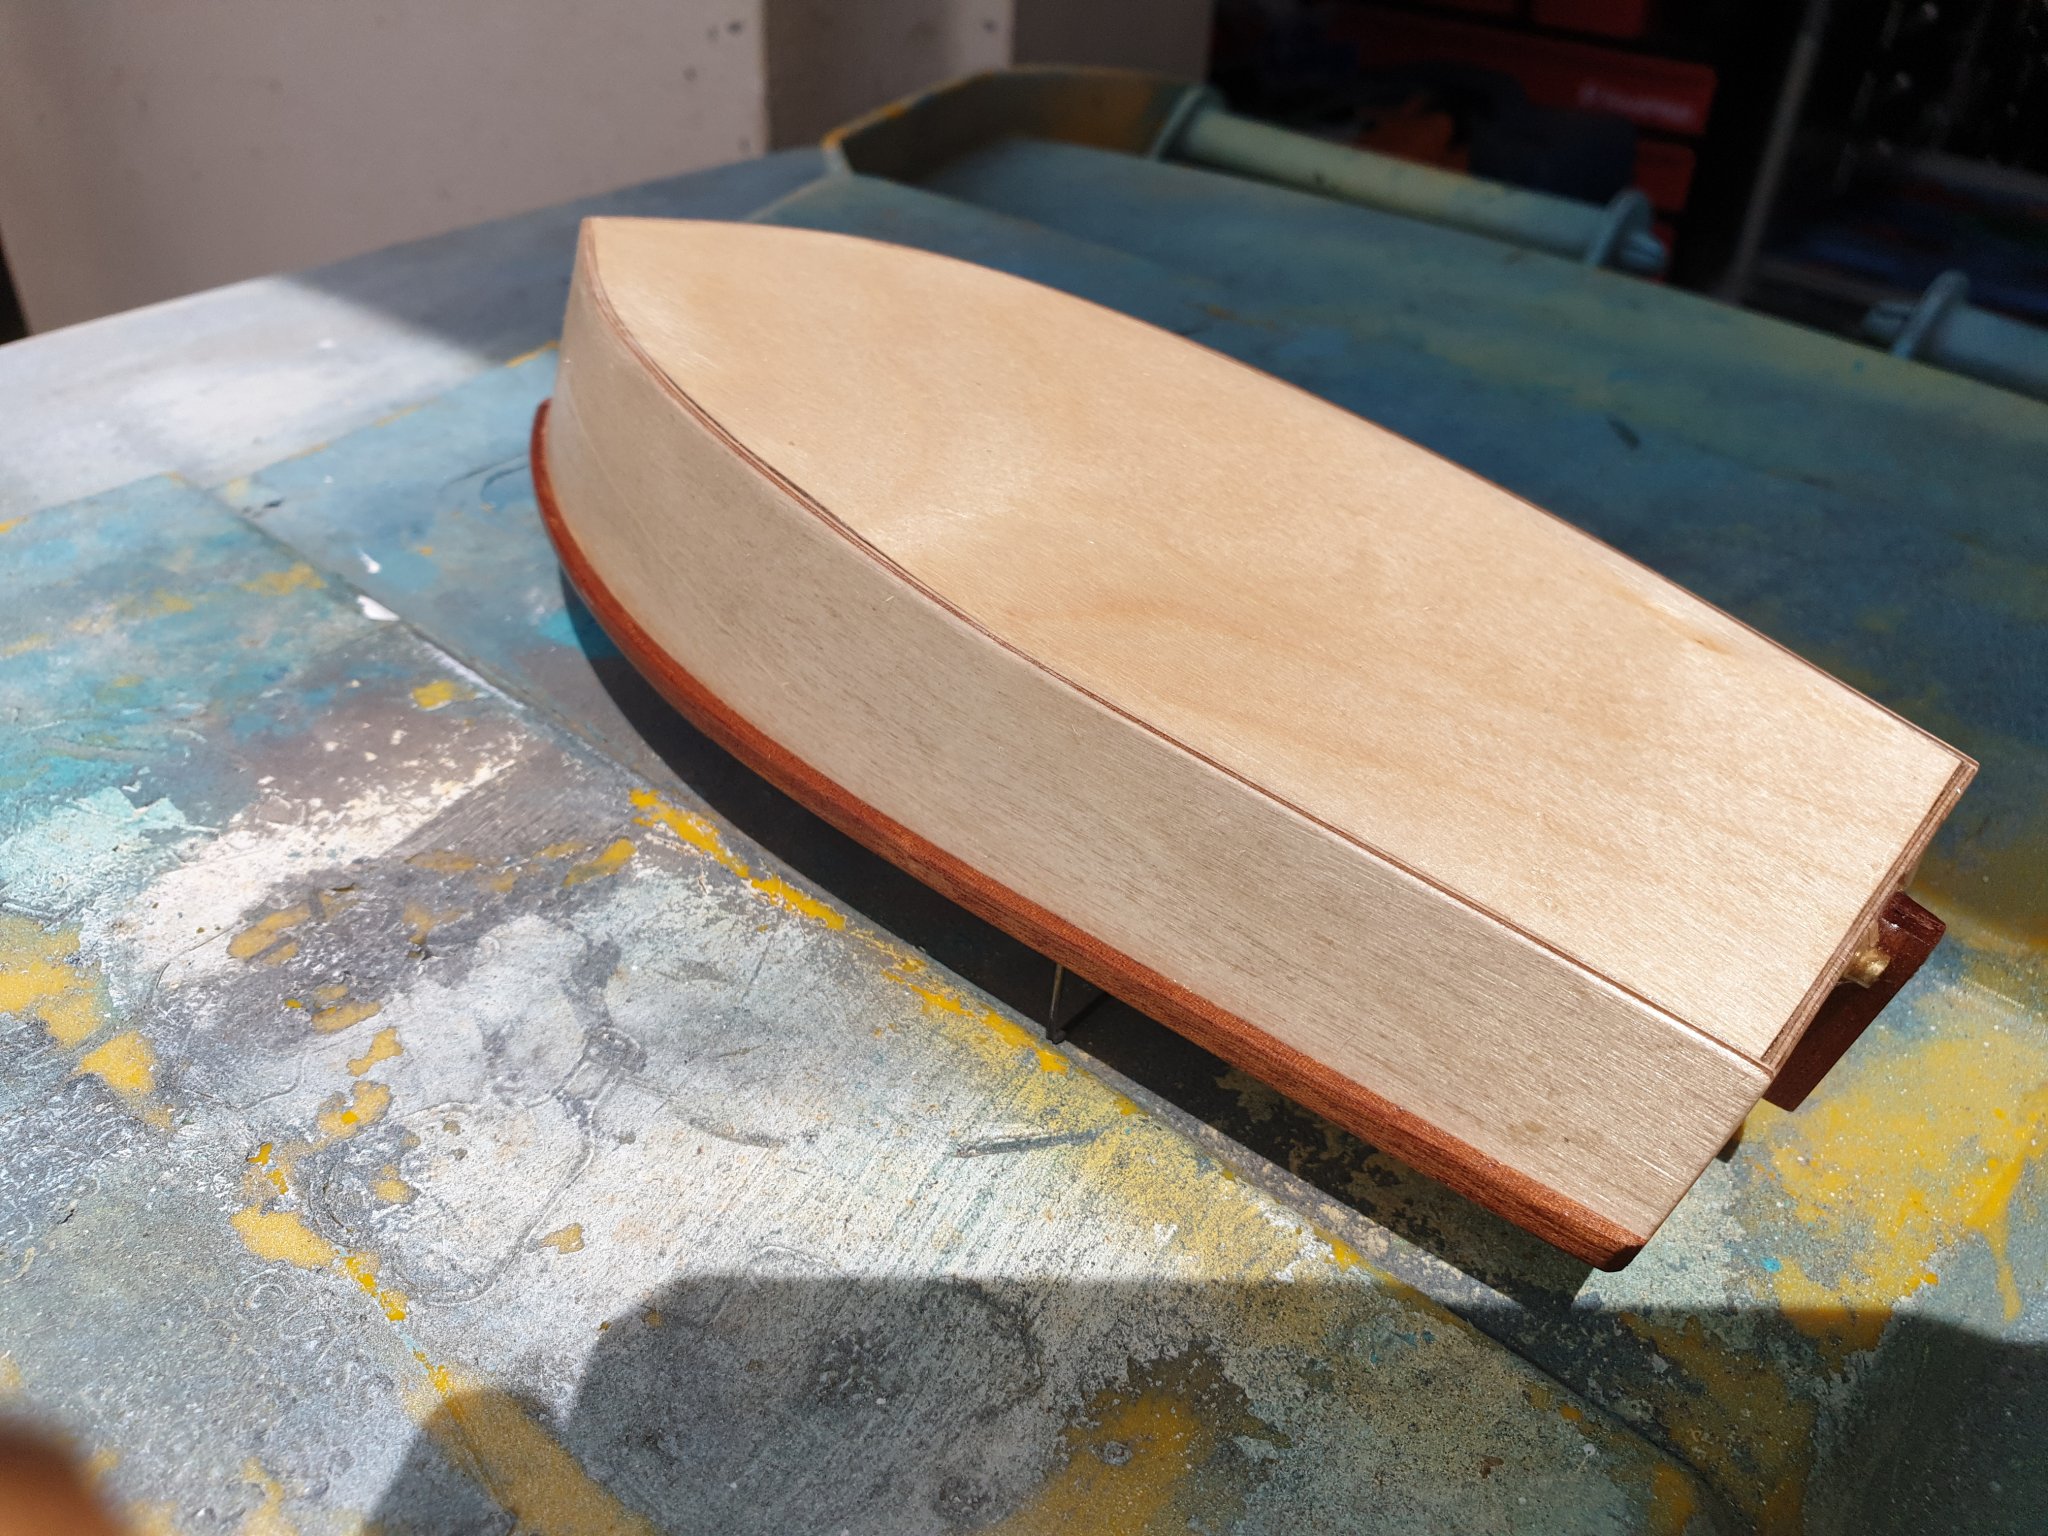
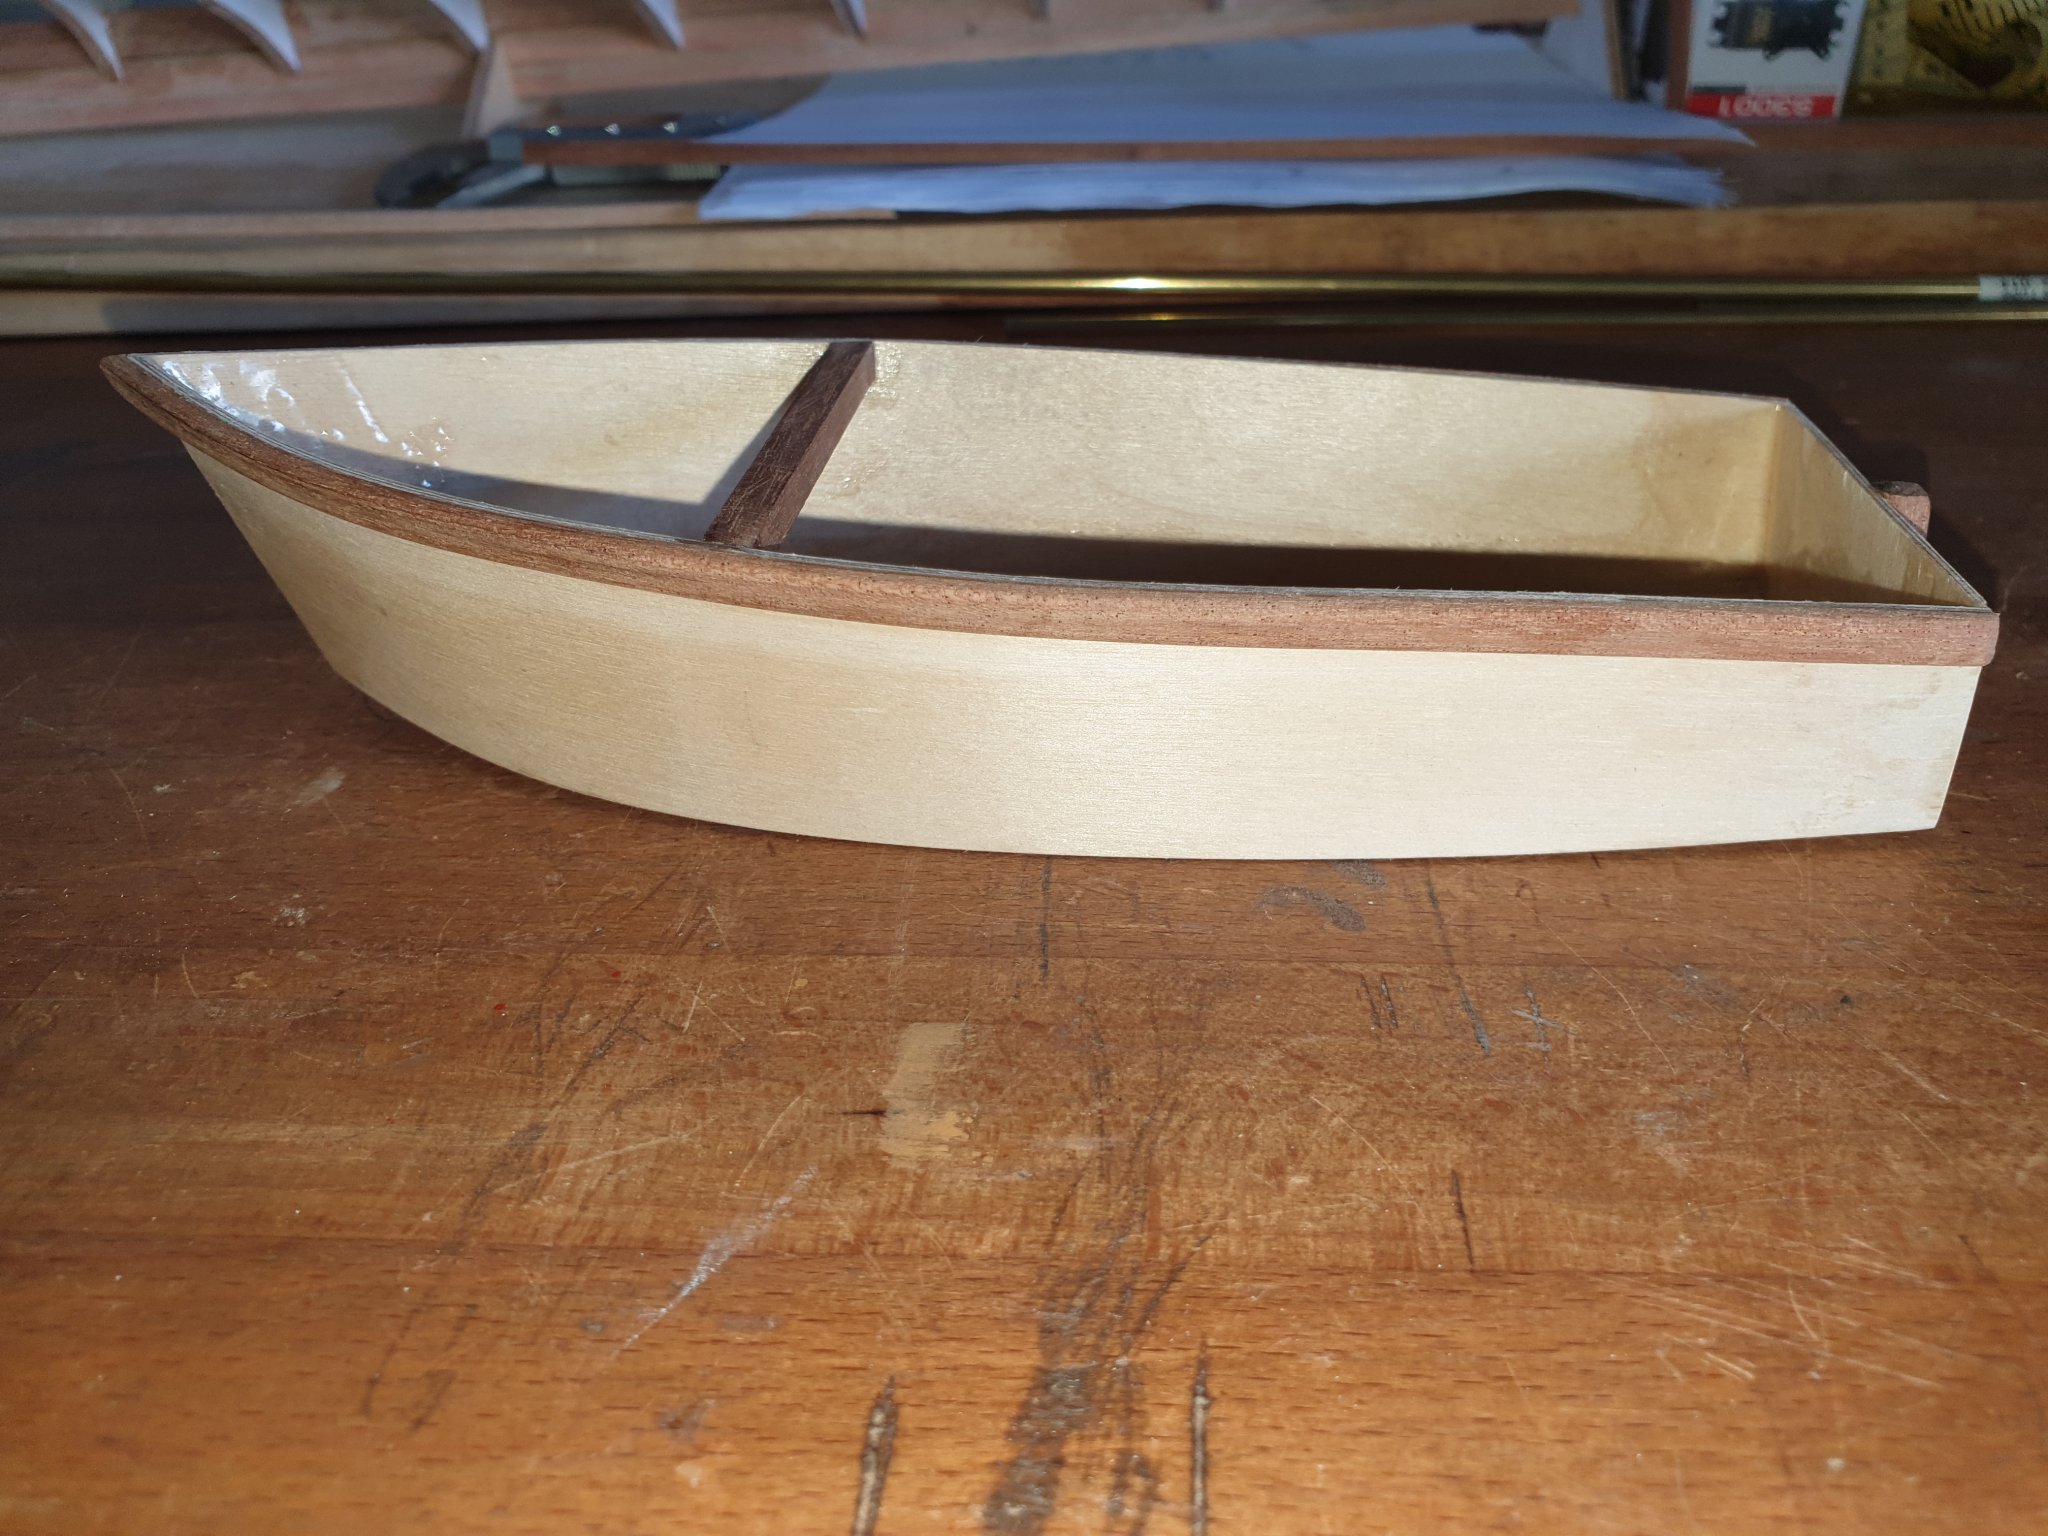
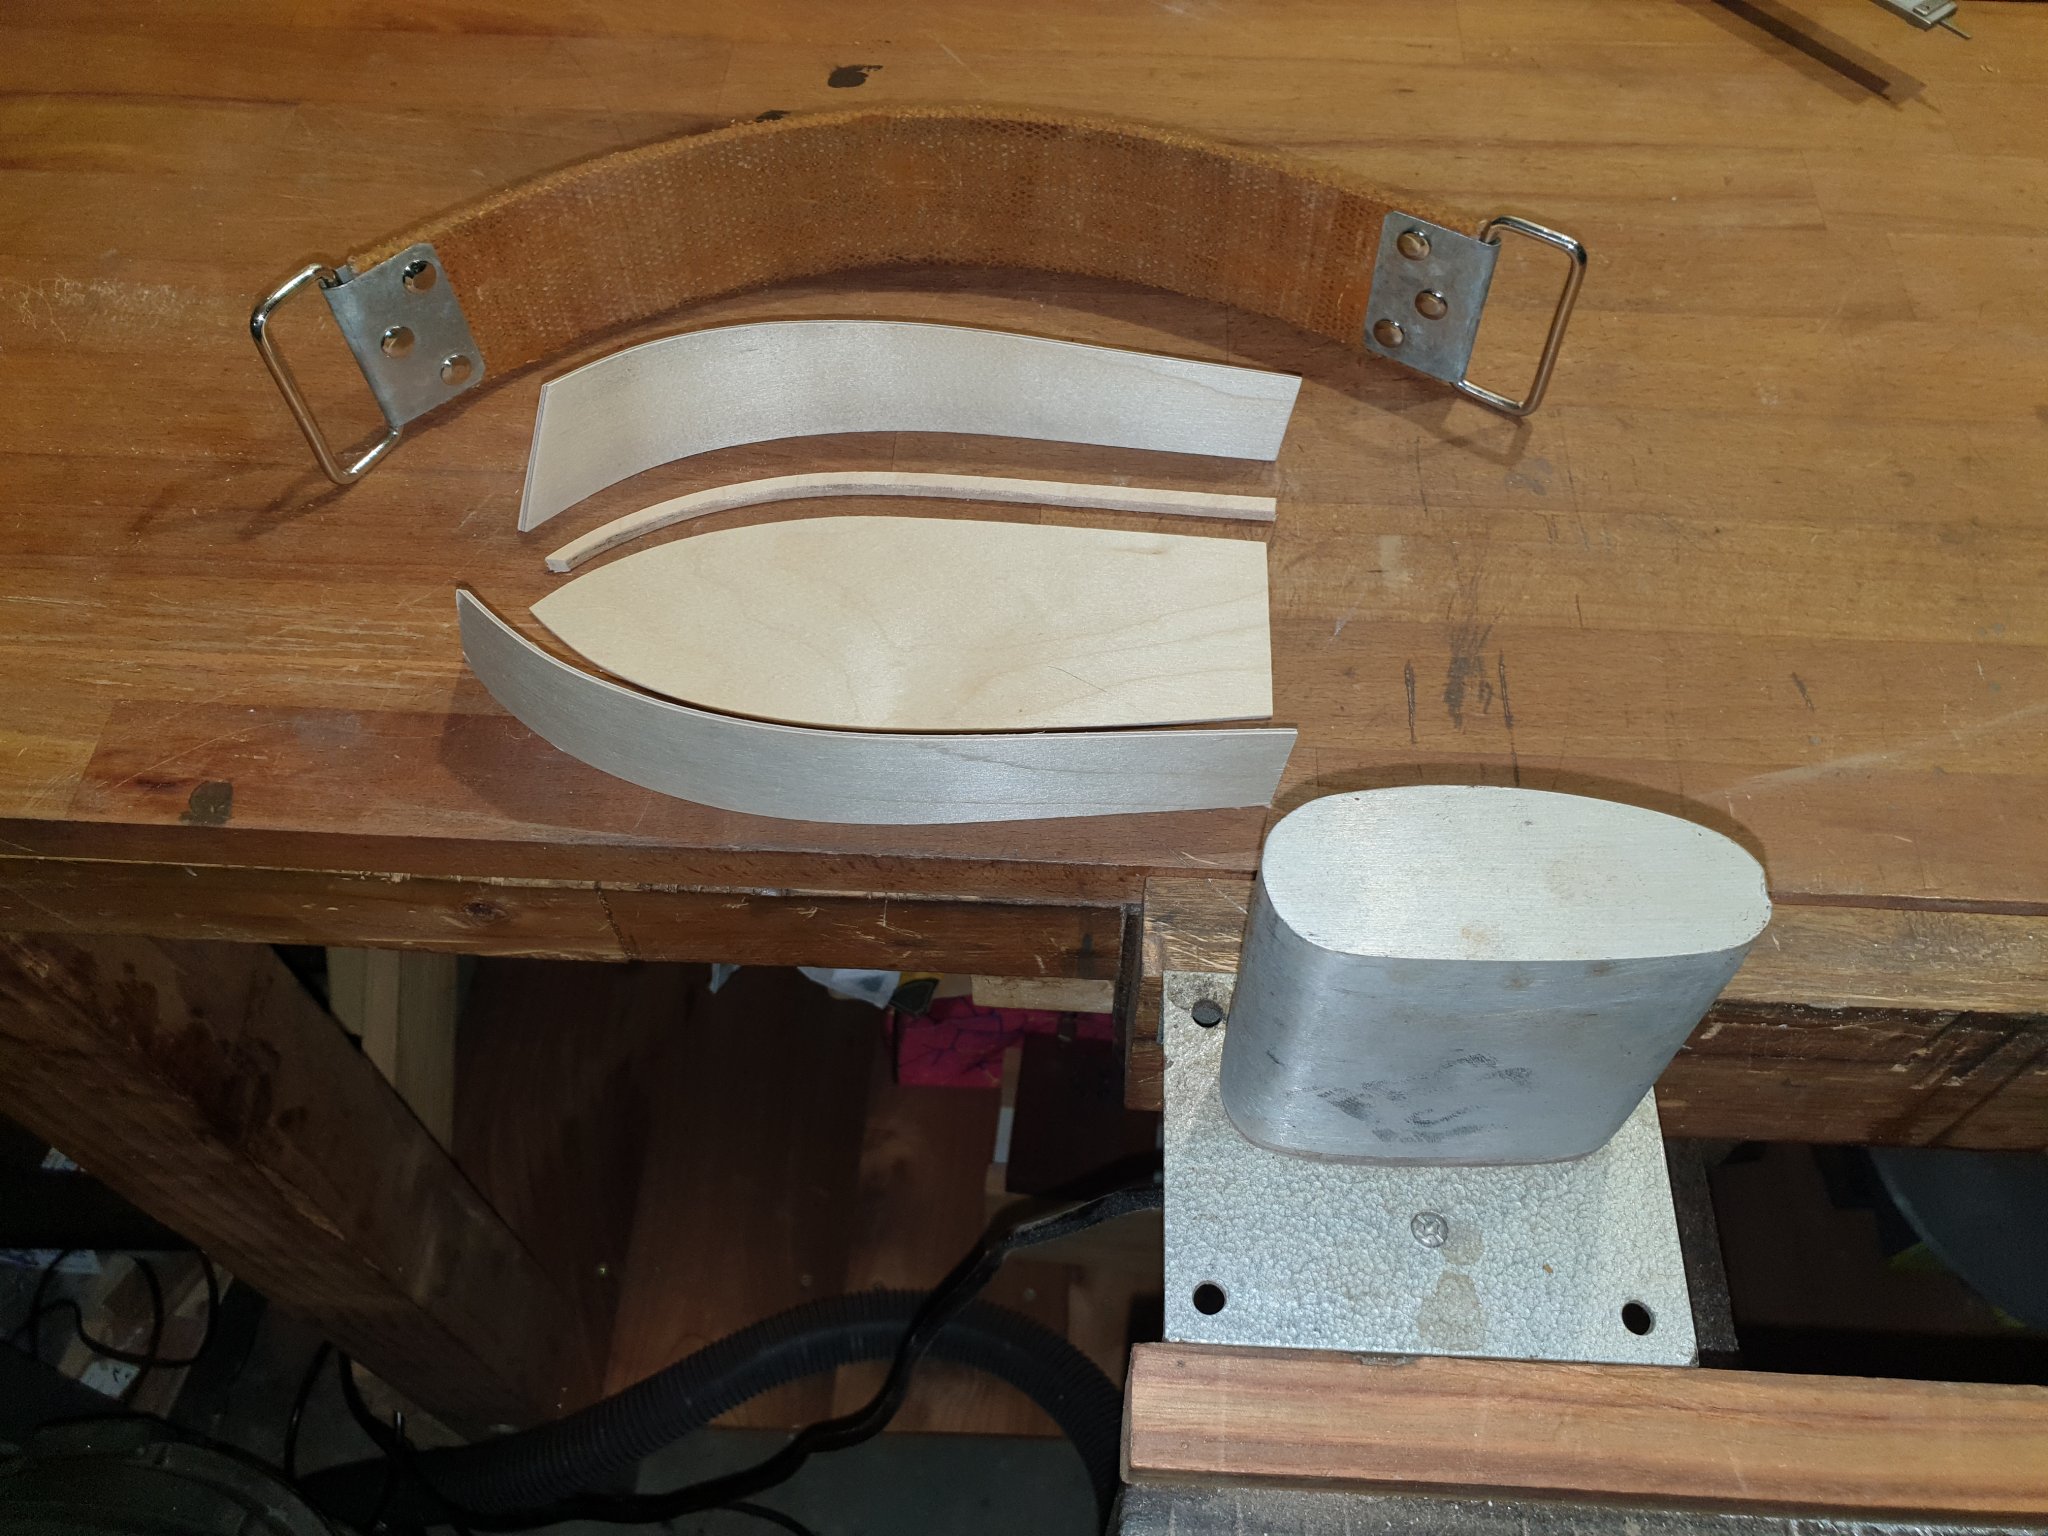
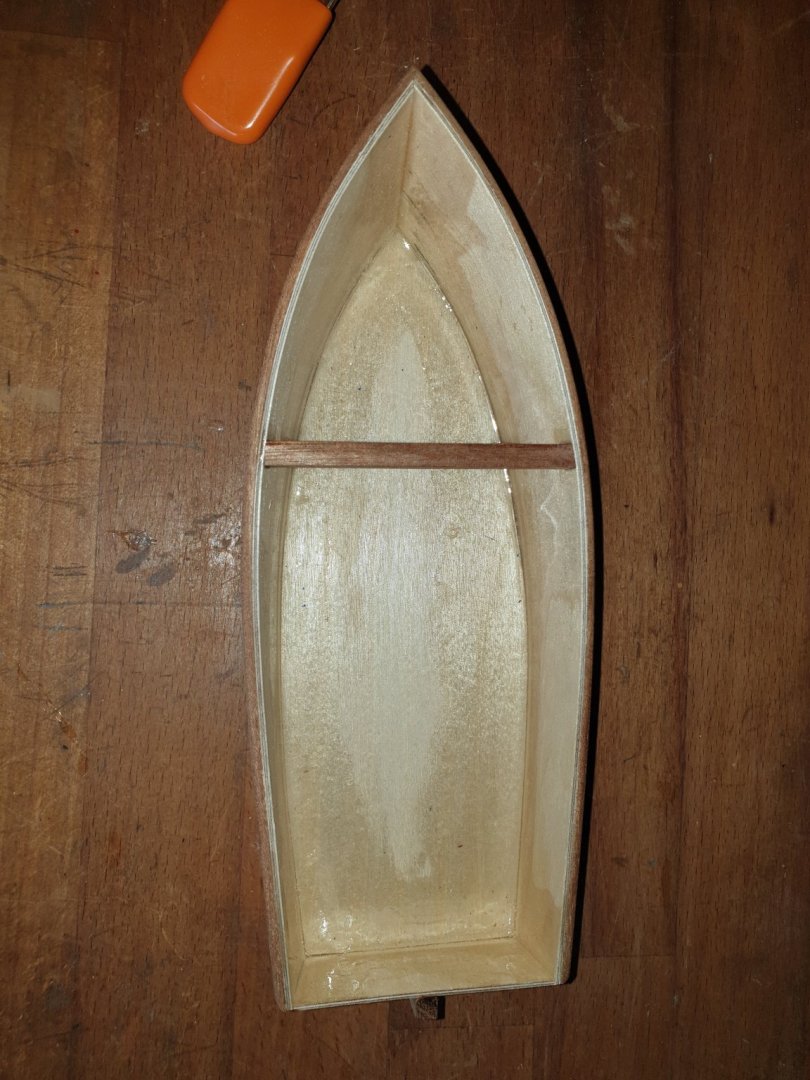
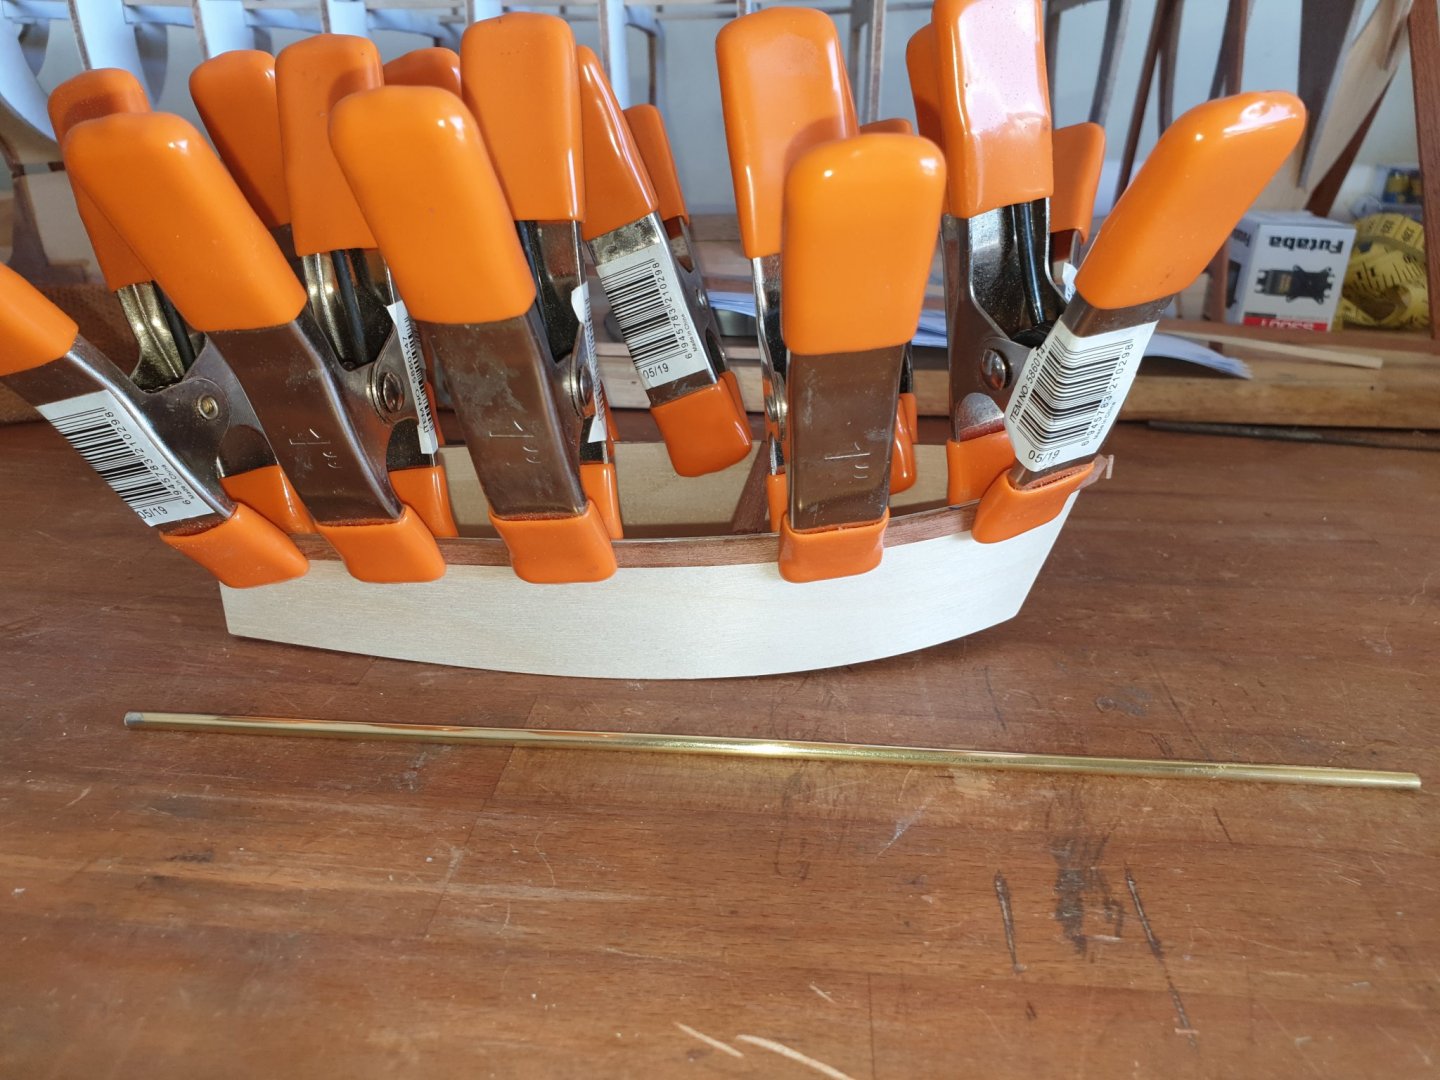
Brandy has glued on the gunwales or bulwarks whatever they are and has sanded them to a nice shape. He has also glued the front decking together with a strip of birch in the centre to pretty things up a bit. I had to have a hand in fret sawing the shapes of the walnut as it was done on a machine and I do not want him harming himself. The hull has a fillet of epoxy all around the inside edges for water tightness. He did not like getting sticky fingers! Ha ha....we all have to. I love doing this... " I am but a grown boy!!!!" Pete Or maybe I have not grown up. Who cares wins.

-
Hi Michael. I was on GN15 and NGMOL Forums under the handle of Narrowminded. I have to giggle at serious " toy " work. We are a bunch are we not! Boats are great fun. Pete
-
Hi folks! I put it to my grandson that we are building a very basic toy for a serious group of modellers to see and in order to make the pop pop worthy of such a forum I think we need to take it to the next level! Ie...fit bulwarks from nice wood and the fore deck from some walnut? Have a figure in it to steer it and a rudder that can be set to different positions. Also thwarts! I am explaining these nautical terms to him as I learn them myself. He agreed that we should step up our act and build it to be a serious toy!!...ahem! Love it!. I did all the bending as that iron can hurt if you nudge it. I also stuck the hull together as I do not want him using CA glue. Here she is today. Pete and Brandon.

-
Michael. Always a joy to hear from you. I assume it is the same Michael Mott from Narrow gauge railway modelling? Yes....I have much pleasure teaching Brandon what I know. He loves hands on and is always knocking up weird and wonderful things from basic garbage. This imagination is priceless. Pete
-
Okay I get it now with the syringe needles. If they will sell them to me that is the way I will do my masts from now on. Question... Do you drill holes through your masts at any point or do you attach shrouds and the fore and aft rigging using tiny eyes etc? They would not have drilled holes through the real thing ? What do you use for rigging lines? I think I have finally sussed how you get the finest black sail lines representing stitching. You showed a pic of a piece of sail cloth with one half painted black. I assume then that you pulled the appropriate threads through until a black thread appears as a stitching line? It wasnt obvious to me at first. Most people Igor wonder how we get ships in a bottle. In your case we wonder how on earth you make something so tiny BEFORE it reaches the bottle!! Pete
-
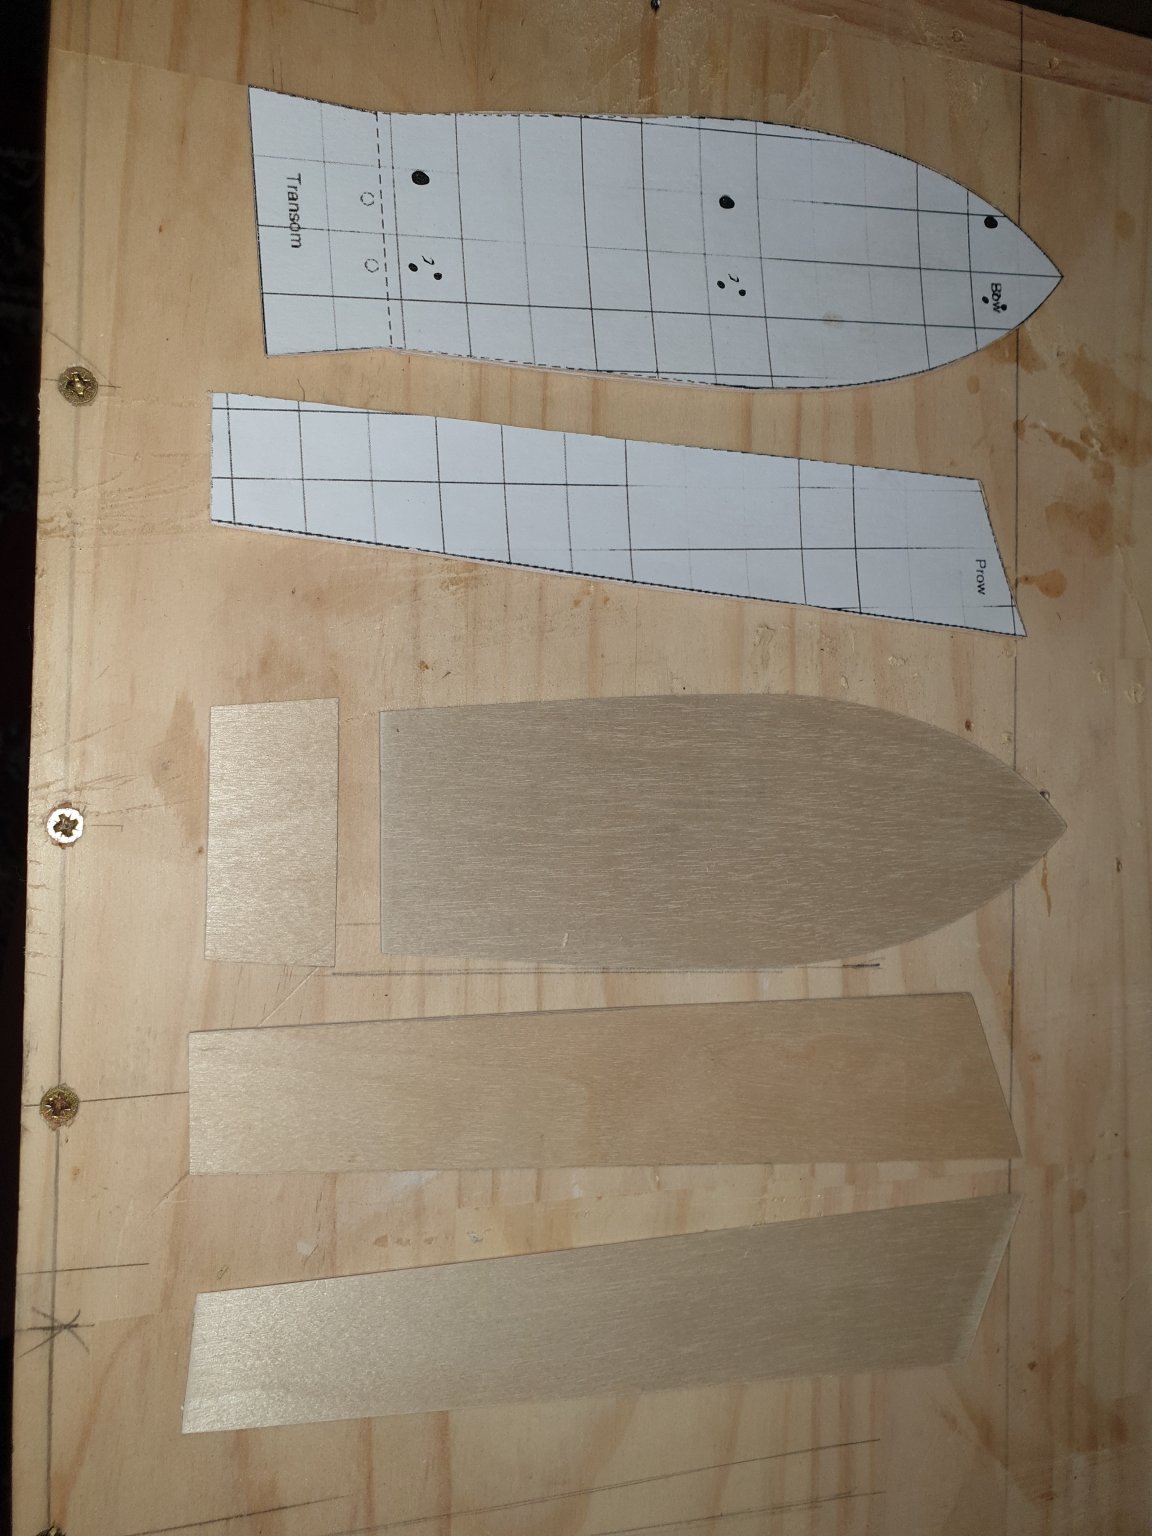
This is a fun and quicky project. My grandson is building it with a little help from Grandad. We saw some you tubes on these wonderful little craft. Next best thing to steam power but a darned sight cheaper. It is powered by its own pop pop motor which we shall be making next. It makes a realistic pop pop!!! Sound. This is a fun toy but to be honest ,because it has a live burning flame inside it, it can hardly be given to a very young child. I think 13 is okay. Not so sure about the 69 year old though!!! Ha ha. If you get the itch and secretly build one, all I ask is for you to be honest and show us your build. The entire build should only take a few days. We are doing a super version of it in very expensive 1.5mm birch ply. The plan is down loadable from the web. My grandson used " publisher " to make the beam a bit wider than the original. This is as far as we are at the mo. Pete and Brandon.


-
What I like about your slipway is you have incorporated eyes at each side to take care of the shrouds and everything port and starboard. Apart from it being a piece of furniture in itself!! Glorious to see your hands at work. My slipway is A la Jack Needham whereas every rope goes fore and I have to tie a series of knots in them to remind me what mast etc etc. Your method makes far more sense. Ingenius. Pete
- 24 replies
-
- 2
-

-
- peter the great
- boat
- (and 2 more)
-
Hi Igor. I don,t use FB. There are a few problems with Beagle in that I made the masts from cocktail sticks and after drilling several holes through them it has weakened them severely. I was thinking about bamboo and now you have confirmed that is the material you use. Secondly I did not use a drawing but made it by eye so in fact it probably does not look anything like Beagle. I like the way you join the masts using micro brass rings which leave a gap between them. It is these micro refinements that stand out with me. My cotton is too thick. I think you use something thinner? In essence my model is clumsey because I have not paid attention to detail. I did not know that these details are humanly possible until I came across your SIB bloggs. The first thing I need is an illuminated magnifier on a stand. I may put Beagle down to experience. I know I can put them in bottles as I have done it decades ago so Beagle in a bottle will not prove anything to me. After seeing what you have mastered, I am inspired to start again but this time ....properly. I have always liked the Zeesboot that Nils is currently replicating to a superb model. I now have a book on the Zeesboot with a drawing included. It also has many pictures of the original. So now I am armed with the info I need I feel I am better prepared to replicate it in micro form. Thanks Igor for all you bloggs and help. I would like to see a picture of the tools that you use if possible??.....to enable me to be better prepared. What thread do you use please? It is very thin and there is no fraying visible. Pete
-
Beautiful. Exquisite modelling. I am taking all this on board. Pete
- 24 replies
-
- 2
-
-
- peter the great
- boat
- (and 2 more)
-
Igor. Many thanks. An illustrated book by you I am pretty certain will be a " die for " for any bottle ship modeller wishing to go the extra mile. It would surely be a classic. It is always nicer to read a book than a screen that eventually will not work. I think I will have to be either one of the two. A defeatist that is unsure of his limitations or a wise man who is absolutely sure of his limitations. Who wrote that?....I did!!! I would have to try to do it anyway to prove the latter. Pray...what do you use for masts? Please do not say wood!!! Ha ha. I can see my HMS Beagle going in a box and not in a bottle. Think its time to start again but this time with a drawing. You would get a good job with Rolex!! Superb micro modelling. Pete
-
Igor. Sorry....I am late to the party. I am totally gob smacked with your model SIB. I do not know you but looking at the incredible tiny details of this fully planked and decked ship I do know that I am witnessing world master class SIB modelling. I have the old Jack Needham book which is good but compared to what you are doing it doesnt come near. If you have not already, please write a book on it including this model. Your build has taught me so much already. Your are in another league. Right down to the sails which are bang on the right colours and not just stuck on but with tiny mast rings toboot. The list is endless. Absolutely totally awesome. I have never seen anything like it. Thank you my master. Pete