HOLIDAY DONATION DRIVE - SUPPORT MSW - DO YOUR PART TO KEEP THIS GREAT FORUM GOING! (Only 24 donations so far out of 49,000 members - C'mon guys!)
×


Peter Cane
-
Posts
240 -
Joined
-
Last visited
Content Type
Profiles
Forums
Gallery
Events
Everything posted by Peter Cane
-
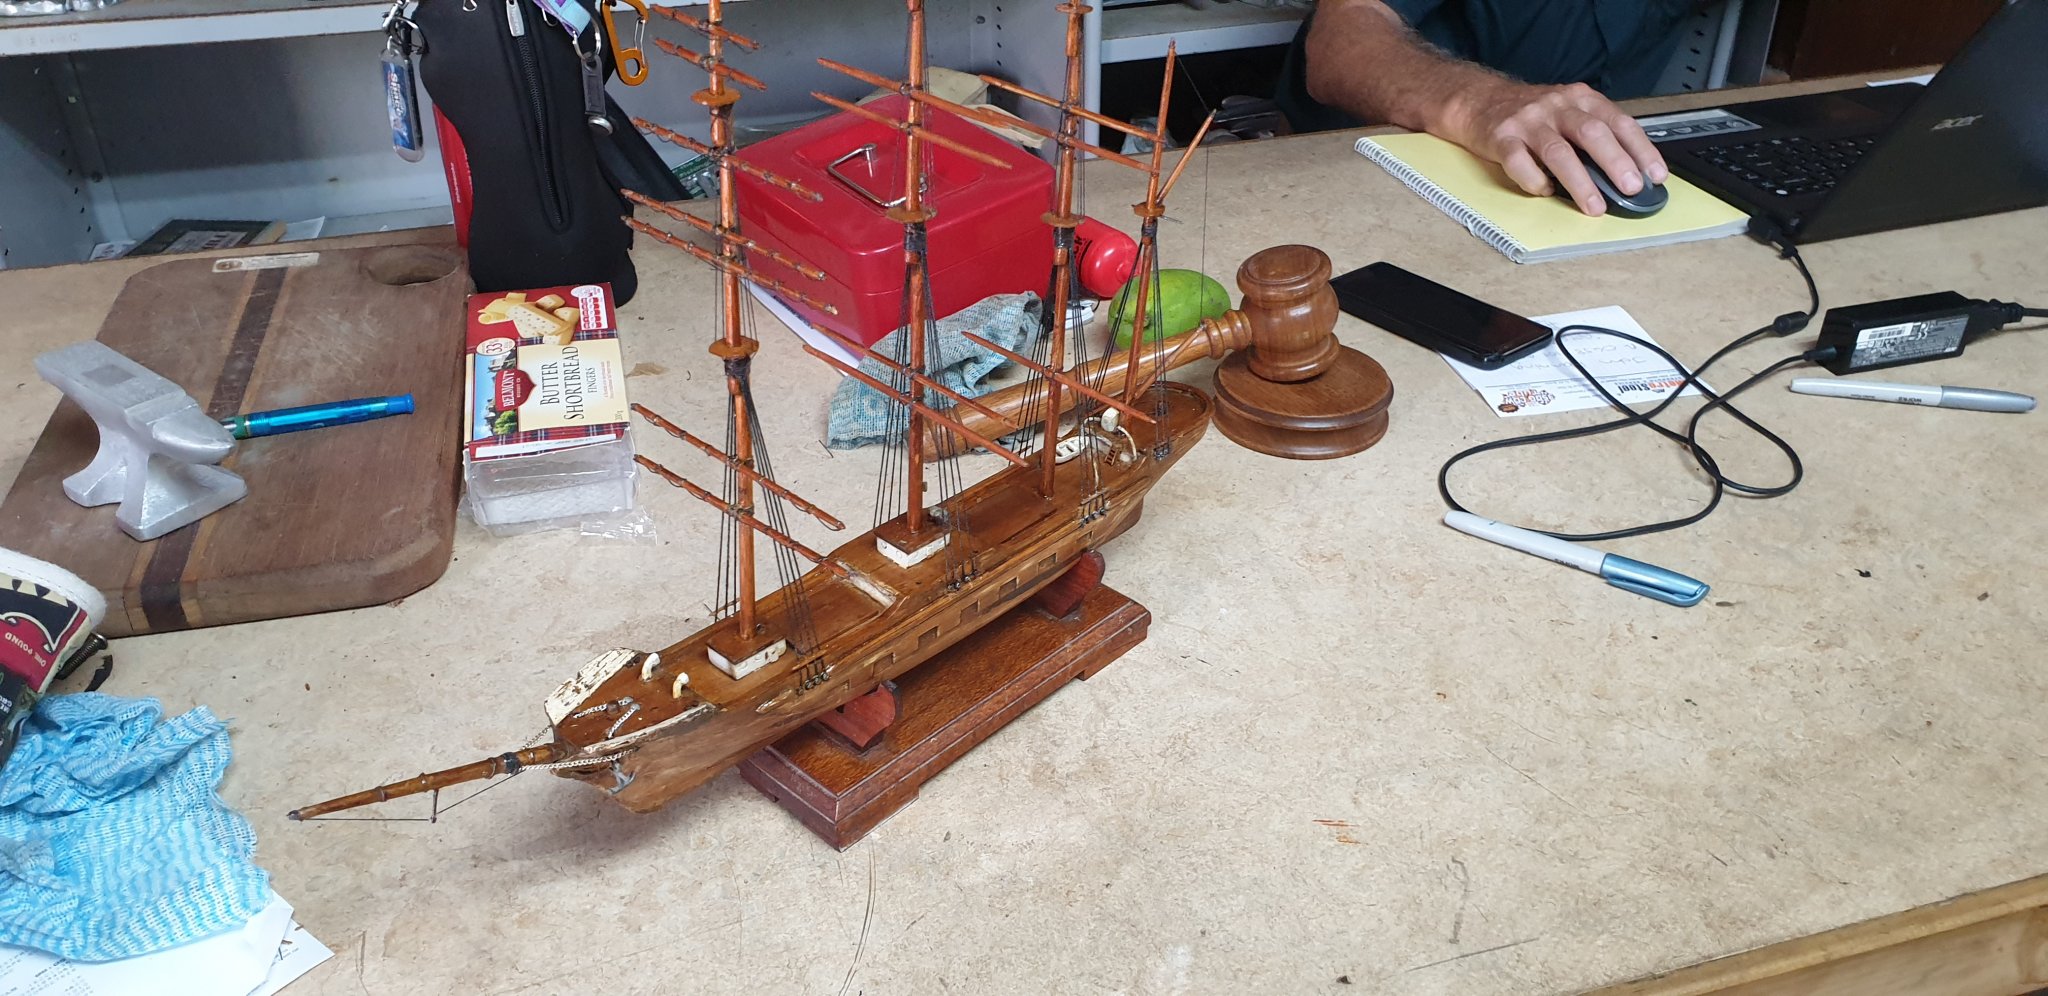
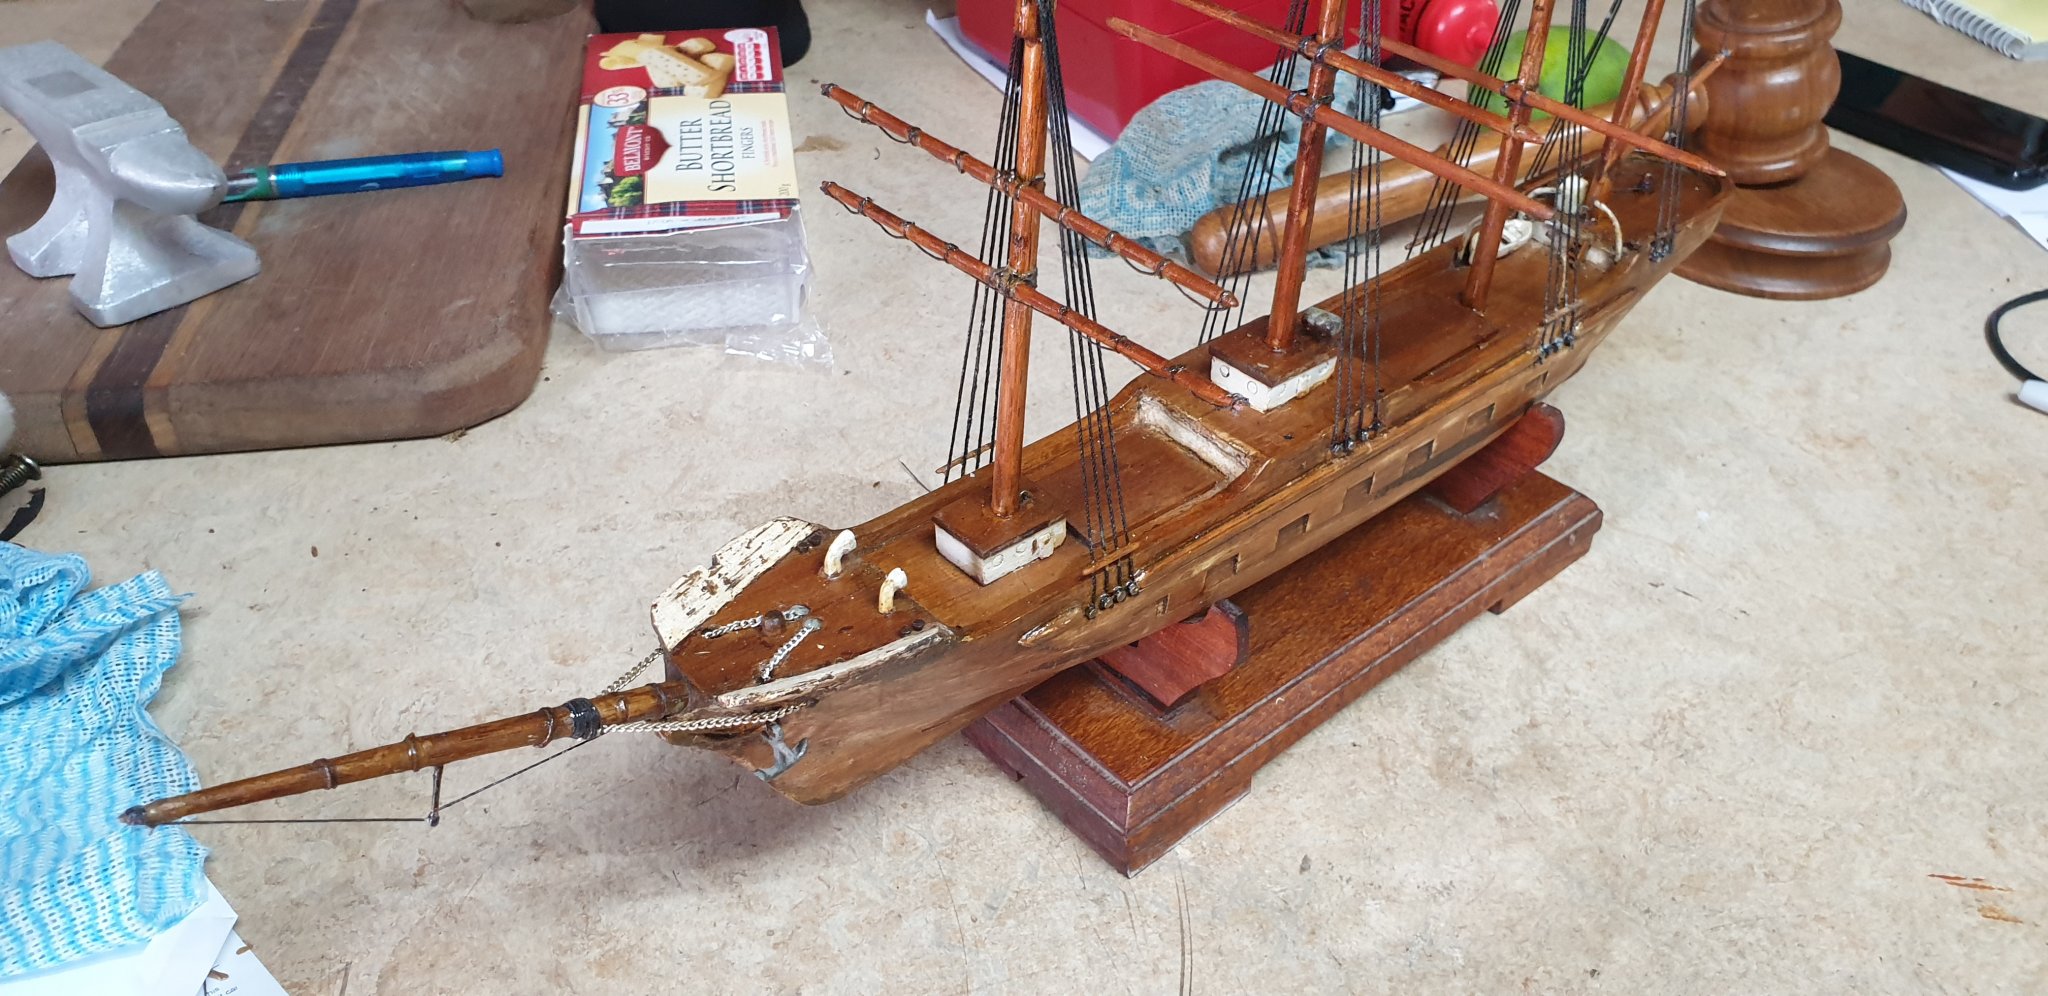
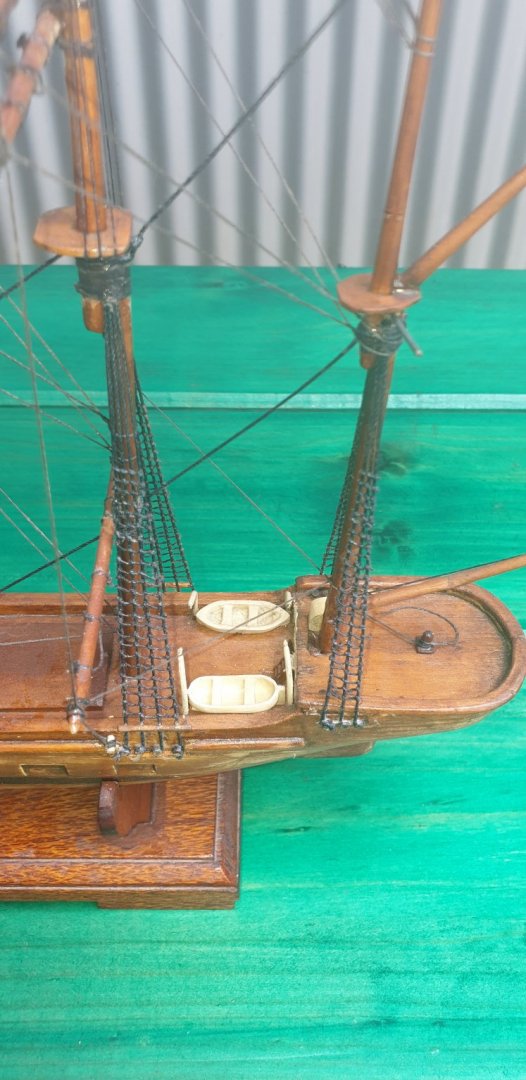
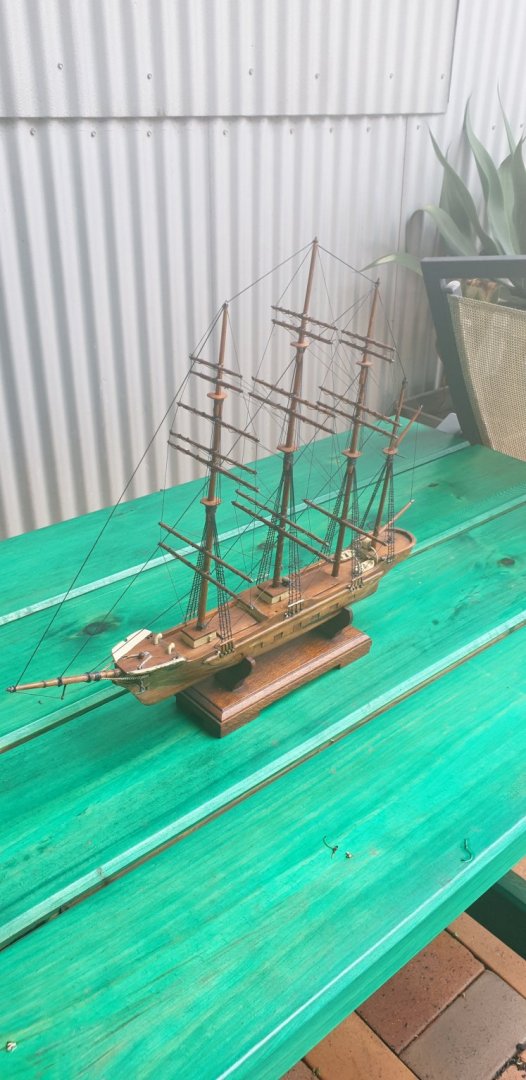
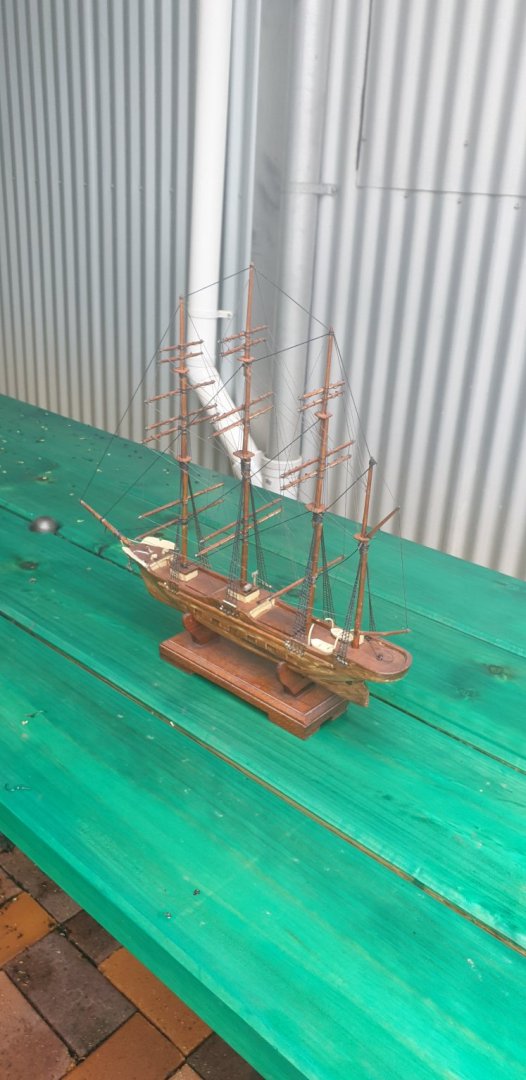
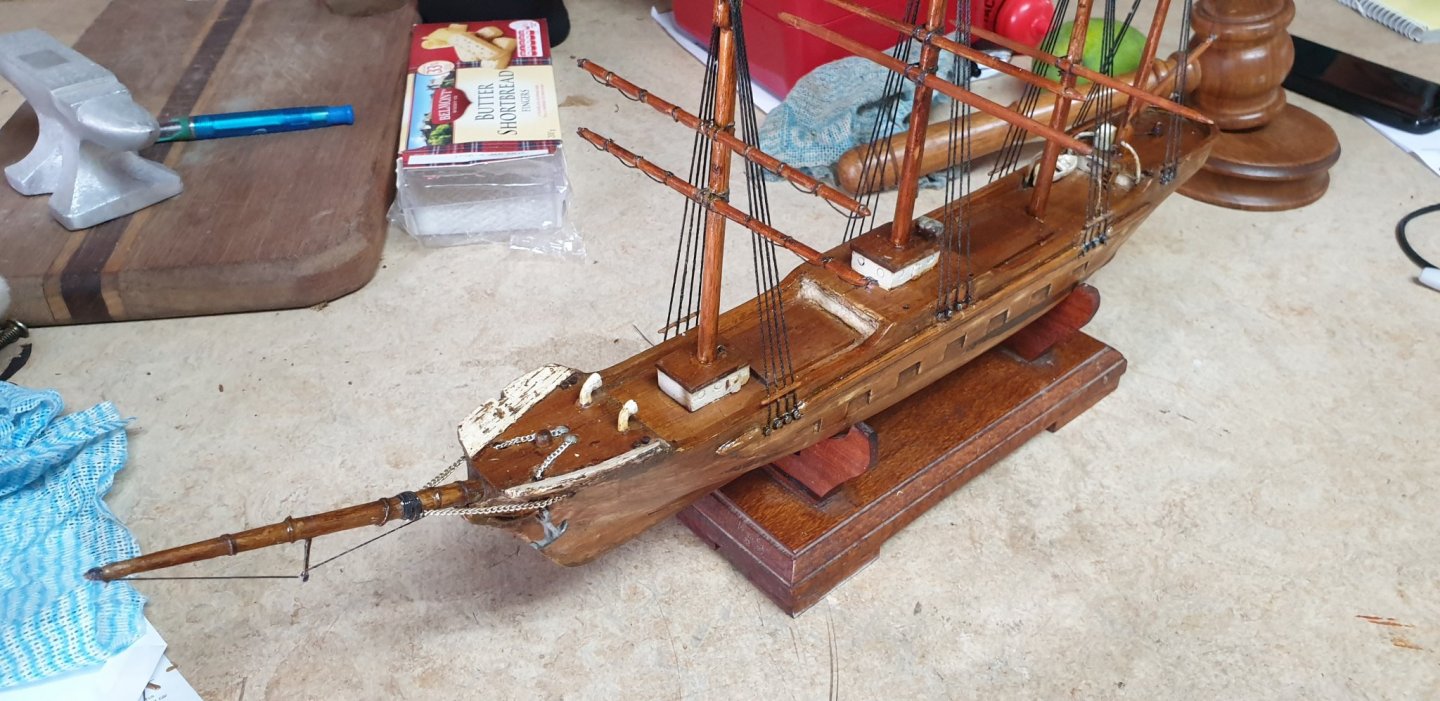
Project done! I have restored it as it was rigged warts an all. A small white boat was missing so a carved up a replacement. Pete
- 10 replies
-
- 2
-

-
- restoration
- finished
- (and 1 more)
-
Roter Löwe 1597 by Ondras71
Peter Cane replied to Ondras71's topic in - Build logs for subjects built 1501 - 1750
Your ship is in order!!! Peter -
Roter Löwe 1597 by Ondras71
Peter Cane replied to Ondras71's topic in - Build logs for subjects built 1501 - 1750
You have even stepped the plank levels for " elevation." I am an ex army gun fitter so I appreciate things " gunnery" Commendable my dear friend. I often wonder what the words of command were from the gunnery officer.. Some thing like " lower plank "" ...or " middle plank " elevation. I am so impressed. You have really thought this out. They will need recoil ropes!!! Superb!!! Pete -
Roter Löwe 1597 by Ondras71
Peter Cane replied to Ondras71's topic in - Build logs for subjects built 1501 - 1750
Beautiful. Don't forget the firing holes!!!! Pete -
Thank you Tony. Guess I do not know where to start when it comes to raw wood. I will go through the list. Pete
-
Hi Tony I am in Narangba. Qld 4504. 40 odd Klm from Brisbane.
-
I have heard of these beautiful woods but unfortunately I do not have the qualities to source them. We can speak of ideal timber but to source them is another tack. Please, if possible, hit me with a supplier. Thanks for your input. Pete
-
I am glad that two people have already said that they thought they were looking at the real thing. That exact thought went through my mind but I did not want to make a fool of myself by asking. This means you have fooled at least three people including me into having thought it was the real thing. That is surely the whole point. What a modeller!!!! Pete
-
Ha ha Yes!!! Lets just say...it's free to swing! Pete
-
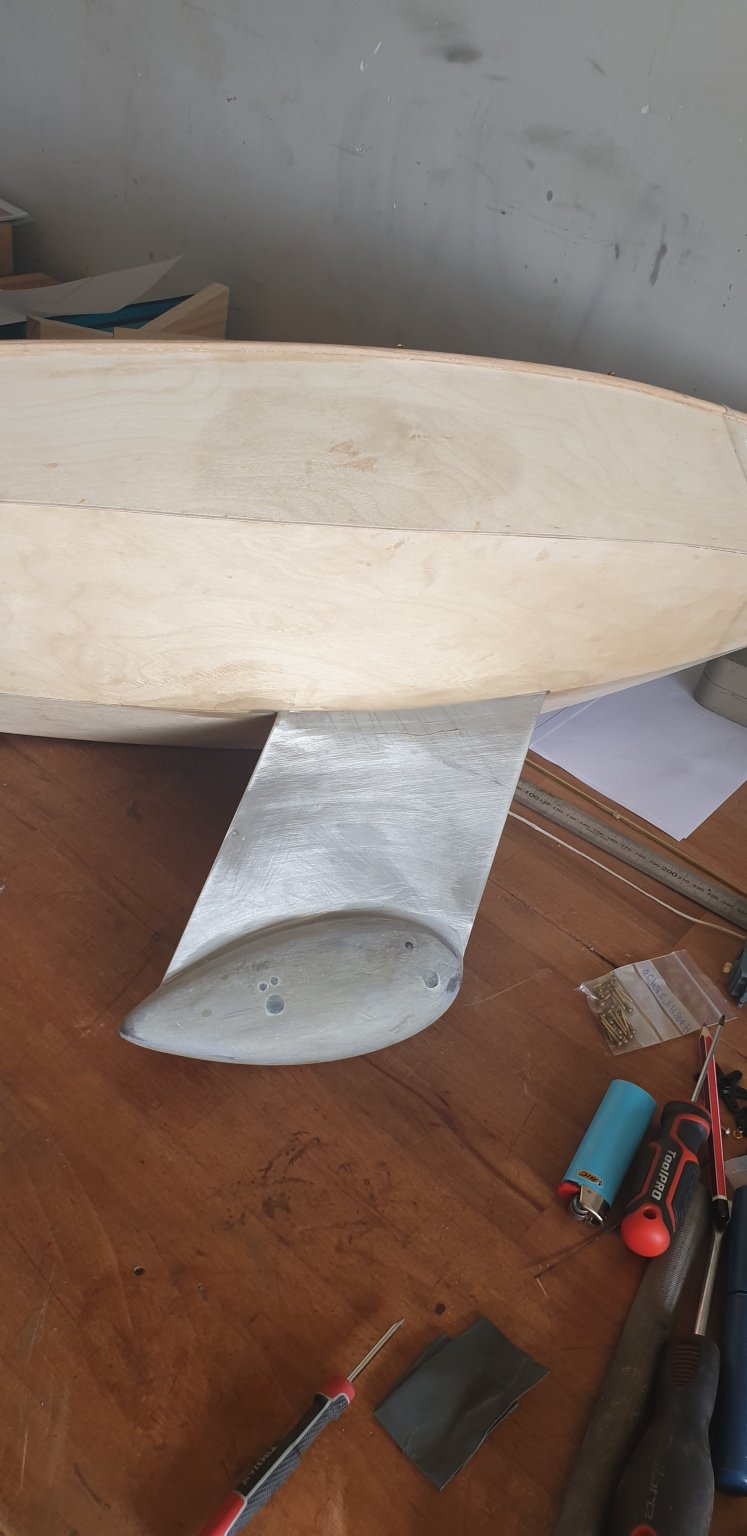
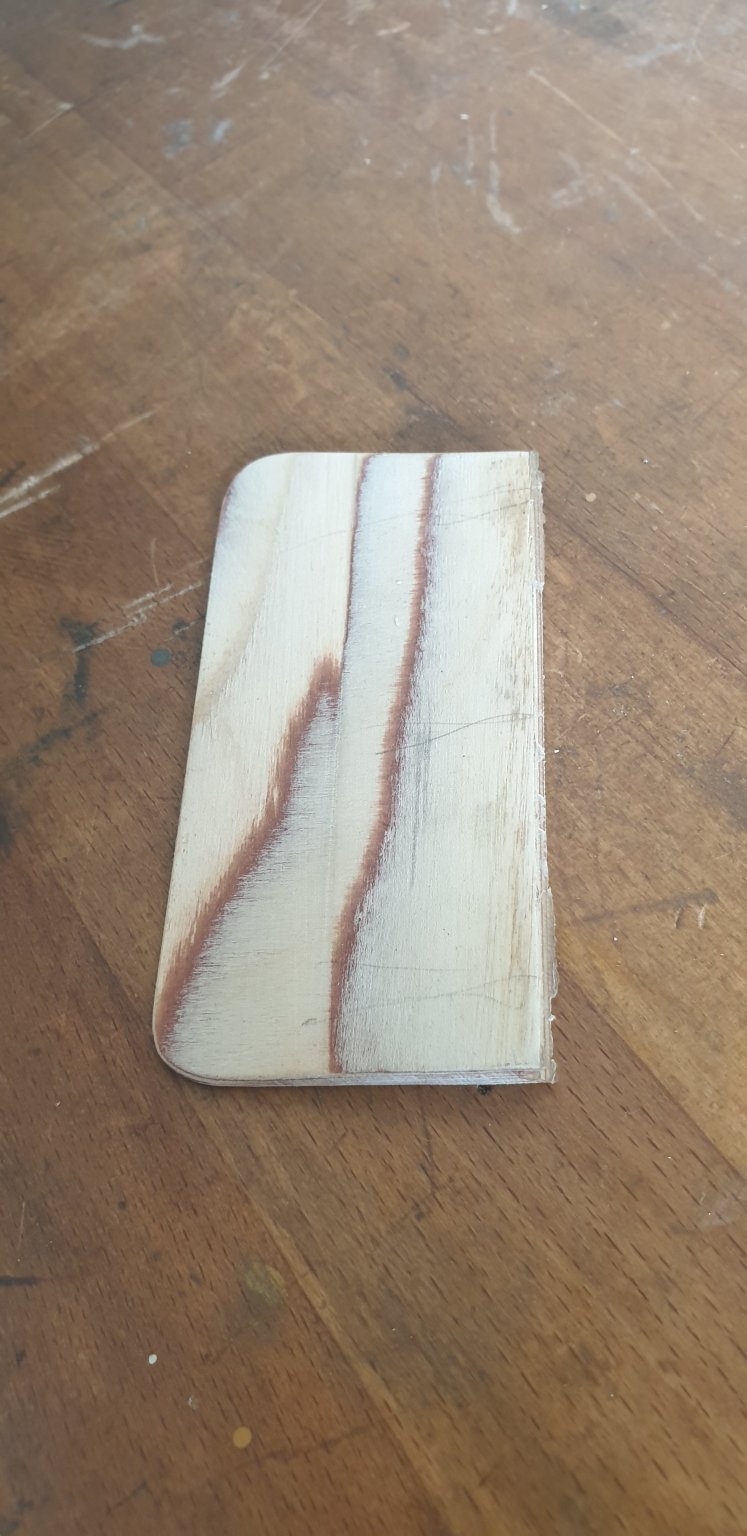
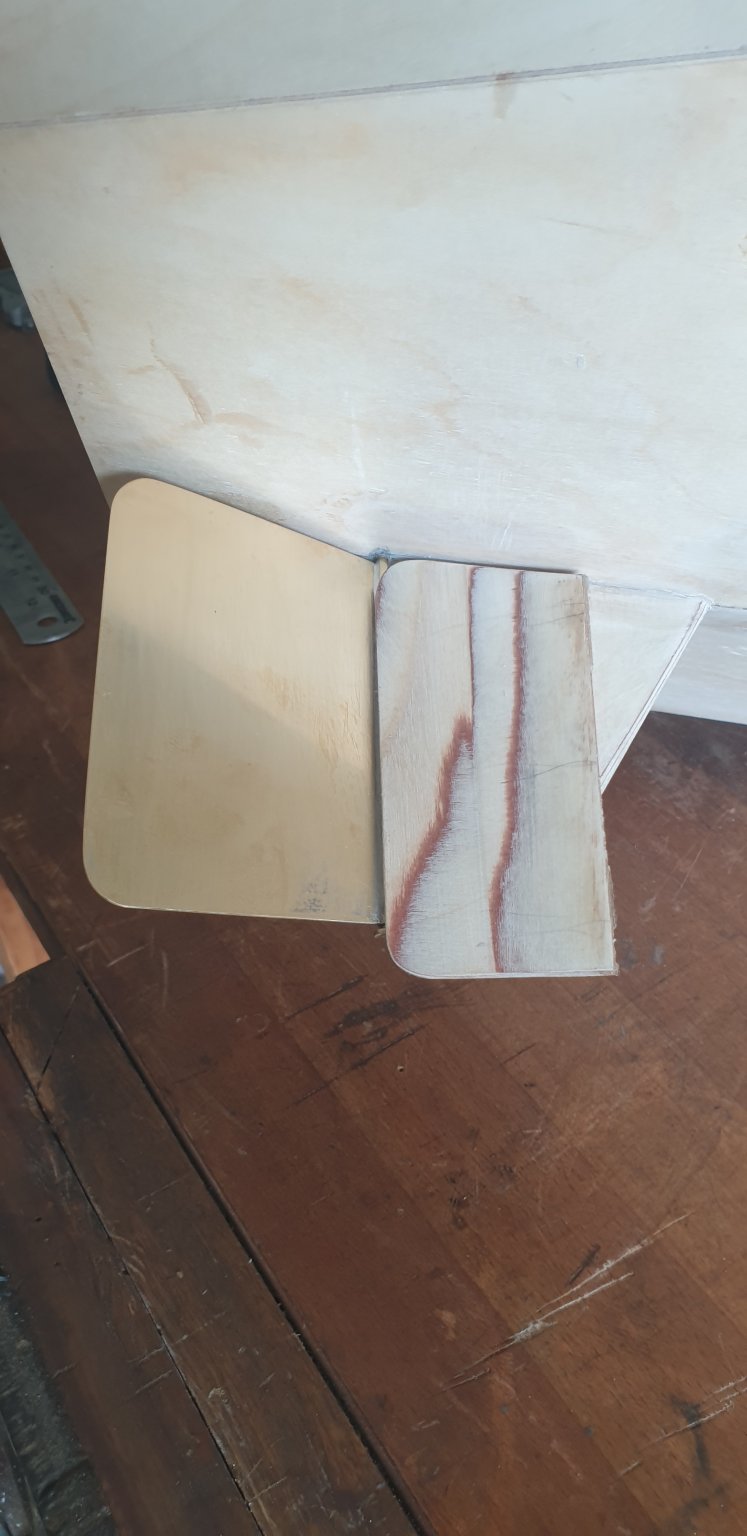
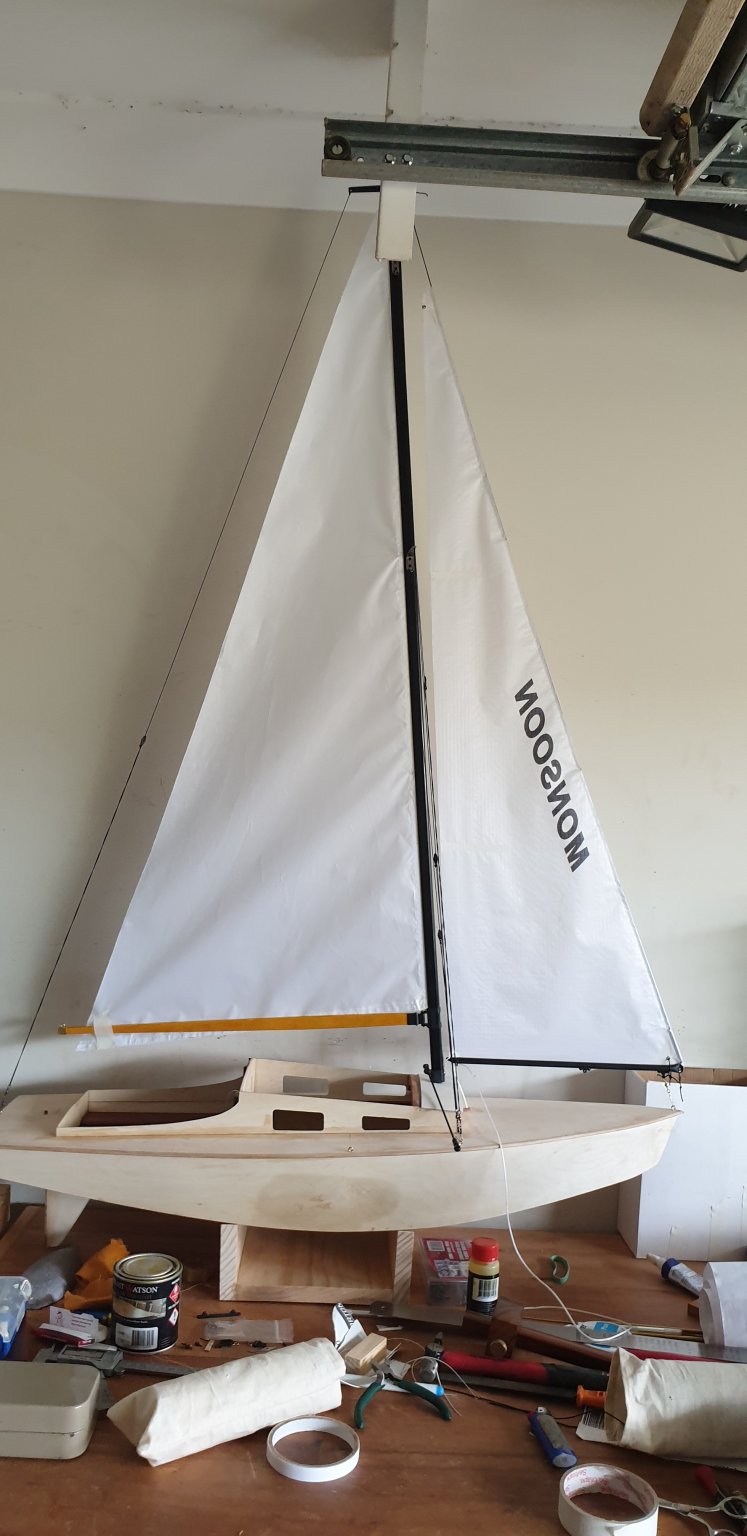
Yes John keep the ol cells working! Thanks all for the likes and nice comments. I did not have any 3/16" birch ply so made the keel from 1/8" ally sheet. It is epoxied into the hull so going nowhere except where the hull goes. The bulb halves are bolted from both sides and epoxied. Then a coat of body filler to smooth everything down. Just a few more rubs now and the hull is ready for painting. My son will two coat it with his spray gun after christmas. I was not sure of the plywood rudder de laminating, maybe parting company with the rudder post because of just relying on epoxy to hold it and also the rudder throw was limited because of the half tube epoxied into the skeg. So I have over engineered it as Aussies do!! and made a solid larger rudder from 1mm brass sheet soldered to the rudder tube. It is NOT going to come off otherwise there will be some hat eating to do. Okay its a bit heavy but I do not think it will have any down sides. I now have 180 degree swing so this boat will definately turn!!!. Pete. Happy christmas my good friends. Hugs all round.

-
Theres a method here. Now if wifey makes the sails she then becomes a part of the model build right? So when it comes to the next one..... There will be no complaints!!!! Merry Christmas. Pete
-
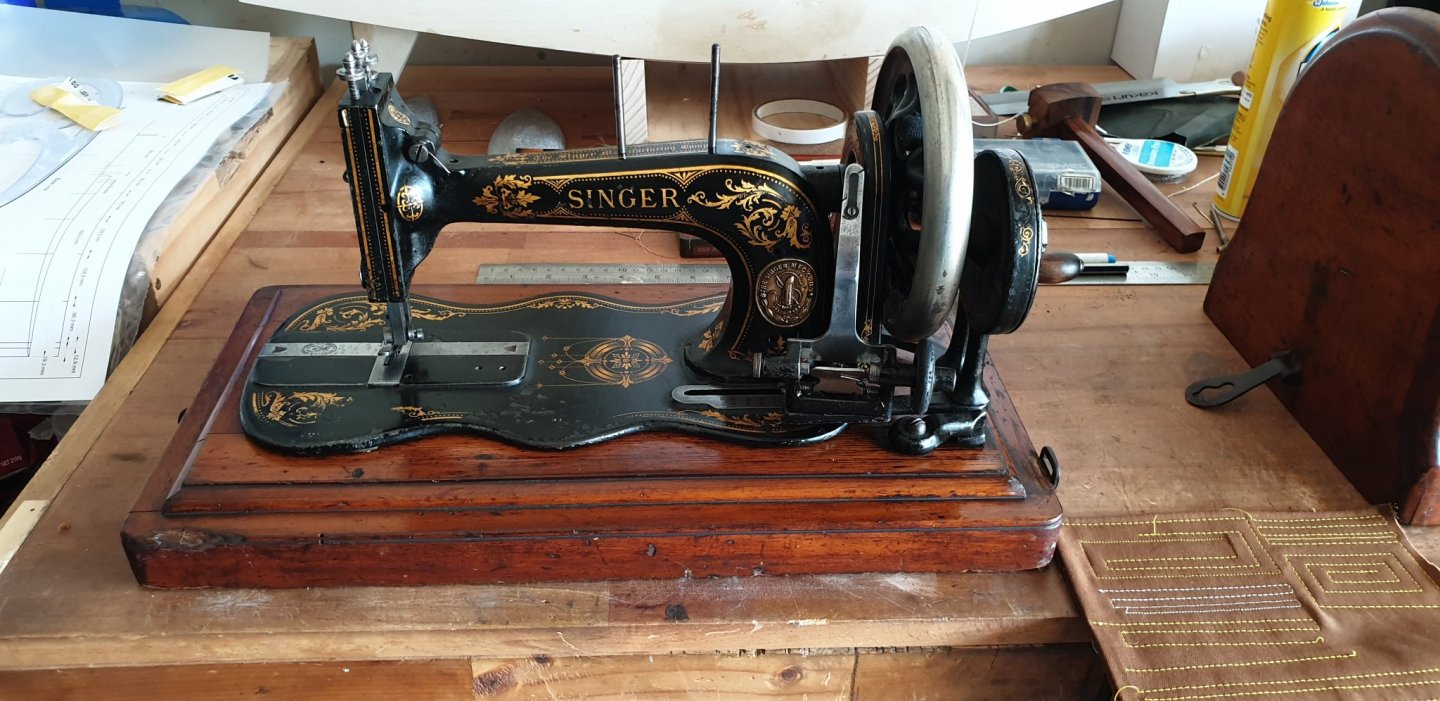
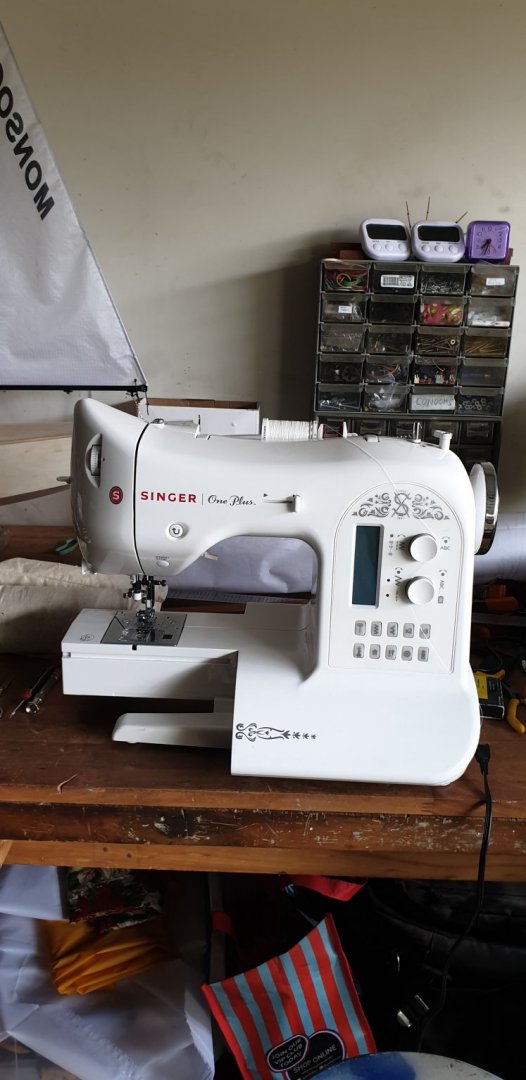
Beautiful rudder and nice knot. My mind goes crazy figuring out how to tie knots. The mere thought of it ties my brain in knots? Re sewing up some sails. Operating a sewing machine is not difficult. All you need is an old straight stitcher. They can be bought really cheaply now. You can get a brand new Singer Starter model now for £50. It is great fun and exciting. If that is an absolute no with you , send the sail plan and I will sew one up for you!. Will not cost you a bean. Pete. I was GIVEN this little beauty three days ago. It is 130 years old and sews a perfectly straight stitch. It was the best machine Singer ever made. It is a hand cranker so I have ultimate control on each stitch. Hope you likey!. How cheap is that?

-
Thank you for your encouraging words. I am not defeated.( Yet) !!! I think in my field of modelling that there is boat building and sail making. Sail making is a whole new and for me, an undiscovered ball game. I am reading up a whole nine yards of material that sends me in circles. I could get Nylet or someone to make me a perfect set of sails but if I did so I learn nothing and satisfaction levels will be Zero. So the bins will continue to fill up. I will have to take this in stages. Stage one is to make simple unpanelled sails from cotton poplin. I have seen Gary Webbs sratch built boats with simple cotton sails sail beautifully. A friend of his built him a set of professional panelled mylar sails and Gary said that yes,....it sails better..." but only a little bit!" Starlet will not be raced so no pressure here and now. I have been invited to join a group that race Marbleheads. It will be interesting to have a fun race with Starlet verses a full on carbon hulled racing Marblehead. The outcome of course will be obvious....but by how many boat lengths? Ha ha. I can see that I may get interested but of course then the sails must be Mylar and panelled. I know the procedures in making the sail block but placing the ideal camber is the art of it. The serious ones of course will not let on else they stand to loose! Win or loose, I am not interested but what intrigues me is HOW they do it!!! I have the plans for a marblehead, made the baseboard and bought balsa wood to plank the hull. It will be 50" long and barely a 7" beam. I will be experimenting with sailmaking for a long time. But thats okay...it keeps the old brain working. Pete
-
Thank you. I am pleased that you like it. It is a basic hard chine easy to build model that will sail really well. It has its own character I think because it looks like a toy yacht!!! If we are honest....us menfolk like toys!!! Pete
-
Roter Löwe 1597 by Ondras71
Peter Cane replied to Ondras71's topic in - Build logs for subjects built 1501 - 1750
I am getting out of the way of that one! You must be having a lot of joy making the cannons. Taper turning can be a pig when on repitition. Excellently executed. Pete -
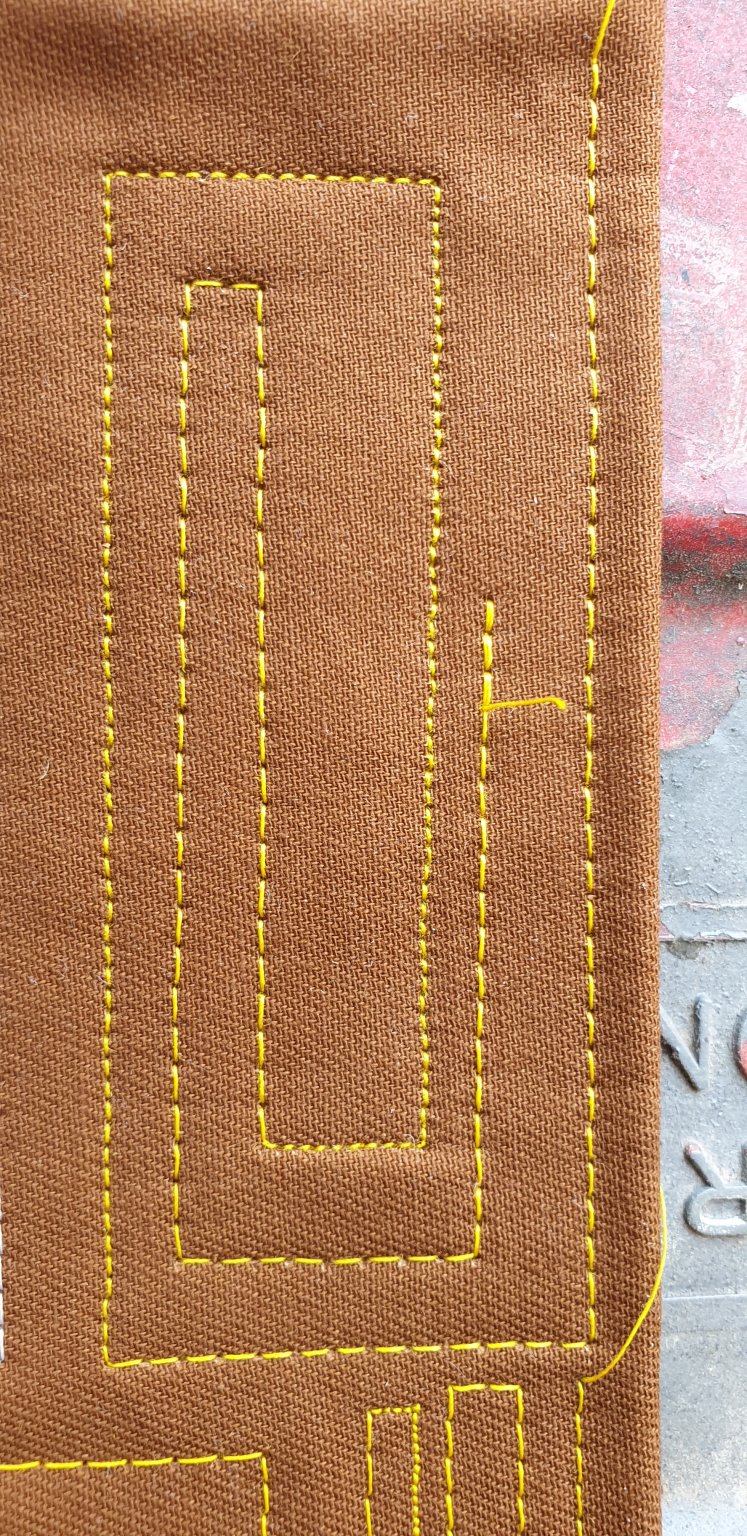
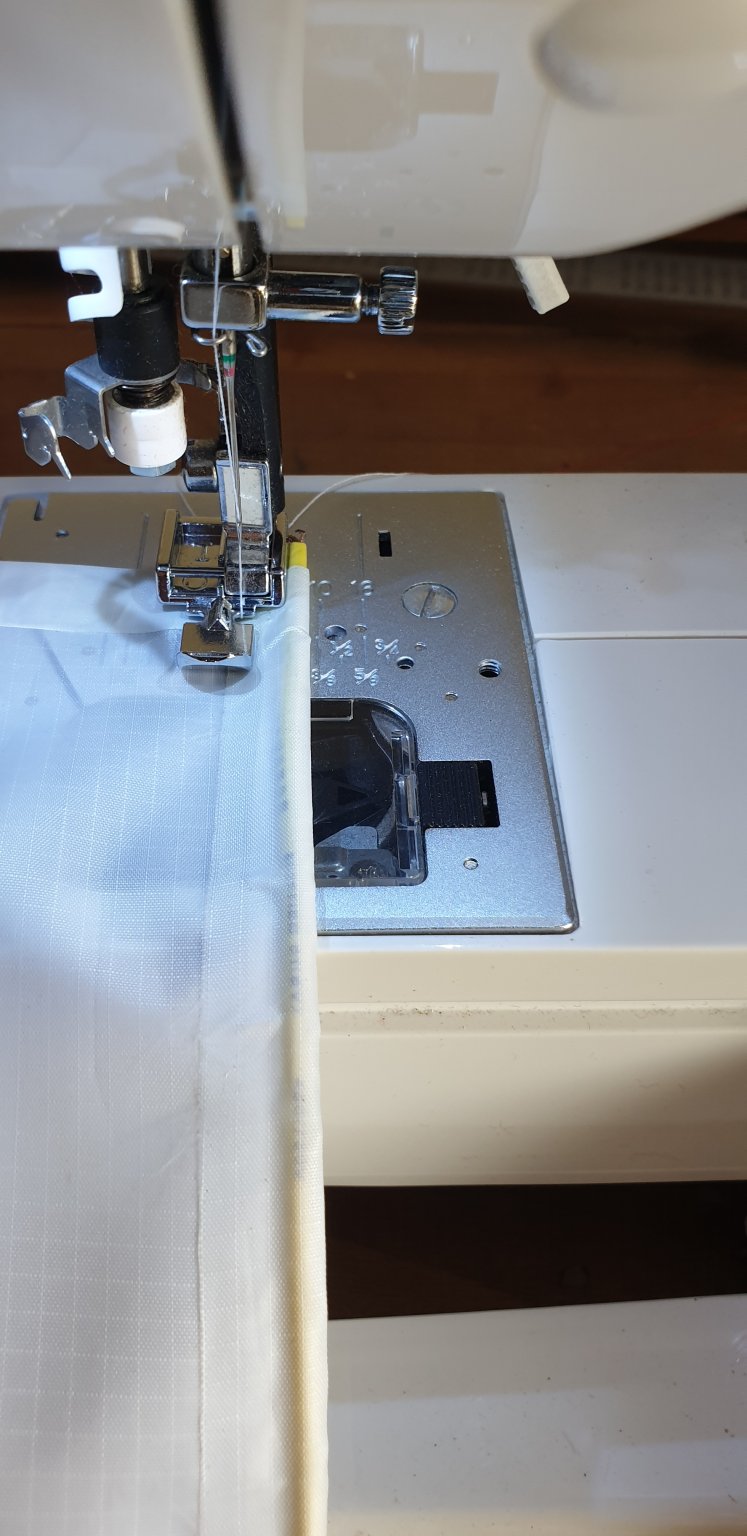
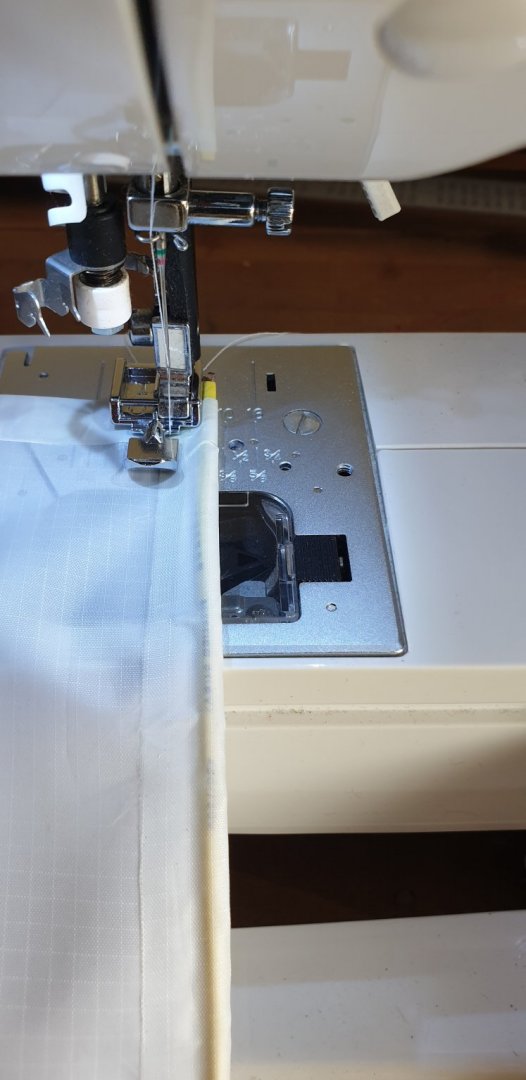
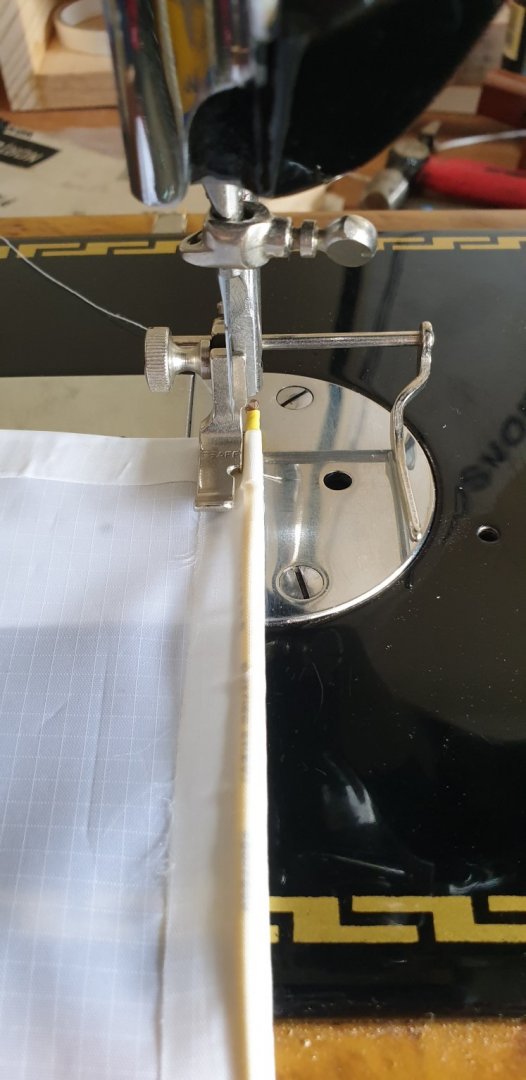
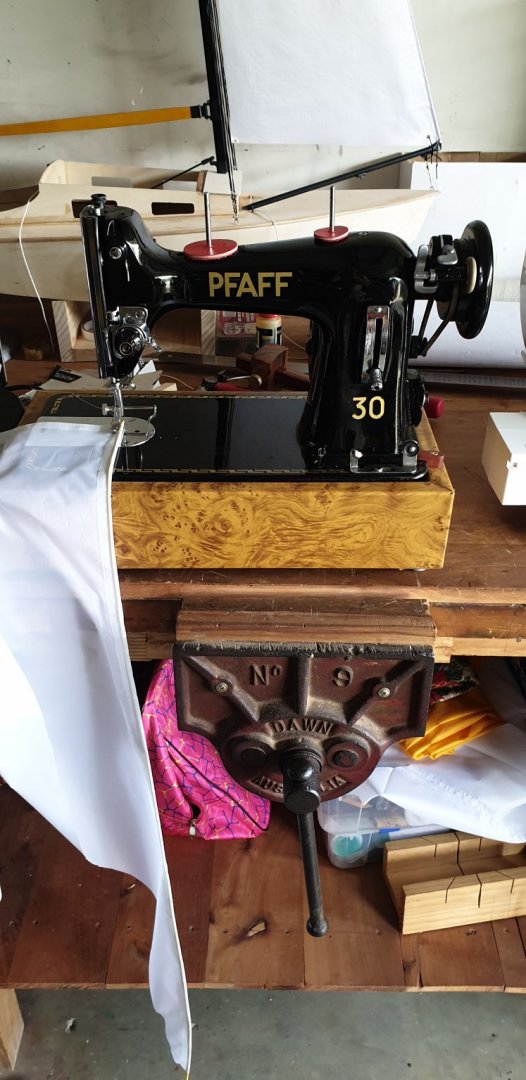
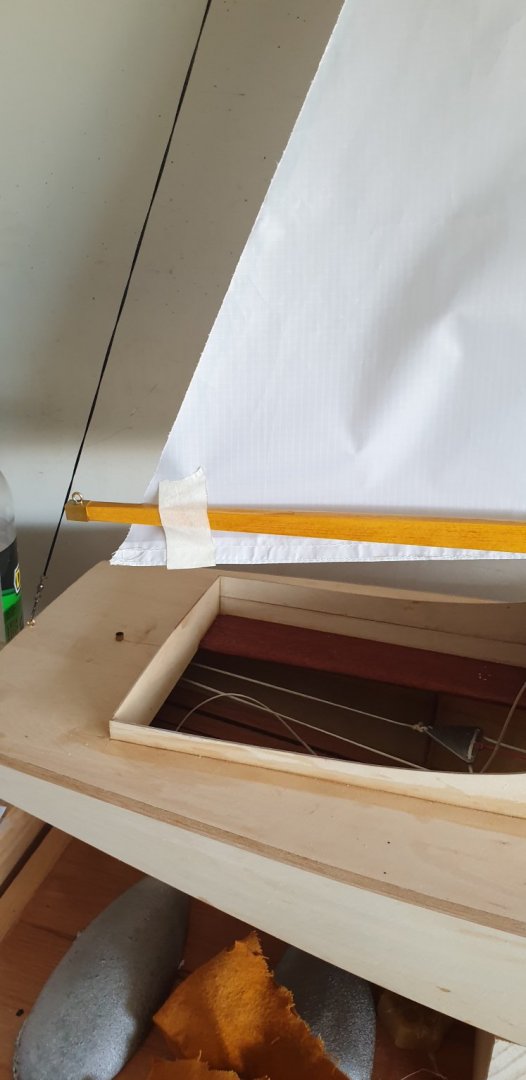
Further to the plot. I am a bit down at the moment because my brain is not working 100% ( never did) and I am making a lot of mistakes. But without these mistakes I cannot learn. So first off I am dry rigging Starlet to get her reasonably right. There is a lot to learn with sail making and I am not close yet...cambers and stuff will come later once I have built a basic sail. I think I have hit on that the most camber needs to be at the leach to create a balloon effect and catch the wind but it also has to let the air escape.... A fine balance that I am studying. Then there is sail twist...OMG I will not be able to sleep! With the old square riggers you make as static models then all what I have said must have been considered by the sail makers. I have made a mainsail from kite nylon. 1 It is not stiff enough. 2 I used double sided tape to form the hems and then over sewed them with the machine. 3 This resulted in wrinkles / puckers which you can see. 4 The sewing machine needle gummed up with the double sided tape and frayed the thread so many times it became exhaustingly tedious. I had to clean out the needle with alcohol on a cloth so many times......this is Not the way ahead! 5 I used the squares in the rip stop nylon as a guide to get a 90 degree luff to sail foot. As you can see it didnt work. 6 I have taped the kicking strap into position so you can see where it is located. 7 The Leach should have a gradual curve.... I forgot to do that. 8 The soldering iron never got hot enough to cut the leach....Aghhh anything else to go wrong? 9. The fabric is too flimsey. 10. I show pictures of my two sewing machines. ( I take great plesure in sewing up my own style Grandpa shirts from linen). You can see that the modern Singer zipper foot got nowhere near enough to sew the bolt rope tightly.... Out comes my favourite 1950s Pfaff 30 with zipper foot. You can clearly see the difference. Many a good tune played on an old fiddle!!! 11. The mainsl is not long enough!!! Finally I am intrigued by your observations of the media I have scattered around my workshop bedlem. I have posted a particular image that ( should ) create some amusement. Lets see how observant you really are!!! So my very good friends, out comes the wine and fags and woah is me!. About the only thing I am happy about is the boom I made. It is quite whacky, long, will cater for max sail area. If the sailors amongst you think its too long then please speak up. It clears the rear stay easily. Pete

-
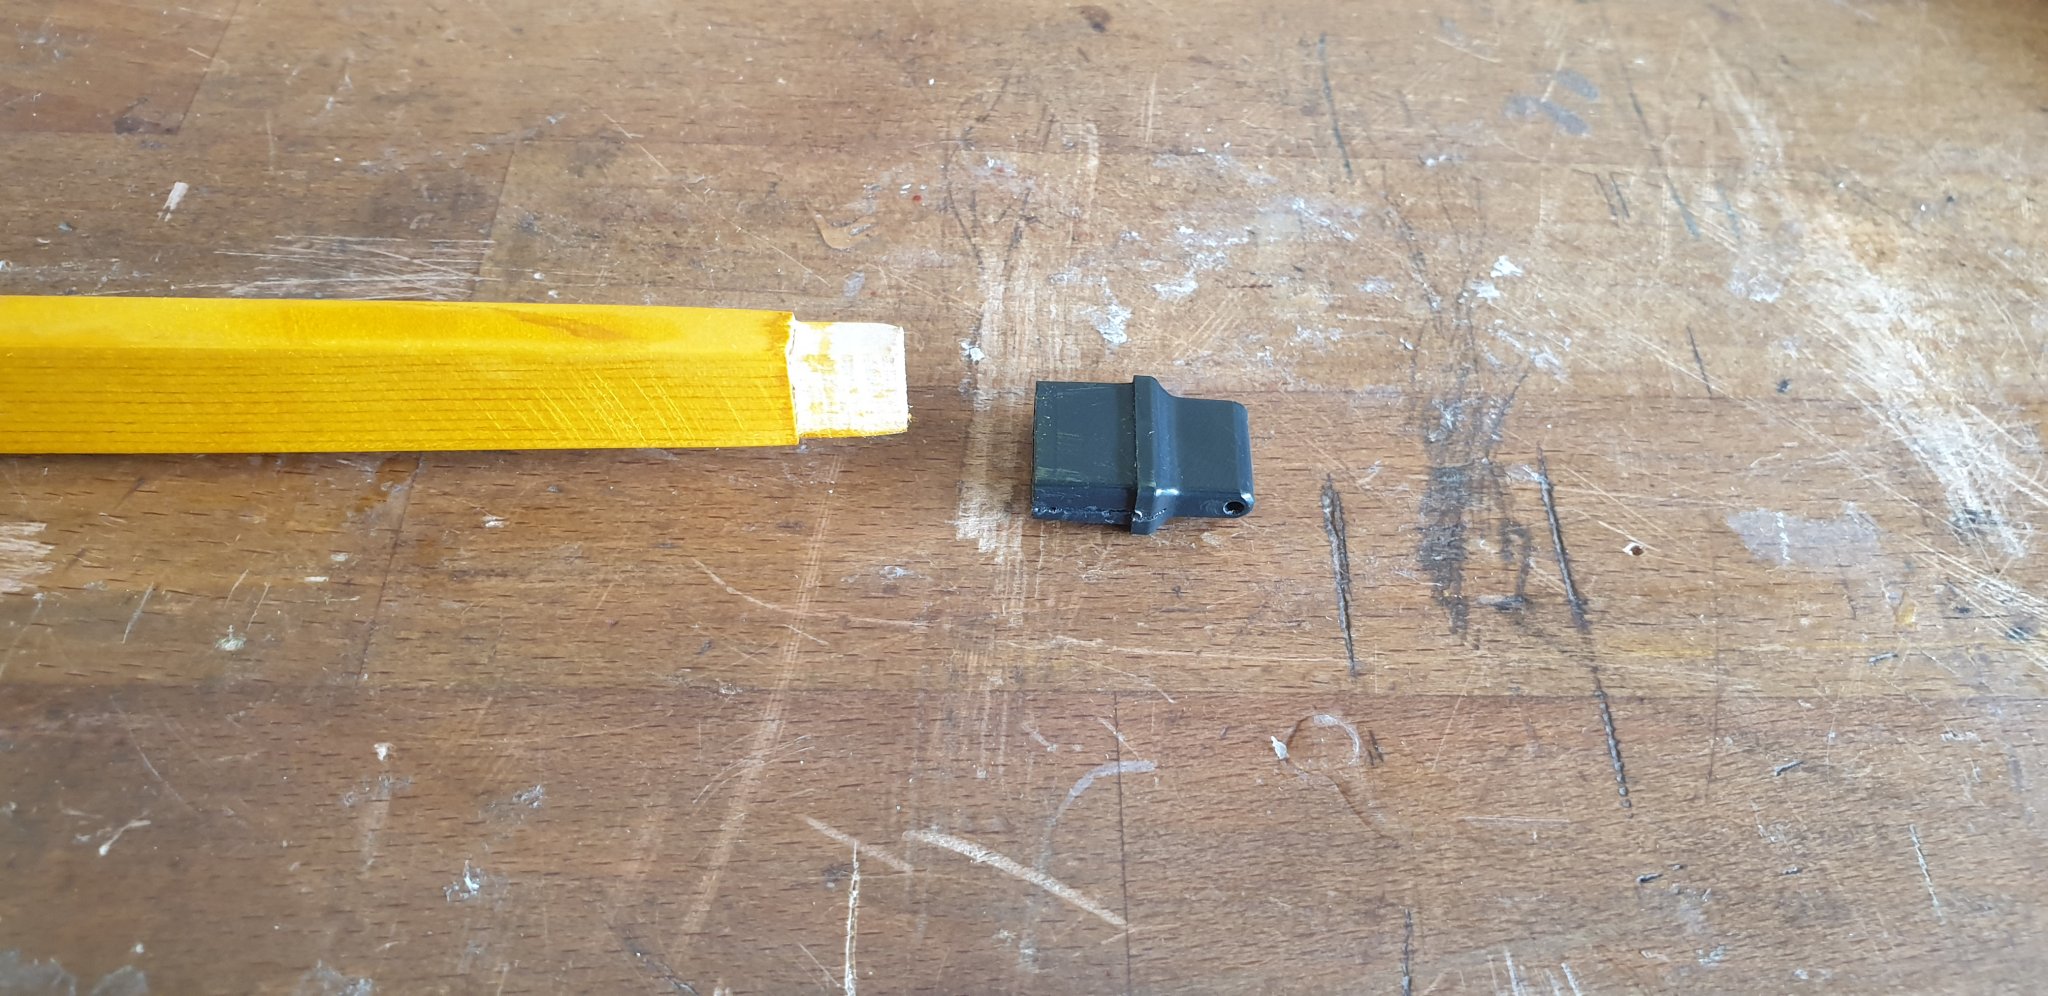
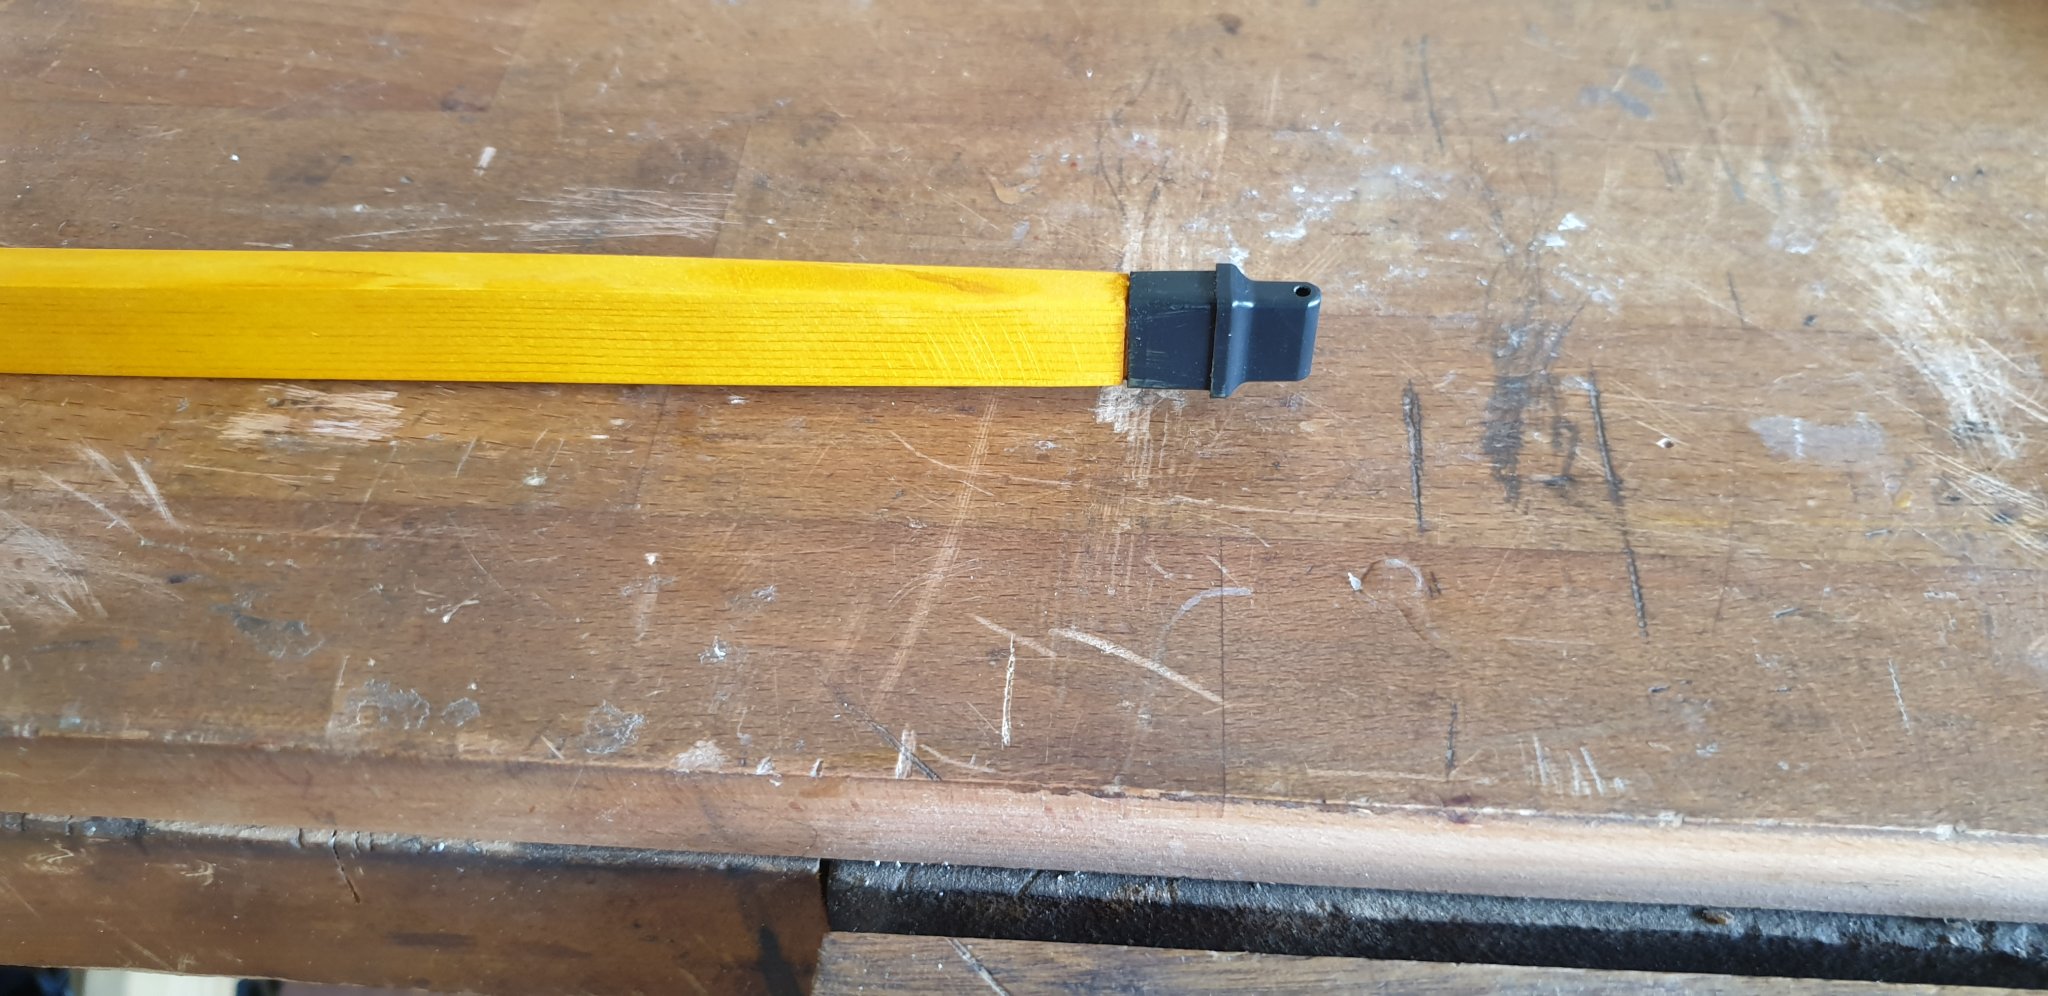
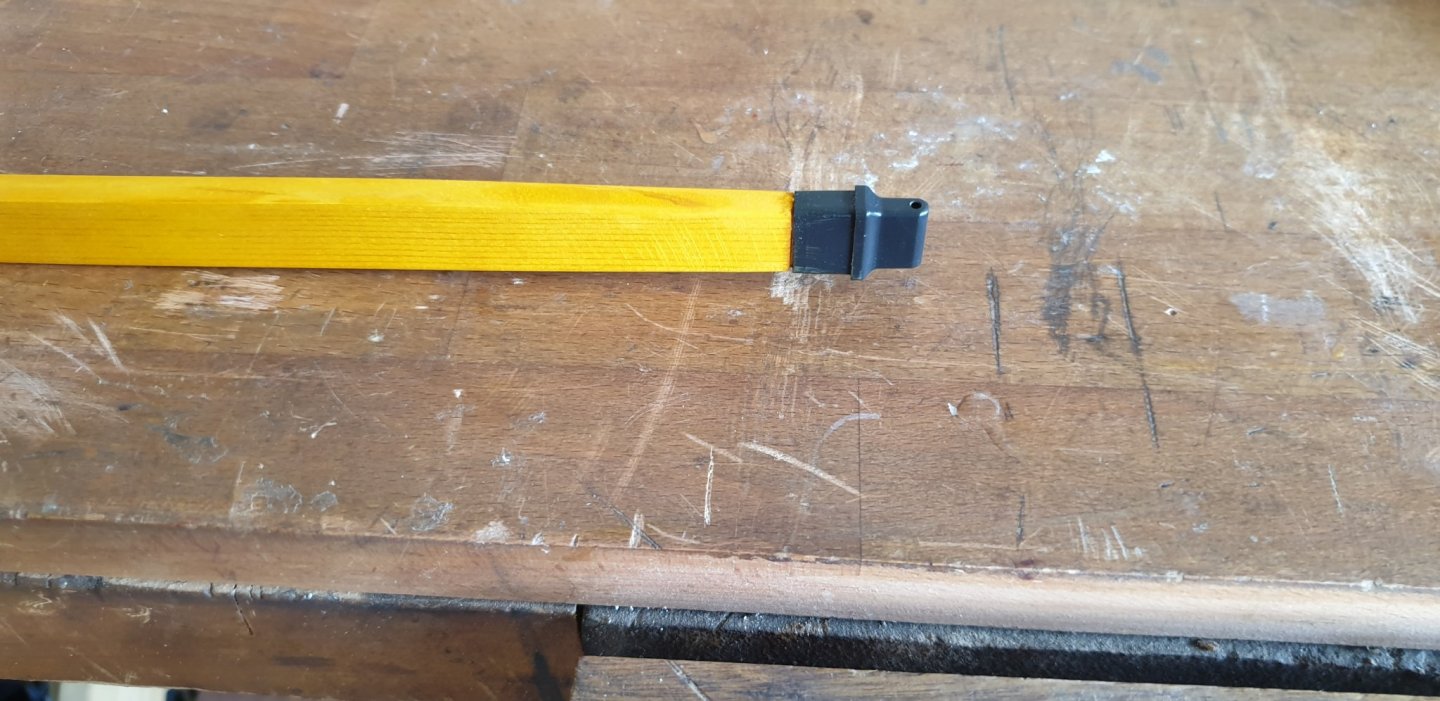
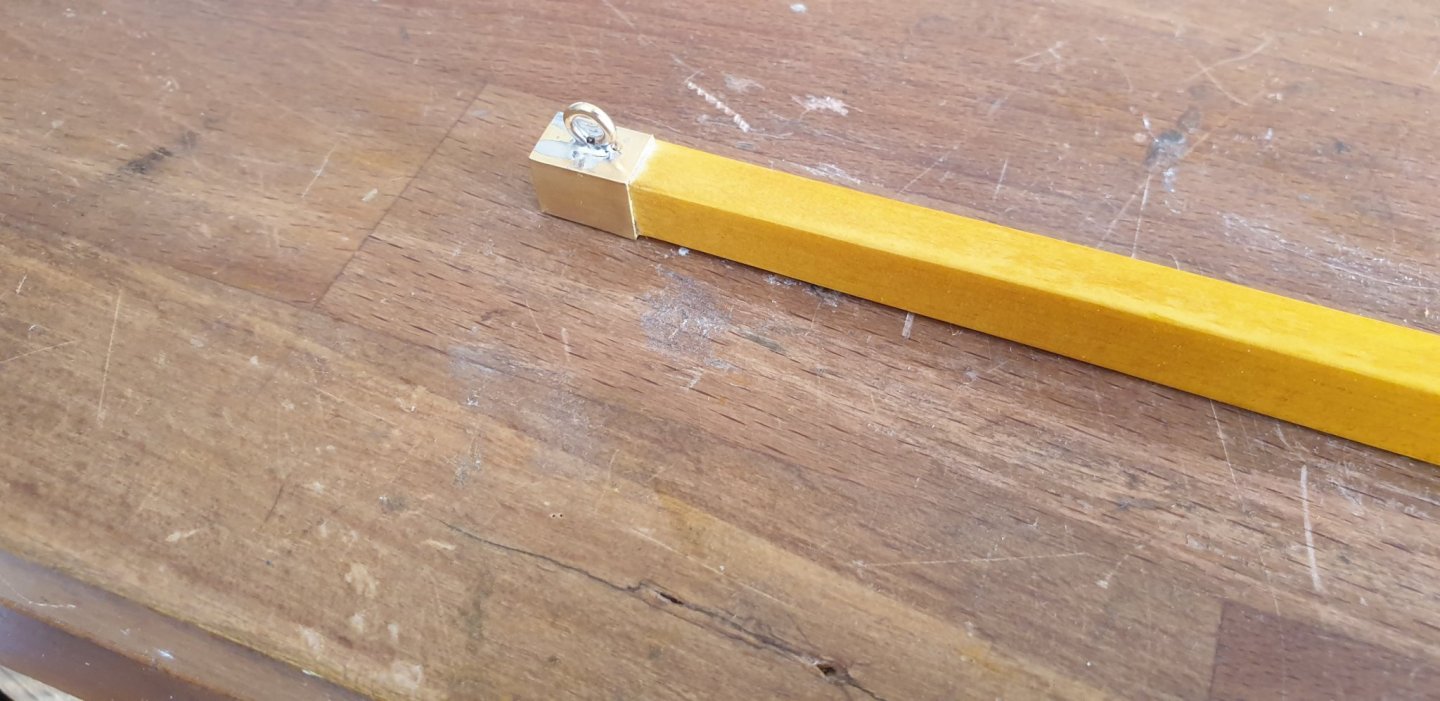
I did not like the black alluminium boom as it was a good 4" short and somewhat heavy. I found a nice piece of Sitka Spruce that is normally used for guitar bracing. I got it from a luthier supplies. It is quarter sawn, strong and very light. I used the original gooseneck but made up a brass wrap to stop the clew out haul brass eye from splitting the end. It is screwed and soldered in. In order to get the sharp corners on the sheet brass wrap I used a dremel with a cutting disc to carefully grind the marked lines to half the depth. It folded nicely after that. Pete

-
How to sew ratlines help needed please.
Peter Cane replied to Peter Cane's topic in Masting, rigging and sails
Thanks for the replies. I am restoring this old but seemly small sailing ship and will " have " to tie clove hitches because the original builder used them . Well he used some kind of knot anyway. I read about splicing on the originals. On this scale I would end up tearing my hair out!!! Pete -
How to sew ratlines help needed please.
Peter Cane replied to Peter Cane's topic in Masting, rigging and sails
The picture speaks a thousand words. It makes good sense to tie the inner rat lines first and leave the outsides longer so as yo clove hitch the outer lines and glue them to prevent unknotting with diluted pva. Thank you. I will try with just tweezers and if all works well I will box away the medical stuff until I go on my brain surgery course. Pete -
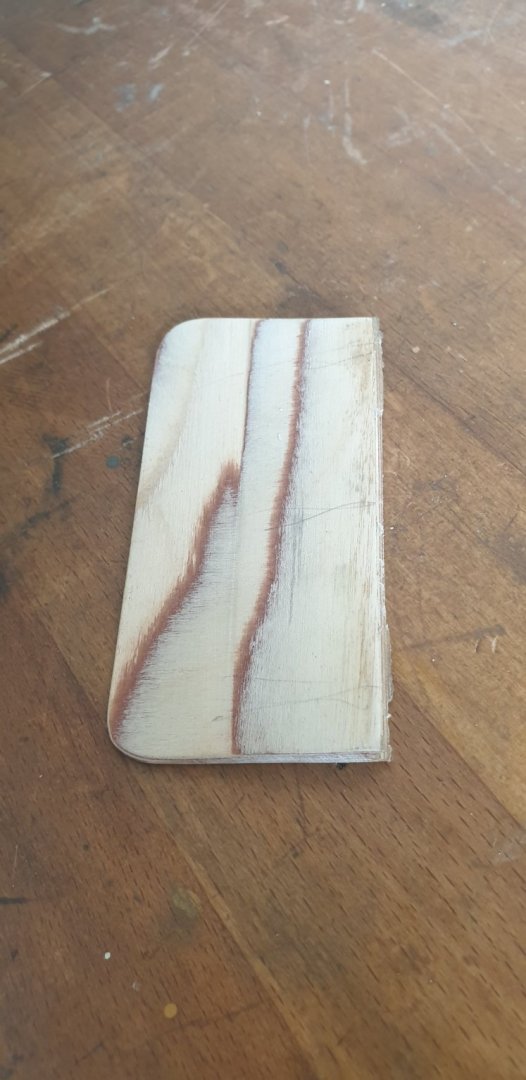
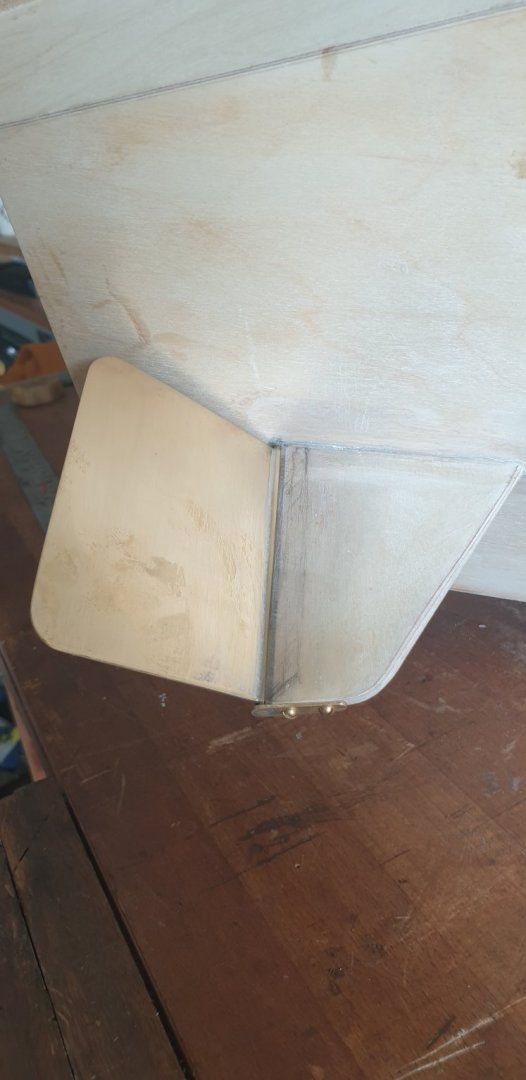
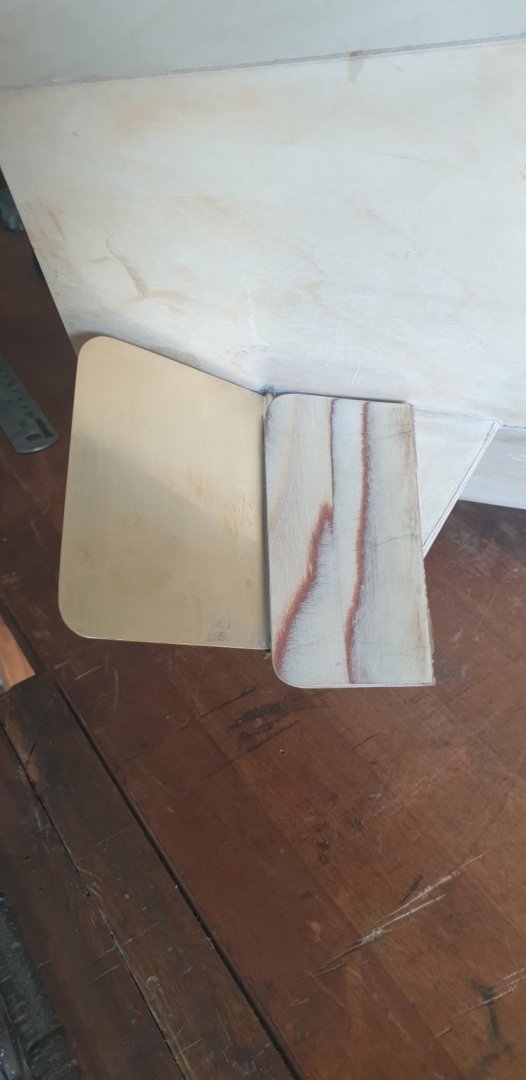
That is a very good point and well observed Sir! I thought the same but the plan does not call for a mast post unless I have missed it. The fore cabin strengthener on the plan is but one 3/16" shaped spar and then the 1/16" birch ply deck. I have actually " beefed" up the plan recommendations by fixing in a somewhat sturdier cross brace and extra T piece system adjoing it directly under the mast. The pieces are of red cedar which is strong and light and Also sawn to the shape of a suspension bridge which I thought should do the job. However I am all ears to hear if a mast post should be incorporated. Pete
-
Hi. Yes Seccotine no longer comes in the lead white and blue tube but in a small glass bottle. I think I am accurate in saying that there is only one place now in the whole world that can supply it. Cornellisen in London. Its reasonably priced at about £8 a jar which goes a long way. If you are in UK postage is doable but here in Oz we take a caning every time!! The shortbreads are for my work mates where I do volunteer work. An Englishman rarely shares his shortbreads. But I am a kind old fella ha ha. Pete
- 10 replies
-
- 3
-
-
- restoration
- finished
- (and 1 more)
-
I have done some reading about this and have found out the following. 1 It is good to practice suturing with surgical instruments. 2 The rat line knots are clove hitches. Okay so I have just ordered some curved surgical needles and a surgical needle holder but still require more in depth wisdom. How do you start the knot? Do you tie a row of clove hitched rat lines and then a finishing knot, snip off and start the next row? I will be extremely grateful for a short video on this if anyone would oblige. Do I need surgical curved needles? Any help greatly appreciated. Pete
-
Thank you. I will relay your interest. I do not quite know the sequence of sewing in the rat lines on the shrouds. Is this done with a needle and cotton with one long length and the surpluses snipped off after the knots are glued? Any help on this will be much appreciated. Pete
- 10 replies
-
- 1
-
-
- restoration
- finished
- (and 1 more)
-
This is what I have done so far. I am restoring it as it was so there are warts!!! Makes it easier for me as well as I also have them. Funny...when I do stuff like this I am always imagining the guy that built it and the joy it will bring. ( well hopefully) I am using Seccotine glue I had sent to Oz from London. I was explaining about the properties of this fine glue to a work colleage who was an industrial chemist. He was so intrigued he is going to do a write up ( thesis) about it!....wow!!! Isnt that nice? For anyone interested he has allowed me to publicise it on this forum when he is finished. Seccotine is a fish based glue that has a longer setting time than other glues which helps immensely ( I imagine) with rigging a model ship. Another smarty on learning it is fish glue asked where the fish were???... bit quick for me! Pete

- 10 replies
-
- 4
-
-
- restoration
- finished
- (and 1 more)