HOLIDAY DONATION DRIVE - SUPPORT MSW - DO YOUR PART TO KEEP THIS GREAT FORUM GOING! (Only 24 donations so far out of 49,000 members - C'mon guys!)
×


Peter Cane
-
Posts
240 -
Joined
-
Last visited
Content Type
Profiles
Forums
Gallery
Events
Everything posted by Peter Cane
-
I know its a static model but I cannot see any reason why this little beauty should'nt sail?. Just now and again. Just tie the rudder arm up as they did and let her go to the other side of the pond. Nothing should go wrong. Its made of oak!. Magnificent work. Sorry if I have offended but that is exactly how realistic she looks...you've done it!!!! Pete
-
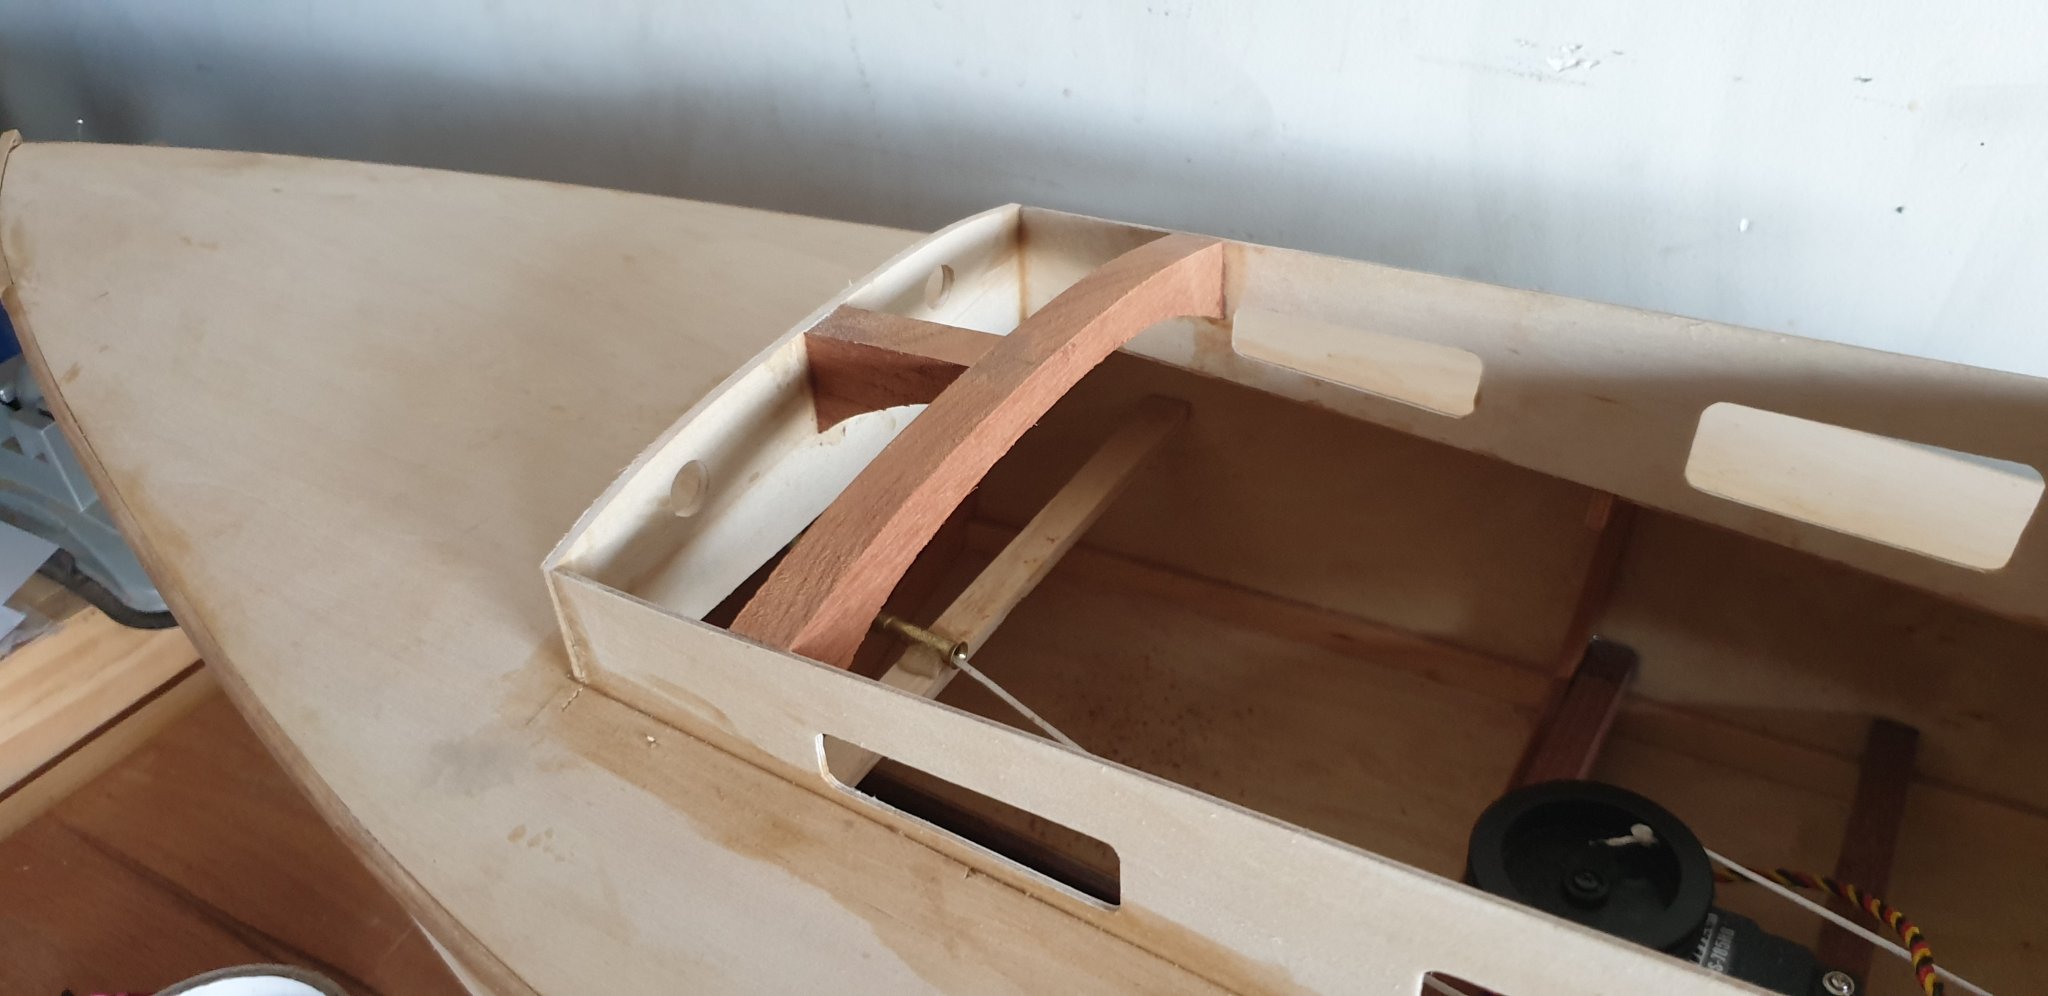
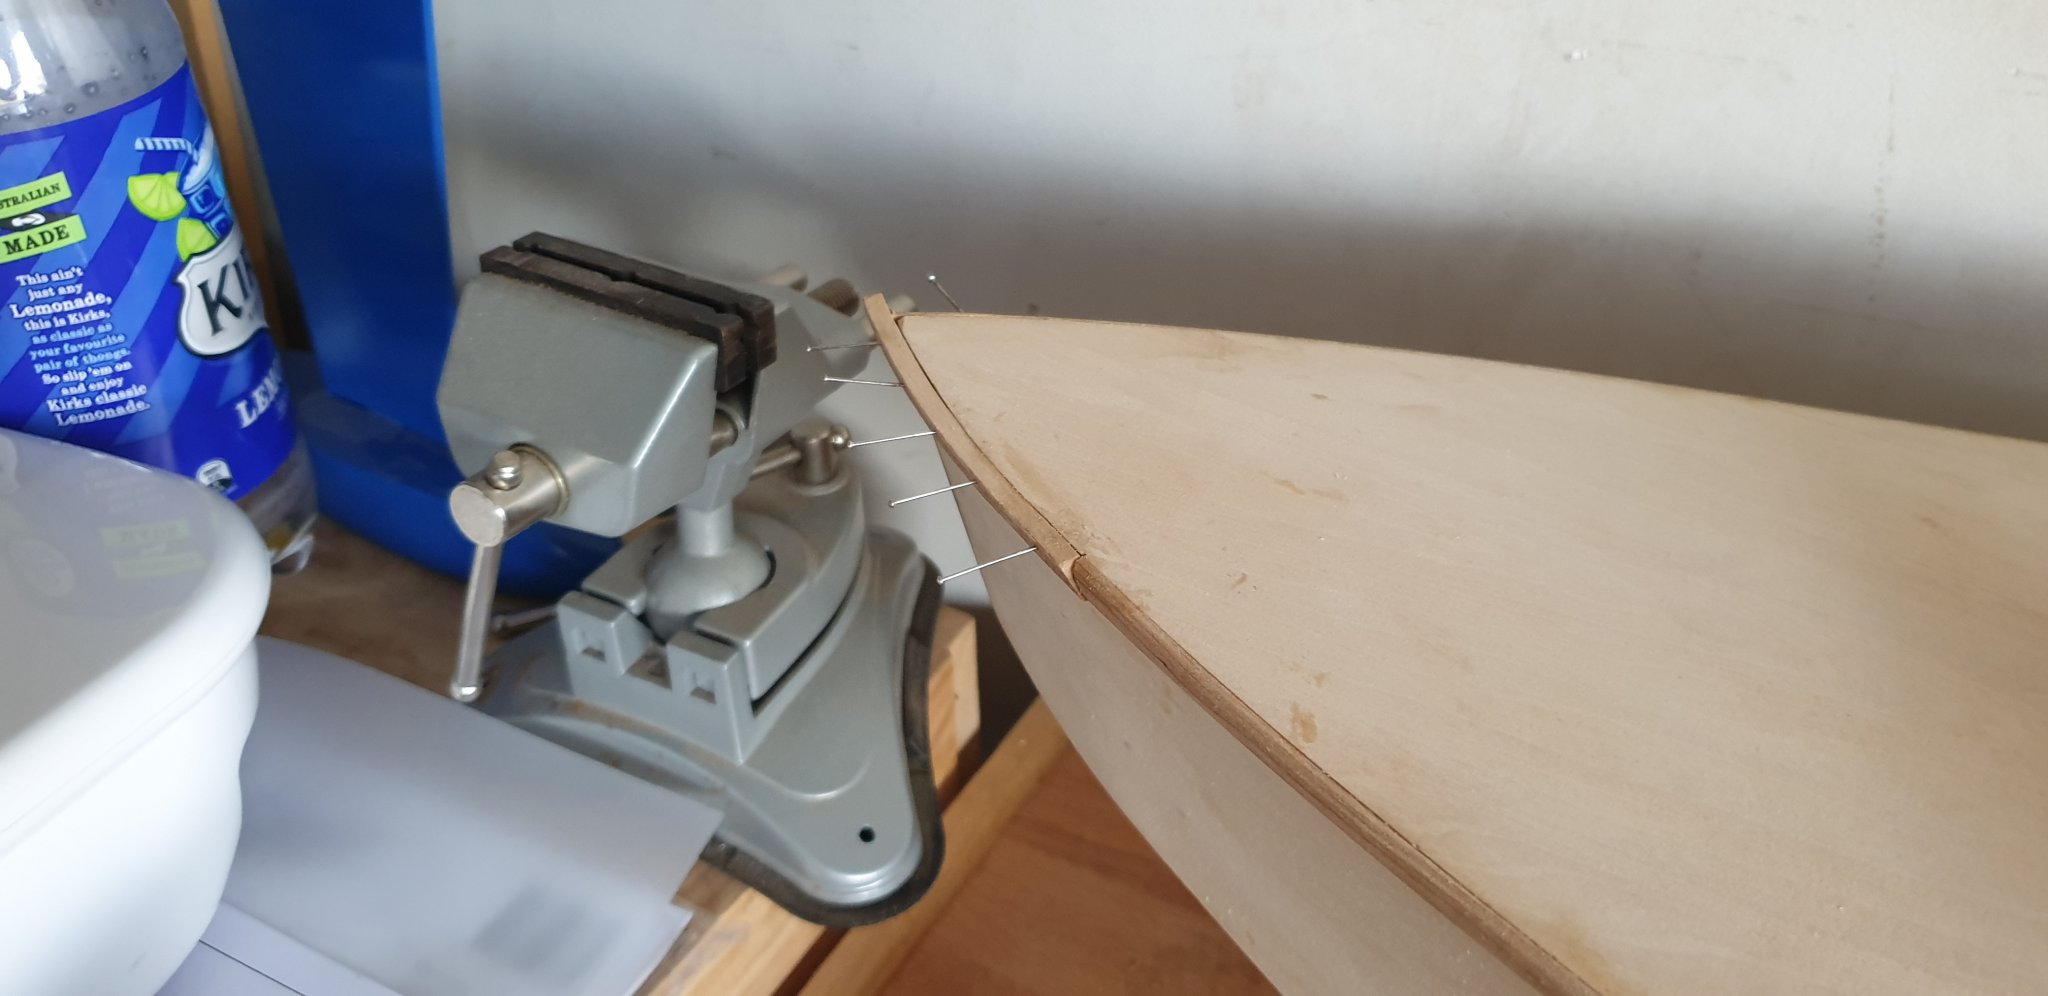
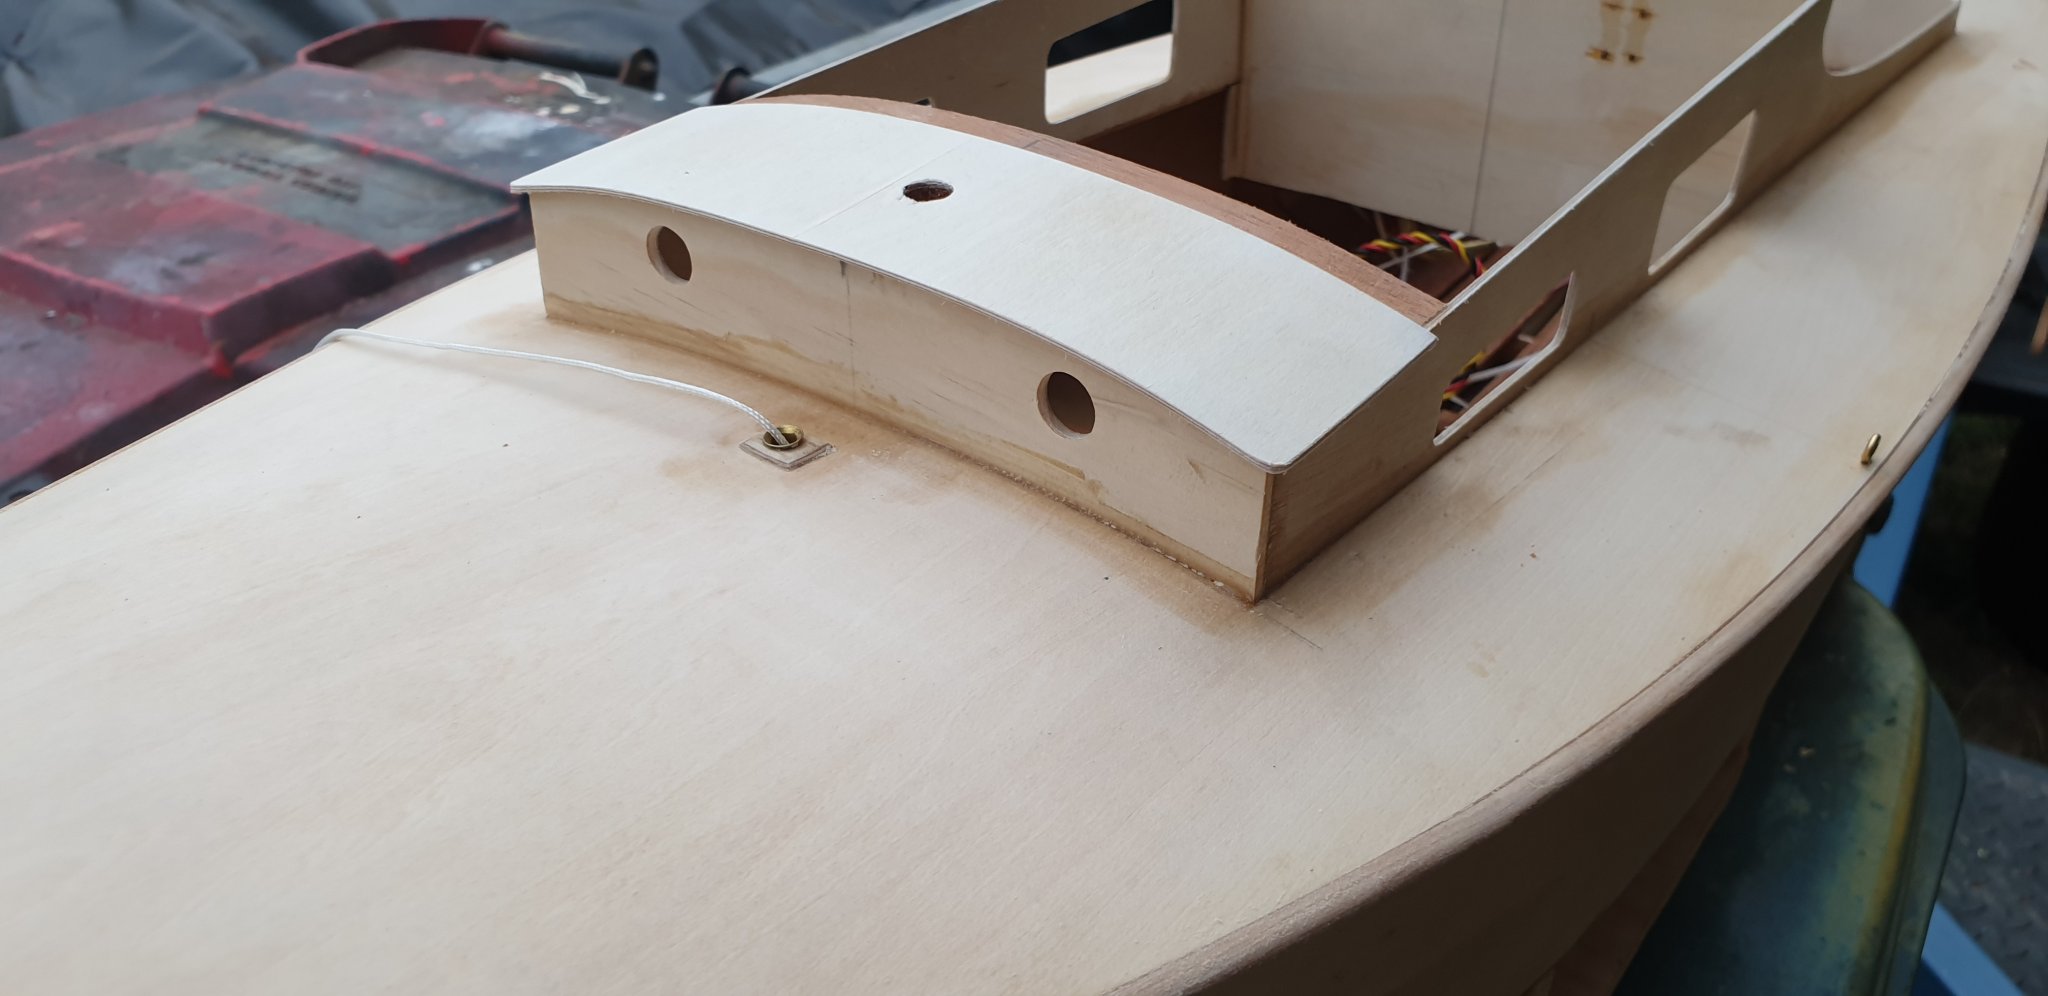
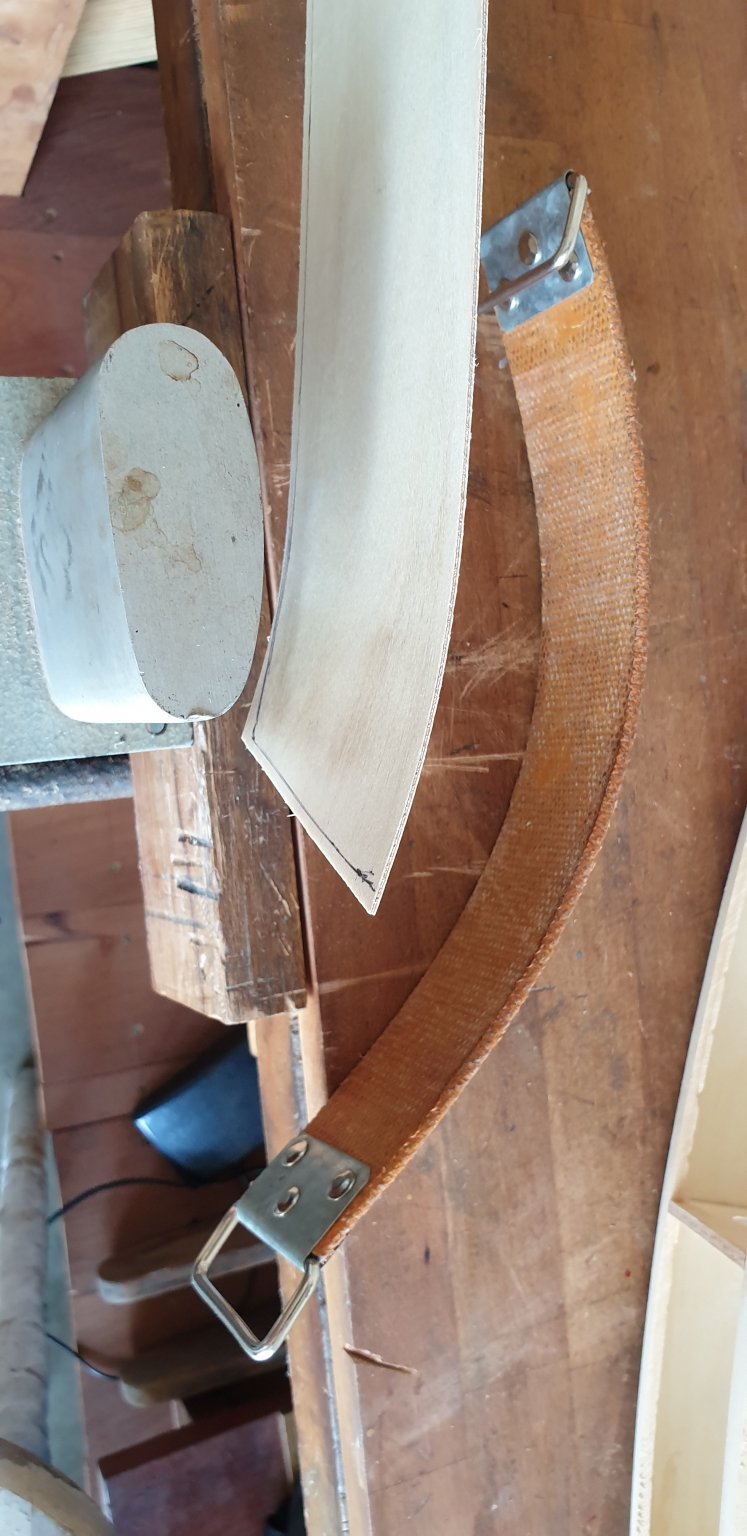
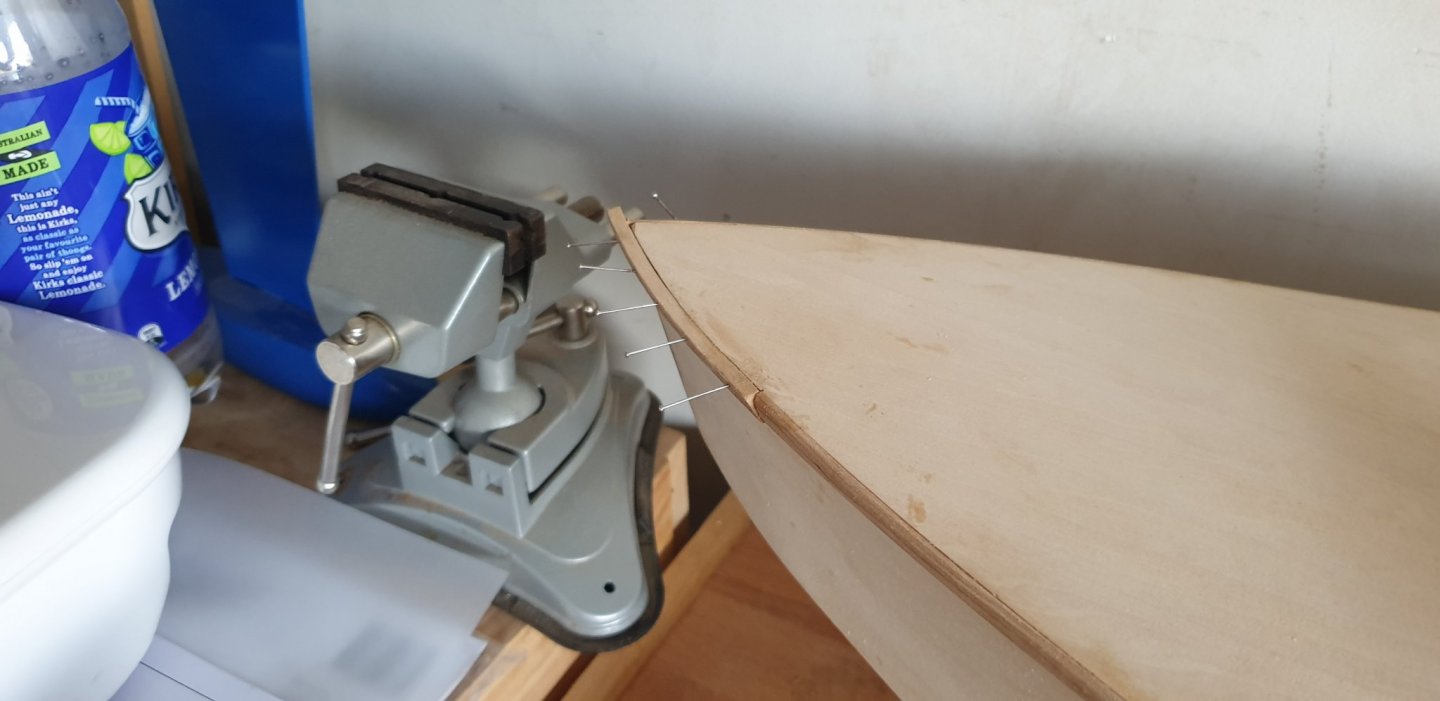
Starlet decided that she would have a go at flying but unfortunately because she is not fitted with wings she hit the garage floor full on the nose / beak!!...stupid boat!!! I am so pleased I fitted a rubbing strip. There are a few pics of the repair. Meanwhile the mast step has now been made and the fore cabin that is not removeable, fixed in position to house the mast step. I have beefed it up a bit from the plan. I was given a fully sailing radio controlled yacht complete with working radio, servos and a good hefty winch! I have stripped it down and Starlet will now have a super mast from the gift yacht. I am having megga problems trying to find spruce out here for the mast and boom etc so this gift yacht was a godsend. Saves me the headache searching. There is a lot to be said for " kits" whereas everything you need is in the box! The mast is grooved to take the luff so that is a big bonus. It is also fitted with a boom and sails plus all rigging. Starlet will now have a free set of sails. I will have to alter them slightly. I had to shorten the mast top by 4" which was a breeze. I am now in the process of dry rigging her to make sure everything fits. Pete


-
Thanks Pop. I will give it some thought. My son came up with " stick two people in it Dad...one esch side" Never thought of that one. I may be a bit quiet for a bit as Christmas is nearly on us and I have to make some presents. Pete
-
Damn..I have failed again!!!. Ha ha. Thanks John Pete
-
I knew if were to mention " steam pipe" I would gain your attention Michael!!!...ha ha. I am pleasantly surprised how she has turned out. Thanks. Pete
-
Thank you for the likes and comments. I have added a duck board and companion way. It is set to the left so the skipper does not hit his head on the boom!....ahem!. You can now have a better idea on how the sheeting will work and I have upgraded the twine for some heavy duty stuff. All tested with the radio and works. Thats about it for cockpit adornments and I think it gives the impression intended. I want to make and fit a skipper though. I see so many beautifully made boats but no ones driving em!!!! I have an idea to swivel him on a weighted pendulum so that he swaps sides according to the heel. The theory of it is in my head but I will have to make a mock up first. I hope you like my flanged brass steam pipes!!! Pete.
-
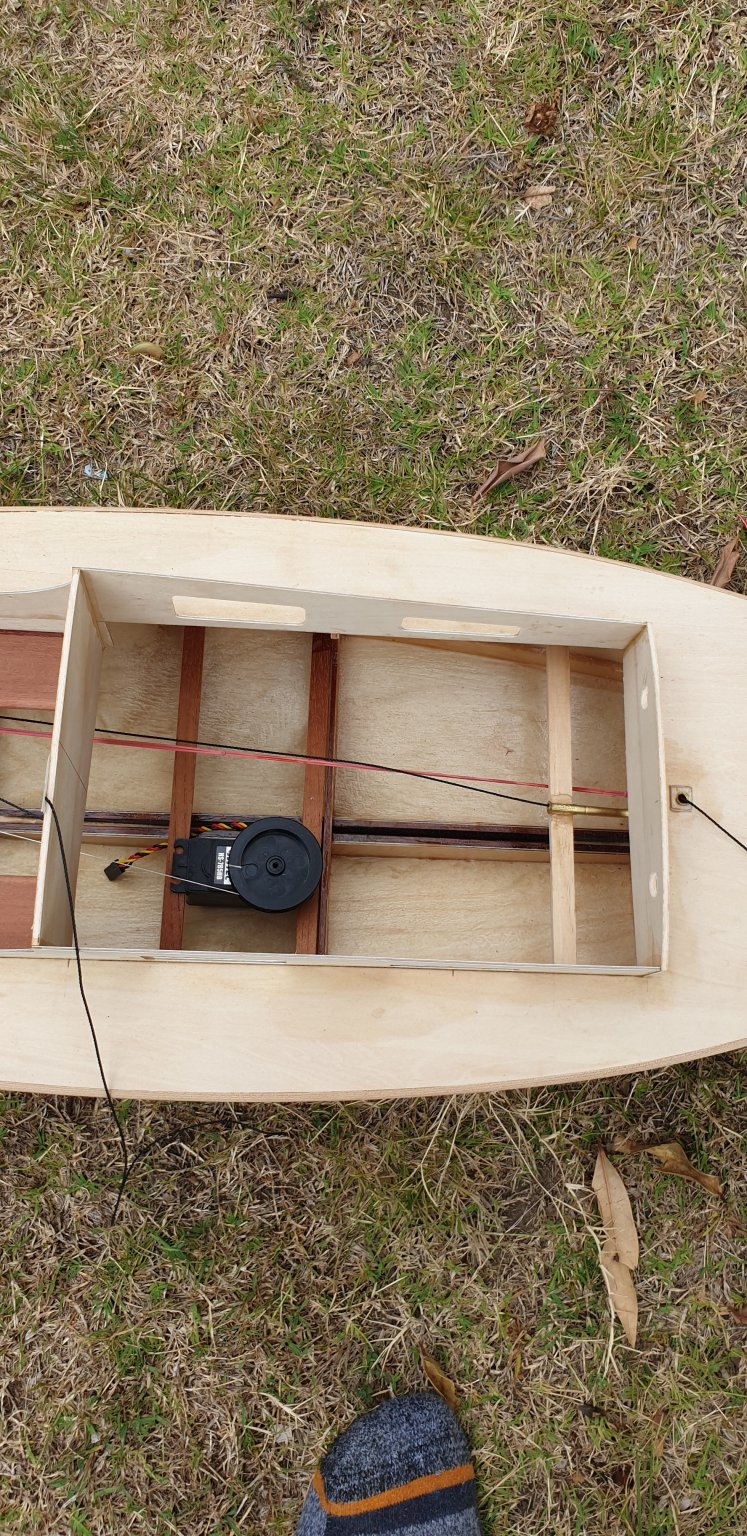
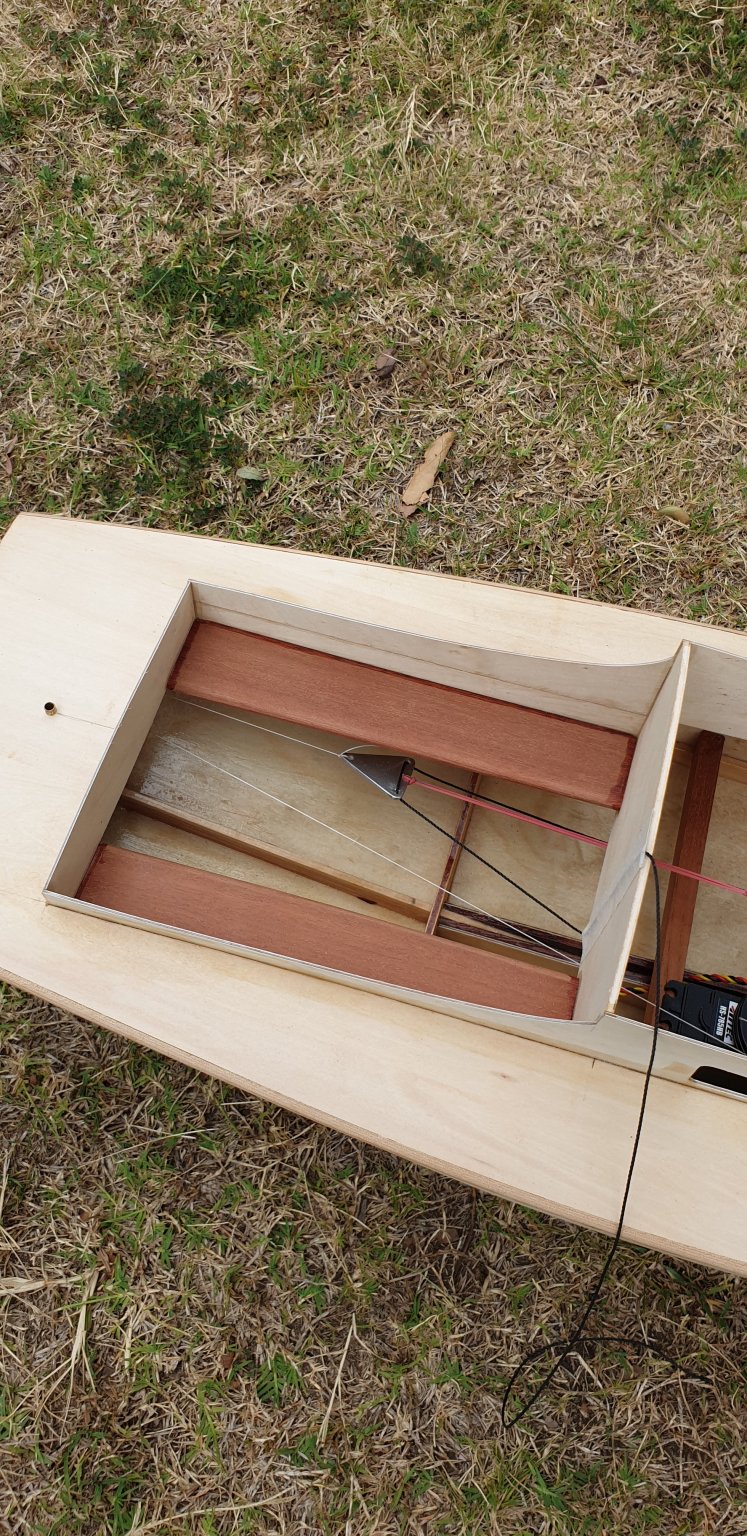
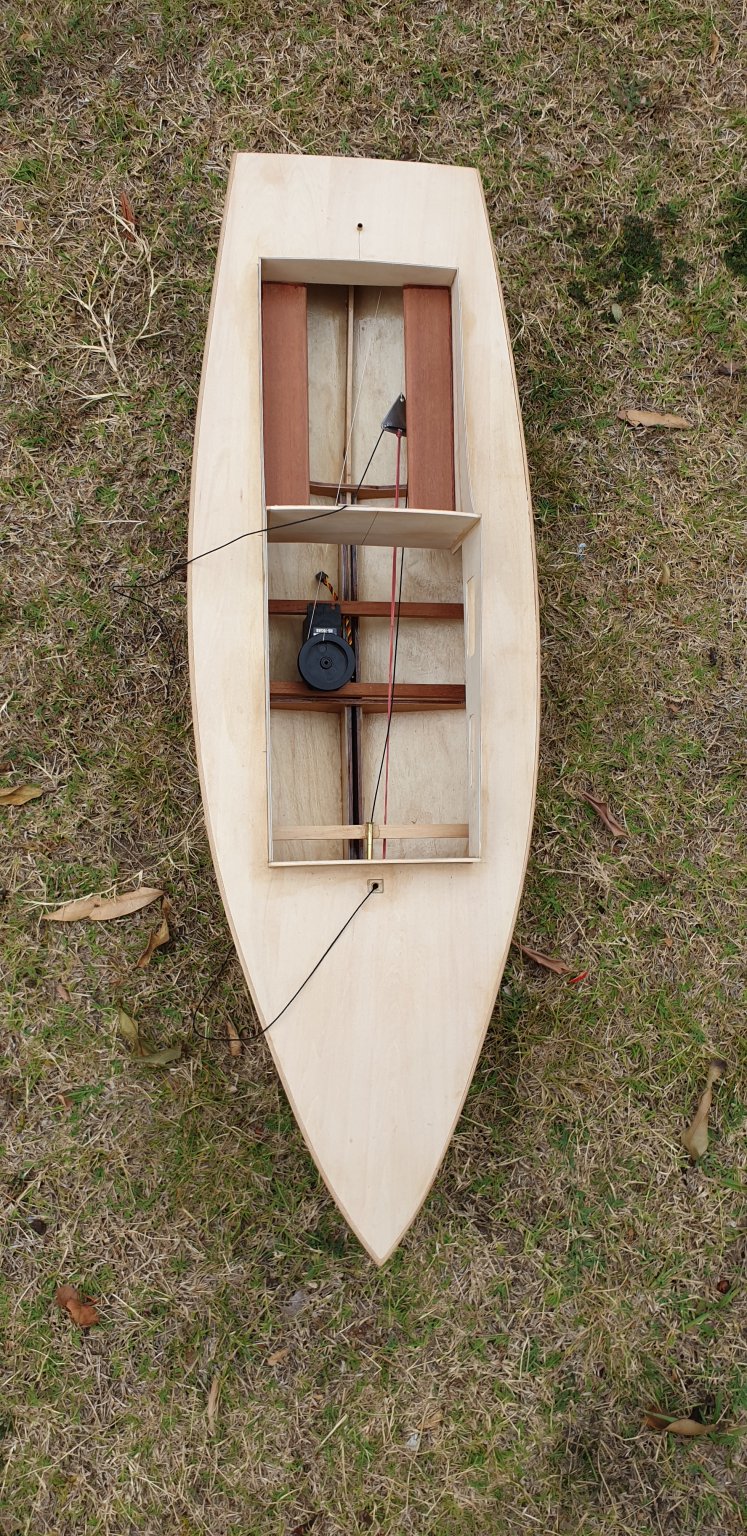
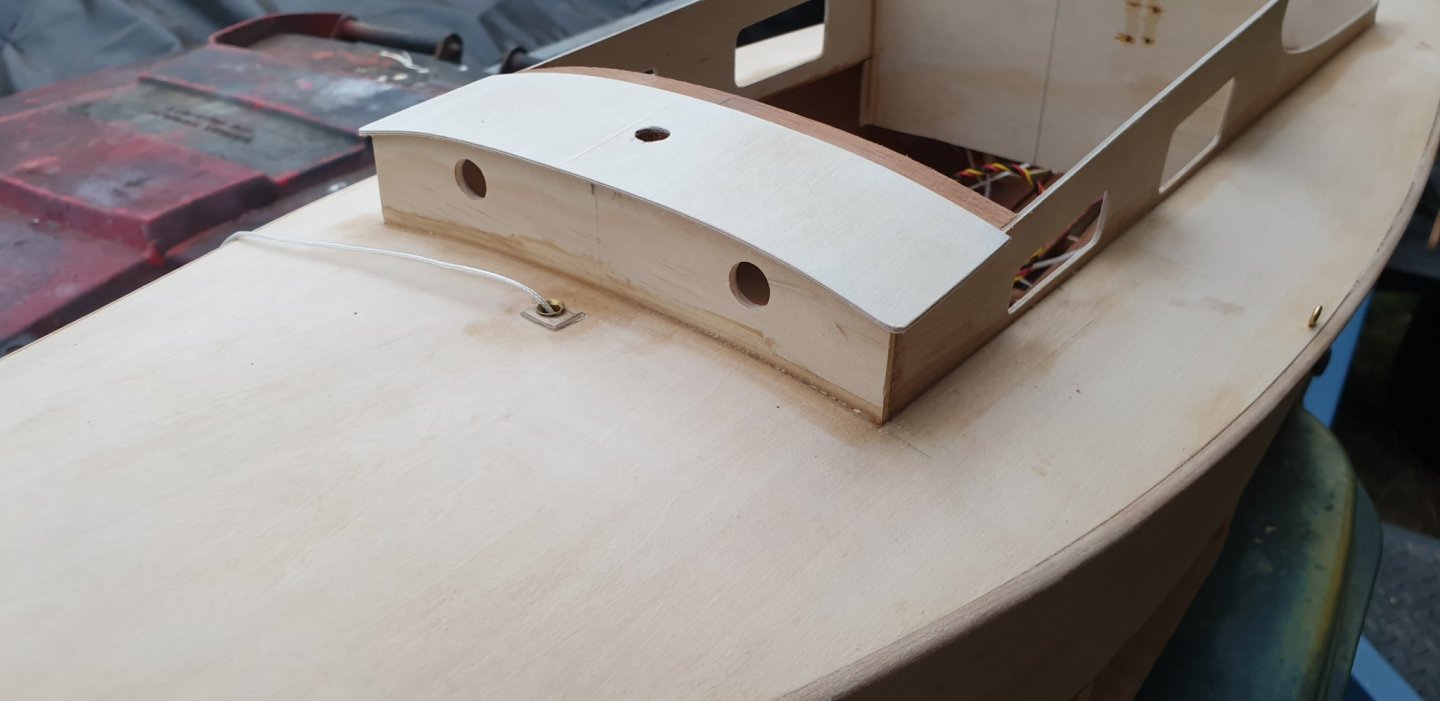
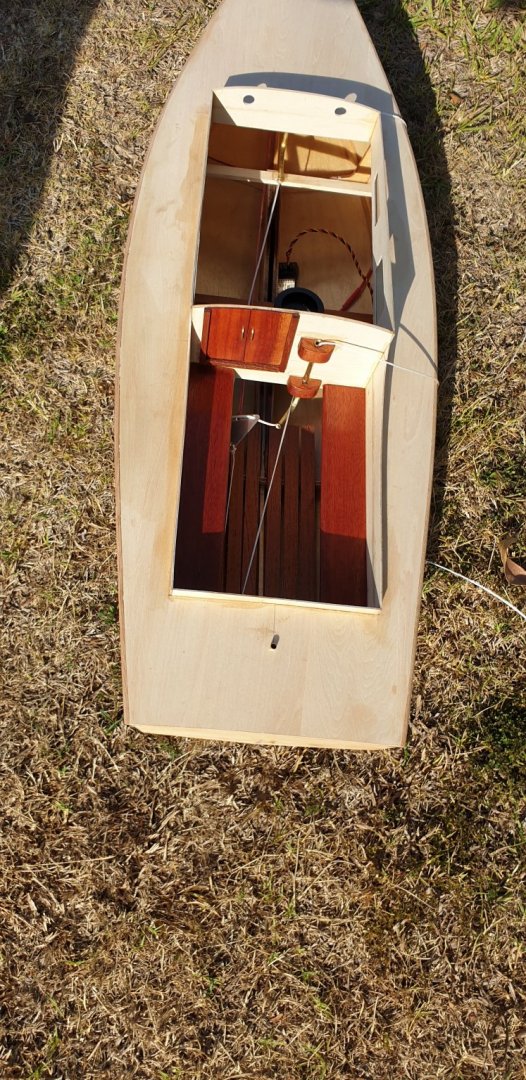
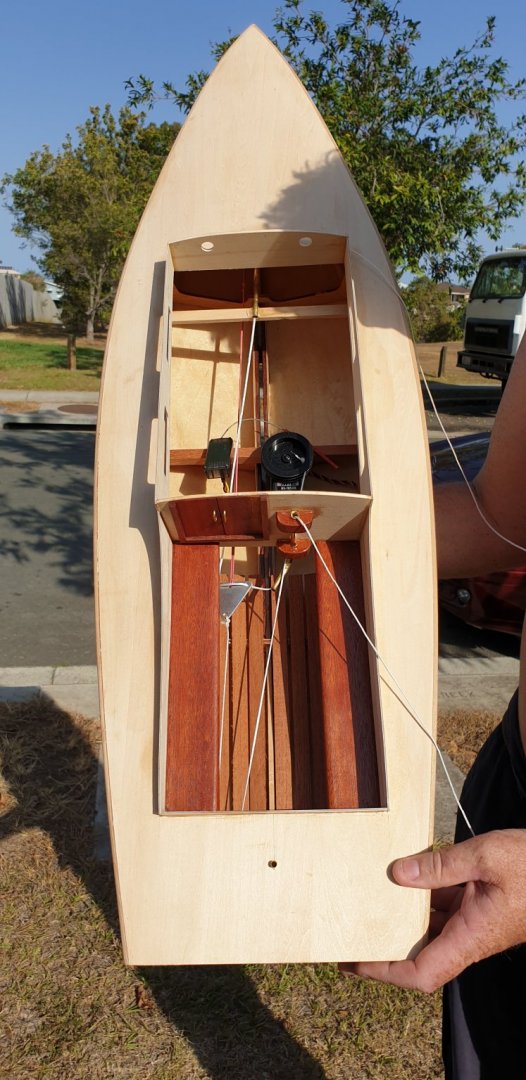
The cabin is now fixed into position and includes two mahoghany thwarts. ( only the best ) I could then play around with where best to situate the winch and the cable runs. The general arrangement is that there are two pulleys that are situated so that one is furthest fore and the other furthest aft. The aft pulley is a metal sewing machine bobbin. The jib fairlead is a piece of brass tubing bent to a right angle and flaired both ends. The same procedure will be used for the mainsheet fairlead which will affix to the rear of the cabin where shown taped. A length of elastic is fastened to the centre of a triangular bridle plate and opposite that is affixed the lead running to the winch. The jib lead and mainsail lead run through the other two holes in the plate forming a sort of bowsie/ bridle. This method allows adjustment to the jib and main sail feed proportionally. I can adjust the jib to match the mainsail now. The elastic serves only to take up any slack in the leads and to avoid probable tangles when letting out the sails. It does not bare the strain of the jib or mainsail leads. The plans did not call for a cockpit area but I thought it would look better with one? Pete


-
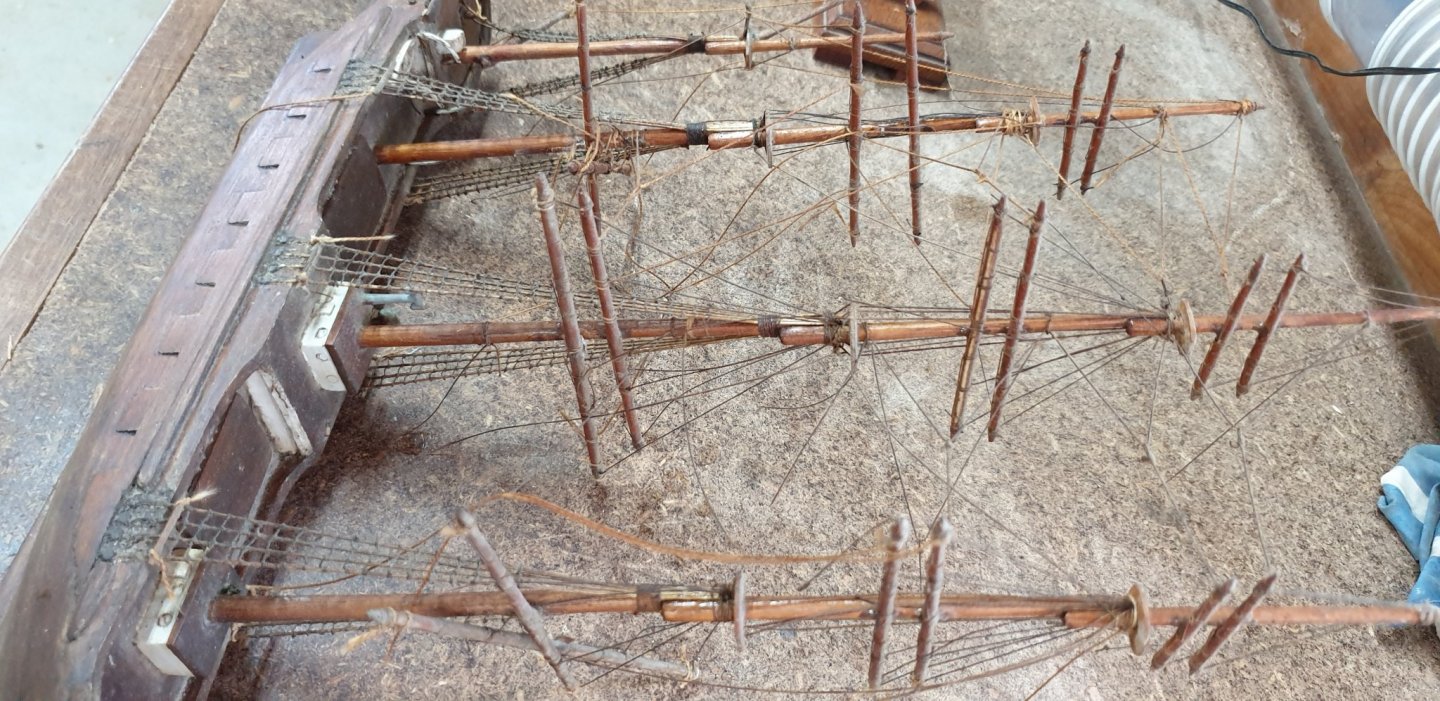
It seems like whoever made it had a knowledge of sailing ships. I have not yet seen one with every yard paired. I believe you are right to say that I should restore it as built. So that is the route I shall take. I work at the tradesmans guild at Old Petrie Town. Pete
- 10 replies
-
- 2
-

-
- restoration
- finished
- (and 1 more)
-
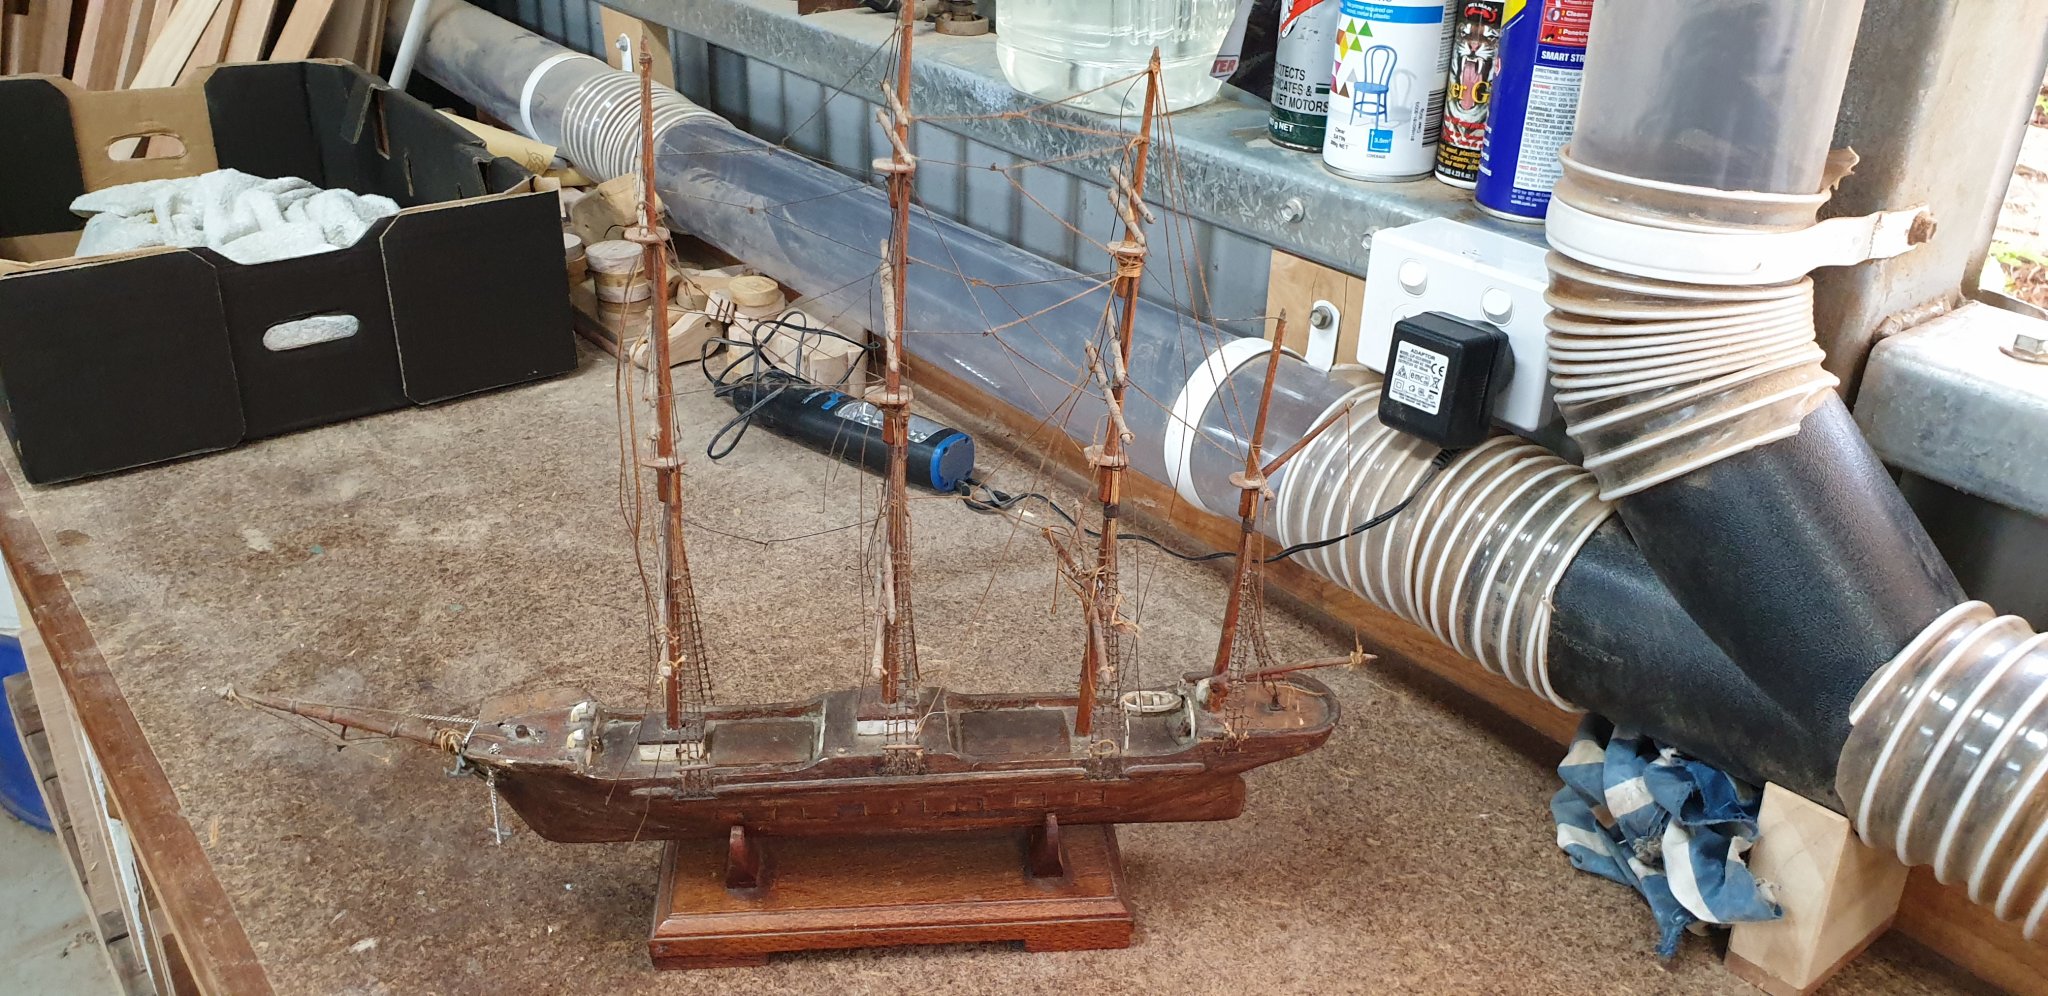
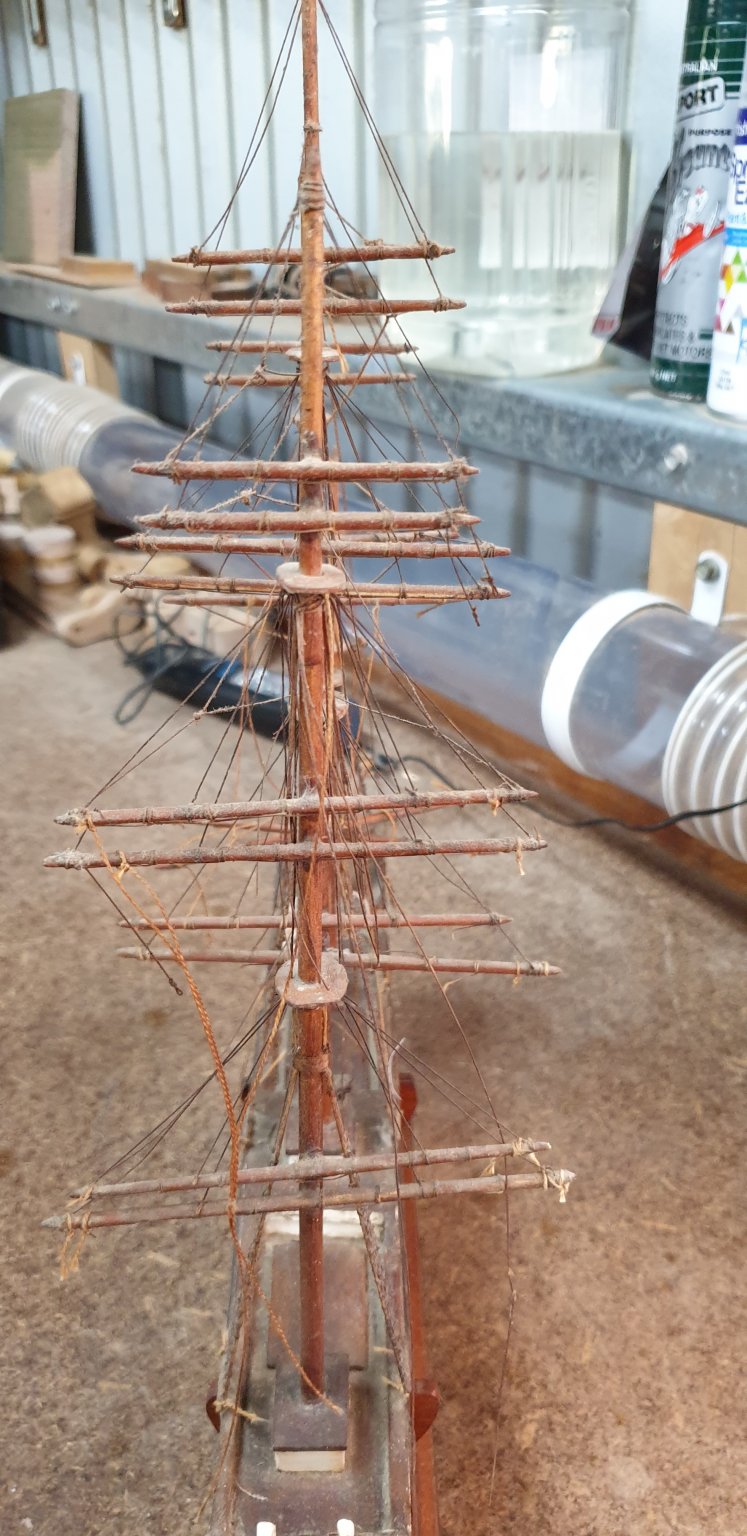
I work as a volunteer for three days a week and have been entrusted to restore an old sailing ship. I feel somewhat honoured and not lemoned. It is about 12" loa. It must be about 60 years old. It belongs to a widow. Her late husband built it. It gives me plesure to rekindle what he went through. A point of note is how he has set the yard arms in pairs? Question... Is this normal without sails or a mistake? I want to rekindle it as built but here lies a potential problem. When it is fully restored and mounted in a glass case that will be made by us, ....if an experienced " boat waller" happens to scrutenise it and sees that I have replicated the " mistake"???? Then I will have egg on my face!. So..... Please advise me how to set the yard arms. My gut feeling is to space them out as normally. Pete


- 10 replies
-
- 4
-
-
- restoration
- finished
- (and 1 more)
-
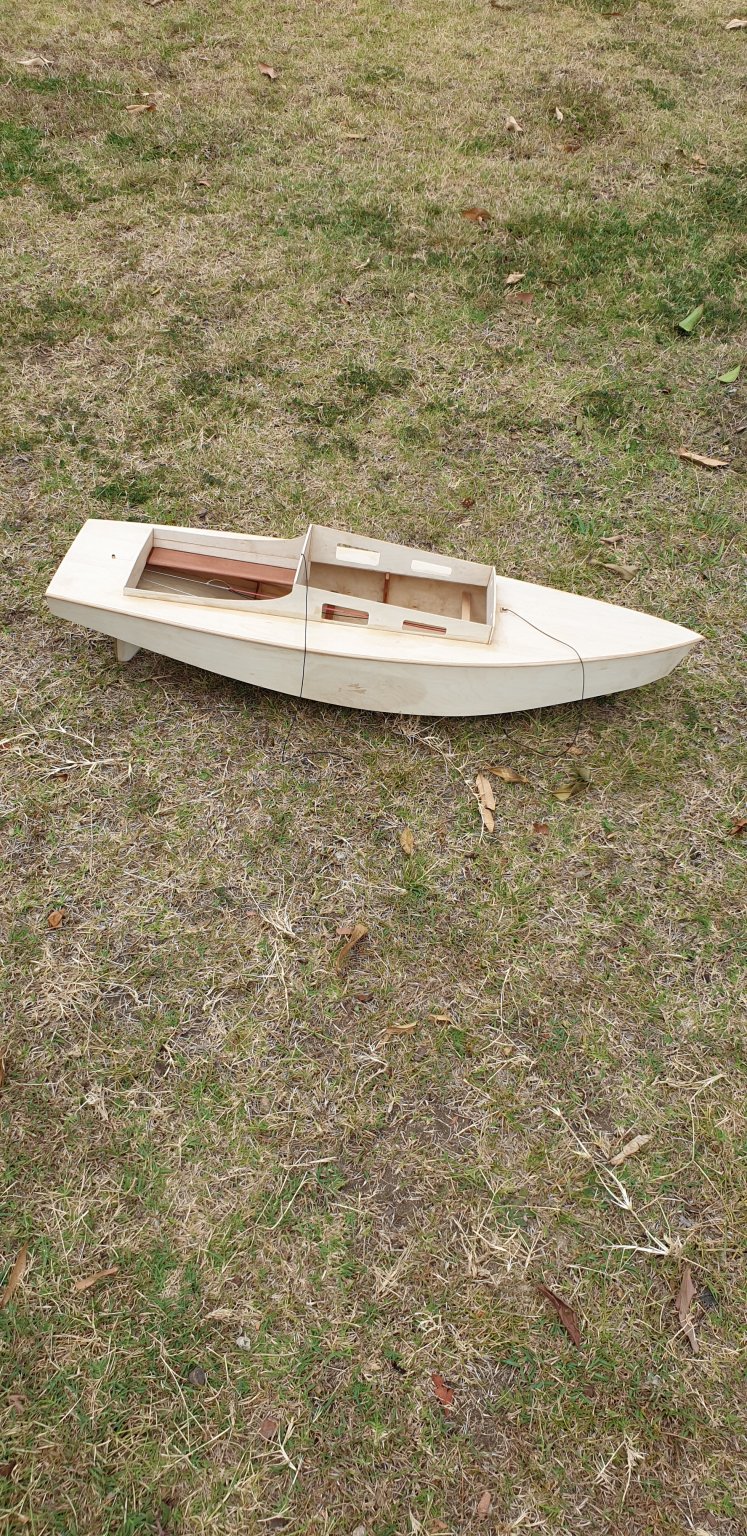
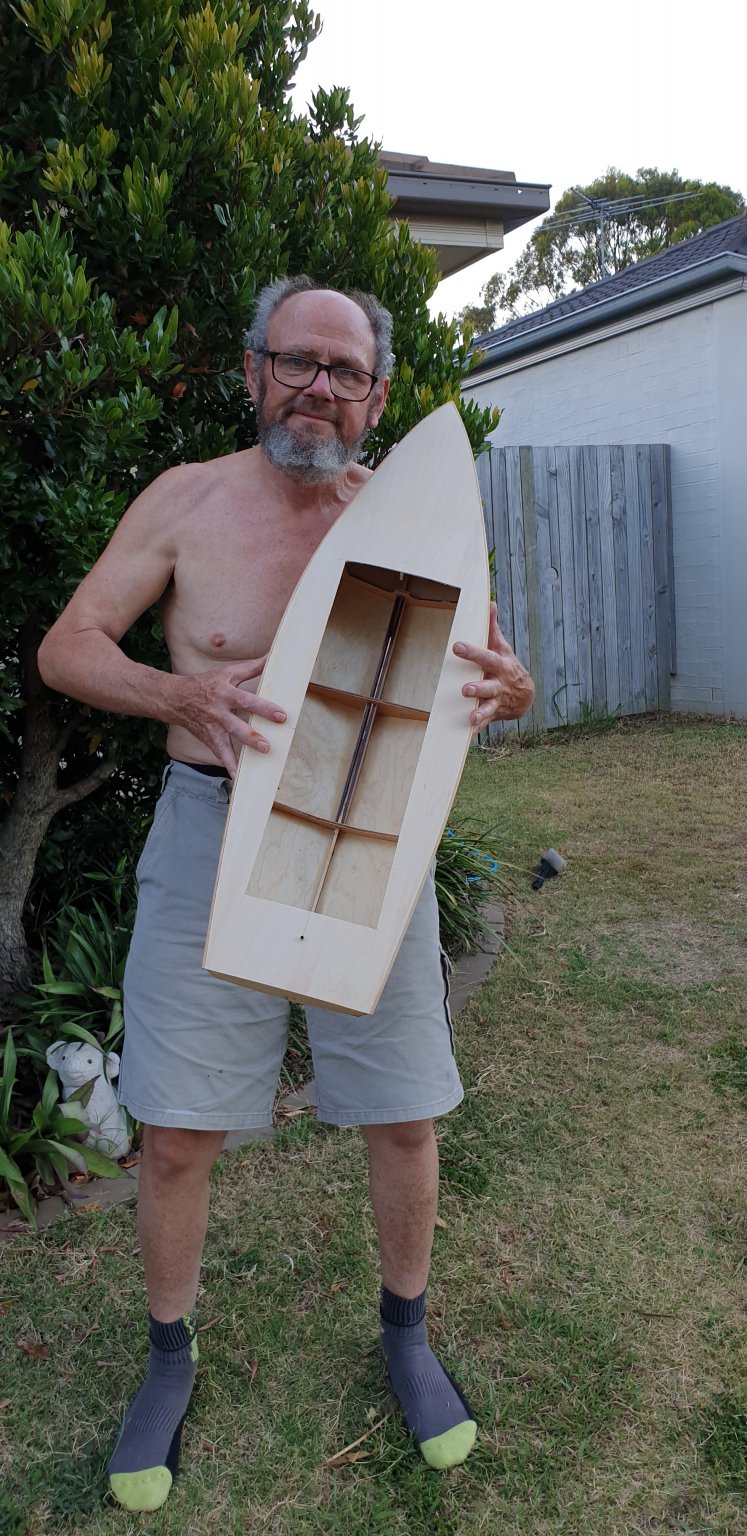
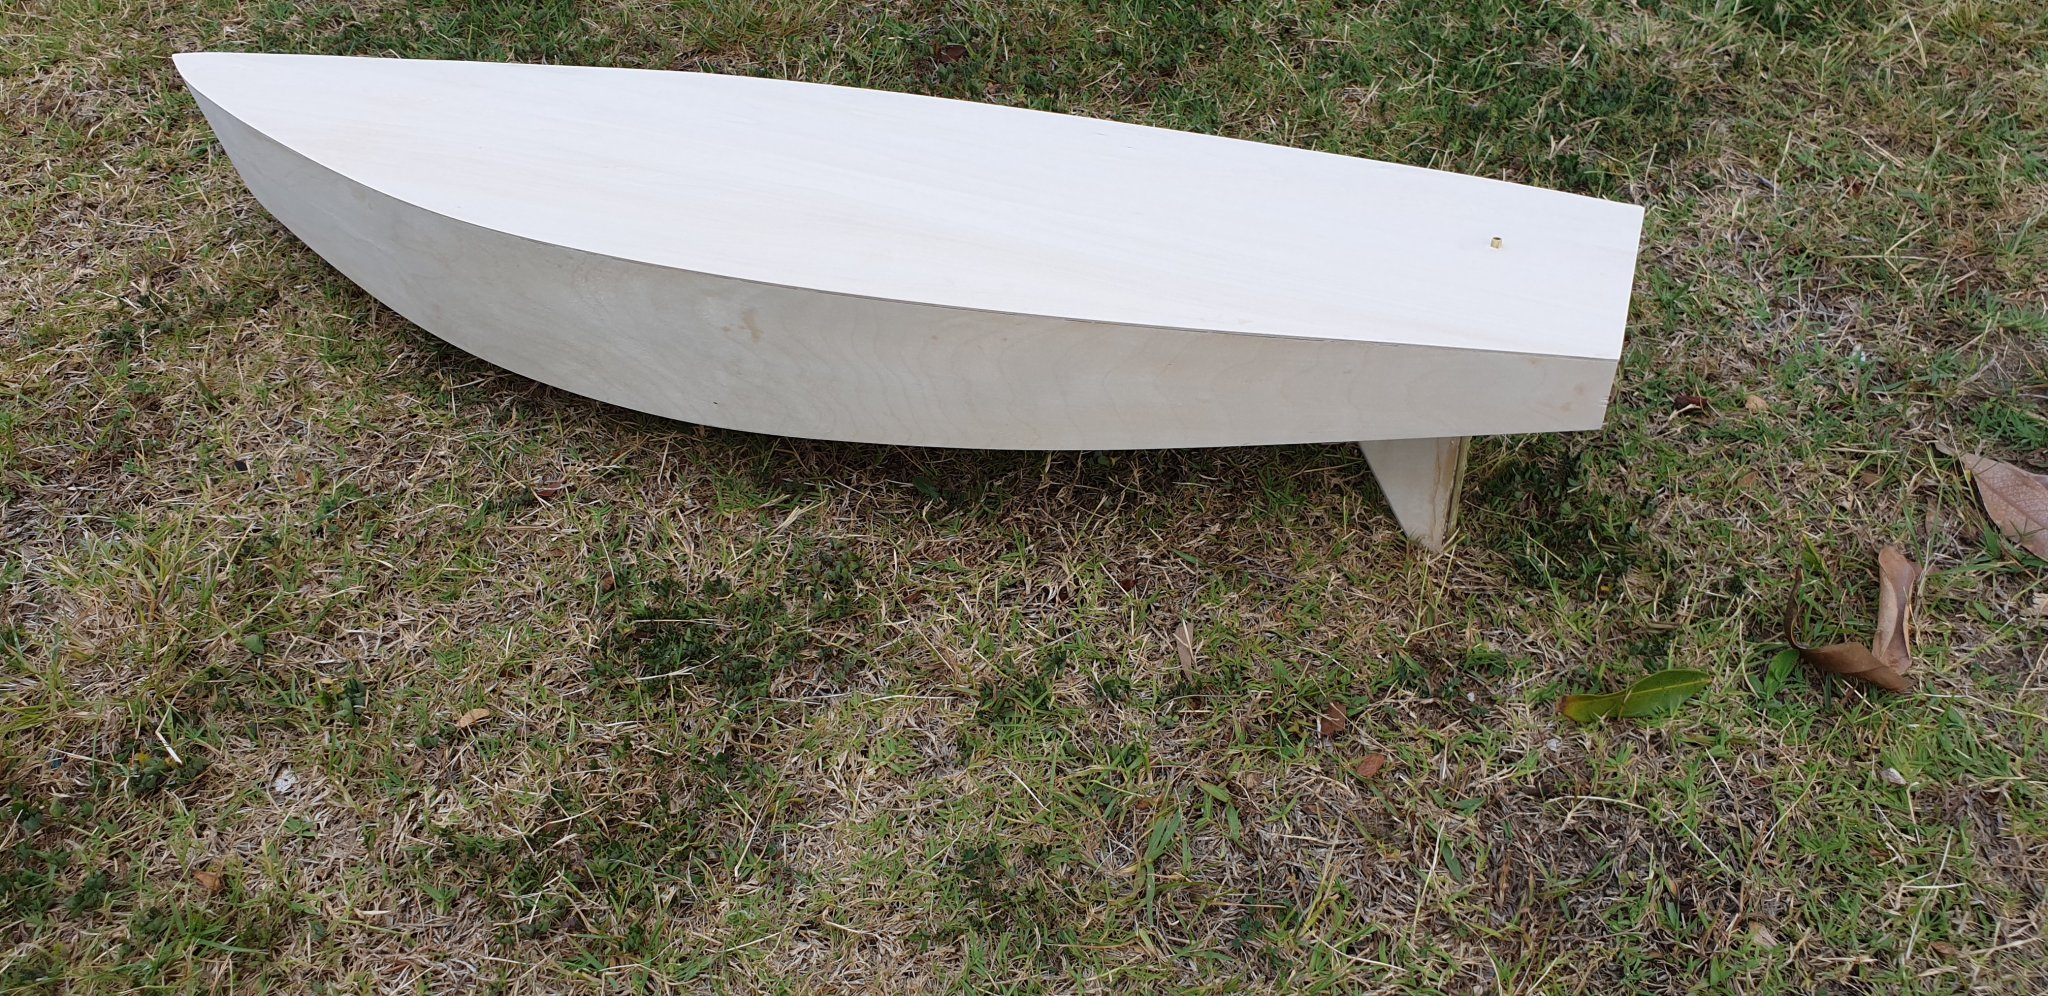
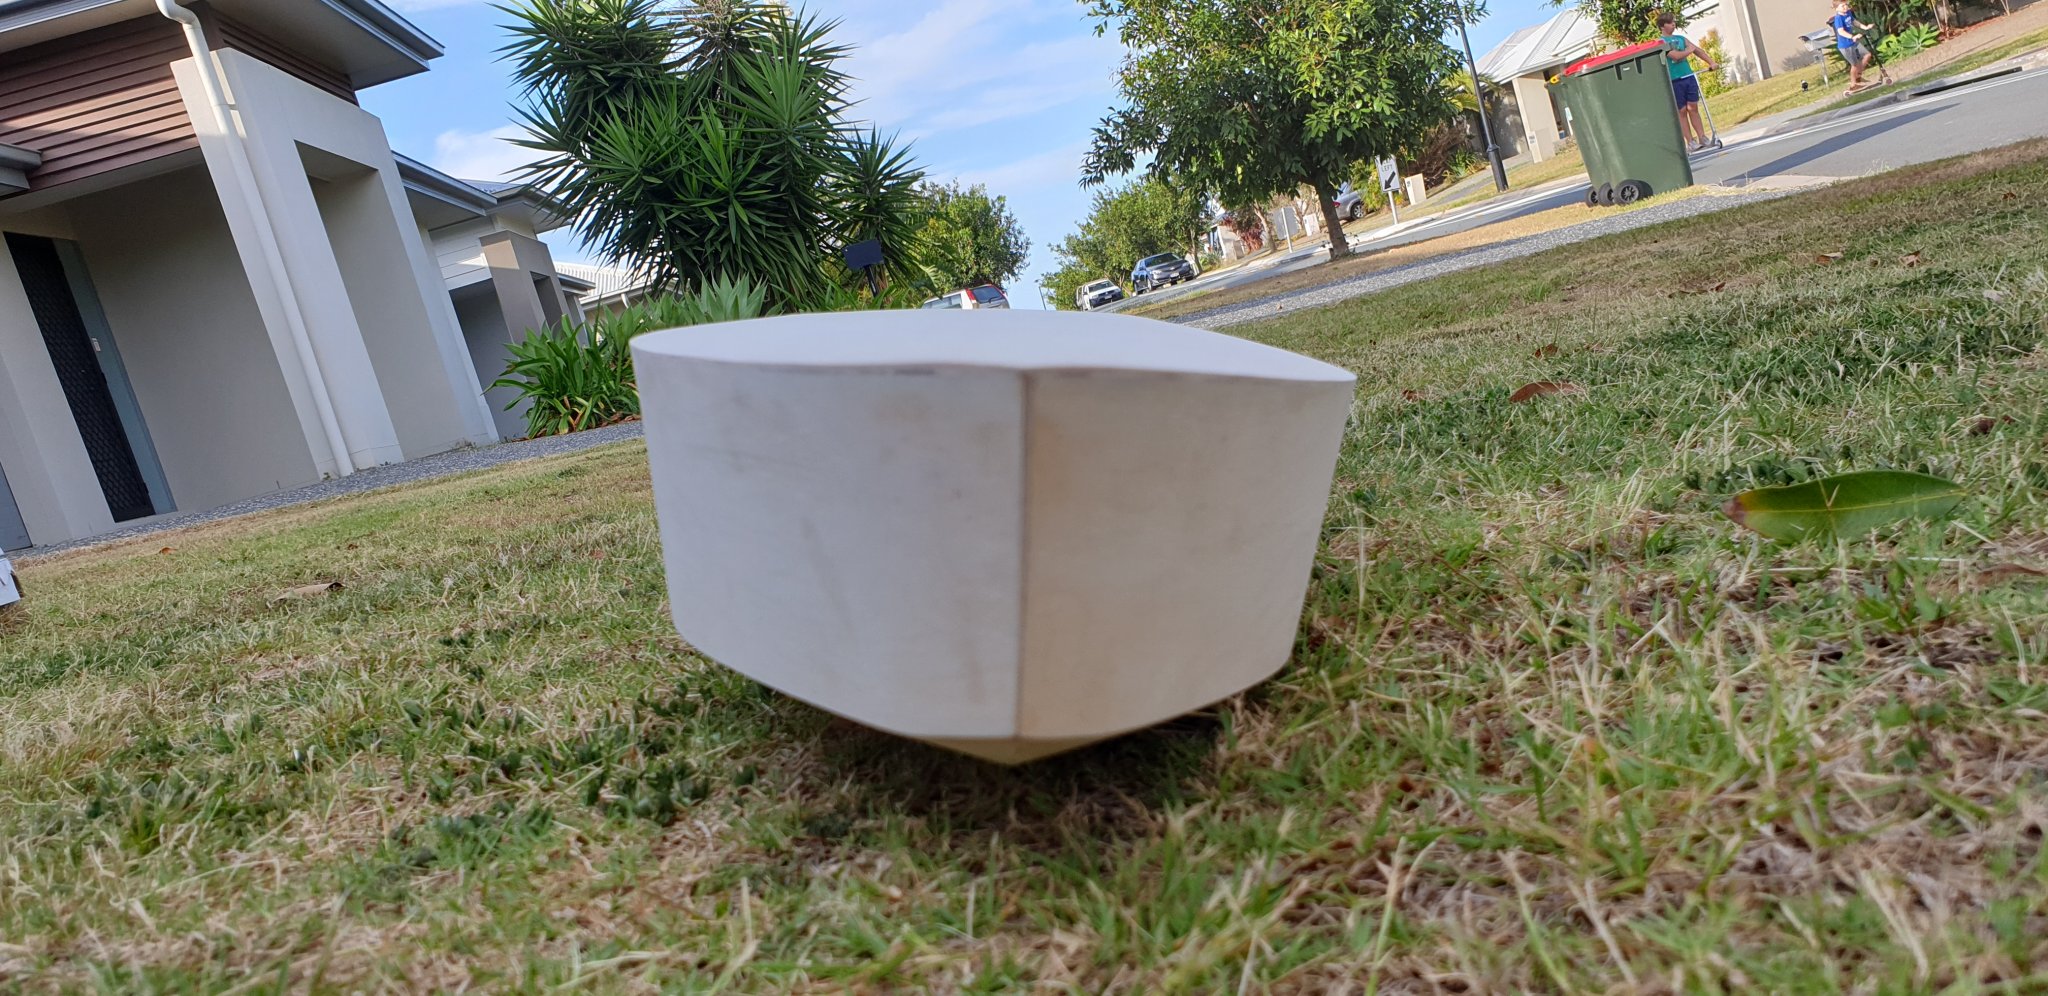
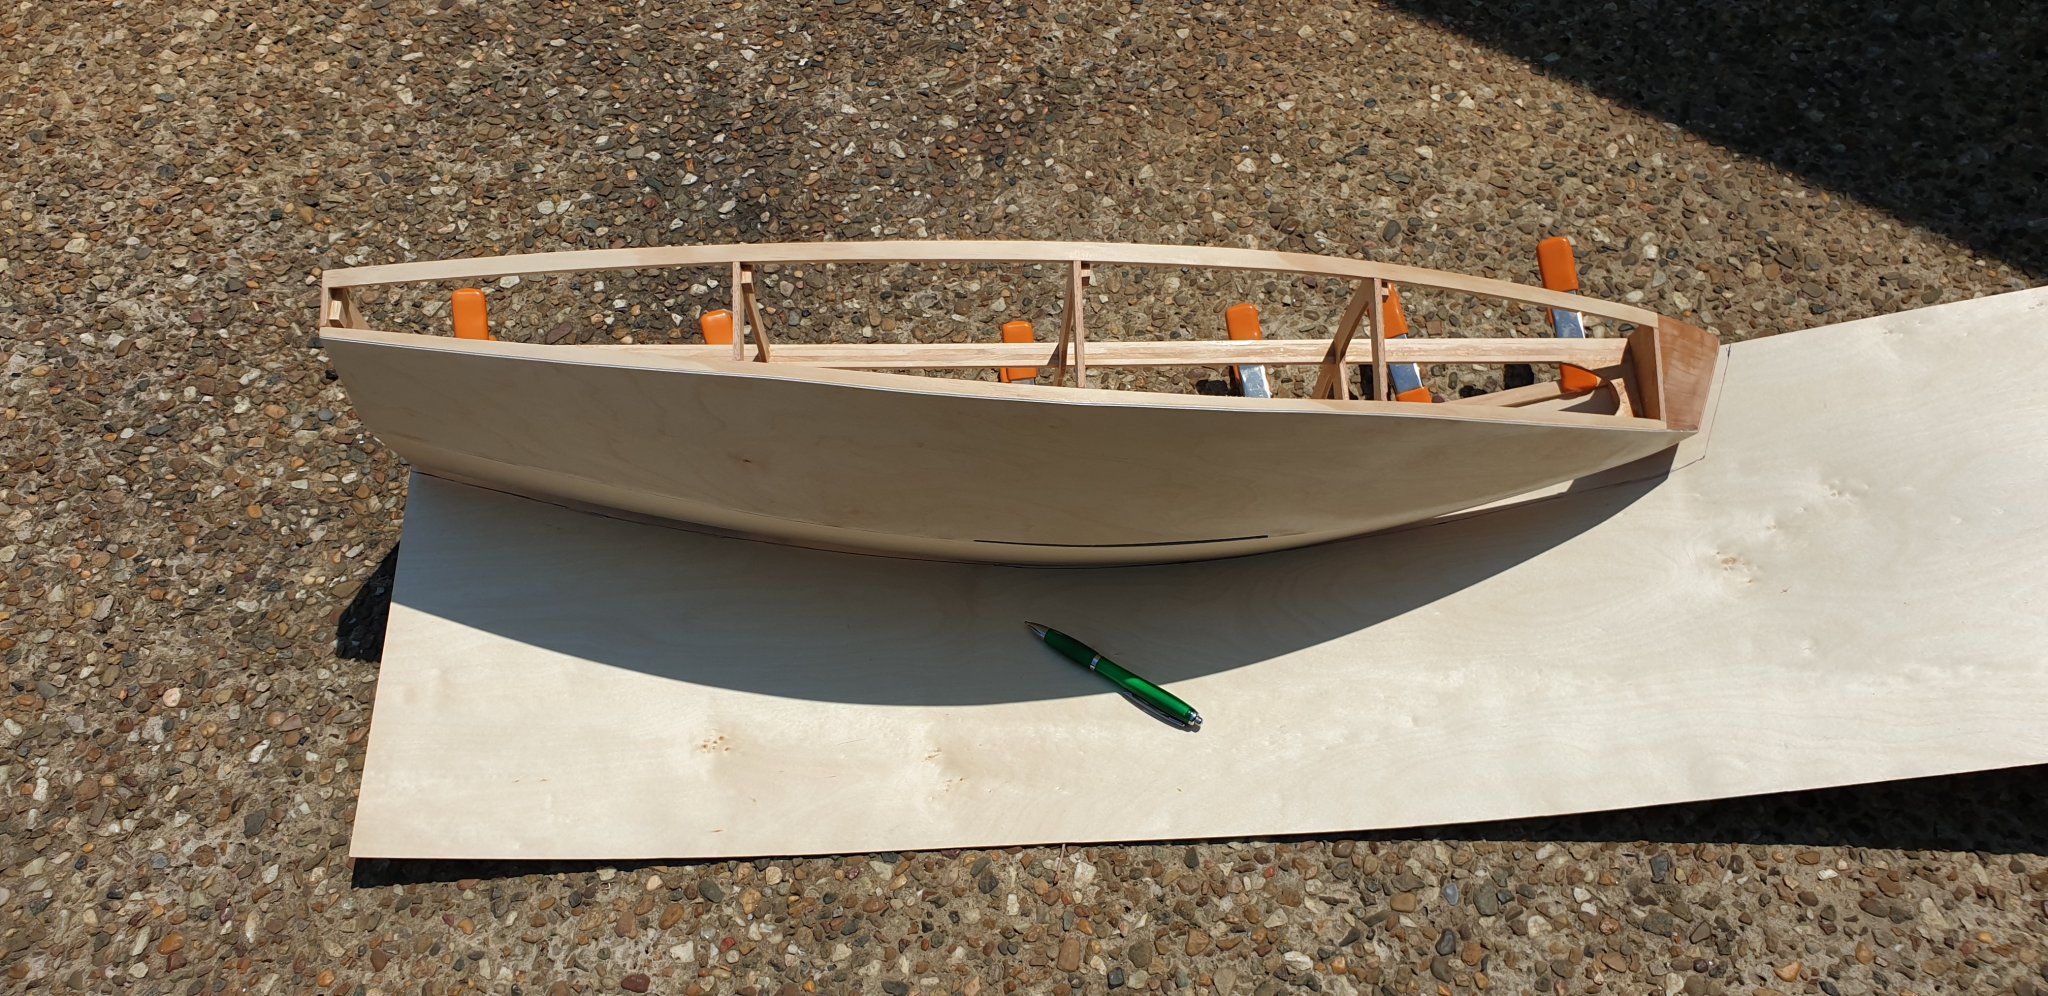
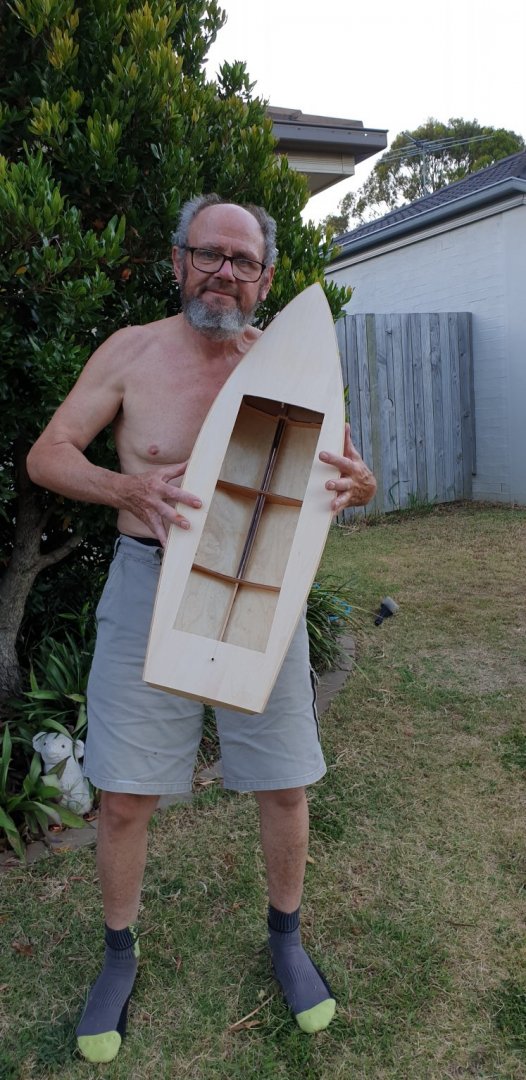
Pop David. This one is for you as you were surprised how big Starlet comes out. I am behind it to show scale. Pardon the nakedness but ii aint half hot mum out here. Pete
-
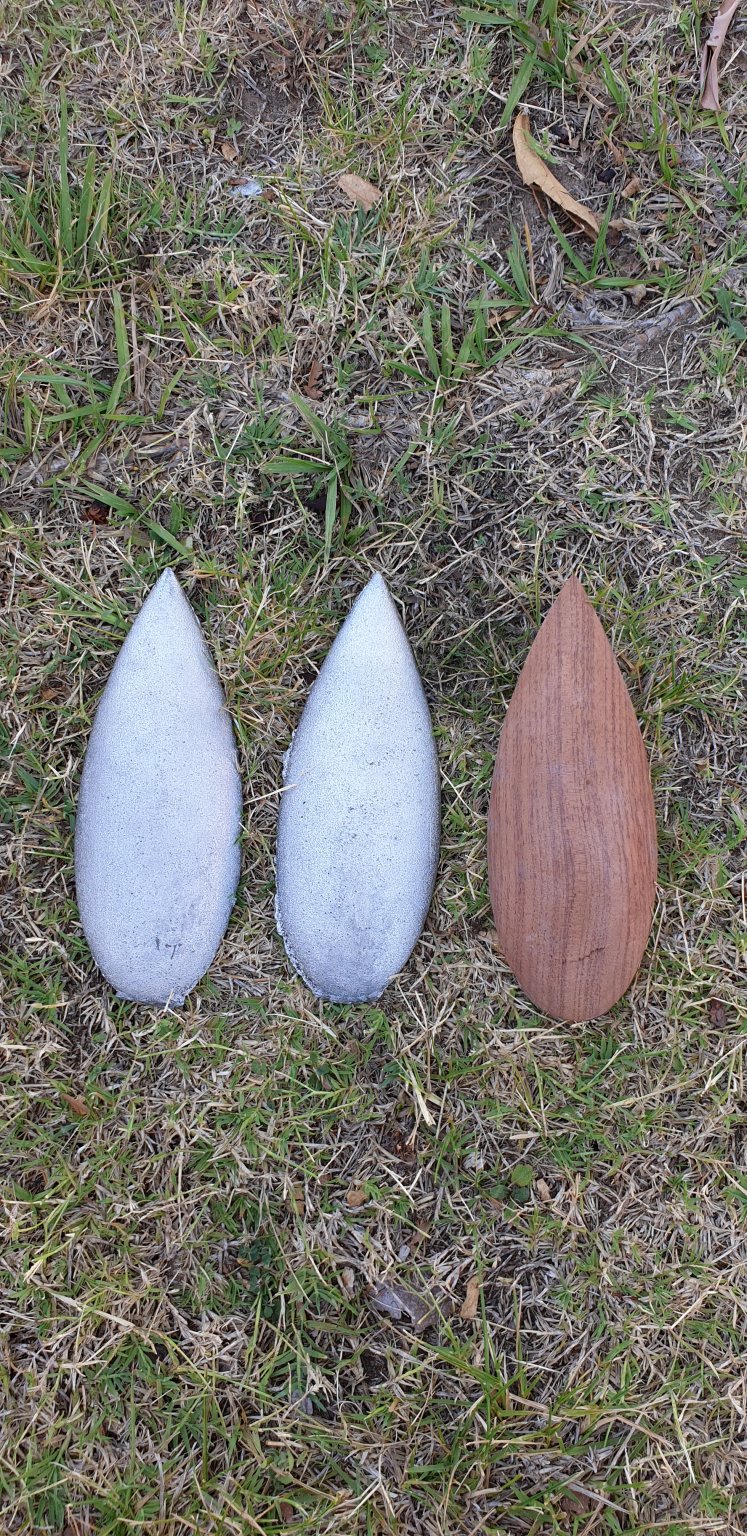
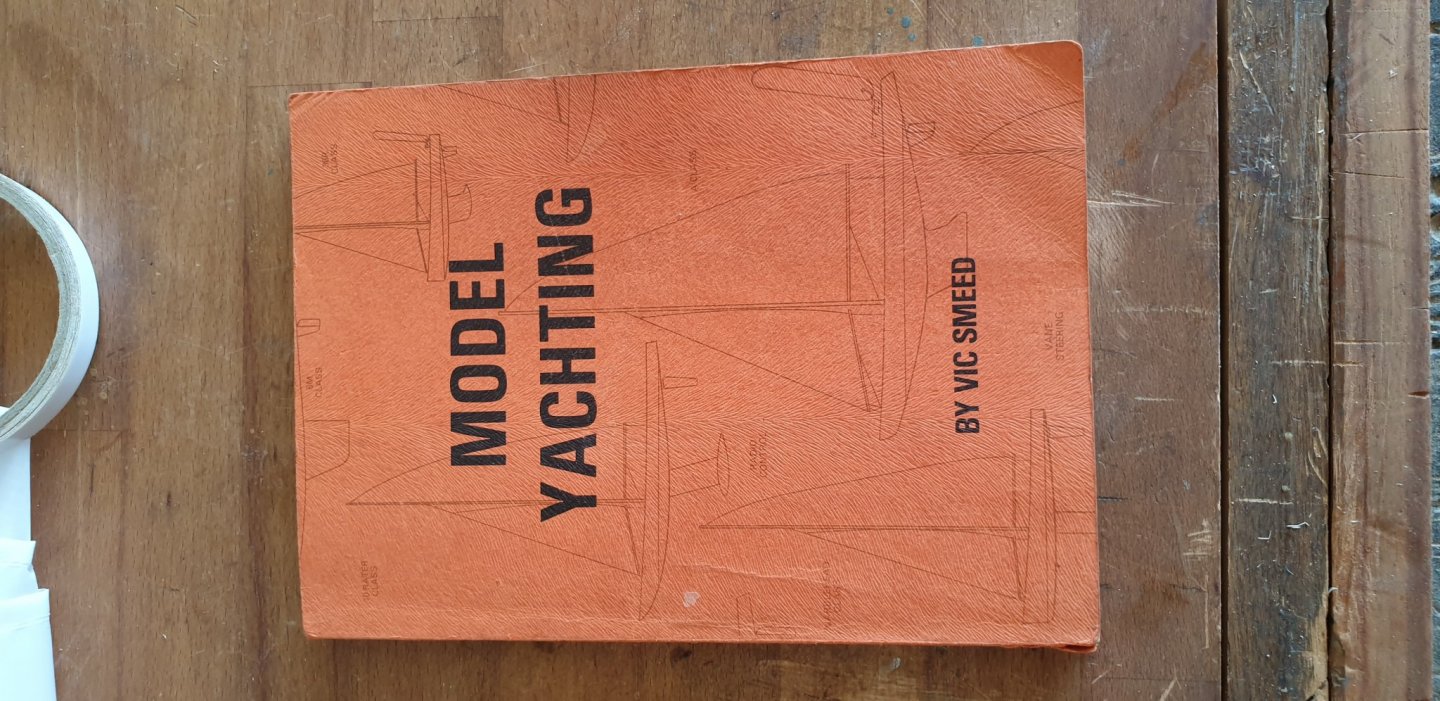
Hello Pop David and thanks for your input. I almost missed it! Yes I think you are right as far as impractical is concerned. As John has said, we think Vic drew it in there as an easy option. I have his model yacht book and there is a drawing there on methods of mounting a winch. I am sold on one particular method, that of mounting a pulley wheel farthest astern and a post farthest fore to which will be attached an elasticated chord to a triangular bridal( bowsie) . The jib and majn boom line will pass through this bowsie and go direct to the jib and boom. Albeit that the jib/ boom angle can be simply adjusted by altering the the loop through the bowsie. The elasticated chord is just enough to take up the slack when both sails are fully out. Pictures to follow when I have done it. I am on the case right now. And Yes!!!! The boat does come out bigger than the plan!!! It surprised me! She is a good armfull I can promise you. I love it. Indeed I have a grandson 13 who comes out sailing with me. When he discovers " girls" or gets a new mobile phone for christmas then thats that one up the creek. My friends at work cast the bulb halves for me. I just made and gave them the mould. Pete
-
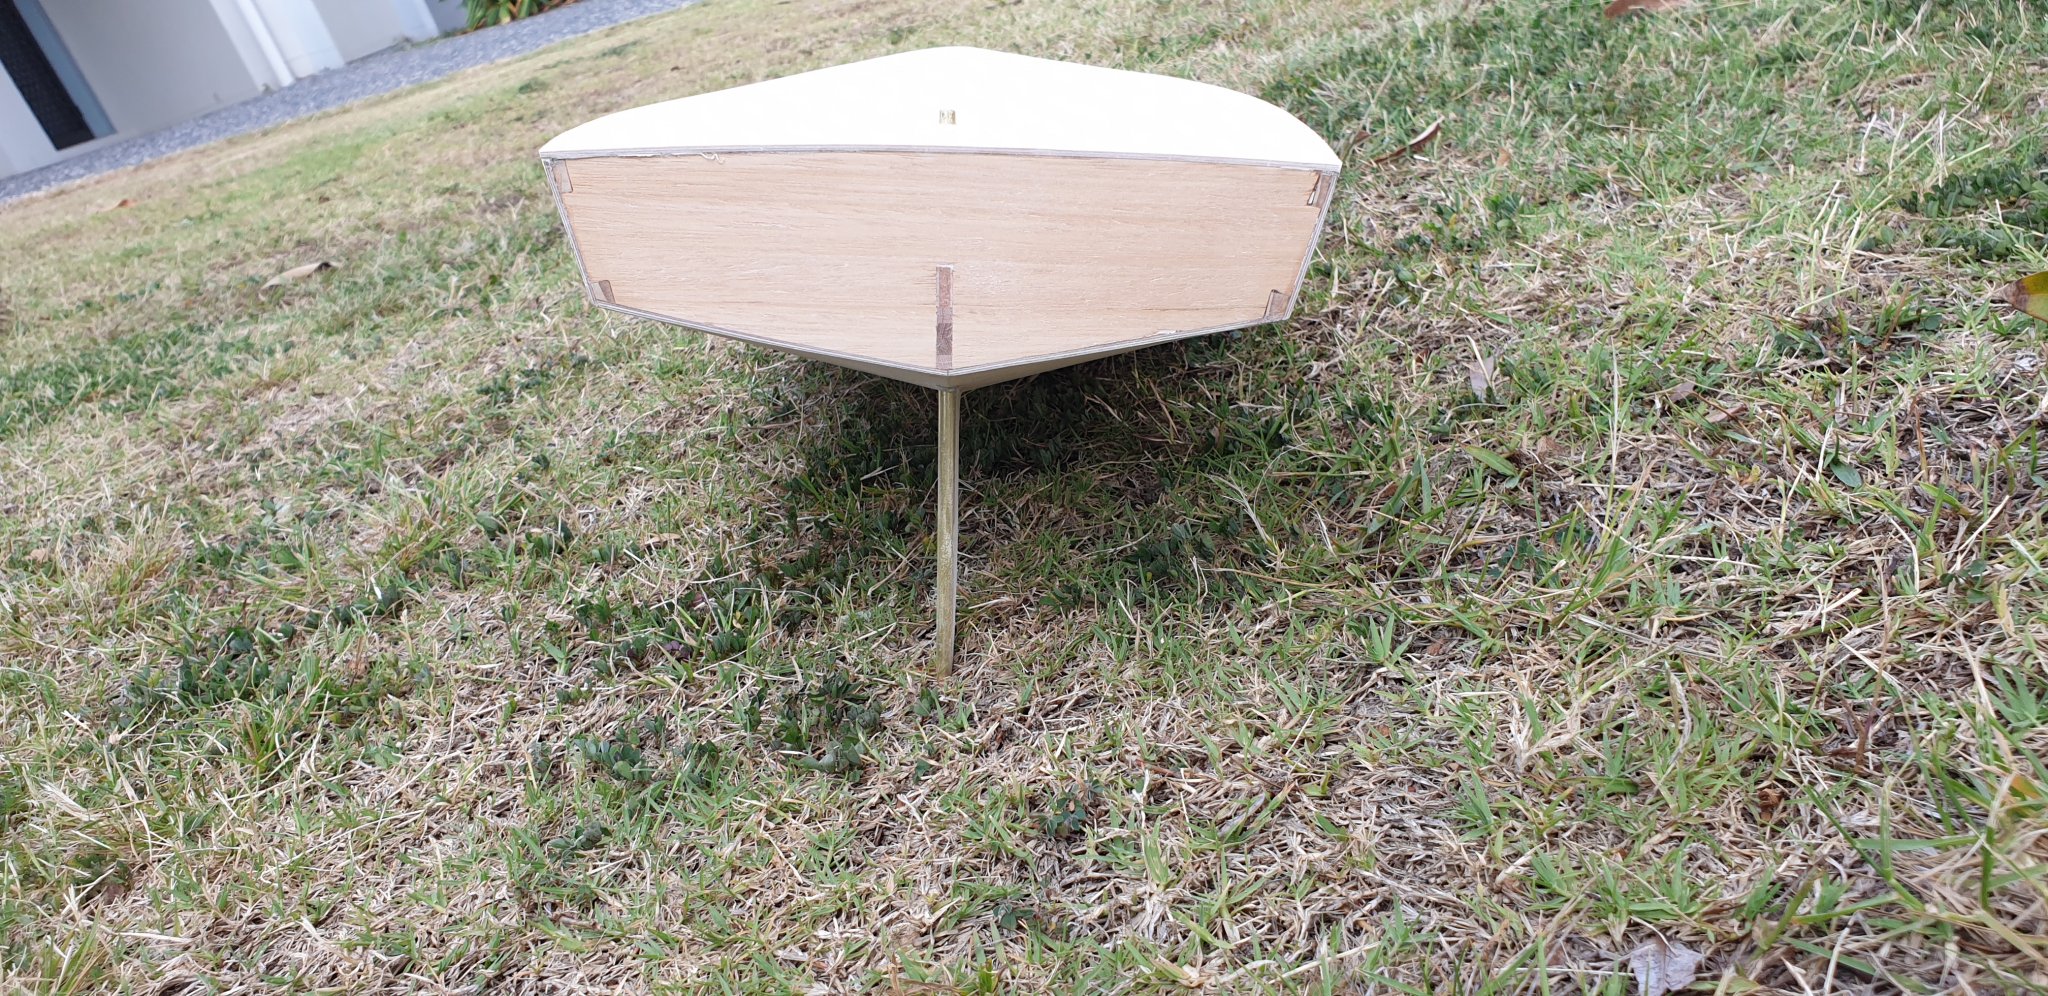
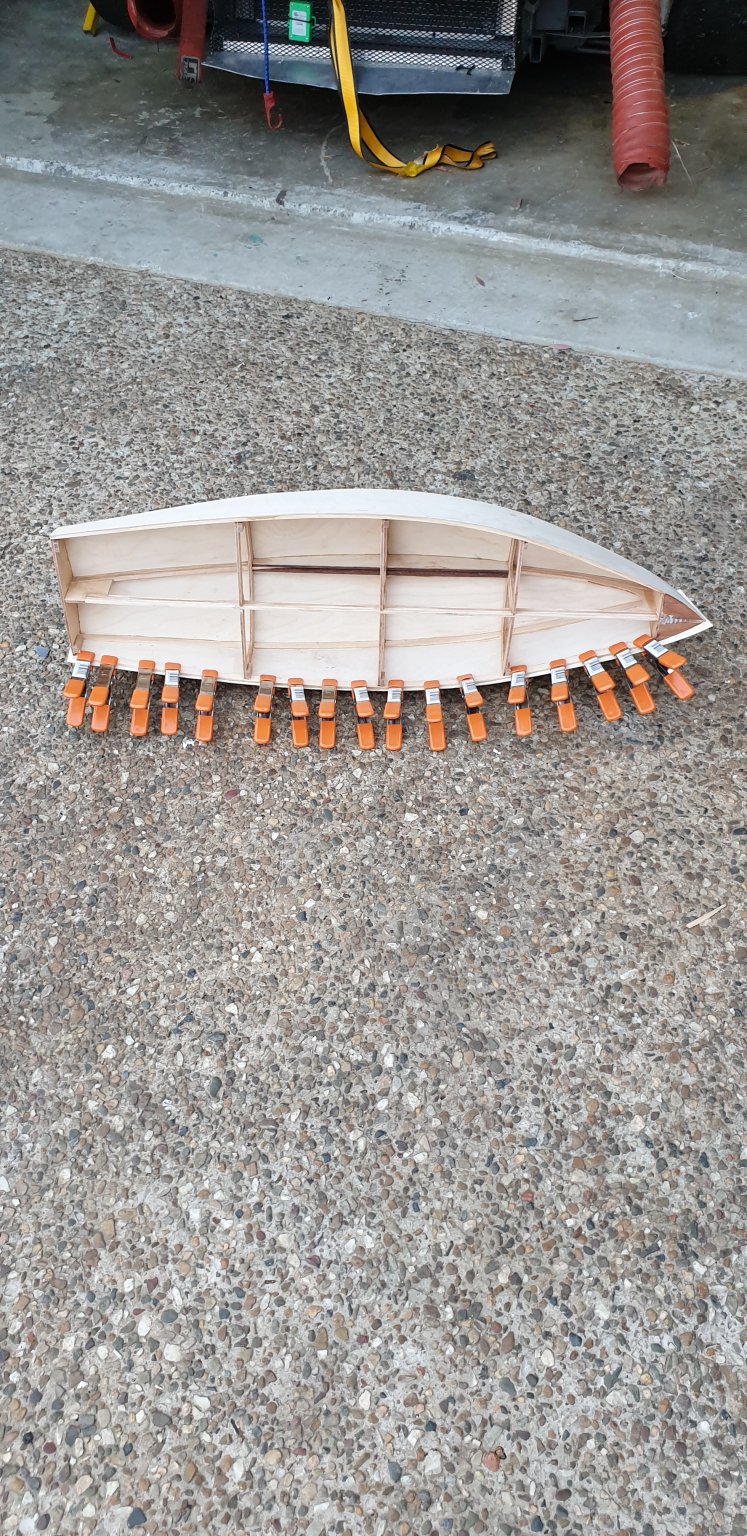
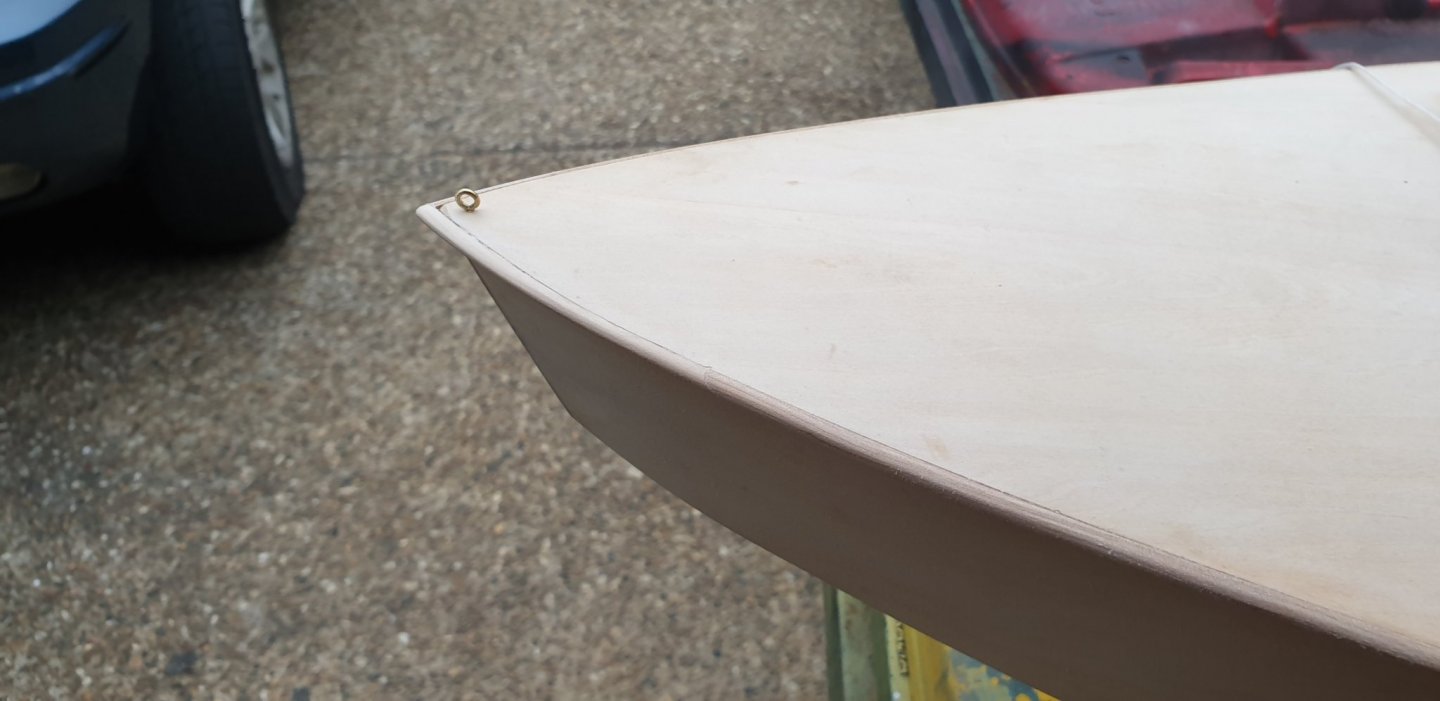
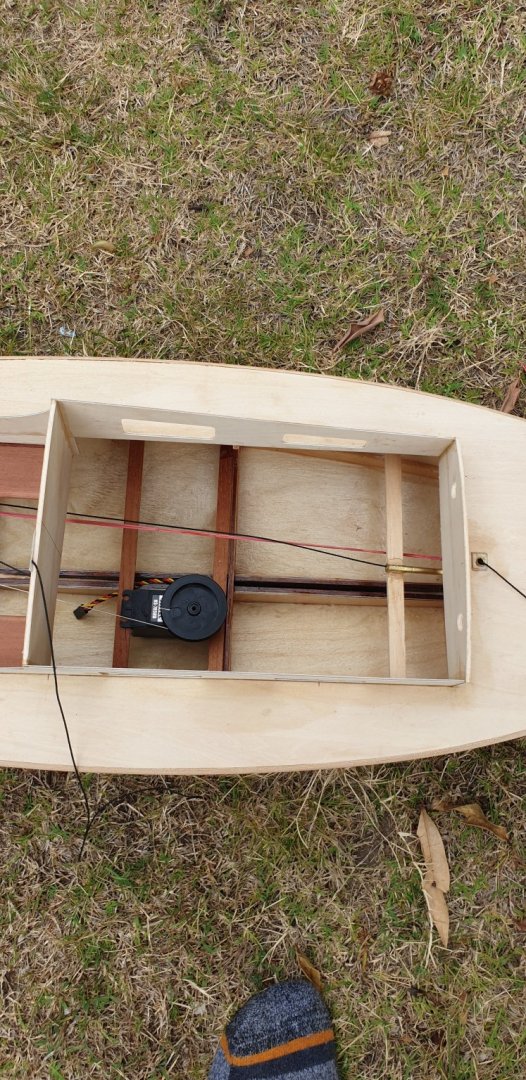
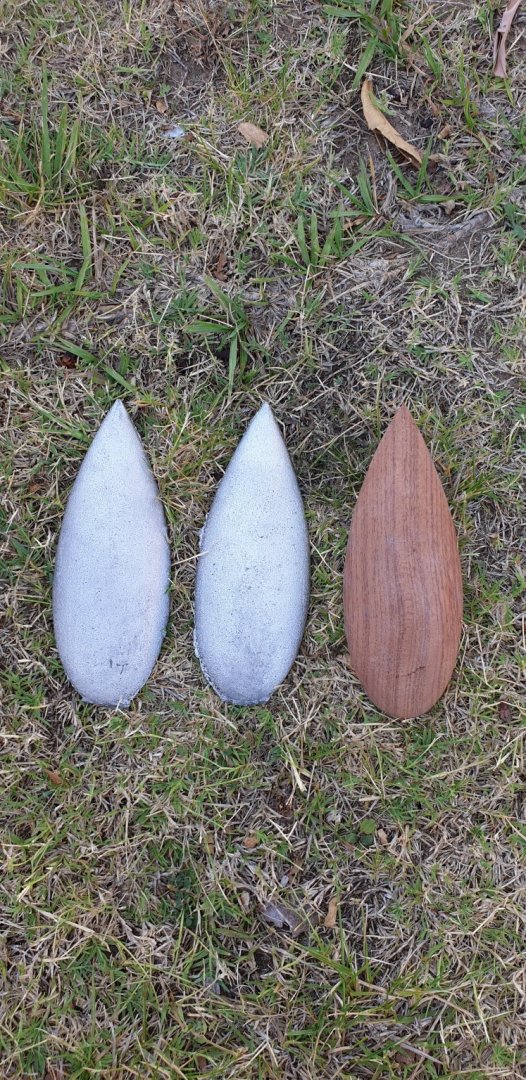
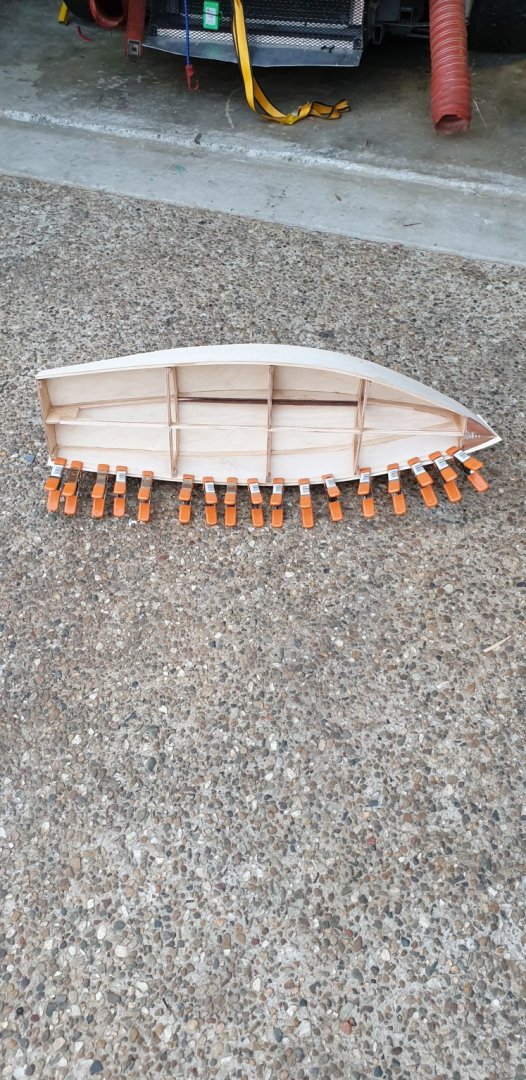
I have decided to mount the winch inside the hull! Will show details later. The plans are pleasantly basic but I have also decided to include a rubbing strip on each side. It kinda puts the edge on it ( pardon the pun). I have also lengthened the cut out so as to incorporate a cockpit which should also improve the general looks. My mates at work cast these bulb halves perfectly in lead. I am so grateful and pleased. So happy today. You will notice that the outline is not perfect. Buggar!!!! I so wanted this to be my perfect model as an ode to Vic Smeed. Sigh and head down.....perhaps the next one? Been there? Pete.

-
Thats nothing! Angry wives.... I have a very old German friend who is a solicitor and likes to read all the business aspects and news from several news papers on a daily basis. His wife makes him wash his hands afterwards to remove any print marks that may be transferred to the white paintwork!!!! Aghhhhh!!!!
-
Thank you David. I am okay with how to rig it and indeed already have the winch. It was a question of why it was designed in the plans to poke through the roof. Apart from being unsightly I see no benefits save that of ease of construction like John pointed out. My first thoughts were ease of operation but it can operate just as well when below decks. I take your hint with competitive model yachting. I am not going down that path. I believe that if one gets that serious then the fun of sailing a boat goes because it has not beaten another or all of them. I do like though to build up a good knowledge of sails, rigging and their various benefits. I belong to a non competitive model boat club whereas it is against the rules to compete. To compare and glare is okay! Pete
-
Hi John. I think you ars right. Ease of building. I must admit it does look a bit weird having a gurt winch poking through the roof!!! I can surely mount it lower and out of sight. Looking at other models of Starlet, builders have done the same. Its quite a big heavy winch as well and that load is best placed low as pos. Pete
-
A bit of help please? Vic Smeed has designed this model boat with the winch drum protruding through the cabin roof. I am aware of the fact that this is a " model" boat and sailing models are built differently to the real thing. I am very much an advocate of simplicity as was VS who designed it so. My first thoughts are to build it as a 60s model boat as per plan as there were reasons why he designed the winch mounting so. My mature son thinks " That is stupid". But Vic Smeed was far from stupid. I do not know how to proceed. I will very much welcome your comments on this matter please. To be specific... Can you see any advantages in having the winch wheel poking through the top of the cabin roof? Please answer as I am at a stop now in knowing what is best to do? Thanks Pete
-
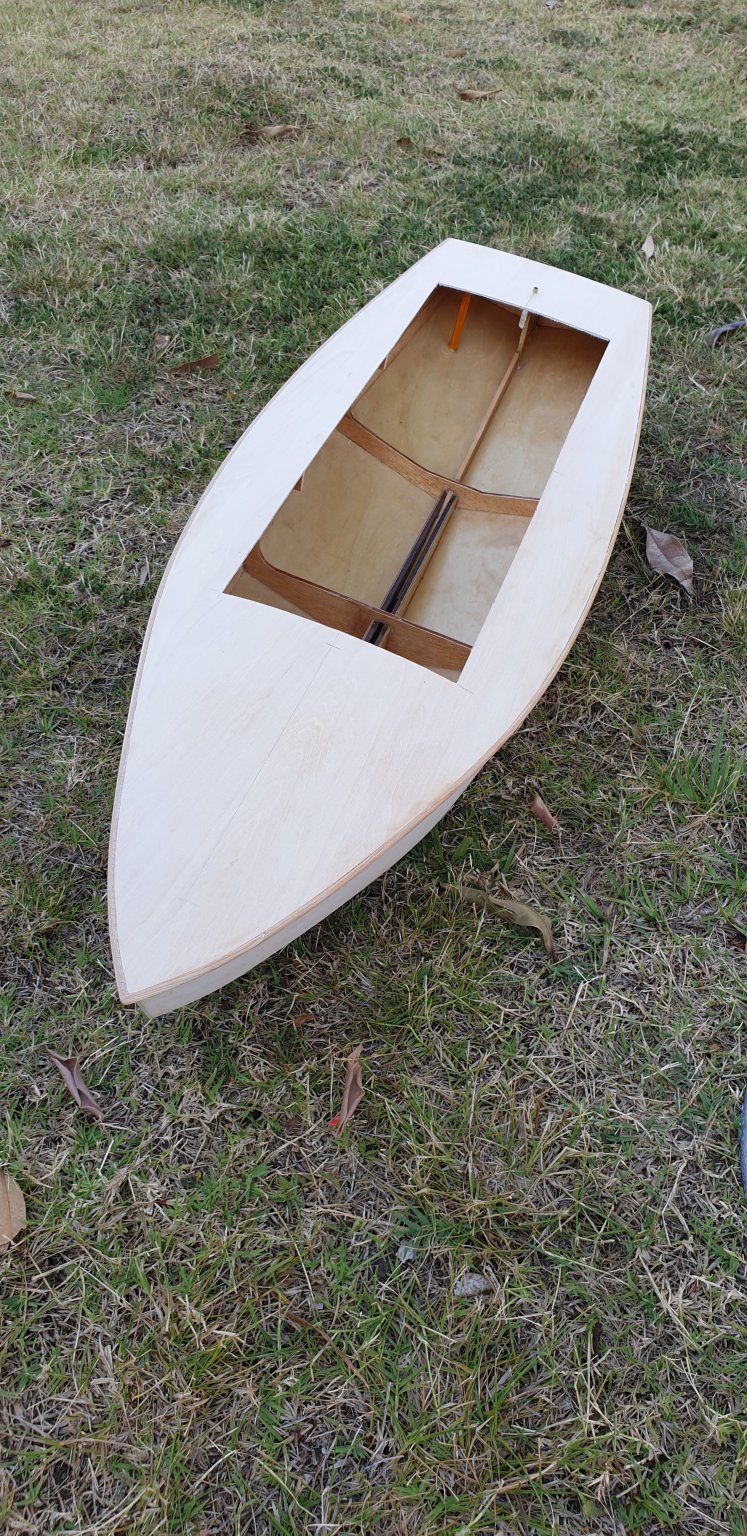
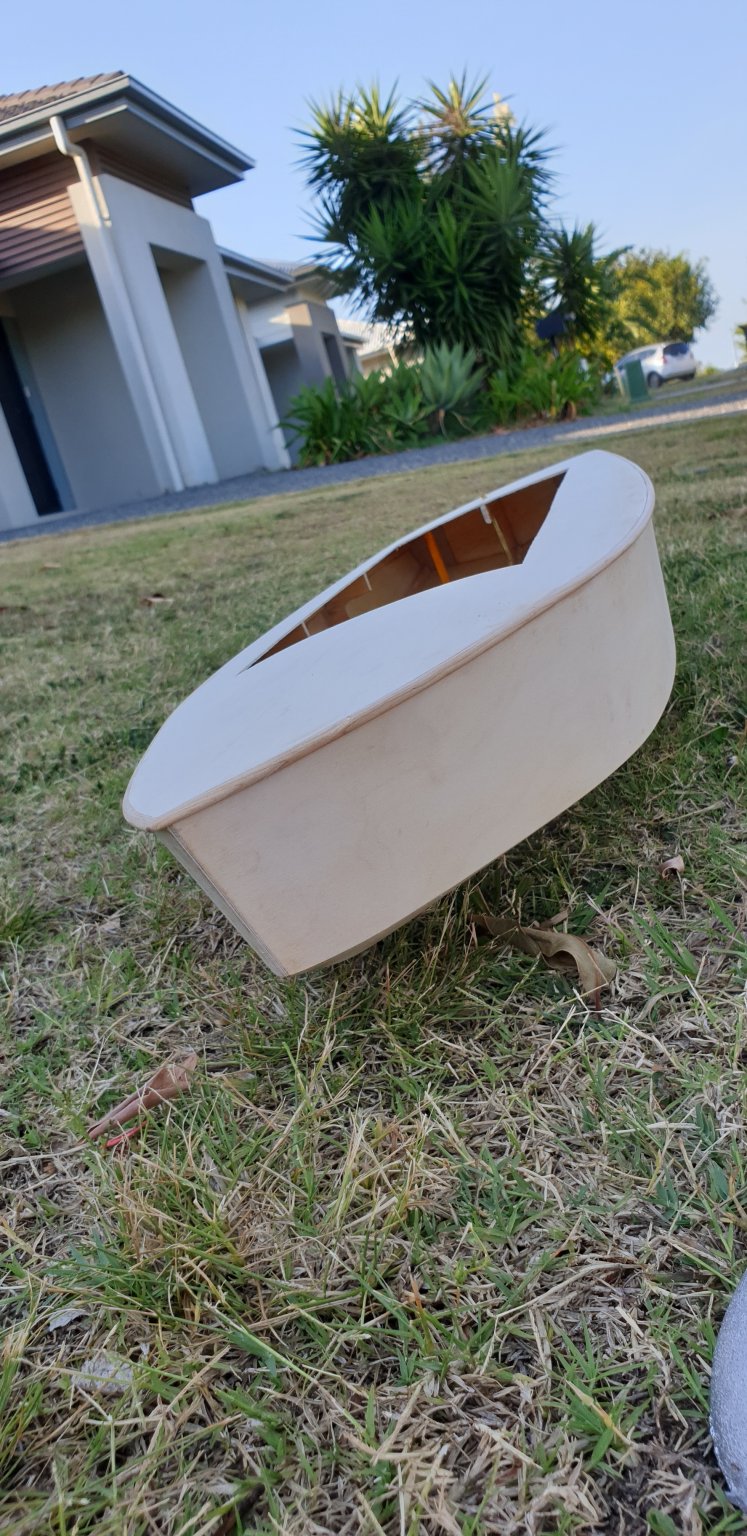
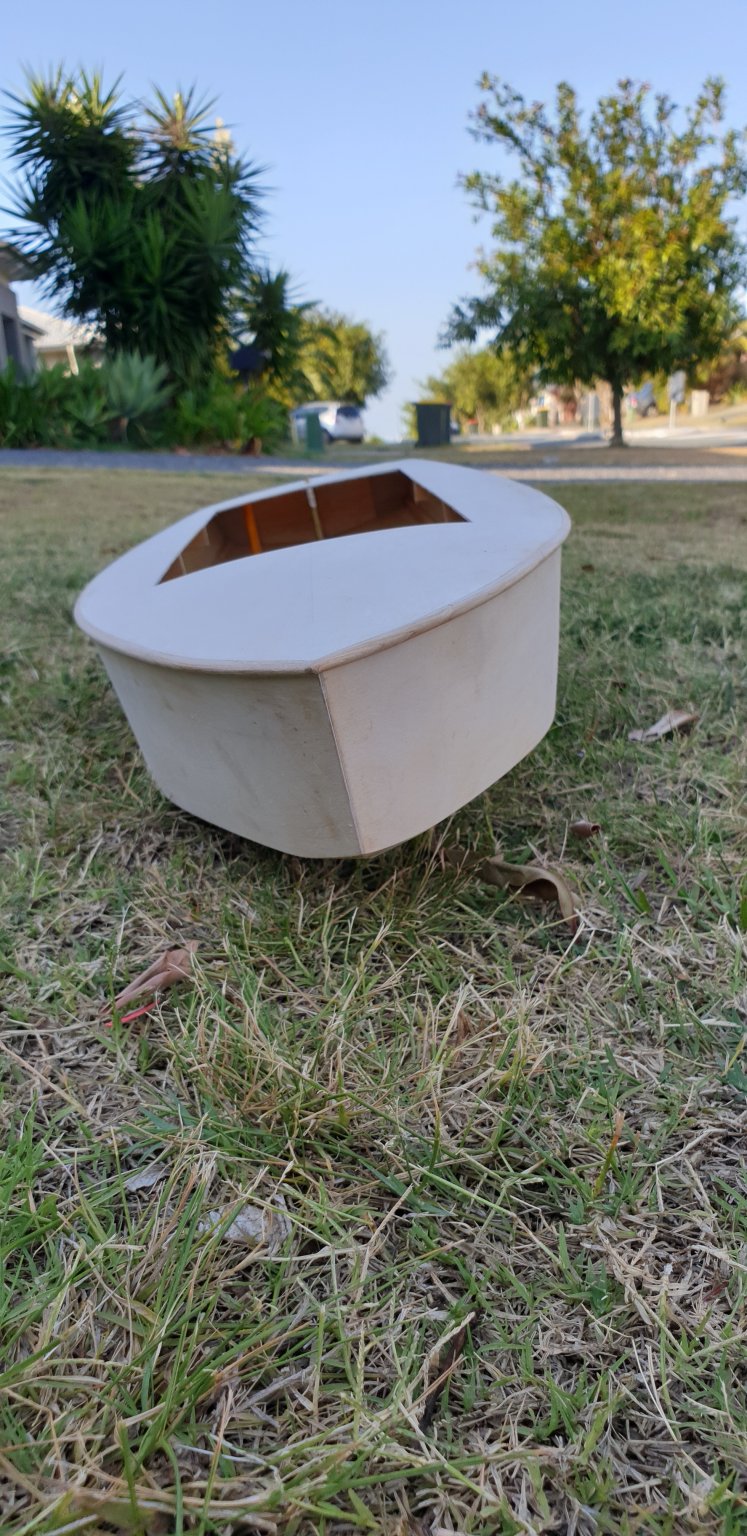
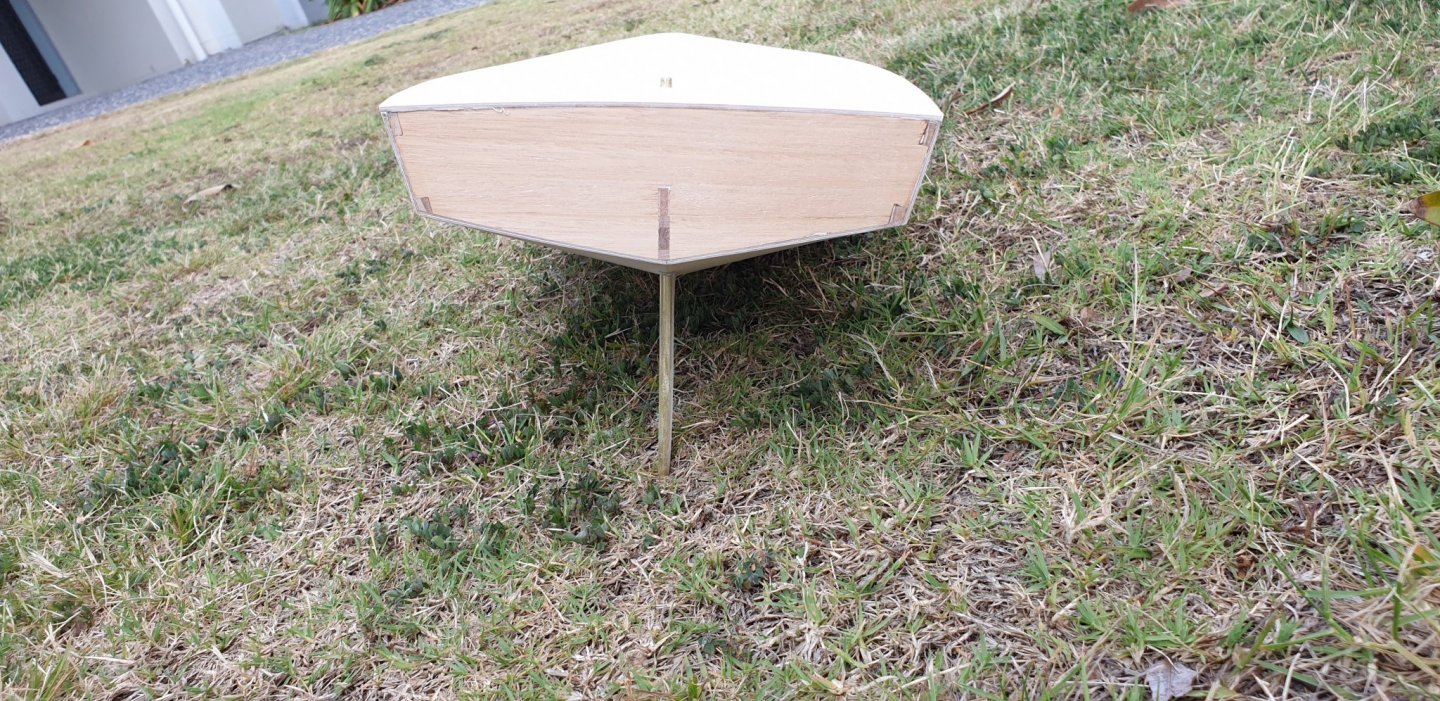
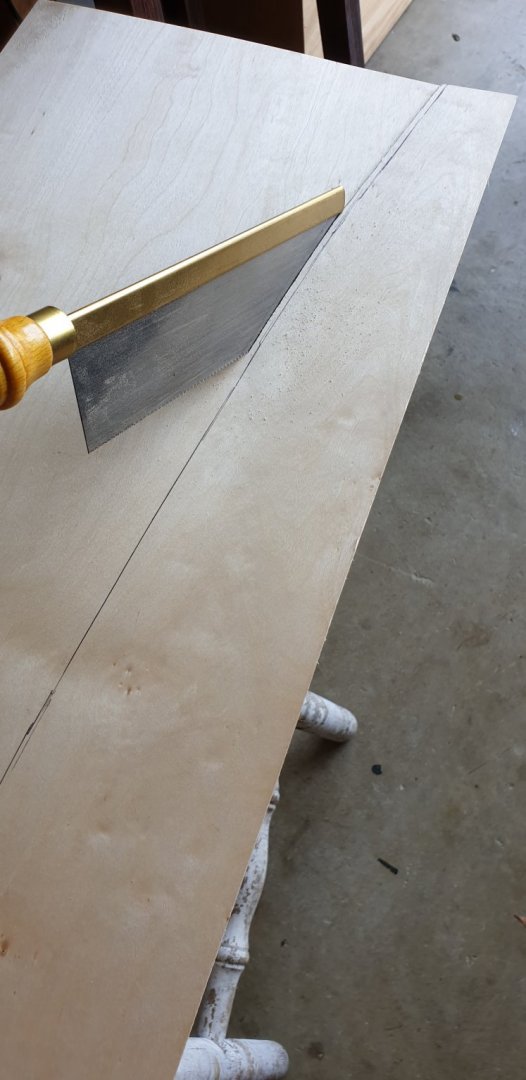
I have made the skeg and epoxied it and the rudder tube to the hull. The deck was then glued on with Titebond ultimate waterproof glue. Had a few panic moments as I had literally 5 minutes to pin it all on. Its a hot day out here and glue goes off dead quick. 5 minute epoxy becomes one minute epoxy. No kidding you. Now for the exciting bit. Cut a gurt hole in it and fit a cabin on. The plans say cabin is optional but I think a 60s yacht must have a cabin. I think I will also fit rubbing strips like Emma. Pete


-
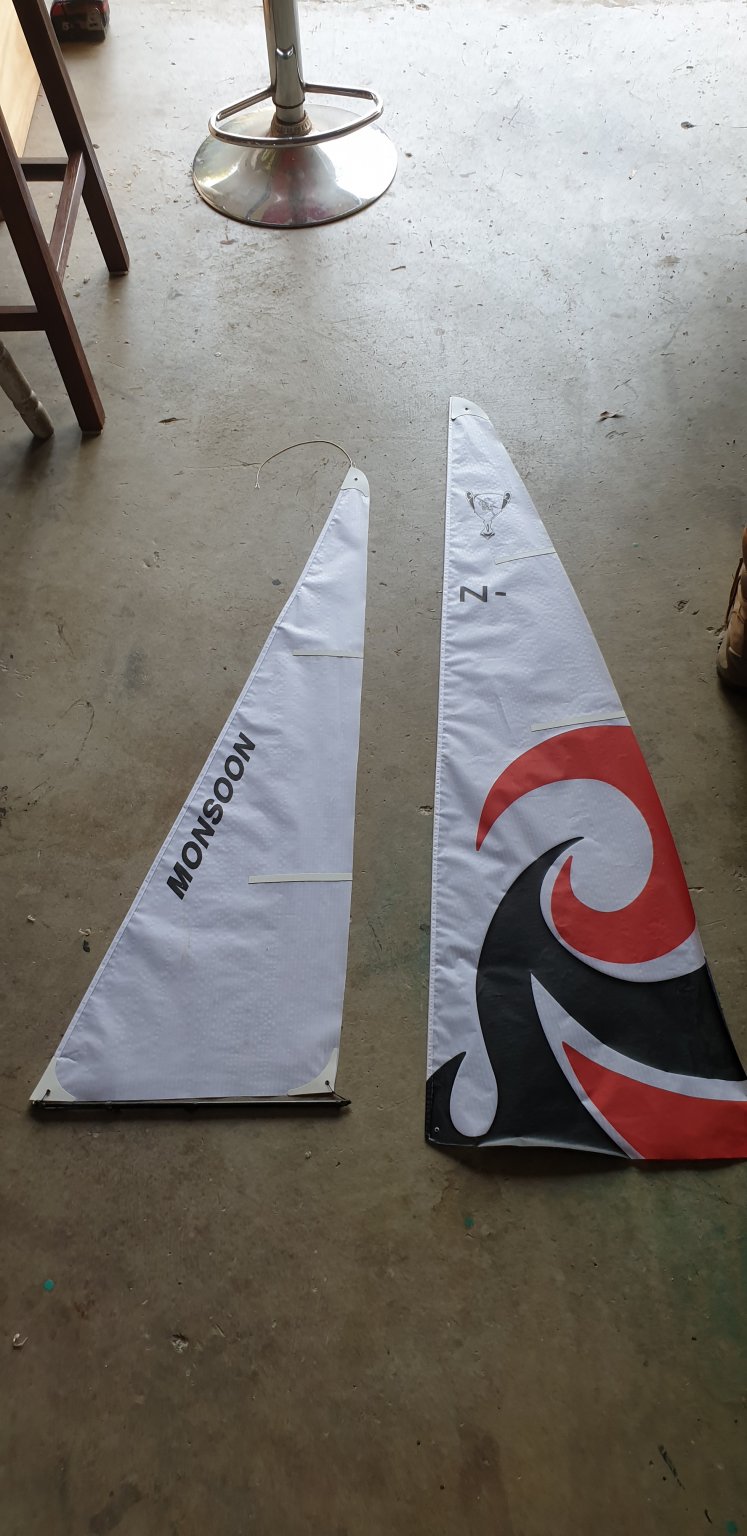
Thanks Chris. Yes shes okay with a bare puff but I was advised to make another sail set for windier conditions. I might just make a complete rig with short sail and swap them around when needed. More weight and a beefier servo required for that size of rudder so I am fitting a standard servo aft of the cockpit. Without adding extra weight I am making the battery pack movable so it can go rearwards to lift the bow out of the water a bit. This will reduce nose dive which is a bug bare with footys. I am also fitting a large skeg so as to give resistance to stop her going around in circles on her own in windy conditions. Maybe she is just a boat for calm days and for windy days I'll sail Starlet or Emma. We cannot have it all. They were all very surprised at my new club that such a small thing can give such a performance. I had lots of interest and questions. So I hope I have started something!. Pete.
-
Today I joined a local model sailing club and myself and grandson Brandon had a grand time sailing Brando. This is Brando Two on her maiden voyage. Sails well in a light breeze but does all sorts when the wind kicks up. I have had advice on what to do so some modifications are underway right now. I am doing the vid and Brandon is sailing his Brando. First time he has ever sailed a boat. What joy! Pete https://youtu.be/tUrFAx-yzMY
-
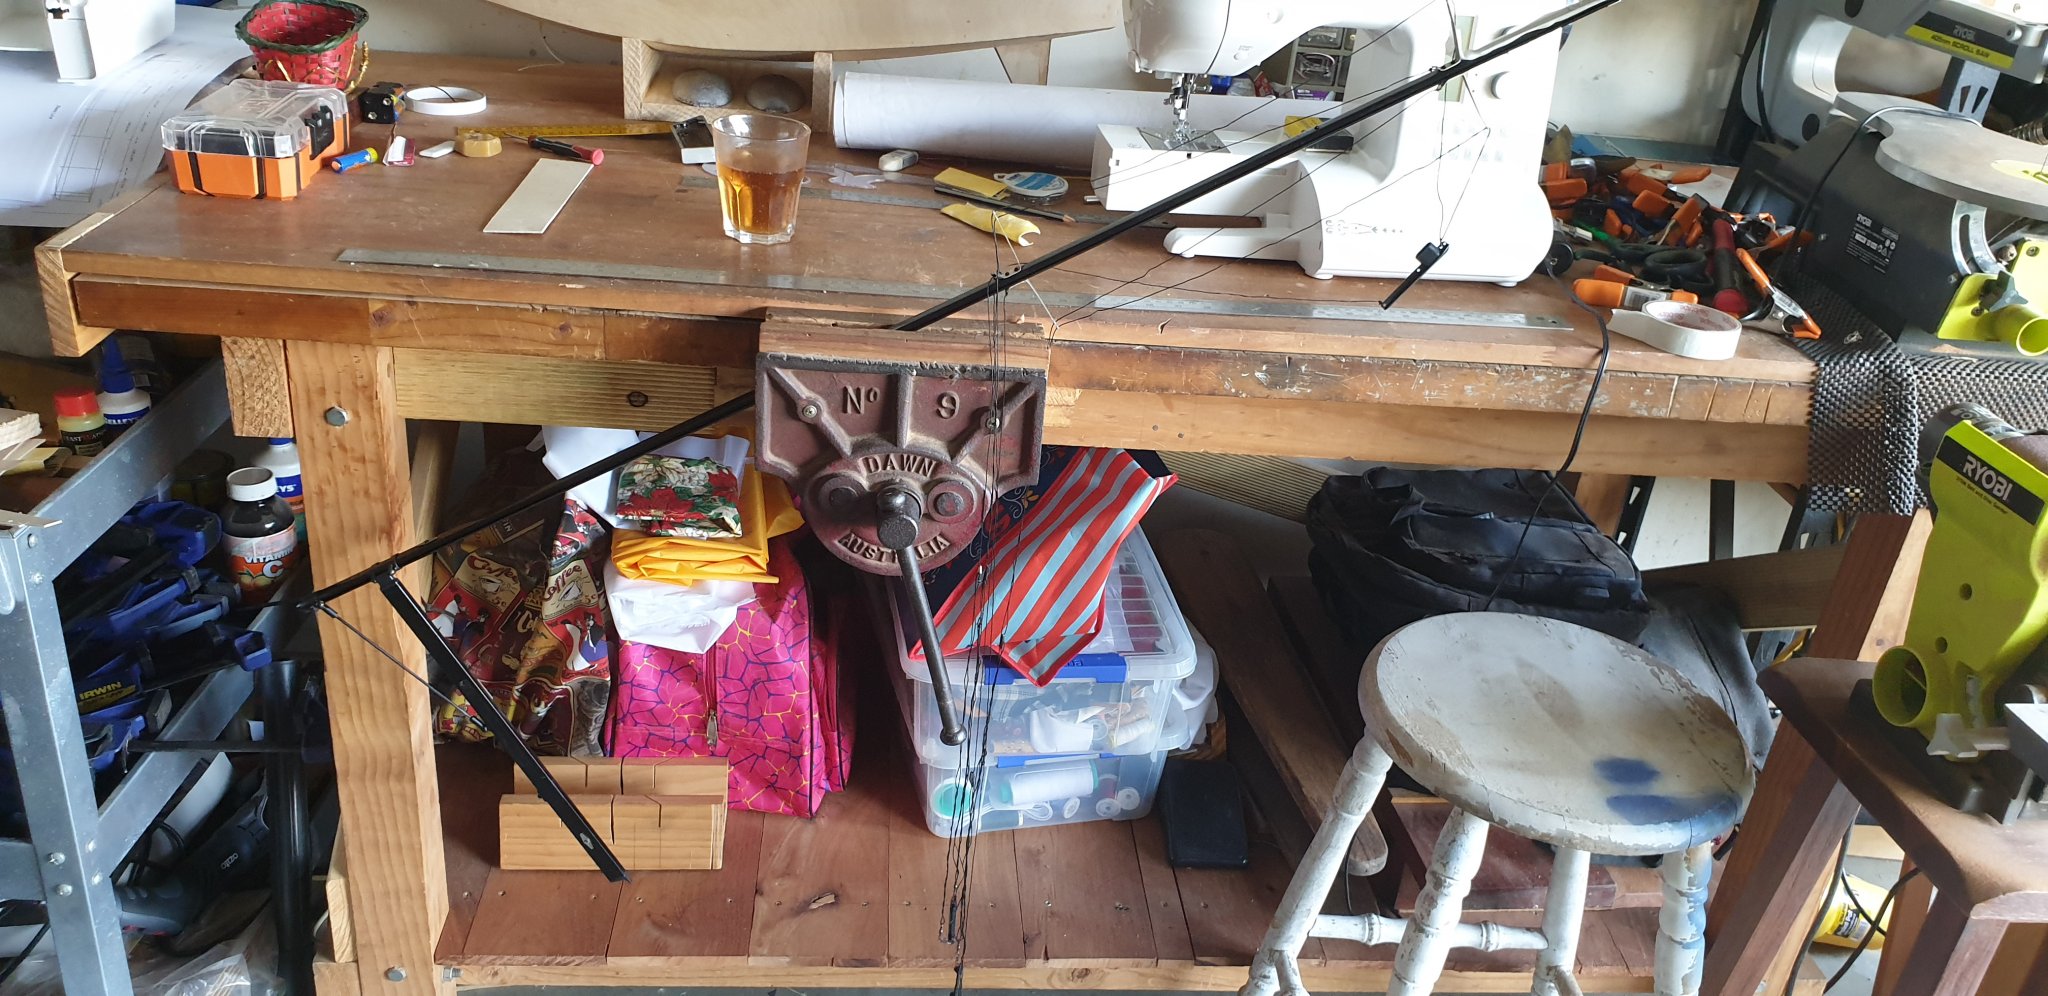
You are a very methodical and clean worker Nils. My shop is a disgrace and very dusty. I do though have a rough idea where everything is and know when I am running out of various glues. Thanks for taking the trouble to do a photo session of your workshop and tools. I am sure that you will resolve being stuck with the decks. So long as you are not stuck TO the decks with CA then alles Gut!!! Pete
-
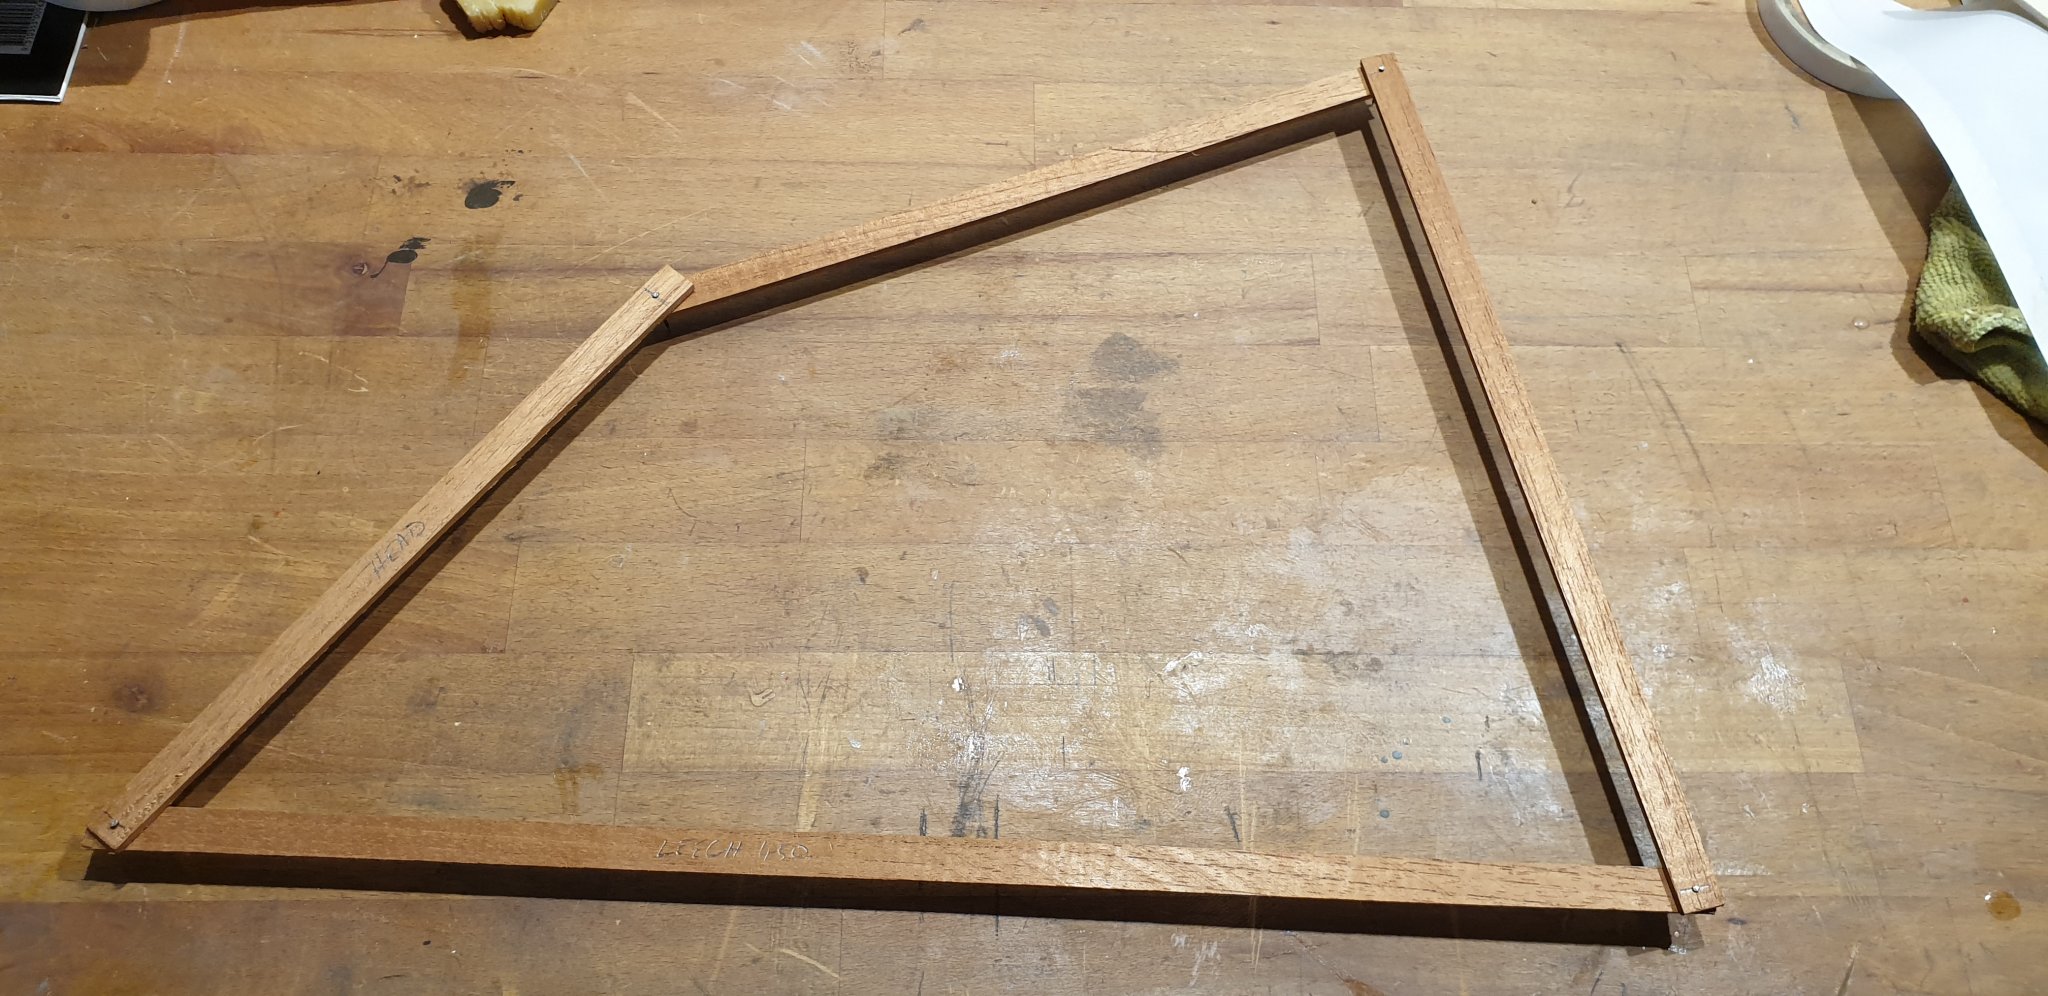
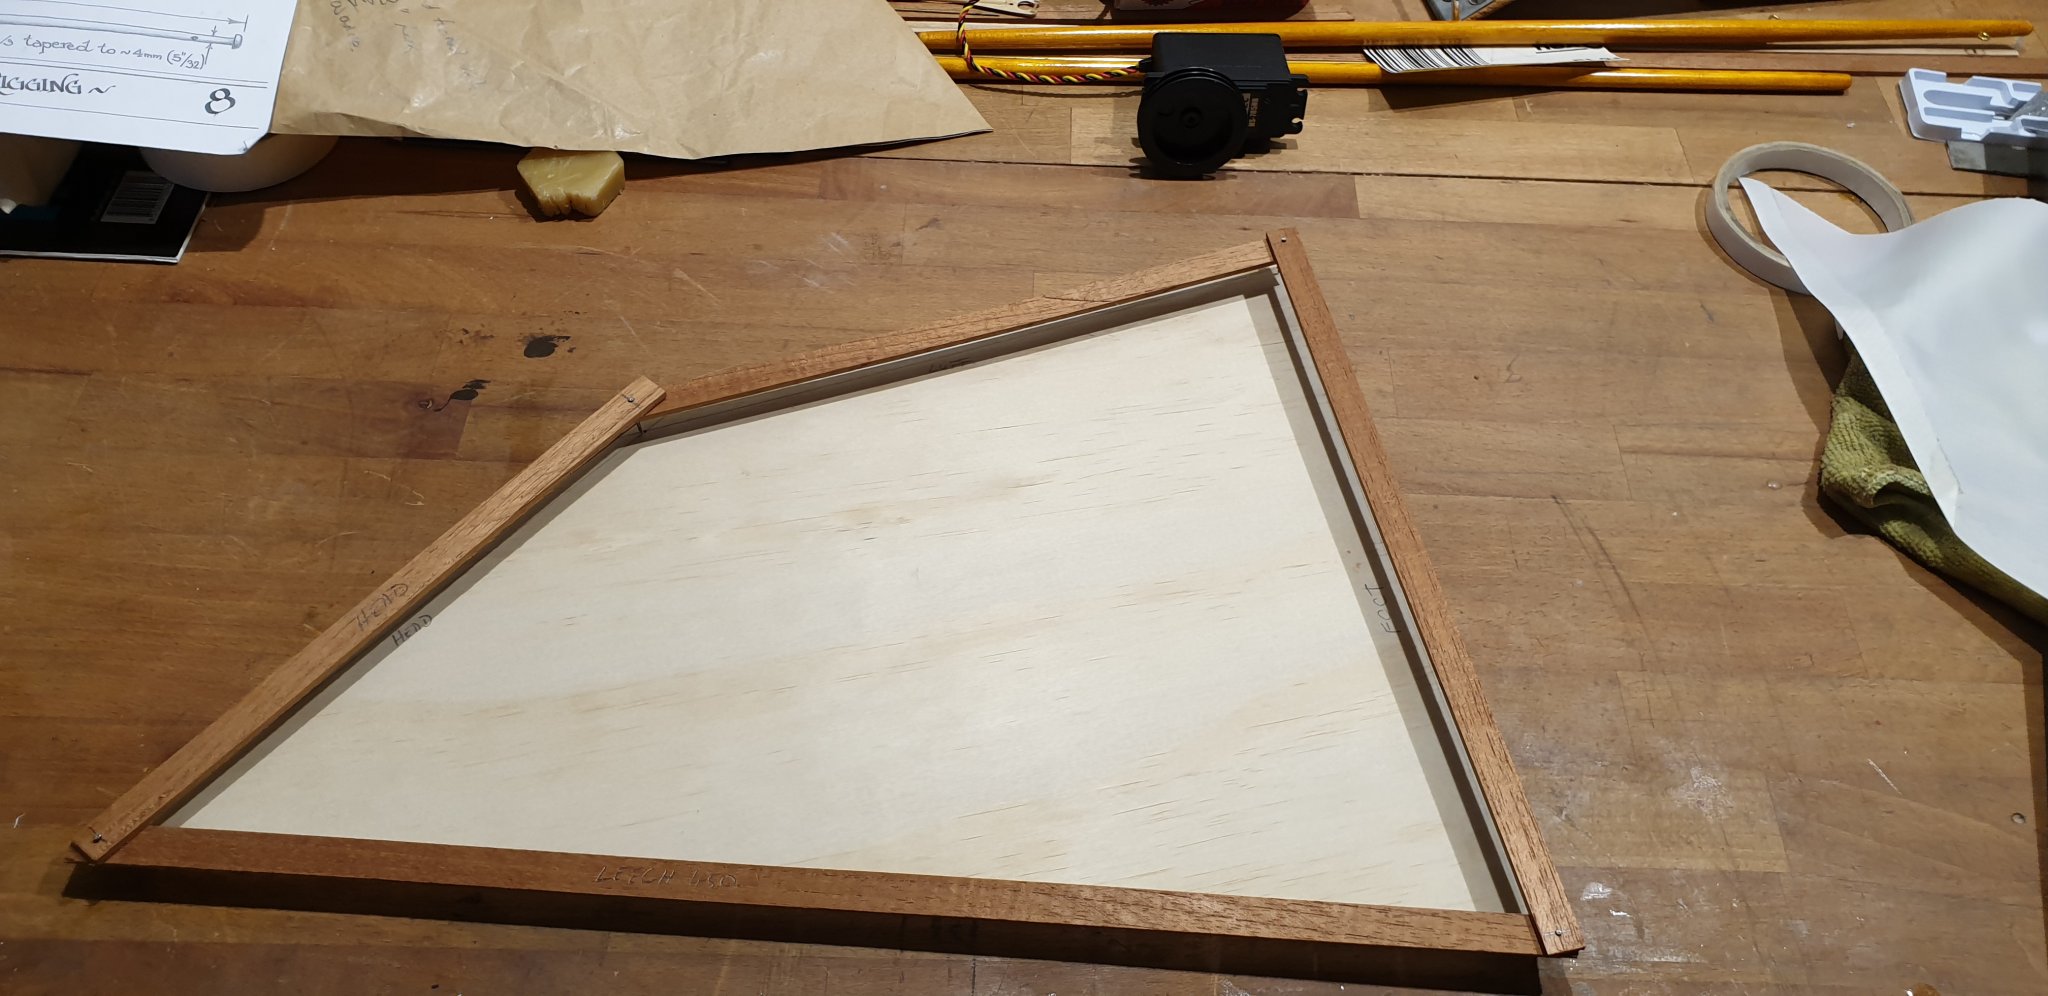
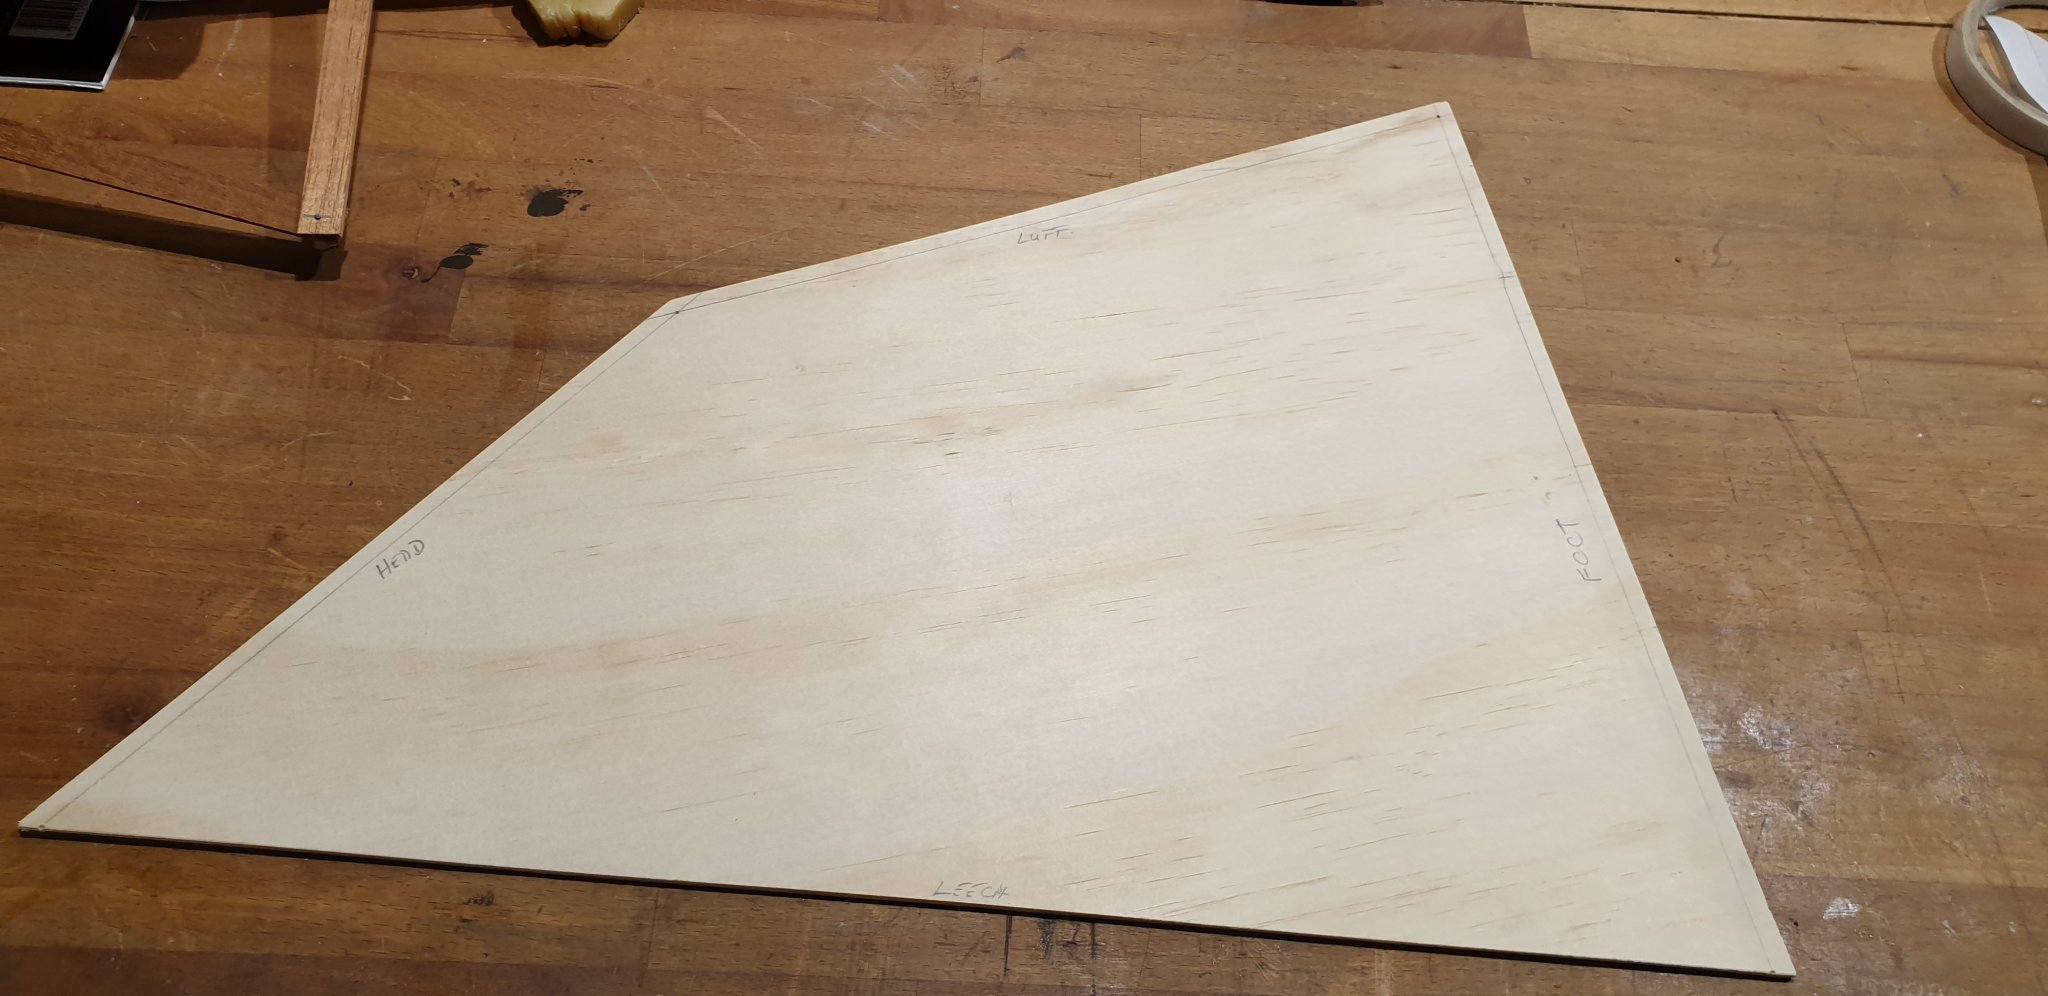
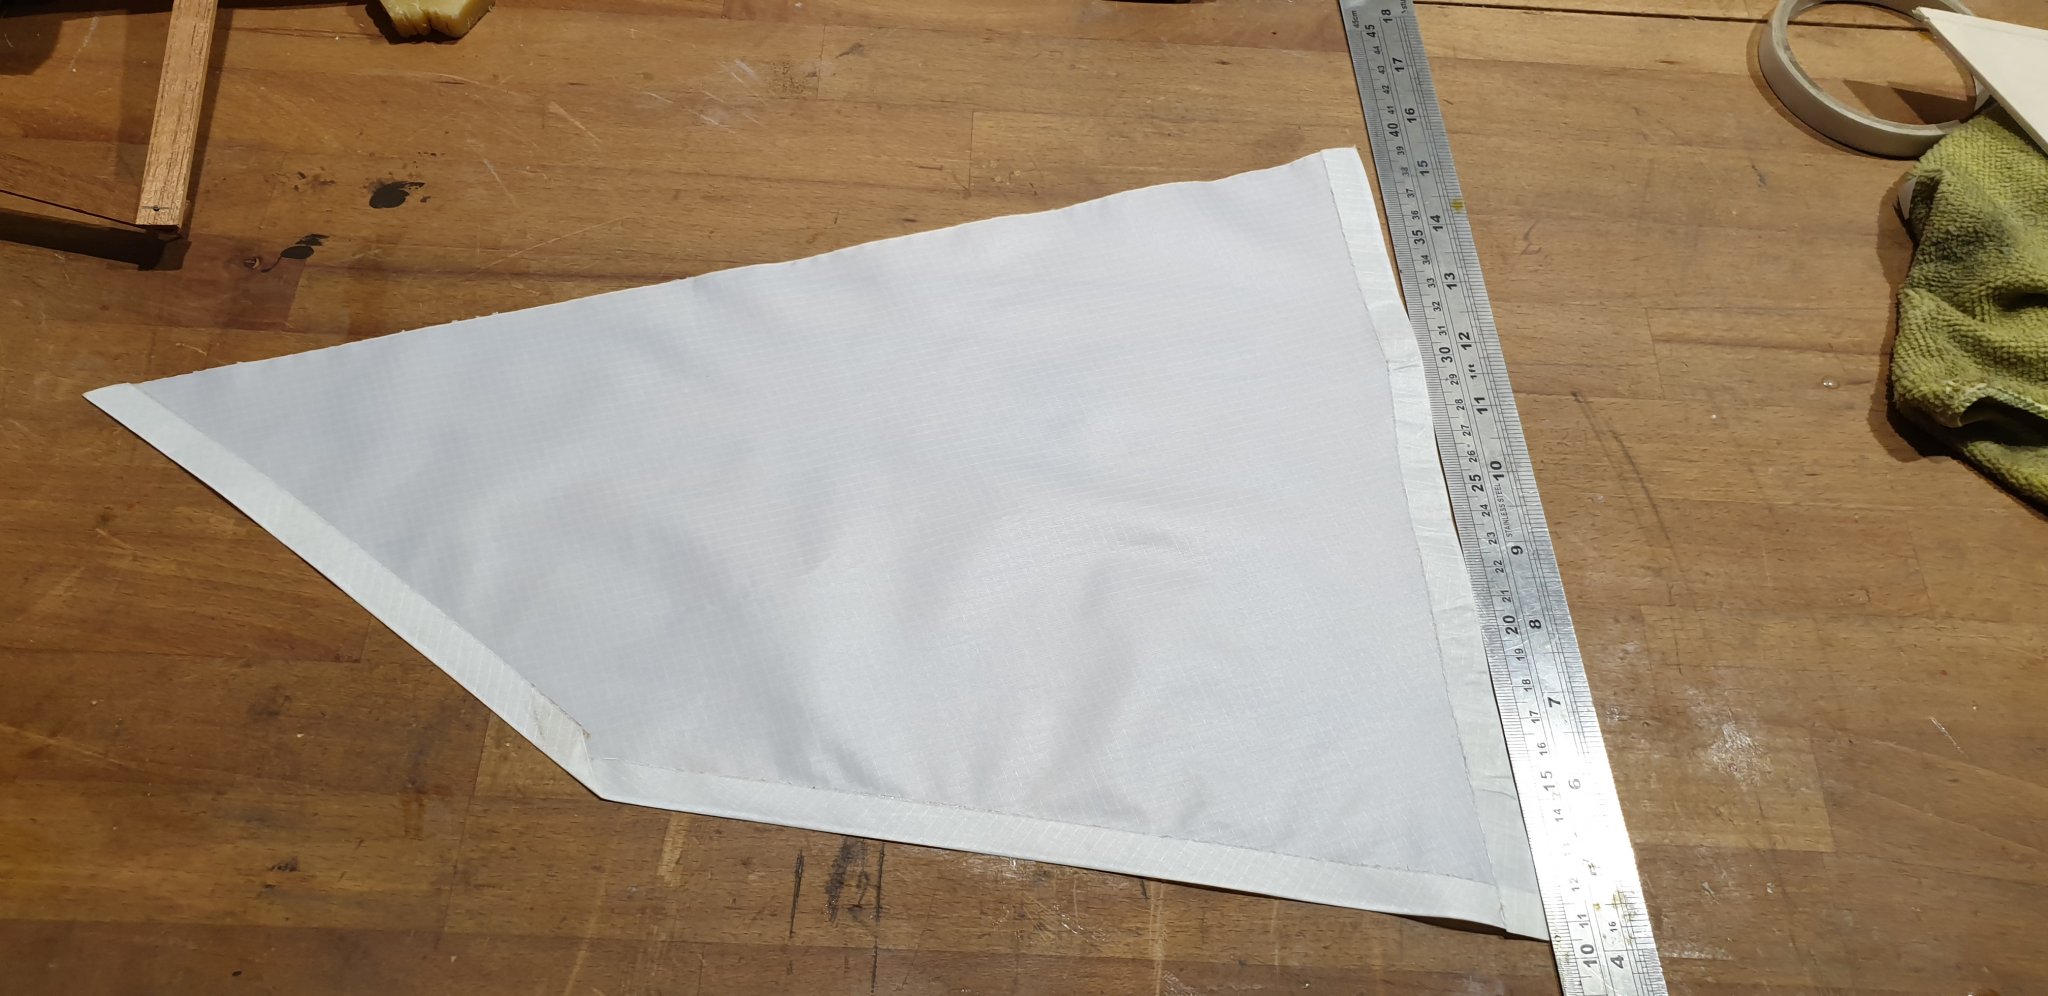
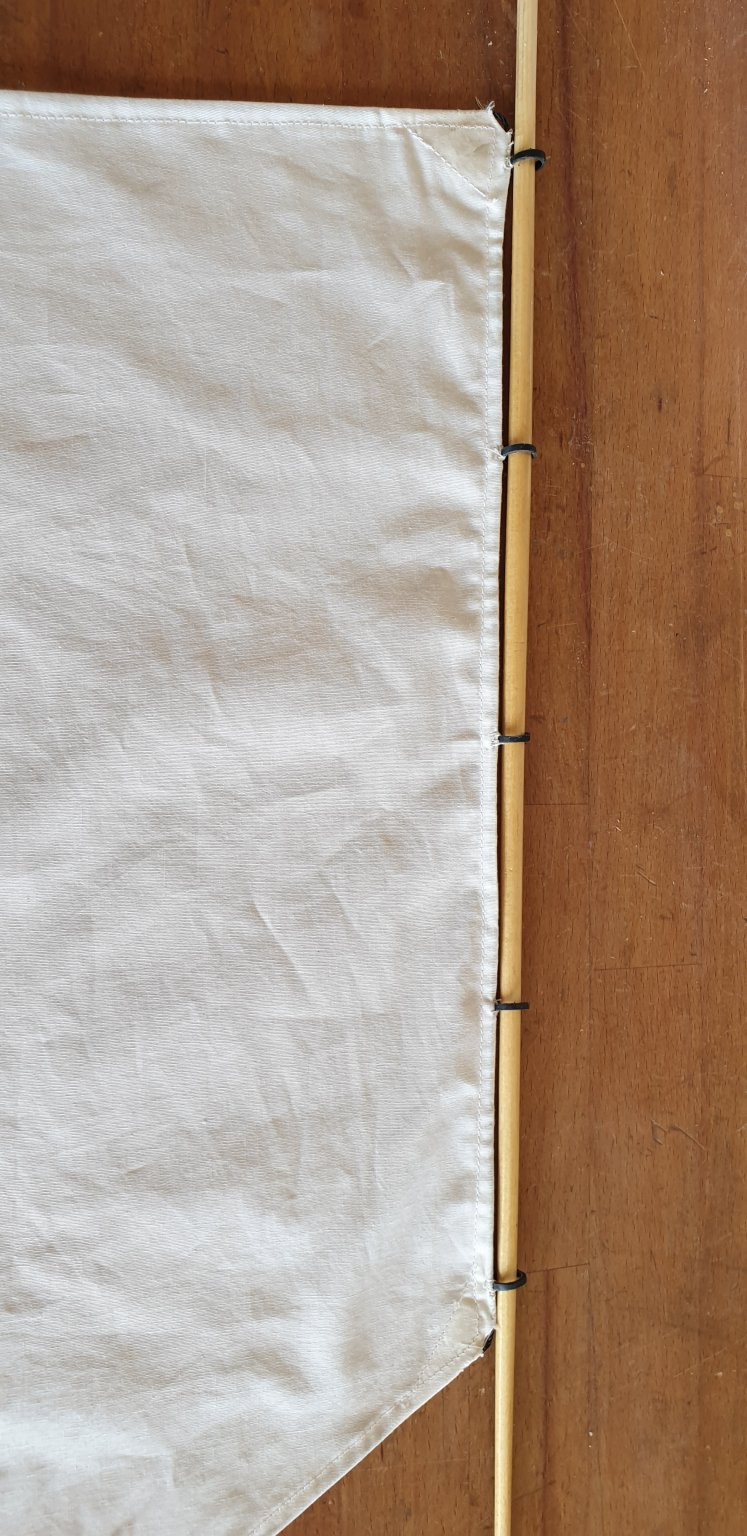
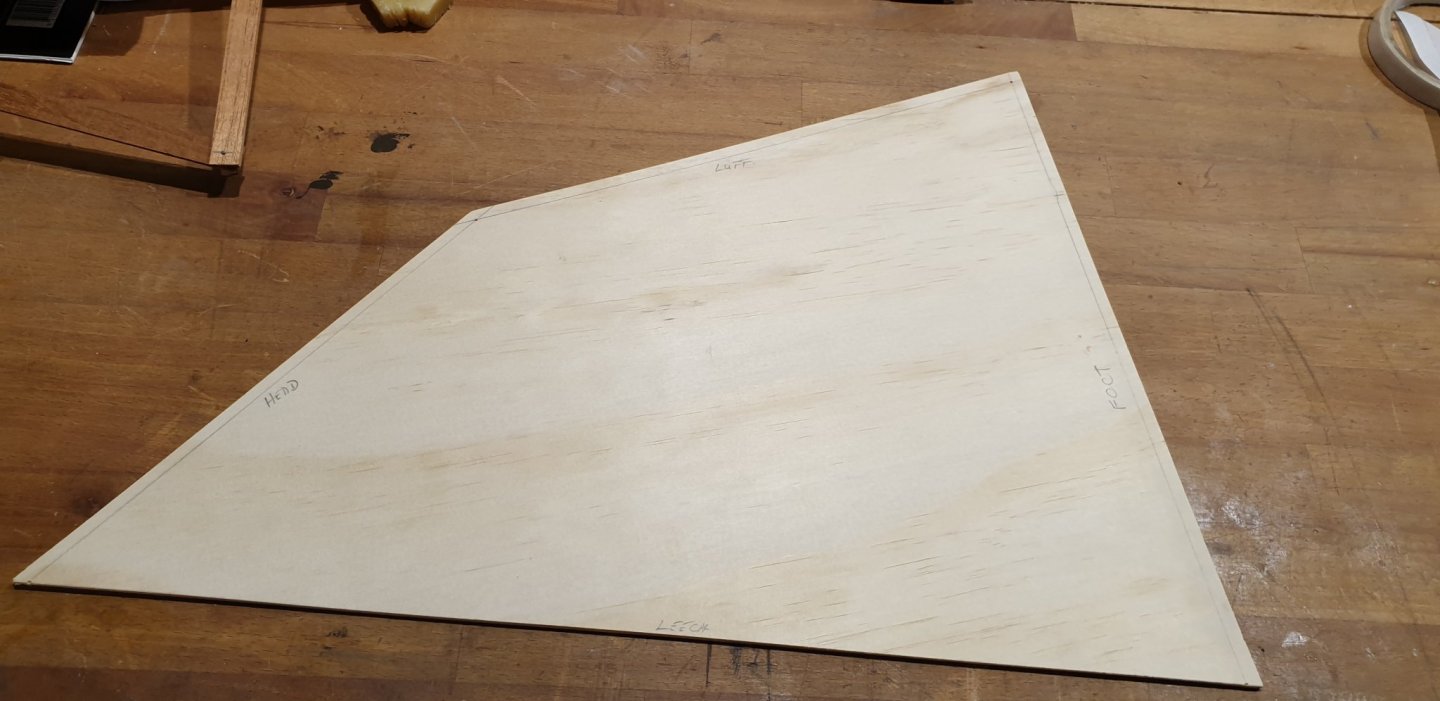
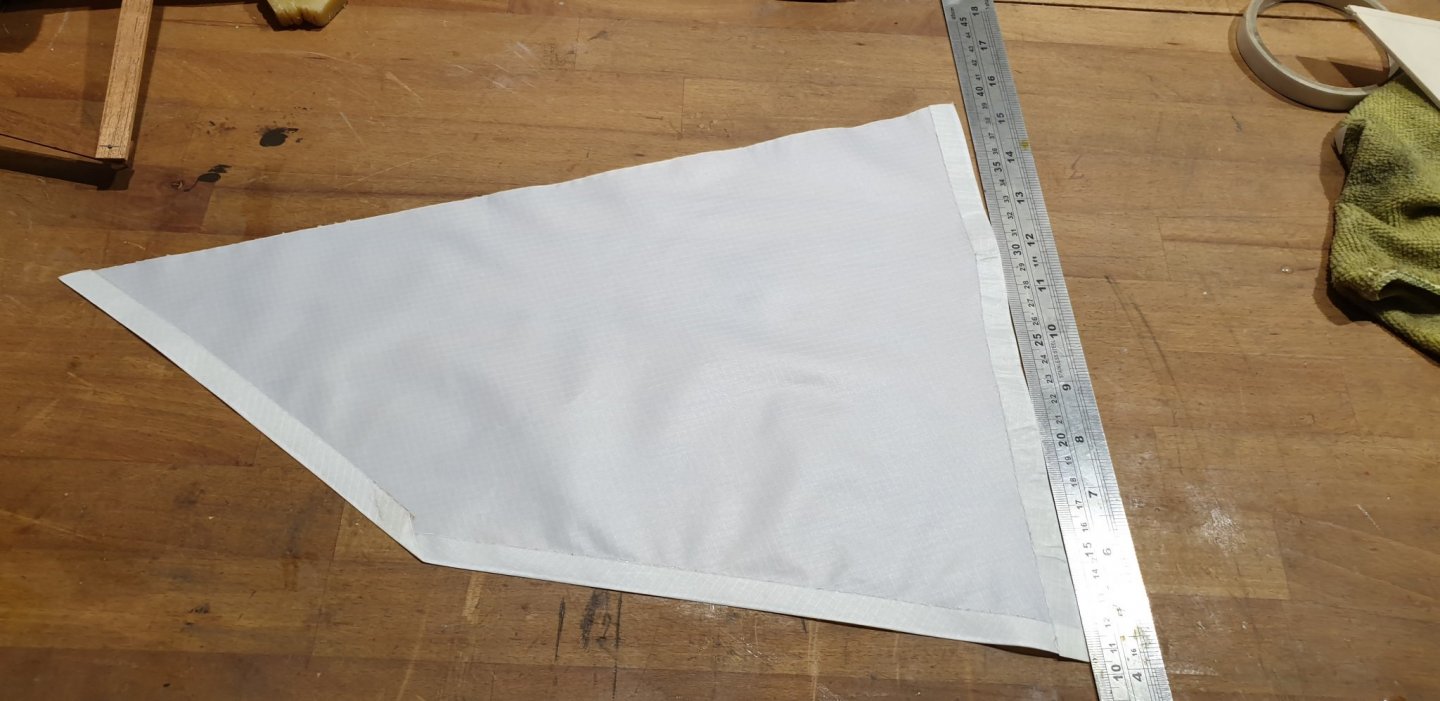
I am having fun and games here with sail making. In particular, the gaff does not haul up as it should do. I have spent hours mucking about with adapting the rigging but to no avail. It has sailed but I did not like the look of the sail when filled. So I went back to the drawing board to check sail geometry. First off the Leech should be left unfolded to allow air flow. With cotton sails this is impossible as the edges will fray in minutes. So it is back to Nylon. I wanted to give this another chance as I have quite a lot of it for kite making ( try it!! It is great fun flying them ) Secondly I was not convinced that I had the correct geometry for the sail. I could not understand how to plot the points of the trapezoidal sail from the drawing as there are no angles given. See the pic. I have wondered about this for weeks until today it suddenly clicked. It does not explain on the plans exactly how to make the sail. It clicked that I would have to make a movable trapezoid by means of making a suitable frame from timber with the exact lengths of the head, leech, luff and foot. To locate nails through them so that the movable frame could be pinned with one pin to a board. I could then adjust it to obtain the correct diagonal measurements as shewn in the drawing pictured. Having got my nail points in the board underneath it was a simple matter of joining up the dots with a ruler and pencil. Hey presto...one exact size sail to correct geometry. I was pleased with myself that my brain still worked but somewhat displeased that it did not work sooner. Question... Would you have twigged straight away?... I suppose it matters not . Anyway I made a pattern from plywood allowing for seams and used a soldering iron the cut the nylon. Very easy once the pattern is made. All edges are now effectively welded and cannot fray. I used double sided tape to form the hems. I shuddered at the thought of this method before but I must say...it works. As you can see the foot of the sail is far from straight. I will cut another one. It now takes minutes to accurately cut a sail with a soldering iron. I need more practice folding over the hems in a straight line. So....nylon sails are back in. I am beginning to see the advantages of using modern materials!!! I know when I'm beat! I need to make reinforcement corners and that will happ en tomorrow. They will be cut with a soldeing iron to patterns I will make from plywood. Pete.


-
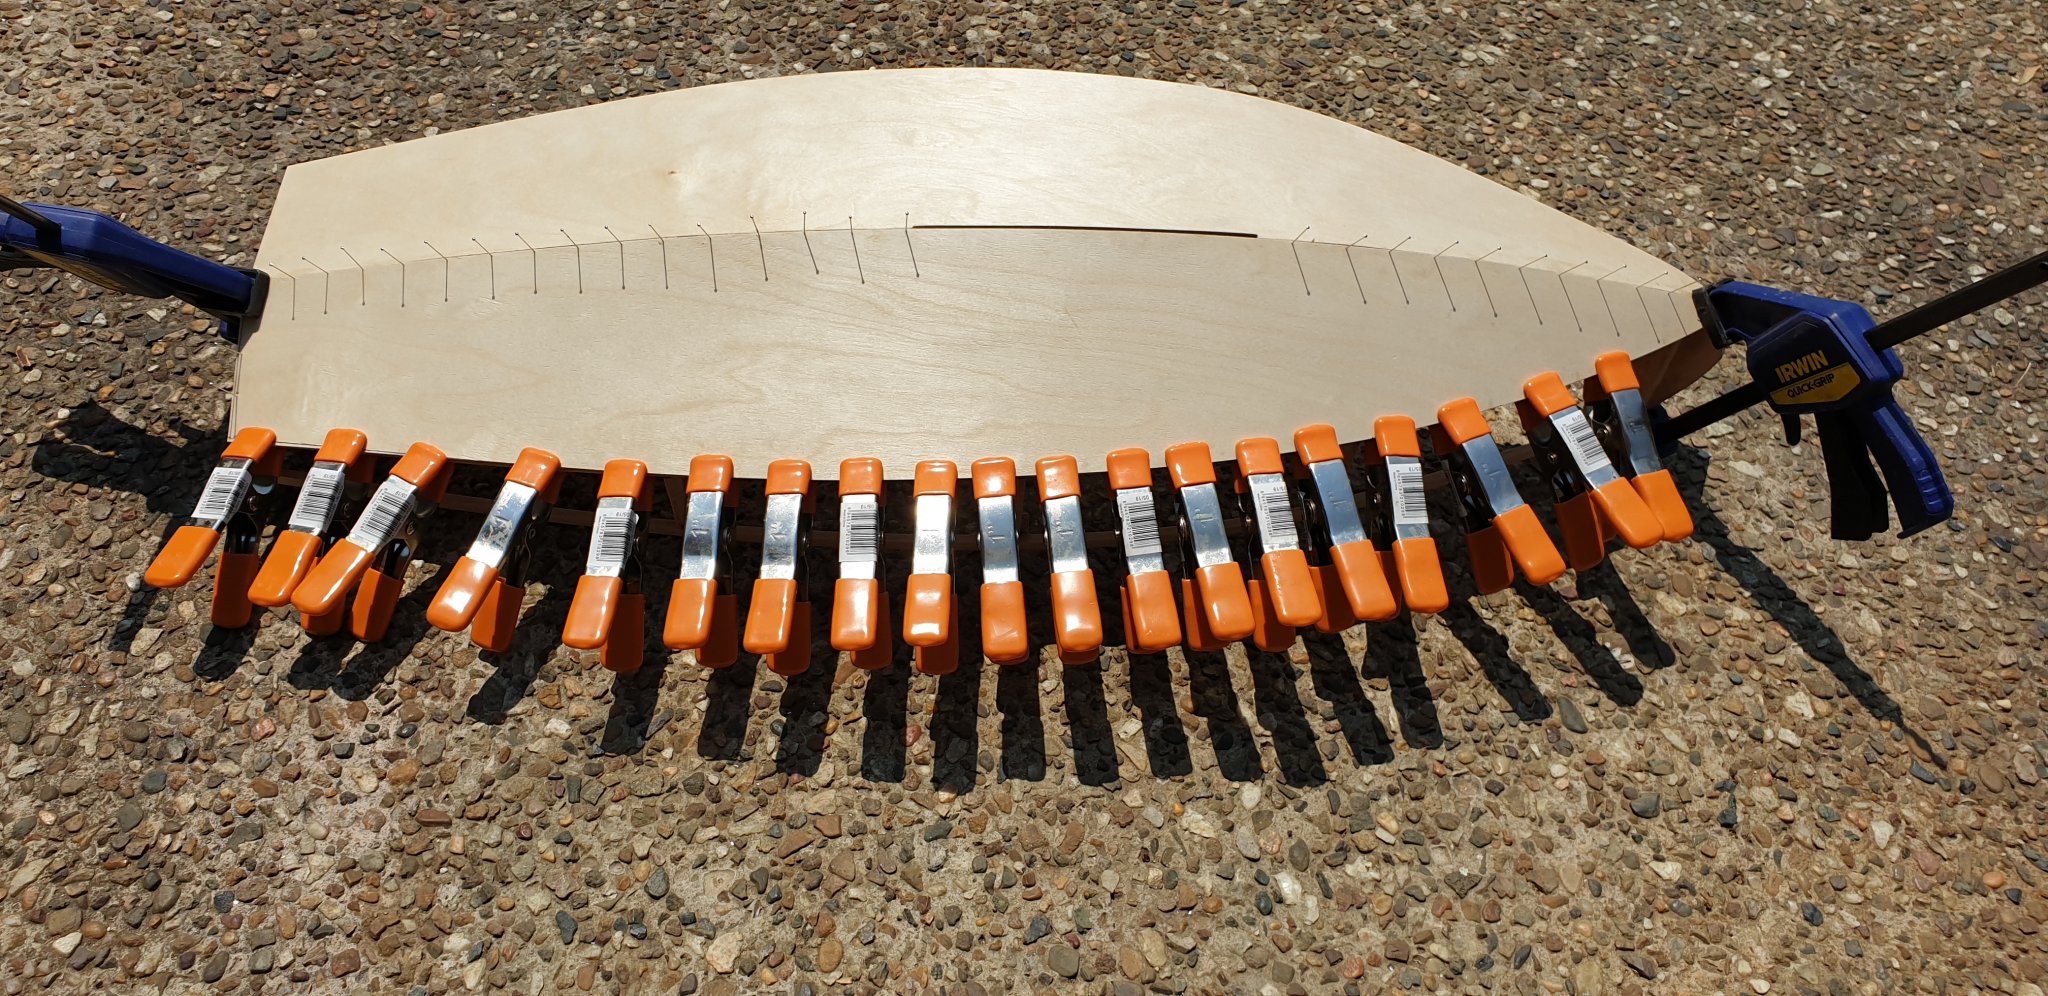
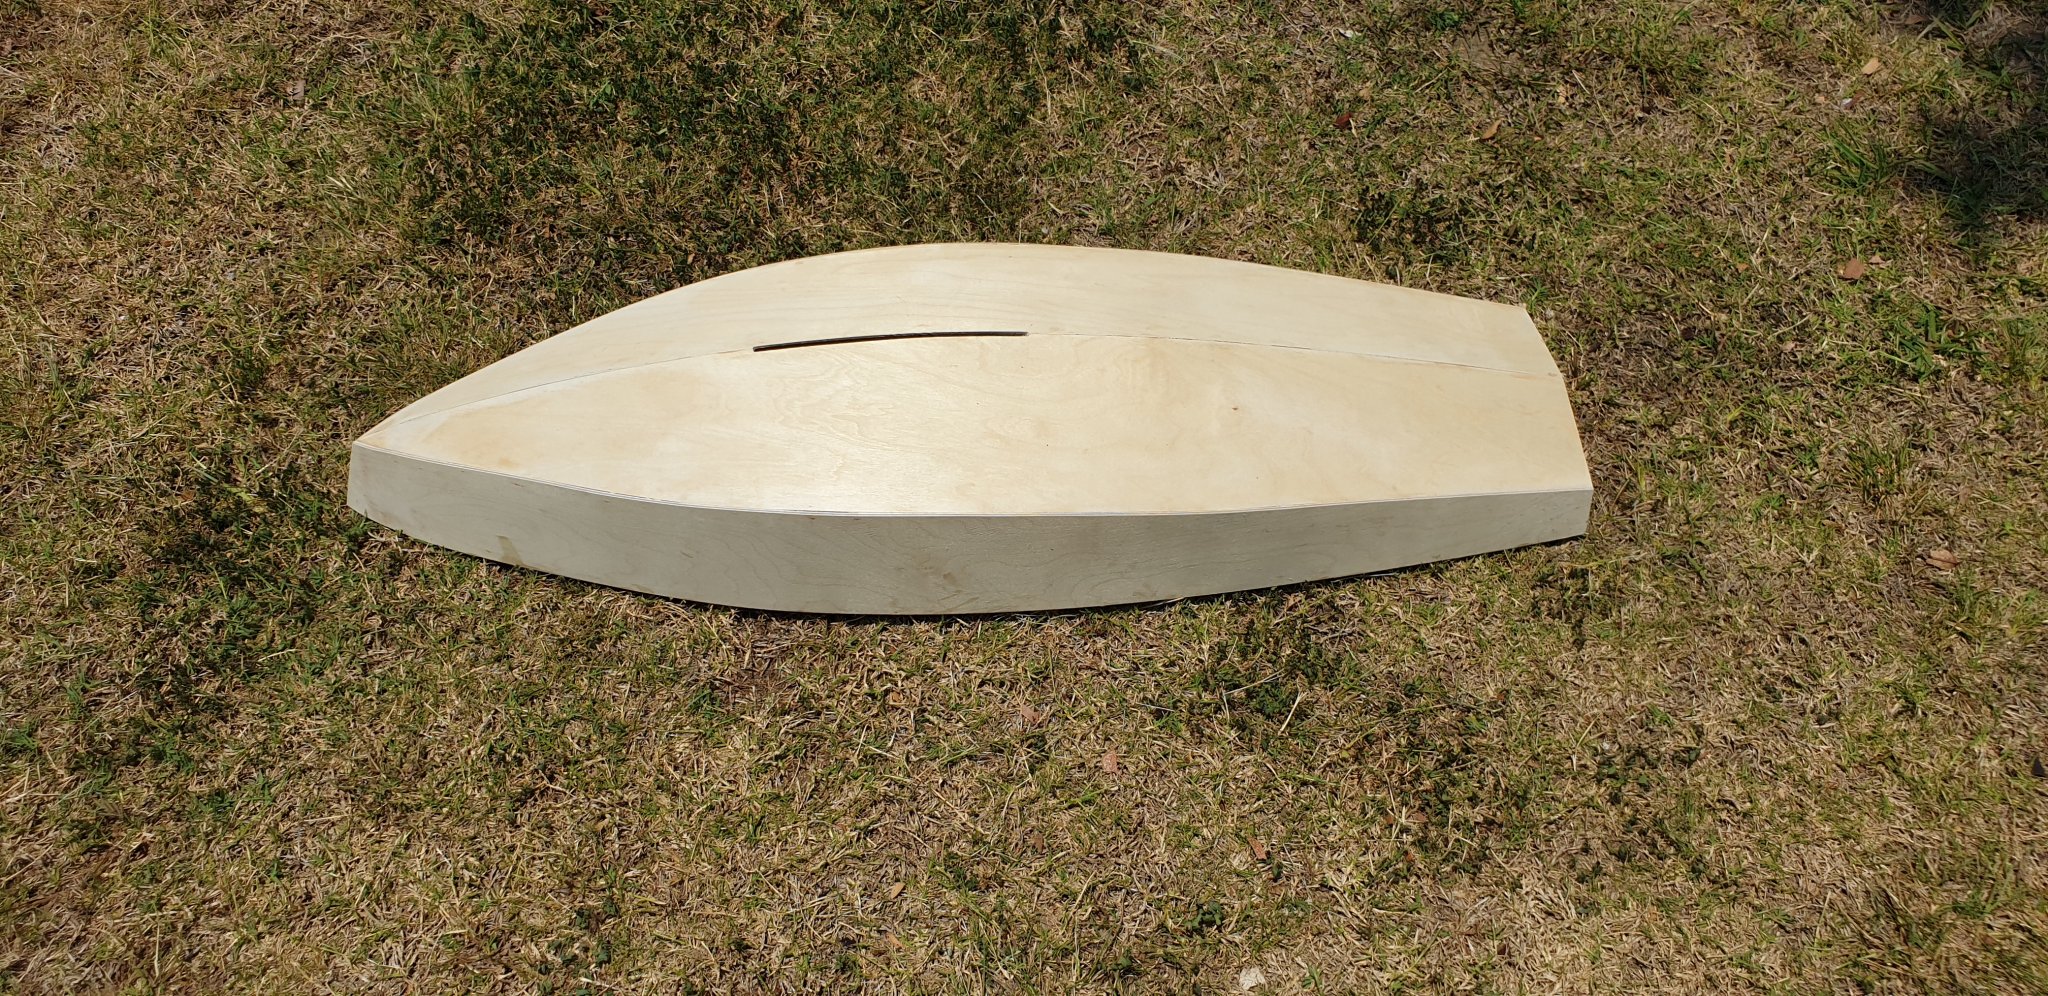
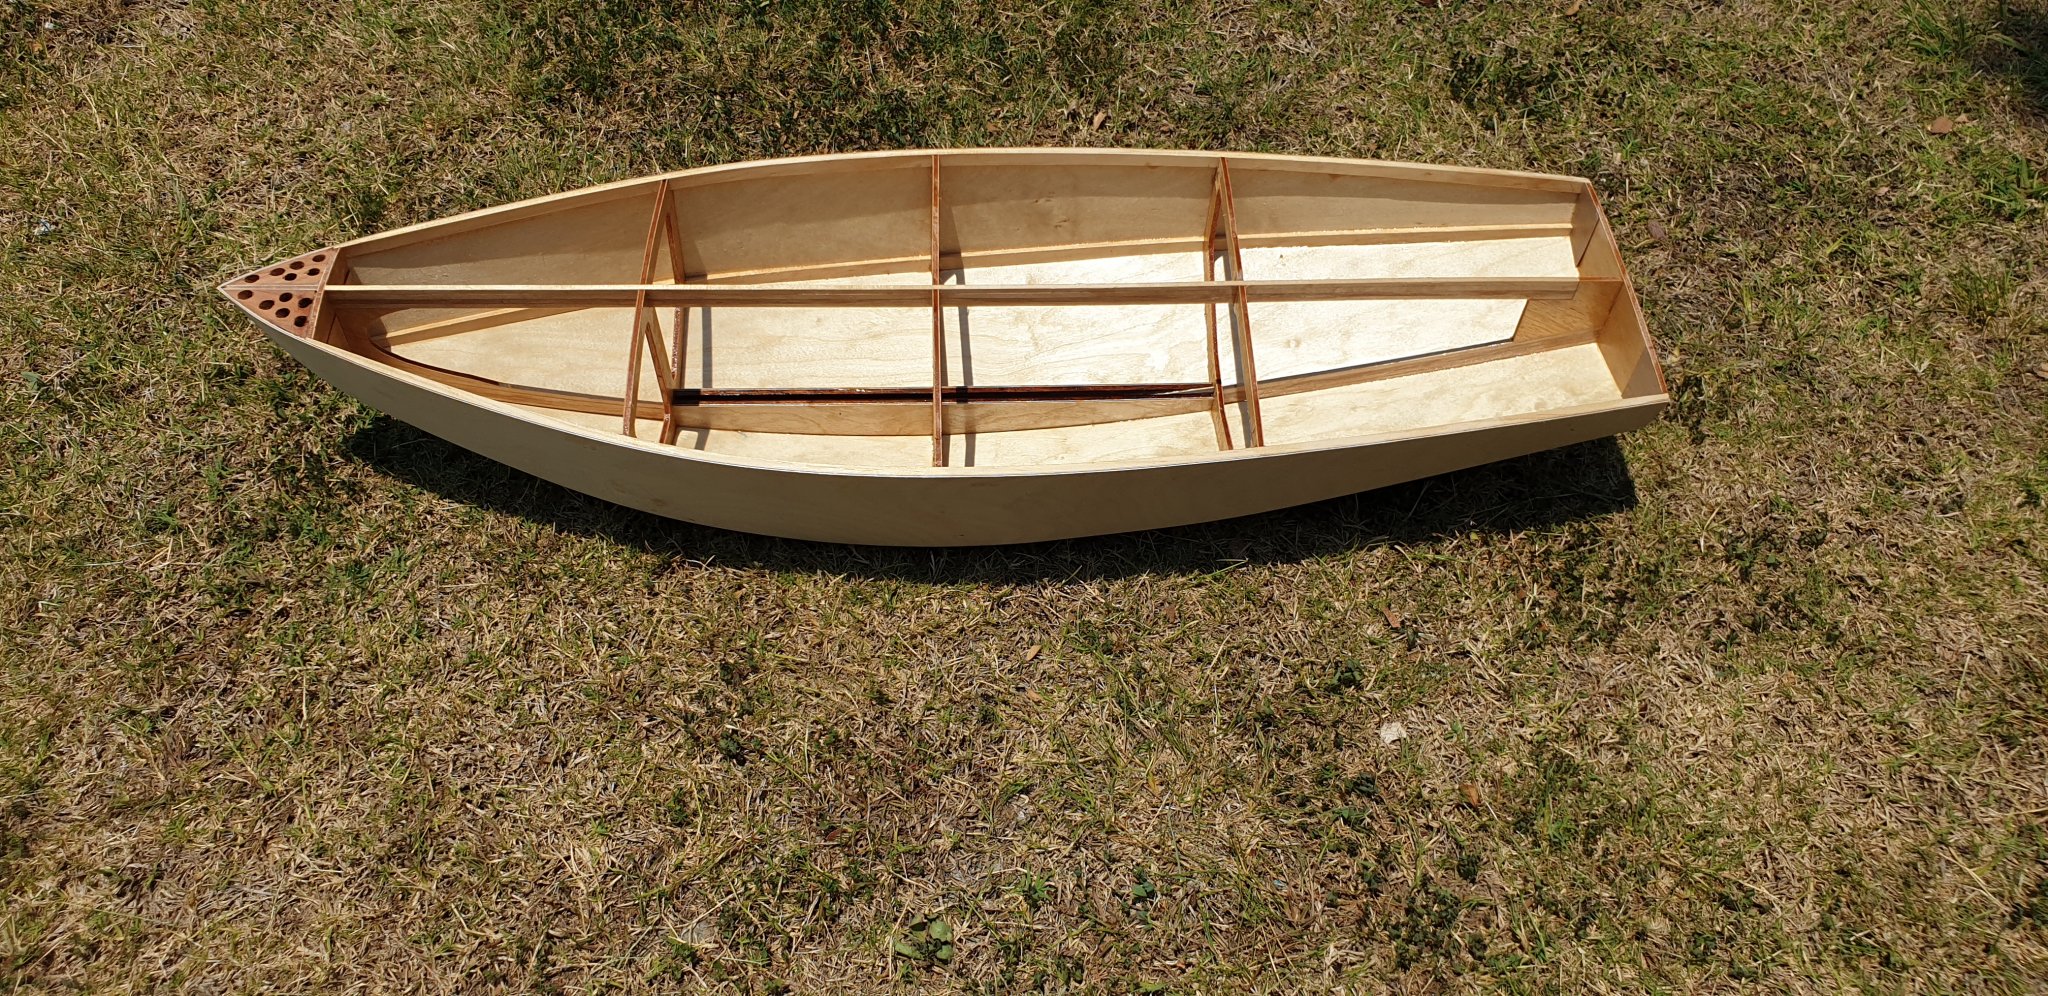
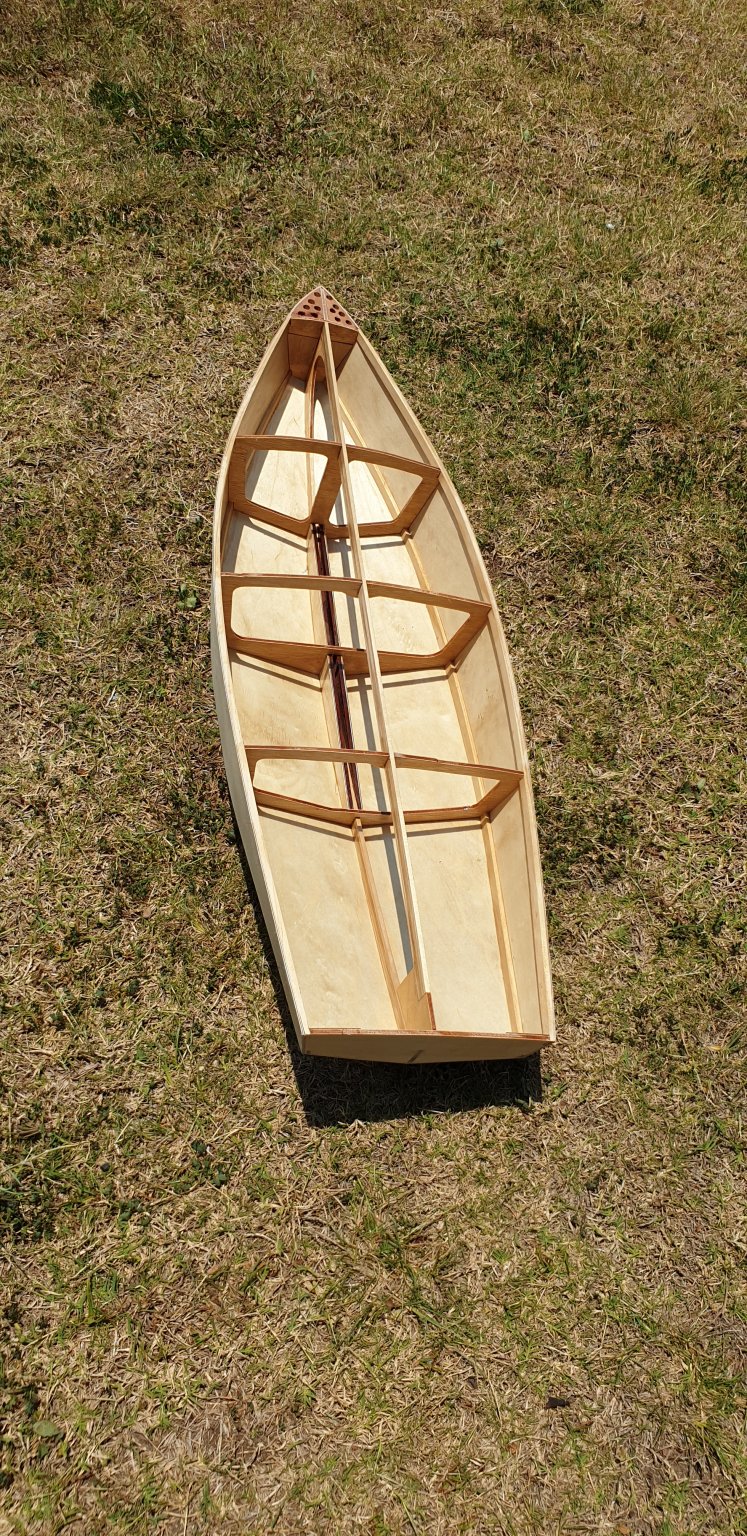
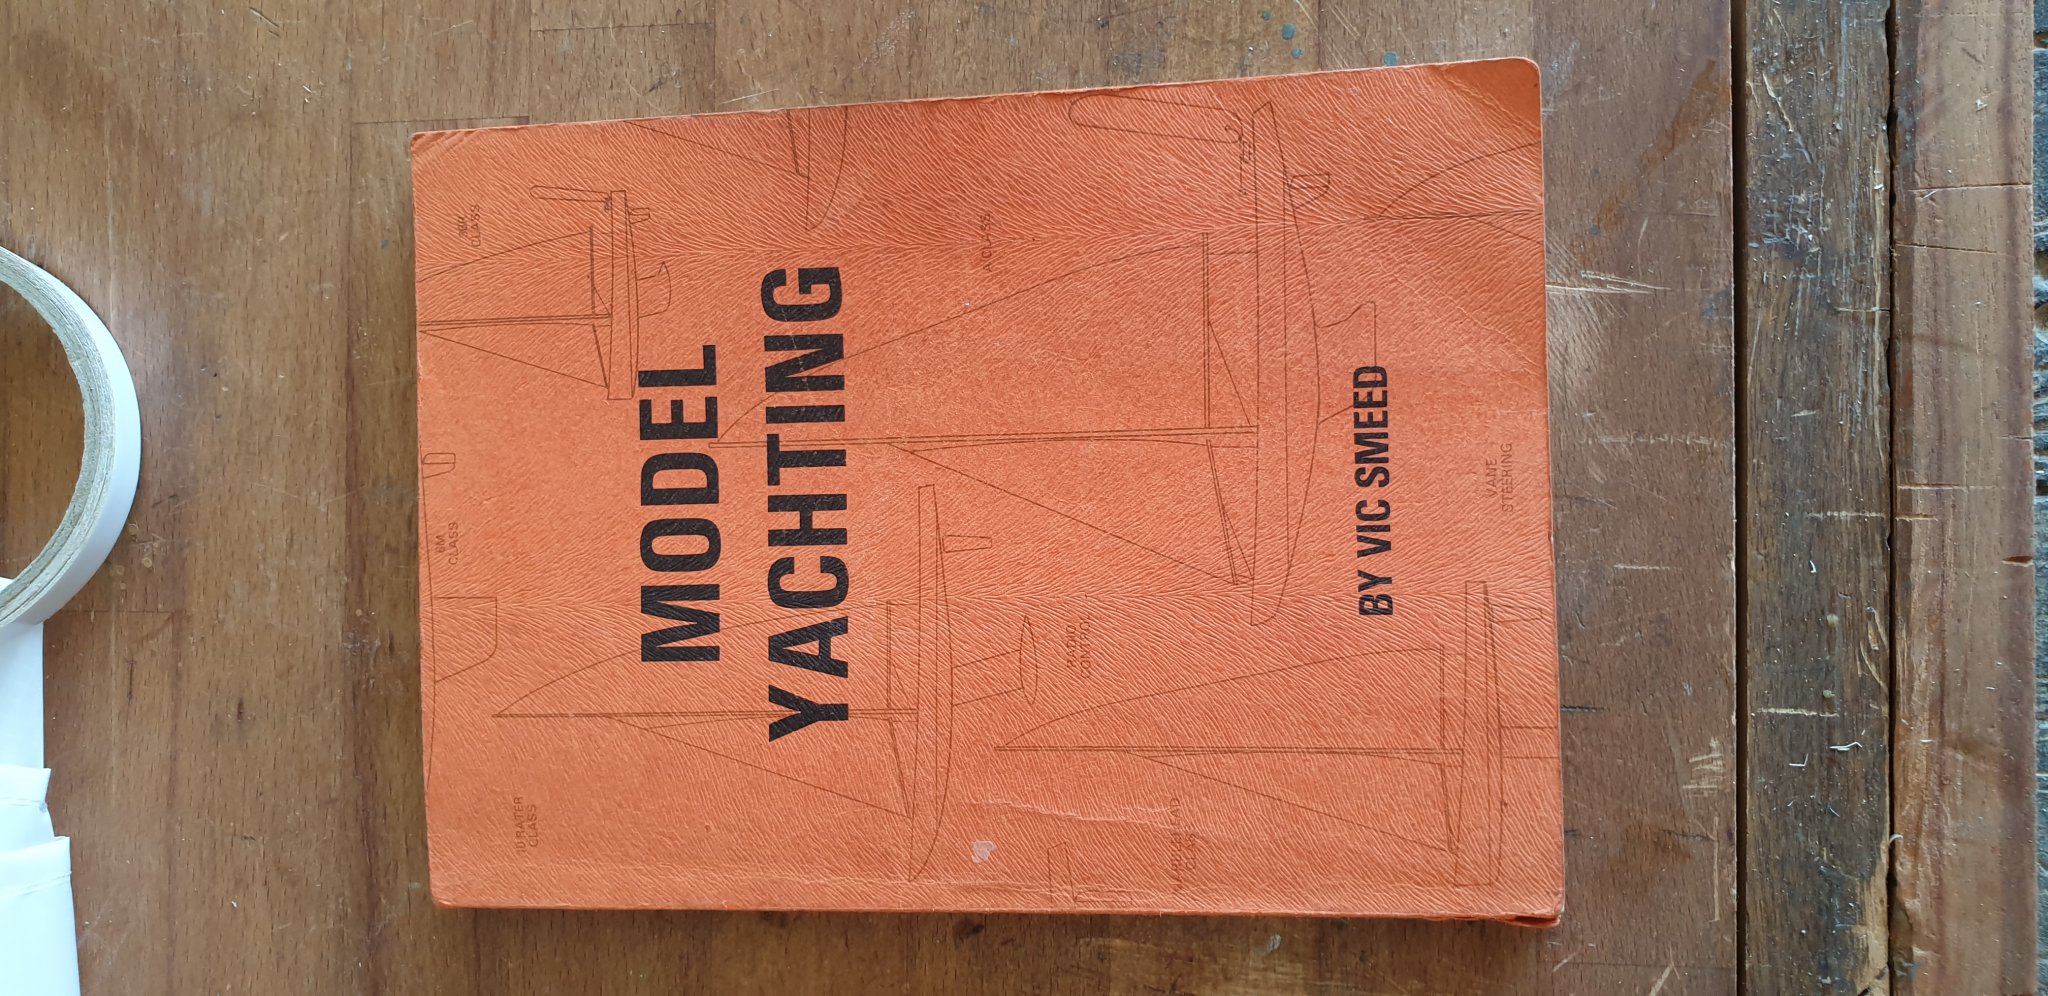
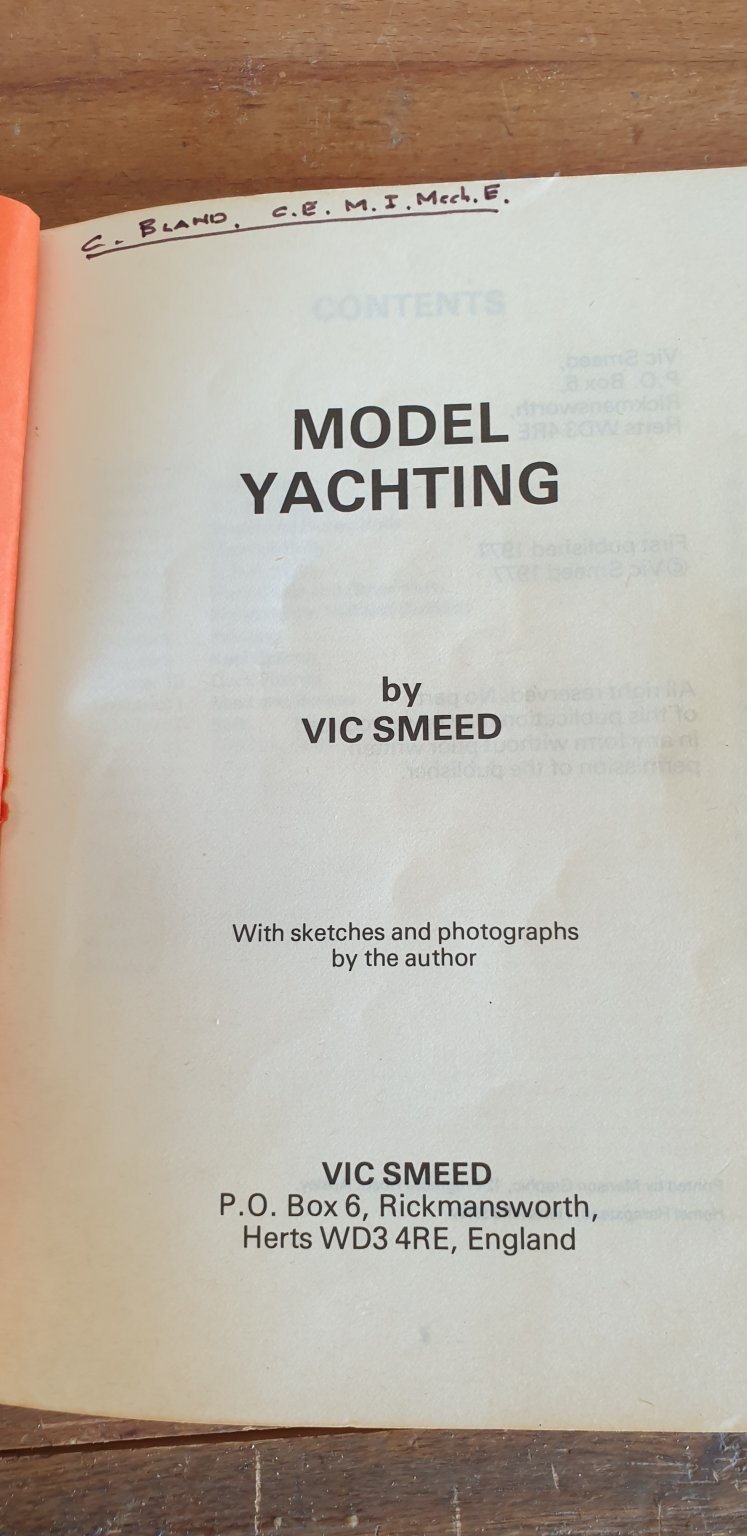
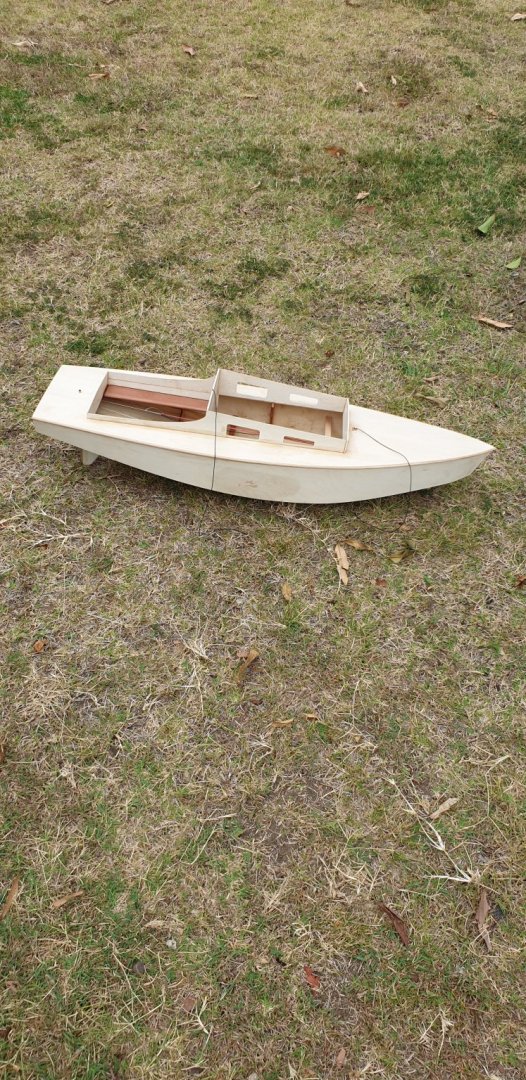
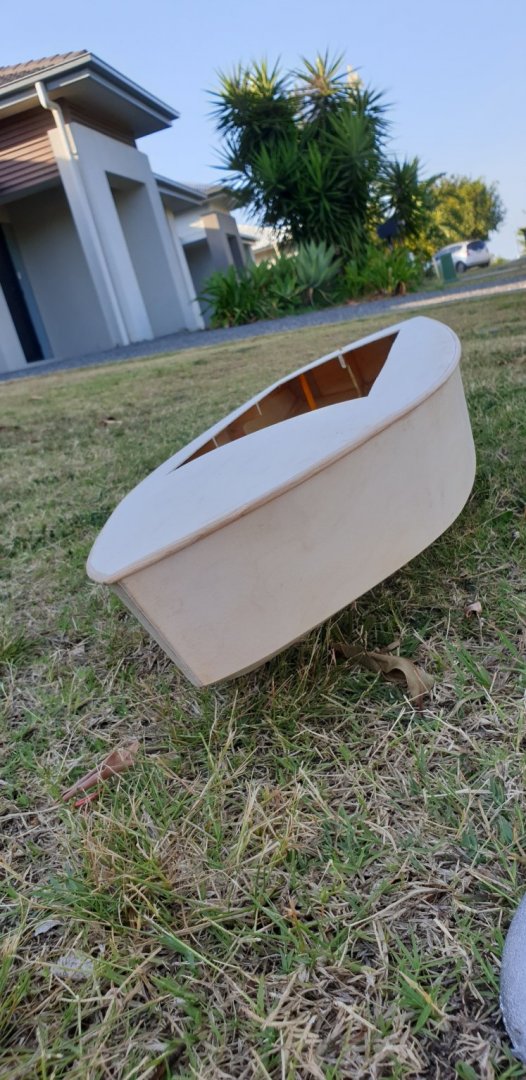
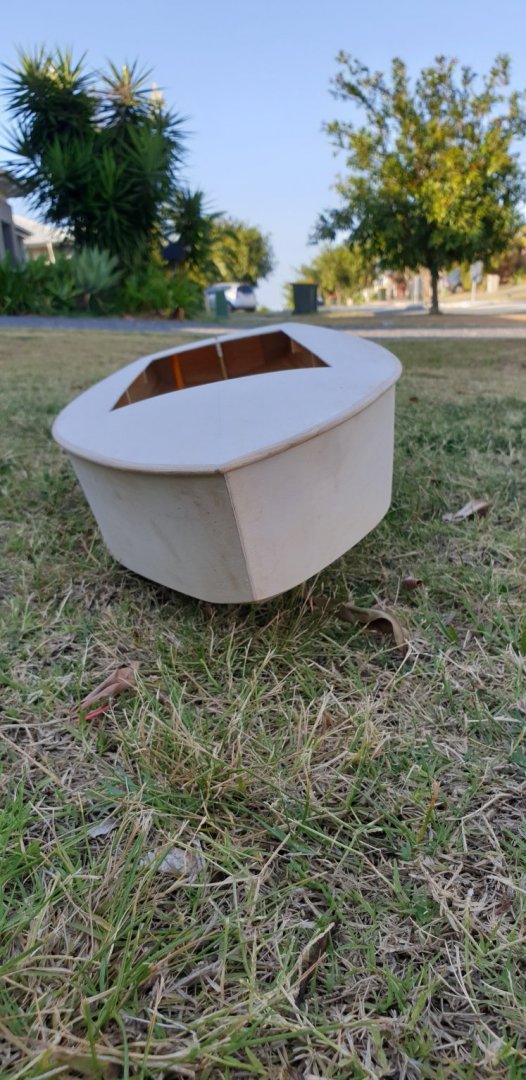
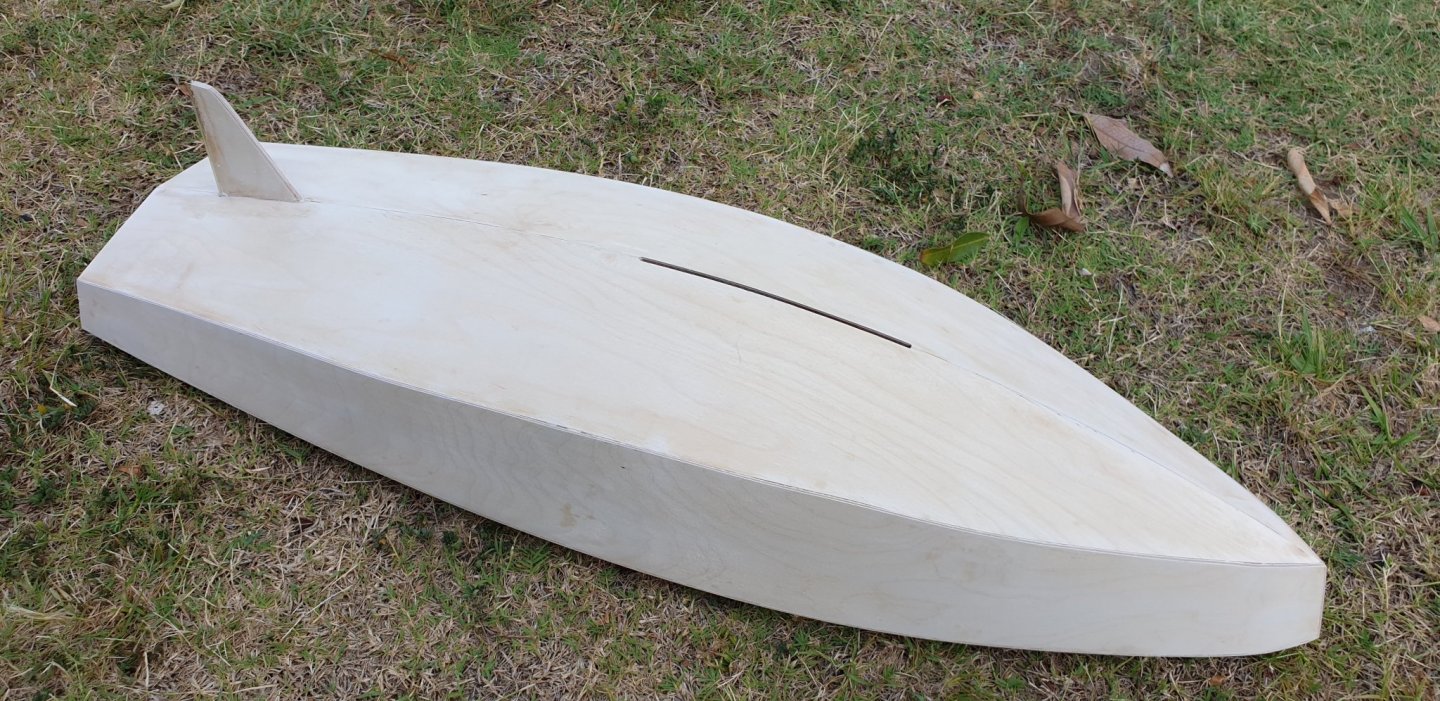
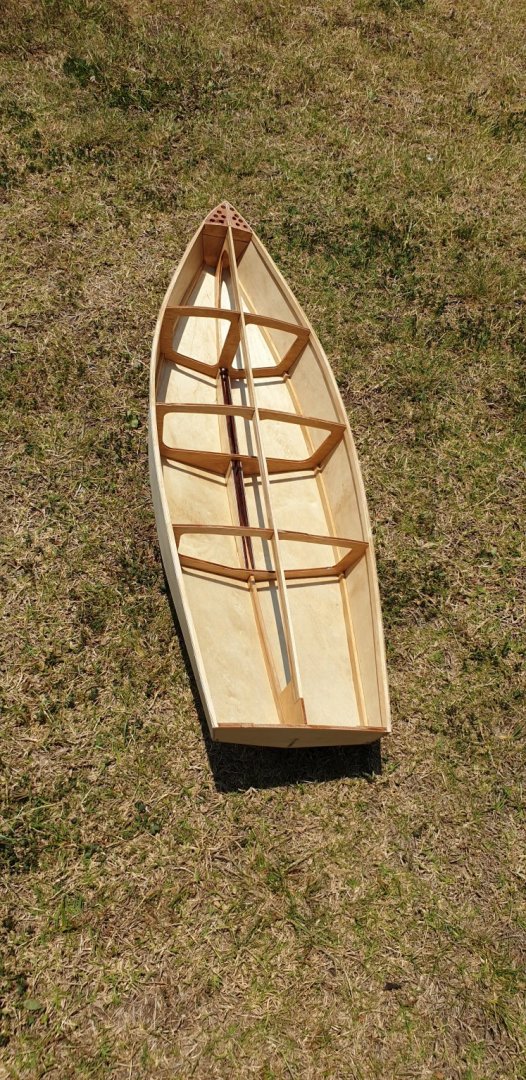
Thank you all followers of this thread for your interest. It is more than I ever imagined. The hull shell is now complete and out in the hot Australian sun for its first coat of interior varnish to dry. My Vic Smeed Yachting book arrived this morning and it is an absolute Gold Mine! If you get into making a sailing yacht then this book has all you need to know. What tickles me is that the past owner who is no longer with us had several engineering letters after his name but he still bought the Vic Smeed book as there were obviously things he needed to know. Vic was a technical genius. Onwards! Here is how his Starlet design has emerged. It is an easy build. It must be as I have done it! It is imperfect but so am I. Pete


-
I cut some mast rings from a felt tip marker. They make all the difference and slide up and down well. My first attempts were brass rings but they catch and do not function so well as these. Pete

-
This is Emma's rudder construction. Pretty sturdy! On the first piece of alluminium bar I tried to drill the holes for the three cross pieces and they were so badly aligned it went in the bin. I ordered another length and this time read the instructions..." File a flat on it first and centre pop it". I should have known better as I was a fitter!. Must be an age thing. Pete

-
Jond. Thanks very much for your expertise but it is too late now. It has been scrapped. I did try to contact you on your Bluenose blog but I guess you were busy at work. I asked if you ever got around to sailing your Bluenose as I am still curious ? The last I read was that you took it to an exhibition somewhere and just about got it in the car. I particularly would like to know if she sailed okay as I need an idea of how large the false keel should be? If she needed one. I have also in retrospect gained more knowledge about the effects of scaling down a full size vessel even as much as half the size and what compromises one has to make ie smaller masts larger beam, longer keel. Did you have to consider any of those comptomises when building your Bluenose? Pete