HOLIDAY DONATION DRIVE - SUPPORT MSW - DO YOUR PART TO KEEP THIS GREAT FORUM GOING! (Only 24 donations so far out of 49,000 members - C'mon guys!)
×


Peter Cane
-
Posts
240 -
Joined
-
Last visited
Content Type
Profiles
Forums
Gallery
Events
Everything posted by Peter Cane
-
Just joined in on your build Keith. Excellent stuff. In the earlier writings you showed how you drafted the formers with your drafting instruments. I found this a real education. I have a beautiful set of antique instruments and now I have found an excuse to use them. I digress..funnily enough just yesterday I picked up another beautiful set in I charity shop for a crazy 10 Australian dollars ( a fiver to you). I gave them to my 13 year old Grandson who asked how to use them? Ha ha I will have fun teaching him the old ways and I am sure he will appreciate them. On the deck planking front, I always imagined the margin plank as being pre cut and did my brain in wondering how on earth they achieved this. You have made it clear to me now with the " joggling" as one proceeds on each plank. That now makes sense. Many thanks for the education. I admire your traditional methods with attention to scaling. Beautiful stuff. Pete
-
Roter Löwe 1597 by Ondras71
Peter Cane replied to Ondras71's topic in - Build logs for subjects built 1501 - 1750
Ondras..when I saw the beginning stages of this ship when you laid out the rough and ready bulkheads from corrugated card I thought " oh dear what are we in for here?".... But mate!.....you have knocked me for six with the eye to detail, craftsmanship and now present this beautifully made miniature replica. You are a master at this. A joy for me to witness your hands at work. Pete -
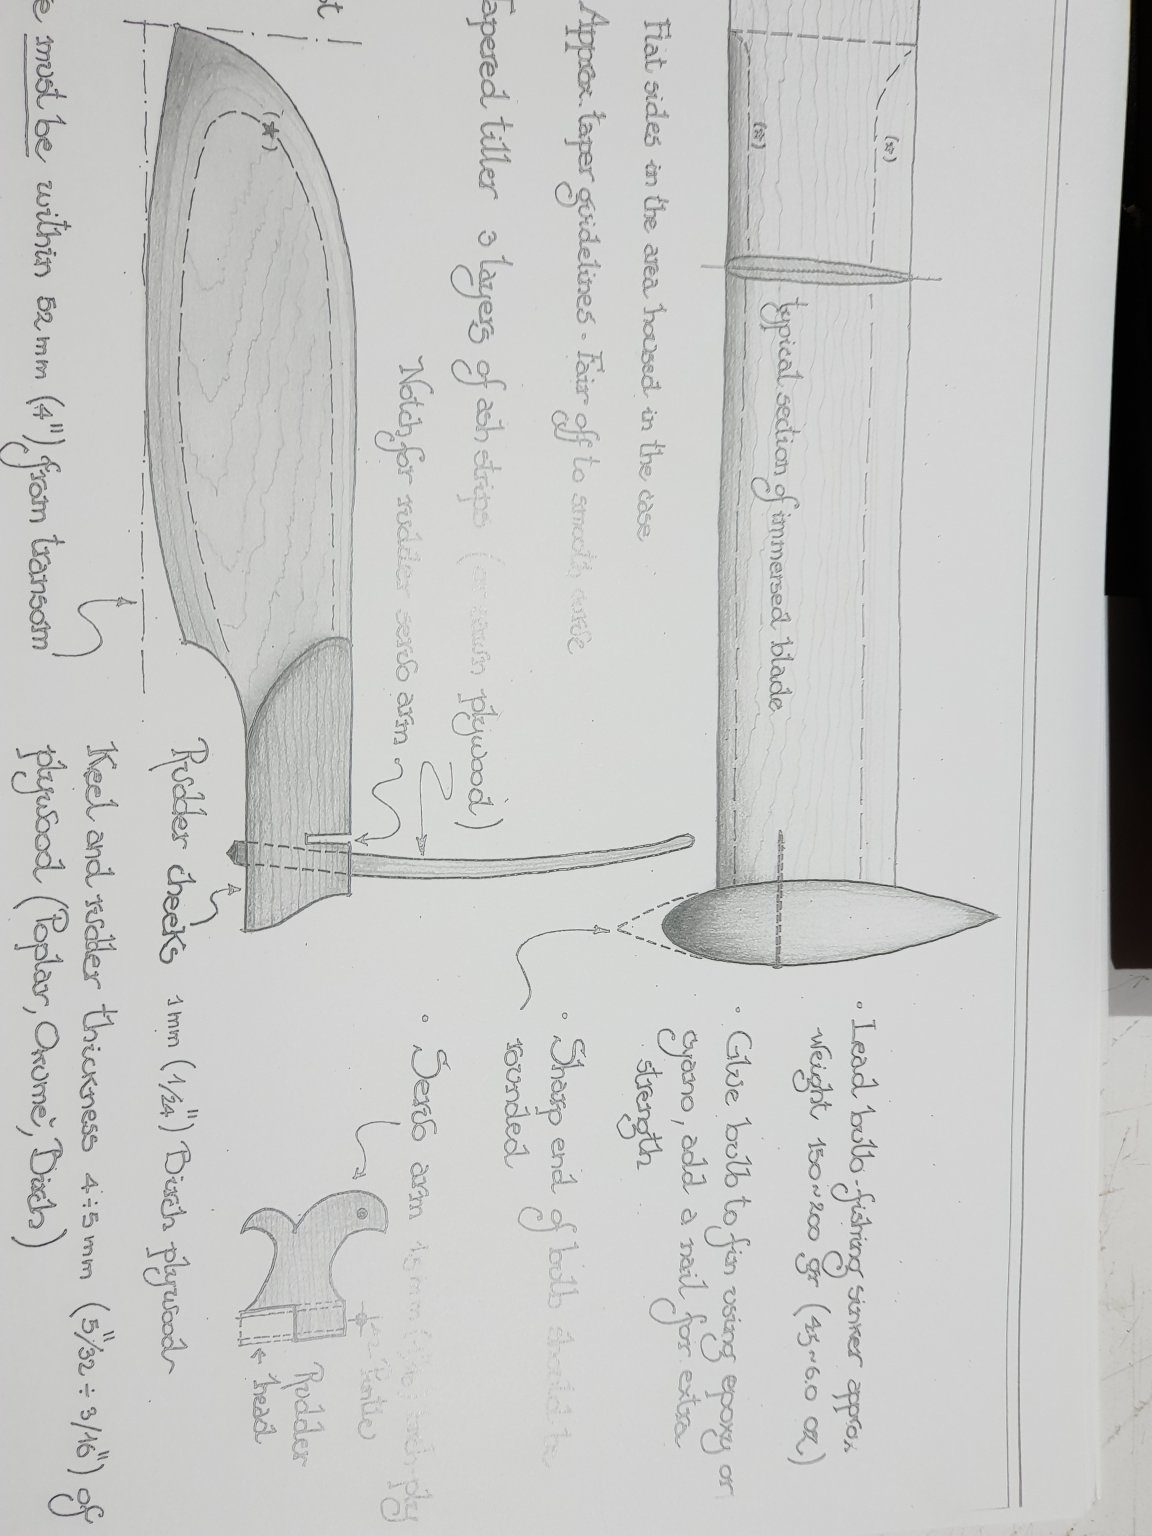
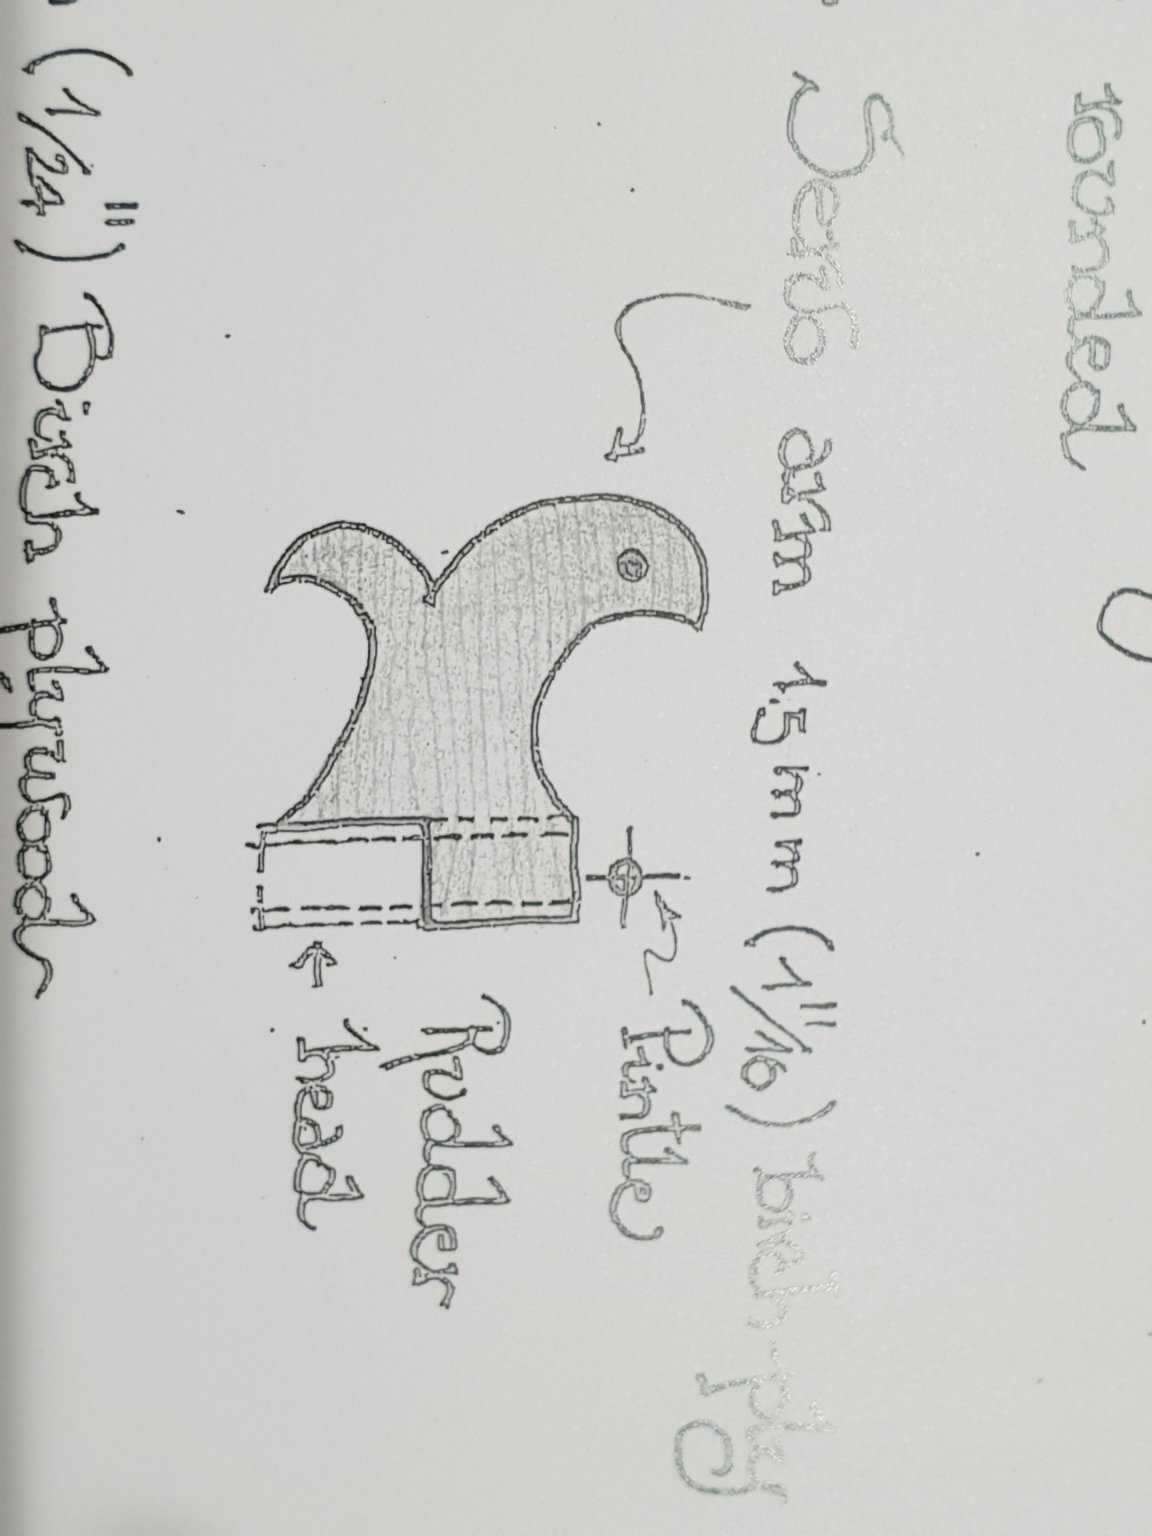
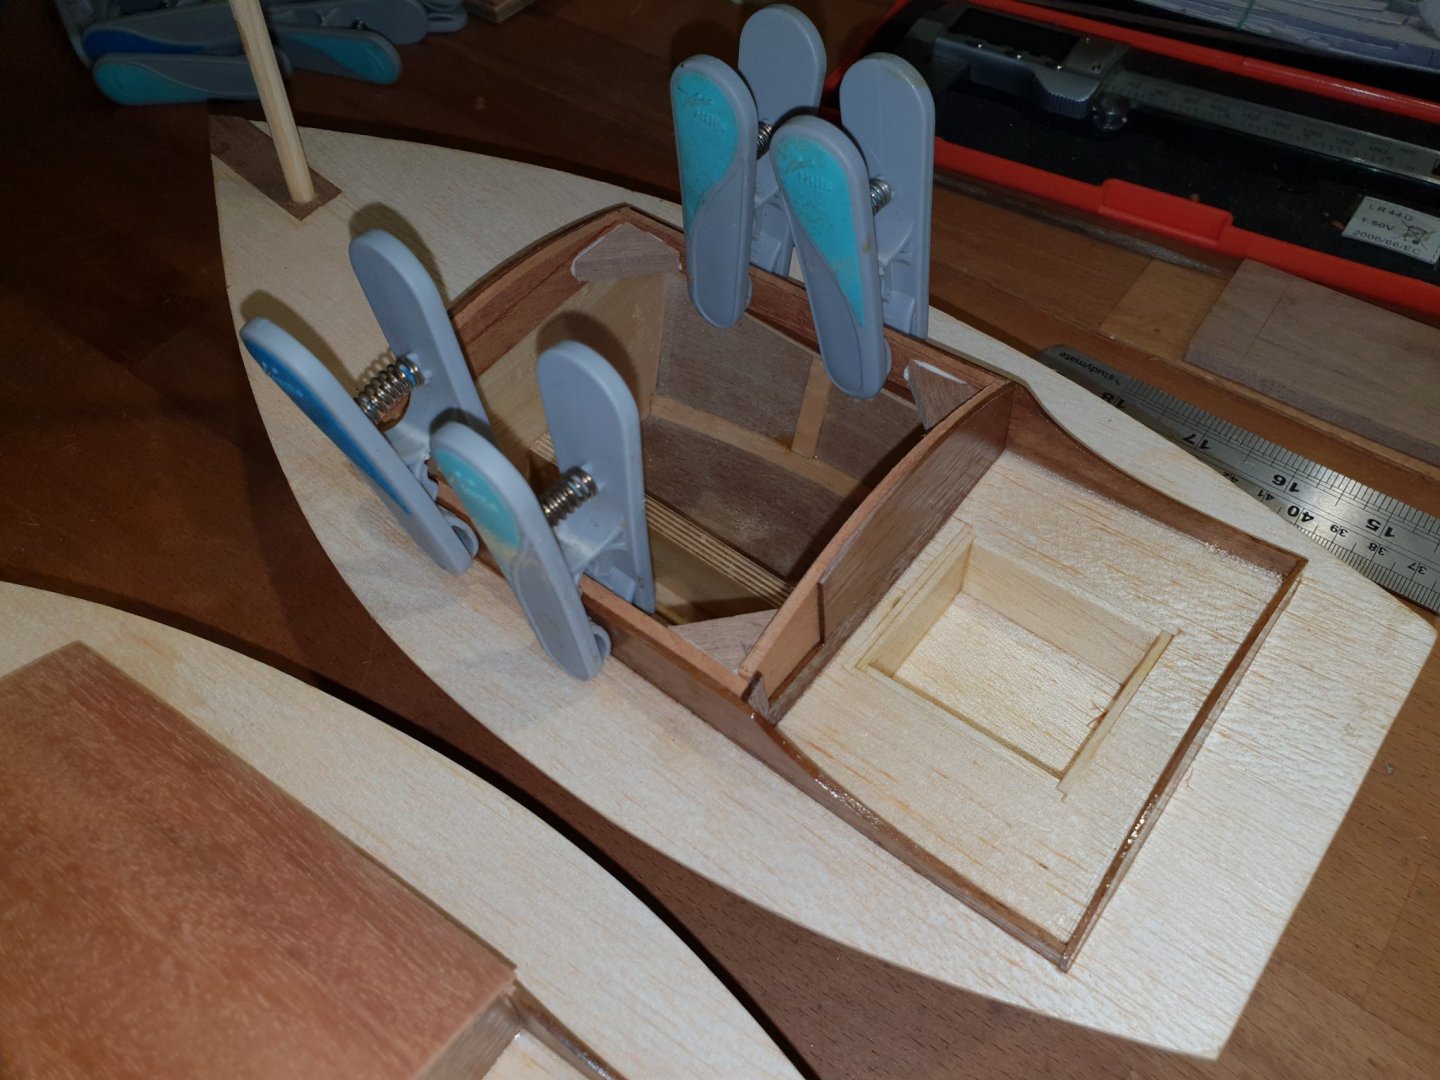
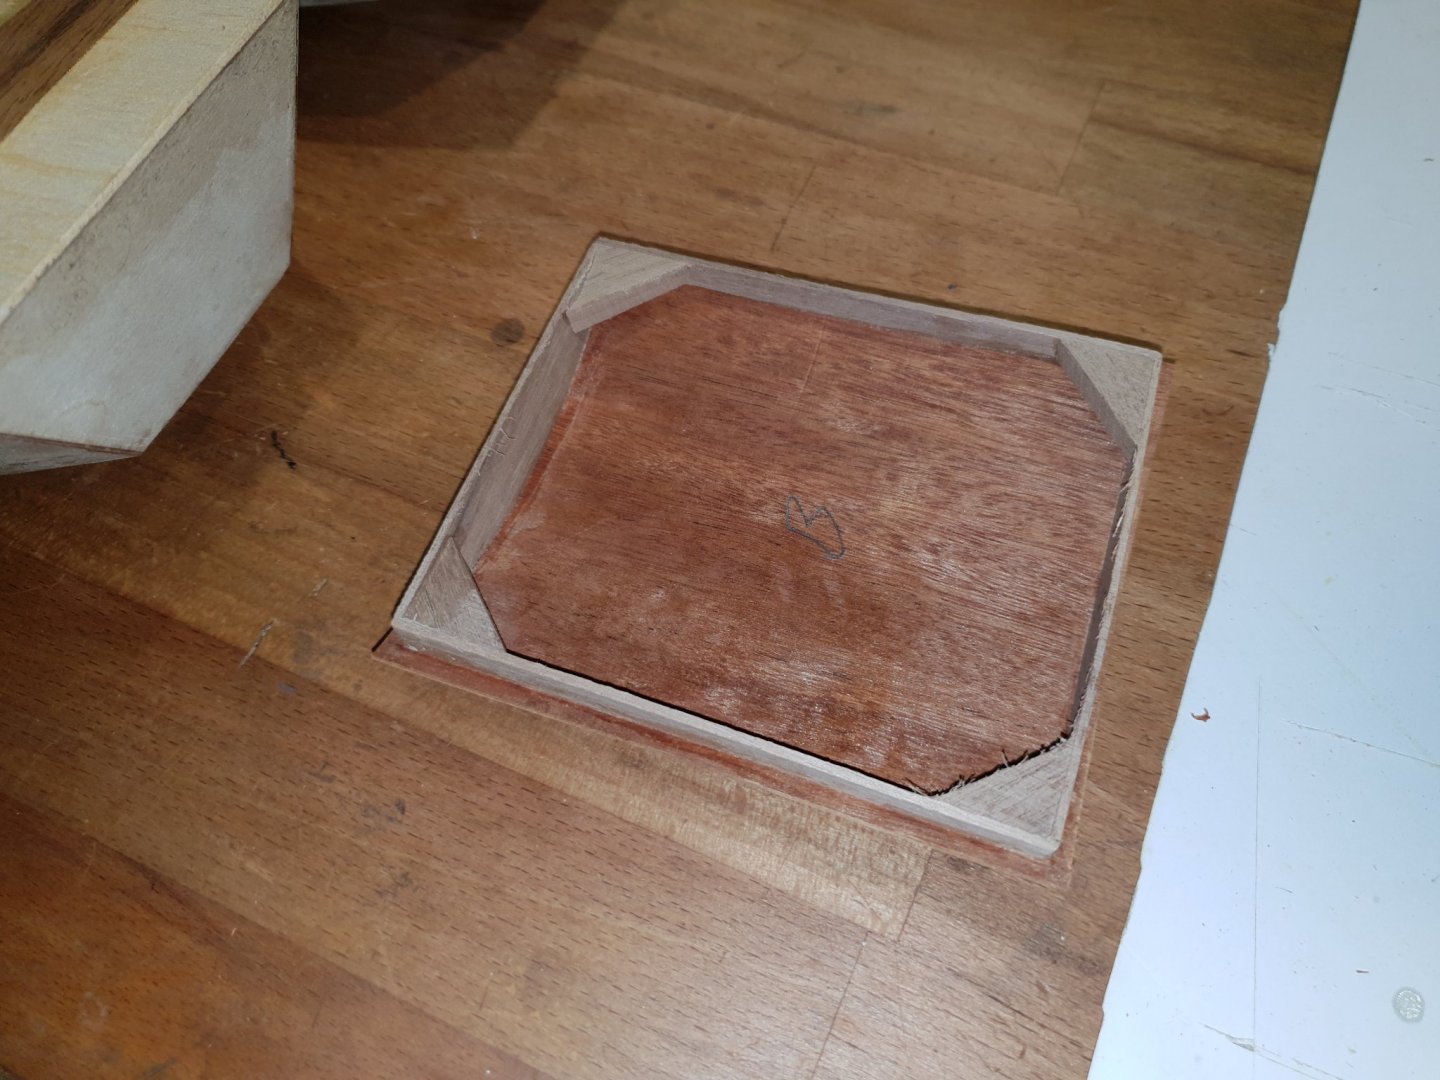
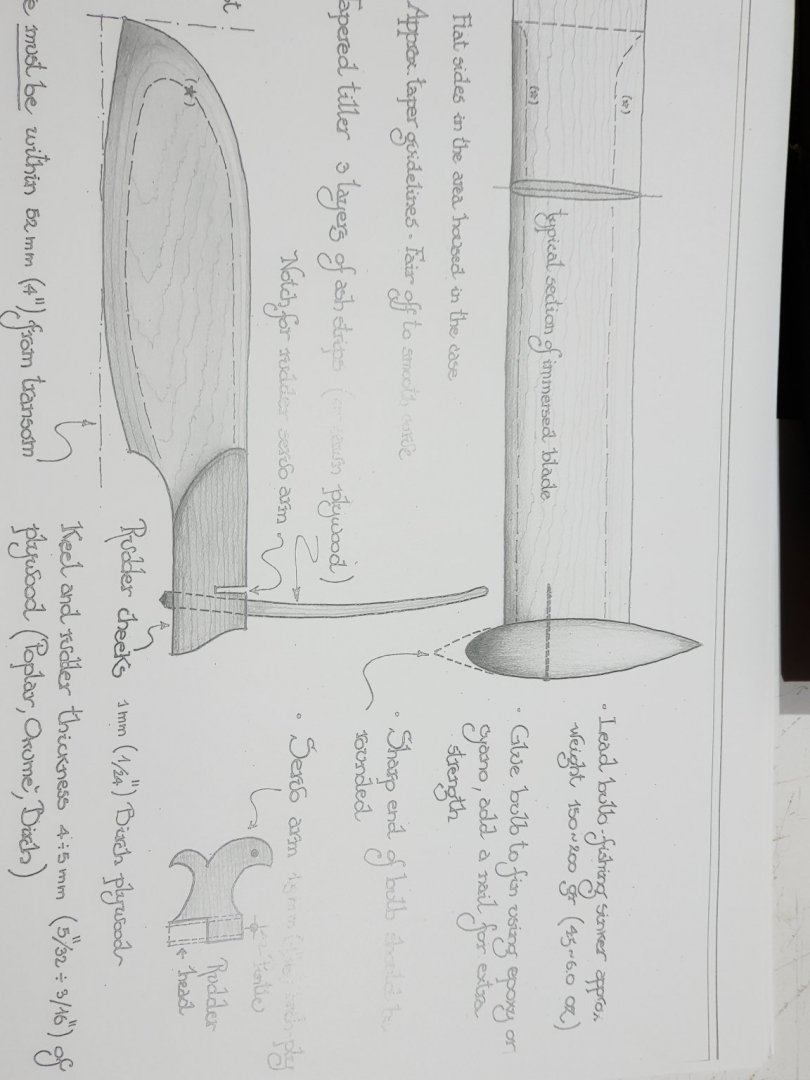
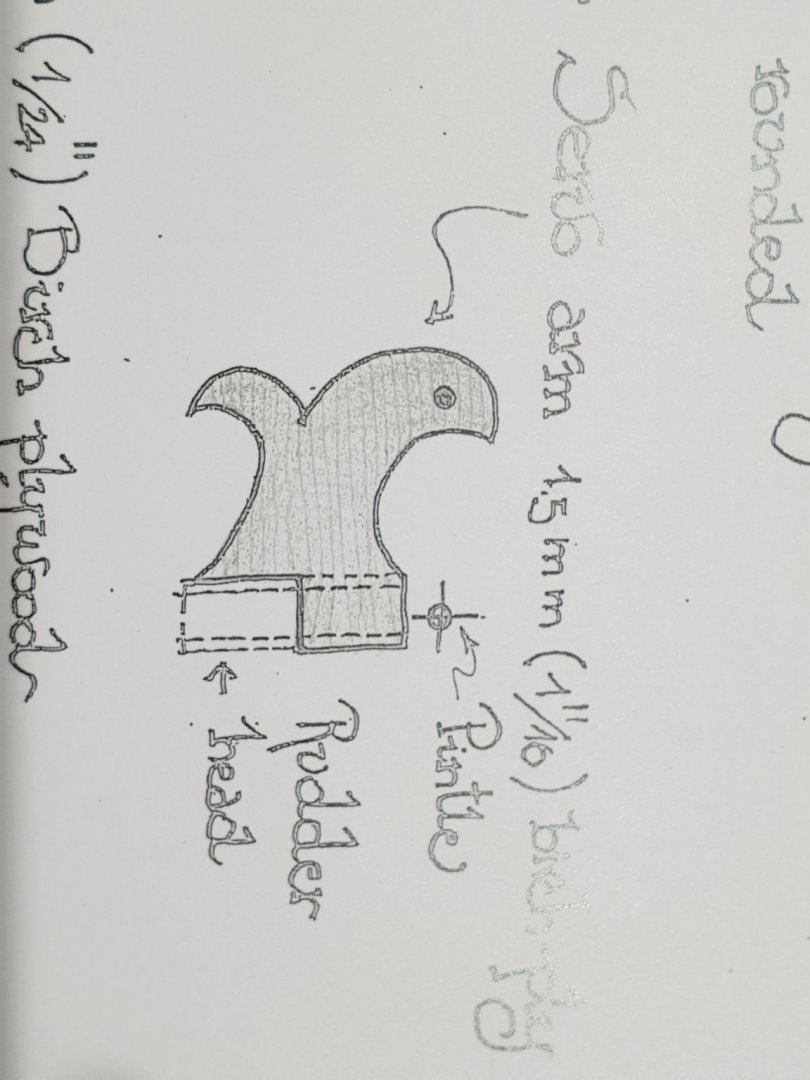
The insides of the hull and deck bottoms now have six coats of varnish on them. The decks are from balsa sheet and are now firmly glued on complete with the cockpits and the cabin super structures. The super structures on the plan call for balsa but I thought it would look special in walnut. The cabin roof is from teak I think. I have quite a hoard of this and cannot remember where I got it from. It smells gorgeous to plane down from the 6mm plank in the picture to 1.5 mm. It has that boaty smell to it. Might have come from a boat! I made a mistake with the other cabin roof. When I bent it with the bending iron I did not pay attention afterwards to check for warping. It was badly warped so went in the bin. You can see where I am building a new cabin roof frame and now I will plane down another plank with which to skin it. The mast supports on the decks are walnut. I am going to order up some nice turned brass port holes and put one each side and one smack in the middle of the cabin front. That should really make it cute. Just look at this rudder head design by the guy who designed this boat ( Flavio Faroci )... Only an Italian can design something so beautiful. I play the violin so appreciate Italian mastery! I love it. I hope I do it justice for Flavio. Pete


-
Well I am well and truly jarred off!! Looked at my bank balances today and some kind person has cleared me out to the last cent. I am totally penniless. Quite a large amount too. Oh well, worse things happen at sea and I am still alive to make boats I suppose. Please dont give a thumbs up for that else I won't know which way to take you!..ha ha. Pete
-
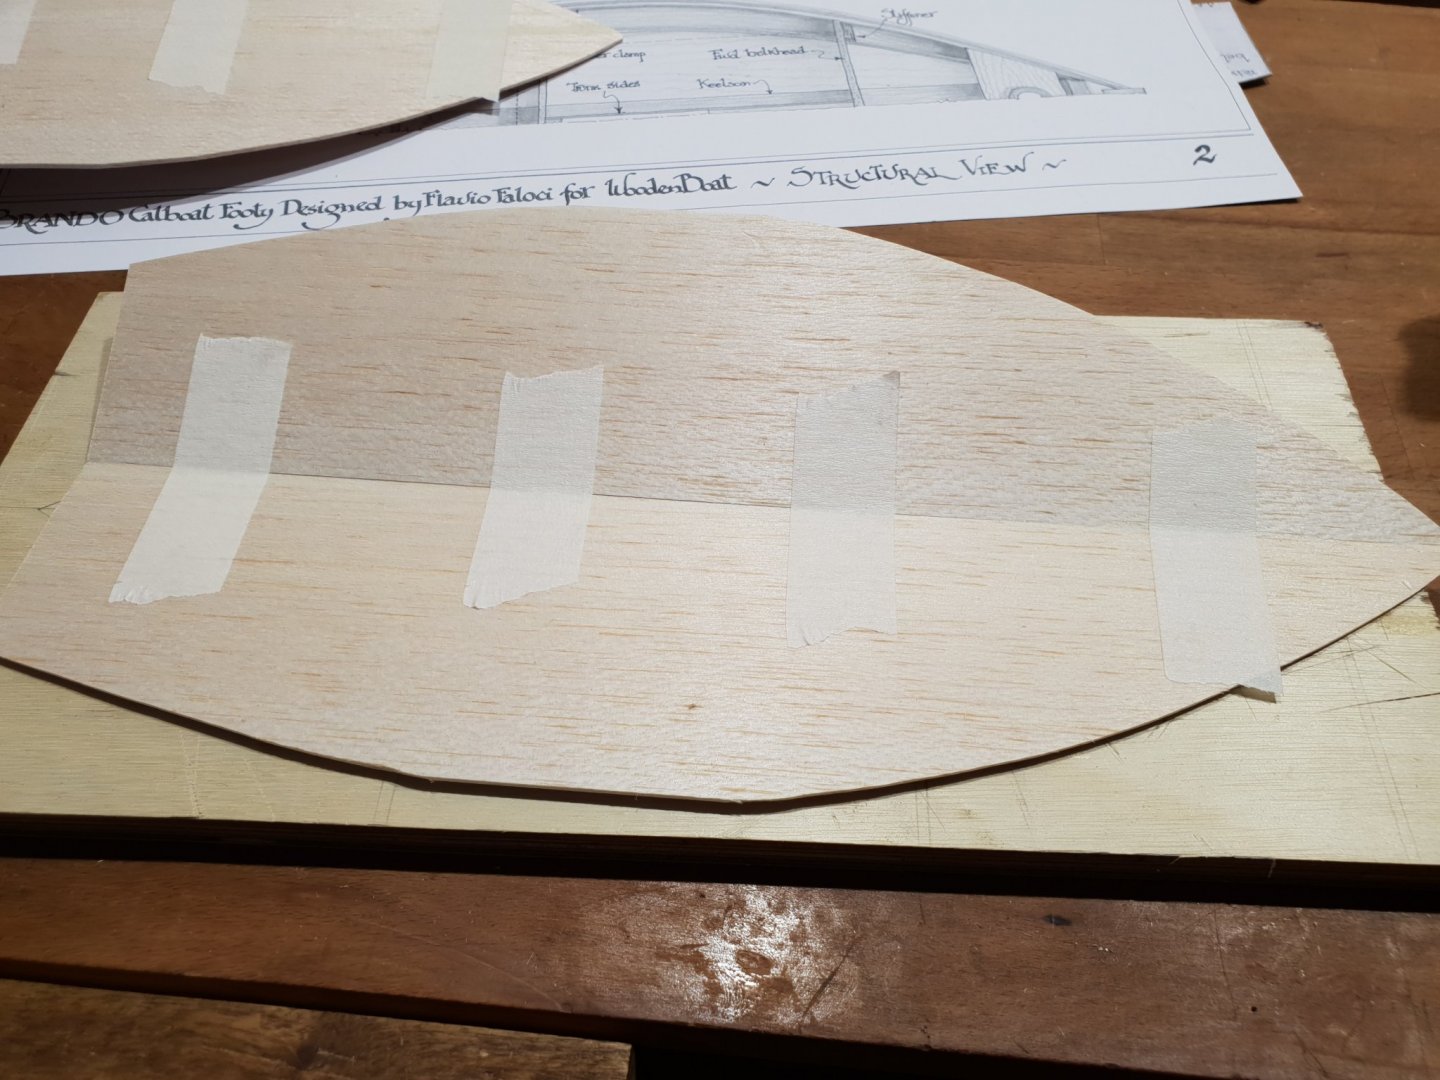
I am glad you like the video. Here is a little trick I would like to share. I learnt it whilst joining musical instrument ( Ukulele ) tops and backs together naturally without pin holes to hold them together!!! First off cut the pieces a little over size and using the straight factory cut straights as the joint. Squeezing the two parts together with your fingers, apply good quality masking tape to hold them together. Under pressure they will then spring up at the sides. Turn the whole over and apply your favourite glue. I use Elmer's Max. Press down in the centre and wipe off the excess glue with a DRY rag. You will find the glue will squeeze out under pressure from the tape underneath. Apply tape on top and that's it. No pin holes. Pete.

-
I hope this works. I am going to try to post a you tube link on somebody sailing their finished Brando like the two I am building. It is just to give you an idea that this tiny little boat actually sails really well and a lot of fun. Pete
-
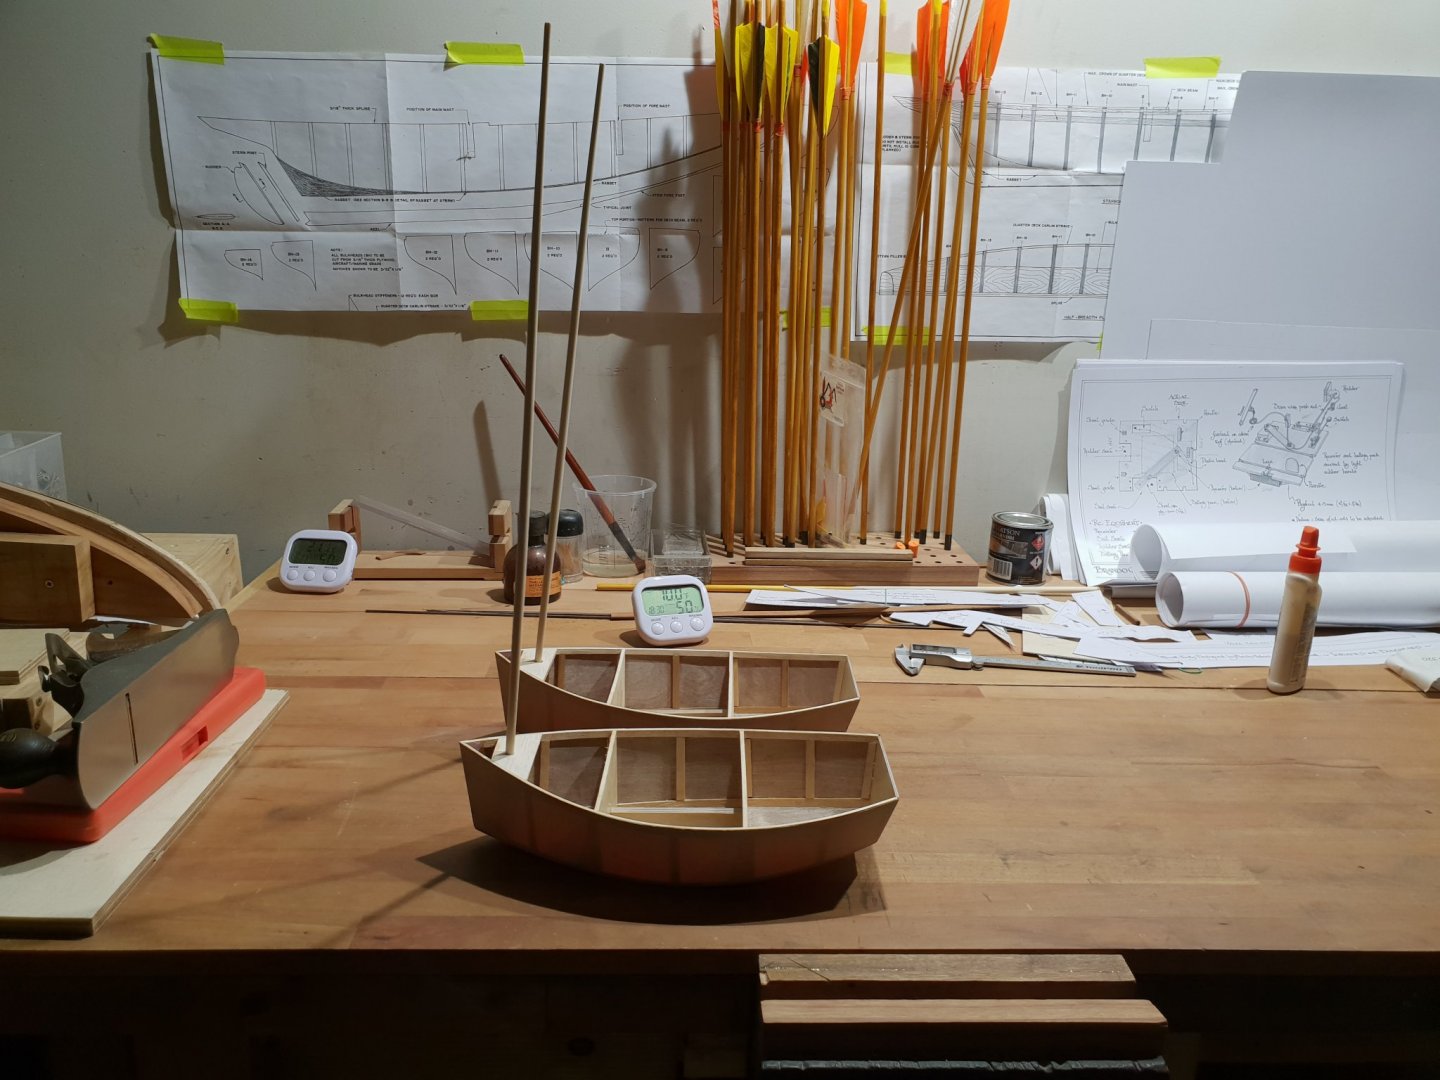
Thanks Nils. Yes they are two little cuties aren't they. I love the build. I am a traditional archer and shoot a long bow , no sights no gadgets just me and my bow. The arrows I made to shoot with my long bow. Nils if you look at the middle picture you will just see Bluenose's nose peeping at me like a laid down dog and watching me make the cuties. I think she is trying to say...." well when are you going to get on with me again?" Pete
-
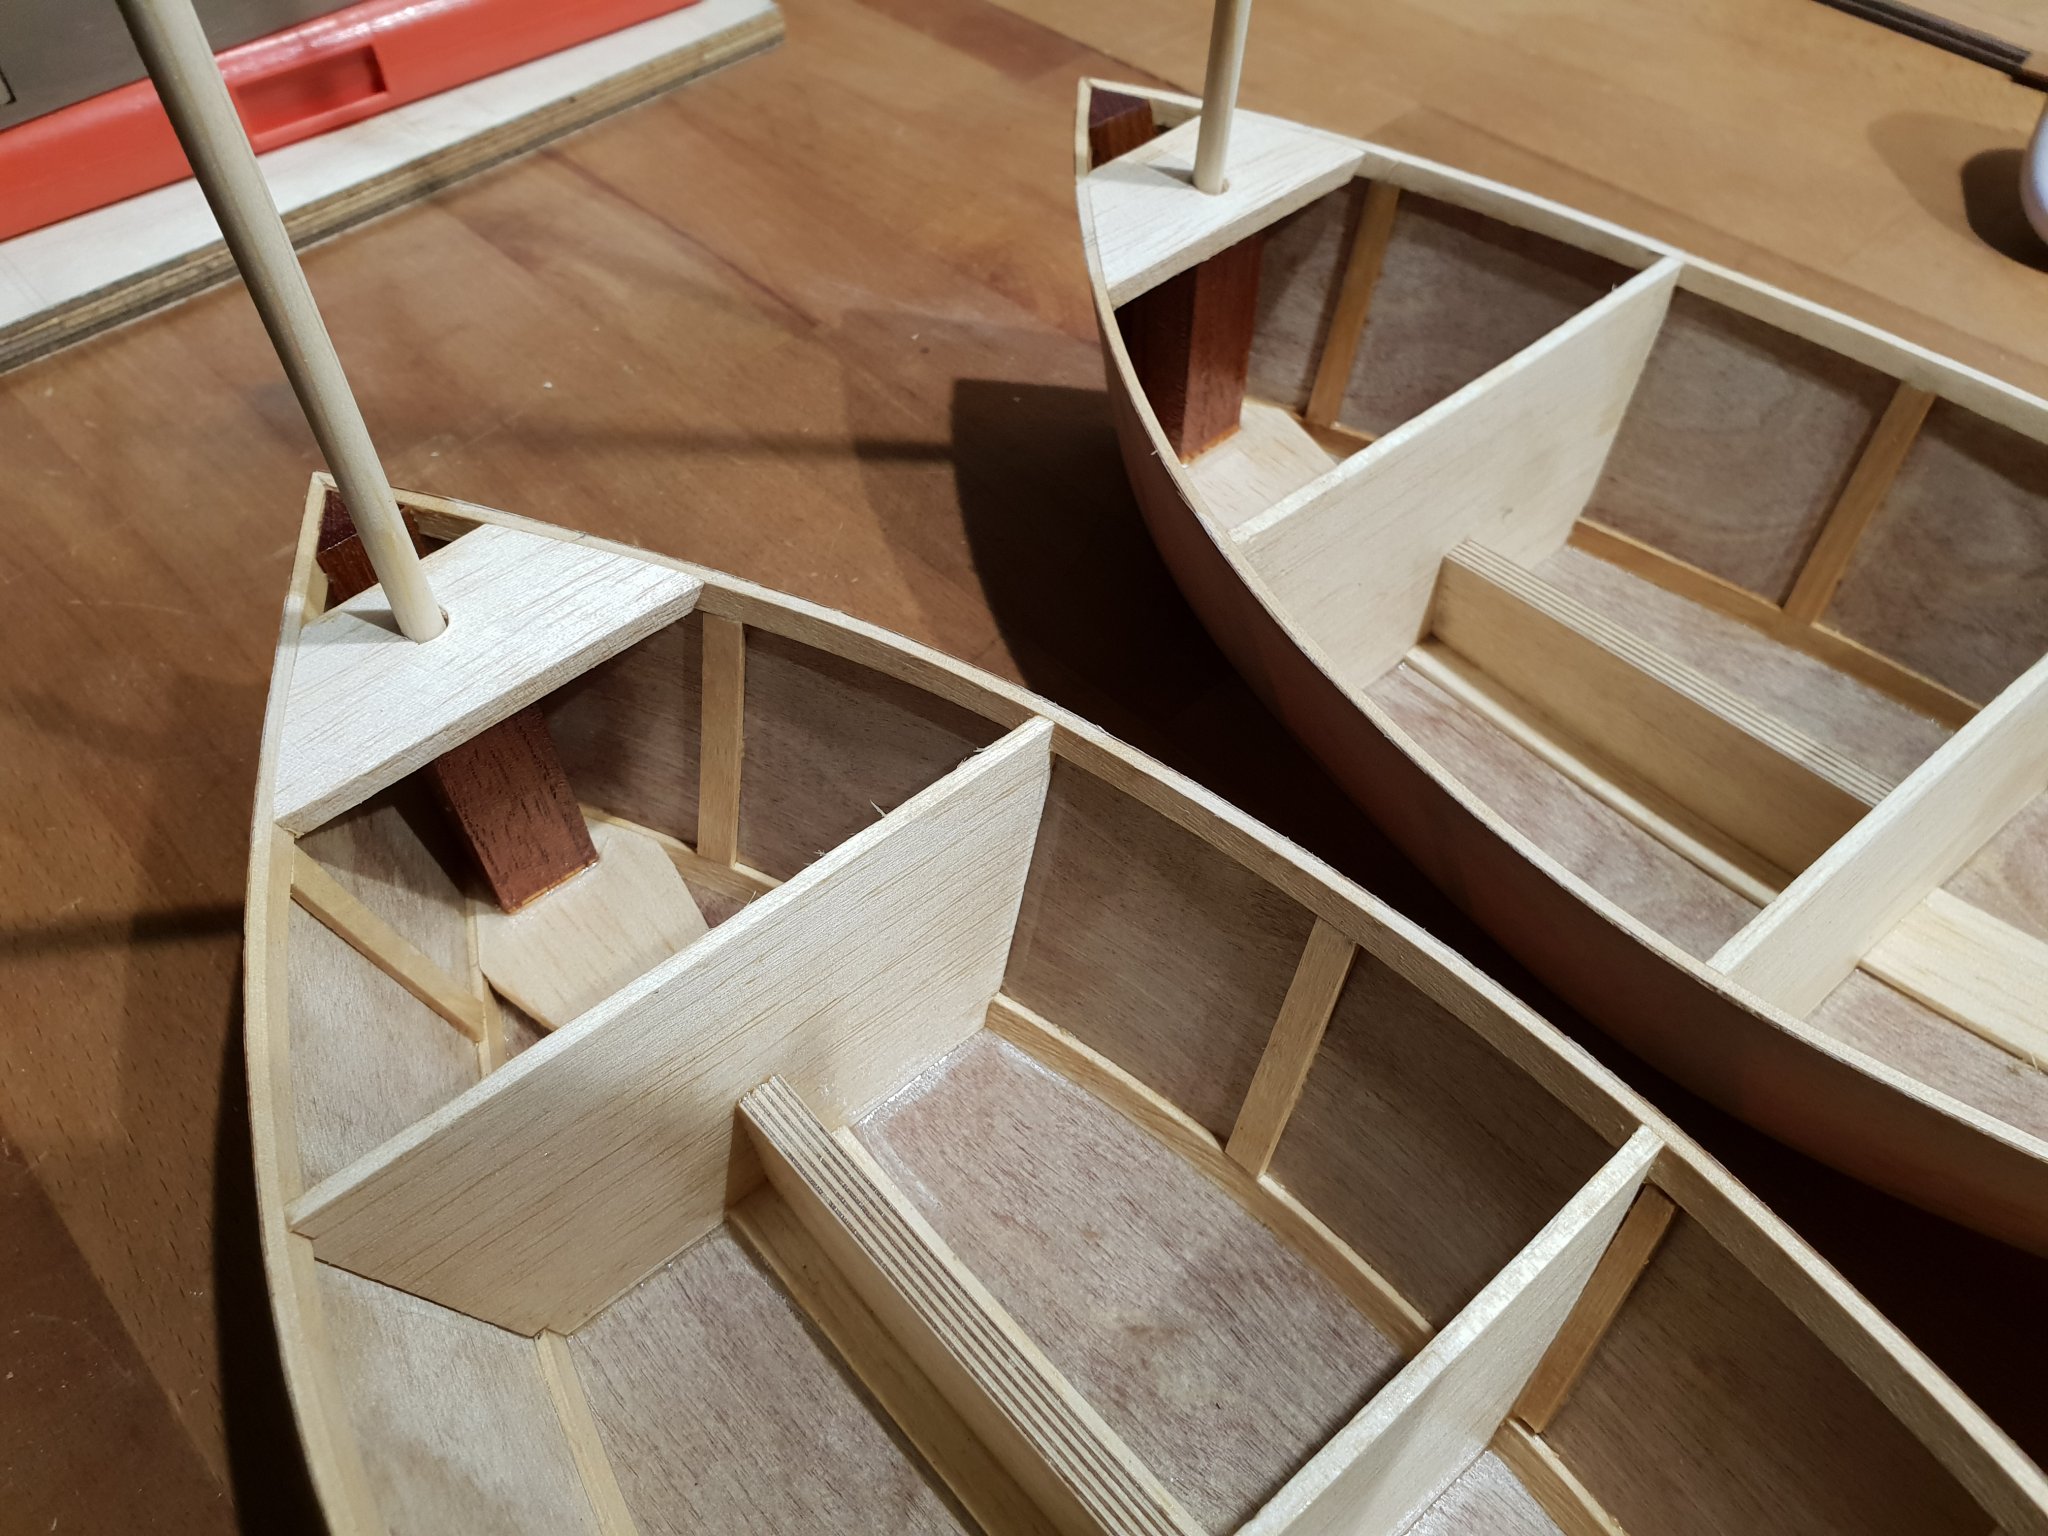
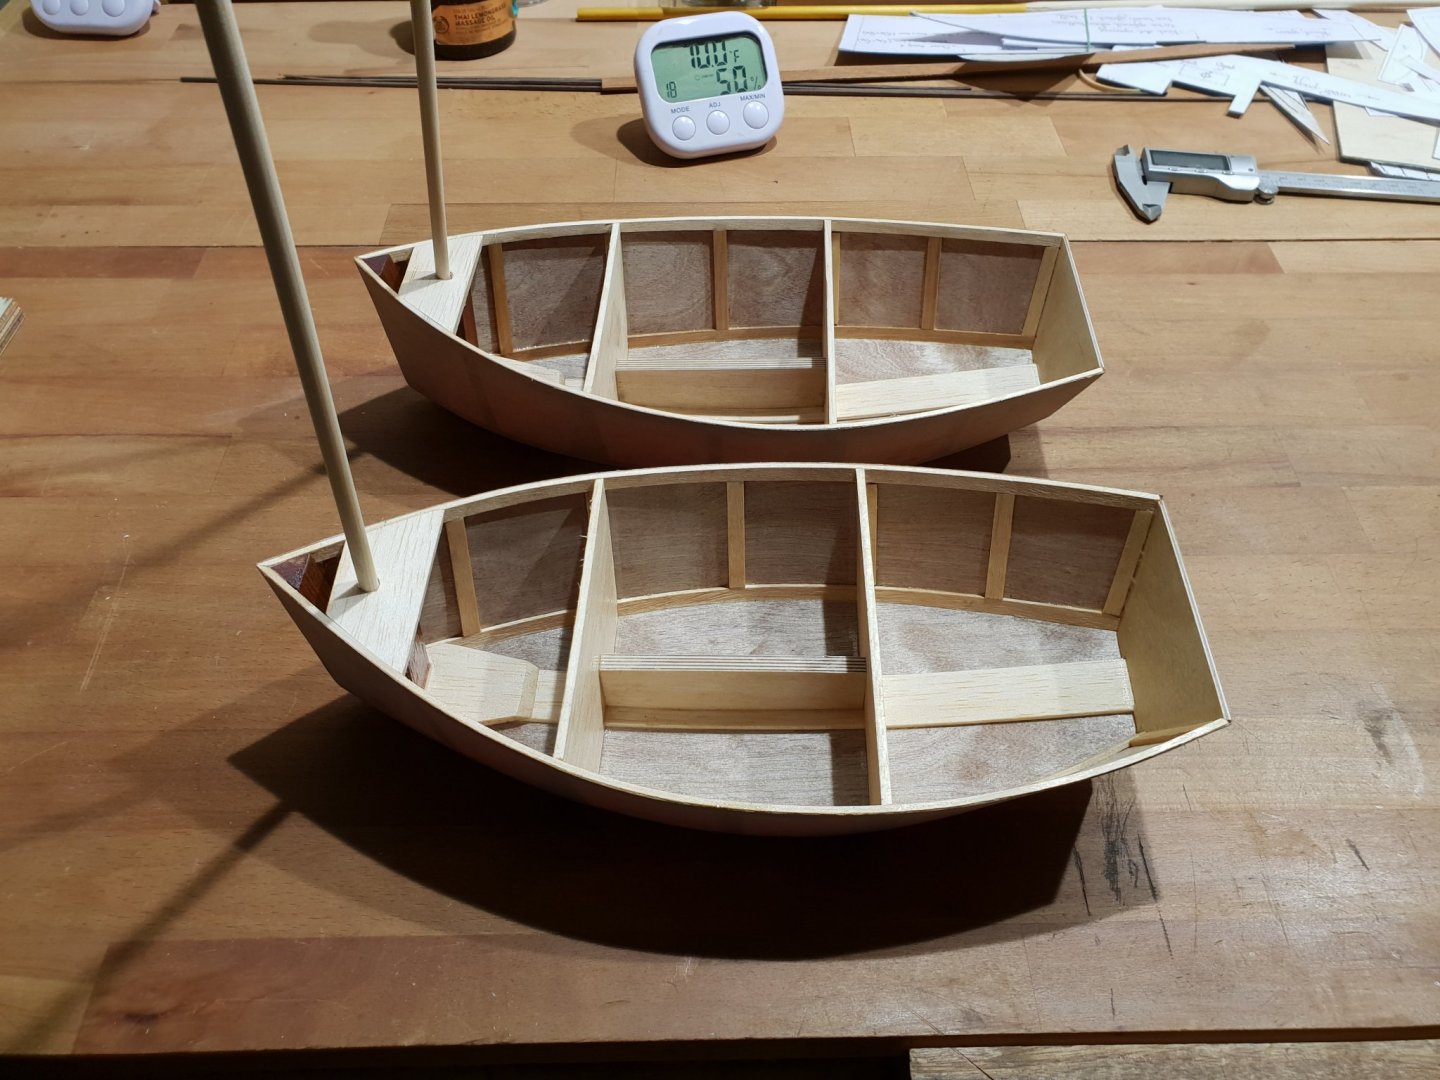
Onwards and upwards with the masts which I made from Port Orford Cedar arrow shafts tapered from 6mm to 4 mm at the top. I do archery as well so that was a bonus. I have built and glued in the mast step, mast holder and partner. The mast is a nice tight fit which slides in and out easily if you know what I mean. Aha...Push fit I think they say! The insides of the hulls have been given their first coat of varnish. All soaked in to begin with but I expected that. I think it will need 4 or 5 coats to be water proof. The mast box is from Western Red Cedar which is extremely light like balsa but a lot tougher. Pete

-
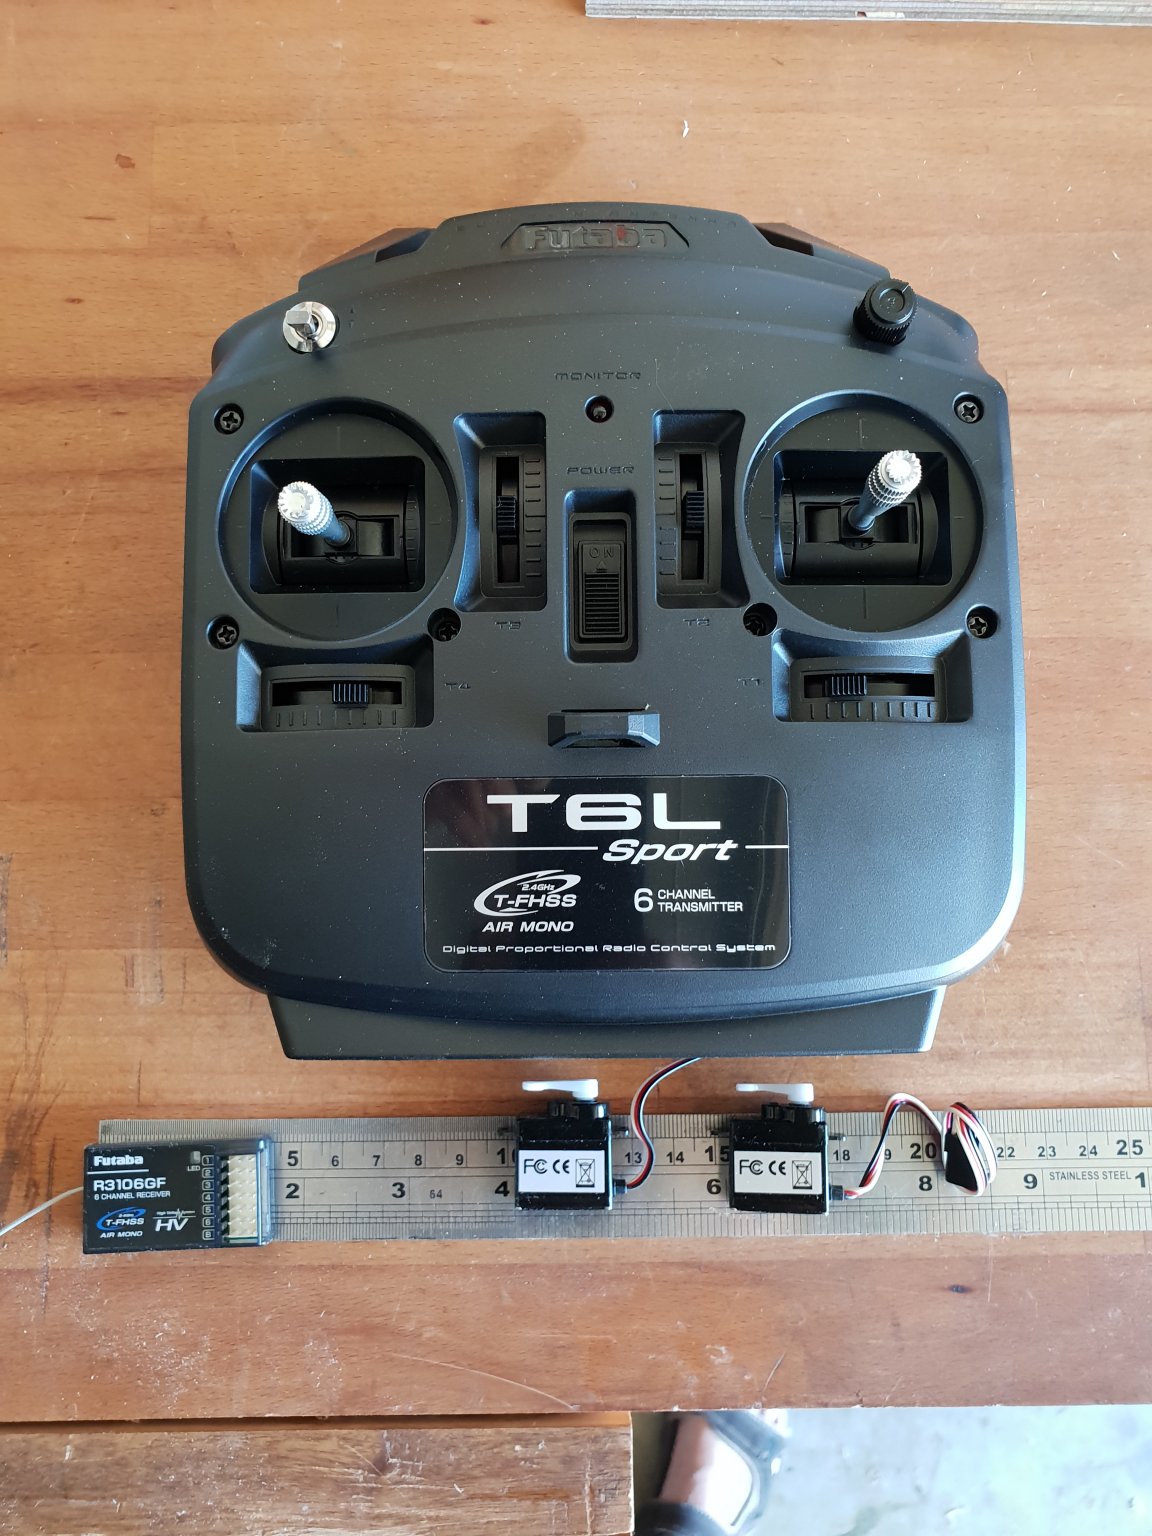
Thanks for the likes. Come to think of it I have made dozens of flying model aircraft but this is my first two RC sailing boats. Decades ago I bought a ready made RC sailing yacht and decades before that I built my first RC motorised cabin cruiser. It was called a Commorant and a small balsa kit . I was 15 then. To have radio control at all was really cool stuff. My radio was a Magreggor single channel with one button for rudder control. Proportional was only to be admired with the big boys who could afford it. So it had a rubber powered escapement as fitted to small aircraft. I had to physically switch on the motor, sail it and then switch it off by hand. Oh those were the days. Anyway, building these two charmers constantly remind me of those happy days. Here they are with their bottoms on, keel boxes glued in and mast steps fitted. The next shot is of the radio gear which is appearing by post in installments. It is good kit and so cheap now. I hope I inspire some of you to have a go at this. I am retired so plenty of time. This stage has been reached in just two days from scratch. They are tremendous fun especially if you have kids or grandchildren!! Or just plain selfish and deserve it. Girls like them too!!!! Pete

-
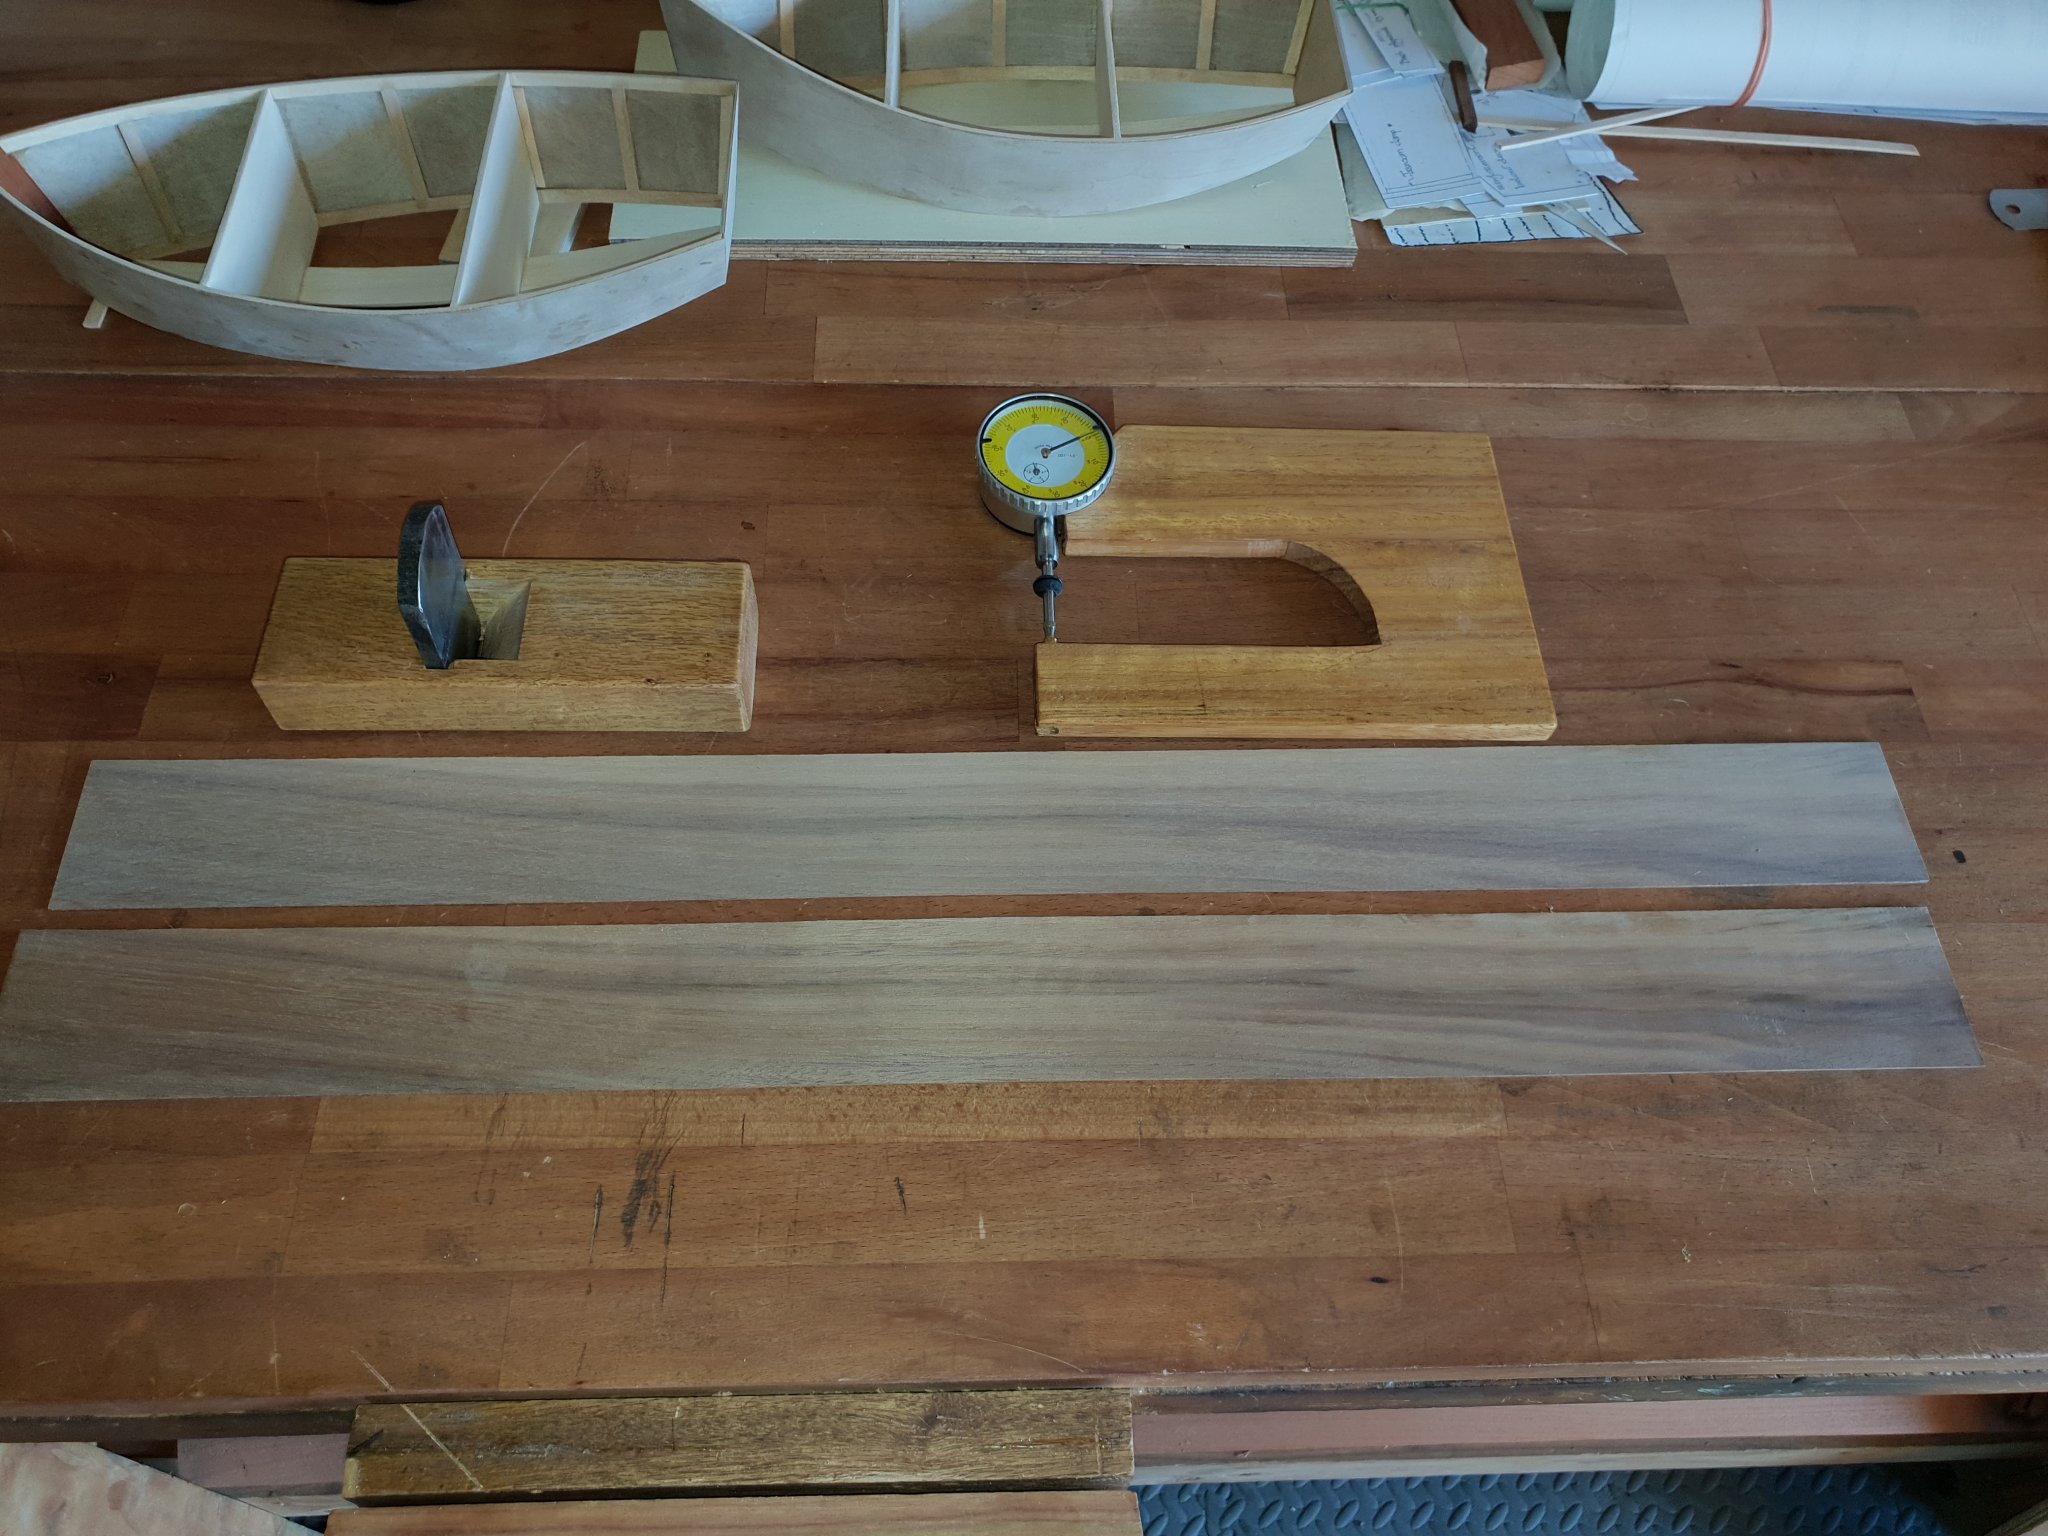
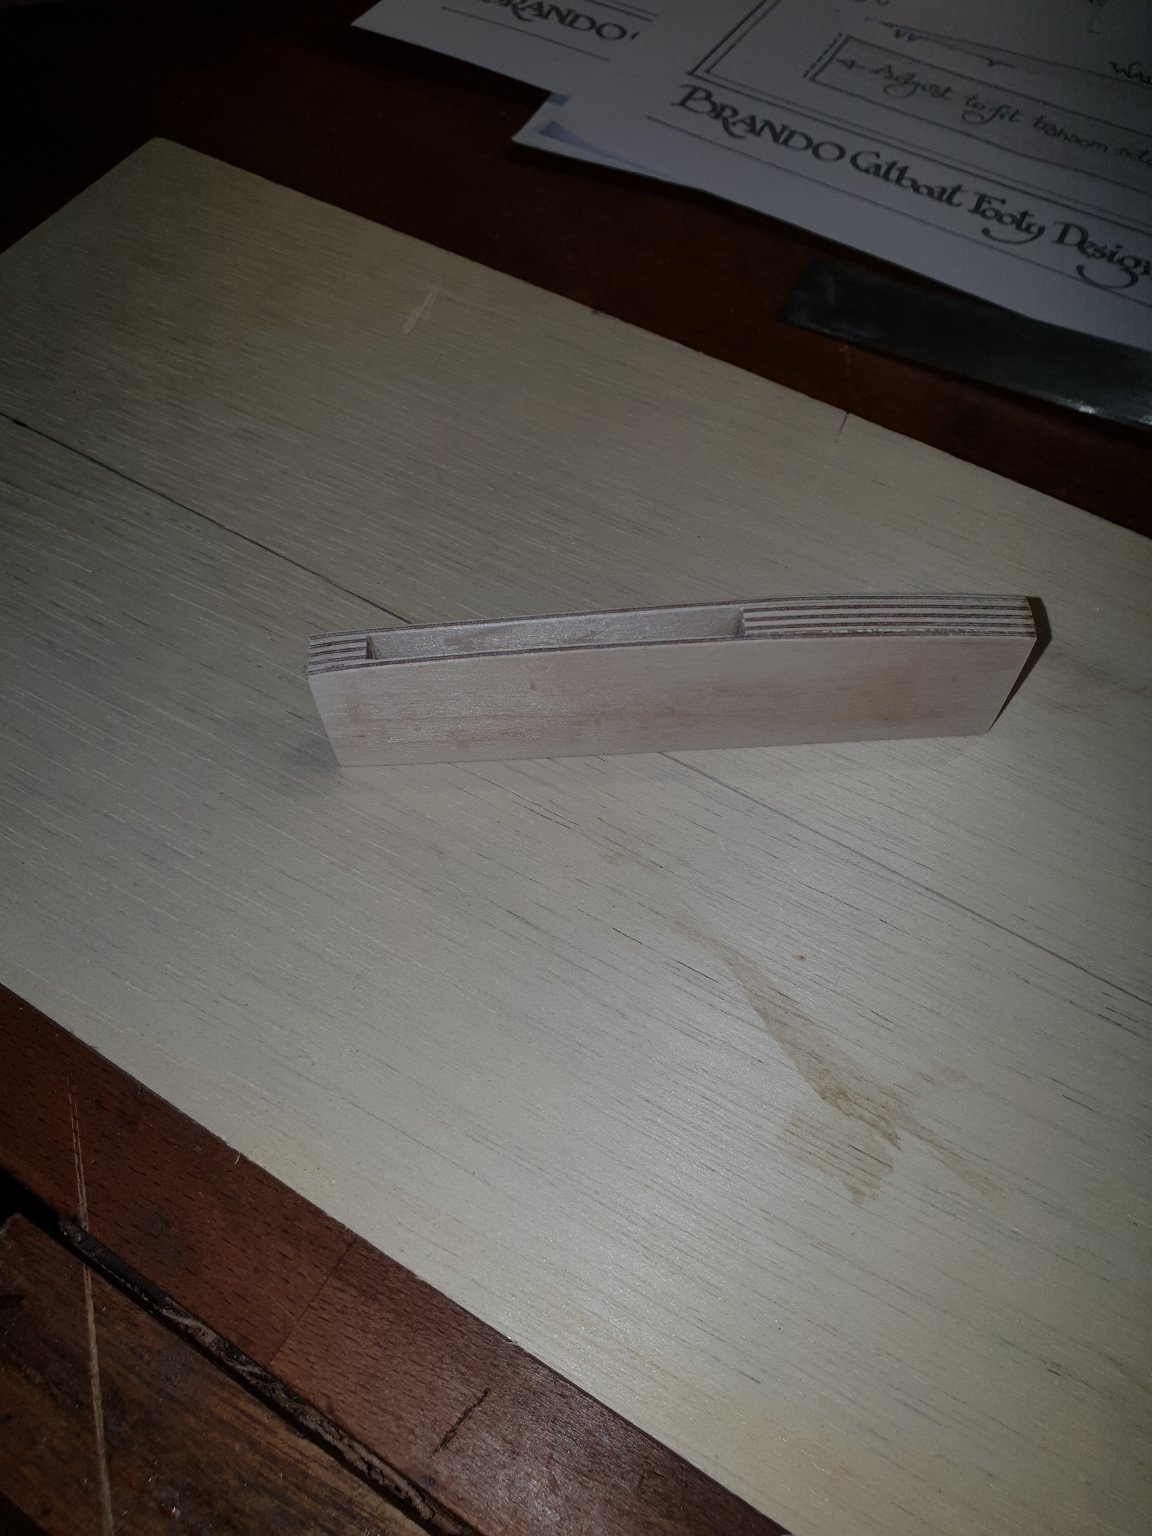
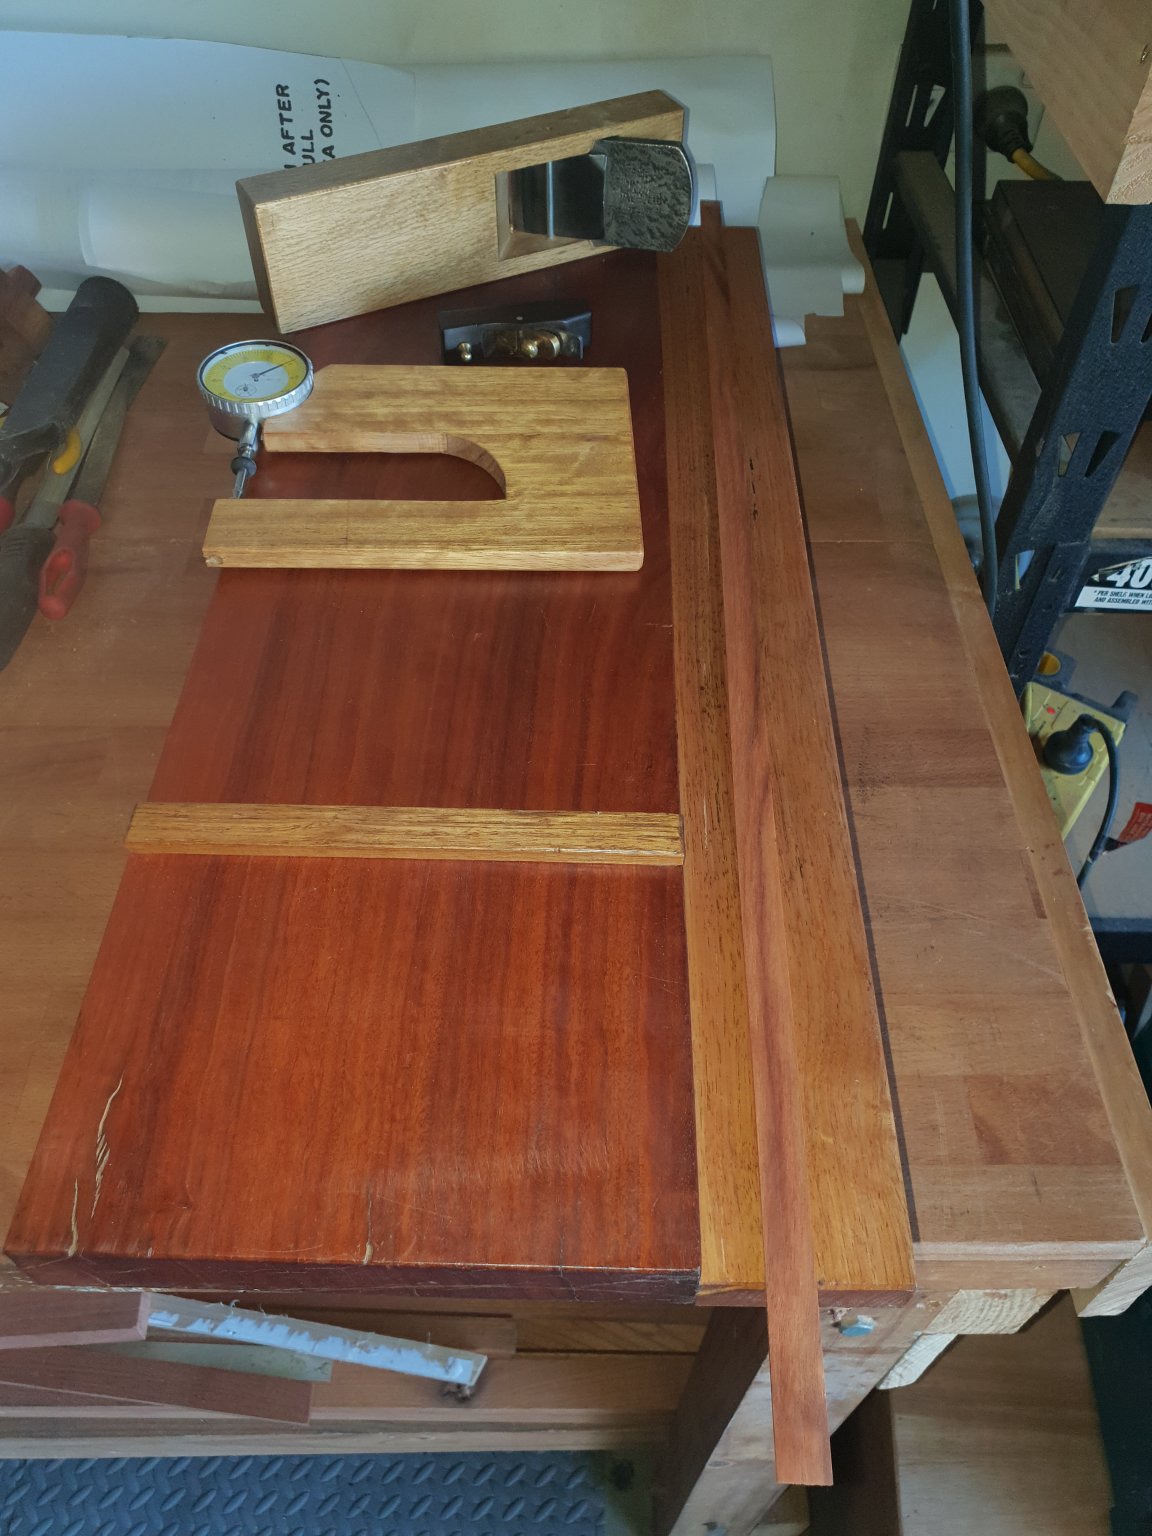
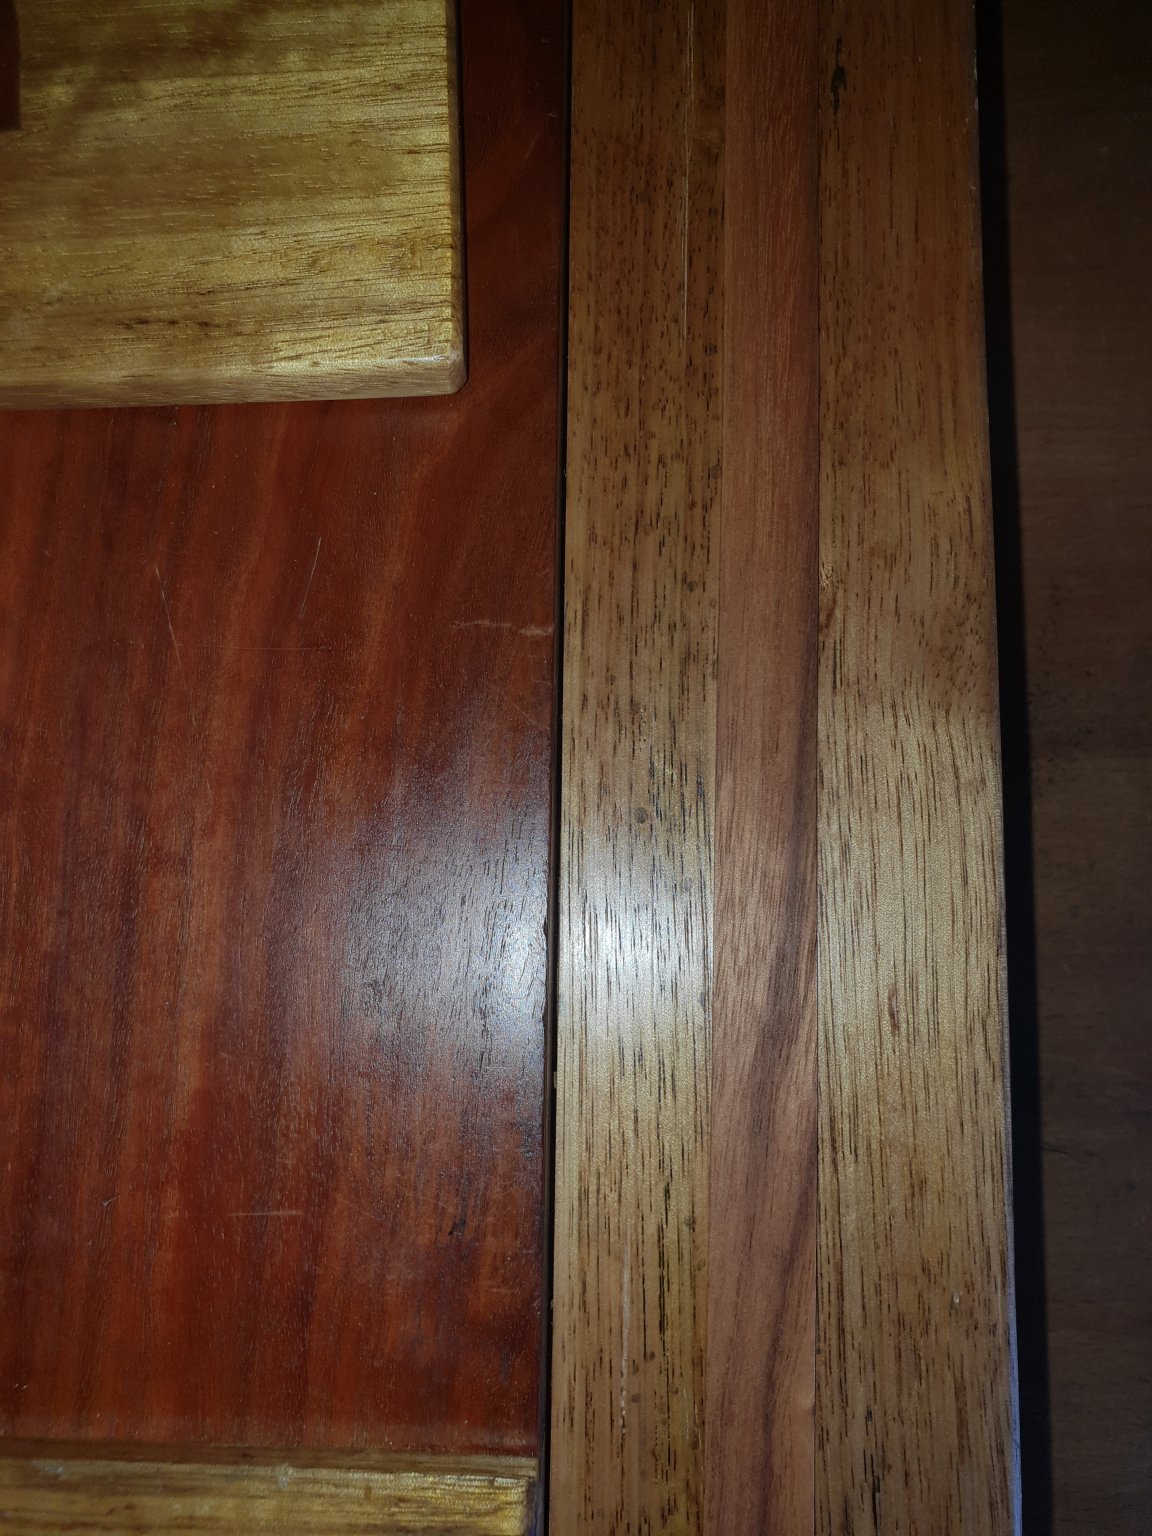
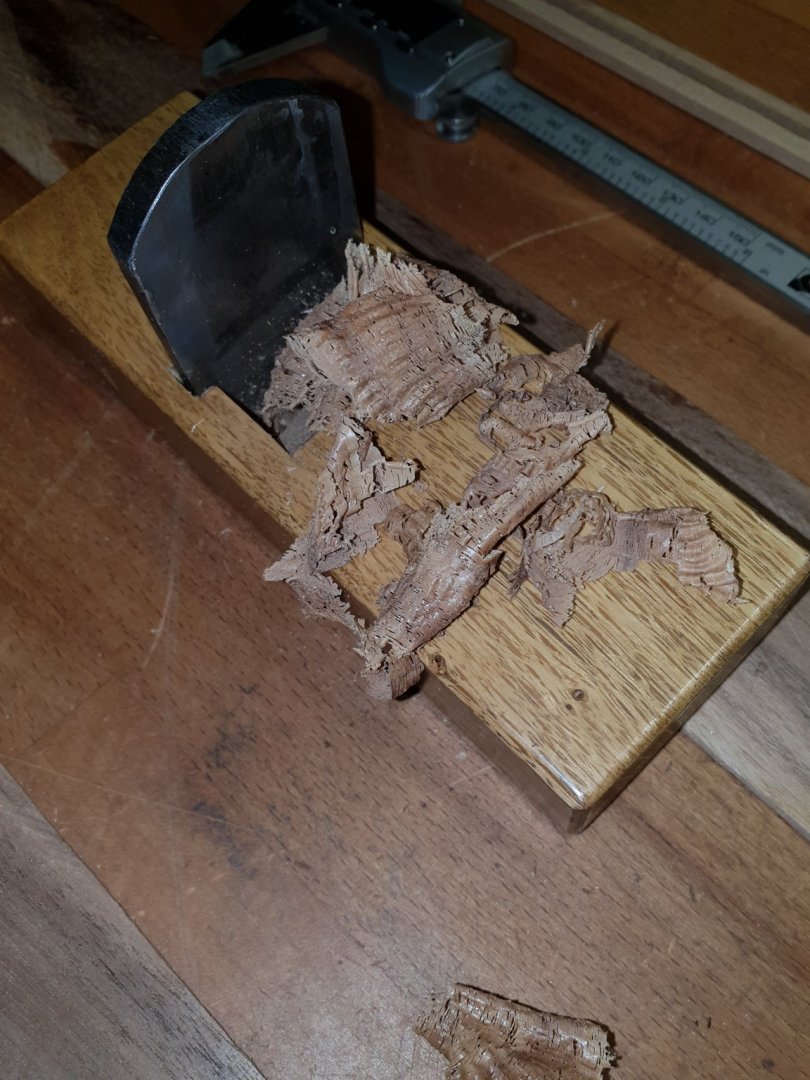
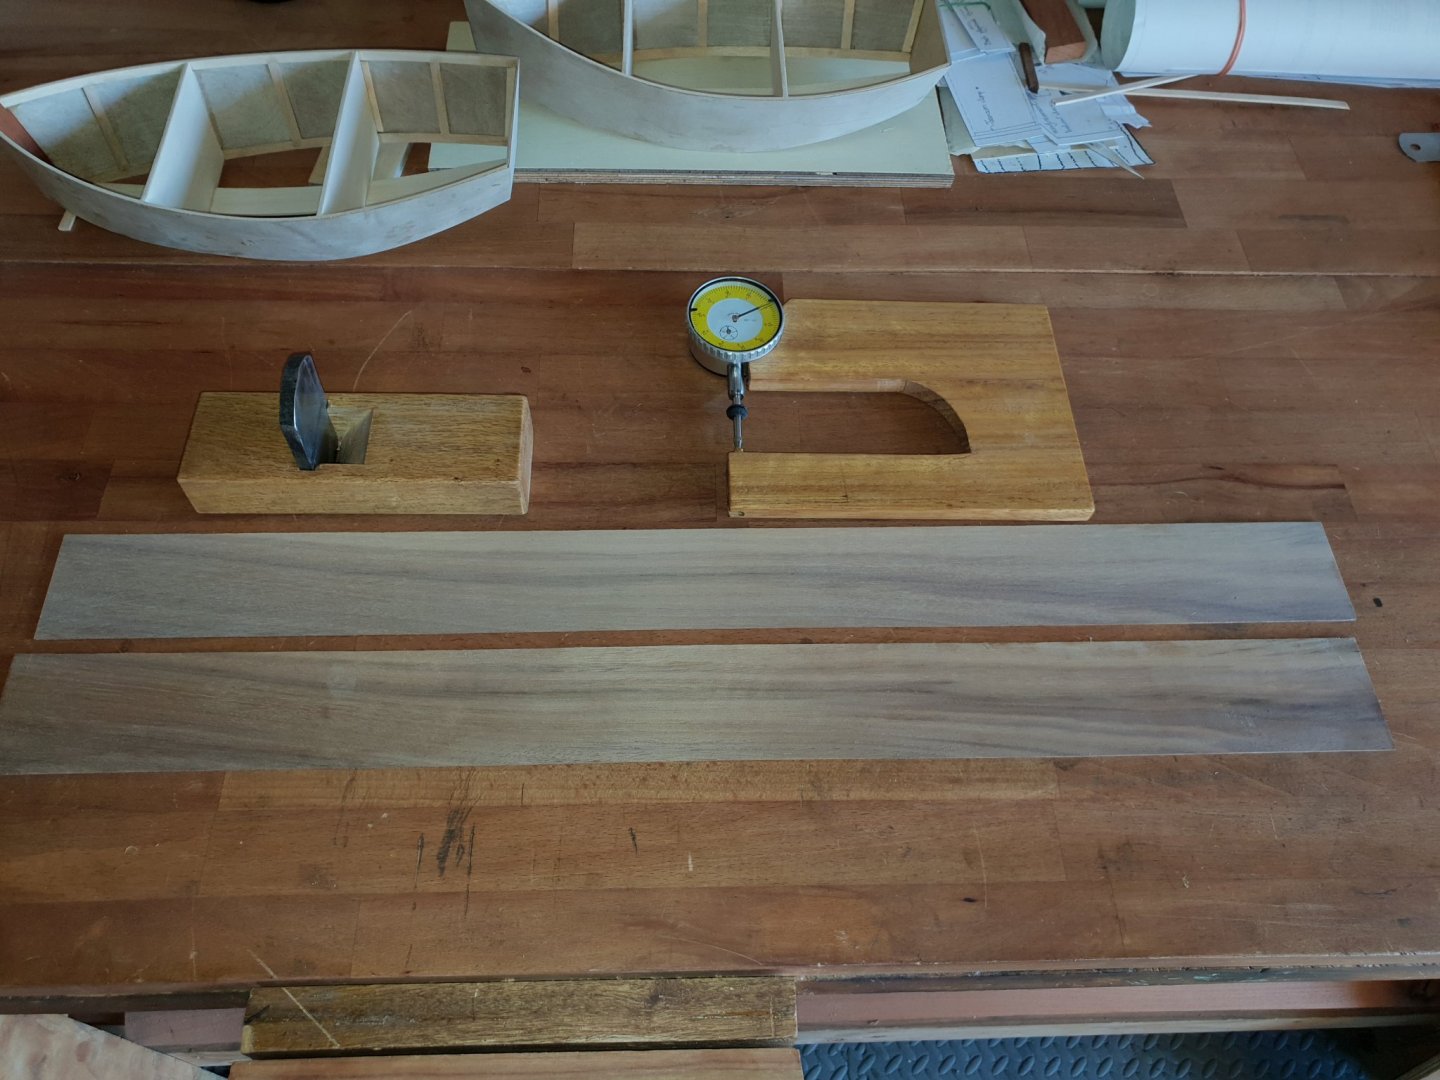
The walnut planks have now been scraped with the japanese block scraper. When correctly sharpened and set up they are most efficient. They should produce micro shavings as shown and not dust. It takes some time to get the blade like a razor. I made the shown thickness tester from a bit if scrap ply and a cheap DTI. This is the keel box made from 5 laminations of birch ply. Pete

-
It looks much better Nils. The other was just too thick and stiff. Plus I do not think they would have used a transparent hose. It looks great. Pete
-
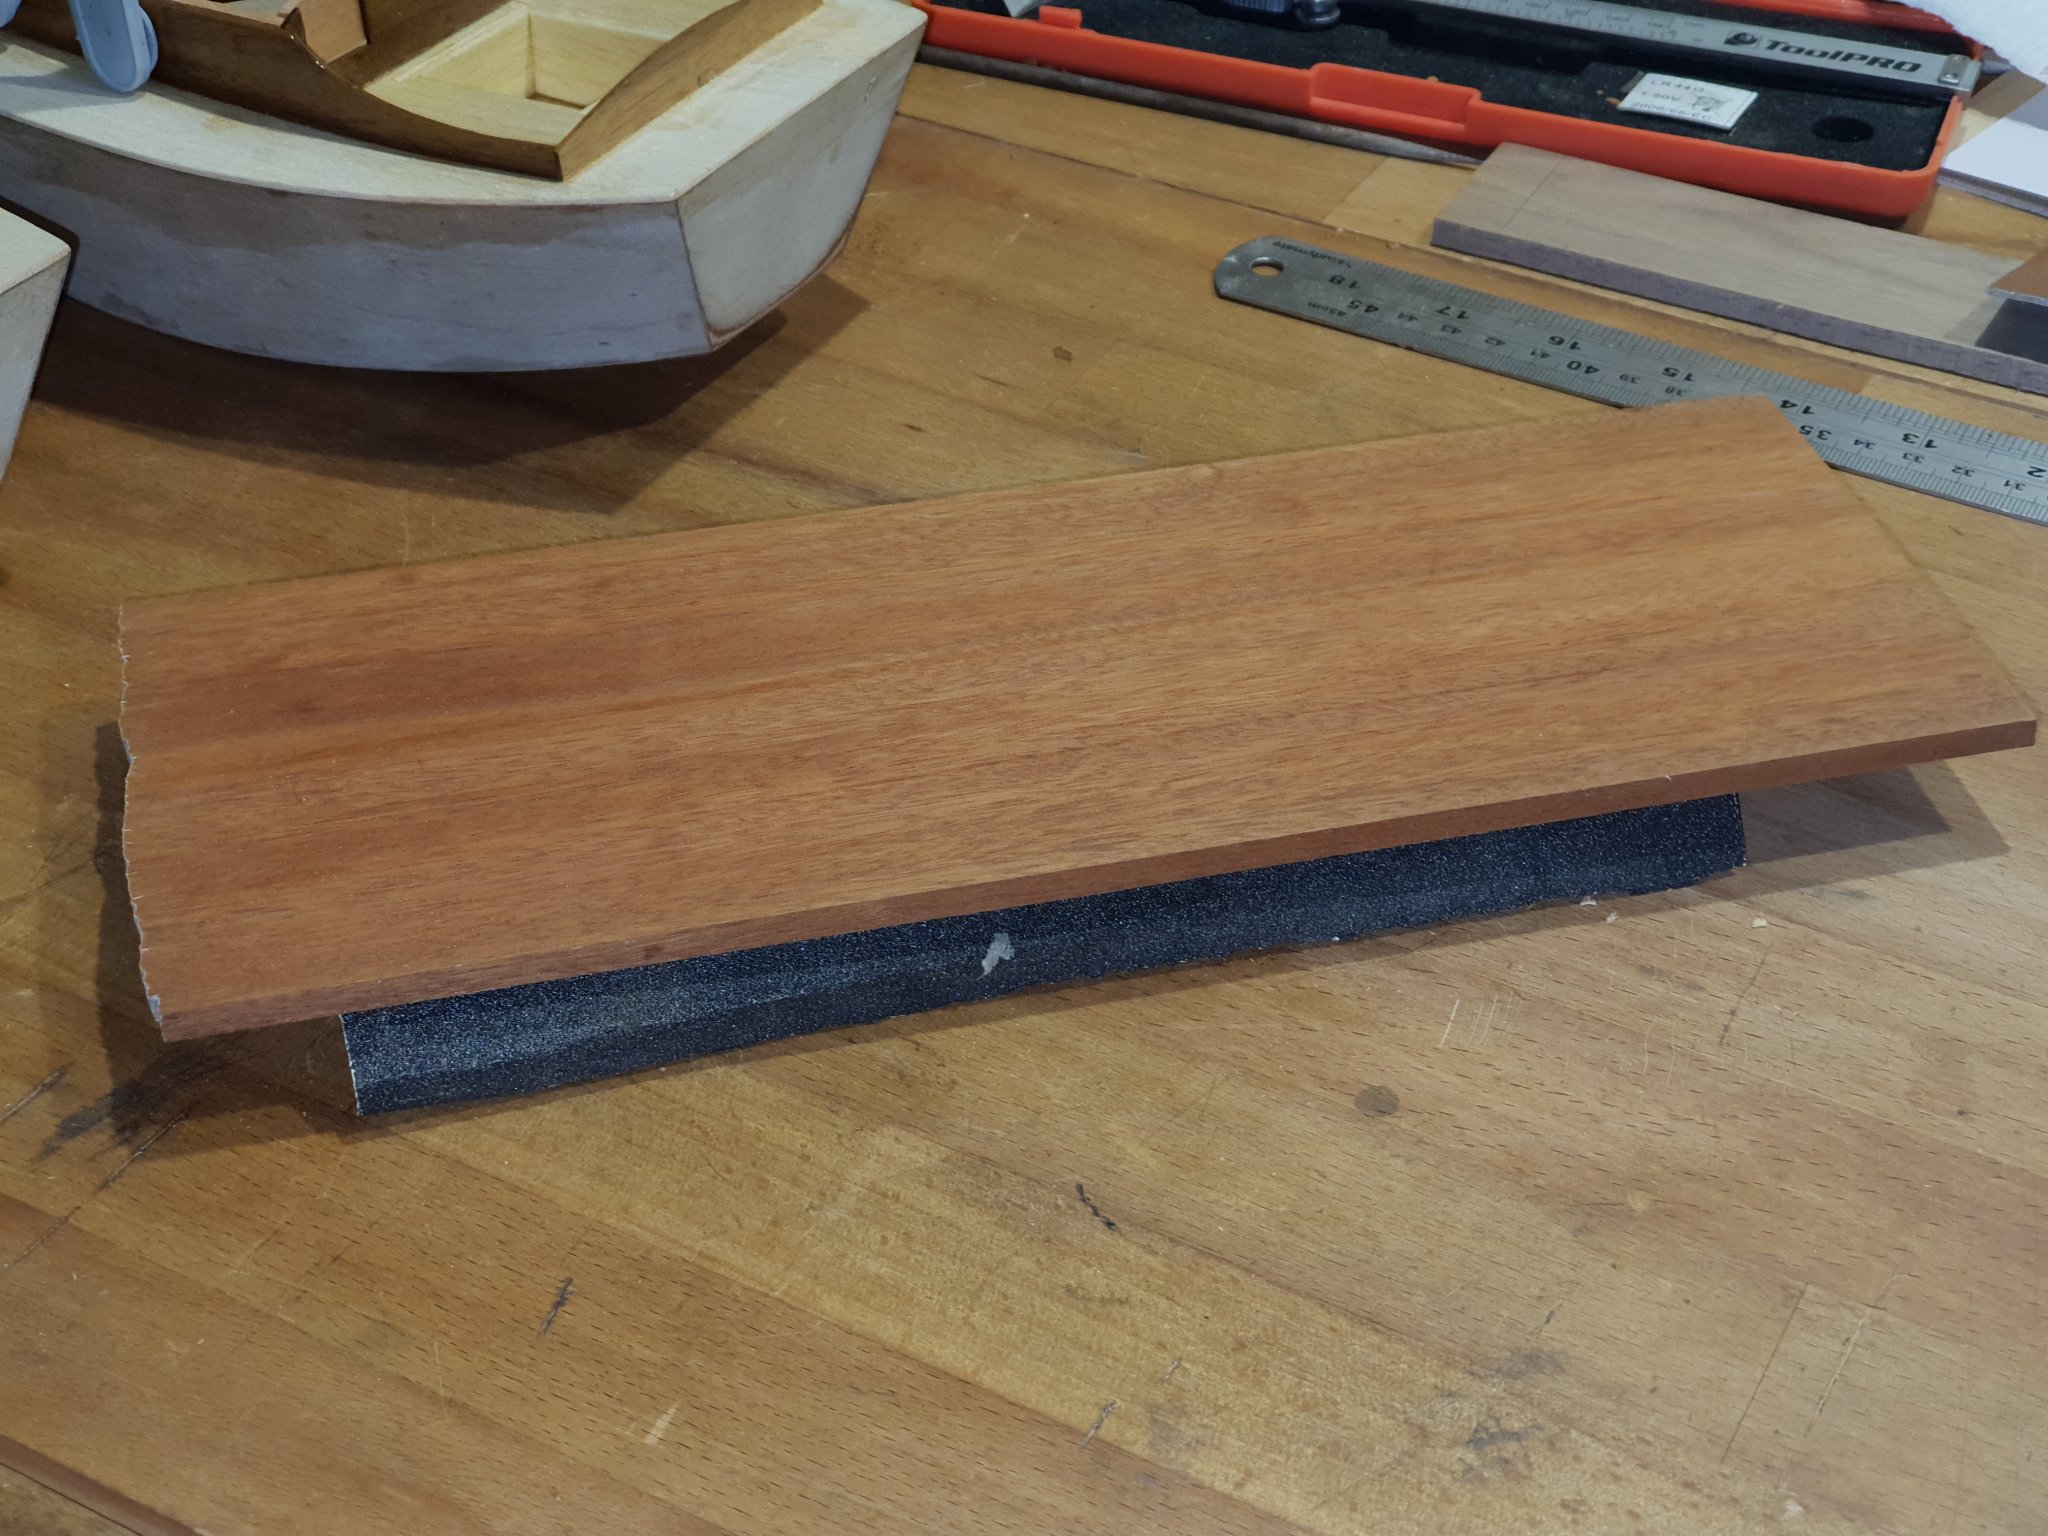
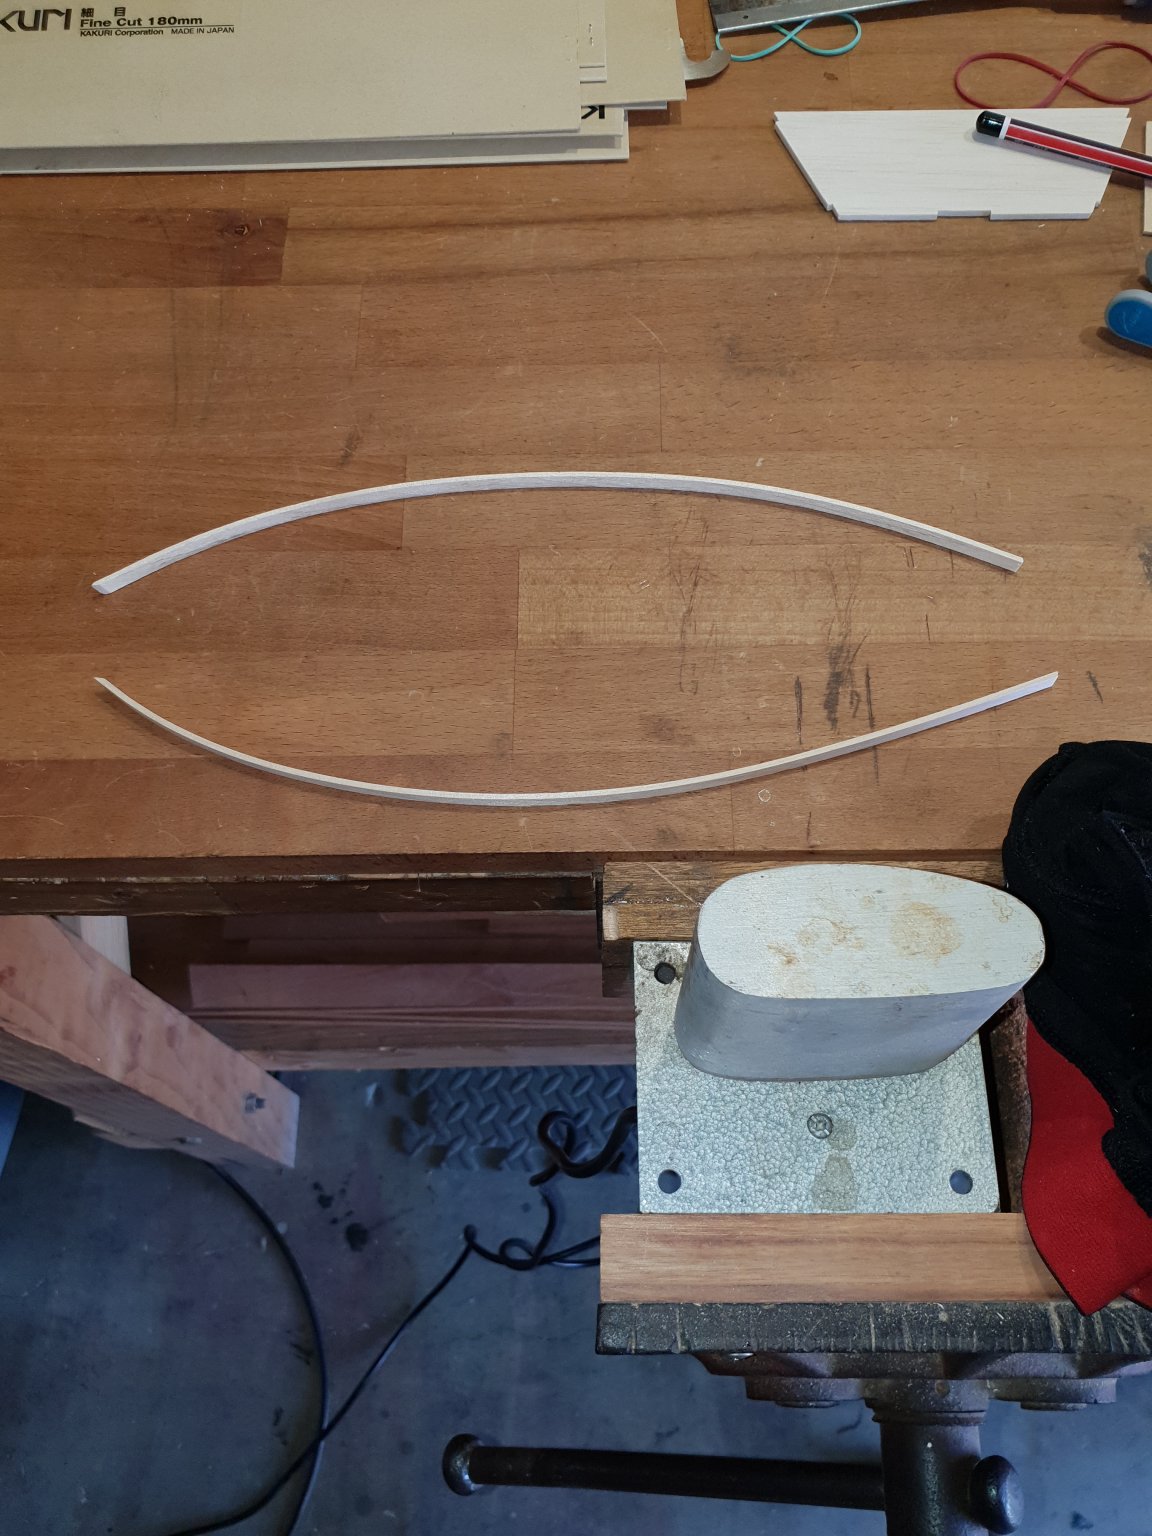
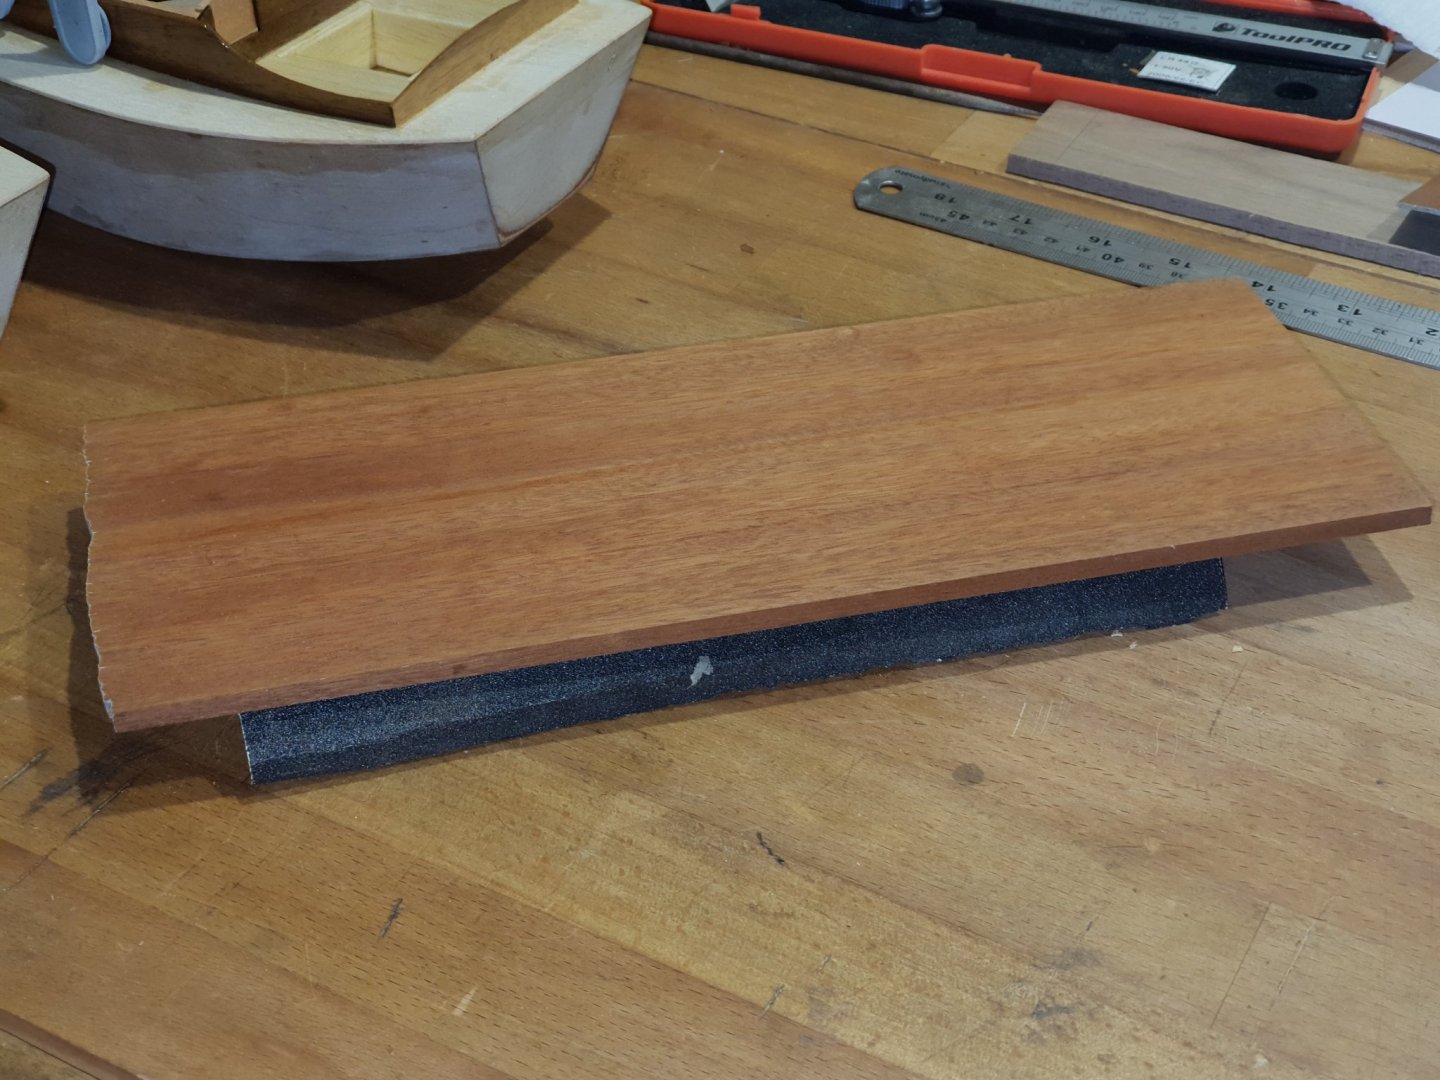
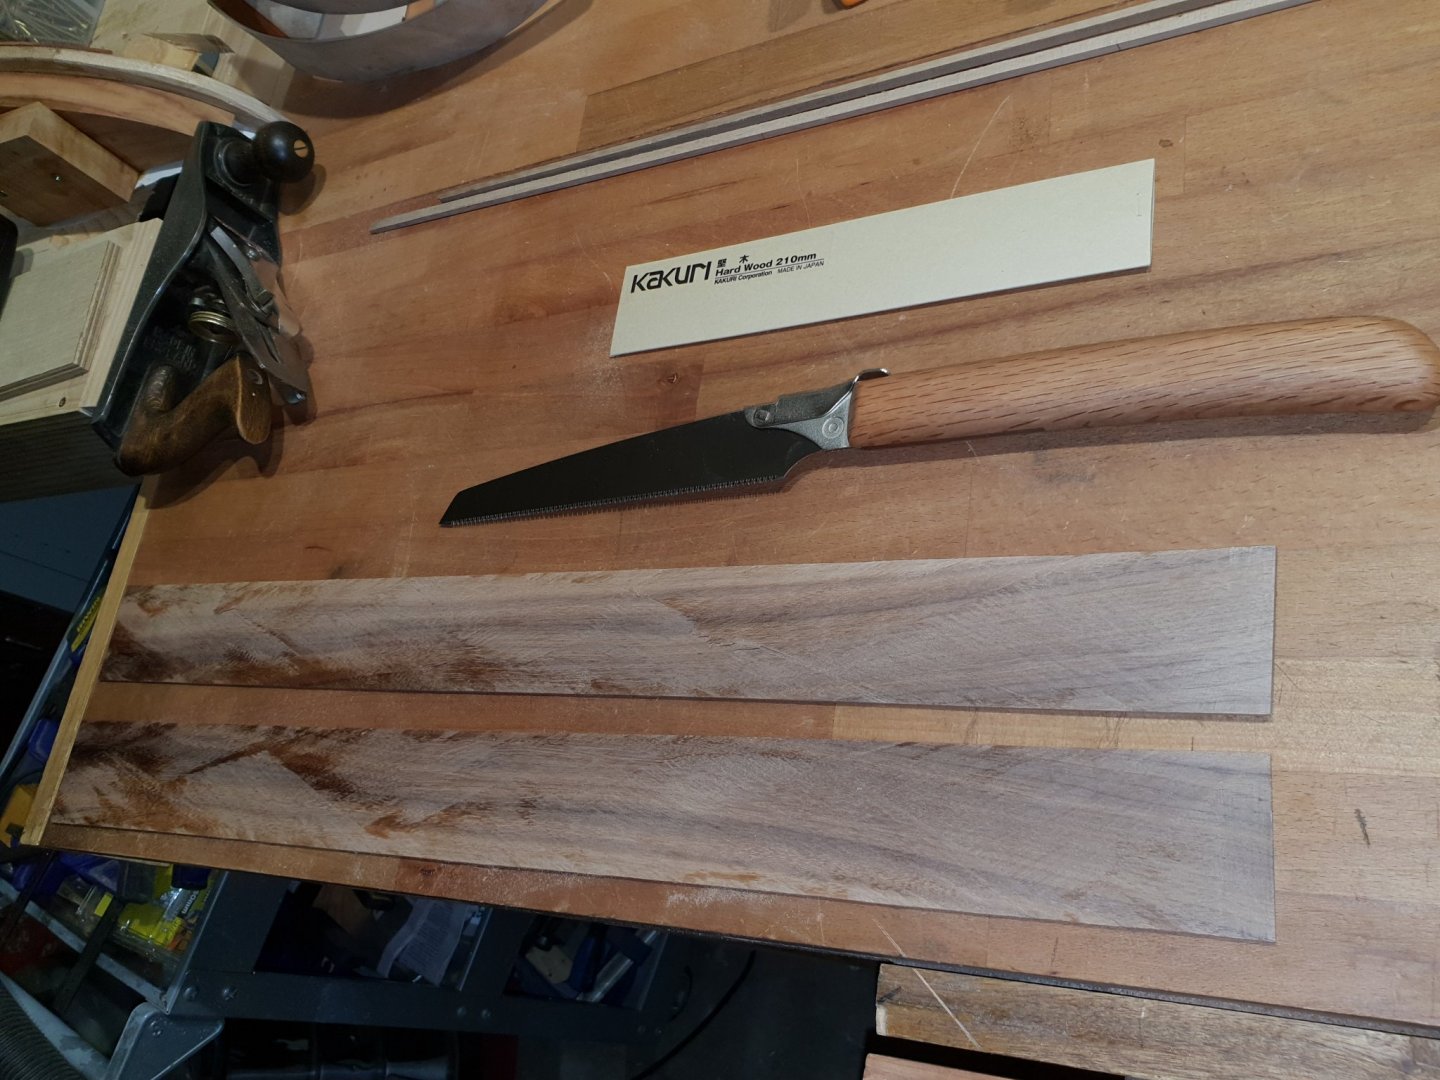
Thanks for all your likes! I am quite enthused to get these two finished and sailing and then it's back to Buenose big girl!! I have decided from the start that I want these two babies to also be beautiful apart from practical. Instead of balsa for the cabin and rub rails I shall use 1/16" sheet Walnut but I only had 1/4" thick. So I have just spent the last hour and a half hand sawing the plank in half to save further expense. Phew!!!..I am really pleased with myself that I still " have it" in me as occasionally I suffer from lack of confidence. Mind you! If it was not for the illustrated Japanese saw with it's very thin blade which cuts on the pull stroke, the task would have been impossible. So thank you Mr Kakuri for helping me out. I will now get out my Japanese block scraper plane and show you pictures later of the two thicknessed planks and how I measured the thicknesses. Thanks for looking in. Oh! Bits of radio gear arrived yesterday in the form of transmitter, receiver and four servos. Pete
-
Pss I do not know whether to Skin the bottom and decks with 1/64" ply as well? The plans say to use 1/16" balsa. I don't want the bottom or deck to wrinkle up with weather, time and water so any advice will be welcome. Thanks Pete
-
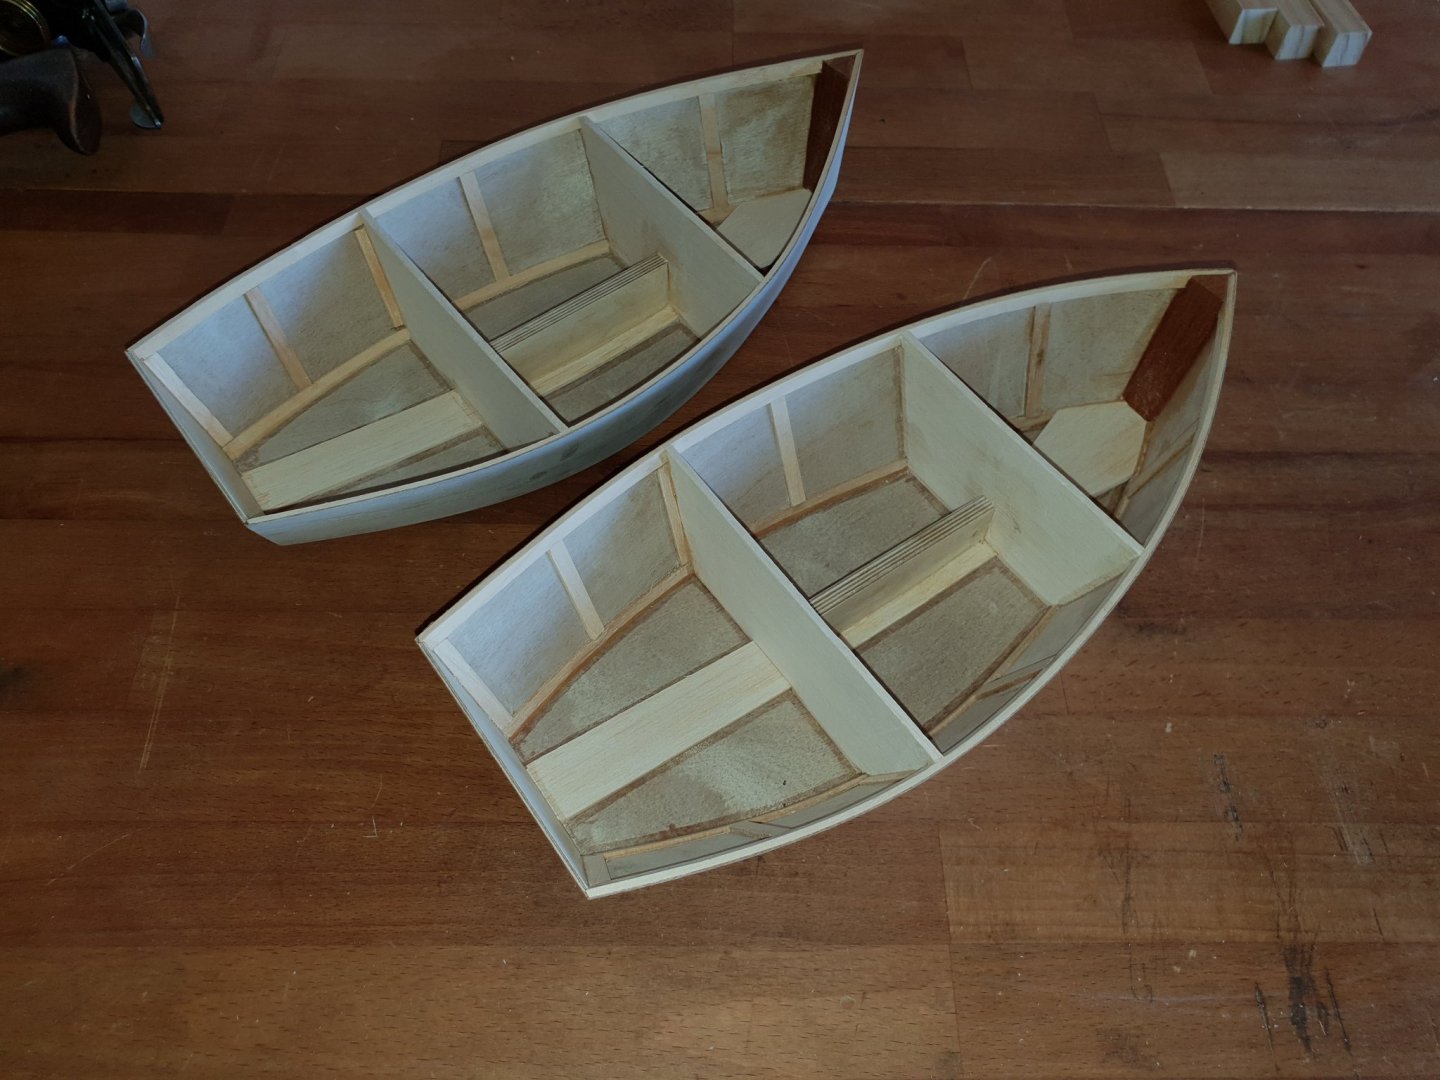
There were two little Ducks.... Sitting in the water! La la la ...la la la la la ! My two Brandos so far. That bow inner stem post was a sod! Something I have learnt about building boats. Nothing is square. That little piece of red cedar had eight different angles to consider. Well that's the hard bit dun. The rest is just plain sailing. And please excuse the pun. Shakespete.


-
Were these battery started or hand cranked Nils? I like your fuel tank and fittings. I think the general view is correct in that it should be a black hose and somewhat smaller diameter but you are on the case now. By the time you have finished the engine and gubbins it will look ready to start!! Dont forget the oily rag!!! Oh the list is endless. But great fun. Pete
-
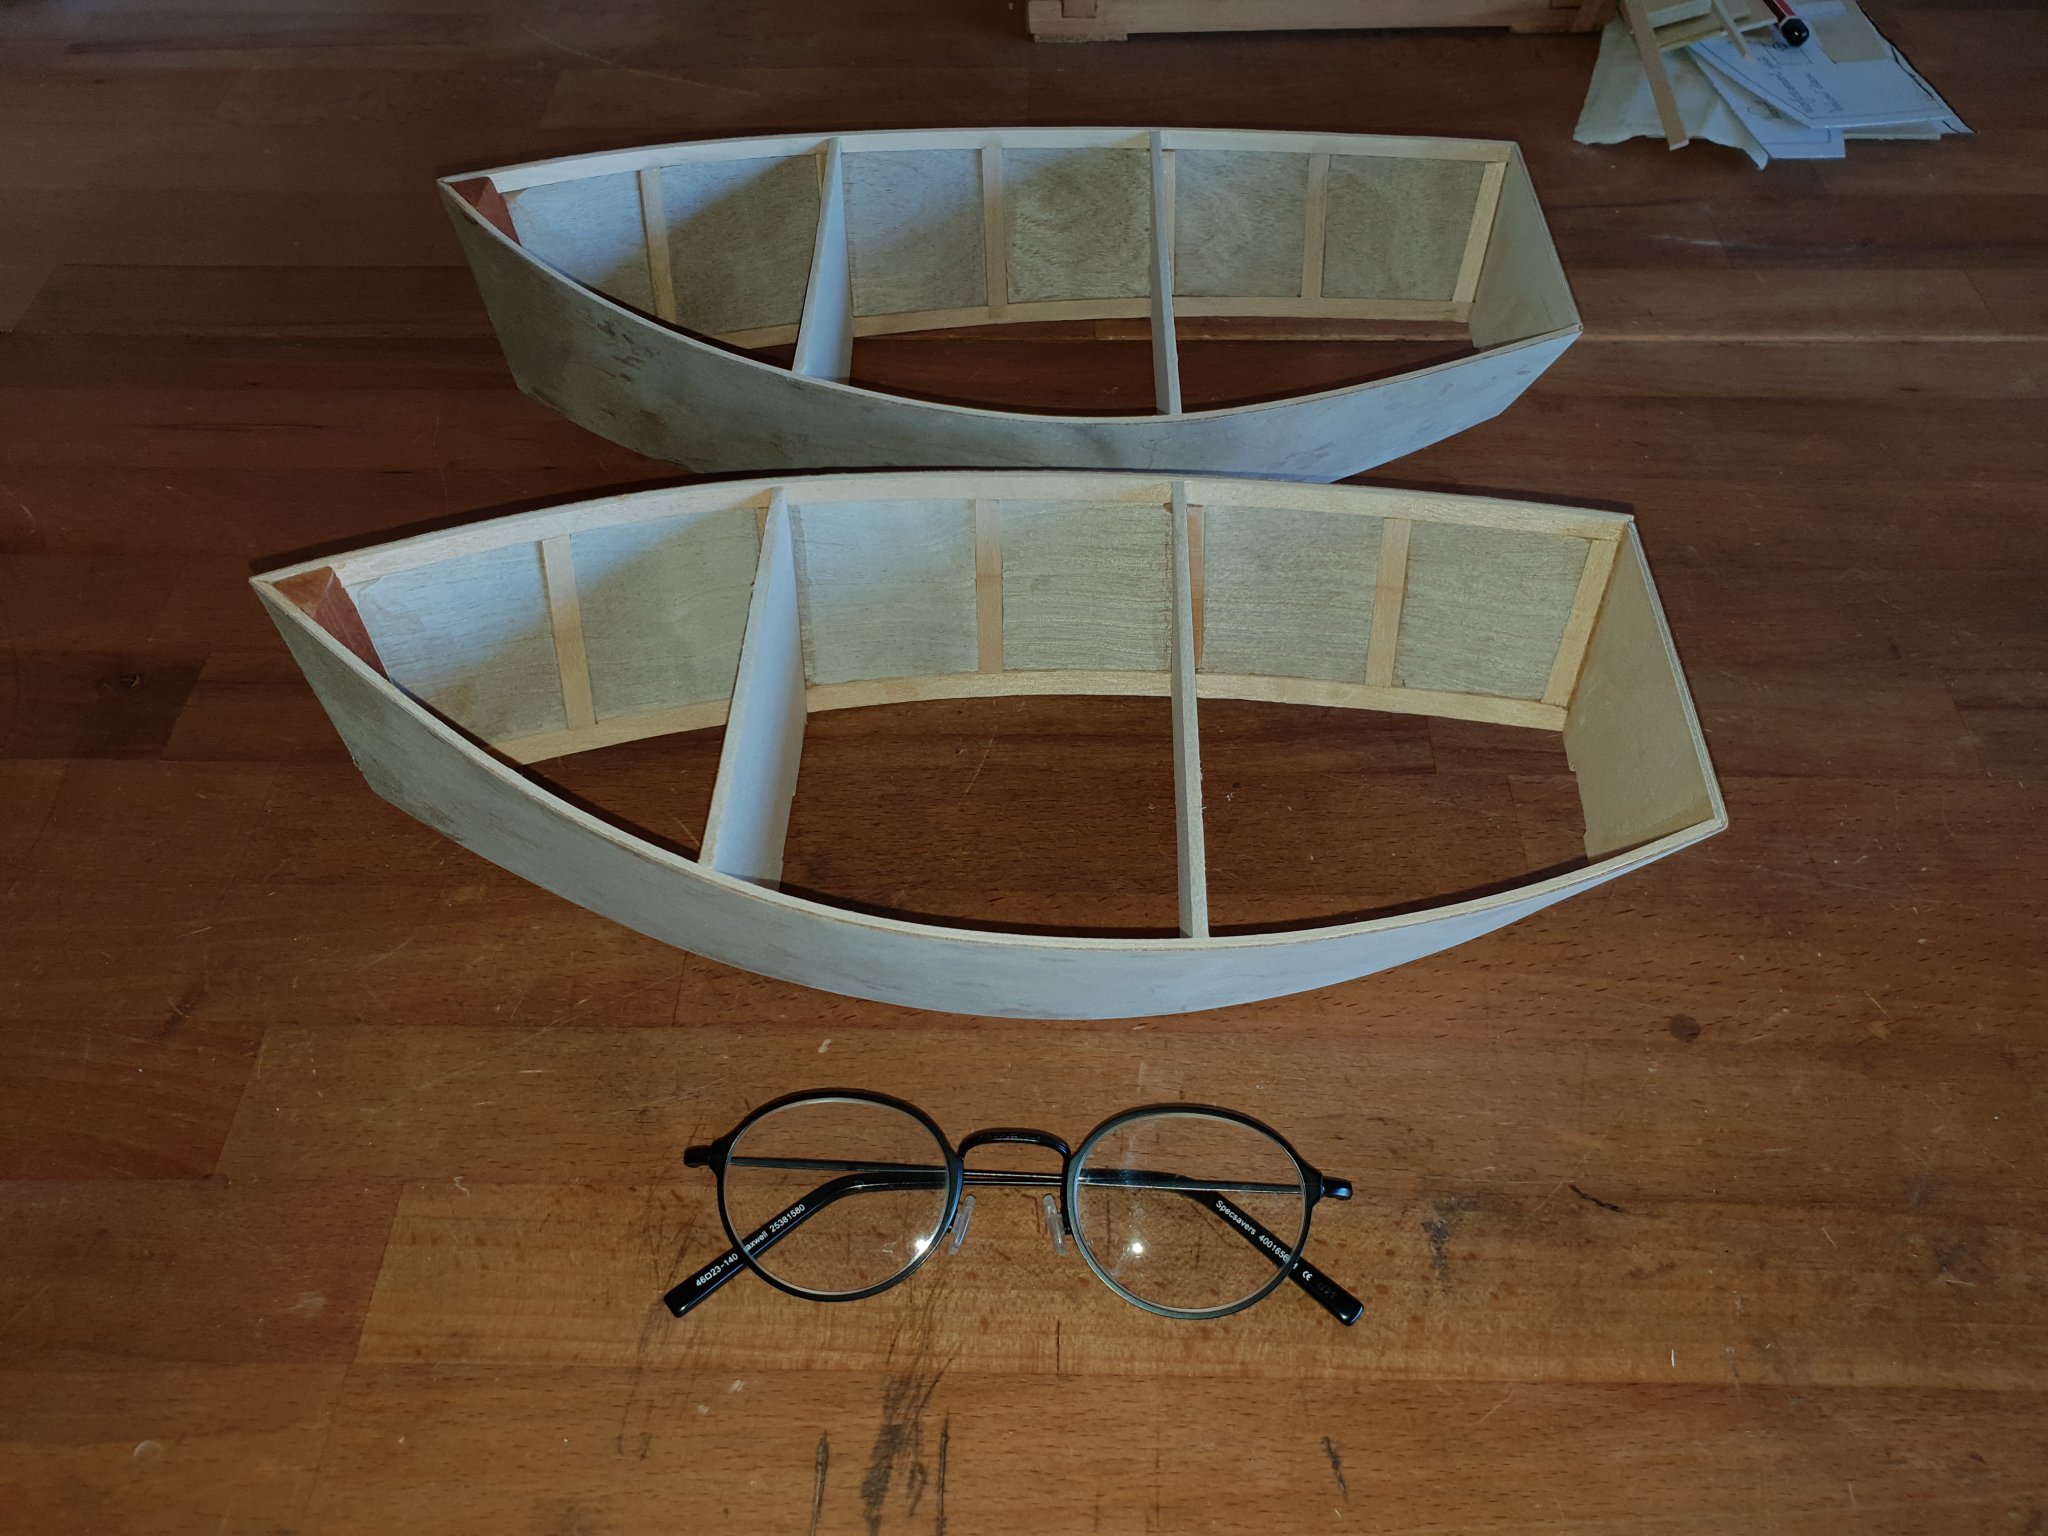
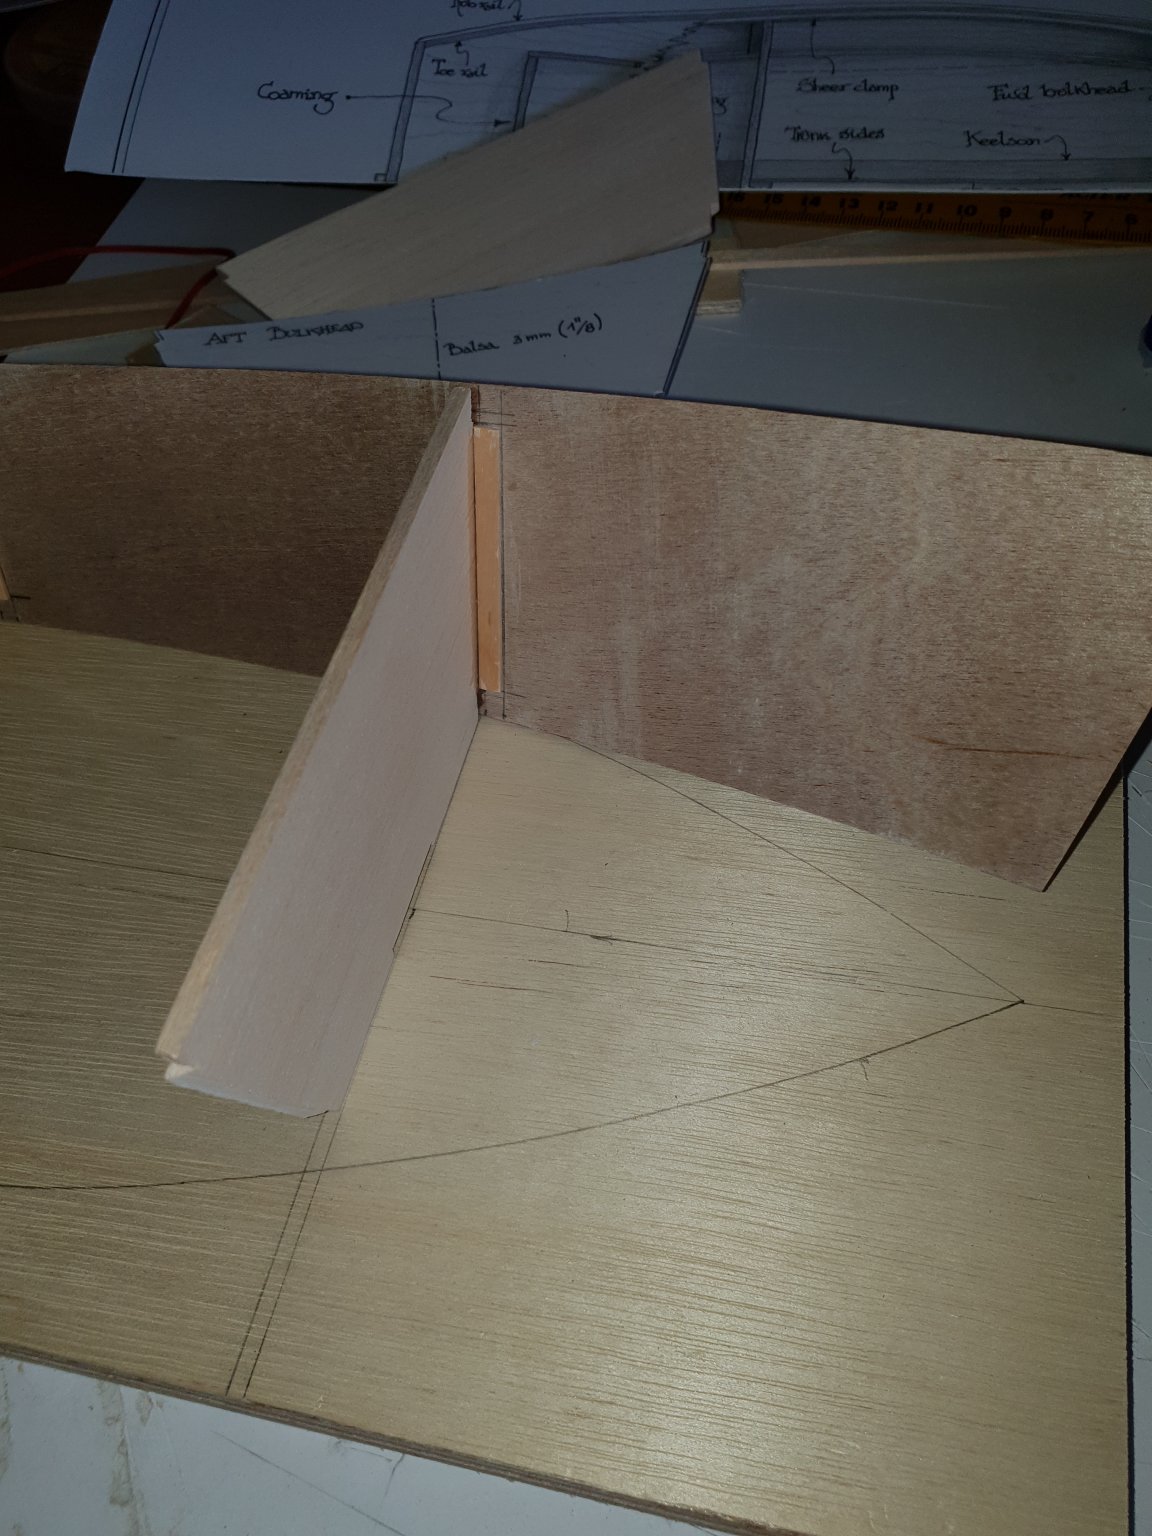
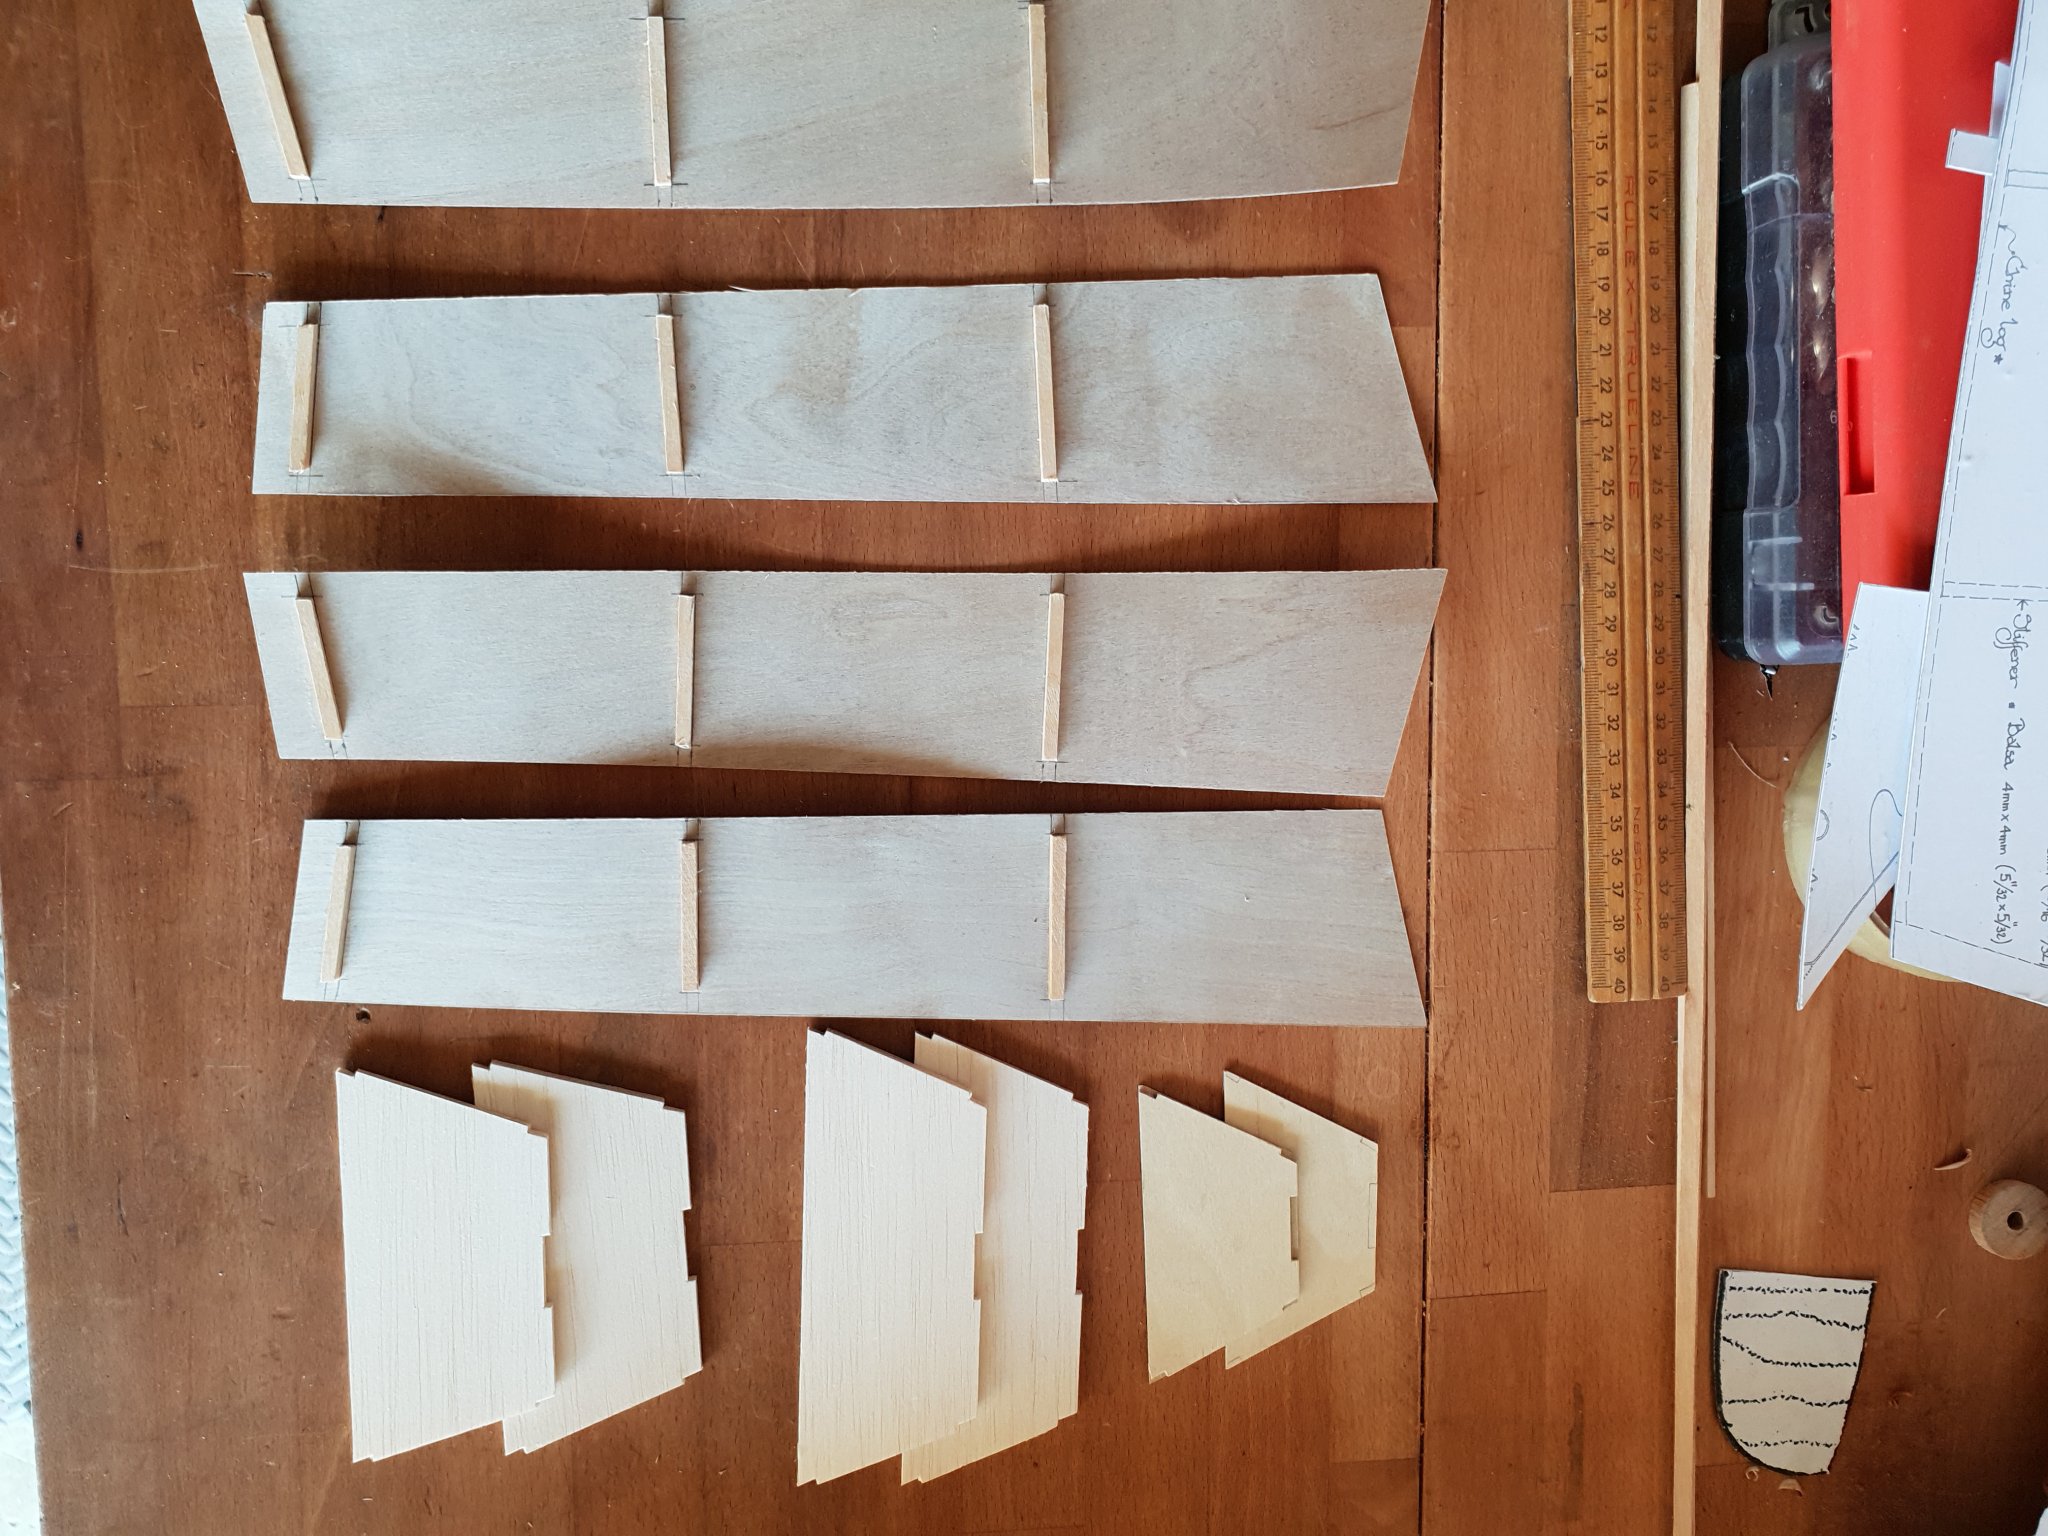
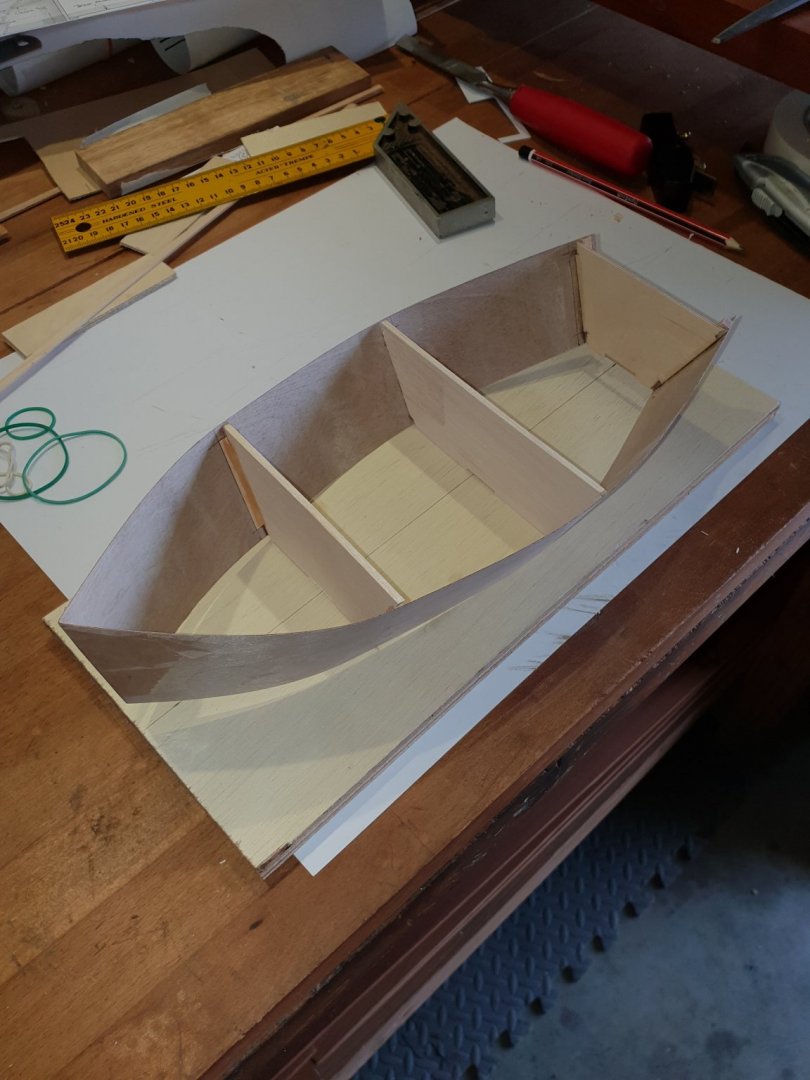
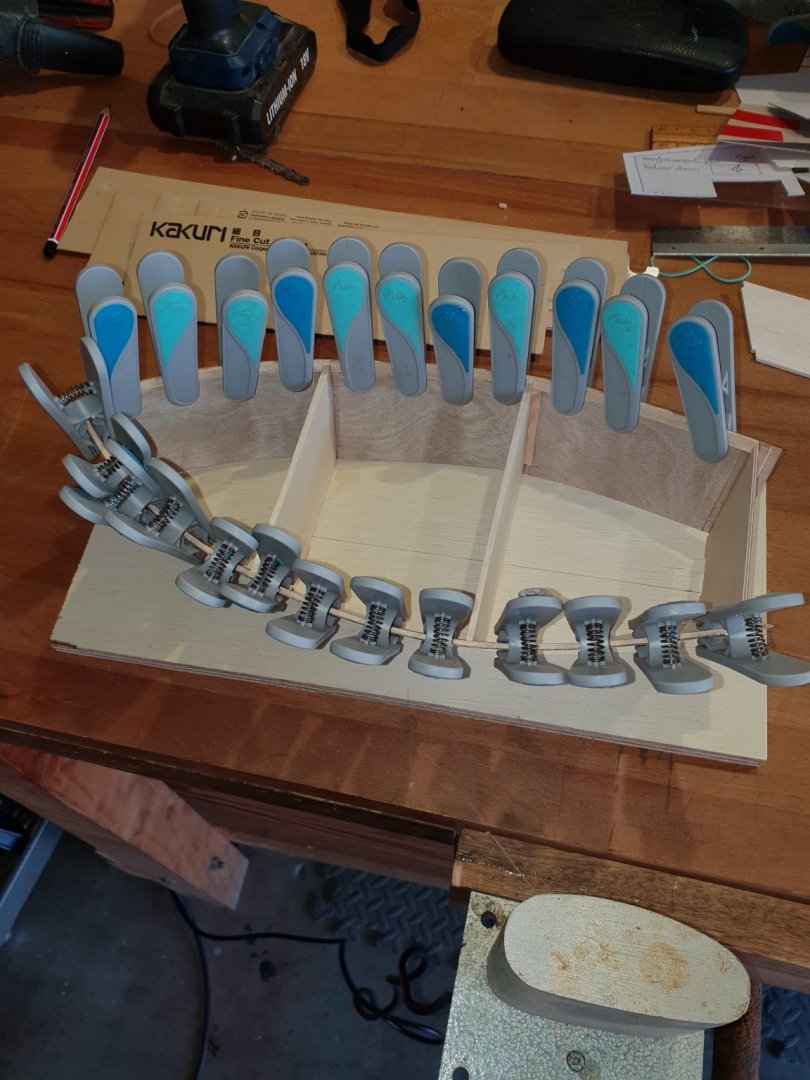
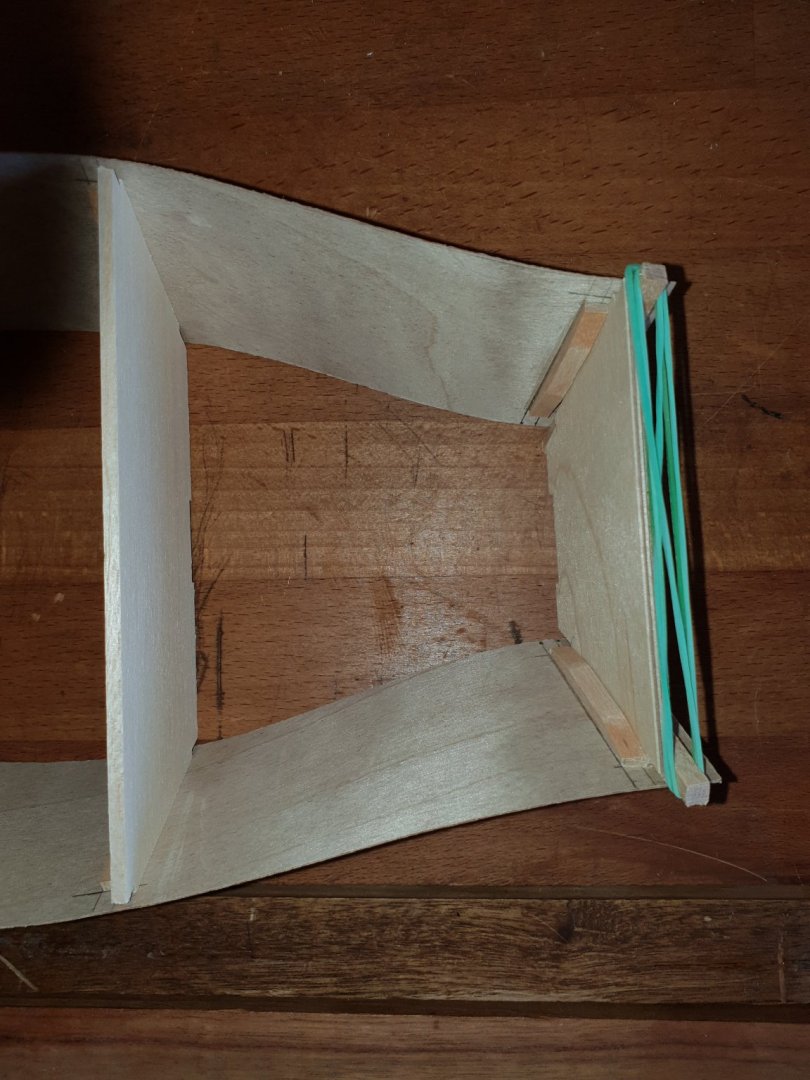
Well I am learning a lot with this (simple boat) ha ha. If you look at the sides you will see that they are straight lines top and bottom. When I came to tape the bow together and glue on the transom, things started to emerge. Because of the different angles of transom and sides the sides took a nice curve as did the top.( side view). Very clever on the design front but a bit of a pig to come to terms with. I did a dry run before gluing the transom and the picture shown reveals a reall nasty curve which needed sorting out. So I had to fair in the transom and two bulkheads. And then carefully held them over a marked out board showing the top view outline and super glued the transom on whilst holding it to the sides. Five minutes later my transom was now on. I then taped the two sides together at the bow. Then super glued the bulkheads in. I had aspersions that the 1/64" ply would be too flimsy but having now glued on the top horizontal strengtheners I was amazed how strong this little gem is getting. I had to use a bending iron to help out the strengtheners a little so the whole would not try to spring apart. I agree though that this model is not for a raw beginner. Looks simple but has its challenges. I am off on my bike now to get more super glue. I only used it to hold difficult pieces together whilst holding the shape. The strengtheners were glued on with Elmer's Max waterproof glue as will all other pieces in future...( unless I have another nasty surprise which is why I do not like to run out of CA. Pete

-
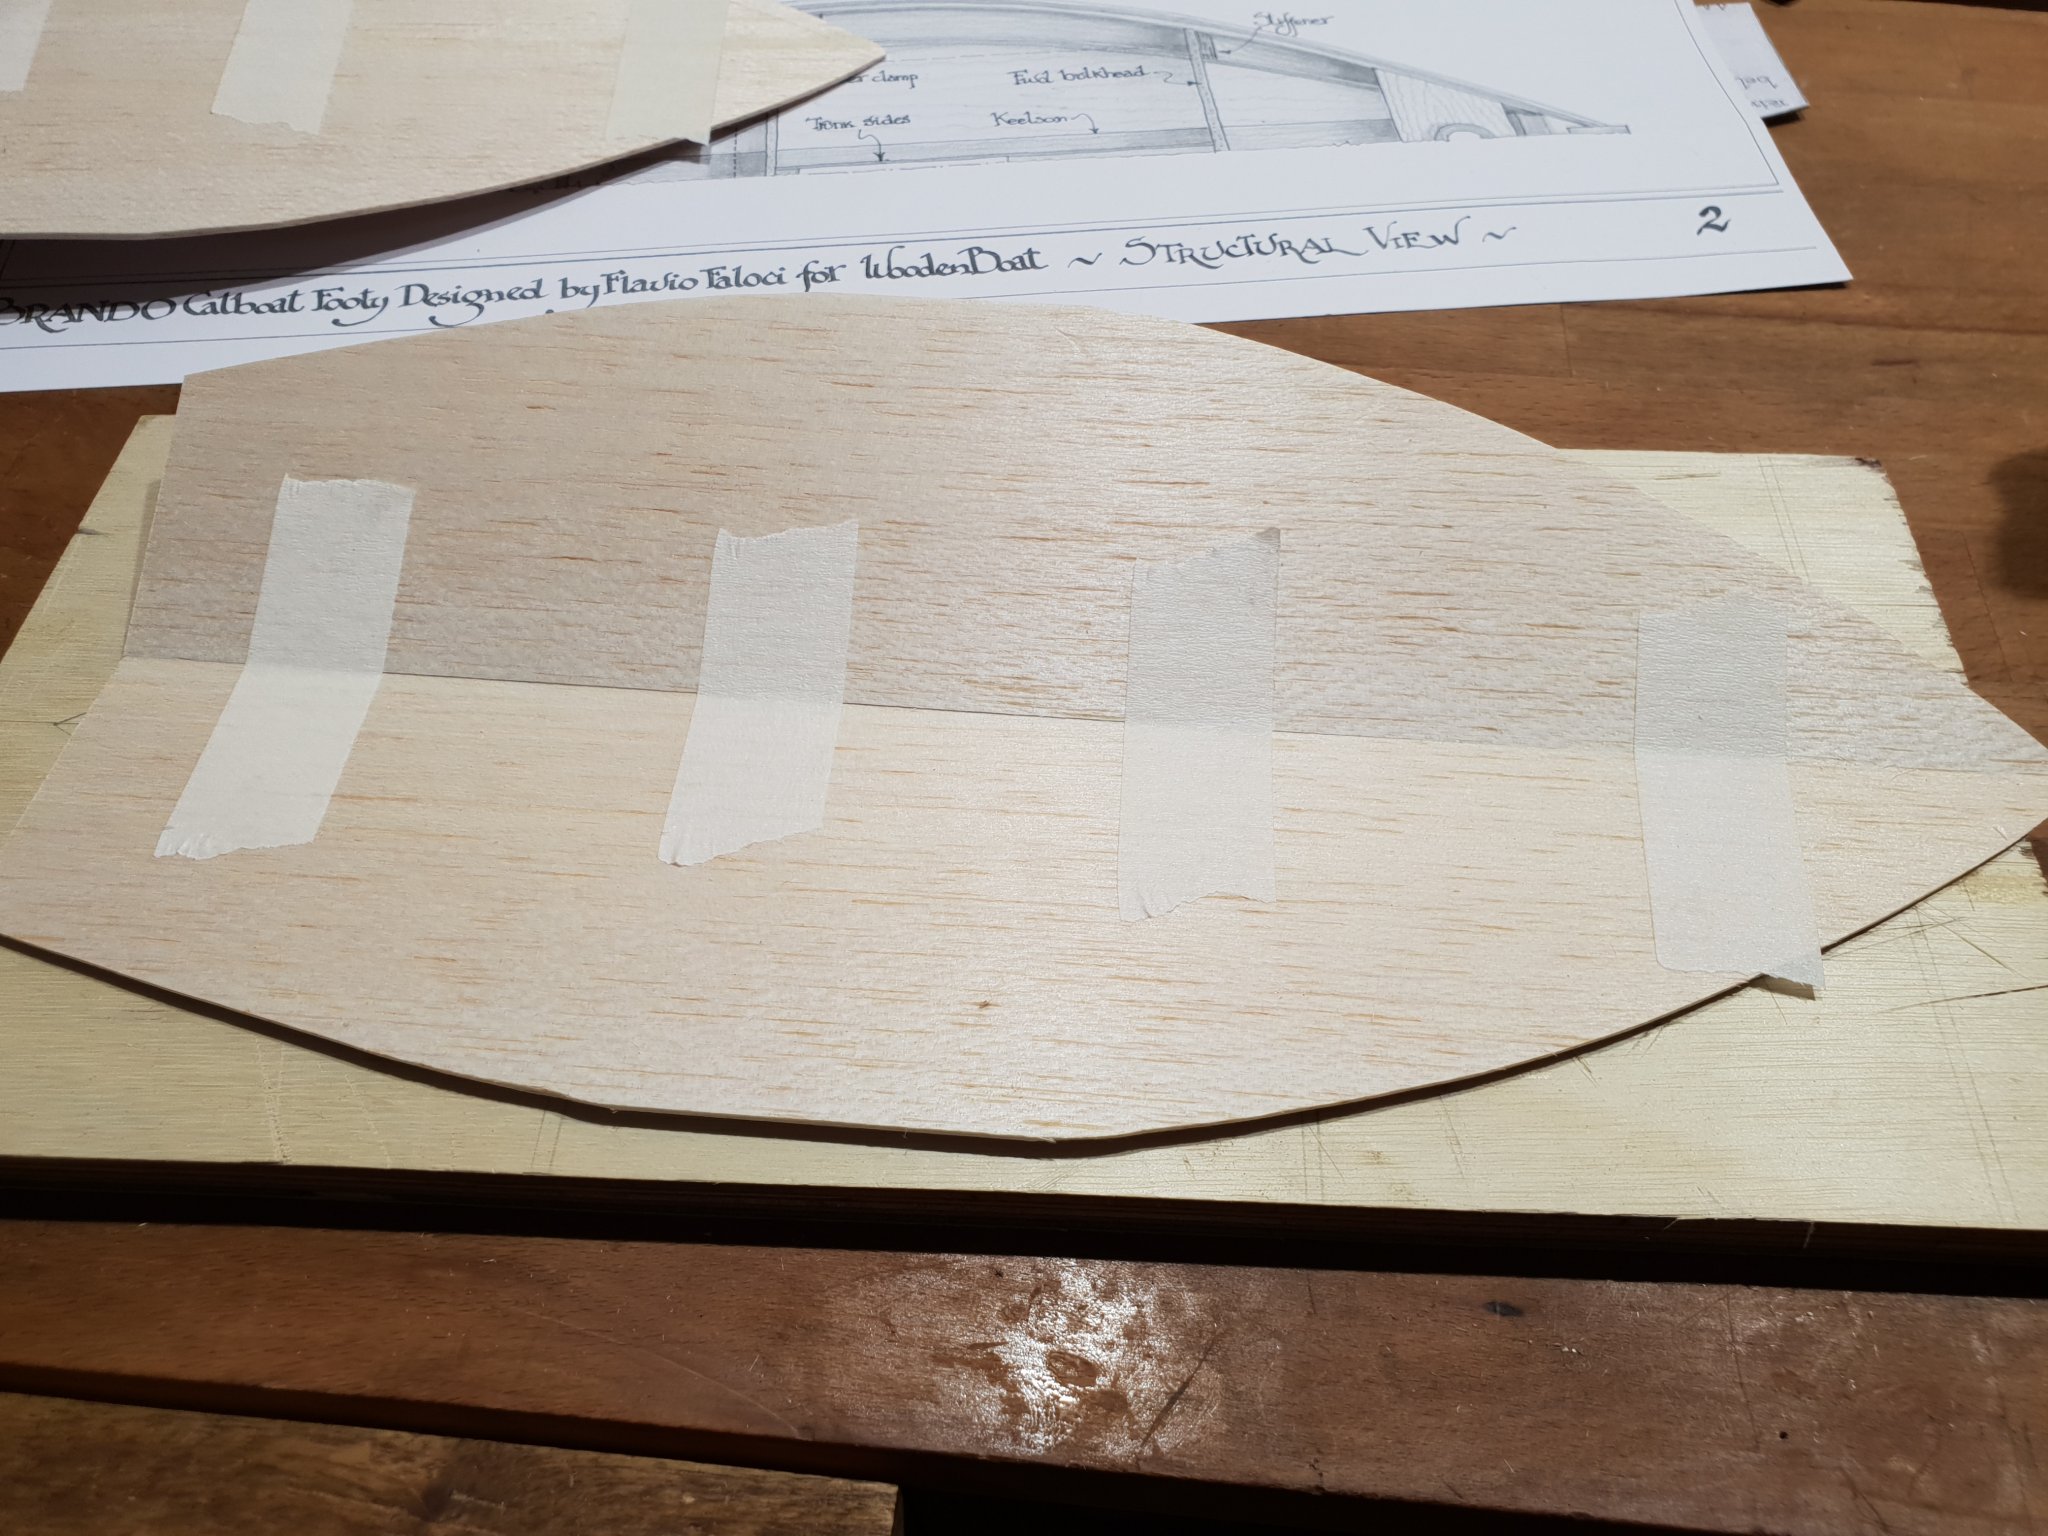
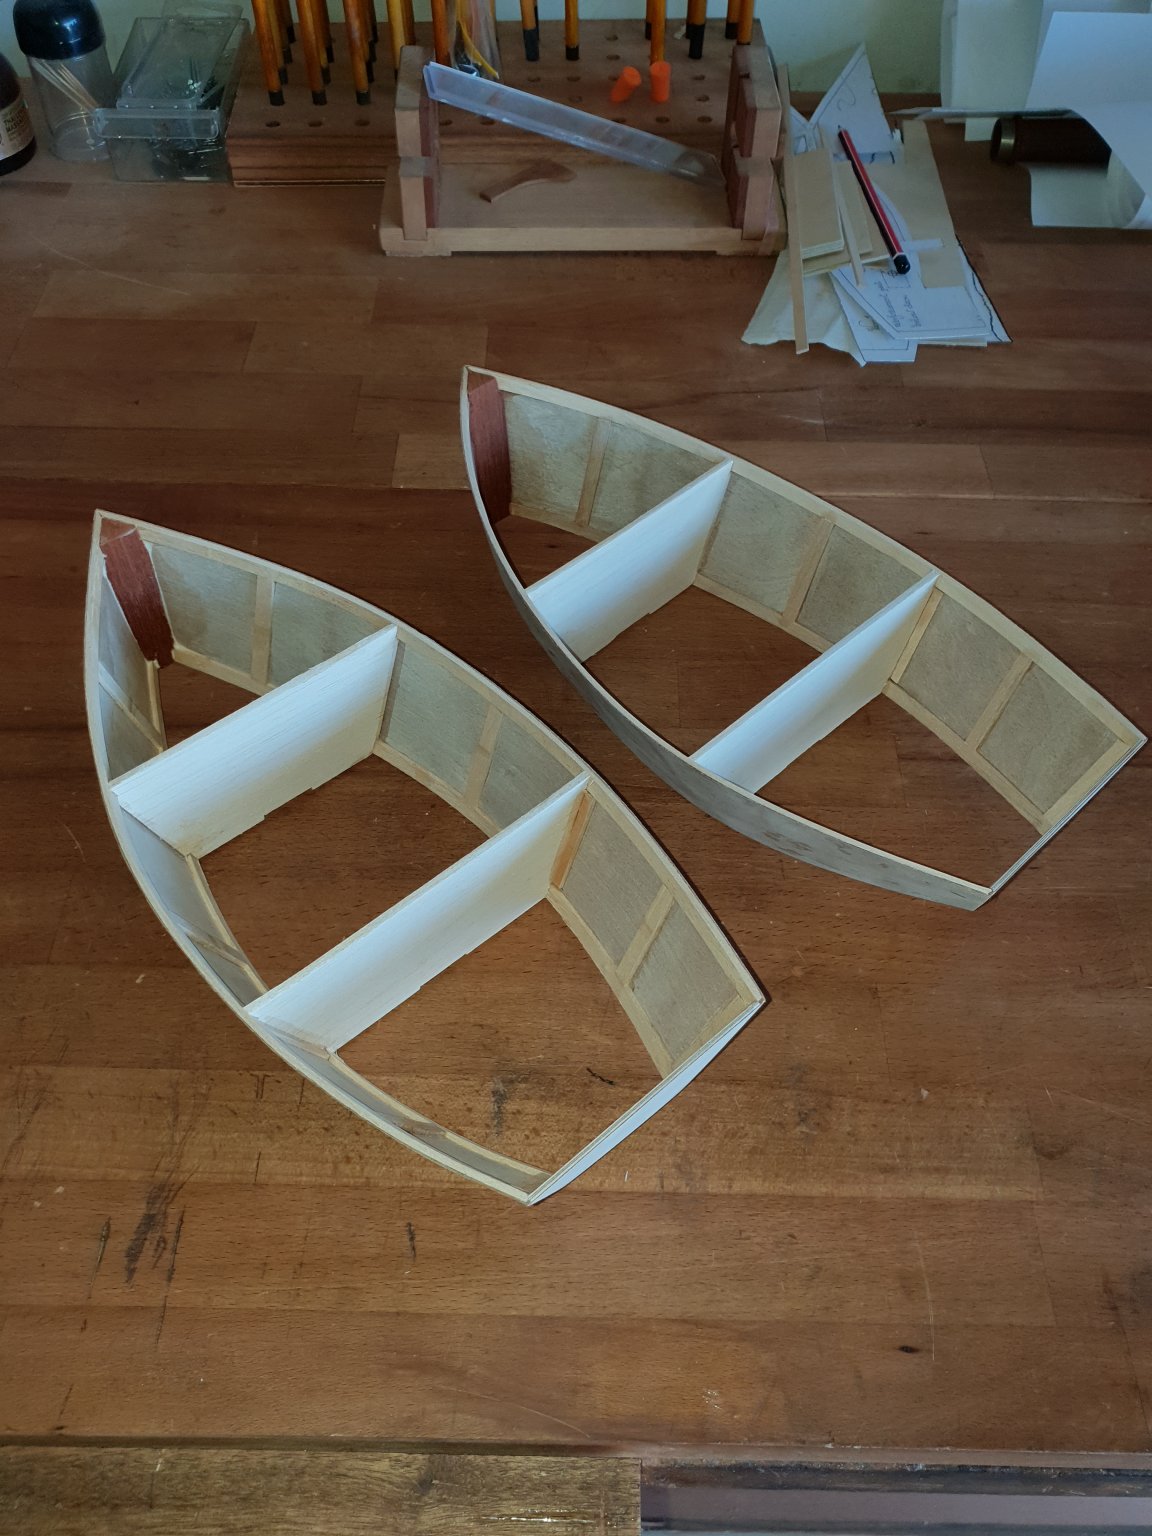
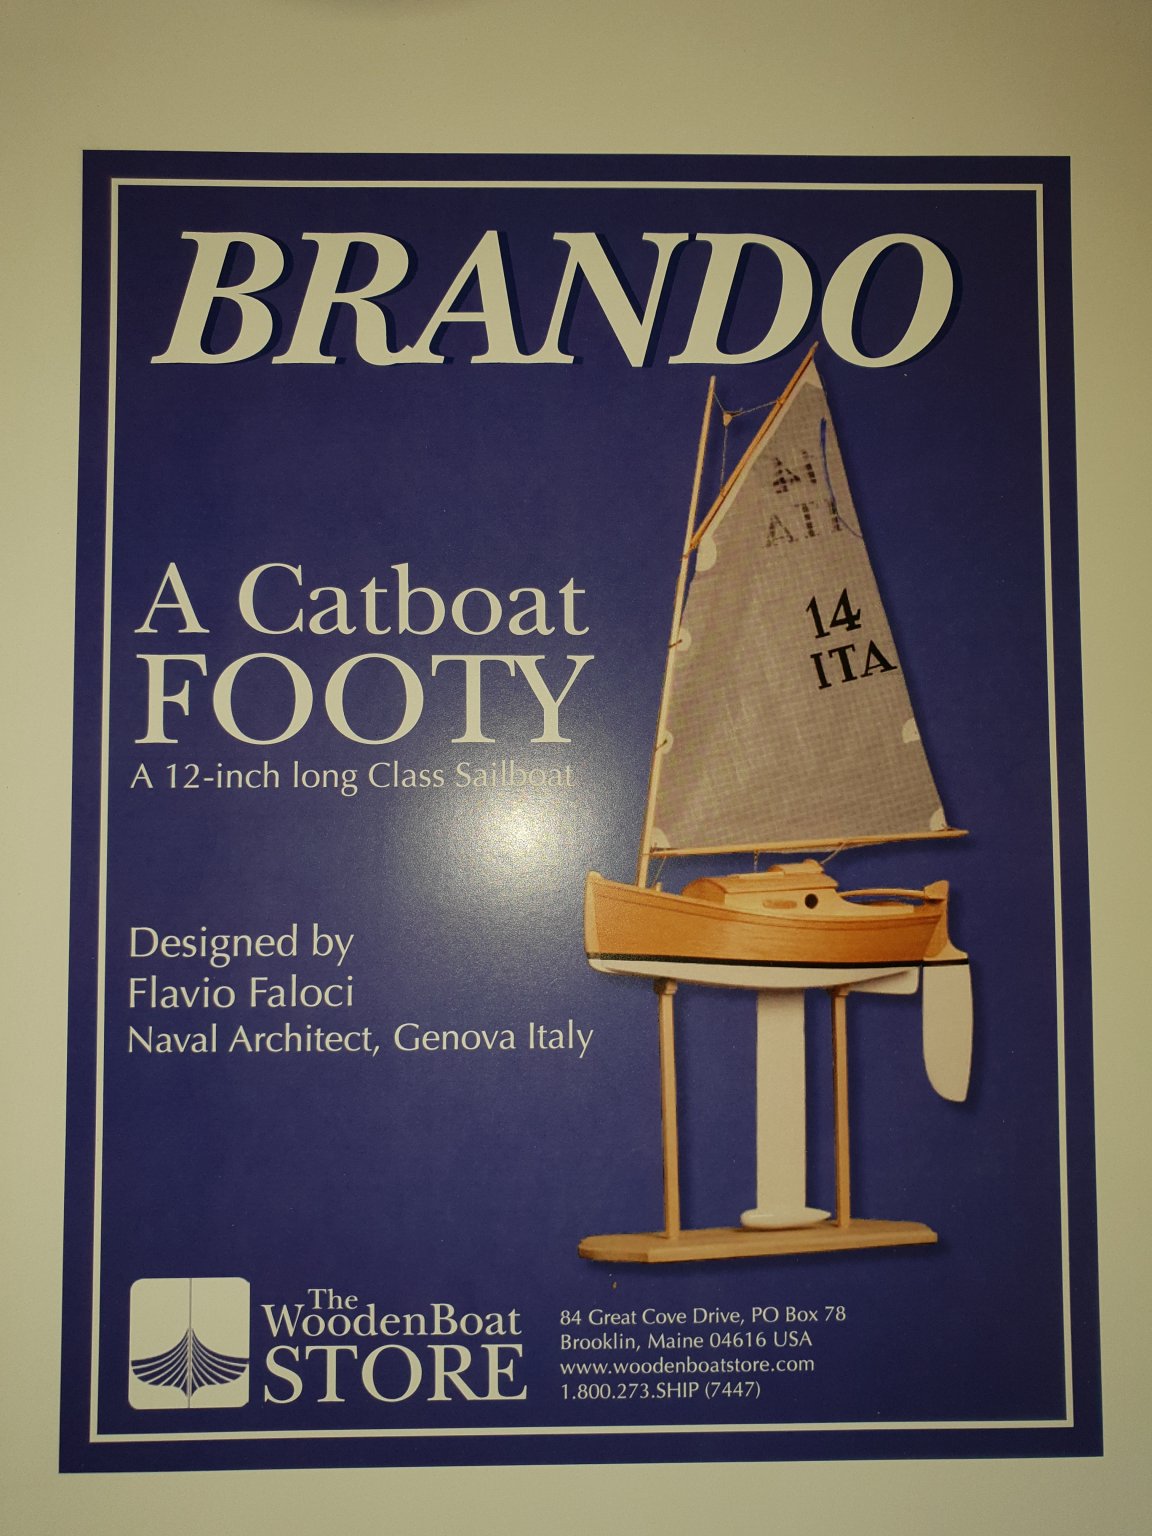
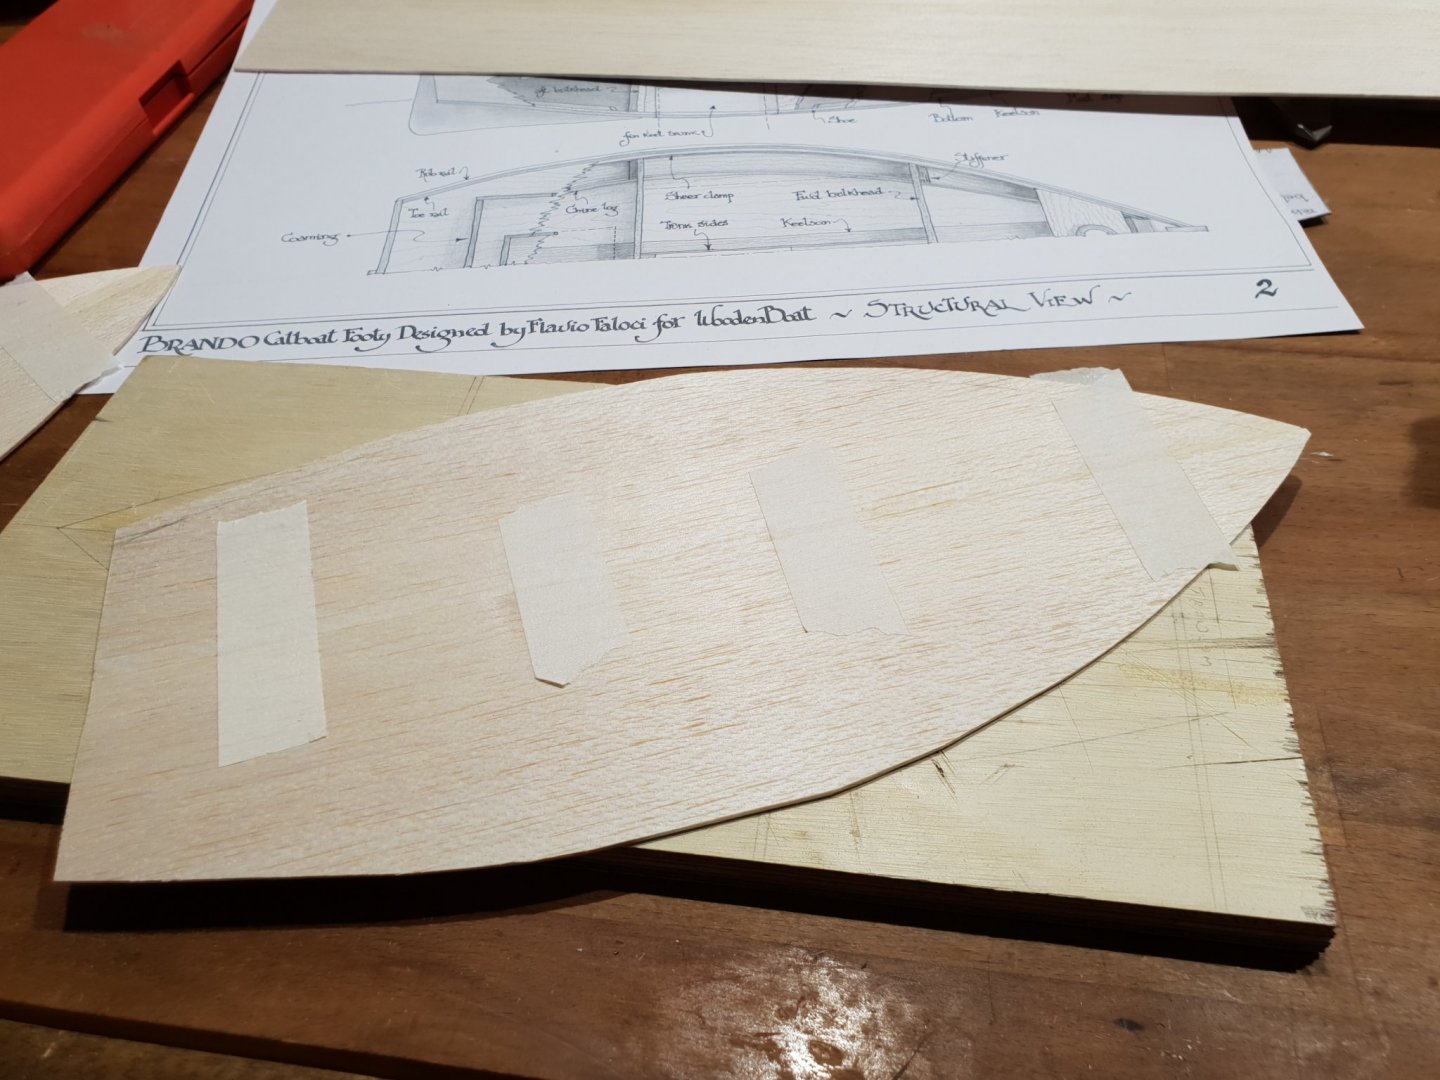
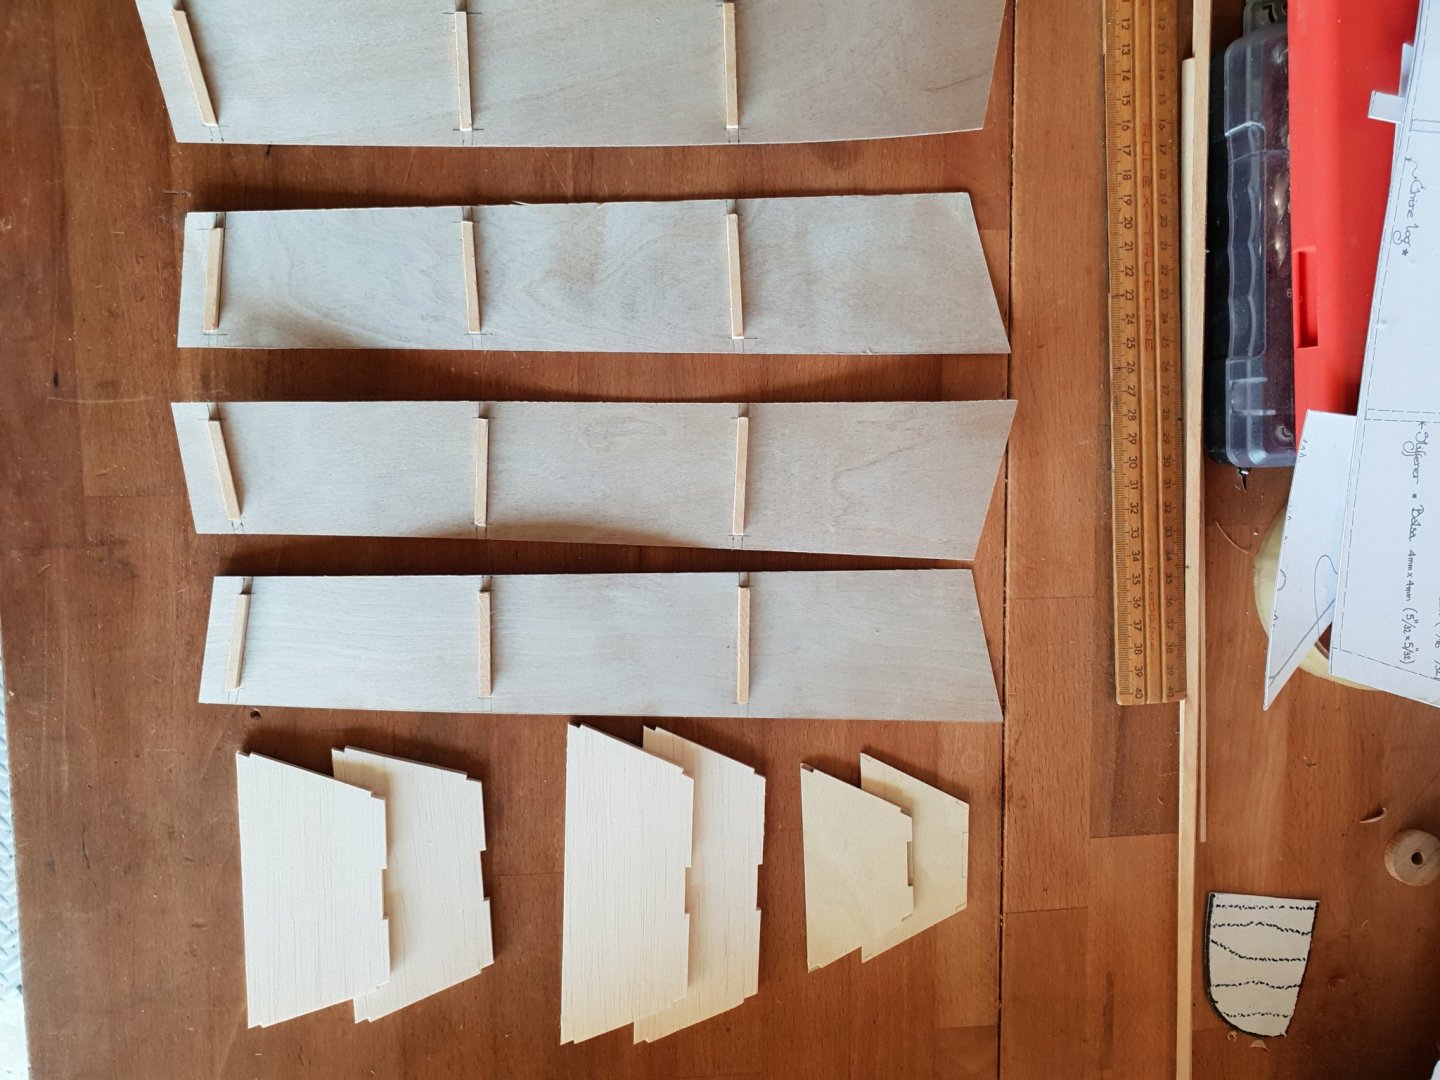
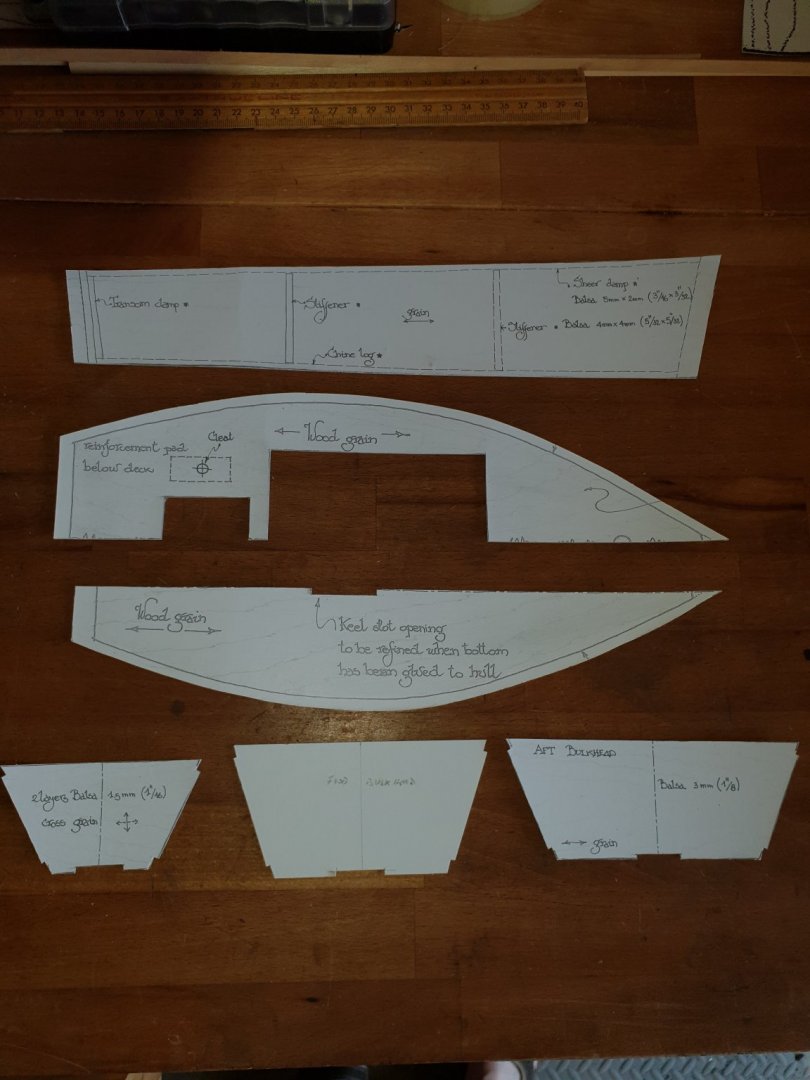
Hello everyone. You will either be intrigued by this or bin it straight away. The foreground.... I am currently building a huge Bluenose which is going to take a very long time to finish. I wanted something to sail " now" that will not take long to build. I have learnt now that there is a " Footy " class RC sailing yacht that is a class in itself, has its dedicated set of rules, are quick to build, inexpensive, fun to build and then you get to sail them! A Footy must be one foot long and fit into a certain size box in order to compete. All Google able. Radio control today is really cheap especially two channels from sky fly. This little gem is Italian designed by Flavio Faloci a naval architect. The plans are a work of art quite literally and super comprehensive. Downloadable digitally. I have decided to make two. One for my grandson and one for the boy in me!!! Then we can go out on our bikes and sail them. I am hoping this build log will be quite quick. The model is largely built from balsa . I have varied a little by using 1/64" birch ply. Grief that was harshly expensive but it can be made cheaply from balsa. My decision! Hope you like and it catches on. Remember when you were a young kid, we dreamed of little boats this shape. It has rudder and sail winch control. The sail winch is nothing more than a Hi Tec 225 servo which has a 3.9kg high torque capability. It is fitted with a long arm. That's the winch! Full radio installation is in the plans and even tells you what Rx, which servos and batteries to use. The whole radio department just lifts out. It is an amazing design. I hope it catches on and you enjoy my build. Here you see the main hull patterns, sides and bulkheads. It will take shape later today. Flat bottomed hard chine with removable keel. Very easy. Pete

-
Hello Steven. My plan is to build a Zeesboot the same as Nils. He has used pear wood for the strakes to plank the sides. I have not counted them but there appears to be about eight each side 15x 2x 500. Then I would need enough to plank the decking. I am busy building Bluenose at the moment so I can wait for wood to season. It is a good idea to scout around for tree loppers. It is this kind of lead I need as I dont possess much common sense!! If I manage to find any, do I cut the log into slices seal the ends with beeswax and stack them between runners so the air gets to them or just leave the log as is? I have never done wood seasoning before so all new to me. I am in Narangba near Brisbane. Queensland 4504. Pete
-
That was supposed to read. Thanks for all that Allan but my mobile senses that Kim should be involved. What??? Duh. Stupid phone. Pete
-
Than Kim s for that Allan. The Photinia Robusta sounds good. But I would not know where to start to find it. Any ideas please? I have loads of Western red cedar but I was after a lighter colored wood. I assume that the building trade pine in Bunnings is actually Huon pine then? Thanks for all your info. It has given me more hope. There is enough good Oz wood around it's just locating it being my problem. Pete
-
Ol mate can supply me with heaps of Campfor. I may be a bit stumped for Privet or anything else. Campfor is good to work with and bends easily. Pete
-
Nils. I completely understand that " living " is also relatively important. However your boat modelling is so interesting and of great entertainment value. I think somewhere along the line we are all blessed with divergences but variety is the spice of life. Hold fast dear Nils!! You will be back and I am waiting to see what you do next. Pete
-
I am a complete *** when it comes to things like this as I just do not know who to ask. When I Google Privet suppliers in Australia everyone wants to sell me a hedge or more bizarrely a radio controlled Drone!!!! Duh!!!! I agree with you though on the campfor. Too grainy. Pity Pete
-
Thanks for all your kind responses. I think the down line for pear wood in Oz is a big fat Zero. Sohhh.... I rang up Sydney re Makore and they do not have any nor Myrtle. Well I have worked quite a lot with camphor wood and in fact made a ukulele out of it which sounds pretty good too. So I cut up a test piece 15mm x 2mm thick and wiped over a very diluted layer if French polish. If I use it I think I will opt for a waxed finish. I got out my Australian built Japanese planing board and plane and shaved up a test plank. I will be following Nils's Zeeboot build very closely so as to avoid failure. His pear planks were 15mm 12mm thick. So Campfor wood for me here in Oz is not a problem . I can get a huge plank from Ol mate down the road. I think it looks okay and it works beautifully. Smells gorgeous too but not if you are an insect. So what do you think of Campfor wood to plank a Boat? Pete