realworkingsailor
-
Posts
3,273 -
Joined
-
Last visited
Content Type
Profiles
Forums
Gallery
Events
Everything posted by realworkingsailor
-
 For a somewhat complicated looking model aircraft, that sure went together well. Fantastic job! Andy
 -
42:06 Rgds, Andy
-
That’s the steam dome, steam collects in there. Inside is a bit of pipe work that leads to the cylinders, the opening of which is controlled by the throttle valve. If you look back at your cab construction, the grey angled leaver is the throttle leaver. To the right, the vertical leaver is the “Johnson Bar” which controls the valve settings, as well as the locomotive direction (Fwd or Rev). Andy
-
Thanks Brad! We’re about fifteen minutes to the southwest of CFB Borden. By my estimation, the main part of the house is over 100 years old. It occasionally makes making even small improvements challenging (Building code? What building code?). I’m not planning on permanently mounting the exhaust outlet in the window, I’ll have to see how things go. I had a slider in the cellar that was almost perfectly sized for the vent outlet. I suppose I could use the pedestal fan to create an extra exhaust flow along the outside of the vent, hopefully preventing any fumes from getting back in. For the most part I am using acrylics, and although the risk isn’t entirely zero, I think should be able to keep things under some form of control. I hope! 🤞 Andy
-
That’s a sand dome. It contained dried, sifted sand to aid in traction when starting or when climbing grades. The engineer would open a valve from in the cab and sand would run out along a pipe just ahead of the driving wheels. The top of the dome was removable so that sand could be refilled as needed. Andy
-
Thanks for all the support guys! So I’ve decided I am not going to wait for the water to recede. We had more rain last night, and given the ground saturation, the water had only one place to go. Time for me to take action! The only other useable space in the house was the attic, unfortunately it really lacked in the electrical department; one meagre light and no outlets. After a trip to the hardware store, I had secured all the fittings and wire that I would need to improve the situation. I then spent a good part of yesterday afternoon adding two ceiling light fixtures as well as a power outlet. Things began to look up! As of this morning, all my equipment and supplies have been rescued from their watery purgatory and are now ready for use in my new space! Hooray! There’s a nice window for light, and ventilation (and a place to run the exhaust pipe from the spray booth extraction fan). The wooden cabinet has been repurposed to hold paints, supplies and other sundries. If needed I have a space heater for colder days (the attic isn’t heated, but it doesn’t typically freeze up there), now that I have power, that should make for a comfortable place to work. My Mosquito build should be commencing shortly! 😀 Andy


- 33 replies
-
- 14
-

-
Thanks Alan! Really it’s just a matter of waiting it out. It’s an annual occurrence, but hopefully soon the weather will begin to warm up, and the water table can recede a bit. The topography and soil has a lot to do with it too. Sand over clay. The melt water from last winter’s snow permeates down through the sand until it hits the clay, then flows along the top of the clay until it hits the low ground (aka my pond), or it emerges through the porous walls of my cellar. Andy
-
Thanks everyone! Unfortunately, this build will be delayed getting under way for a while. Living in an older house has its quirks. And this house has one particularly interesting one, at that. Every spring, the cellar turns into a bit of a river, due to the melting snow. The cellar also happens to be the location of my spray painting area, (there being no other space in the house that is currently usable). This is the normal state of affairs in this house at this time of year. The foundation is an over 100 year old, two to three foot thick blend of mortar and small stones. Waterproofing is next to impossible, or really really expensive (honestly, the best, and cheapest, tool to repair all of the problems with this house is a bulldozer😂). There is a sump and a sump pump, so the critical systems, like the furnace are safe: But given the volume of snow this past winter (the first old fashioned winter we’ve had in a long time), it’s going to take a while for the… um…. tide… to go out! Of course the rain we had last weekend has not helped the situation any either… Apologies to anyone who was anticipating a quick build. Hopefully the weather will cooperate and the water flow will abate enough that my painting area becomes somewhat useable again soon, at least accessible without resorting to hip-waders 🤪. I’m eager to get building again as soon as possible! Andy
- 33 replies
-
- 11
-

-
-
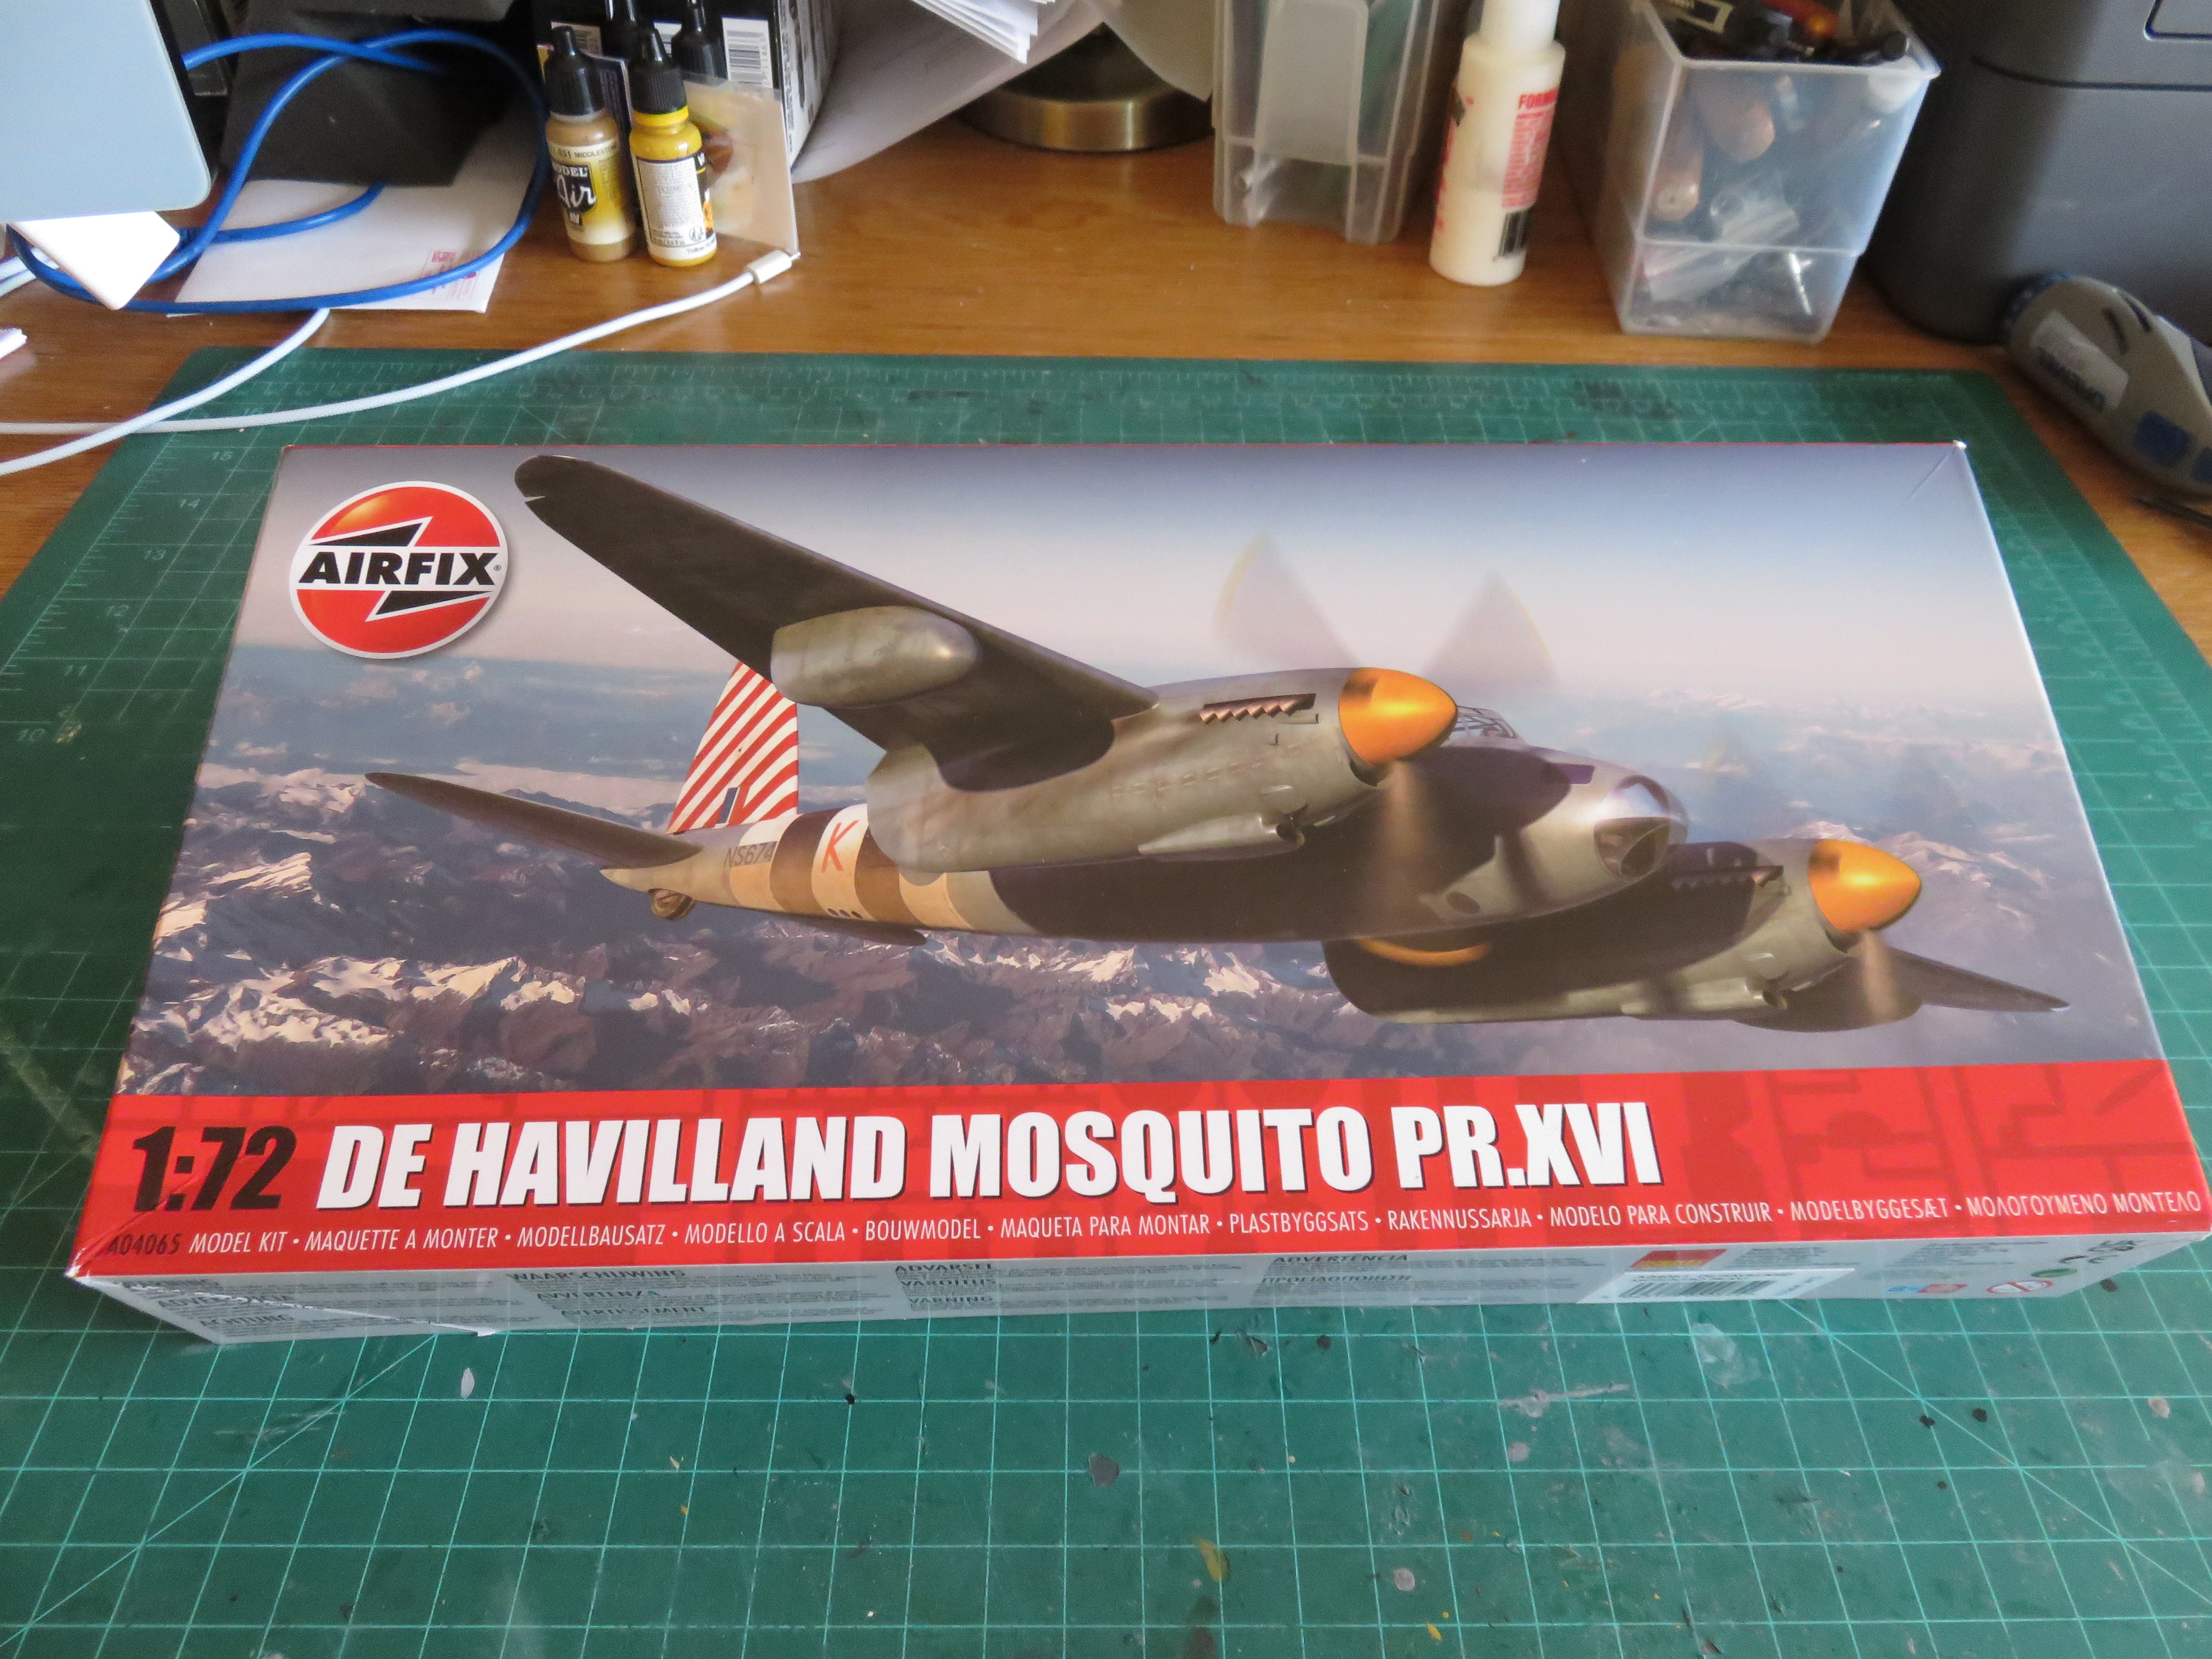
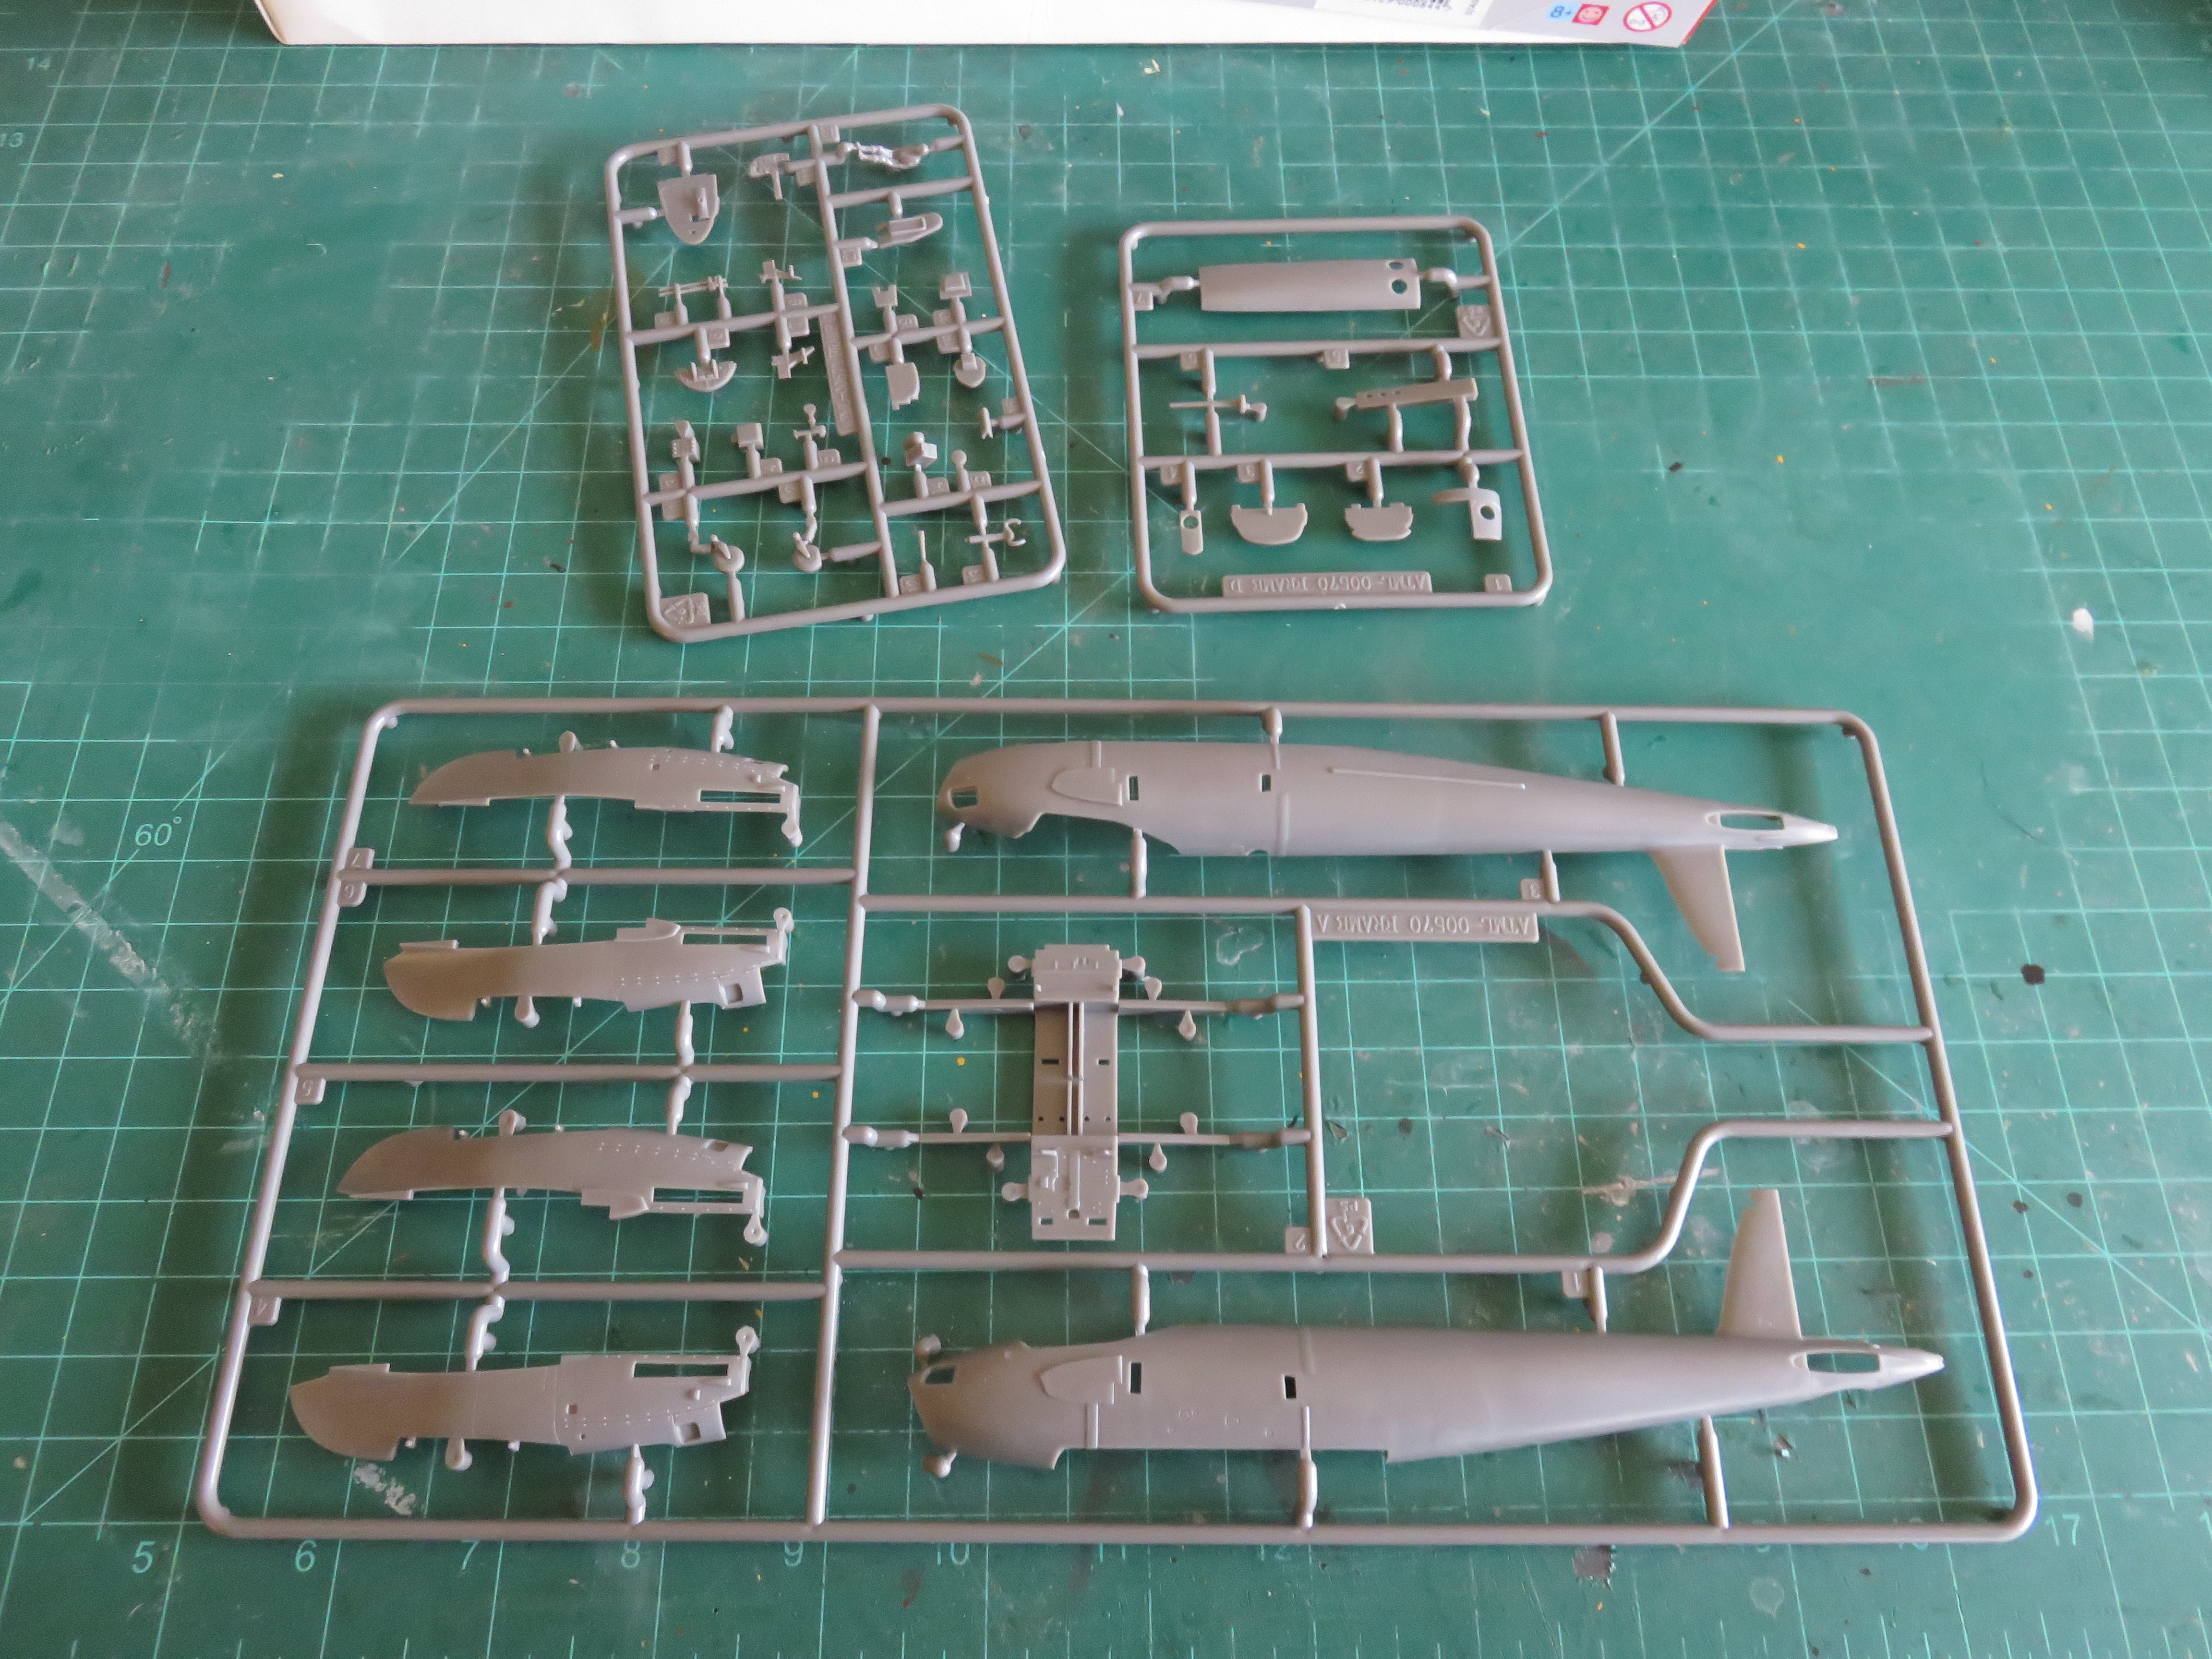
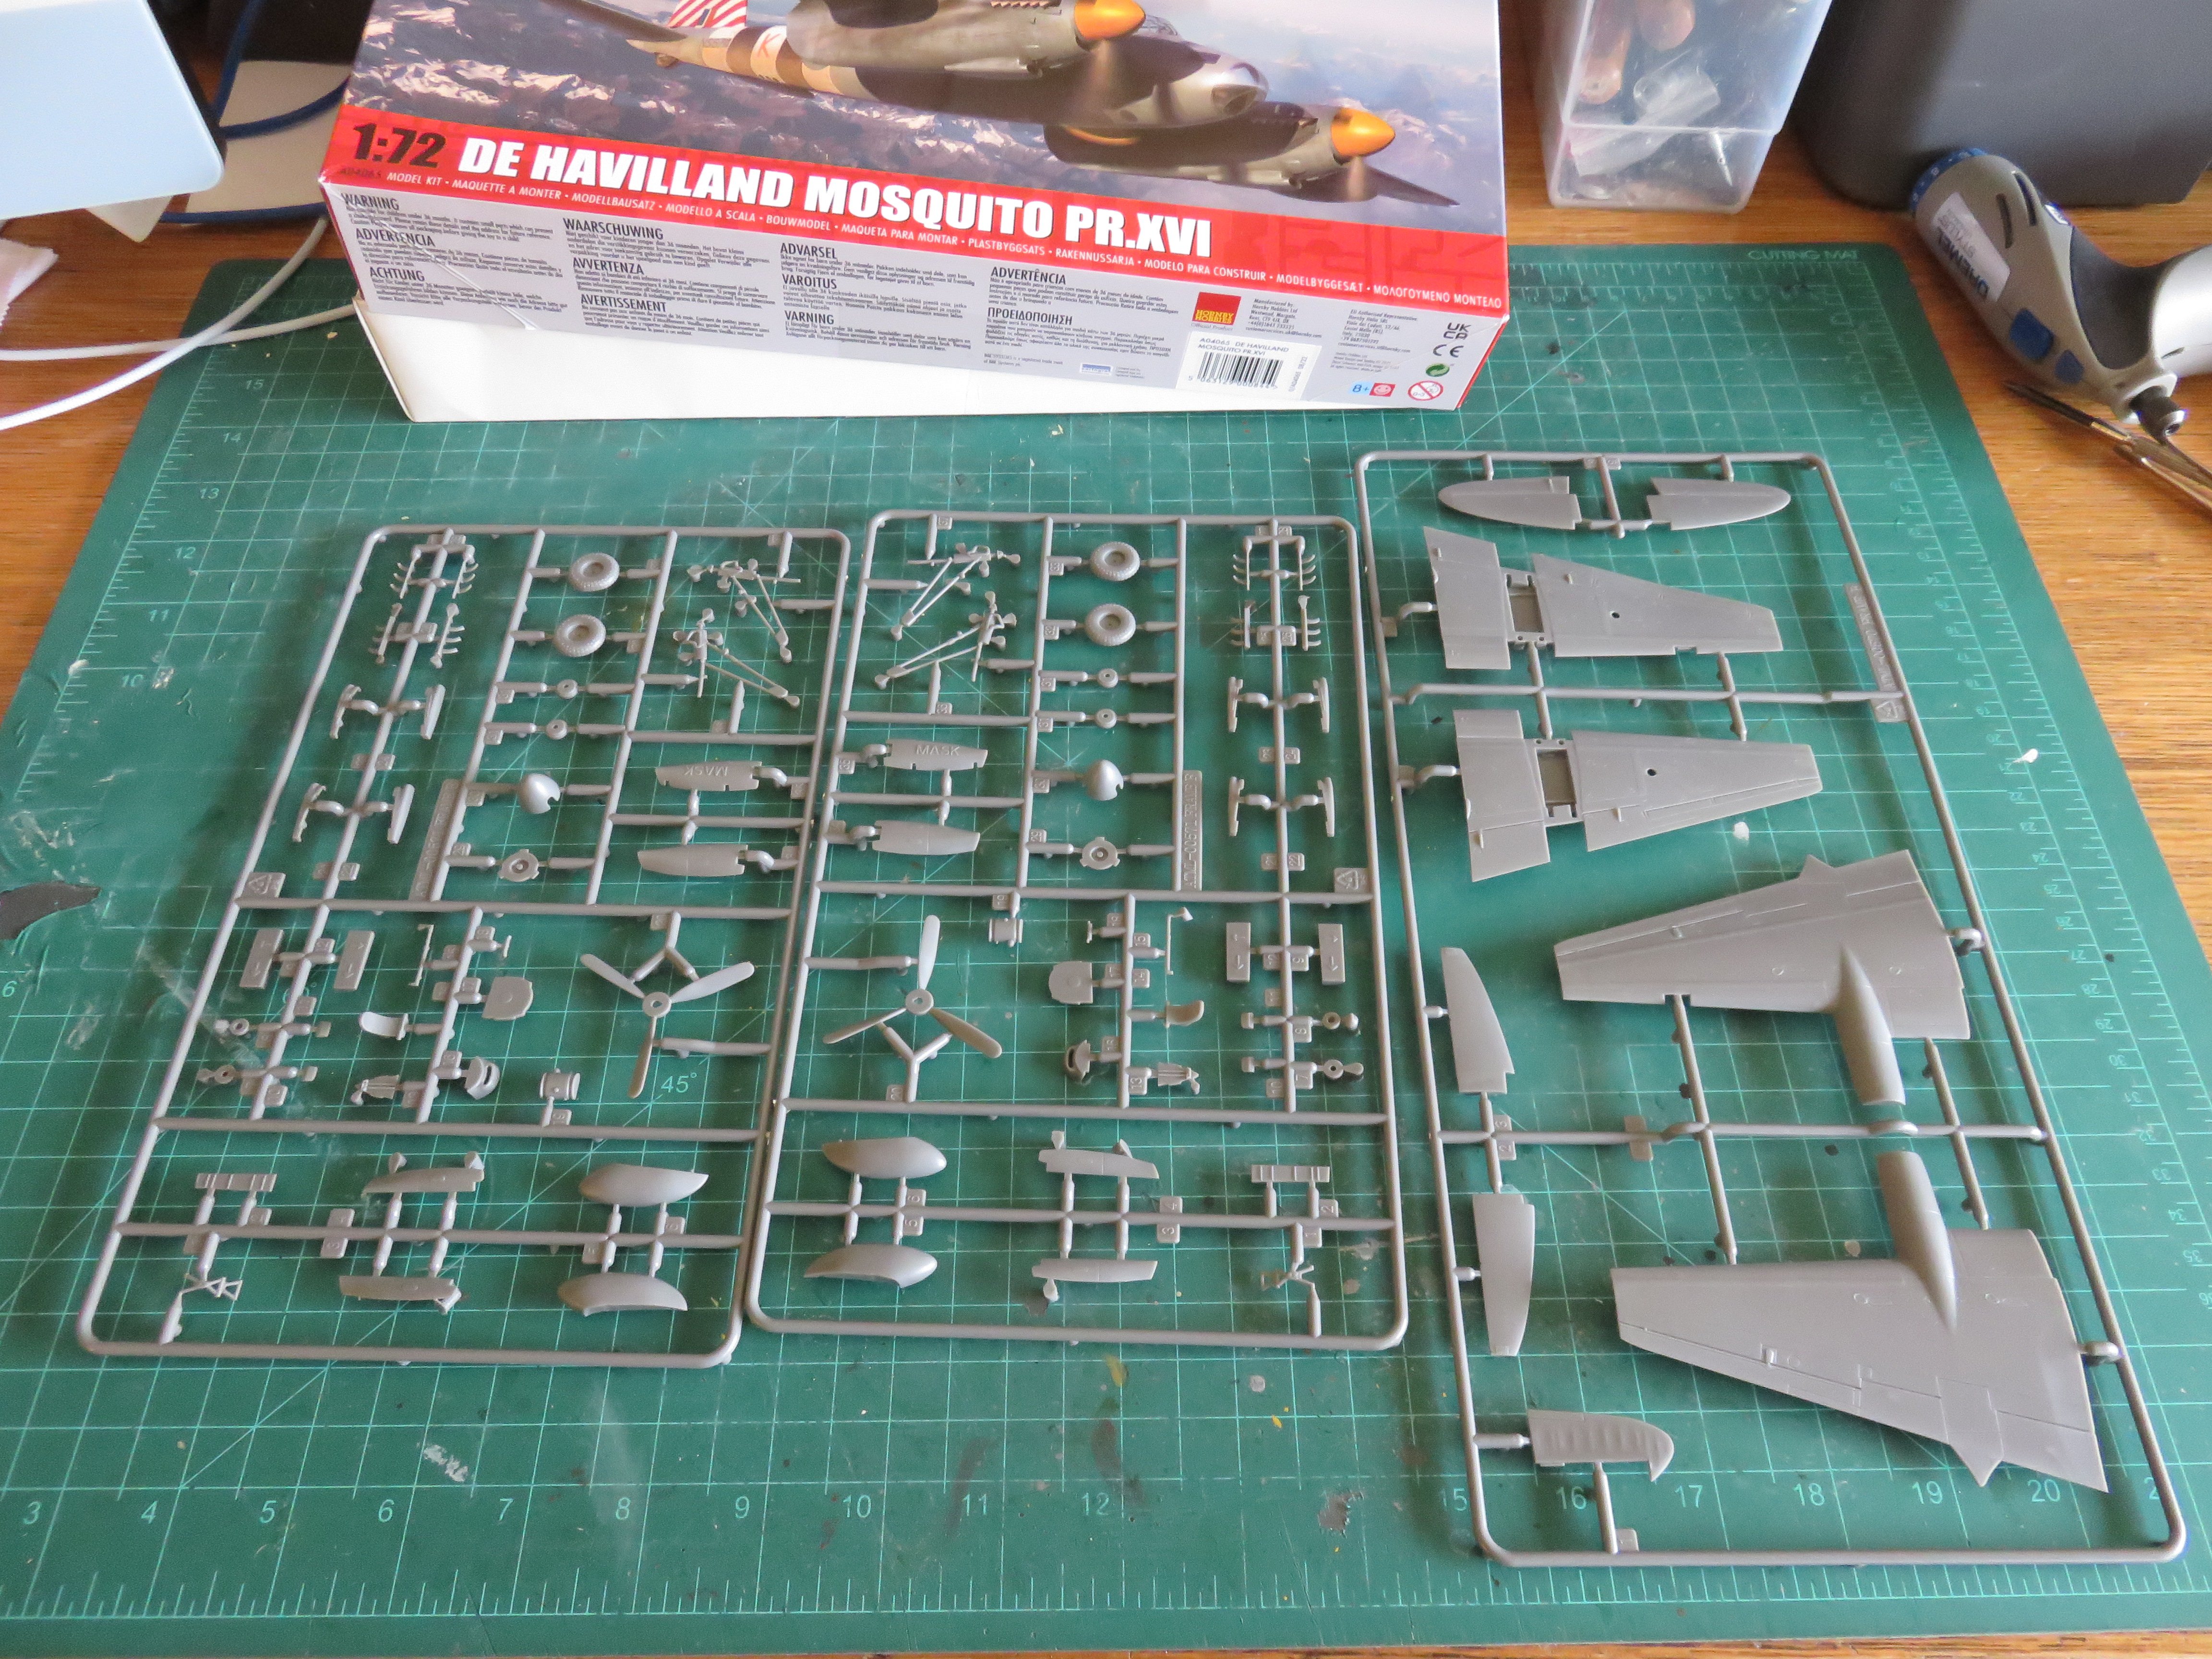
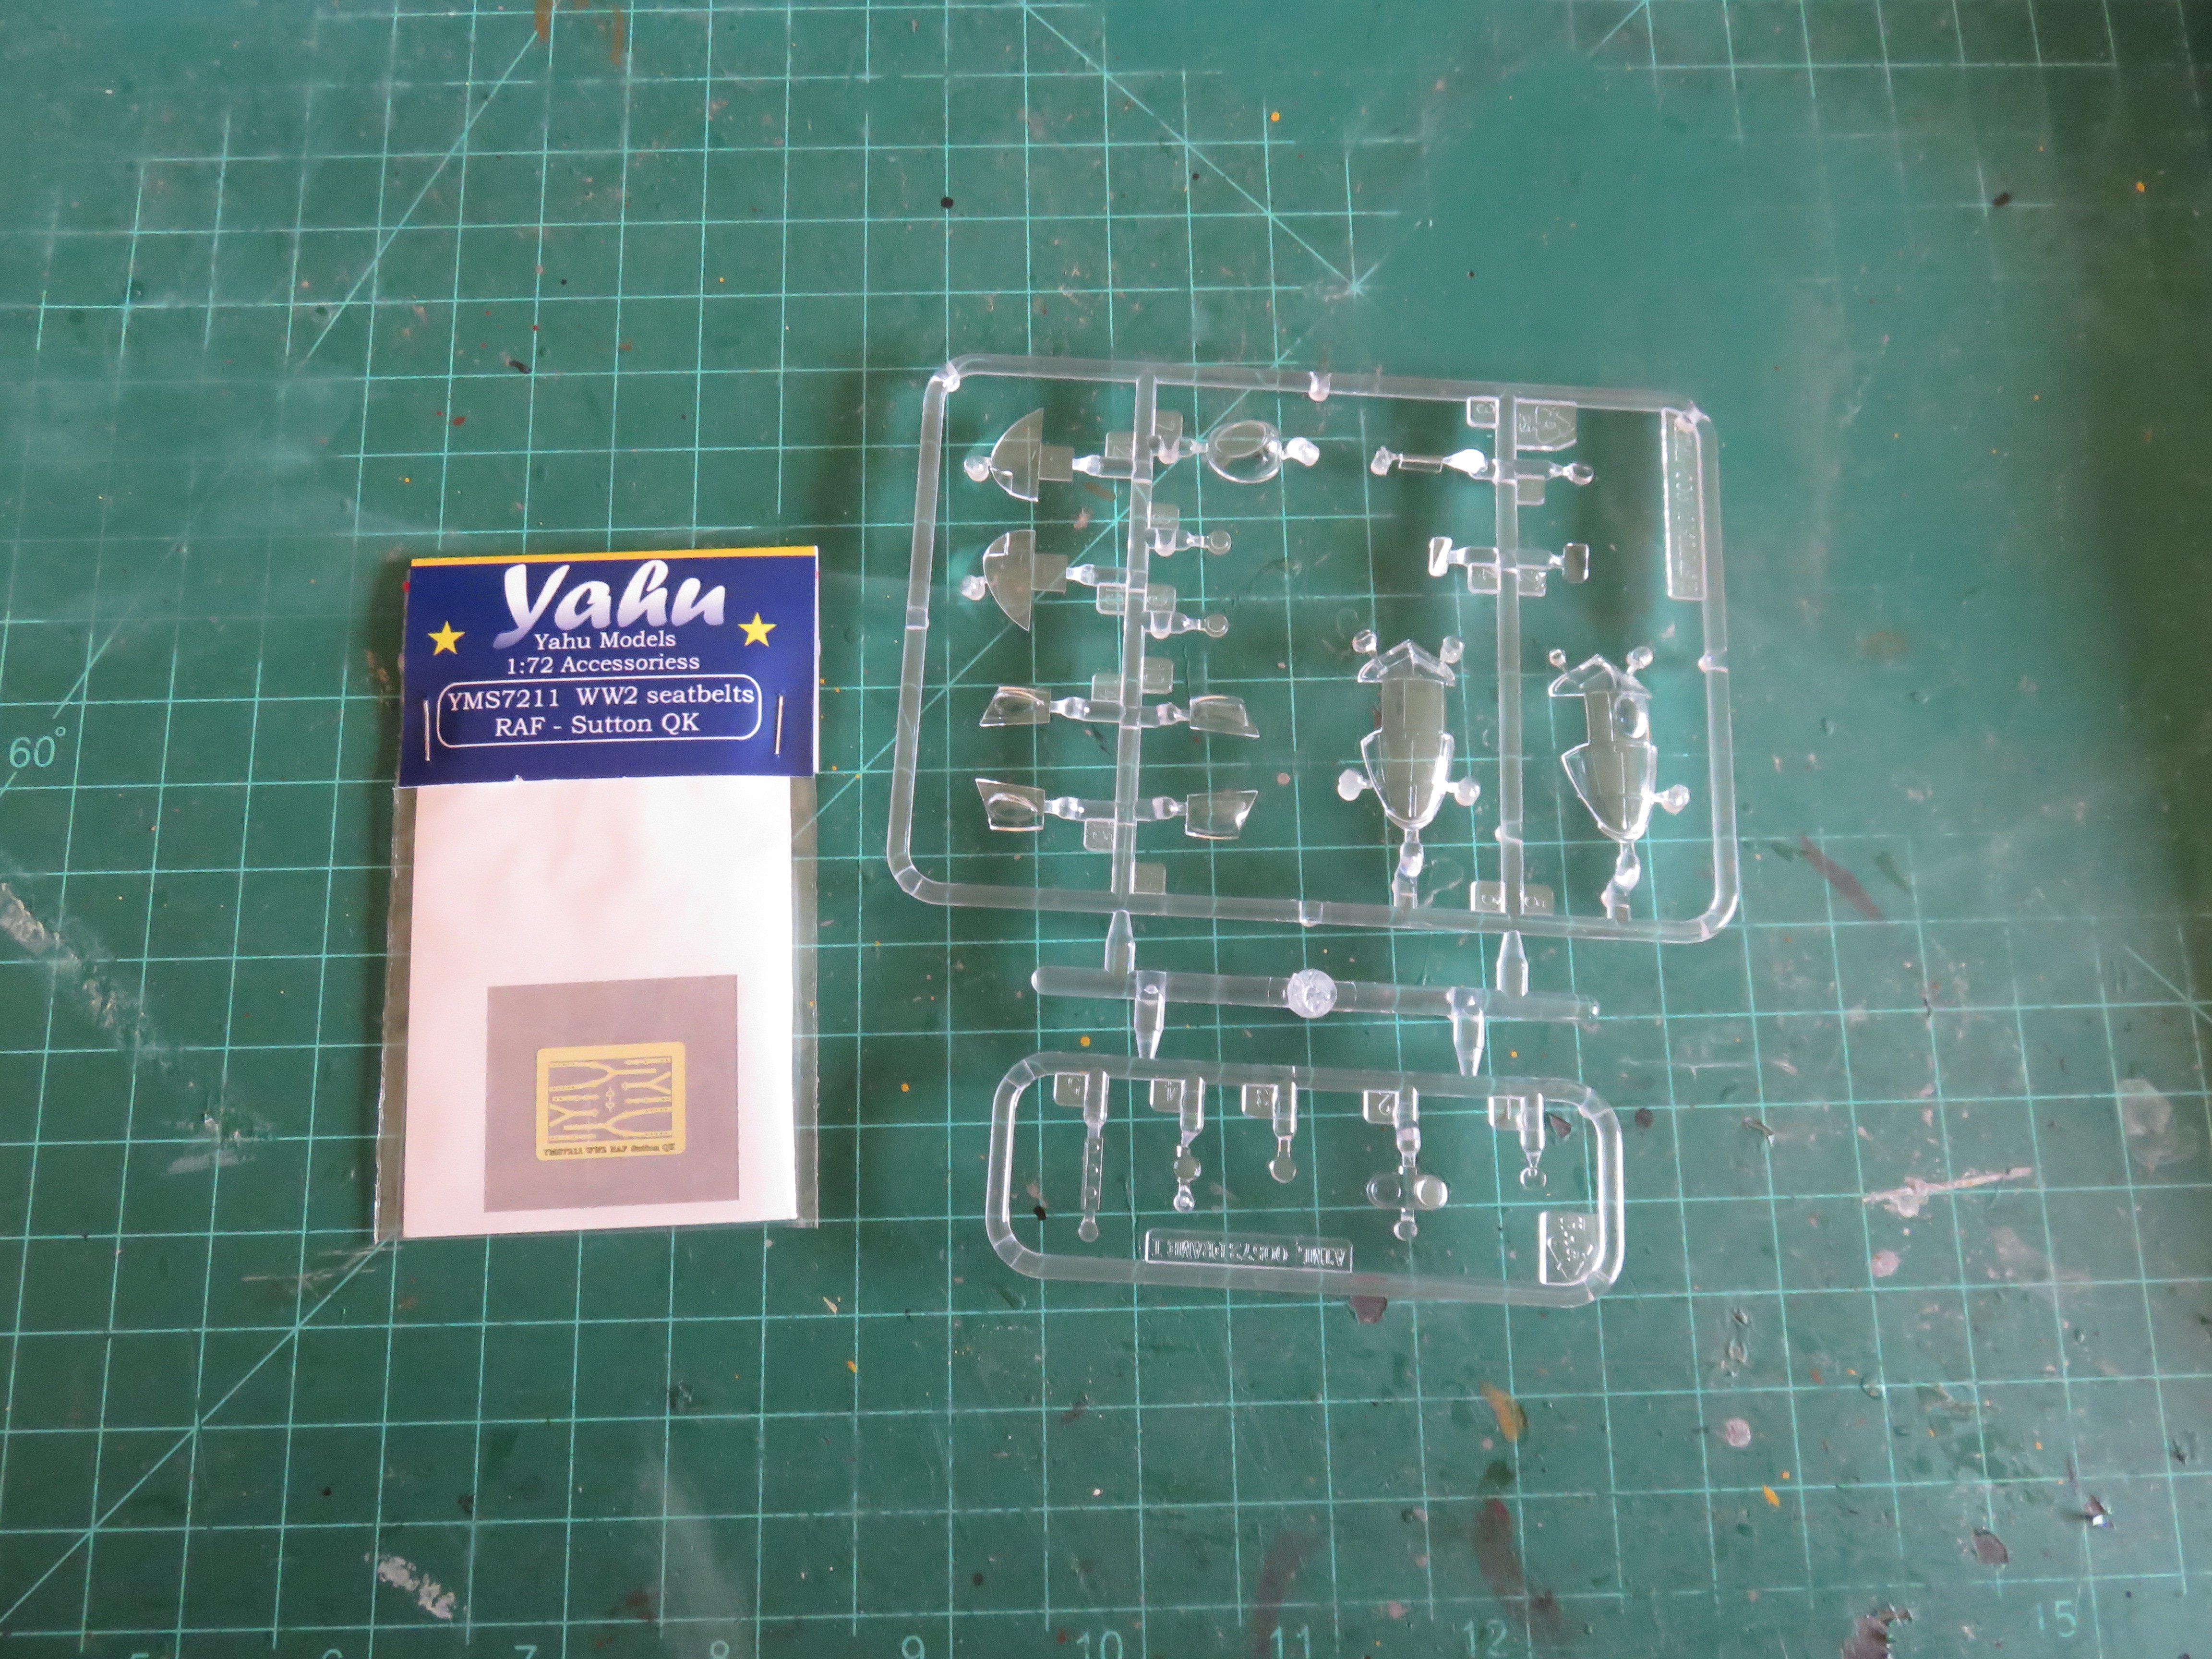
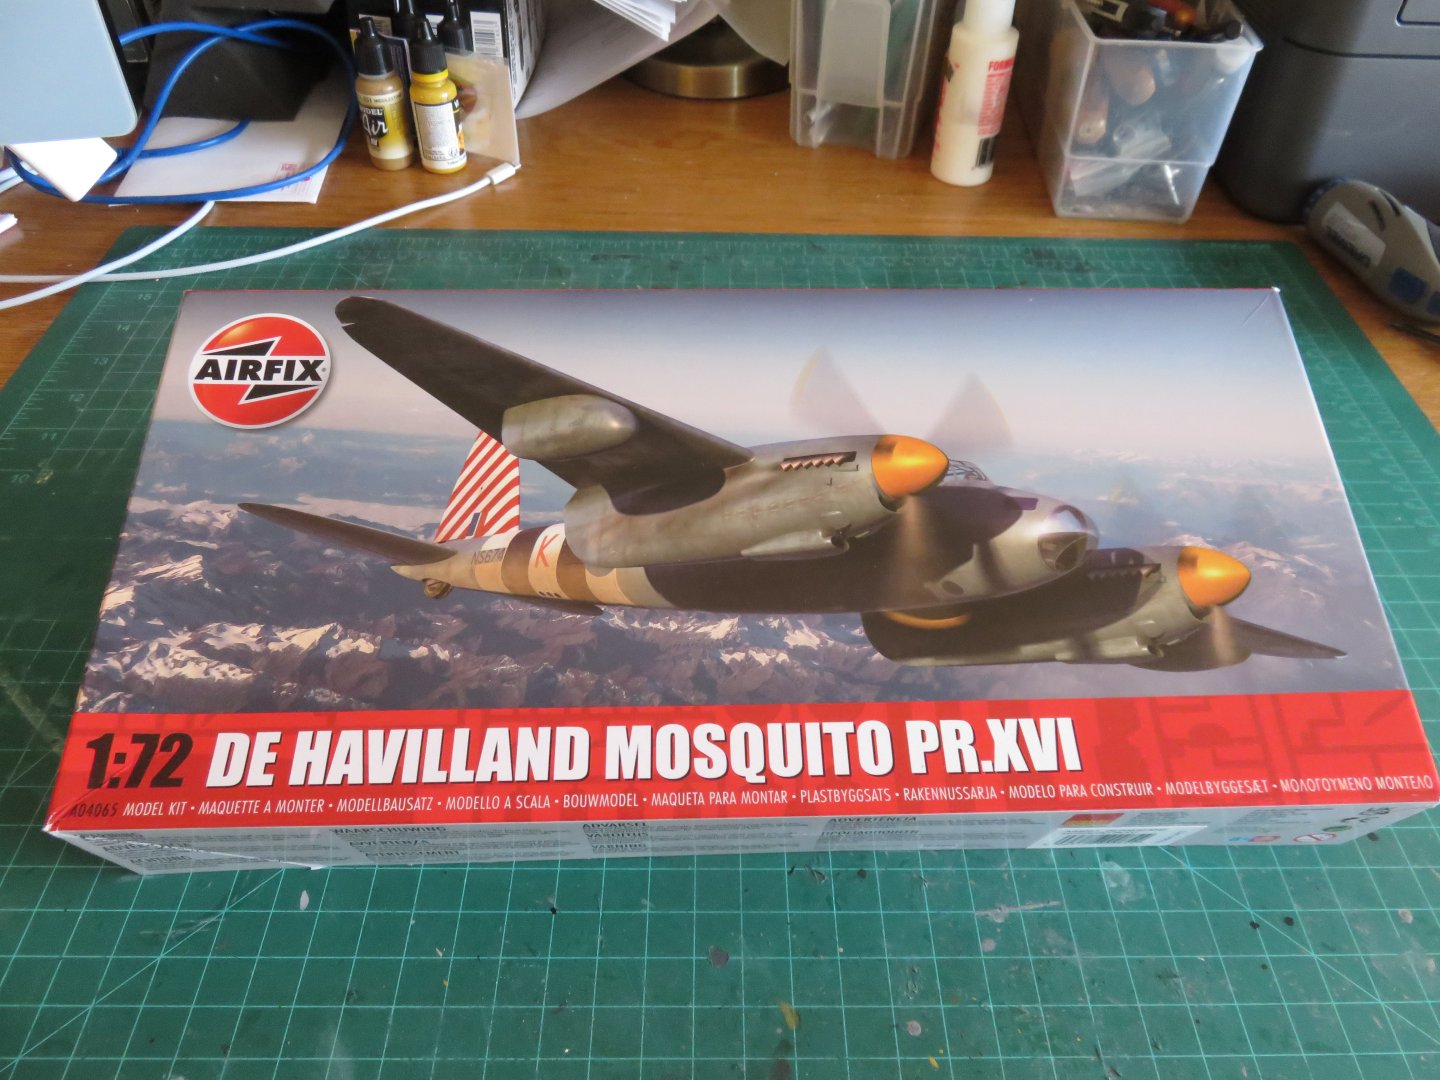
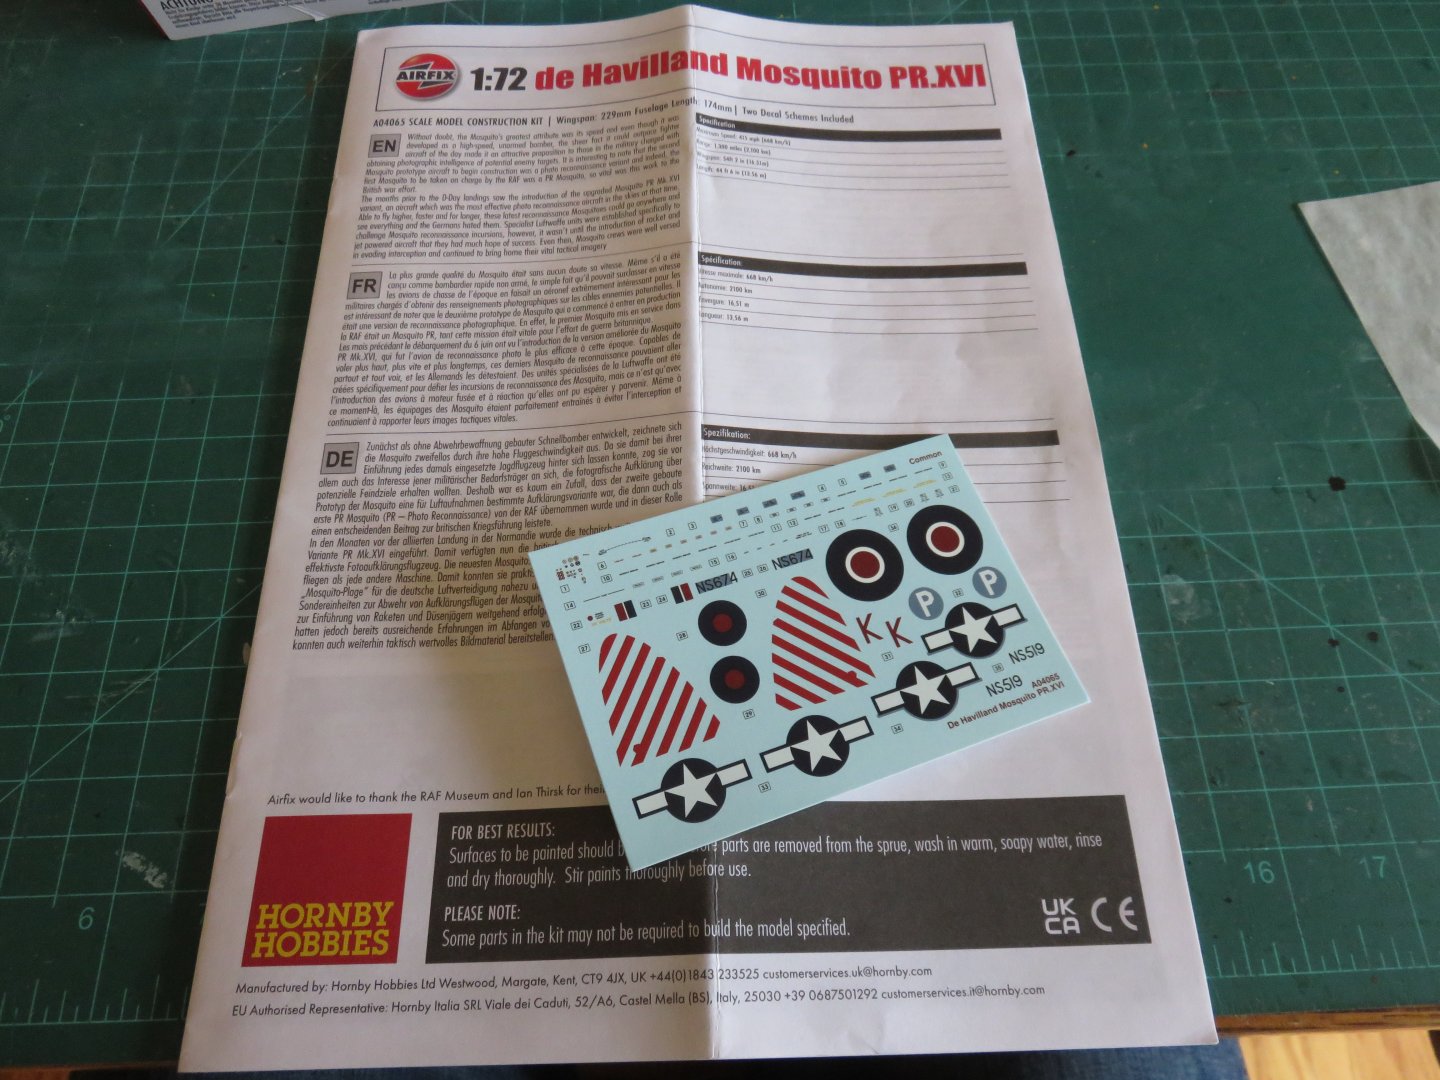
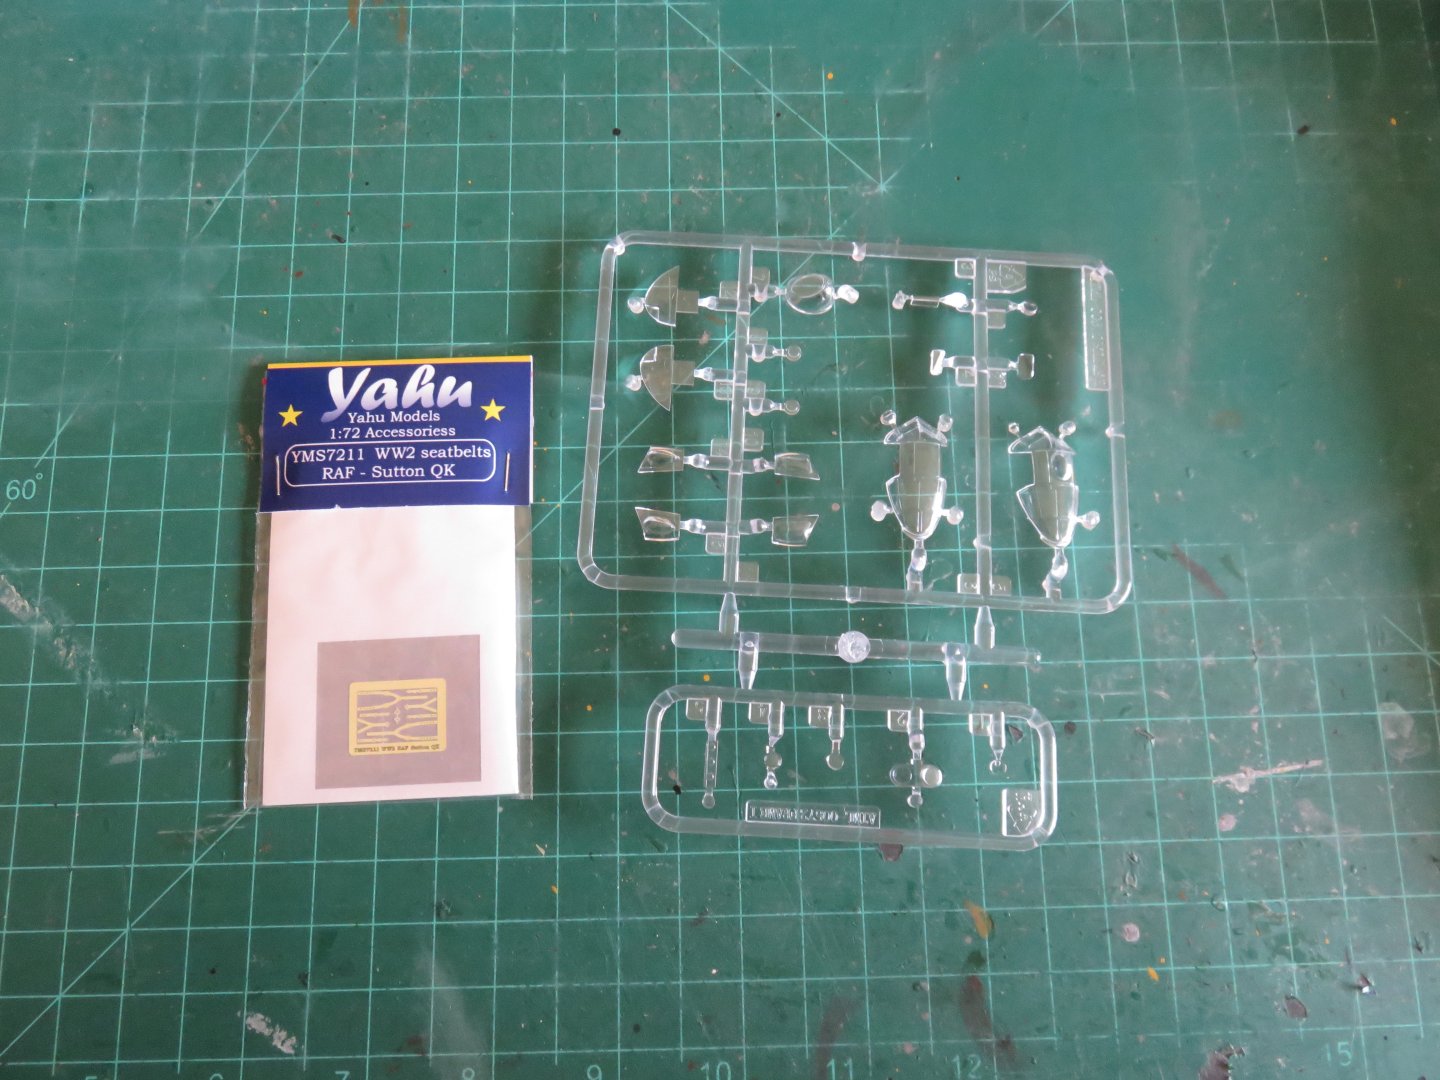
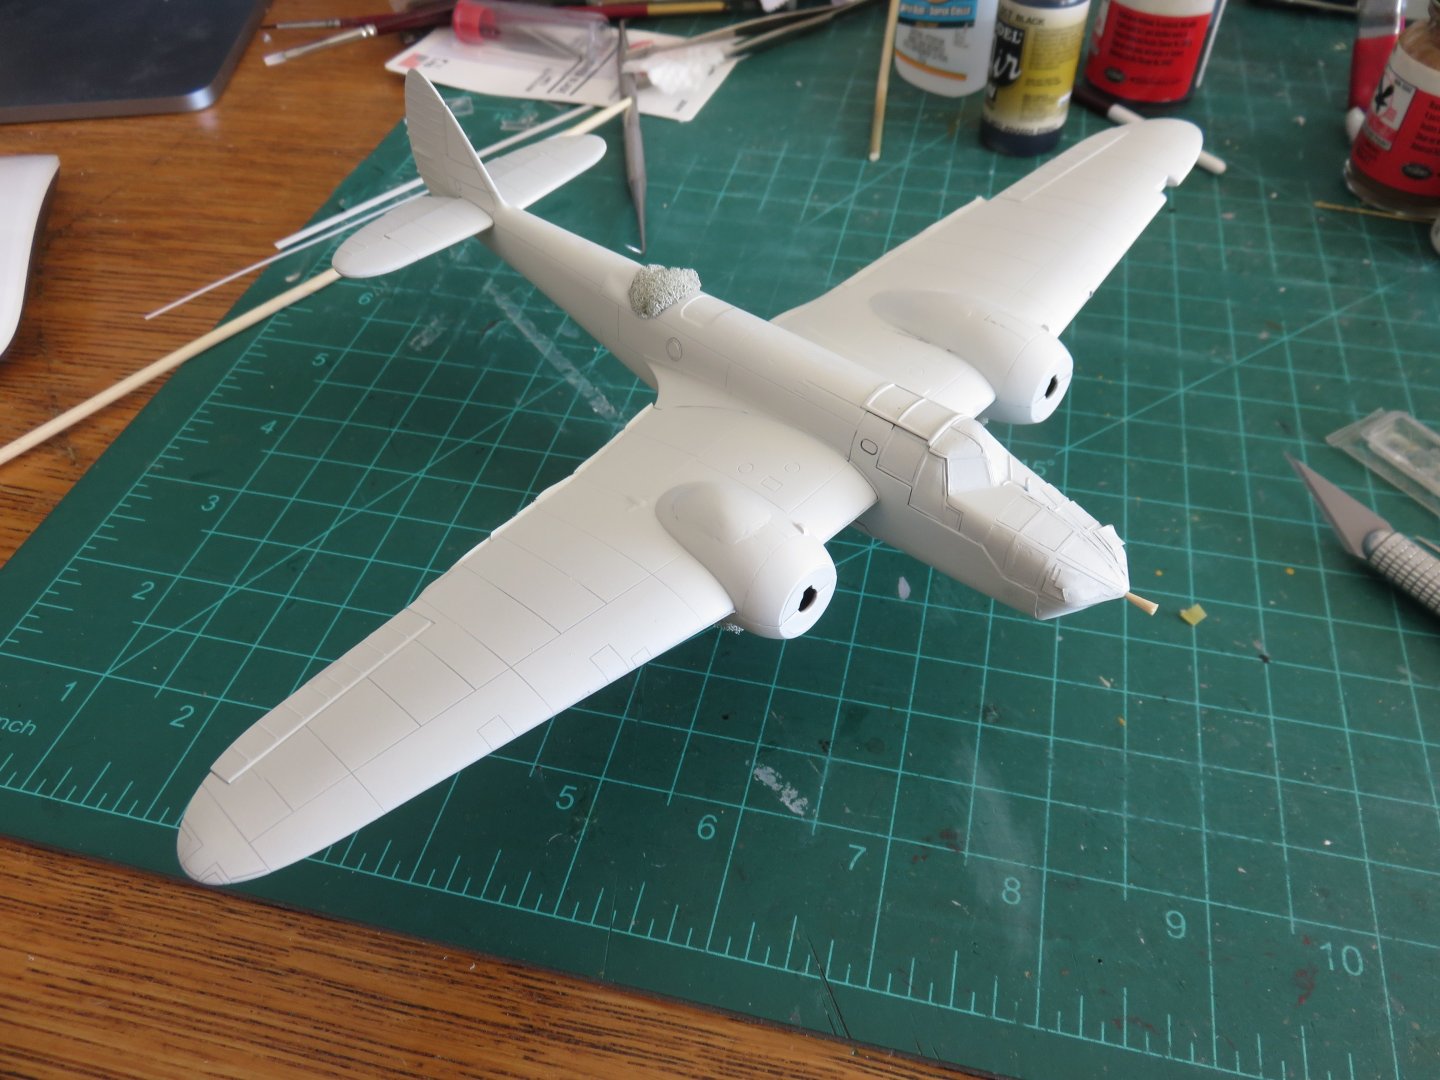
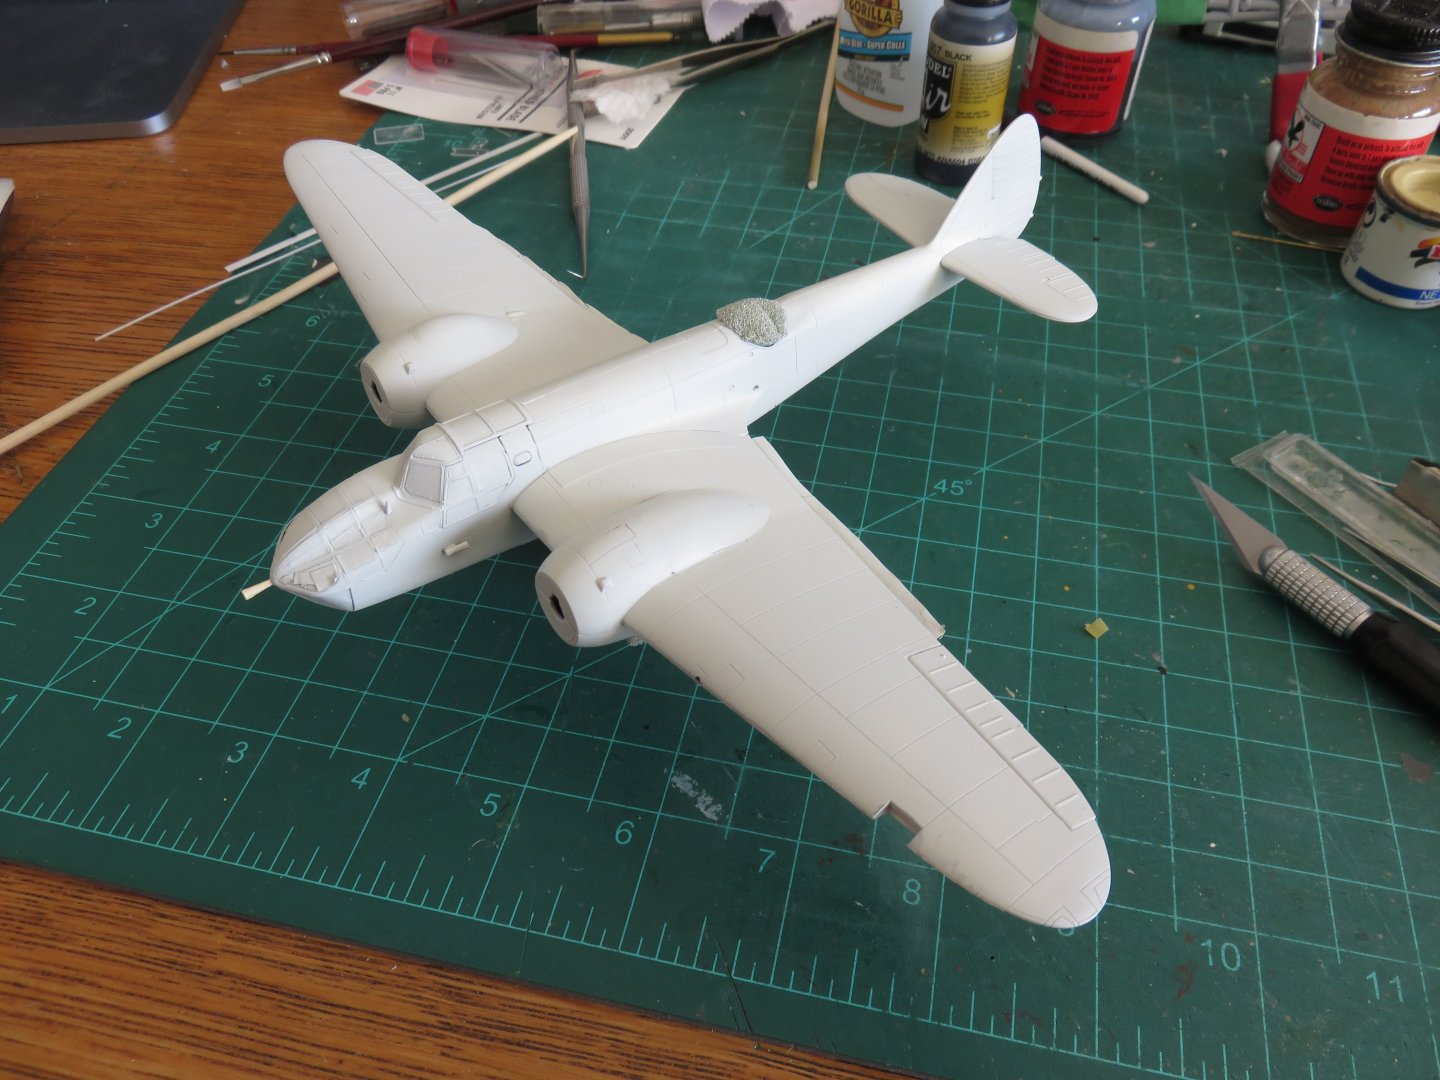
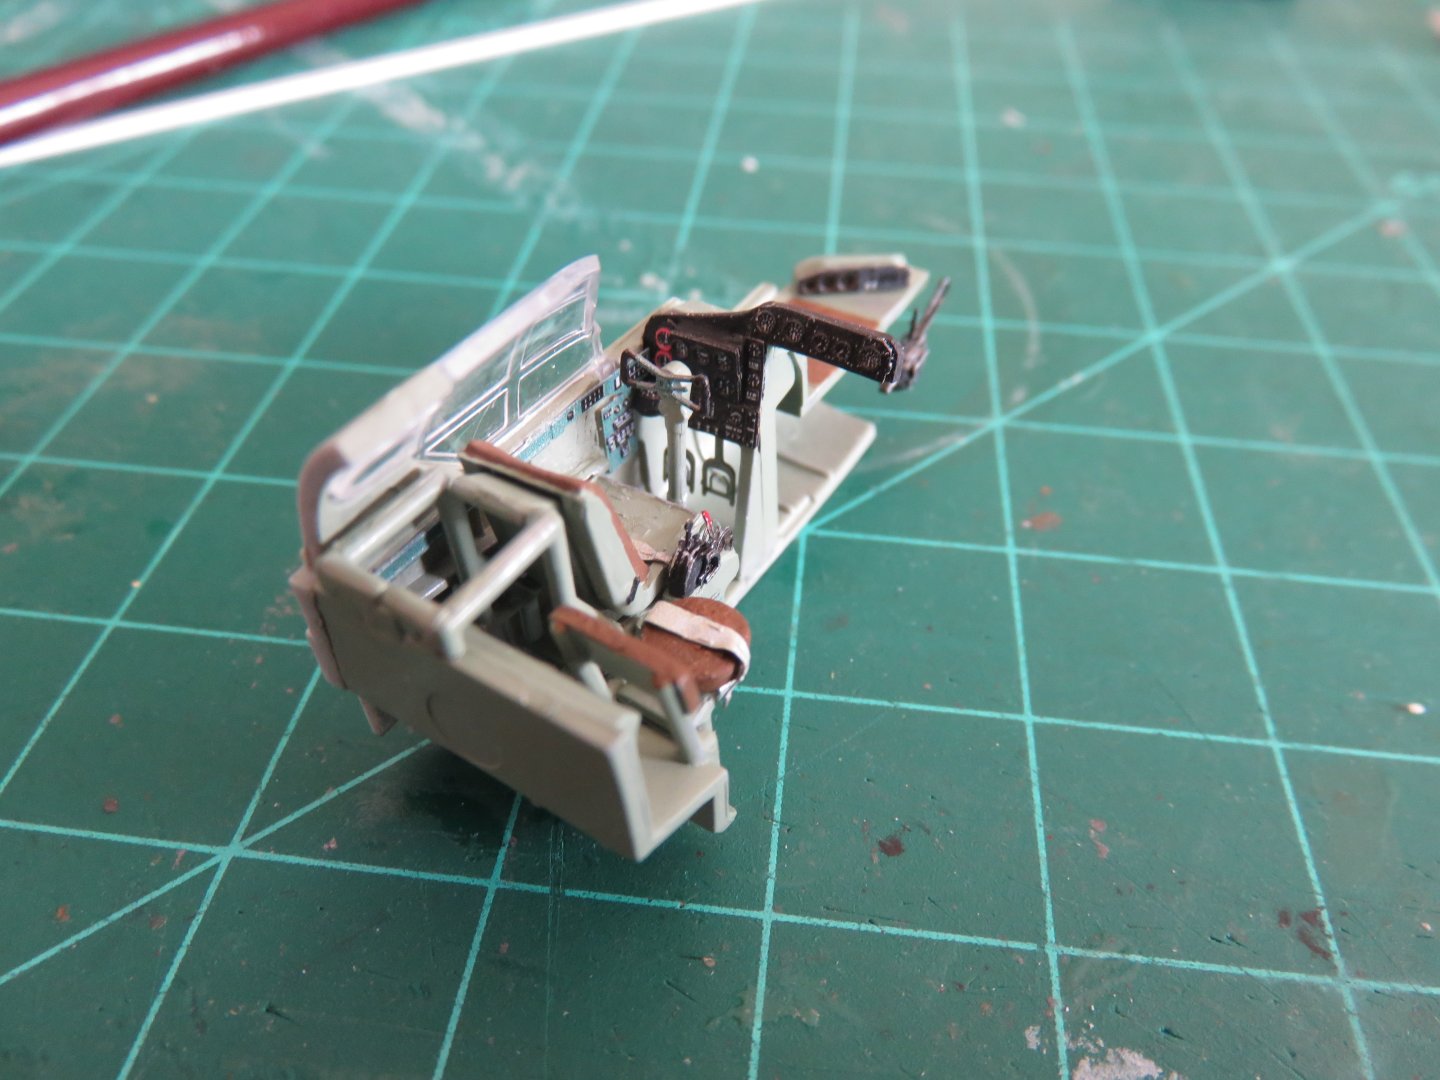
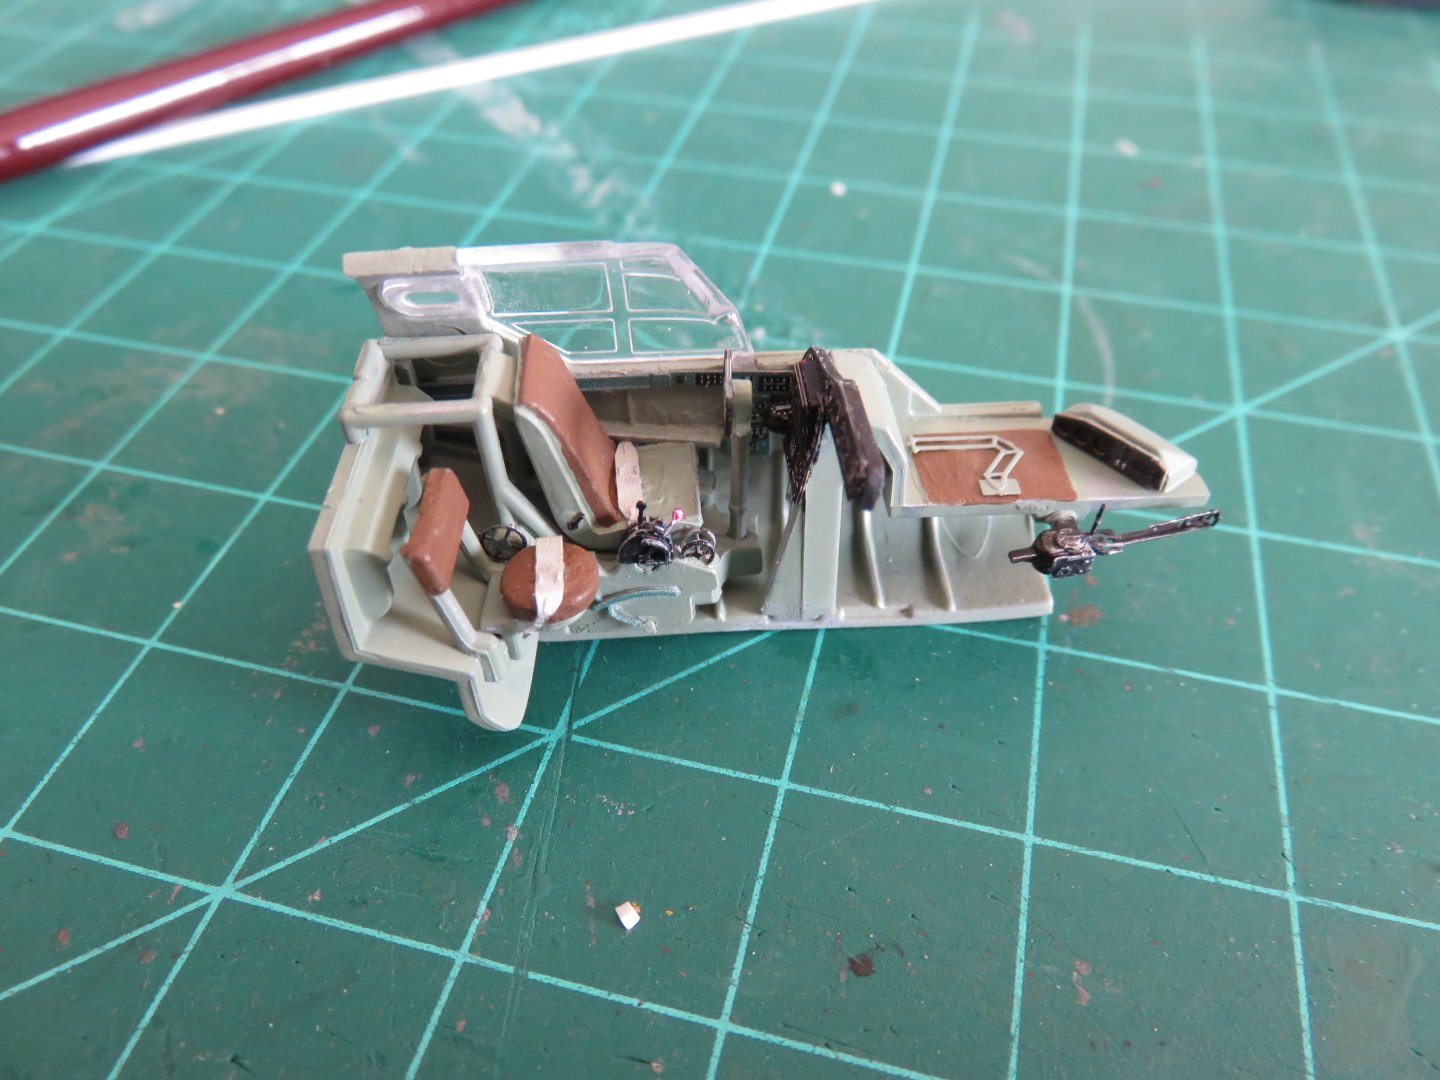
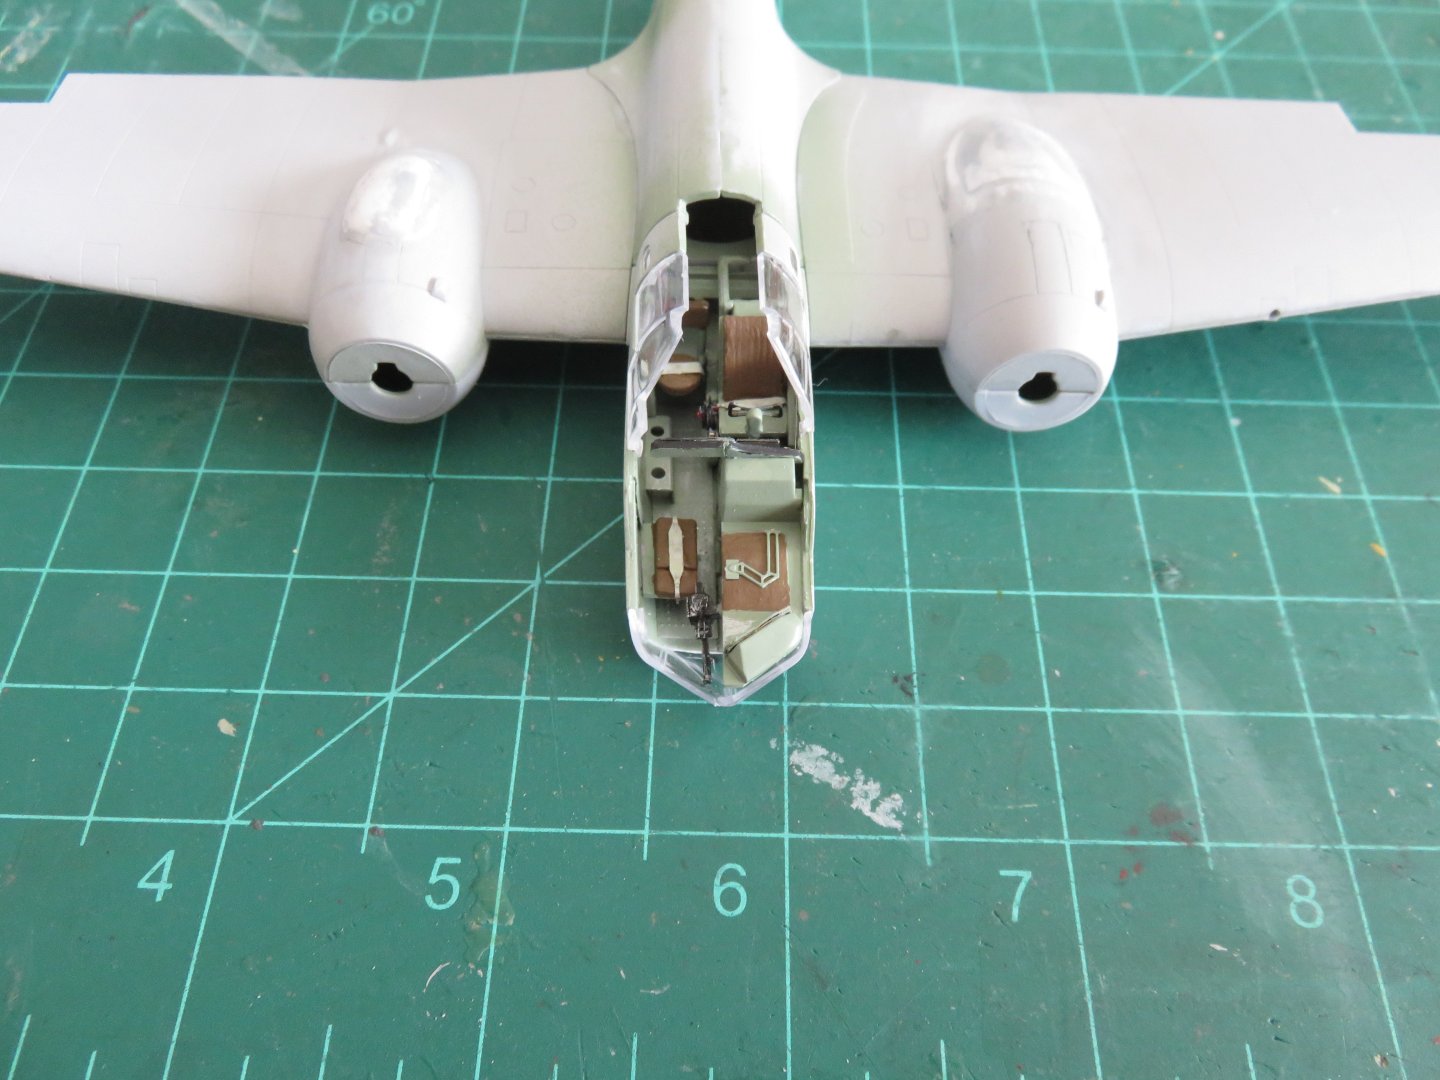
Um..... so yeah.... This showed up the other day.... So in all honesty, a Mosquito wasn't initially on my "build radar", I was looking at a few other kits in my stash trying to figure out what I wanted to do next. My inspiration for this project stems from my GF. She's a Canadian Forces veteran, who worked at 400 Tactical Helicopter Squadron for a time. I did a little historic research and found some of the squadron's history from World War II. 400 Squadron was formed as an army co-operation squadron, and when it arrived in England in 1940, they were equipped with Lysanders. They were re-equipped and reassigned as a Fighter/Reconnaissance squadron in 1941 with Tomahawk Mk IIs, and in 1942 with Mustang Mk Is. Starting in December 1943 they were redesigned a Photo Reconnaissance squadron and were again re-equipped, this time with Spitfire PR XIs and half a dozen Mosquito PR XVIs. The Mosquitos only lasted until the end of May 1944, with 400 Squadron flying the Spits until the end of the war. The Mosquitos seems to me to be the most interesting of the aircraft flown by 400 Squadron in the PR role, and one in particular. As PR airplanes, they were never assigned squadron codes, being identified only by their serial numbers. The aircraft I'm looking at was serial number MM307. While its time with 400 squadron was rather uneventful, what happened after was much more intriguing. After a short time with 140 squadron, MM307 was sent to 544 squadron in the late summer, early fall of 1944. After the Quebec conference in September 1944, Winston Churchill decided to travel to Moscow to meet with Soviet premier Josef Stalin in early October. In order to keep Churchill up to date with the events of the war, a special courier operation was set up using the PR Mosquitos of 544 Squadron. Operation Frugal saw 16 round trip flights between RAF Benson and Moscow. MM307 made one of those trips. Unfortunately, on the return leg, the airplane suffered a failure of the constant speed unit on one of its engines as it began its return crossing of the North sea. The airplane did make it back to base on one engine, but did not participate in any further "Frugal" sorties. A full description of Operation Frugal and be found here The Airfix kit is pretty straightforward as far as Airfix kits go. Six sprues of the newer dark grey plastic are included, one of the smaller sets has the details specific to the PR XVI: From what I've read and seen online, there should be no need for any major corrective surgery as was the case with the previously released B XVI (or was it TT??) The instructions are the typical fare from Airfix as well as the expected Cartograph decals: Although, I don't intend to use many of the decals beyond the airframe stencils and fuselage roundels. I will be dipping in to my stash to source the correct type "B" roundels for the upper wing, and I'll be printing off my own serial numbers. Finally, the assortment of clear parts appears cleanly moulded, and a small addition of some Yahu seatbelts: I will probably source out a masking set for this build, and maybe some resin wheels but otherwise I will build this straight out of the box. Overall this looks like it should be a fun build, and I'm not anticipating too many problems with the kit, if the online reviews are anything to go by. (Famous last words!) Andy


- 33 replies
-
- 12
-
-
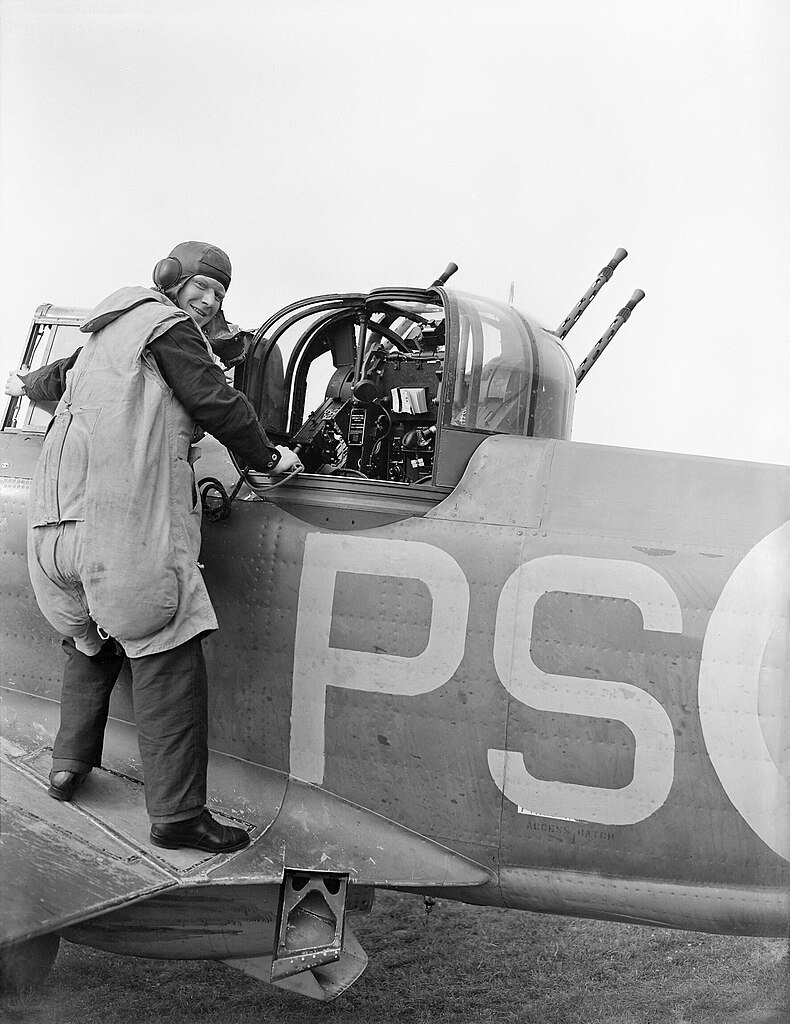
Incidentally, John Dell has a great treatise on the origins and purpose of the black and white underwing colour scheme: https://dingeraviation.net/articles/blackandwhite.htm Andy
-
Ahem…. Resistance is futile! 😂 Now…. About that Beaufort….. 🤔
-
Count me in! Have you got an Anson to go with it?
-
Close, but the word is “Casemate”. Casement refers to the operating (opening) part of a window in your house. Casemate is the armoured enclosure through which the guns can fire. Andy
-
Very nice! You just need a figure of the gunner trying to clamber in the turret wearing that… um… contraption of a parachute/suit they needed! Andy
-
Thanks! I must admit, I’ve been “casually” looking at the Airfix Beaufort. I know at some point I’m going to “have to” add one to the stash. The issue I have is, because the Bolingbroke is kinda the lesser known fourth member of the Bristol twins, I’m going to have to look at a Blenheim too…. and right now that makes my brain hurt…. 🤪😅 Andy
-
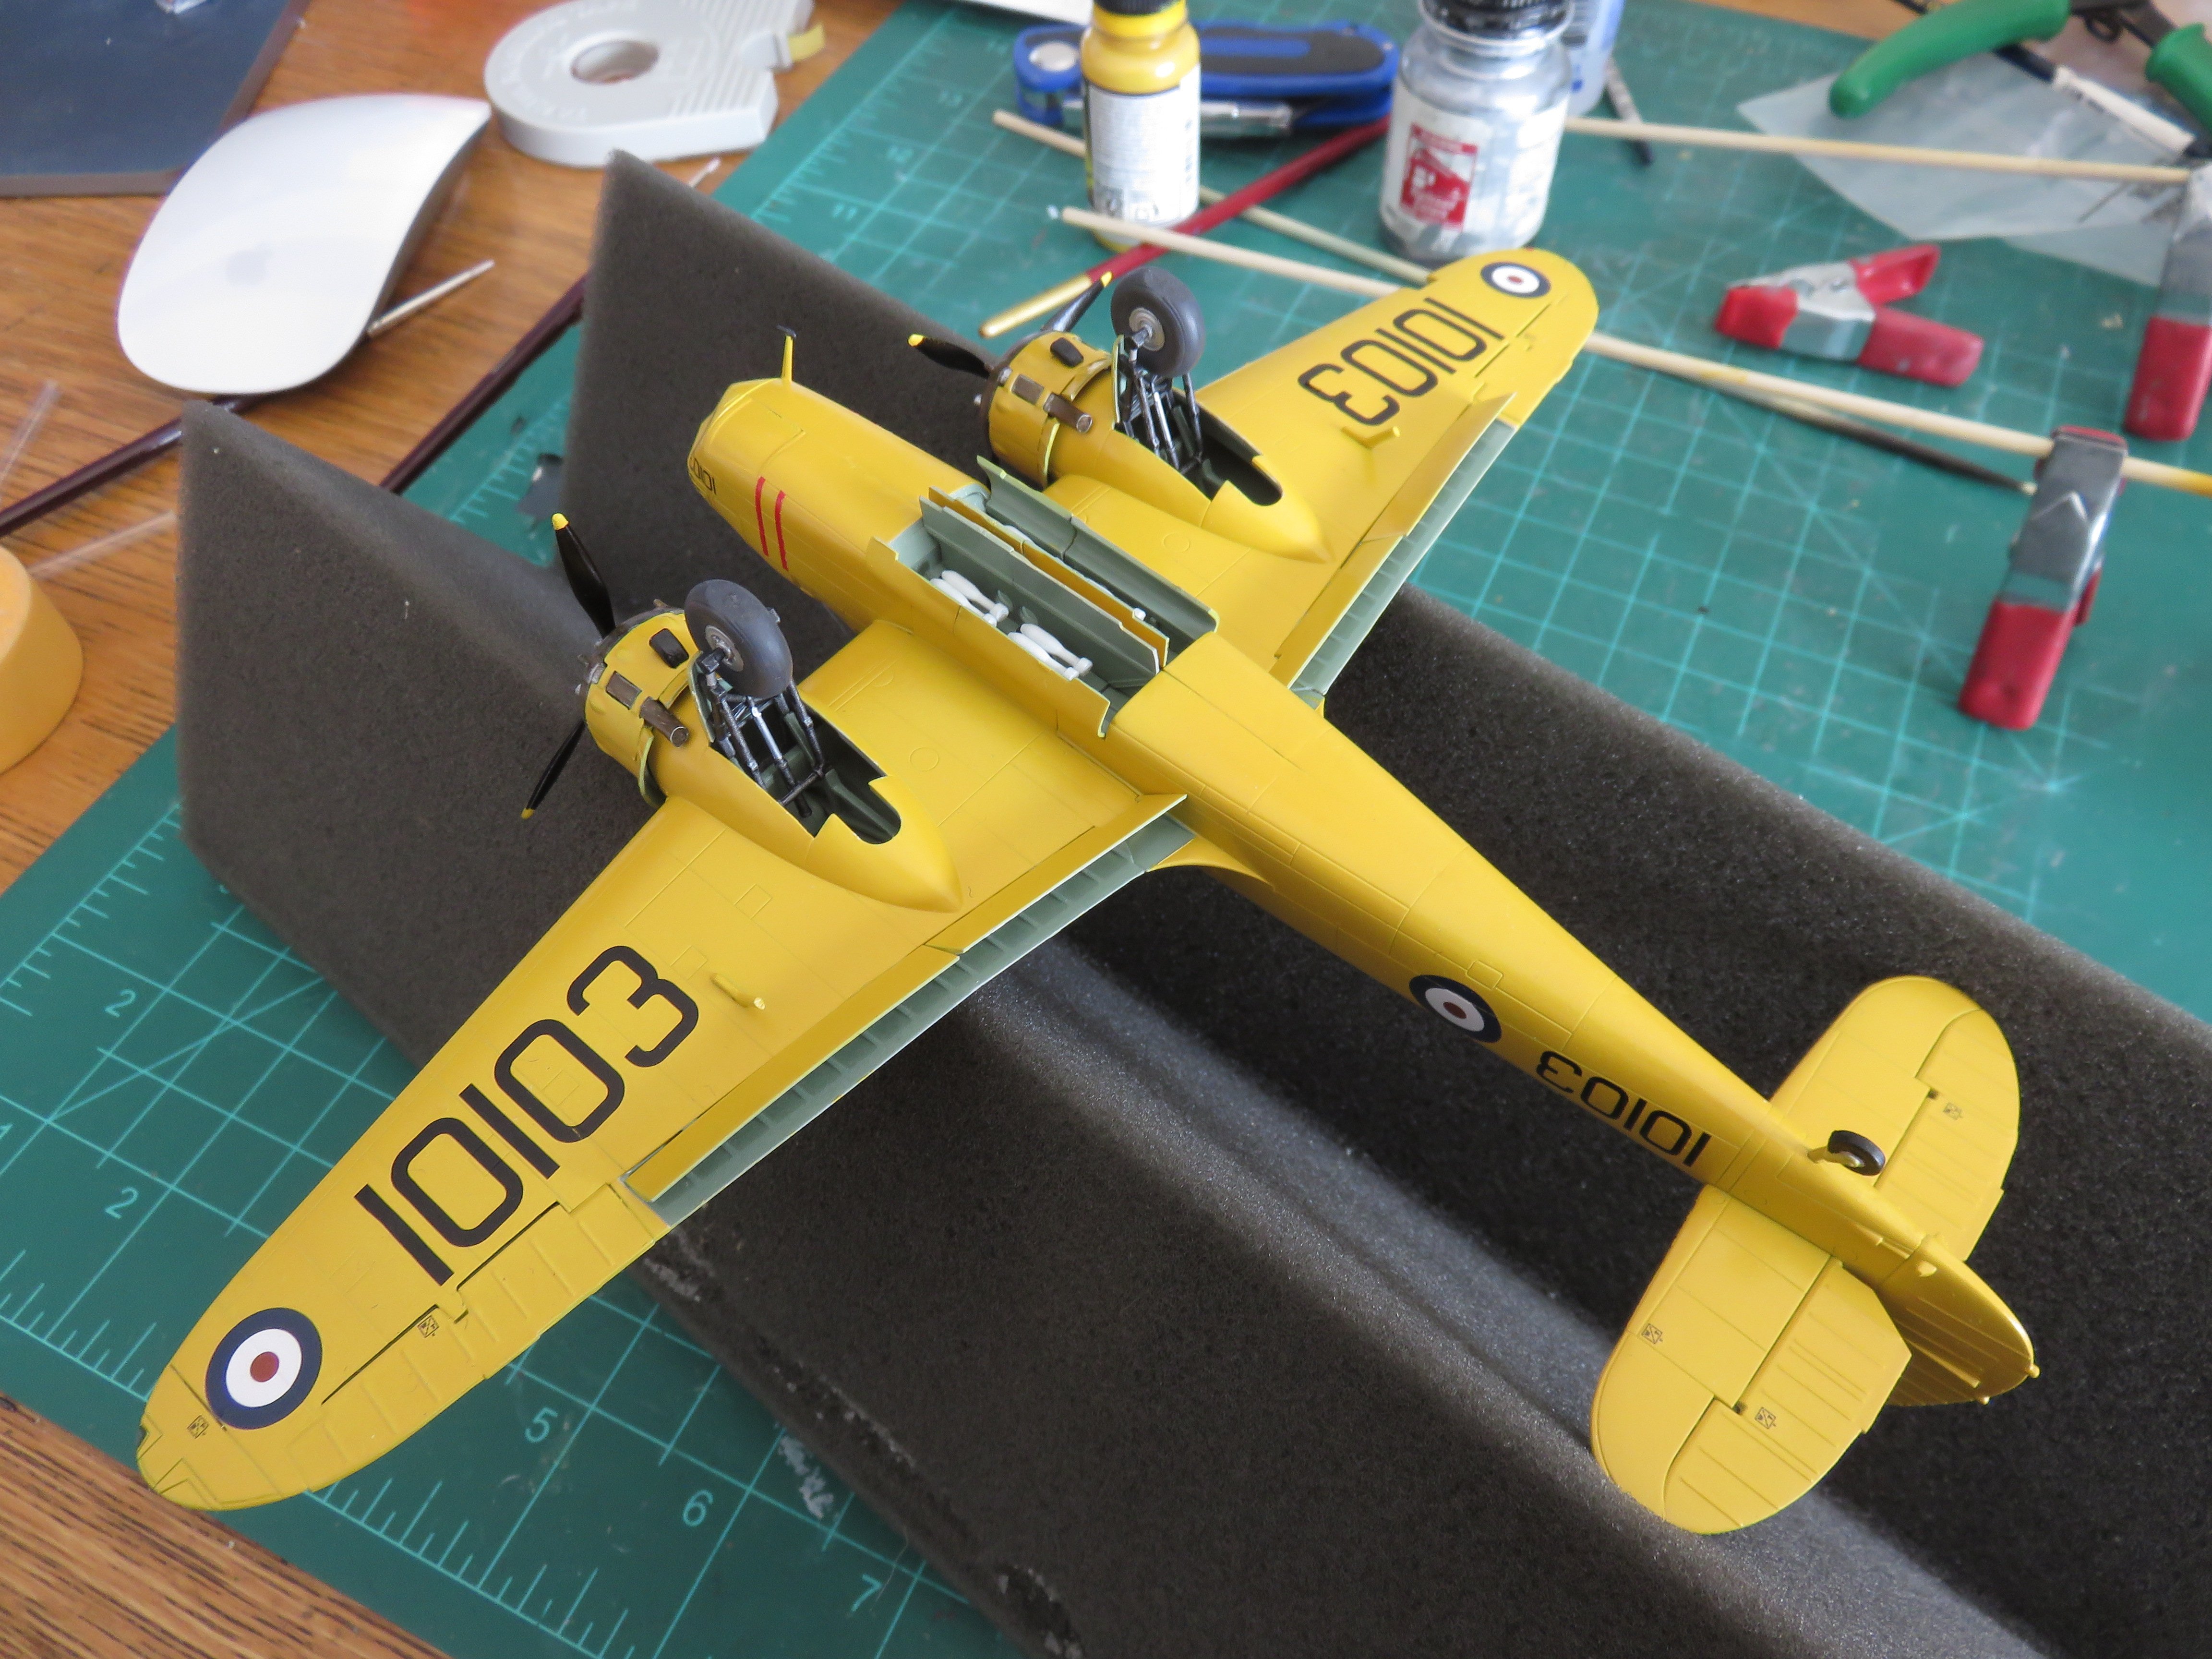
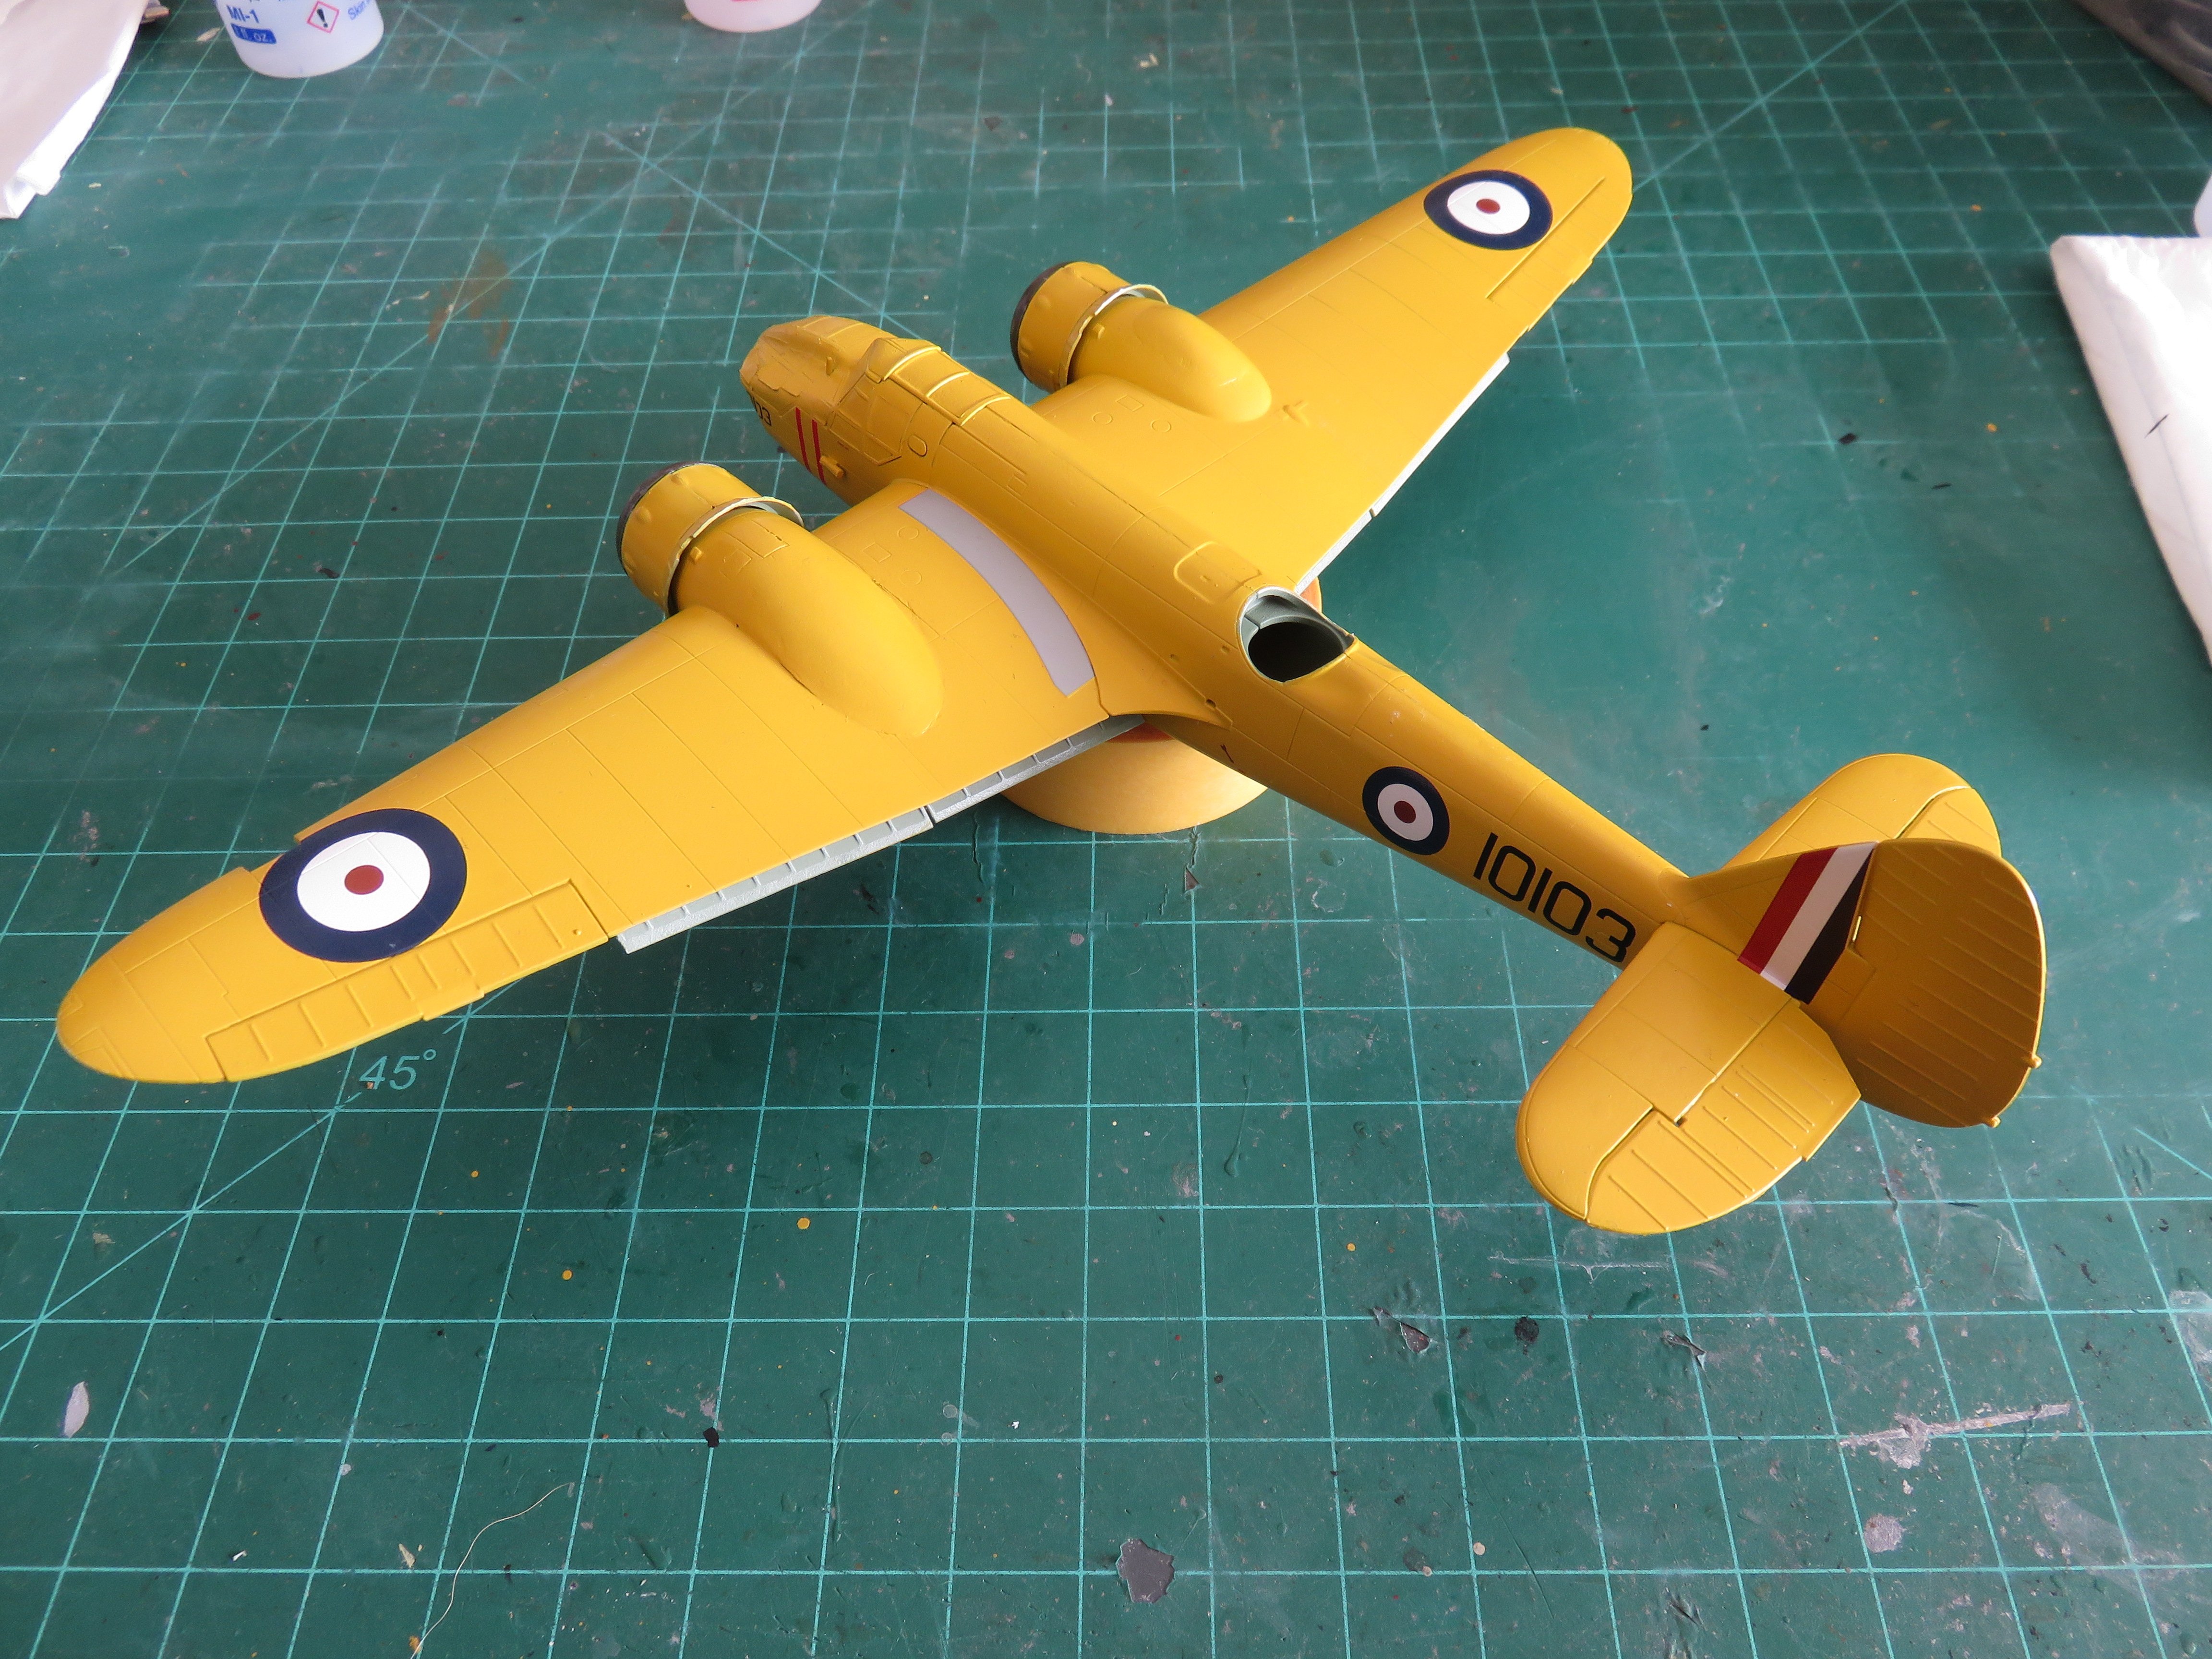
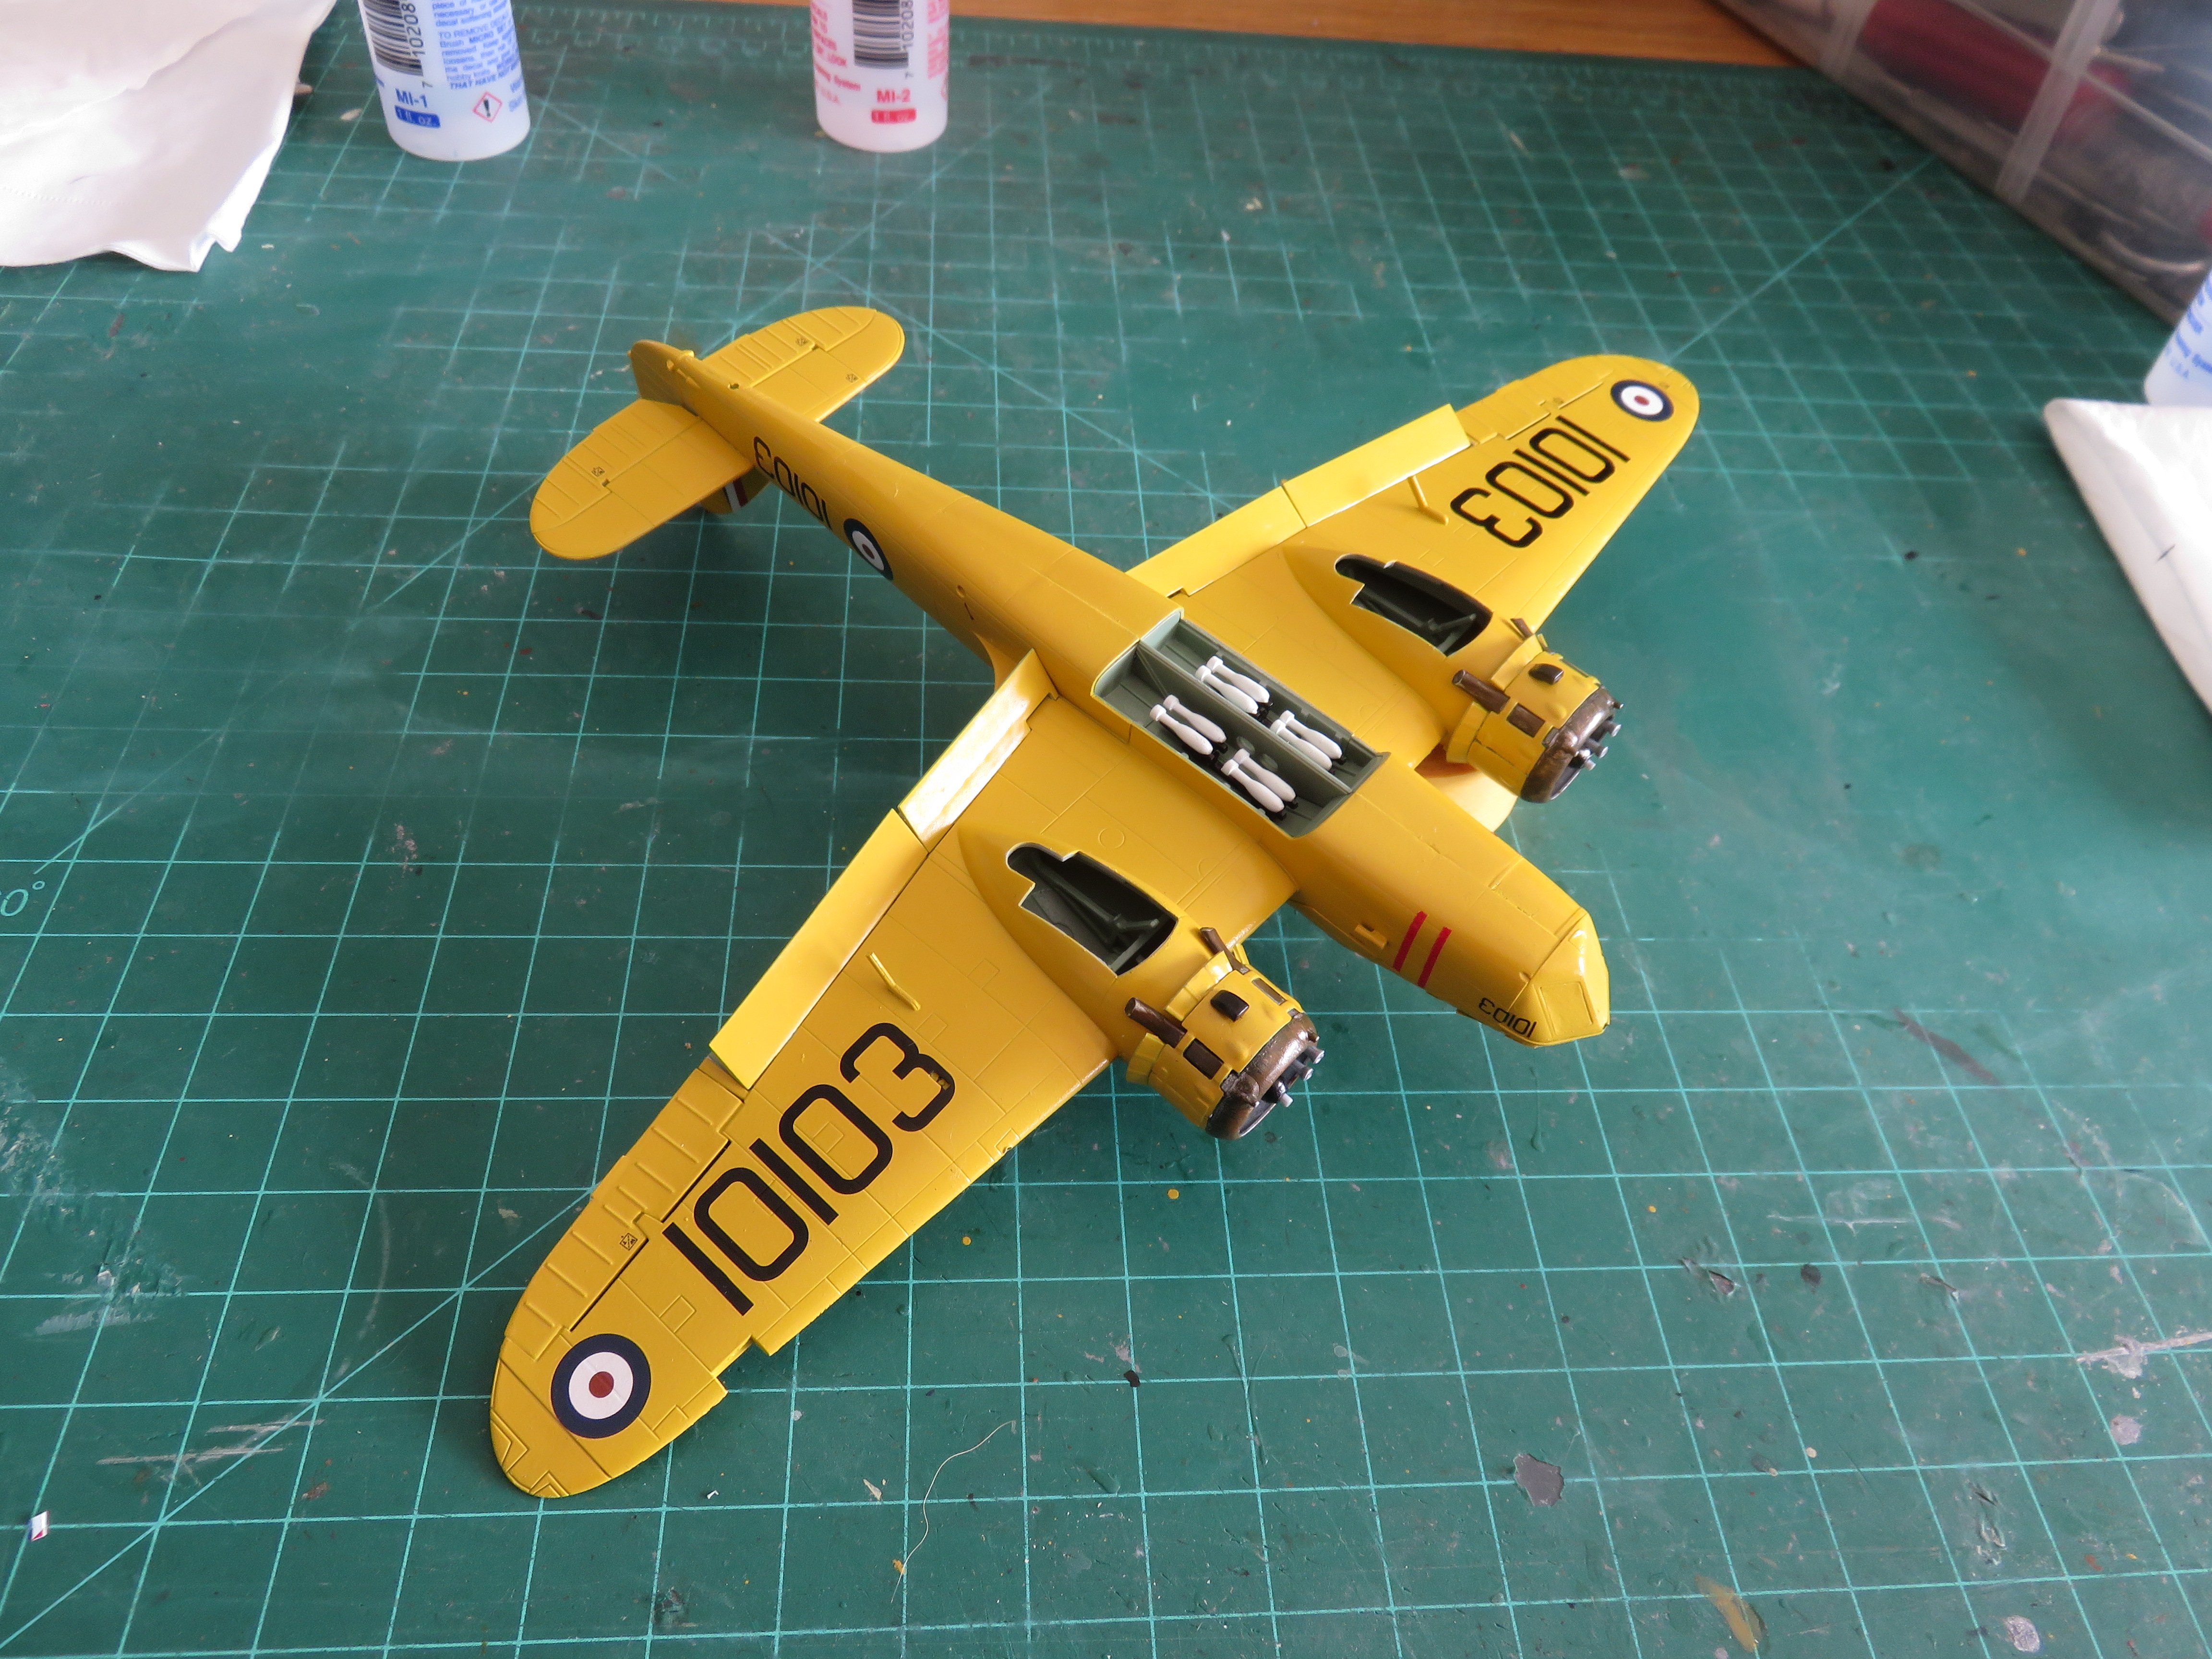
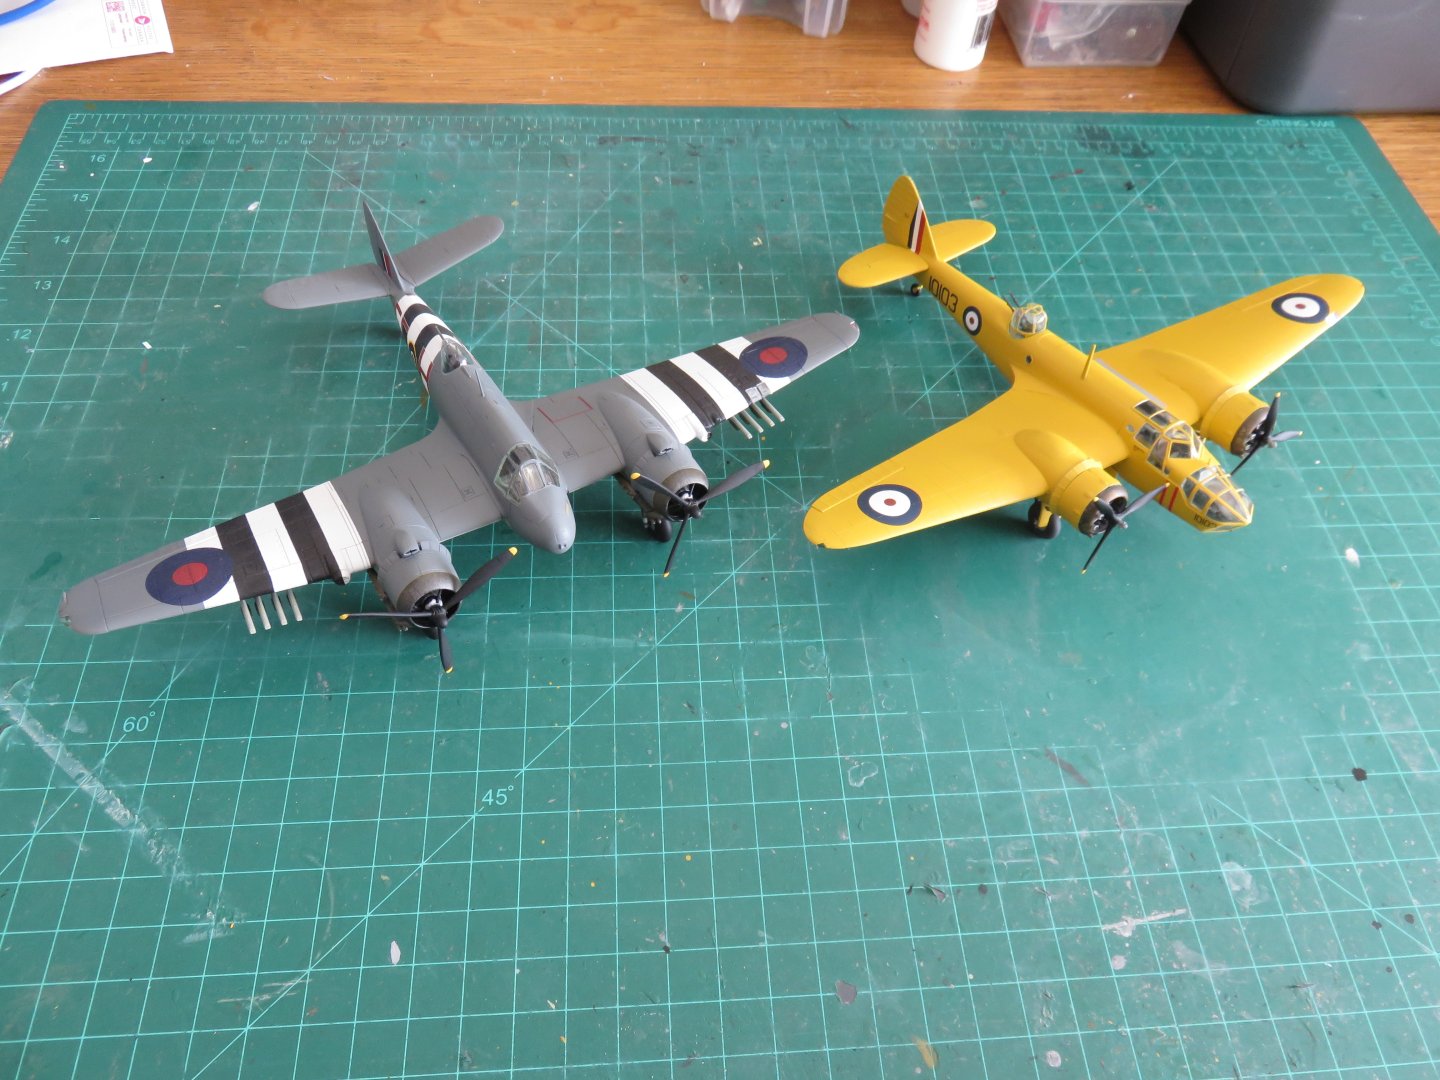
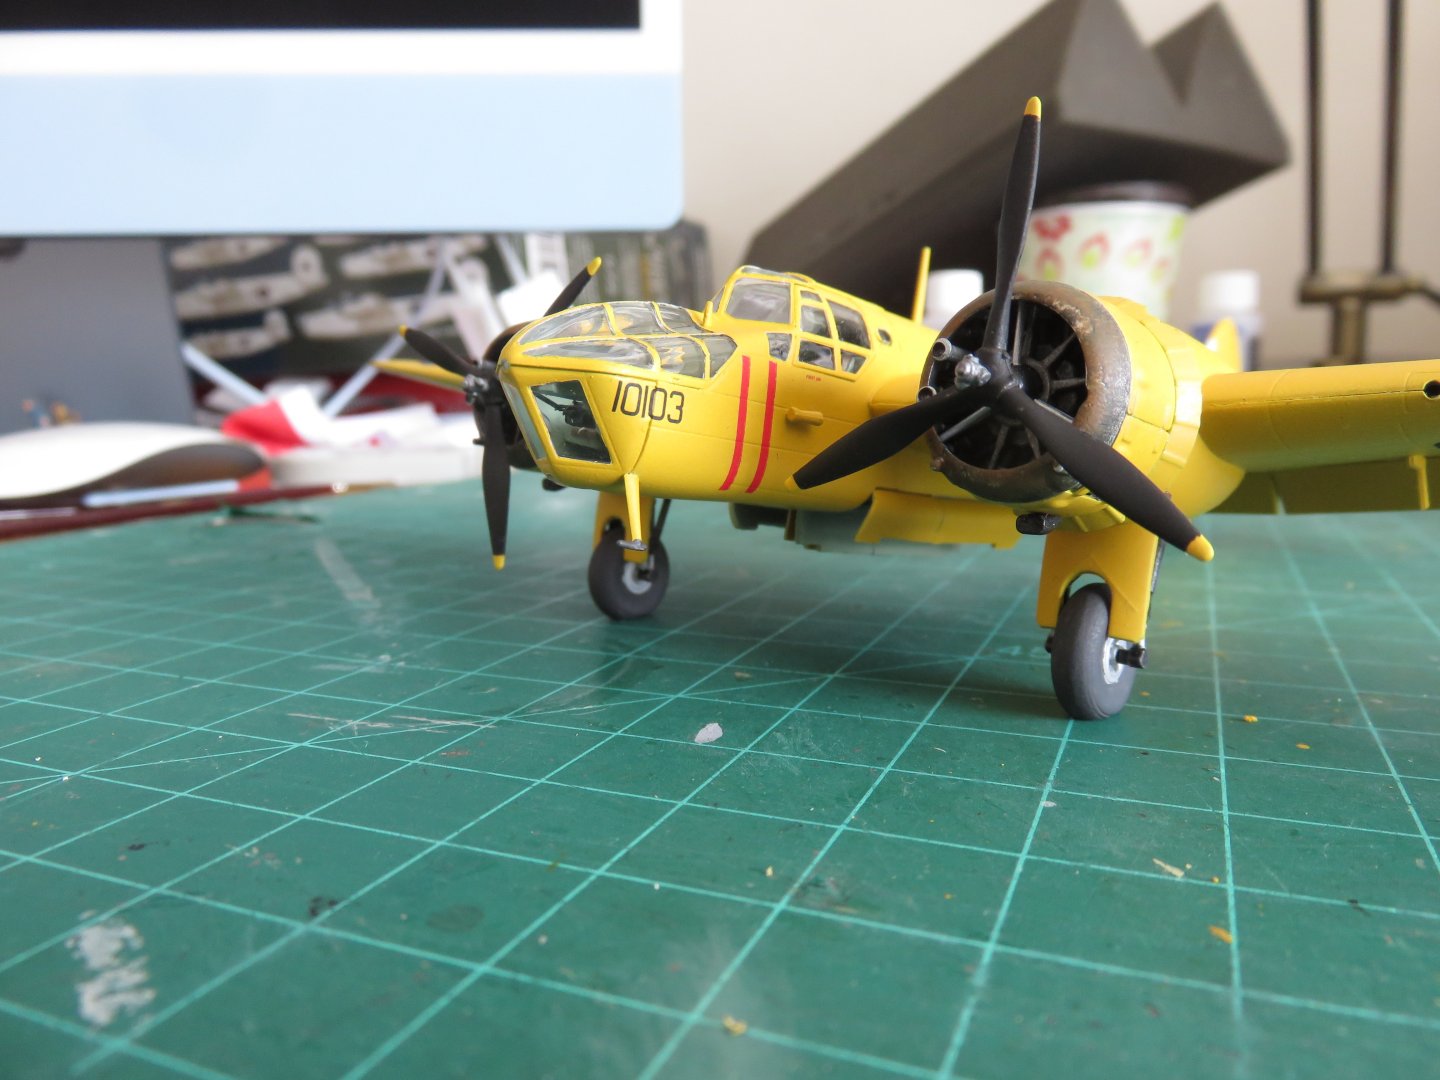
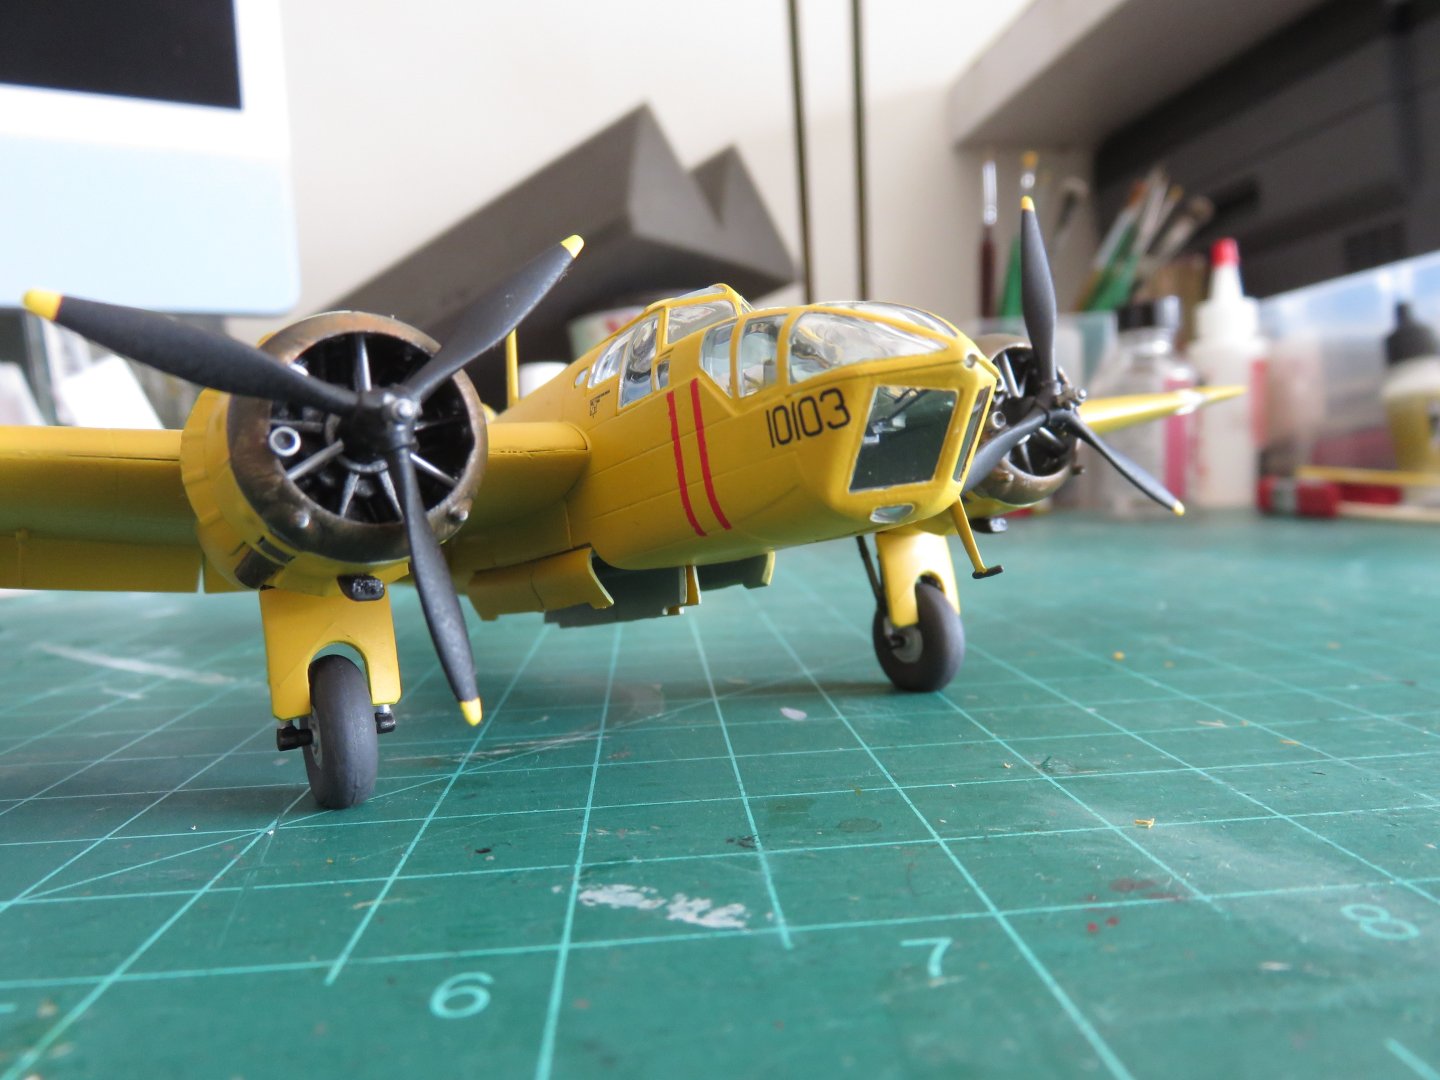
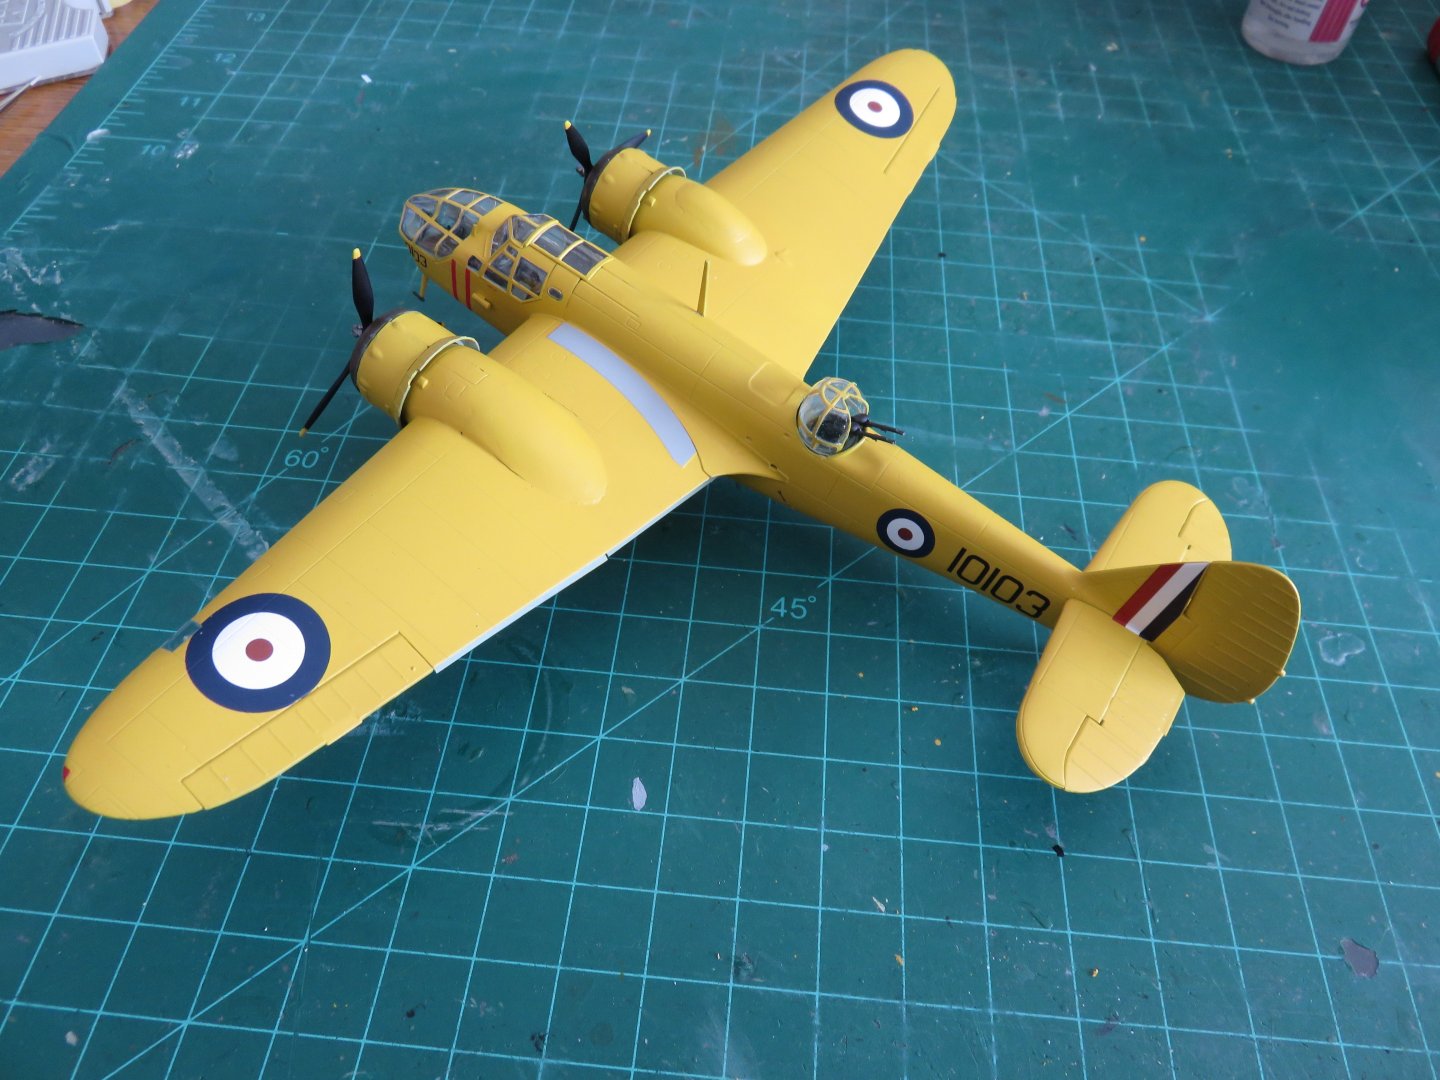
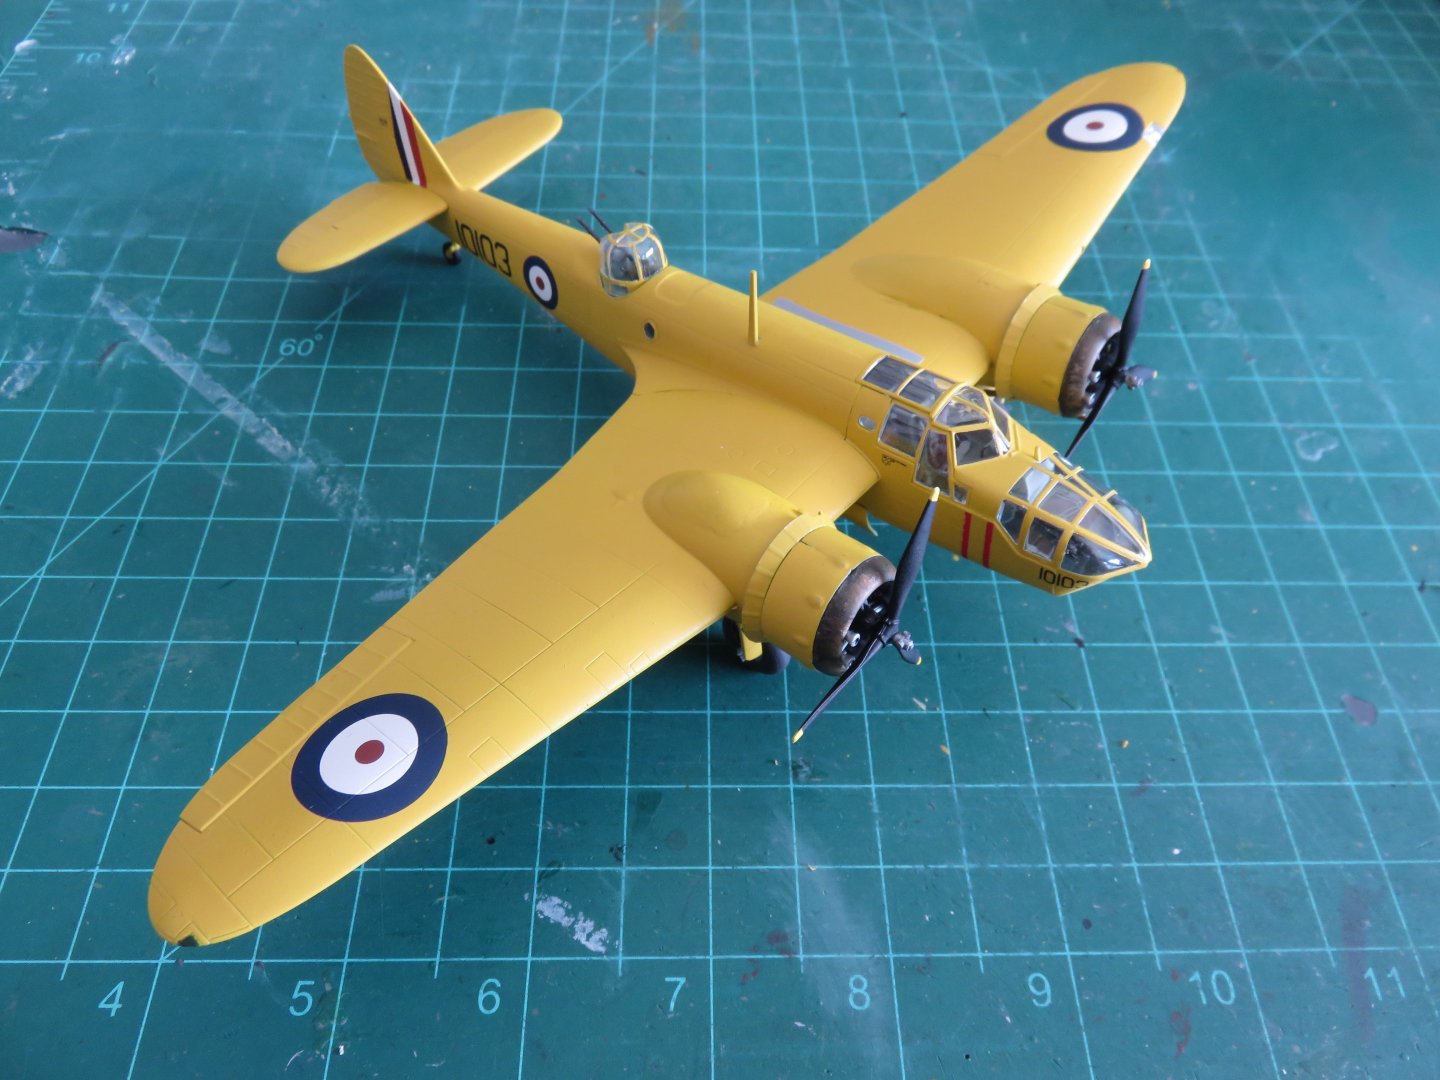
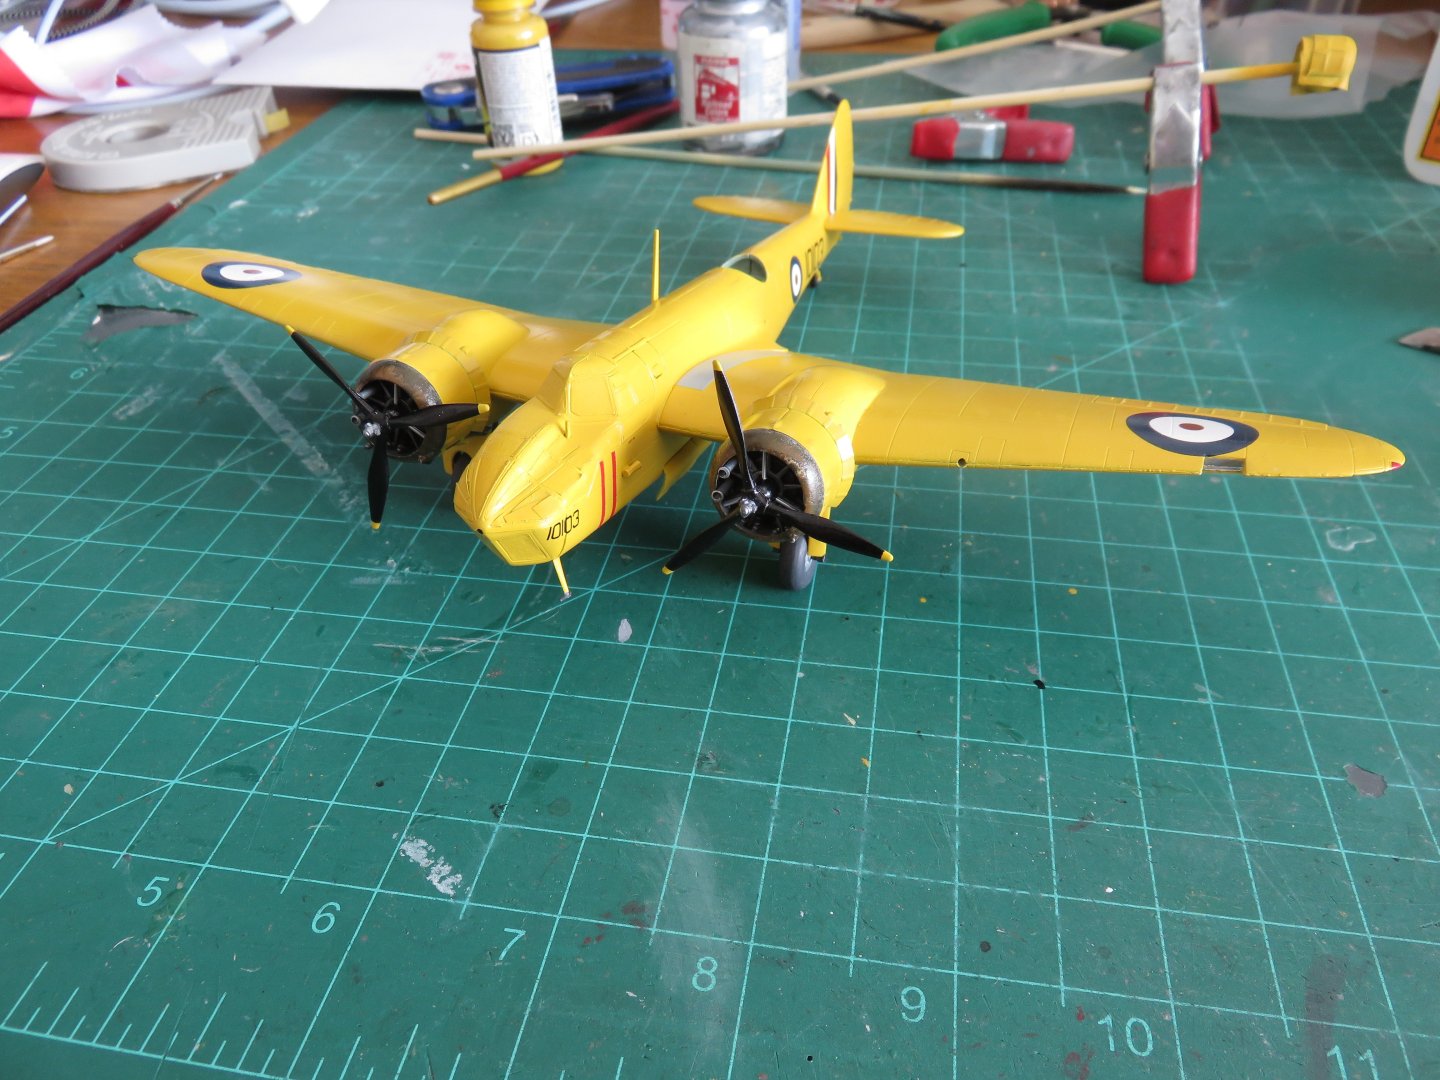
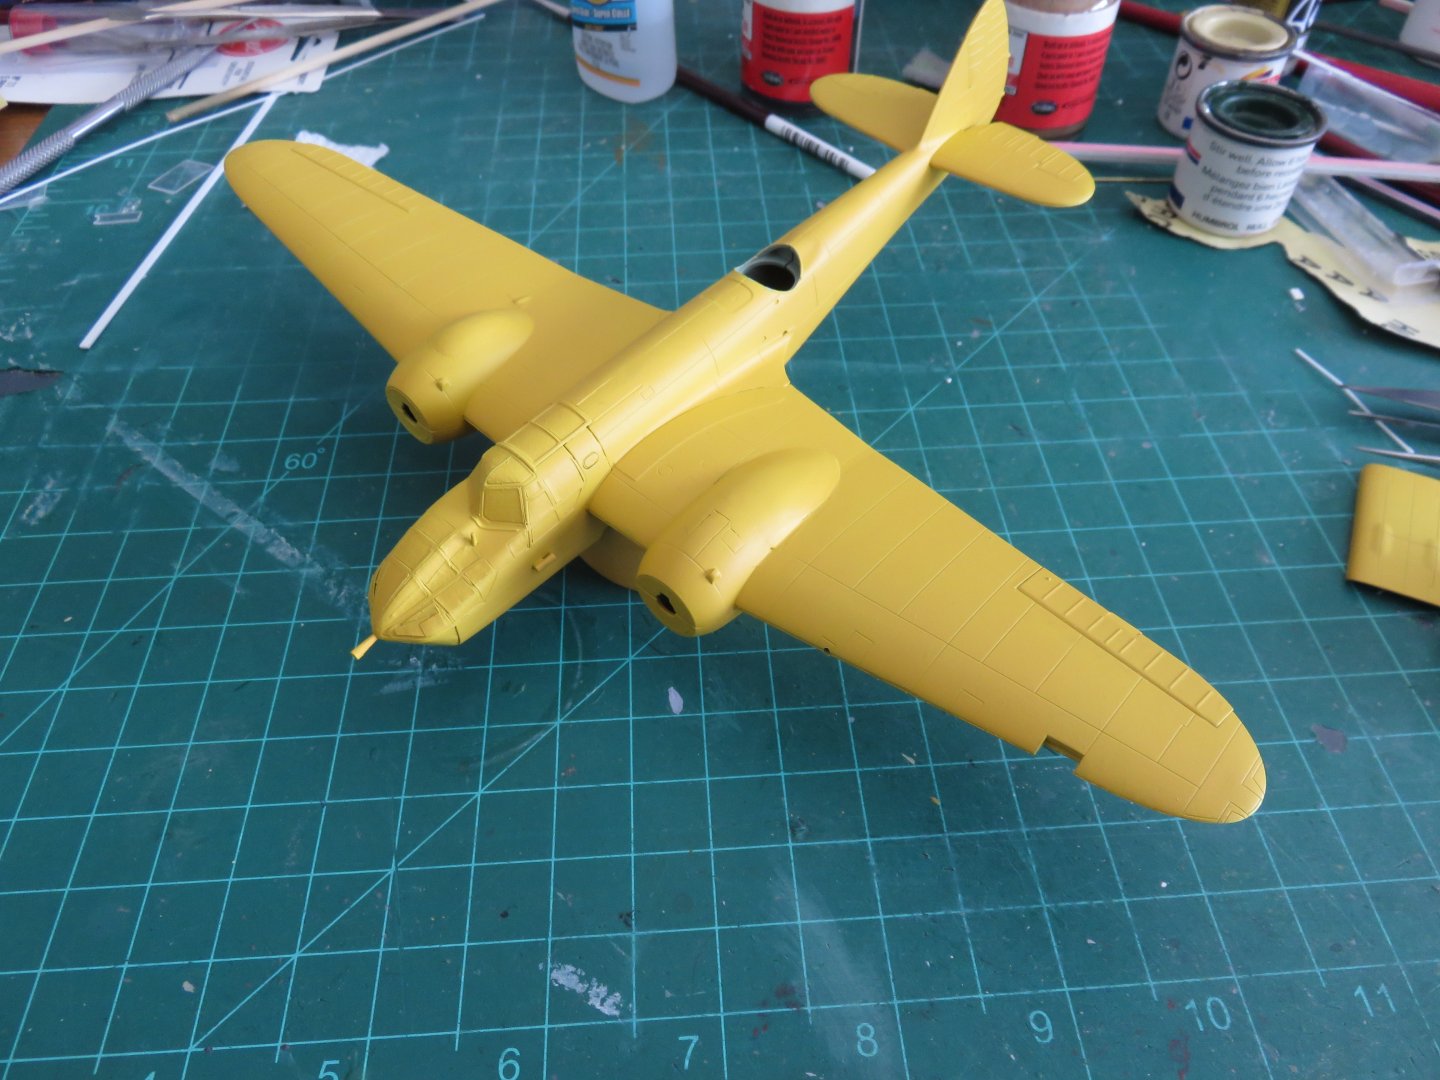
Good morning everyone! Things have gone reasonably well over the last little while. After the lettering was finished I began to add all the extraneous little details, Propellors, landing gear, bomb bay doors, aerial masts and whatnot. A not too involved process. The landing gear went better than I expected, for once the parts actually fit as designed! After a final touch up, I sealed everything with a layer of Testors' Dullcote. And then the fun of removing all the masking from the glazing. The turret glass required a little studious work with a tooth pick to get rid of a couple of spots where the paint bled, but the nose and canopy area came out clean and crisp. From a lower angle it kinda looks like some of the photos I've seen of Bollys stuffed and mounted in museums: Overall, I think I managed alight. Not the best result, but given the fitment challenges with this kit, it will do. The bright yellow paint definitely highlights things we'd rather not see. (Yeah some of those seams could have been better, but from a distance, and in natural light they don't show so badly). I would say that this is not the best kit offering from Airfix, this is perhaps one that deserves a bit of a revisit in terms of their design work and tooling, as they are reissuing the Blenheim Mk I this year, it obviously must be a somewhat popular kit. Anyway, a quick final shot of my Bristol collection so far: I may do a little weathering yet, but I'm happy to call this one done. Thanks to all who have been following along, leaving kind comments and "likes", your support and feedback is always greatly appreciated! Andy


- 33 replies
-
- 13
-
-

-
Hopping around the internet this afternoon I found a bit of the record card for Bolingbroke 10103: https://caspir.warplane.com/historycards_pdf/Bolingbroke-10103-RCAF-HC.pdf Some parts are slightly illegible, but from what I can decipher the plane entered service with the RCAF on the 22nd of February 1943, and was placed in reserve at that time. On the 20th of October 1943, it was assigned to 3rd Training Command. 3TC was headquartered in Montreal as part of RCAF Eastern Air Command, and oversaw training facilities in the province of Quebec and in the Maritimes. The record mentions the plane being a Bombing and Gunnery trainer. Two B&G schools were assigned to 3TC, No. 9 at Mt. Jolie, PQ, and No. 10 at Mt. Pleasant, PEI. The next entry has 10103 back in reserve on the 20th of June 1945. There are a couple of other entries I’m having trouble deciphering, before it was listed as “War Assets” on the 6th of January, 1947, and then subsequently sold. Andy
-
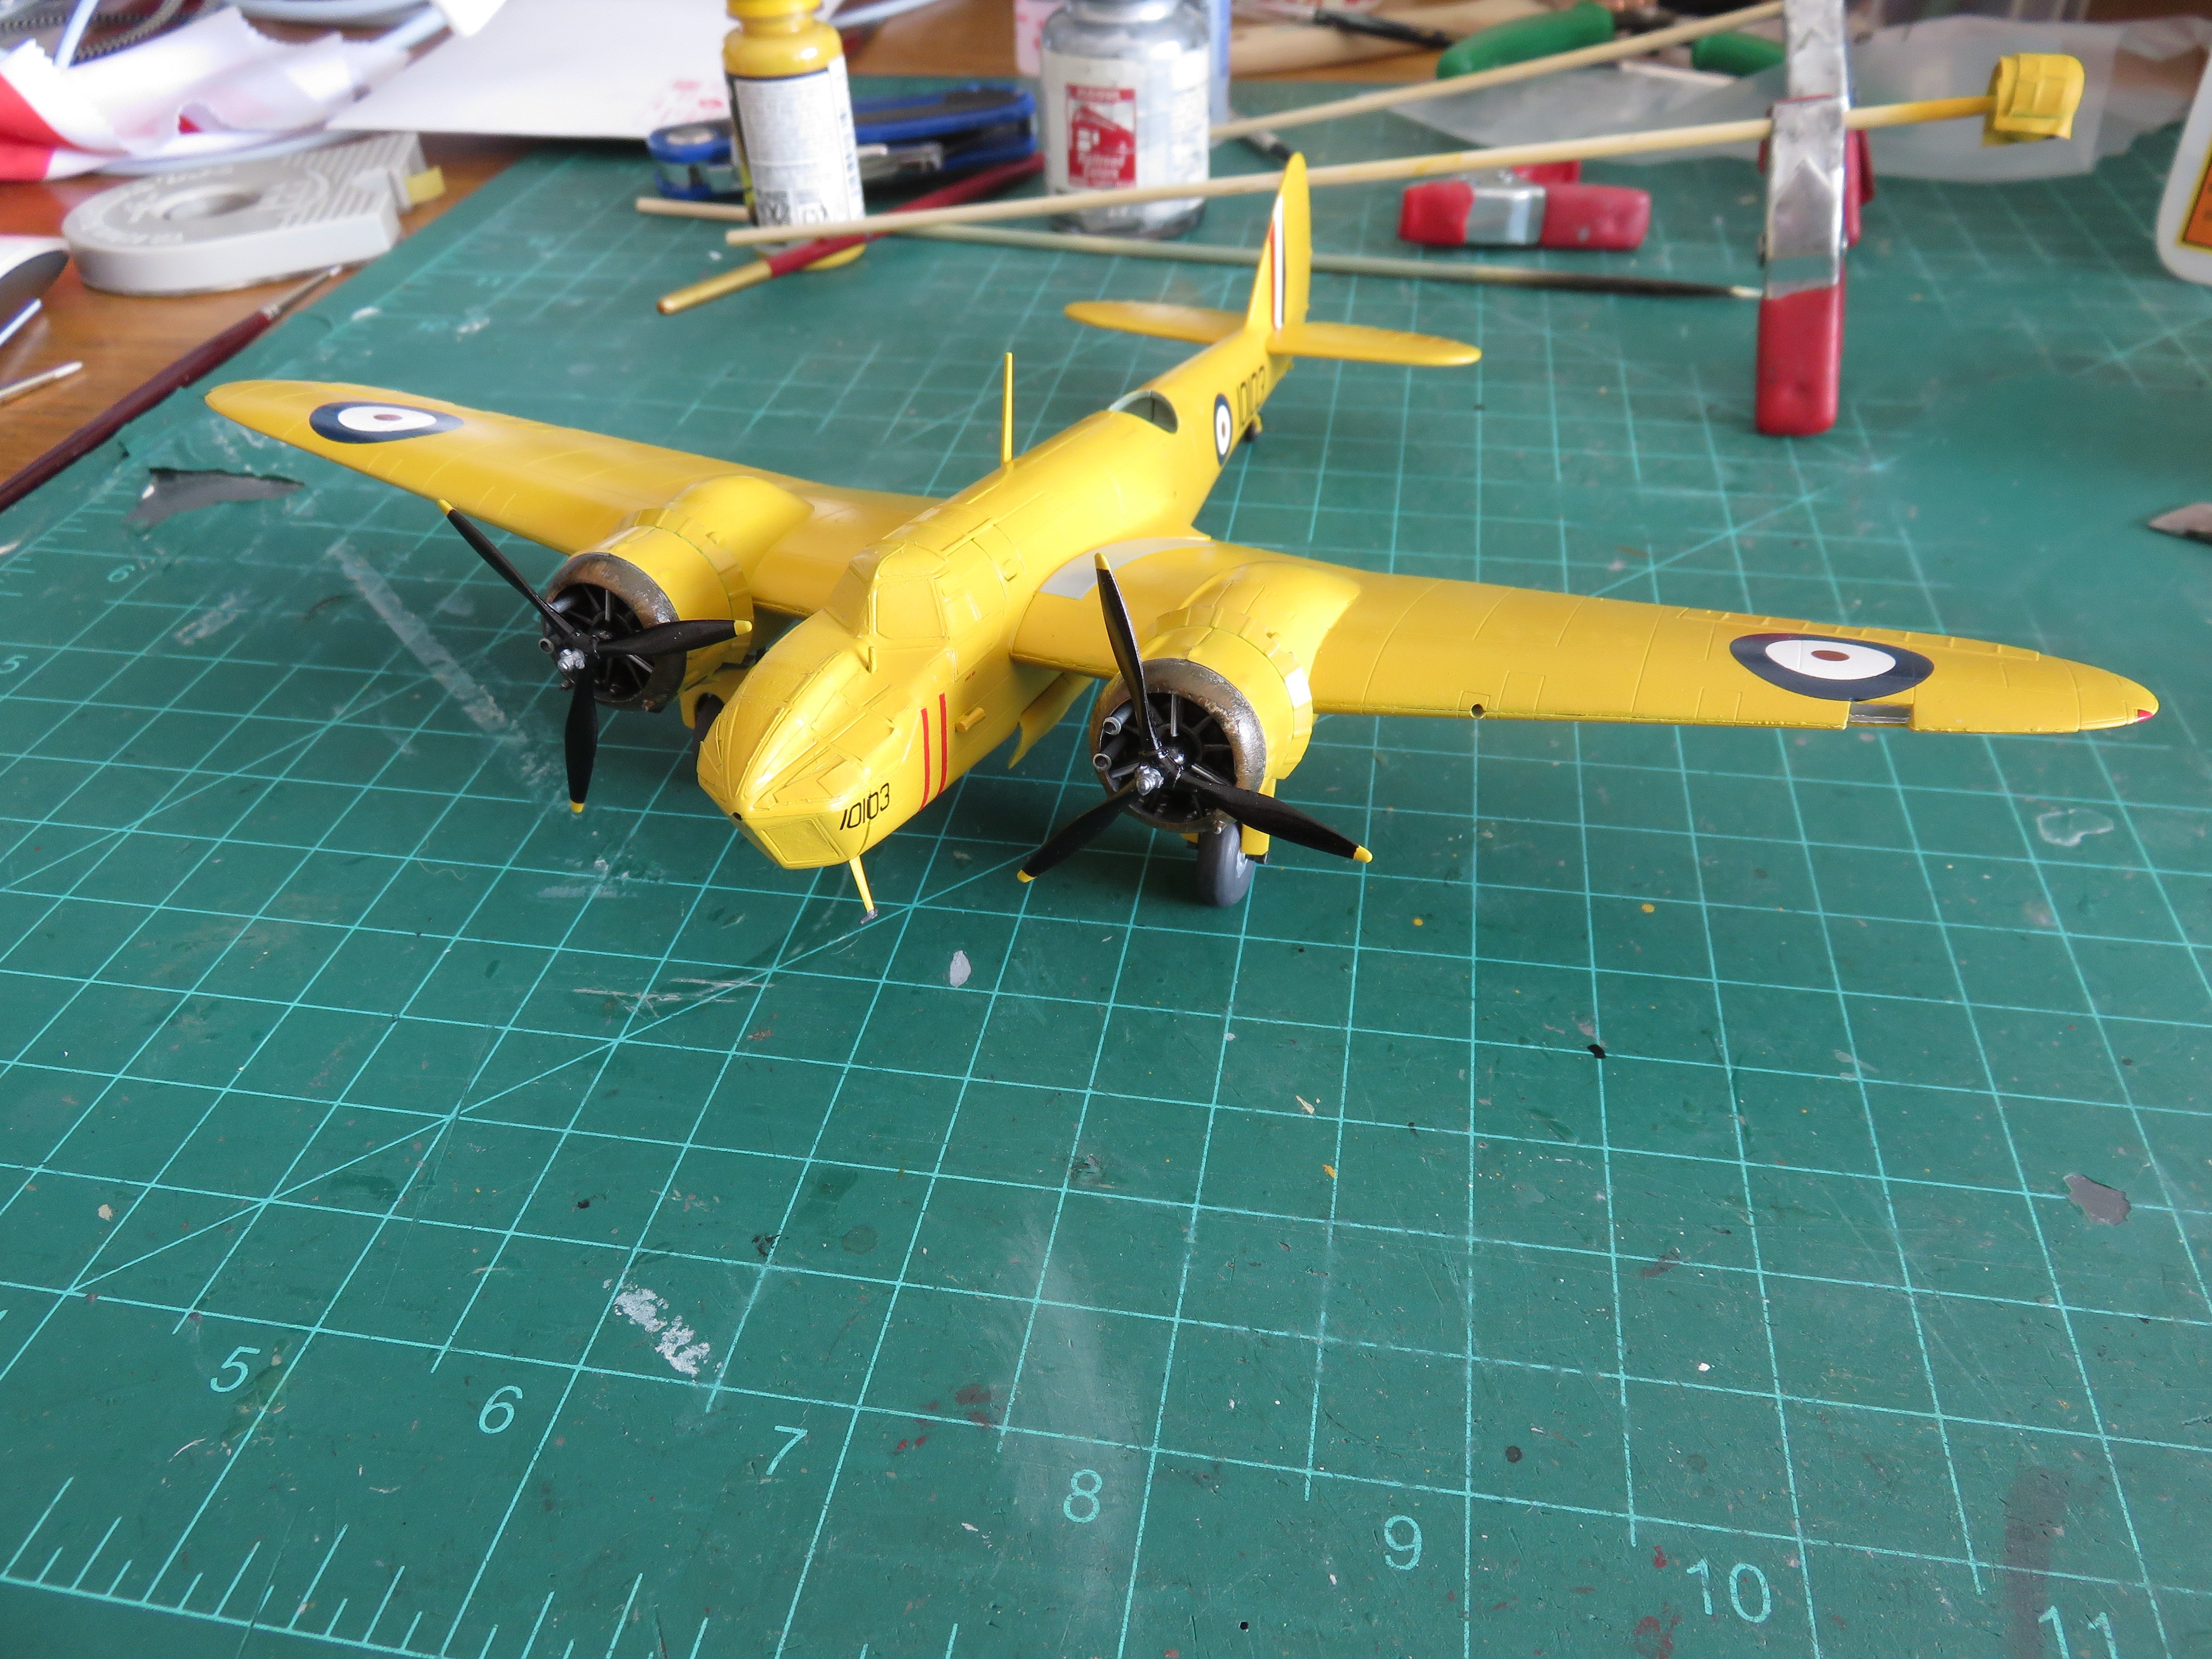
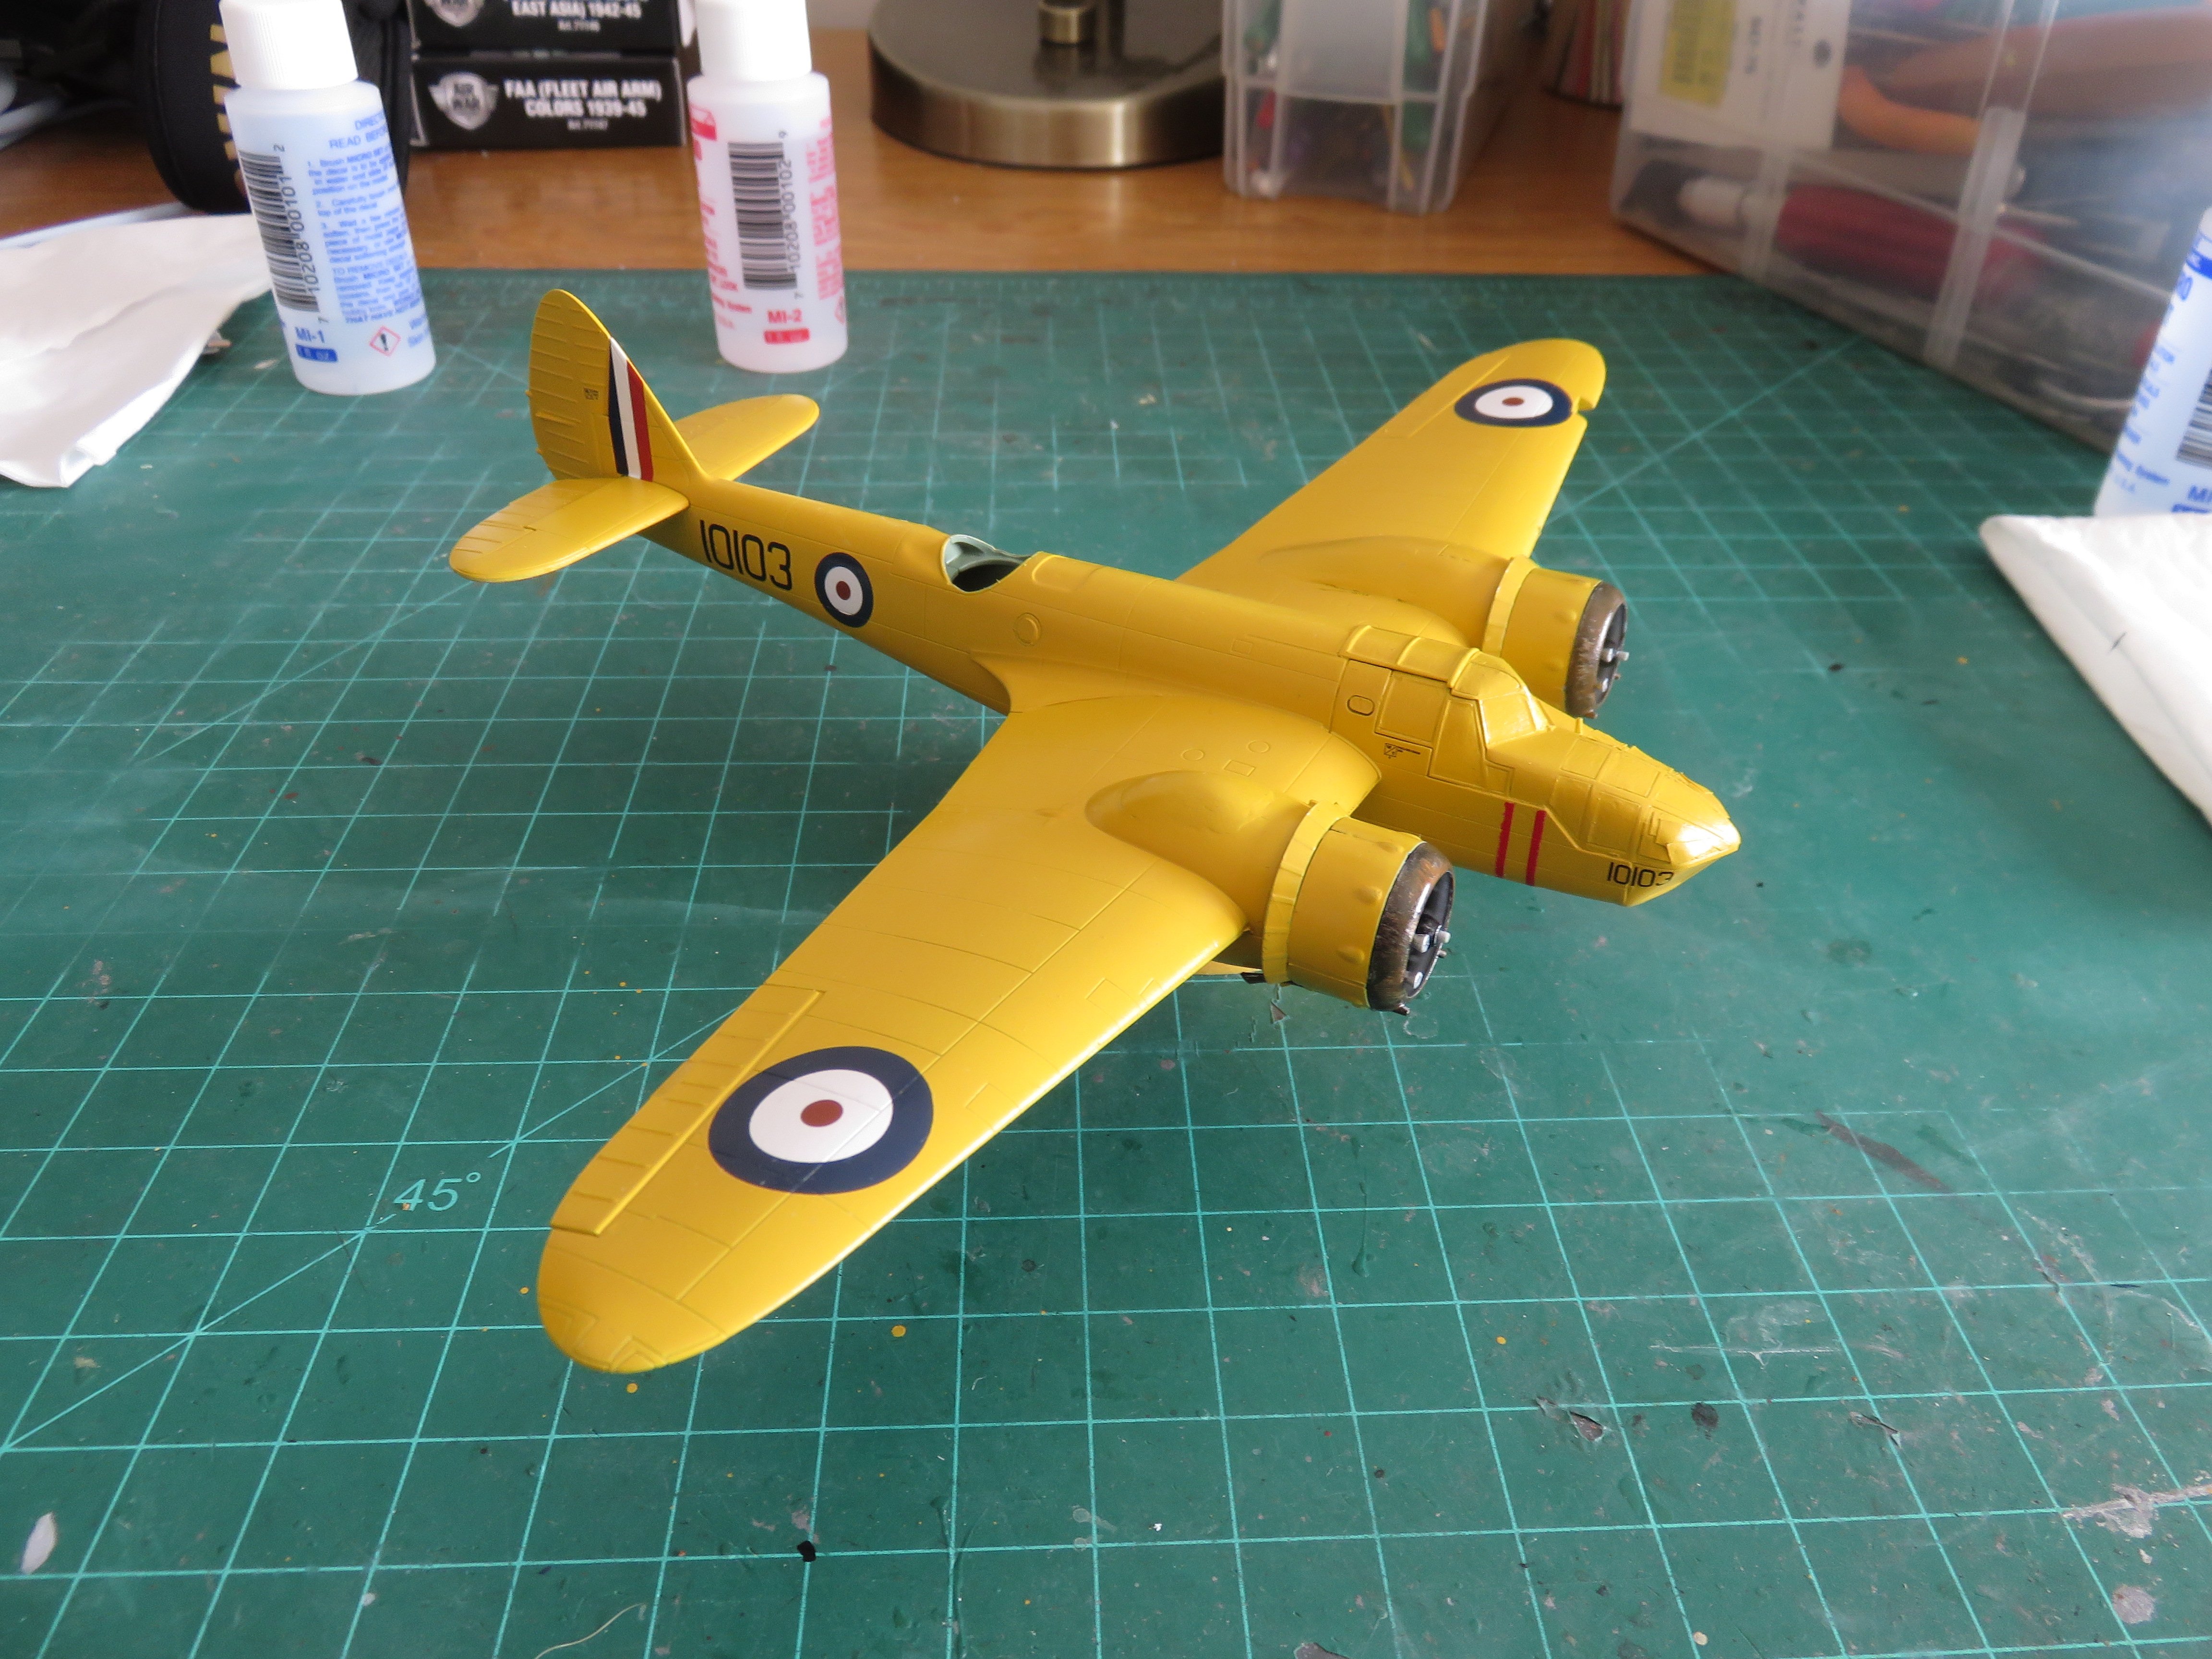
Good morning everyone! Work on the lettering is largely complete. I used elements of the kit supplied decals as well as markings from an Xtradecal set. The roundels really stand out on the yellow background! The bright red propellor warning stripes were excised from a large French fin flash in the Xtradecal set. On the overwhelming majority of prototype photos I found online, the trainer Bollys had at least one, and more frequently two red warning stripes. The small registration numbers on the nose took a lot of digging. It seems to have been more common on the later production Bollys (above serial # 10000), and only on trainers. The large serial numbers on the underside were the most challenging to place, simply due to their size, but the generous use of Micro Set and a lot of patience ensured a successful outcome. Next up is seeing to the landing gear and all the other sticky outy bits that would have been at risk while handling during the lettering process. Thanks, as always, for all the kind comments and "likes"! Andy


- 33 replies
-
- 12
-
-
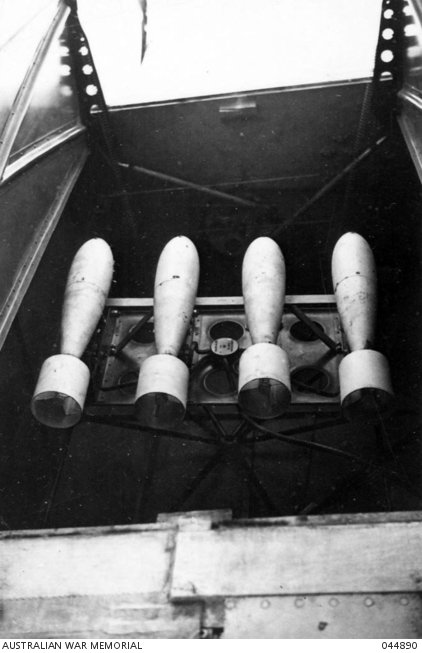
Thanks Ken! About the closest I could find online, image-wise, was this picture from the Australian War Memorial (image catalogued as being in public domain): It depicts some practice bombs as loaded in an Avro Anson. I’m guessing a similar kind of set up was used in the Bolingbroke. Judging by some of the photos taken of some salvaged Bollys at the Warplane Heritage Museum (if you scroll the the photo gallery), there doesn’t seem to be any kind of noticeable special modifications to handle any kind of practice ordinance. The only thing I can figure is they must have used off the shelf standard fittings. Andy
-
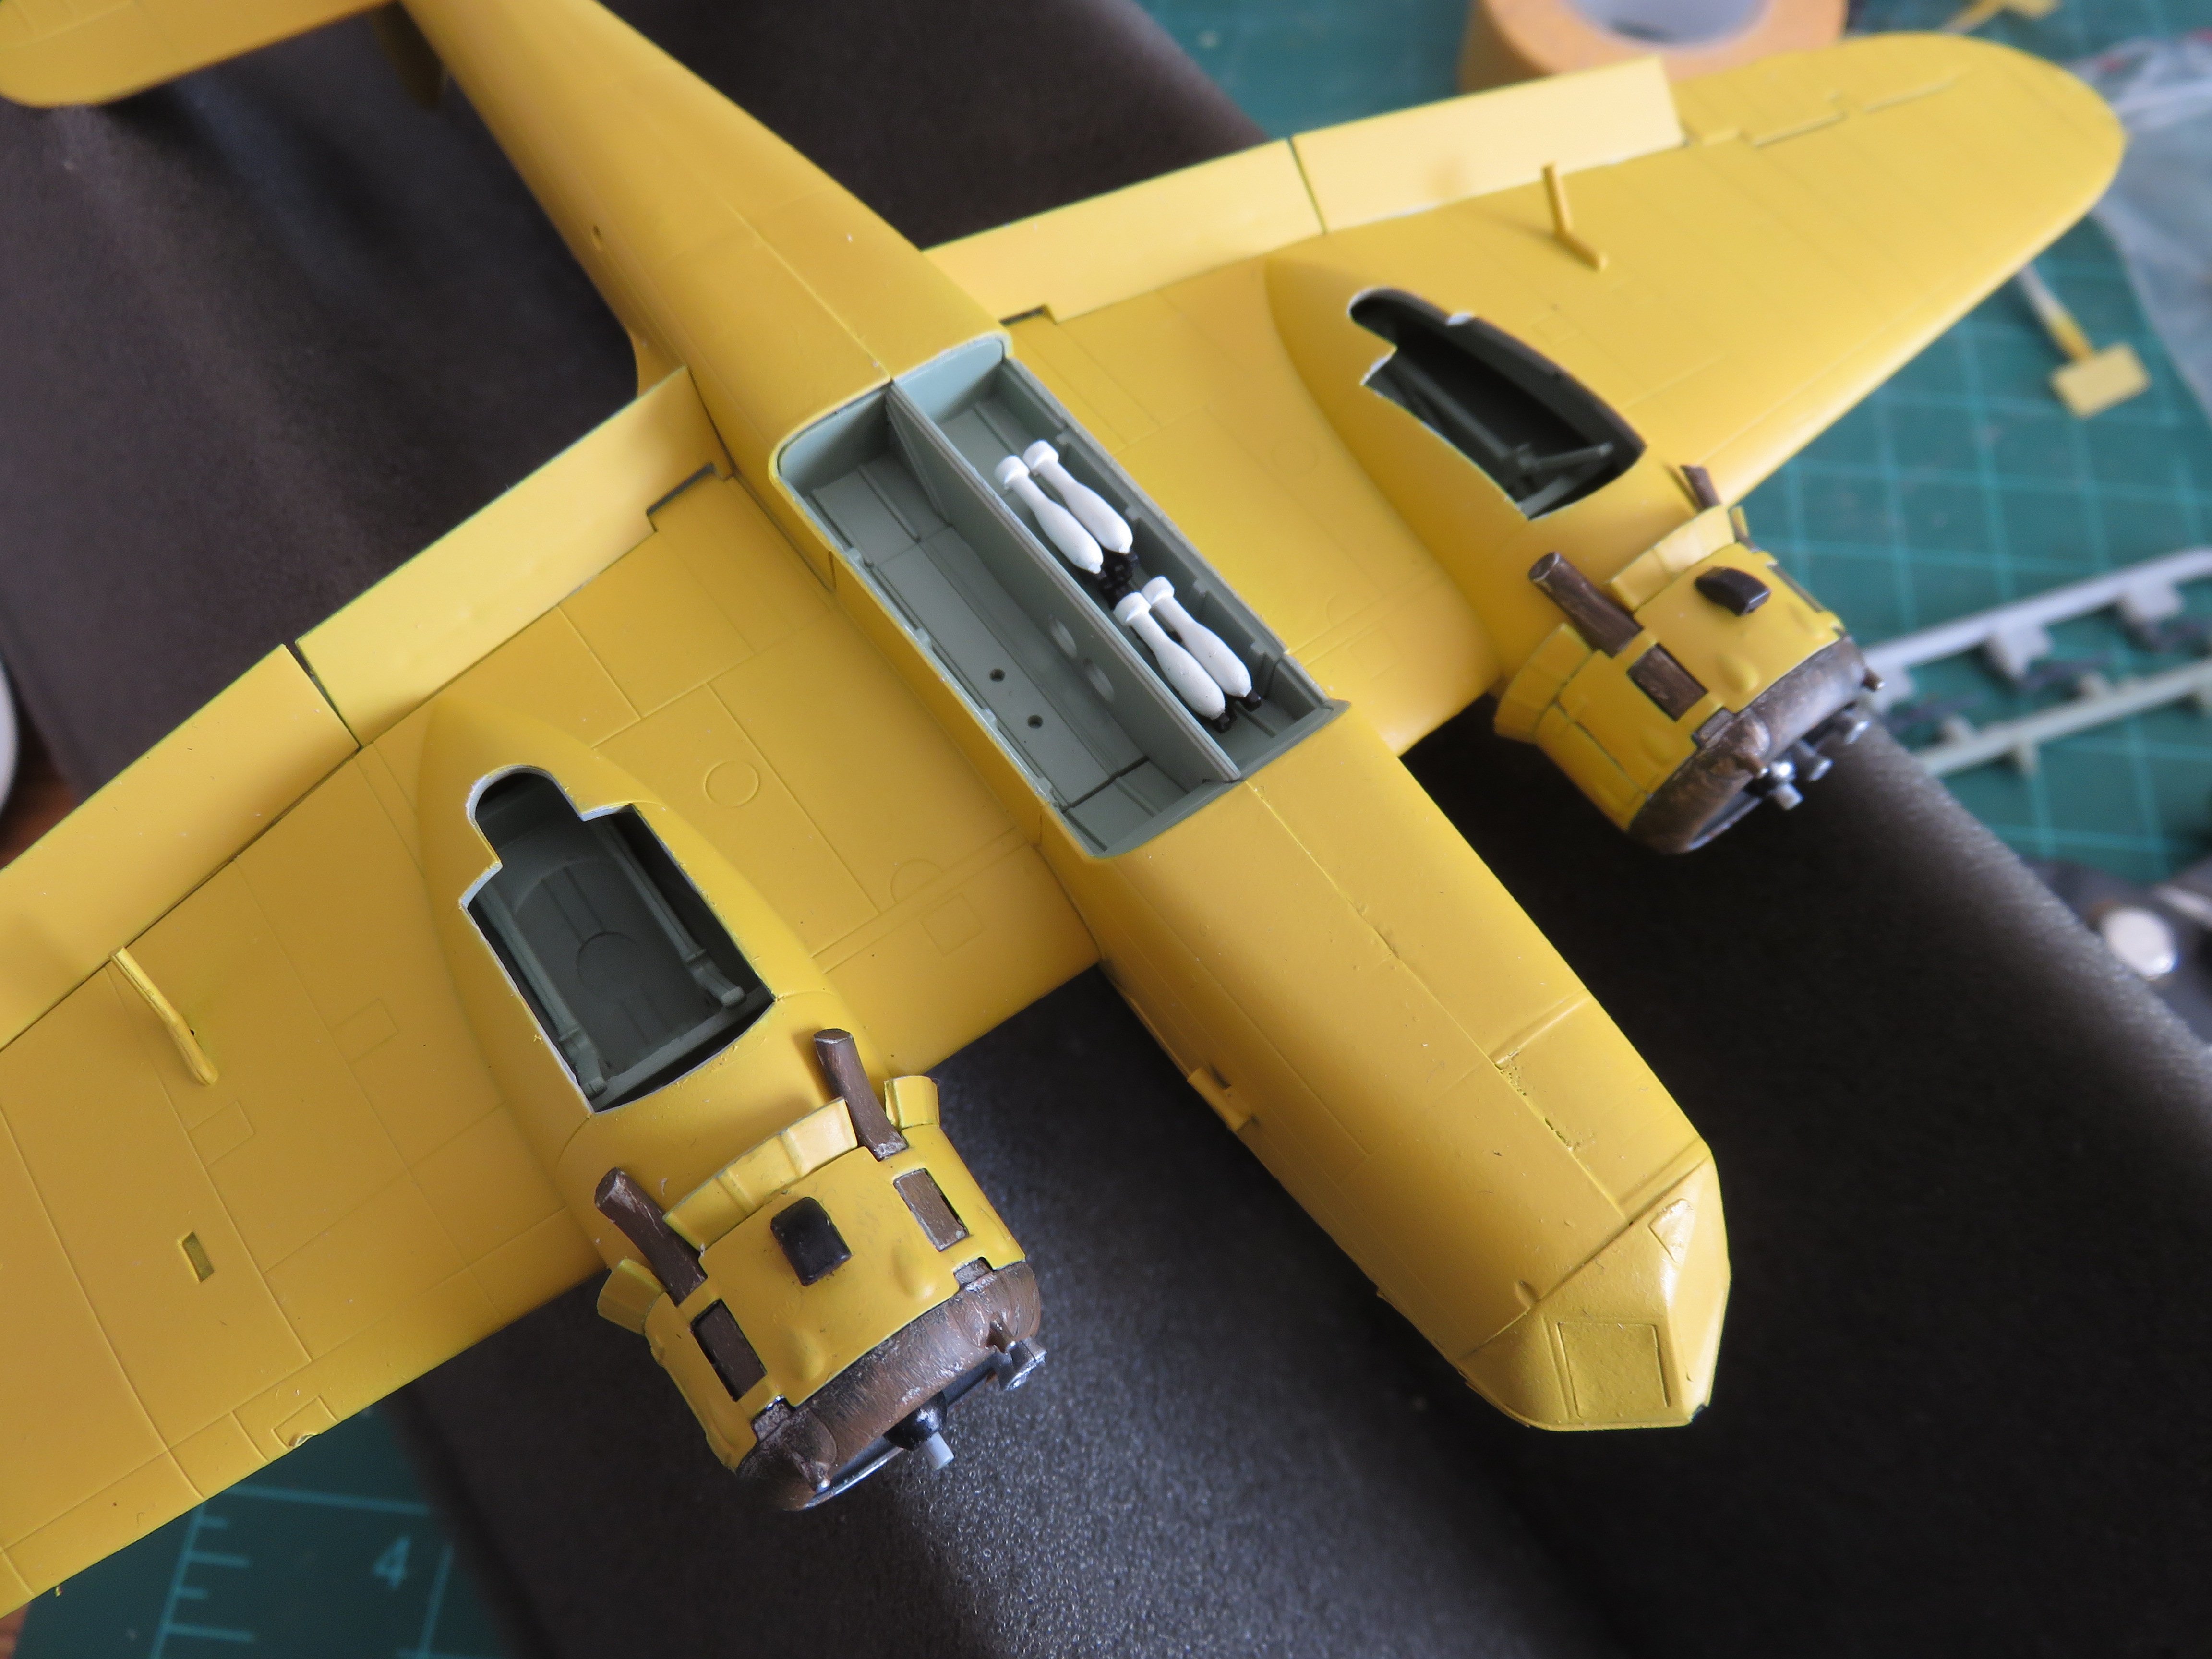
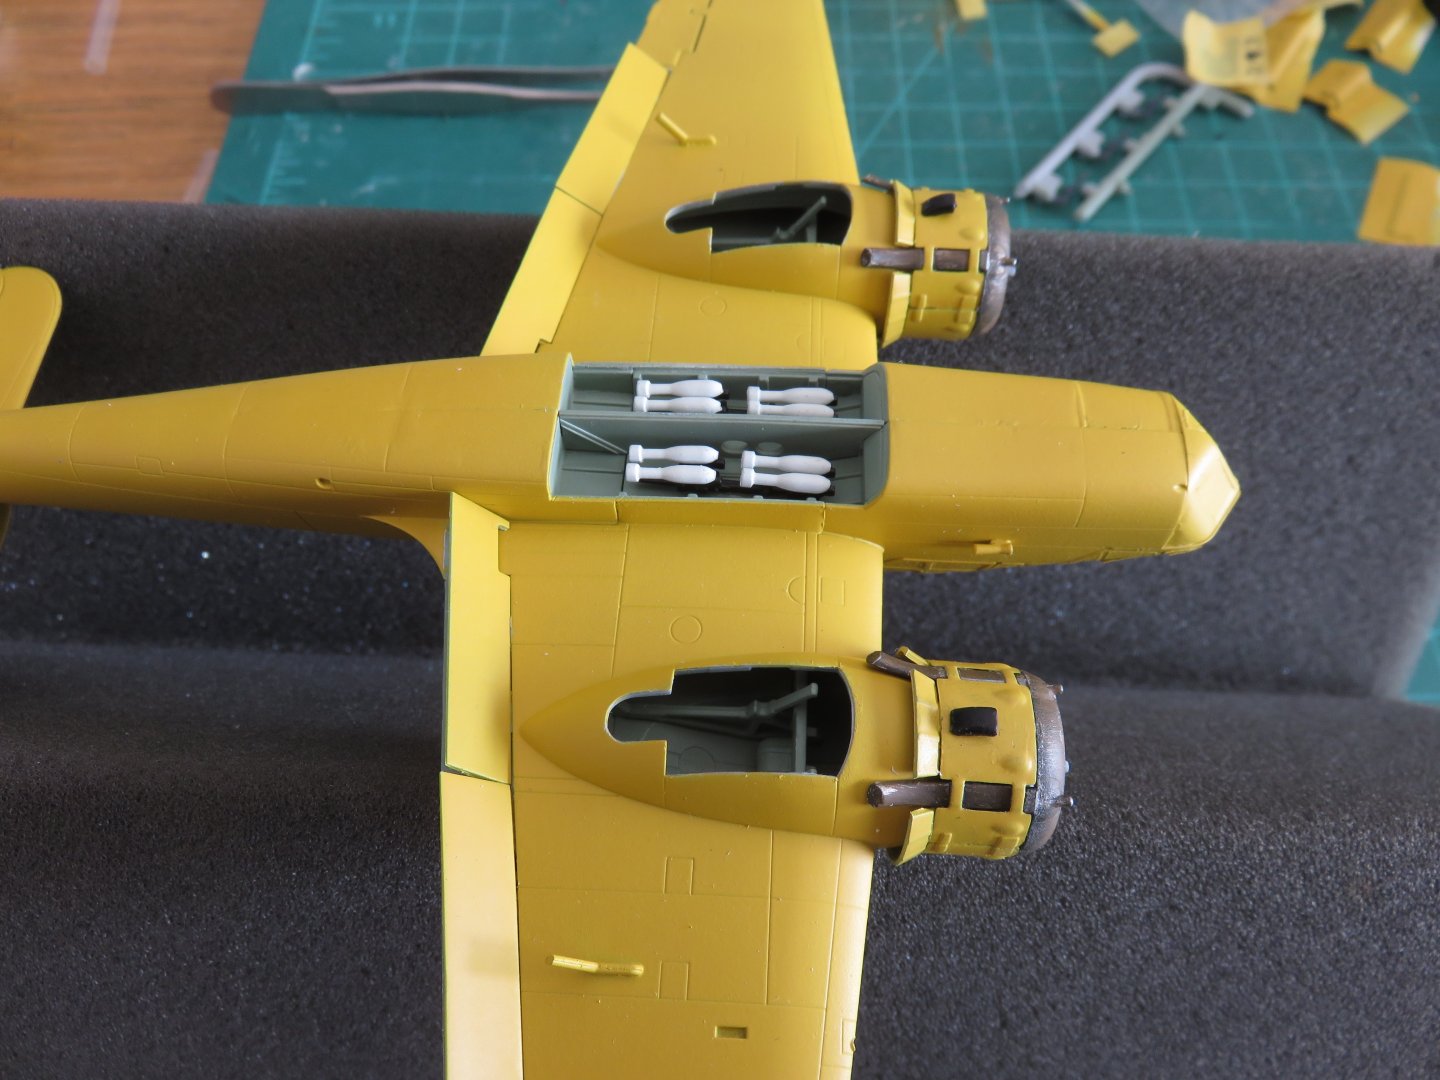
Thanks, as always, for all the "likes", everyone! My main hurdle over the last couple of days has been figuring out the loading for practice bombs used in Bolingbrokes. I was able to establish that they were painted white, so that's a start, but I was unable to determine how exactly they were loaded in the bomb bay, and how many. I was able to find some pictures of the loadings used on Fairey Battles and other airplanes used for training, so I used a bit of modellers license to come up with something that sort of looks plausible. The Airfix kit includes some small bomblets as well as a bracket that is meant to be attached to the fuselage behind the bomb bay (as on the model there is a gun pack in that space). I first cut the brackets in half, so that each would hold two bomblets in the bomb bay cells. I initially trialed just gluing these to the bomb bay, but the bombs seemed to be too far recessed. Looking at as many Bolingbroke prototype photos as I could find (especially photos of post war scrap piles of partially disassembled Bollys), it didn't look like there were any special modifications made to the roof of the bomb bay. Taking this as a hint, I then used the bomb rack that was included in the kit as part of the bomber variant, and mounted the half racks on those, before trial fitting in the bomb bay. I was much more pleased with this look. The bomblets are not too recessed into the bomb bay, and I think it makes for a plausible load out. Now glued in place, I think it will work well enough for me. Once everything has had a chance to cure and dry, a coat of gloss and then on to lettering this yellow bird. Thanks again for the support! Andy

- 33 replies
-
- 11
-
-
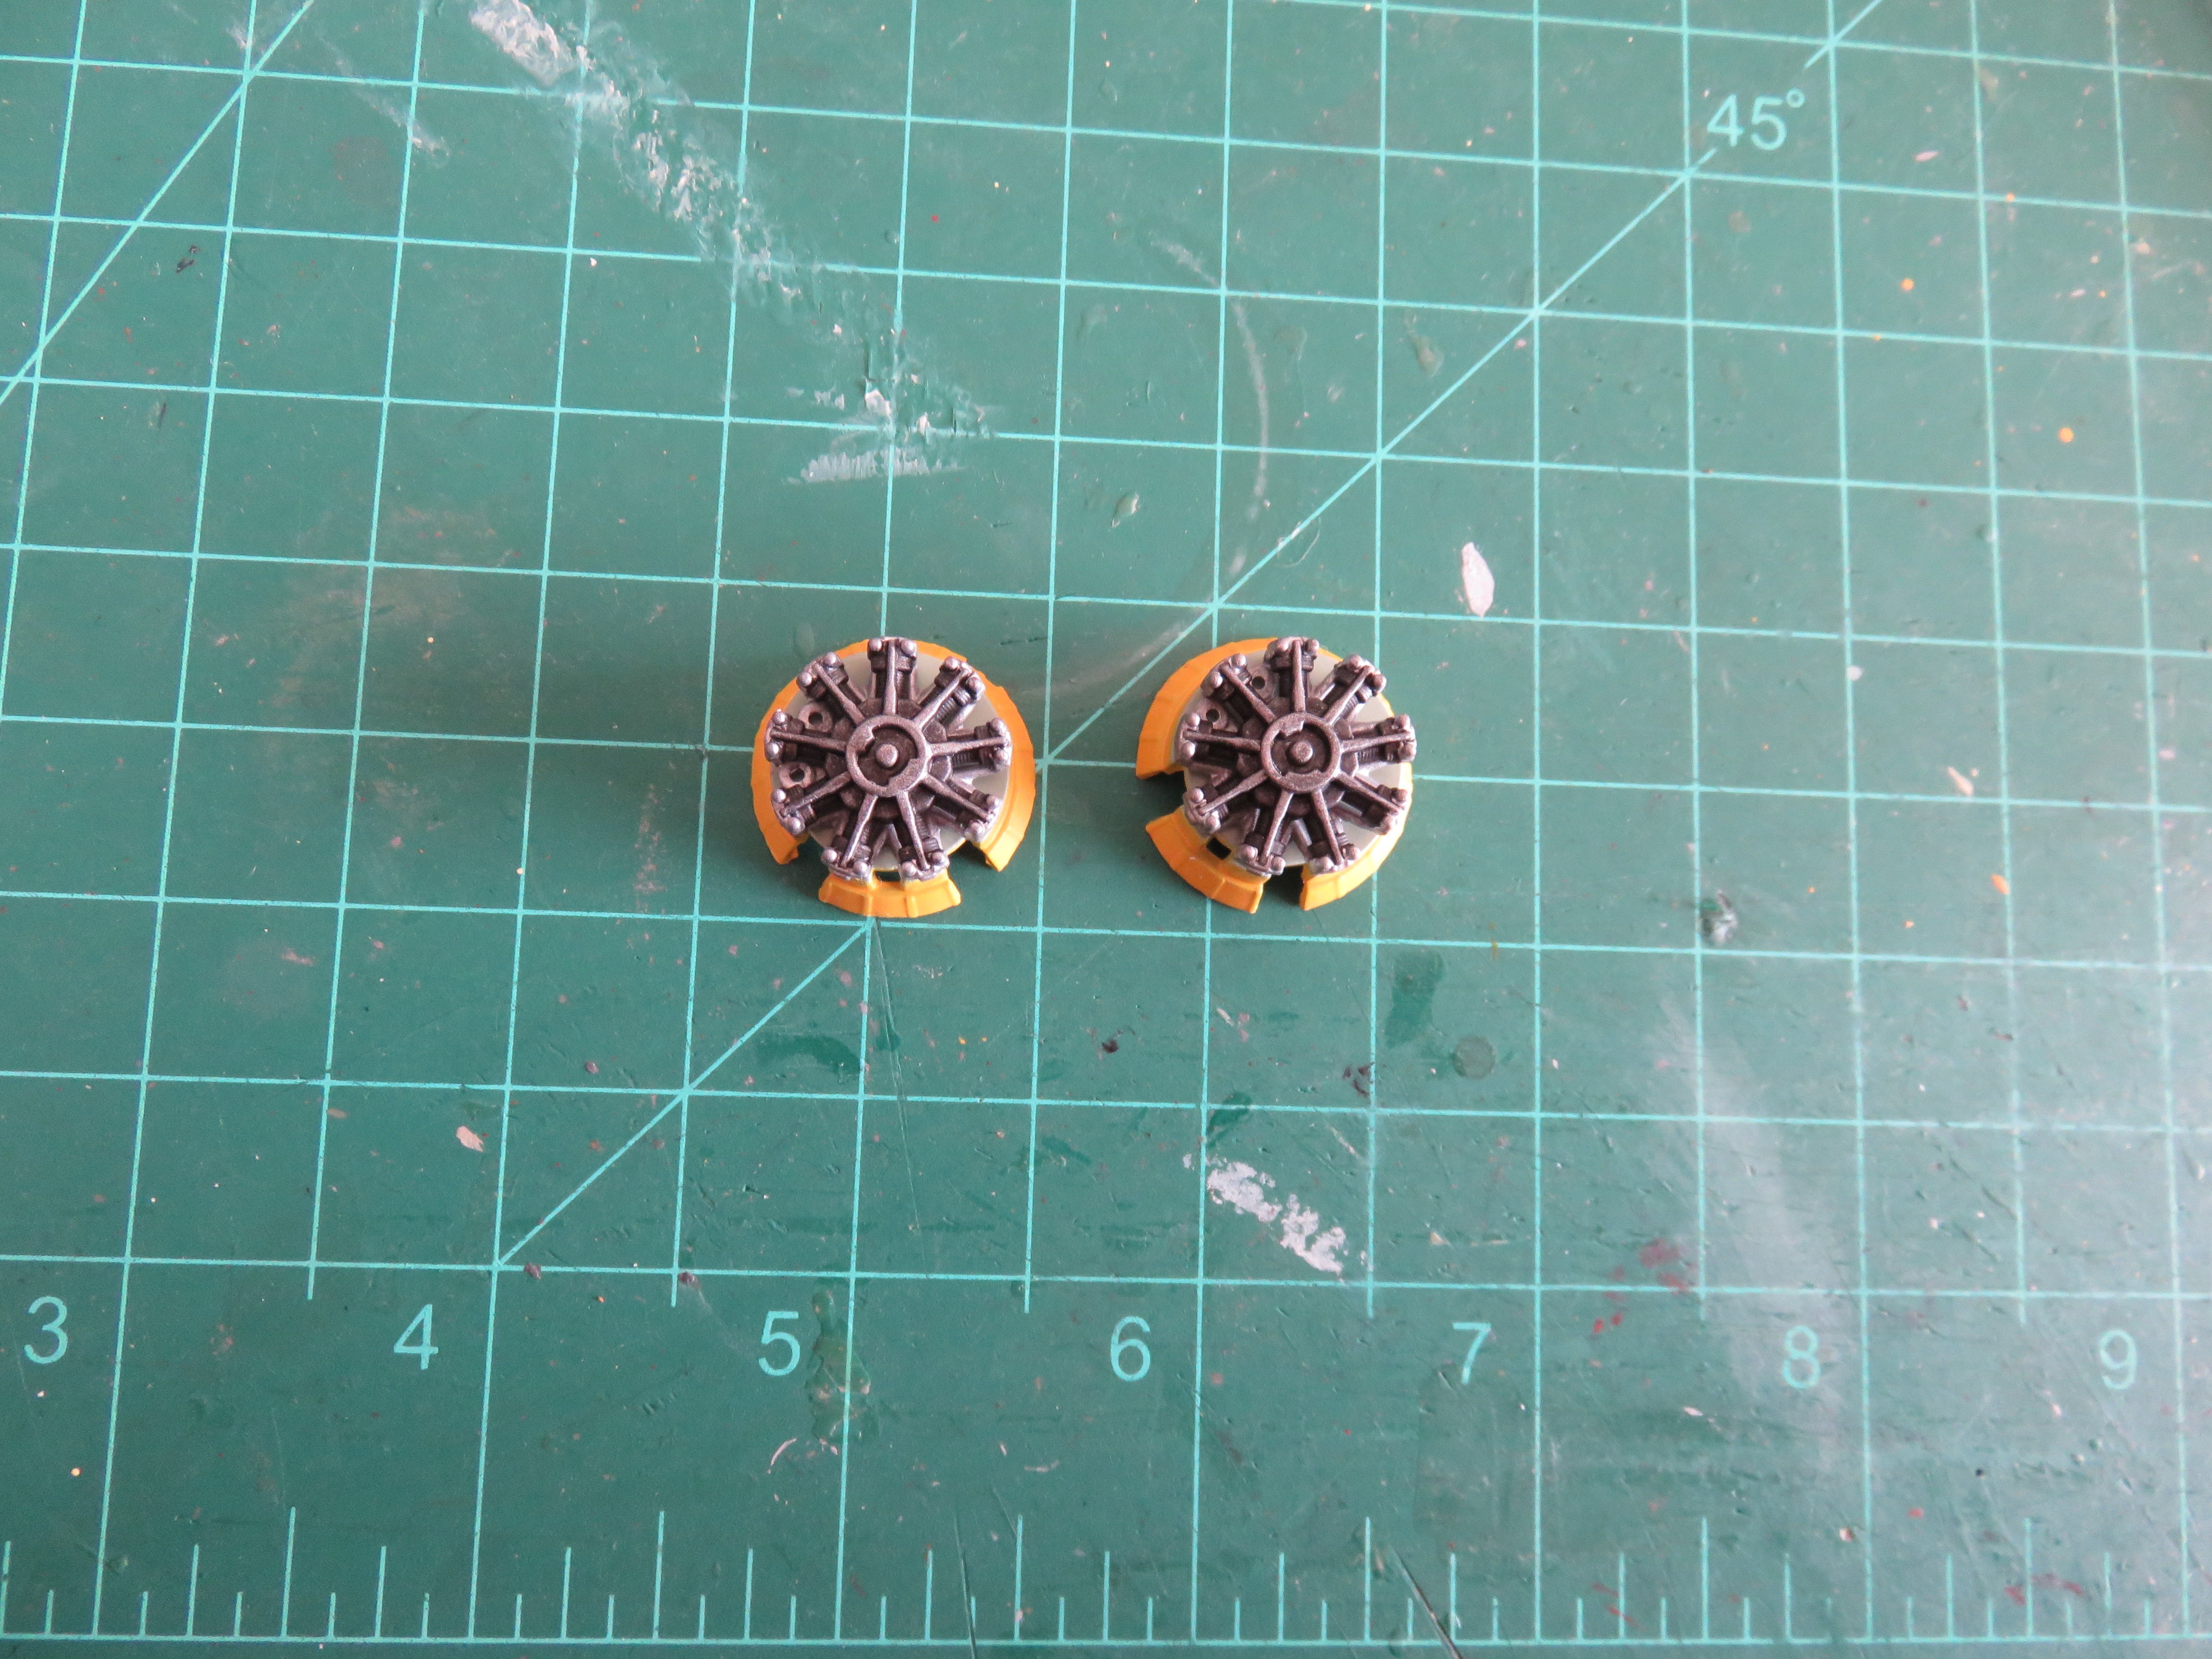
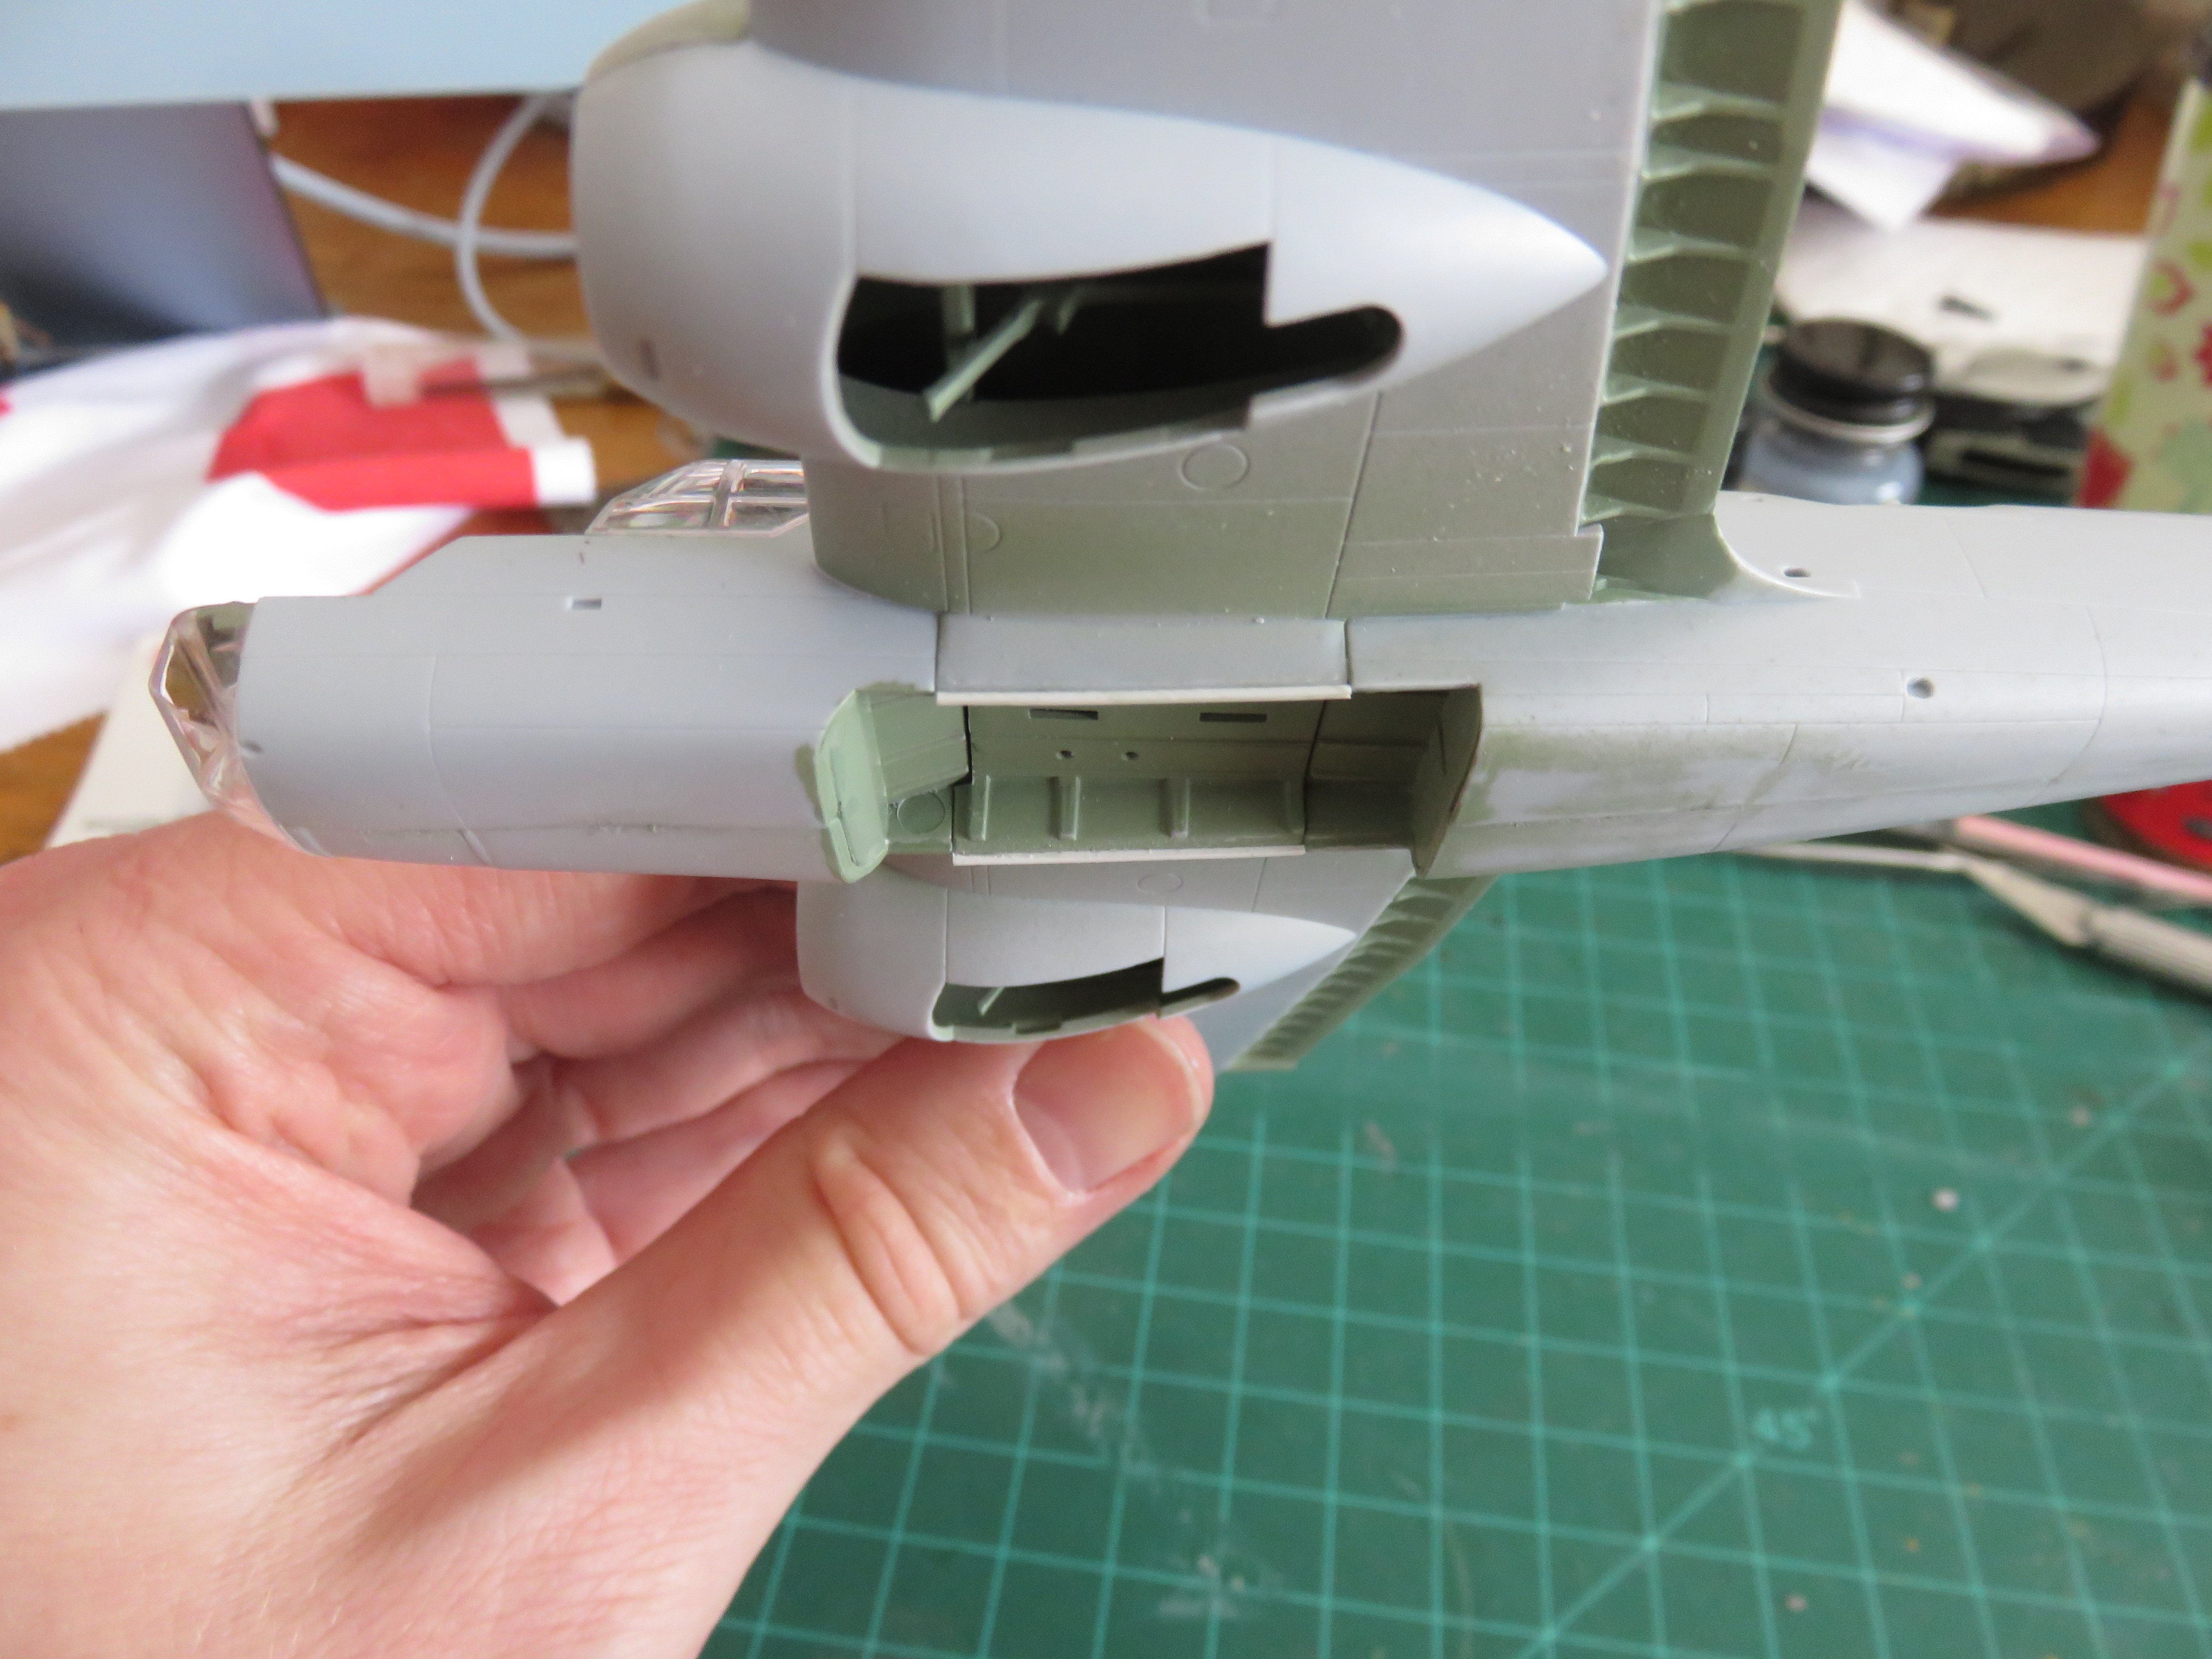
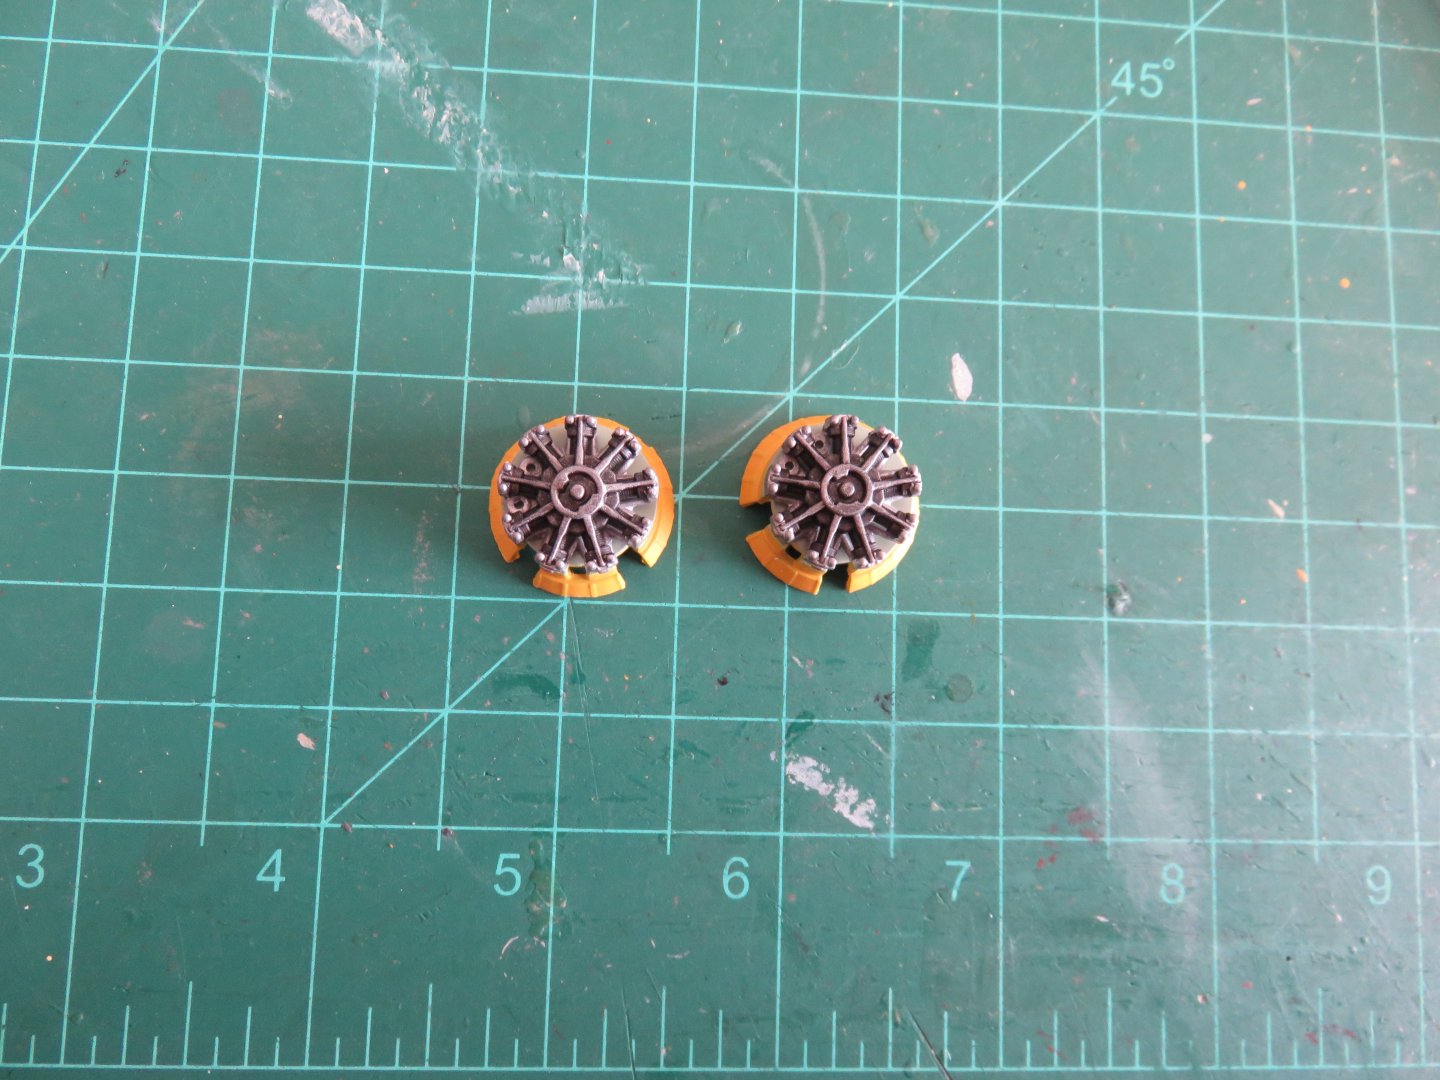
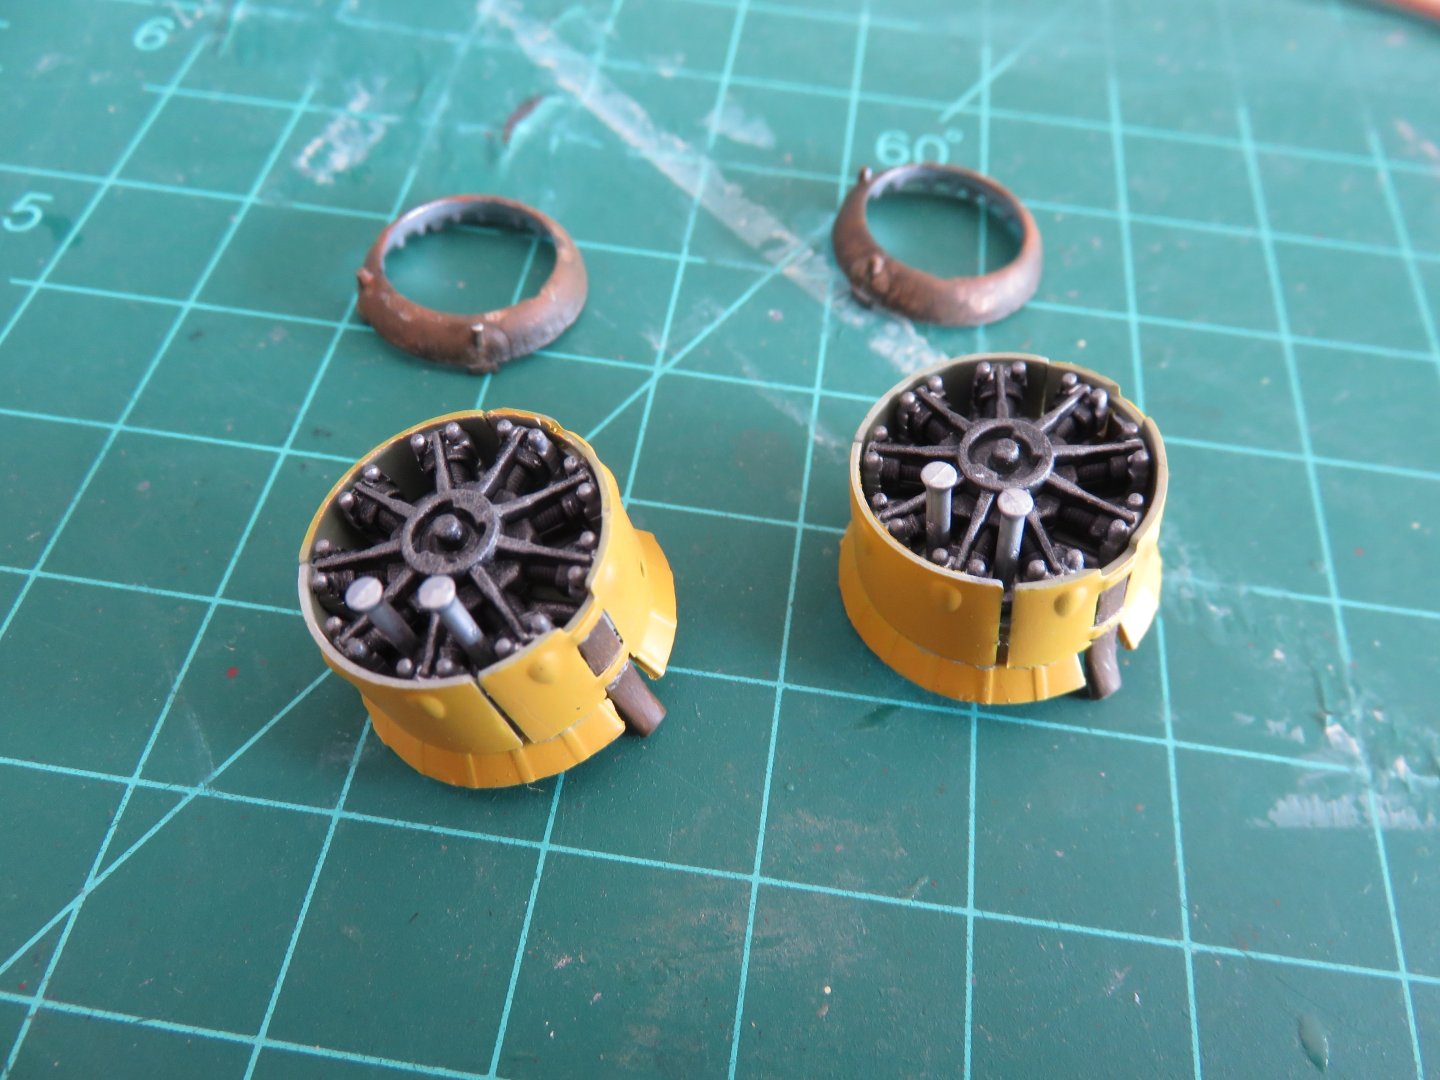
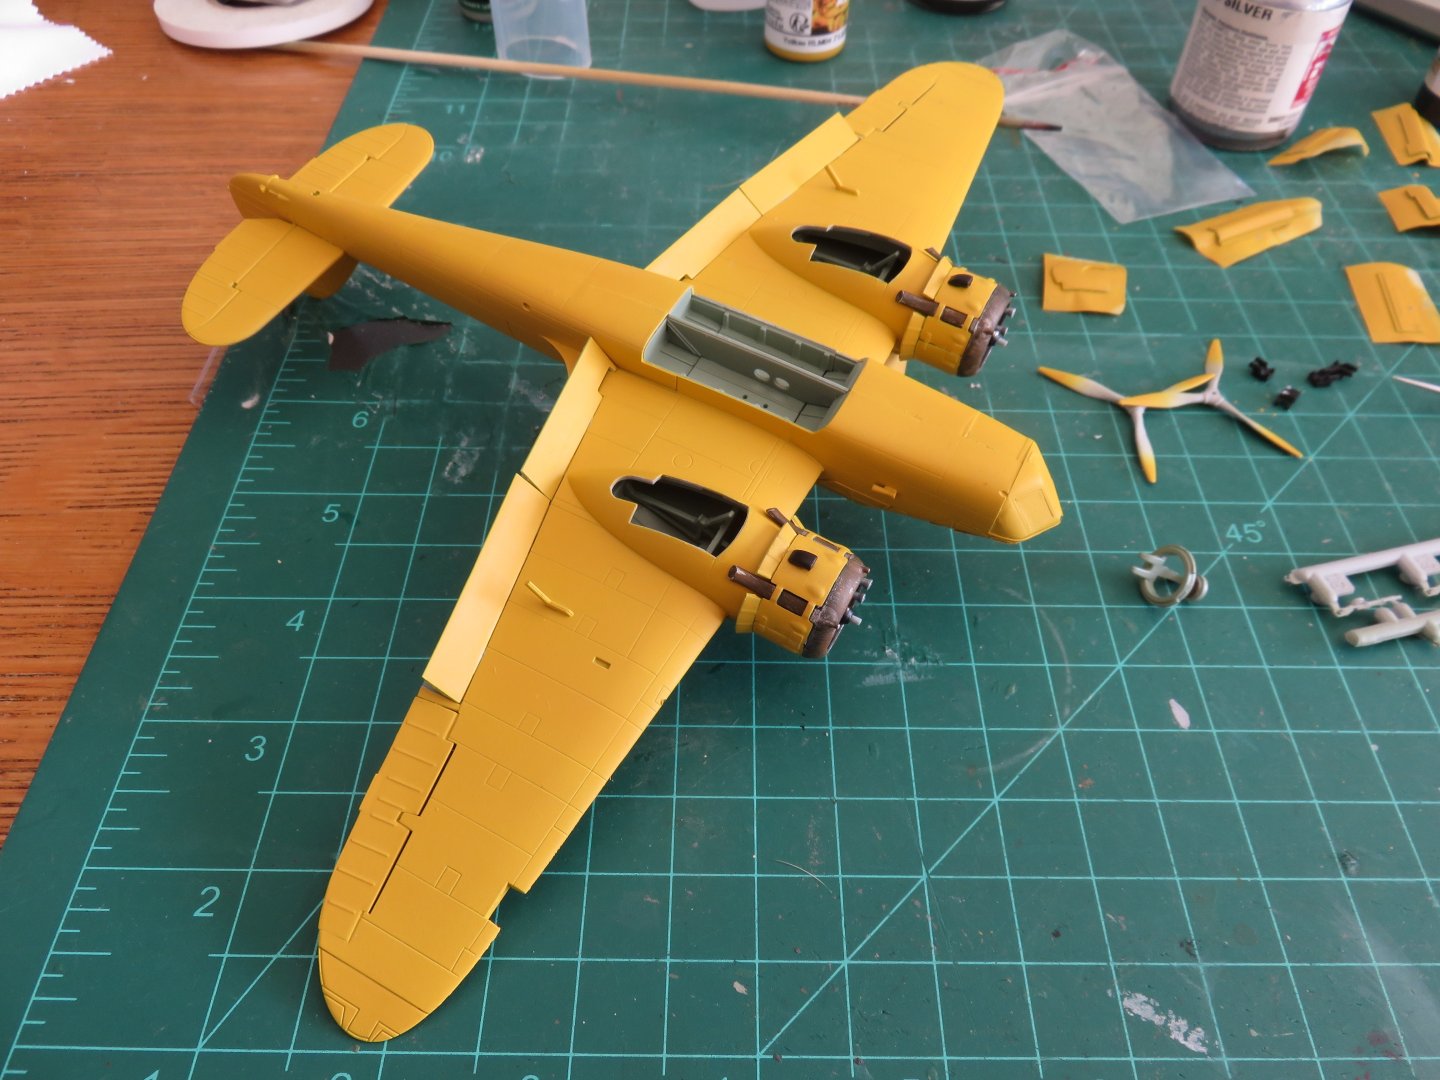
Good morning everyone! Time for another little update! I've spent the last few days working on the engines and cowlings. For the most part the engines are ok, detail wise. I painted the air intake ducts (behind the engines) silver, as opposed to the black called for in the instructions. I dulled this down with some dry brushed Humbrol gunmetal. The engines were painted black and the cylinder heads picked out in silver. I then dry brushed again with gunmetal to highlight the details and dull down the heads a bit. More fit issues cropped up with the cowlings 🙄 Unlike for my Beaufighter build, I couldn't hide the gap under an exhaust pipe. I had to carefully fit a bit of 0.020" square styrene stock to fill the gaps and paint accordingly. It's far from perfect but it will do. The exhaust collector rings and pipes were first painted silver, then dry brushed black, followed by a dry brushing of Floquil rust. I'm planing on drilling out the ends of the oil cooler intakes to make them look a little better. In the mean time, the engines have been mounted on the airplane. Before prepping the plane for decals, I am aiming to also do some work on the bomb bay. As of now I have the central bomb beam in place. I am planing on using the small bomblets included in the kit to represent a load of practice bombs. I'm currently hunting for any photos that may show how these were mounted. I'm thinking of just using the kit supplied exterior mounts and modifying them to fit. We shall see. Thanks again for the kind comments and likes! Andy

- 33 replies
-
- 10
-
-
-
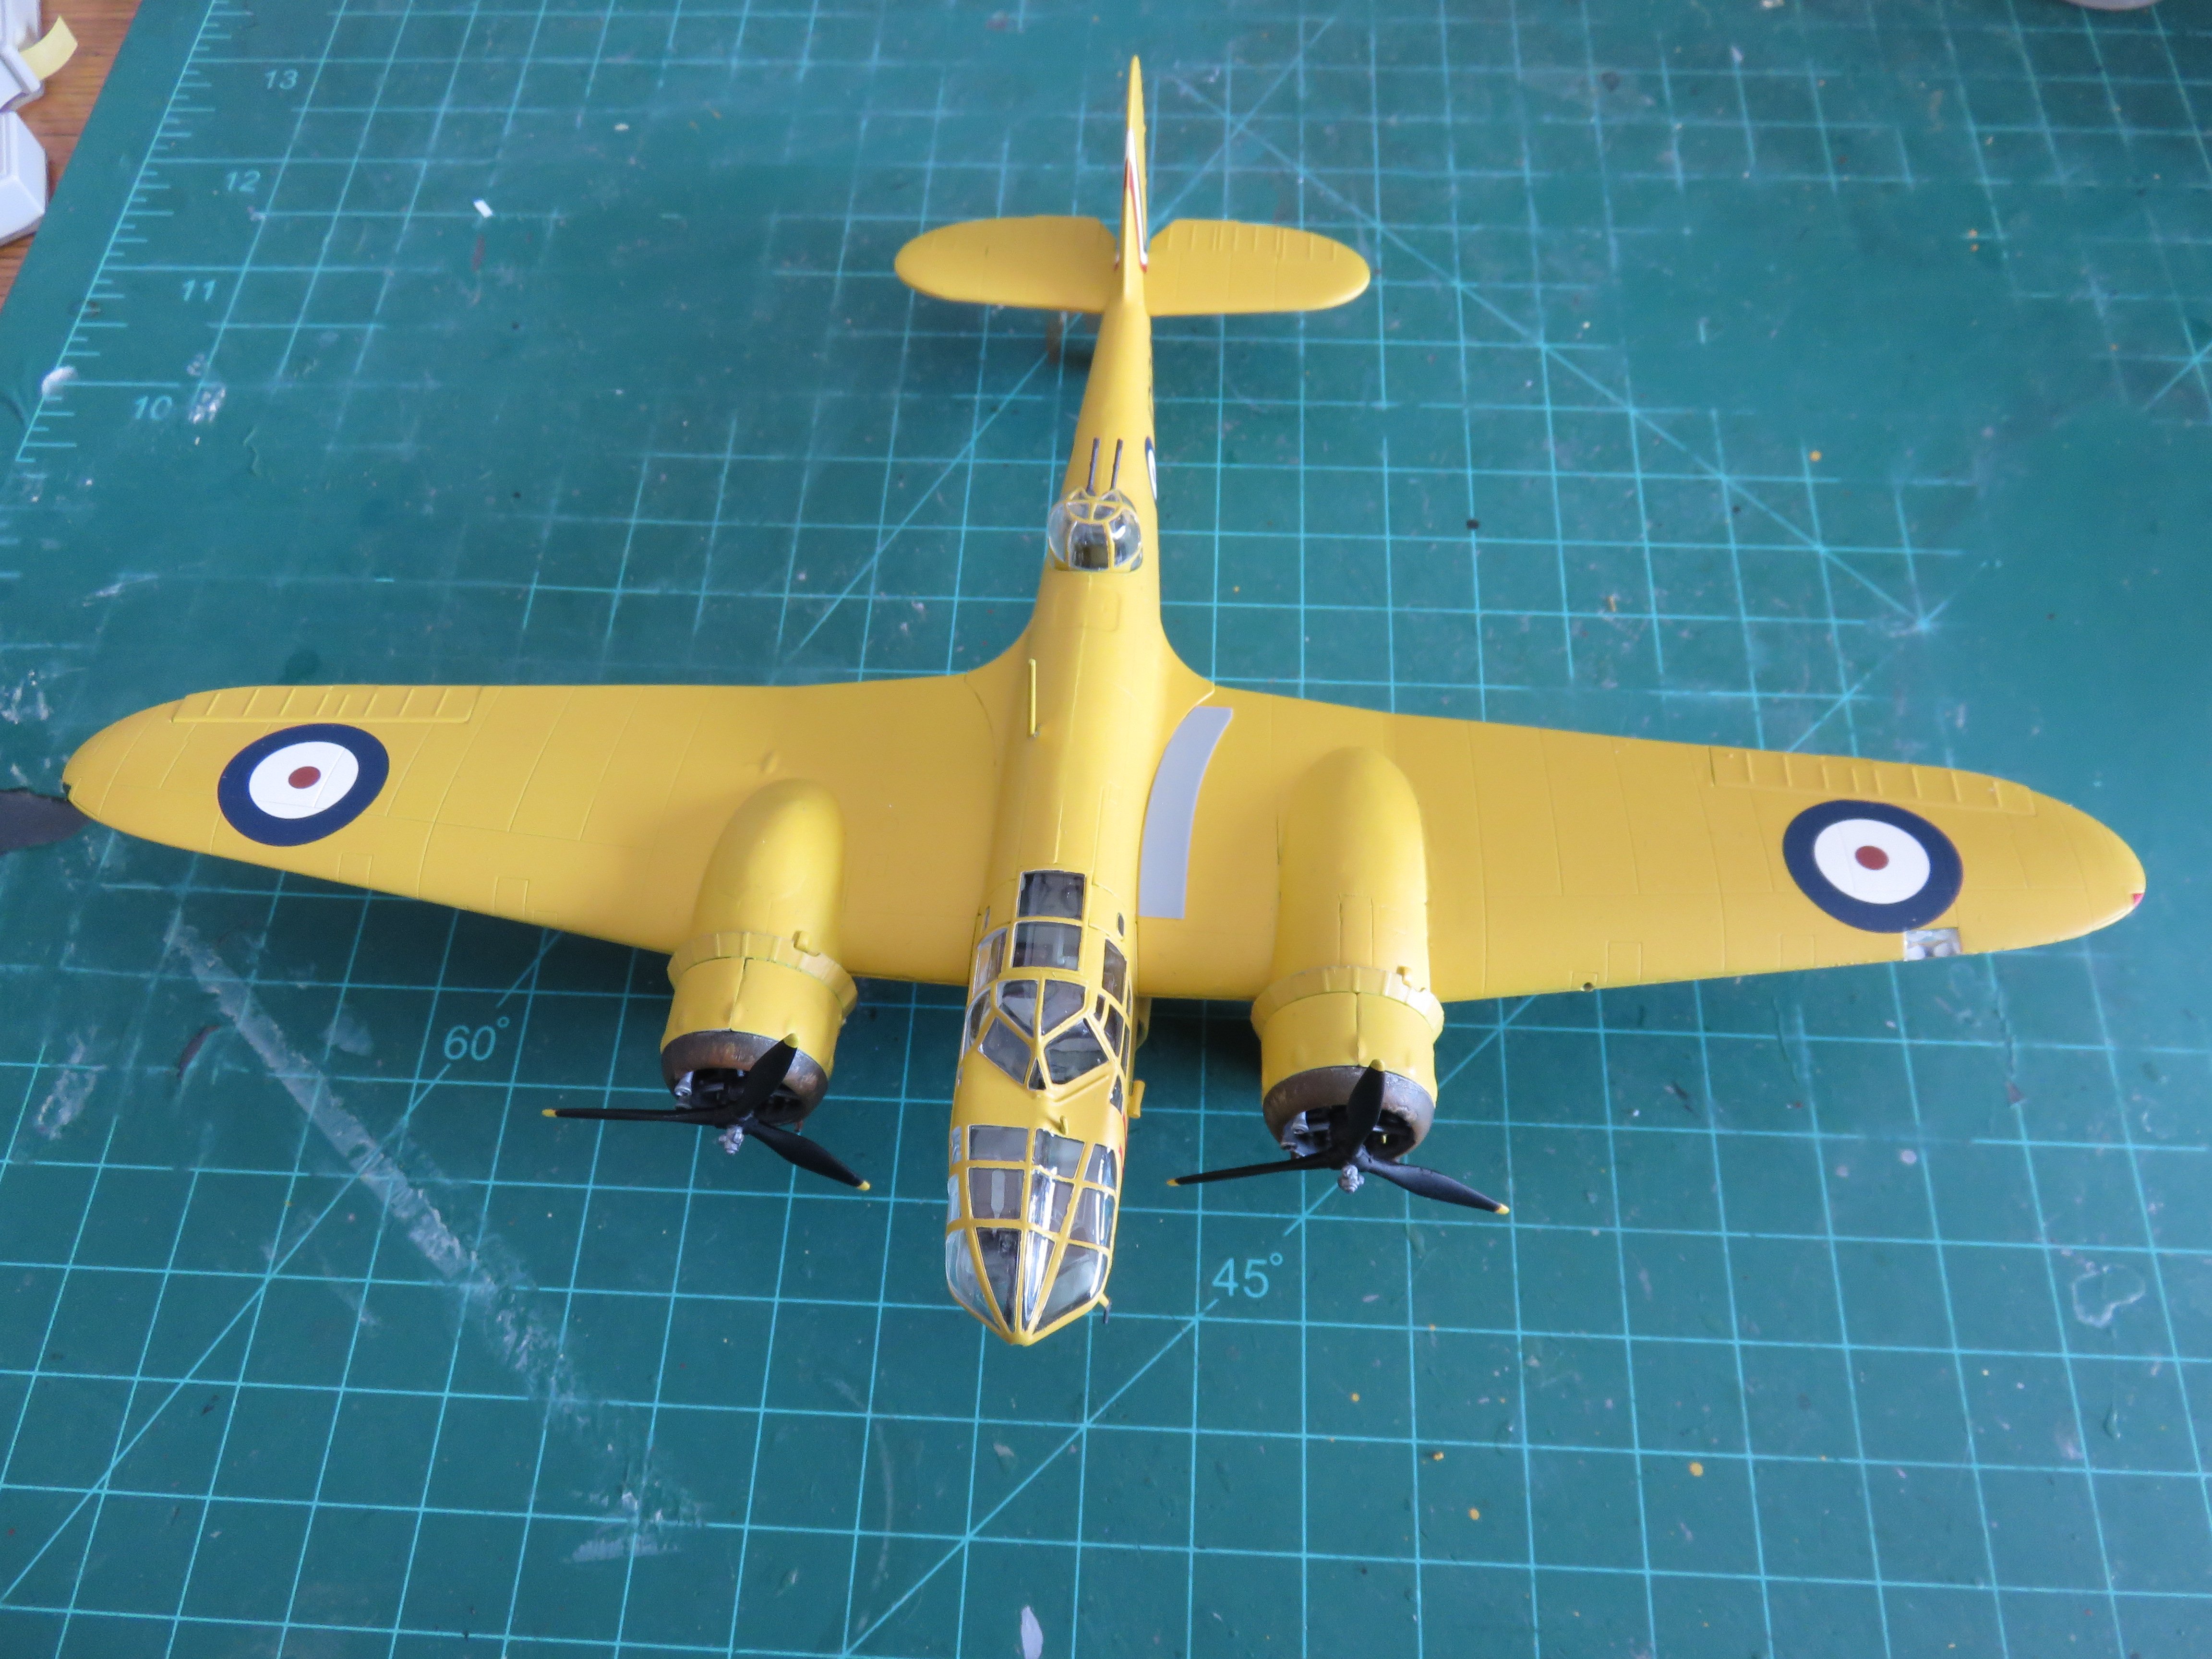
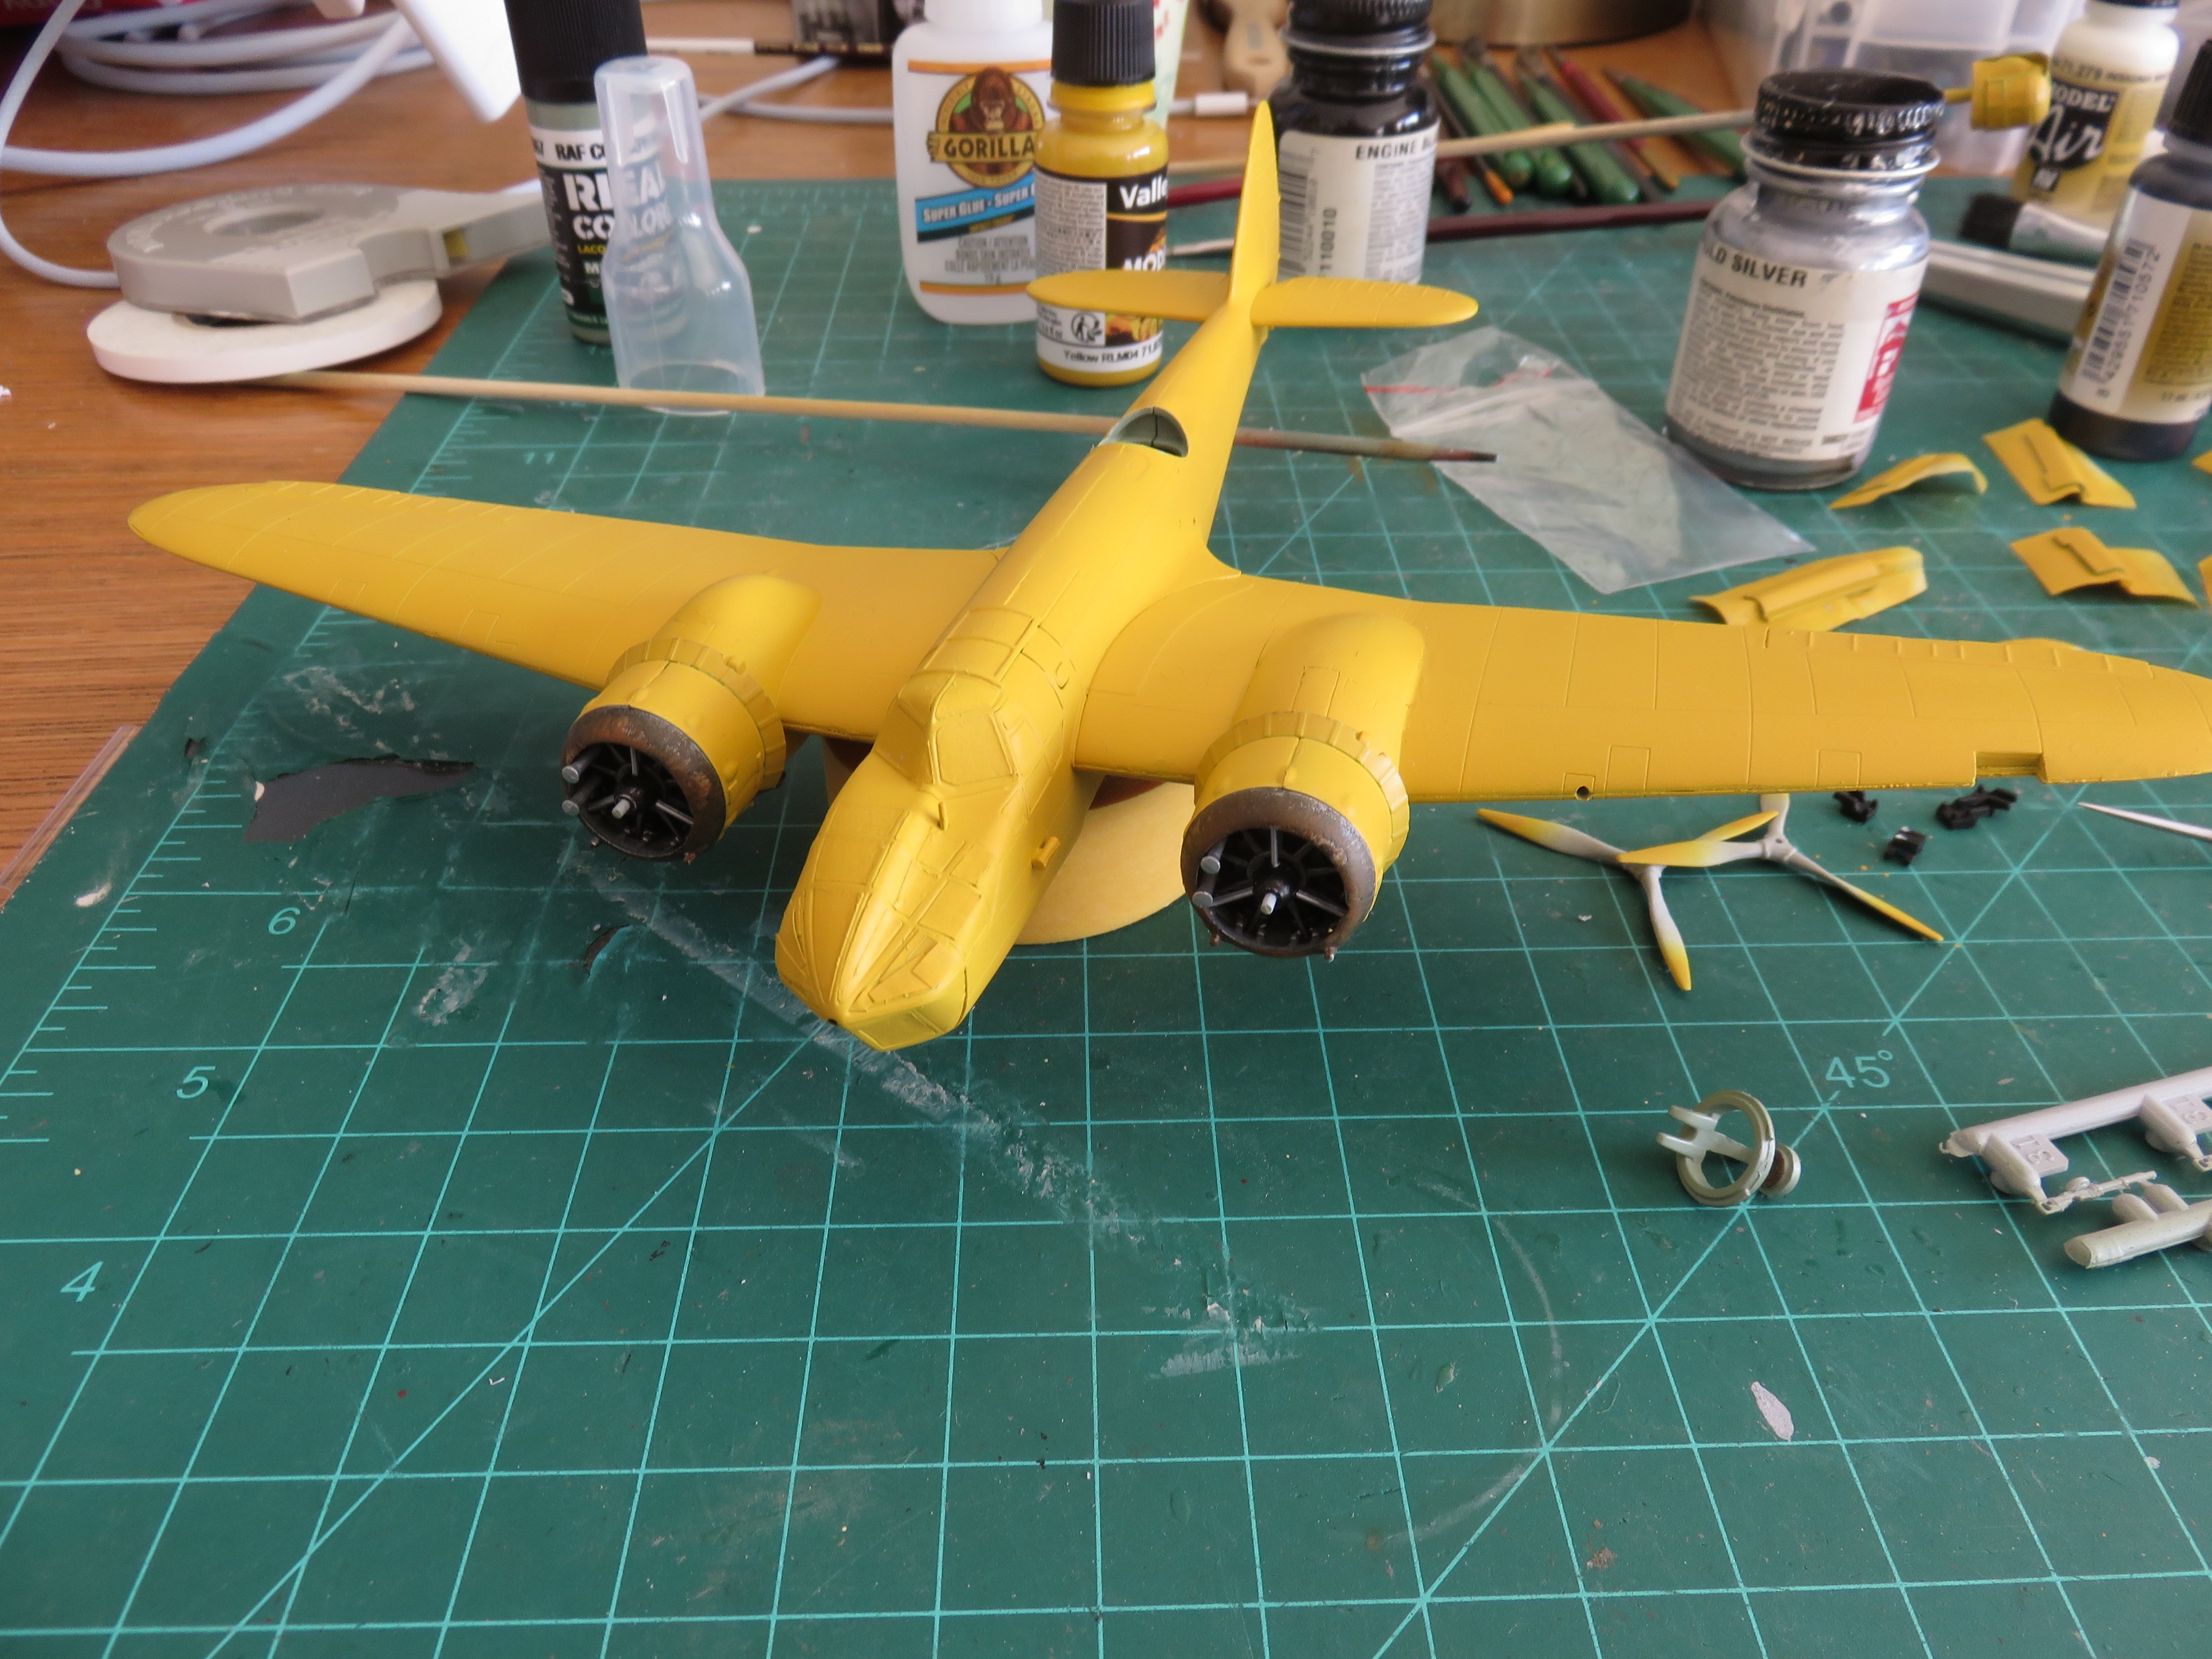
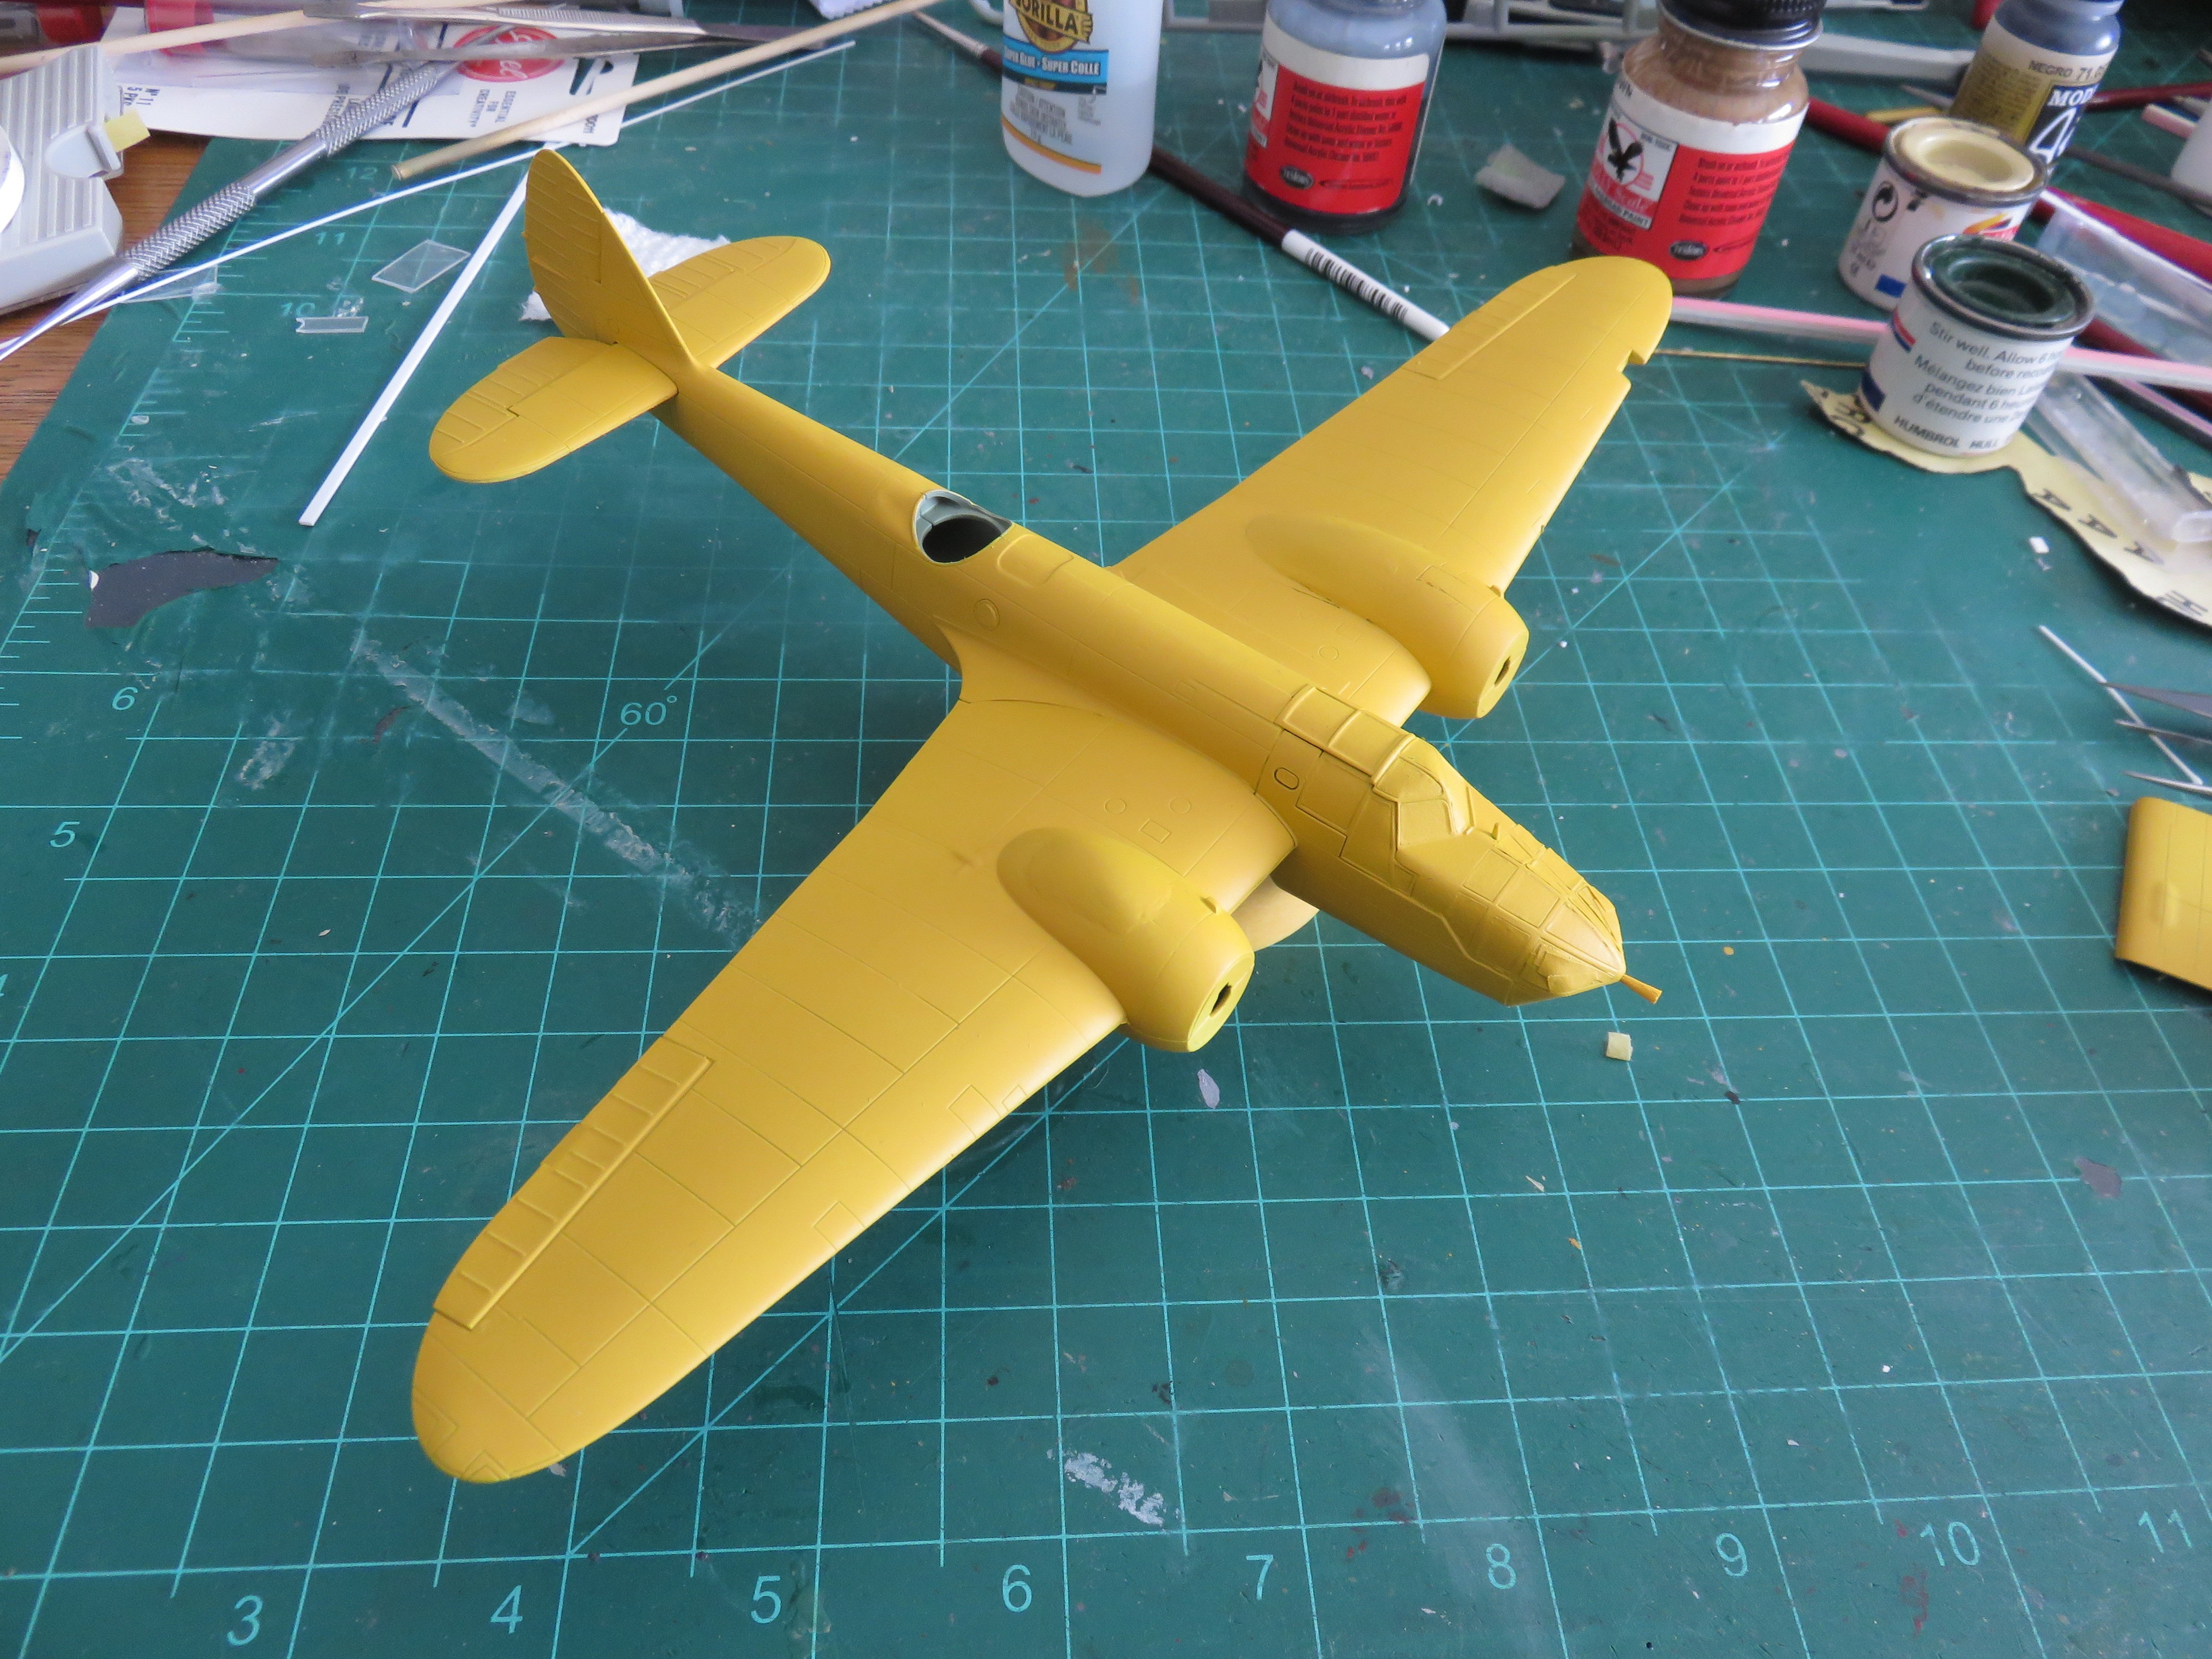
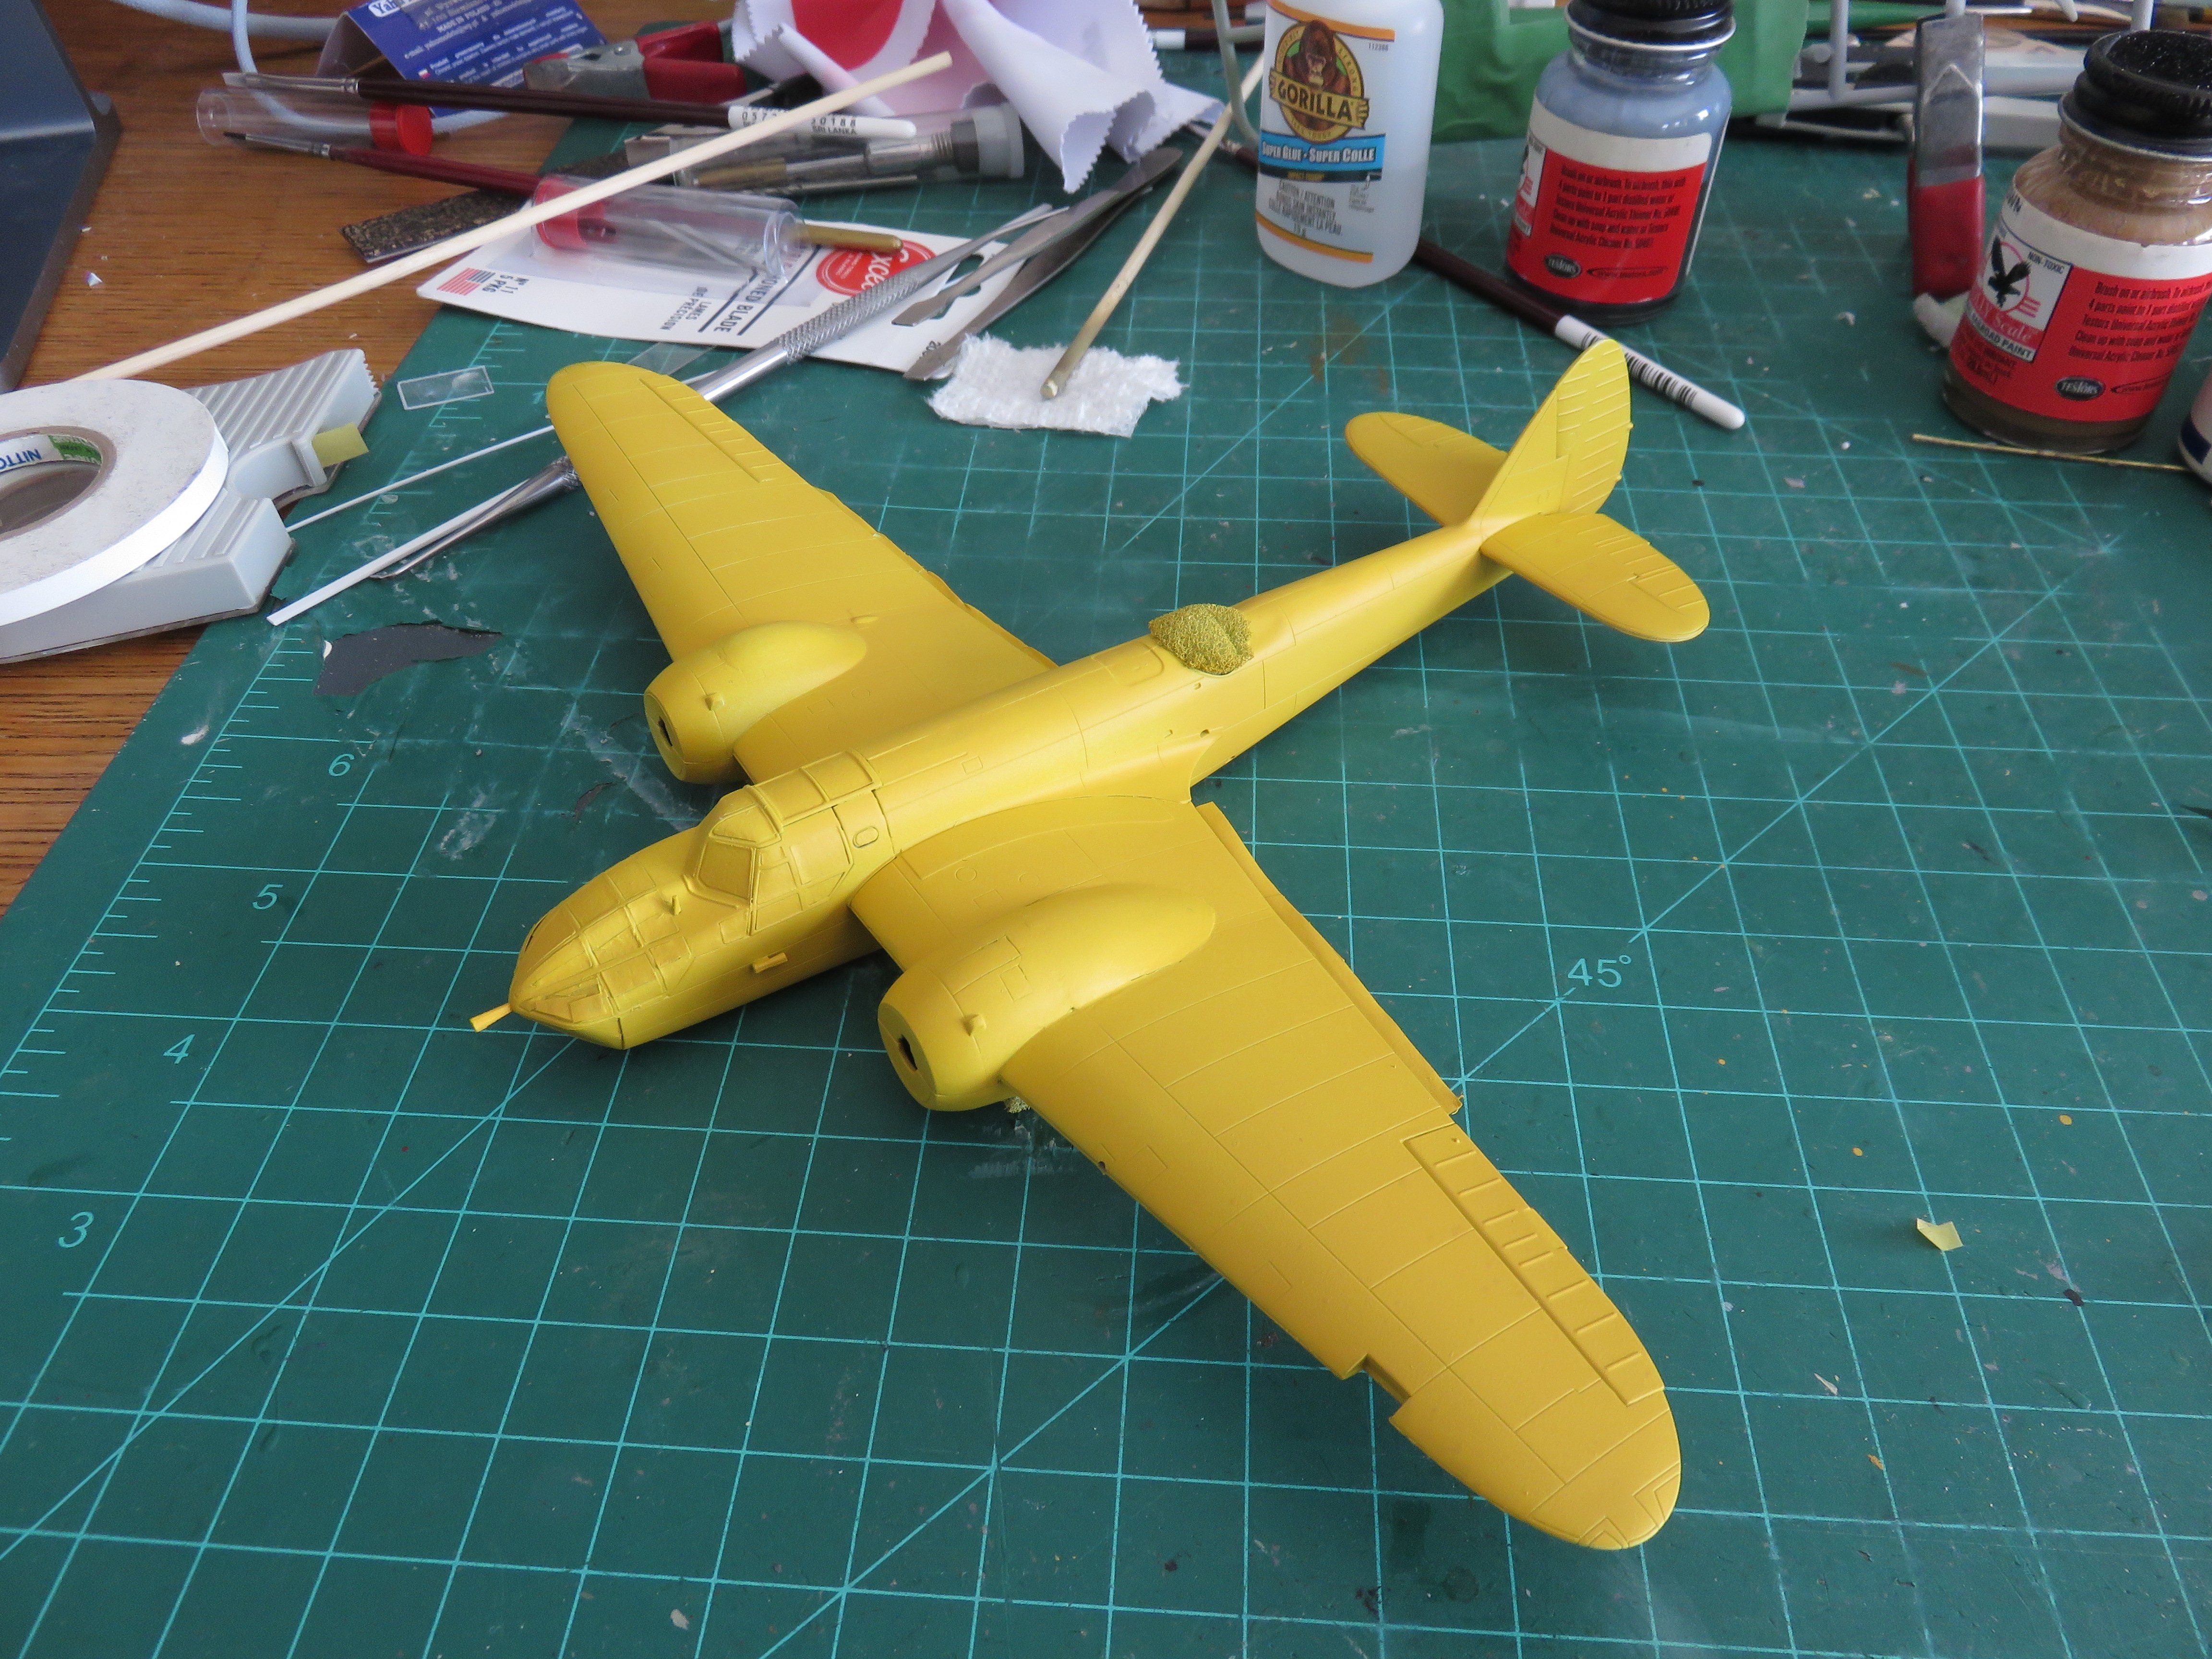
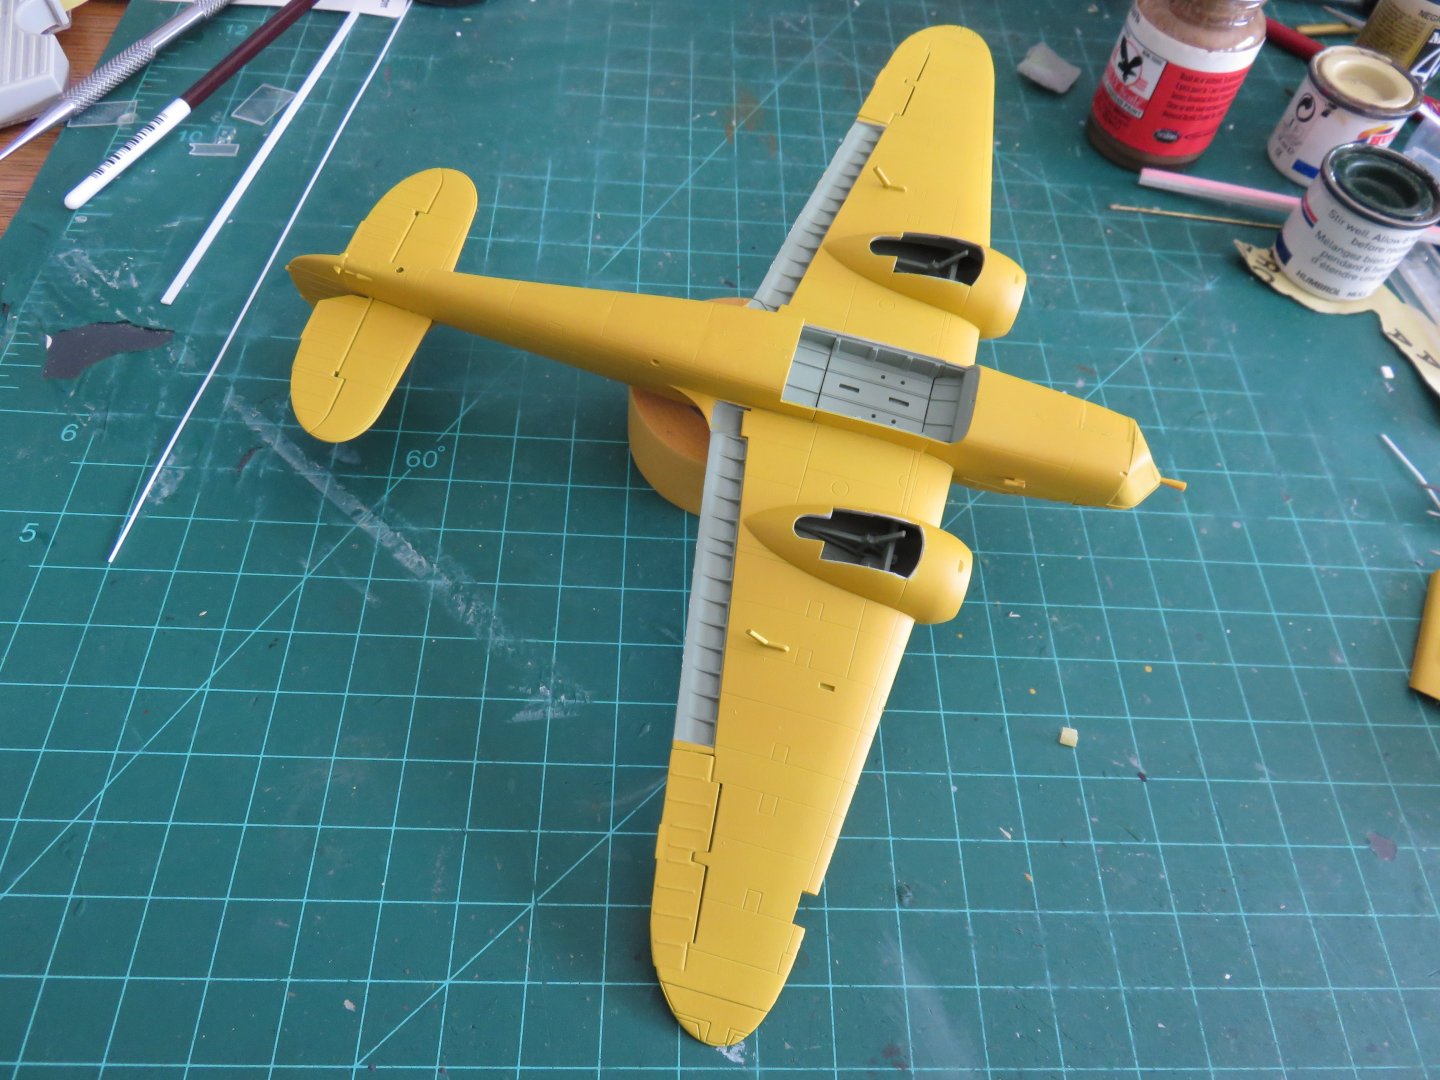
Thanks Andrew! I think there's a very good reason I can't seem to find many models of trainers, yellow is definitely not for the faint hearted! Well, two coats seems to have done it reasonably well enough! Some little tiny bits of touch up here and there, but nothing major! She's a yellow bird! (Can you tell me how to get......) The second coat went a long way to smoothing out the variations in the first coat. I will be modelling this bird with the flaps down and bomb bay open, if only to add a little variety to the overall yellow paint scheme. Thanks, as always, to all the kind comments and likes! Andy

- 33 replies
-
- 10
-
-
-
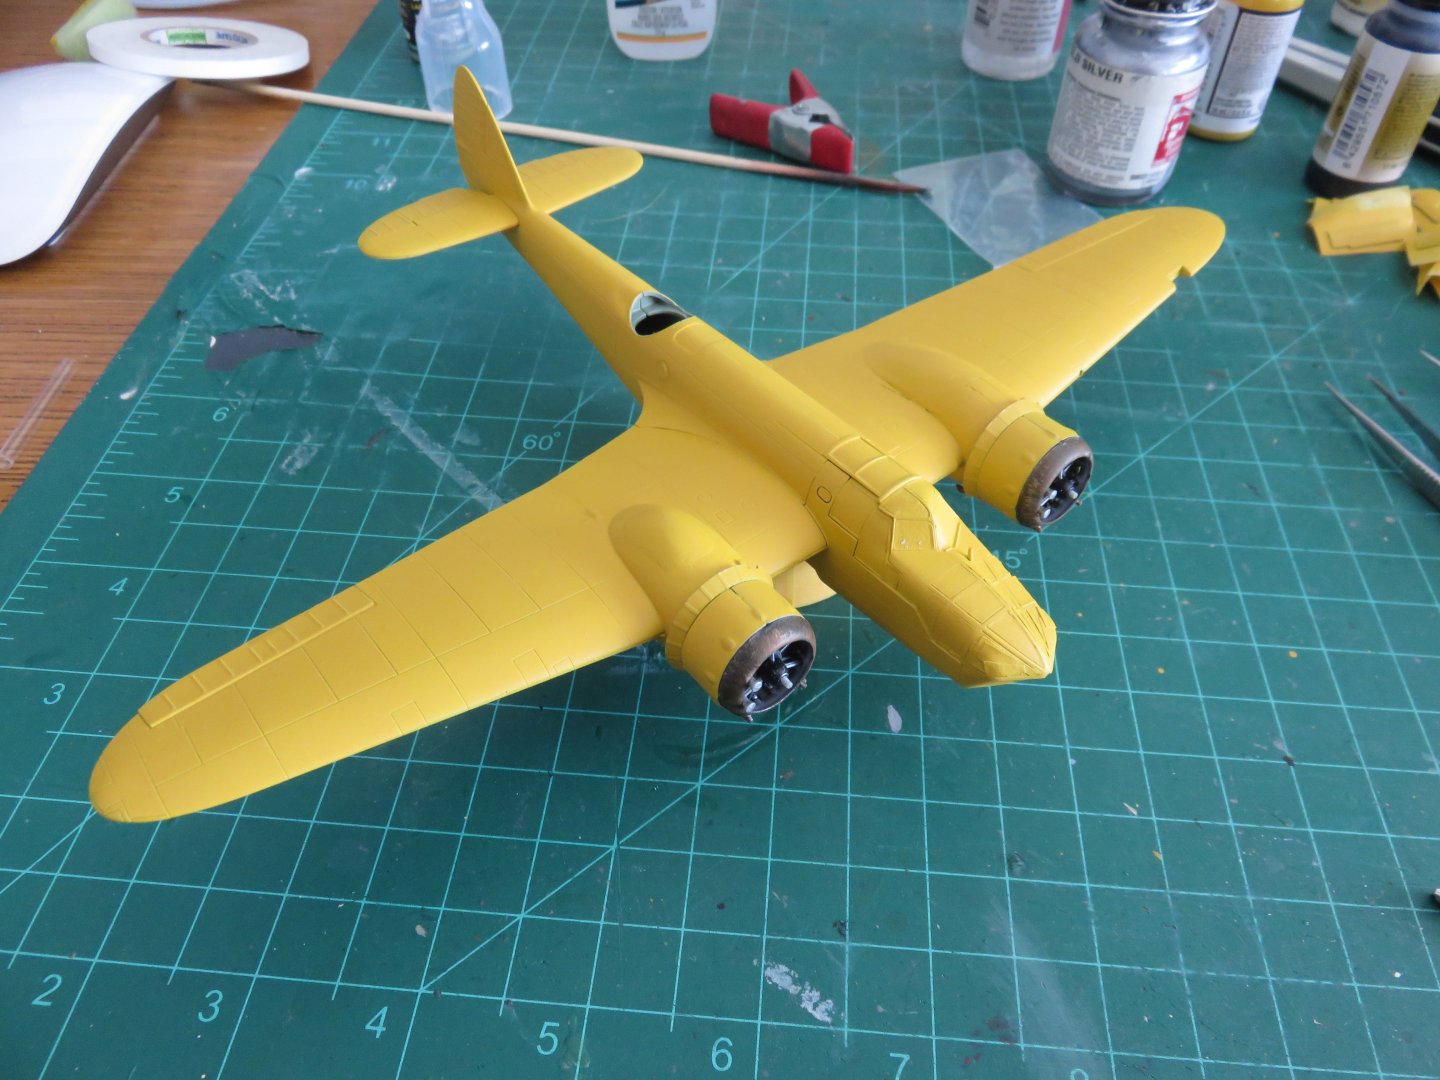
First coat of yellow: Not bad. A little blotchy, but the white seems to have done its job. I was prepared for far worse than this. A second coat should go a long ways to evening things out, otherwise I'm happy with progress so far. Thanks for all the support and kind comments and "likes"! Andy


- 33 replies
-
- 12
-
-
-
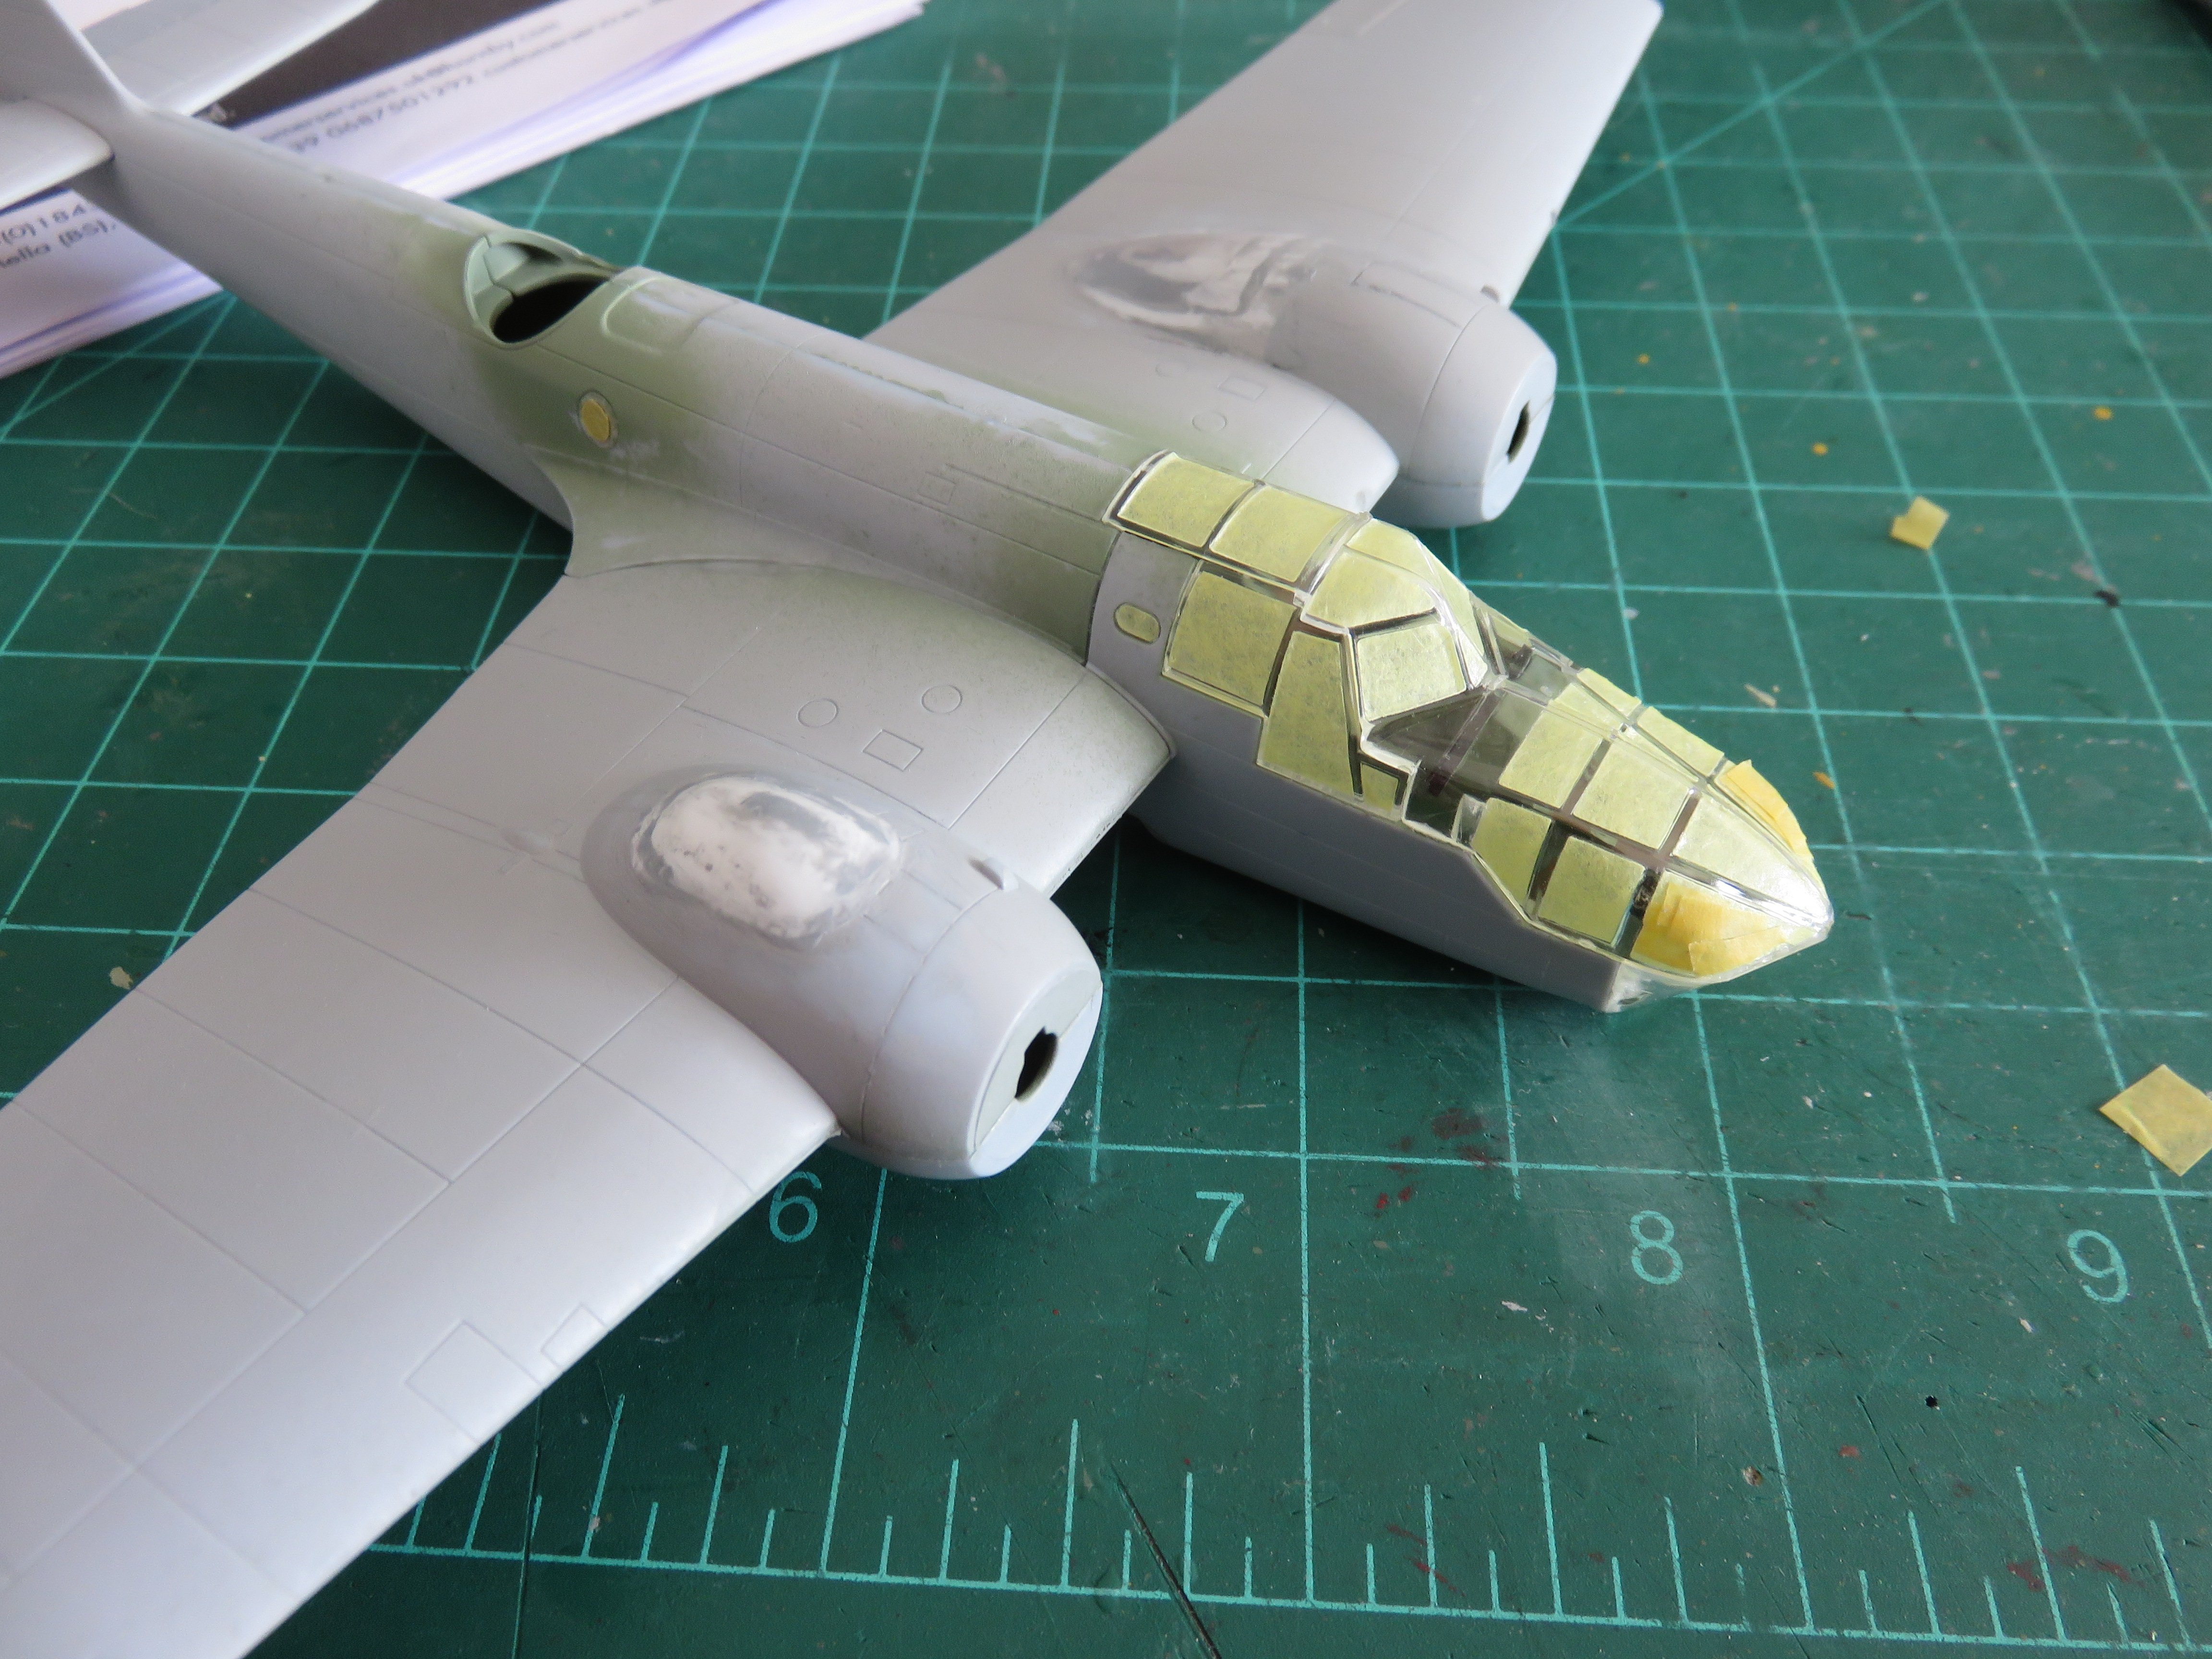
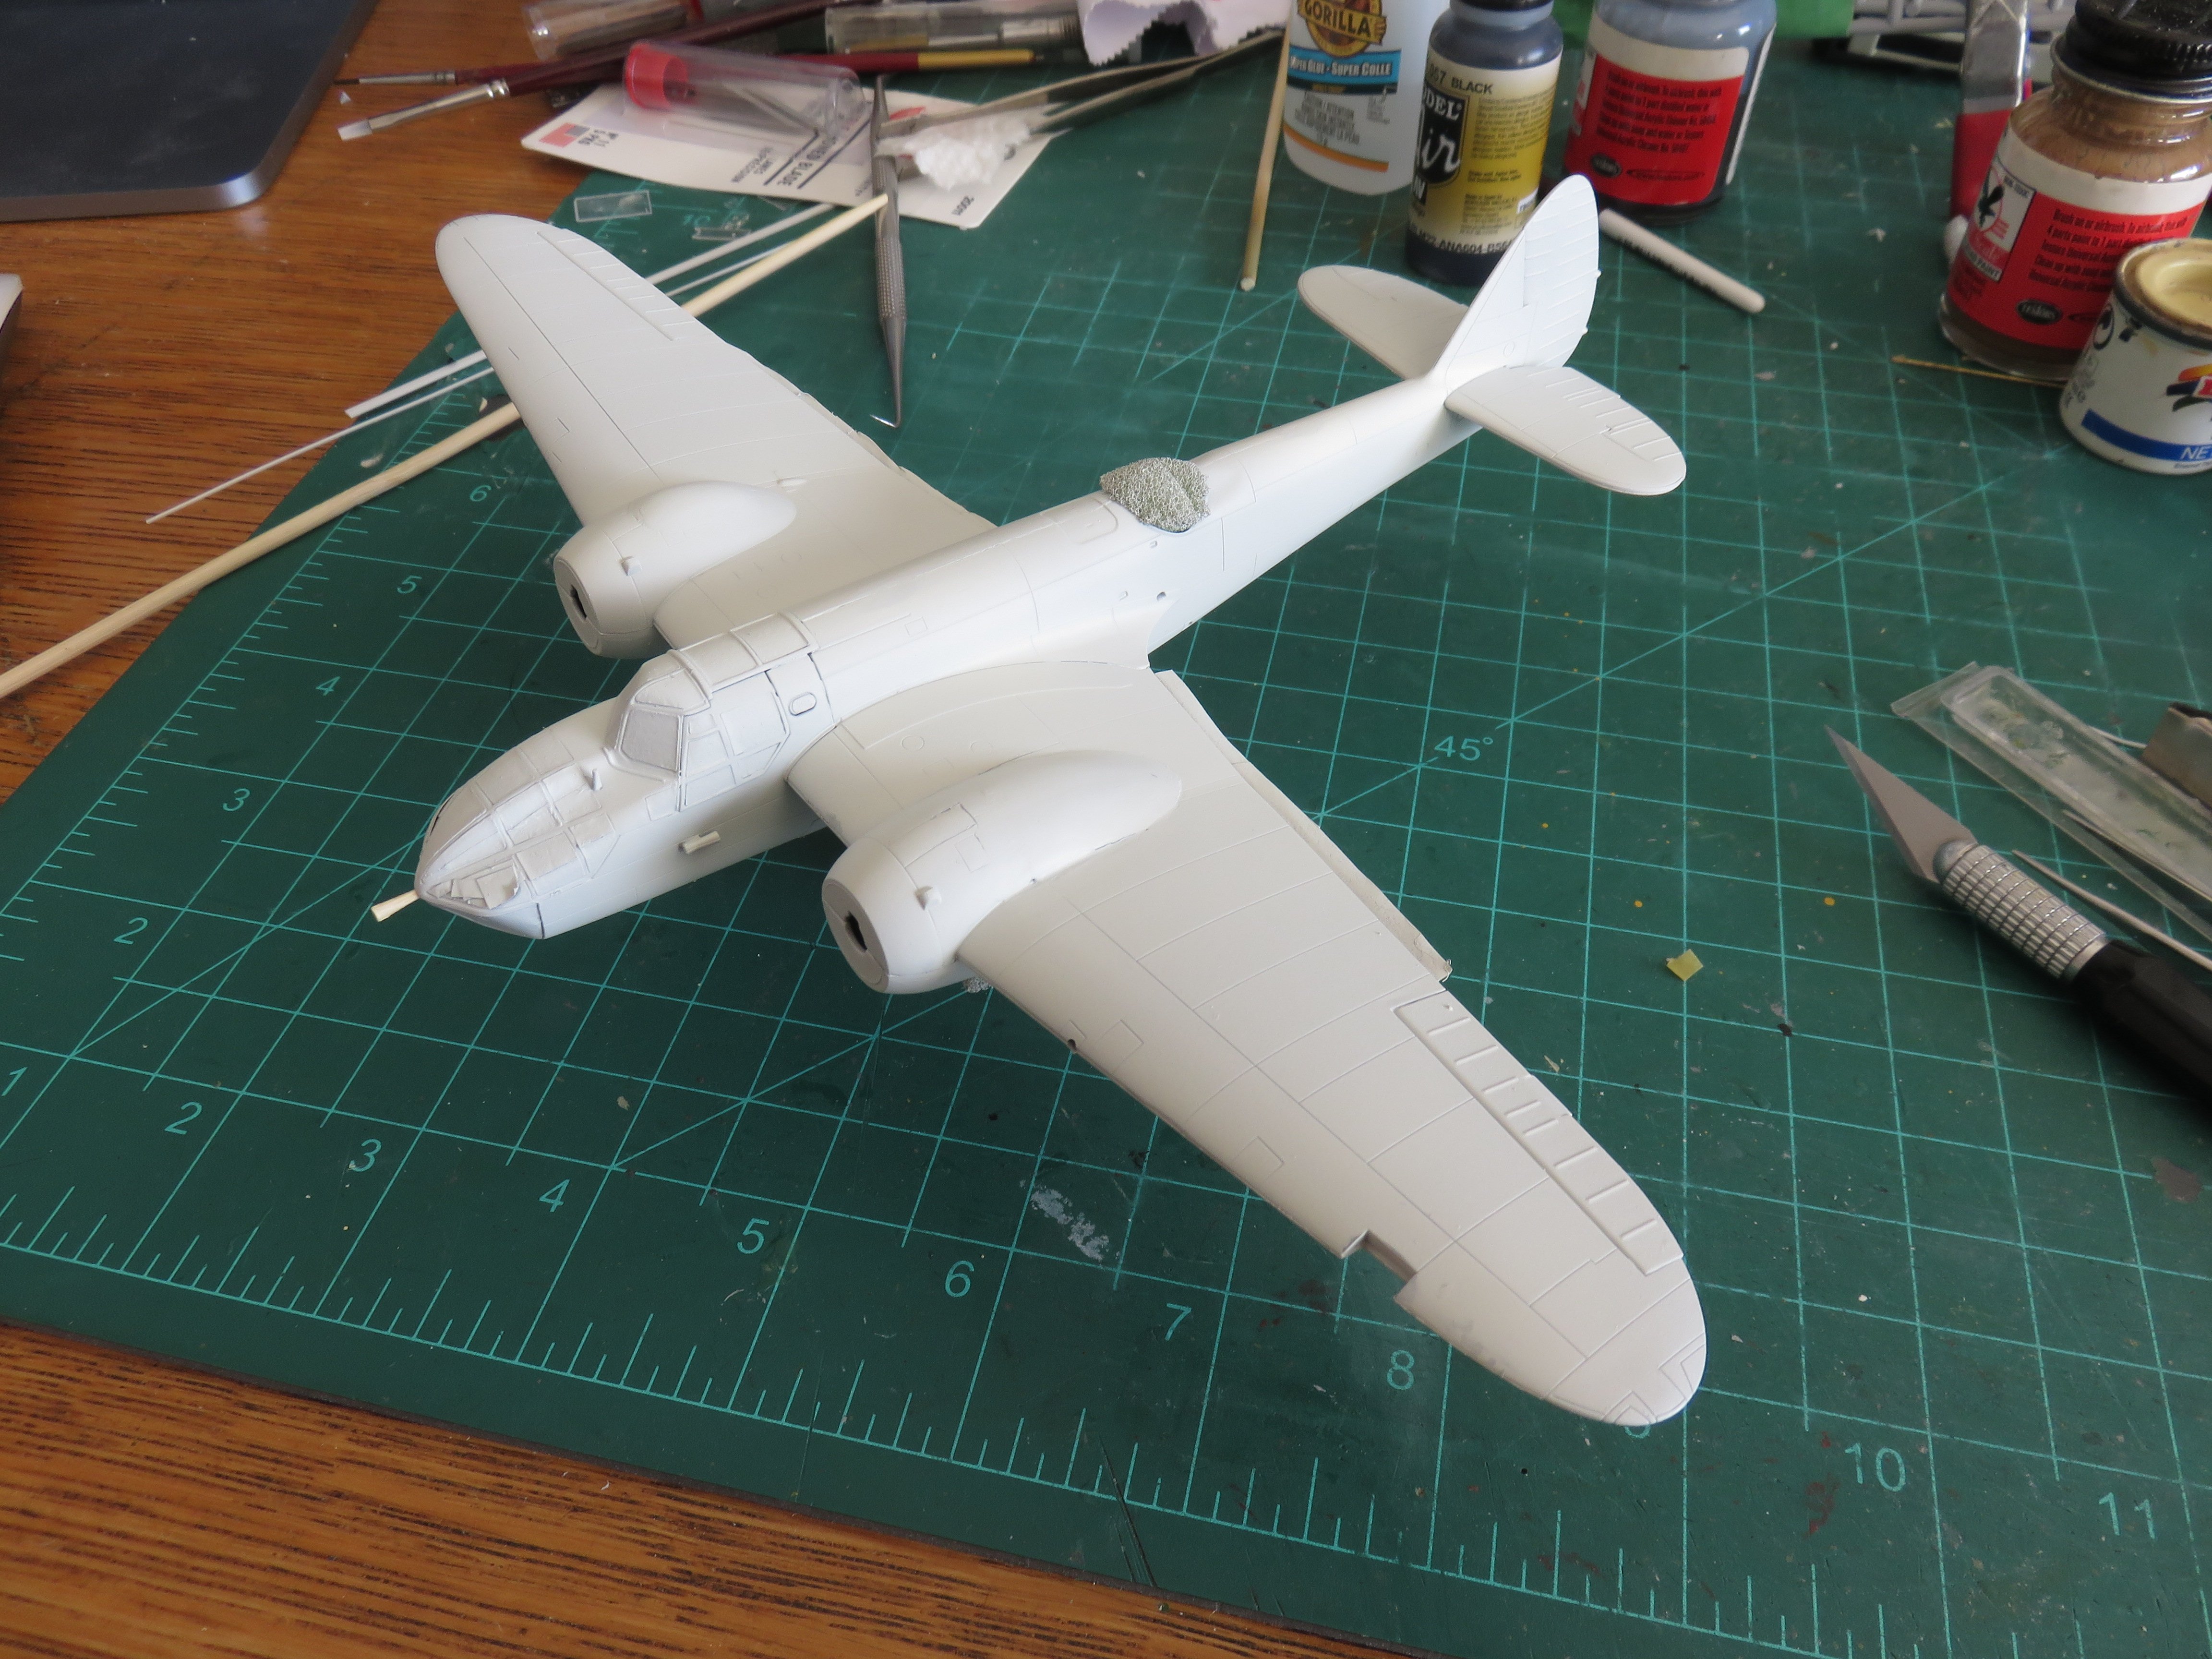
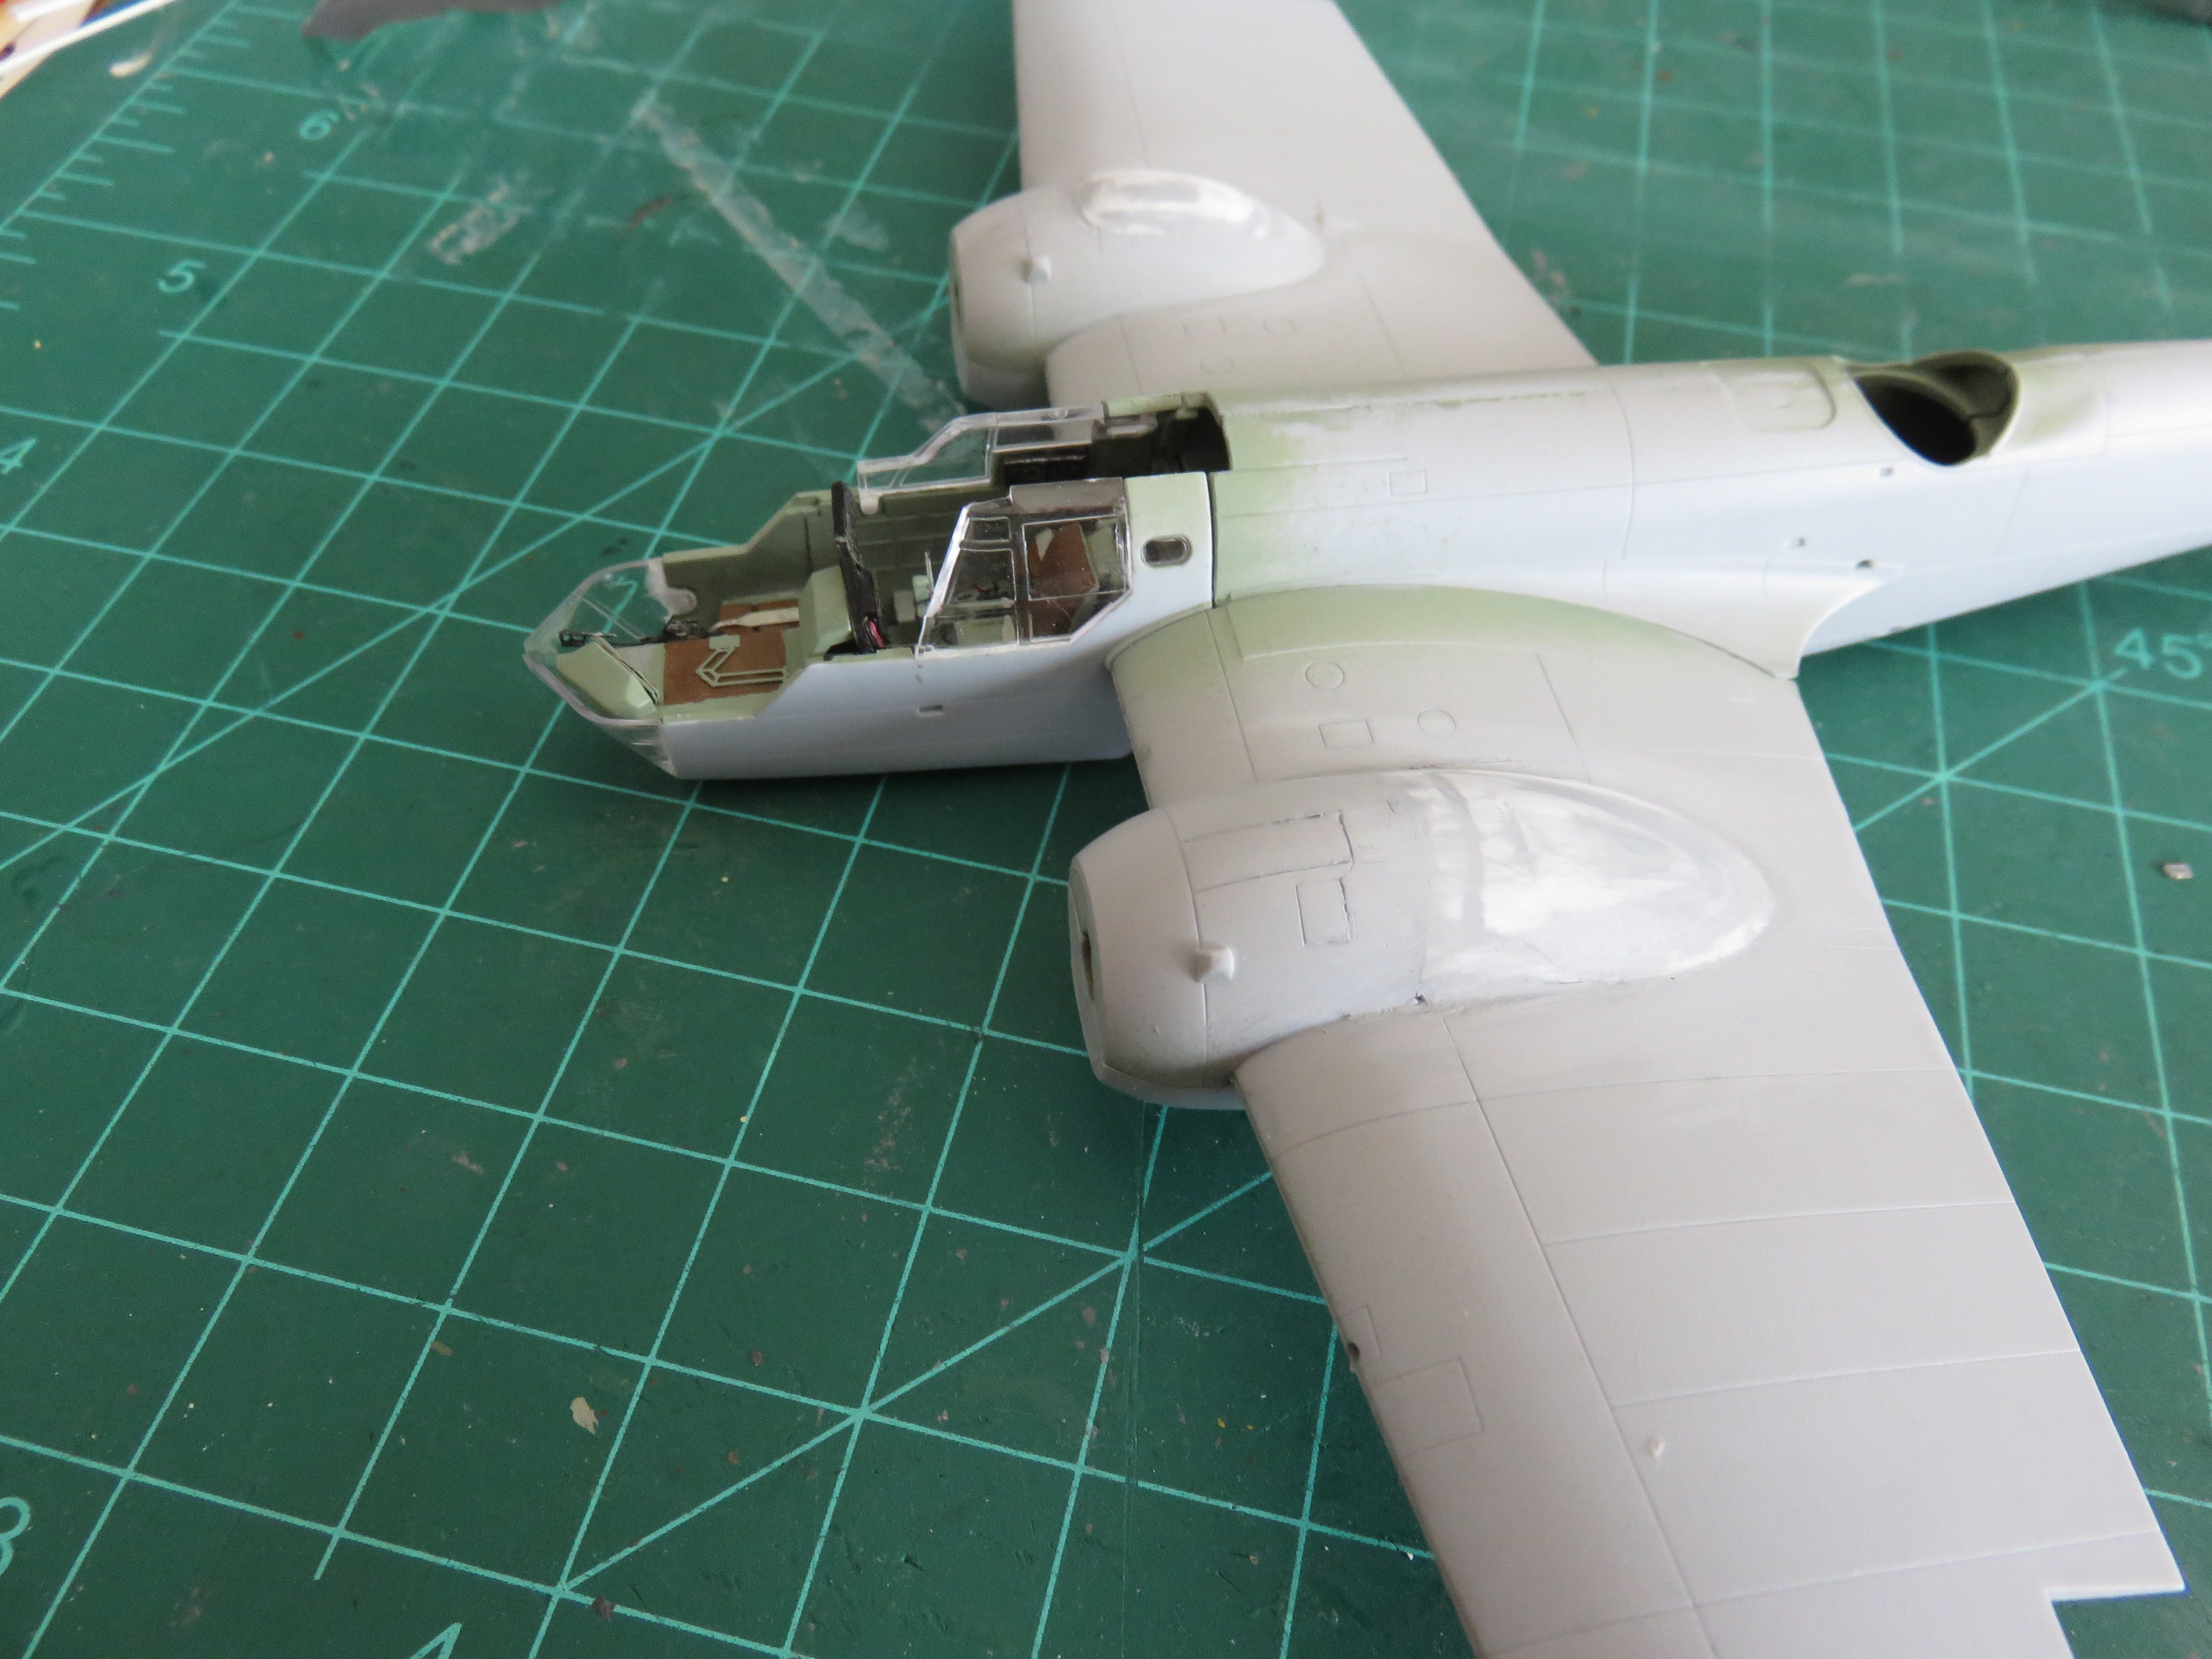
Thanks for the kind comments, guys, and all the "likes"! After fettling the nose section on to the fuselage, I managed to get the gaps down to an agreeable (to me) minimum separation. I followed this up by adding the greenhouse thus fully enclosing the cockpit. The fit was....ok. Not the greatest. It required some very careful use of styrene cement, and pressure applied just the right way to get it to sit. After setting, I began masking the windows, in preparation for paint and priming. I used the Eduard masking set for this job. There were a couple of small gaps (what more gaps?!) where the angled step of the nose rises to the level of the bottom of the windscreen that I filled with a little canopy glue. Afterwards I gave all the now masked glass a coat of interior green. This was followed by a full coating of primer. Finally I applied a thin layer of white. Hopefully this will help with the yellow top coat. I'm using Vallejo acrylics, and I've noticed that the yellow doesn't cover very well. I'm hoping that this player of white will help with that. So that's where things are at the moment. Thanks again for all the kind comments and likes! Andy


- 33 replies
-
- 12
-
-
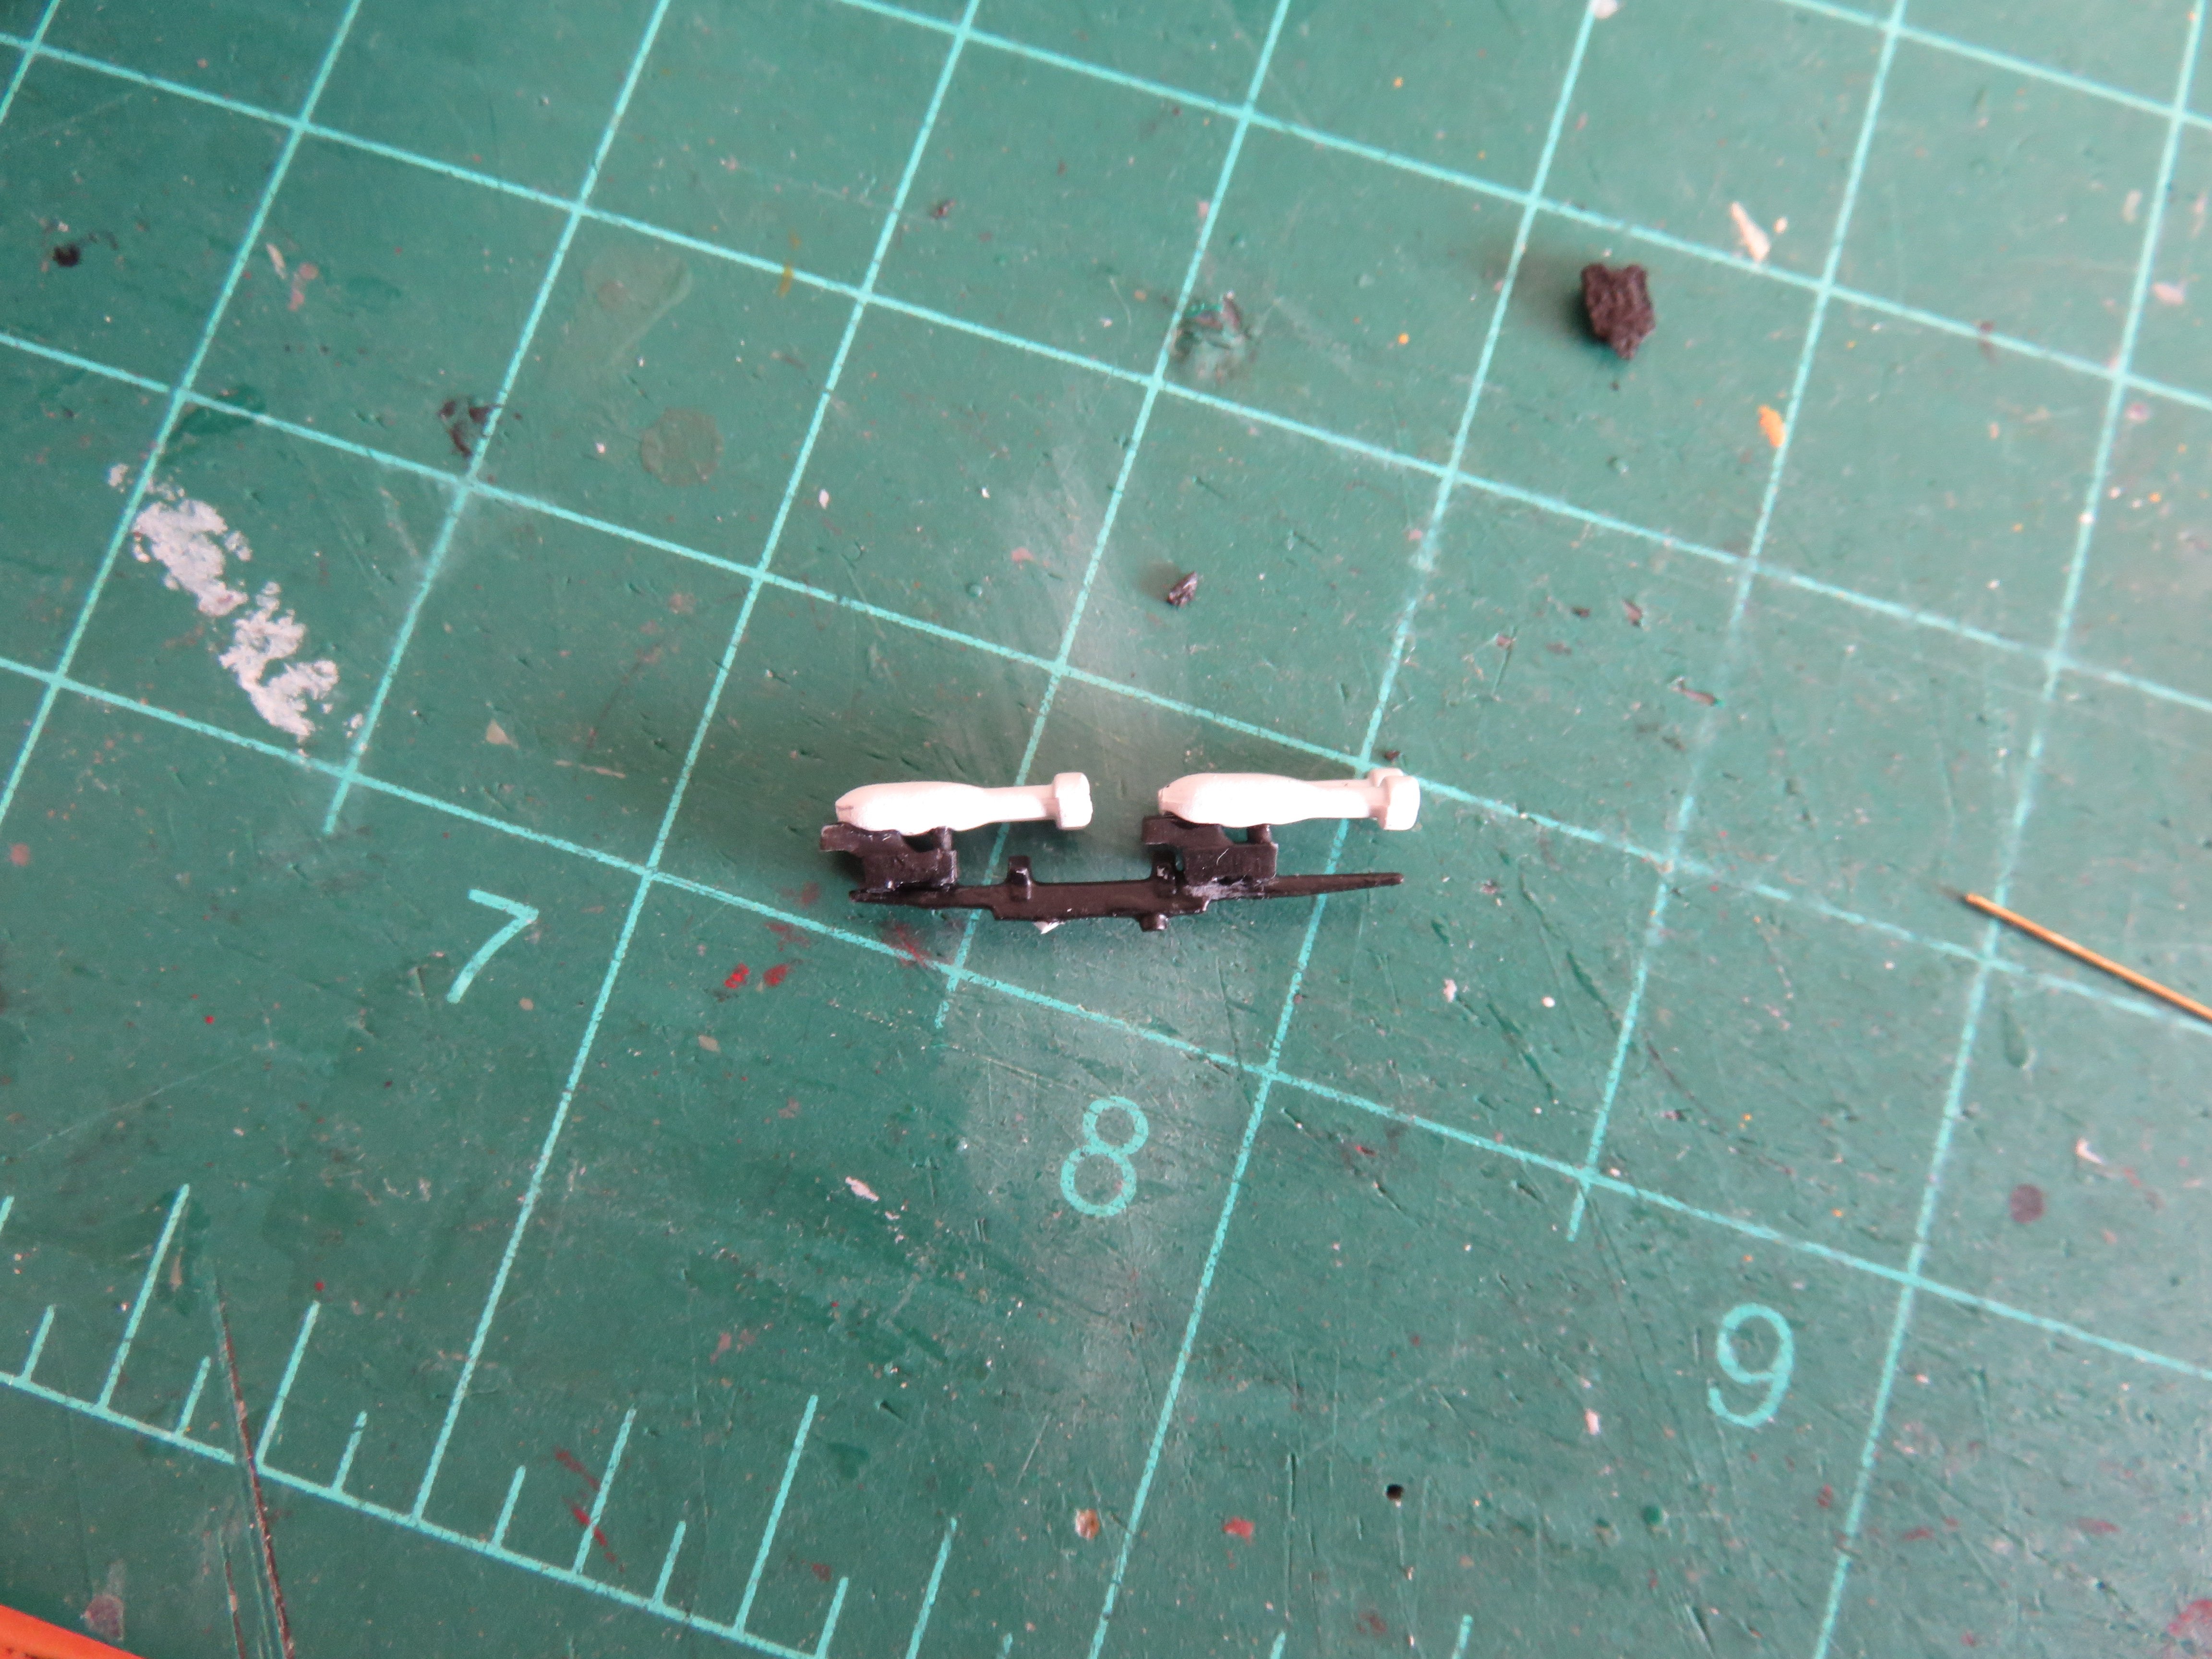
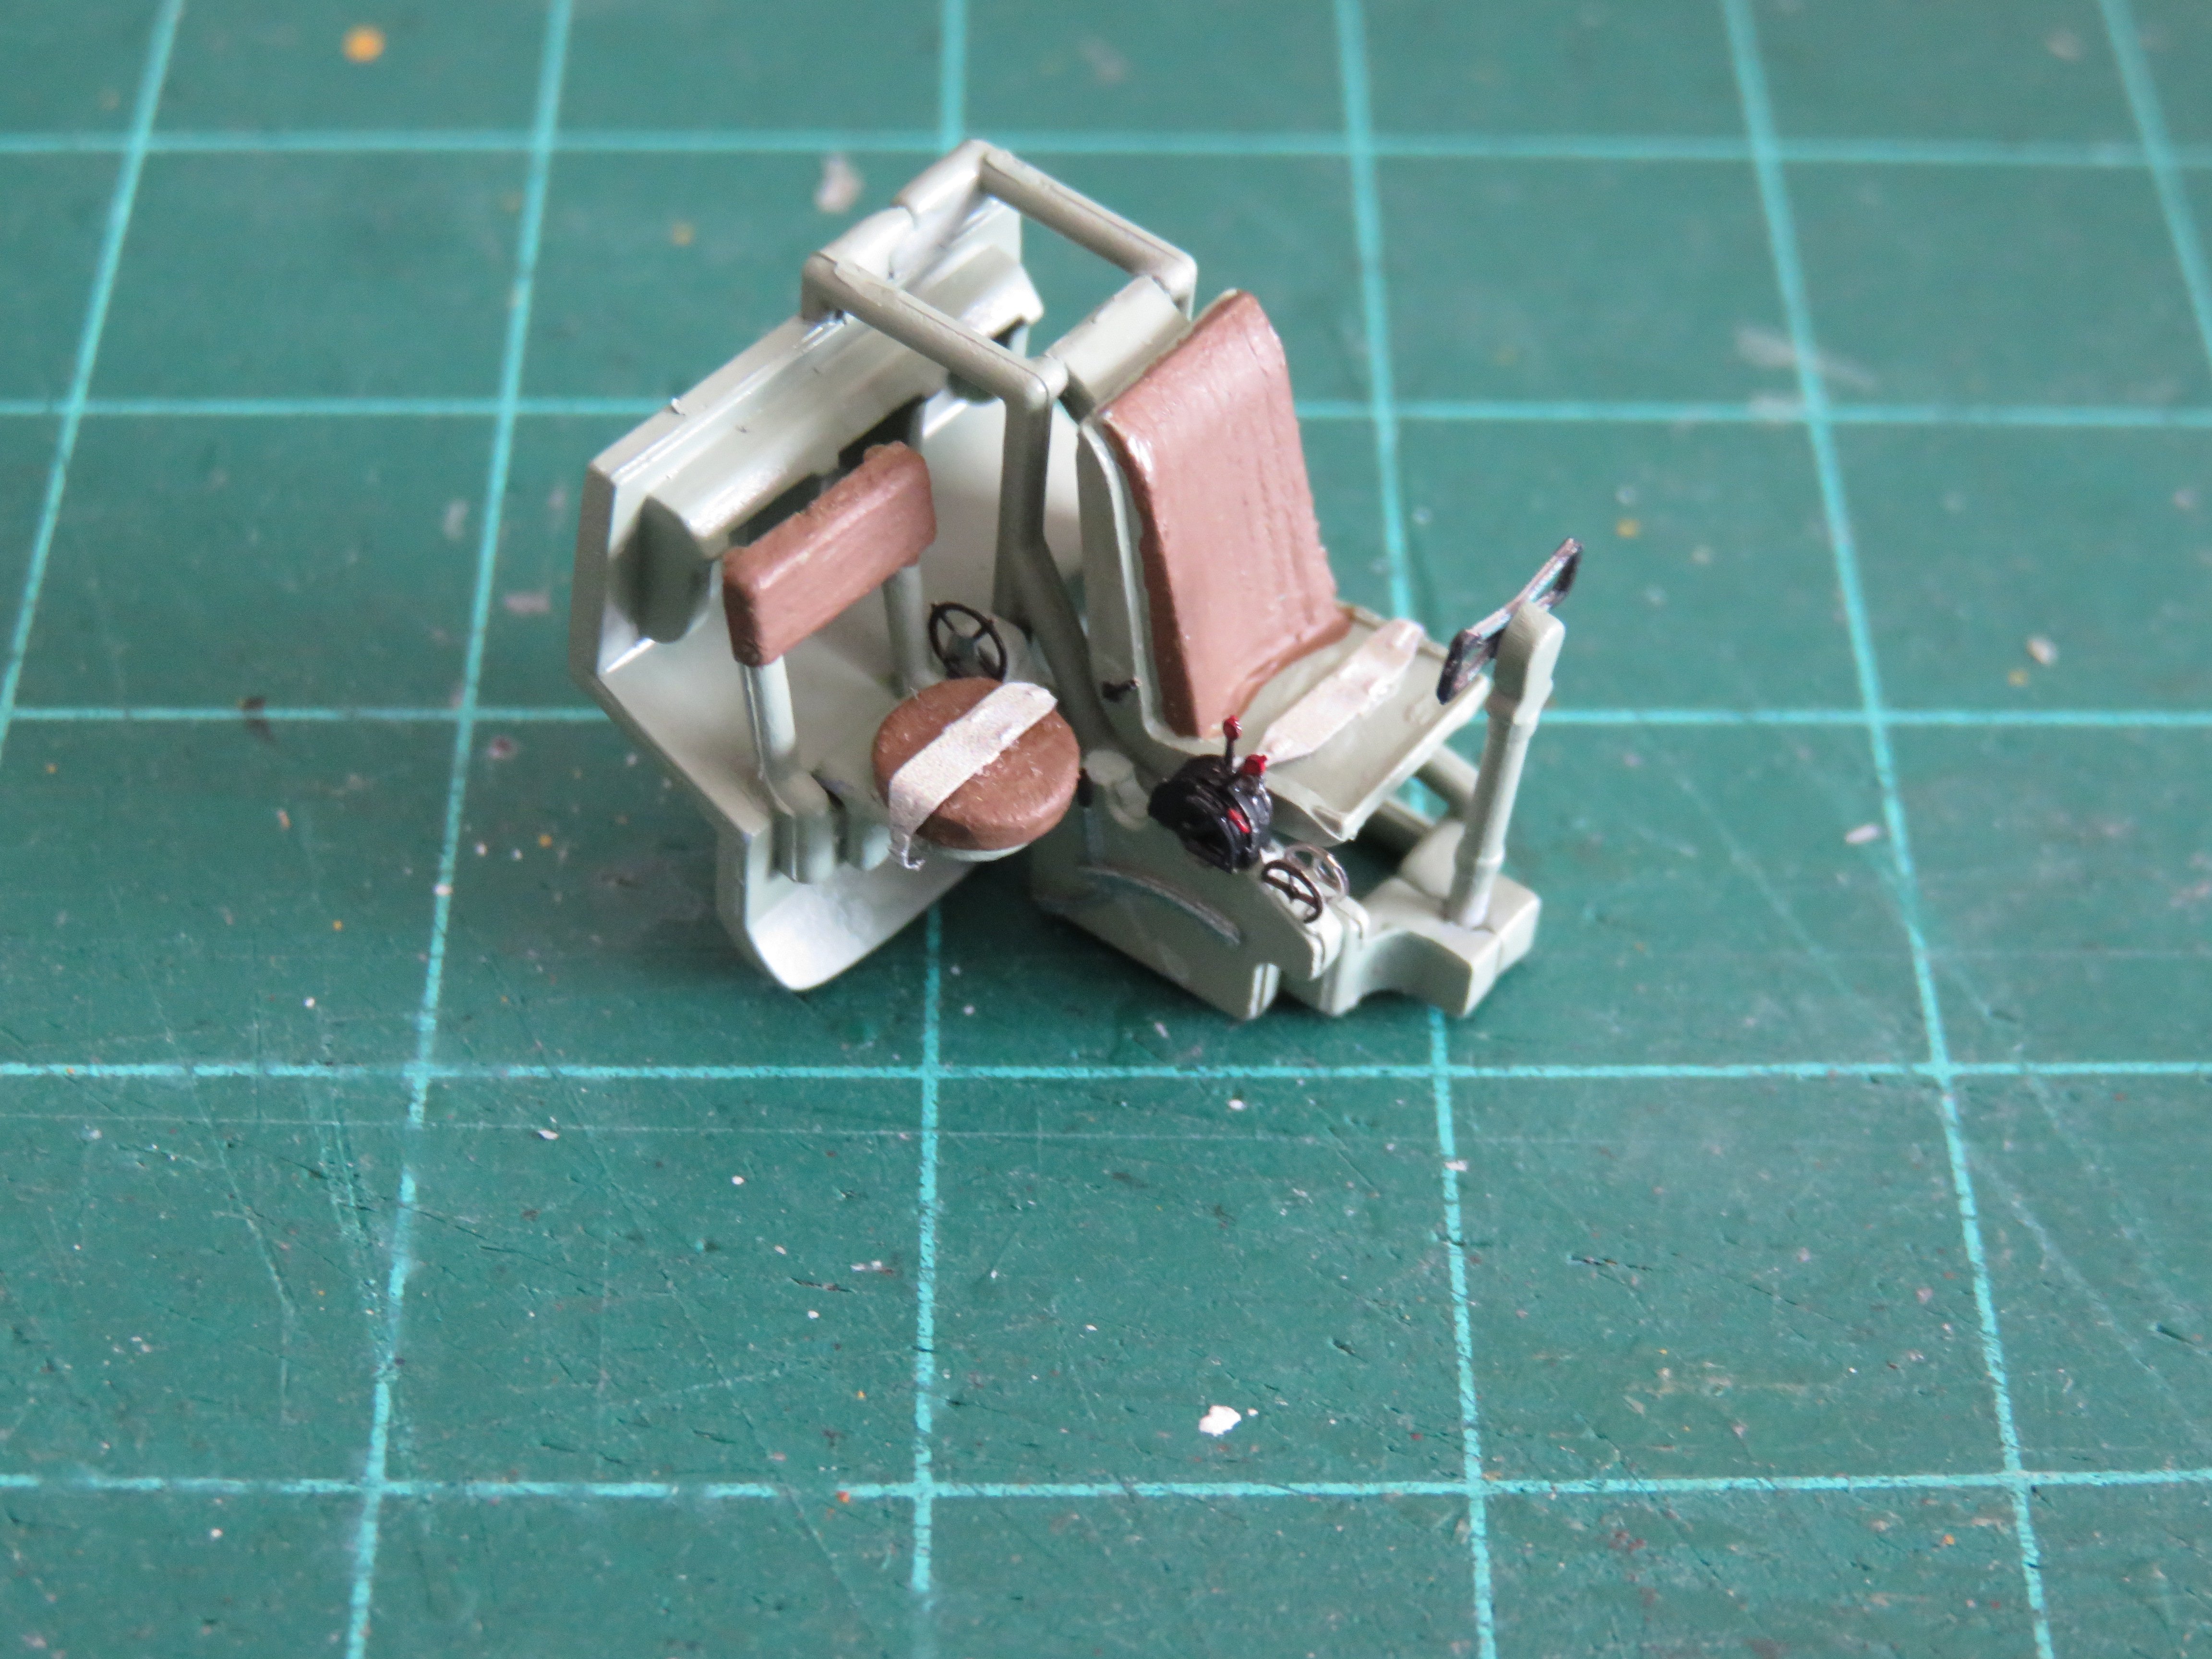
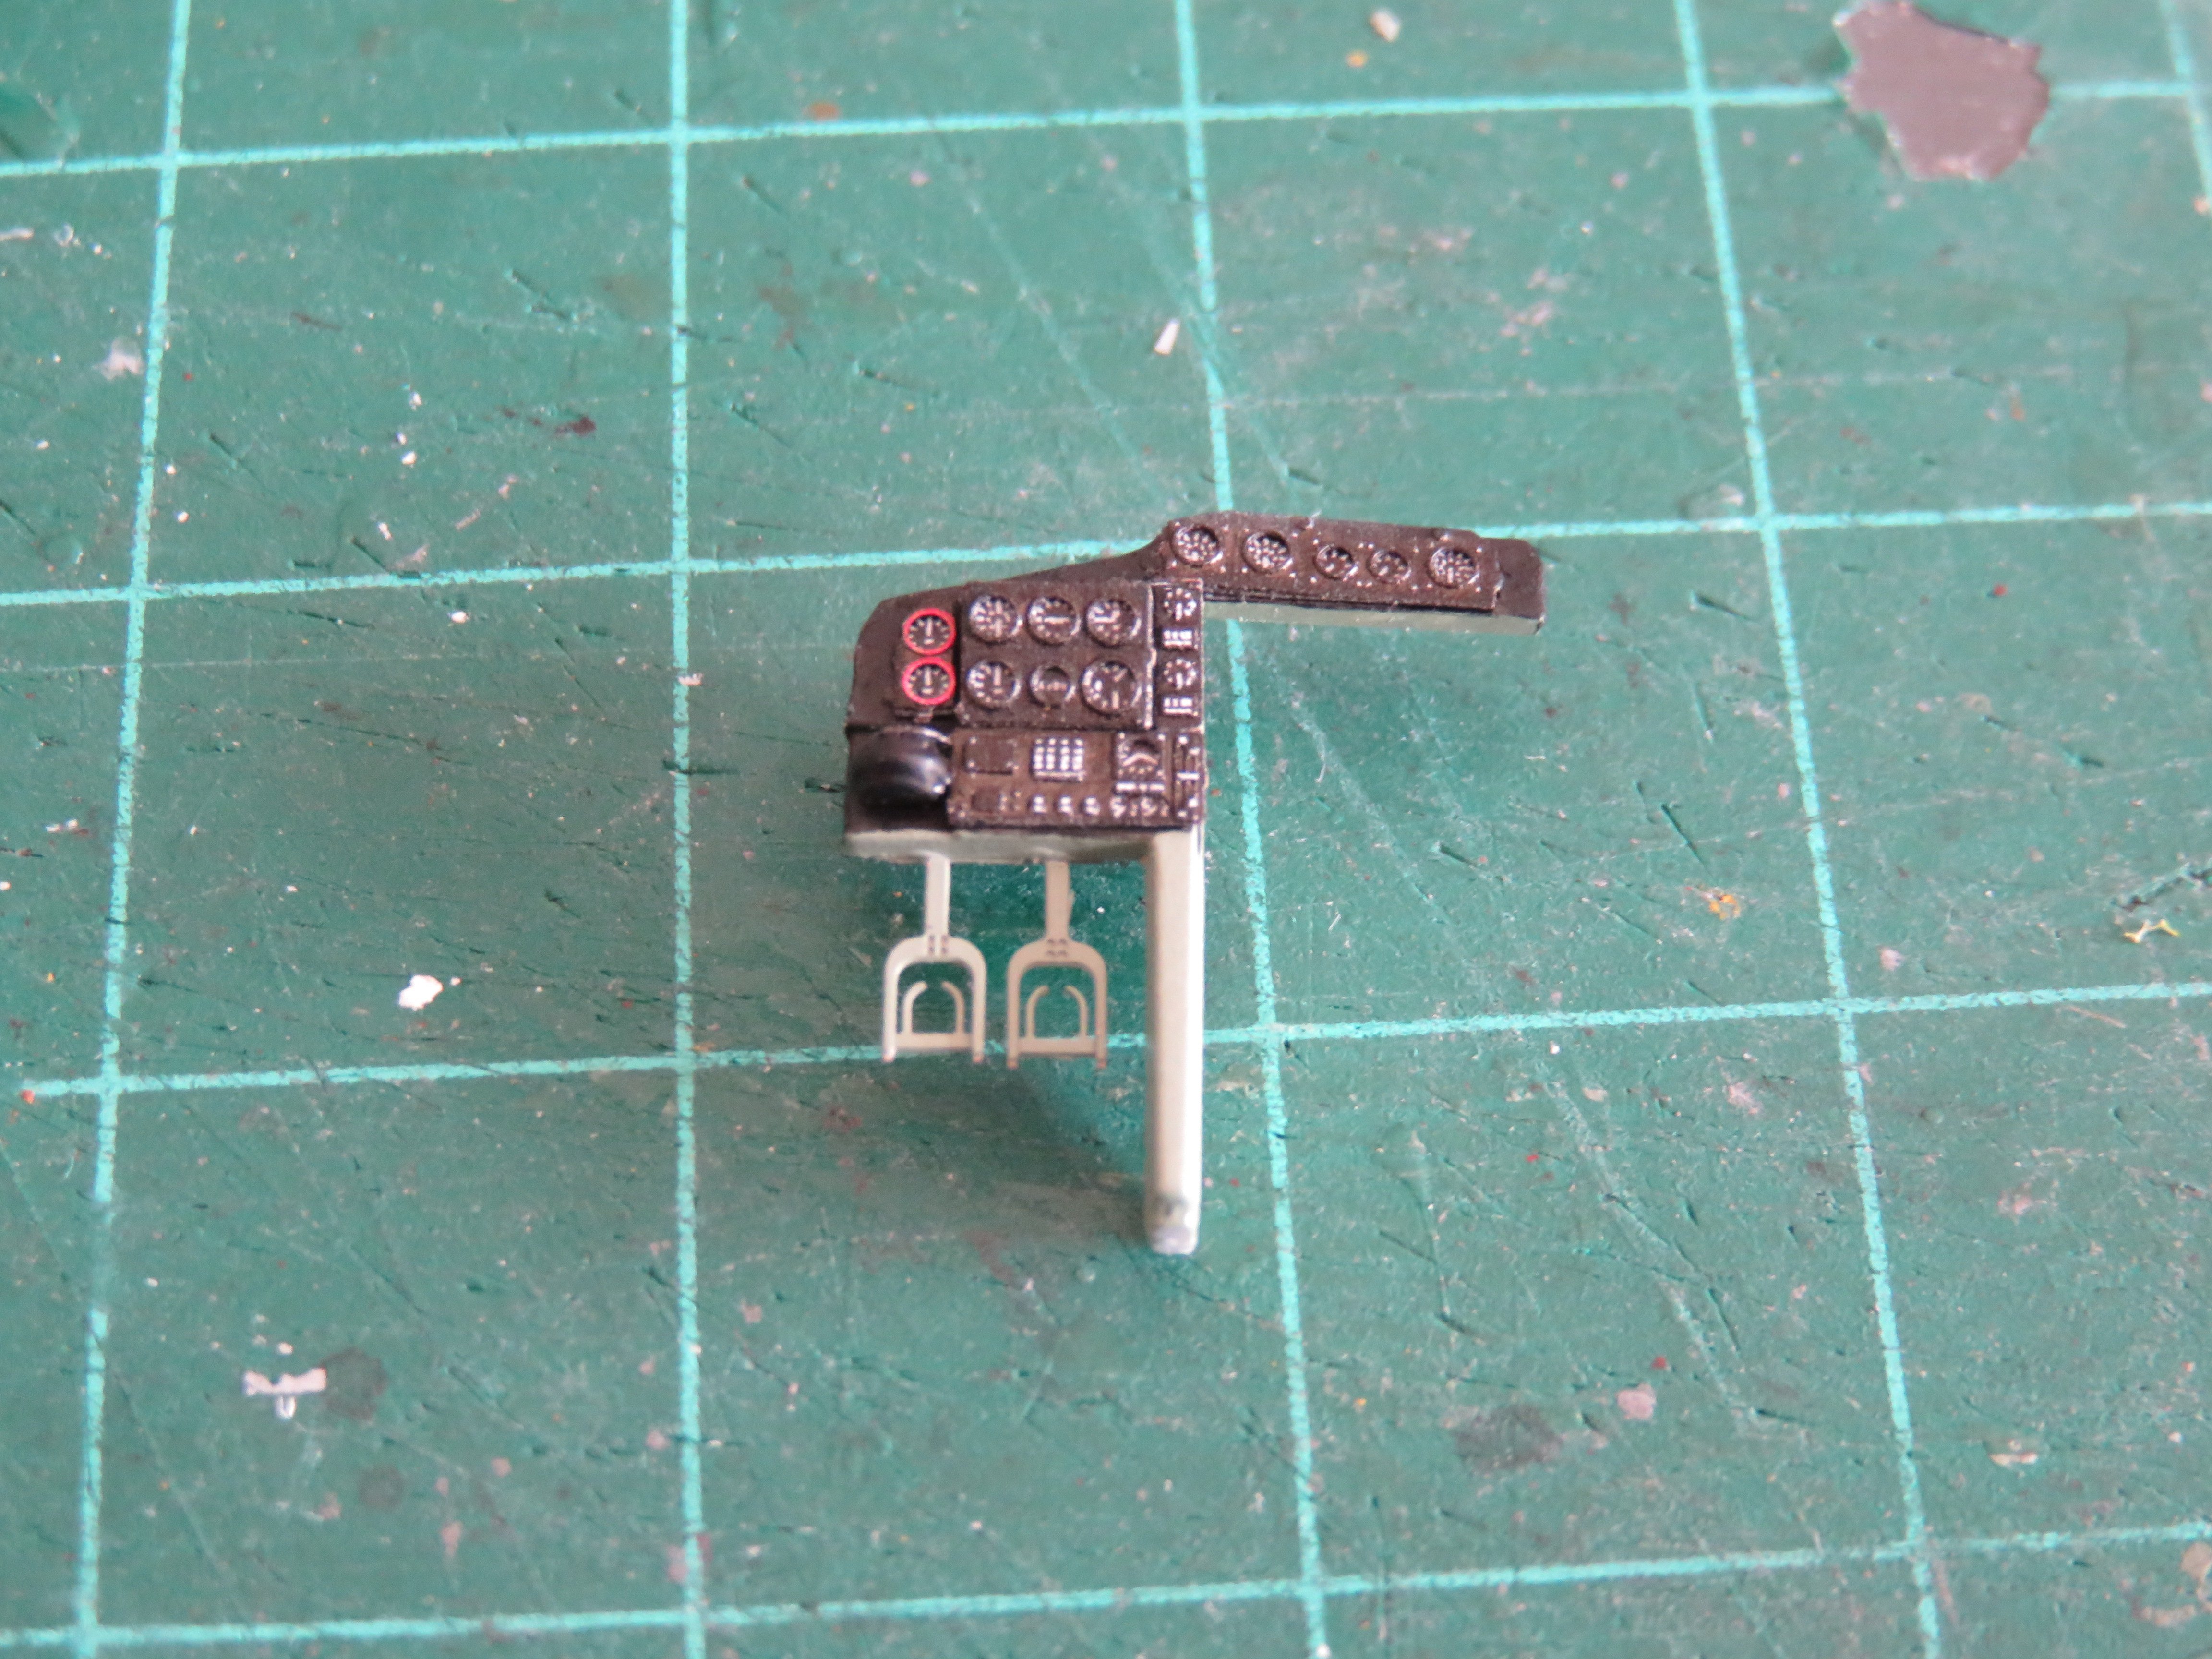
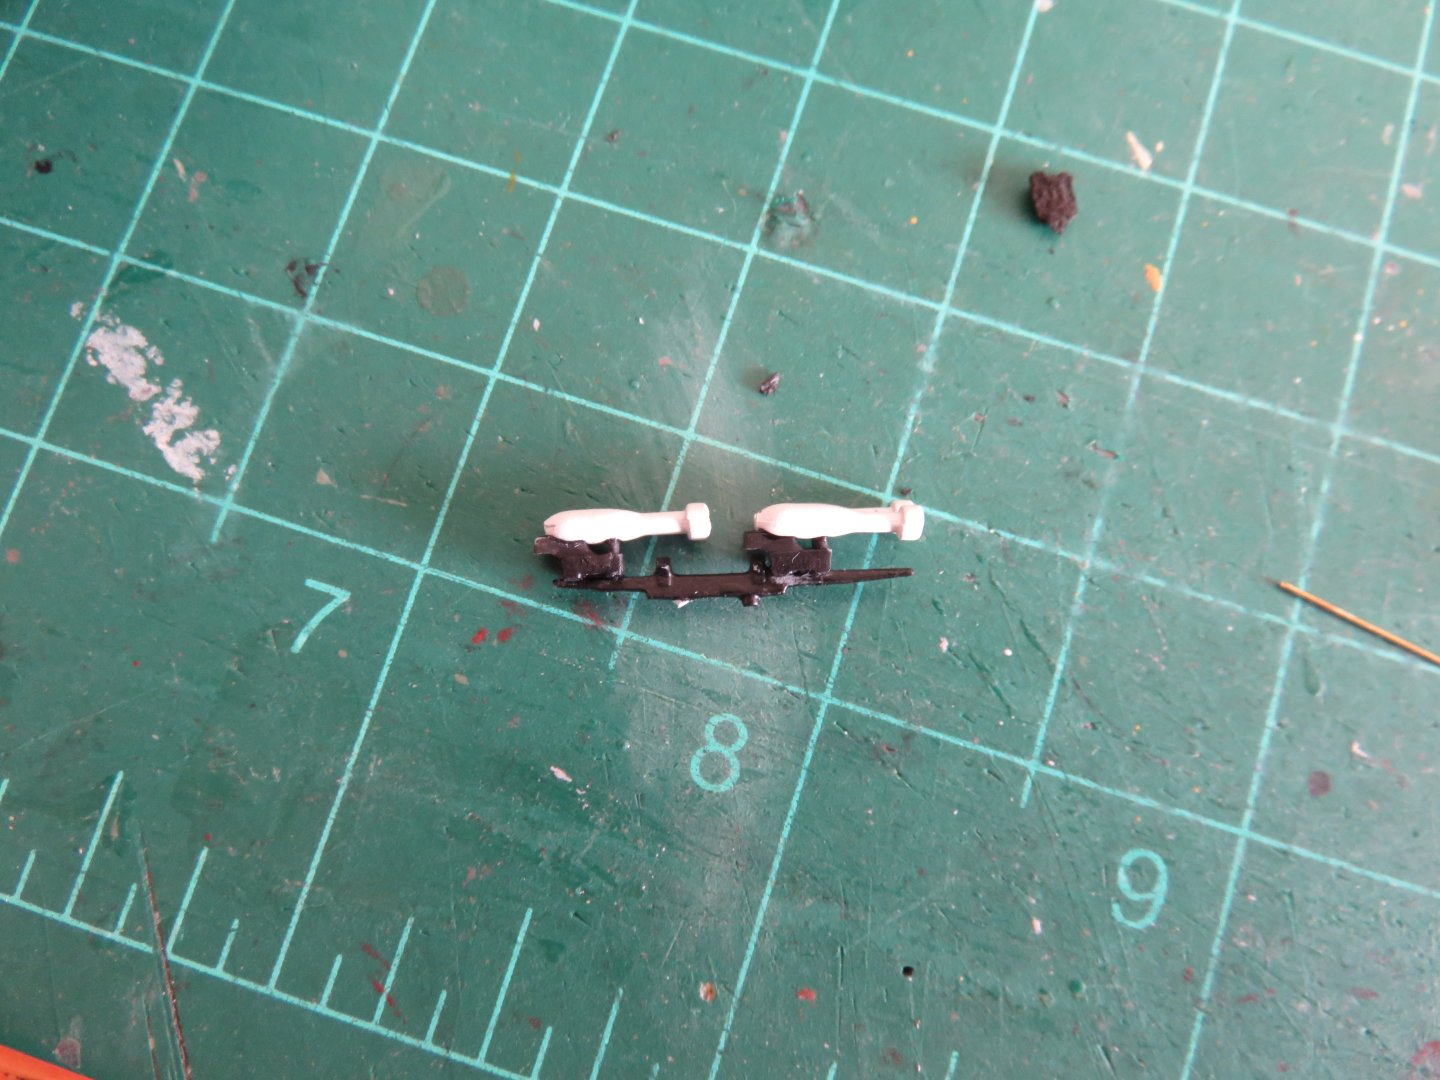
Thanks Everyone! Work has slowly been progressing. I needed a bit of a break from the sanding and filing, so I started work on the cockpit. There are a few differences from the Blenheim. In a Bolly, the throttle quadrant was on the pilot's right. Thankfully, Eduard includes a replacement for the cast on quadrant, so it was simply a matter of removing that moulding from the canopy half, and glueing the PE replacement on the right hand console. The next noticeable difference was found in the instrument panel arrangement. The Blenheim featured a single set of instruments directly in front of the pilot. The Bolingbroke had a second set located below the right windshield. I used an appropriately sized strip of styrene to act as a backing, and used the PE instruments designated for the navigator's table to represent these. Arguably, there should be two rows of gauges and dials, but this will do as a representation. I left myself ample room for adjustment when fitting the greenhouse windows, but otherwise things fit well. For the navigator's instrument cluster, I used the panel that came with the Yahu IP set. The cockpit was then partially assembled and dry fit to the fuselage. Ugh.. looks like yet more gaps! I'll see what more tweaking I can do before glueing things up and adding the greenhouse. Speaking of which, doing some checking with the closed bomb bay door casting, it seemed the easiest course of action was to raise the middle section slightly with a piece of styrene, and sand that back down until the bomb bay piece fits properly. I do plan on having the bomb bay doors open, and a couple of "practice" bombs inside. I'm making a trainer Bolly, so I will need something to break up all that yellow! The fun and games continue! Andy


- 33 replies
-
- 14
-
-