


tmj
-
Posts
302 -
Joined
-
Last visited
Content Type
Profiles
Forums
Gallery
Events
Posts posted by tmj
-
-
28 minutes ago, mtaylor said:
I've read that they used but it was never defined as to era, ship class, or nation. British seemed to mentioned as I recall more than any other country. I suspect that we modelers just ignore them as they would be hidden.
I read that too, somewhere, a long time ago. I might display such hanging out of the ends of my Victory cross section limber-channels, but not sure. My biggest curiosity was pertaining to how they would have actually been used. Would it have been just one, single, length of chain to be crudely dragged back and forth to dislodge stuff, or would it have possibly been a circular length of chain, wrapped around something like a 'pulley', on each end of the chain, where the chain could be constantly rotated in one direction, or another to not only dislodge debris, but also drag that debris to a desired location where it could be easily cleaned out, somewhat like a rotating 'bicycle chain'. I'm wondering if I need to display only one chain hanging out of each limber channel, or should there be 'two' chains hanging out of the end of each channel...??? "Hmm."
-
-
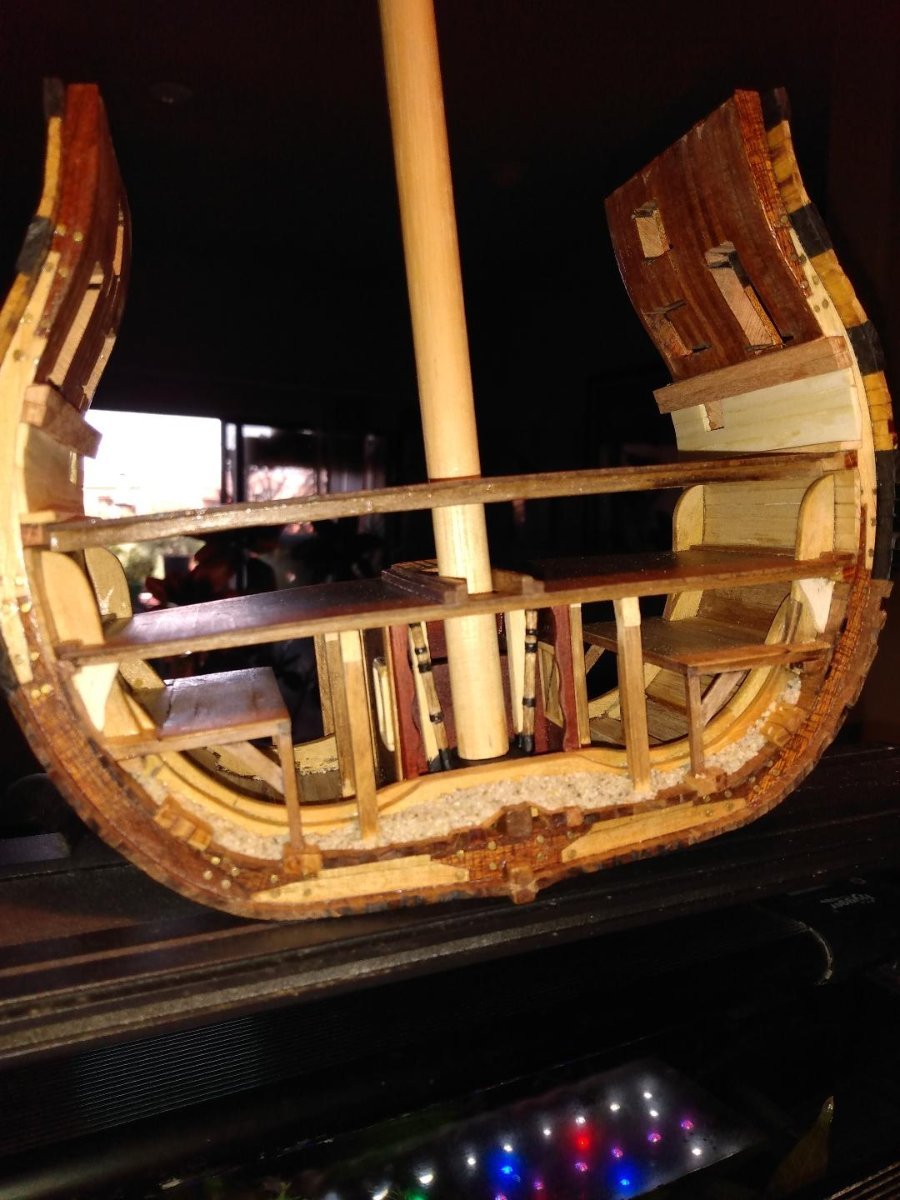
A bit of 'ballast' added to this side of the model. No more ugly joints to distract my eyes from other fine details while I work. I really like the way this ballast looks. This ballast is going to not only look 'GREAT' when I eventually fill the bilge with ballast and barrels, but it also appears to be extremely close to scale, in both size and color! "Win, Win!" I'll do the same thing to the 'other' side of the model, tomorrow, after the PVA/Water solution has dried thoroughly.

-
Much better. I now have proper doors on the pump house!

- mtaylor and Jack-in-the-Blue
-
 2
2
-
That is 100% the 'look' that I am after. Very nice job! It makes for a great contrast in colors that also depicts the actual construction methods used to create the mast. I'm thinking about taking your method a step further and segmenting the long pieces into 'shorter length' pieces, much like the deck, or the hull of a ship would be segmented in shorter lengths of planks. Trees do not typically grow tall enough to construct a full height mast of the model I seek, nor would they likely have enough strength to endure the wind load stresses even if they did grow that tall and were used in such long lengths. I'm thinking that 'that' is why there are so many iron 'bands' around HMS Victory's mast. Those bands must be keeping numerous, shorter length timbers banded together where certain timbers both end in one place and new timbers begin in another place. Kinda like building a mast that looks like an elongated 'chessboard', if that is an accurate enough description of what I see in my mind. Thank you for chiming in and sharing that photo. You have been extremely helpful!
-
I just might give this method of mast fabrication a go. The fancy joinery will obviously not be necessary, however. Different species of wood, with slightly different, contrasting colors, laminated together might look really nice after being turned down to a finished product. "Hmm?"
-
I spent the better part of today taking care of needful details within the bilge area. A 'punch-list', if you will. While I was able to tackle everything, I also inadvertently created an entirely 'new' detail that now must be added to that list of truly needful bilge items. "Arghh!" I'm beginning to wonder if I will EVER get out of the bilge and start making upper-level progress!
The last thing on my bilge list was to create access doors to the outside of the pump housing. Mission accomplished, however. I've now created a pump house straight out of the infamous "Winchester Mystery Mansion" where stairs lead to nowhere and doors open up to walls. Should my model be displayed on the 'shot-locker' side only, this would not be an issue, but it will be viewed from all sides. I now need to install doors to the 'inside' of my pump house too, just to make things visually jive. I honestly never considered this up front. It just bugged me that there was no way to get inside of the pump house, so I built doors. It wasn't until I had finished my work and put it up to eye level, for examination, that my "Duh" moment hit me *insert Homer Simpson sound effects here*. Oh well, just another day in the ol' hole! I'll get to work on those interior doors tomorrow. As for now, I'm out of time. I now need to get started on a batch of 'Biltong'...

-
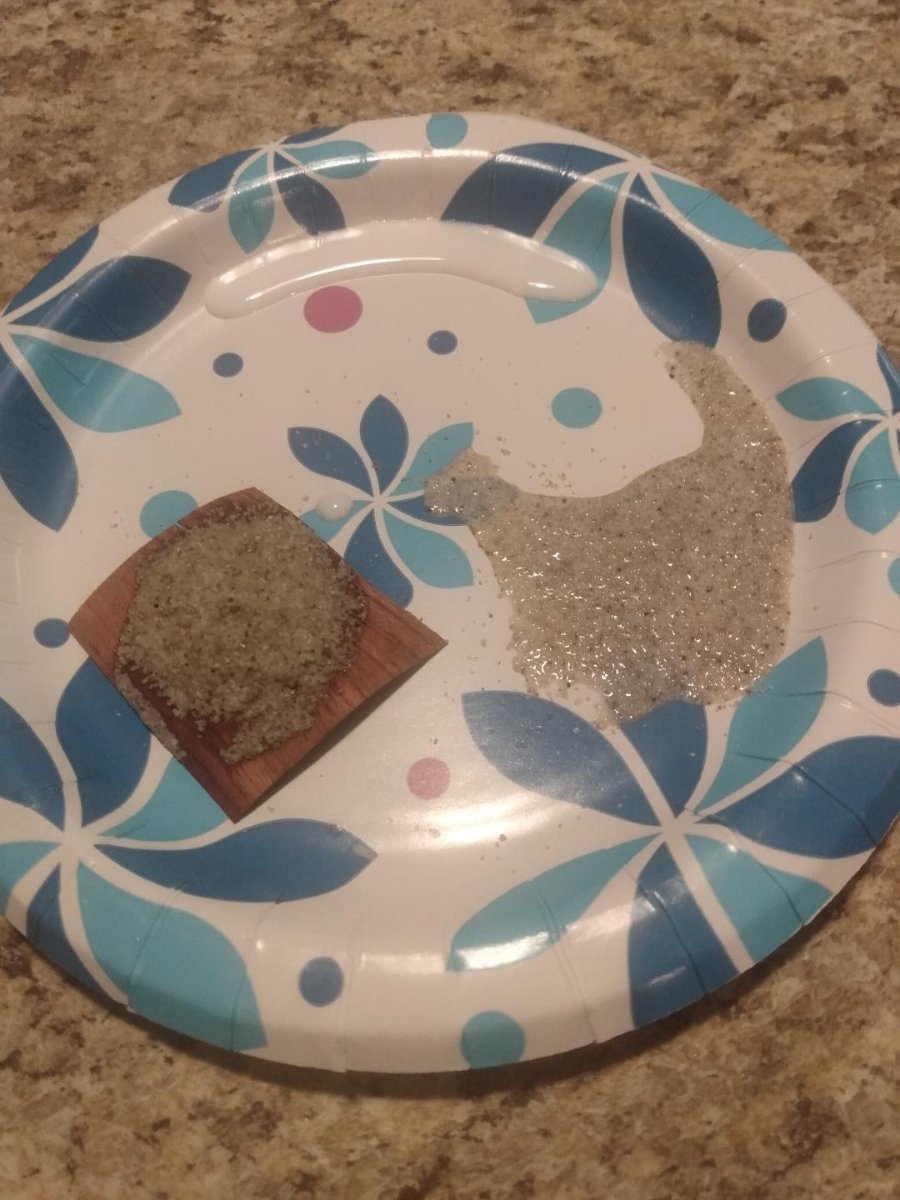
I'm happy with the PVA/water glue. It dries unnoticeably when used to glue my sand media down. I see no color changes in my sand, nor any unwanted 'sheen' in the final product. It adheres very well too. I can turn the veneer up on its edge and pound it down on my workbench without losing a single grain of sand. I'm impressed! Very durable to say the least. I've always wondered just how strong this gluing system would be and now I know! 🙂
-
-
I hope that I am posting this in the proper place. If not, feel free to move this post to its proper location!
I'm currently working on a 'cross-section' of HMS Victory. The main mast of this build is a simple wooden dowel, as is the case with masts on most models, however. That cannot be the case on the actual ship(s). The masts were surely too large and too straight to be carved out of a single large/tall tree. I'm thinking that they must have been fabricated via many laminations of numerous precisely shaped timbers. Does anyone have details of 'exactly' how these masts were fabricated back when?
-
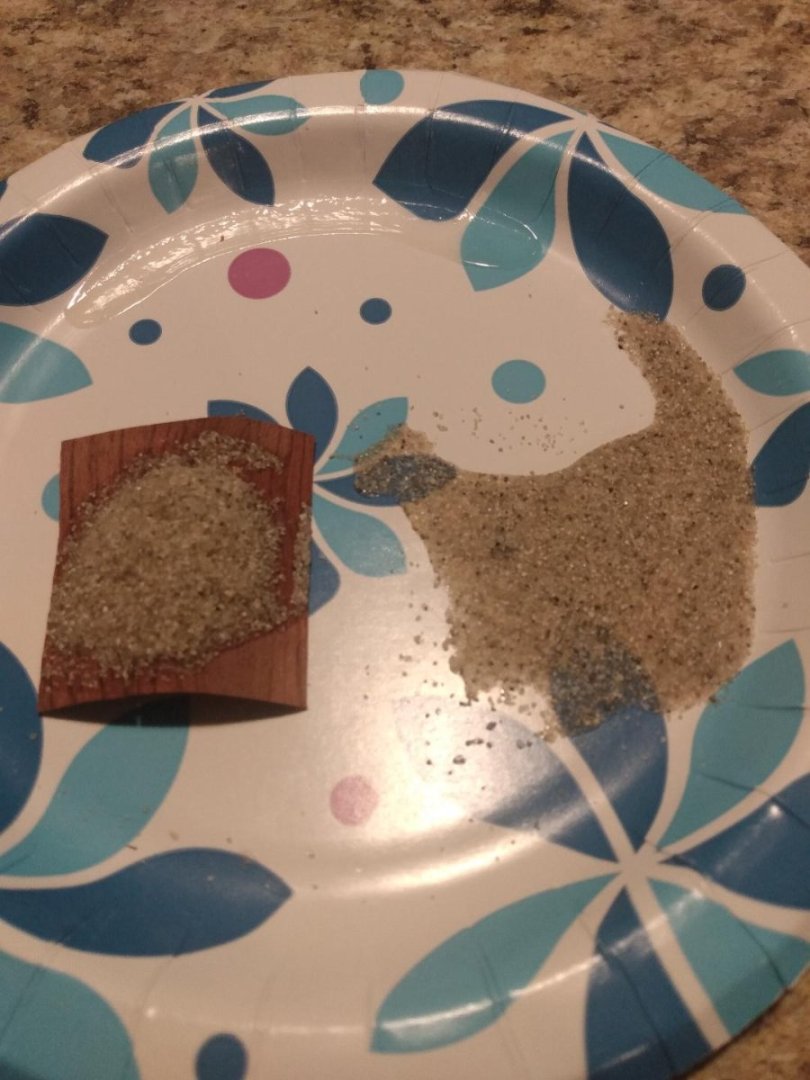
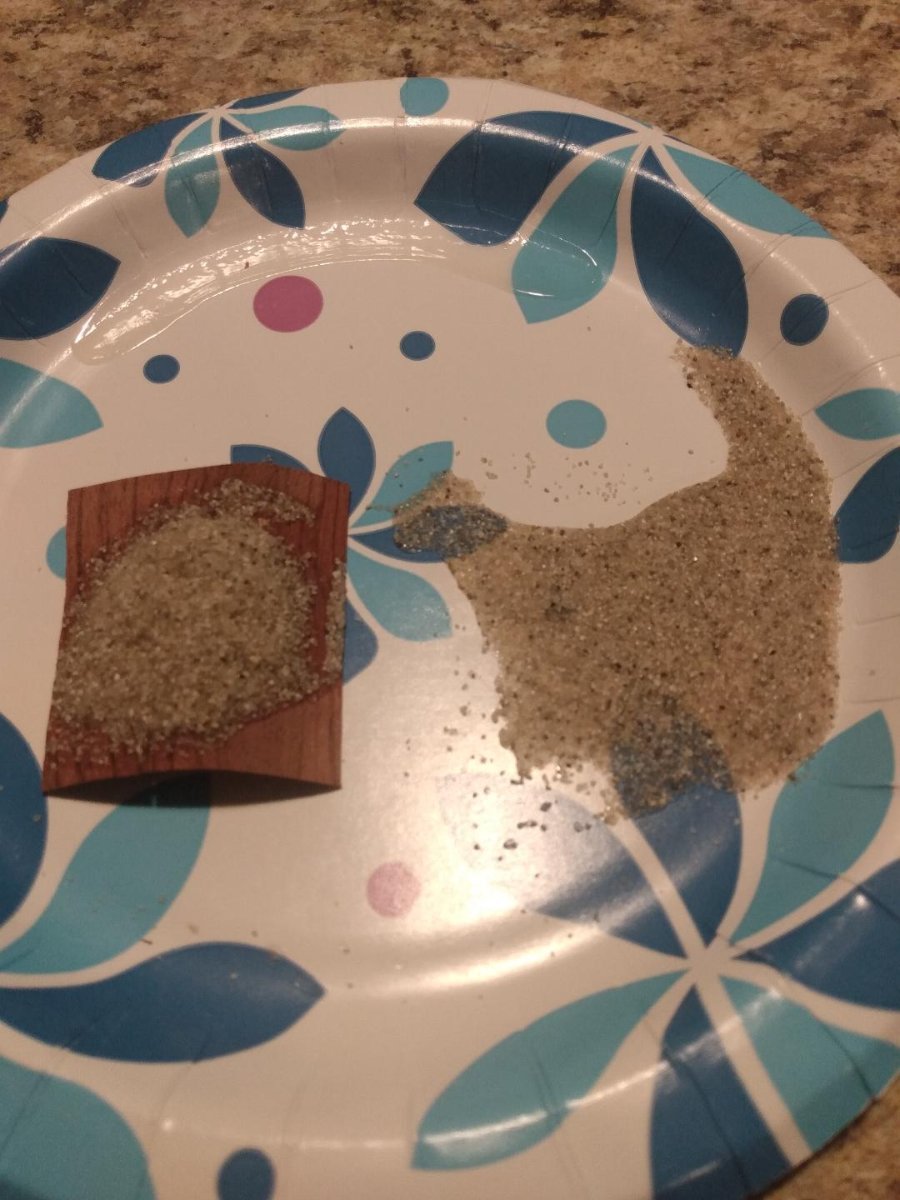
I'm thinking ahead for when it becomes time to glue ballast into the bilge area. The below photo is an experiment using a 3 to 1 ratio of water to PVA glue, and sand. I sprinkled some sand on a thin piece of veneer and then used an eyedropper to carefully drip my glue mixture into the sand. I then sprinkled some sand into the plate and poured the remaining glue mixture into the sand, TOTALLY saturating the sand. Lastly, I tilted the plate to make all of the excess glue mixture run away from the sandy 'beach' and leave a thick puddle of pure glue and water to dry all by itself. I want to see how durable this process actually is, and also just how clear and 'neutral' looking the PVA/Water solution will appear after it has dried in all three tests. This will help me to determine just how I need to glue my ballast when that time comes. I'll post another photo when everything has finally cured.

-
Hello Allan!
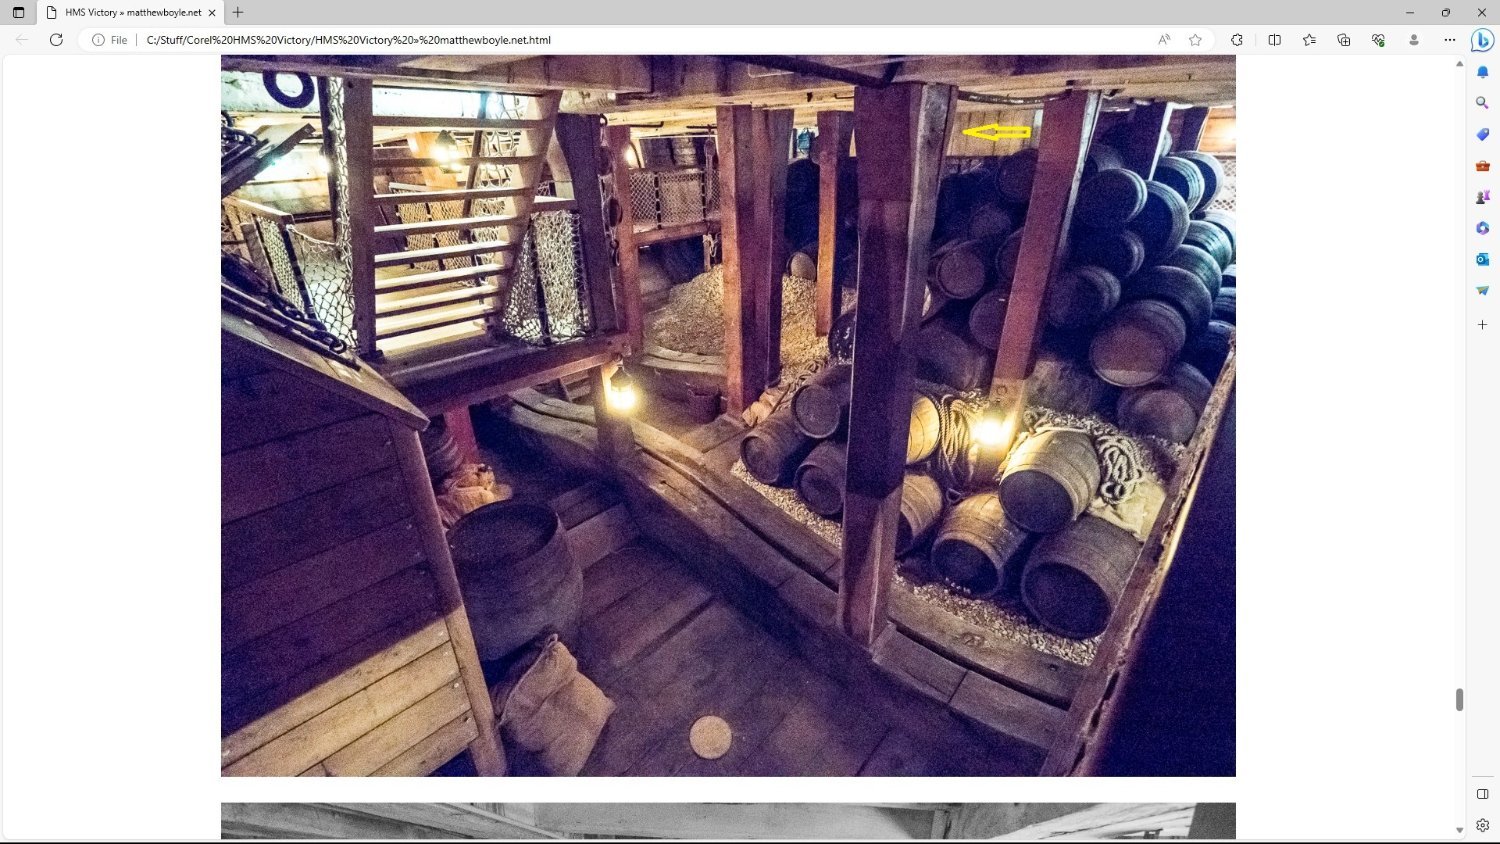
The below photo was taken within Victory's bilge. These are the things that I am referring to as 'doublers'. You'll have to pardon my blurbage until I learn the true nomenclature of many unfamiliar parts. It's impossible to see in the photo of my model, but 'my' doublers are also tapered just as the ones shown in this photo. 🙂

-
-
I've tarred/waterproofed things inside of the bilge section of my pump locker, added some of the 'doublers' to the outer tops of my bilge stanchions, and planked the interior of my hull up to the next higher level gun deck. I'm not sure if the pump housings were actually waterproofed on the real ship, but when I don my engineers cap, I see this as being an absolute necessity be it factual, or not. I also like the look of the doublers atop those stanchions so I will now be adding them to both sides of 'all' of the bilge stanchions. It adds a really nice realistic effect. I'll then need to file out the gun ports, on the lowest level gun deck, and also add some very thin headers, footers and jams inside of the gun port openings. I think that I will use something like padauk wood, bloodwood, or some sort of wood that has a reddish tint to it for the interior framing of the gun ports. I'm trying to avoid using any paint. I'm trying to use wood that naturally simulates the ships colors without using any paint. So far, so good on the wood colors. I'm also still debating on whether or not I should simulate nails and fasteners for the interior planking of the hull walls within the areas of my gun decks. What do 'you' folks think? Should I nail those planks, or just leave them clean looking and free of fasteners?

-
-
56 minutes ago, mtaylor said:
Looking good. May I suggest you open a log in the appropriate area? It's a better place for many reasons as this one is for discussions/question, etc. The log will get your build indexed such that others can find it.
So sorry, Mark!
It's been so long since I was last here, I didn't realize that I was posting this in the wrong place... until you mentioned it and I just now looked!!! Is there any way that you, as a moderator, can move all of my posts, for this build, to the proper build log location? I have a few posts here and I don't know how to do that.
-
One more note, for those with really accurate eyes. The arch of my lowest gun deck is not yet set. It is not glued in place. The true 'curve', or arch will finally be set only after I build the second story of my pump house and also fabricate the wooden stanchions that will support that lowest level gun deck. I'll be fabricating all of the scale stanchions myself. I cannot purchase any pre-made stanchions of proper geometry, nor proper scale. Gonna have to make 'em myself! That lowest gun deck will ultimately have a proper arch and look totally correct after all is said and done!
-
Please disregard my bilge stanchions resting upon bilge planking rather than frames. When I started this build, I had no intention of going for true scale or becoming a 'rivet-counter'. I just wanted to build a model that looked good. That was 'then' and 'this' is now. The true scale thing was an afterthought and certain damages had already been done. All I can do now is to try and work my way through those initial mistakes and try not to make any more gross errors from this point forward. Fingers are crossed!
-
Making progress. I have the knee braces in place, below the orlop deck, but still need to fabricate the iron braces to hold those knee braces true. I'll be using copper for those iron braces. Copper will make for a great artistic contrast against the wood and will also be far more visible than black iron would be. I also need to add some walnut 'doublers' to the top of the bilge stanchions, where those stanchions attach to the beams supporting the Orlop deck. I'll keep the walnut doublers 'natural' in order to produce a contrasting color against the stanchions. I like contrast. It will draw one's eyes to certain 'small' details, such as those tiny doublers and iron knee braces... fine details that would otherwise likely go unnoticed without extremely close examination. I've also purchased a perfect scale of media to place within the bilge along with my semi-scale barrels, etc. I'll add the bilge media and barrels later down the road, when it is the proper time. I'm now planking the inside of the hull working upwards, between the lowest gun deck up to the next level gun deck. I'm looking at photos of the actual HMS Victory, as she sits today, and seeing no real indications of nails and/or fasteners holding that interior planking to the frames. There must be a lot of paint, putty, etc. hiding those details from the eye. I'm debating on whether or not to show nails on the interior of my build. My decks are segmented and nailed via the 'rule of four'. Not sure how my model would look with nailed decks and smooth walls... "Hmm?"
-
Allan and Gary,
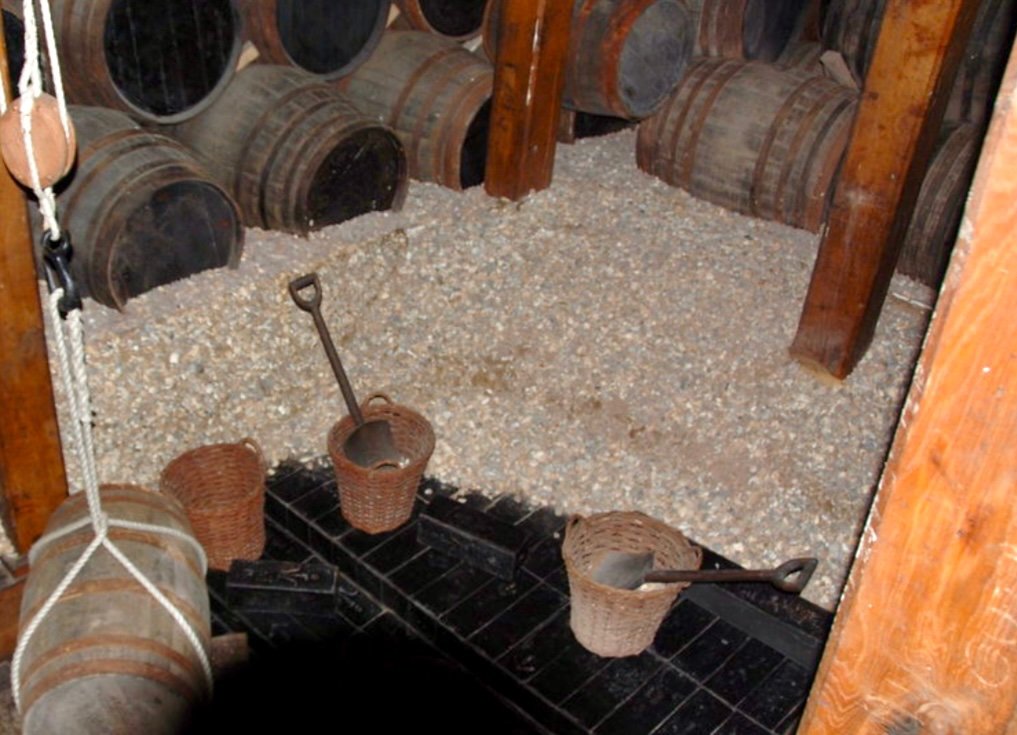
This is "Really Great" stuff that the both of you are sharing with me! I've simply been looking at completed models, built by others, and going from 'that'. I'd have never known about this 'Pigs of Iron' ballast thing without you folks enlightening me! I'll now be losing the small 2mm-4mm gravel, for ballast stones, and replacing it with a coarse grain sand, or crushed rock for the bilge. My barrels will be a teeny bit large, @ 1:98 scale, which would equate to being about 6.125" larger, in diameter, than they should be at full scale, however. I should be able to get away with that minor discrepancy. I doubt that the slightly larger size of my scale barrels will be easily noticed inside the model. I'll also need to make some small woven baskets and shovels to add to the desired effect. Thanks for the photo, Gary. It gave me more inspiration and insight of needful things to display inside of the bilge!
-
18 minutes ago, Morgan said:
The Victory’s primary ballast by 1805, assuming you are modelling the Trafalgar Victory, consisted of ‘Pigs’ of iron. These large ingots were overlain with gravel or shingle, although this added to the ballast weight it’s primary use was to provide a stable bed for the lower tier of casks and stop them rolling around.
I don’t think stones would be accurate.
Gary
Gary, this is the sort of stuff that I need to know! "Thank you!" Do you happen to have any visual examples of 'pigs' of iron? I'd love to see an example of such!!
-
After a three-year Hiatus... I'm now back to this build. The photos that follow are of my current build progress. Be forewarned that any progress I make, from this point forward, might be a bit slow in coming. I'm pushing 63 years old and still working full time designing and building industrial machines... and can only work on my hobbies during the weekends because I'm just simply too tuckered out, after work, to mess with anything during the work week.
My first goal, on the continuation of this build, is to now start adding ballast stones to the bilge and build the depth of those stones up to a somewhat scale height that will also offer room for numerous scale barrels that will need to be stowed atop the ballast stones. I'll also need to use ballast stones and sand to artistically hide my bad 'joinery' of the ribbing where it 'should' contact the hull planking. This may take some time. I'll need to inject epoxy, spread it around and add gravel... without accidentally getting any epoxy on anything/anywhere that I don't want it. I'll need to do this one level/layer of ballast at a time until I get the bilge filled to the proper height with ballast stones. I also need to ensure that every level of ballast is securely glued down, and nothing moves, or falls out of the ship when she is turned on her sides to accommodate future building needs and processes. I'll then begin to populate the bilge area with needful items, tools, etc. that would typically be found in that lower area of the ship. I'll try to be as historically accurate as possible, when I can, but will also be using a bit of 'artistic license' in some of the things that I do for visual appeal, effect, and visual impact. If I cannot find the exact details that I seek, I'll put my engineering hat on and create something that I deem sound, doable, and proper be it right, or wrong! That's the best that I can do!
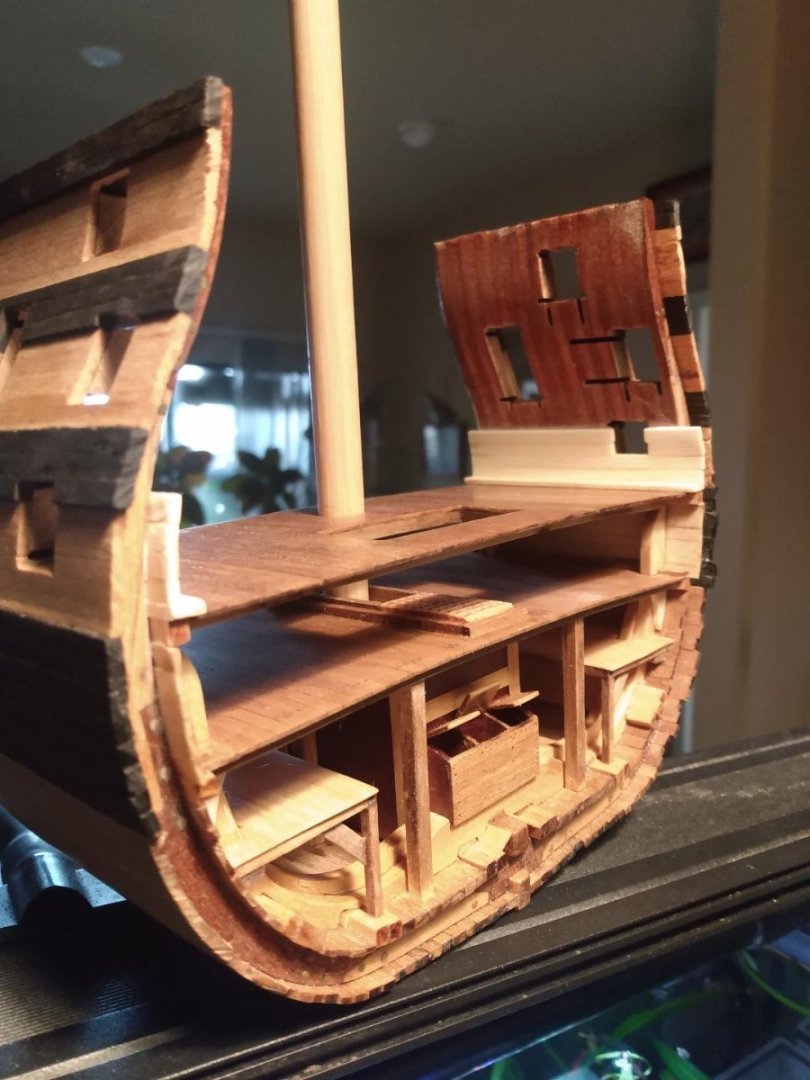
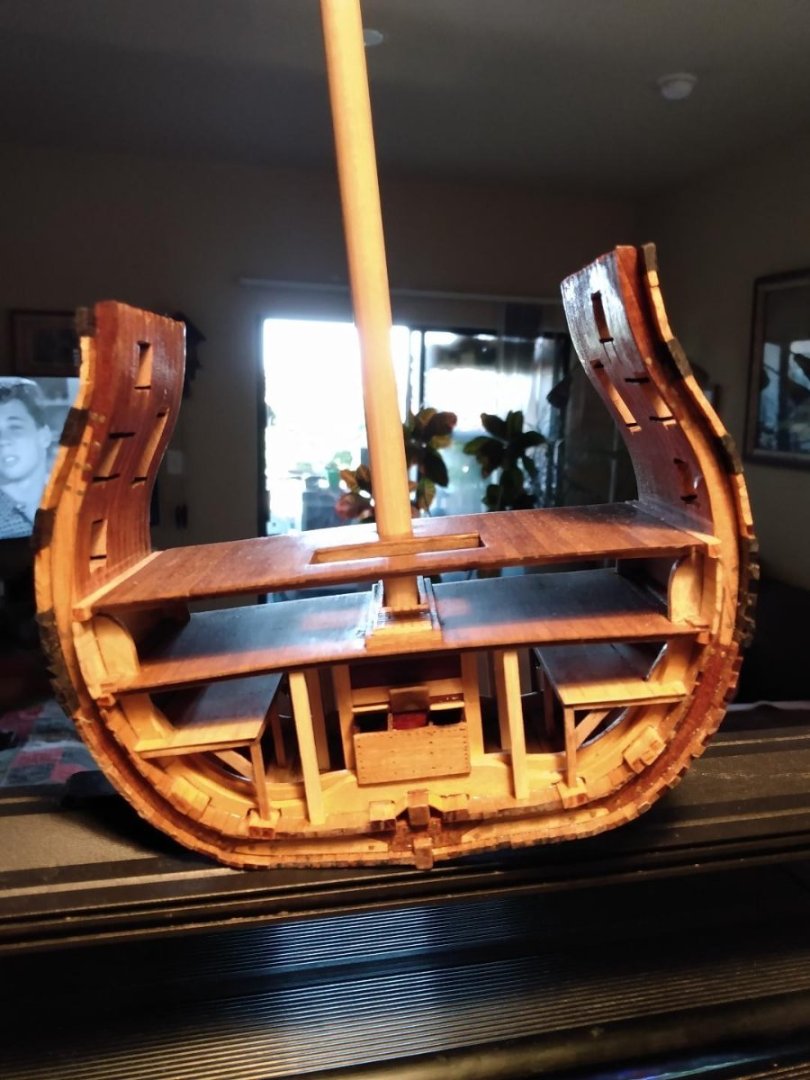
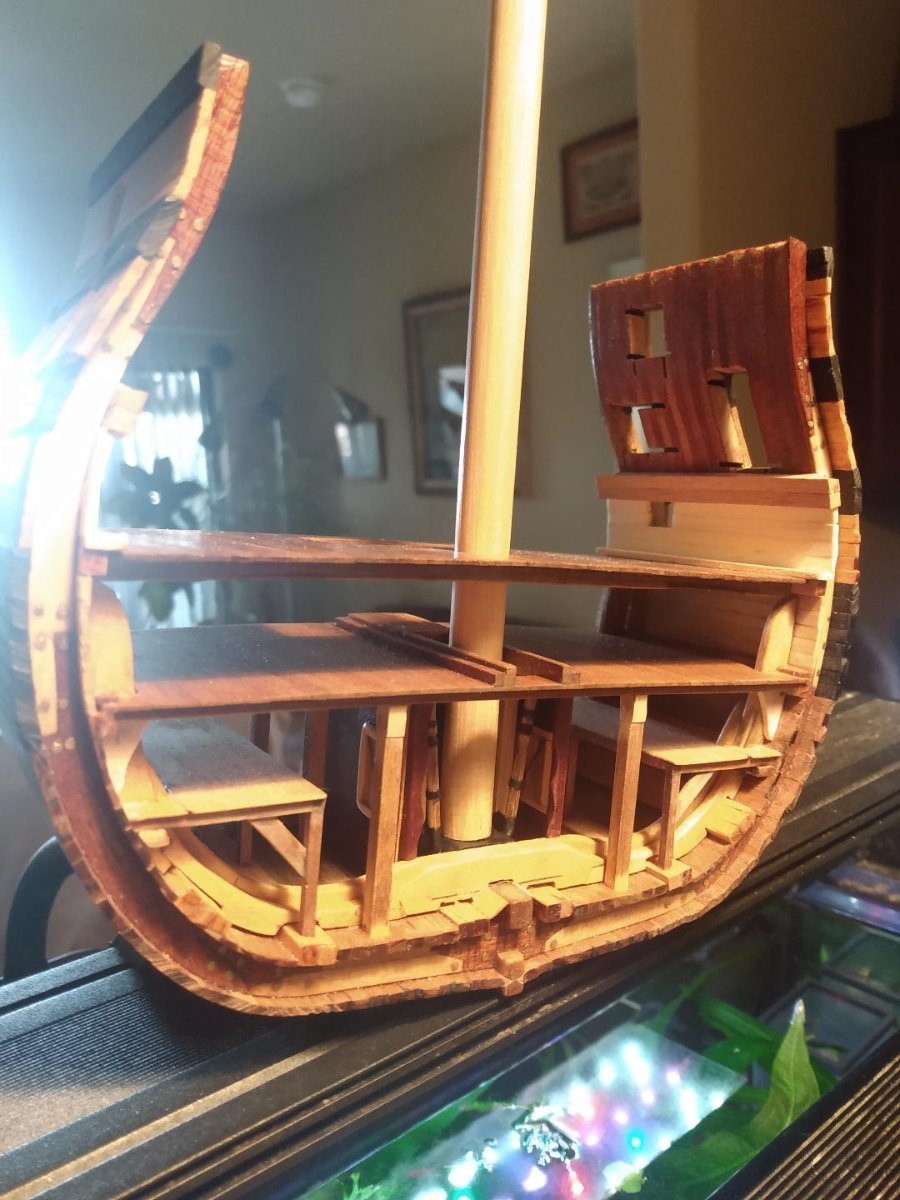
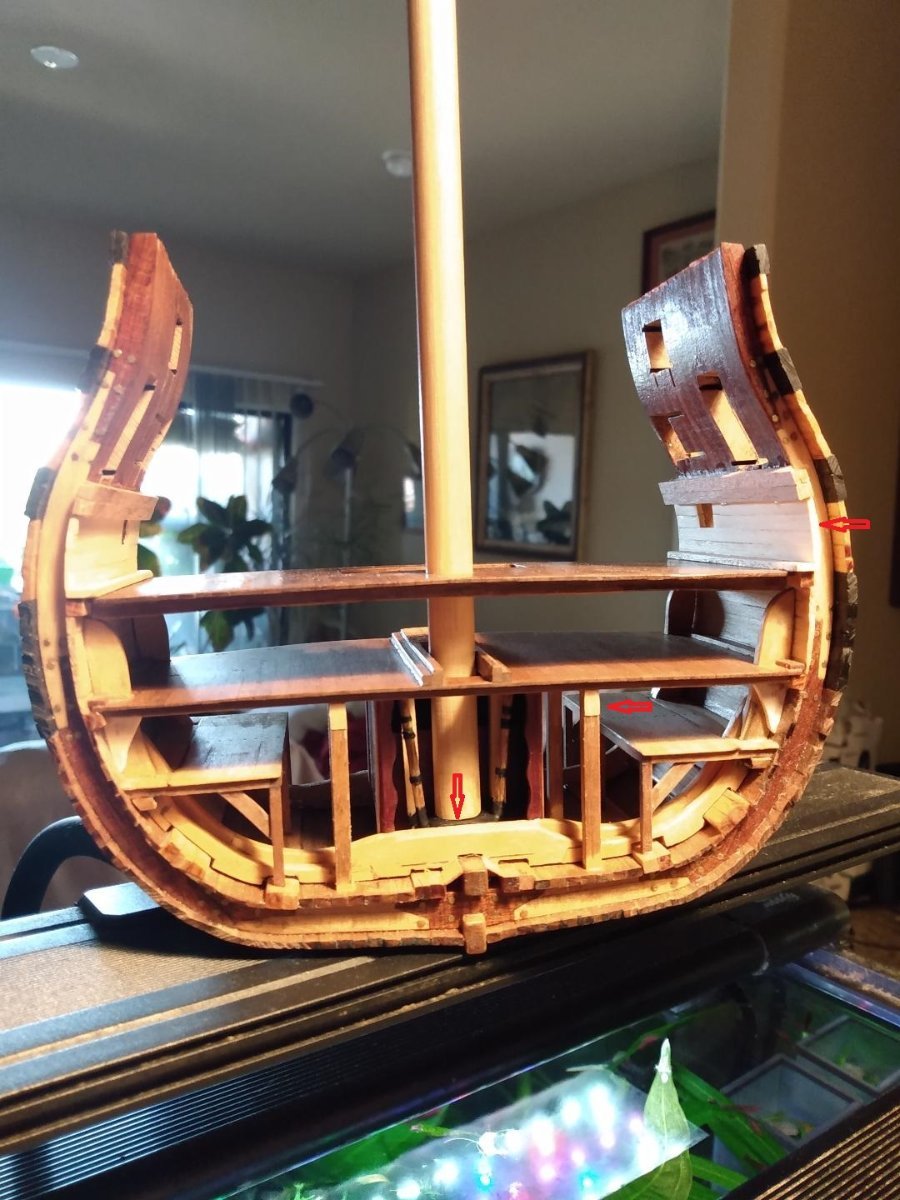
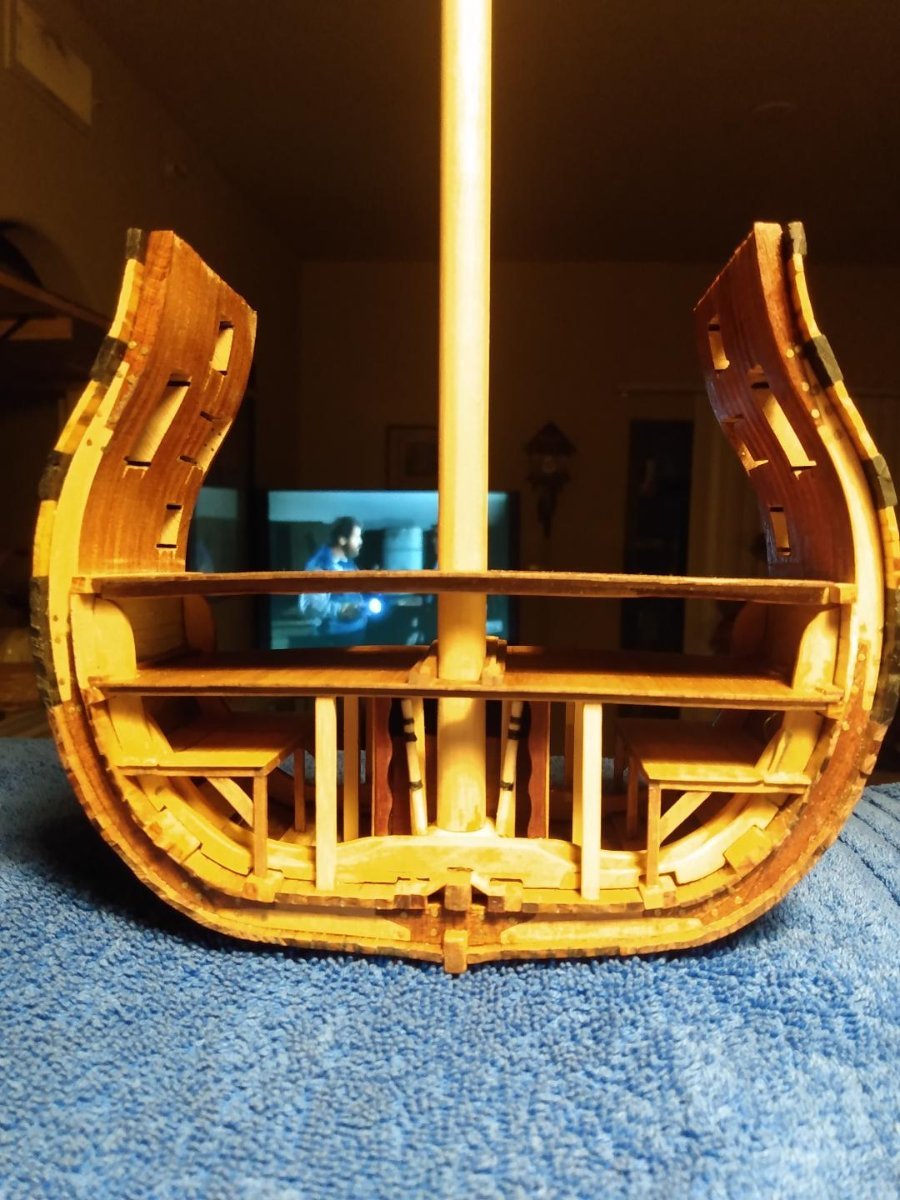
Here I go again. The following photos show each end of the current state of my Corel HMS Victory 1:98 'bashing'. Updates will be posted as they occur.


-
One last question, pertaining to the 'flip side' of this cross section. Other than cannon balls in the bins... is there anything else, cannon ball or weapons related, that should also be displayed on 'this' side of my build?
- mtaylor and Keith Black
-
2
-


'Limber' Channels
in Nautical/Naval History
Posted
I've read how bad bilges could be on many ships, especially pirate ships, however. Wouldn't first rate military vessels, typically being run as a much tighter ships than most, vehemently frown on such behavior as using the bilge as a toilet... and likely harshly punish anyone caught doing so? I'm just supposing here. It seems as though military discipline, aboard ship, was much, much harsher back in those old days than it was while 'I' was in the Navy in a more modern era.