


Mirabell61
-
Posts
7,403 -
Joined
-
Last visited
Content Type
Profiles
Forums
Gallery
Events
Posts posted by Mirabell61
-
-
I was never happy with Mr. Crispy Toes so I have made two new crew members. Small items, like the head and feet, were added after the torso was baked and then epoxied in place. The captain has prohibitted drinking in bed so I have my sailor sleeping with his hands behind his head. His buddy up top is holding a mug of ale.
Toni,
I love that Atalanta model of yours, especialy the neat and clean wooden joinings, there must be several hundreds of them by now..., and I like the Patience you have and in not becoming less less acurate in your Ambition in facing all the Details yet to come...
Very well done !
Nils
-
Chris,
I just had a look into your beautiful build`s Progress, and must say it realy gets me excited....
That is eyecandy all the way
Well done !
Nils
-
Michael,
the wooden tiller shapes in combination with the brass metal work Looks great, just like all the other Details you are providing
Nils
-
Hi Pierre,
I wish you all the best for enjoying your Special day, and for your new living year..
BTW your nicely built Agamemnon is well improving from sequence to sequence...
Nils
-
Thanks Popeye,
yes I have seen the chiropractor already, but he is a bit afraid that it could be a prolapsed intervertebral disc, so nothing was done in that direction. But I am hoping that next weeks appointment with a good masseur shall bring relief.
Nils
-
-
Thanks Danny,
after there was no other help, that was my thought as well, I have 6 fixed apointments with such a masseur but no beginn terminated before first April week
Nils
-
-
Hi Crackers,
thanks for all the "likes" when dropping into and exploring the Pegasus build log. I hope you like the scratch build from Amati plan.
It was because of the lost Pictures in MSW that I replaced them with an update in the last days. Probably you overlooked that Anjas birthday greetings were from Oct. 2013, so it swam up with the replacement announcement today.
Sorry to admit, I have`nt been busy with this build reasonably since then, but hope to reactivate it with more Progress soon
Nils
-
Steve, yes it is rather bigger than a lot of the models on the forum.
John, sometimes I think I should stay out of the RC conversations as well.
Mark, sometimes I think that I should forget about sailing her.... but then I would always wonder.
Sherry, thanks, I like the term full fledged, conjures up thoughts of flight and wind.
This evening I did a little more work on the tiller, after doing a few sketches this morning to get a better sense of the shape.
the next step in shaping the yoke on the mill
and the new Lilac tiller, I am looking forward to the fine work on the lilac it is such a wonderful wood to work with and has the aroma of aromatic cedar. and is very fine grained with purplish streaking.
Michael
Beautiful Michael,
you are realy resembling your "actual dream cutter" in a splendid done model, I would wish to own such a boat in reality...
Nils
-
Thanks for your wishes Dirk,
Nils
-
Here she is "Stefano 1875." -barque... she looks something like this ... the draft is still under construction... 11 or 12 sheets 1300 mm x 900 mm...
Ist going to be a nice model...
good looking lines of the hull and well placed Frame distances, also the rig Looks interesting, barque typical square sails on the first two masts only. The rather sharp bow area and the fine Stern lines must be a Little bit Clipper like
You made me curious for more Progress to be shown here...
Nils
- Canute and MarisStella.hr
-
 2
2
-
-
B.E.
I hope that soon a Little Progress can be achieved with my HMS Pegasus Swan Class. I am suffering now for for several weeks already from a painfull pinched nerve in neck, shoulder and arm area, and visiting the doctors did not bring help to date. But this gave me time to think about what sequences were to be done next with my build, at least in my mind
Nils
-
-
Robert,
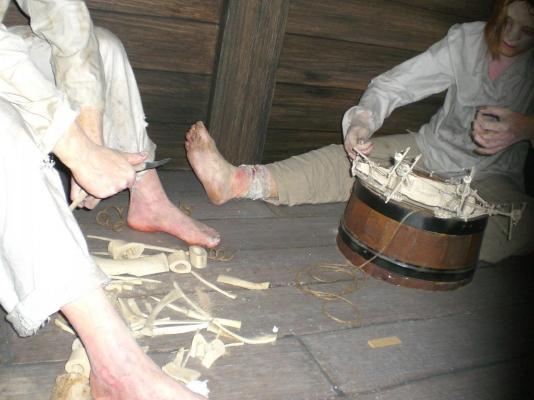
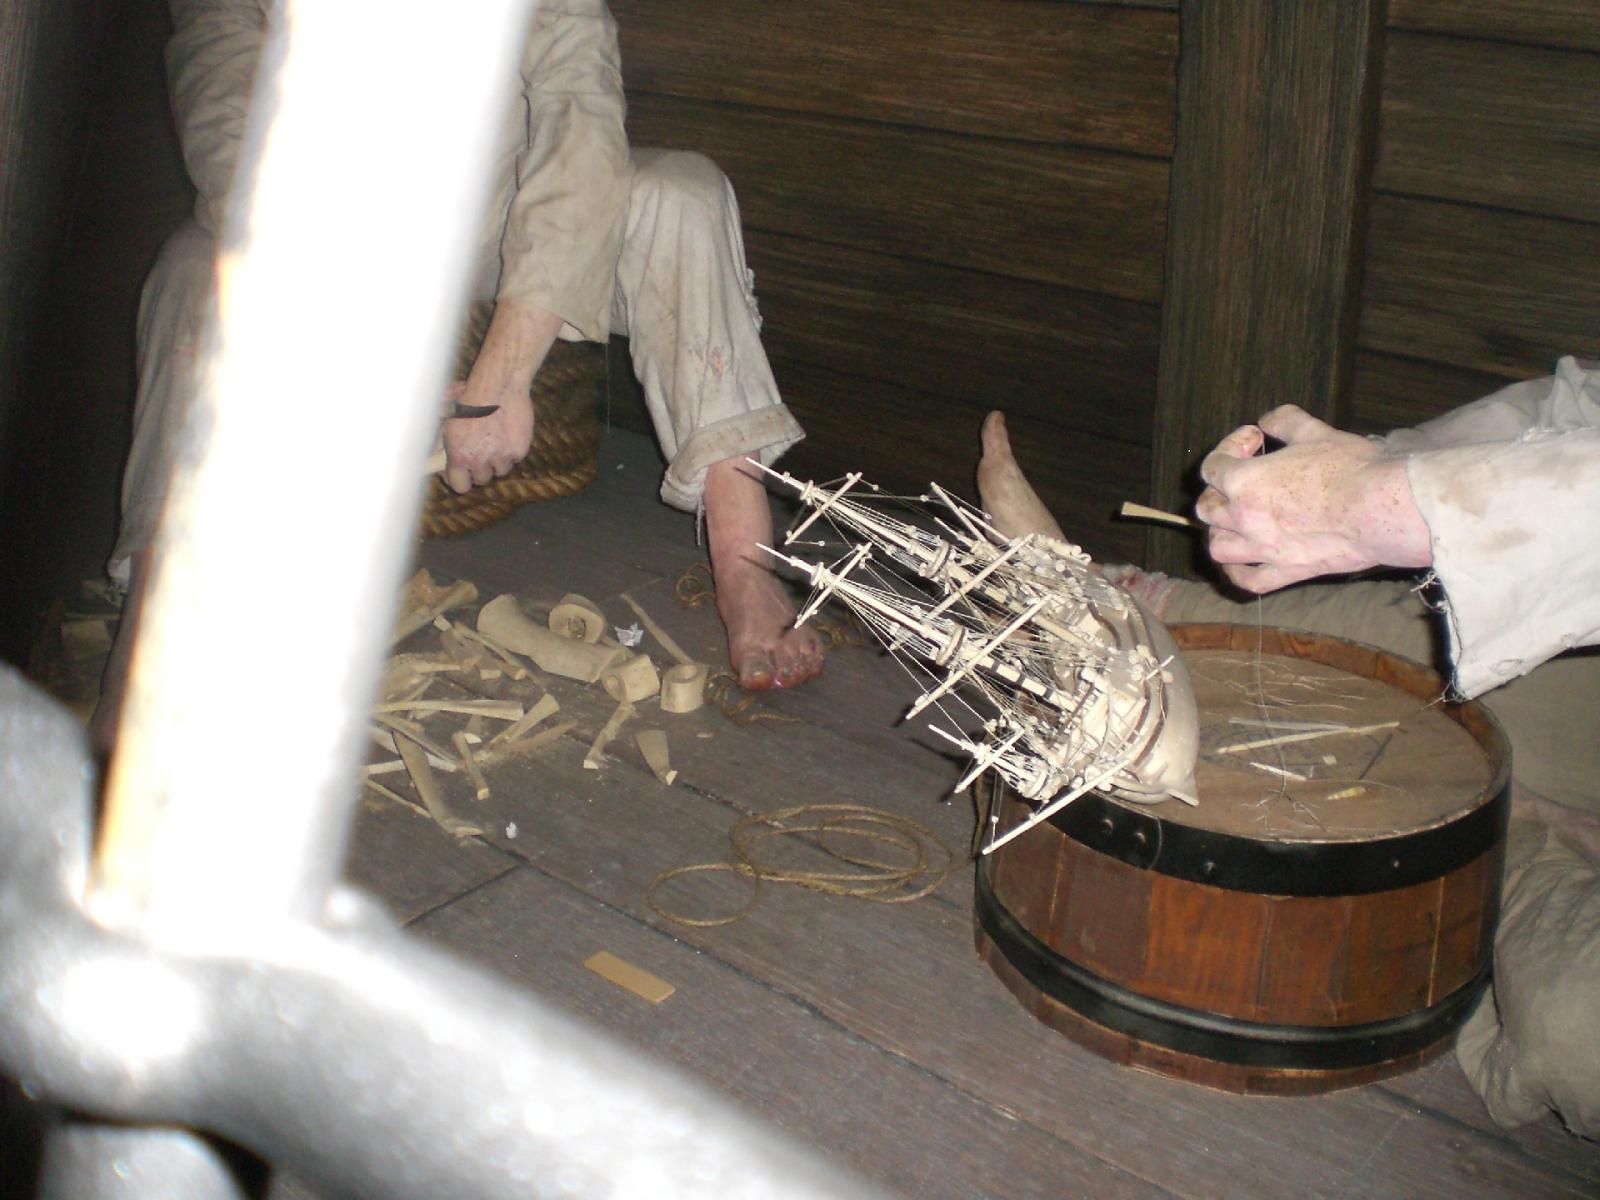
your work is fantastic, the bone-shipmodelling is such an admirable handcraft, and your skill in doing so is unbelievable
Well done !!
By the way I had a Chance to peep into the secret bone-ship building Hobby room of the Hamburg Maritime Museum recently, here two pics for you...
Nils

- WackoWolf, harvey1847, Jeronimo and 7 others
-
10
-
-
very nice looking sails Mauro,
ist a bit difficult to see from the pics, but did you sew a boltrope to the sails by Hand or by machine ?
Nils
-
Beautiful metal work Micheal,
I can imagine the fun you have in creating those lovely Fittings
Well done !
Nils
-
As I said before, “SHE wants GOLD”. Now I come to the cove that should be gold. I looked into gold leaf but not only is it expensive but I don’t need near that much. Yellow paint isn’t the same and I’ve never seen a gold paint that came close. Besides with my hands I could never paint a straight line. So here comes brass. All I have to do is fasten a strip of brass . . . but I read topics here saying how do you fasten brass to wood? There are probably many ways but here is how I did it.
The stripe goes in the cove line or in my case where the thin bulwark strake and the wide strake meet.
 26a typ frame small (Copy).jpg
My plan was to solder .188” of the tip of several .024” brass plank nails to a .032” brass rod. This is still up in the bulwark area so fasteners had to be placed where the stations are. I drilled .020” holes into the stations. I measured the hole locations and soldered the nail tips at the same distances and found out that if you are off by even that little the brass rod doesn’t fit properly.
On to plan B. I placed the nail tips in the holes leaving about .06” exposed. Then I soldered on the brass rod and pushed it tight against the wood. I then filed a flat on the exposed part of the brass to catch the light.
Thanks for the help Nils.
Bob
Drilling for the nail tips.
A nail tip pressed in, waiting for solder.
Rod soldered to nail tip
It Looks great Bob,
can`t wait to see the fixed rods when pollished in Close ups...
Nils
-
Karl,
thanks for sharing those fine Pictures of the modernized GF of 2013, shall save These to my Archive
Nils
-
your Lettie Looks great Bob,
well done !
I am expecting a most beautiful created and built schooner under your Hands
Nils
-
Thank you very much Nenad
Nils
-
Bob,
thank you for your nice and appreciative words
Nils

Le Fleuron by Gaetan Bordeleau - FINISHED - 1:24
in - Build logs for subjects built 1501 - 1750
Posted
Beautiful Work Geatan,
its a pleasure to see every new Progress update...
Nils