


Mirabell61
-
Posts
7,403 -
Joined
-
Last visited
Content Type
Profiles
Forums
Gallery
Events
Posts posted by Mirabell61
-
-
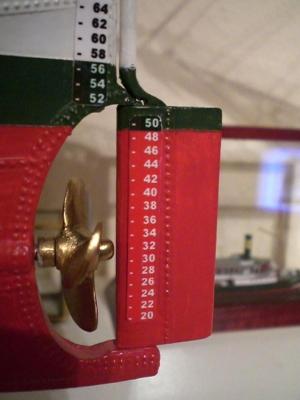
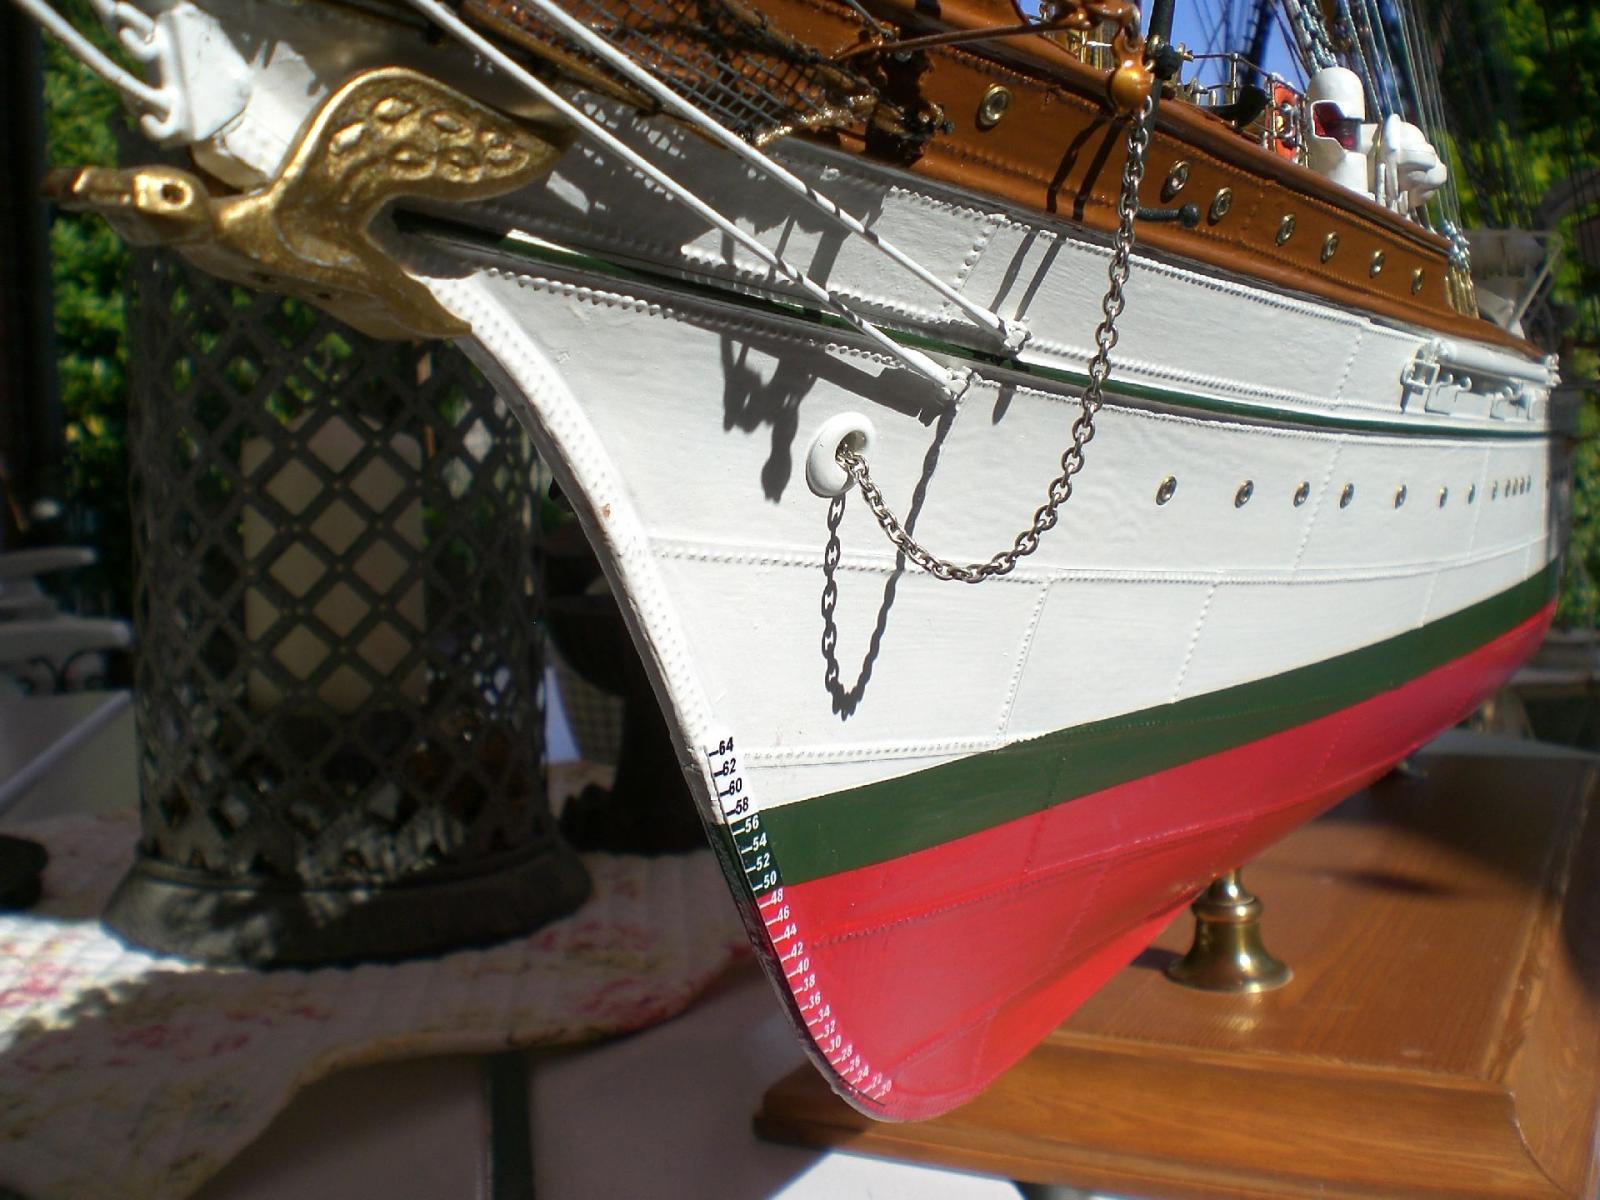
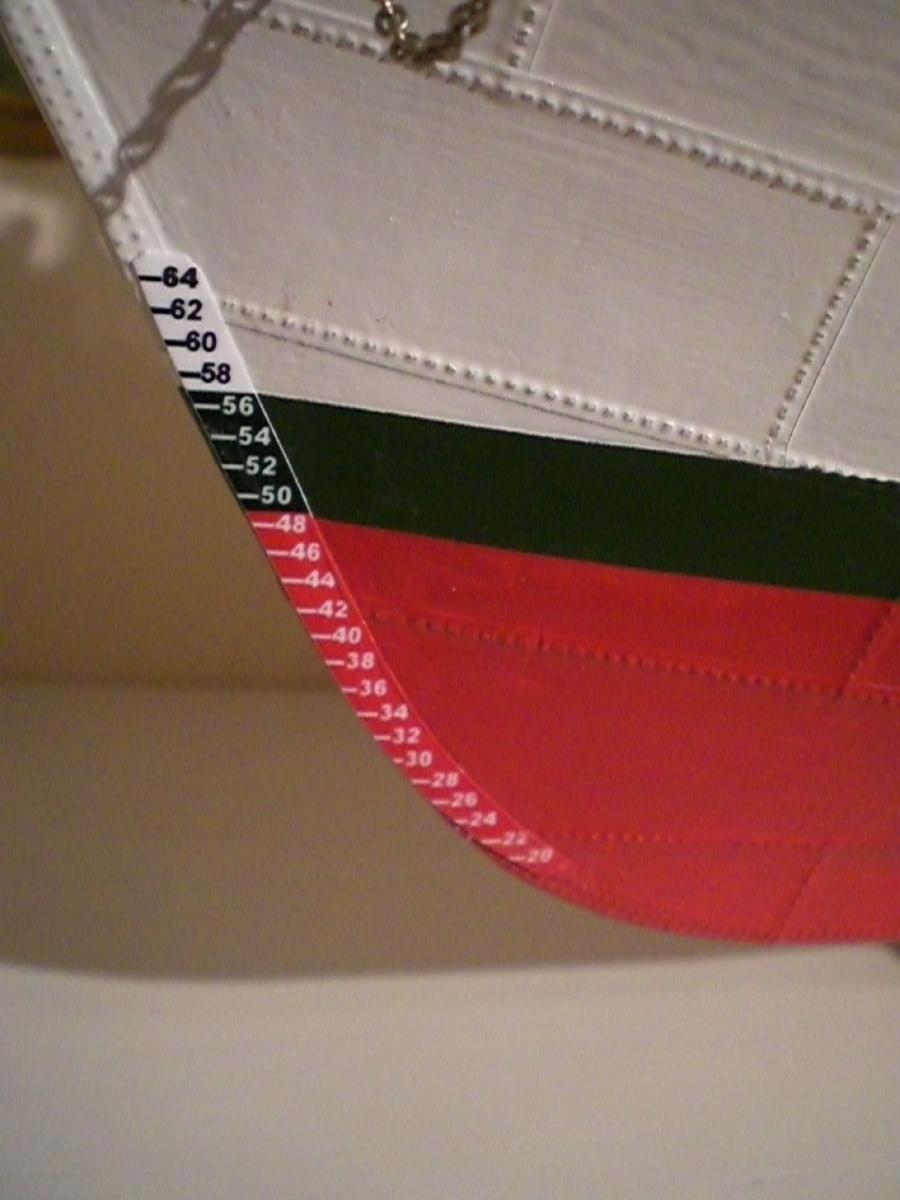
Consistently amazing. I love how you harmonized the printed depth mark numbers with the steel hull plates. Are the rivets on the printed pieces printed as well, or are they dimensional? (applied separately to photo paper)
Bob,
the objects next to the depth mark numbers are printed dashes. I was not my aim to to resemble the rivets on These pieces as well. I tried before to print on transperent (thin ! ) blanc decale sheet and to have the hullplate rivets pressed through, but that did`nt stick well, also the very thin sheet was tearing every now and then, driving me crazy and so a compromise had to be made..... no feelable rivets there, but good visible markings instead.
Nils
-
great lesson Michael,
very nice way of getting anchor tube openings flush to the hull, without just sawing them off at a certain angle,
Thank you for sharing
Nils
-
thanks David,
the Picture flow is now slowly moving on to its end, but still 6 more parts to come
Nils
-
-
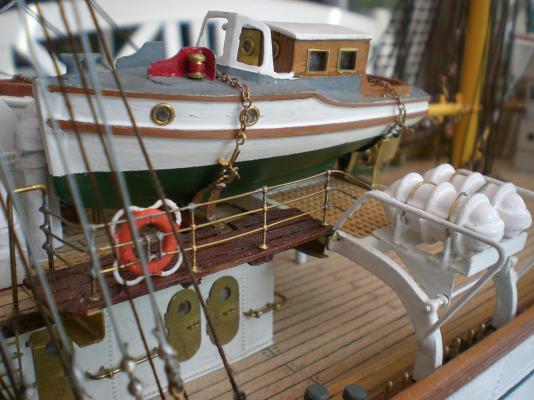
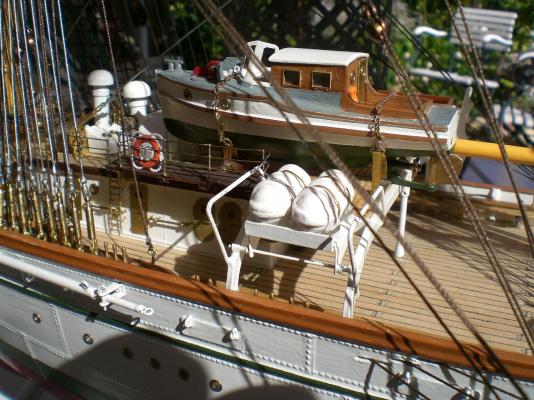
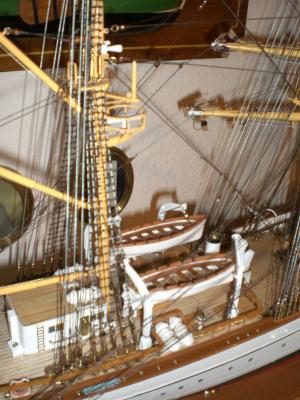
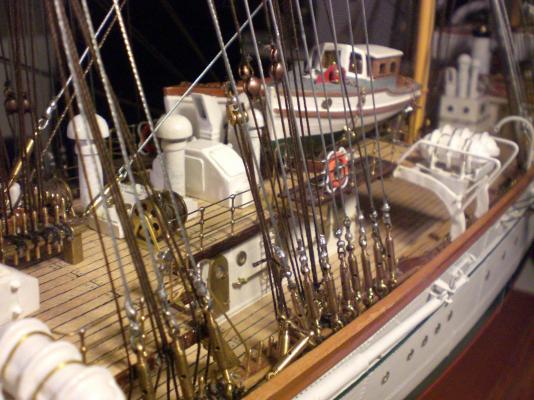
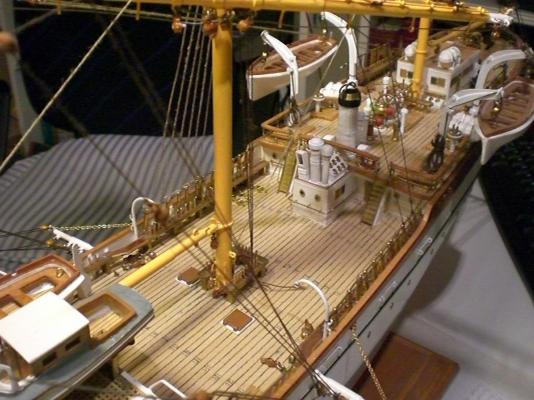
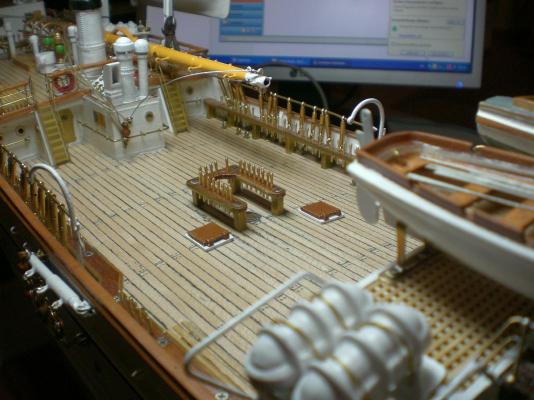
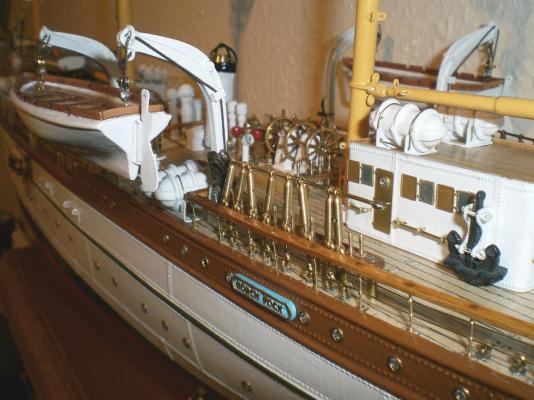
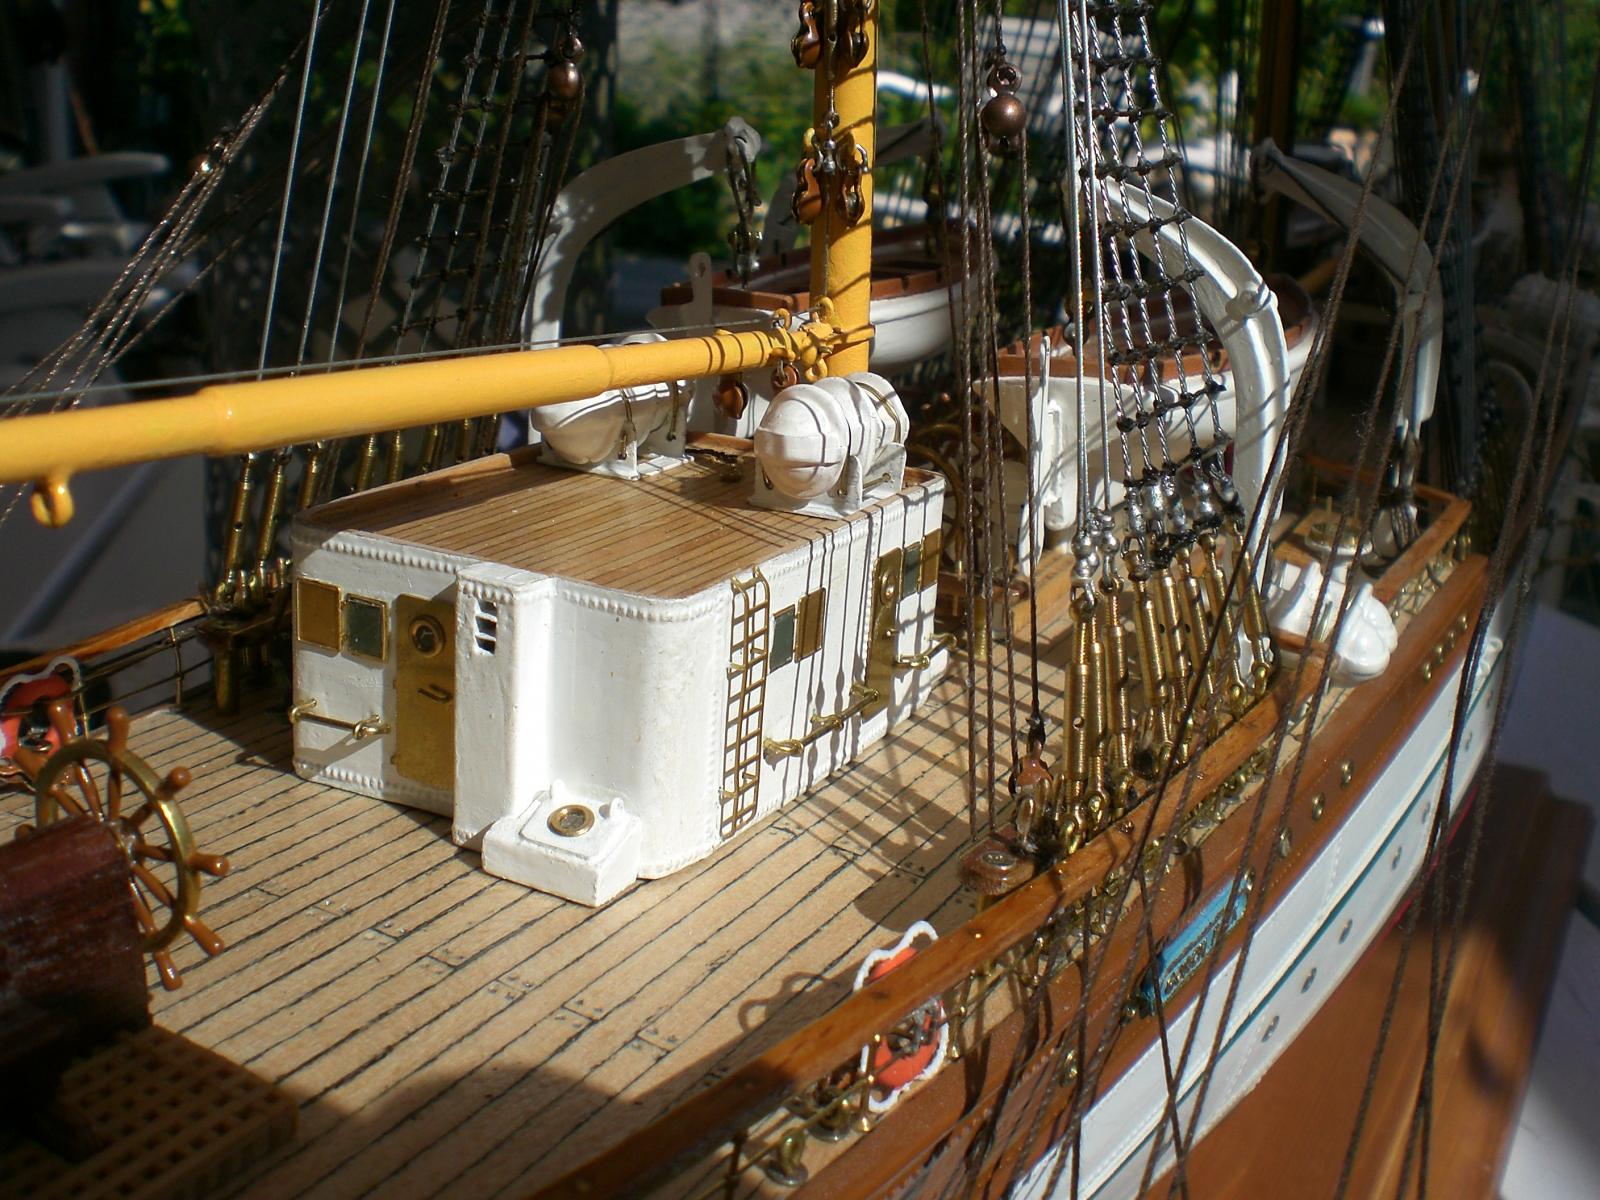
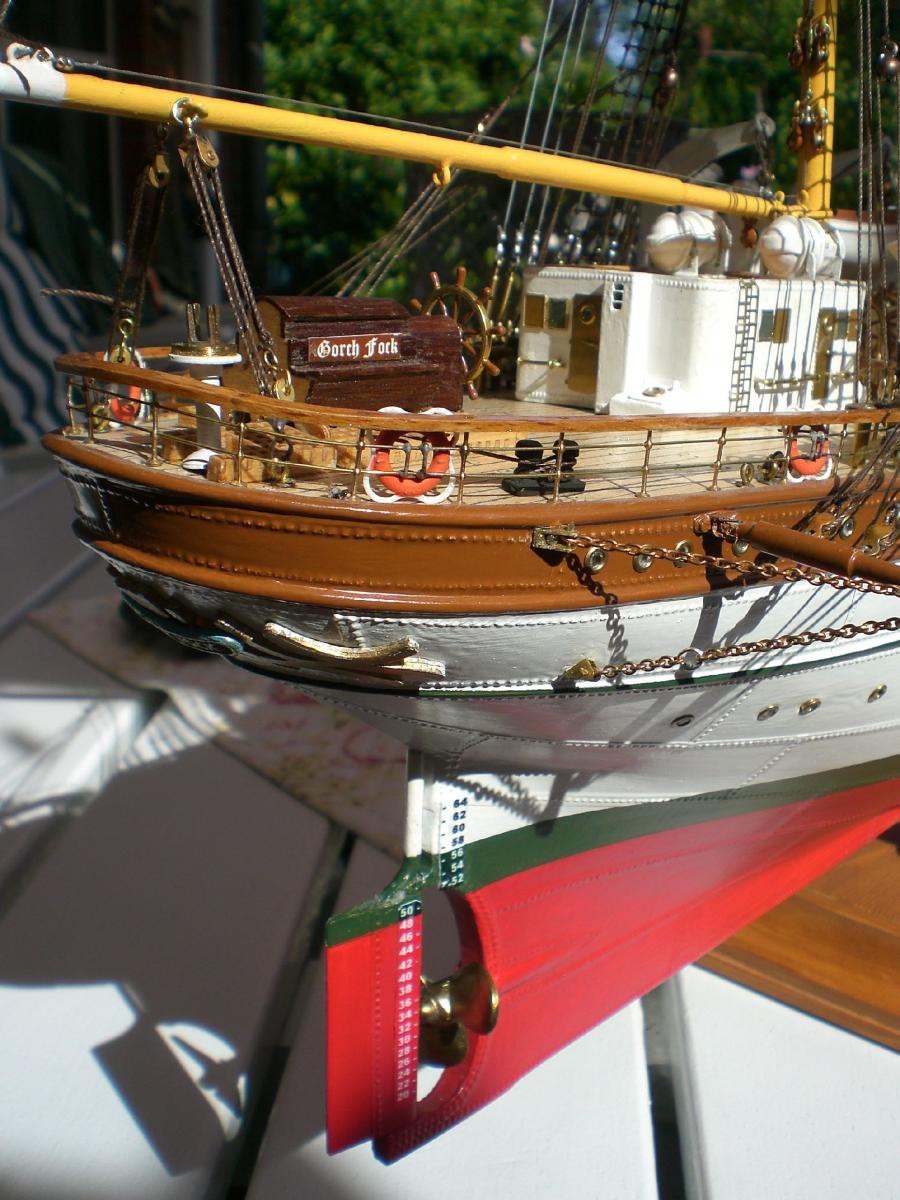
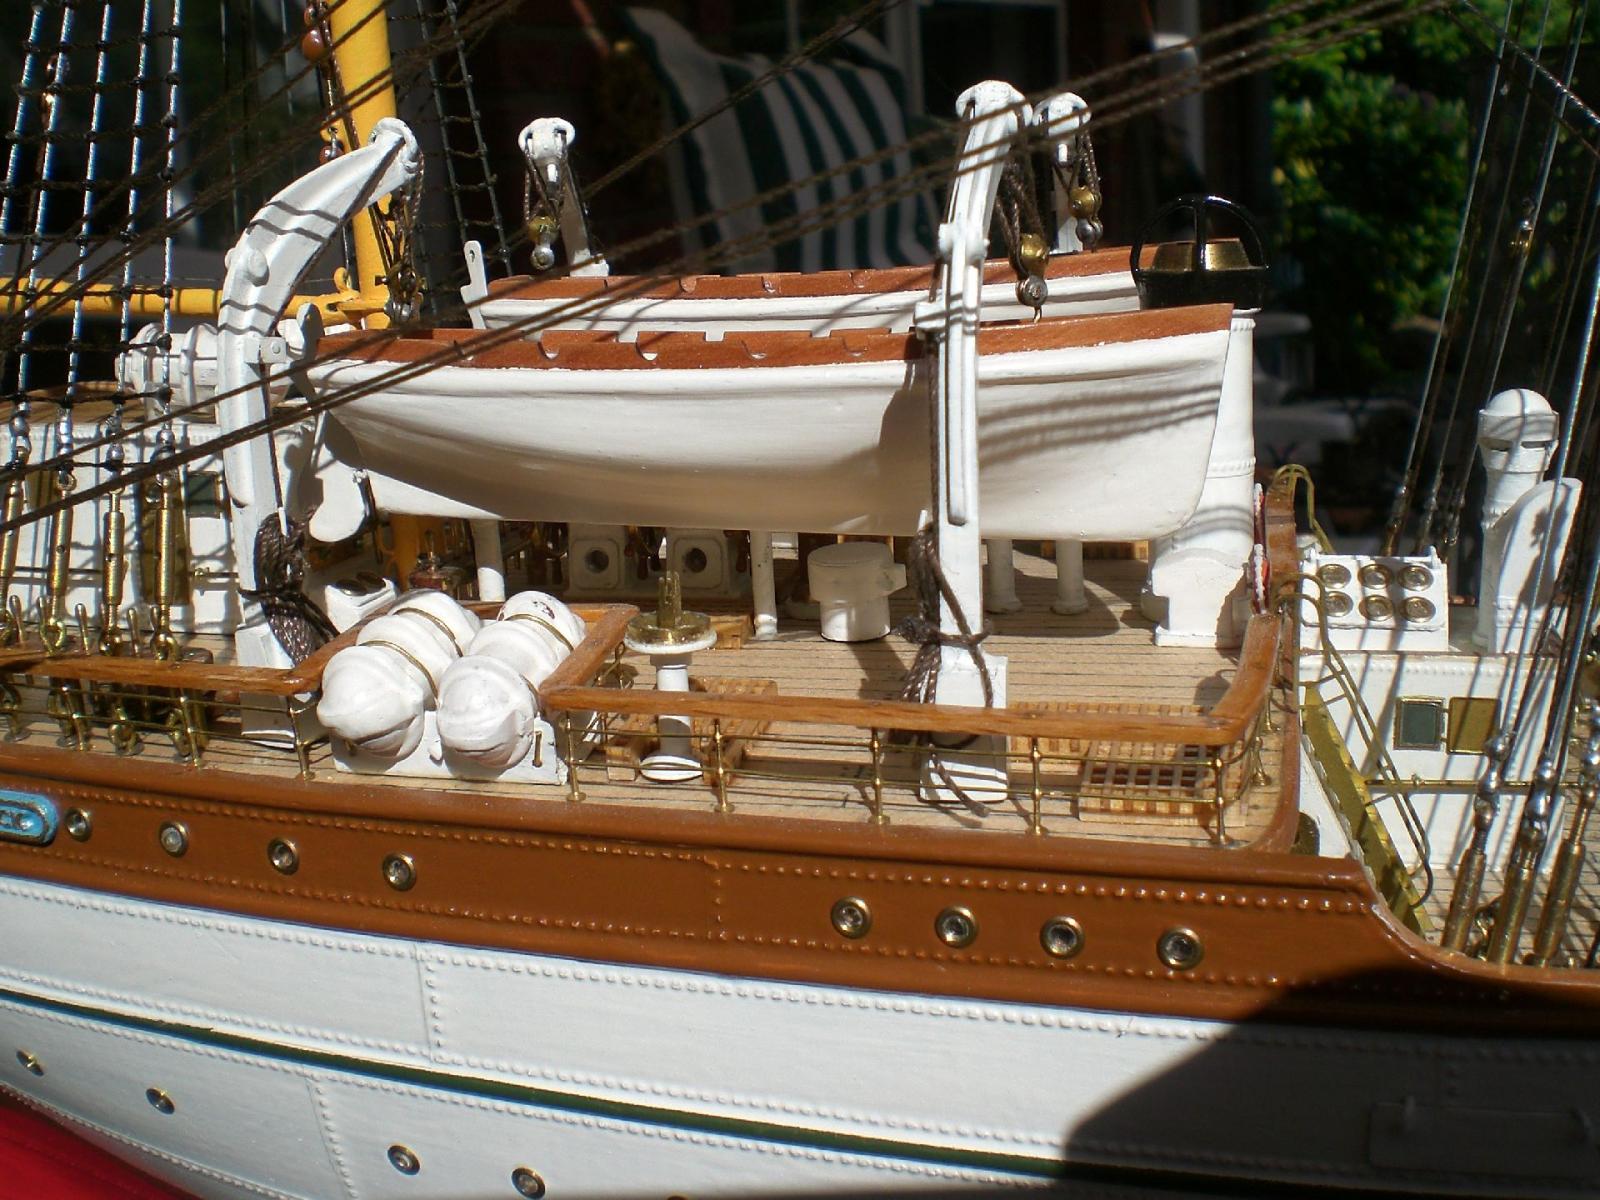
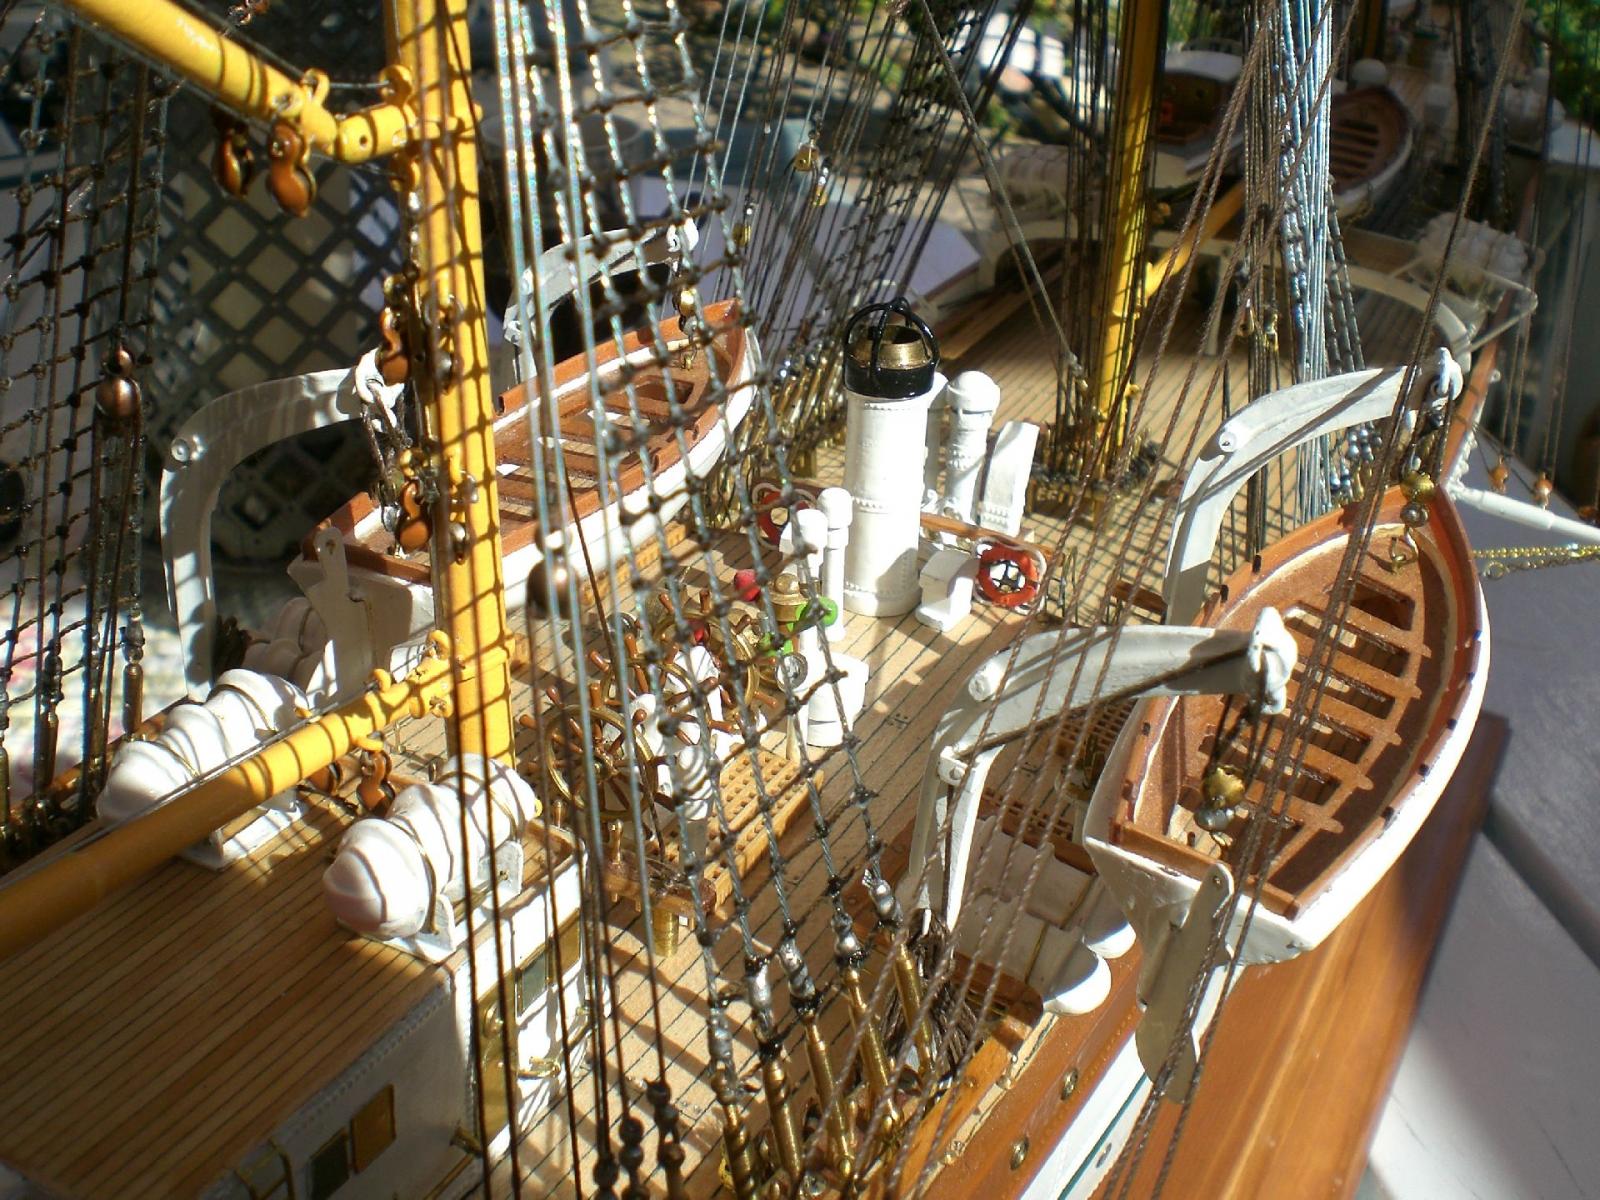
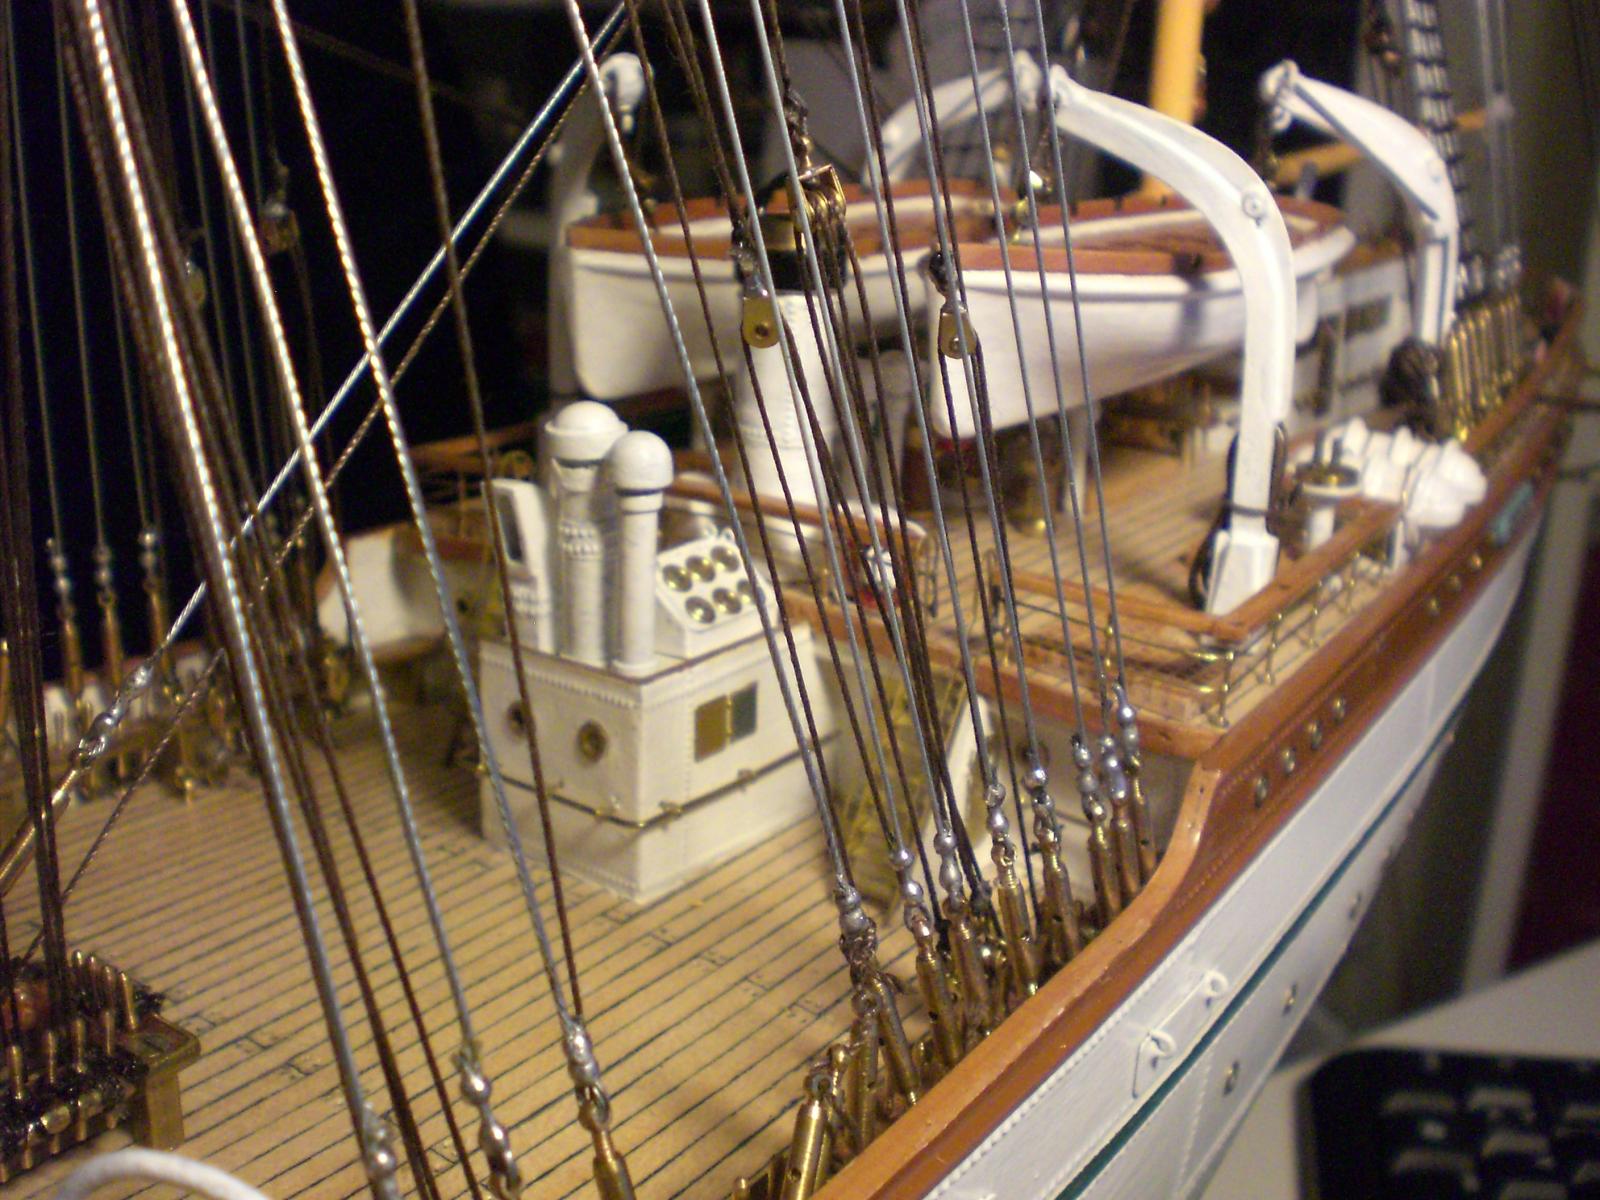
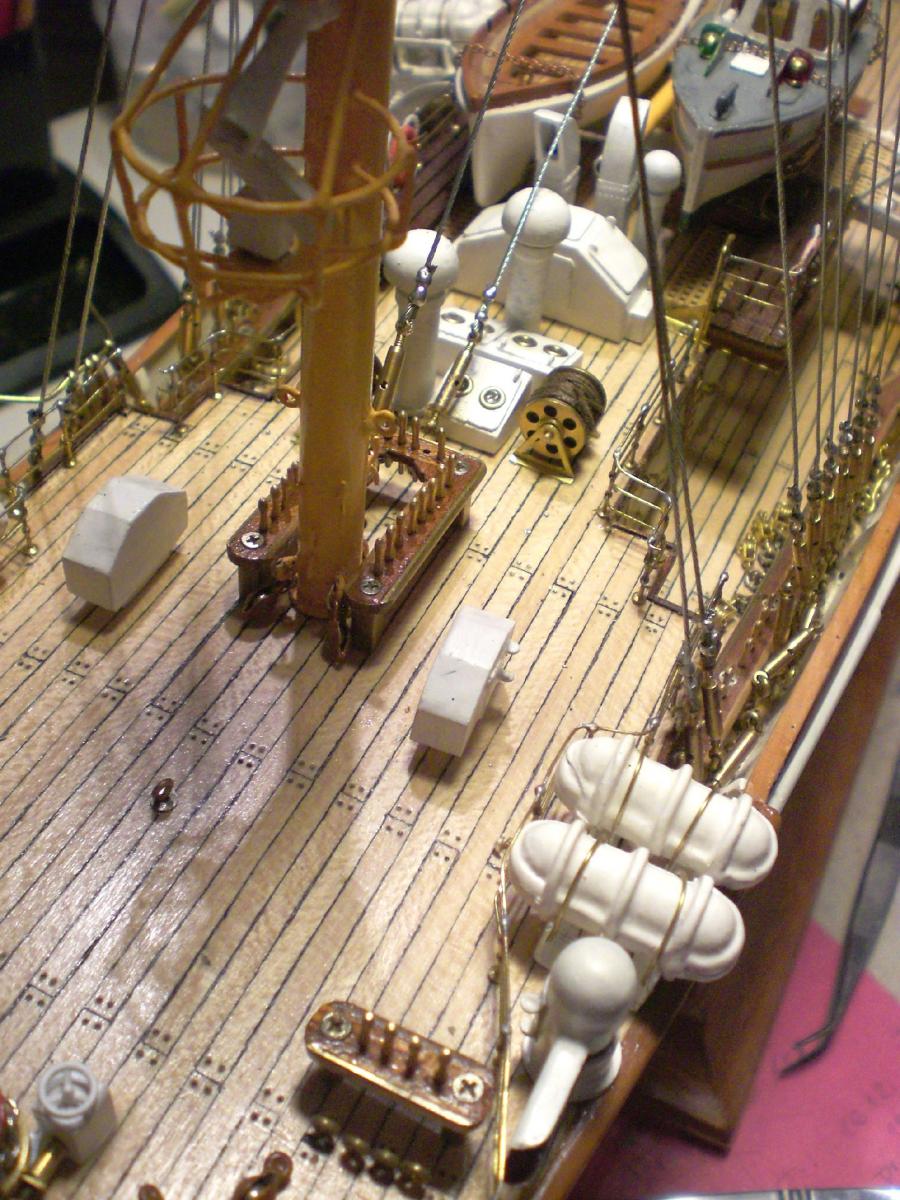
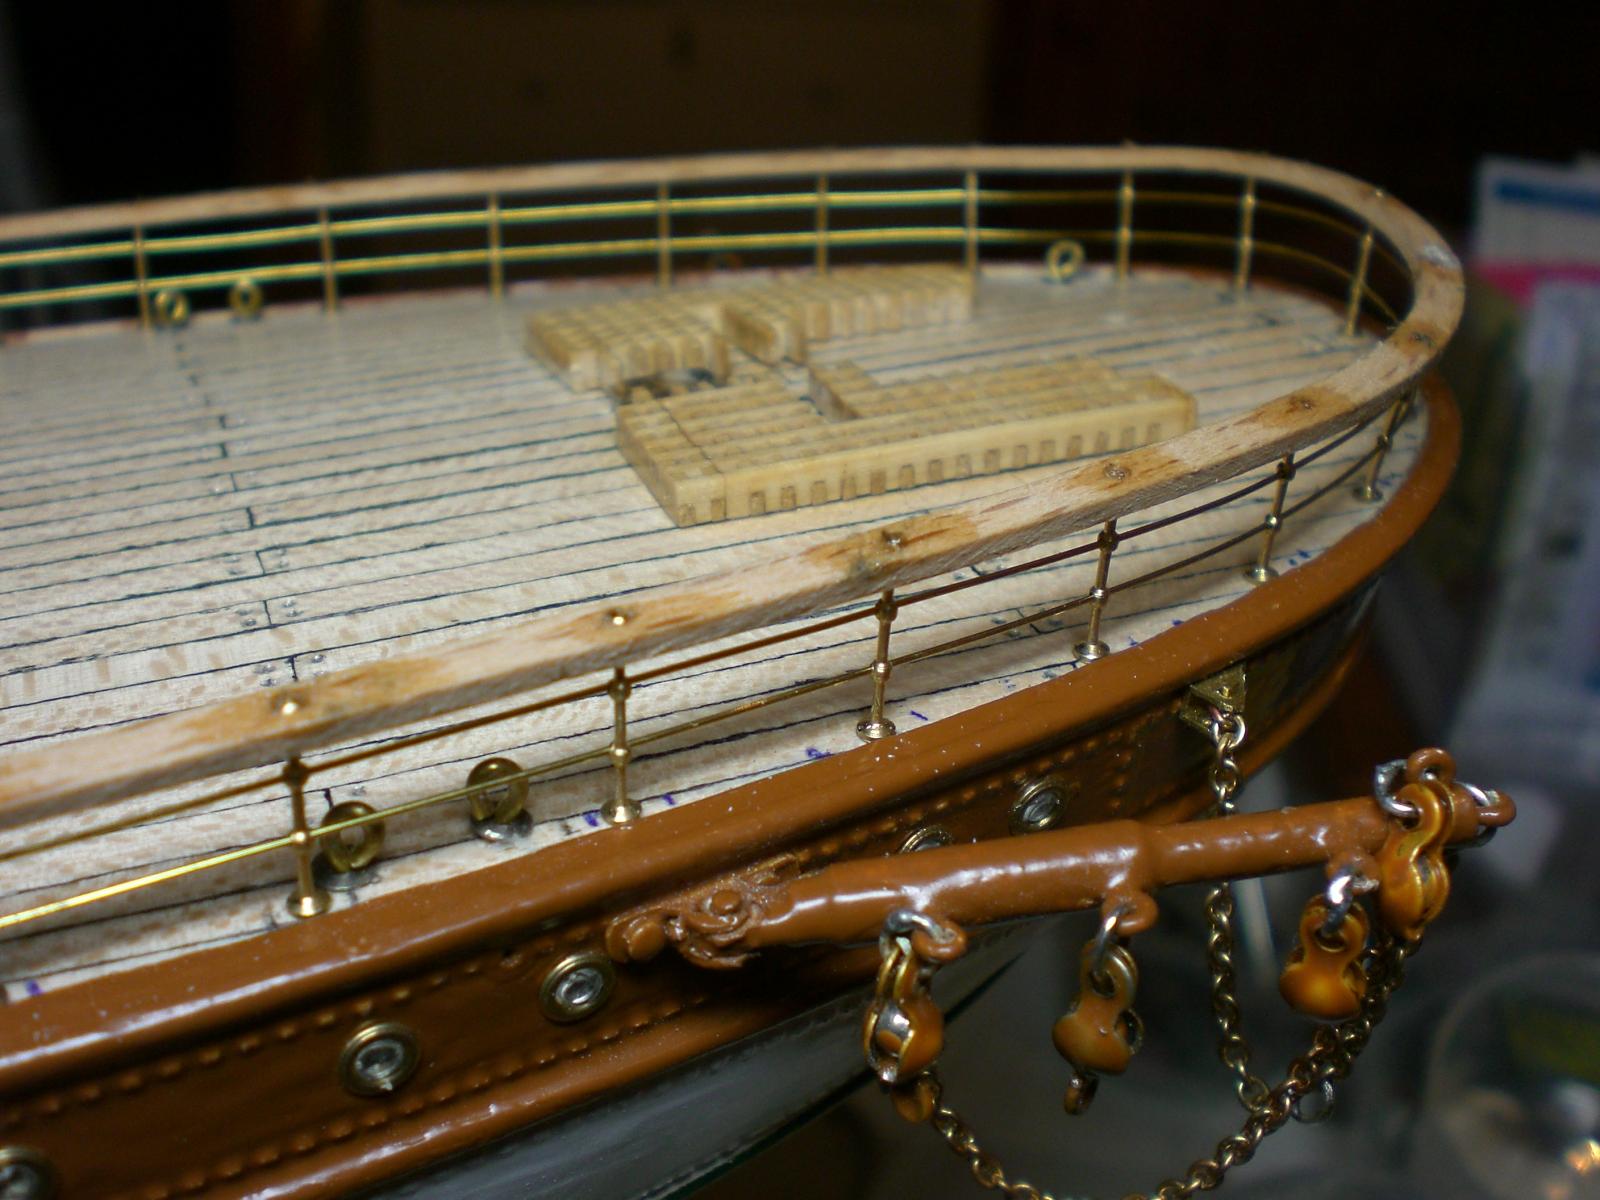
Build log part 46

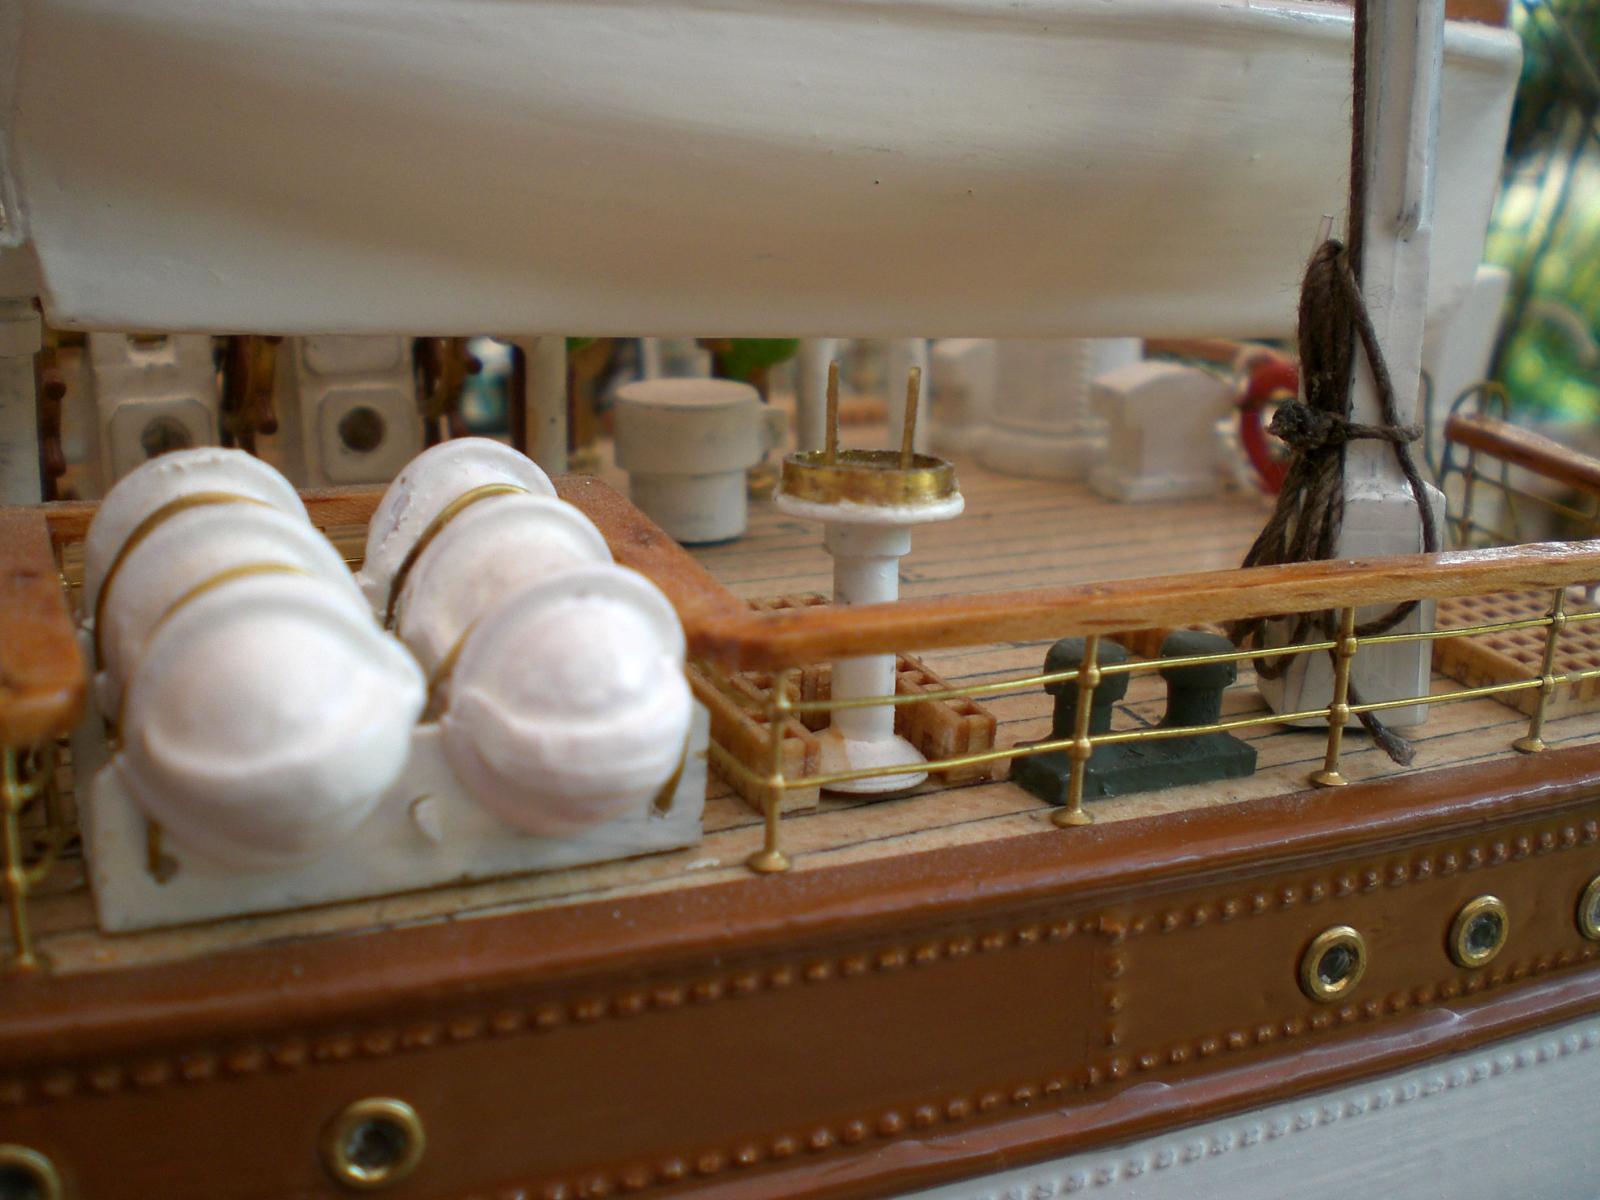
liferaft Containments on poopdeck
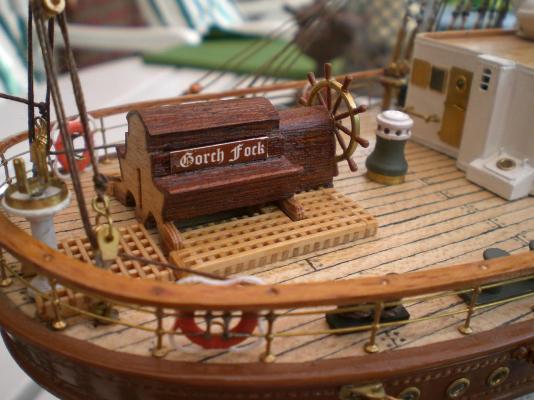
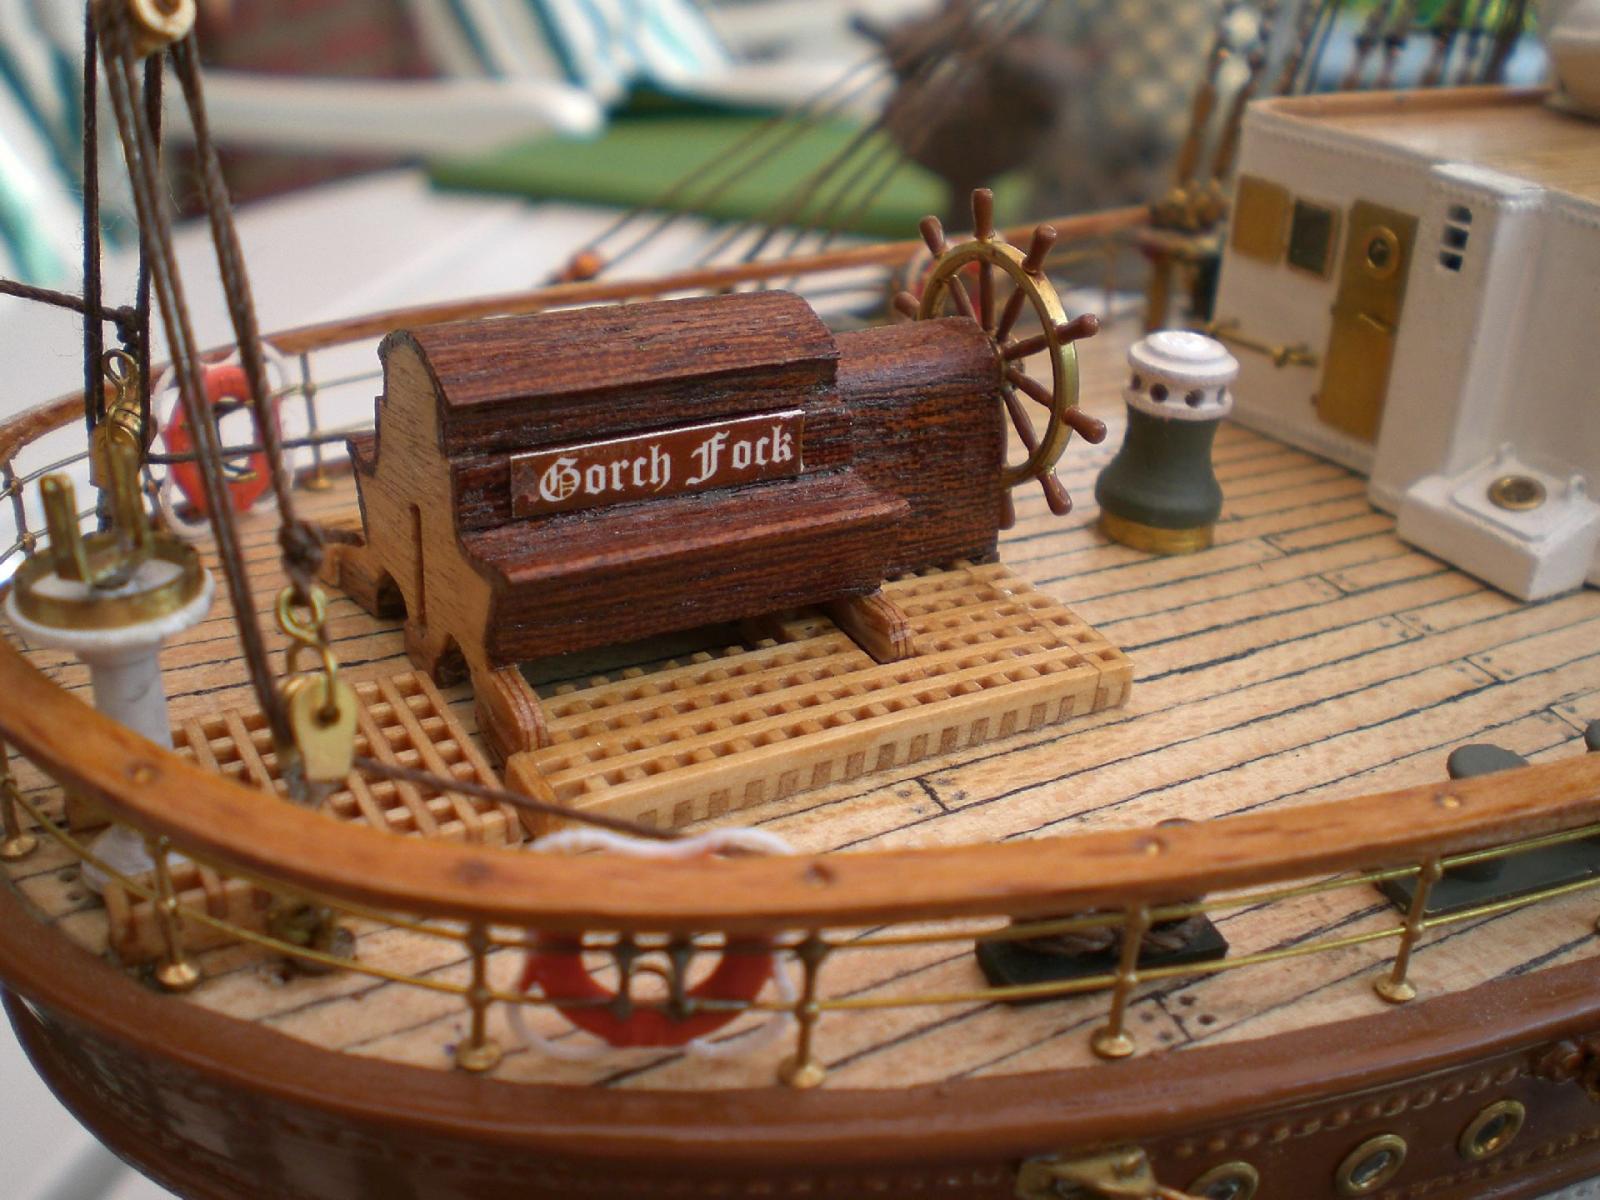
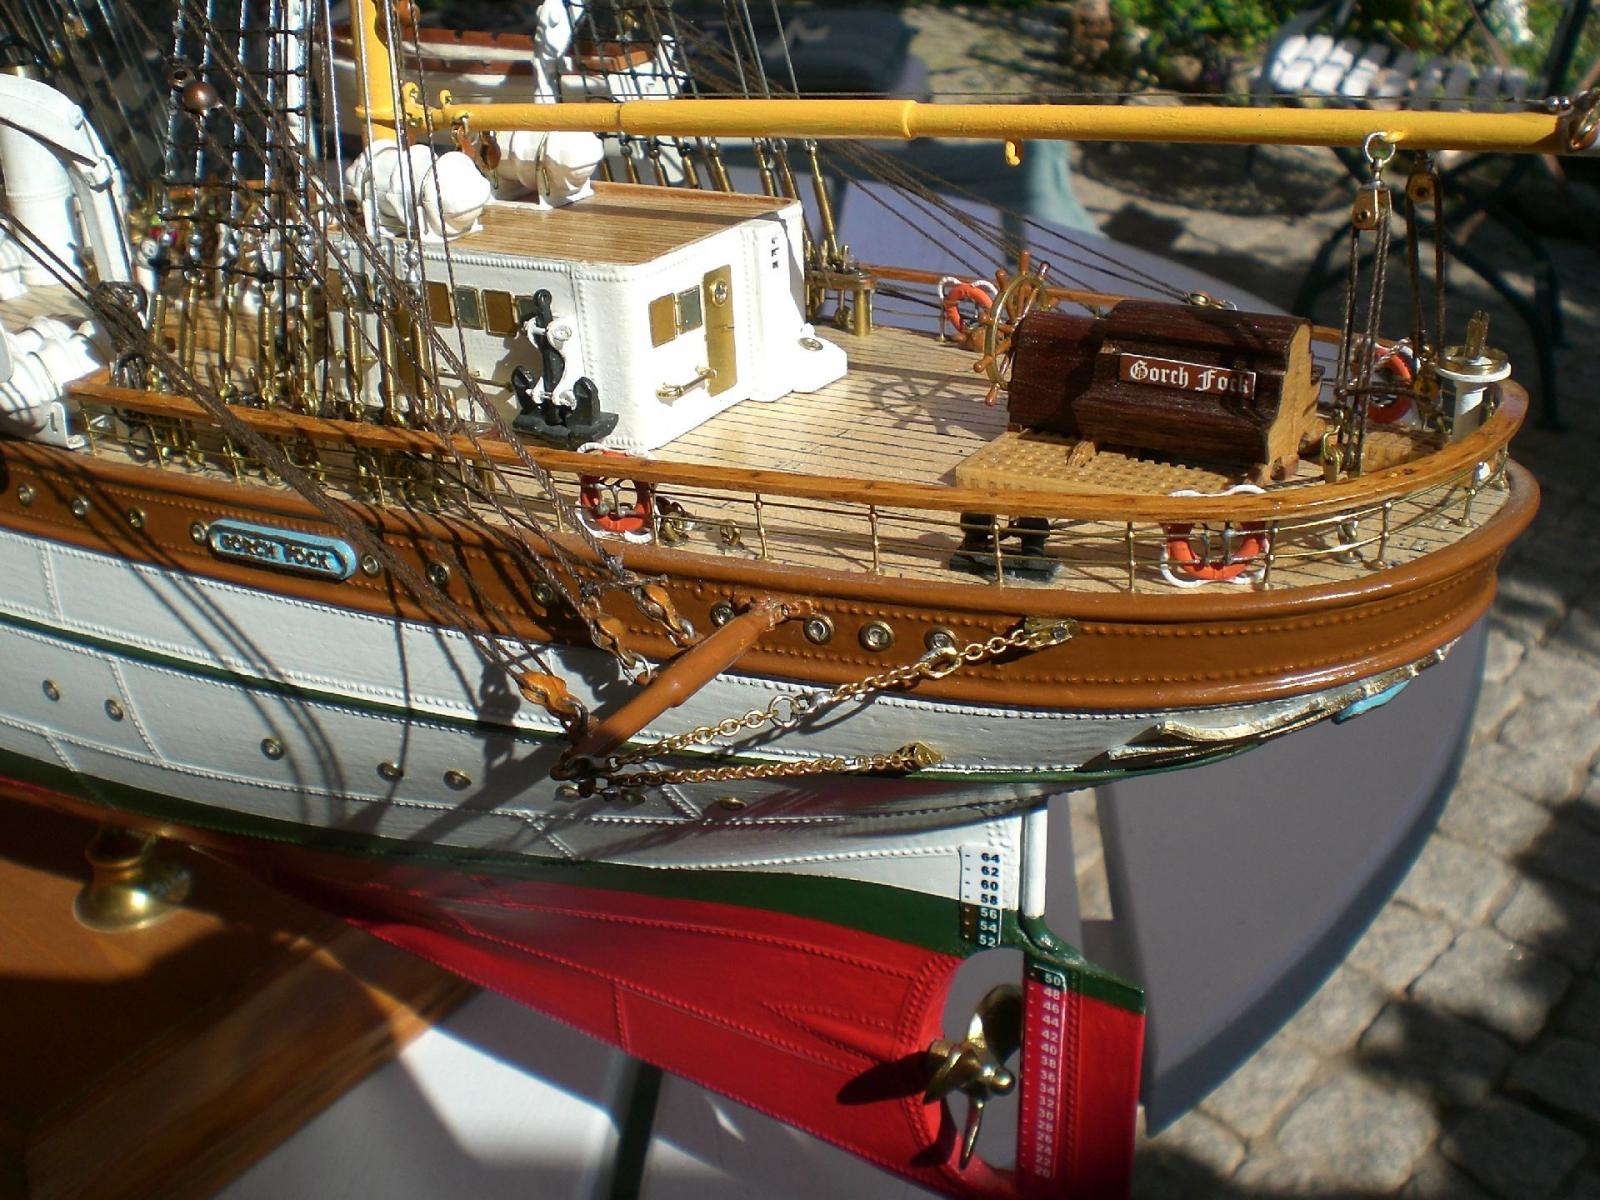
additional Name on auxilliary rudder device chest
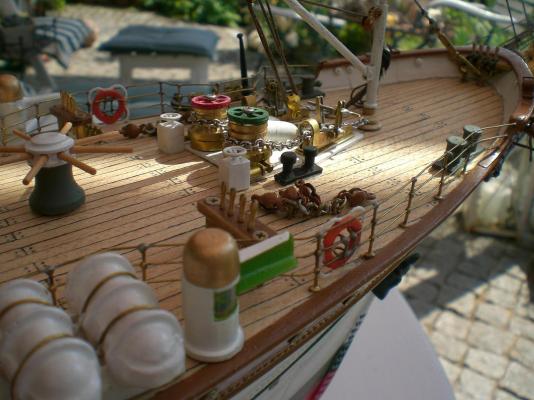
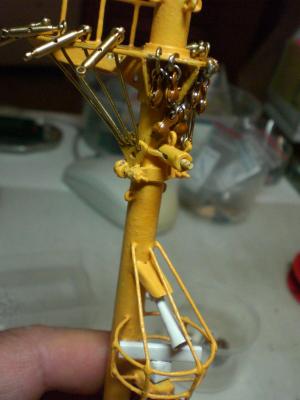
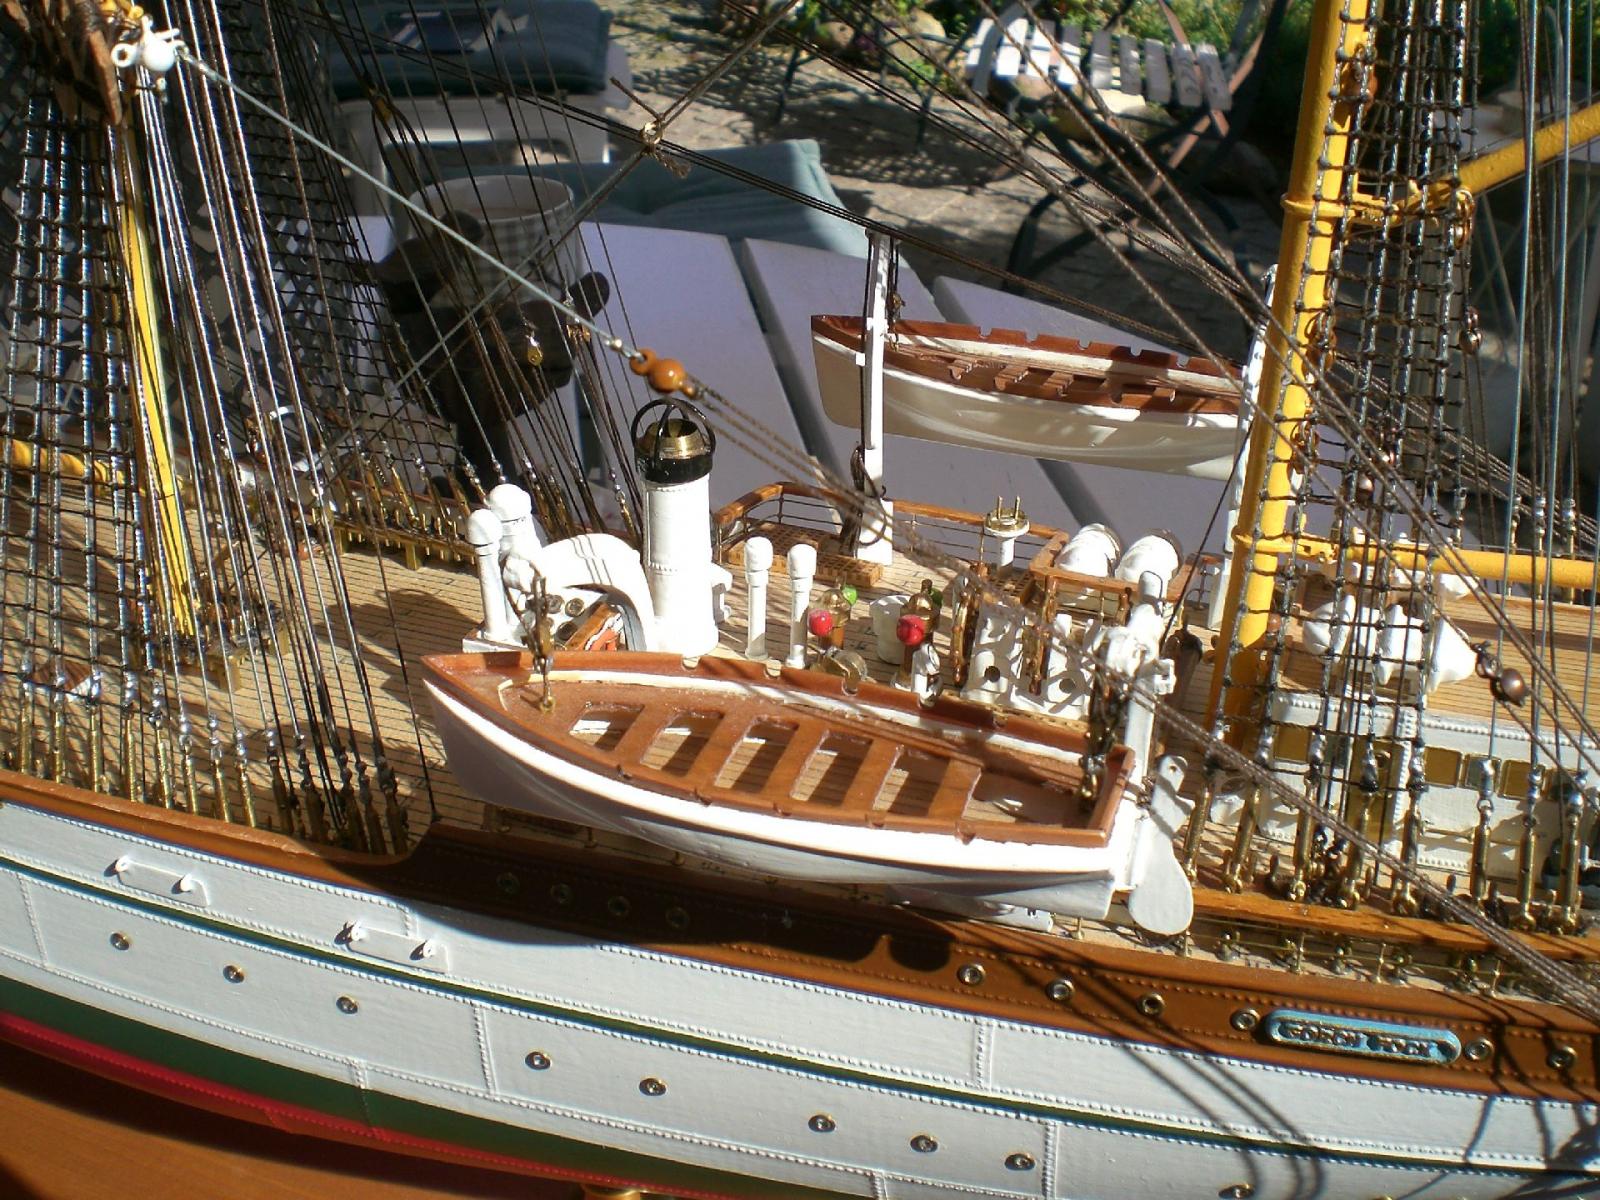
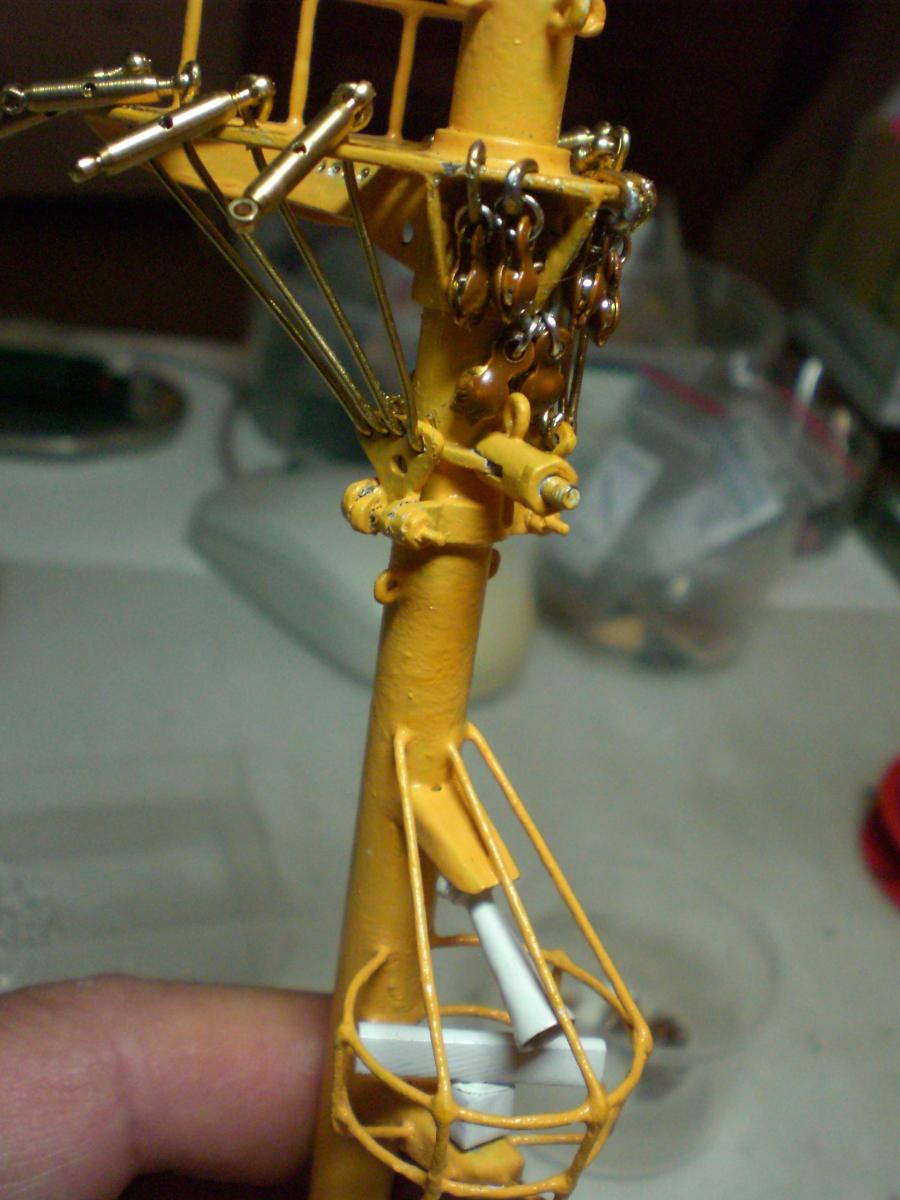
nav light Towers equipped wit lanterns and glass covers

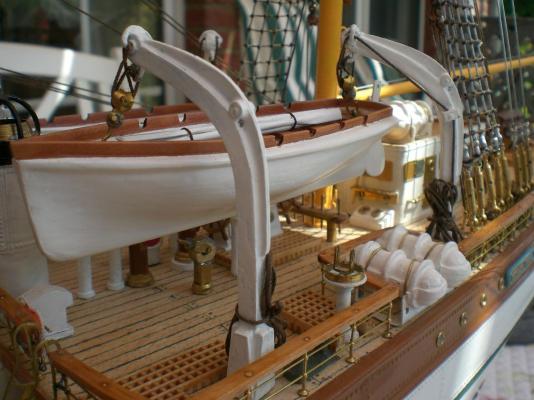
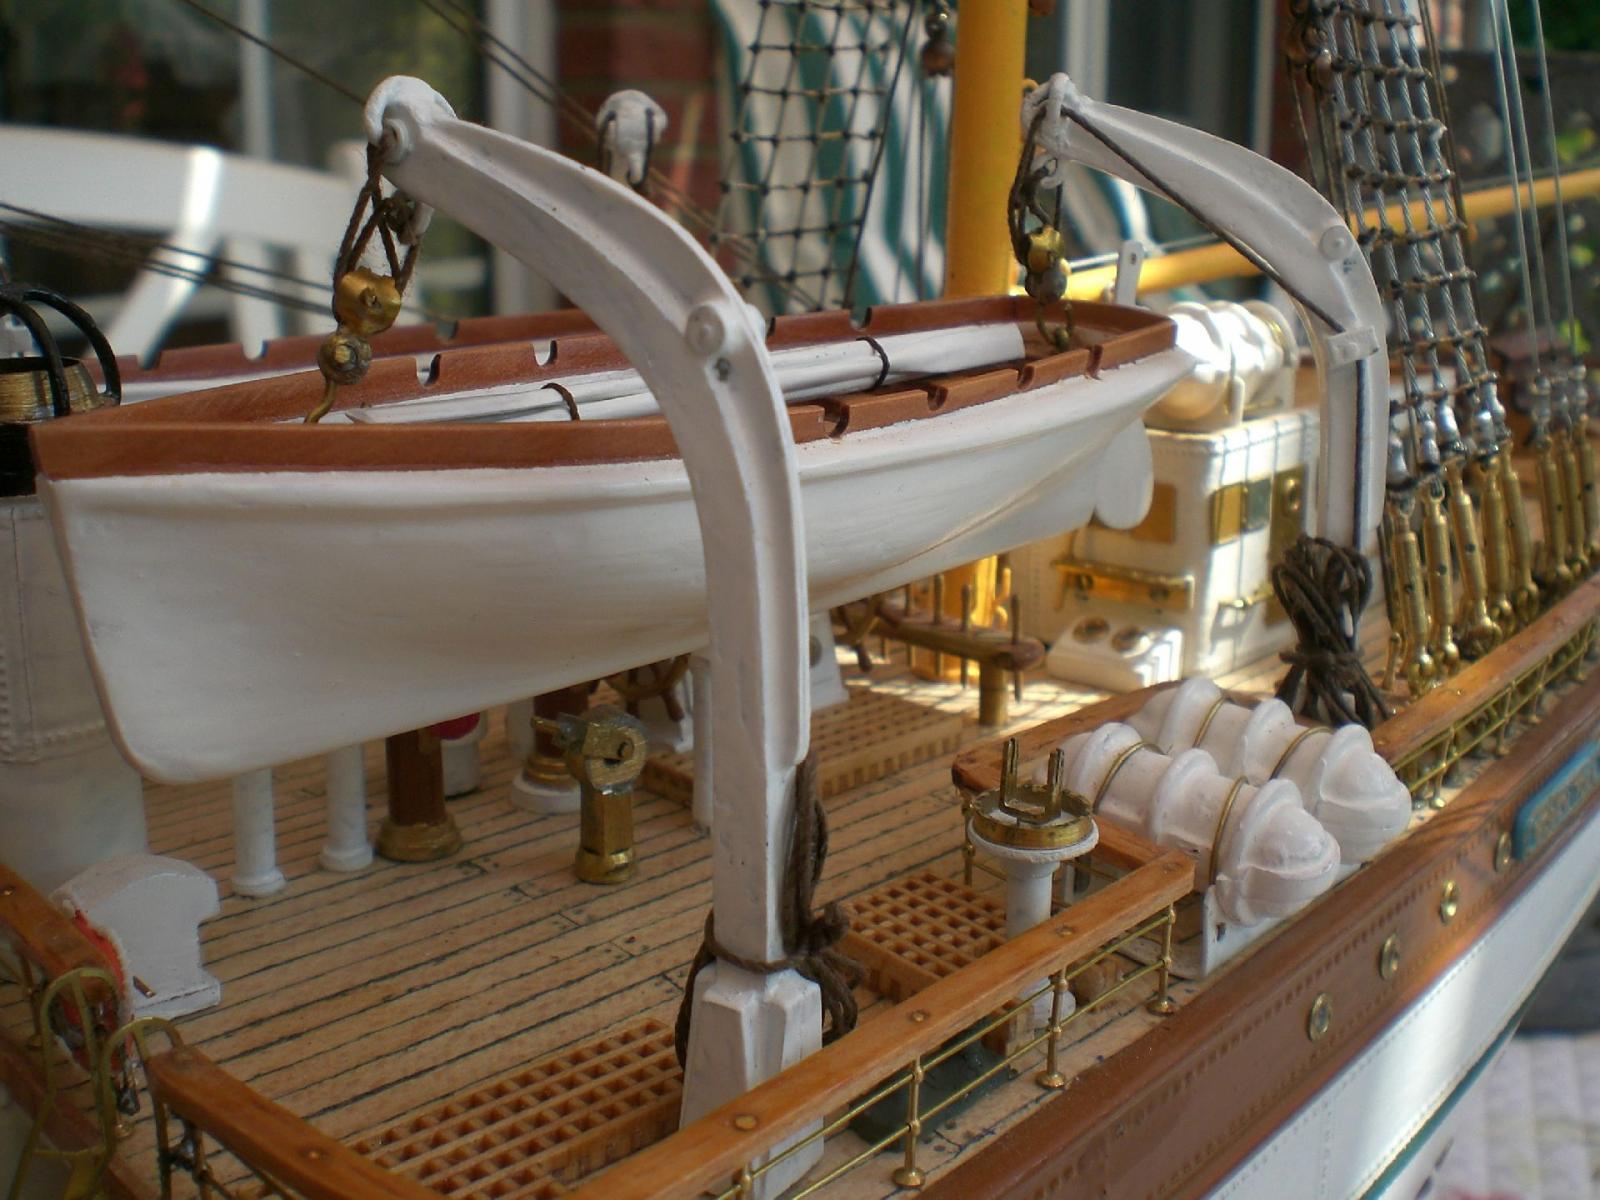
the sail operating running rigging is coiled up onto the wooden bits at the yards
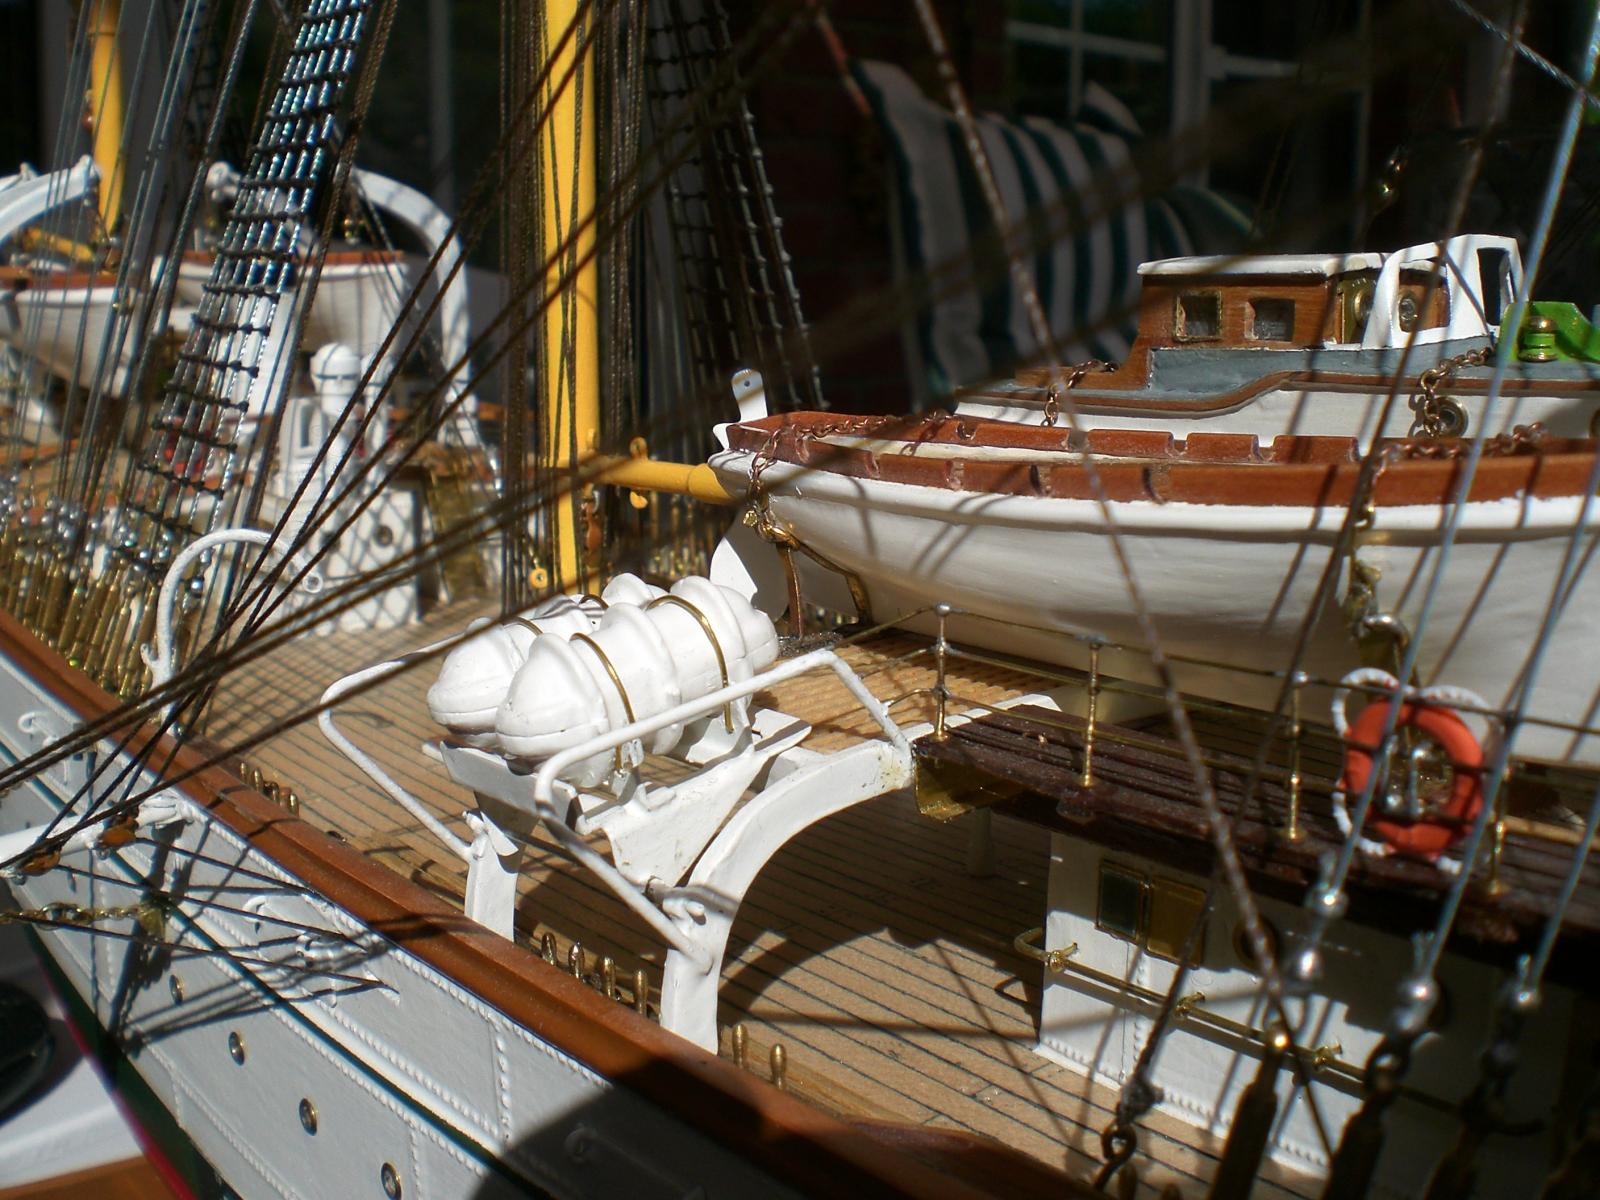
the functional strapping down device for the boats
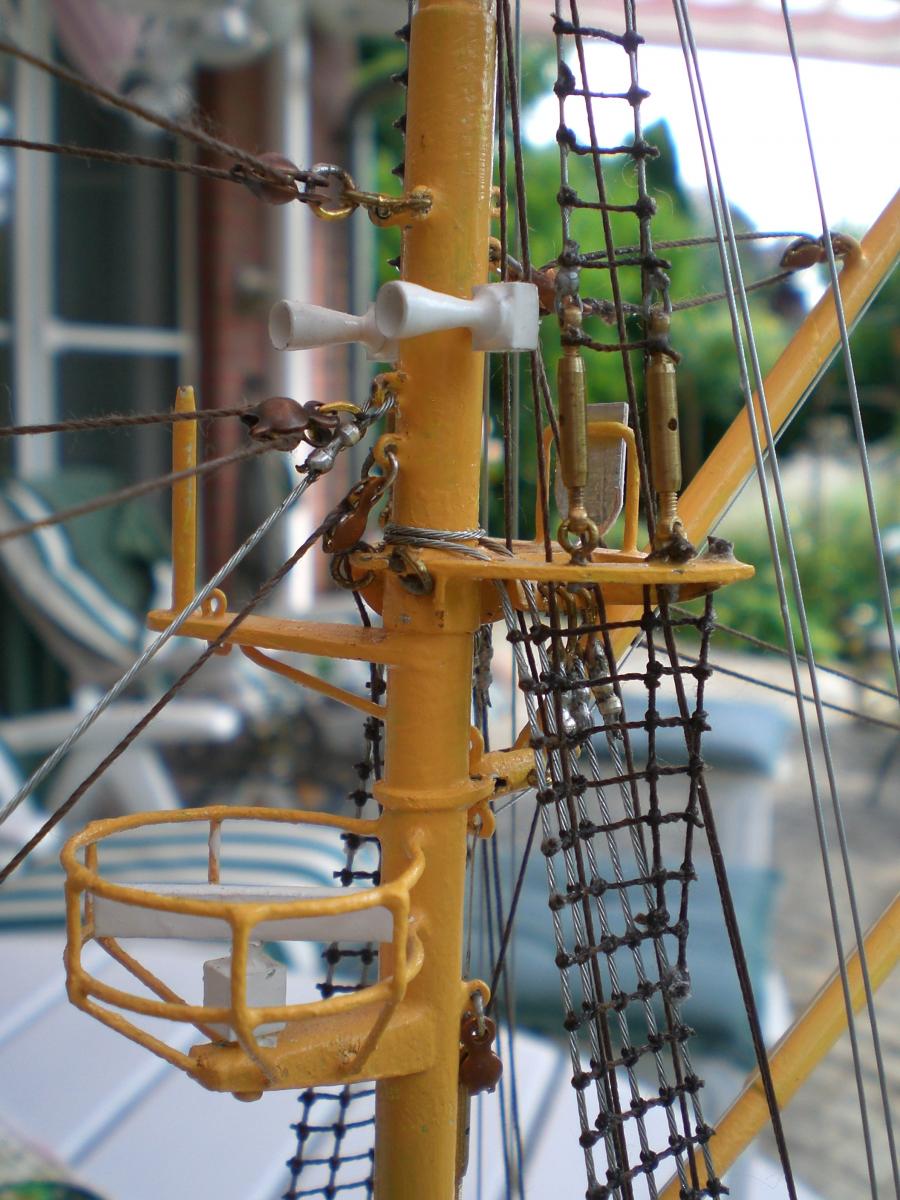
horn / loudspeaker of the mizzen mast

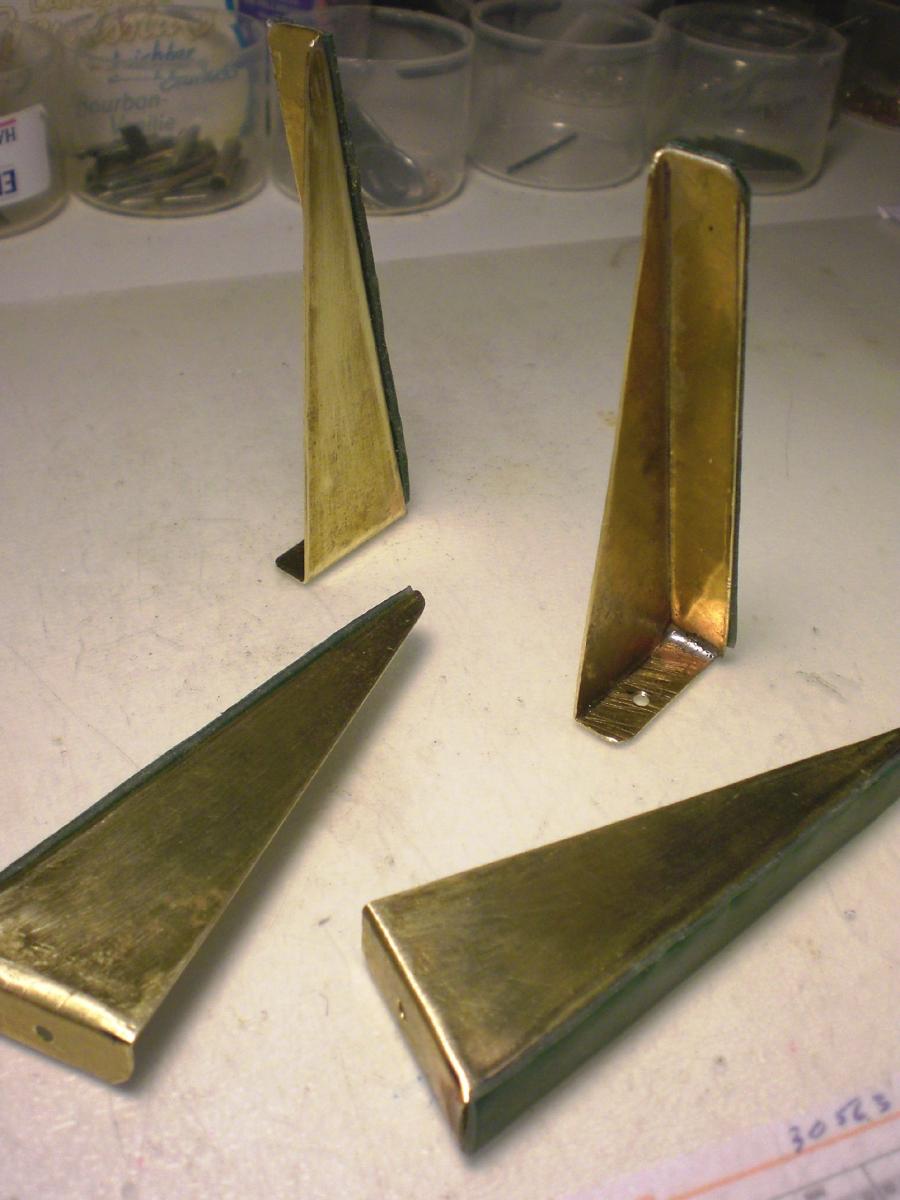
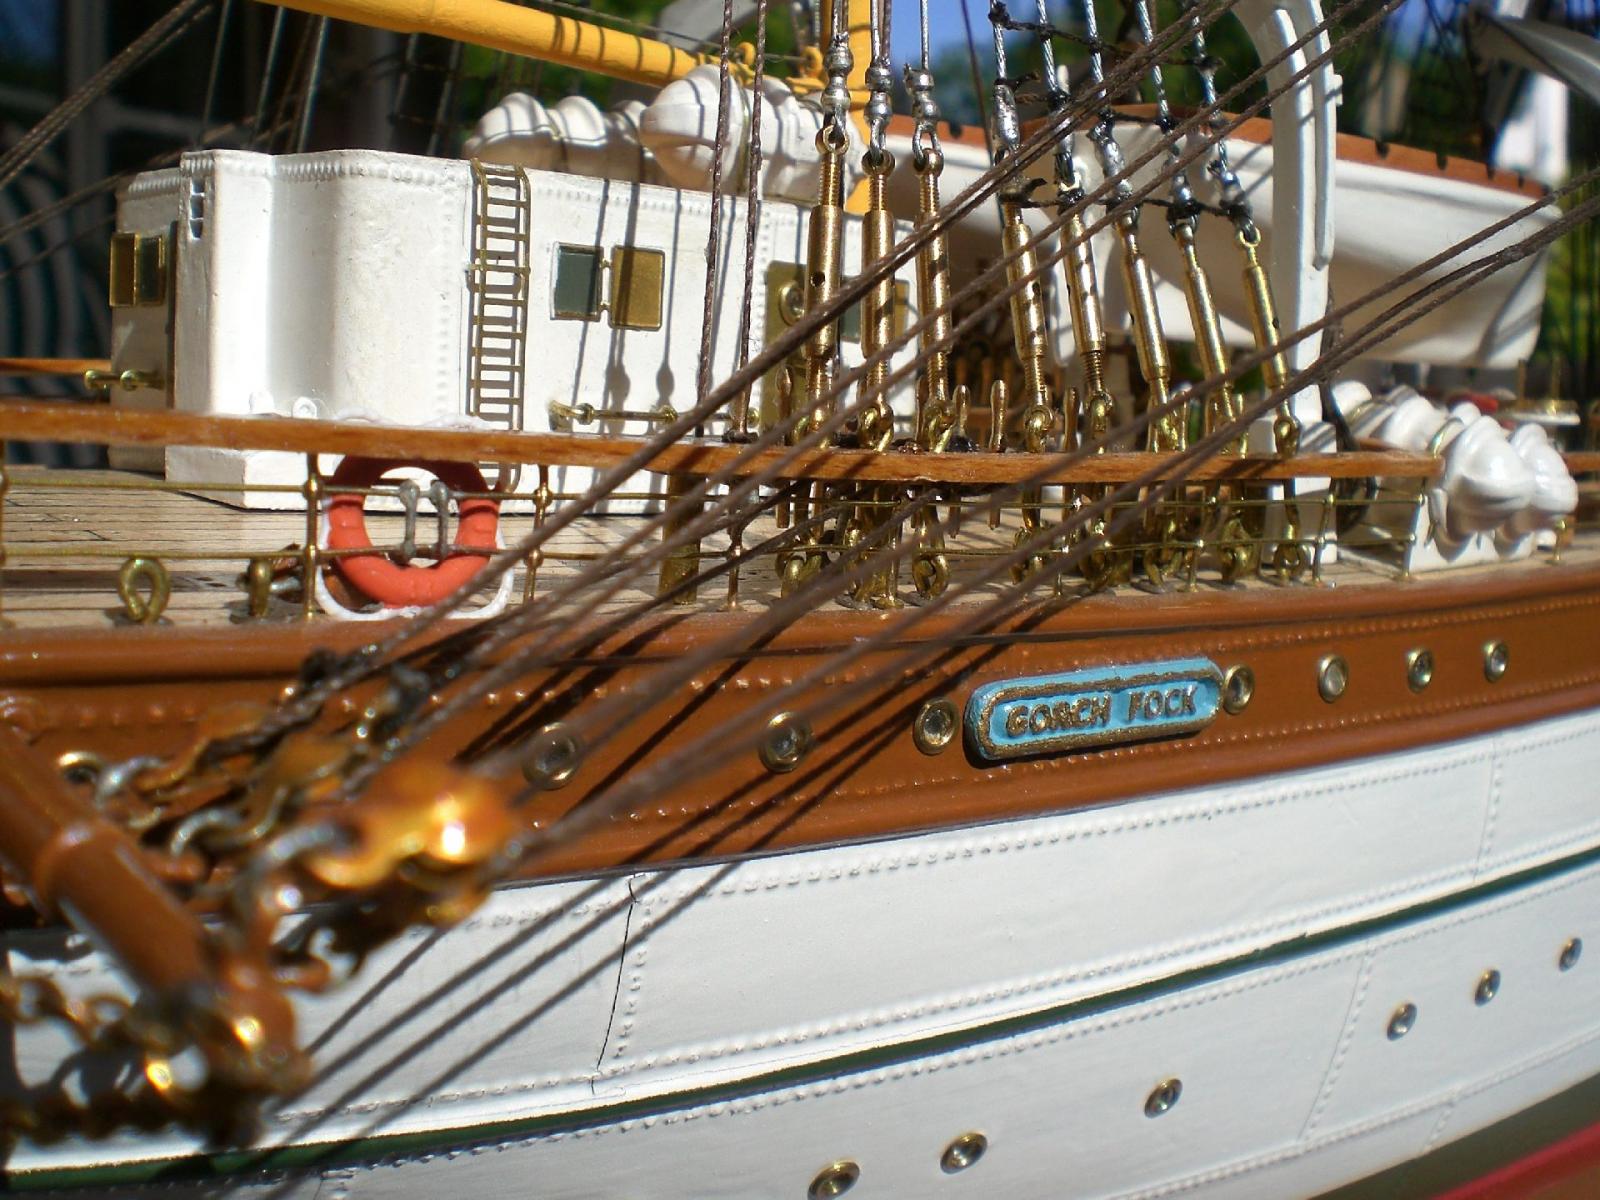
pedestal brackets for the nameplate that go to the glass casing later on
Build log part 47 to follow....
Nils
-
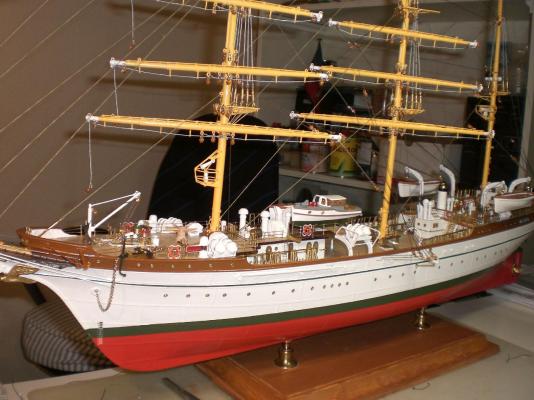
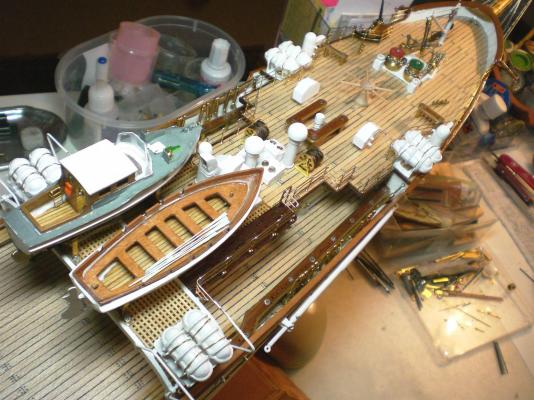
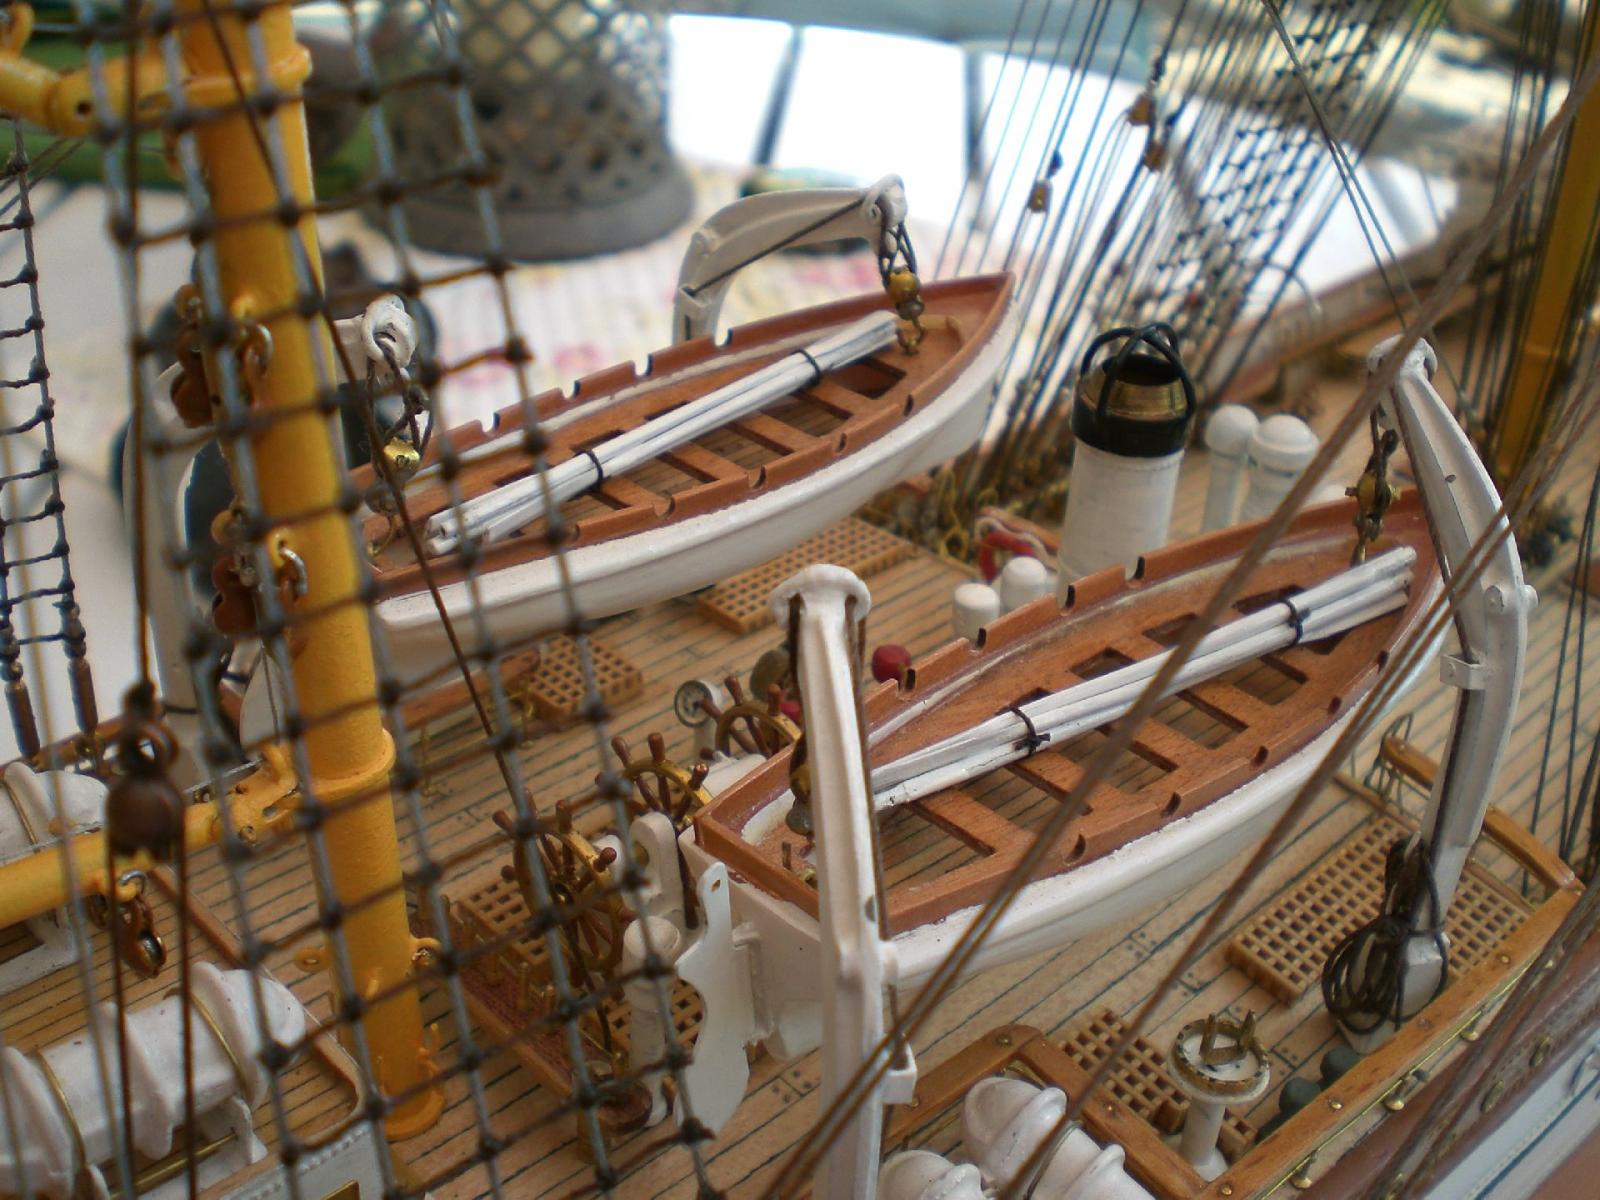
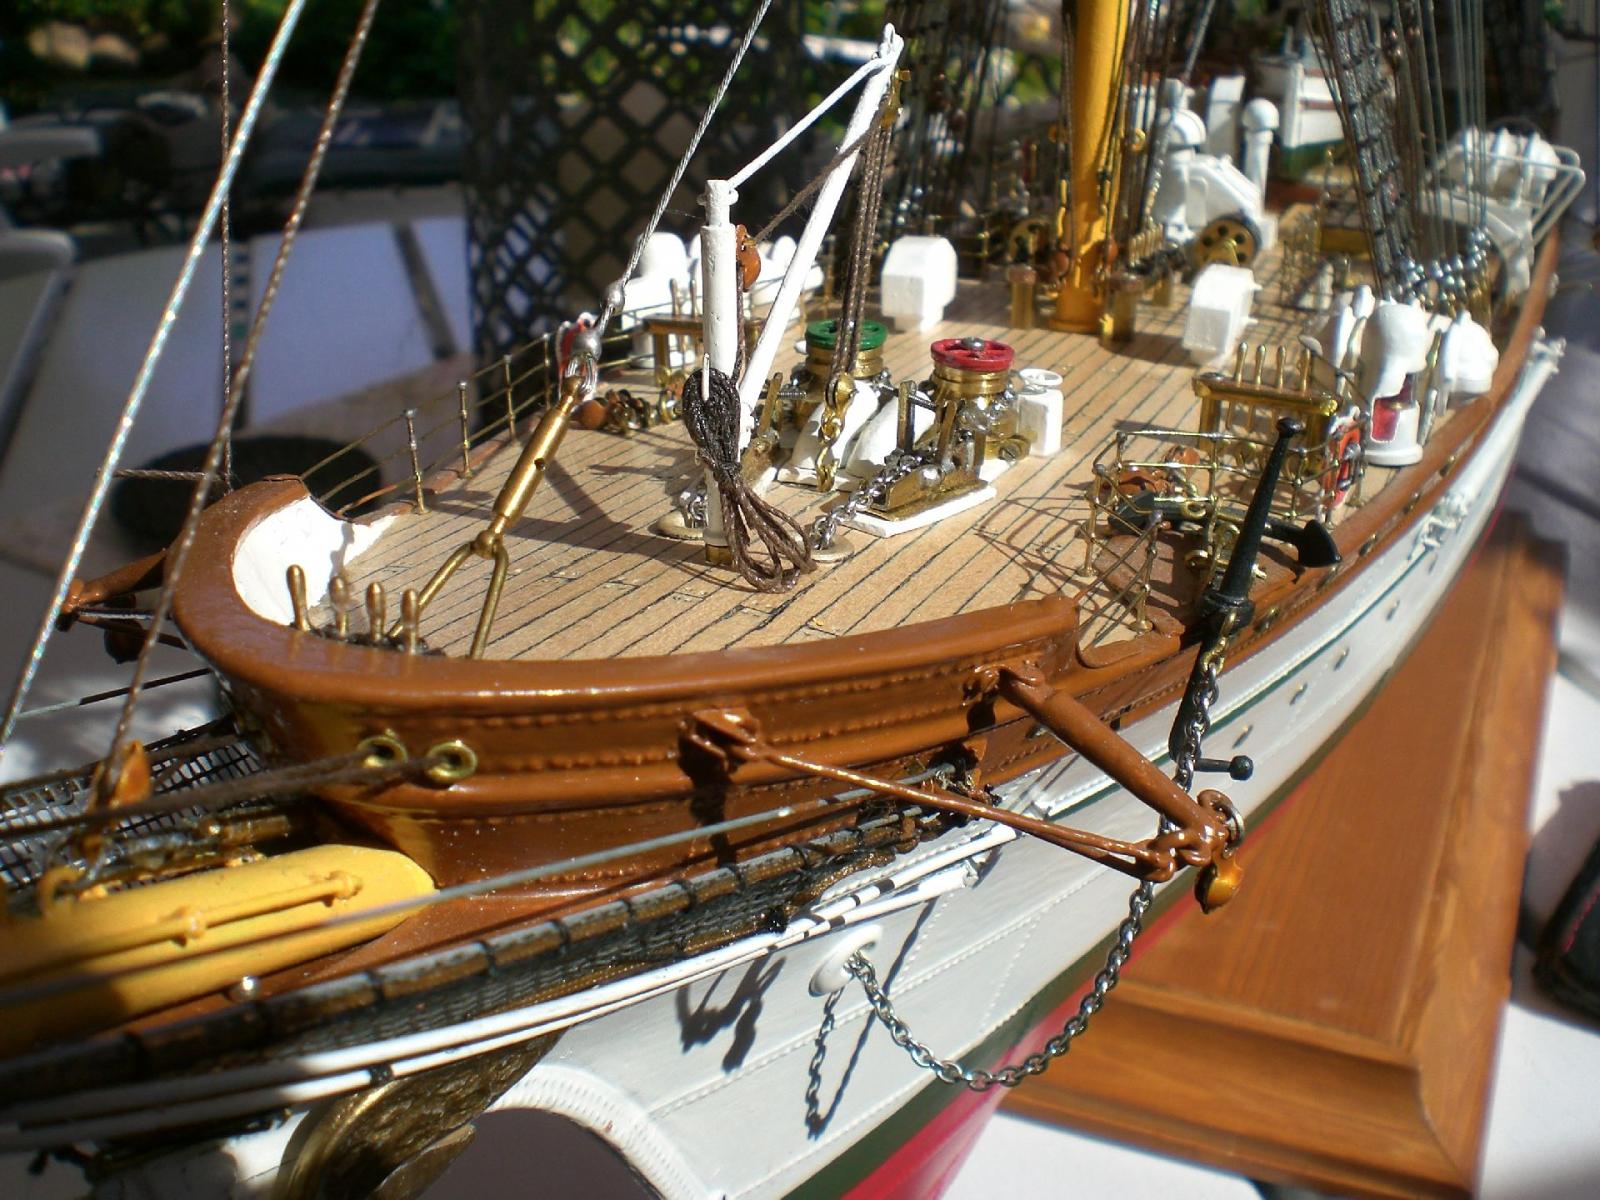
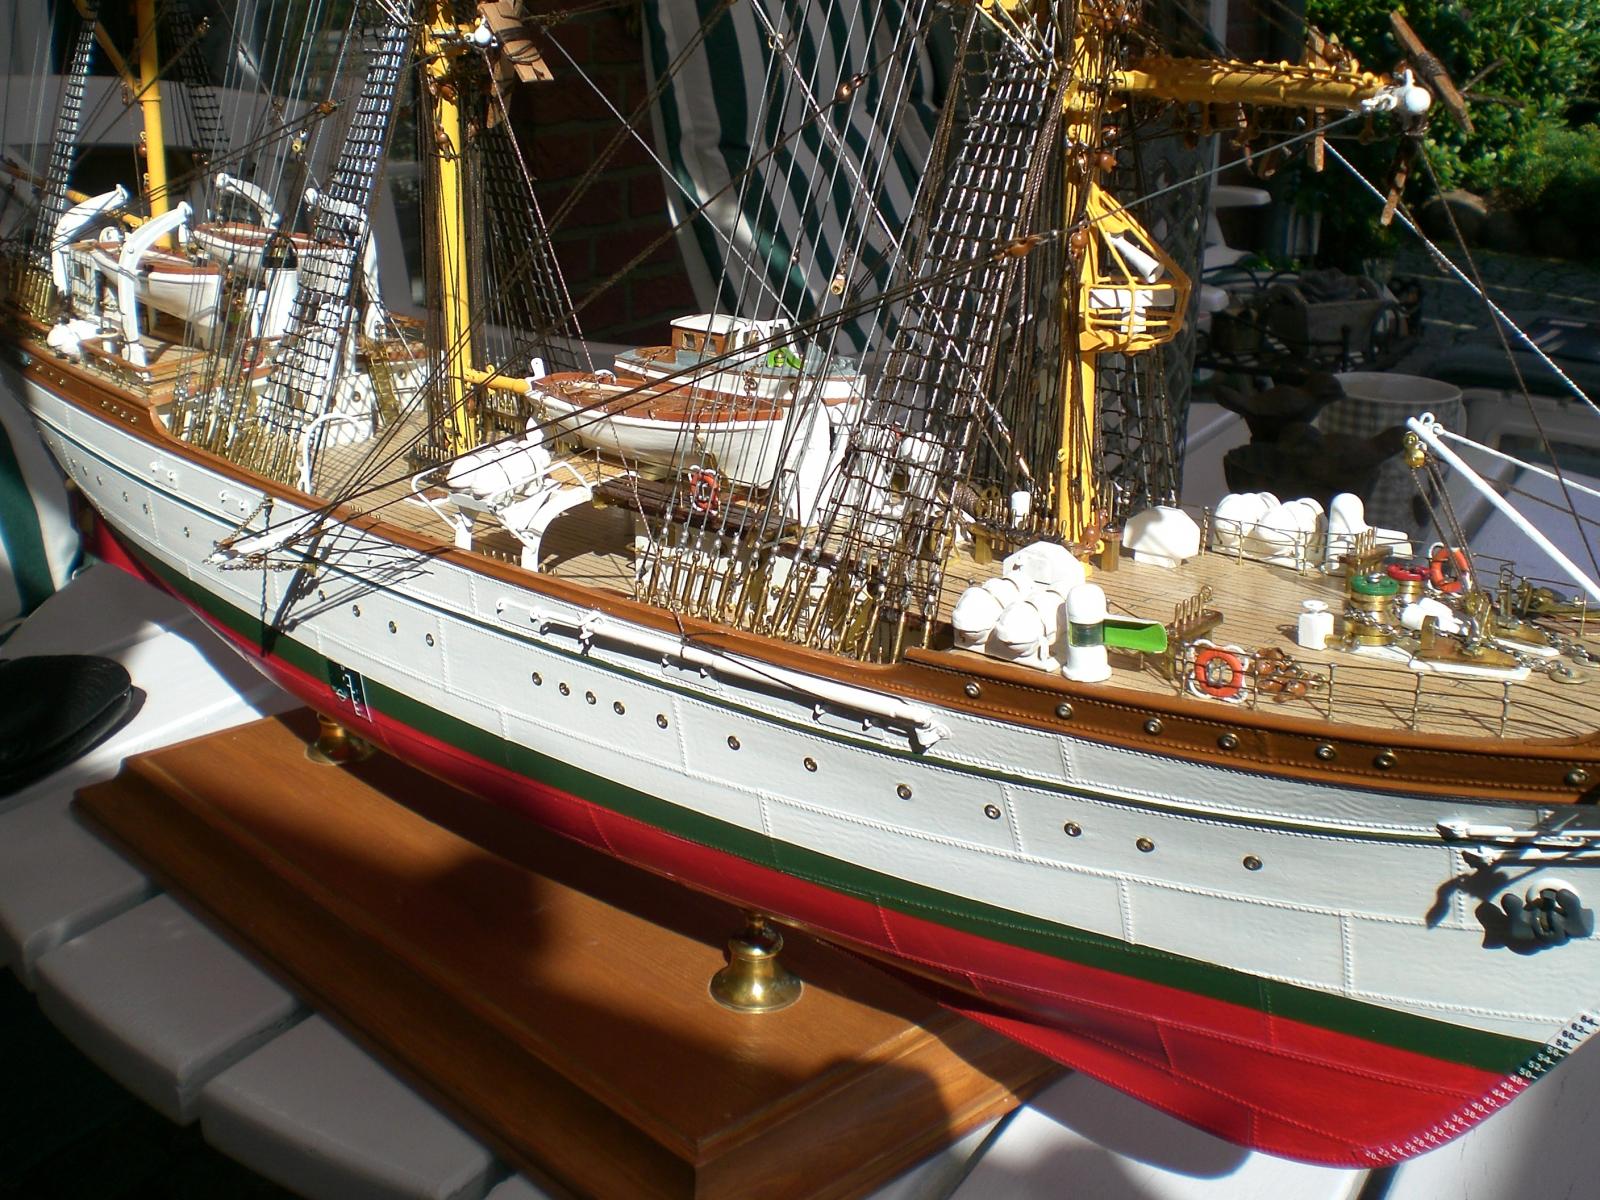
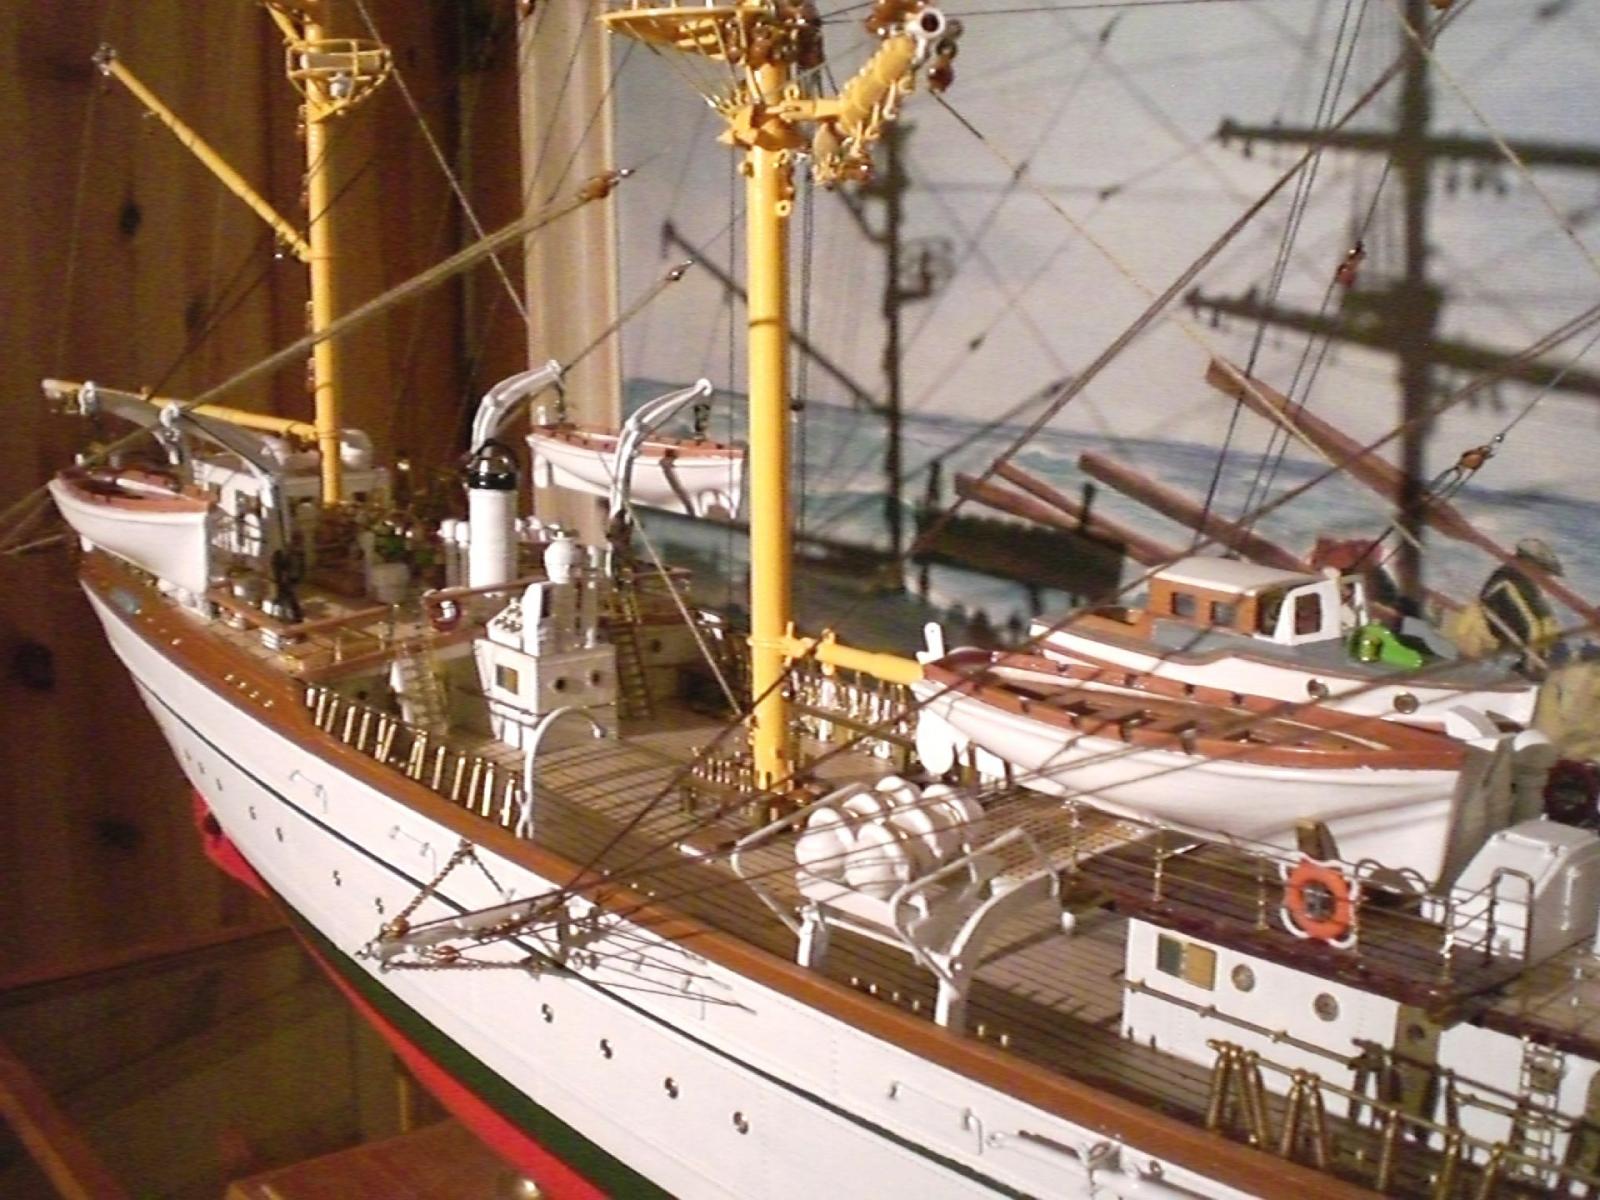
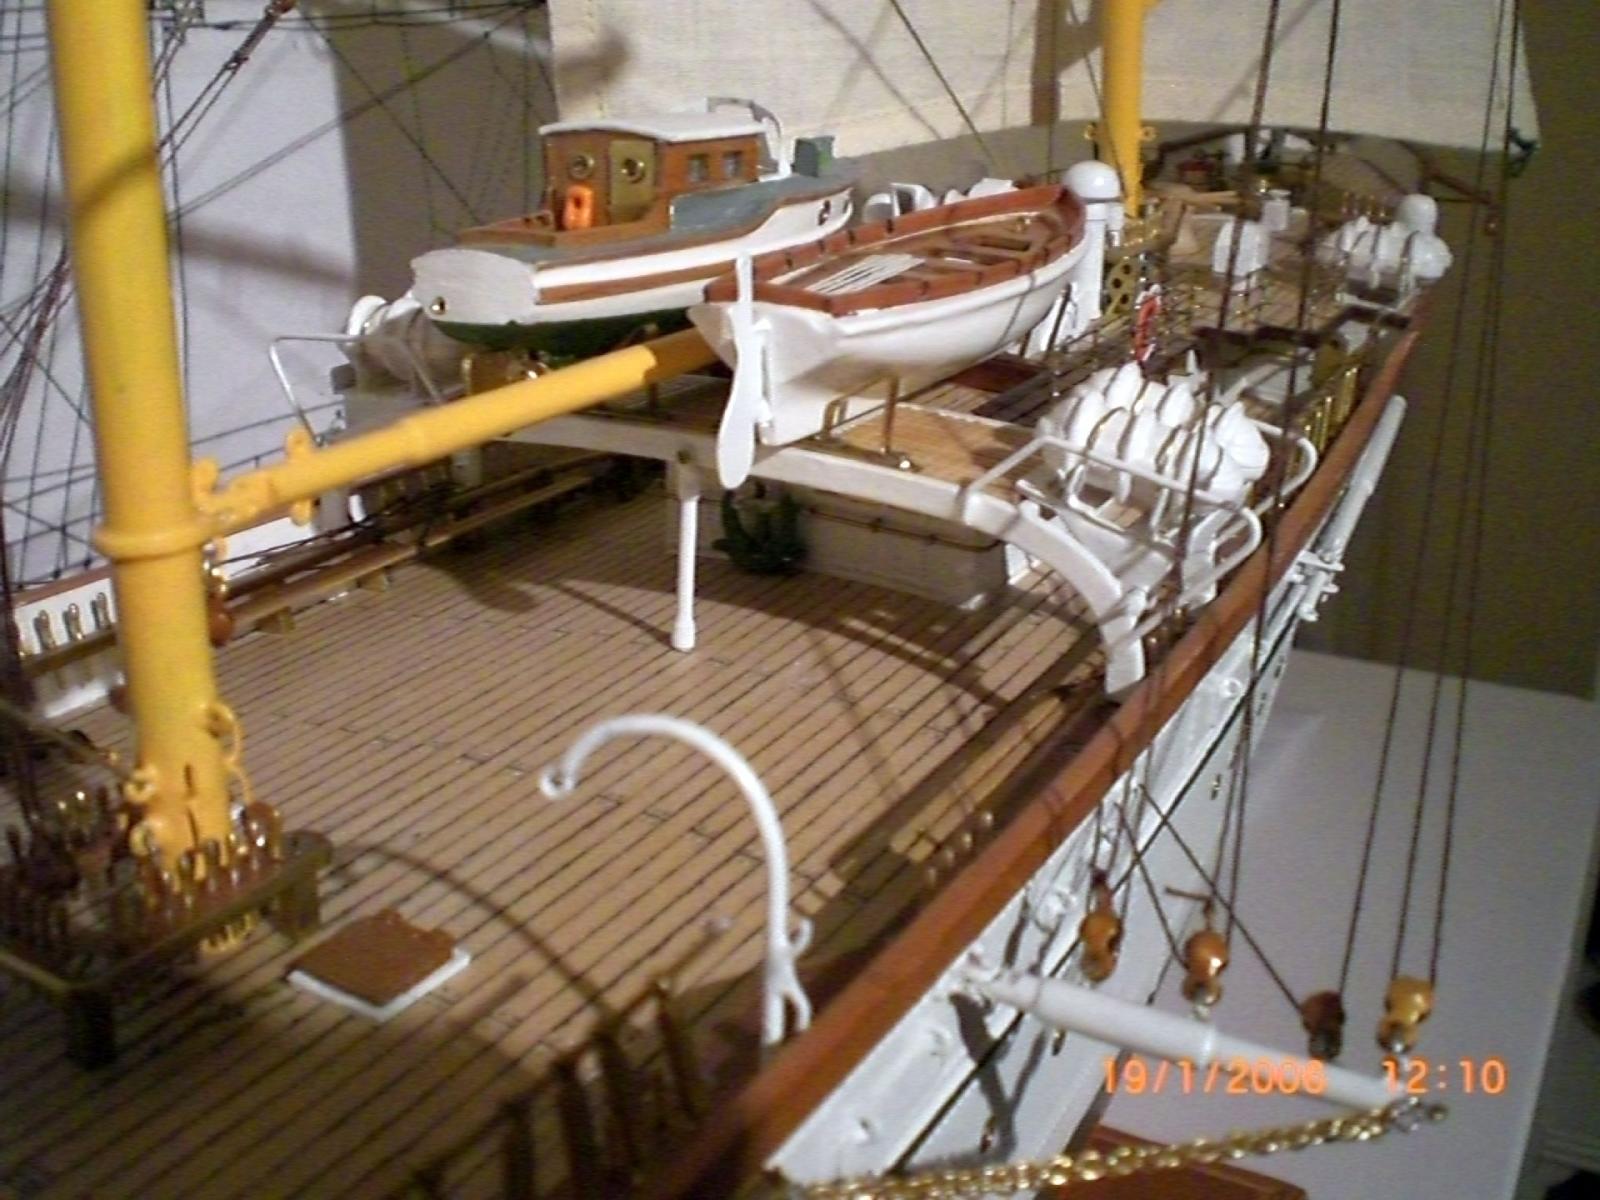
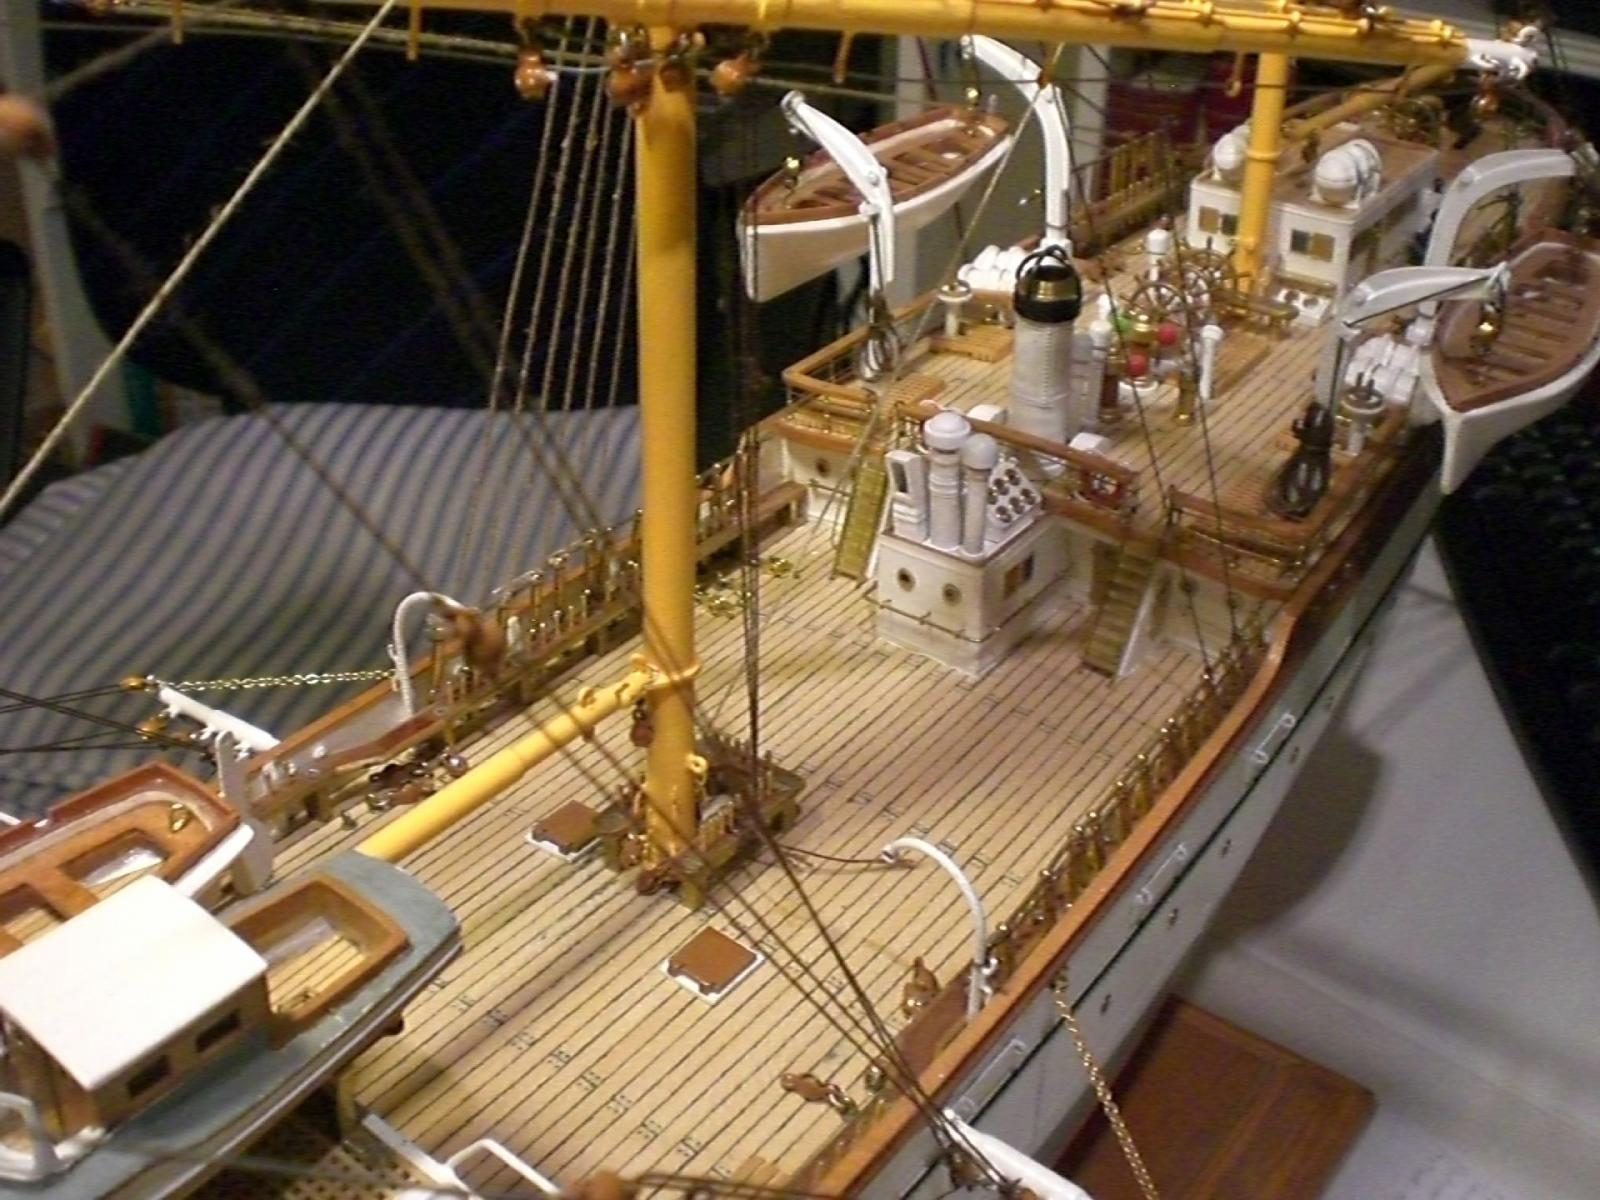
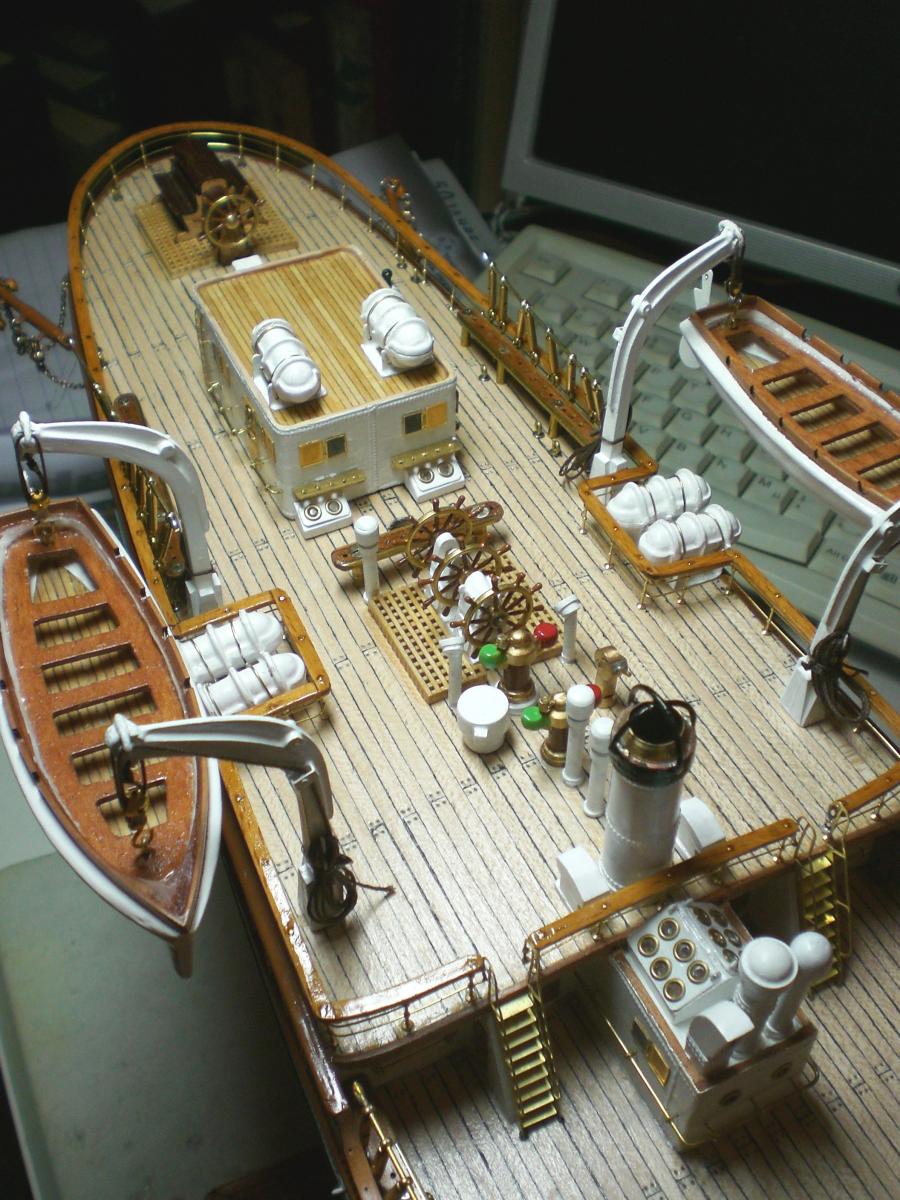
Build log part 45

all ready for making sails
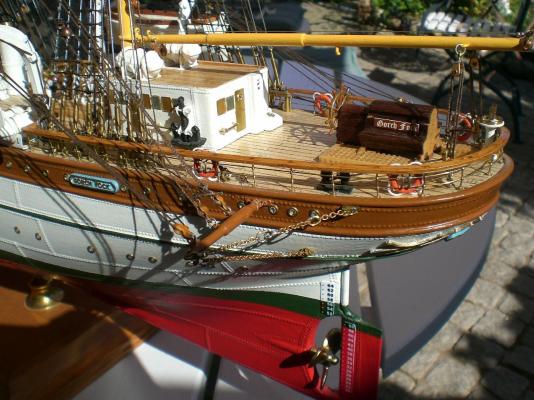
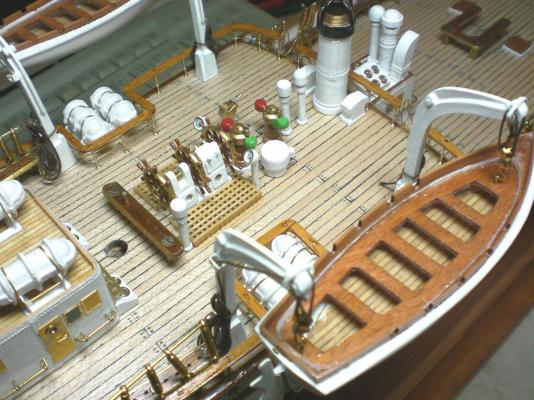
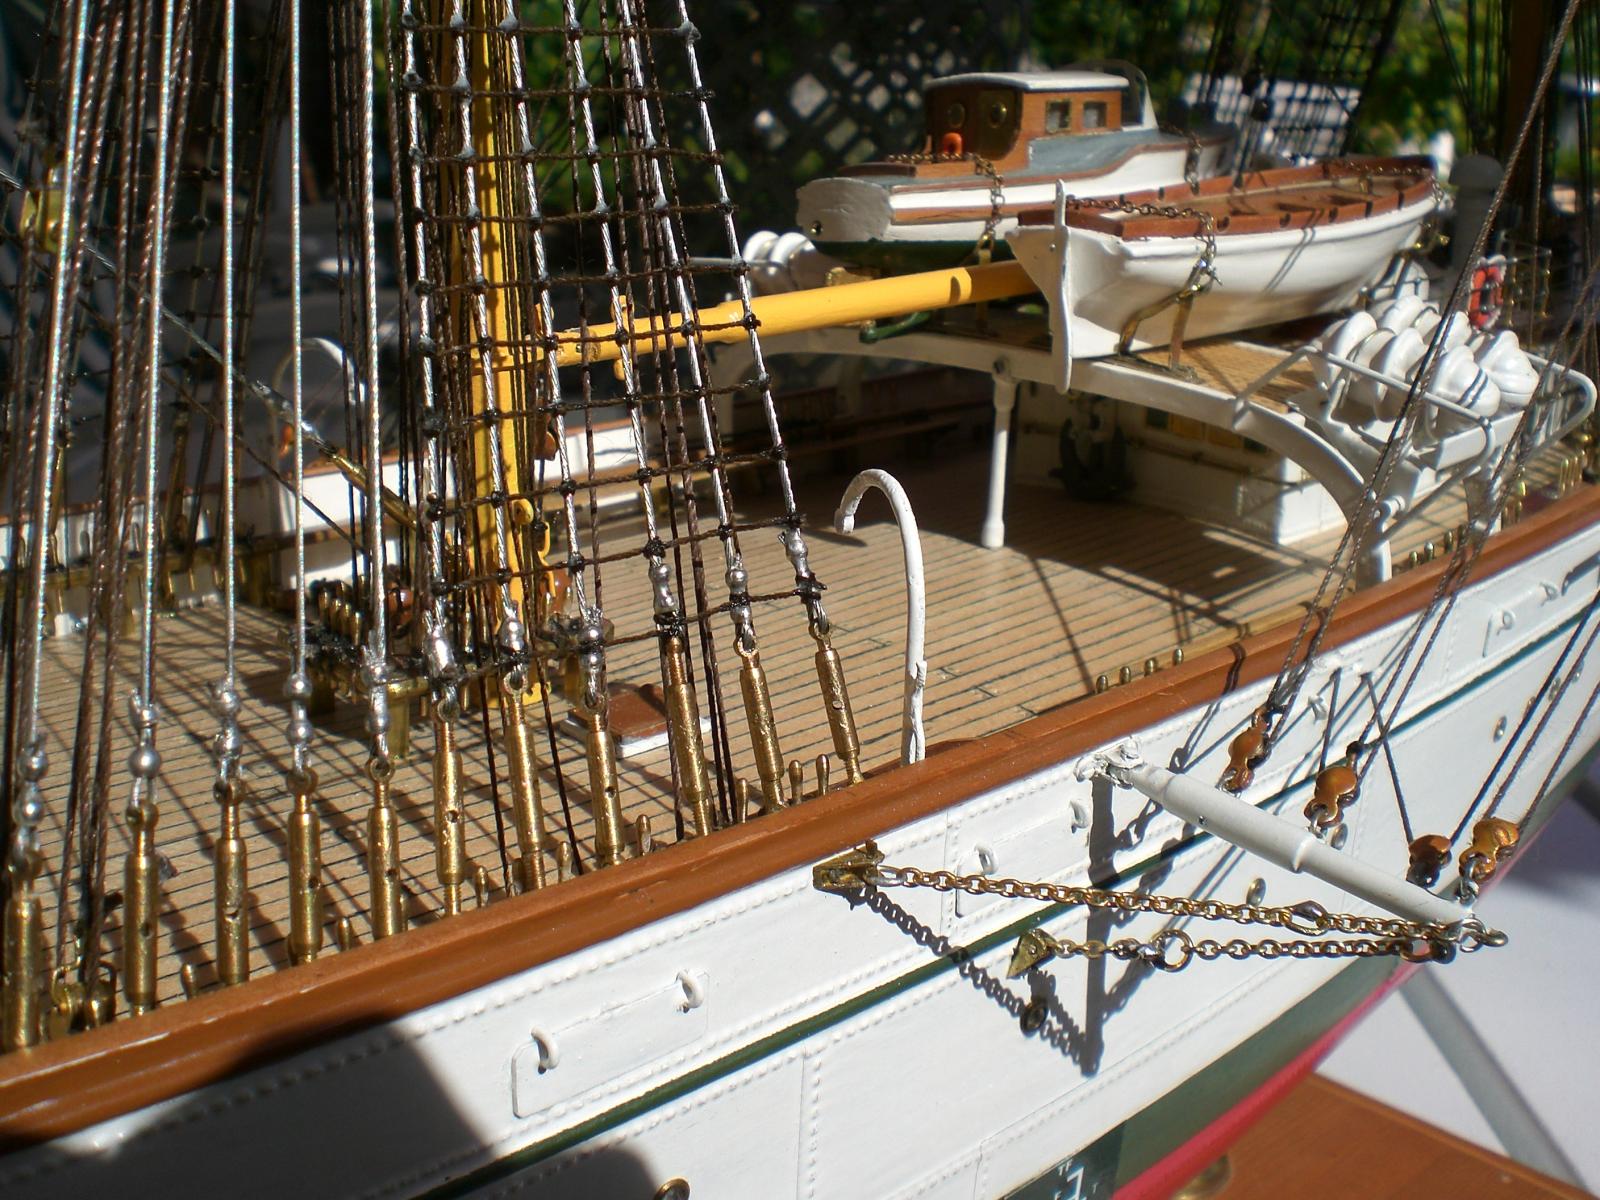
captains pinnace with Position lanterns and window frames
shrouds and backstay spanners in row

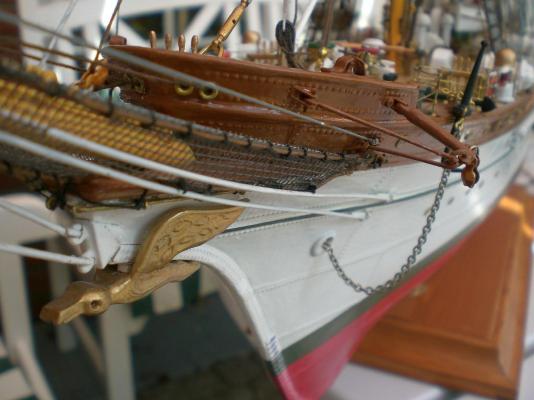
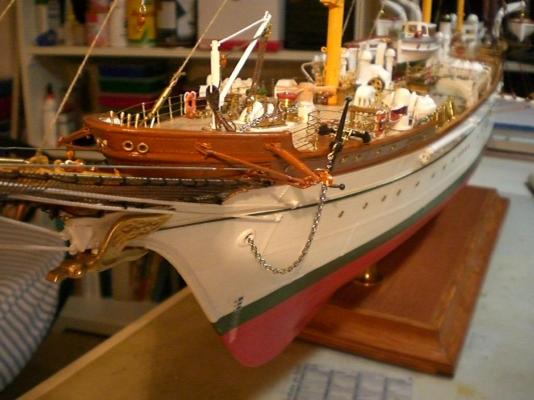
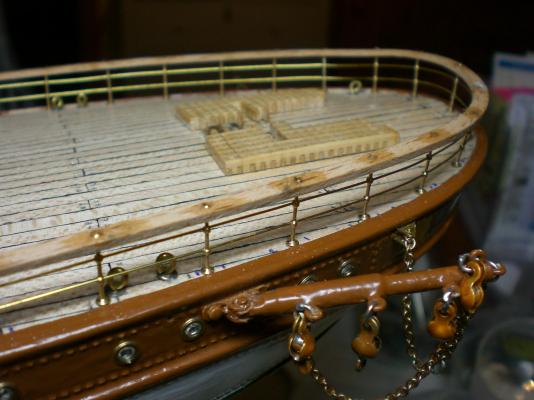
drydock view on port bow

Fitting out the poopdeck done

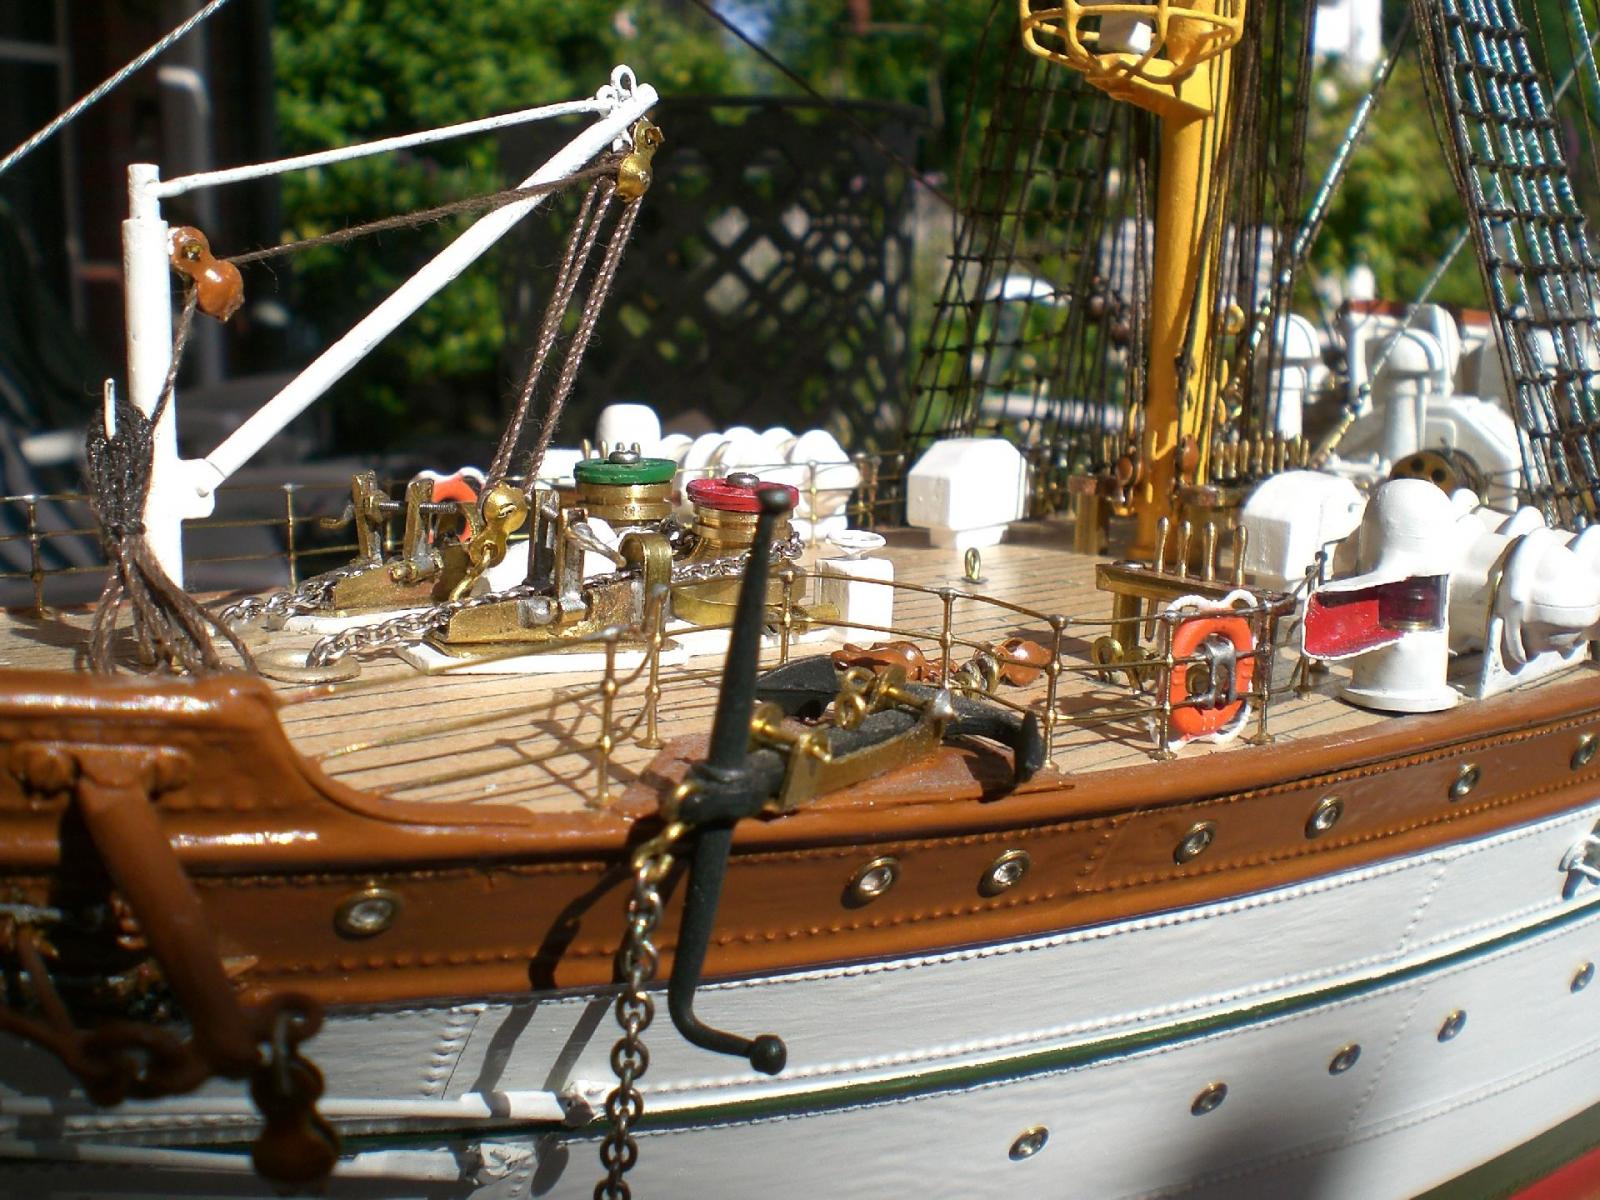
forecastle deck likewise

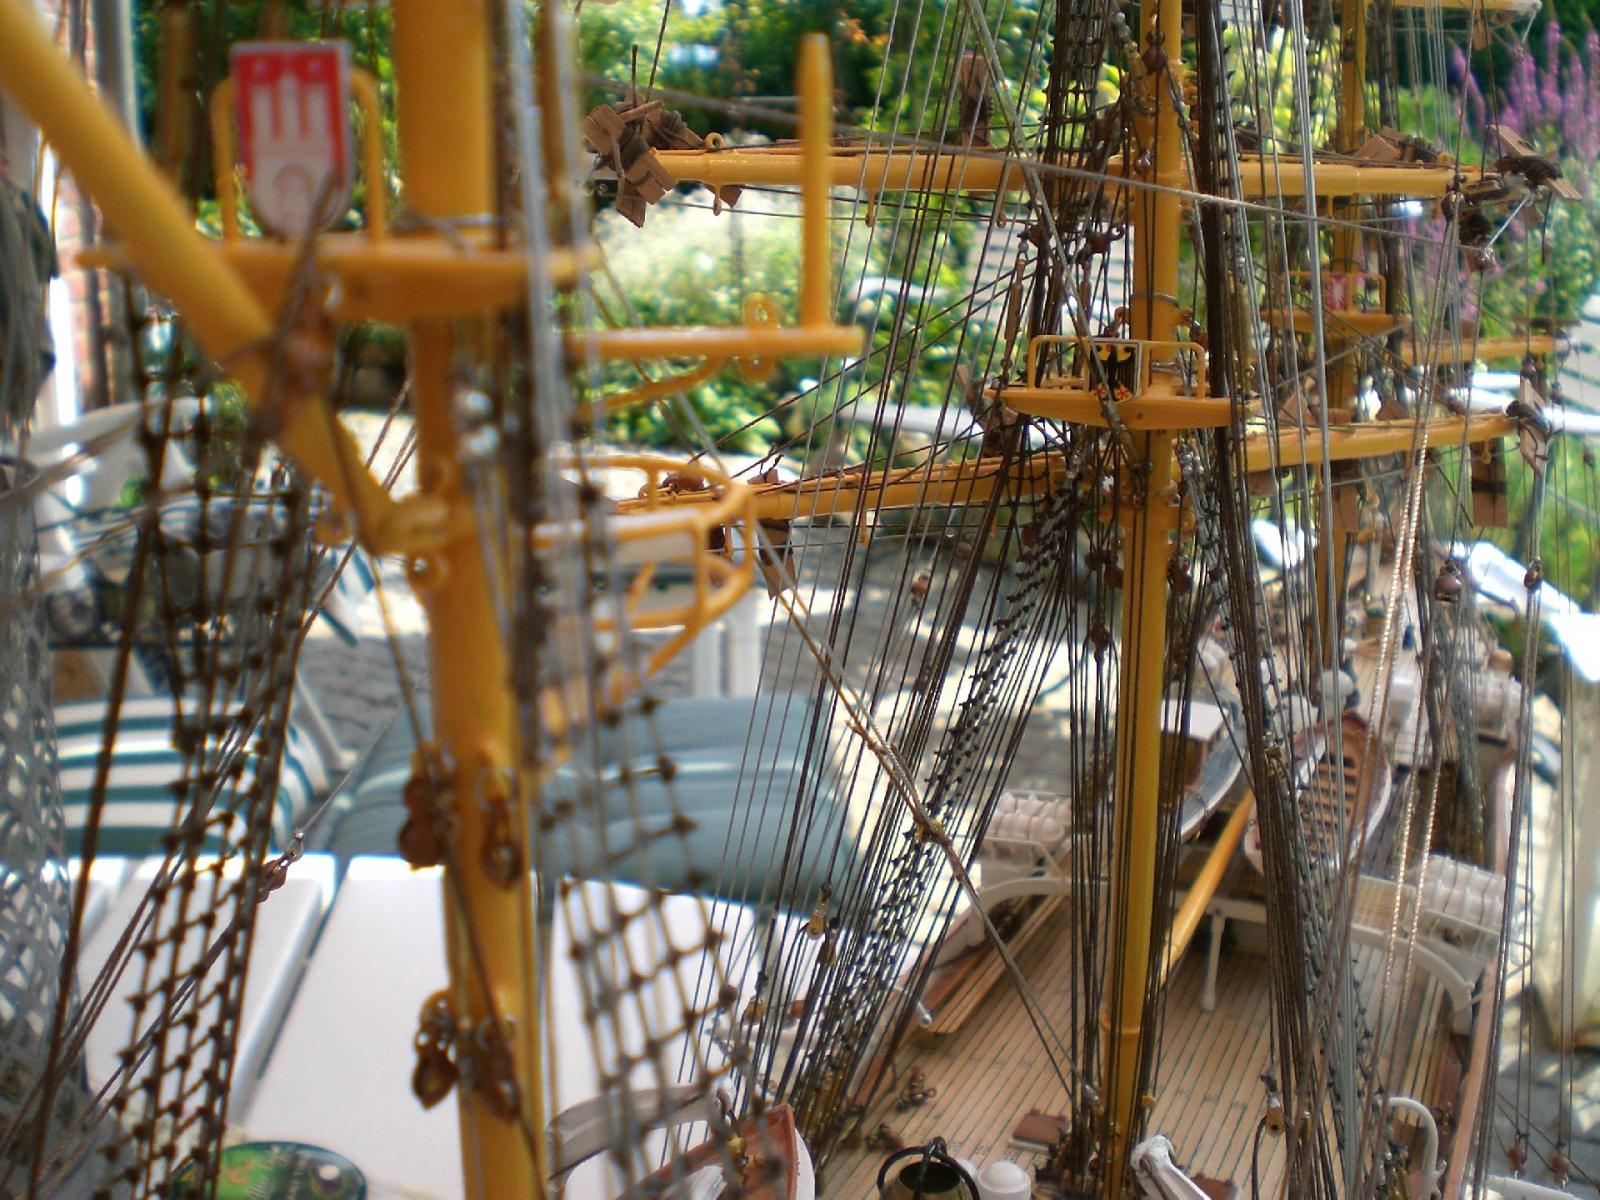
the three masts bear the badges attached to the platform railing : State Hanburg, fed. Rep. of Germany, state Schleswig-Holstein
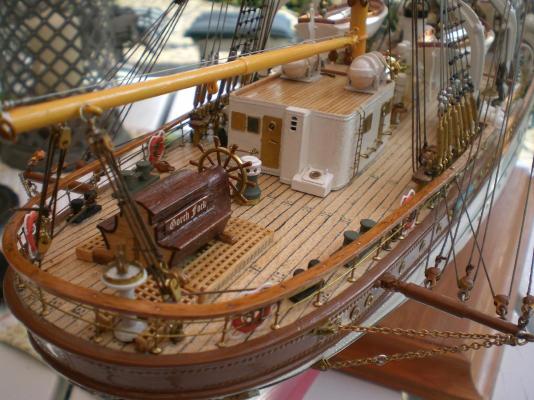
Tackling for lower gaffboom and wire lead (all around) for lower mizzen sail attached, als capstan for poopdeck
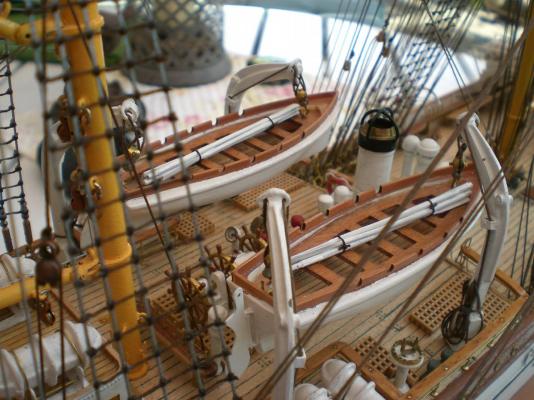
each a set of oars for the boats
Build log part 46 to follow....
Nils
-
-
-
Sam, What did that pan look like, and how was the stove mounted in it? Your prototype is mounted only on a plate, but your drawings show something that looks like wooden beams below the plate. Do you have, or could you draw, a picture of what it should look like?
While thinking about the stove mounting, I installed and rigged the first six guns. For this I used blocks and rope from Chuck. I can say without hesitation that I am a satisfied customer. I've used Morope in the past, but I like Chuck's stuff a whole lot better and intend to do all of the rigging on Essex with it. After ordering a variety of sizes, I settled on the 1/8" blocks, the .035" line for the breeching rope and the .008" line for the tackles.
I also made and mounted the main cable bitts. These were done in boxwood and are merely a larger version of the fore riding bitts, previously done. I also added the first ringbolts to the deck.
Since I am waiting to receive more carriage kits from the Lumberyard, I will probably do some more work in the bow area, rather than moving back along the gun deck for now.
Bob
I like that Bob,
very nice work indeed !
Nils
-
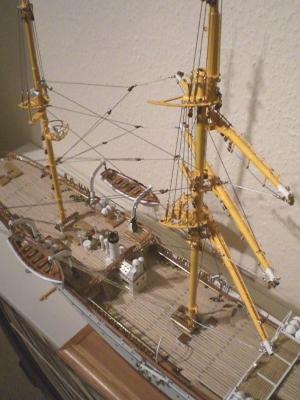
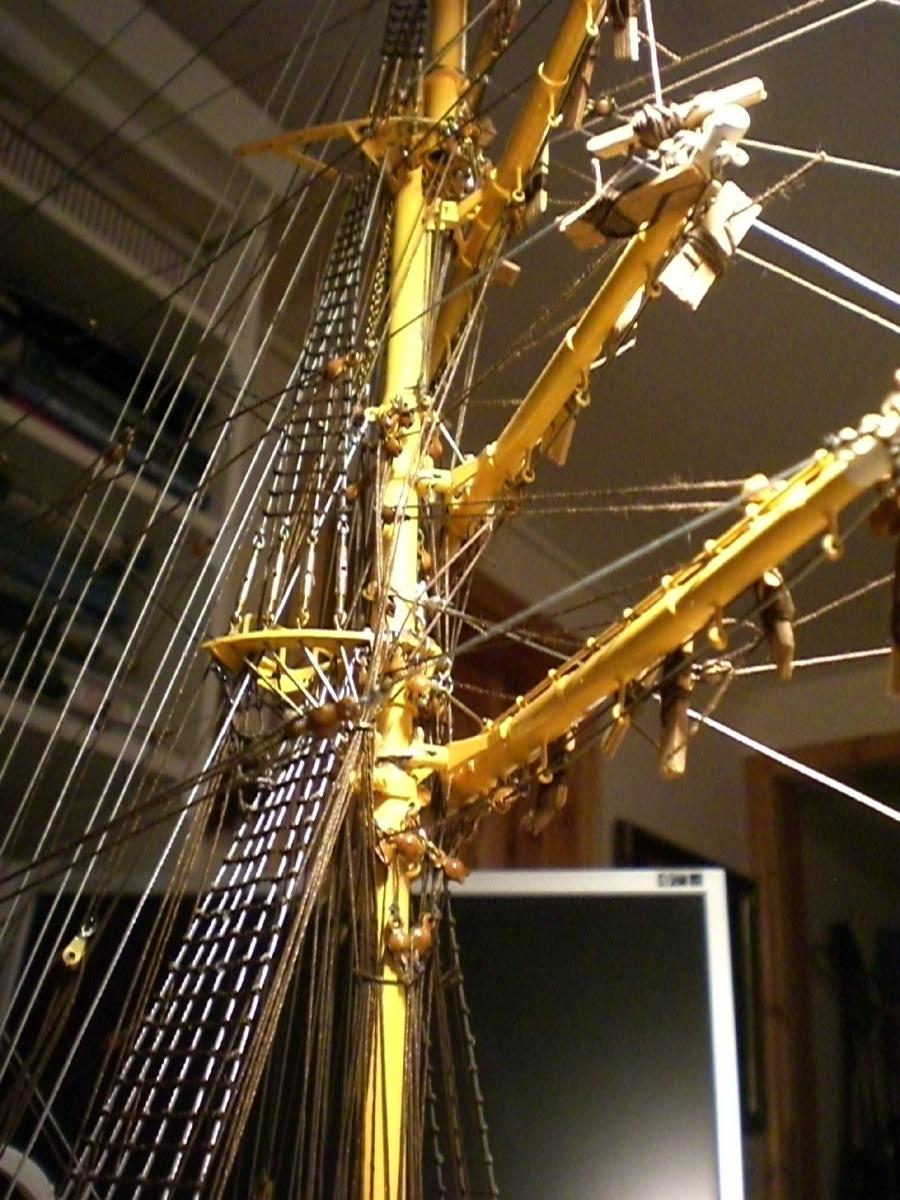
Build log part 43
here the boats are swung to the inside. Shrouds with ratlines
at this stage latest the forecastle stairs had to be attached
middle hight shrouds
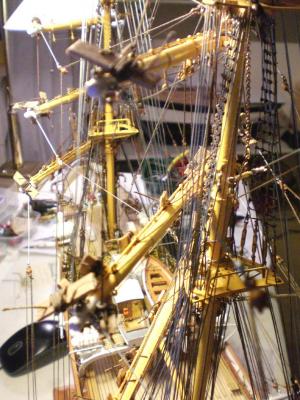
the running rigging is also being attached


mizzen mast
main mast
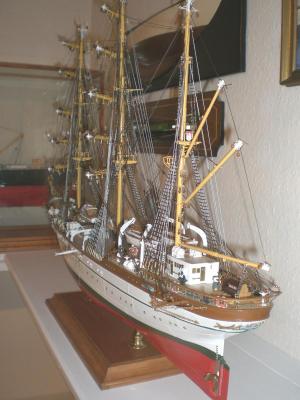
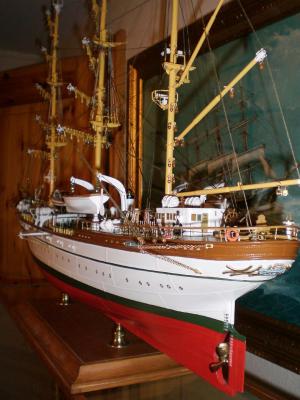
moving towards completion (without sails), White tipped Yard Ends closed
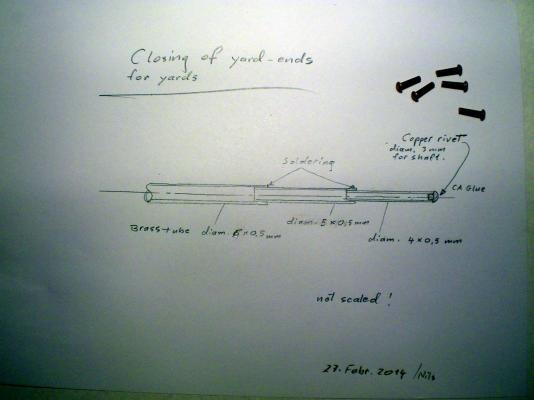
Close Yard Ends with semi round rivets
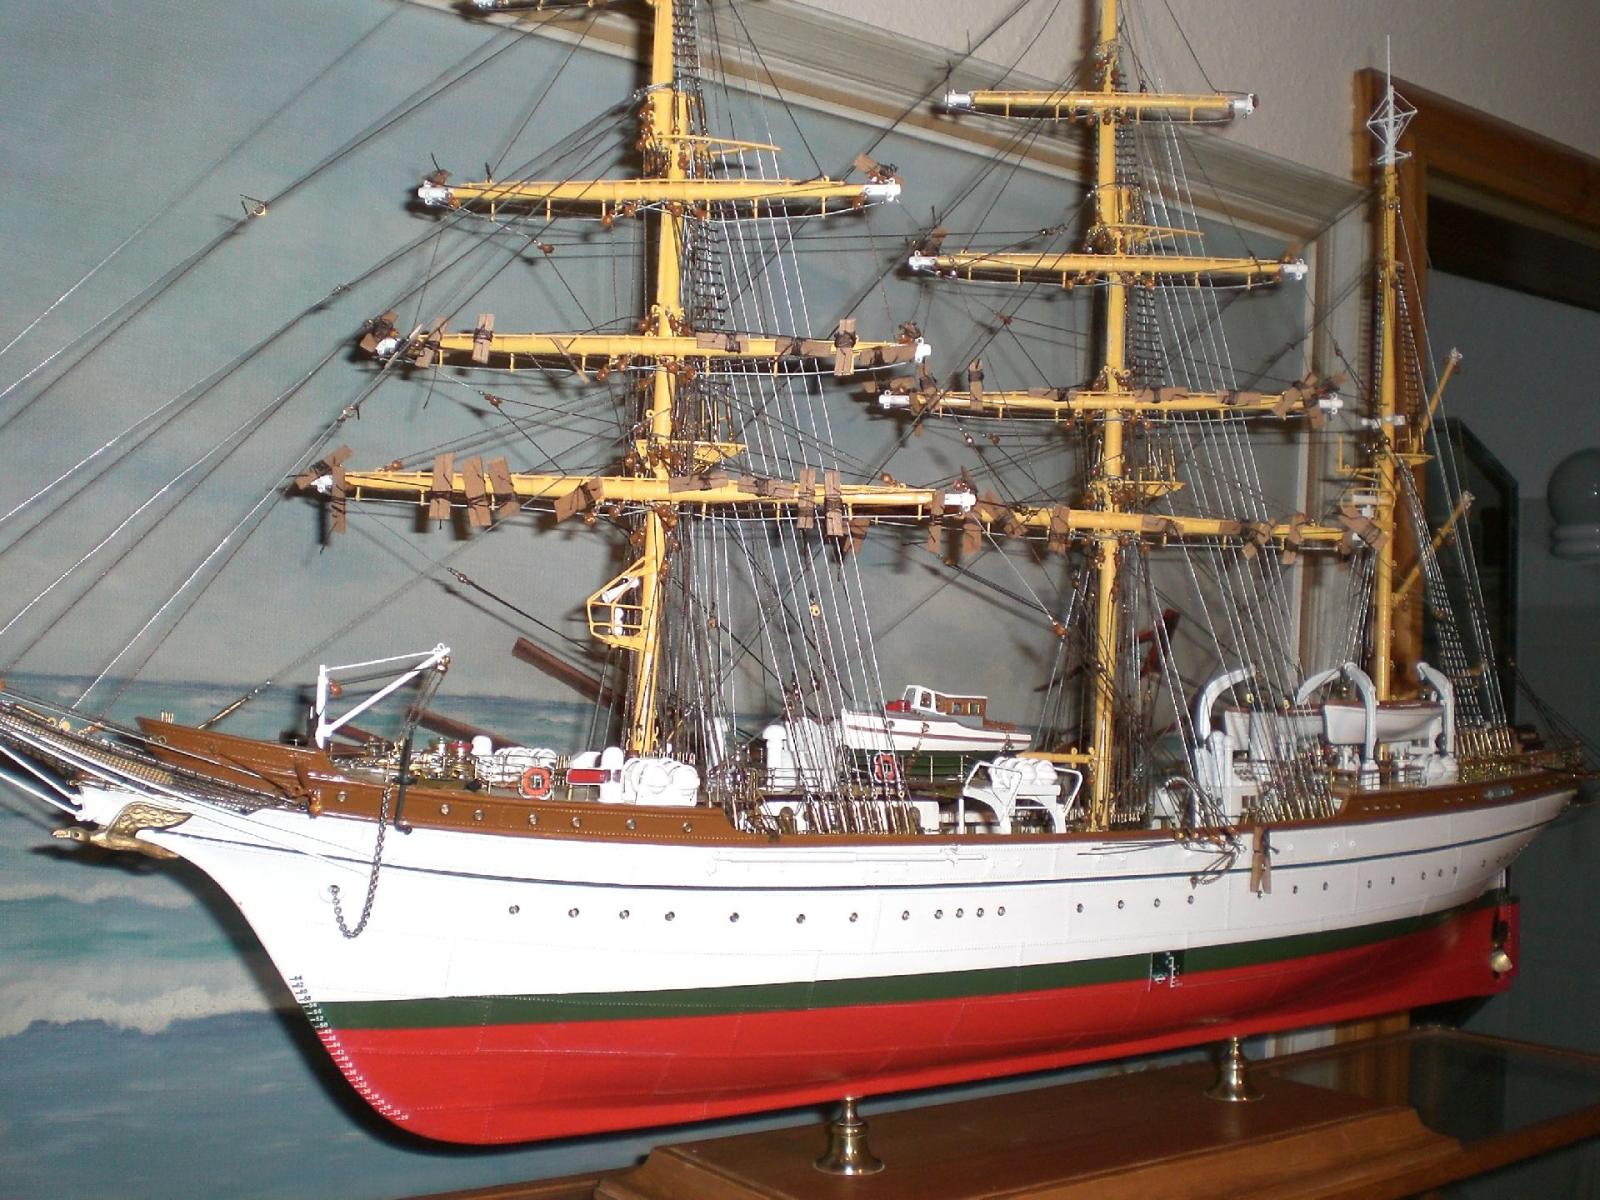
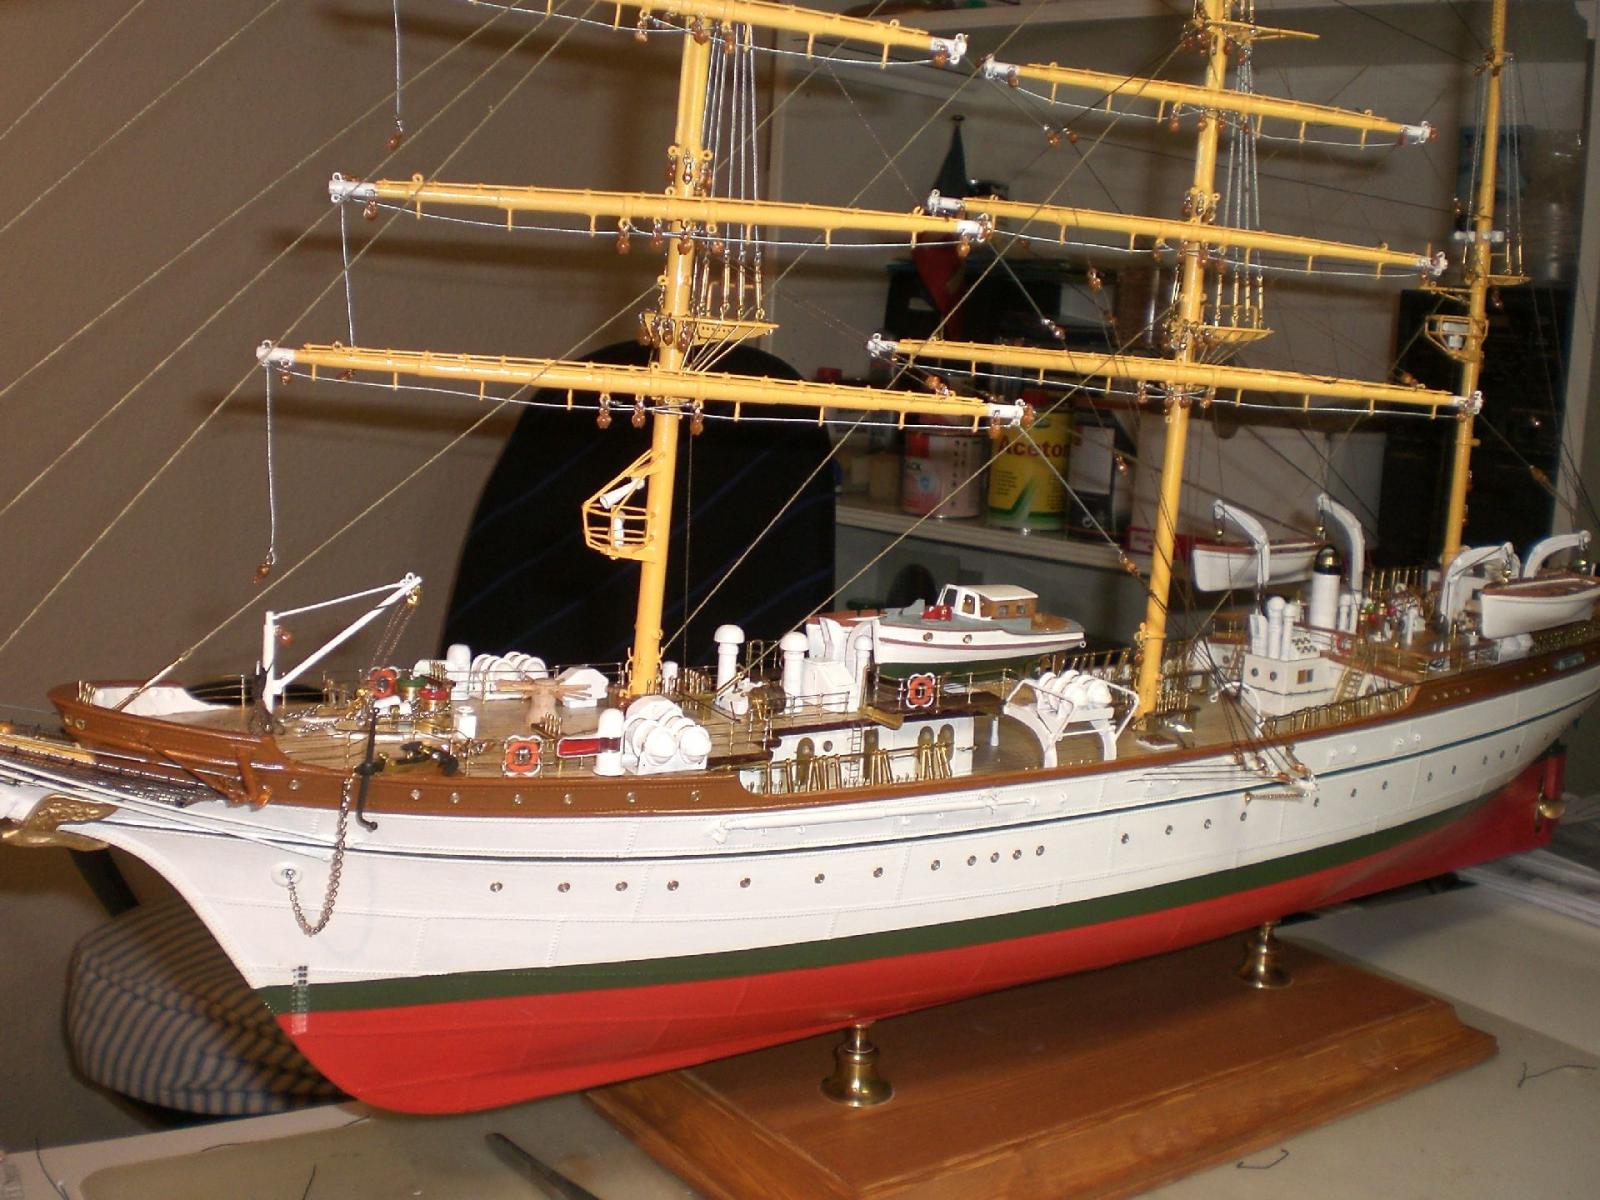
THE NEXT 3 SETS OF PICTURES SHALL SHOW THE MODEL IN DAYLIGHT ILLUMINATION PHOTOGRAPHS, BUT STILL WITHOUT THE SAILS
Build log part 44 to follow....
Nils
- Stockholm tar, EdT, captainbob and 9 others
-
 12
12
-
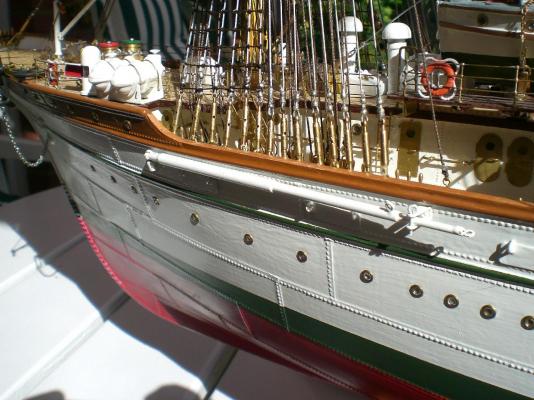
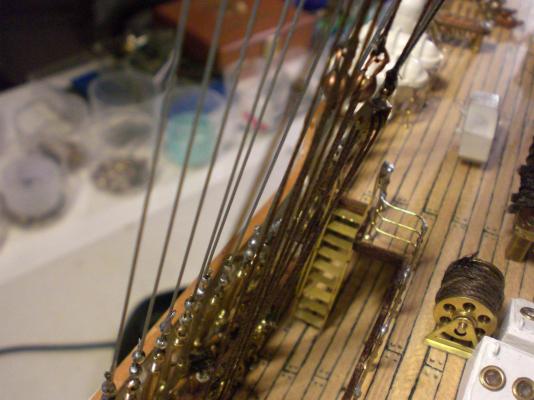
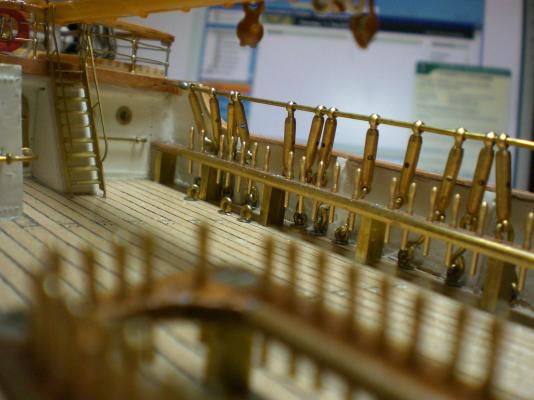
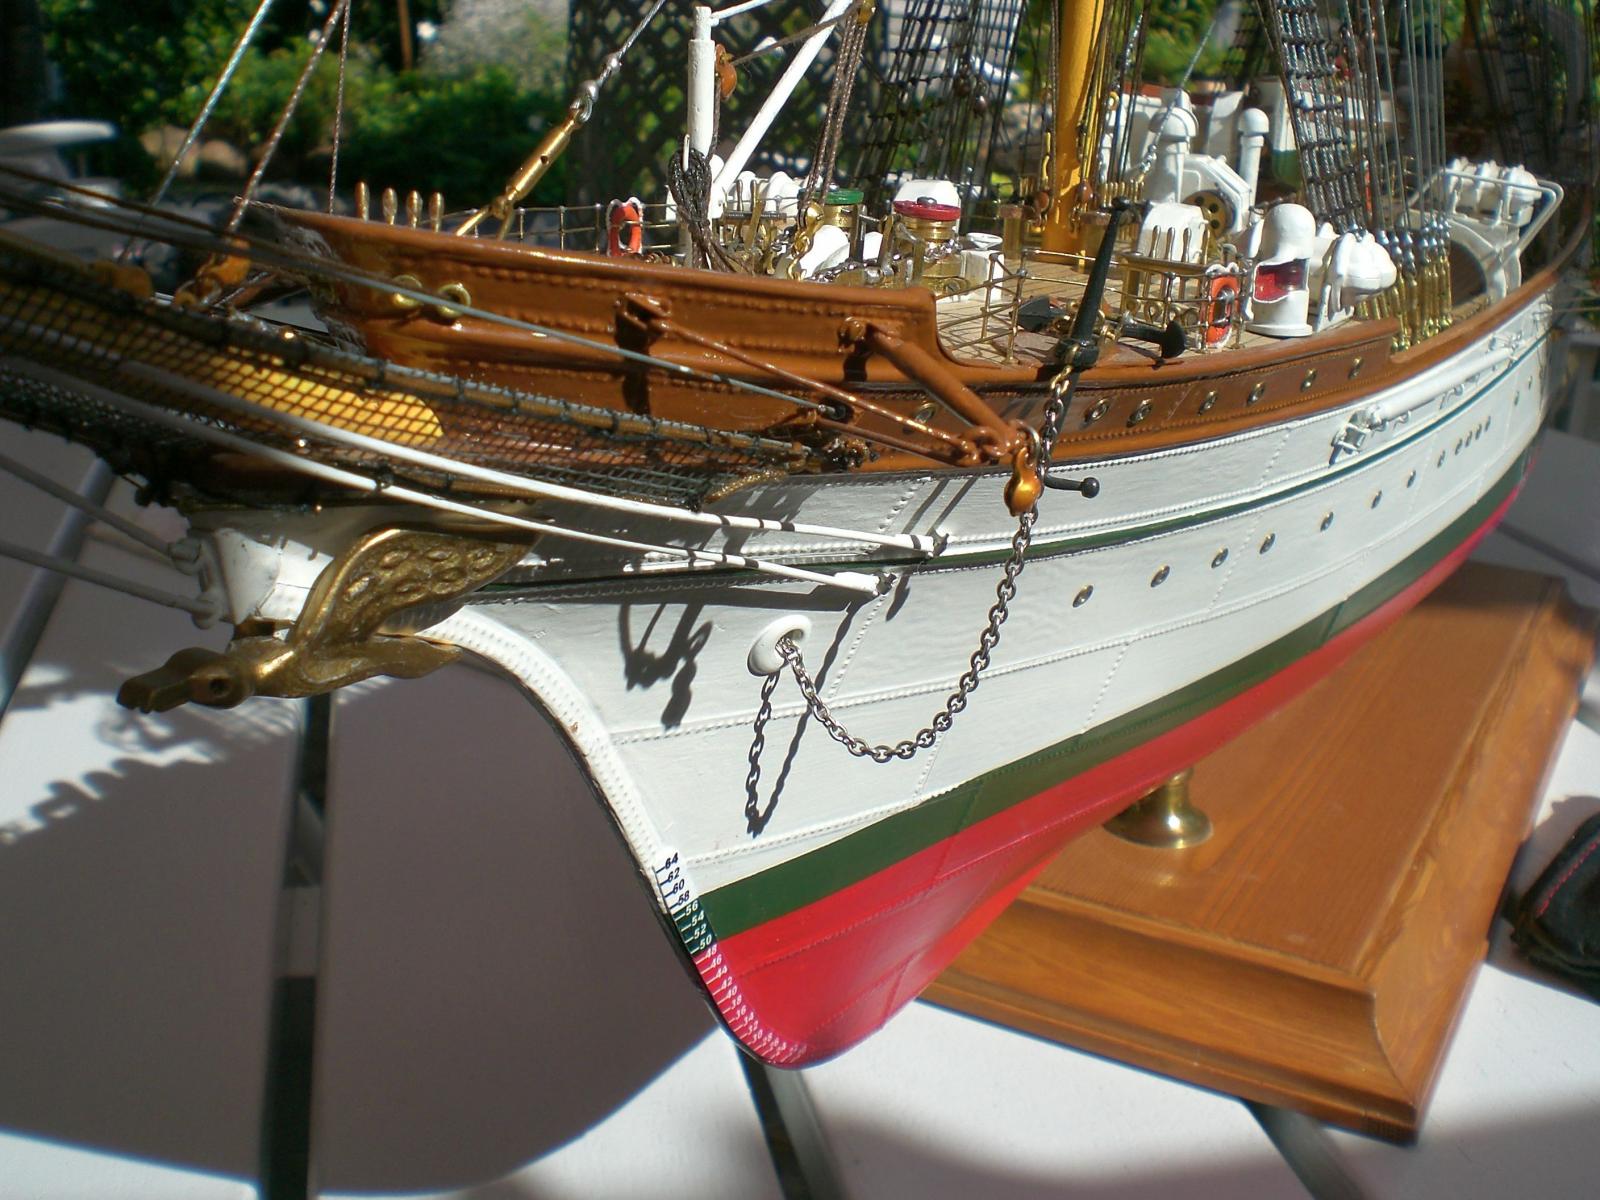
Build log part 41


the shroud wire alignment in relation to the mast belaying Points is pre-checked with ordinary strings
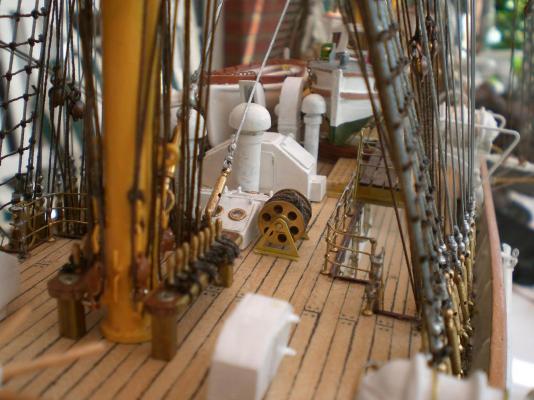
after belaying all the running rigging the deck shall look more busy


the depth indicator scales are made with my regular Microsoft Excel program on photo print paper

portside shrouds and backstays under way, also ratlines in the upper shrouds
Build log Part 42 to follow....
Nils
- captainbob, Aussie048, hexnut and 12 others
-
15
-
Build log part 40
view on inner port bulwark side with pinrail and shroud- and backstay spanners
the yellow boom is just a Yard laying at the wrong place
started to rig the bracing ropes


the mainmast running bracing ropes are lead over the aft bumpkins

starboard foremast backstays
Build log part 41 to follow....
Nils
-
real nice looking ship Tom,
also the two boats look very realistic
Nils
-
congrats Patrick
a proud ship and a proud builder....
well done !
Nils
-
Nils 1600 hours that is amazing
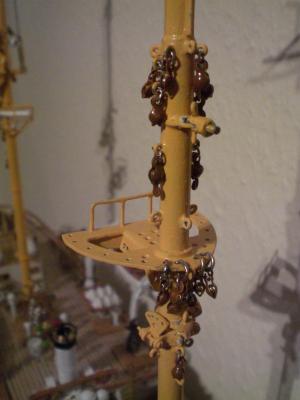
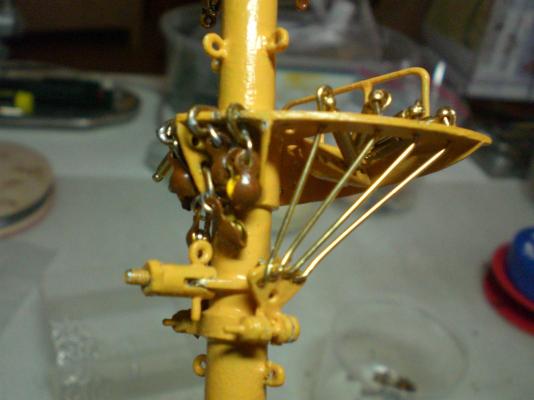
I am curious about all the blocks and the way you have fixed the shrouds.
How did you make the blocks and the other question is what metal did you make the small shackles from?
Michael
Michael,
I was already expecting that question related to the blocks already since the Pamir`s rigging pics had been posted.
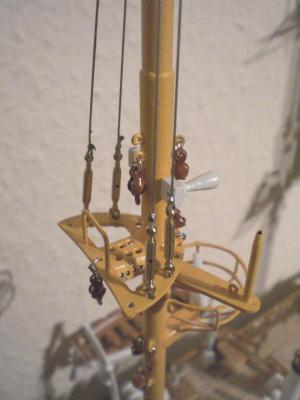
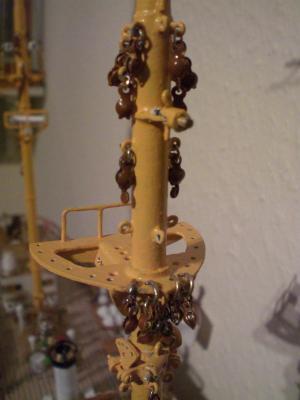
I once was on search in the web and at Ebay Shops for this type of equipement and finaly found quite a lot of items that with a Little Tuning only would well suit my Needs, an this all at peanuts priceing....
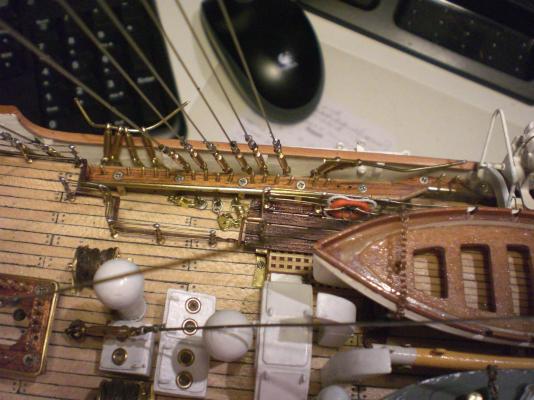
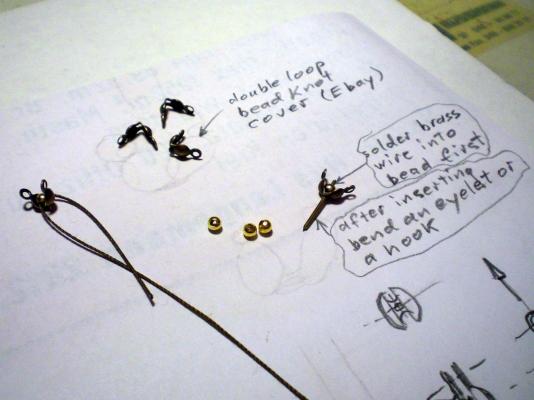
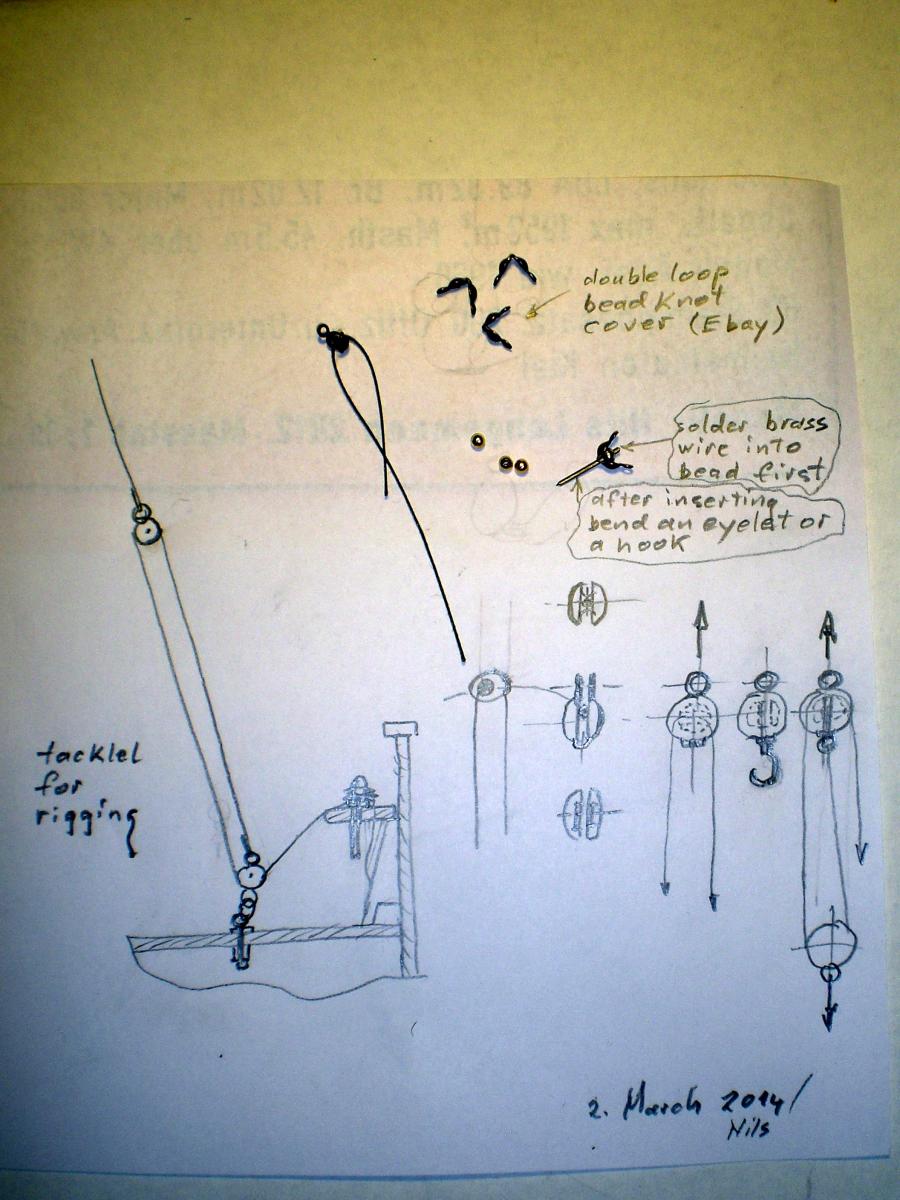
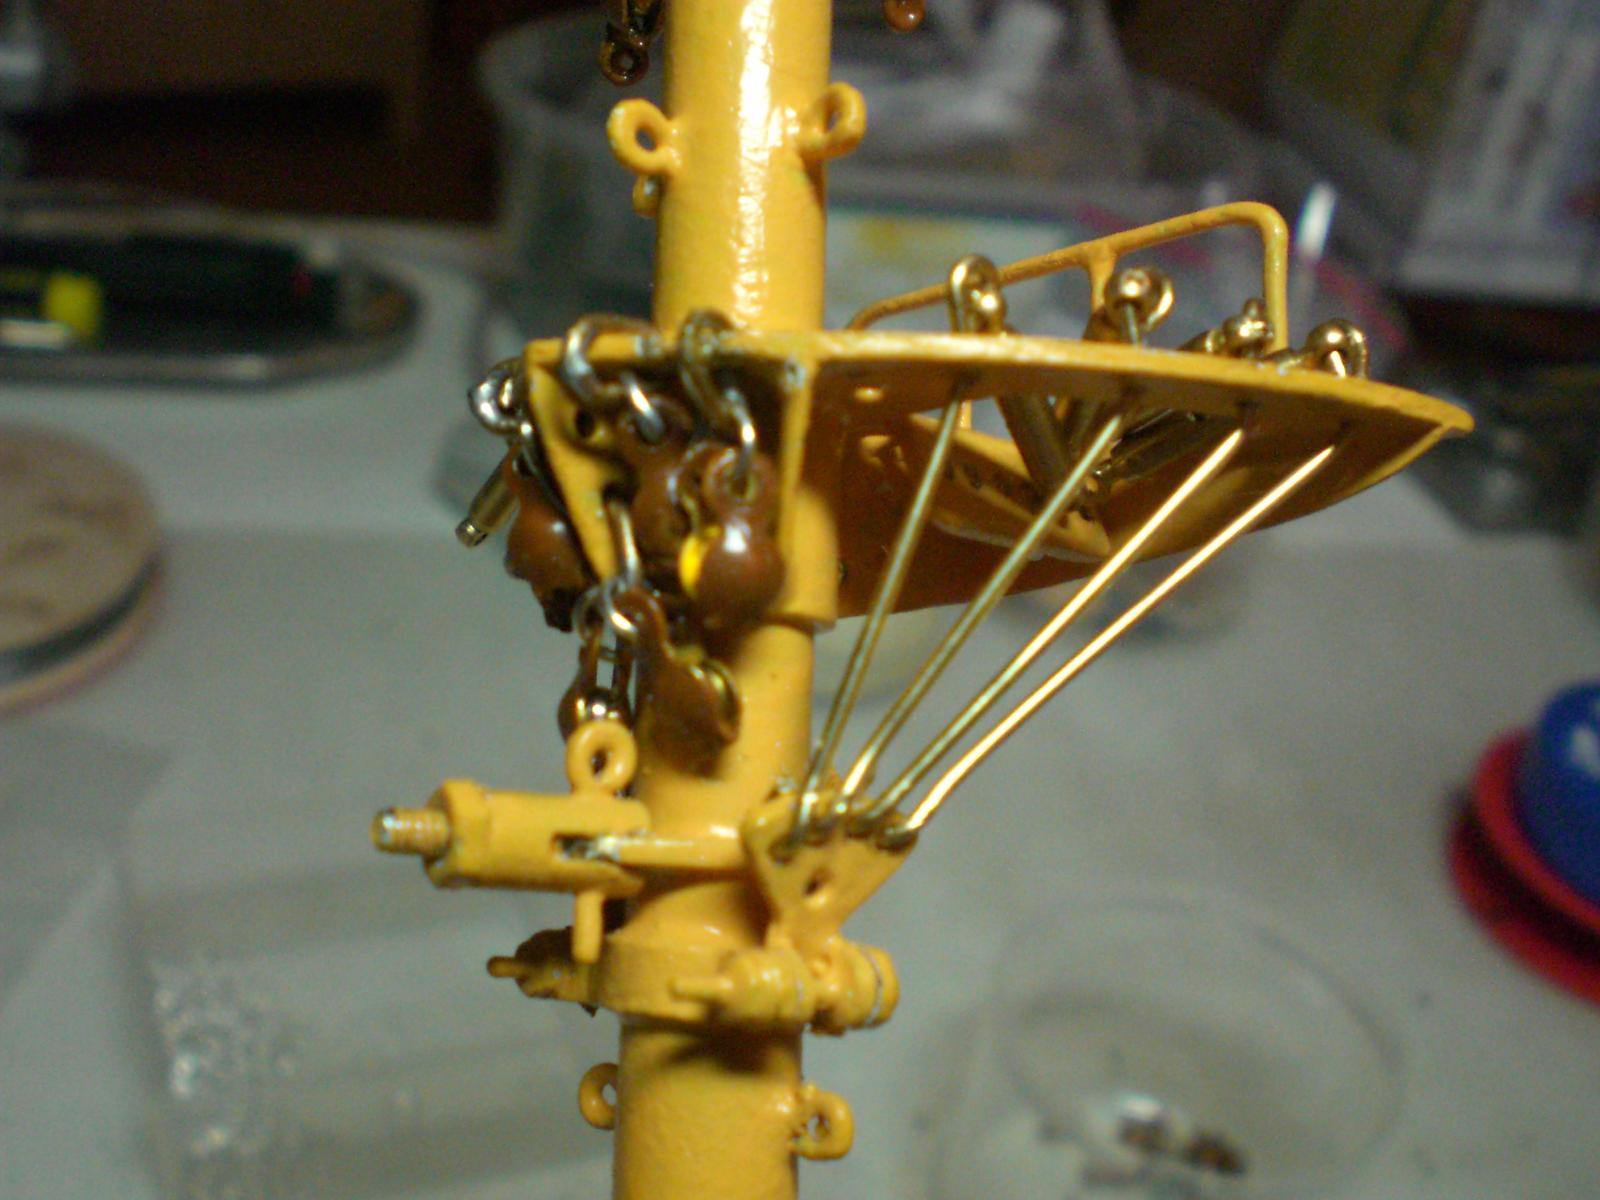
When sighting the articles available at the Ebay sections for Fashion jewelery equipement I discovered Little metal beads of all sorts in diam. and Color. These I use for solderingthe wire chord Ends to the shroud spanners. Criteria is the Little hole through the bead. The beads are very well solderable (clean Ends and sufficiant flux)
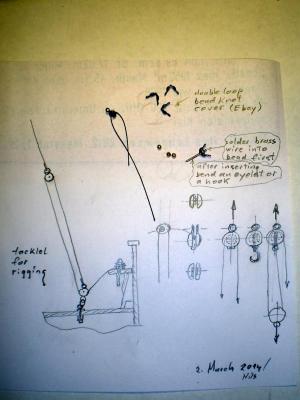
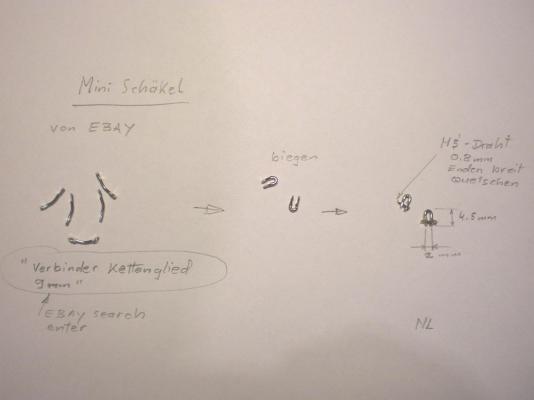
For the single sheaved blocks I use metal double-Loop capsule type bead knot covers, which are available in different sizes Colors quantities. As rollers I again use metal-beads that resemble rollers also in sizes to suit the bead covers. Shall enclose a scetch for explaination....
I would though not use These for historic wooden shipmodels, here Chuck has the correct ones in his Sortiment.
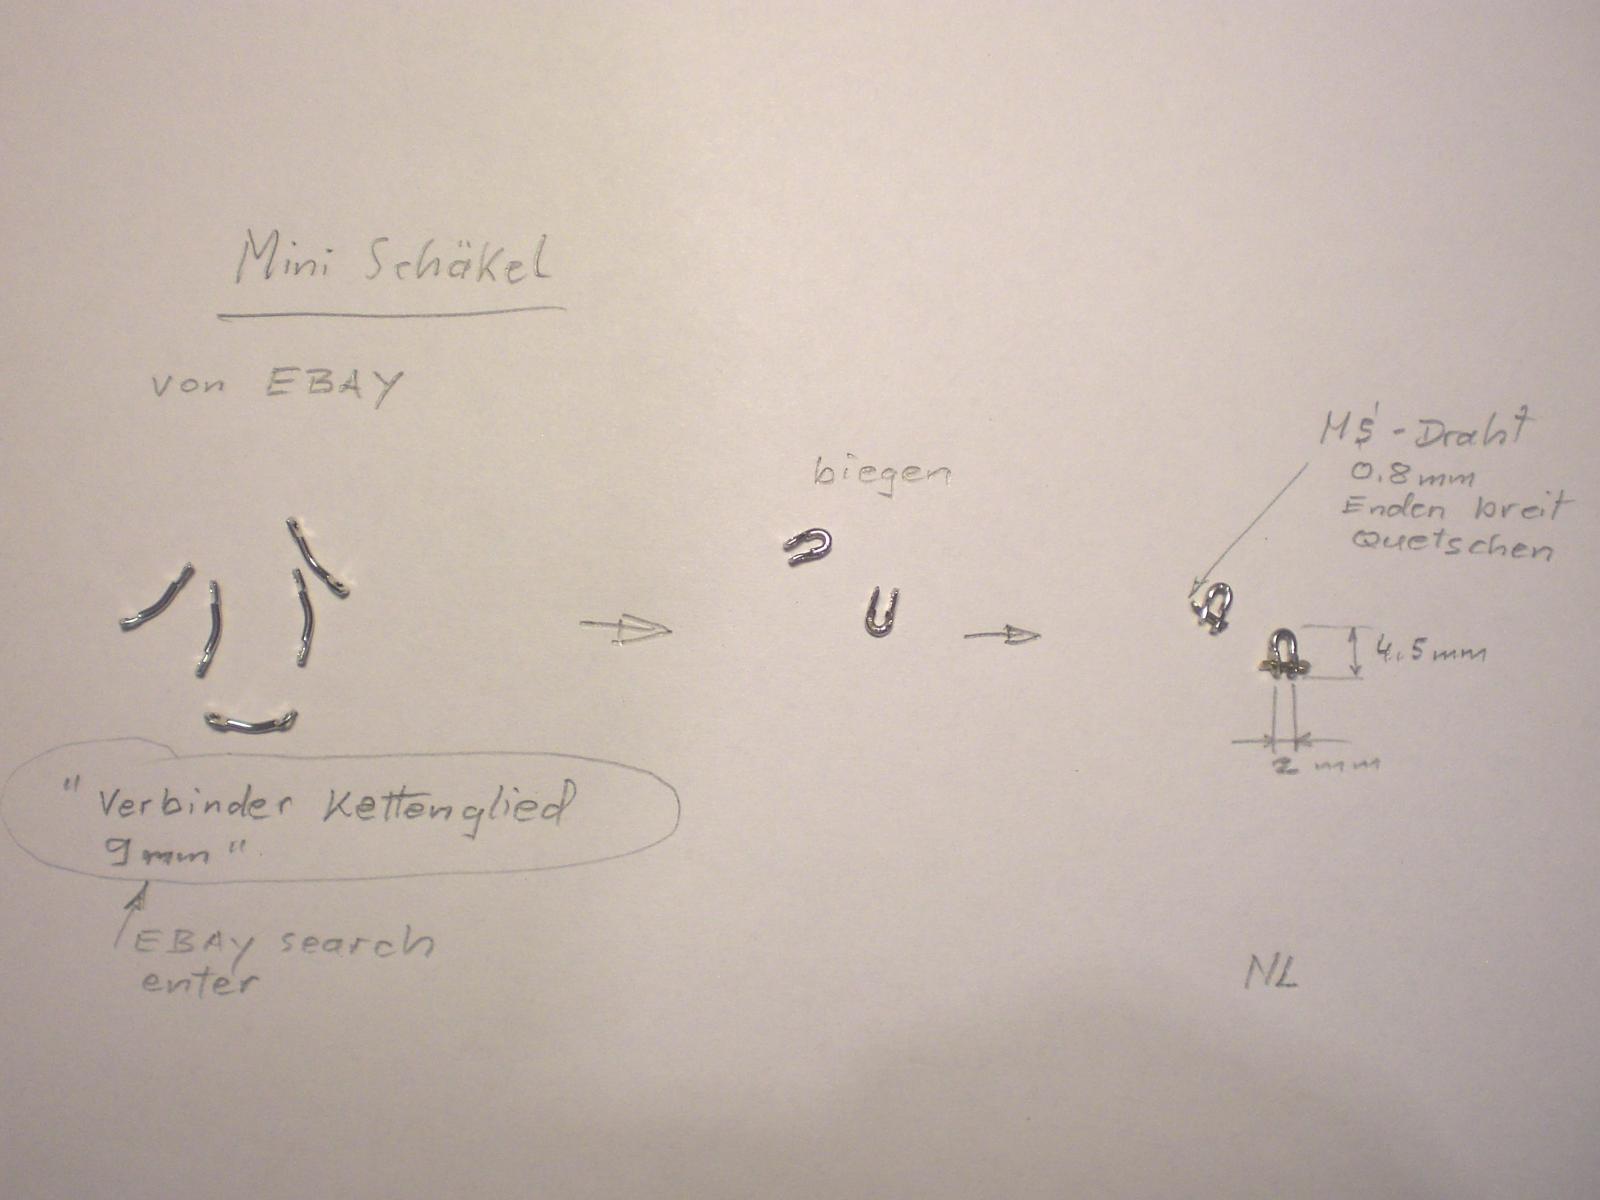
For the mini shackles I use an article from the beadsshop made of brass, nickel galvanized, shall enclose a link
cheers
Nils
use bead knot cover "blocks" either for hooks, single sheave blocks or blocks with 2 fastening sides
-
Nigel,
many thanks for sharing that link comprising Jimmy Woods work, you`re right, that is very interesting for me as well, and I`ll take myself more time to study and explore that site more intensively.
I love those modelers who build machinery from scratch, modern or historic. I also built a steam river tug with selfmade gas fired Boiler and driven by a self designed and made V-type arrangement 6 cylinder steam engine for RC control. Unfortunately I had a leakage in the Boilers superheater tube coil, and so the model is sitting idle on the shelf for many years already.
Nils
-
nice good looking planking Mauro
Nils
-
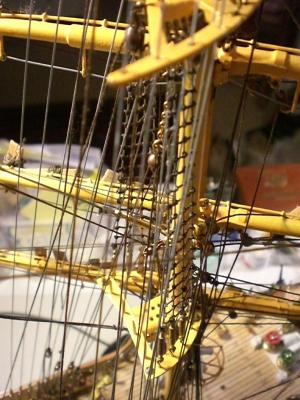
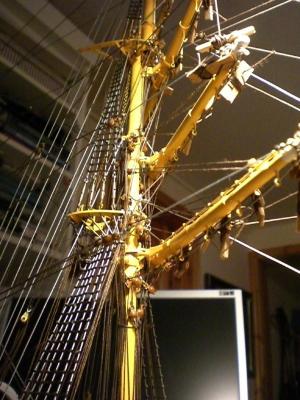
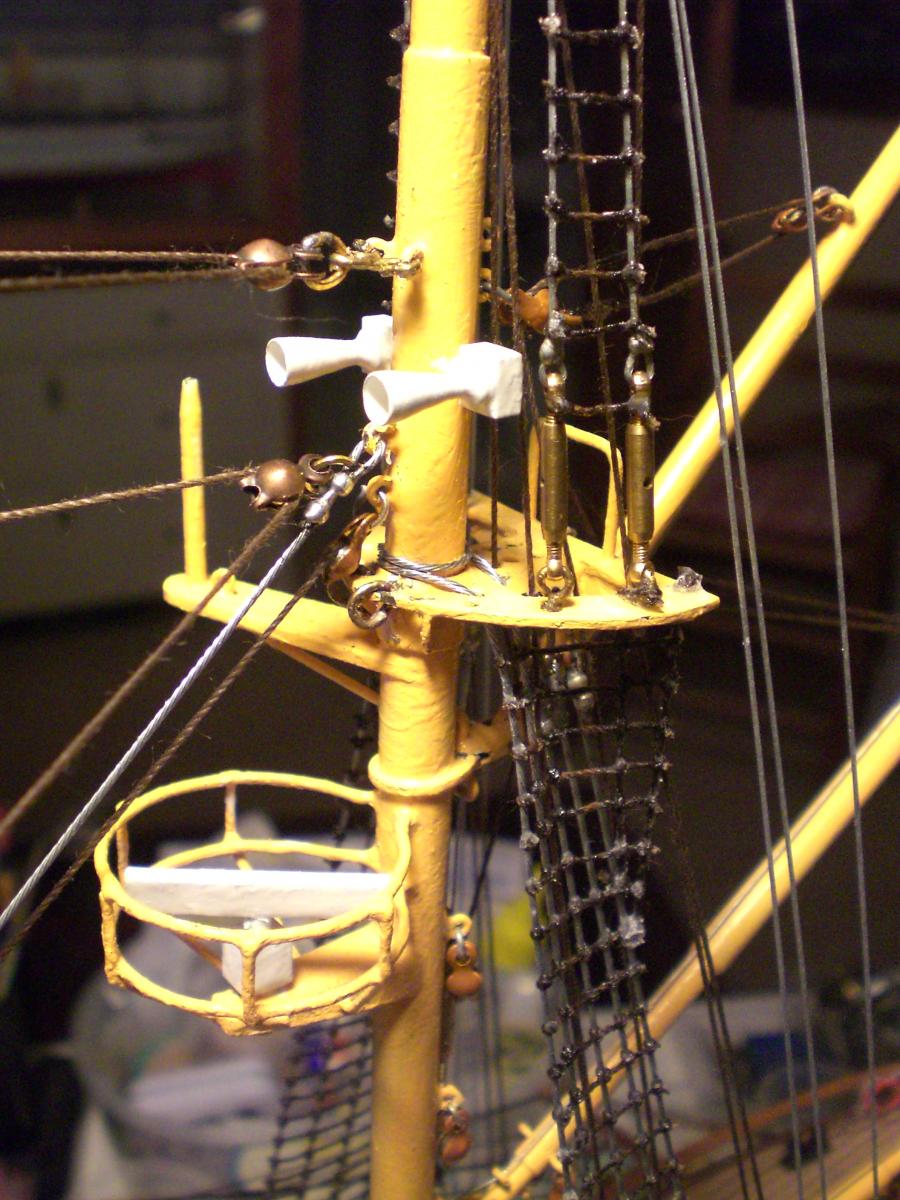
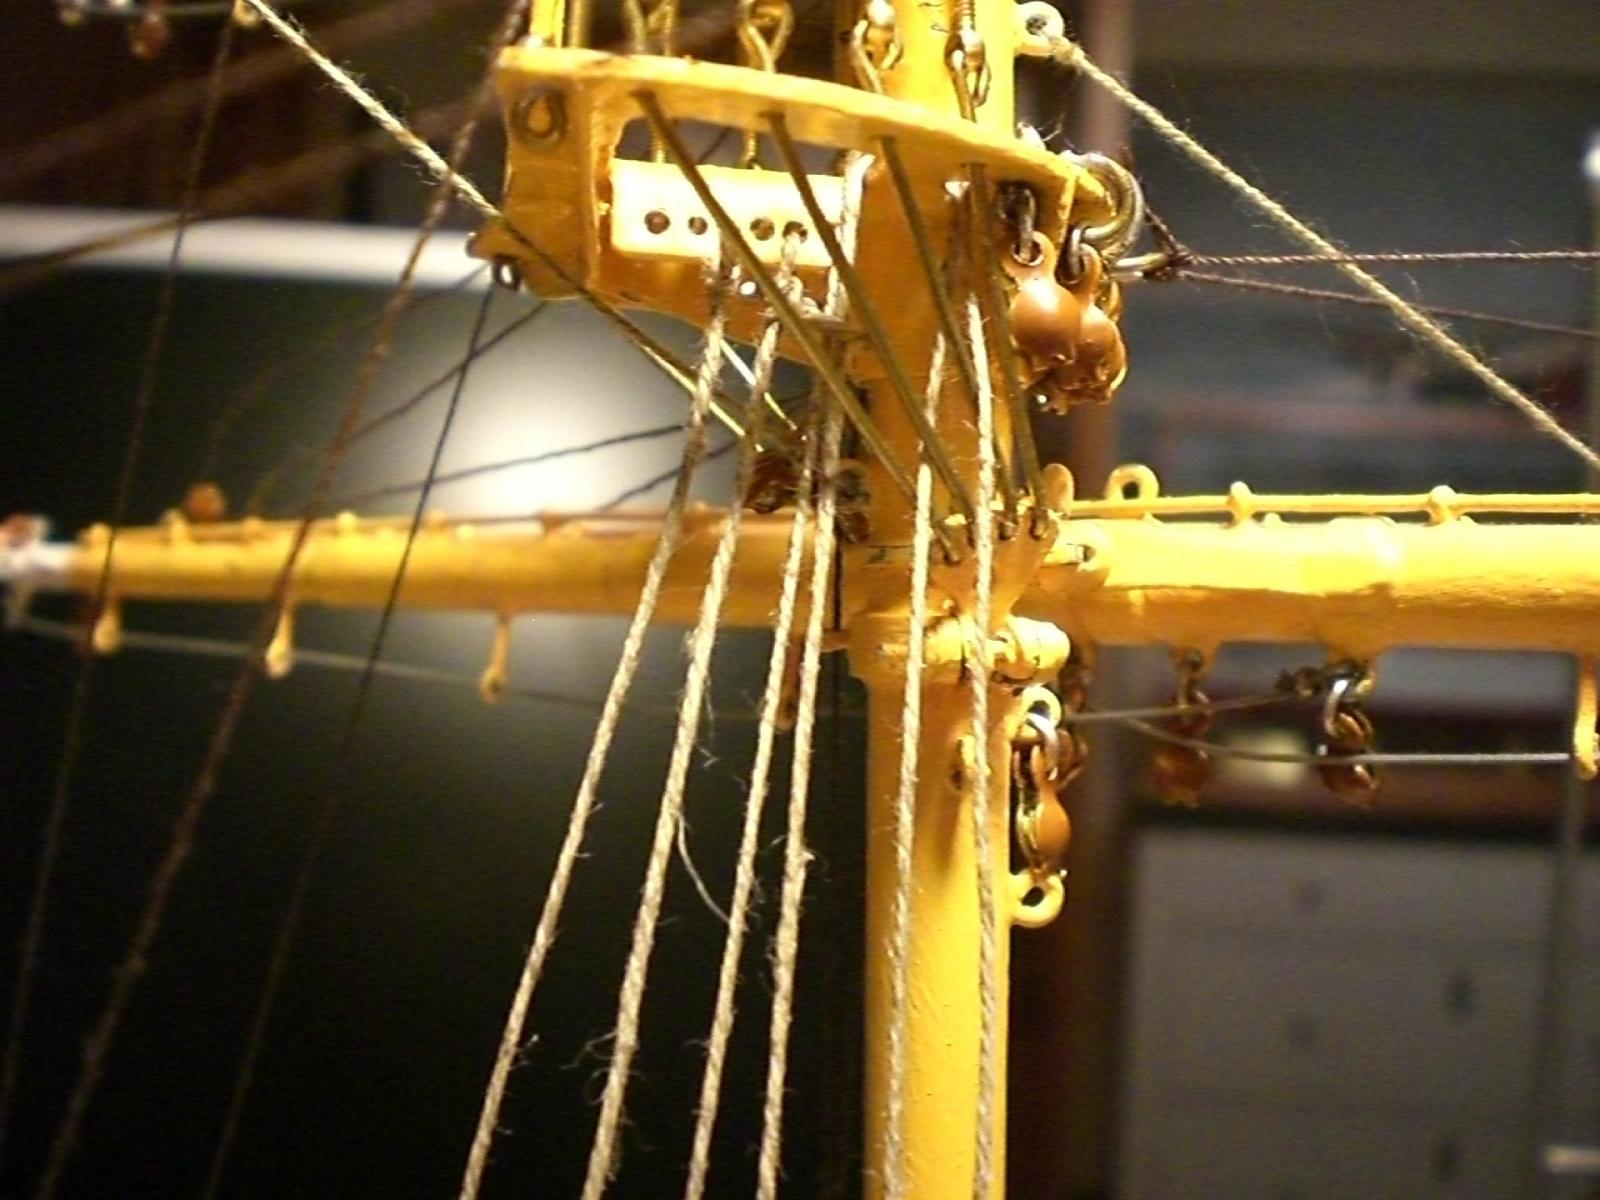
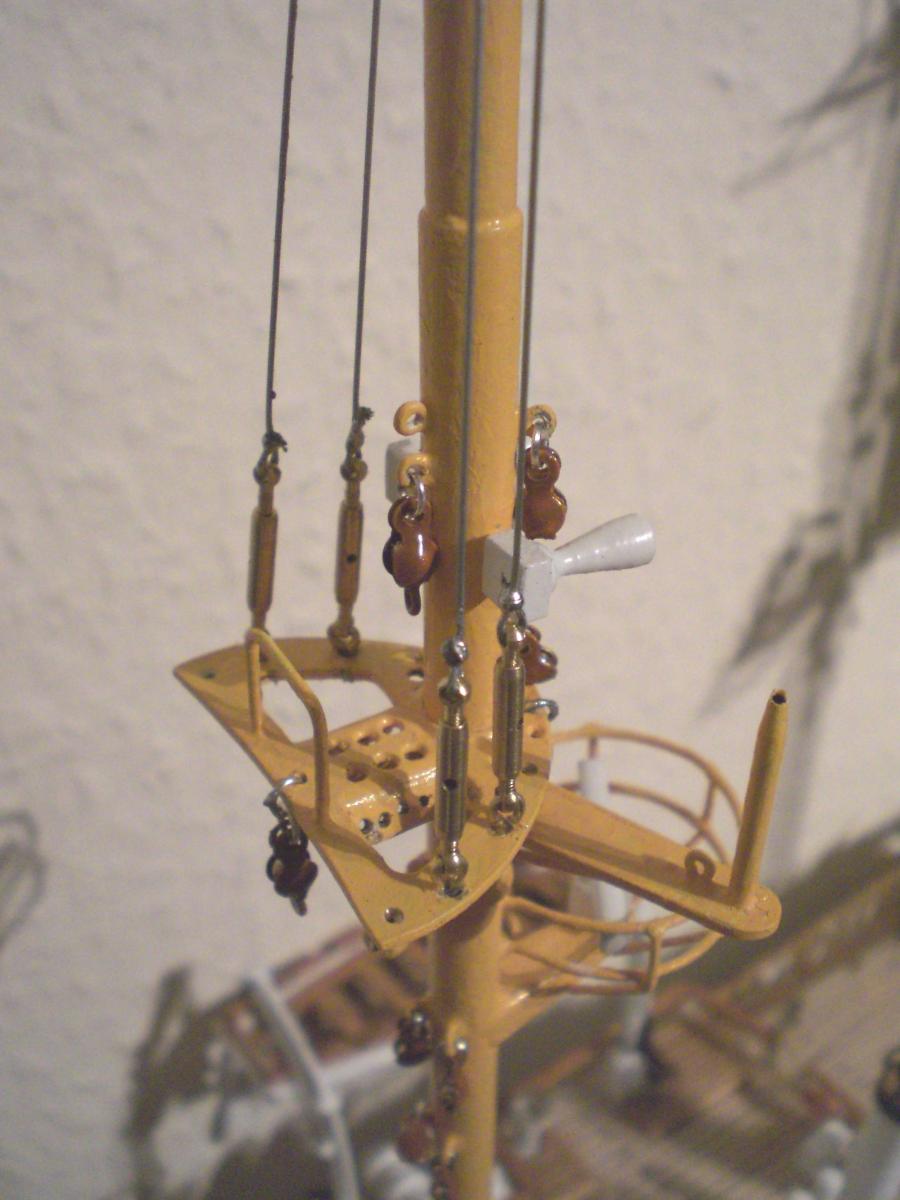
Build log part 39

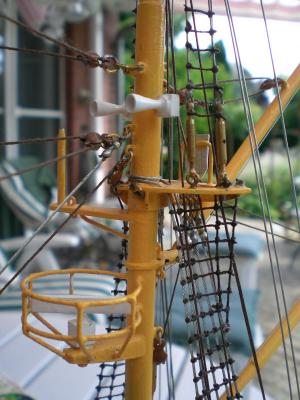
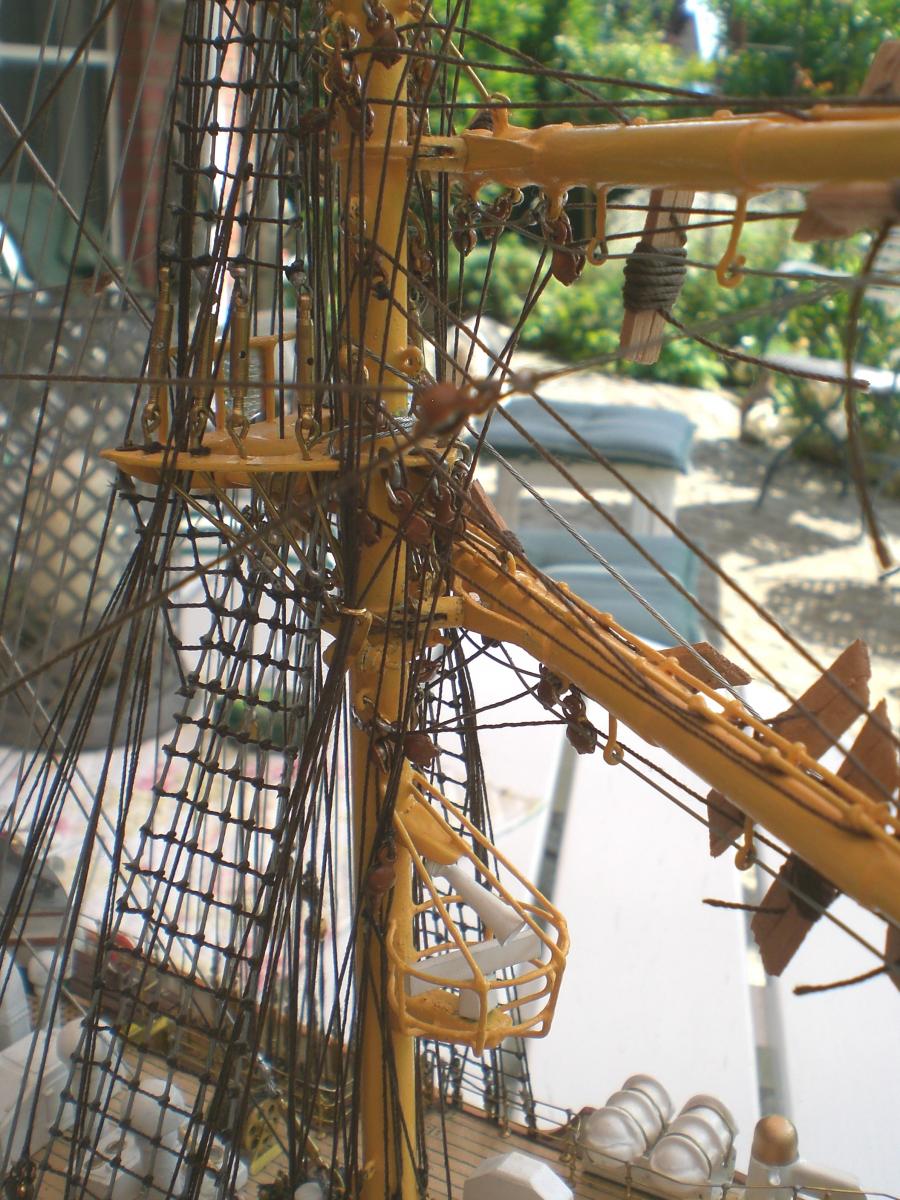
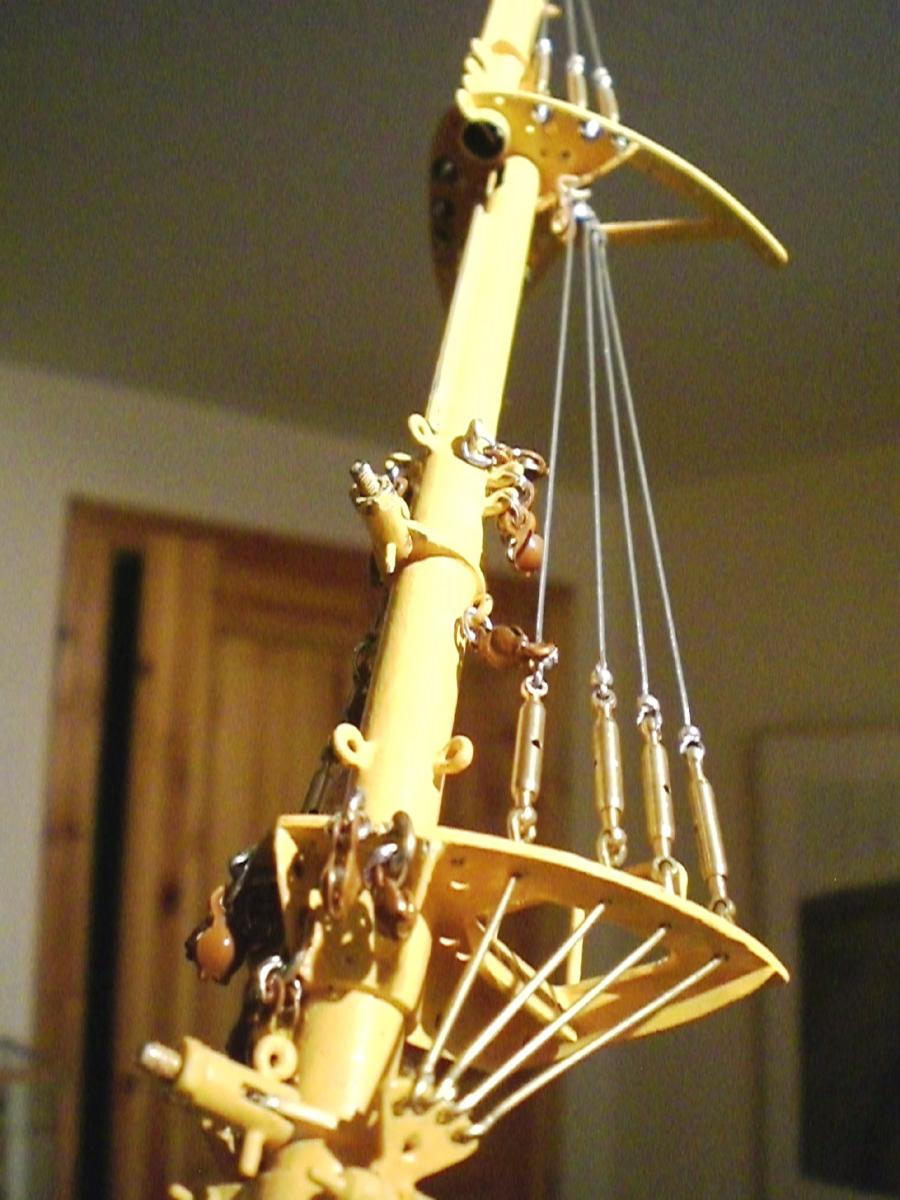
mast top
lower top platform

here with Counters for upper shroud spanners

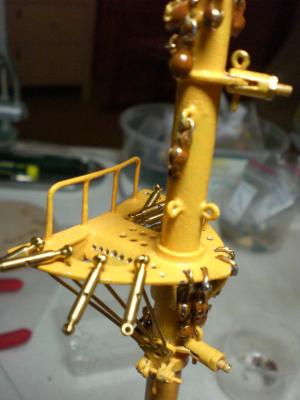


made several mini shackles for Multi usage
Build log part 40 to follow...
Nils
- flying_dutchman2, Piet, hexnut and 3 others
-
6
-
Michael,
thats a a nice rememberance to your mind. The mainsheet block shall look great when its done
Nils
-
Thanks for your nice comment Nigel,
I found out that doing models in finer scale than 1:95, max 1:100 is not so well producable for me, too much fiddeling and fagile parts. A Limit of course is the length of an actual ship...., for example I would love to challenge in doing one of those famous 4-stacker Atlantic liners between 1900 and WW1.
I have already a beautiful plan for Cunards quadtriple screw "Lusitania" in scale 1:200, that could be magnified, I fell in love with the lines...., but still its a beast in model-length, let alone in scale 1:100, would Need an extra room for that.
Nils
-
-
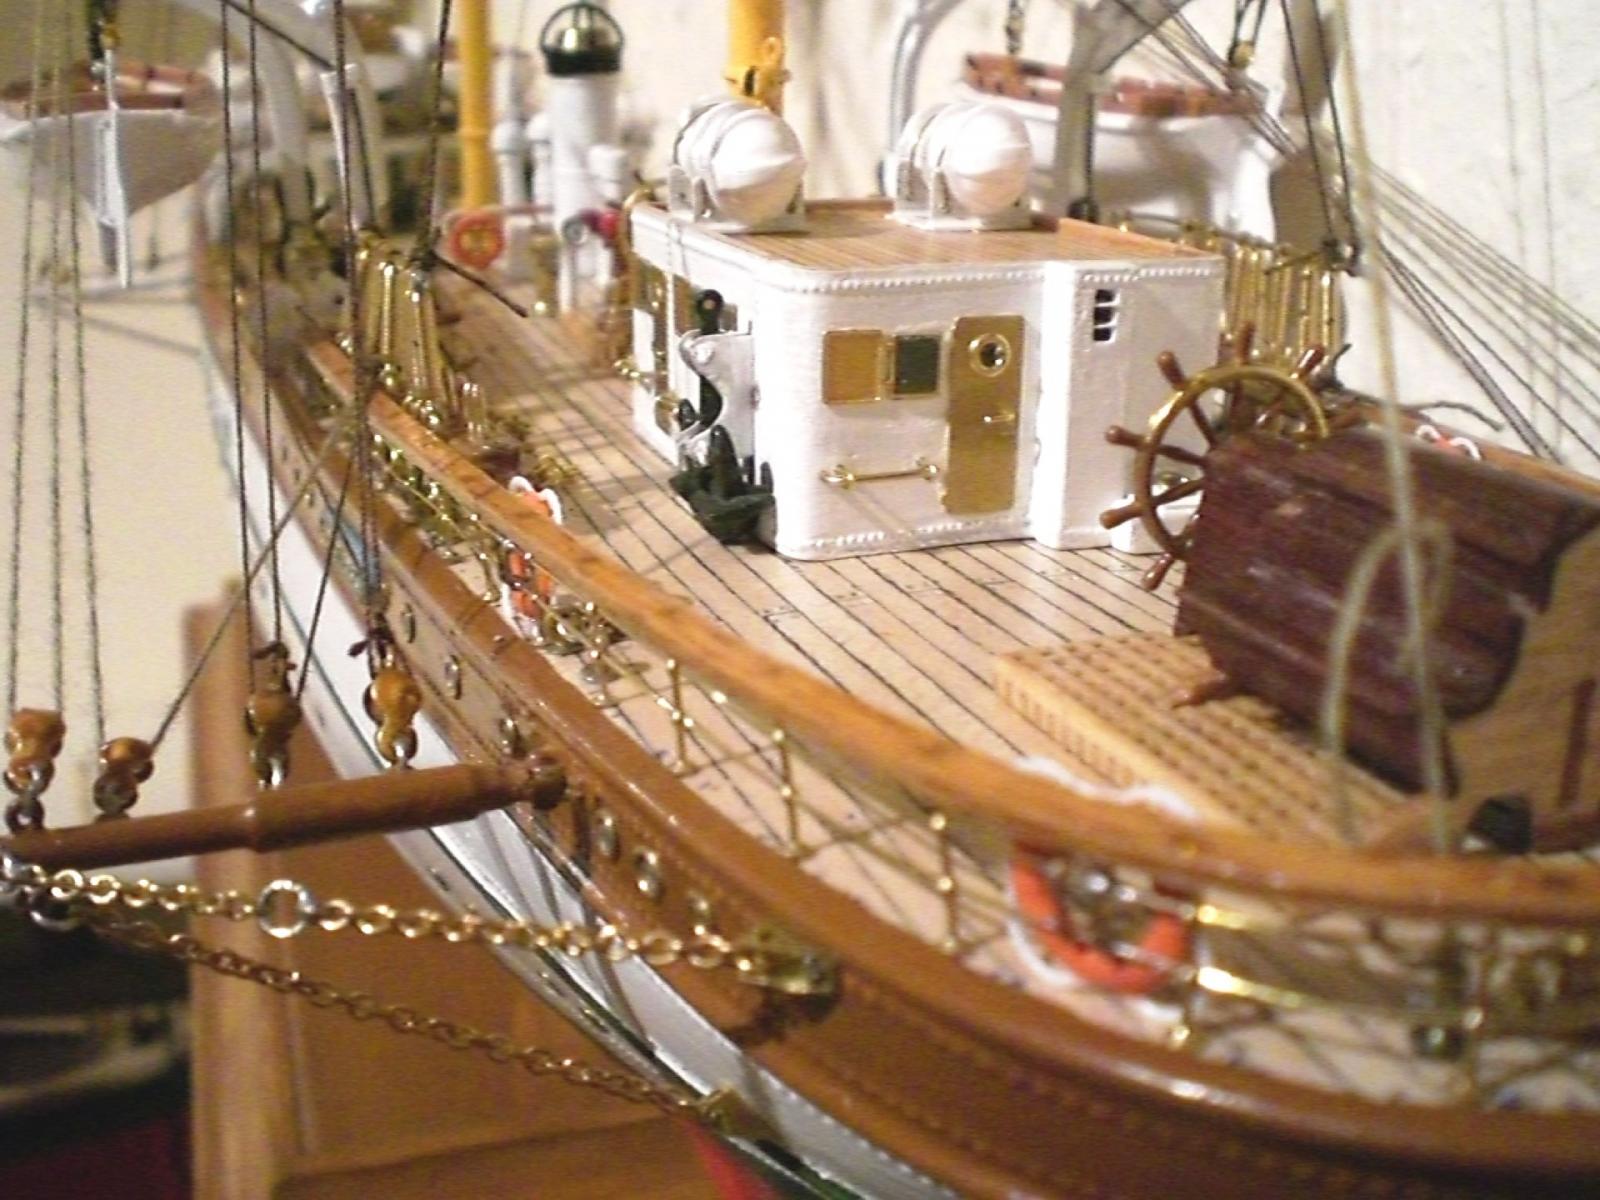
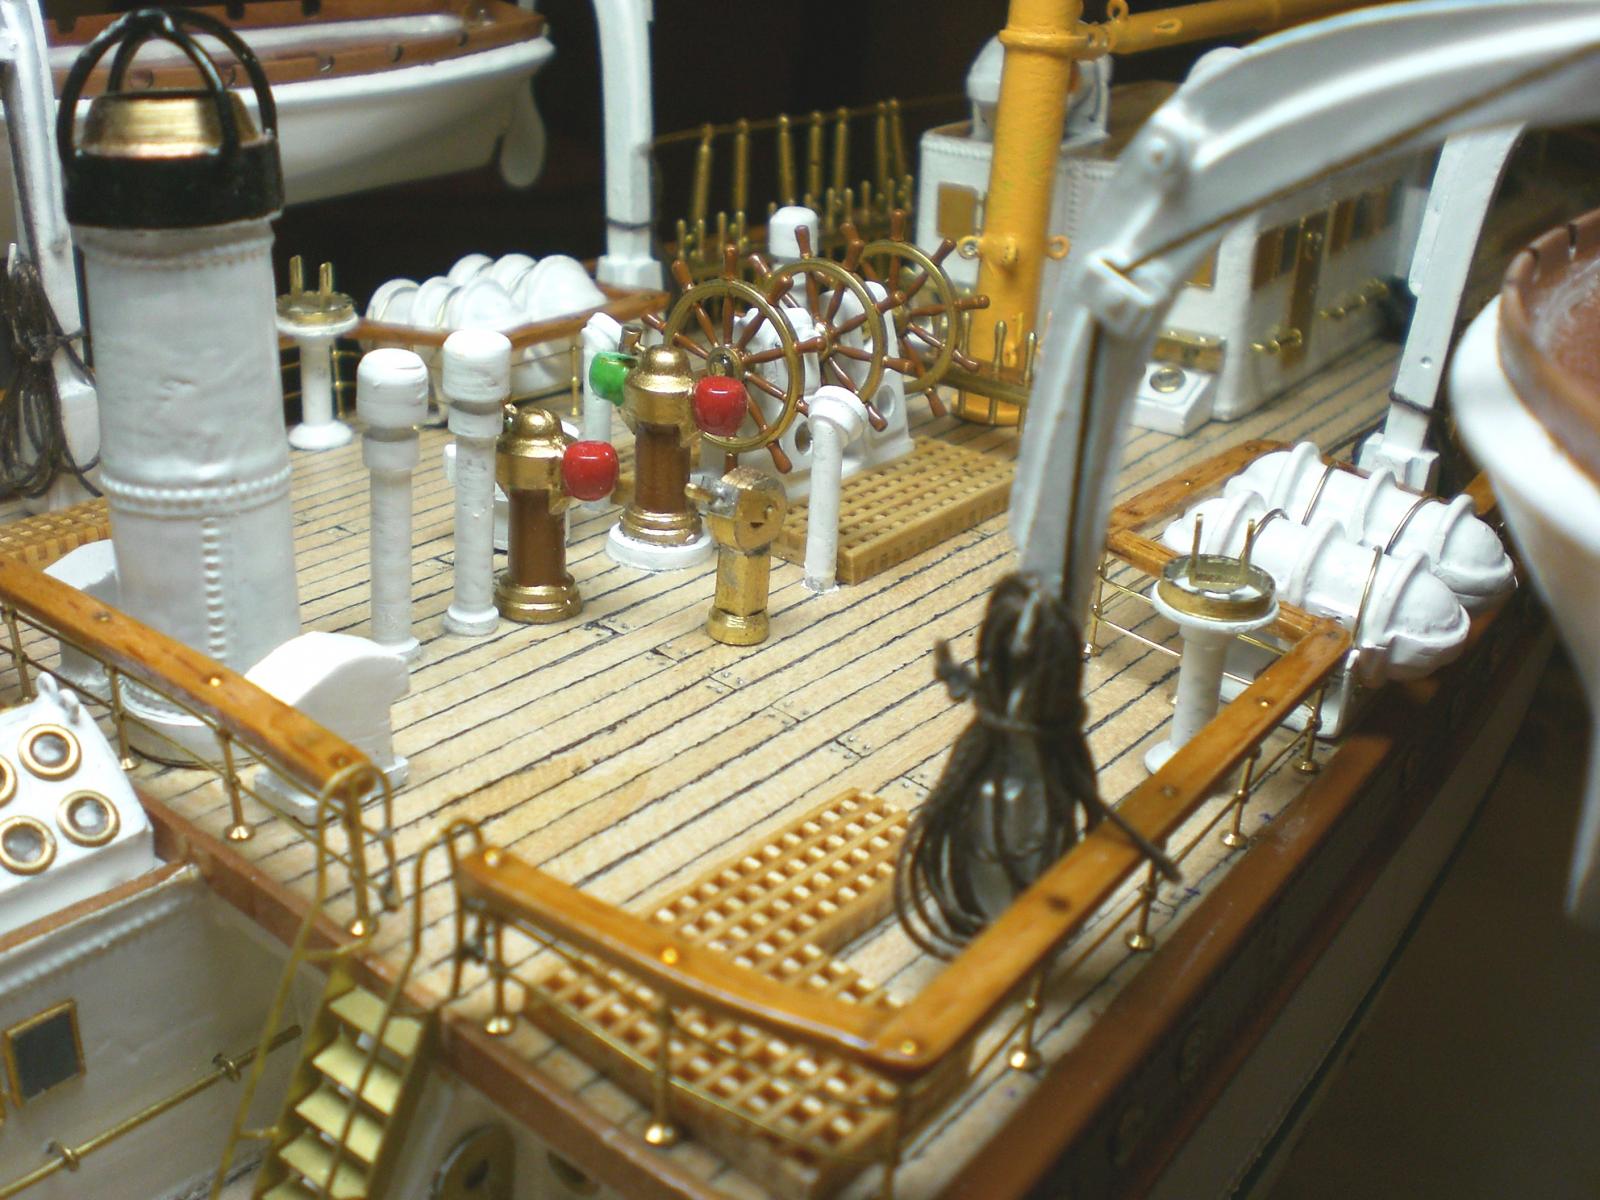
Build log part 38
poopdeck handrail Prior to sanding and varnishing
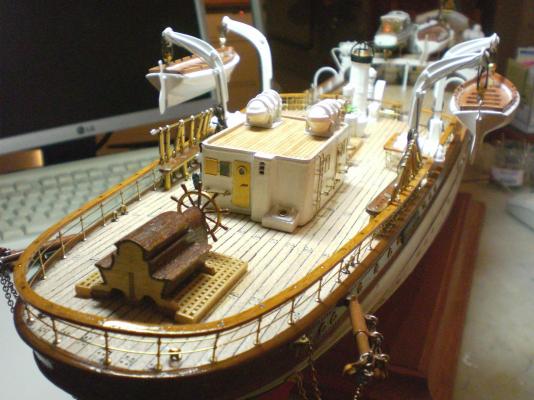
wheel to auxiliary rudderstand

decks nearly completed

nav sight-bearing devices on pods next to the raft containers
handrails complete all around poopdeck
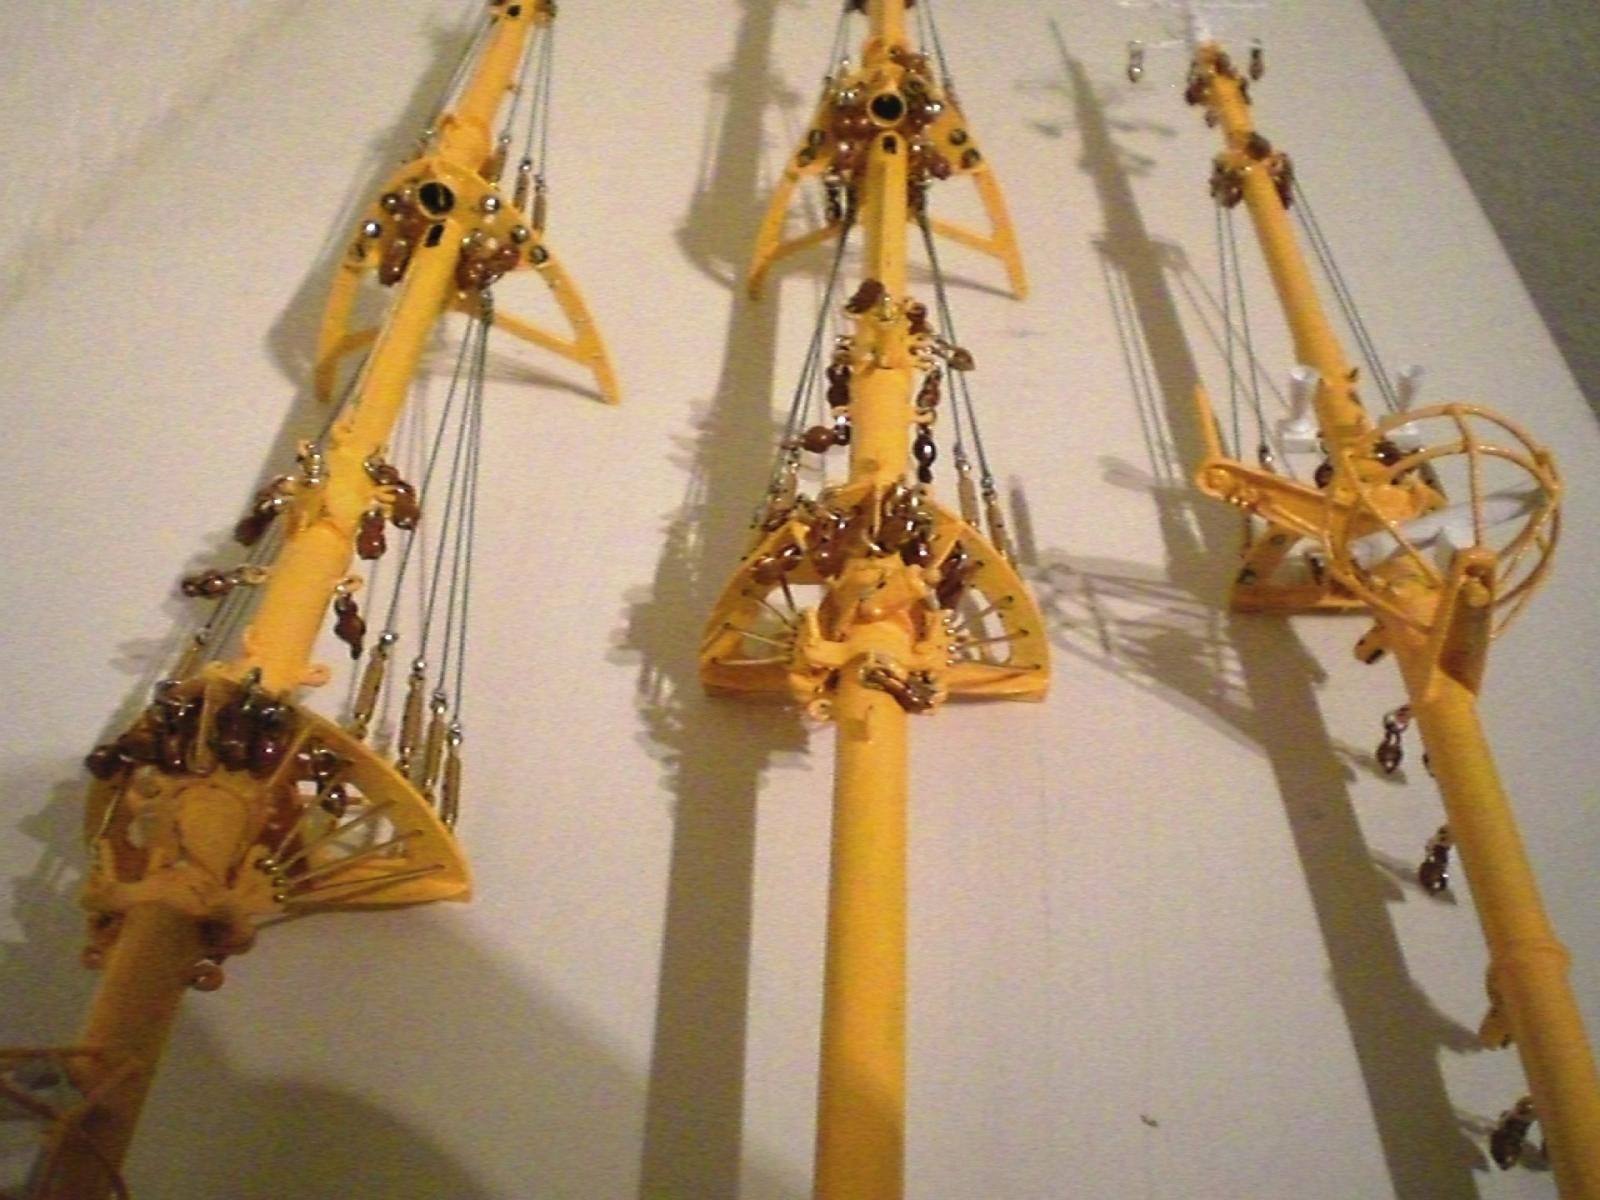
mizzen mast top shroud wire chords
a few hundred blocks (in total) for all the sail operating running rigging
spanners for the upper shrouds of foremast
Build log part 39 to follow...
Nils
- Piet, NMBROOK, flying_dutchman2 and 3 others
-
6
-
-
So if my calculations are correct 1.5 x 365 x 24 = 13140..... oh subtract a couple hours for sleep and eating (1.5 x 4 x 365 =2190) which leaves 10950 hours
And if it did not take that many hours then you must work incredibly fast.
An absolutely wonderful build it is fun following along.
Michael
Michael,
in total it must have been appr. 1600 manhours, but not continously building, because the Pamir was pulled up inbetween, whilst the Gorch Fock stood waiting, so that both ships nearly had the same sequence Level and I could do common practice withe the sailmaking, etc...
Cheers
Nils


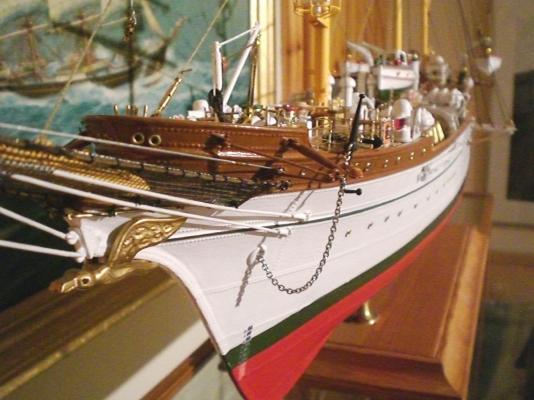
Gorch Fock 2 by Mirabell61 - FINISHED - scale1:95
in - Build logs for subjects built 1901 - Present Day
Posted
Danke Karl,
nice comment of yours , I`m glad you like this 3 mast barque
Nils