


Mirabell61
-
Posts
7,403 -
Joined
-
Last visited
Content Type
Profiles
Forums
Gallery
Events
Posts posted by Mirabell61
-
-
Marc,
a very impressive looking model, well done so far !, I like that you are intending to present her under sail, that shall make this lovely clipper complete.
shall follow your Progress with great interest...
Nils
-
John and Popeye,
many thanks to both of you for your apriciative words, and I am very happy that my build log was so much liked
Nils
-
Bob,
I thank you for your very nice comment and am happy that you enjoyed the build
Nils
-
Hi Crackers,
thanks for your words, and hopefully you did`nt have a data loss due to your harddrive Crash and its repair. I know from my own experience that every time my harddrives were exchanged there were losses in data somewhere when firing them up again.
But nice to see that you`re online again
Nils
-
Thank you Michael,
I would have another steamship up the sleeve, but that had been started (If I remember right in 1981), then set forth 2006 and finalized in 2009.
I`m not sure I I should post it, because the Build log pics would first set in when it was appr. 60% done. I had no Digit camera for documenting Pictures before that time.
Nils
-
Thank you for you words Ed,
I am glad you liked it
Nils
-
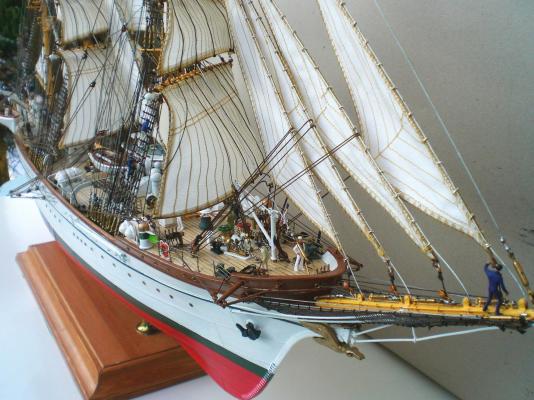
Build log part 52
THIS LOT ENDS THIS GORCH FOCK 2 BUILD LOG
Many thanks to all who had fun in following along this build log,
thanks for all the kind comments, your "likes", questions, and suggestions made. If there remain any questions, please feel free to ask, I shall be pleased to give answers.
It was a pleasure and very encouraging for me to share the making of this ship to all who like this 3-mast barque, and possibly it may encourage the one or other to consider it for their own build / Project list
THANK YOU
all last adjustments have been made to the rigging

the decks have been cleaned up
and scrubbed
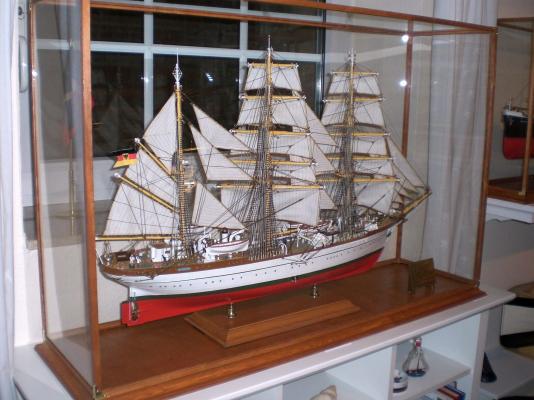
and she find her honorable place in her own glasscase, protected from dust
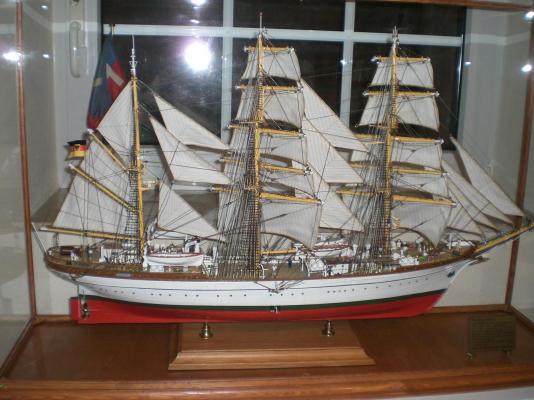
and set up in my Hobby office
Auf Wiedersehen...
Nils
-
Thank you Nigel,
I`m glad you liked this build...
Am just preparing the last few pics of this build to be posted.
Nils
-
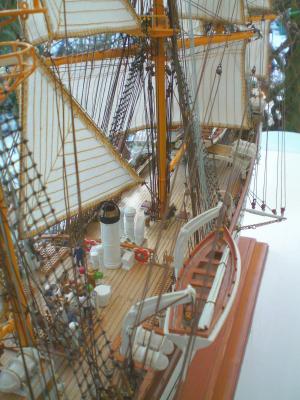
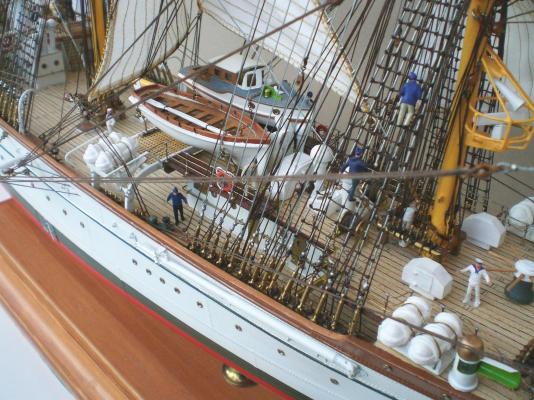
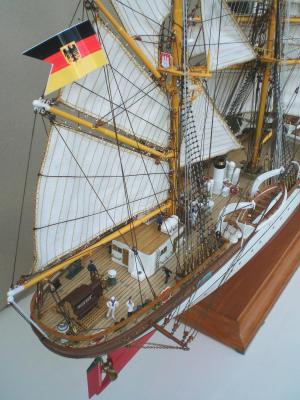
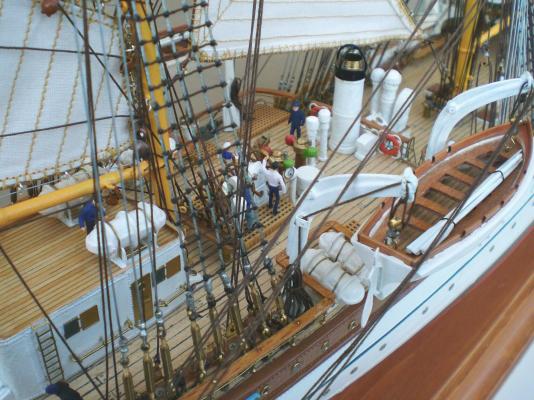
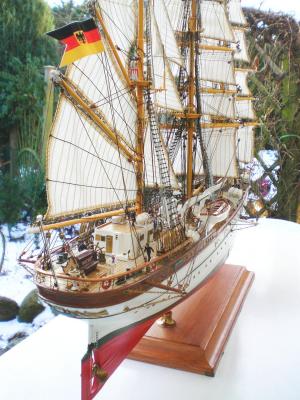
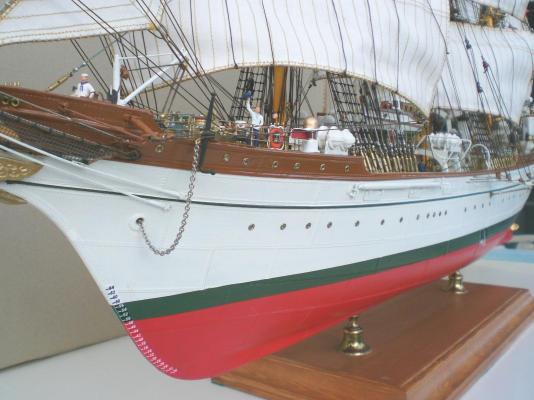
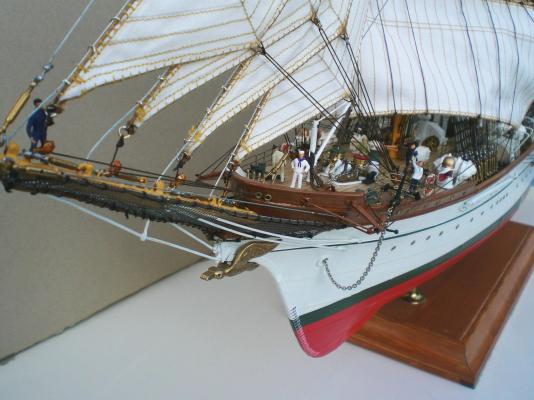
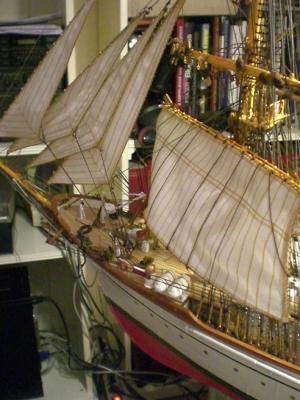
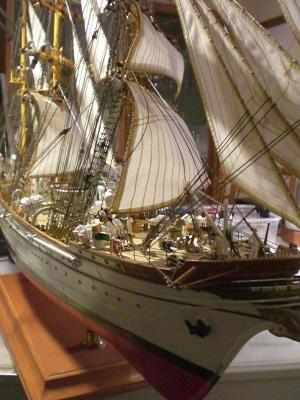
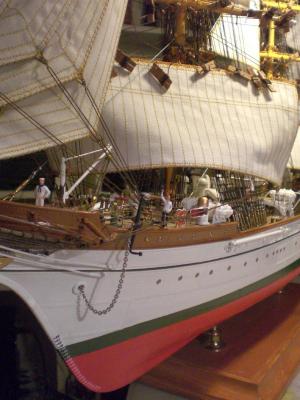
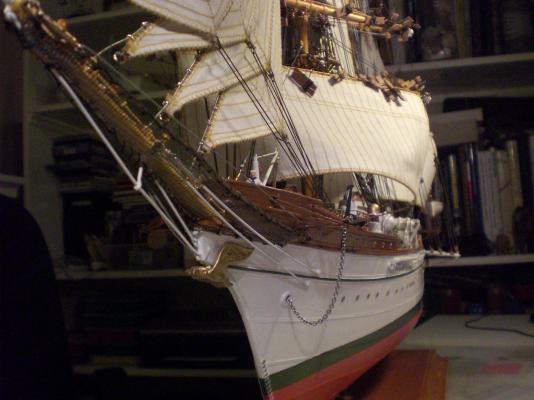
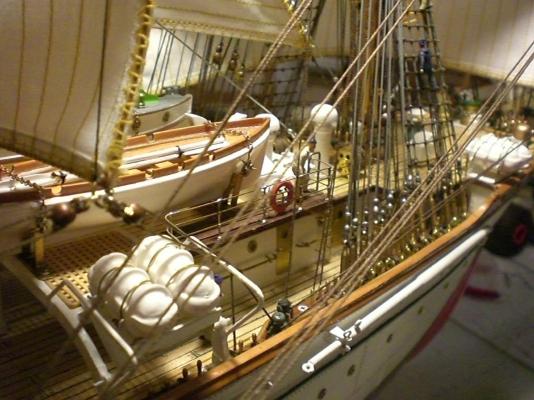
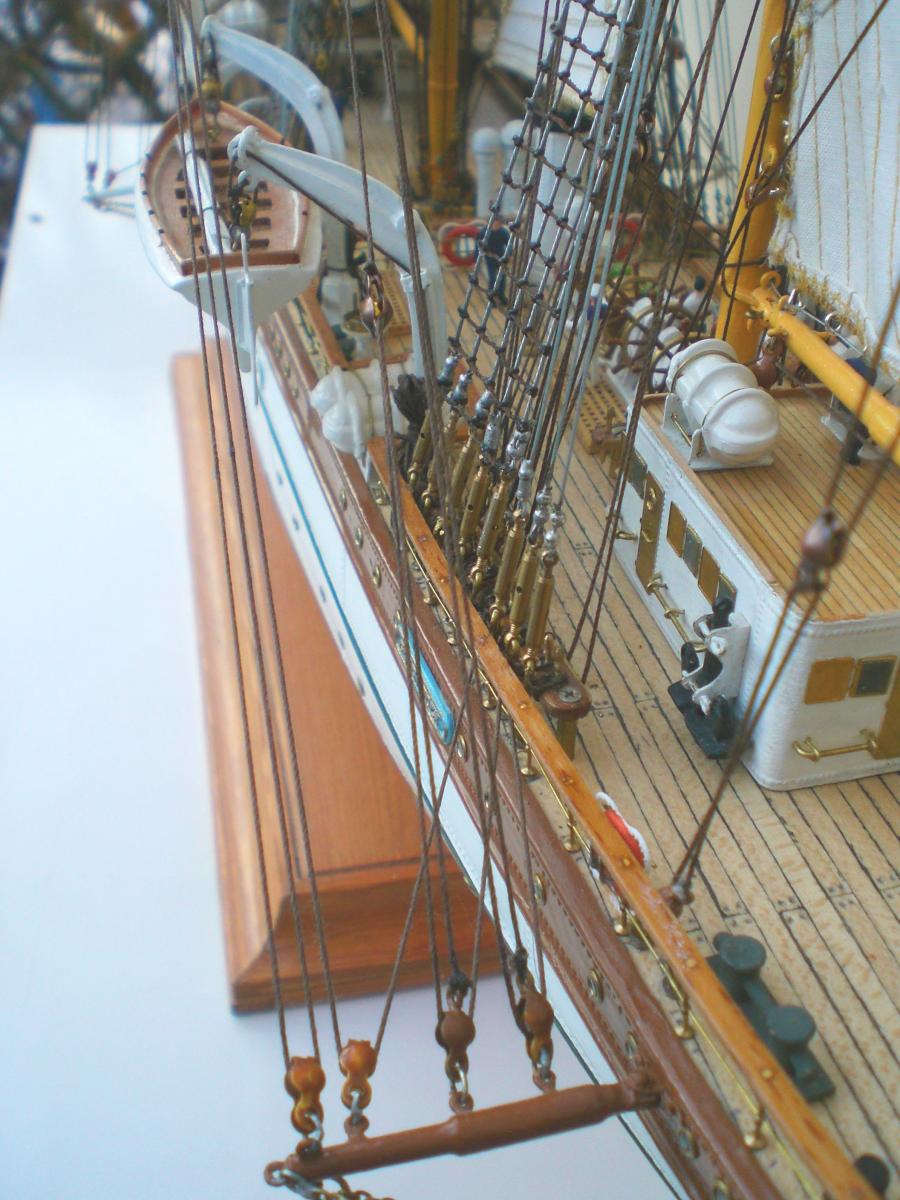
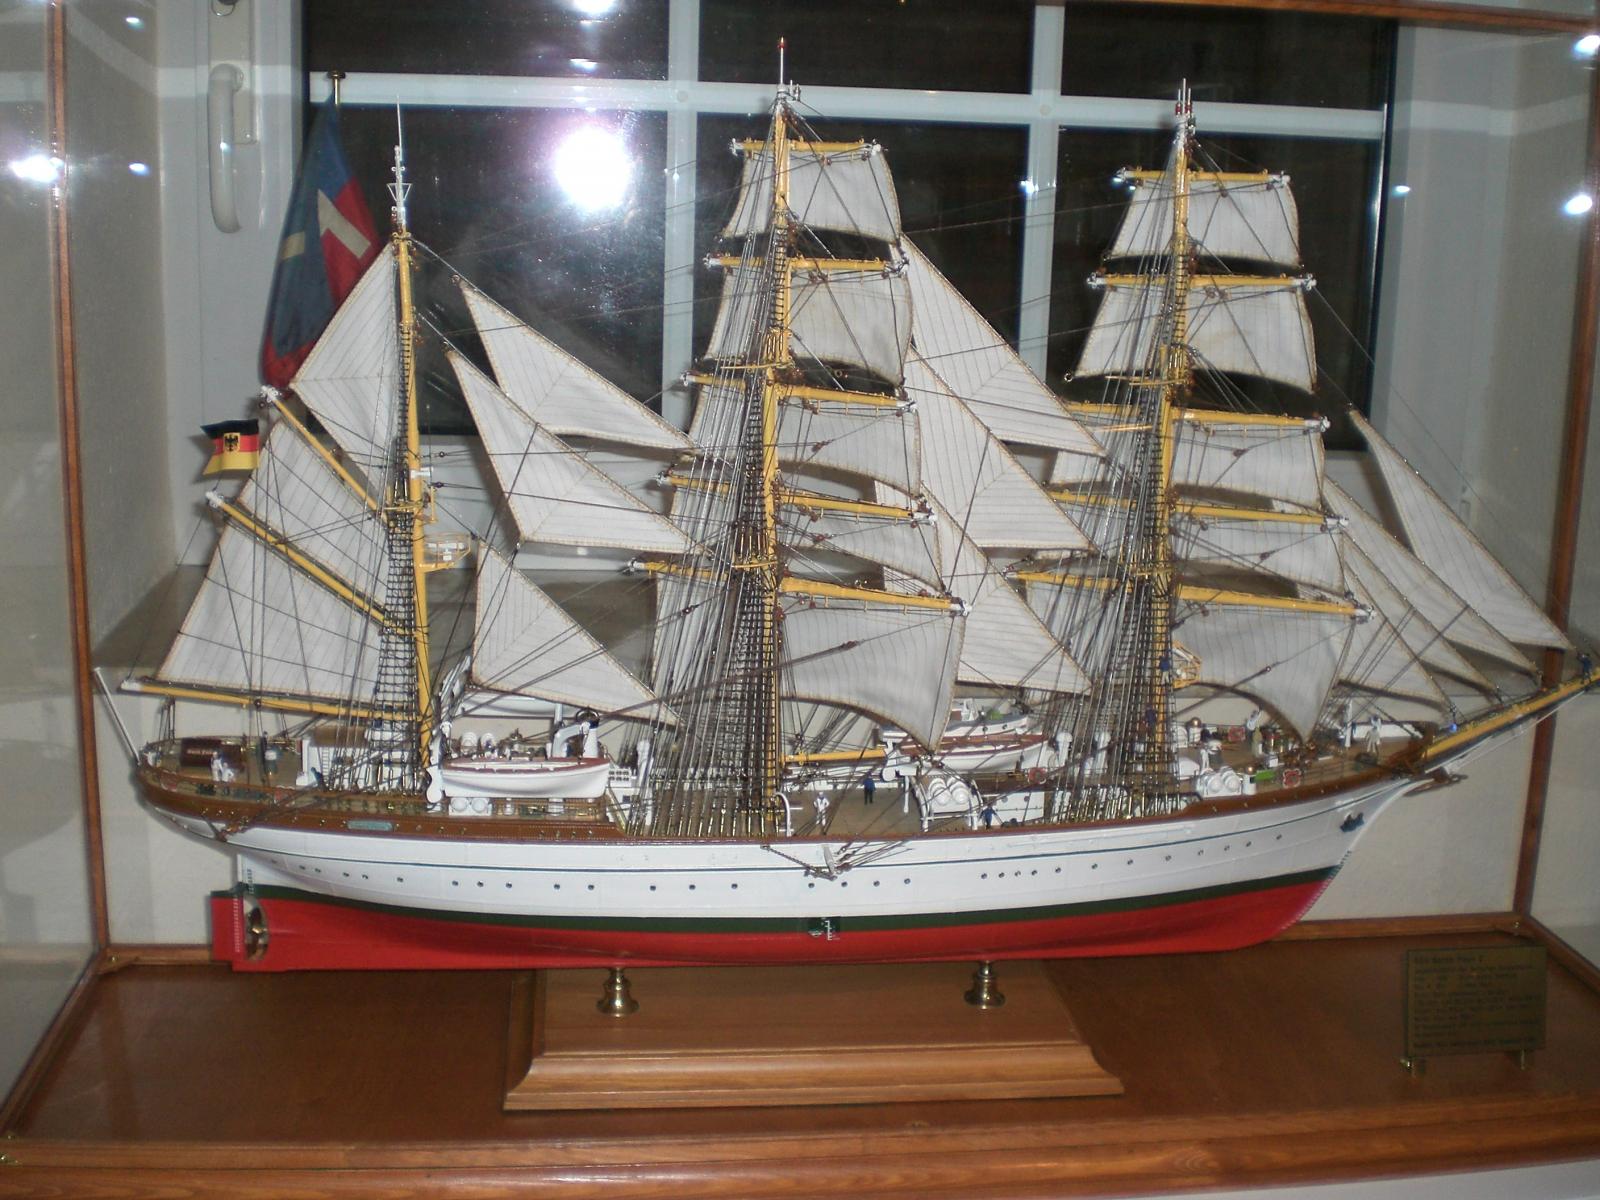
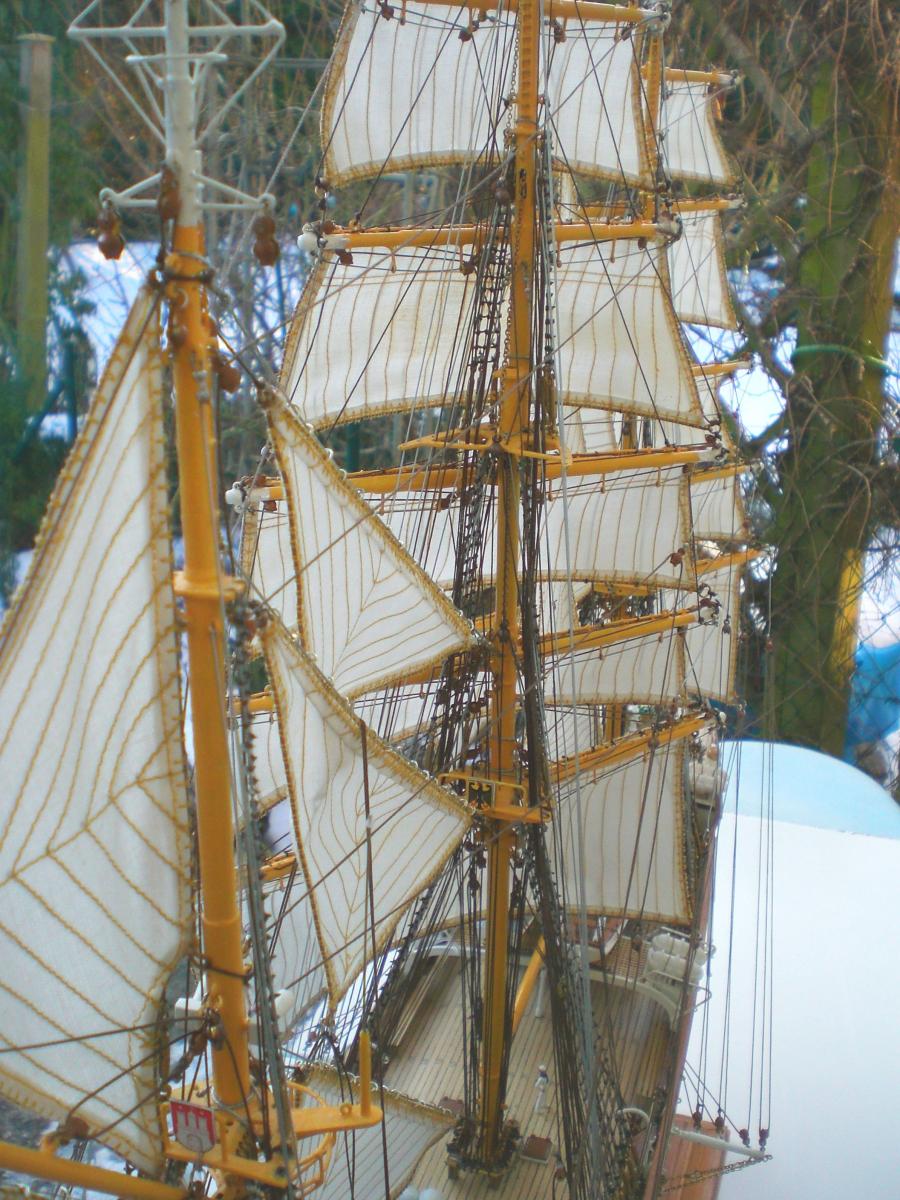
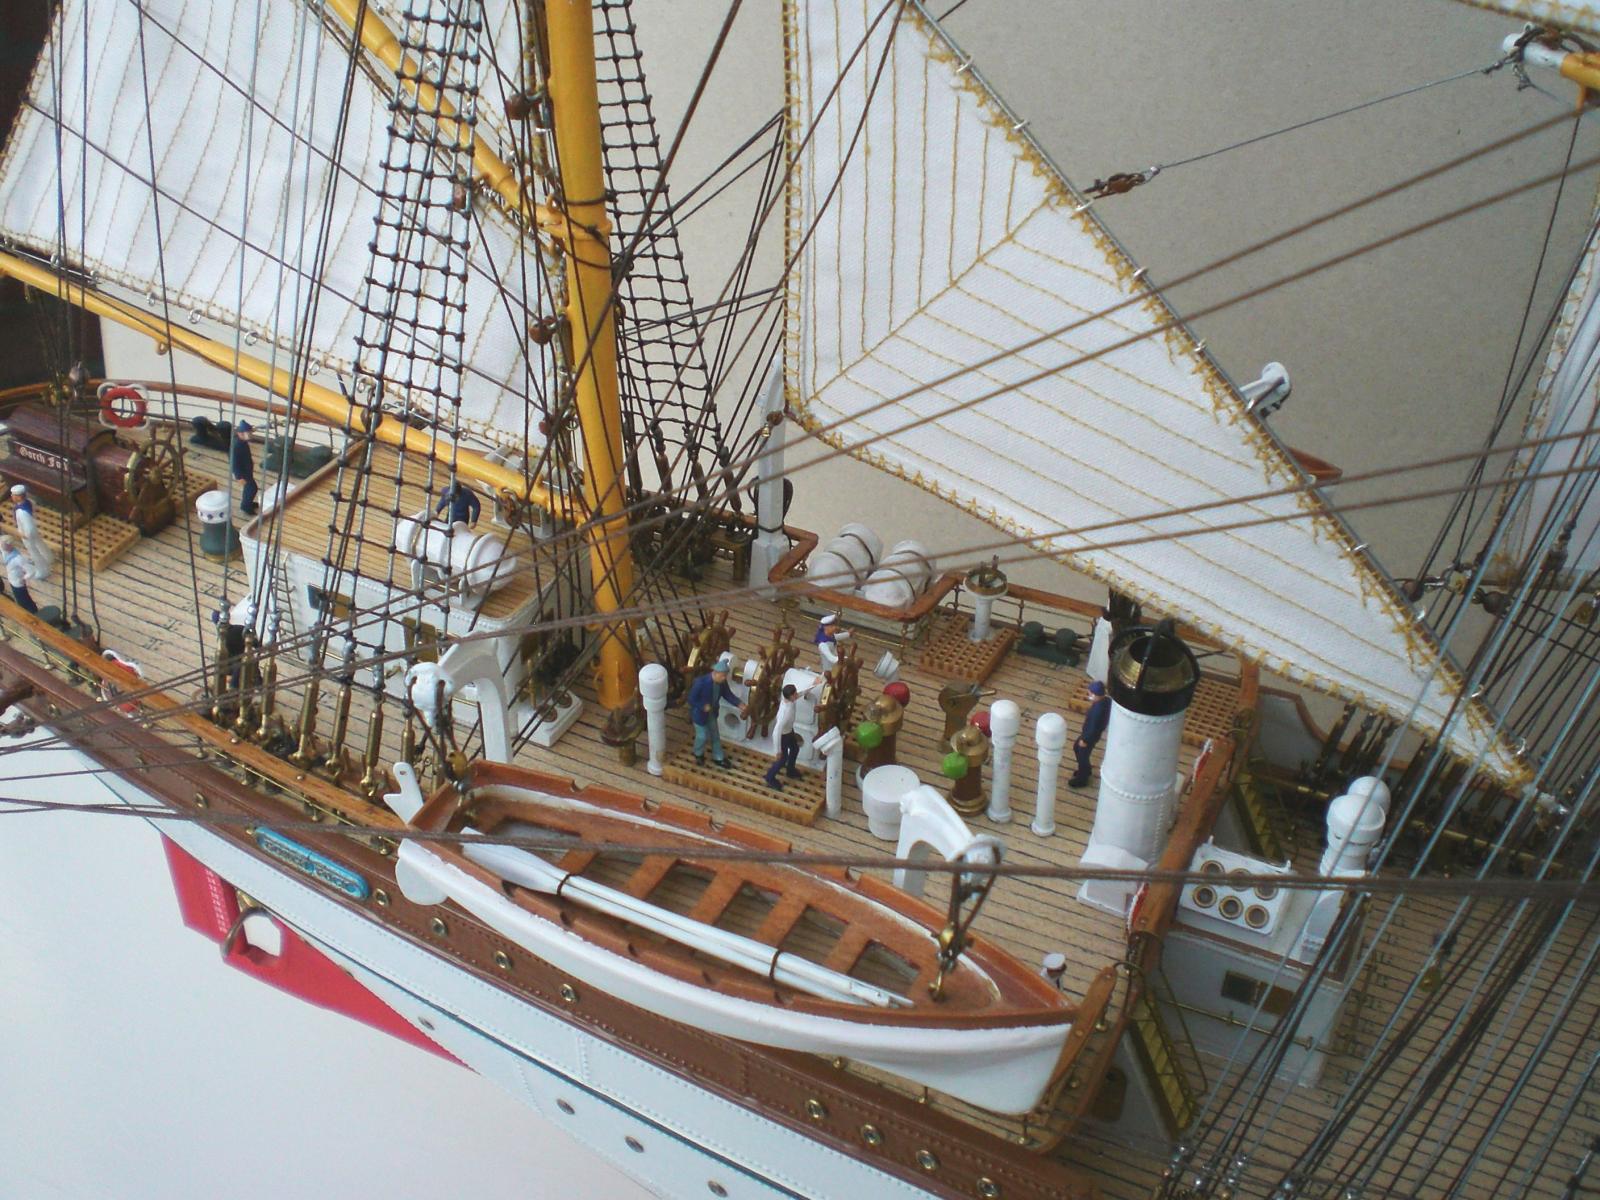
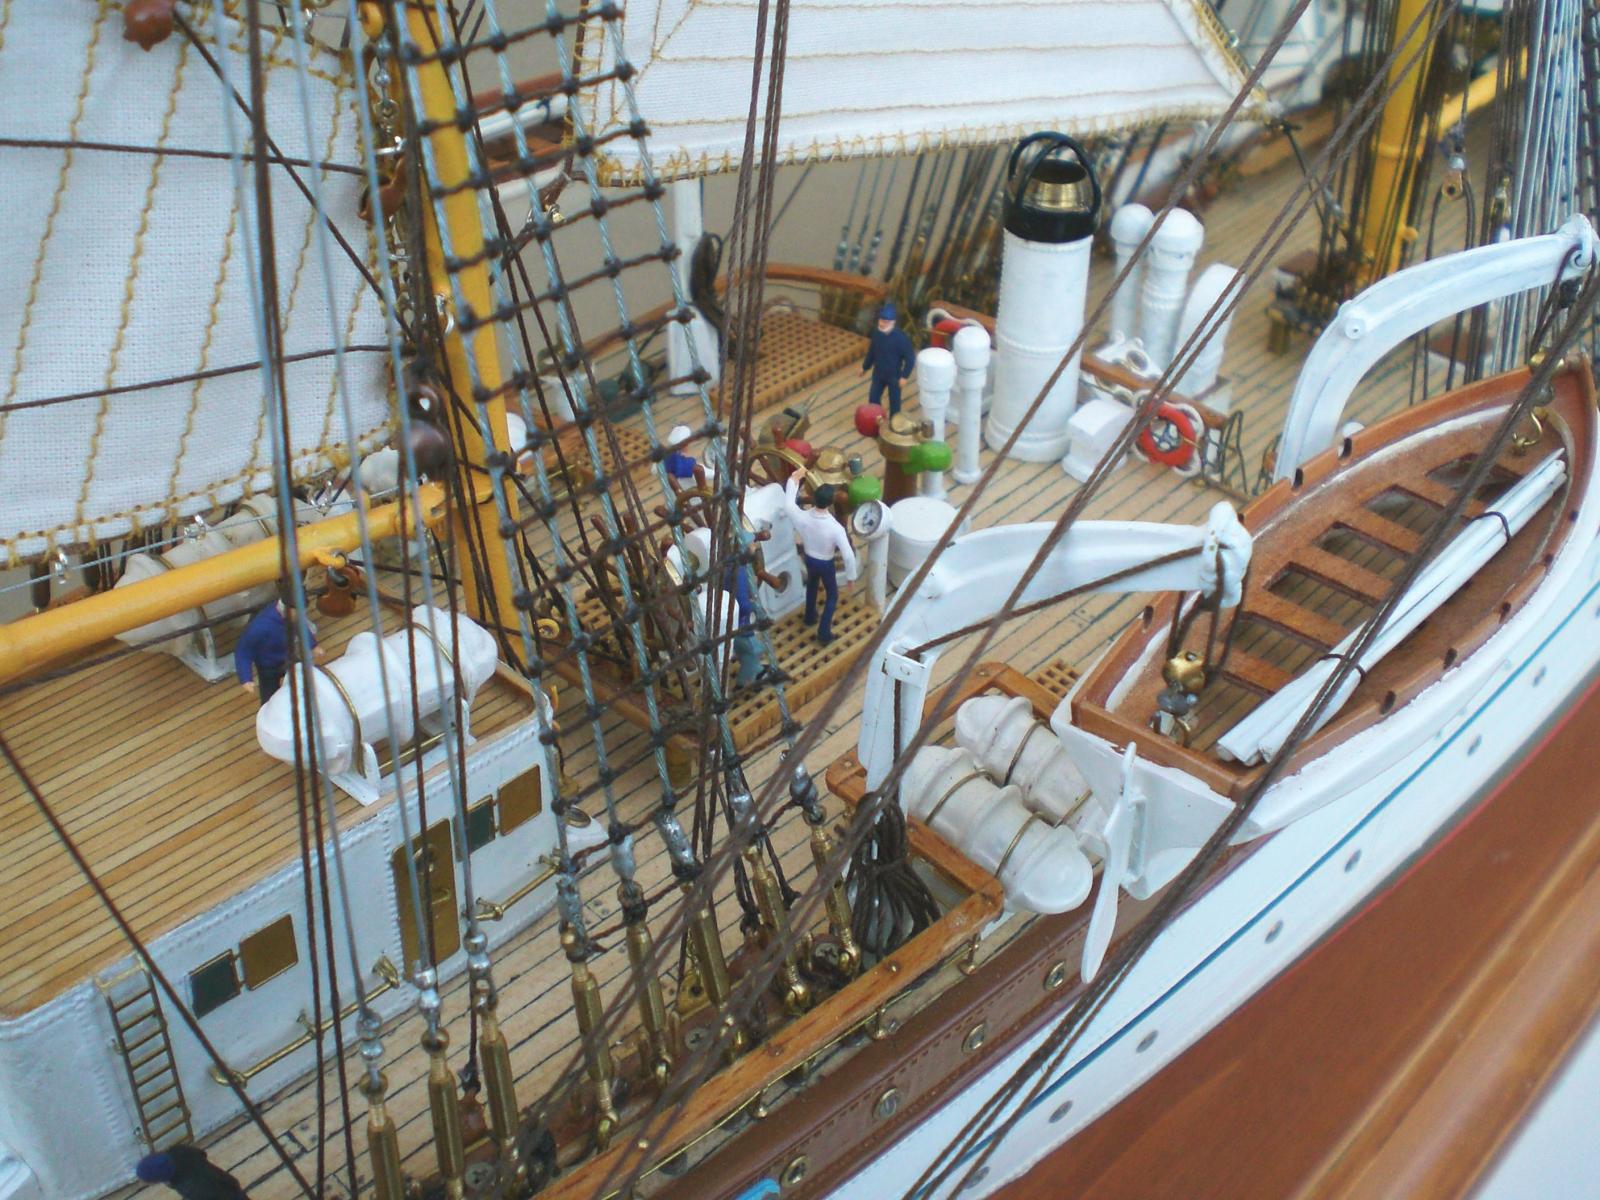
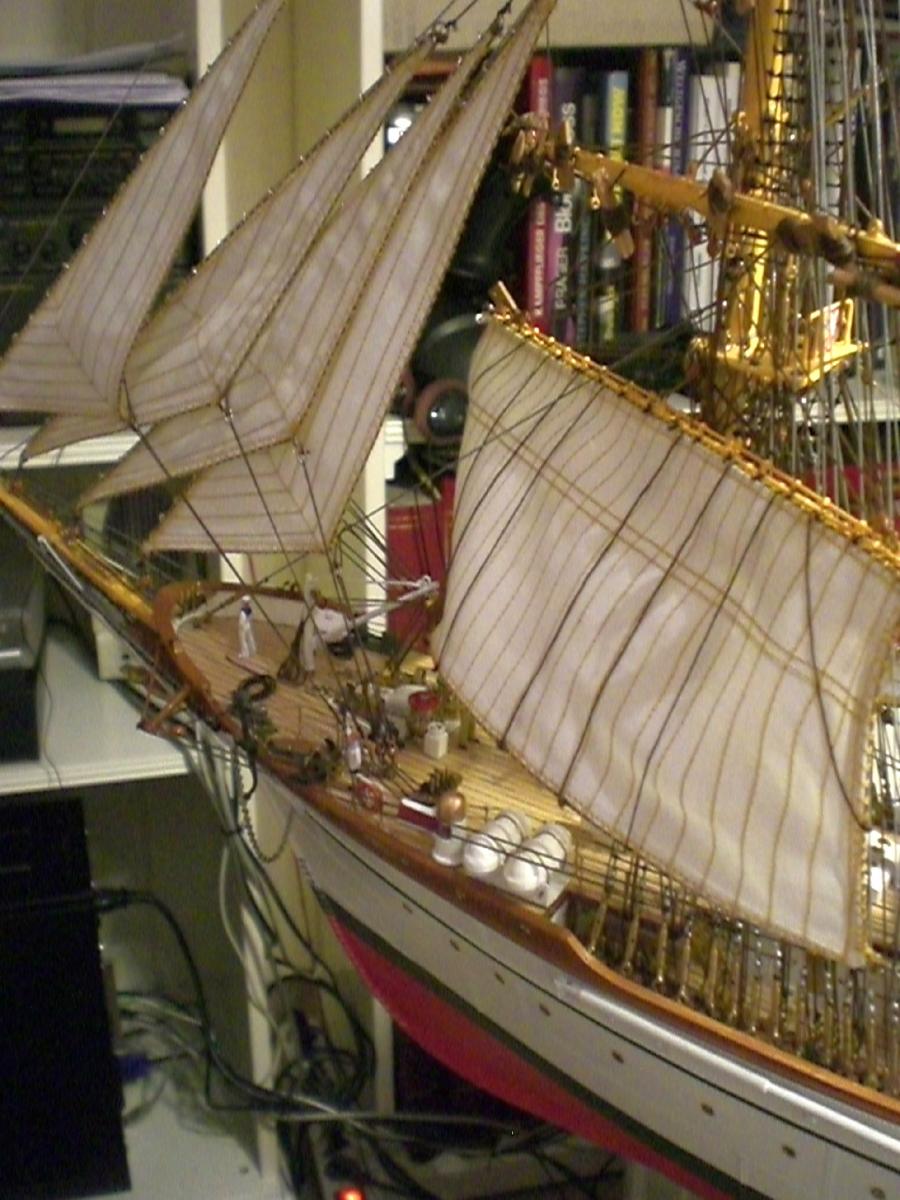
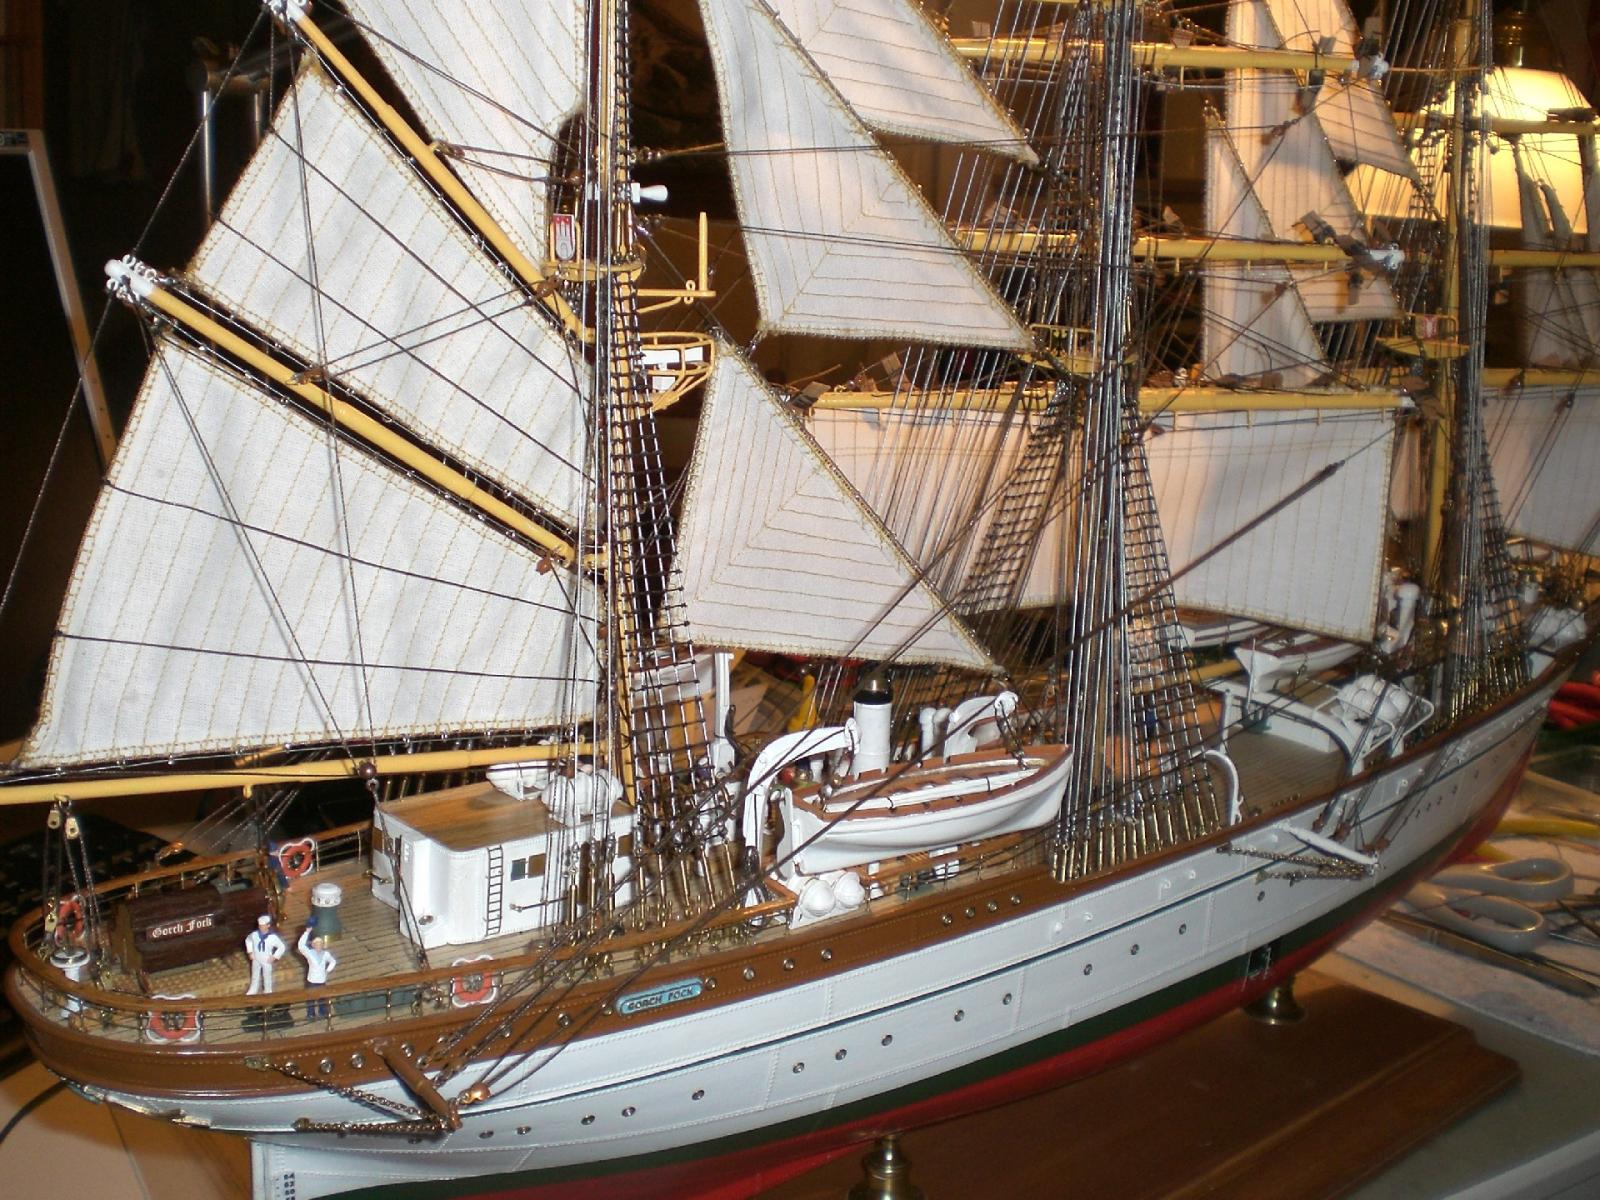
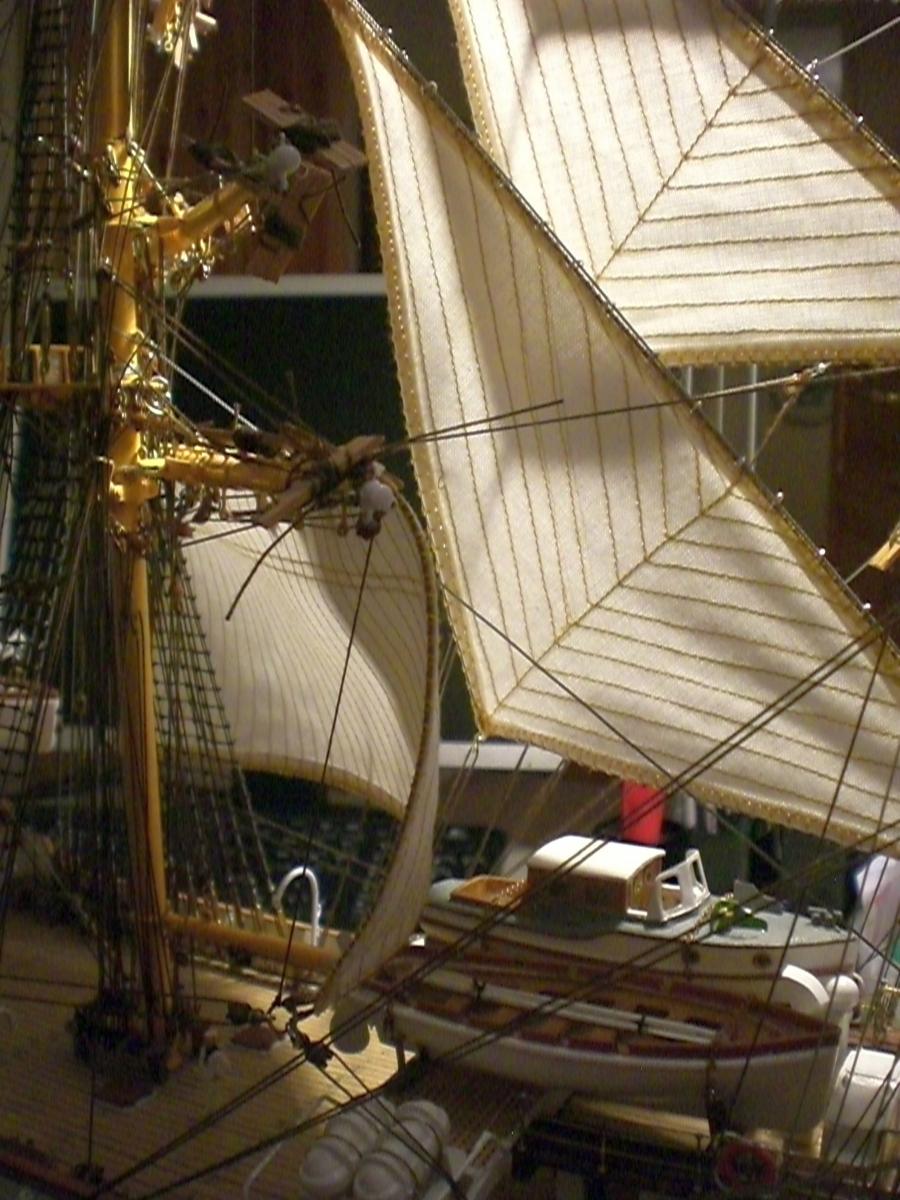
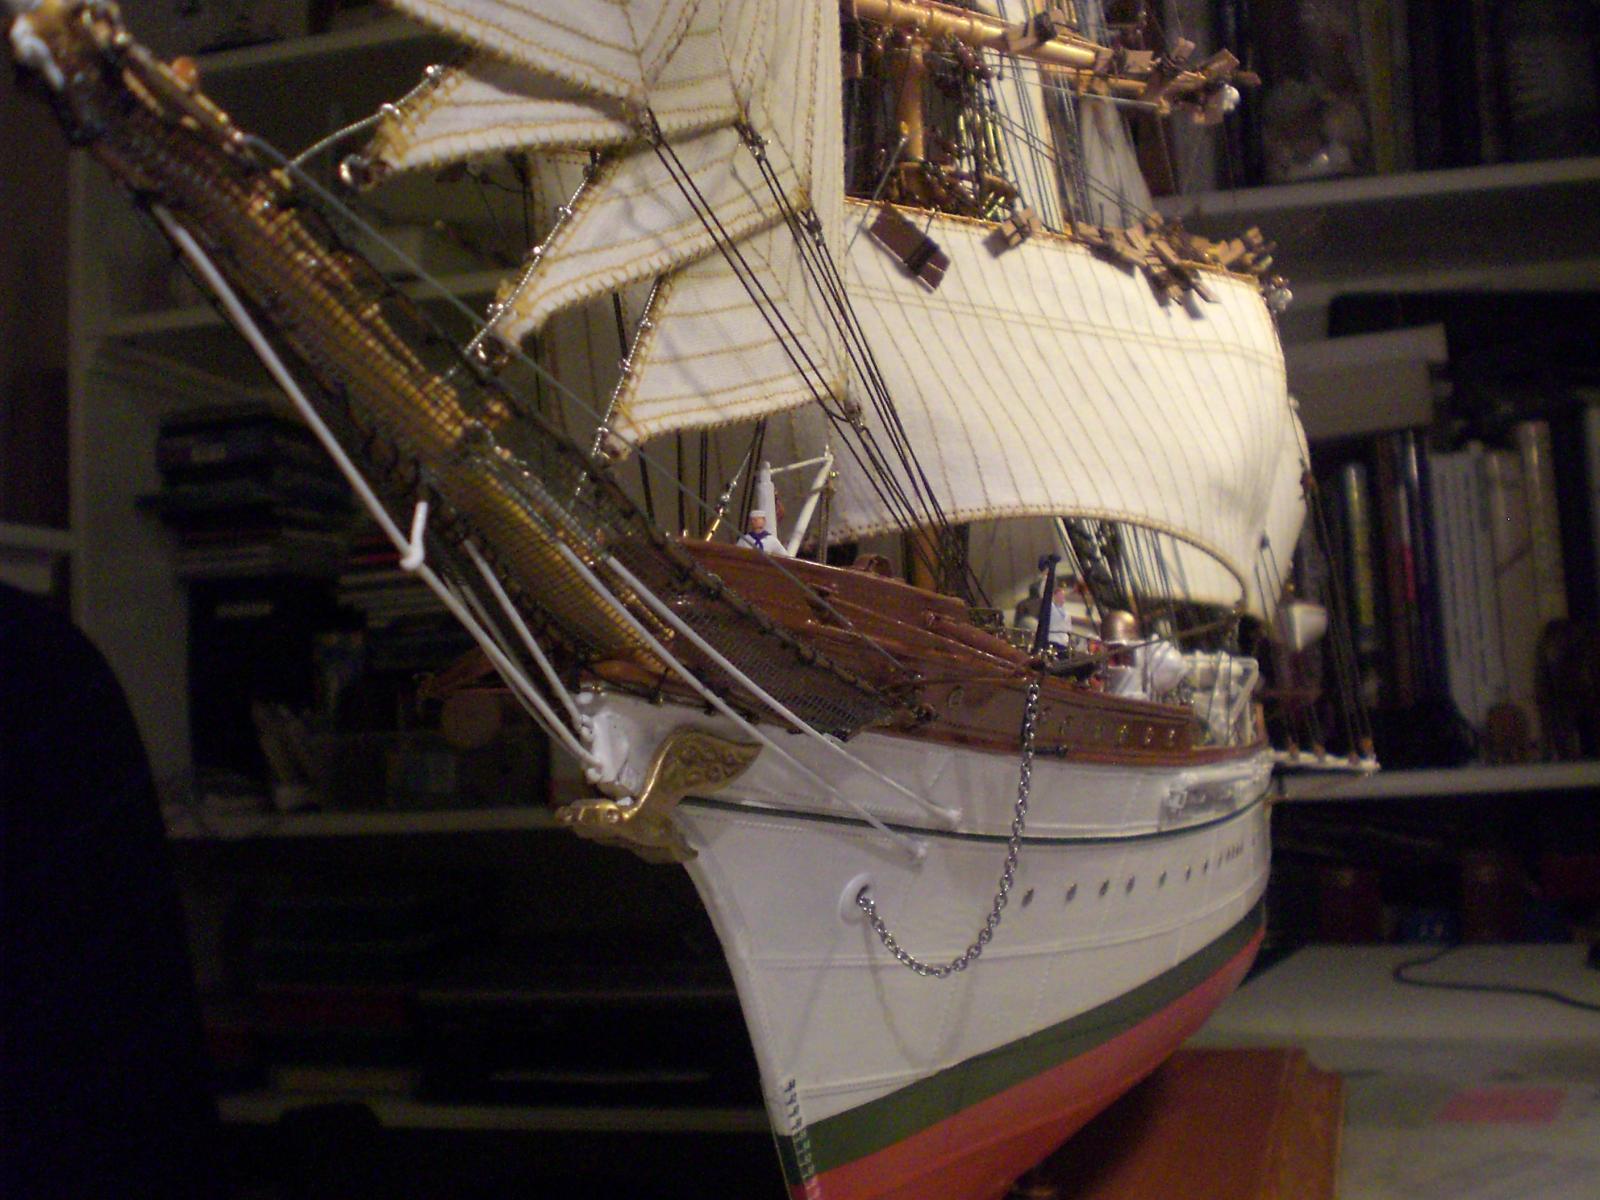
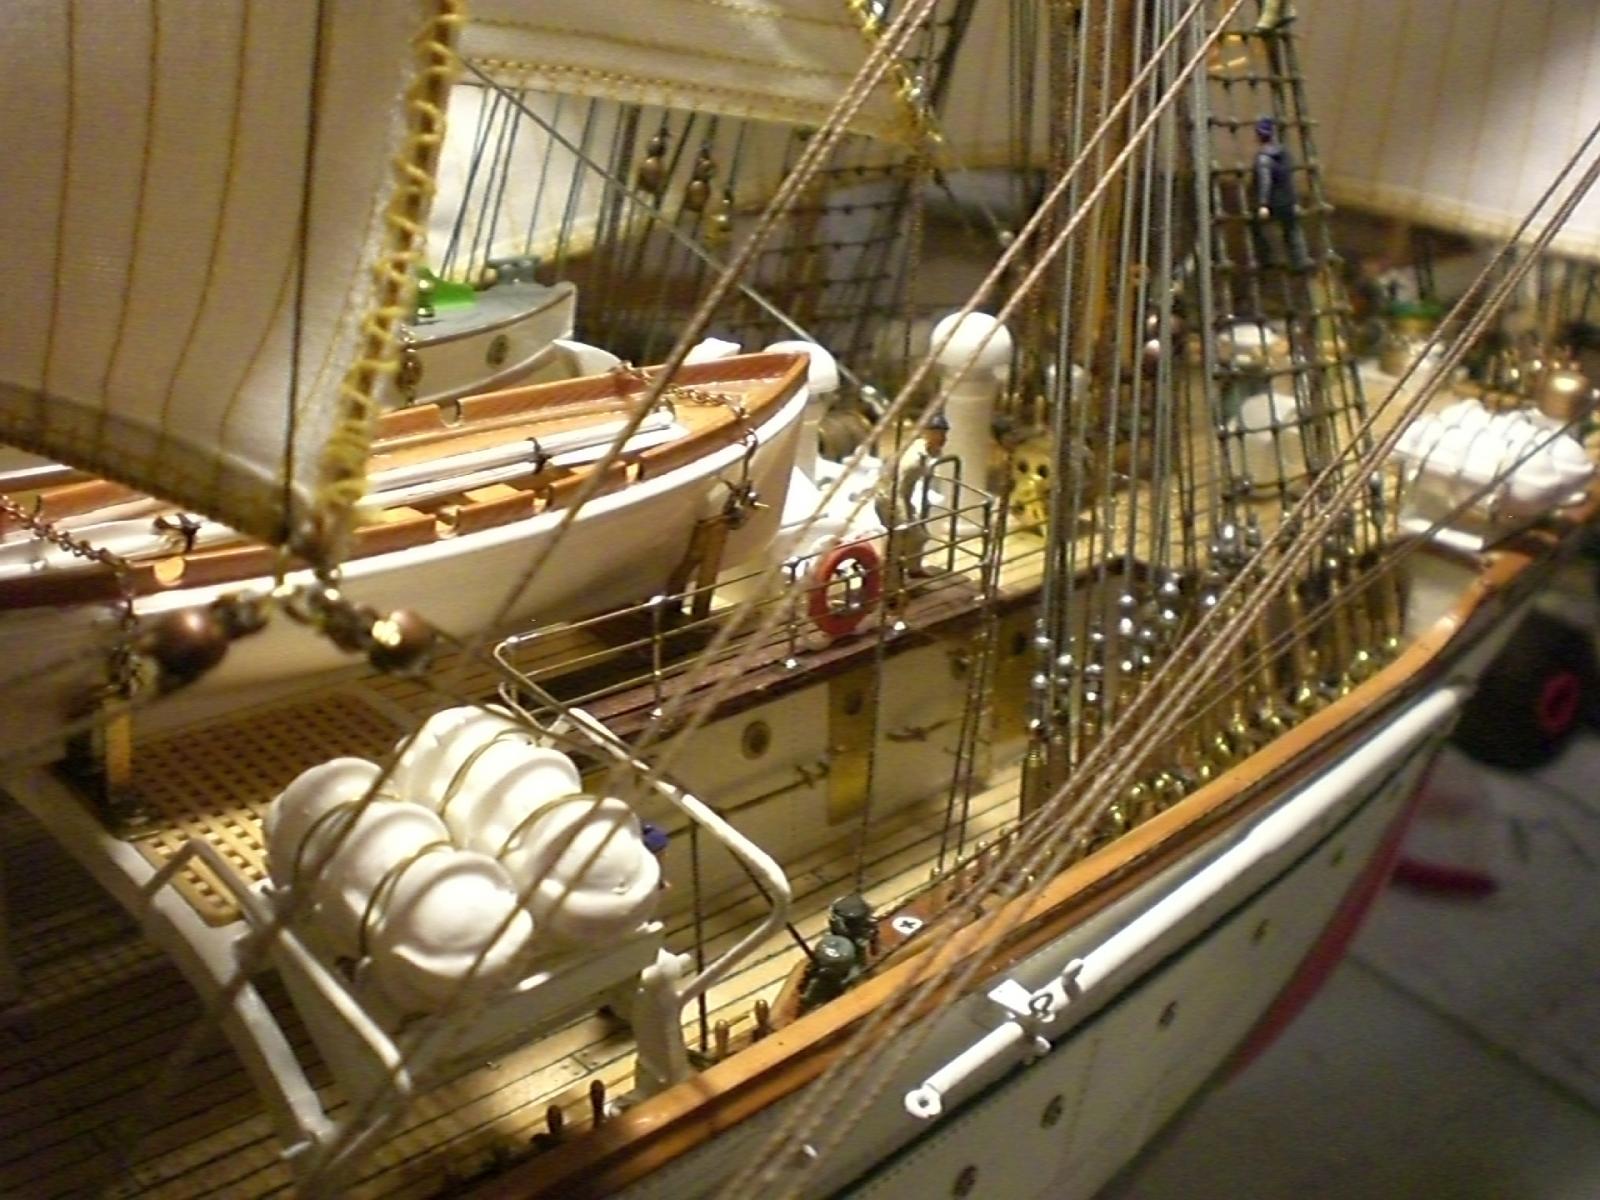
Build log part 51
HERE THE MODEL COMPLETED WITH ALL SAILS (part 2 of 3)

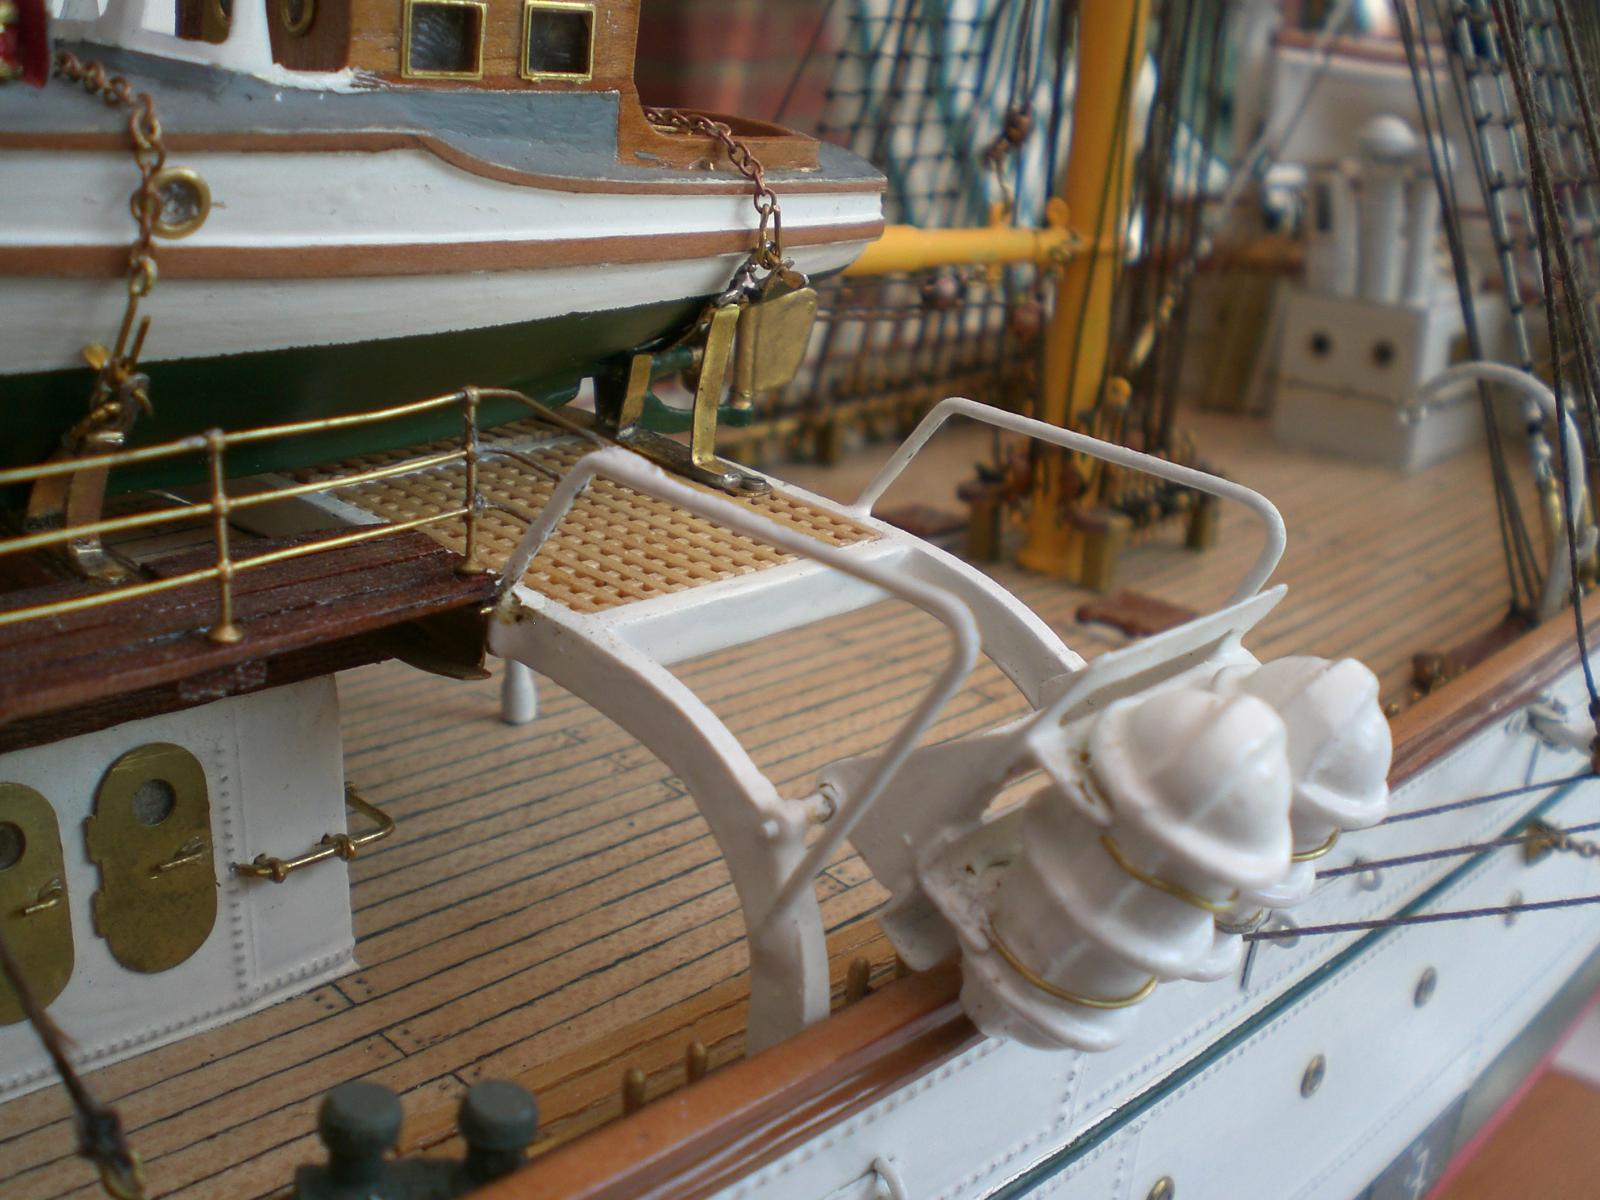
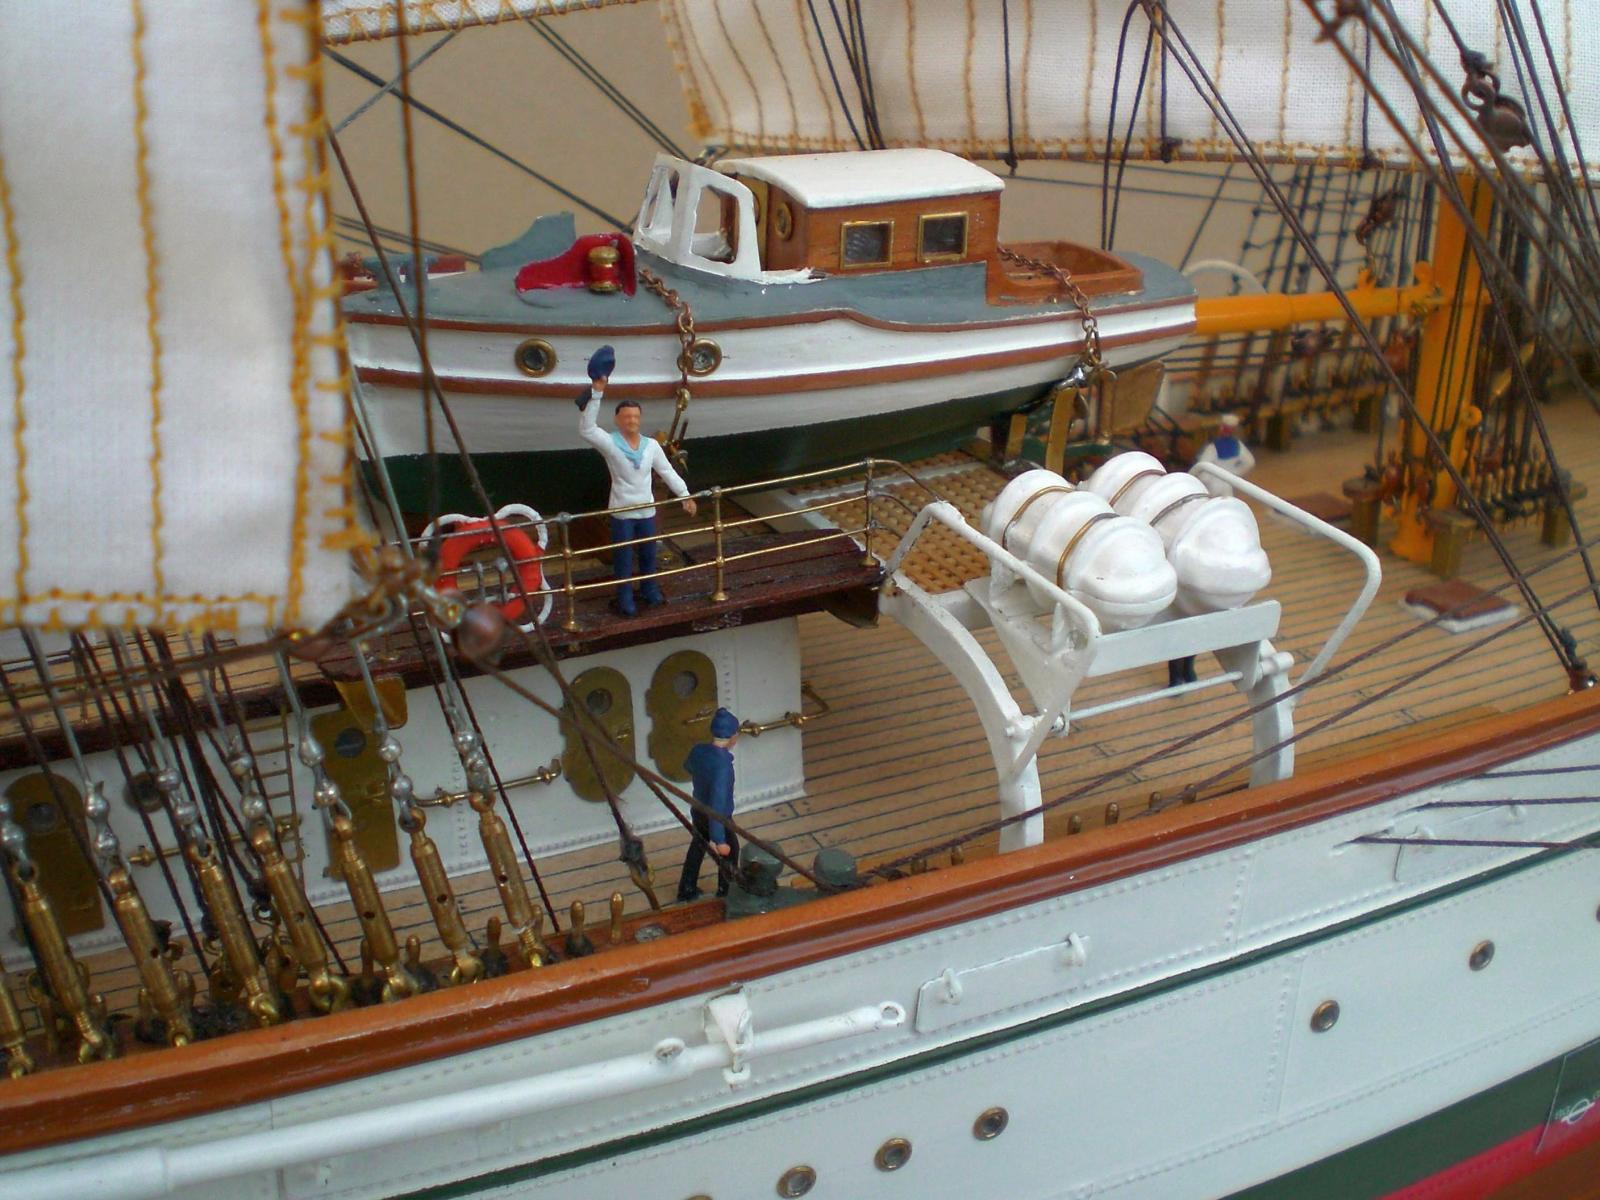
raft Container launching flip board

all ready for the maiden voyage
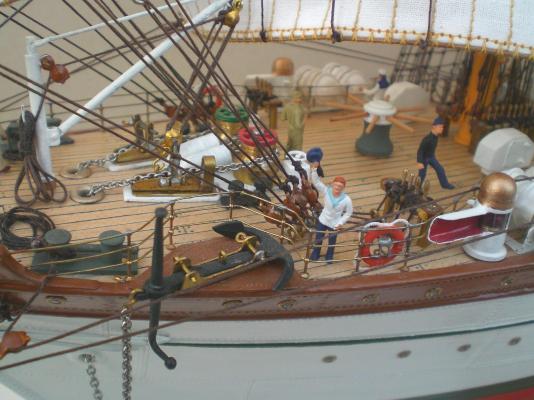
forecastle reports all sails set
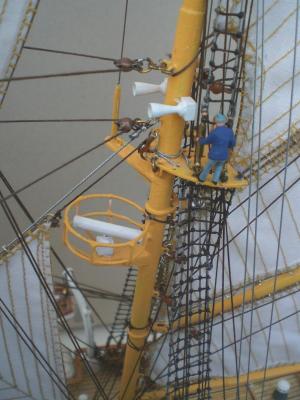
mizzenmast top

foremast topgallant platform
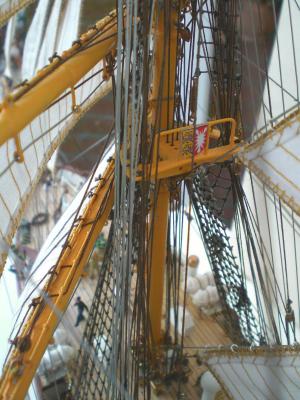
foremast lower top with view on hard braced main sail yard
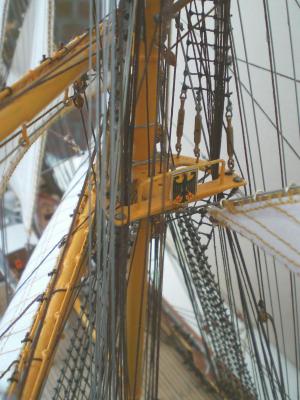
likewise for mainmast
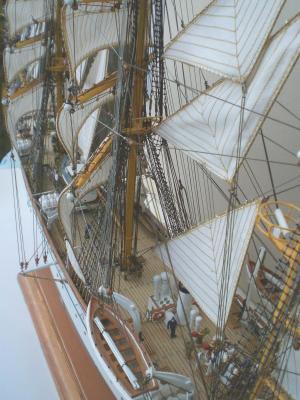
mainsail braced leewards around the shrouds

view from the after wake
good at the wind course...
Build log part 52 to follow...
Nils
-
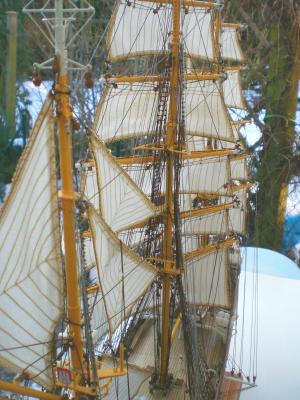
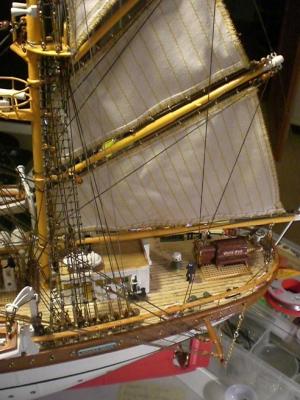
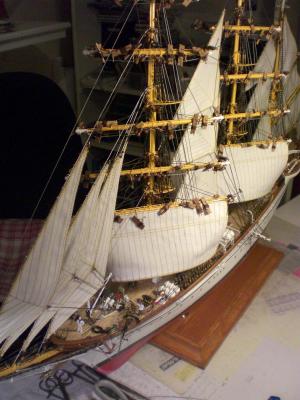
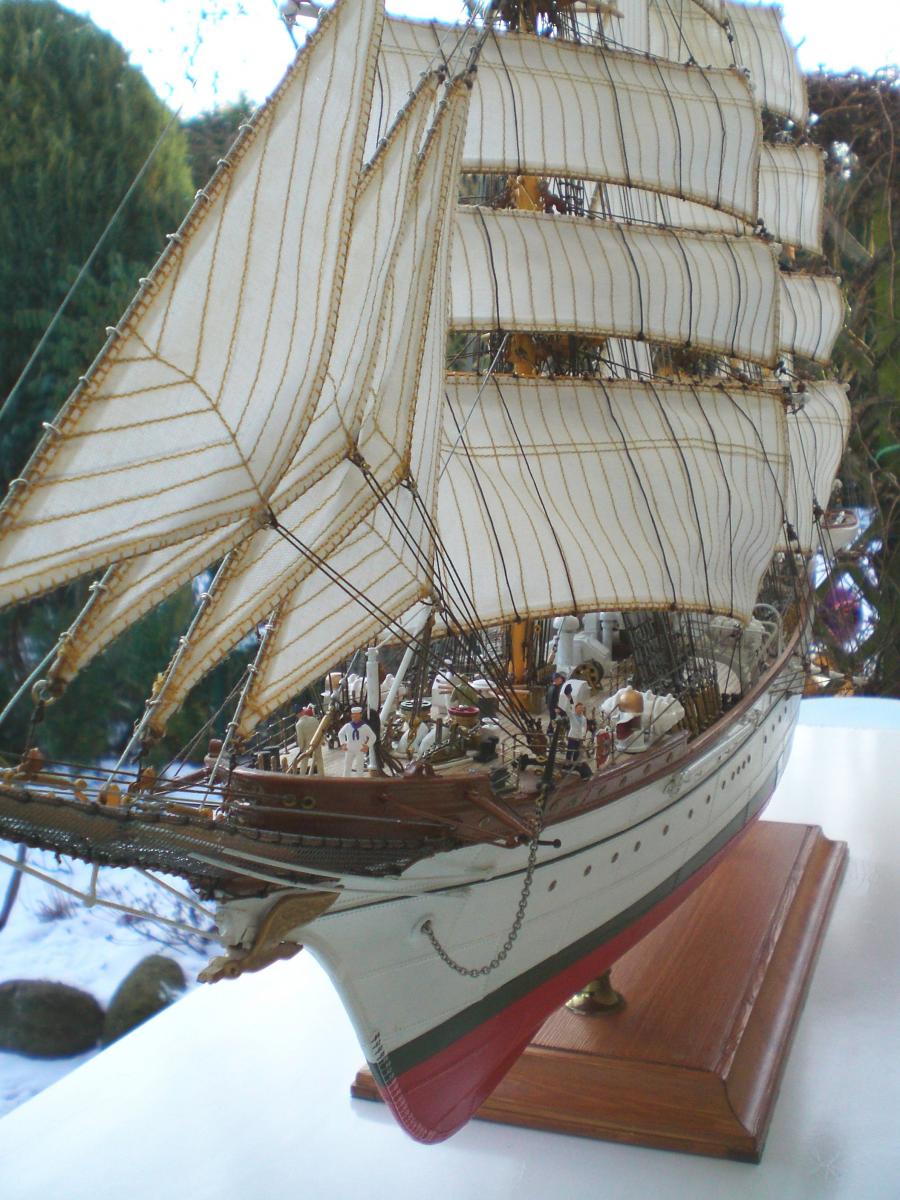
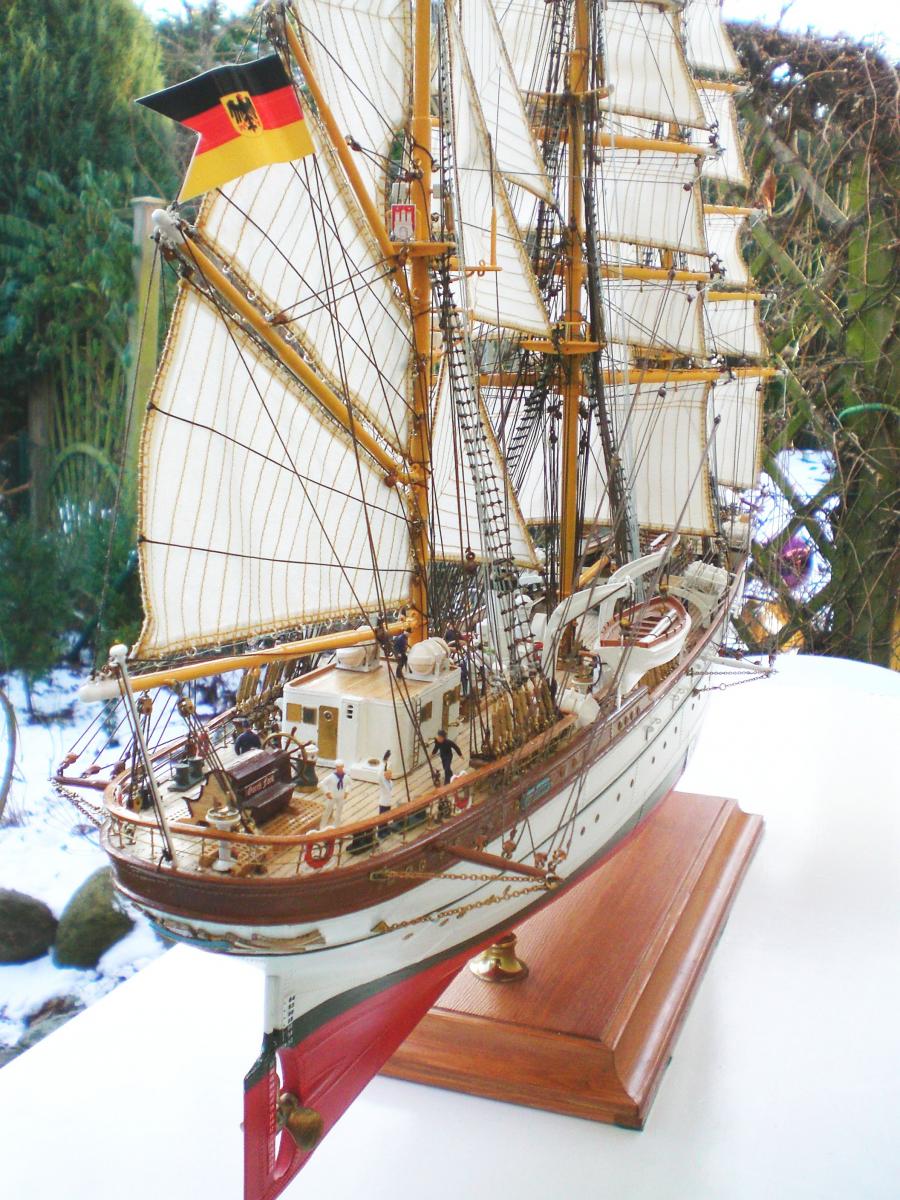
Build log part 50
HERE THE MODEL COMPLETED WITH ALL SAILS (part 1 of 3)

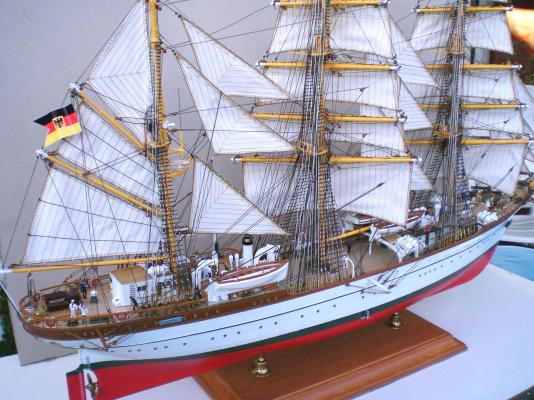
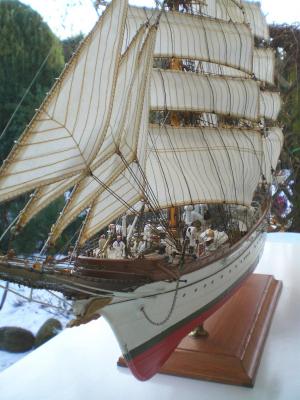
Build log part 51 to follow...
Nils
- GrandpaPhil, Piet, Stockholm tar and 20 others
-
 23
23
-
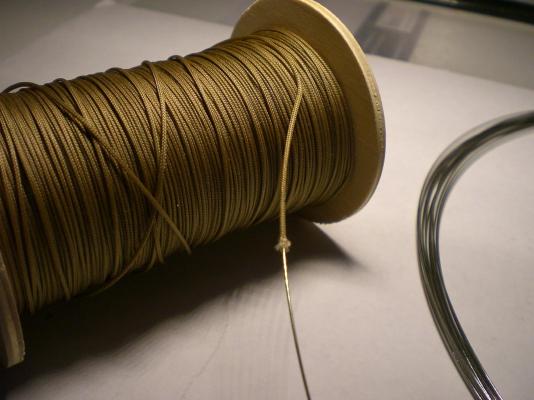
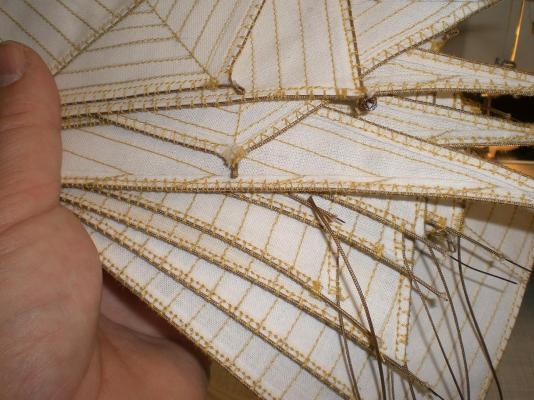
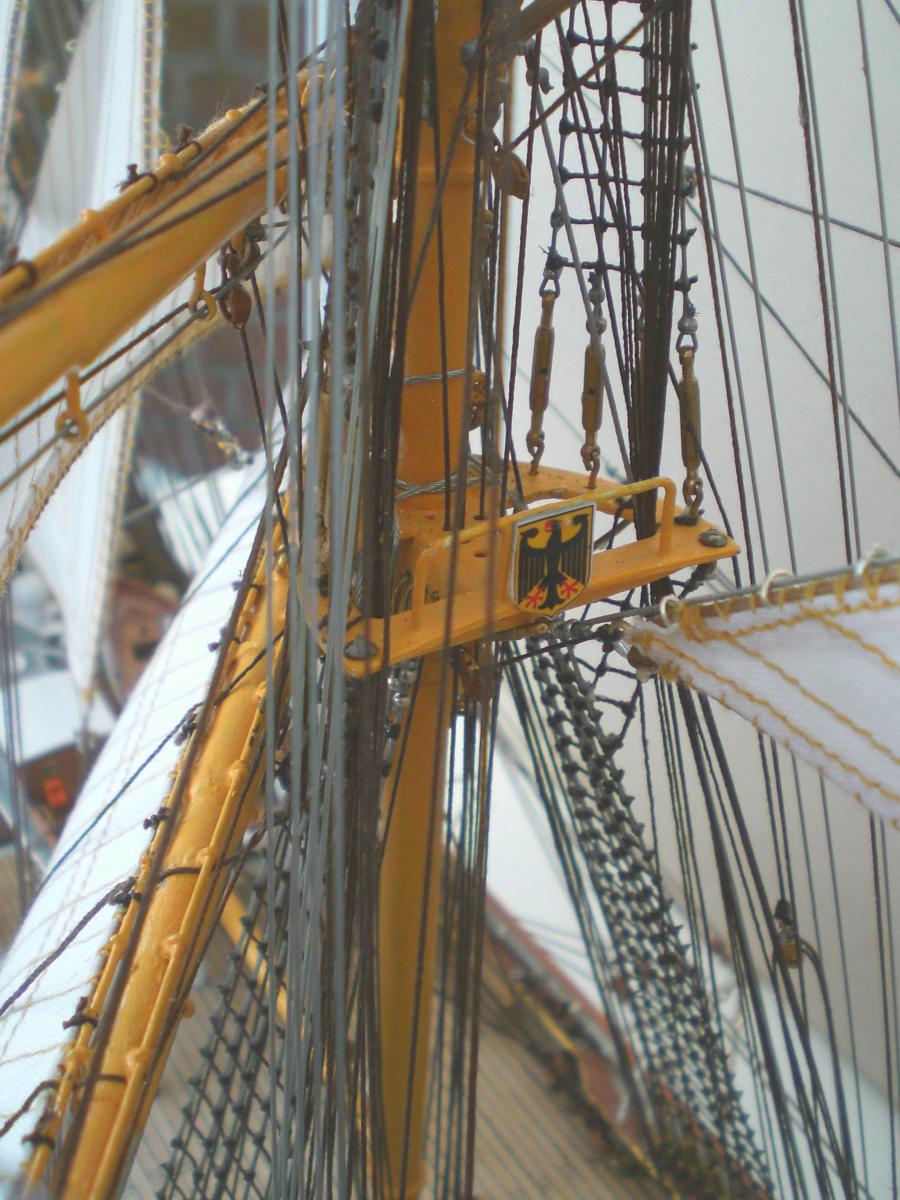
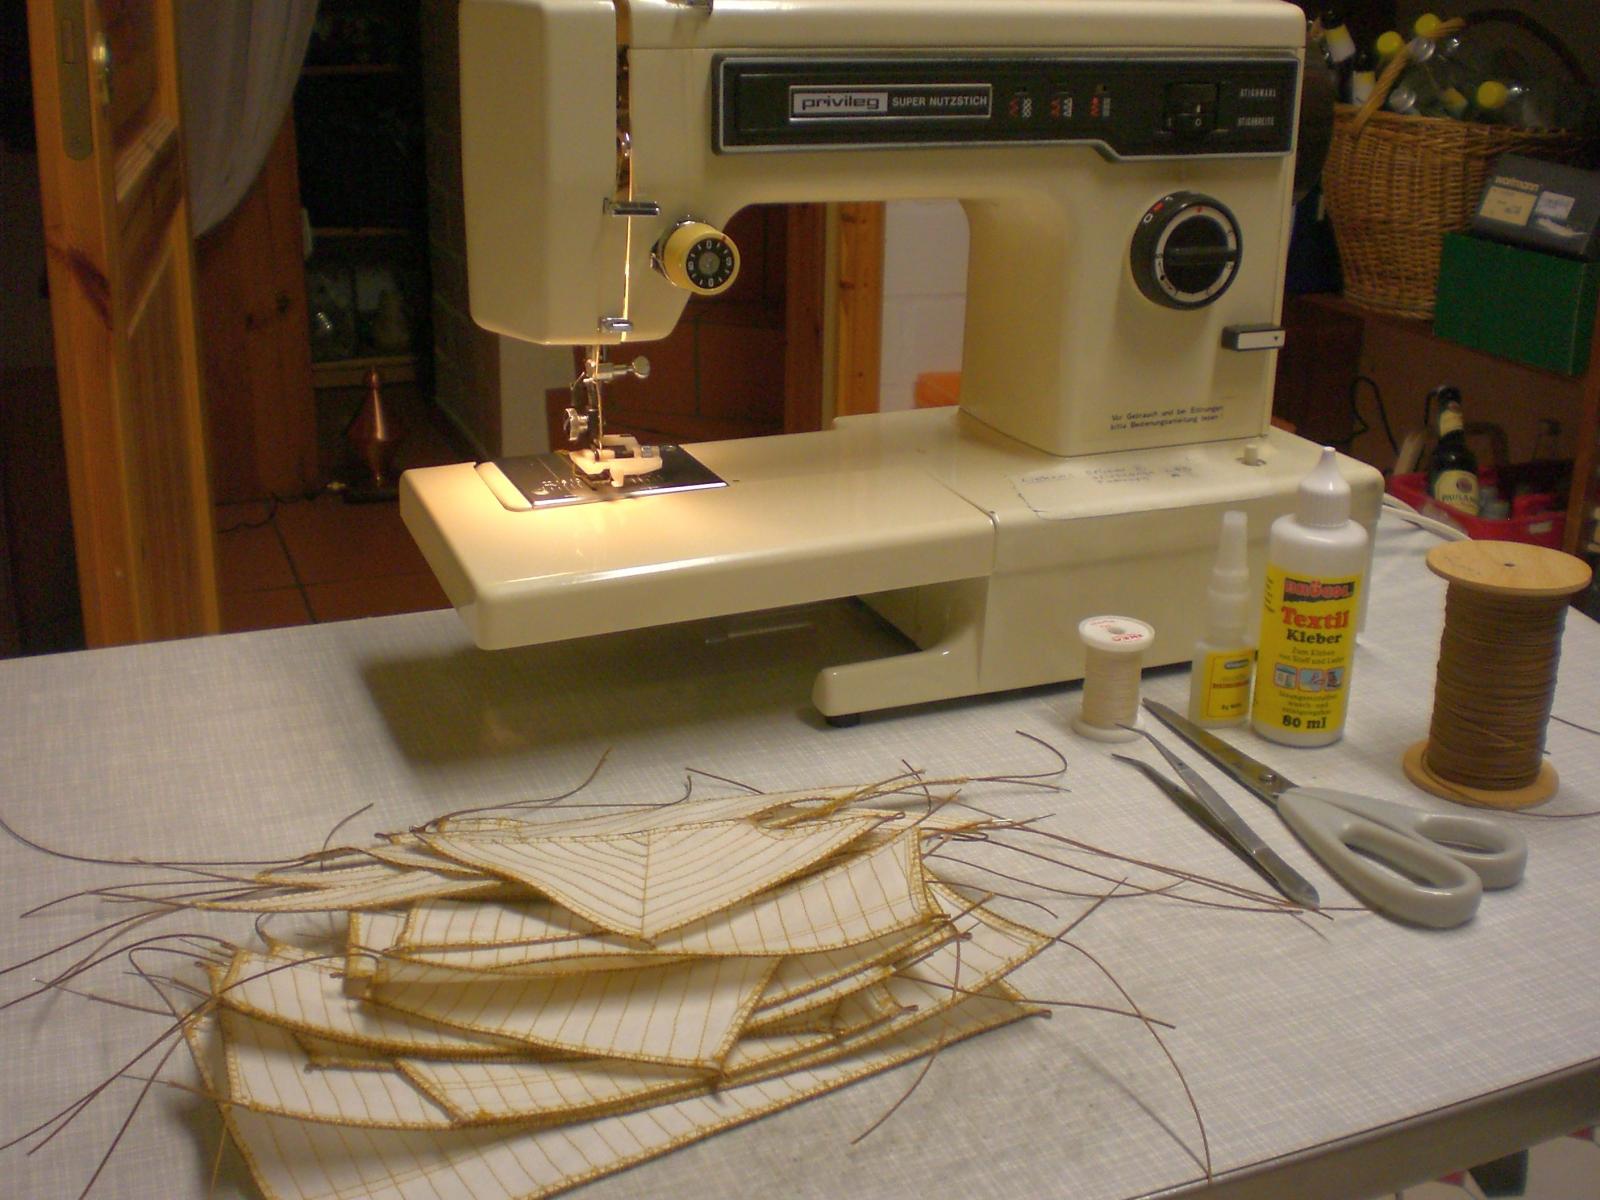
Michael,
please bear in mind that many sequences I have done nearly simultanously wih Pamir, and the rigging and sail making was one of These Features, if I were to build another tallship it probably could even be bit swifter because all the time consuming Trials would not have to be repeated again
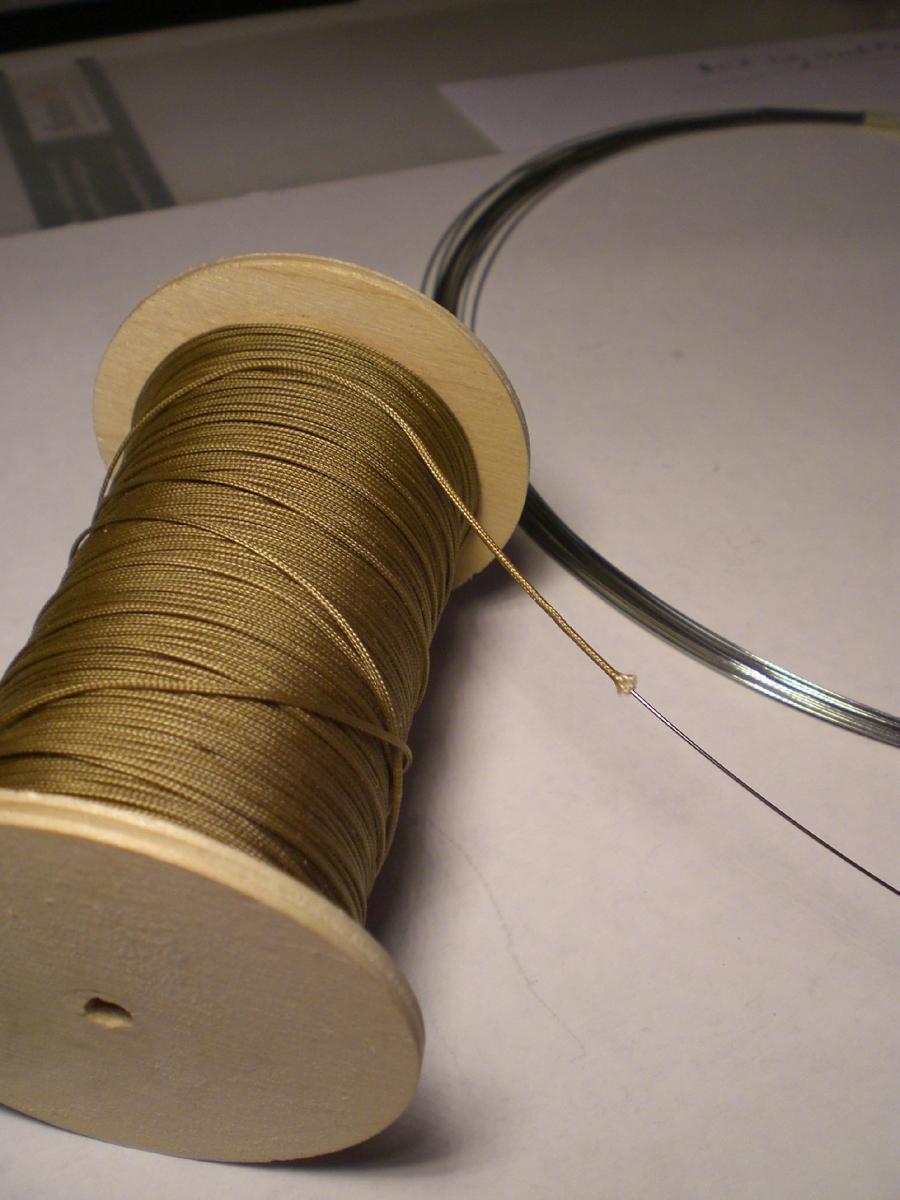
Now coming to the boltropes with stainless core....
I found a good flexible Brown woven 100% polyester line, 0,5mm diam. (a Little bit like the one the masons use, but finer in structure).
This has a hollow sole, and with pushed in st. steel wire of 0,4 to 0,5 mm the total boltrope exspands to 0,9mm diam. outside. One can hardly see the difference with / without wire
Two pics are enclosed.. (best is to magnify the pics)
Nils

- 3qq, flying_dutchman2 and Piet
-
3
-
Thank you Bob,
and good success with your Trompe-l'œil technique for your Project..
Nils
-
very nice planked hull Adrieke
Nils
-
absolutely fantastic Karl,
Nils
- Elmer Cornish and Jeronimo
-
2
-
amazing work Remco
well done !
Nils
-
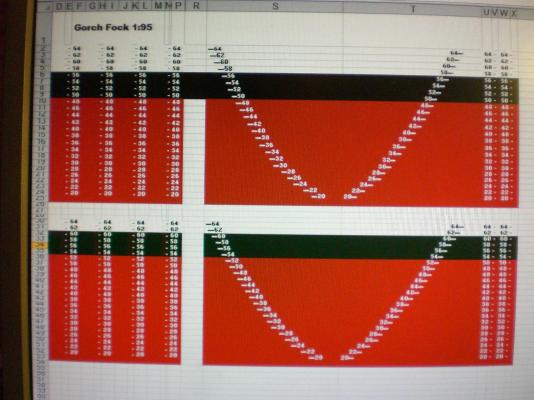
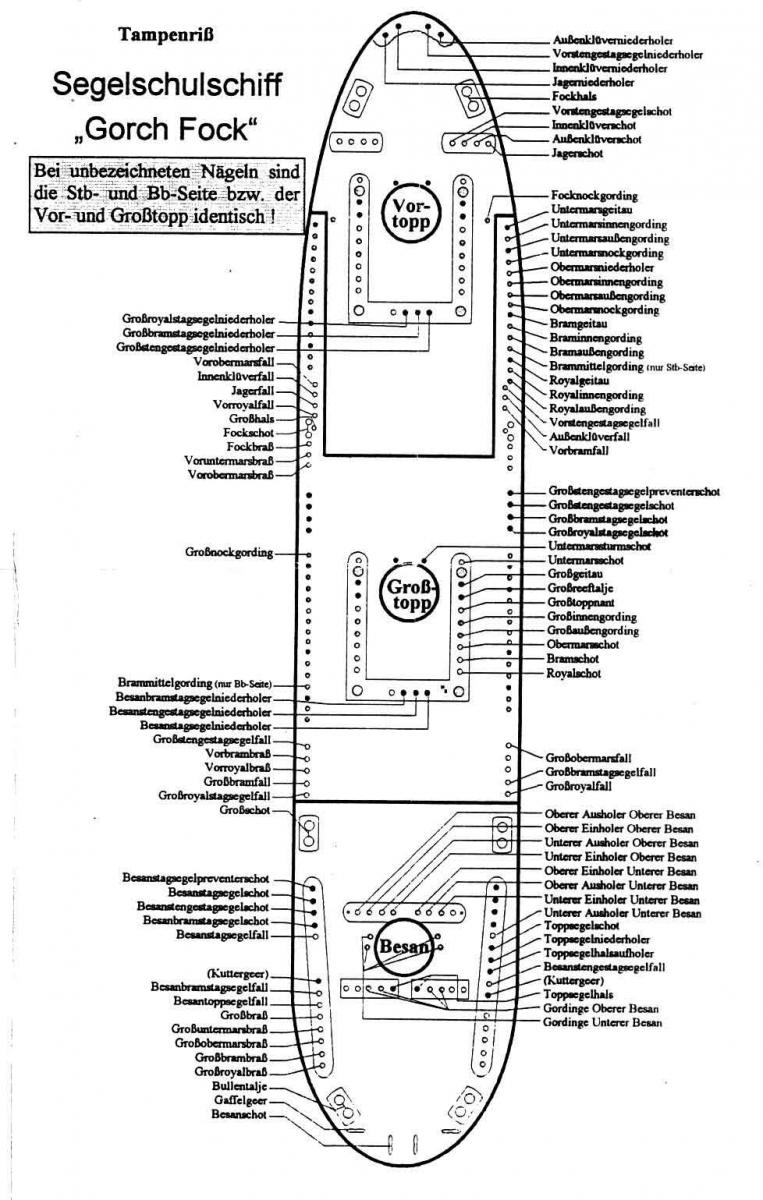
Build log part 49
sorry, the first 4 pics come in .Bmp Formate, I was`nt able to Transfer them into .Jpg Formate.
If you do a right mouse click on, the new opening interactive window bar requires pressing the "open " button in order to get the pic....
together with the "flounder" scheme These 4 scetches provide mainly the belaying Points for the actual ships and the models functional running rigging


THE NEXT PICTURES (3 LOTS) WILL ROUND UP AND FINALIZE THIS BUILD LOG OF THE GORCH FOCK 2
Build log part 50 to follow...
Nils
- flying_dutchman2, hexnut, NMBROOK and 6 others
-
9
-
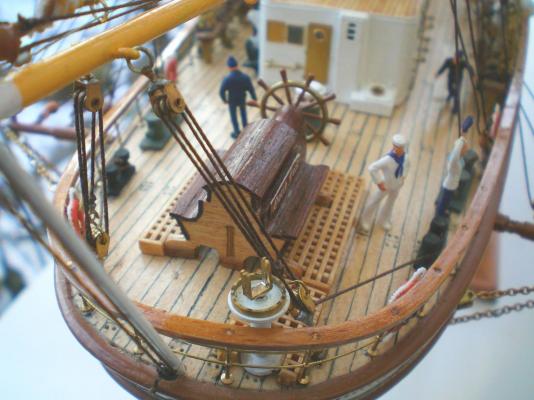
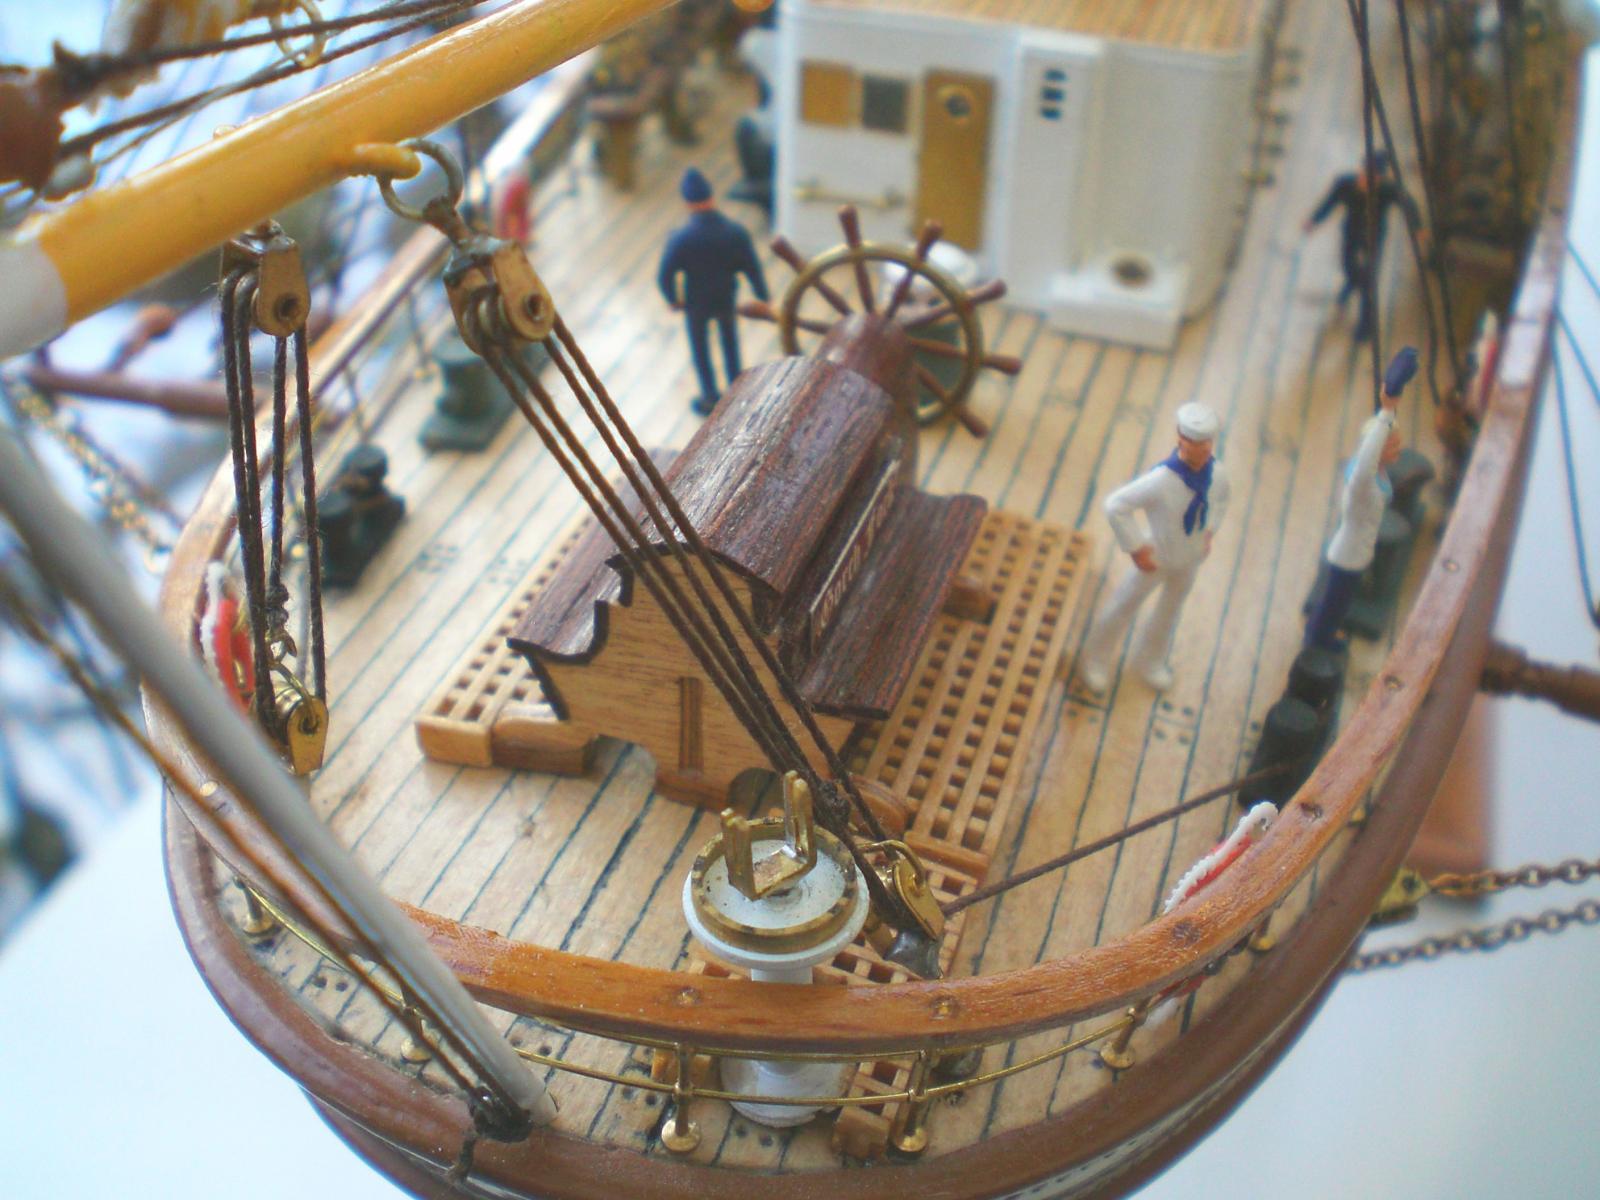
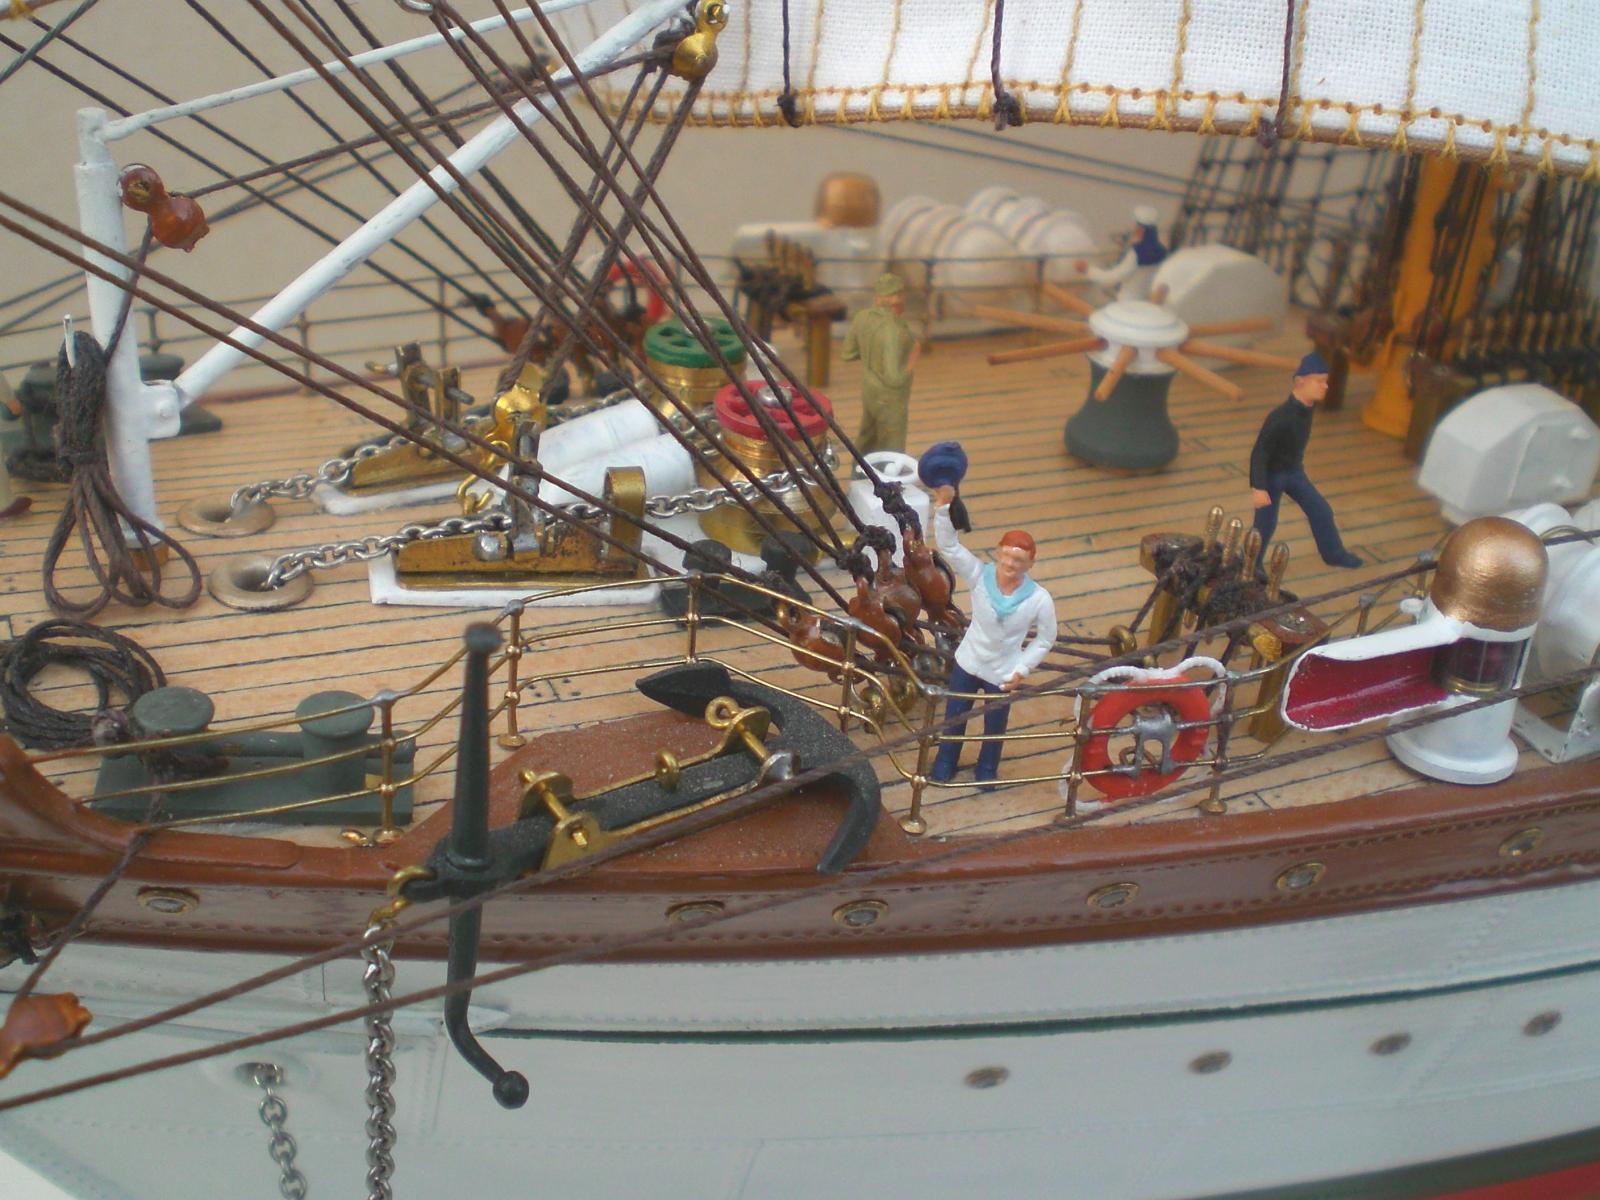
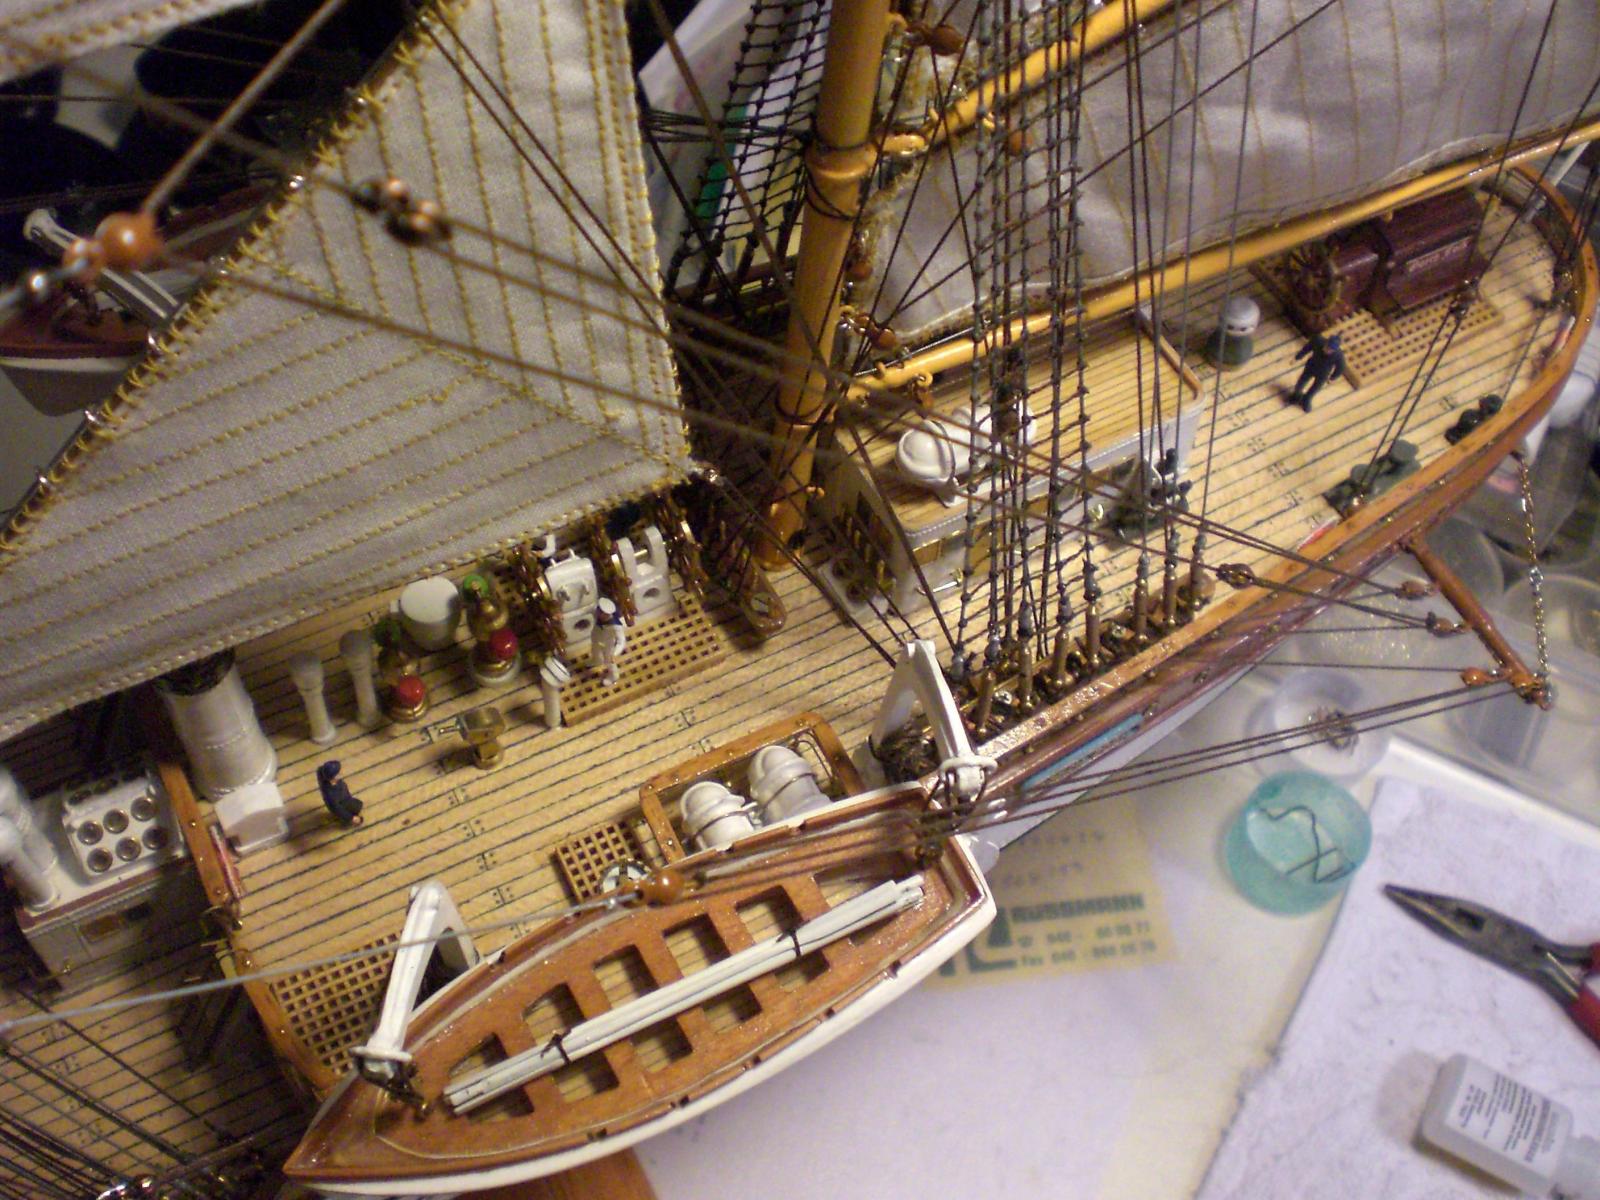
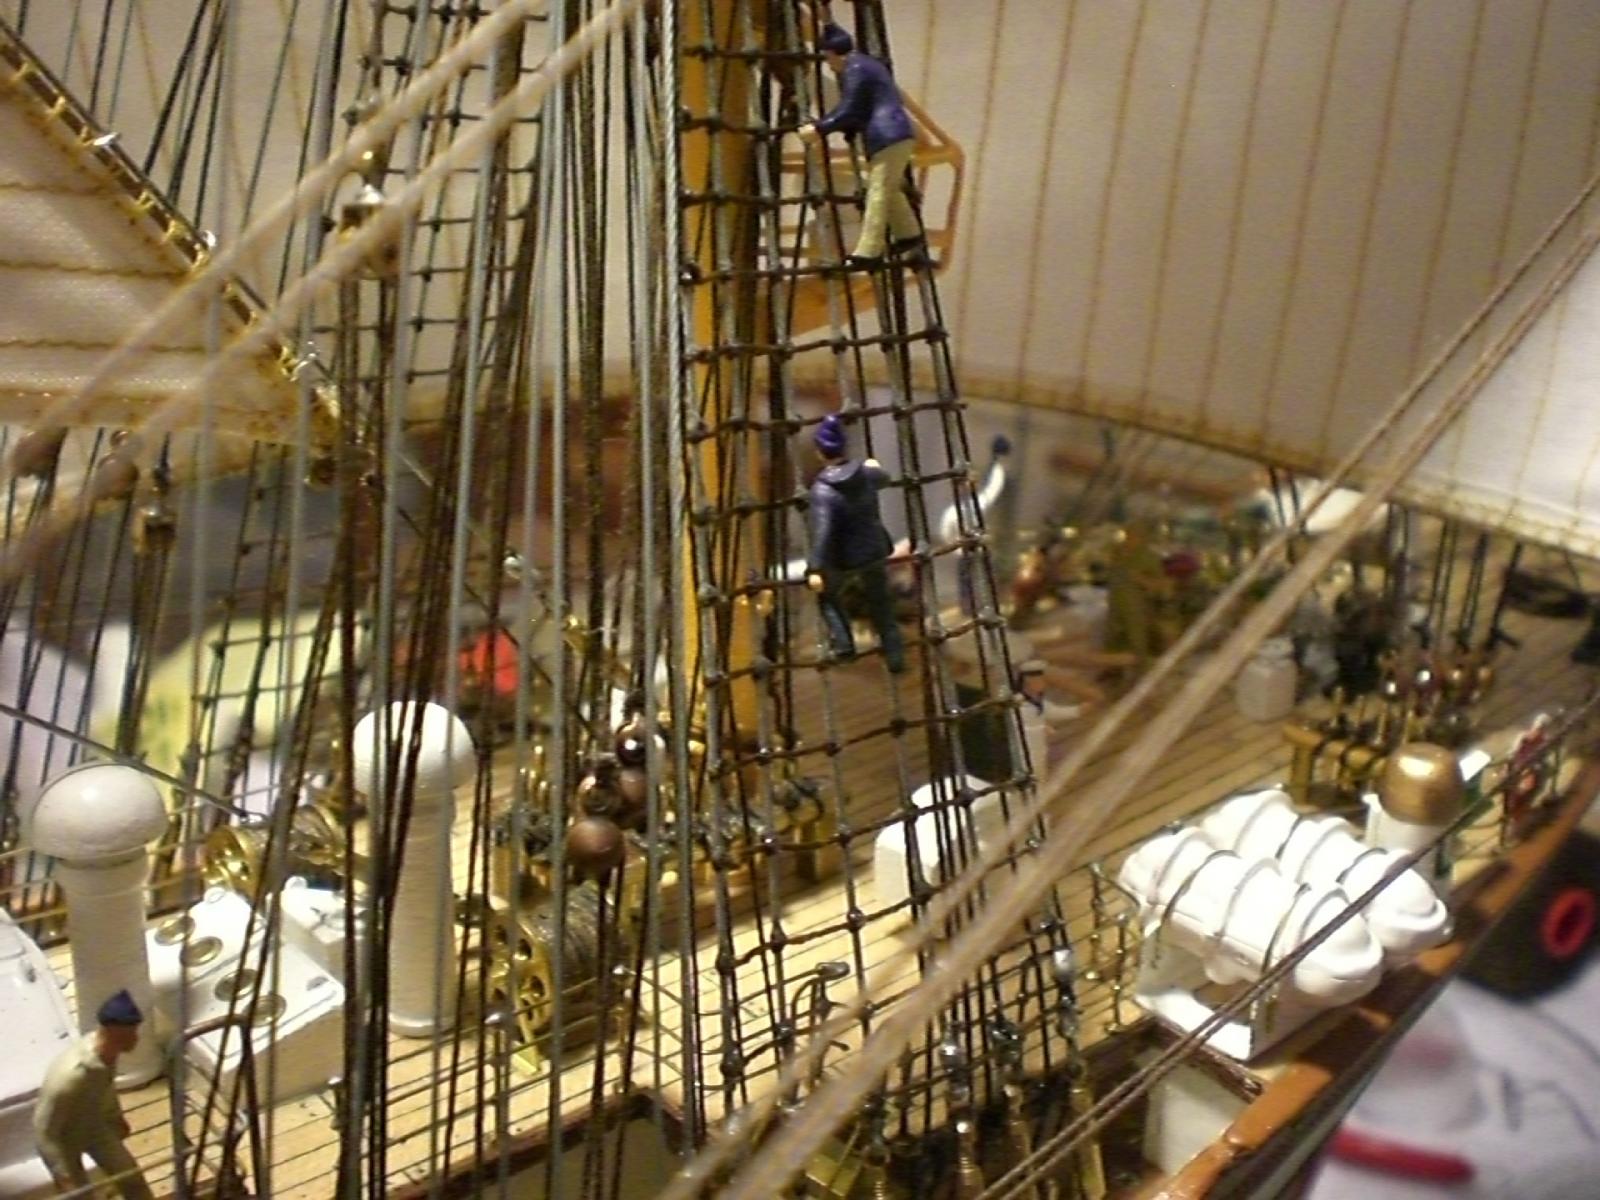
Build log part 48
STARTING WITH RIGGING OF THE SAILS

this is the so called "Flunder" (flounder) named so because of shape and look like the flounder platfish with fishbone Peaks all around the outer edge. This belaying pattern is a must for the Young cadets to learn by heart, the names of the belaying Points and to find the ropes, their nominations, first pick, by day and night.
Sheets of the 4 jib sails

mizzen mast sails

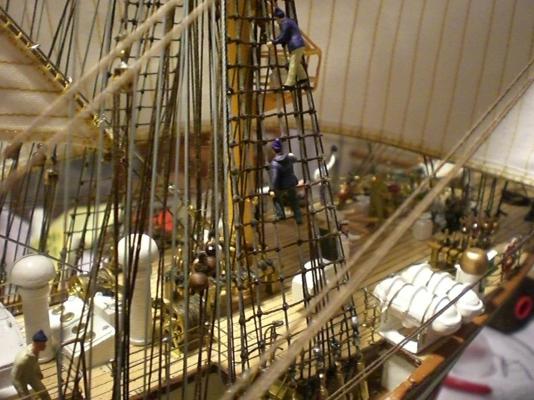
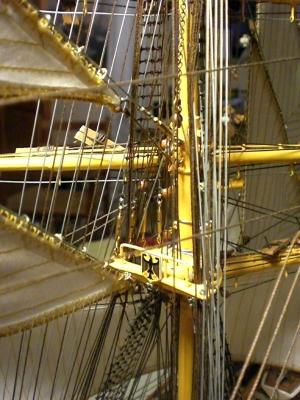
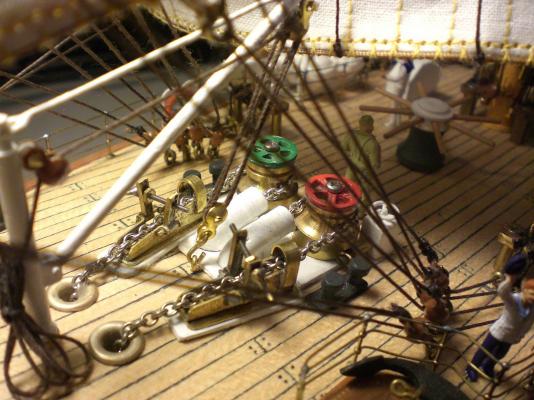
the Sheets are guided on forecastle deck
Build log part 49 to follow...
Nils
-
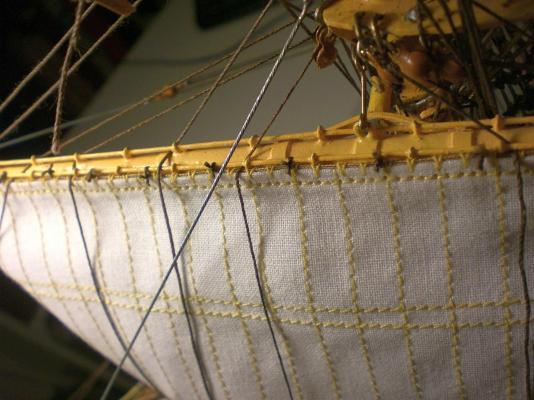
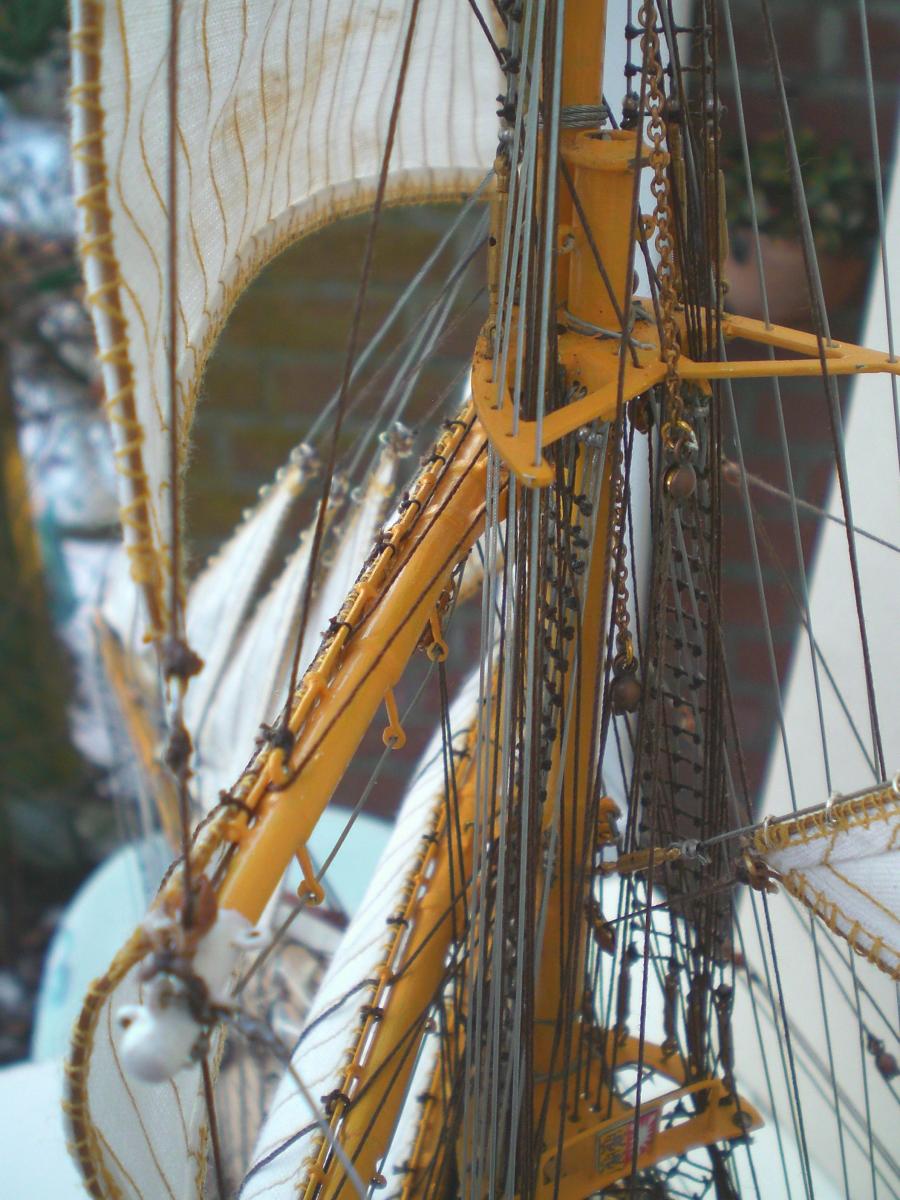
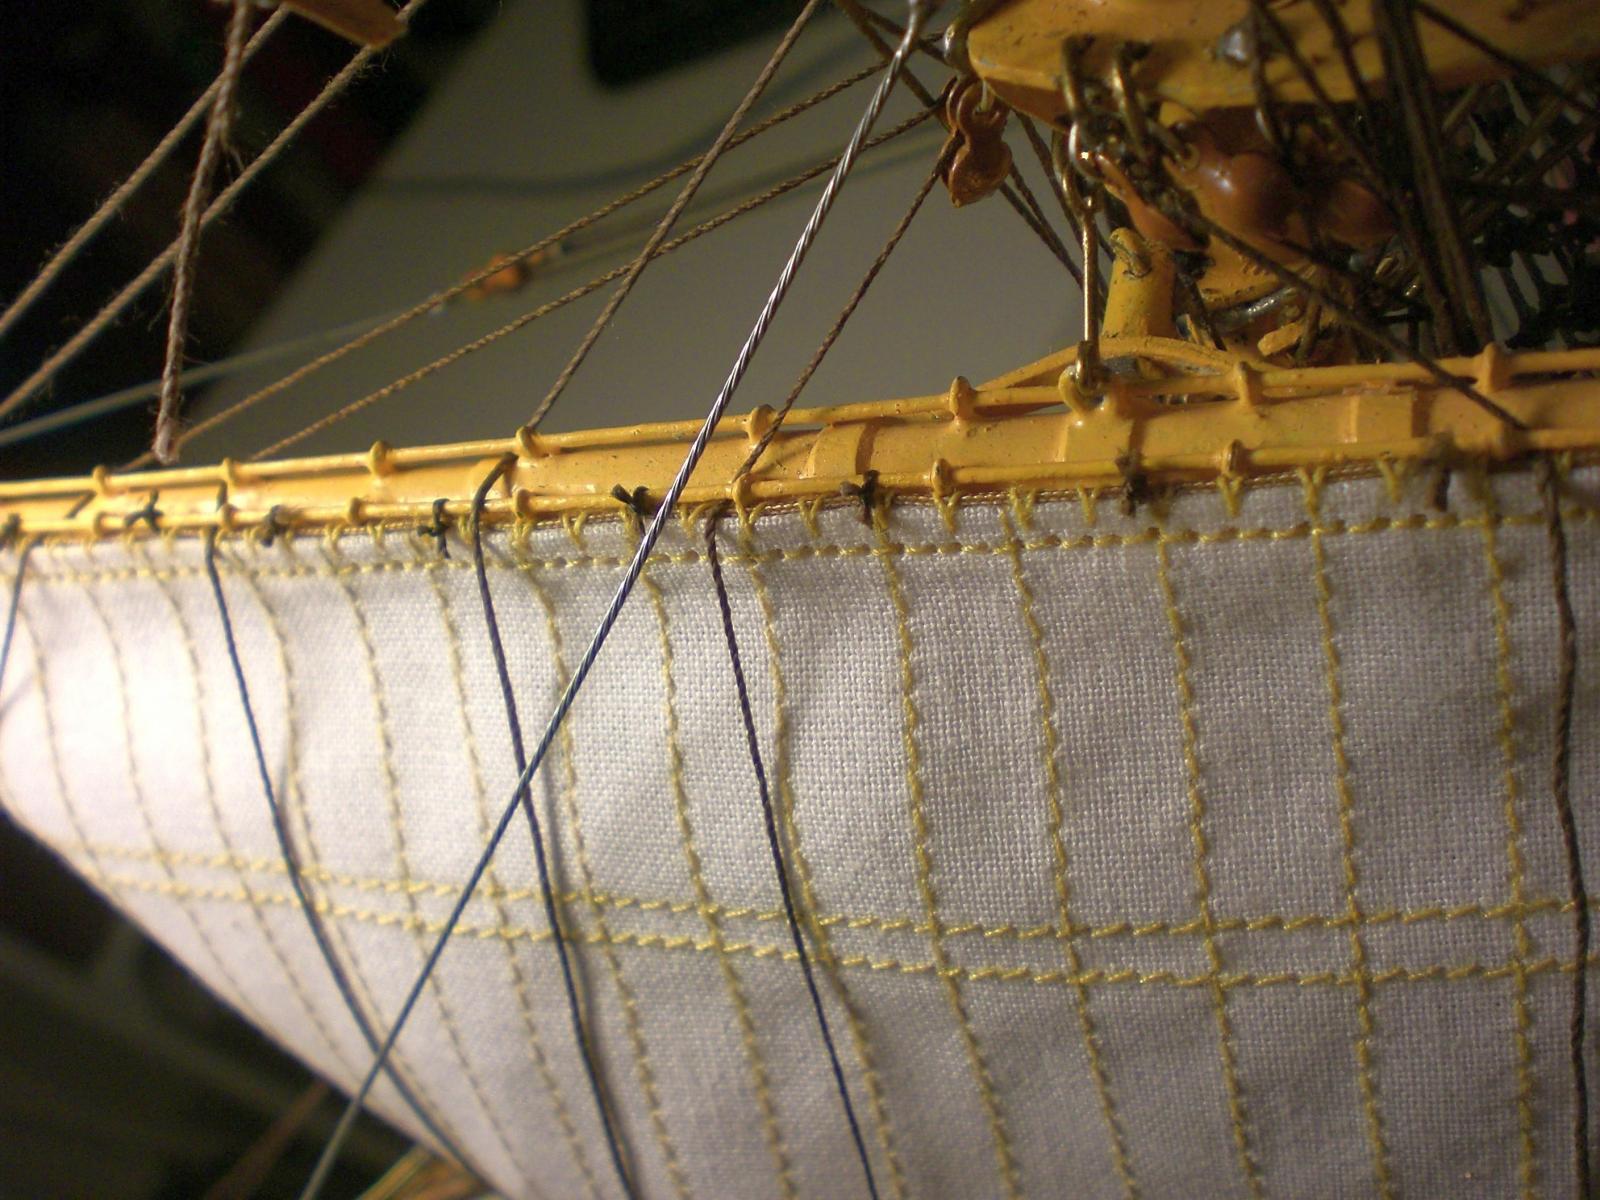
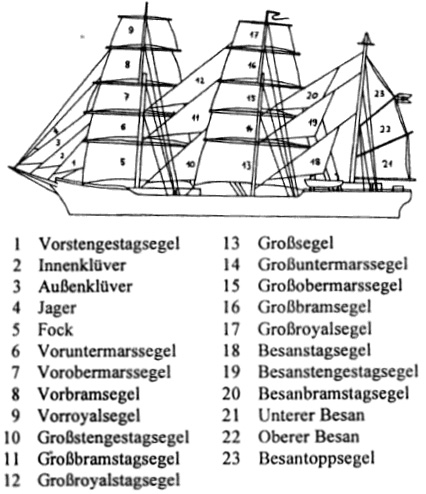
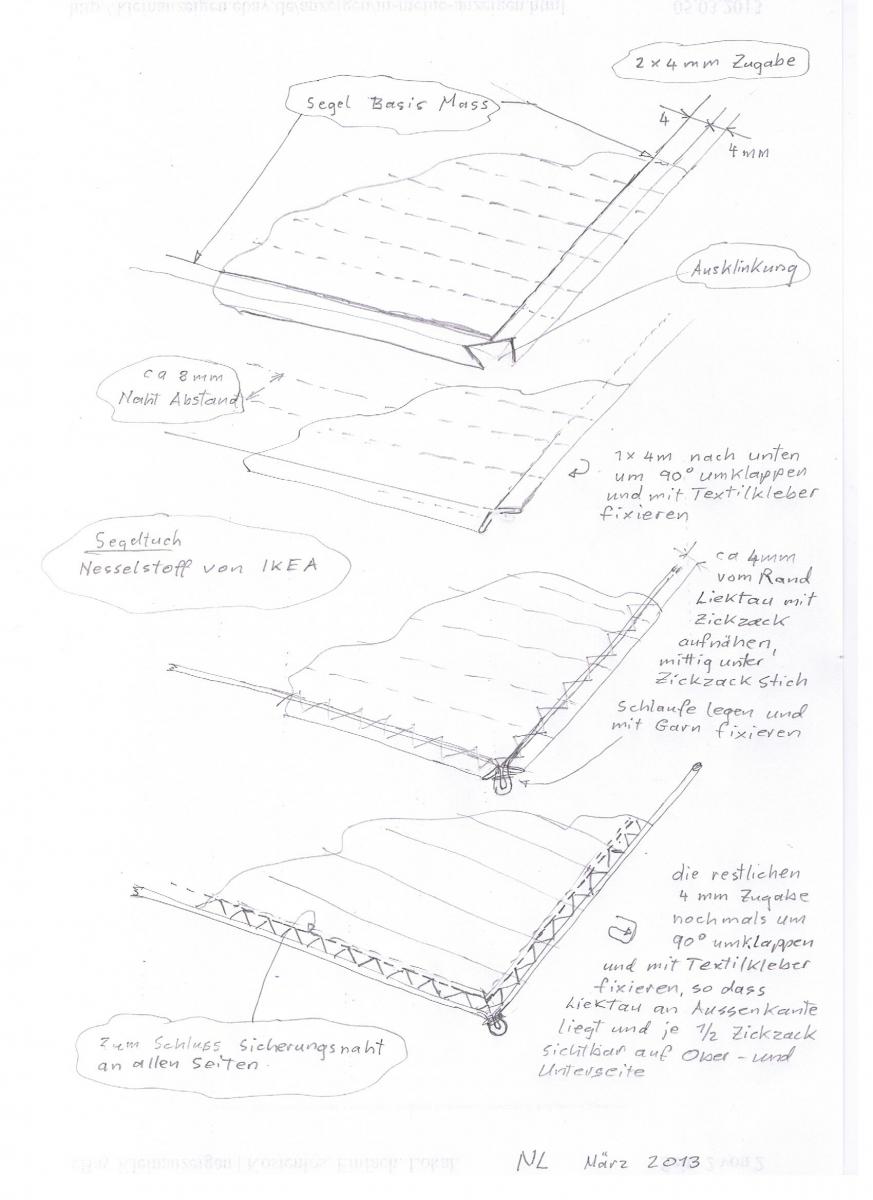
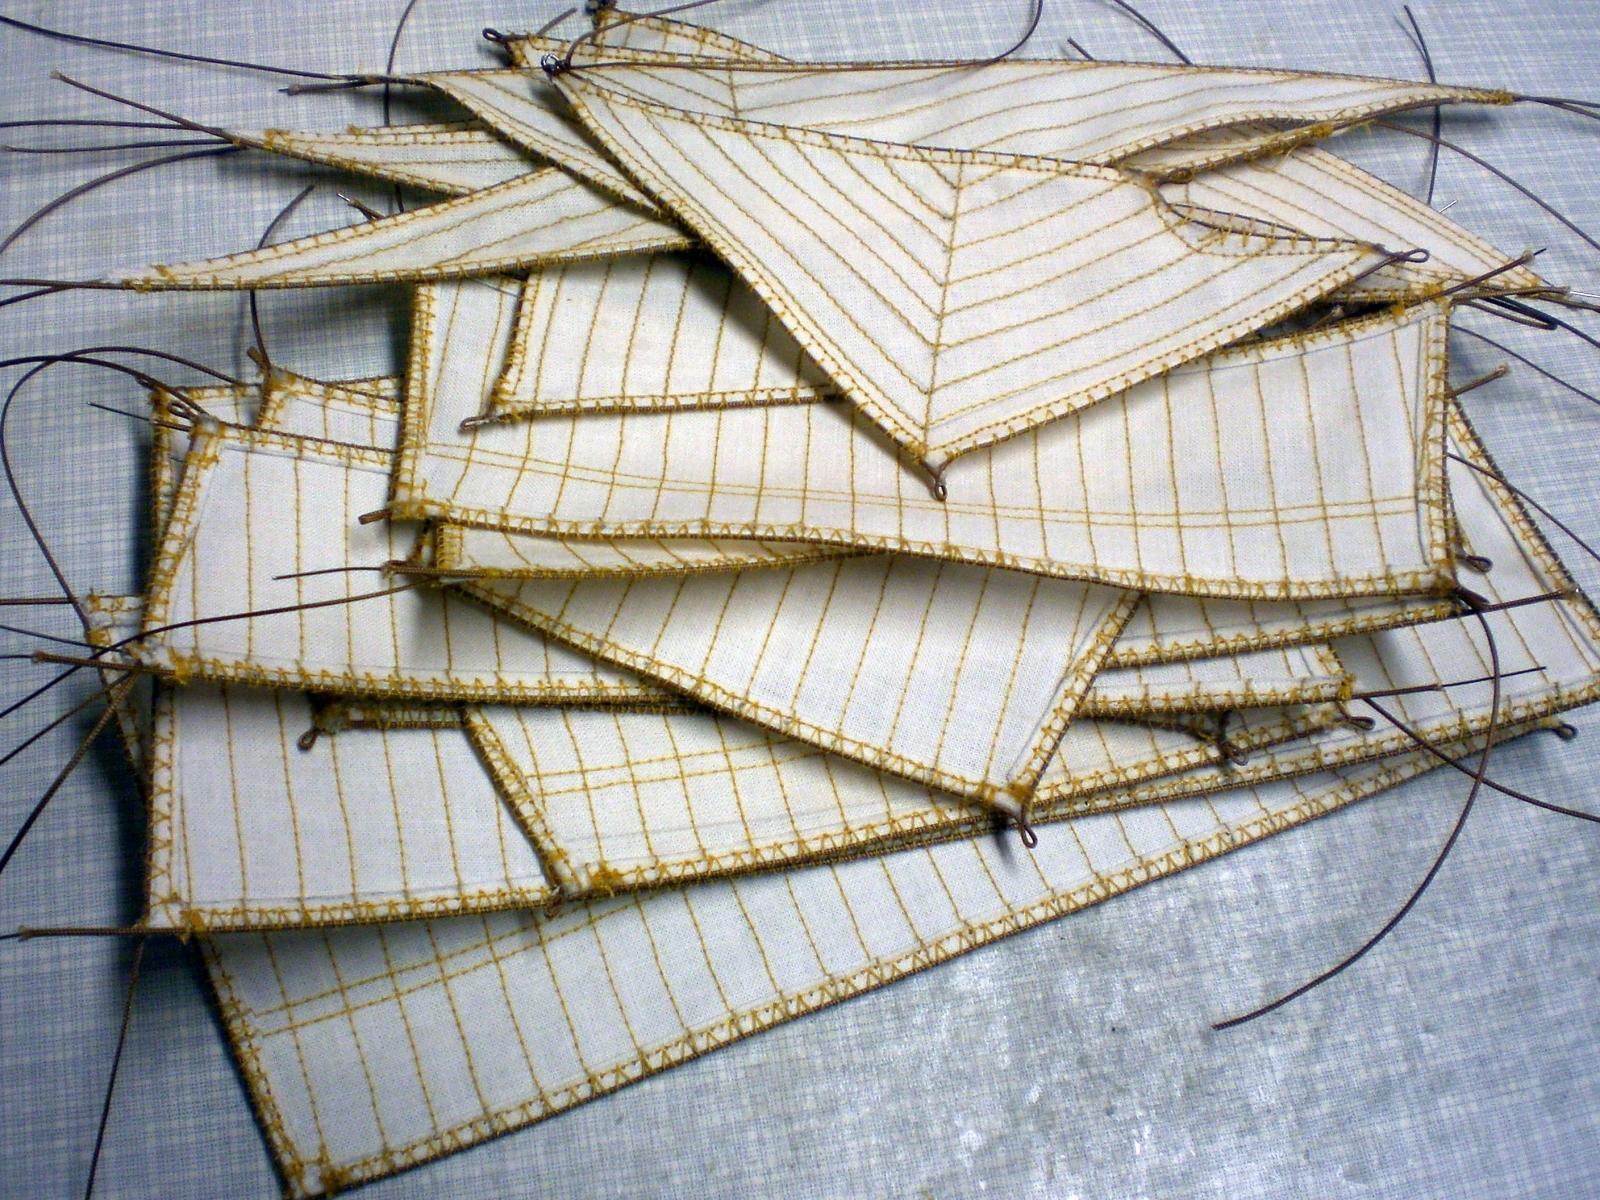
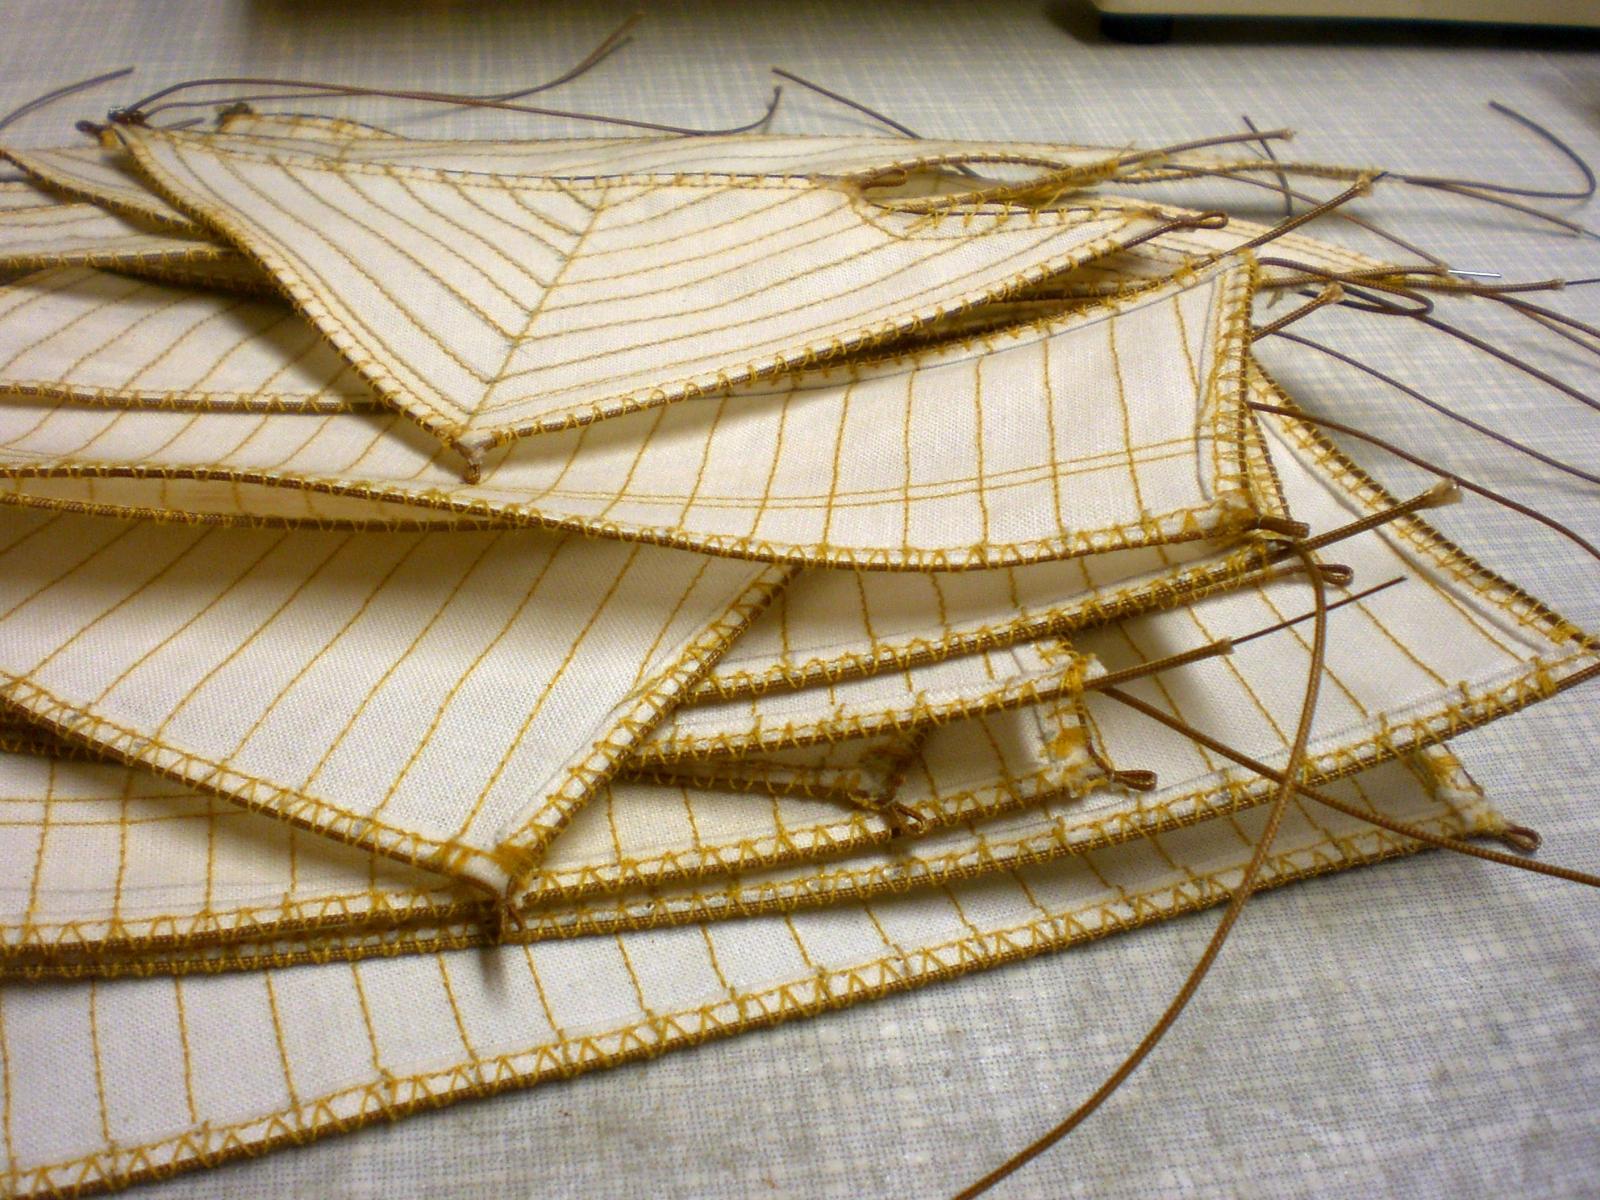
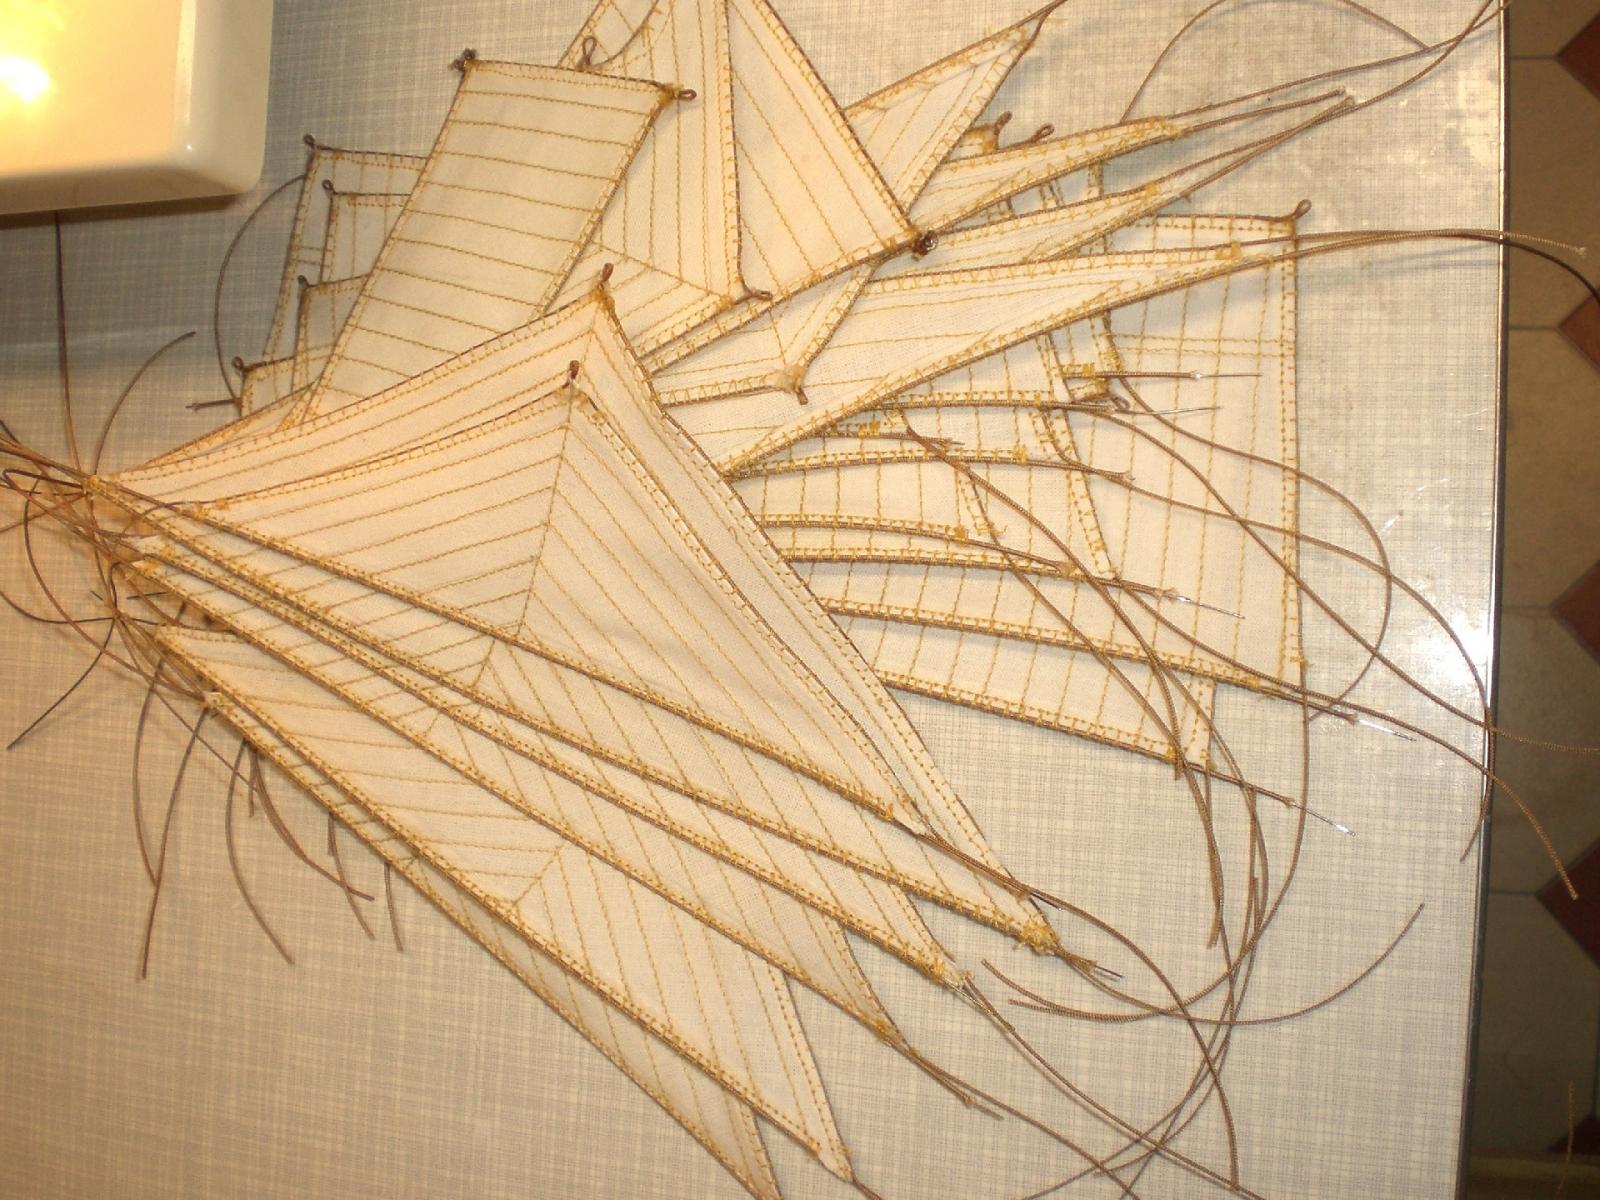
Build log part 47
THIS COVERS THE SAILMAKING
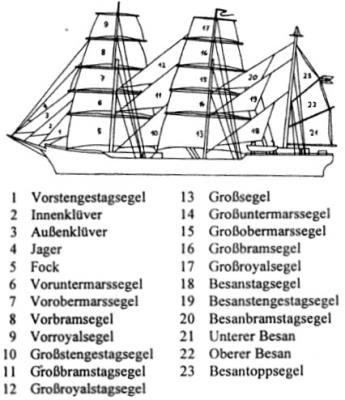
the full set comprises 23 individual sails
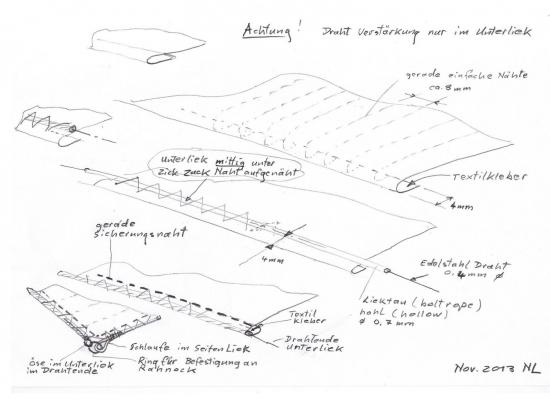
this and the next pic as already described whin I did the Pamirs sails
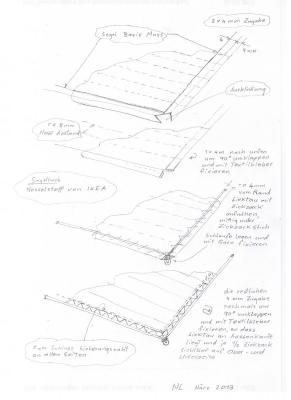
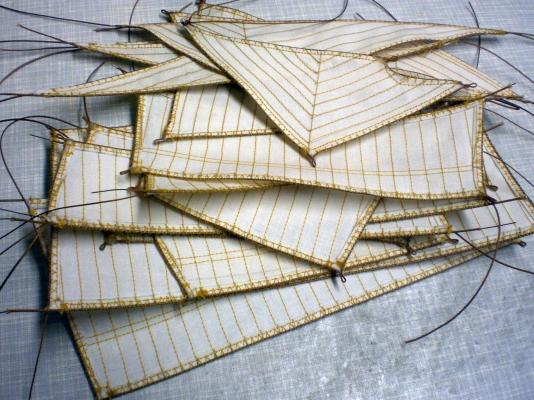
the longest side of the triangleb sails and the bottom boltropes of the square sails are reinforced with thin stainless steel (springhard)wire
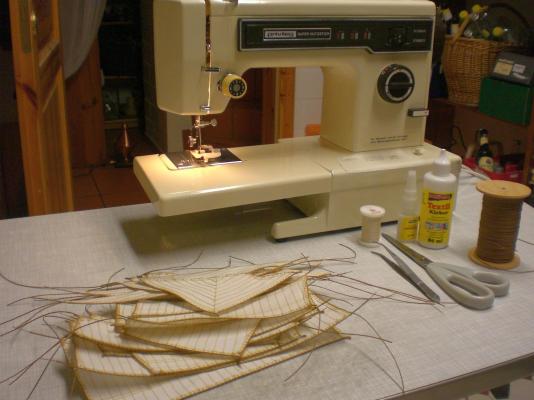

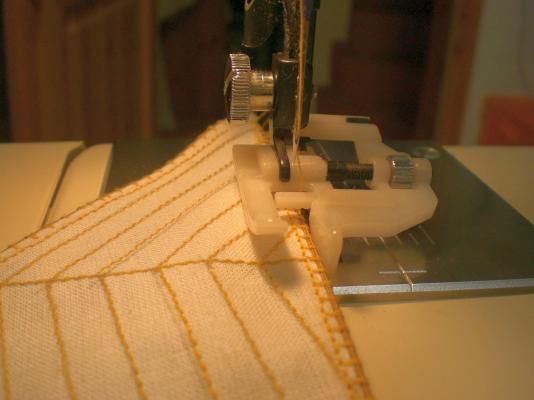

Shall continue with the rigging of the sails next
Build log part 48 to follow....
Nils
-
Thank you Remco,
for making the depth indicator I used only the available Excel Features, an ink-Jet Color Printer and regular photopaper with the gloss side up. I was so fed up with the thin decale foil, so I dd`nt mind about the thickness of the photo paper, but yes your comment is correct, and after attaching the marking I did a Little retouche to the thin papersides with paint and a thin brush in order to cover the thin White cutting edges after glueing it on.
Nils
Excel pattern....
- flying_dutchman2, Remcohe and hexnut
-
3
-
nice work Pierre,
well done !
thats a good base for the second planking, I would love to see...
Nils
-
-
The wellroom and shot lockers is made from marble wood (Acacia bakeri). It was in a “grab bag” of pen turning blocks I bought a while back.
Mike,
I knew that this is going to be a great model, and I am by no means disappointed from what I see at this sequence already...
Very well done !!
Nils
-
nice comment Nigel
thank you for your words, and regards to Stanley from Ronny
Nils

- NMBROOK, 3qq and michael mott
-
3
-
Simply Outstanding Nils!!!!
I am cursing myself for not dropping in earlier.I feel I could spend hours just looking and admiring your model.Every part is covered with a mass of detail.
Kind Regards
Nigel
Hi Nigel,
I see you have a nice new member Icon, is that Little pal a Jack russel you have ? I have a 7 year old Fox Terrier.
I had so many ideas as to what Details could be added some became realism and some went to the bin, but not being a kit, the mind was free to adopt many Details from all the gathered photos I had saved on my PC.
Nils


HMS Vulture 1776 by Dan Vadas - FINISHED - 1:48 scale - 16-gun Swan-class sloop from TFFM plans
in - Build logs for subjects built 1751 - 1800
Posted
very nice Progress Danny,
your beautiful build in all Details of this Swan Class is an awesome sight !
Nils