Mirabell61
-
Posts
7,418 -
Joined
-
Last visited
Content Type
Profiles
Forums
Gallery
Events
Everything posted by Mirabell61
-
 many thanks Patrick and Greg, for your kind compliments... Nils
- 2,625 replies
-
- 3
-

-
- kaiser wilhelm der grosse
- passenger steamer
- (and 1 more)
-
Thanks very much Joel, I`m pleased you like the model.... nils
- 2,625 replies
-
- 5
-
-
- kaiser wilhelm der grosse
- passenger steamer
- (and 1 more)
-
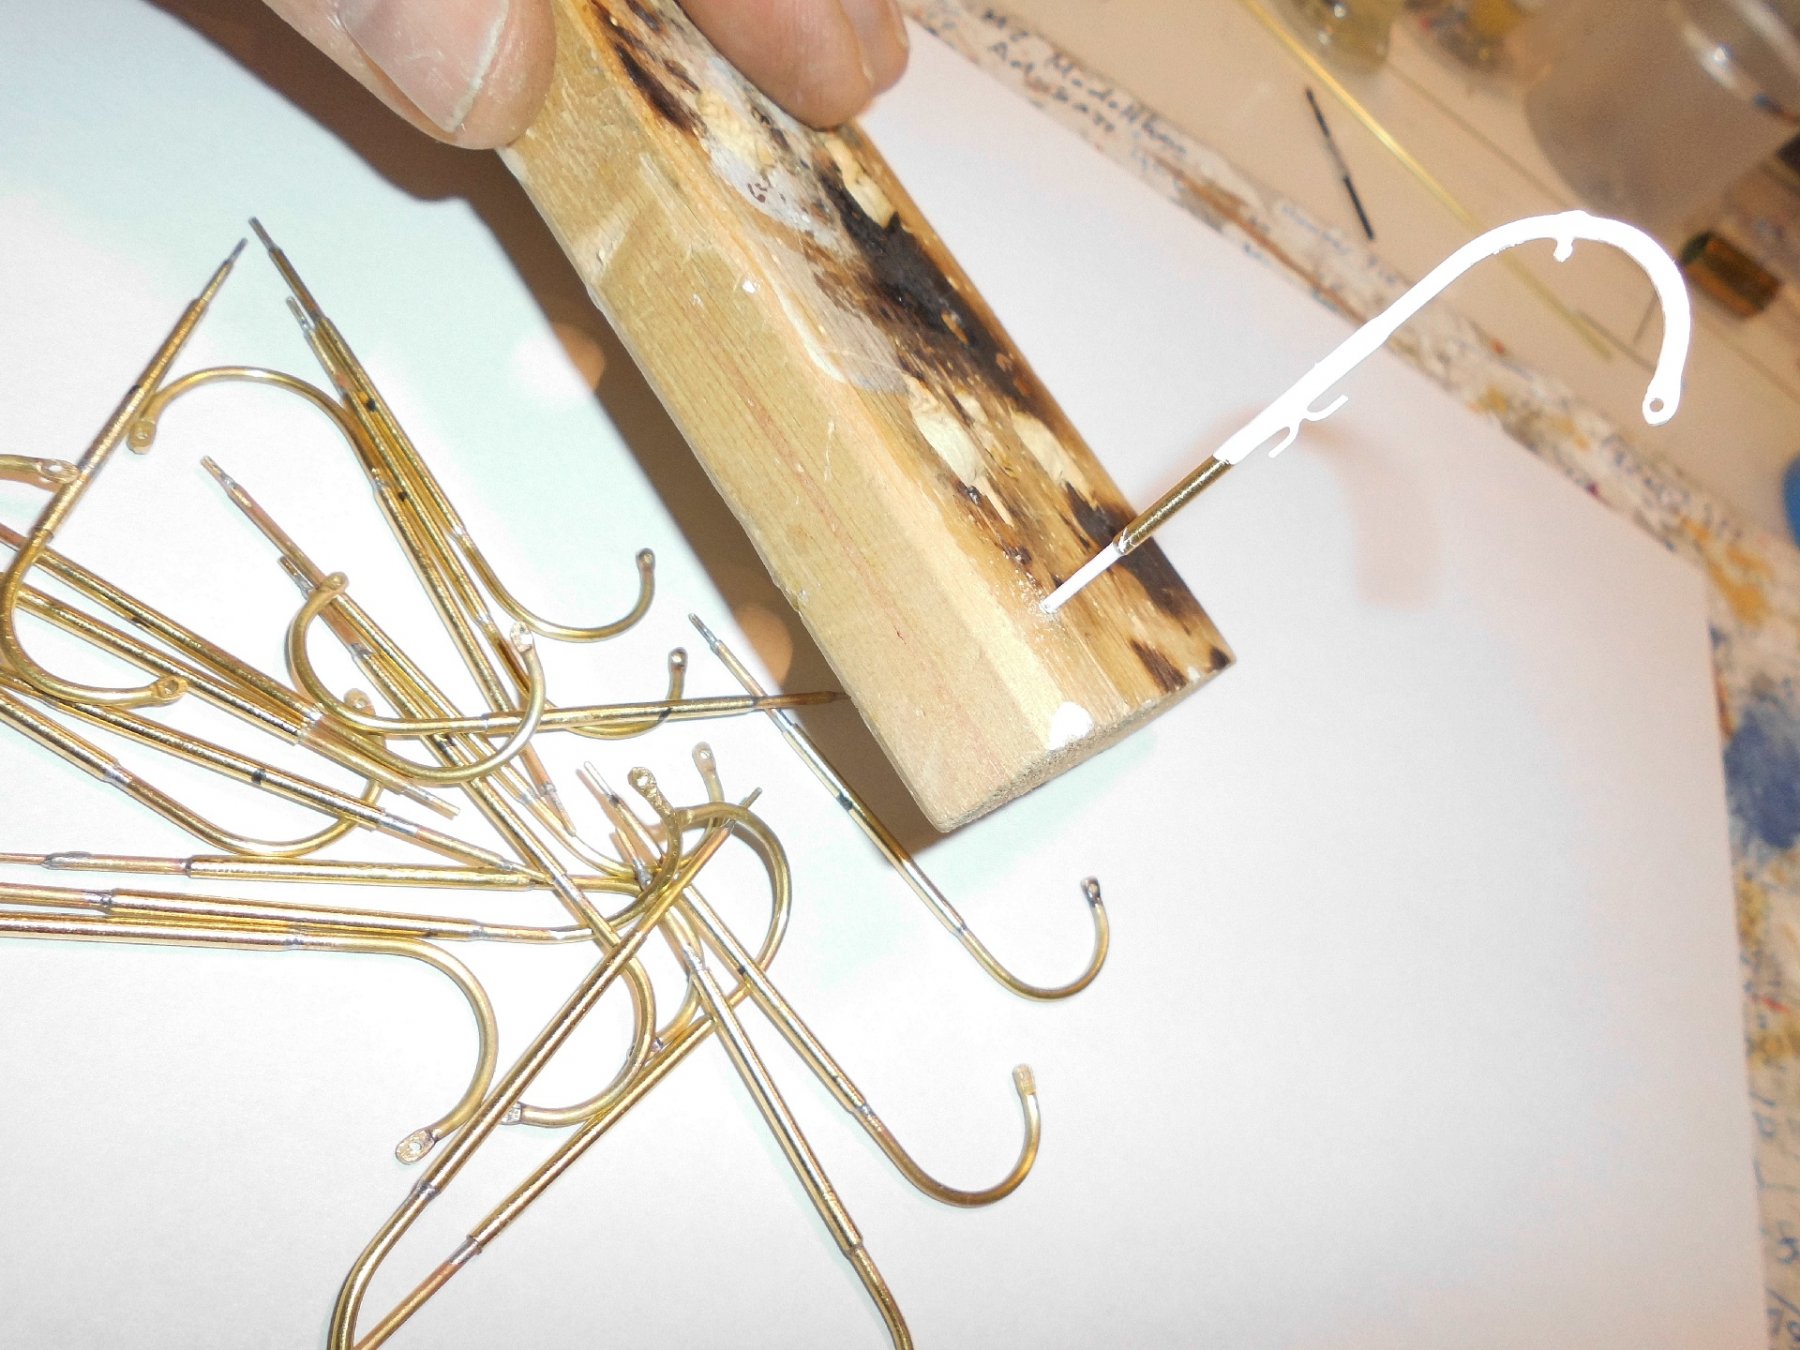
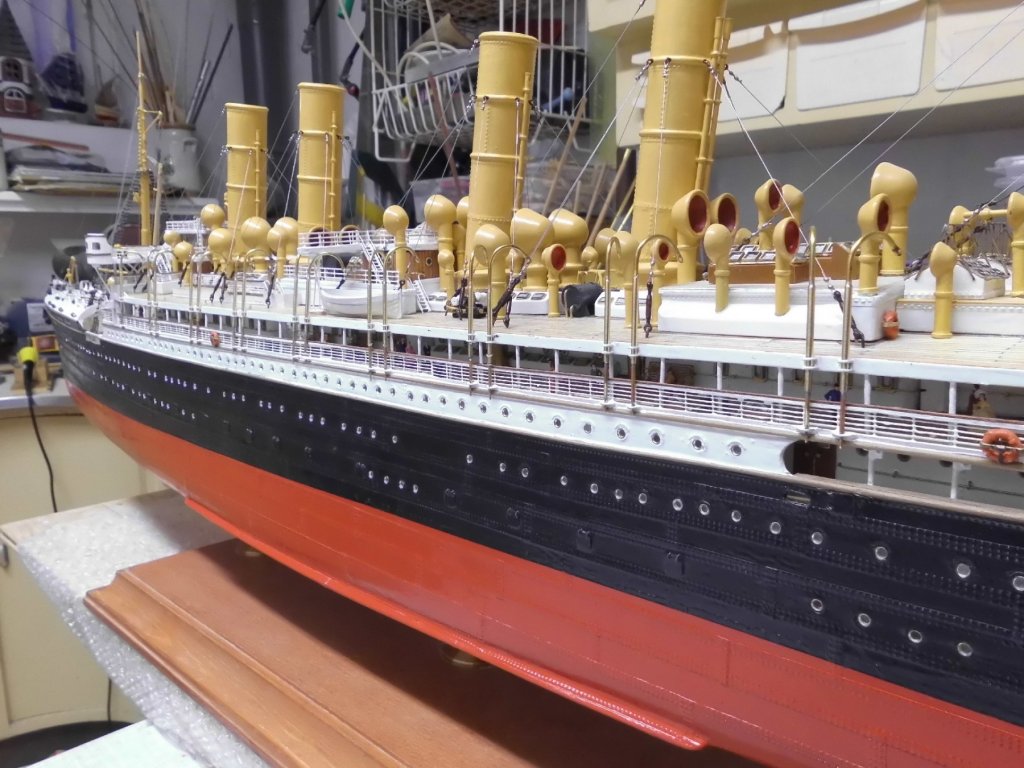
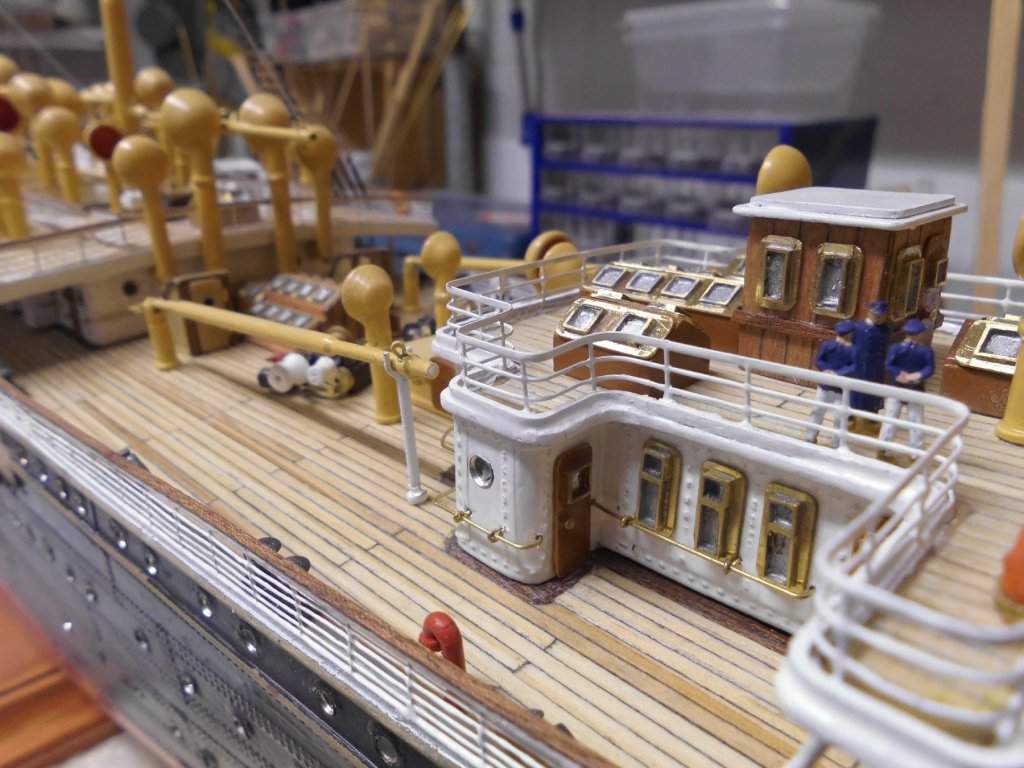
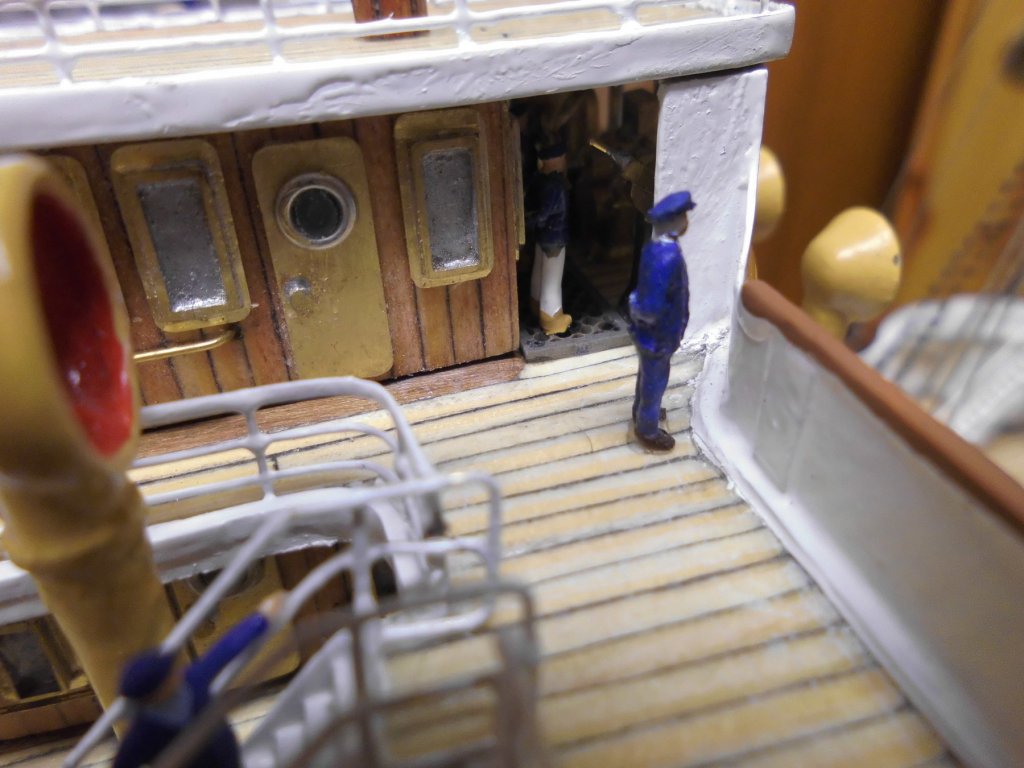
Small update... all 40 raw davits have been made, now every one is being equiped with a lead for the pulley rope in the upper curve and a cleat on the vertical post, just above deck level. The unprimered section will be painted when the davits are mounted, otherwise I would scrape off the paint where the post passes the bearings, when pushing through... Nils officer briefing two sailors on the aft deckhousing

- 2,625 replies
-
- 34
-
-
- kaiser wilhelm der grosse
- passenger steamer
- (and 1 more)
-
Thanks very much Hartmut, I`m really happy you like the model... Nils
- 2,625 replies
-
- 5
-
-
- kaiser wilhelm der grosse
- passenger steamer
- (and 1 more)
-
super looking framing work Bob, here it shows how essential that jig plate is for placing /holding the frames to distance.... Nils
- 682 replies
-
- 3
-
-
- halifax
- lumberyard
- (and 1 more)
-
Greg, I think most of the hard work on steam ships as well as a remarkable reduction of engine room crew came with the convertion to "oil firing" the furnaces. The combination of oil firing and the use of (geared) turbines made life much easier, cleaner and less stressy. Then came the motor ships with their economical diesel engines..... Nils
- 2,625 replies
-
- 4
-
-
- kaiser wilhelm der grosse
- passenger steamer
- (and 1 more)
-
Hello Hartmut, yes indeed, that is a capitel not so much known today,......I remember reading about the hard work of heaters trimmers on merchant steamers, deep down in the ships belly, especially if the masters they reported to had a bit inhuman touch. Usualy the captain felt himself as highest instance next to god. It was not seldom that some of these poor men knew no more way out, and committed suiside by jumping overboard. it was noticed when their clogs stood lonesome standing inside the railing Nils
- 2,625 replies
-
- 5
-
-
- kaiser wilhelm der grosse
- passenger steamer
- (and 1 more)
-
thank you very much Piet, Nils
- 2,625 replies
-
- 3
-
-
- kaiser wilhelm der grosse
- passenger steamer
- (and 1 more)
-
thank you very much Denis Hartmut and Michael, for your nice comments, Also thanks to all the "likes" for clicking on... Denis, that scale surley is quite an ambitious one to tackle, sometimes the cruel close up pics show up every little detail that could have been done more accurate, and I did`nt even notice until I saw the pic... Hartmut, I can imagine the rough side of life those seamen were facing in the early steamship days Michael, Thanks for your words, thats about what I can do in that scale. Love that compass you are doing for your pilot cutter Nils
- 2,625 replies
-
- 6
-
-
- kaiser wilhelm der grosse
- passenger steamer
- (and 1 more)
-
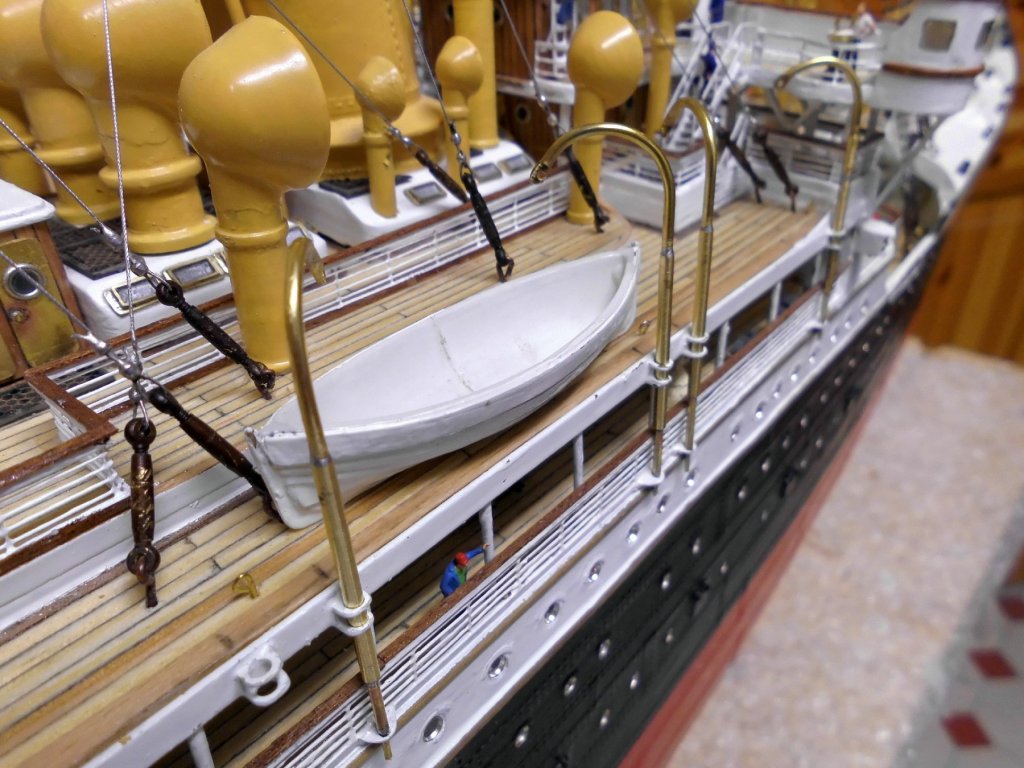
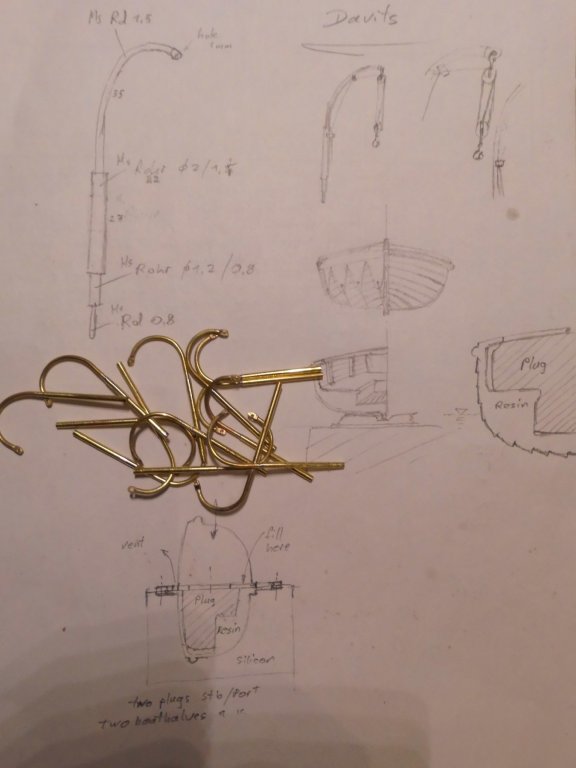
Build log part 58 Davits, boats..... started with the production of 40 davits. The building of the boats will take some more time, but the first hand scetch has already been brought to paper, to give the mind something to think about.... (changes pending...) Nils first lot of the radial davits
- 2,625 replies
-
- 16
-
-
- kaiser wilhelm der grosse
- passenger steamer
- (and 1 more)
-
Hi Sailor, that a nice rememberance, I guess one always treasures beautiful moments in life... Nils
- 2,625 replies
-
- 4
-
-
- kaiser wilhelm der grosse
- passenger steamer
- (and 1 more)
-
Thank you very much Mark and Piet, for your kind compliments, its nice to know you are watching the progress with interest.... Nils
- 2,625 replies
-
- 4
-
-
- kaiser wilhelm der grosse
- passenger steamer
- (and 1 more)
-
Many thanks Rob and Carl, for your comments.... Rob, agree, must have been lousy cold and uncomfortable out there, especialy in winter or during a gale or blizzard. But I think there was the possibility to drive the ship from the inner closed wheelhouse, just like later on the Titanic the crew also had that alternative.. Carl, thanks for the words, no more big surprises in the near future, except for the missing two guy wires on each side for the first funnel. They can be put on now that the bridge is complete and these do`nt hinder access for mounting parts any more. Its about time now to get the ships boats and davits under way, it will take quite some time to do that sequence... Nils
- 2,625 replies
-
- 6
-
-
- kaiser wilhelm der grosse
- passenger steamer
- (and 1 more)
-
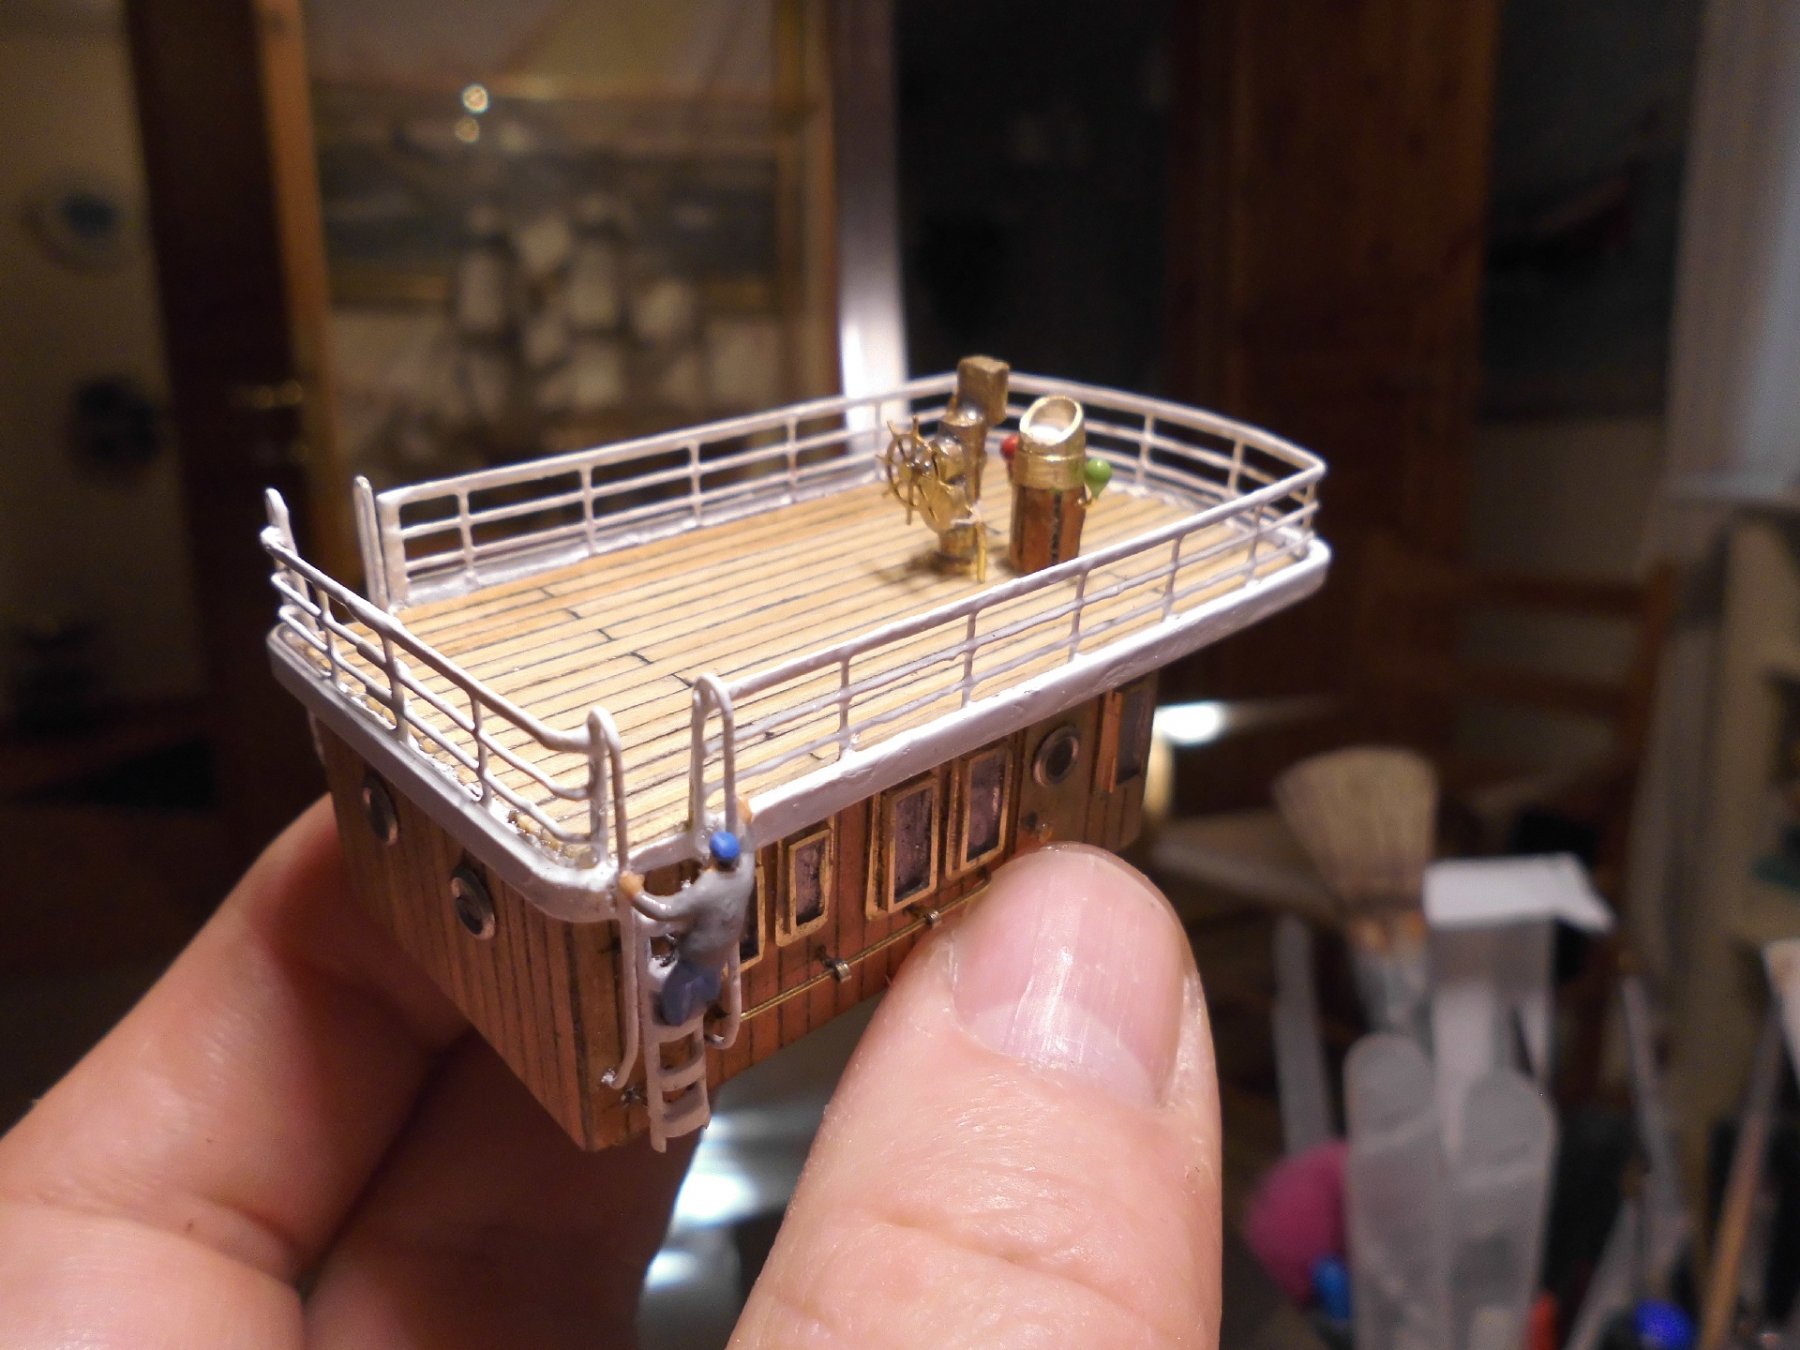
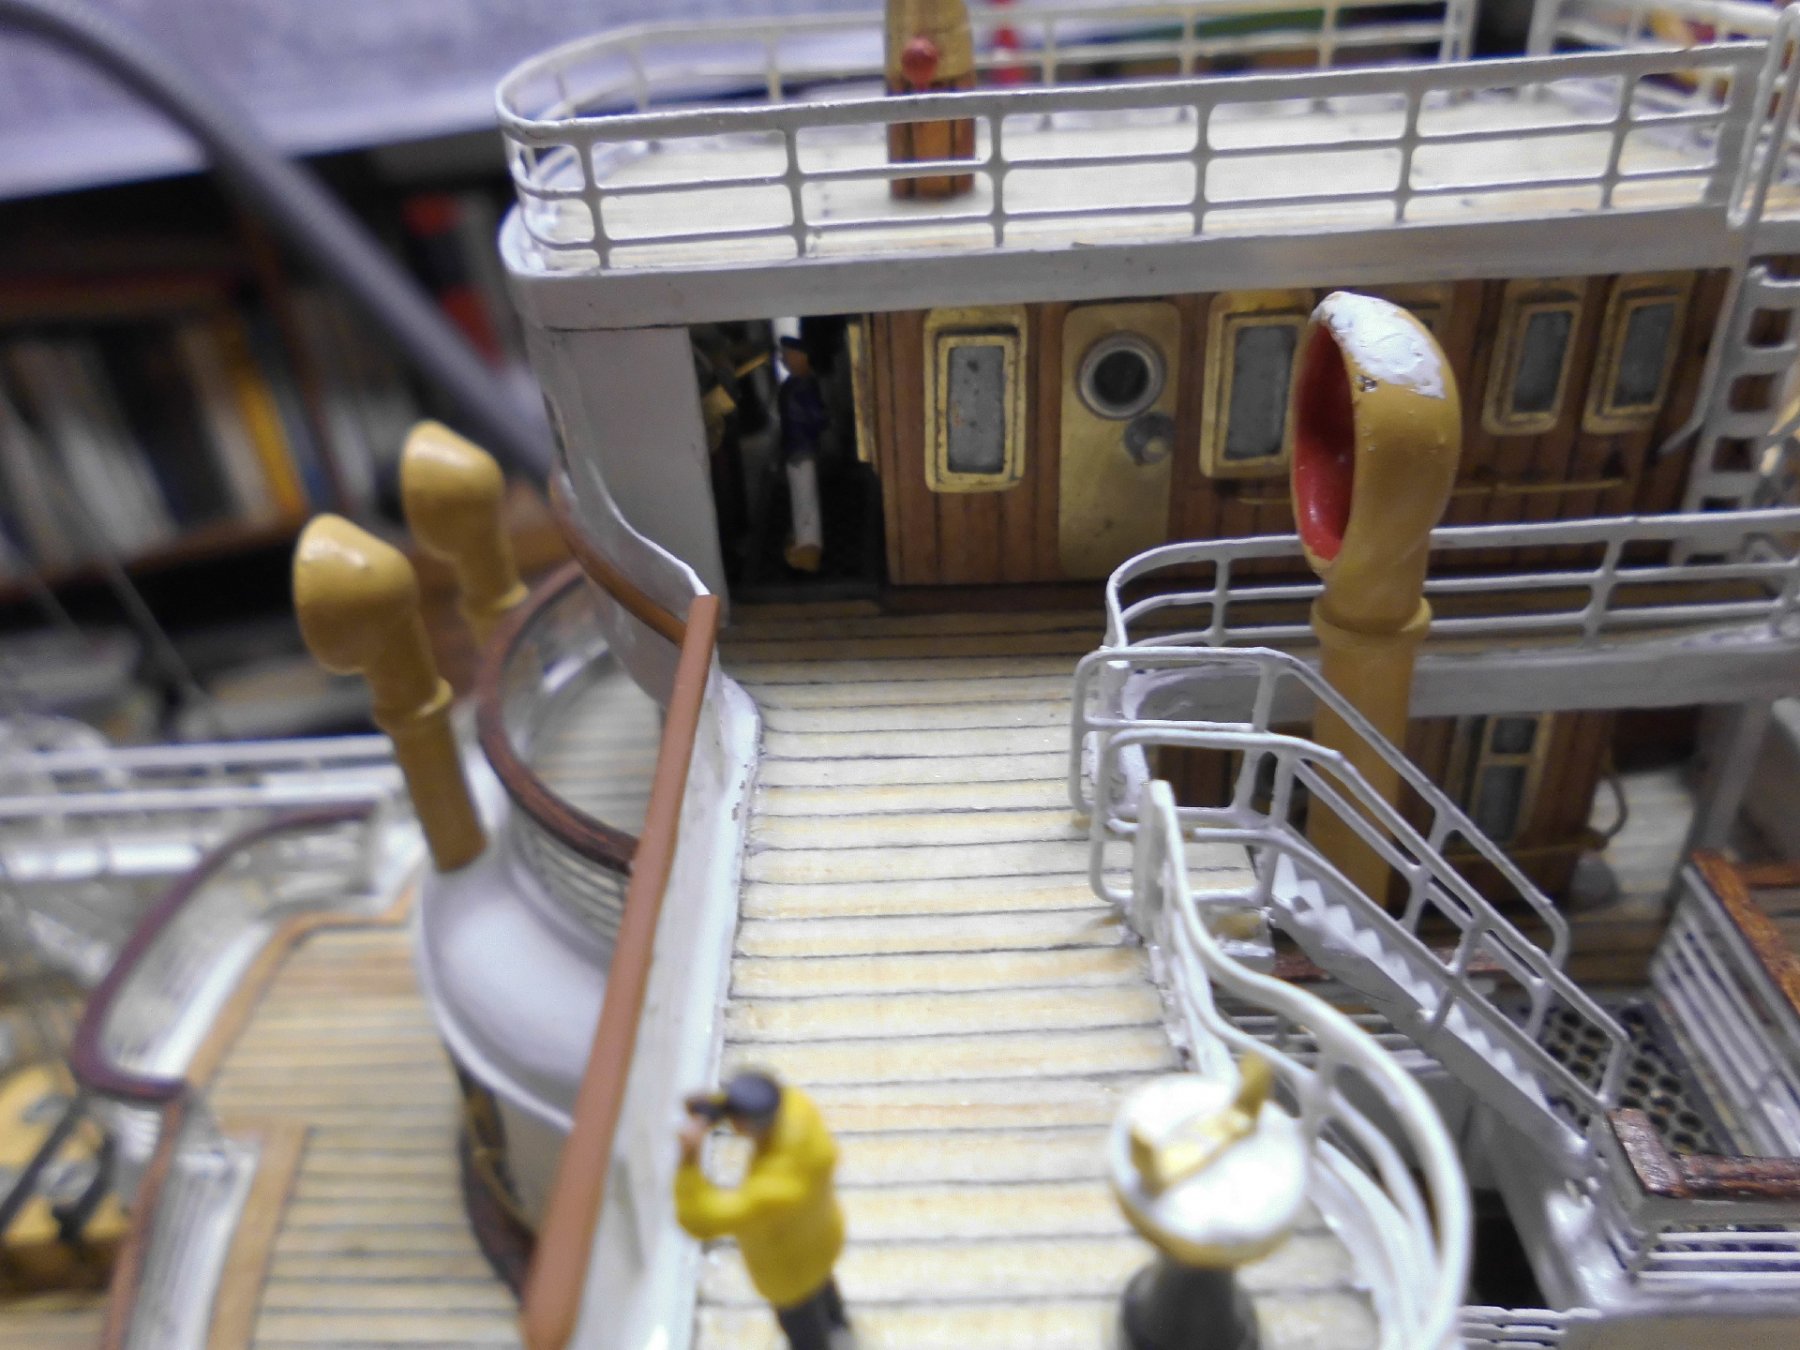
Thank you very much Gerhard, words, much appreciated.... a helmsman is climbing the "monkey island" for the feeling of freedom under the wide ocean sky and calm weather, and is preparing to steer the 14,300 tons and 31,000Psi here from this point for a while... Nils

- 2,625 replies
-
- 21
-
-
- kaiser wilhelm der grosse
- passenger steamer
- (and 1 more)
-
Thank you all so much for your words and appreciations, Gerhard, Kees, Rob, Grant, Patrick, Greg and Johann and all the "likes".... The last days it was only progress in tiny bits, but that also needs to be done to a certain degree, am pleased you like it.. Nils
- 2,625 replies
-
- 6
-
-
- kaiser wilhelm der grosse
- passenger steamer
- (and 1 more)
-
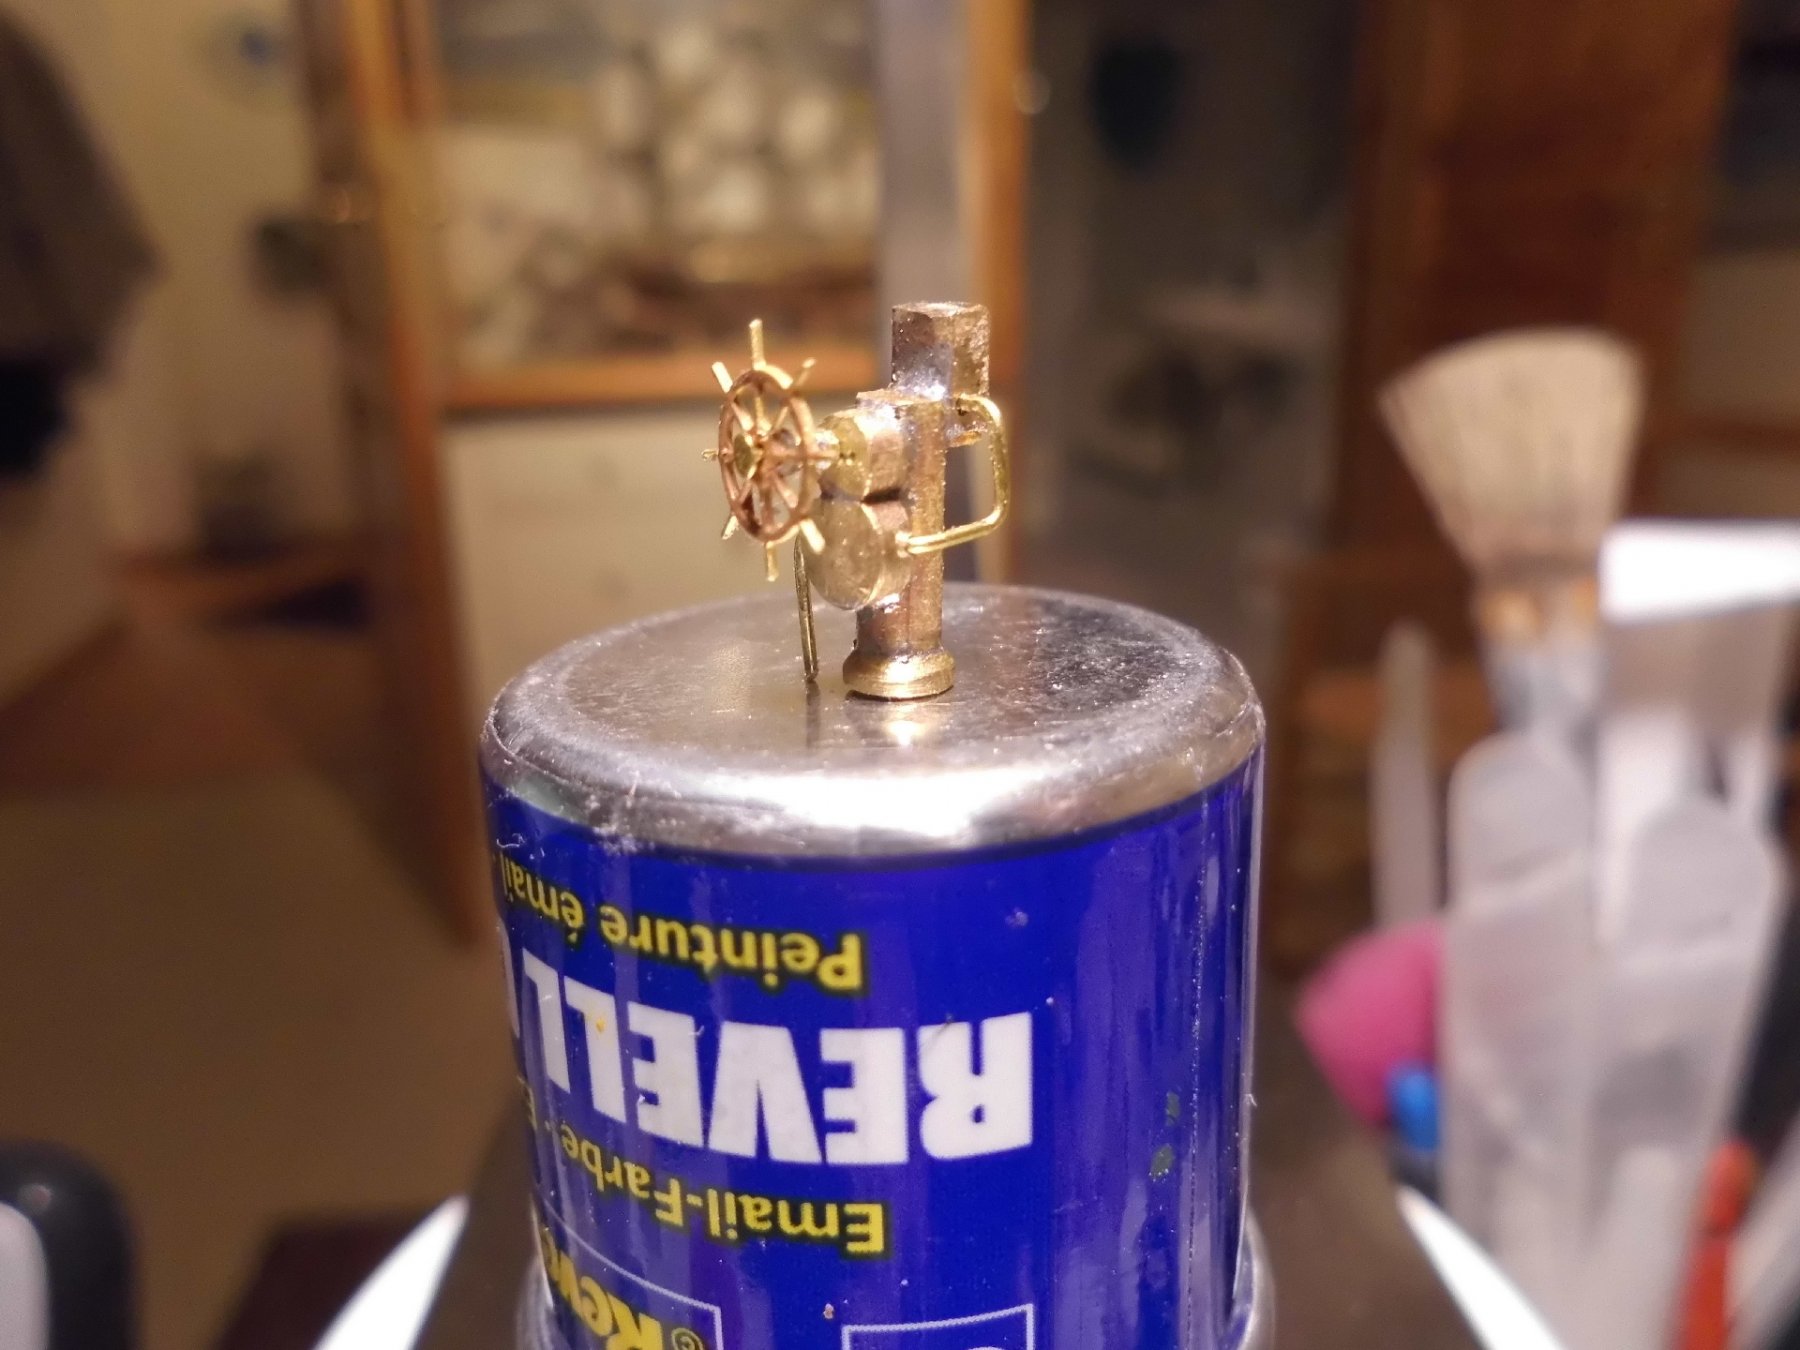
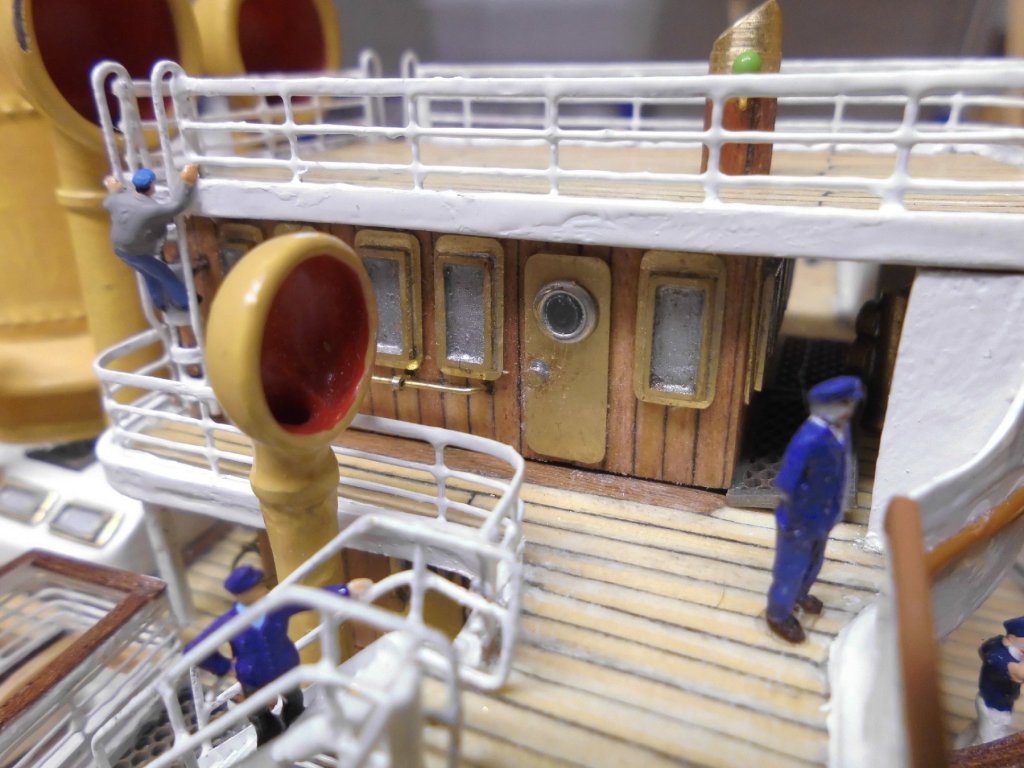
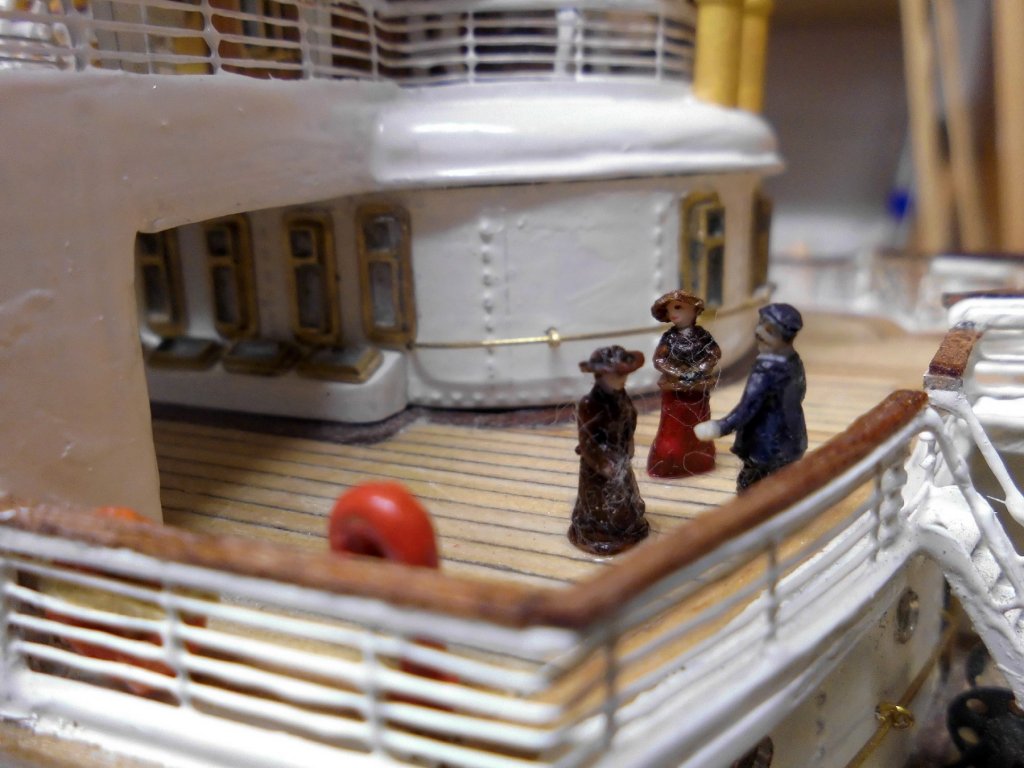
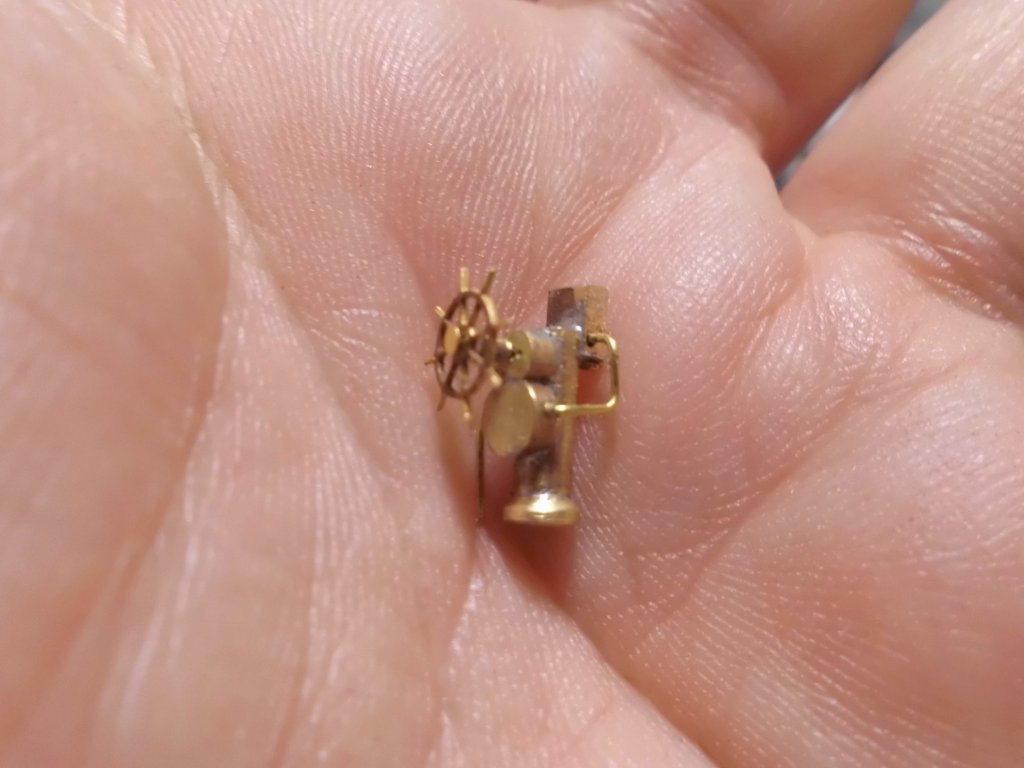
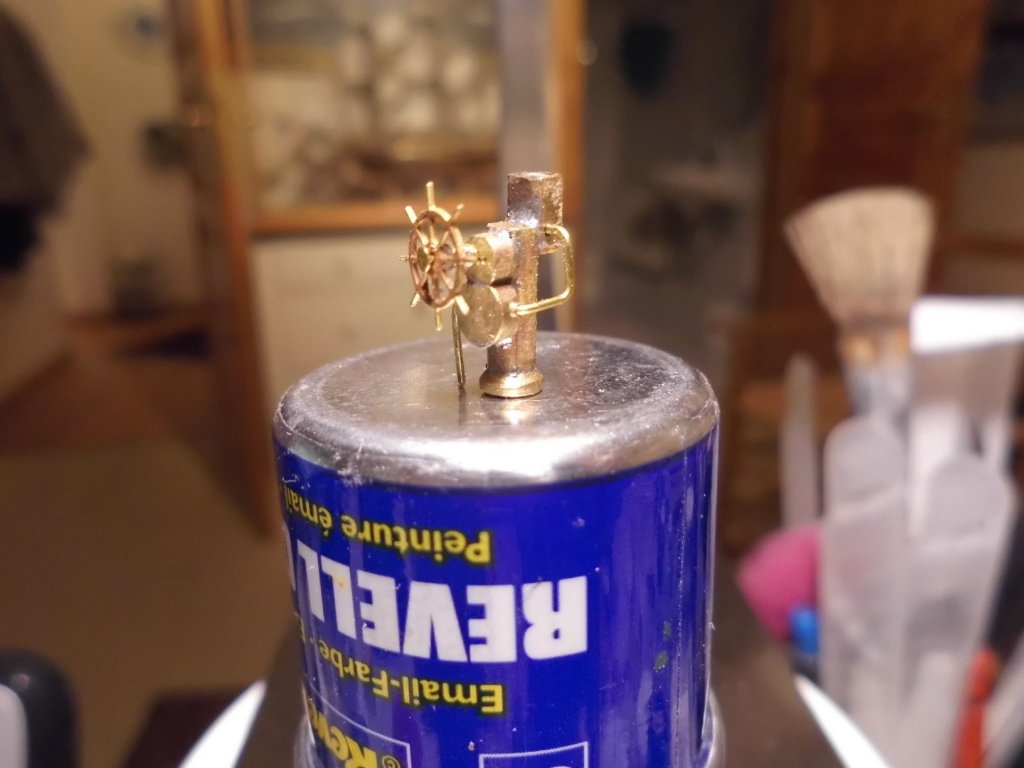
Update : here we have the captain, just behind the the stb. bridge bulwark. He is proudly watching his baby plough the Atlantic, as the bow wake browses by. This little figurine, together with the gentleman and the two lady passengers in conversation two decks below, I`m proud to posess. They are a gorgious gift from MSW member "TLC", who saw that I was on the look for certain figurines in scale 1:144 or 1:160 N-gauge, specialy the captain, and he so kindly merged the make of these with a young Bulgarian artist, who was producing miniature dolls and dollhouse articles. She herewith, first time attempted, custom made, to do a long time searched for captain for the KWdG, and I know she did a top job on it. Many thanks again at this ocasion to "TLC" and the young artist... Now is the time to have these figurines boarding and placed on board at exponated positions. Also today I received the etched brass wheels from "M.Z. Modellbau", Manfred Zinneckers webshop and they are correct in size and look top, so the telemotors could be completed, installed, and the hydraulics connected thereto. The bridge crew is now complete and doing its job... Nils Captain in scale 1:144 with moustarch and in his Norddeutscher Lloyd uniform.... the litte group of passengers, two ladies in their 1900- 1910 fashions in conversation with the gent at the railing on the forward promenade deck one of the two telemotors after completion... the little Revell color can for scaling the nautical crew at work, hopefully they bring her safe to the port of destination

- 2,625 replies
-
- 29
-
-
- kaiser wilhelm der grosse
- passenger steamer
- (and 1 more)
-
Many thanks for your nice words and comments, Jeff, John, Greg and Piet, Jeff, I like to work with brass and also with wood, thats why sometimes the combination is used.. John, there seem to be a lot of identical (technical, nautical) terms used in both languages... Greg, agree, I am sometimes surprised that the early merchant steamer sailors and officers were so much familiar with the terms...., they actualy used them, and the sometimes international crew members well understood... Piet, I saw you had good catch up with the build, thanks for looking in again, pleased you like it Nils
- 2,625 replies
-
- 4
-
-
- kaiser wilhelm der grosse
- passenger steamer
- (and 1 more)
-
Many thanks Dan, for your nice words, a good description of the process, I`ll save this in my mind for next feasible application.... It reminds me a little bit of soft-soldering (unpainted parts) with the mini gas torch with ref to clean capillary action and fixing /holding parts in place preliminary... Nils
- 2,625 replies
-
- 4
-
-
- kaiser wilhelm der grosse
- passenger steamer
- (and 1 more)
-
Very nice work Hartmut, I like the rails carving at the gallion and fine finishing, and also the metal reinforcement for the bow post, looks great.... Nils
-
Thanks Denis, yes, I took some 1,4 x 0,8 mm semi round brass profile, and was anxious quite some time to put it on, because usualy it gives a mess on the white underground with the CA, it smears and the CA on the fingertips then sticks to the painted brown profile. This time I masked the white bridge bulwark with Tamiya tape first, (horizontal line) and then slipped the pre-bent glue-applied profile into place, with out problems. Am happy with the result...sigh of relief.... Nils
- 2,625 replies
-
- 5
-
-
- kaiser wilhelm der grosse
- passenger steamer
- (and 1 more)
-
Thank you very much Carl, trust the set will be ready by this weekend.... Nils
- 2,625 replies
-
- 4
-
-
- kaiser wilhelm der grosse
- passenger steamer
- (and 1 more)
-
nice and tidy work Ed, your clipper looks so beautiful.... Nils
- 3,618 replies
-
- 3
-
-
- young america
- clipper
- (and 1 more)