Mirabell61
-
Posts
7,418 -
Joined
-
Last visited
Content Type
Profiles
Forums
Gallery
Events
Everything posted by Mirabell61
-
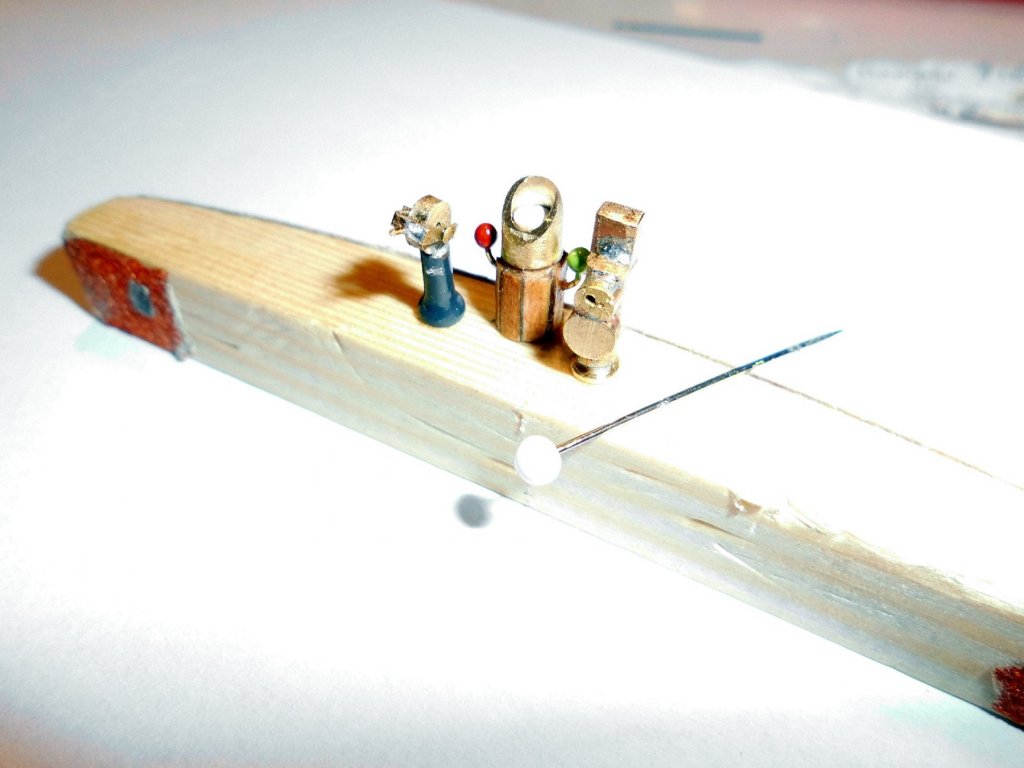
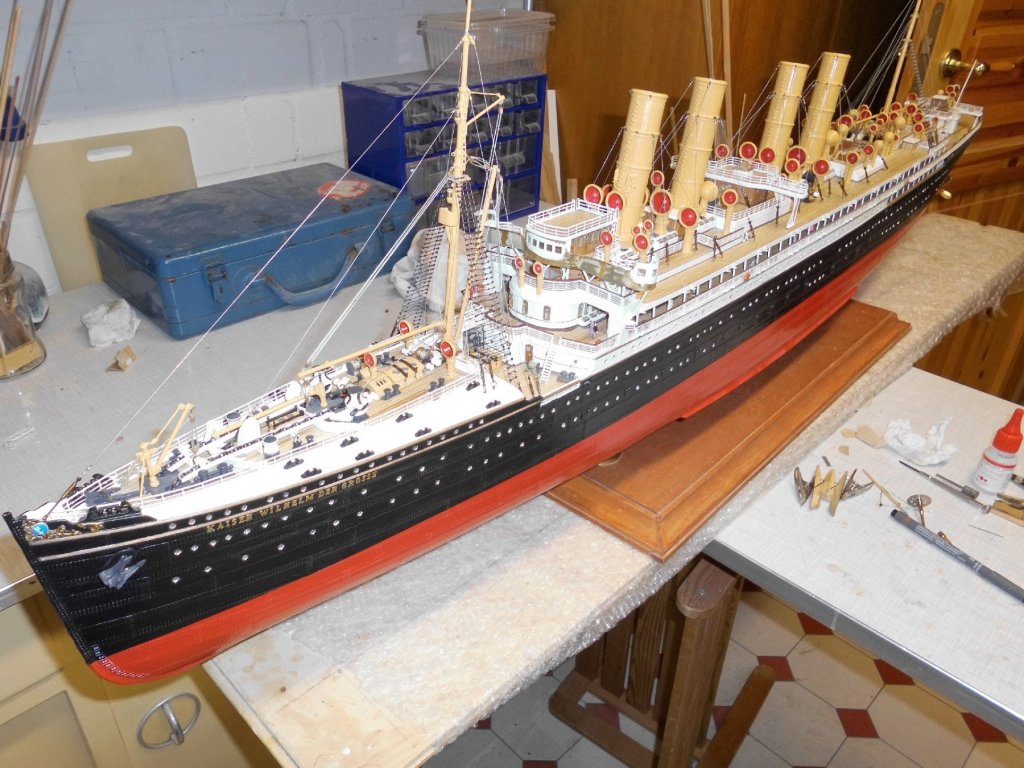
 Many thanks go to Christos, Gerhard, Bob, Greg, Eddie, John and Igor, for your nice comments and compliments.... Christos, thanks for your words.. Gerhard, am very pleased that you like it... Bob, thanks again for you nice compliment, much appreciated... Greg, thanks for your words and greetings to Down Under... Eddie, another greeting to Australia and thanks for your compliment... John, wow, again Australia ! thanks John, I`m learnig a lot for english nautical terms, keep them coming.... Igor, correct in scale the wheels ought to be 7,5 mm diam. outside the spokes. So I should be looking for 7-8,5 mm, if possible etched brass. I was lucky to have found some inbetween now and look forward to holding them by the weekend... Nils made some scaled brass steering columns, comprising the column, the reduction gearbox, hole for the wheel and the reservoir for the hyraulic oil. In German they are called "Telemotor", and actually the steering-wheel remote operates the hydraulic circuit for actuators on the steam valves far back stern where the steam powered steering mechanics sits under the waterline, within the tail cone area. wheel axis and wheel still missing here..., one for the bridge, one for the "monkey`s island".... The three main controll instuments
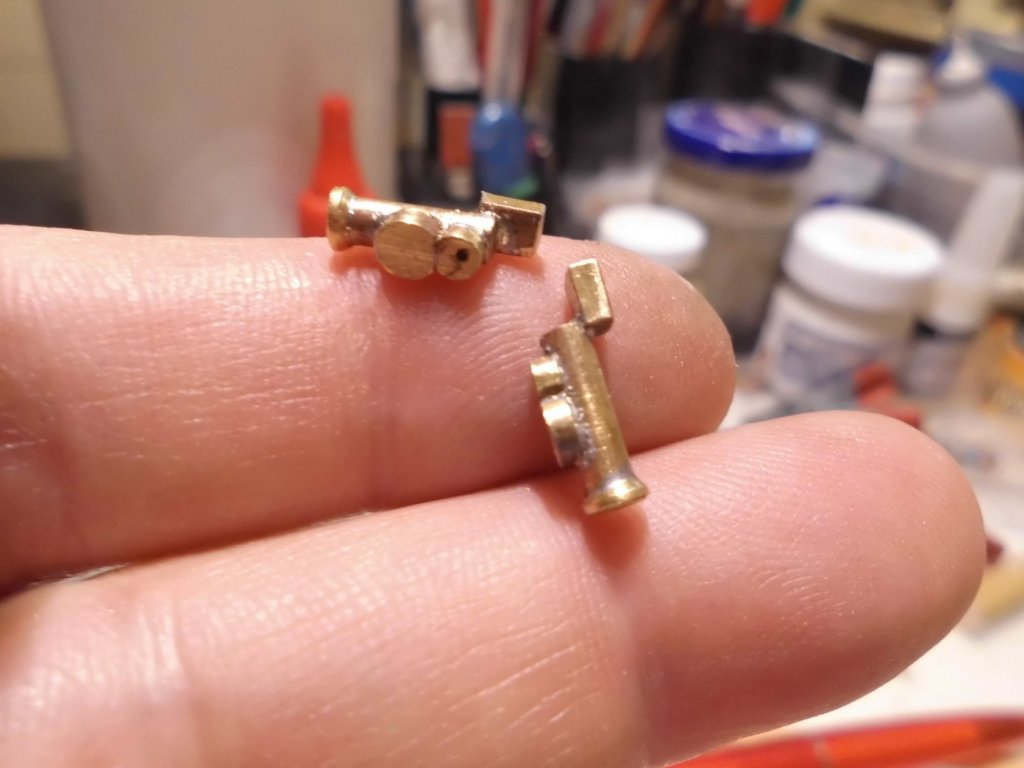
- 2,625 replies
-
- 24
-

-
- kaiser wilhelm der grosse
- passenger steamer
- (and 1 more)
-
thank you very much Albert and Bob, and the " likes" .... Albert, thanks for your nice compliment... Bob, that was just what I was looking for, but unfortunately the North Star etched wheels are are too small in scale ( 1:700 , 1:350) but many thanks for your input on this.... Today I found and ordered some etched wheels in the scale required and after a few days search Nils
- 2,625 replies
-
- 10
-
-
- kaiser wilhelm der grosse
- passenger steamer
- (and 1 more)
-
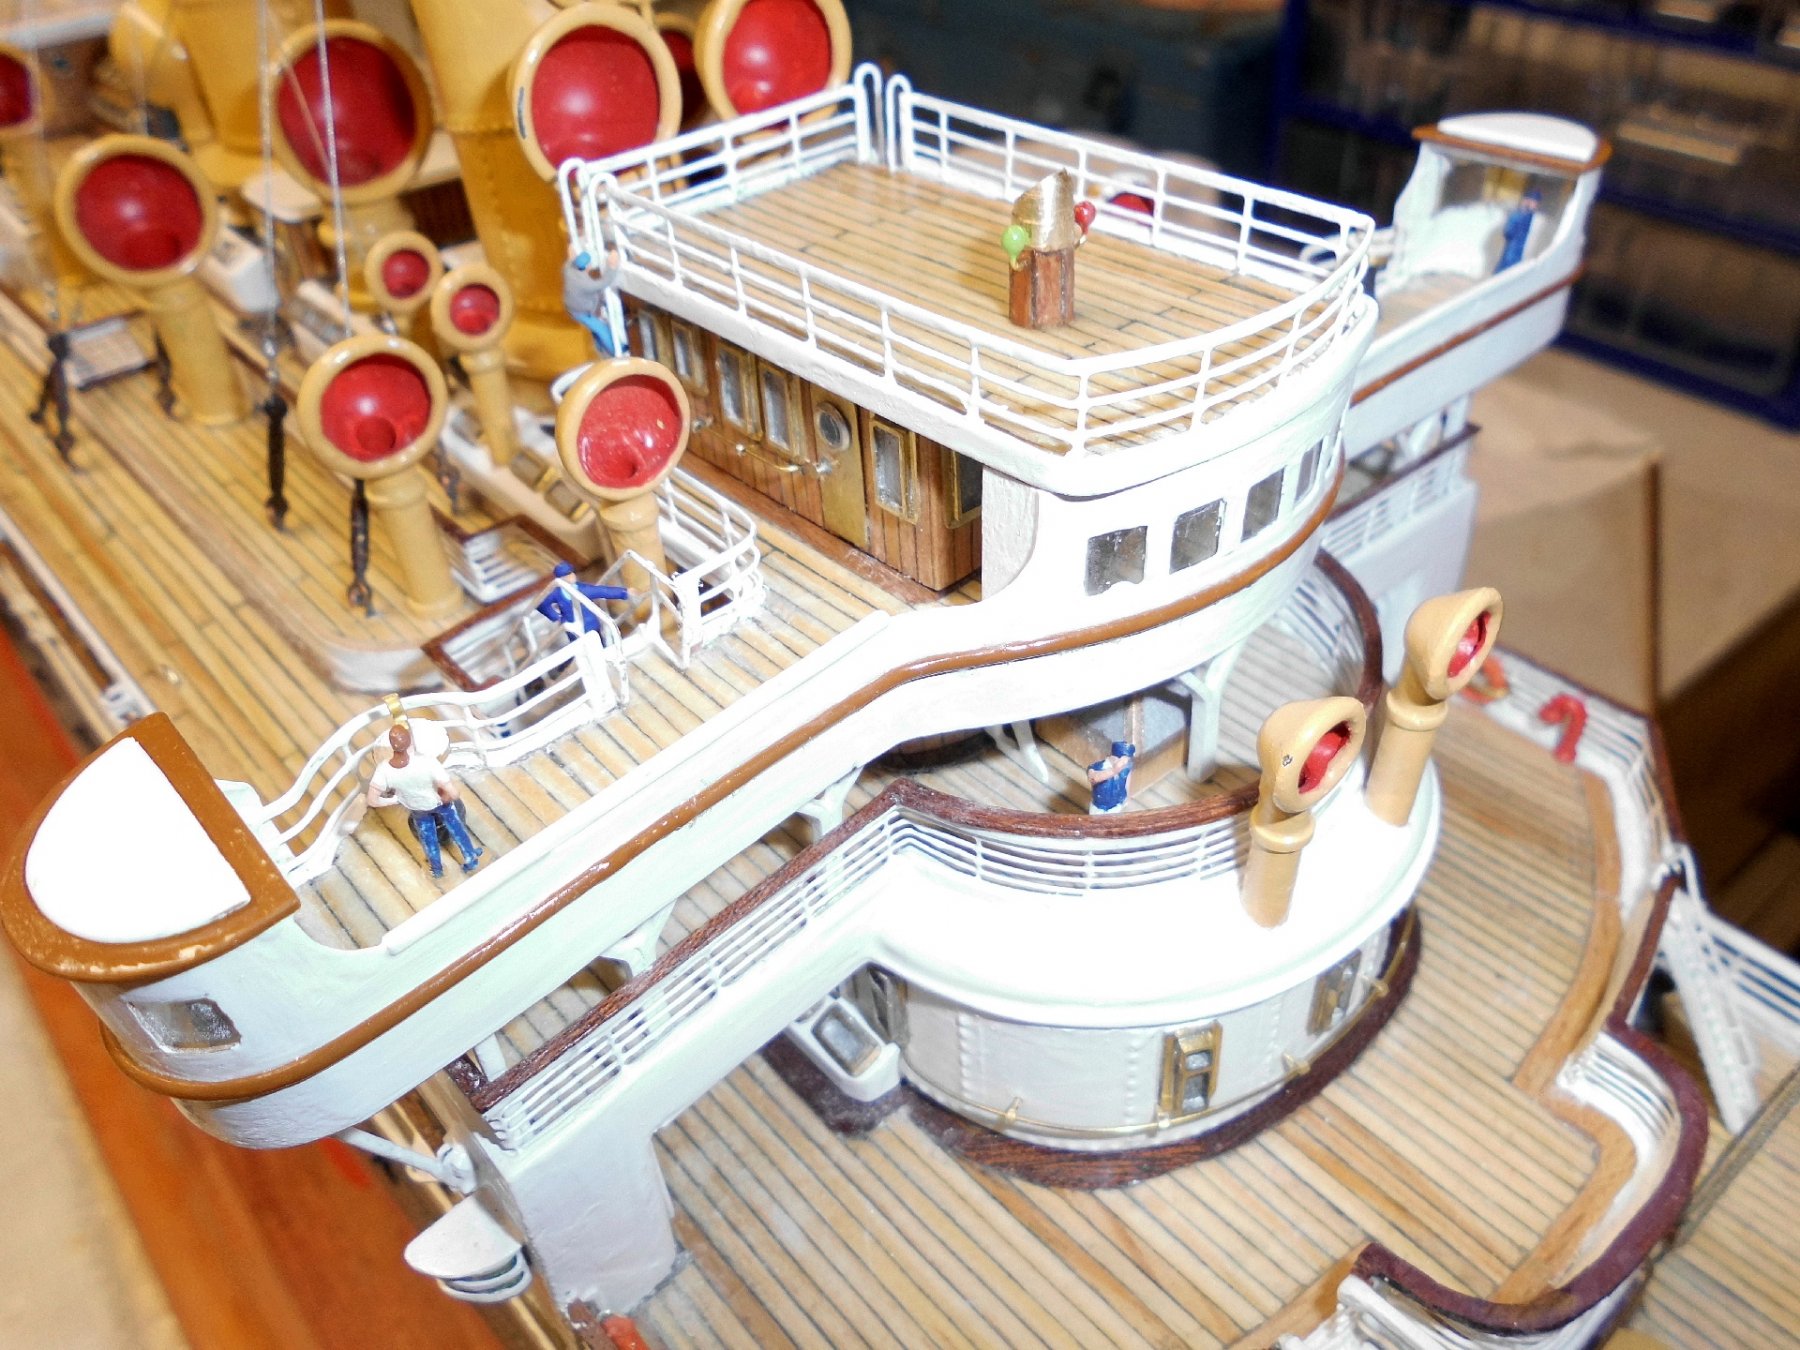
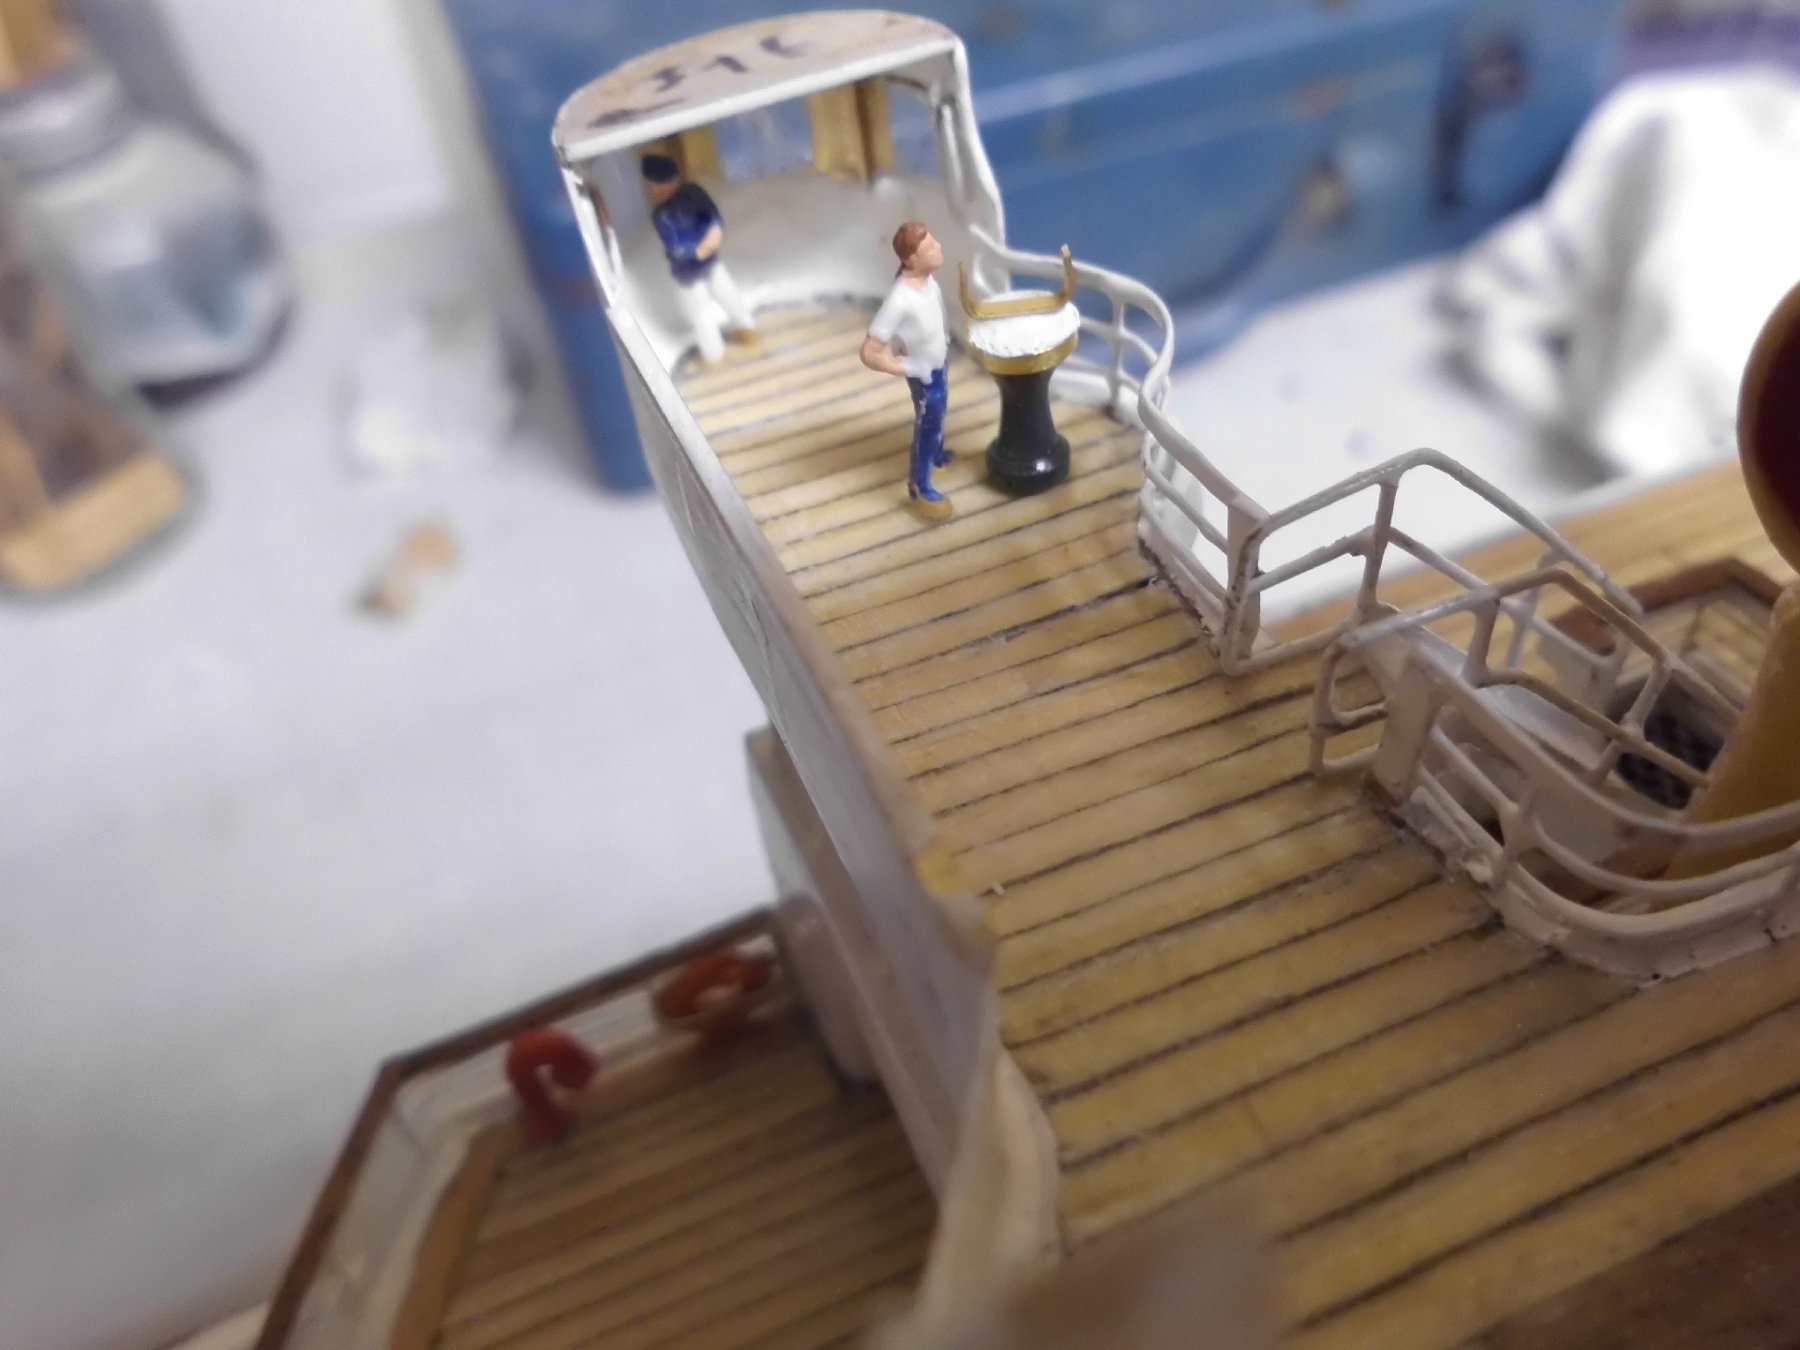
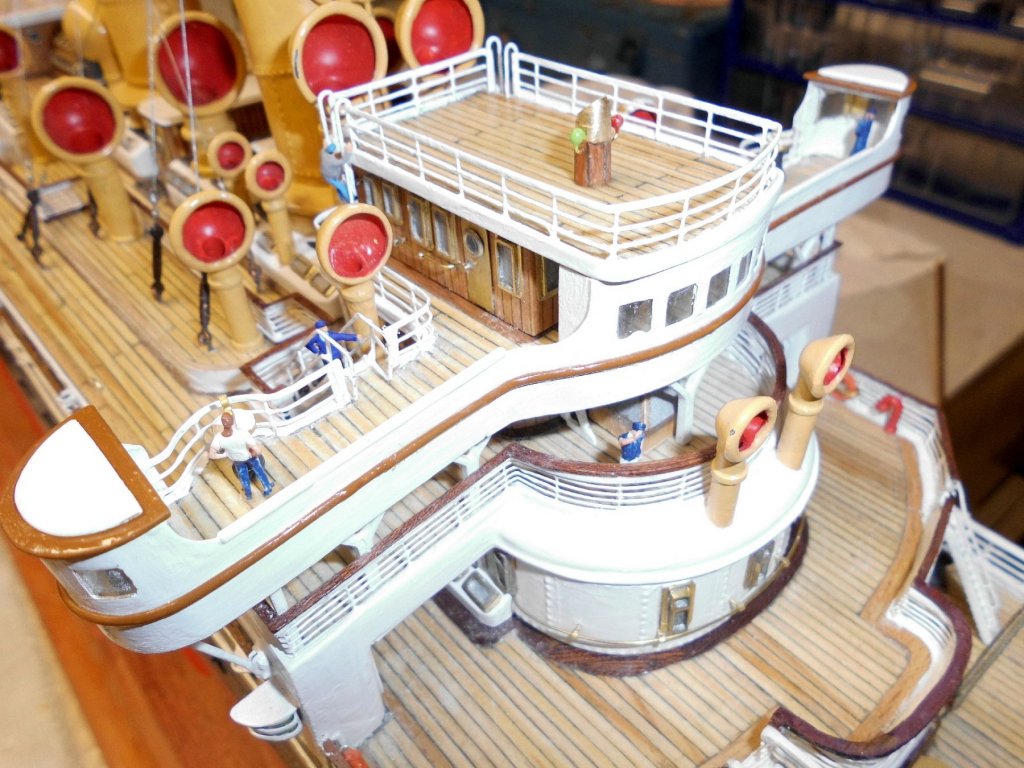
Martin, thank you for your your nice compliment. Have now completed the bridge front and the cabs. The roof platform remains removeable until the ship control devices underneath are permanently installed Nils The crow`s nest is maned with two sailors, safety reasons


- 2,625 replies
-
- 28
-
-
- kaiser wilhelm der grosse
- passenger steamer
- (and 1 more)
-
great progress Dan, beautiful work at 1:350 scale... Nils
- 287 replies
-
- 4
-
-
- michelangelo
- ocean liner
- (and 1 more)
-
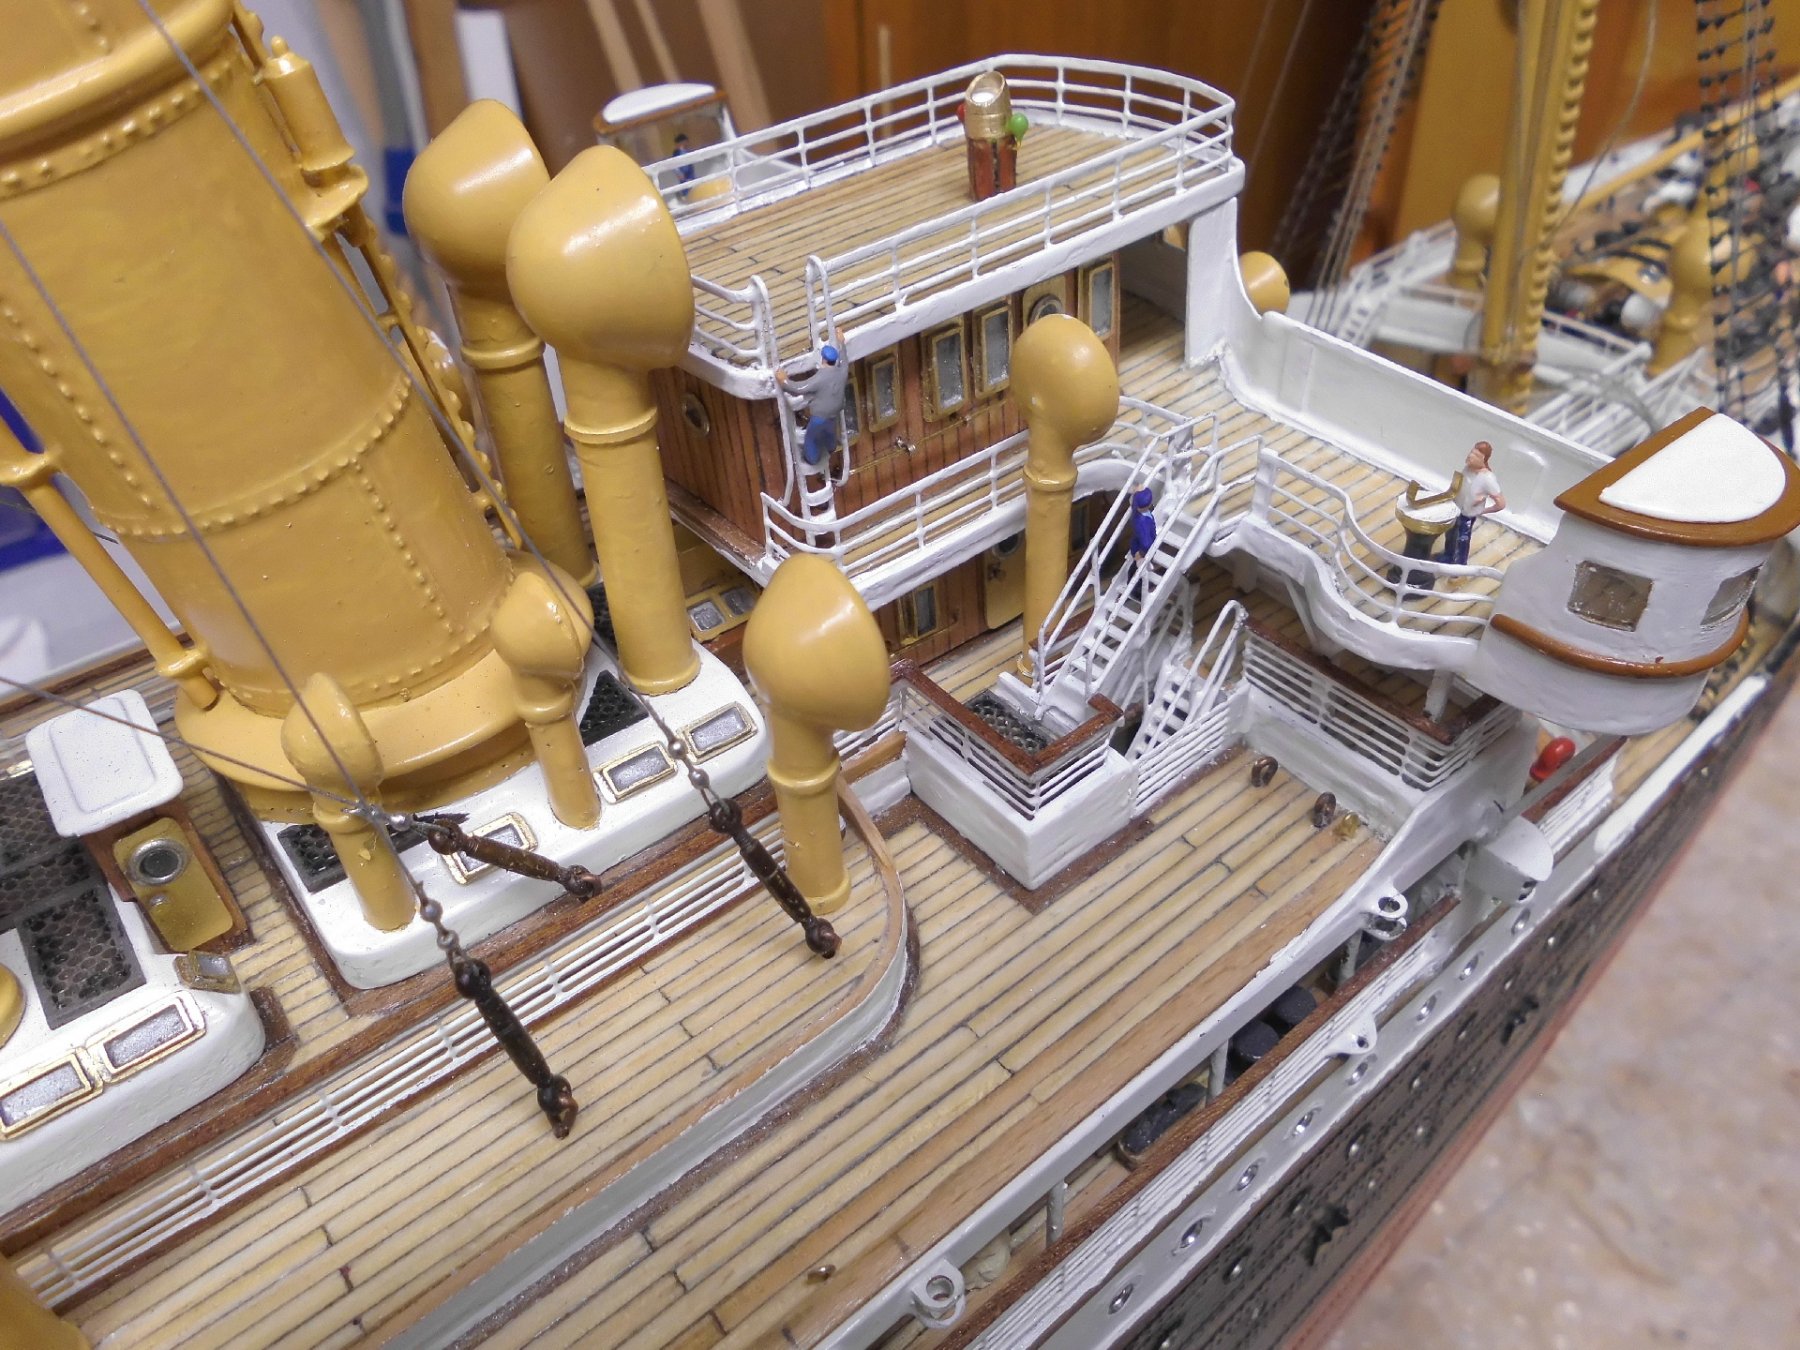
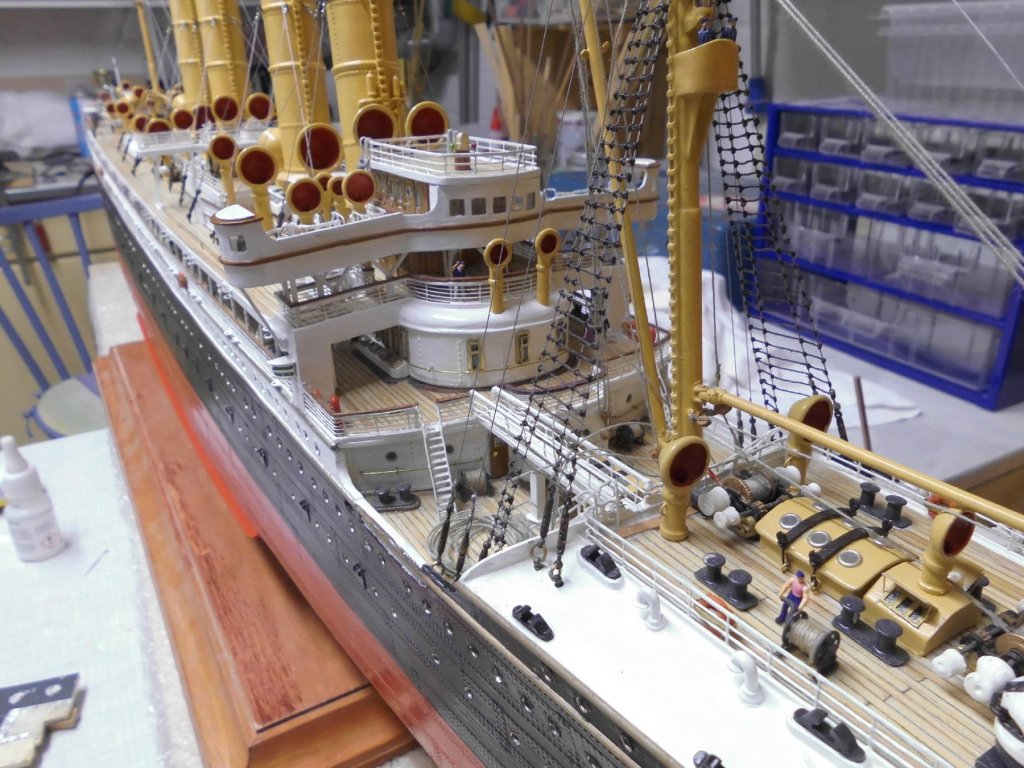
Many thanks John, hey mate, you got me there..... you`re not only a knowledgeable and attentive observer, you also recognized that the pic is showing the engine room receiver telegraph, much appreciated, well then, "slow ahead" on both bridge telegraphs, when going through reported possible "iceberg region" Nils
- 2,625 replies
-
- 7
-
-
- kaiser wilhelm der grosse
- passenger steamer
- (and 1 more)
-
Beautiful build Denis, a very nice equiped fishing workboat Nils
- 956 replies
-
- 5
-
-
- andrea gail
- trawler
- (and 1 more)
-
Thanks very much Rob, I`m pleased you like the small updates as they come.... Nils
- 2,625 replies
-
- 6
-
-
- kaiser wilhelm der grosse
- passenger steamer
- (and 1 more)
-
Thanks very much Patrick, for your kind comment, much appreciated... Nils
- 2,625 replies
-
- 5
-
-
- kaiser wilhelm der grosse
- passenger steamer
- (and 1 more)
-
Thanks for your nice comment Greg, she`s just making "full ahead" on both.... Nils
- 2,625 replies
-
- 11
-
-
- kaiser wilhelm der grosse
- passenger steamer
- (and 1 more)
-
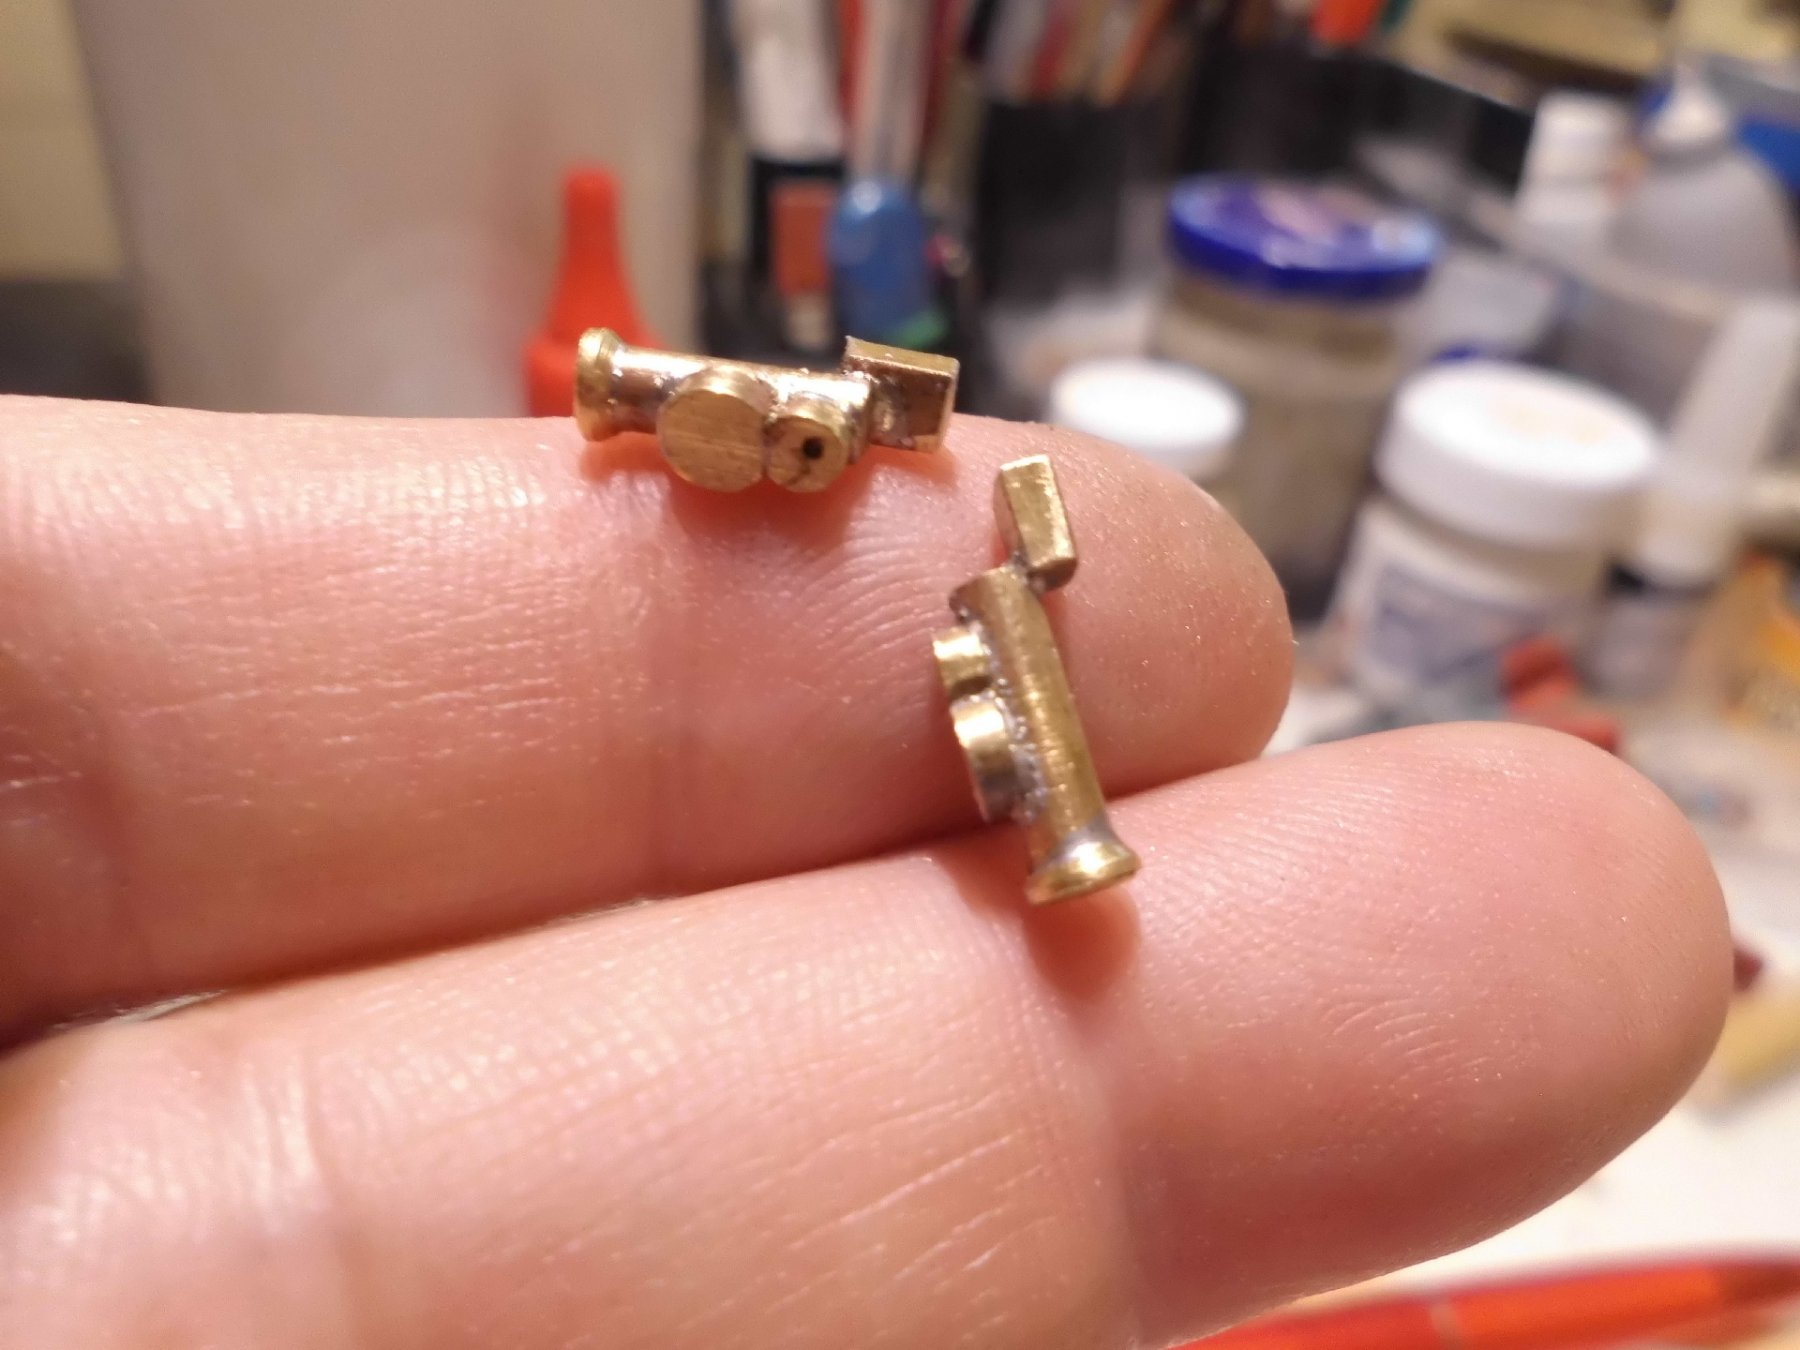
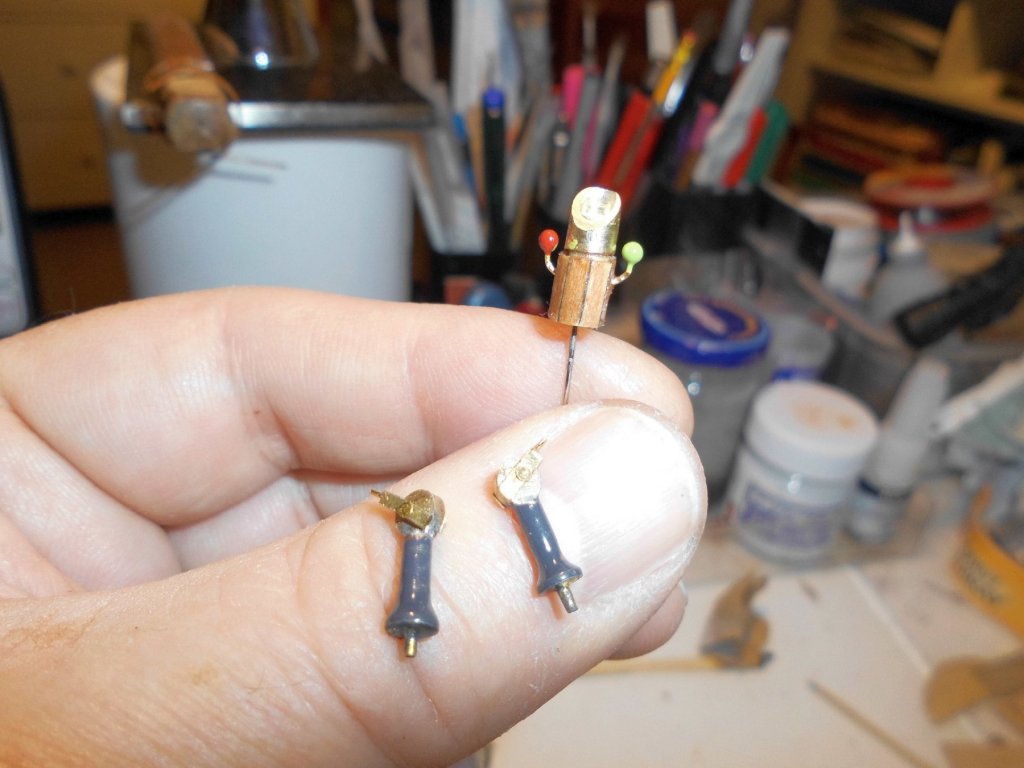
Small update.... I`m still looking for a suitable set of steering wheels in scale 1:144...... Have made the two bearing compasses for the outer end bridge wings, the two machine telegraphs, and the main bridge compass-column with it`s trimming magnets for nautical alignment setting Nils

- 2,625 replies
-
- 26
-
-
- kaiser wilhelm der grosse
- passenger steamer
- (and 1 more)
-
amazing fine details Patrick, so many rooms and fitting out on your yacht to explore, ..... Nils
-
Many thanks to Rob, Greg, Grant, CDW, Denis, and Christian, for your nice words and appreciations... Rob, since CA is available in several viscosities there is no problem anymore in modeling with compound structures (metal / wood) Greg, right, only the end-cabs have a small protected roof (not shown yet).... Grant, thanks for your nice comments.. CDW, thanks for looking in, and for your kind compliment.. Denis, some parts have to be painted when mounted, if other way round it would possibly result to a better surface quality... Christian, I know, you`ve got me there, I`ll try and fix the painted surfaces a bit better... Nils
- 2,625 replies
-
- 7
-
-
- kaiser wilhelm der grosse
- passenger steamer
- (and 1 more)
-
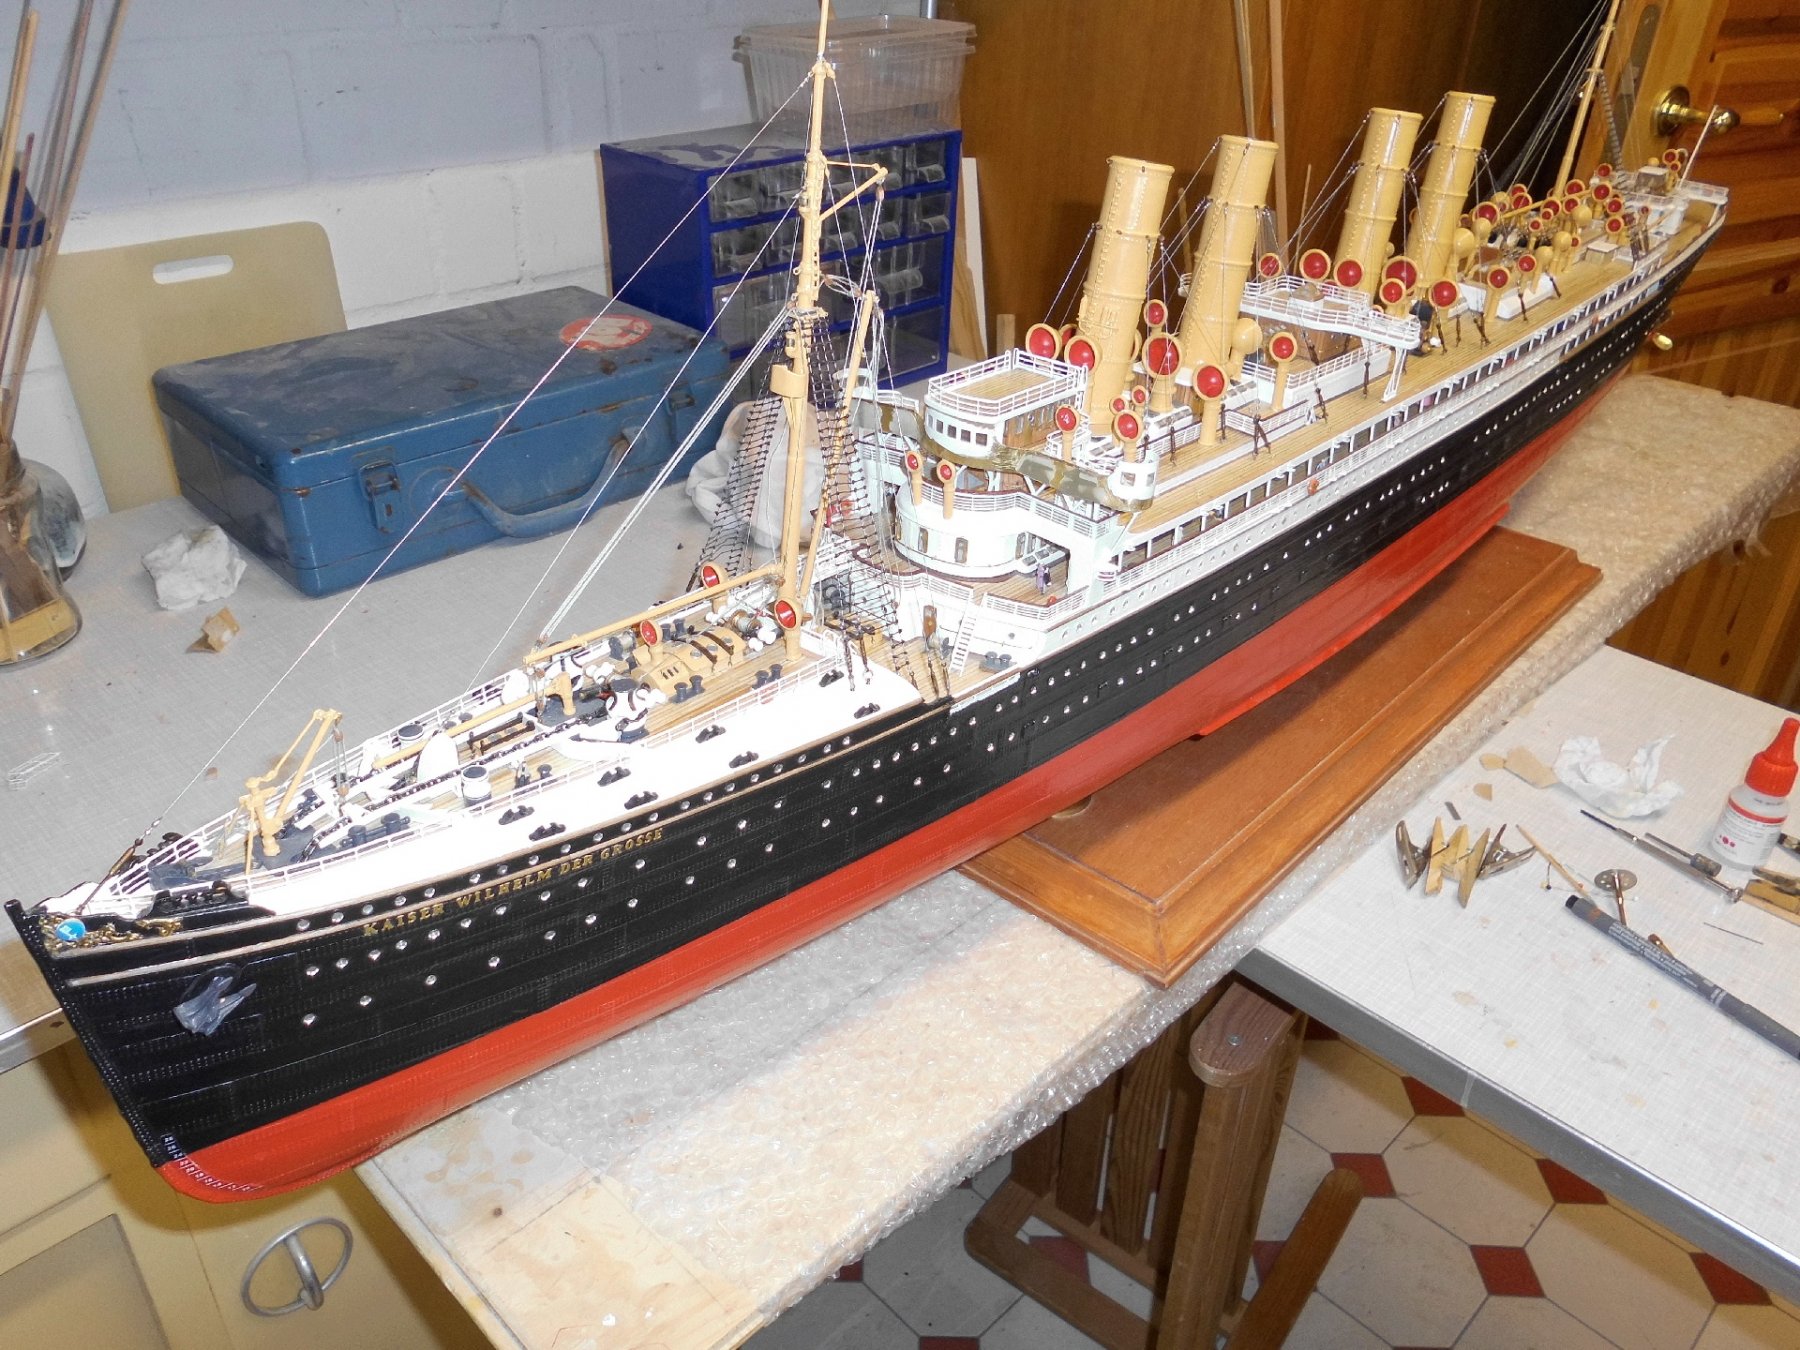
Thank you very much B.E and Dan, for your nice comments... B.E., am pleased that you like it, much of little details now to do and touching up... Just as well I liked the fnalisation of your Pegasus and the photos of the ship Dan, thanks for your nice words.... final port of call not made out yet, as it is not for any client, its going for display in my home Nils
- 2,625 replies
-
- 7
-
-
- kaiser wilhelm der grosse
- passenger steamer
- (and 1 more)
-
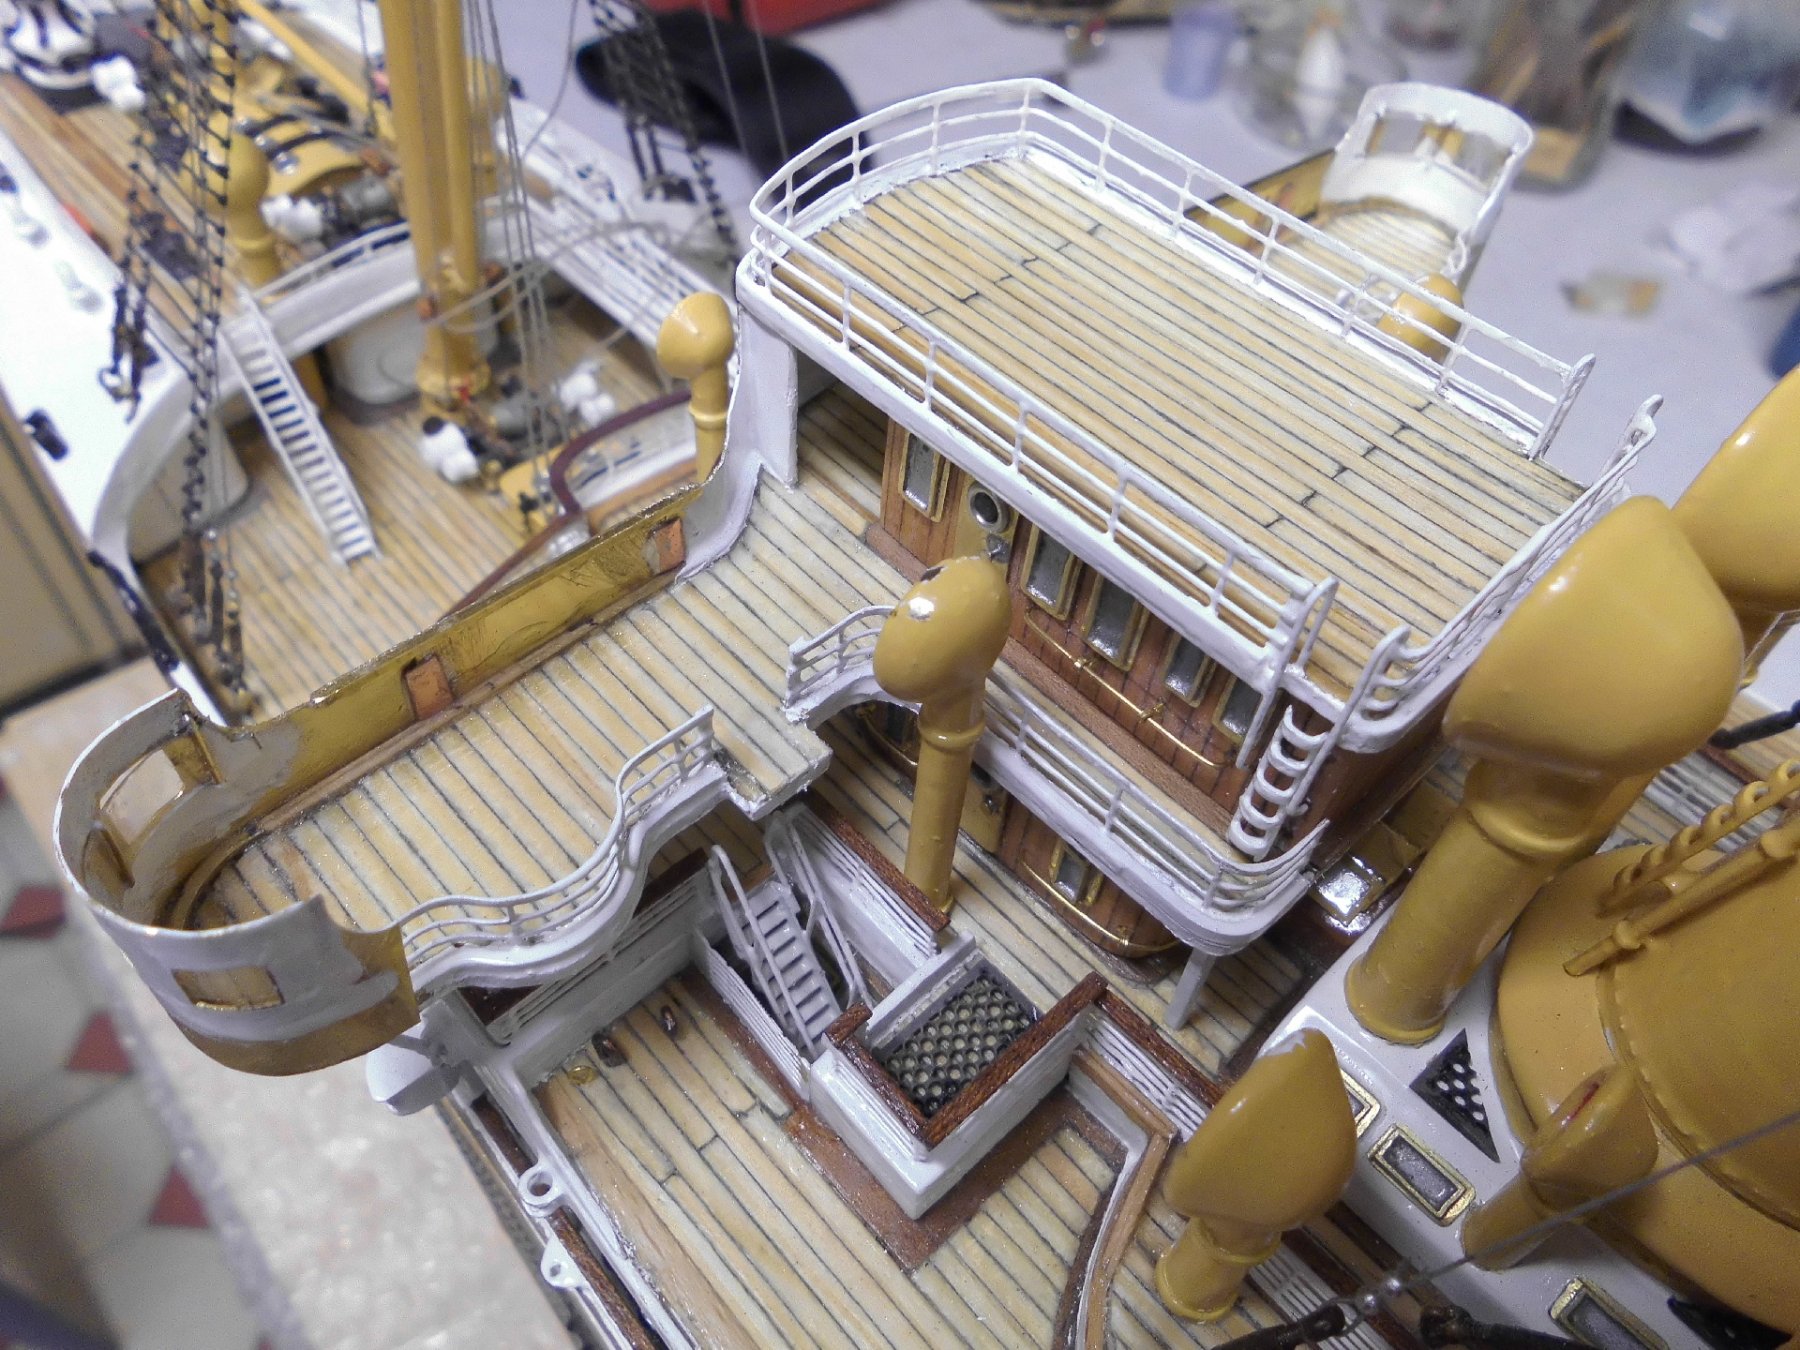
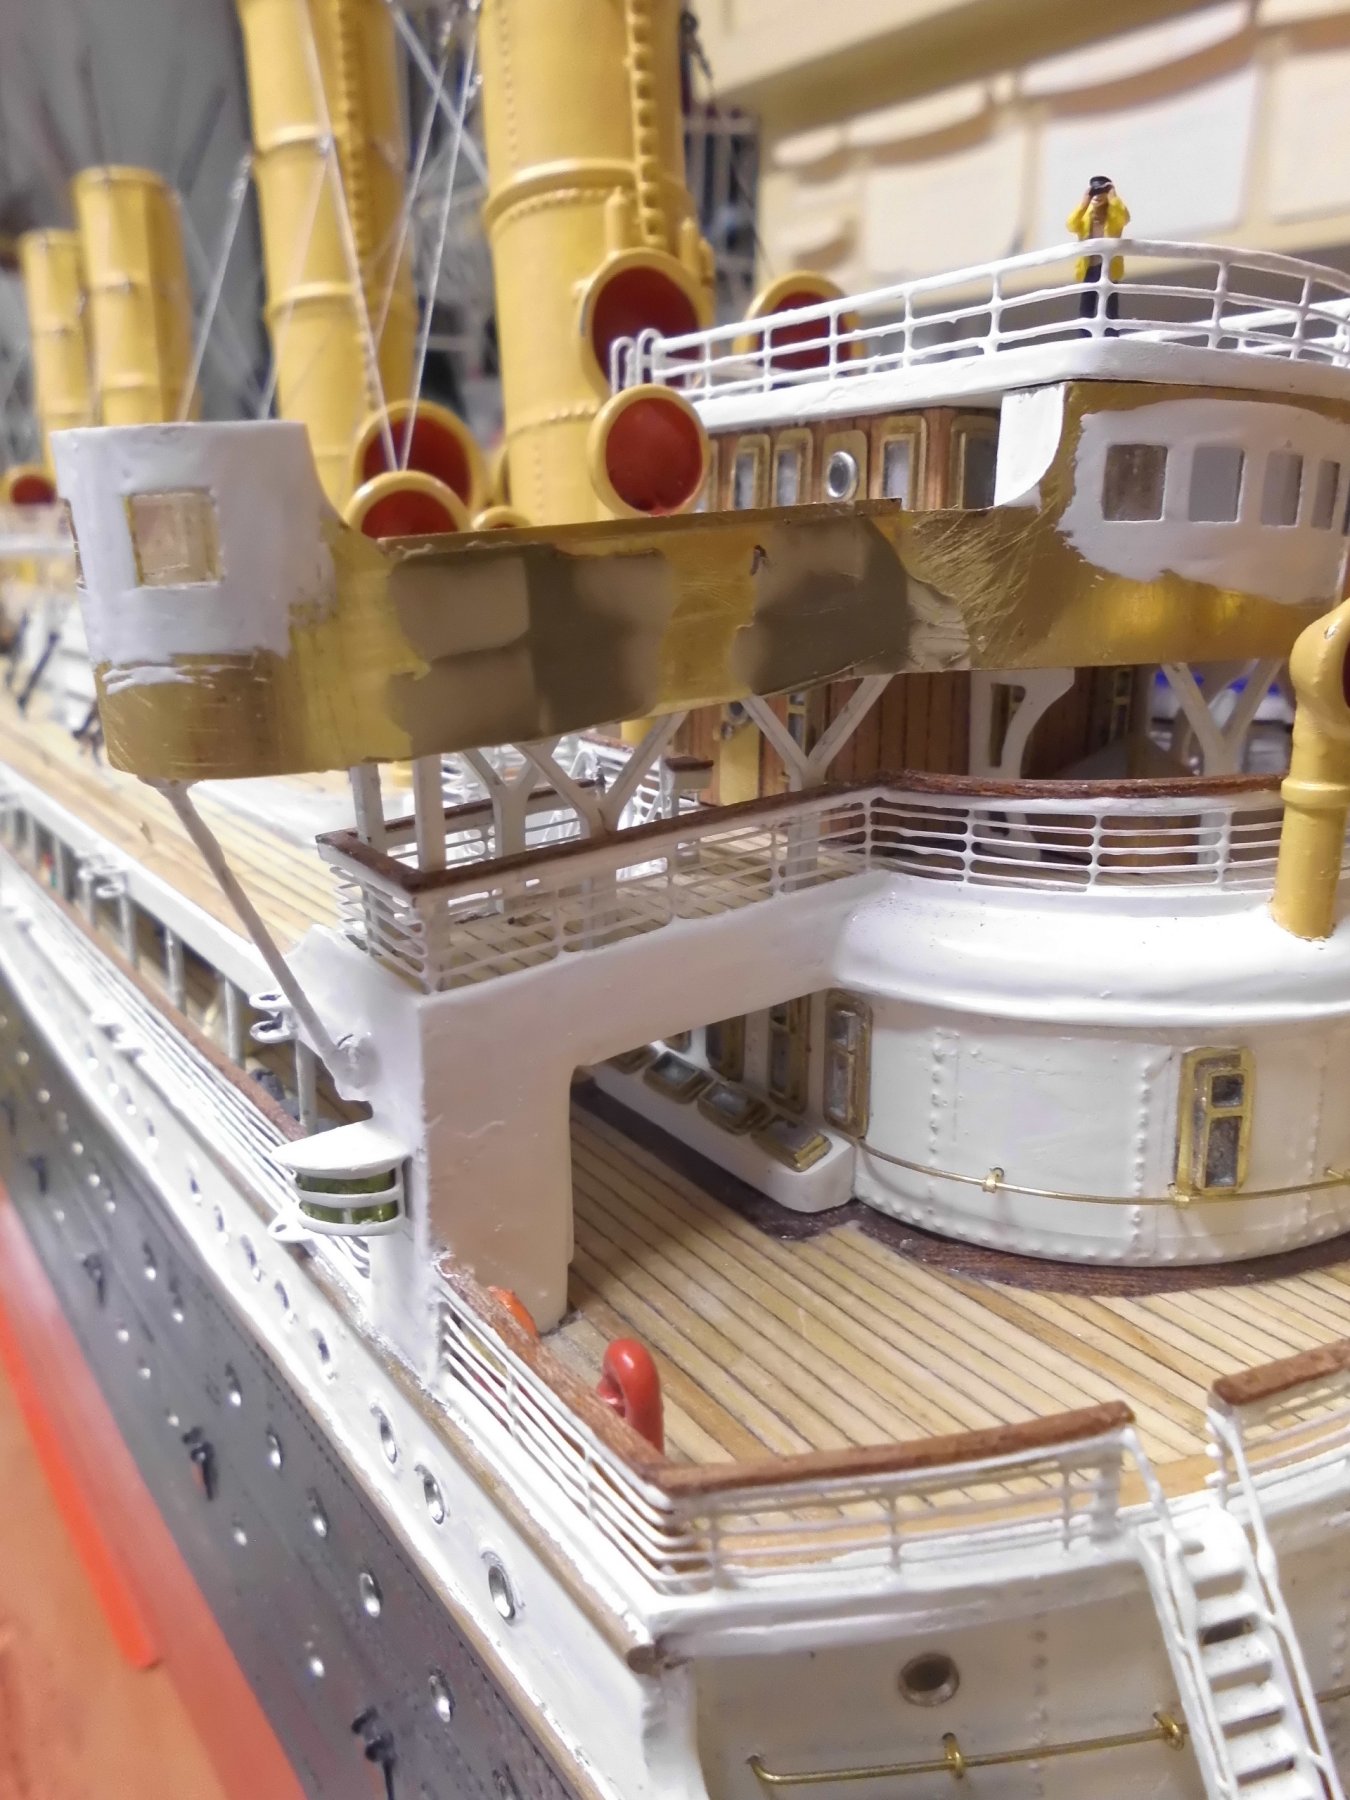
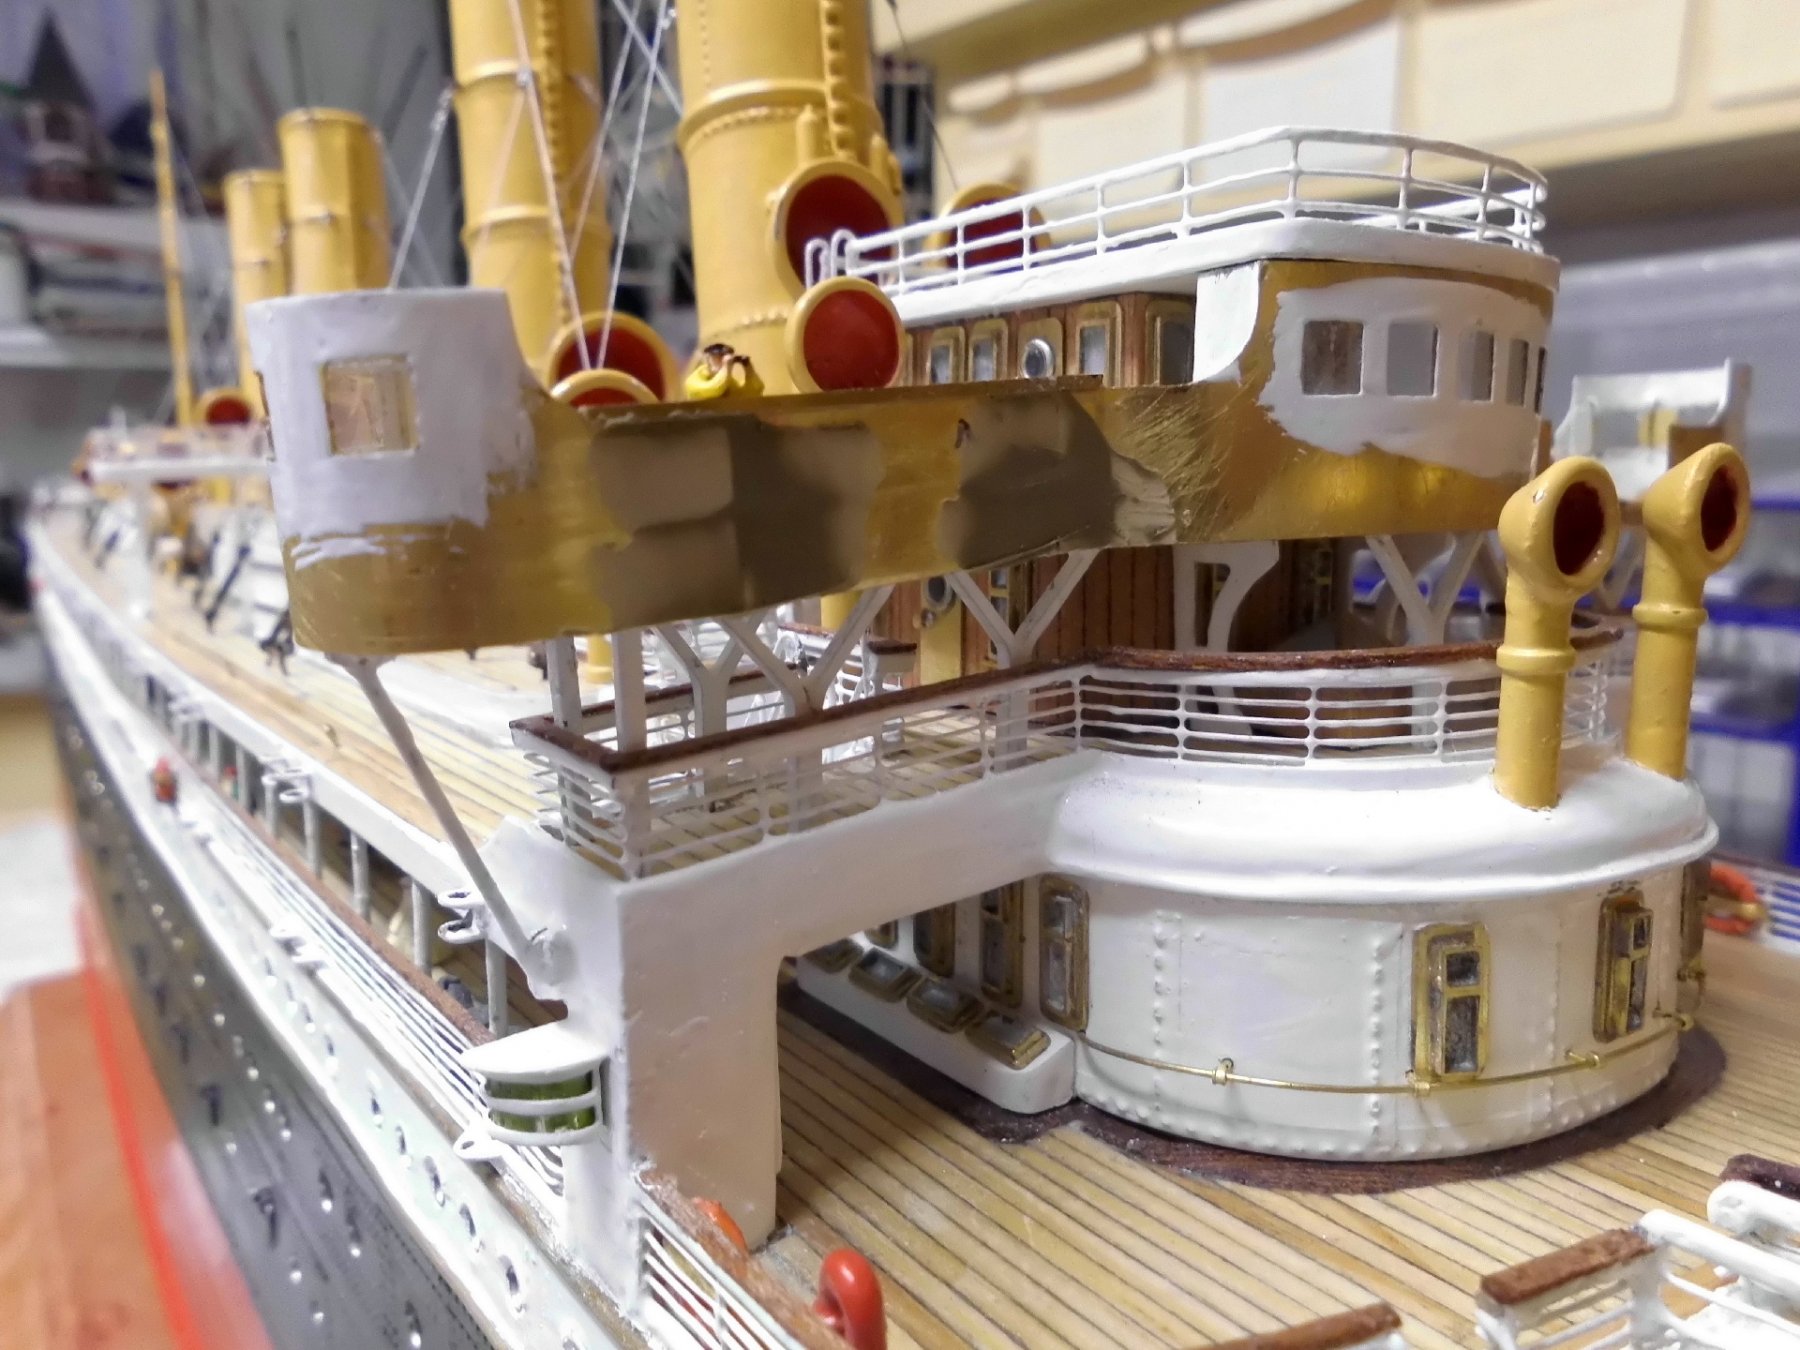
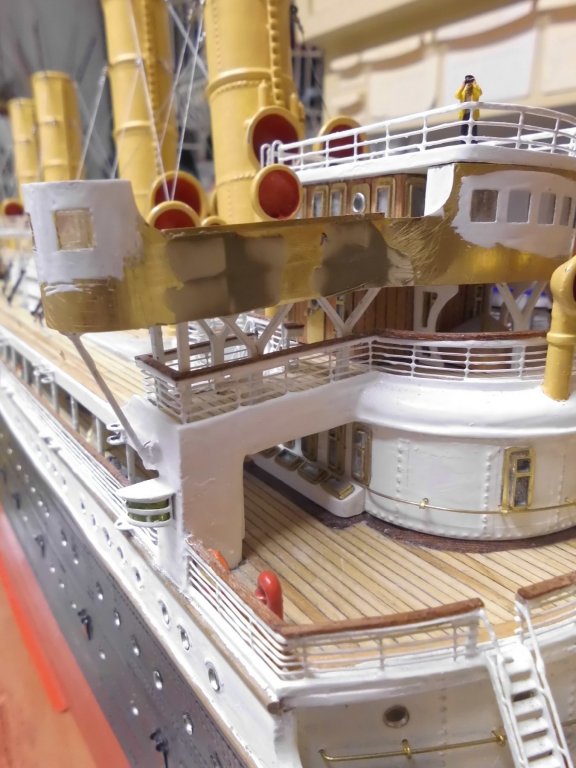
John, thank you for your nice compliment, much appreciated here is a small update on the bridge wing cabs (raw version) The last days I was having trouble with my PC in booting on from the moment I switched on.... (it would`nt show anything),... it started with 1/2 hour, then 45 min, then 2 hours. Fortunately I saved up my old monitor with square formate, and installed it instead, and "Bingo" the screen was there again, otherwise I could`nt do any more updates..., looks as if it was only a monitor issue (hopefully) Thanks also to all the "likes" for clicking on.... Nils Glassing like at the middle panel made from 0,3 mm brass sheet a bit of filler material to smoothen the bulwark joint ( not sanded yet ) bridge bulwark at elbow hight


- 2,625 replies
-
- 25
-
-
- kaiser wilhelm der grosse
- passenger steamer
- (and 1 more)
-
Thanks so much for your nice comments, Bob, Michael, Carl, Greg and the "likes" Bob, thank you for your kind words, much appreciated Michael, nice compliment thanks very much... Carl, its beginning to show all the details I had in mind Greg, most of the details were makeable in that scale, for some I had to quit production though, unless a good idea comes over night Nils
- 2,625 replies
-
- 4
-
-
- kaiser wilhelm der grosse
- passenger steamer
- (and 1 more)
-
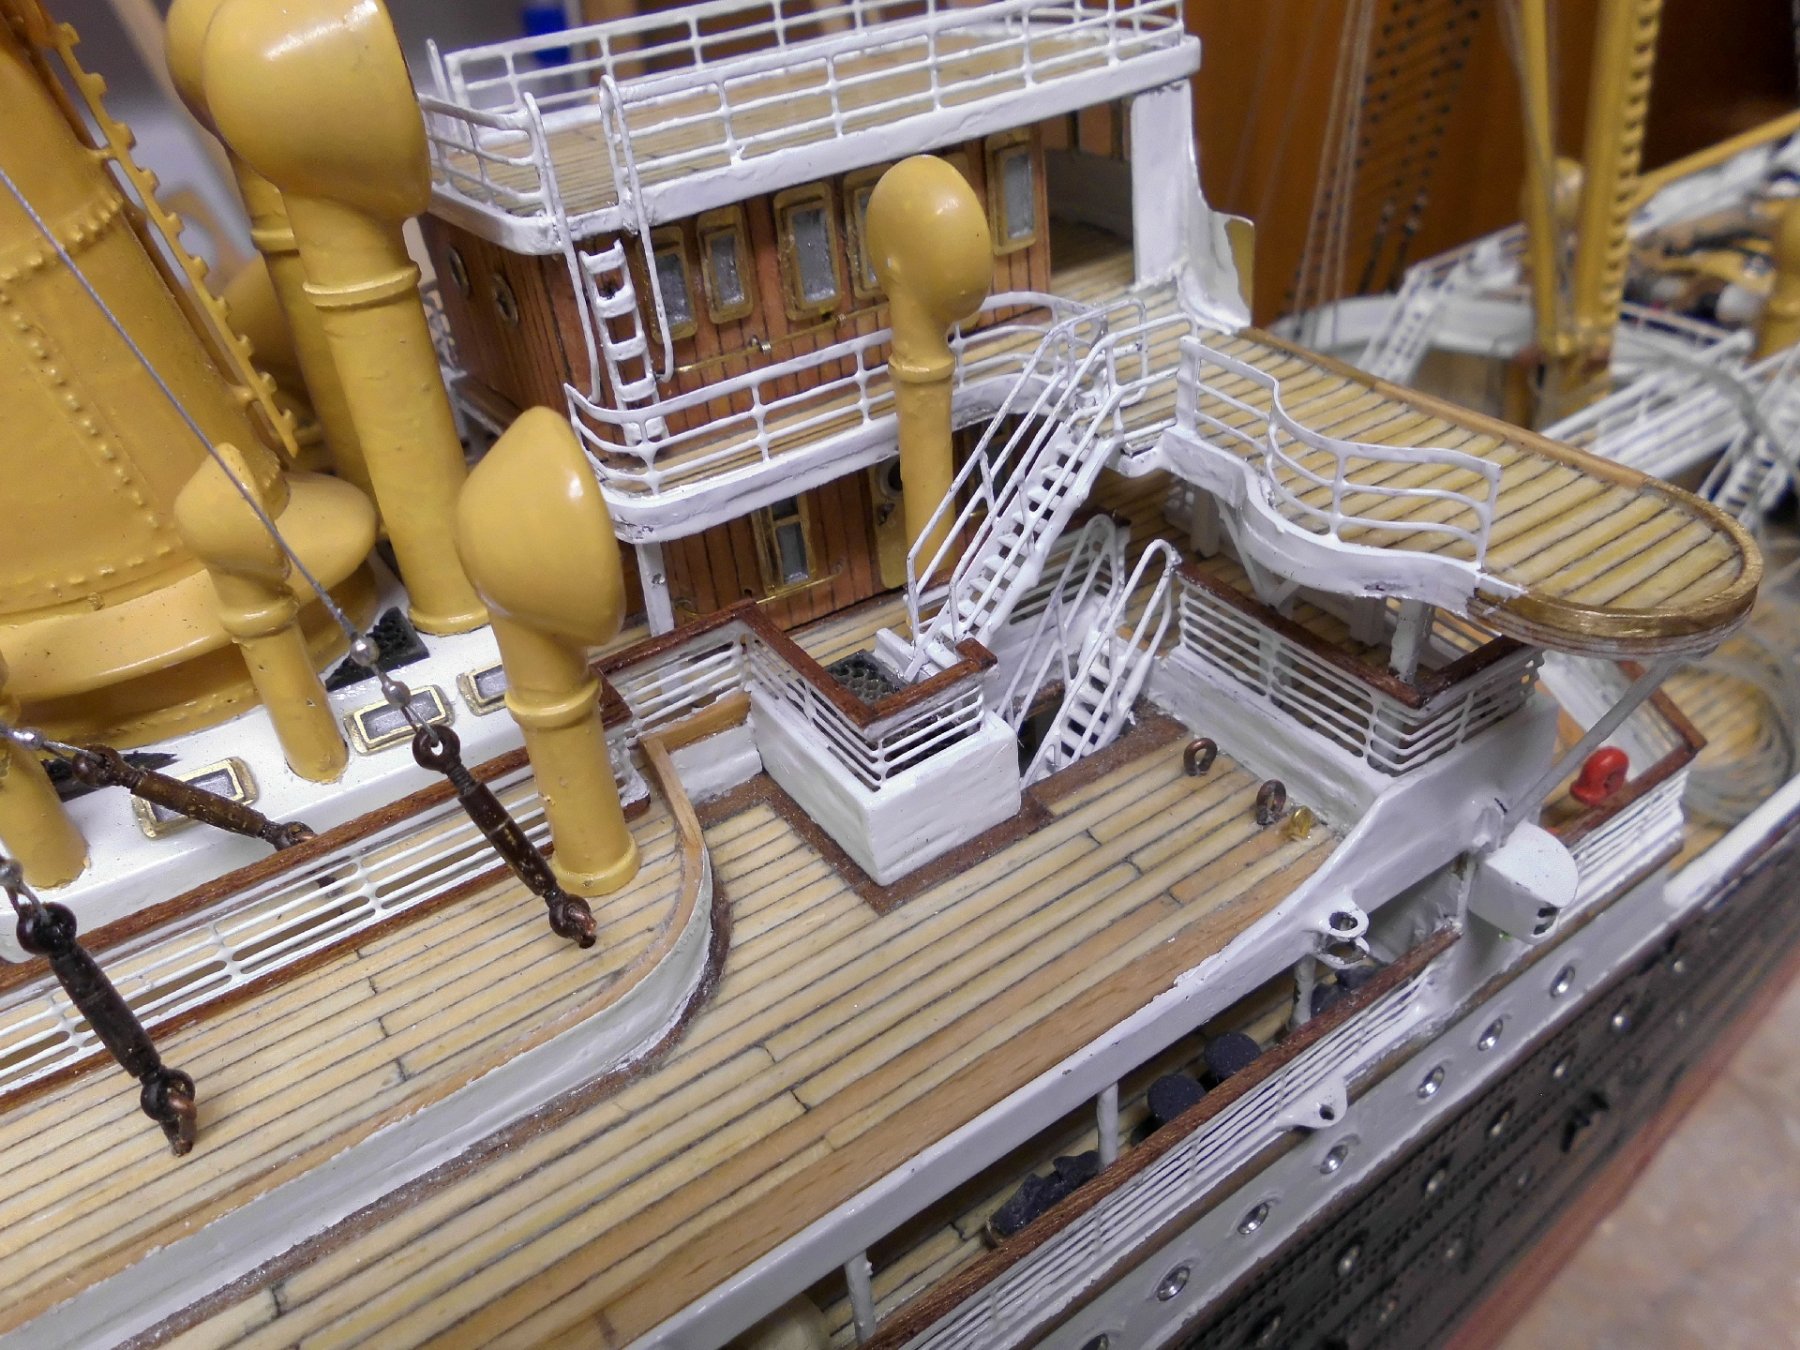
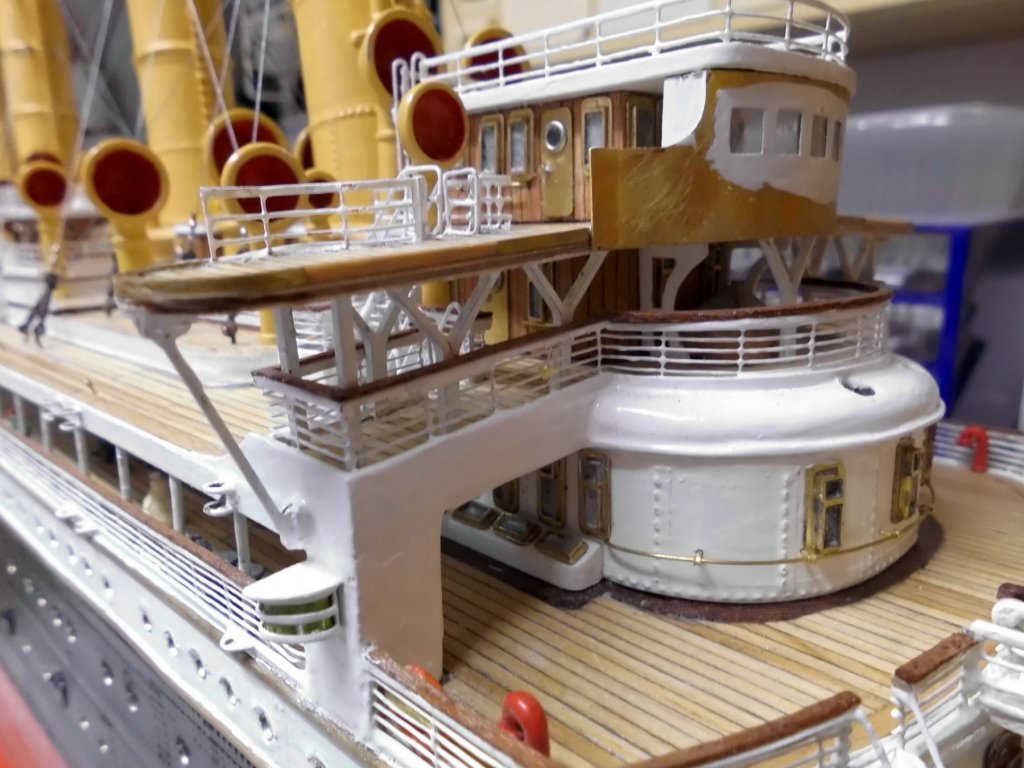
small update : installed the bridge front, the wheelhouse-roof platform and its railing, as well a the access ladders thereto. the further bridge front bulwarks and the wing cabinets are under contruction. Nils passengers on the promenade deck... There is no surplus space on the midships line 0,3 mm thick brass sheet will be shaped to the wing cabinets of the bridge


- 2,625 replies
-
- 25
-
-
- kaiser wilhelm der grosse
- passenger steamer
- (and 1 more)
-
Nice going Igor, it will be a beautiful little cutter Nils
- 185 replies
-
- 3
-
-
- jolie brise
- pilot cutter
- (and 2 more)
-
Wonderful completion photos B.E. a real Gem in memory of the "Swan Class" and an extraordinary well built model... Nils
- 366 replies
-
- 3
-
-
- pegasus
- victory models
- (and 2 more)
-
Thanks very much Bob, yes. I`m quite happy with the "glas holders", that way it hardly takes extra space.... Do`nt worry about the quote box, it ca`nt be seen on my side... Hope you are getting along with the paint for the "Mariefred". Nils
- 2,625 replies
-
- 5
-
-
- kaiser wilhelm der grosse
- passenger steamer
- (and 1 more)
-
Denis, thanks for looking in, and for your nice words, I`m glad you like the (already completed) build... Nils
-
beautiful wax modeling Alex, and the investment casting parts look great.... Love that 3D rendering of the ships structures to get an idea of the modeled parts and how they fit together. (real professional processing, I beleave!) Nils
-
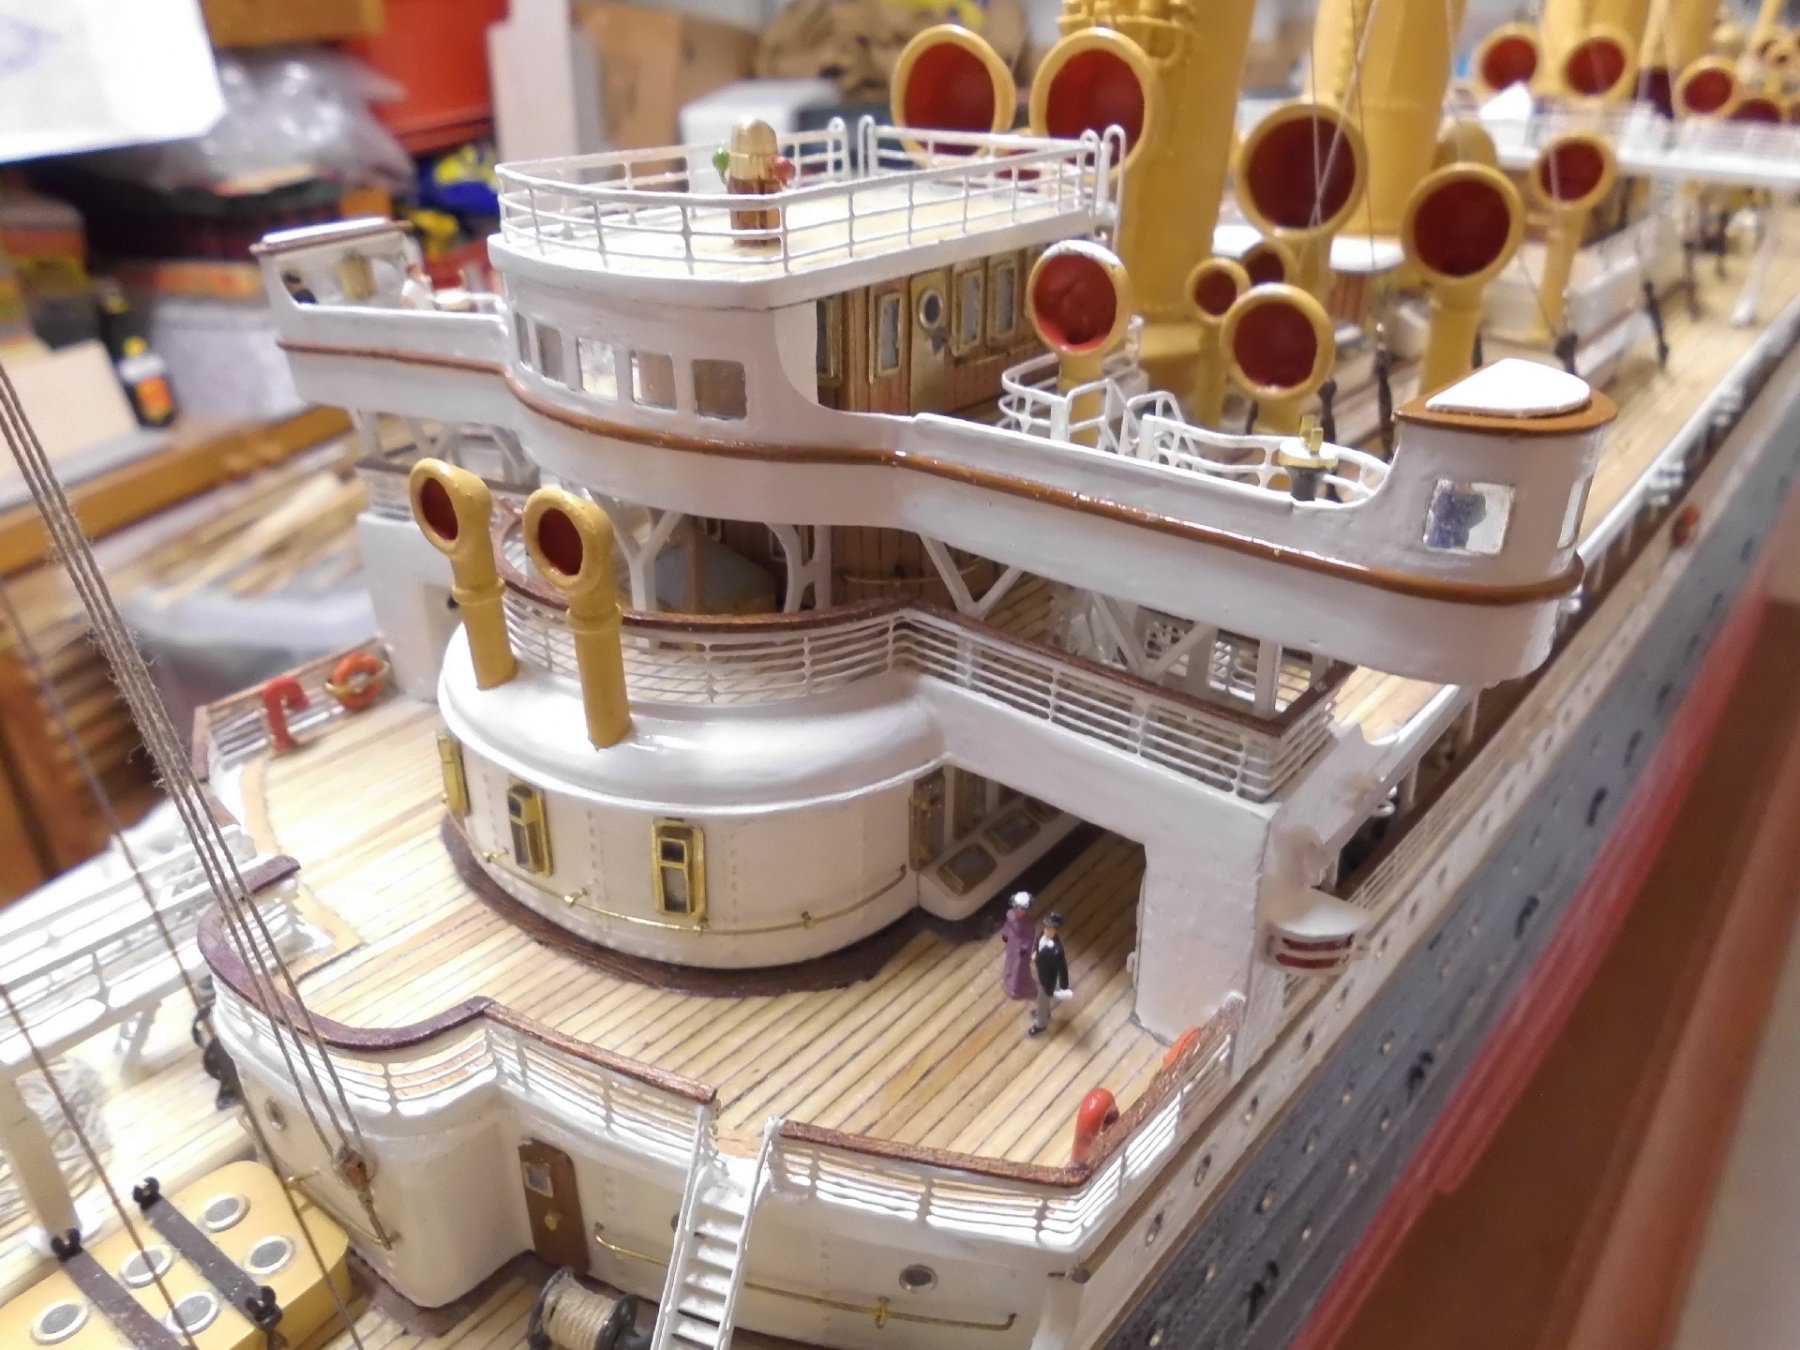
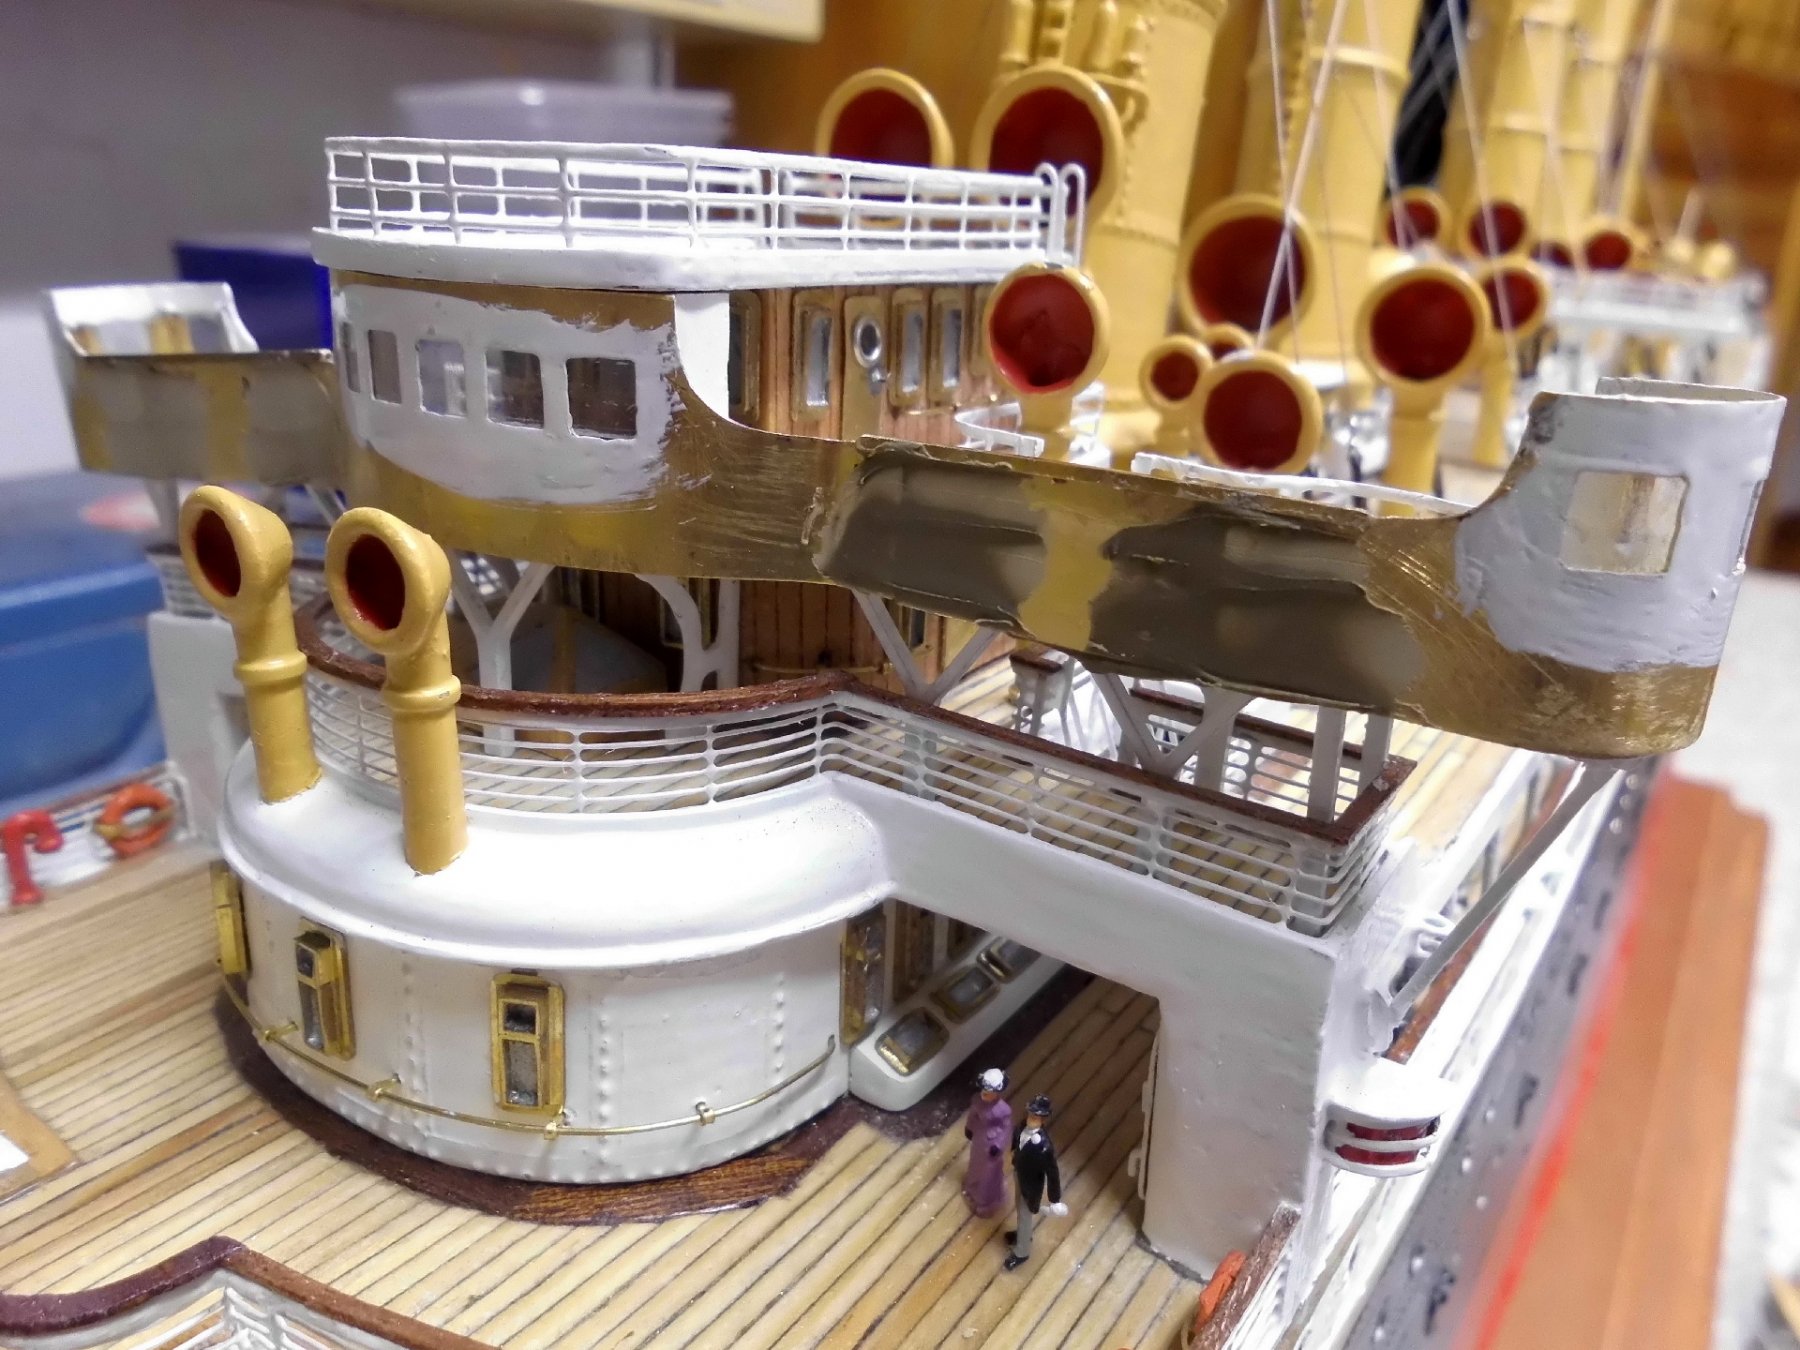
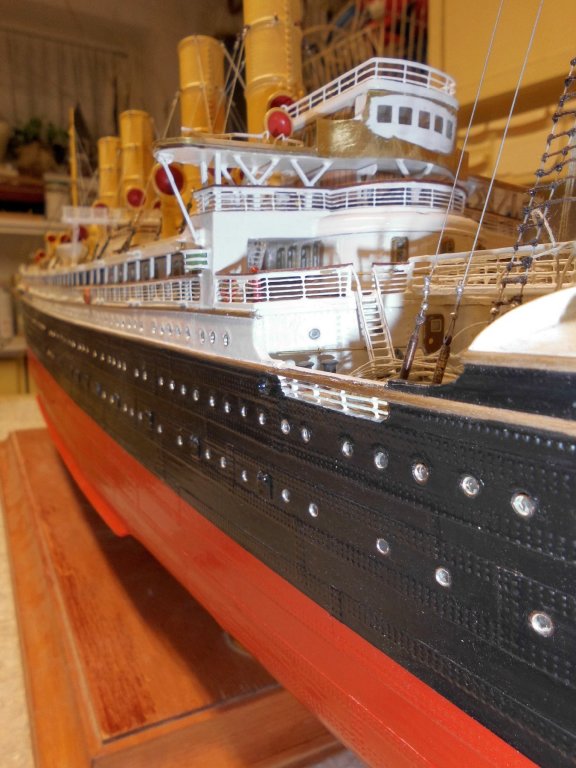
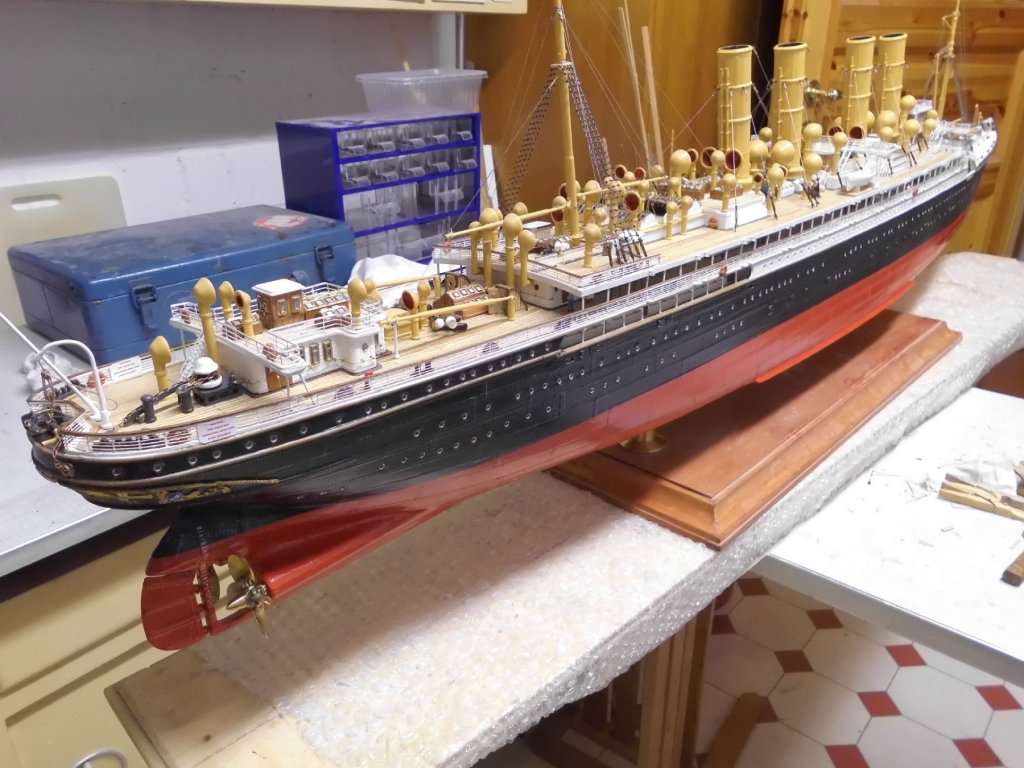
Thank you very much Denis, Piet, Joel, Patrick and Greg, for your nice words and comments, Denis, am pleased you like the fitting out.... Piet, thanks for catching up, I saw you had a real intensive look at the recent posts, thanks for your words.. Joel, yes, agree, it was probably a fashion of the designers to mount 4 funnels, where 3 would have done the job as well.. Patrick, I had some alternatives in mind for doing the "glassing", but this one was easy and effective, and because there is sight into the sidewise open wheelstand I did`nt want it to look too bulky /clumsy Greg, appreciate your kind words, many thanks for your compliment... Nils
- 2,625 replies
-
- 6
-
-
- kaiser wilhelm der grosse
- passenger steamer
- (and 1 more)
-
Wonderful work Danny, never had the chance to see the structure of an old stagecoach so detailed and am amazed of what blacksmith work is involved in the truck-work, and what you are detailing in model is fantastic, well done !! Nils
-
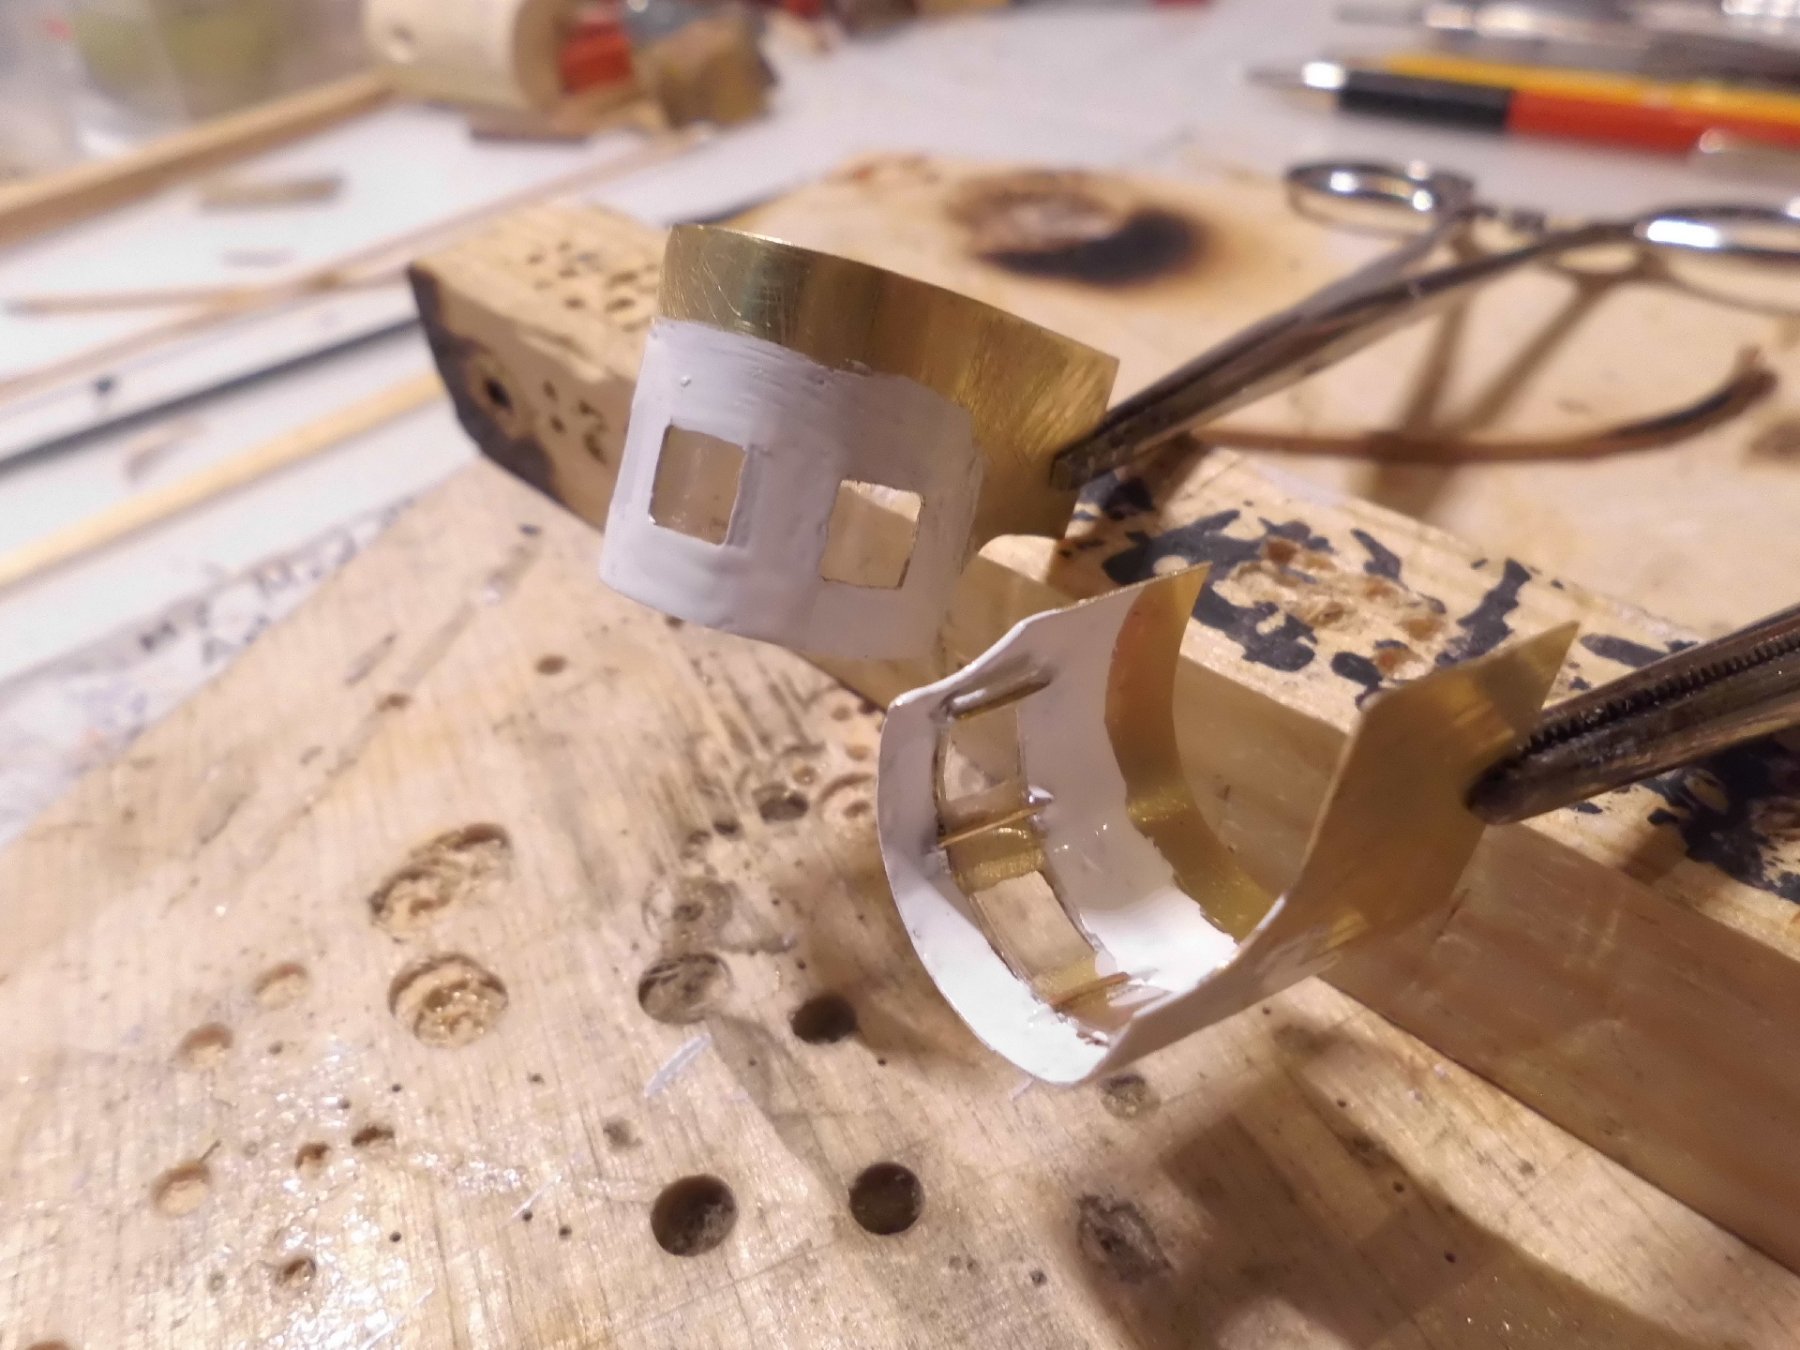
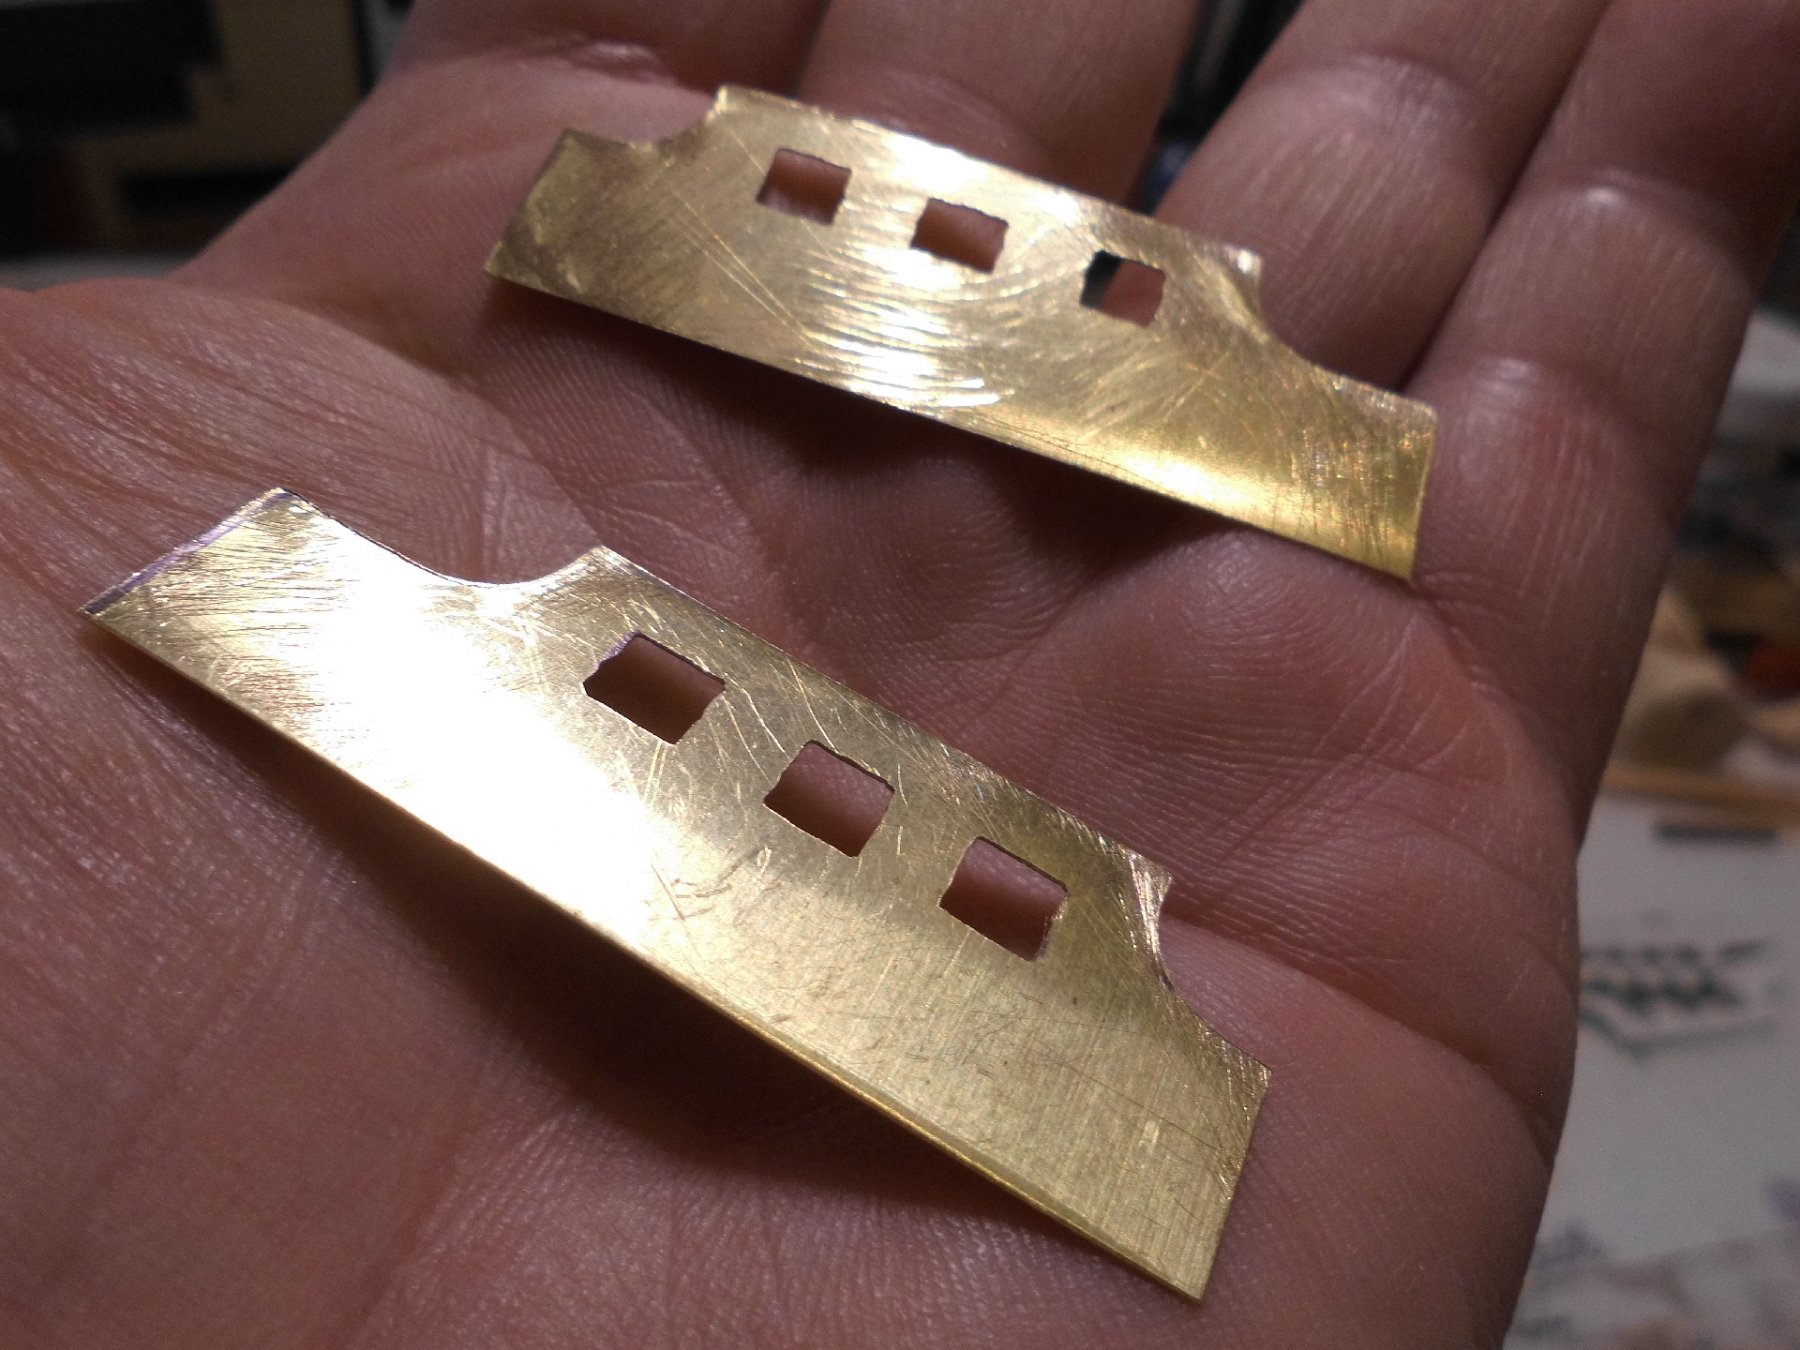
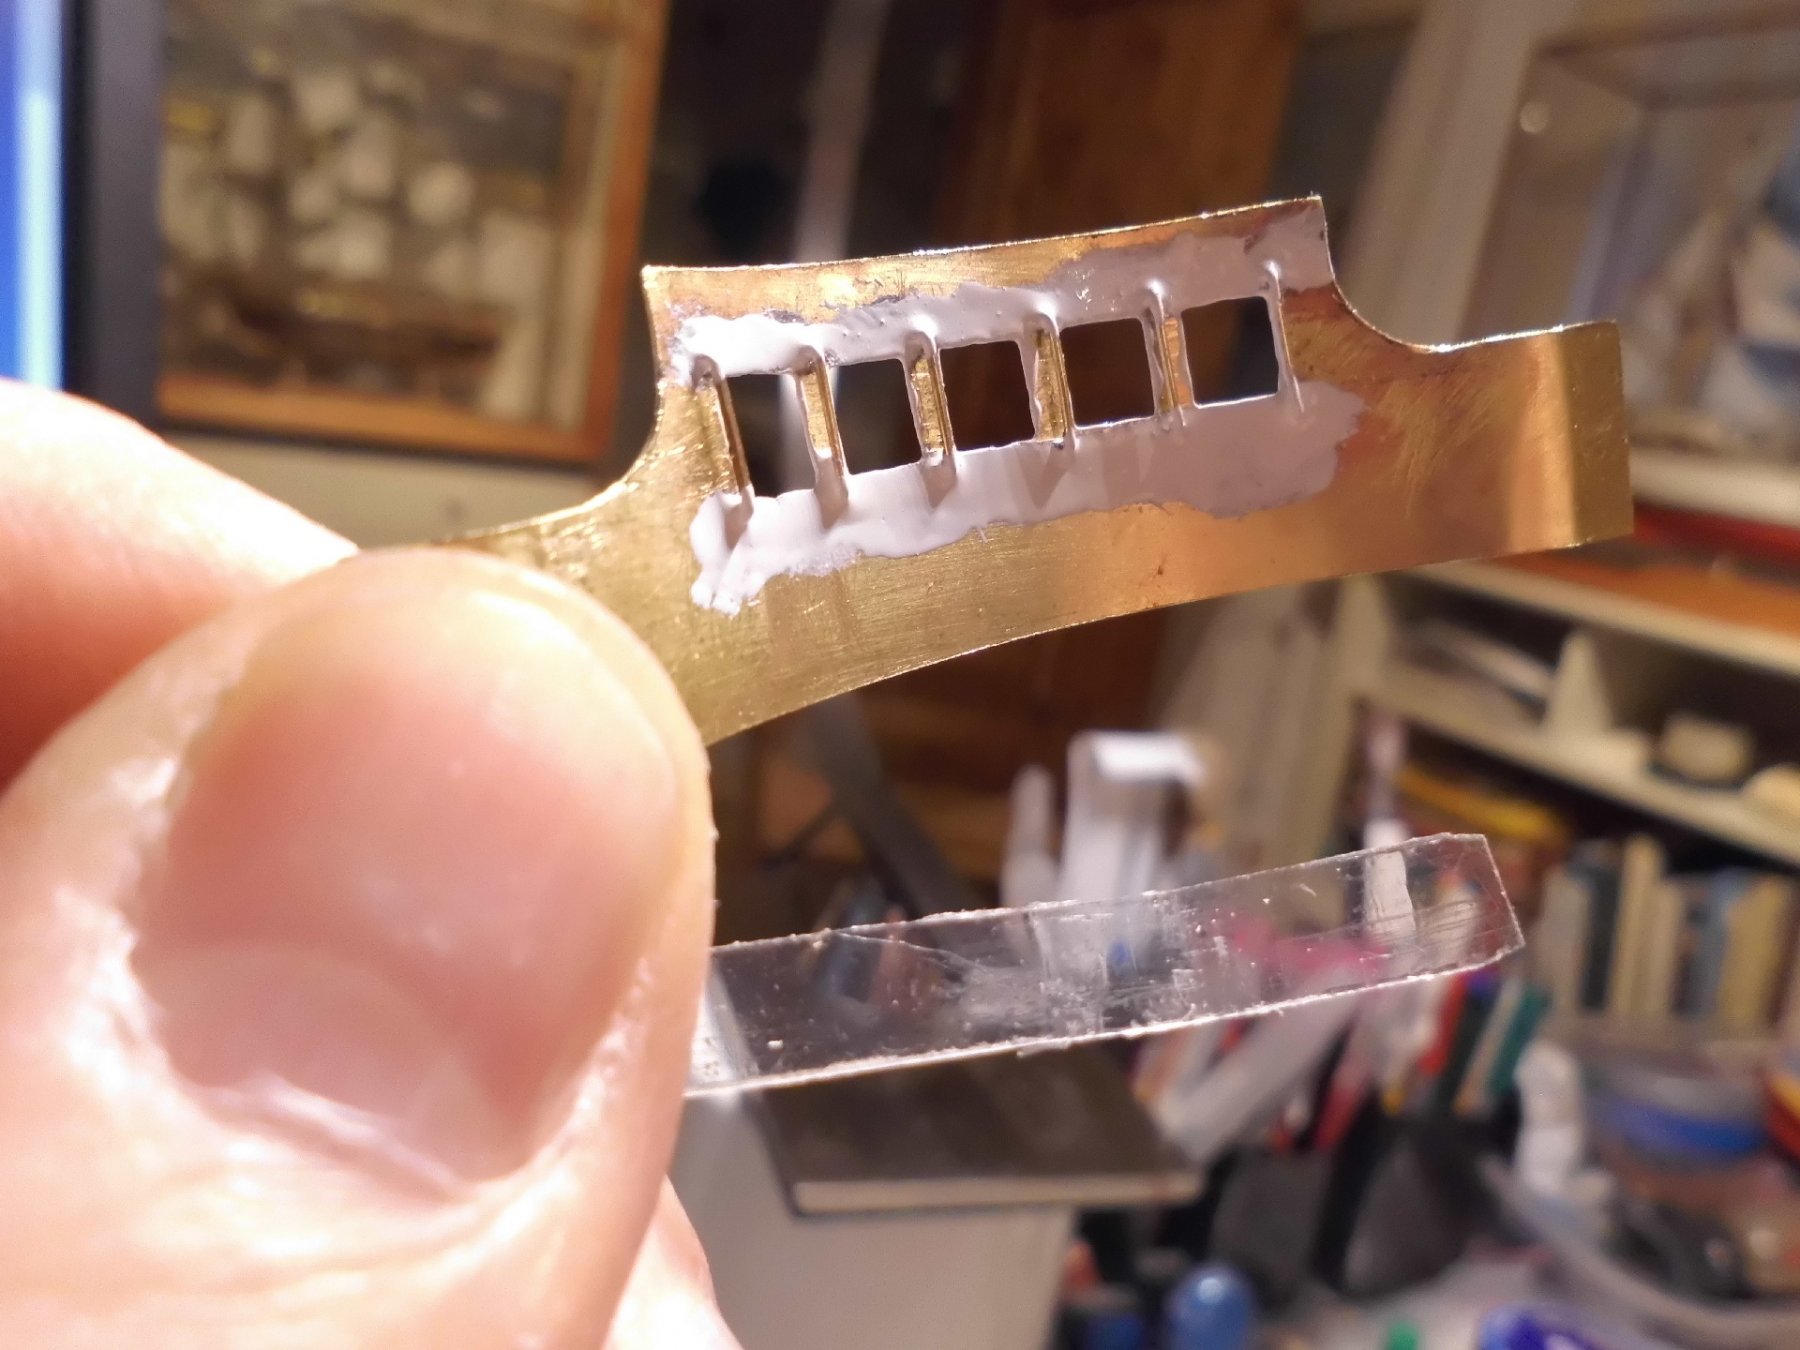
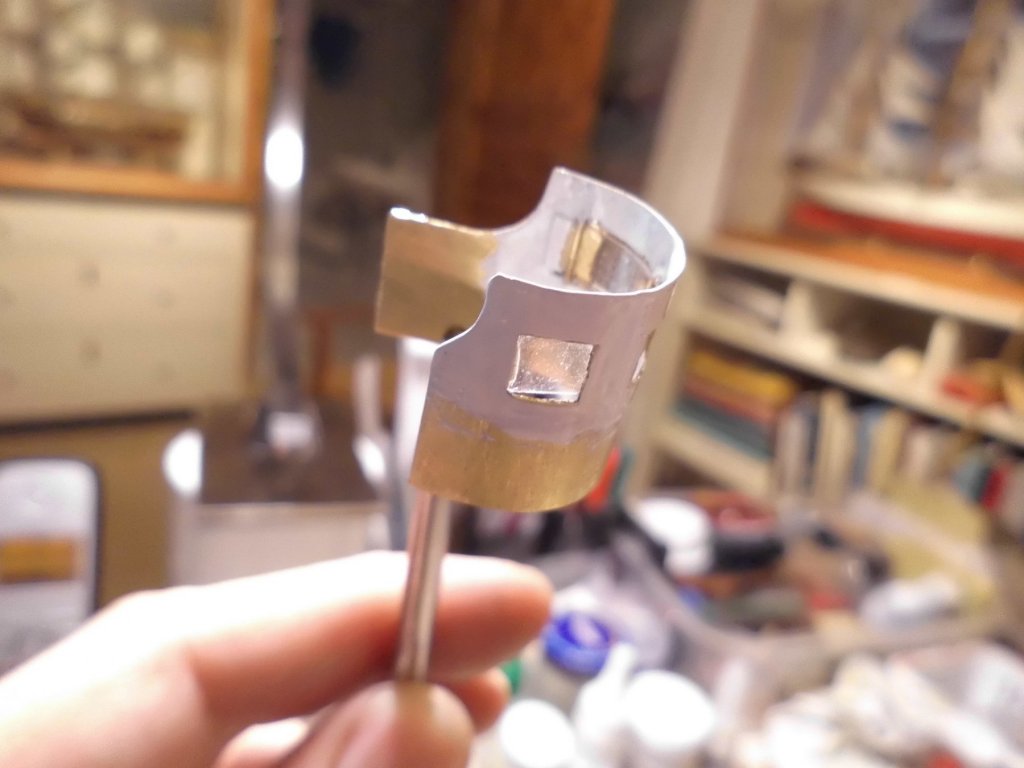
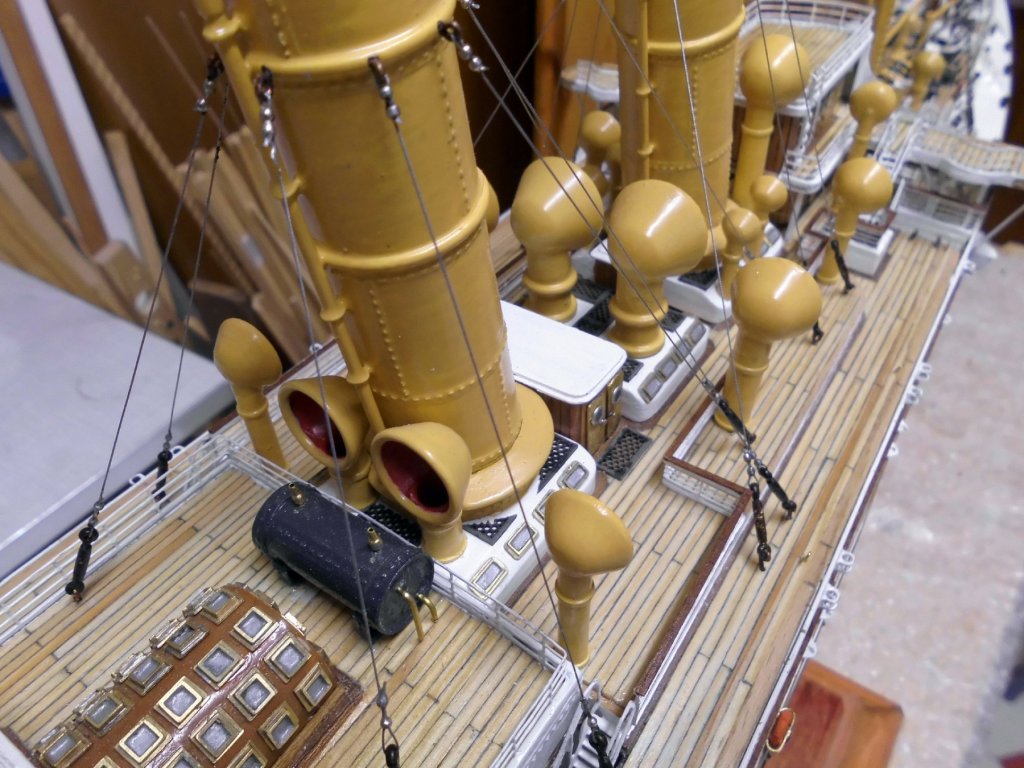
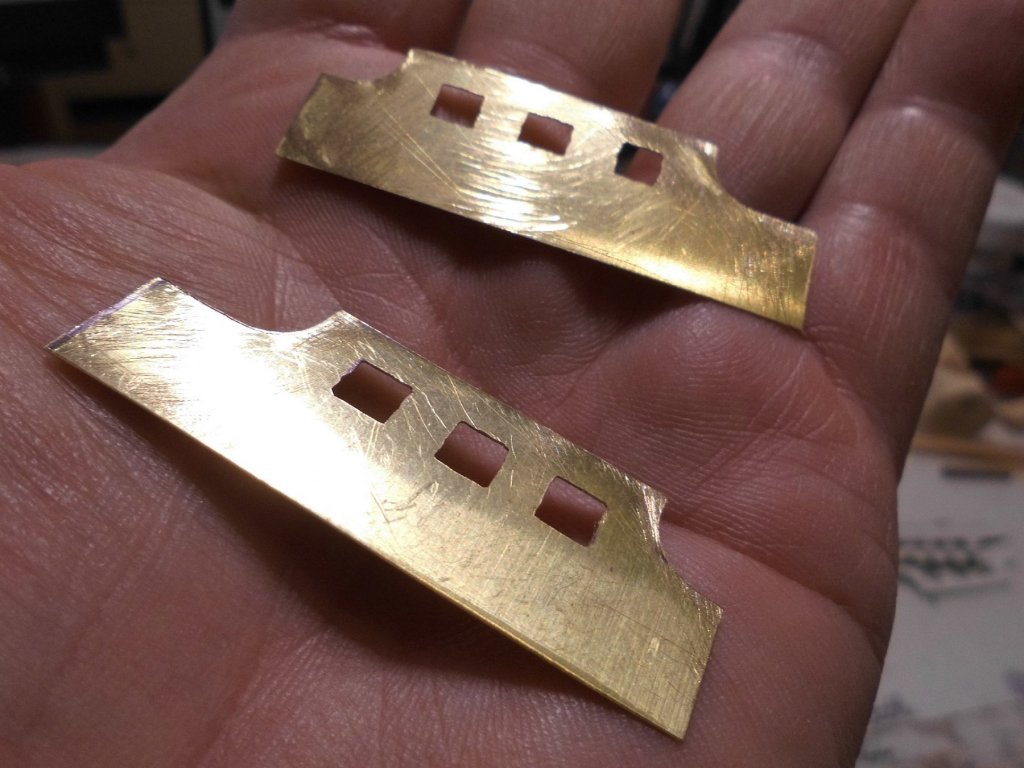
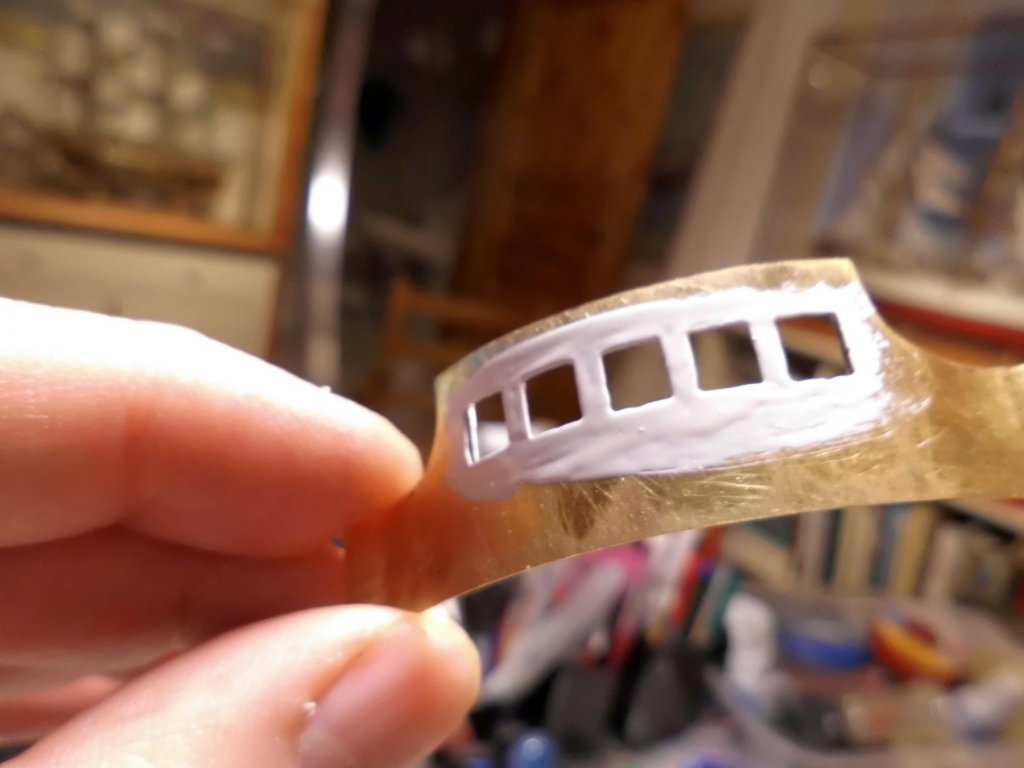
Small update... am just making the front panel of the bridge after the card template and filed out the 5 square windows for celluloid glassing. There was the question as how to do the glassing from the rear side CA would "frost" the celluoid and PVA would be too smeary during mounting. I came up with a solution that requires minimum space and can take up a stipe of celluloid shifted in horizontaly and directly on the rear panel surface, by soldering 6 mini-braces that leave a space of 0,5 mm to the panel surface Nils

- 2,625 replies
-
- 22
-
-
- kaiser wilhelm der grosse
- passenger steamer
- (and 1 more)
-
Many thanks Lawrence, Joel, Patrick and John, for your nice comments, and to all the "likes" for clicking the button Lawrence, your comment is well appreciated, many thanks Joel, Thats the great thing with MSW, something for everybody.... Patrick, Thanks so much for your words, there were several things along the way I could have done better..., where recognized possible solutions were saved up for the next time if feasible, but trust that is our all experience... John, those grates are glued on with CA, so removing them would leave some traces on the wood below...... Nils
- 2,625 replies
-
- 5
-
-
- kaiser wilhelm der grosse
- passenger steamer
- (and 1 more)