HOLIDAY DONATION DRIVE - SUPPORT MSW - DO YOUR PART TO KEEP THIS GREAT FORUM GOING! (Only 36 donations so far out of 49,000 members - C'mon guys!)
×


Mirabell61
-
Posts
7,407 -
Joined
-
Last visited
Content Type
Profiles
Forums
Gallery
Events
Everything posted by Mirabell61
-
 Mark, thanks for your nice words, I saw you had a good catch up with the build recently many thanks for looking in, and am pleased you like it Nils Thanks also to all the "like this" for operating the button....
- 2,625 replies
-
- 4
-

-
- kaiser wilhelm der grosse
- passenger steamer
- (and 1 more)
-
a beautiful built ship Bob, love your rigging, it looks great...., and good looking pics taken ! Nils
-
beautiful and charming little boat Chris, well done so far.... Nils
- 144 replies
-
- 7
-
-
- corsair
- bermuda boat
- (and 1 more)
-
Hi Tozbekler, nice and interesting build, wish further good success with this scratch build... Nils
-
Hi Bob, nice find for detail !.... I also still need to install these "eyebrows" on my Bohuslän (spoilers to prevent rain- and splashwater rinsing over the window panes) Nils
-
Micro Drill Press
Mirabell61 replied to michael mott's topic in Modeling tools and Workshop Equipment
Wow! Michael now thats a fine tool, amazing how you are able to transfer your thoughts into smart toolery ..... Well done. Nils -
Hi Art, had a look at your homepage link, wonderful work there and beautiful pictures.... Nils
-
excellent build Mike ! Nils
-
A good start bob ! pre-lasered jig and keel provide the correct frame distances all the way Nils
- 682 replies
-
- 3
-
-
- halifax
- lumberyard
- (and 1 more)
-
many thanks Rob, for your nice words, much appreciated Nils
- 2,625 replies
-
- 4
-
-
- kaiser wilhelm der grosse
- passenger steamer
- (and 1 more)
-
Hi Dan, no. I have`nt considered vacuum forming yet, but many thanks for your very inspiring museum examples. I made the boats for my "Gorch Fock" from a wooden plug, (one for outside , one for inside) by creating a negative mould in plaster of Paris, and then processing them with cast polyester resin. That worked quick and easy, but these intended boats will be a bit more challenging I think, so learn by doing is the theme.... Nils
- 2,625 replies
-
- 5
-
-
- kaiser wilhelm der grosse
- passenger steamer
- (and 1 more)
-
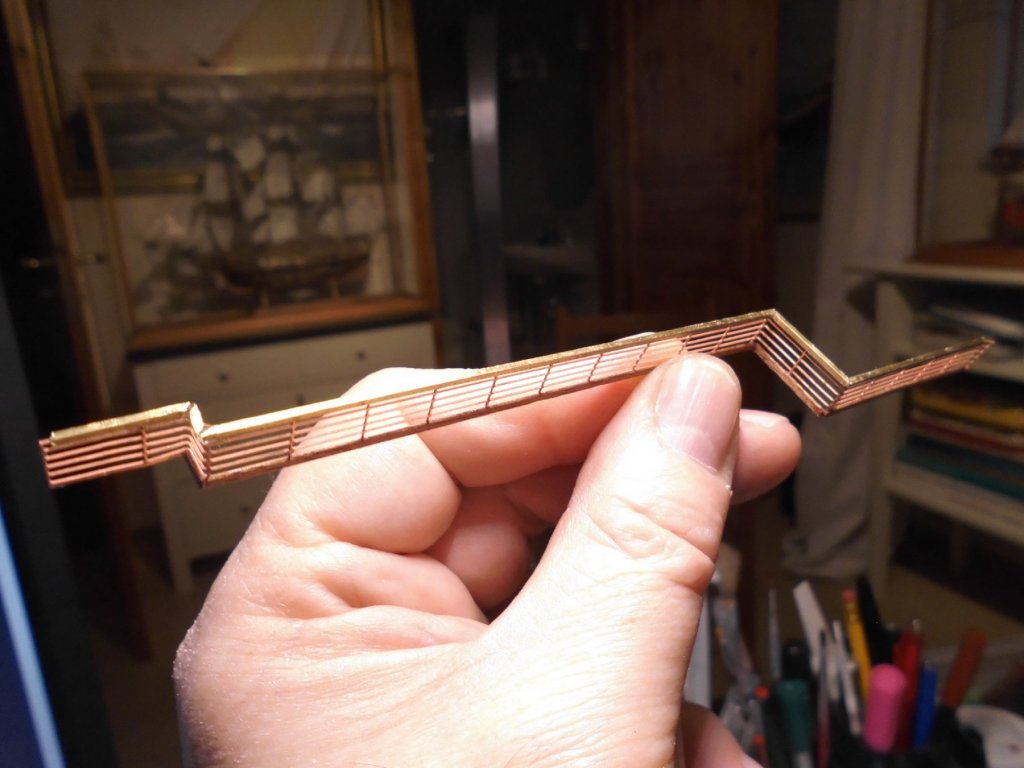
I must admit Dan, it looks a bit strange... the bottom side has a thin wooden mahagony reinforcement rail from the visual outer side, and that is masked off for painting duration. The U-channel is only at the top side. Nils
- 2,625 replies
-
- 5
-
-
- kaiser wilhelm der grosse
- passenger steamer
- (and 1 more)
-
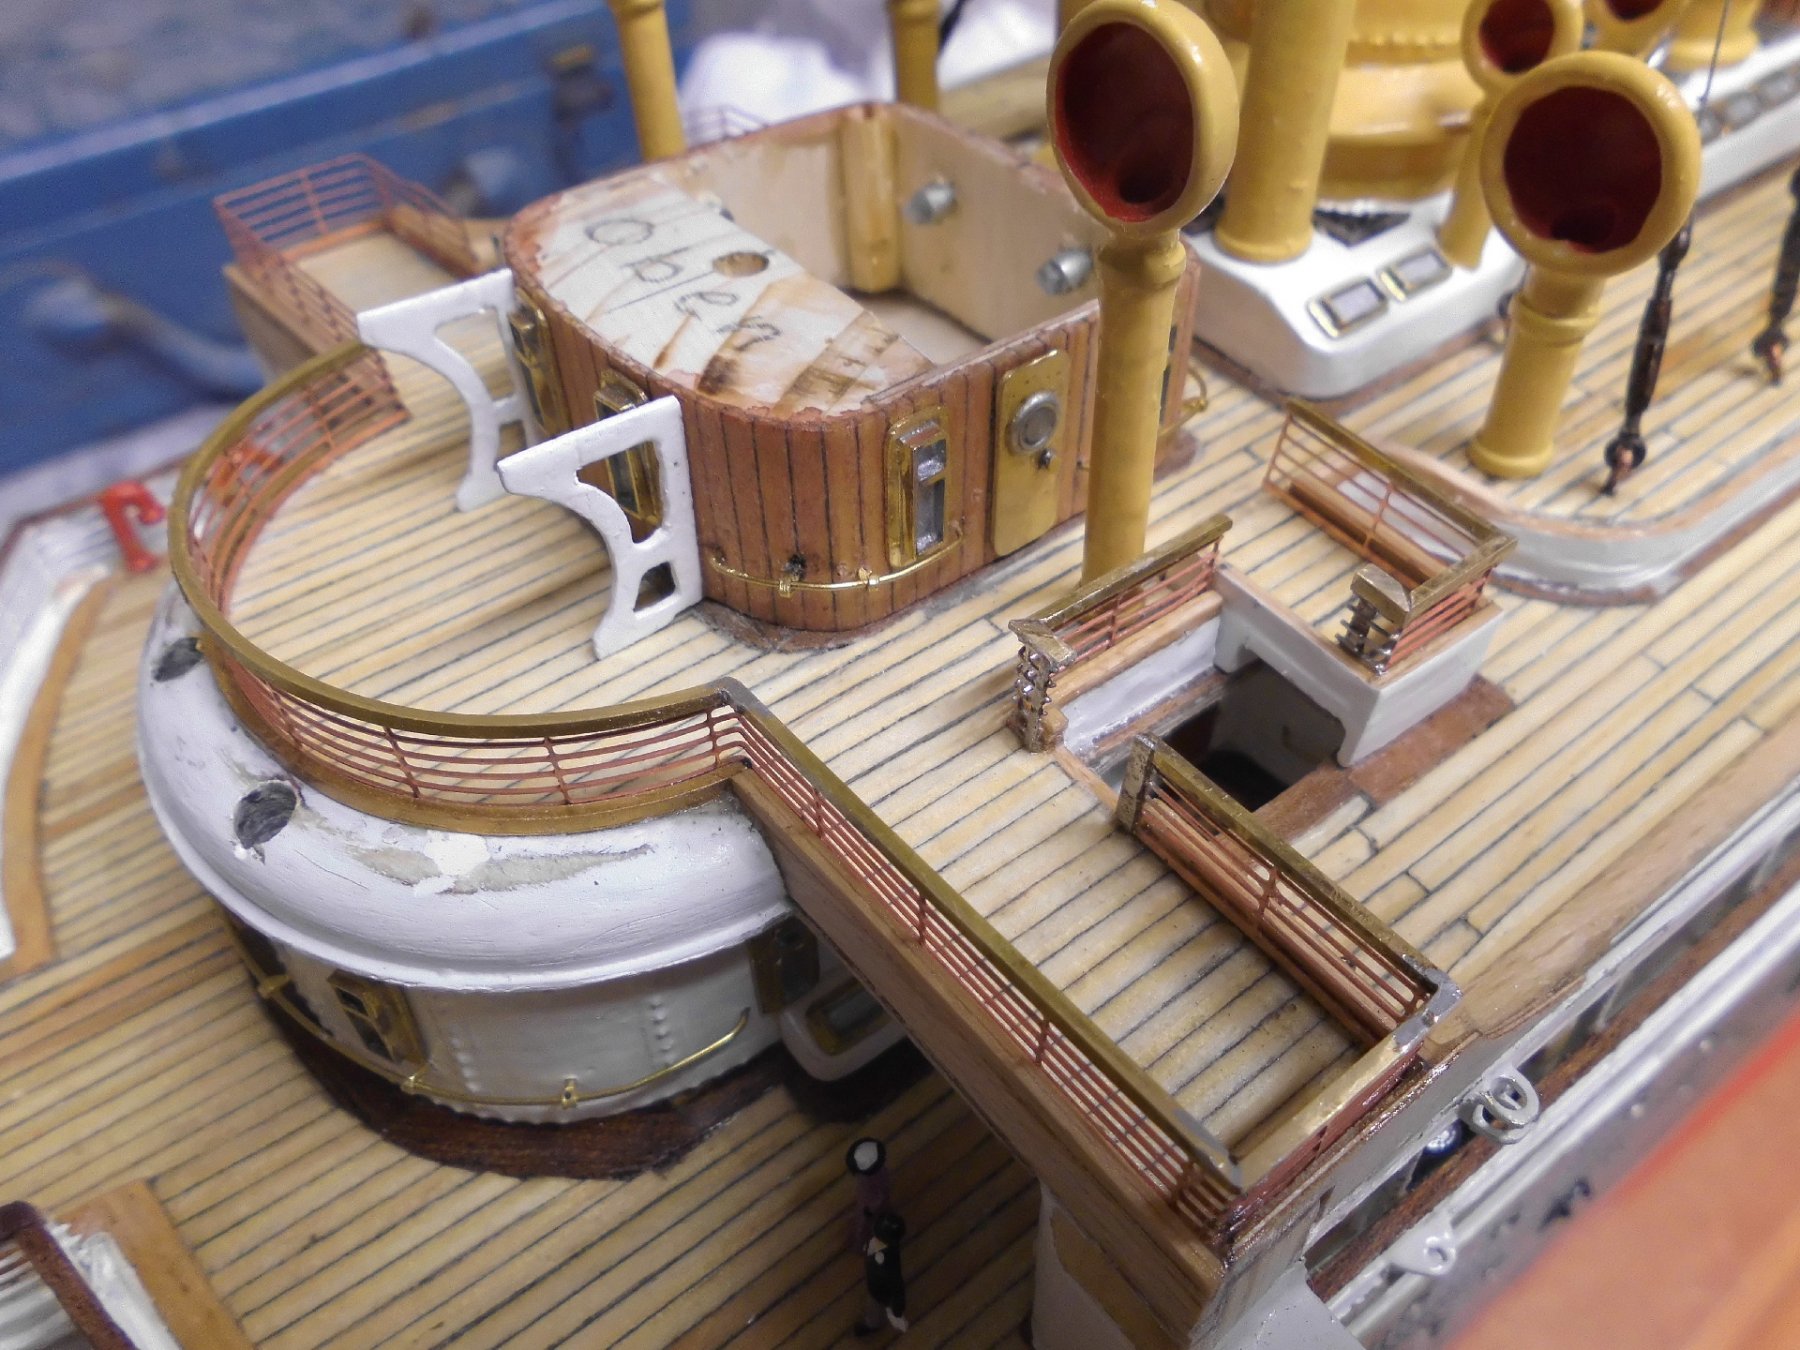
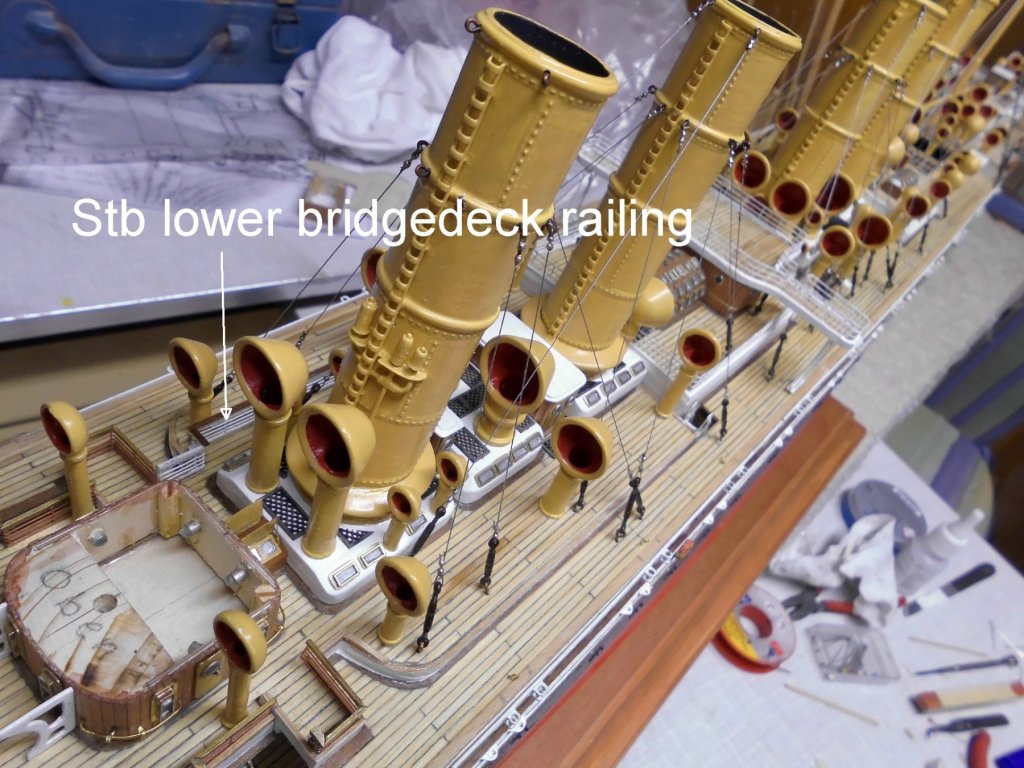
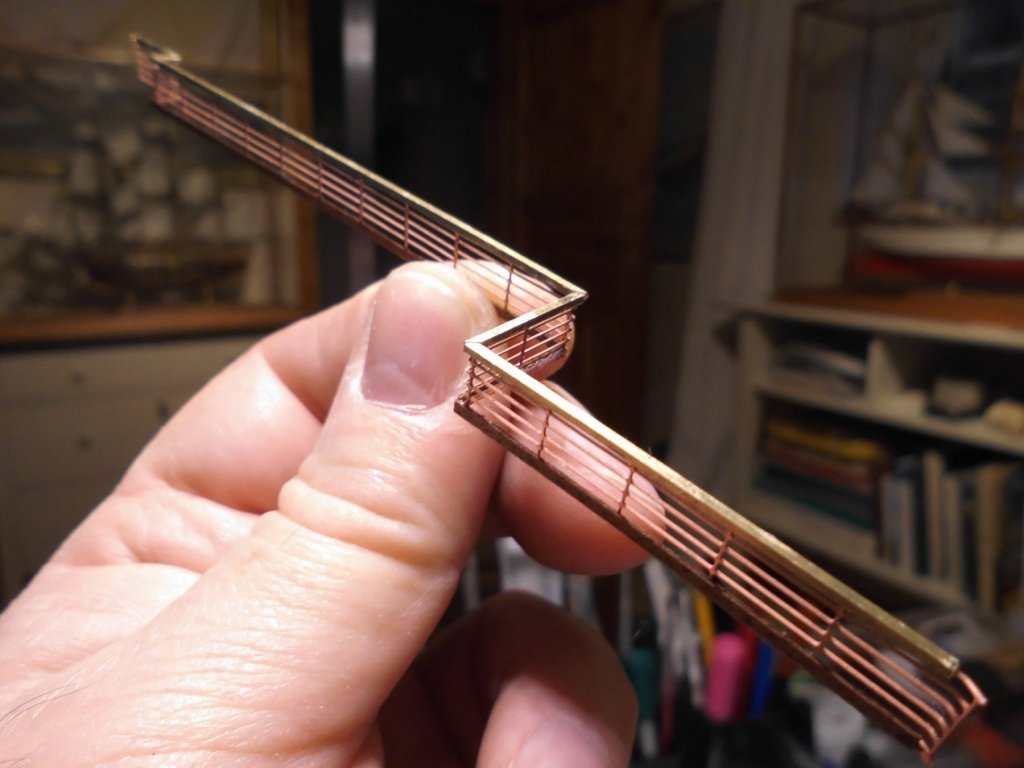
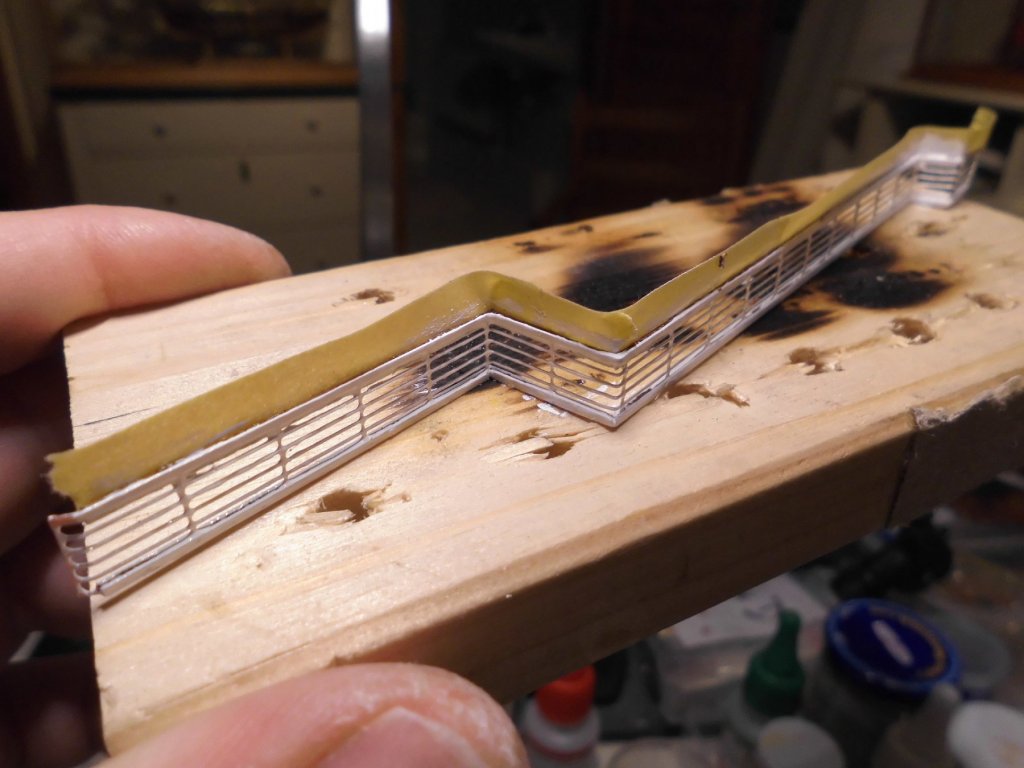
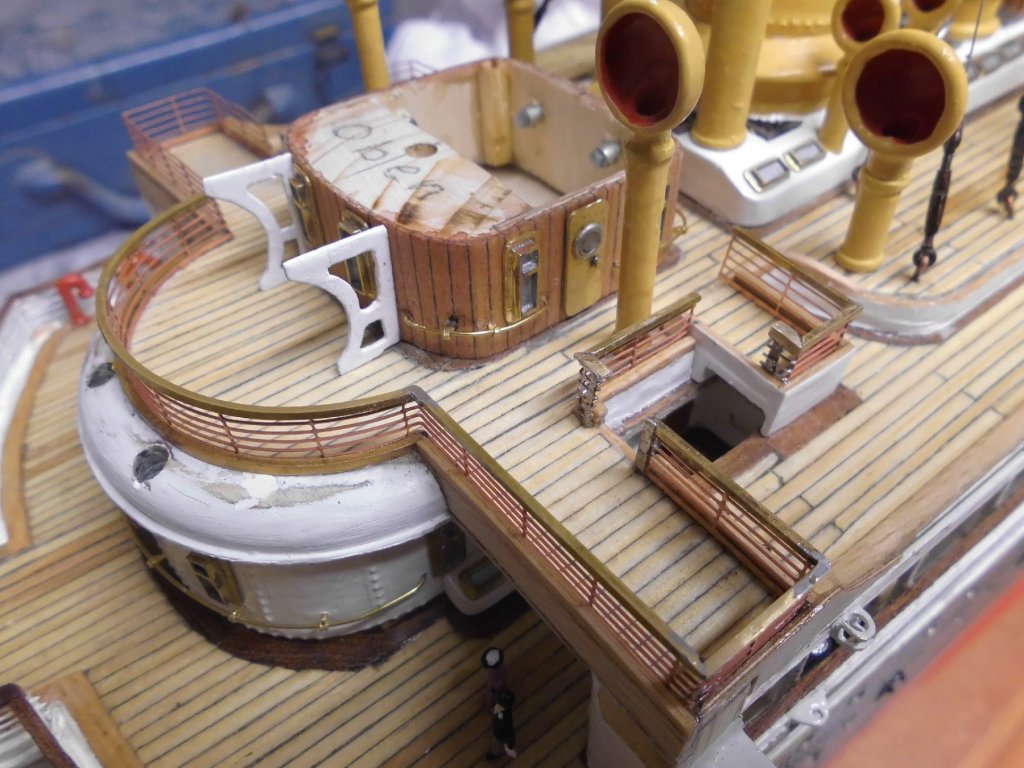
small update : made the lower bridge-deck railings, these guide the first class passengers alongside the structures of funnels 1 + 2 to the staircase that goes down to the promenade deck, so no one gets lost on the boats-level. There are no railing to the sea-side of the boats. The etched copper railing is too "flimsy" on its own, so I spent a reinforcement rail at the bottom side and the obligatory brass handrail to strengthen the upper side. Nils
- 2,625 replies
-
- 30
-
-
- kaiser wilhelm der grosse
- passenger steamer
- (and 1 more)
-
Miniature plywood
Mirabell61 replied to Kurt Johnson's topic in Building, Framing, Planking and plating a ships hull and deck
Hi Kurt, before you try making your own Plywood from veneer sheets, would it perhaps be an alternative for you to utilise so called multilayer aero-plywood ? I used for examlpe 10-layer ply in aero quality in total thickness of only 5,5 mm, and got very strong filigrane thin parts (frames for my Pegasus build) out of it.... Nils -
Albert, thanks for your nice compliment, much appreciated... Nils
- 2,625 replies
-
- 3
-
-
- kaiser wilhelm der grosse
- passenger steamer
- (and 1 more)
-
nice work Ed, the white walled little "photo studio", good idea Nils
- 3,618 replies
-
- 5
-
-
- young america
- clipper
- (and 1 more)
-
Thank you Michael, for looking in, you`re always welcome... in the moment I`m thinking of all the boats required, and of possibly doing a sample one (prototype) from wood in a way that a negative mould (in one or two parts) can be taken off it for reproduction. But first I need to gain some experience with silicone rubber resin forming and resin casting from the "rubber mould" Nils
- 2,625 replies
-
- 6
-
-
- kaiser wilhelm der grosse
- passenger steamer
- (and 1 more)
-
Thanks very much Dirk, Nils
- 2,625 replies
-
- 3
-
-
- kaiser wilhelm der grosse
- passenger steamer
- (and 1 more)
-
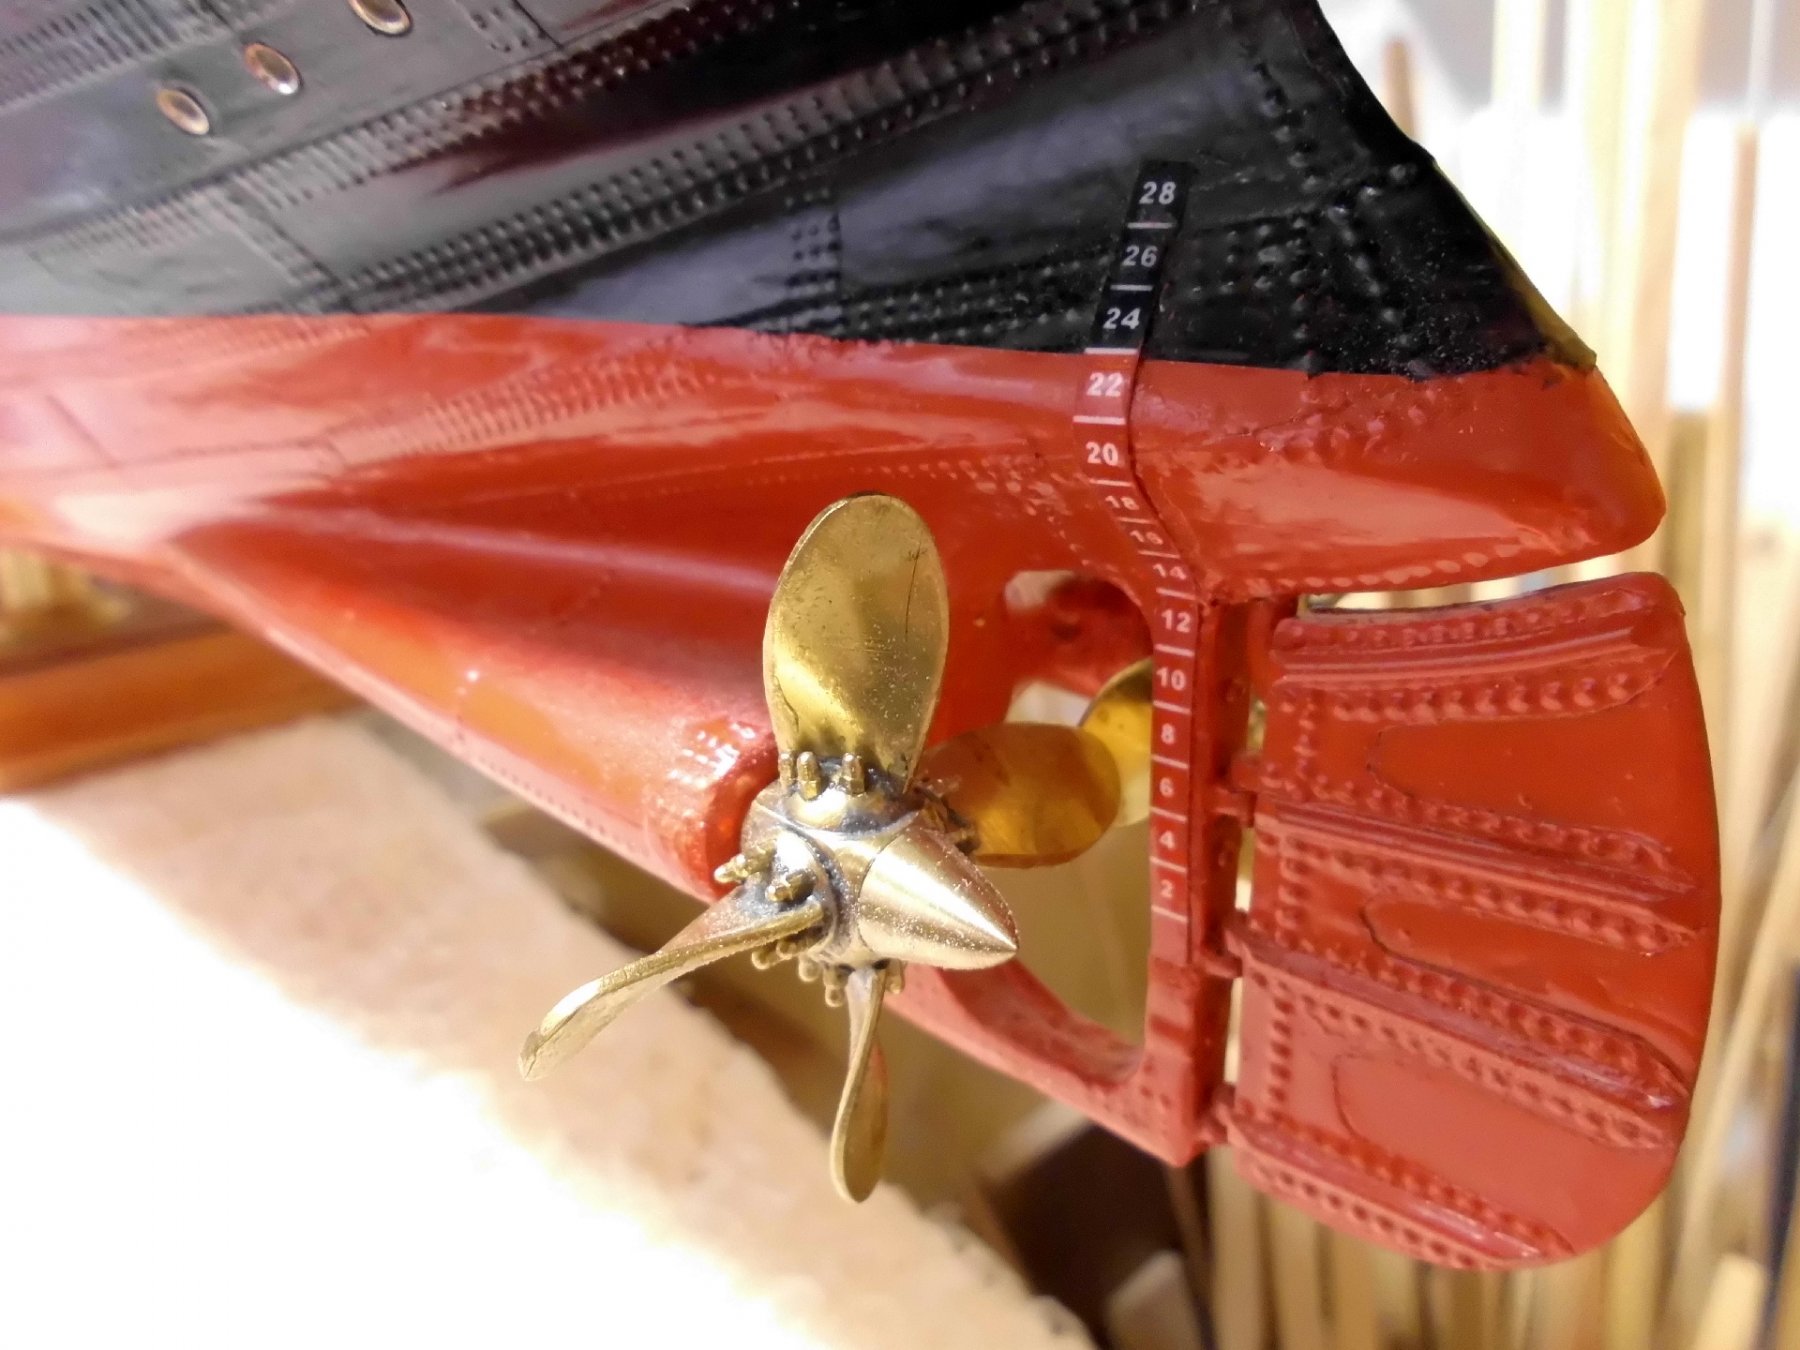
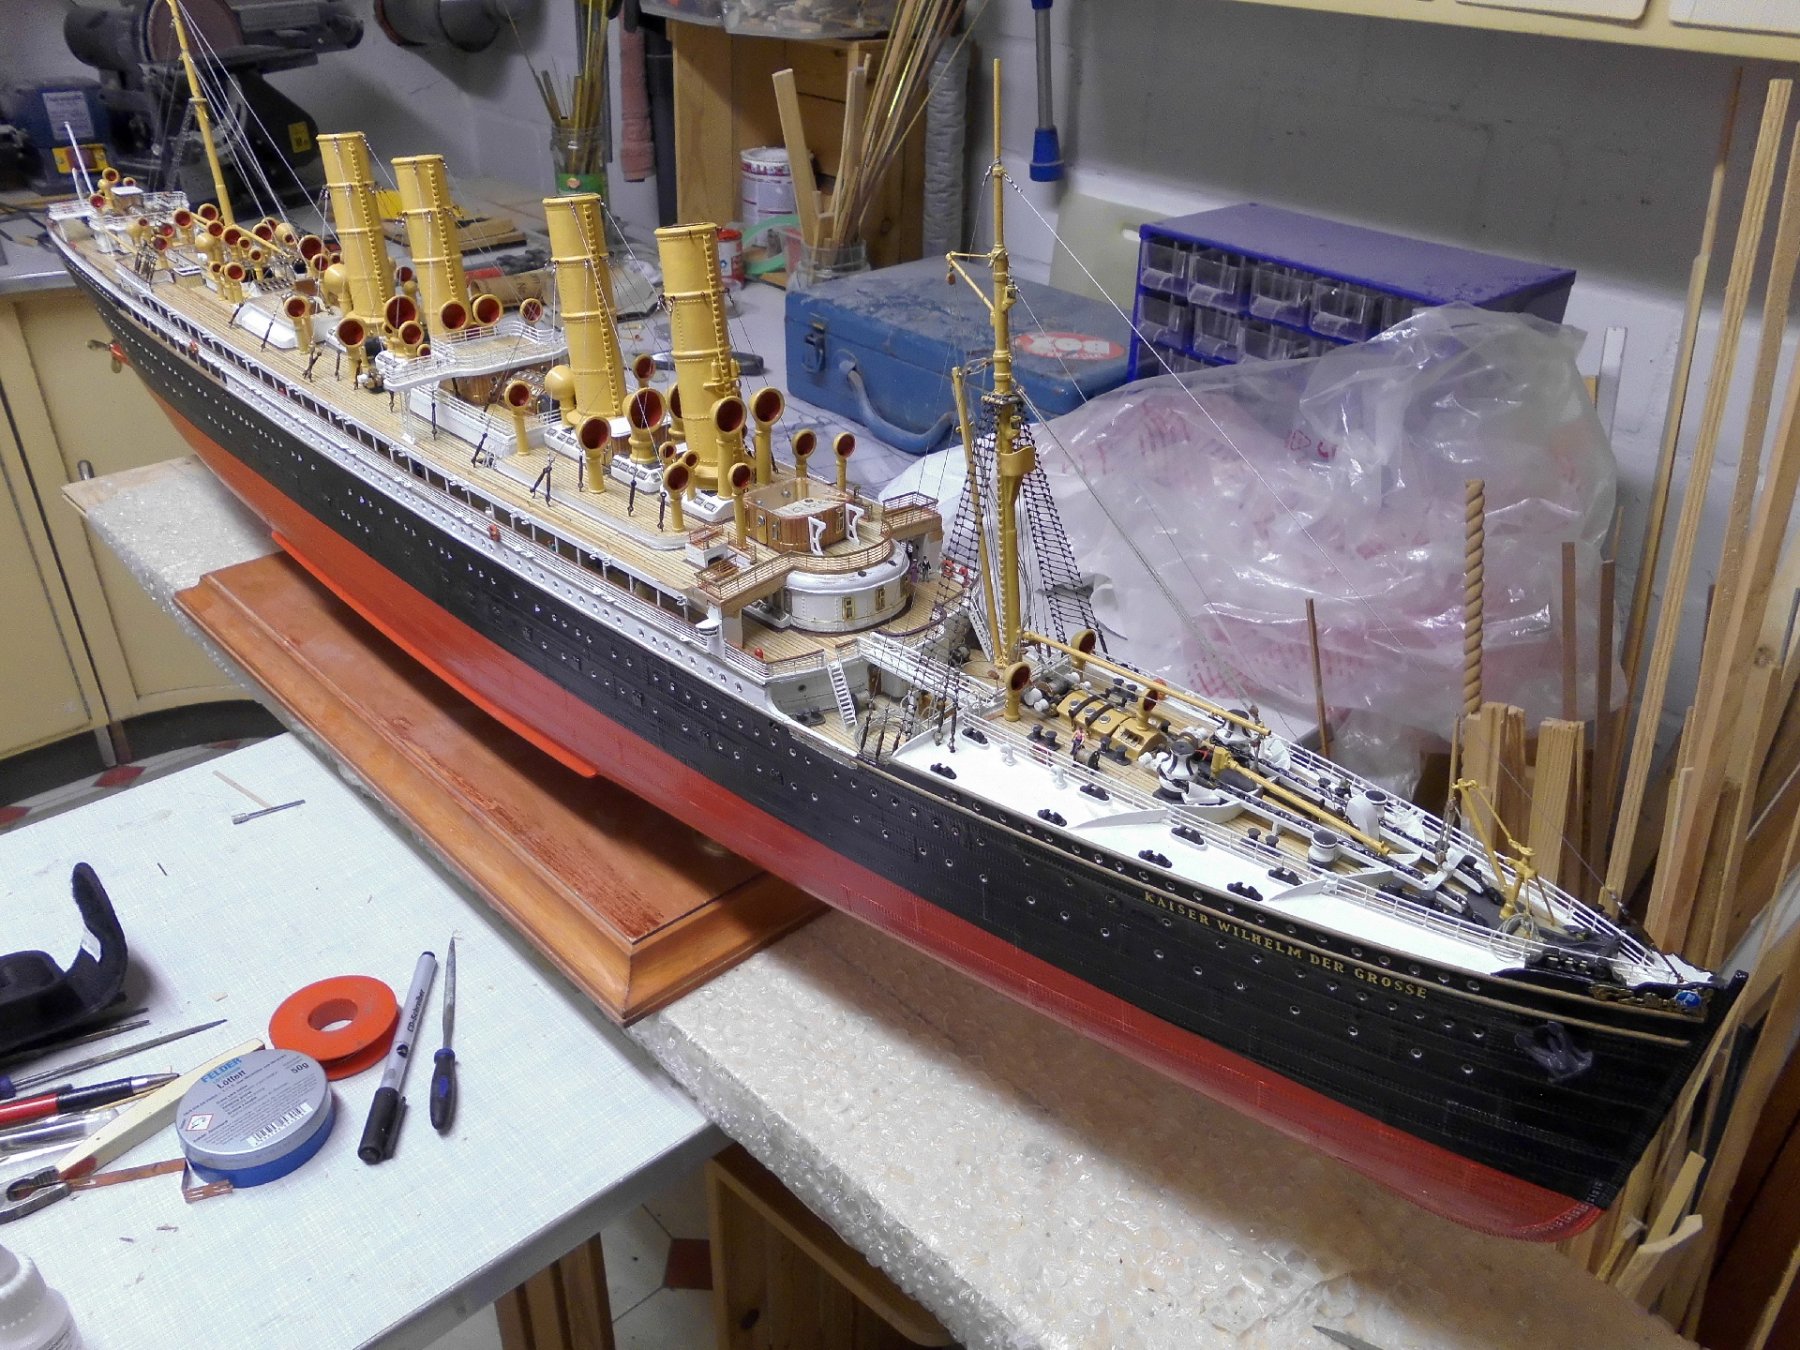
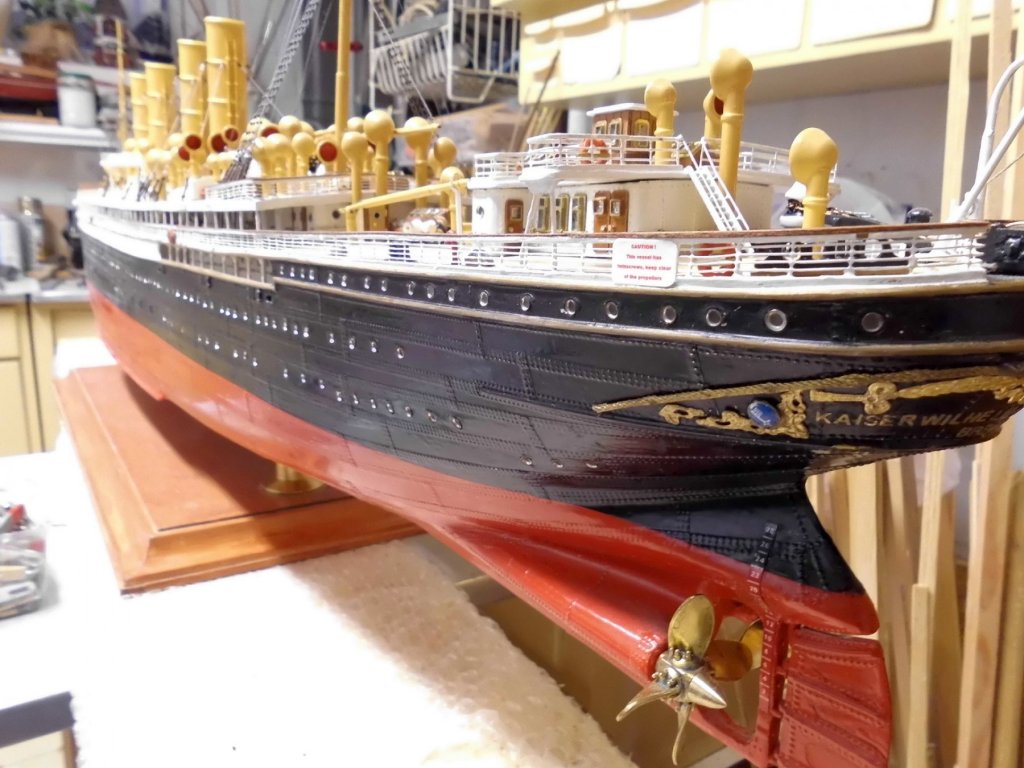
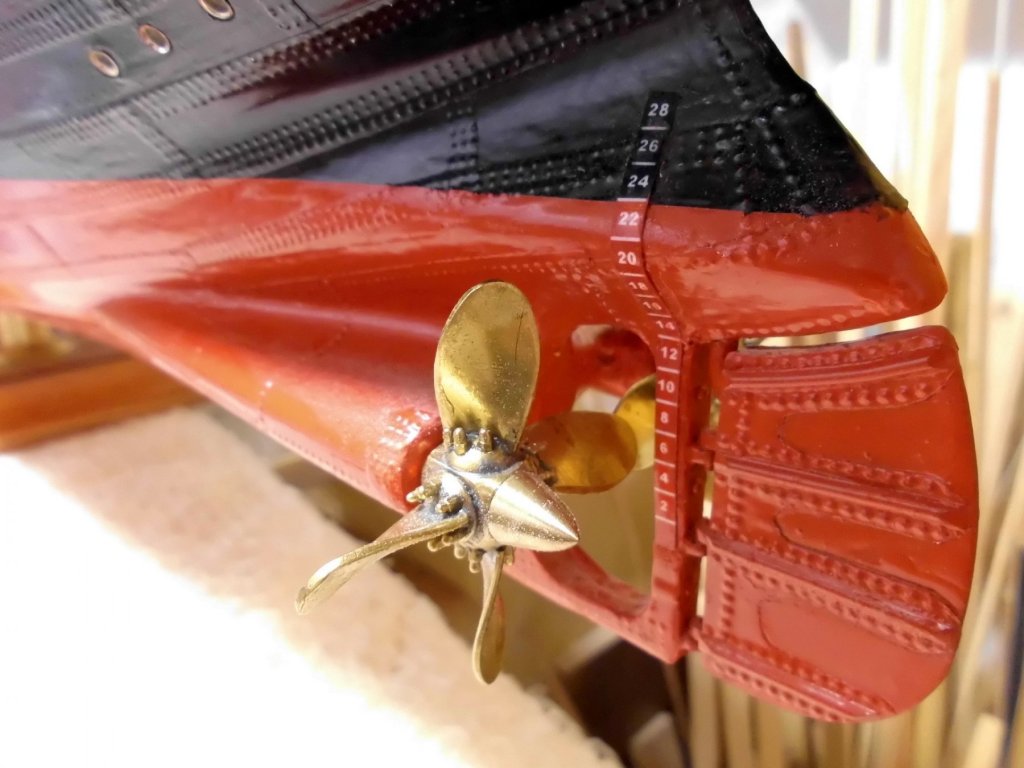
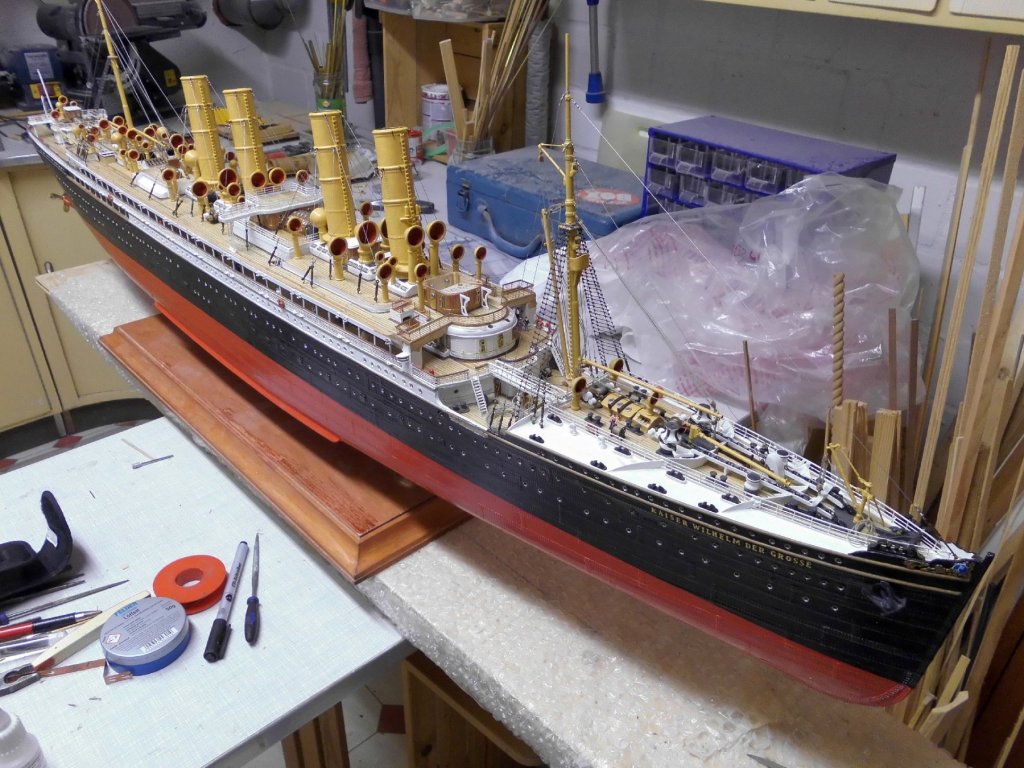
many thanks to Carl, Captain Poison, Lawrence, Dan, and Greg for your nice words and comments..... Carl, I was much inspired by the 1:100 KWdG models of the professional Kvartett-team, and the one by Peter Davis Garner (Mr. Hollom), but that scale would have called for a 2 Meter long Model, and a card Model in 1:250 would have been something for a modeler with "surgeon skills" in his hands... Captain Poison, welcome aboard, I`m pleased you like it, the idea with resembling only the riveted seams of the funnel-plating came per flash one morning, and I tried and approved it... Lawrence, thanks for you nice words, much appreciated.. Dan, I put a little effort into the props, right at the beginning of the build, as I never saw such scale props on the fitting out model after sale market Greg, thanks for your words mate, I grew up in Capetown SA, and I remember my father using that adjective "bloody ....." for something he liked much, etc. but he spent some months in Australia before, so no wonder.... Nils
- 2,625 replies
-
- 7
-
-
- kaiser wilhelm der grosse
- passenger steamer
- (and 1 more)
-
Rob and Jeff, many thanks to you both for your words...., an no need rush through, enjoy the build Rob, I´ll be looking out for your further progress on the GR, when you find time to continue.... Jeff, Dankeschön, a nice comment, much appreciated... Nils
- 2,625 replies
-
- 3
-
-
- kaiser wilhelm der grosse
- passenger steamer
- (and 1 more)
-
Very nice build Paul ! the kit provides best view into the ships belly and its stations... Nils
-
Welcome aboard Dan, and many thanks for your nice words, I`m pleased you like it... Nils
- 2,625 replies
-
- 4
-
-
- kaiser wilhelm der grosse
- passenger steamer
- (and 1 more)
-
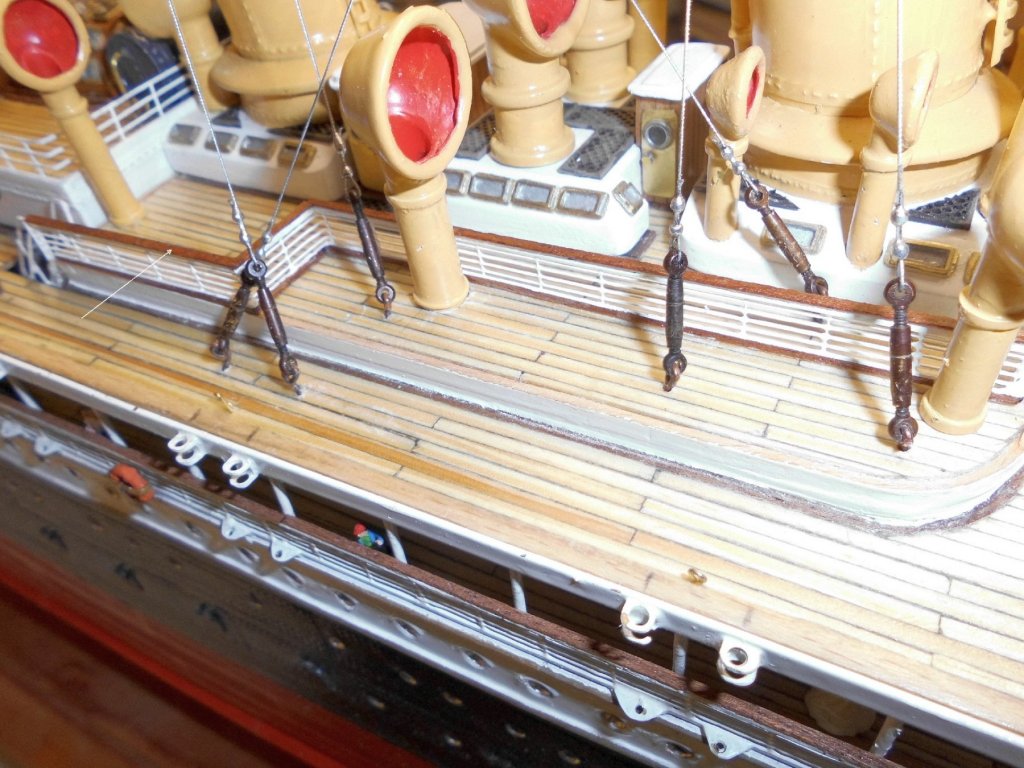
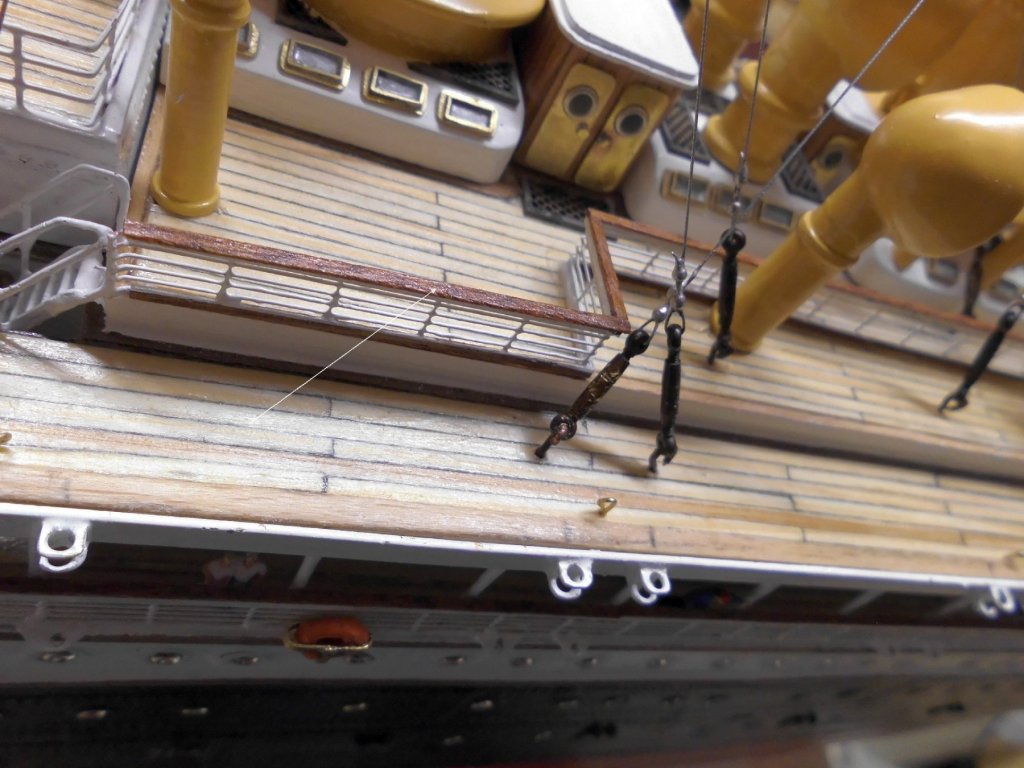
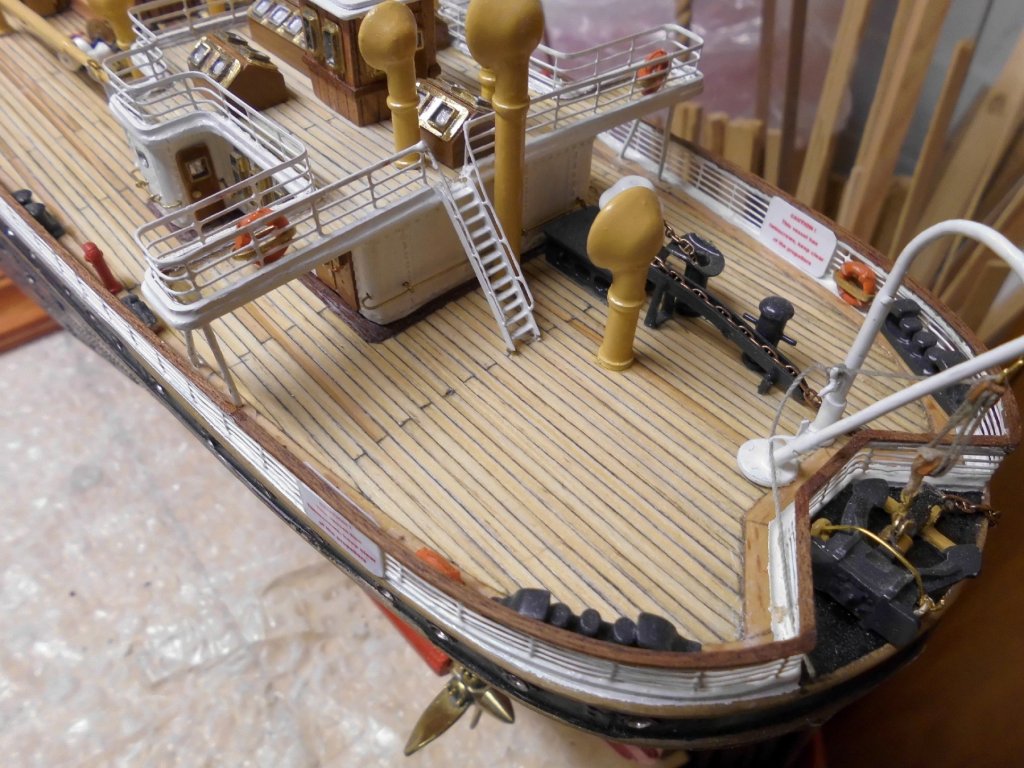
small update: the upper brass profiles on the railing are carrying base for the mahagoni handrails (glue on with CA) Nils the U-type brass mini- profiles give stable strength to the fragile upper railing wire like here on the aft ship railing
- 2,625 replies
-
- 22
-
-
- kaiser wilhelm der grosse
- passenger steamer
- (and 1 more)
-
beautiful built model Ondras71, nice and clean and excellent masting, I also love those modified figurines in period uniforms, well done Nils
-
Thank you so much for your nice words John (Jim Lad), Greg and John (Neptune) Nils
- 2,625 replies
-
- 3
-
-
- kaiser wilhelm der grosse
- passenger steamer
- (and 1 more)