


Oddball
-
Posts
32 -
Joined
-
Last visited
Content Type
Profiles
Forums
Gallery
Events
Posts posted by Oddball
-
-
1 hour ago, Edwardkenway said:
I just did quick measure of my guns on Sherbourne and the barrel is 27mm and the carriage 16mm, so on Tony's calculations if yours are the same they are a bit oversized.
Yeah mine are the same dimensions but all sorted now.
Thanks to everyone who took the time to look and suggest solutions.👍
- Edwardkenway and tkay11
-
 2
2
-
-
20 minutes ago, ccoyle said:
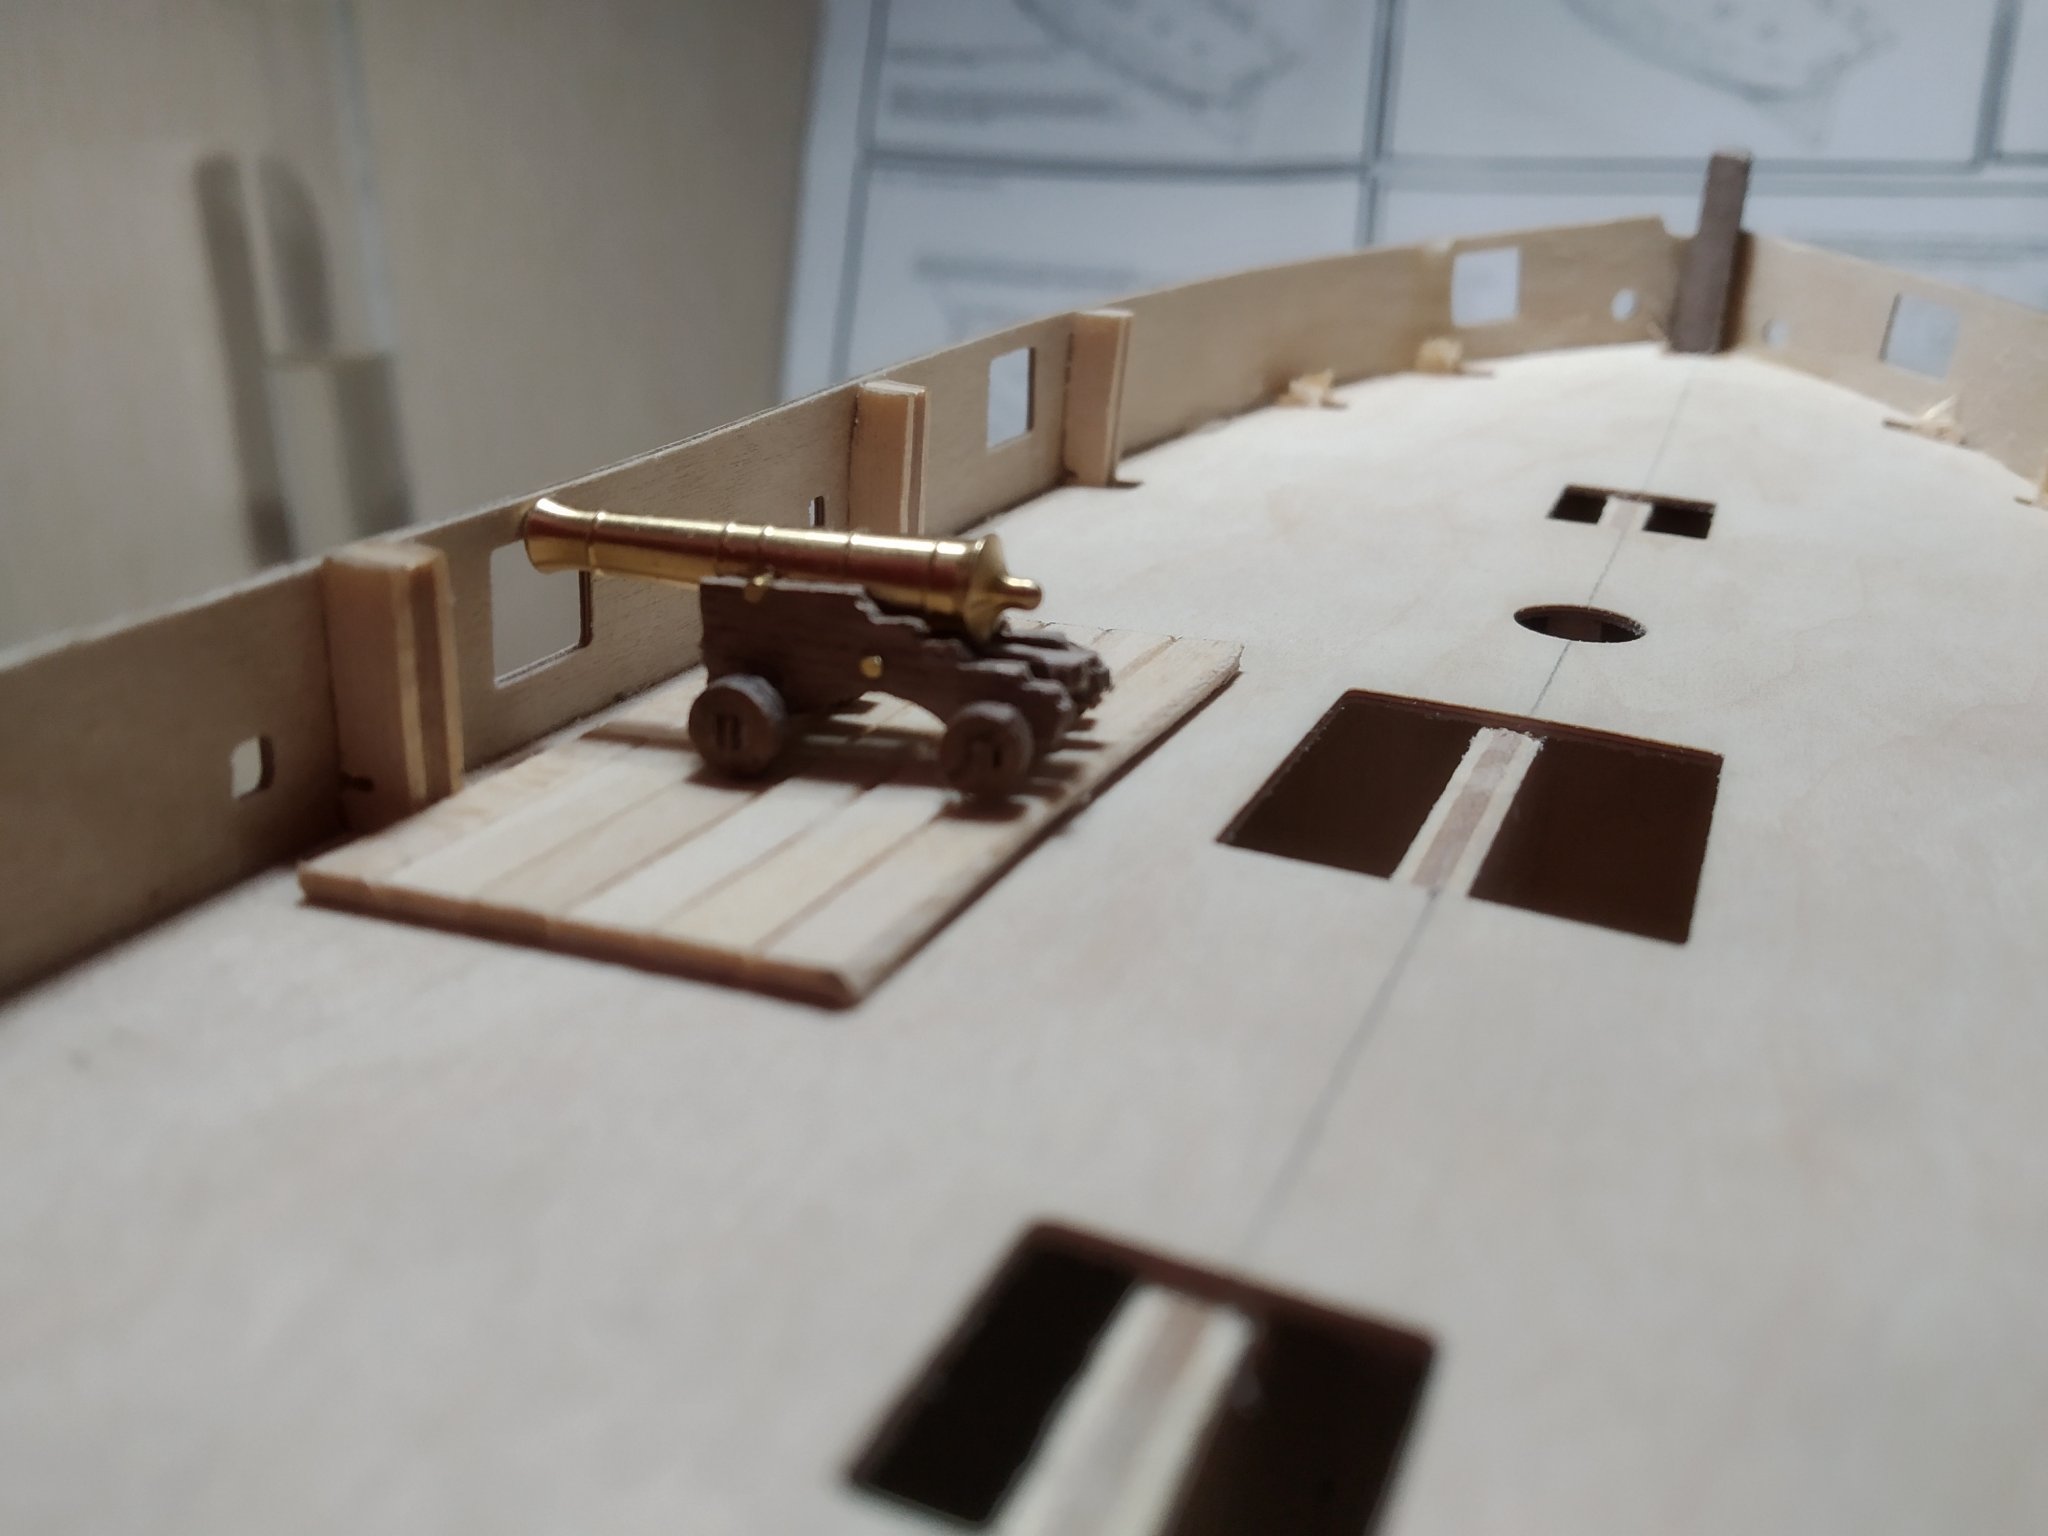
Wow. I can remember when I built this kit (twenty years ago now) that I had some variation in the cannon heights relative to the bulwarks, but at least all of them pointed through the gunports. You've got quite a discrepancy there, and I'm not sure how that might have happened. It does look like you applied the pattern strips at the correct height, i.e. level with the tops of the bulkhead extensions.
Come to think of it, though, your deck planks look overly thick. Are you using the correct strips? Deck strips are usually pretty thin. Those look like they may be first planking strips?
I feel stupid now,the planks I'd used were indeed first planking strips which are 0.5mm thicker than the decking planks and that coupled with the thin card I'd used as backing was enough to throw it off kilter.
Thanks for your keen eye CC you've at least spared my blushes with Caldercraft.🥺
-
I can see an email to Caldercraft coming up.😏
-
45 minutes ago, tkay11 said:
It's difficult to say without a photo. Your particular difficulty seems to be a little different to the problem with the fitting of the cannon through the gunports in other Sherbourne builds. What cannon are you using? Are the guns horizontal? Have you already made them from the kit or are you using card cutouts?
Tony
Using cannon from kit and it looks level to me...
- KARAVOKIRIS and JeffT
-
2
-
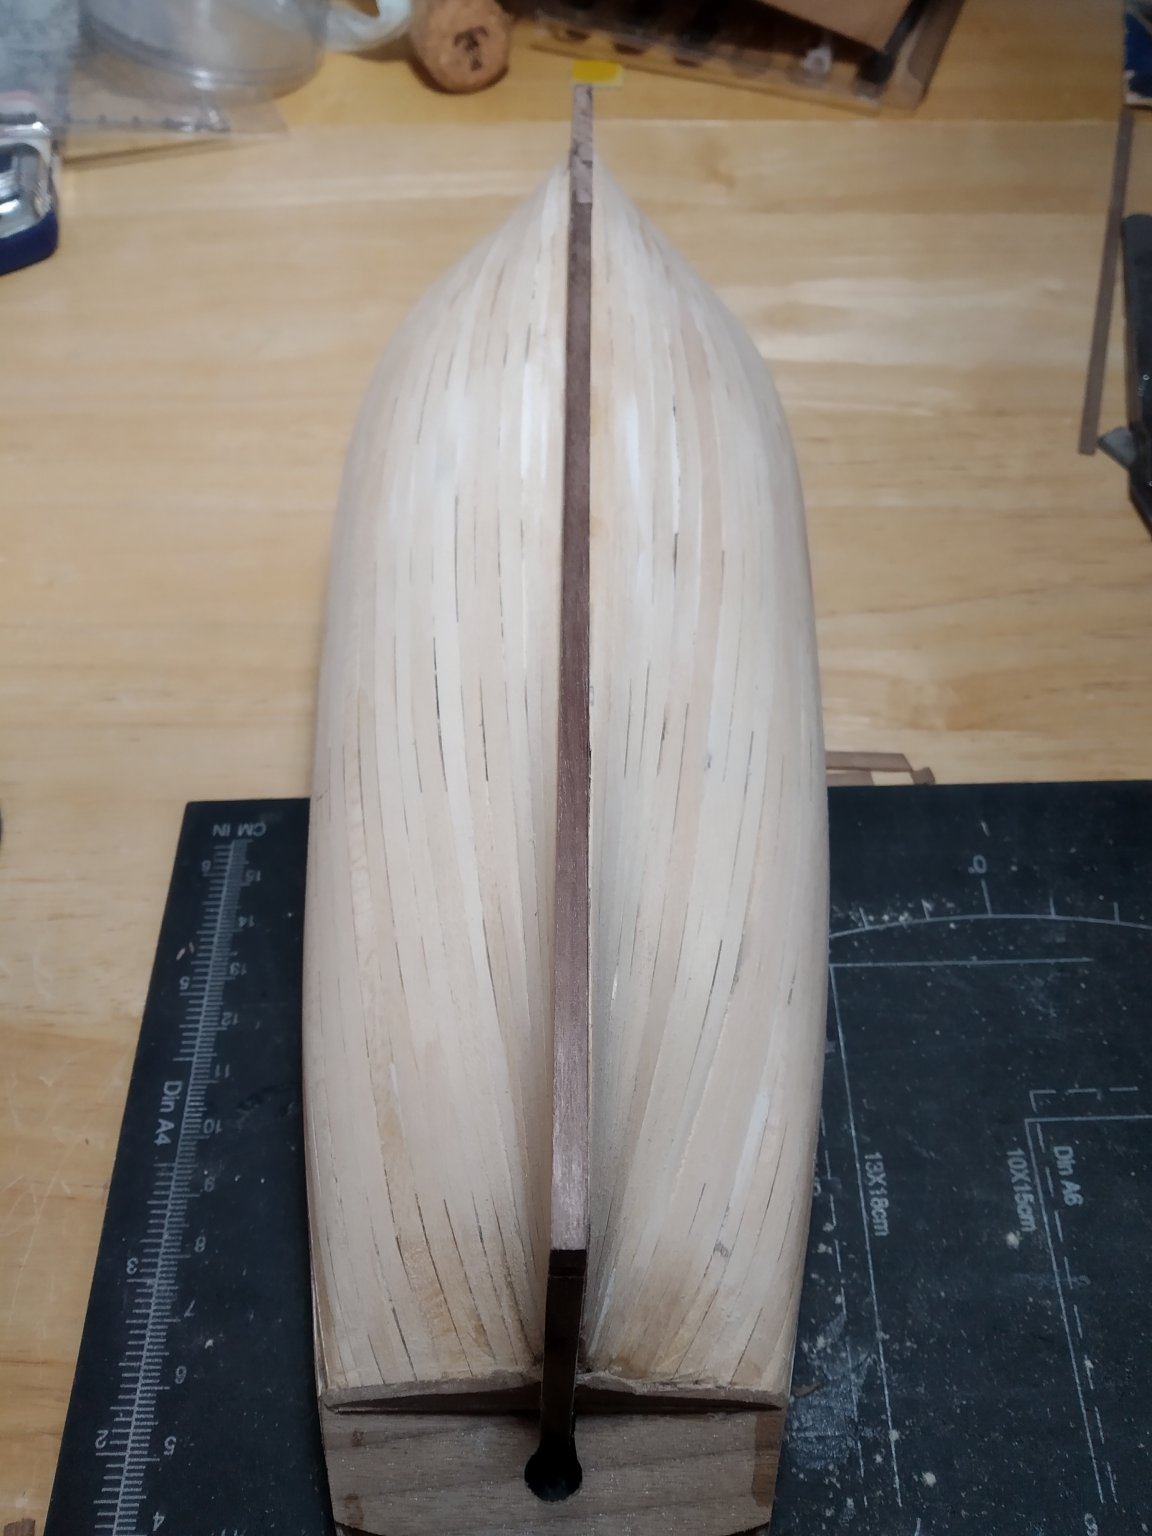
So the first planking has been done and considering it's my first ever I'm relatively pleased with it.Pics show before and after filler and the keel being fitted.
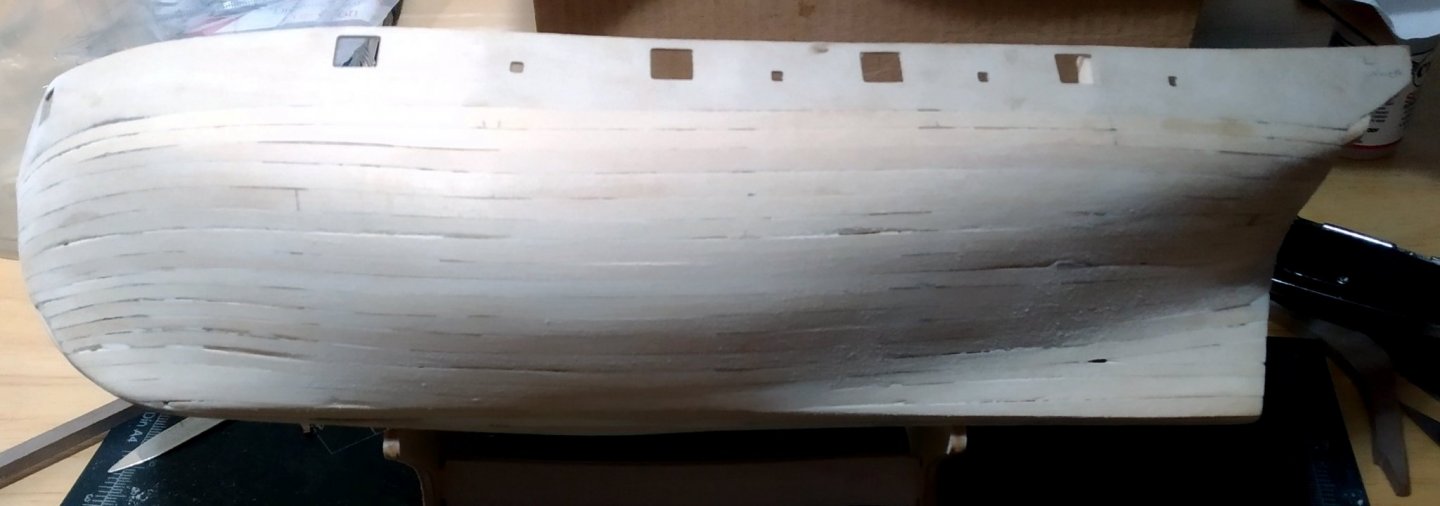
Not perfect by any stretch of the imagination

Filler applied but not rubbed down

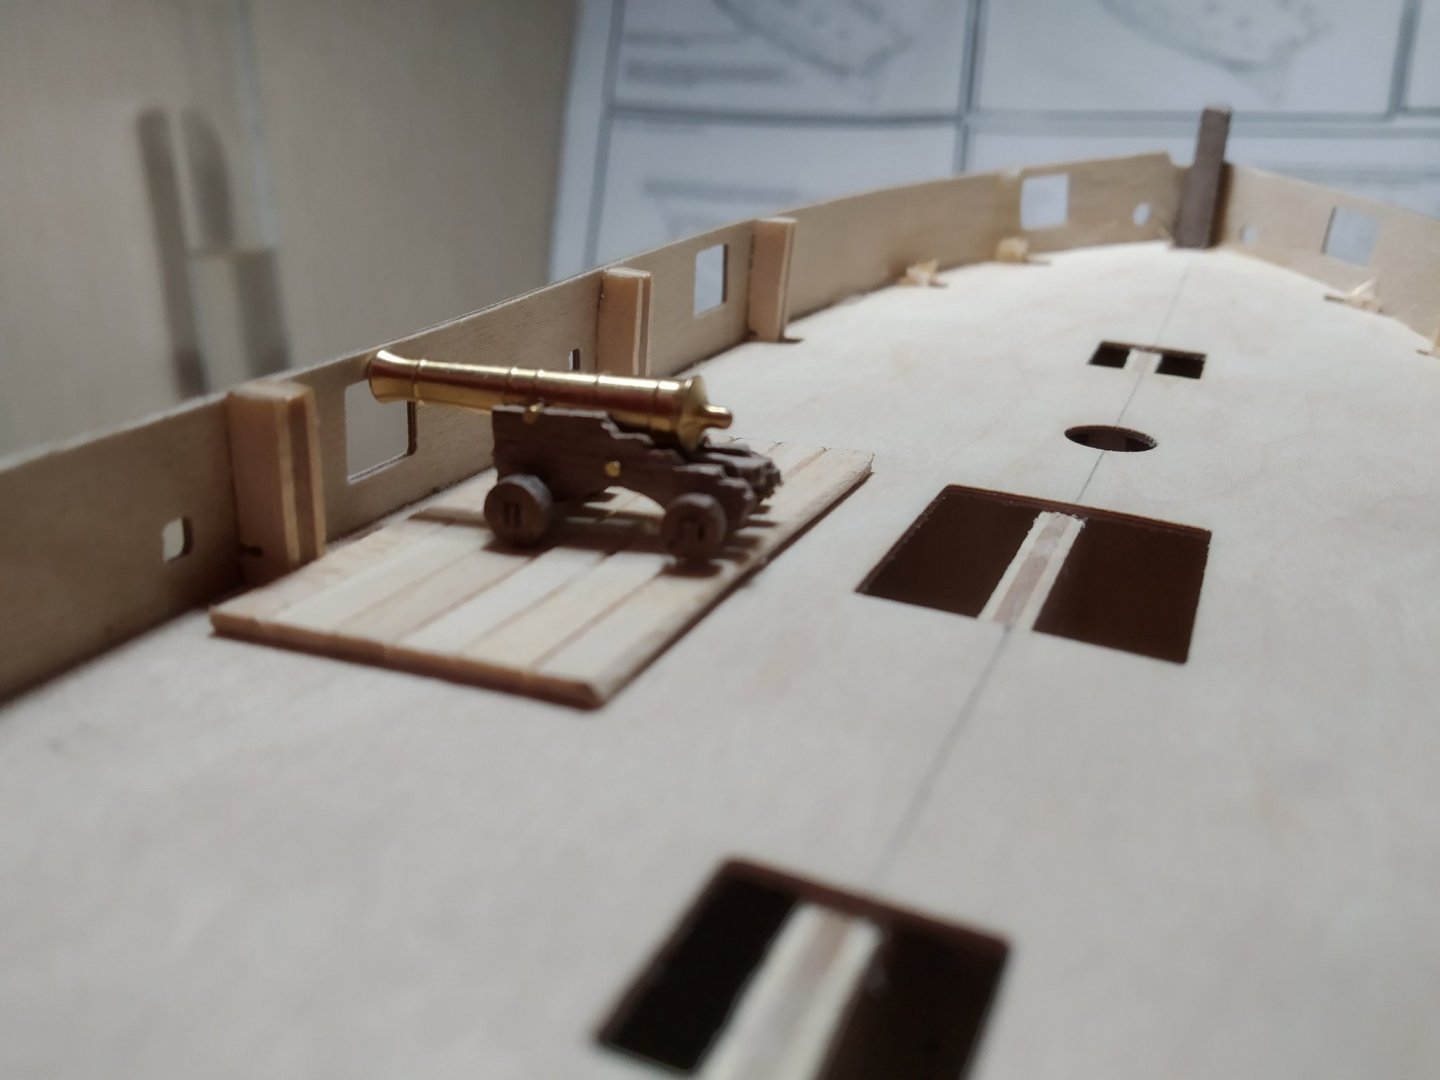
Now partially sanded and keel on.The problem I have now is how to sort out the gun ports, Iv'e mocked up a sample of decking for the cannon to stand on and only the first ports on both sides allow the cannon through (the bulwarks are level with the bulkhead extensions) With the other gun ports the top of the cannon is level with top of the bulwark so I have no way of filing the opening any higher. Is it a case of planking higher than the bulwark so I can open up the gun port ( that's not going to look good from the inside ) or is the another solution?
Thanks Chris
- JeffT, ccoyle, GrandpaPhil and 2 others
-
5
-
-
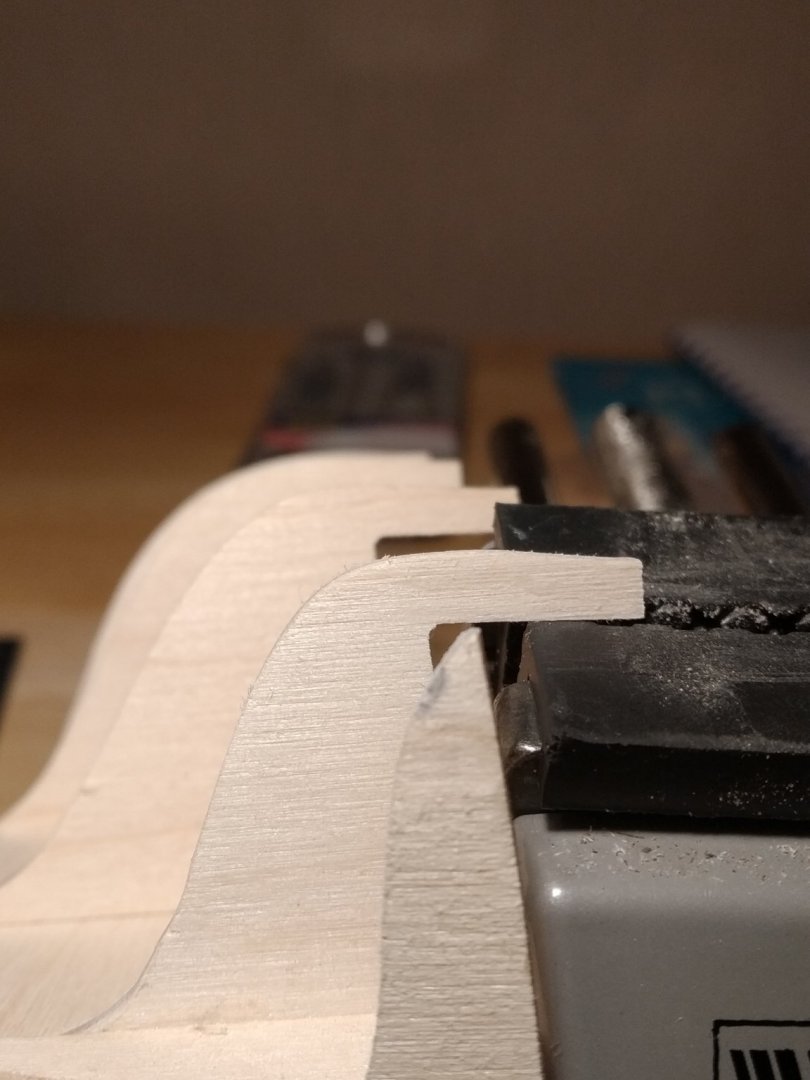
Quick update.I have started the planking and have four planks each side of the hull the only problem is I'm an IDIOT of the highest order.DESPITE reading and seeing on chucks video that you can't get the planks to lay flat around the stern and bow without bending I thought I'd have a go anyway which resulted in a clinker effect on 2 planks each side ! I know I know the information by experienced people is spot on and not there just for fun,the only conclusion I can draw up is it is some sort of macho challenge that clicked in my dim brain.A bit like when you see a 'wet paint ' sign but you still have to touch it to make sure.
I have truly learnt my lesson and will follow any advice and information as best as I can in future, I can say hand on heart though I have learnt loads of stuff even at this early stage of building the model such as the prep of the bulkhead profiling wasn't as good as I thought it was and accuracy really is your best friend Oh and how to bend planks using the jig like Chuck shows in his video.🥴
So apologies to all you people out there, for thinking I could ignore your fine advice.I will have no qualms if you make me walk the plank
Yours Ashamedly
Chris


.
- tkay11 and Edwardkenway
-
2
-
2 hours ago, ccoyle said:
Oh, dear -- then I'm afraid I can no longer converse with you. Long-suffering Toffees fan here.
Just kidding! Ship modeling crosses the usual footballing boundaries. 😉
Are you an expat? Blues are poor at the moment and can't see it getting better with their set up.
You can't excommunicate me I need all the help I can get!🙁
-
-
Cheers Gregory will do👍
-
Thanks Tony for your answer having watched the videos I'll be marking the bulkheads and using the fan lines system.As oppose to marking the points where the planks interfere with each other and then cutting which I've read about in books..Not a bit confident about planking,maybe over thinking it but will probably drill and pin planks in place first before glueing into position.
-
Thanks Tony for your comprehensive explanation and no you have muddled it further.. I had read the planking pdf but wasn't aware of the planking videos by chuck which were excellent.Maybe I'm being thick or using wrong terminology but when watching and reading about planking the hull they lay one plank from the front of the ship to the rear ? think I need to do more searching and reading on this site. 🥴 Once again ta very much for your info.
Chris
- tkay11 and Edwardkenway
-
2
-
I managed to snap a rear axle when fitting the wheel..grrrrr not able to glue it back but after 4th attempt managed to make another phew! Bullwarks are now fitted so now on to the planking (breaks out in a sweat ).Now a couple of questions ,does the very first plank that goes against the bulwark go straight across or follow the bullwark's curve at the stern and bow?Secondly having read and seen videos about planking is it necessary to work out the widths of the planks at each bulkheads and adjust accordingly or do people just use full width of plank and adjust as they go.Not looking for a short cut just want to do it the most practical/ correct way ?
Thanks Chris
-
Whilst waiting to carry on with bullarks decided to build a cannon,wow the they're fiddly blighters.
-
😊
I've actually got a well kitted out garage but it would mean leaving the Admiral on her own and didn't think it was fair.Plus would be prone to getting less cups of cha.
- mtaylor, Canute, Keith Black and 1 other
-
4
-
No tea as it was in non building mode ,rings!! you think the Admiral would allow rings,not a chance place mats for the mug.

- Keith Black, mtaylor, Ian B and 2 others
-
5
-
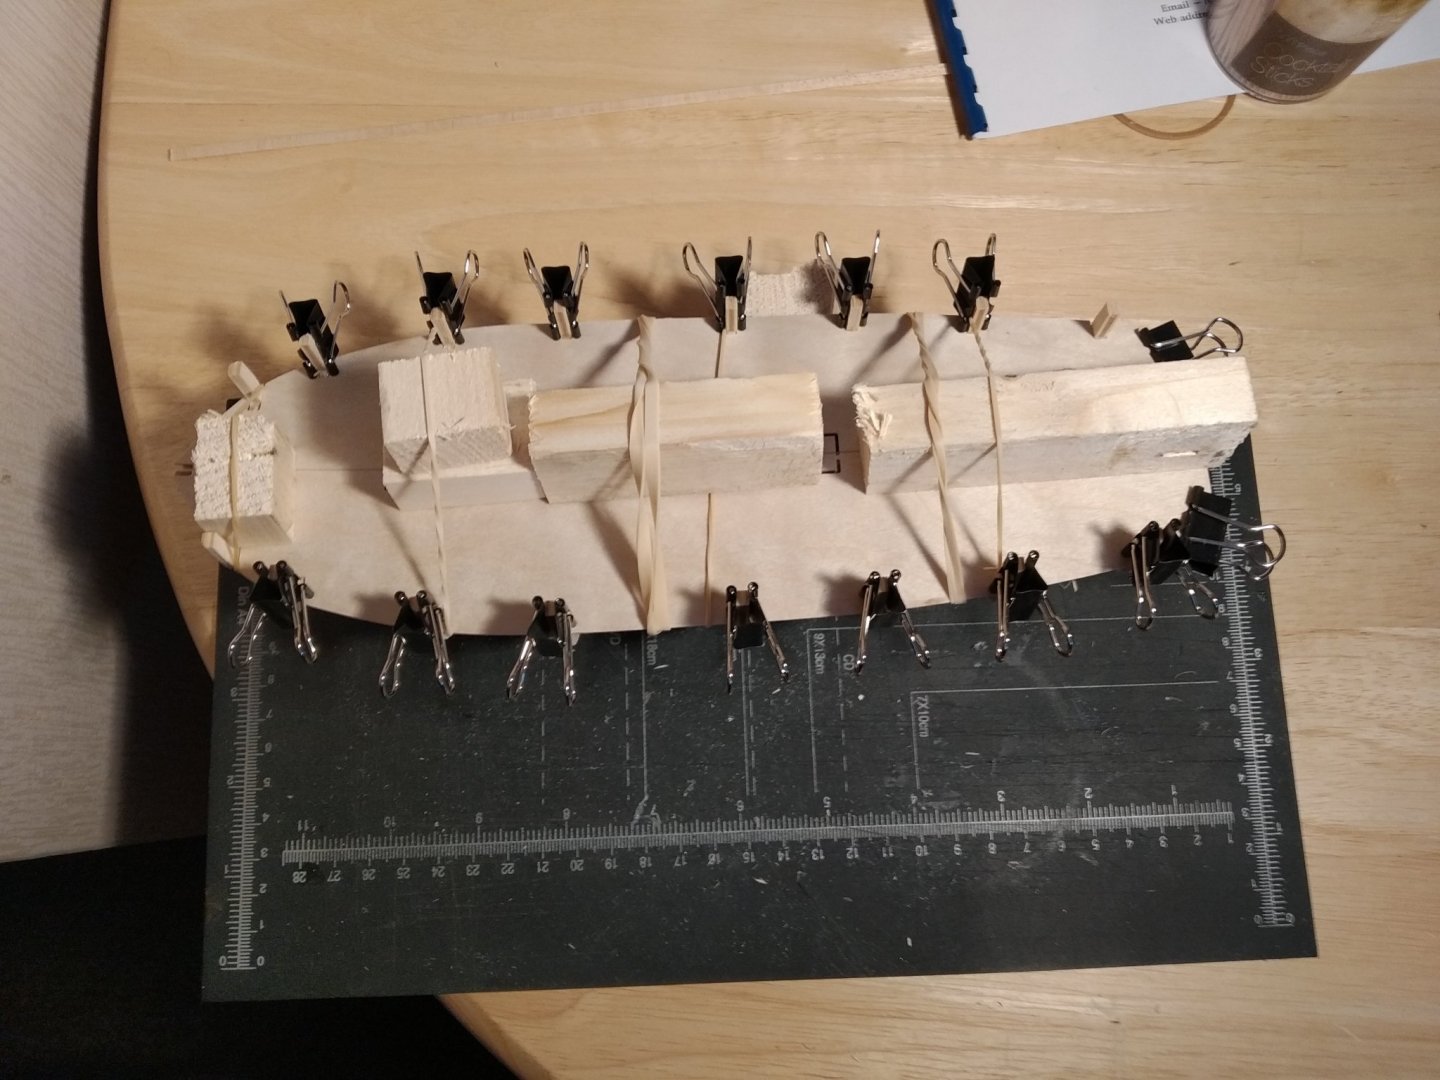
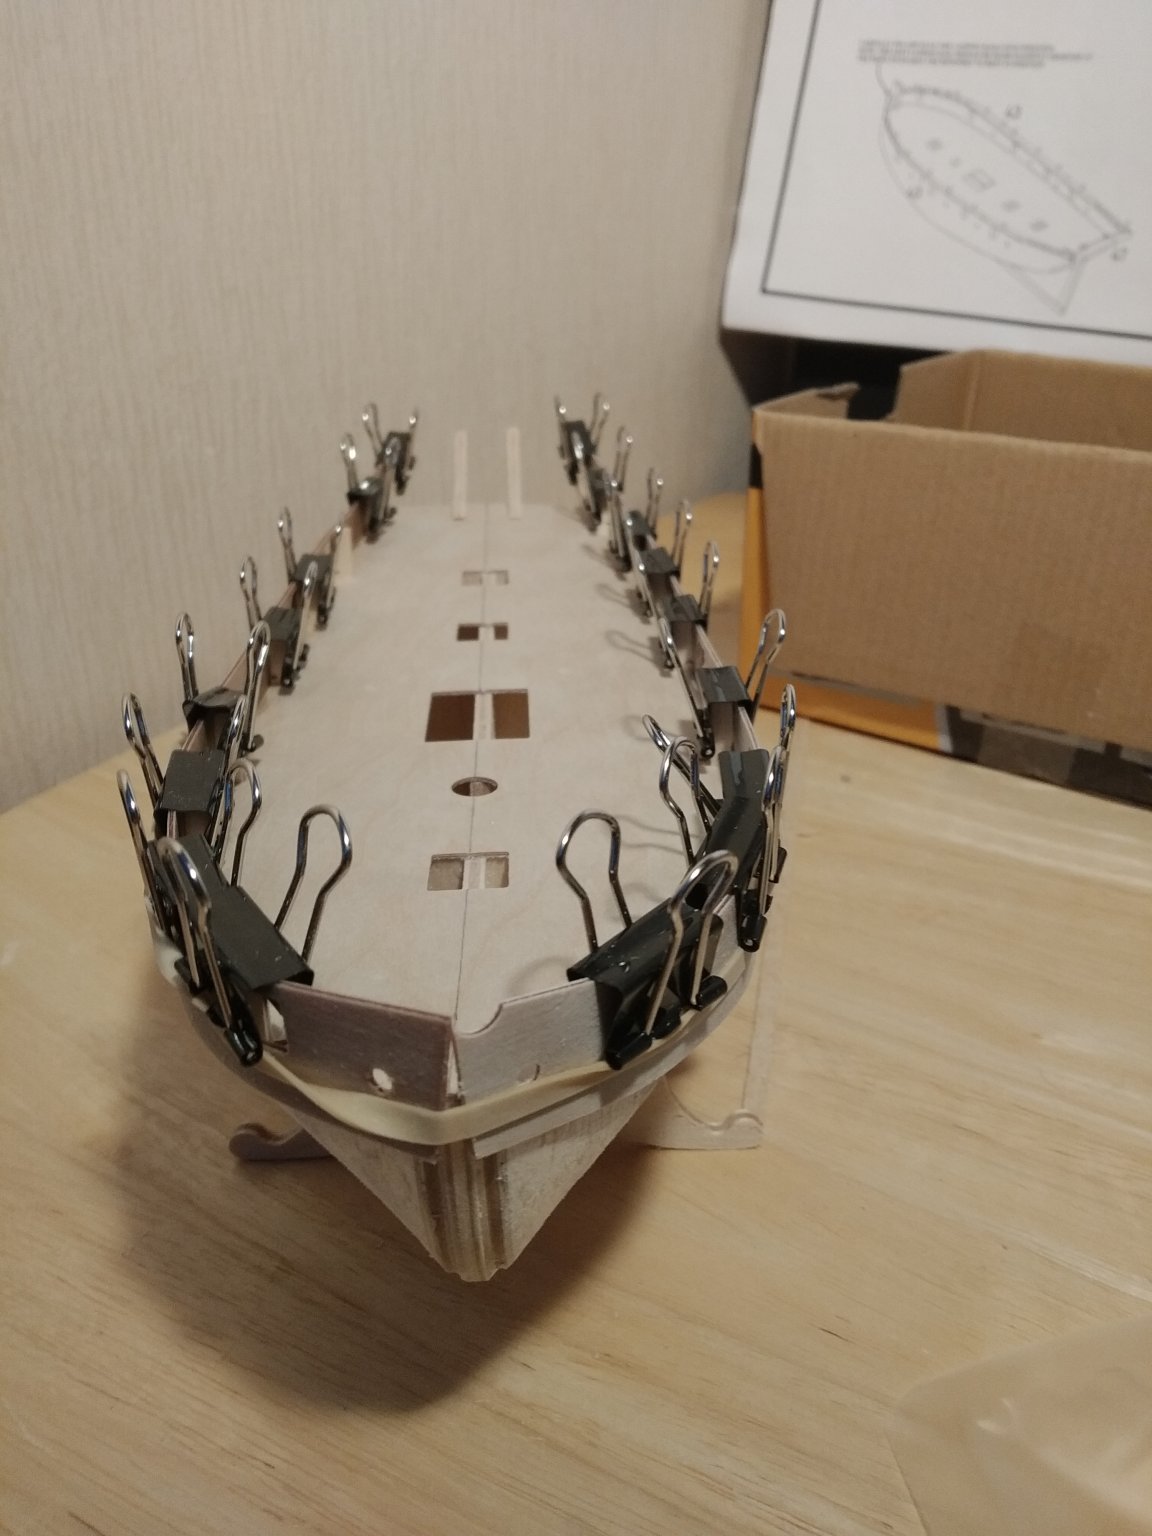
Whilst I'm waiting for the bulwarks to dry thought I'd just put a pic up of my set up.Things I've bought for my first build are:
Tweezers
Compass dividers
Map pins
Rubber bands
Wire bulldog clips
And a lovely little 360 degrees suction vice from Aldi.
Wife had a jigsaw board which I'm using for displaying plans and she also had a magnifying light.
So hasn't cost much for me to get going as a novice builder.

-
Thanks for all the feed back fellas,I think I'll be going with the idea of putting keel and posts on after first planking.I'm constantly reading the build logs to take advantage of other peoples experiences and tips.
Quick update I have cut halfway through bulkhead tabs readying for snapping off later and bulwarks soaked in warm water for half an hour and now drying in position then I'll glue them in place.

- Dubz, Edwardkenway, GrandpaPhil and 3 others
-
6
-
47 minutes ago, Gregory said:
If you haven't already discovered them, there are some excellent articles on the NRG home page..
Ship Modeling Database of articles
Thanks, yes have read through the articles.
-
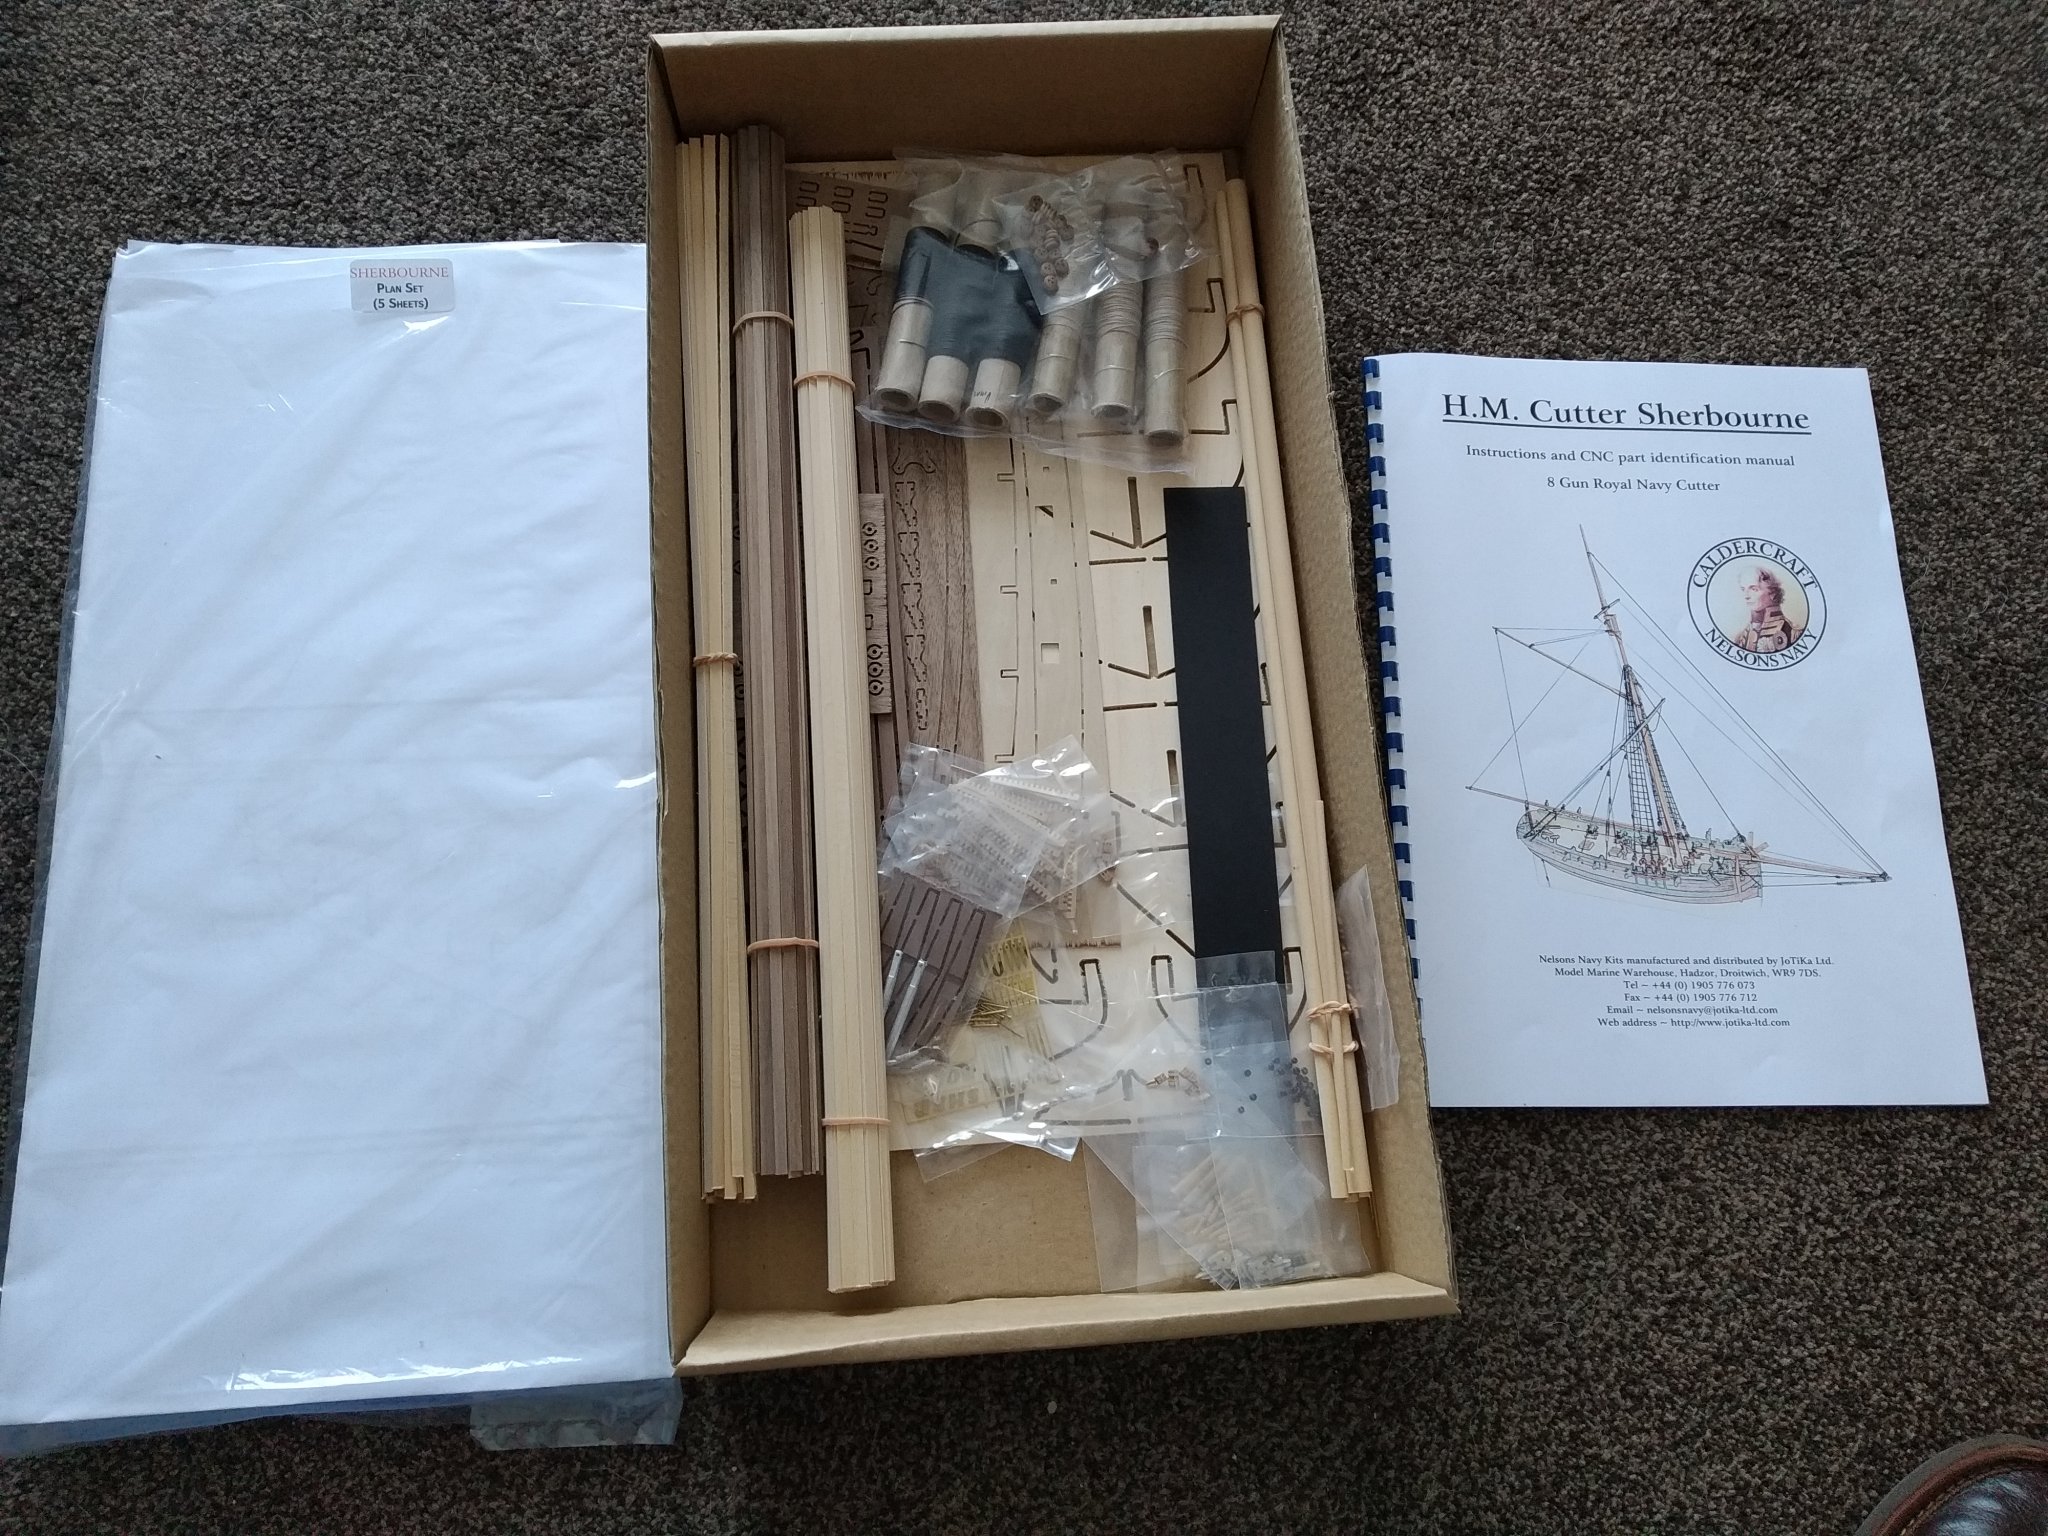
This is my first ever build of a wooden ship and Ihave taken my time before starting it.I have bought three books on the subject and found the last book which I bought
'Period ship kit builder's manual ' by Keith Julier to be the most informative and easiest to follow.I've read quite a bit of these books before I started my build with a great deal of apprehension.I don't want to make a mistake that cant be rectified so have also read the log's from other builds to see which way is the best to approach it and can hopefully learn from their 'mistakes' / learning curve.
 Checking off the parts against the list at first looked baffling but Caldercraft do a good job of numbering and naming parts.

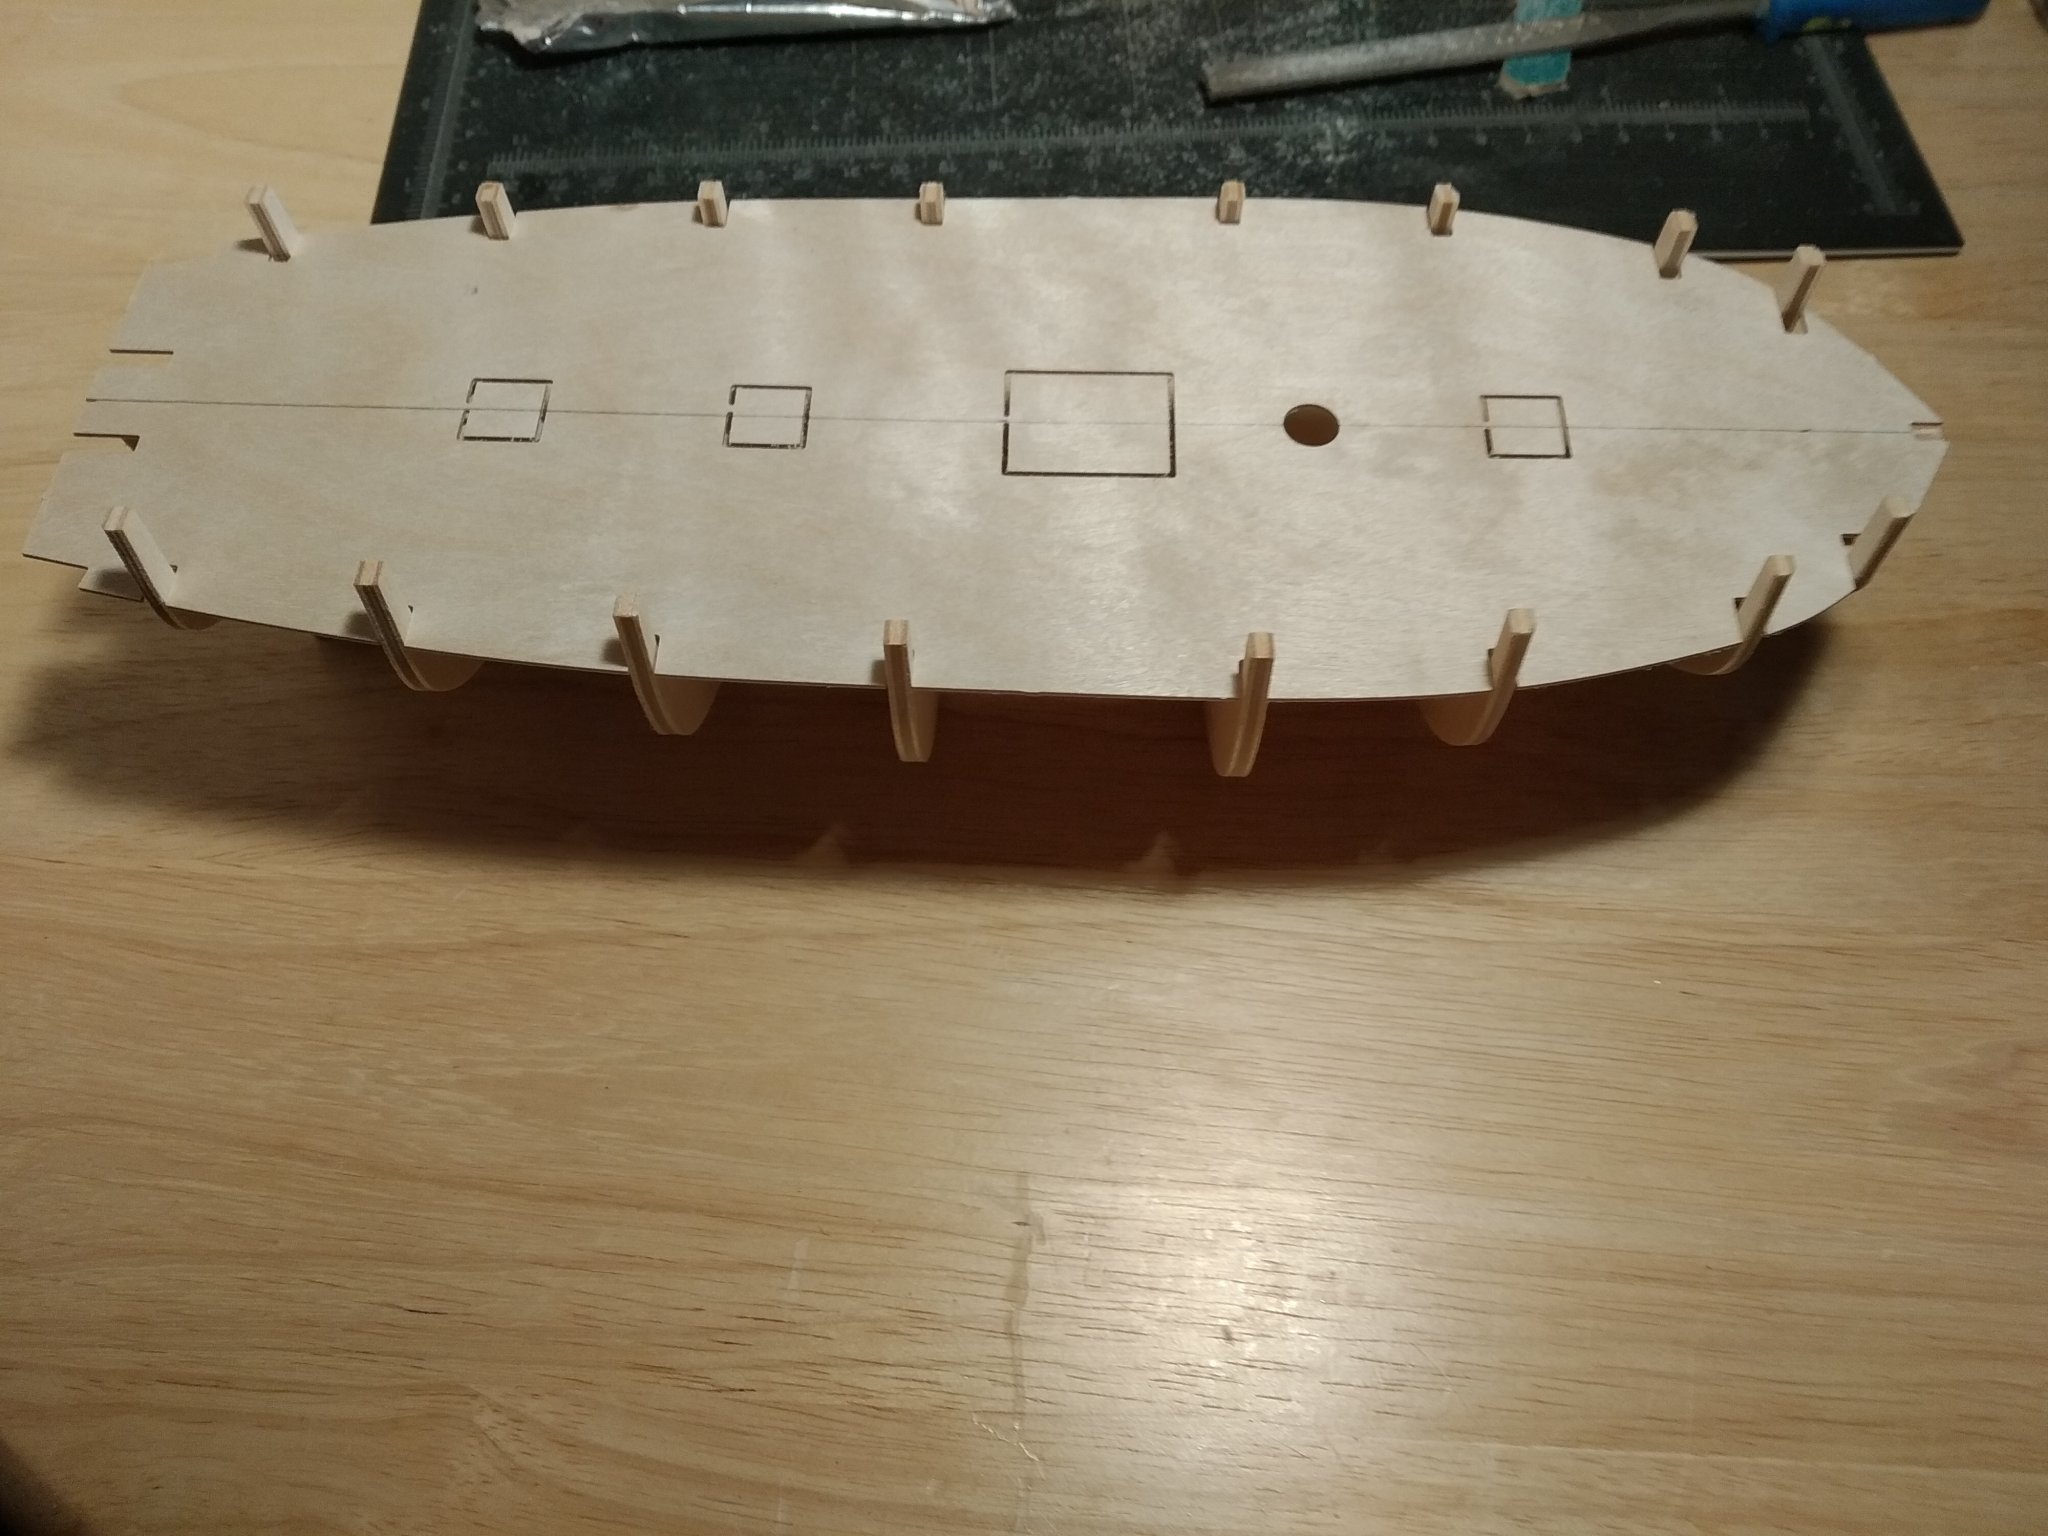
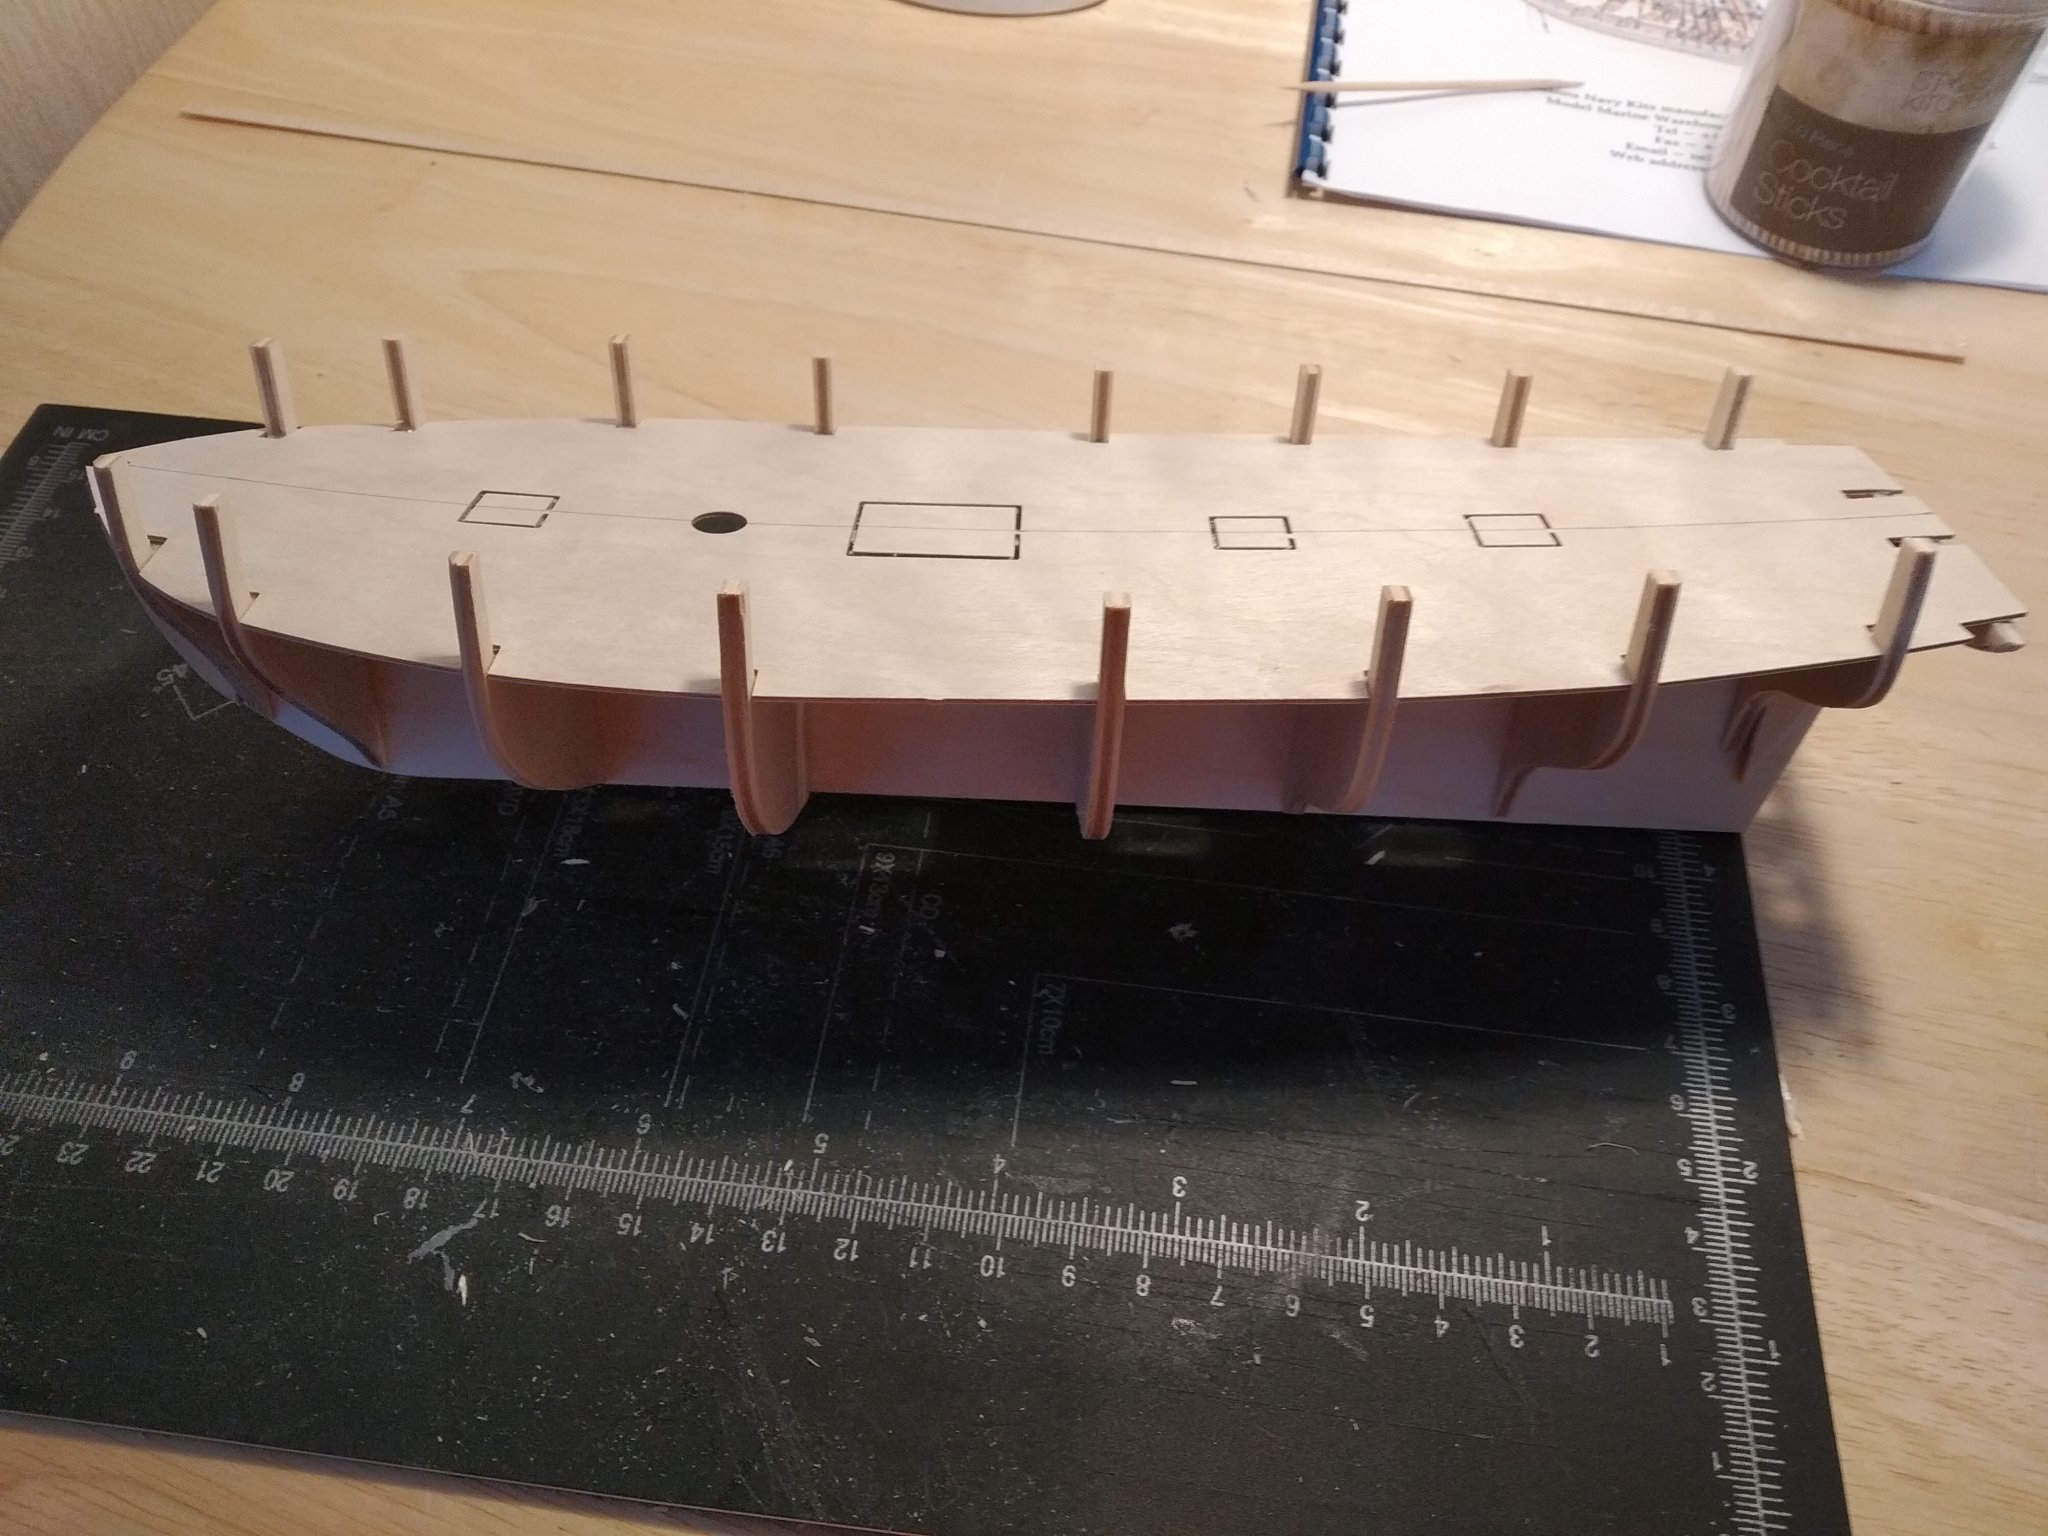
 First dry fit of bulkheads with false keel and false decking to make sure everything is lining up.
 There
There
There was a small dinge in the last bulkhead that had to be filled.
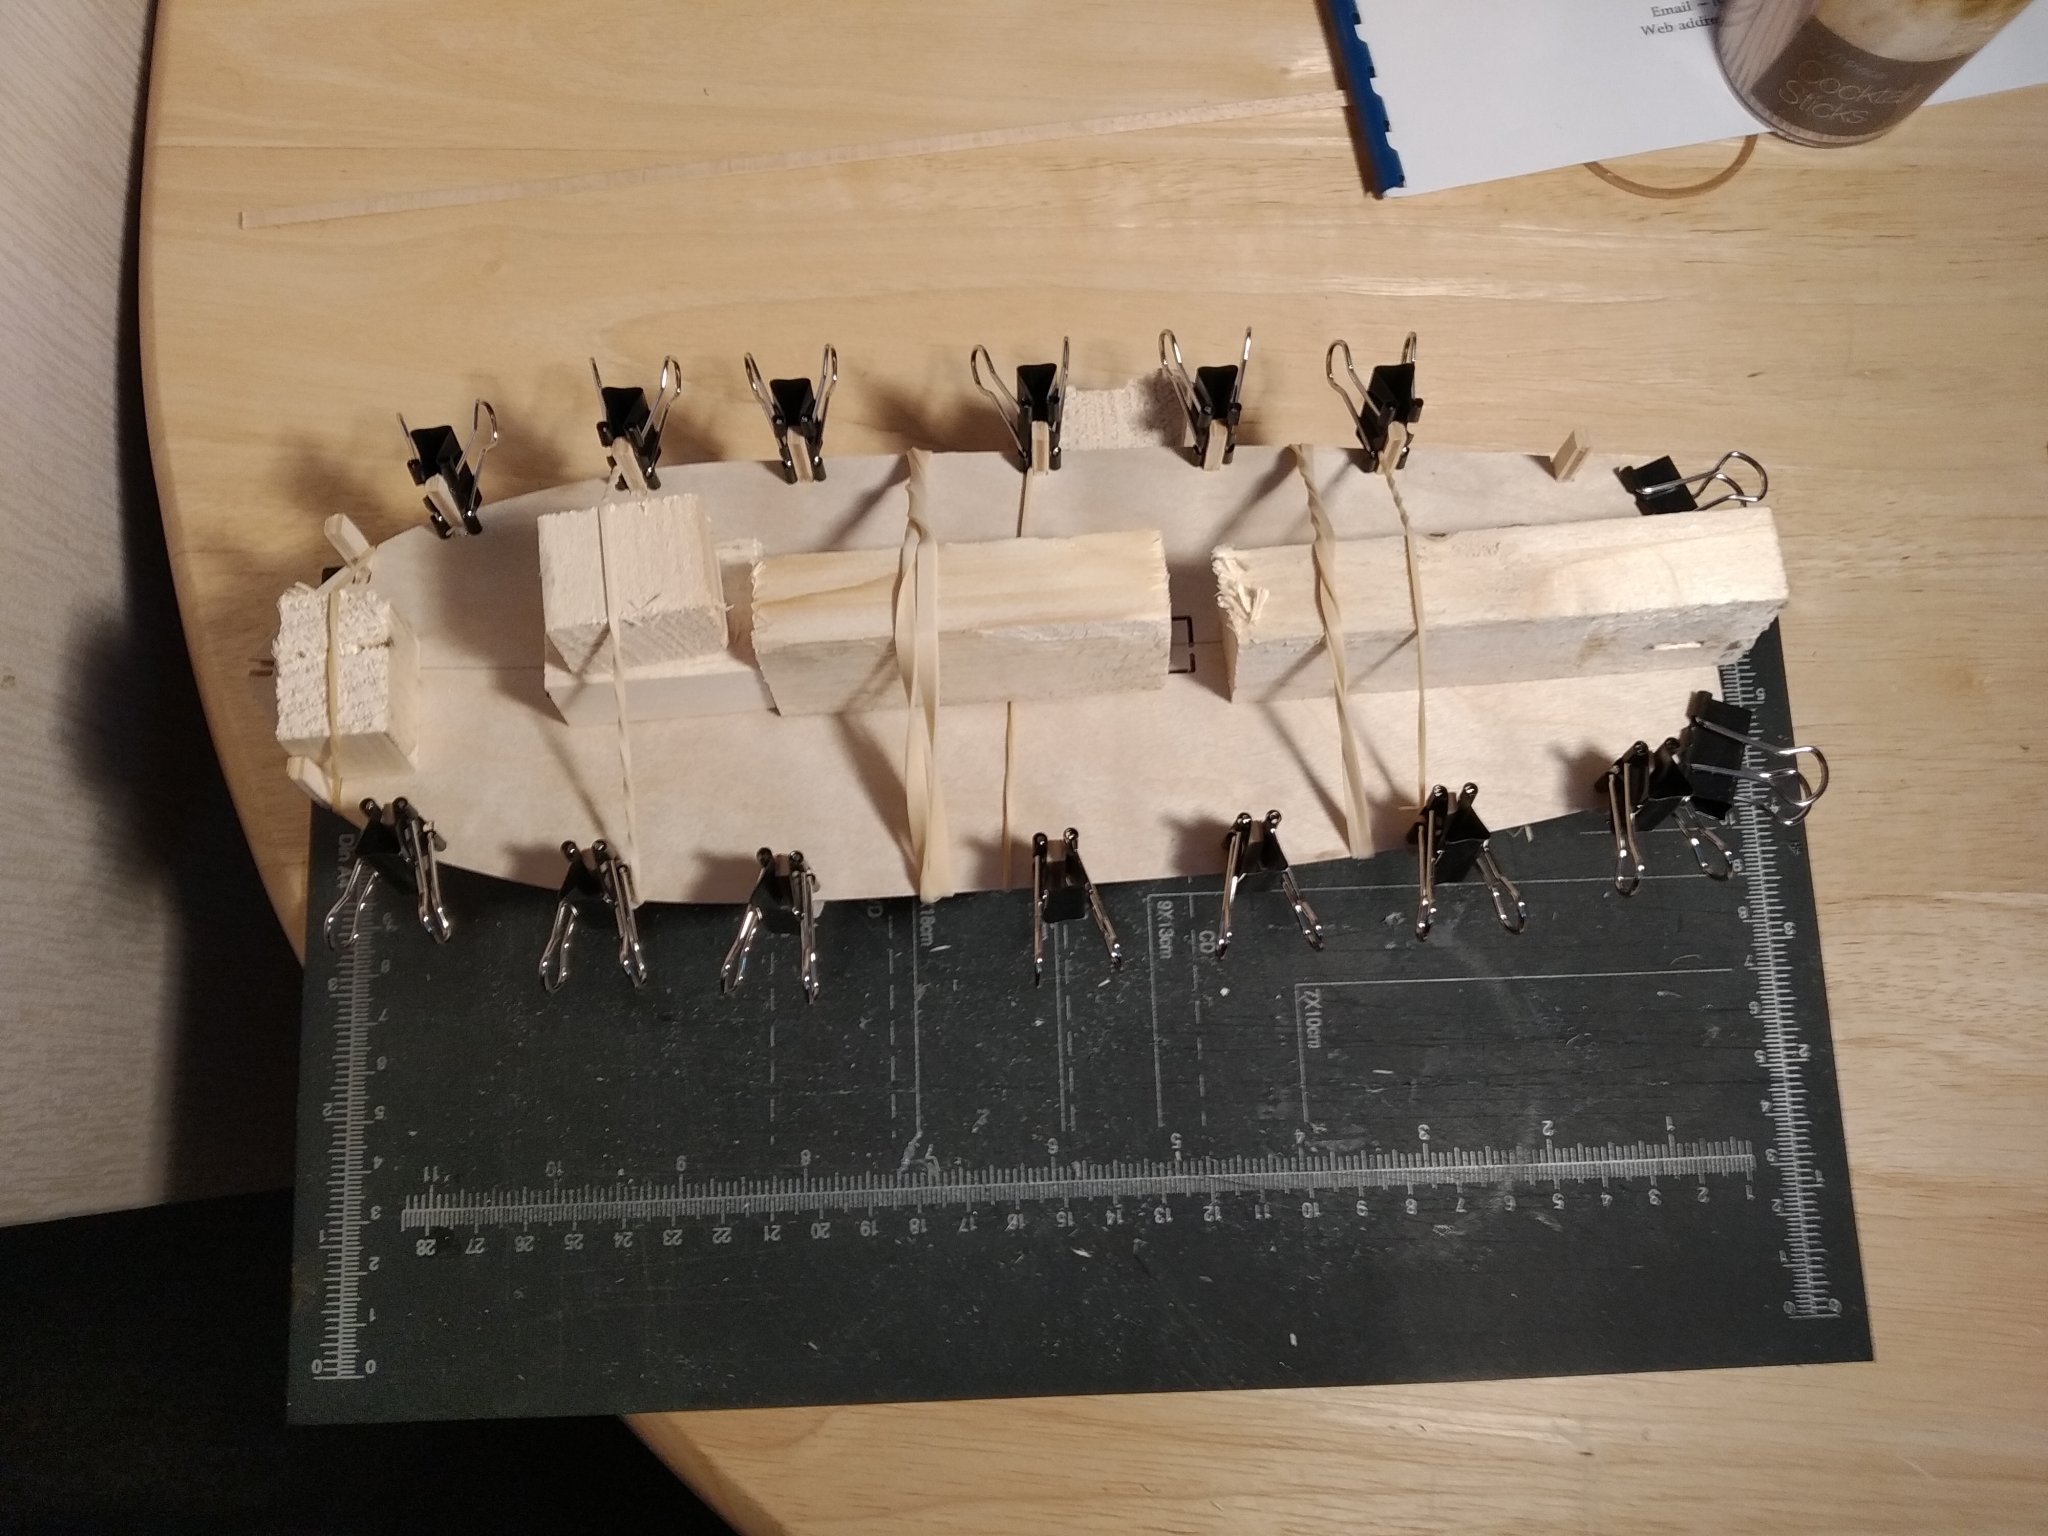
False deck on and glued down
 Deck now held firmly in place and although not much to look at for experienced builders I'm chuffed with it so far.

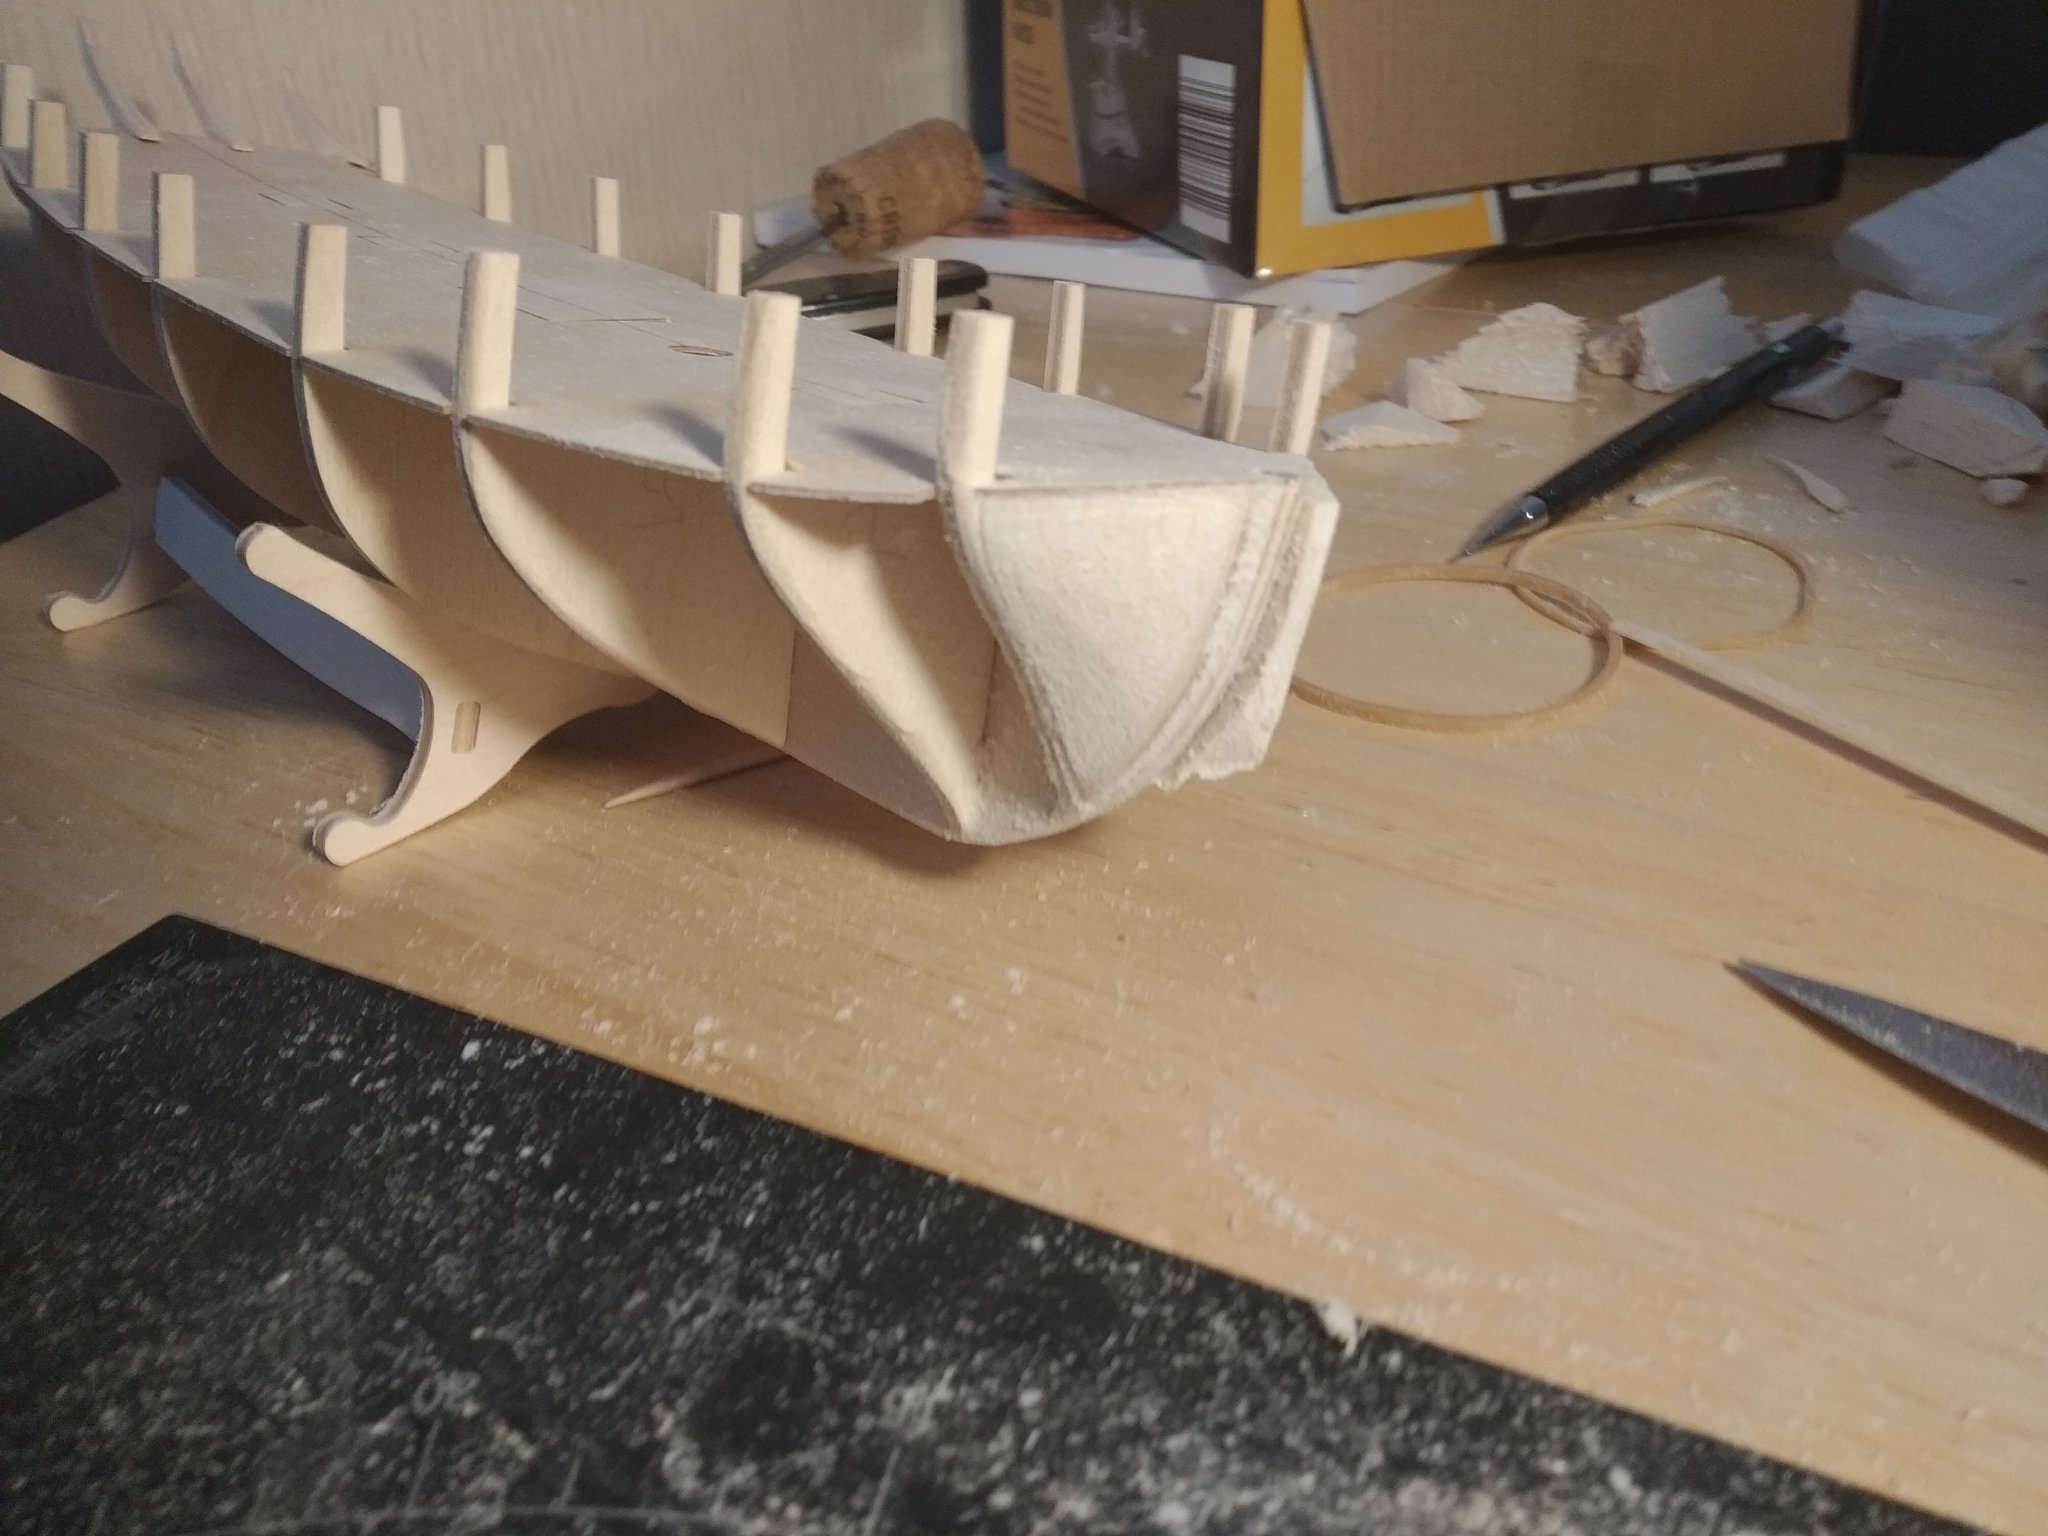
Now for filling the front and back bulkheads,this is the first one I've done and you can see the other side filled but not yet shaped.
Hope I haven't made some glaringly obvious mistake so far,fingers crossed.
Still not sure how to proceed when it comes to planking,for now I've left the keel and posts off as per other builds to make it easier but should I add the keel after first planking ,second planking and should I even rabbet for the planks.Seems there are different approaches to the planking conundrum.Thanks for looking all constructive criticisms welcome.
- Ryland Craze, KARAVOKIRIS, Dubz and 4 others
-
7
-
-
Now this might be a stupid question from a newbie but I'll ask anyway.Seems lot's of builders crave for accuracy with their build but then only glue the planks and don't use pins,surely the pins would represent the nails used for planking?
-


HM Cutter Sherbourne by Oddball - Caldercraft - 1:64
in - Kit build logs for subjects built from 1751 - 1800
Posted
Well I've started the second planking and have now decided to go down the route of using CA for initial contact at tip of plank and then wood glue for the rest.Gives opportunity for adjustment and less messy ( for me ). It's also not a race to finish and take it slow and steady should produce a better result.
Once again learning so much on this first build.