modeller_masa
-
Posts
950 -
Joined
-
Last visited
Content Type
Profiles
Forums
Gallery
Events
Everything posted by modeller_masa
-
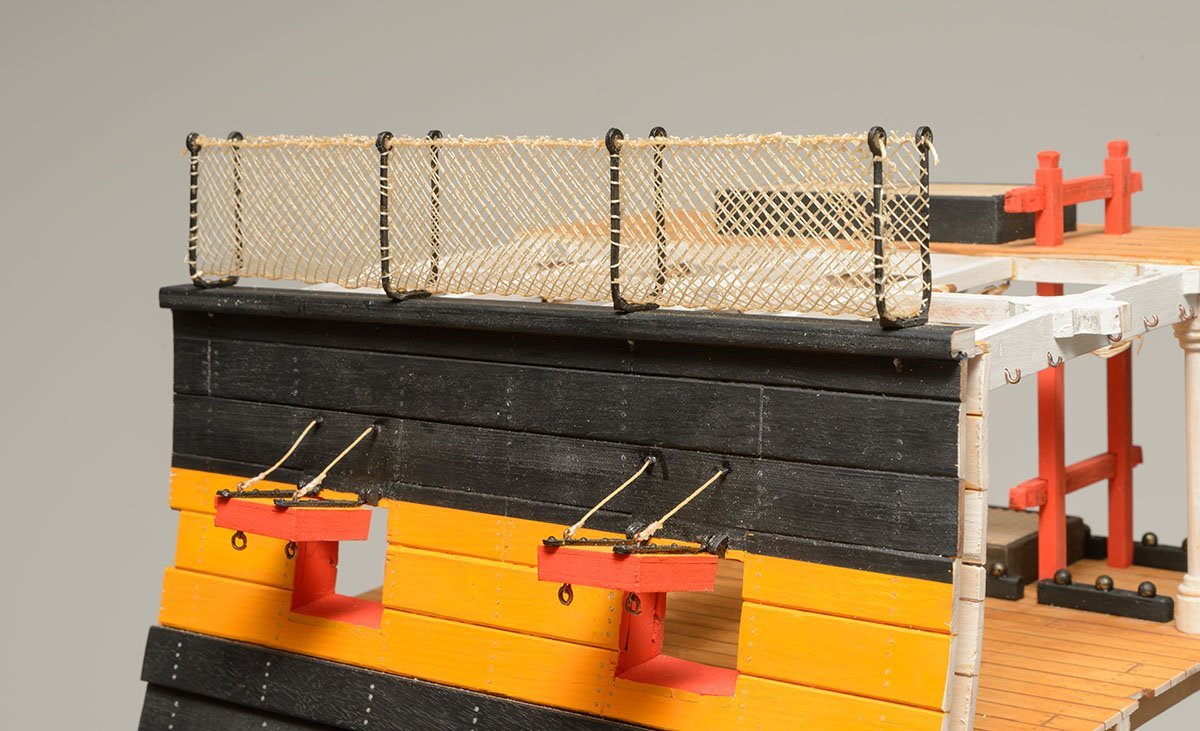
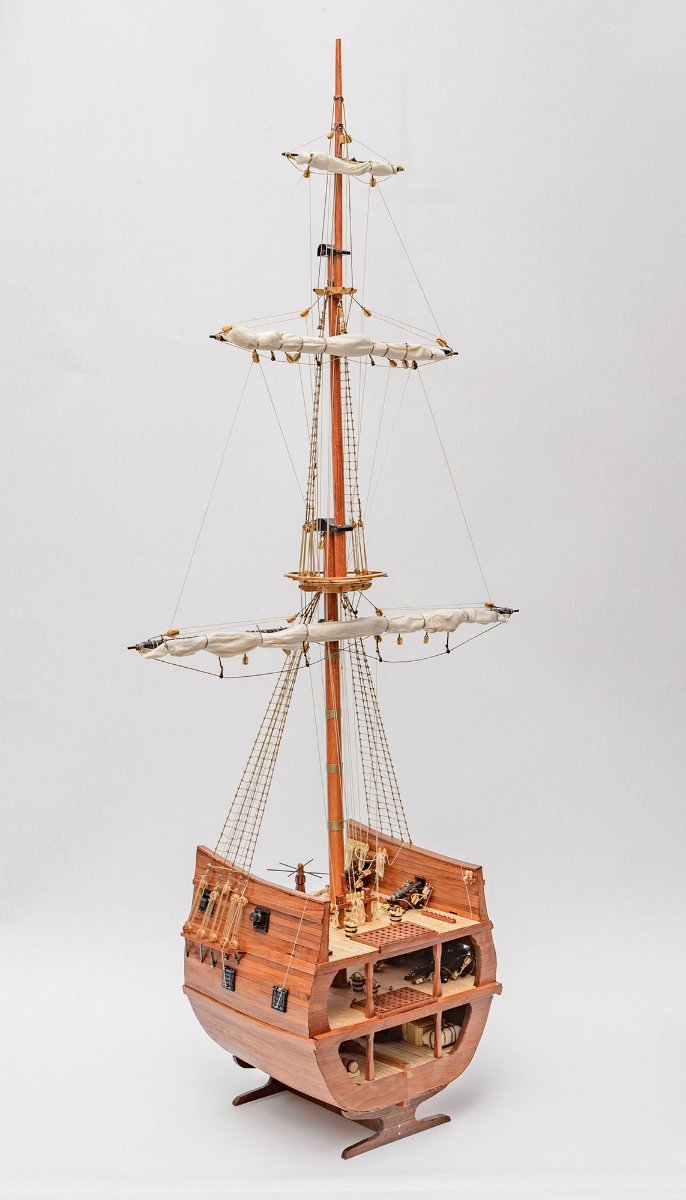
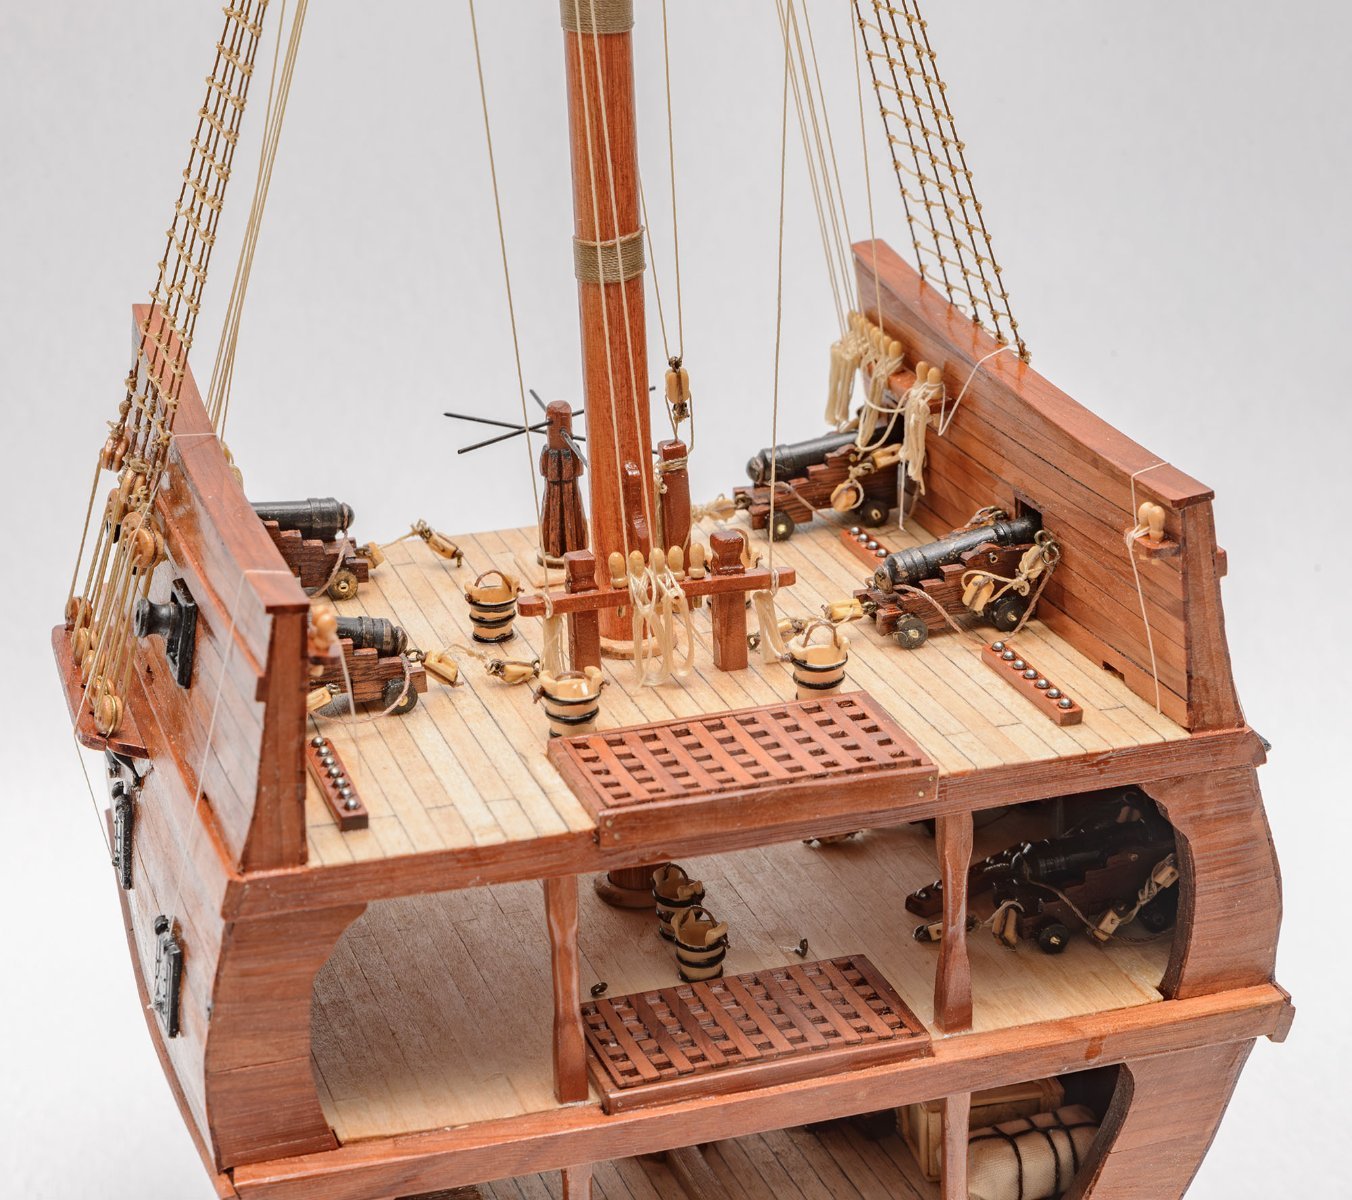
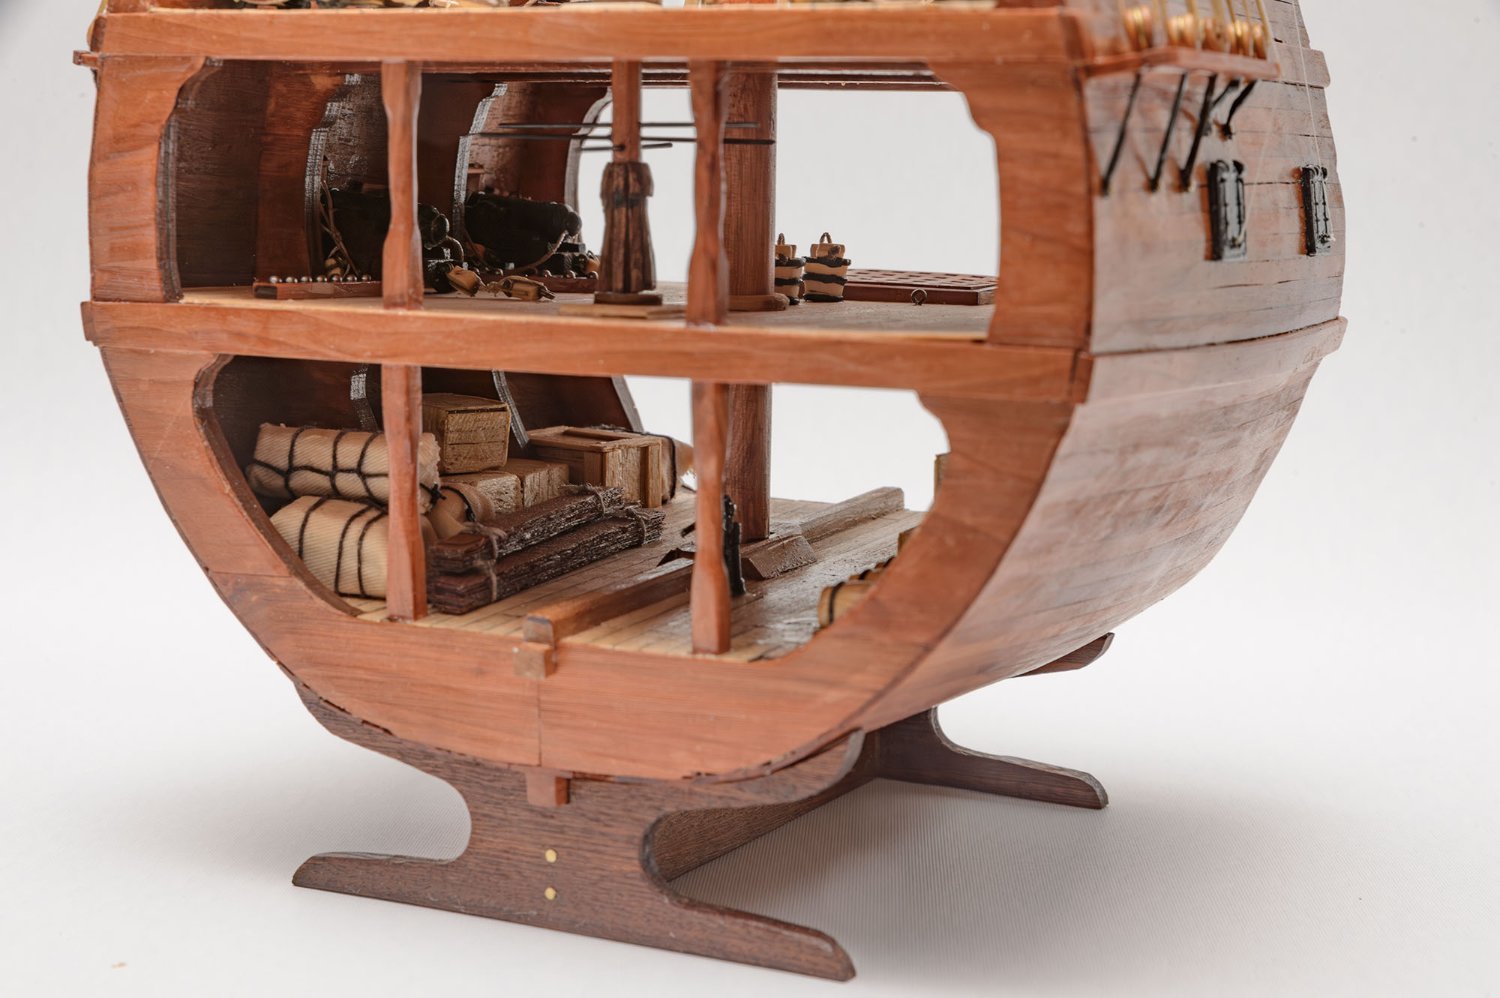
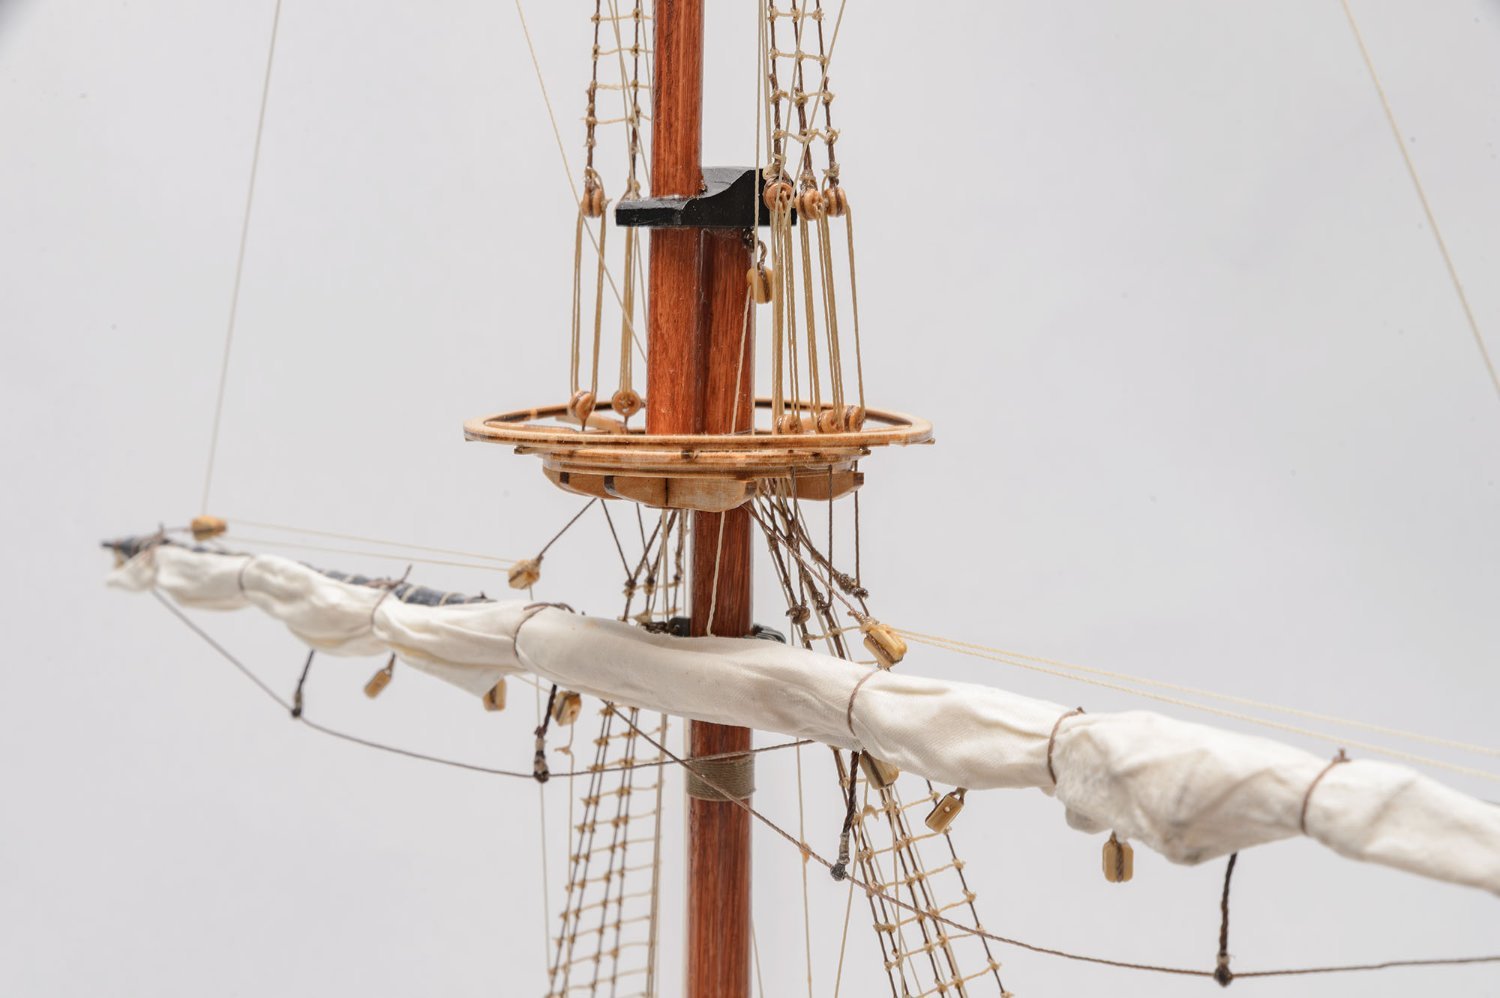
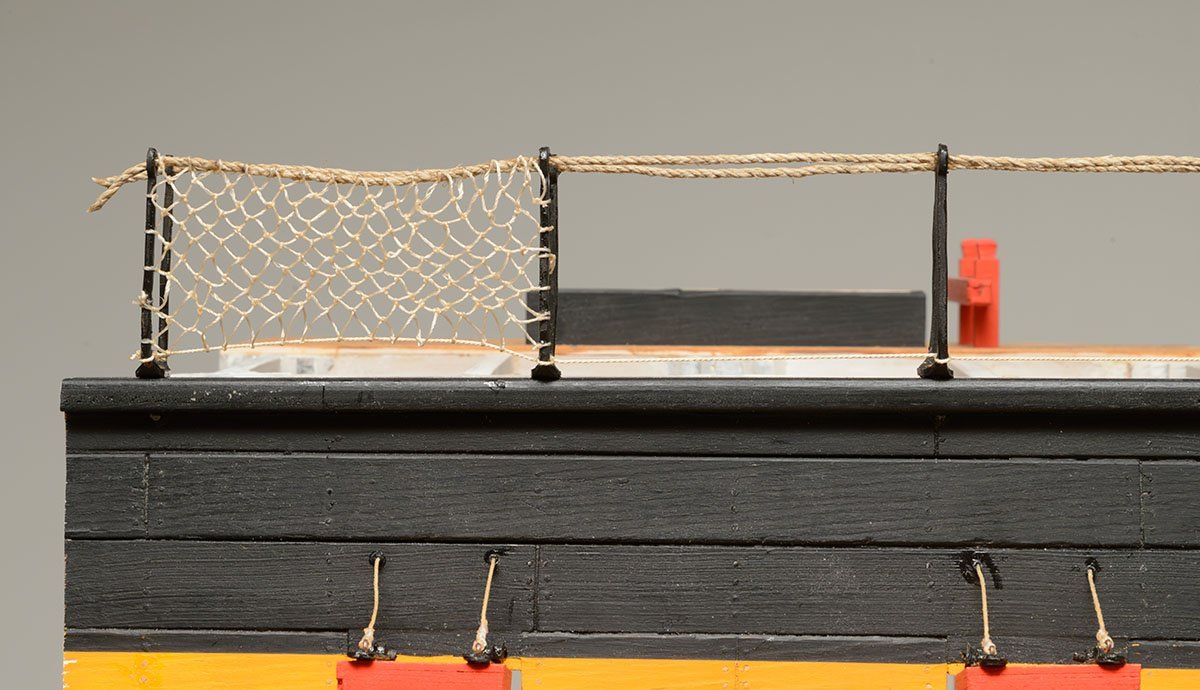
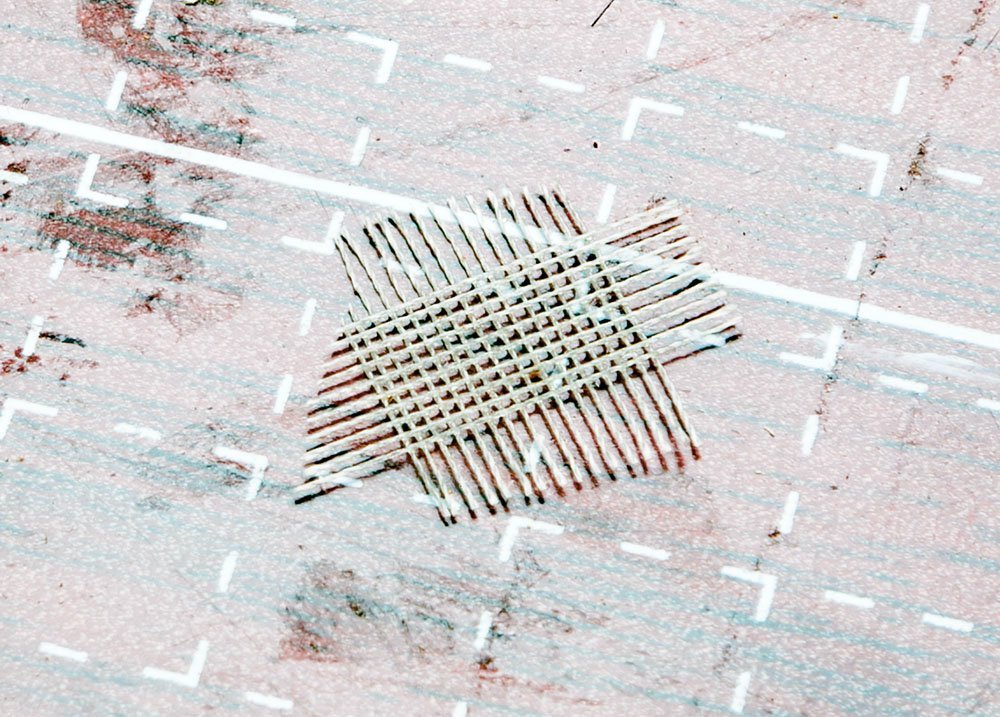
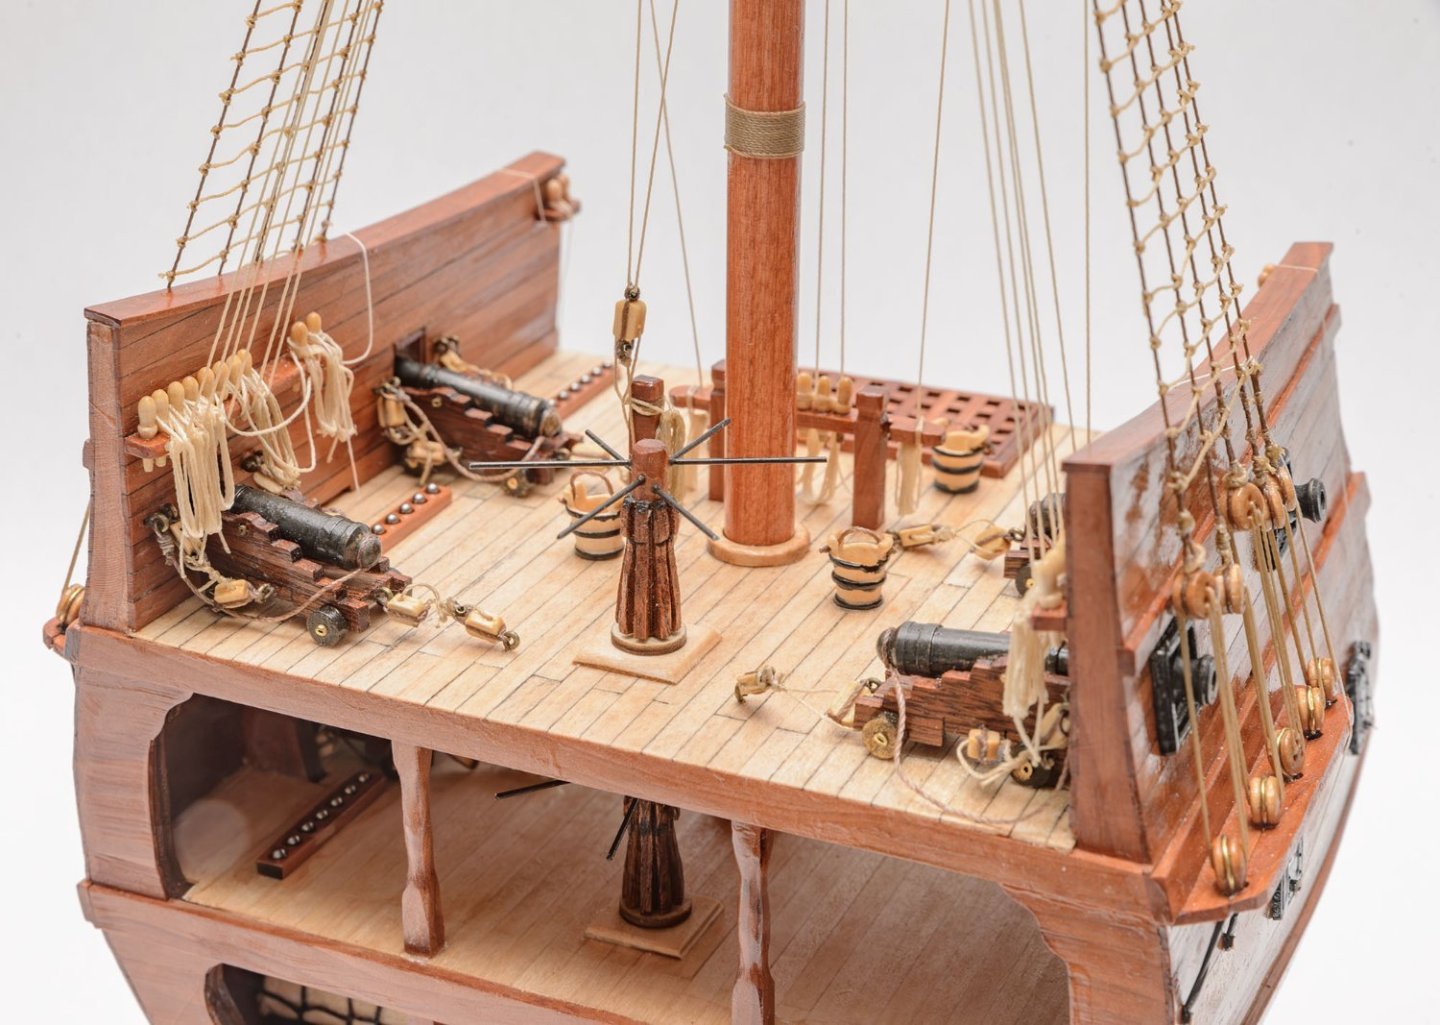
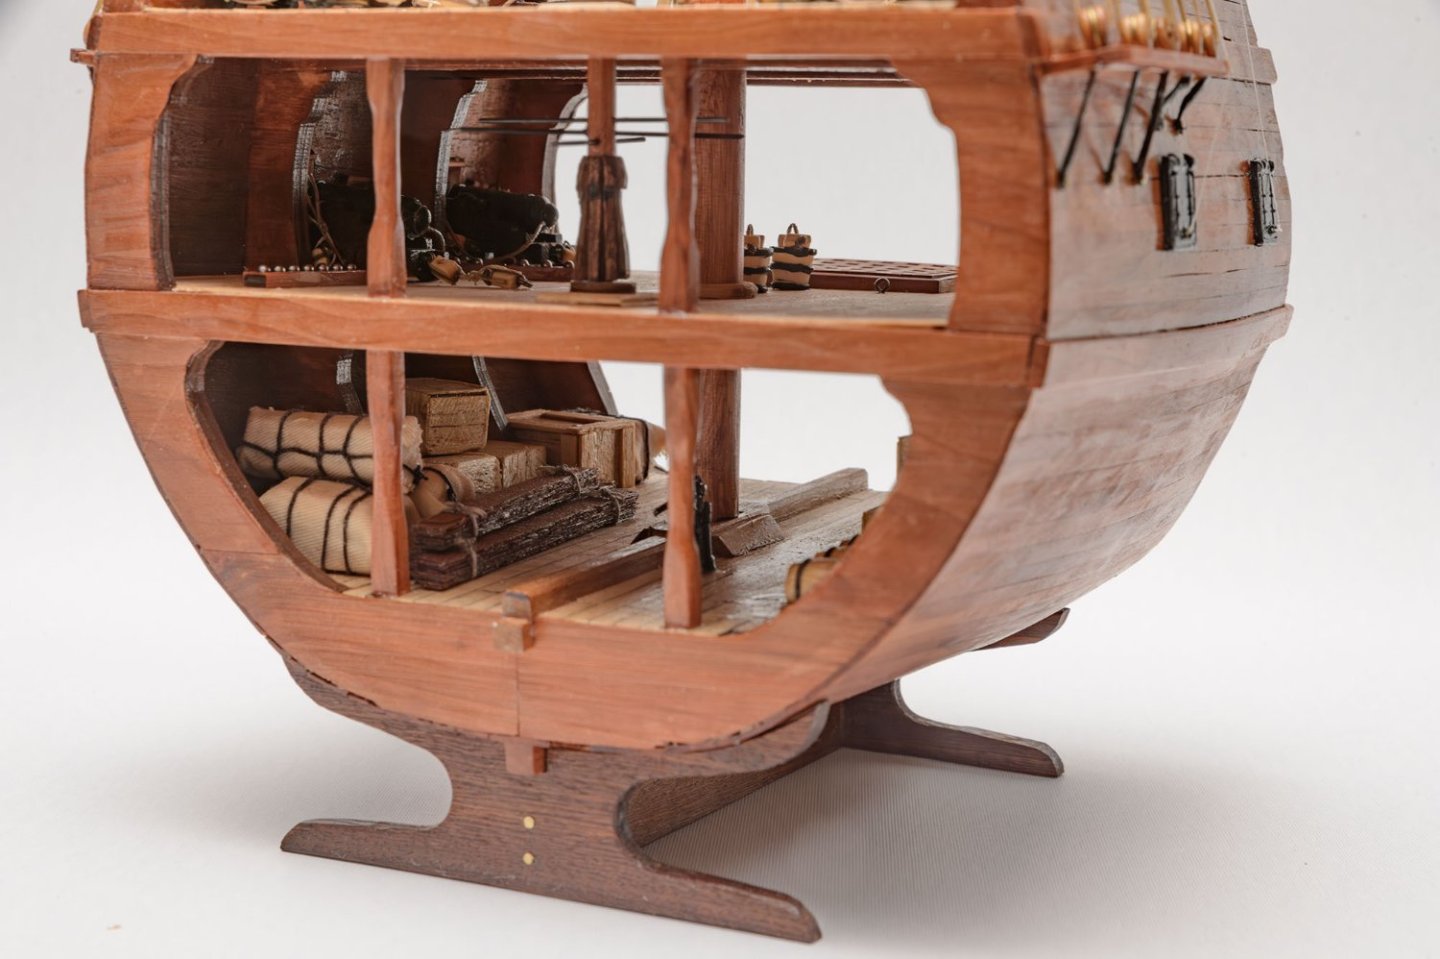
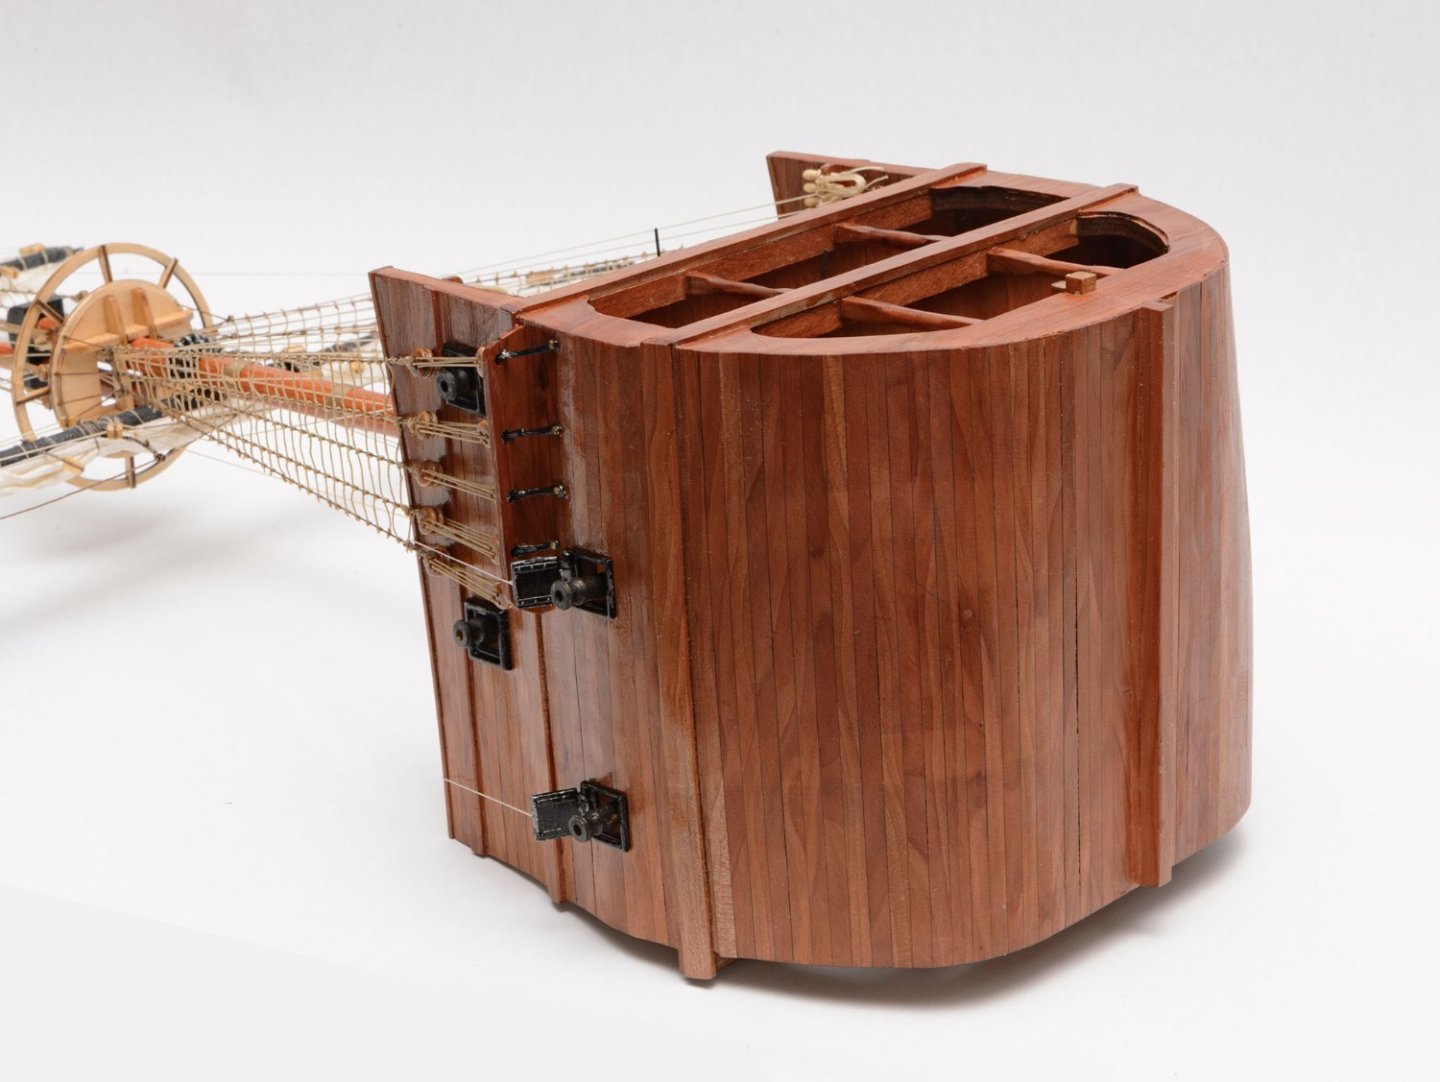
I'm making a 1/23 scale gundeck cross section kit. I tried to knot the hammock crane net by hand, but the result is a bit questionable. The size and intervals are not even. I'm using polyester thread. Do you have any ideas of DIY machine to build the fishing net, like the ropework? The fishing net machine seems pretty complex, so I don't think I can copy the structure at home. I saw someone make a fence net using brass wire. It seems much more promising than my handwork. There it is!
- 1 reply
-
- 2
-

-
Gregory, your first machine looks like a premium version of mine. After careful adjustment, I had no significant issues with my machine. The Xtool has a smaller extension kit (2x1 < 2x2), but the machine seems much more enhanced and sturdy for its $300 higher price. I want to upgrade to Xtool D1 Pro 20W for two reasons. (1) Lack of power. It is embarrassing when a 4mm thick hardwood sheet isn't cut enough. 20W would be sweet spot. (2) Too big dust chamber. If you use the 10W machine, basically you are making a bonfire in your room! The smoke is very toxic, so forced exhaust and full-cover enclosure are mandatory. It is a reason you need a huge space for the high performance laser machines. Also, don't miss any accessories. They are not options. Without the honeycomb plate and mini air compressor, the laser machine will be broken in minutes. I run CAM files(*.nc) with LaserGRBL-open source software, and make the CAM files with the Inkscape-open source software. The UI of the software is poor, but it is free.
-
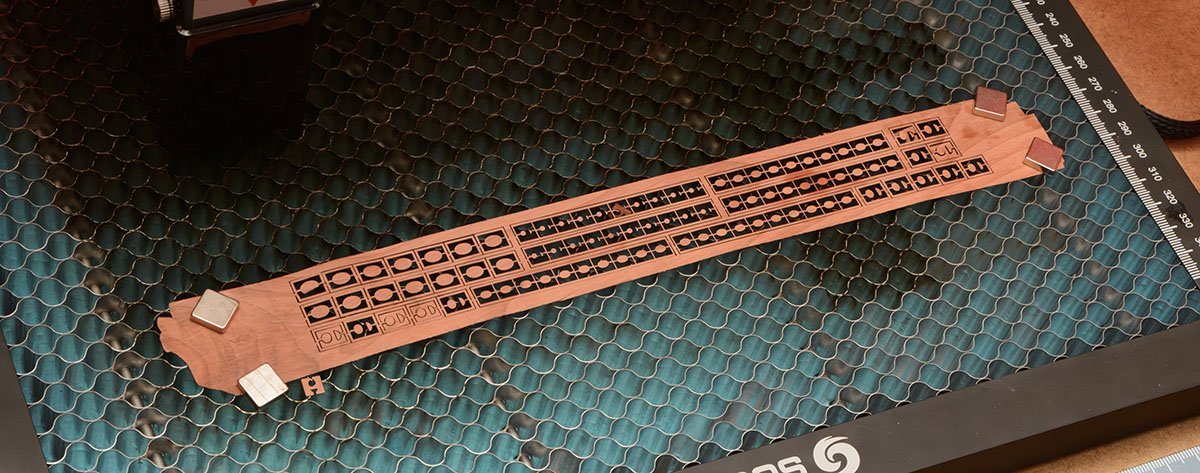
I'm using a double-stacked 10W laser, and it almost cuts 6mm or 1/4 inch cherry veneer sheet in one pass. The 20W quad-stacked laser should be better at cutting any model-scale wood in one pass. The 20W output quad-stacked system consume 120W of electricity. My system cost about $500–700. the 20W system starts at $900 (3x3 feet work area), and the full set will be over $1,200.
-
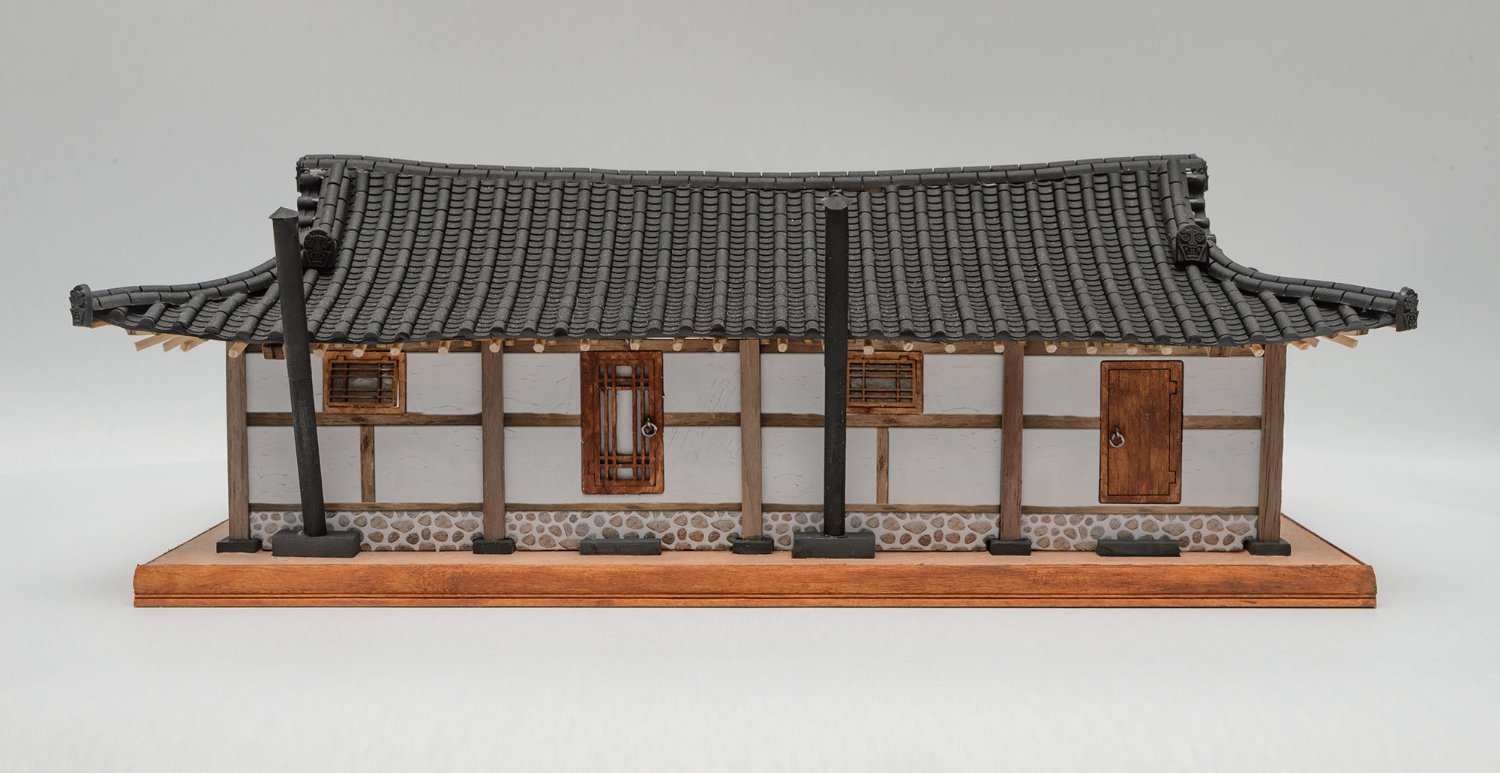
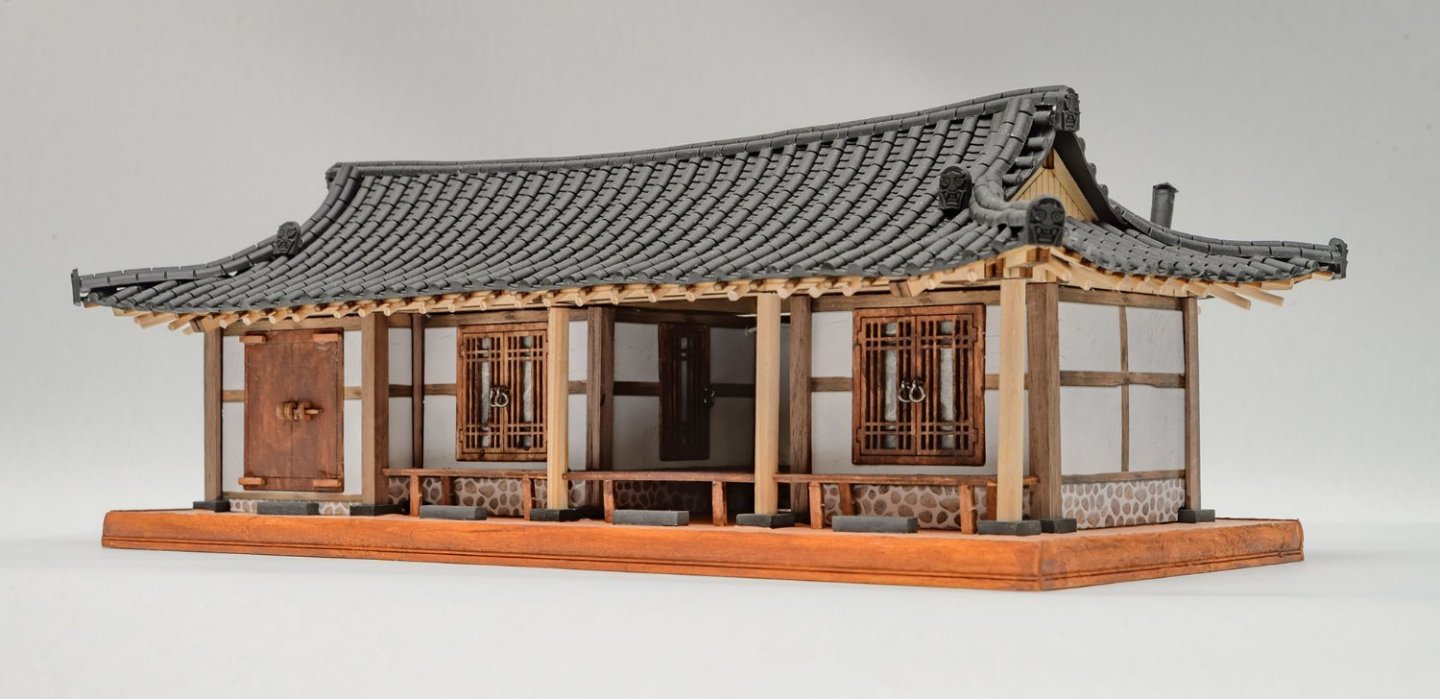
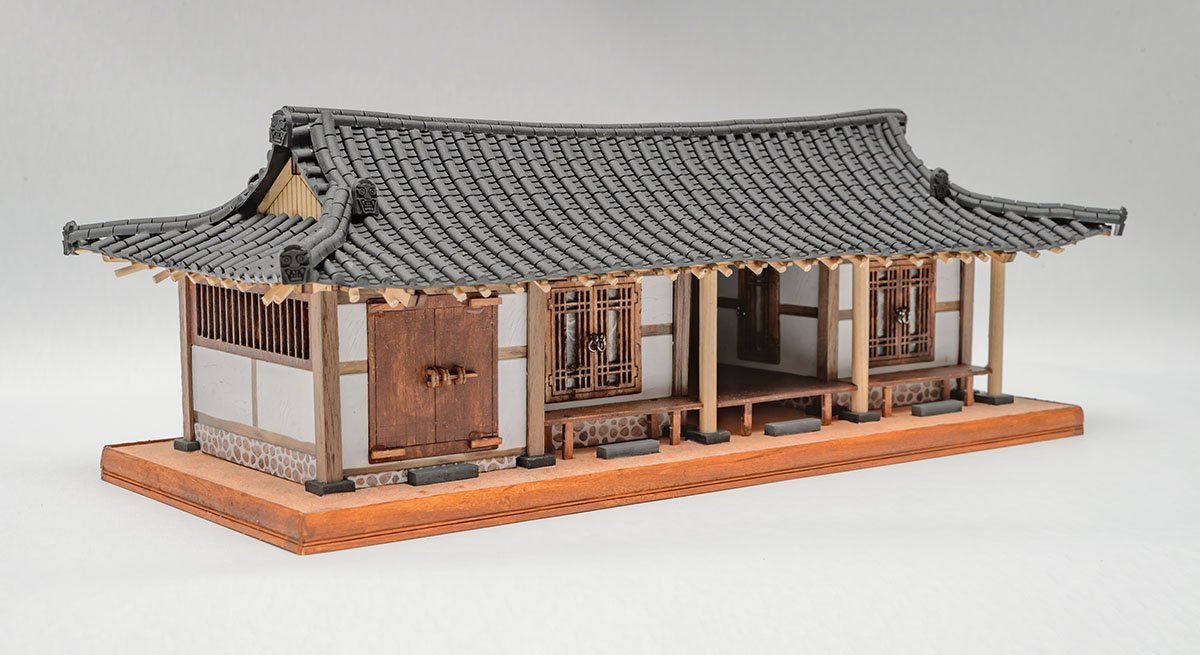
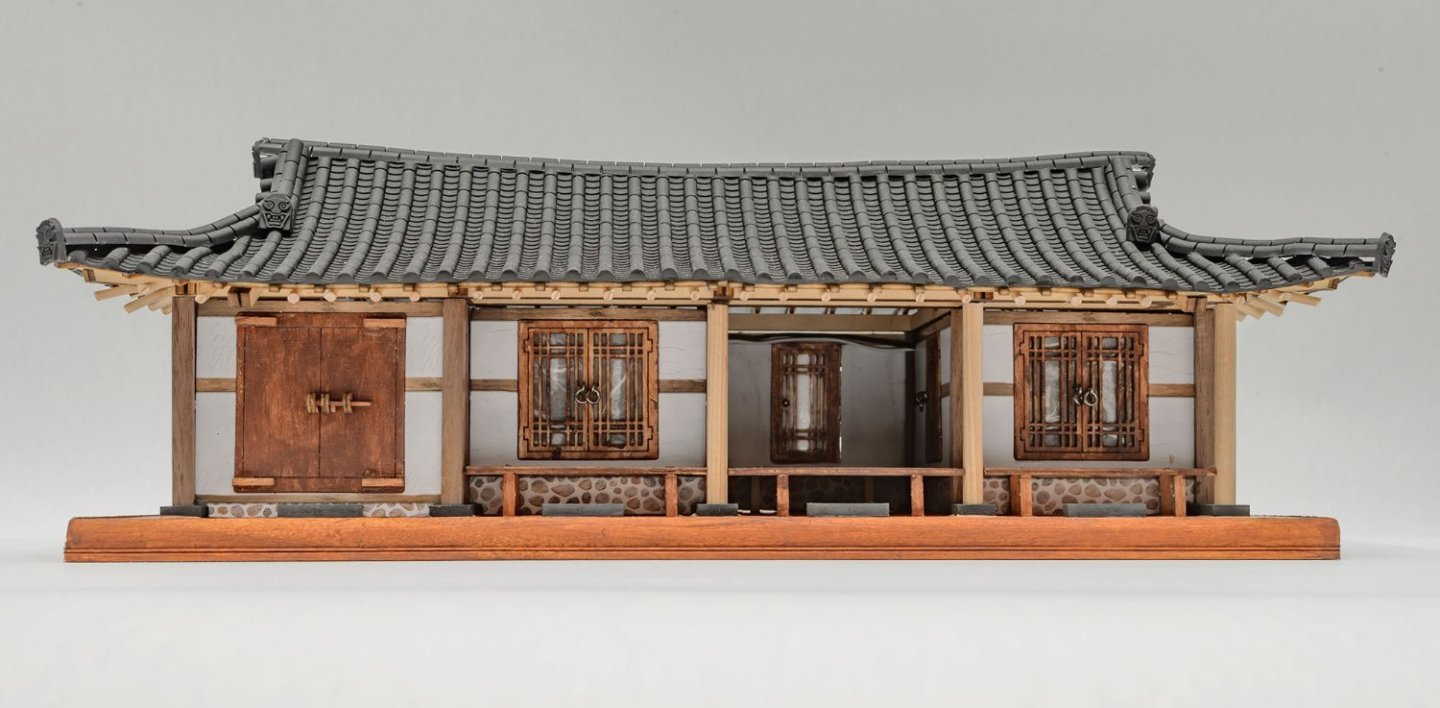
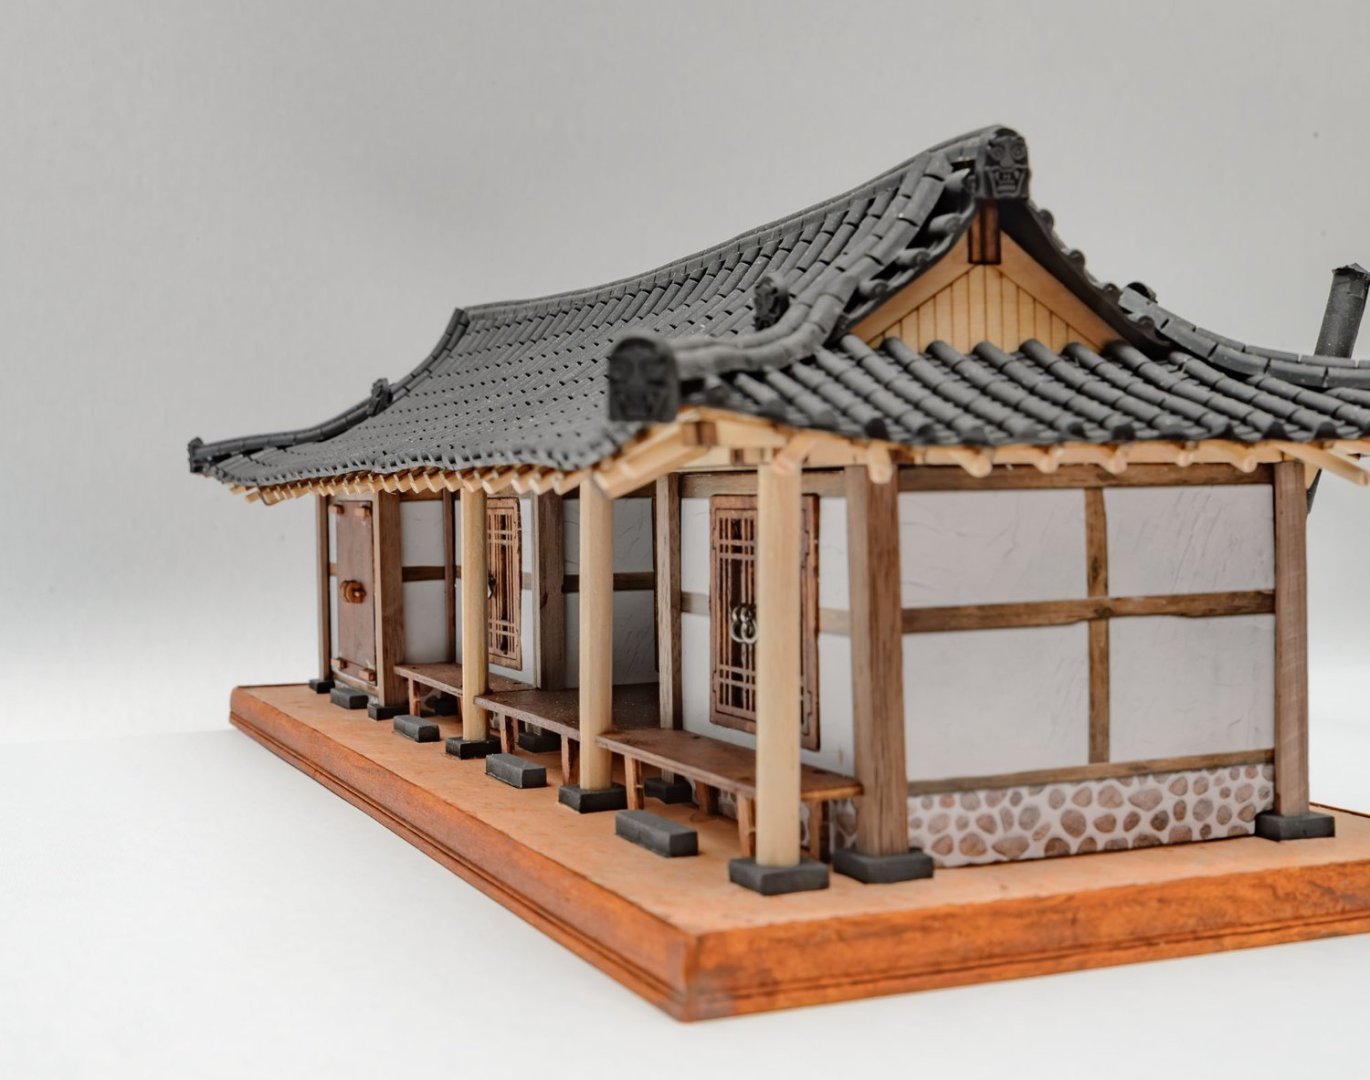
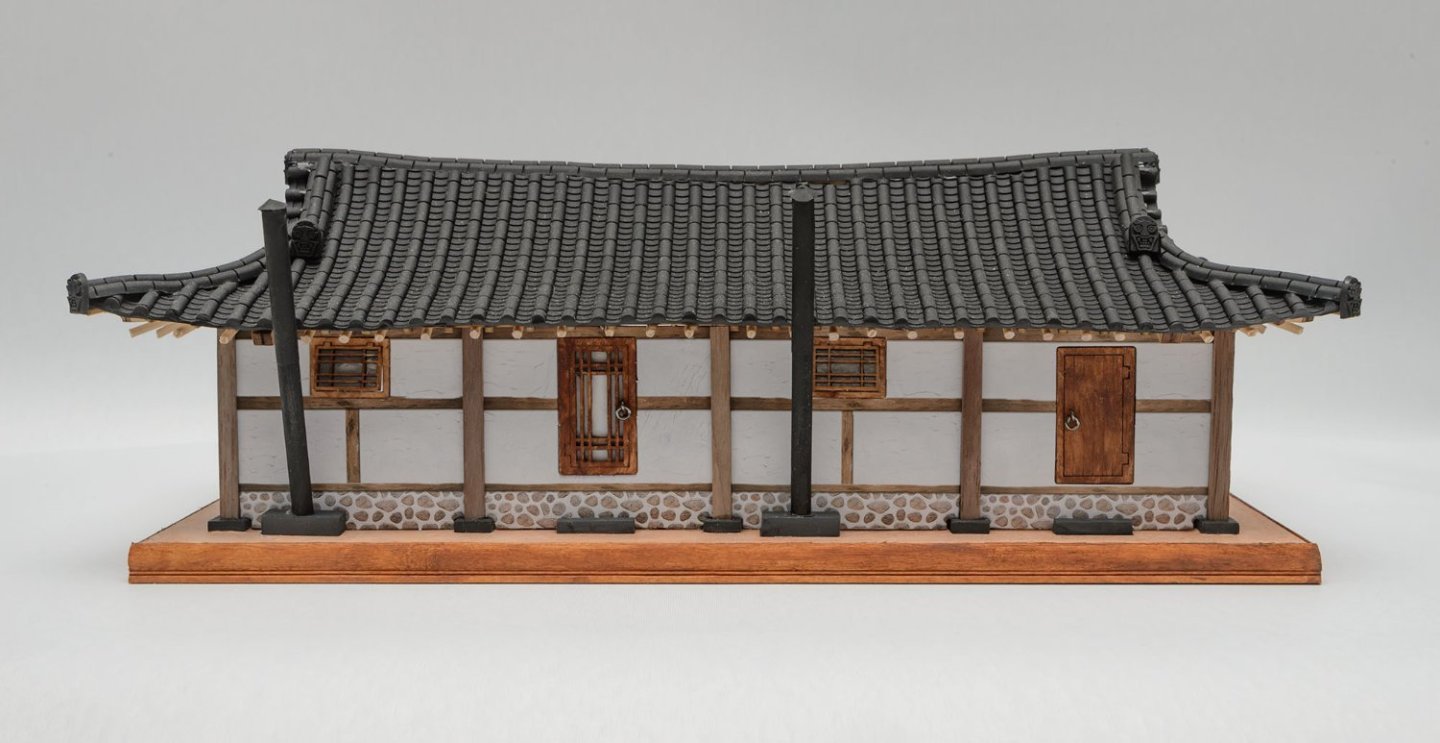
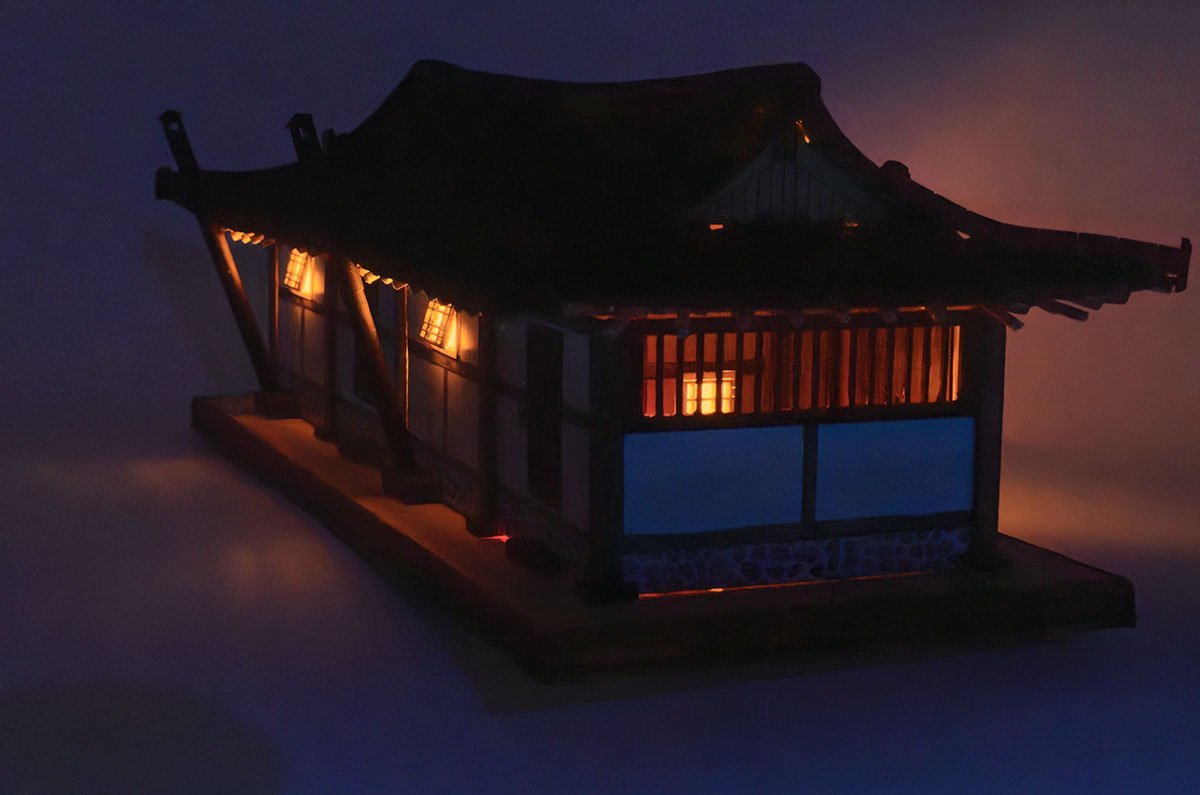
This is a Han-Ok (traditional Korean-style house) Gi-Wa-Zip (house with tile roofed). The tile and rafter was introduced from China 2,000 years ago, and the current Han-Ok style was established around the 17th century. The traditional house of each country are optimized for the local climate. Han-Ok, a traditional Korean-style house, has a huge roof with a steep slope. The height ratio is about 1:1. Also, most Han-Ok buildings are single-story buildings. Korea's annual average temperature difference is about 30~50℃ (85~125℉), which is three times bigger than London and Paris. To save on heating costs in winter and endure heavy rain or typhoons in summer, a single story building with a huge roof is a functional design. Countries that have a rough climate have similar designs for traditional houses. Hall House in Scotland has a huge roof, like Han-Ok. Norway's Viking Long House implies that Northern Europe has a more harsh climate than Korea. Kitchen & floor heating system Thank you for watching~


- 3 replies
-
- 14
-
-

-
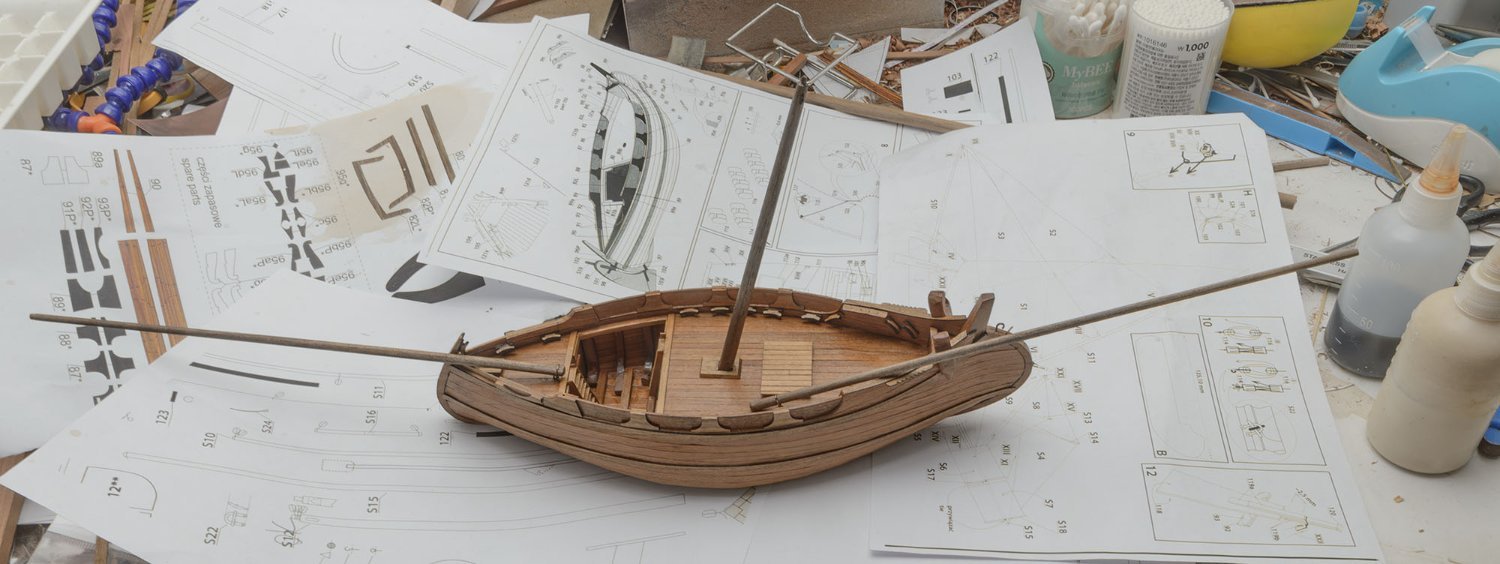
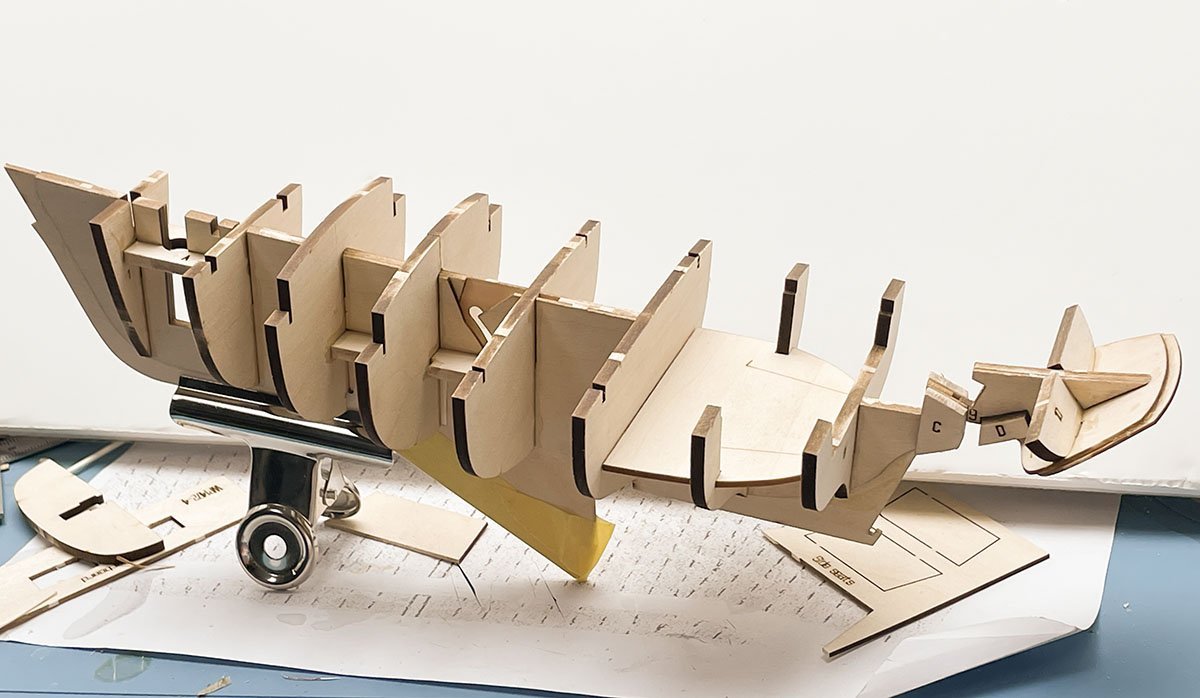
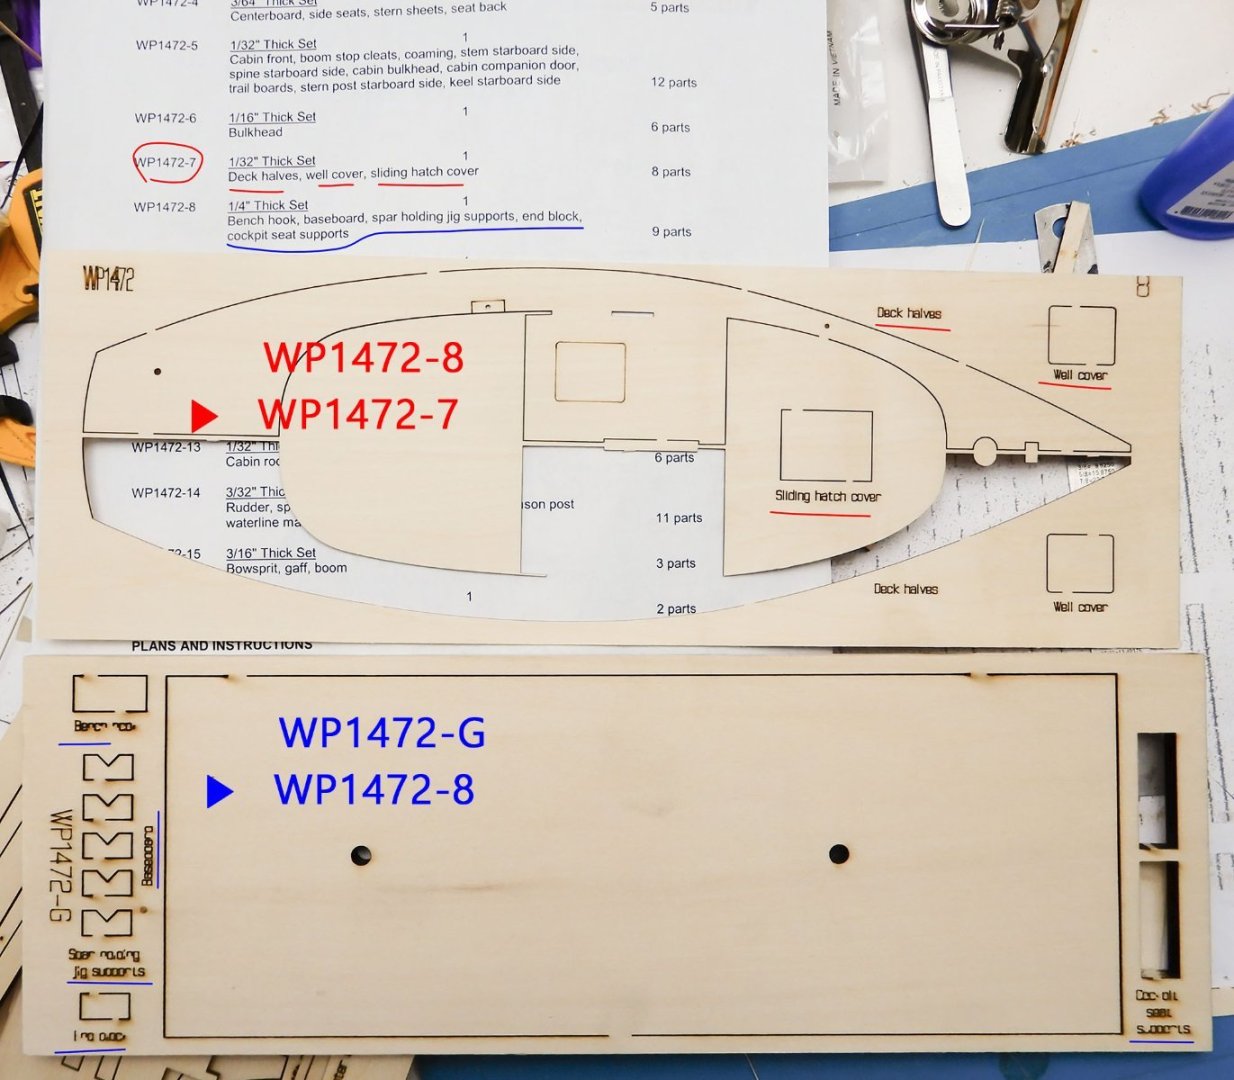
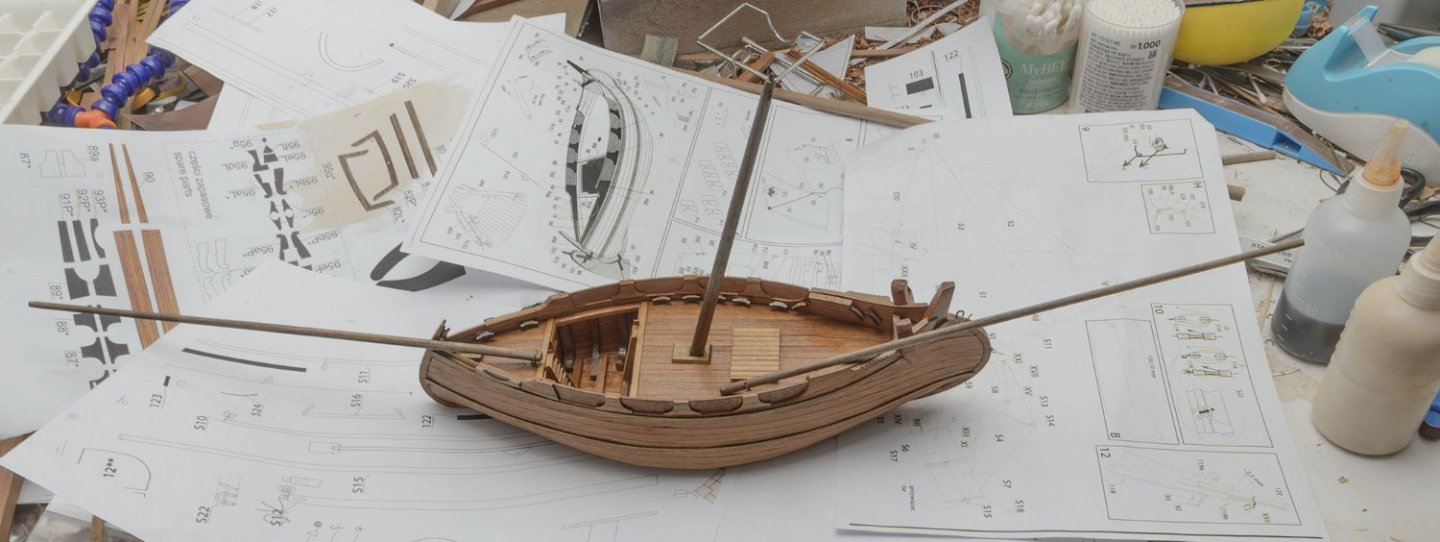
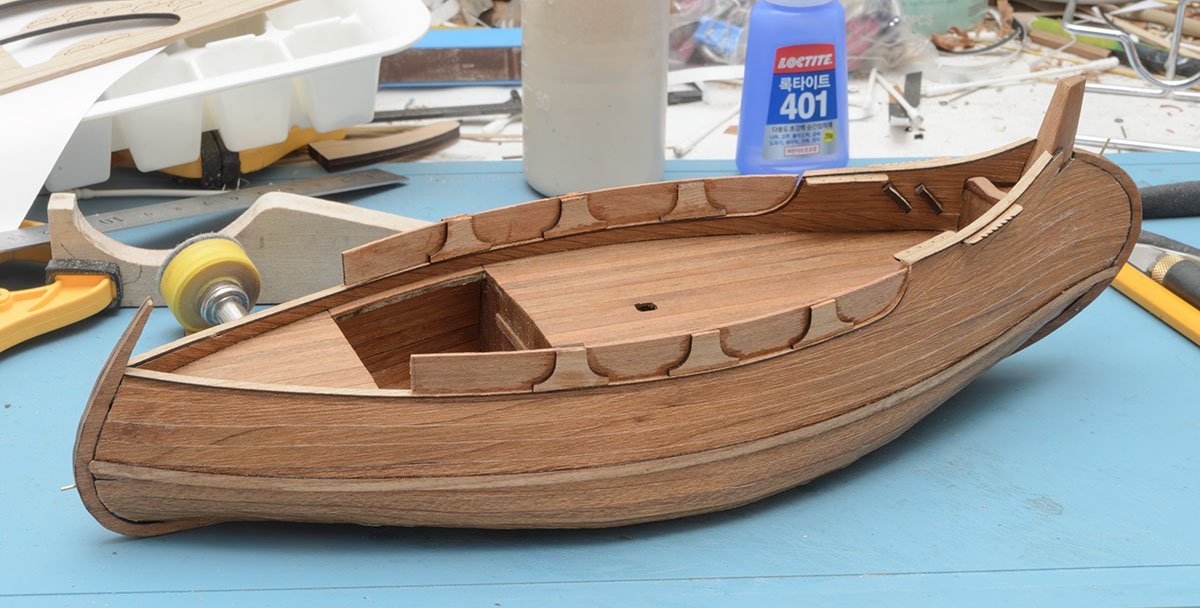
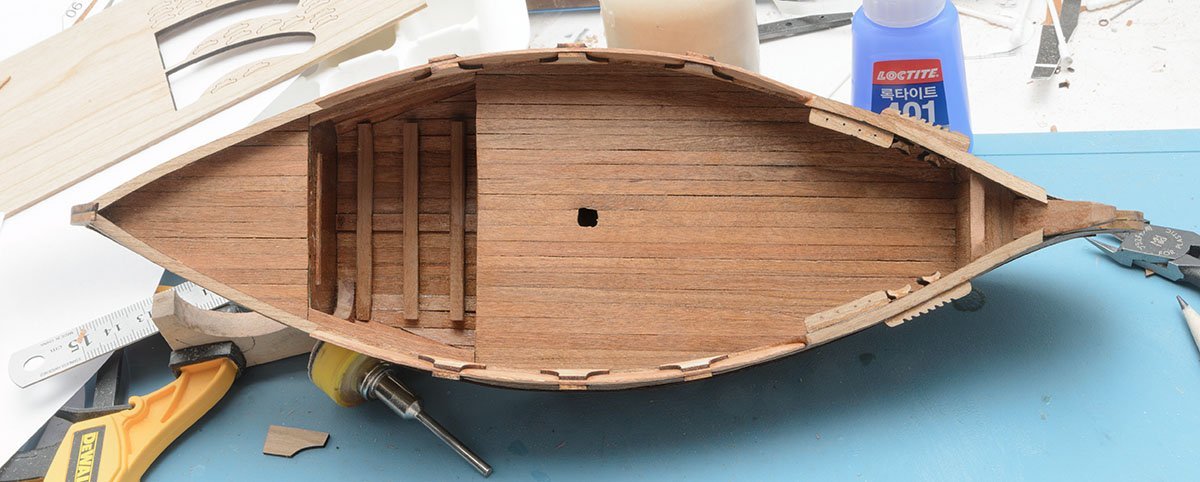
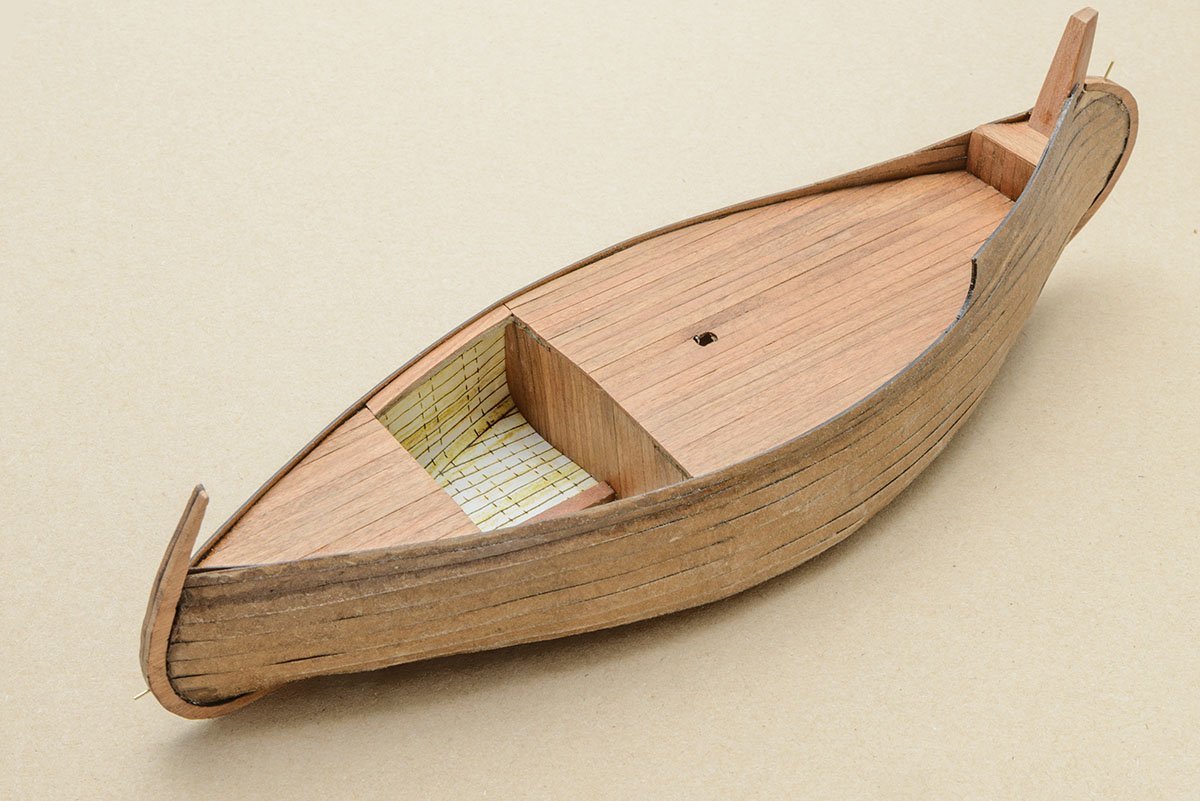
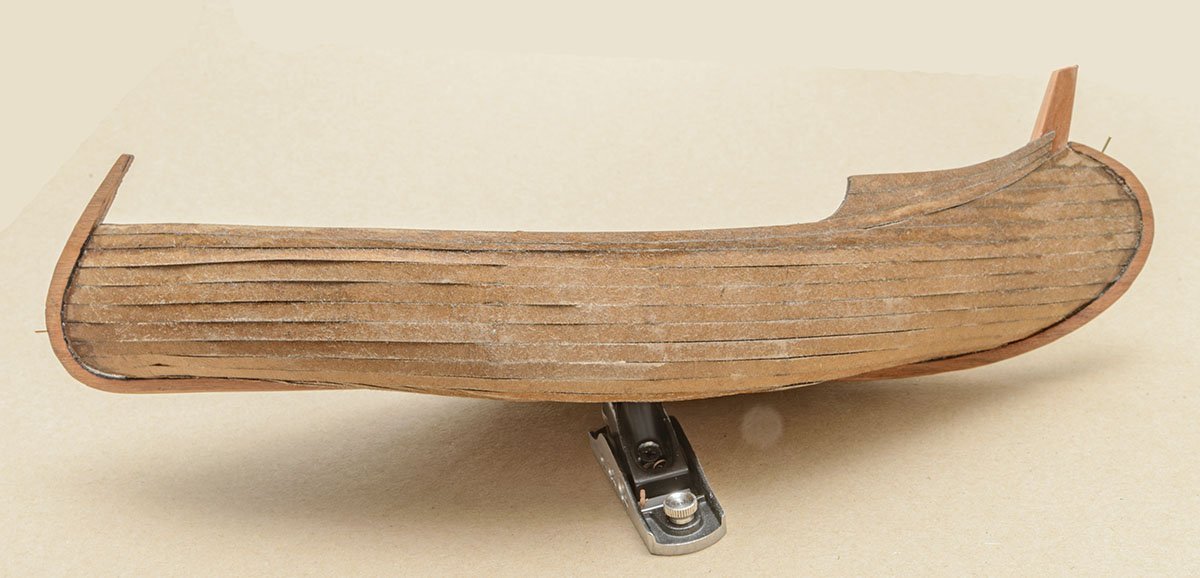
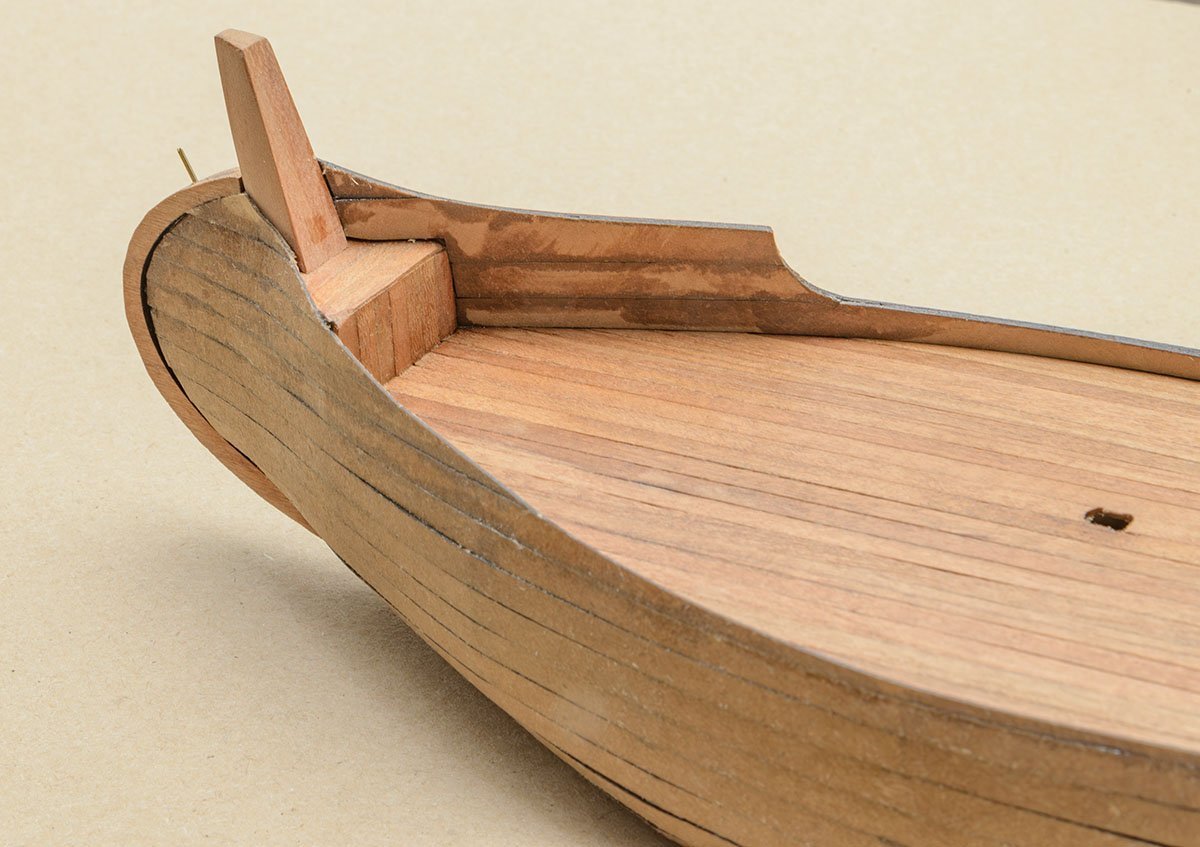
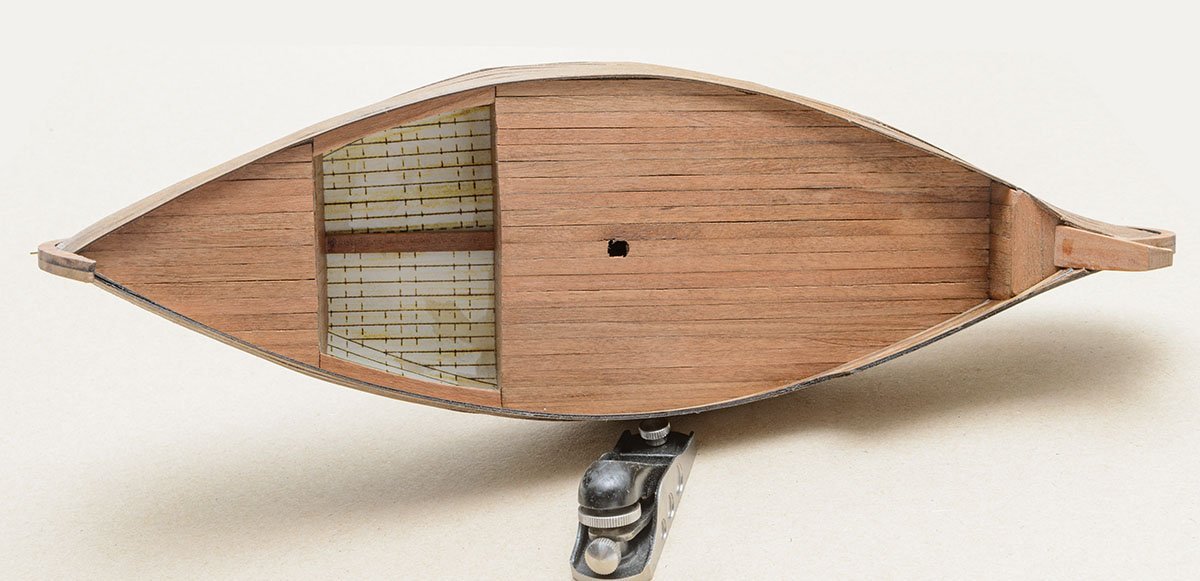
It may be too late, but thanks to Bryan Woods for watching my build log. It is good to check every part in a new kit, but this case is a bit embarrassing. When I checked the part list paper of the Smack kit, I found that part 7 (WP1472-7) was missing. I stopped to build it and requested a replacement part from Model Expo. Two days later, I was building the kit. I decided to build until I needed the missing part. I suddenly found that the part list was misprinted. (Check the above picture) All the parts were in my kit, and there was no more obstacle to finish my project! I request an order cancellation to Model Expo... 🤣 It is time for another sprint. 😎
- 1 reply
-
- 8
-
-
- Model Shipways
- Muscongus Bay Lobster Smack
- (and 1 more)
-
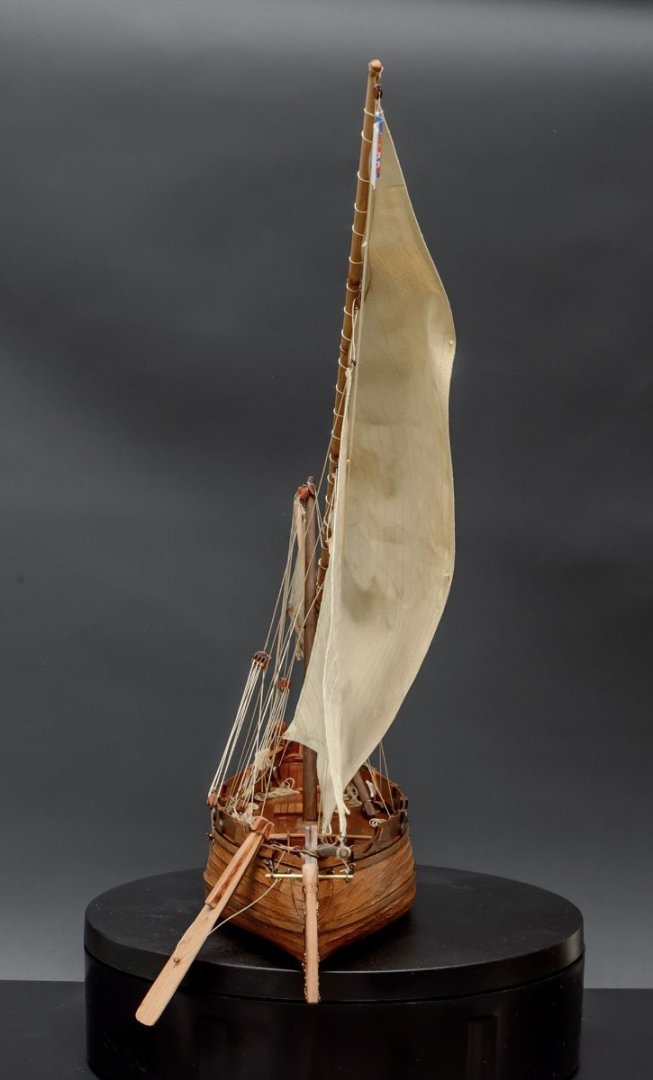
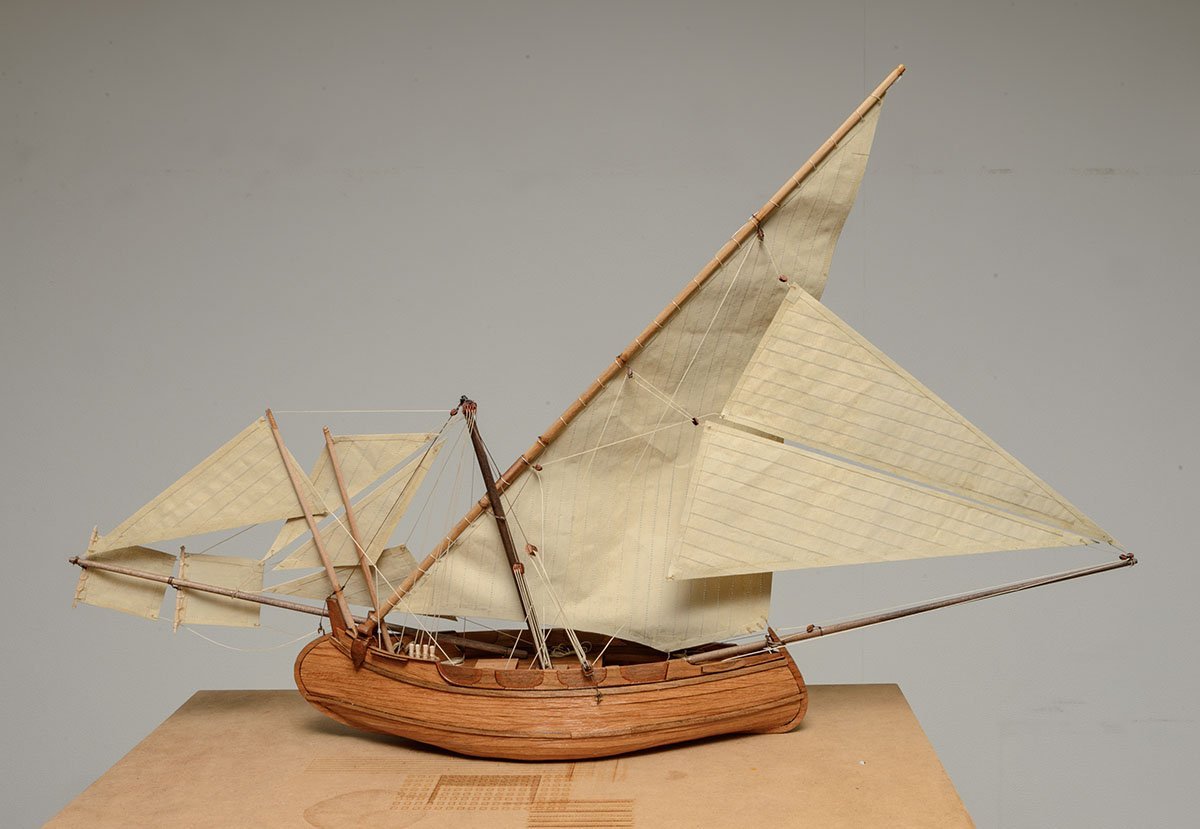
I hope some makers build the Muleta kit. The design is very attractive and not too difficult. The scale should be 1/50 ~ 1/60. Thank you for watching my build log, and see you again at my old ongoing logs. 😎


- 12 replies
-
- 4
-
-
-
- Muleta de Seixal
- Seahorse
- (and 1 more)
-
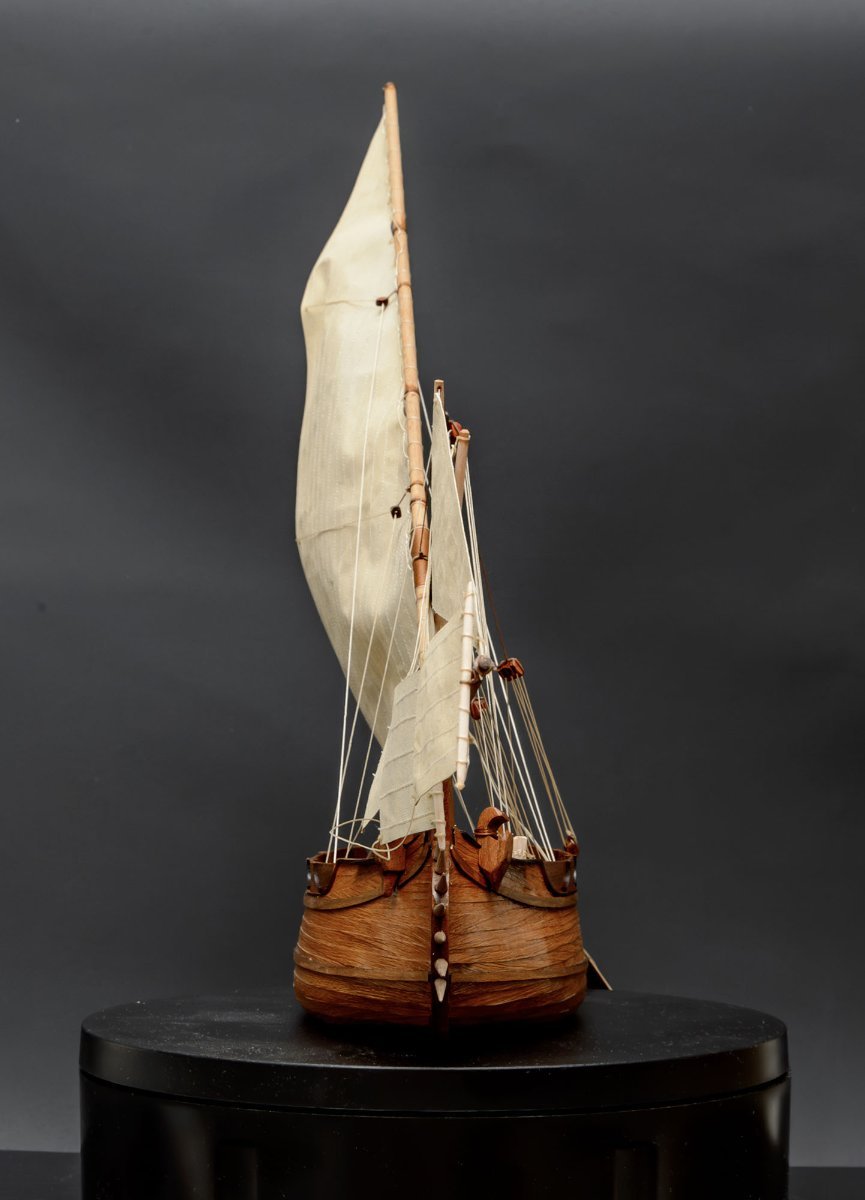
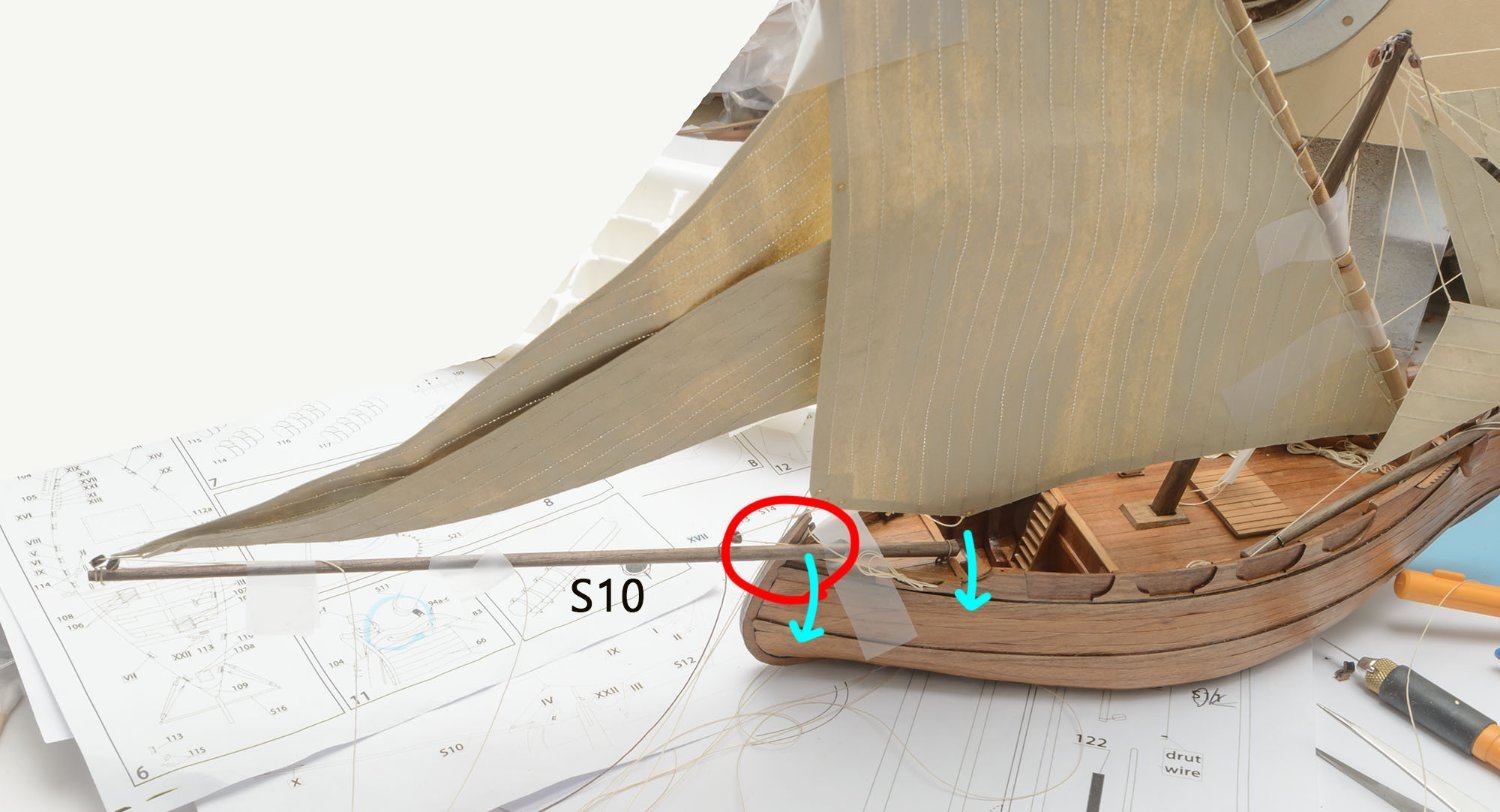
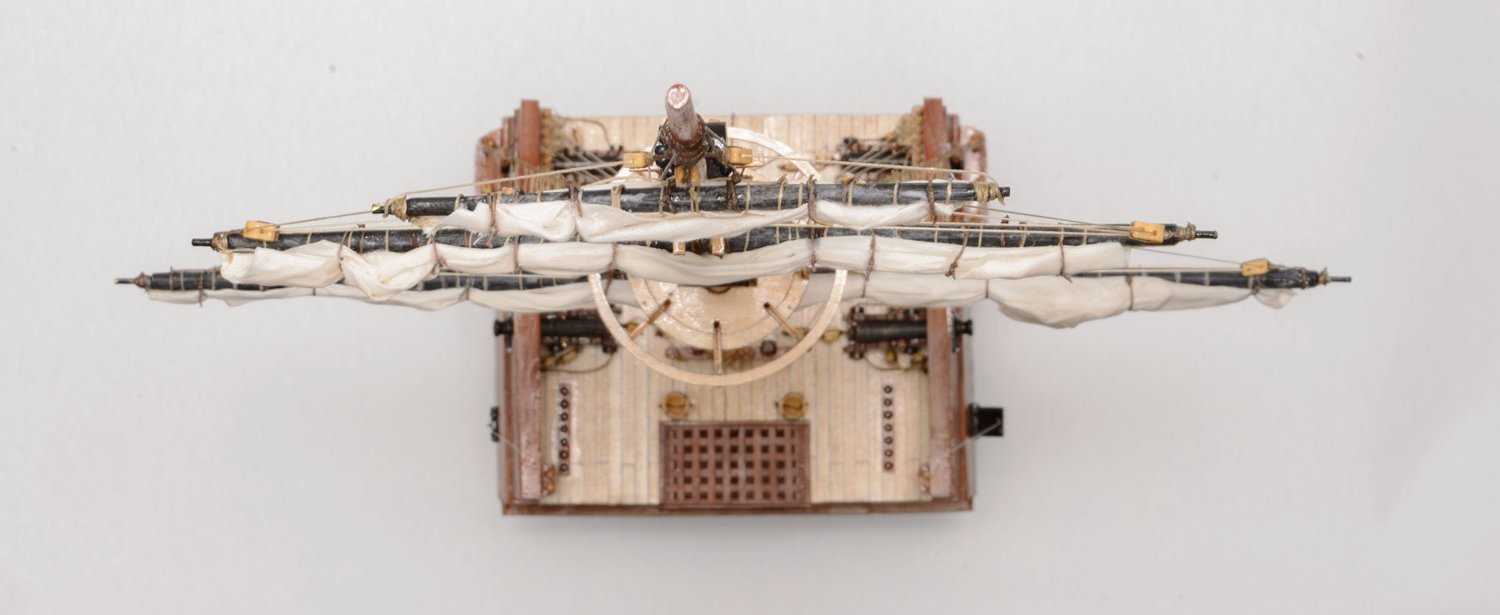
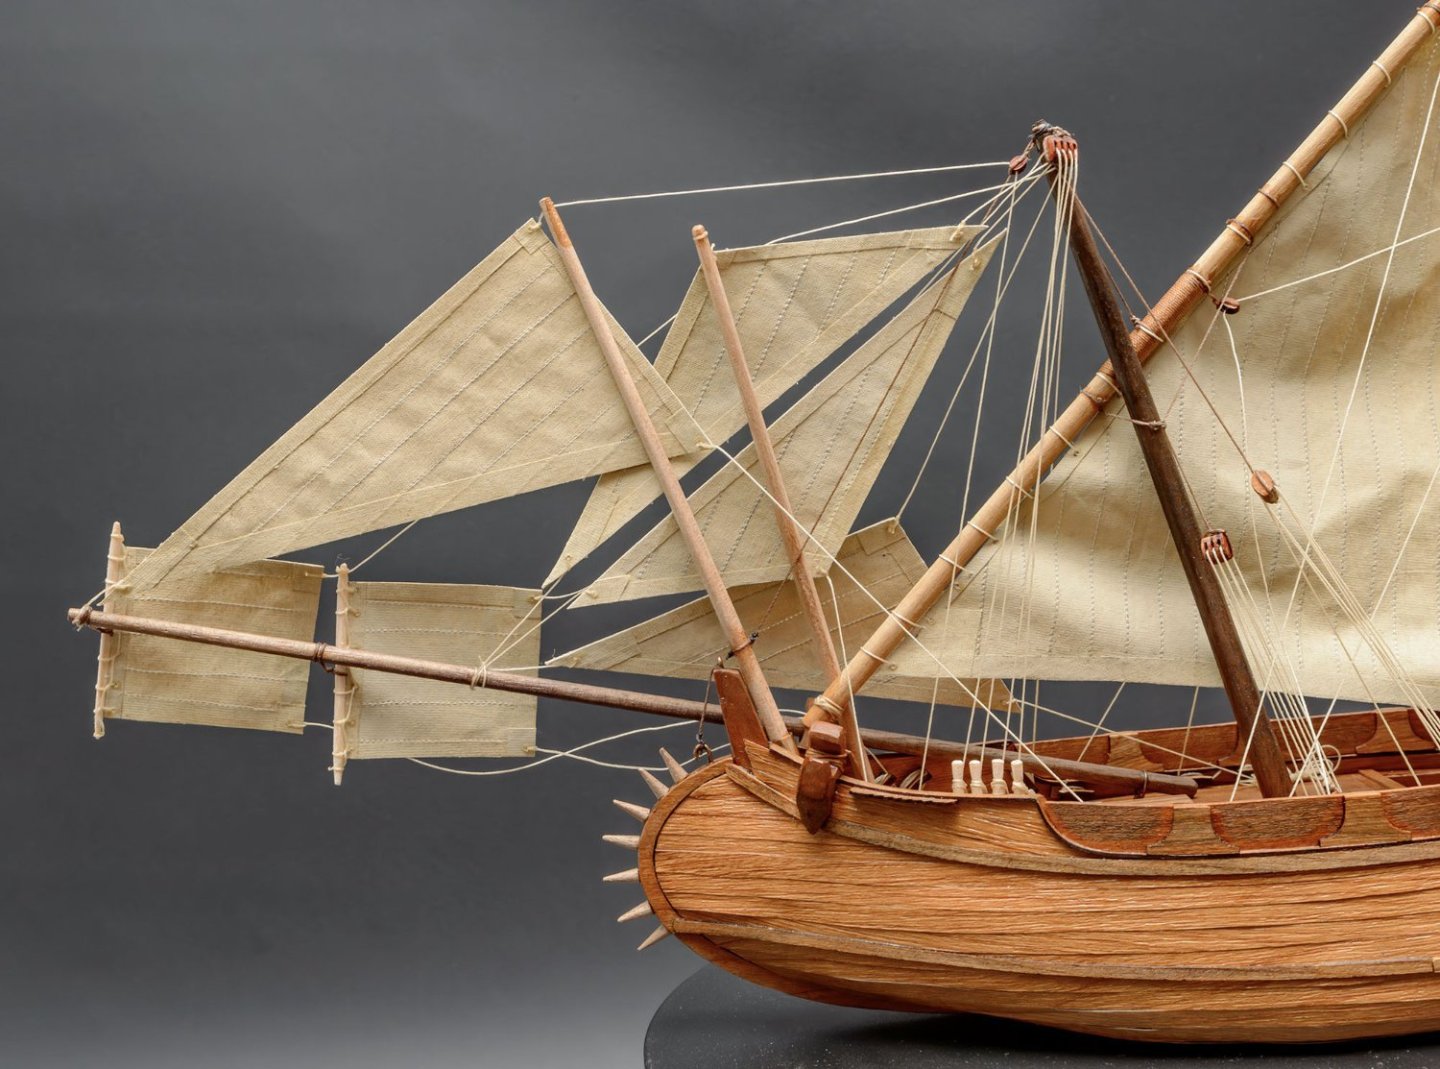
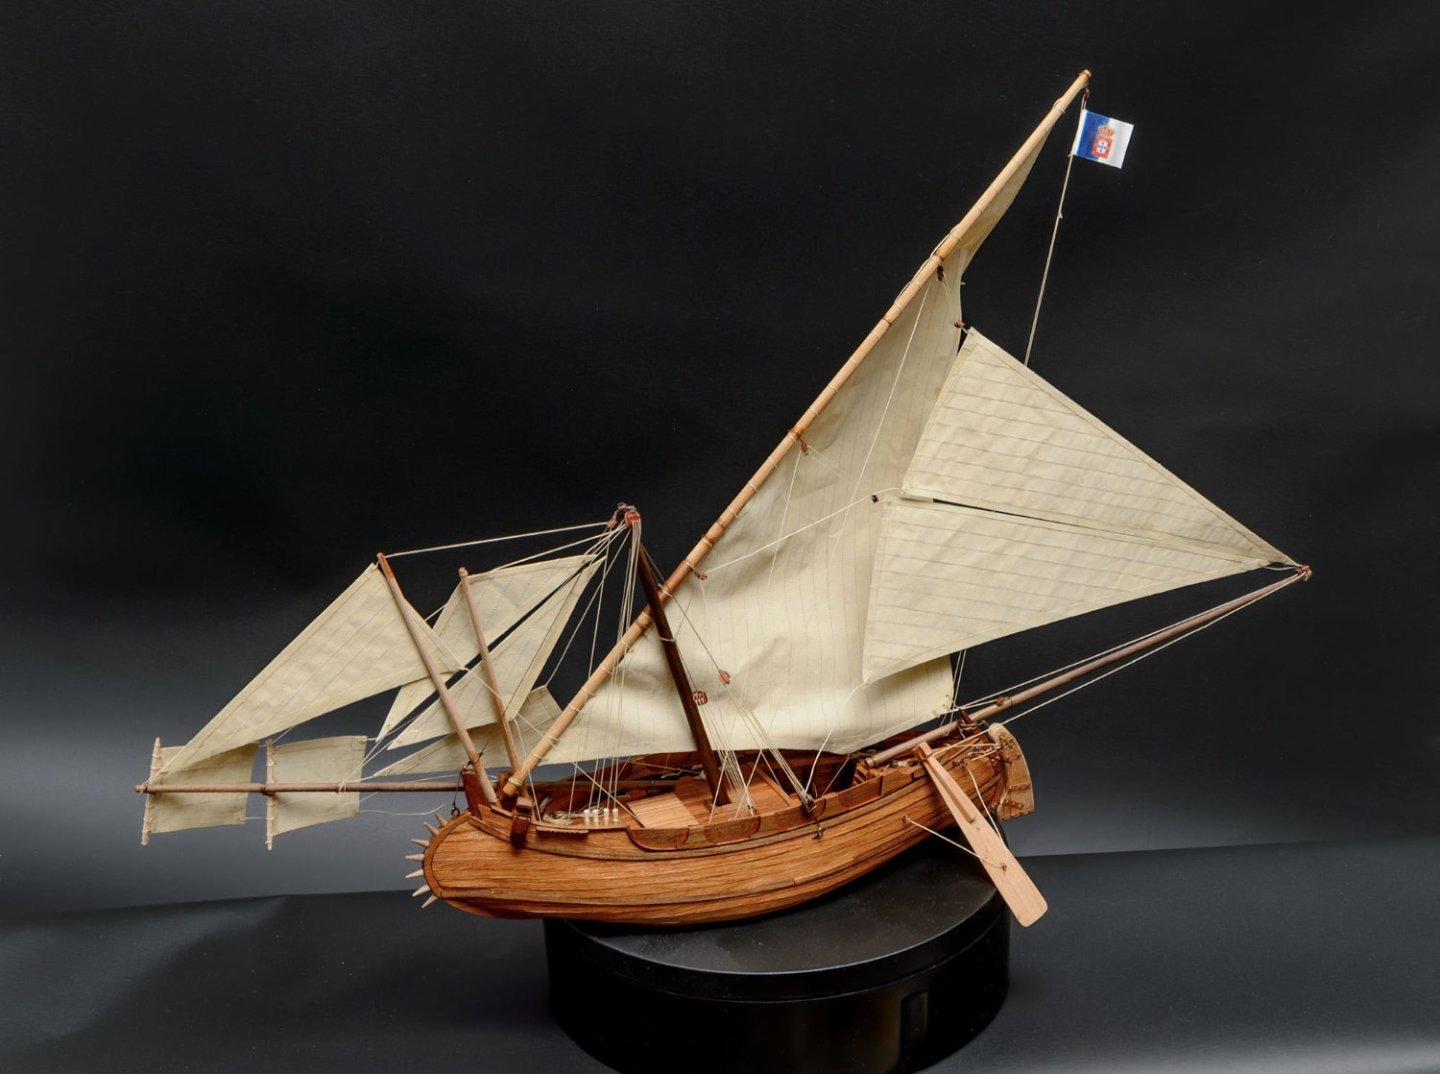
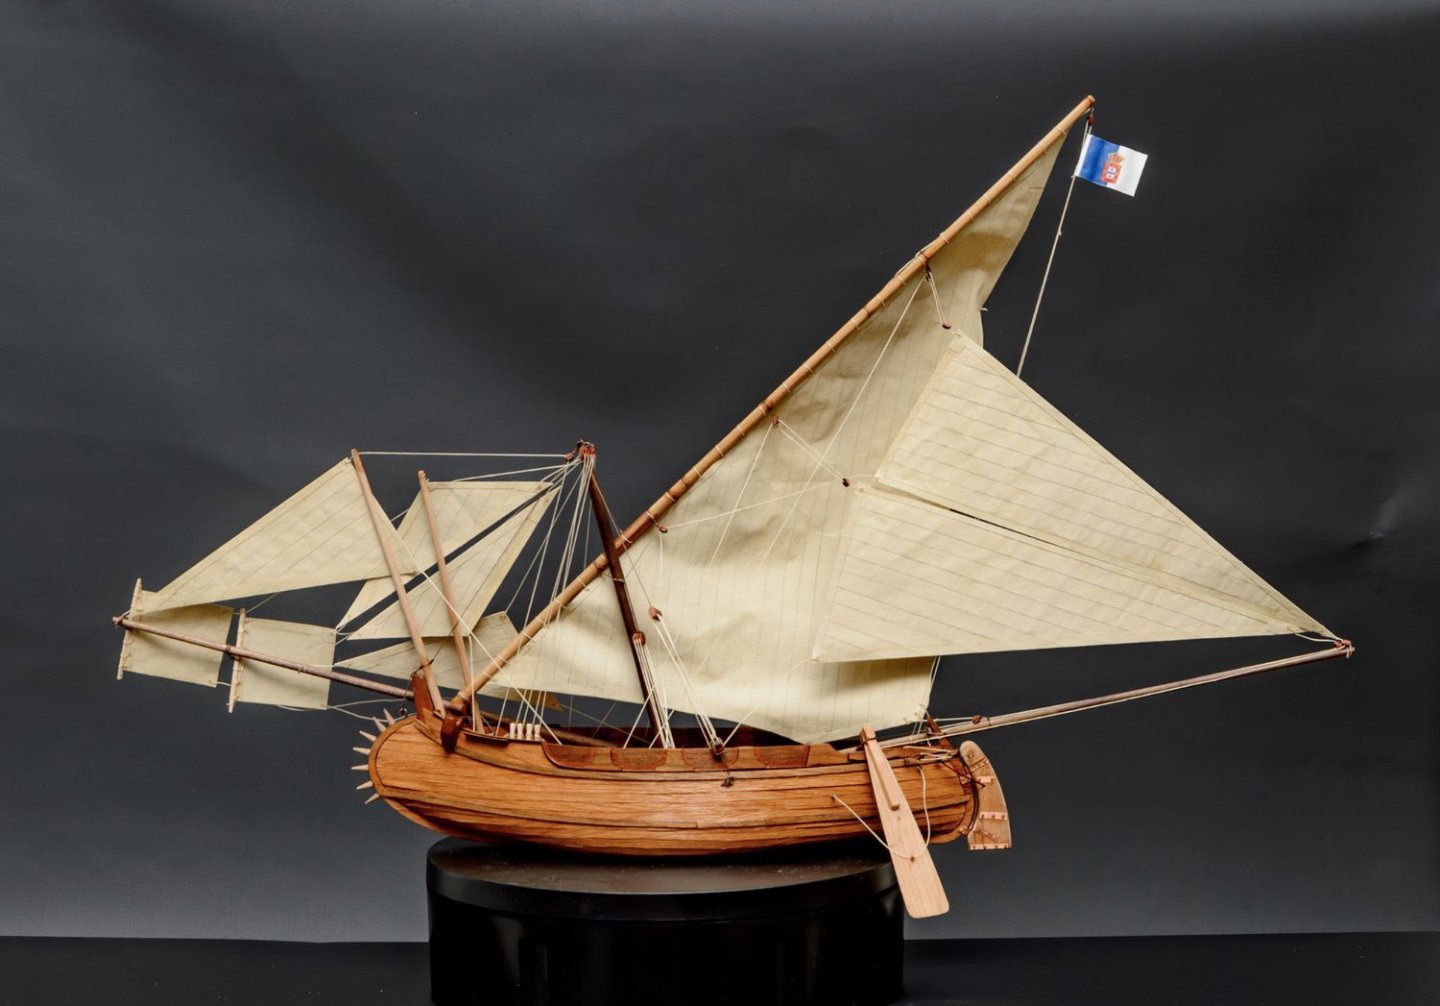
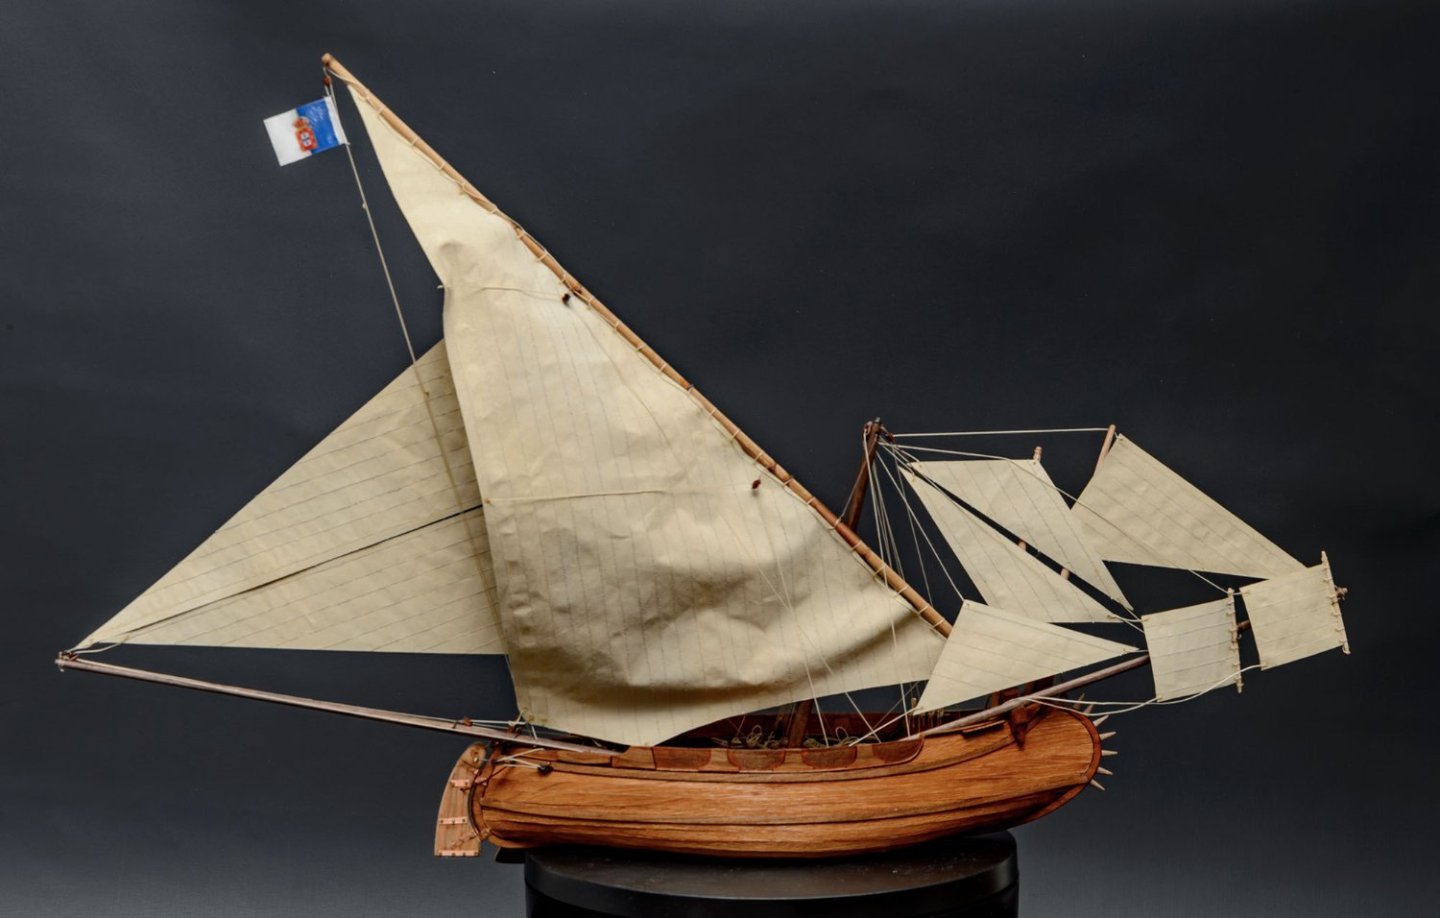
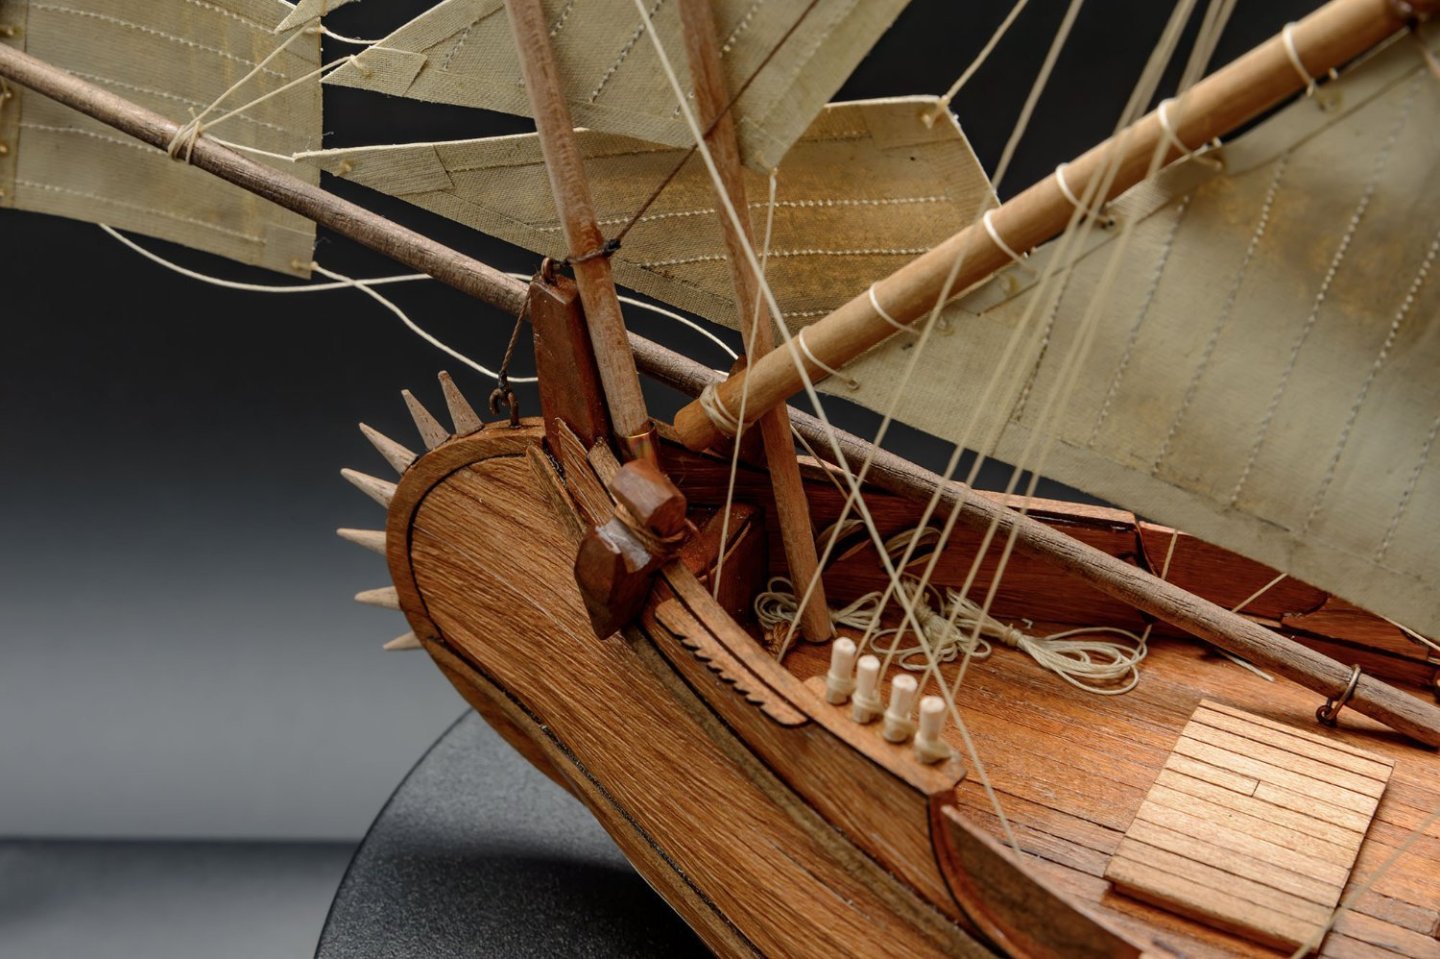
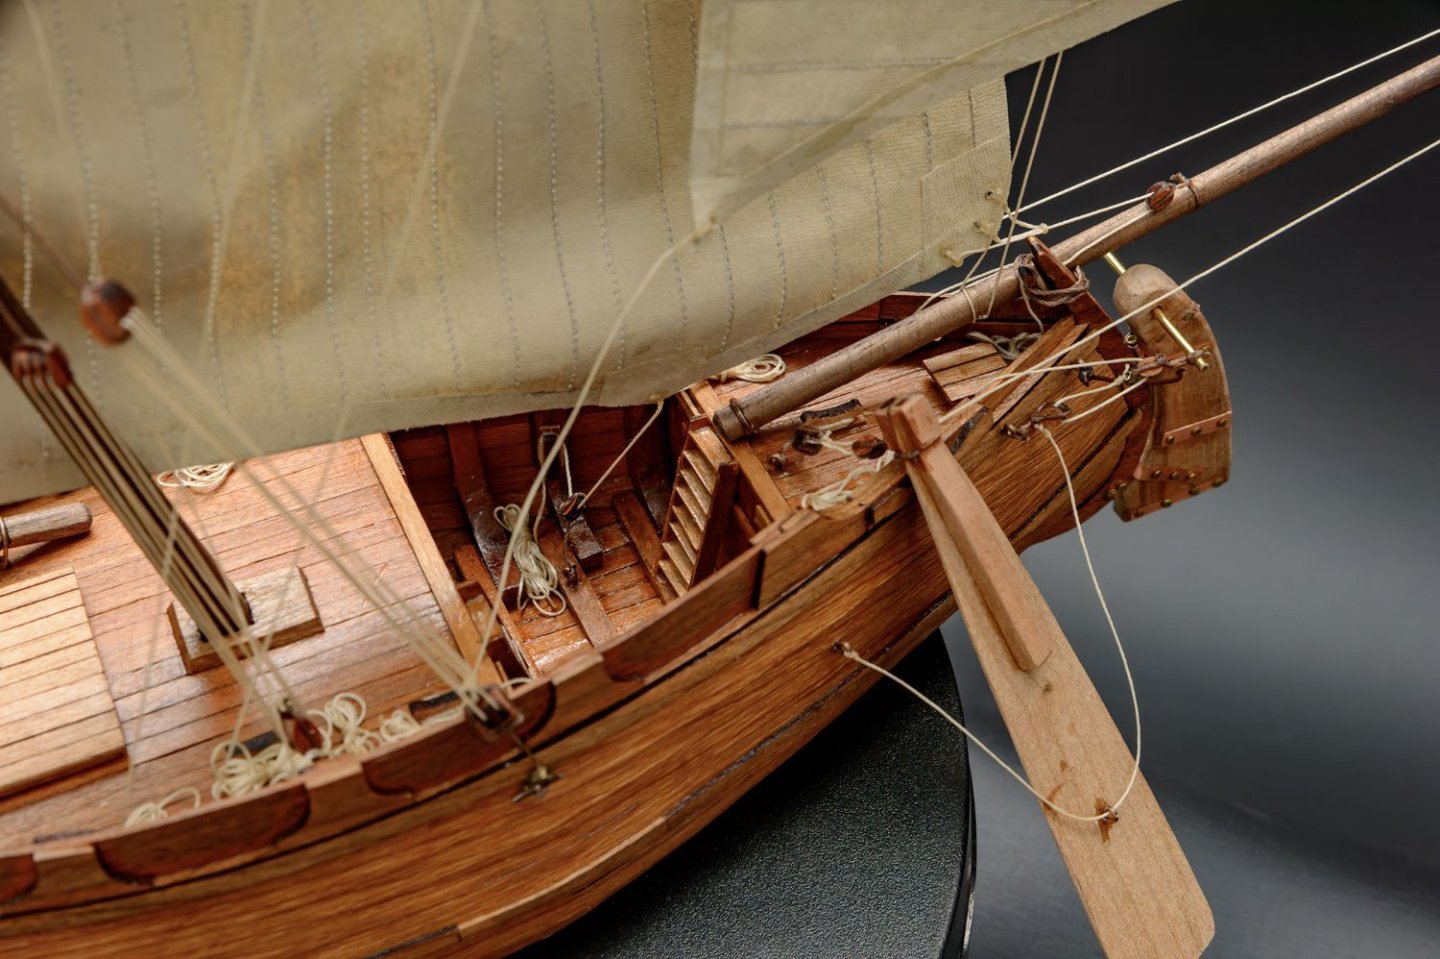
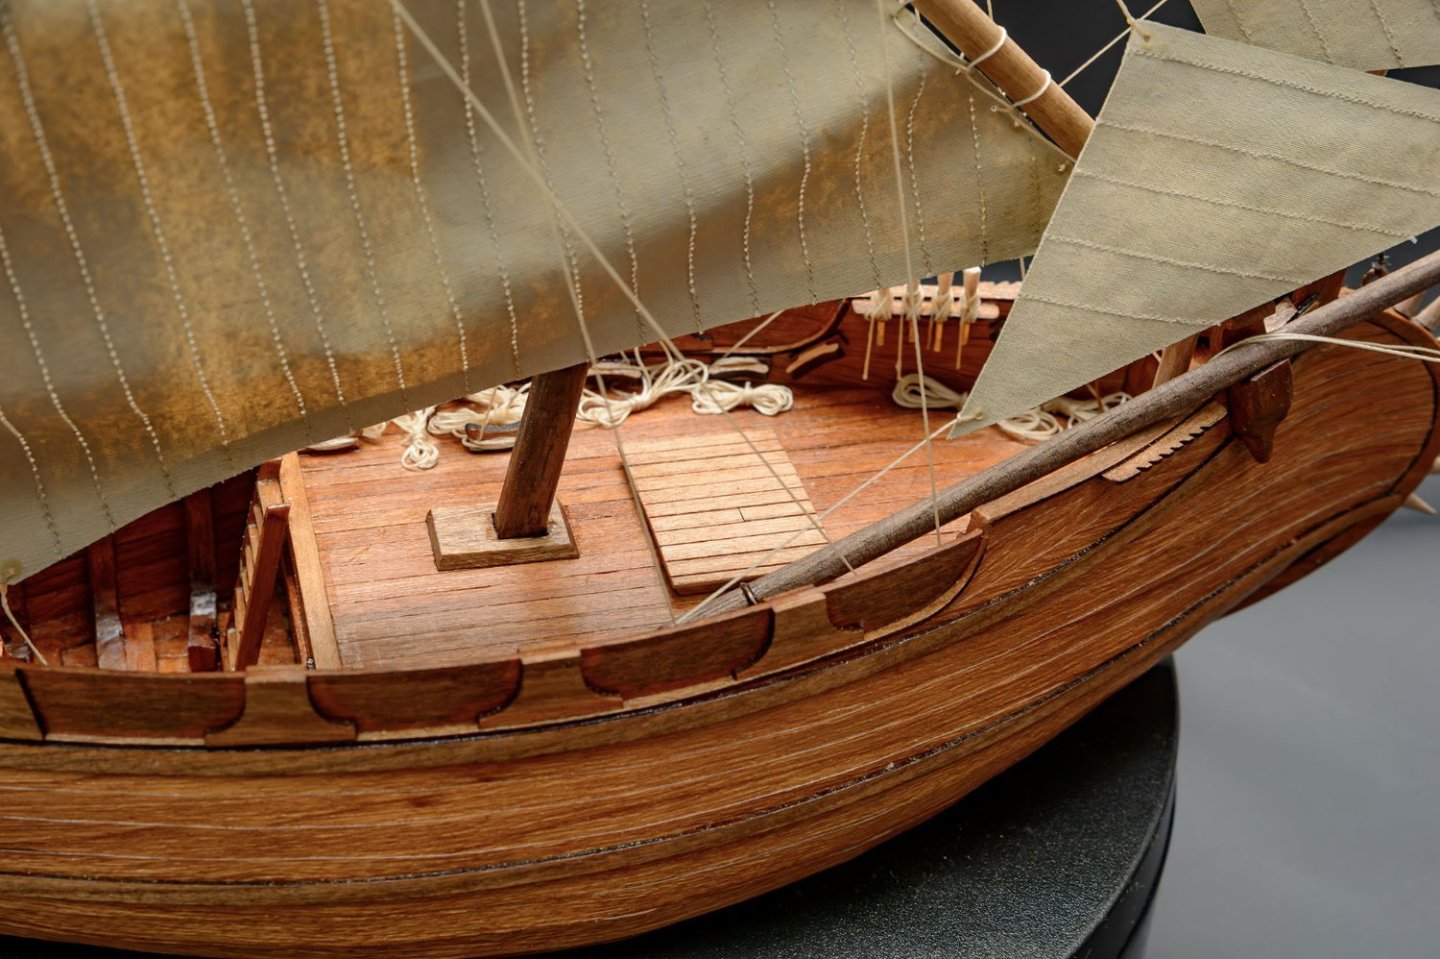
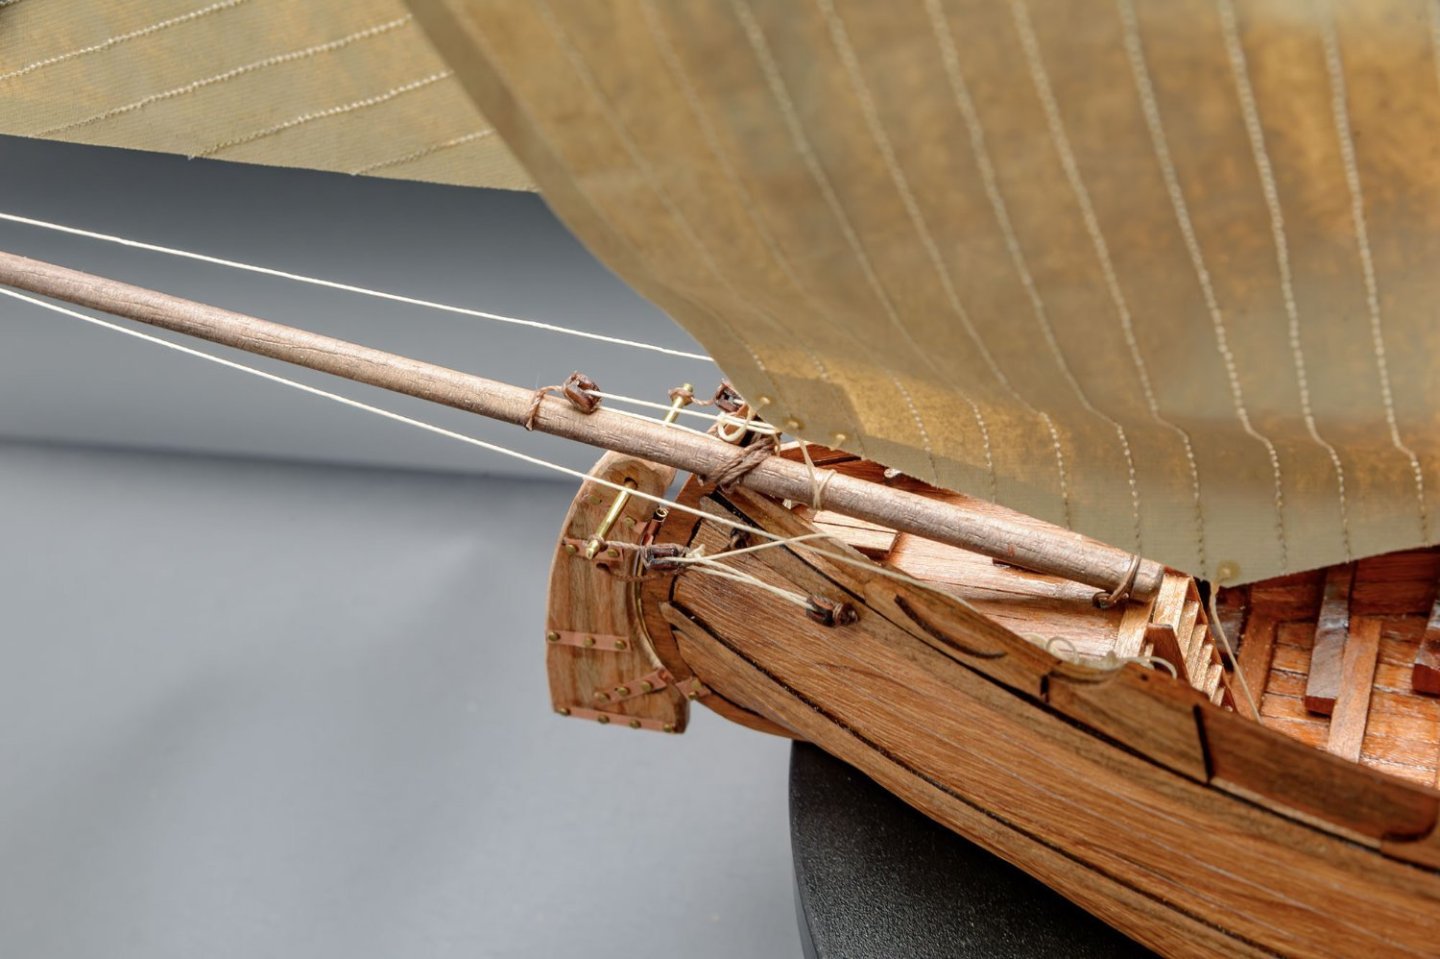
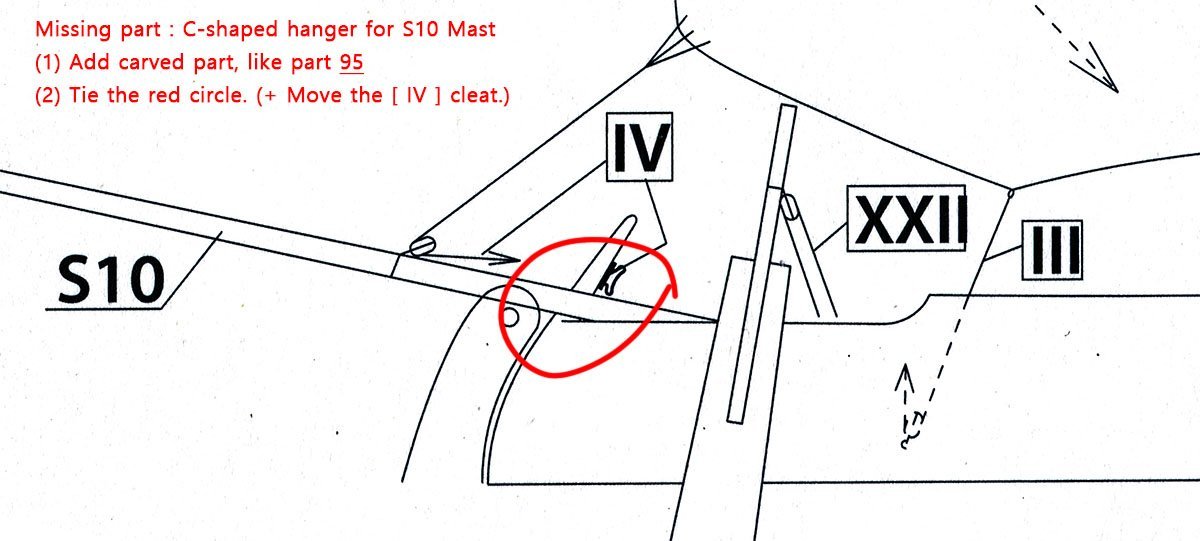
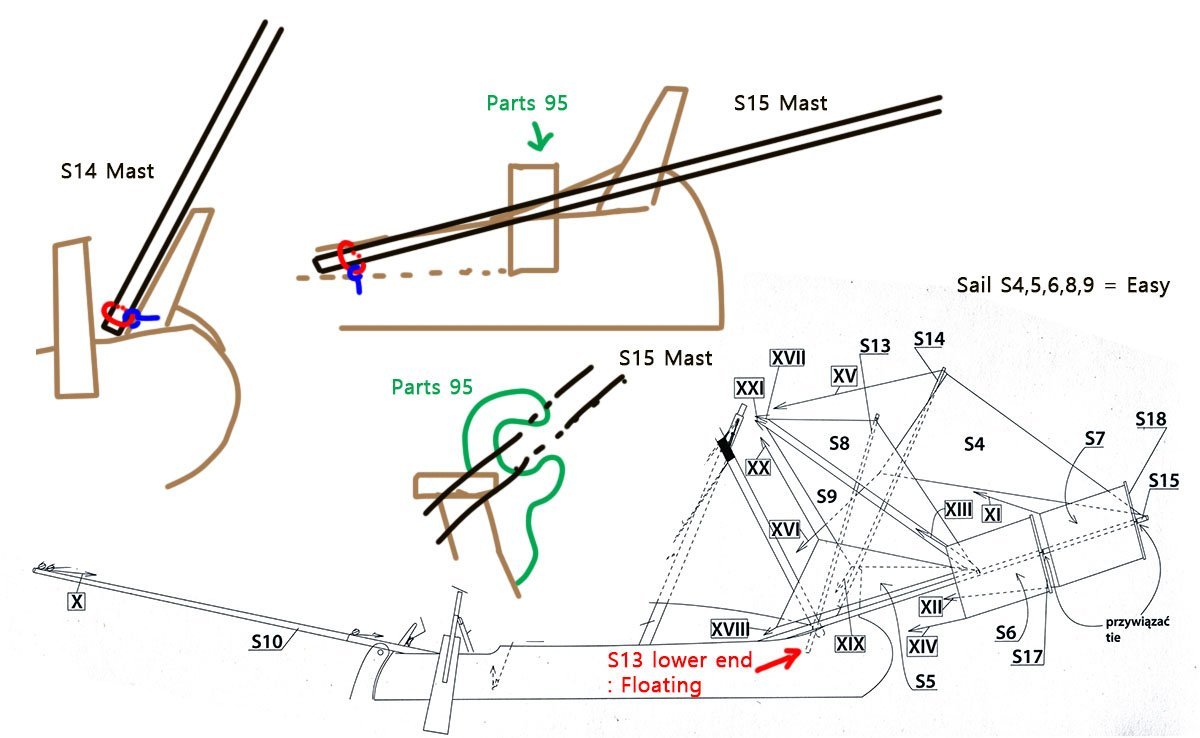
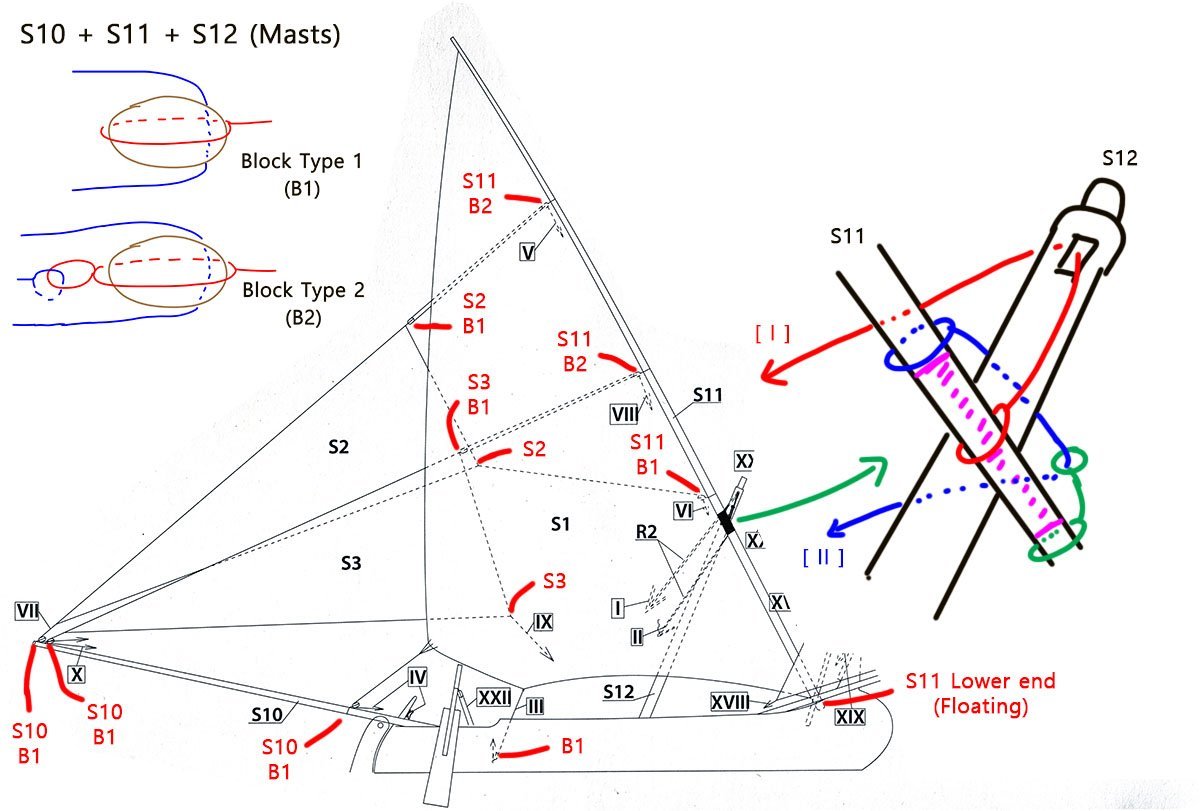
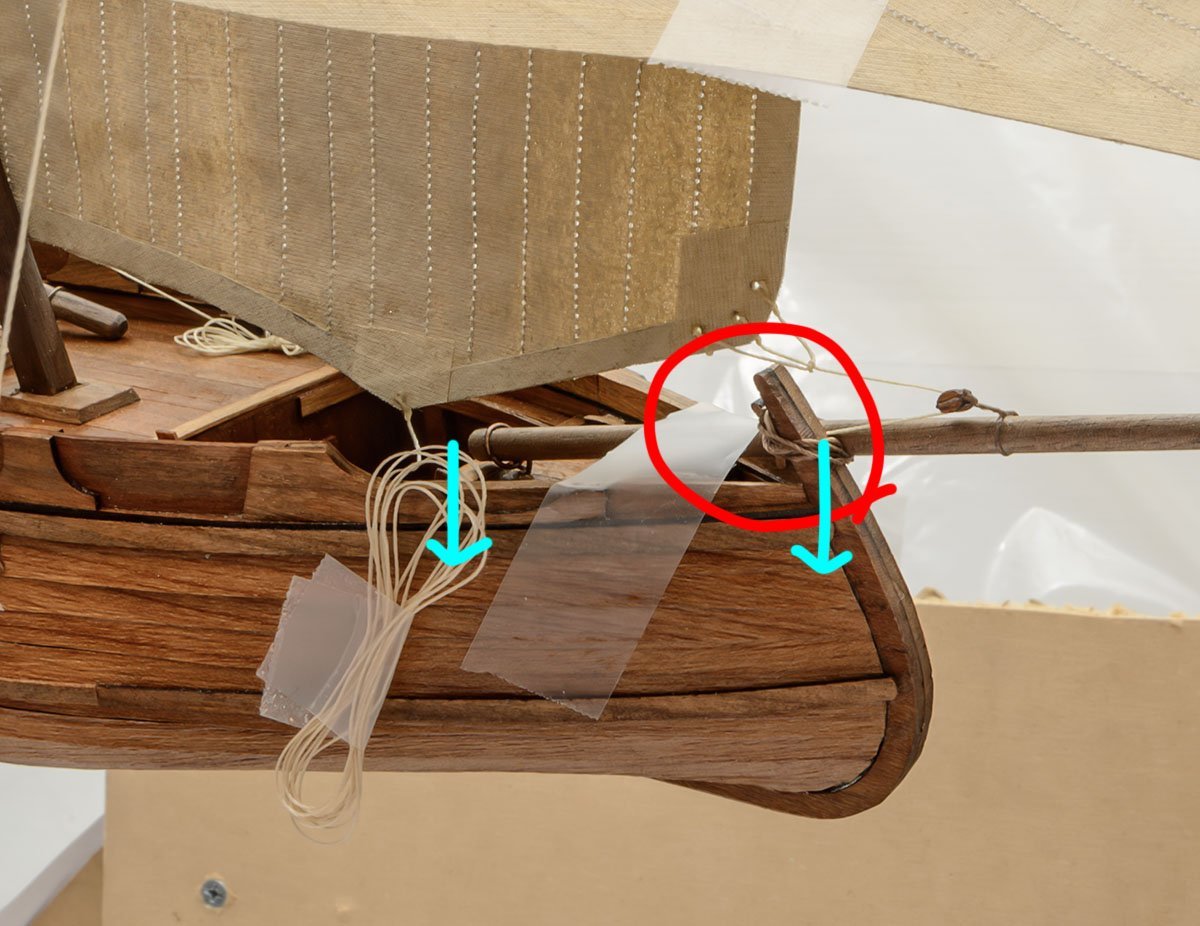
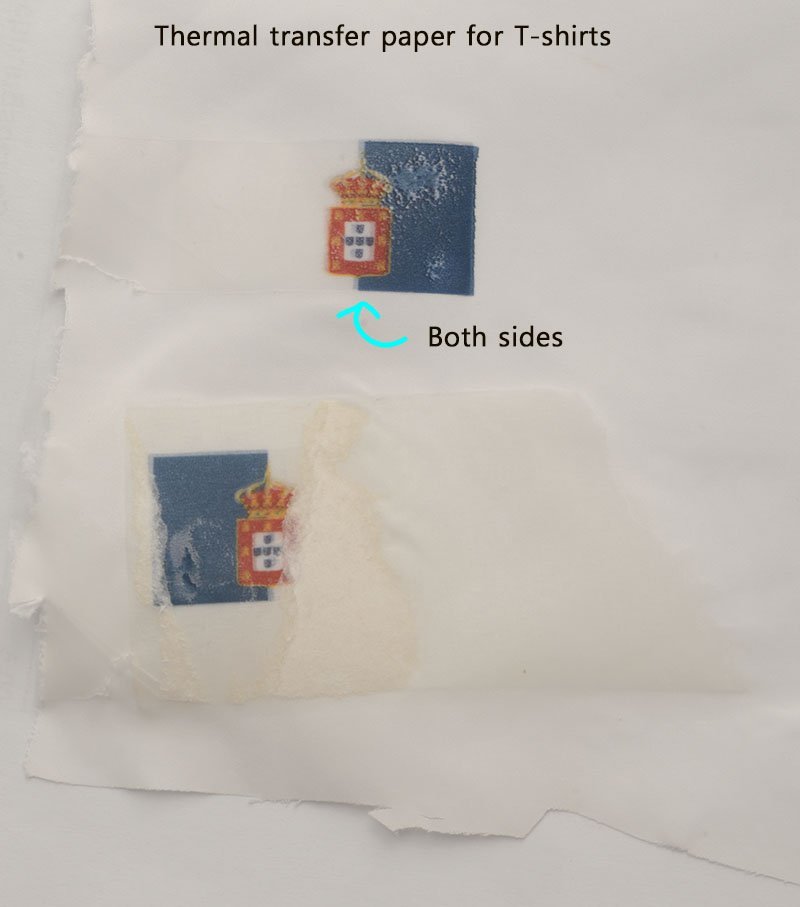
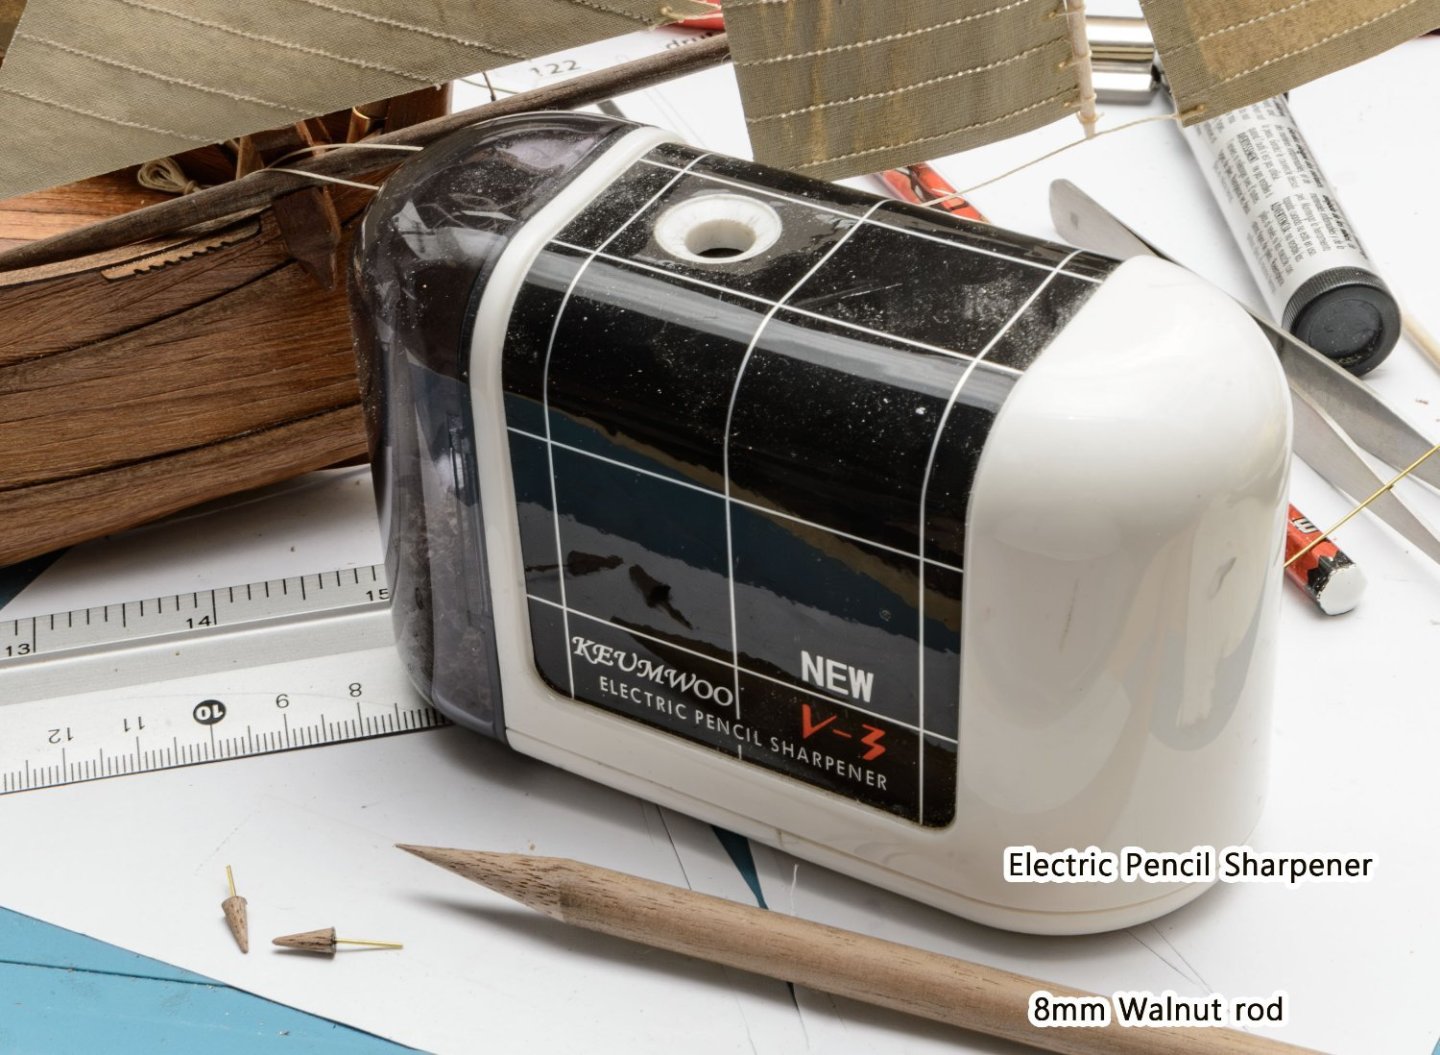
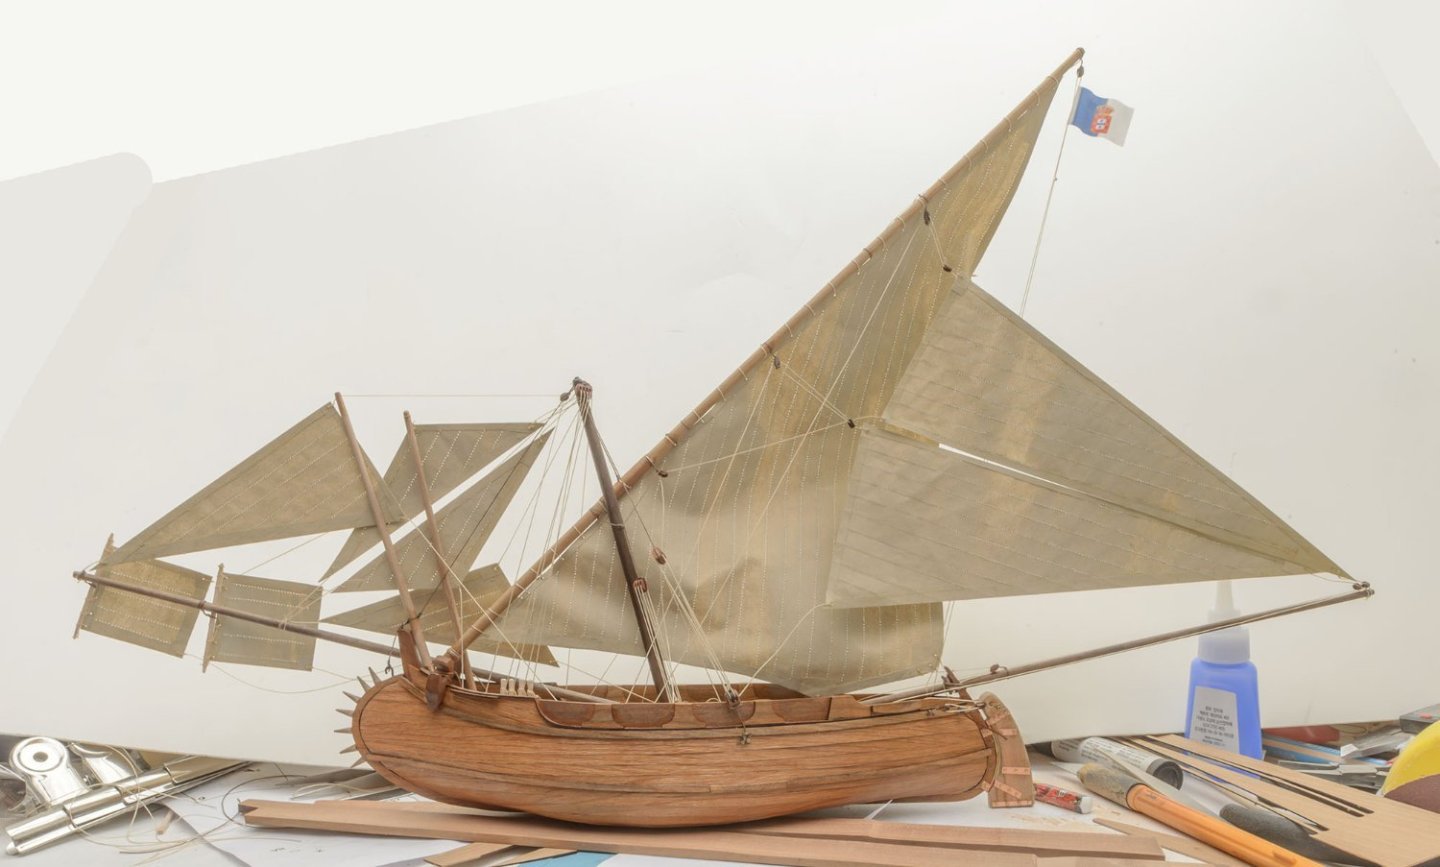
I added great references. https://mnm.webmuseo.com/ws/musee-national-marine/app/collection/record/10129 It is a contemporary model from the Musée National de la Marine in Paris. https://veryimportantlot.com/fr/lot-gallery/view/vitaliy-anakhin-a-model-of-the-portuguese-fishing-12820\ It is not a museum model, but the model has the best details I've ever seen. The rigging plans in the manual are generally good. The manual missed some important parts. Once I added the missing parts, all rigging work was pretty straight and easy. These diagrams show additional explanations of the missing parts. Check the red circle on S10 aft-mast. I had to hold the S10 mast. The S10 mast is connected to the S11 main-mast. It is necessary to complete the rigging work. I made a fabric flag. The Portugal flag was used between the 1830s and the 1910s. The Muleta ships disappeared in the early 20th century... I made some rams at the stem. The project is almost finished. I'll add the oar and stand tomorrow. 😎


- 12 replies
-
- 4
-
-
- Muleta de Seixal
- Seahorse
- (and 1 more)
-
I had some issues with kit rigging plans. The kit omitted an important part, so the main mast and aft-mast didn't work well. I confirmed the missing parts from the contemporaty model of Portuguese museum sites. After I fixed it, everything went very smoothly. 😎 I'll post the modified rigging plan when I finish her.

- 12 replies
-
- 4
-
-
- Muleta de Seixal
- Seahorse
- (and 1 more)
-
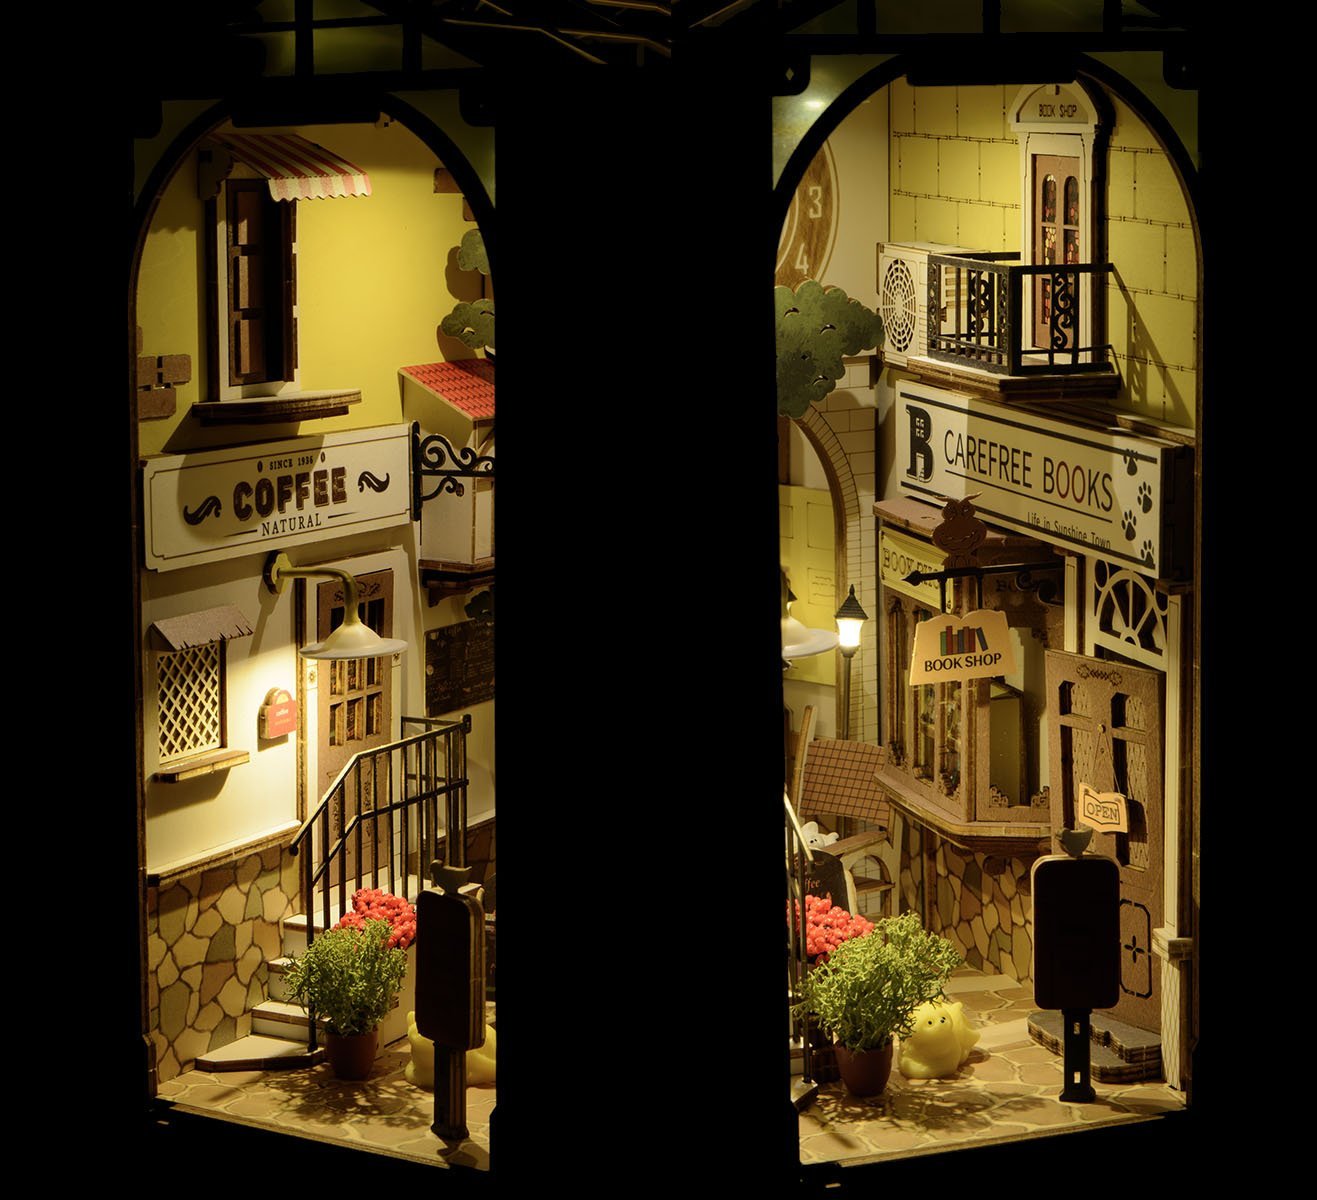
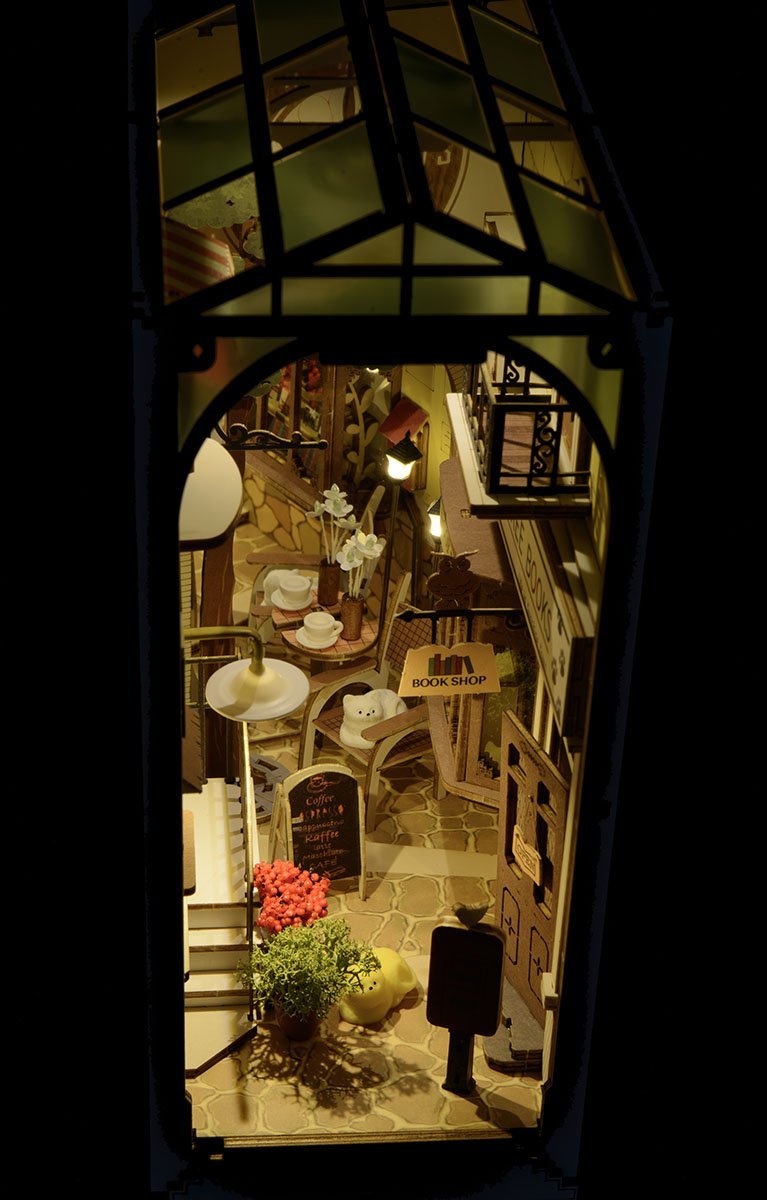
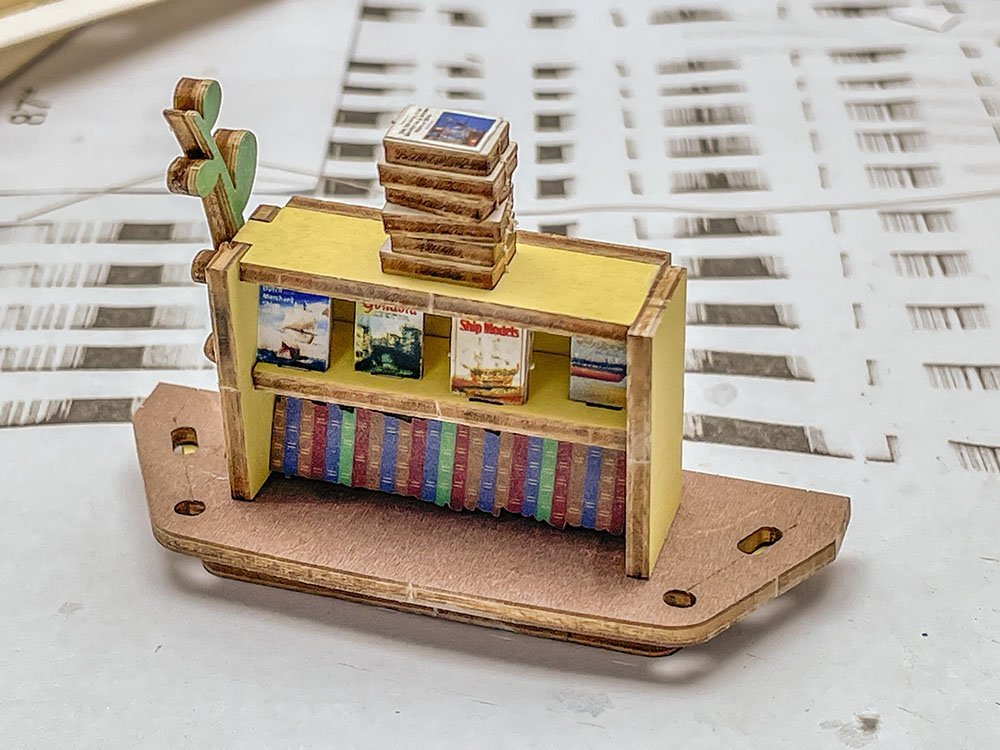
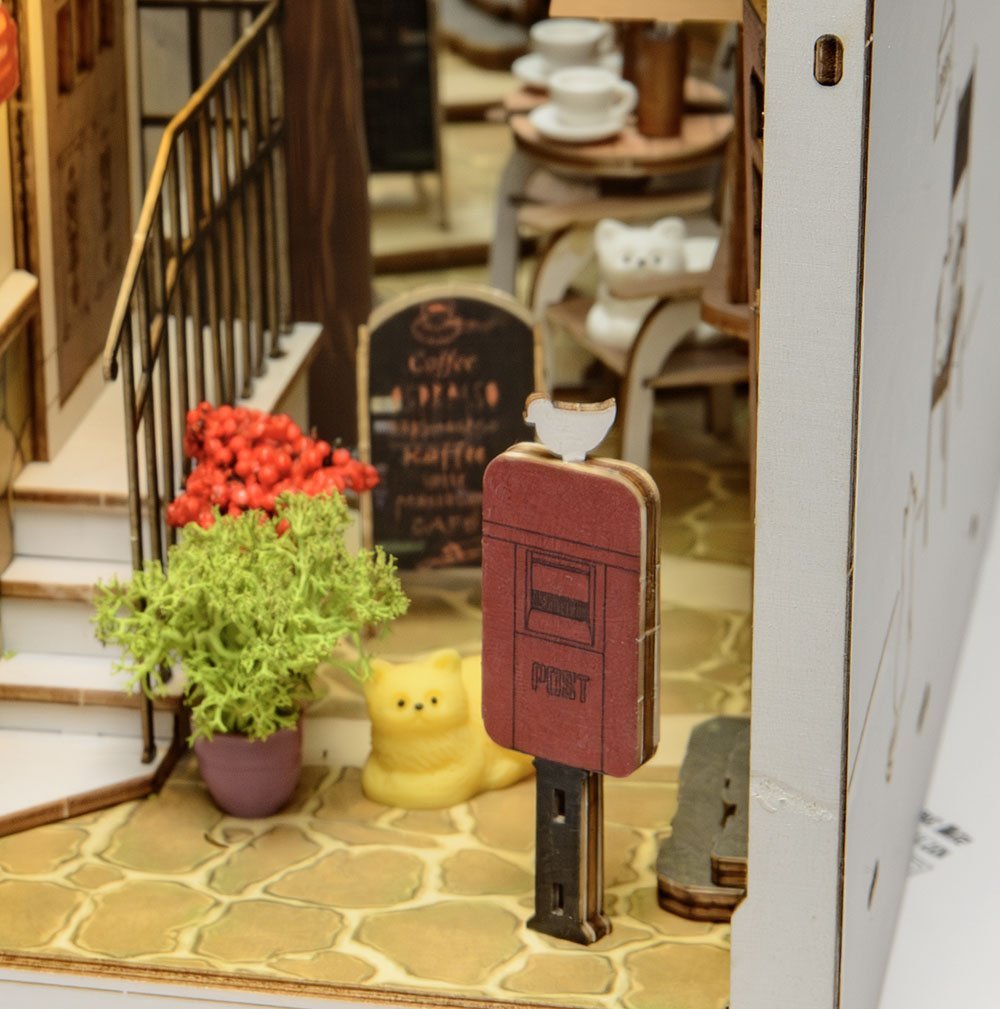
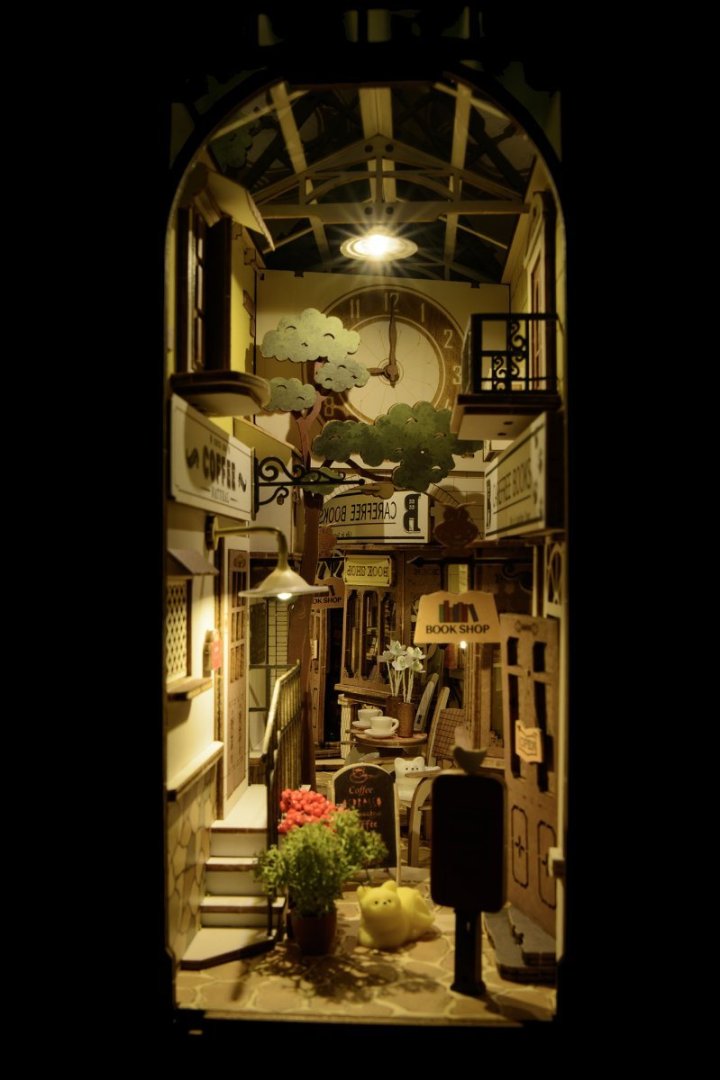
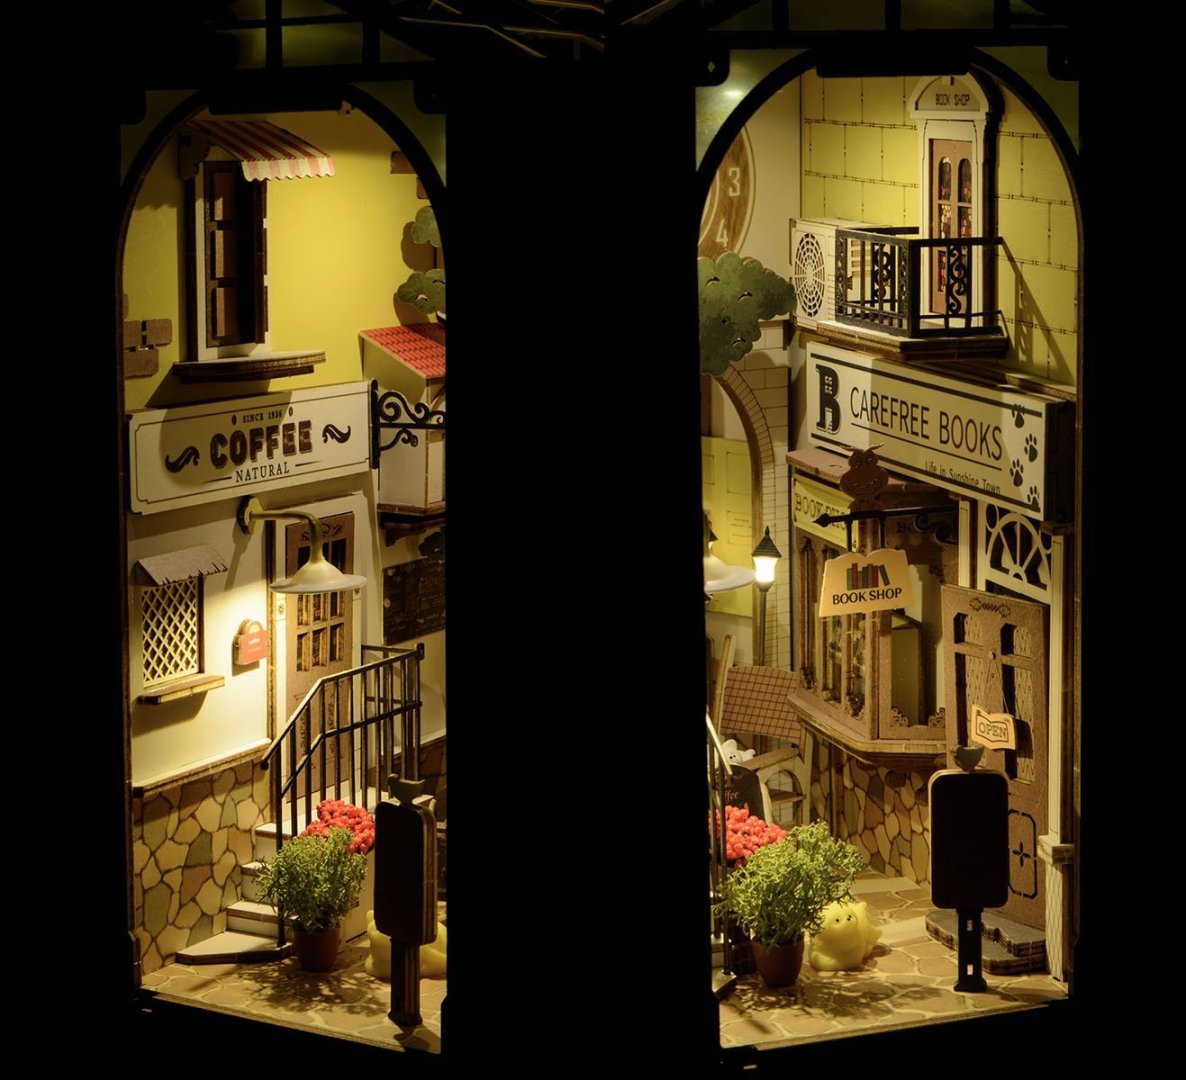
This kit is a very small project for everyone and can be a good present for somebody. I'll present the finished one to a child and present another new Book Nook kit. I hope she appreciates my present and is pleased with completing the new kit. By the way, this is a tiny detail that you might miss.
-
[Customer]
-
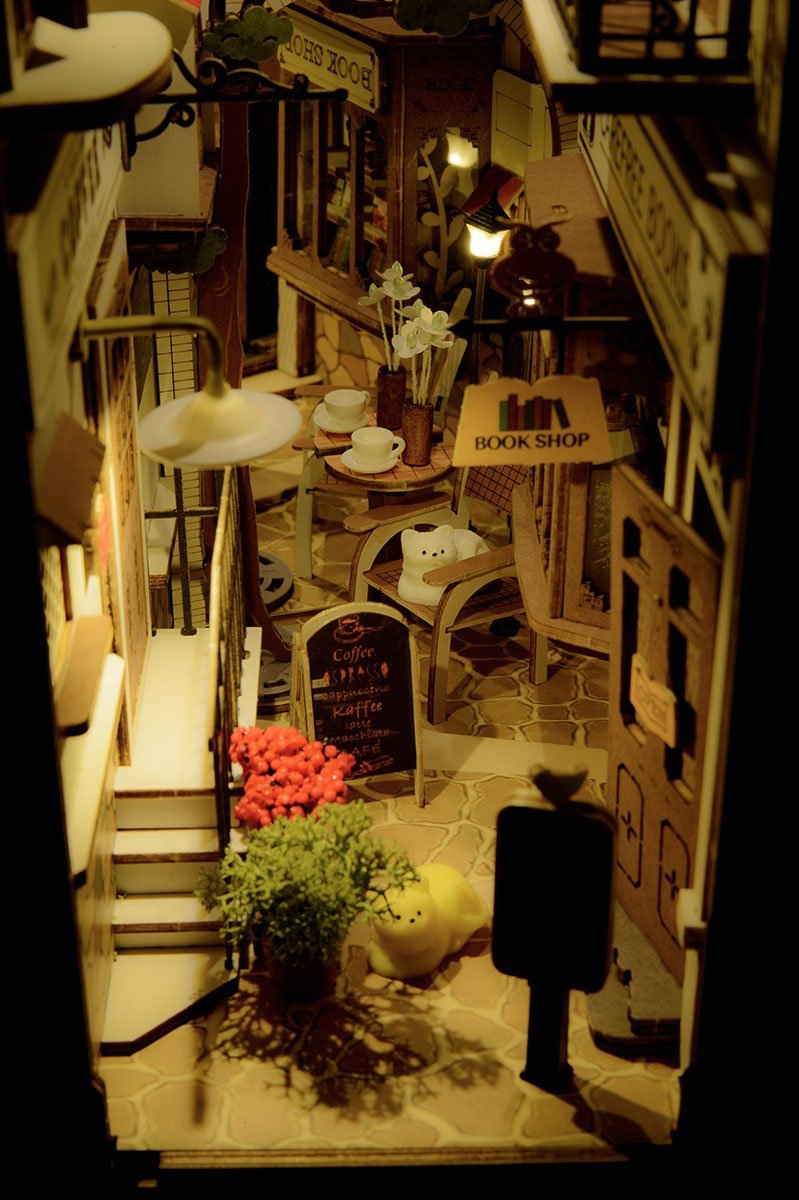
It's been 3 years since I finished a kit from Robotime. I bought TGB02 Sunshine Town, which is one of Book Nook series. This kit is more difficult than the Sam's study room and requires paintings. I completed the kit in one day without painting.


-
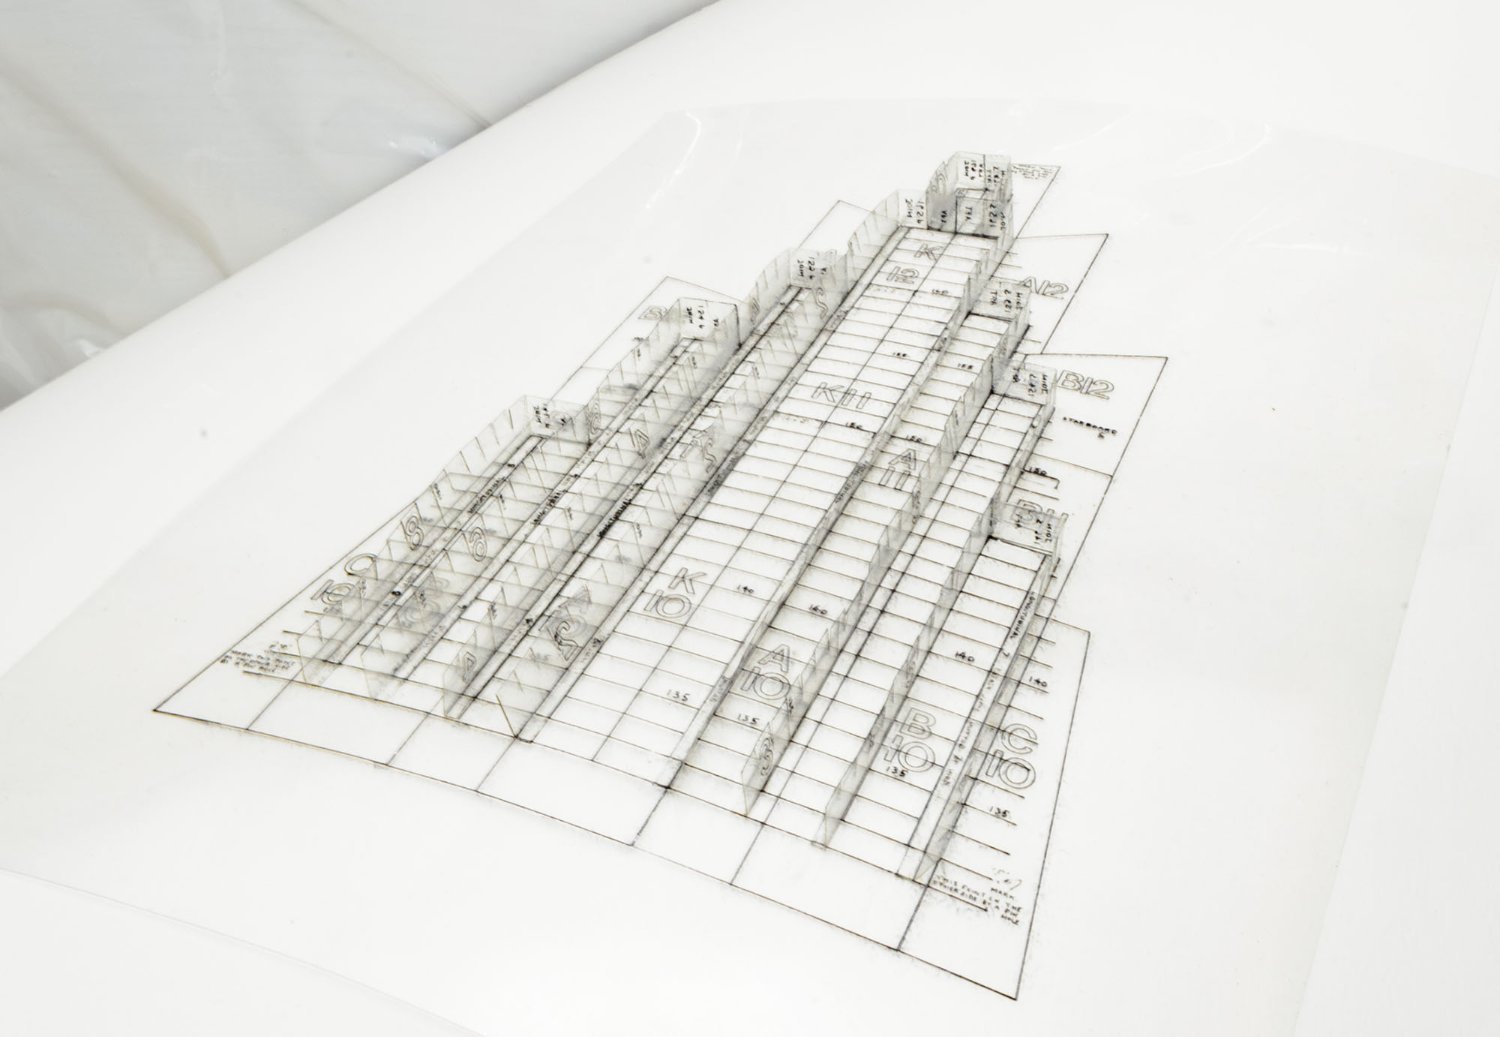
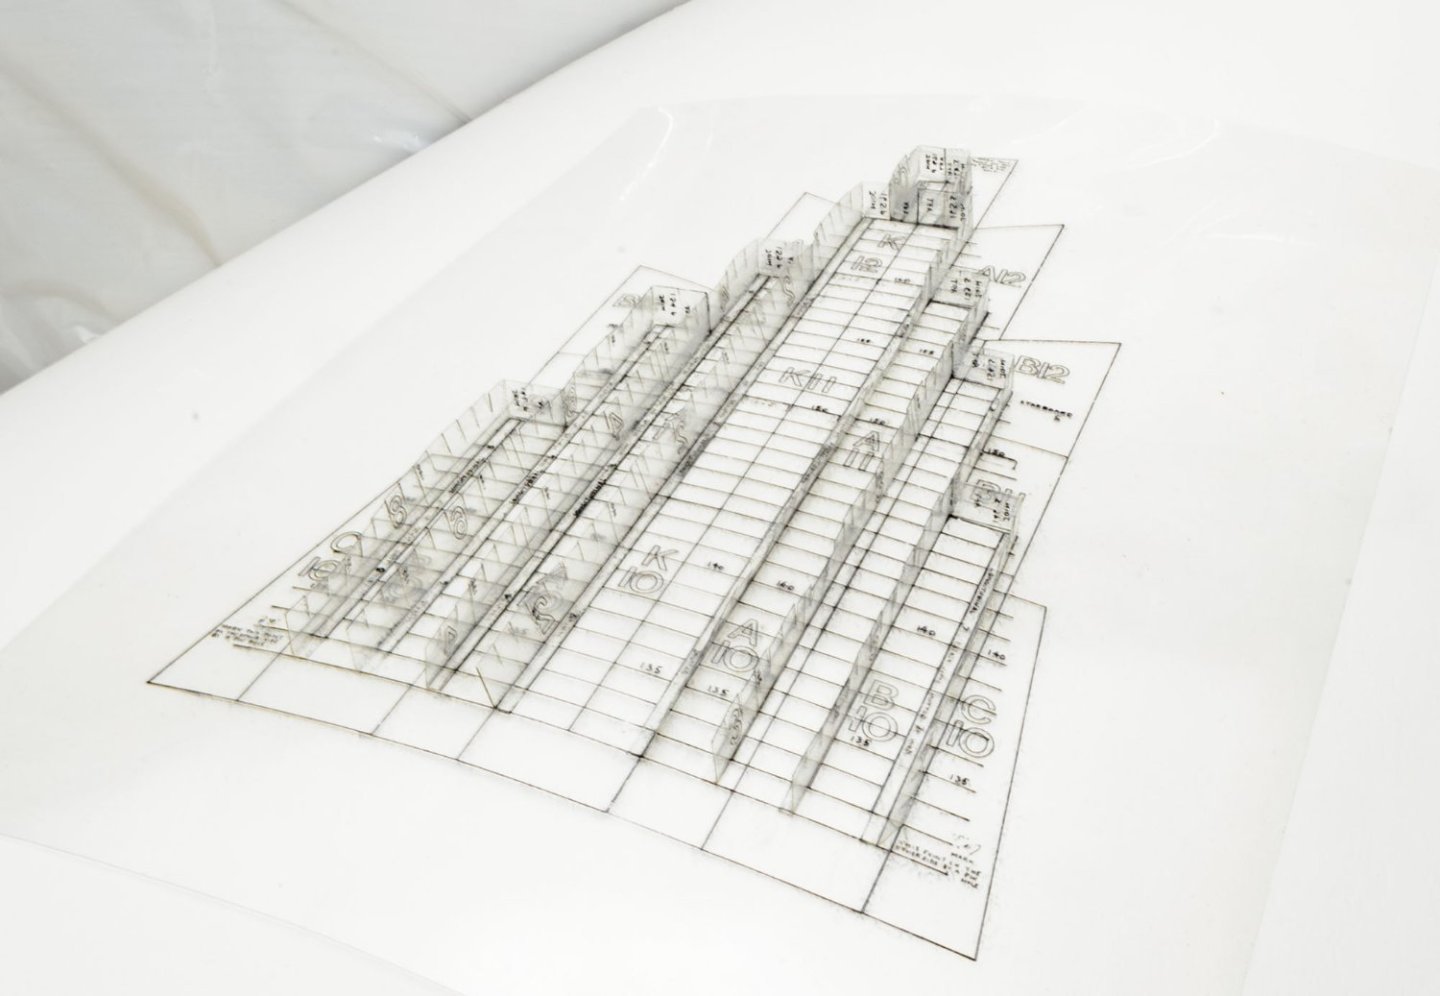
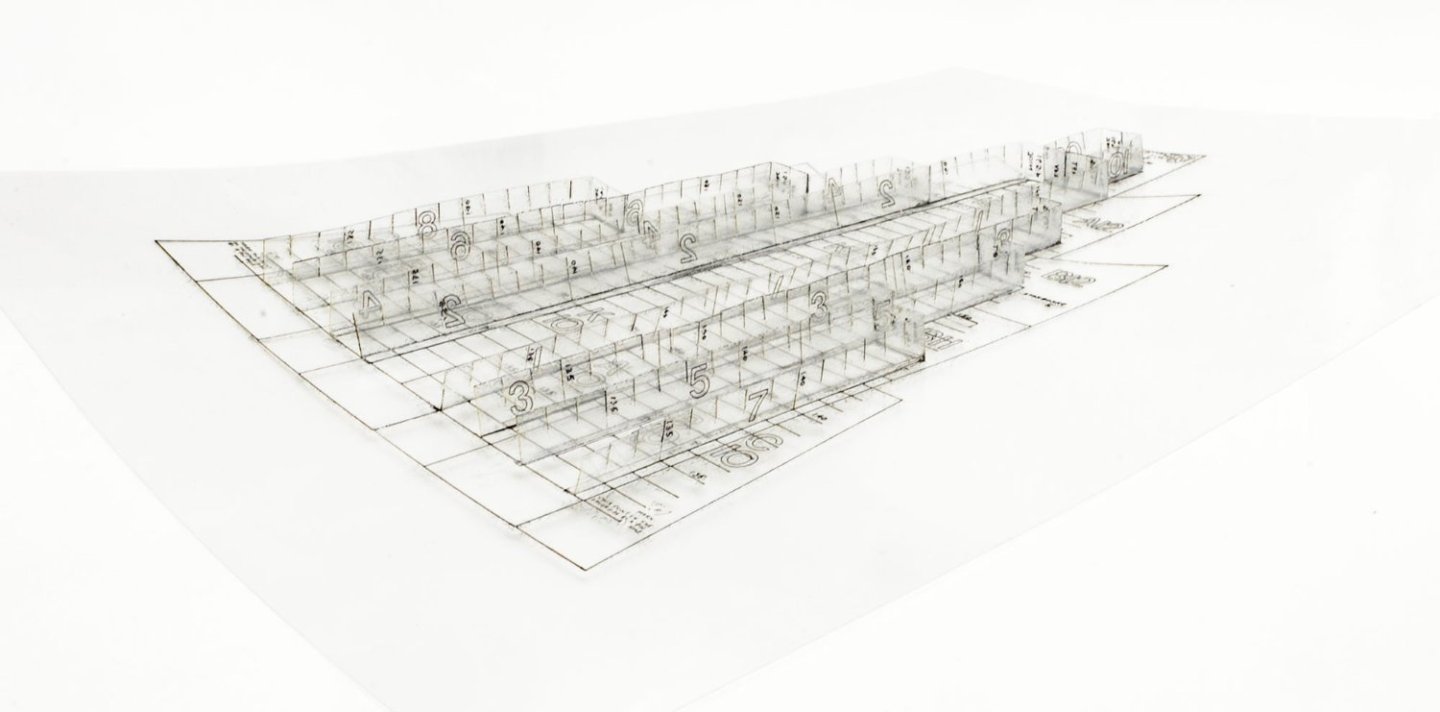
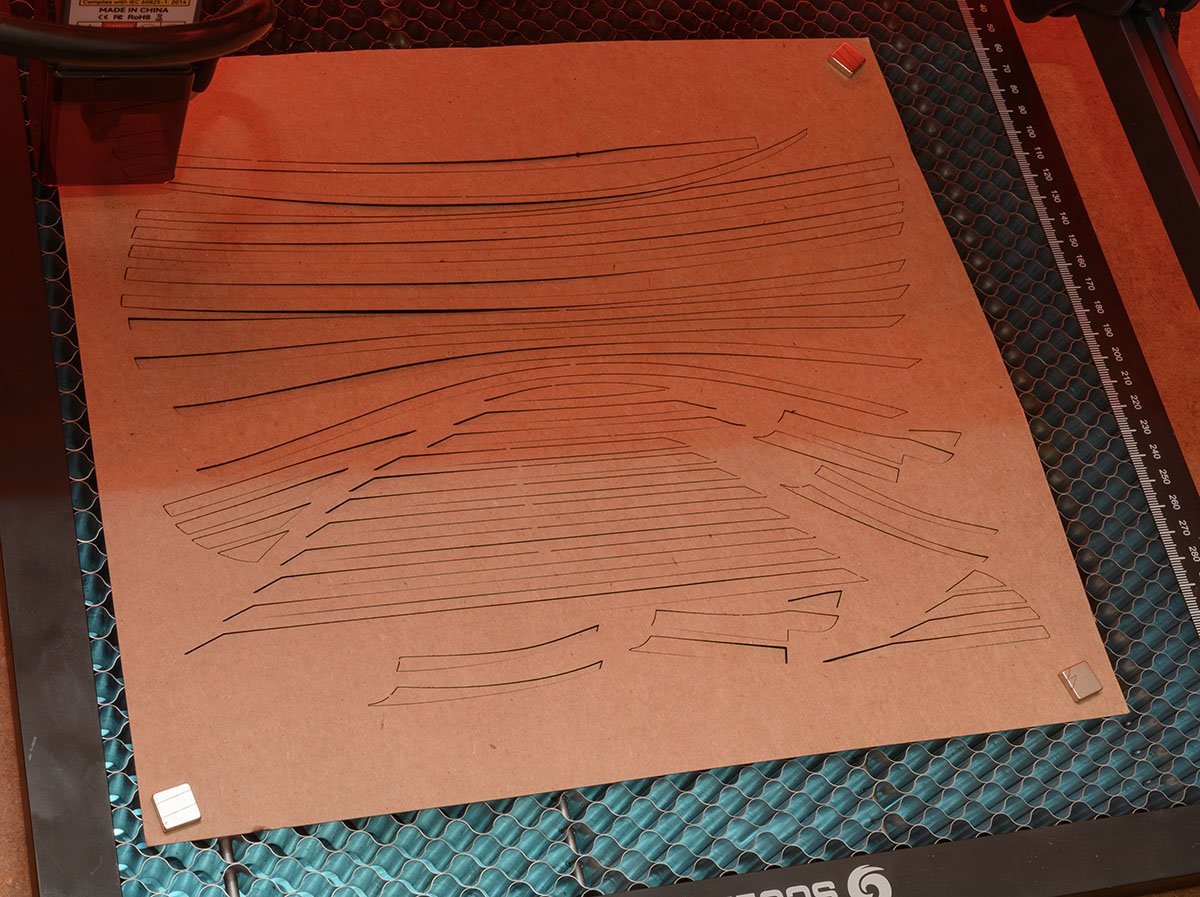
I caught a COVID. My fever has gone down, but I have difficulty breathing and can't smell yet. These are small projects I made during a hard time. I resized the SD14 plan in half and printed on OHP films. It seems pretty promising. I cut double sized blocks using a laser cutter. It's difficult to cut and sand each part now... But, I'm keeping working on it. Oh, and thanks to GrandpaPhil. I upgraded the plank using interior adhesive films. The interior film is not better than raw-wood planks, but much better than paper.


- 12 replies
-
- 5
-
-
- Muleta de Seixal
- Seahorse
- (and 1 more)
-
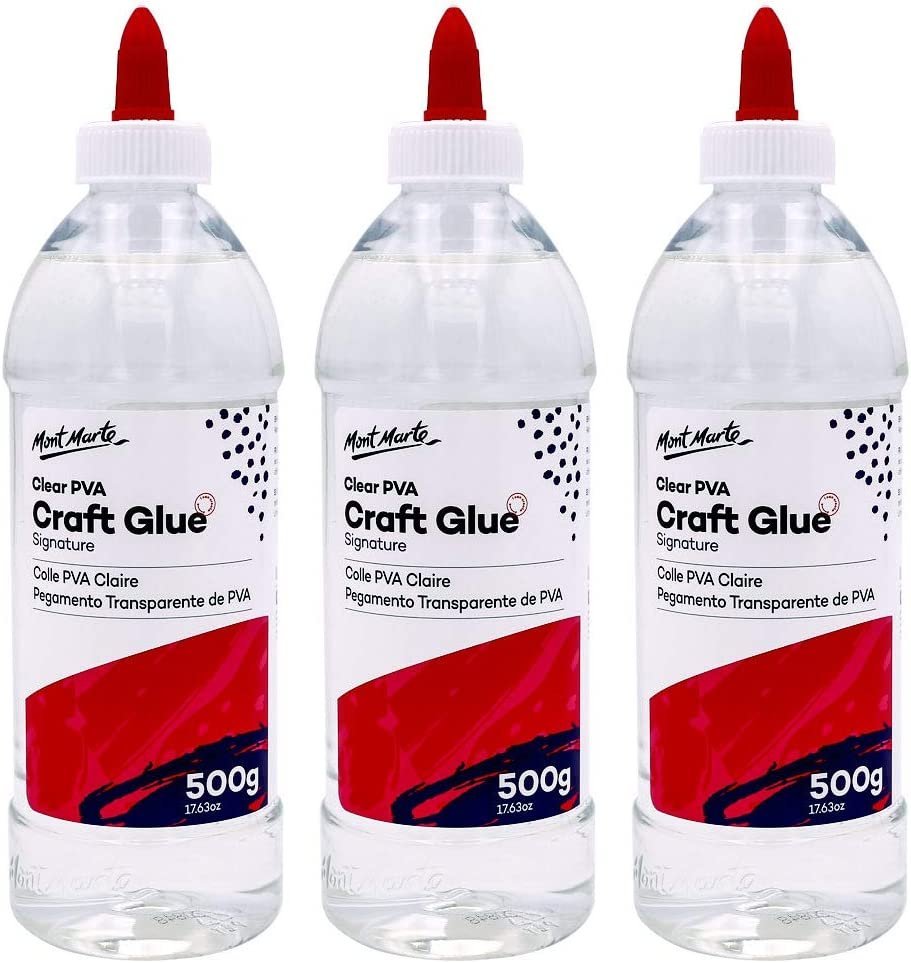
I was surprised when I learned the clear glues I used in elementary school were PVA glues, like titebond. Does anyone know any cautions about using the clear glues that are sold everywhere? I think the clear glues are good for hardening threads.


-
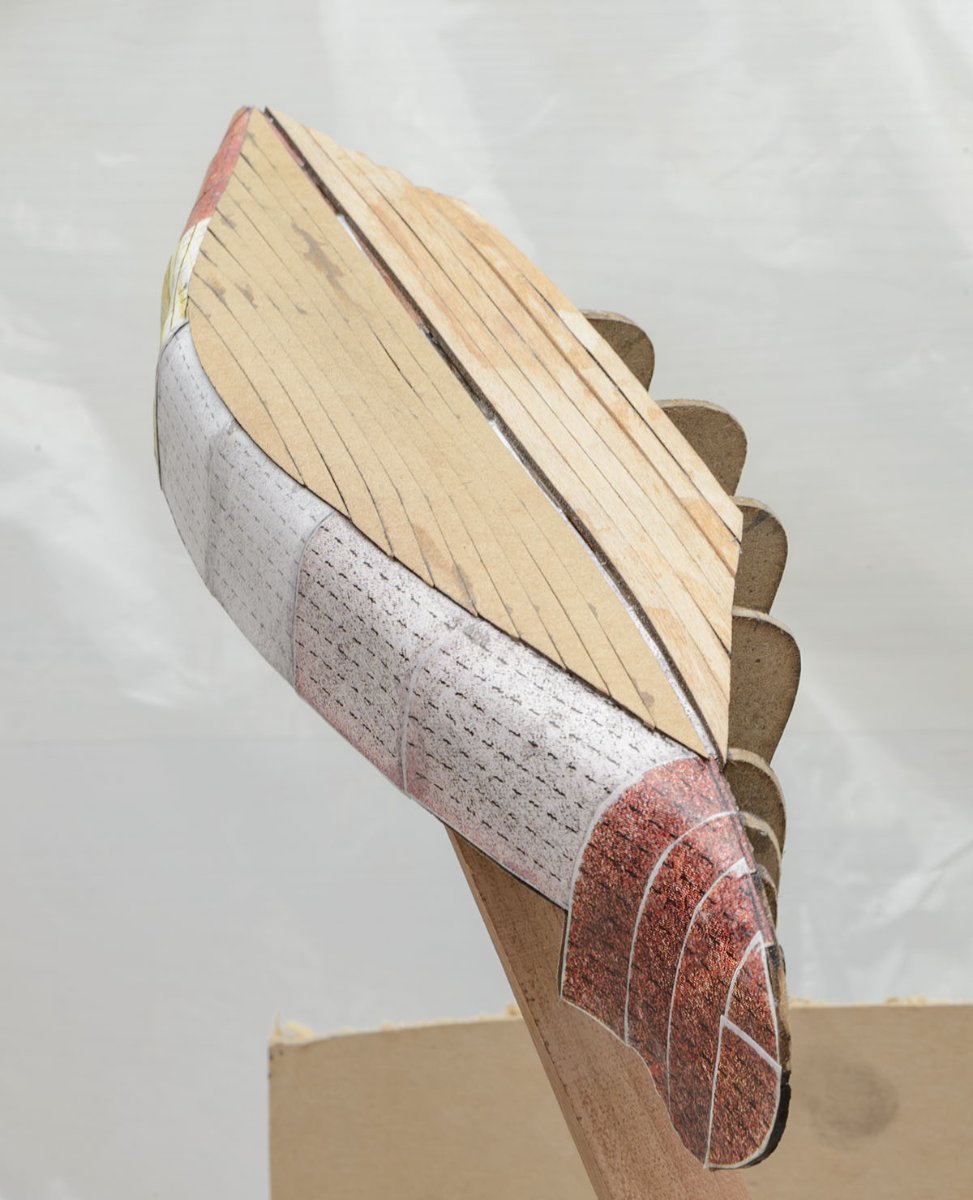
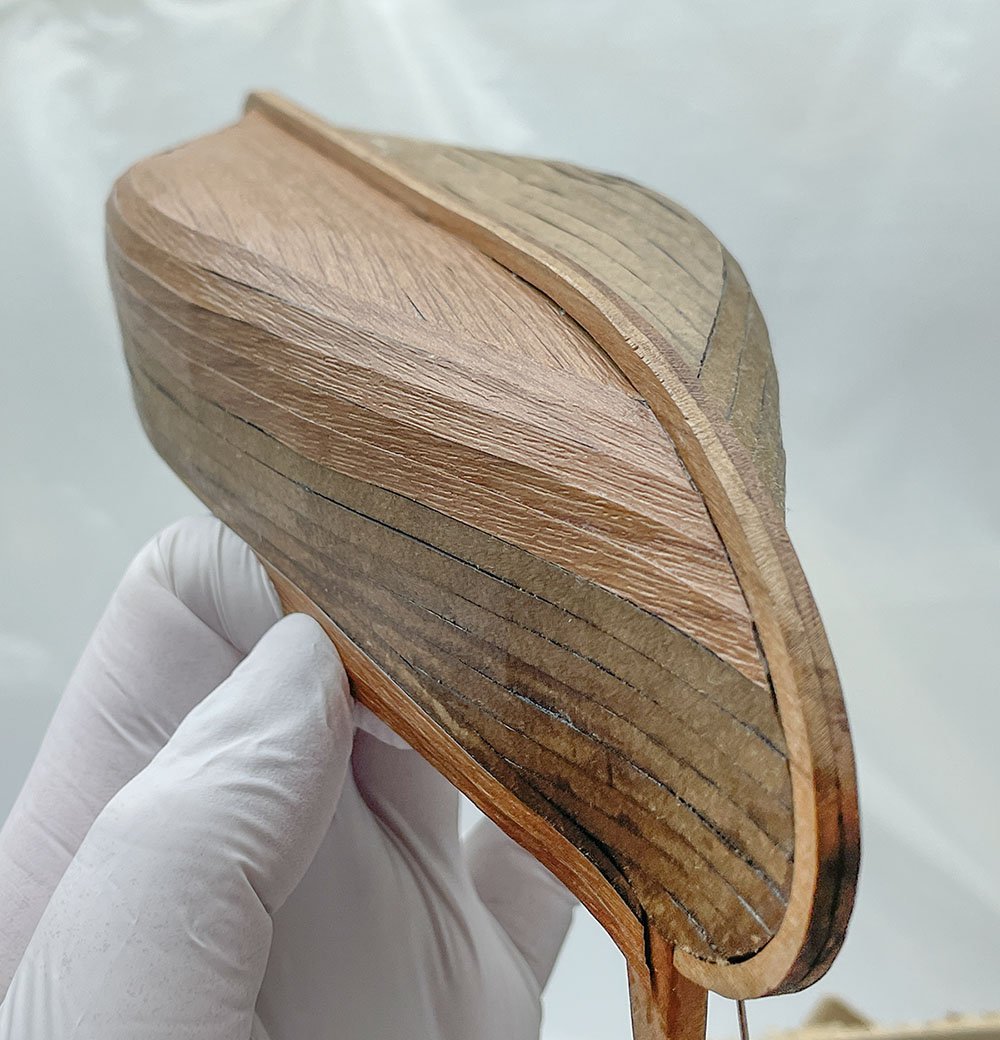
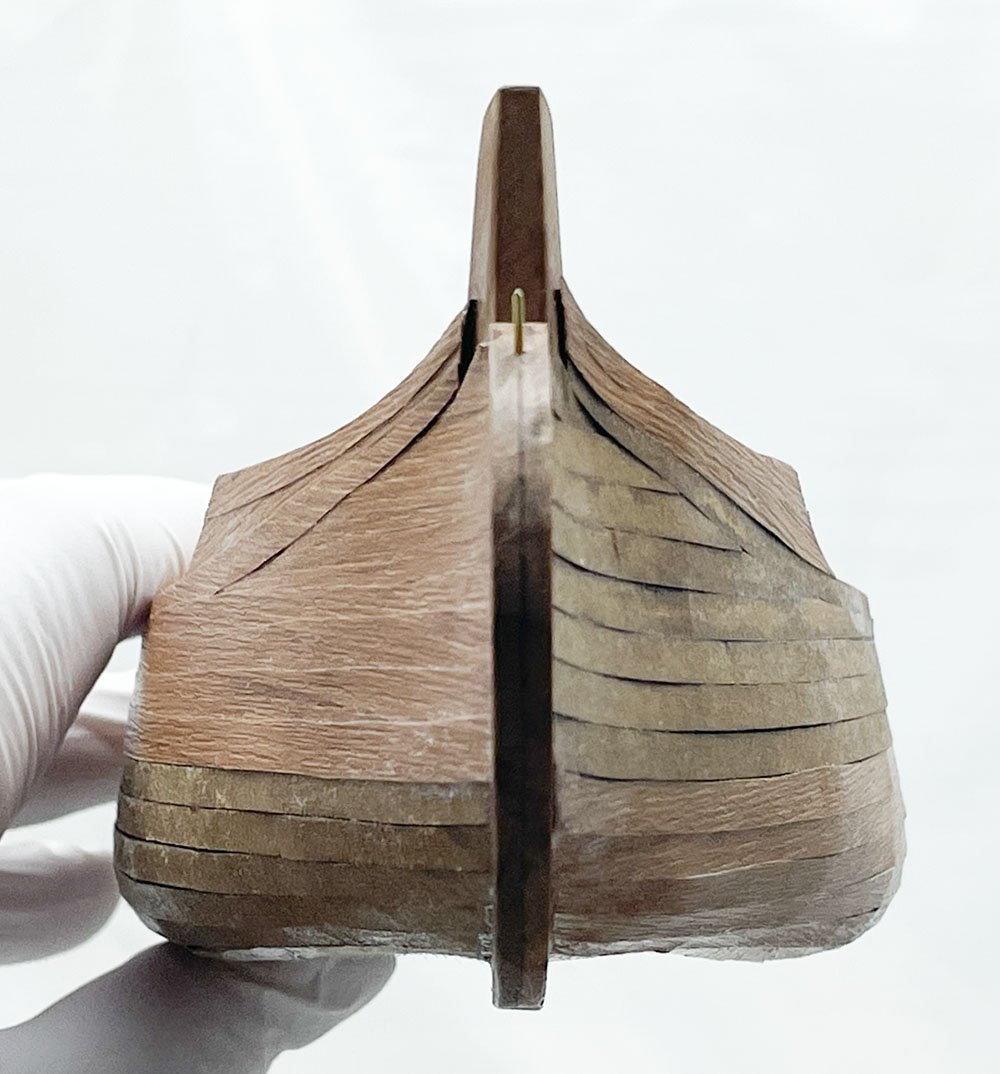
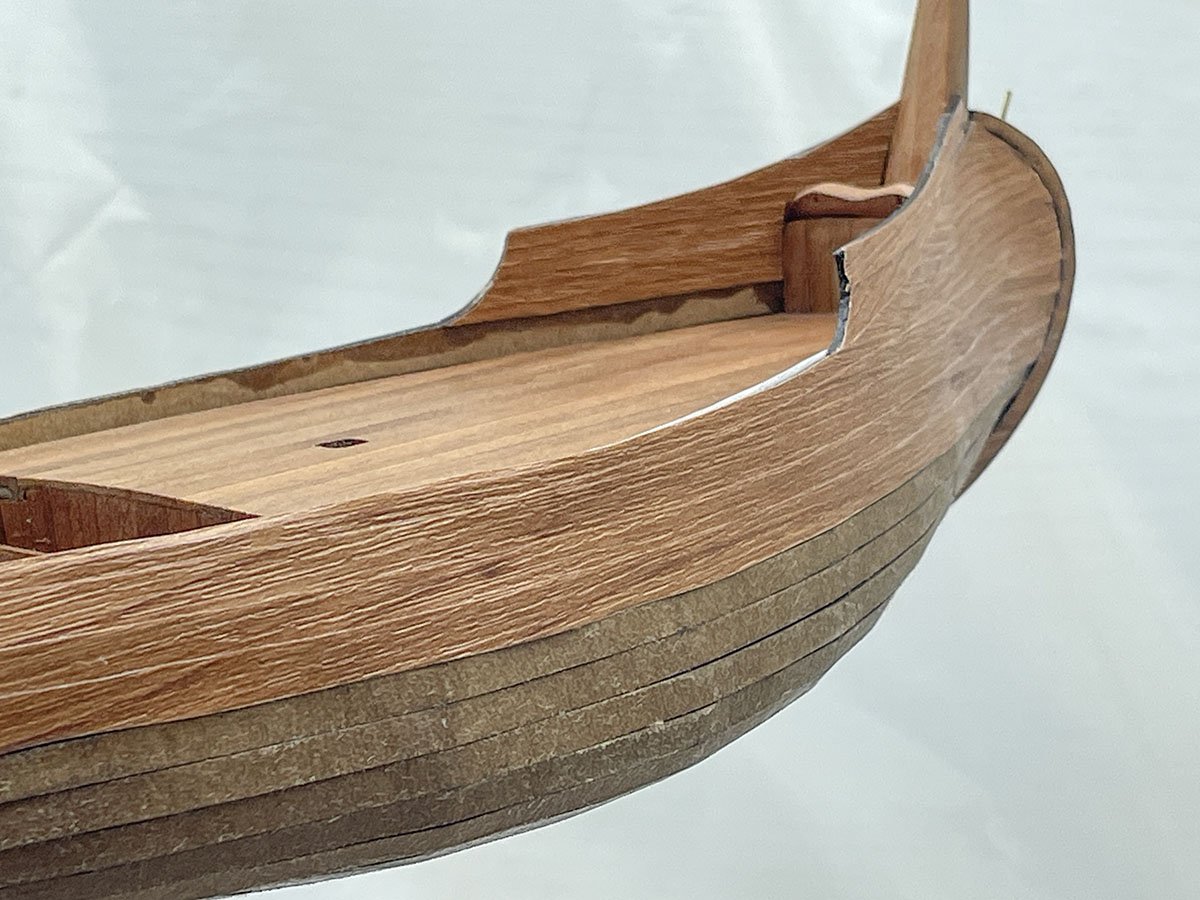
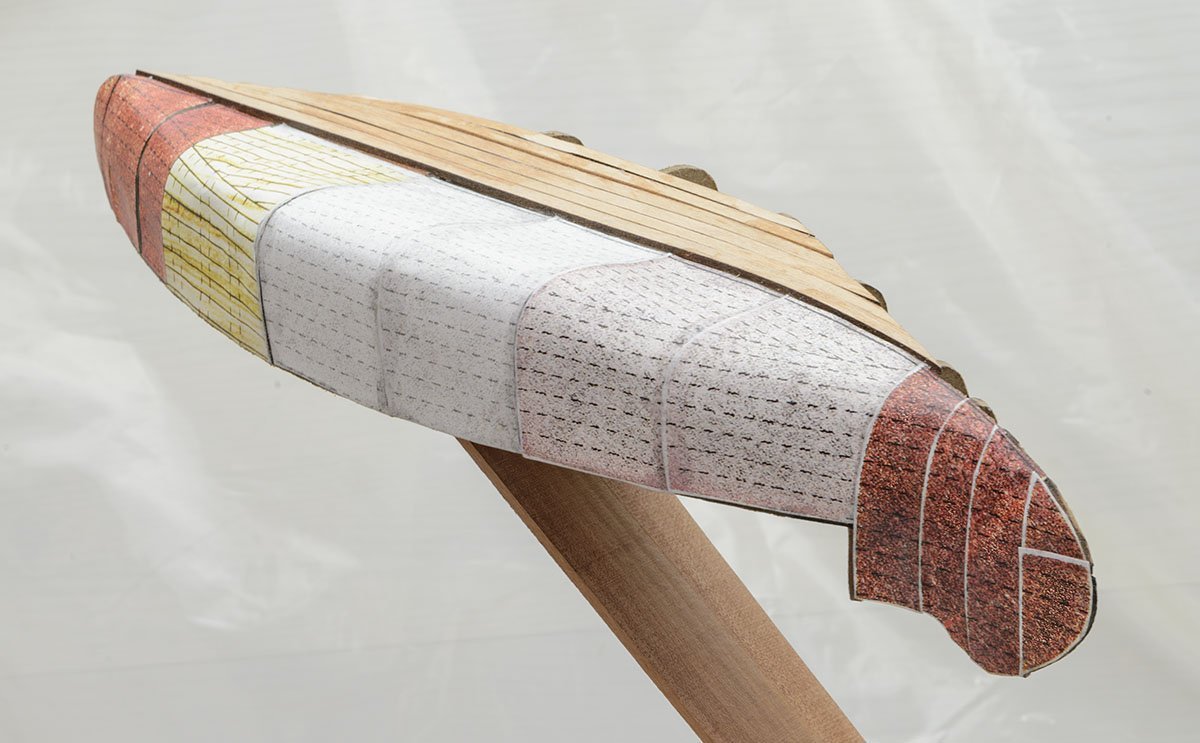
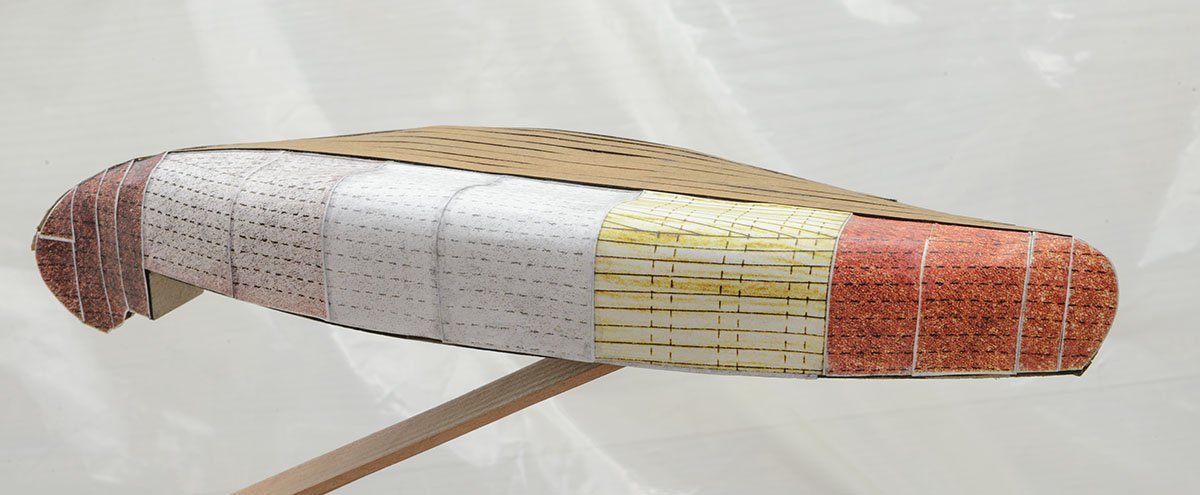
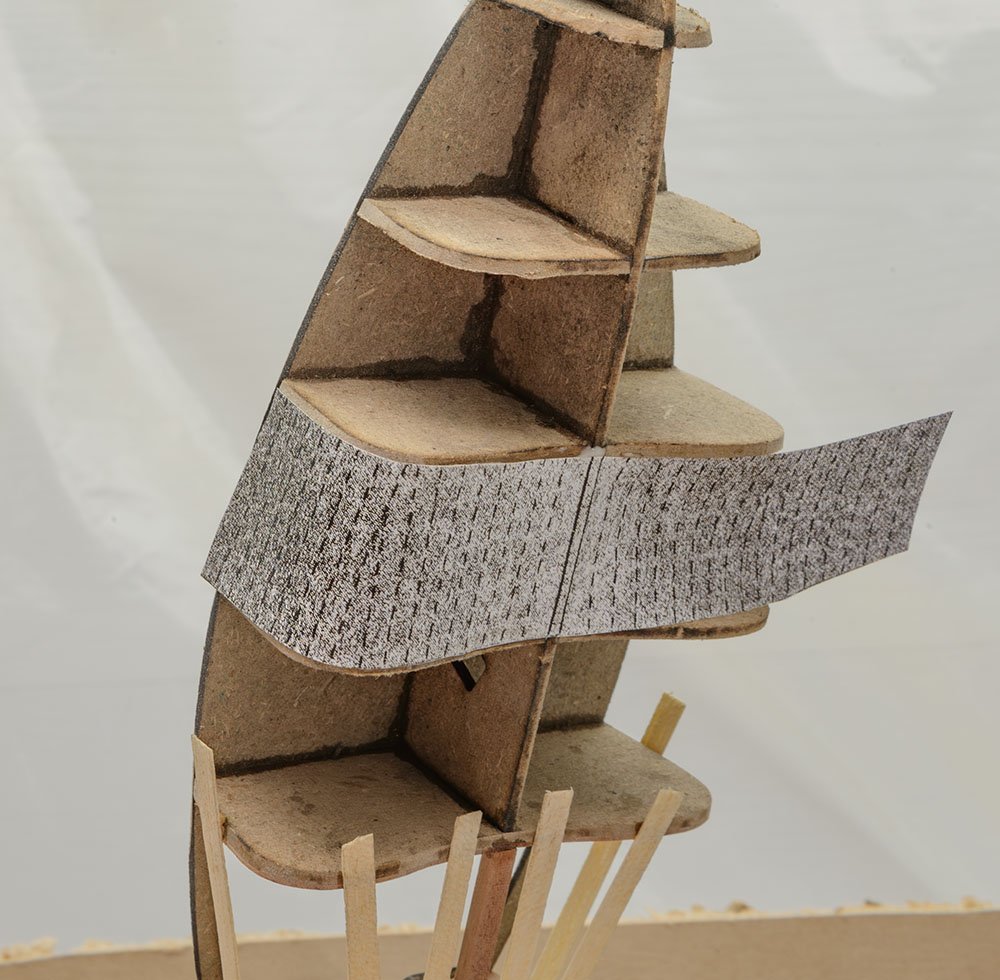
OK. The paper planking is ready... The grain pattern of the craft paper isn't in my favor... However, the process of paper planking was so fast and easy. Added more paper strips. I finished the planking process within a day! It's so fast and easy! I'll be looking for craft paper that has better grain patterns.

- 12 replies
-
- 8
-
-
- Muleta de Seixal
- Seahorse
- (and 1 more)
-
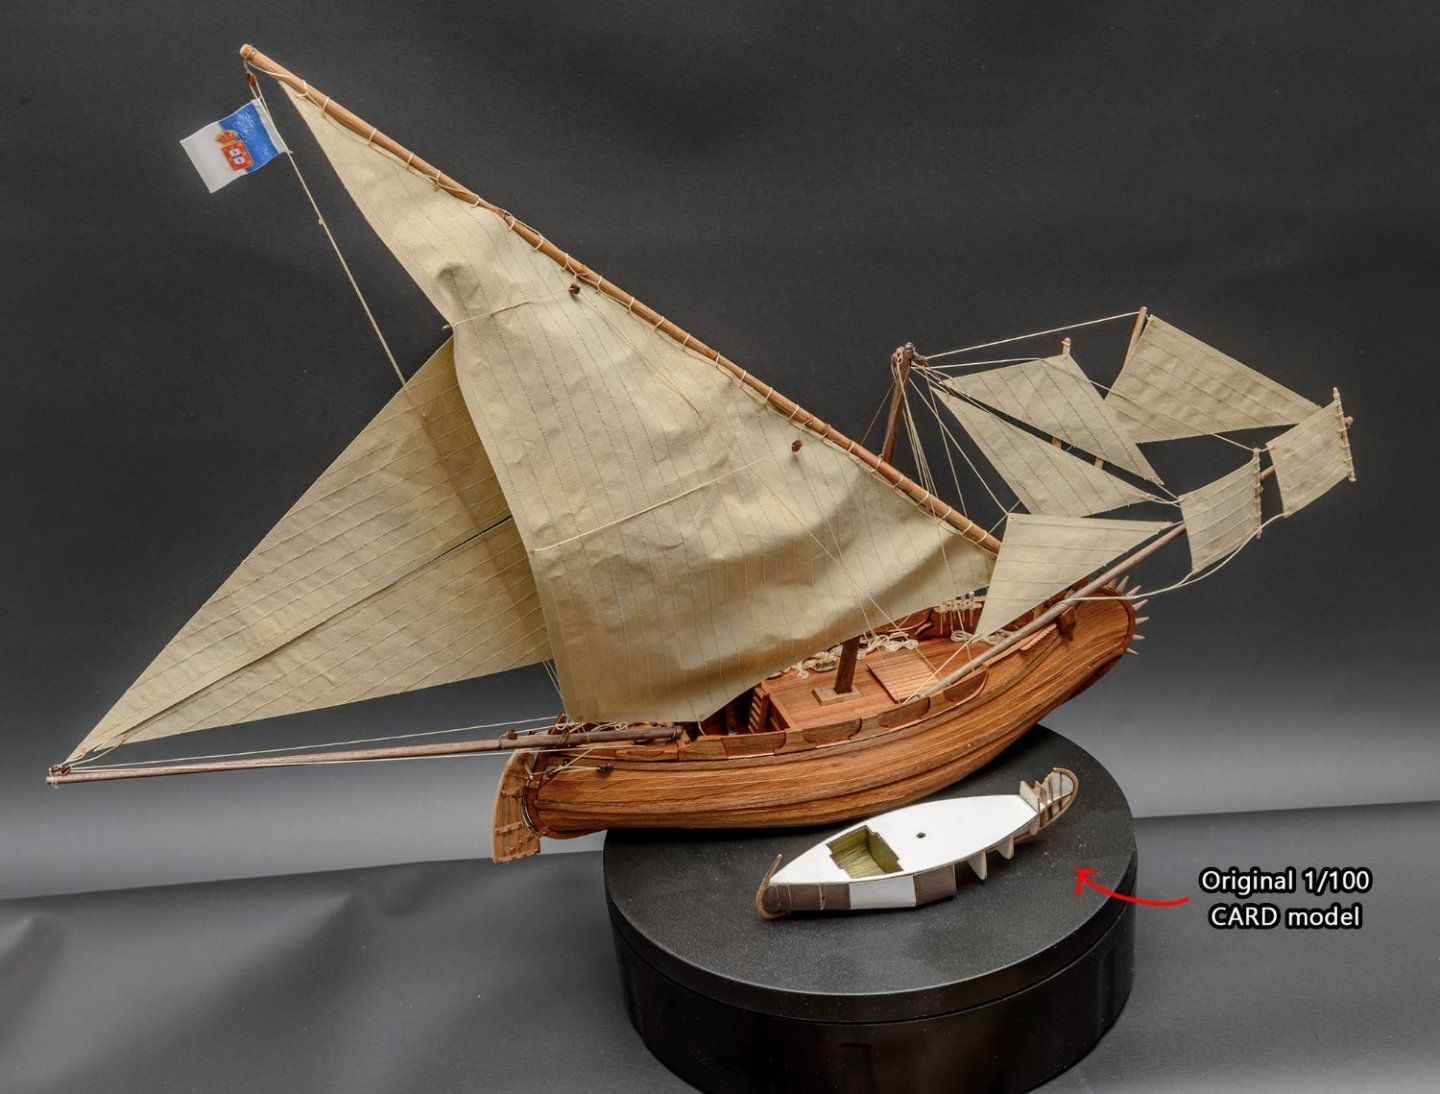
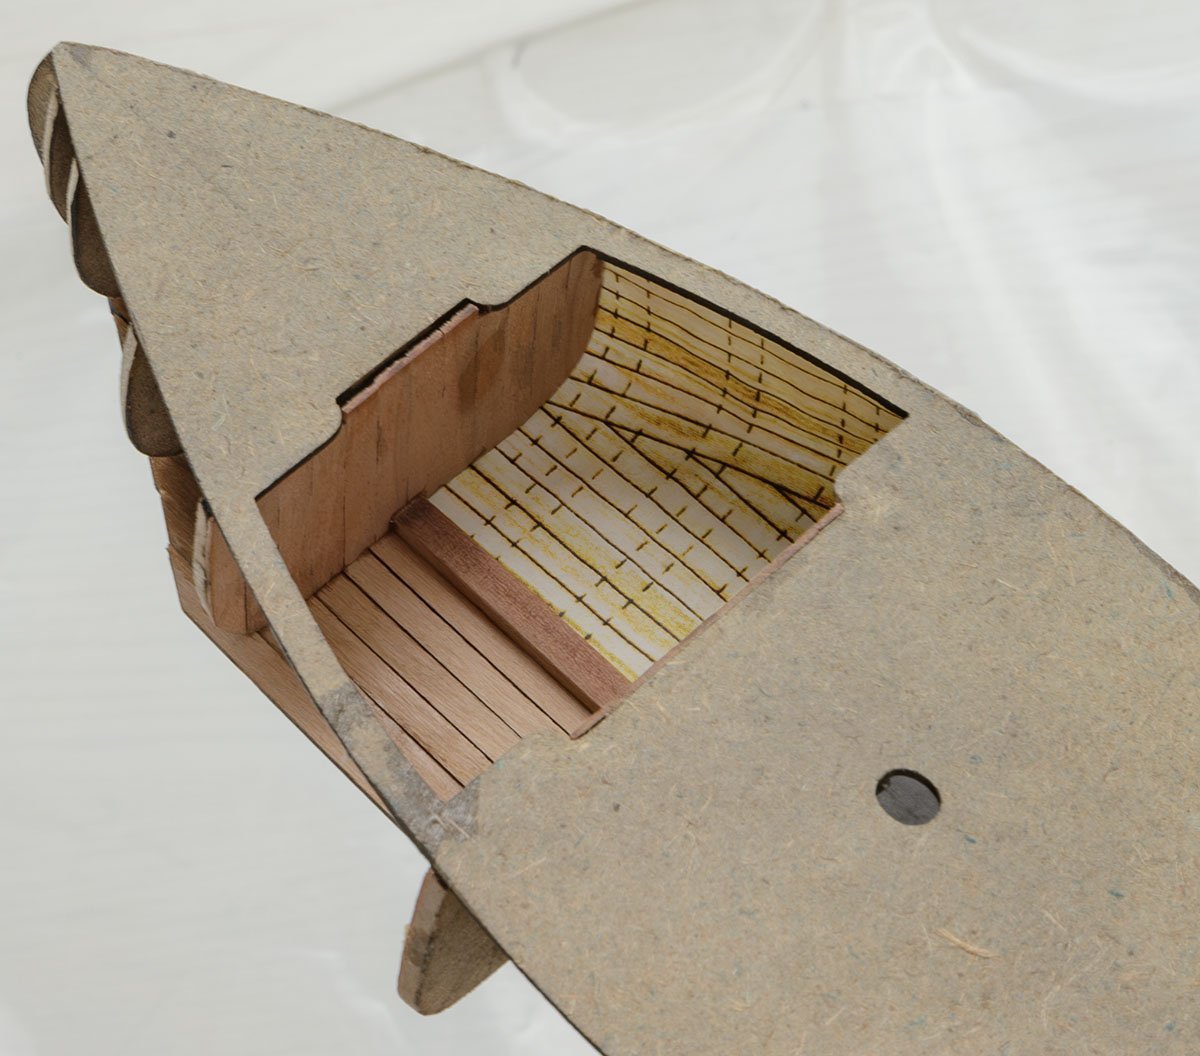
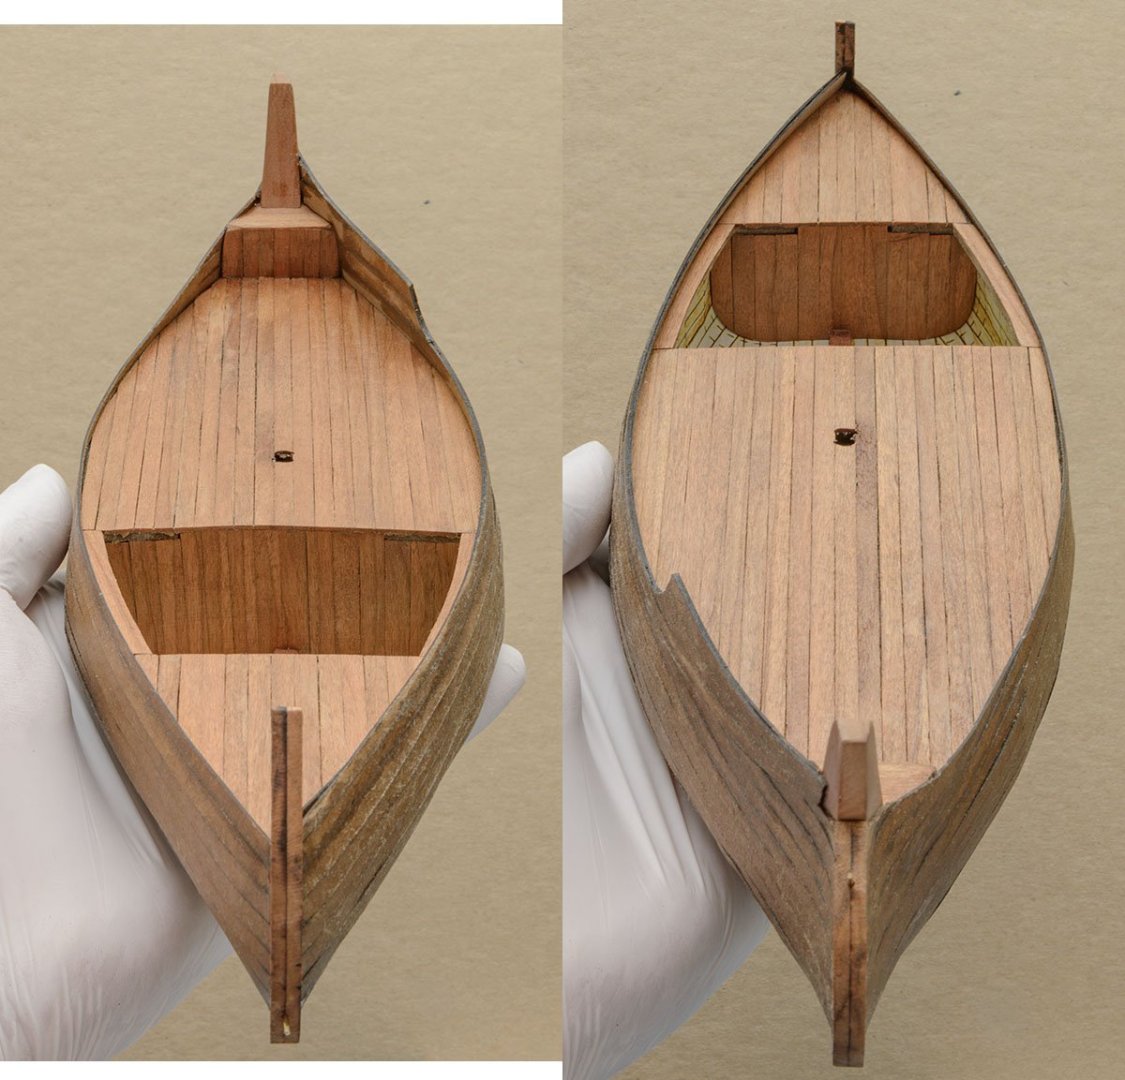
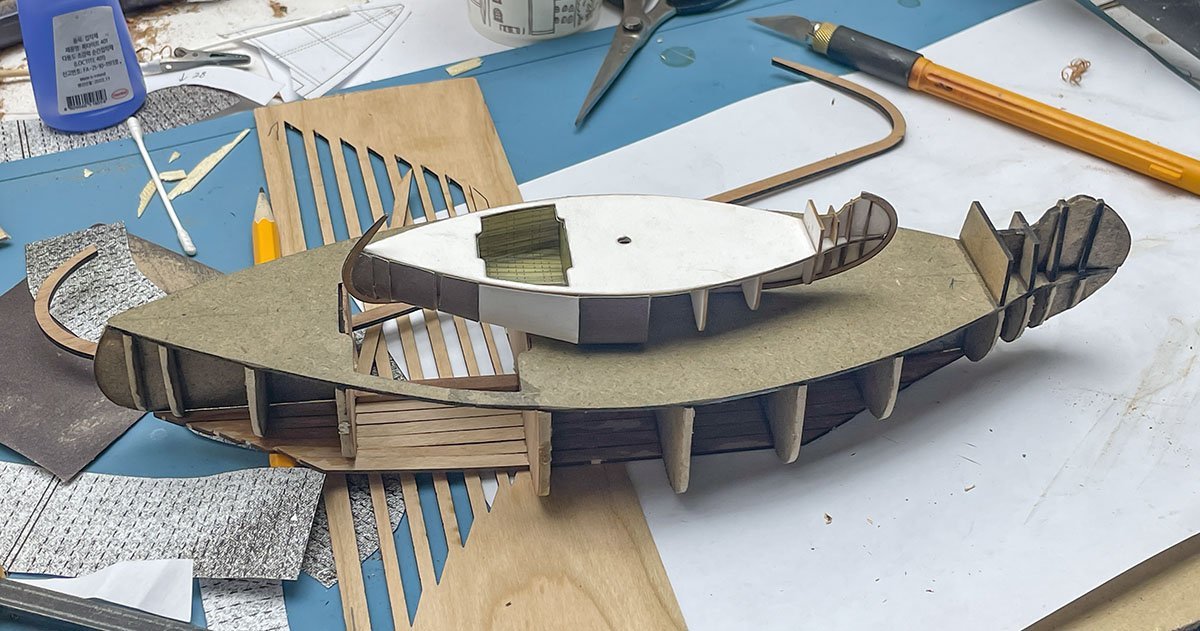
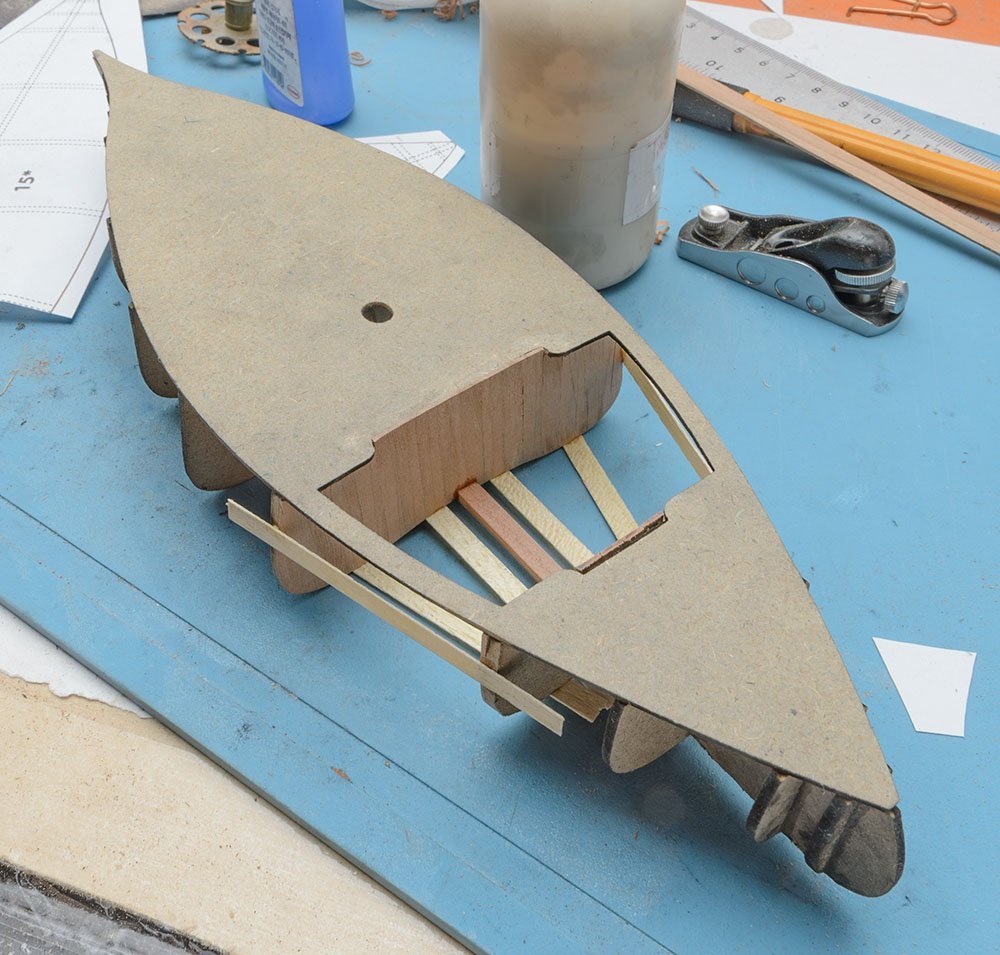
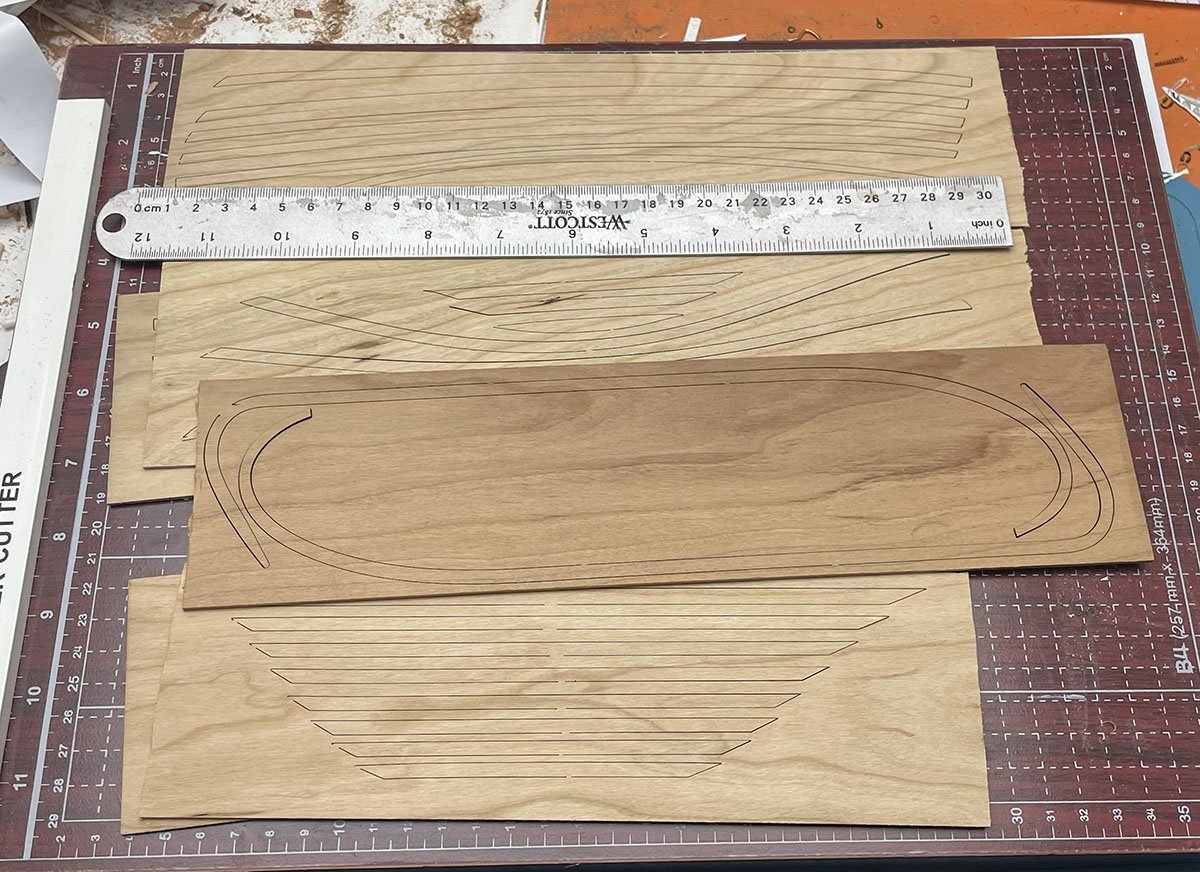
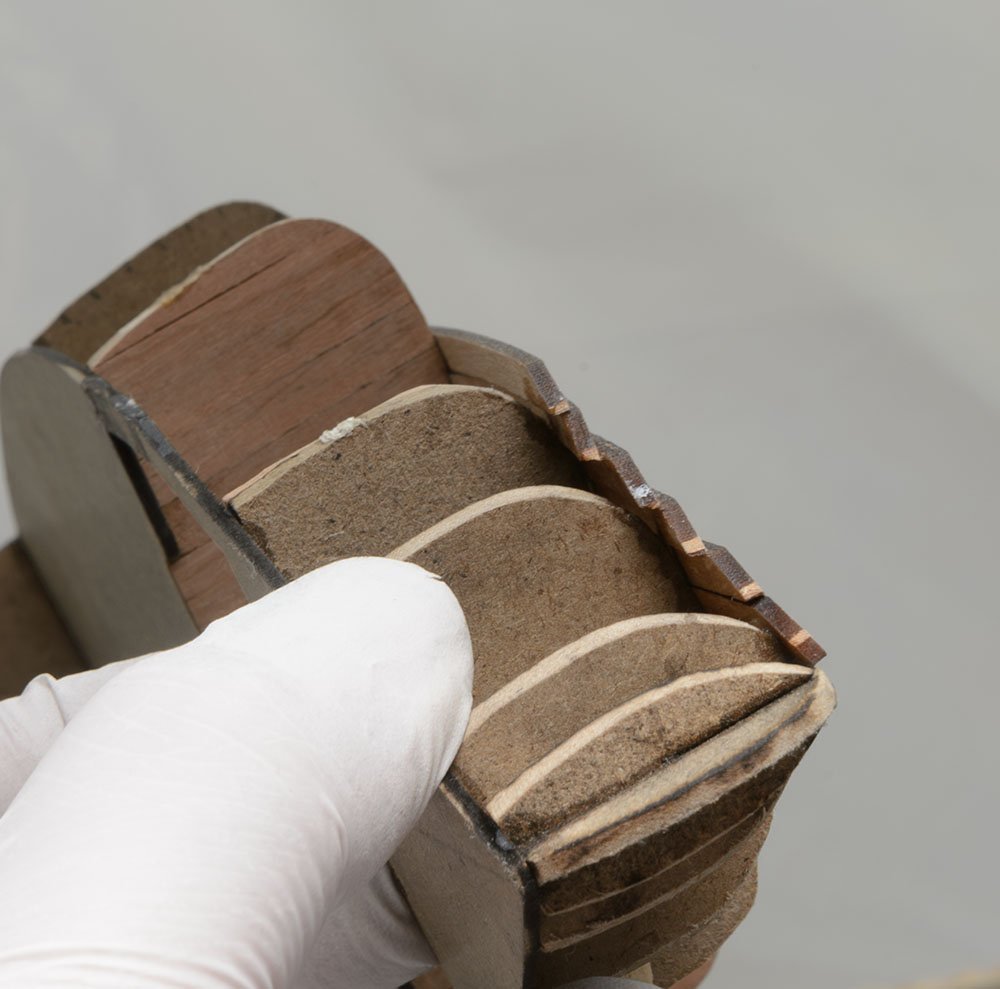
While I was building the 1/100 CARD model, I realized my critical mistake. Unlike wooden model ship kit, this paper model doesn't allow such mistakes. To fix the issue, I had to destroy many parts. After a month, I decided to convert the CARD model to a wooden model. The size is 2X, so the scale is 1/50. The frame building was pretty fast and funny work. I used MDF panel. Everything was looking good. Also, planking was promising. I cut 2x larger cherry strips for planks and keels. This is the first hurdle. The wooden planks are too stiff, so they didn't attach to frames tightly. Due to my limiation of skill, I gave up building a wood-only ship, and decided to use papers on planking. The plankings will be only paper parts of the entire ship. 🤔 The pre-cut cherry strips will be disposed. 😱


- 12 replies
-
- 5
-
-
- Muleta de Seixal
- Seahorse
- (and 1 more)
-
I glued at first and then wound without glue, like a bobbin. I soak all with CA to keep shape. The regular CA glue has high surface tension, so it tends to block tiny slots. I carefully removed excessive CA glue with Q-tips. I'm looking for more water-like glue.
-
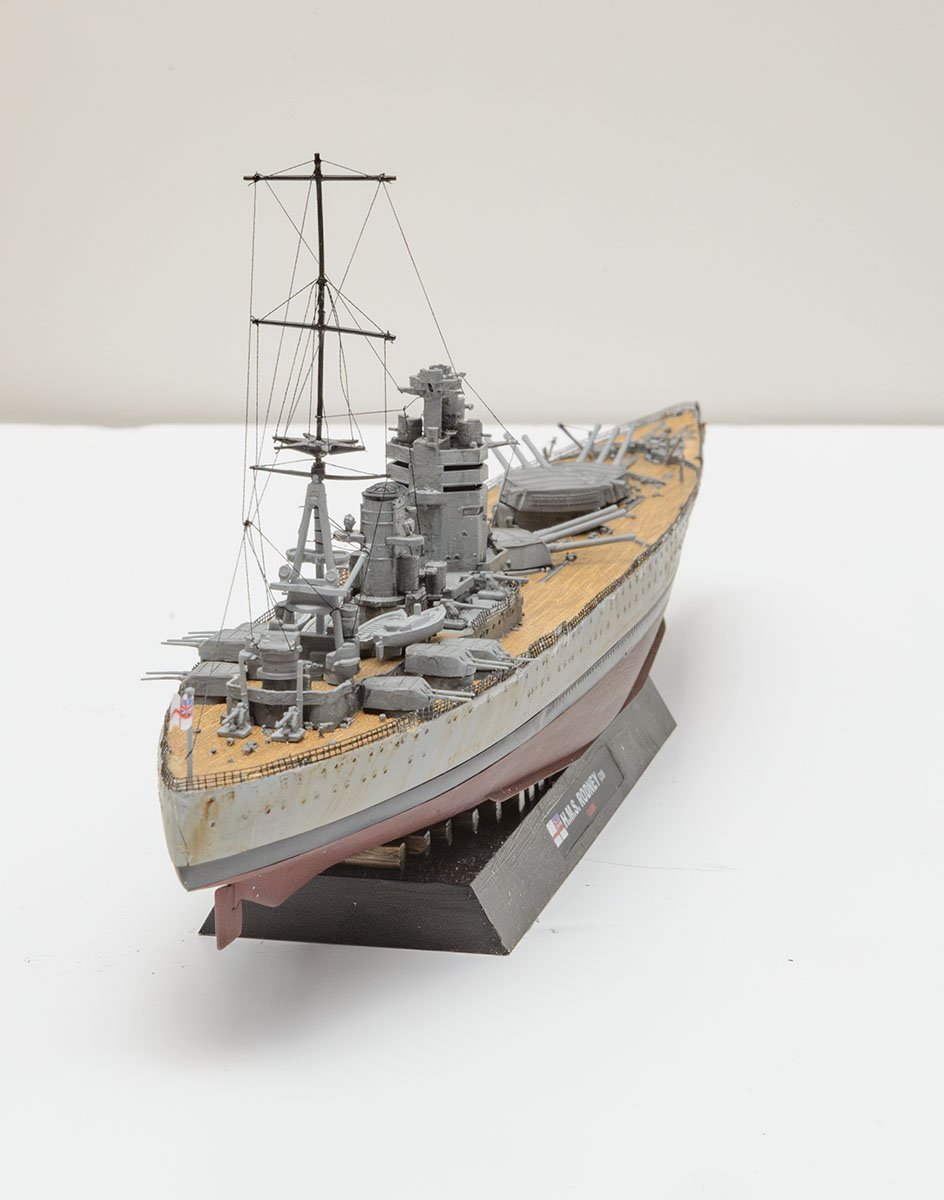
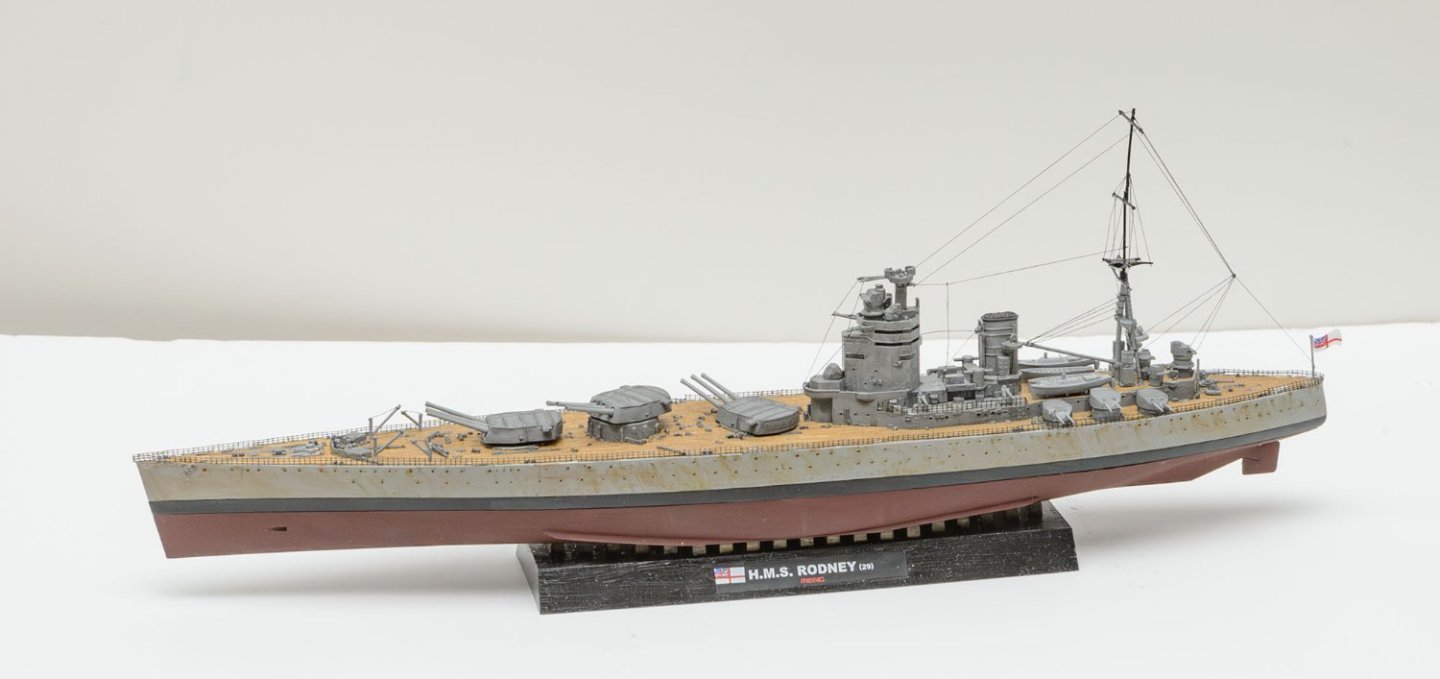
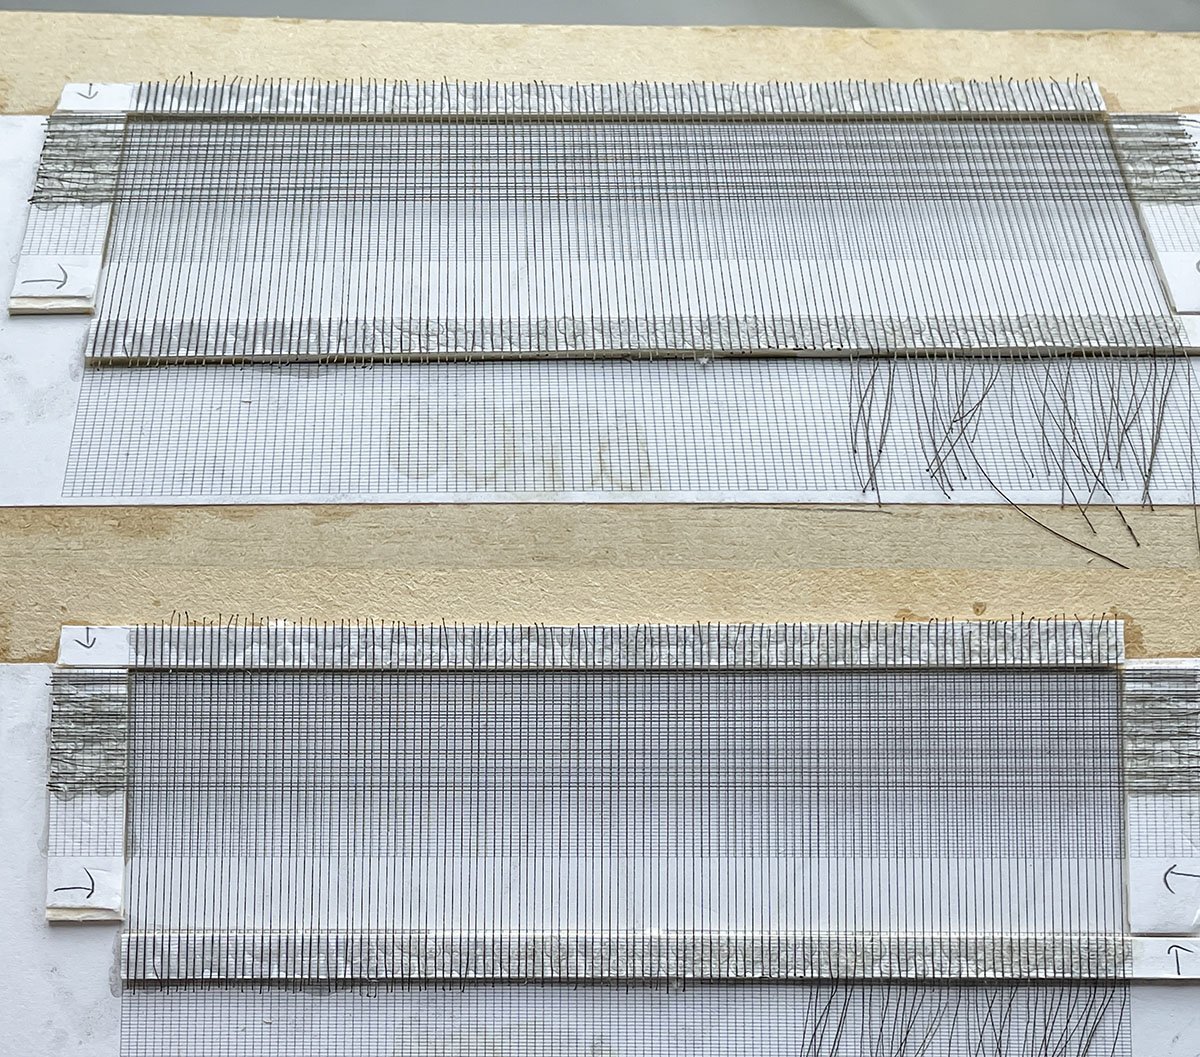
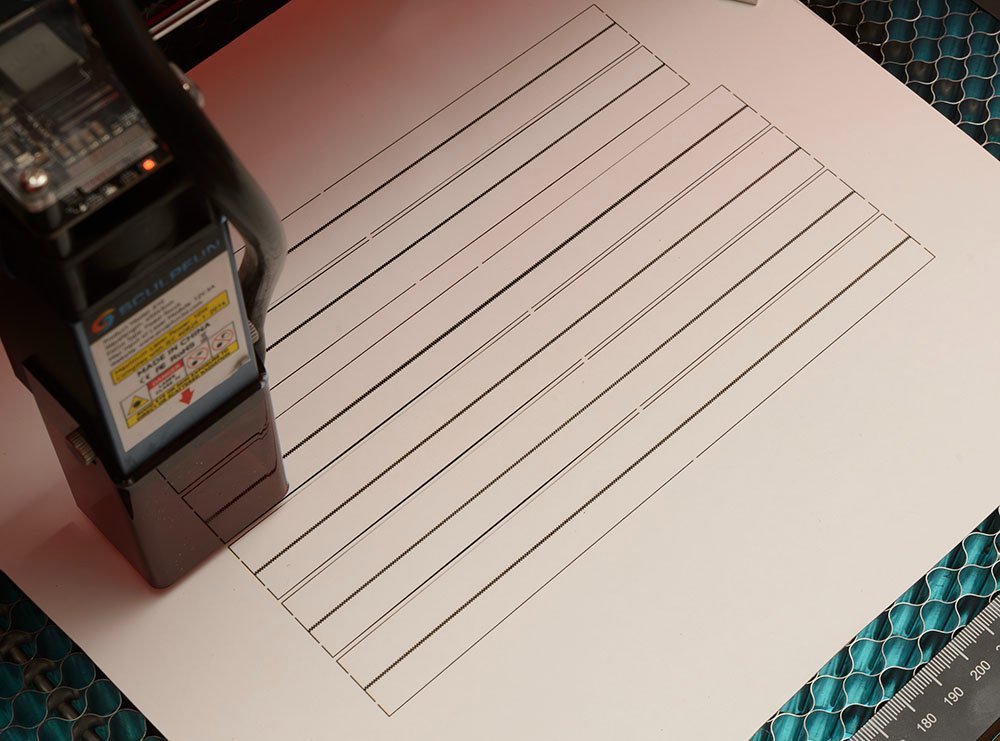
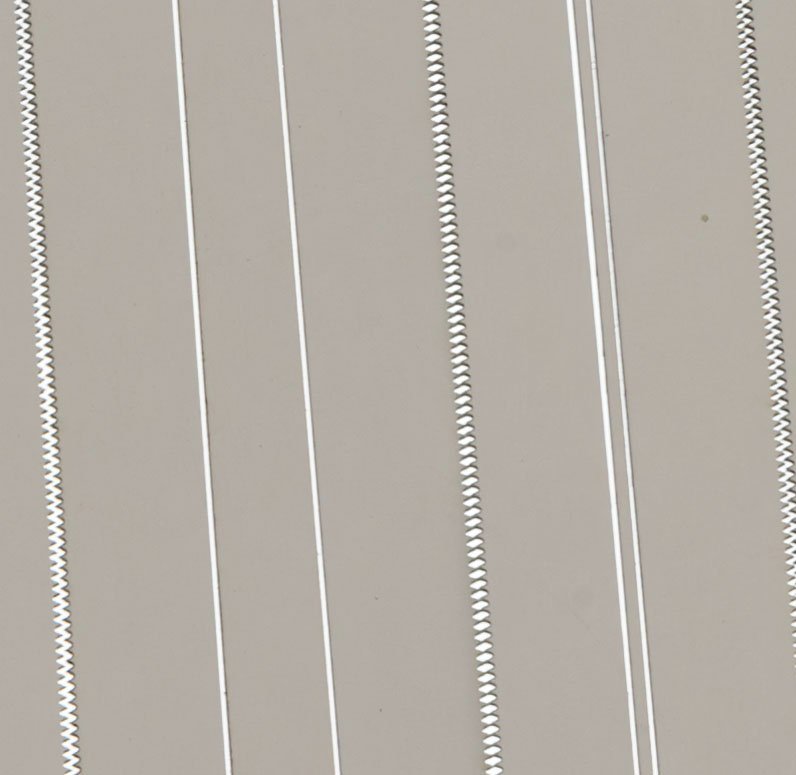
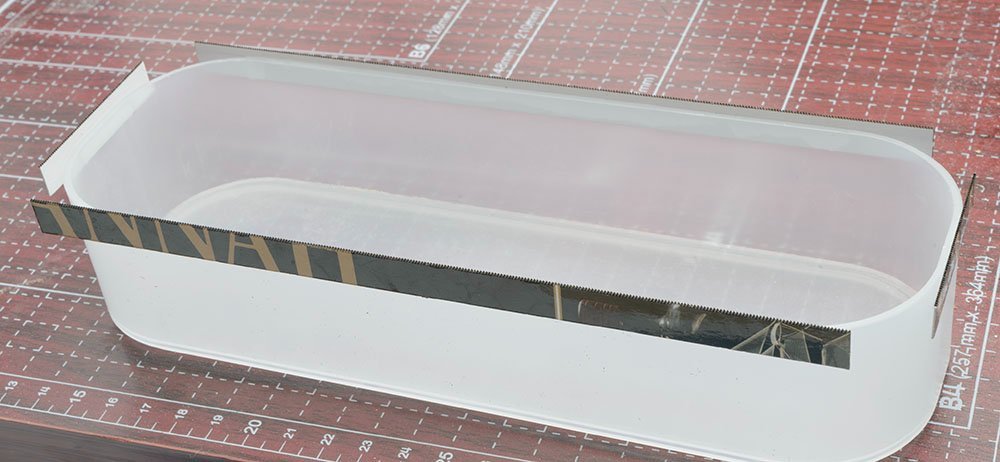
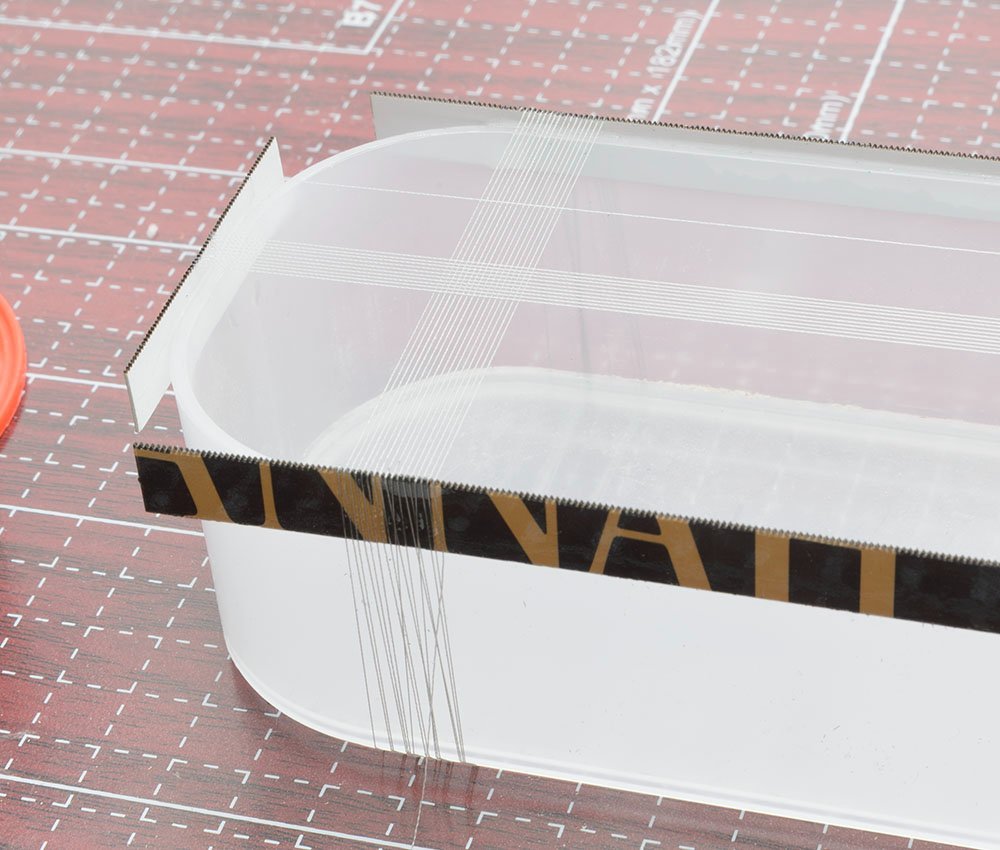
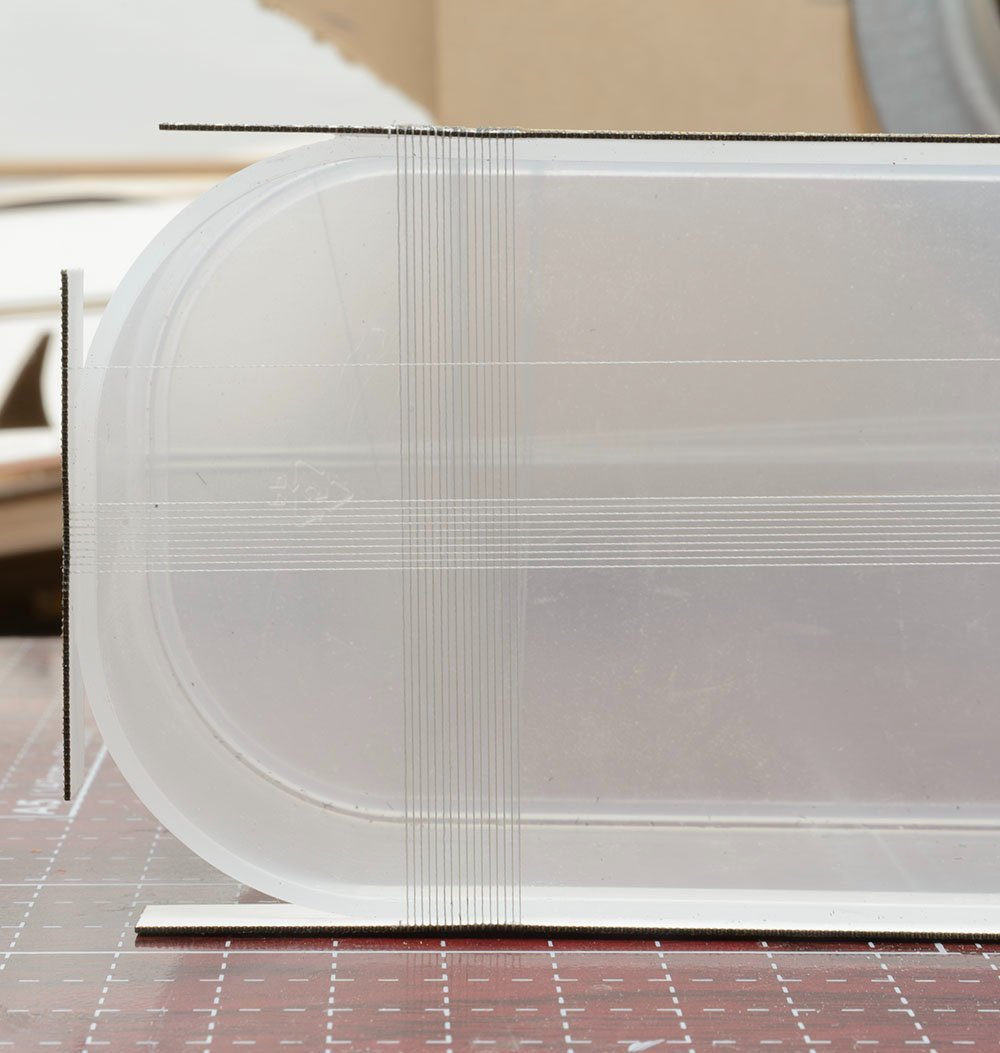
The Meng HMS Rodney 1/700 was my first model ship I used DIY thread railings on. I used printed paper as a template, and it was time and labor consuming method, unfortunately. But I loved the concept. I improved the process by replacing the printed template with a laser-cut sawtooth. The pitch was 0.70mm. This is a test bed. I'll change the pitch. The thread was 0.10mm thick Amann Serafil 180 polyester thread, and the pitch was 0.70mm. All the thread-winding progress is done within 10 minutes. I hardened the thread using CA glue, and the result was durable. I hope my idea was enjoyable.


-
Thank you for your compliment. I'll complete several incomplete projects, such as Papegojan, and focus on a more historically accurate model next. You'll see the new kits soon at the "What did you receive today?" post.
-
Although I still have some unresolved feelings, such as deck fittings, I decided to move on to another project. Thank you for watching my build log!

- 4 replies
-
- 2
-
-
- San Francisco
- Artesania Latina
- (and 2 more)
-
Any cannon kit recommendation?
modeller_masa replied to modeller_masa's topic in Wood ship model kits
Thank you for the recommendation, Roger. The lot of research sounds not easy, but it is worth keeping on track. I'll focus on the famous ships until I get used to the various armaments from each country. The French ships are the next after I decipher the English ships. Thanks again for all the comments. Your advice was very helpful in clarifying my destination. -
Any cannon kit recommendation?
modeller_masa replied to modeller_masa's topic in Wood ship model kits
That is breathtaking art! I can't imagine how many techniques and knowledge you used to build the project from the plan. -
I can't copy and post my rigging guide book, so I searched for similar walkthrough video. In addition, you may find some useful information in the old build log. Not all the riggings are correct.
-
Any cannon kit recommendation?
modeller_masa replied to modeller_masa's topic in Wood ship model kits
As long as I do research, I'm finding out what I'm missing. The climb will be long but exciting. I hope I meet my goal without a lot of difficulties. Thank you for introducing the promising book, GrandpaPhil. I buy it. -
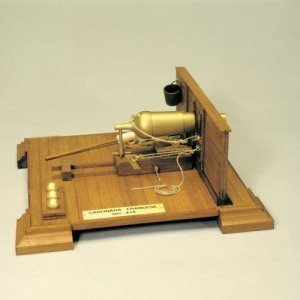
https://www.agesofsail.com/ecommerce/mantua-cannon-kit-french-carronade-ma800.html While I was making the cross section kit, I felt I needed more detailed information about some parts, especially the cannon. I researched some cannon kits, and found Manual 800 and 806 cannon kits. There are some hesitations because the kit designs were built for forts, not moving ships. I'm not sure the 800 and 806 cannons were installed on ships in the same shape. Is there any recommendation for cannon kits except Mantua kits? Scratch build plan are the most wanted. I would like to build cannons and cannon rigging academically. also, I want to detail the wooden deck and gunwale. Cannon-specialized reference books are also welcome! ------------- Loading procedure https://www.youtube.com/watch?v=cayTFunCkBA Reference books - Treatise of Artillery: Containing ... to which is Prefixed, an Introduction with a Theory of Powder Applied to Fire-arms / John Millan, 1768