modeller_masa
-
Posts
950 -
Joined
-
Last visited
Content Type
Profiles
Forums
Gallery
Events
Everything posted by modeller_masa
-
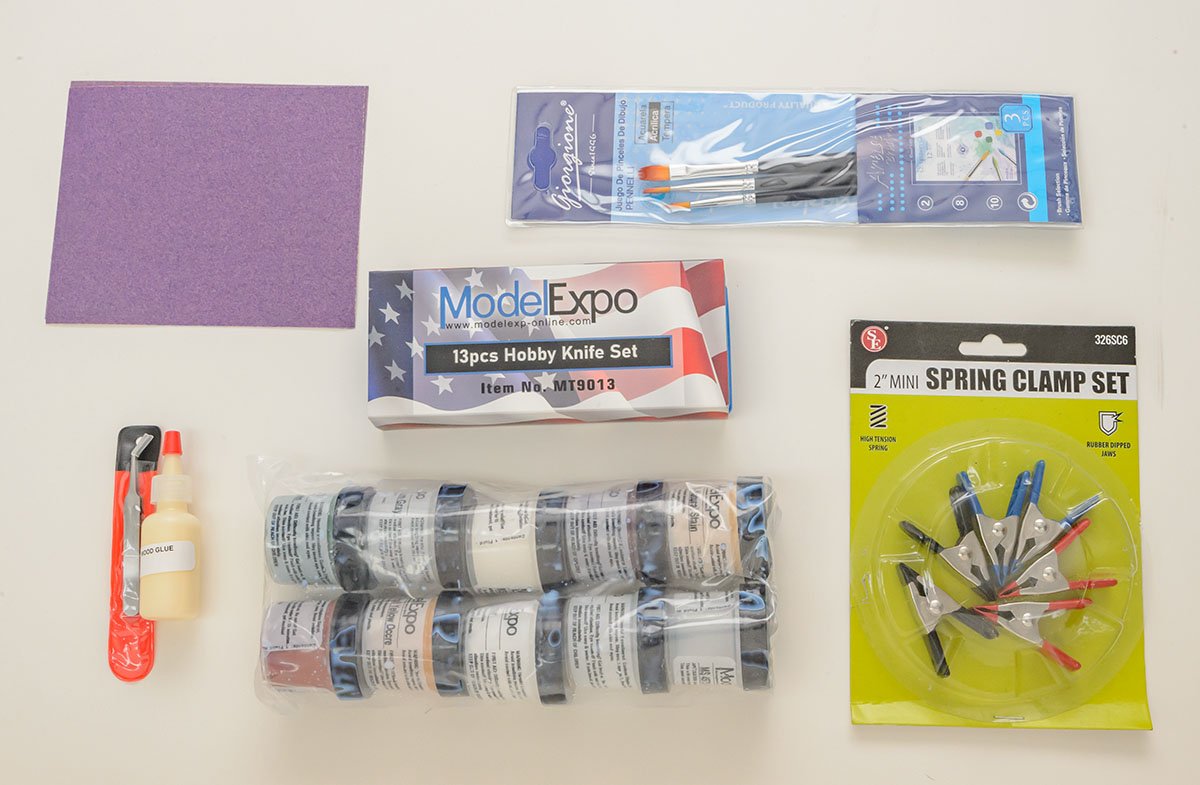
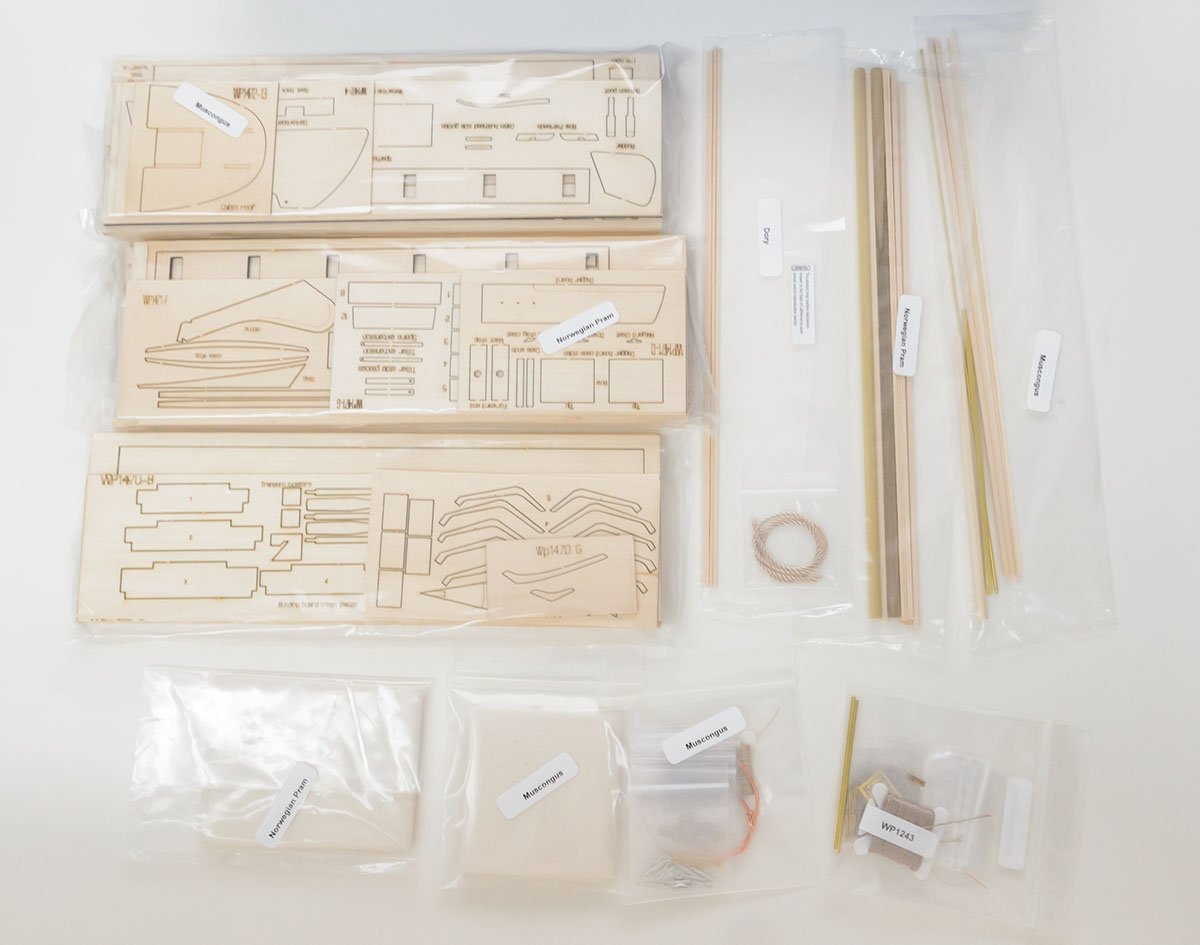
I received it and had the same issue. The wood conditioner bottle leaked. In addition, some contents are changed in the Jan 2023 production. I am really satisfeid with David Antscherl's quality instructions and kit build.
-
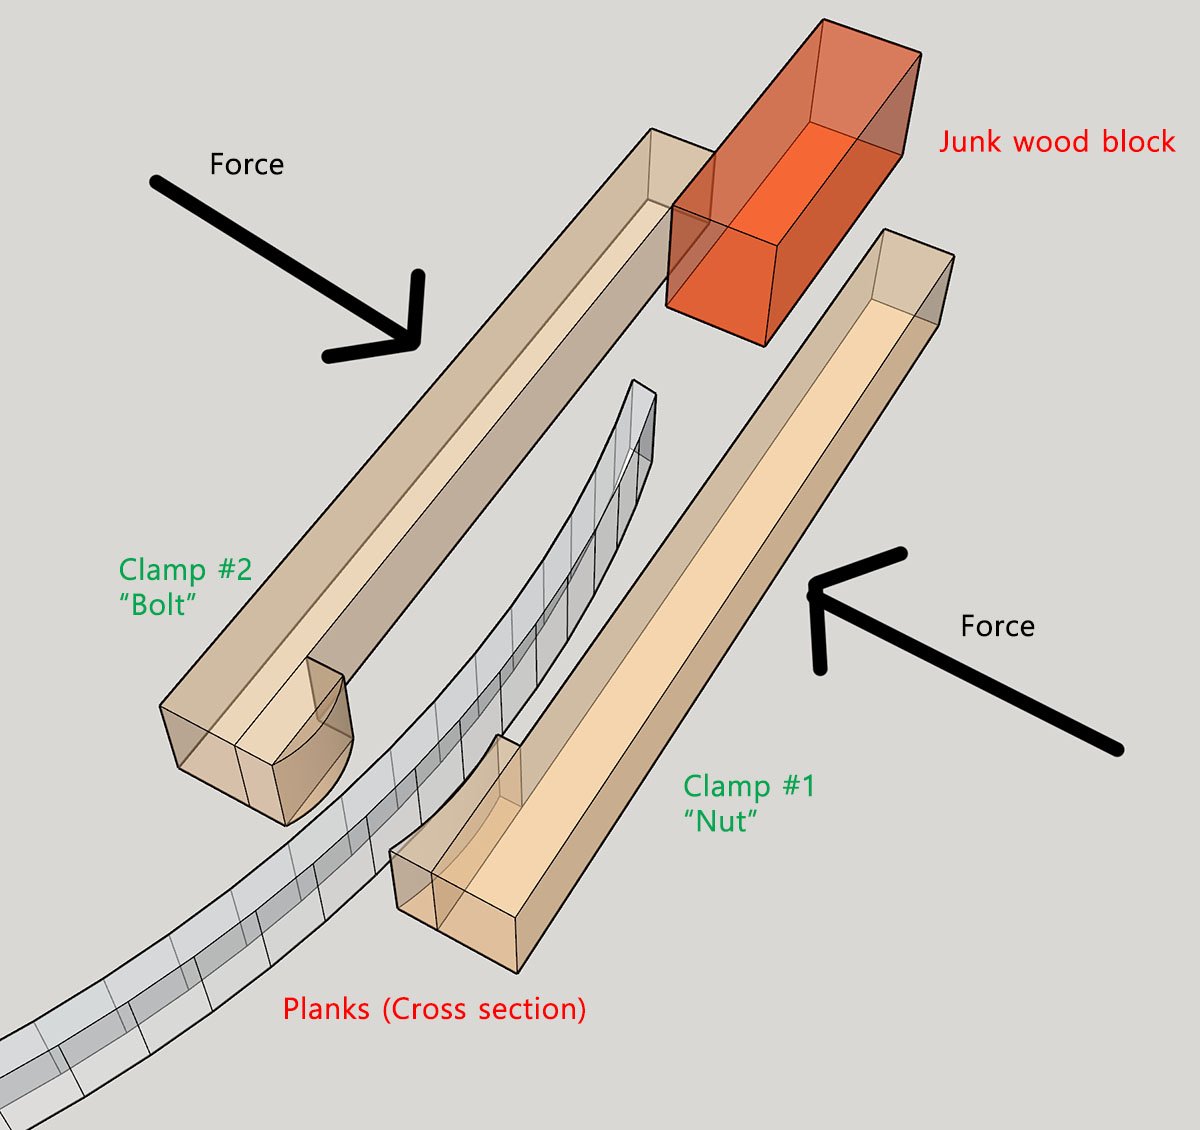
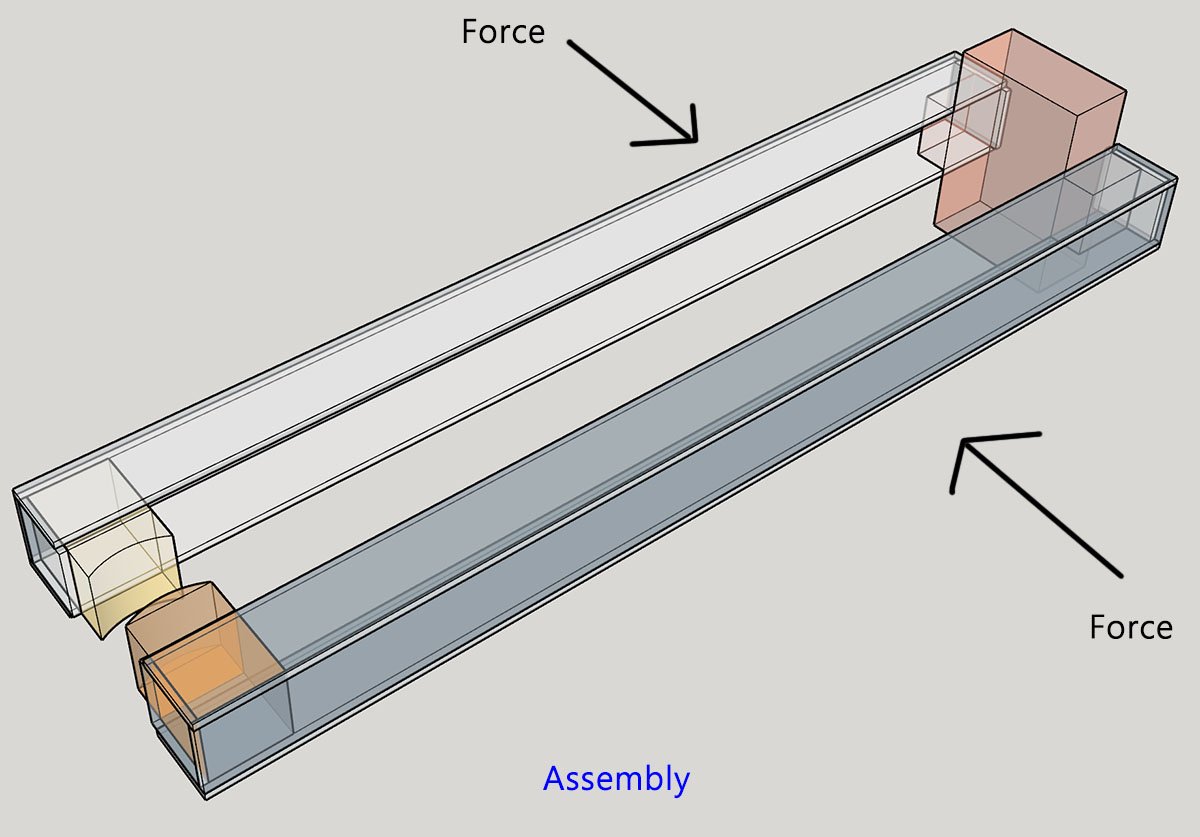
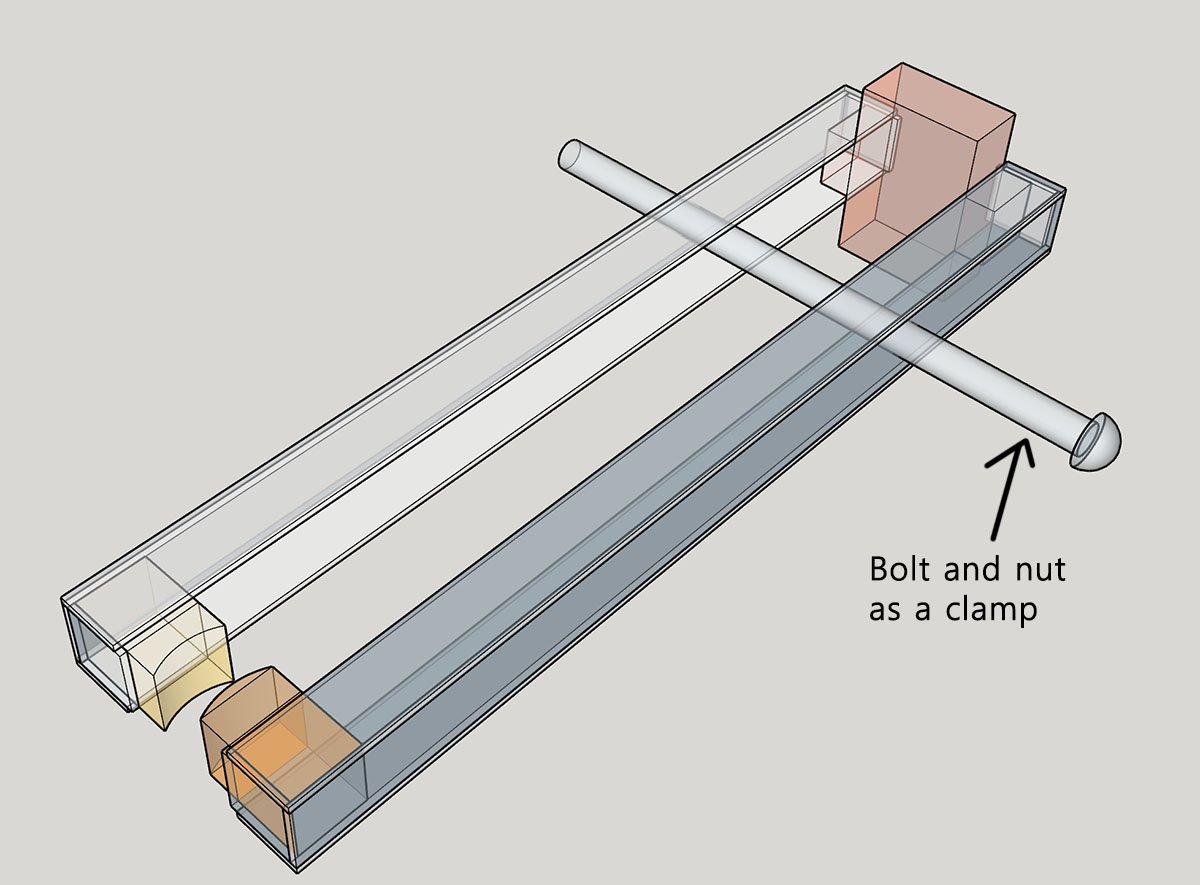
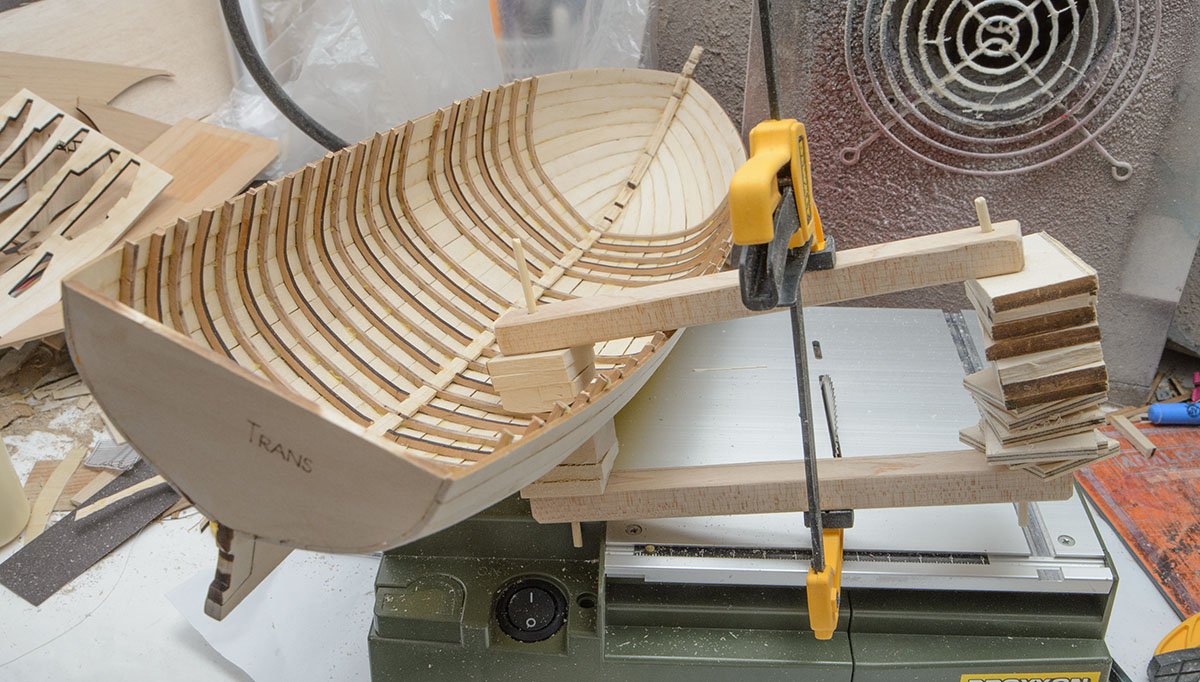
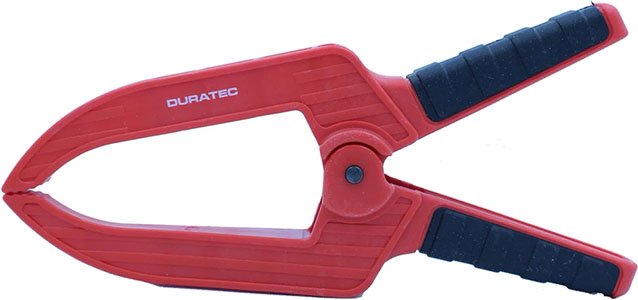
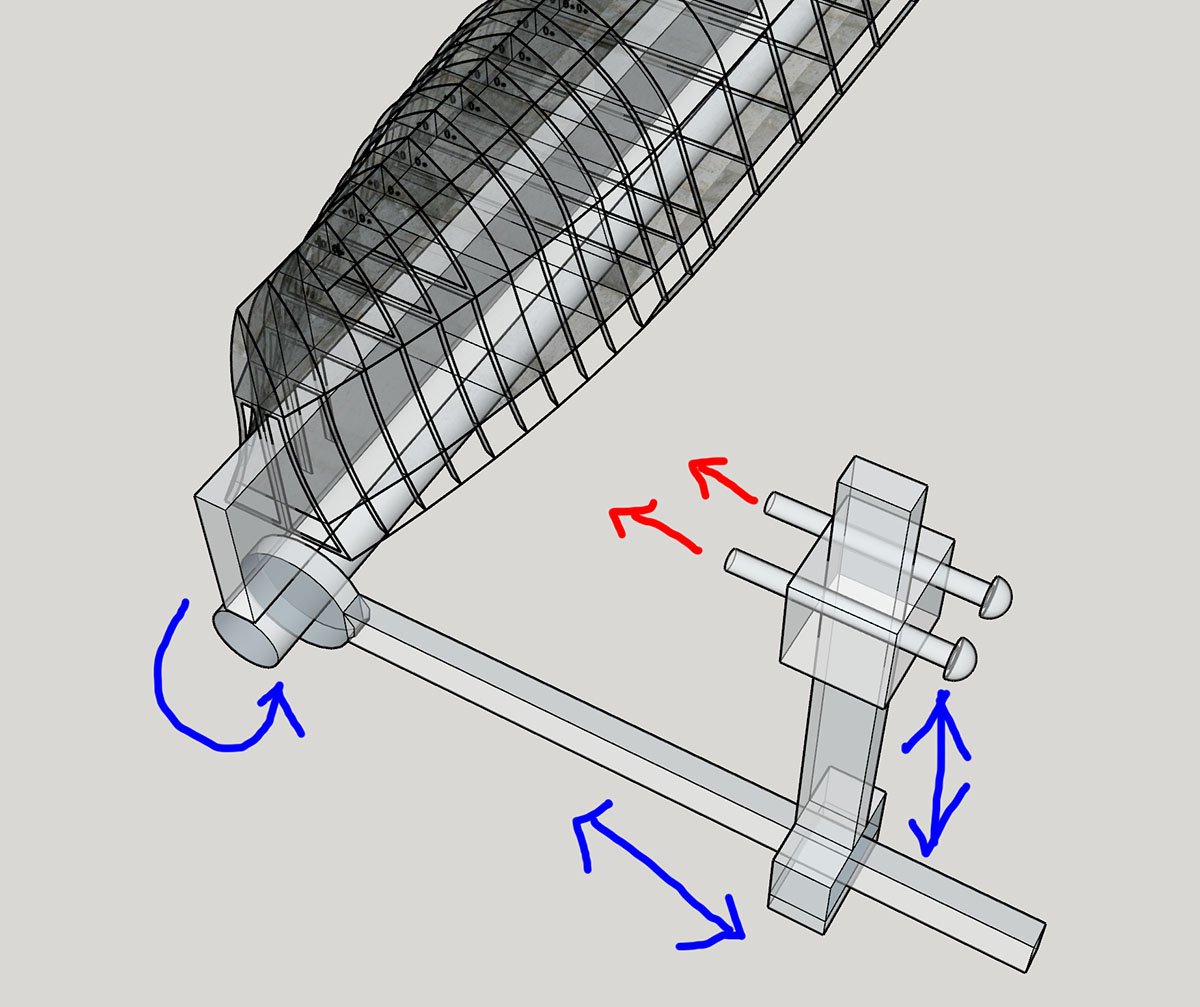
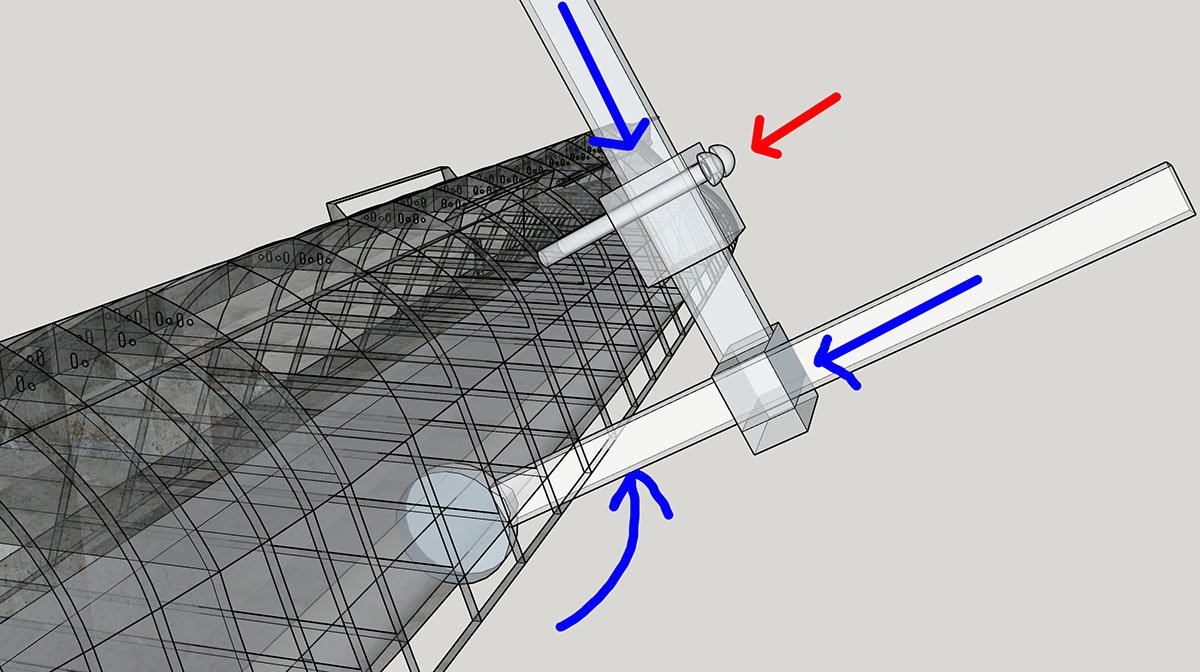
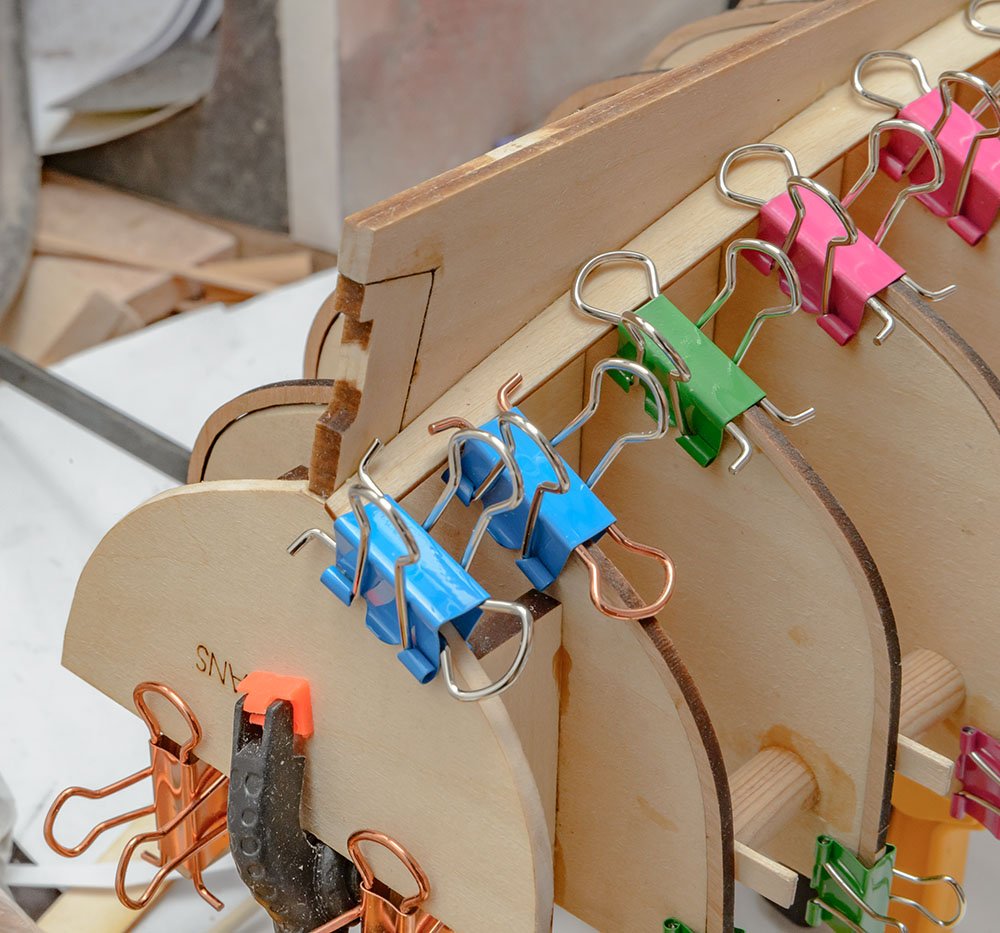
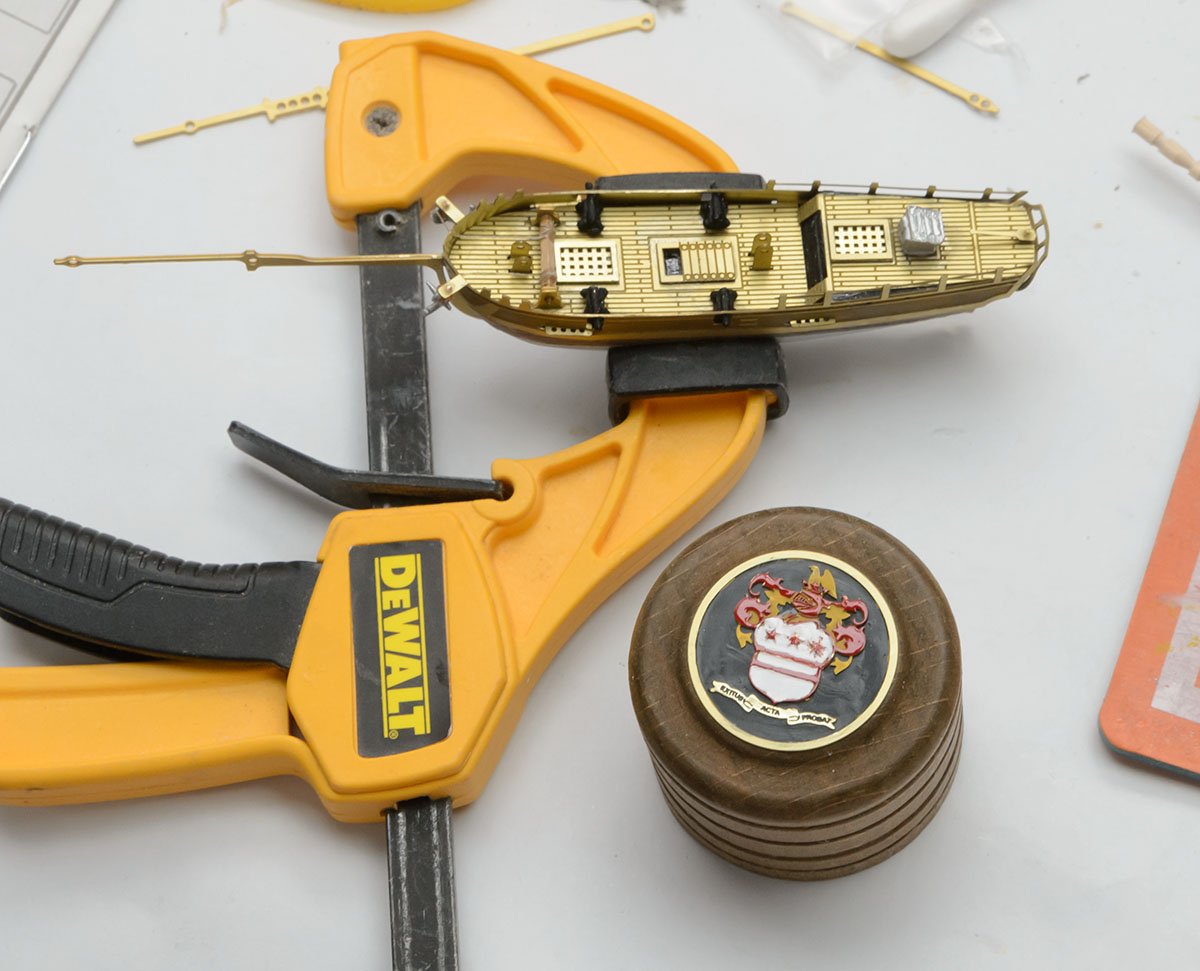
That was nice application of cloth pegs, Spyglass. Good modellers are not picky about tools. In the first plan, I missed action and reaction force, Jaager. The bolts could easily shatter planks if the inside of planks doesn't have adequate support. It is a reason I started thinking about clips.
-
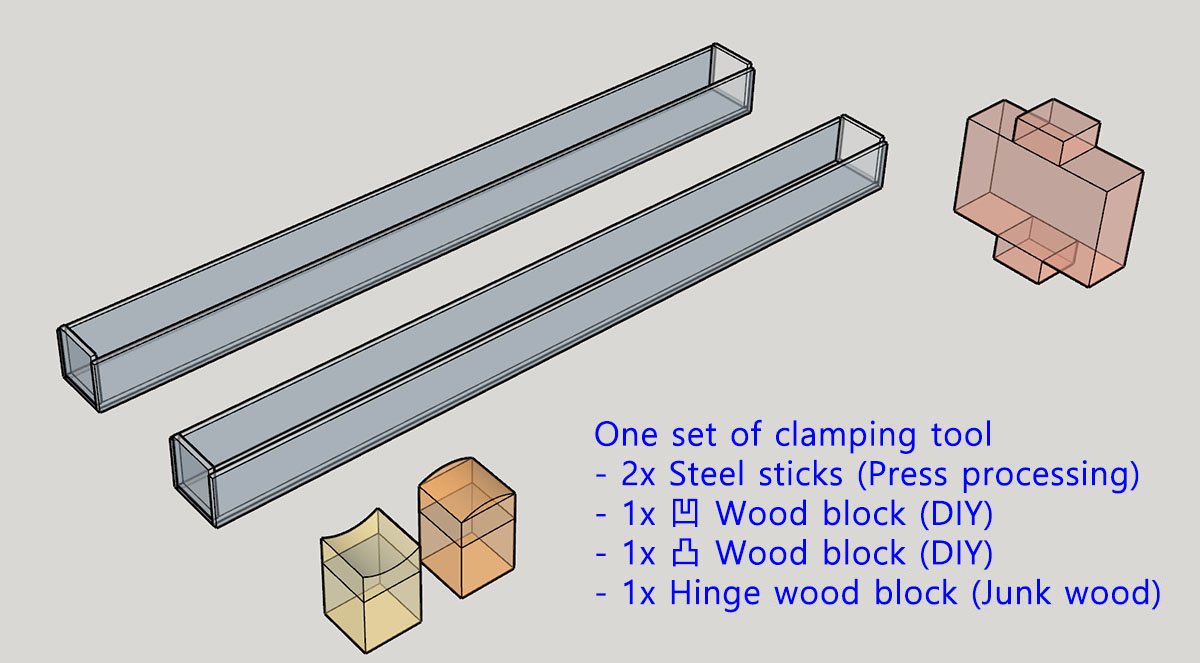
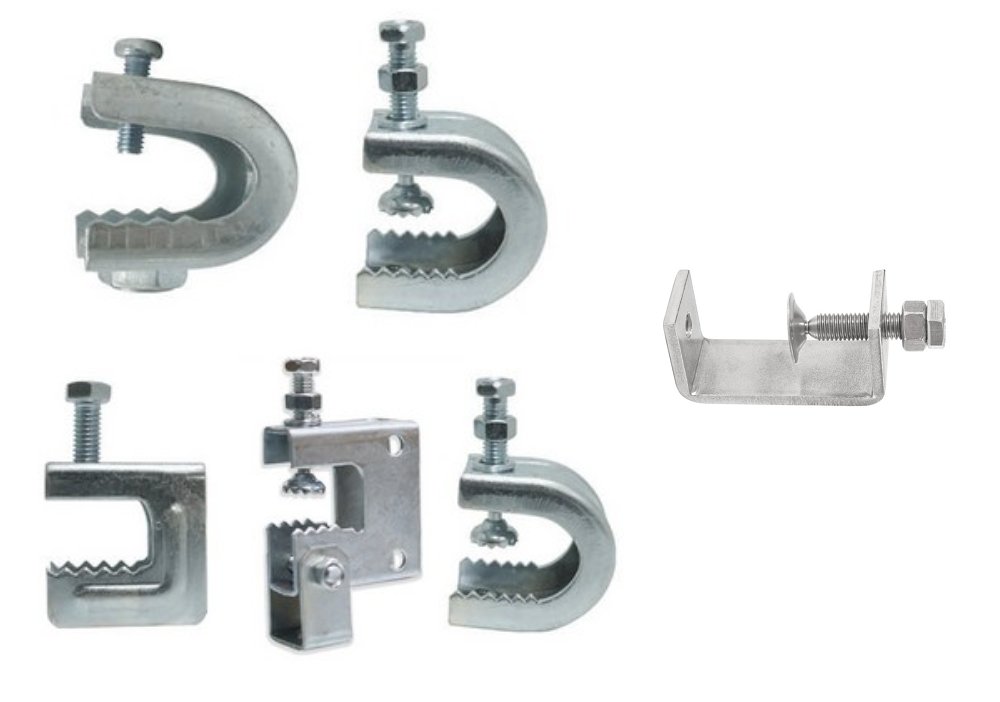
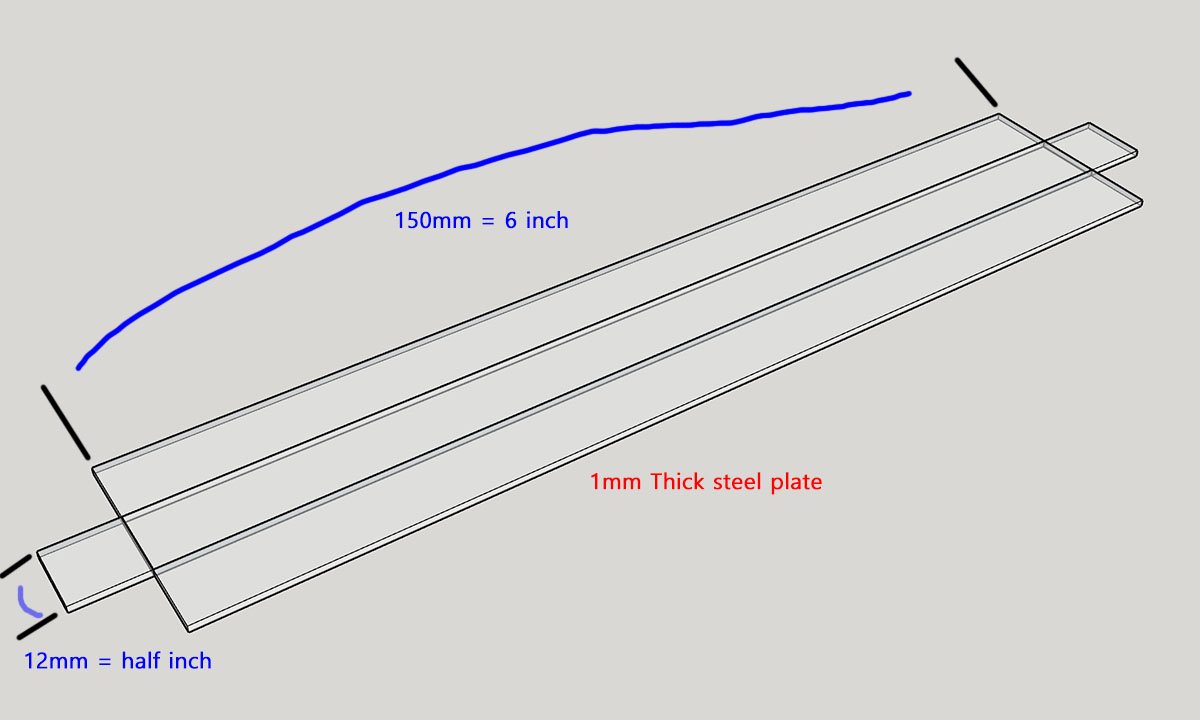
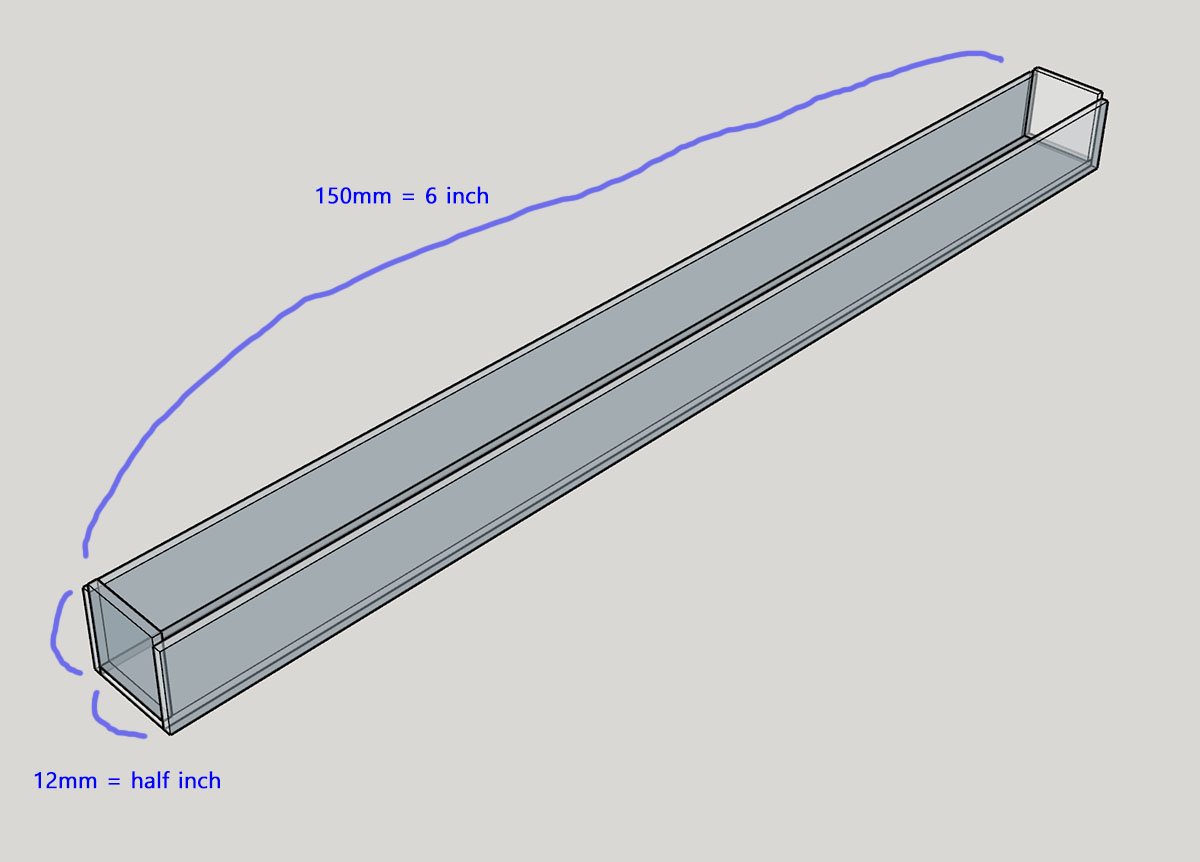
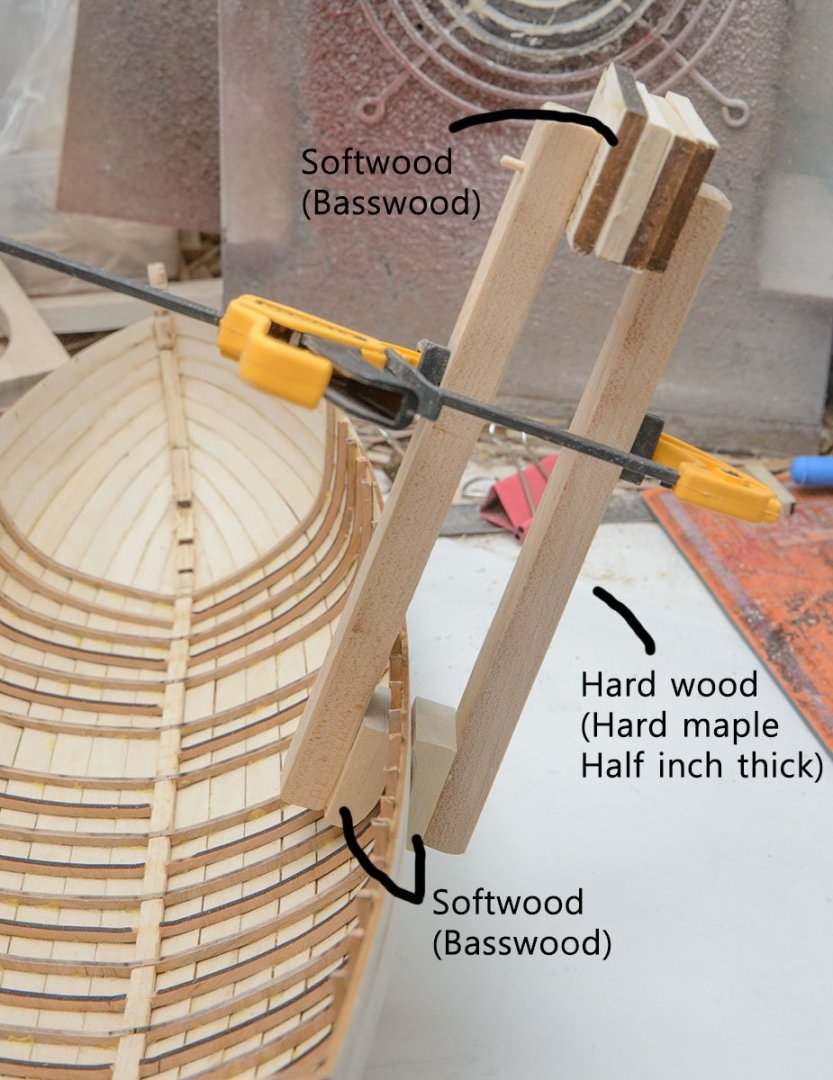
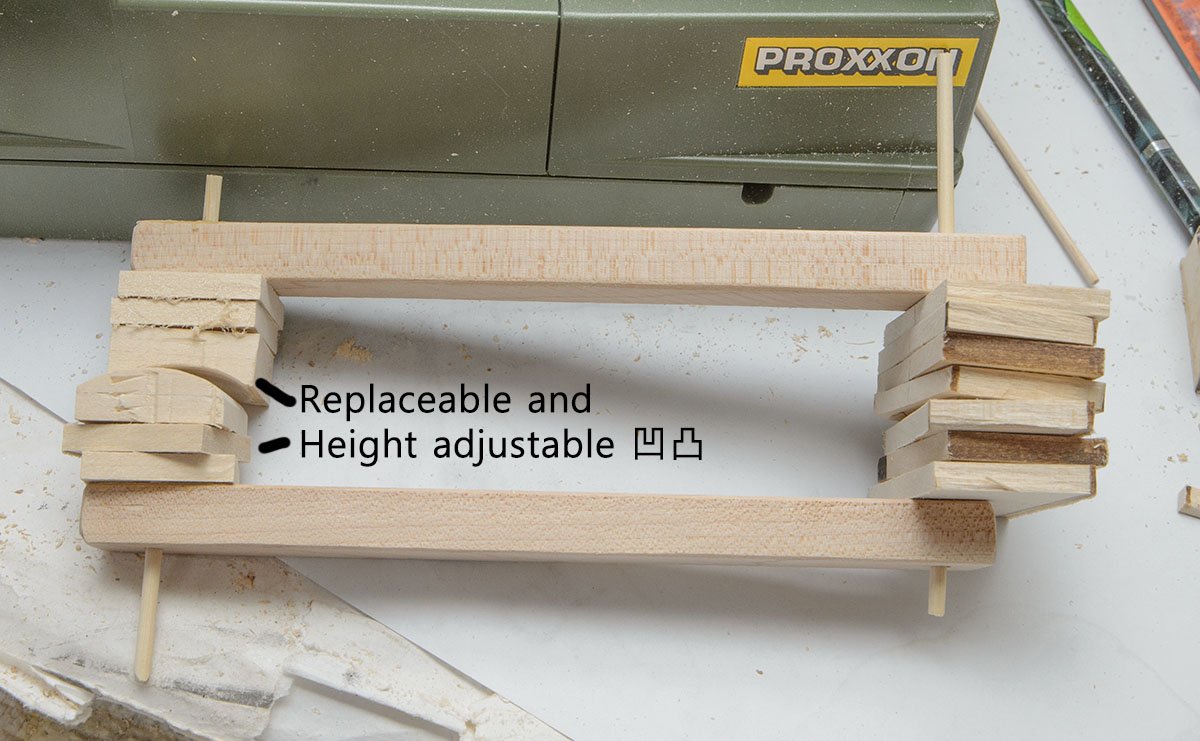
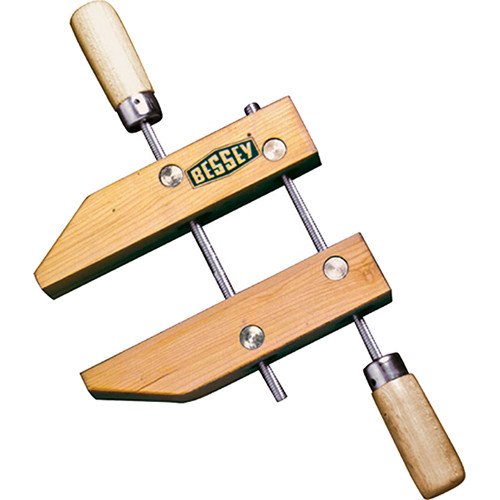
I advanced the draft idea a little bit. It uses the structure of cheap steel C-shaped clamps, which are made of pressed steel plate. The cost of each C shaped clamp is about 50 cents. I don't have metal bending tools, so I tested my idea with wooden pieces. It seems nice, but the depth isn't enough with the mini tip. Fortunately, the hard maple wood was very durable. I added a modification. Now it has replaceable tips. Also, I can adjust the height of both ends. Finally, it works. OK... then... Where can I use this jig? It is still complex and not very handy, in my opinion. Building a new tool was fun, but I need to polish the experimental jig a lot...
-
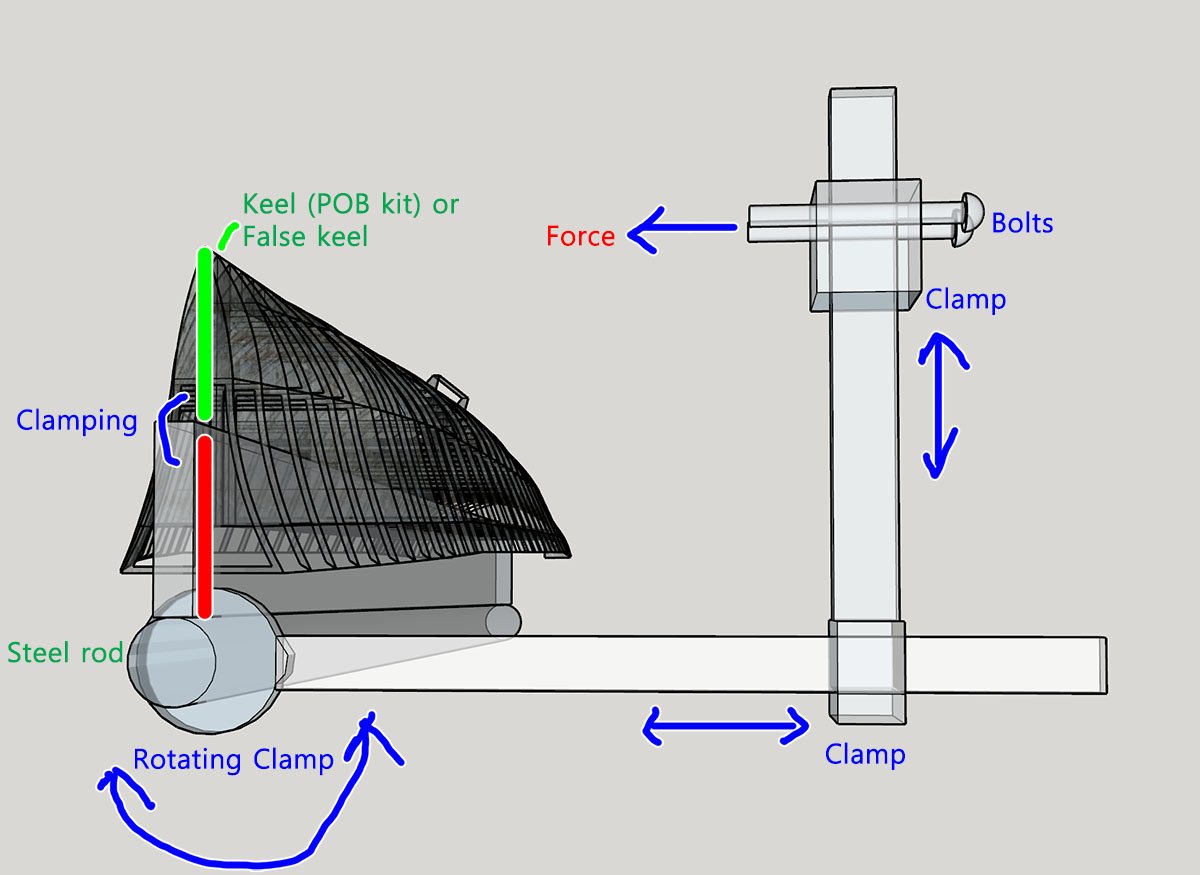
Thanks for pointing out my intention, David. It is a vision of the "planking clamp tool," and sometimes I draw more specific concepts to materialize the vision by calculating engineering stuff. Same idea, different approach. I tested the hair clip, but the spring wasn't strong enough. It seems better. I'll test the structure. Also, I ordered a "long mouth spring clamp" to test the same idea.


-
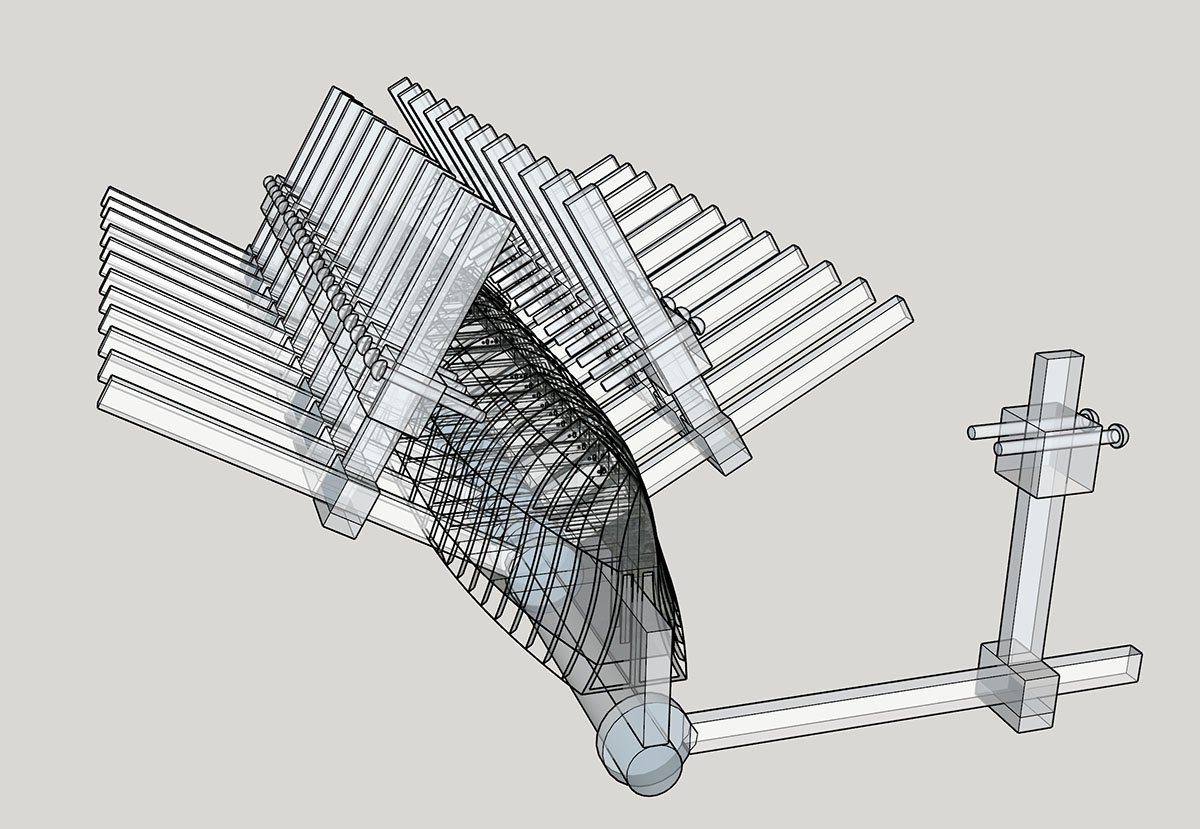
While I was frustrated by the uneven planking surface, I had a dream... It could be more fun, faster, and fantastic if every clamping task was as simple as designing a 3D model. I know many people use rubber bands instead of the heavy steel stuff, but I need more universal clamping tools for every angle and perspective.
-
How many kits do you have on the go at the moment?
modeller_masa replied to CaptnBirdseye's topic in Wood ship model kits
Countless. It is faster to count ongoing kits. 😭 (Pending) Middle age long house - Stone block - 2 years old Occre HMS Terror - 1 Year old Zvezda Kruzenshtern - Plastic kit - 1 year old Zvezda Atomic powered icebreaker Arktika Project 22220 - Plastic kit - 1 year old Academy Arleigh Burke - Plastic kit - 1 year old Academy LCS-2 Independence - Plastic kit - 1 year old Marisstella Liburnian Monoreme - 6 months old (Ongoing) Mantua Sergal HMS Bounty (On pins and needles 😭) -
Fast drying PVA glue, such as the Titebond series and Aliphactic glue, will be a sweet spot. Titebond I, II, II Dark, III - Various colors with low viscosity Titebond White - High viscosity with more faster drying time https://ralphsway.com/aliphatic-glue-vs-pva/
-
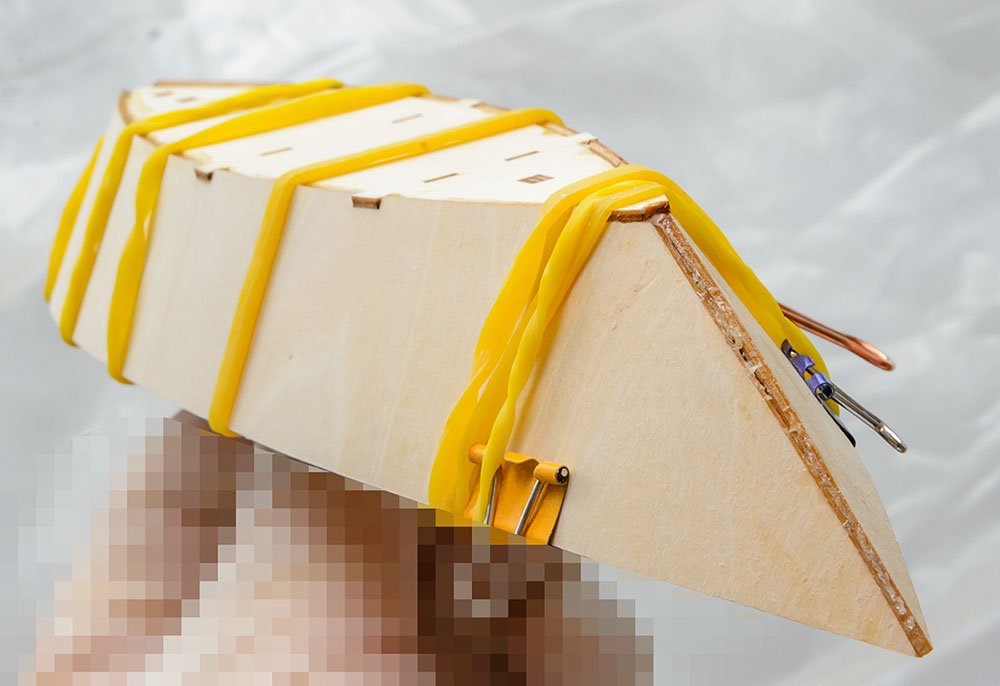
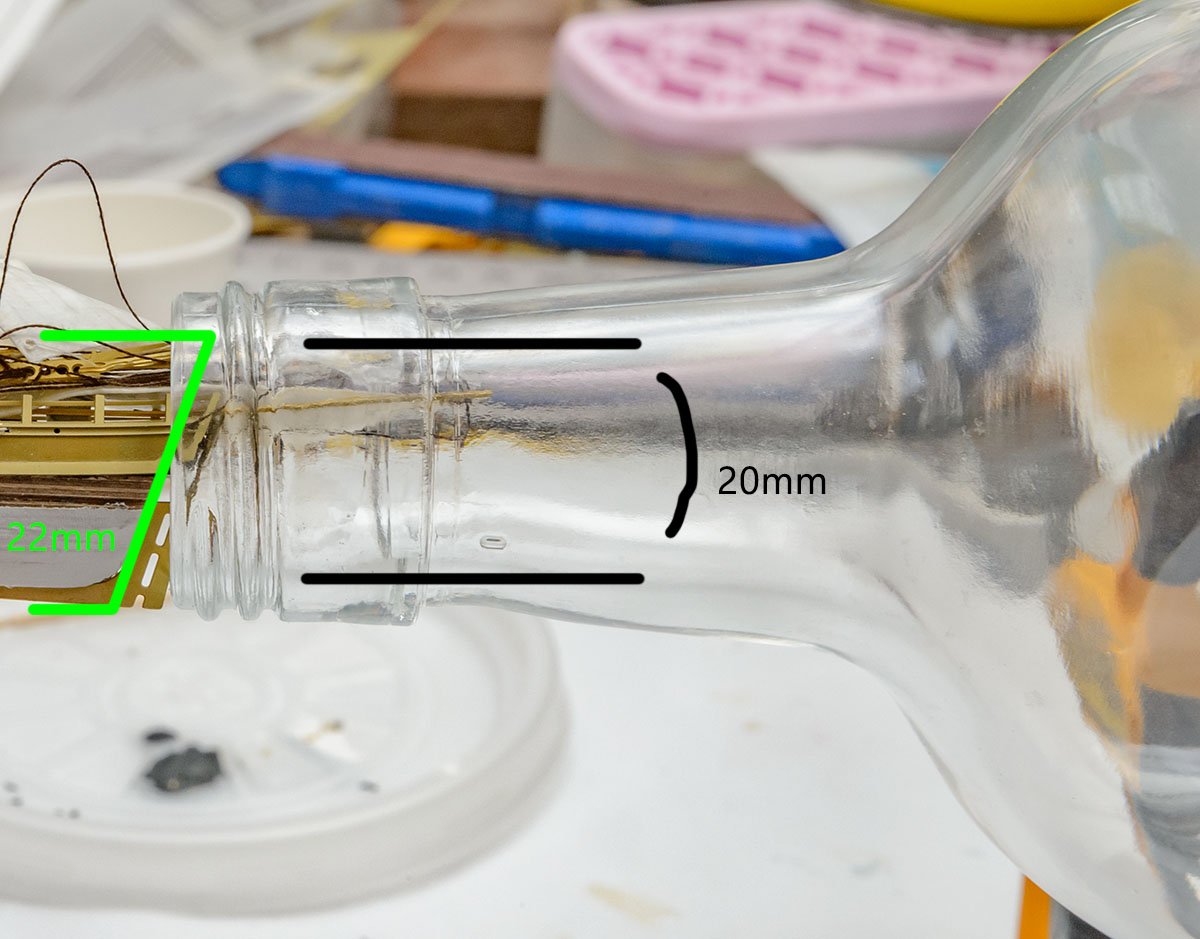
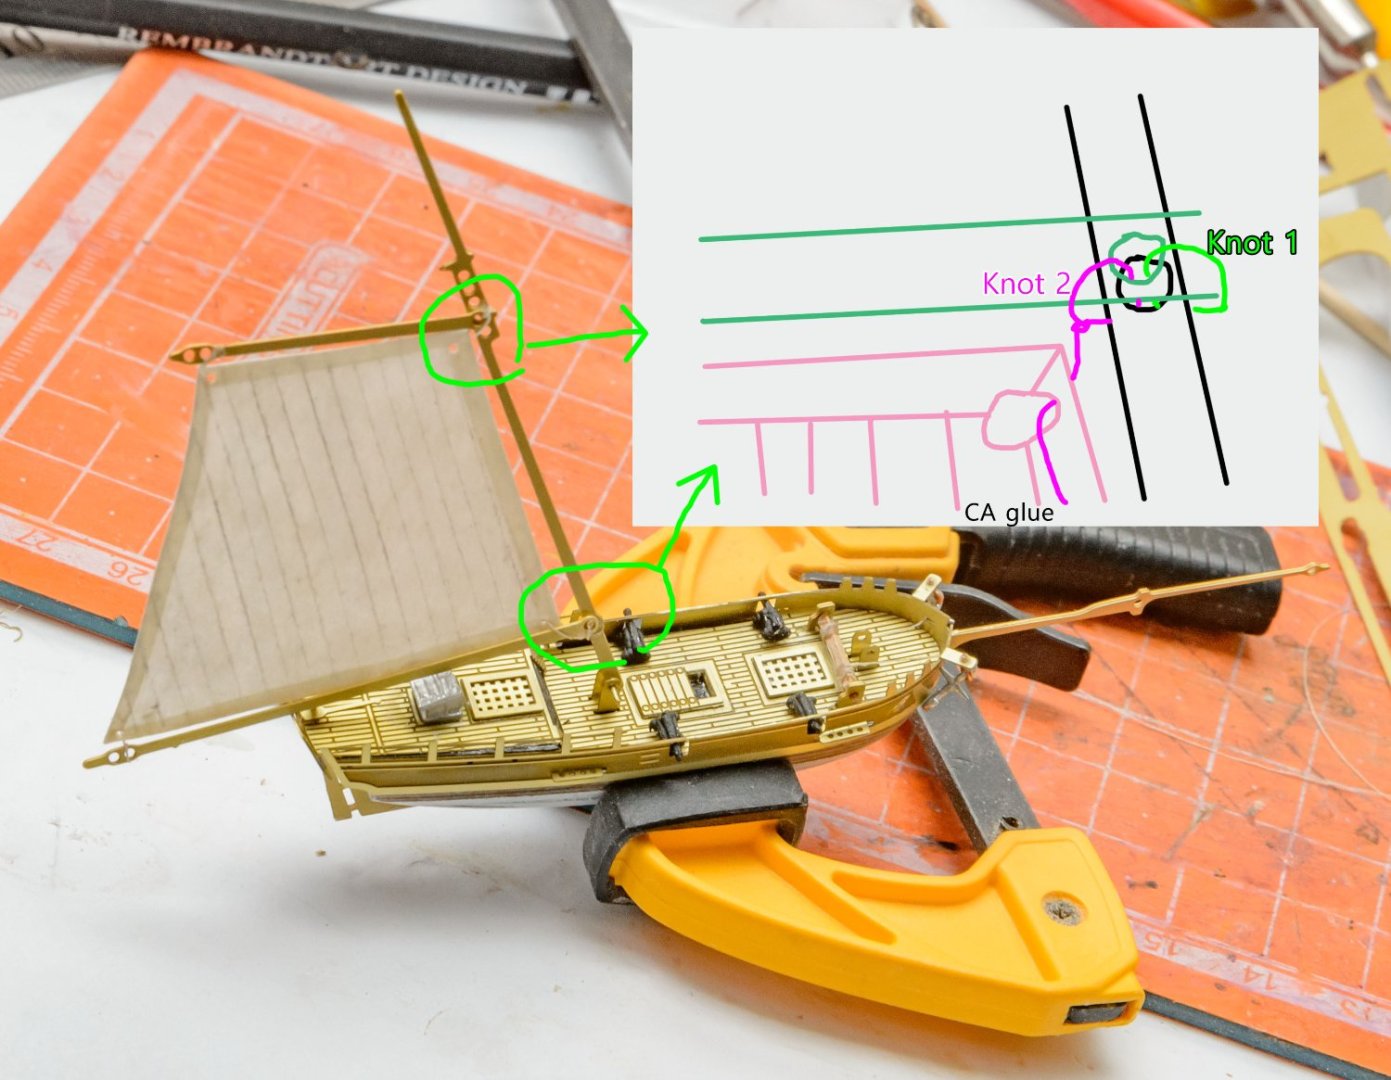
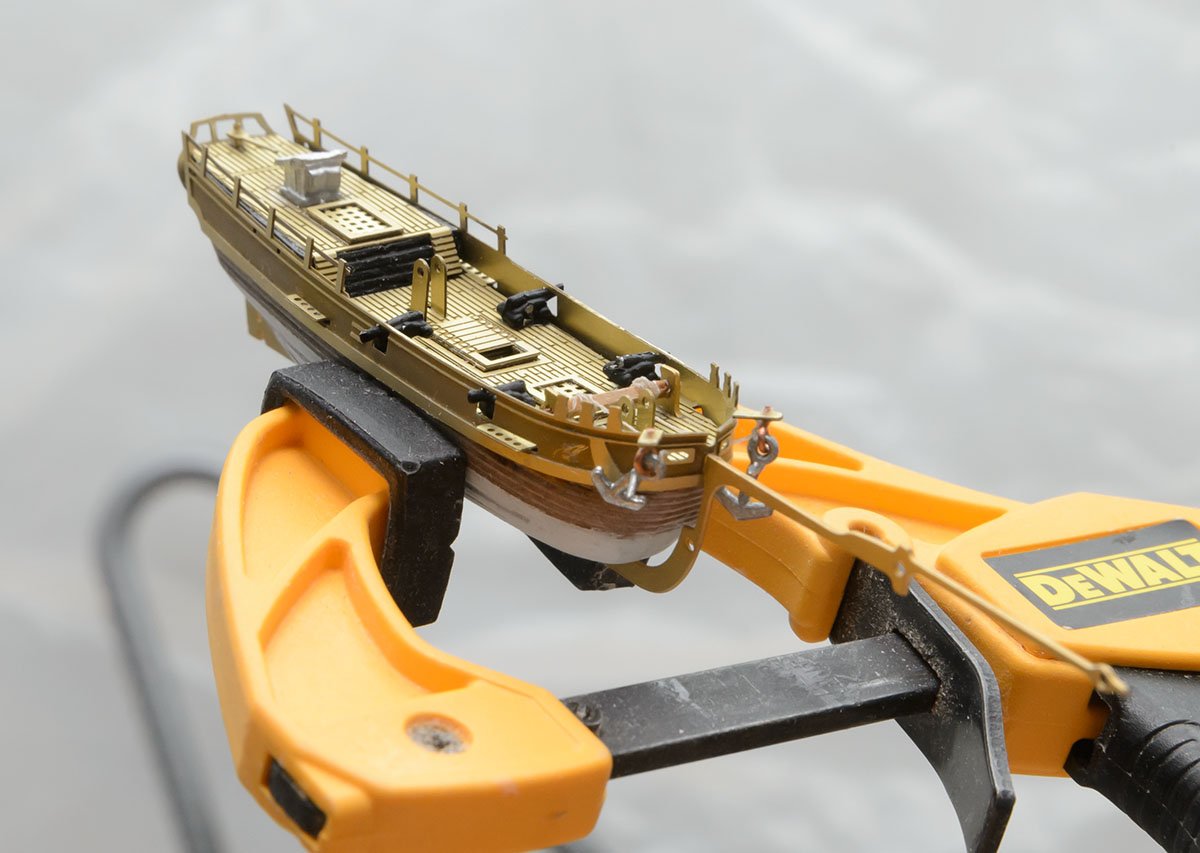
I got stuck at the entrance of a bottle. 😭 I'll buy a new bottle tomorrow... I admire Amati's reasonable design, but this kit's production quality issue is repeating itself. I believe that the main brass mast should have had one more hole at the top. After several considerations, I simply added the ring with CA glued string. In addition, I think the F lines are two riggings. Without these modifications, the brass masts and yards warped easily when I folded them. OK. I may finish this small project tomorrow if I find a proper glass bottle. See you again at the gallery. 😎

-
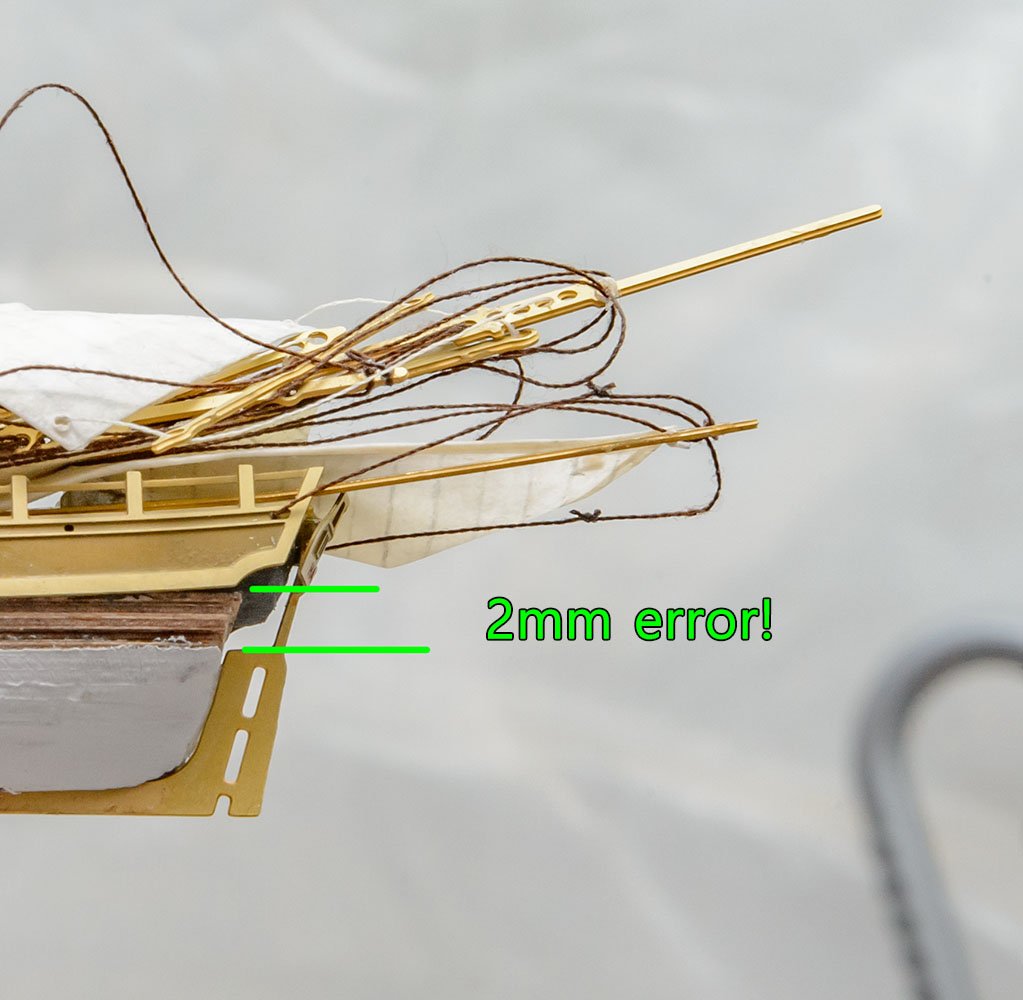
It looks better than mine, Bob. I didn't paint the deck fittings. I started mine five hours ago and had some difficulties with the hull planking. My current issue is that the kit's sails are not the proper size or shape. I set a paper (silkspan) and will make paper sails tomorrow. 😎 The manual said 0.60mm wood veneer sheets, but the real wood sheets are 0.72mm thick! As a consequence, the height of the deck is 1~2mm higher than the plan. I would say that this is the correct one.

-
Sergal HMS Bounty.
modeller_masa replied to mark j's topic in Building, Framing, Planking and plating a ships hull and deck
Hello, Mark. I'm delighted to meet you, as we're working on the same kit. I'm making the same kit with an older version, which used inaccurate CNC cut. It looks like your plan paper is exactly the same thing I have. I referred to some sources, such as Anatomy of the Ships series and Amati's kit plans, and concluded that the Sergal Bounty is a tweaked version of the AotS book. The Sergal Bounty changed the proportions of hull and deck height to fit their universal deck parts. Therefore, this kit is a kind of artistic model in my opinion. If you want to build historically accurate model or accurate Bounty replica, you should expect lots of difficulties that frustrate first time builders. Also, if you follow the building manual in the 50 year old kit, you'll experience many issues. I strongly advise you to research the most recent and enhanced modelling techniques from here. This project won't be easy and will take a lot of times But don't give up. If you get bored, it is ok to build a secondary project at the same time. Just don't forget to come back and continue when you are ready to conquer the hard part that makes you feel frustrated. -
Jaager, I think you are talking about the incomplete 3D graphics model, which has recently uploaded weekly. In my opinion, the posts are violating in two terms; (1) The project seems incomplete because it is frequently updated. Assuming the 3D model posts are incomplete, the fair place to upload the posts is the "CAD and 3D modelling plans." (2) The posts may not match with kind of the culture of the bulletin. The "one-time" post is the general use of the gallery. Although there isn't an explicit usage guide in the gallery, most members used to upload only their finest and polished models, which can be a good reference for other members' builds. The "updating" project is vulnerable. I wish the member would roughly research the gallery and understand the characteristic of the bulletin. I agree that the 3D models don't fit the current categories of the gallery bulletin, but uploading in the scratch build category is not that bad. I think the 3D model is kind of a plan and a reference. We build models, and it is a useful way to build an accurate model. If the model has the master quality of the NMM contemporary models, the post can be uploaded in the "Gallery of the contemporary models and private collections," in my opinion. Of course, any 3D model post should be a completed project. To be honest, I don't want to see any 3D models on the main page unless the gallery impose the 3D web-cruising function, that allows user to rotate and zoom in and out.
-
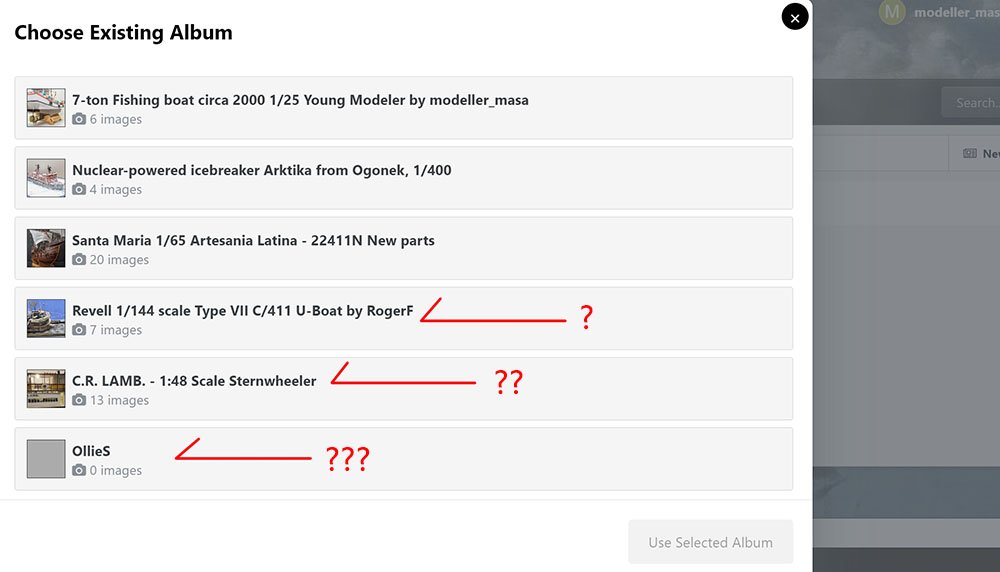
Happy new year~ When I uploaded the most recent completed project, I found some unknown albums in my account. I didn't touch or delete the albums, but I want to clear the unwanted albums. Could you help me solve the issue?
-
Hello, rcmdrvr. They are not threaded metal pins, but plastic beads to shallow the pin's length. I was scared of pins poking my fingers when I pushed the pins. 🤣 It didn't work well and was useless.
-
Hello, John. It is my pleasure to meet people who are making the same kit or ship. I understand many people have difficulty posting build logs. They tend to upload completed projects on Gallary page. I also have some difficulty on updating build logs, but sharing my progress with enthusiasts is more attractive to me. Everyone has own taste, so I think concentrating on own project is also good. As I noted above, I think my hull fairing, especially on the upper hull of both ends, is not correct; they are reversed. When I put this project on hold, I decided to fix the issue anyway. I intended to dump the current hull and purchase the same kit again. My new plan is to cut the walnut strips and repair the balsa hull. I'll restart the work when I'm ready; I'll make additional walnut strips. I think I'll do it in the middle of this year, after I finish current build, Bounty 1/60, and the next build, the Papegojan cardboard model. I hope you make great progress on your project.
-
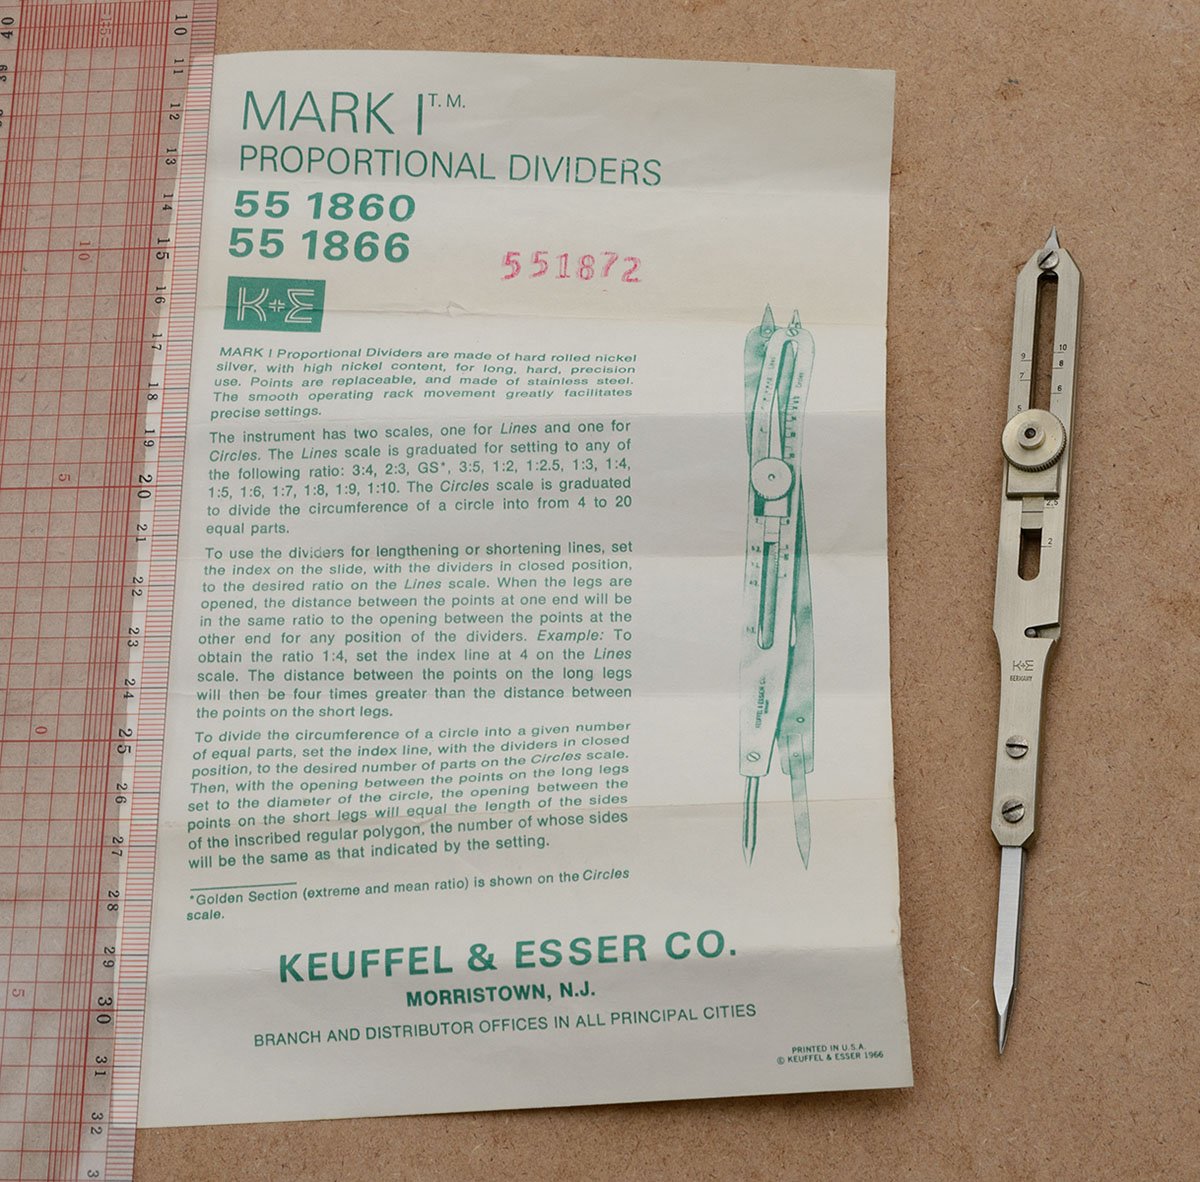
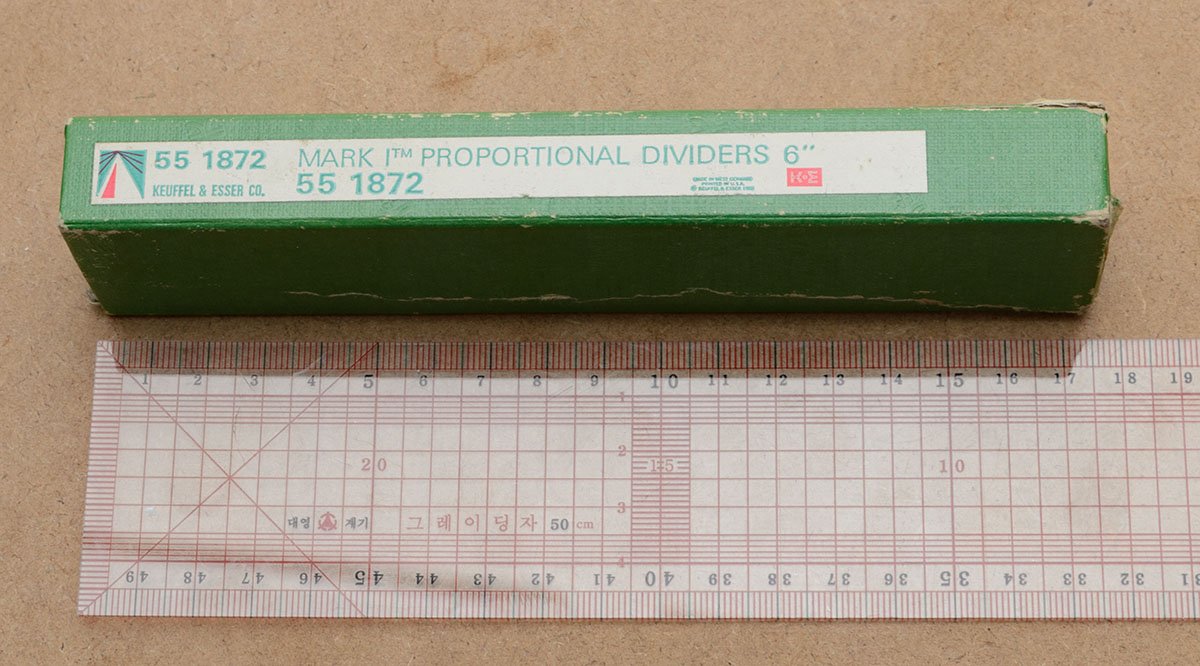
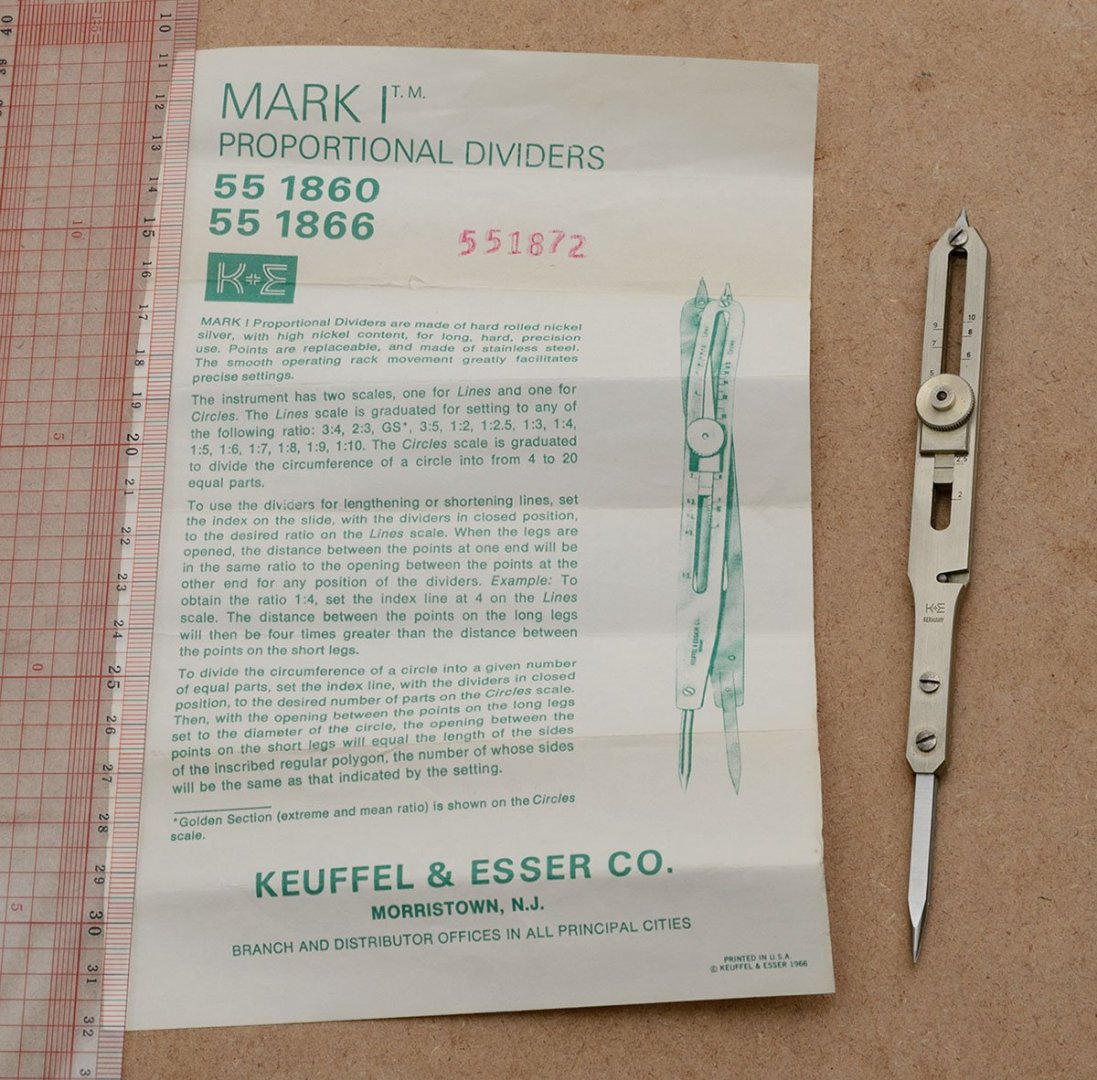
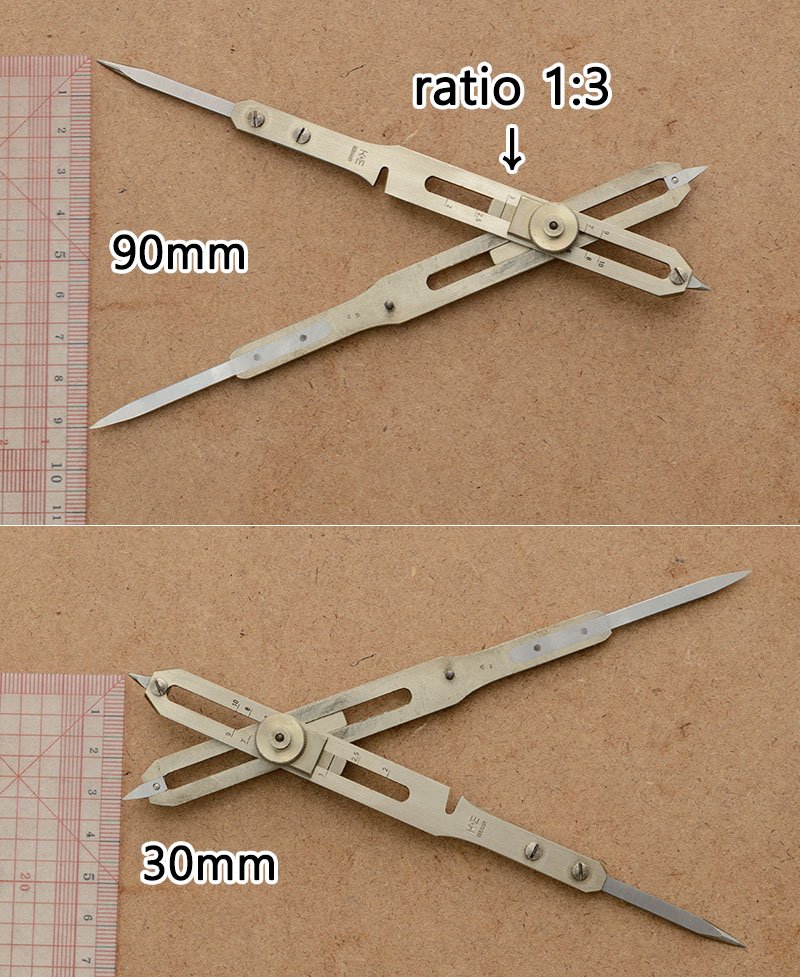
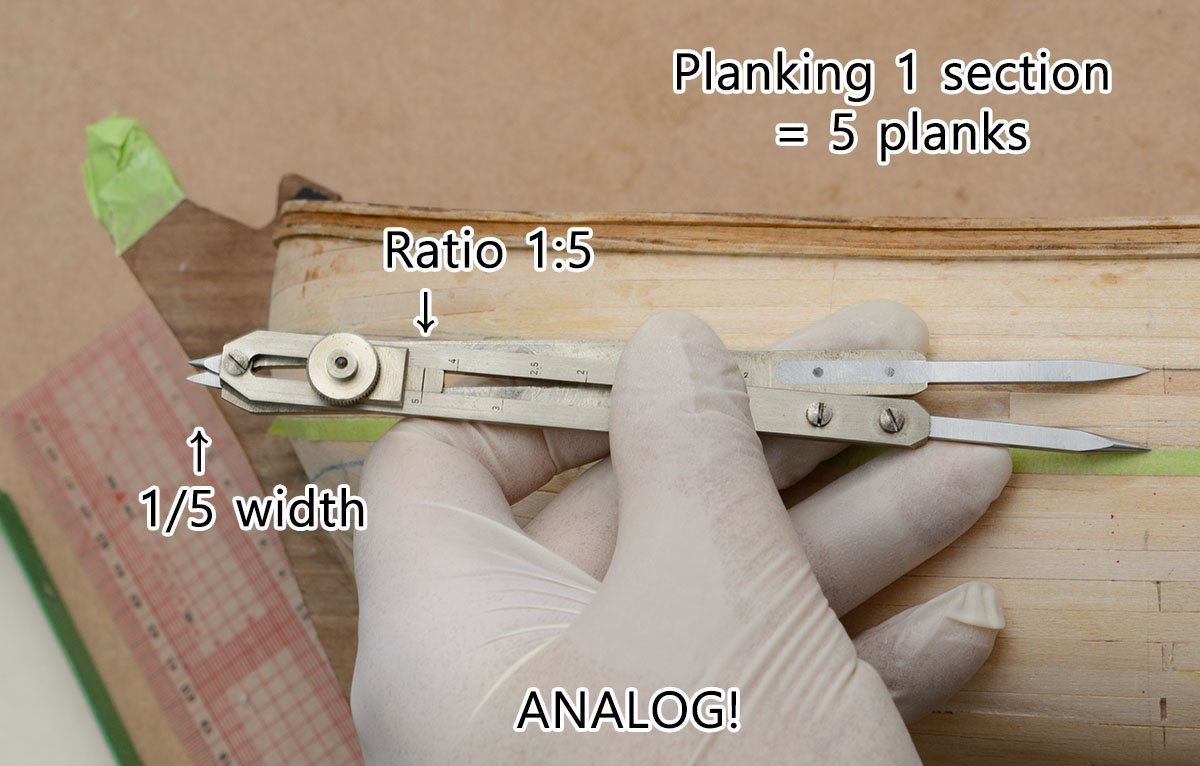
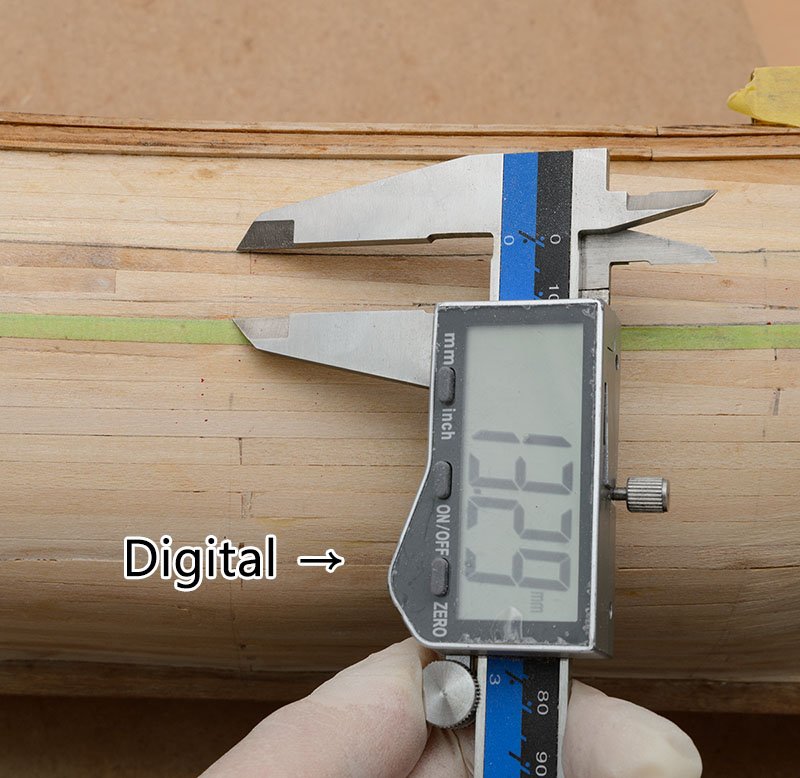
After I read a post about an interesting tool, I bought it for pleasure. Made in U.S.A in 1966. It seems like a genuine K&E proportional divider. There are lots of junk metal dividers on eBay and Amazon. Also, a cheap plastic one for artist is not reliable. Here is a quick guide for proportional dividers. Simple and fast. It was amazing that I could use the 56 years old tool to determine the width of planks when I did hull planking. ..... As I said, I bought the proportional divider for pleasure. There is no reason to pay $50 for the genuine K&E proportional divider. At least I can make a ship when the battery of the digital veneer calipers run out.

-
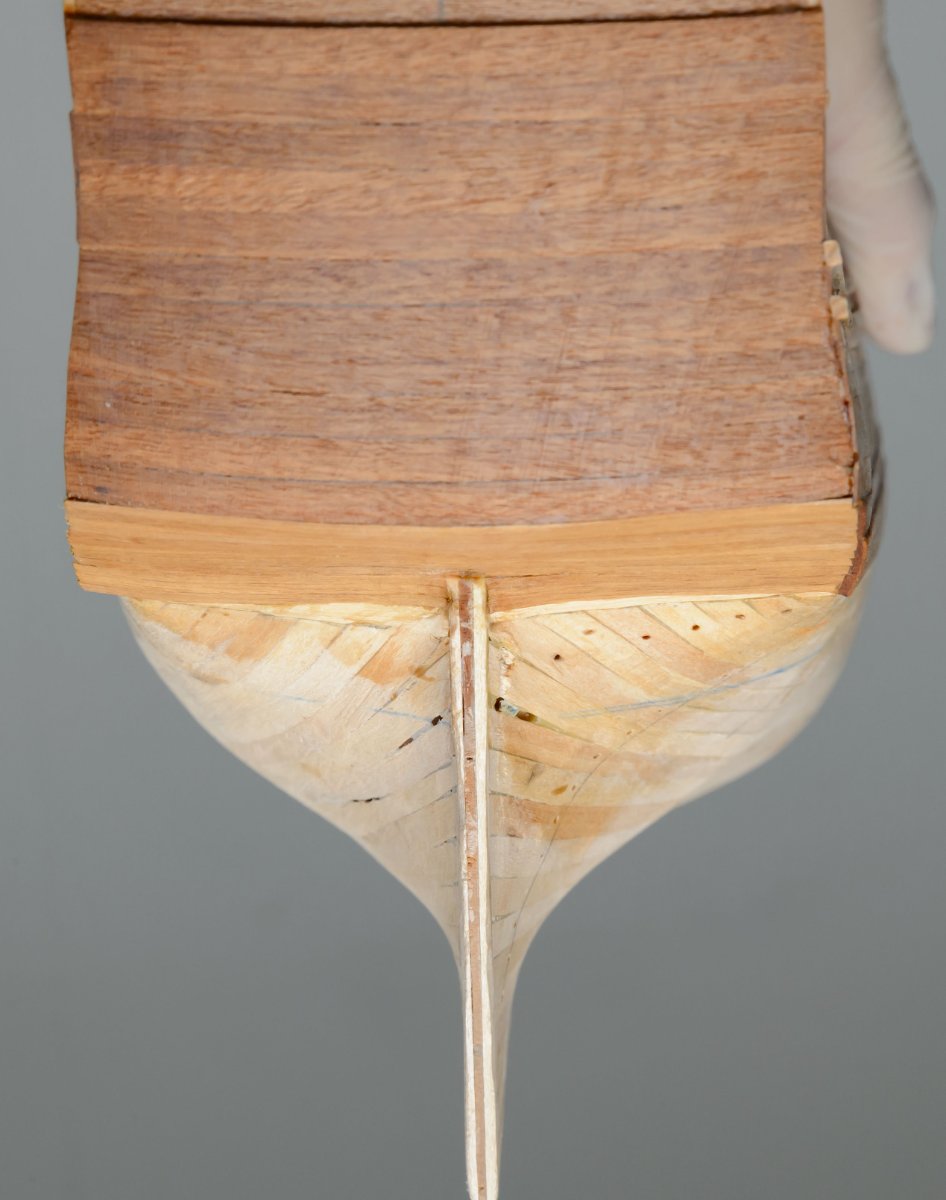
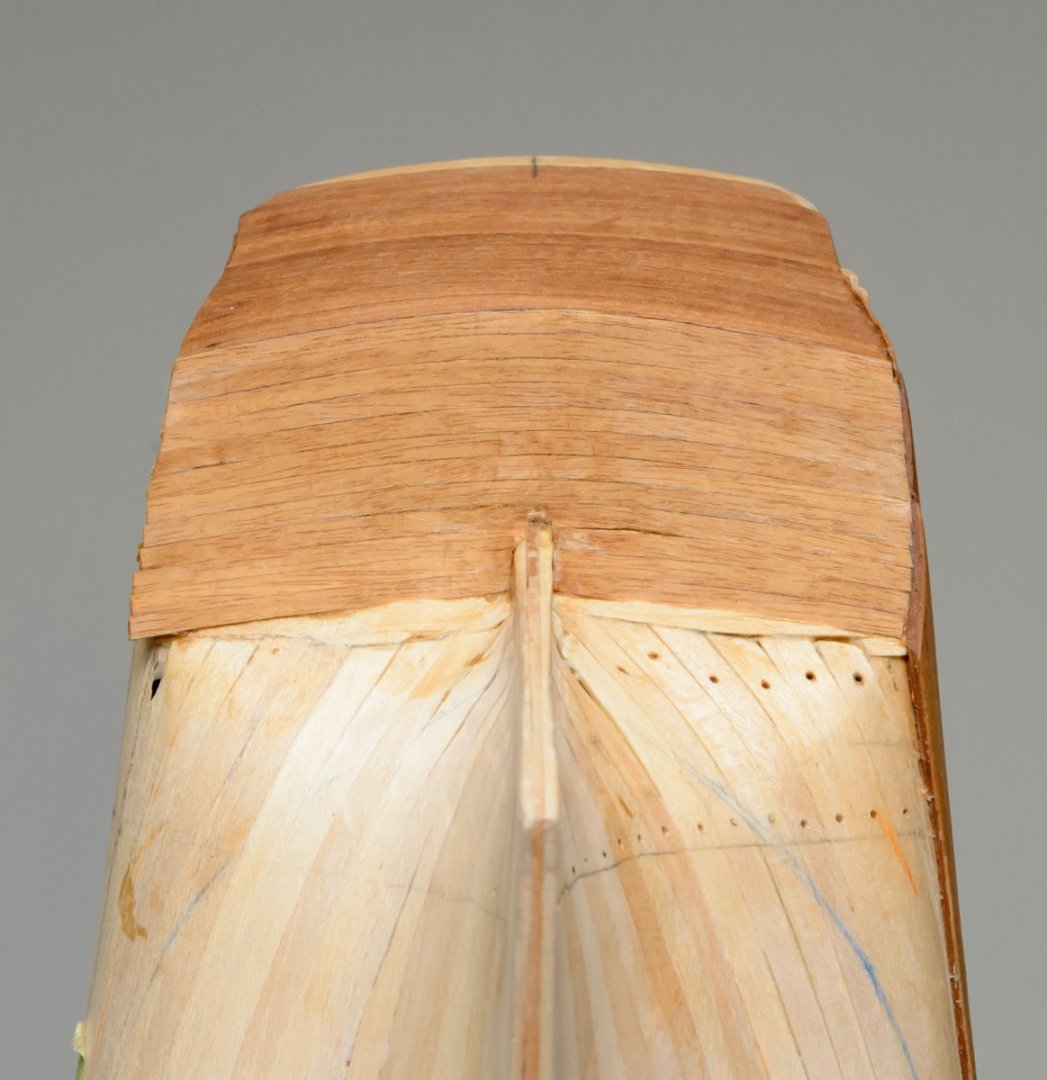
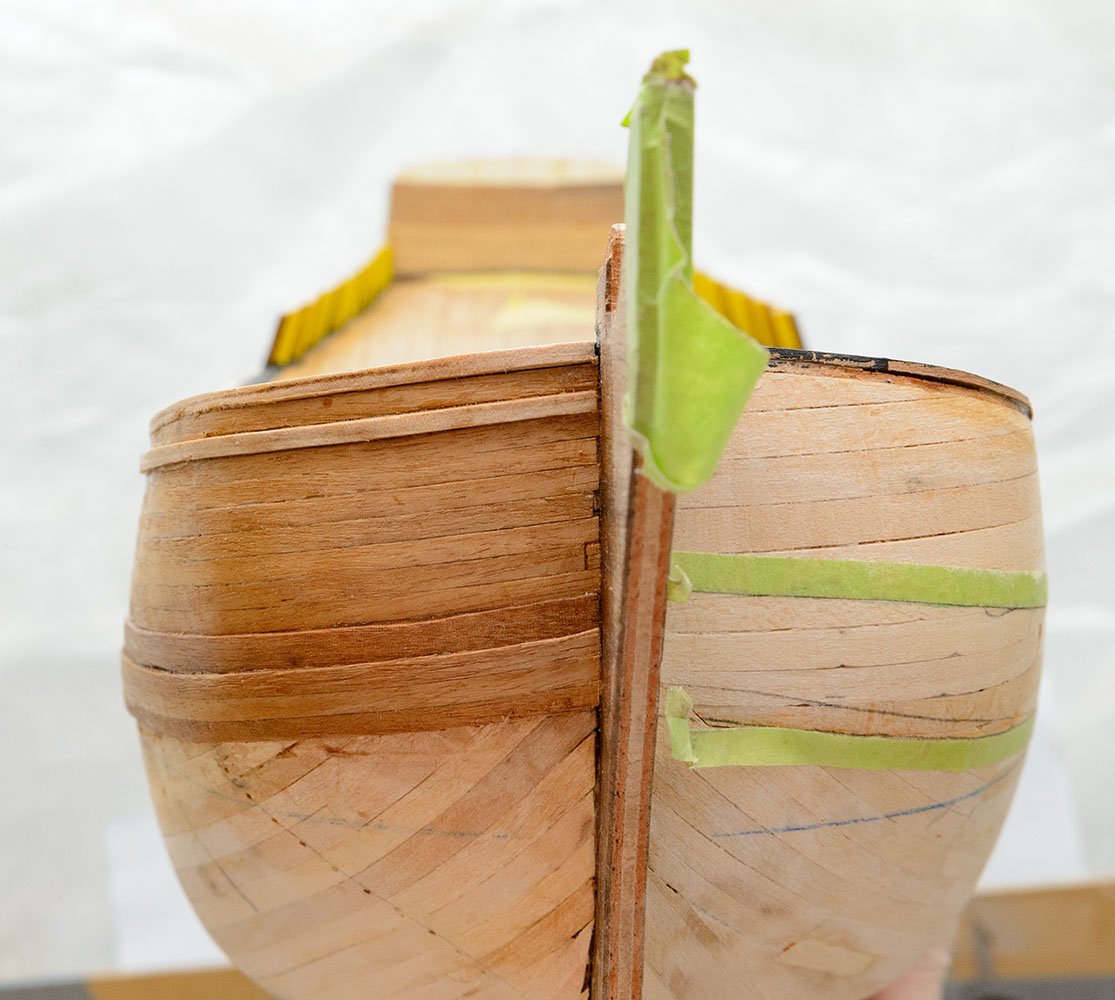
Before I wrapped up the wales and went to the lower hull planking, I had to finish the transom.


-
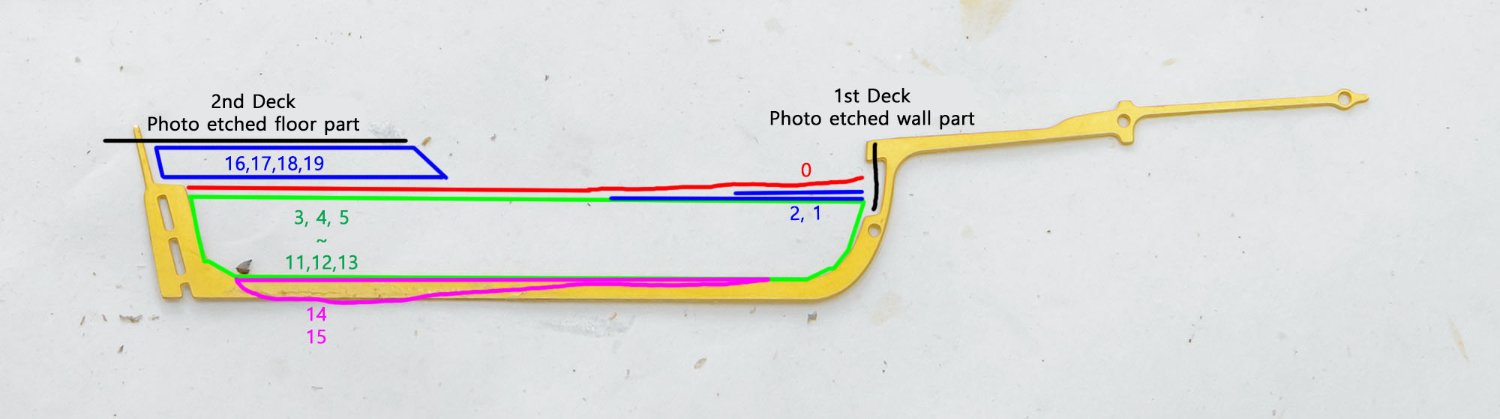
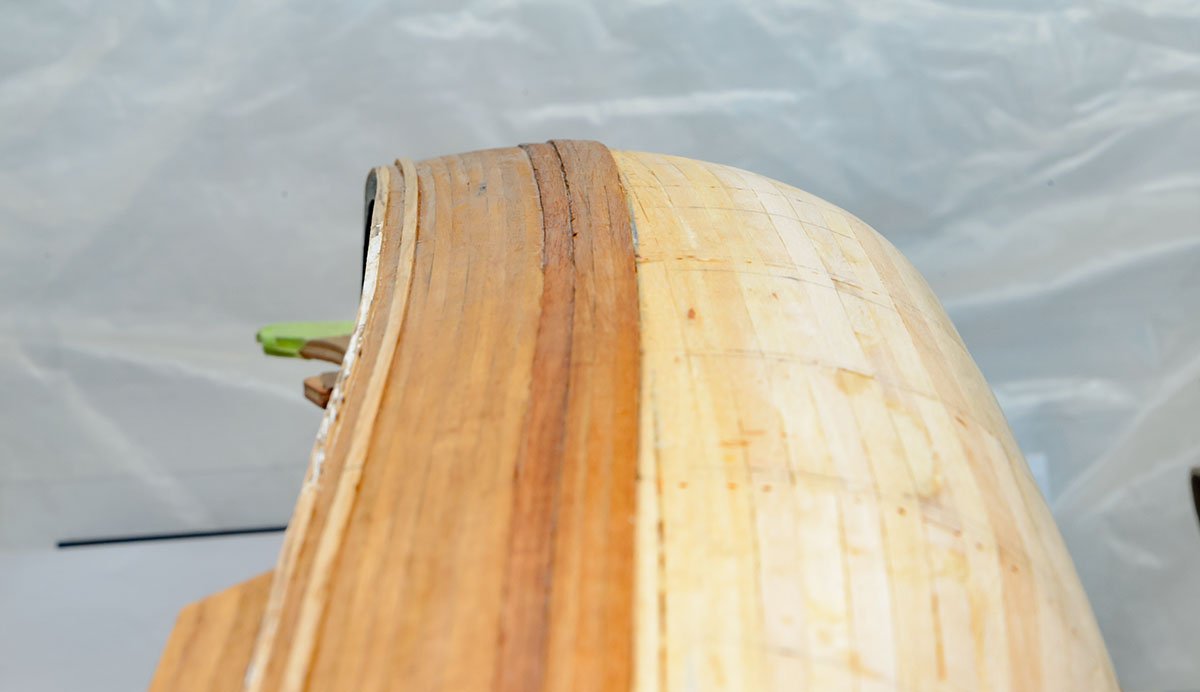
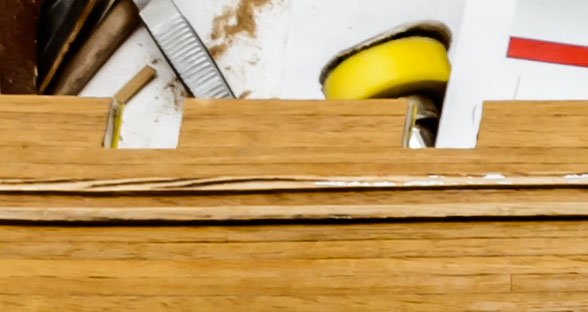
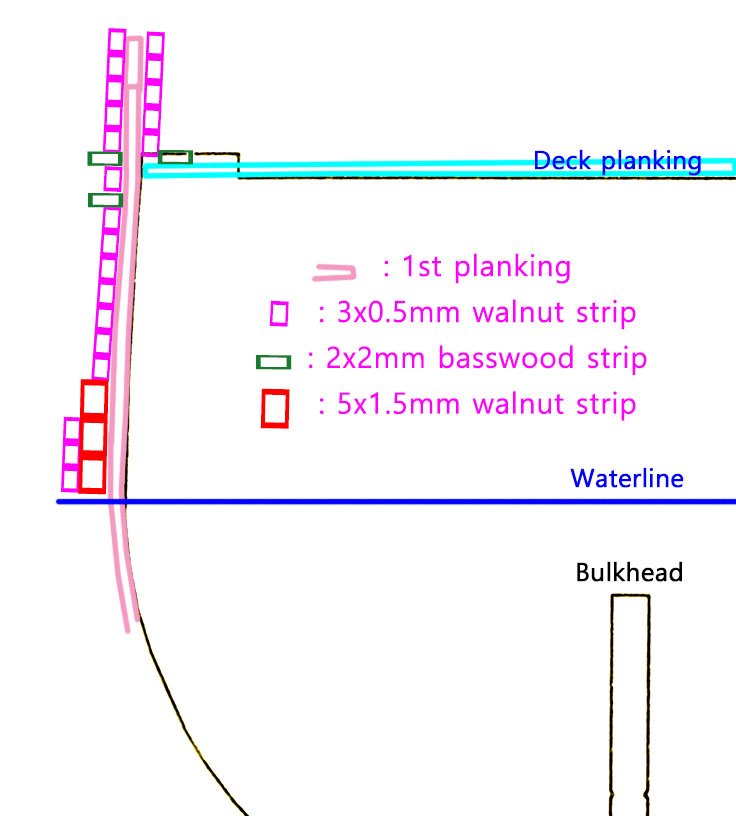
After some break time, the wale progress has gone forward a little bit. As I said, the structure of my build is based on the AotS book. This is a summary of the planking layers. Happy new year~
-
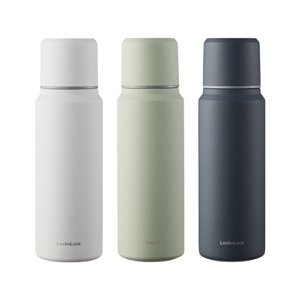
I keep boiling water in a $1 thermos bottle. It lasts an hour. Then I use a leather work iron to bend planks.
-
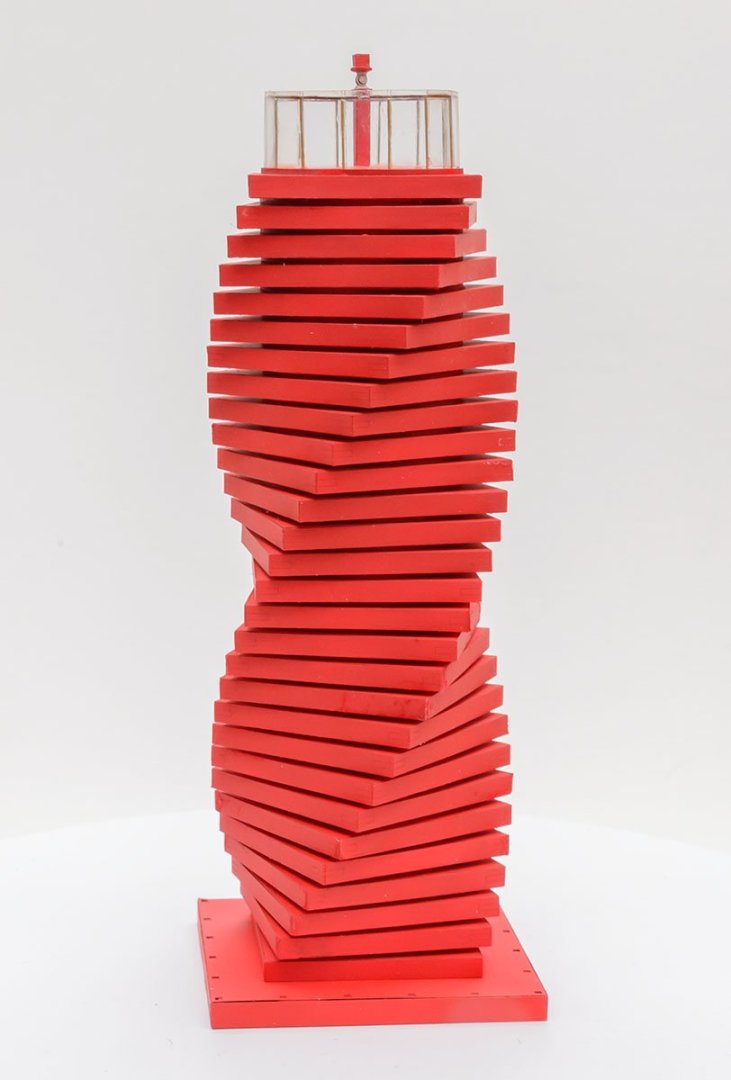
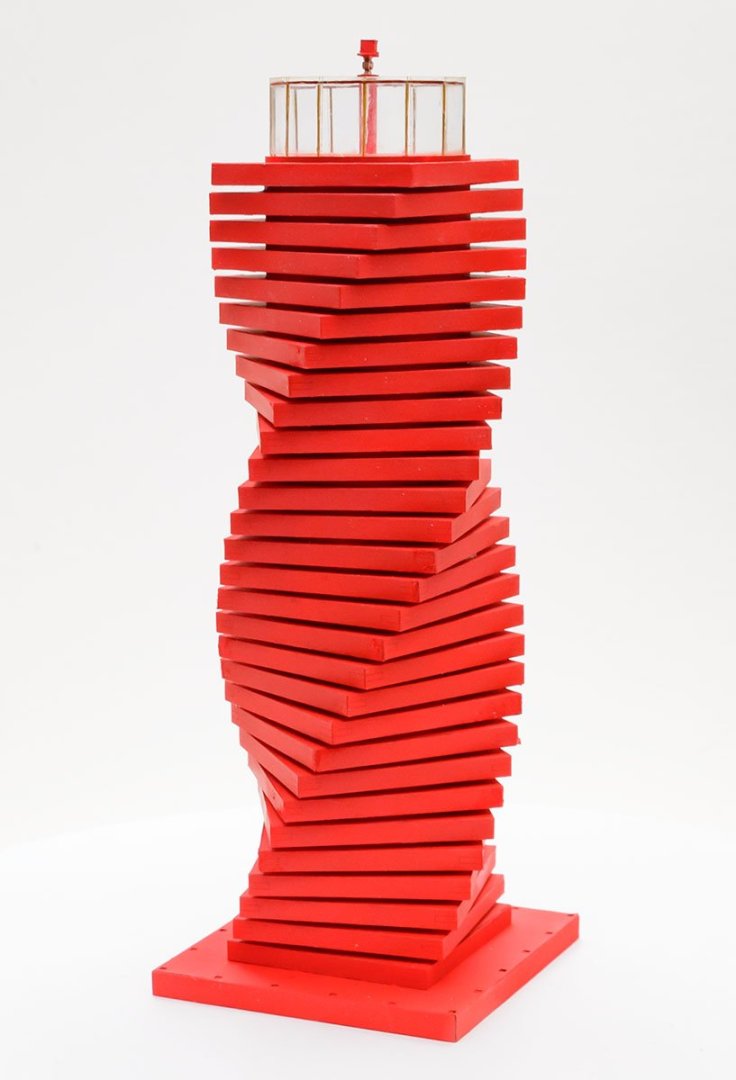
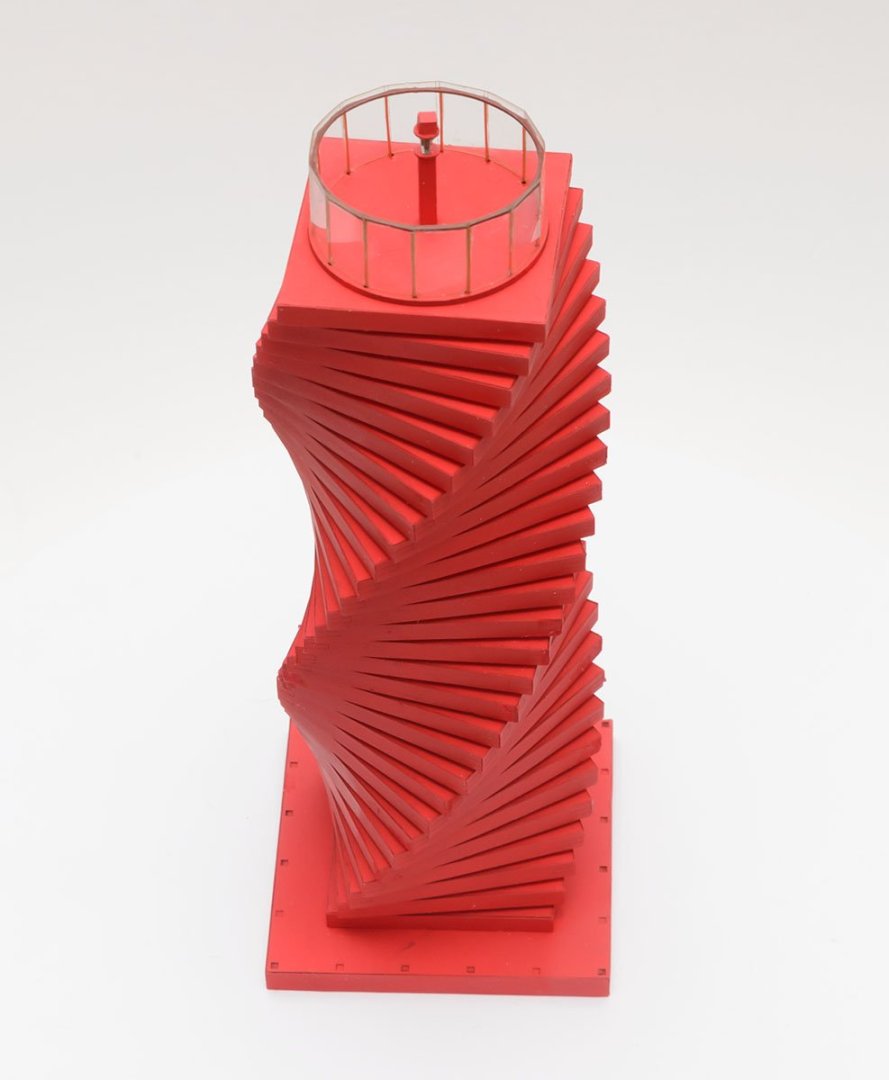
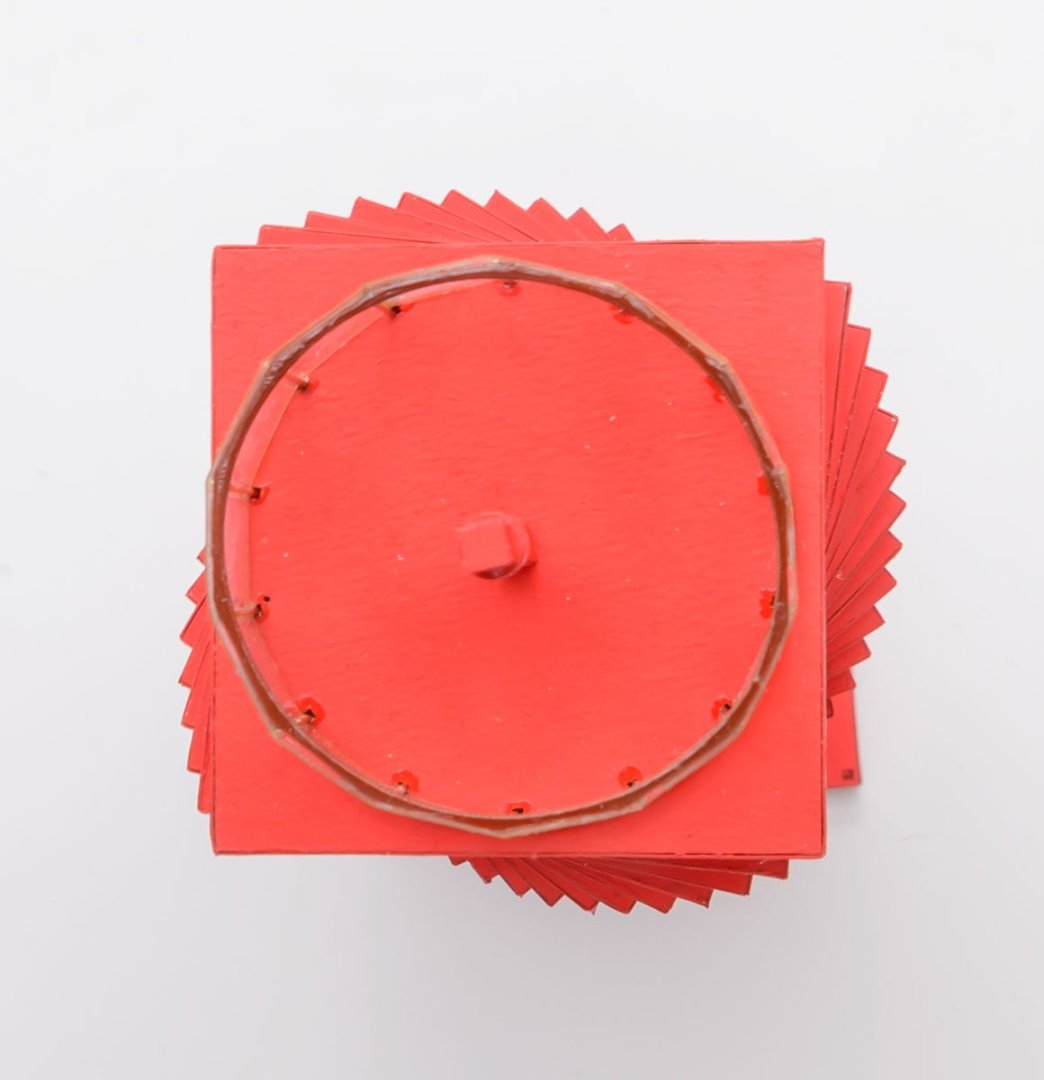
Happy new year! This is my first completed project in 2023. The singing lighthouse of Wando Port in South Korea isn't a functional lighthouse, but rather a tourist attraction. I'll present it to a child, so I omitted some details such as white led lights at the edges. Also, the wooden deck was replaced with a concrete seawall after several typhoon seasons. The Shipyard cardboard kit was so impressive that I purchased the Papegojan 1627 1/72 kit. It'll be my next project.
-
- 10
-

-
The AL's tutorial video seems to be similar to the method Paul le Wol used.
-
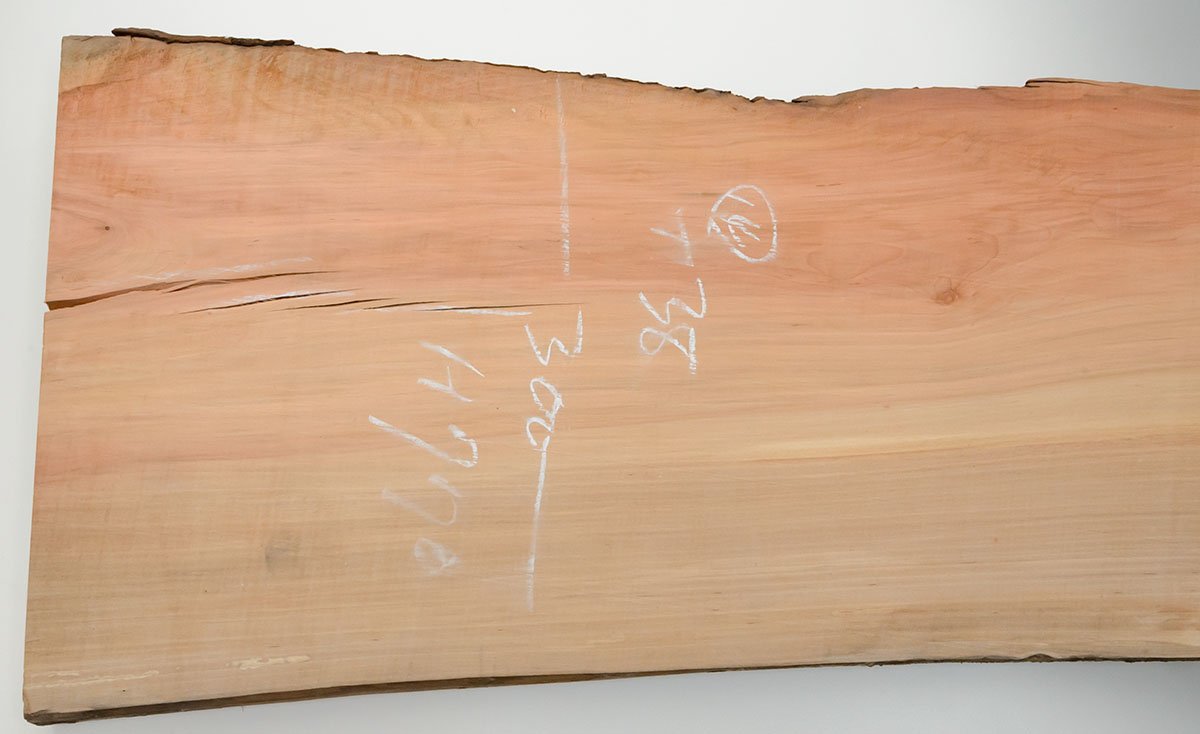
https://en.wikipedia.org/wiki/Pyrus_pyrifolia It looks like Swiss pear wood. The hardwood has a very sturdy and dense surface, and I hardly notice its grains. Also, the price is similar to cherry wood, although I have to cut it by myself. I'm glad that I found a quality wood supplier locally. https://en.wikipedia.org/wiki/Pyrus_communis (European pear or common pear)

-
After lots of optimization, I've come to a very simple conclusion. - Block sander (5 inch) - Binder clip as a steady rest That's all.
-
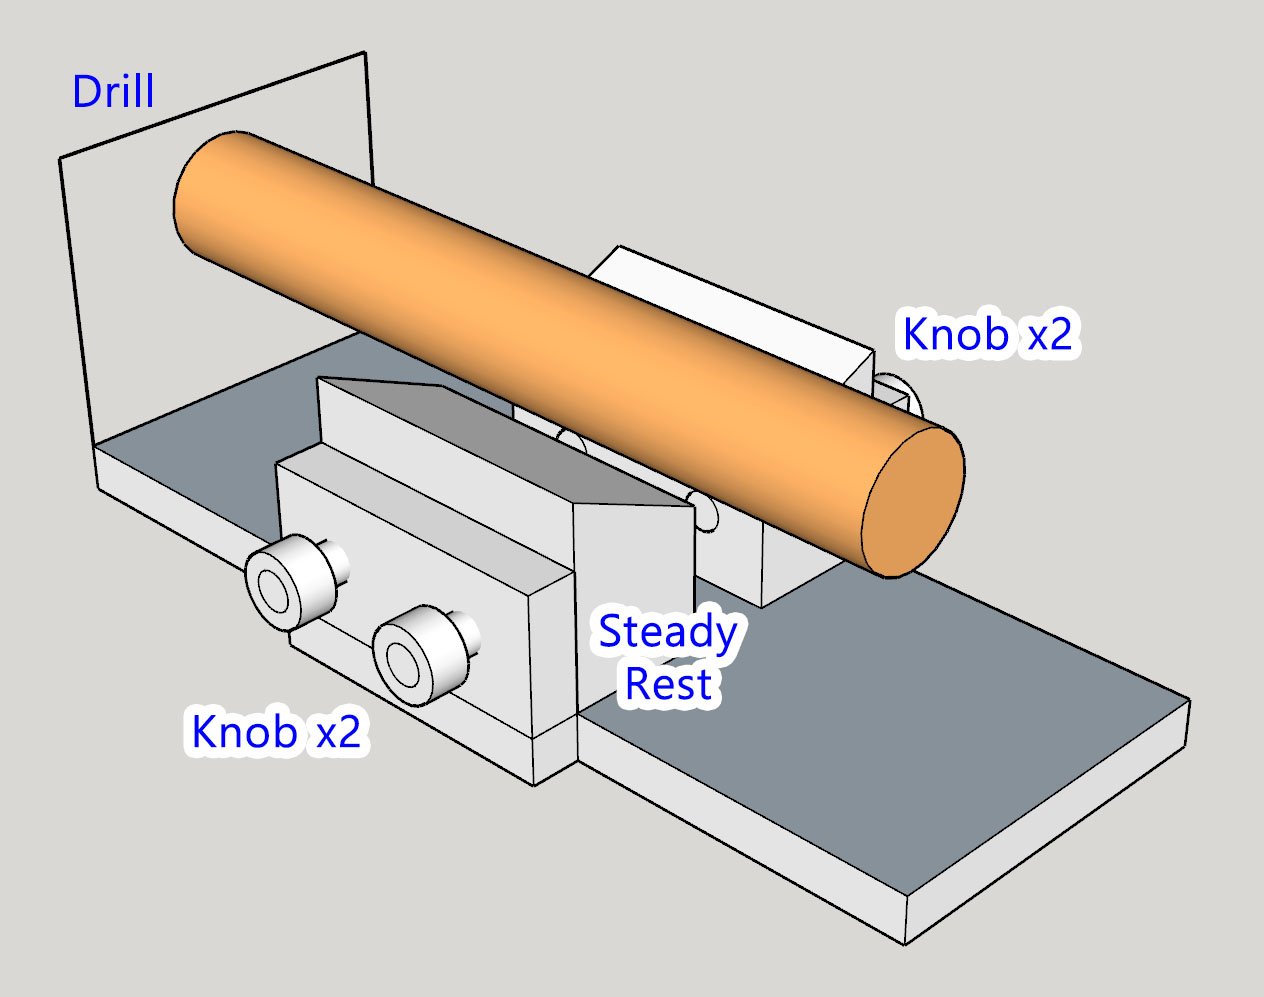
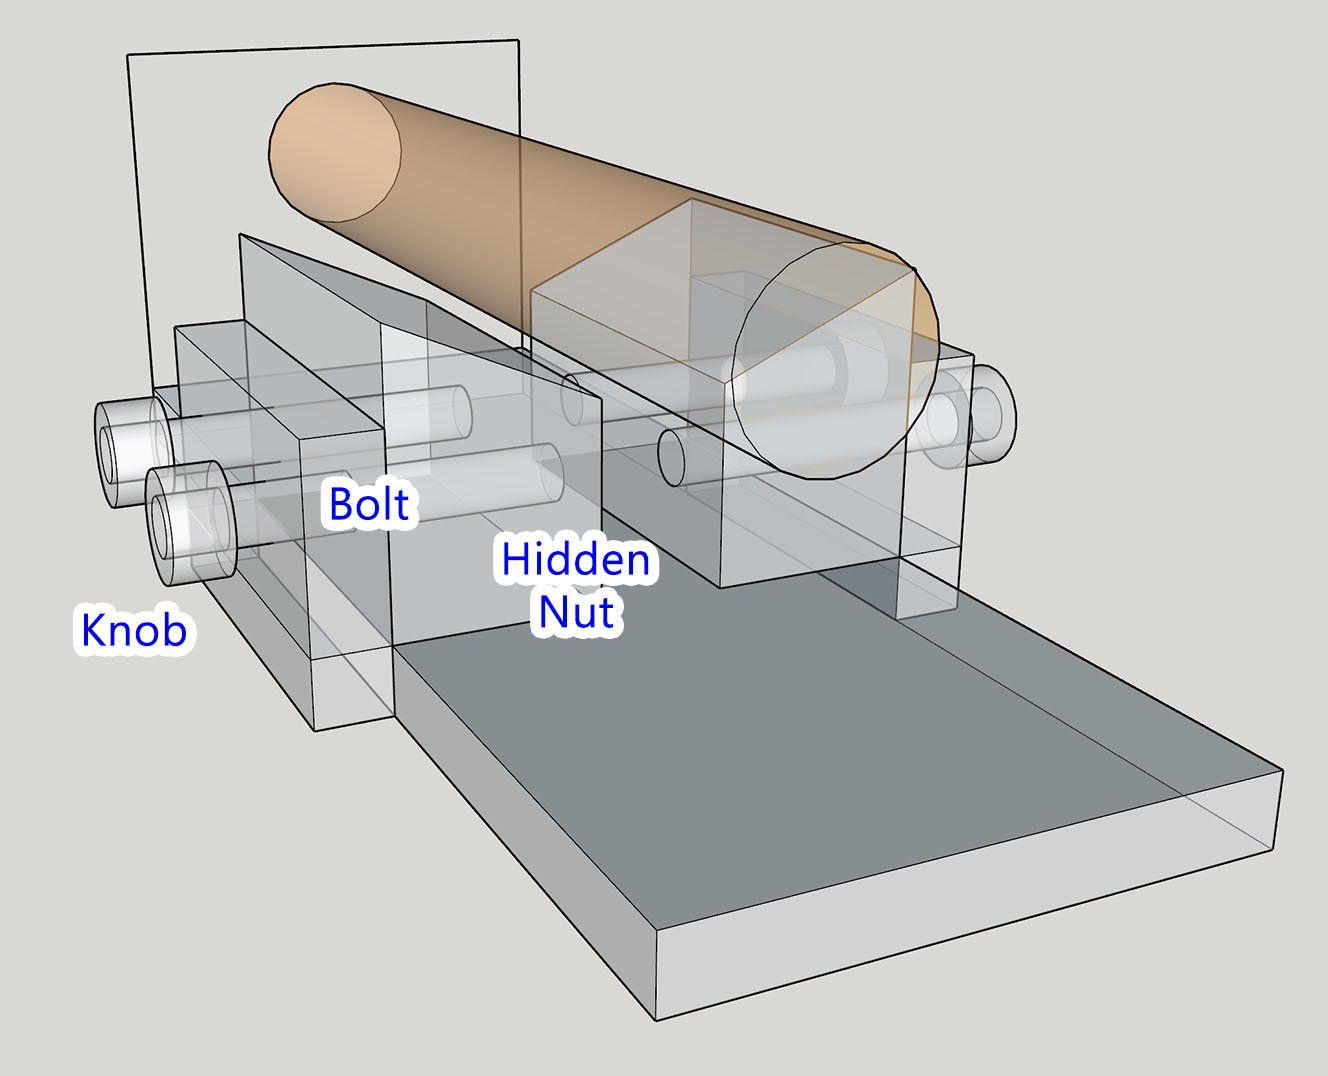
I developed my idea more... I optimized the steady rest. This design has limited coverage but is more simple.
-
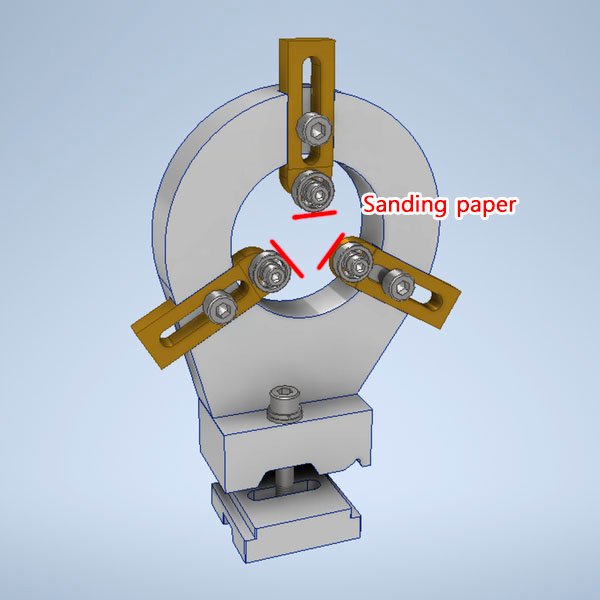
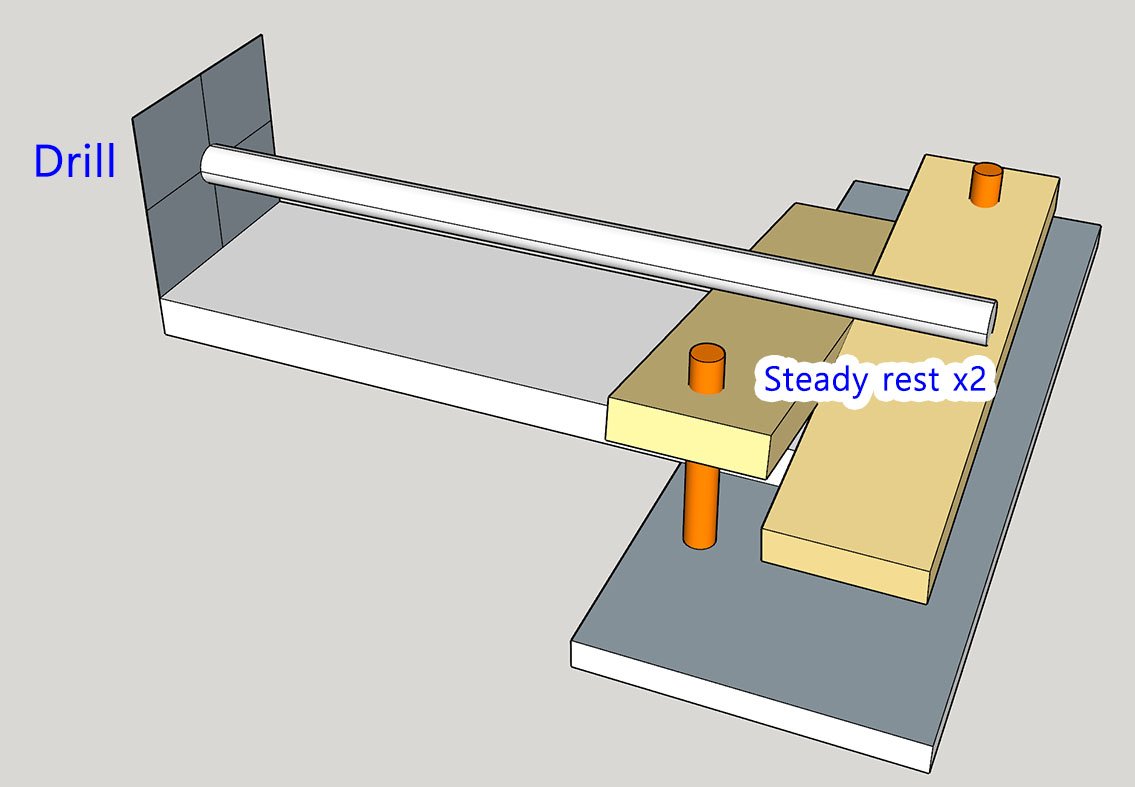
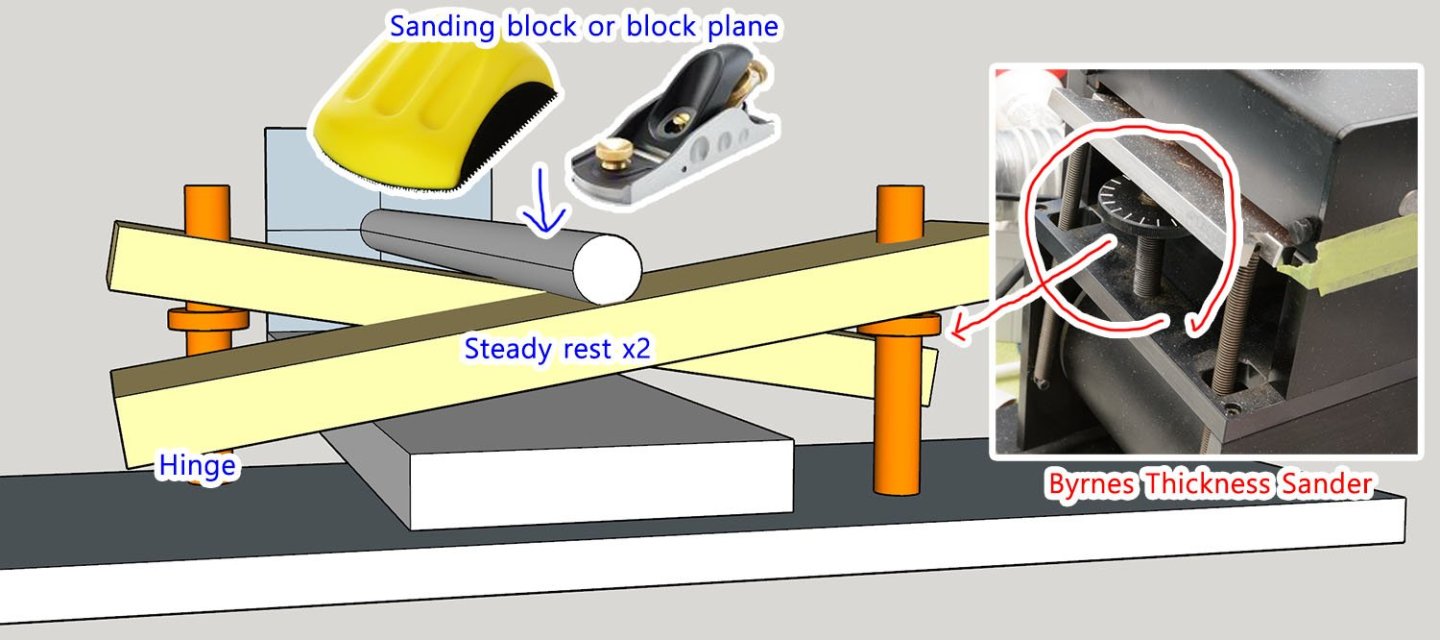
Nirvana's method gives me some ideas. I'd like to combine the thickness sander and lathe steady rest. If I replace the tips of the steady rest with sanding paper, I may be able to sand a wood rod without grabbing it for 30 minutes. It should be a safer and faster jig.