modeller_masa
-
Posts
950 -
Joined
-
Last visited
Content Type
Profiles
Forums
Gallery
Events
Everything posted by modeller_masa
-
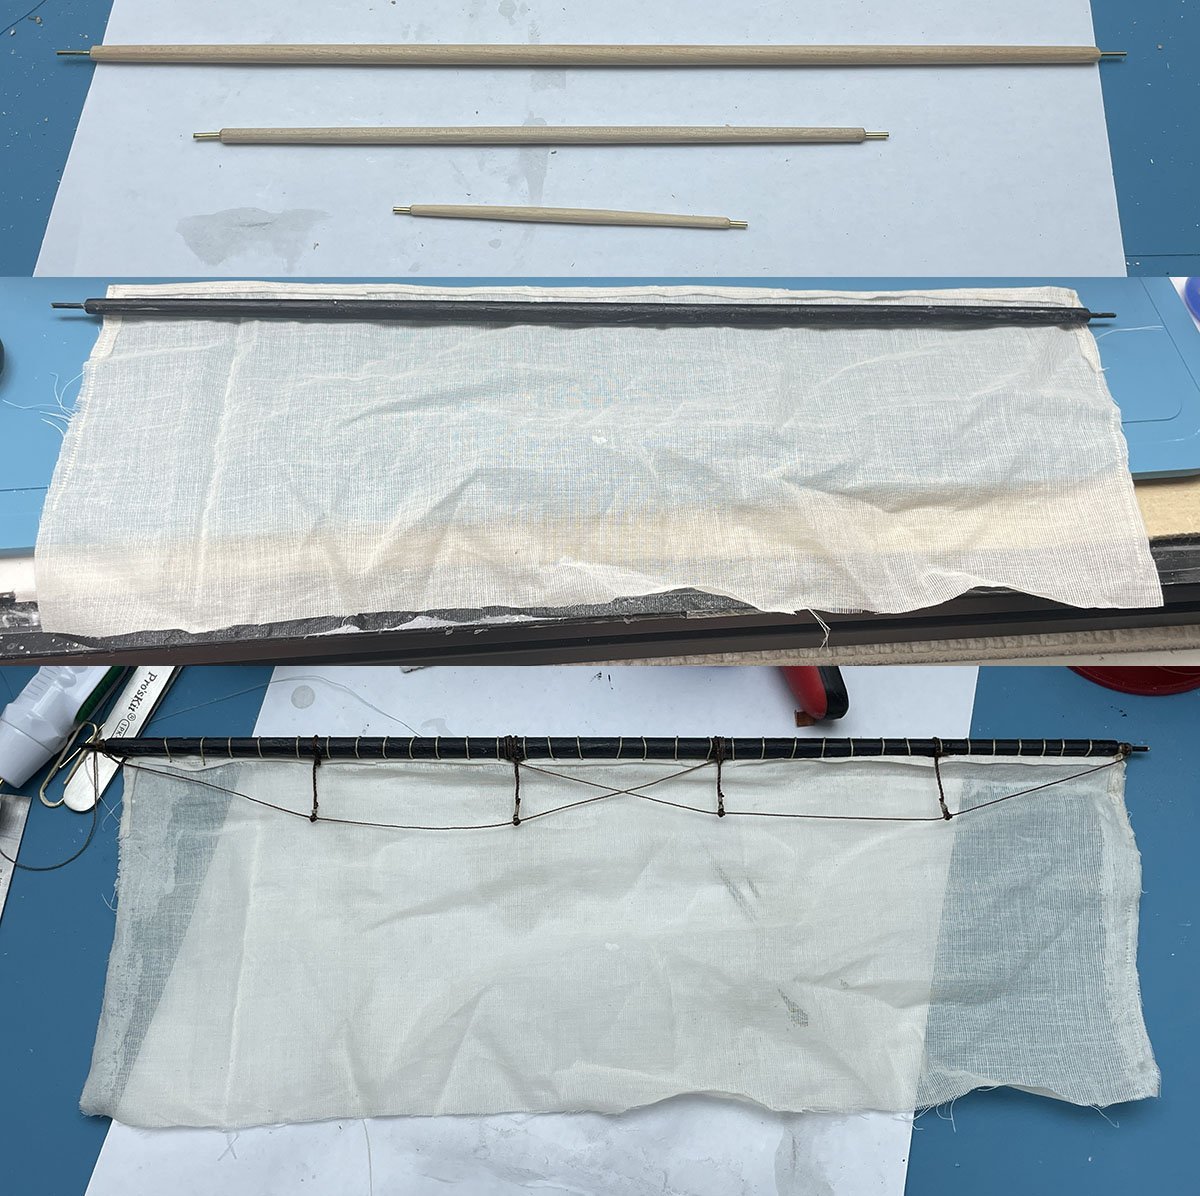
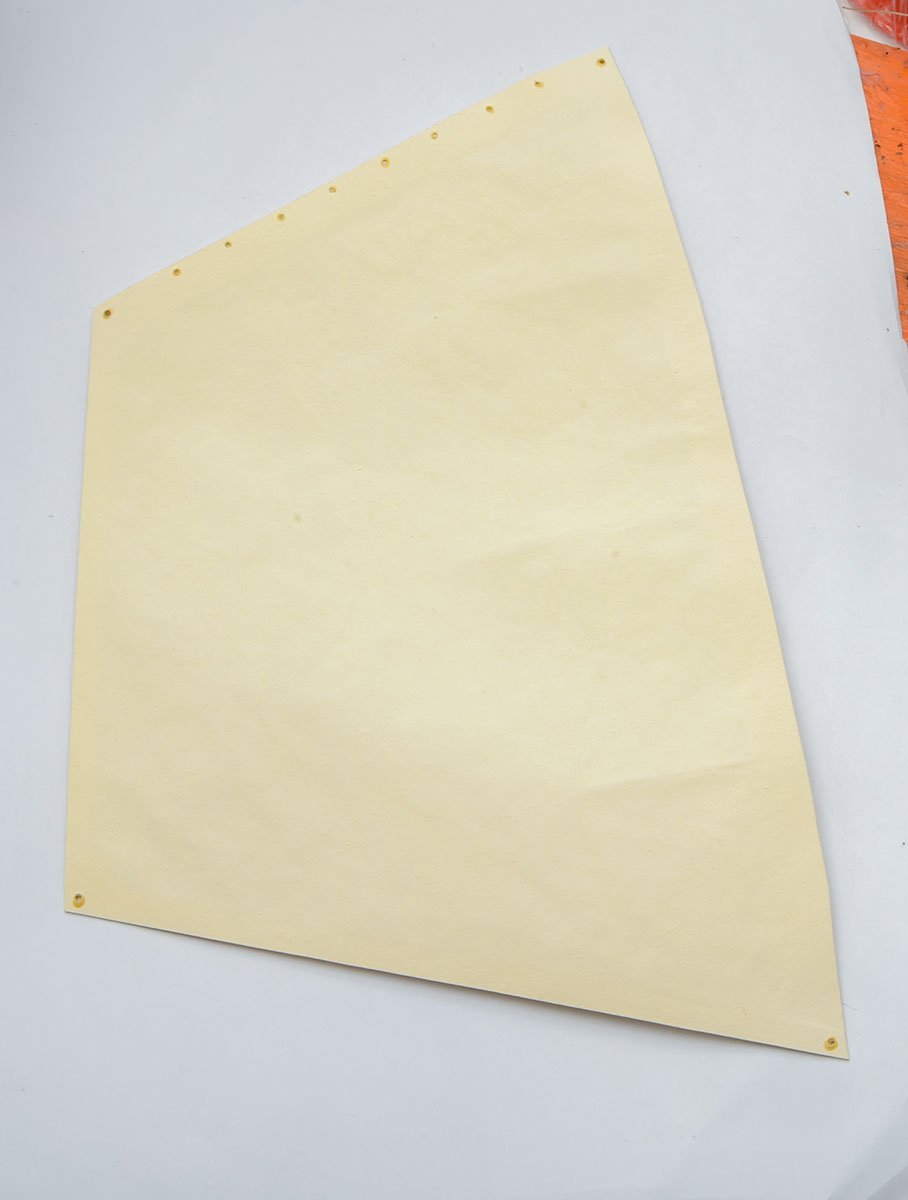
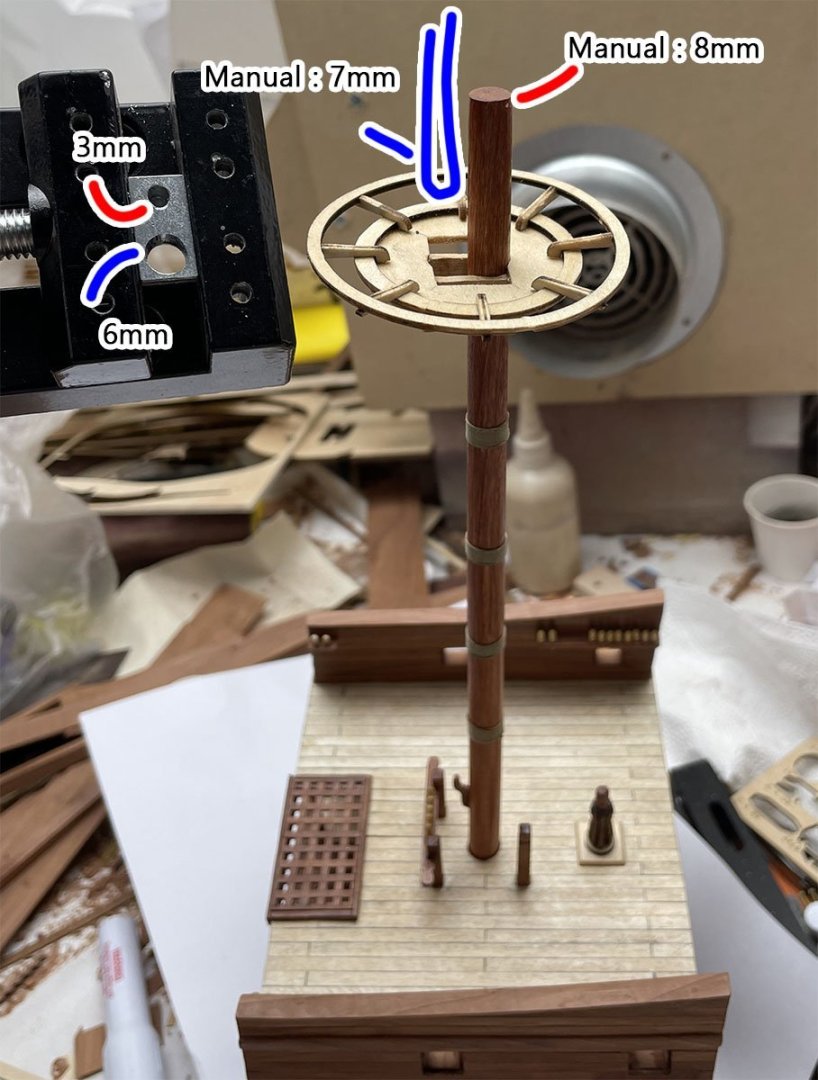
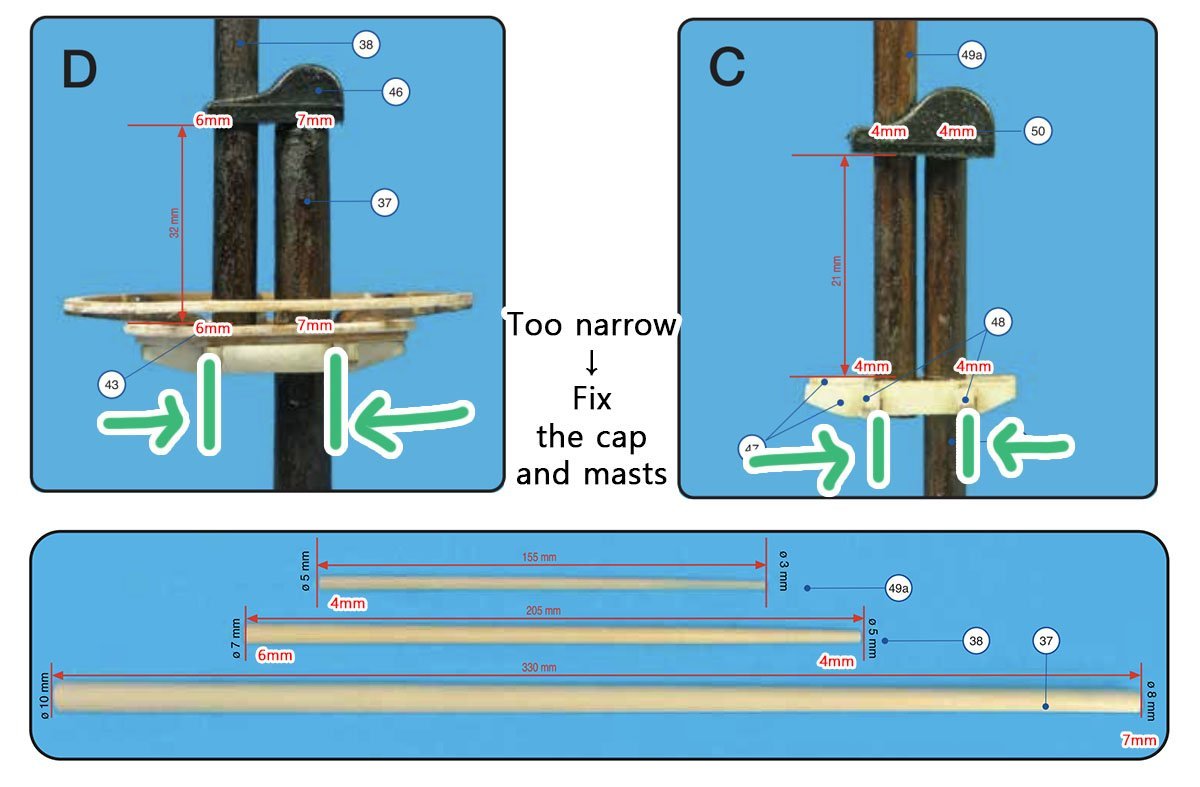
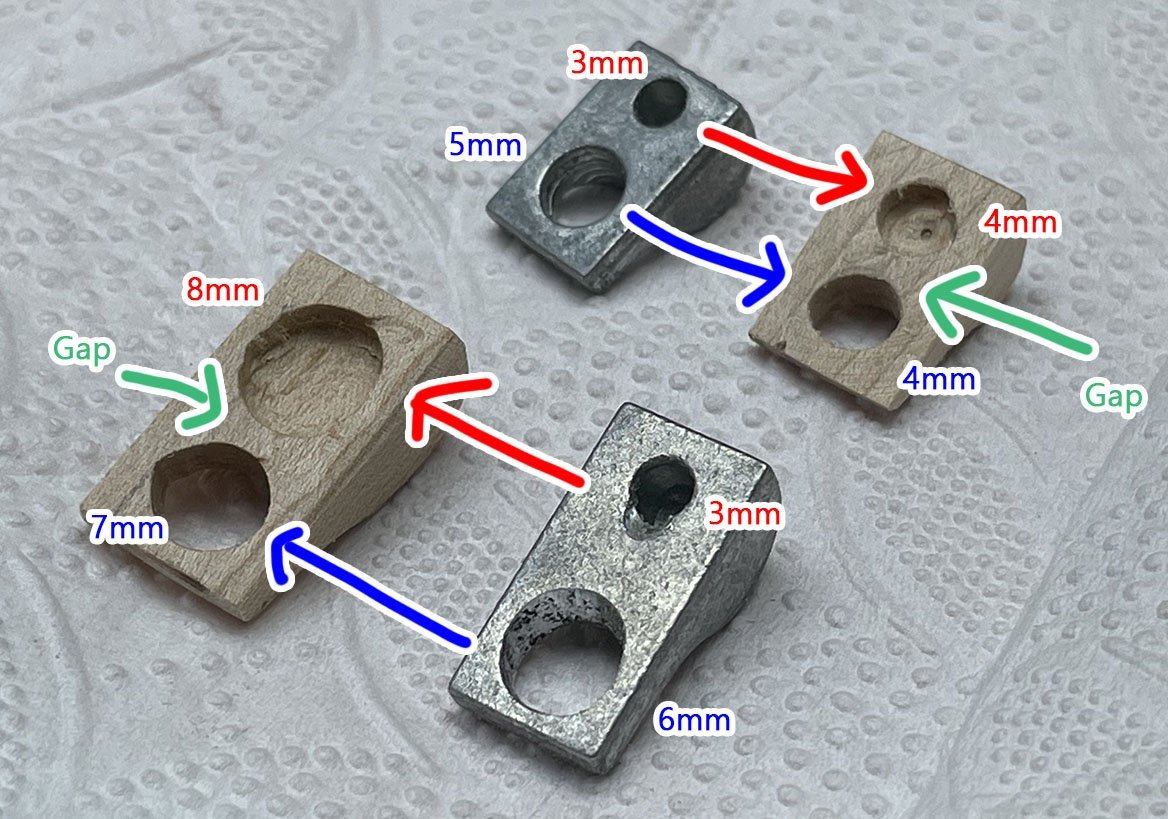
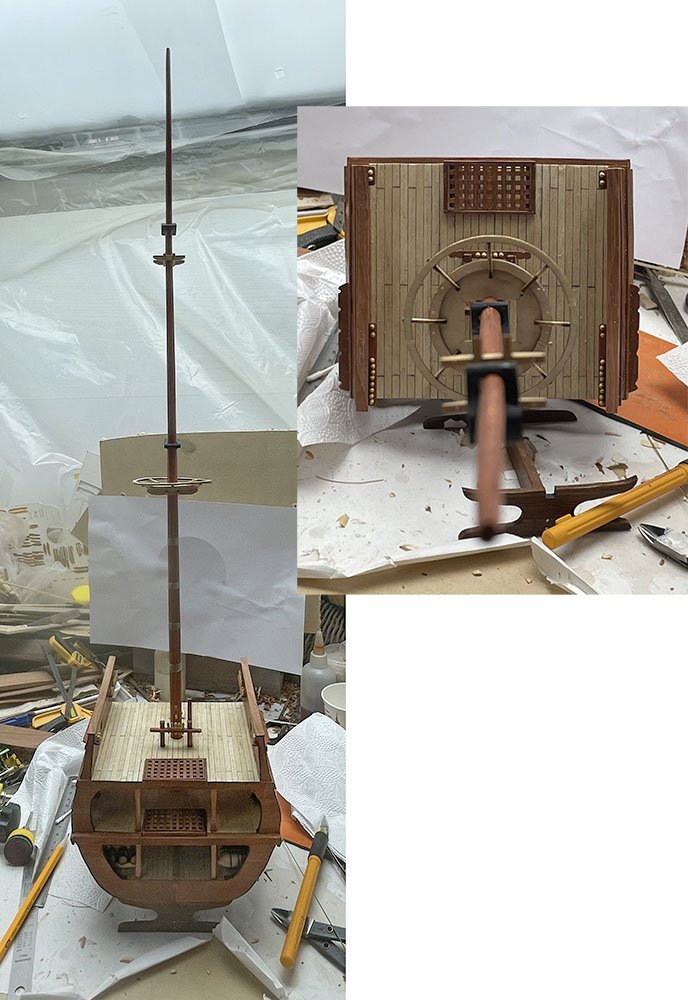
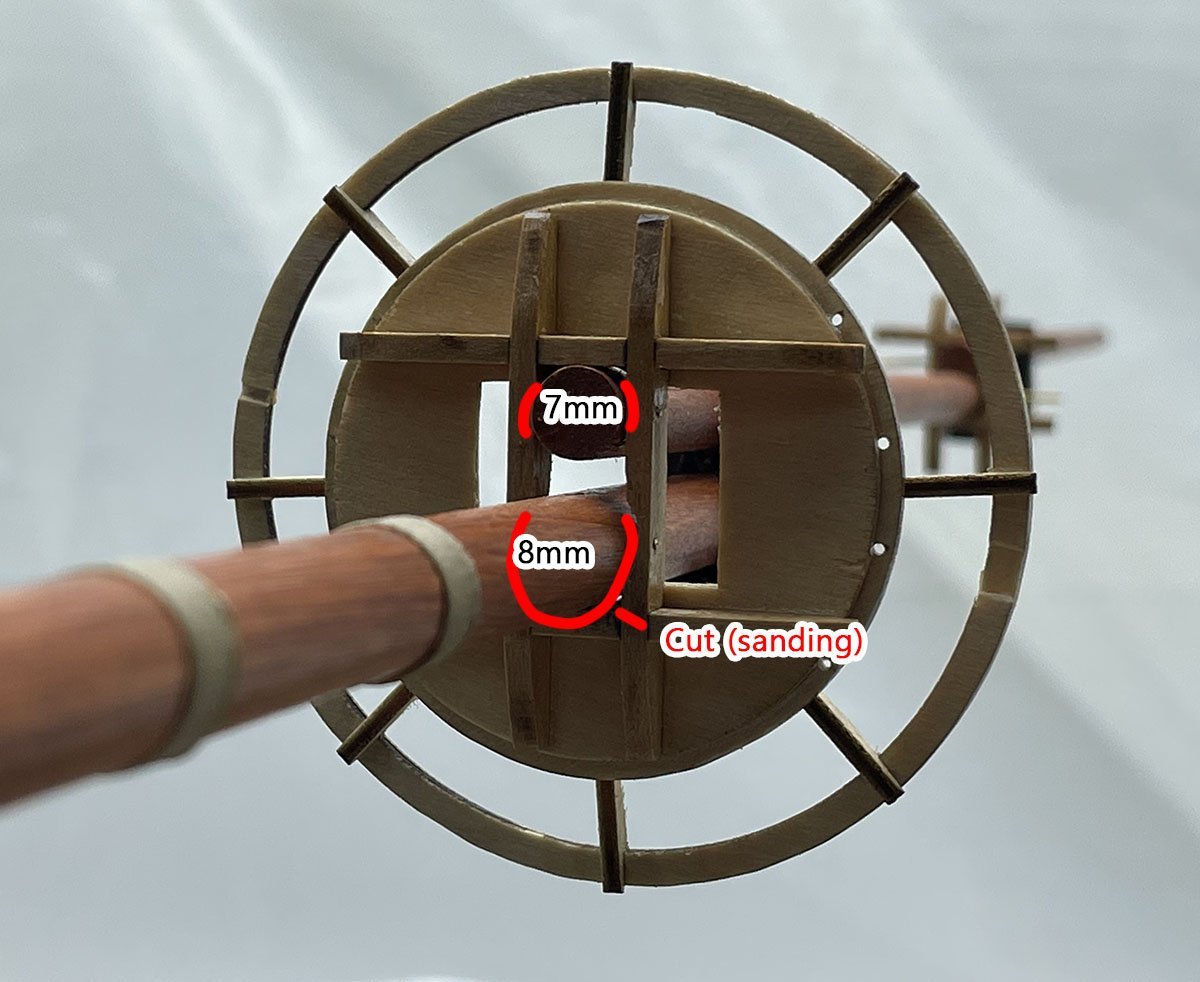
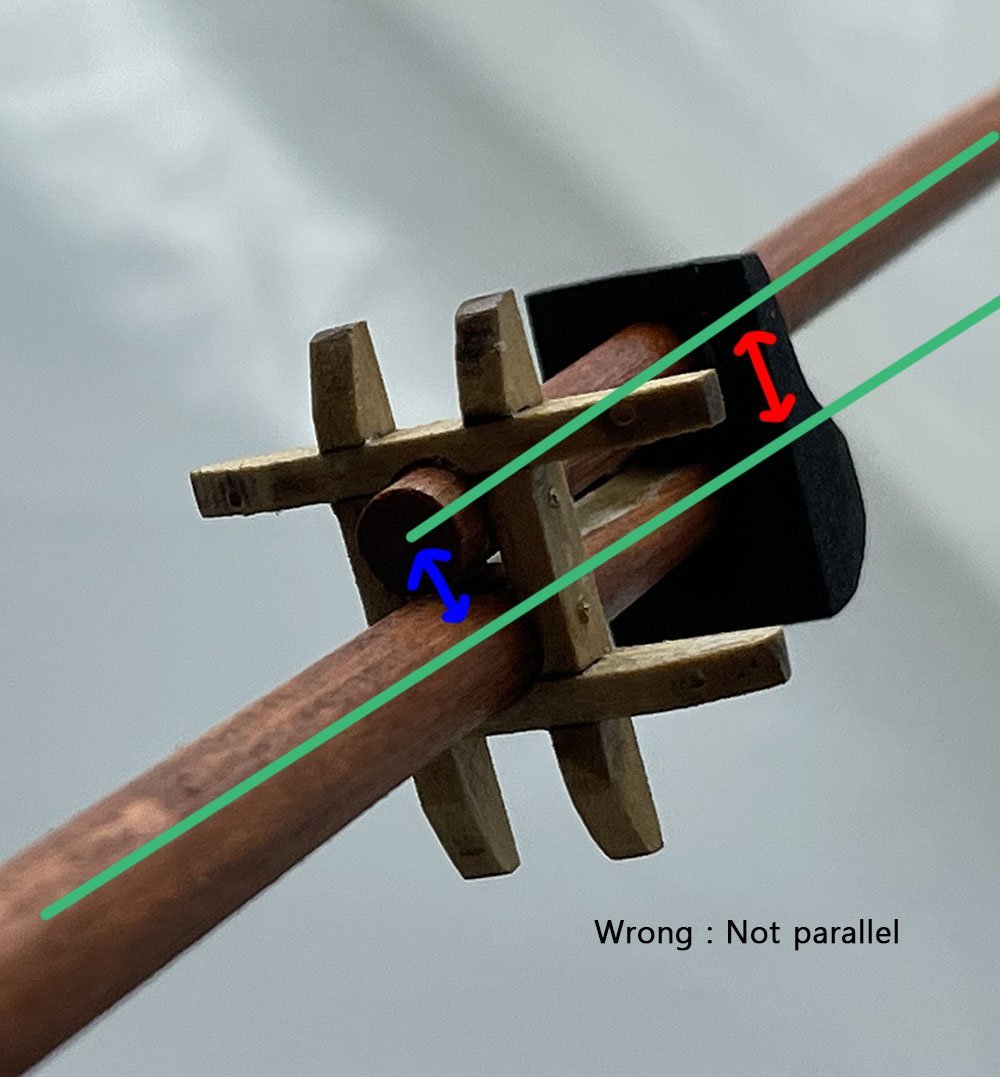
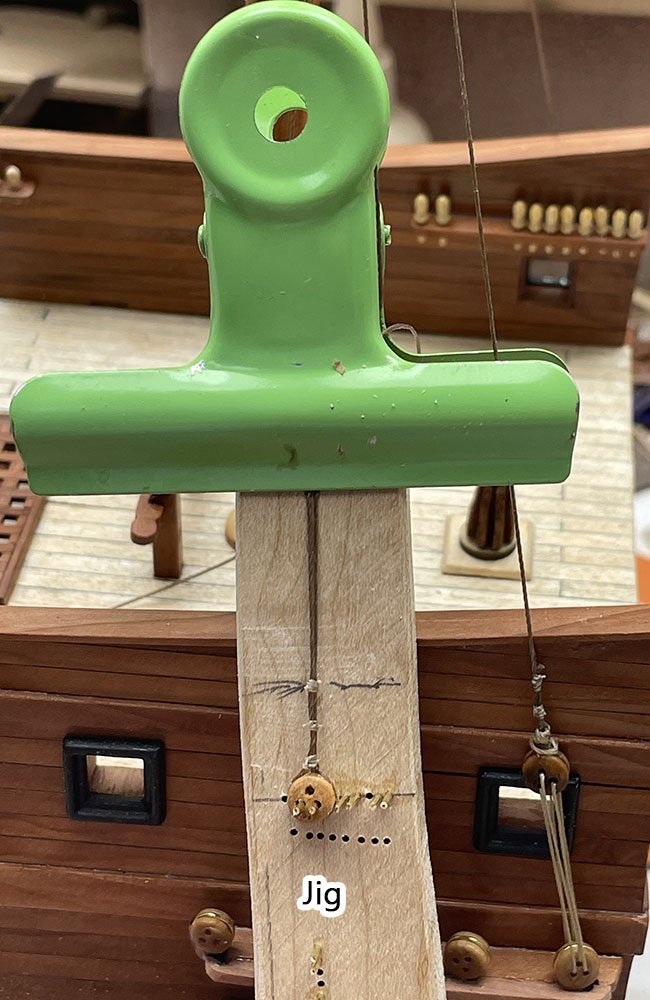
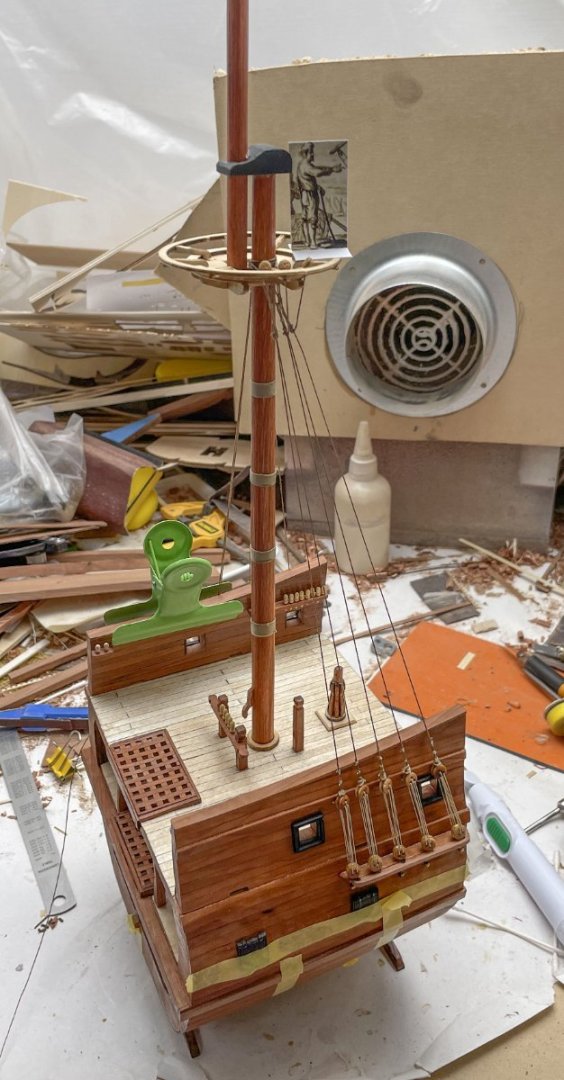
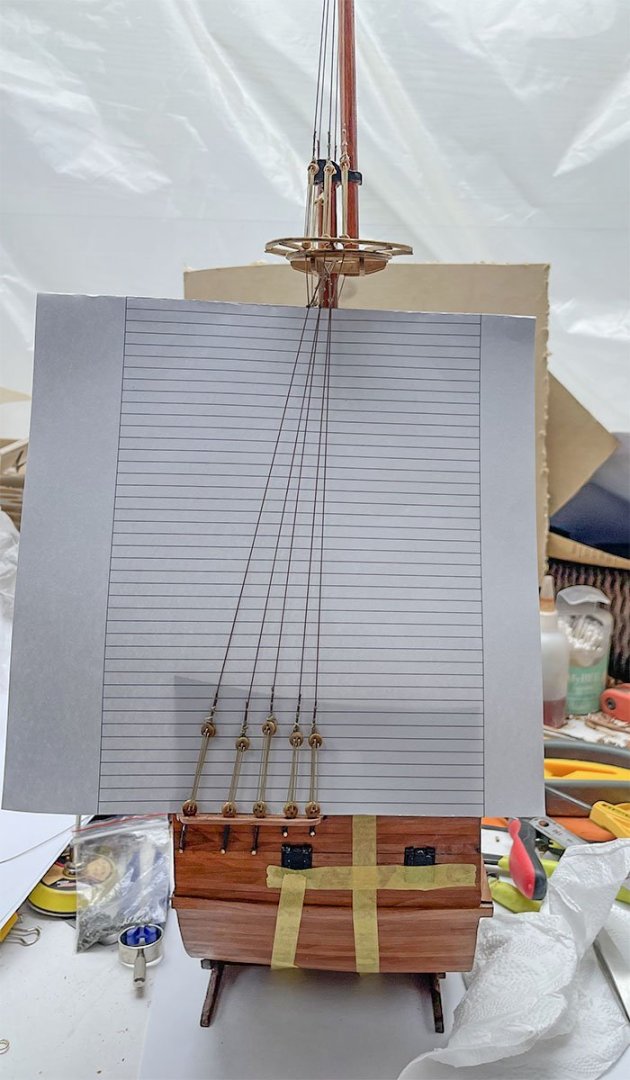
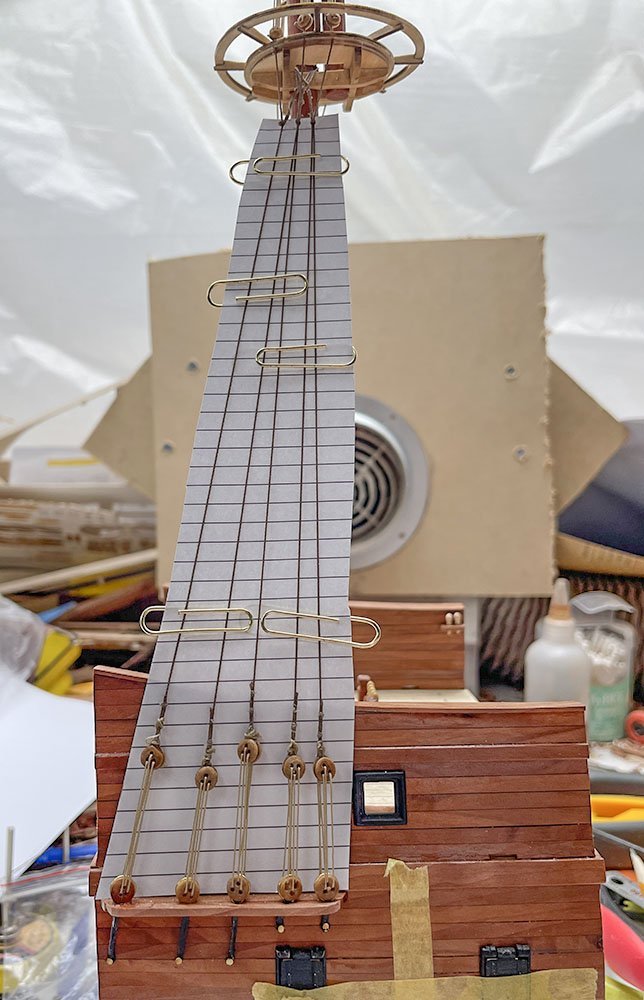
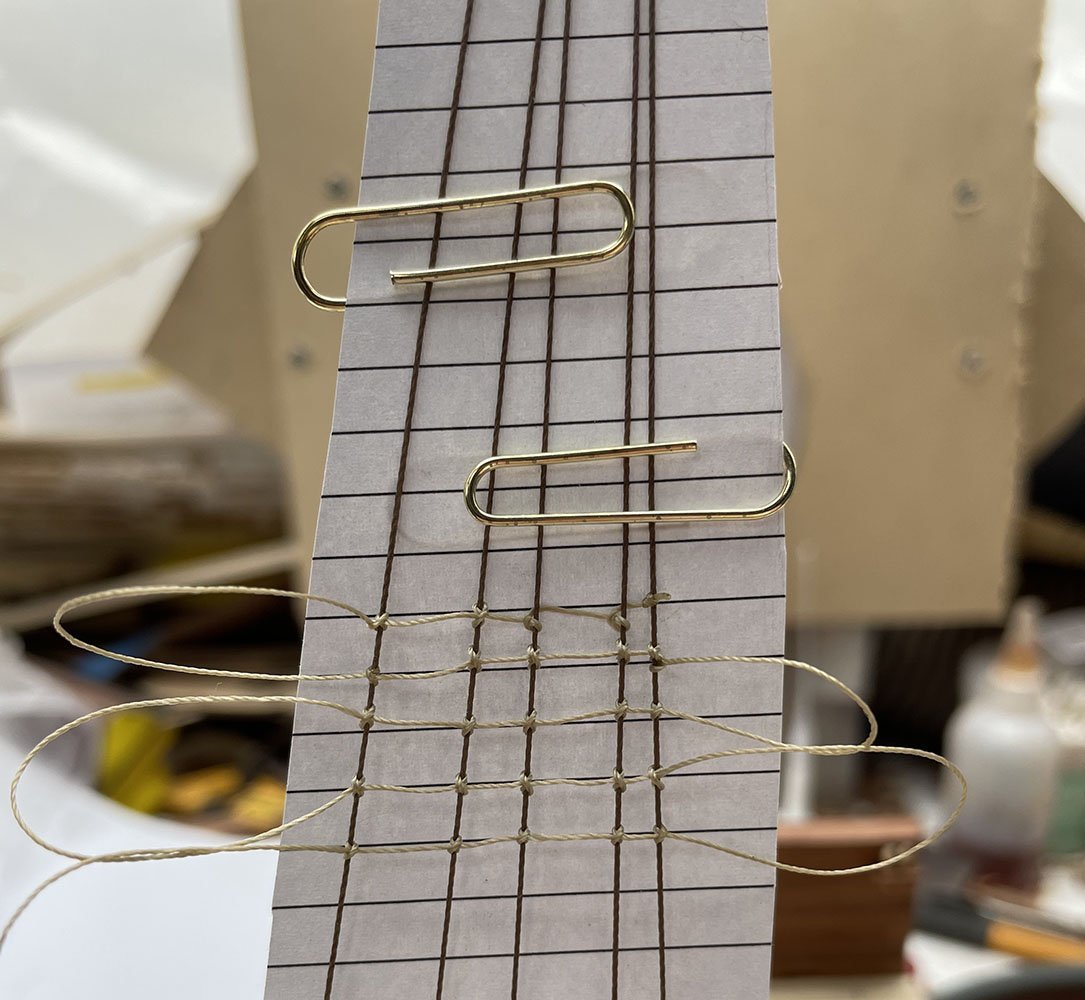
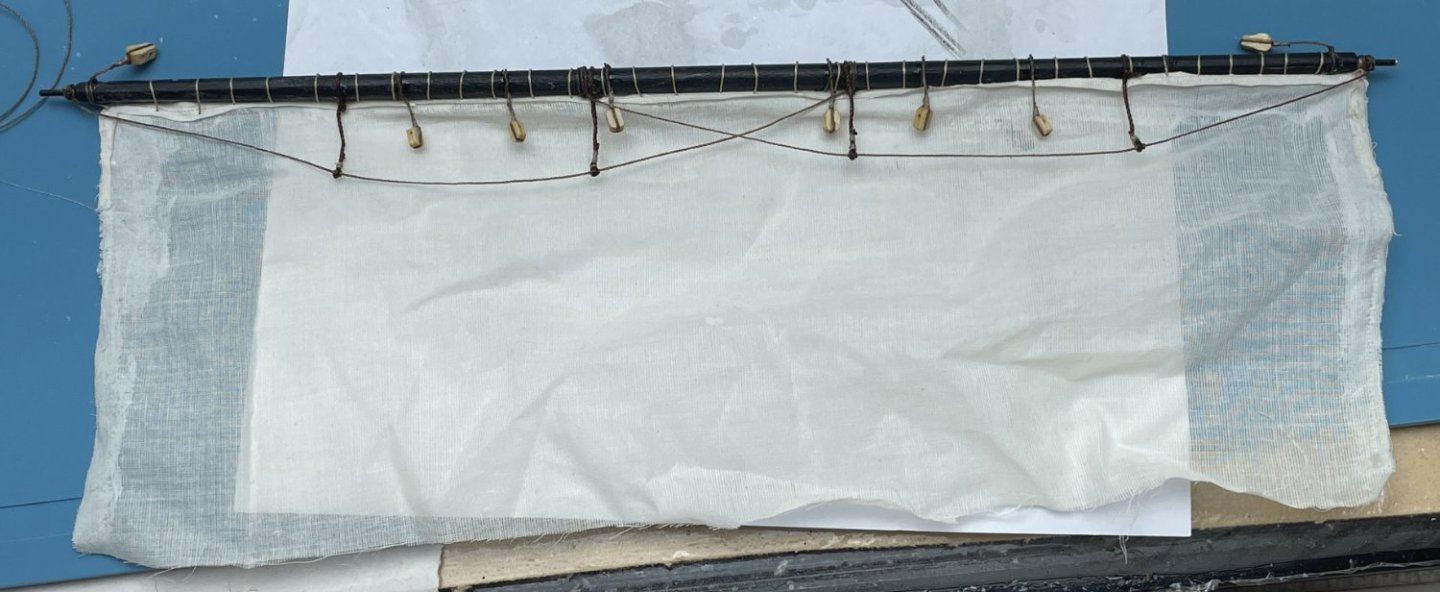
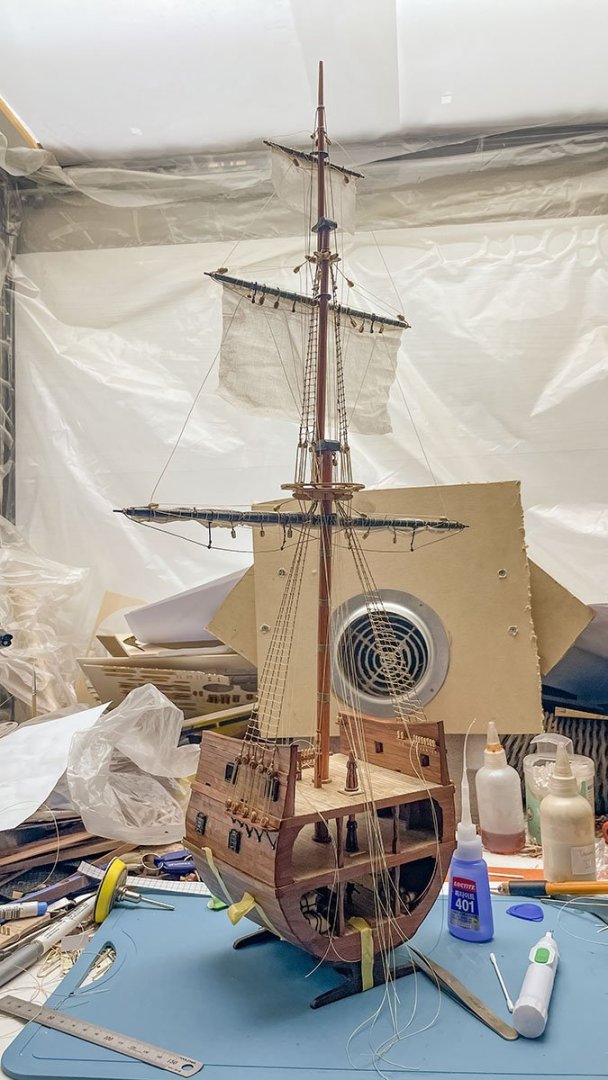
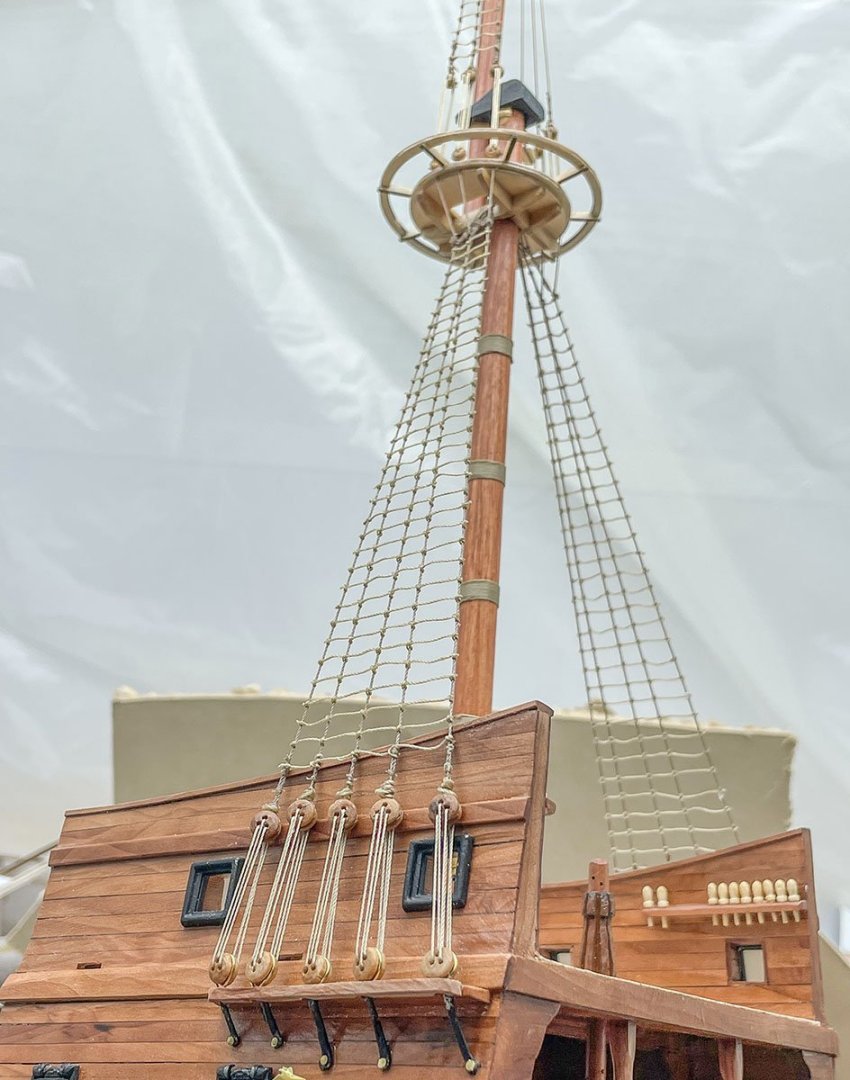
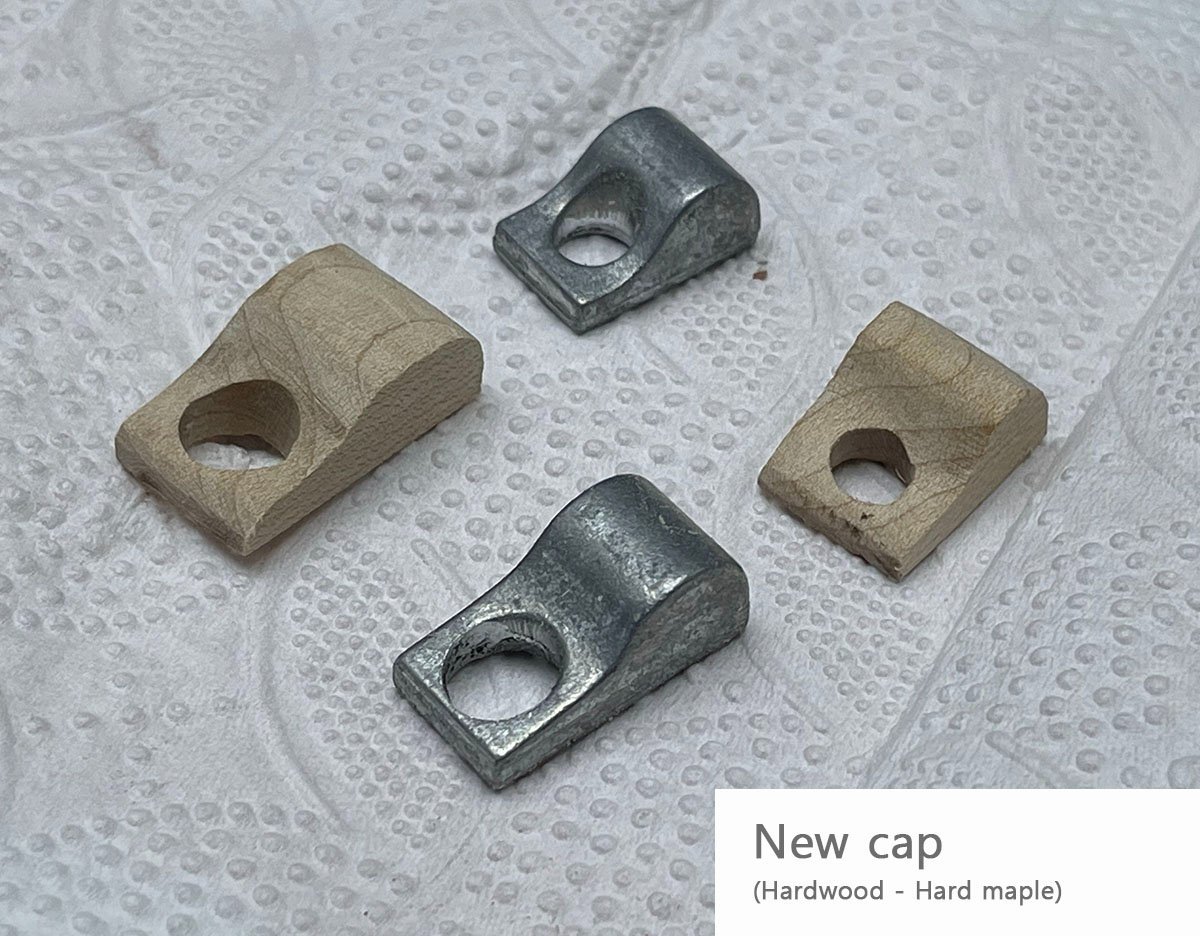
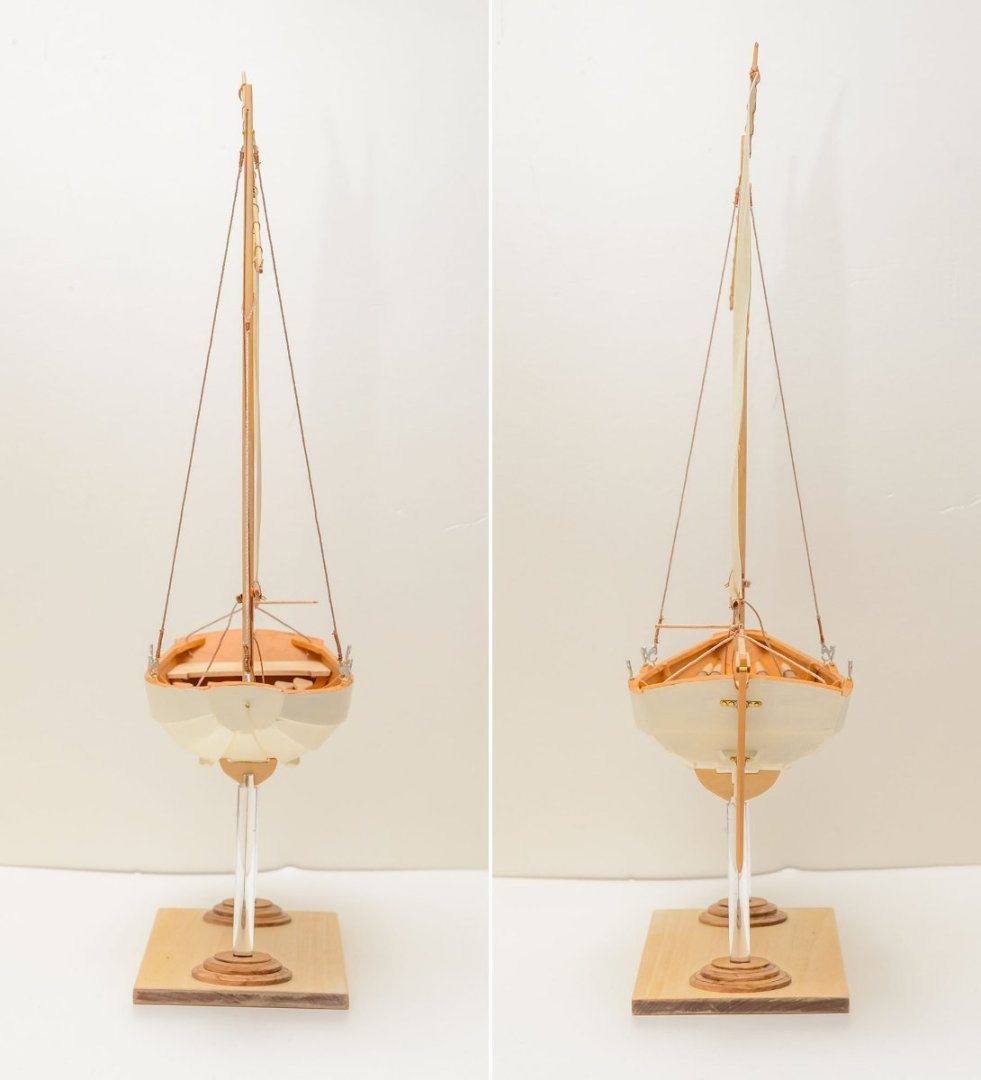
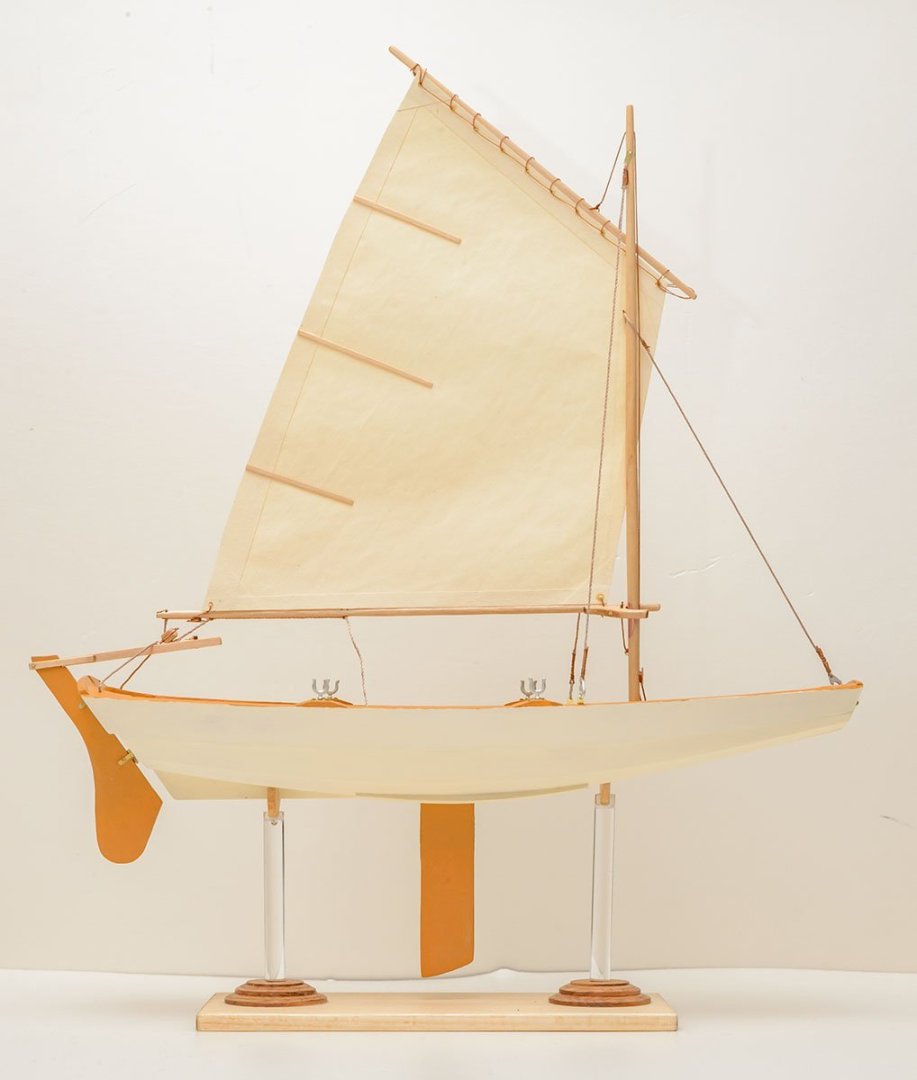
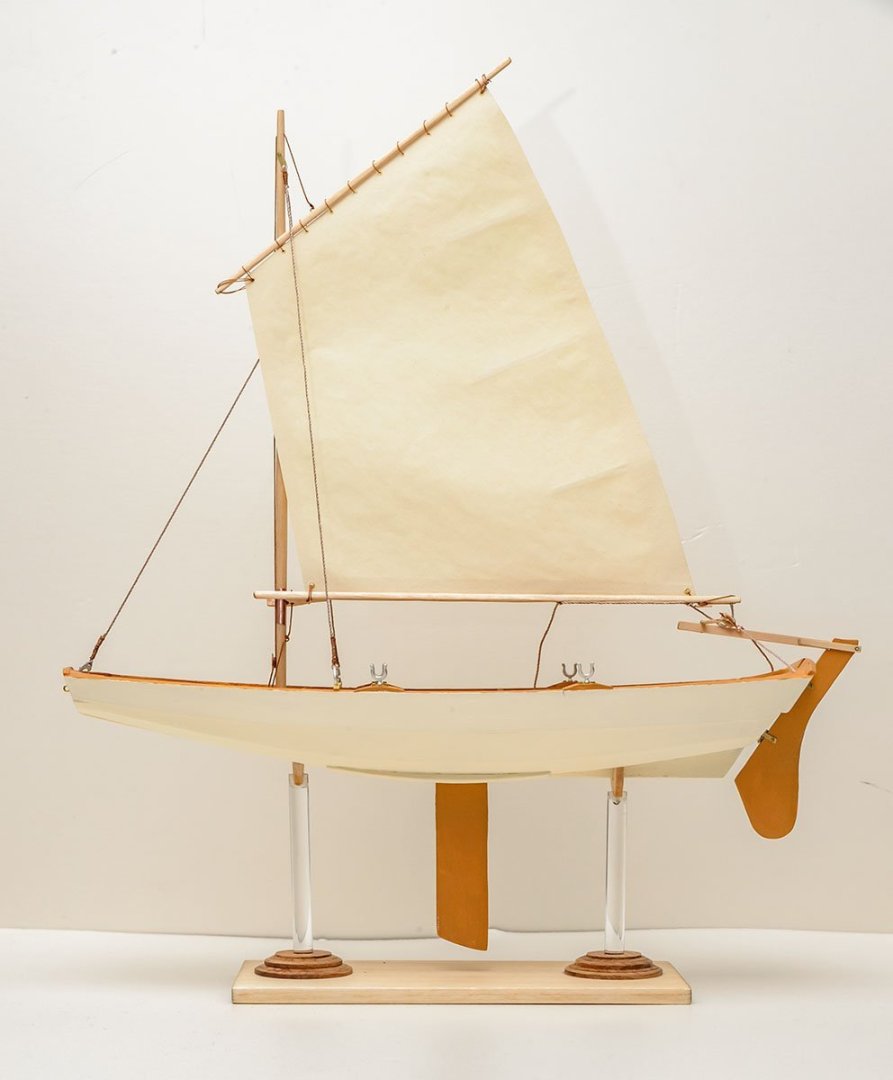
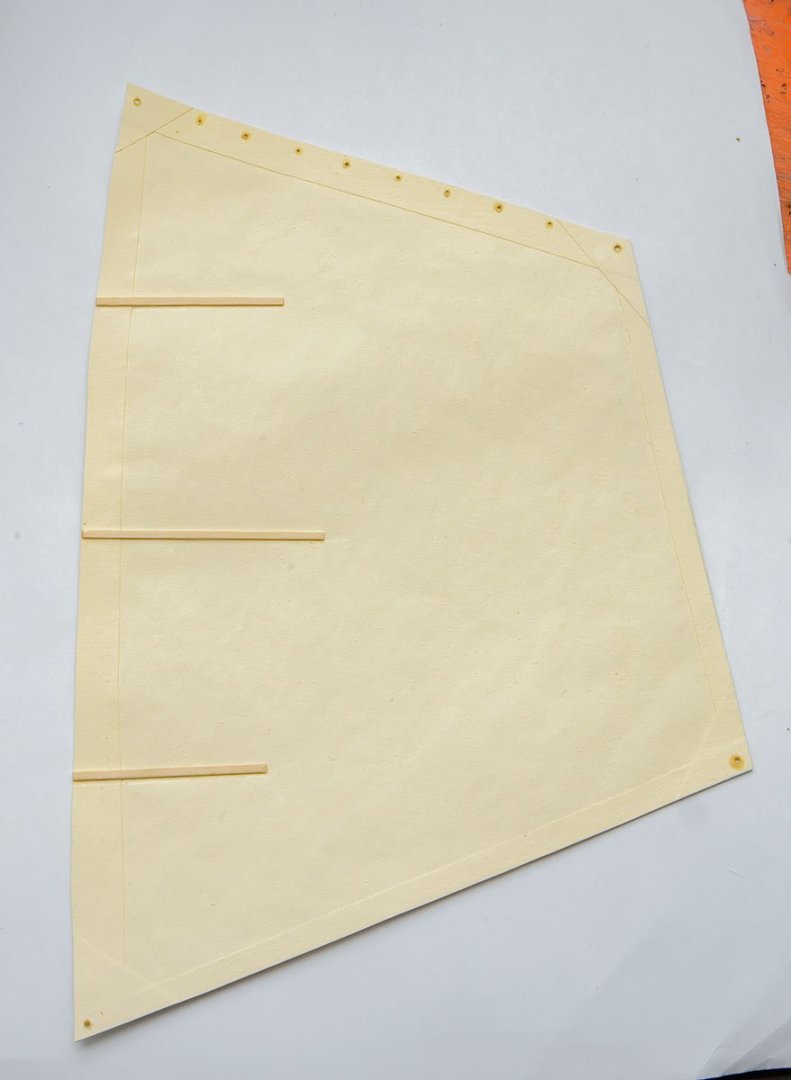
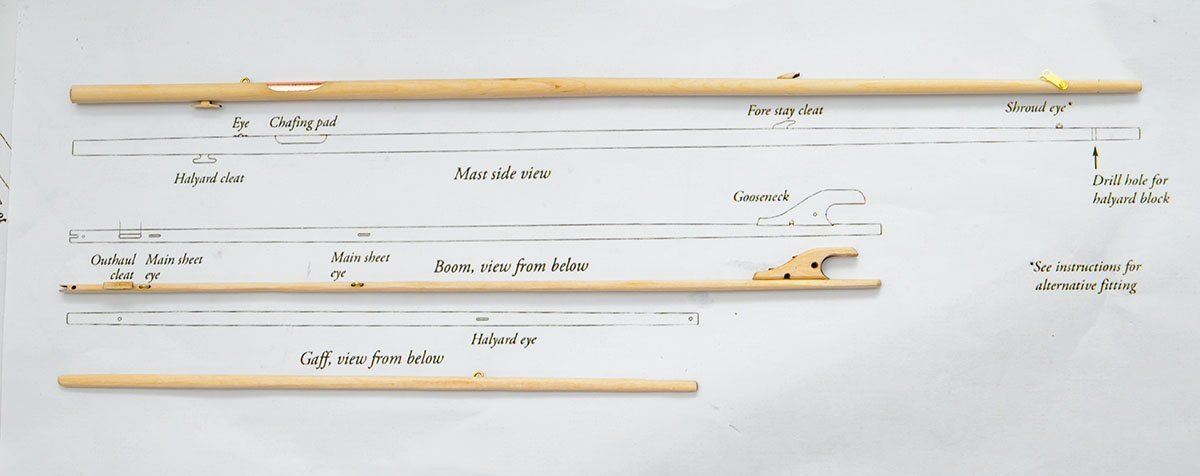
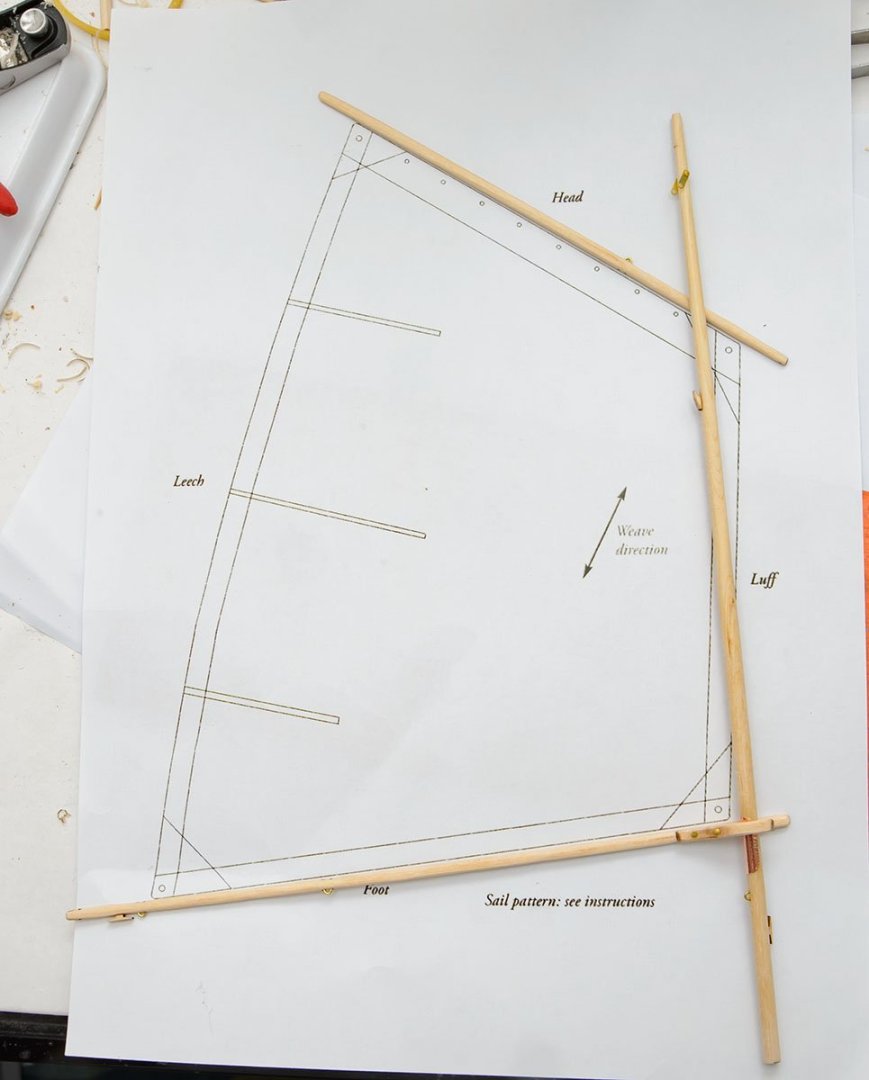
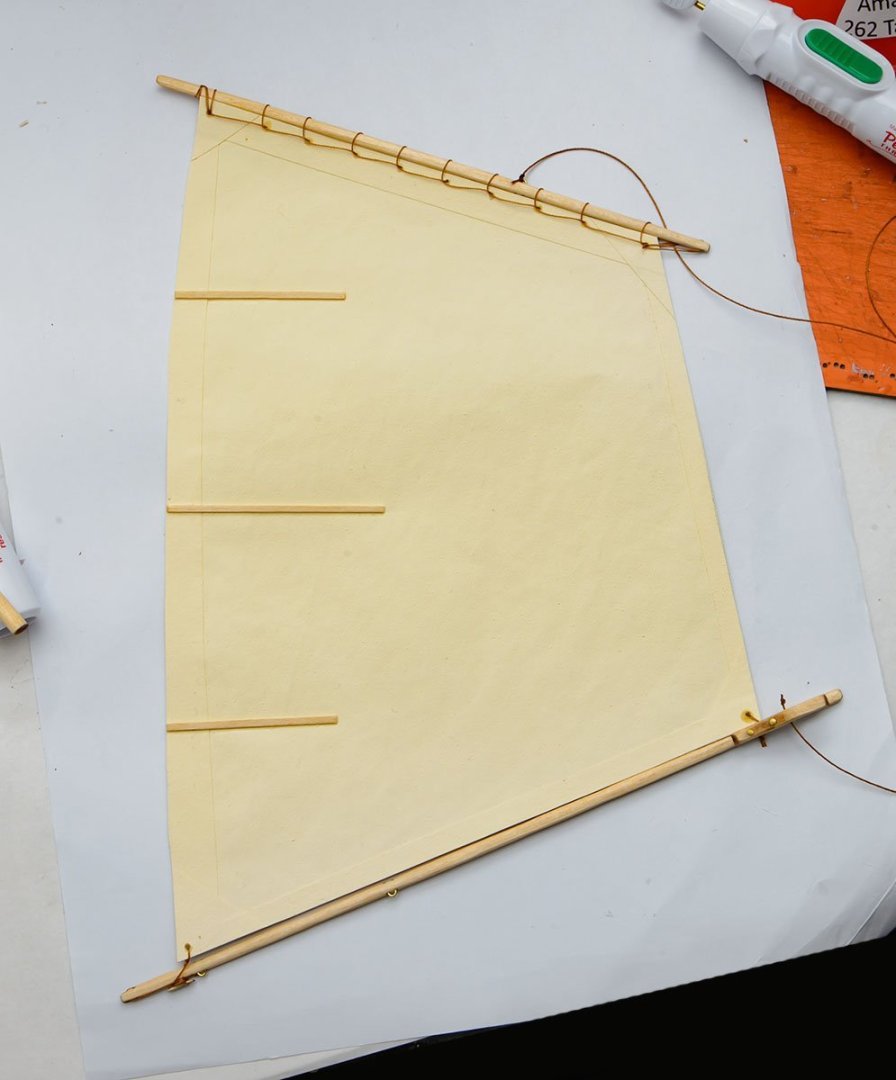
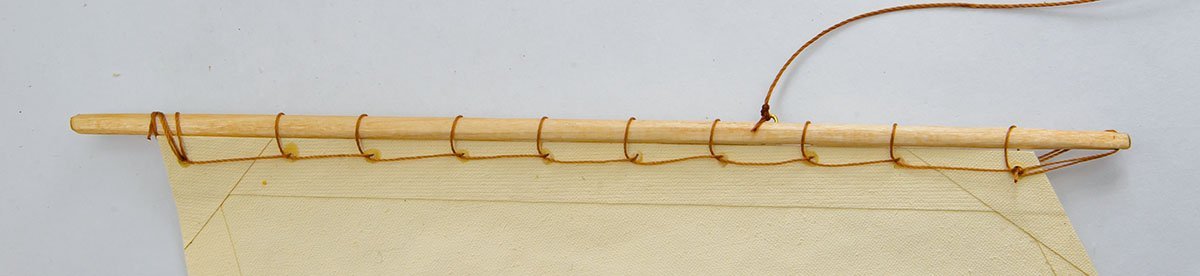
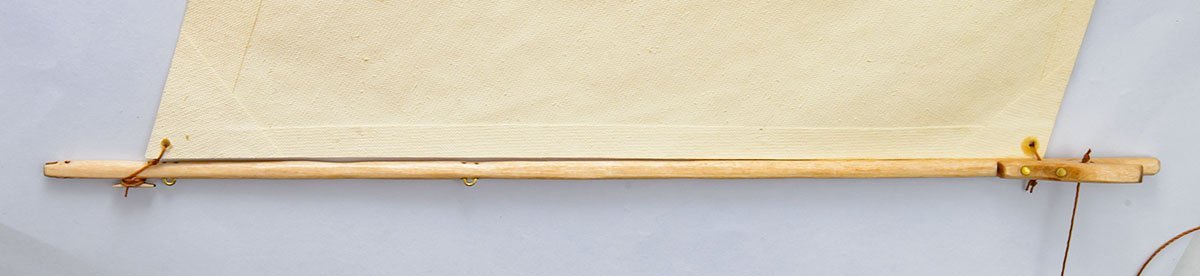
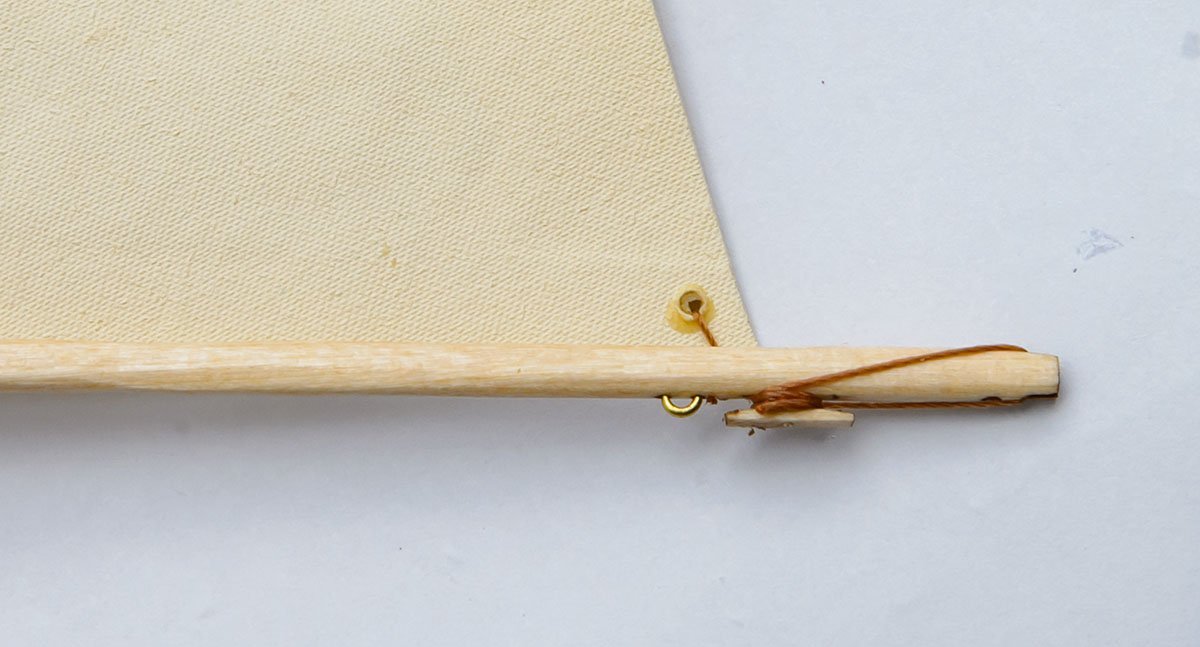
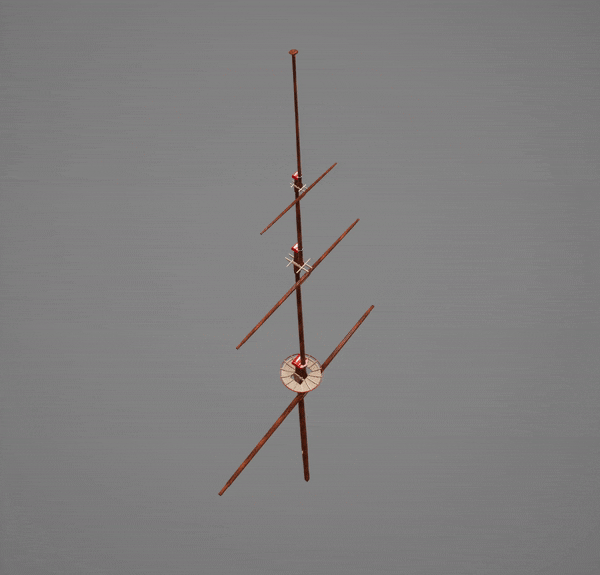
Oops, I didn't update this log. I'm sorry I left it for a long time. Both the AL's manual and metal caps are wrong. It is good to fix them. Alignment 🤔 😆 I used clove hitch knot. The sail is half size because I'm making a furled version. ★ Don't furl the sail before rigging work! It is really exciting work. 😆


- 4 replies
-
- 2
-

-
- San Francisco
- Artesania Latina
- (and 2 more)
-
Thank you Roger, I'll practice and learn the stick method again. I used CA glue because it dries fast and protects cords from mashing. I can use acrylic medium or PVA glue which are slow. It is a reason I'm coming back to stick. It is good to hear that someone has already considered the same issue; how to read thread thickness on plans. The underscale rigging may imply how he ovecame the issue.
-
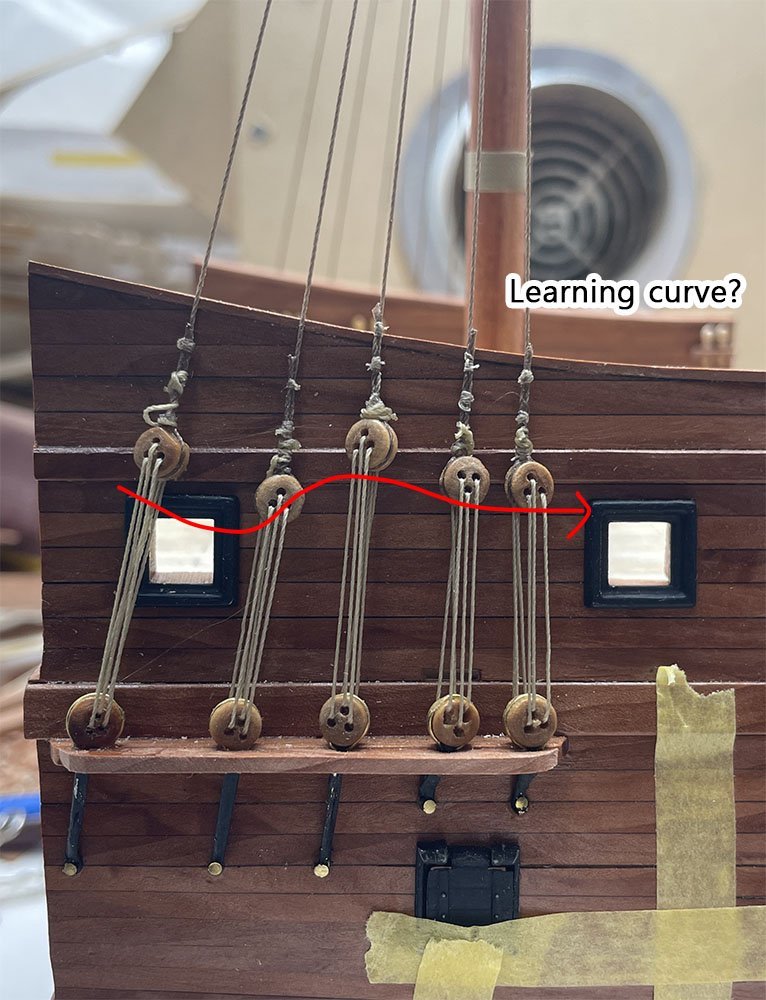
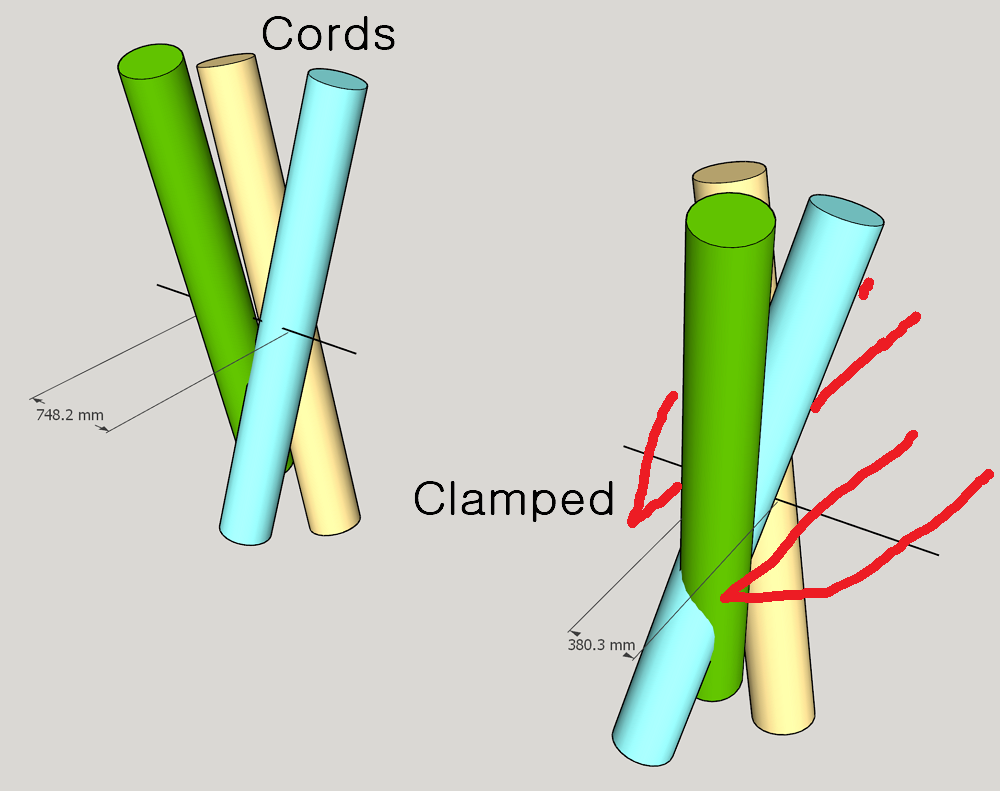
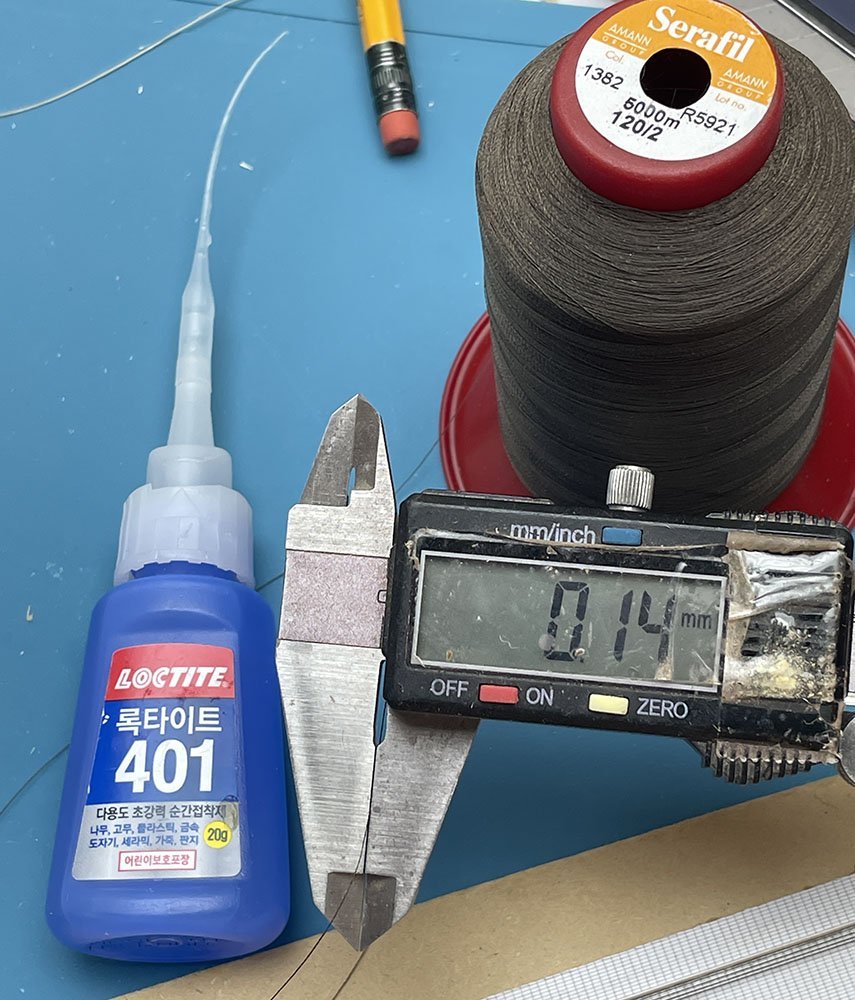
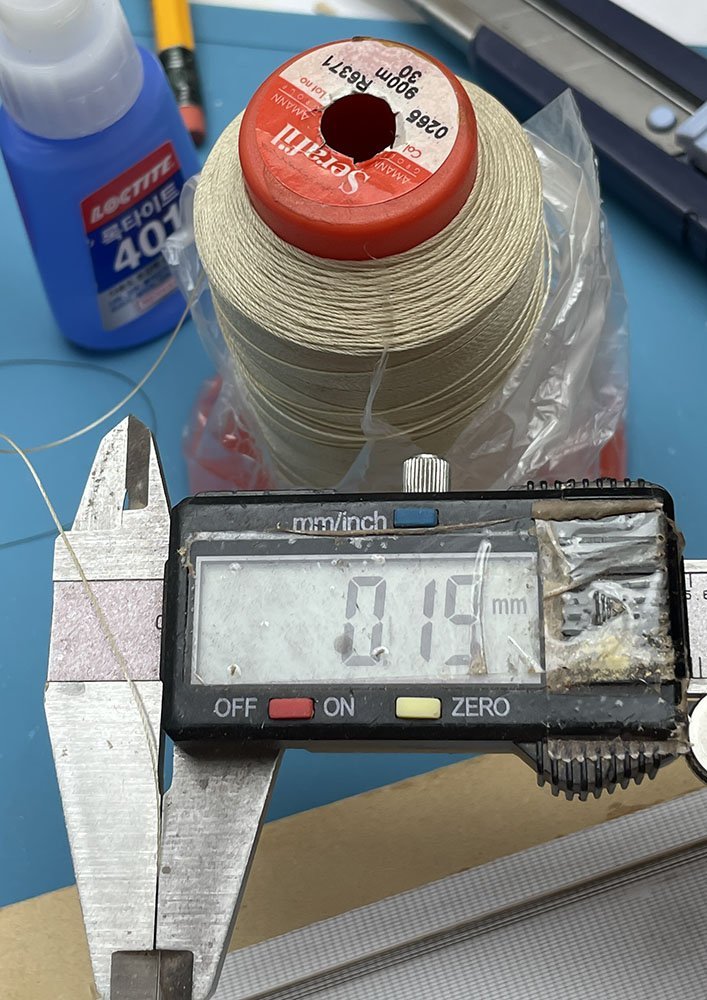
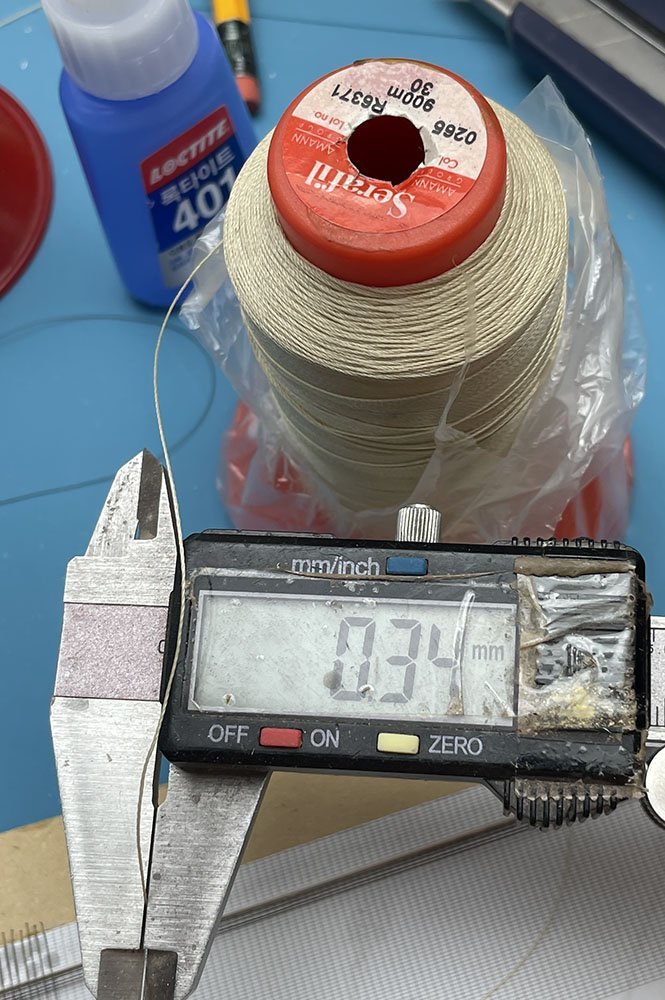
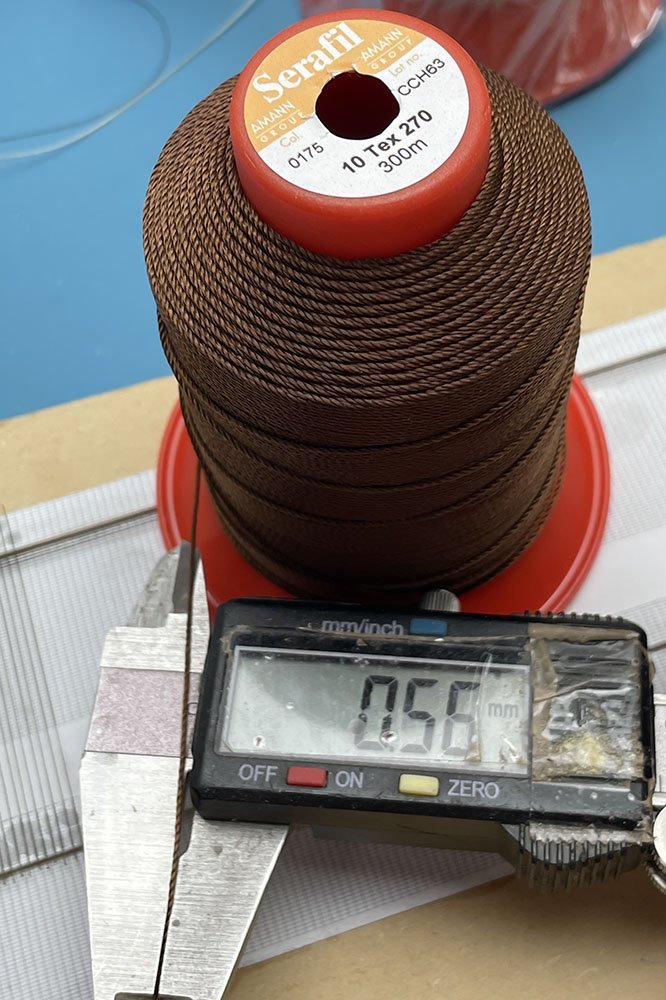
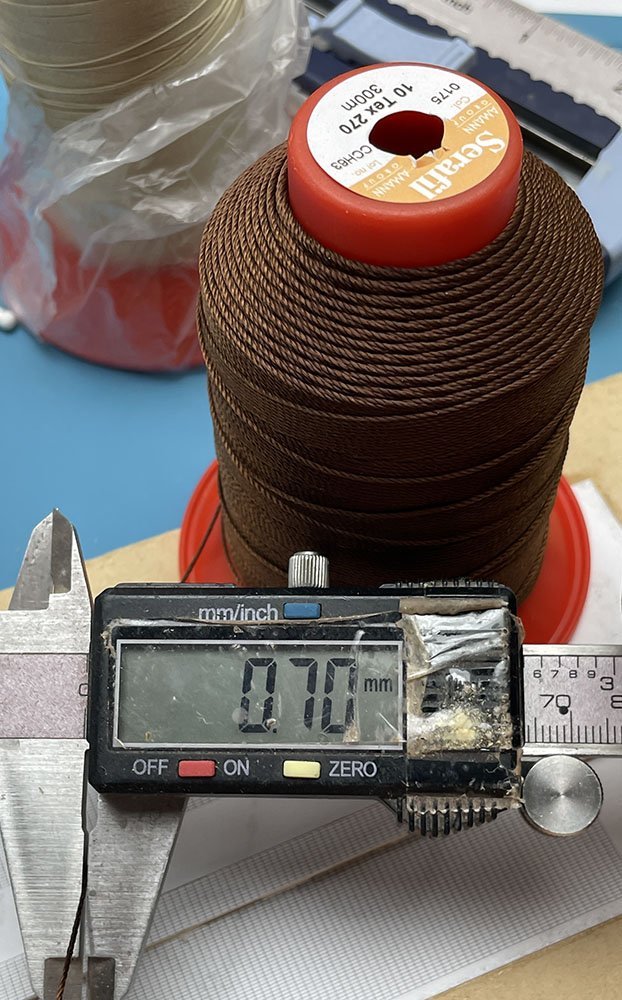
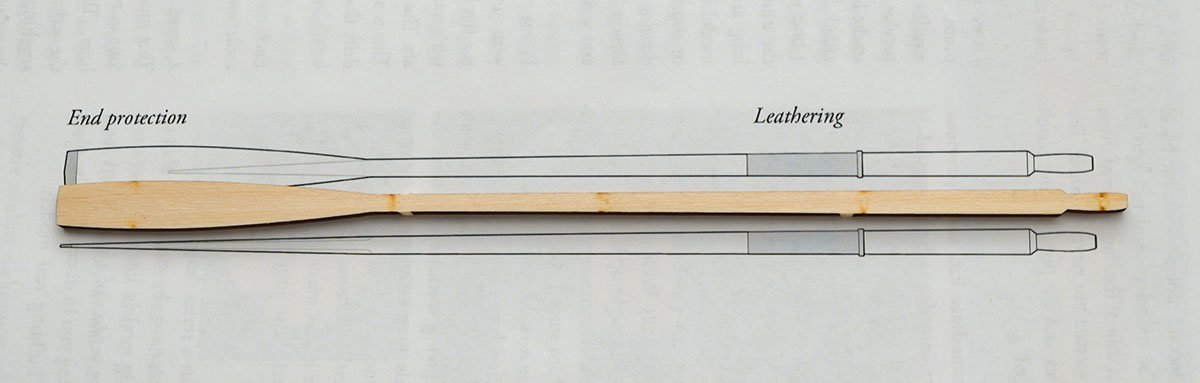
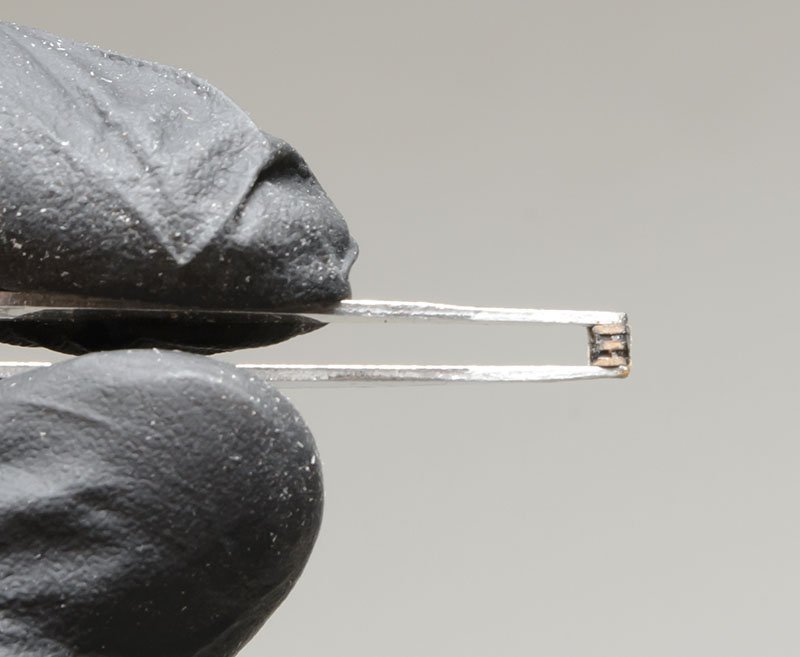
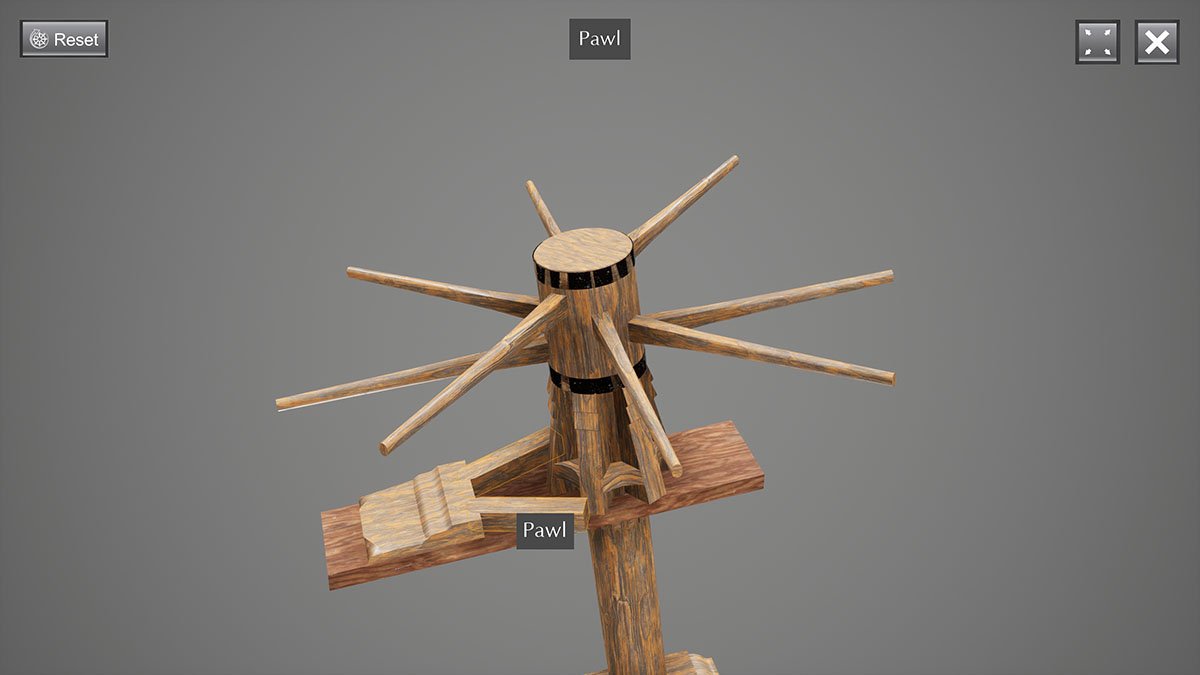
@Cathead It is not only dry, but also clamped. The 0.25mm is the thickness of cords rather than the entire thread. The difference between thread and cord is critical because our eyes recognize the thickness of thread as the volume of ropes in a model. In my opinion, there is a mismatch between the standards of the traditional weaving industry and an actual usage of threads in the model hobby. It is easier to buy "0.25mm threads" than "0.50mm visible thickness threads." BUT, If I see rigging plans from Ancre, I'm afraid of which thickness threads I should use. @Roger Pellett The traditional method is rational, but the CA glue with the digital vernier calipers is a lot faster and more accurate than it, in my opinion. I had minor difficulties with the inch-long rod because cords were compressed when I tied threads too tight. In my conclusion, this is the best method for choosing appropriate threads based on real ships. (1) Calculating "visible thickness" from the original ropes - 4 inch thick rope → 1/12 inch threads (1/48 scale) (2) Finding the same "visible thickness" threads after applying CA glue, PVA glue, Acrylic medium, or shellac.
-
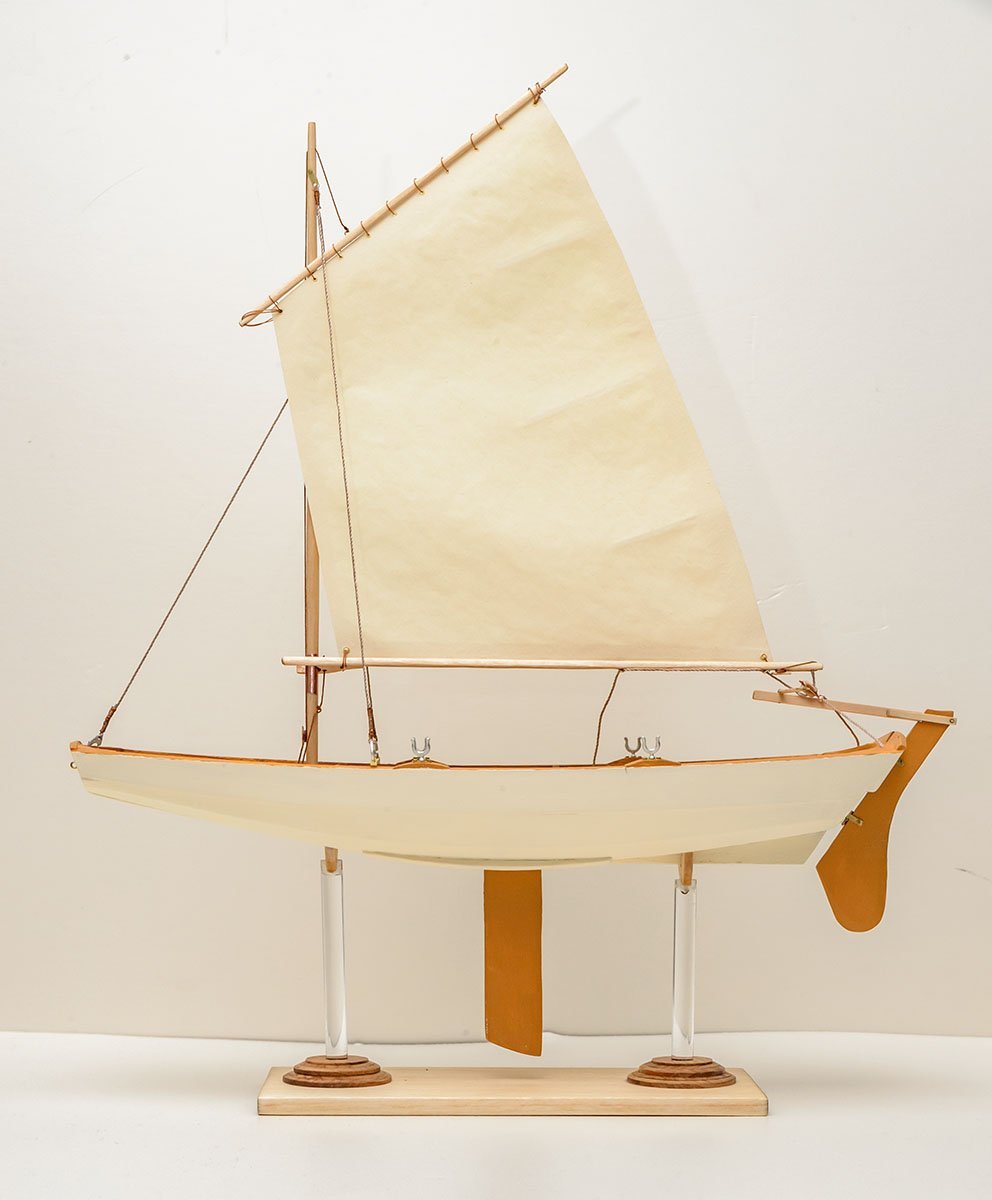
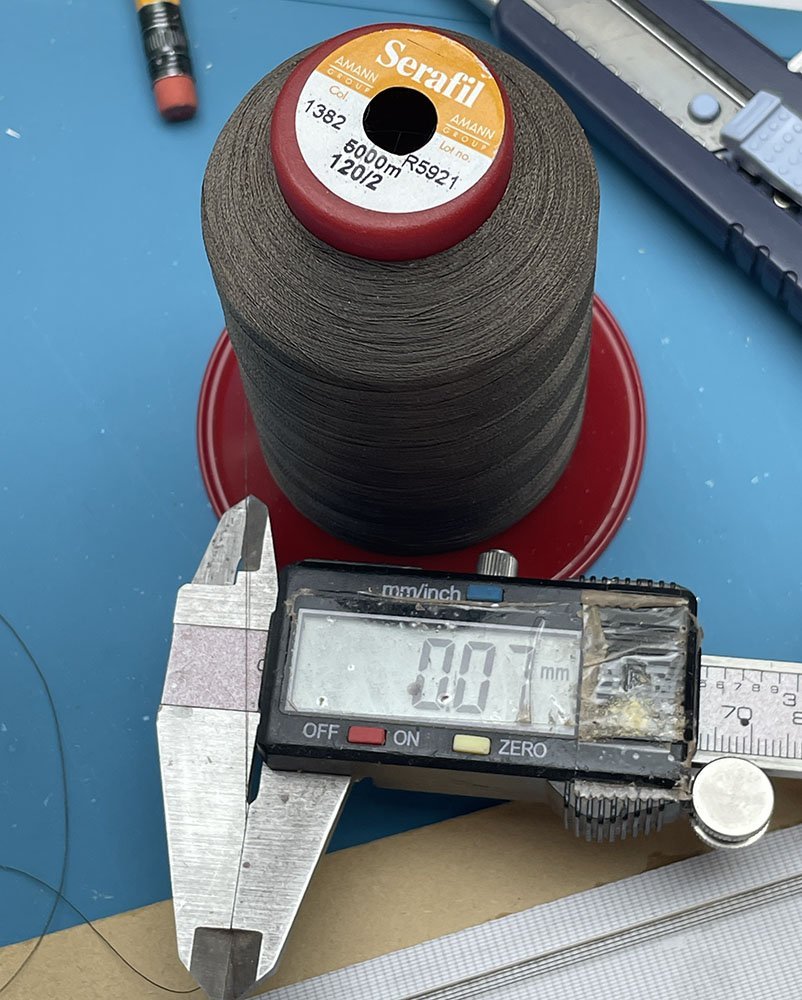
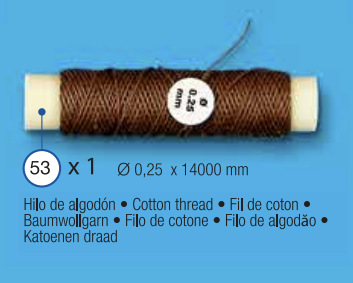
I have a question about the thickness of threads in a kit. I used CA glue to harden the thread. I would say that this method shows the exact thickness of threads when I see them. Amann Serafil 120 Without CA glue - 0.07mm Amann Serafil 120 With CA glue - 0.14mm (+100%) Amann Serafil 30 Before - 0.20mm, After - 0.35mm (+75%) Amann Serafil 10 Before - 0.55mm, After - 0.70mm (+27%) As you can see, this method is easier and faster than other measuring methods. During further experiments, I had a question about the appropriate thickness of threads in a kit. According to AL's kit instructions, the supplied threads have a thickness of 0.25mm. When I measured it with digital vernier calipers, it was 0.25mm. After I applied CA glue, it increased to 0.50mm. How do you think about the difference? Unfortunately, this ship (San Francisco) wasn't real, so I have no reference for actual rope. Should kit companies fix their measuring method?
-
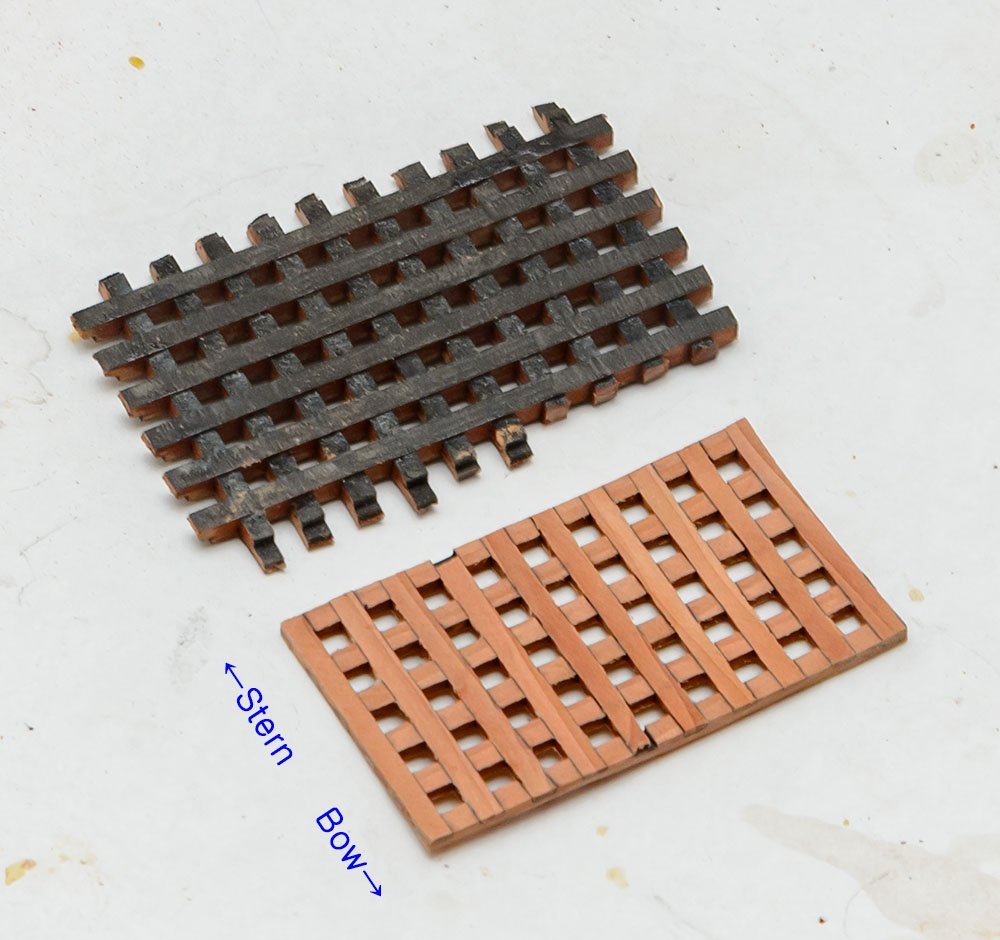
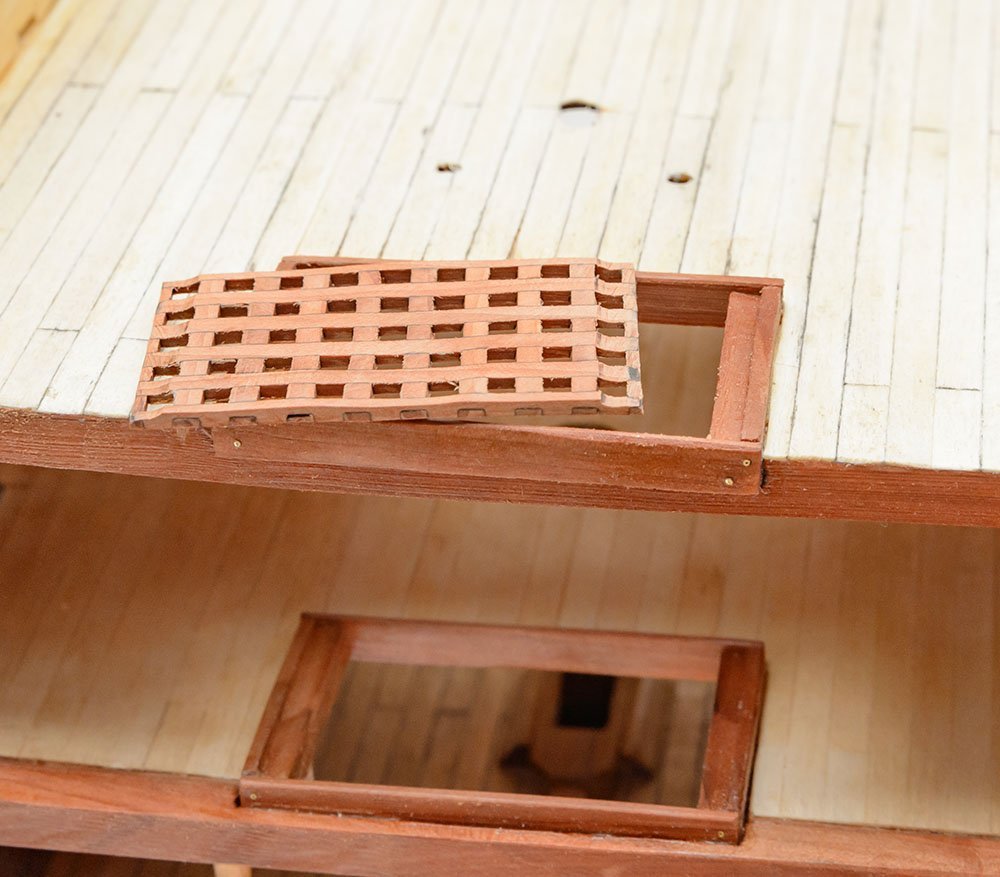
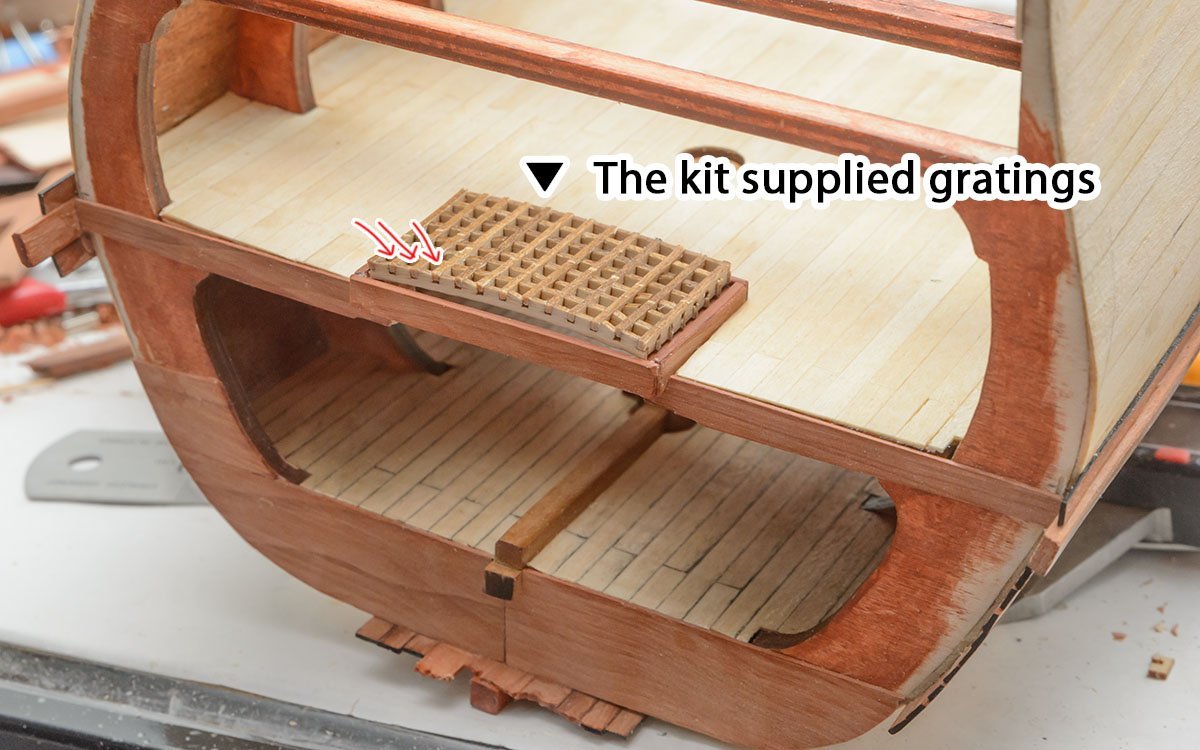
Thanks to many members' help, I updated my gratings. I'll do better next time...
-
Thanks, wefalck. It is very interesting structure. Old sailors invented many things beyond my imagination. https://en.wikipedia.org/wiki/Dom_Fernando_II_e_Glória The white ship may be this.
-
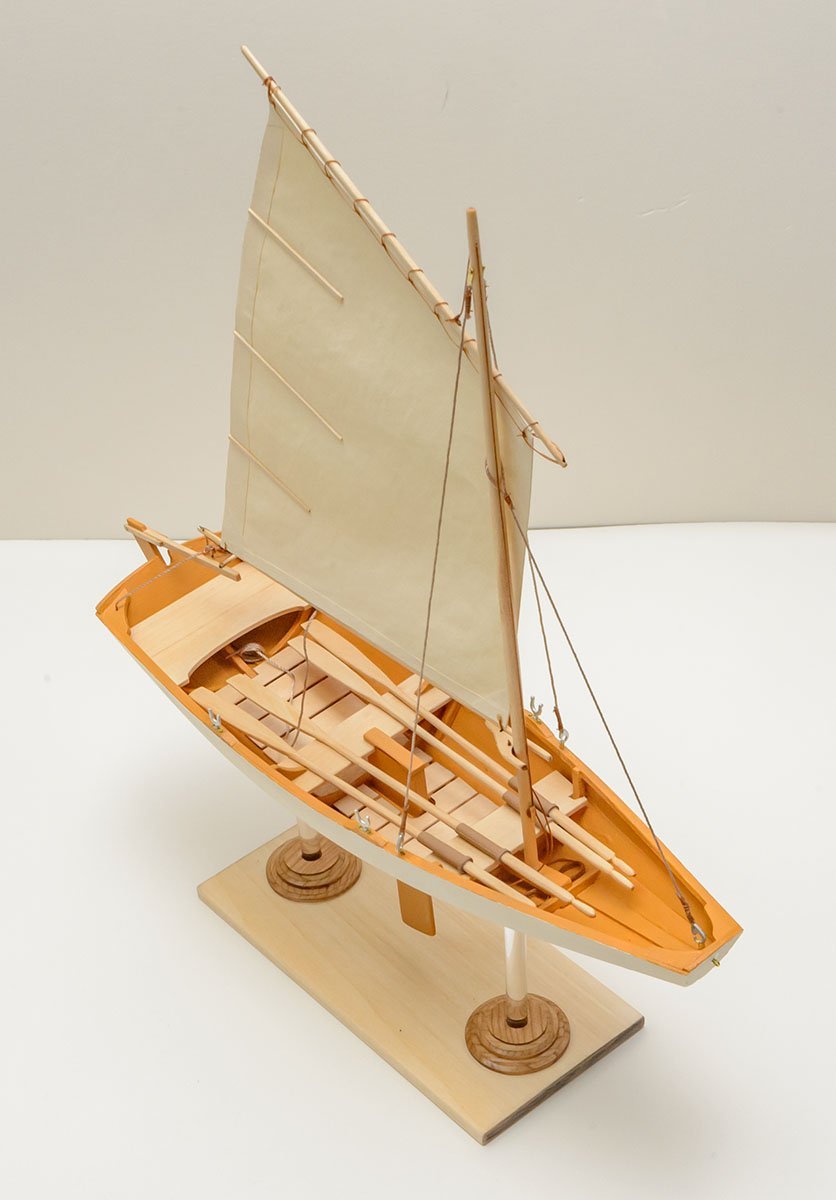
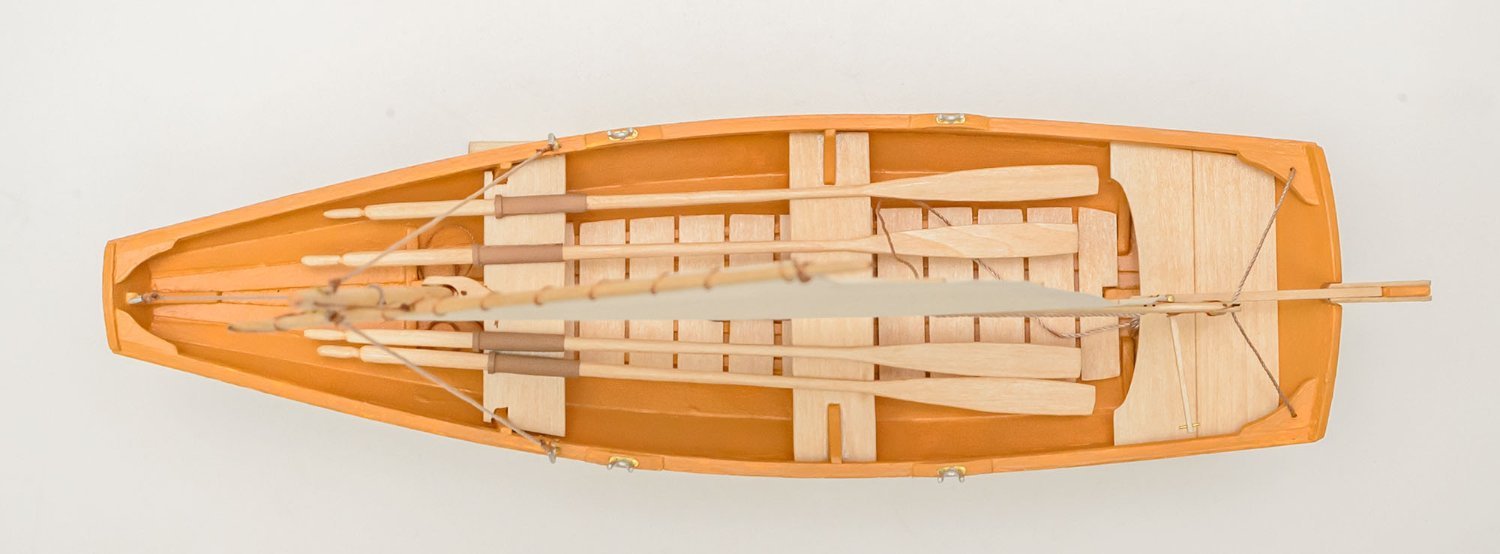
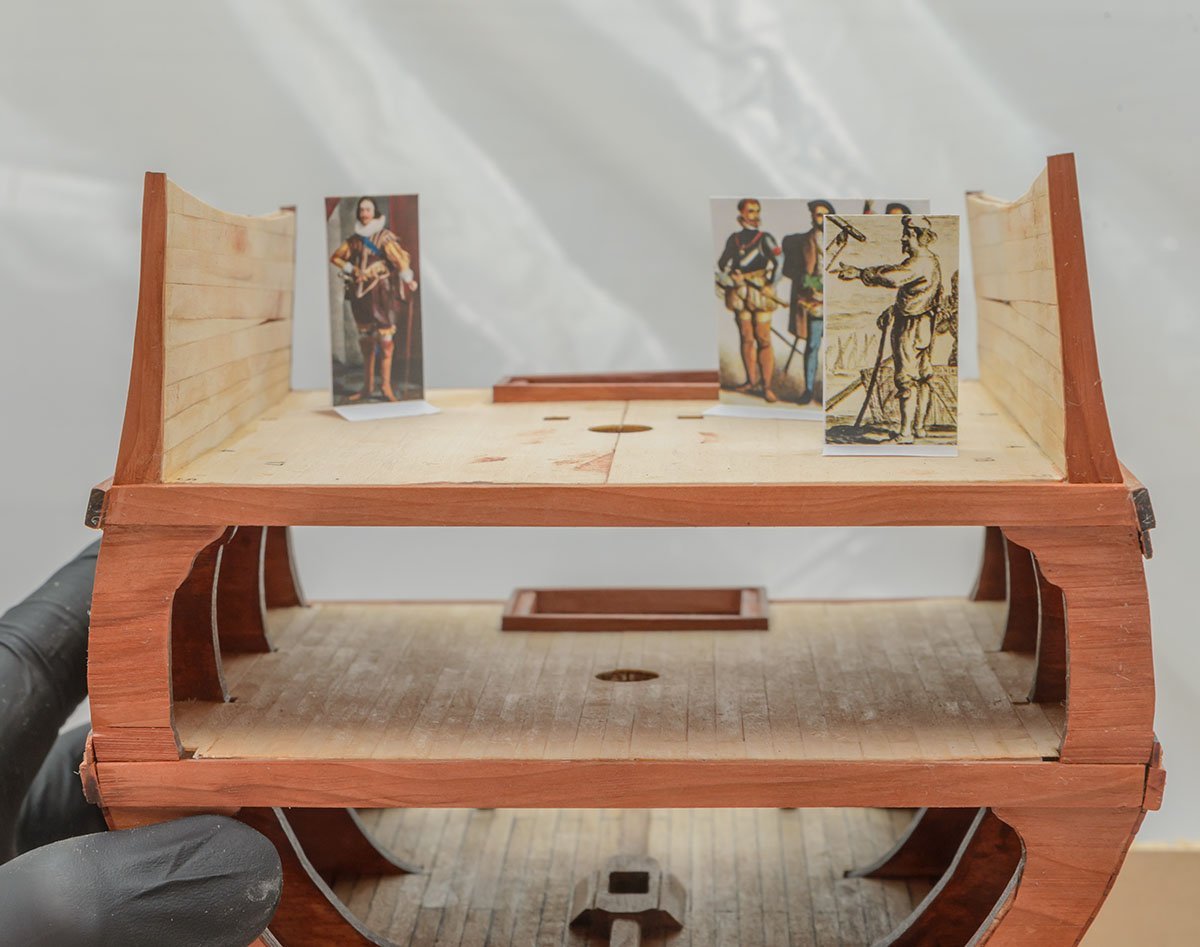
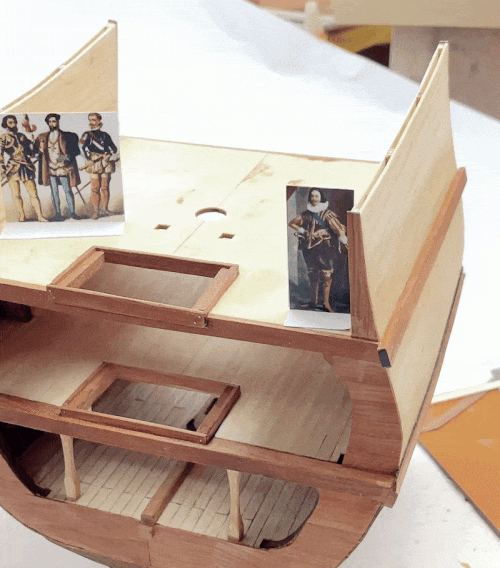
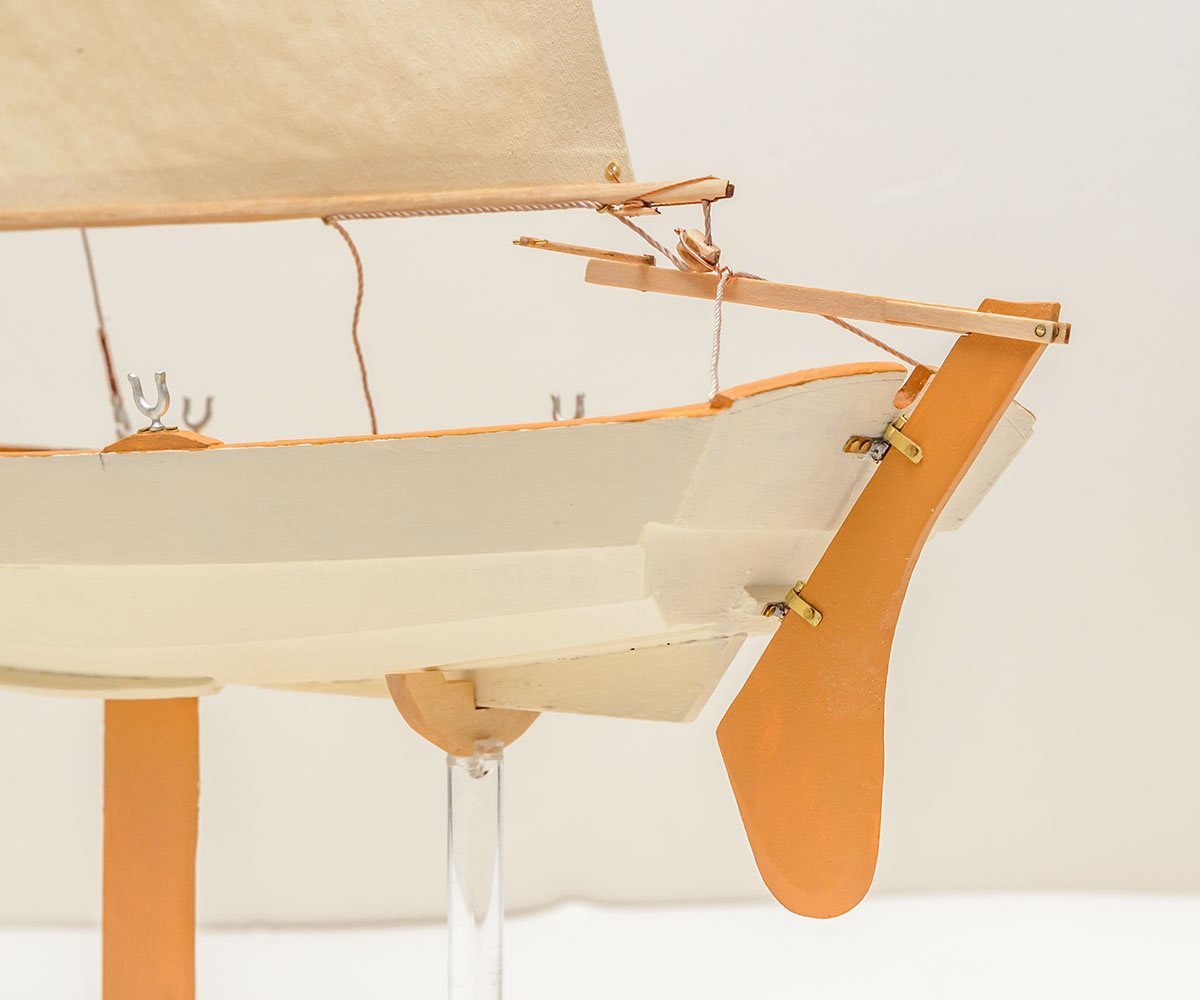
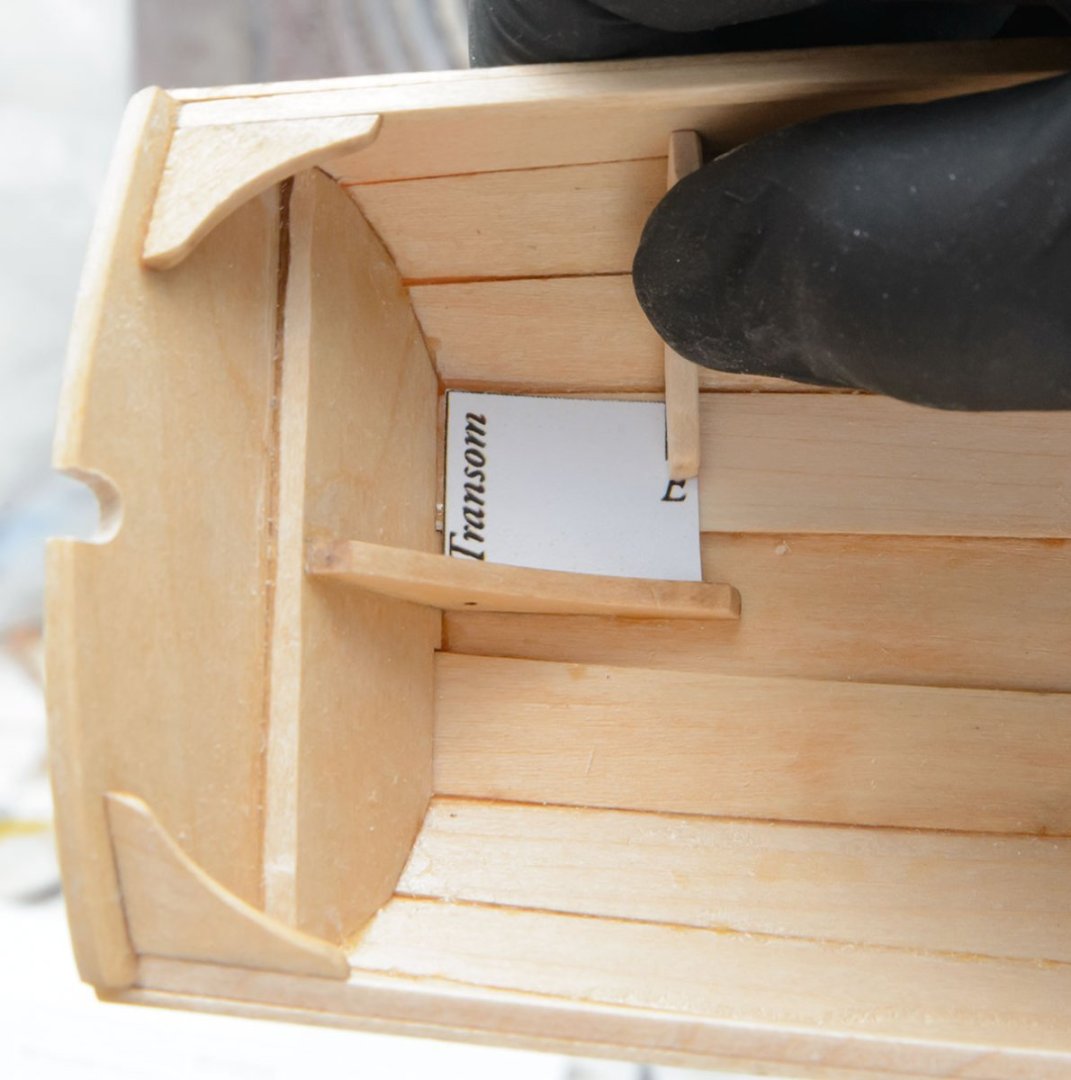
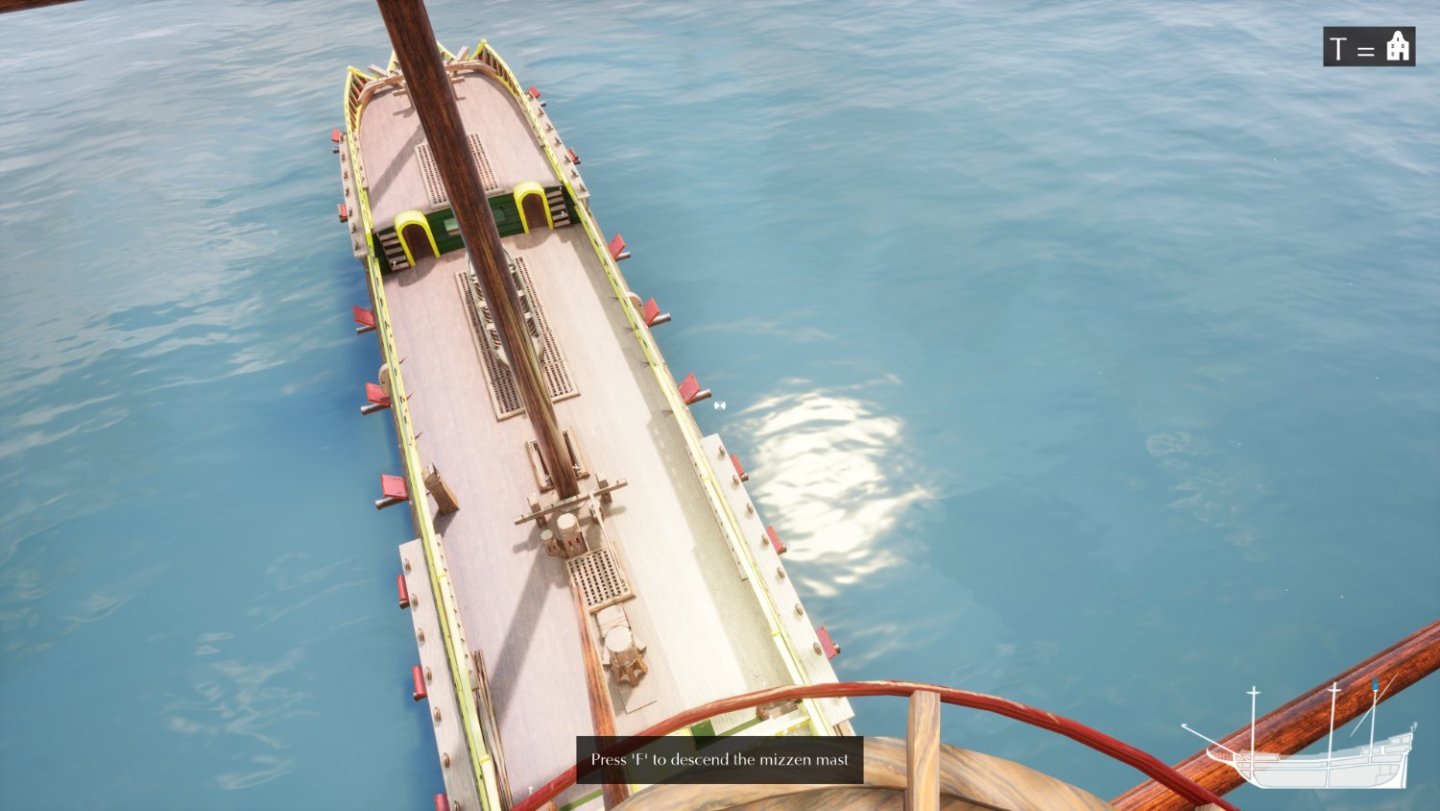
I have a question about the AL San Francisco cross section kit. While I was checking reality with 1/50 paper figures, I found the position of side ladder a bit weird. The wall is too high, and there is no inside ladder. On the contrary, the Swedish Dutch ship Papegojan had an inside ladder. It is suspicious that another gimmick filled the model ship without reality. Did historical ships have this structure? If not, I'll simply remove the side ladder.
-
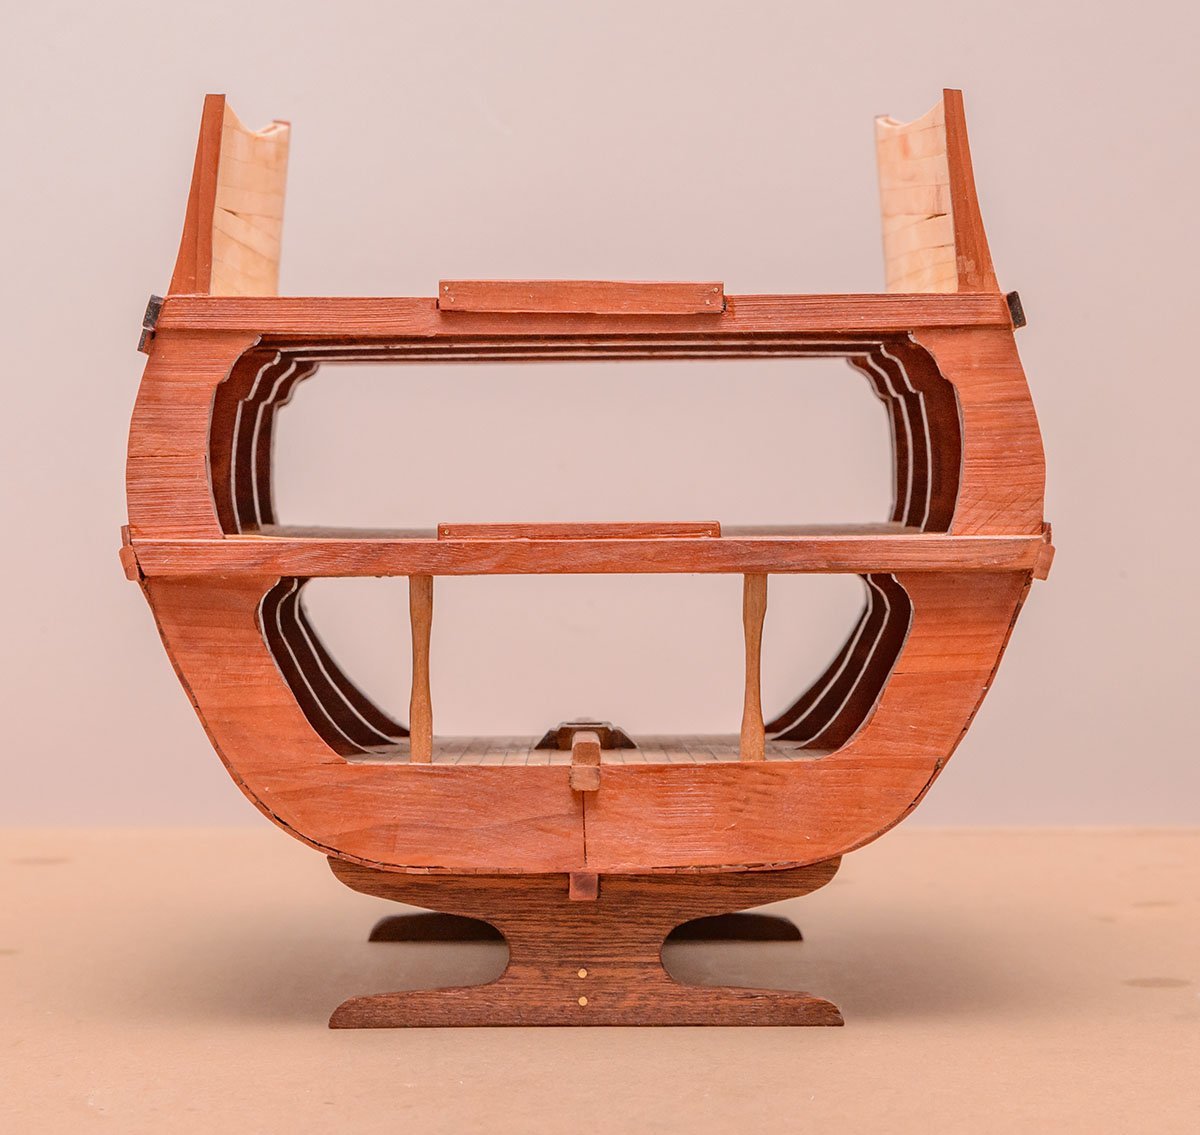
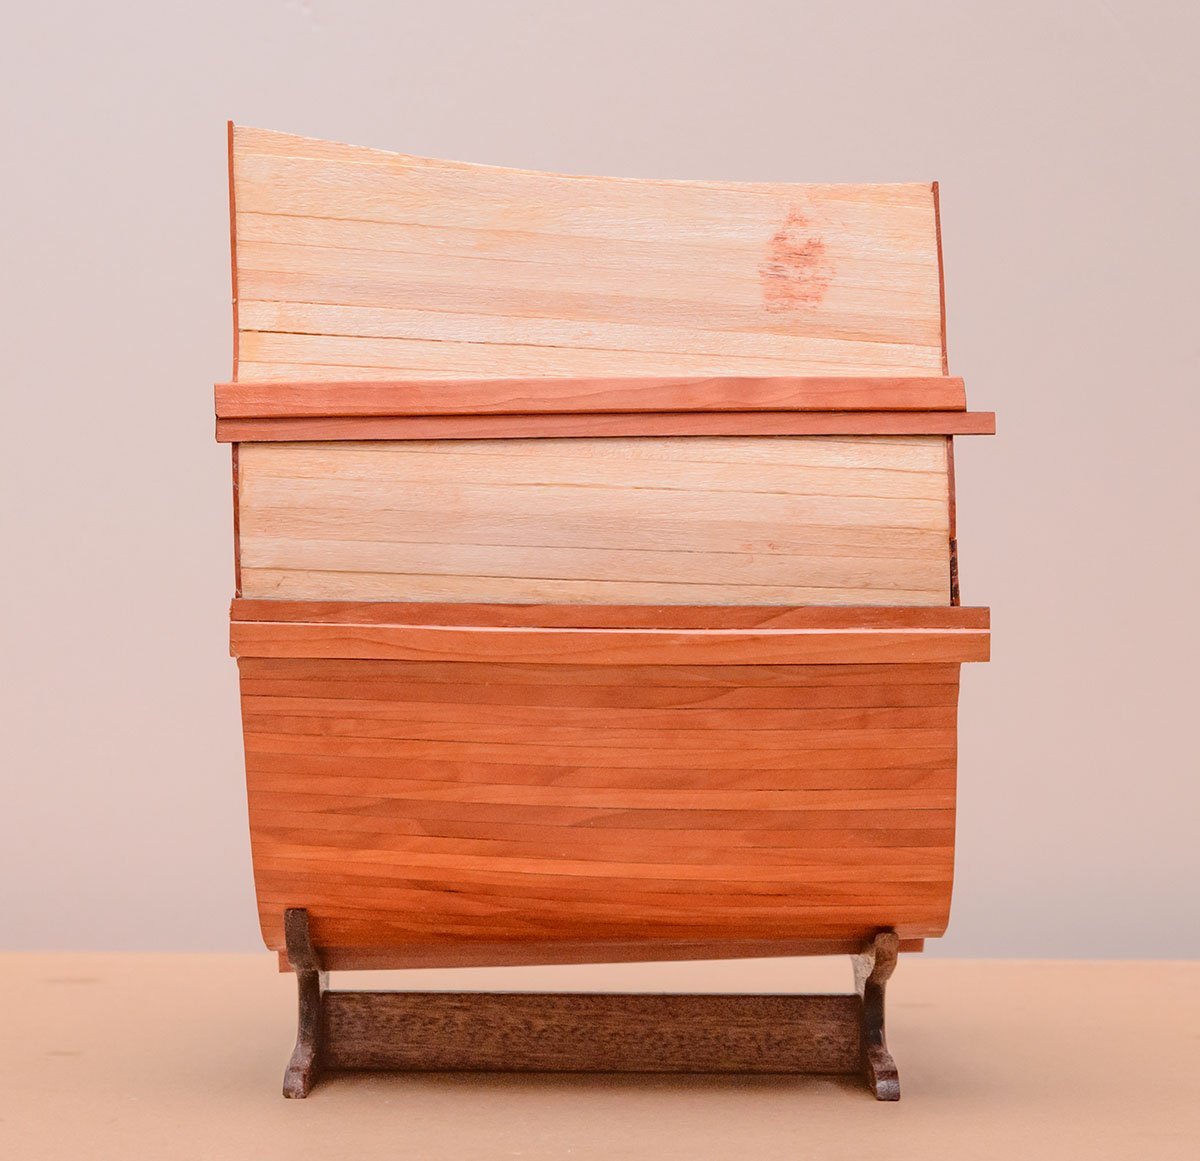
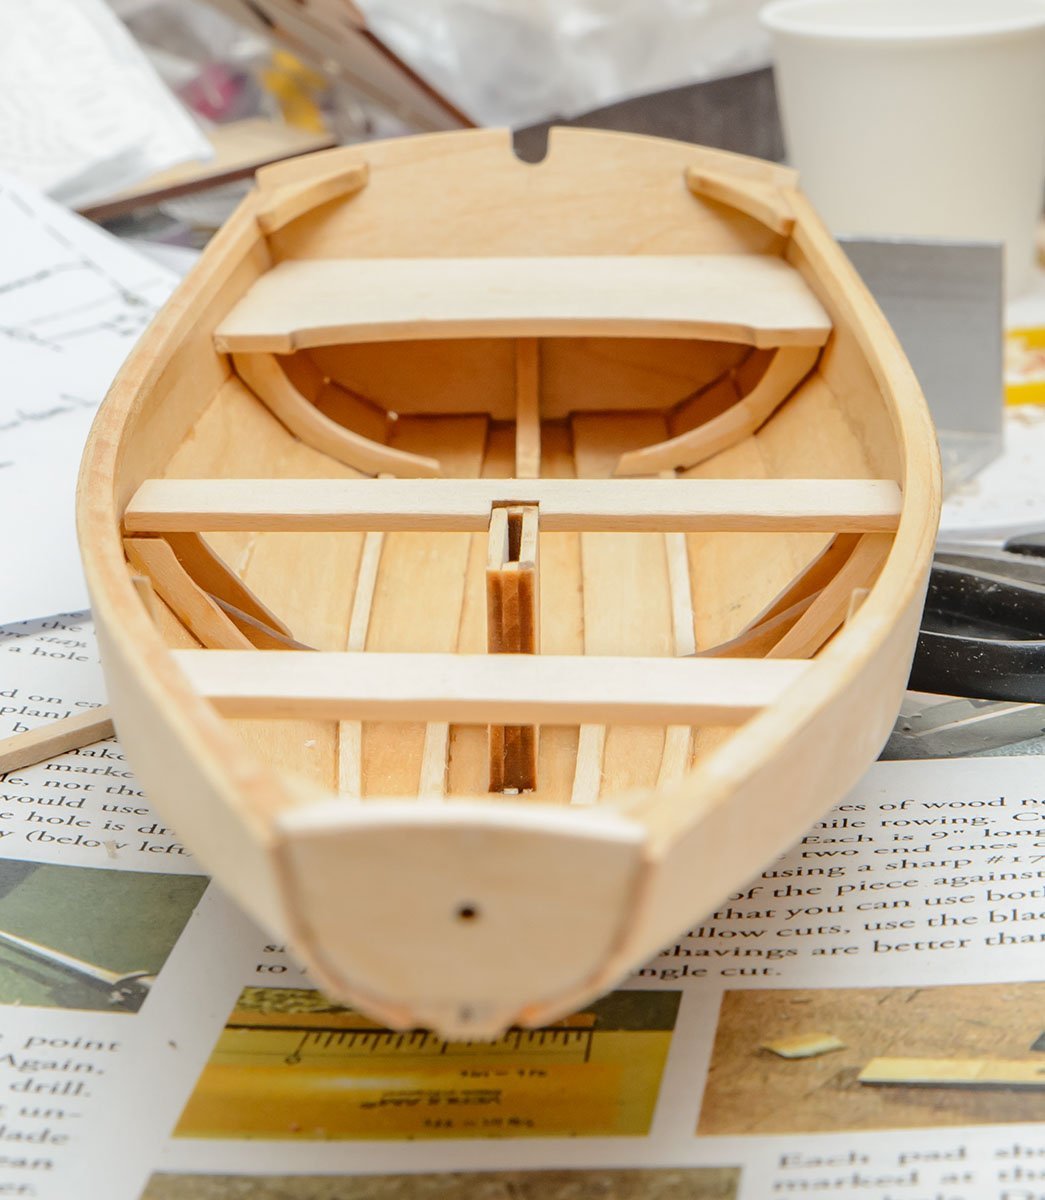
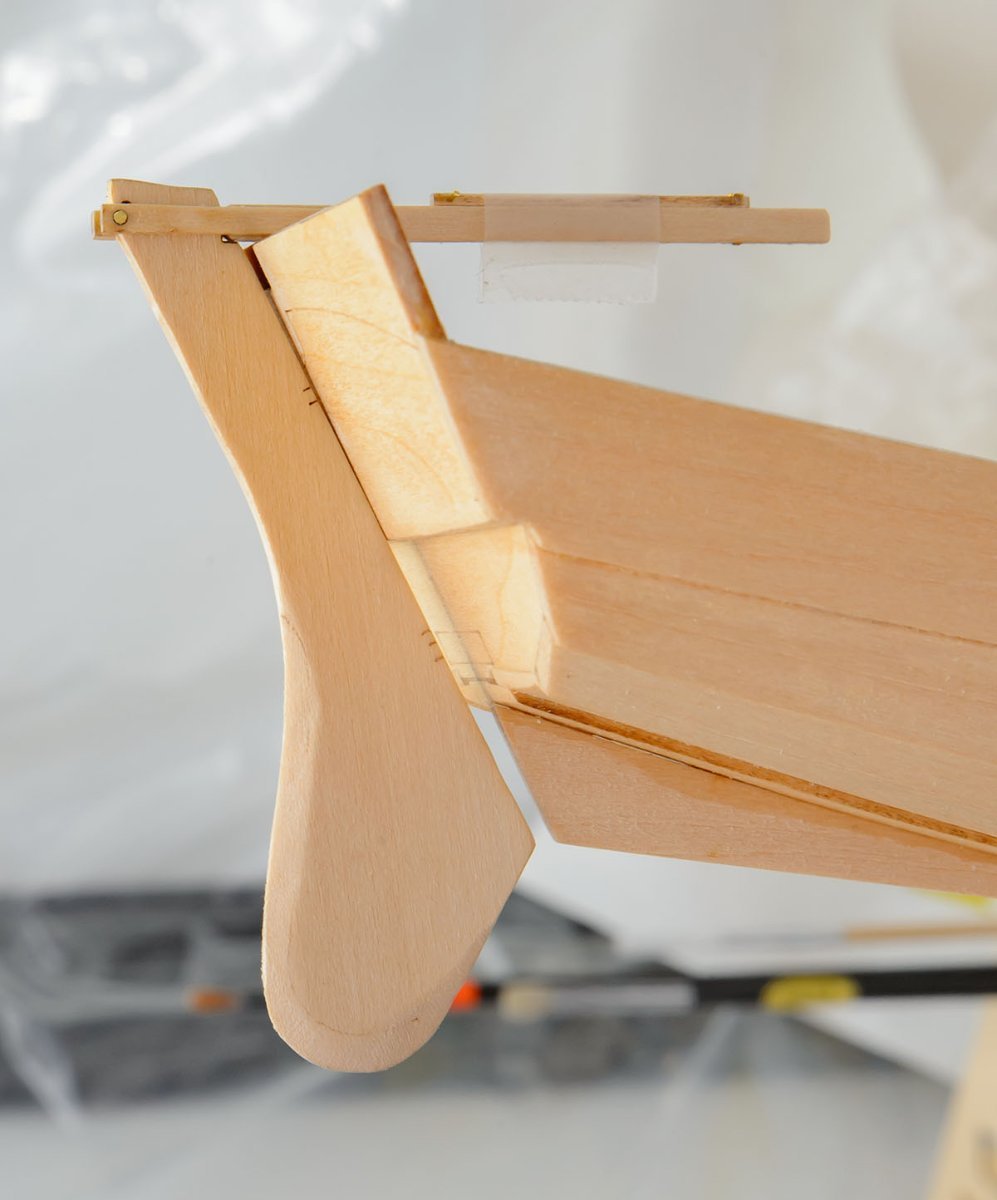
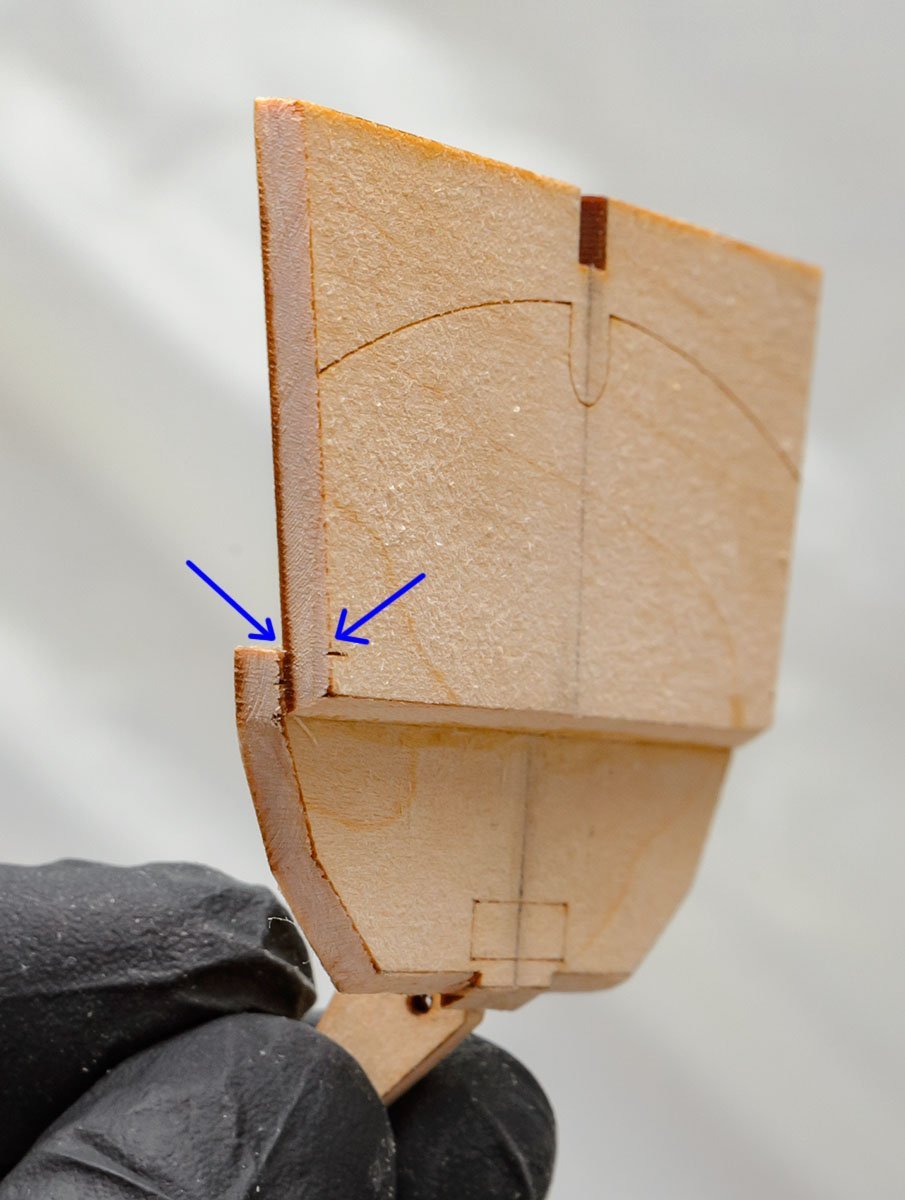
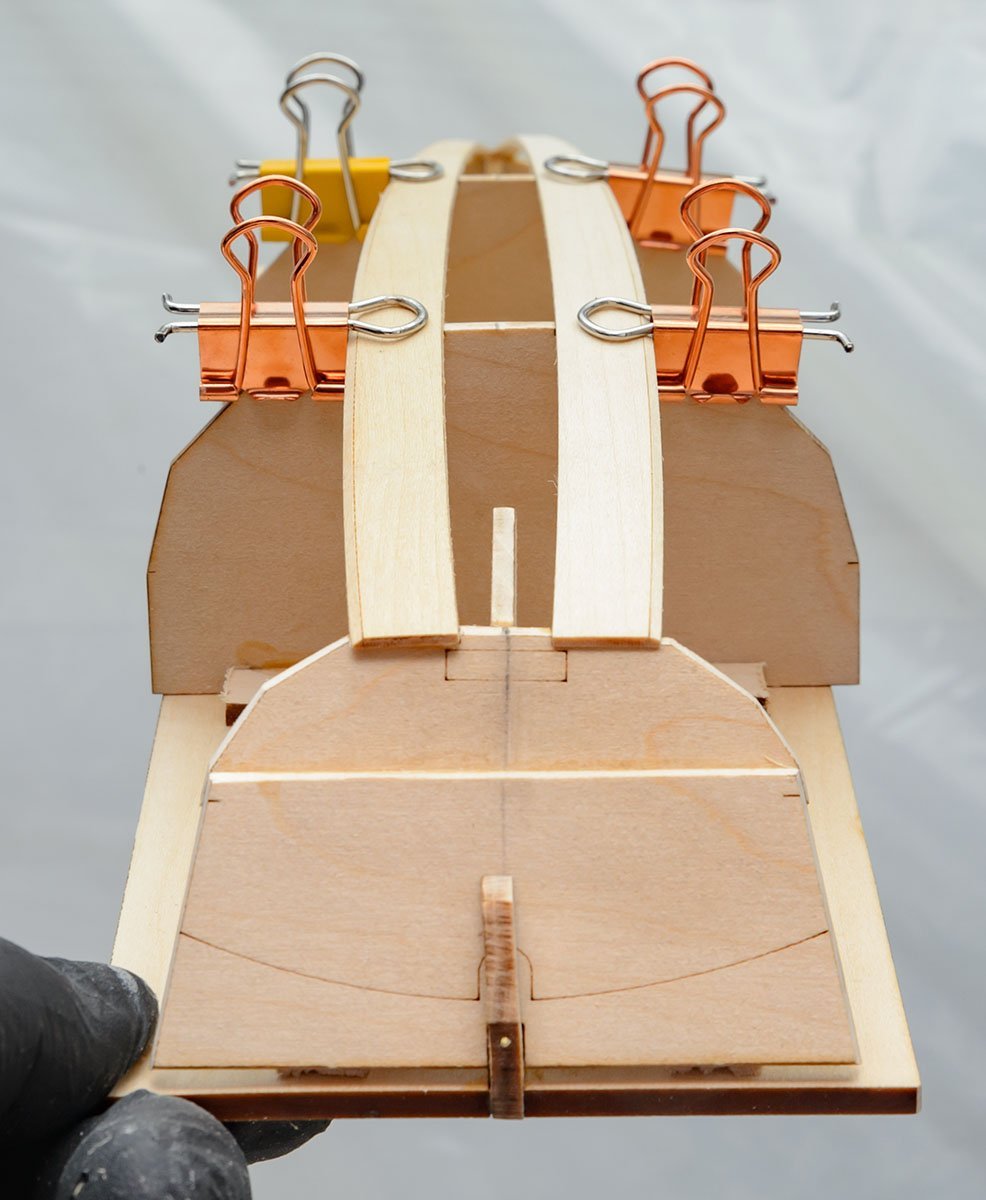
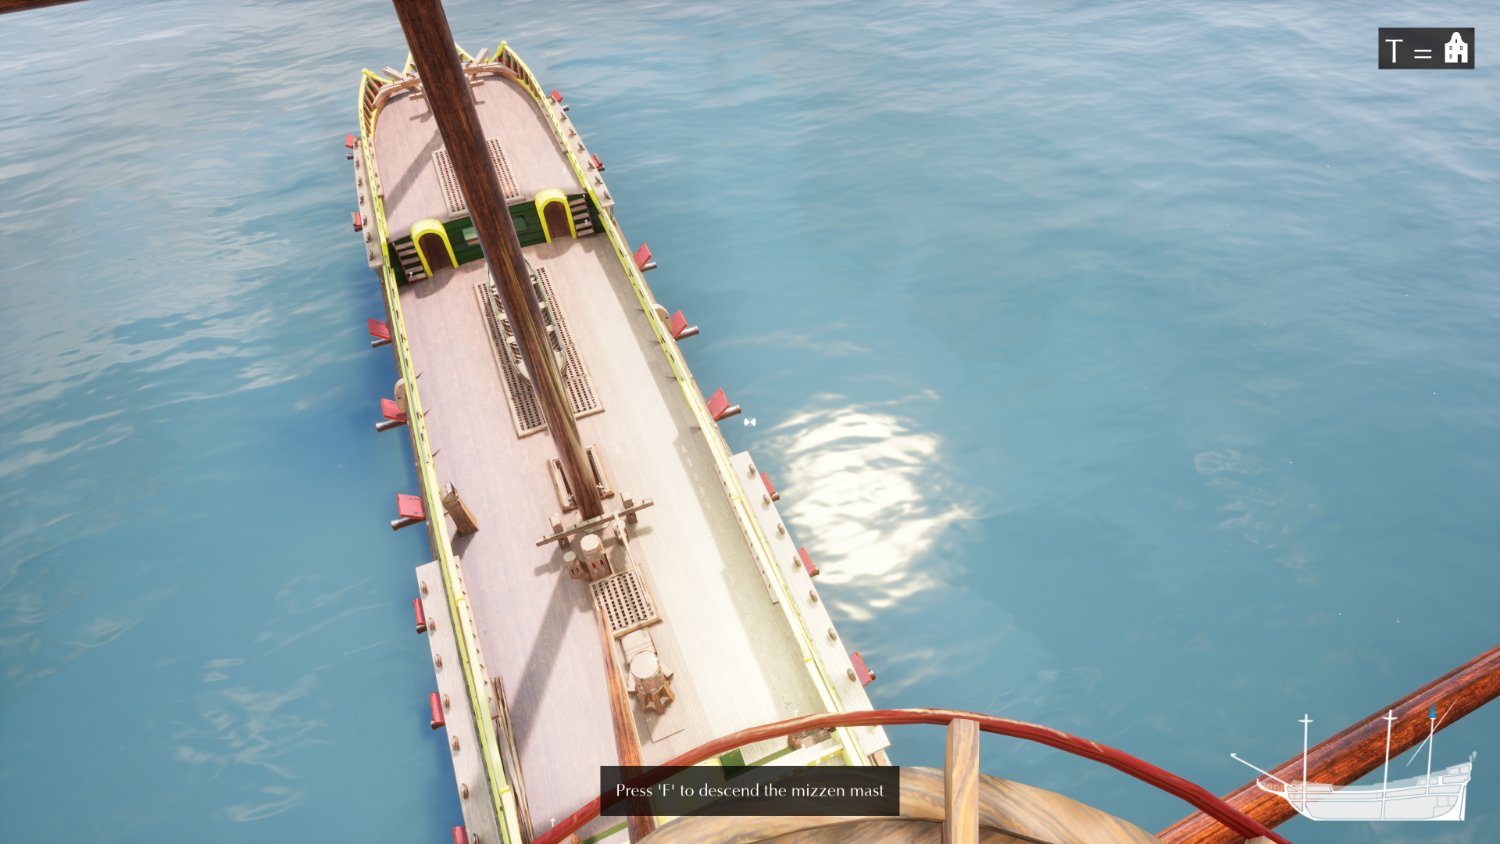
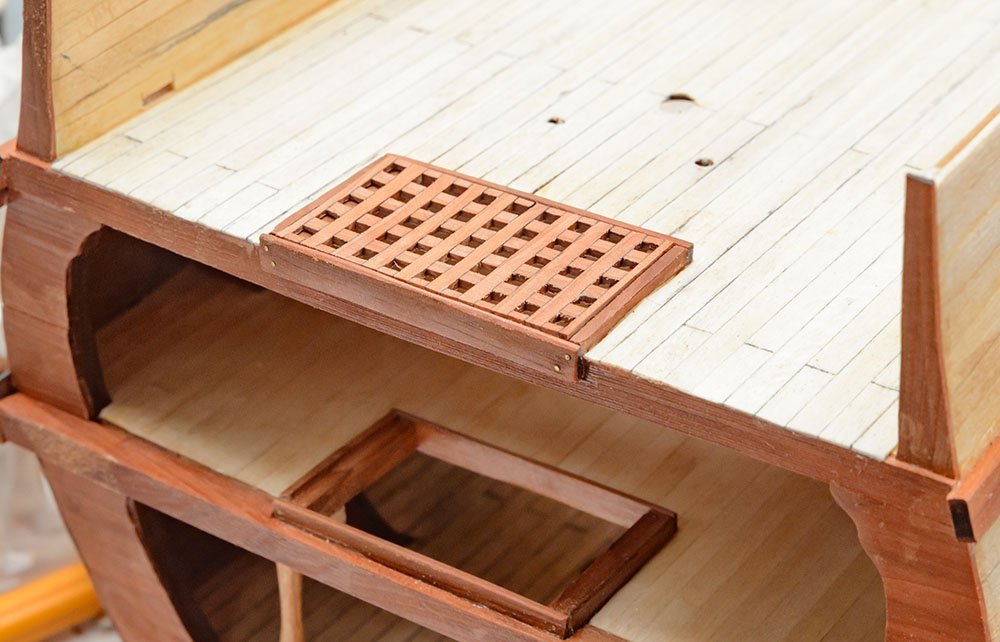
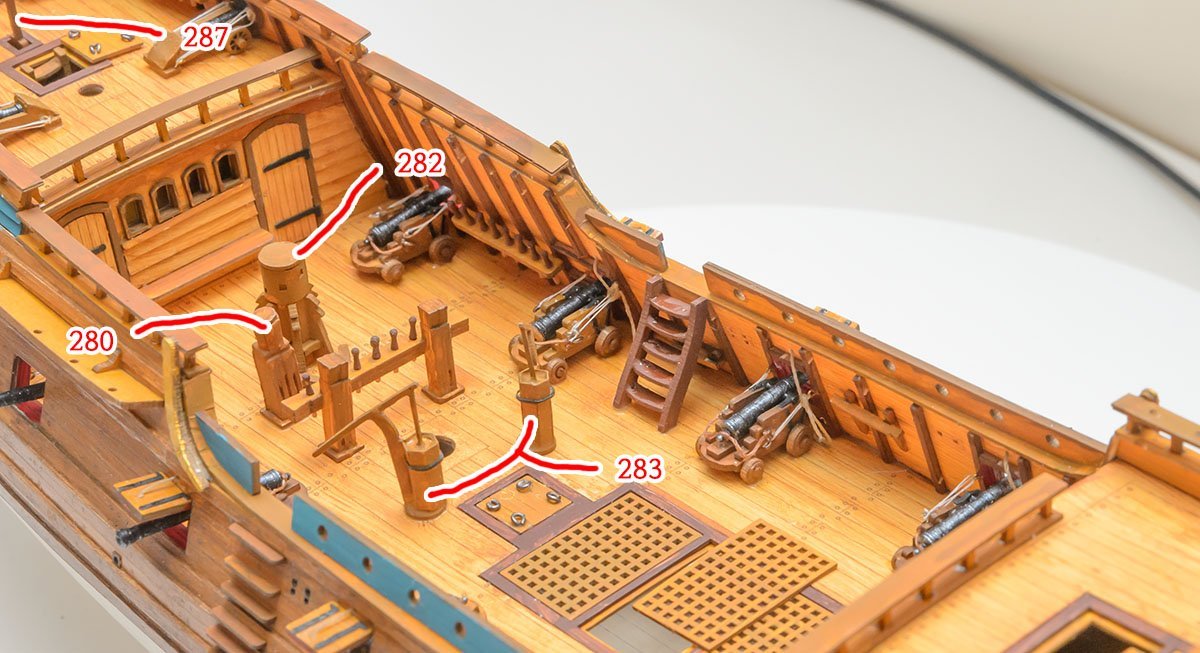
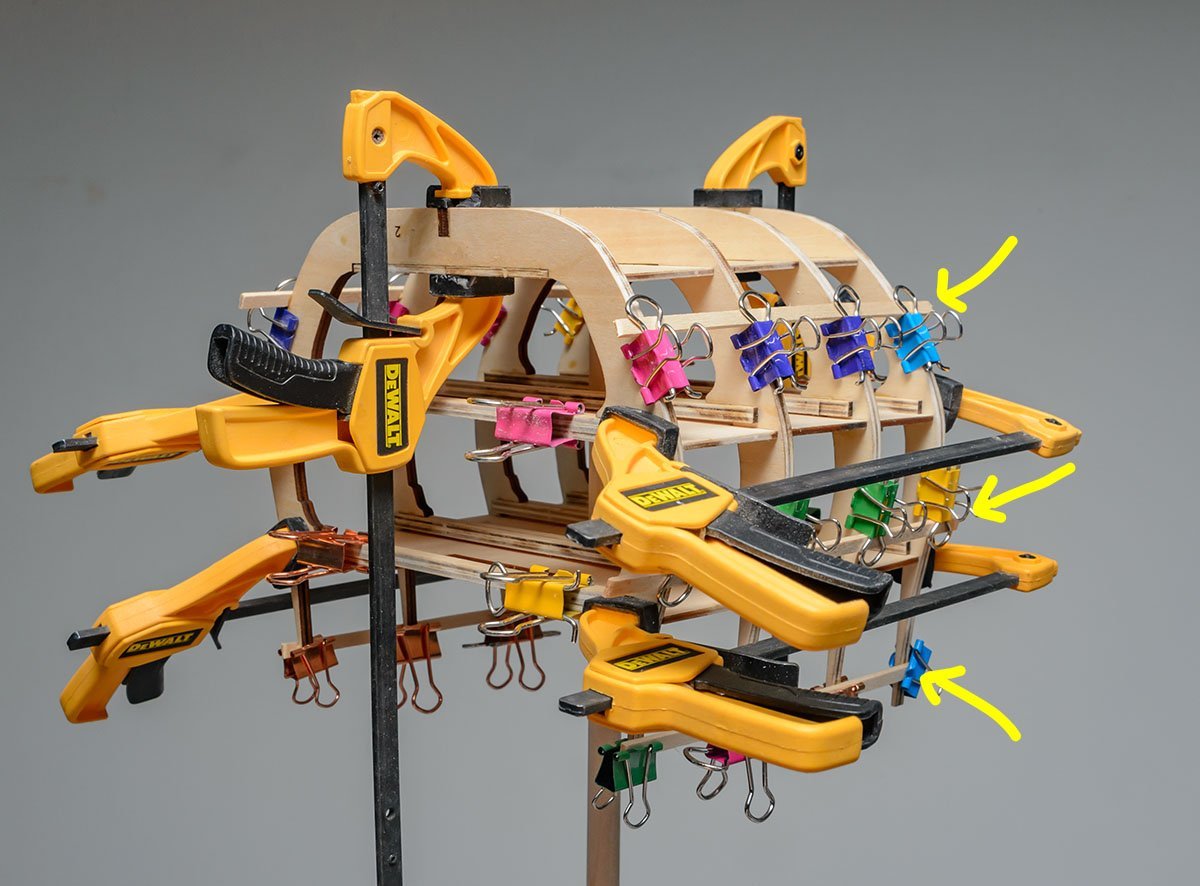
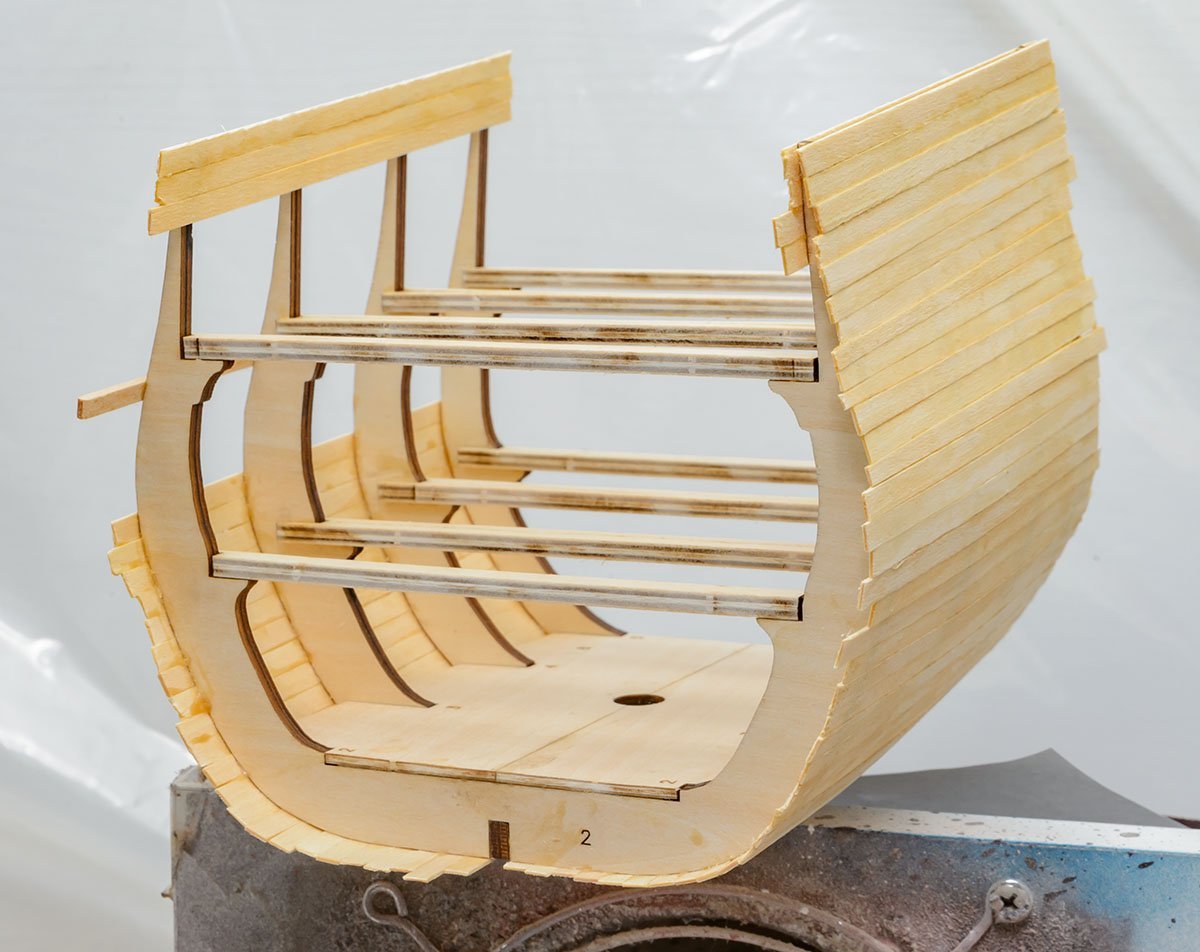
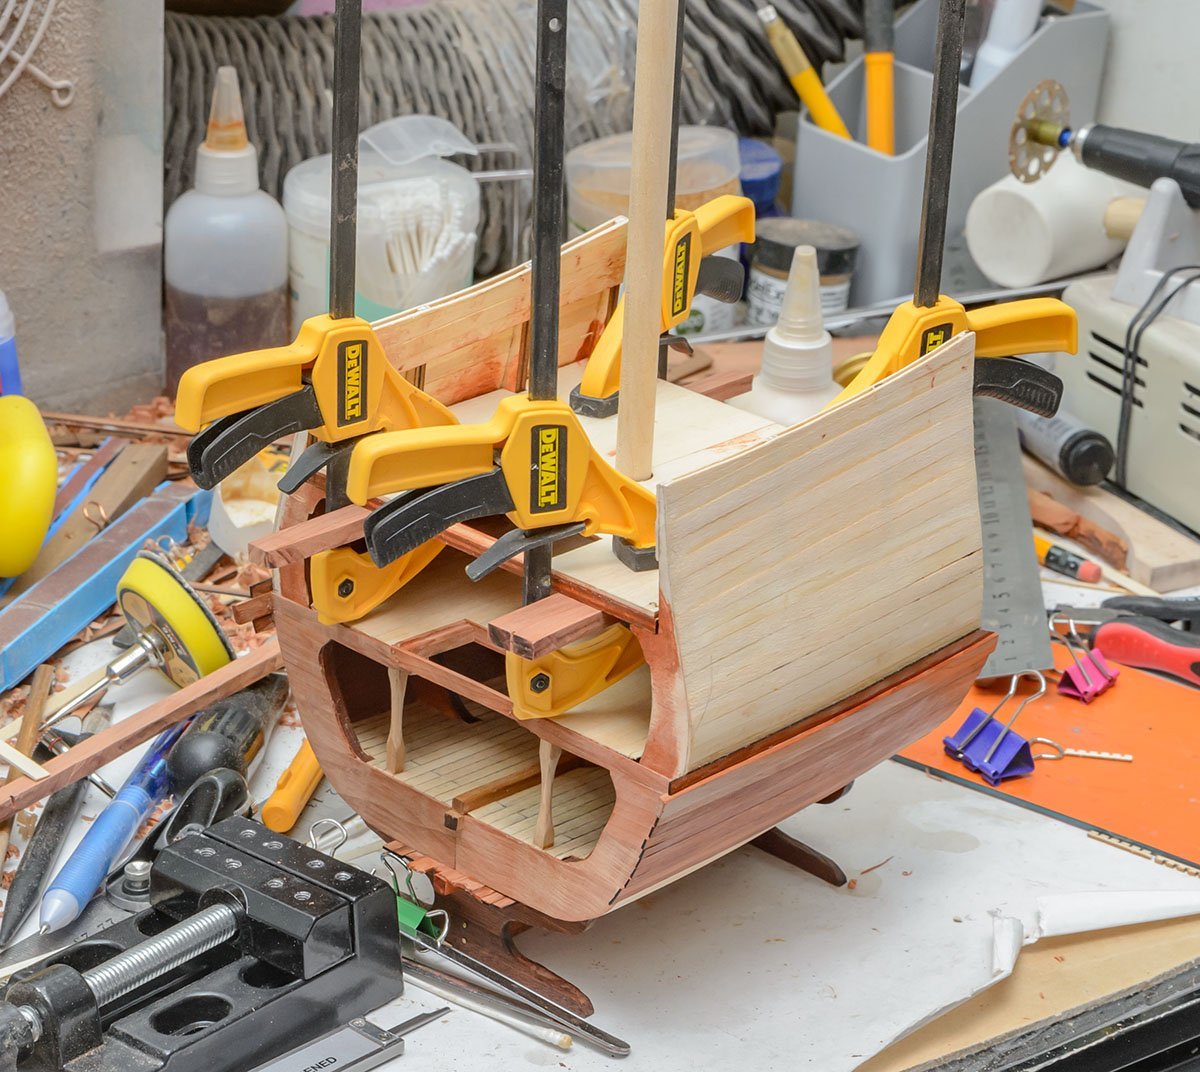
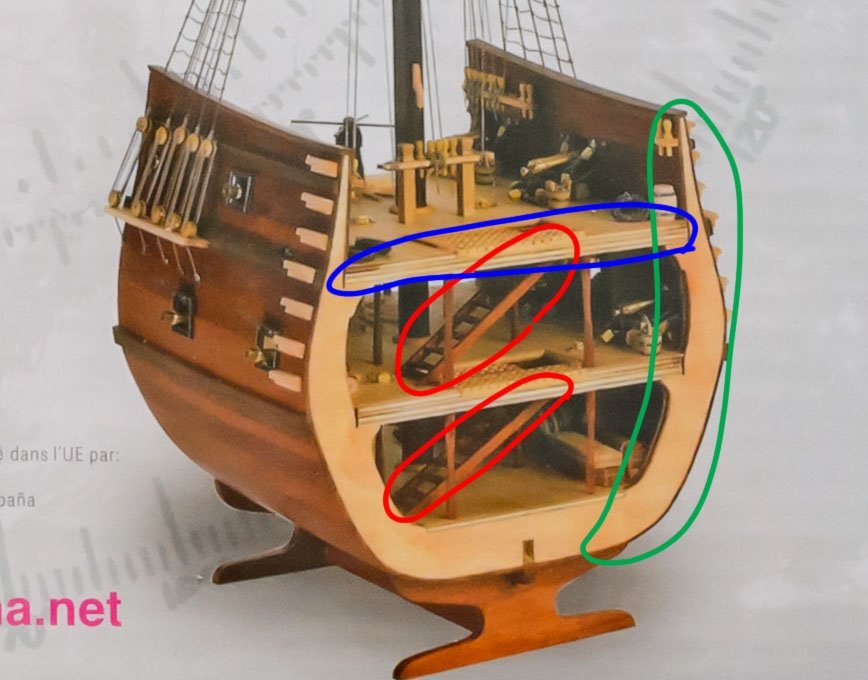
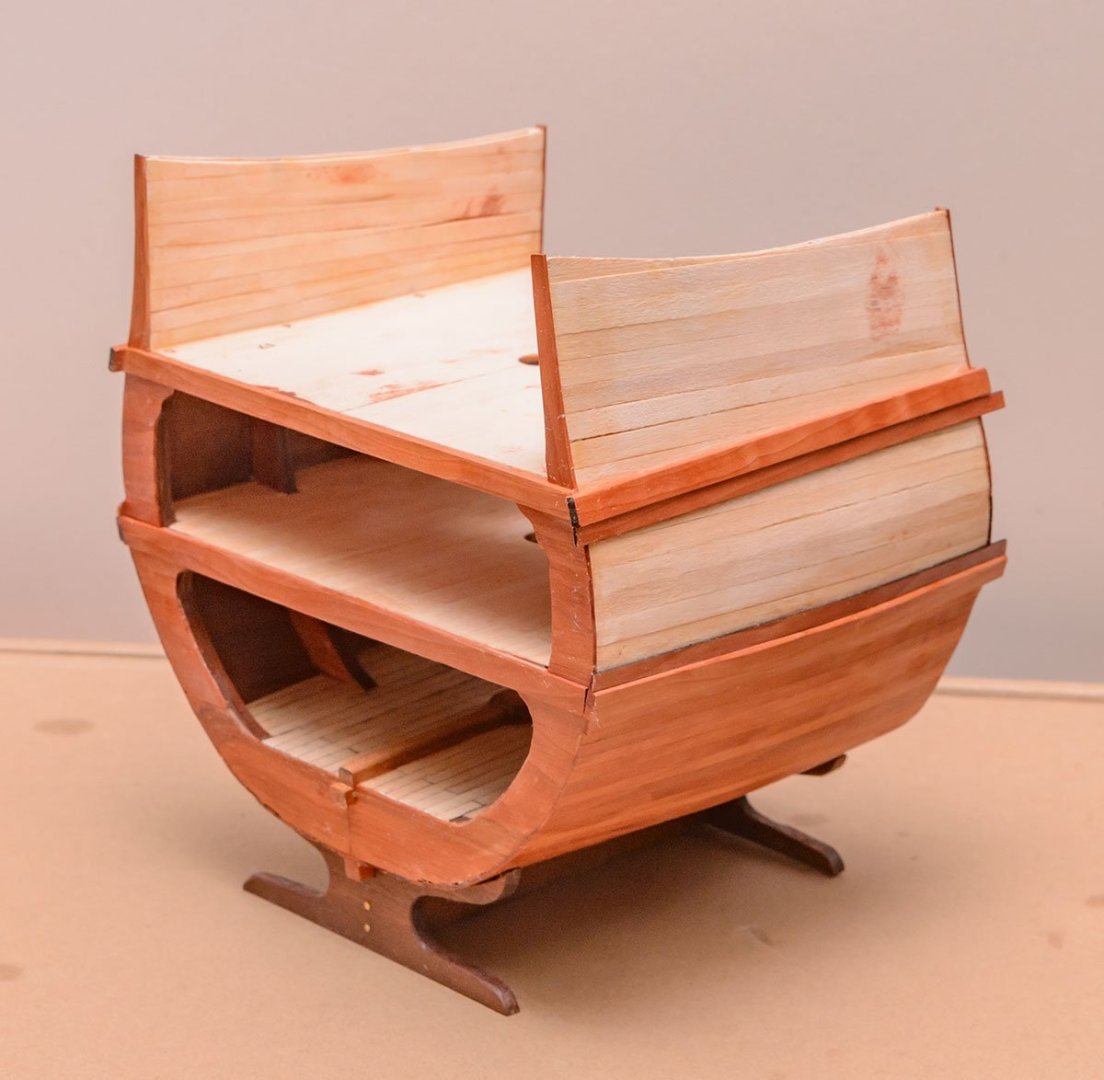
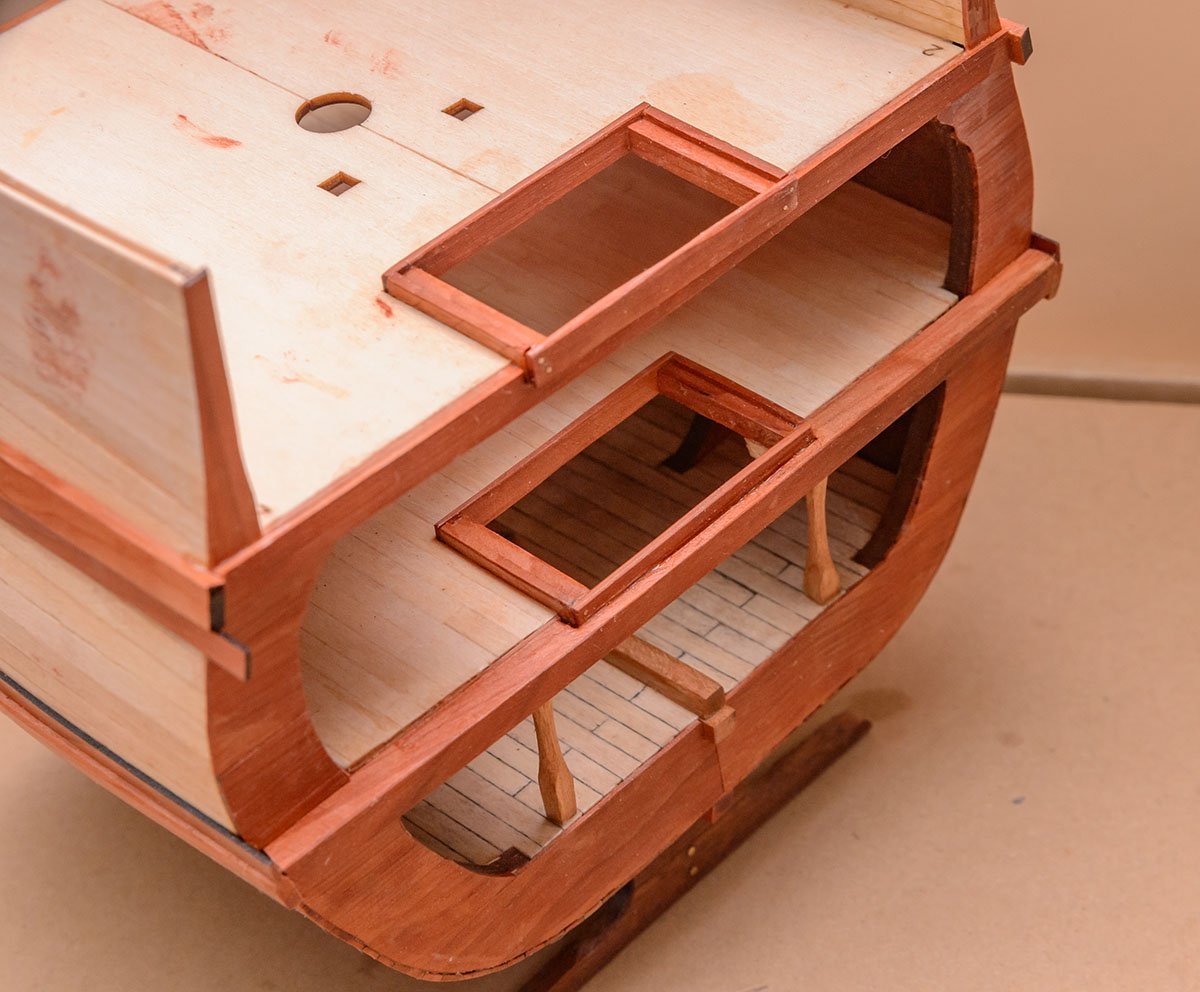
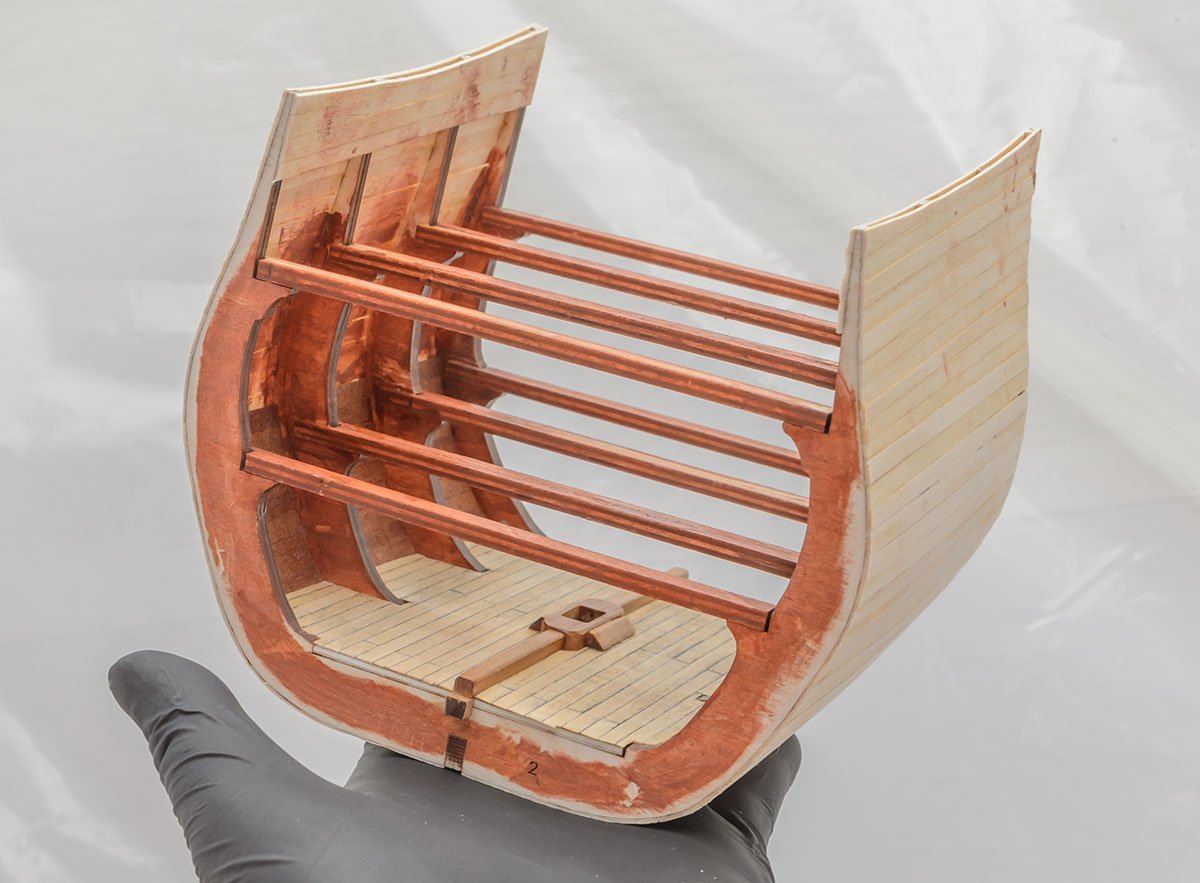
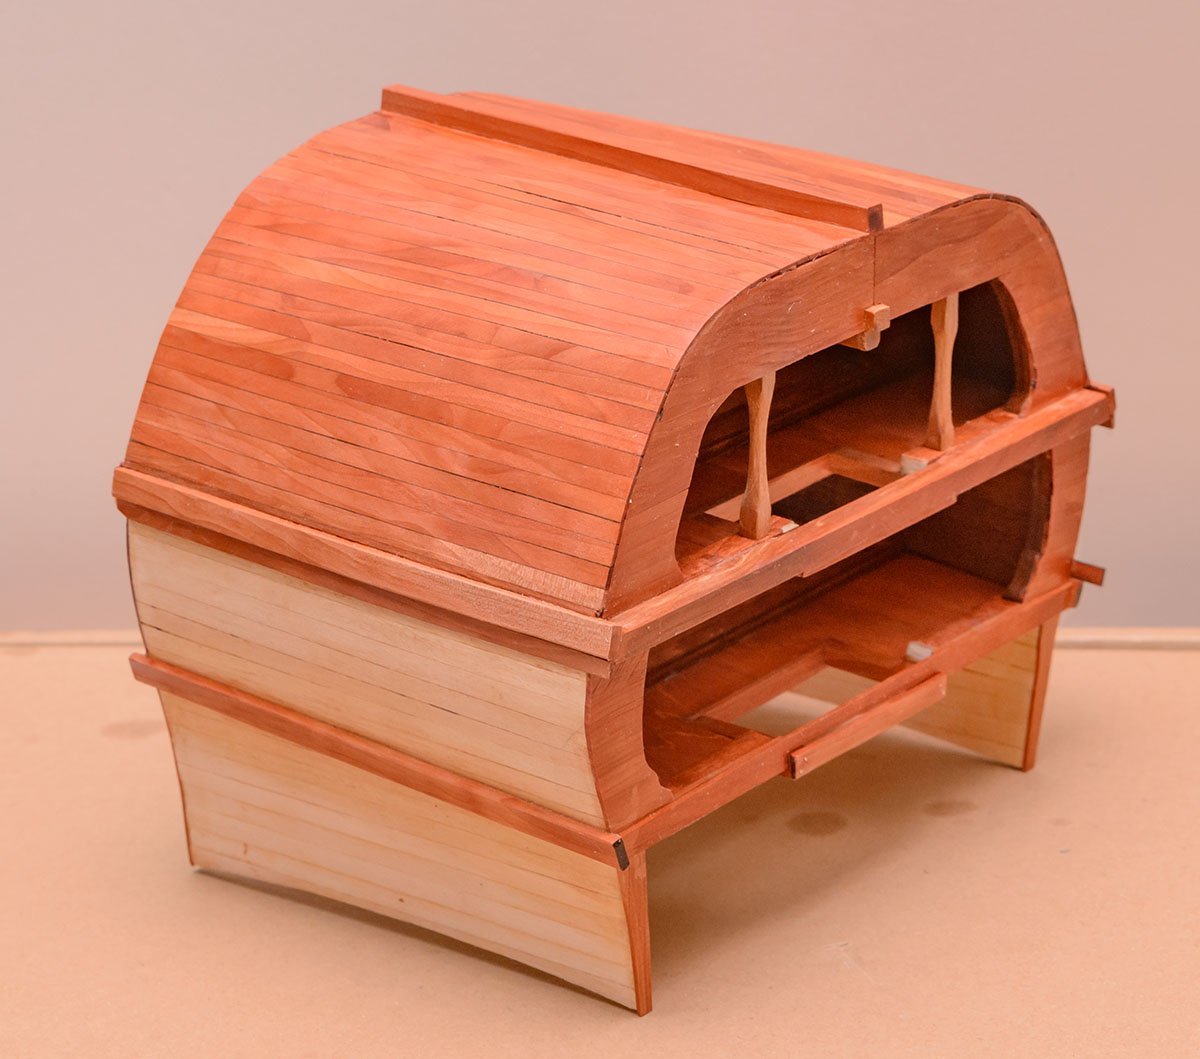
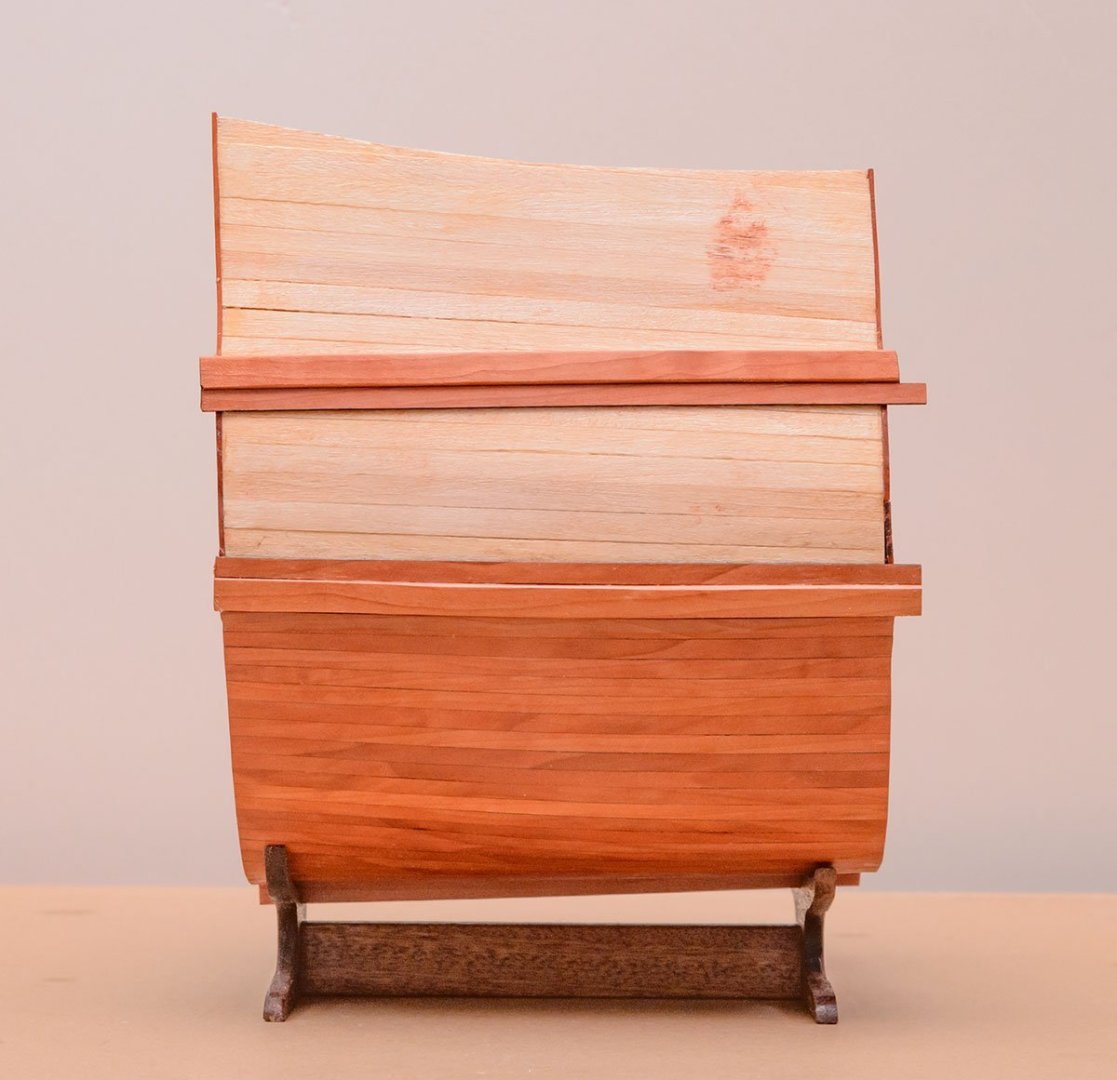
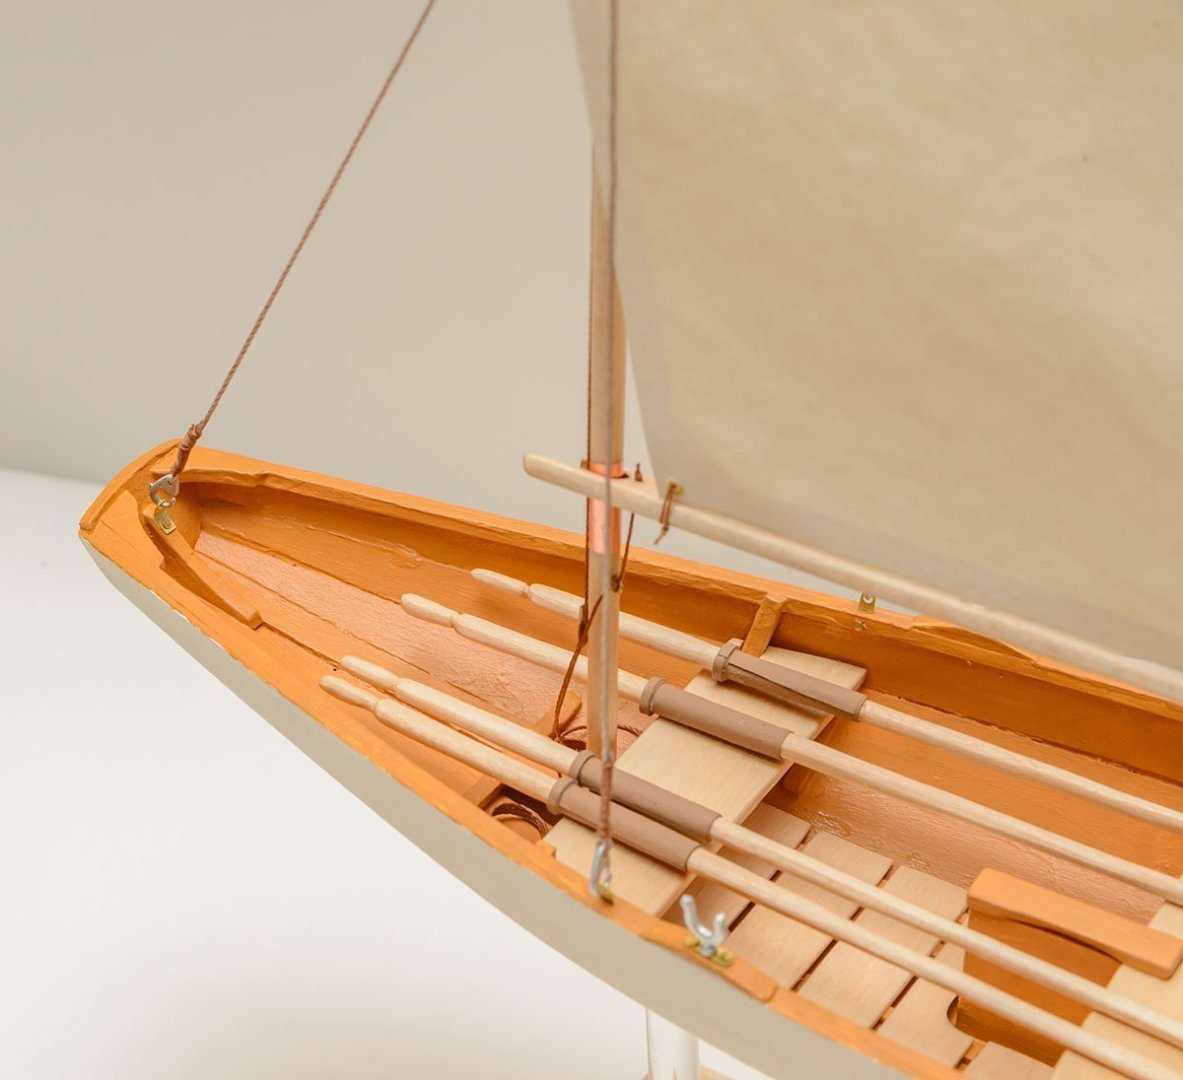
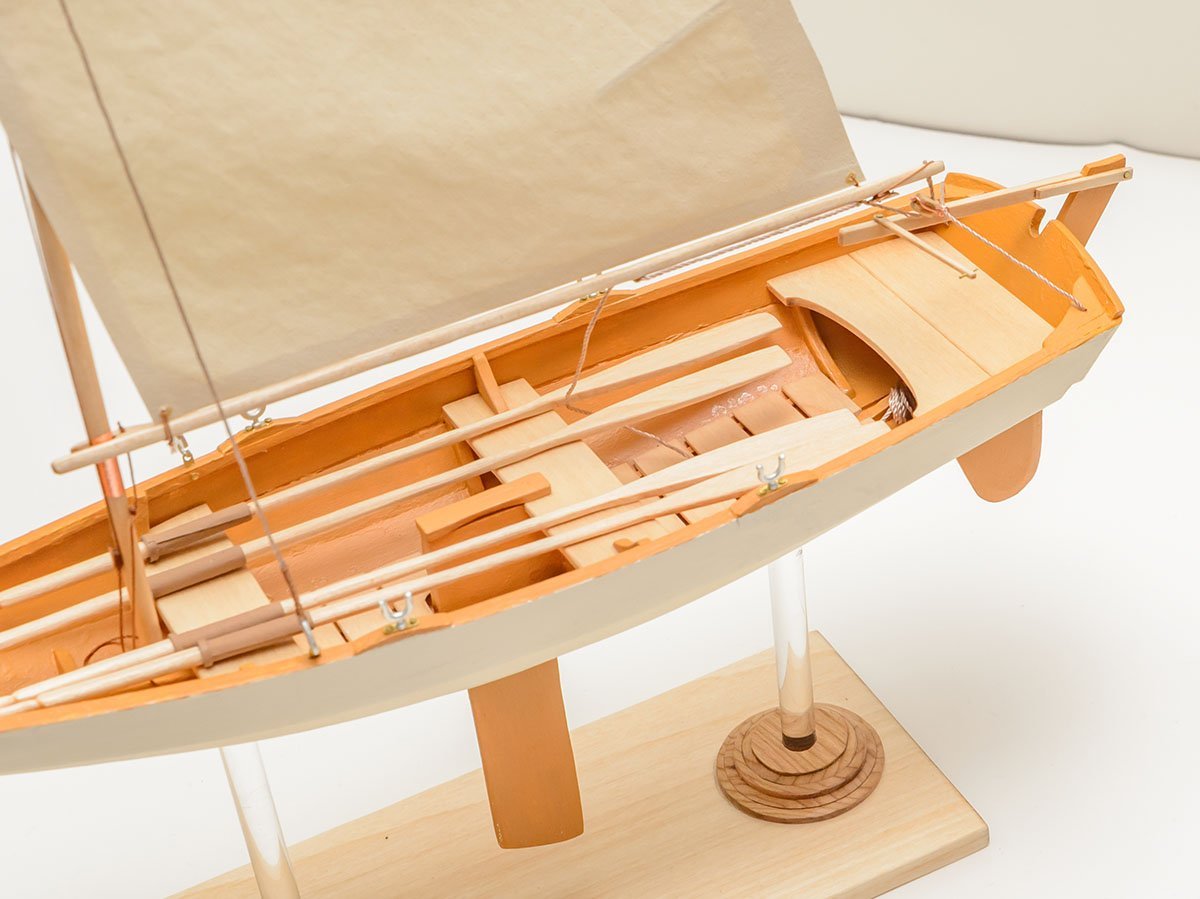
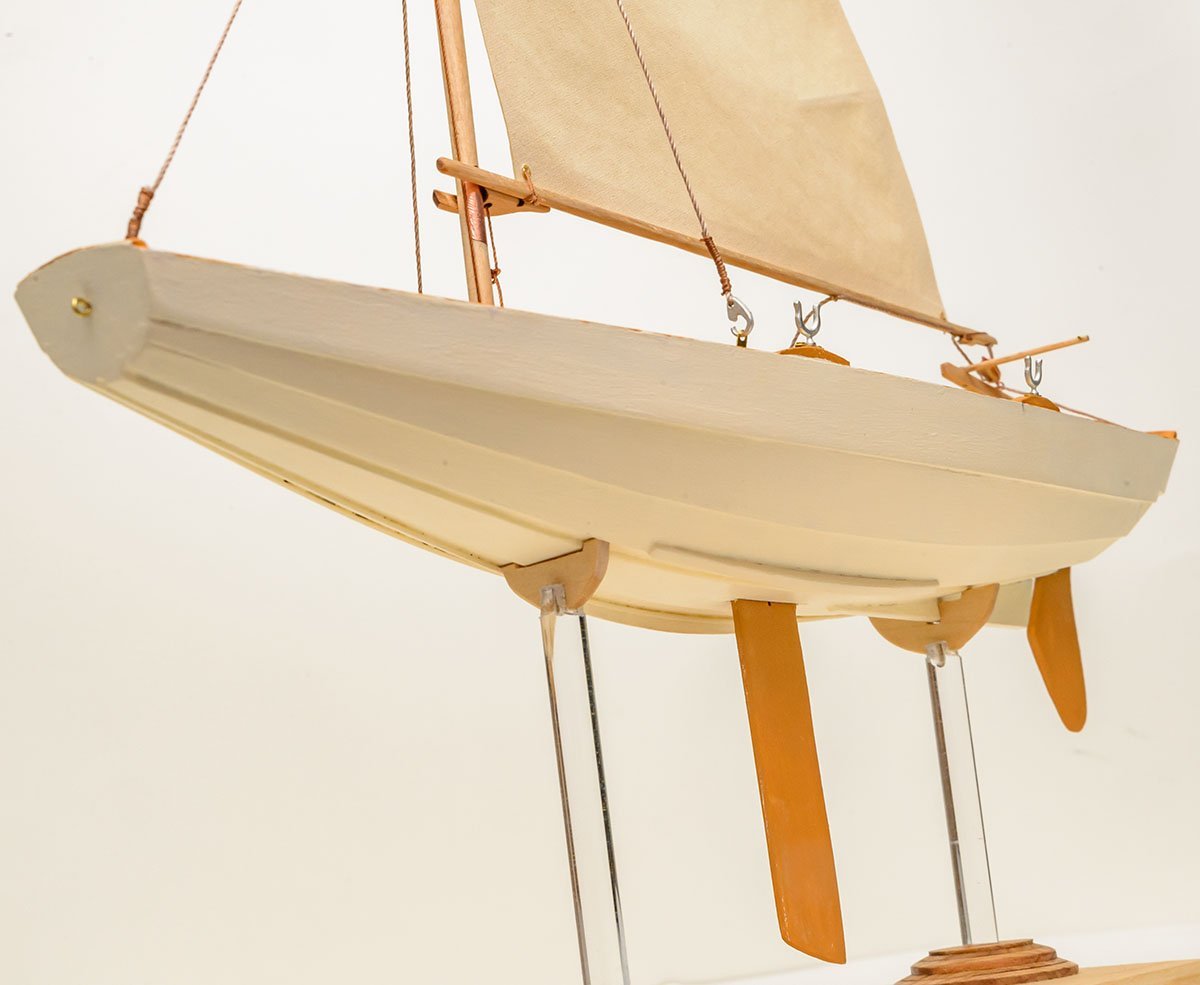
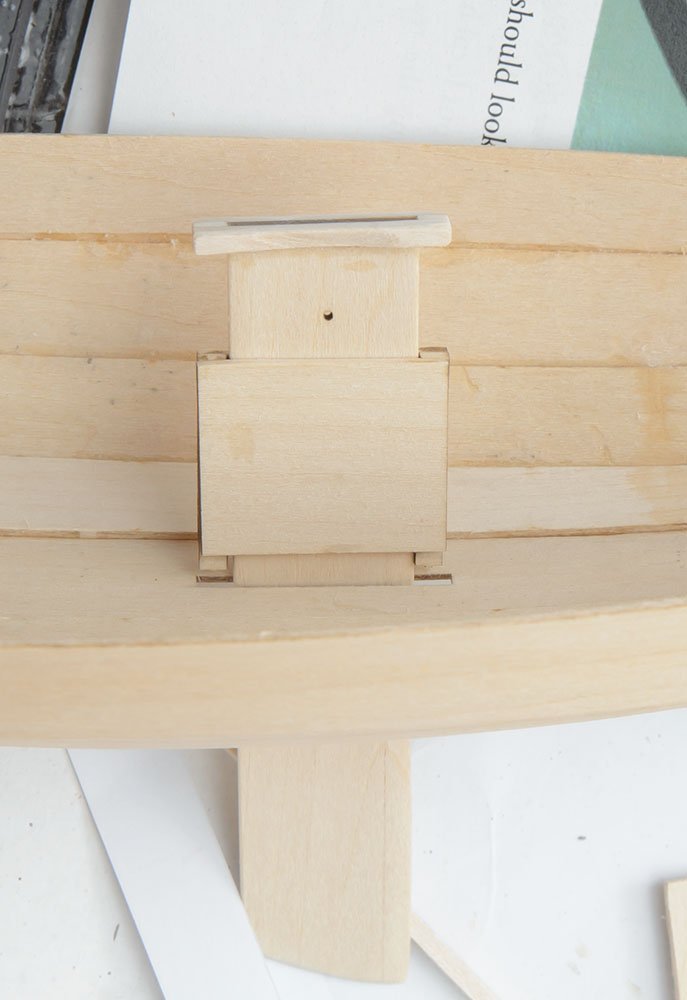
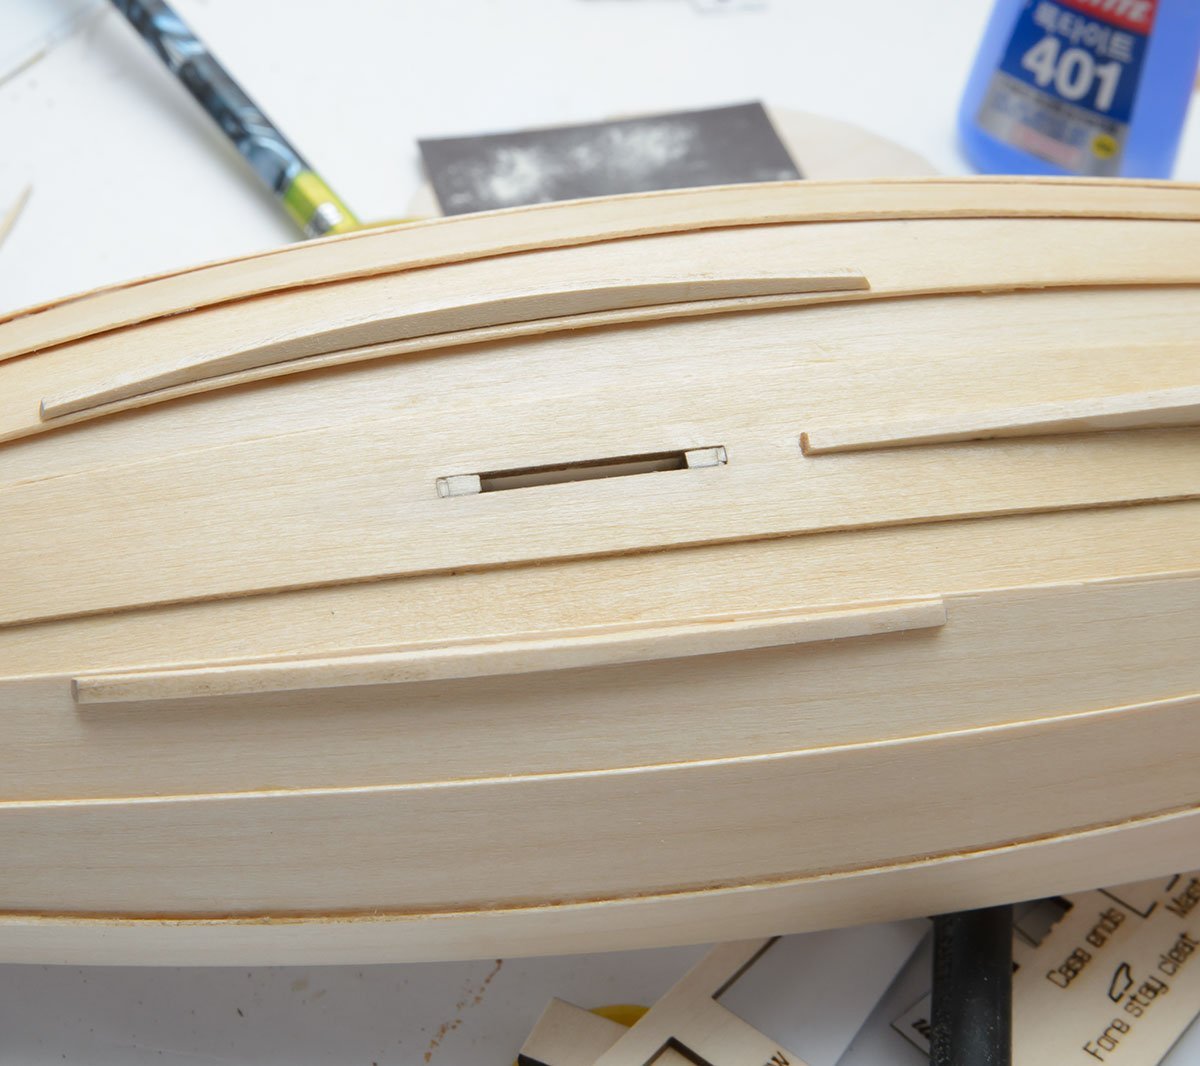
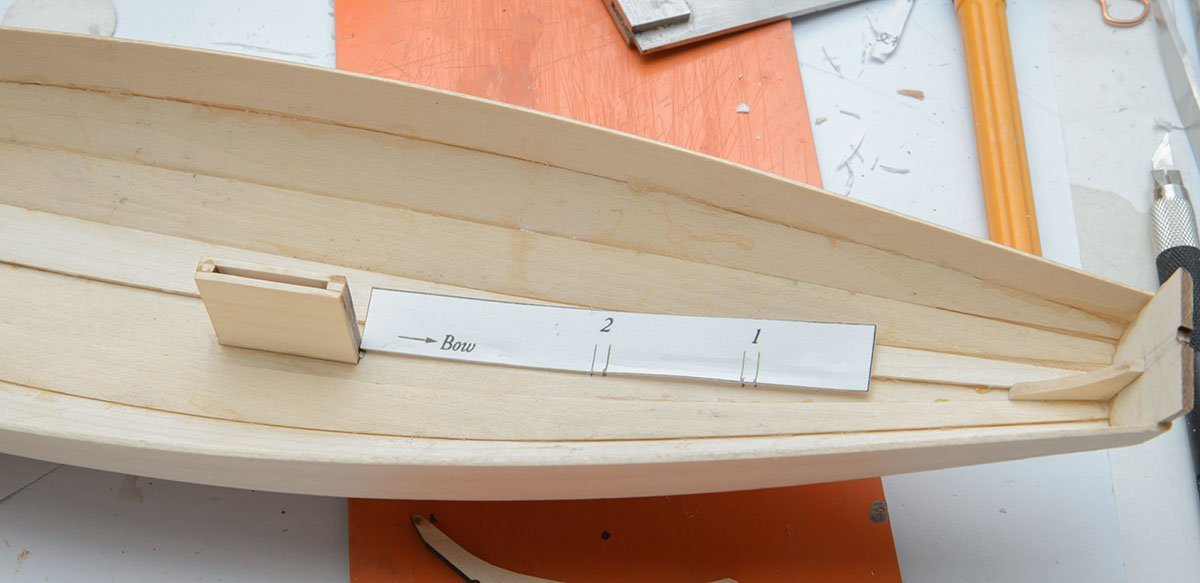
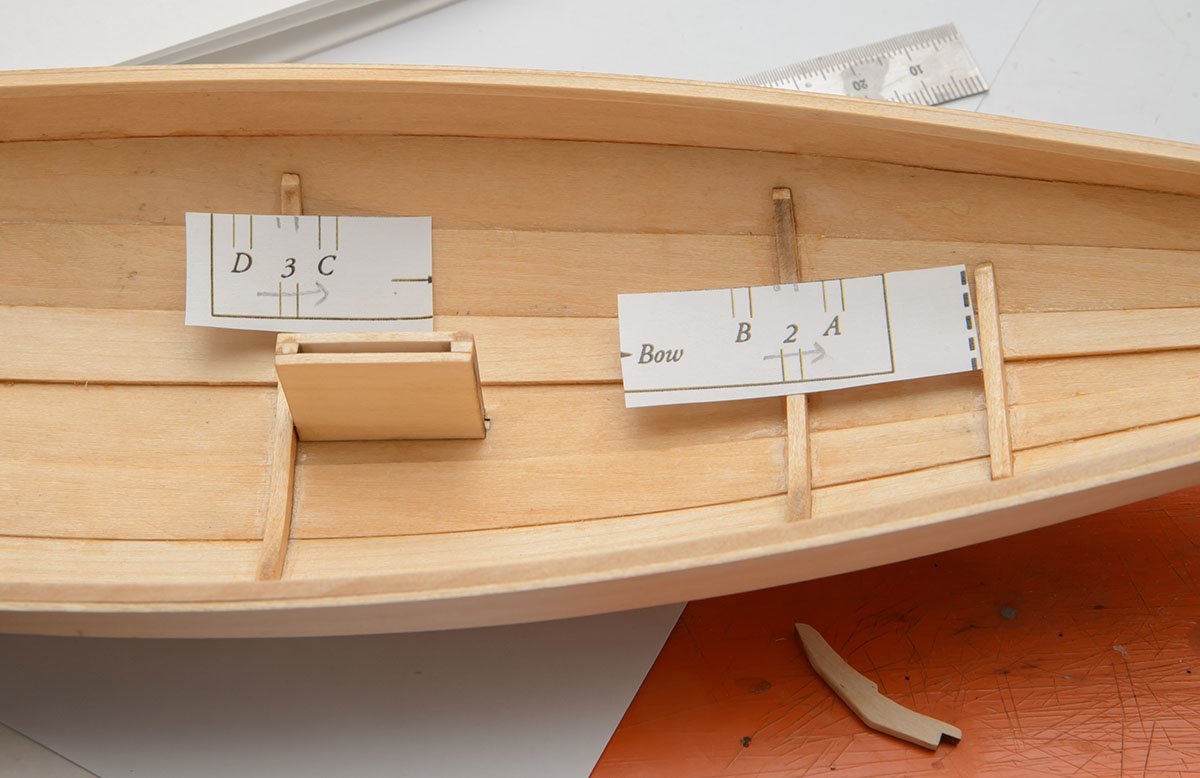
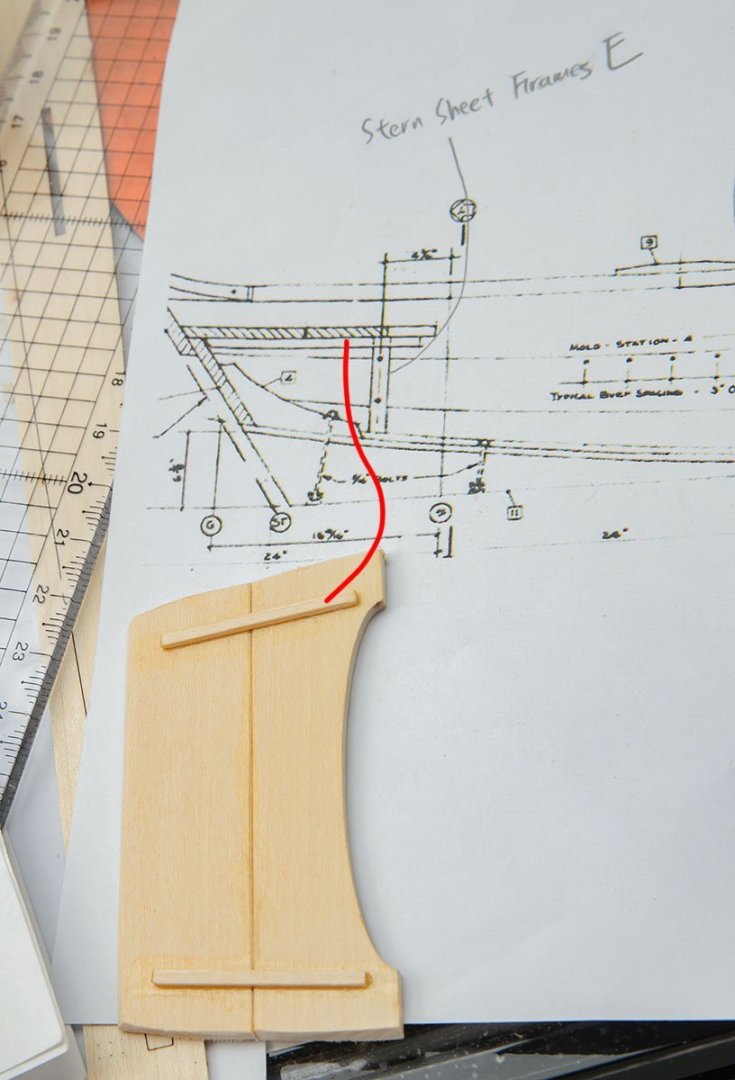
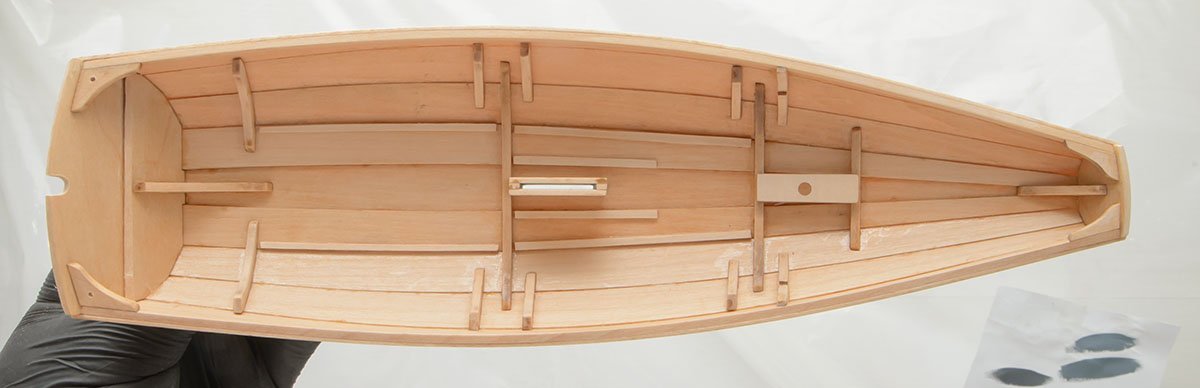
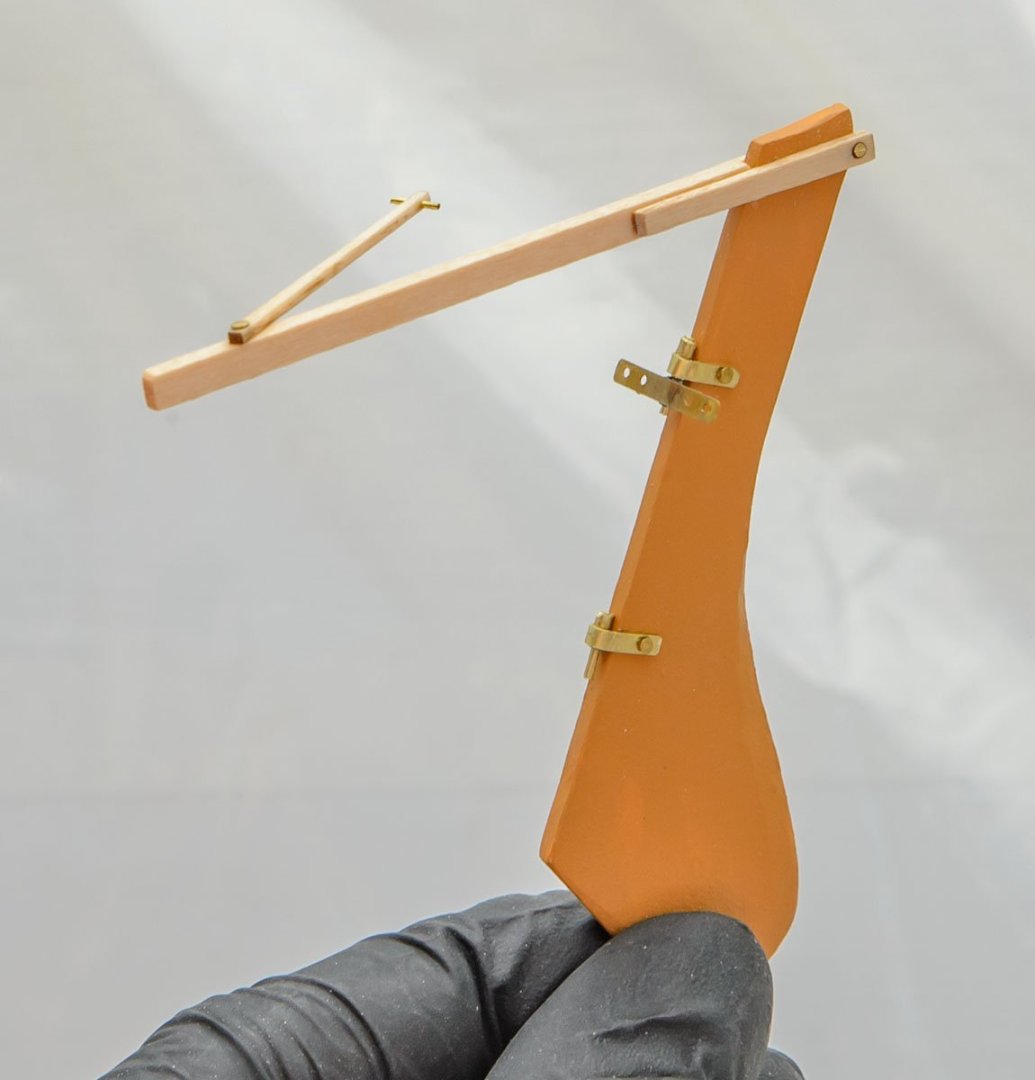
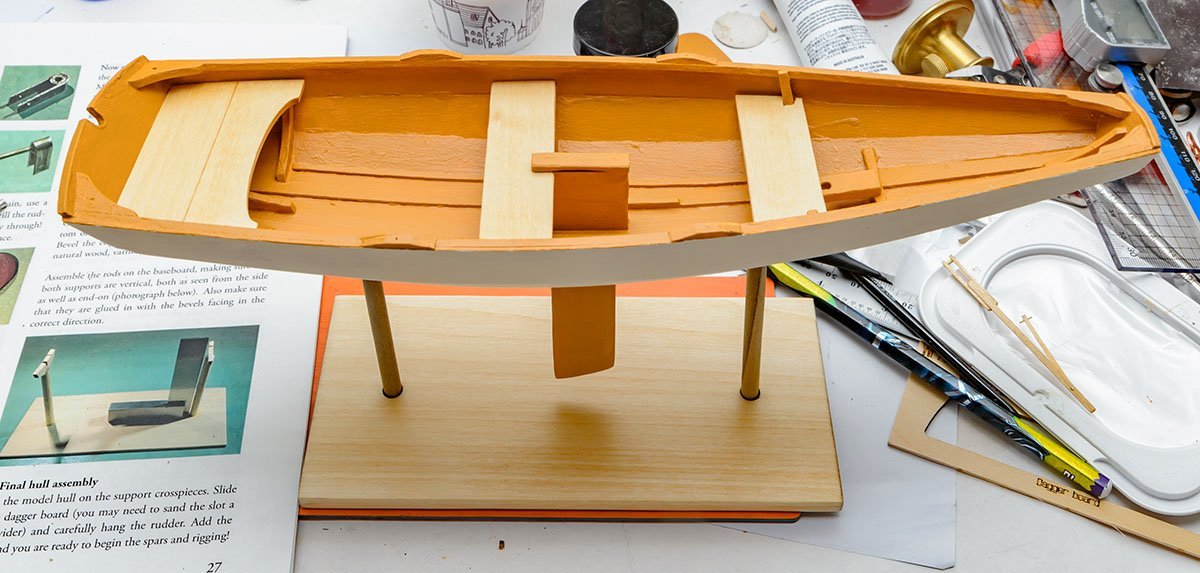
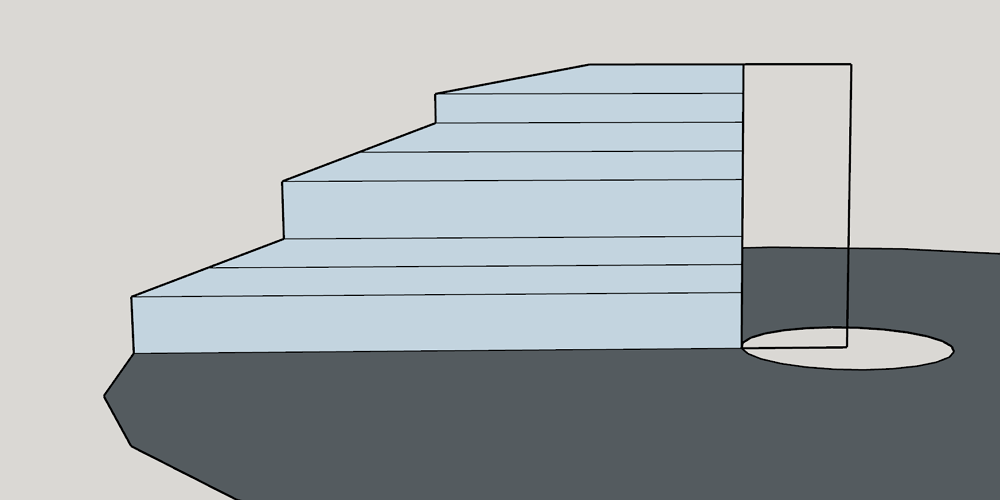
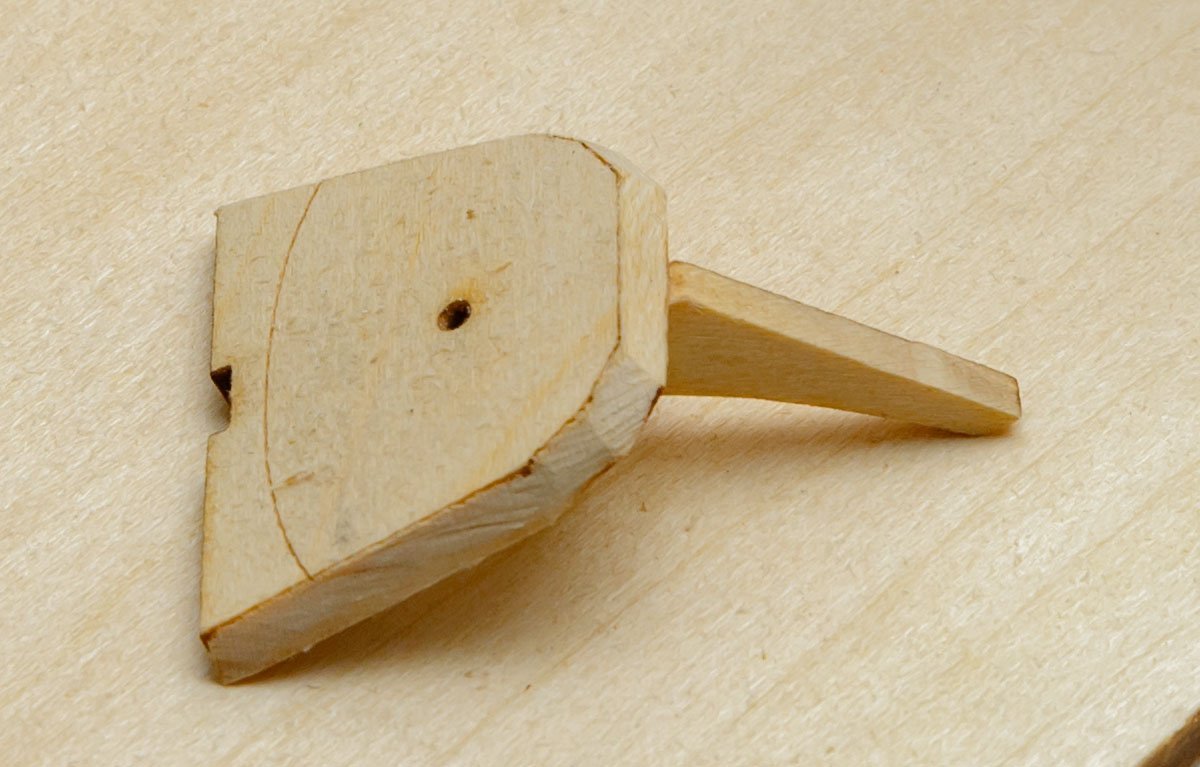
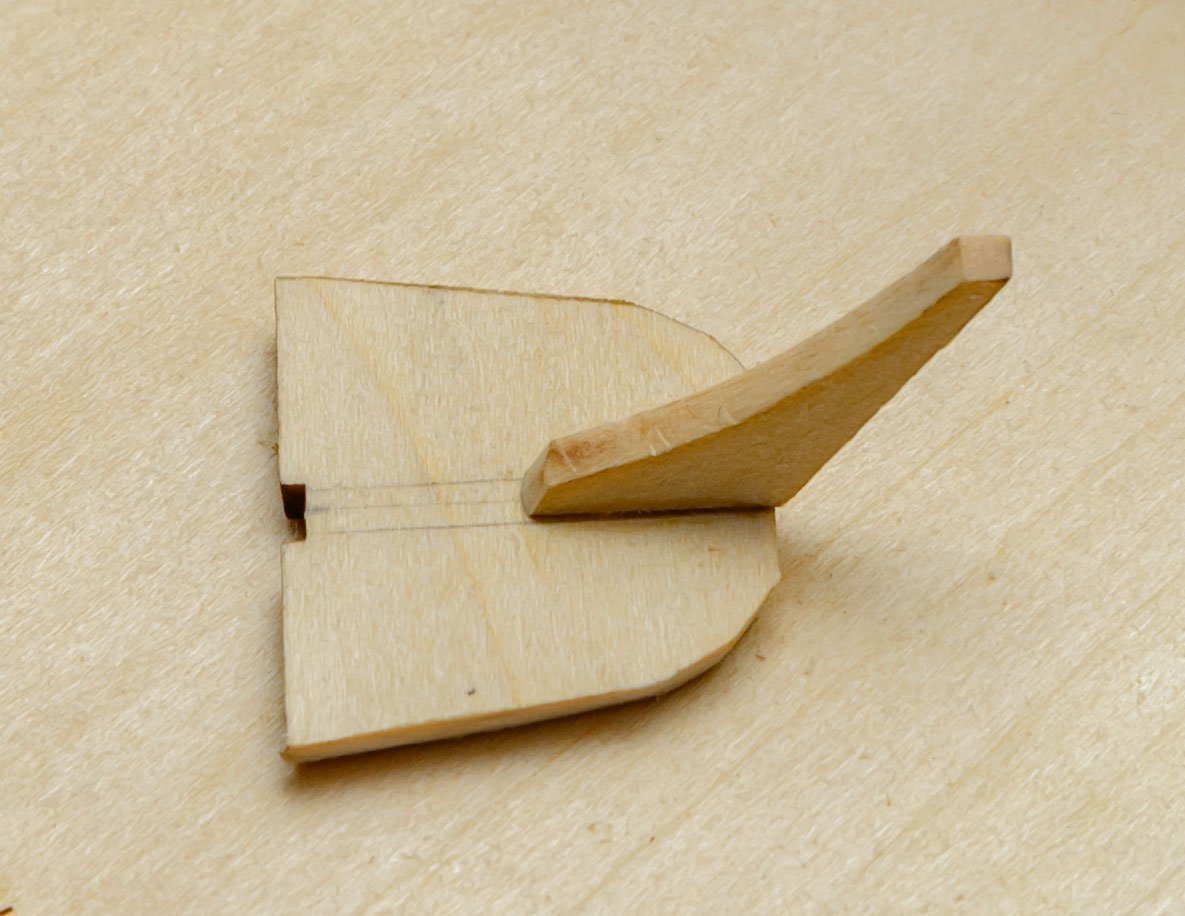
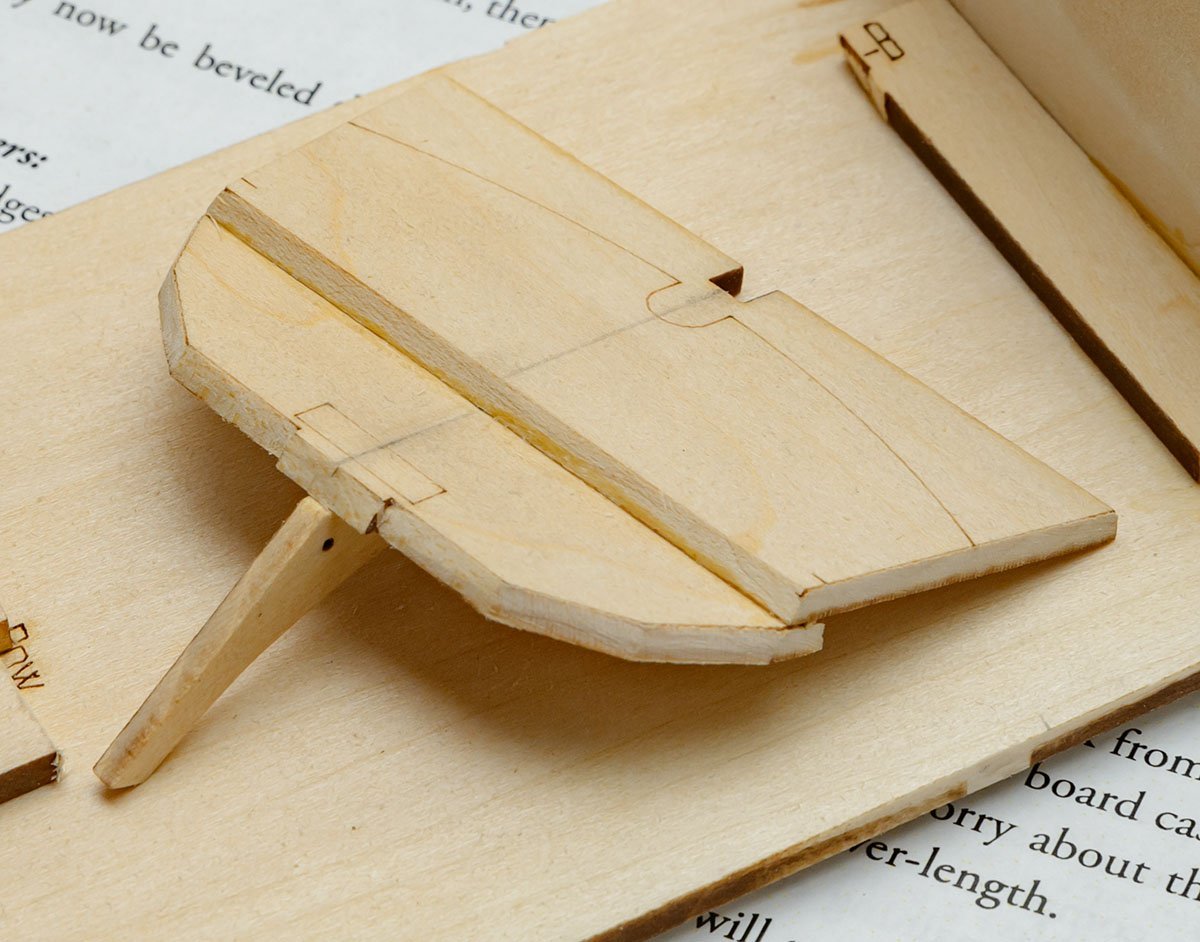
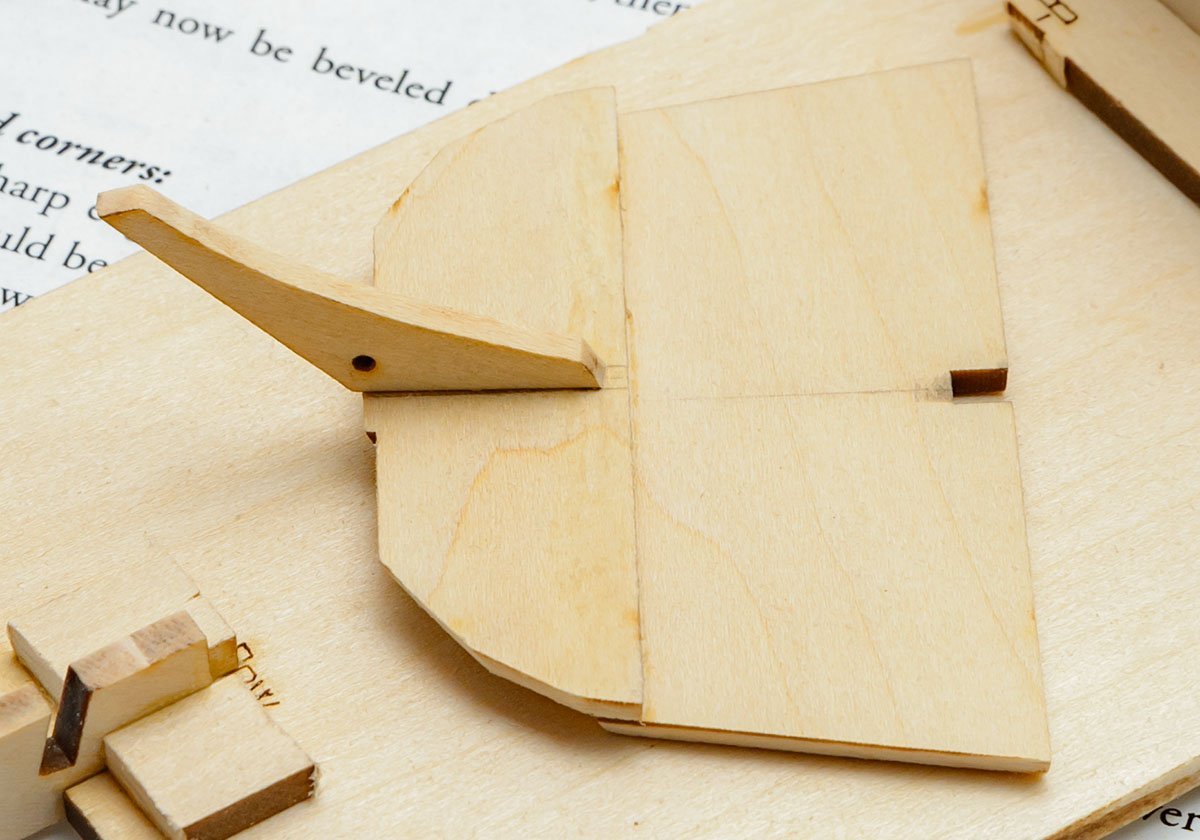
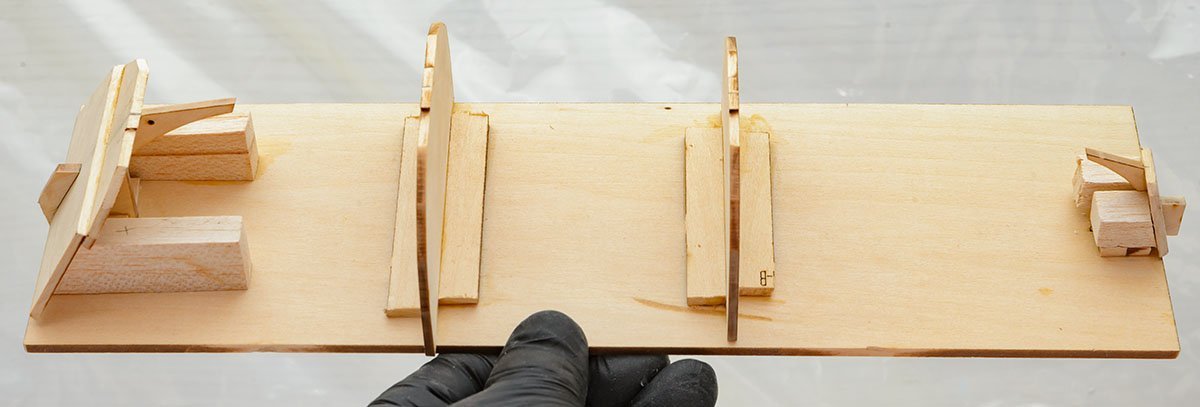
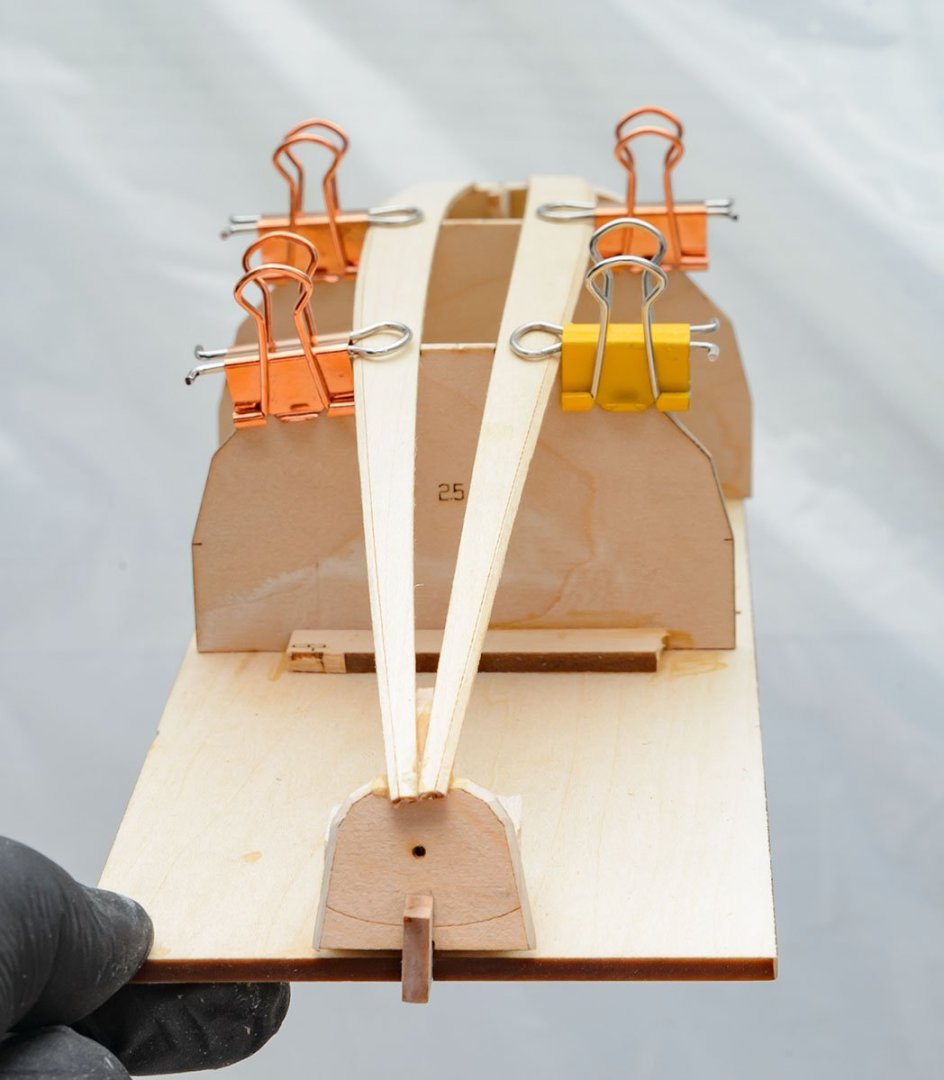
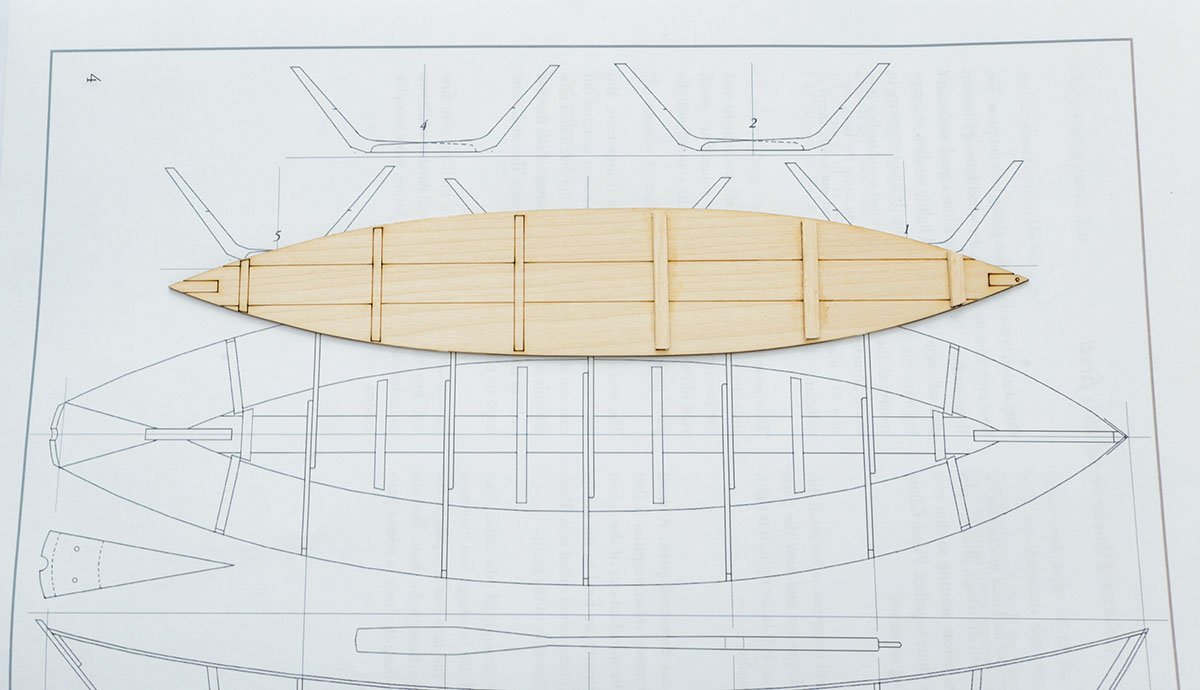
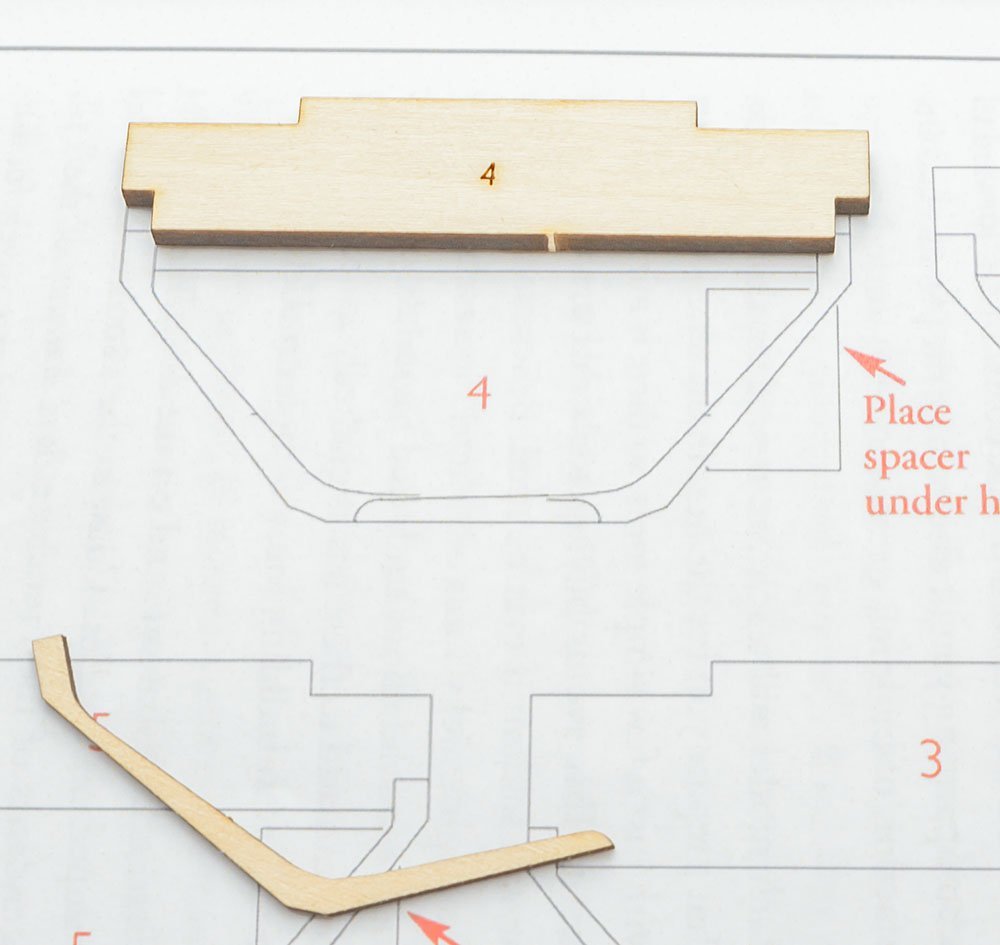
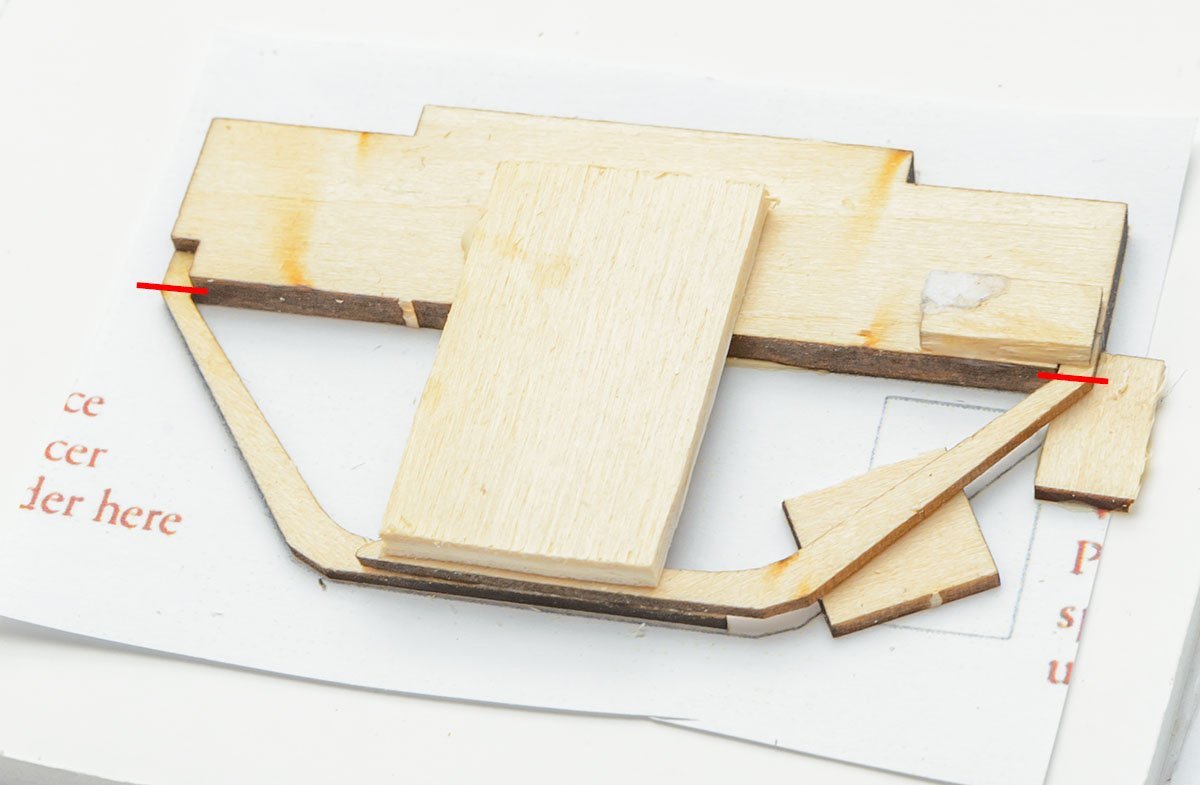
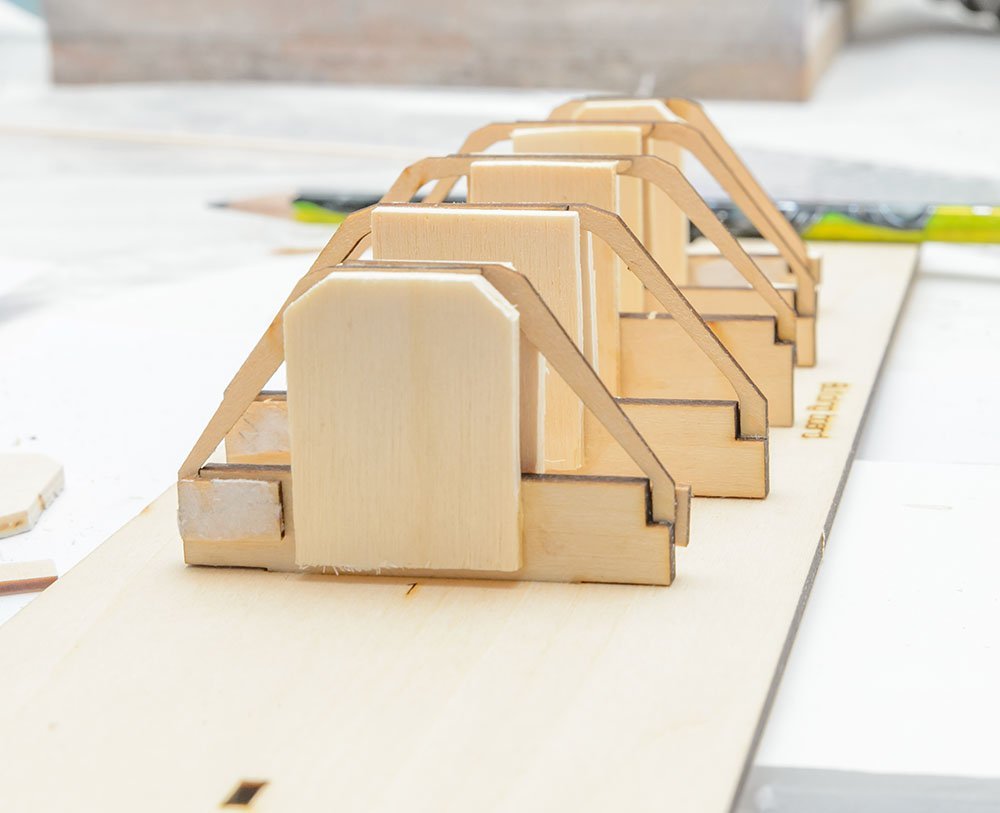
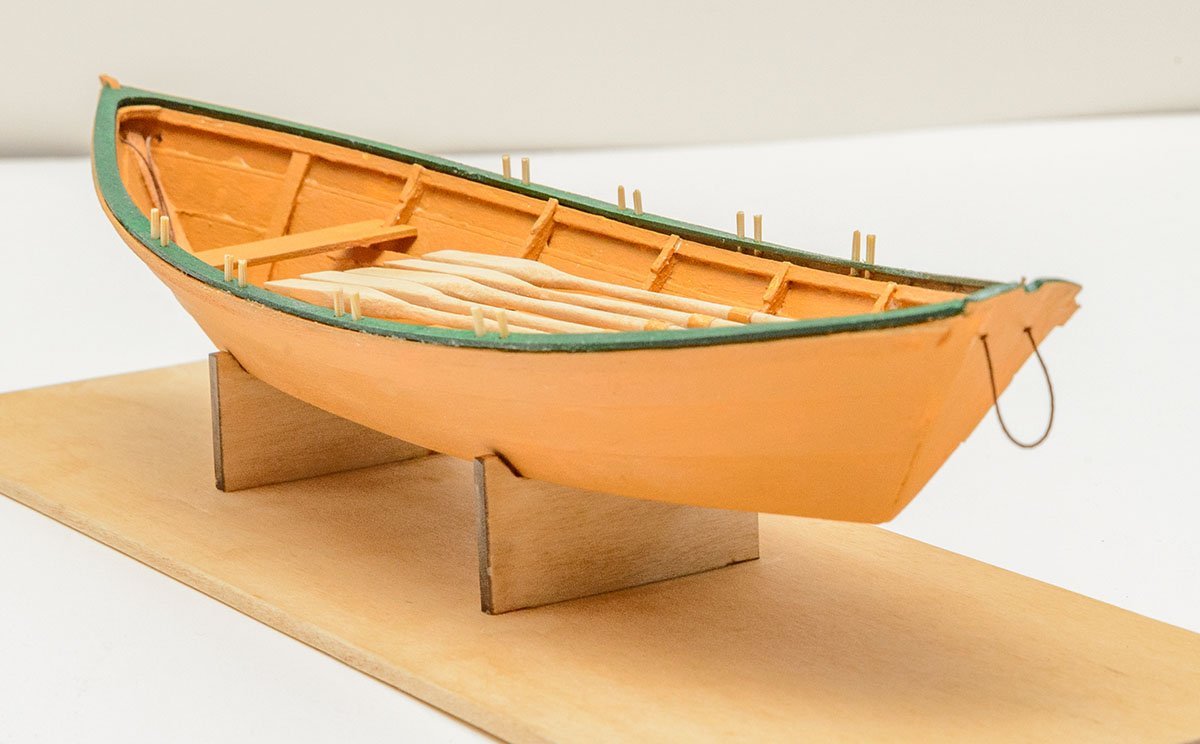
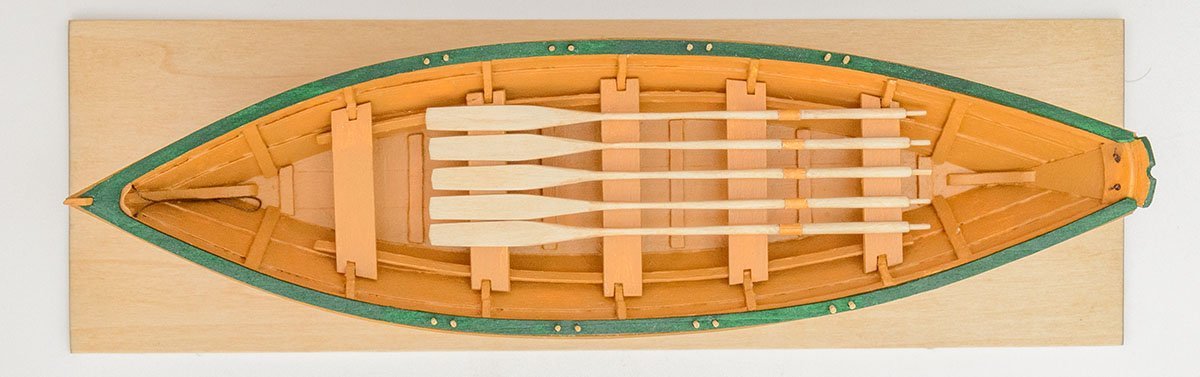
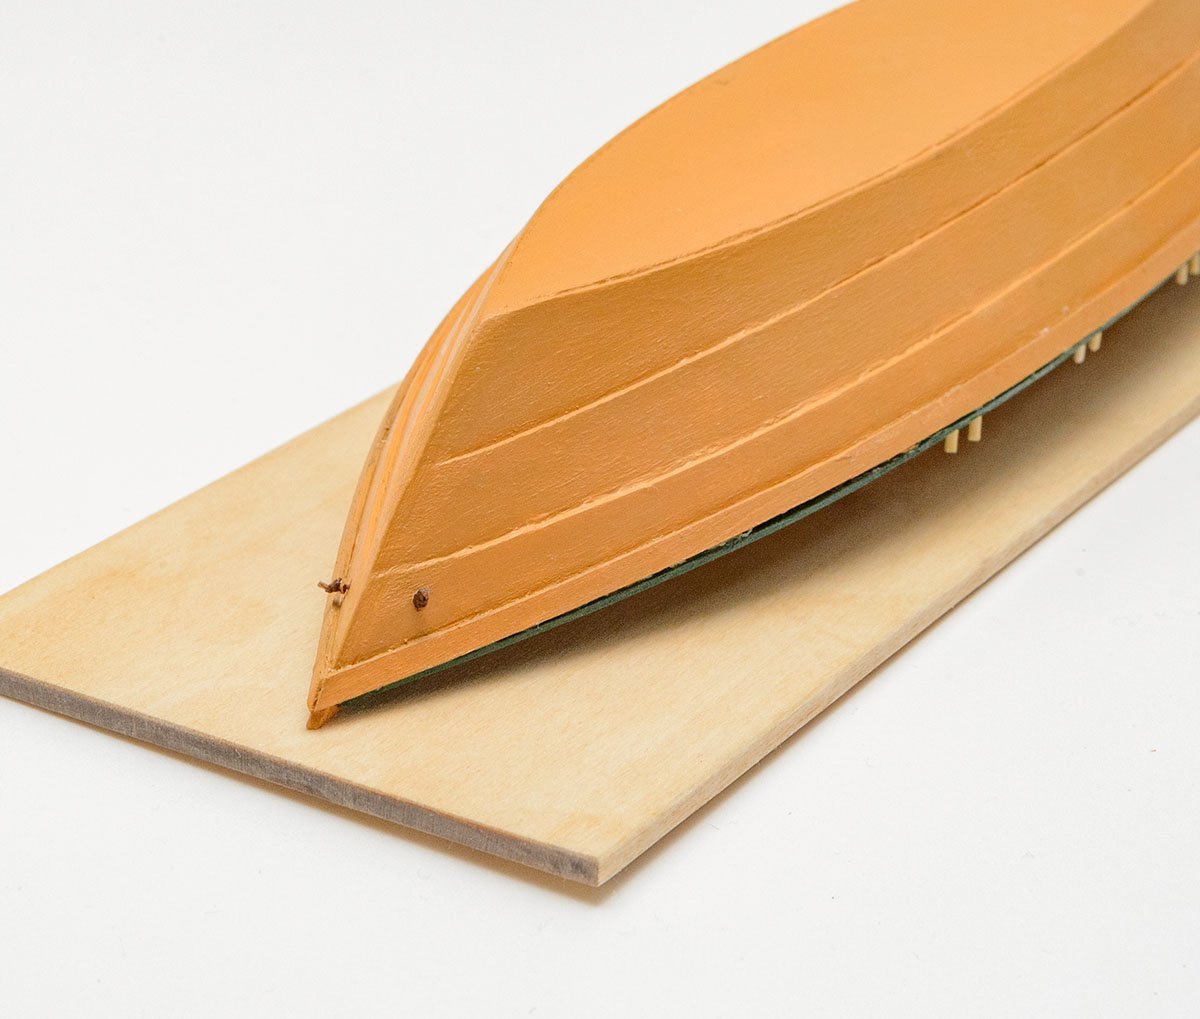
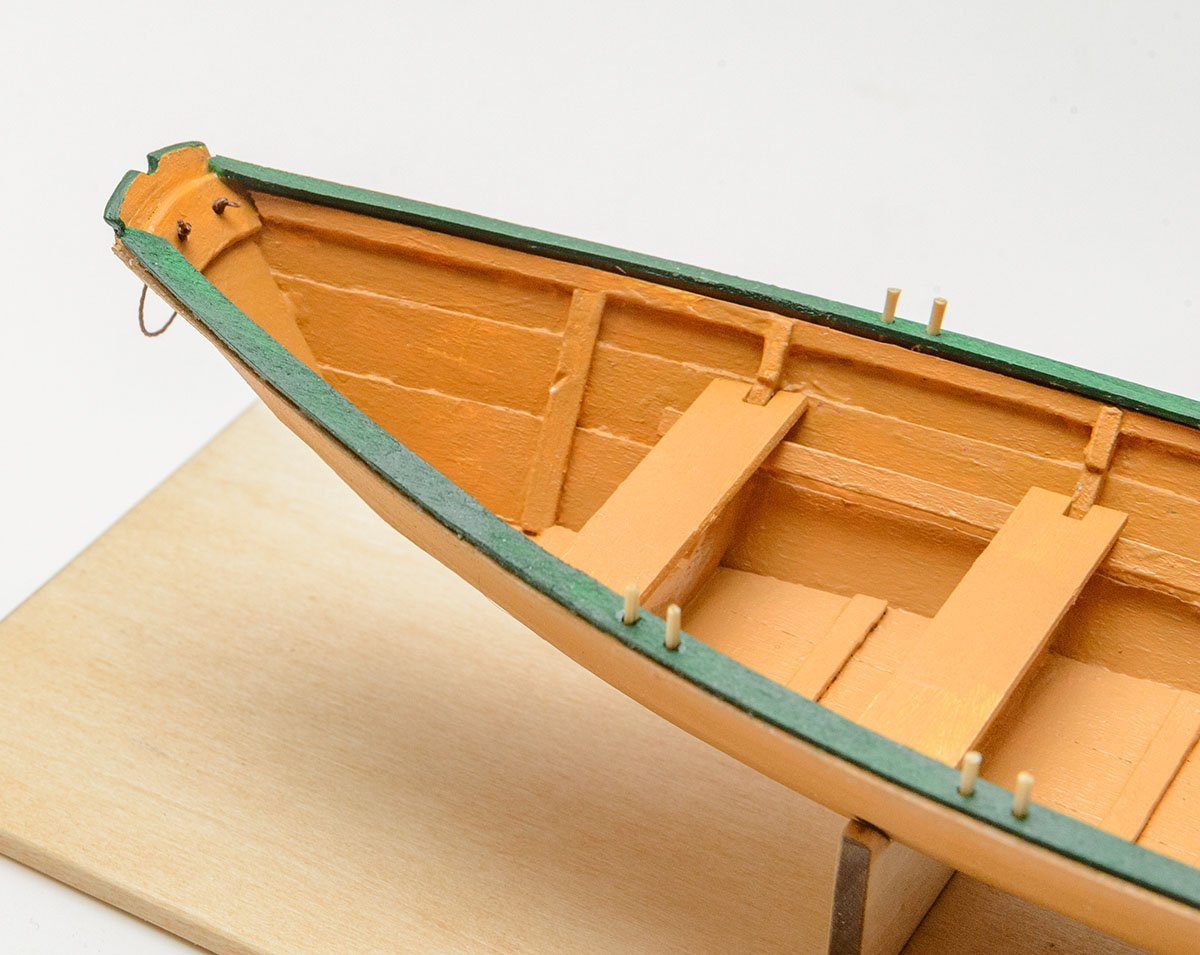
I wanted to forget a memory that I lost some parts of the Papegojan 1627. 😱 The AL San Francisco Cross Section may heal my wounded heart. Because of the kit's unreality, its assembly ability is extremely good. I would say that children are able to build this kit without much difficulty. I added some temporary planks (yellow arrows) to harden the frame's shape. The 1st planking is done. At this point, I decided to change the second plank from stock sapelle to my Asian pearwood. After some trial and error, I made straight strips using a laser cutter. As I said, the kit has many fatal errors. It just combined every detail that people might like. - The ladders (Red) are too slow, and the width is narrower than shoulder width. - The grating frames are on the beams (Blue). - The cross sectional diagram is not realistic (Green). I referred to the cross sectional diagram from the contemporary wreckage ship. ( Source : https://albaola.org/proceso-de-construccion/ , https://www.patrimoniocultural.gov.pt/media/uploads/trabalhosdearqueologia/18/22.pdf ) But, I stopped in the middle of modification. I didn't want to pay more than a month for this kit, so I left the cross sectional diagram incomplete. Also, I I cut the beam to expand the space for grating frames. The thicker beam was part of the modification for realistic structure. By the way, I decided to skip the ladder. I thought it made more sense. This is an internal painting. I applied a cherry-colored gel stain. The outside and cross section are Asian pearwood. I love the pink wood. The next step will be gunports.


- 4 replies
-
- 5
-
-
- San Francisco
- Artesania Latina
- (and 2 more)
-
https://kjhowells.co.uk/grating/ I remember modern gratings, like in the above link, but old ships didn't use them, unfortunately... Of course, I don't want to make up model ship excessively. I'm trying to make the holes exactly squares, as you said.
-
I found it too late. I hope to find any ship on which I can use this technique. 😂
-
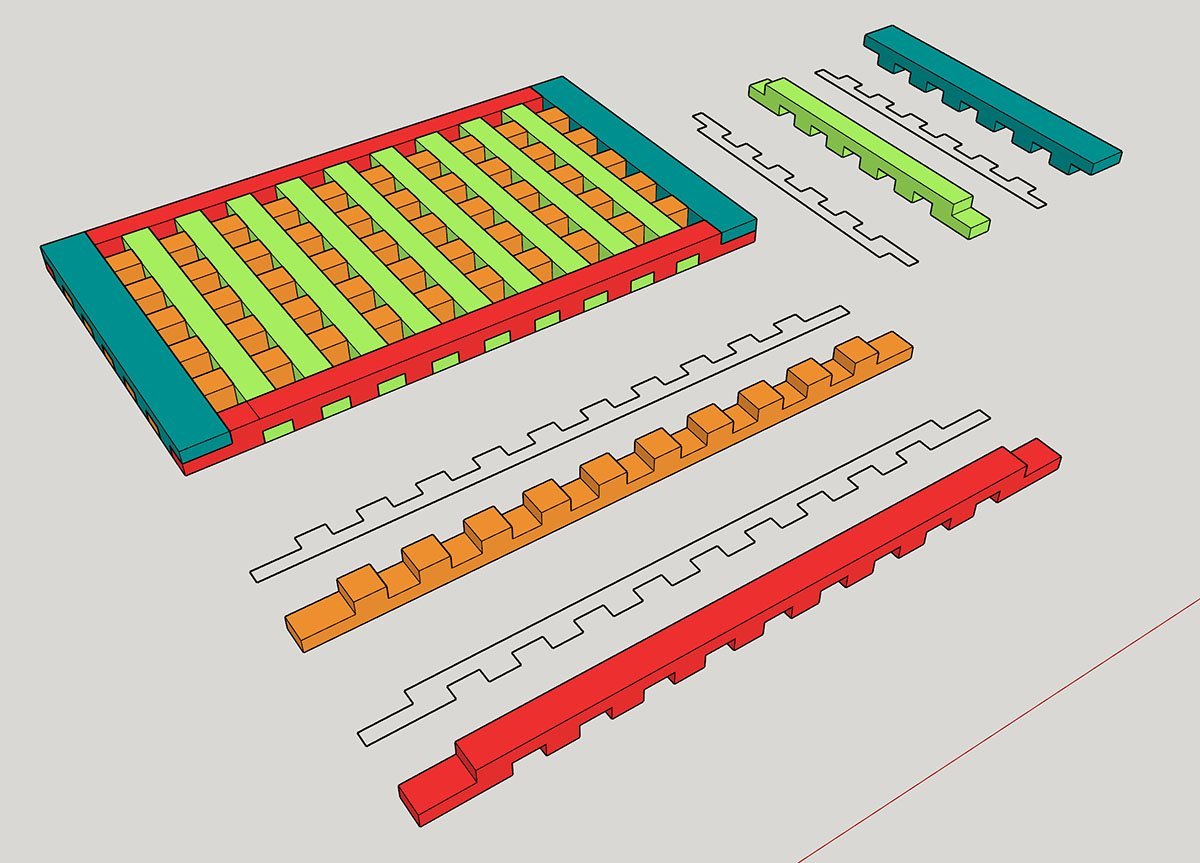
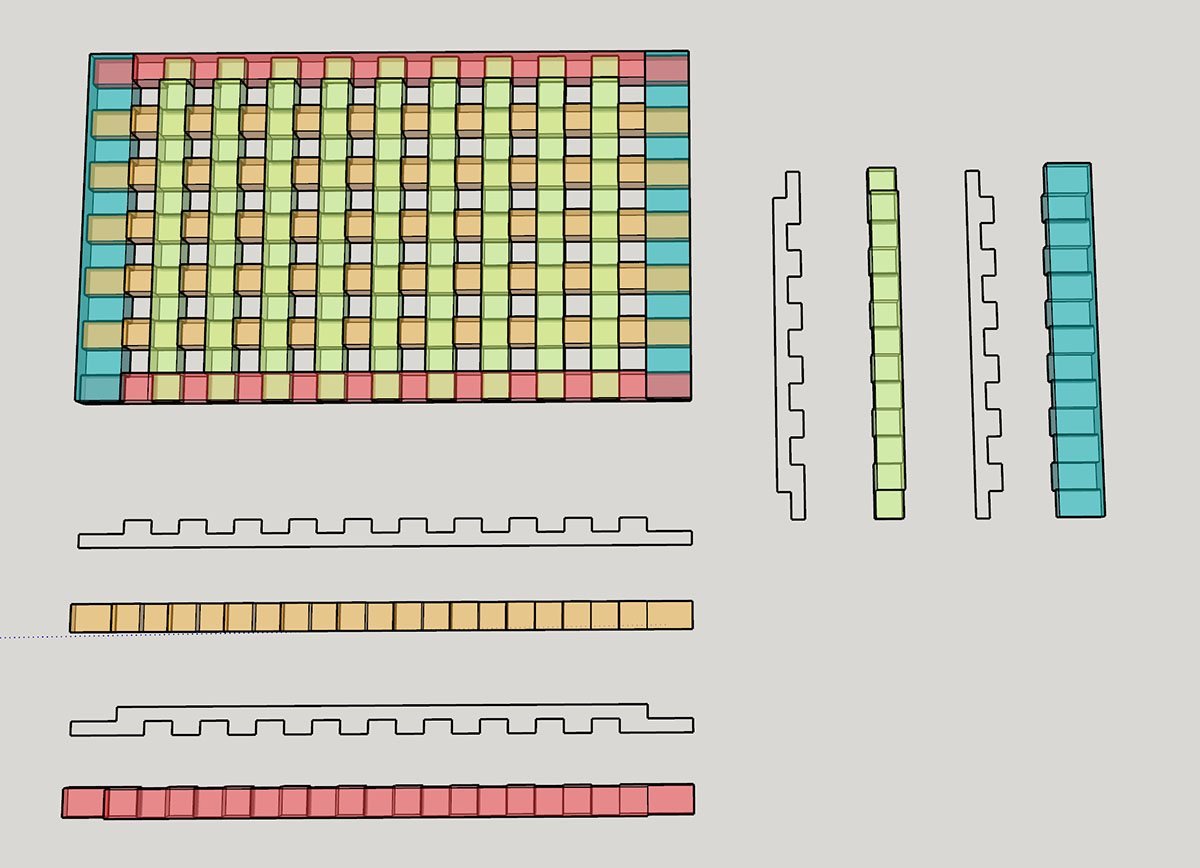
Whether the gratings are historically true or not, I didn't like the red-arrowed edges. https://www.onwardmarine.com/product/solid-teak-square-grating/ For a better outfit, I designed gratings surrounding the border, like this commercial gratings. This design is proven and ready for laser-cut. I'm curious that 18th century ships had similar gratings.
-
Failed print but also not fine enough detail
modeller_masa replied to Srenner's topic in 3D-Printing and Laser-Cutting.
I had the same experience with 0.20mm thin shrouds. I consider the parts inappropriate without thousands of supporters or more strong metal-material 3D printers. The sailing ship won't be conquered by 3D printers easily.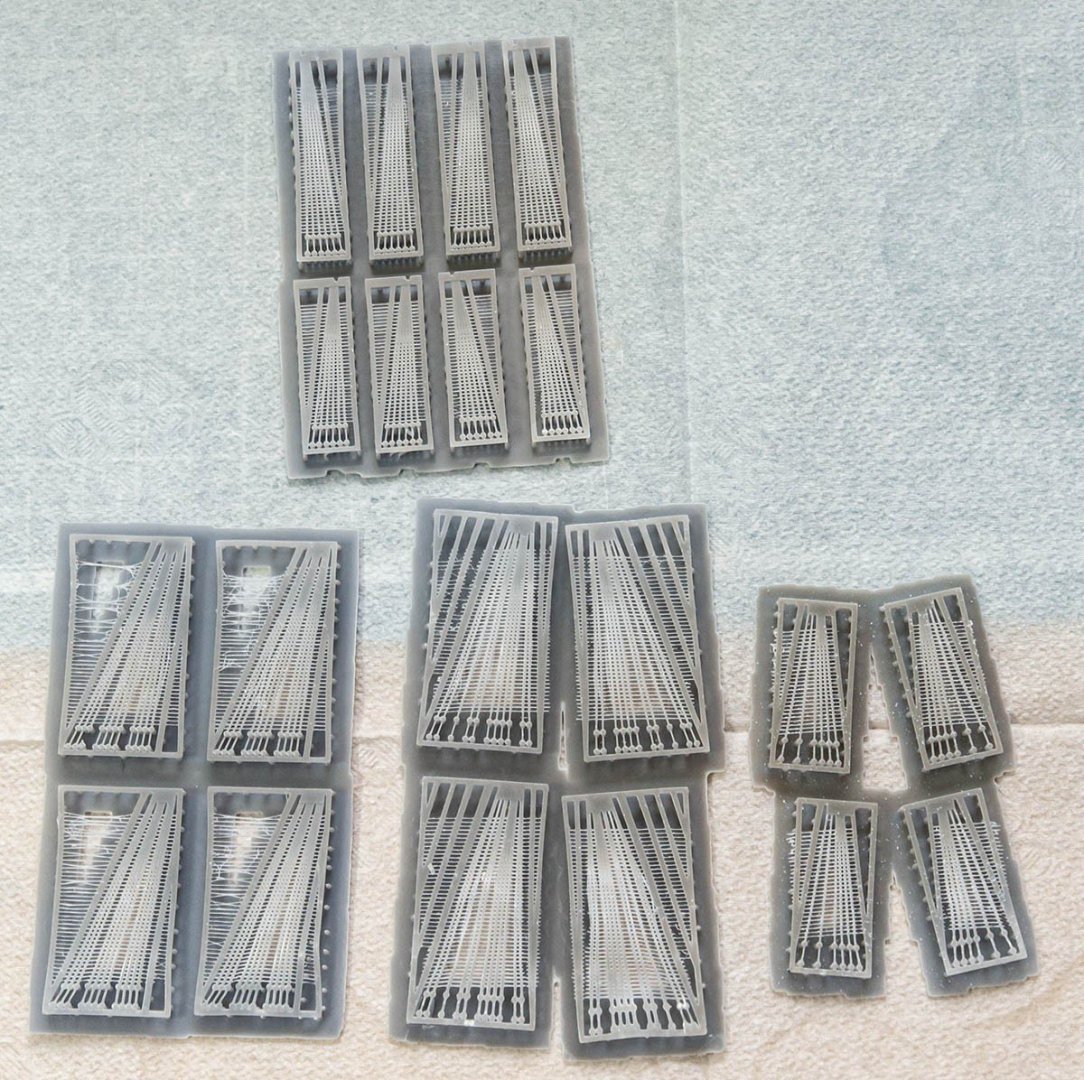
-
Here is link to my device. As I said, cutting width is about 0.40mm and depth is 6mm in the case of cherry wood. +++ I researched a little bit, and found that a fiber laser is much bigger and more expensive. I guess the Chinese manufacture lied about the specs. It is curious that a real fiber laser cutter has less than 0.20mm kerfs. The treenail marks are amazing. I didn't learn to draw spots yet. Probably very small circles would work in the same way.
-
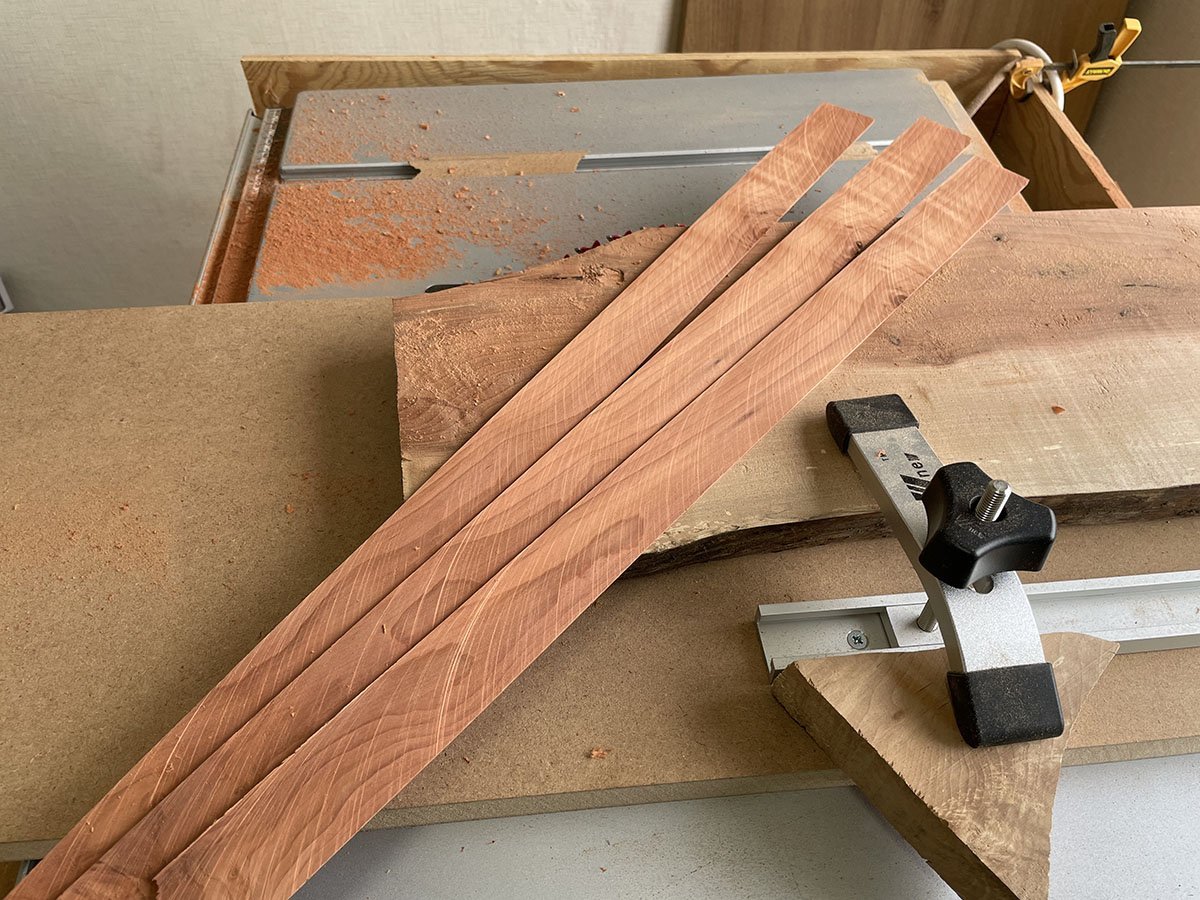
I bought the NRG thin strip saw jig for cutting planks, but I found that my table saw isn't compatible with it, unfortunately. This is my alternative method to cutting accurate thickness, which is important for deck planking. First, I cut my asian peer woods. Today's weather is clear with a little smog. I'm so scared of my table saw, so I don't measure the thickness accurately now. The plank size is 600 x 35 mm, or 2 feet x 1 1/3 inch. Thickness is vary. The next is Byrnes thickness sander. It punches material and makes a loud noise, but works pretty well. I made all the sheets 1.00mm thick. I own a $500 fiber laser cutter. Cheaper laser cutters that use a blu-ray drive diode are much inferior to fiber laser. I designed a very simple g-code that cut 135mm x 4.20mm thick planks. Final result. The size is 134.80 mm x 4.02 mm, and the gap between planks is about 0.40mm, which is thinner than half the thickness of a table saw blade. Also, it is much safer. The burning marks at the sides may be a good expression of deck caulking. I put my large Proxxon table saw in a warehouse. 😎


-
I'll come back to Papegojan and complete it. The level 3 Smack will be posted weeks later!


- 4 replies
-
- 11
-
-

-
- Model Shipways
- Norwegian Sailing Pram
- (and 2 more)
-
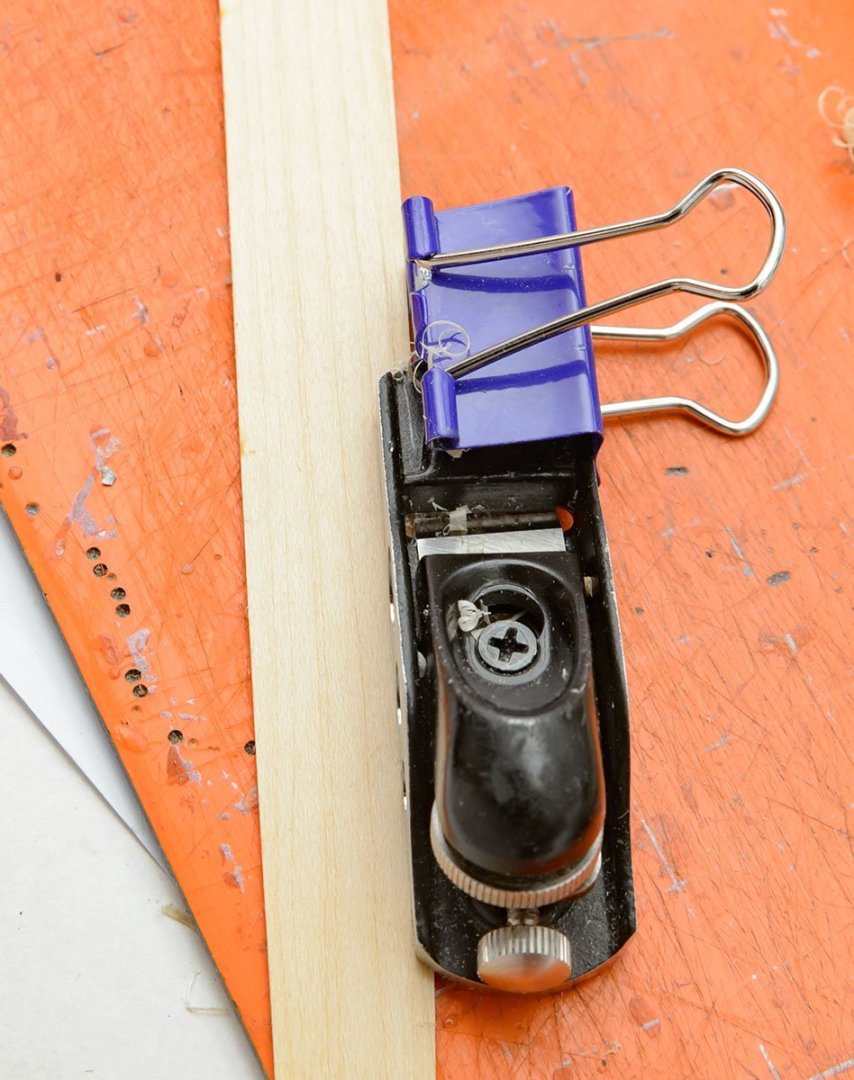
I bought the Veritas miniature plow plane, but it wasn't as useful as the miniature block plane. It was too small to keep the track straight. I confirmed every plan in the instructions is in the wrong scale. It is good to download and print the original instruction PDF files from Model-Expo.


- 4 replies
-
- 6
-
-
-
- Model Shipways
- Norwegian Sailing Pram
- (and 2 more)
-
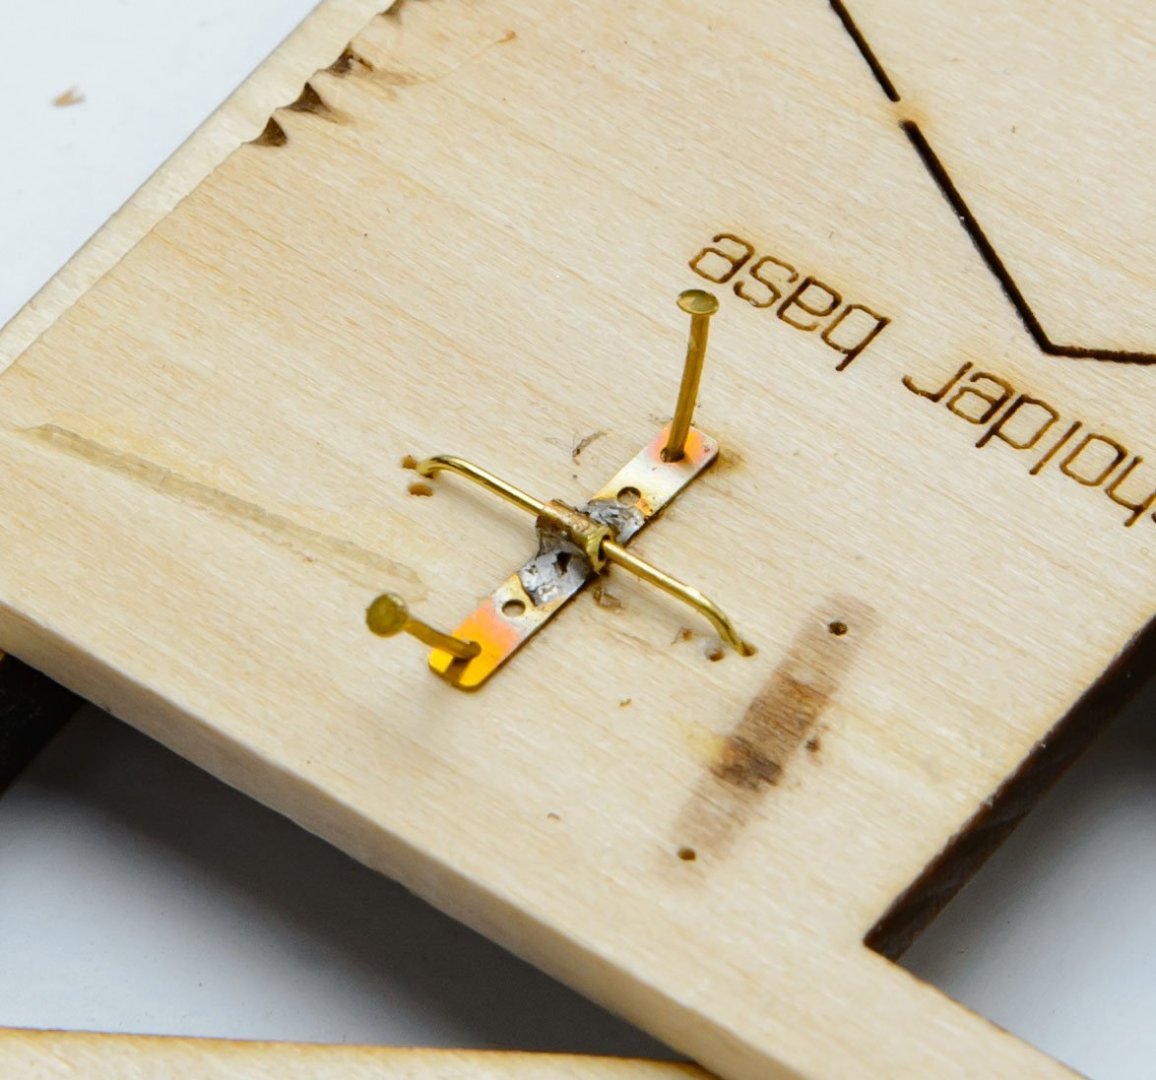
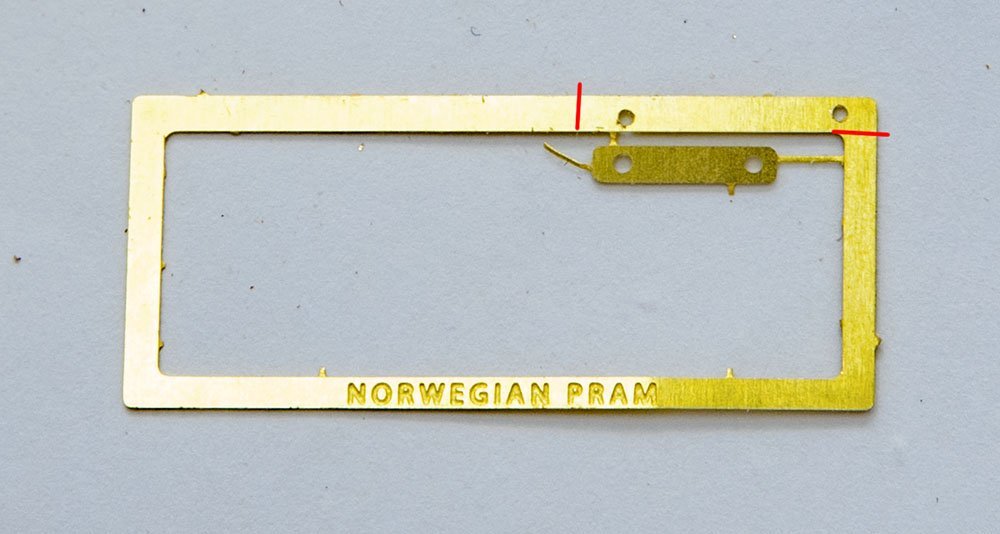
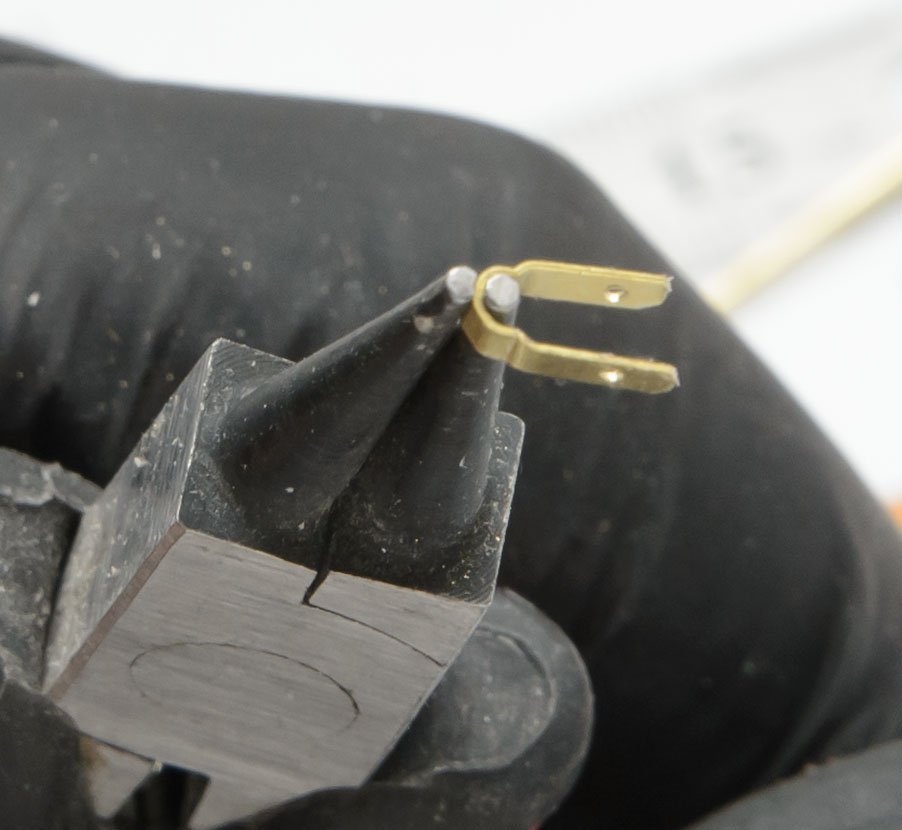
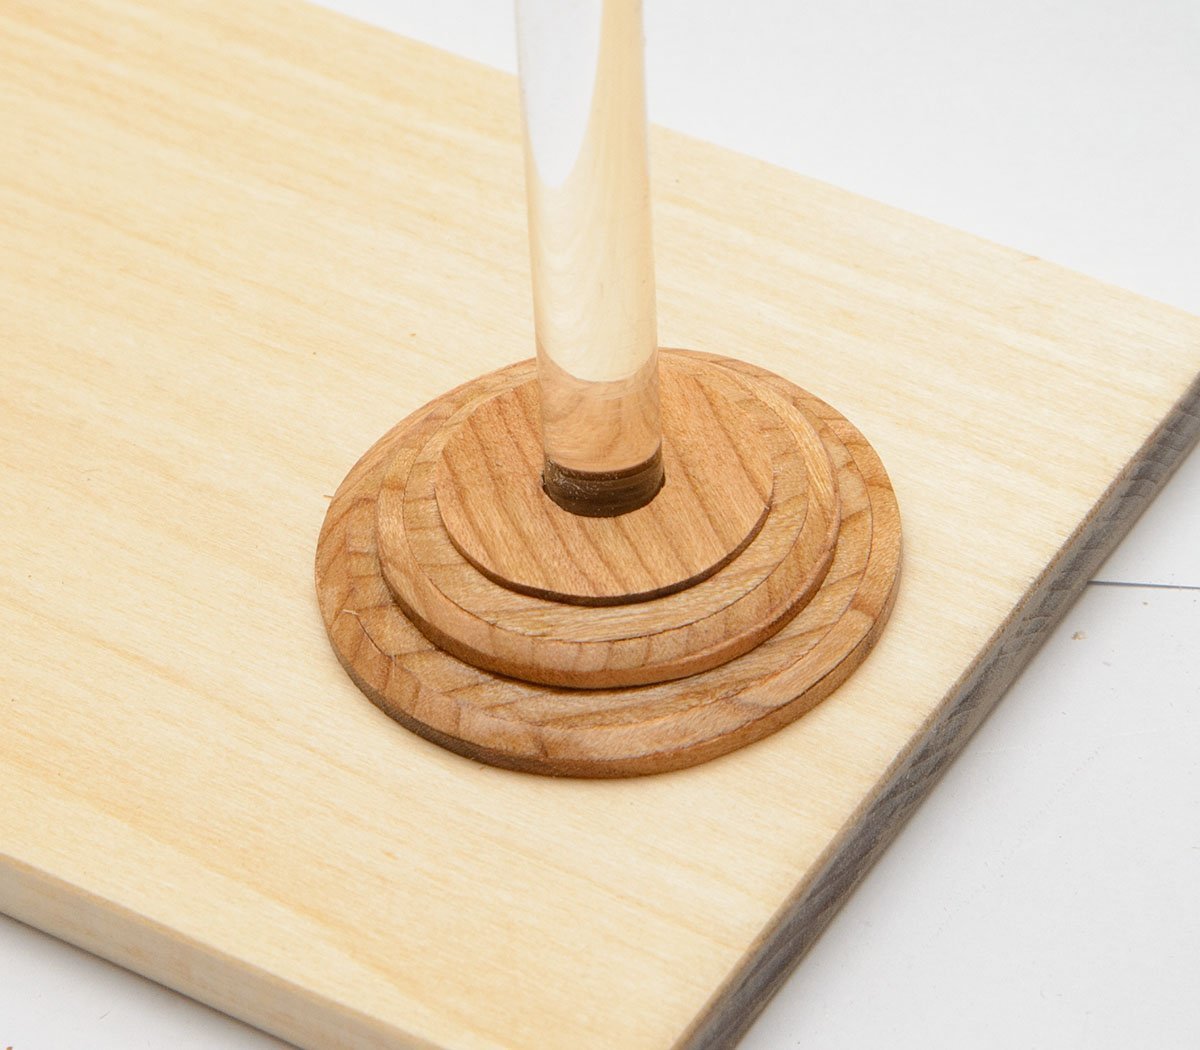
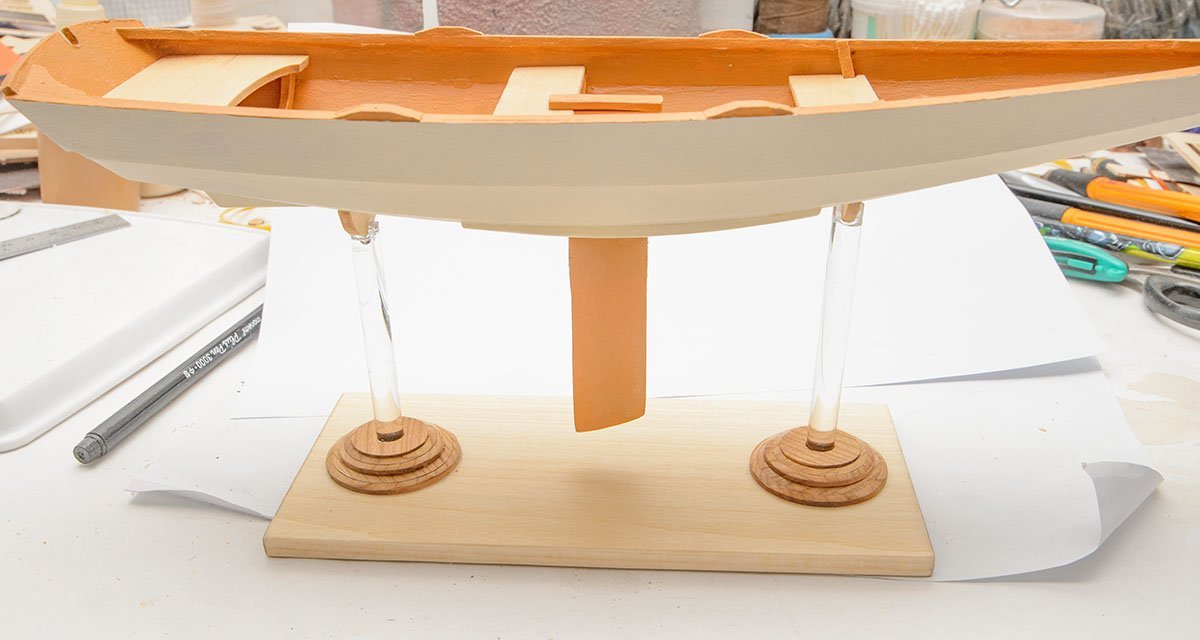
I upgraded the Norwegian Pram kit's stand to a cherry wood stand and acrylic pillar. I cut cherry wood sheets using a laser cutter, and glued them together. I slightly sanded the edges. It is a cheap and nice result, but the sanding was a bit frustrating. I'll try 3D CNC next time.


- 2 replies
-
- 18
-
-
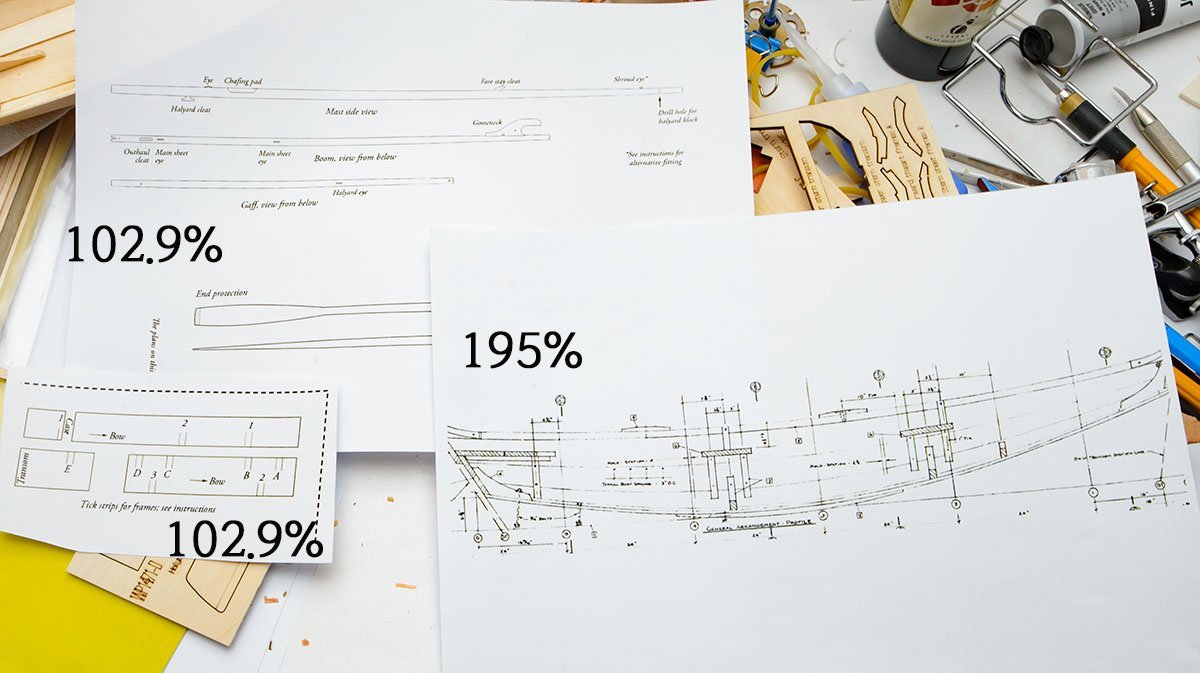
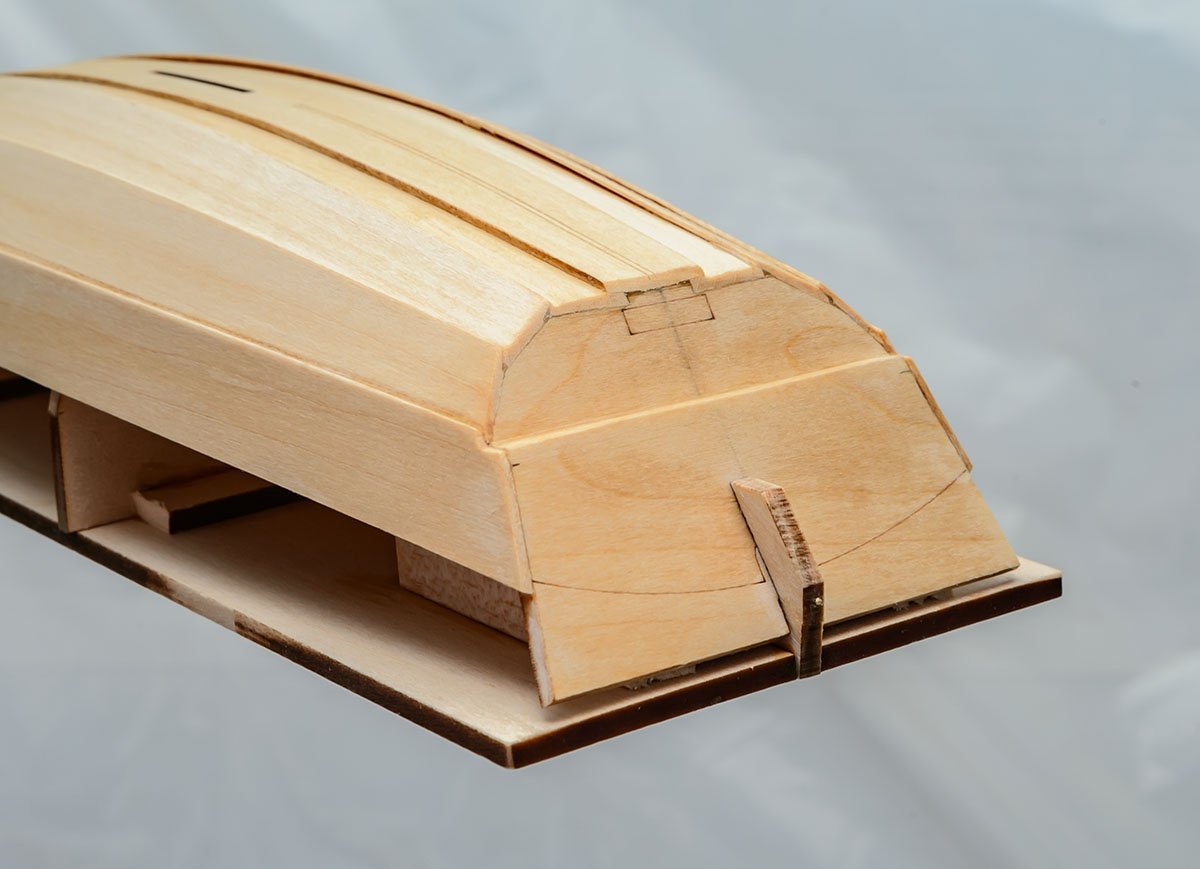
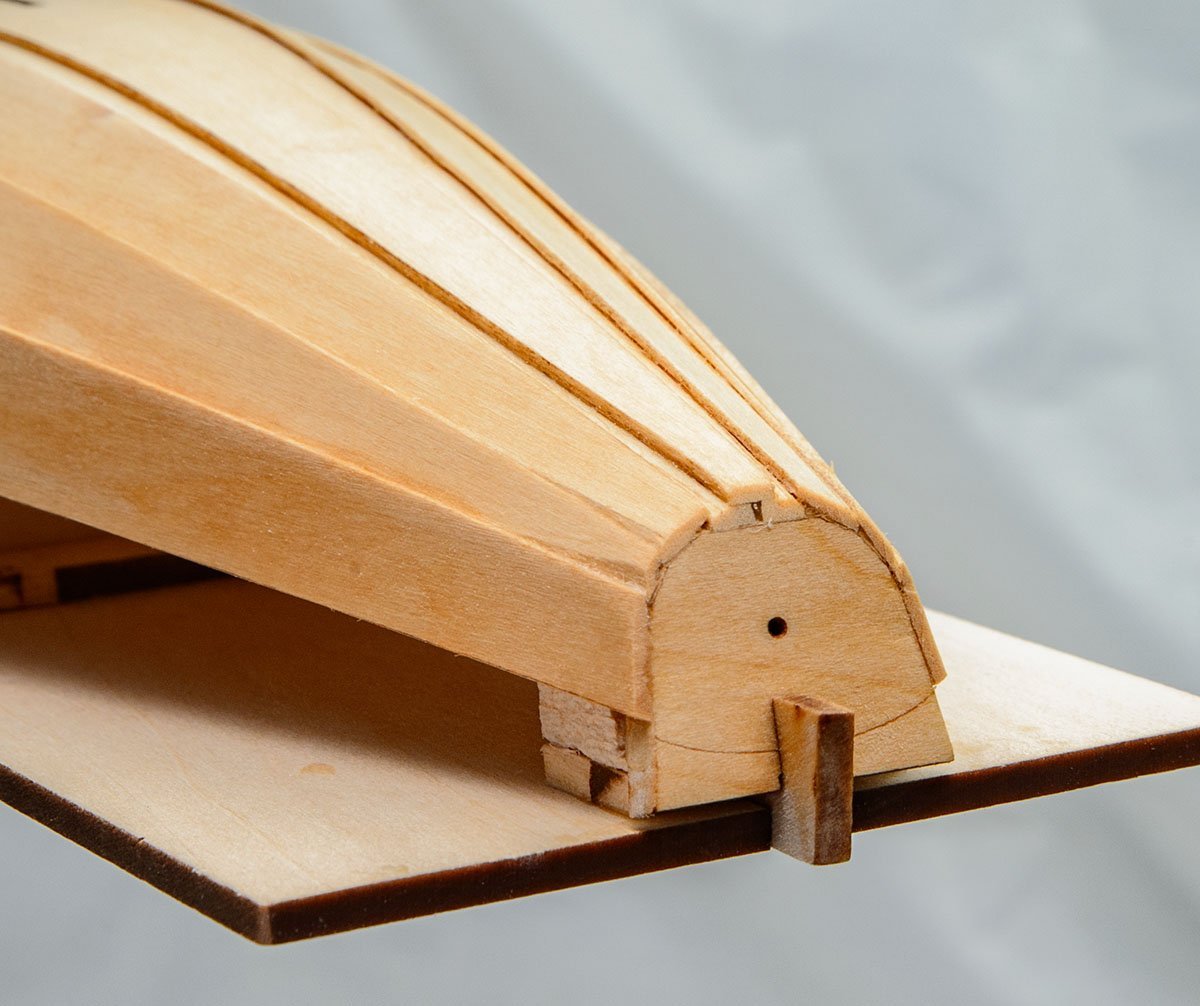
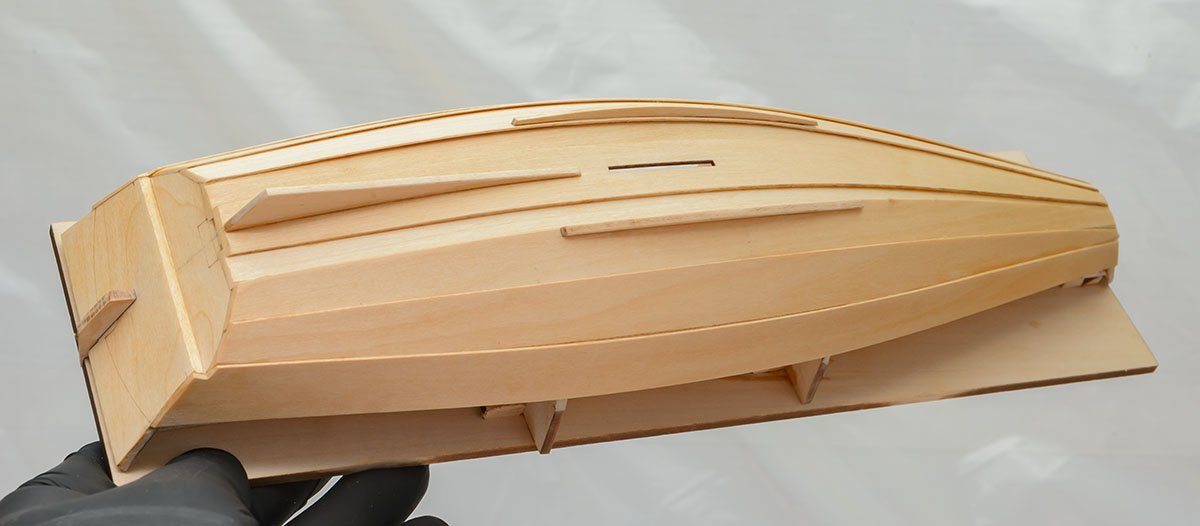
The next is the level 2 Norwegian Sailing Pram. Unfortunately, this kit also has some minor laser cutting issues. Don't forget to enlarge plans in the instructions! My ratio was 102.85%. Bow transom. Stern transom. I made my life better again. Bottom planks. It is a bit tricky to make rabbets and gains. I didn't want to order an expensive Veritas plow plane, so I modified my Veritas block plane. Planking is done. Skeg and bilge keels. Finally, I removed the building board. I'll print the enlarged plans tomorrow. 😴


- 4 replies
-
- 7
-
-
- Model Shipways
- Norwegian Sailing Pram
- (and 2 more)
-
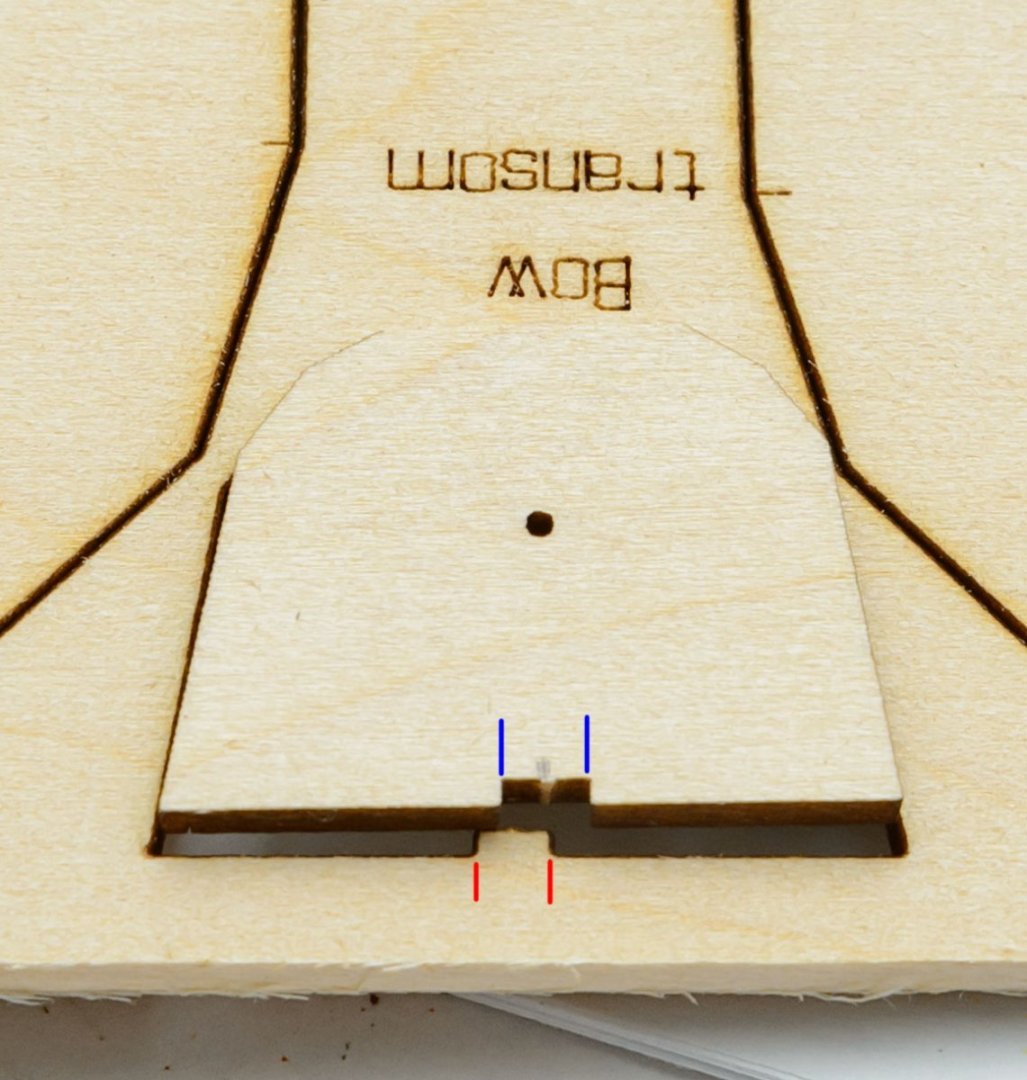
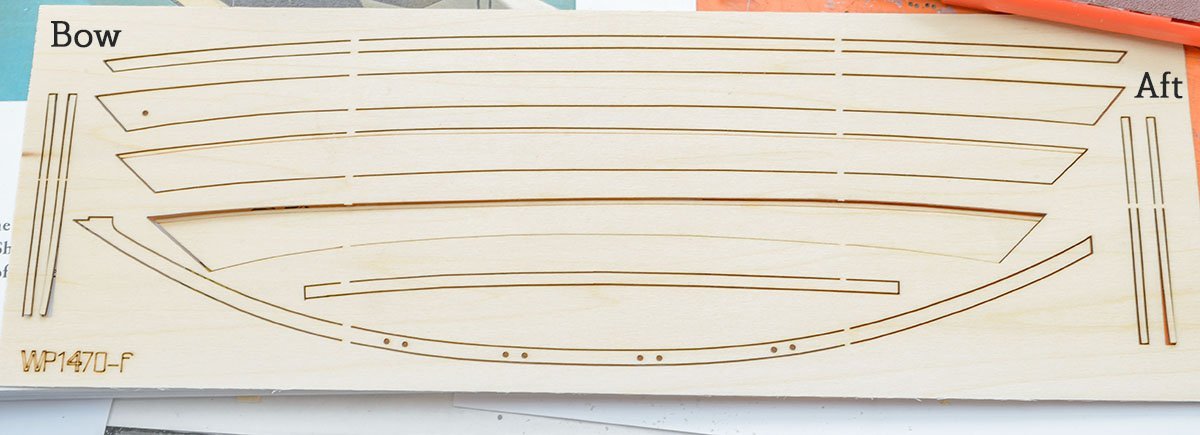
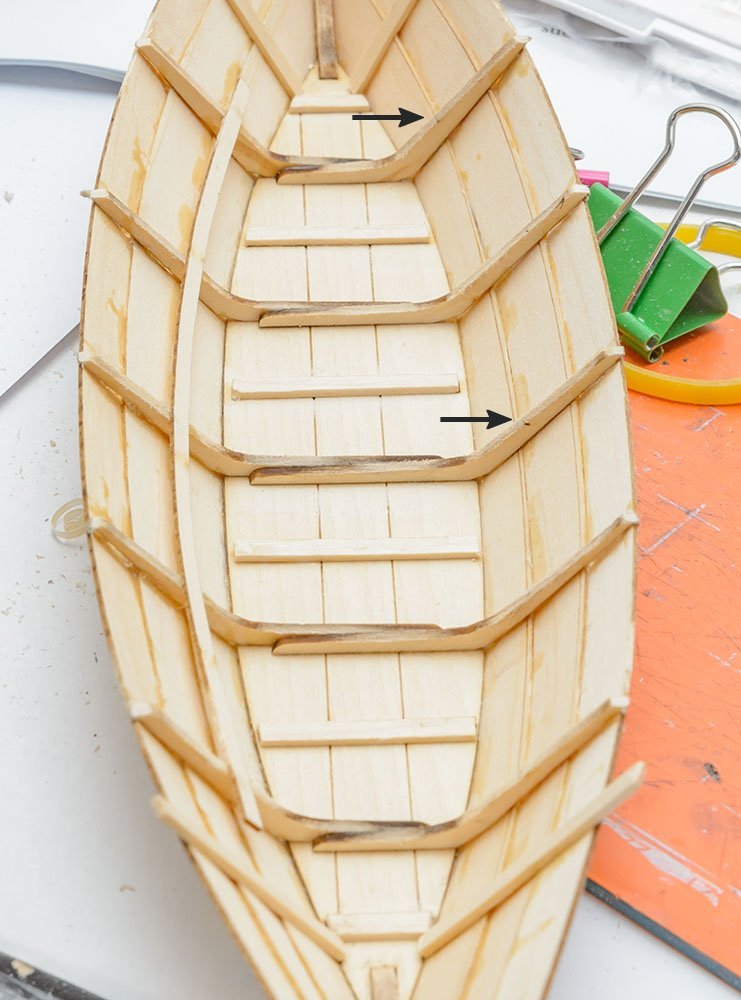
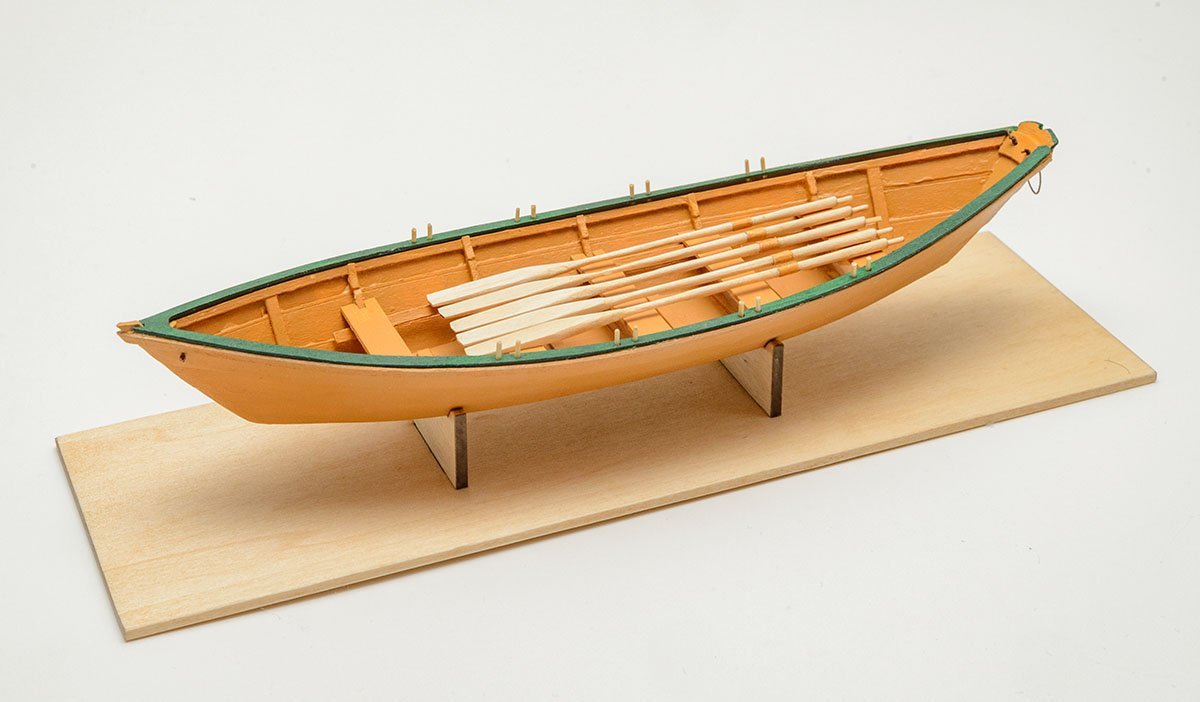
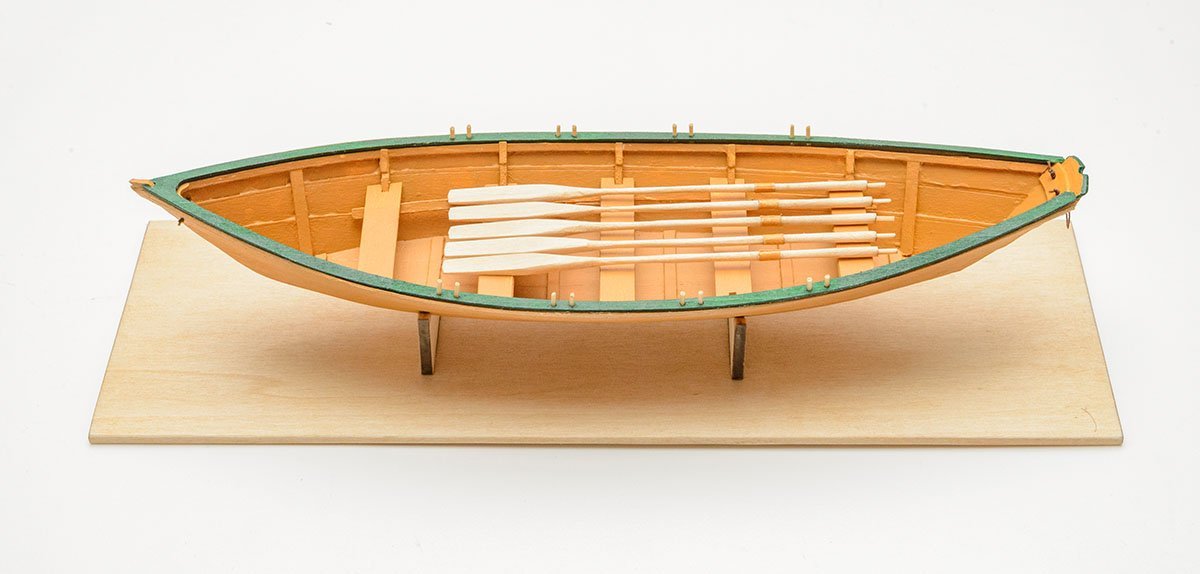
IMPORTANT NOTICE DOWNLOAD ALL THE PDF MANUALS FROM THE MODEL EXPO WEBSITE AND PRINT PLANS YOU NEED. ALL THE 1:1 PLANS IN THE PAPER INSTRUCTIONS FOR THE THREE KITS ARE WRONG. (NOT EXACTLY 1:1) CHECK THAT THE PRINT SCALE OPTION IS DEFAULT OR 100%. ------------------------------------------------------------------------------------------------ While I was frustrated that I lost the figurehead of the Papegojan, I tried another kit to recover my mind. I have no complaint about this kit is perfect start for beginners. Unfortunately, I found some minor errors, such as wrong laser cut or inappropriate plan size on the manuals, so I'll leave only a few short pics to help other builders. The plans in the instructions are downsized. I scanned it and enlarged it to 102.9%. I guess that the prototype sample by the professor is different from the mass production version. It is a simple tip to make my life better. This is a critical error. The guiding line on one side of the planks goes inside because both plank sheets are identical. I would say that the kit manufacturer forgot to reverse the opposite sheet. The risers goes here. The Lowell Grand Banks Dory is done!

-
- 11
-
-
- Model Shipways
- Lowell Grand Banks Dory
- (and 2 more)
-
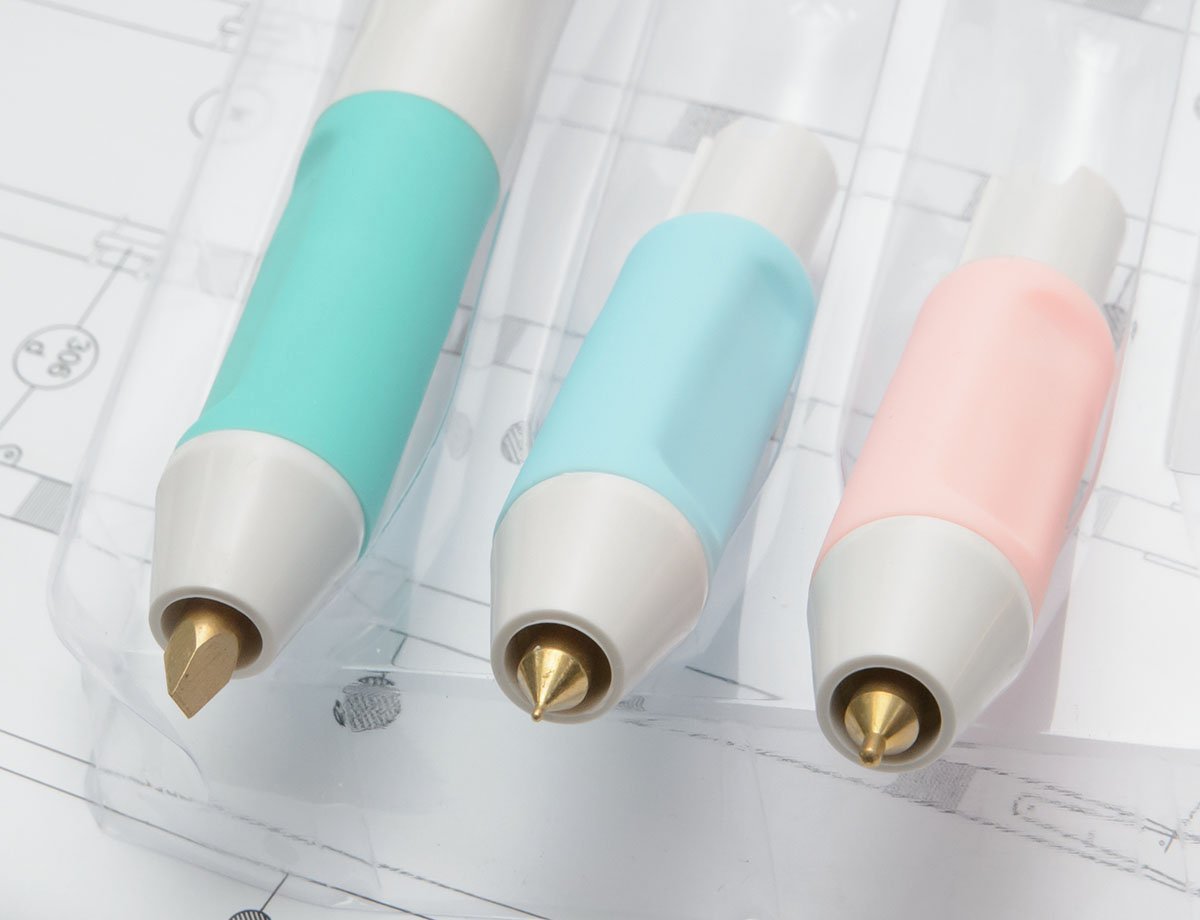
Hot stamping pen
modeller_masa replied to modeller_masa's topic in Modeling tools and Workshop Equipment
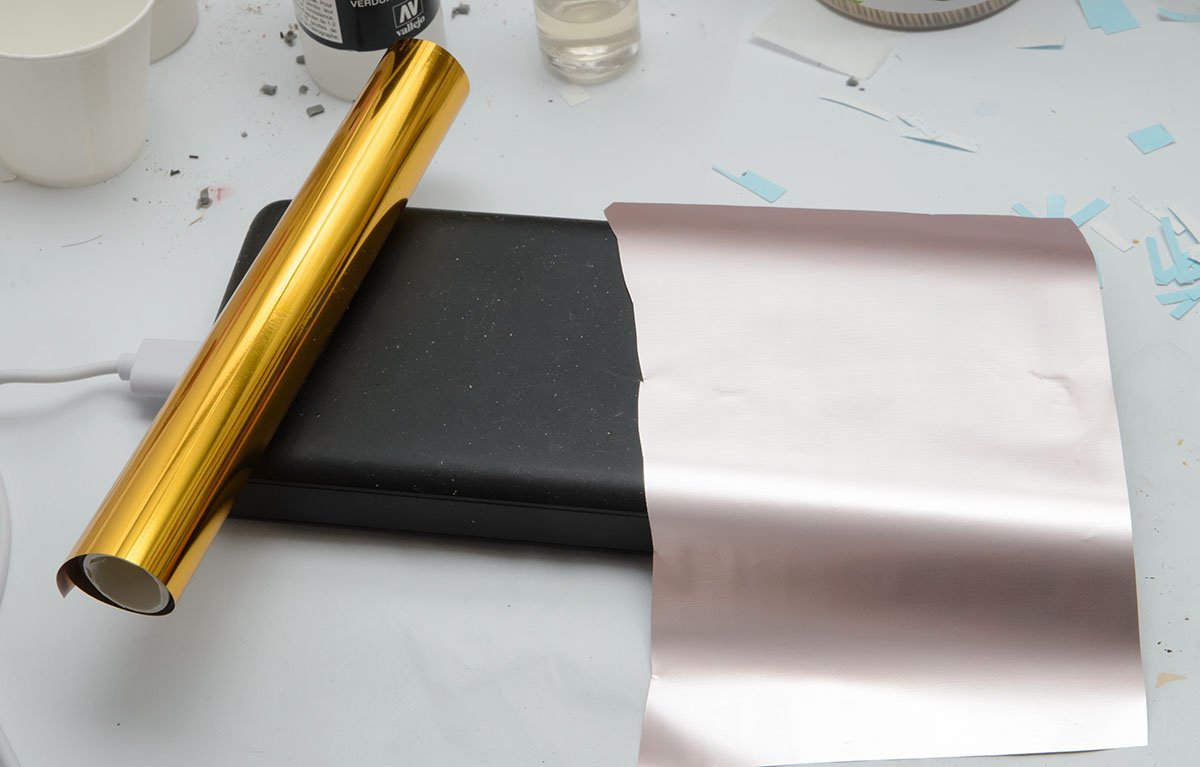
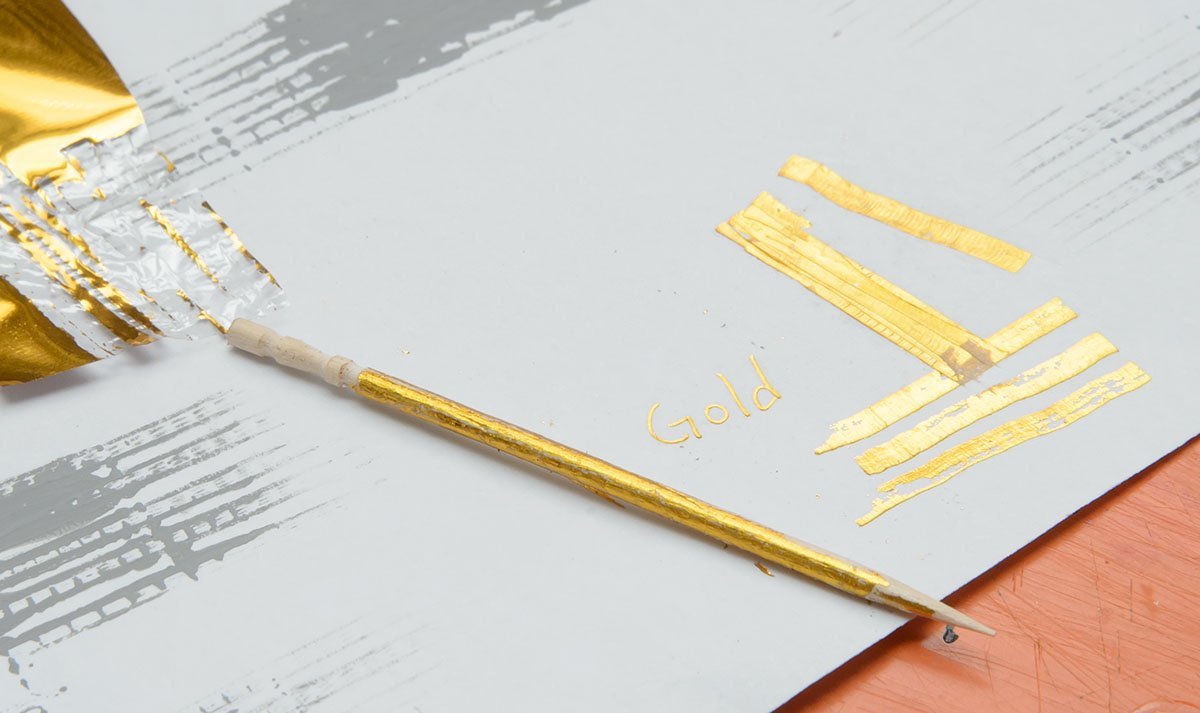
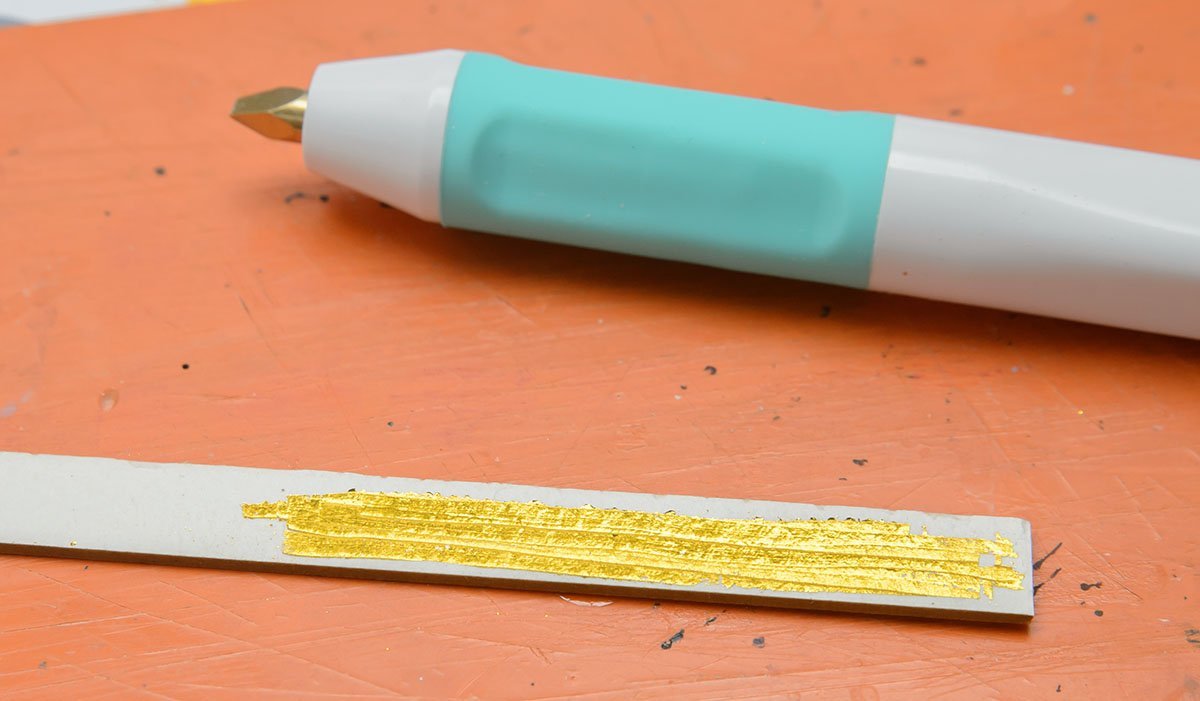
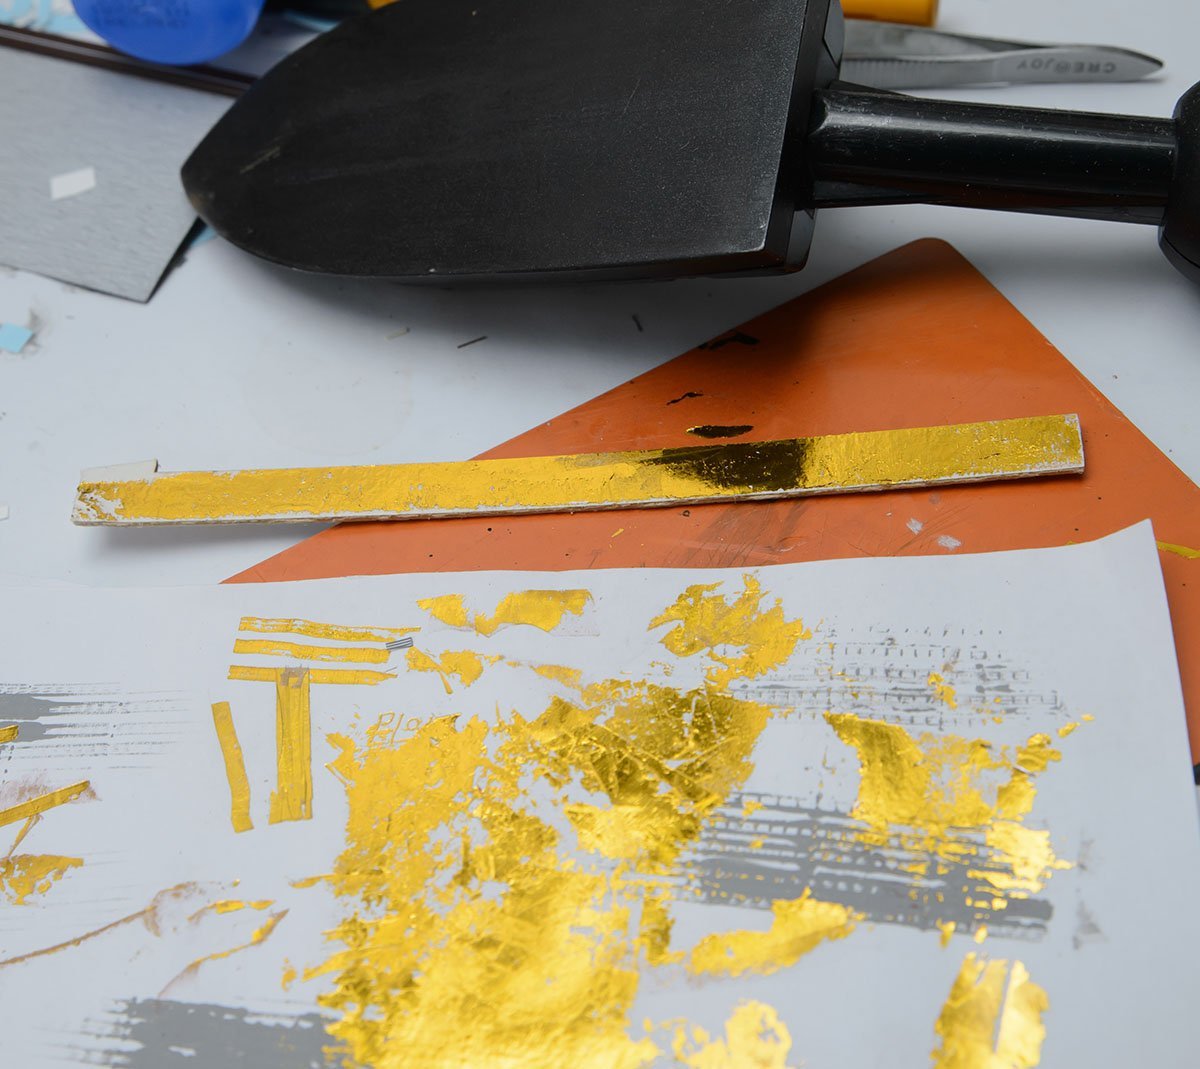
I received the hot stamping tool and the hot stamping foil. The pen is USB-powered, so I needed an external battery pack. The pen's weight is very light, like a pencil. The back-adhesive side has a pinky metal color. I tested the strength of the foil. When I applied it to paper and wood, it was so strong that I couldn't remove it with my nail. I had to scrap it with a chisel blade. On the contrary, it also works on plastic runners, but it is relatively weak and a bit hard to apply with the default pen. Metal never attached the foil. When I tried to use it bigger than the pen's size, I had several difficulties. The picture shows many pen strokes. I tried to apply it on a wide surface with a leather work iron. I set the temperature at 125℃. (250℉) Unfortunately, the foil was so sensitive that it didn't allow for a uniform surface. I saw some guides for applying the foil to T-shirts. I guess I need another tool to apply it over a wide area. The appropriate varnish should only be water-based. When I tested a solvent-based varnish, the gold surface melted or lost the glossy finish. In my opinion, this tool is good for paper and wooden models, especially those with narrow or small areas. For example, a figurehead doesn't need to have a uniformly glossy gold surface. In that case, this hot stamping pen would be a reasonable and intuitive tool with a quick and fast result. It is a bad thing that I can't make copper sheathing plates with the foil...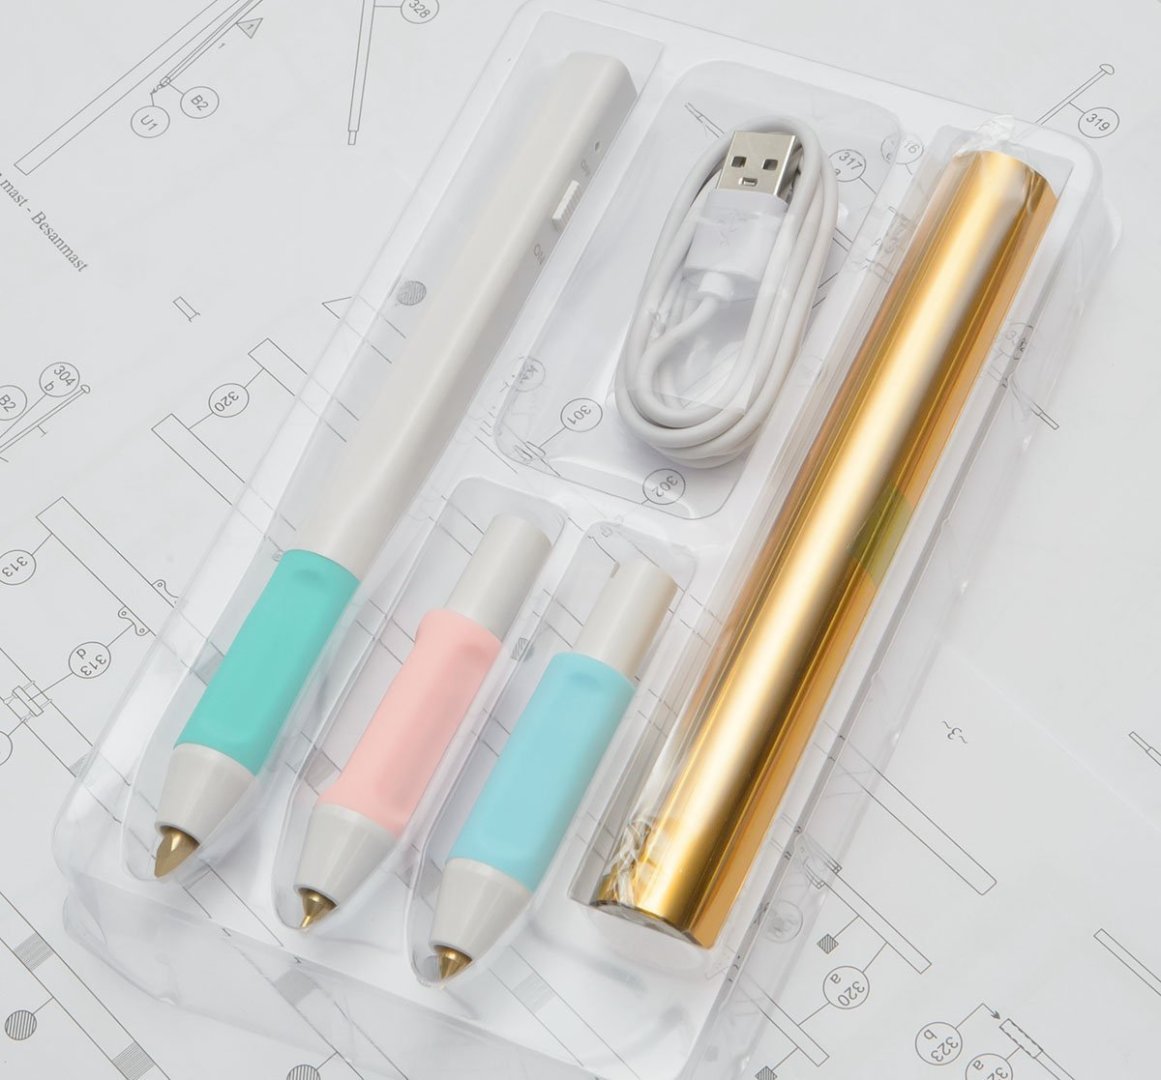
-
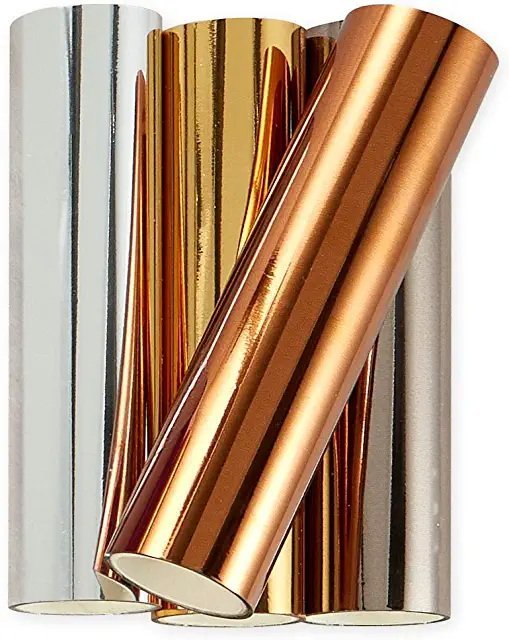
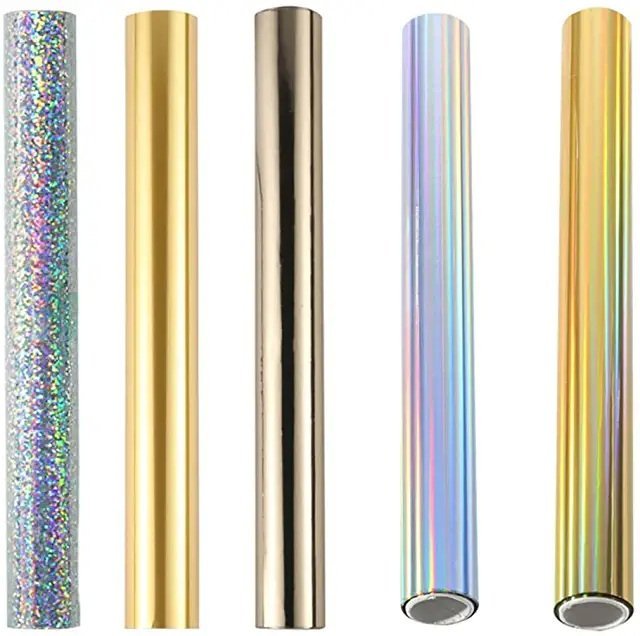
I found a useful metal-gold plating tool. It is a hot stamping pen or a hot foil pen. It uses a heat-activated foil with iron. The iron's temperature is 175~200℃ (350~400℉), so I can't use the pen for plastic kits. There are a lot of colors of heat-activated foil. It seems like a very simple, easy, and intuitive tool. The surface is more shiny than brush painting because it is real aluminium metal. I hope it lasts longer than metal-colored paints. The residues can be cut with a cutter like I handle masking tape. In addition, I saw some videos that the heat-activated foil also works with laser printer toner. With very accurate temperature control, I may add very detailed metal-gold plated patterns on the paper hull. https://www.profoil.com/introduction-toner-foiling/ I'll try the tool on wooden and paper ships.
-
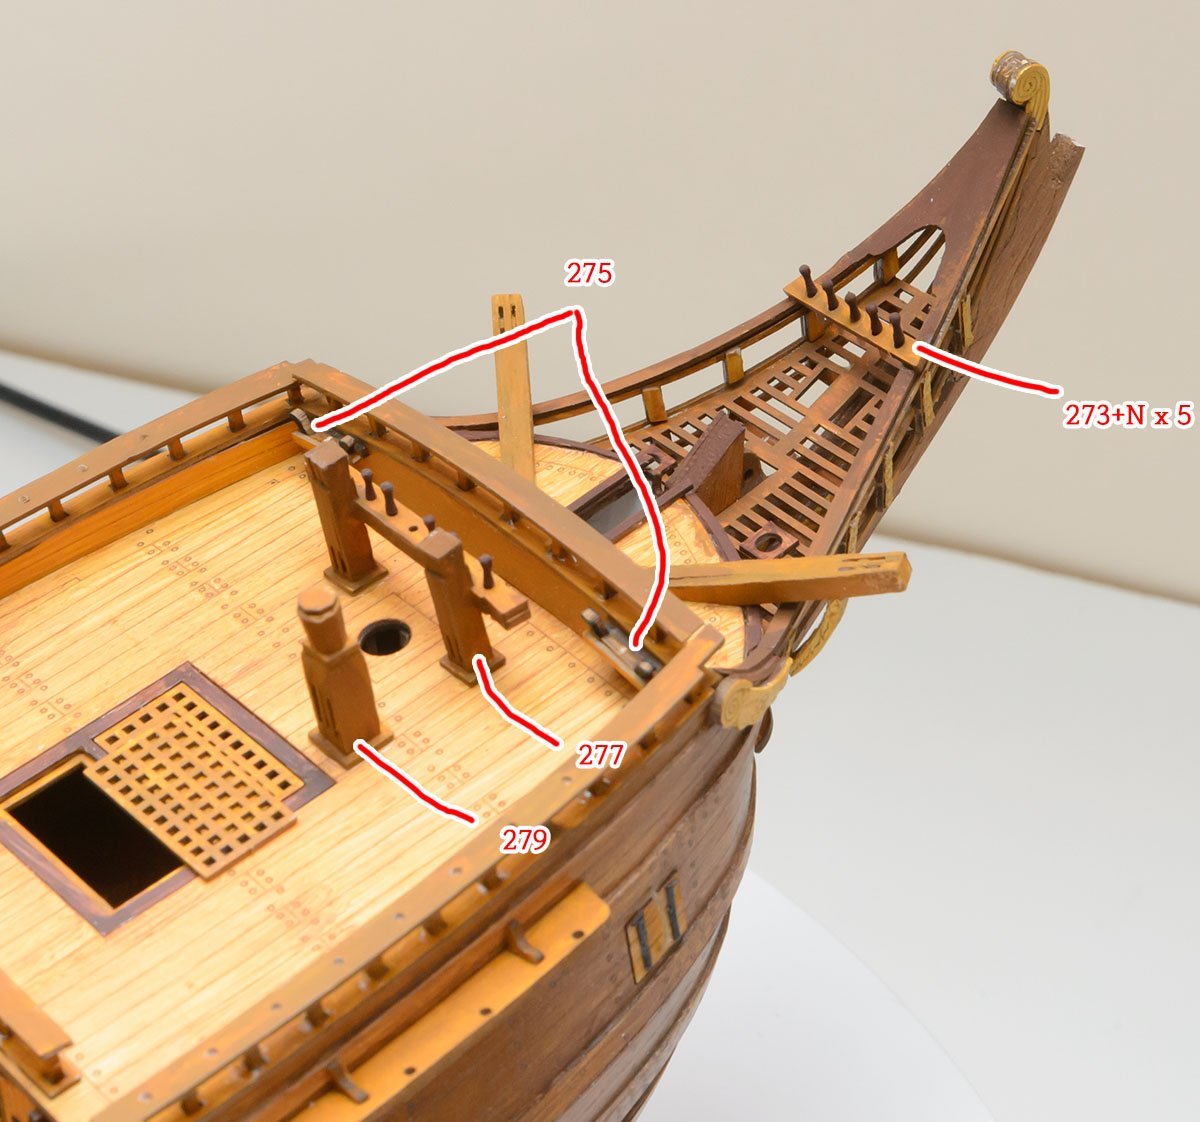
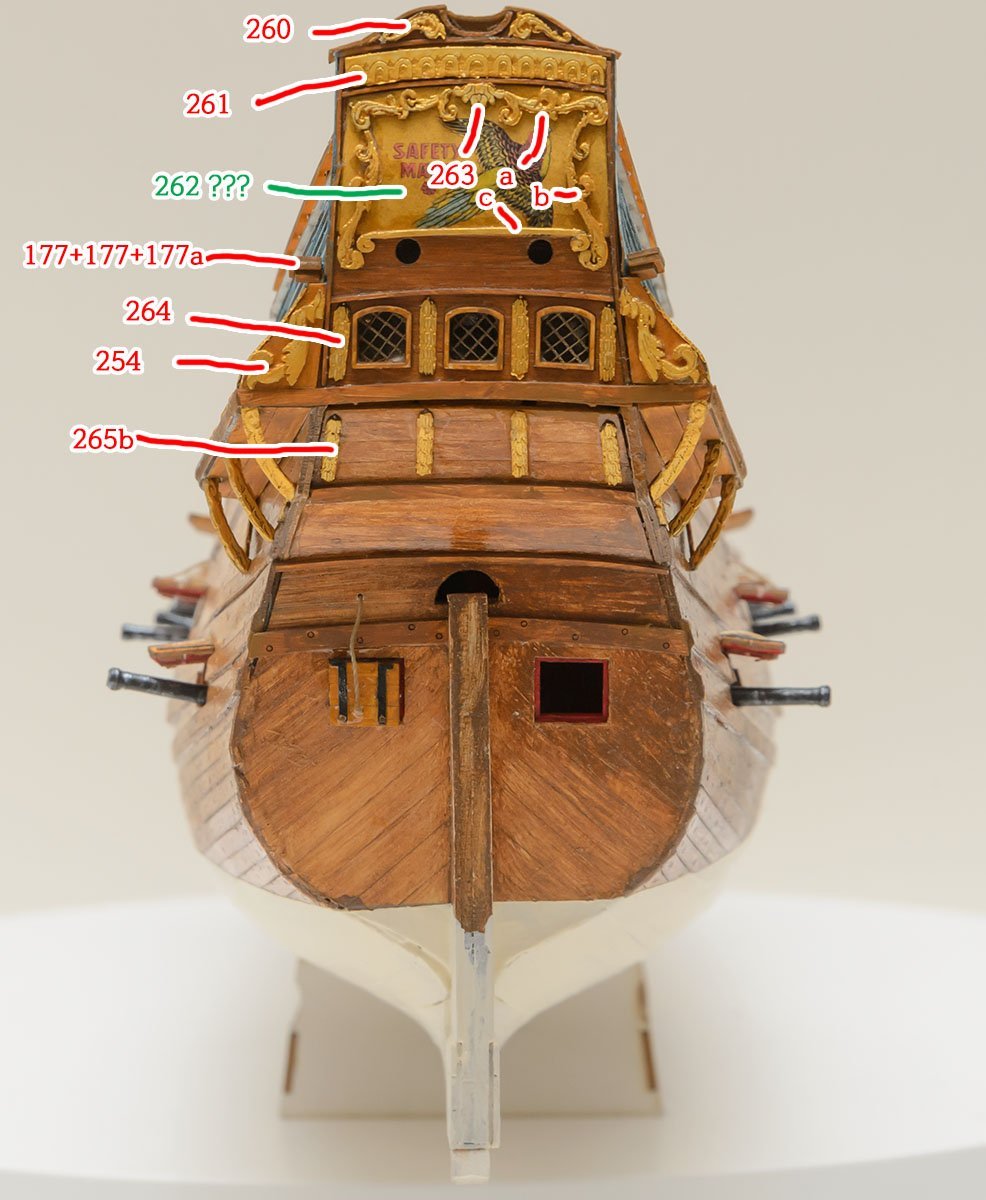
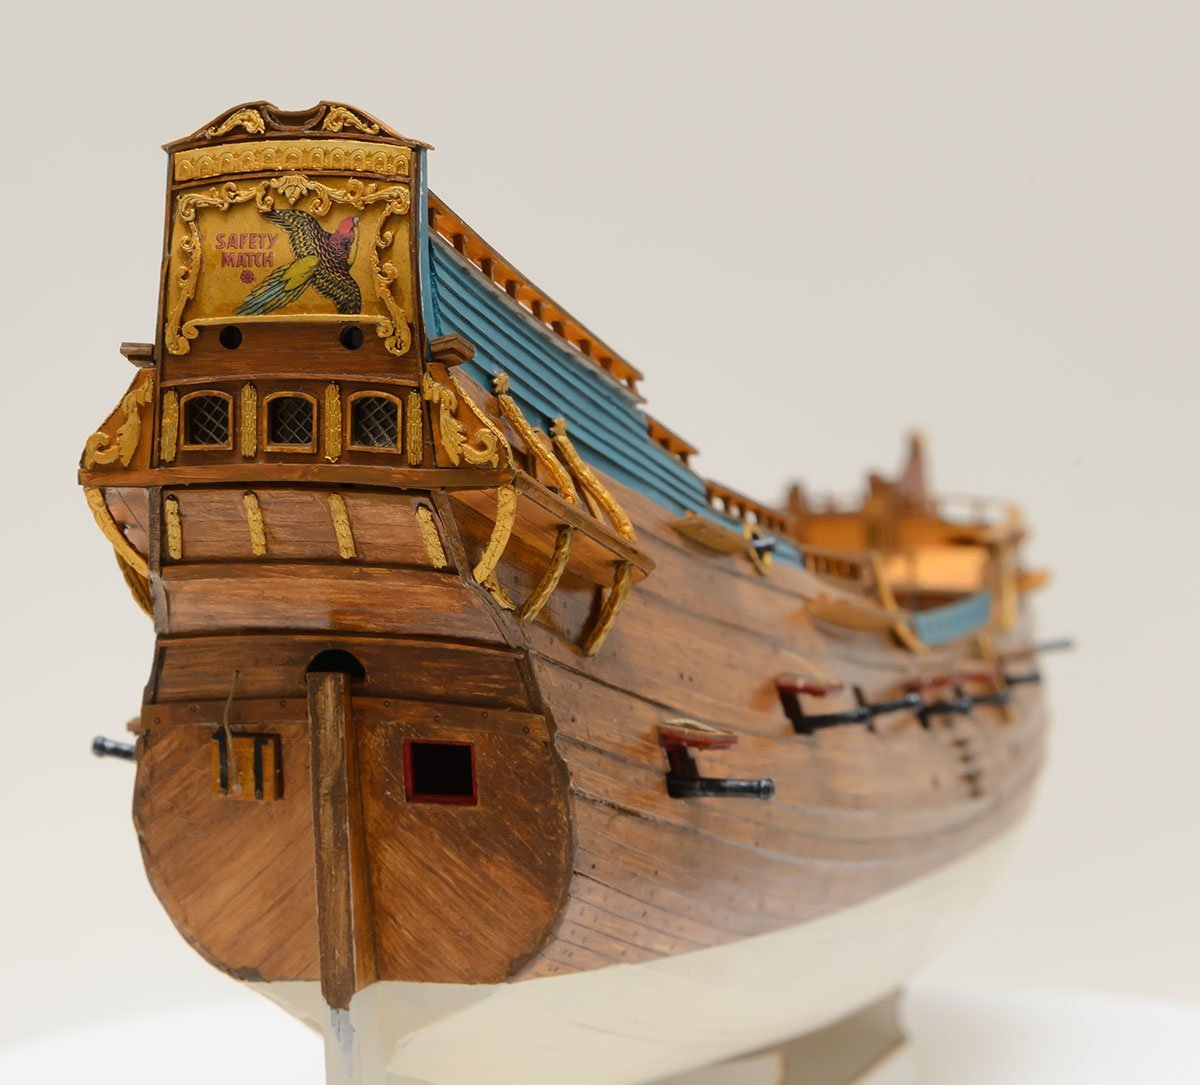
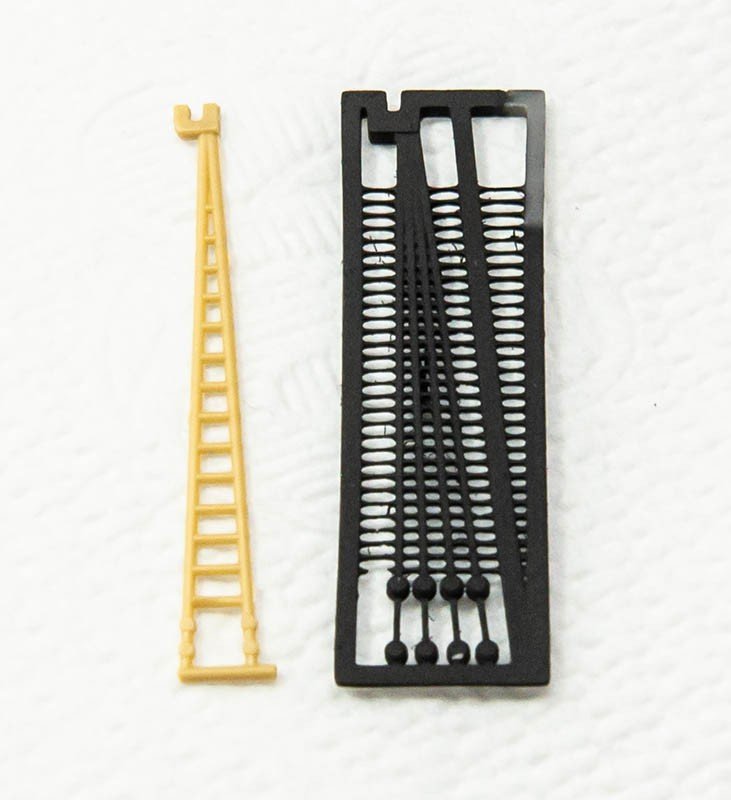
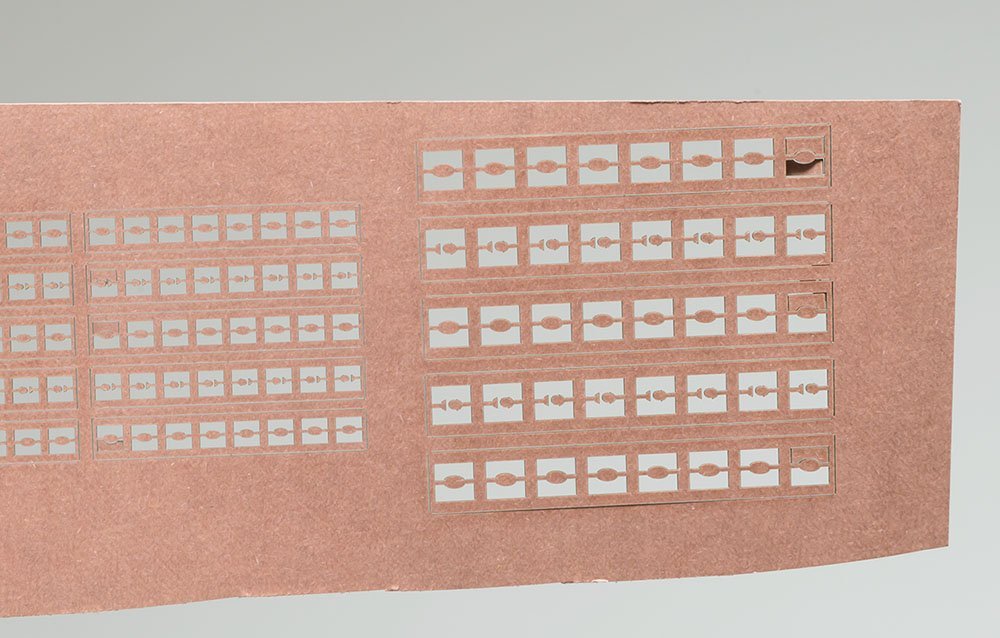
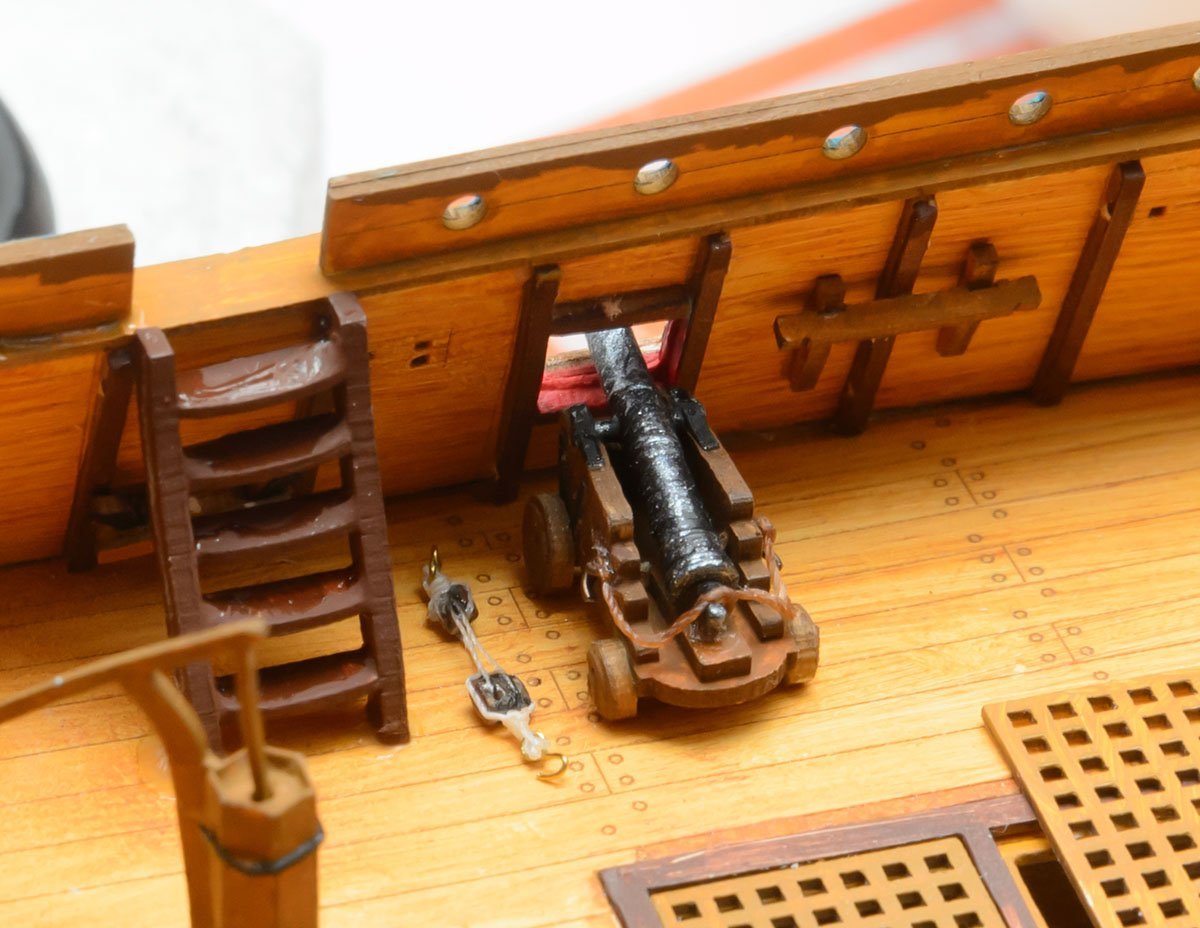
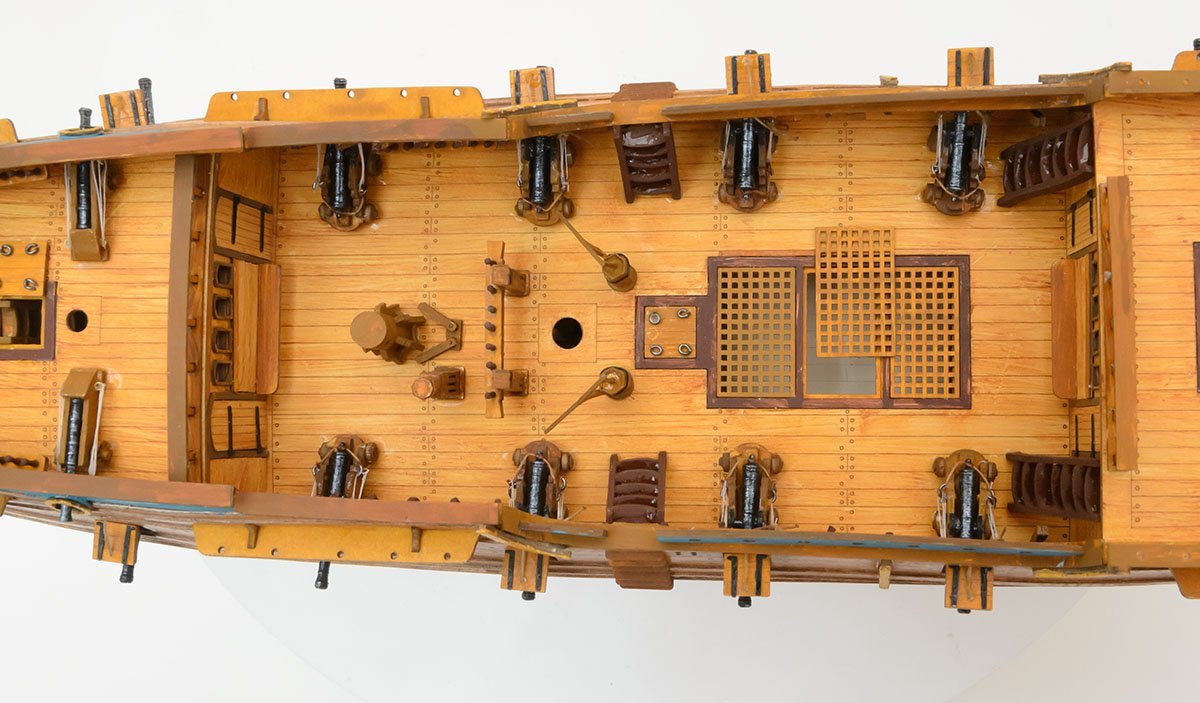
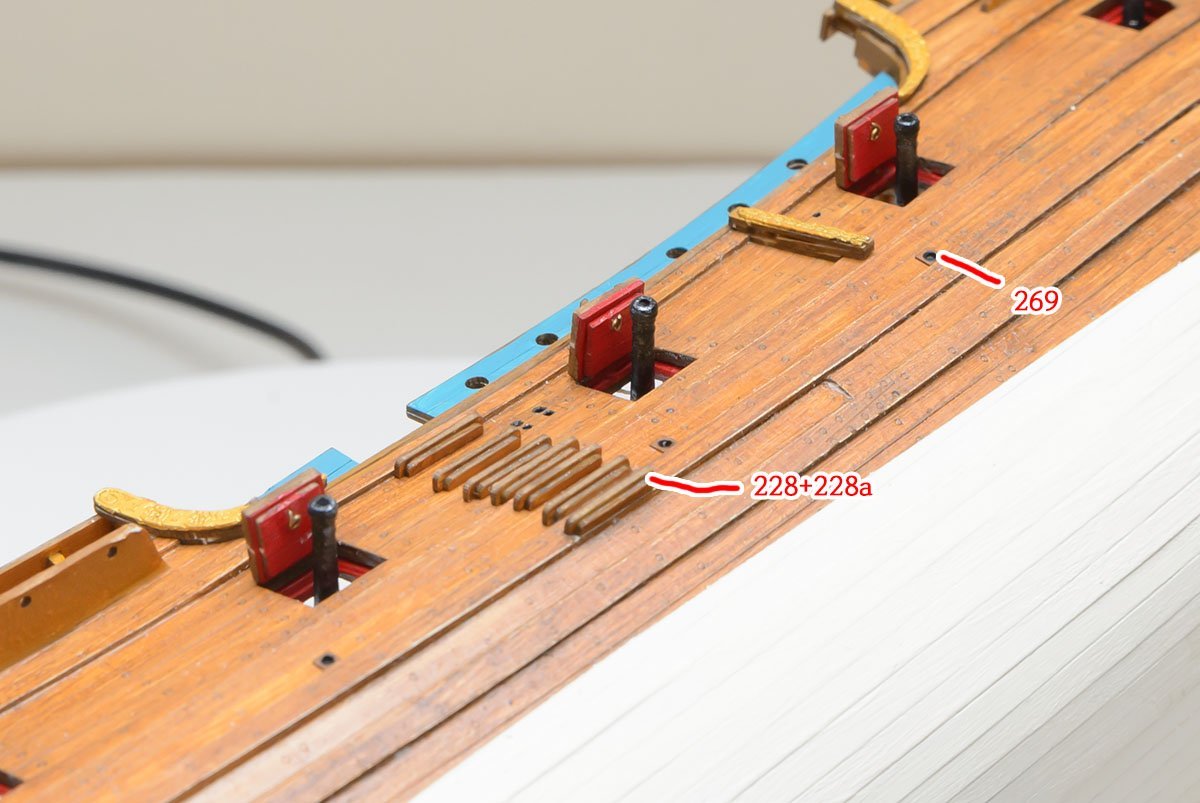
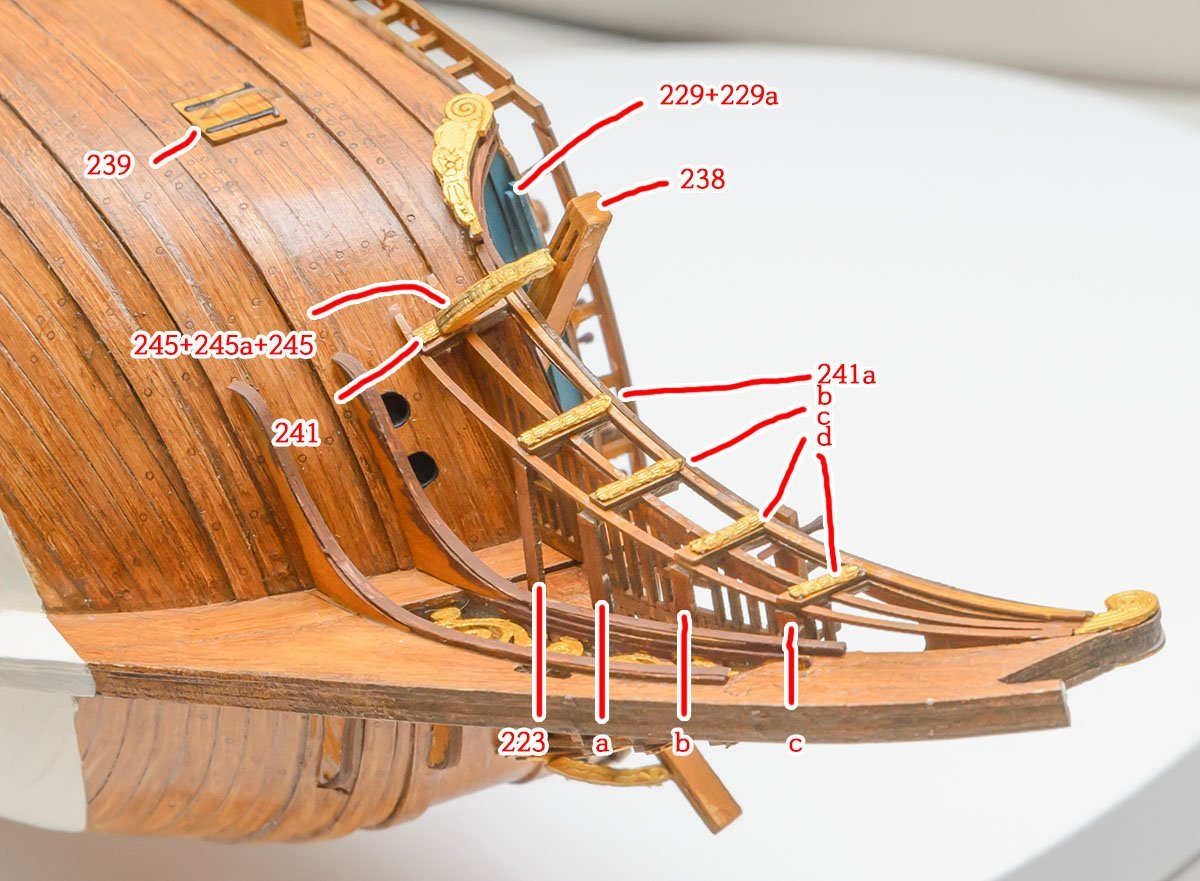
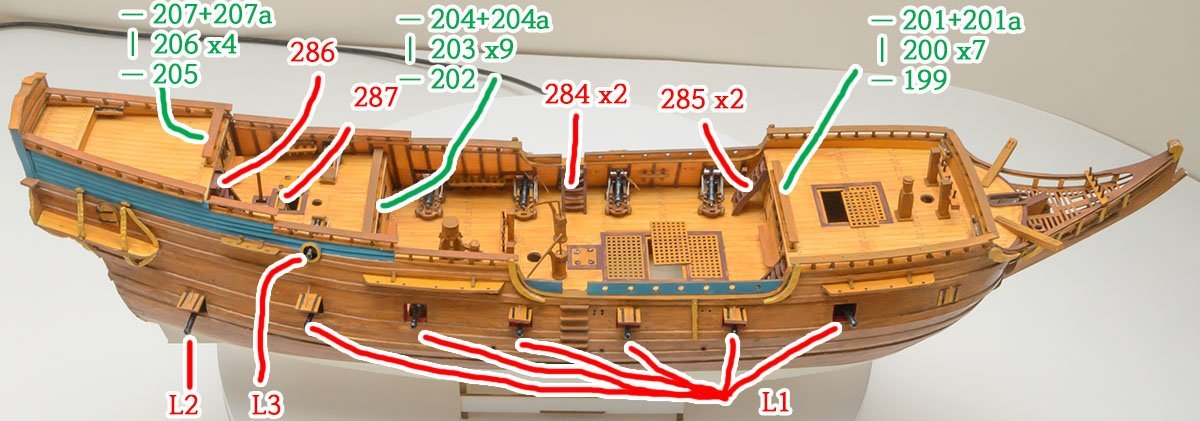
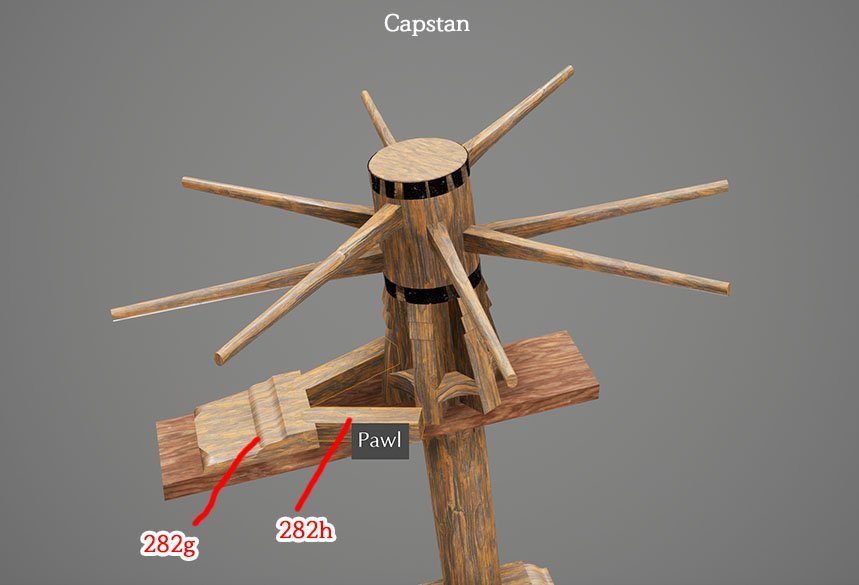
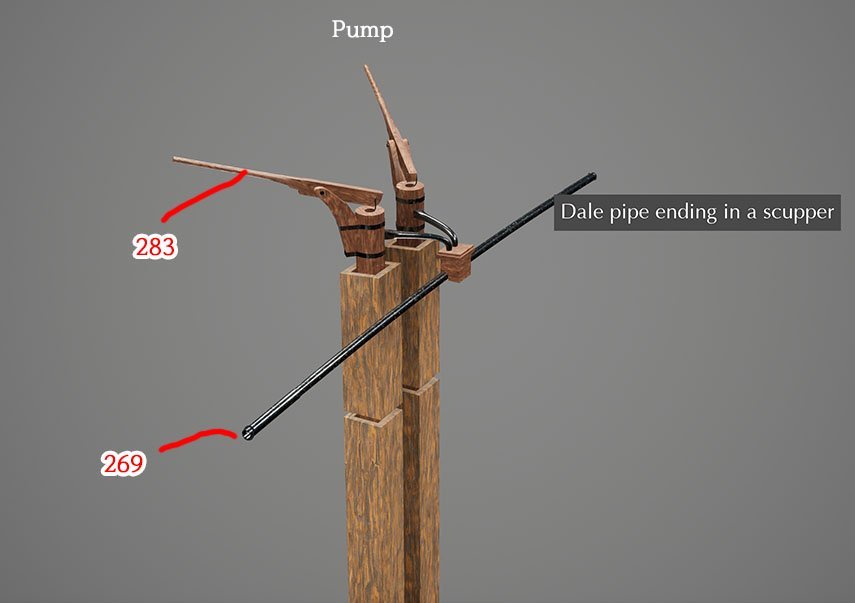
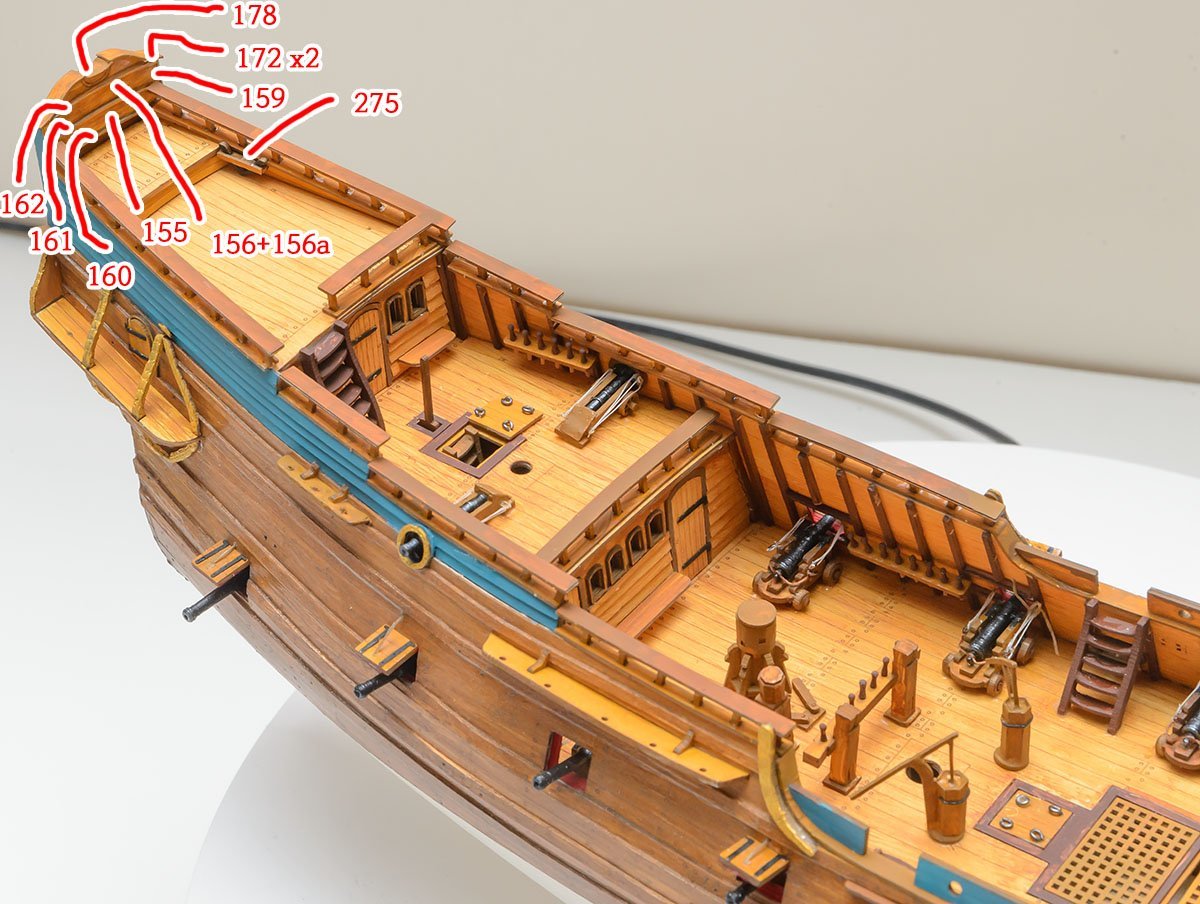
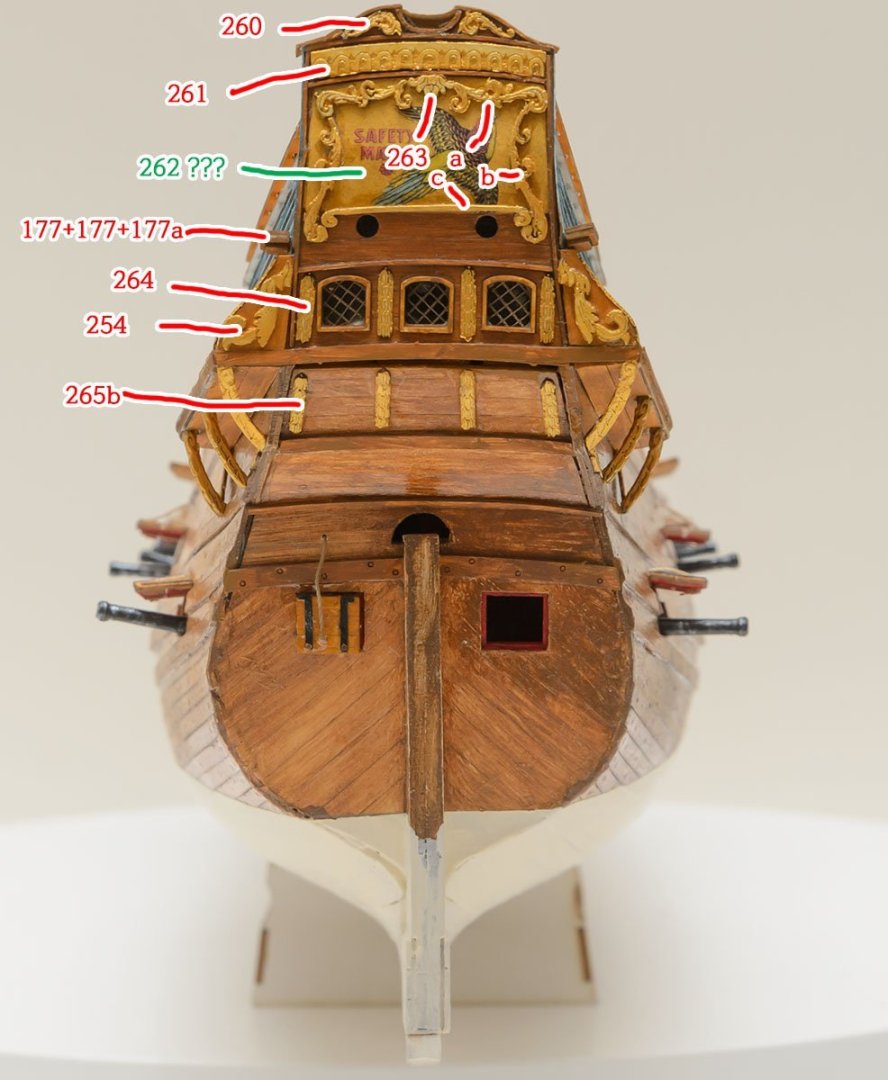
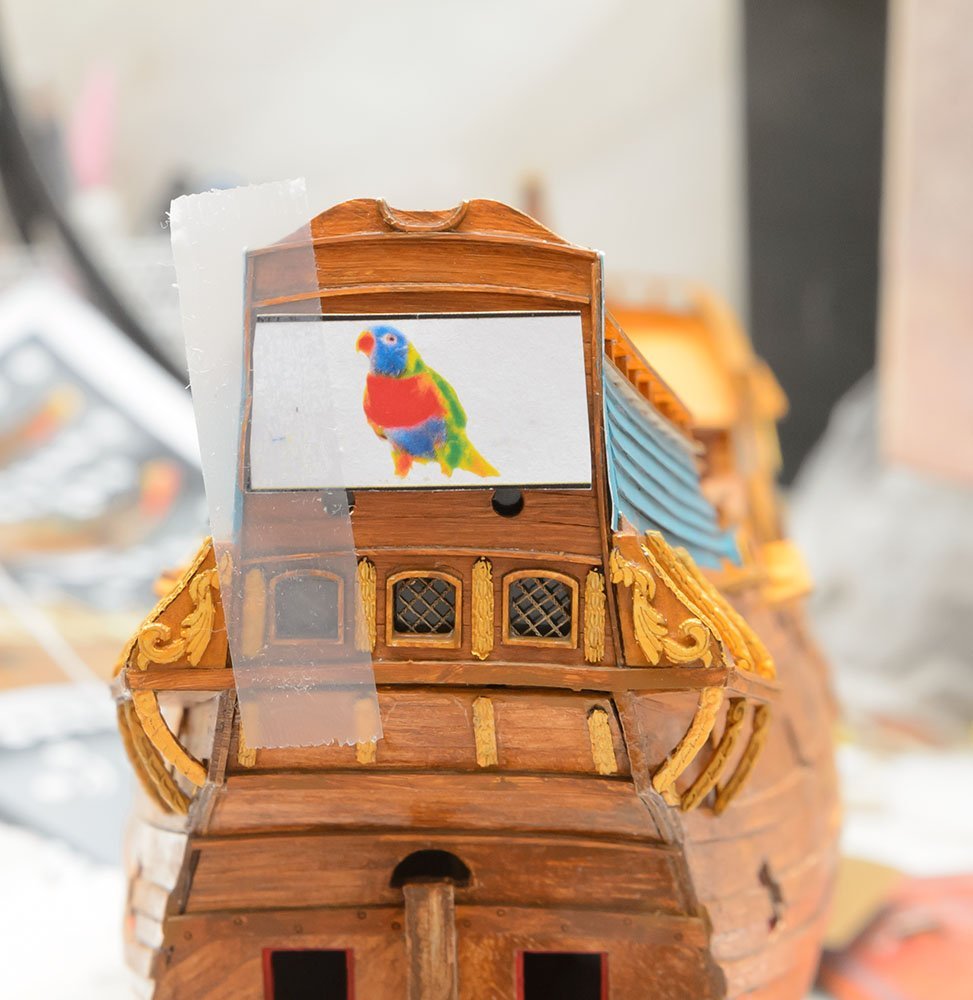
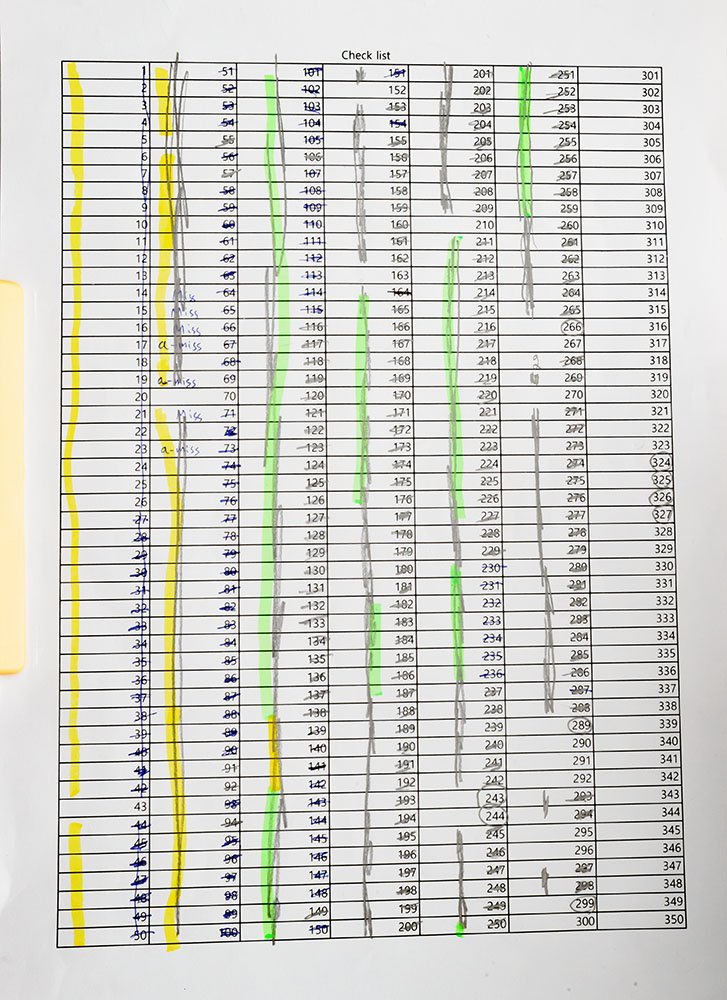
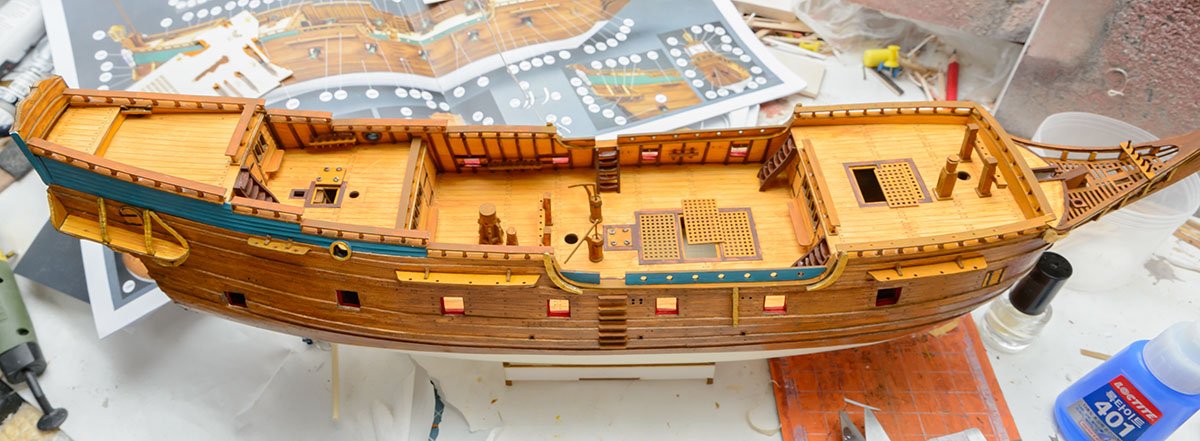
This kit doesn't offer rigging for cannons, so I researched Dutch cannons and made 2mm double blocks using a laser cutter. Unfortunately, the 2mm blocks are still bigger than I wanted. I wasn't sure that I would be successful if I spent one more week, so I cancelled my all plans and applied simplified rigging only. The 1/96 scale kit had a parrot picture, but the 1/72 scale kit didn't. I researched images about the parrot, but I couldn't find historical paintings or plans of the Papegojan. Therefore, I selected a parrot image, which is related to Sweden. https://www.tekniskamuseet.se/en/learn-more/swedish-inventors/lundstrom-brothers-safety-match/ The safety match was invented by the Swedish. The company developed safety matches, including the match case design. The parrot image was one of thousands of box images in the 1920s. 😎 By the way, I tried to spray industrial lacquer to make matte varnish. When I tested the matte lacquer can before applying it, the surface began to have craquelures! I'll buy Golden MSA matte spray tomorrow. 😆 I forgot to mention important tips. Don't hesitate to fill out the part check list. I found some forgotten parts, such as 270 and 299. Some parts, like 152 and 163, are not on the instructions, so they are hard to find...


-
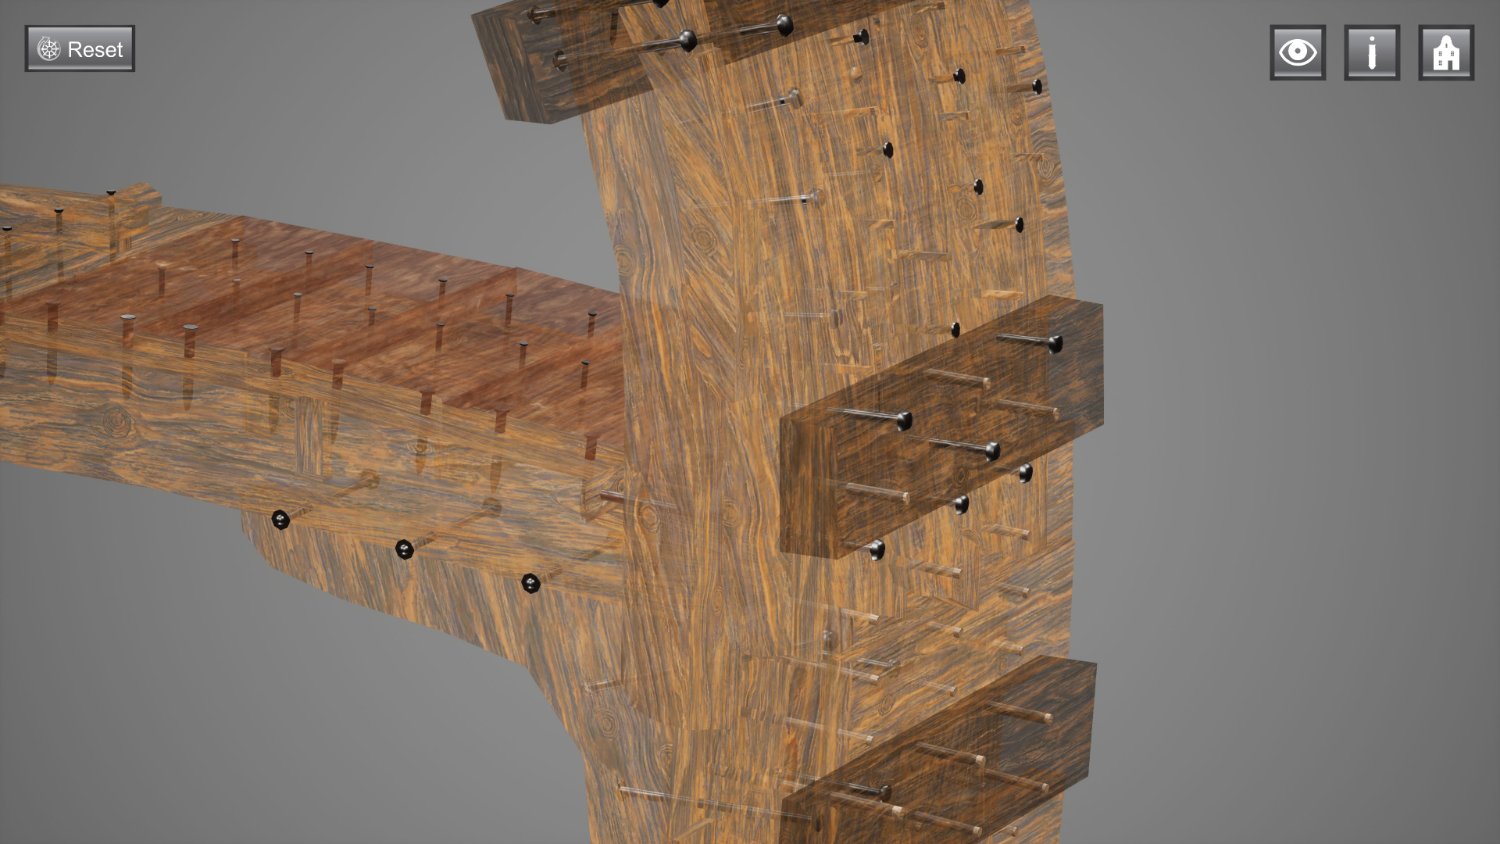
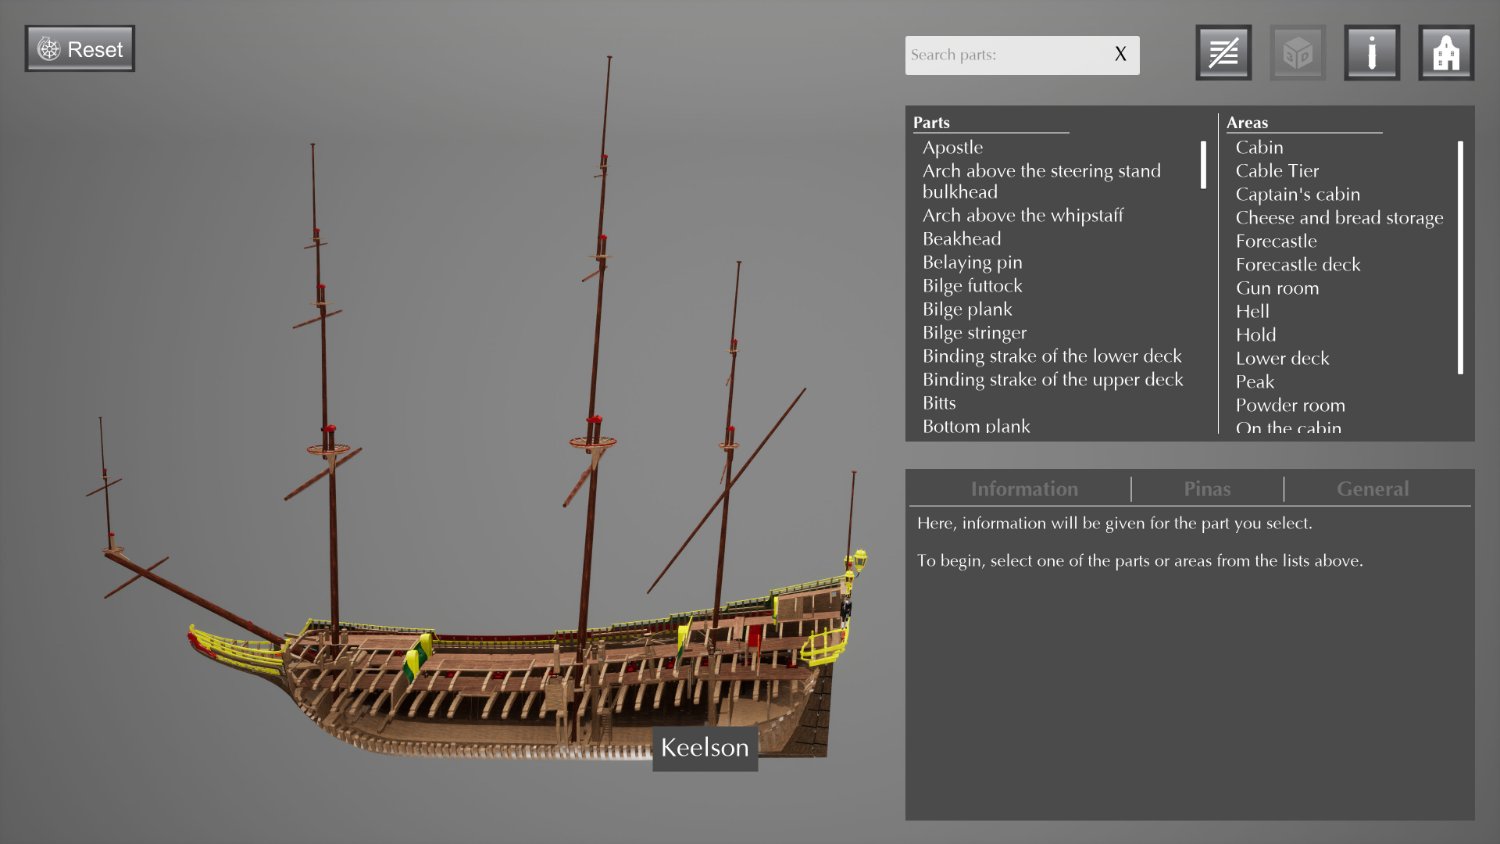
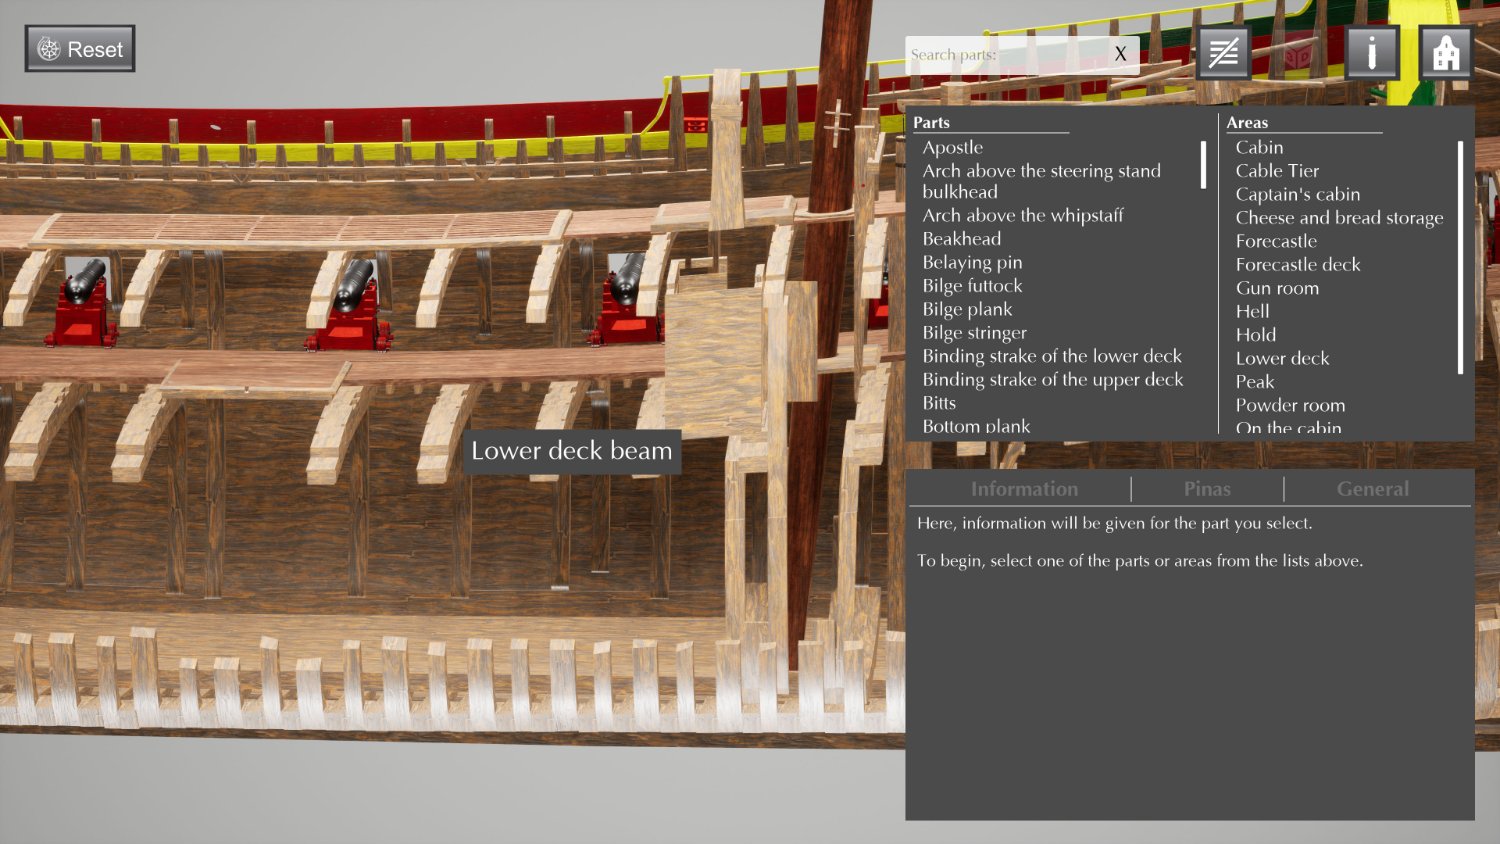
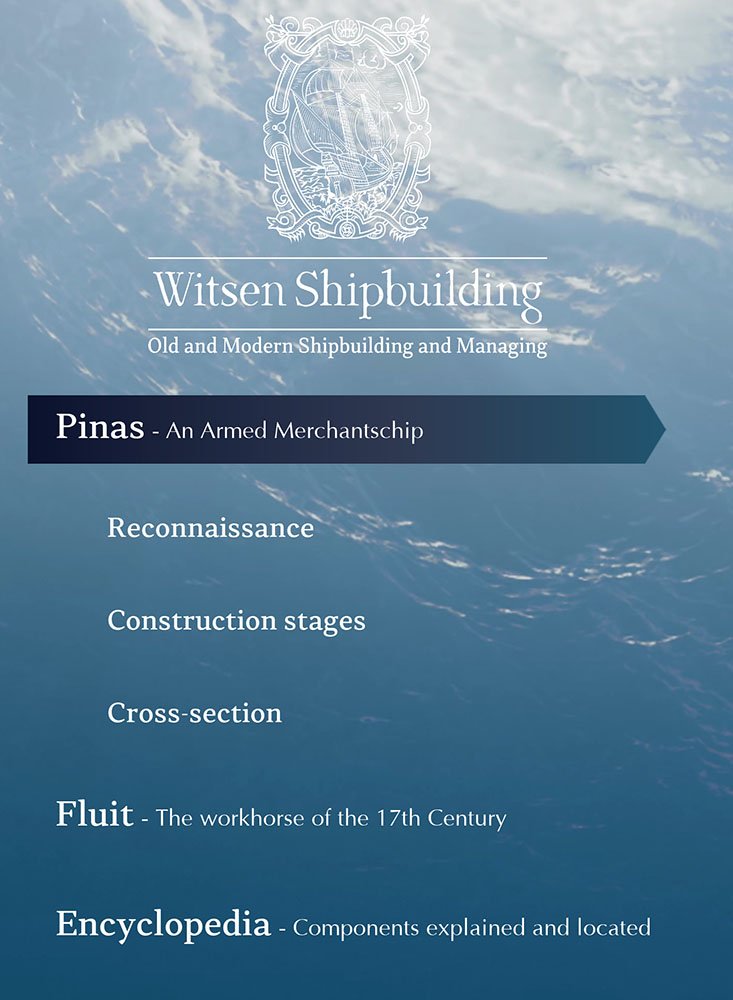
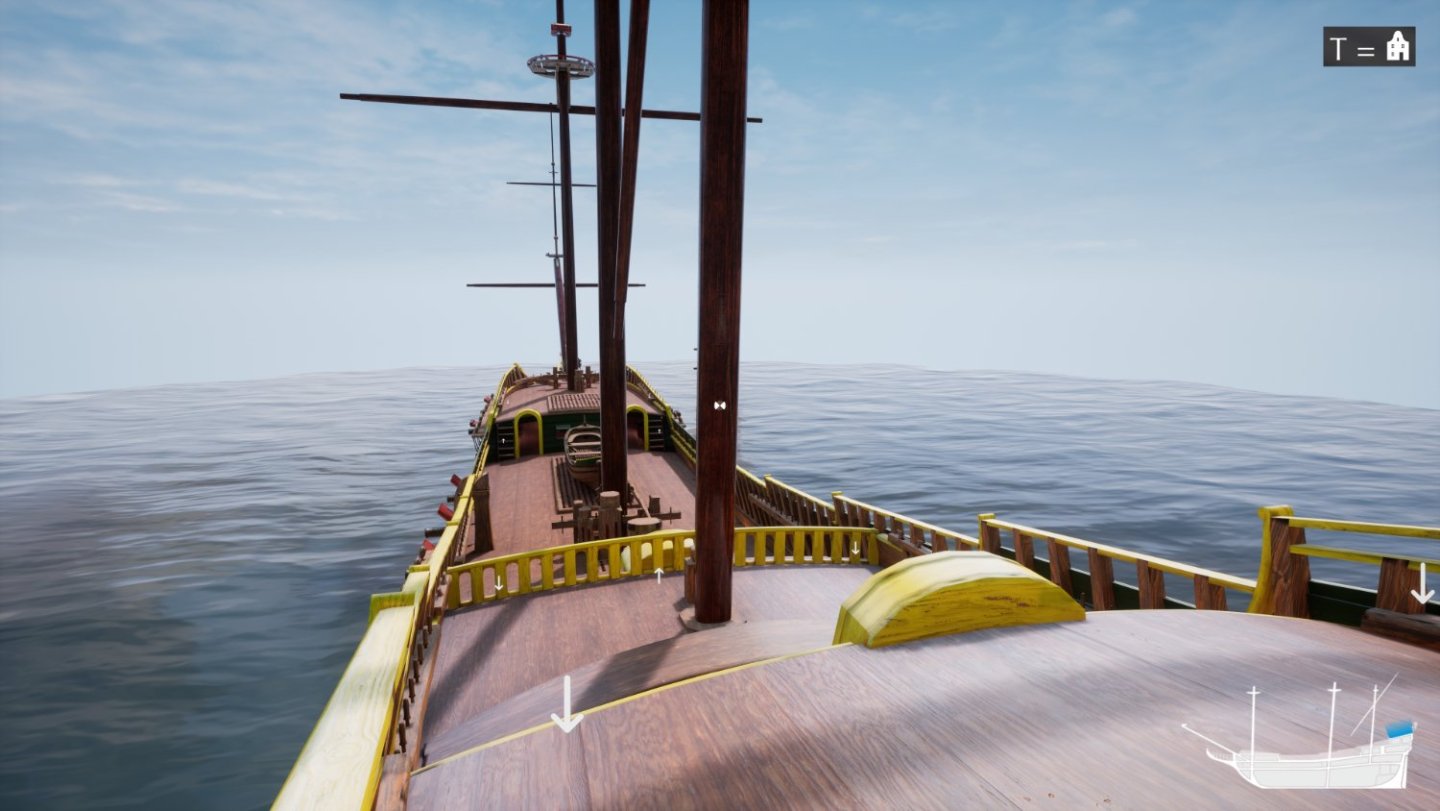
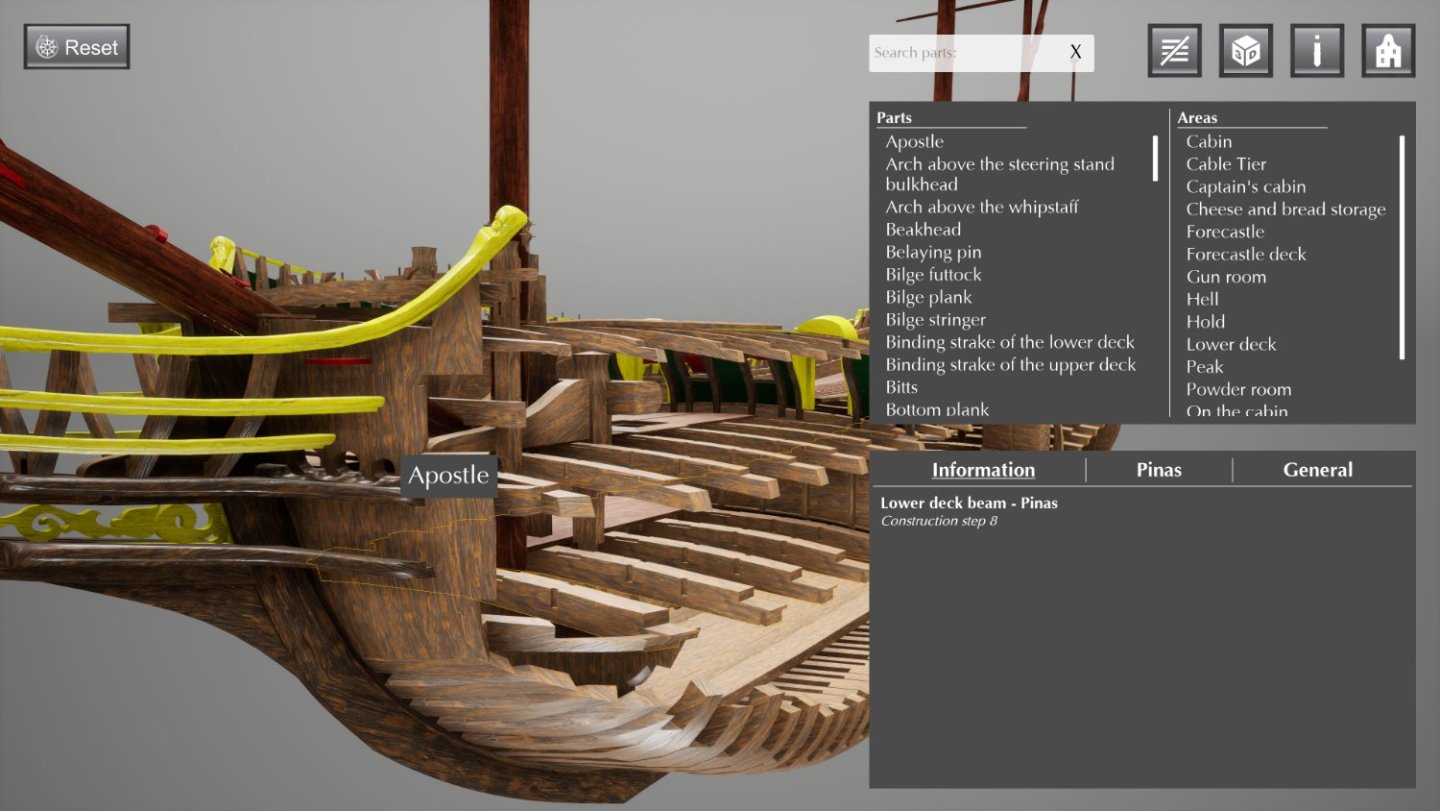
I didn't finish the deck fittings yet. Instead, I introduce some useful sources. The papegojan was an entry-level Dutch East Indiaman ship. I couldn't find the historical facts of the ship, but the Shipyard kit is very similar to the V.O.C. Batavia. I was able to find many useful videos of Batavia from Youtube. https://witsenscheepsbouw.nl/en/#Witsenscheepsbouw In addition, Witsen Scheepsbouw (Ship buildings) is a rich repository of Dutch ships. You can download and run the tour program offline, or you can watch the online version after some downloading. The program introduces full 3D models of two Dutch ships, Pinas and Fluit. First, you can explore the ships' deck or interior. The construction stages show how she was built. I've never seen such a detailed cross section plan. The encyclopedia is the most useful section for newcomers, including me. The encyclopedia shows every part and bundle, and how they were assembled. This is a really fantastic program. The program sparked my interest in Dutch ships. I ordered @Ab Hoving's book, who studied Dutch ships for 40 years and published the awesome program. If you are interested in his project, check out his most recent post. I already solved some mysteries using his magisch program.


-
Both the varnishes that caused the cringled surface and didn't have any issues were lacquer sprays. The difference is that the first lacquer spray was $1.5 for industrial use from a hardware store and the second spray was $20 Golden MSA Archive lacquer spray for artists from an art supply store, which was compatible with acrylic, oil, alkyd, egg tempera, watercolor, and casein paintings. Lacquer sprays may not be compatible with oil paint because there are many kinds of it. It is good to test before using. Also, the surface before varnishing is very weak, so use an indirect painting method, such as spraying, airbrushing, or pouring.
-
Yes. It was difficult to choose a way. I almost flipped the table over and would have bought the same kit again. Also, the lacquer thinner made the paper surface clump, so the result is a bit worse than before. I'm not sure, but the oldest build log of the same kit here was 2013. I found fewer than ten notable errors, but I avoided the errors by making fixed parts from the edges of paper runners or by putting a lid on. In my opinion, the errors are not a really big issue. The majority of serious issues stem from my mistakes. I still love this kit, but it is good to read the instructions carefully.