John Ruy
-
Posts
1,592 -
Joined
-
Last visited
Content Type
Profiles
Forums
Gallery
Events
Everything posted by John Ruy
-
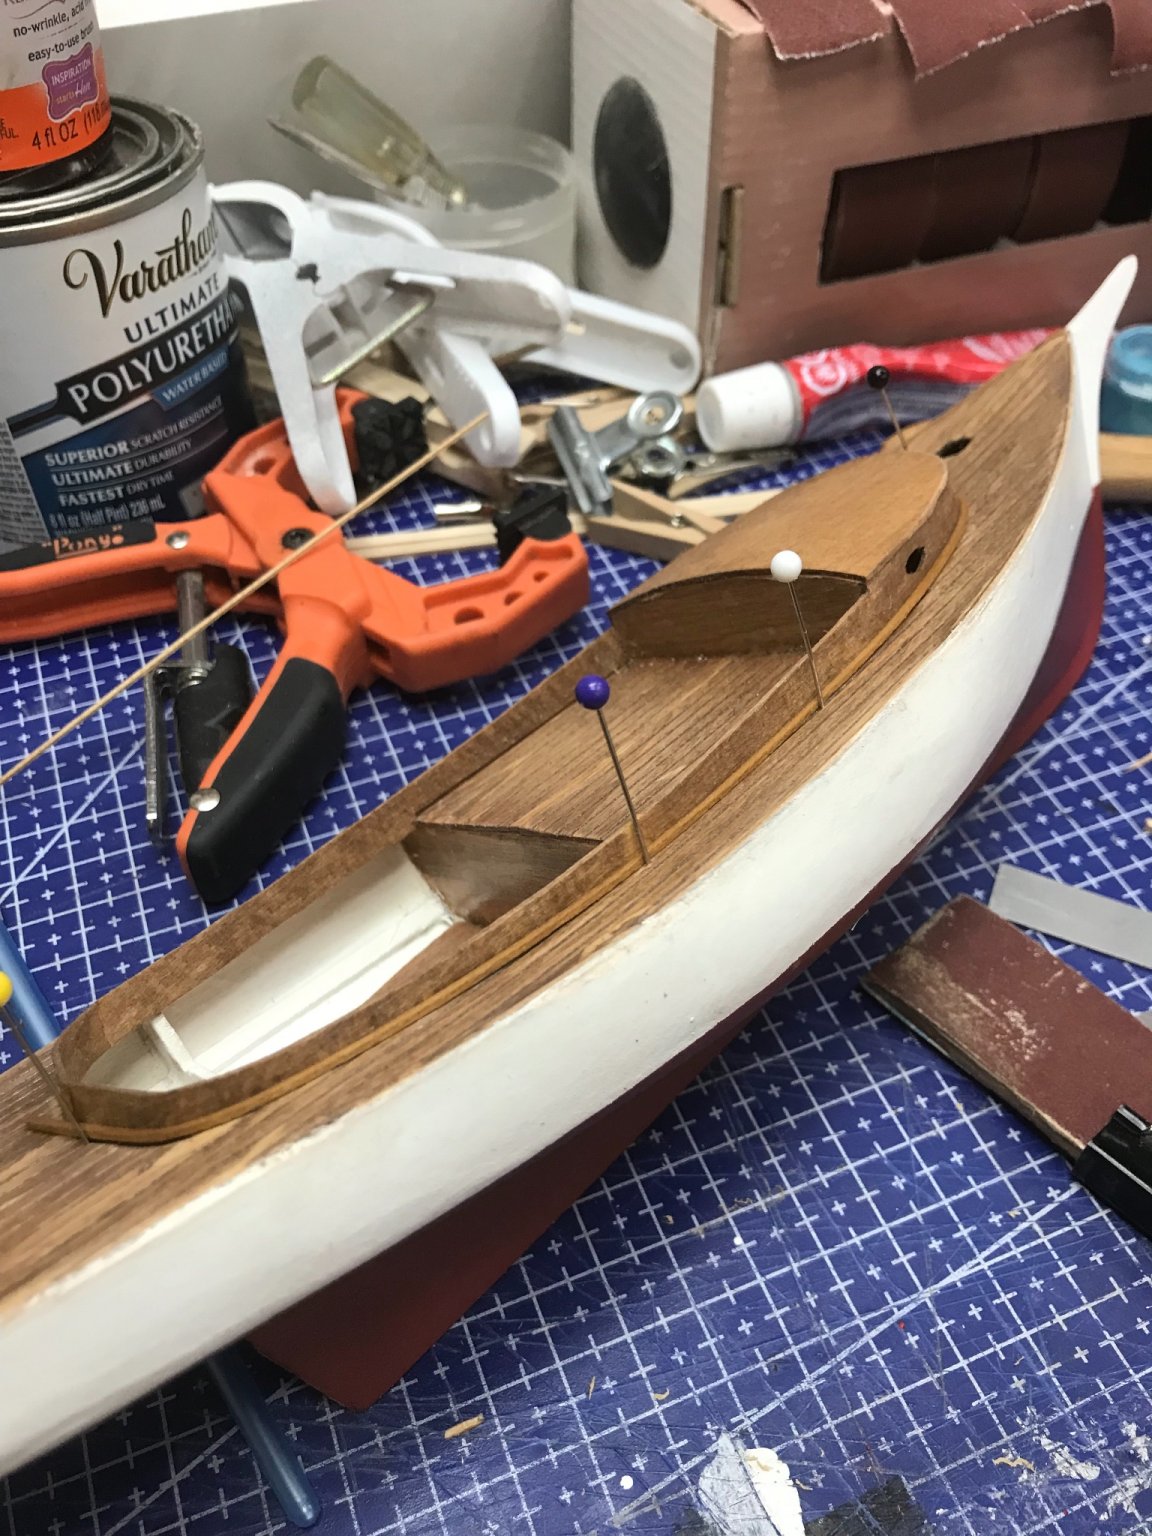
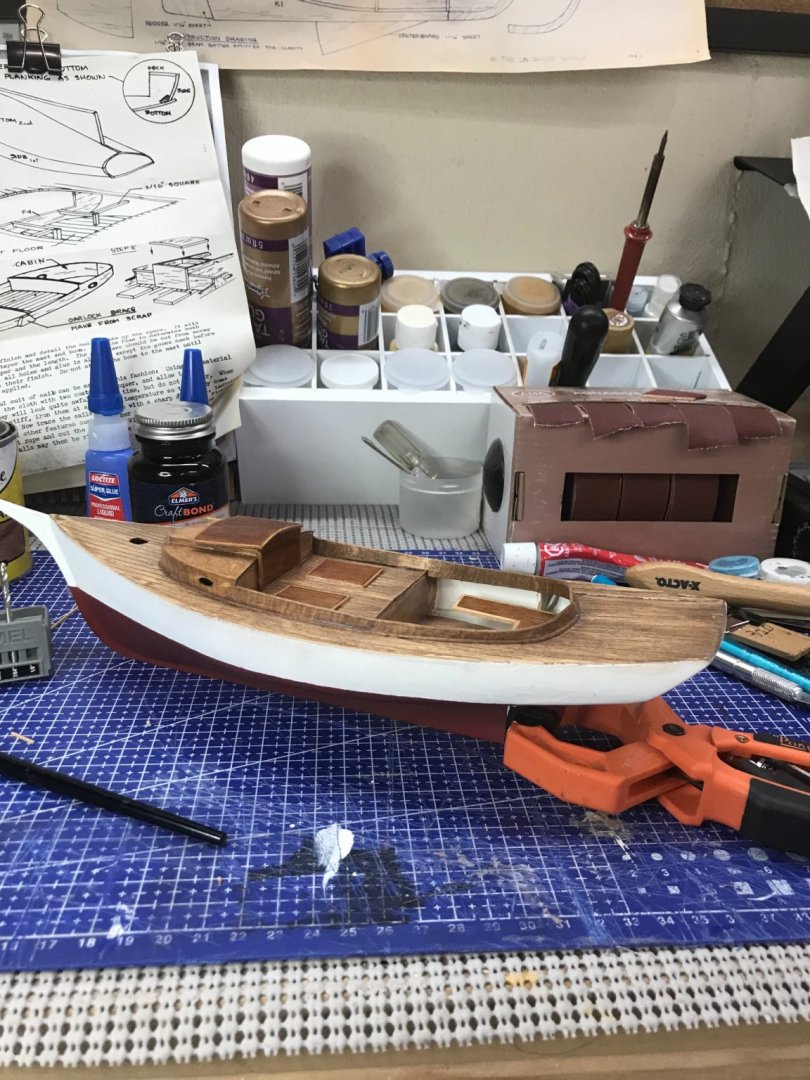
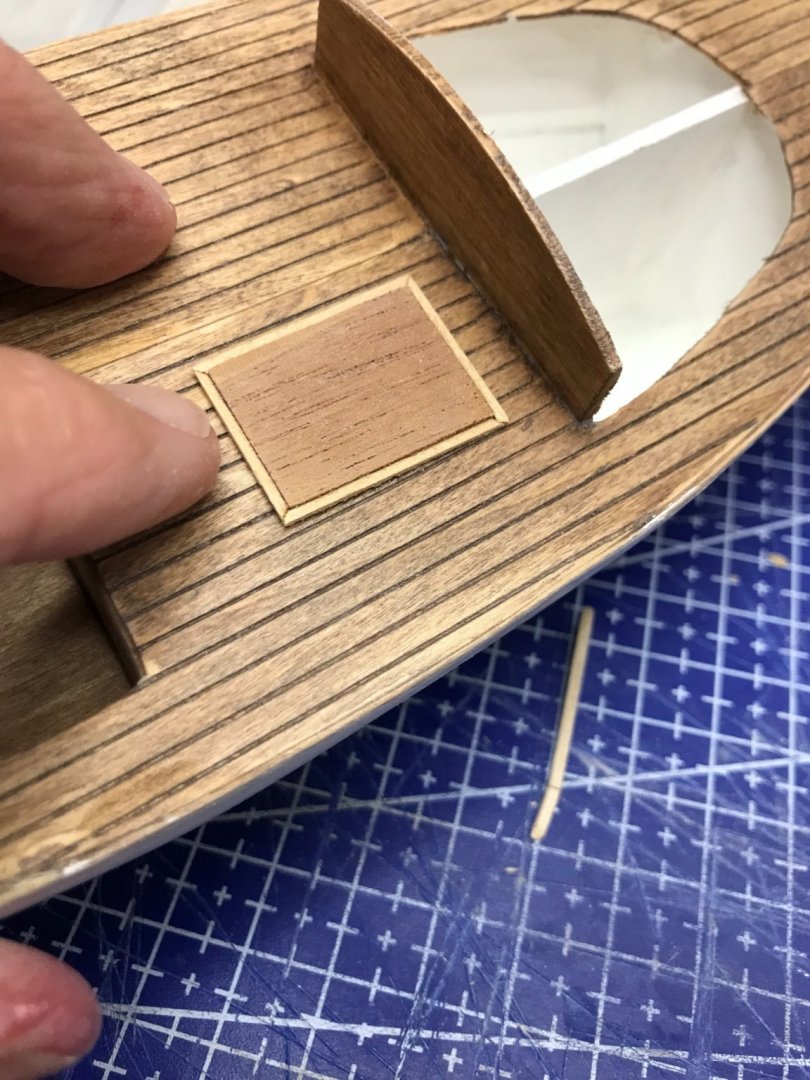
 Cabin continued… Once I glued the Cabin Coaming and roof into place, I placed 1/32” trim at the base of the Cabin on the deck. Added the Cabin Hatch, Live Well Covers and Seating. She is starting to come together. Another day. Cheers 🍻
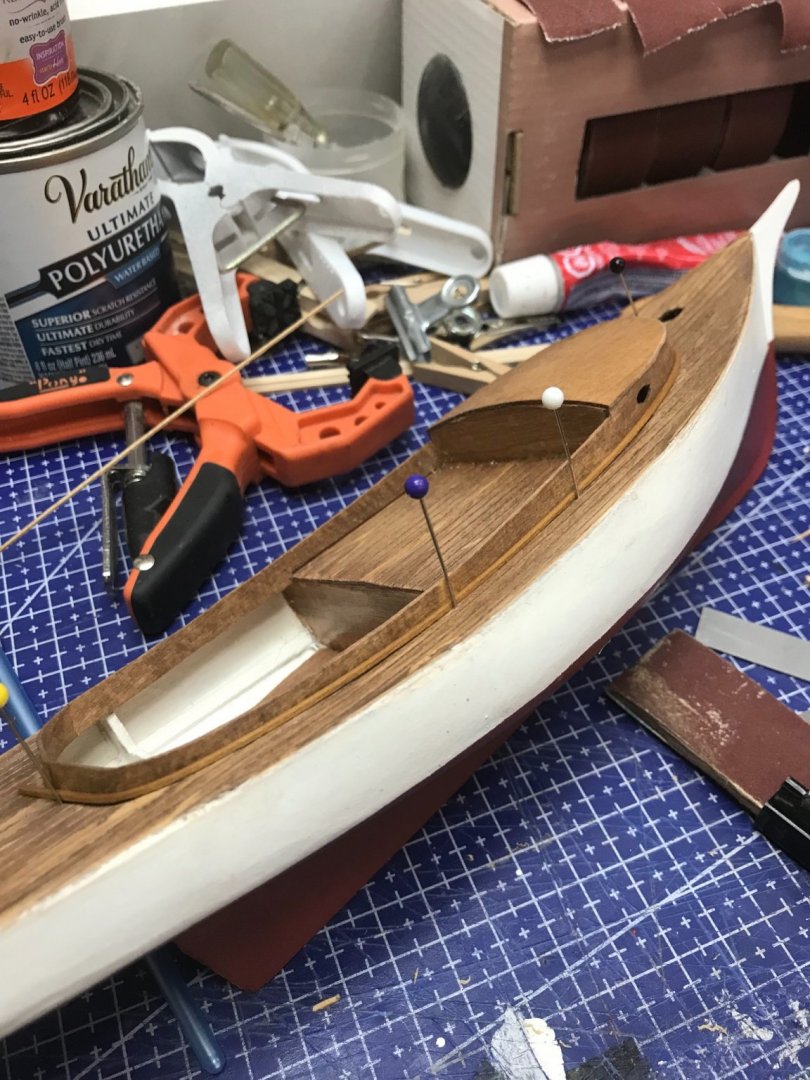

- 26 replies
-
- 4
-

-
- Maine
- Laughing Whale
- (and 2 more)
-
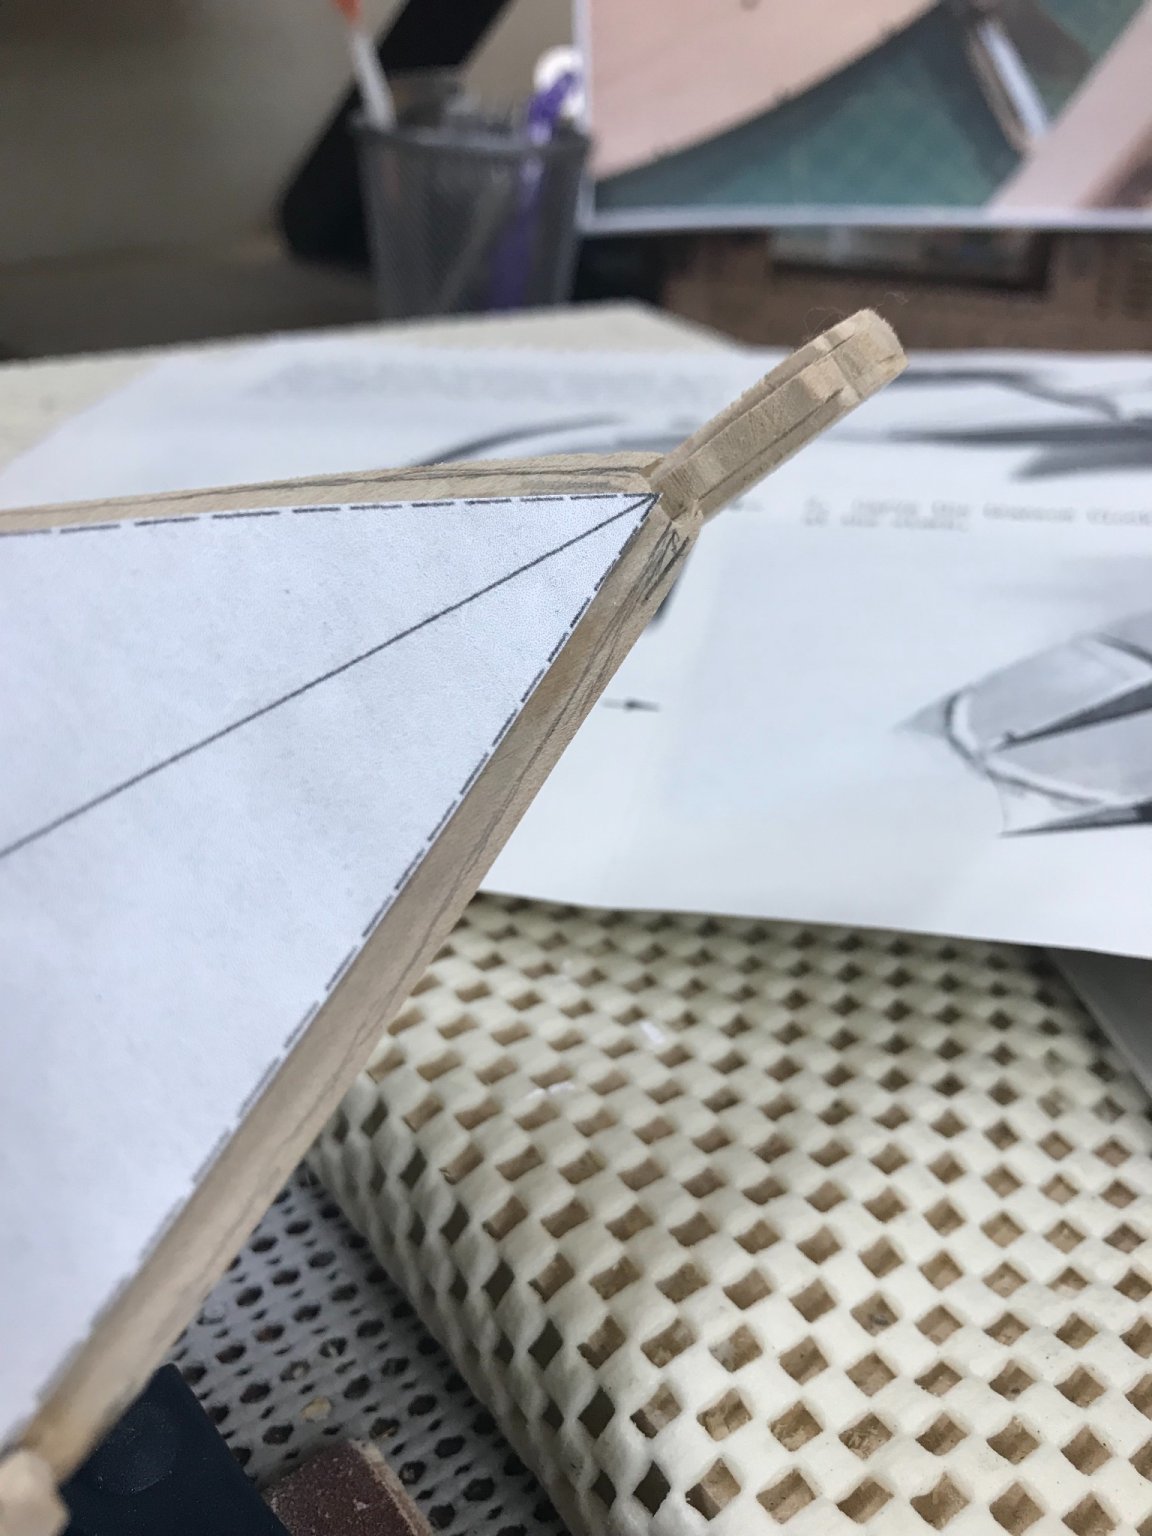
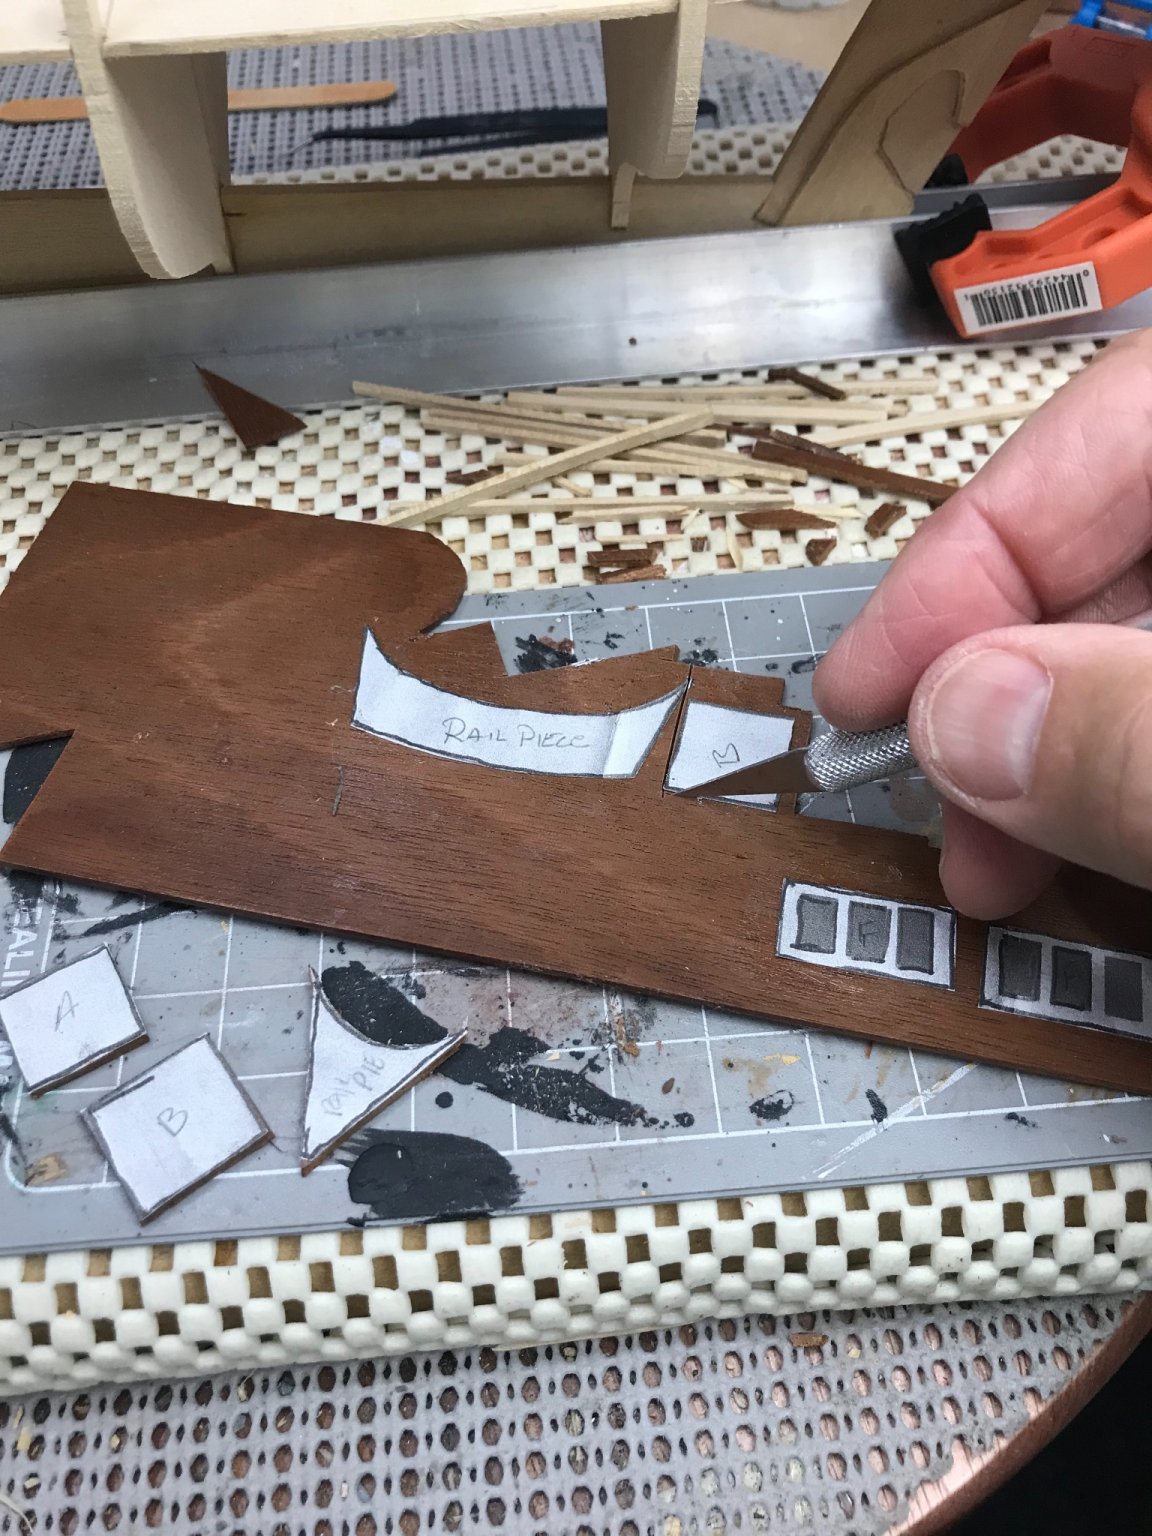
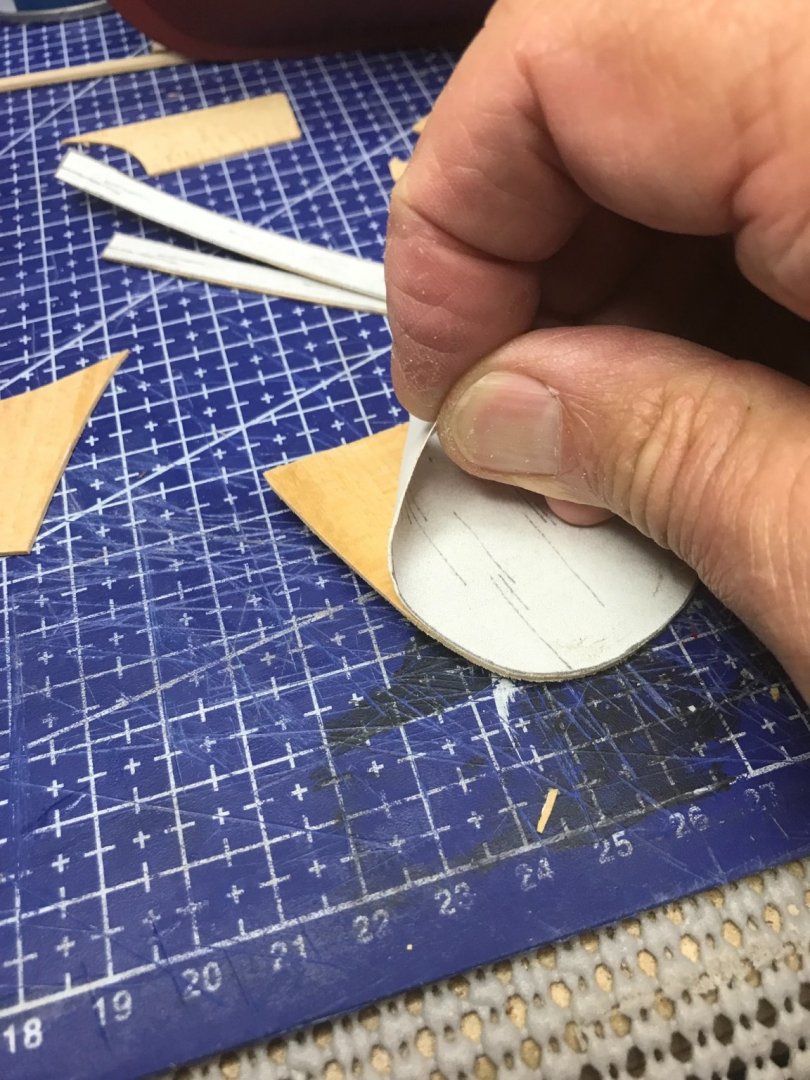
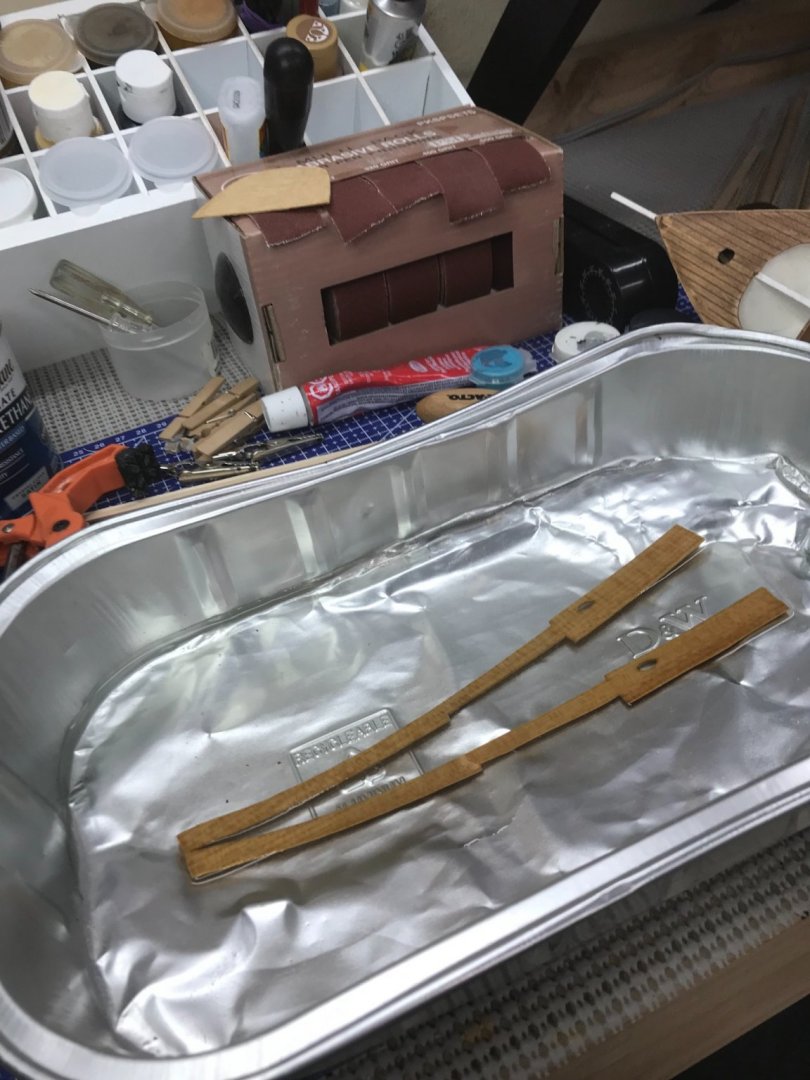
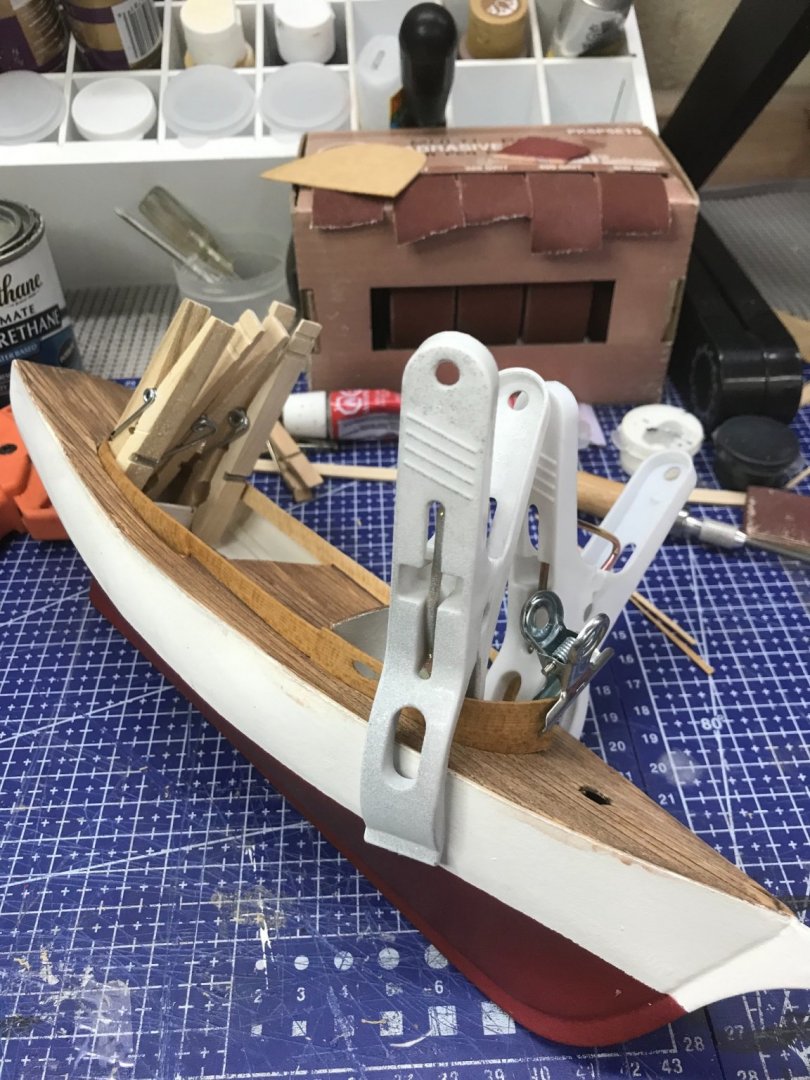
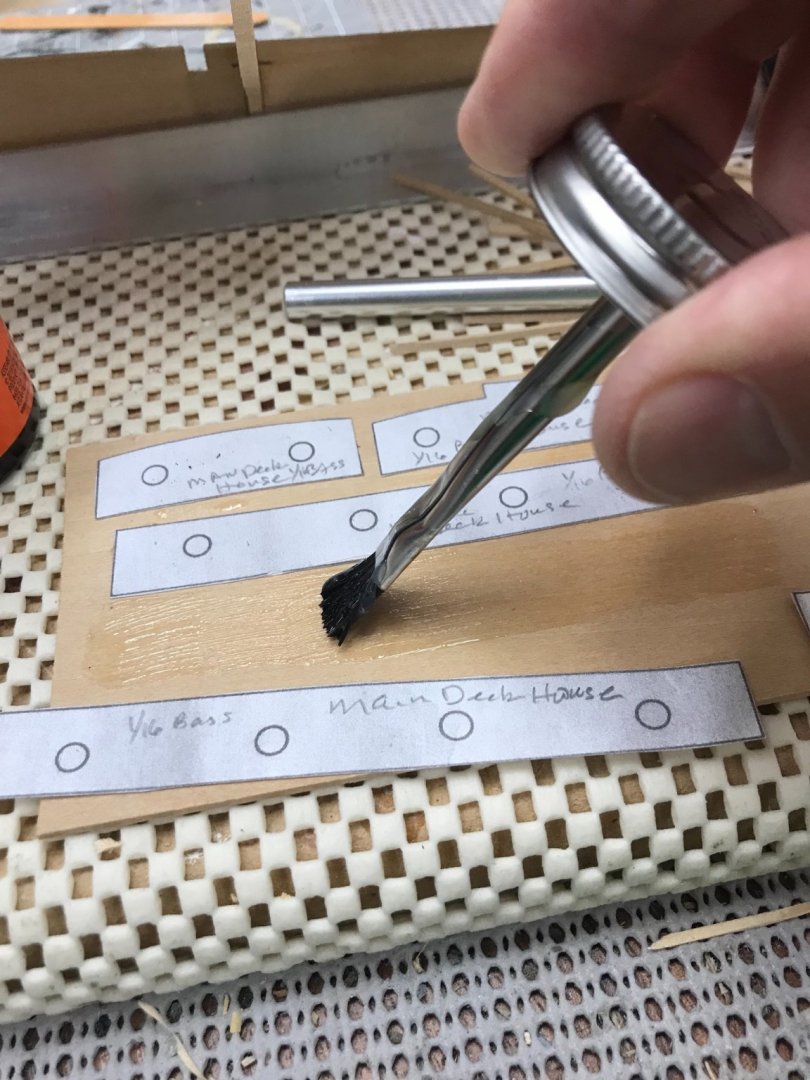
Cabin Coaming and roof… Photo copied sections of plan drawing to creat templates to cut out cabin coaming and roof from 1/32” material as stated on the drawing. Used rubber cement to to attach templates to 1/32” Bass Wood. Carefully cut out the Coaming and Cabin Roof. Peeling off the templates… Soaking the Coaming in Ammonia/Water, as it will need to wrap the cabin. Shaped both sides of the Coaming and it’s in place with various clamps until it dries. I will be back… 🍻


- 26 replies
-
- 2
-
-
- Maine
- Laughing Whale
- (and 2 more)
-
Thanks Bob… I think I’m starting get the hang of it. These vintage kits do force skill development. 😆 Lots of scratch building with little if any instruction. Thank goodness I have MSW Build logs to reference. 🙏 I appreciate your comments along the way. Thanks again for your encouragement.
- 127 replies
-
- 1
-
-
- Bowdoin
- Arctic Exploration
- (and 3 more)
-
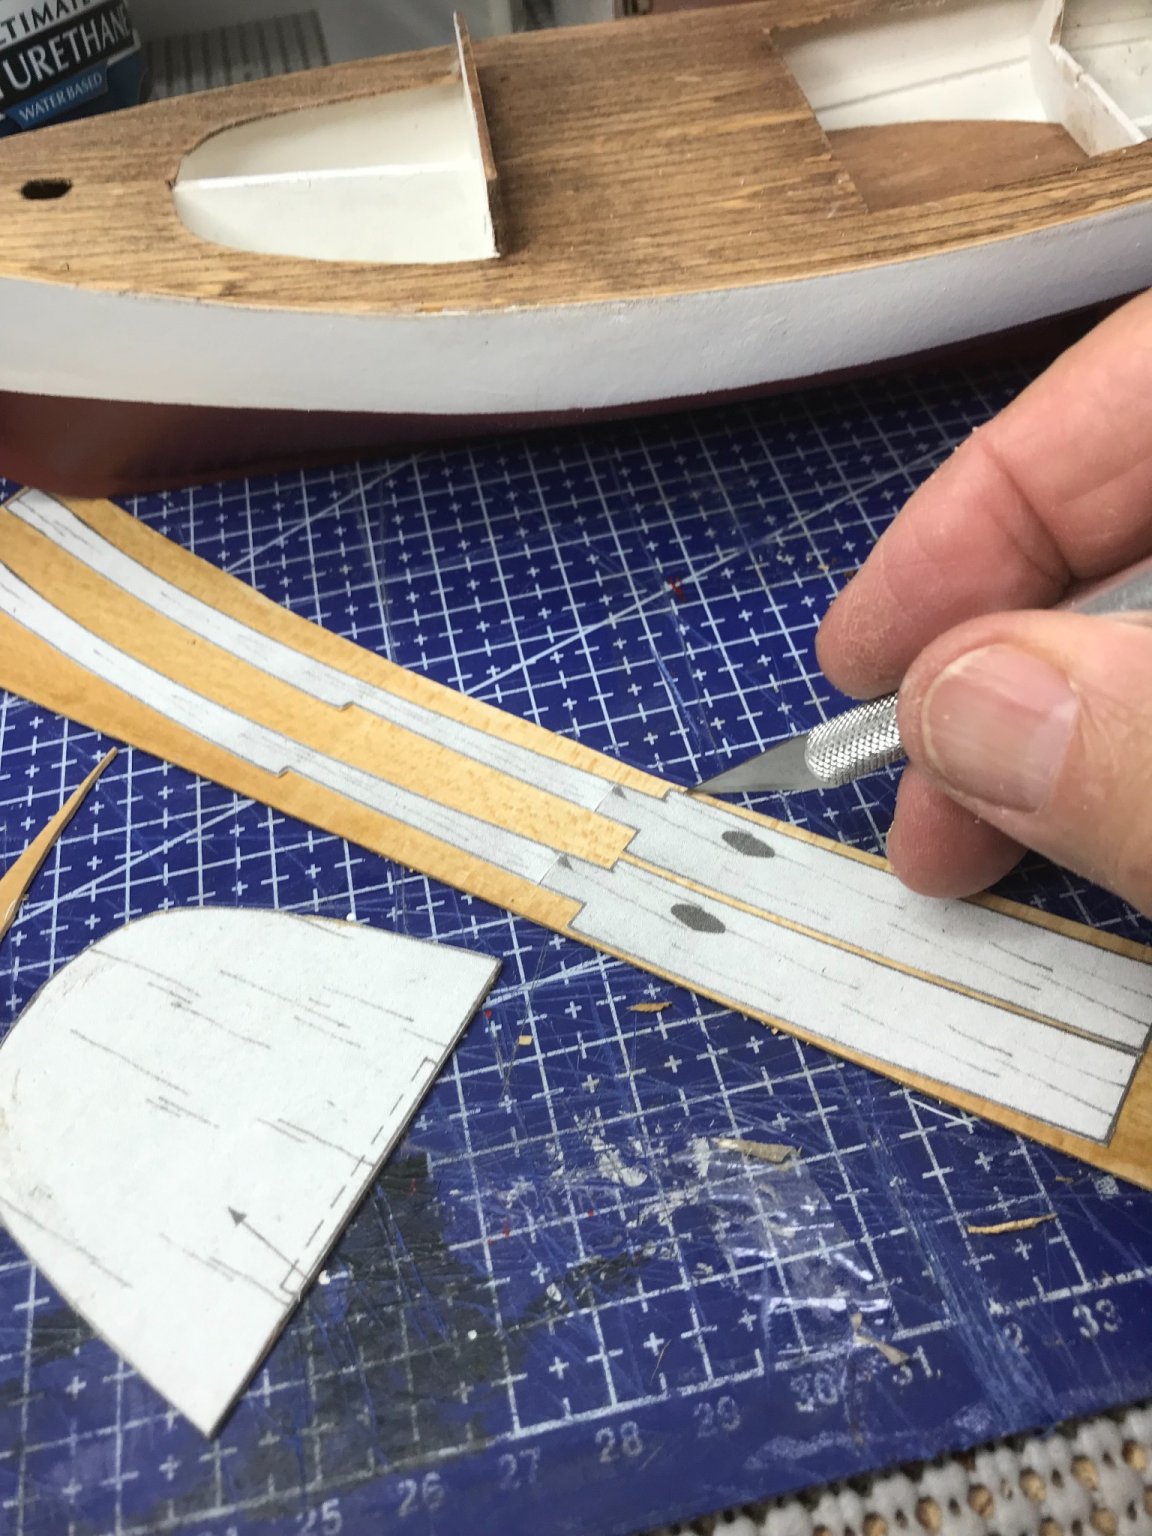
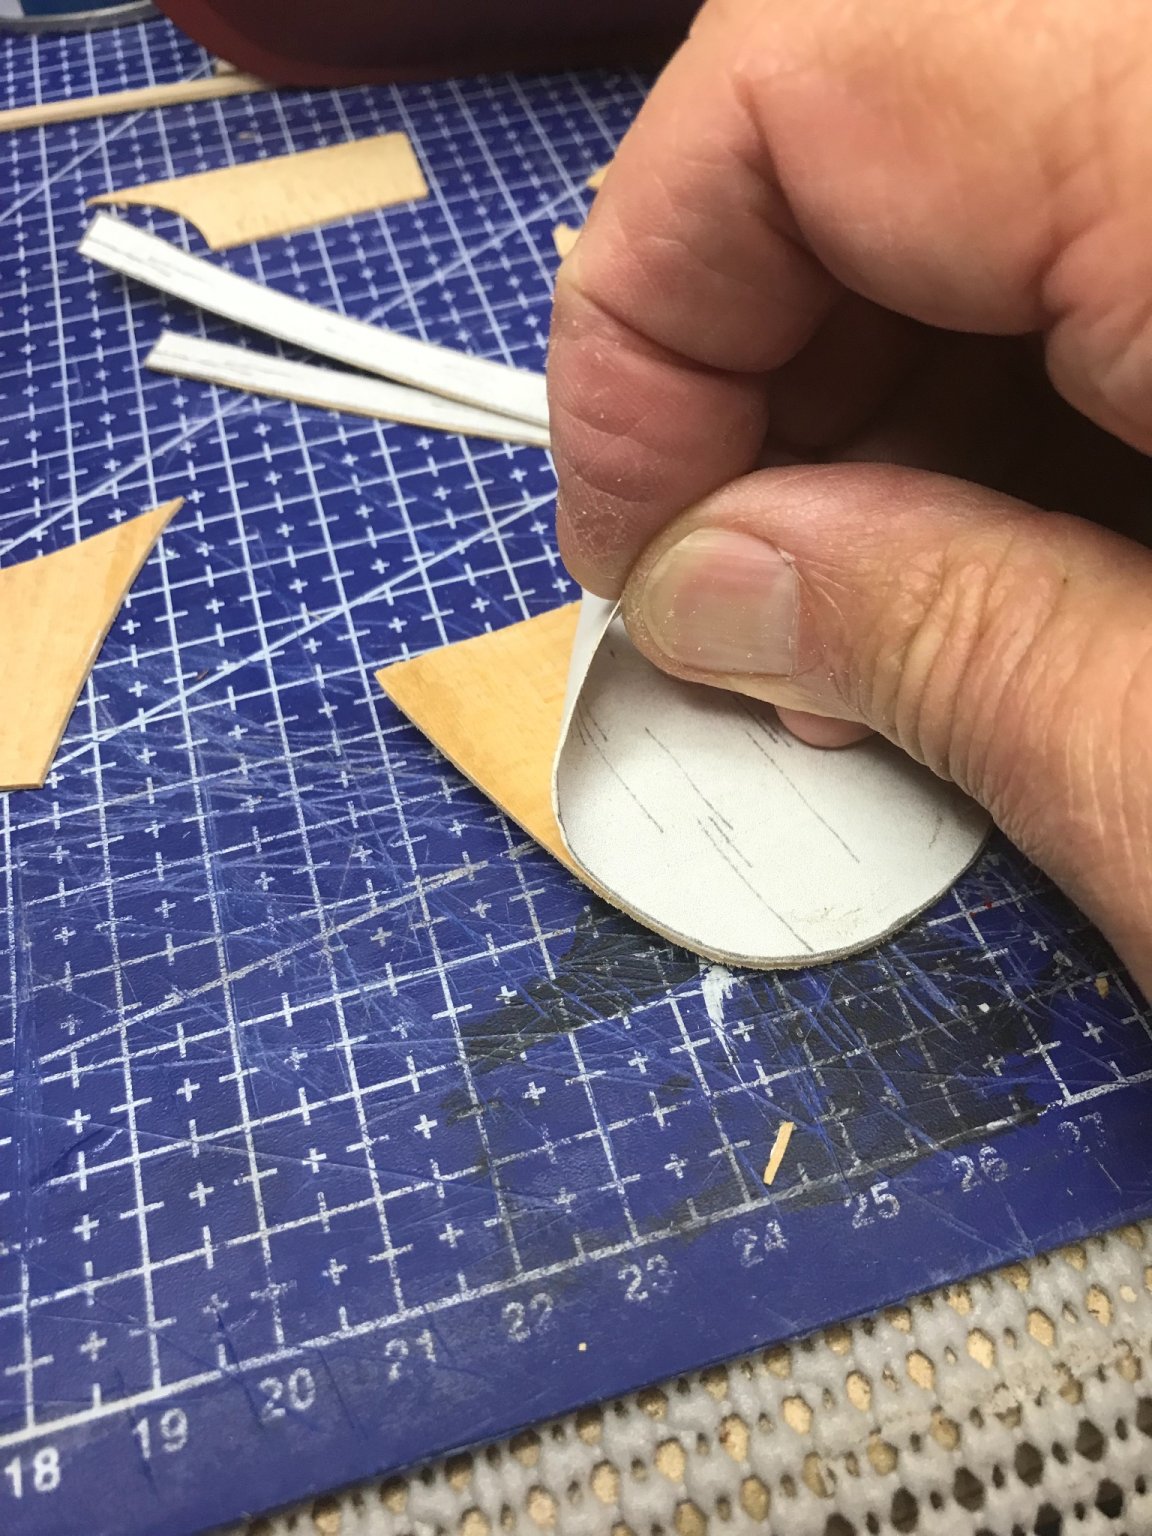
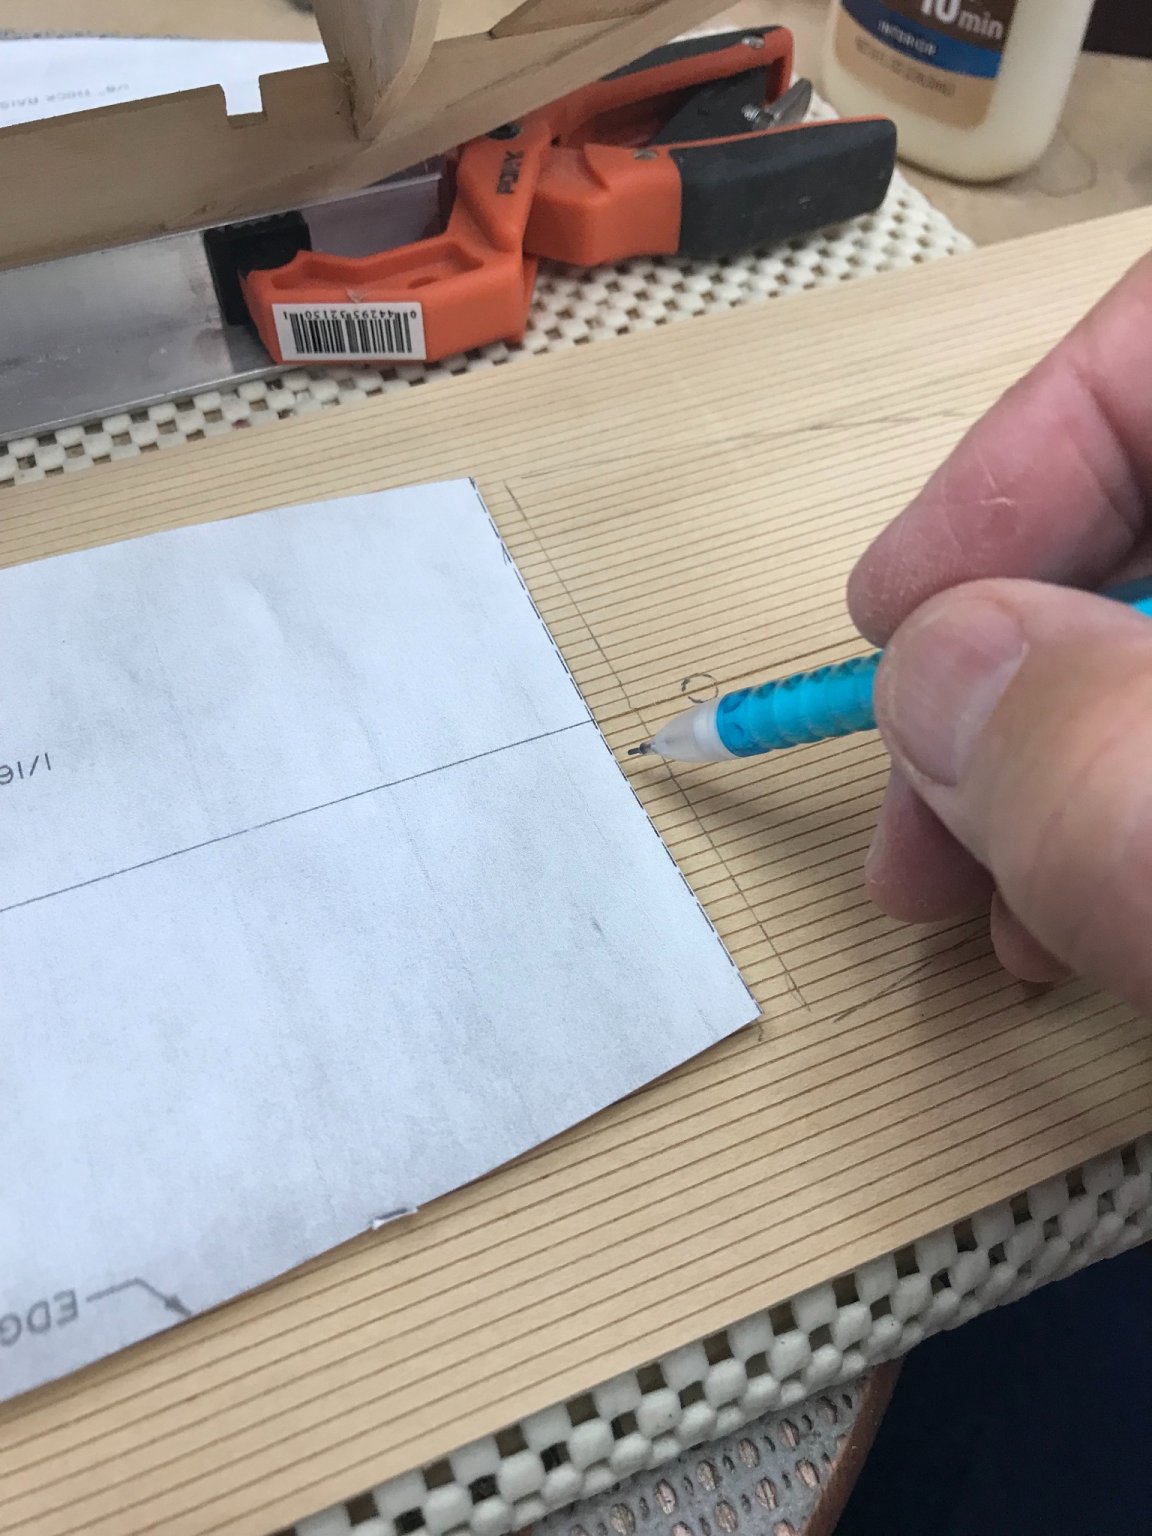
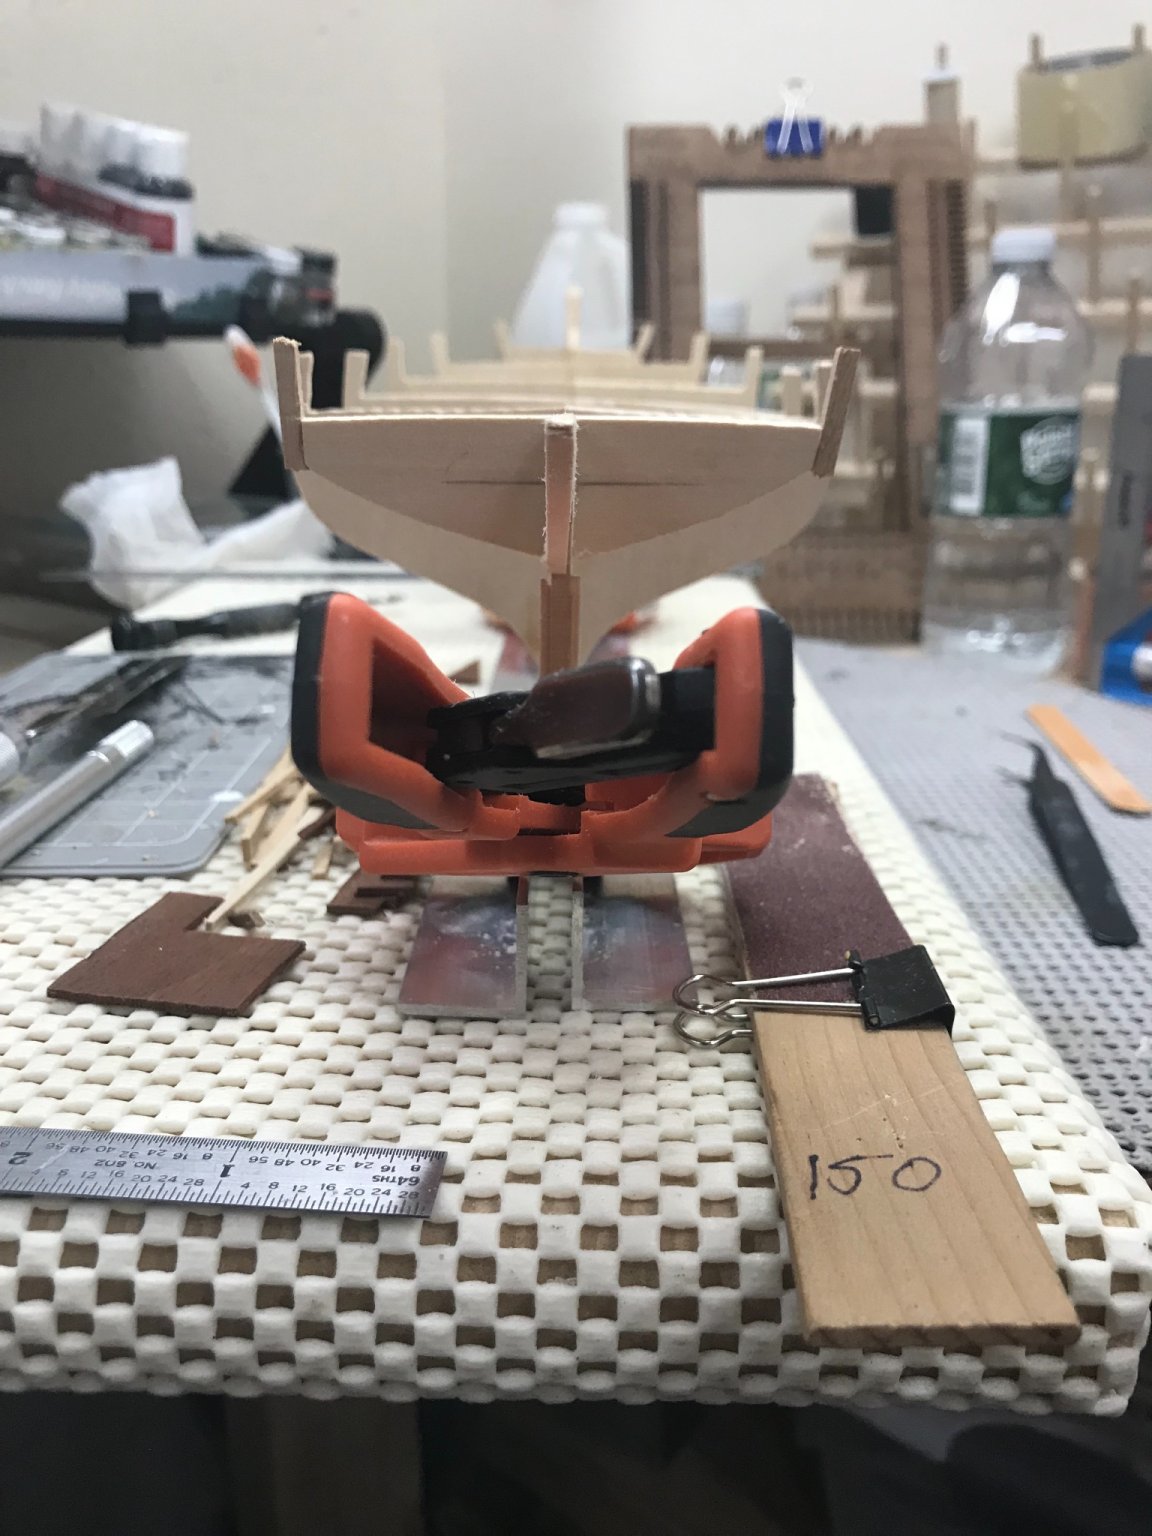
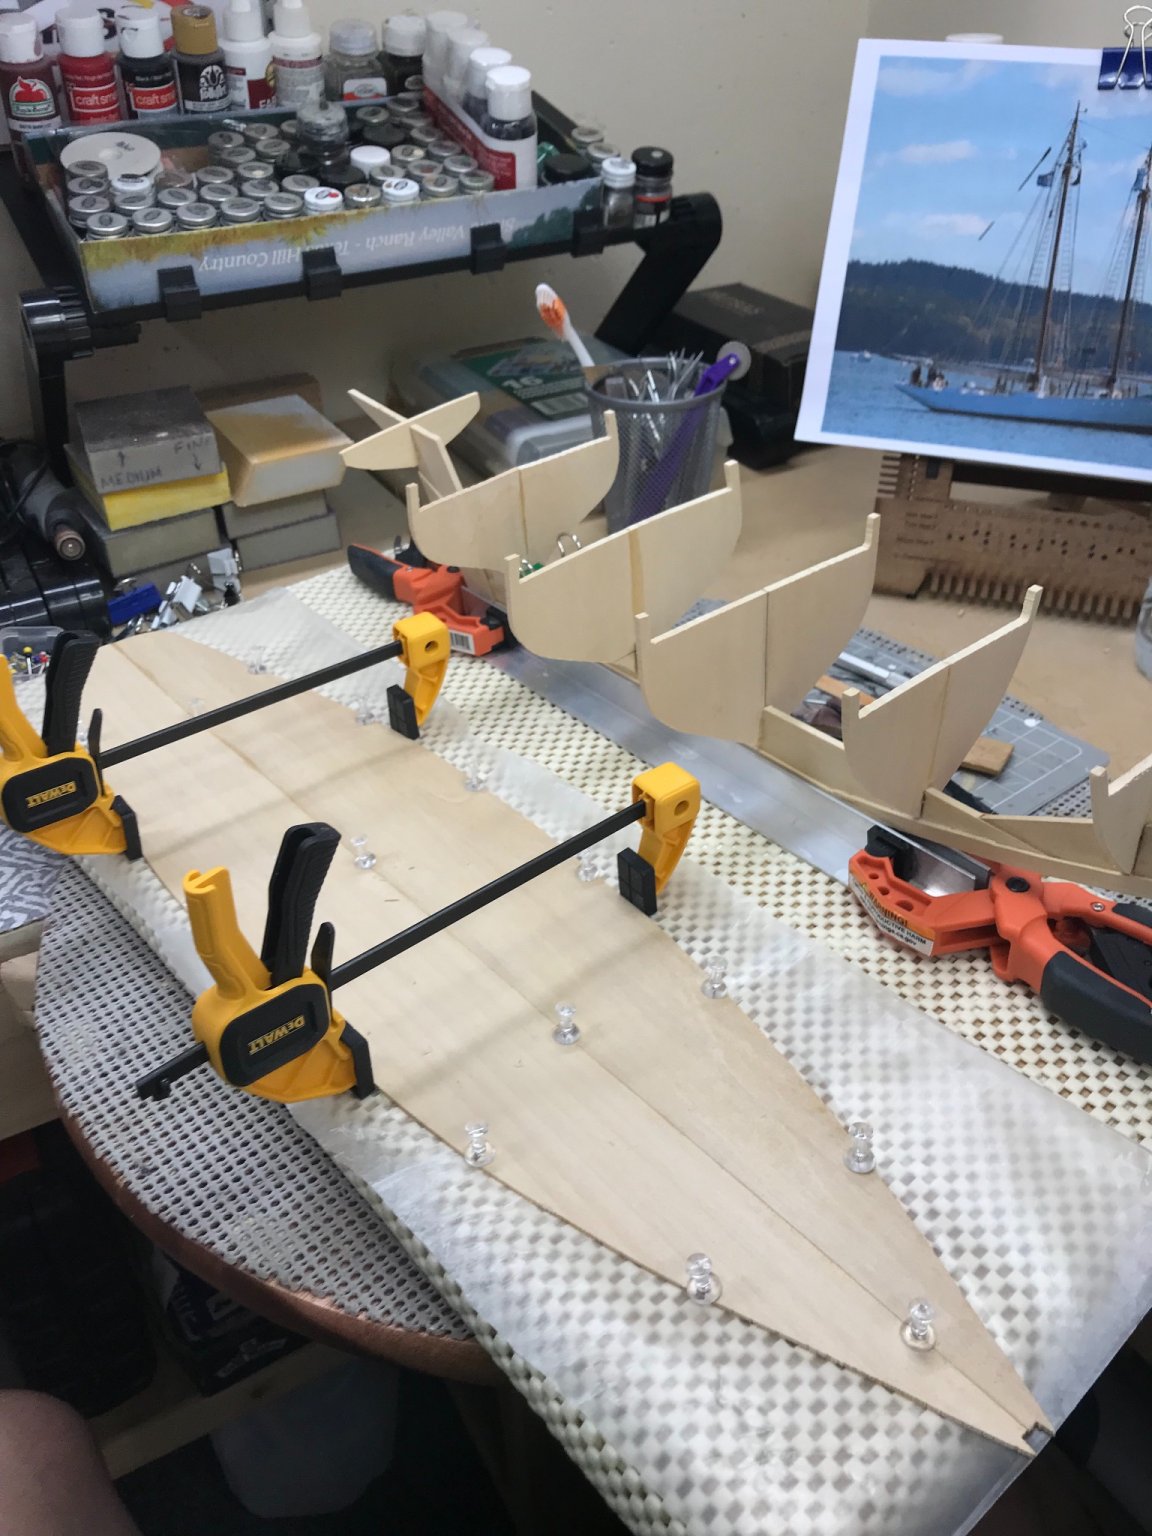
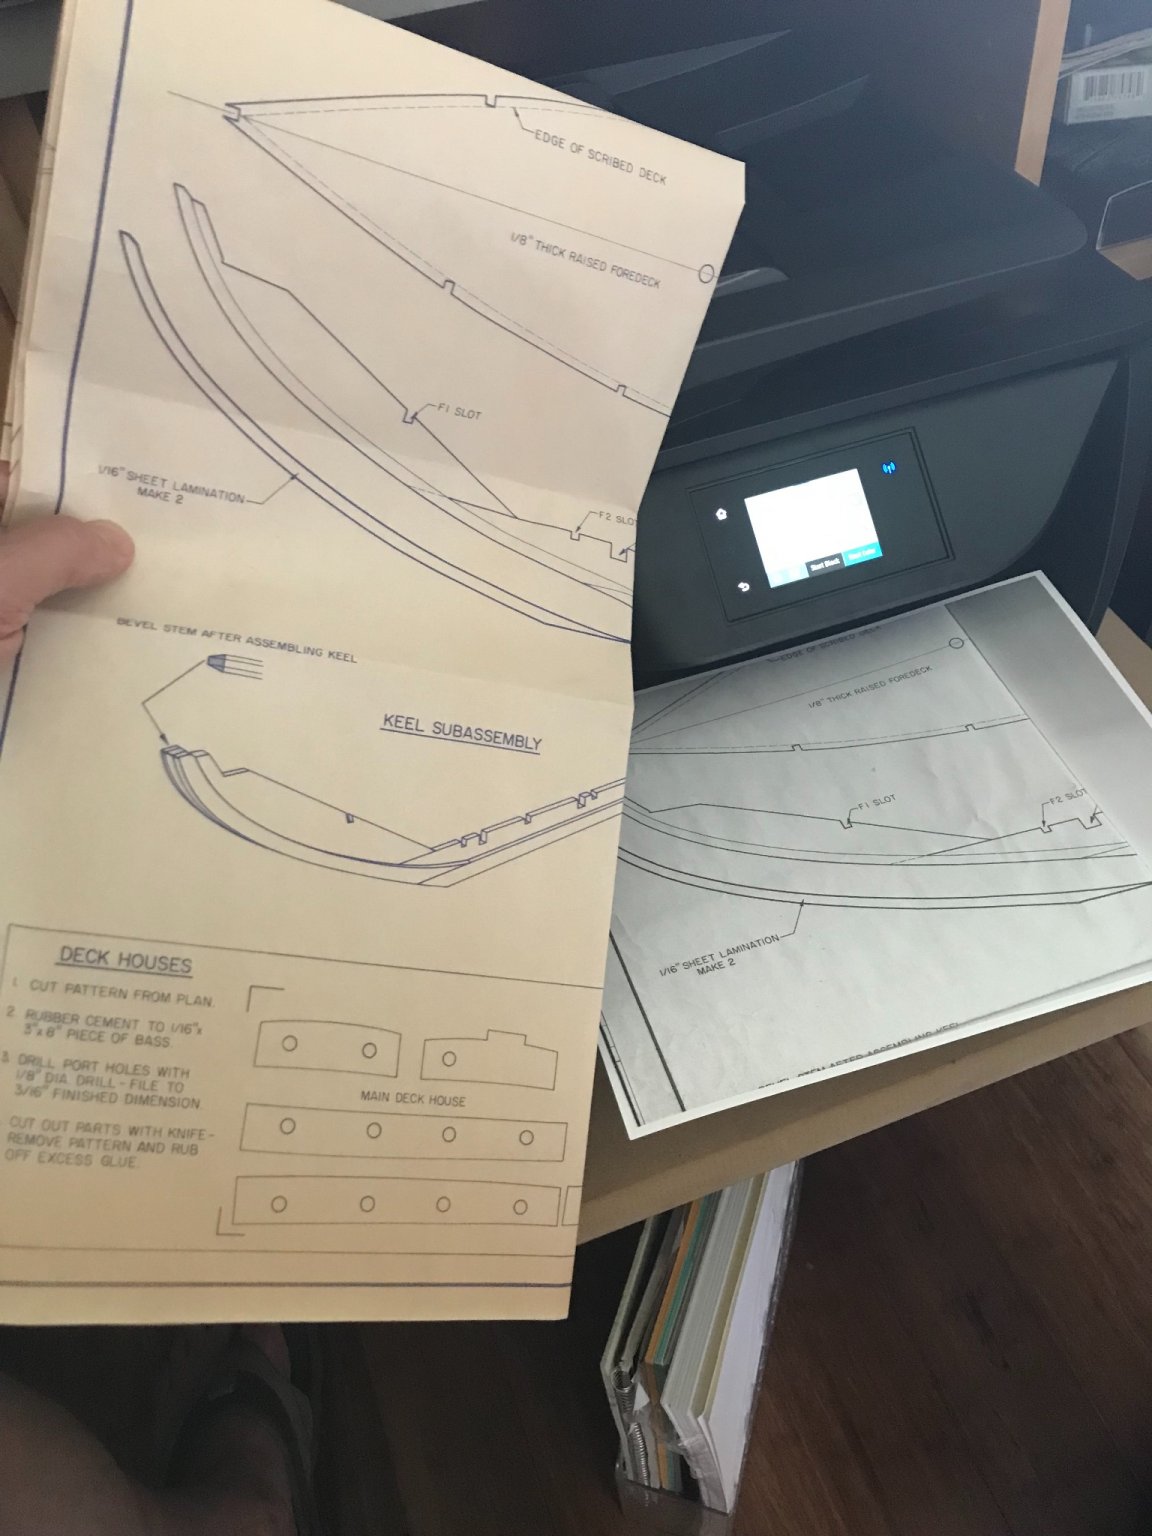
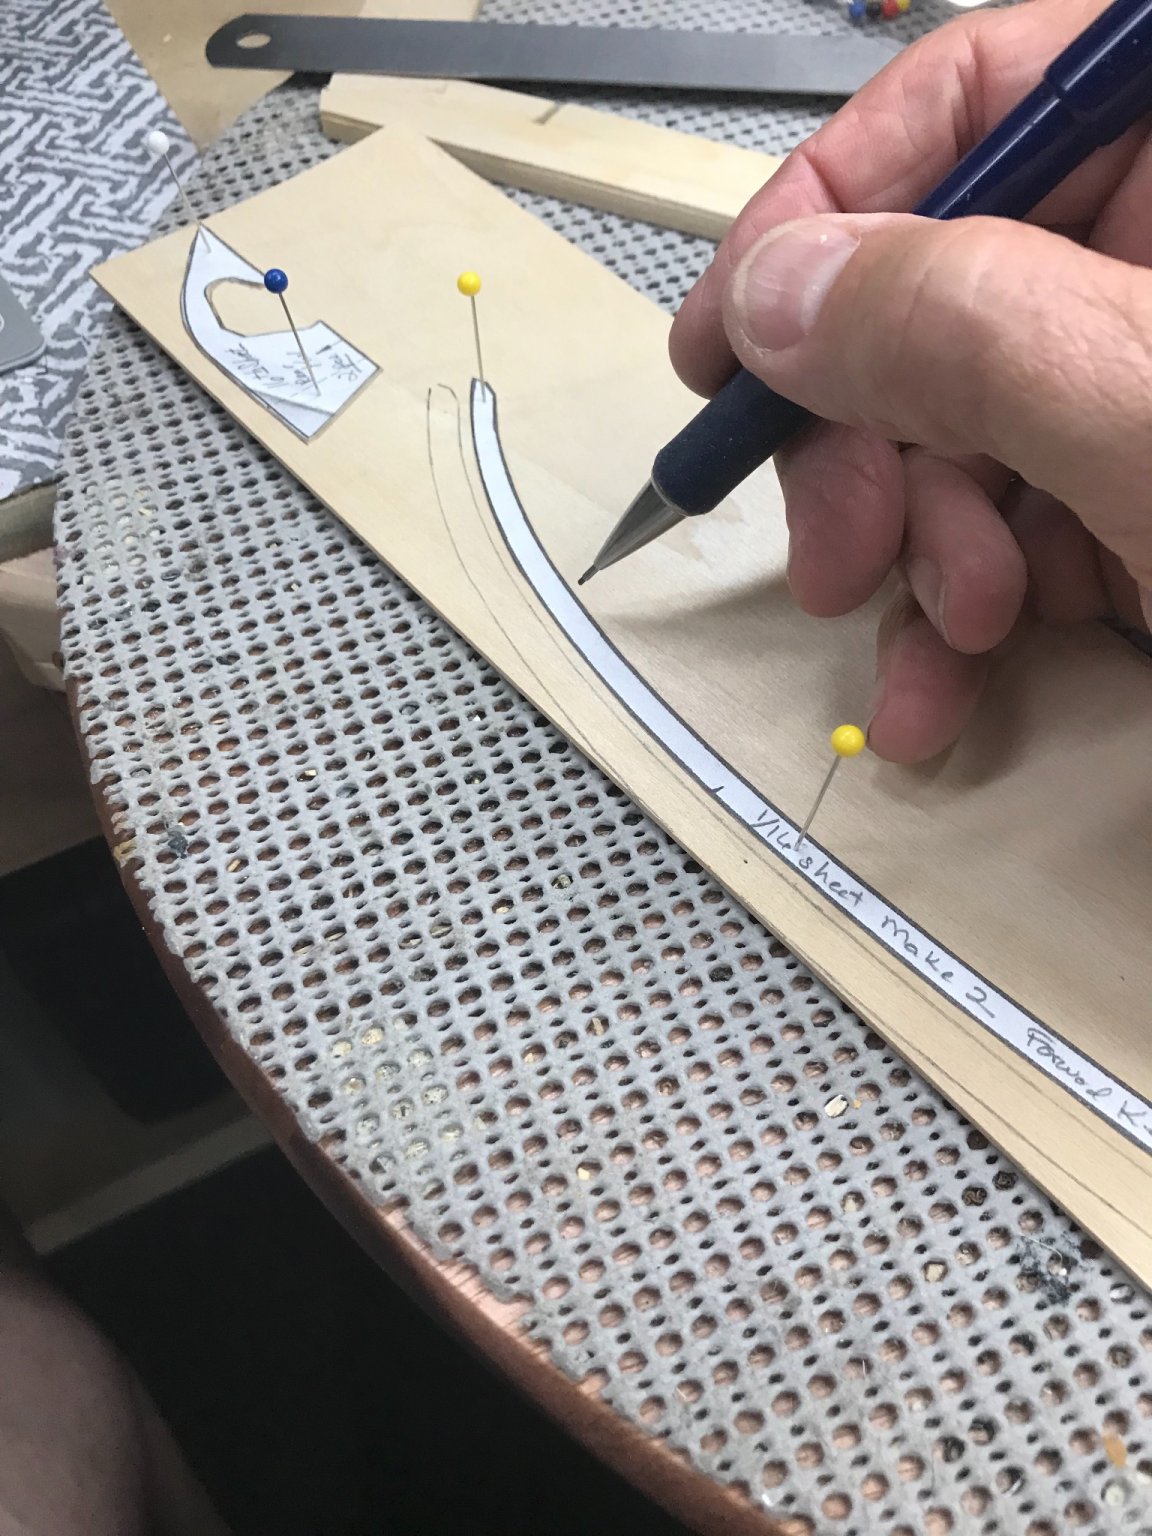
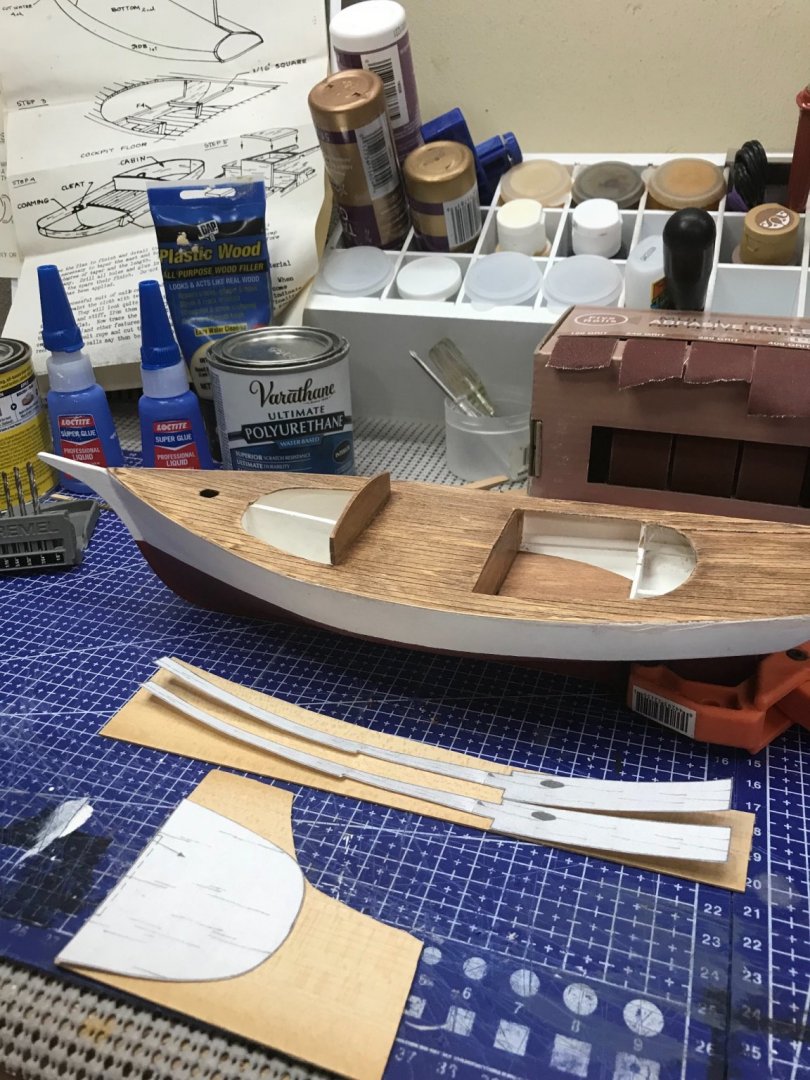
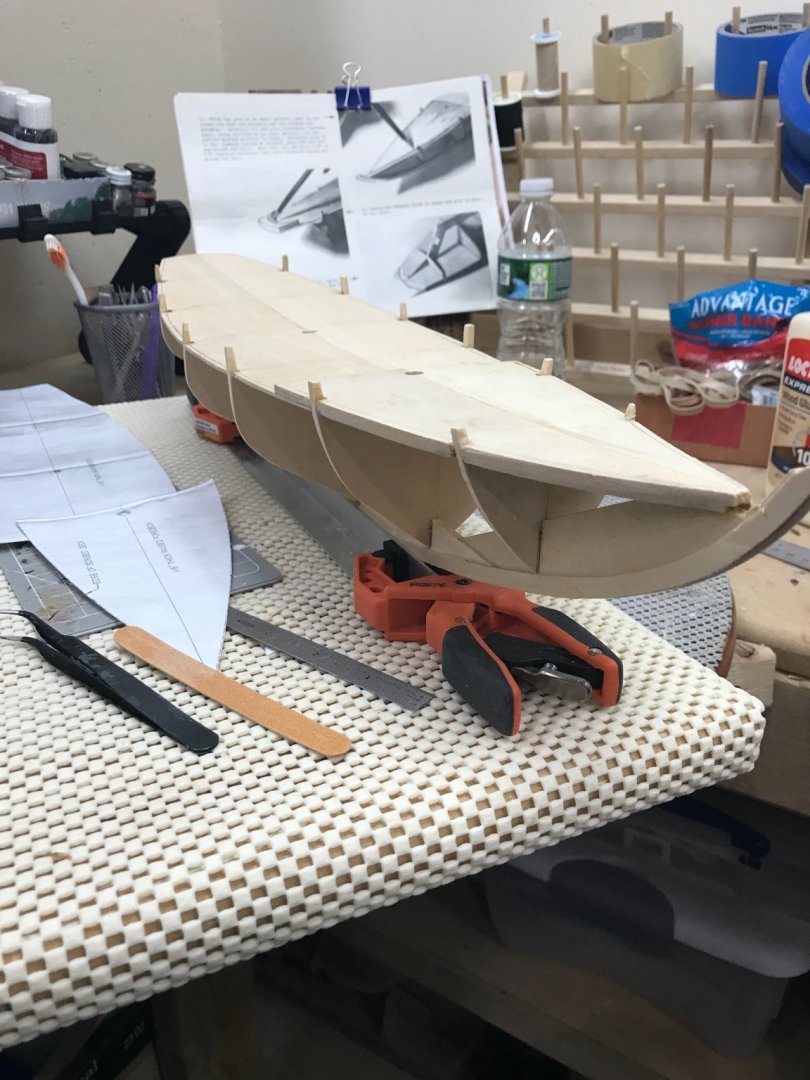
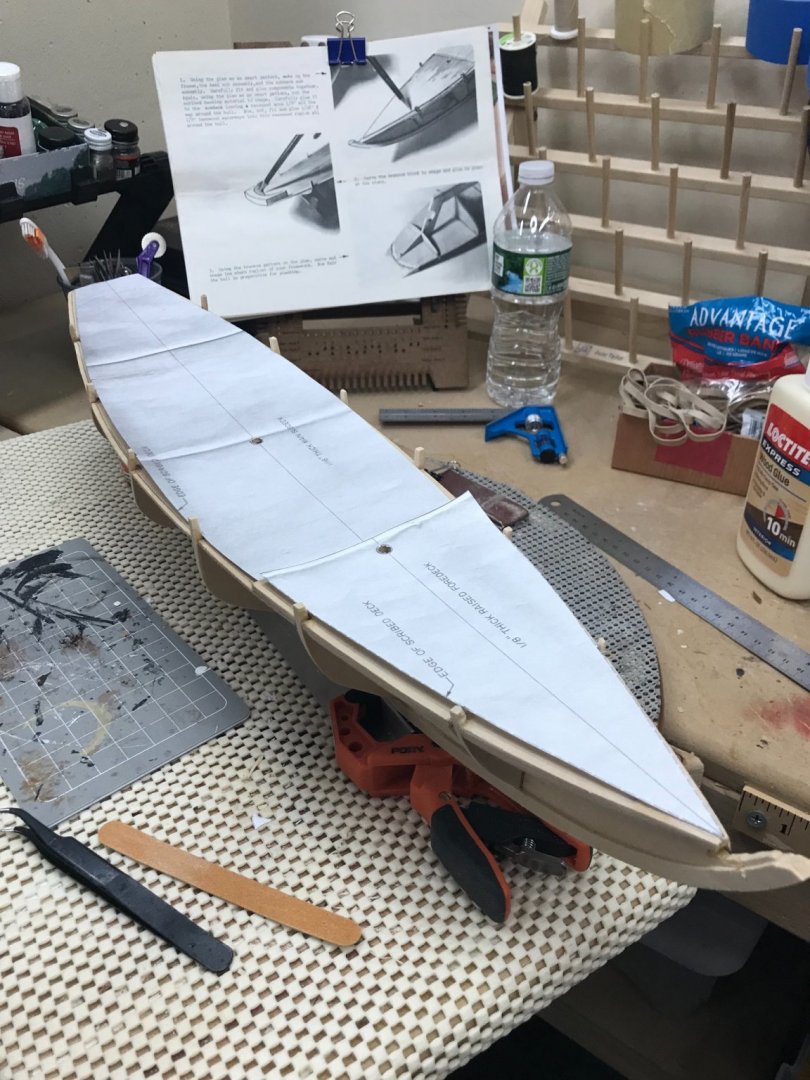
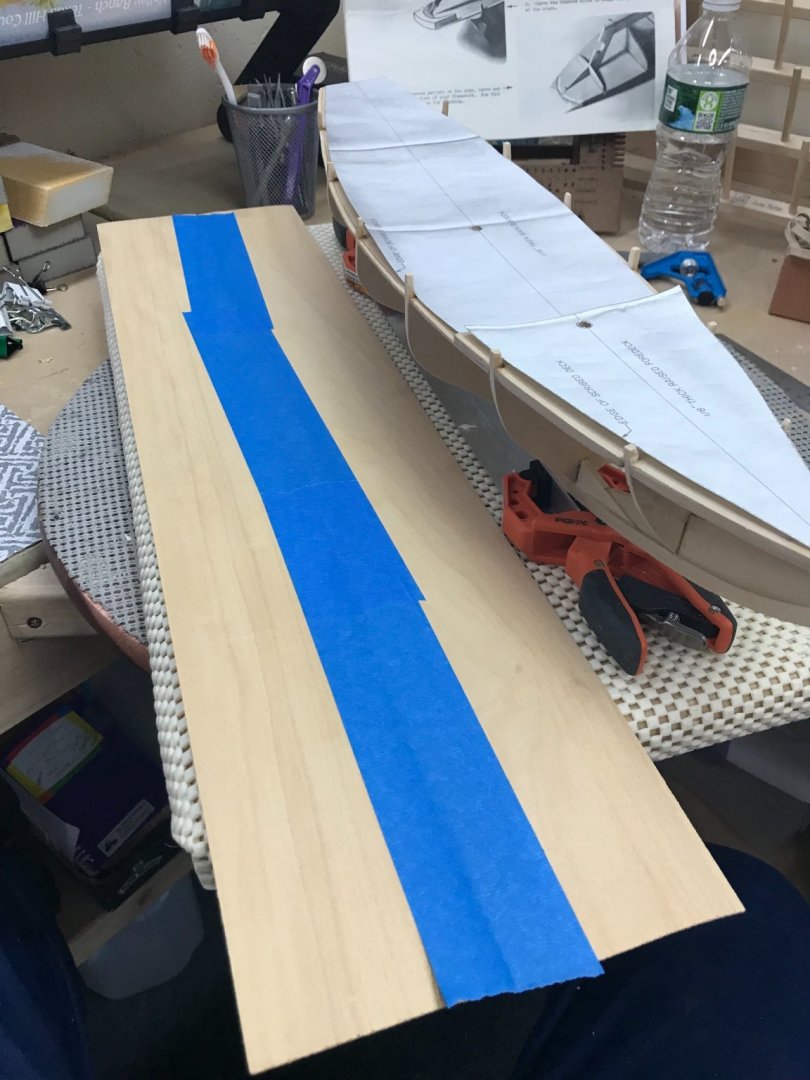
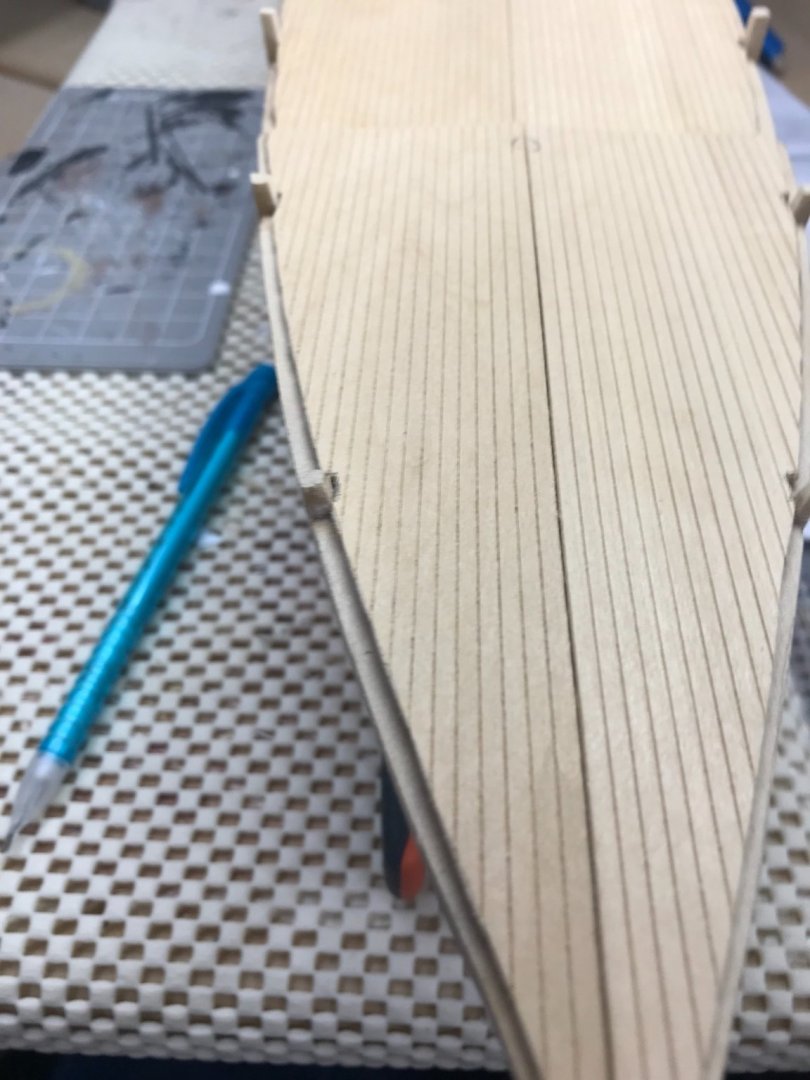
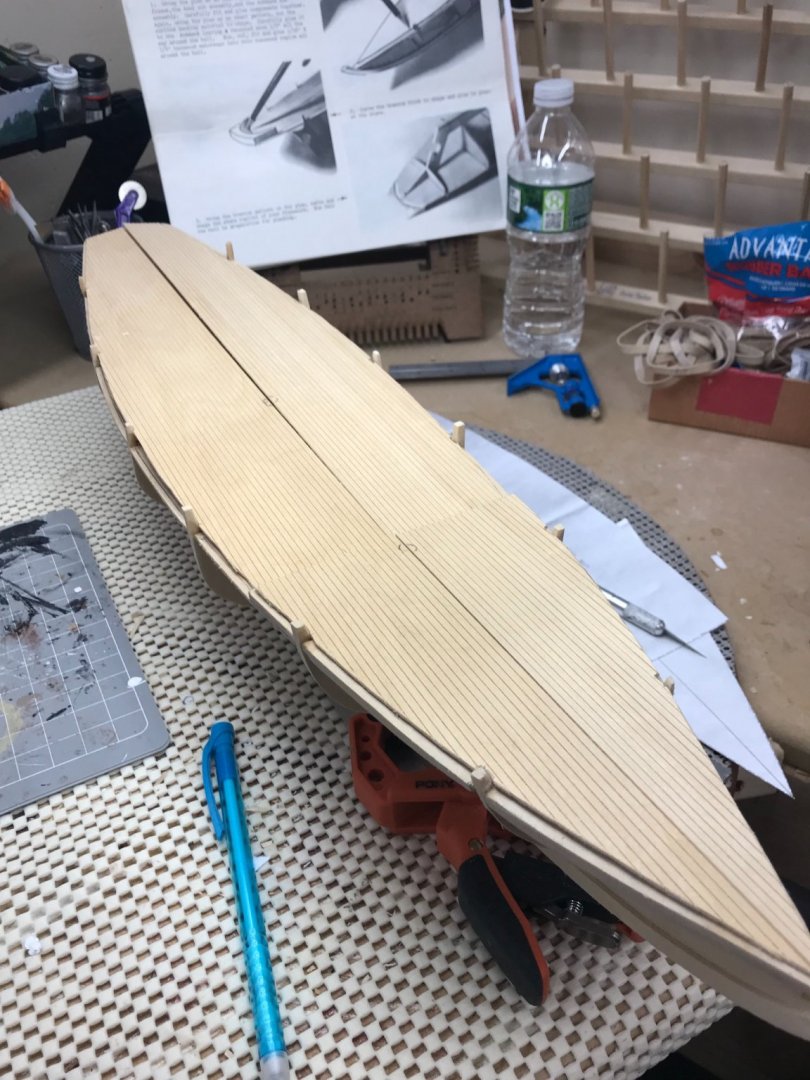
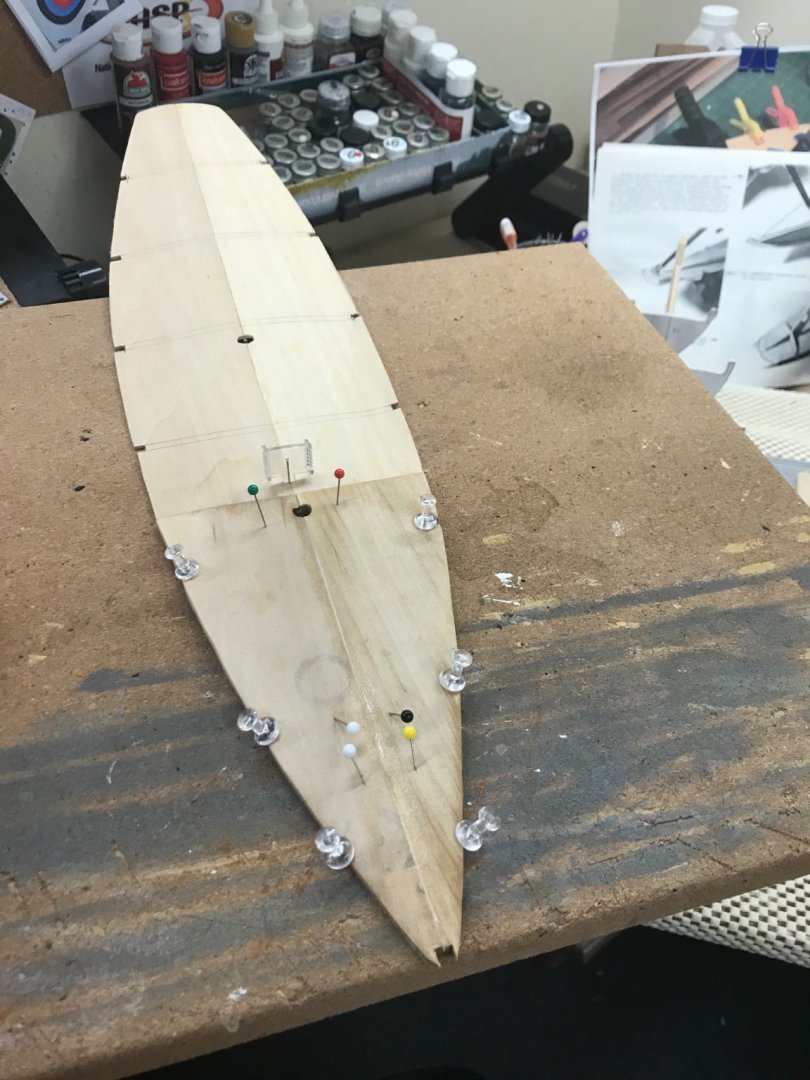
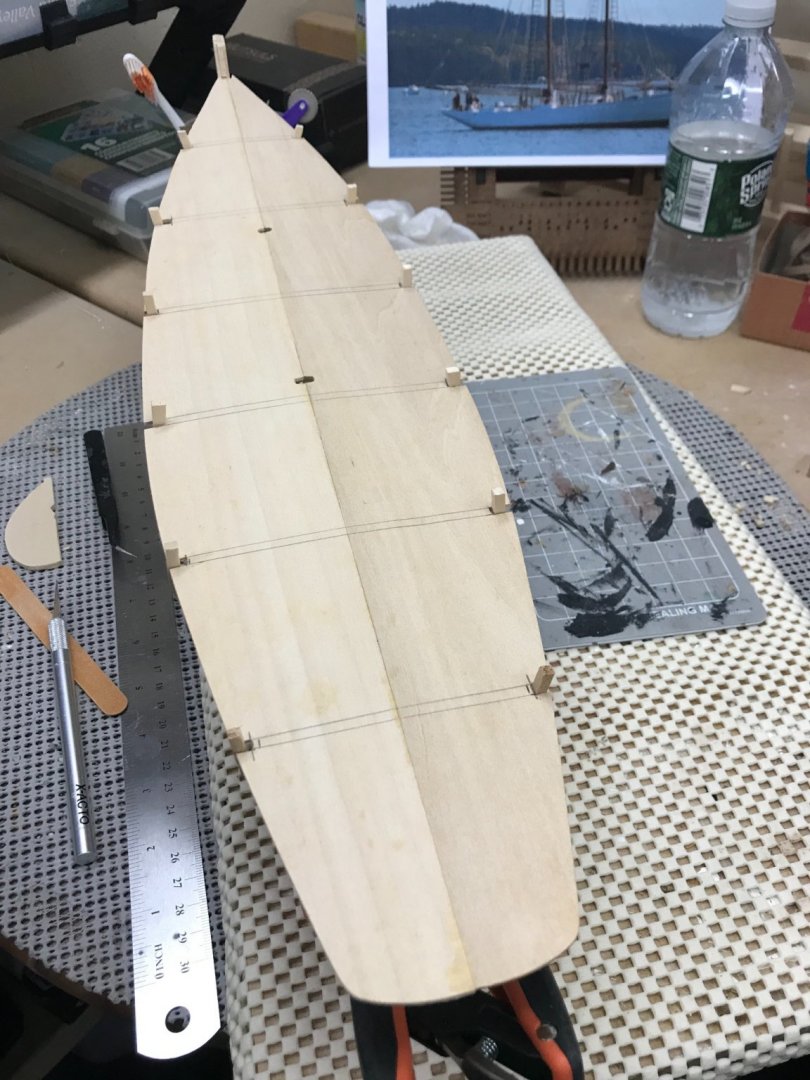
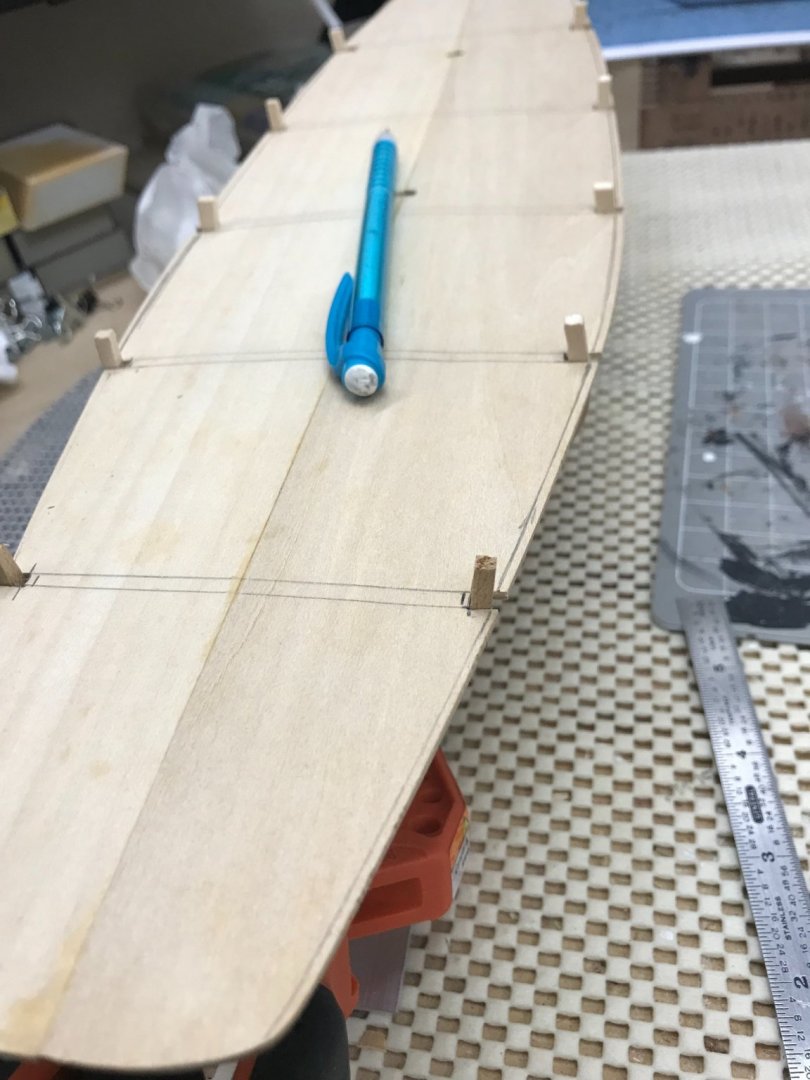
It actually came out straight. 😆 A bit more 150 grit, to fare things up. Laid out the templates for the scribed decking. Needed to narrow up the bow a bit. Templates are all set… Scribed decking is in two halves. Used painters blue tape to hold temporarily while I mark and cut out the decks. Traced out templates with pencil Notched out the decking for bulkheads. Dry fit looks good. 👍 Thought I would stain the decks cherry. I will give them a coat of semi gloss poly, before I glue them down. (tomorrow) It was a good day… 😎 Cheers 🍻


- 127 replies
-
- 9
-
-
- Bowdoin
- Arctic Exploration
- (and 3 more)
-
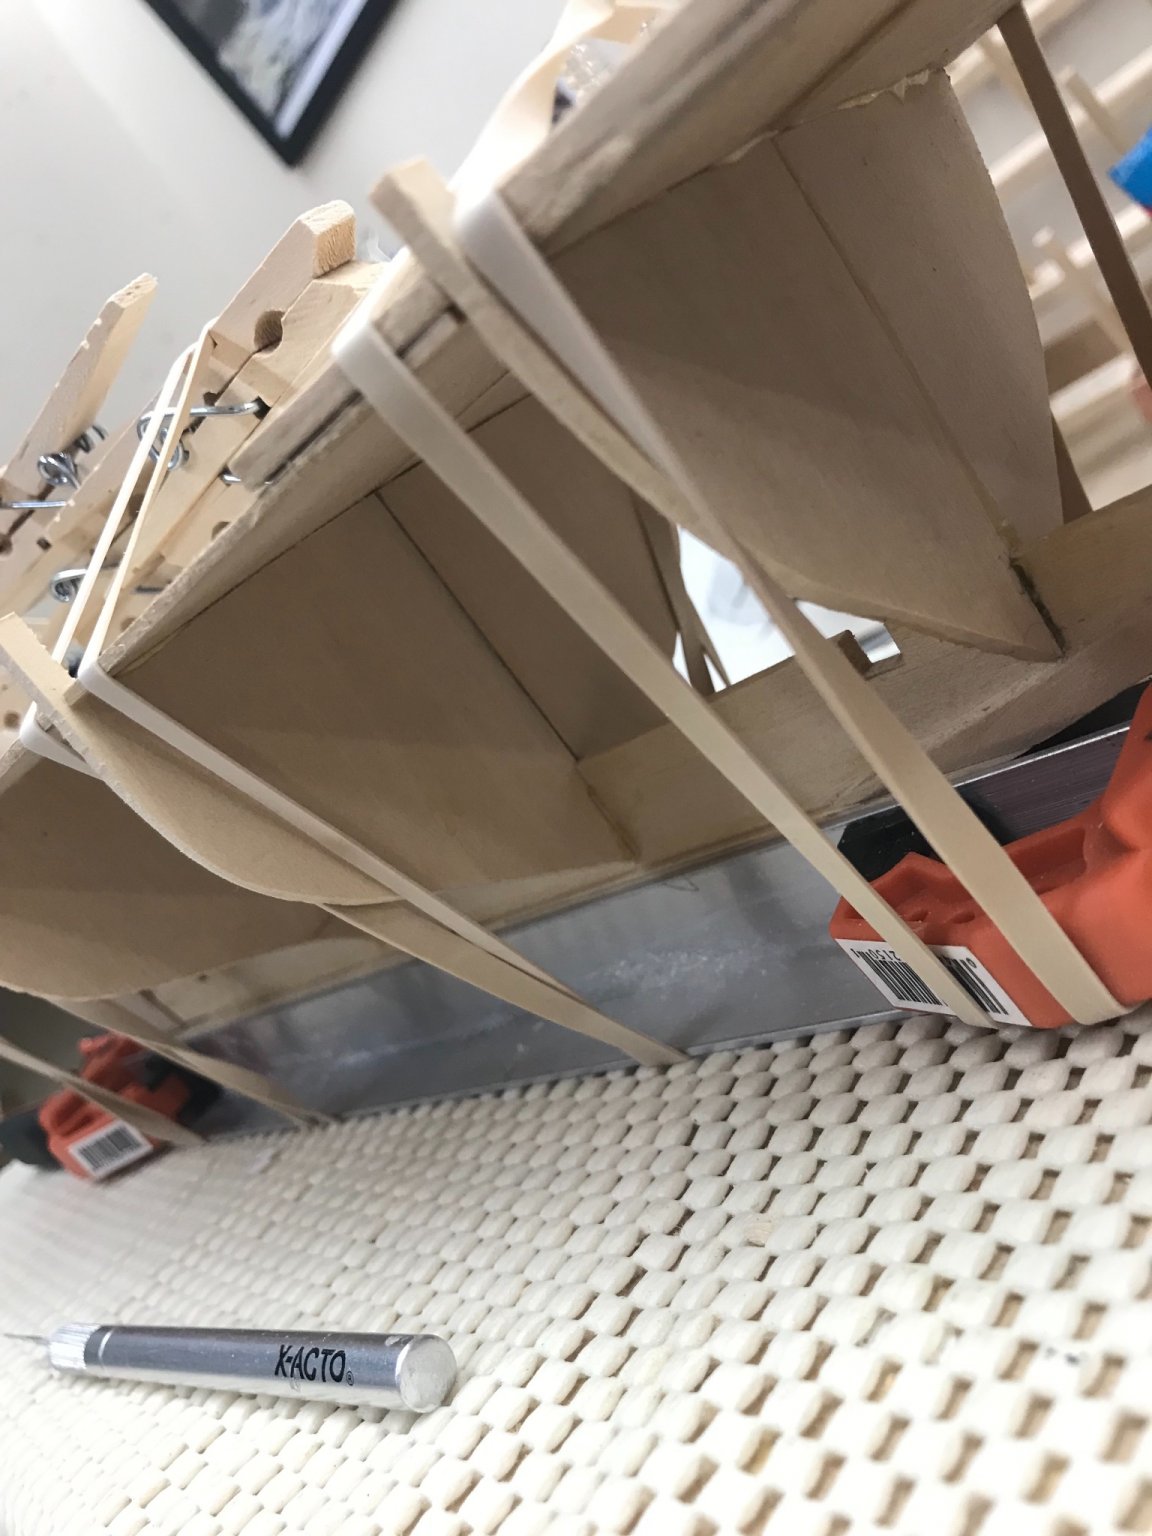
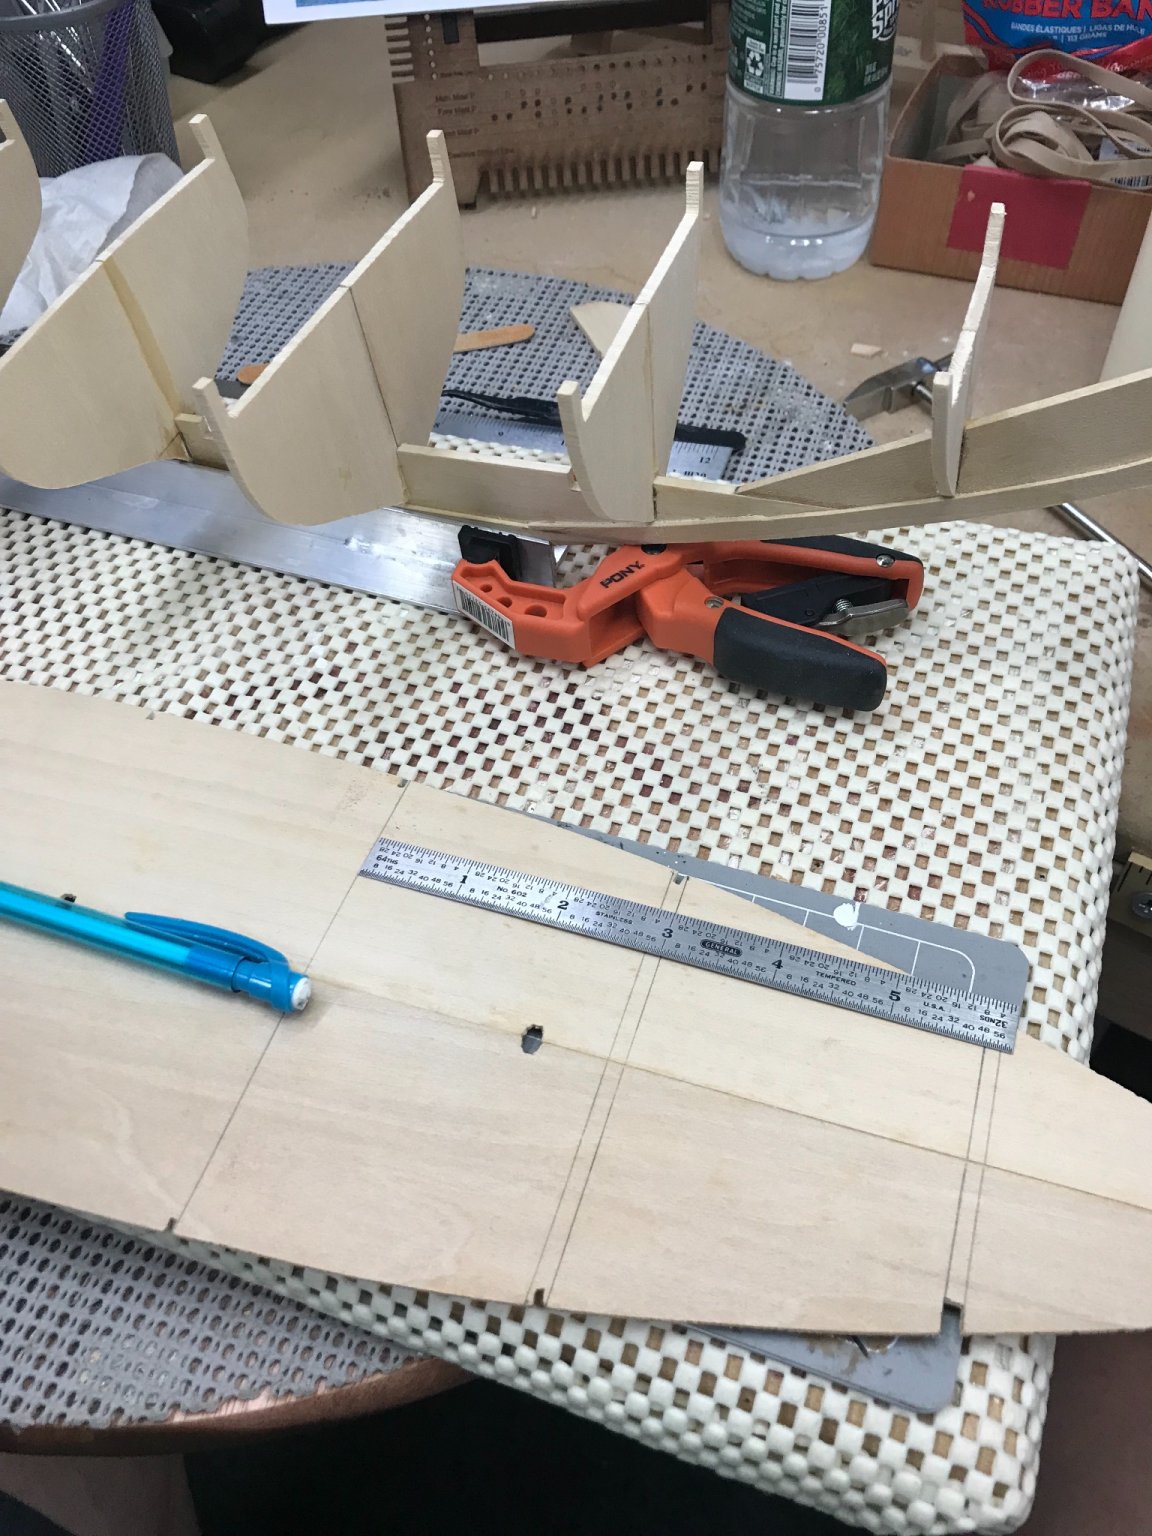
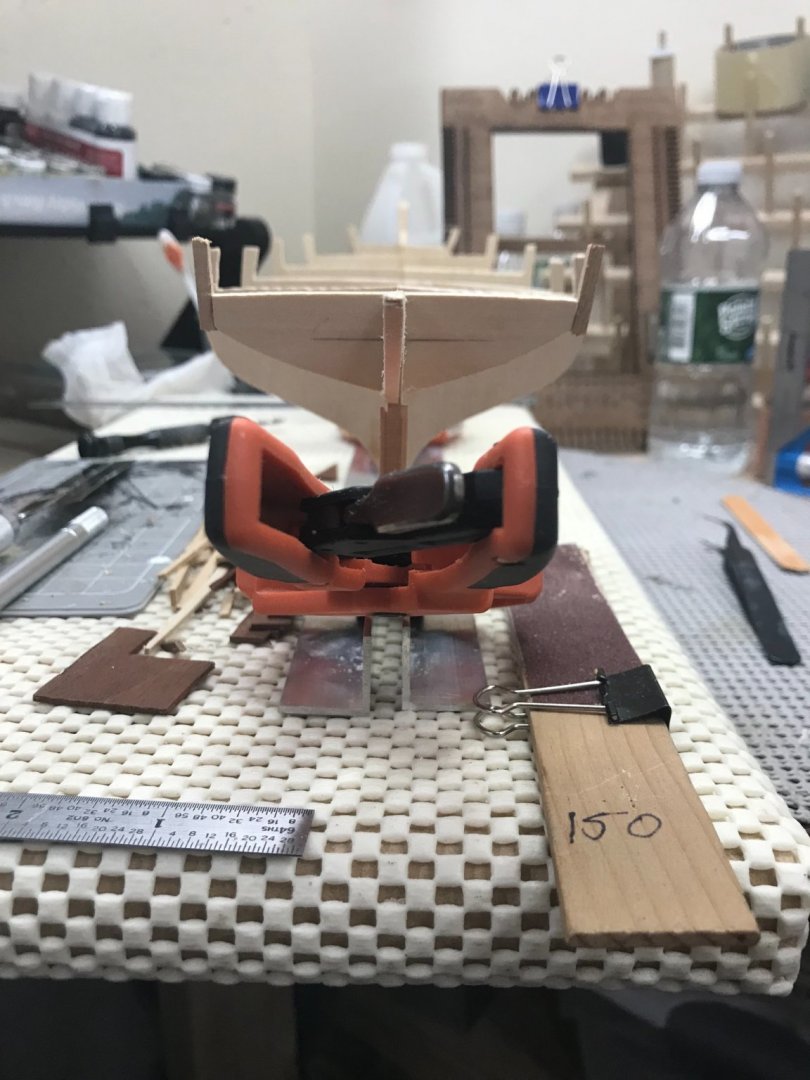
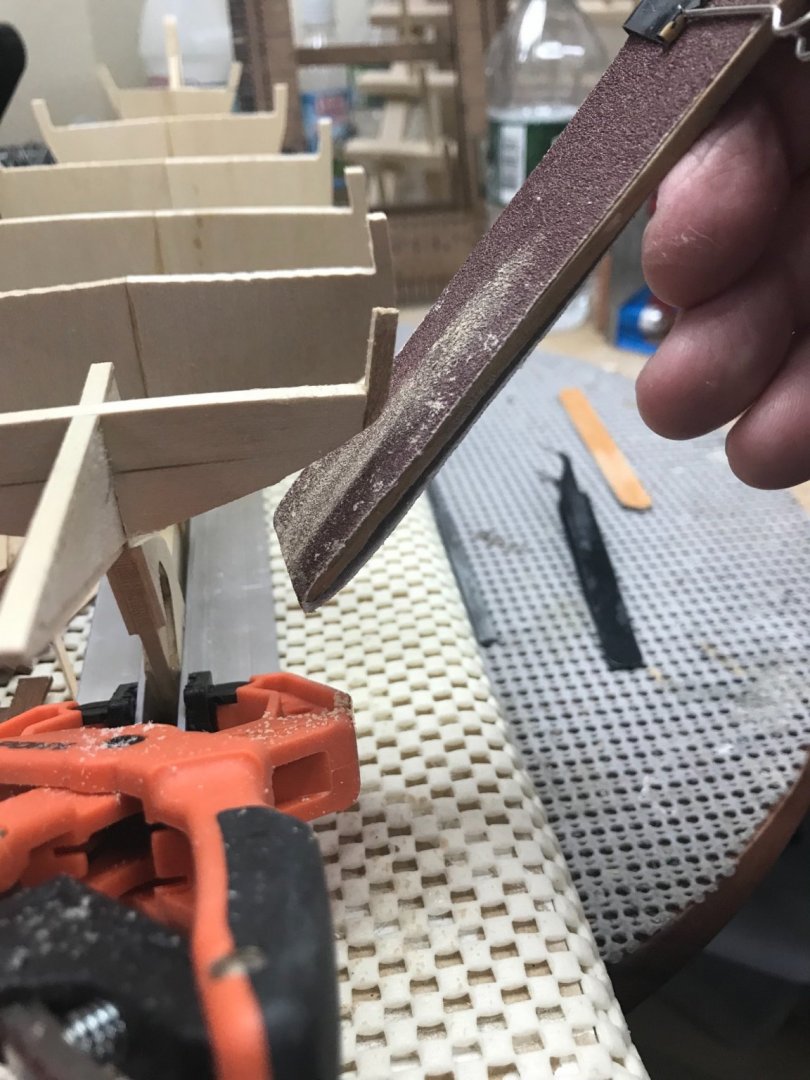
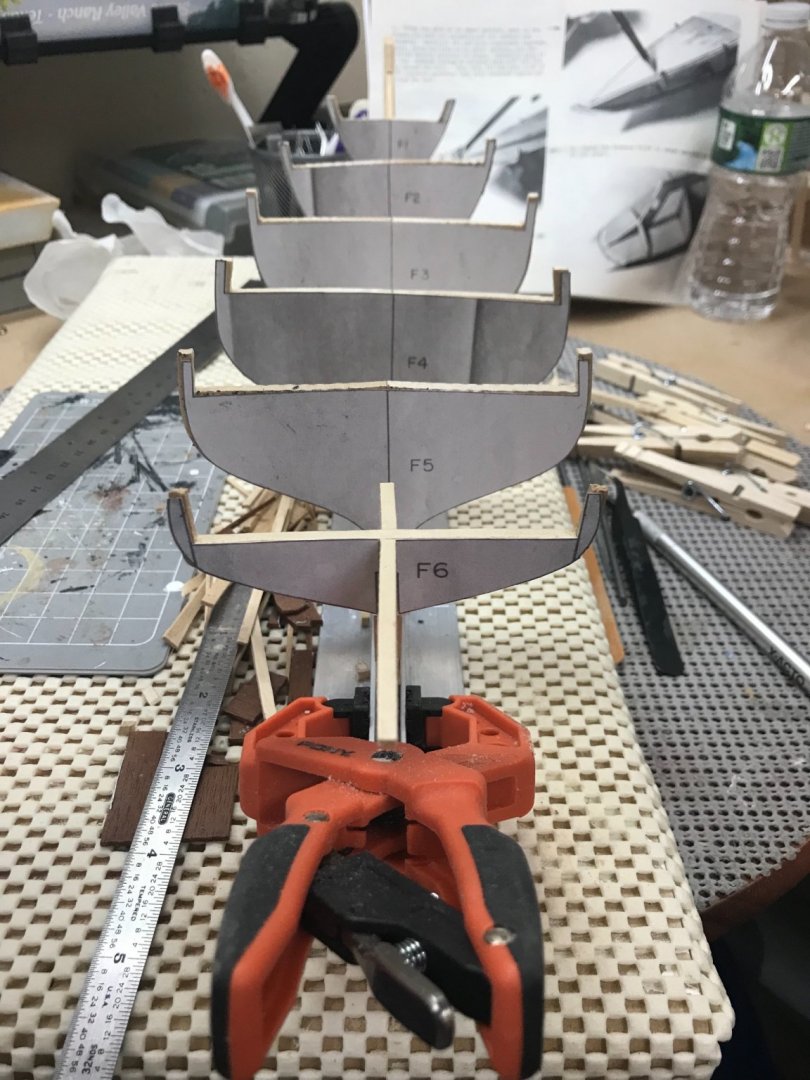
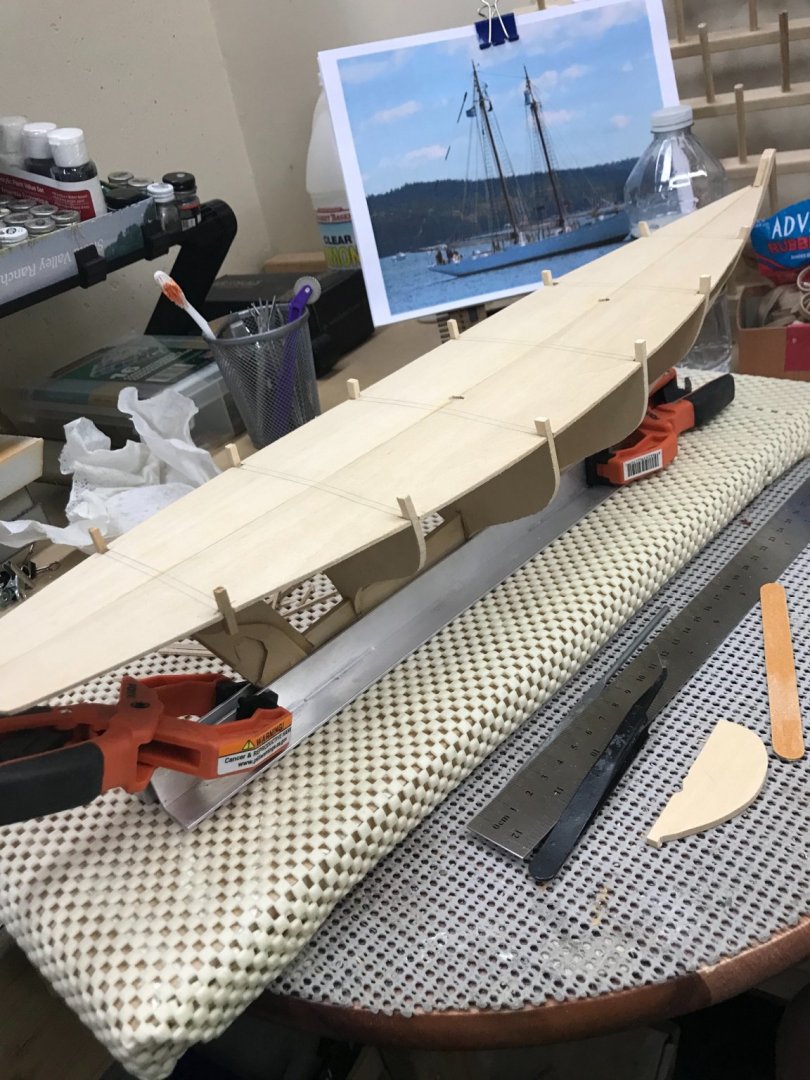
It’s been a good day in my MSW. Progress… Used strip wood to fare out the bulkhead surfaces for the sub decking. Begin shaping the bulkheads for mounting of the sub deck. 150 grit sanding… This view shows the rough cut bulkheads…. I decided to use templates to get the bulkheads shaped properly. I should have done this before I mounted everything to the keel. 😩 Hind sight is always 100%. 😆 Moving on… 150 grit and persistence gets it right. 😎 Gluing down the fore deck… Soaking wet, trying to get the curve right. Had to re-glue and clamp… Ta Da… sub deck glued in place. Straight, I hope 🤞 We will know more when I remove the Rubber Band/Close-pin Clamping System. 😎 Bulkhead to sub deck joints look good. 👍. Later 🍻


- 127 replies
-
- 4
-
-
- Bowdoin
- Arctic Exploration
- (and 3 more)
-
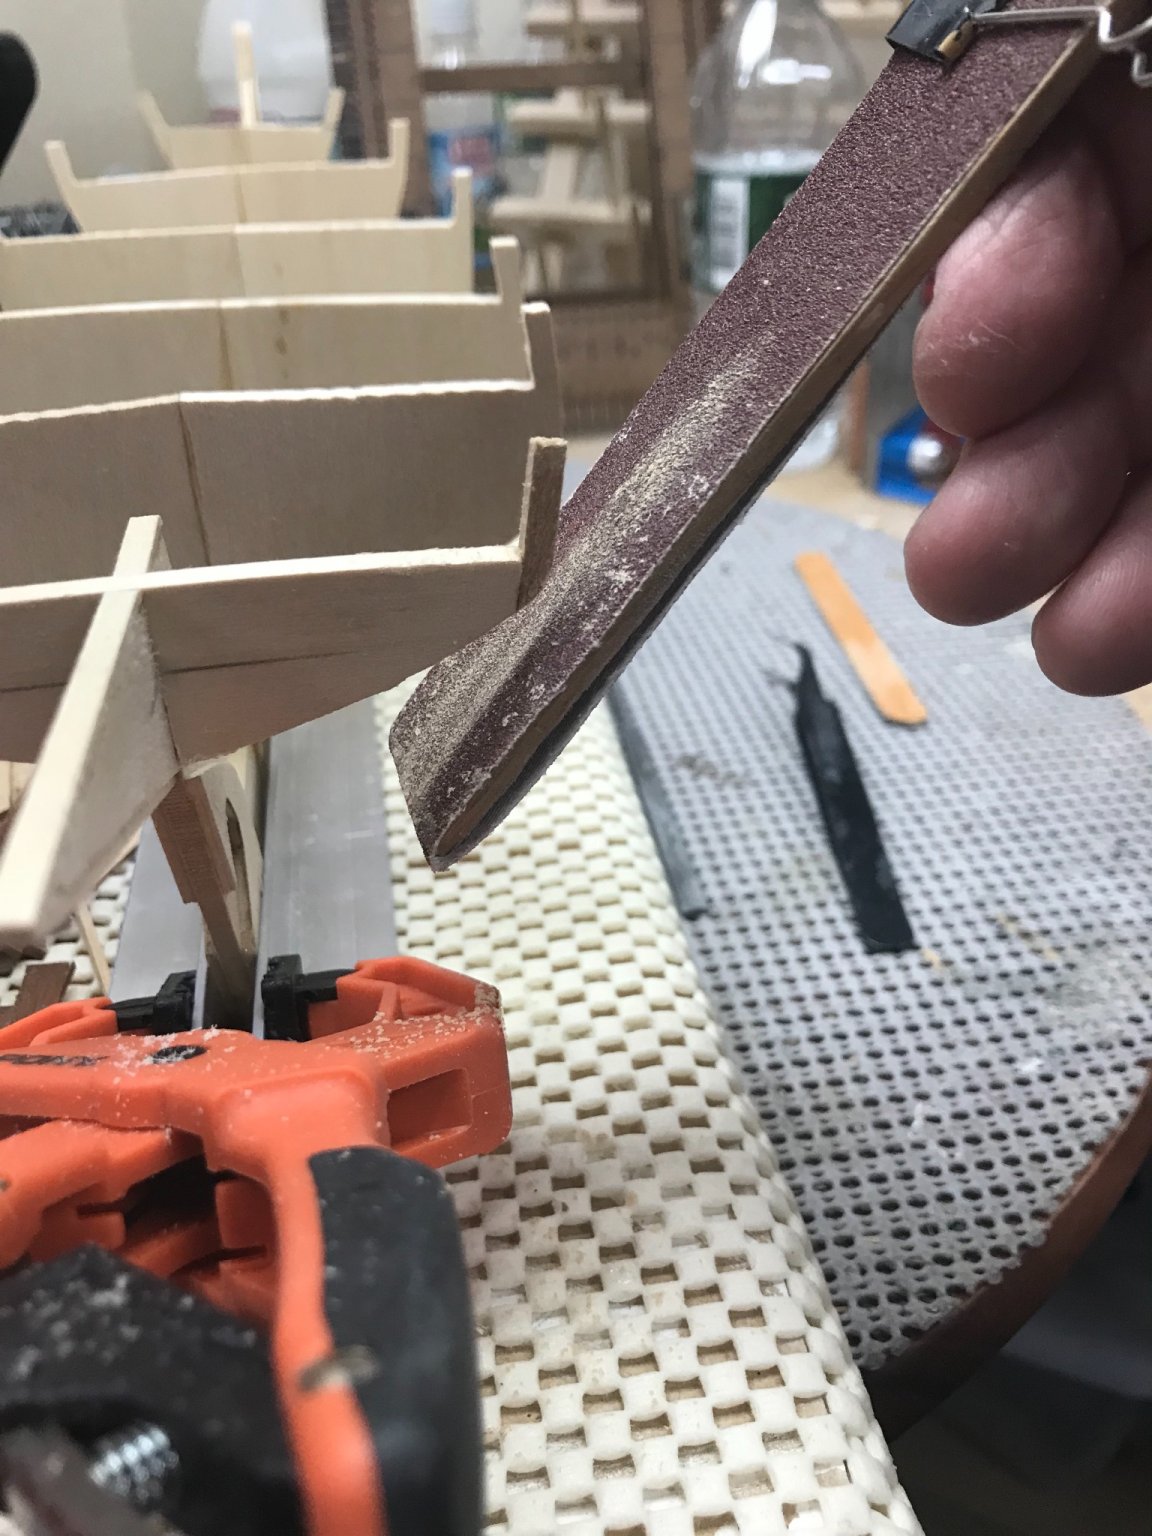
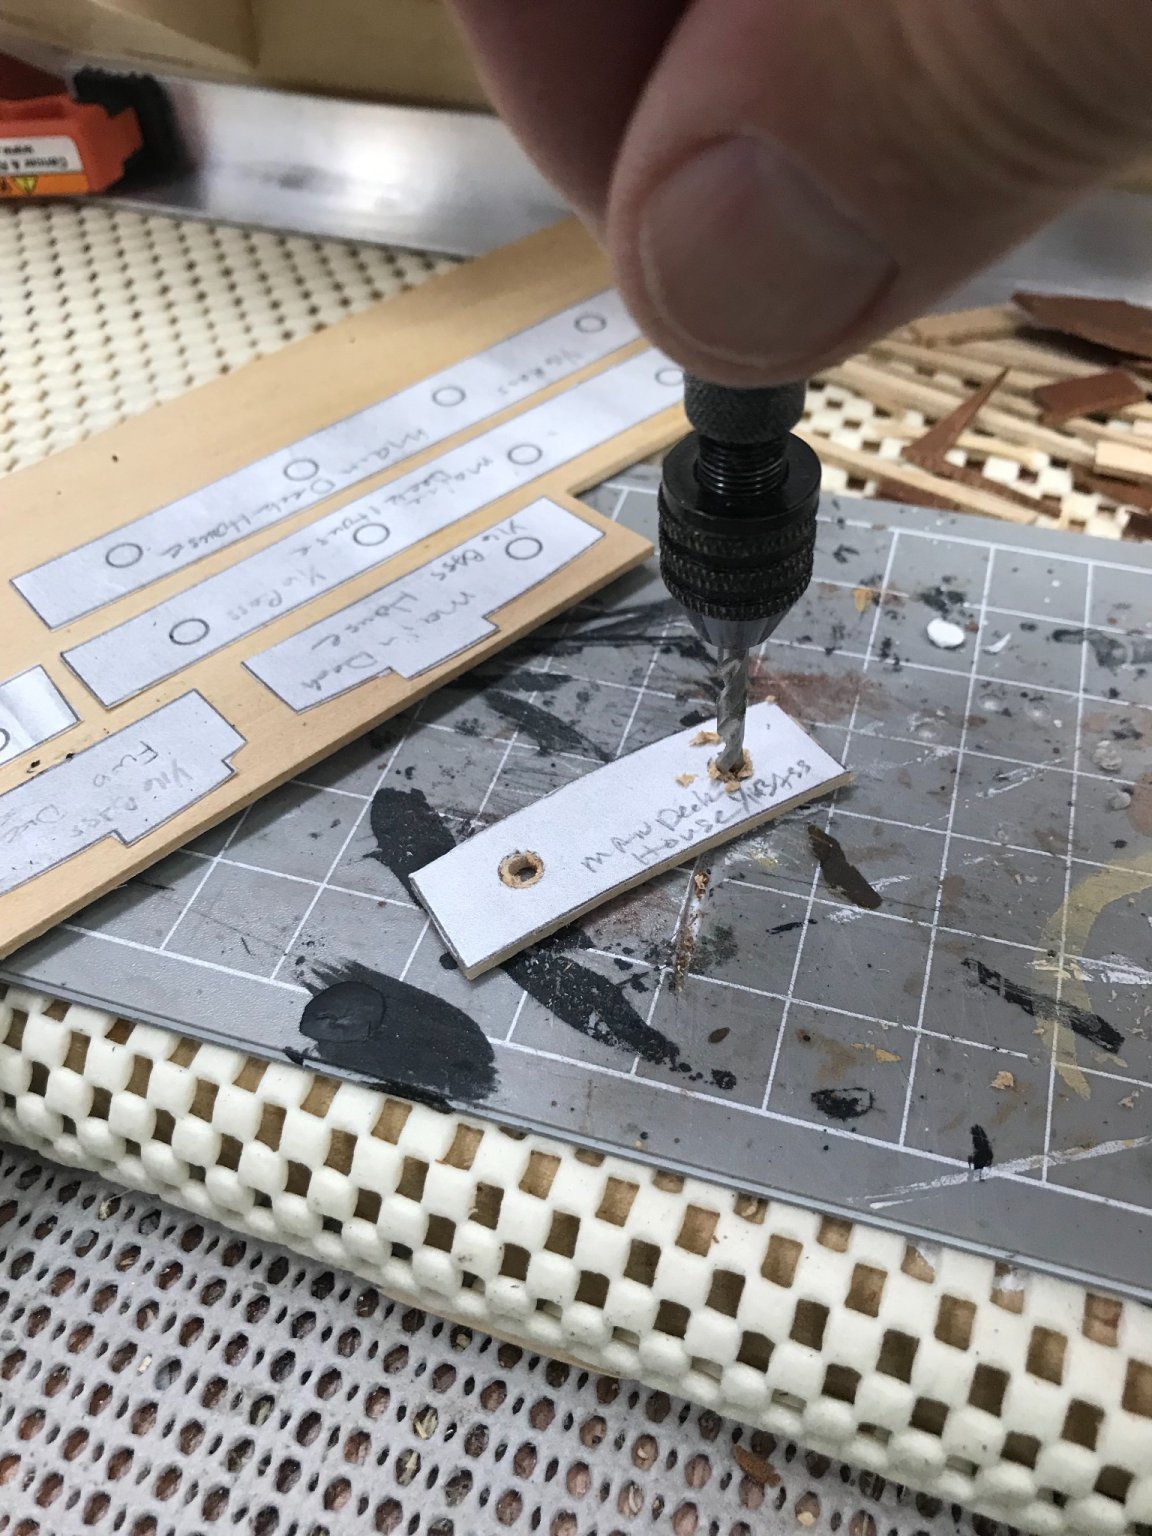
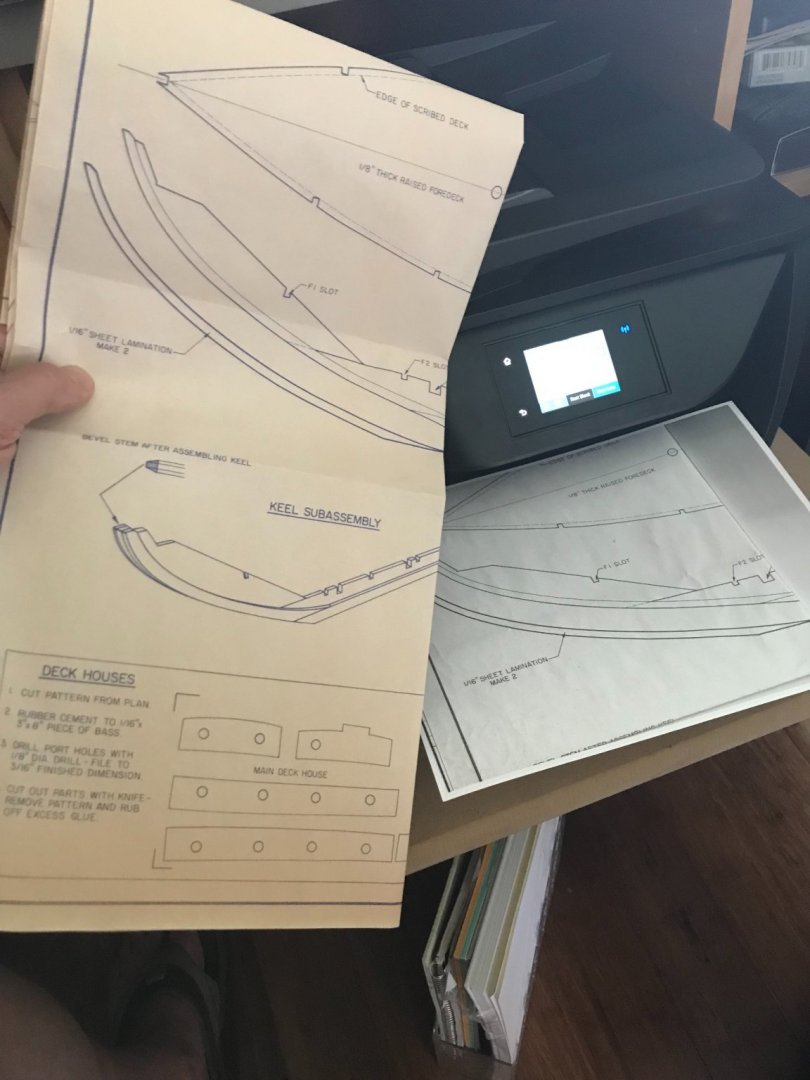
Rubber Cement Templates… Thin coat applied… All templates laid out… Carefully cut using light pressure and multiple passes… Drill out portholes with 1/8” bit and finalize to the correct size with round needle file. Be careful not to split the wood. On the shelf until I finish planking and decking. Onwards. 😎


- 127 replies
-
- 4
-
-
- Bowdoin
- Arctic Exploration
- (and 3 more)
-
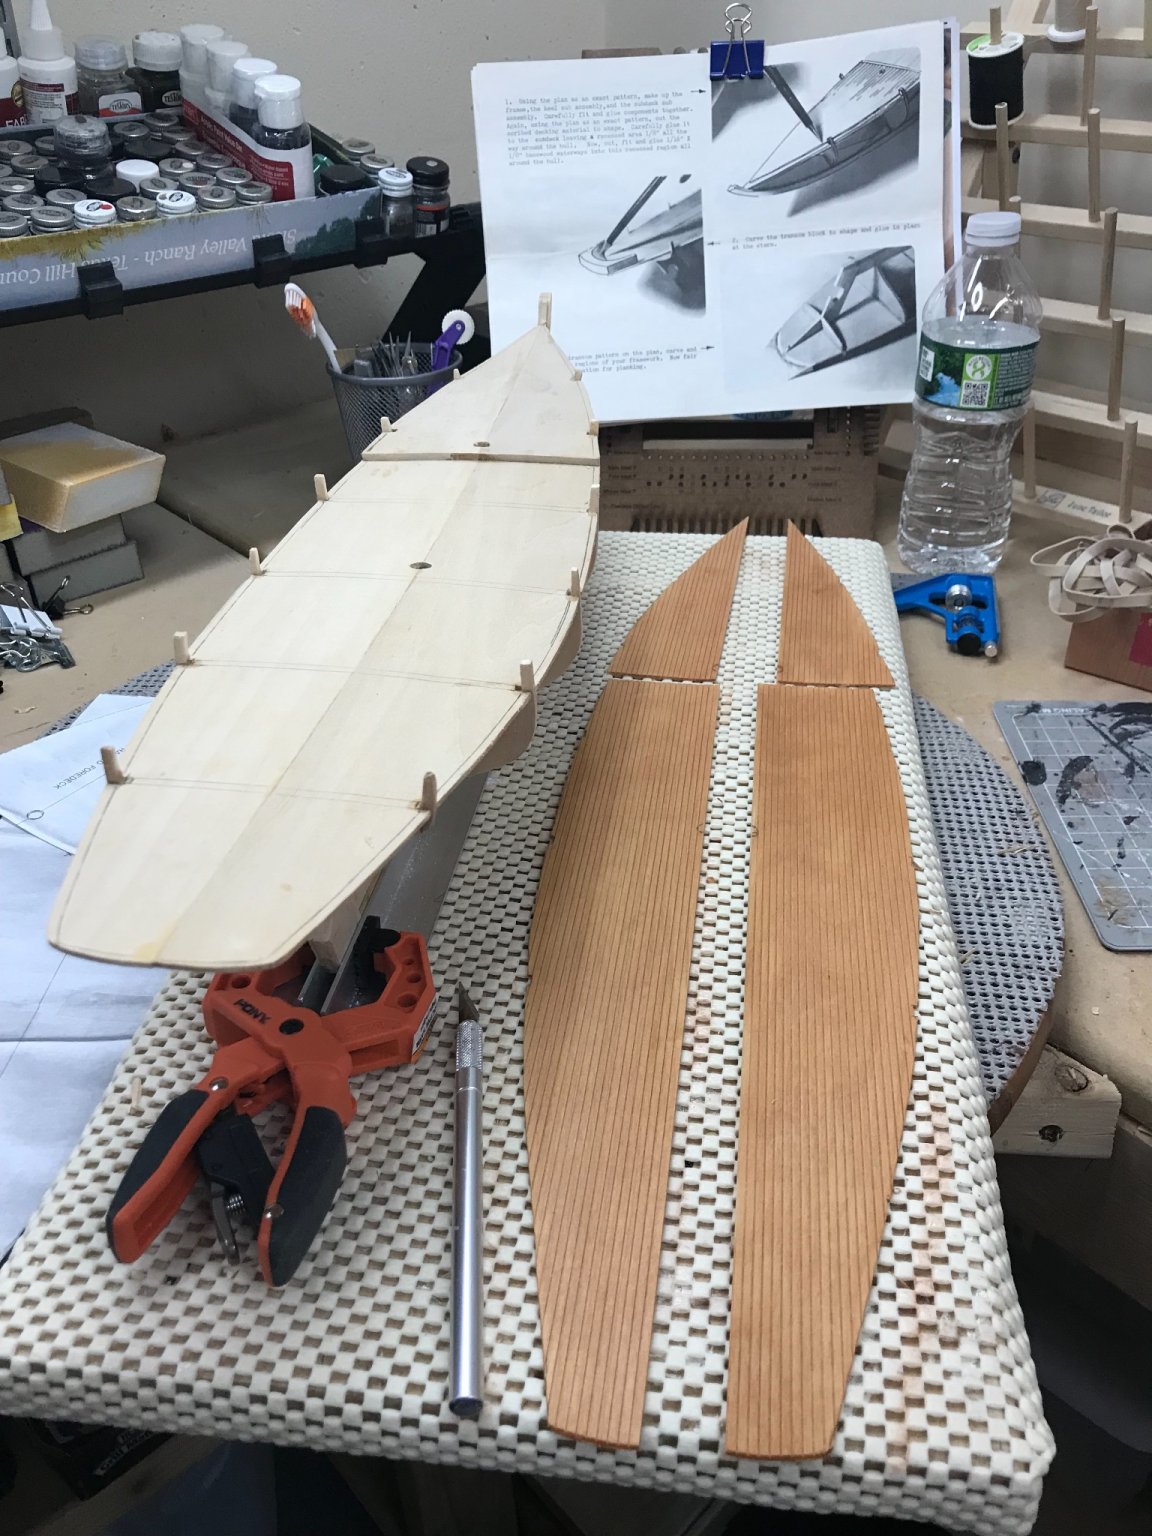
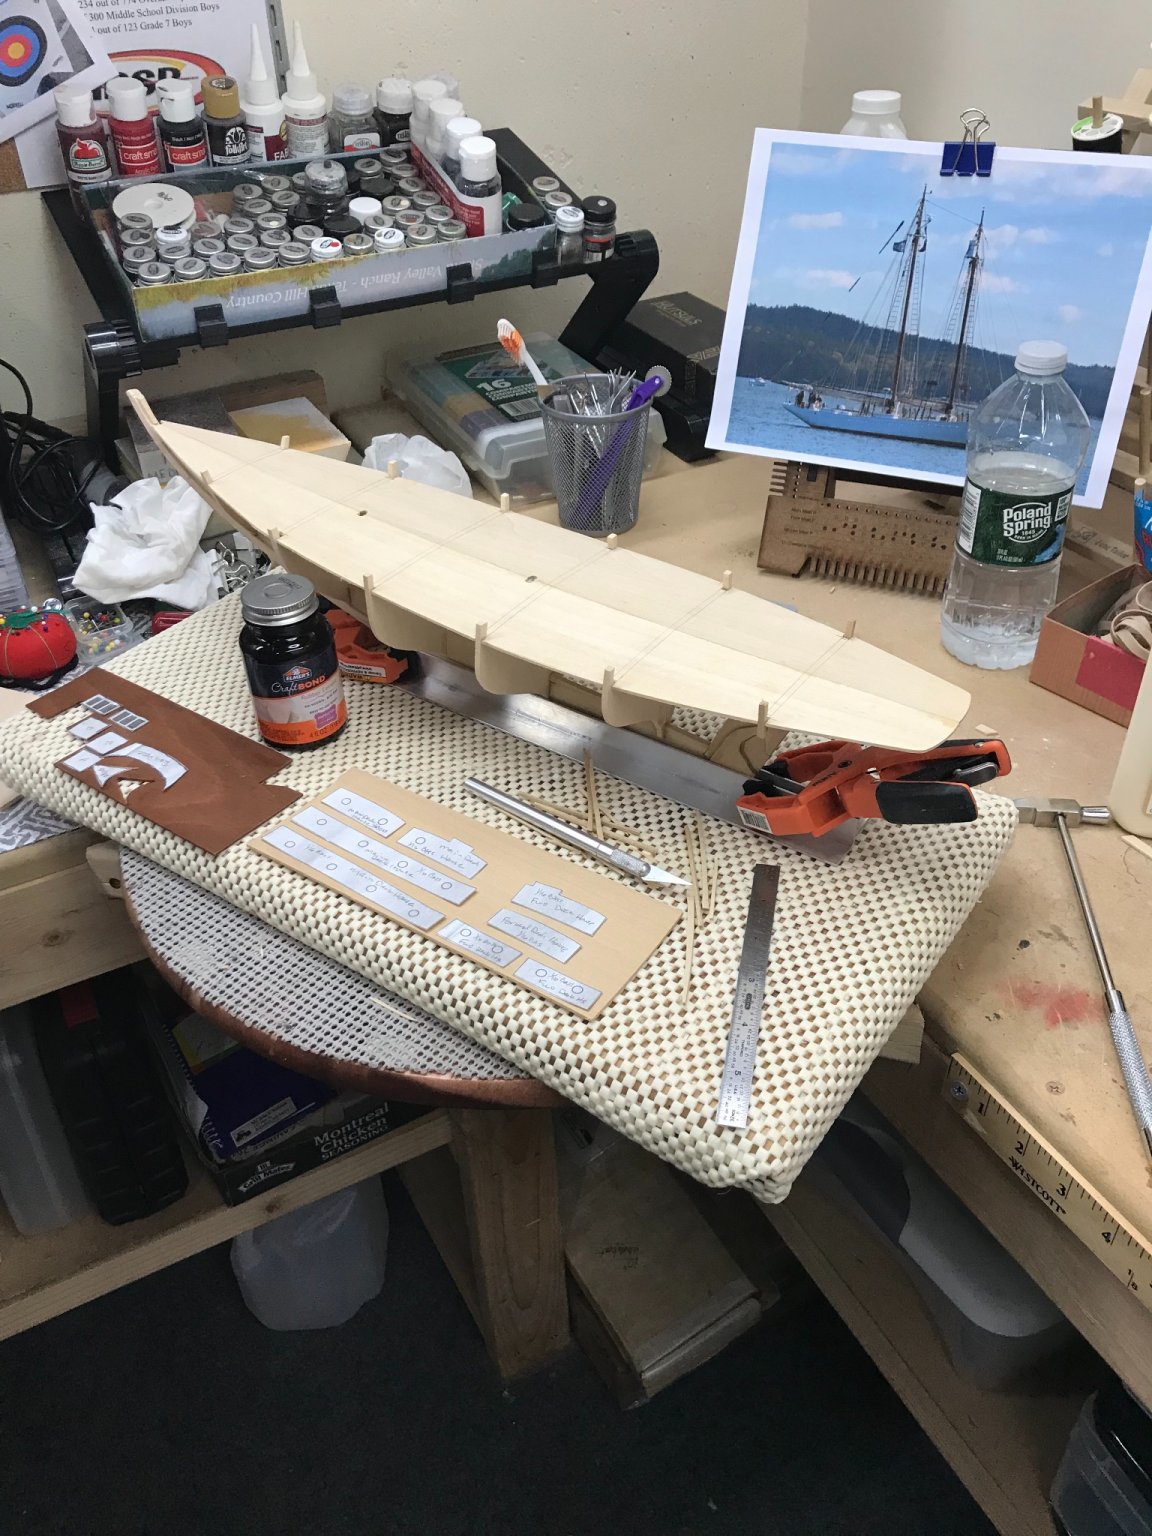
Installing the sub deck… Clamped the two precut halves of the sub deck together with the 10 min clamp wood glue. Precut slots for the bulkheads needed some adjustment. Checking the fit… Need to trim up edges, marked with pencil. Looks like a good fit… Next up, cutting out deck furnishings. Using Rubber Cement to hold templates in place. (Old school) 😆


- 127 replies
-
- 7
-
-
- Bowdoin
- Arctic Exploration
- (and 3 more)
-
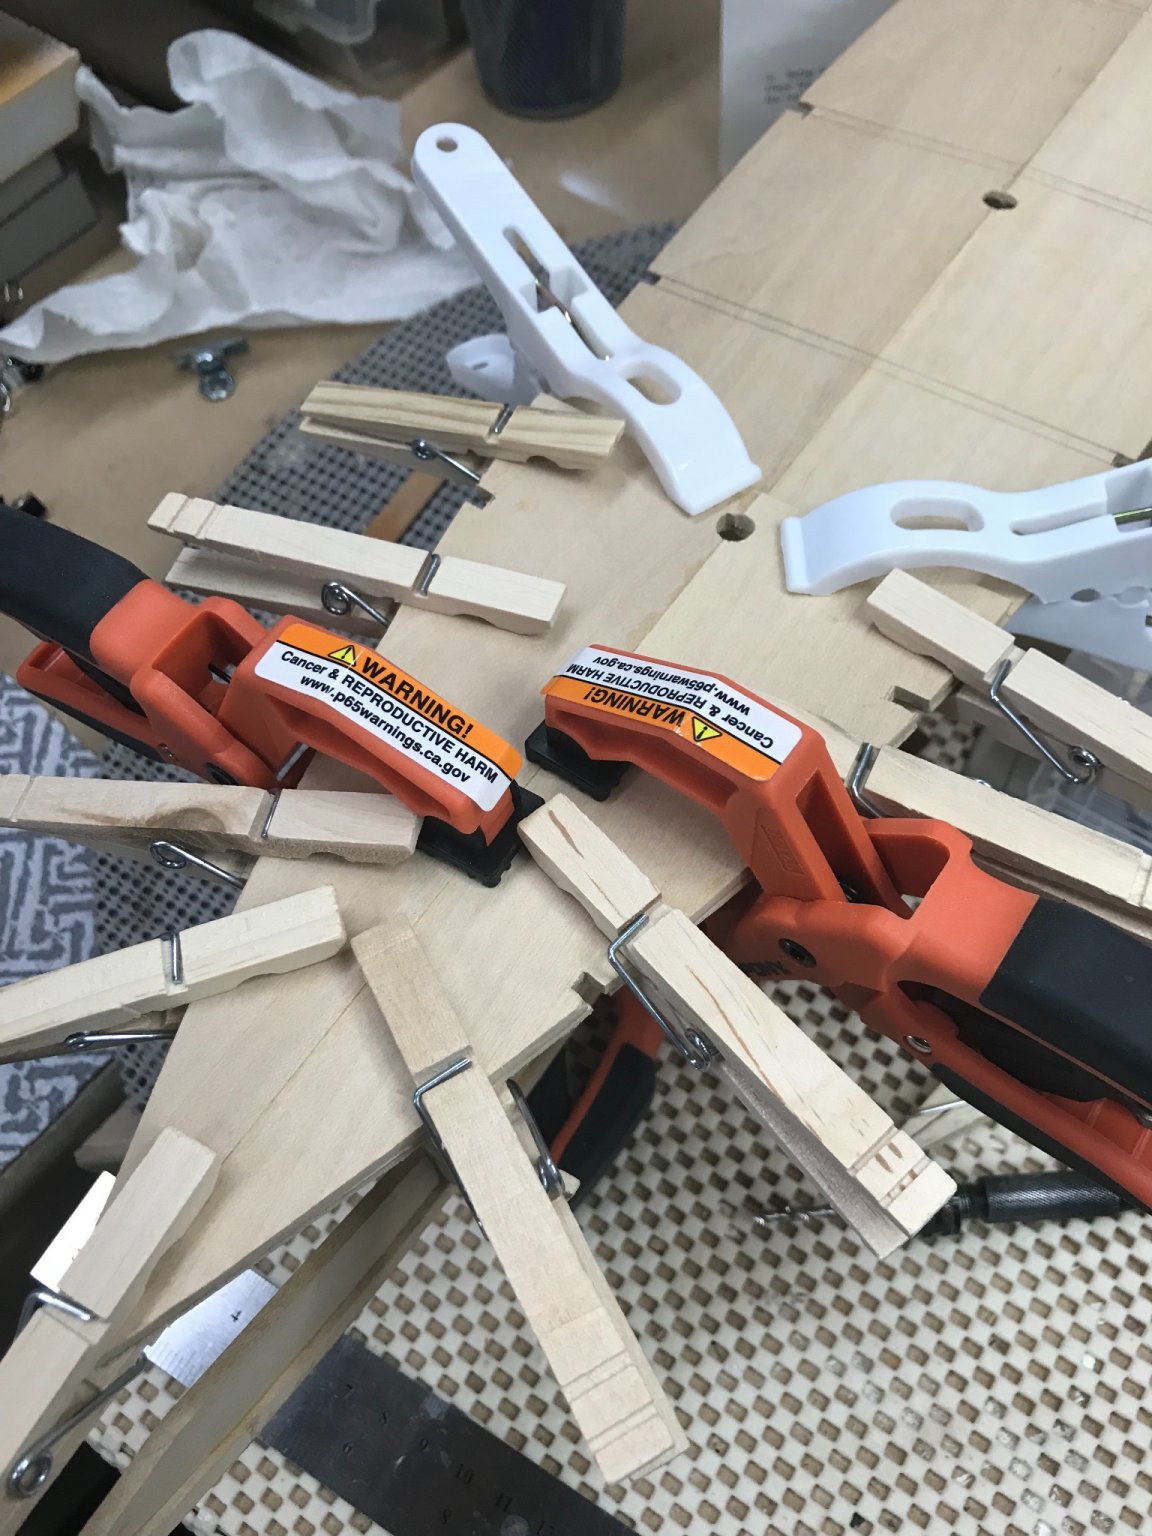
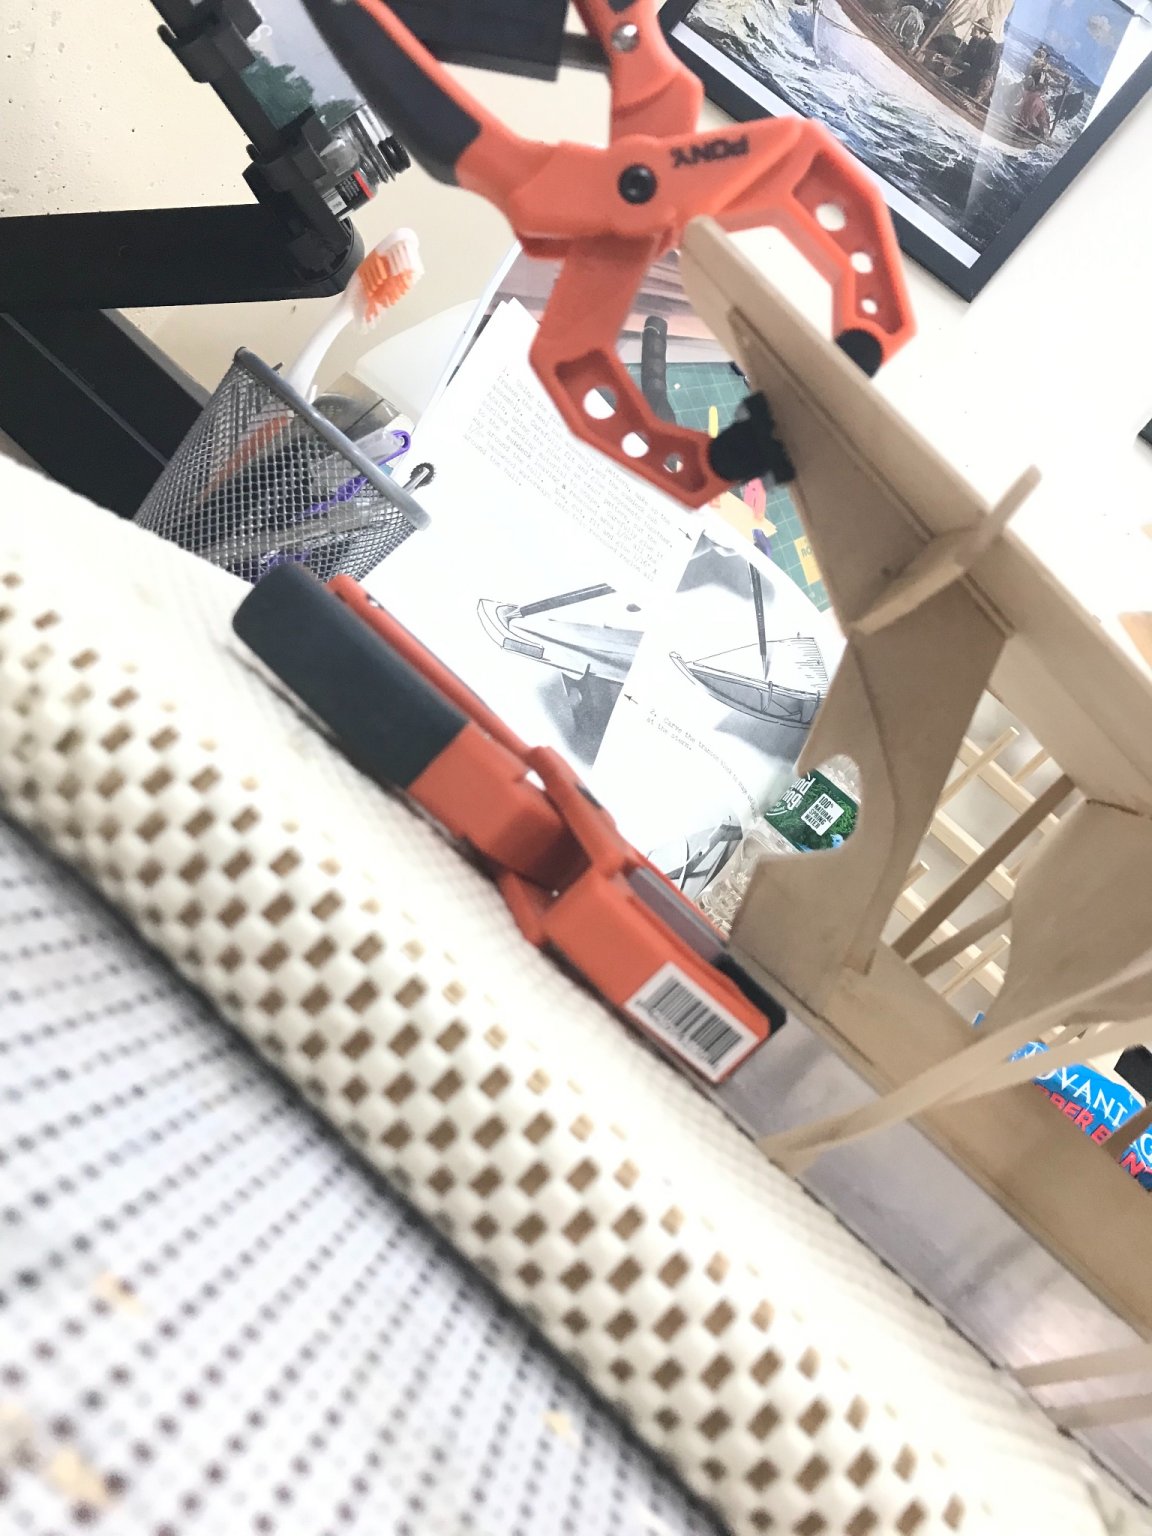
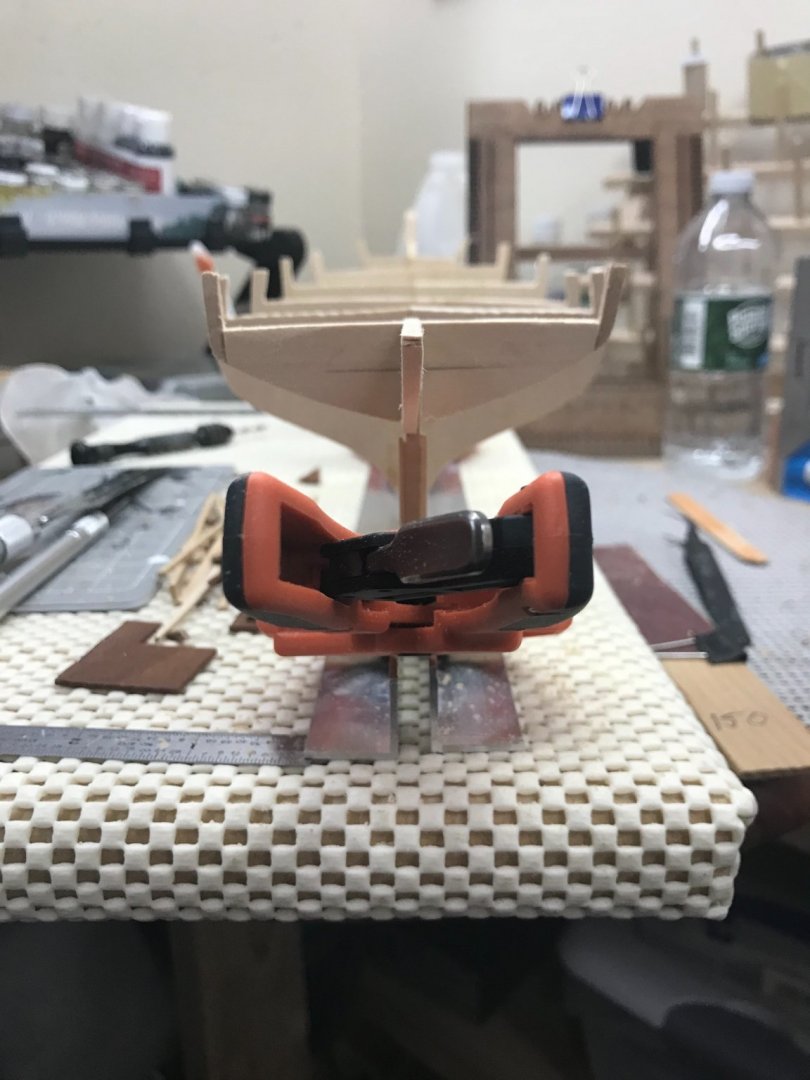
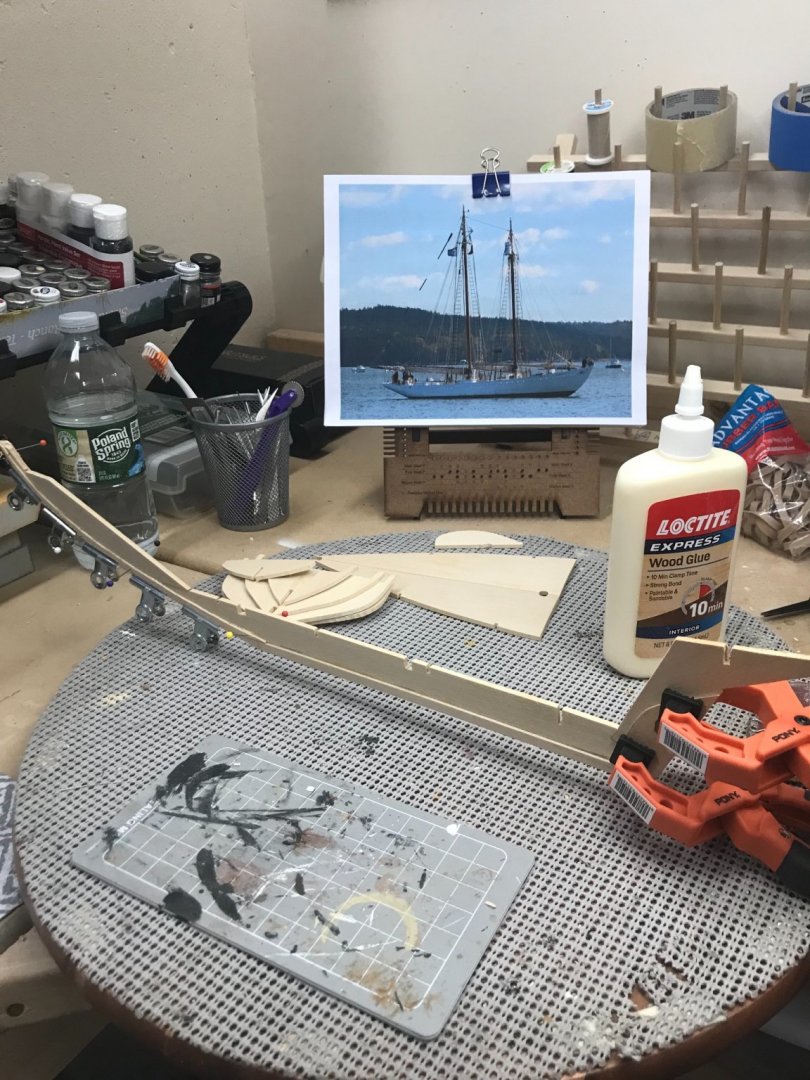
Keel vise 2.0… Had to fix some warp-age… so I am on my 2nd version of a building slip. 😆 Bulkheads are in place should dry with no warping. Next up sub decks… cheers 🍻

- 127 replies
-
- 7
-
-
- Bowdoin
- Arctic Exploration
- (and 3 more)
-
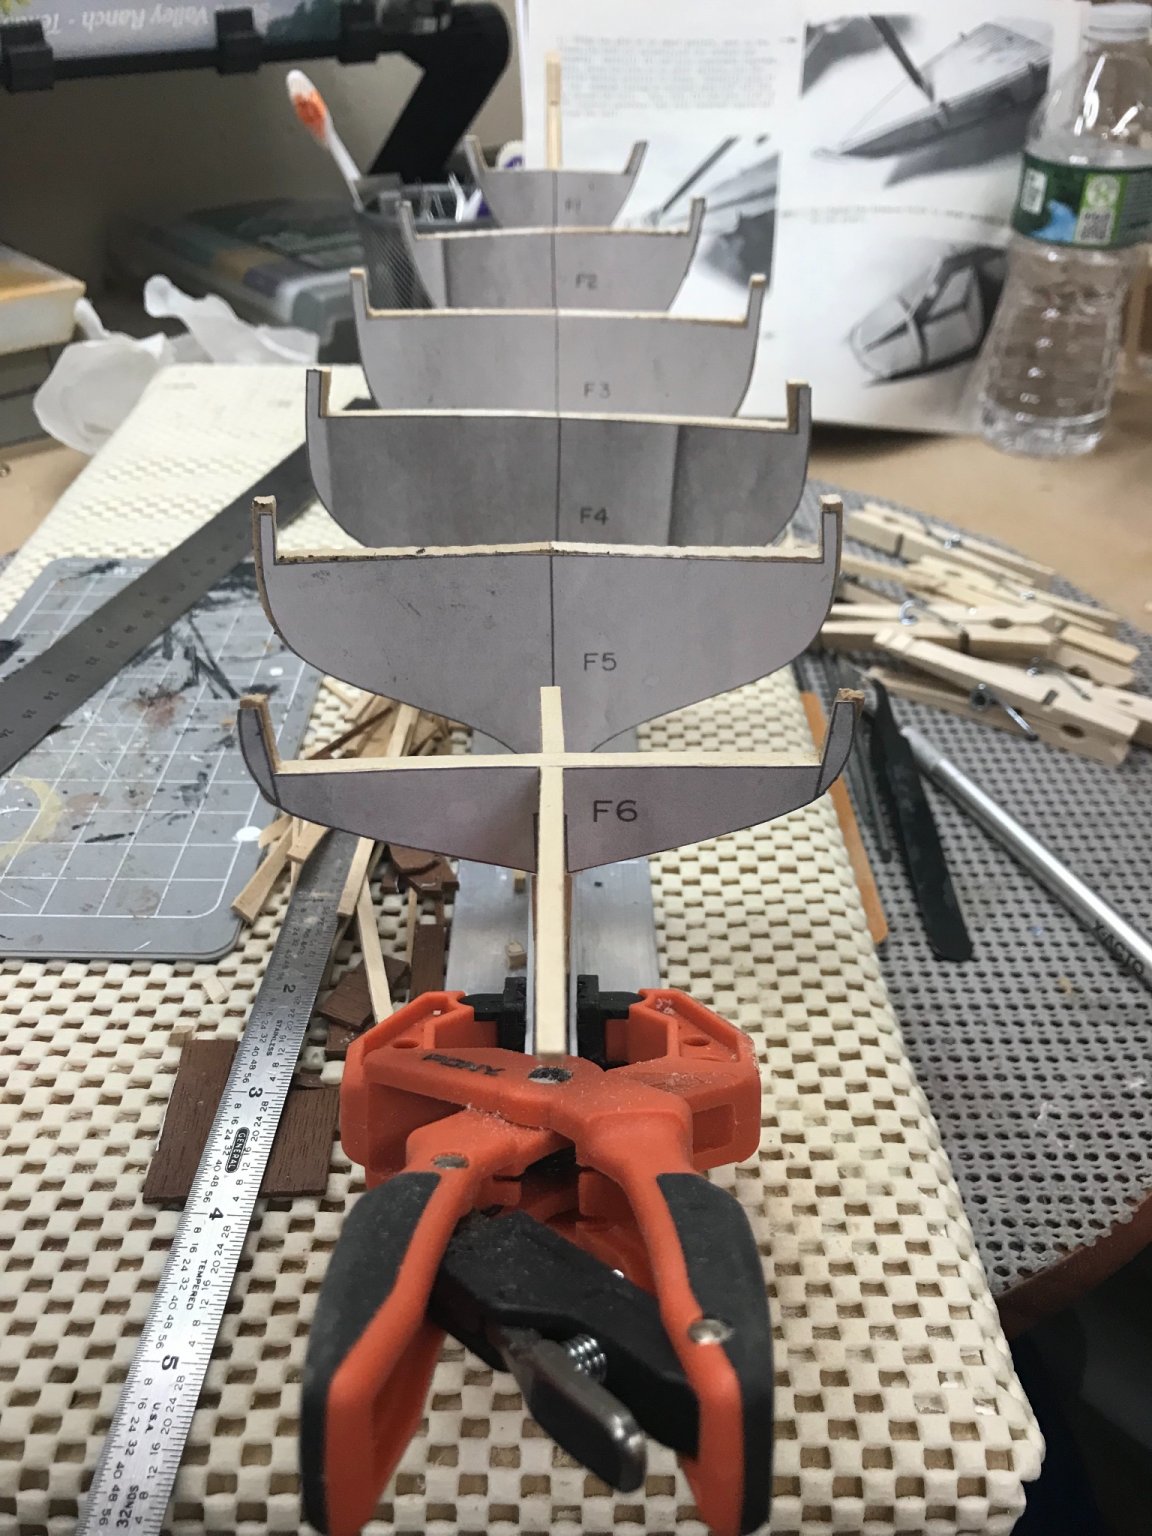
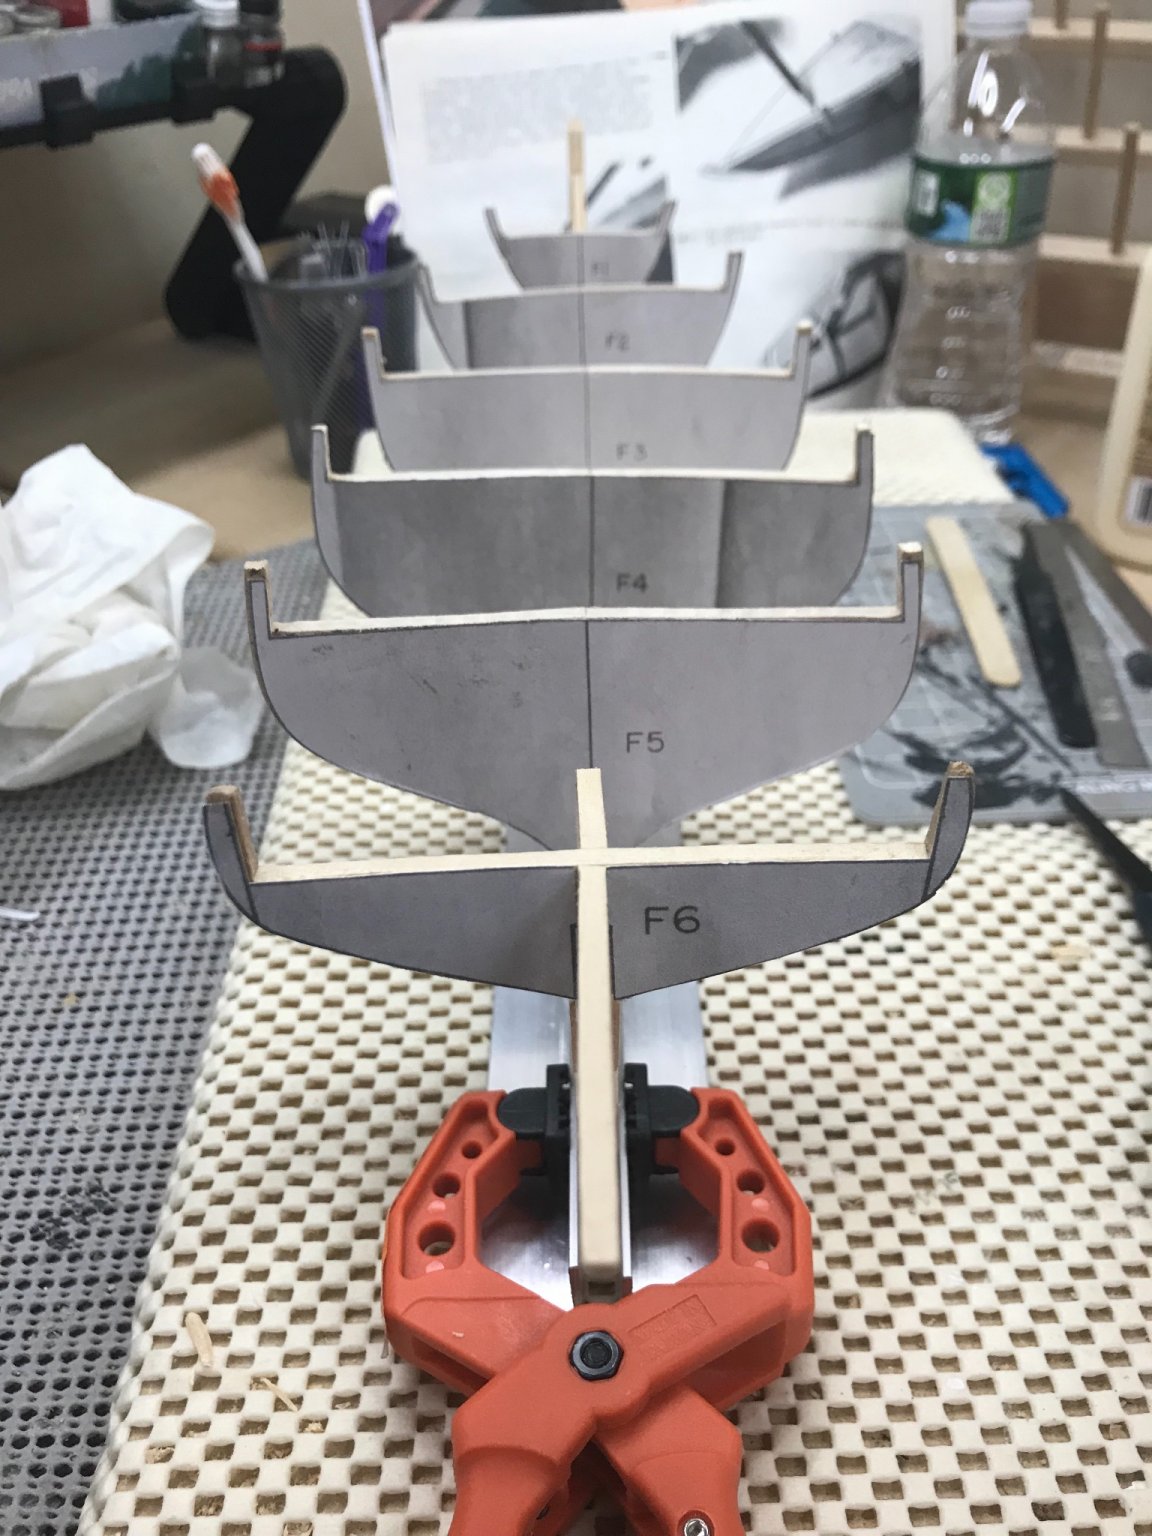
Rigged up a Keel Vice… Started work on the bulk heads… Onwards… 😎

- 127 replies
-
- 5
-
-
- Bowdoin
- Arctic Exploration
- (and 3 more)
-
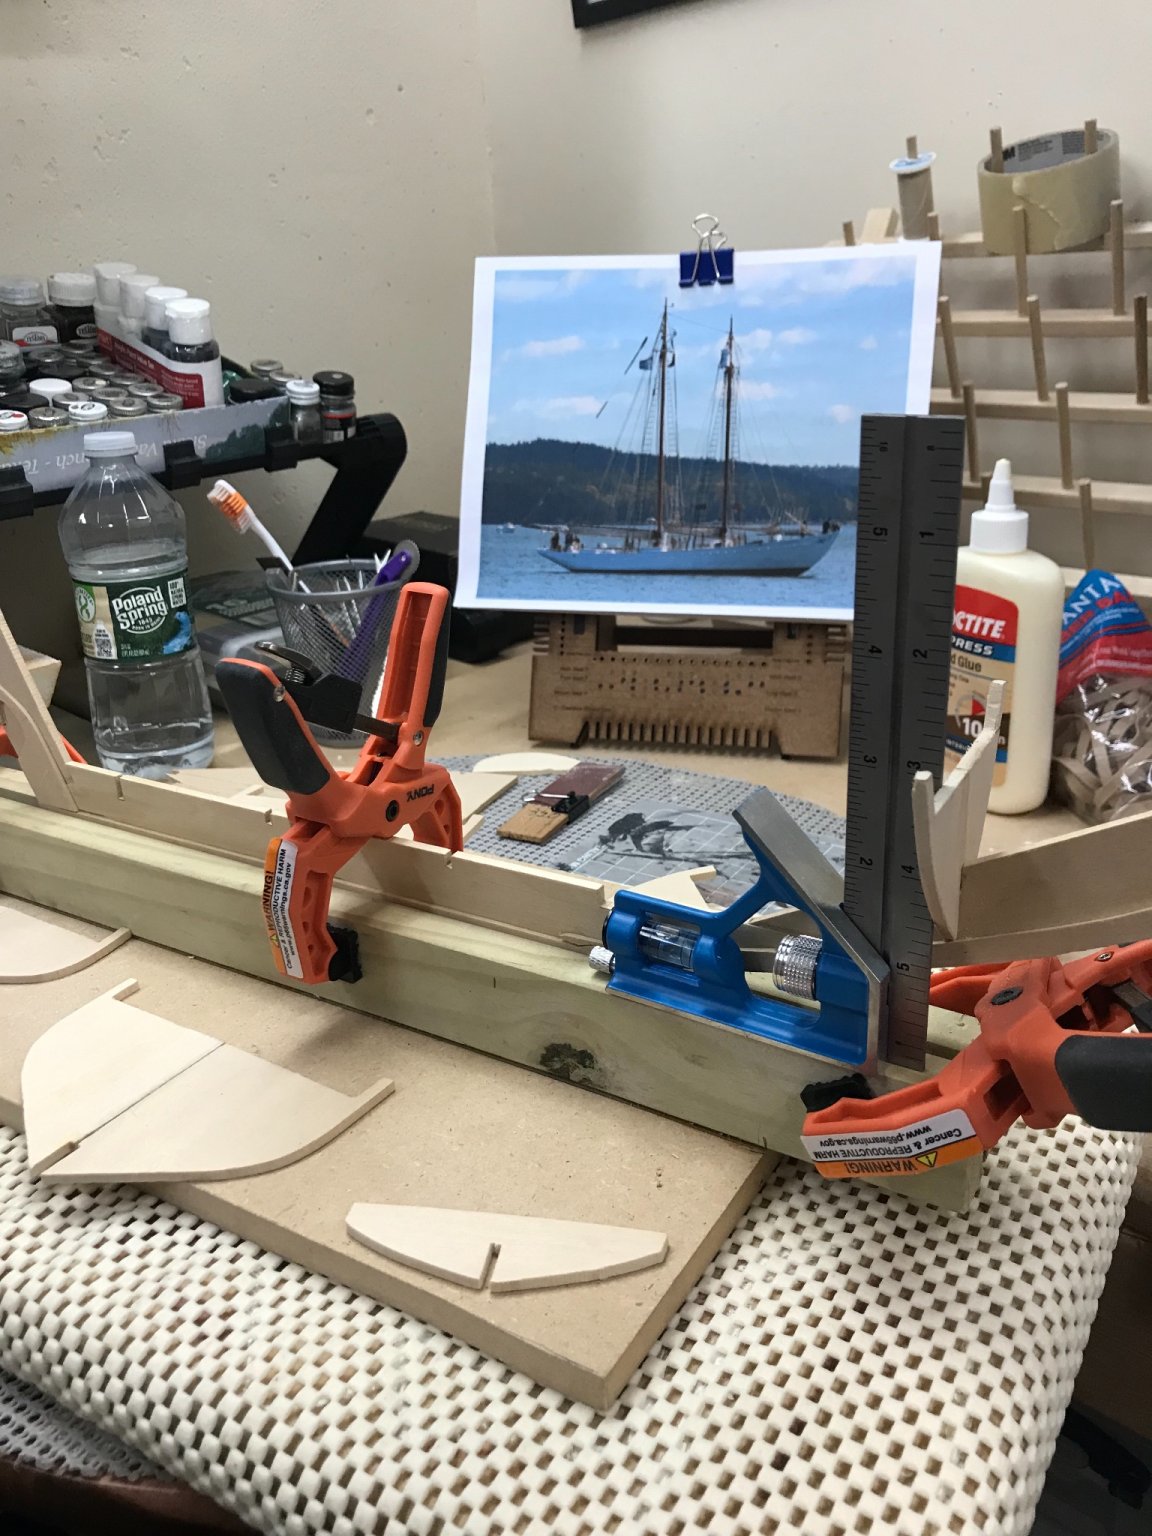
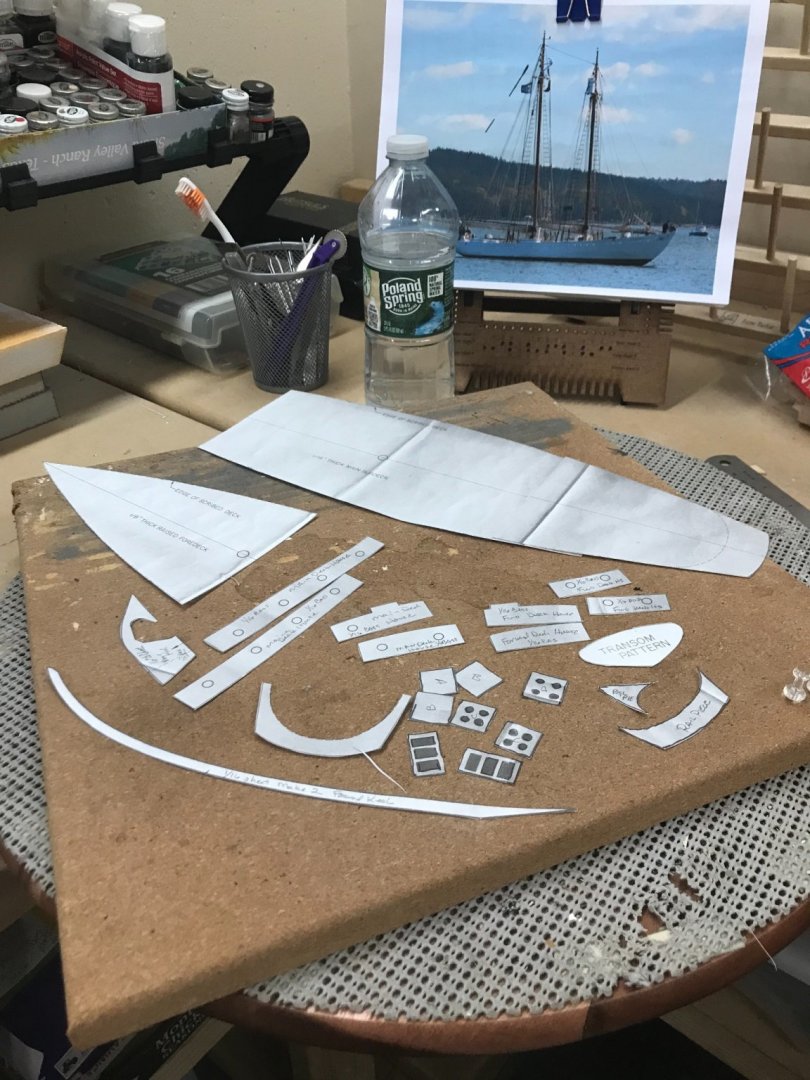
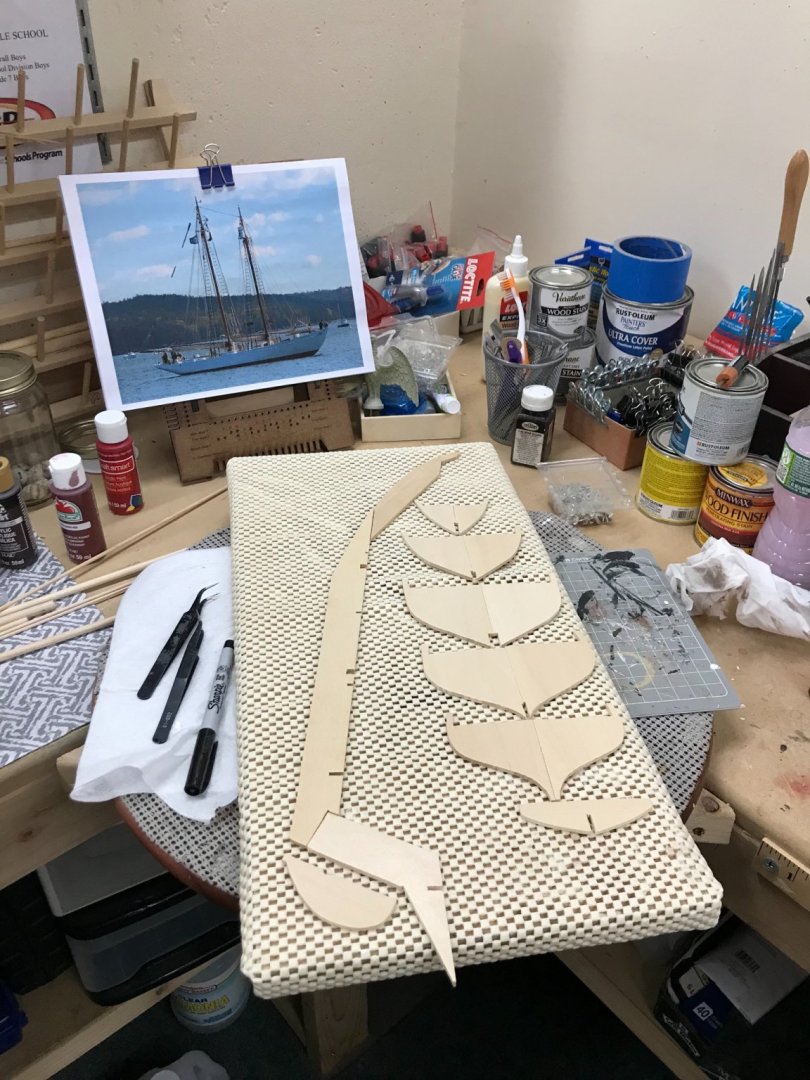
Cutting out pieces using templates. A photo copy pieces to be cut out… Printed the copies on card stock. Laid out the templates on Bass Wood. Laminated the pieces onto the keel using the Loctite Express Wood Glue. This is much better than CA Glue. No gluing my fingers together. 😆 These kits do give me an appreciation for the laser cut kits. Cheers 🍻

- 127 replies
-
- 8
-
-
- Bowdoin
- Arctic Exploration
- (and 3 more)
-
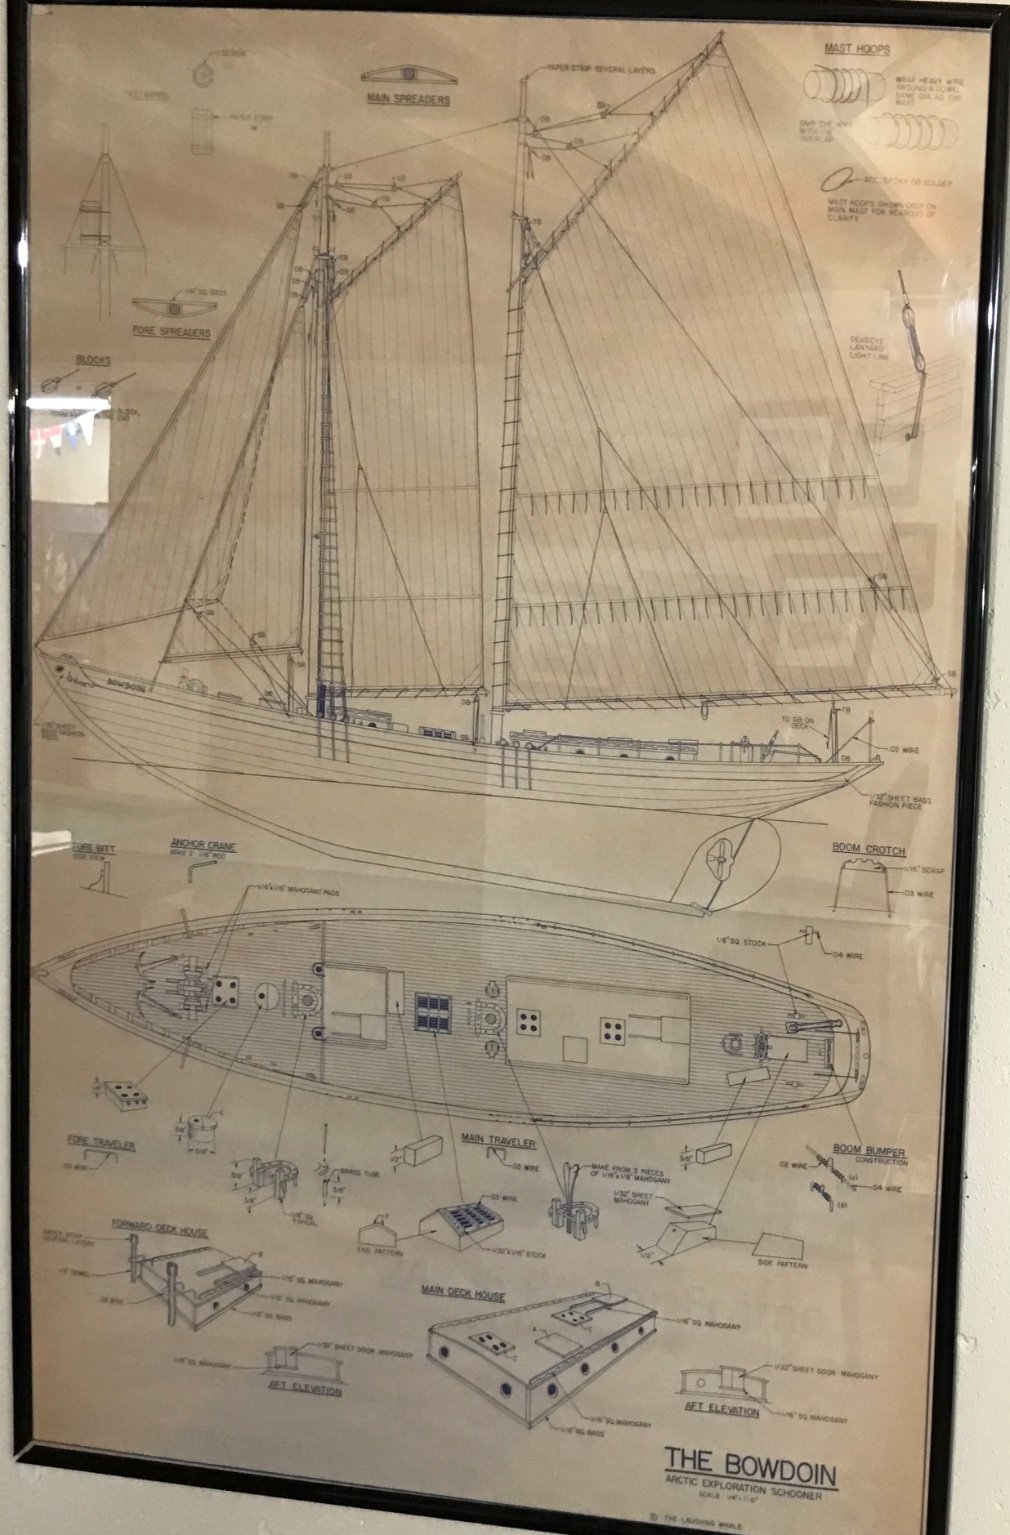
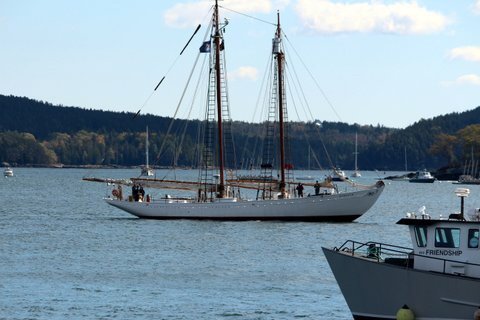
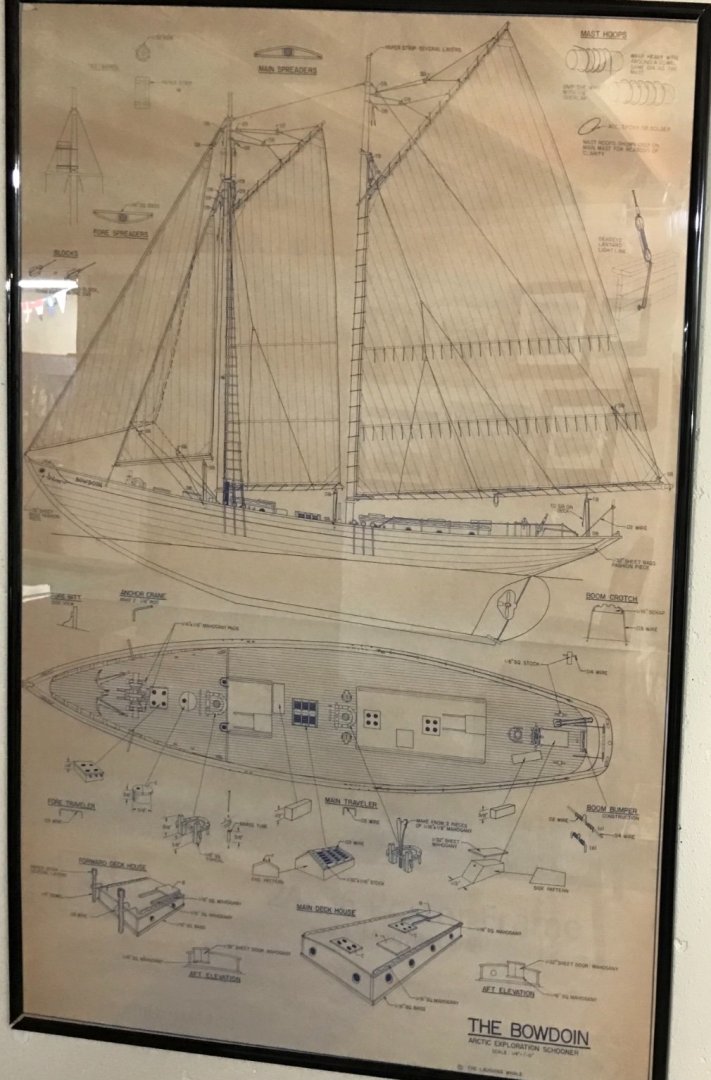
Roger, Your memory serves you correctly, The Bowdoin was designed specifically to survive being trapped between two ice flows. Something MacMillian was always on the look out from aloft in his ice barrel as he navigated the Arctic. This book is the best regarding the Bowdoin’s life in the Arctic and up and down the Eastern Seaboard. Fascinating little Schooner. Saw her this last year at Maine Maritime Academy in Castine Maine working with students abroad. Took these photos of her myself, so looking forward to working on this build. She’s going to be a beauty. Welcome aboard. 🍻

- 127 replies
-
- 5
-
-

-
- Bowdoin
- Arctic Exploration
- (and 3 more)
-
Thanks Nic, Ah yes of course, I follow him on Facebook. He’s currently designing the Wyoming, right? I was thinking Al was the name, but I wasn’t sure. Please let me know if there are any enhancements for the Bowdoin available. I am following a couple of completed builds of the Bluejacket Bowdoin on here to make this vintage build special. John
- 127 replies
-
- 1
-
-
- Bowdoin
- Arctic Exploration
- (and 3 more)
-
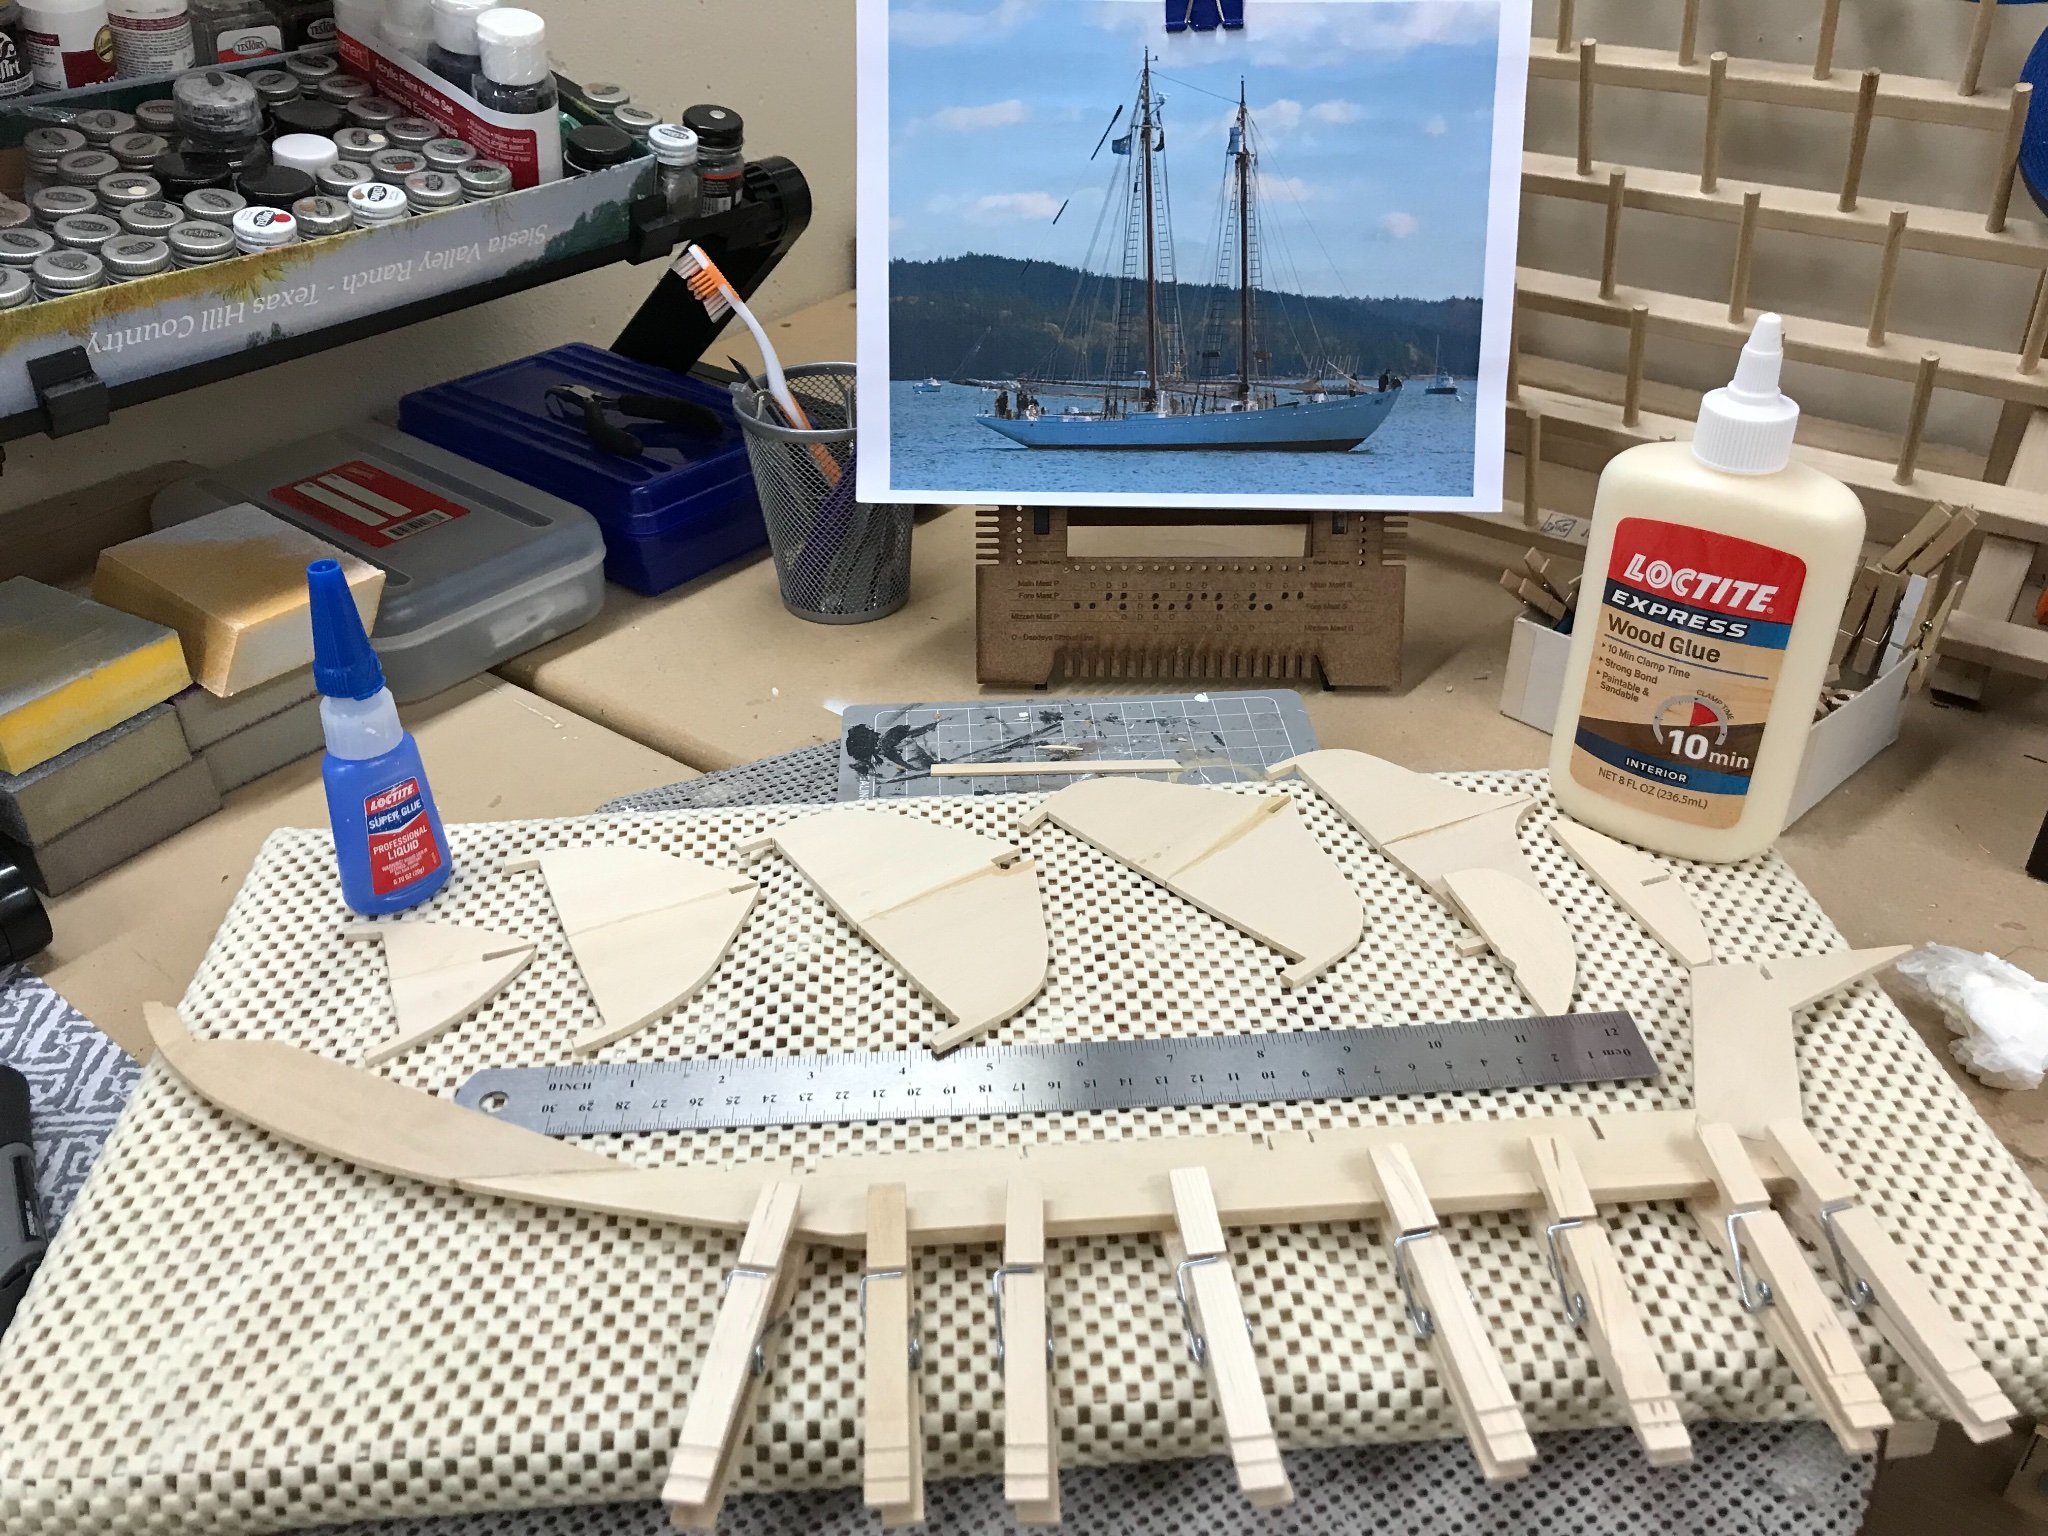
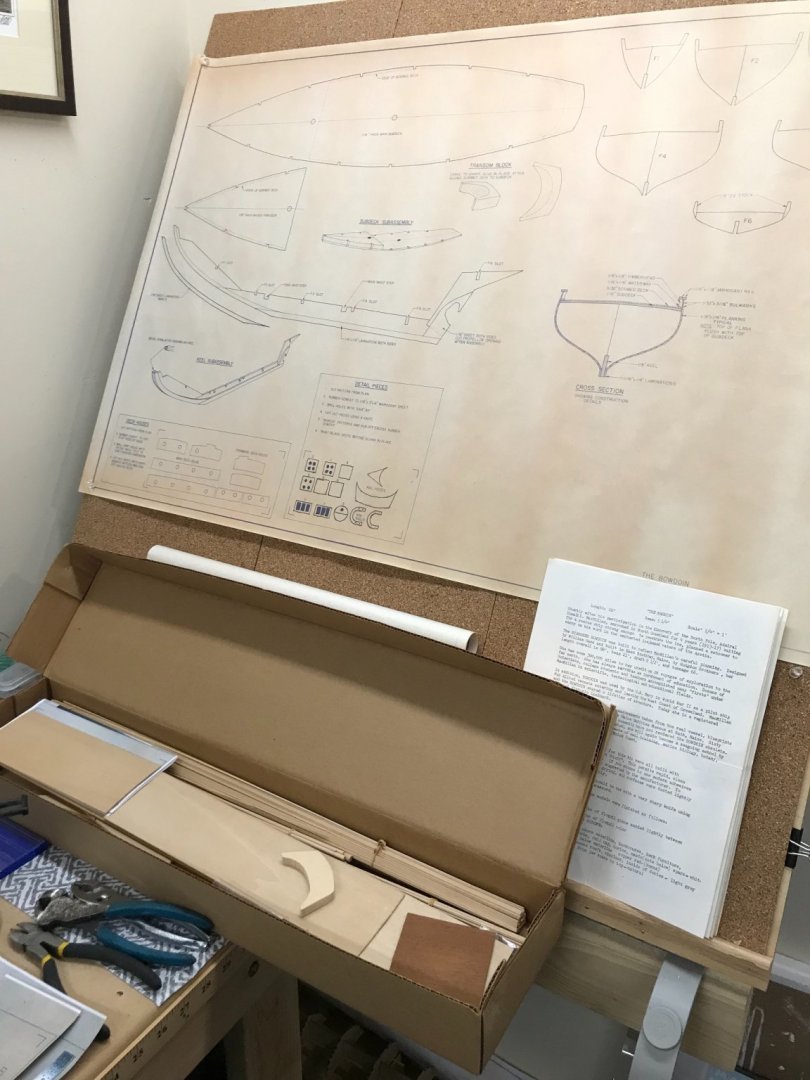
The schooner Bowdoin was designed by William H. Hand, Jr., and built in 1921, in East Boothbay, Maine at the Hodgdon Brothers Shipyard. She is the only American schooner built specifically for Arctic exploration, and was designed under the direction of explorer Donald B. MacMillian. She has made 29 trips above the Arctic Circle in her life, three since she was acquired by the Maine Maritime Academy in 1988. She is currently owned by the Maine Maritime Academy, located in Castine Maine, and is used for their sail training curriculum. She is named for Bowdoin College. Information taken from Wikipedia. Actually found this vintage Laughing Whale kit in Searsport, Maine in the Bluejacket Shipcrafters Gallery. They had some kits in the corner from a long time customer’s estate. What was really cool, is that I talk to a gentleman (forgot his name) working there that worked at Laughing Whale in Wiscasset, Maine. He verified the kit was complete and told me he probably cut out the pieces for the kit 40 years ago. 😎 Bluejacket does have this kit available with all the laser cut pieces and nicer fittings. So this build is for you @MrBlueJacket I love to rescue these old kits, I will try to make you proud. Yes I have this drawing framed. I like collecting and framing these old blueprints for my Gallery. Everything is in very nice condition considering the age of this kit. Sheet No 1 is up on the board. These keel and bulkheads are all hand cut 40 years ago. Everything else will need to be cut out by me. 😆 First steps, glueing the keel and bulkheads. Trying a new glue (new for me) Loctite has a wood glue with a 10 minute clamp time. I think this will be better for laminating than CA Glue. We will see… 🤔


- 127 replies
-
- 12
-
-
- Bowdoin
- Arctic Exploration
- (and 3 more)
-
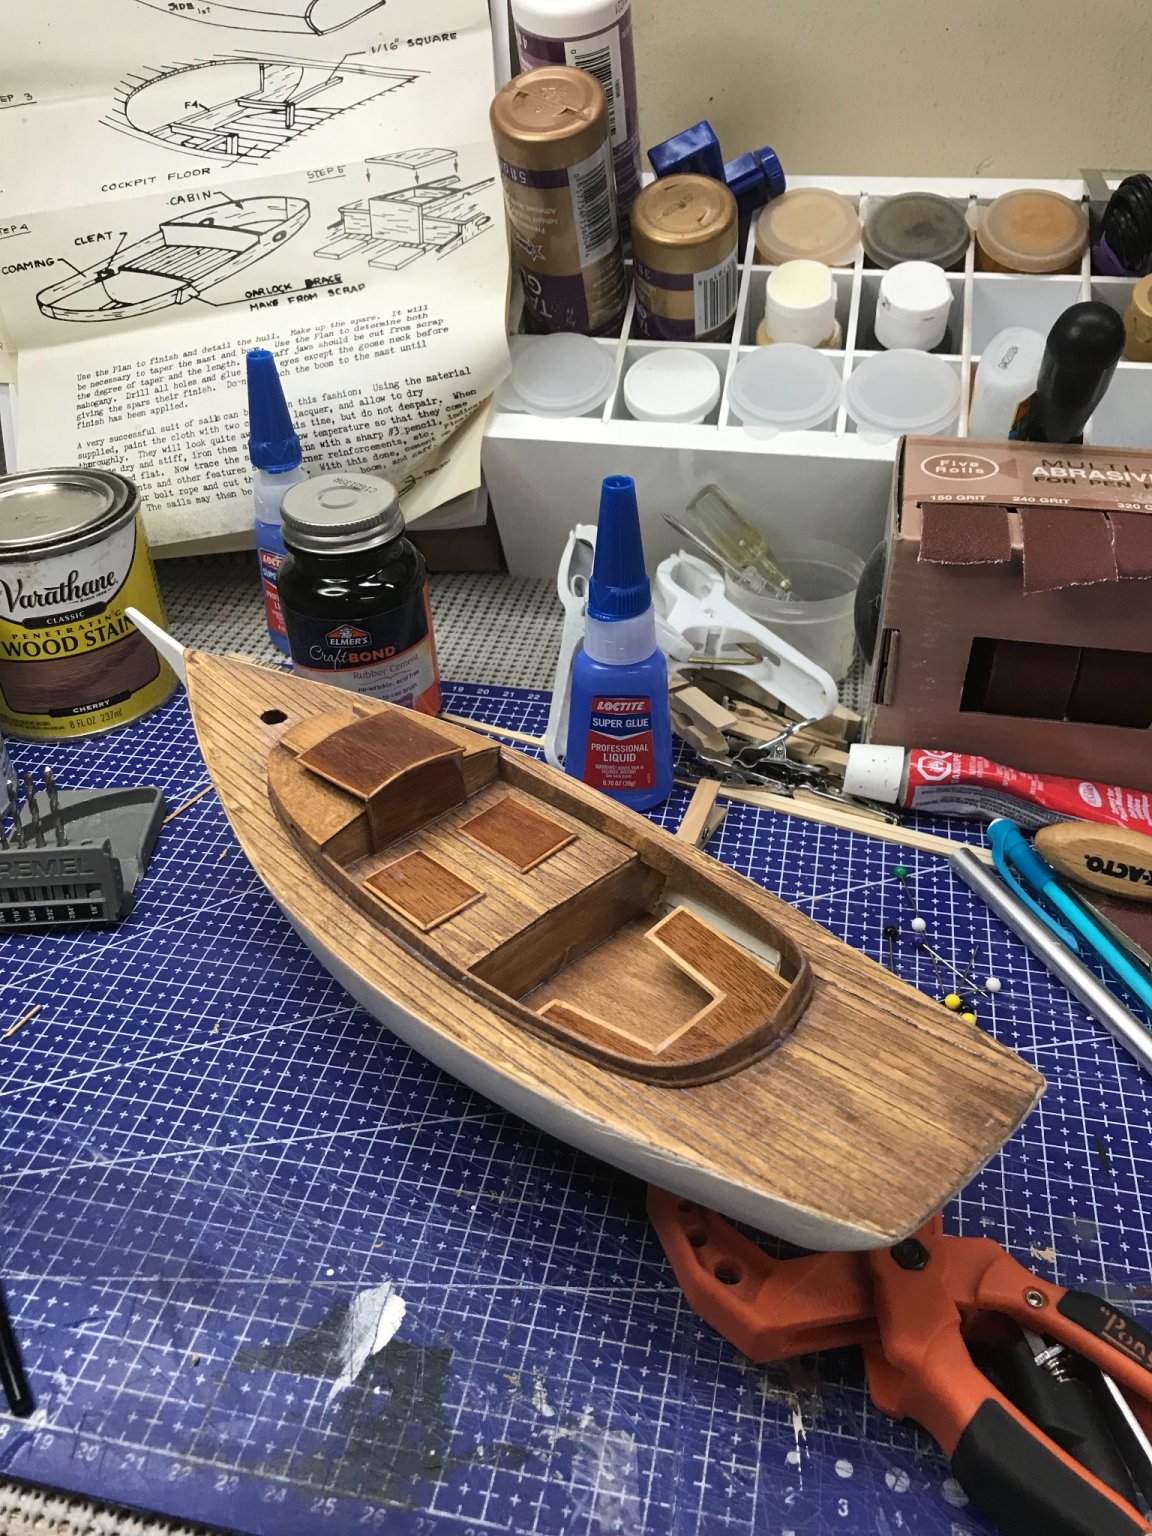
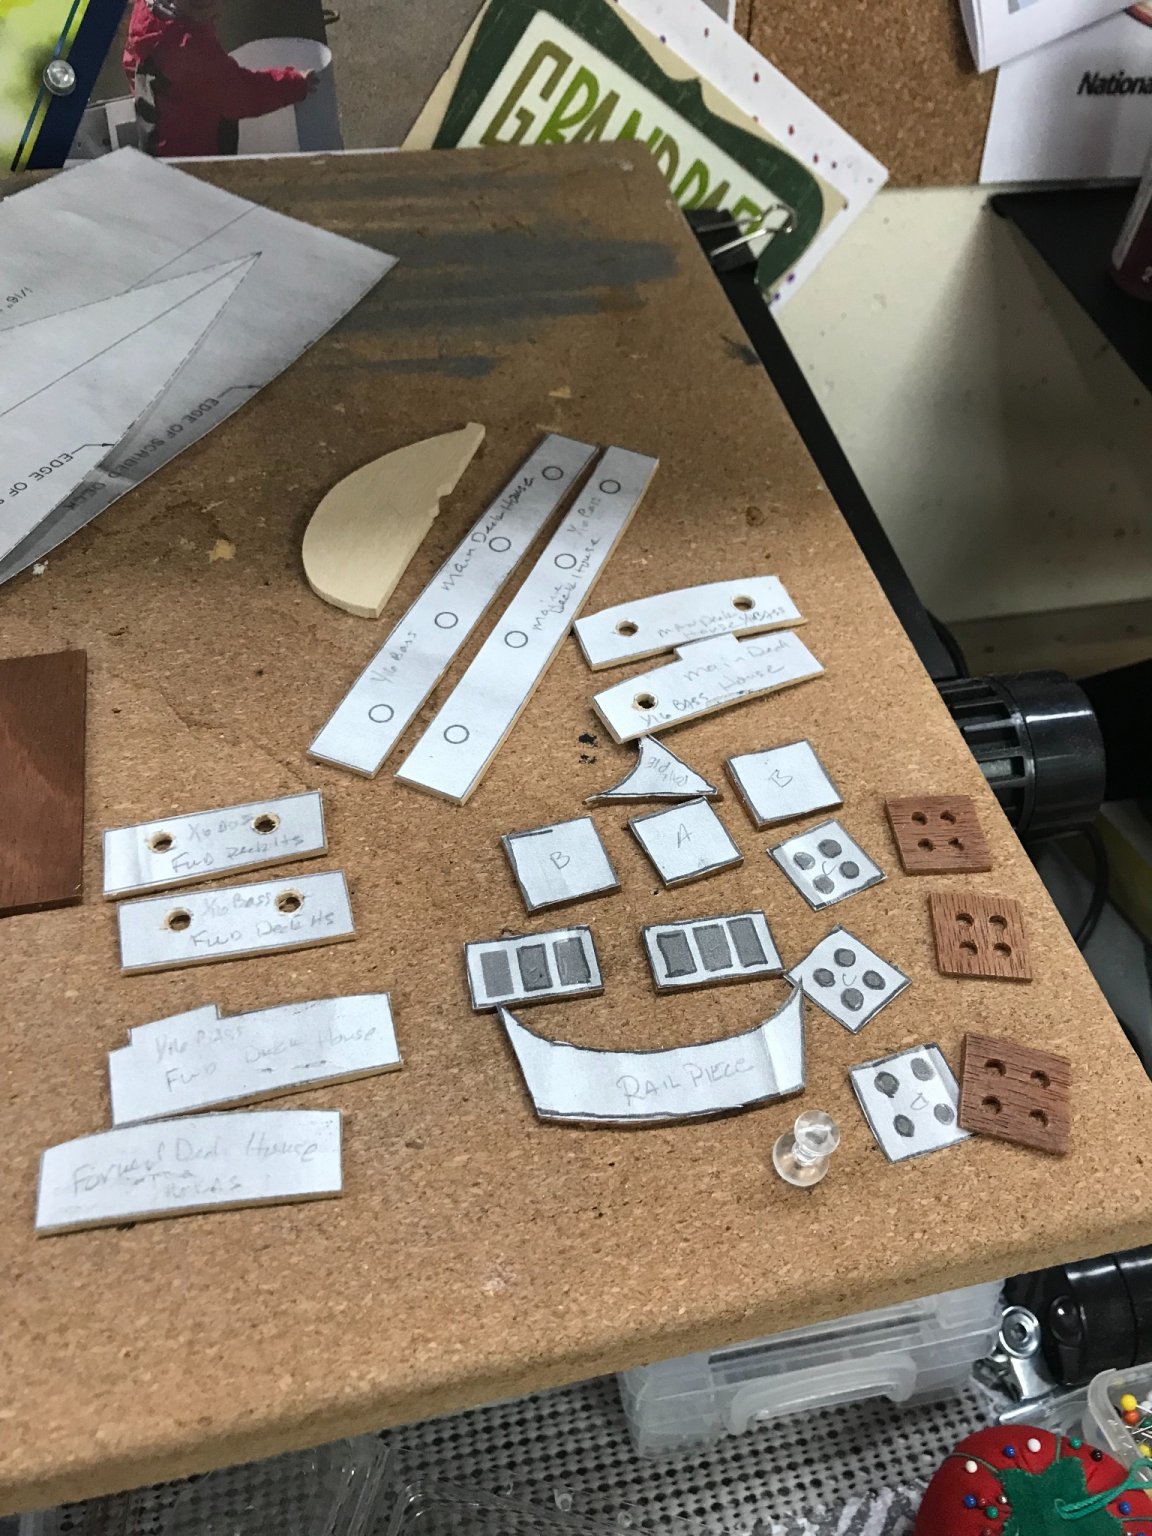
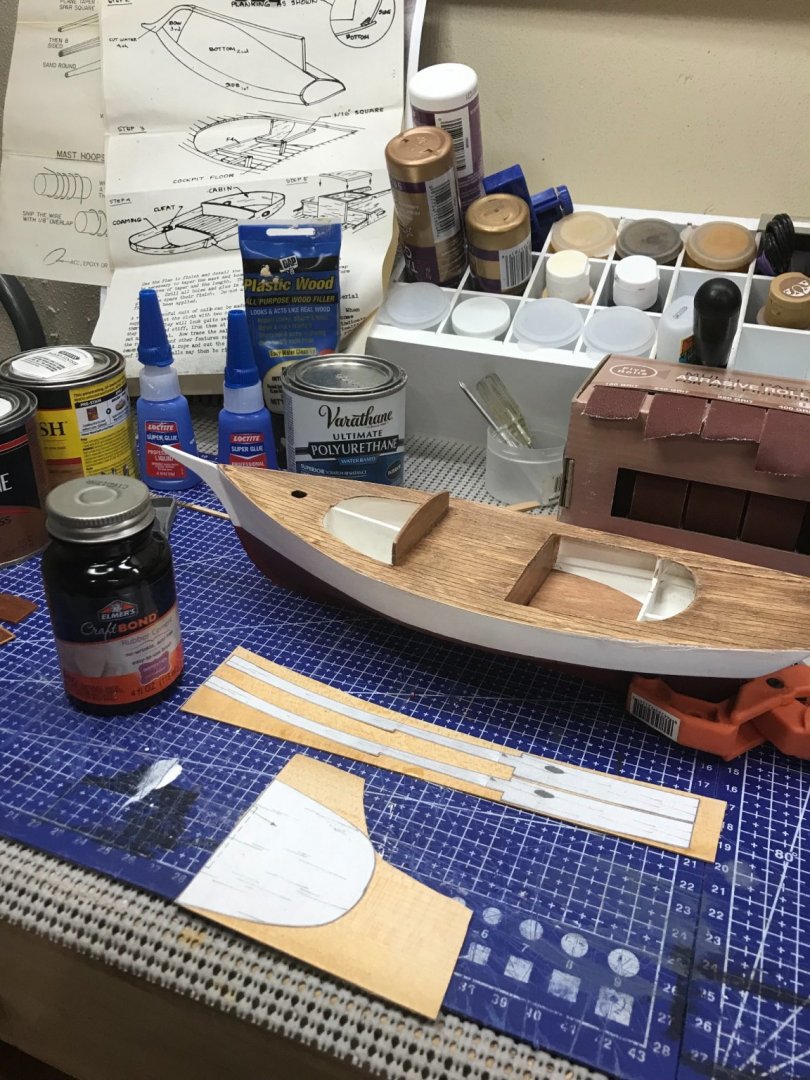
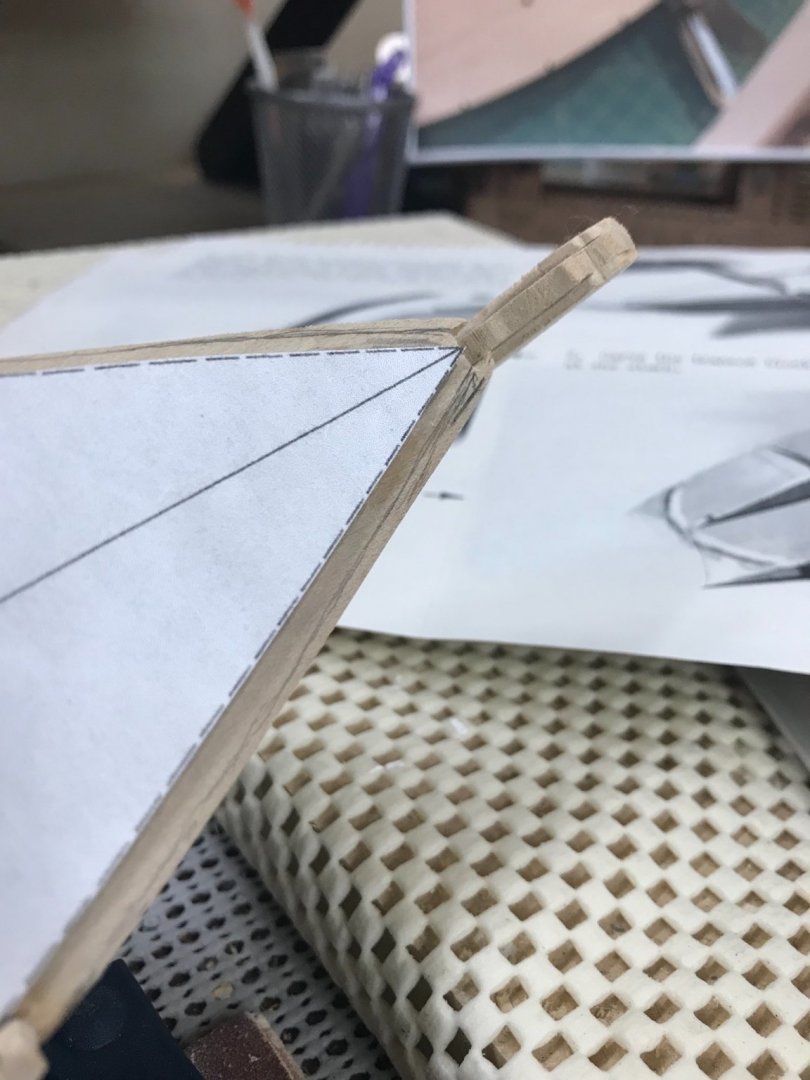
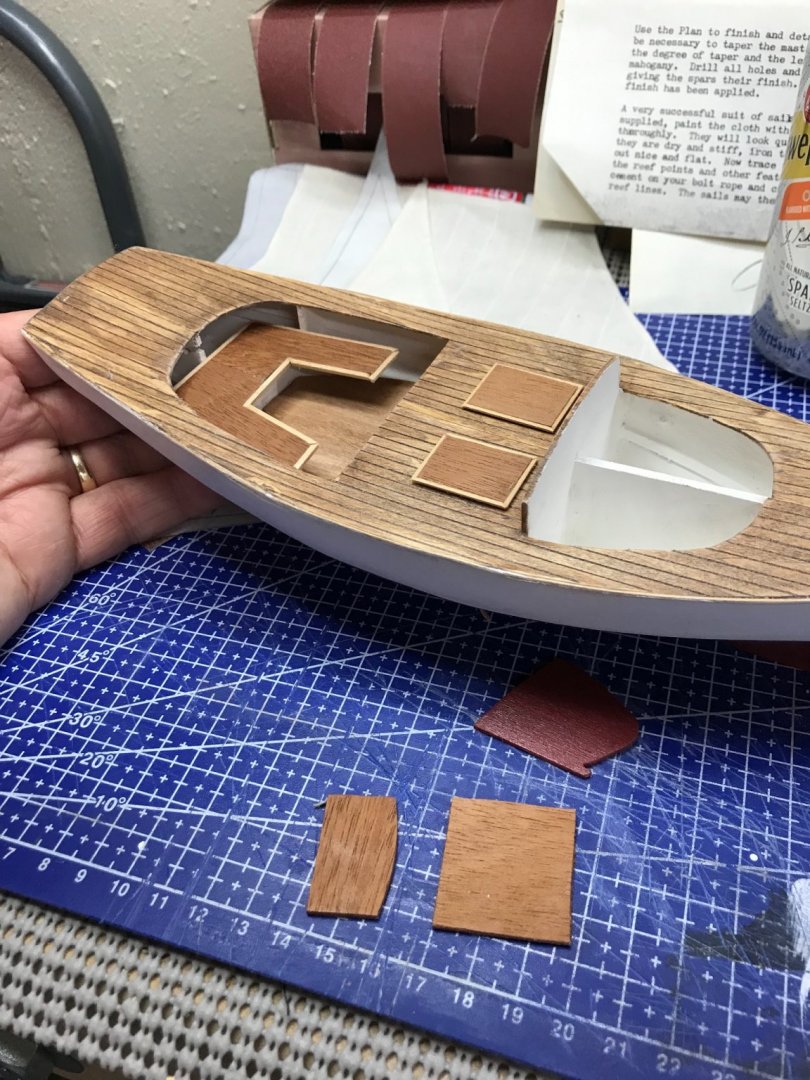
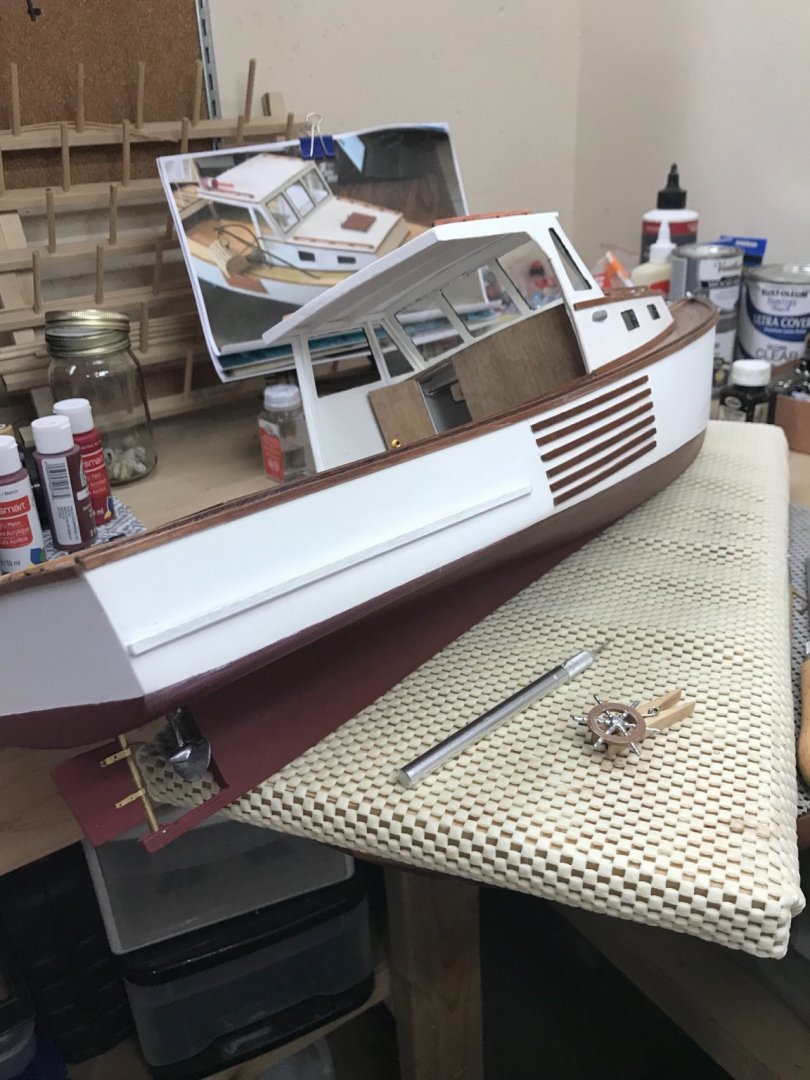
Instructions are very pictorial. 😆 So begins deck furniture and cabin. Trimming out the mahogany with some 1/32nd material. Those miter joints are tricky at this scale. I’m liking the look this far. 😎 Later…
- 26 replies
-
- 4
-
-
- Maine
- Laughing Whale
- (and 2 more)
-
This was a lot of fun. @popeye the sailor I can see your obsession with the Maine Lobster Boat. Very versatile boat, can be useful for everything from lobstering to yachting and racing. I see them everywhere now. I love these Laughing Whale kits. Learned a lot about modeling. I have another Laughing Whale kit that I am about to dive into, The Bowdoin (Arctic Exploration Schooner). See you all on the flip side. Cheers 🍻
- 51 replies
-
- 1
-
-
- laughing whale
- maine lobster boat
- (and 1 more)
-
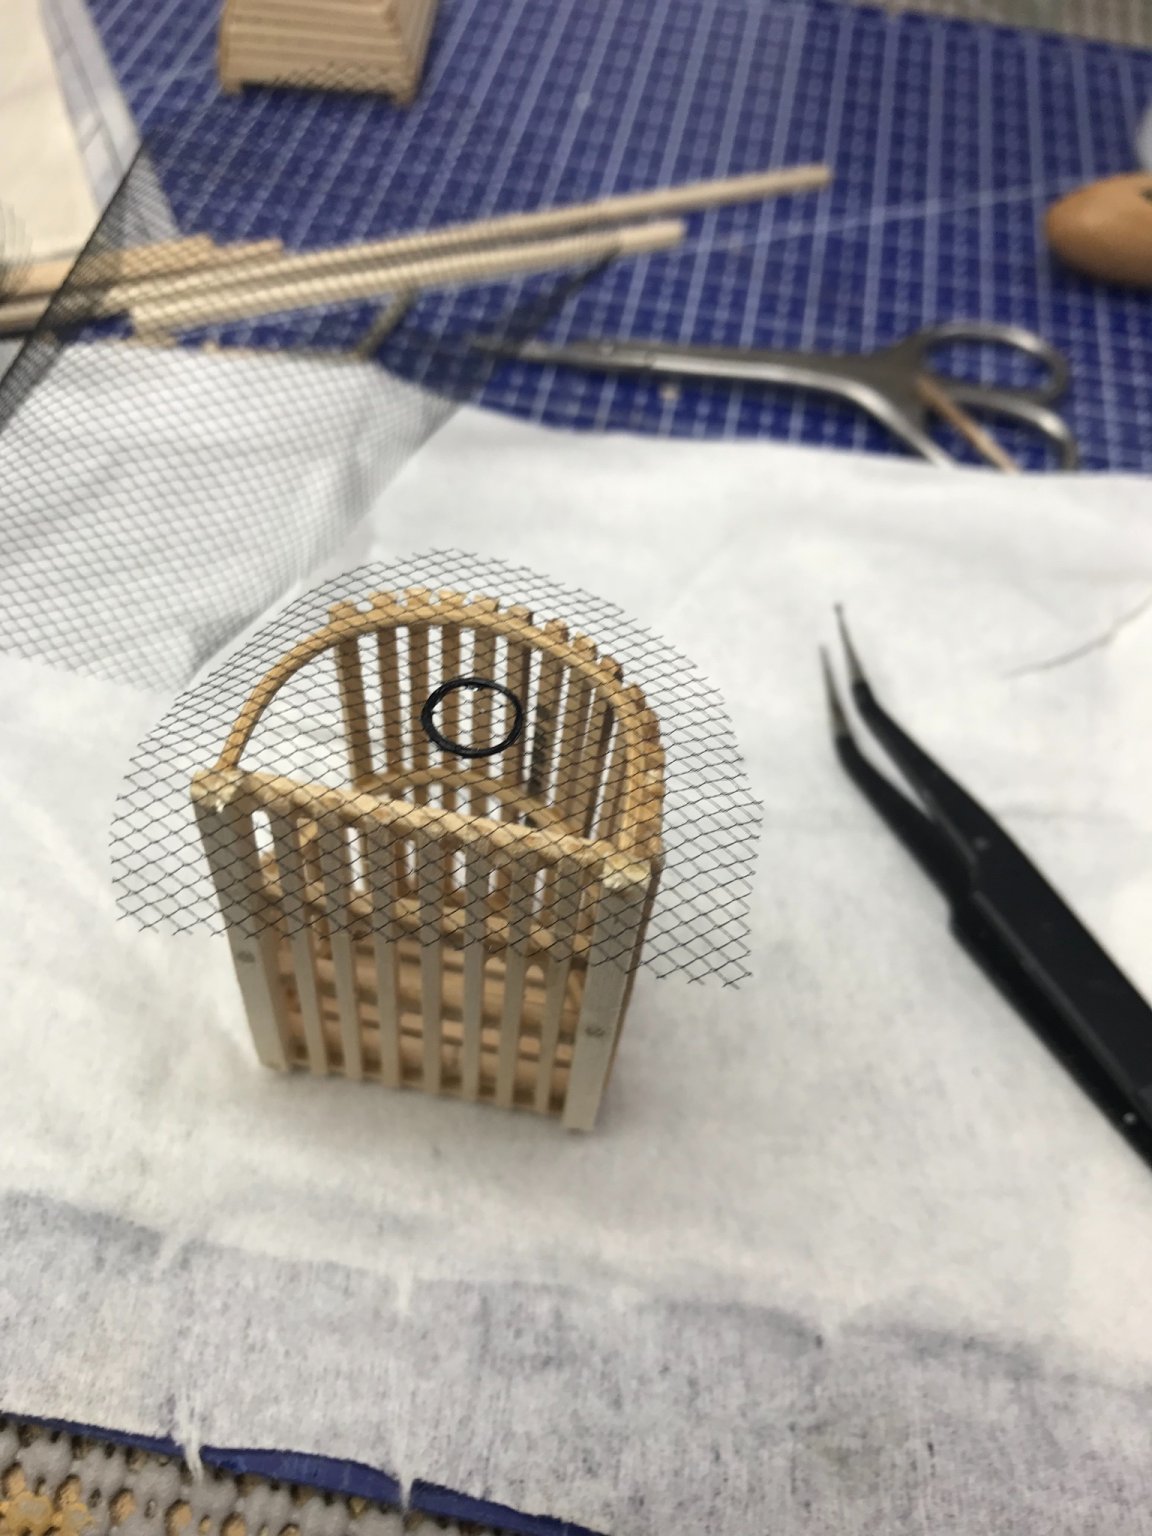
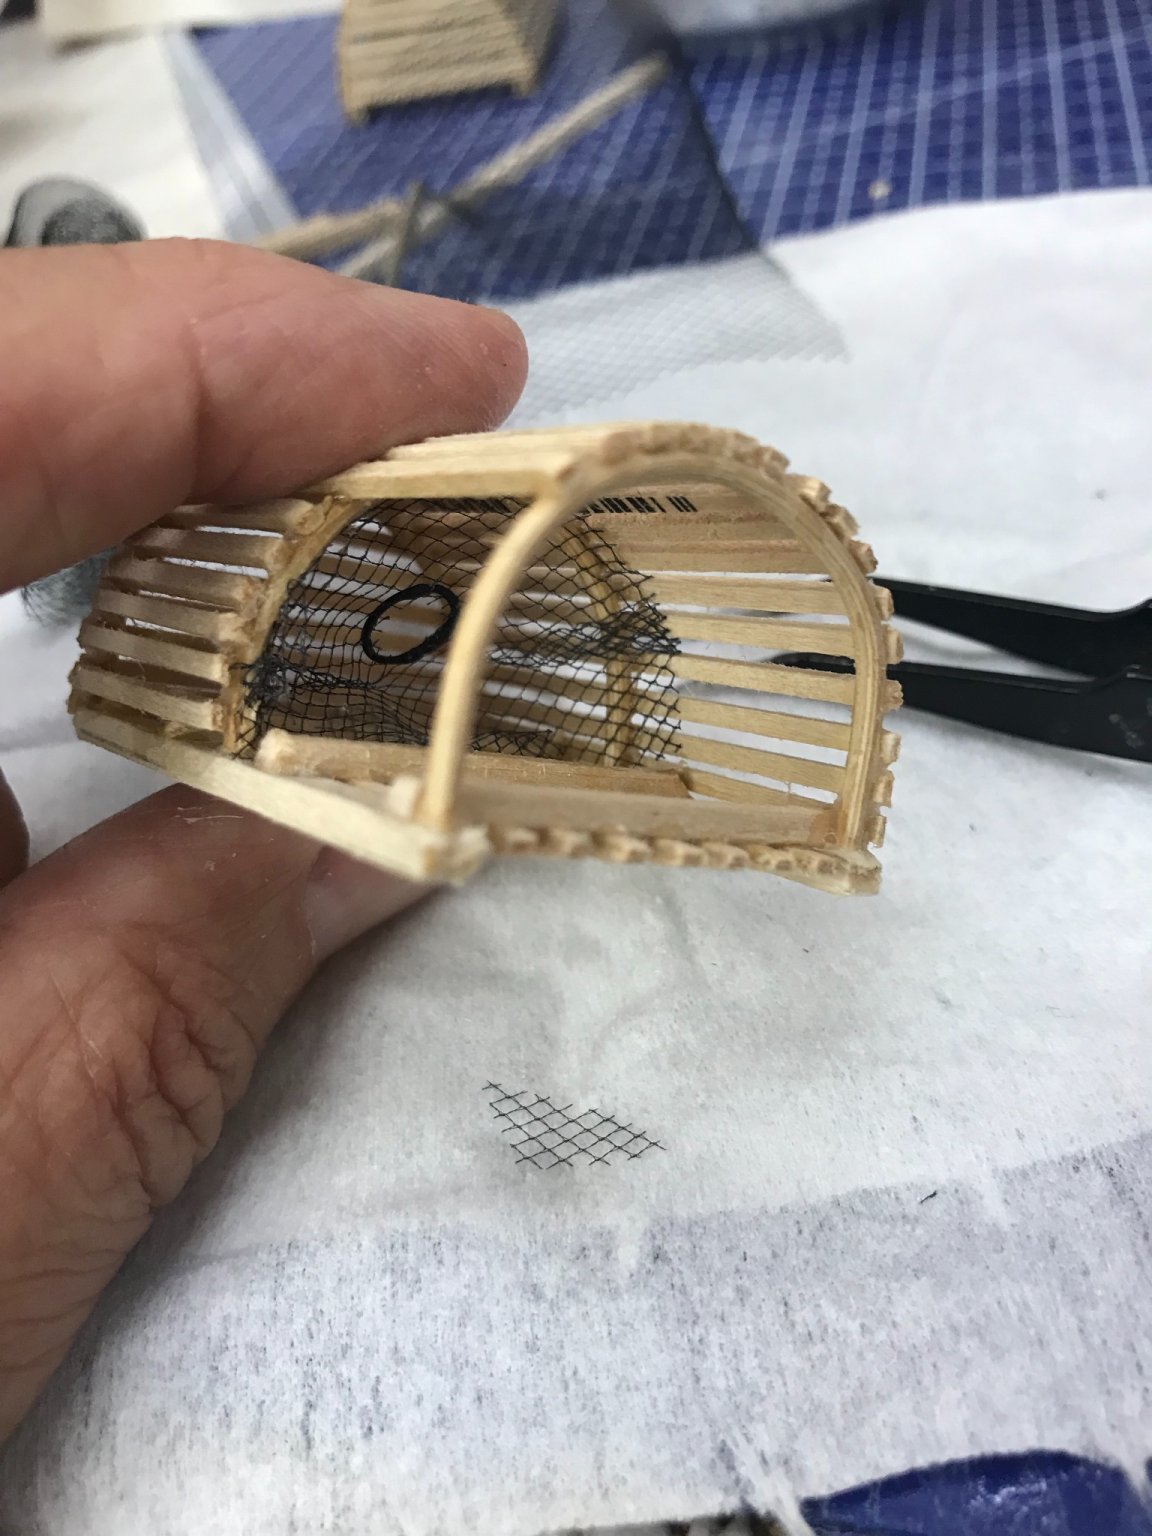
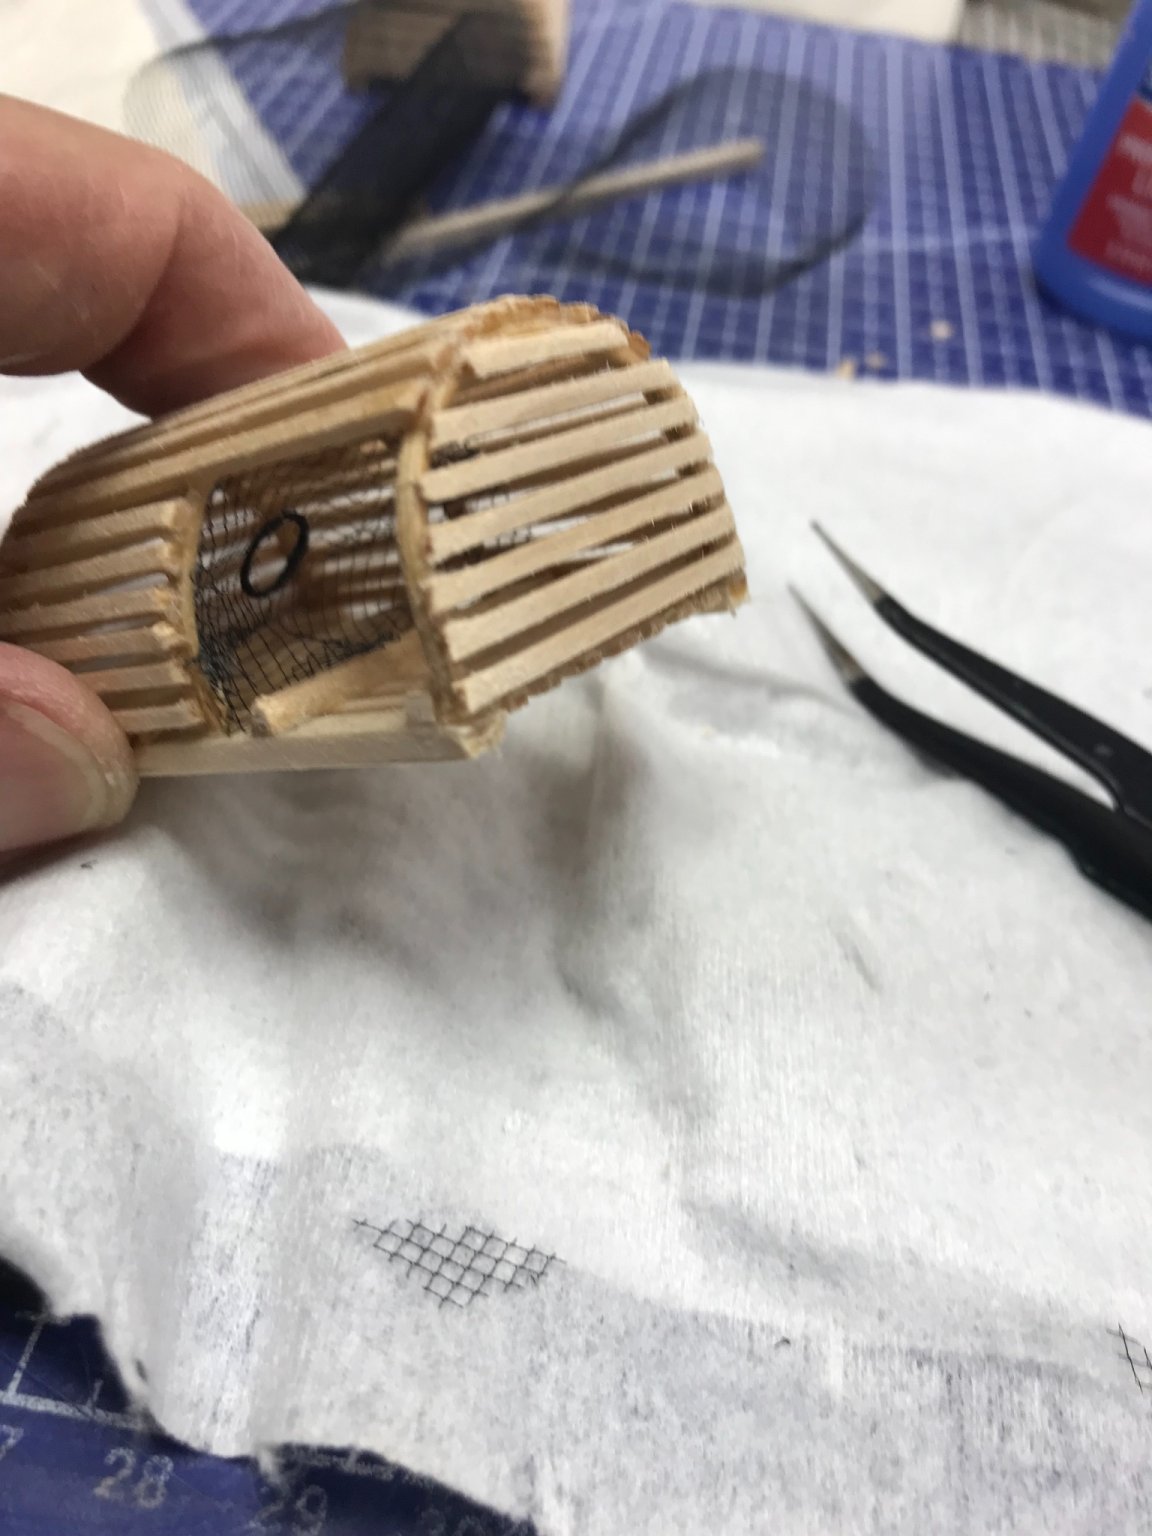
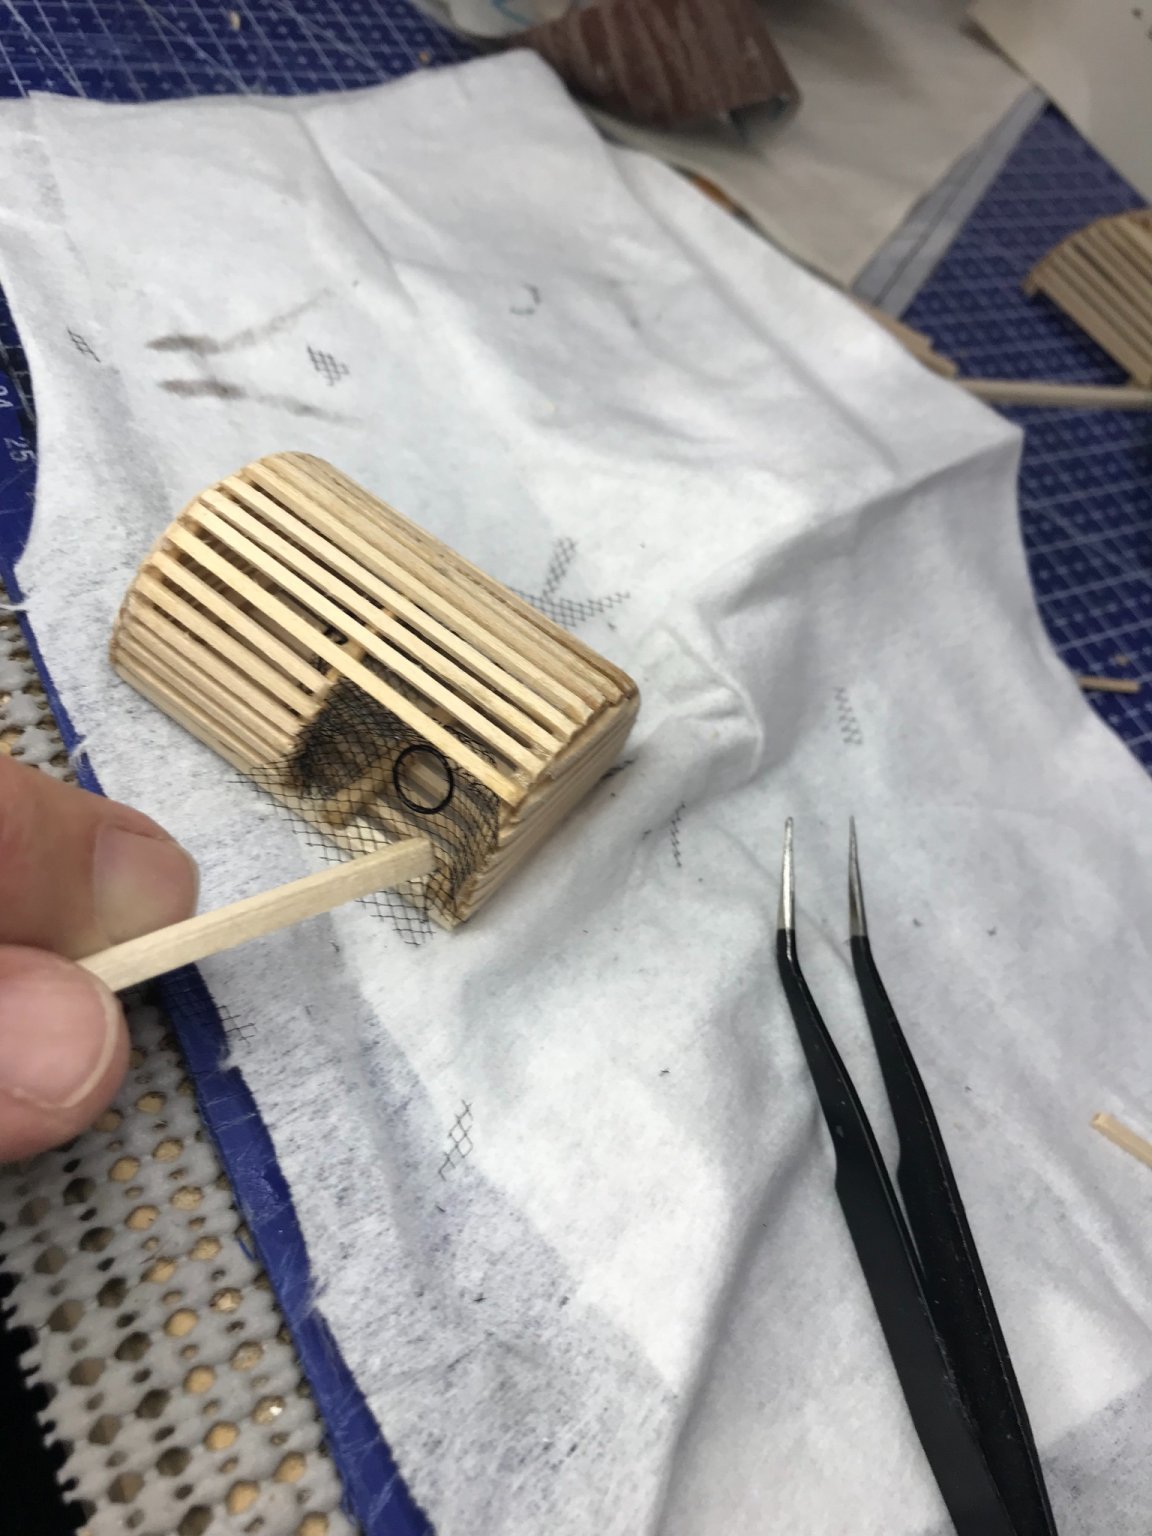
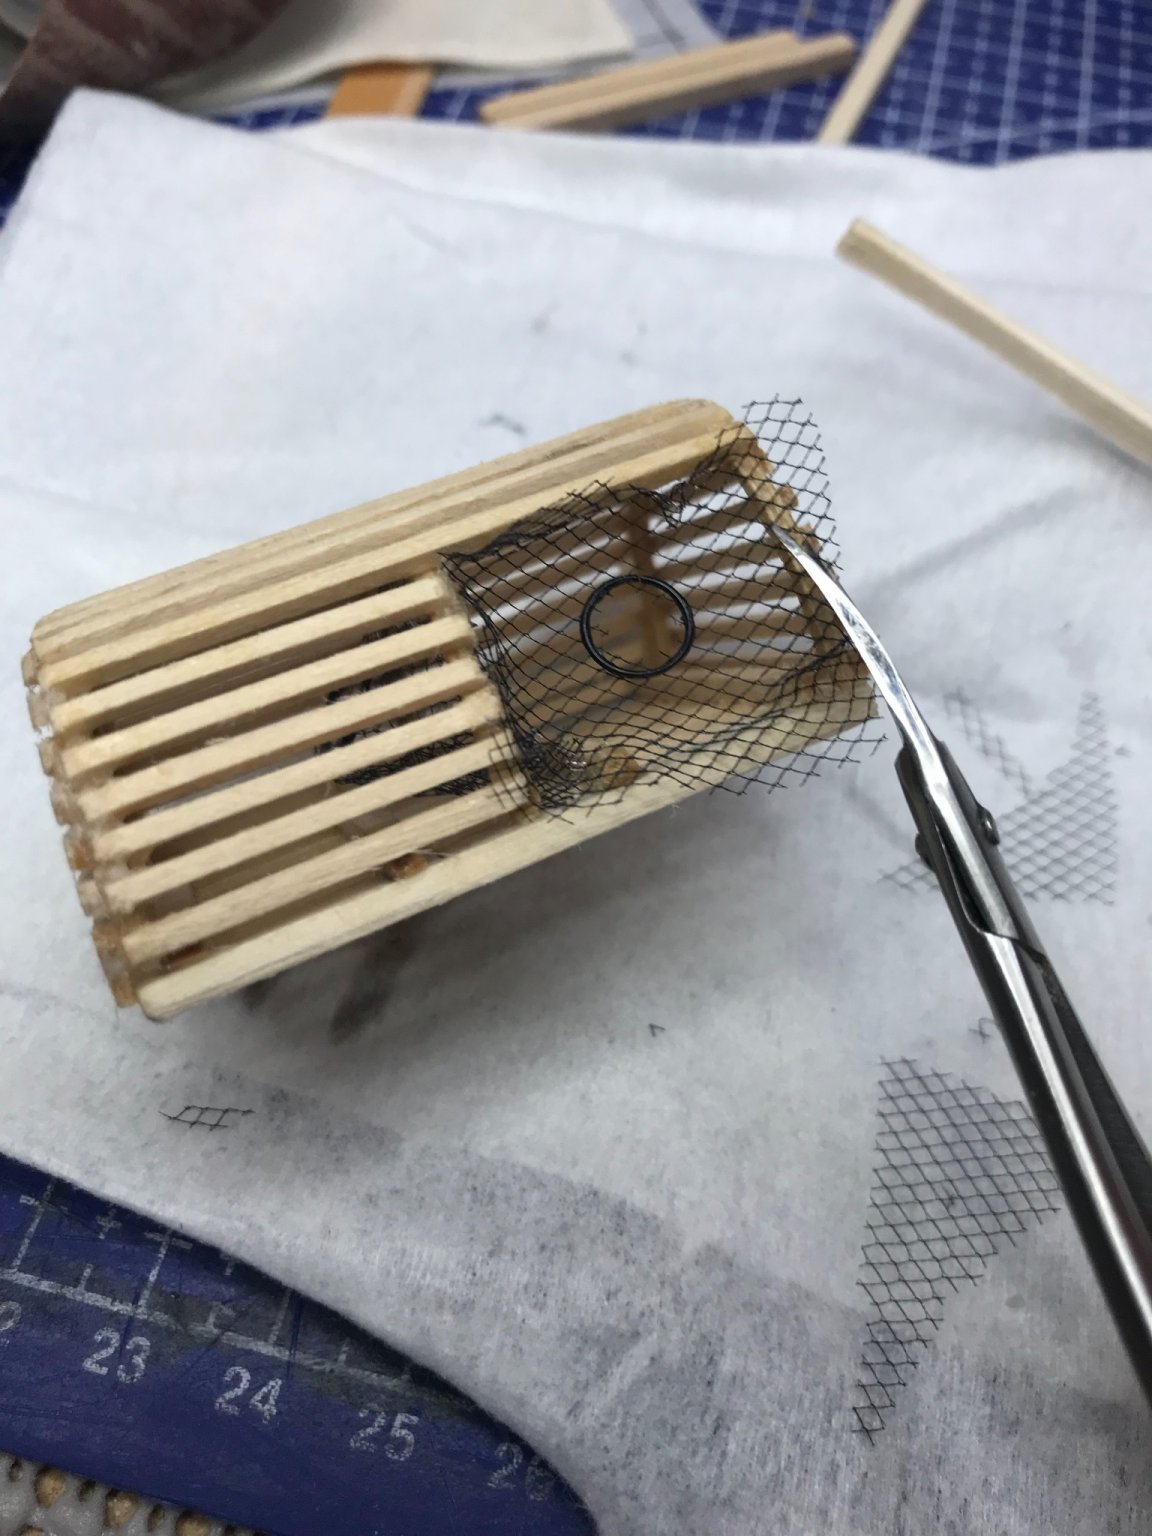
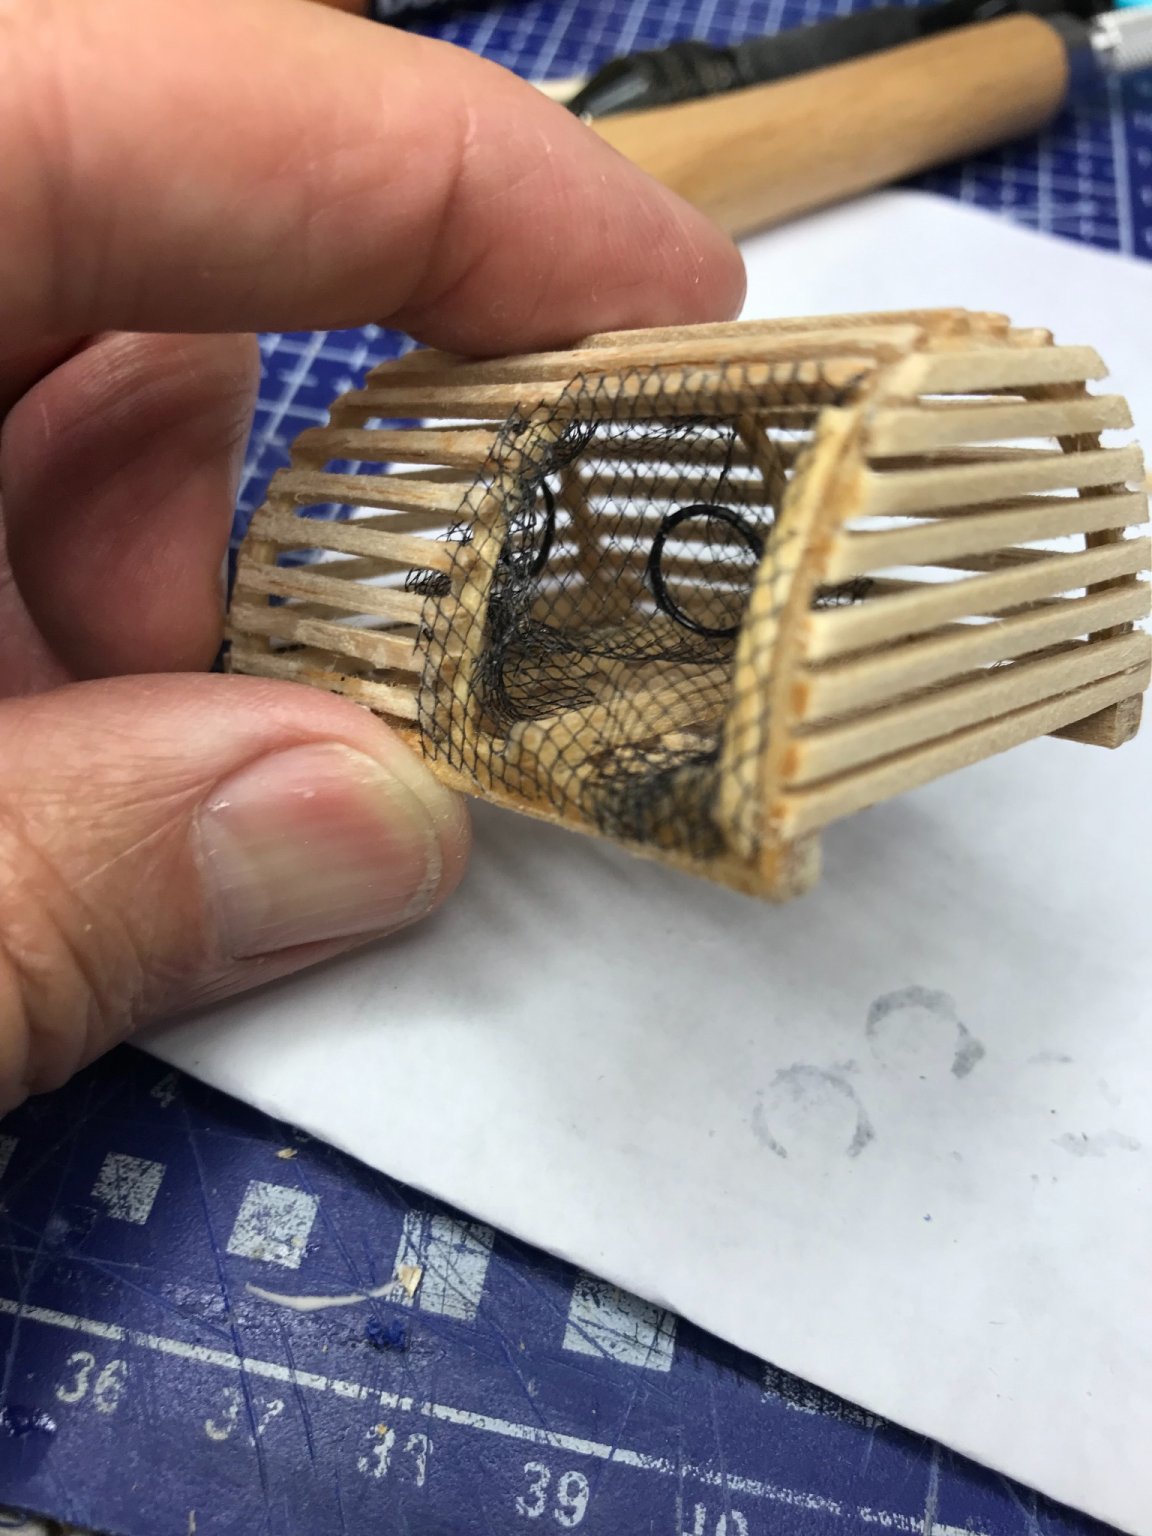
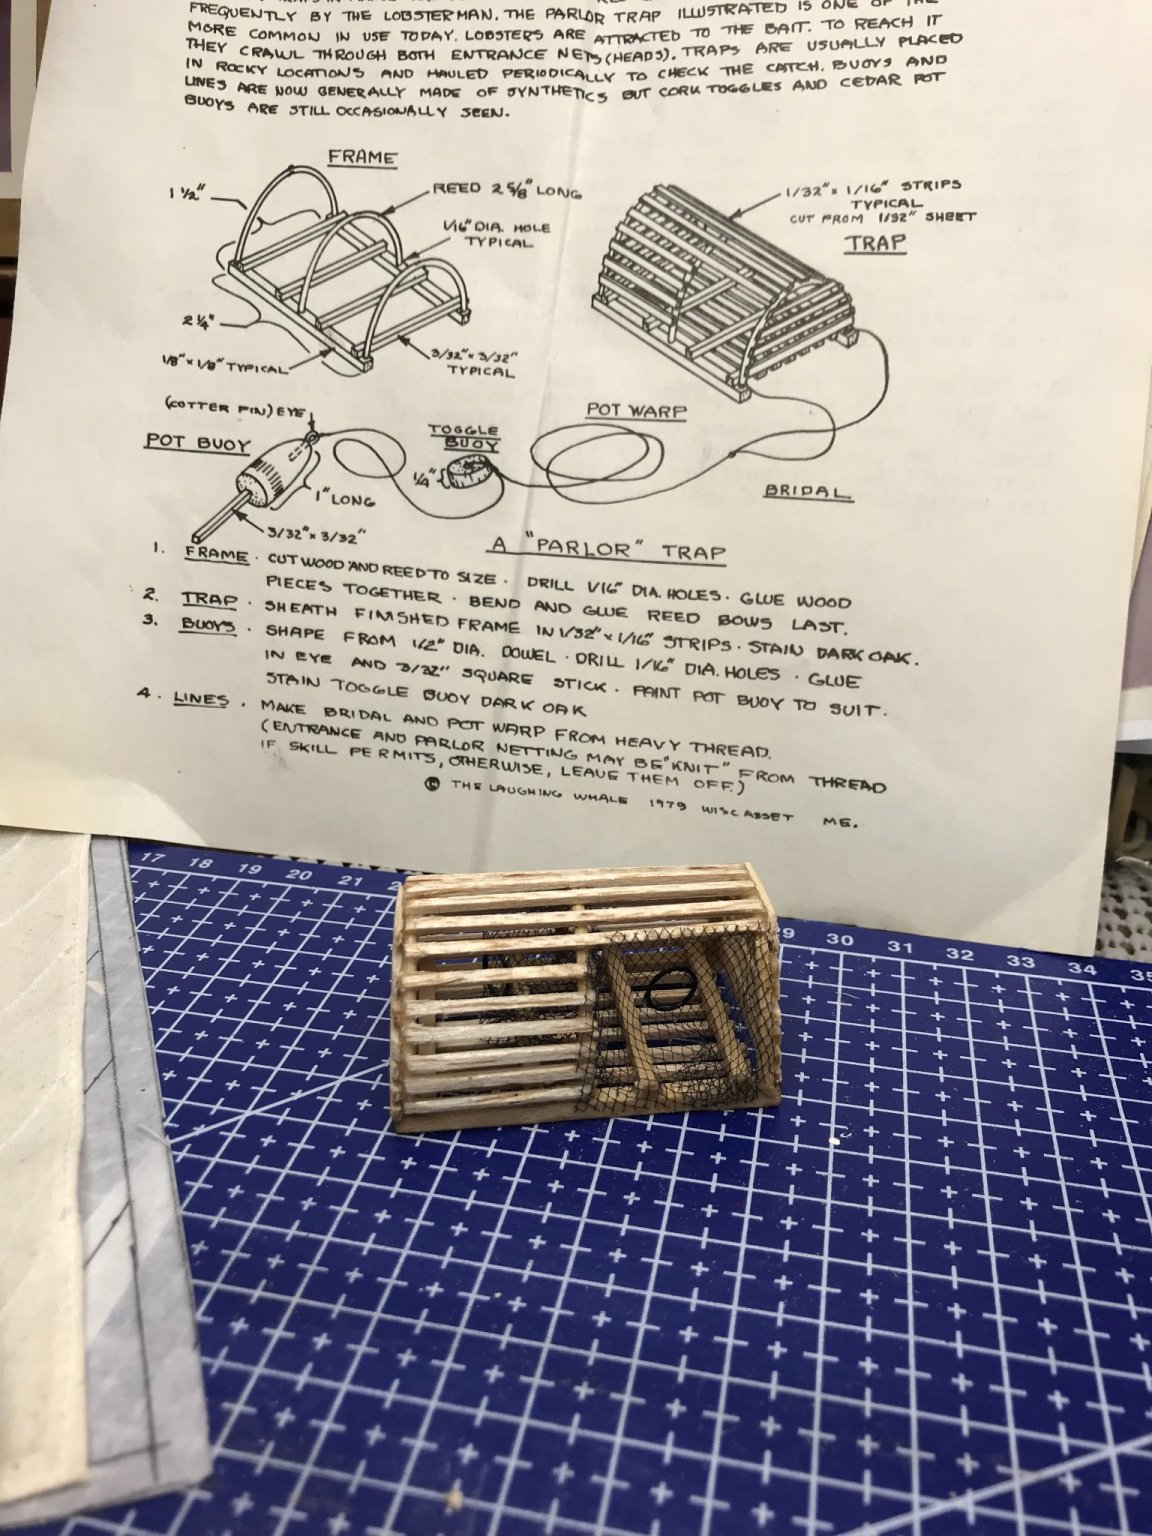
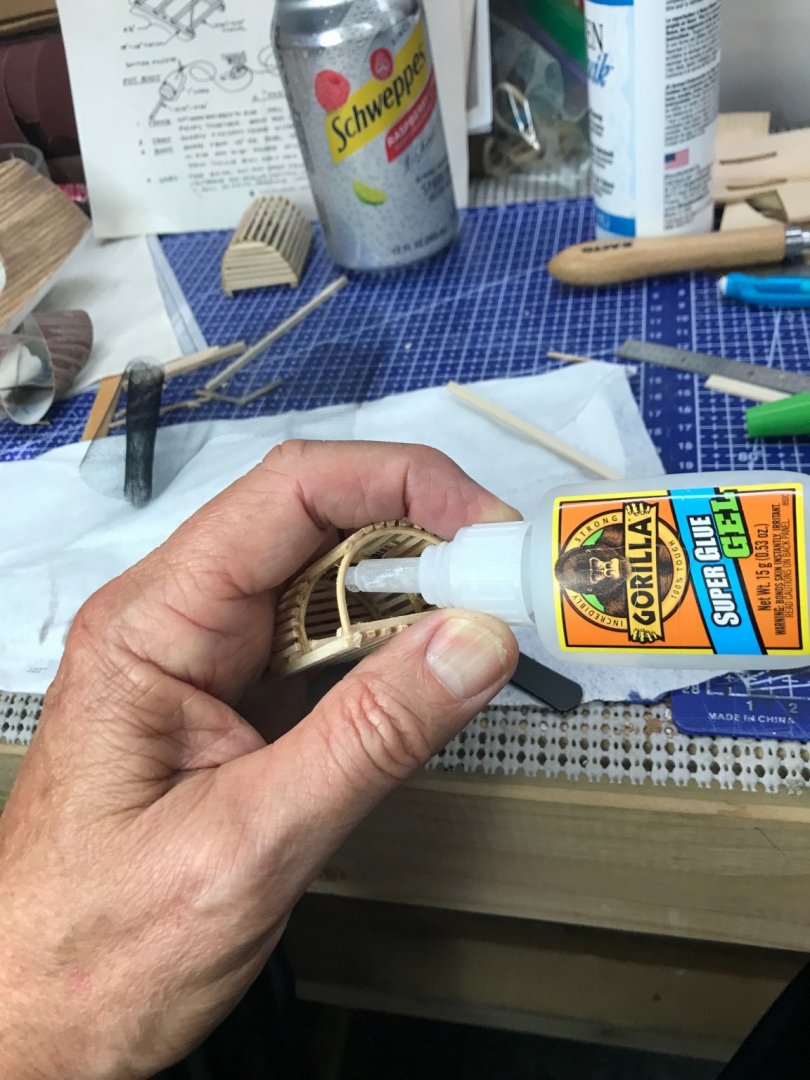
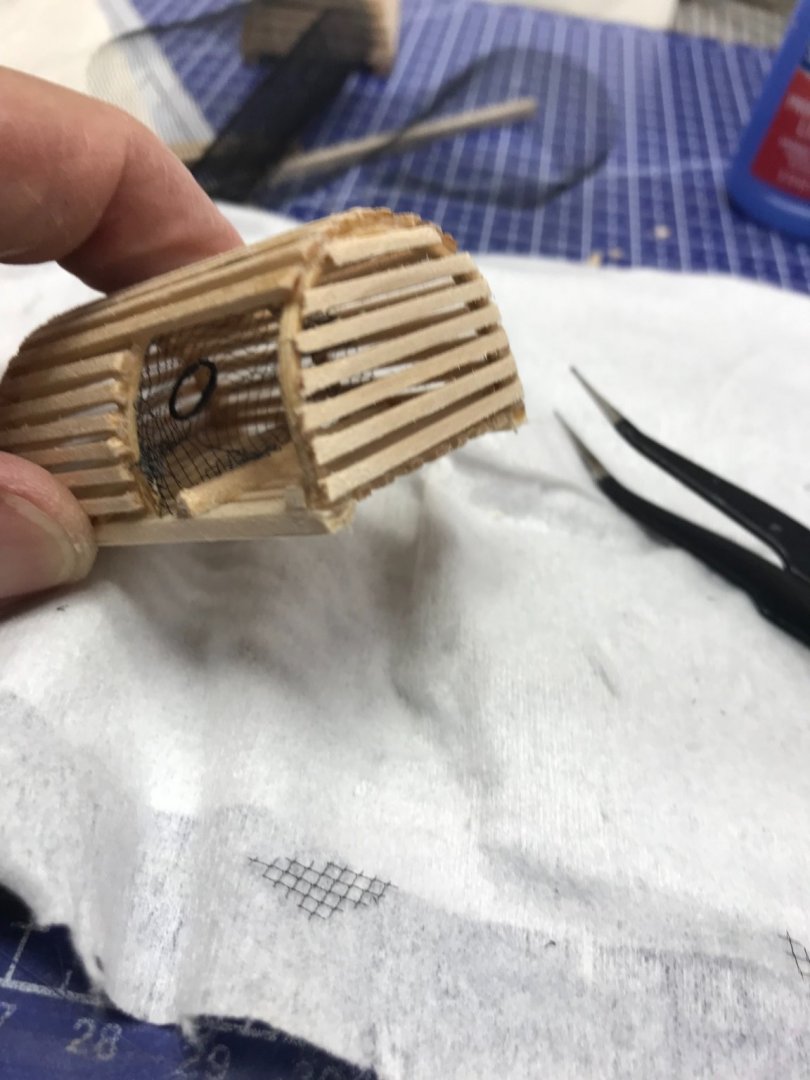
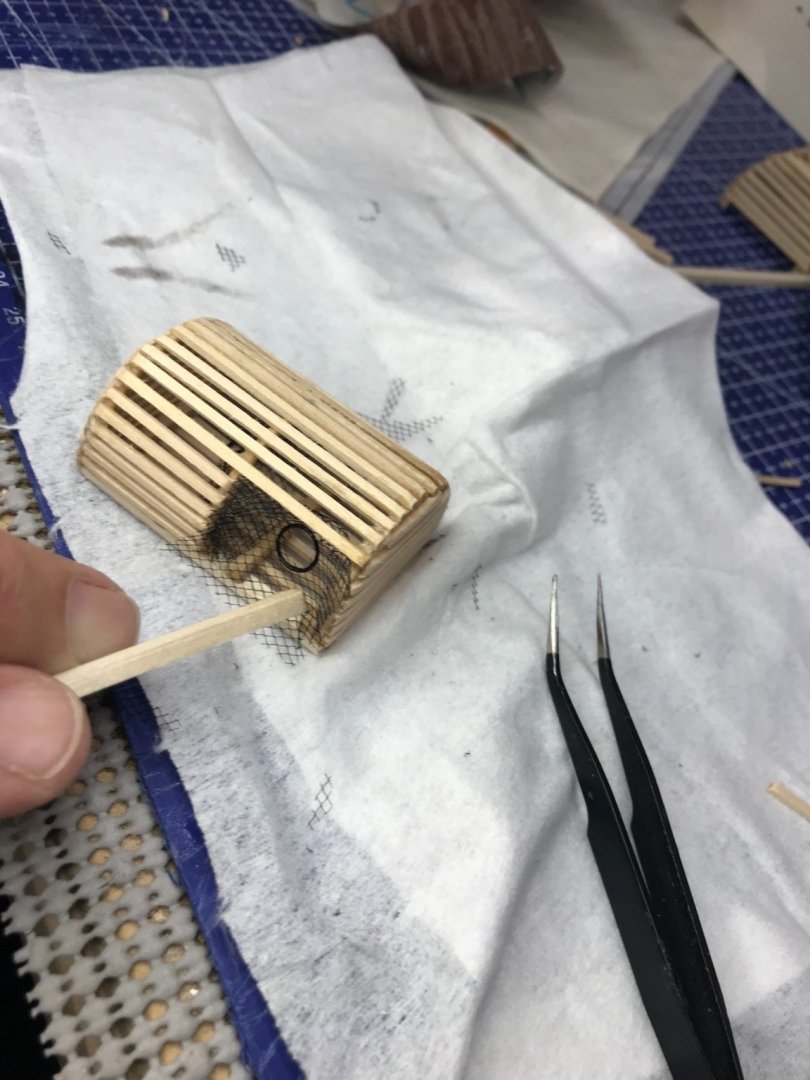
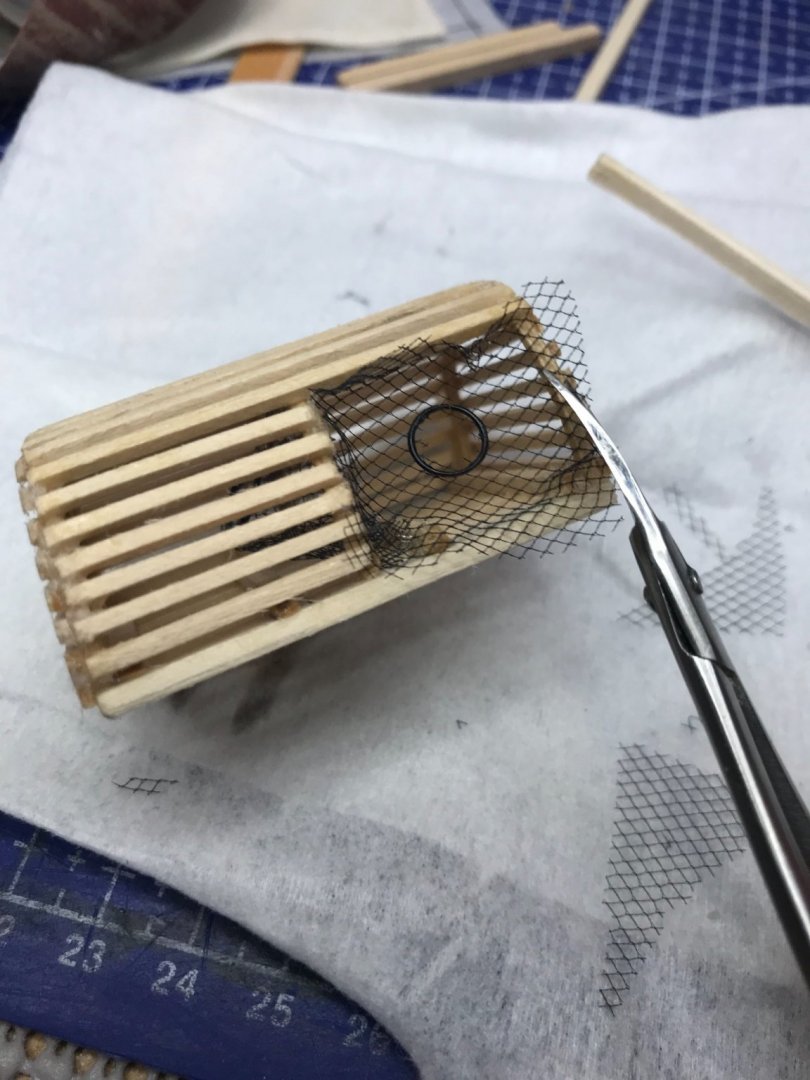
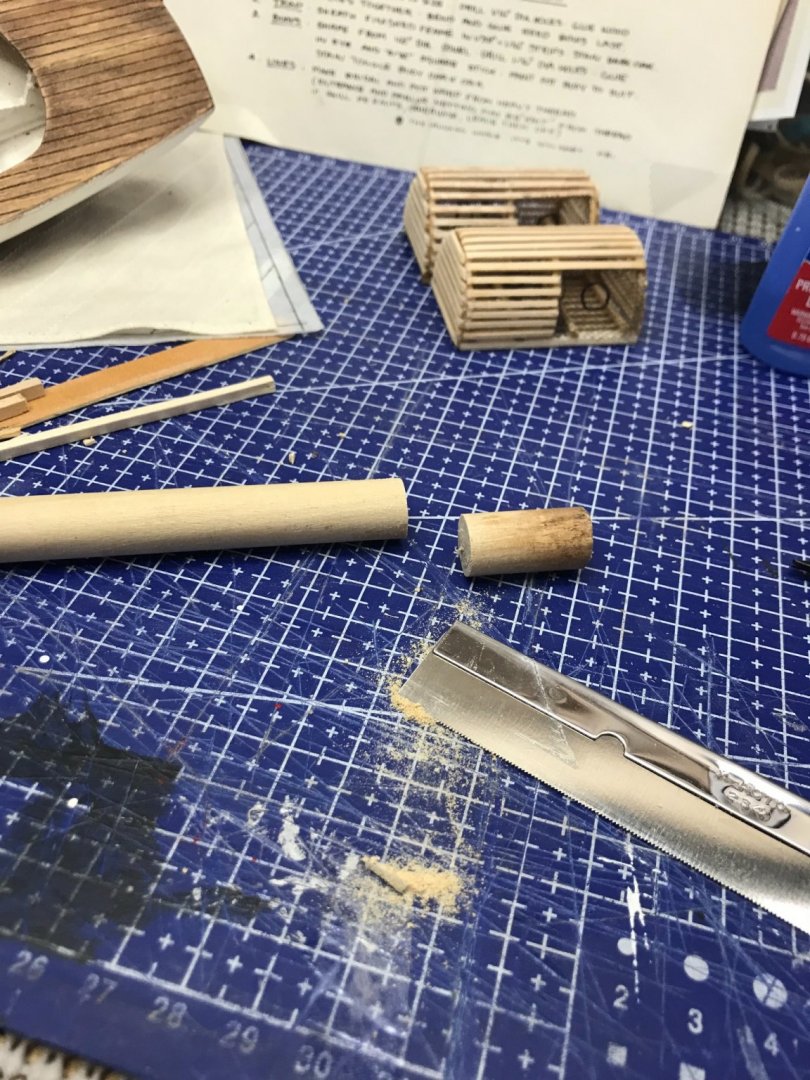
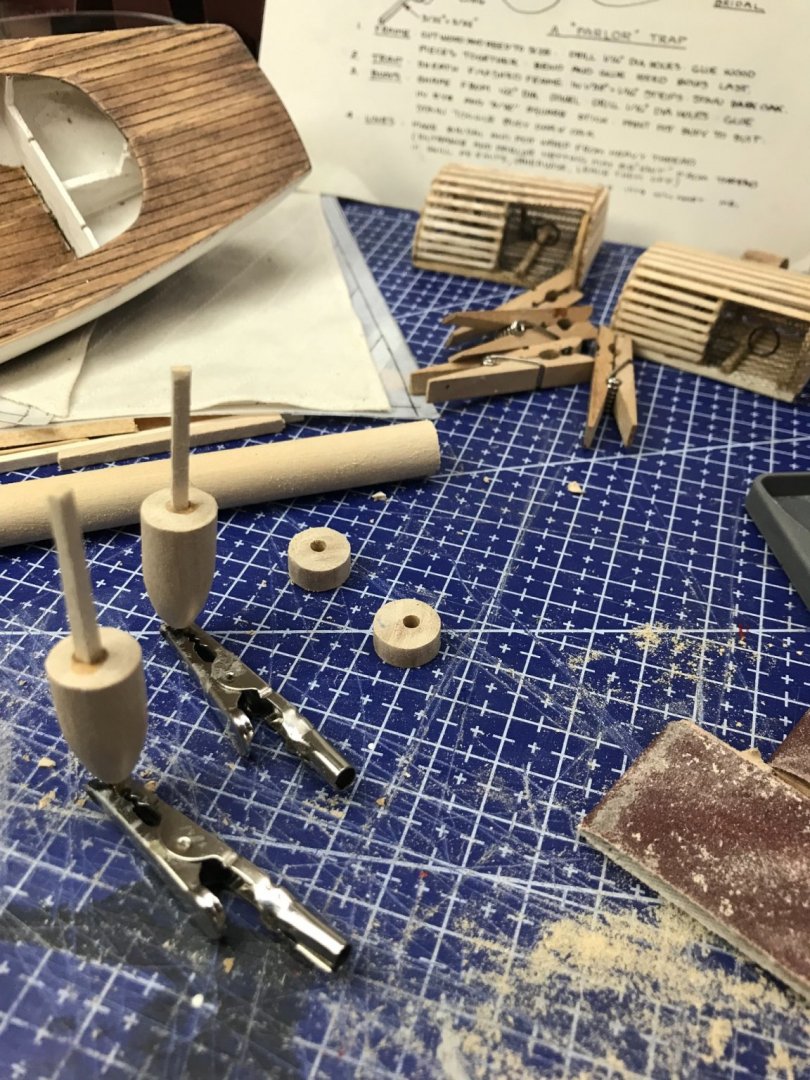
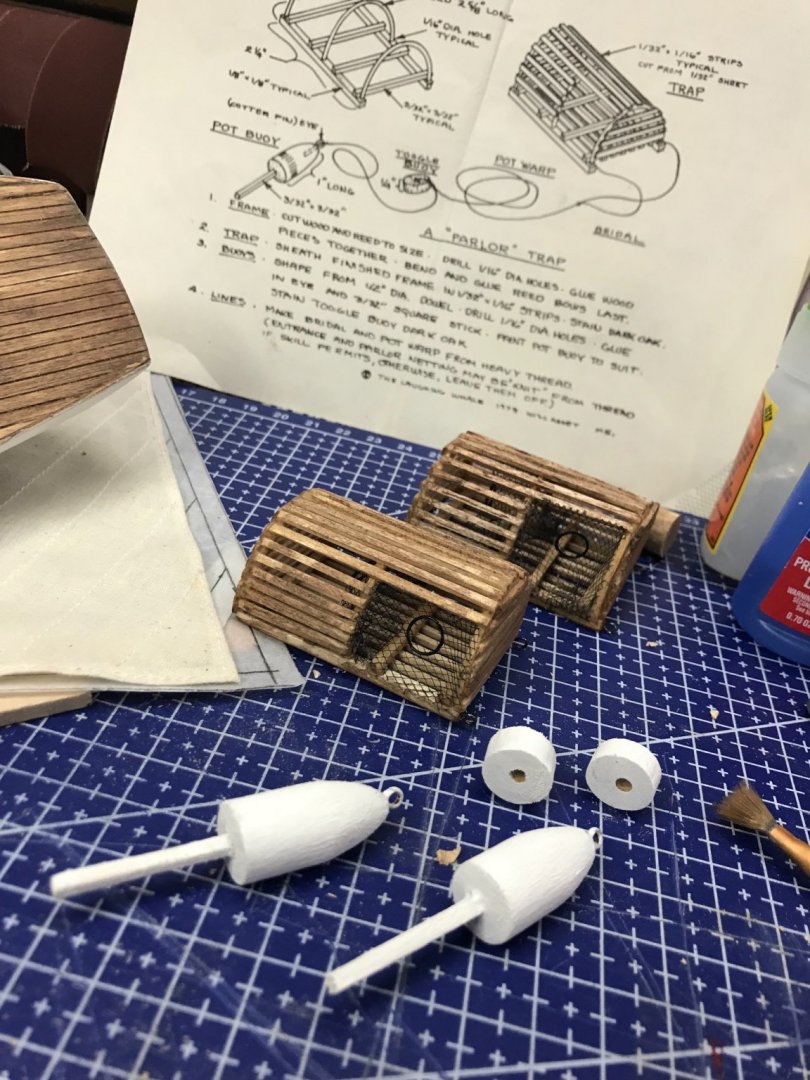
Trap 2 of 2 and buoys… Parlor net… Shaped and ready to glue inside… Just a few drops of gel CA Glue… Very tricky… Losing up the entrance side of the trap. Gluing in the entrance net. Trimming up the excess netting. 2of 2 complete… Cutting 1/2 inch dowel for the buoys. Buoys complete ready for paint. Identifier striping and line is all that’s left to complete this one.


- 51 replies
-
- 3
-
-
- laughing whale
- maine lobster boat
- (and 1 more)
-
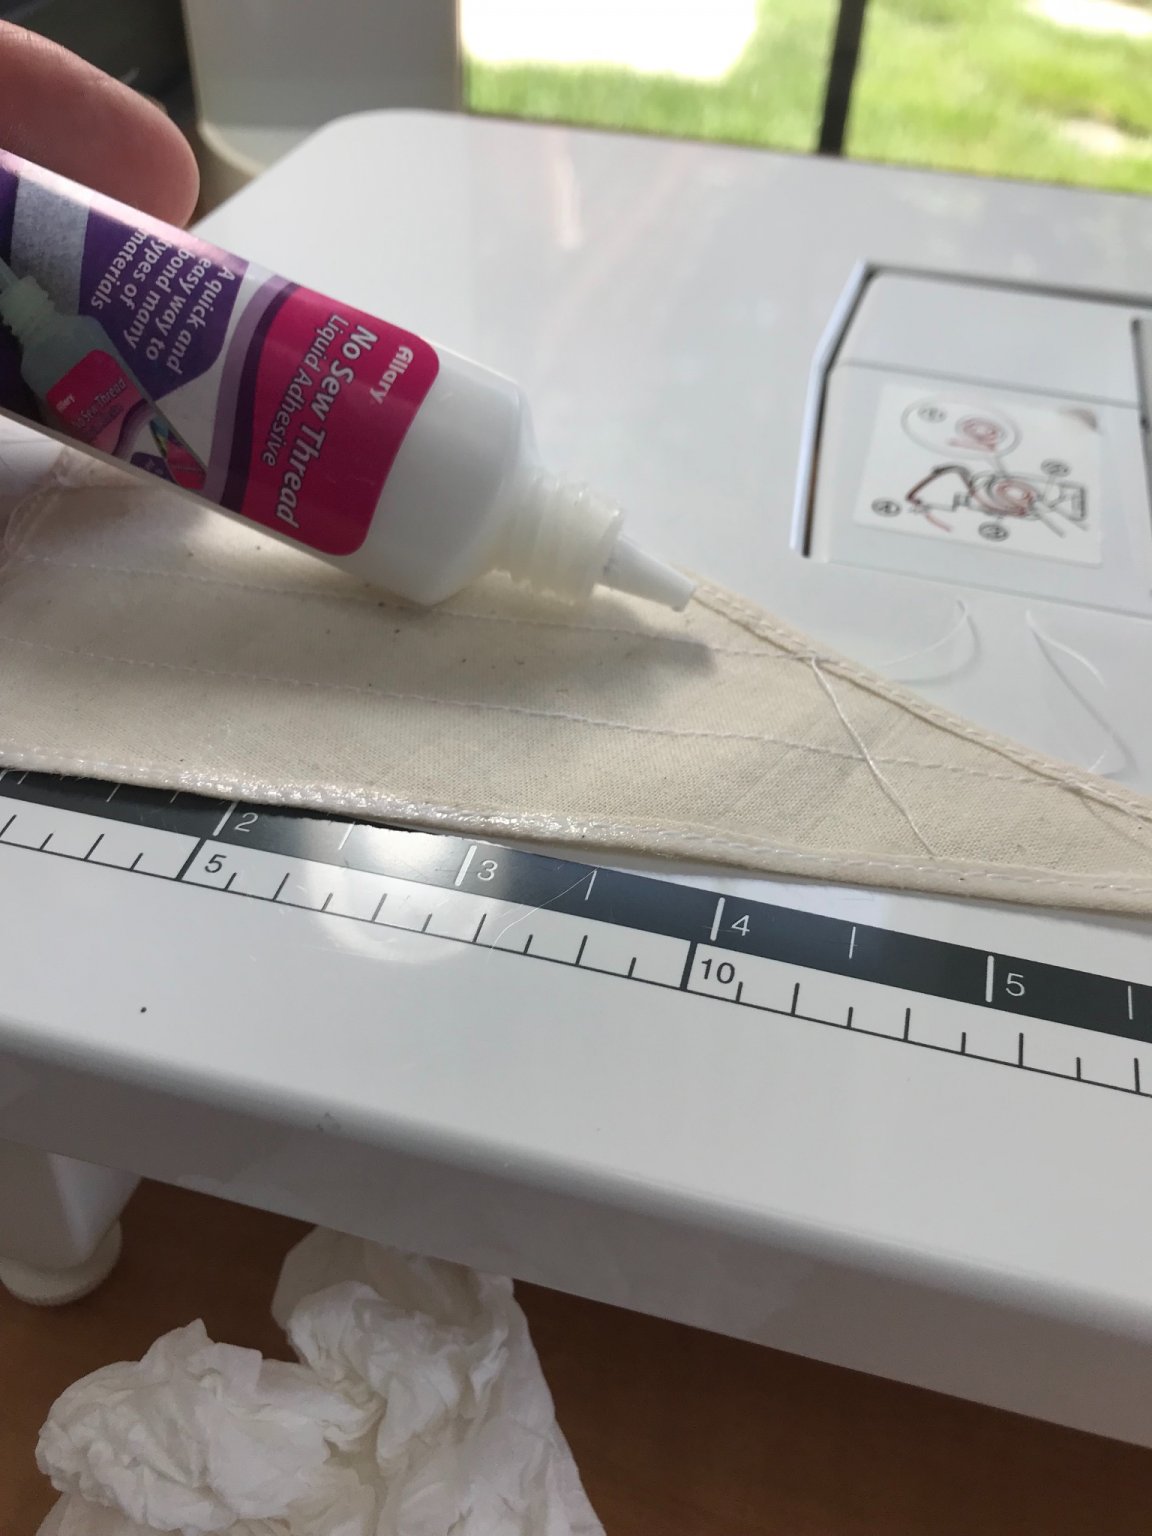
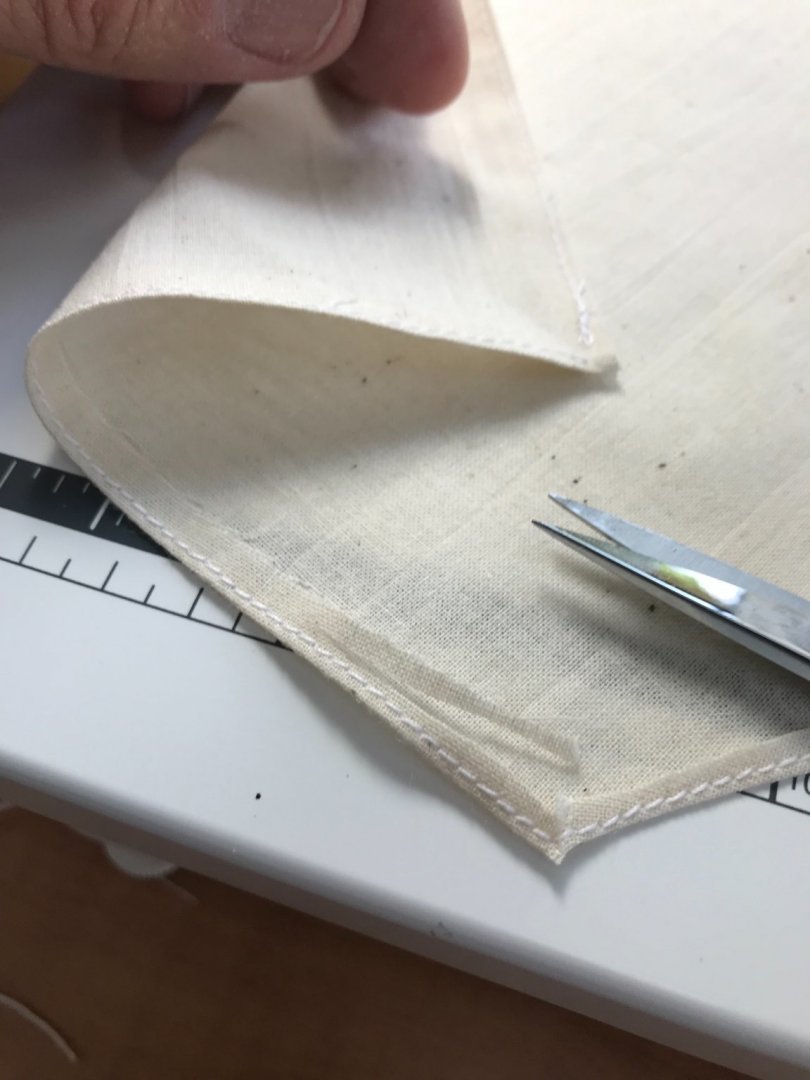
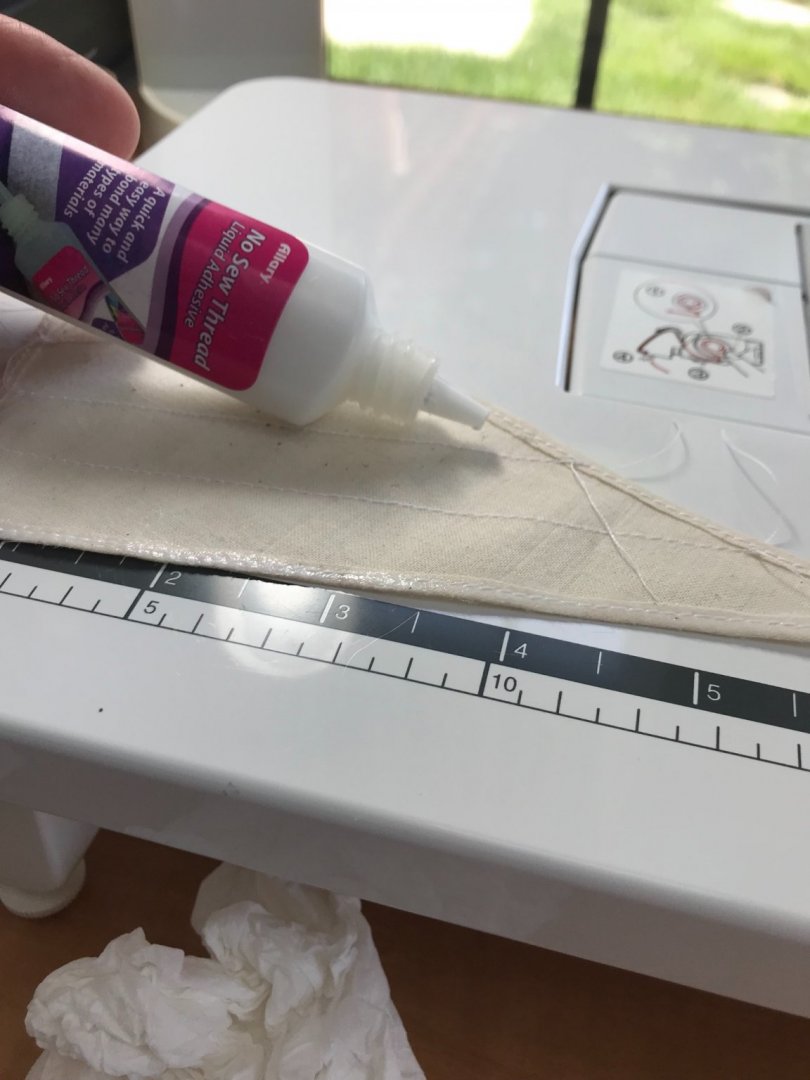
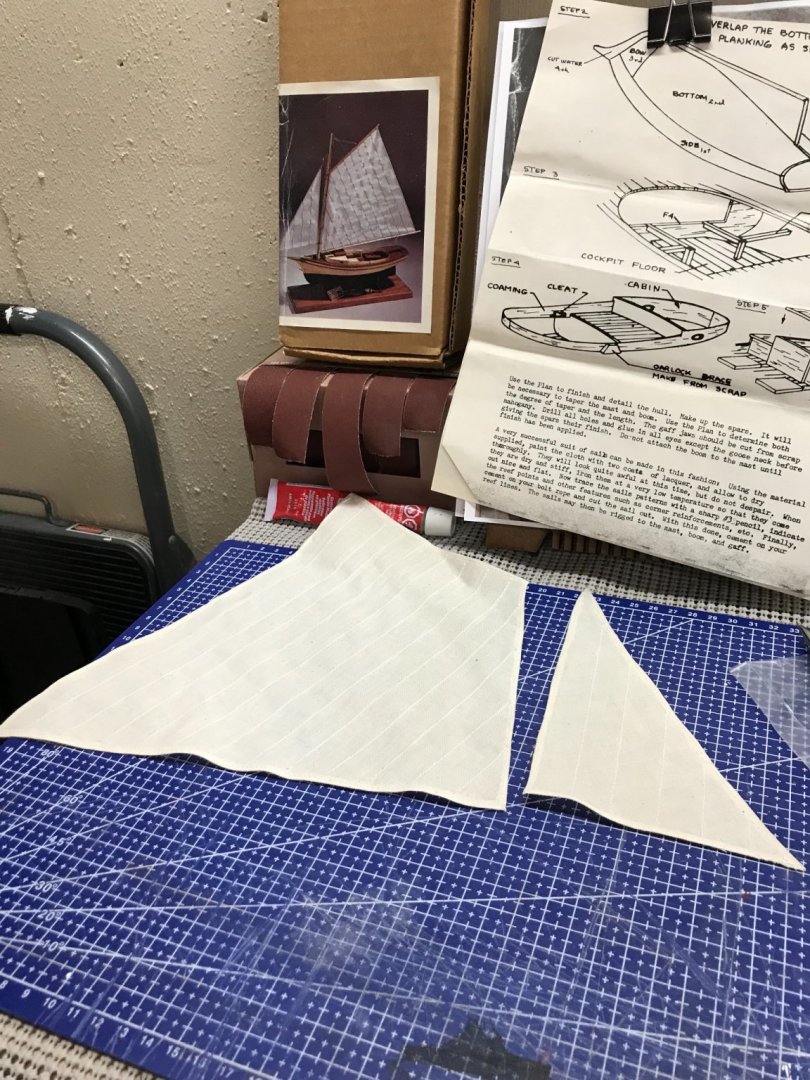
Sewing Sails… Allow 1/4” fold, stitch at 1/16” then trim for an 1/8” hem. Fabric glue to secure the seams. Ready for bolt rope… Now for the deck. Onwards 😎🍻
- 26 replies
-
- 3
-
-
- Maine
- Laughing Whale
- (and 2 more)
-
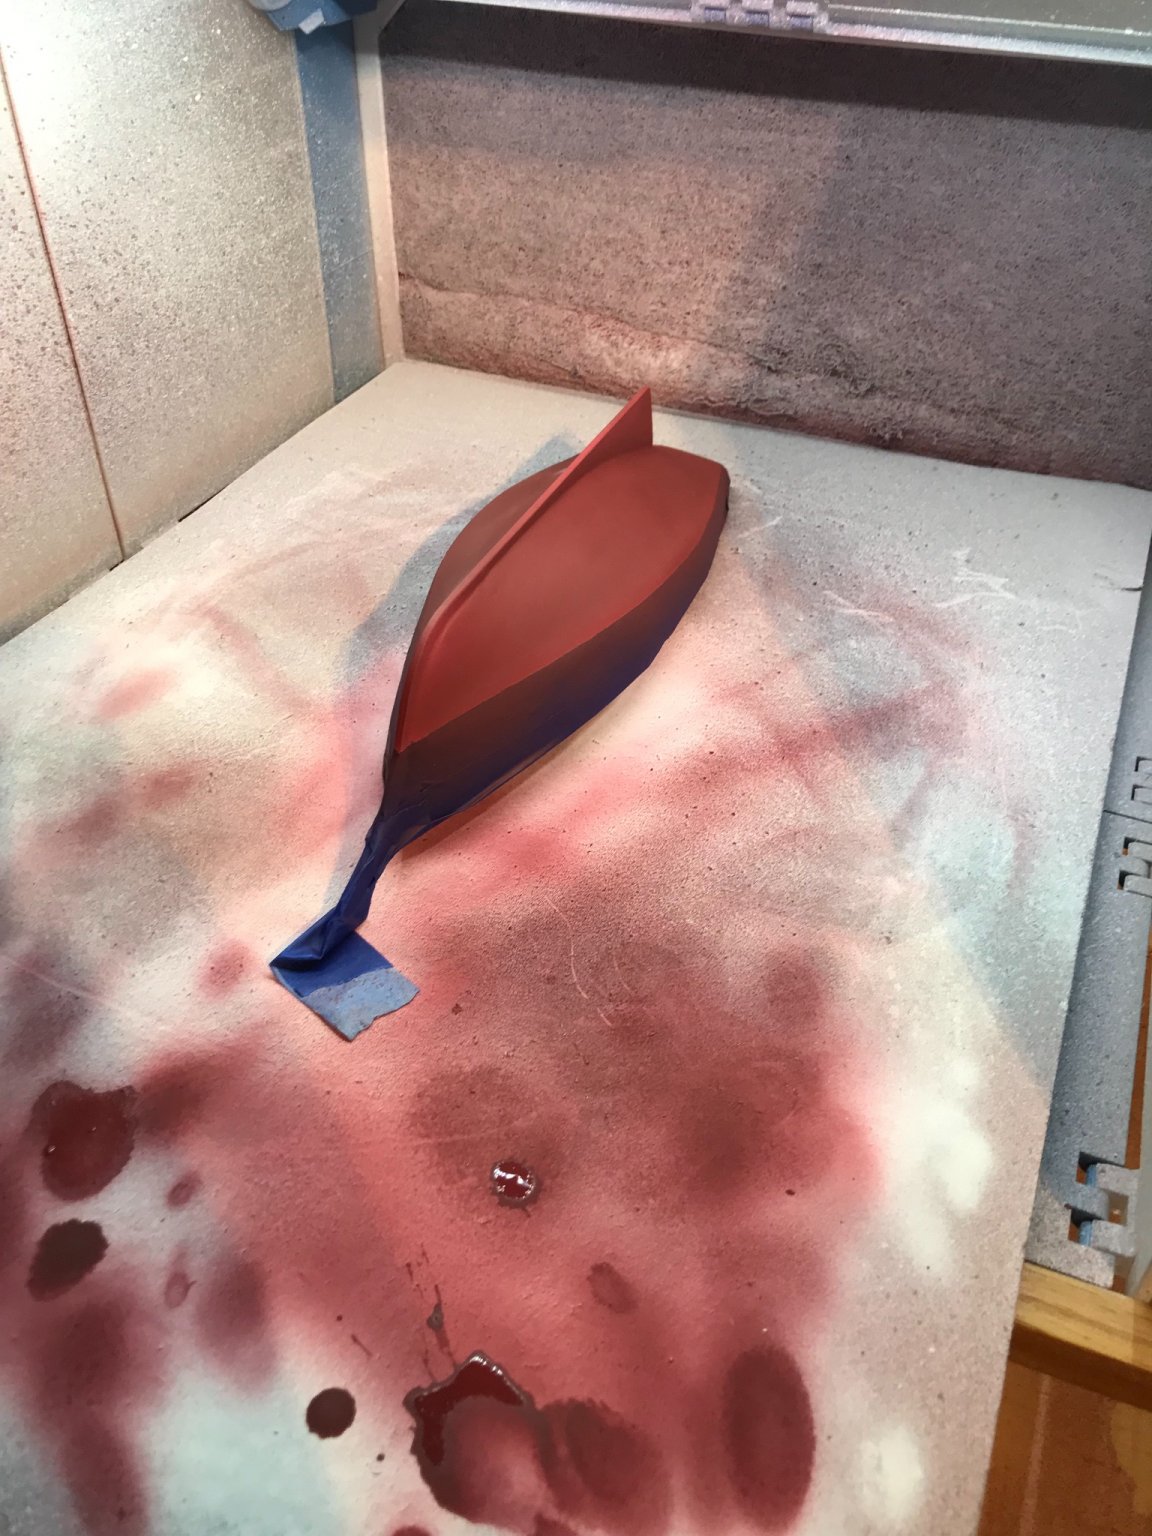
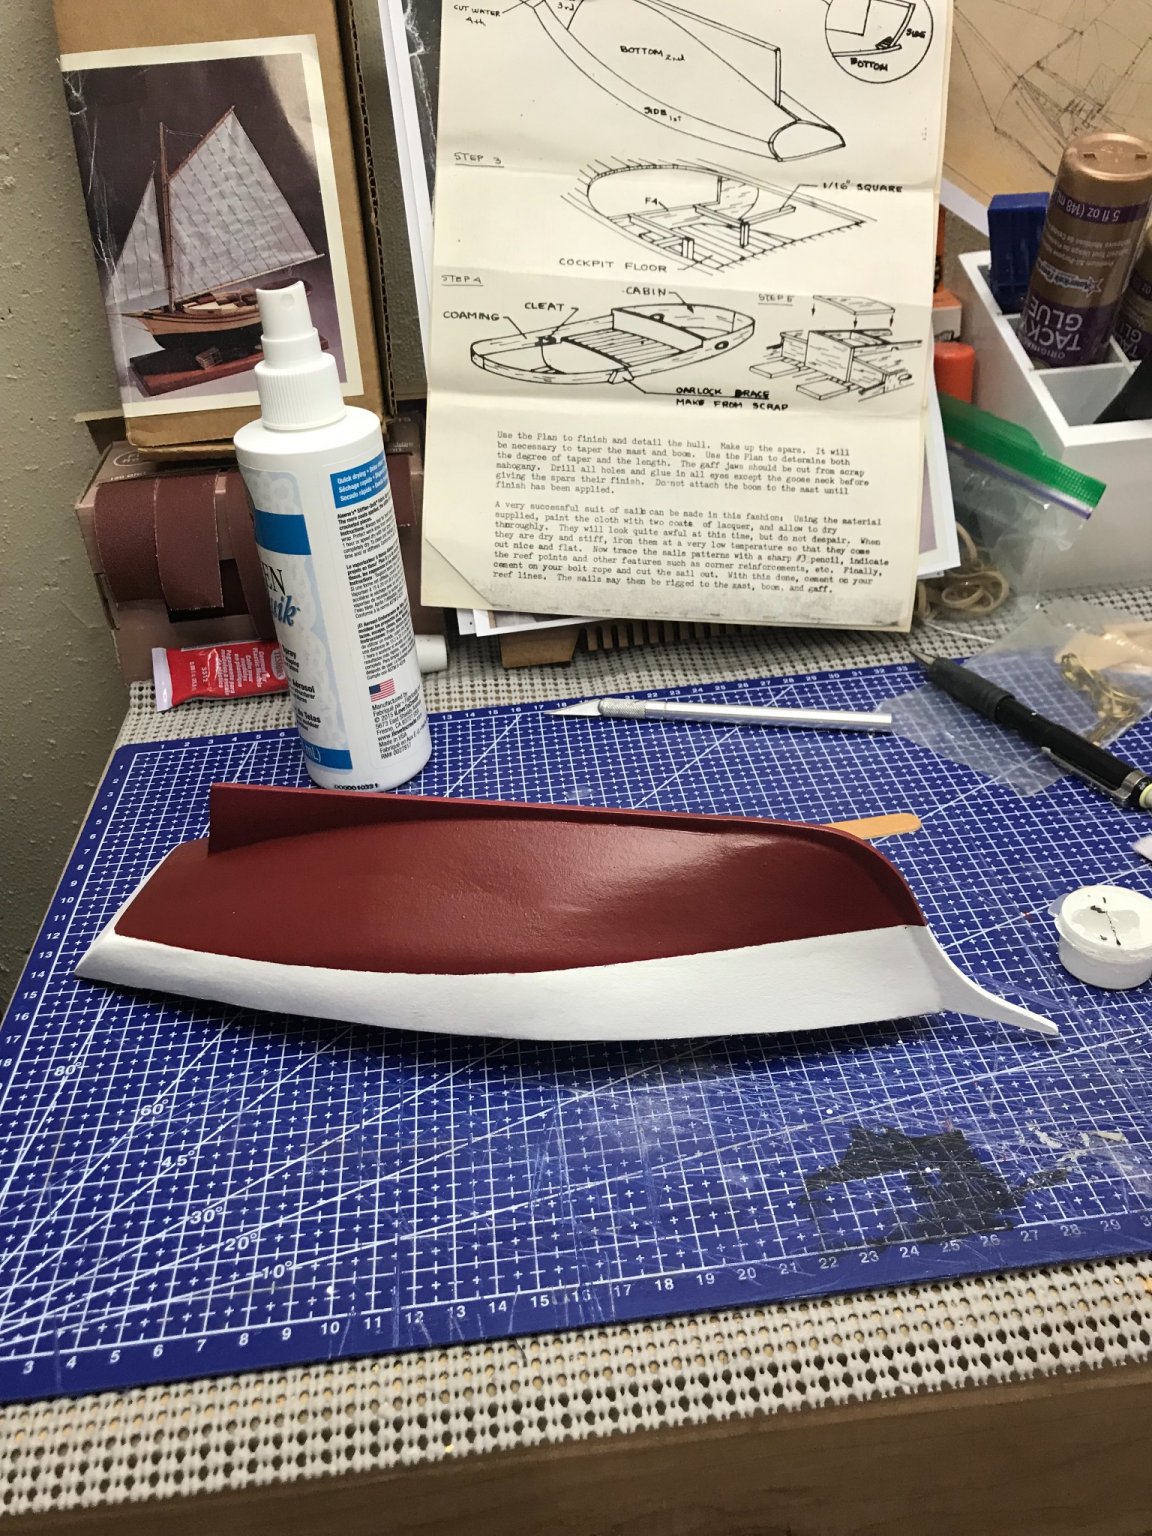
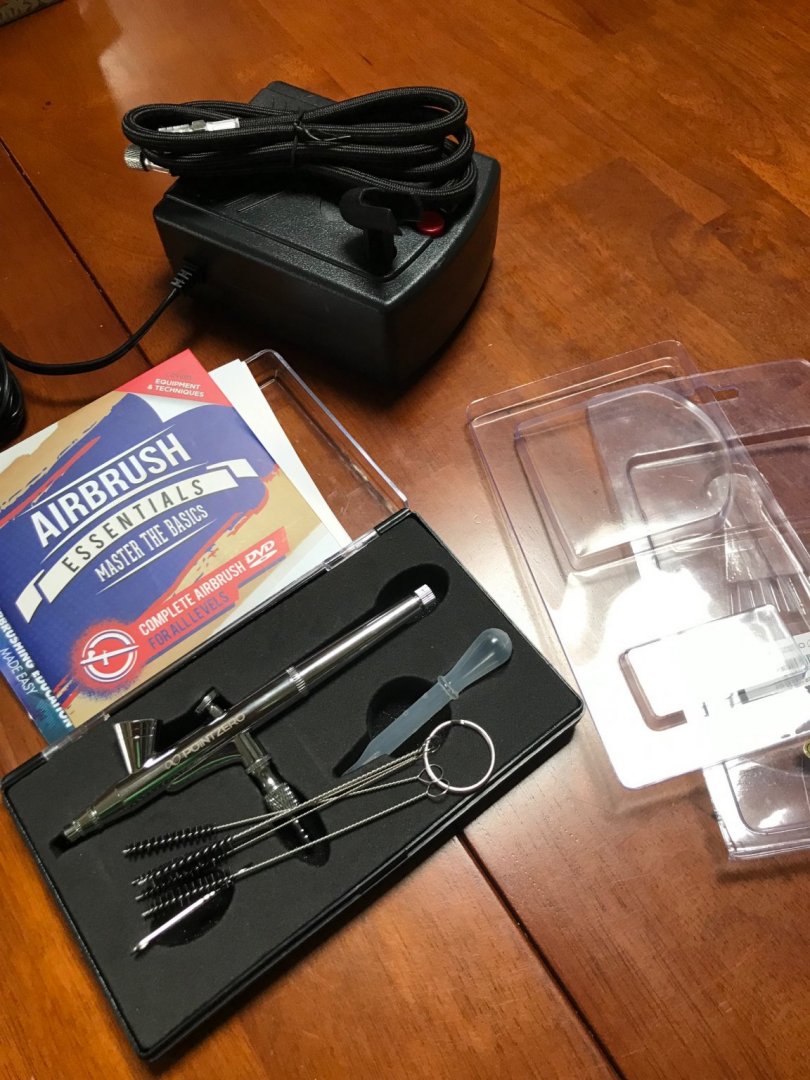
Into the paint booth… Masked off at the water line. New airbrush and pump working good. Matte Varathane sprayed with airbrush. Now for the deck… 😎


- 26 replies
-
- 1
-
-
- Maine
- Laughing Whale
- (and 2 more)
-
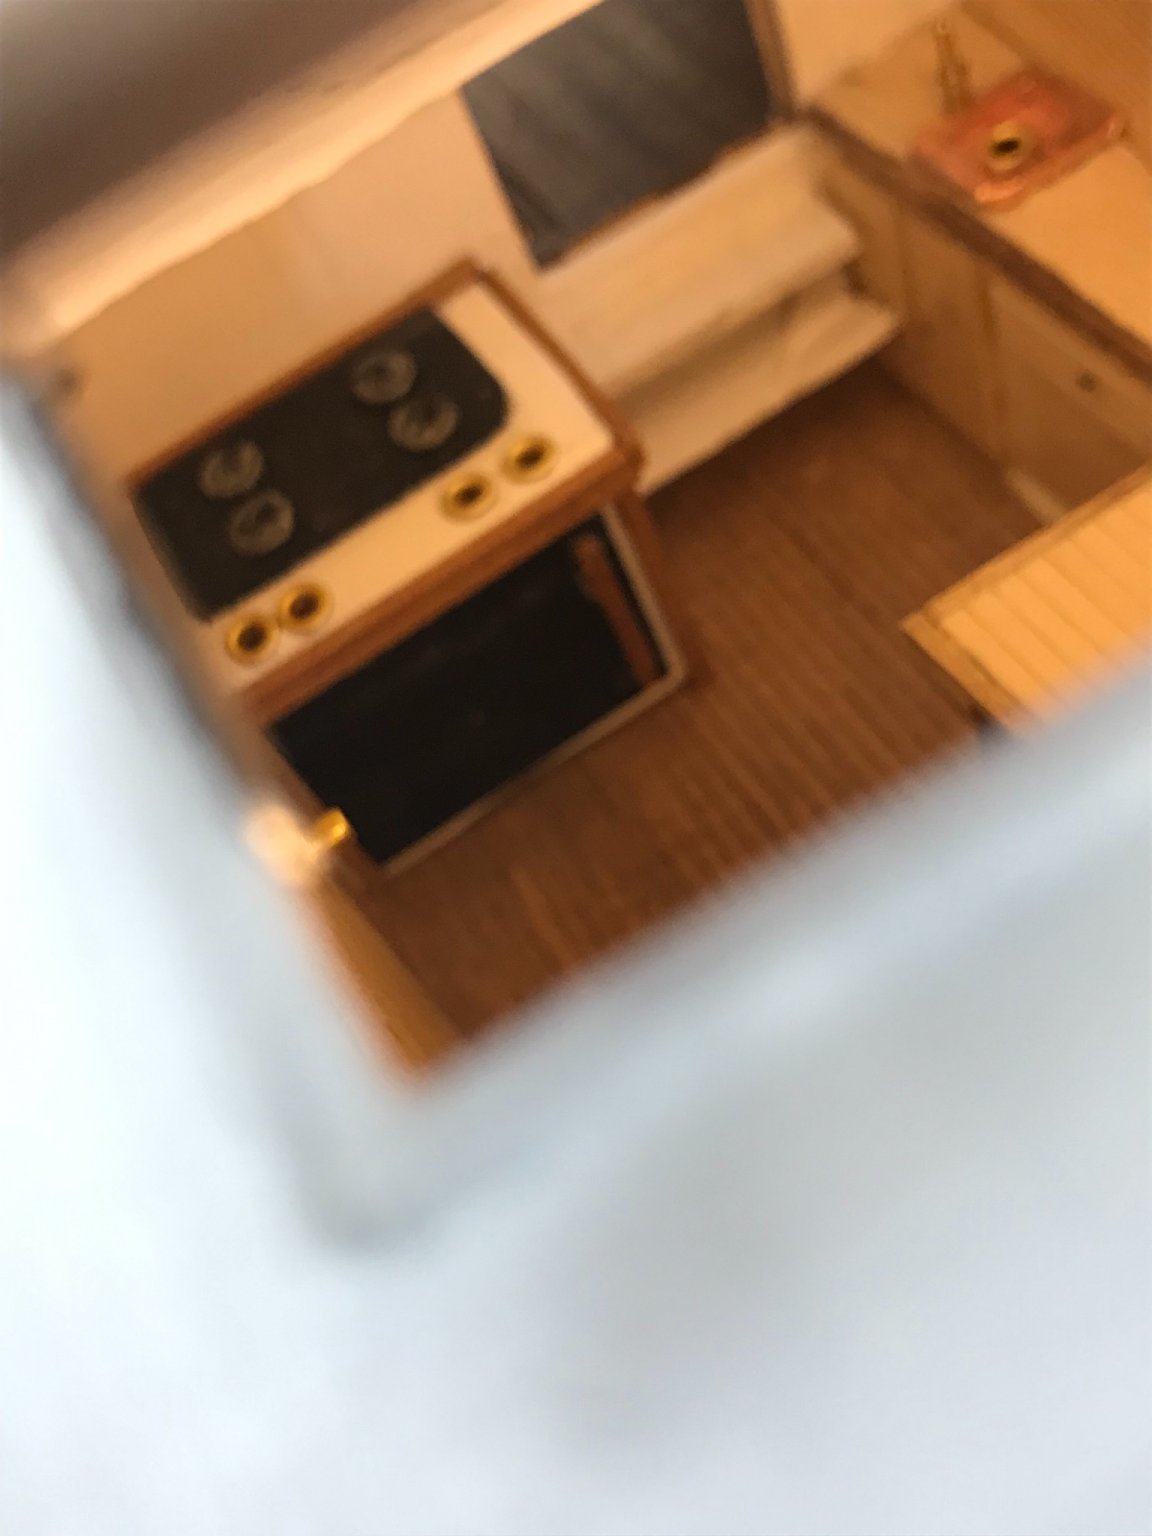
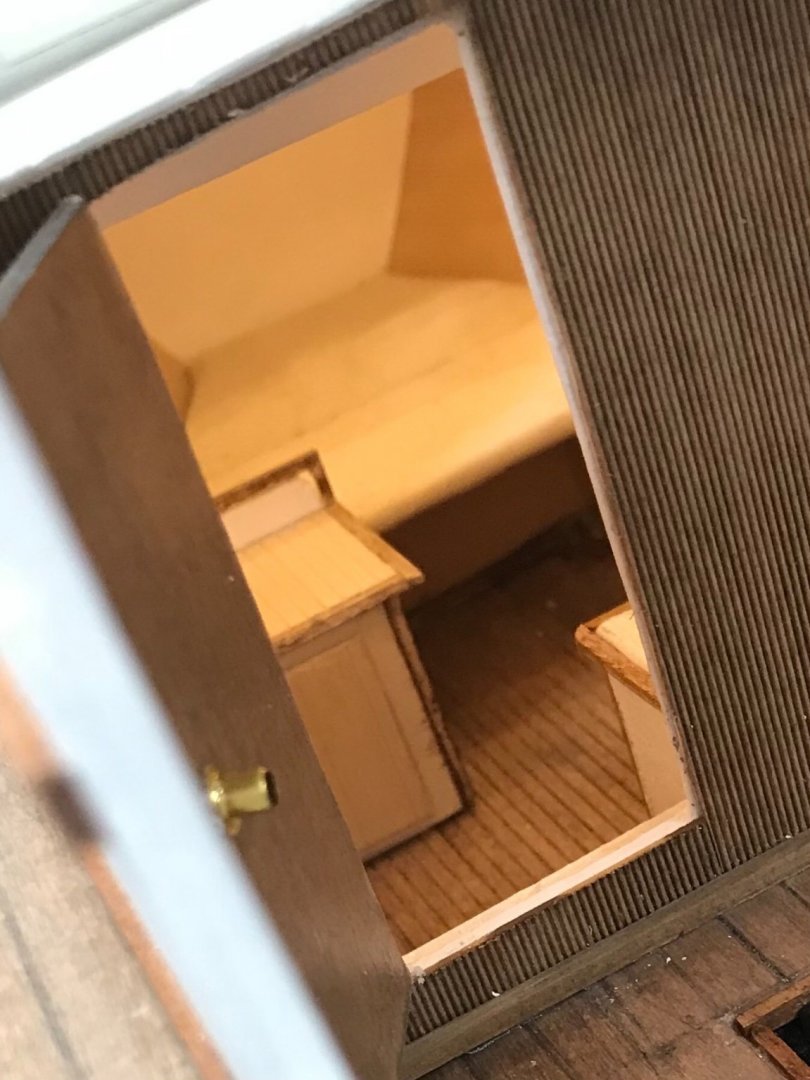
Views of the Fore Cabin furnishings. From the hatch… From the side window… From the Deck… Later… 😎


- 51 replies
-
- 2
-
-
- laughing whale
- maine lobster boat
- (and 1 more)
-
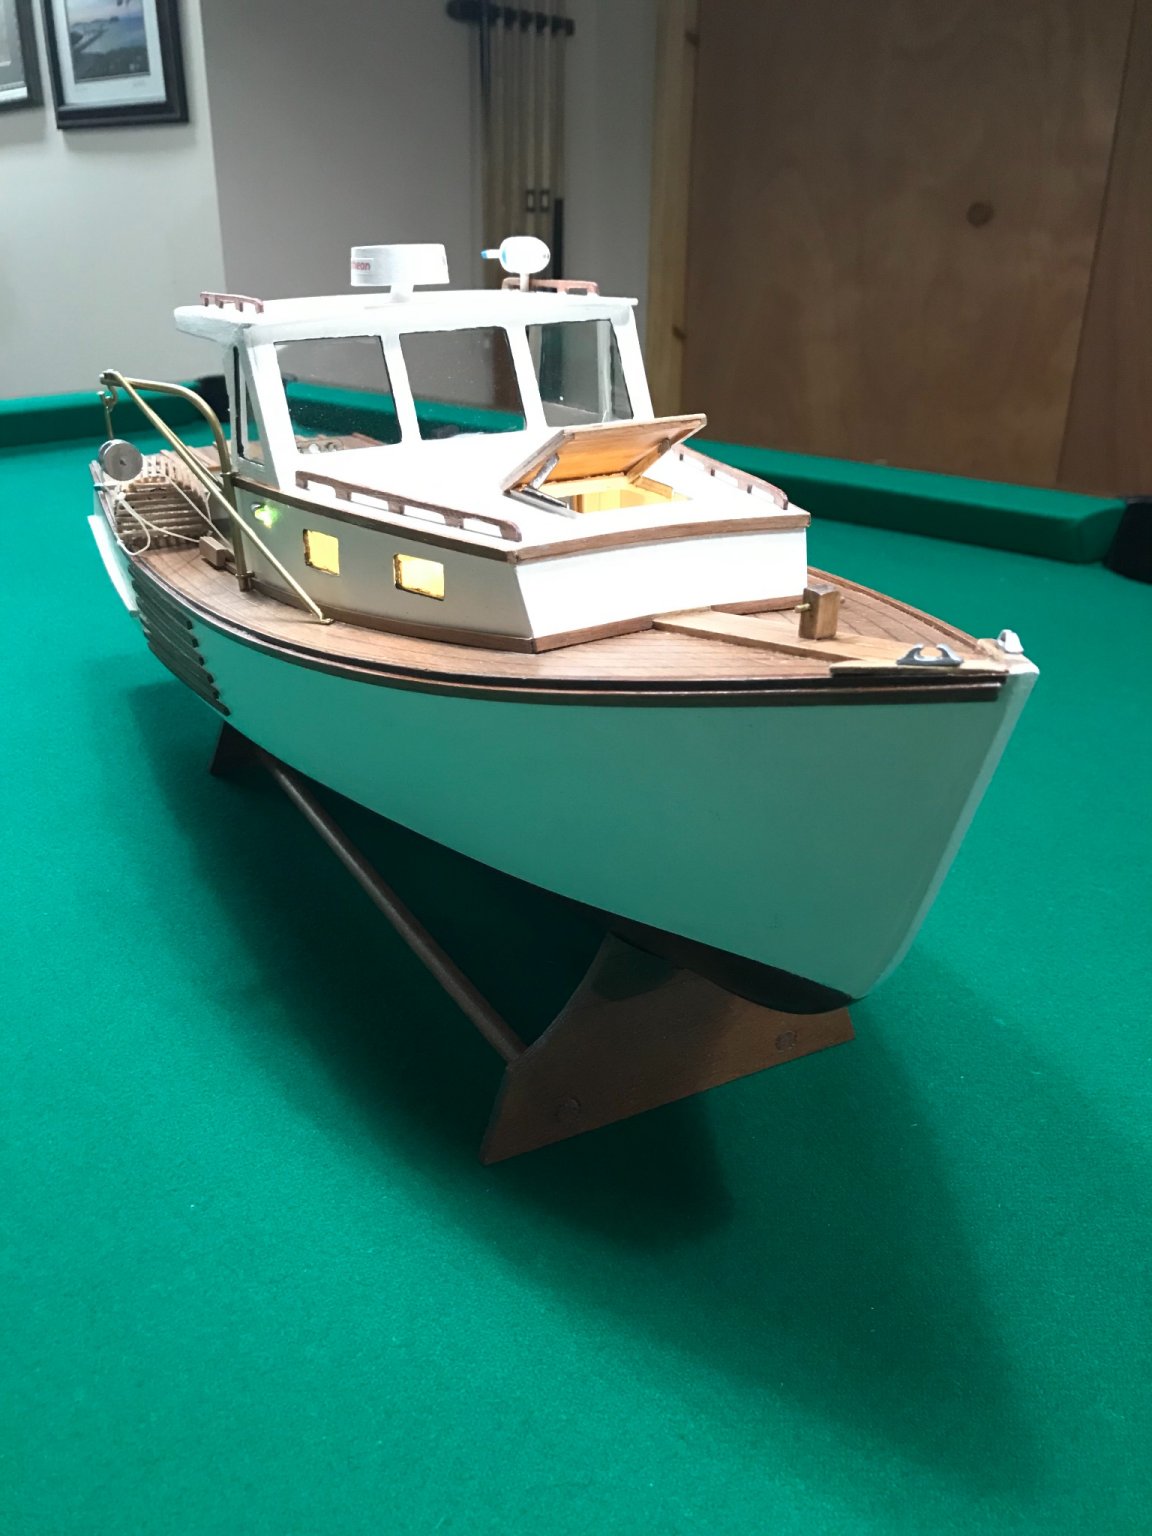
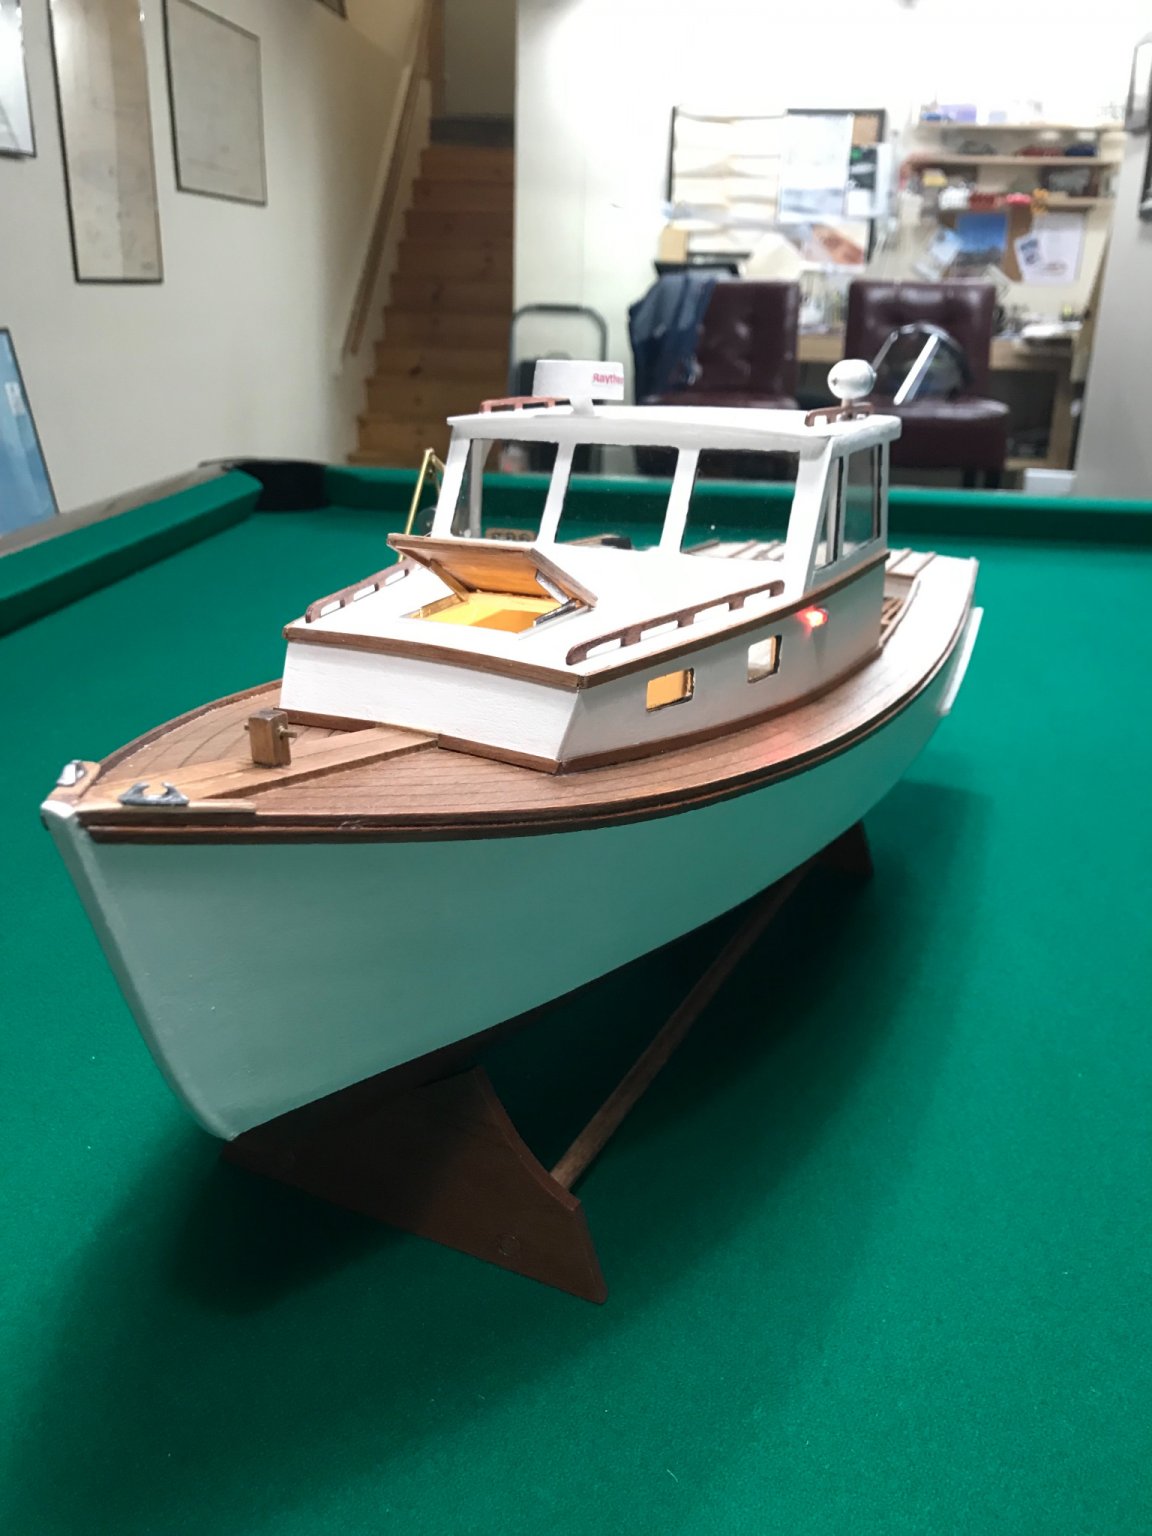
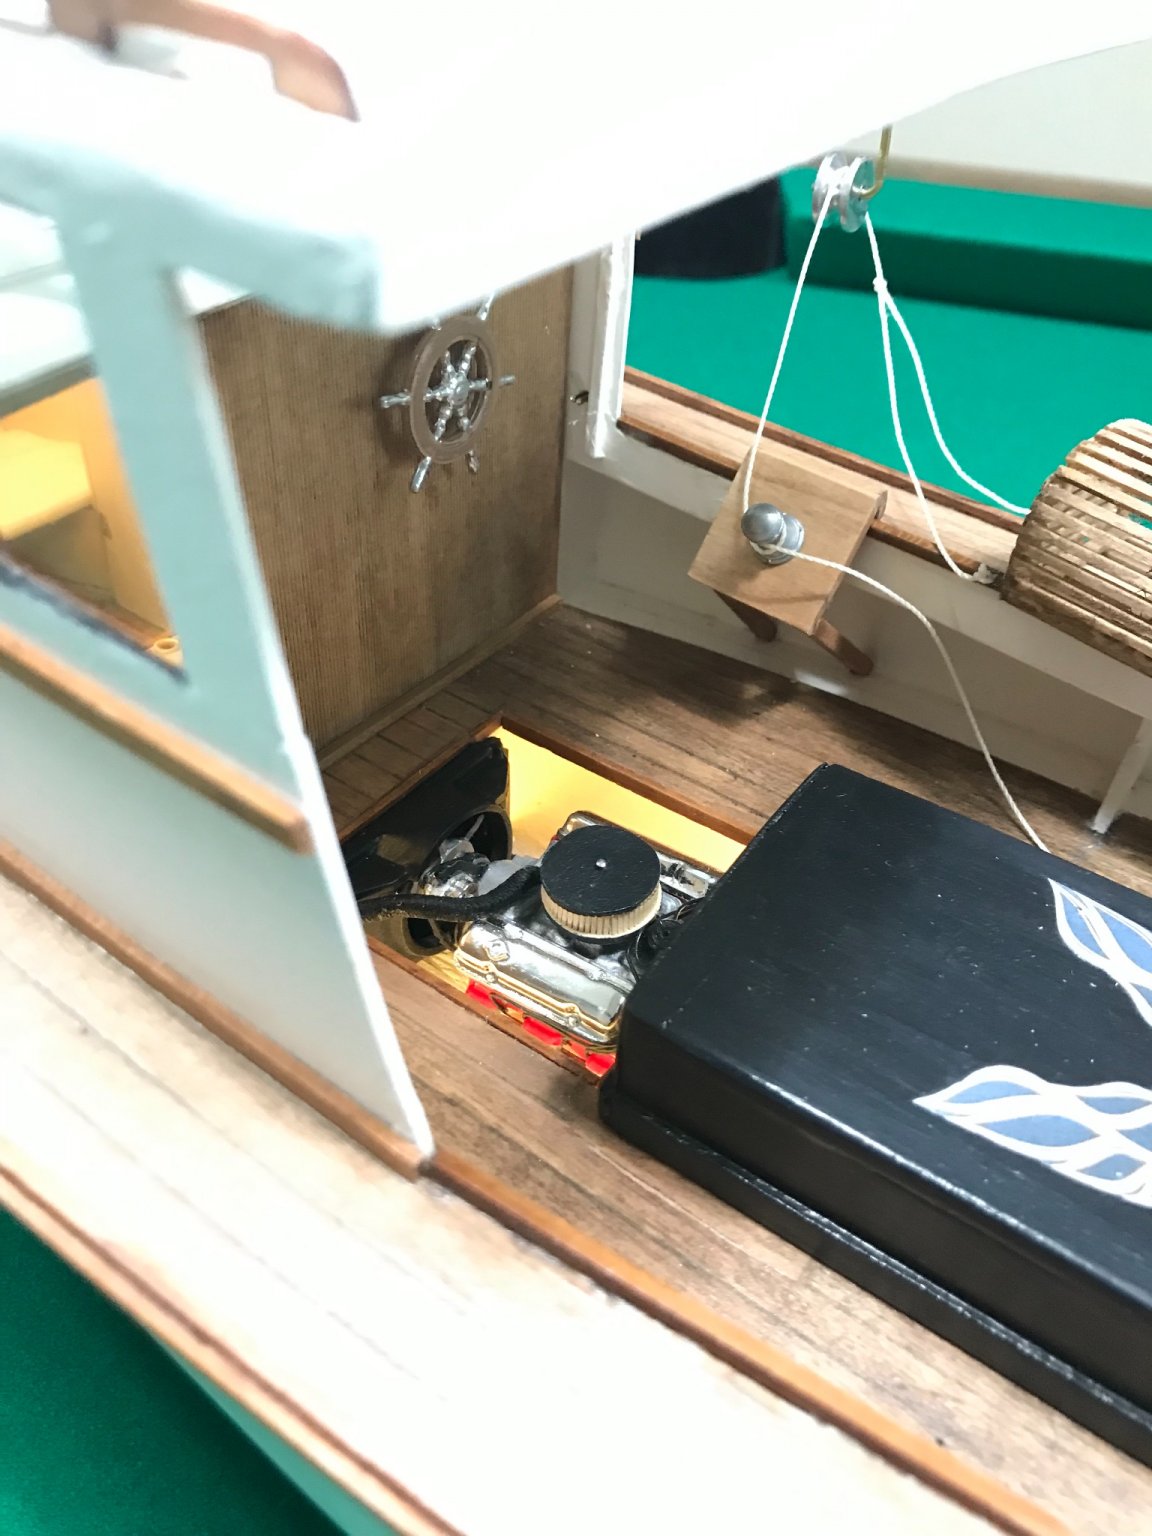
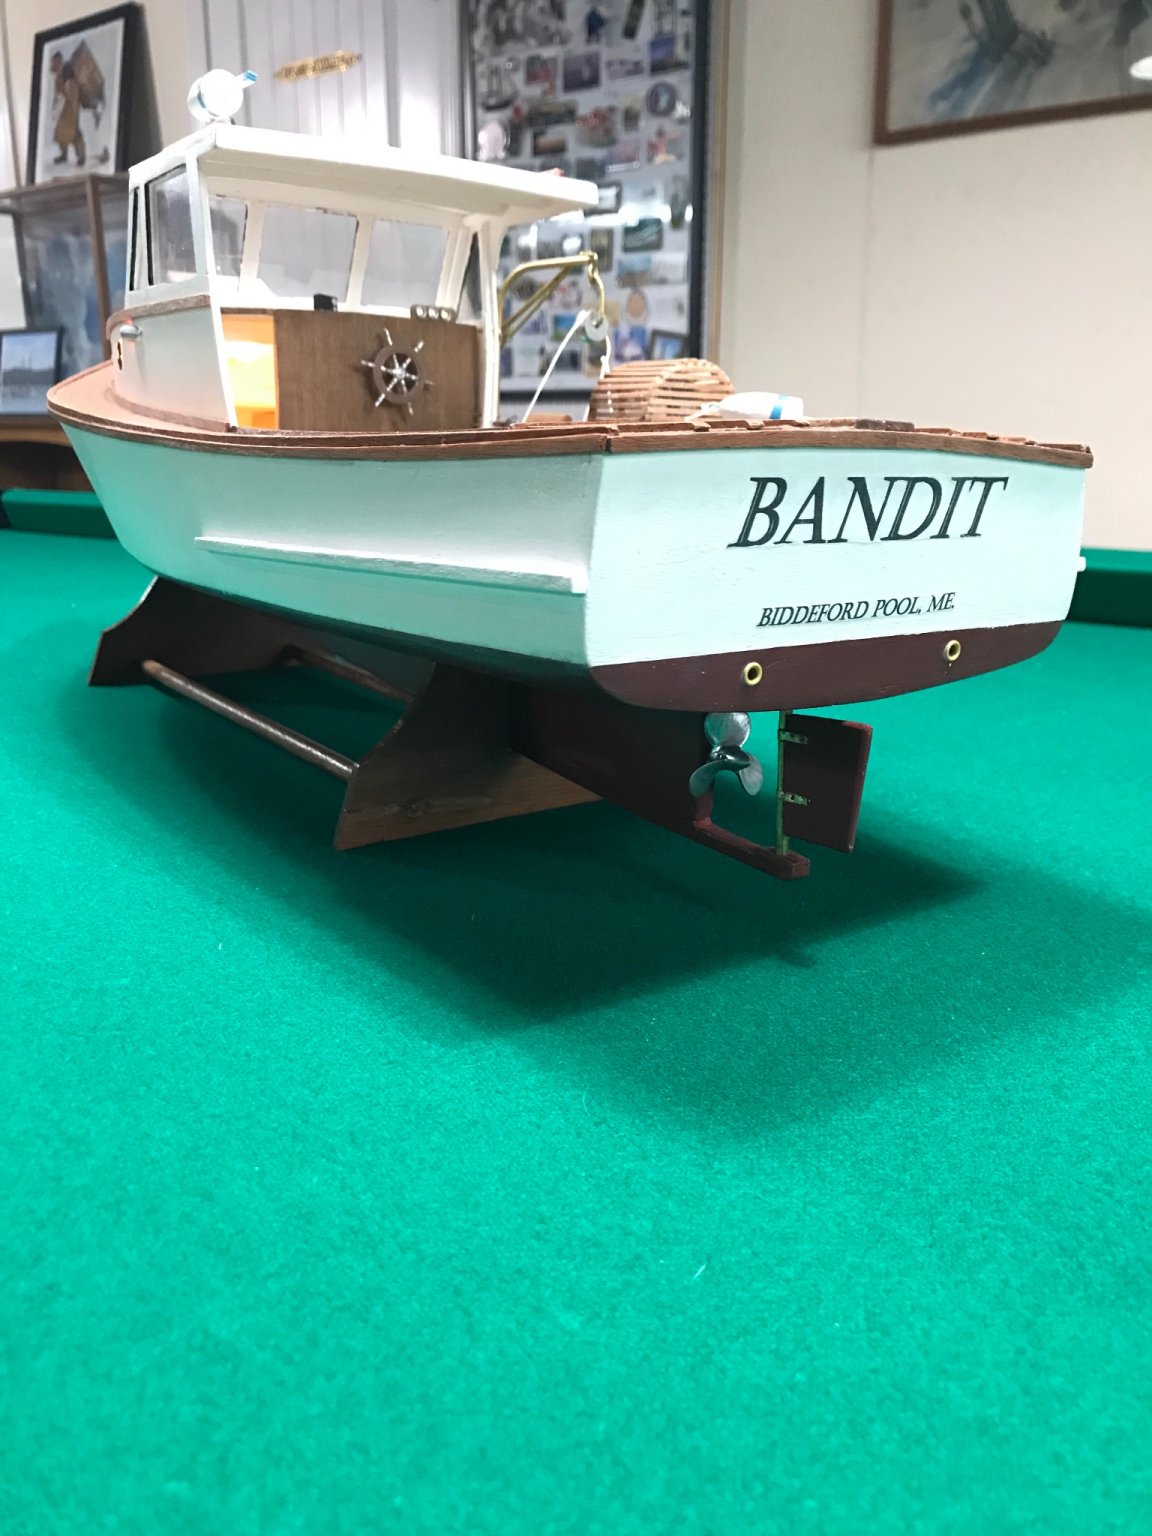
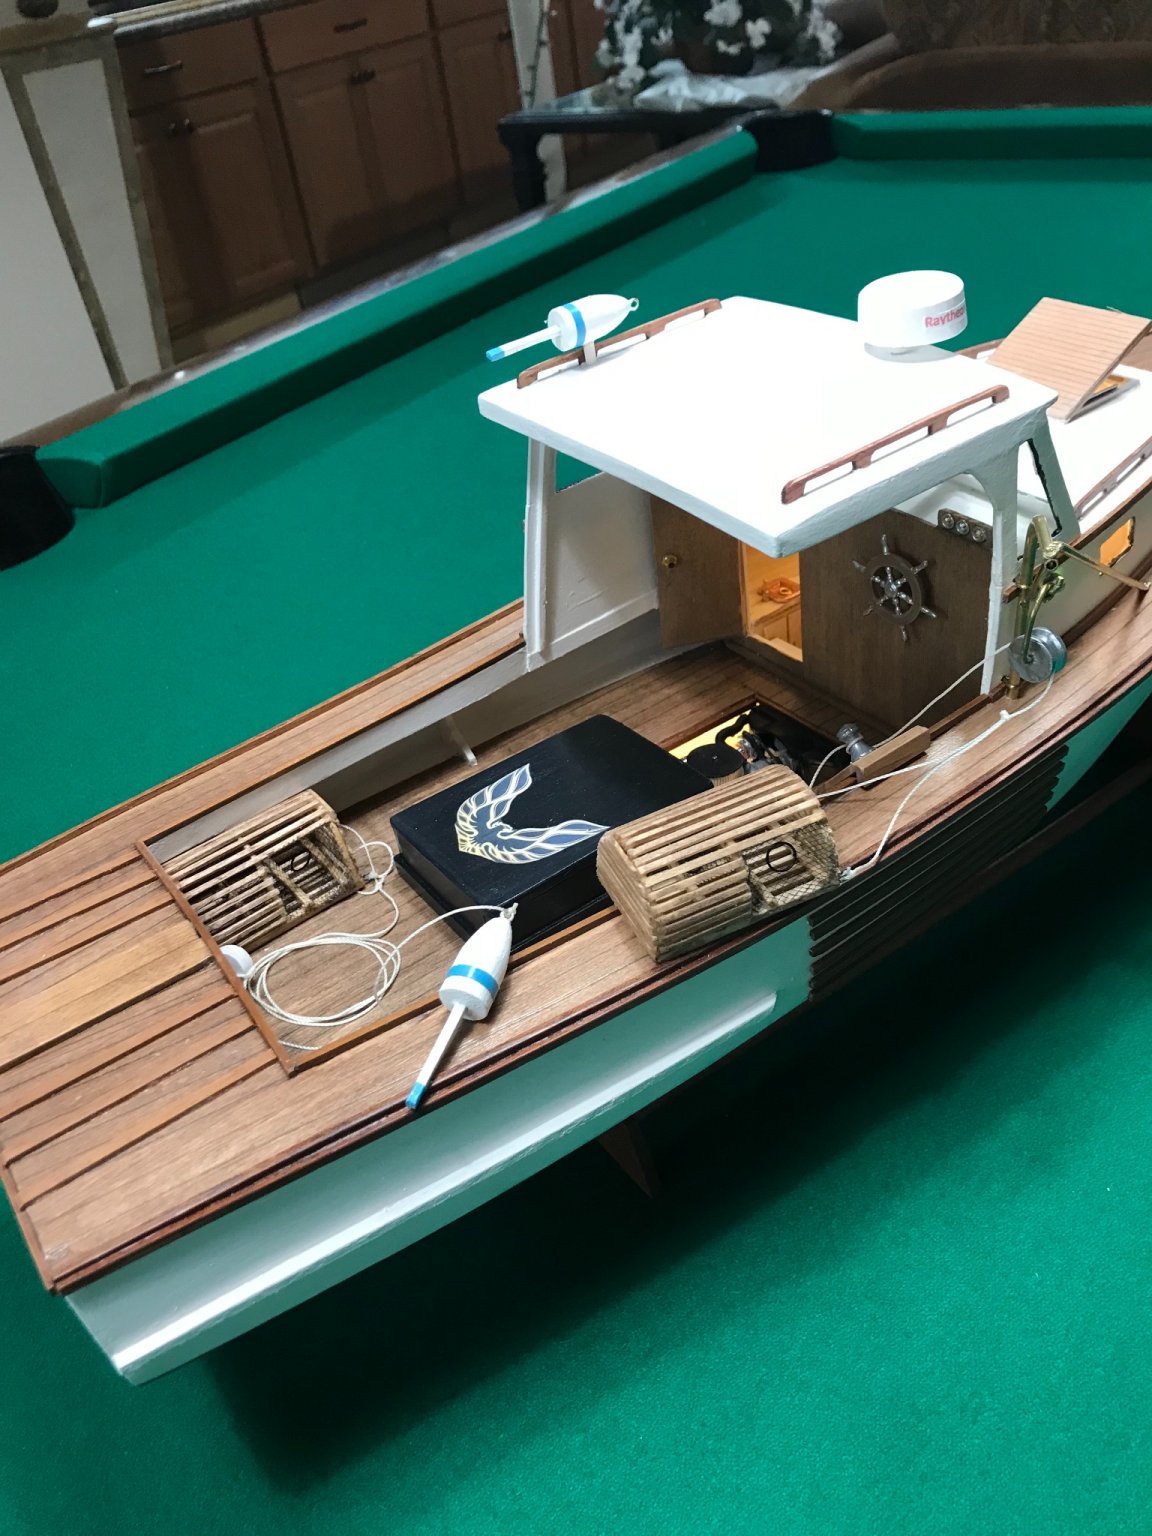
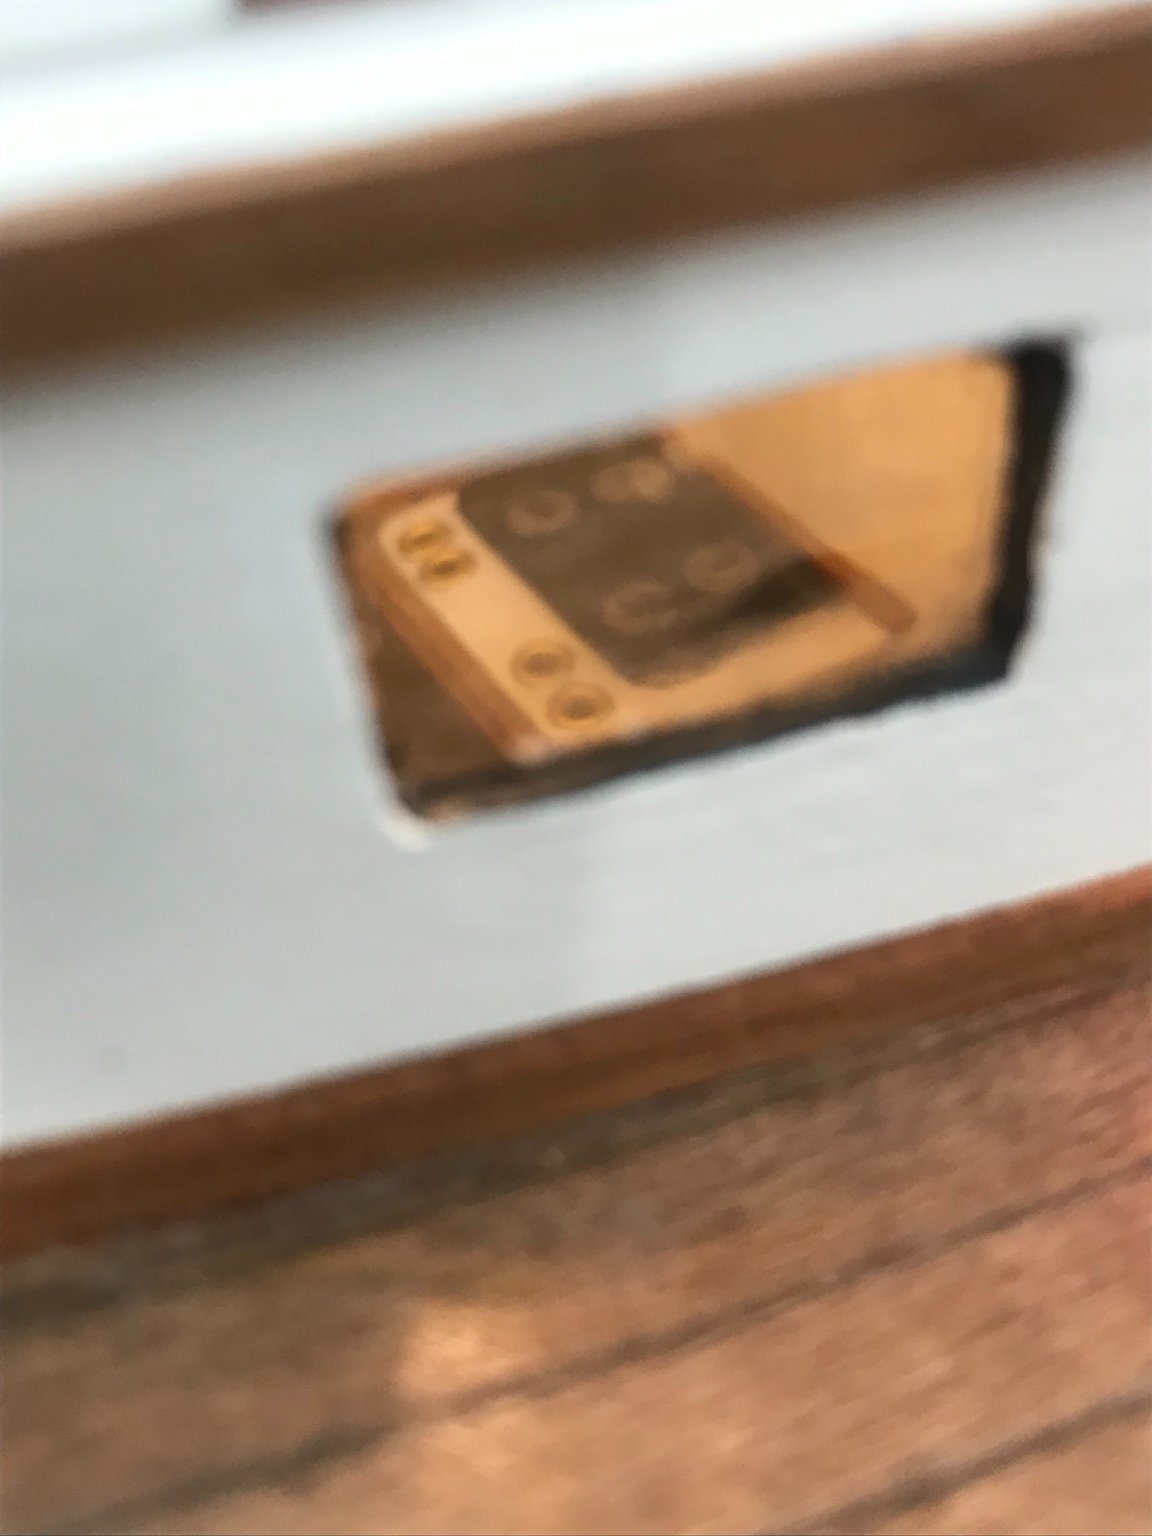
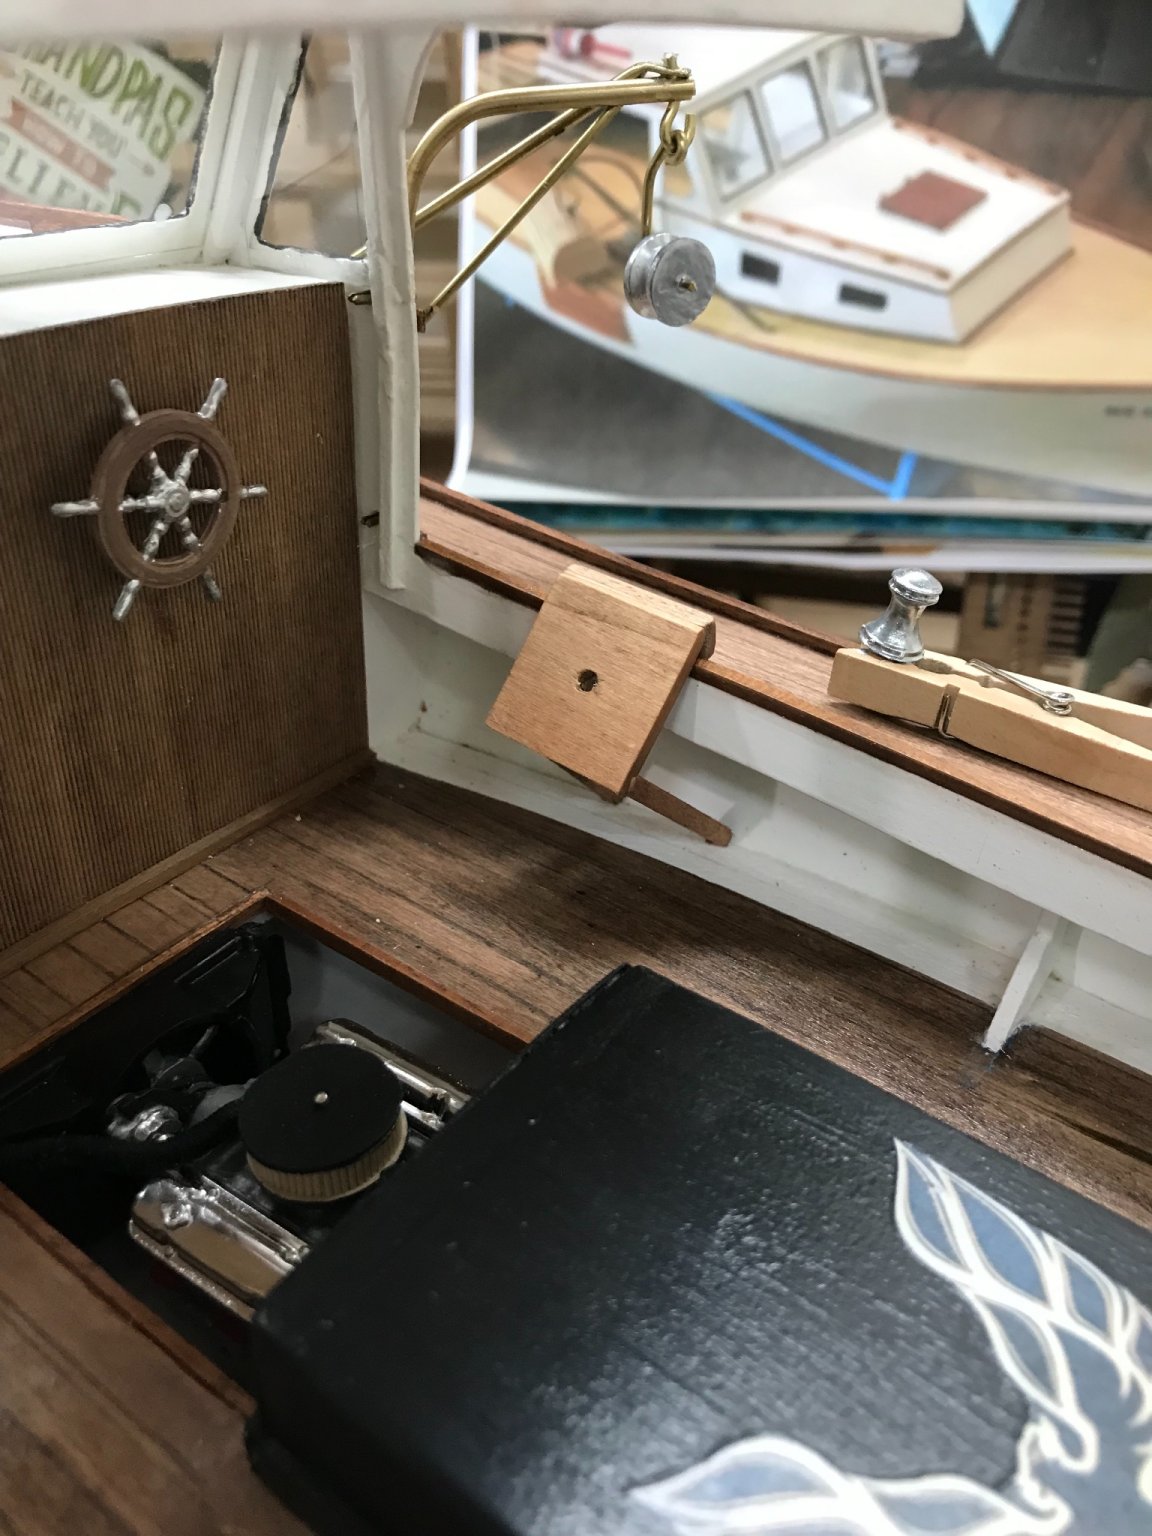
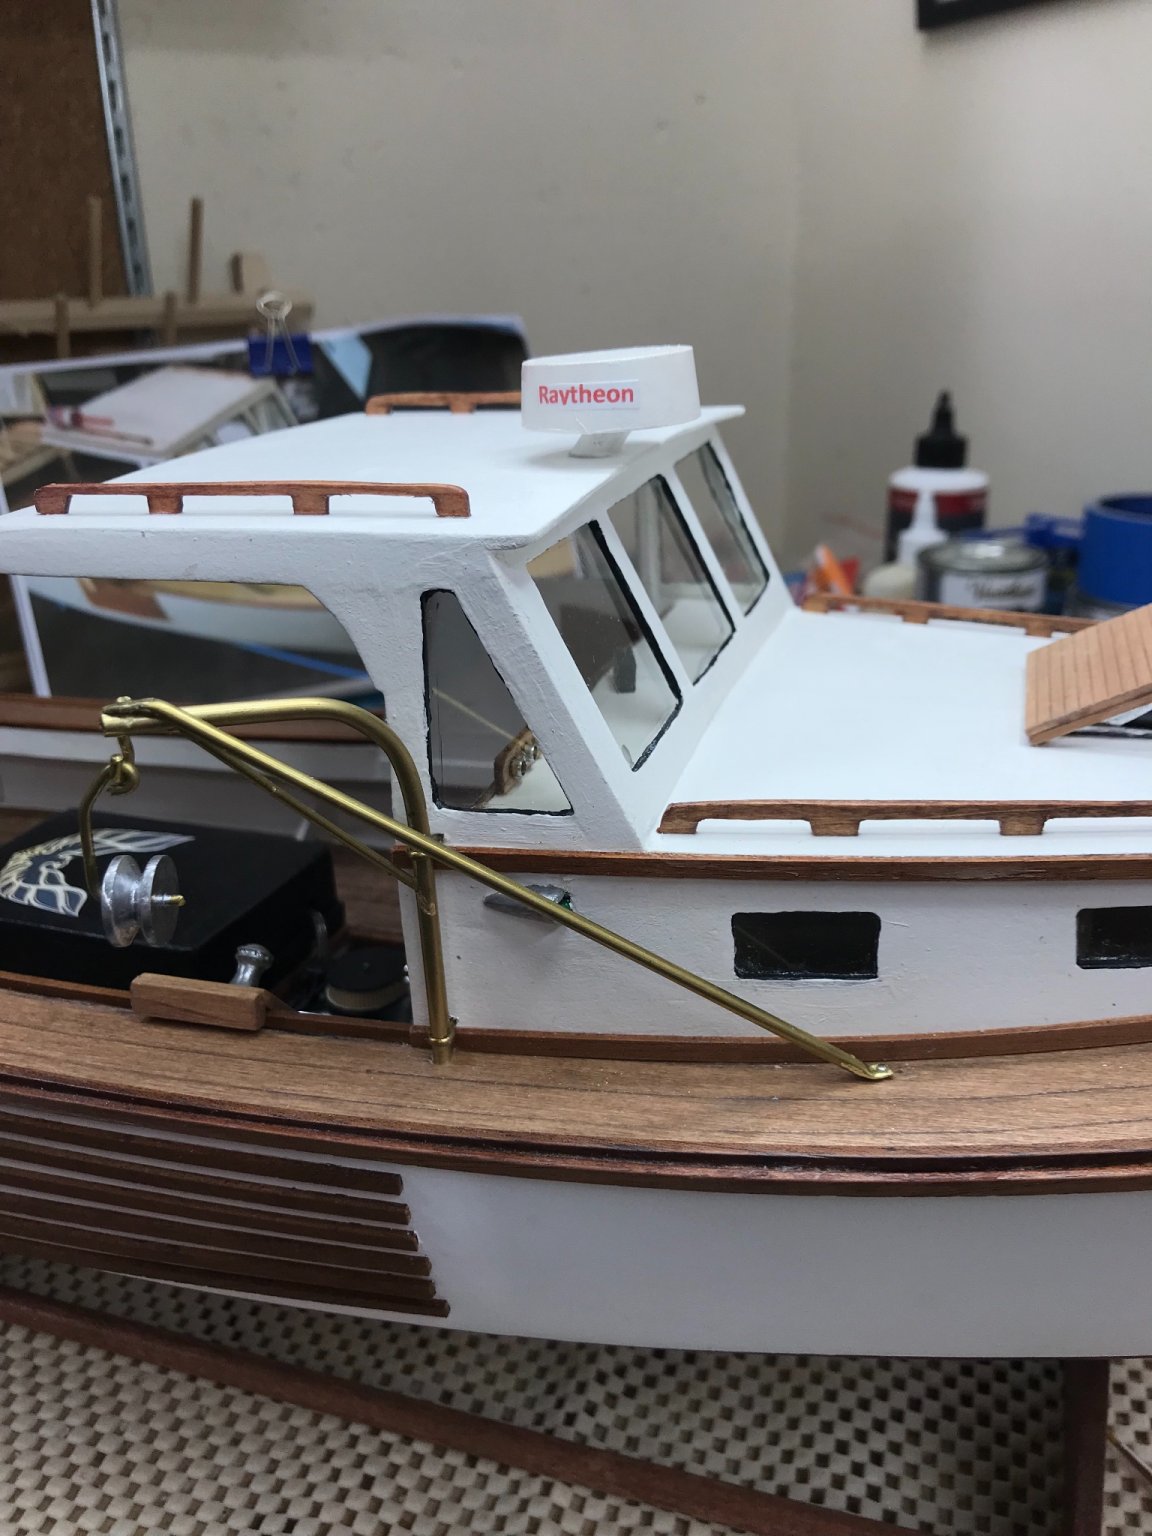
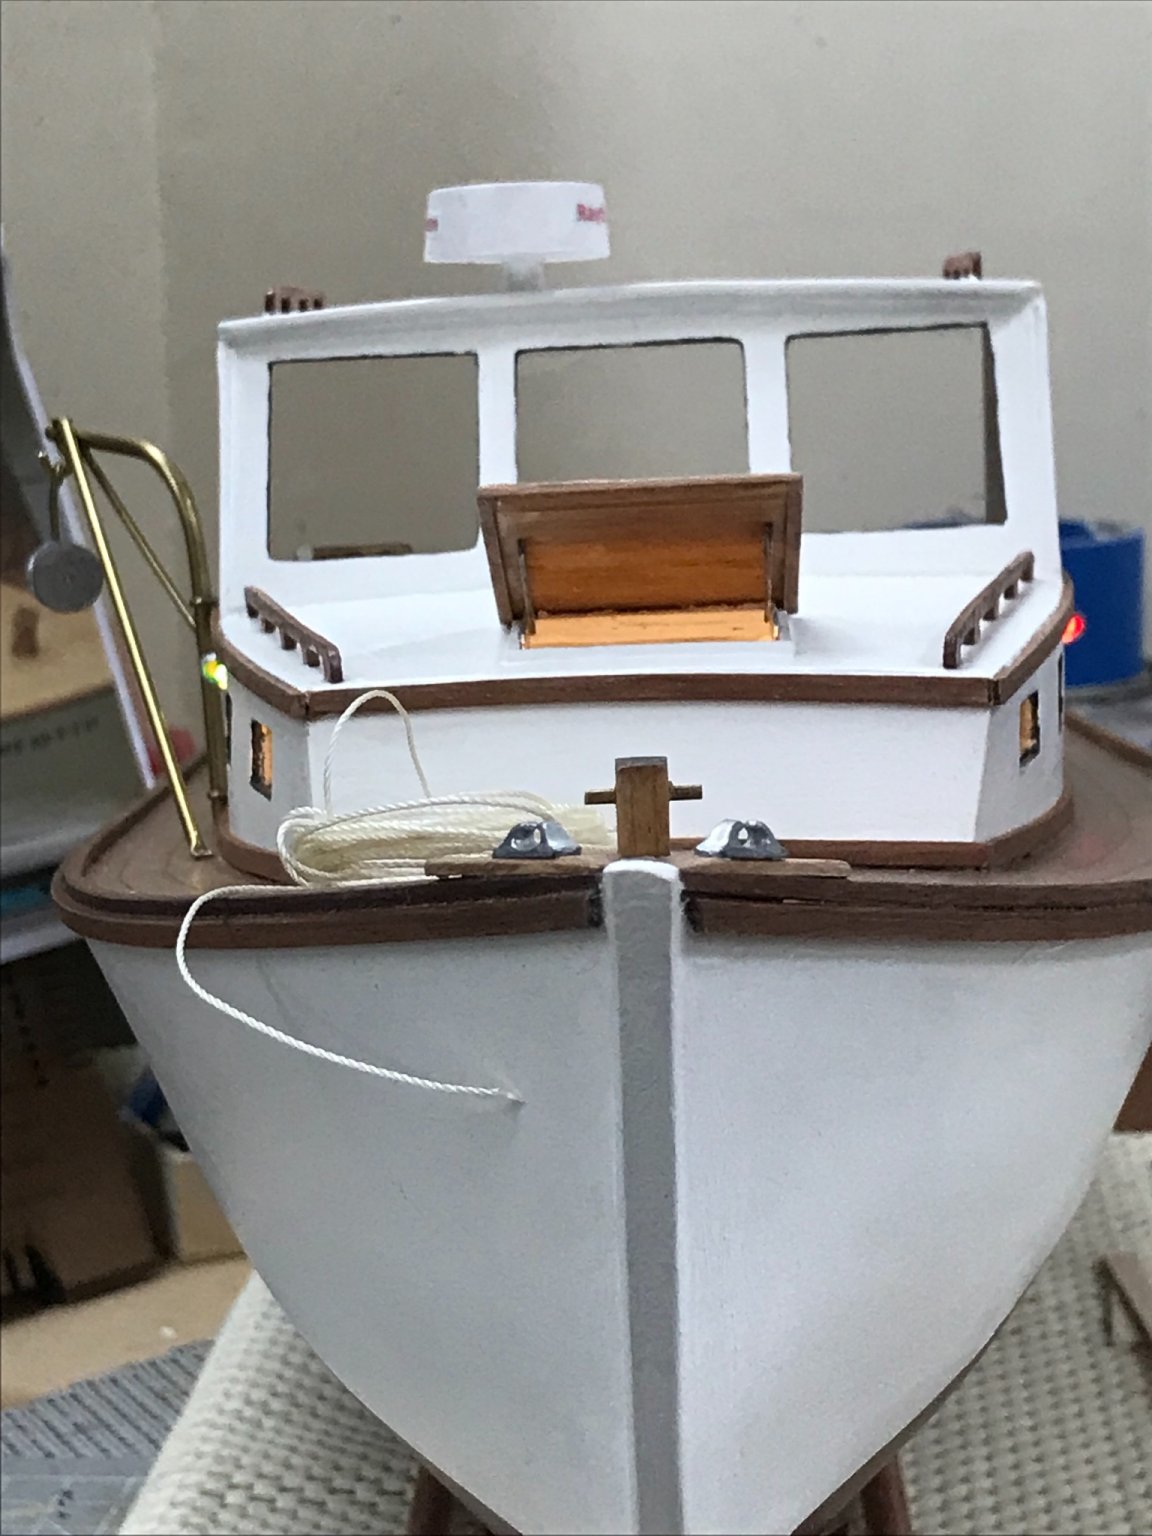
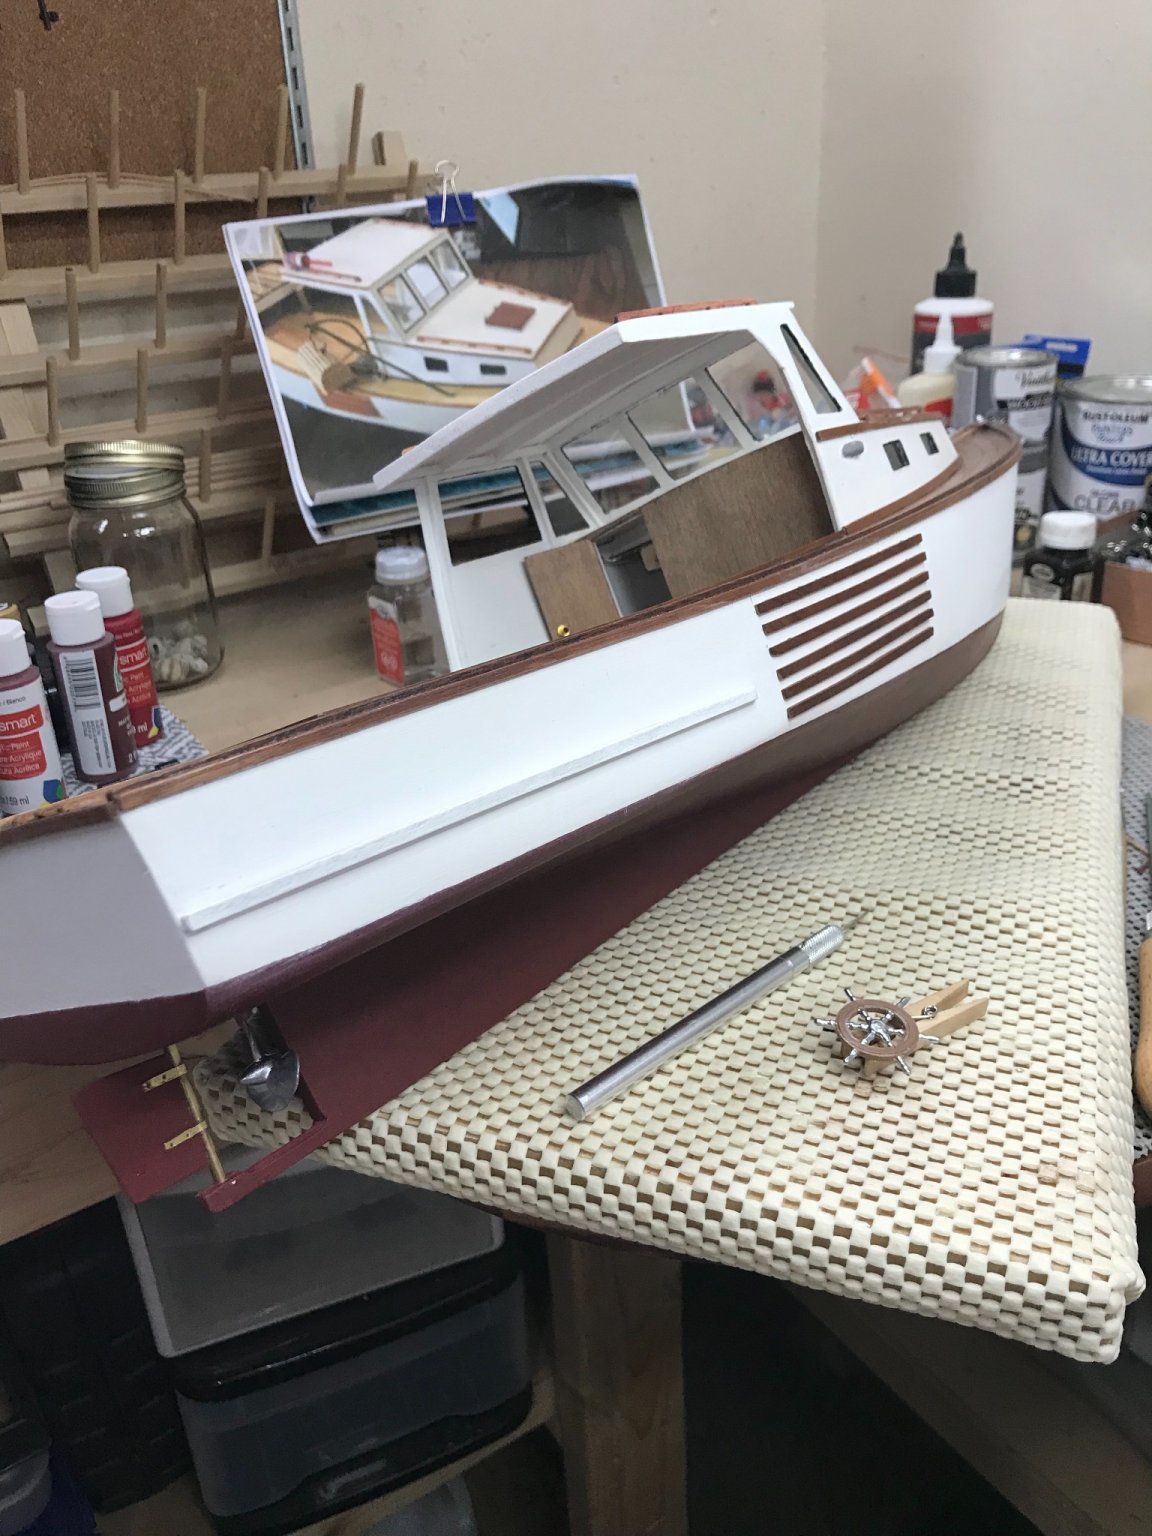
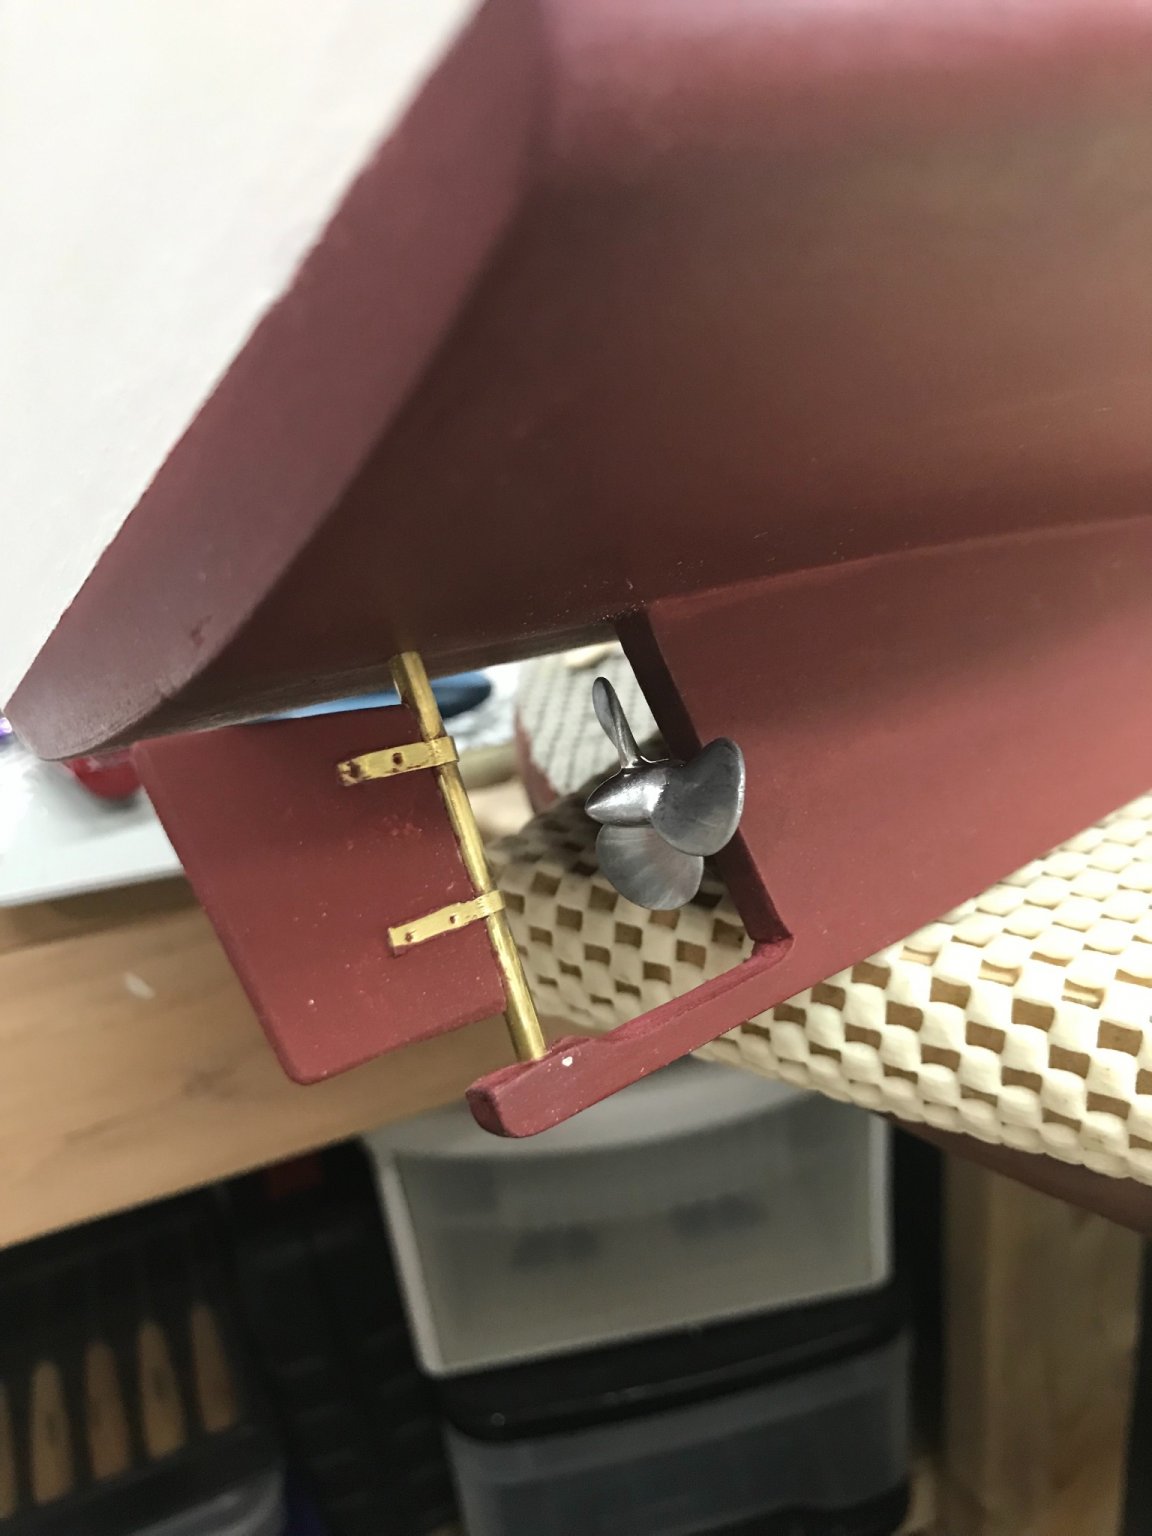
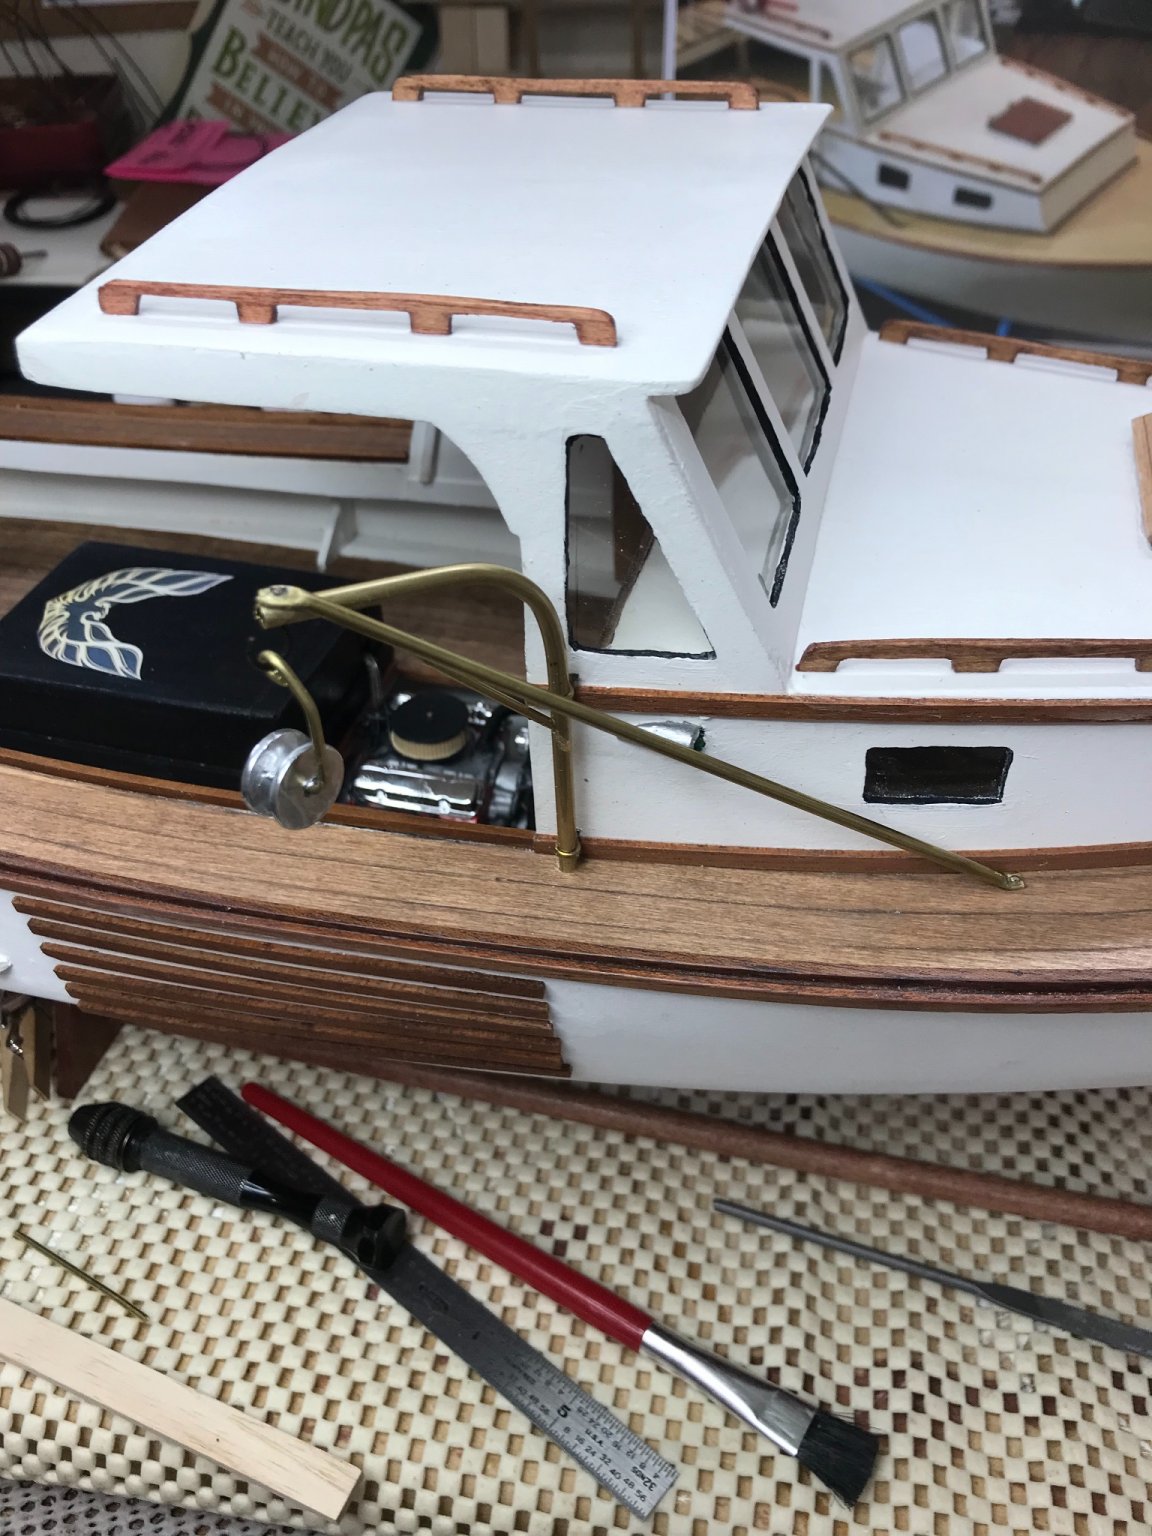
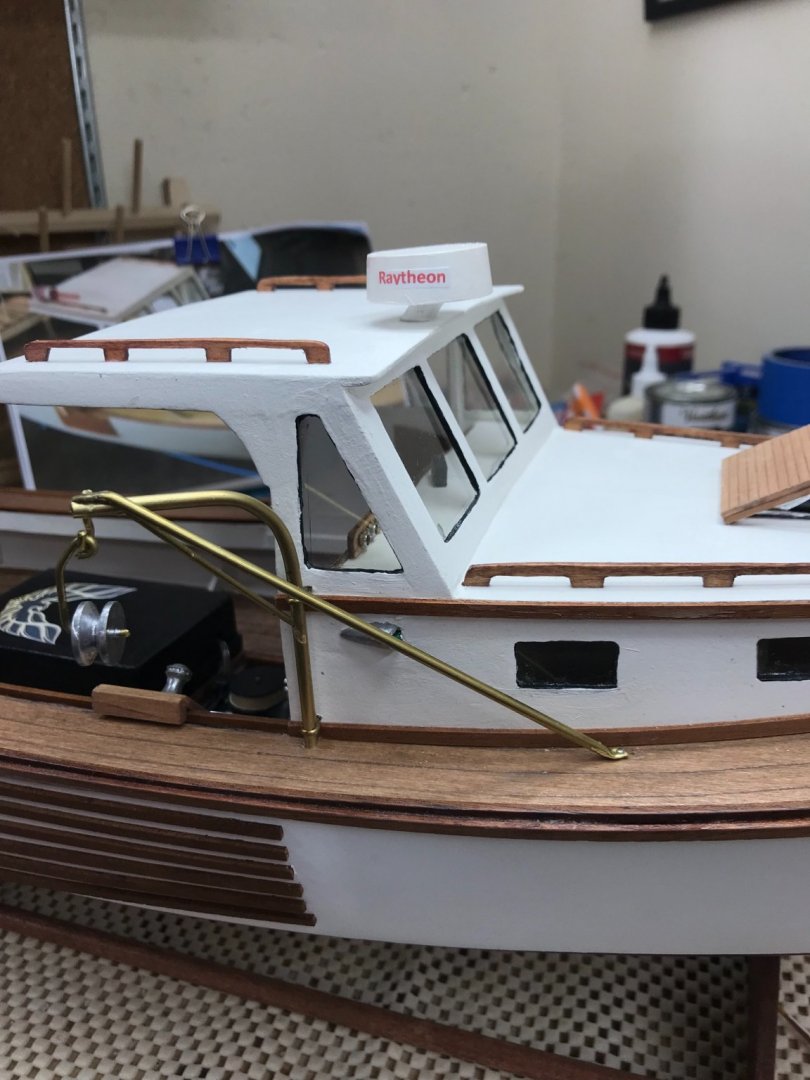
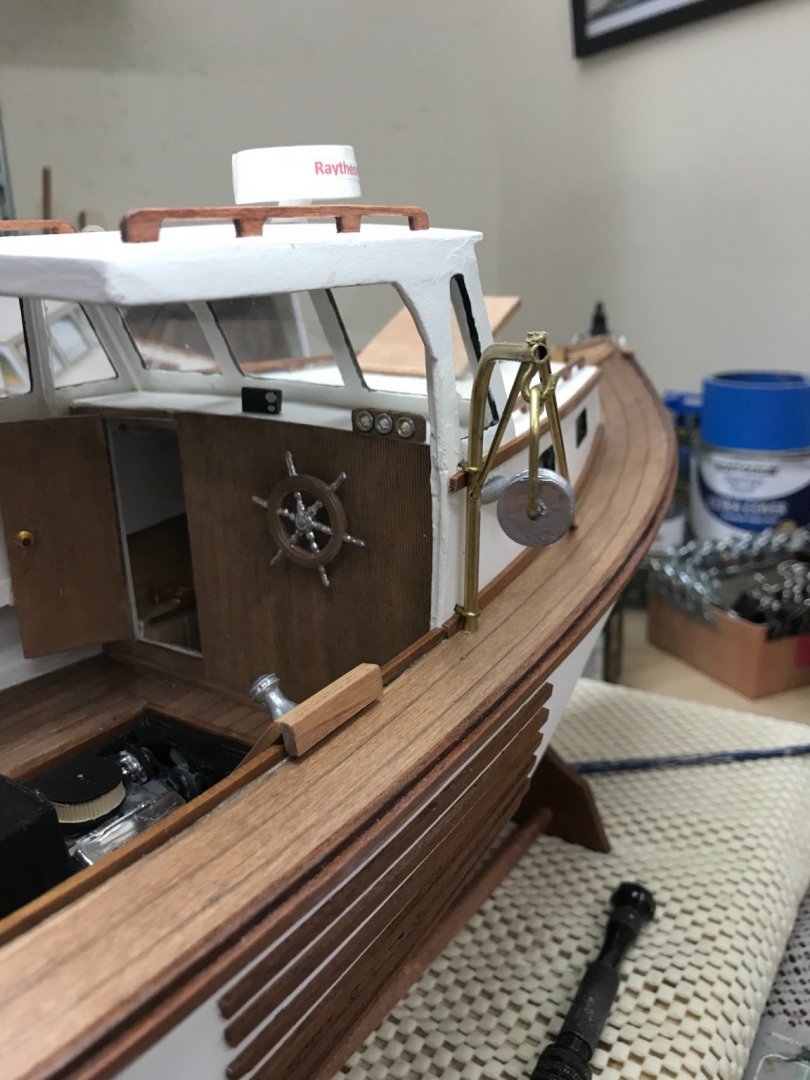
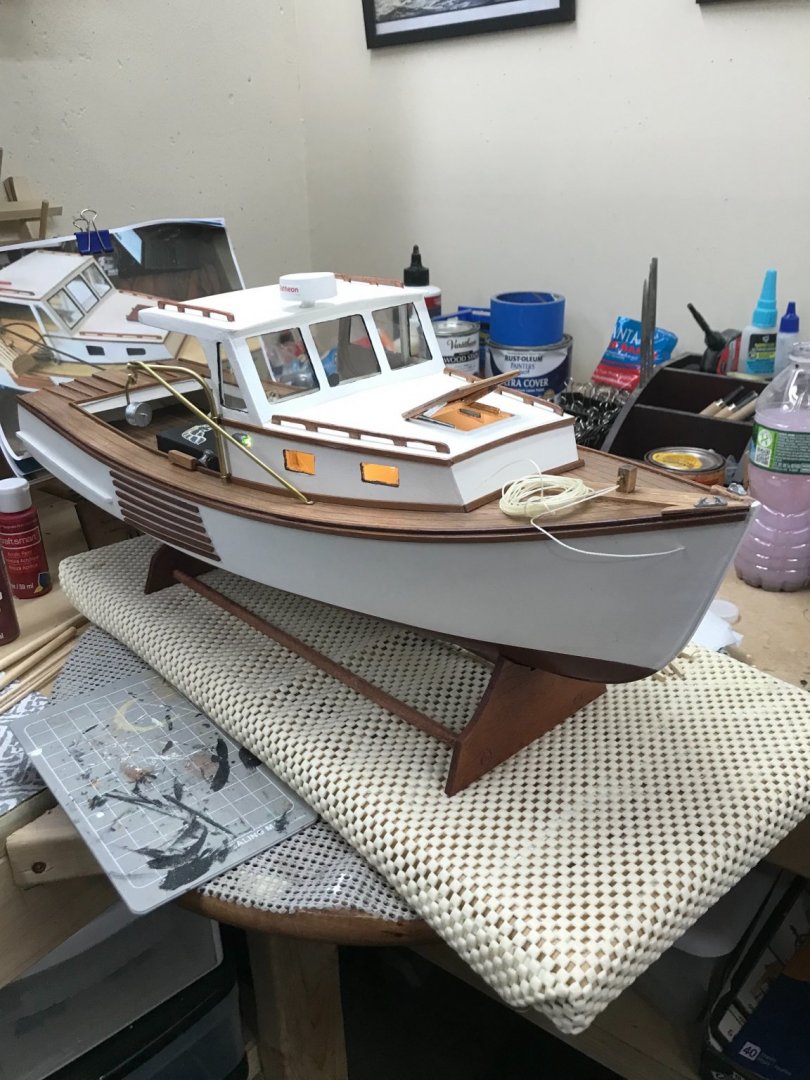
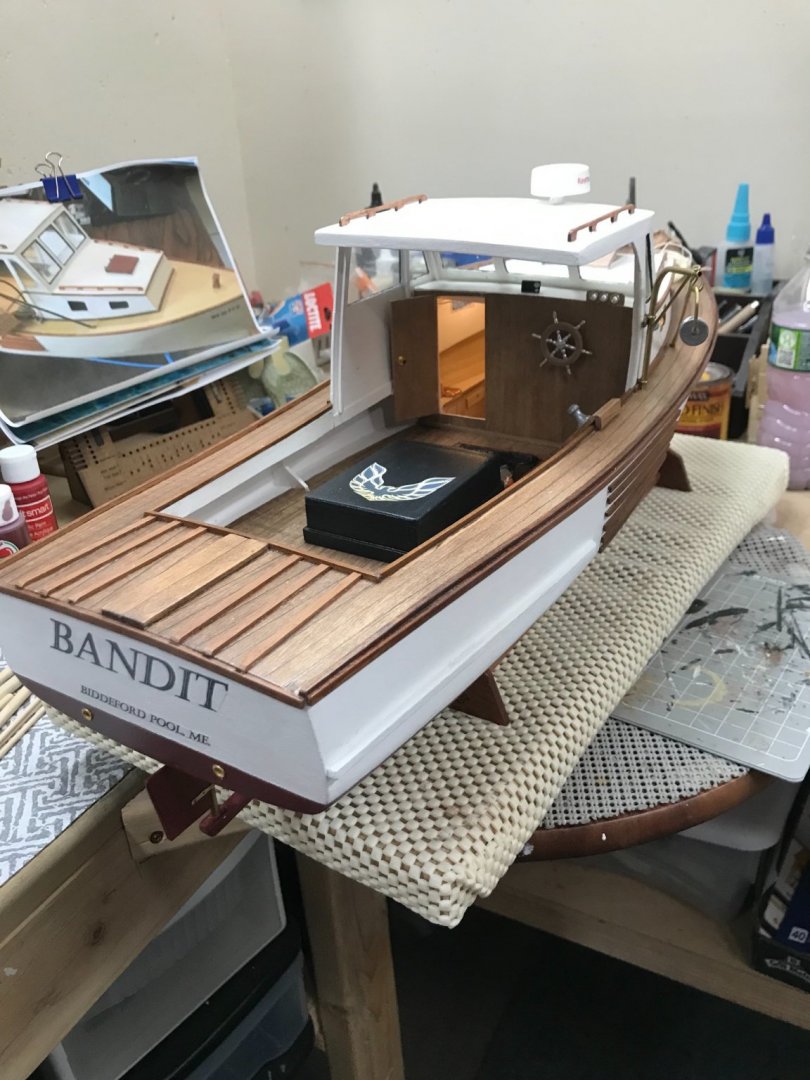
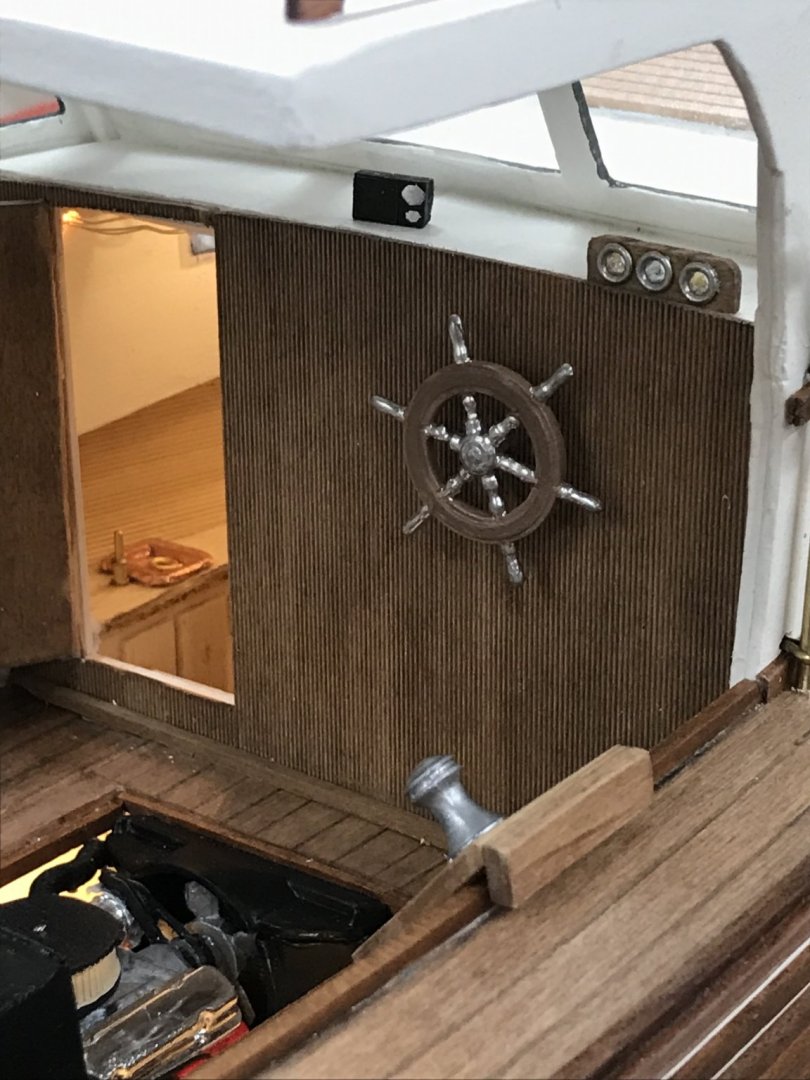
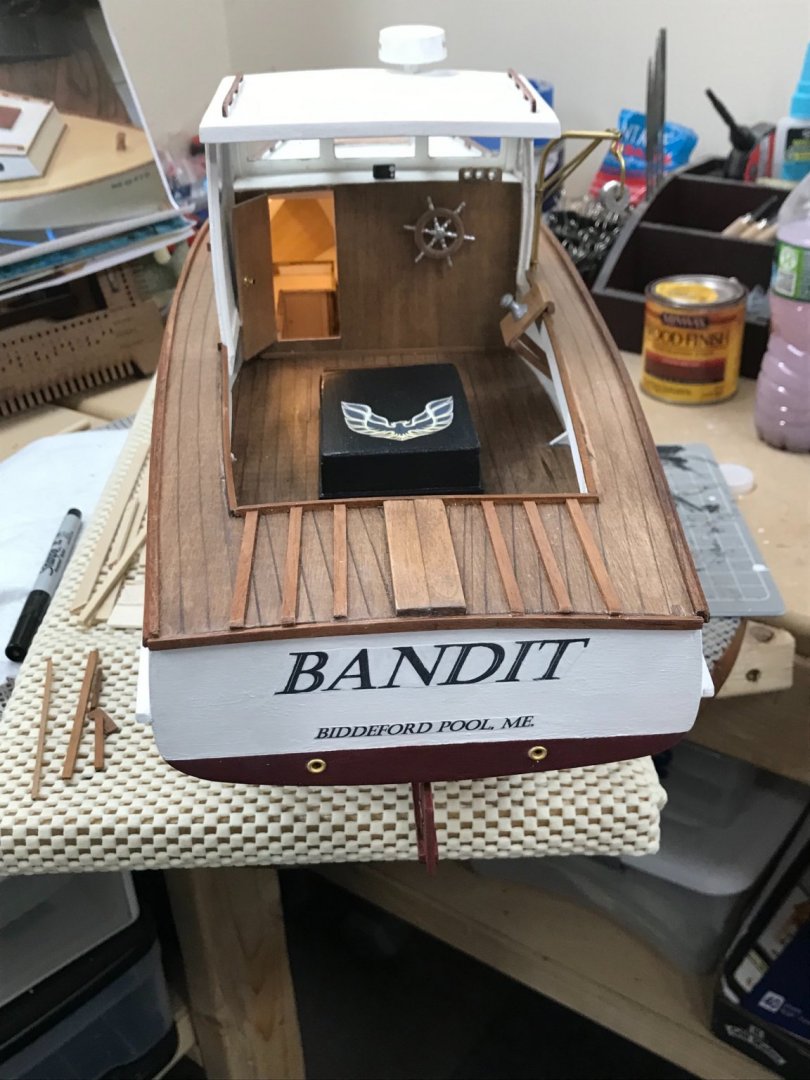
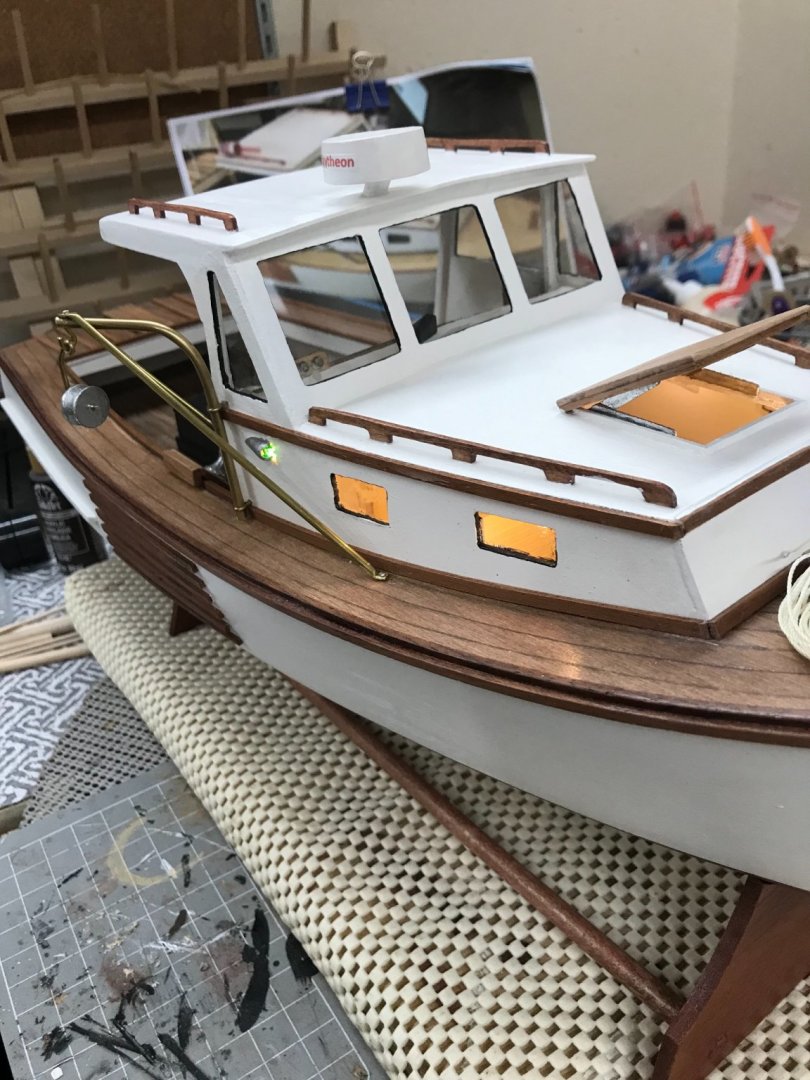
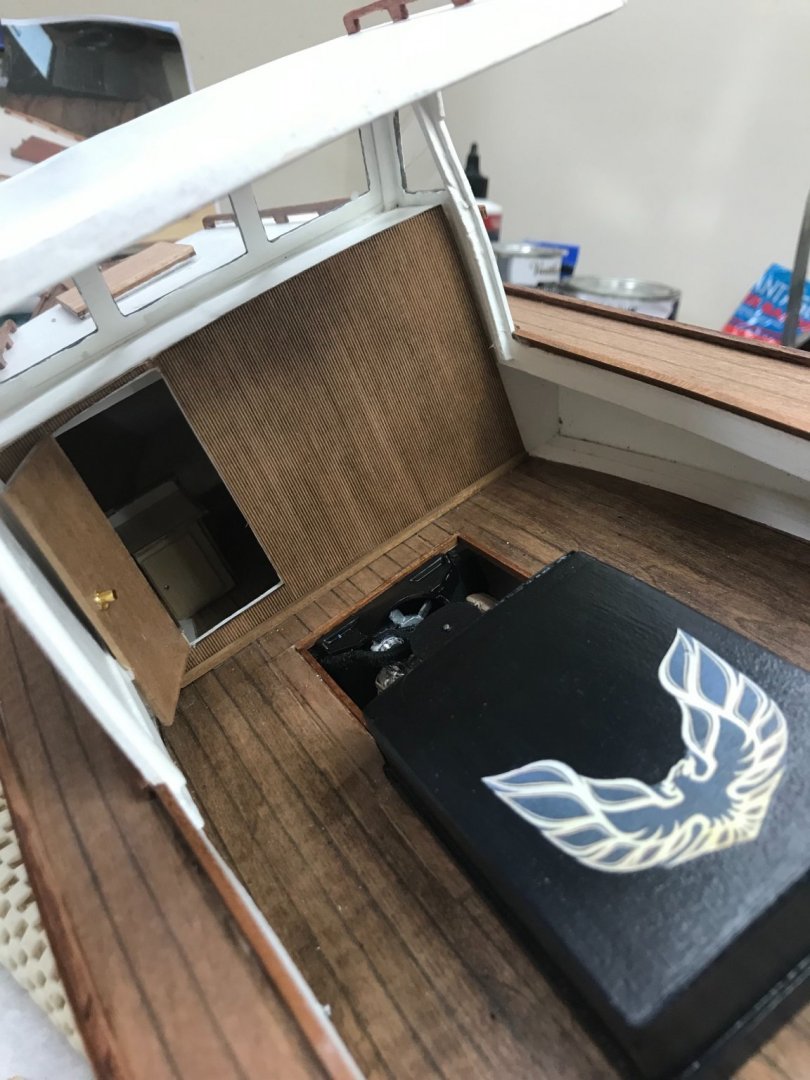
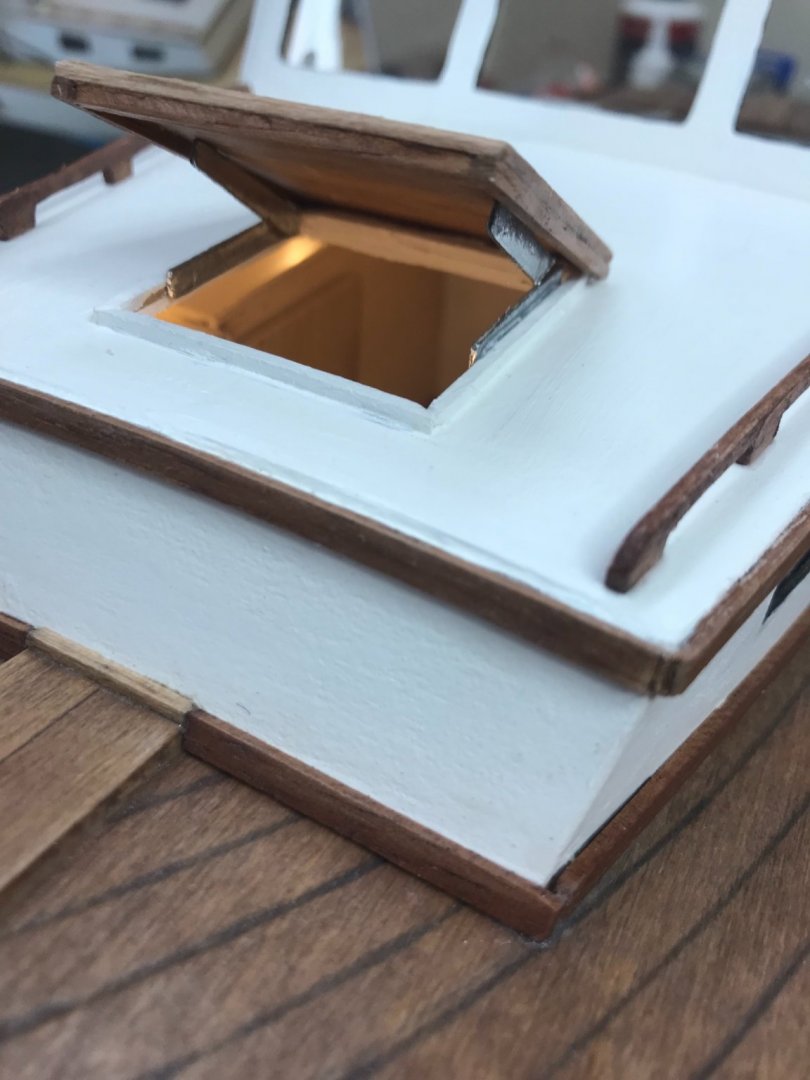
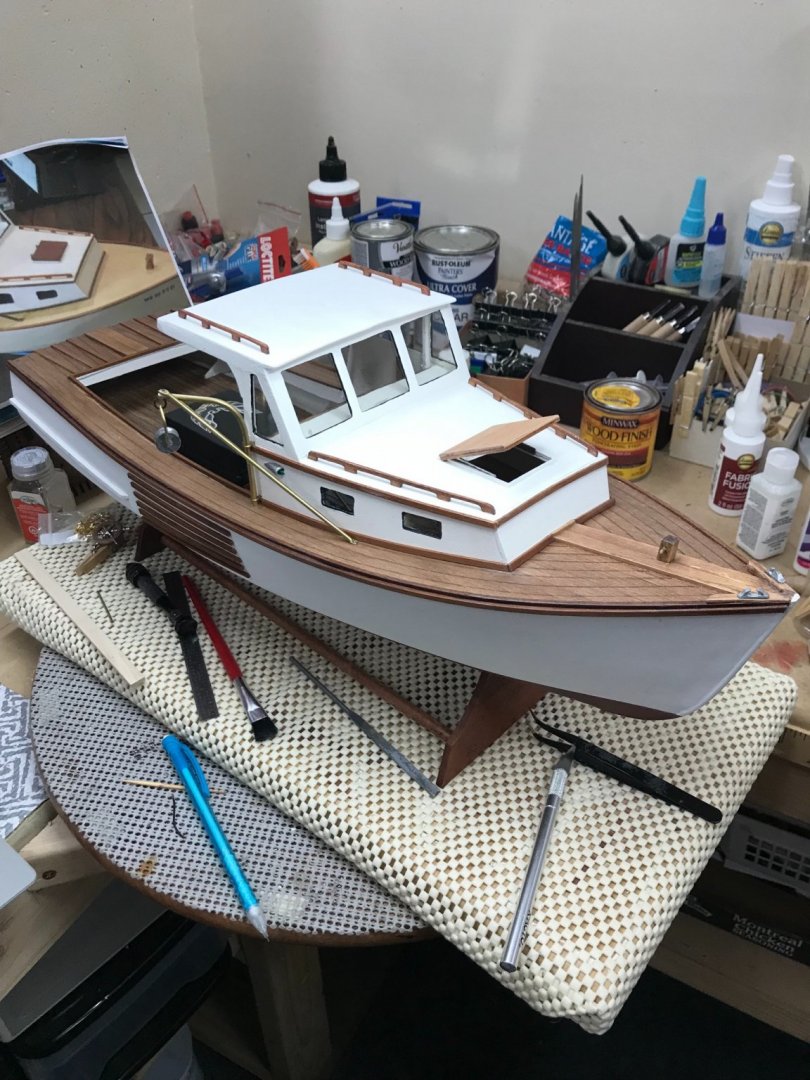
Adding Details… Radar Dome… Winch mount… Snatch Block framing completed… Ready for rigging and traps… She is now known as BANDIT out of Biddeford Pool, ME. Lighted engine bay to show off the Pontiac 400. Instrumentation… Note lighted cabin. View from the bow shows Navigational lighting. Open fore cabin hatch… Rear view… Prop and Rudder… Nearly completed, just needs some lobster buoys and traps.


- 51 replies
-
- 3
-
-
- laughing whale
- maine lobster boat
- (and 1 more)
-
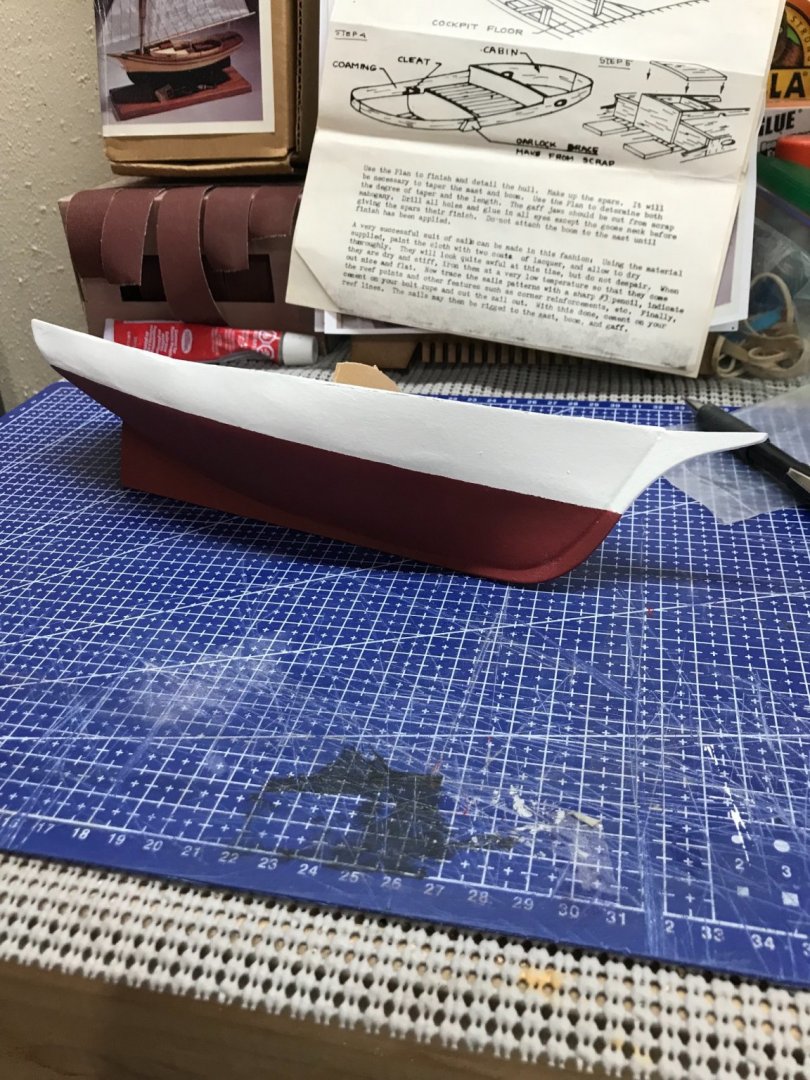
Primed… Just a few more imperfections to fill in and she is ready for paint. Got my new airbrush with pump today. 👍 Later… 😎

- 26 replies
-
- 2
-
-
- Maine
- Laughing Whale
- (and 2 more)
-
Nice guess… Actually, eBay is as good as a pick-a-part junk yard. I was able to get a complete Pontiac 400 and radiator without having to buy a 1/16 Pontiac Firebird kit. 😎 Thanks for the tip on the windshield material. Just opened my new Airbrush Pump and there it is. Enough clear plastic to fix that window… 😆 BTW… Who says it has to be a a working Lobsterman’s Boat. This guy is retired and Trapping occasionally for dinner. He will also be on the Lobster Boat Racing Circuit here in Maine. Gotta fix her up nice to live on it 6 months of the year. Just some fantasies of an old man in Maine building boats. LOL 😂
- 51 replies
-
- 2
-
-
- laughing whale
- maine lobster boat
- (and 1 more)
-
Adding the details… Propeller and Rudder… Wood paneled bulk head… Forward Hatch hinges… Hoist hardware… Sheer and more Trim… She is getting there, more later… 🍻


- 51 replies
-
- 2
-
-
- laughing whale
- maine lobster boat
- (and 1 more)