John Ruy
-
Posts
1,595 -
Joined
-
Last visited
Content Type
Profiles
Forums
Gallery
Events
Everything posted by John Ruy
-
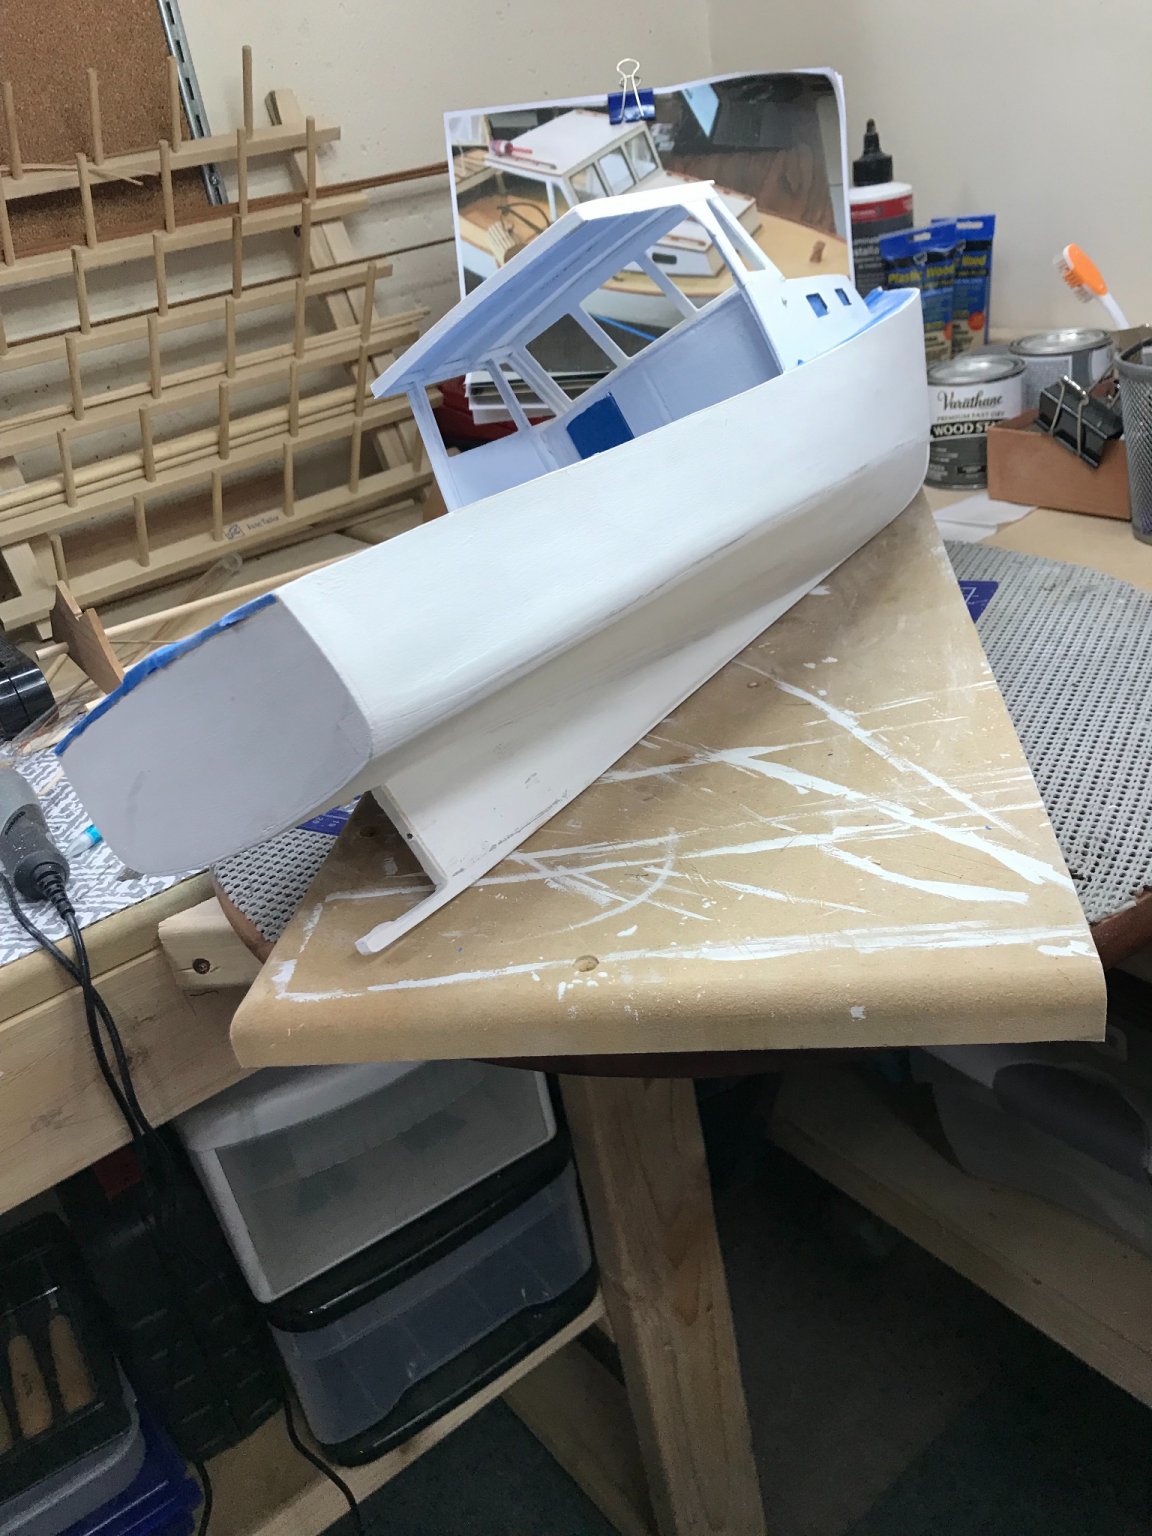
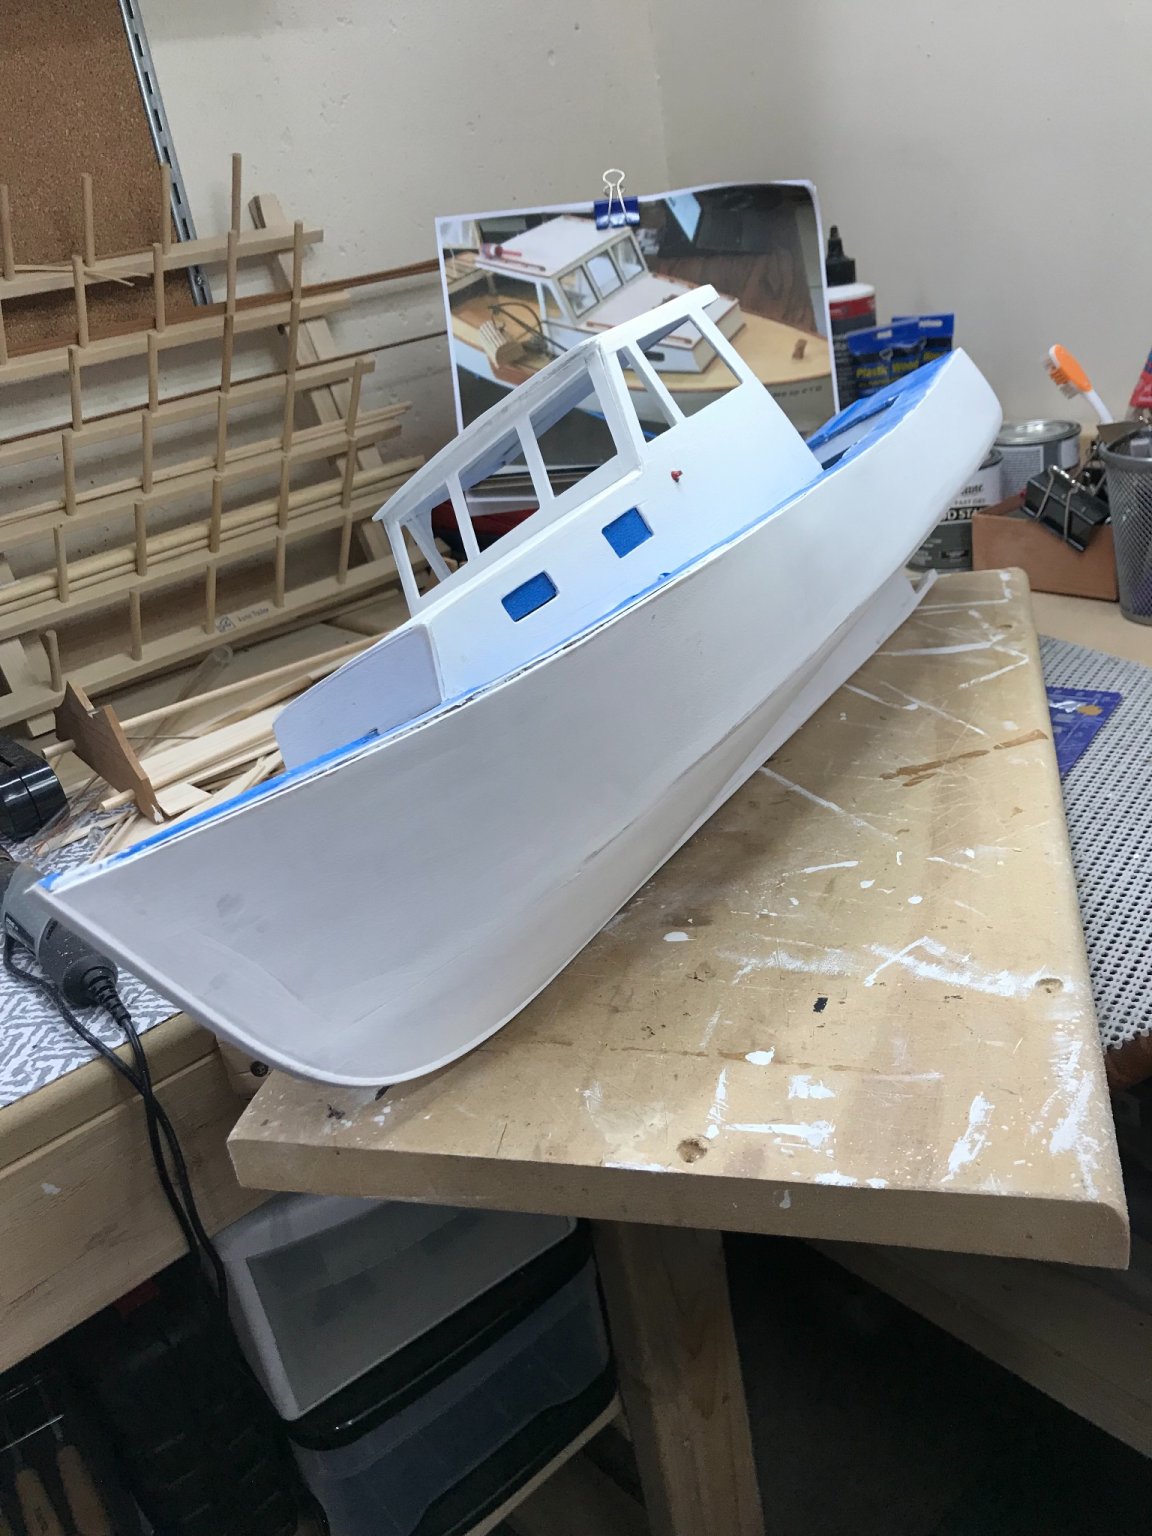
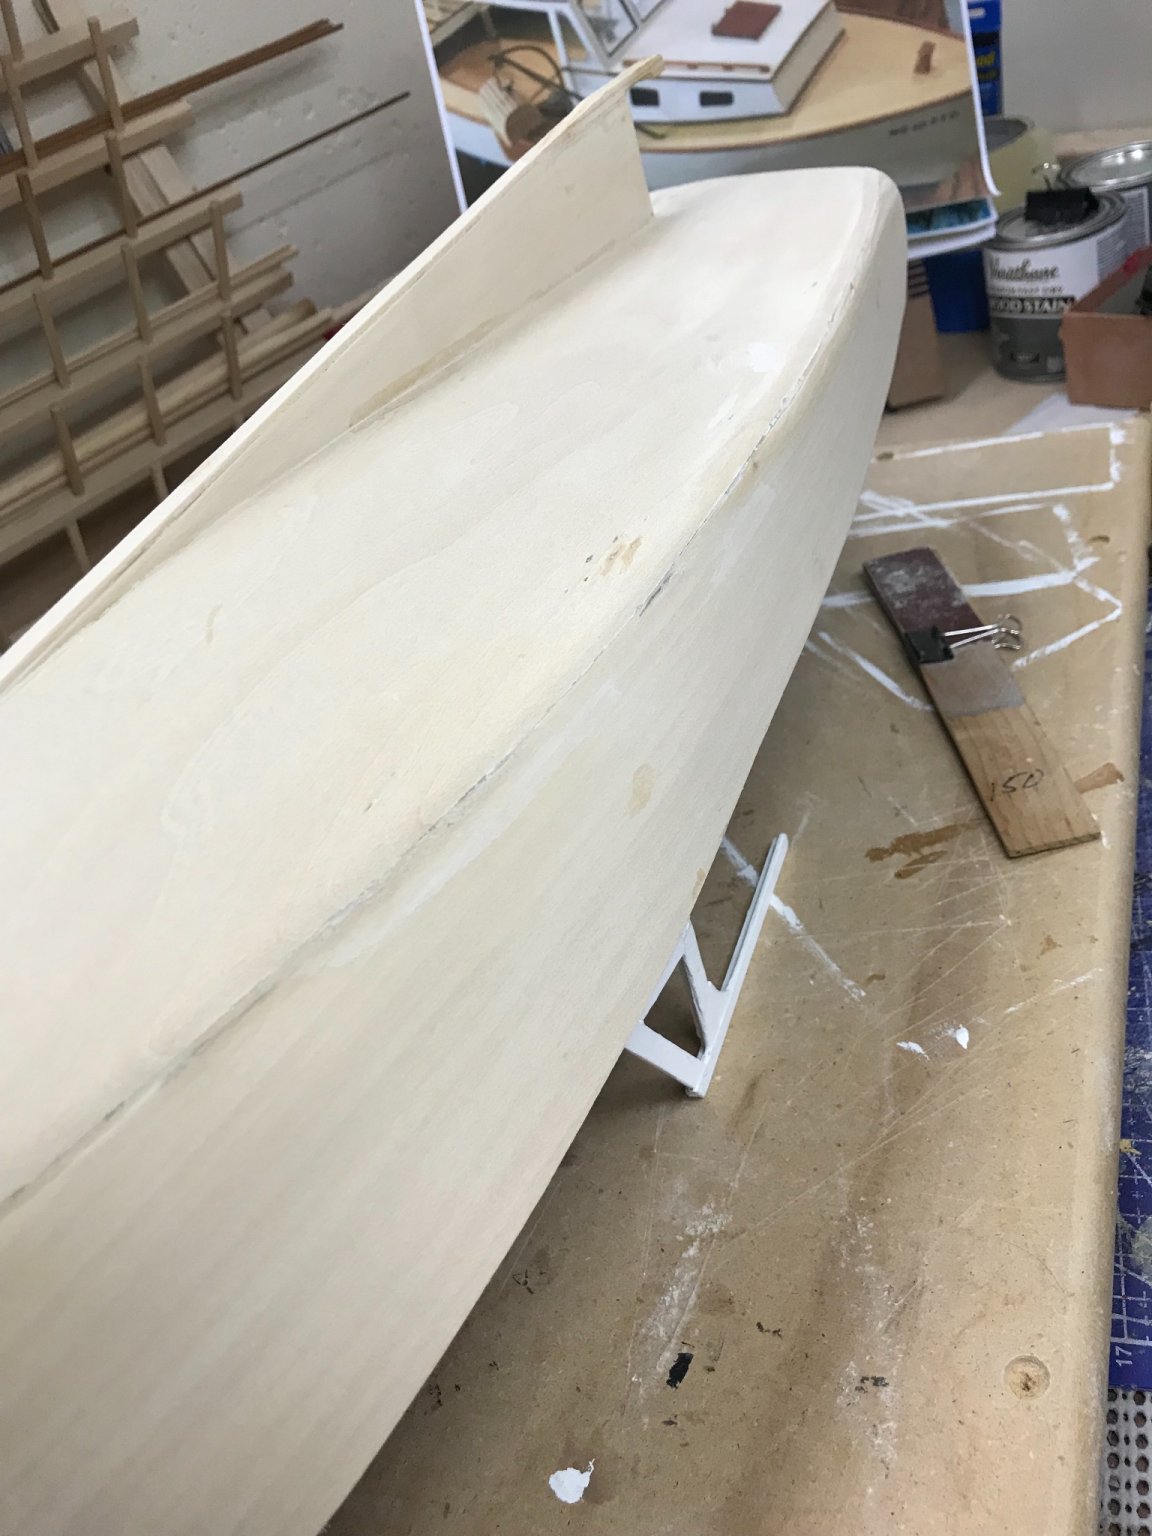
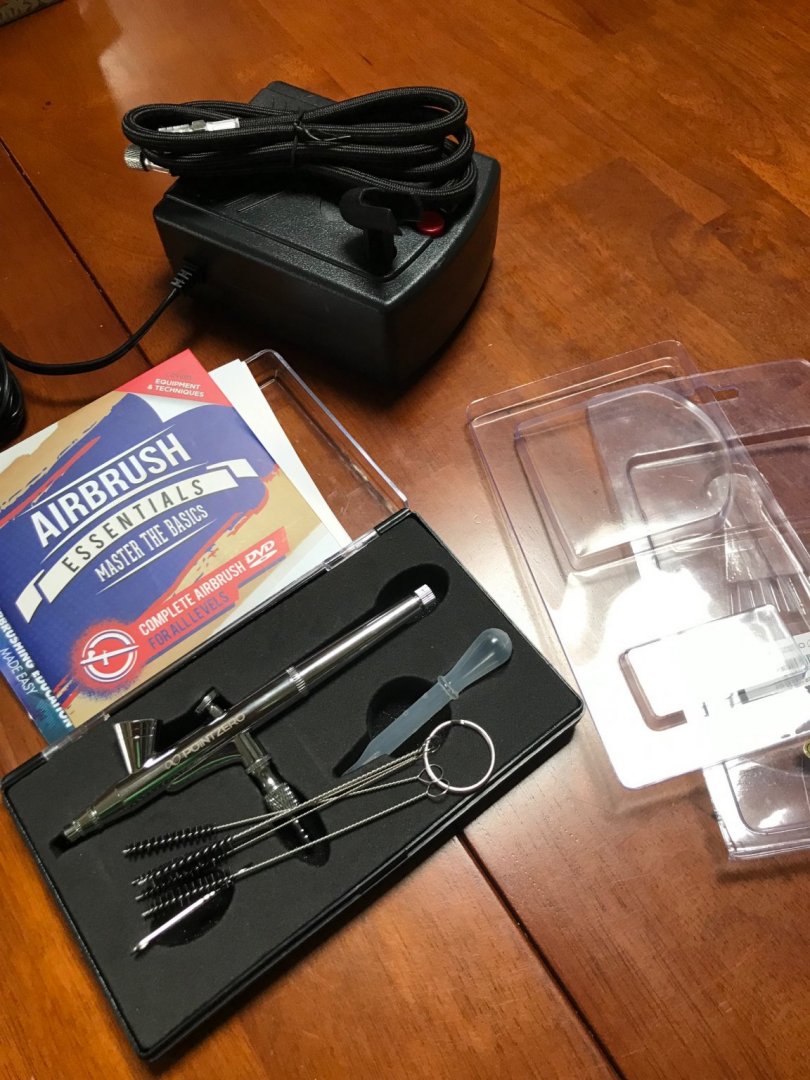
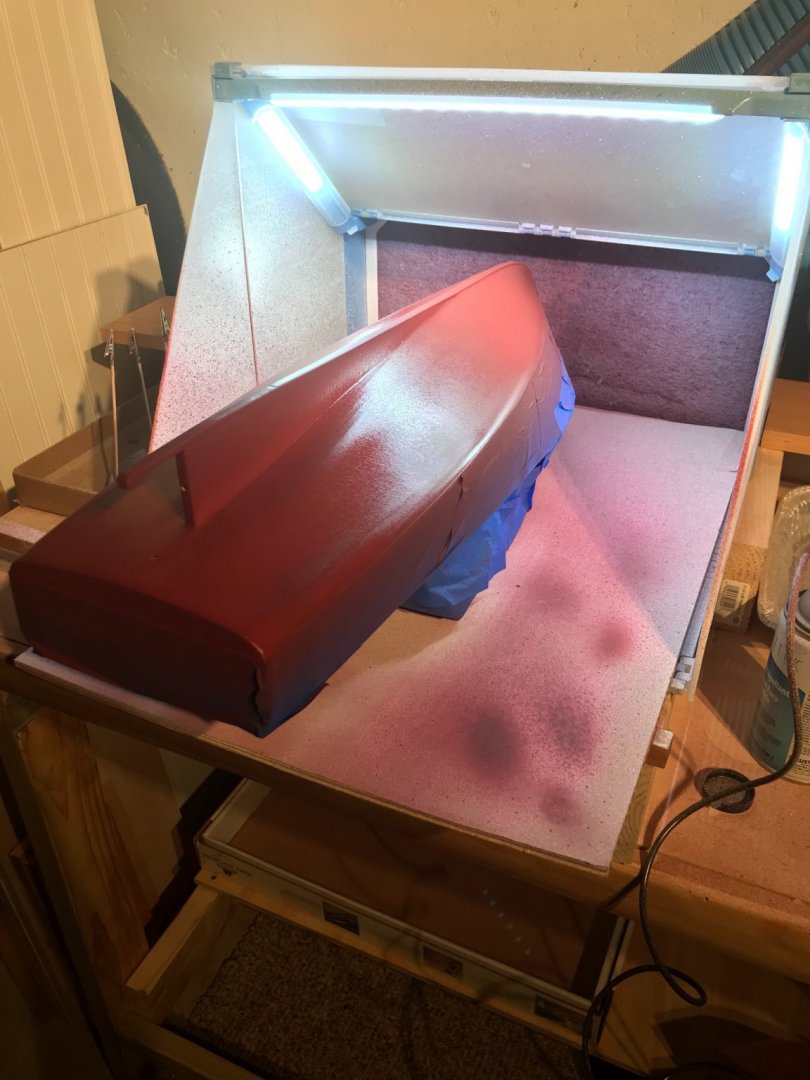
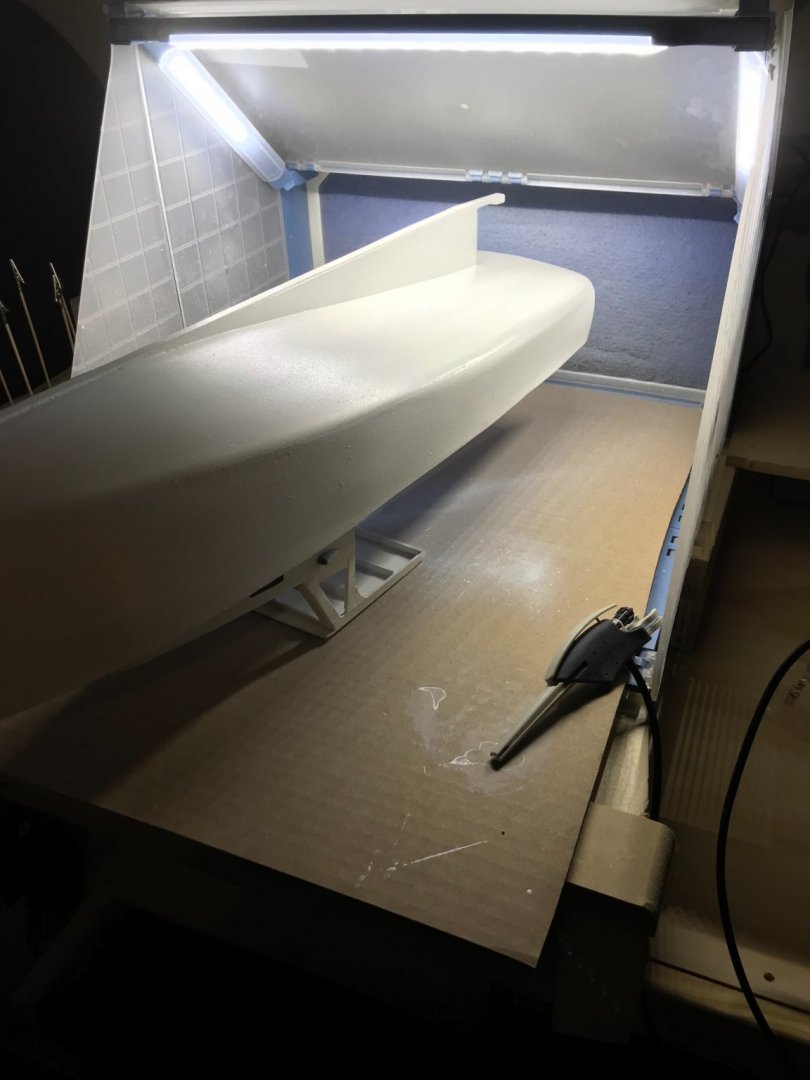
 Primed… Just a few more imperfections to fill in and she is ready for paint. Got my new airbrush with pump today. 👍 Later… 😎
- 26 replies
-
- 2
-

-
- Maine
- Laughing Whale
- (and 2 more)
-
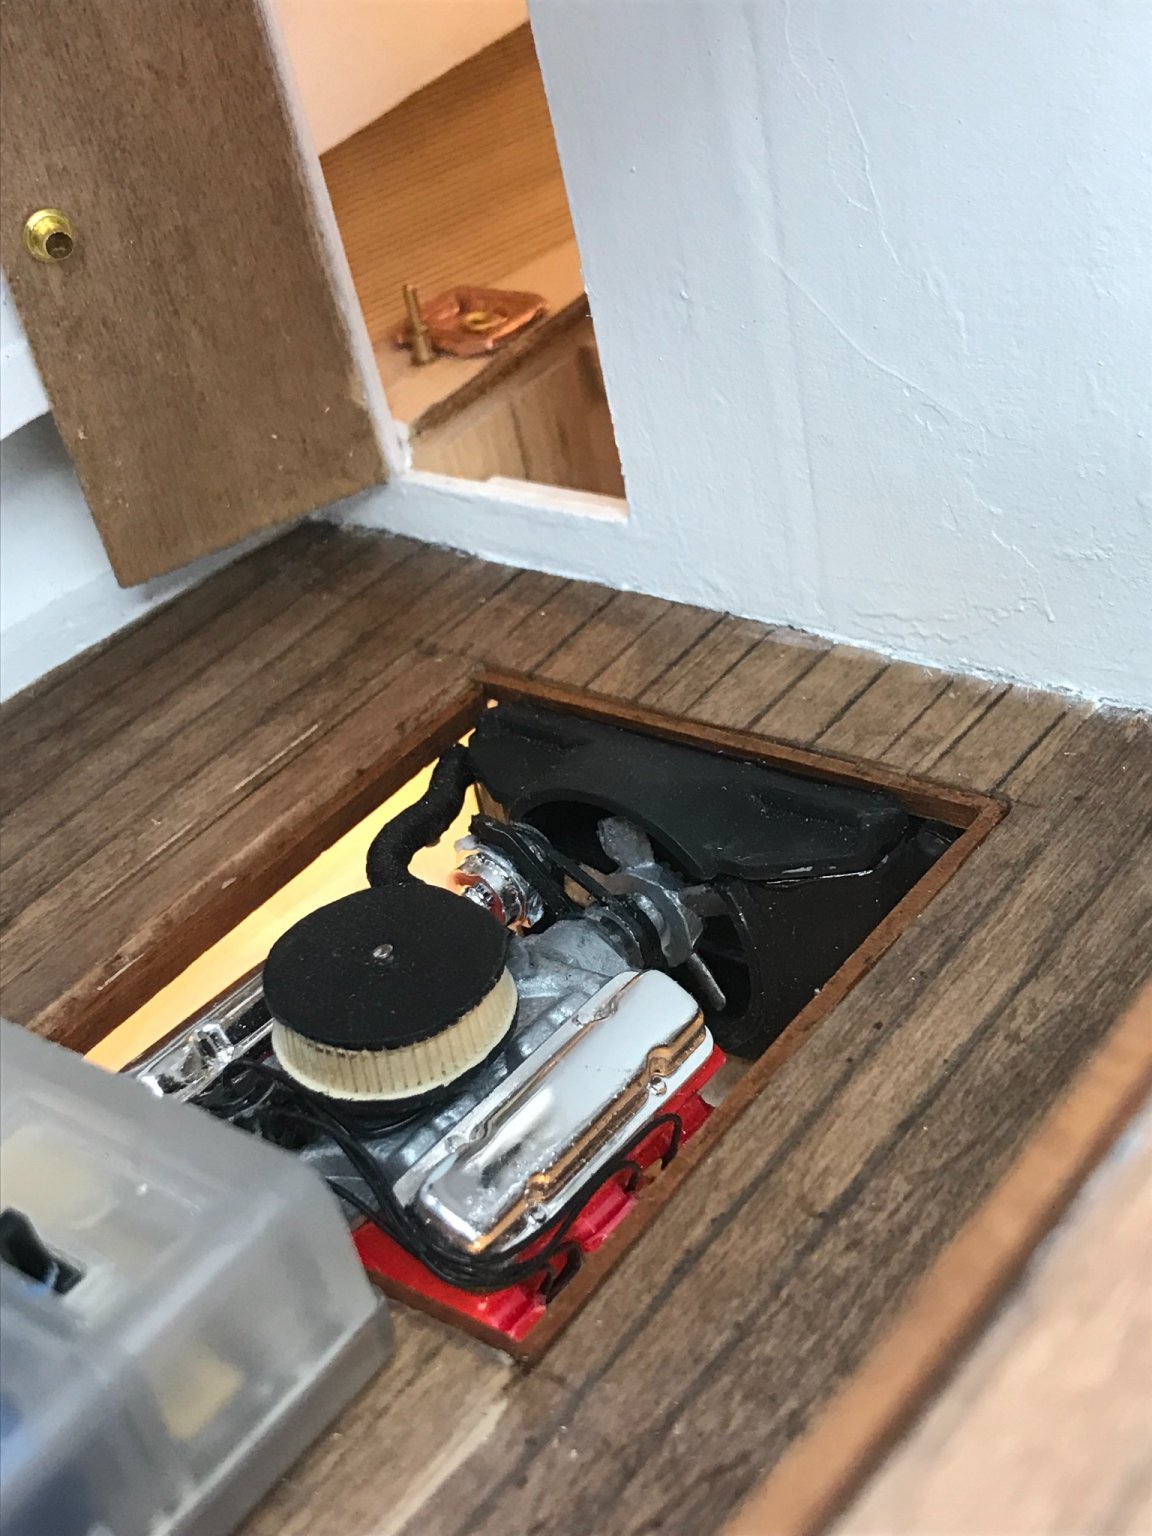
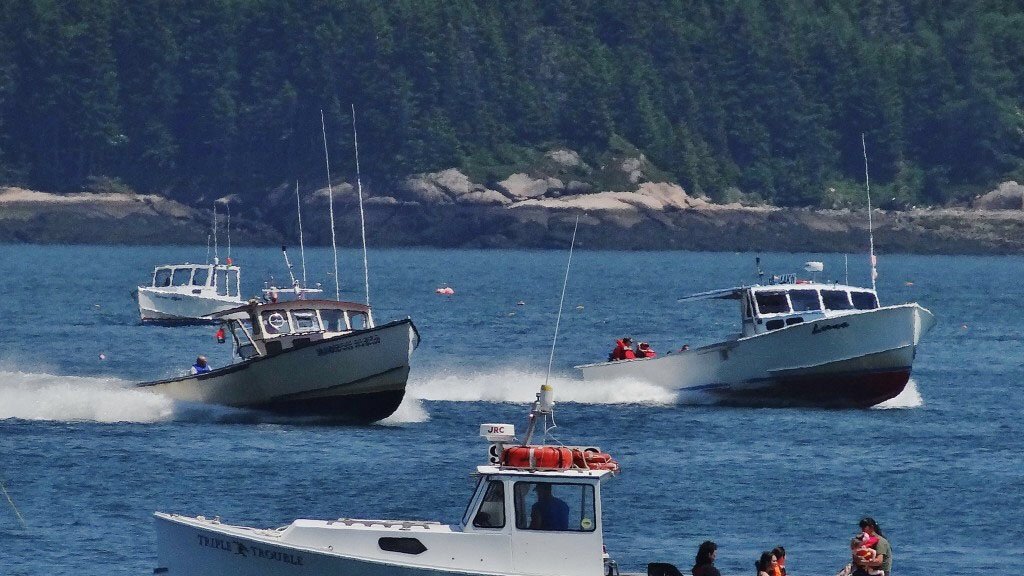
Nice guess… Actually, eBay is as good as a pick-a-part junk yard. I was able to get a complete Pontiac 400 and radiator without having to buy a 1/16 Pontiac Firebird kit. 😎 Thanks for the tip on the windshield material. Just opened my new Airbrush Pump and there it is. Enough clear plastic to fix that window… 😆 BTW… Who says it has to be a a working Lobsterman’s Boat. This guy is retired and Trapping occasionally for dinner. He will also be on the Lobster Boat Racing Circuit here in Maine. Gotta fix her up nice to live on it 6 months of the year. Just some fantasies of an old man in Maine building boats. LOL 😂
- 51 replies
-
- 2
-
-
- laughing whale
- maine lobster boat
- (and 1 more)
-
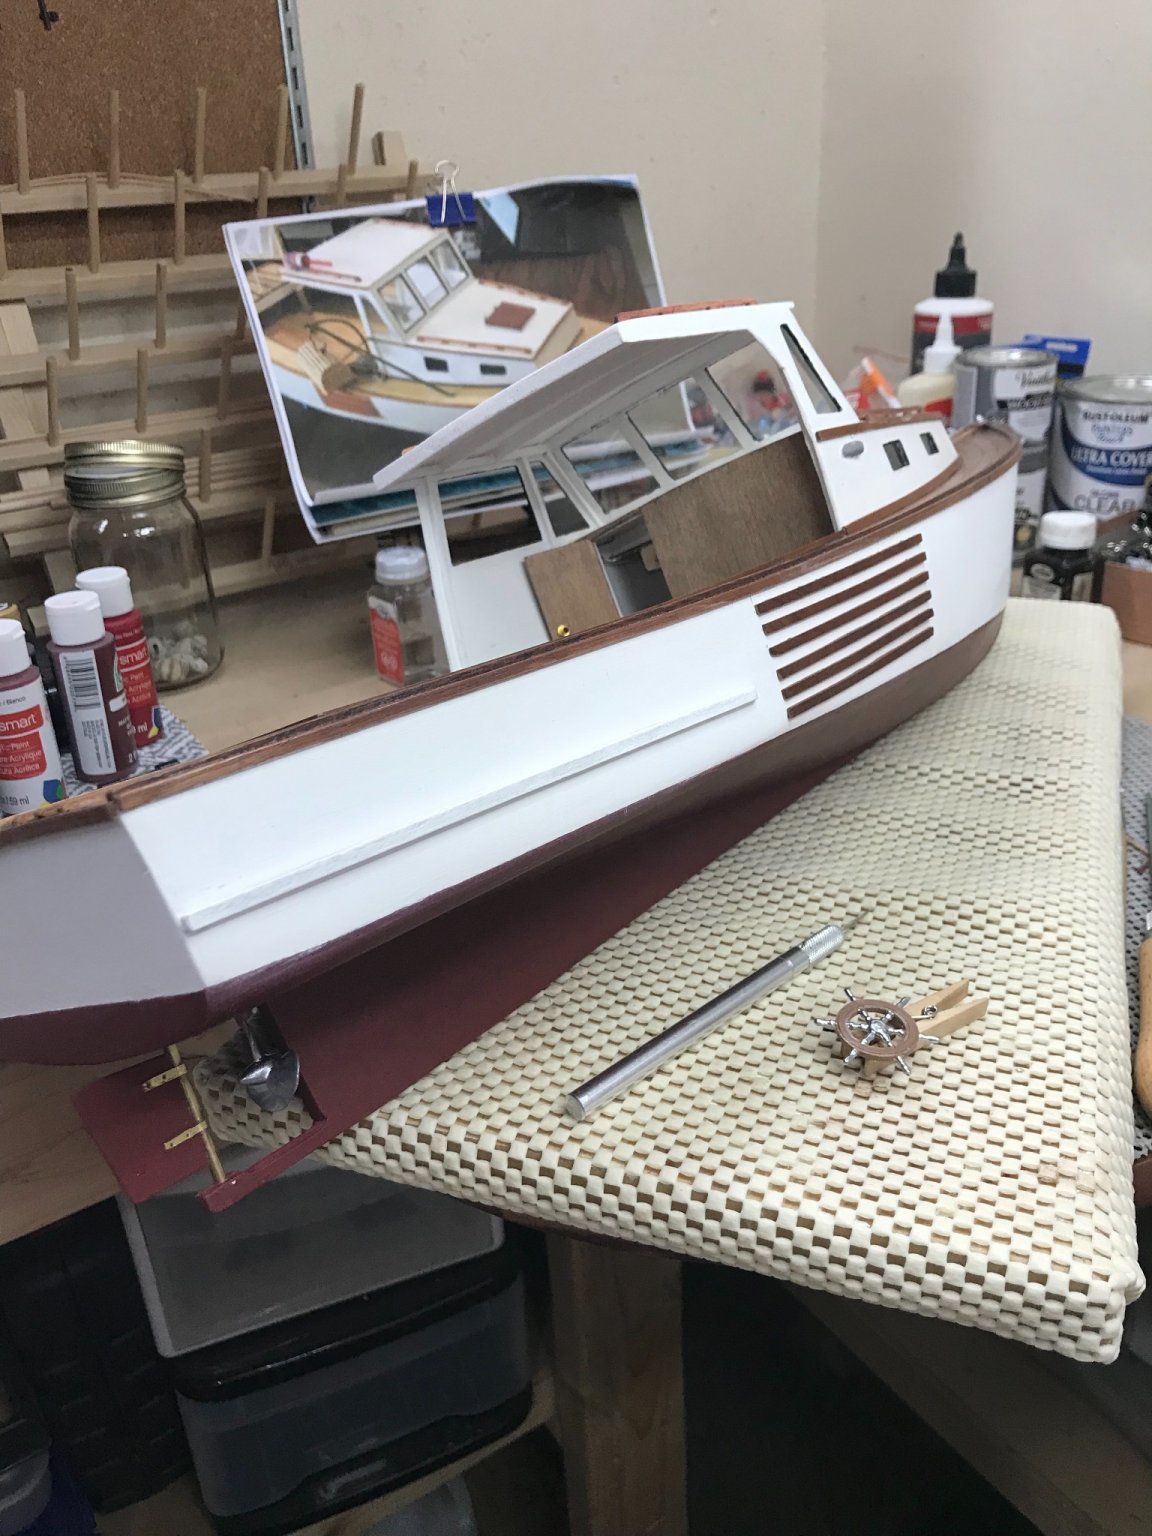
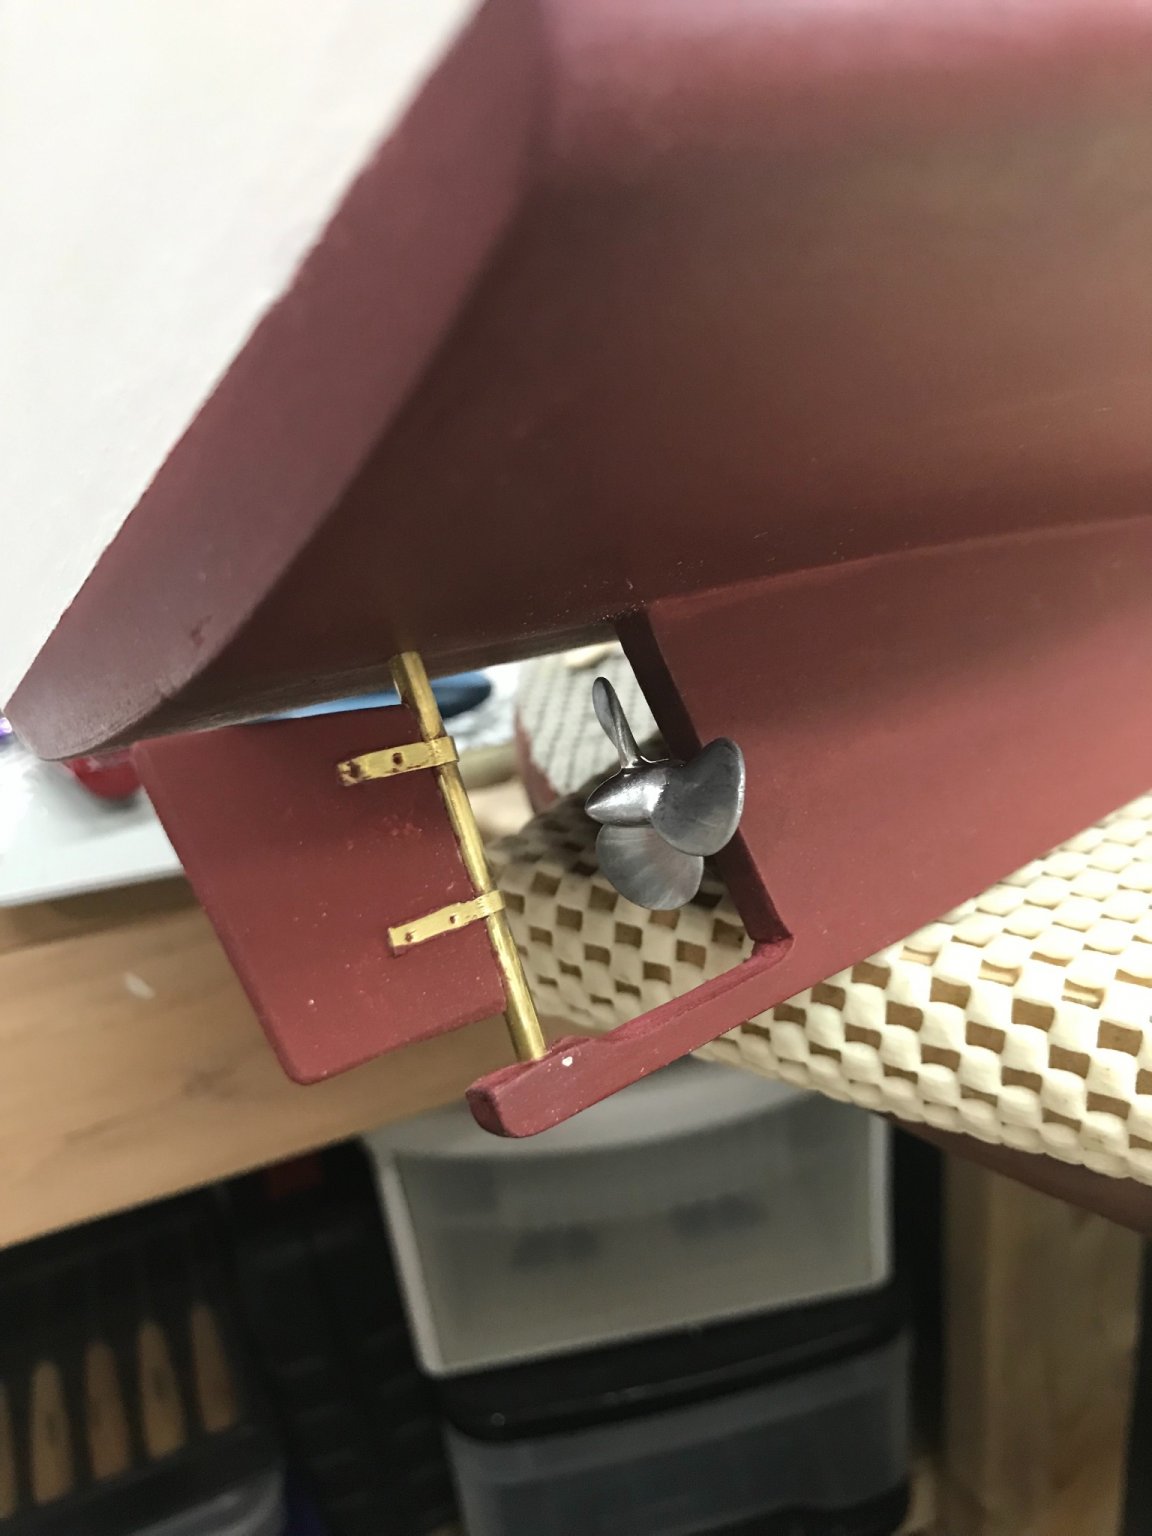
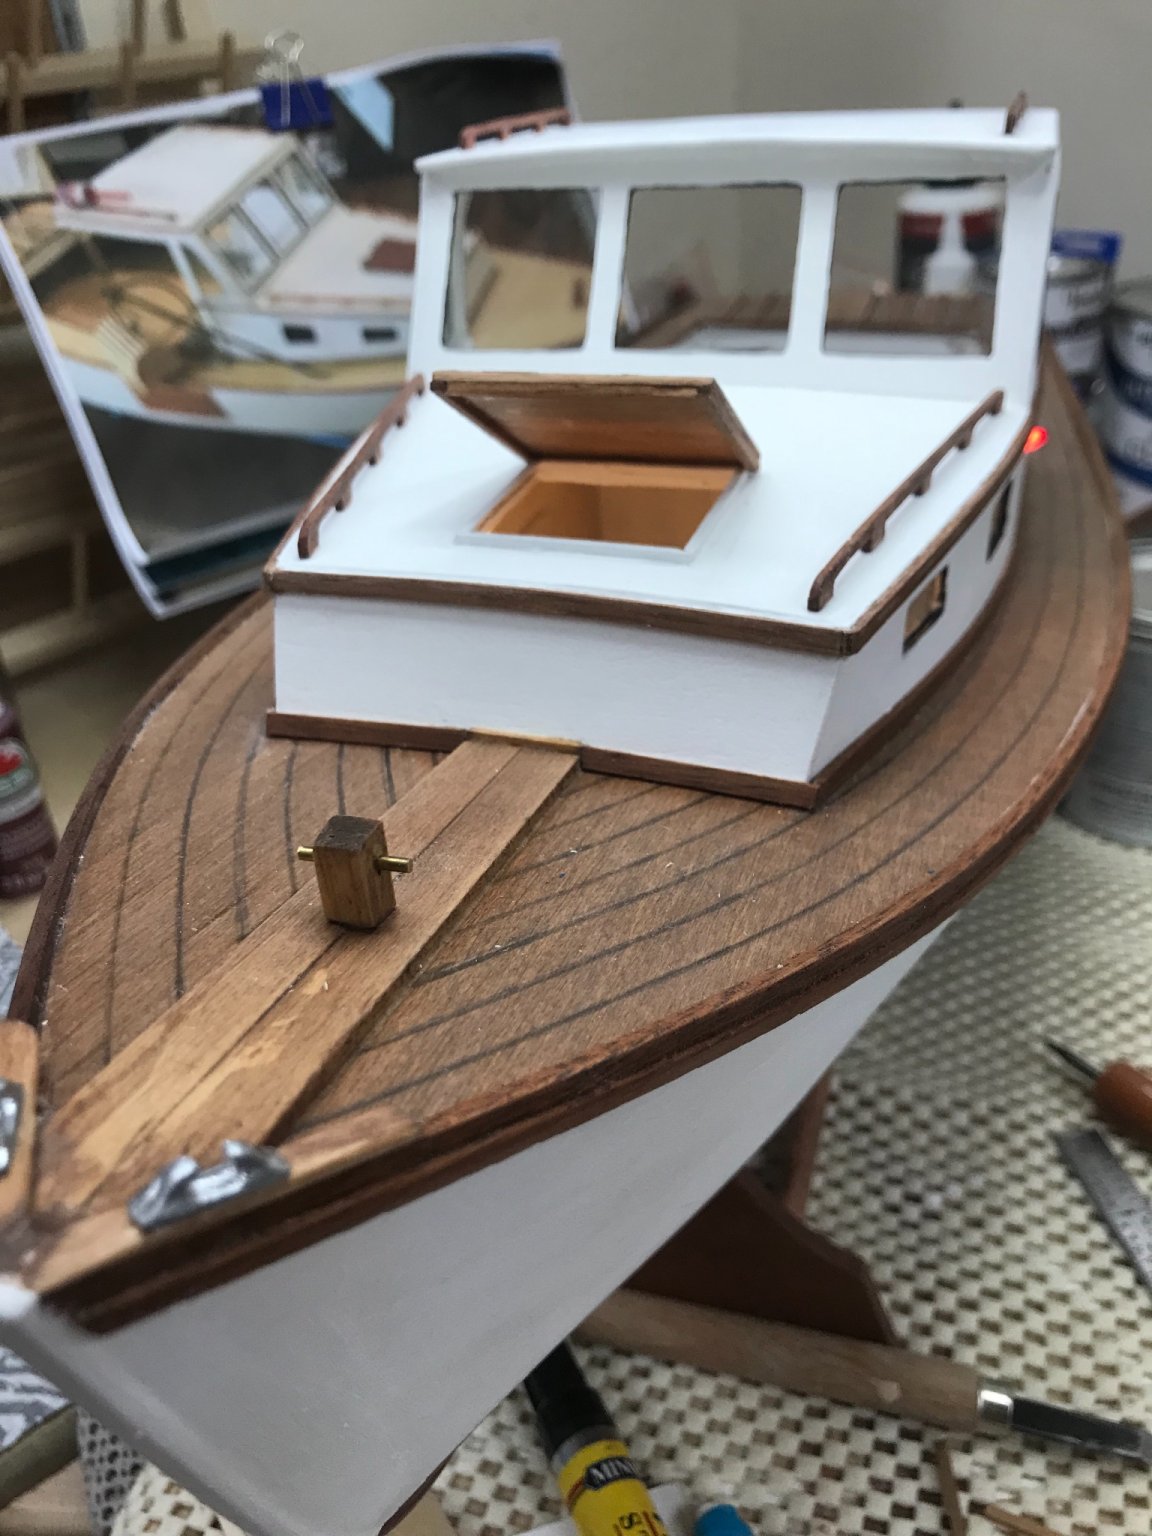
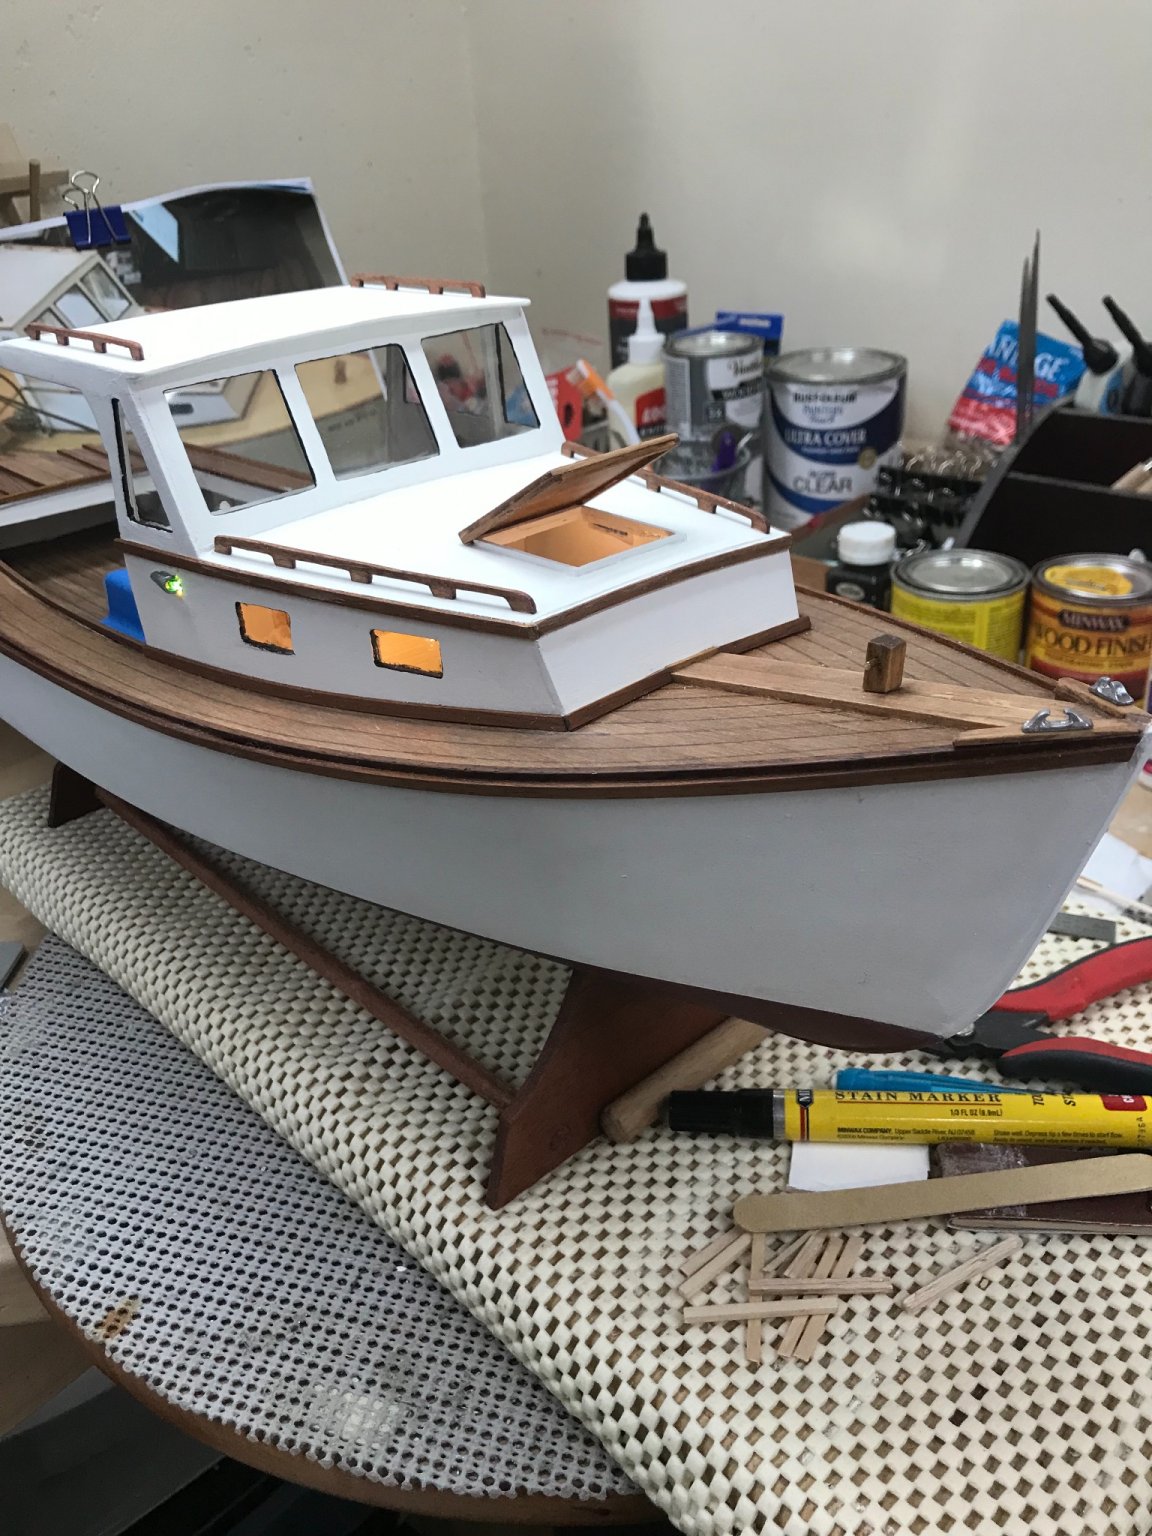
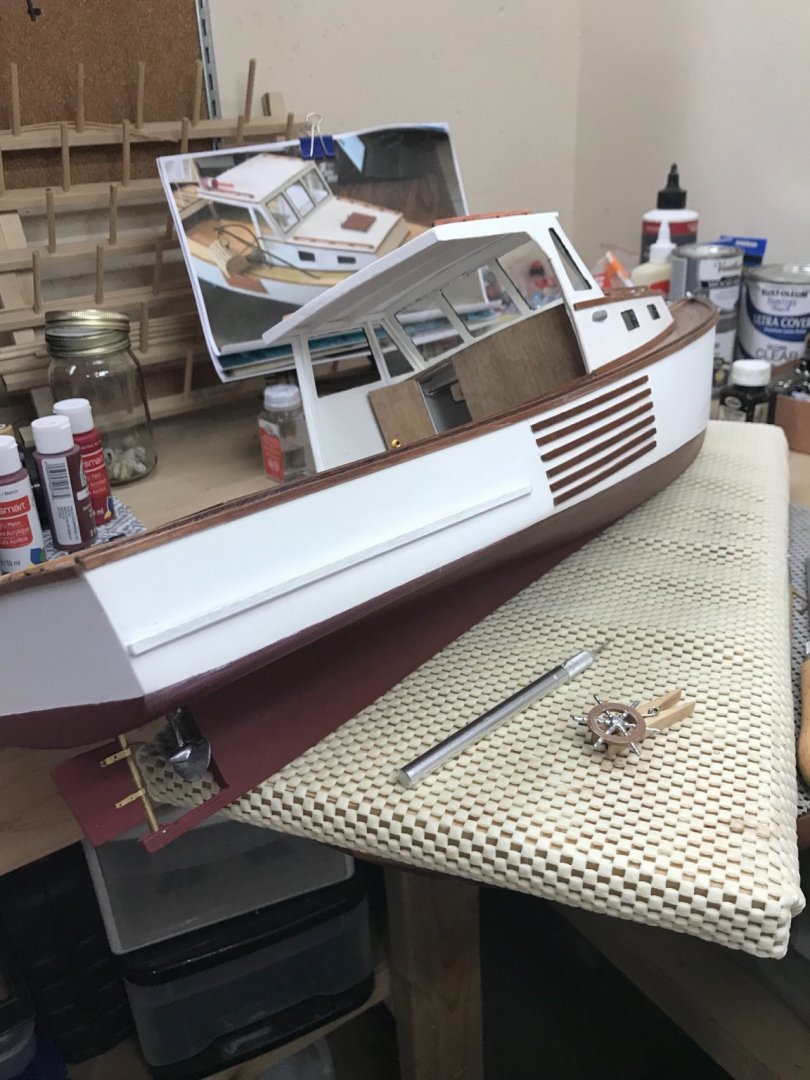
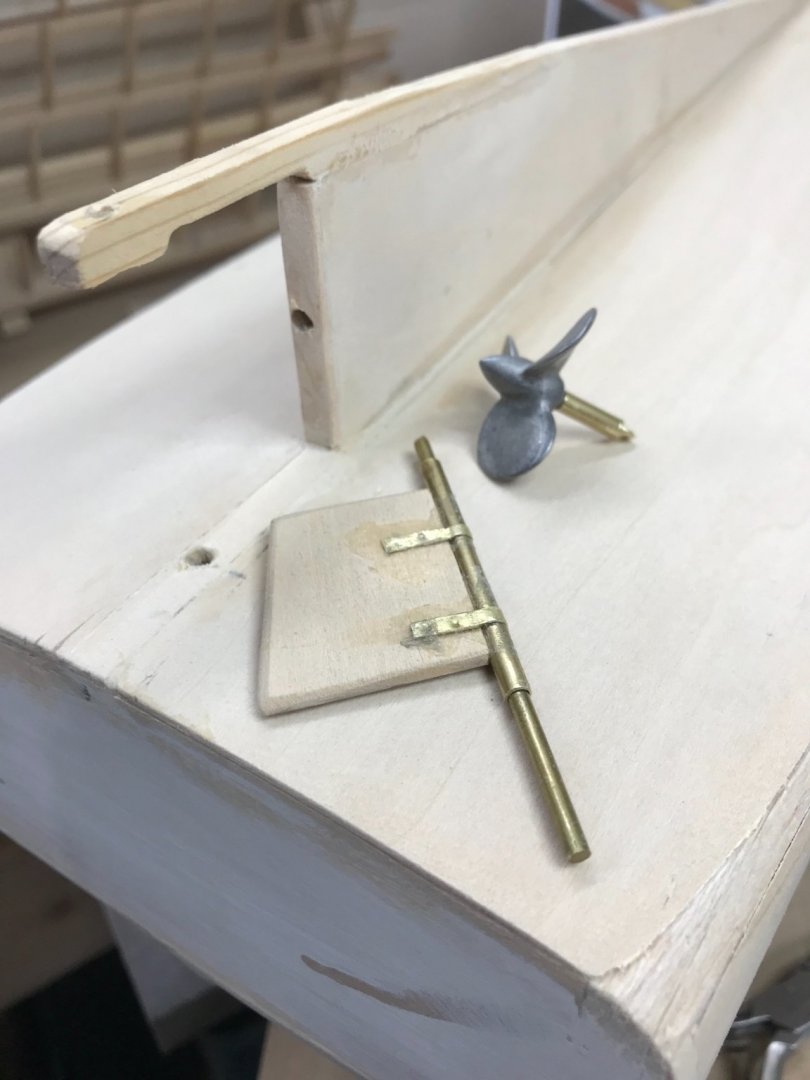
Adding the details… Propeller and Rudder… Wood paneled bulk head… Forward Hatch hinges… Hoist hardware… Sheer and more Trim… She is getting there, more later… 🍻


- 51 replies
-
- 2
-
-
- laughing whale
- maine lobster boat
- (and 1 more)
-
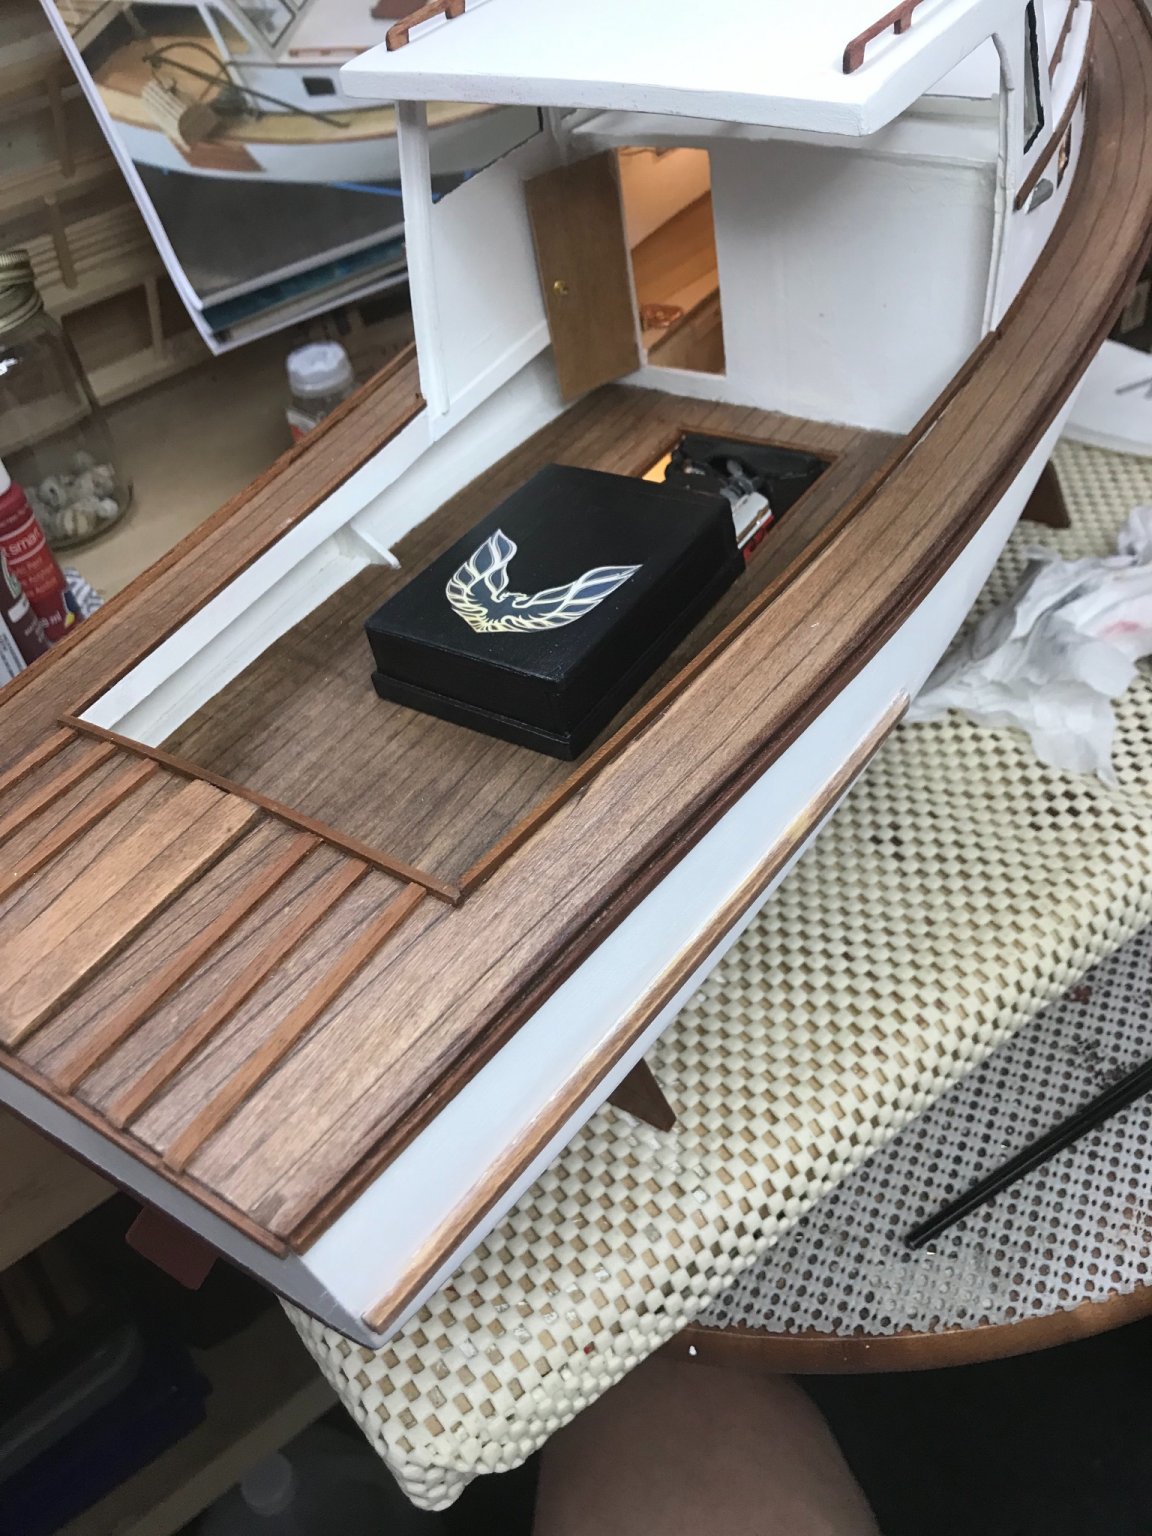
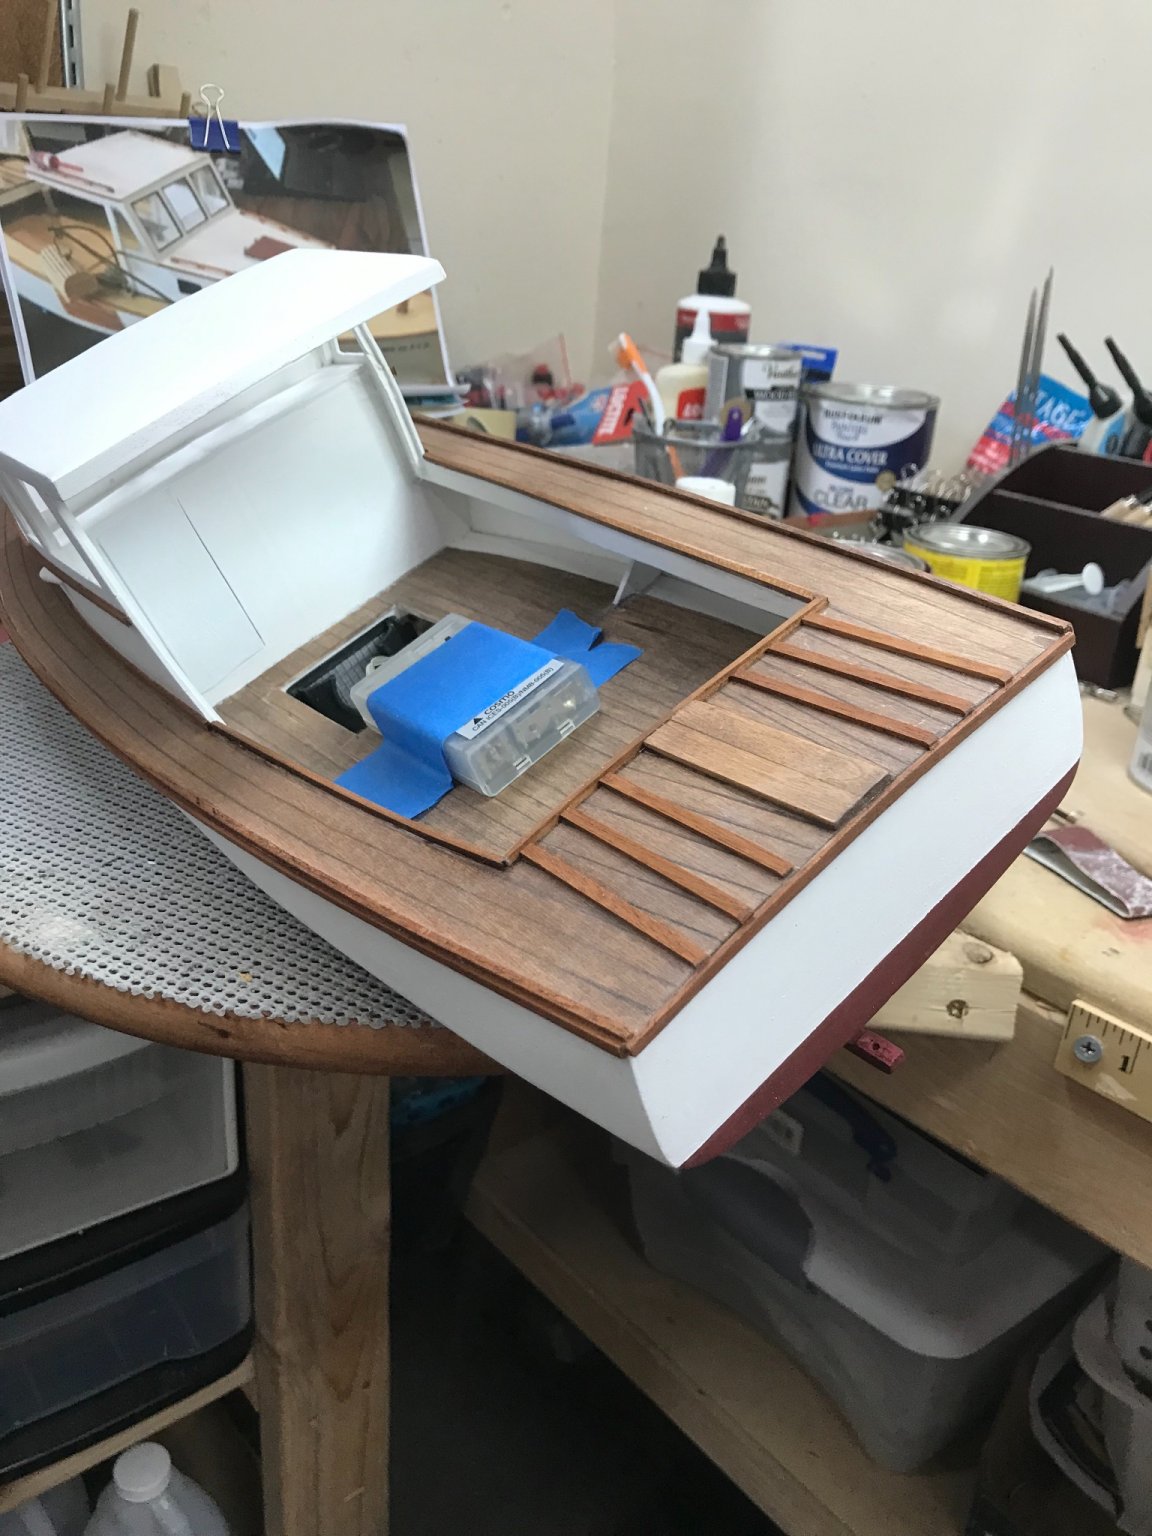
Yep… I’m doing a cover and displaying it pulled back to cover the battery box for the lighting. 😎
- 51 replies
-
- 2
-
-
- laughing whale
- maine lobster boat
- (and 1 more)
-
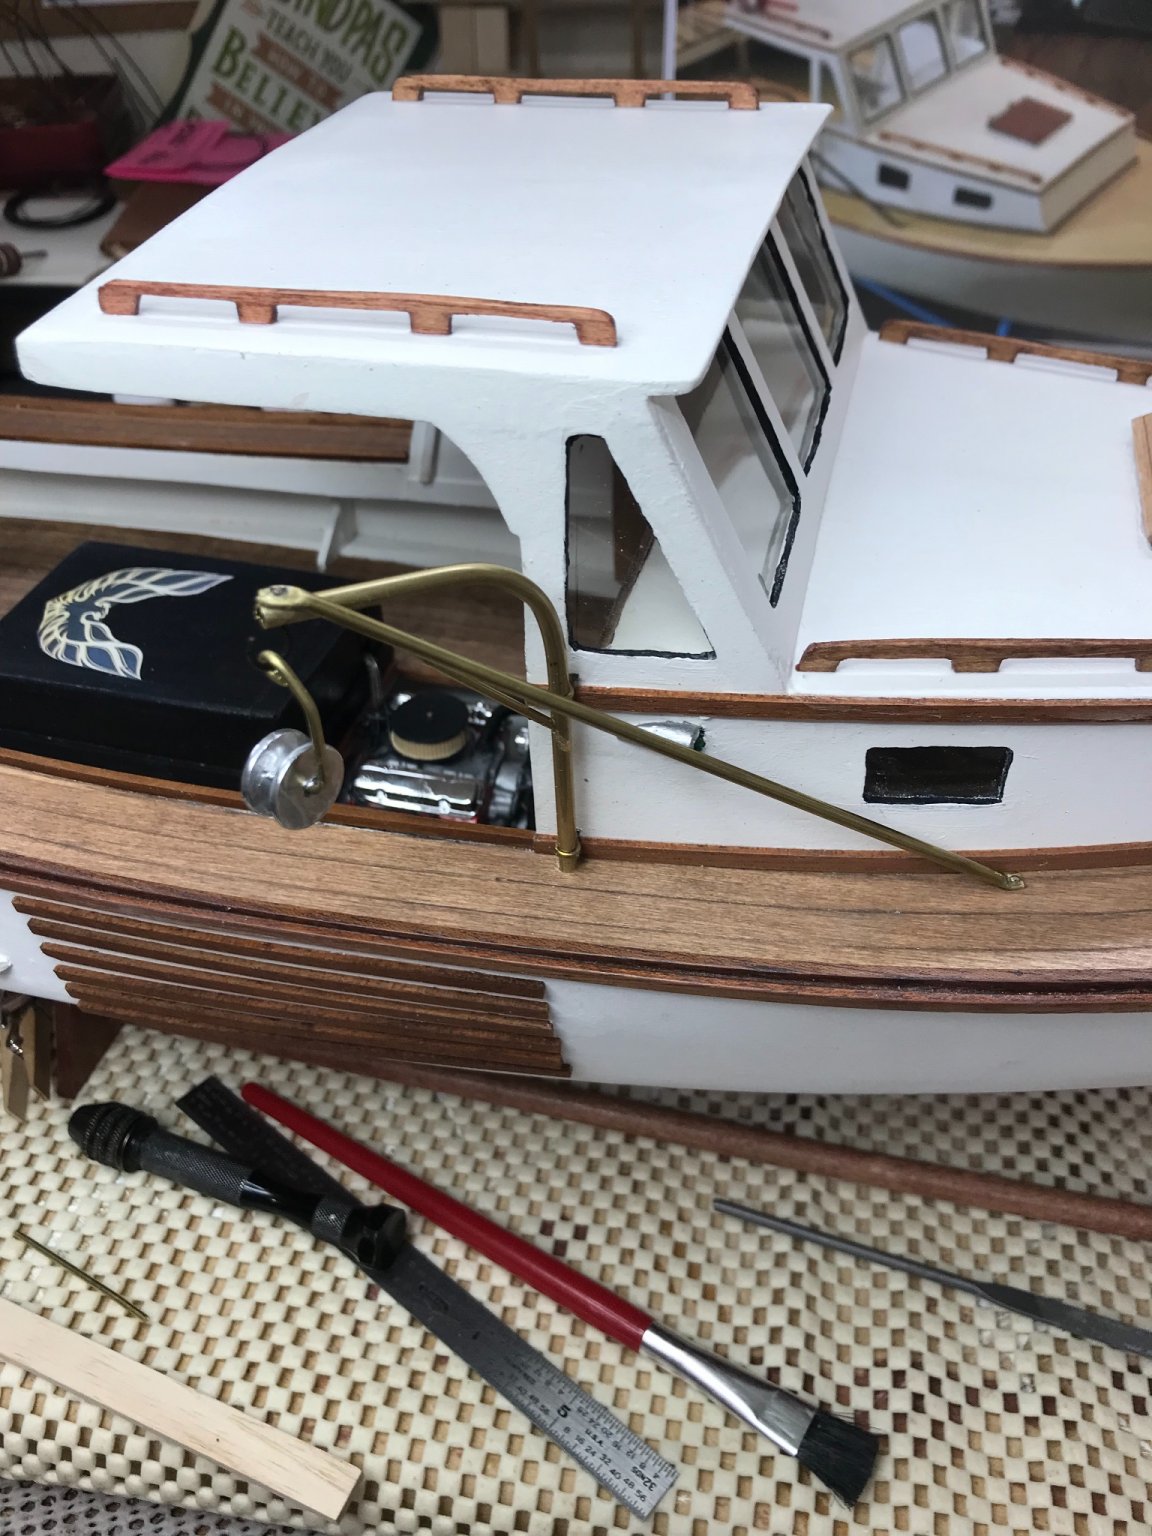
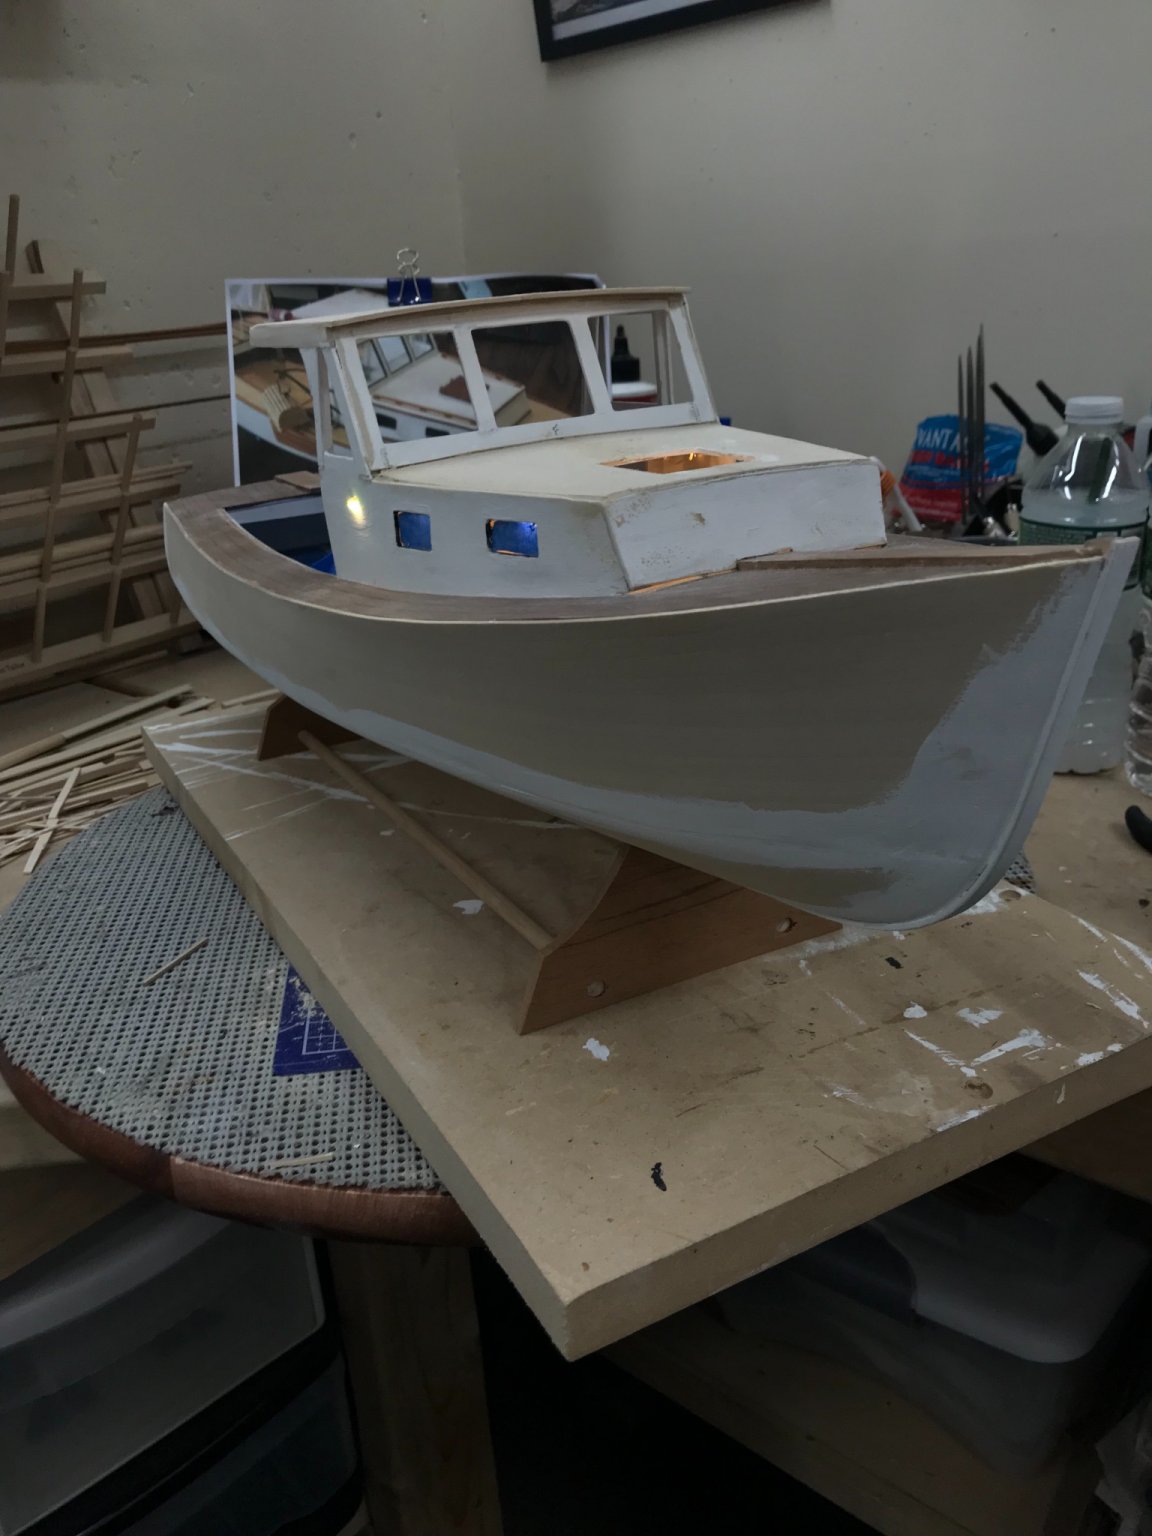
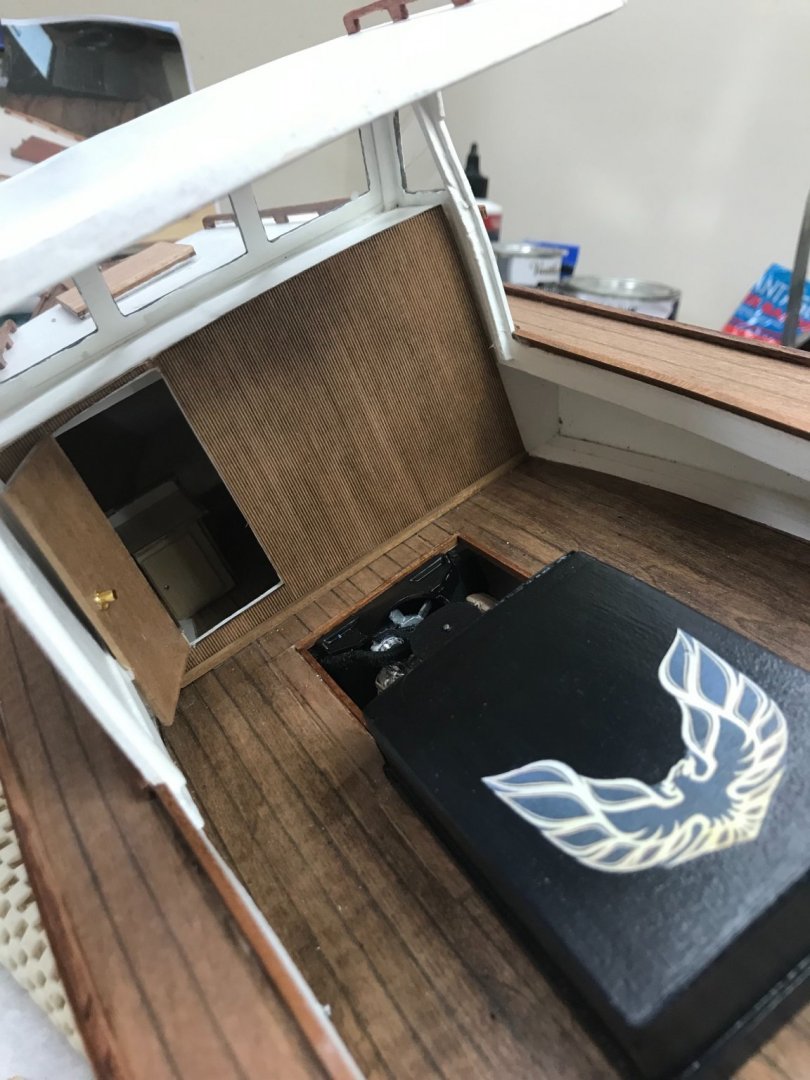
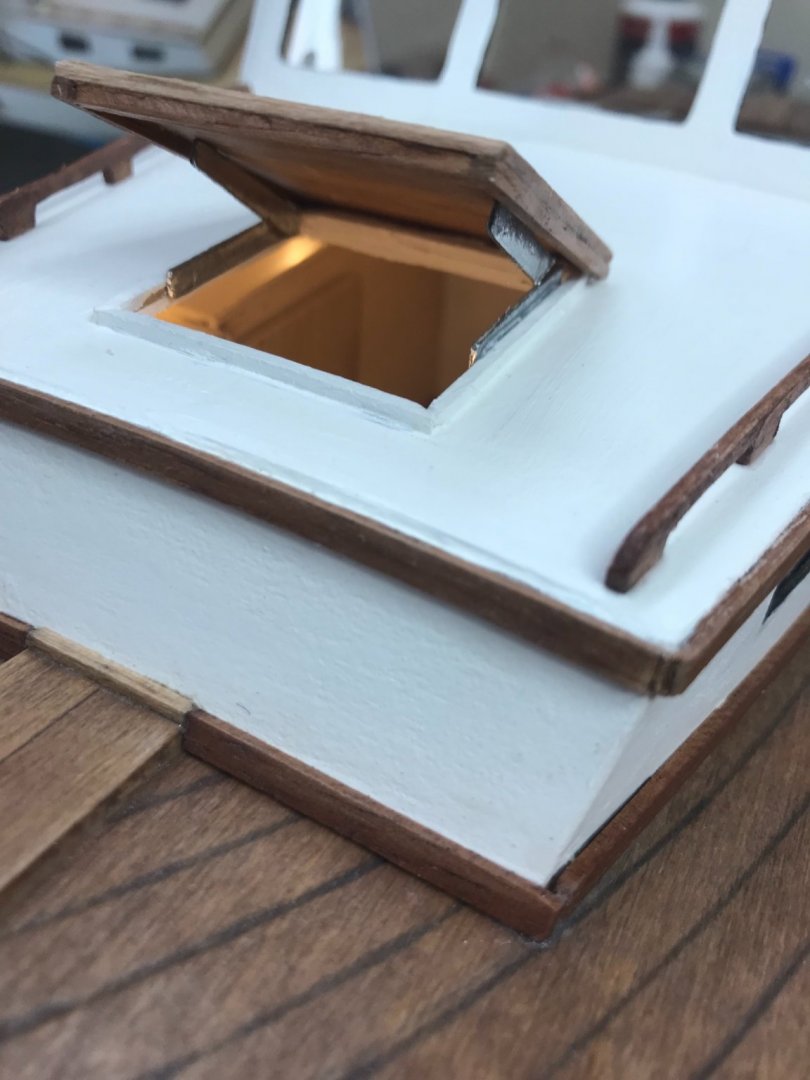
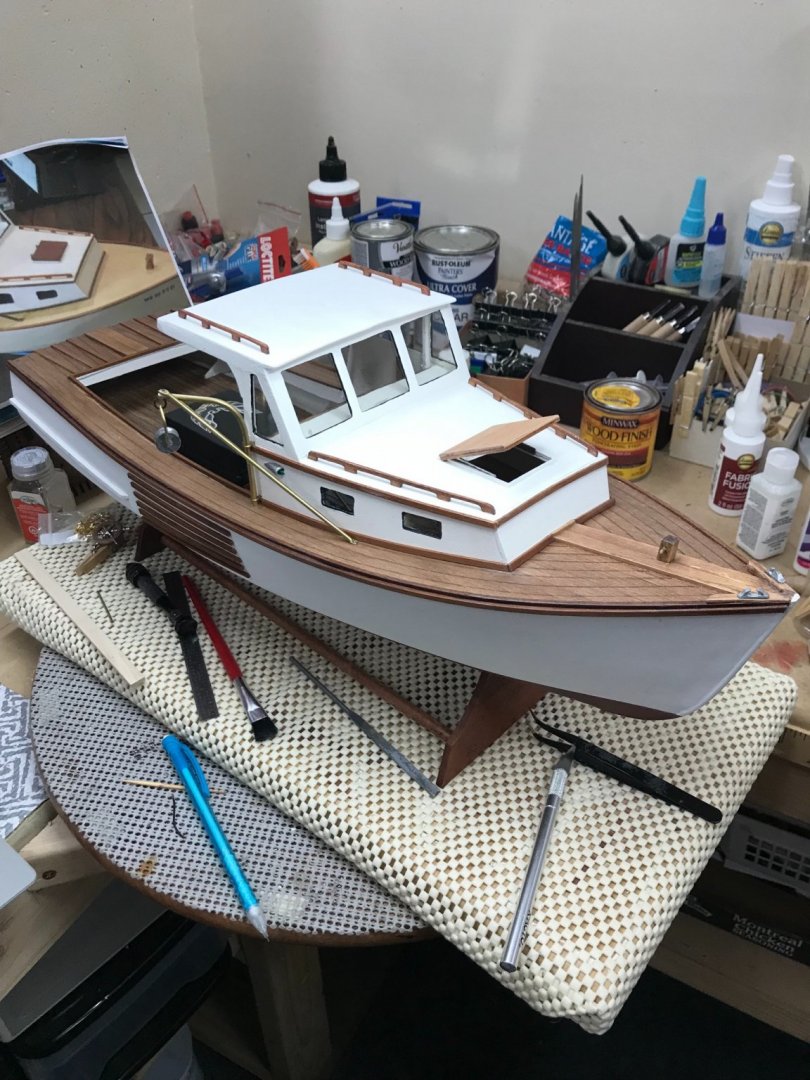
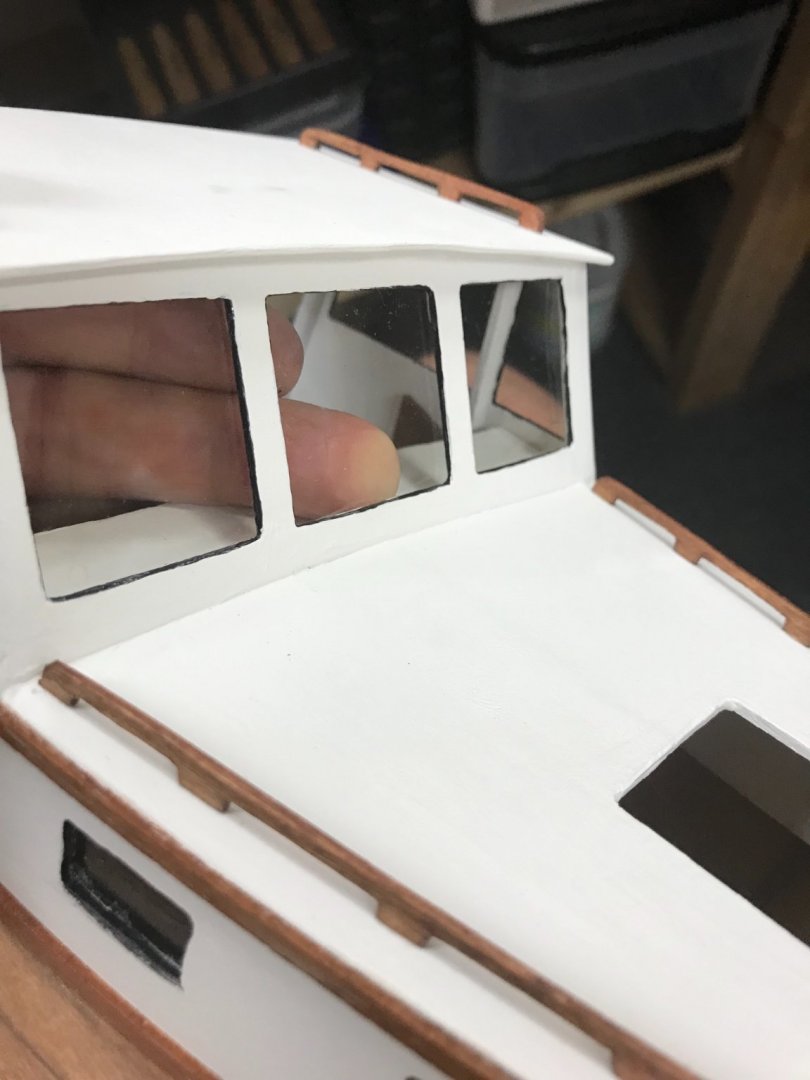
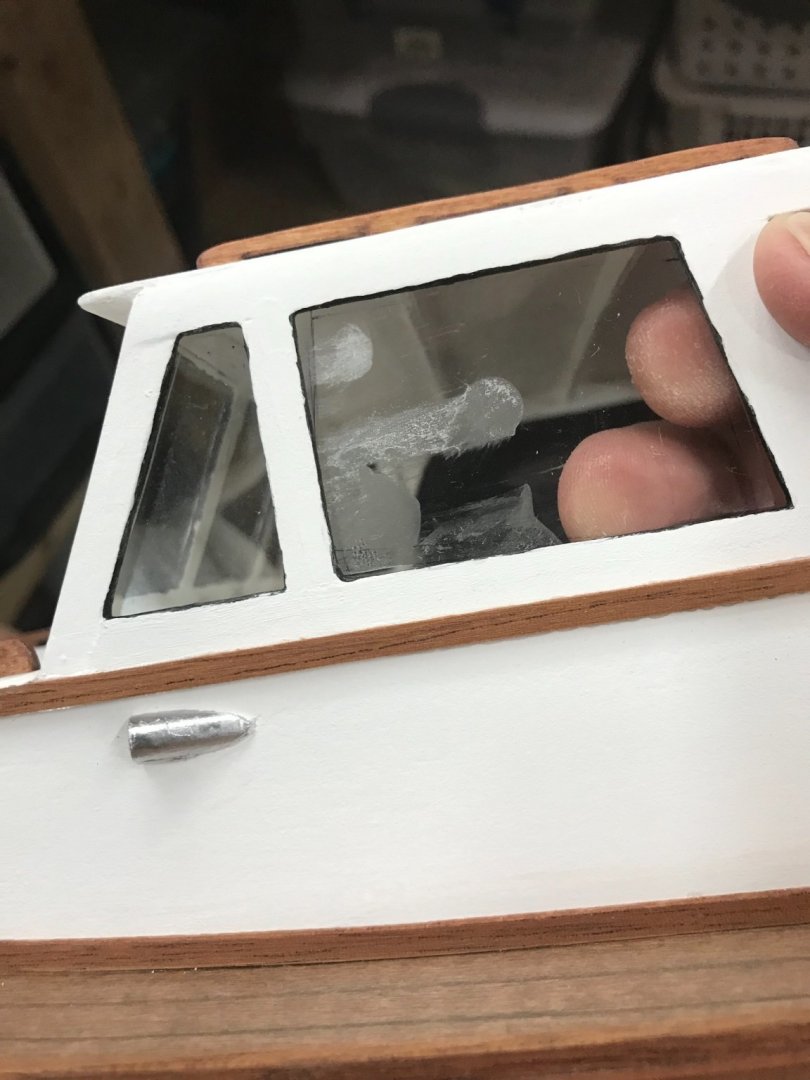
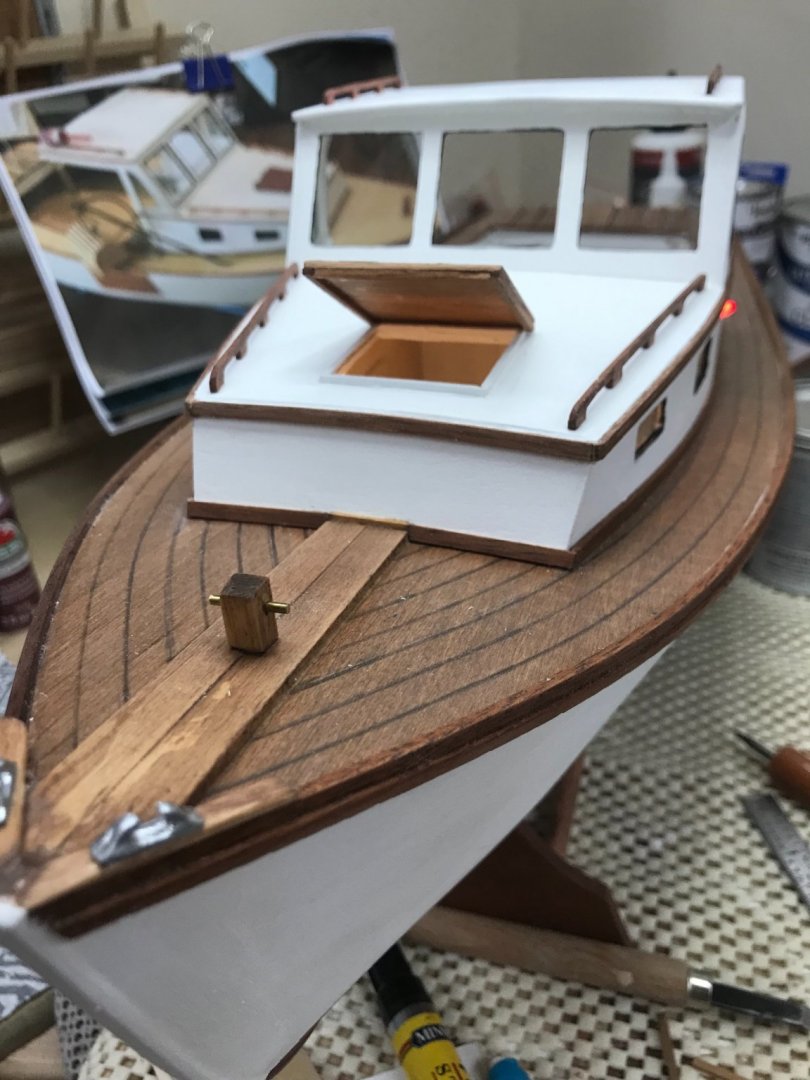
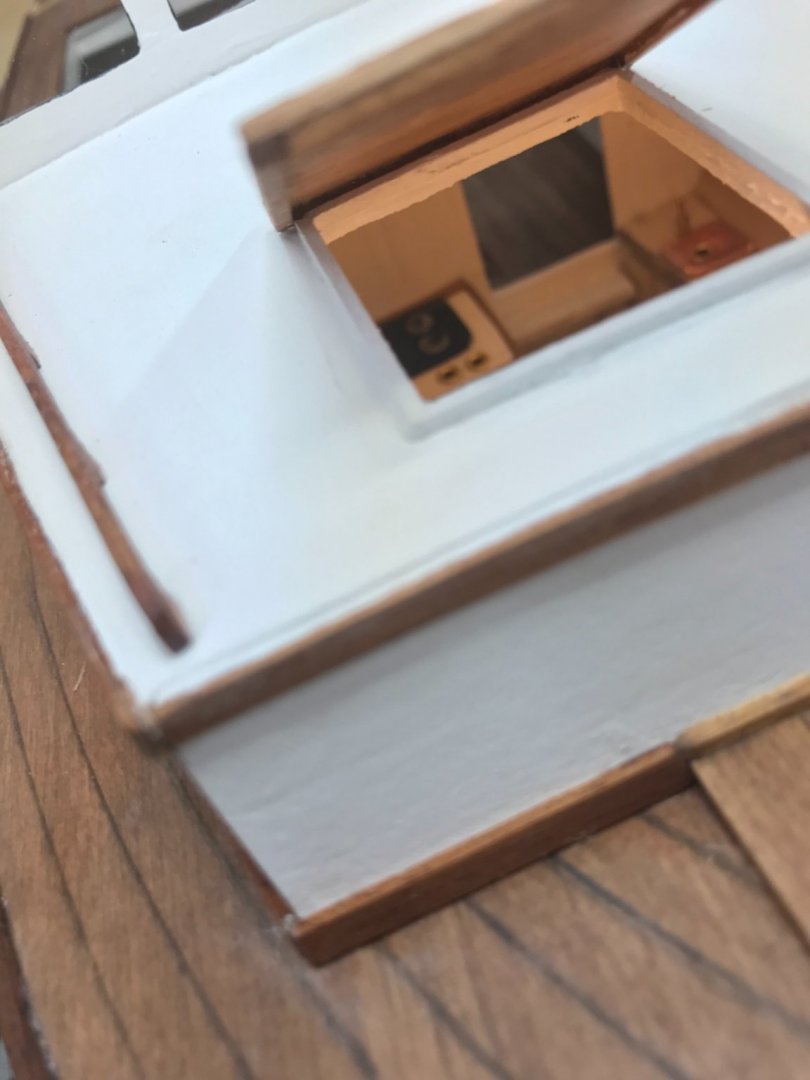
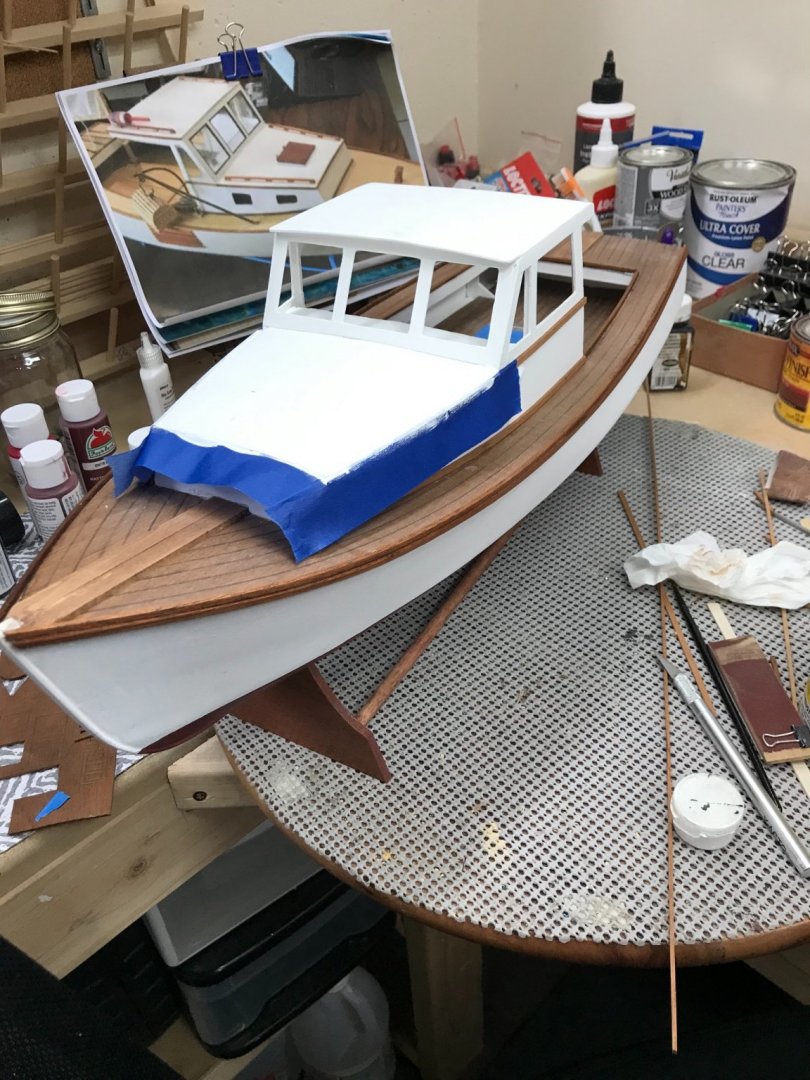
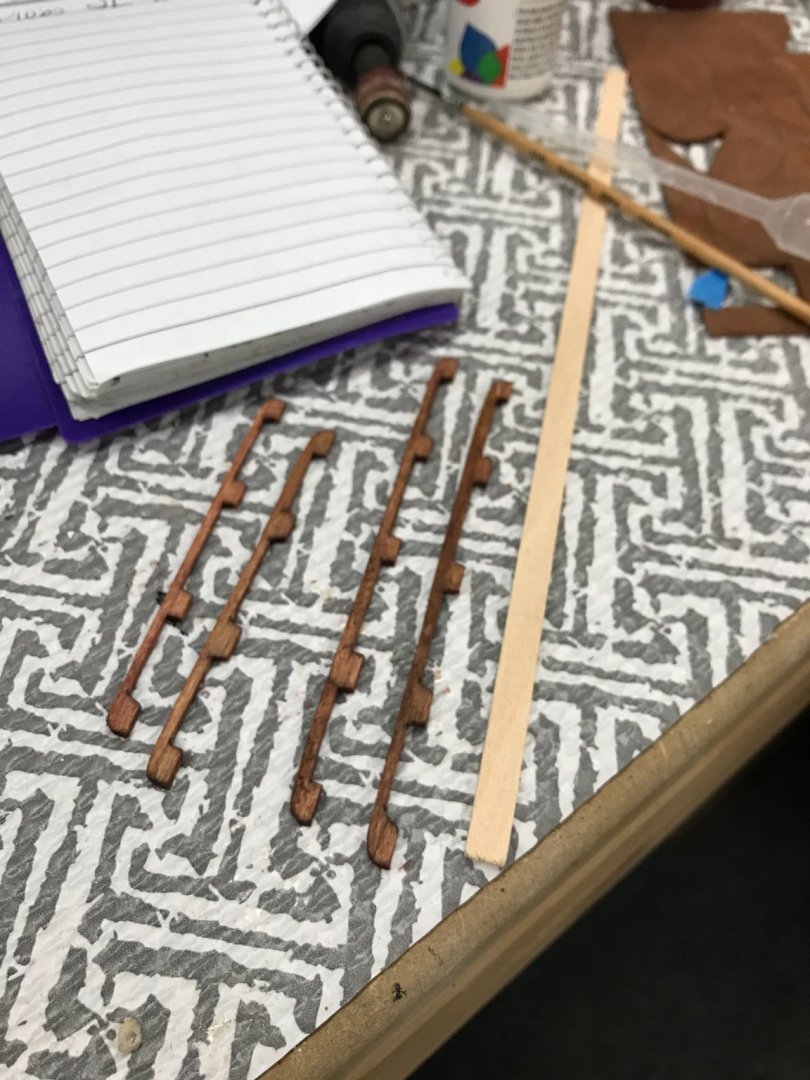
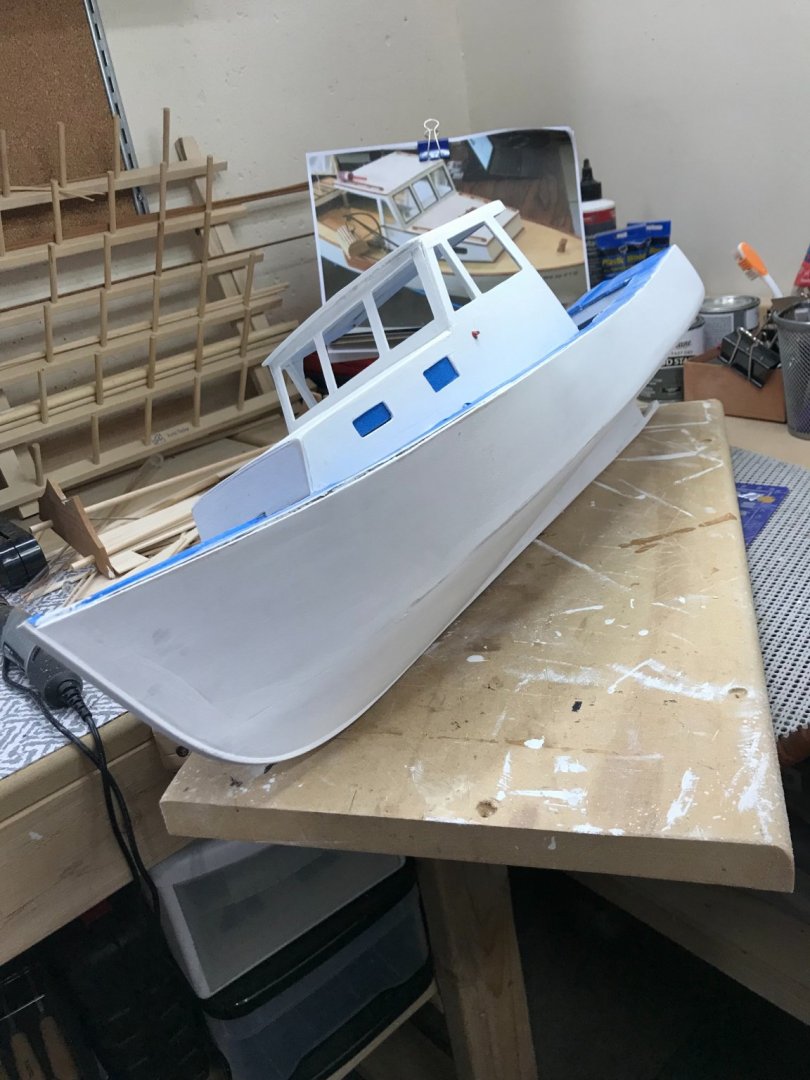
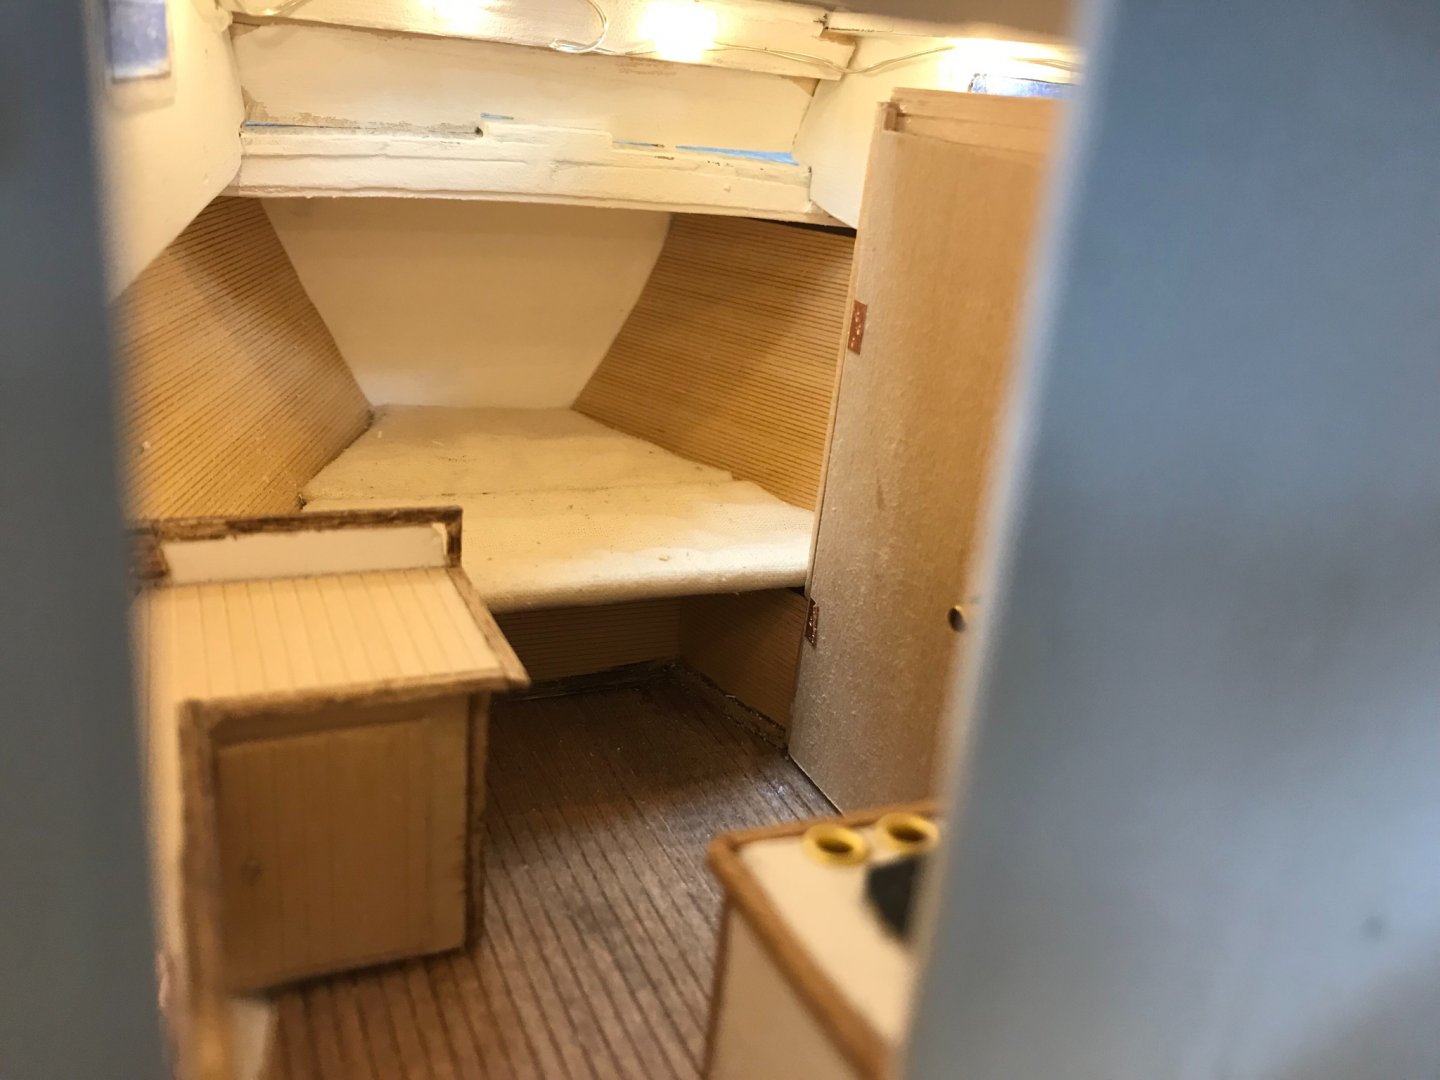
More progress… Trim work on the stern… Hand Rails placed… YES! The Speed Shop showed up today with my new motor. 😆 1979 Pontiac Firebird 400… That ought to make her scoot. Installed Windows today… Not so good, you don’t want glue on clear plastic. Particularly CA Glue… I will have to see if I can source this clear flexible plastic. Might just leave it out, I have seen lots of these boats and they may or may not have this side glass in place. Fore Bit placed, Bow work completed. Hatch over the Forward Cabin trimmed out… Take a peak inside the lighted Cabin. All the comforts of home. 👍 Cheers 🍻


- 51 replies
-
- 4
-
-
- laughing whale
- maine lobster boat
- (and 1 more)
-
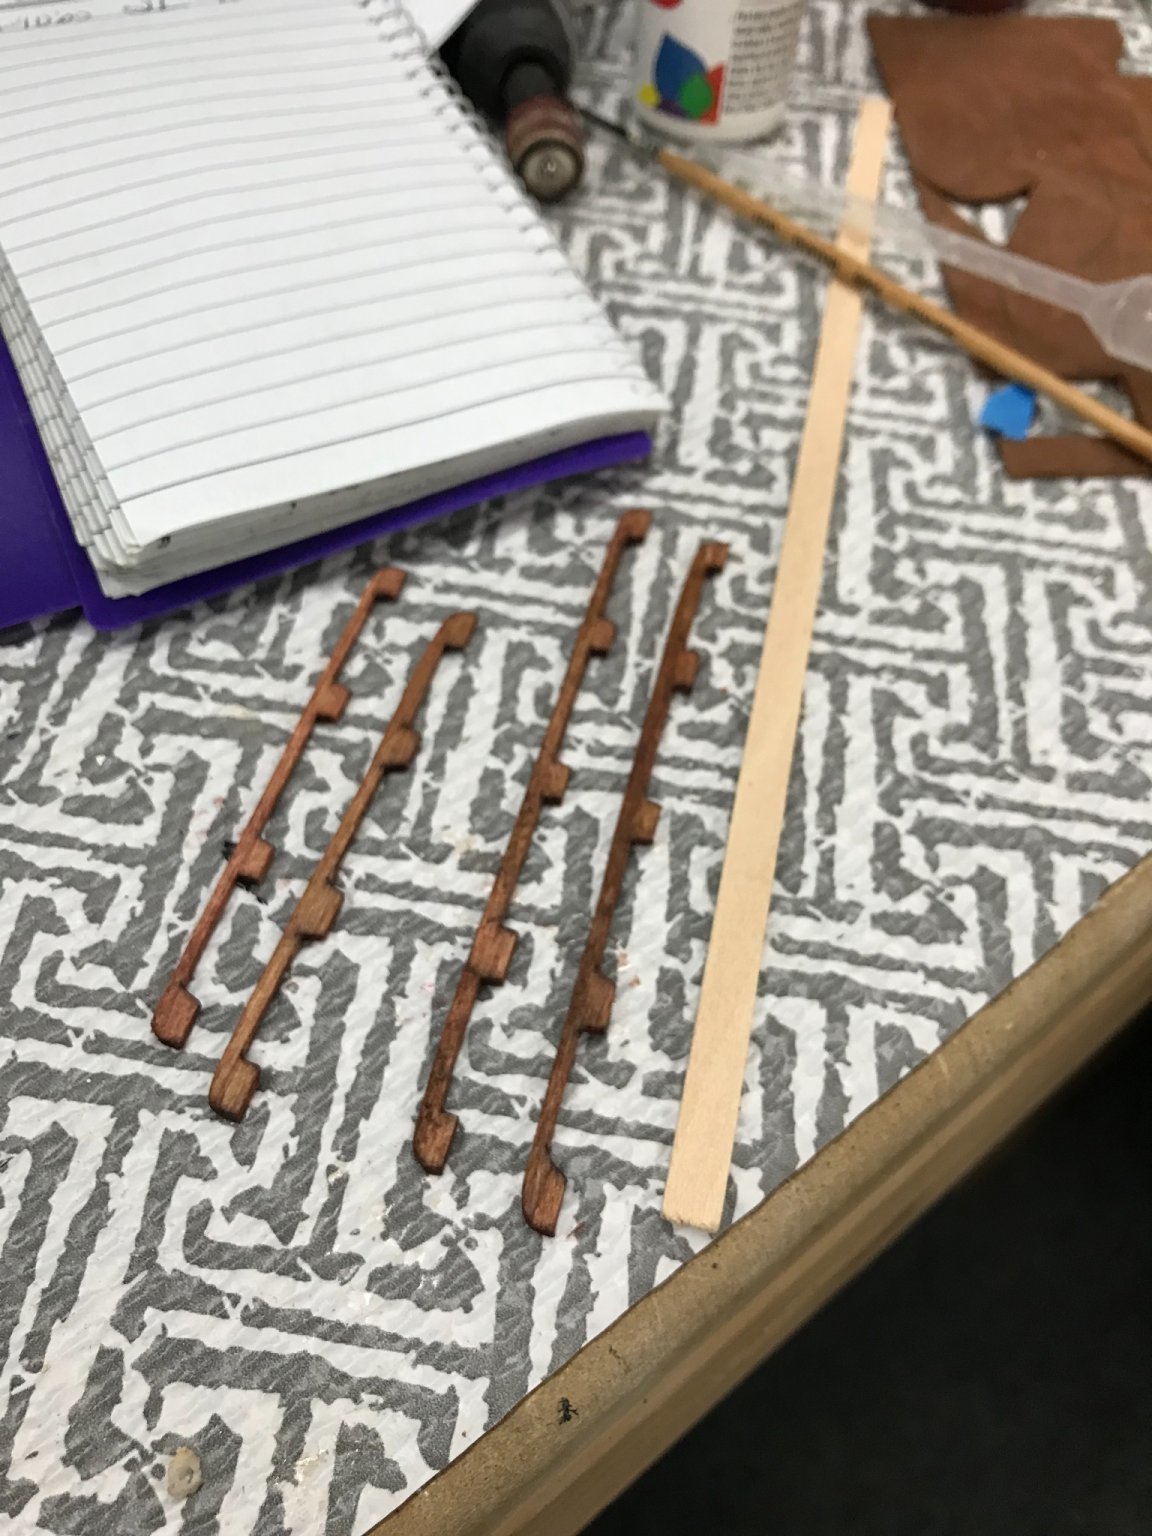
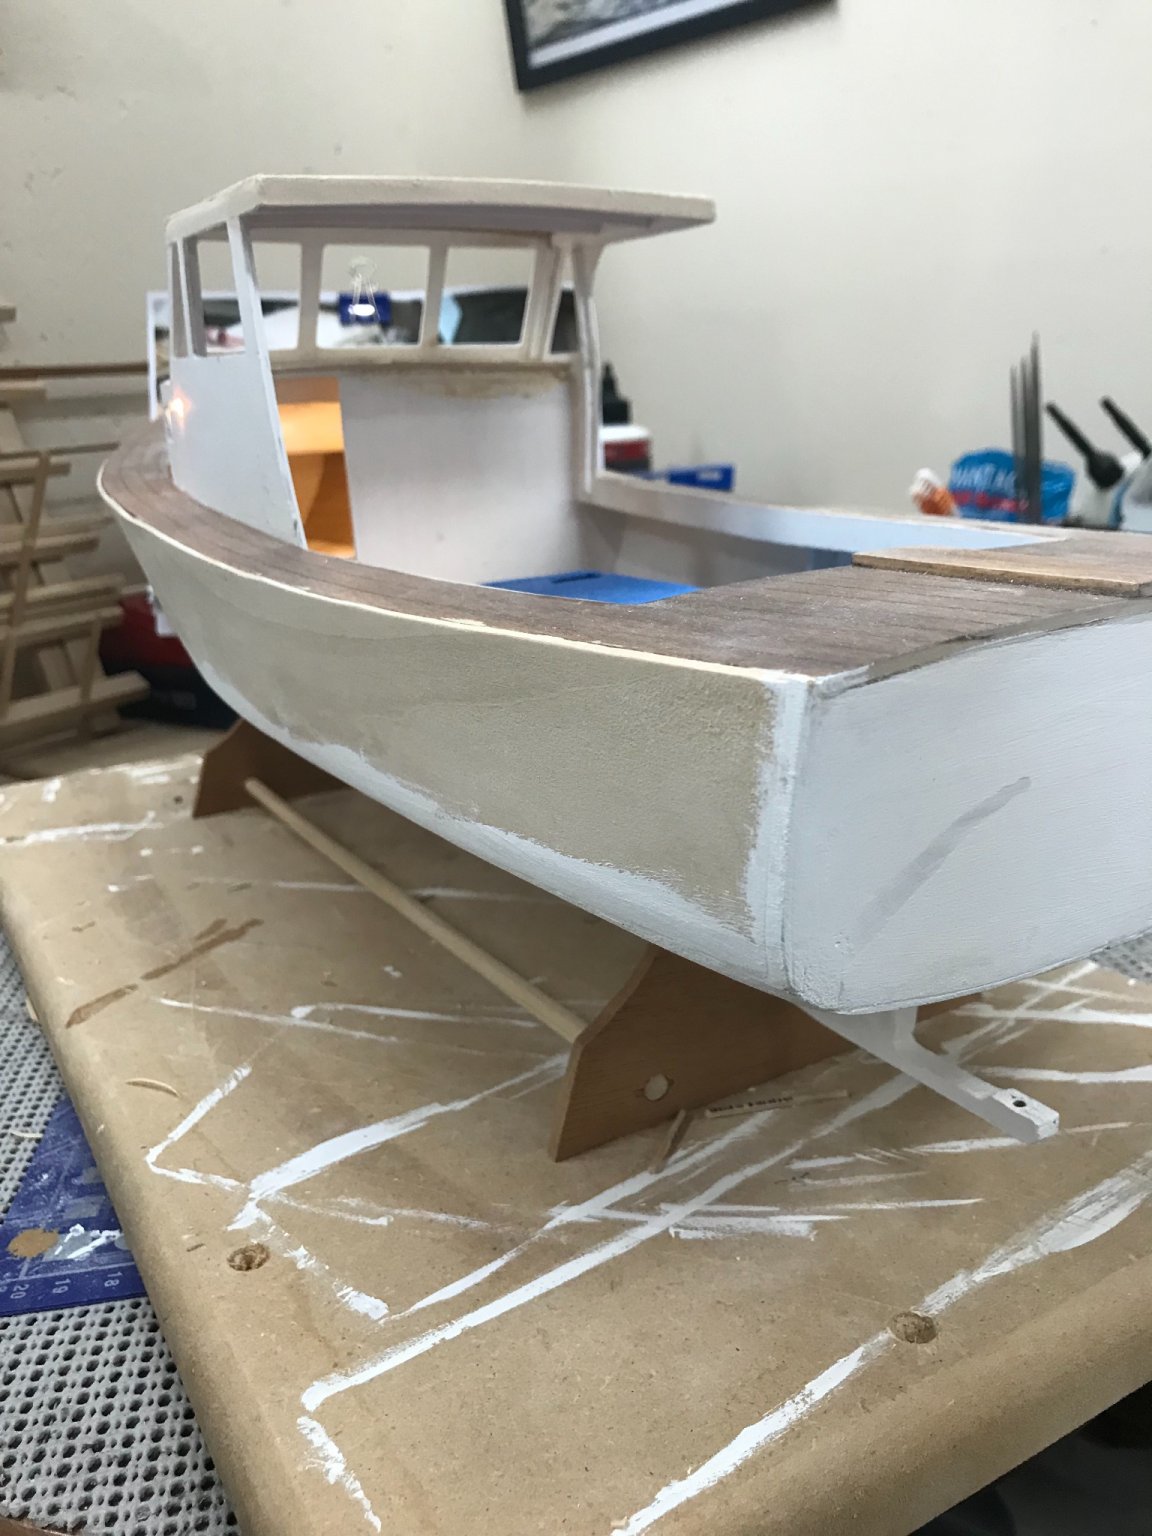
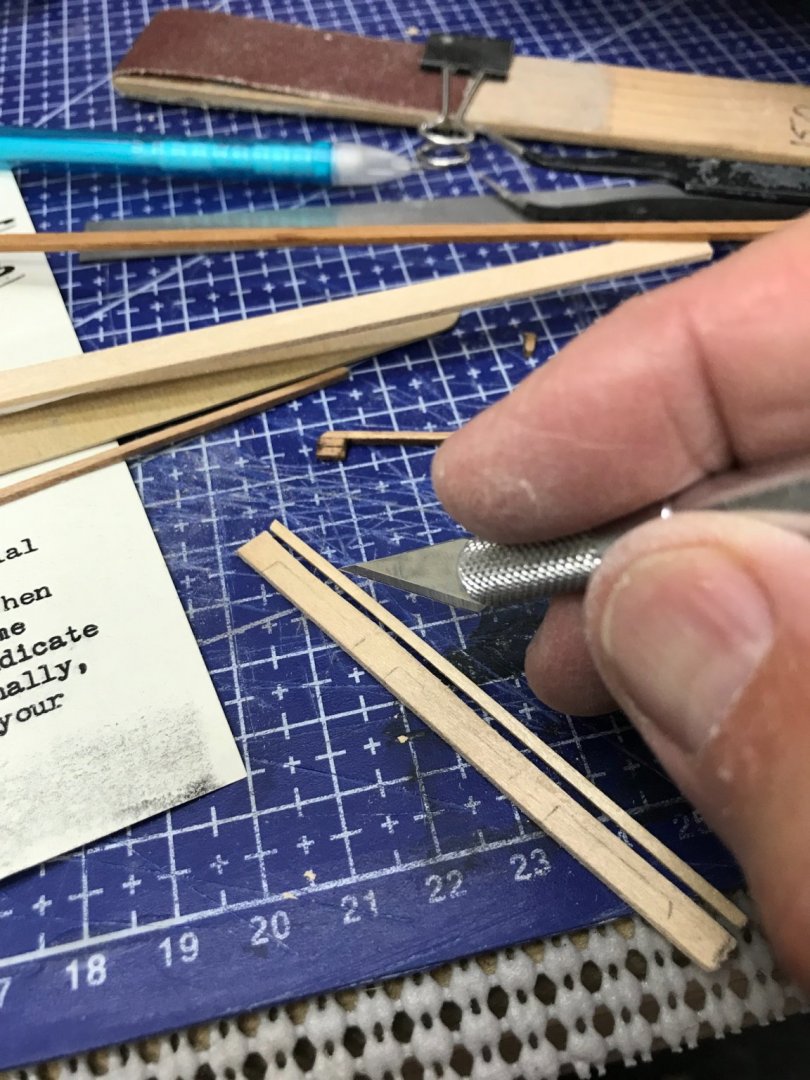
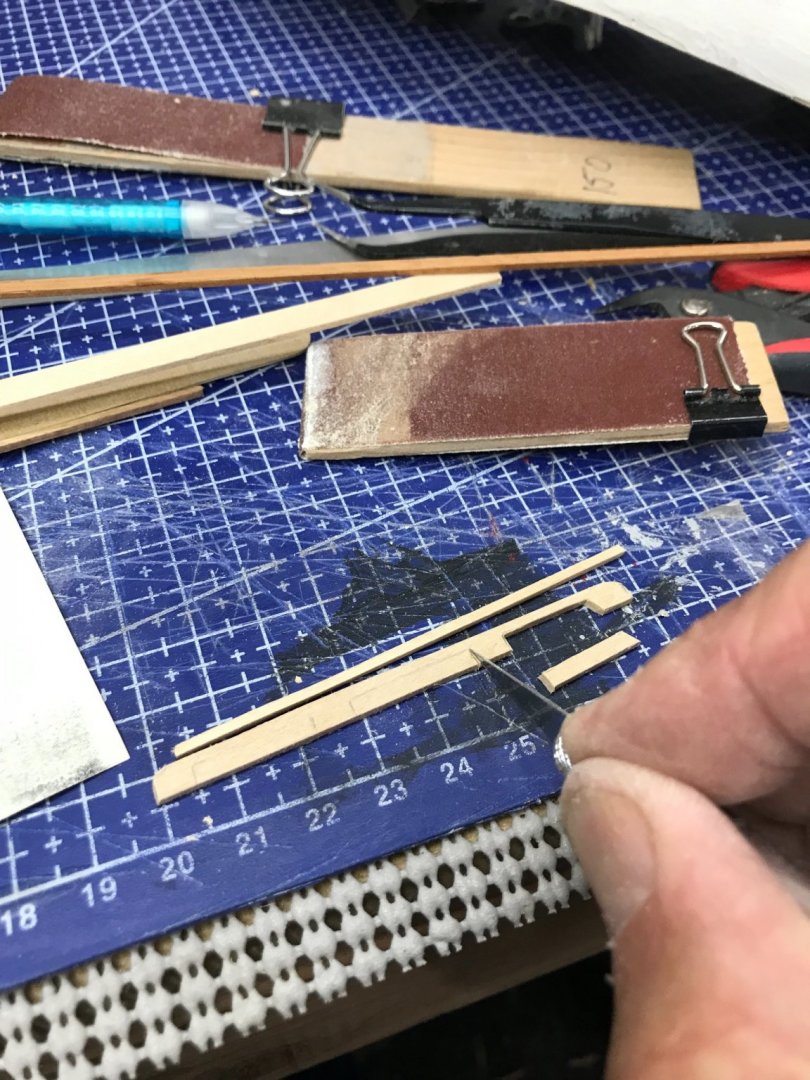
Cleaned up waterline… Started mahogany moldings… Doing a bit of clean up on the Forward cabin roof. Hand cut Hand Rails… Onwards 🍻


- 51 replies
-
- 4
-
-
- laughing whale
- maine lobster boat
- (and 1 more)
-
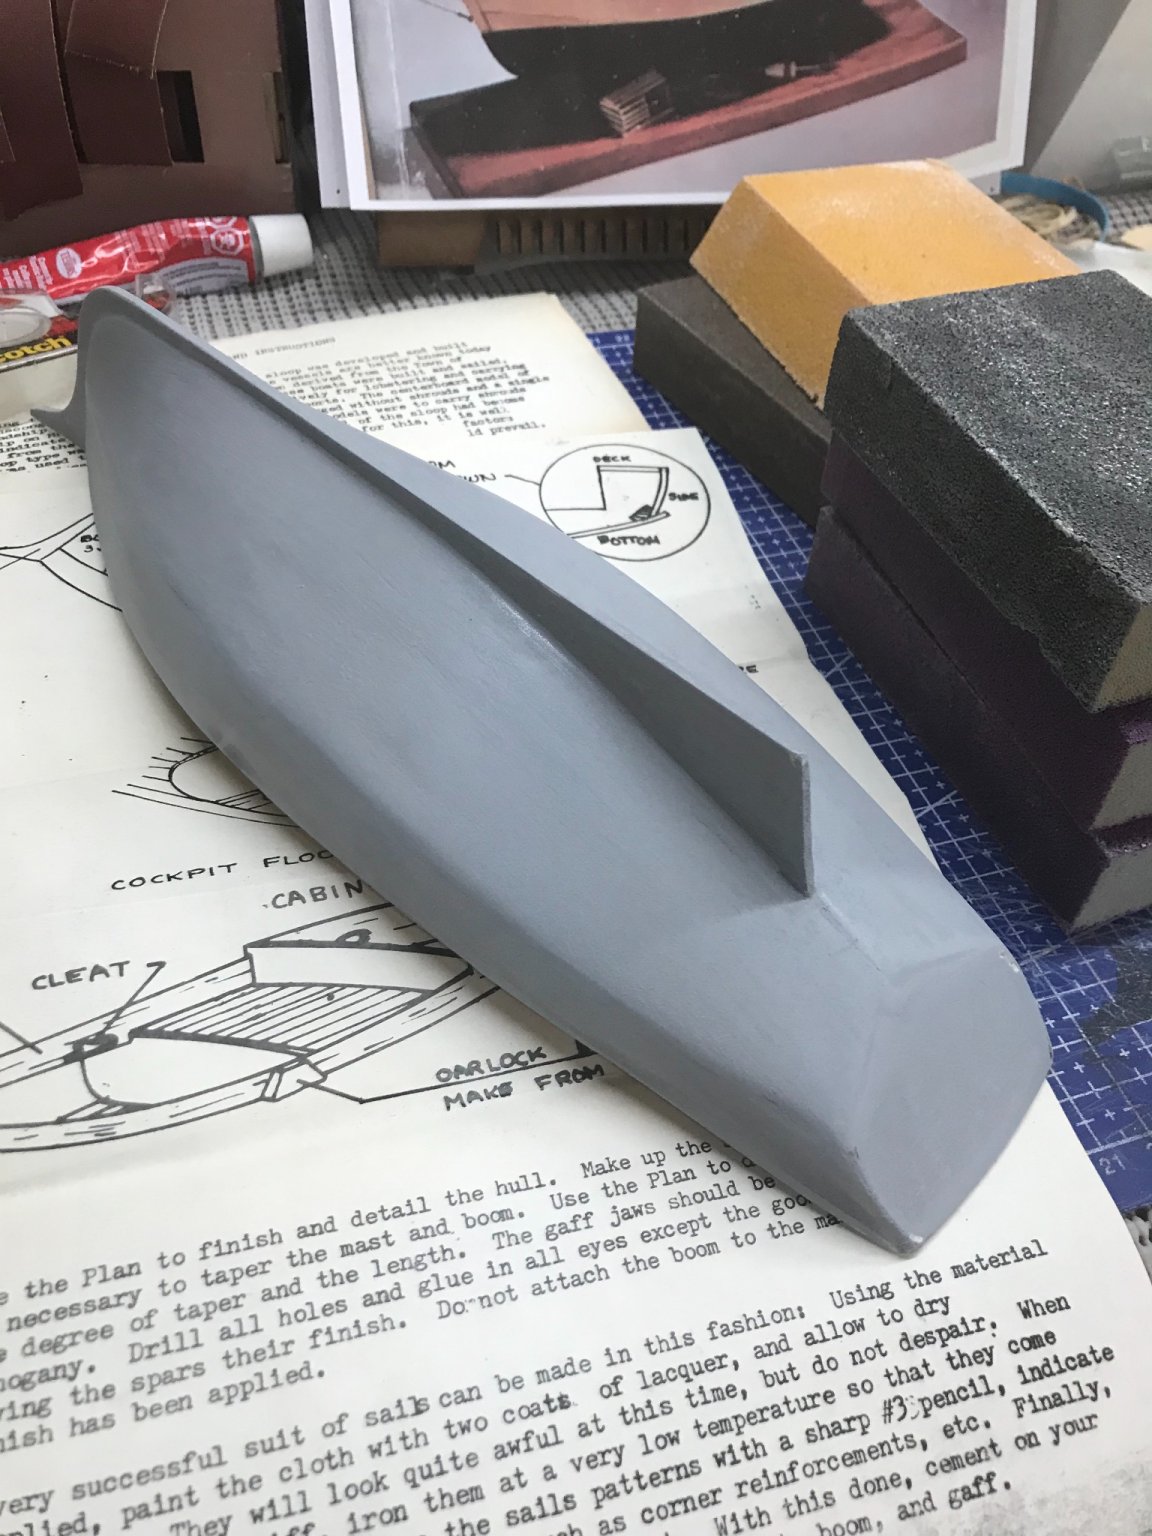
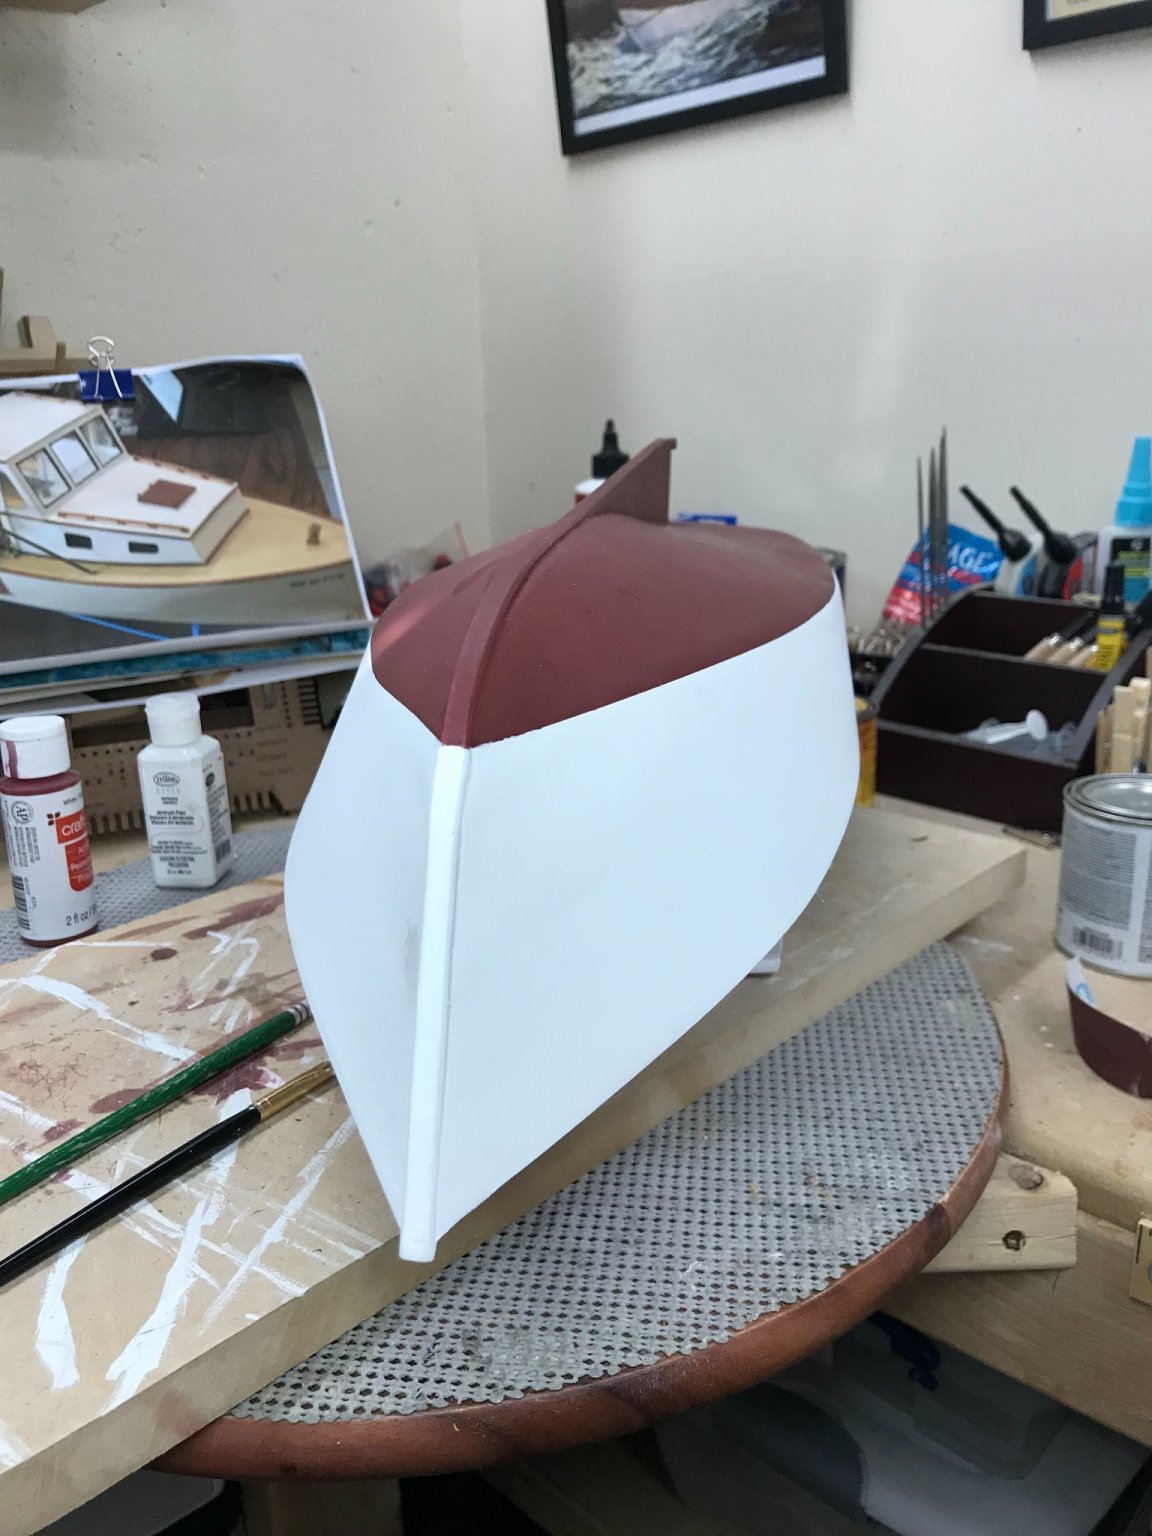
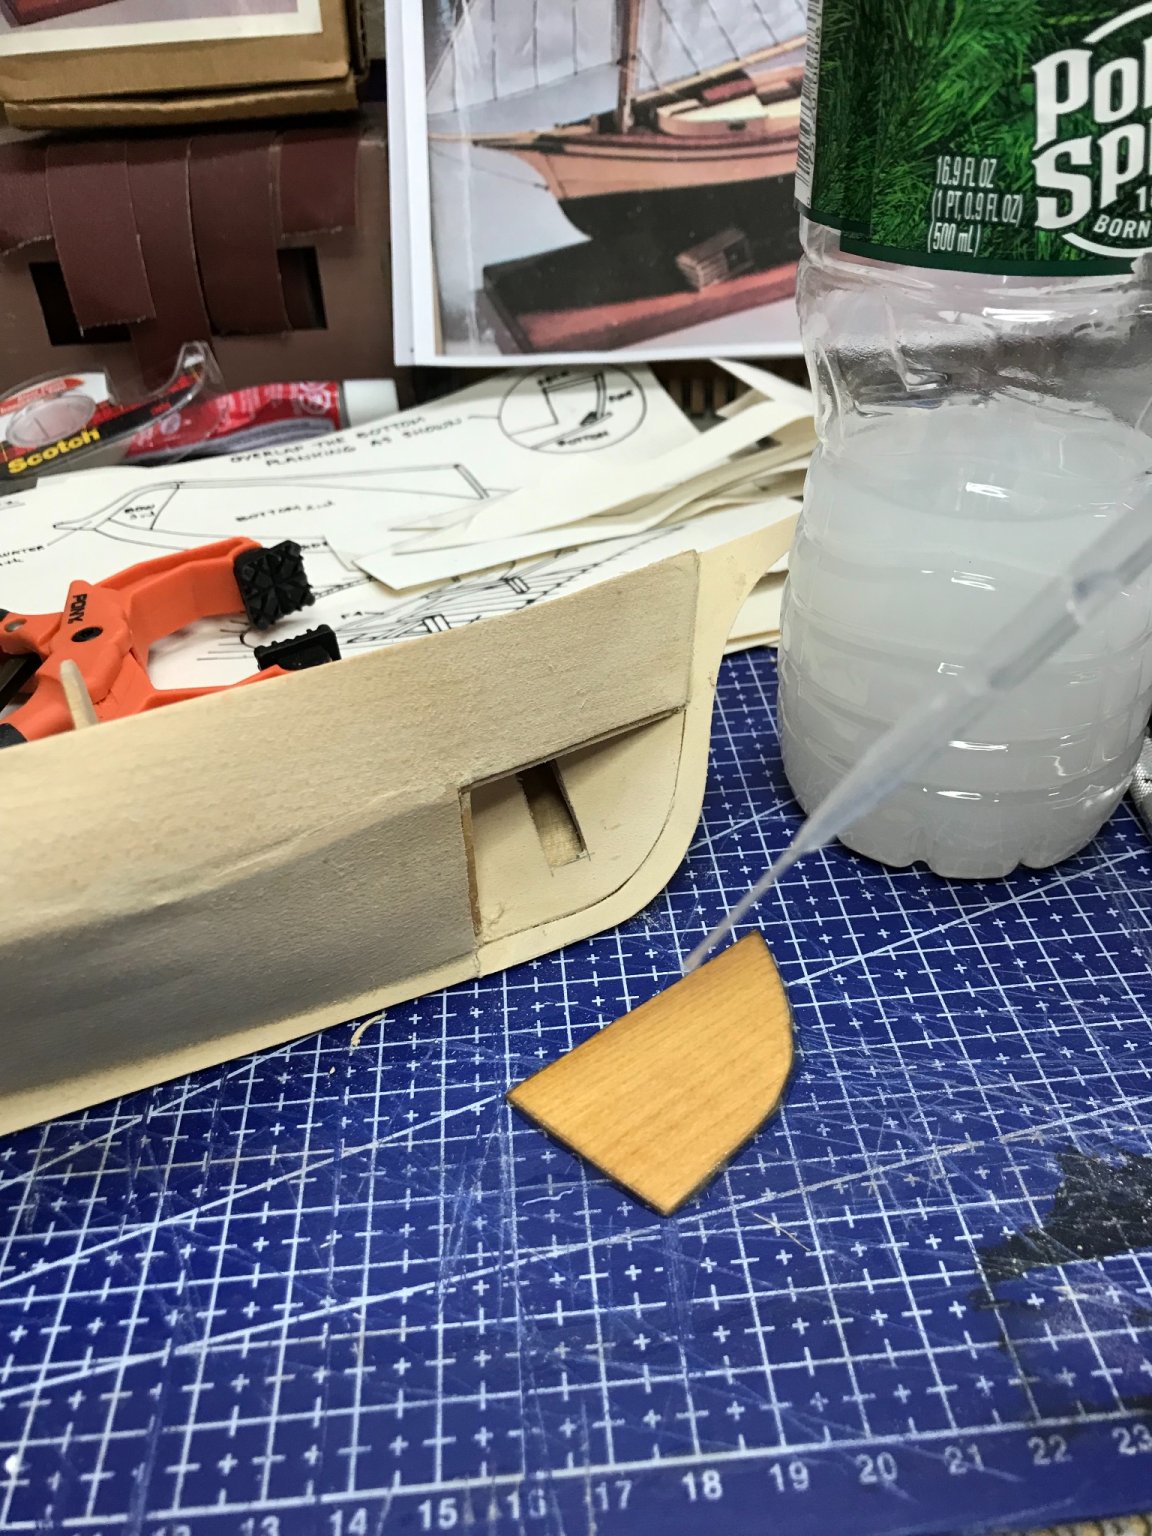
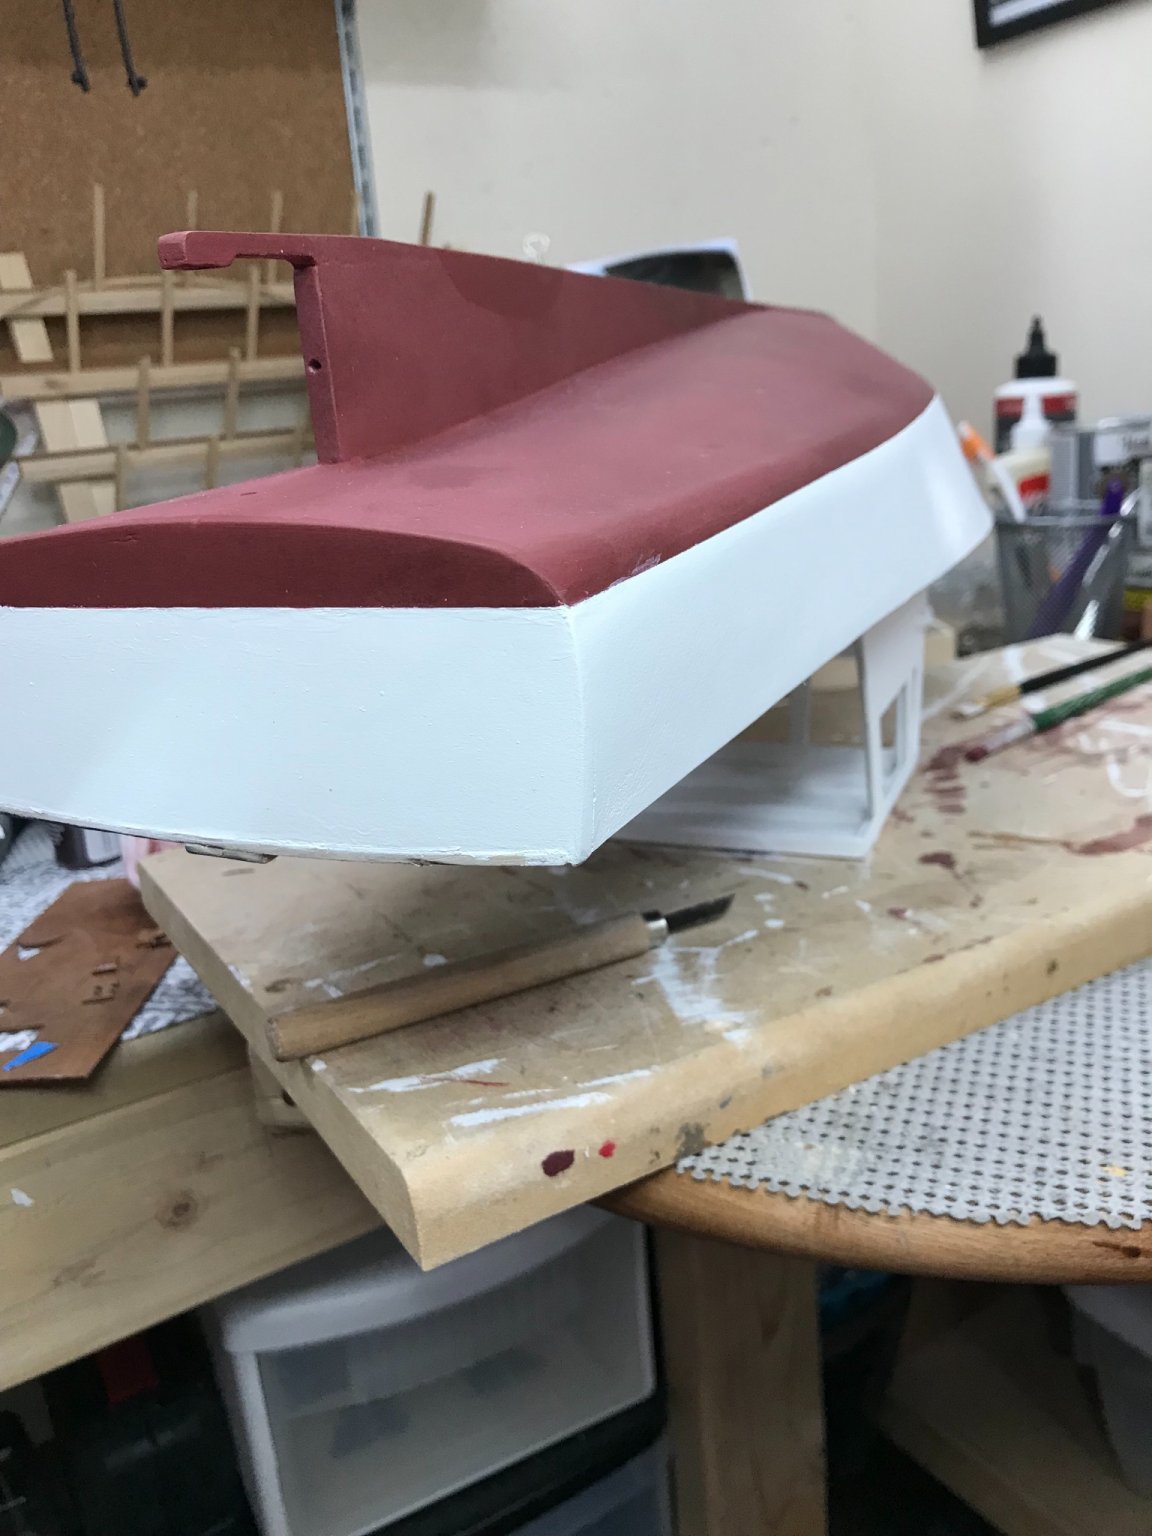
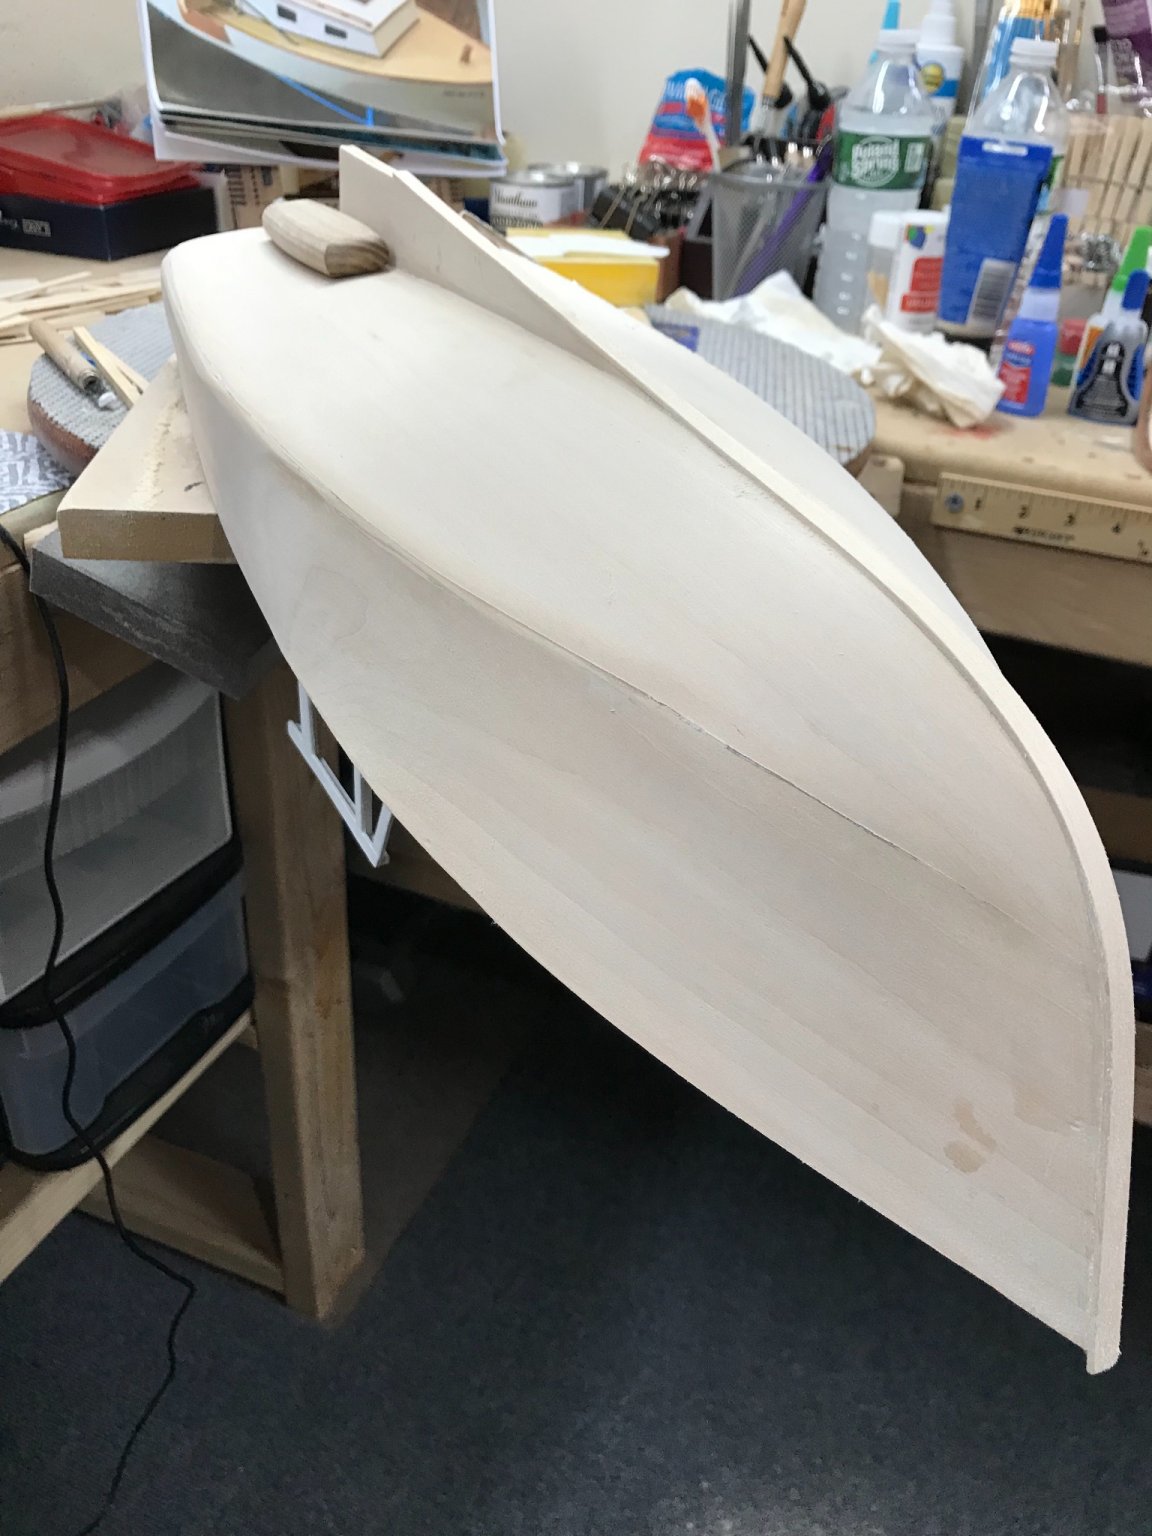
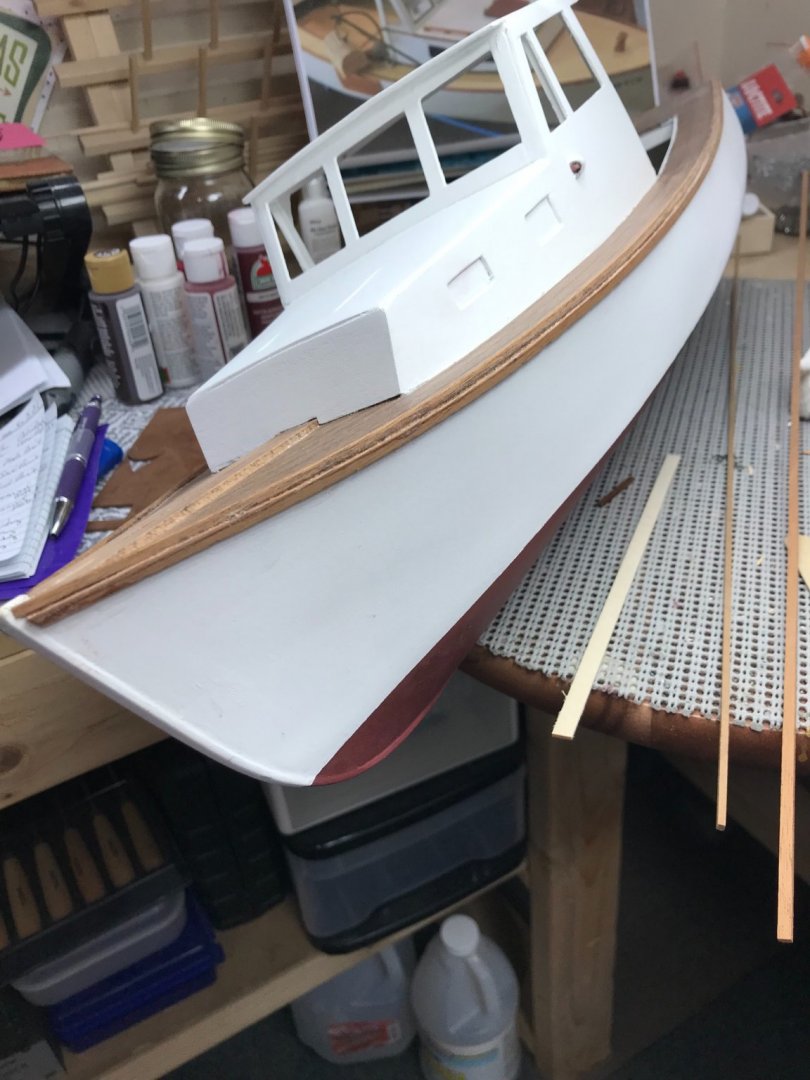
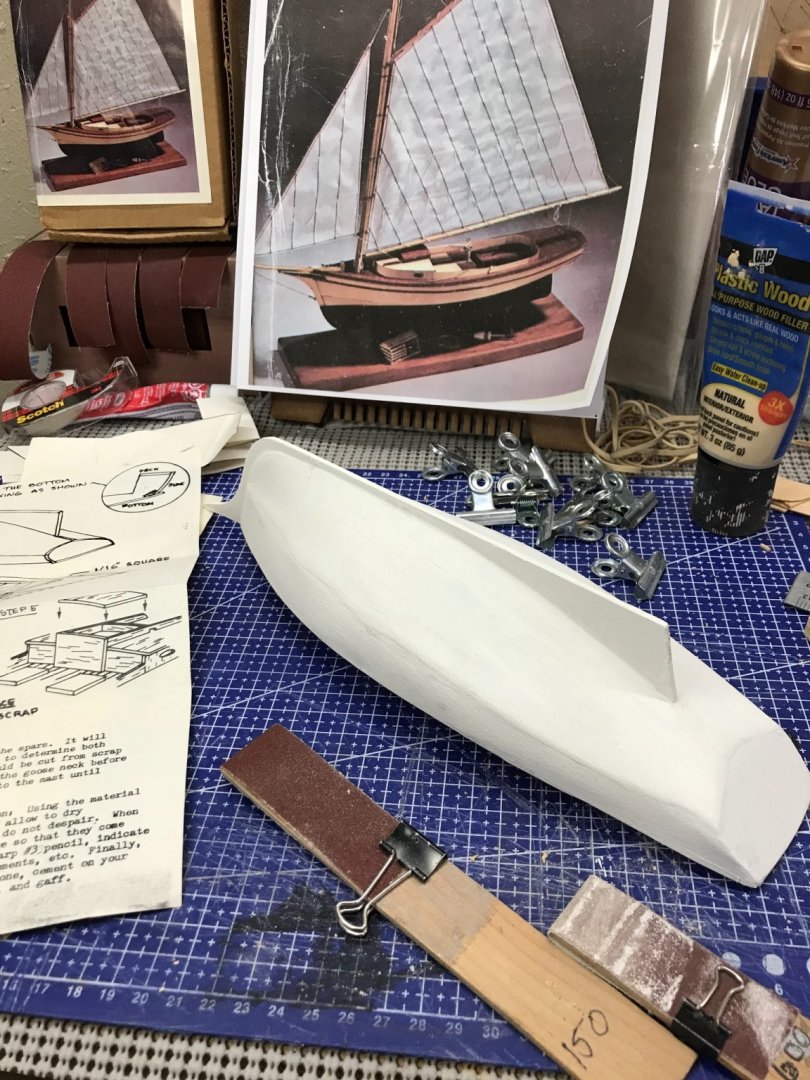
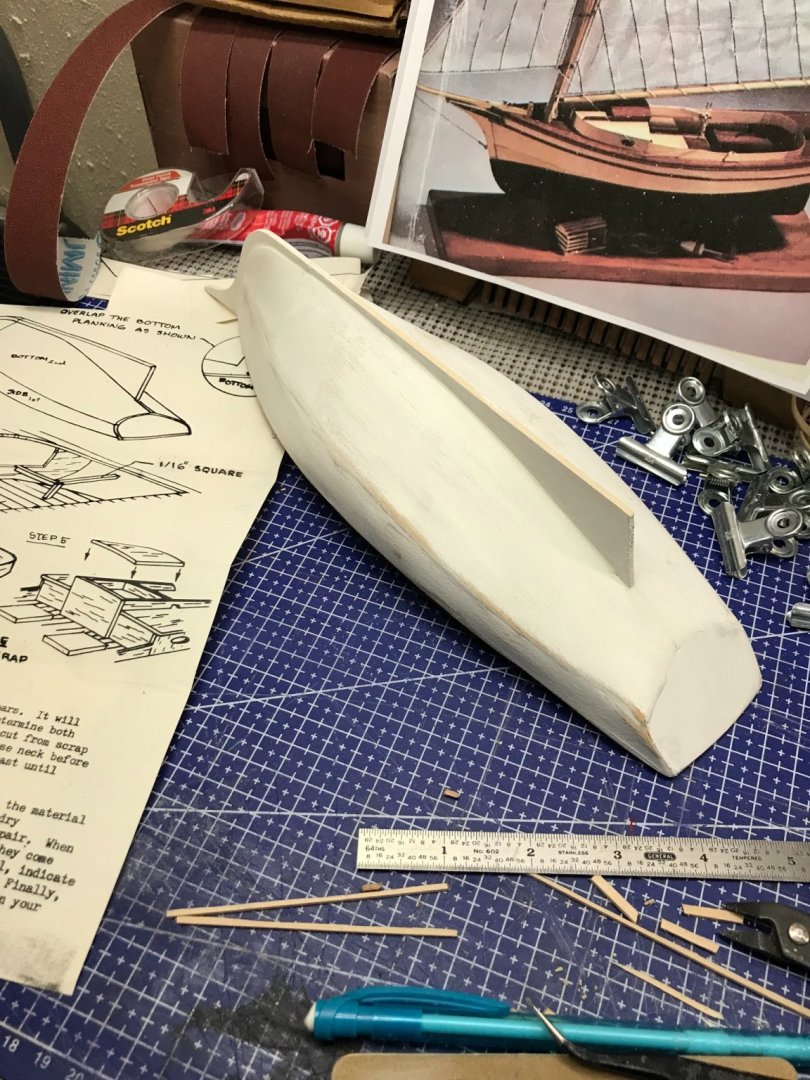
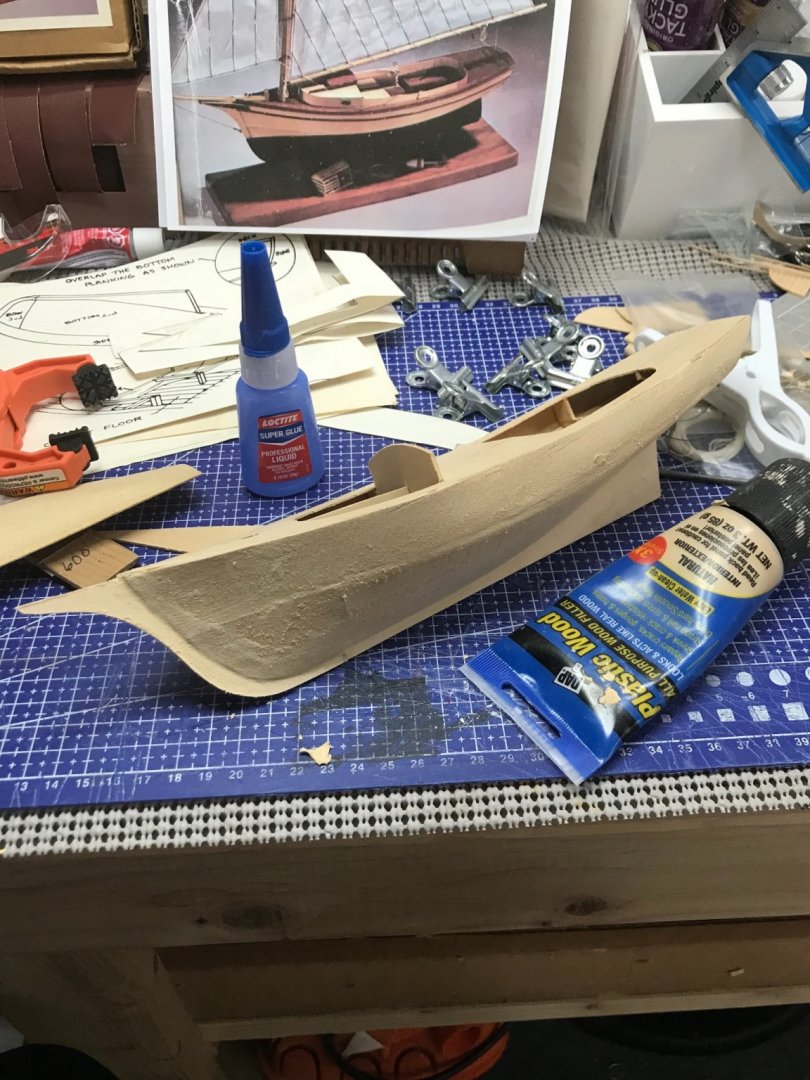
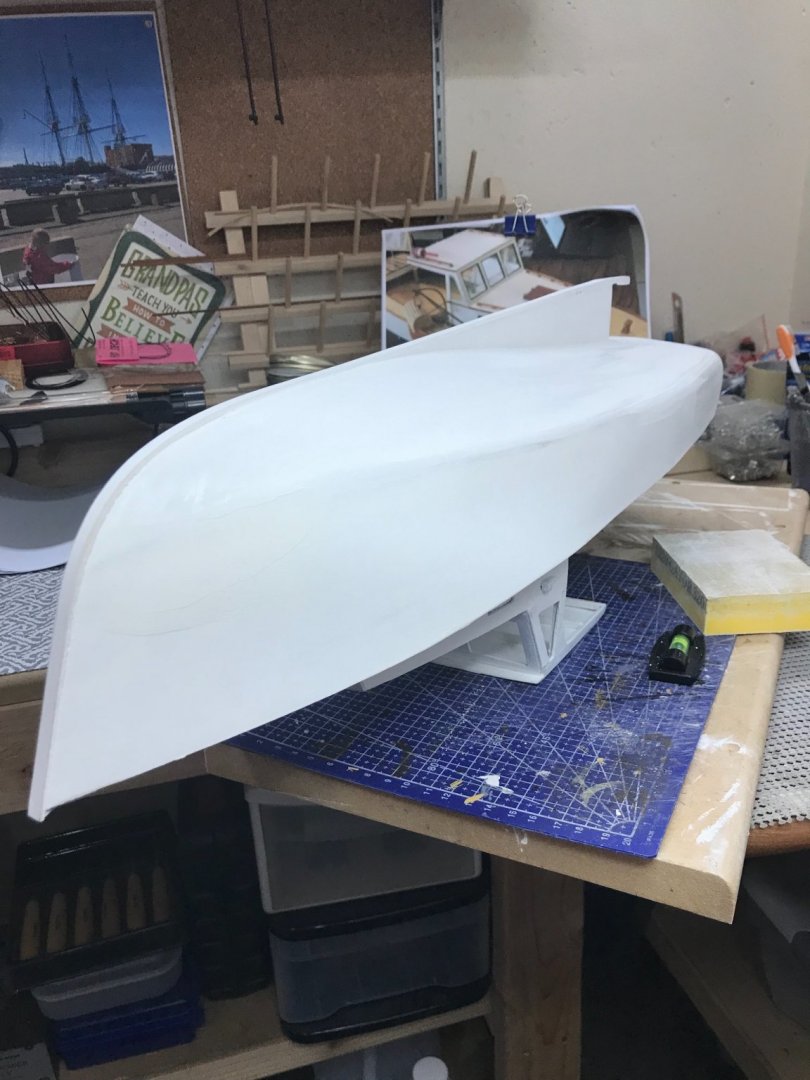
Bow piece… Forming wet… Hull now glued in place and primed. Ready for more sanding and filler. Sanded… Another coat of primer coming up… 🍻

- 26 replies
-
- 2
-
-
- Maine
- Laughing Whale
- (and 2 more)
-
Some touch up required, but all in all not bad. 😎 Ready to start accessories. Cheers 🍻

- 51 replies
-
- 4
-
-
- laughing whale
- maine lobster boat
- (and 1 more)
-
The airbrushing takes a lot of patience. Spray a light coat and walk away at least 10 minutes. Come back repeat all day long. Also having the acrylic thin enough to not plug the nozzle. 😩 It pays off, Brushing can not match the result. Just needed to start another project to fill the time between coats. I hate watching paint dry. 😂 So I started my Laughing Whale Lobster Smack. 😎
- 51 replies
-
- 2
-
-
- laughing whale
- maine lobster boat
- (and 1 more)
-
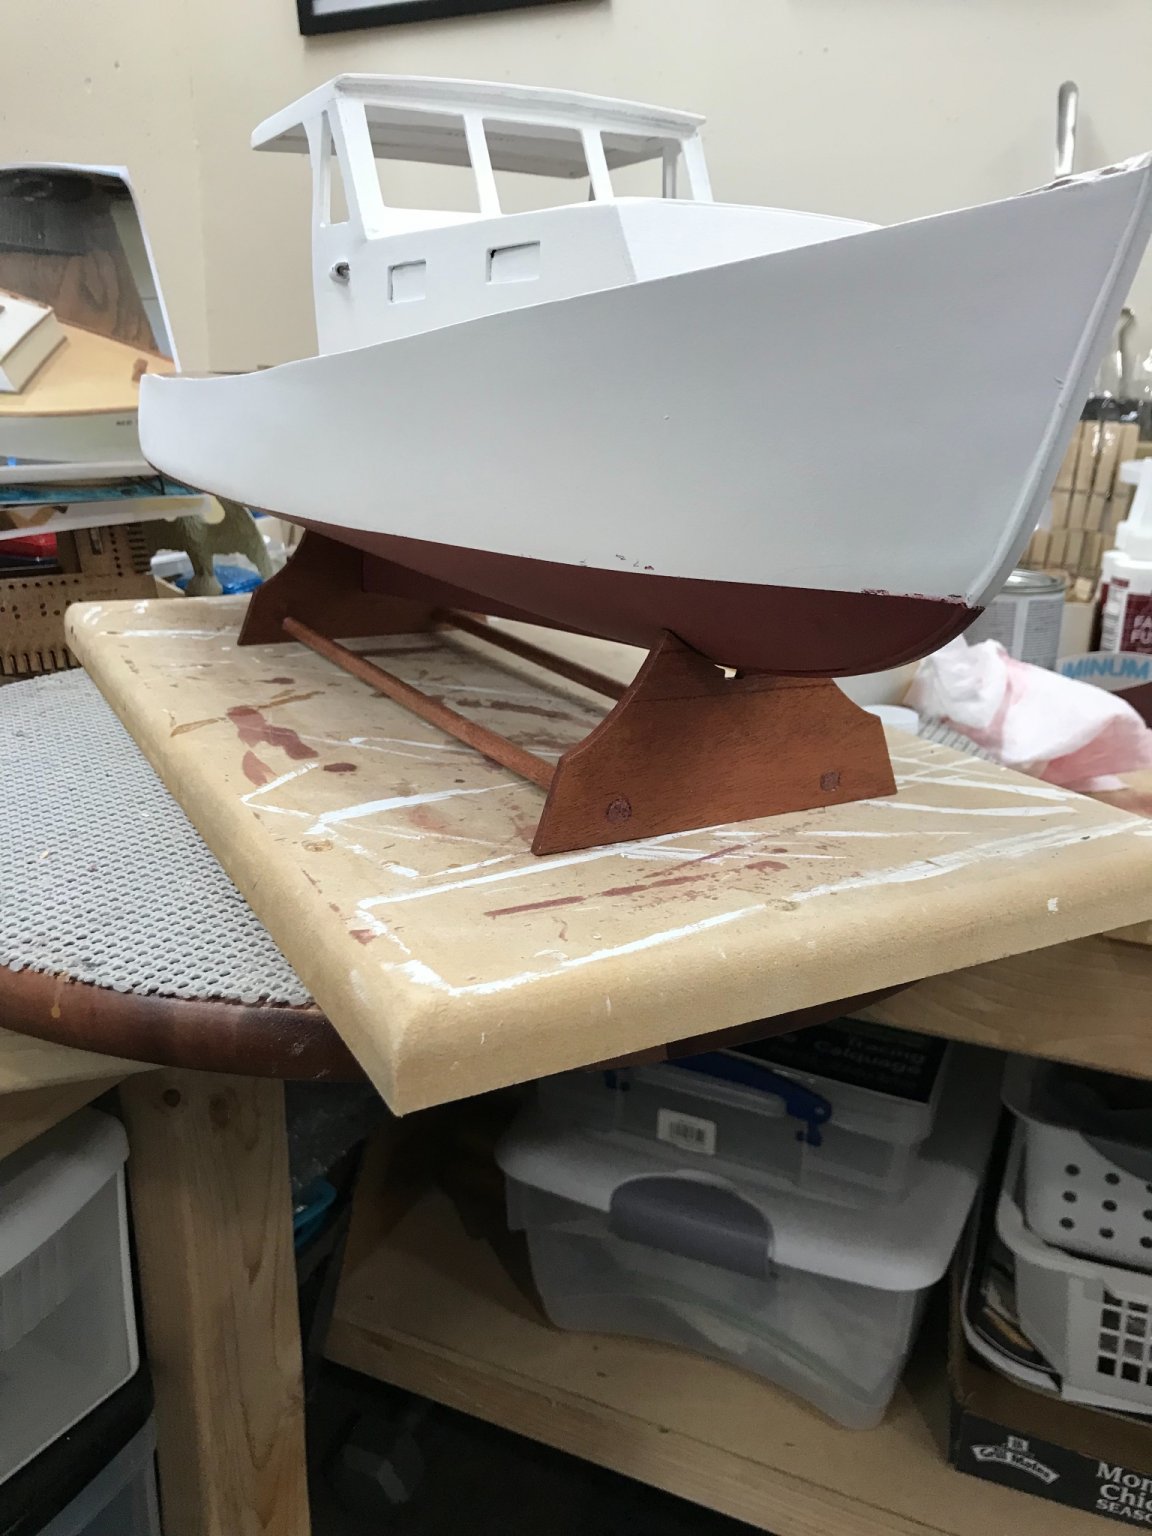
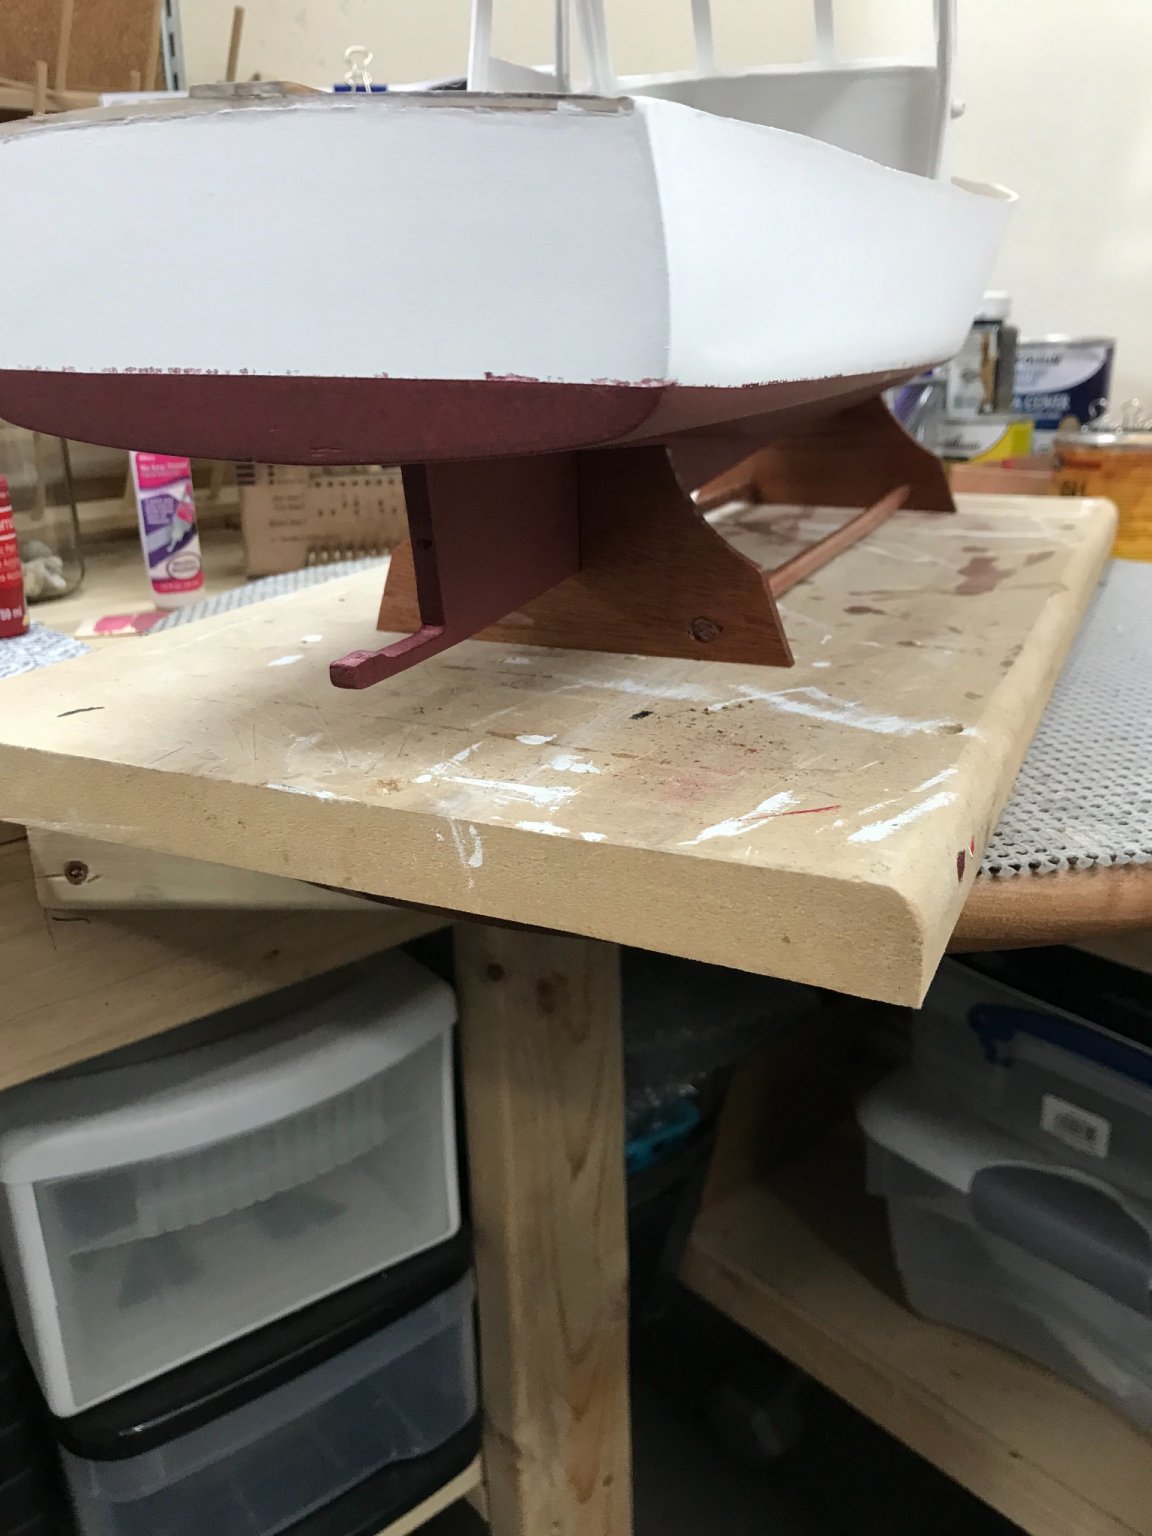
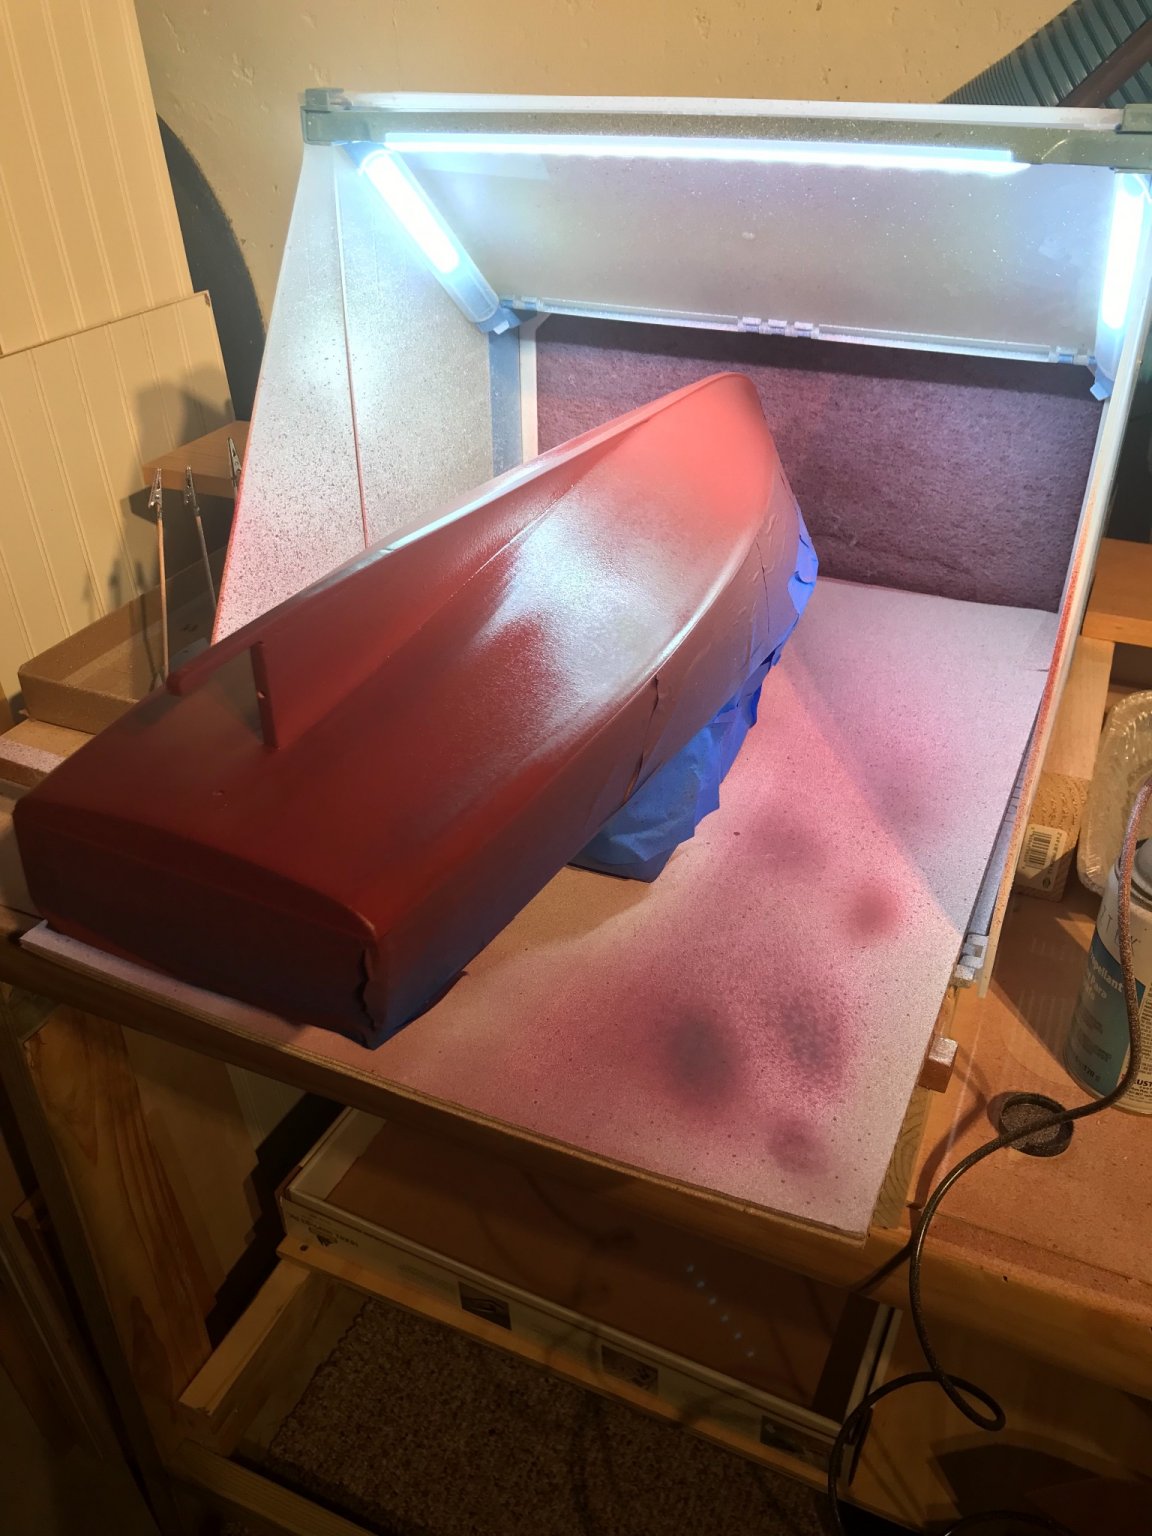
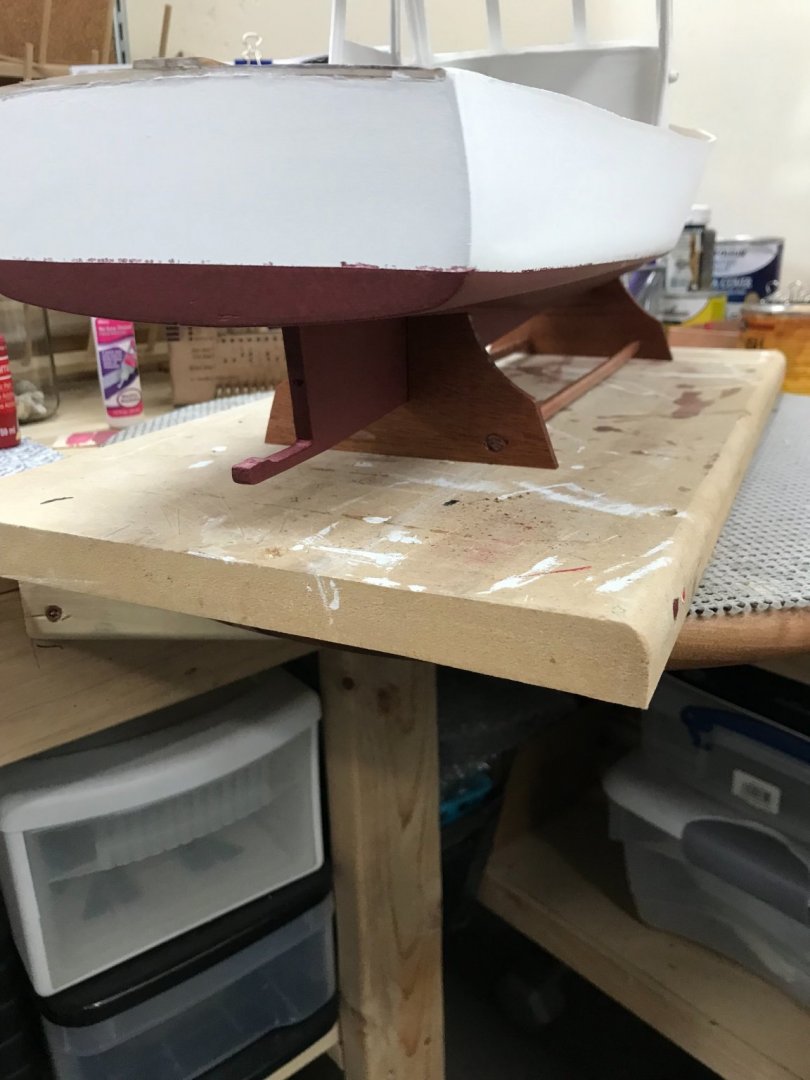
More progress… Time to mark the water line and mask for painting the underside. Finally getting the flow and thinning down for airbrushing. Starting to feel good about using an airbrush. I see painting more hulls in the future. Cheers 🍻


- 51 replies
-
- 3
-
-
- laughing whale
- maine lobster boat
- (and 1 more)
-
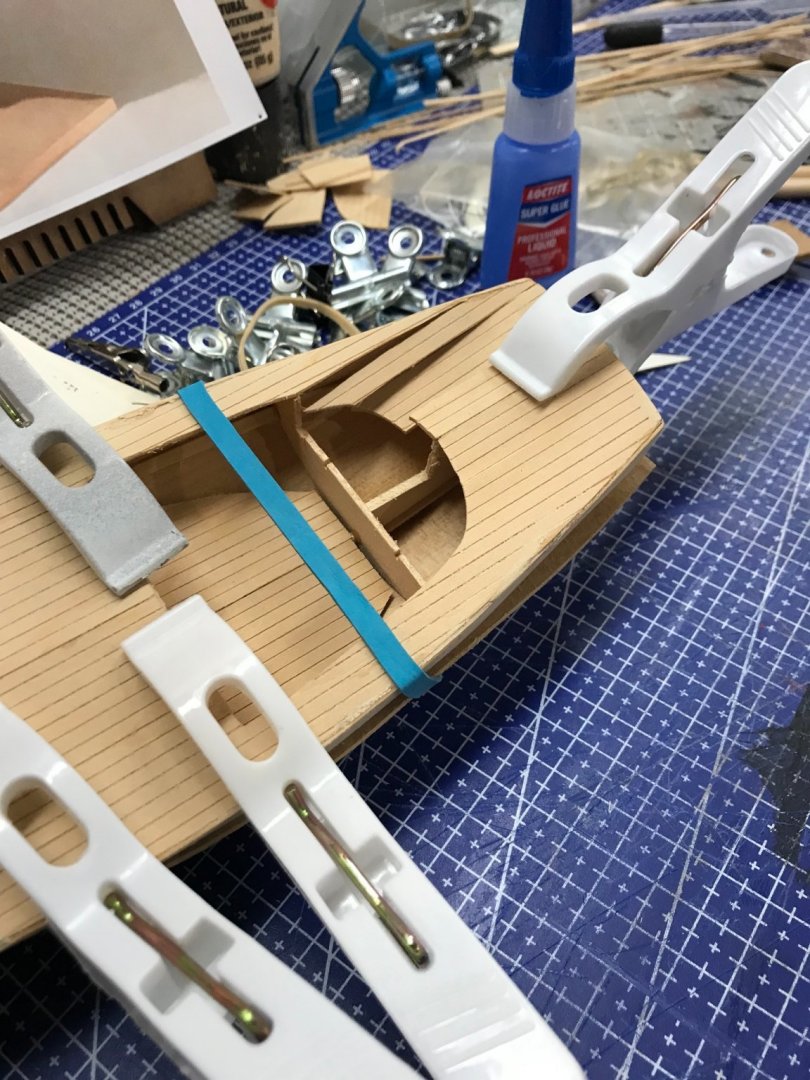
Repaired… Added some deck material on the underside to strengthen the rear deck. One side completed and filled. 😎

- 26 replies
-
- 2
-
-
- Maine
- Laughing Whale
- (and 2 more)
-
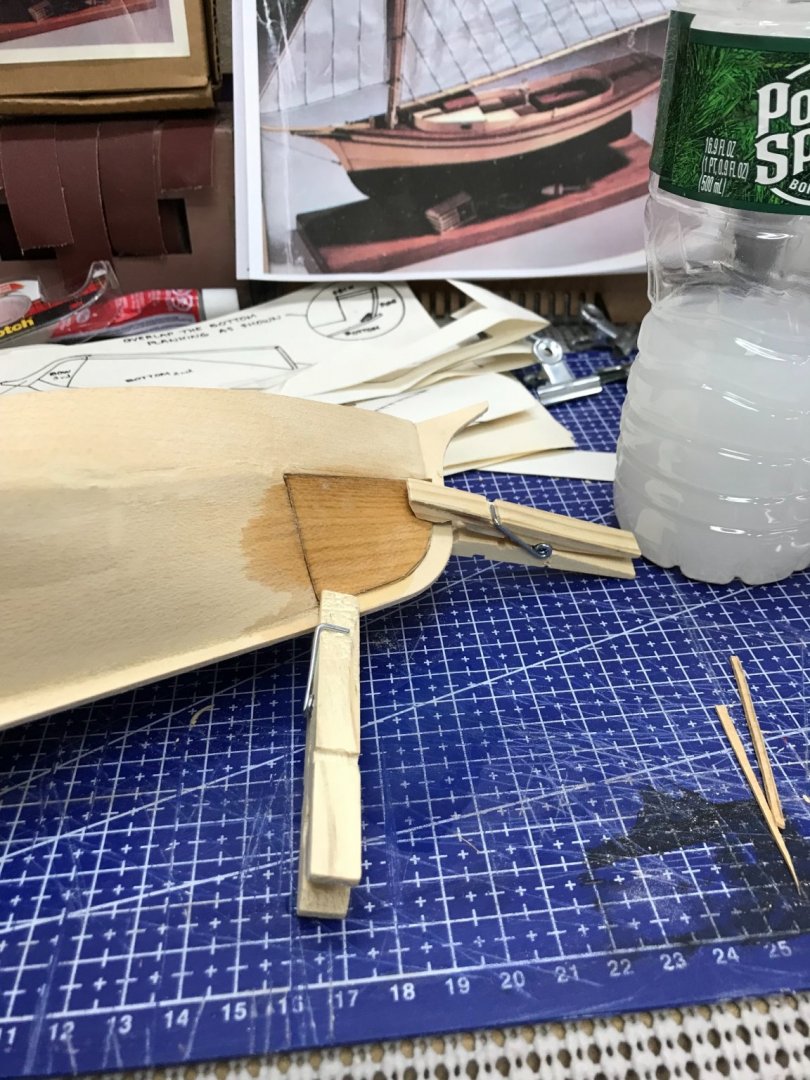
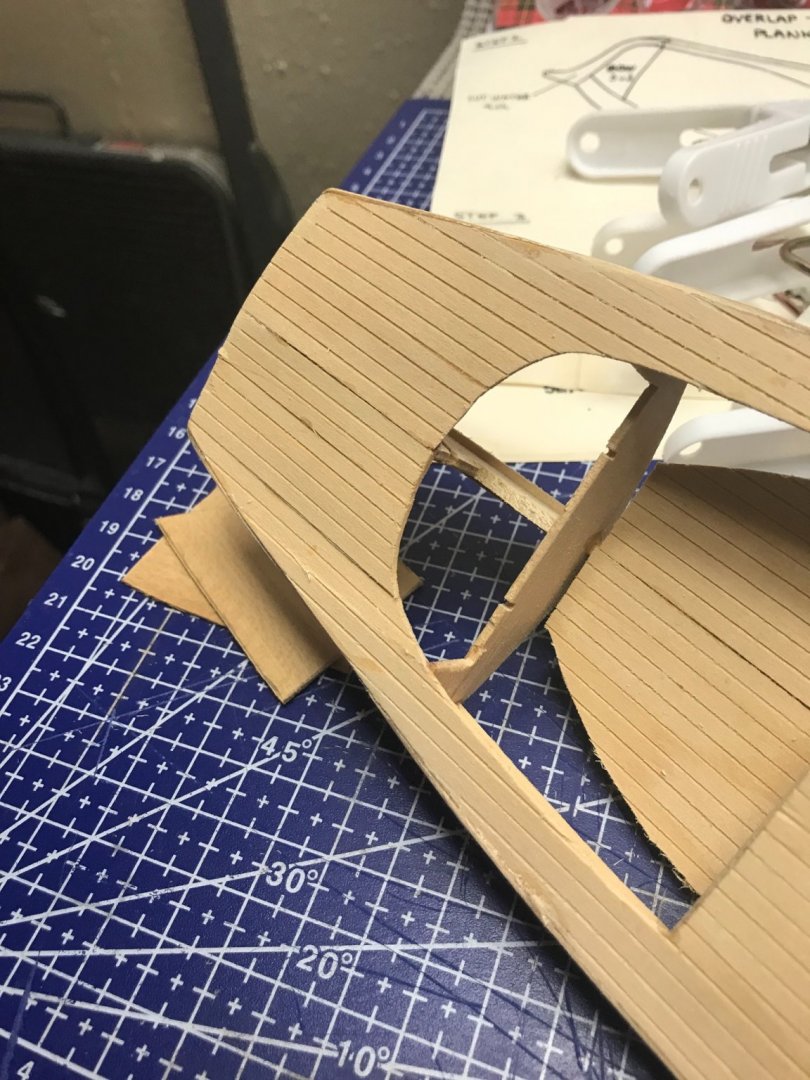
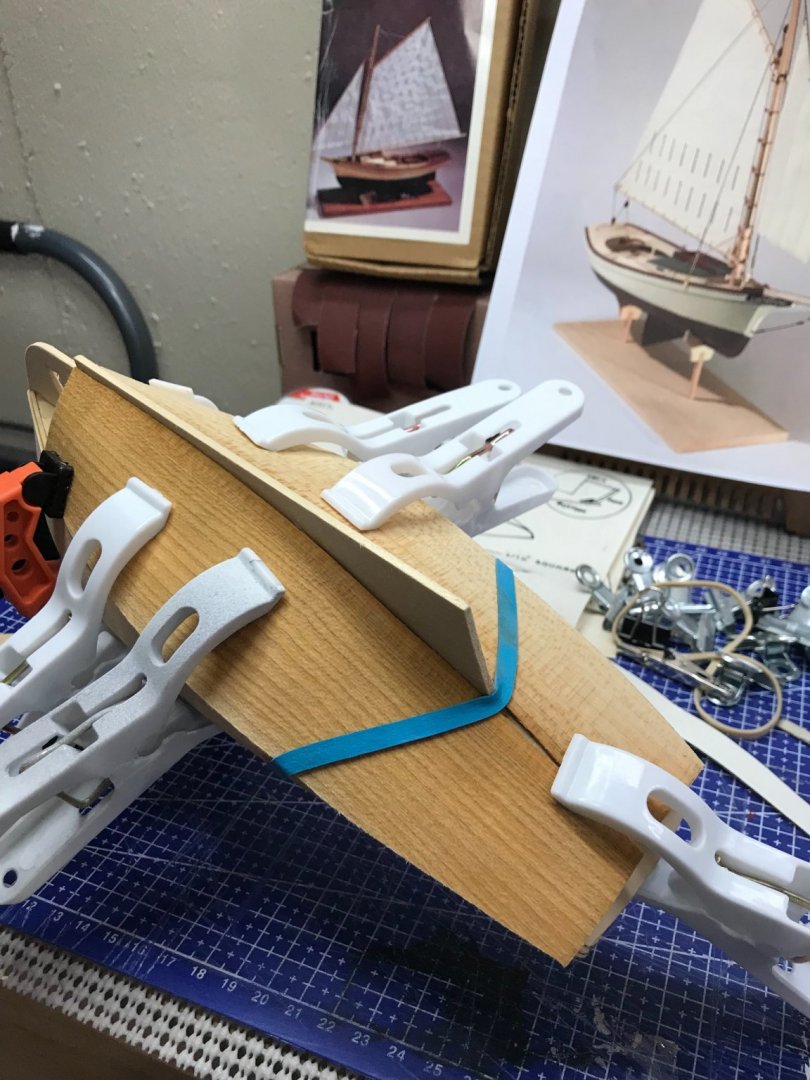
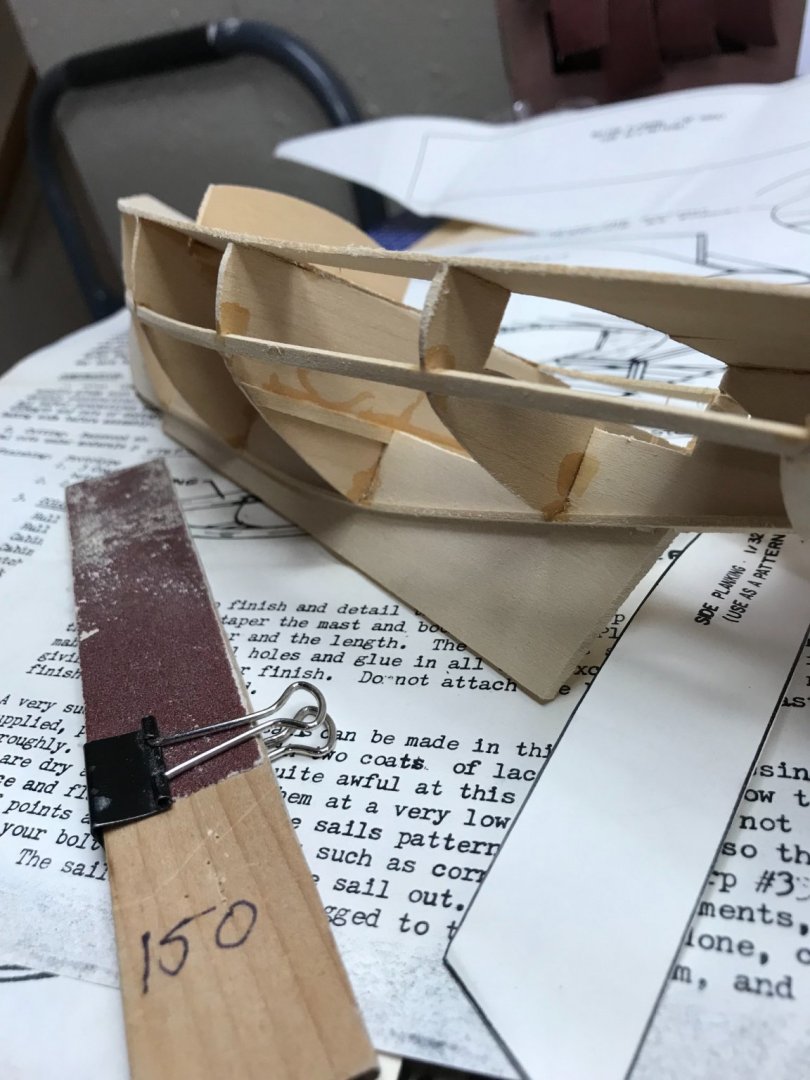
Side planking now dry and formed to fit. Double check the fit and glue into place. Carefully beveled all mounting edges for the bottom sheet planks. Soaked planking and clamped in place to dry. Oops 😬 Be careful clamping. That will have to be repaired before I glue the bottom planks in place. Tomorrow is another day. 😒 I will be back… 🍻

- 26 replies
-
- 1
-
-
- Maine
- Laughing Whale
- (and 2 more)
-
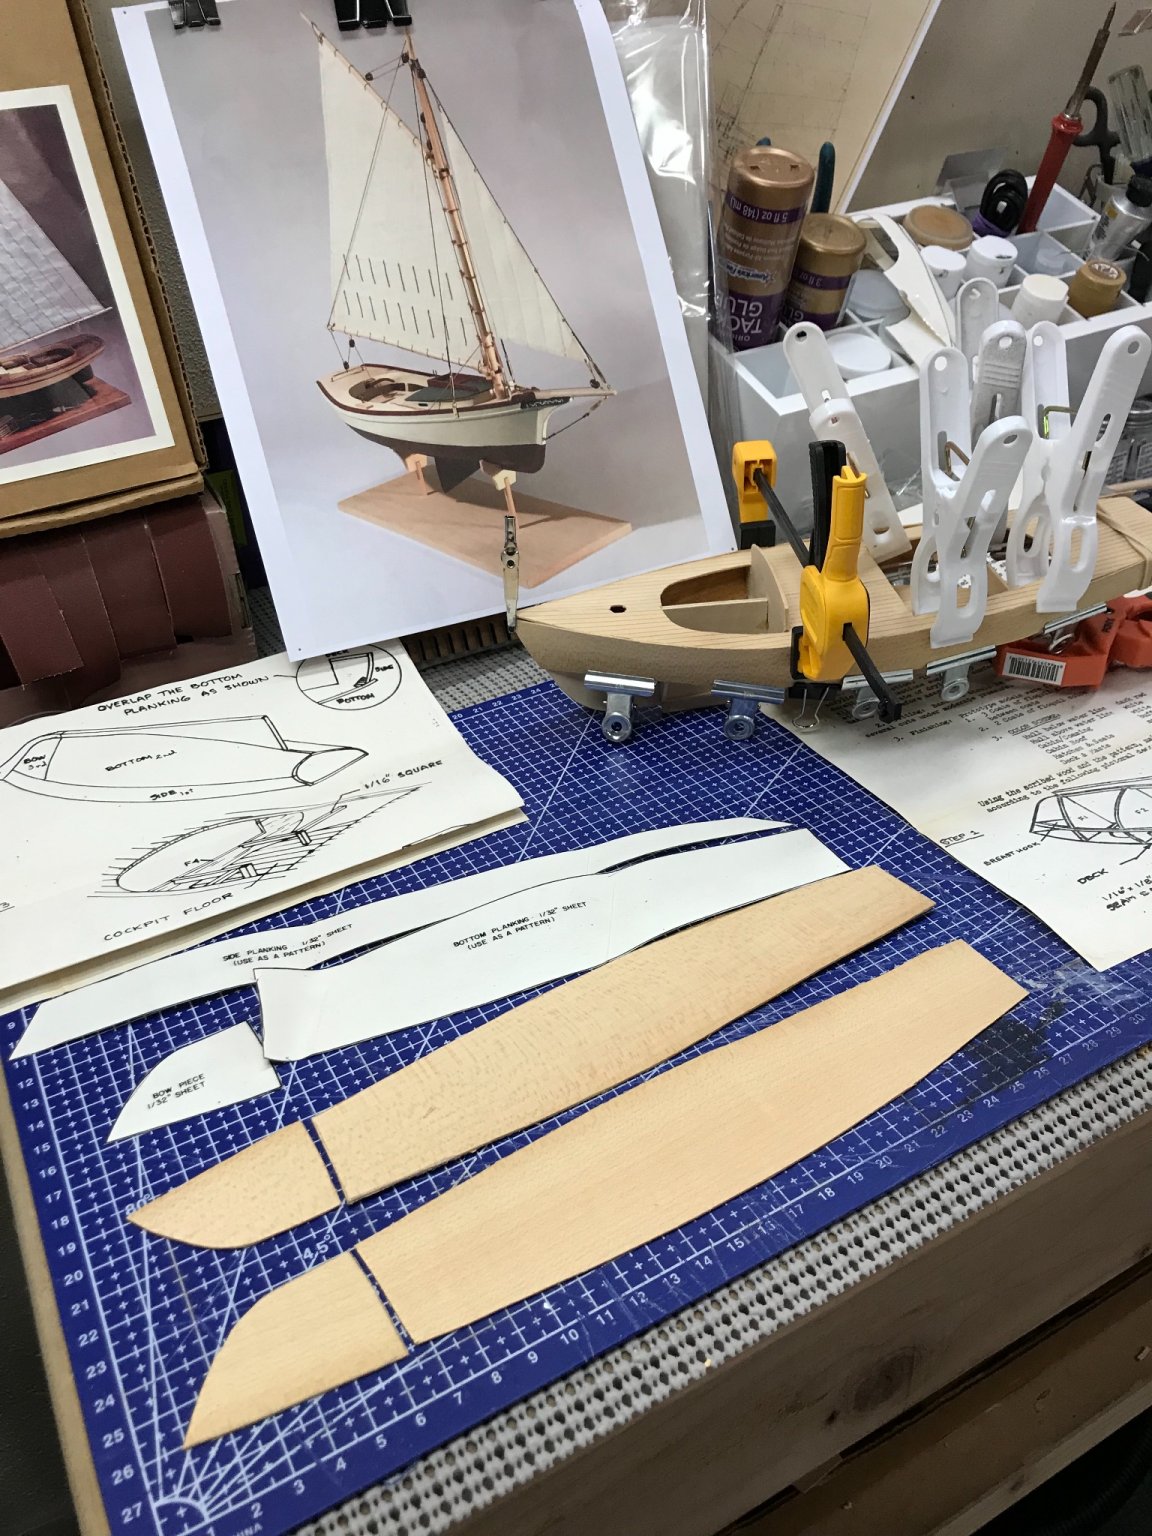
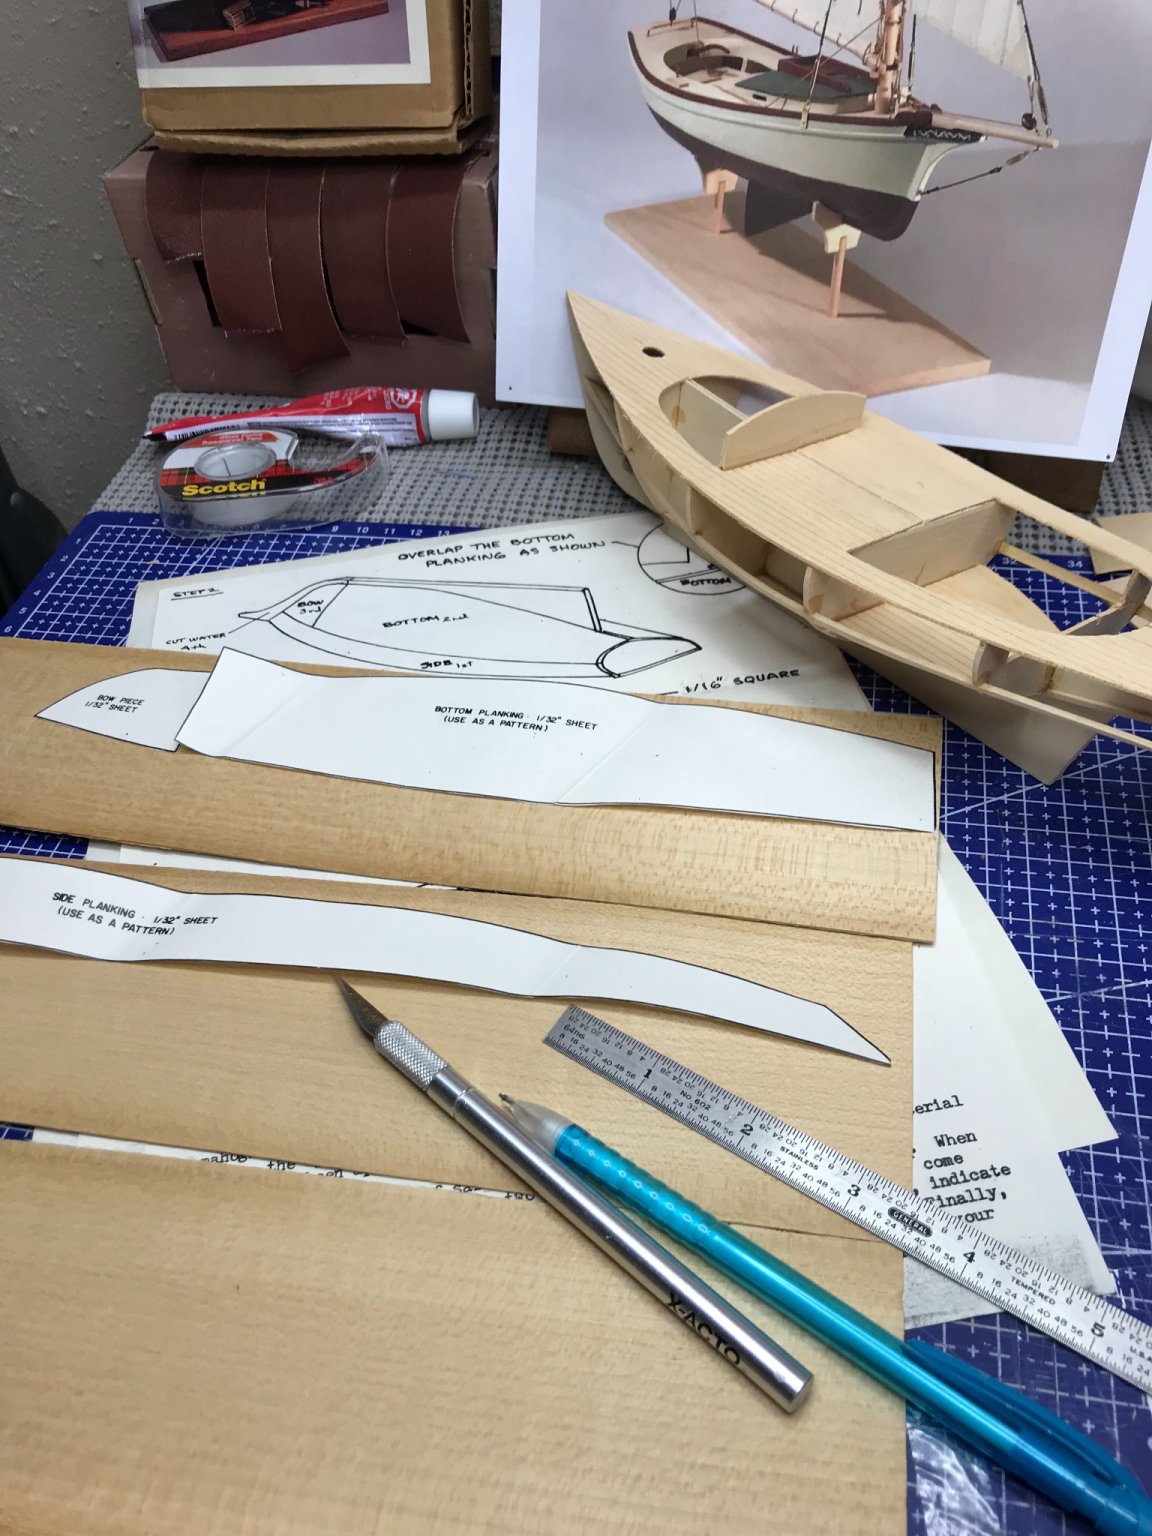
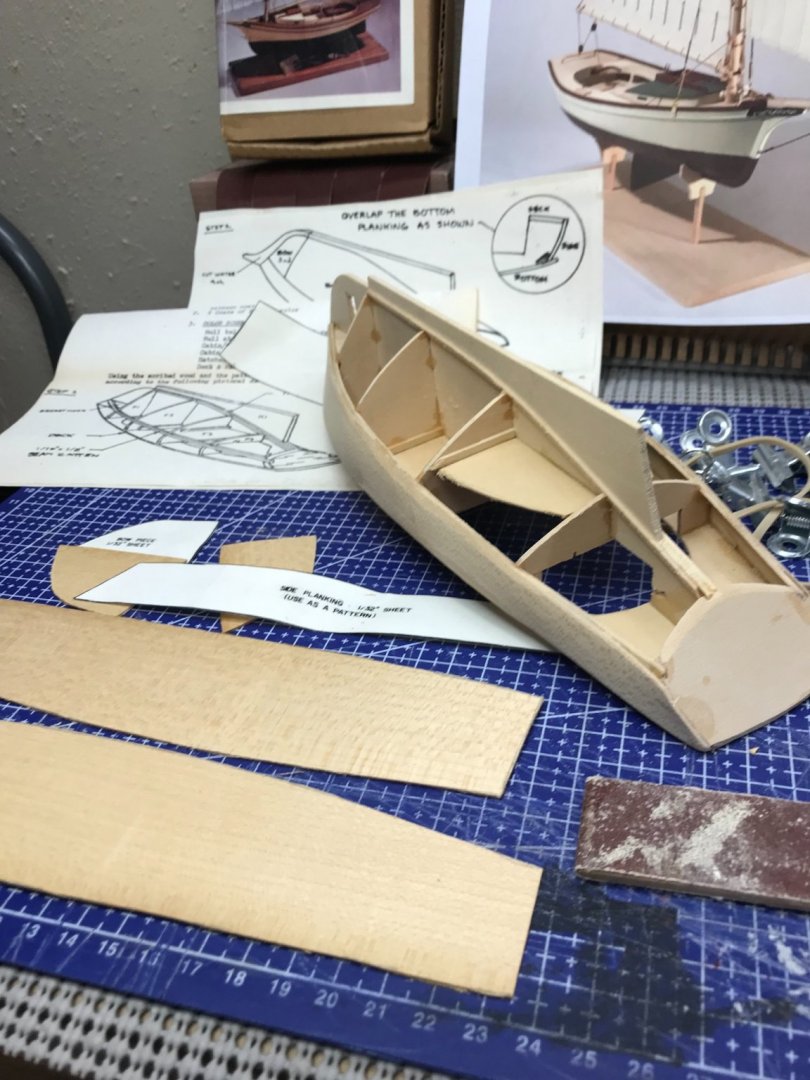
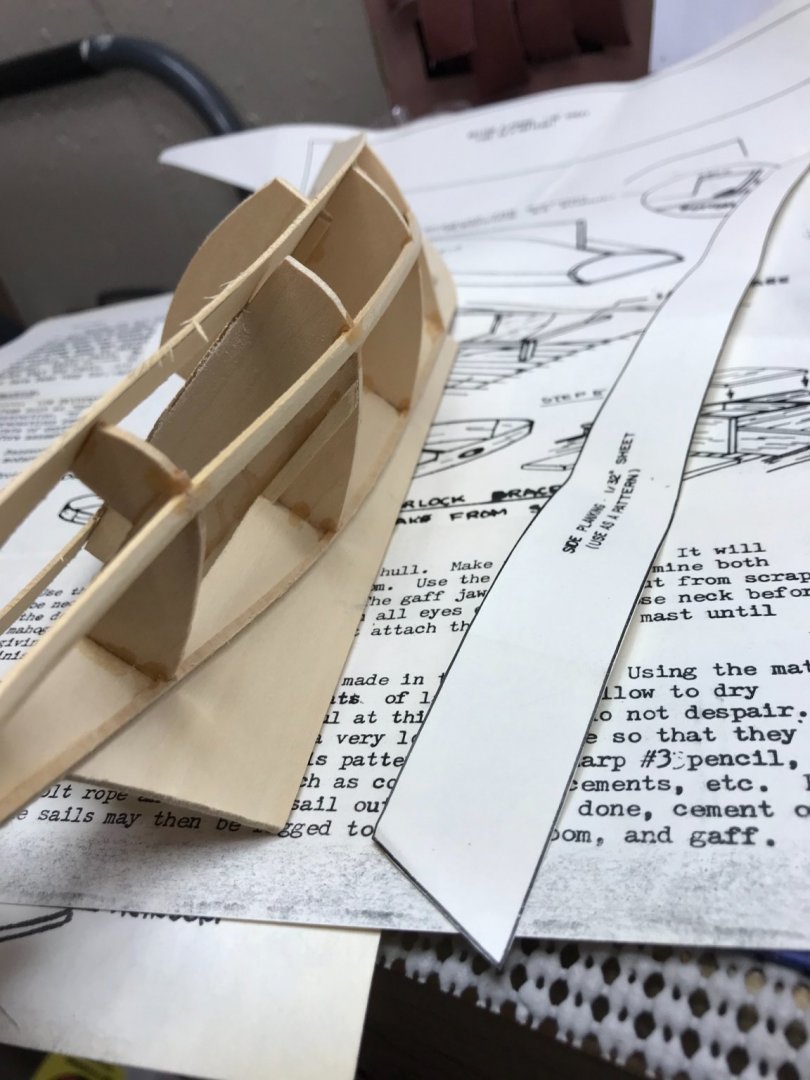
There, we have those laser cut pieces. Side planking has been wetted with Ammonia/Water solution and clamp to dry with proper shape. I will glue those down before adding these bottom pieces. Cheers 🍻

- 26 replies
-
- 1
-
-
- Maine
- Laughing Whale
- (and 2 more)
-
Coming along… More sanding, filling and light coats of paint. Back to the paint booth. 😷
- 51 replies
-
- 4
-
-
- laughing whale
- maine lobster boat
- (and 1 more)
-
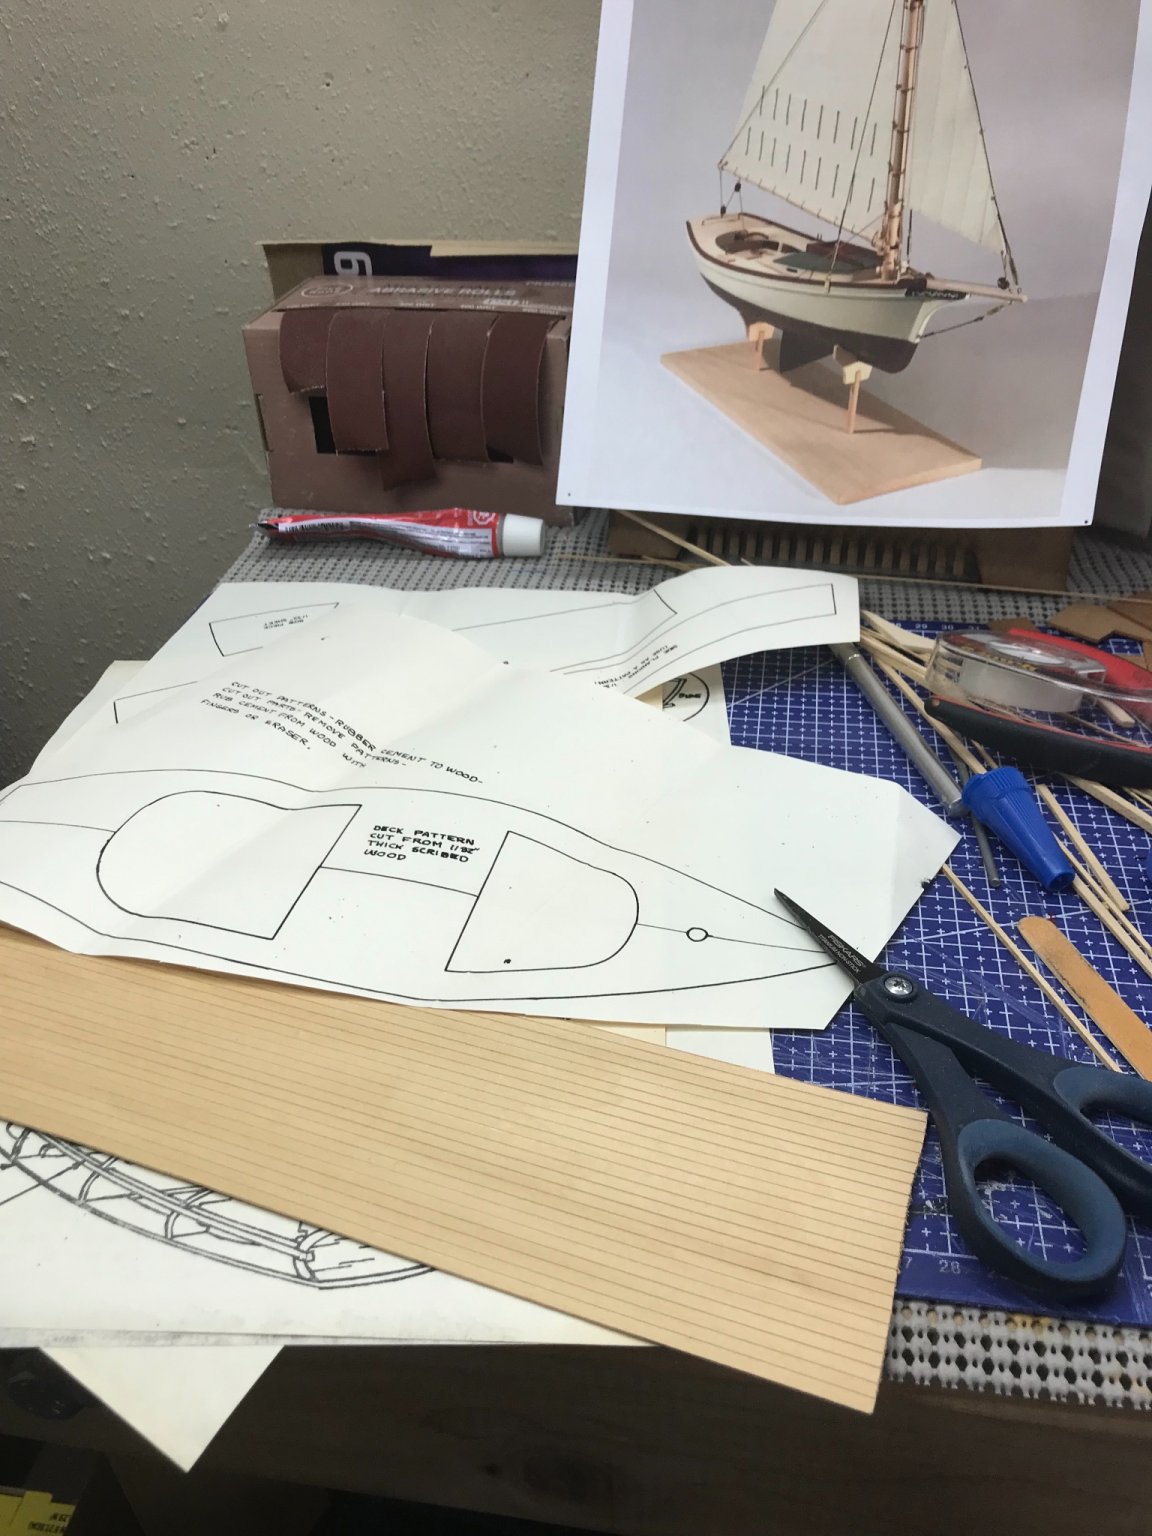
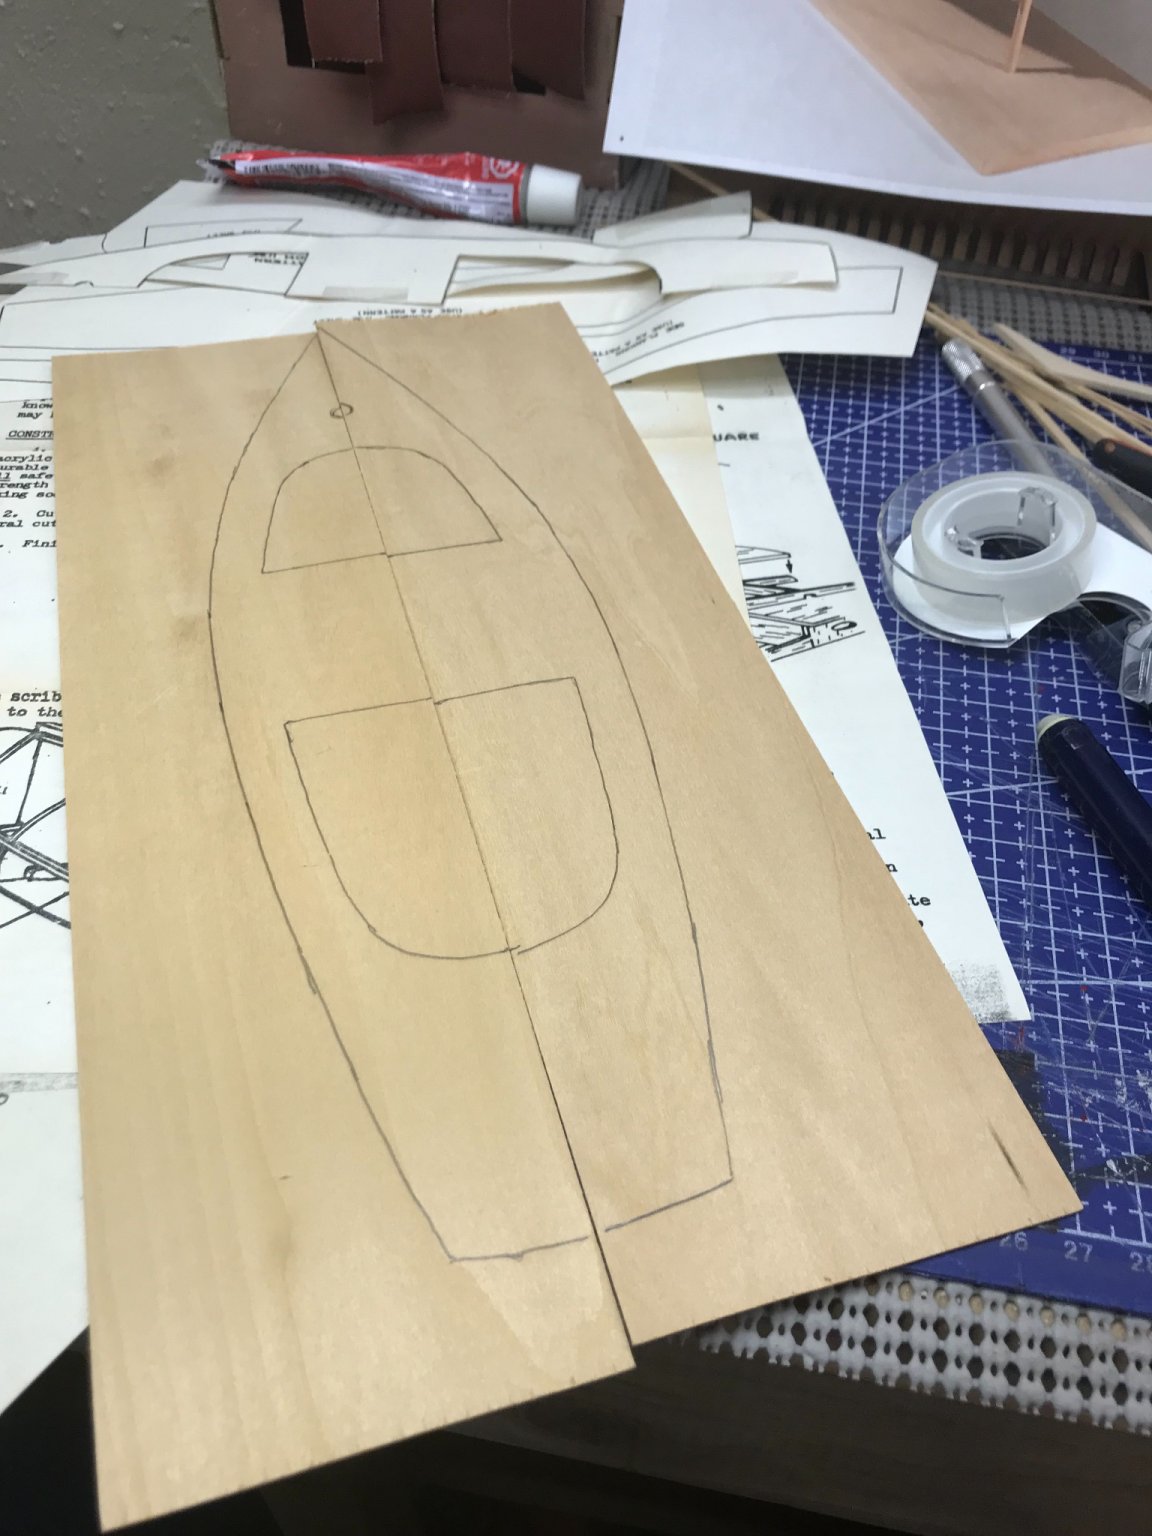
Finishing up the battens for the sheet planking. Paper Templates… Laid out Deck template on the back side of the scribed decking material. Need to fair all framing components prior to gluing down the deck. Once the deck is glued down, need to fair out the decking edges with the framing prior to planking. Sheet planking templates will be laid out on Bass Wood sheets to cut out planking. This is where a more modern kit would have some nice laser cut planking pieces. 😎 All for now, later…


- 26 replies
-
- 2
-
-
- Maine
- Laughing Whale
- (and 2 more)
-
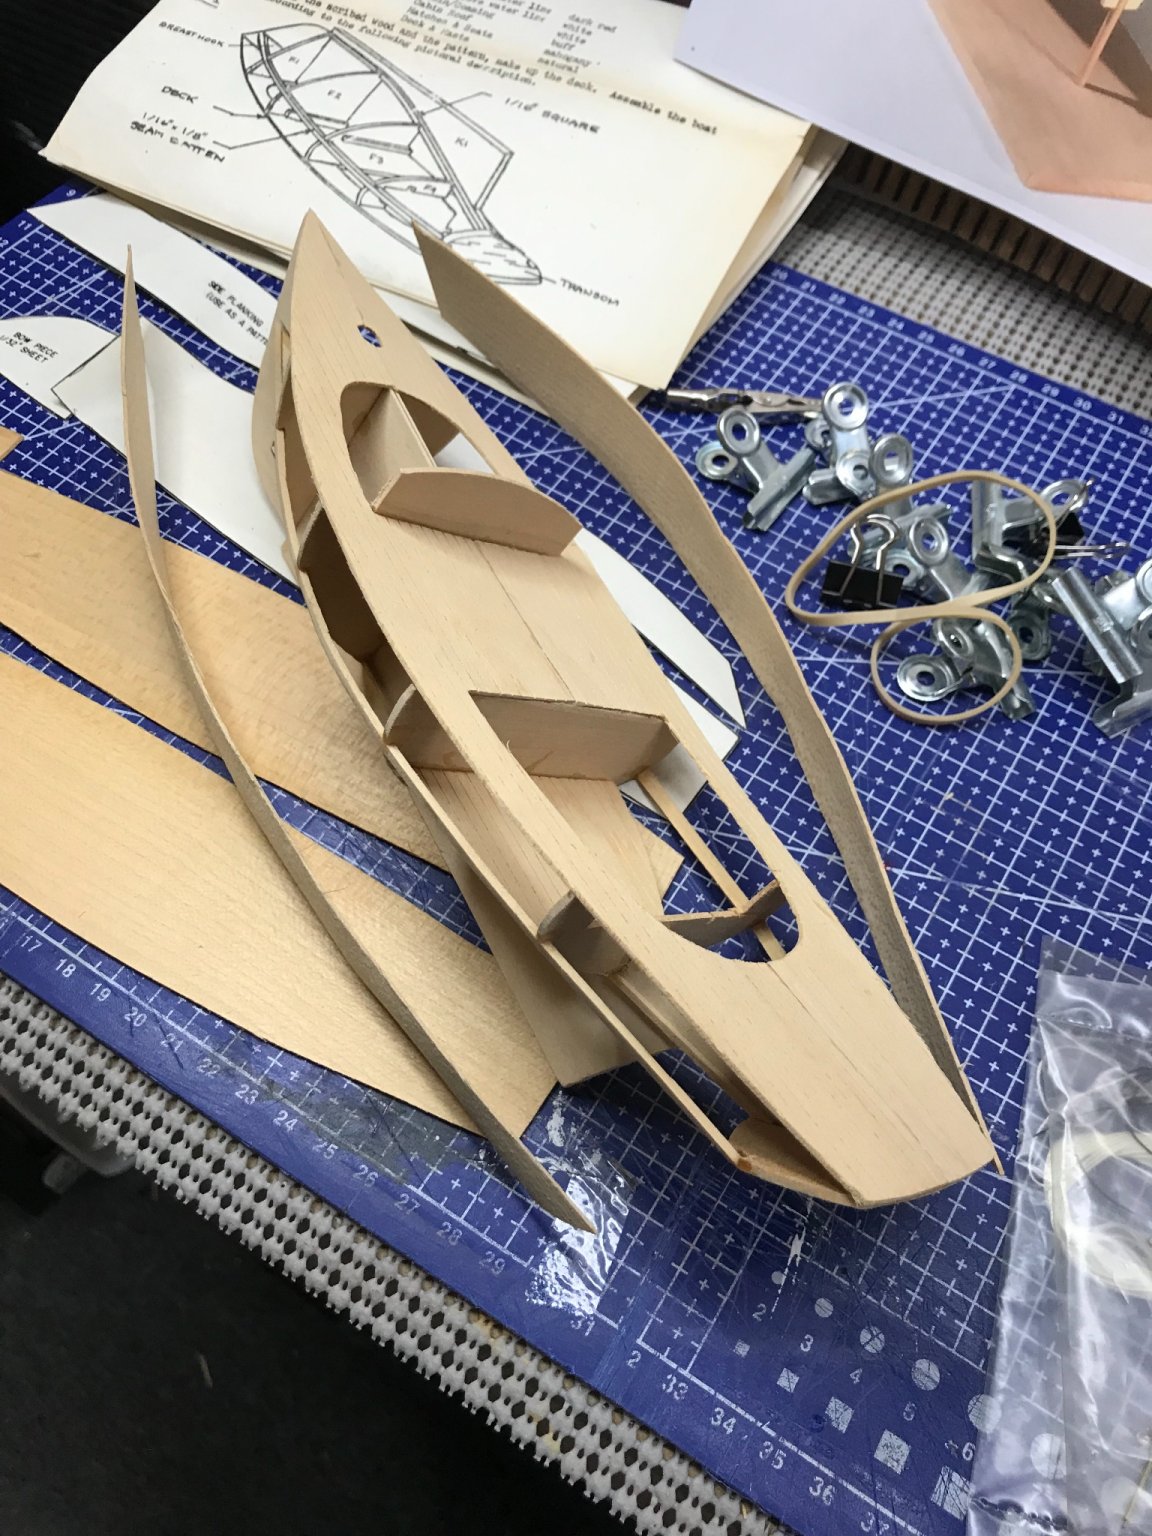
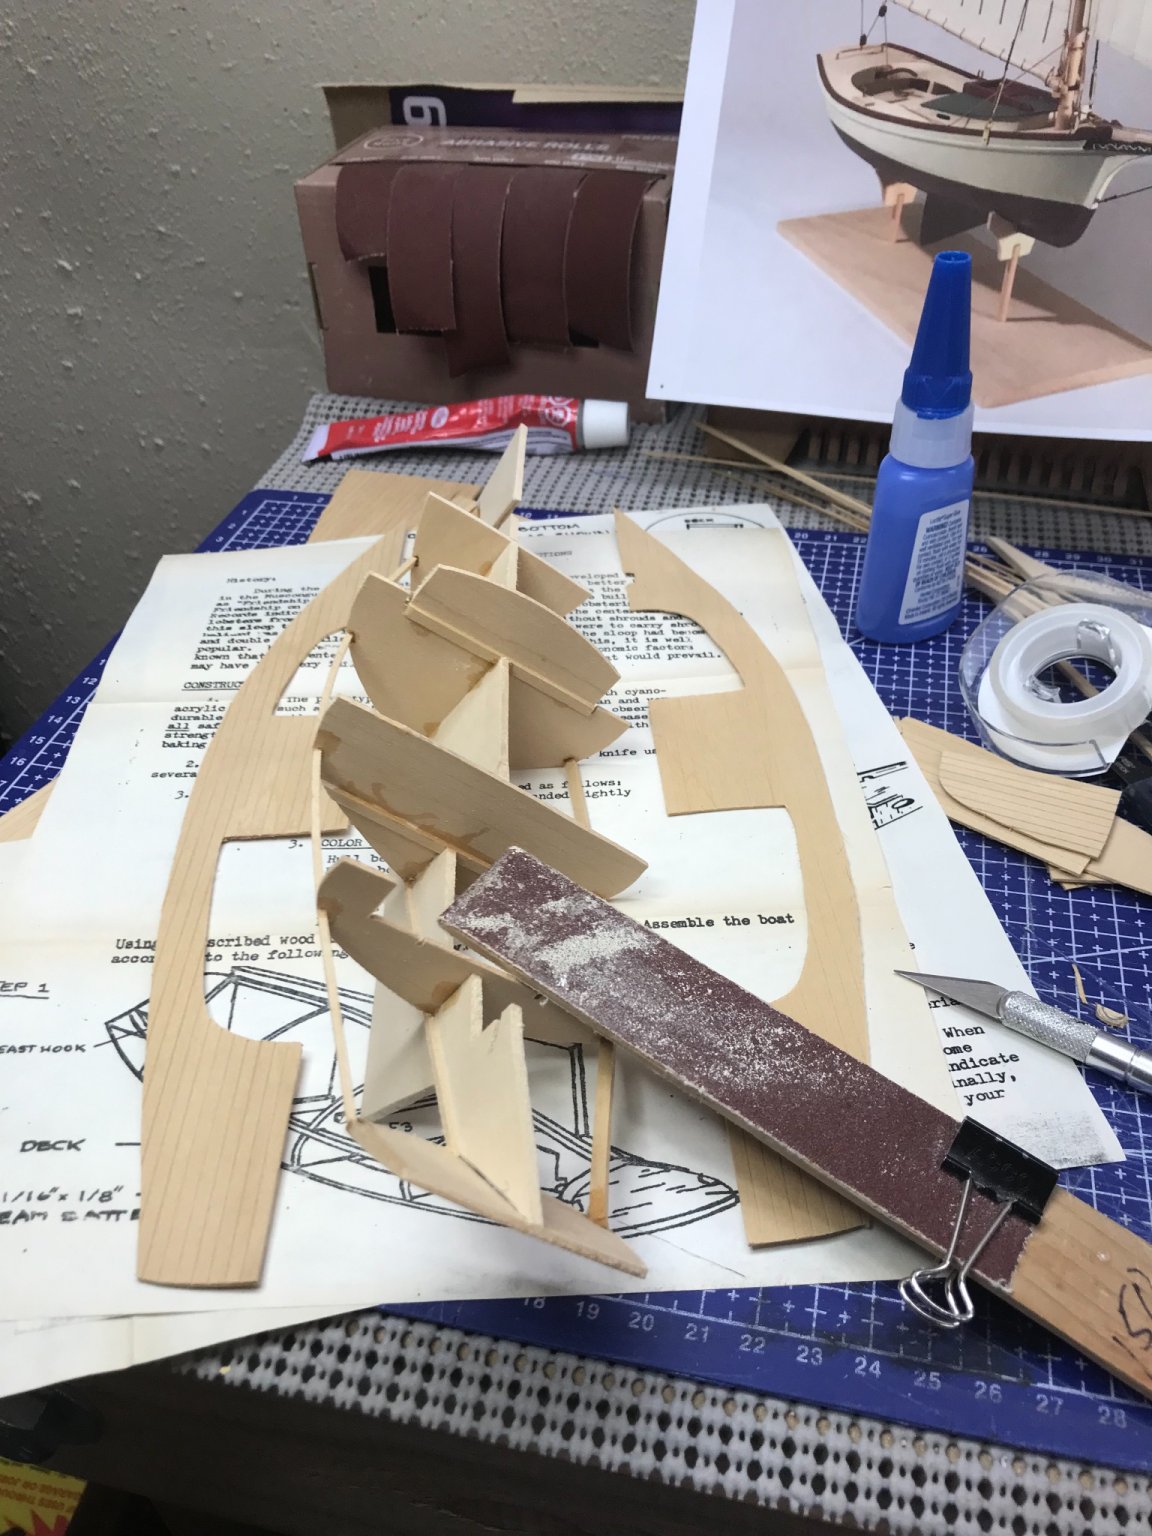
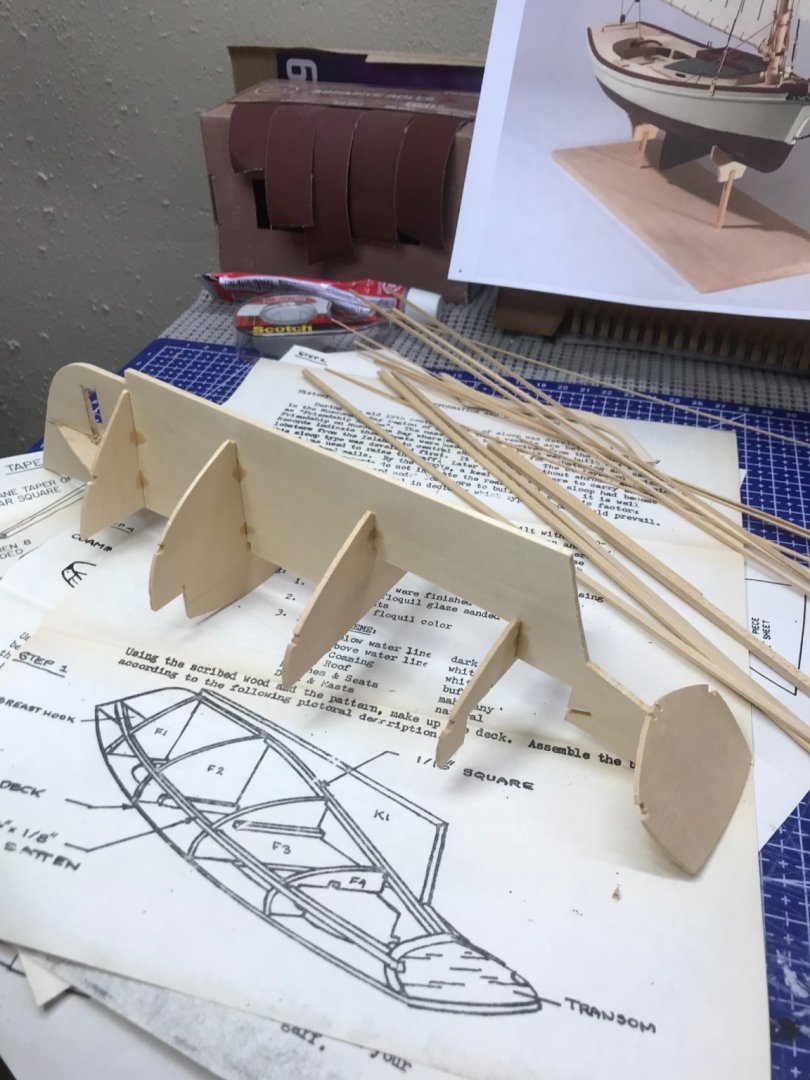
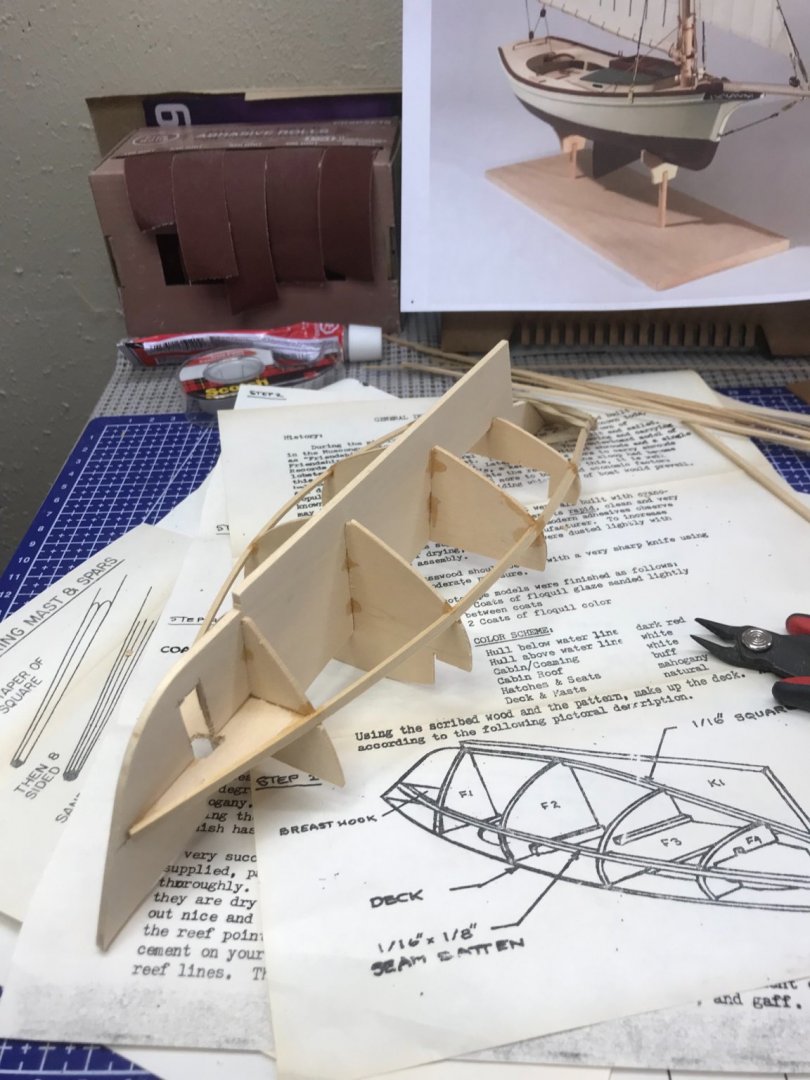
Some assembly required. 😆 Pre cut pieces assembled nicely, only a bit of sanding required. 😎 Later… 👍
- 26 replies
-
- 2
-
-
- Maine
- Laughing Whale
- (and 2 more)
-
This kit was 47.00 w/shipping. Model Expo has the same model for 69.99 + shipping. I can make this kit look the same, why would I want two of them. The modern kits make the hobby a bit easier, but more expensive. Besides, I would never get the requisition past the Admiral. 😆 That’s the REAL reason I’m addicted to these Vintage Kits.
- 26 replies
-
- 1
-
-
- Maine
- Laughing Whale
- (and 2 more)
-
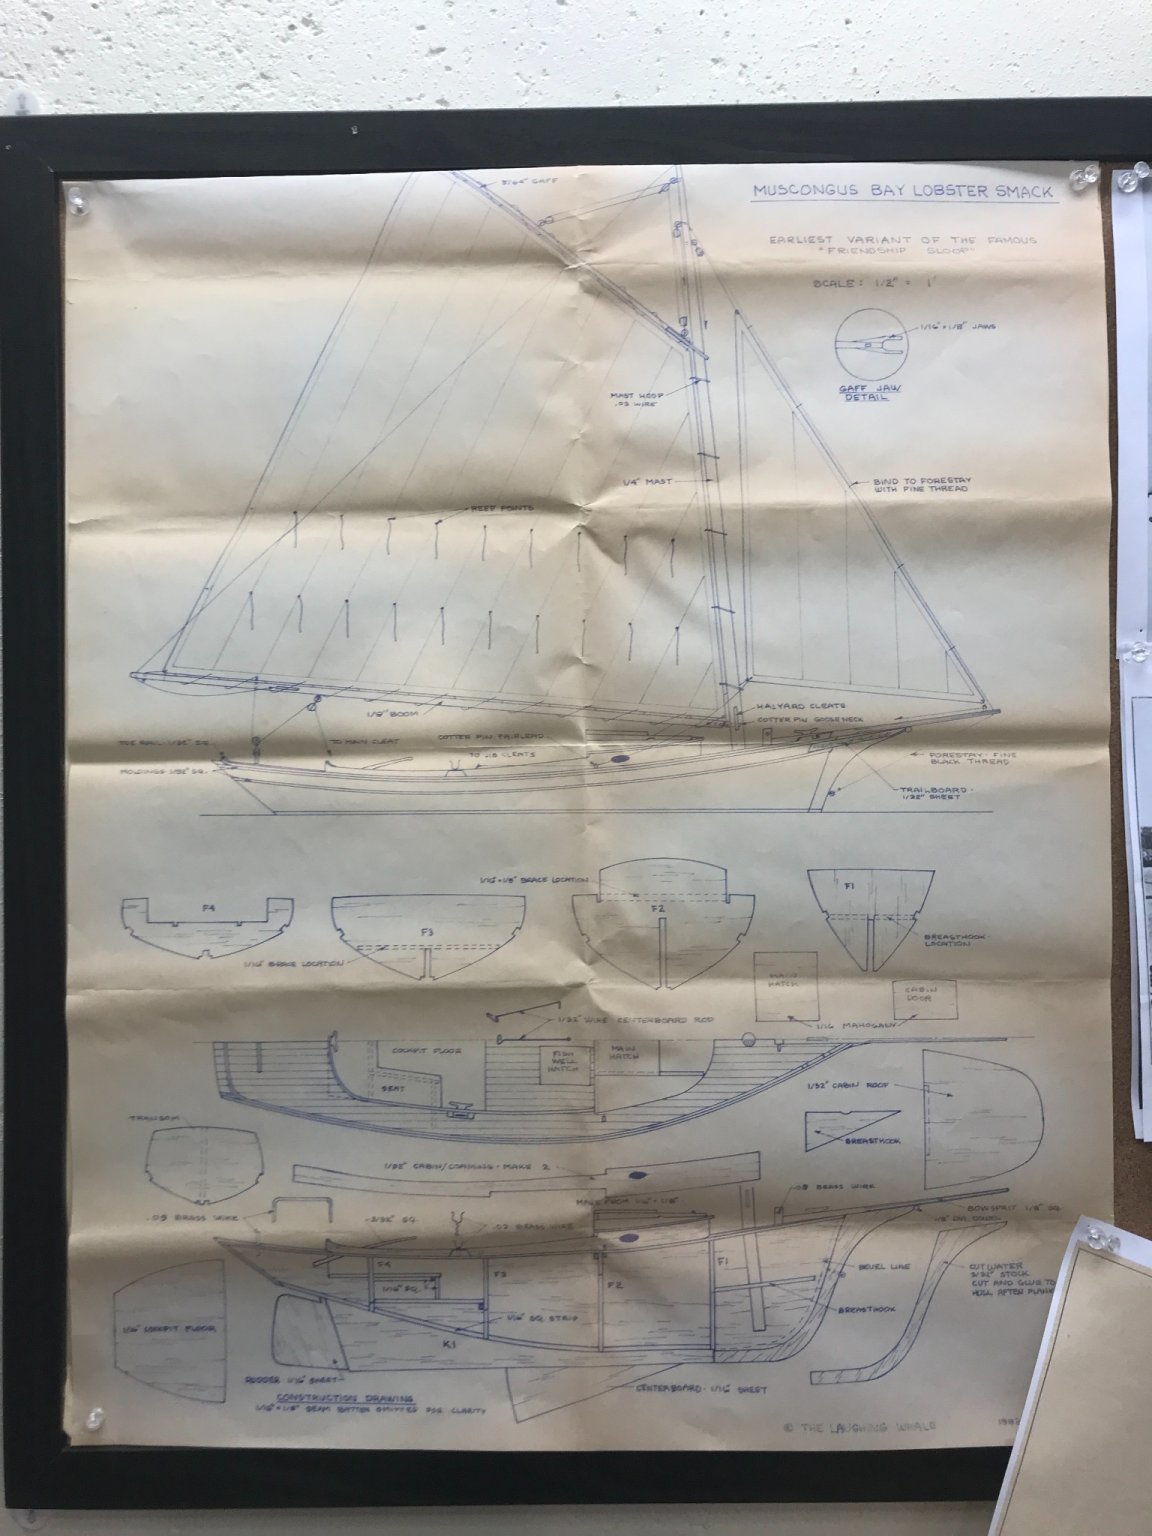
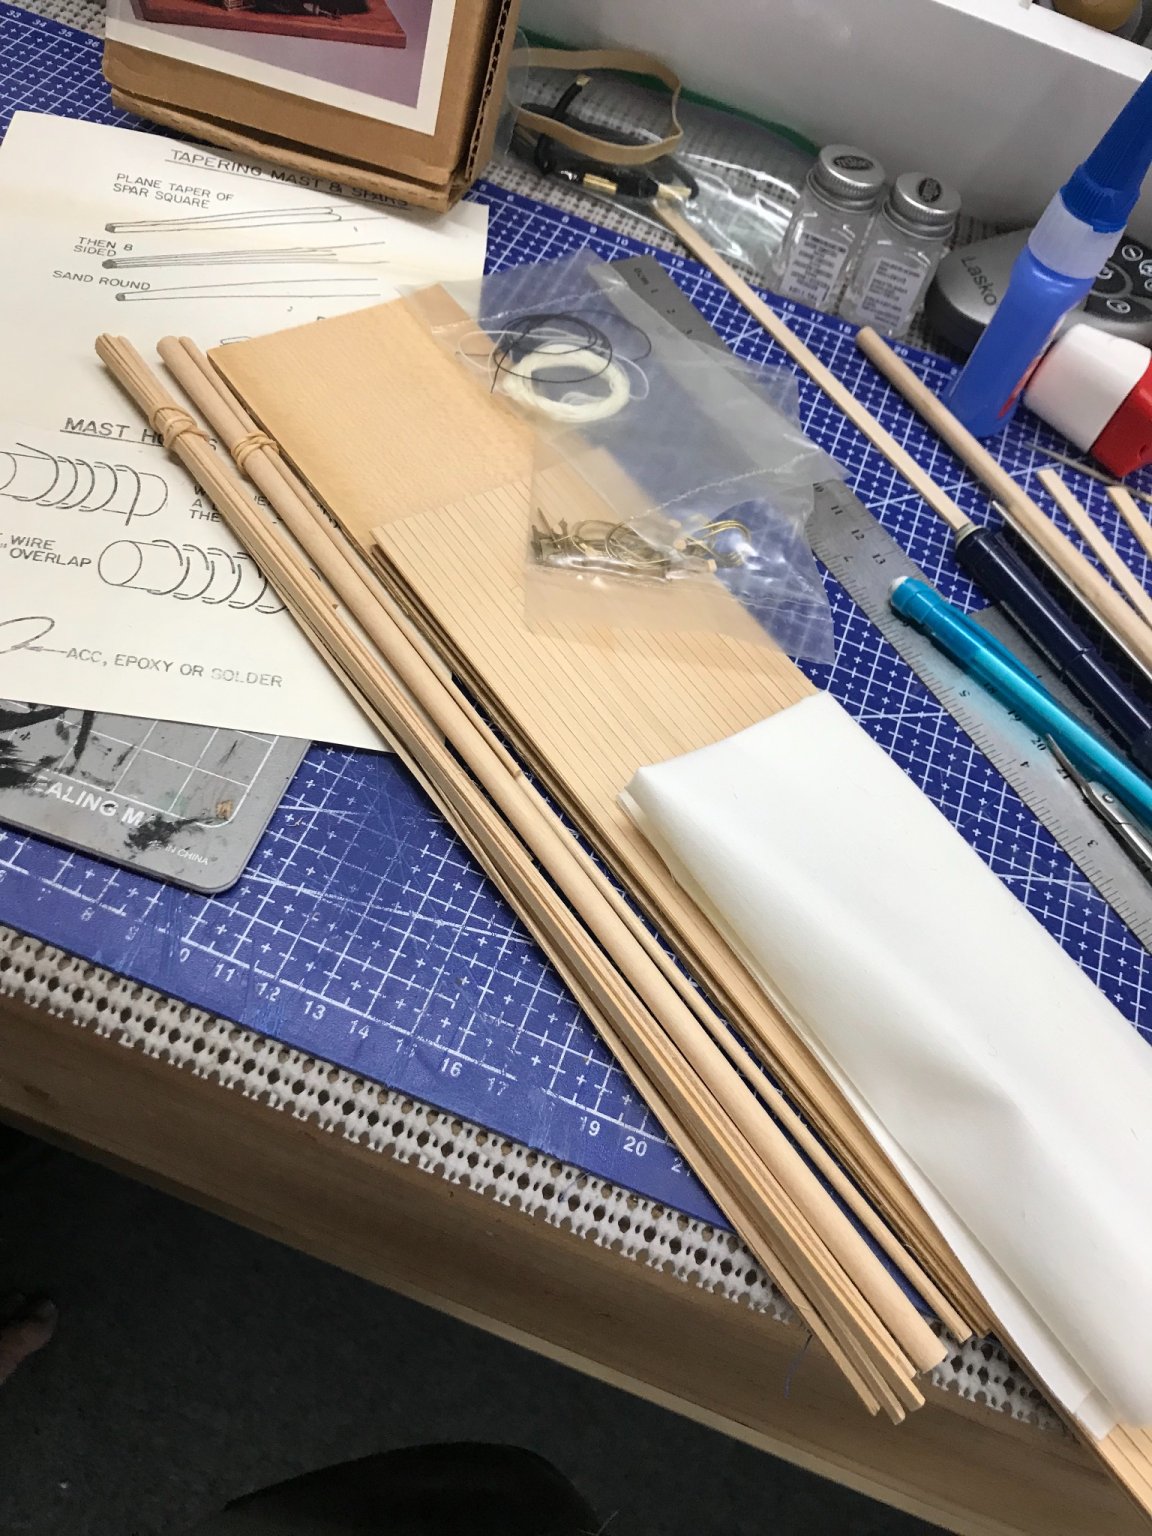
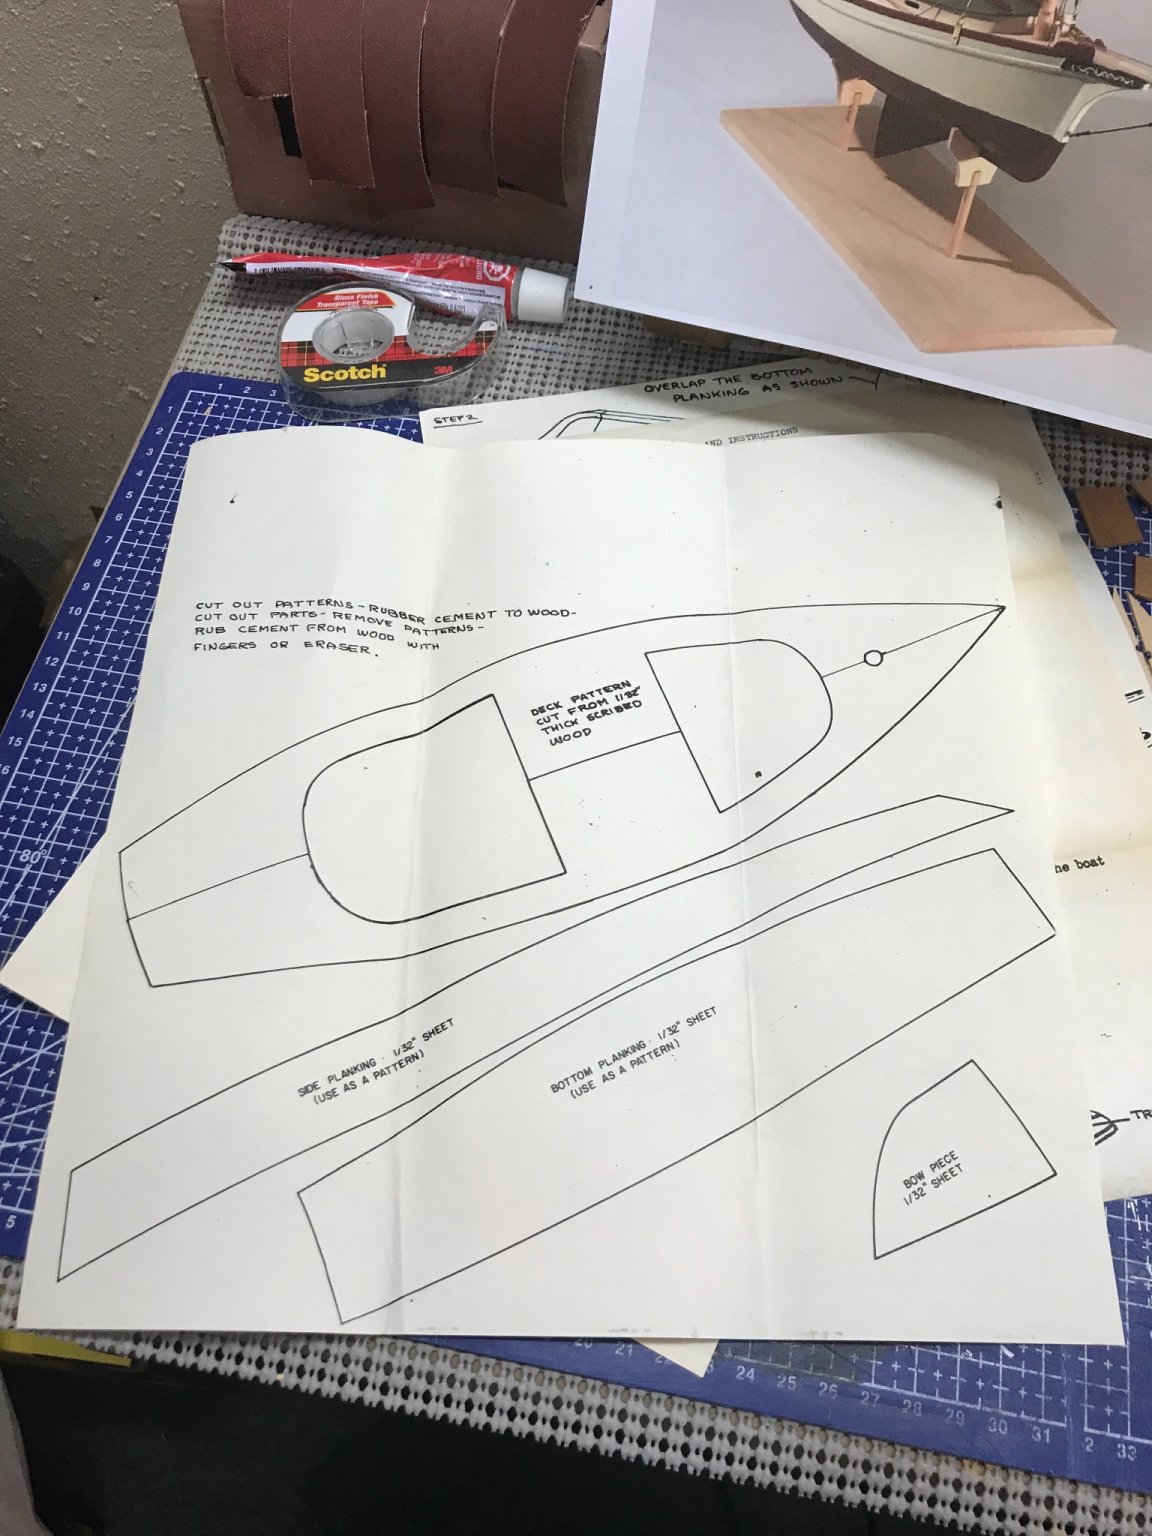
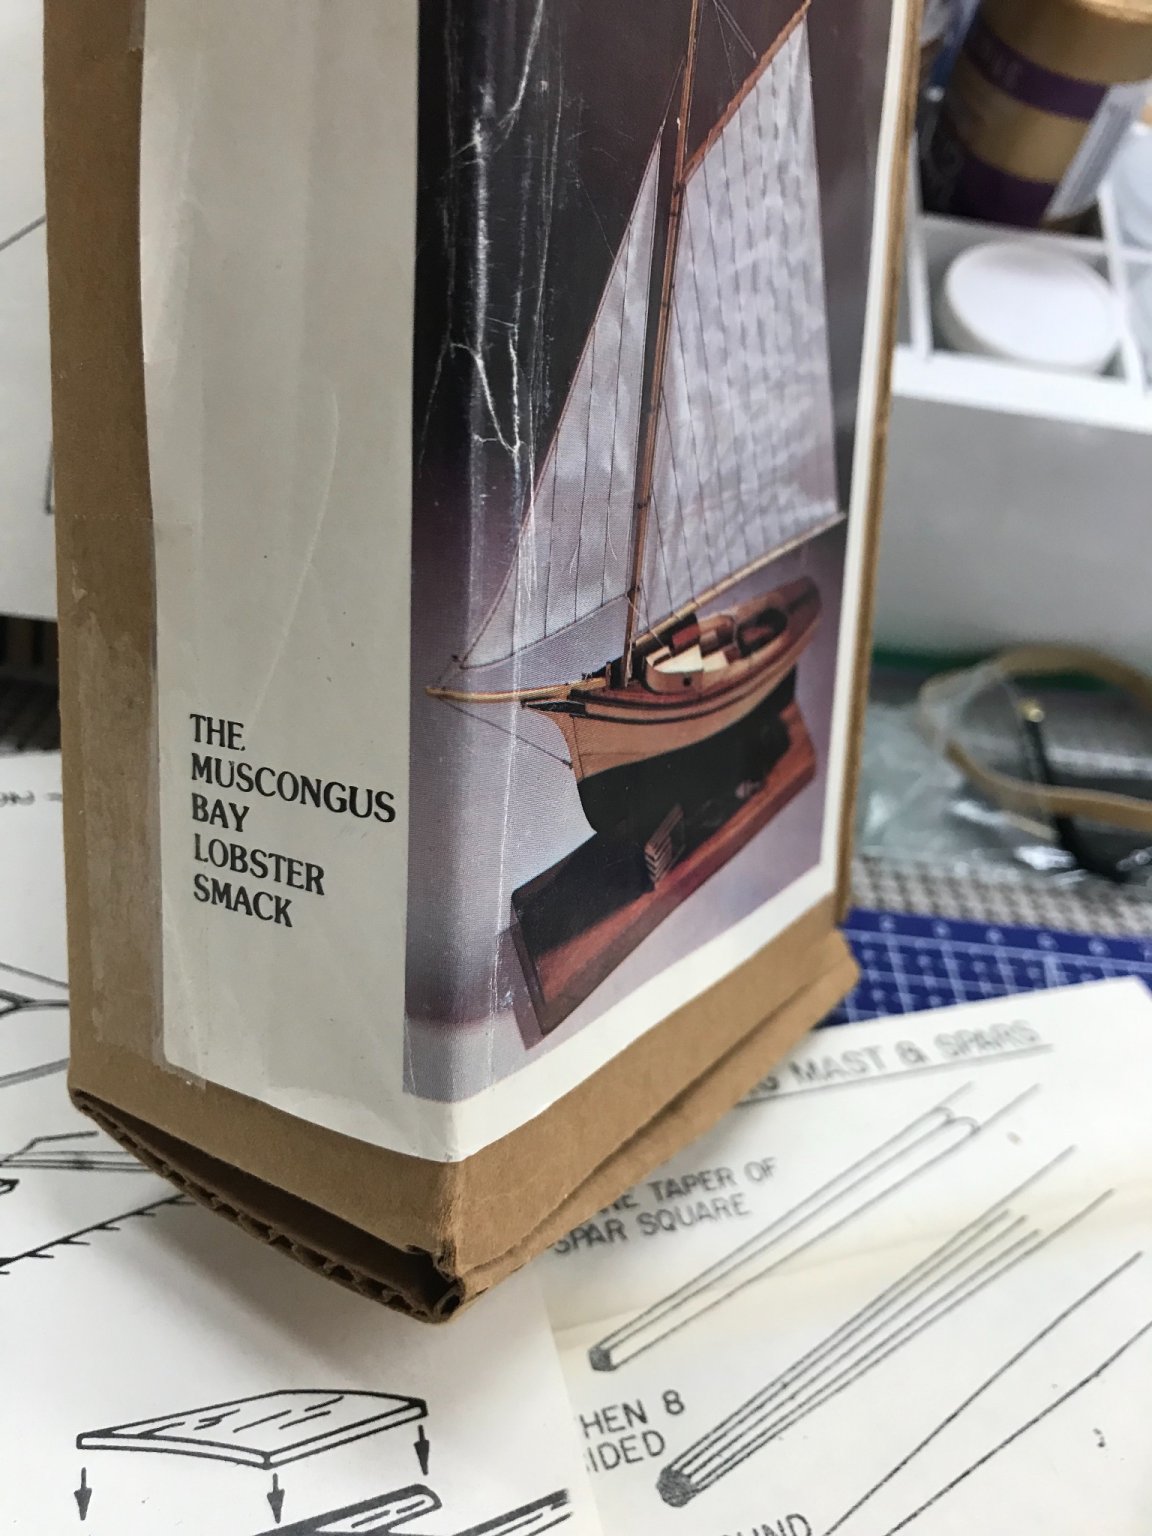
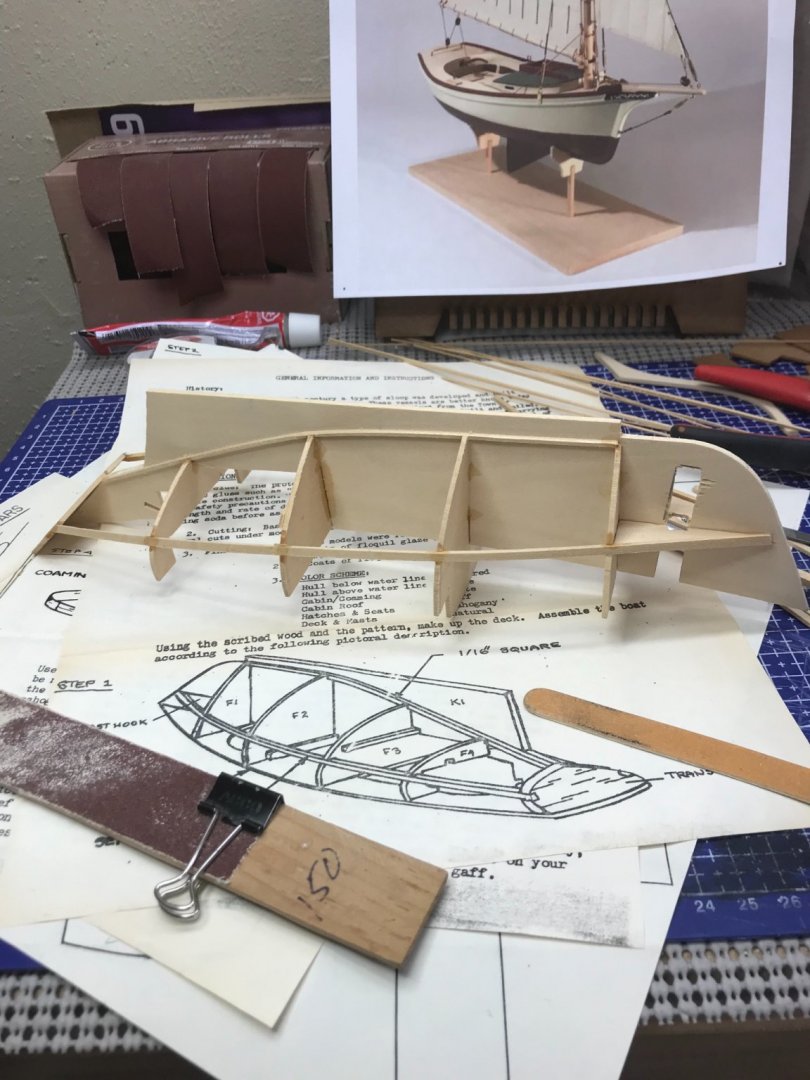
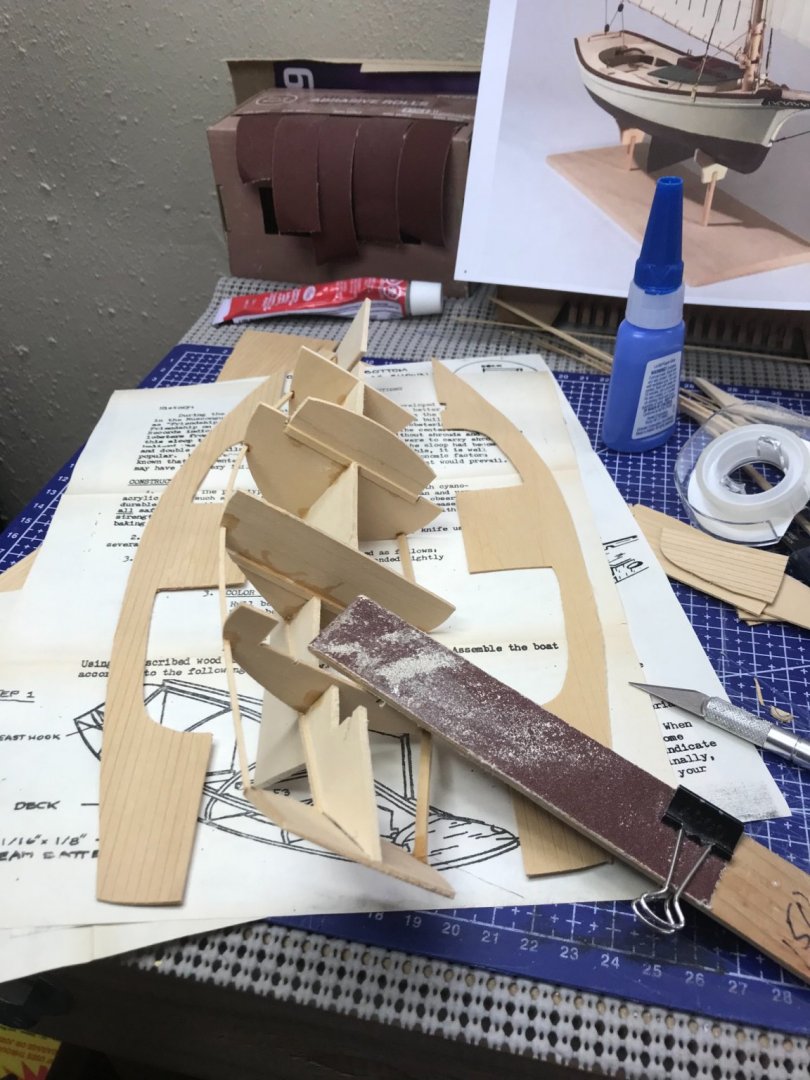
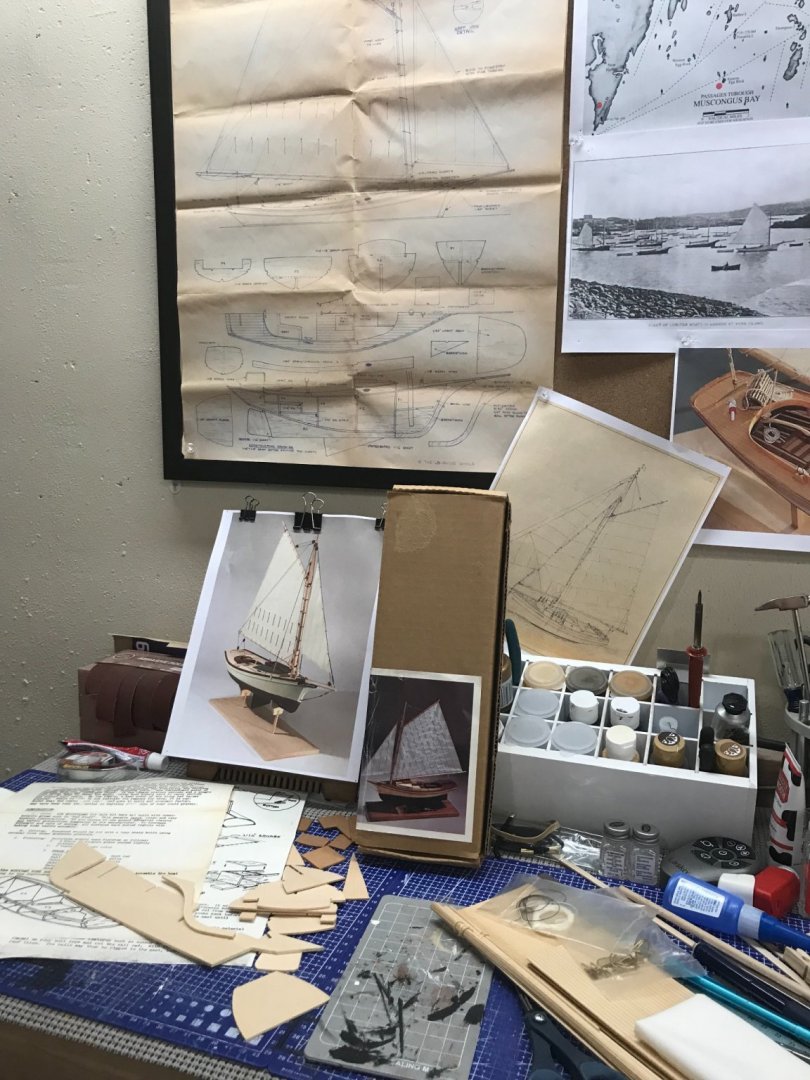
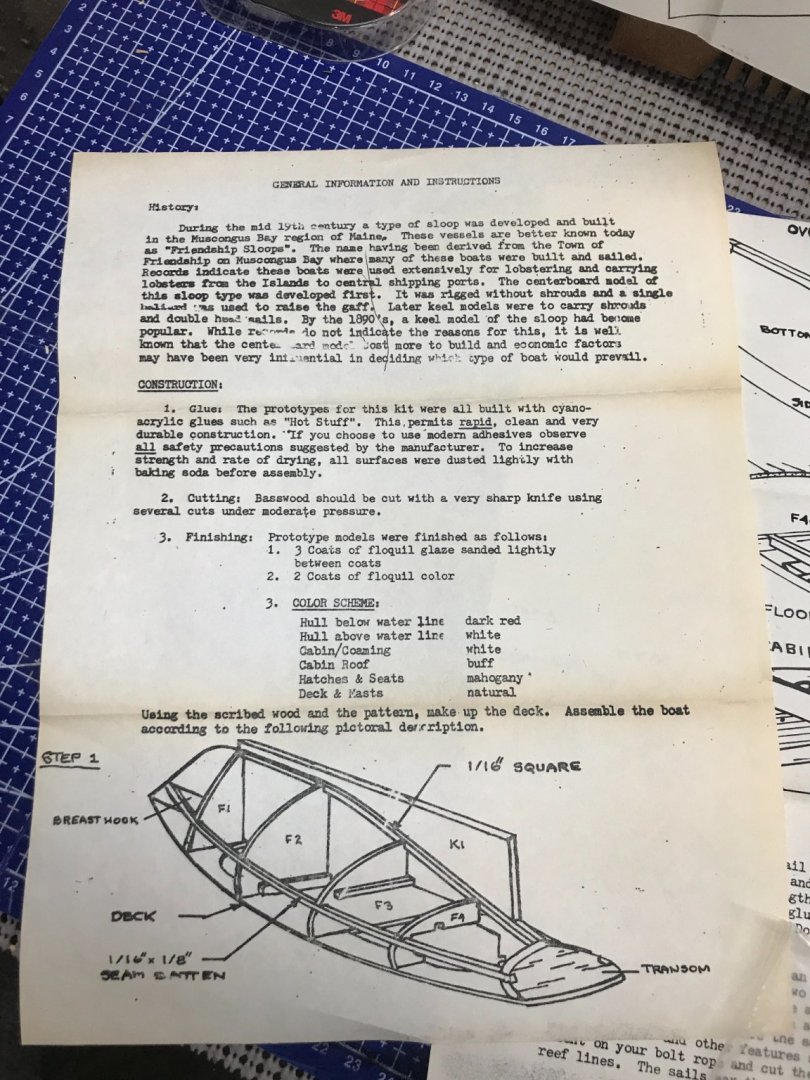
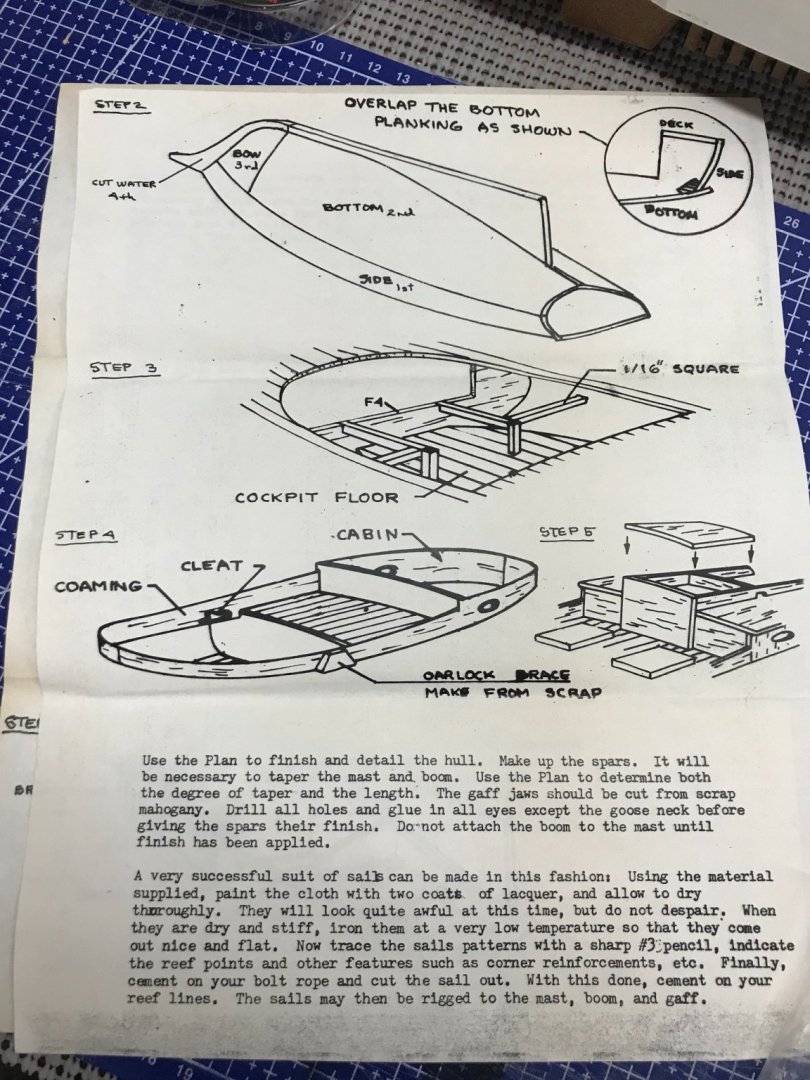
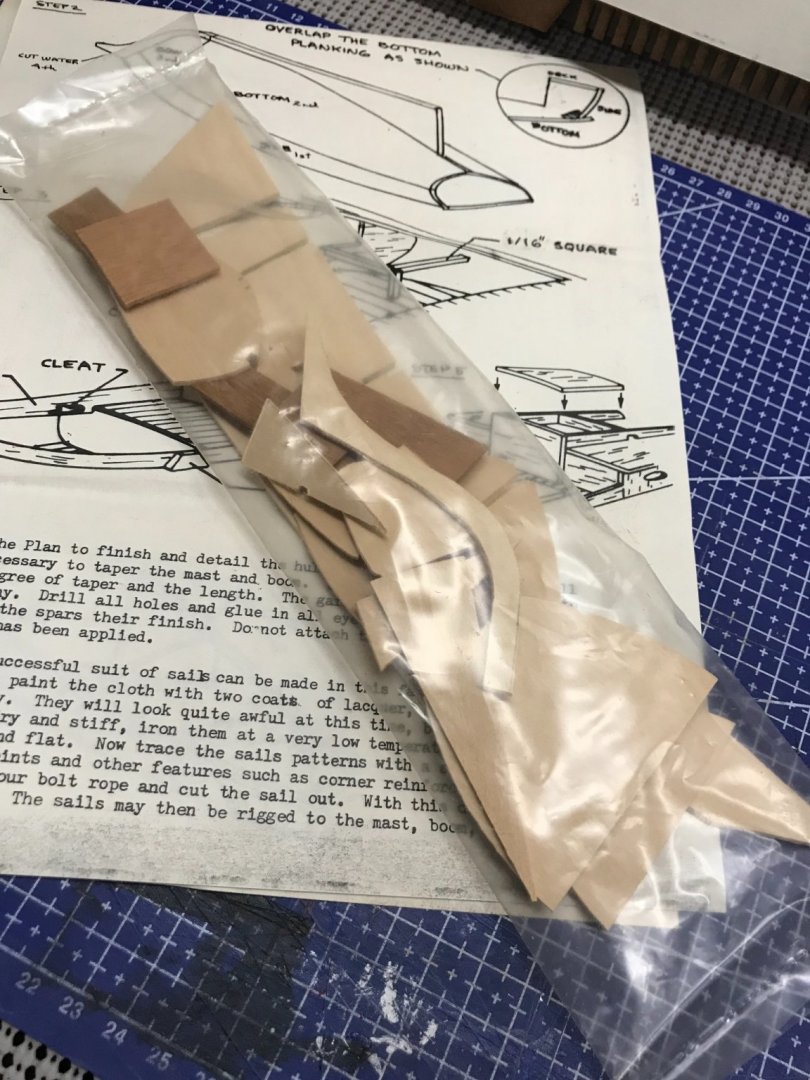
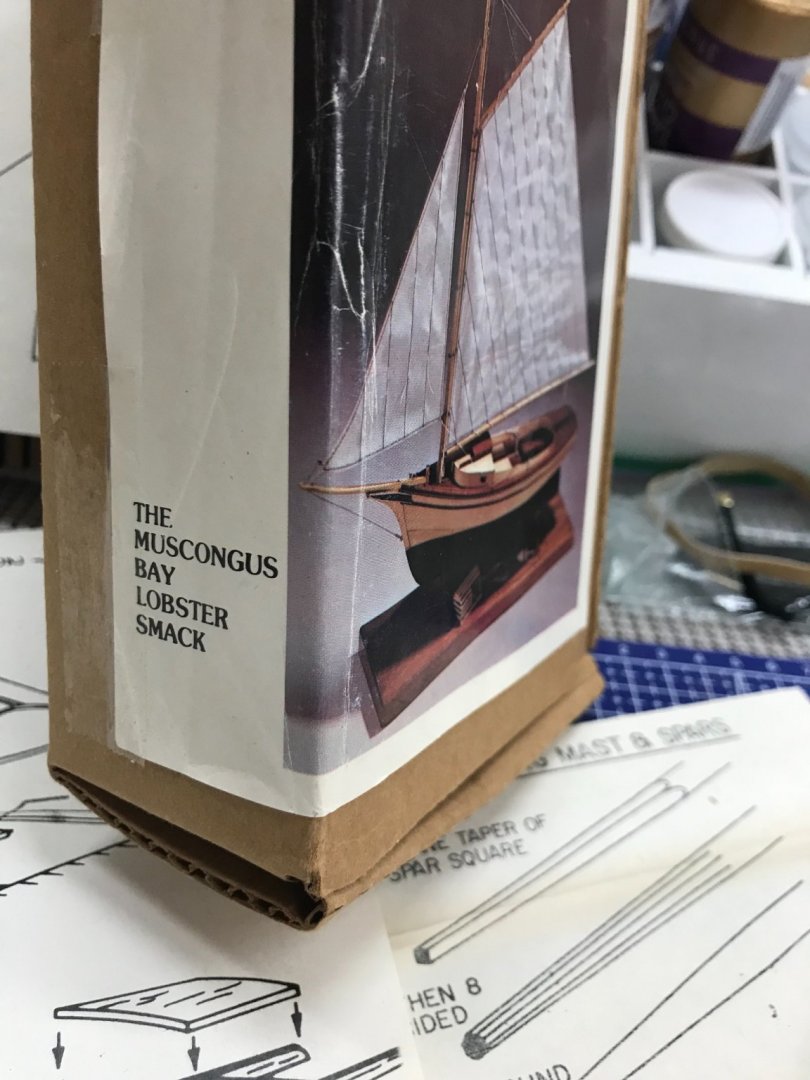
Another Laughing Whale vintage kit. Found this one, of all places, on Etsy. I seem to have become addicted to rescuing these forgotten kits. This one has found it’s way back to Maine from Florida… 😩 Sold in the 80’s it’s now going to be built. Blue prints a bit yellowed but have survived well. Two pages of typewriter written, hand drawings. These kit were produced here in Maine. Just up the road here in Wiscasset, Maine. Nice materials in the original packaging. Framing parts have been hand cut. Scribed Decking and Sail Cloth also provided. Paper templates provided for the sheet planking and deck materials. All in all a nice little package. Time to get this one started. Cheers 🍻


- 26 replies
-
- 1
-
-
- Maine
- Laughing Whale
- (and 2 more)
-
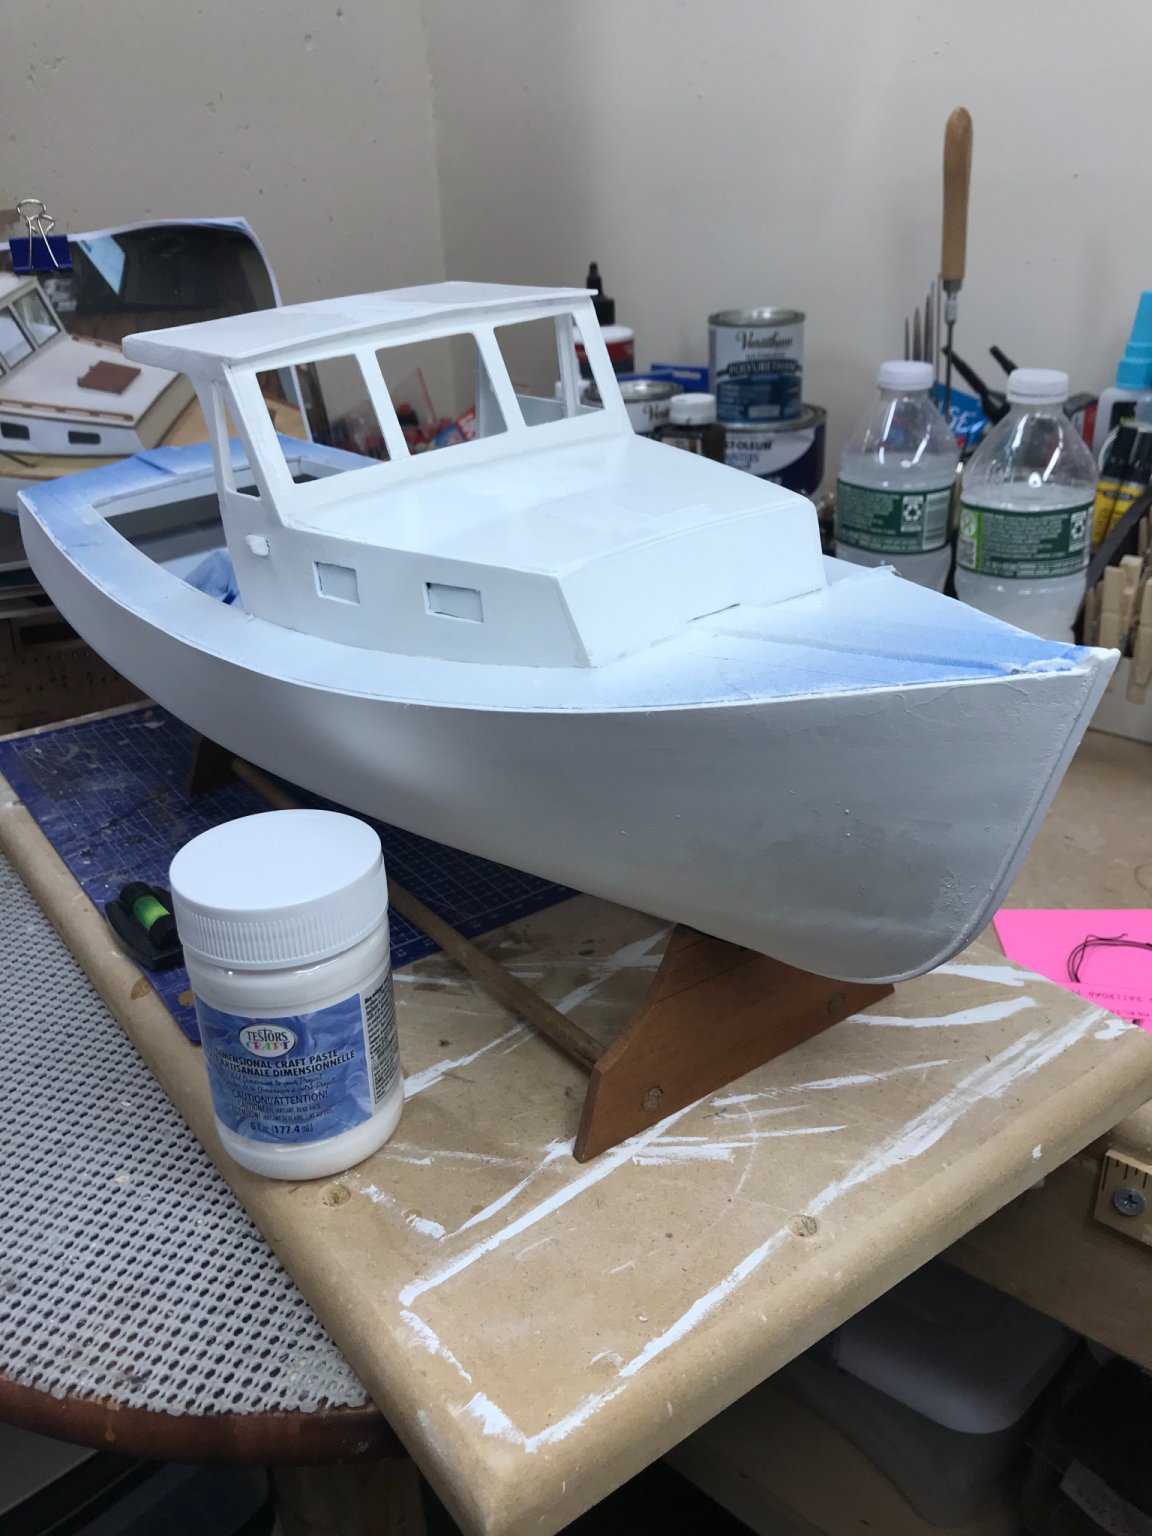
Several sandings later… Airbrushing is a new experience for me. First time for my new paint booth. A bit of research 🧐 then jump in… More sanding and more light coats. Amazing how paint brings out the voids in the wood. 😜 No worries there is always filler. Testors Dementional Craft Paste seem to do the trick. We shall see after a few more sandings and paint. Cheers 🍻

- 51 replies
-
- 3
-
-
- laughing whale
- maine lobster boat
- (and 1 more)
-
Wood decks masked and first coat of paint to seal Bass Wood. First coat sanded. Tomorrow we rinse and repeat with Primer. Cheers 🍻

- 51 replies
-
- 4
-
-
- laughing whale
- maine lobster boat
- (and 1 more)
-
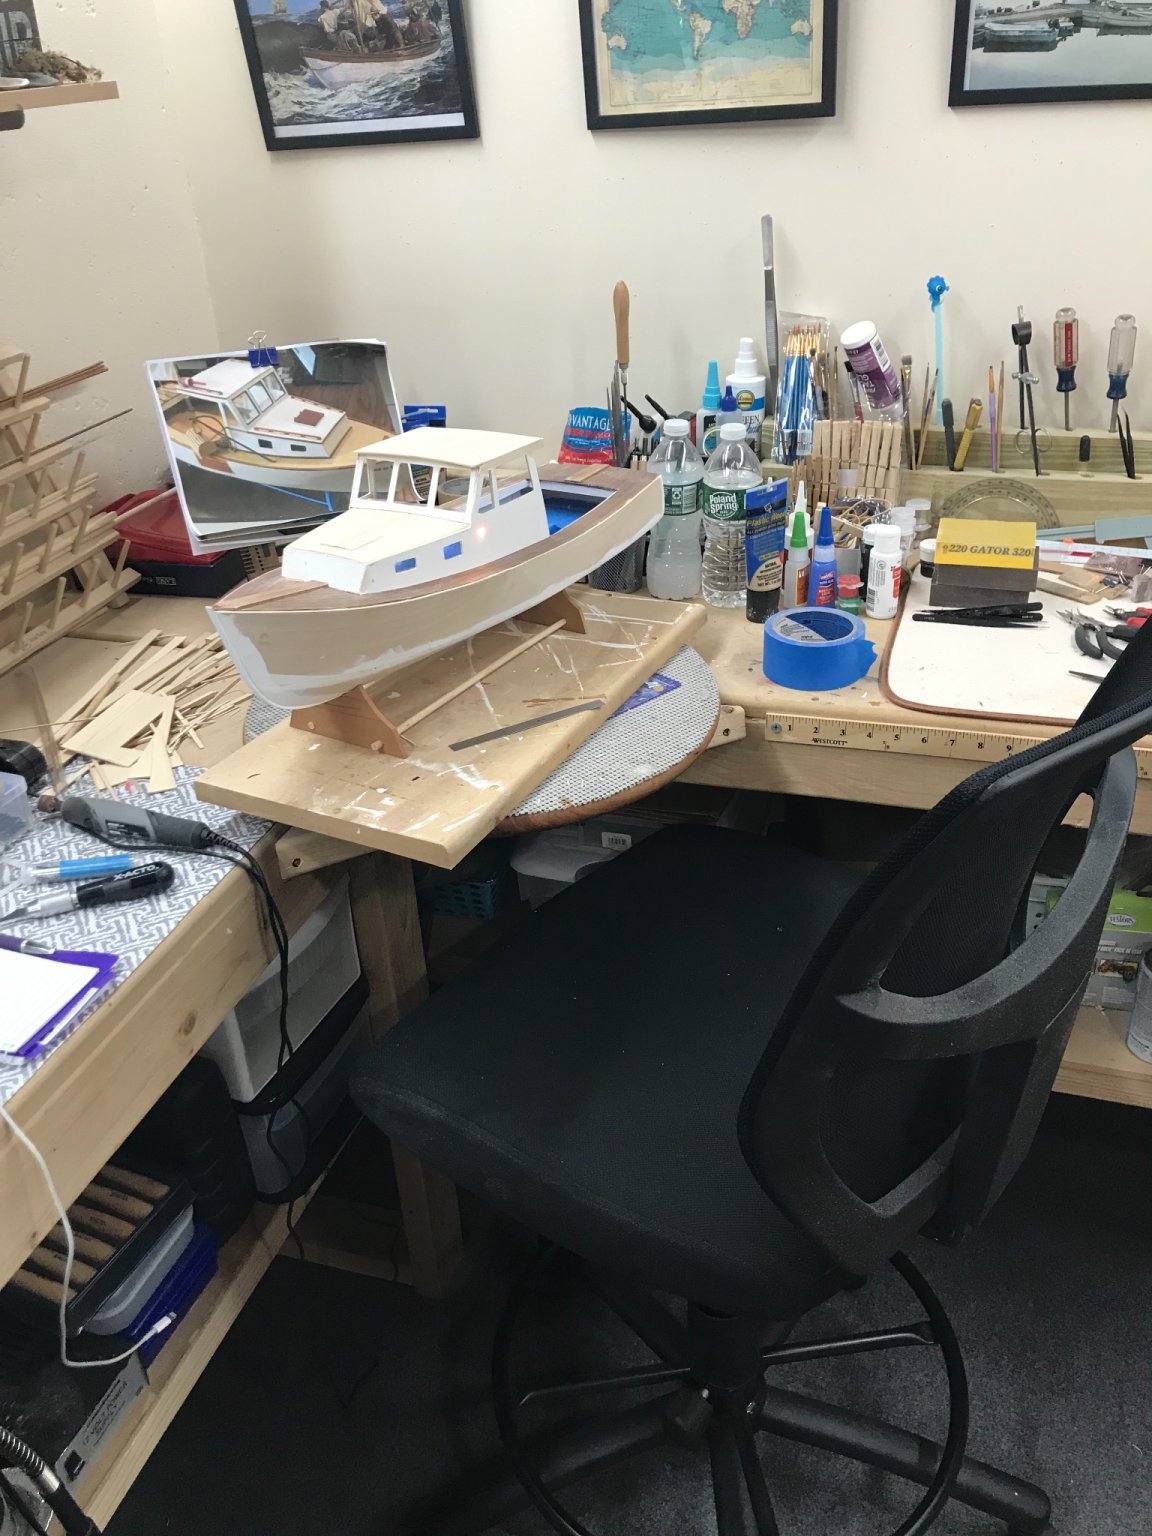
Two of the Home Depot Pre-Assembled “Workbench”. Preserves the walls… 🤔 Added the Lazy Susan in the corner with a Magnifying Lamp that swings between work benches. Speed Shop is working on the engine for this “Retired” Working Lobster Boat. Later 🍻
- 51 replies
-
- 2
-
-
- laughing whale
- maine lobster boat
- (and 1 more)
-
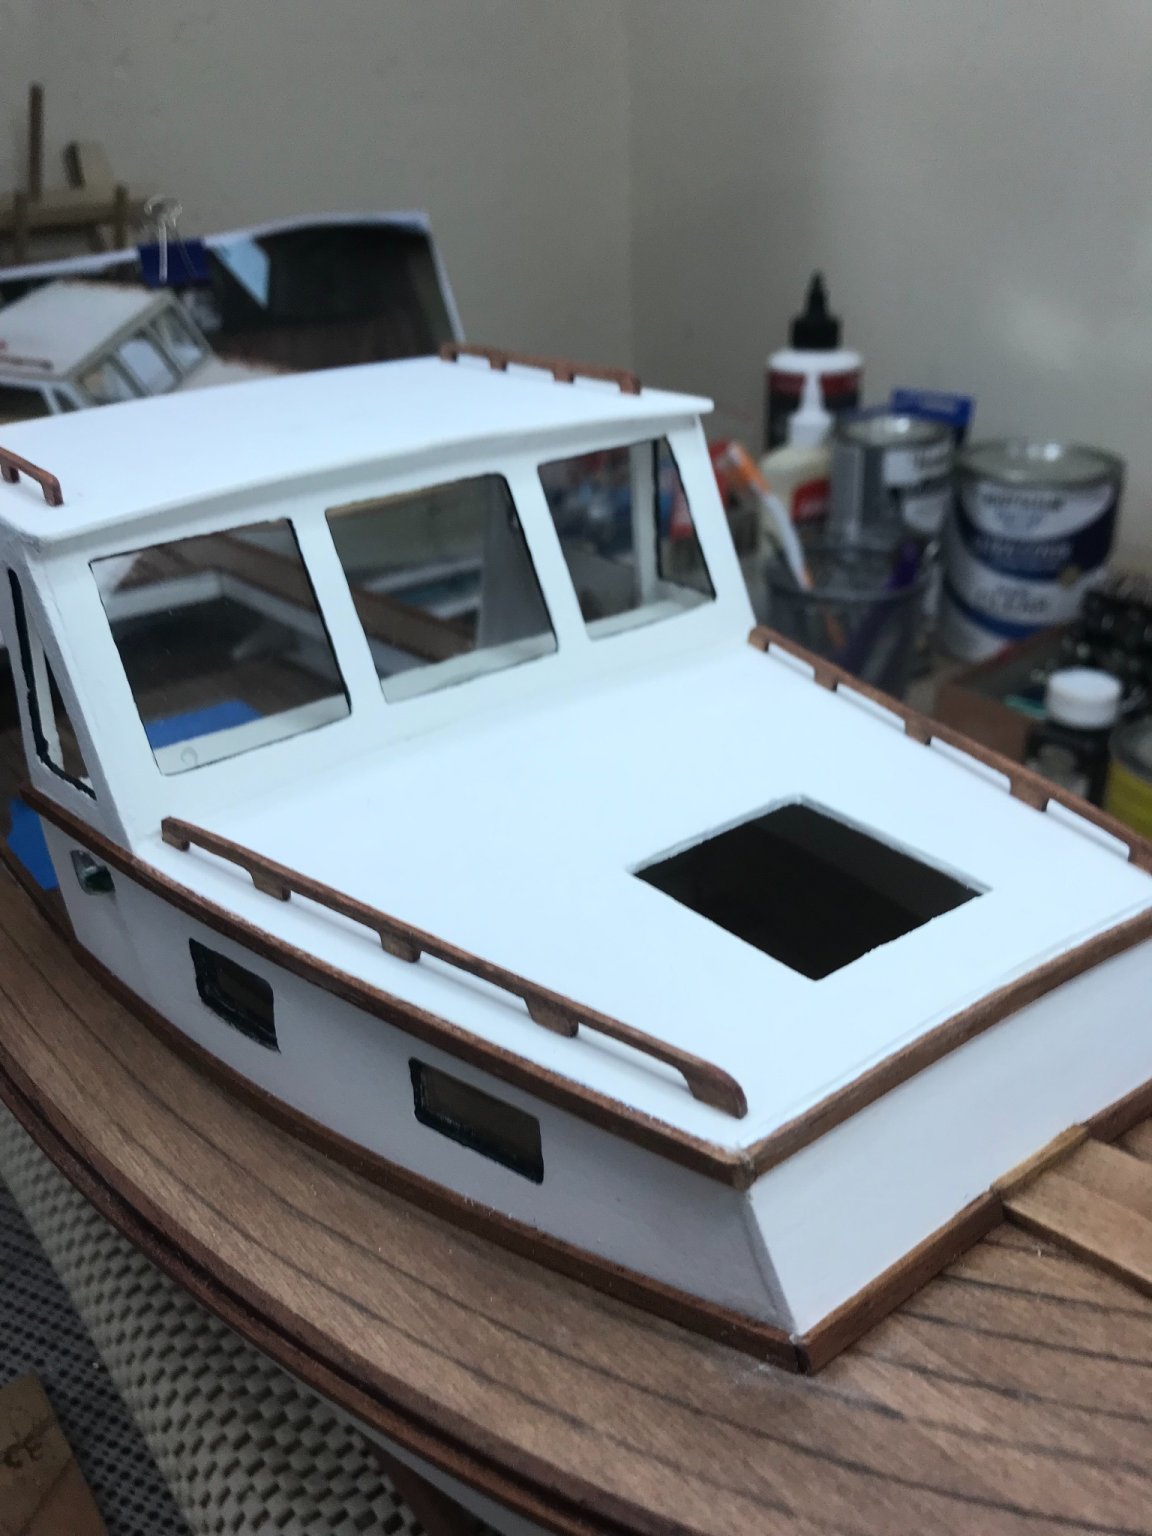
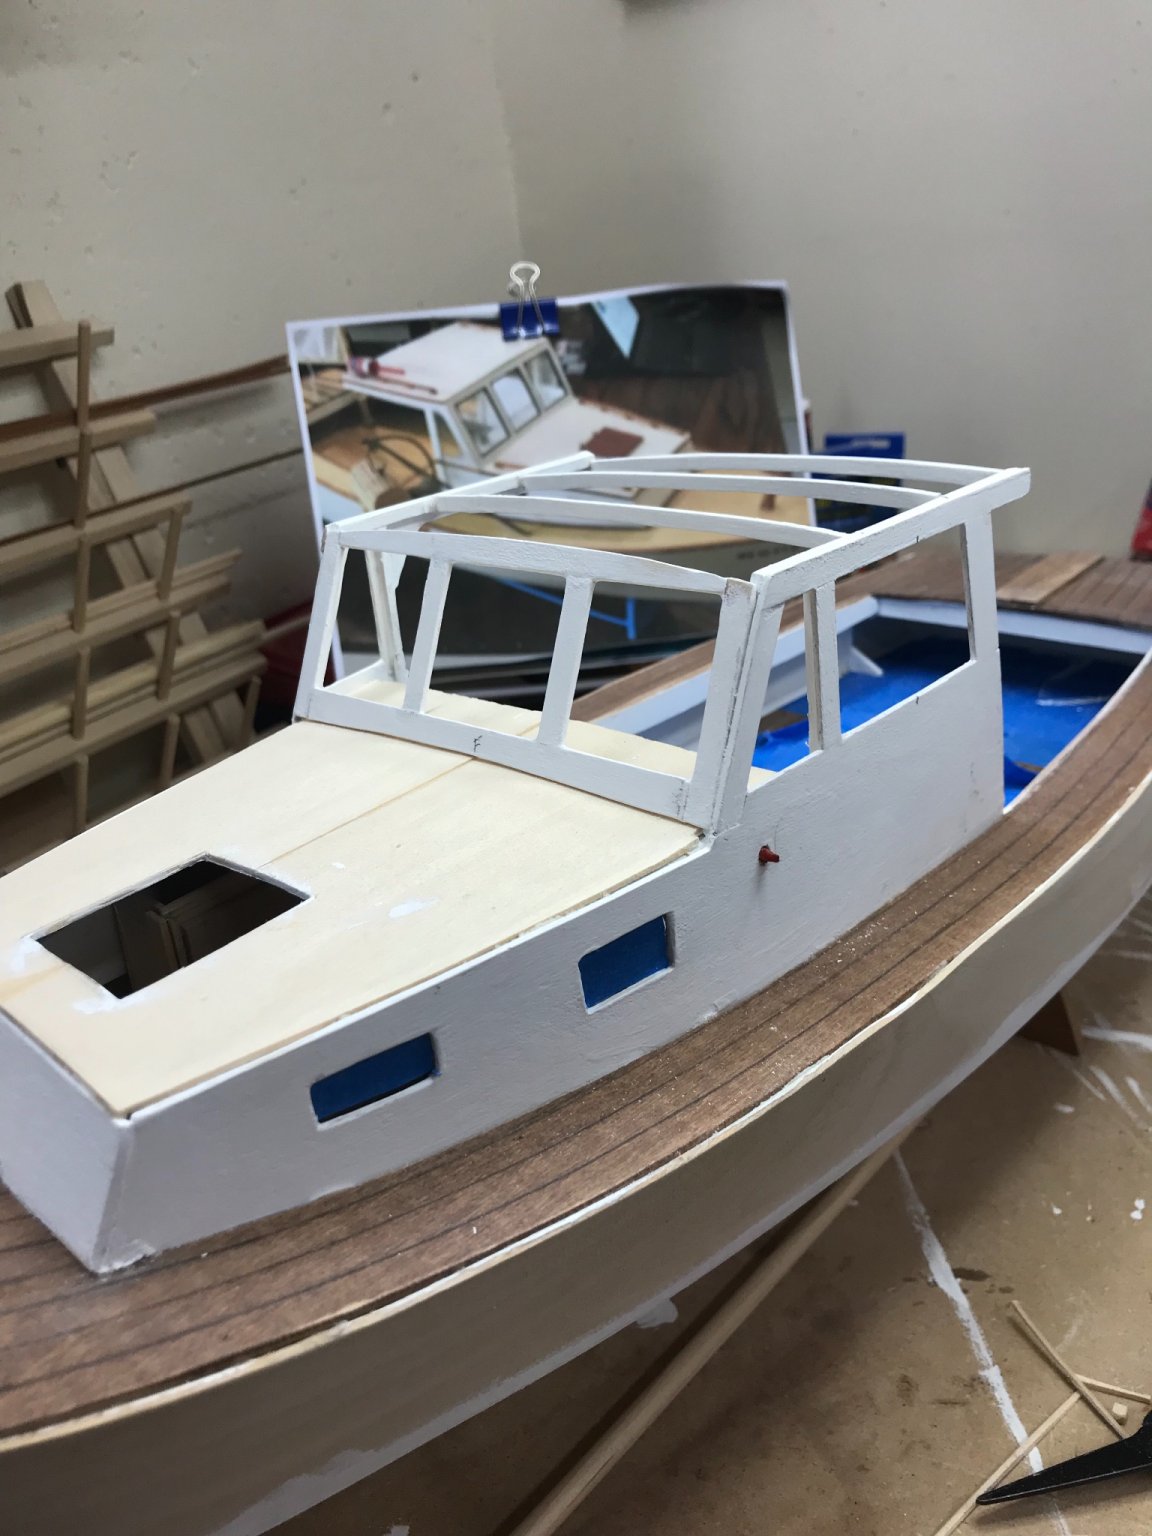
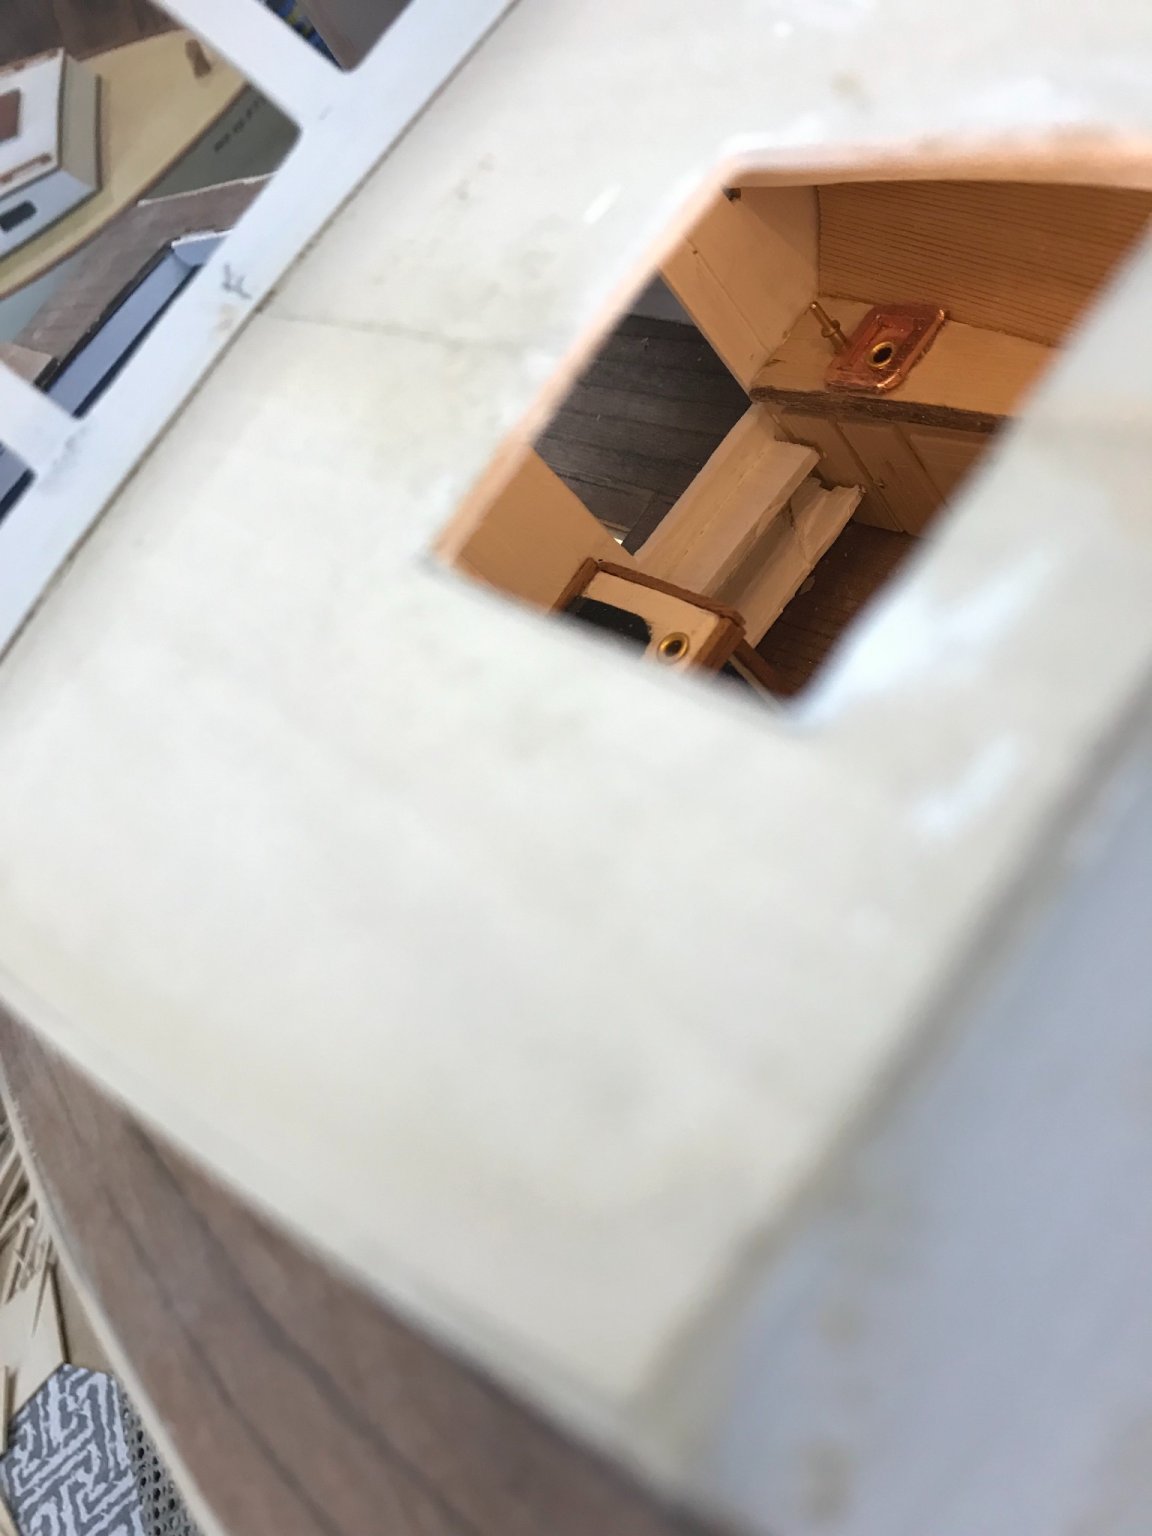
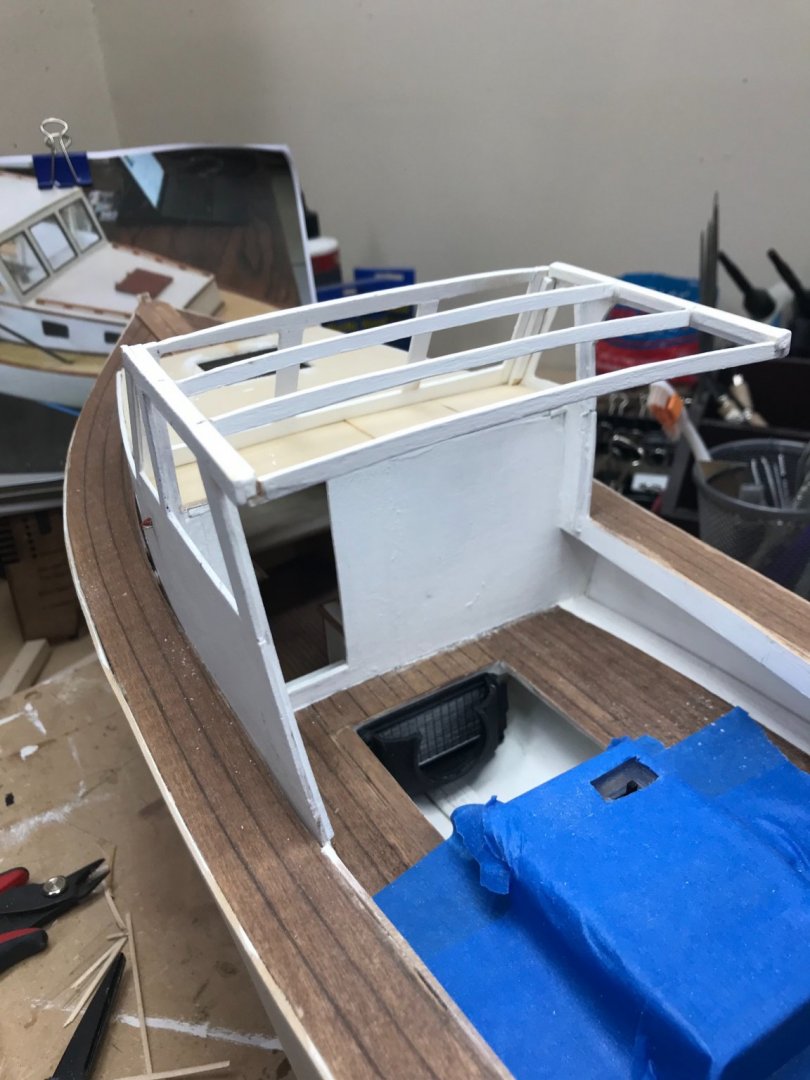
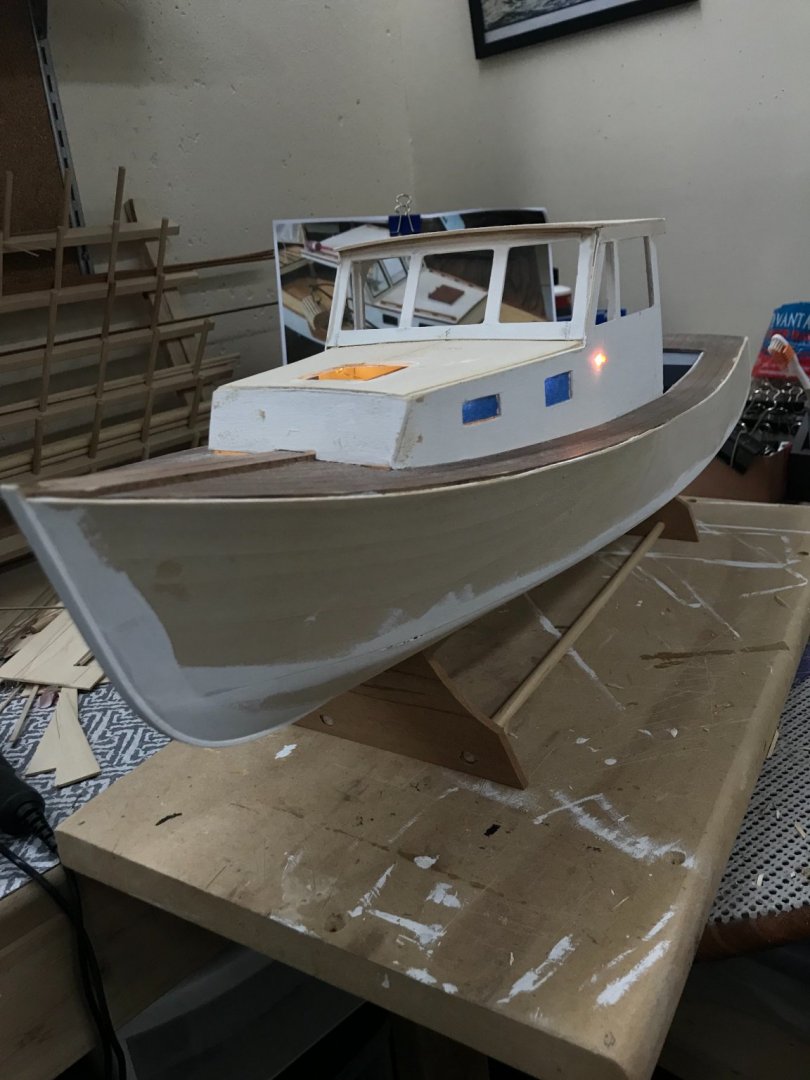
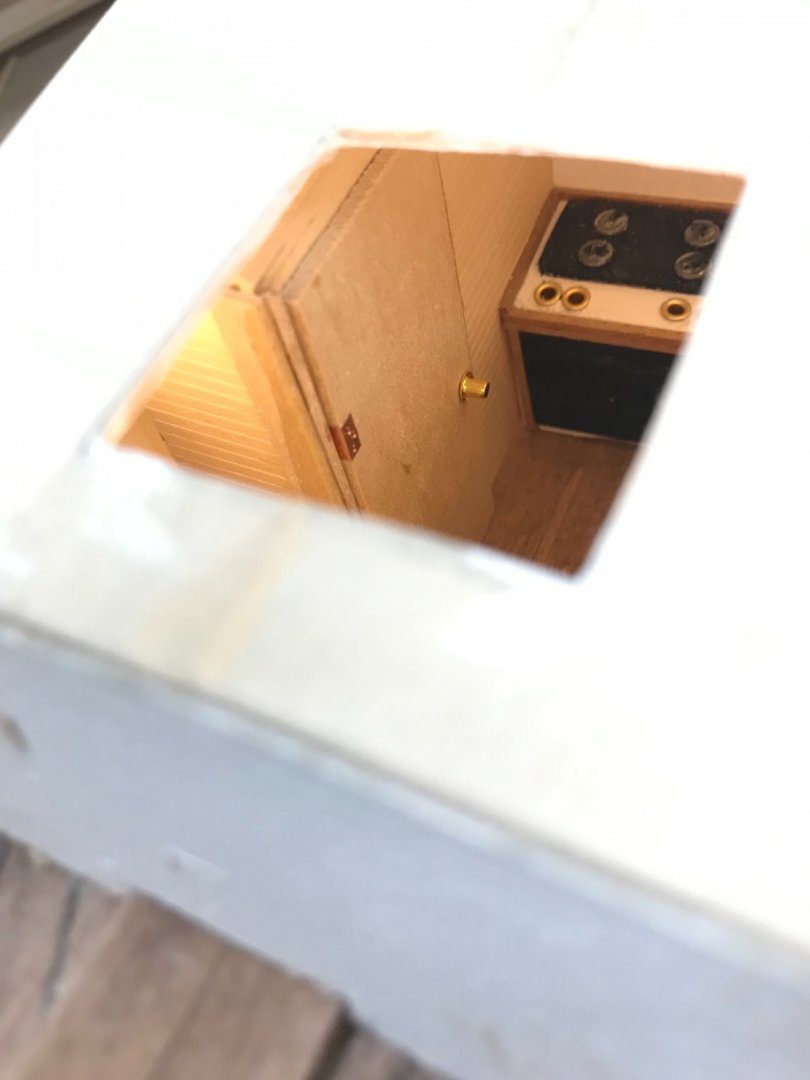
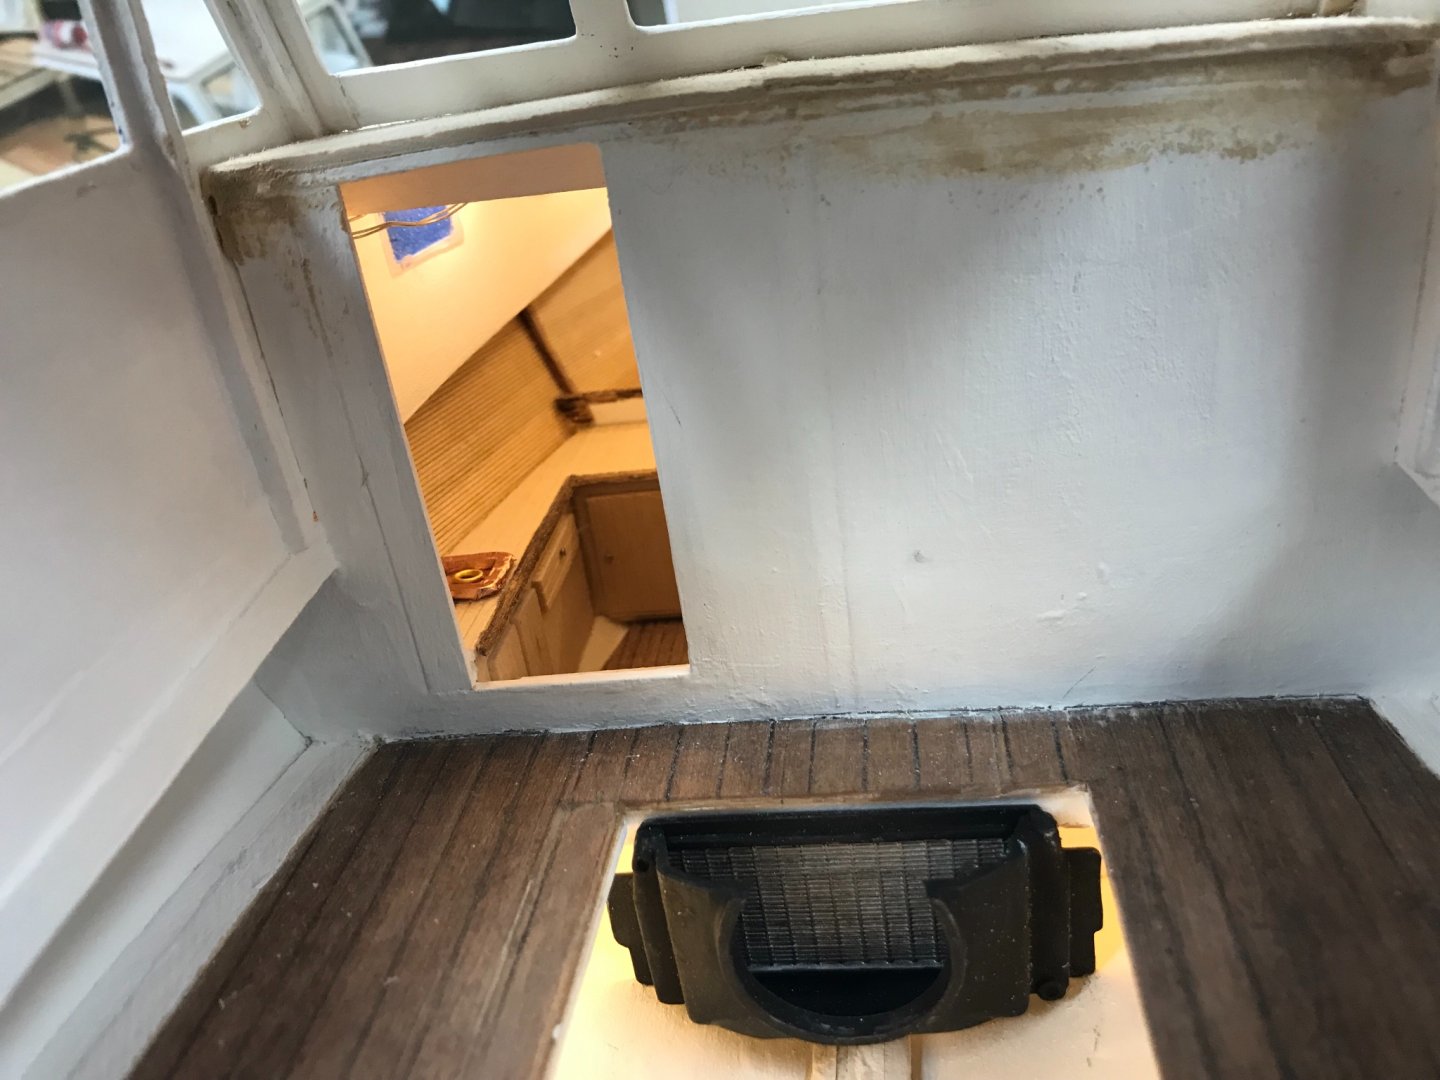
Roofing for the cabin. Forward cabin roofing with hatch opening. Main cabin framing completed. Main cabin roofing completed. Port and Starboard views showing Navigational lights. View of the lighted forward cabin through the forward hatch. View of the lighted birth and galley through the forward cabin door. Starting to take shape. Time for more sanding filling, sanding Primer and painting. 😎 Cheers 🍻


- 51 replies
-
- 6
-
-
- laughing whale
- maine lobster boat
- (and 1 more)
-
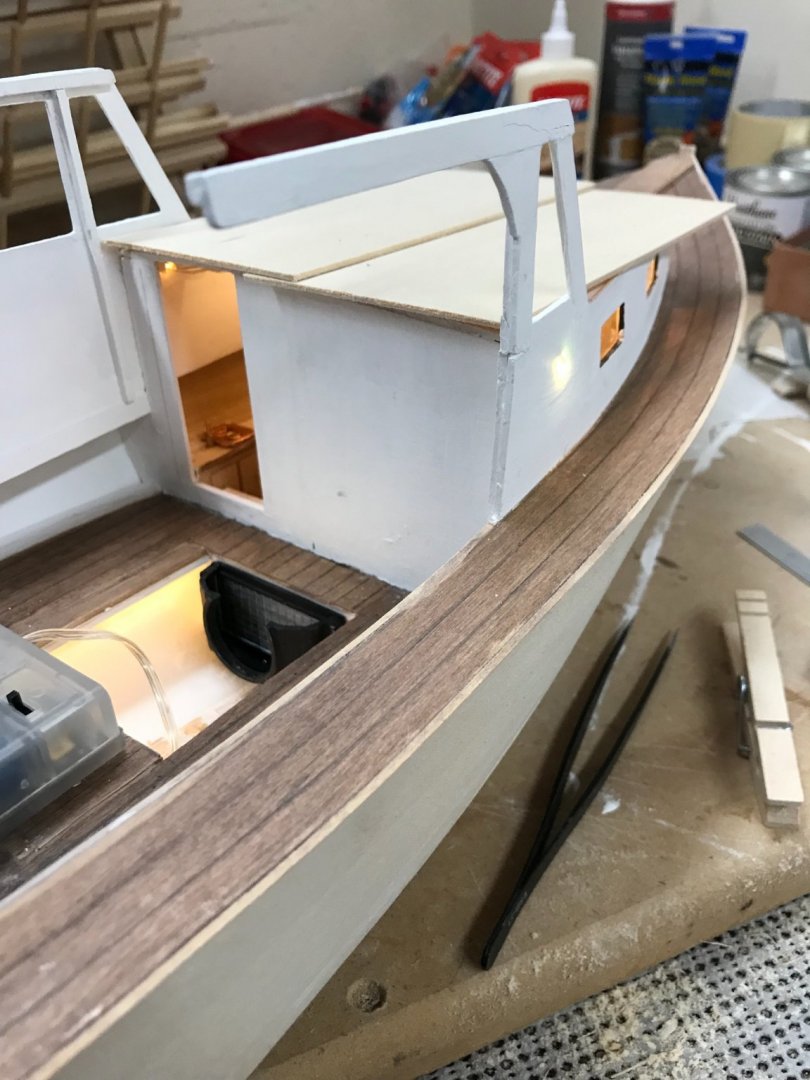
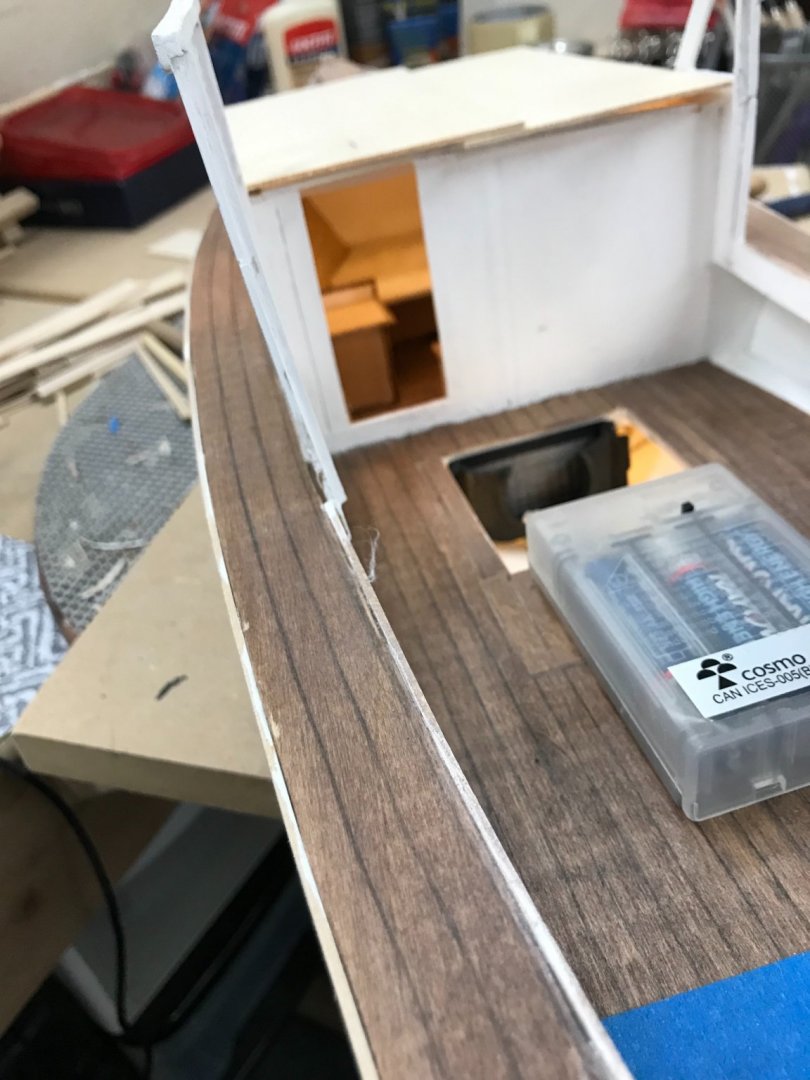
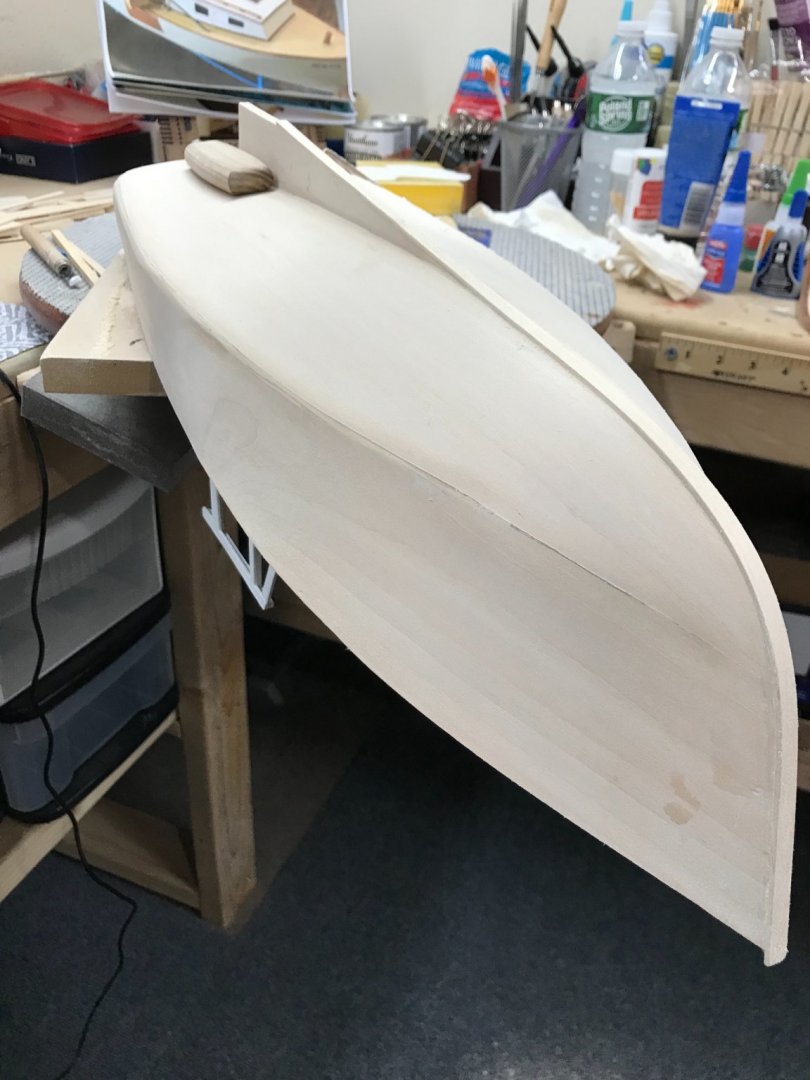
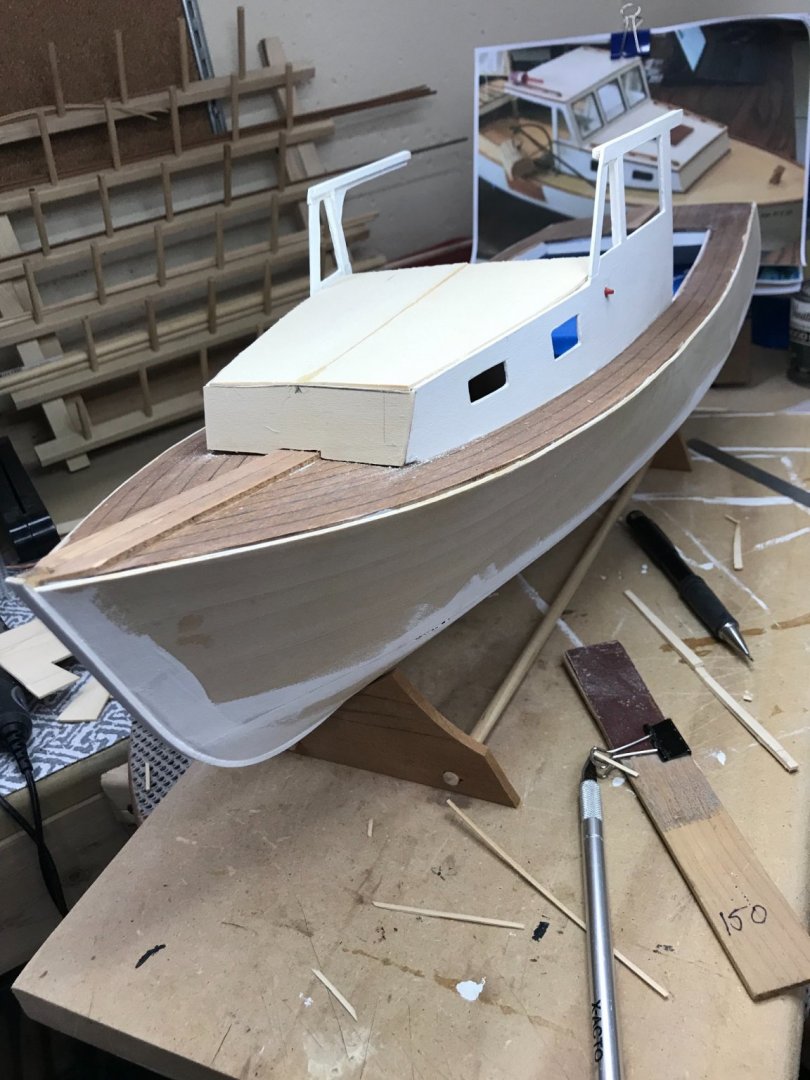
Installing lights in the forward cabin and engine bay. More rounding of the hull. Needs more rounding…. Rudder and prop built and fitted. Finally, got to the hull shape I’m looking to achieve. 😆 Starting to build the cabin. Onwards… 😎

- 51 replies
-
- 5
-
-
- laughing whale
- maine lobster boat
- (and 1 more)