John Ruy
-
Posts
1,585 -
Joined
-
Last visited
Content Type
Profiles
Forums
Gallery
Events
Everything posted by John Ruy
-
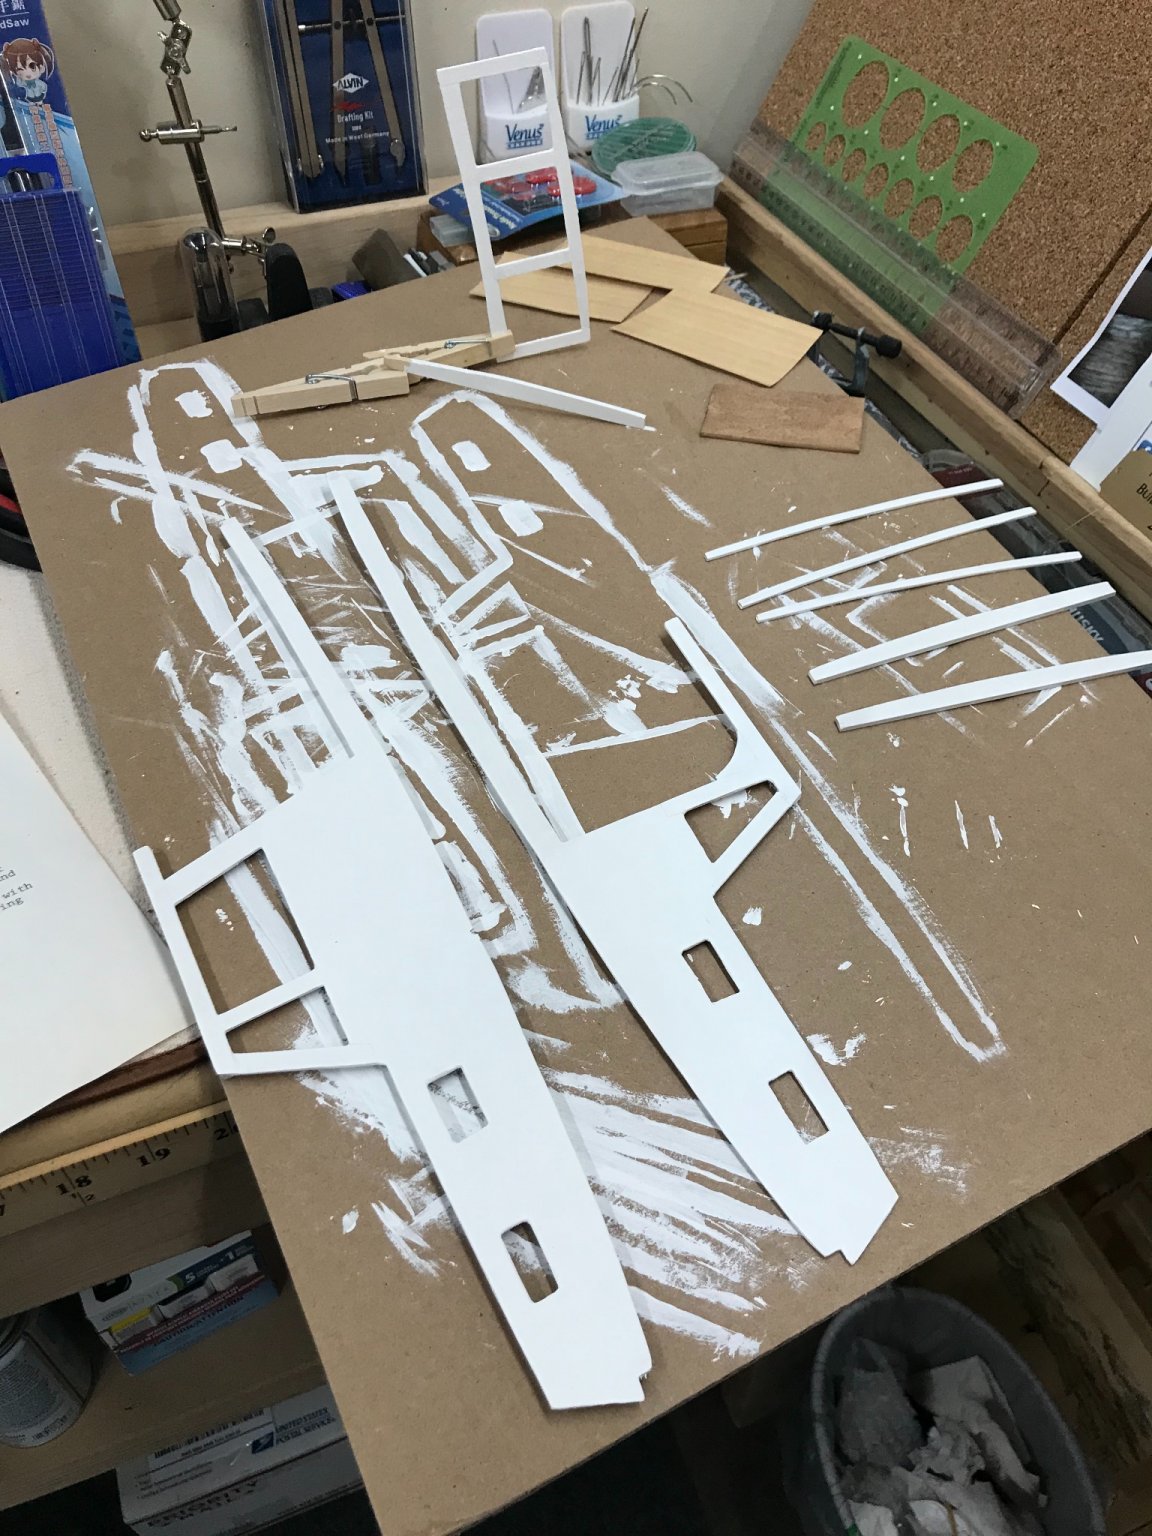
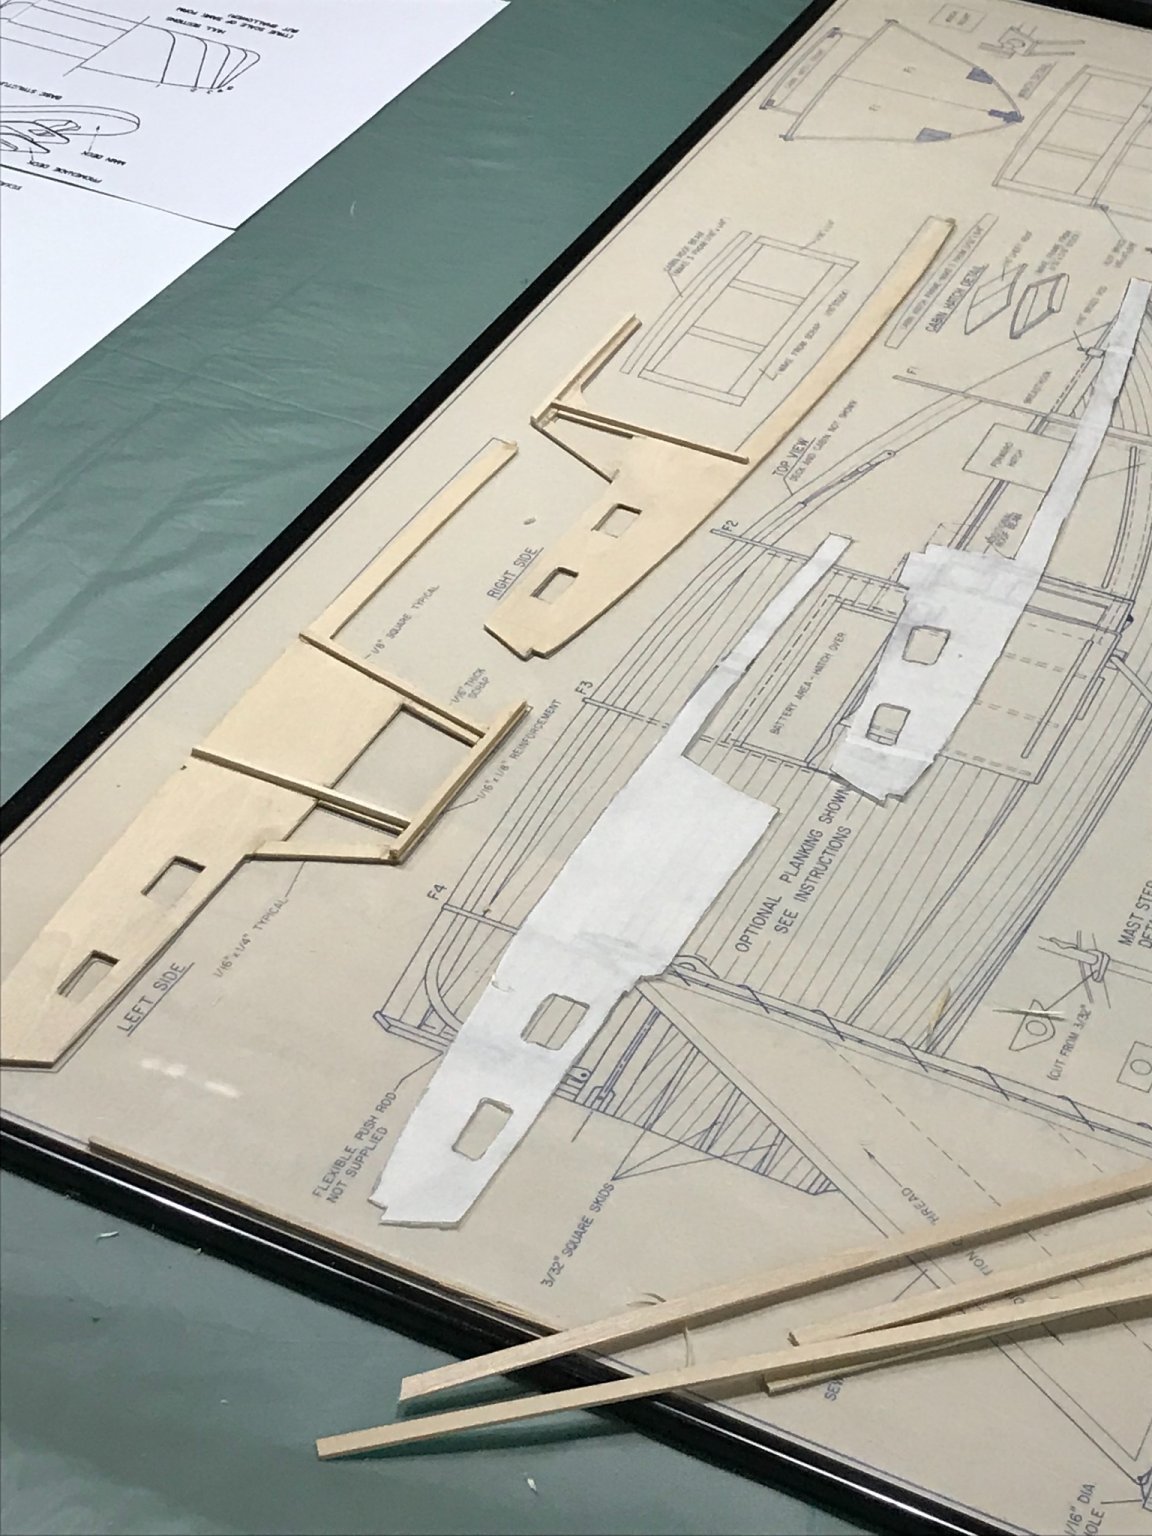
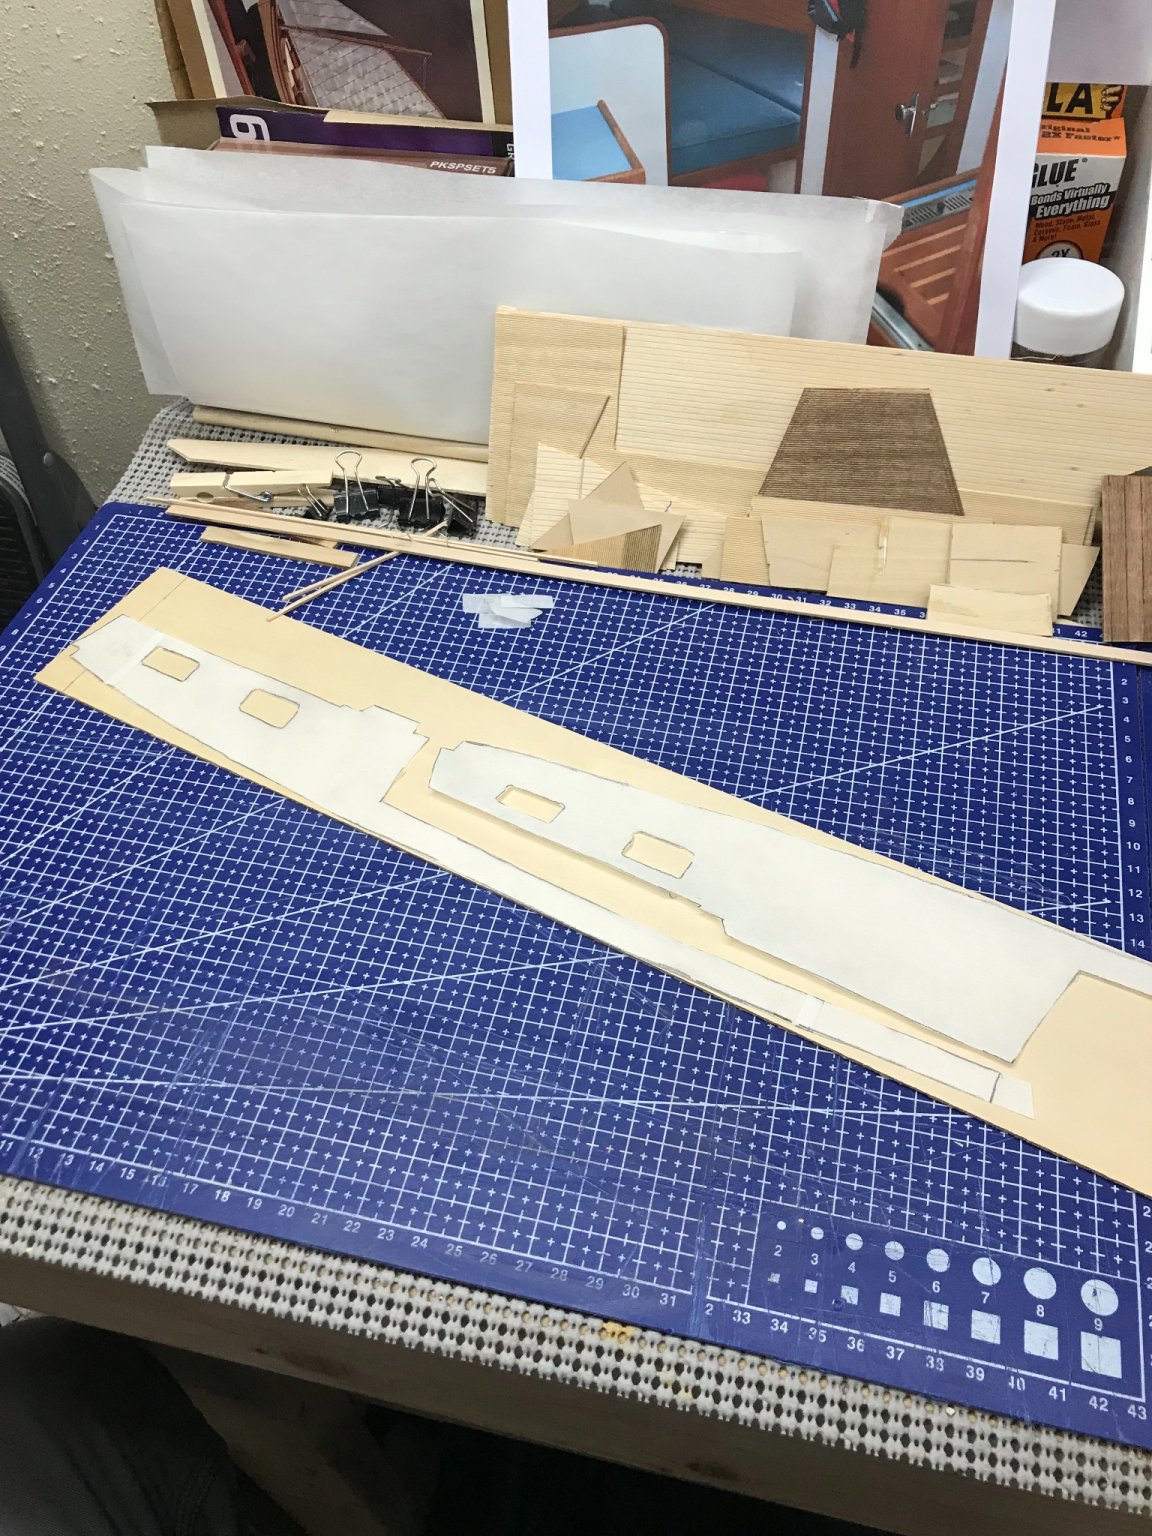
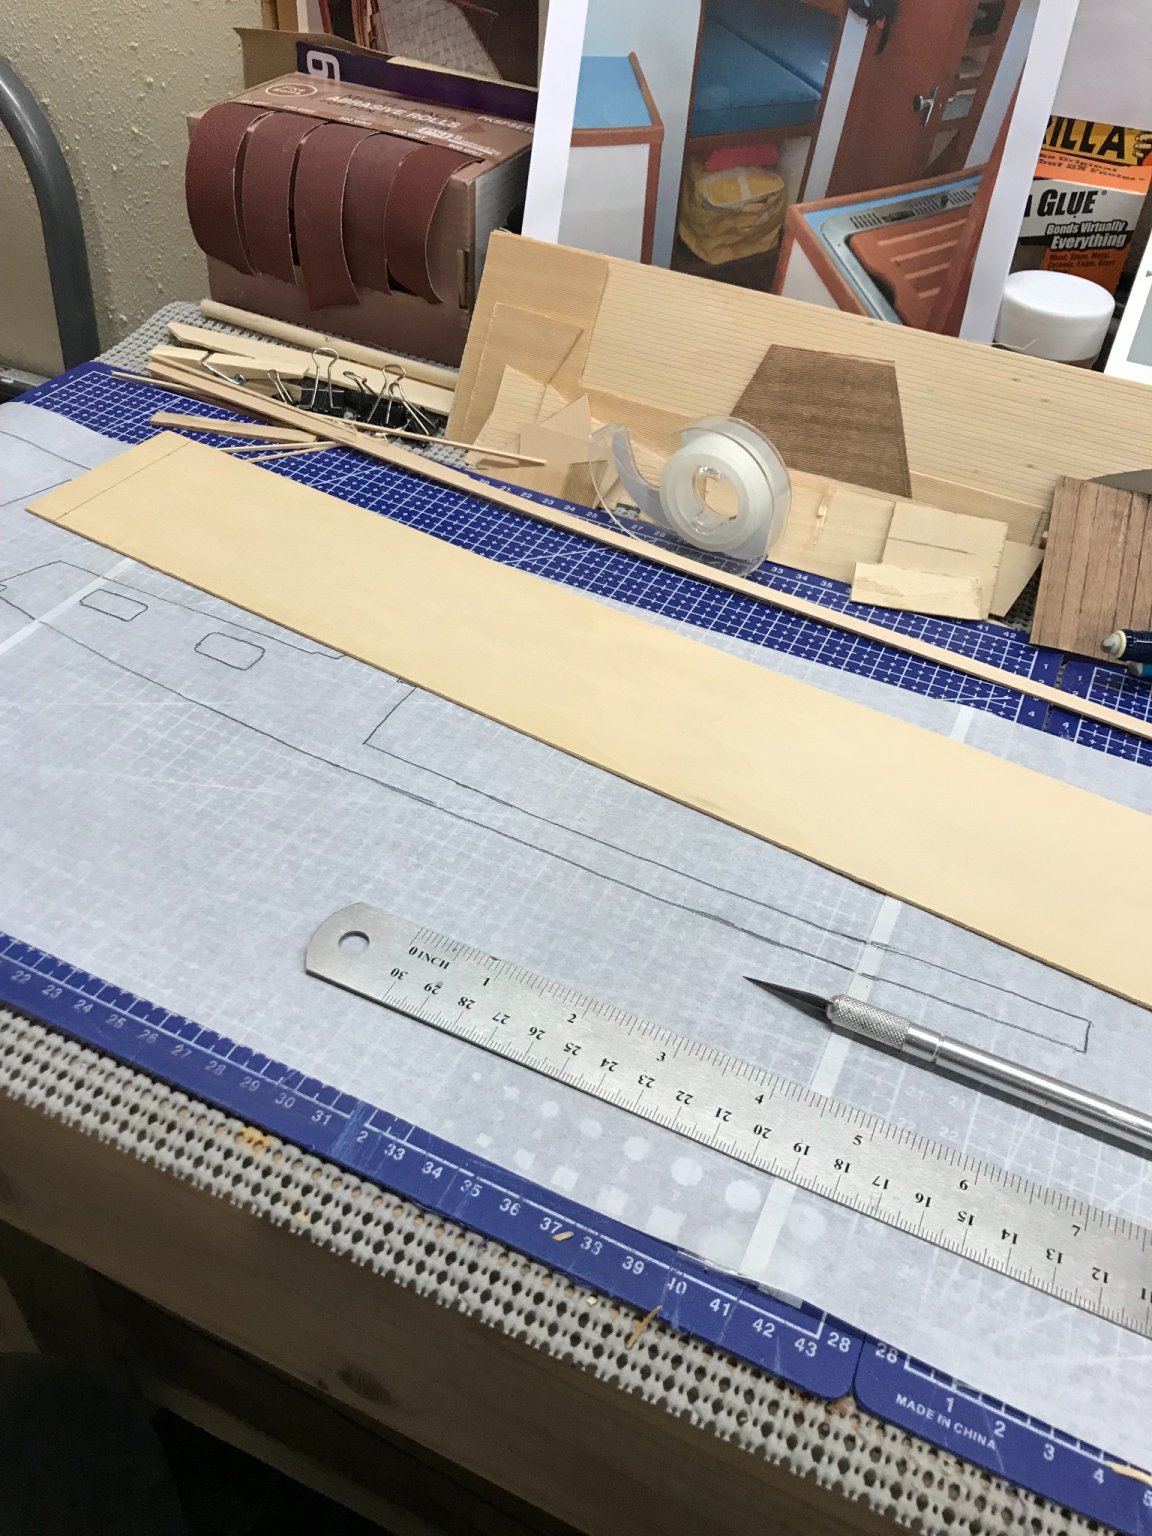
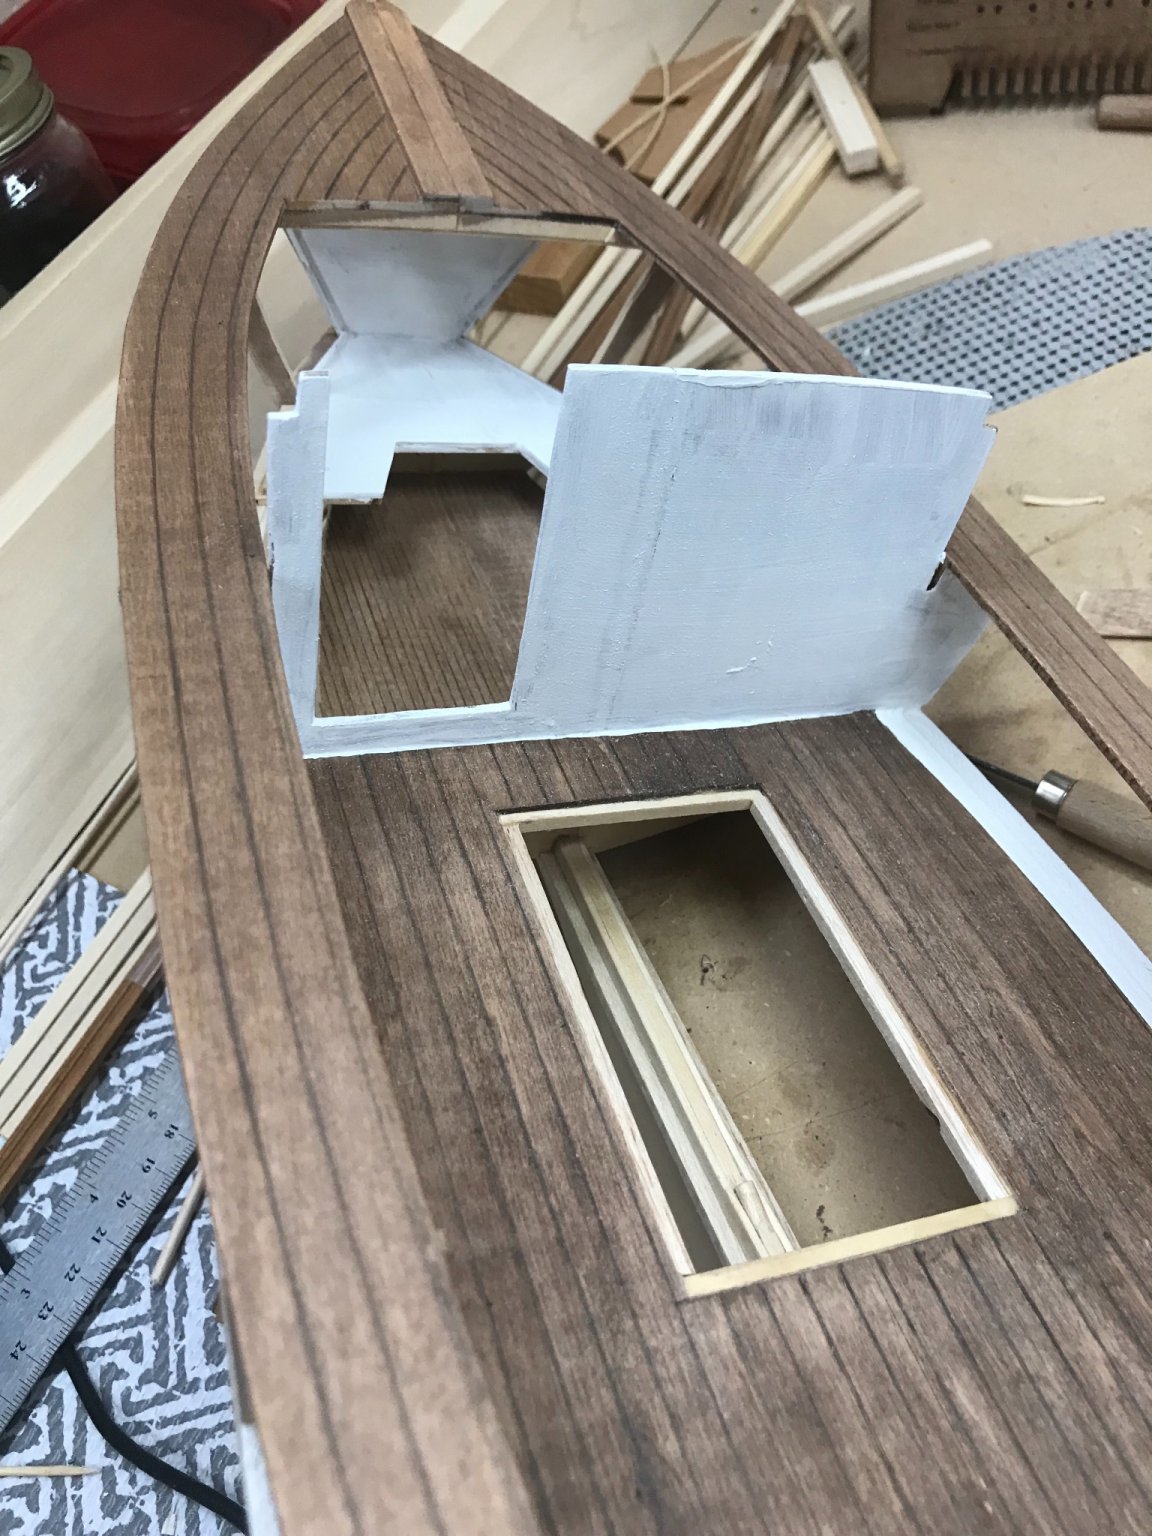
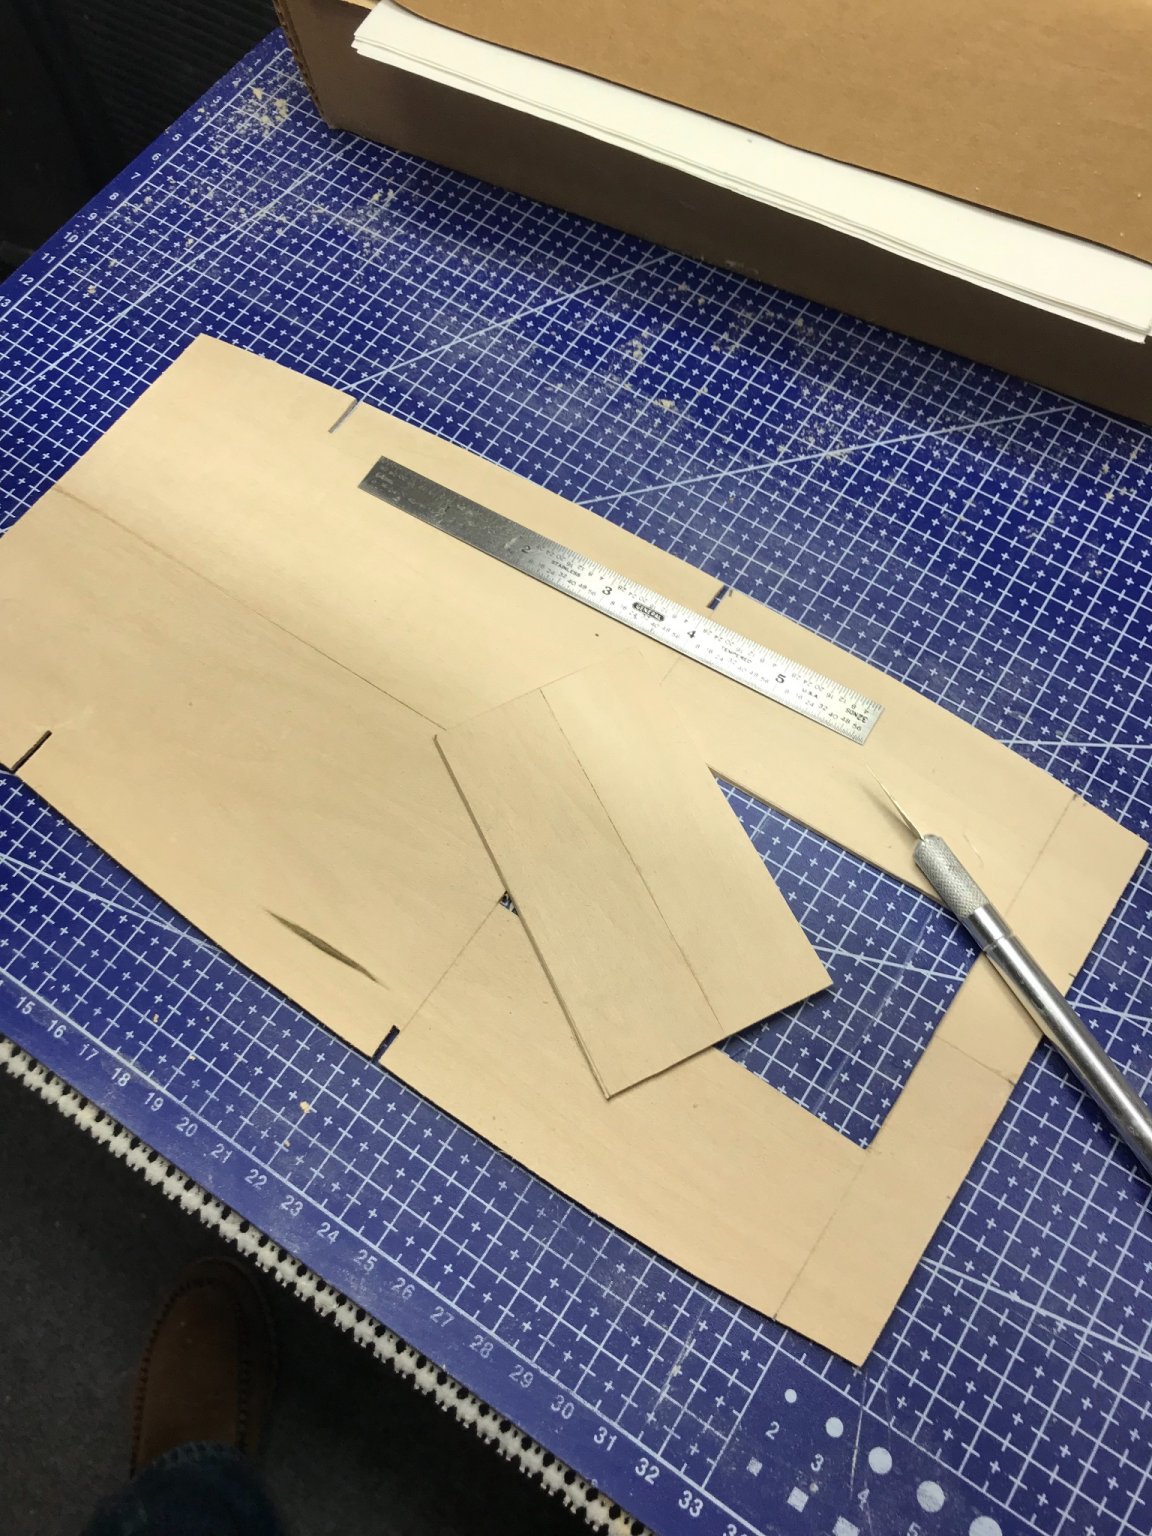
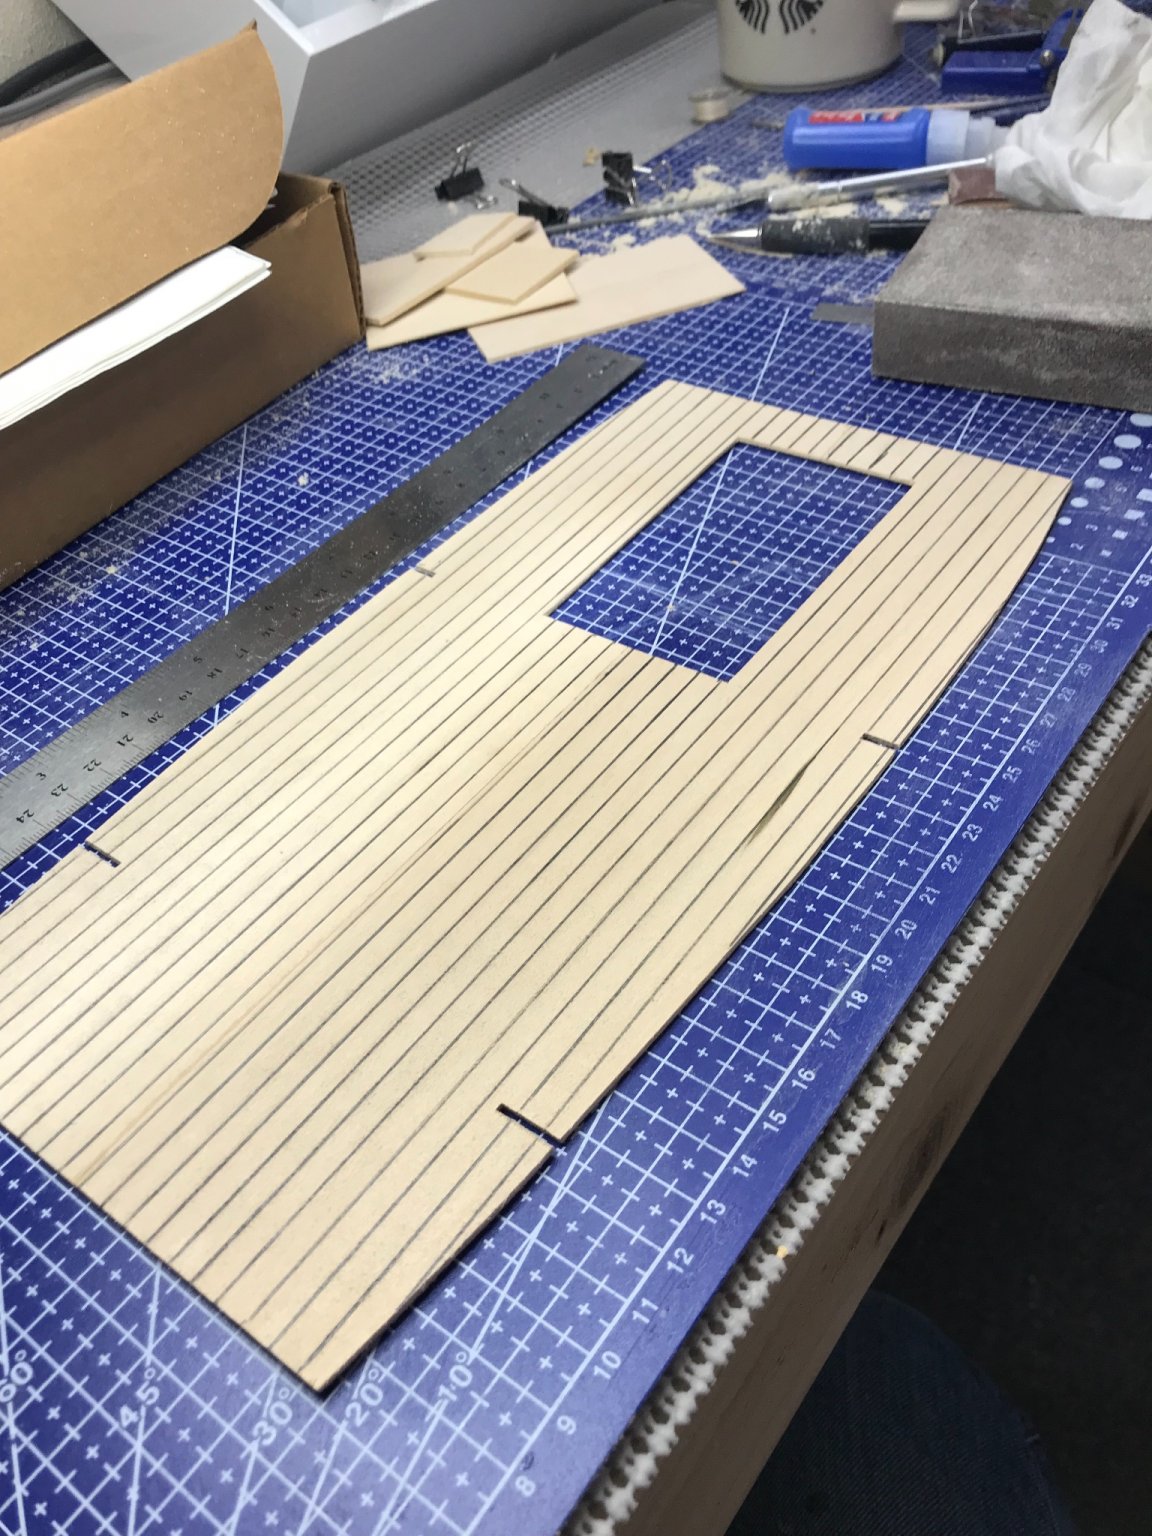
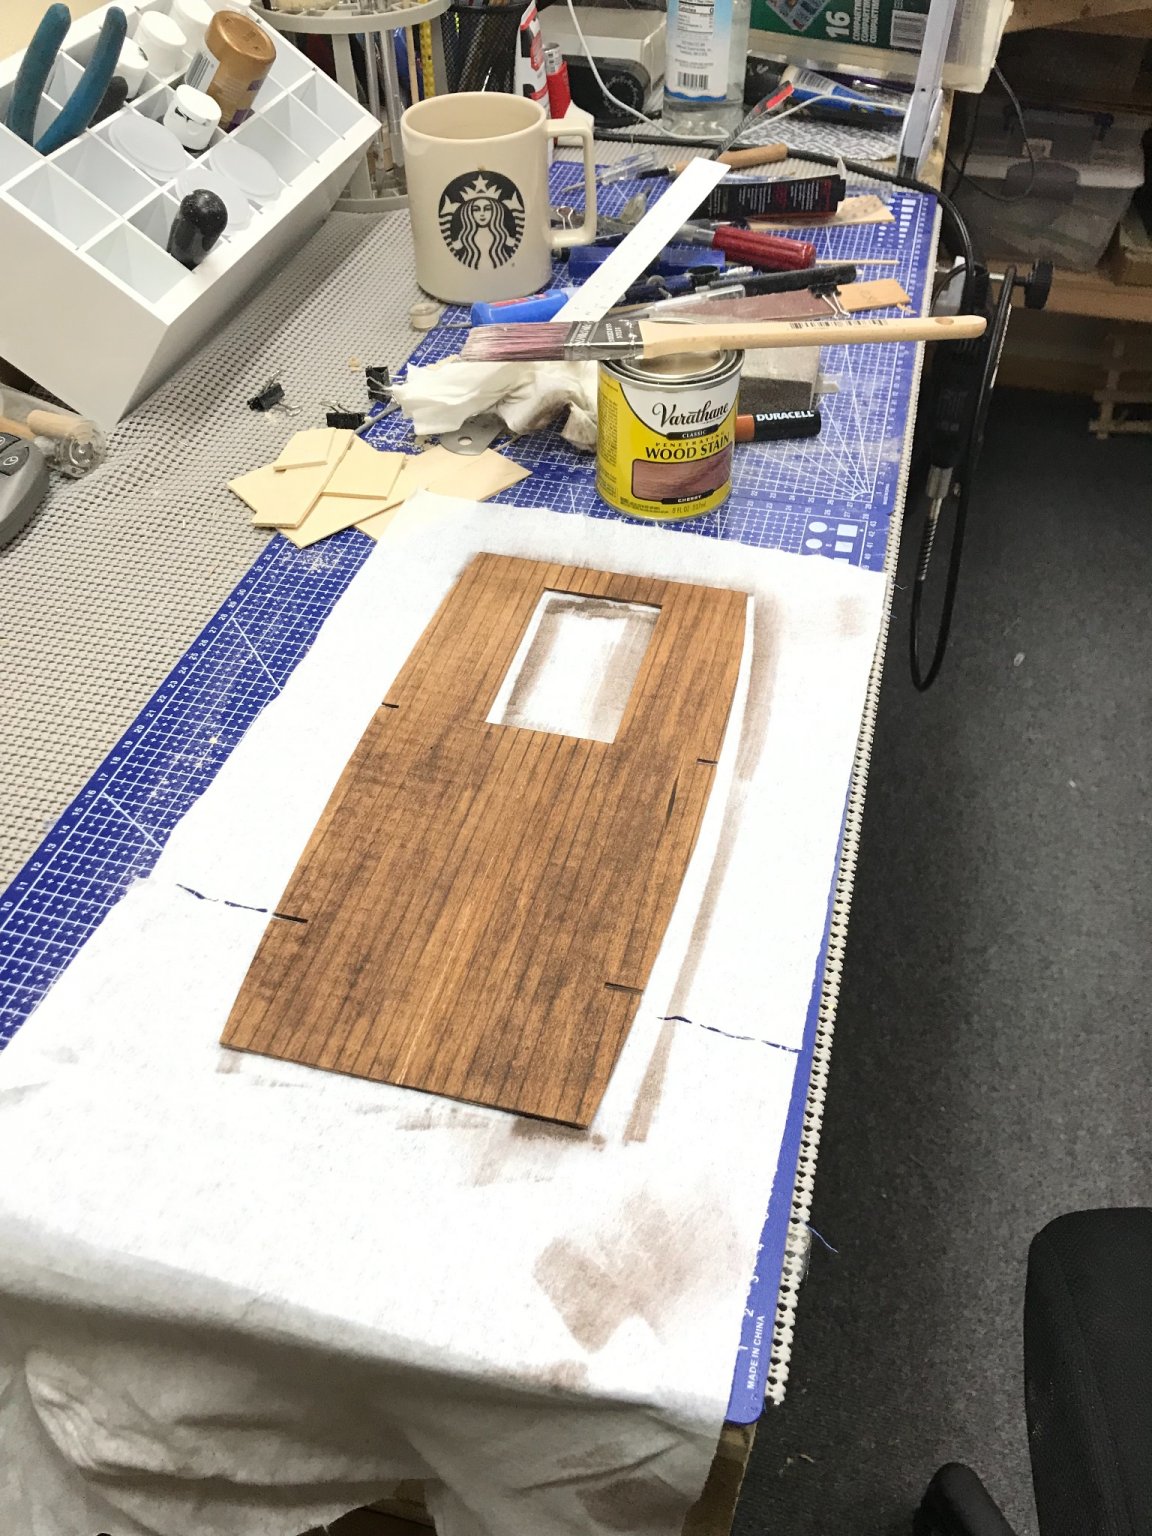
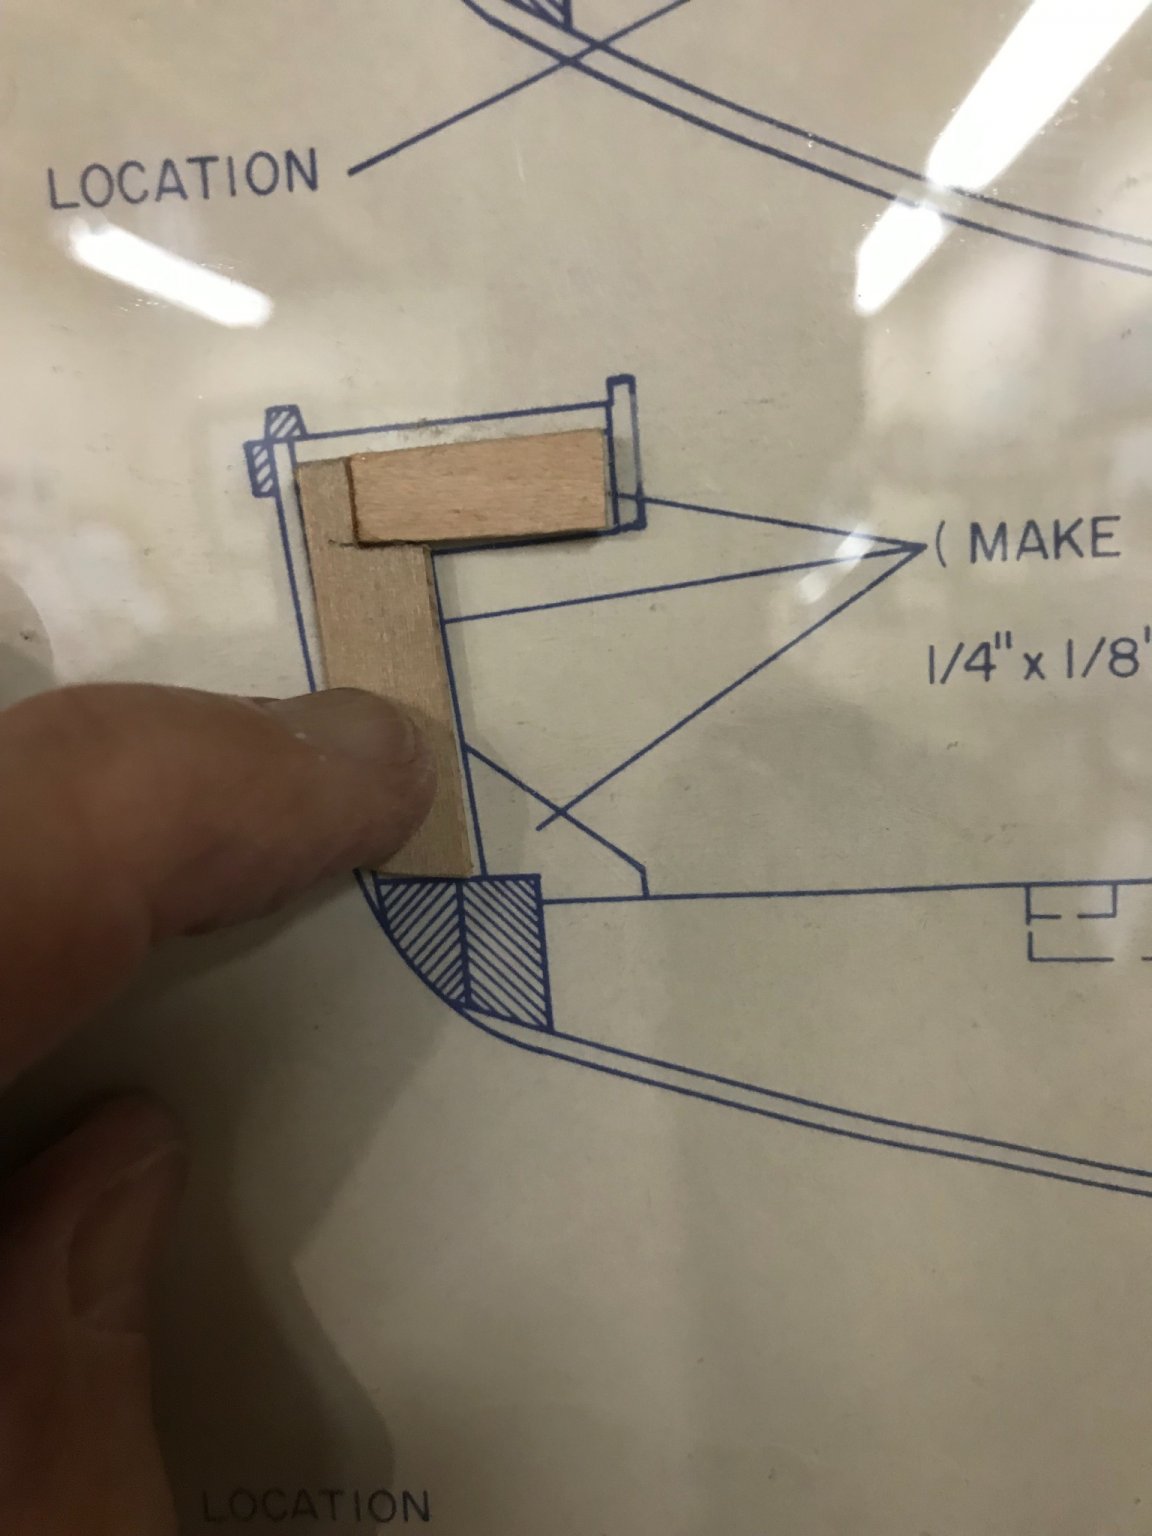
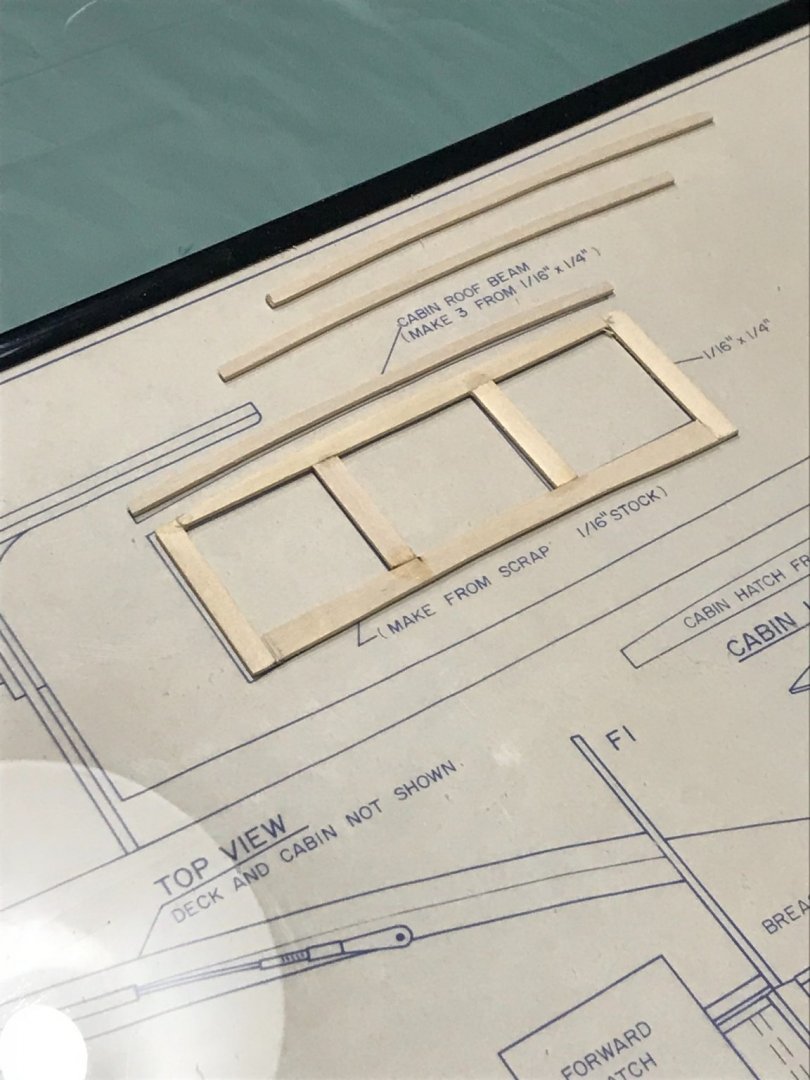
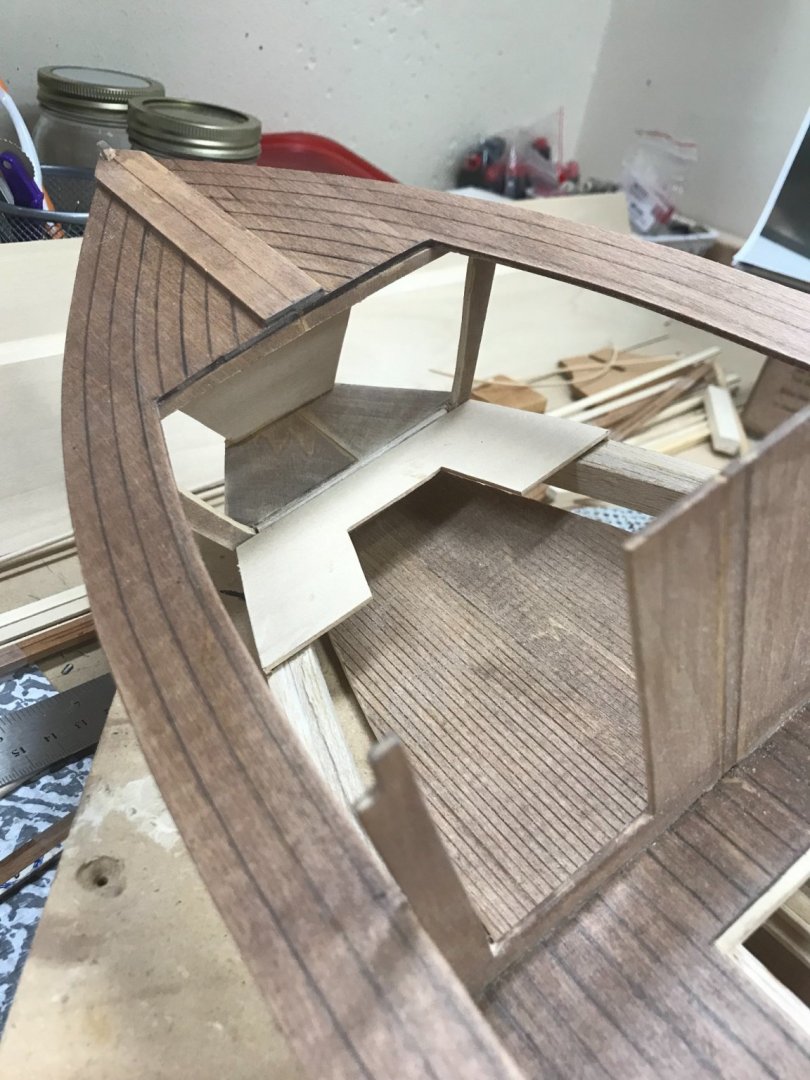
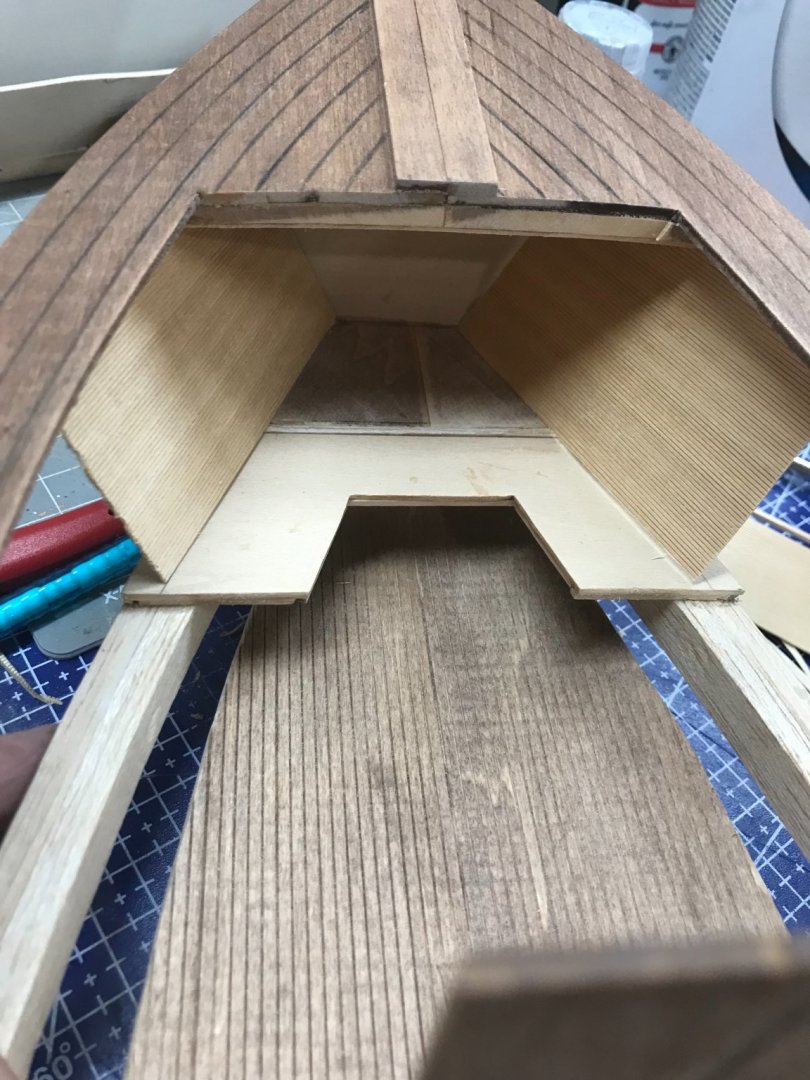
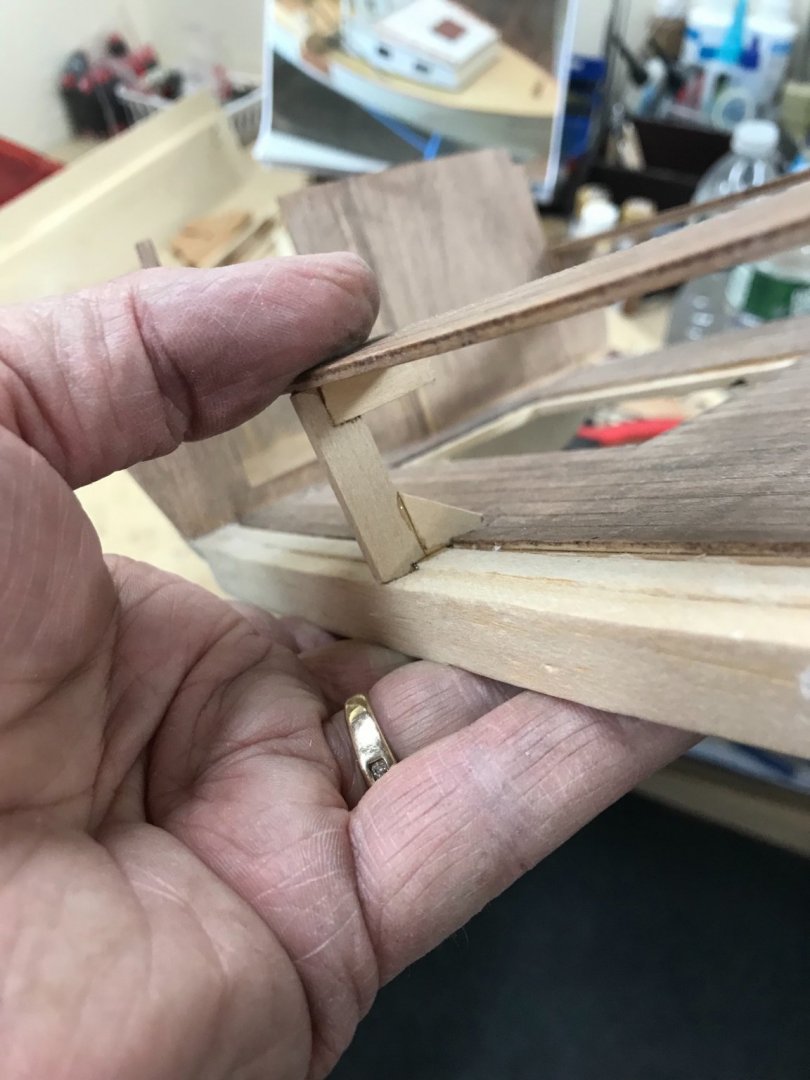
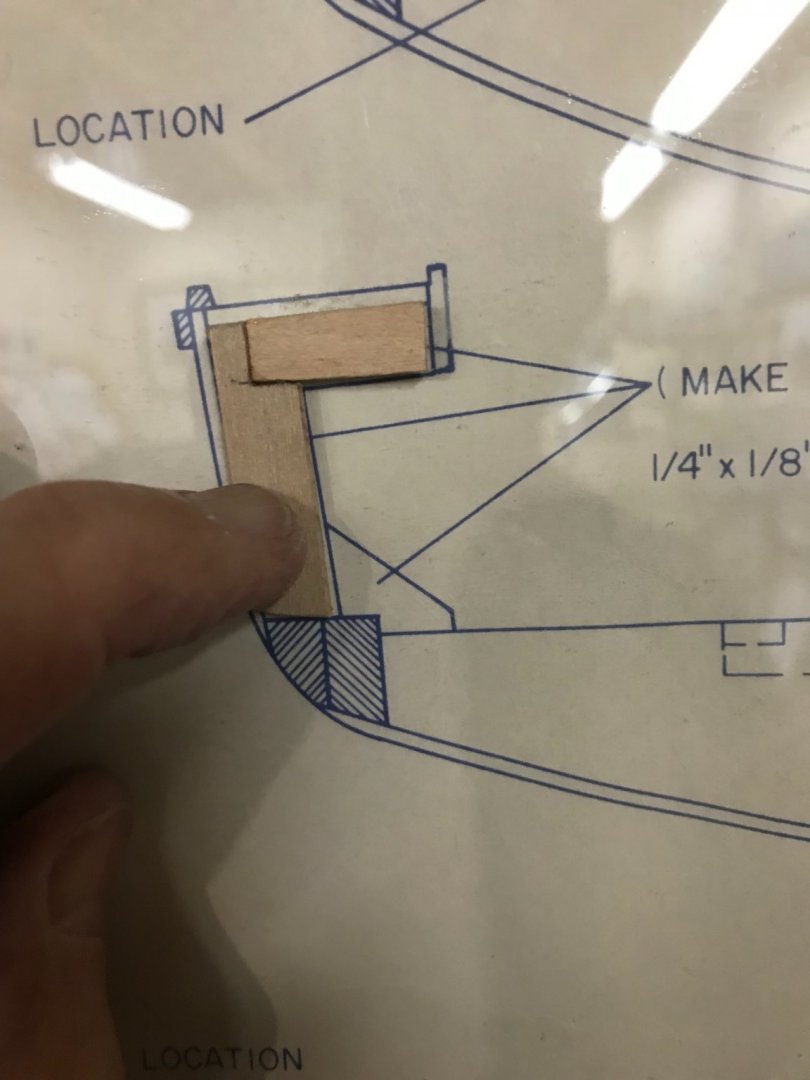
 Progress… Disadvantage to these vintage kits, no die or laser cut parts. Advantage is the opportunity to improve on scratch building abilities. Cutting Bass Wood sheeting accurately is an acquired skill. 😆 Framed out forward cabin walls. Fitted interior sheet planking. Traced out cabin exterior walls. Preparing to cut Cabin exterior walls from supplied sheeting. Cut out tracing paper patterns and laid out on sheeting. Penciled the walls on to the sheeting using the patterns. Acquired the necessary cutting skills to cut out the walls accurately. Finished framing out the walls and matched everything up to the drawings. Now for the forward wind shield. Verified fit, required some trimming. First of several coats of paint… Stay tuned, customizations to the Forward Cabin coming up. First I have to figure out the roof framing from the drawings. Instruction leaves a lot to be desired. Cheers 🍻


- 51 replies
-
- 5
-

-
- laughing whale
- maine lobster boat
- (and 1 more)
-
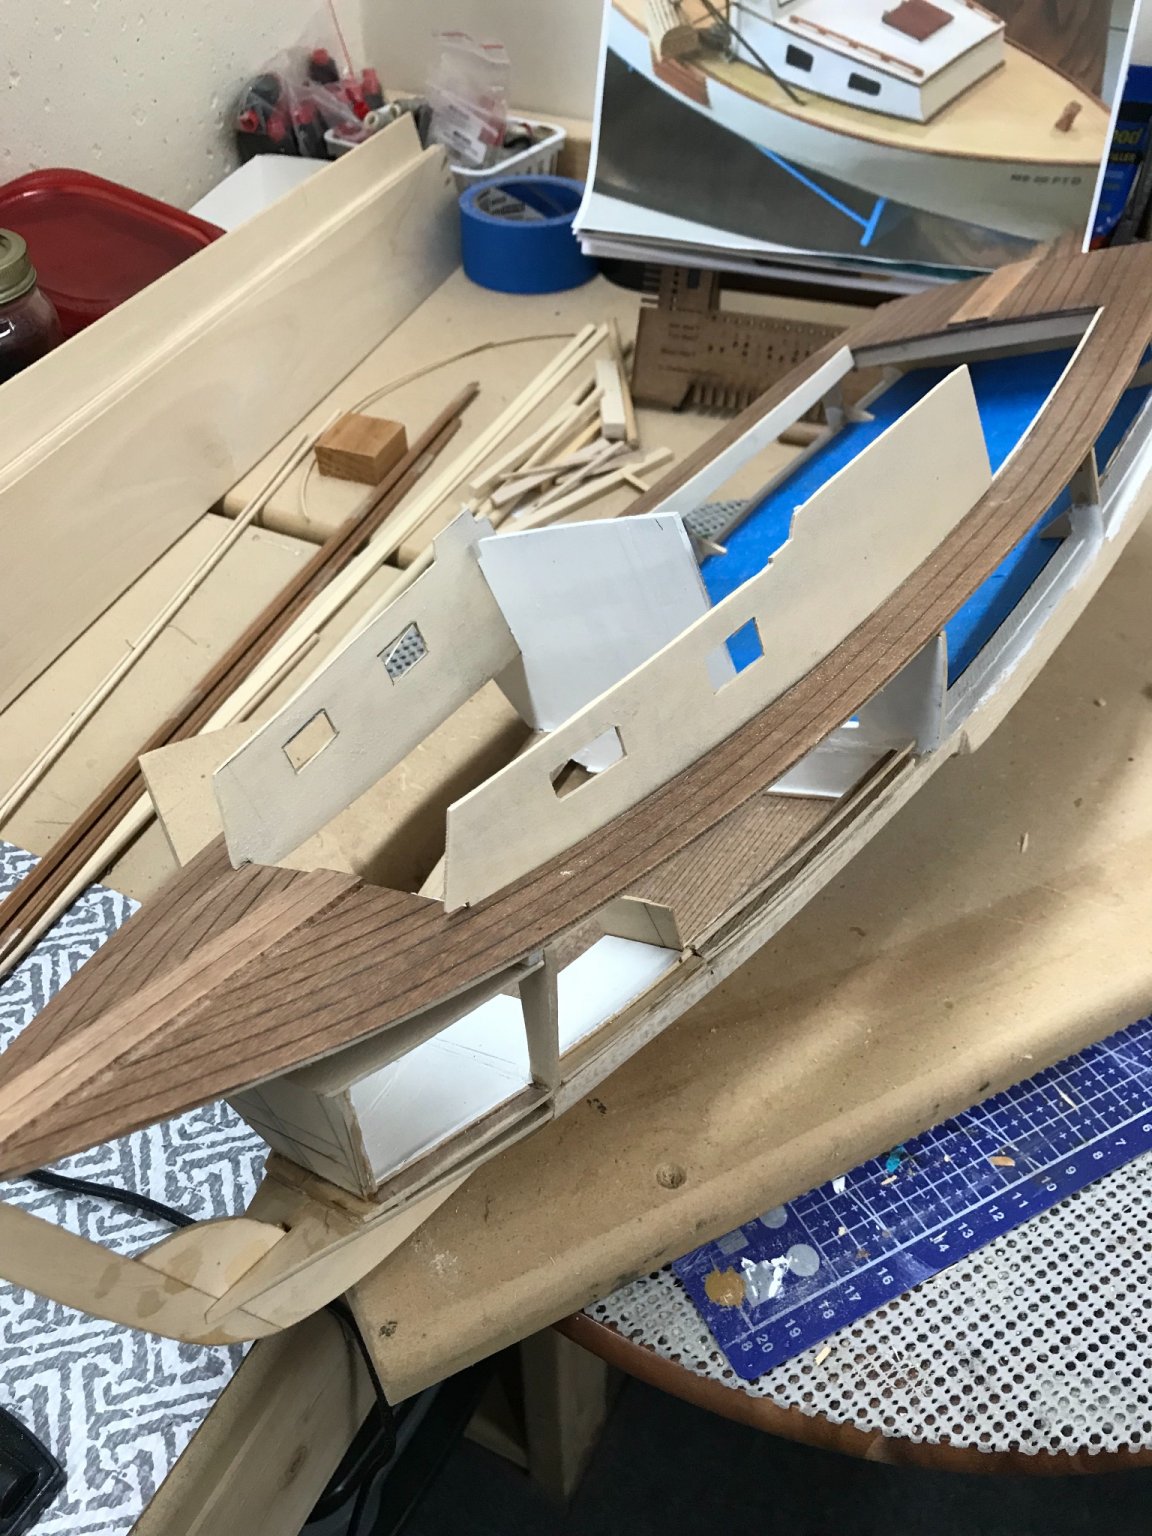
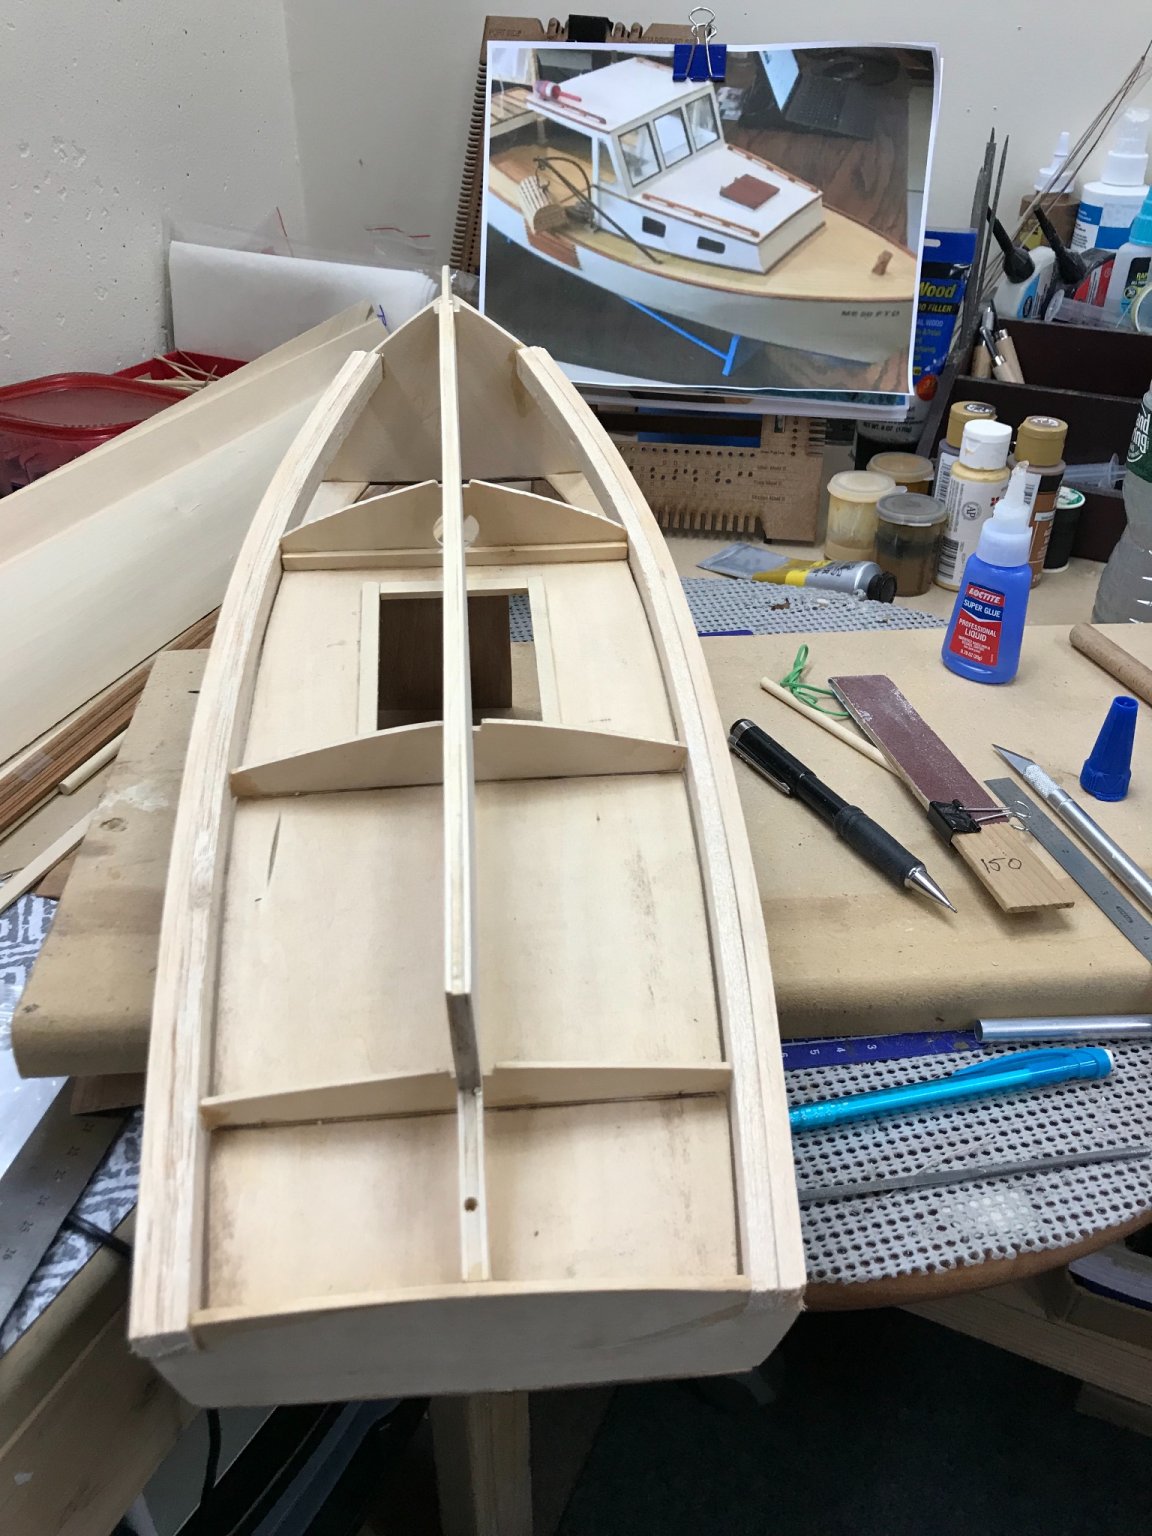
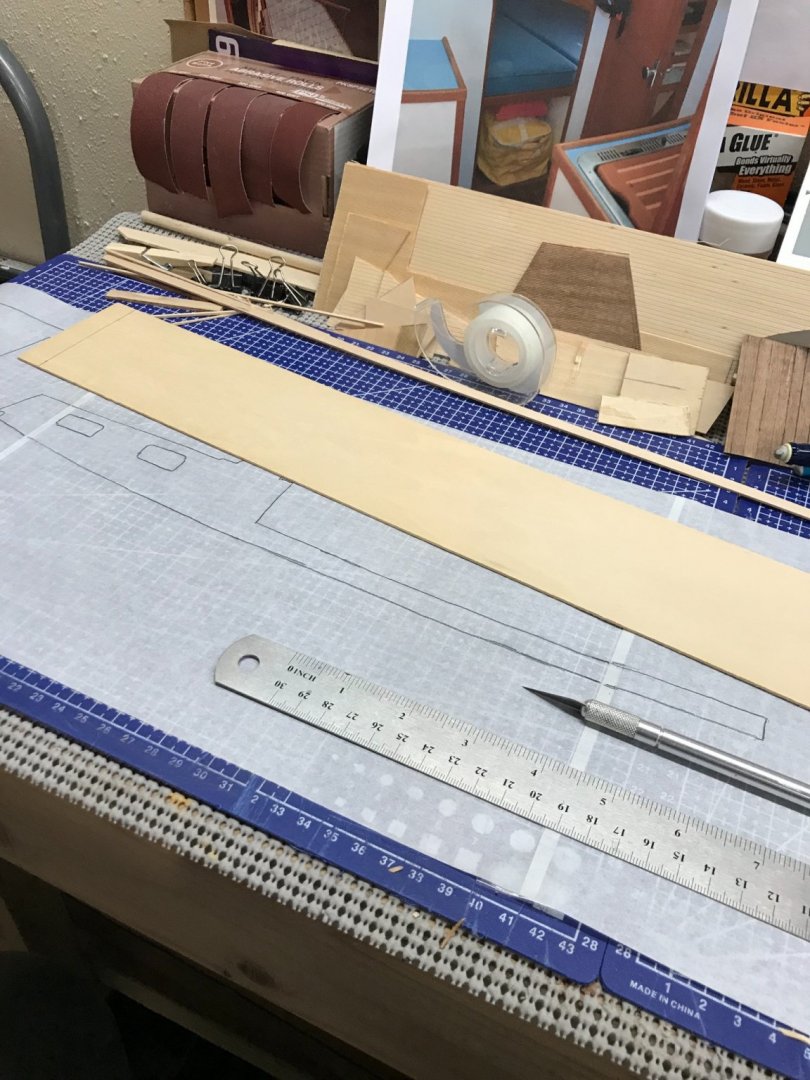
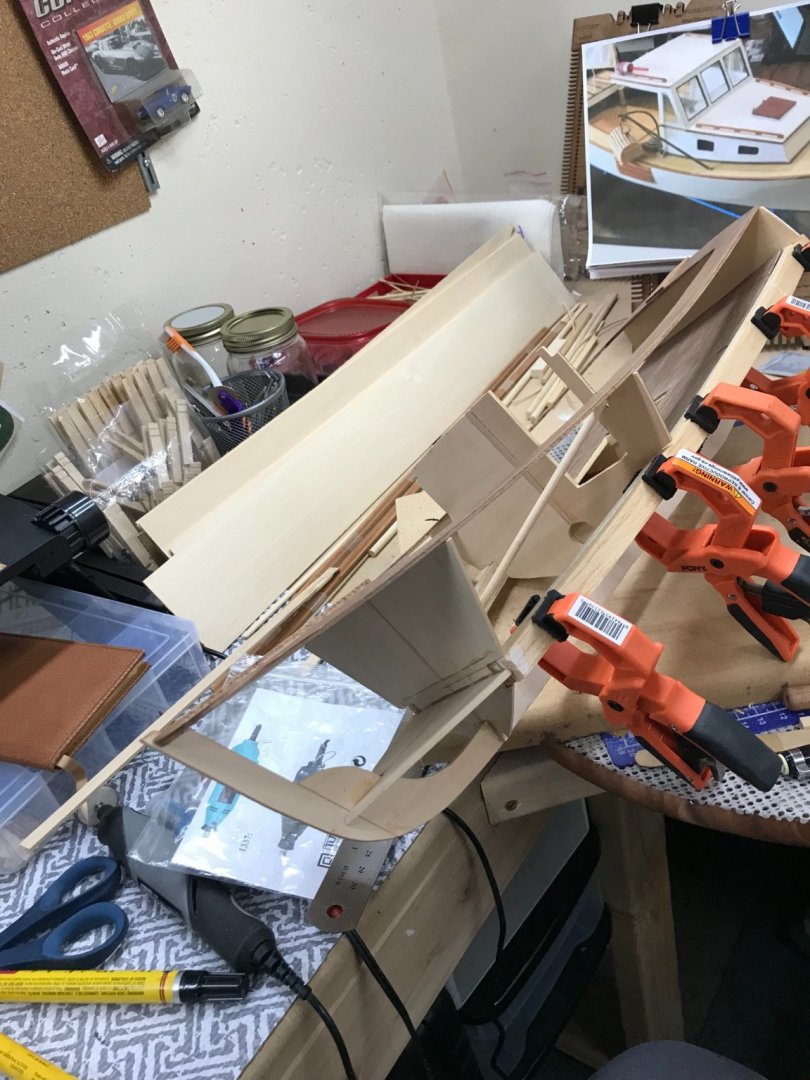
Started the Forward Cabin scratch build. Sketched up a plan. Design on the fly… 🤔 Onward 🍻


- 51 replies
-
- 6
-
-
- laughing whale
- maine lobster boat
- (and 1 more)
-
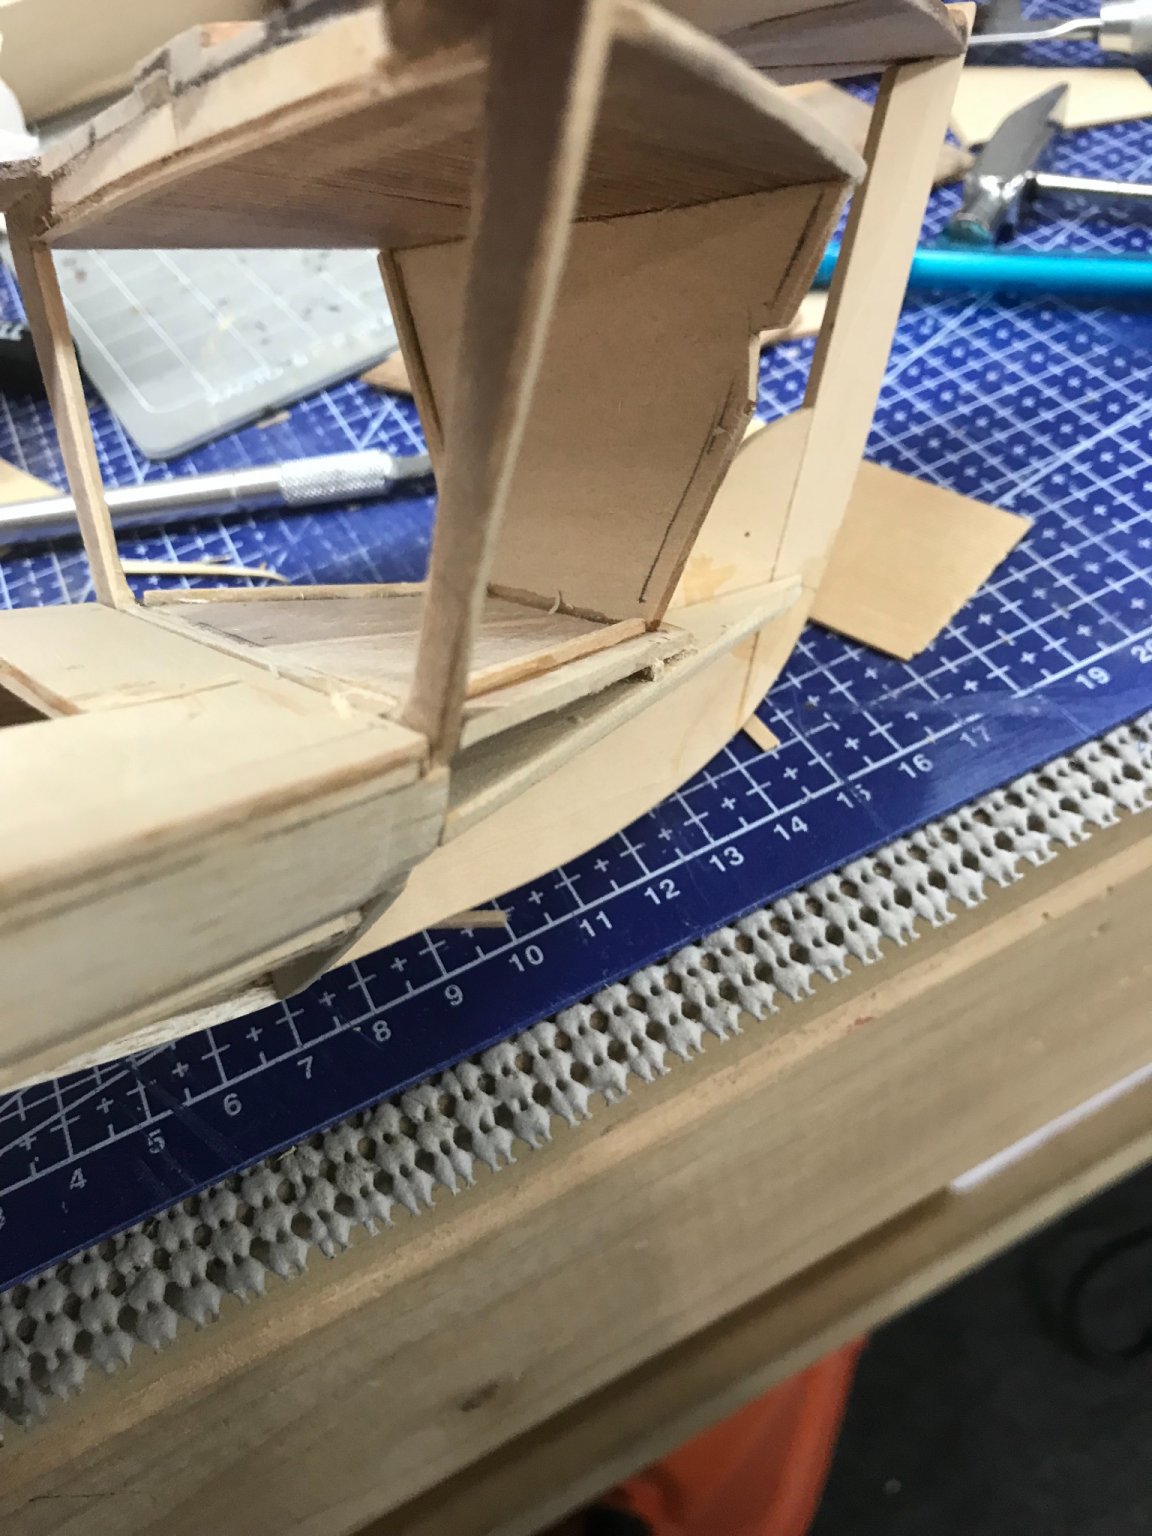
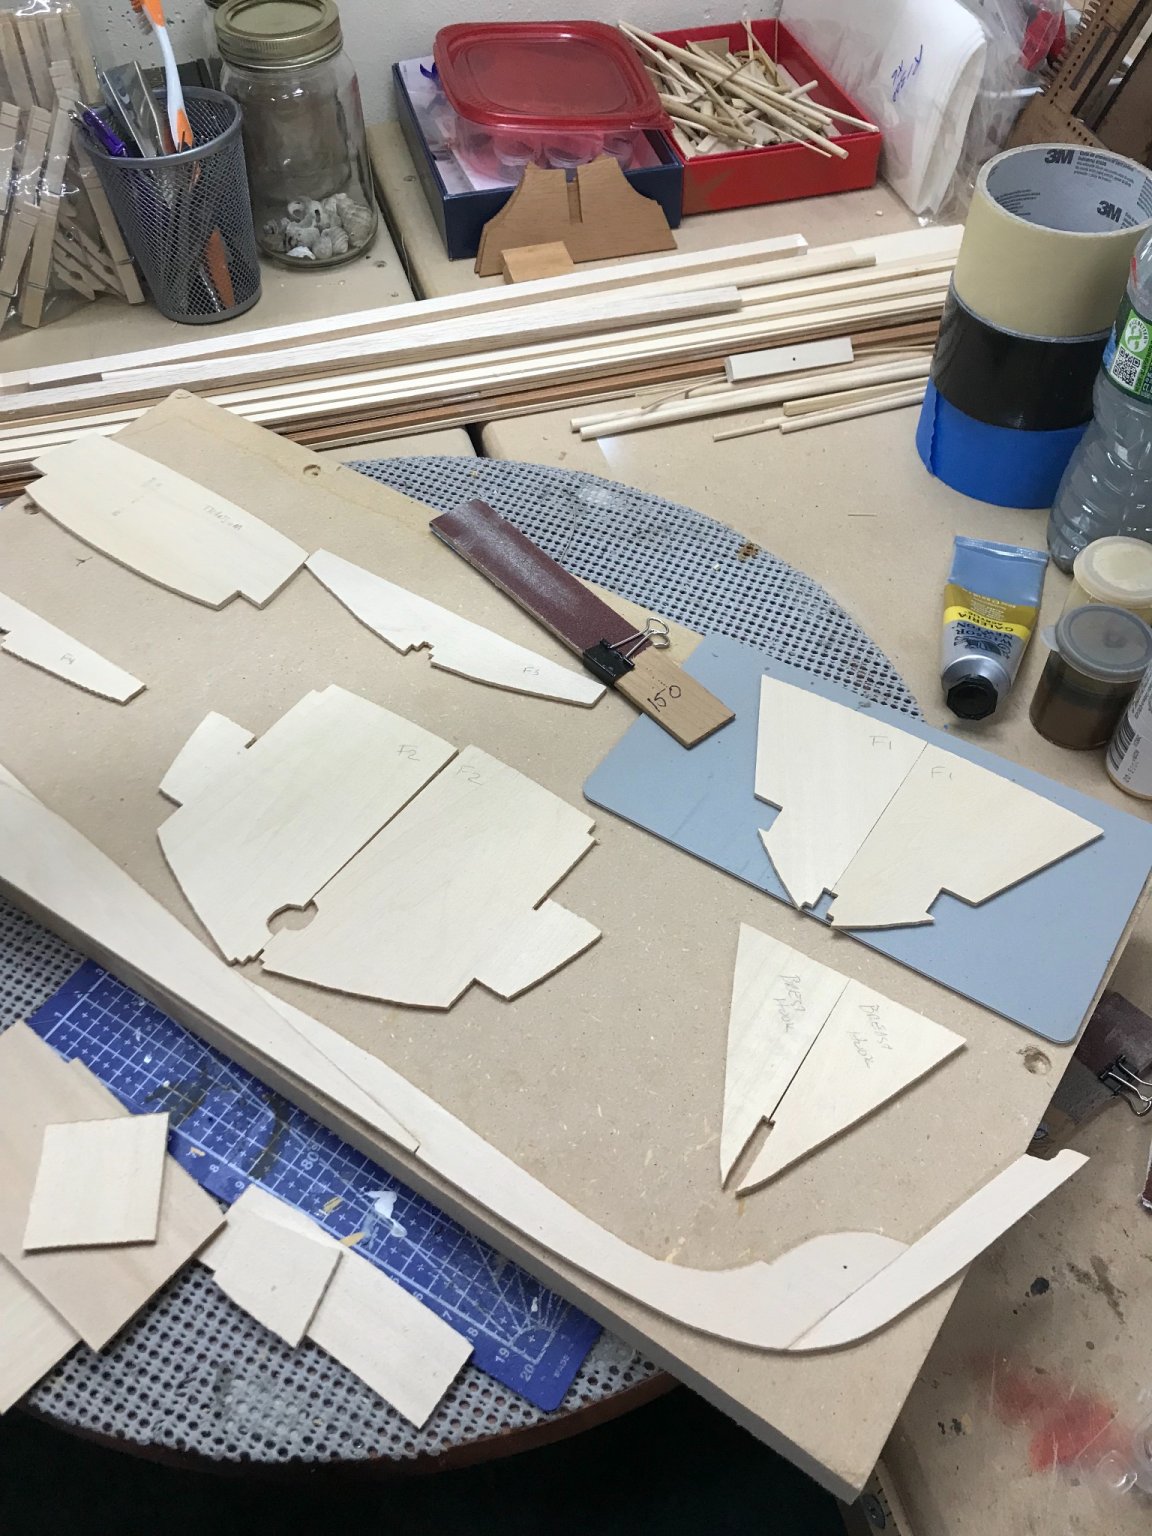
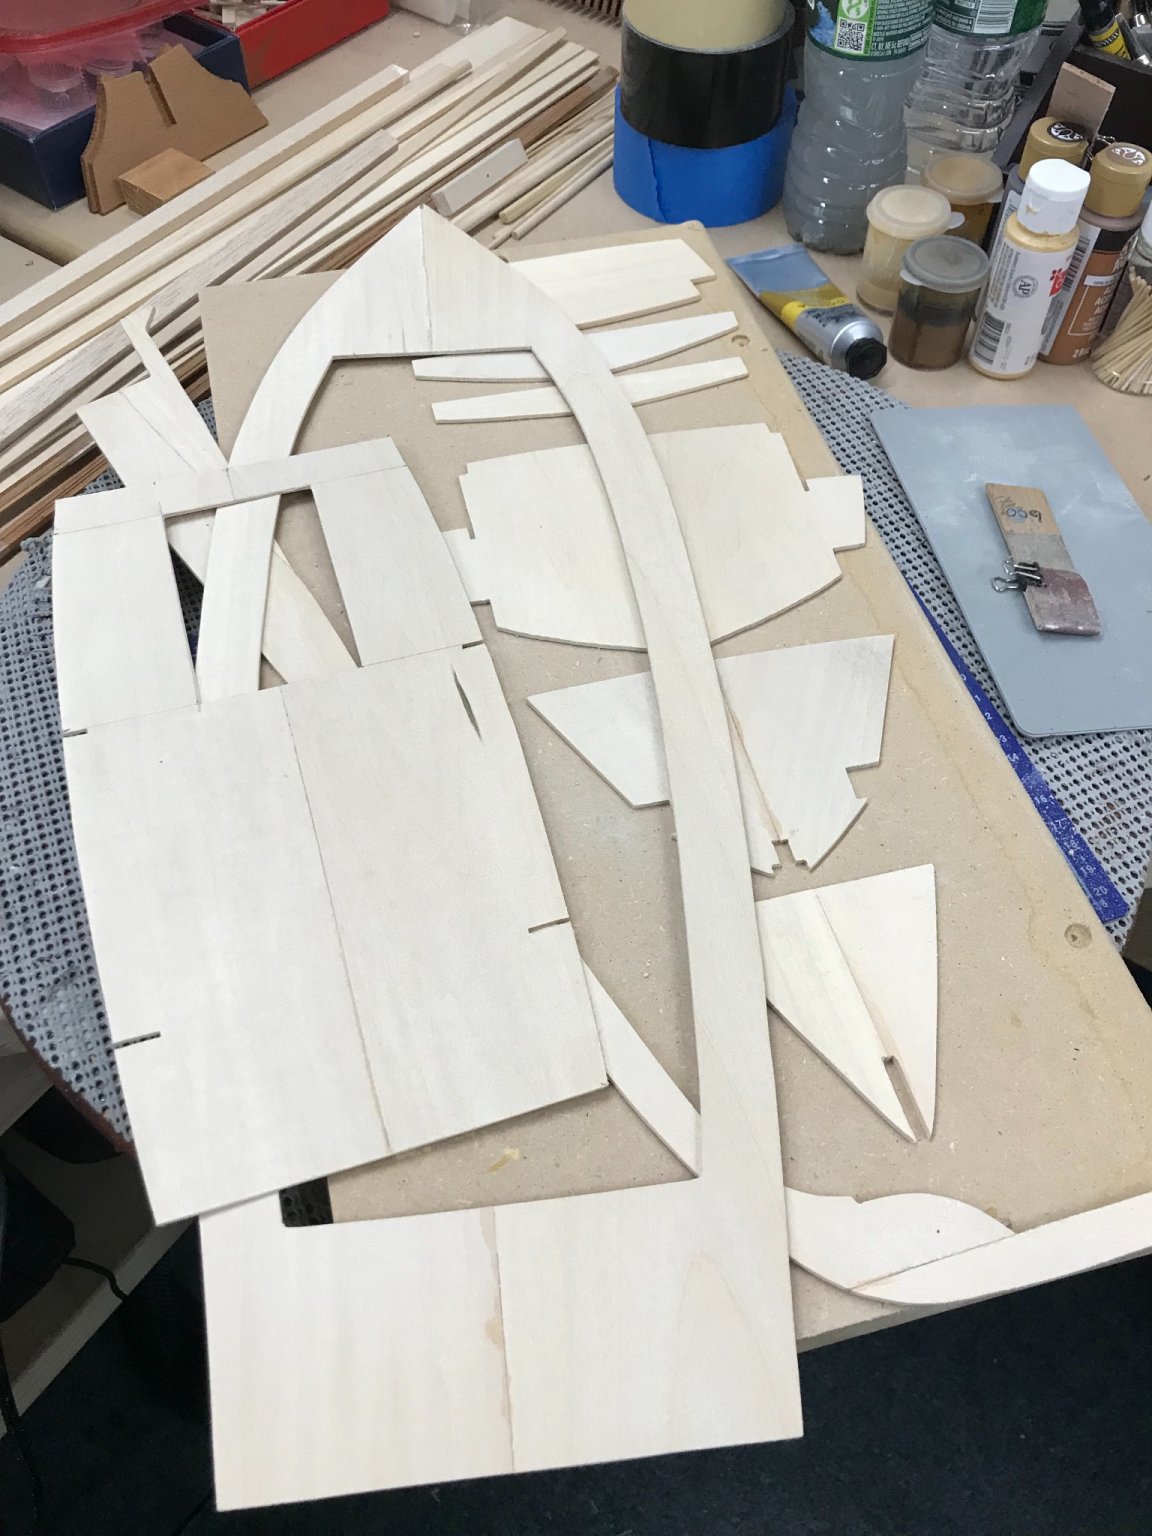
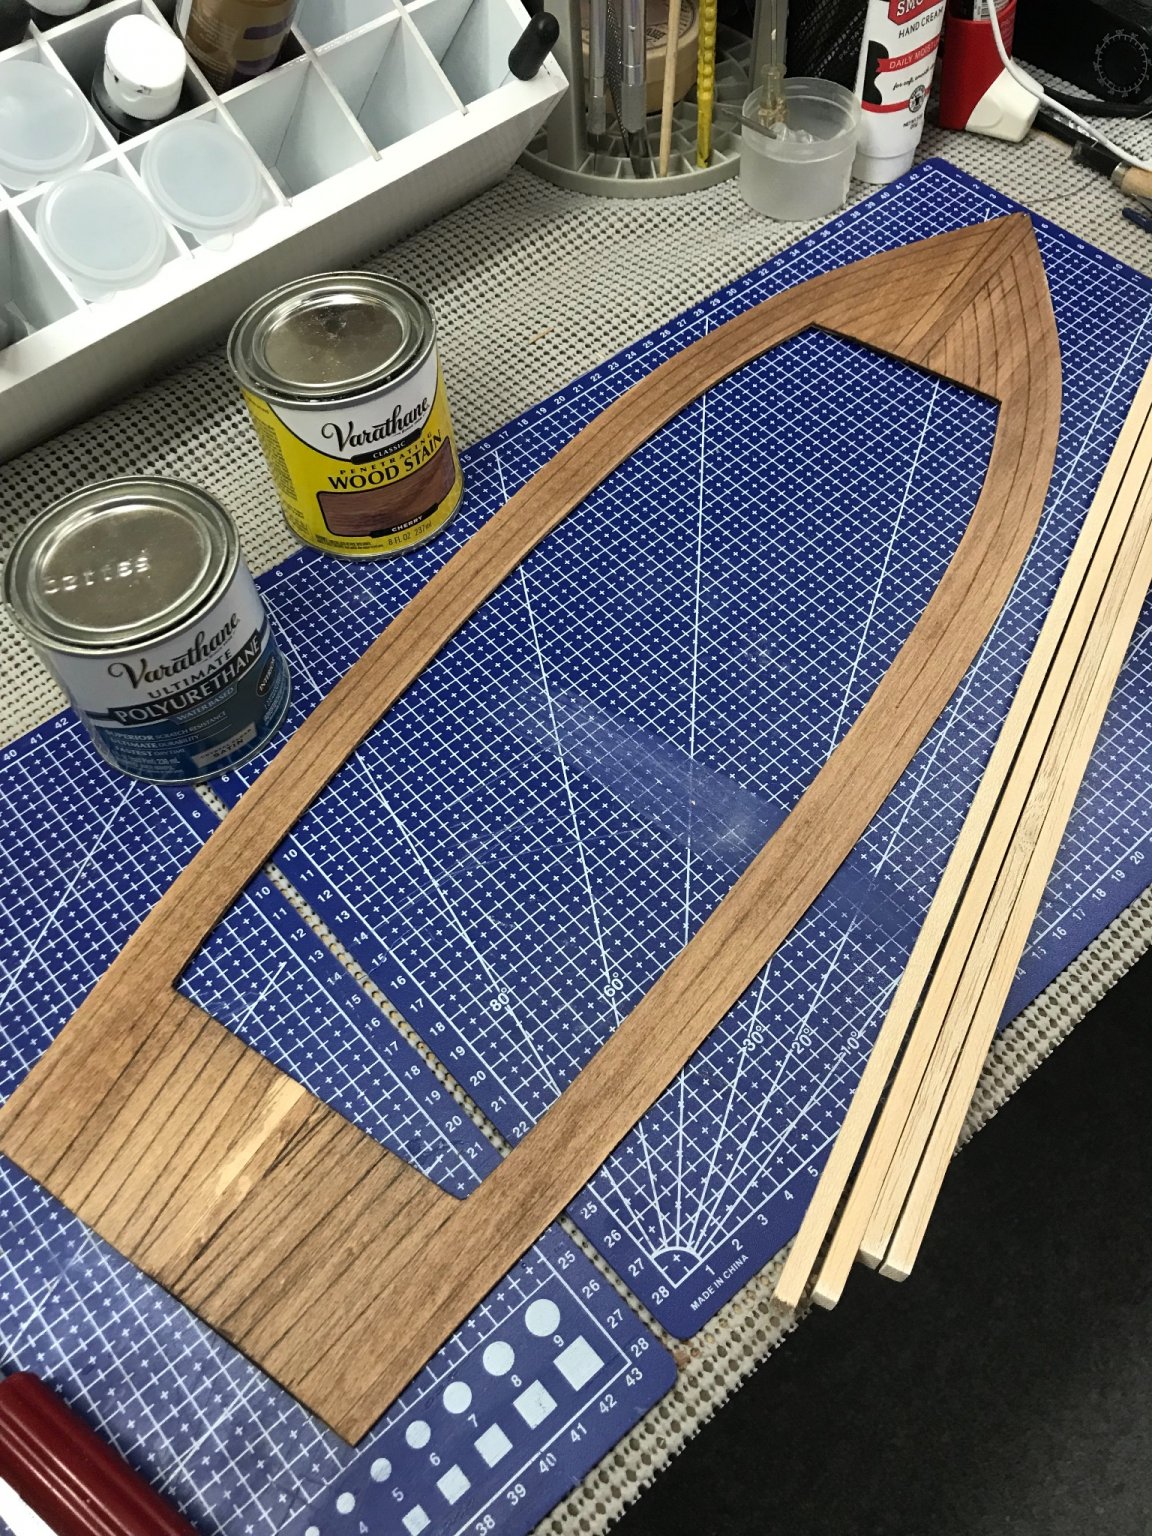
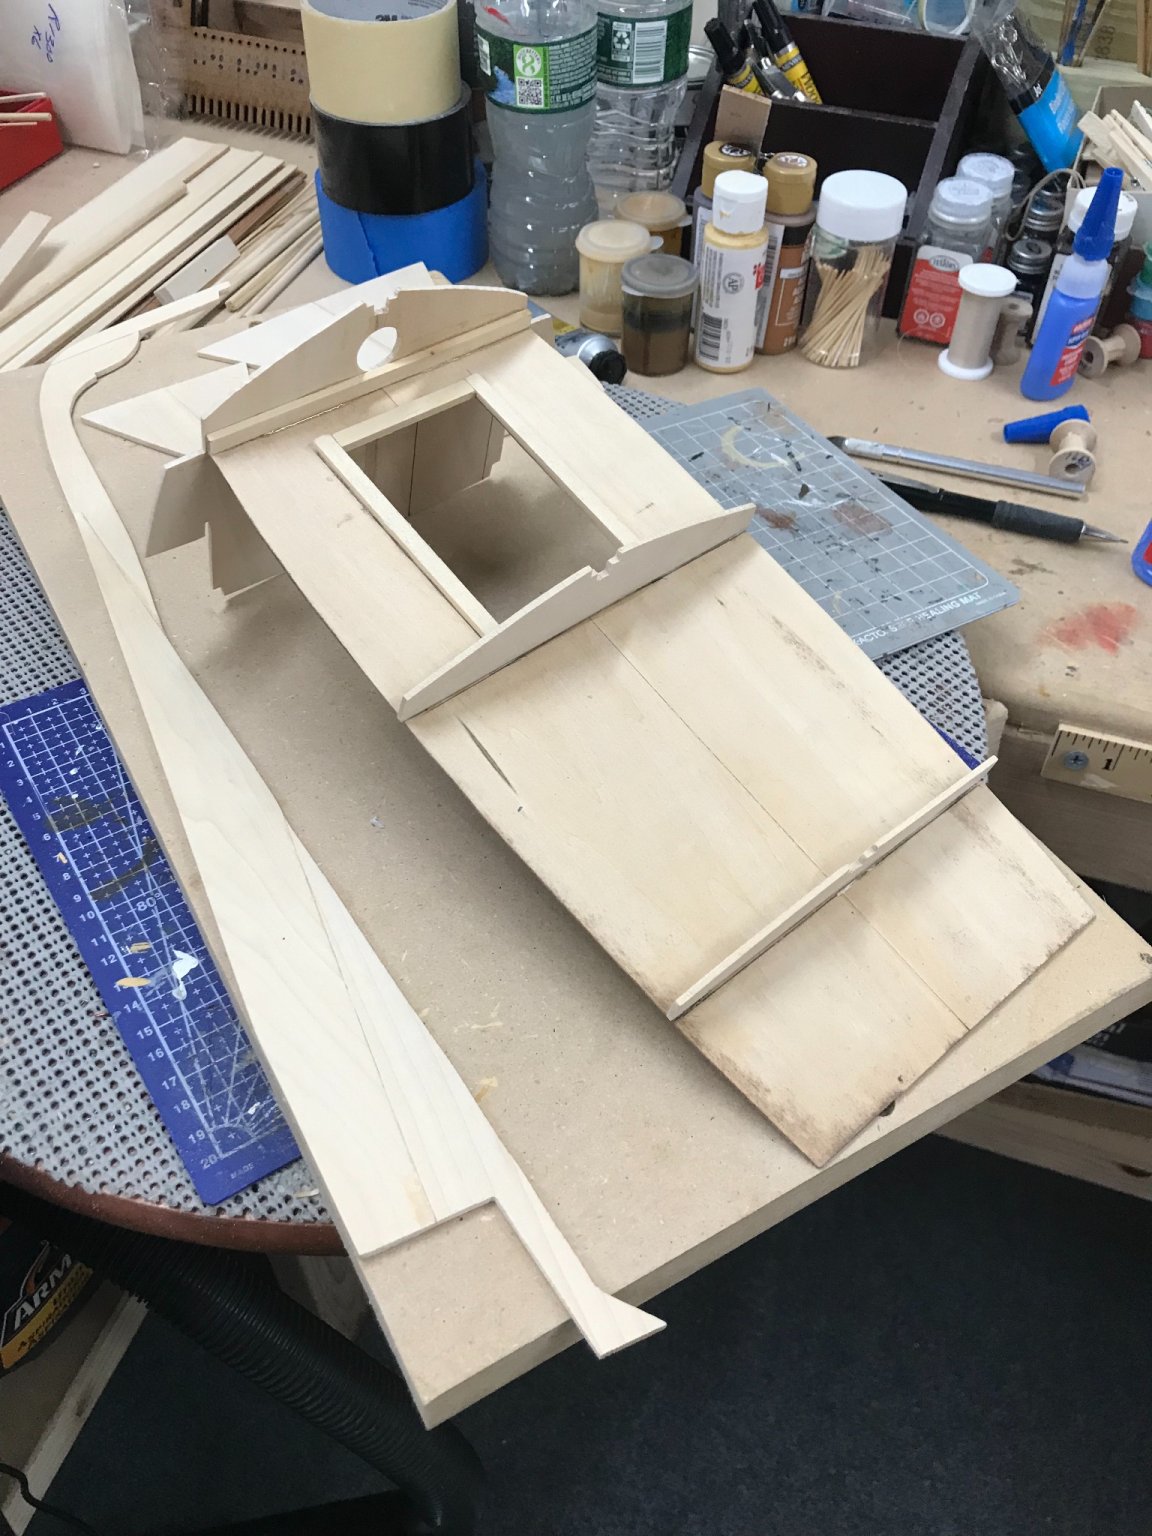
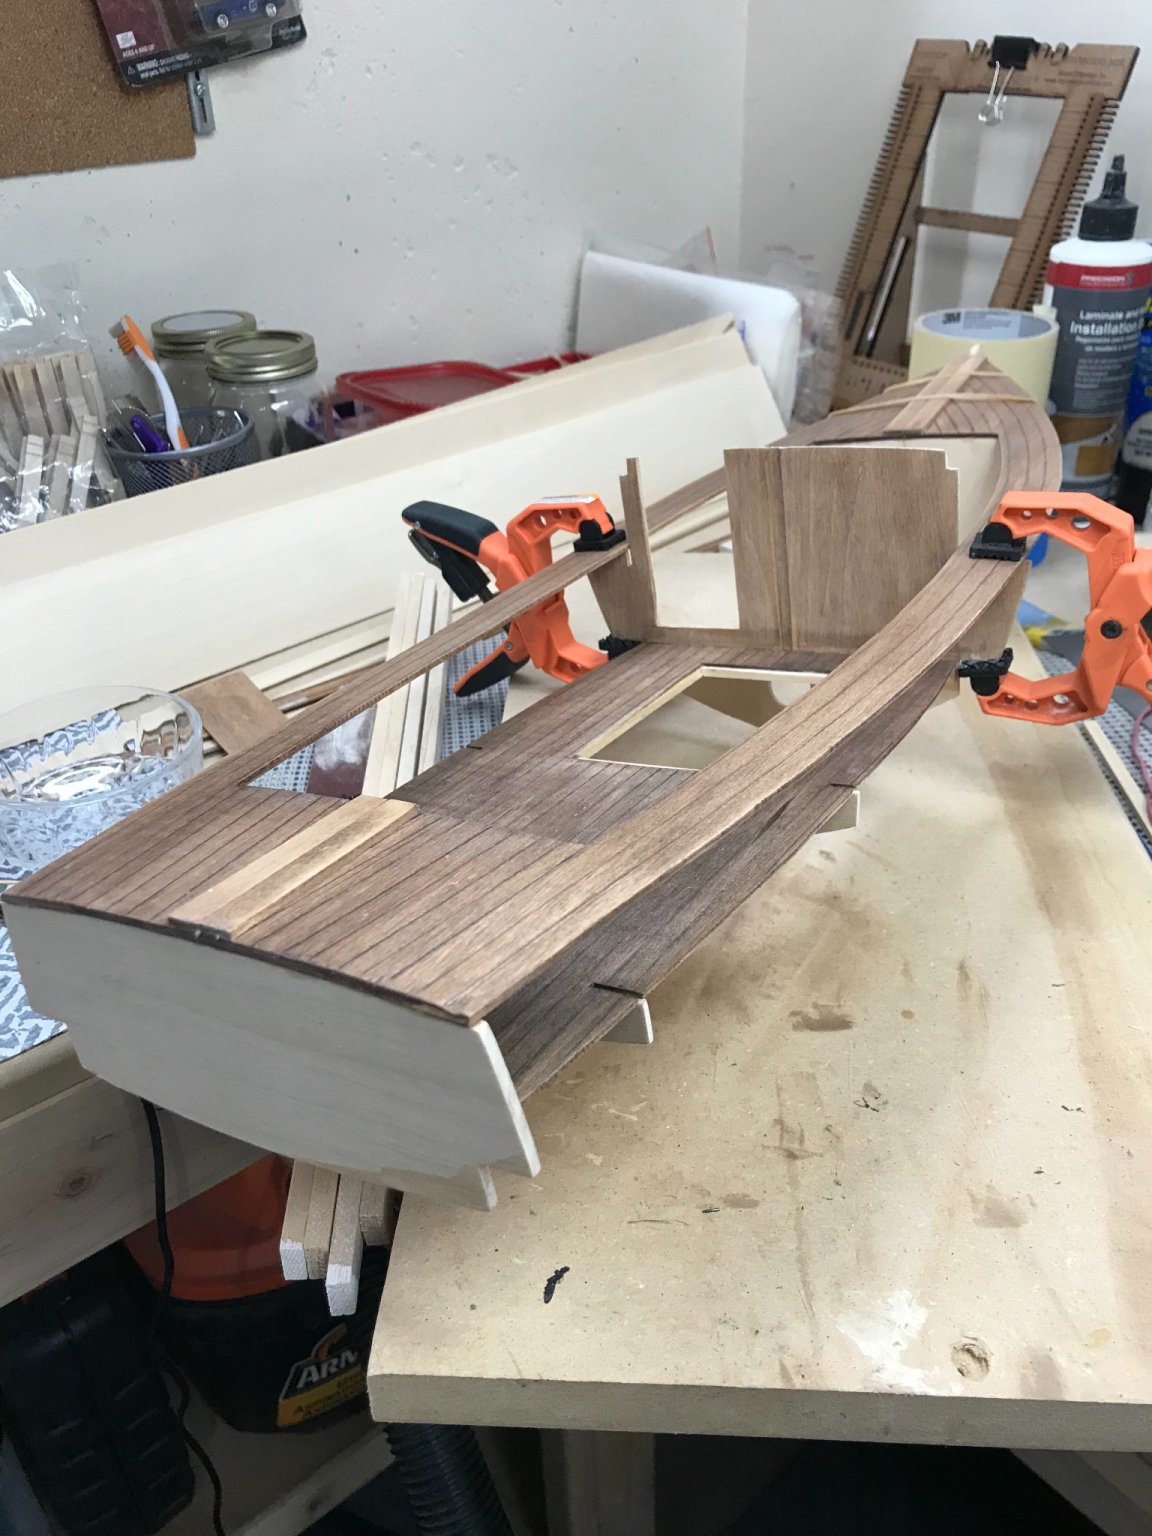
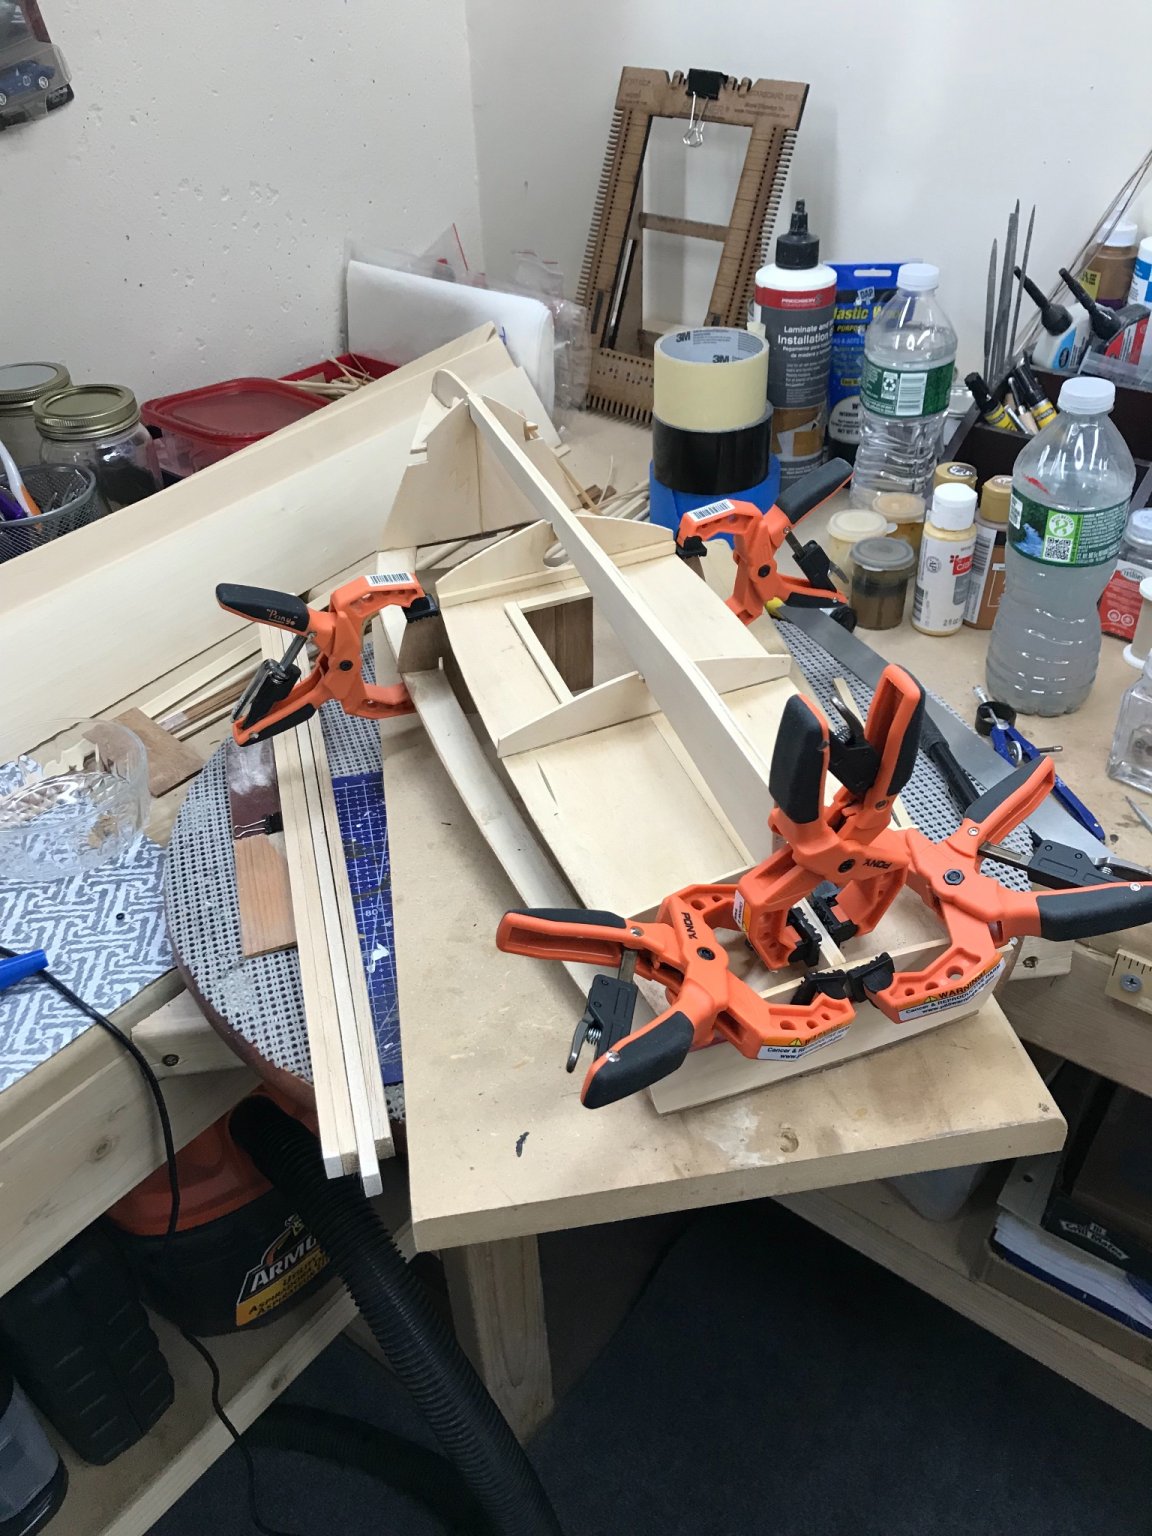
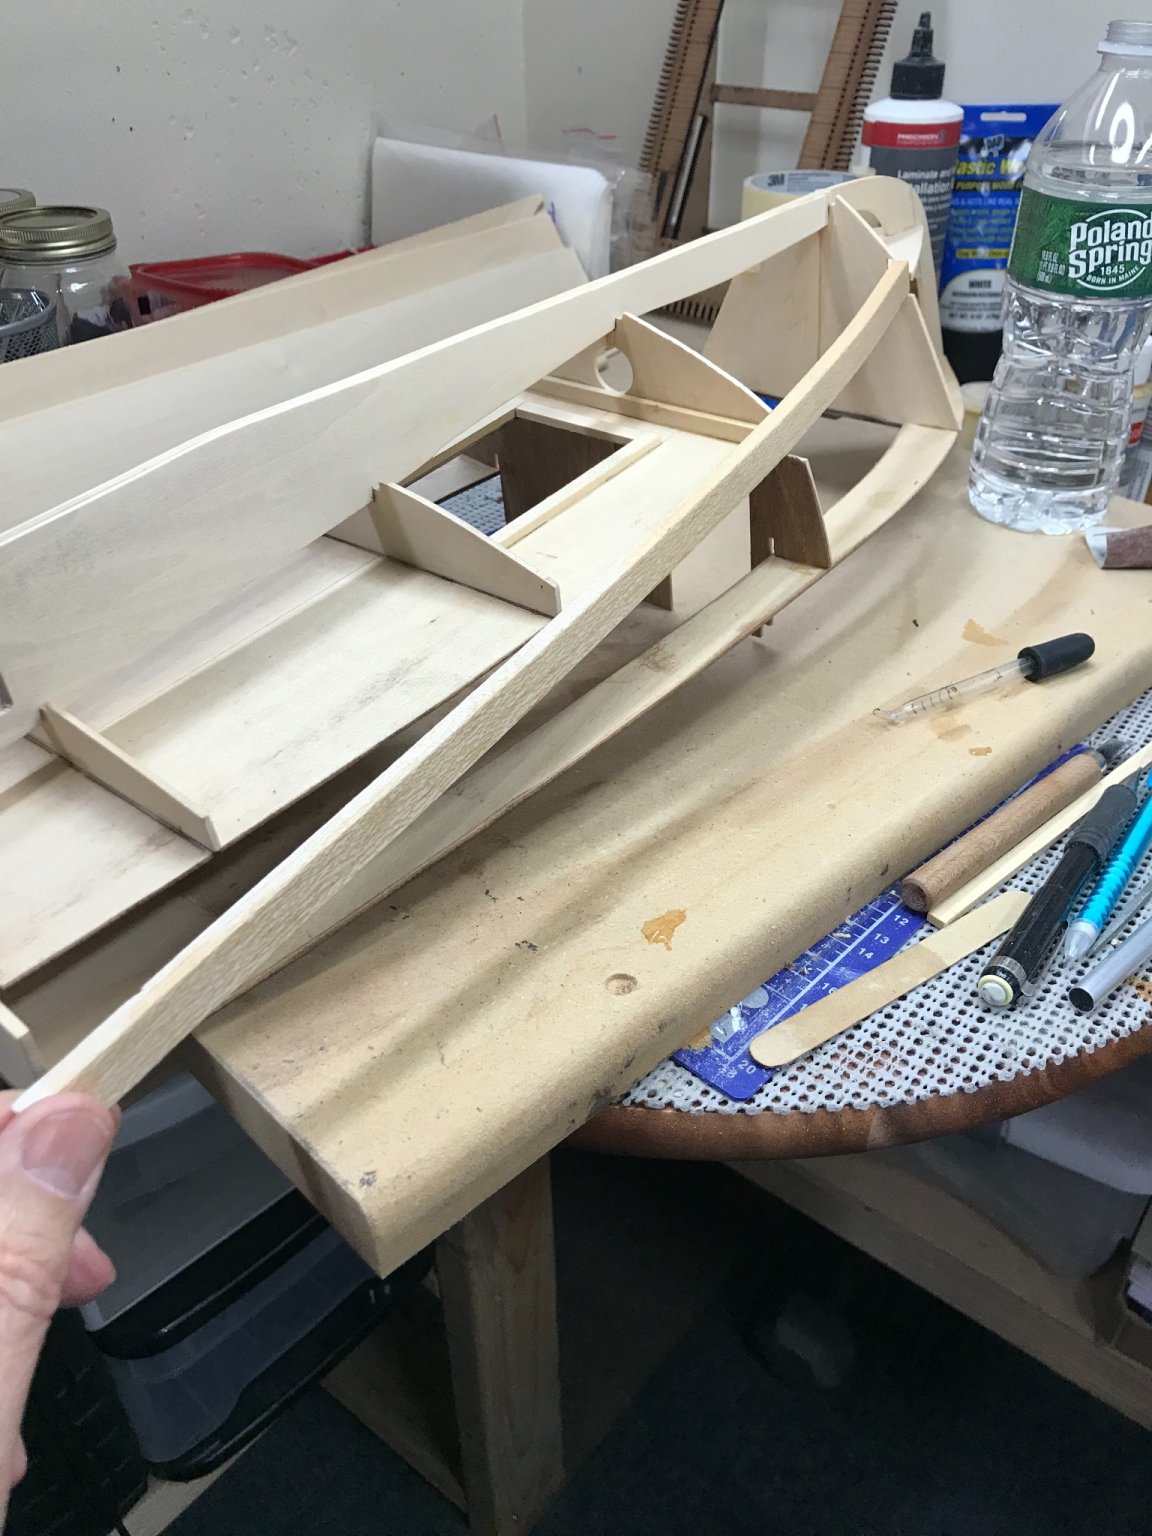
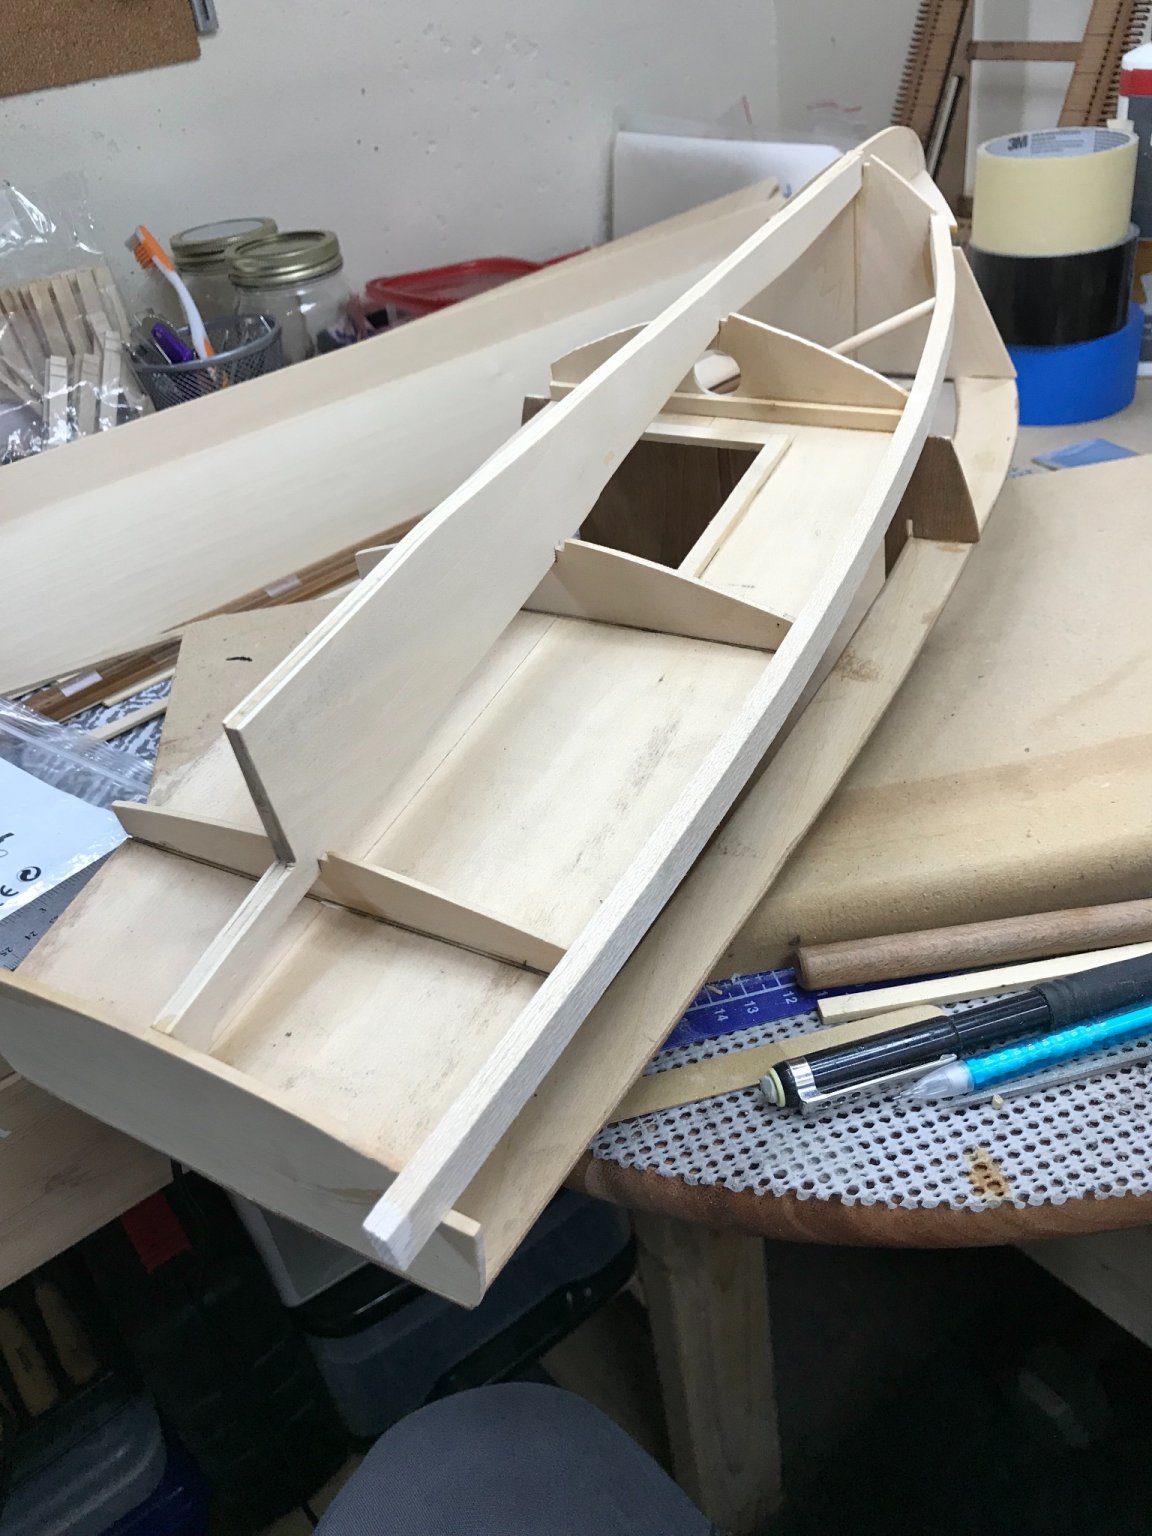
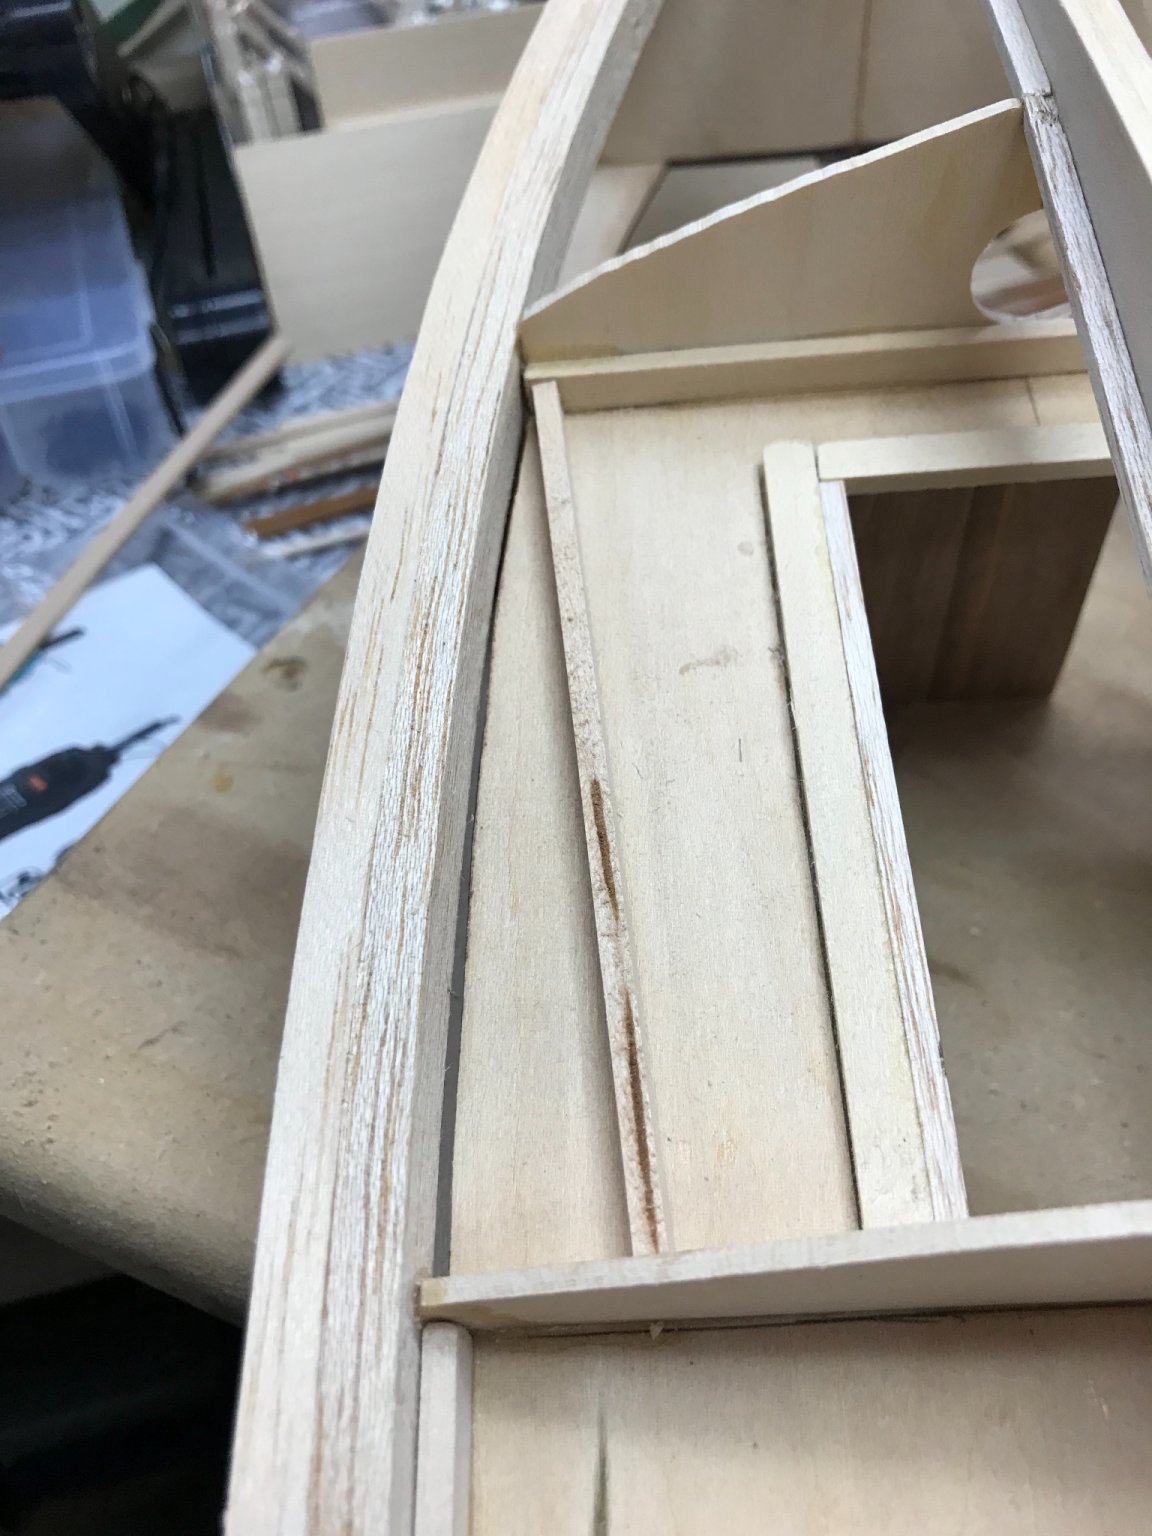
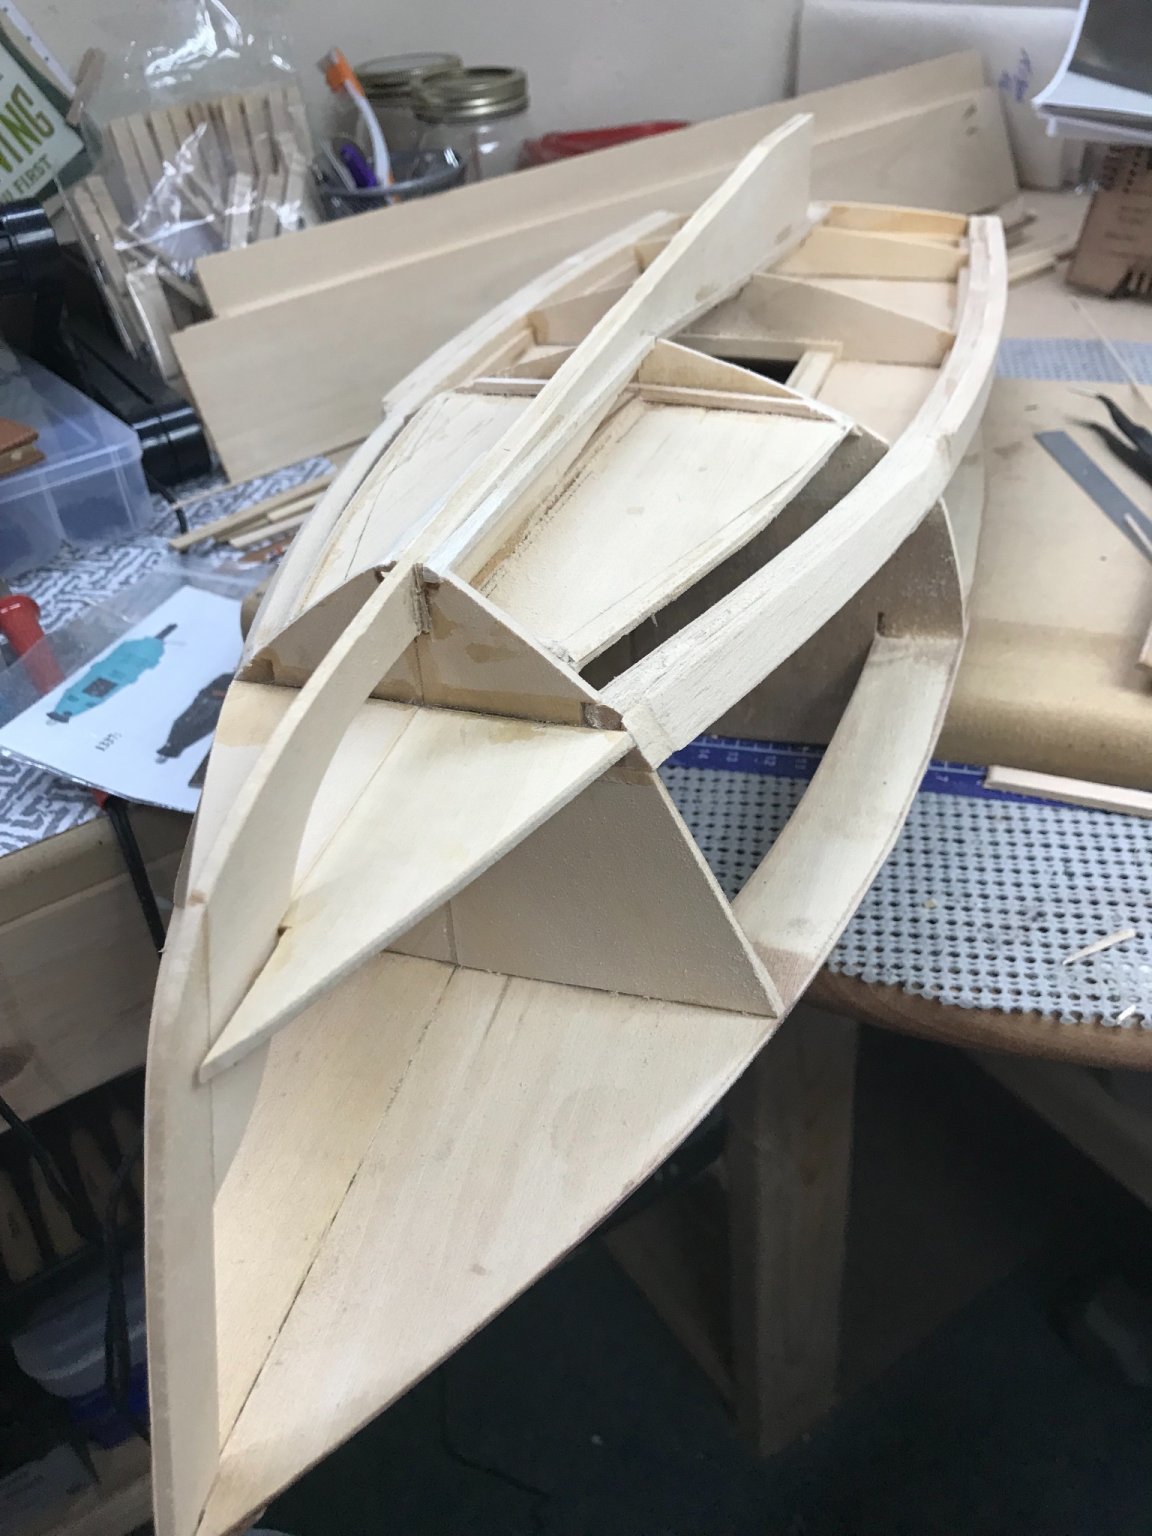
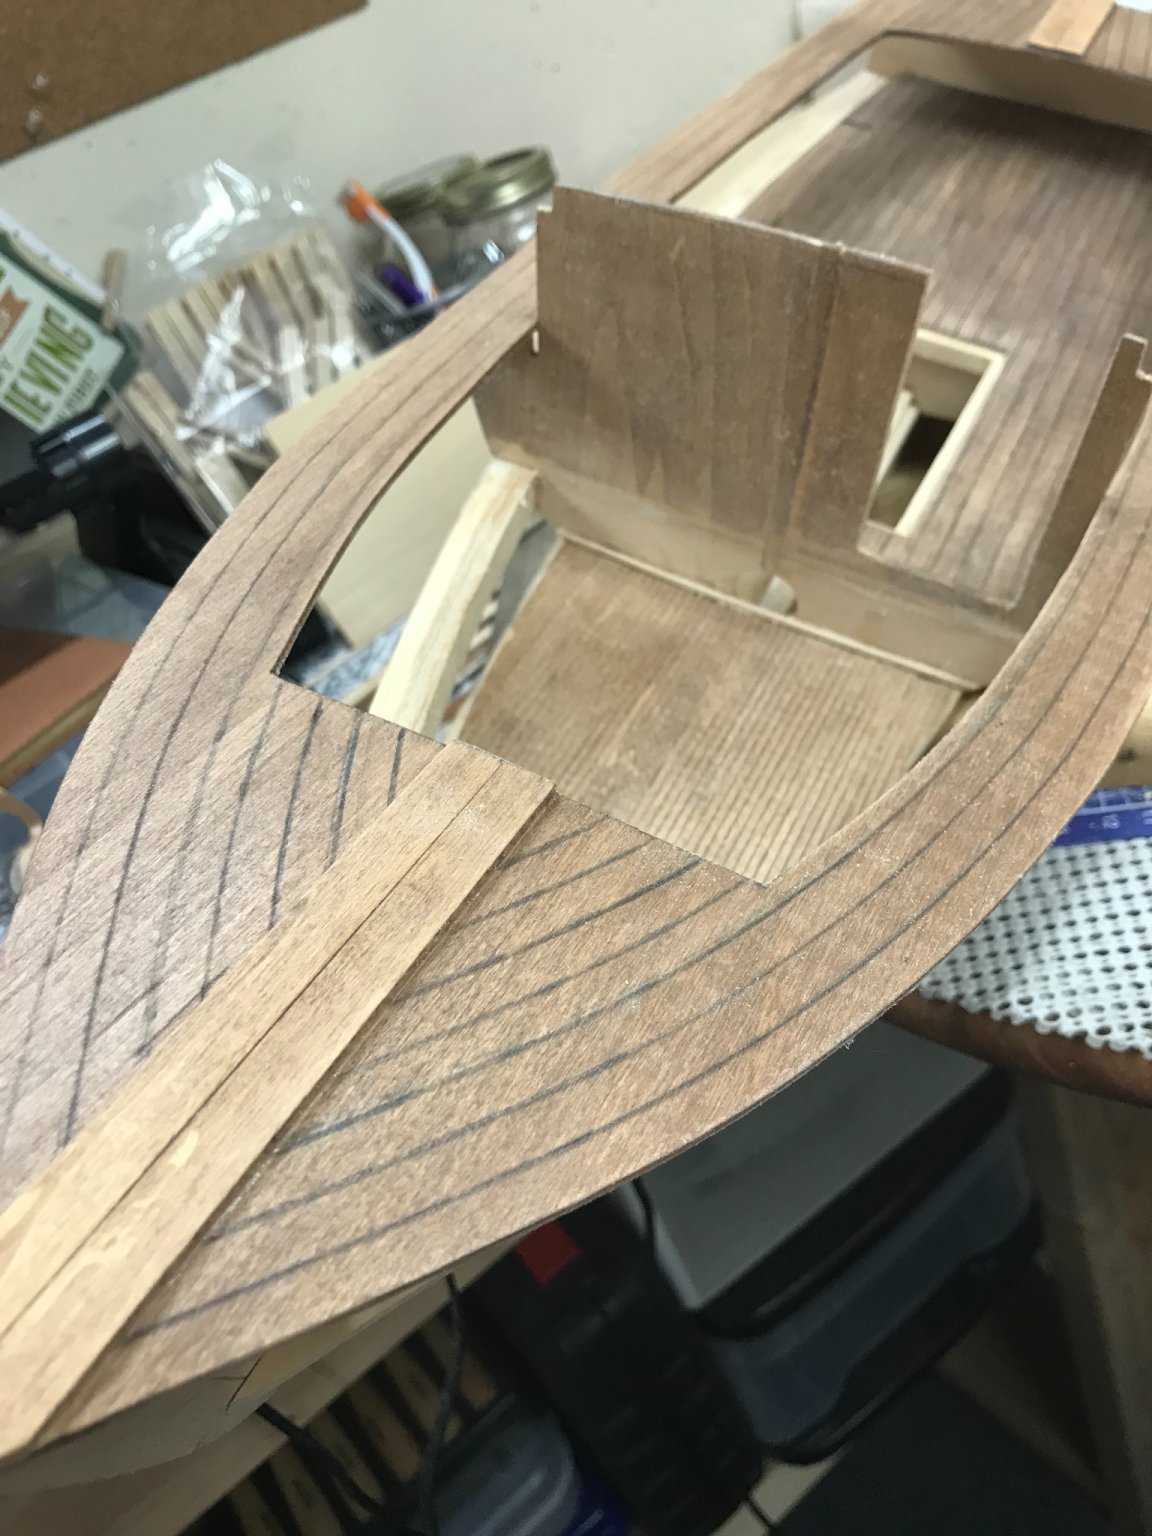
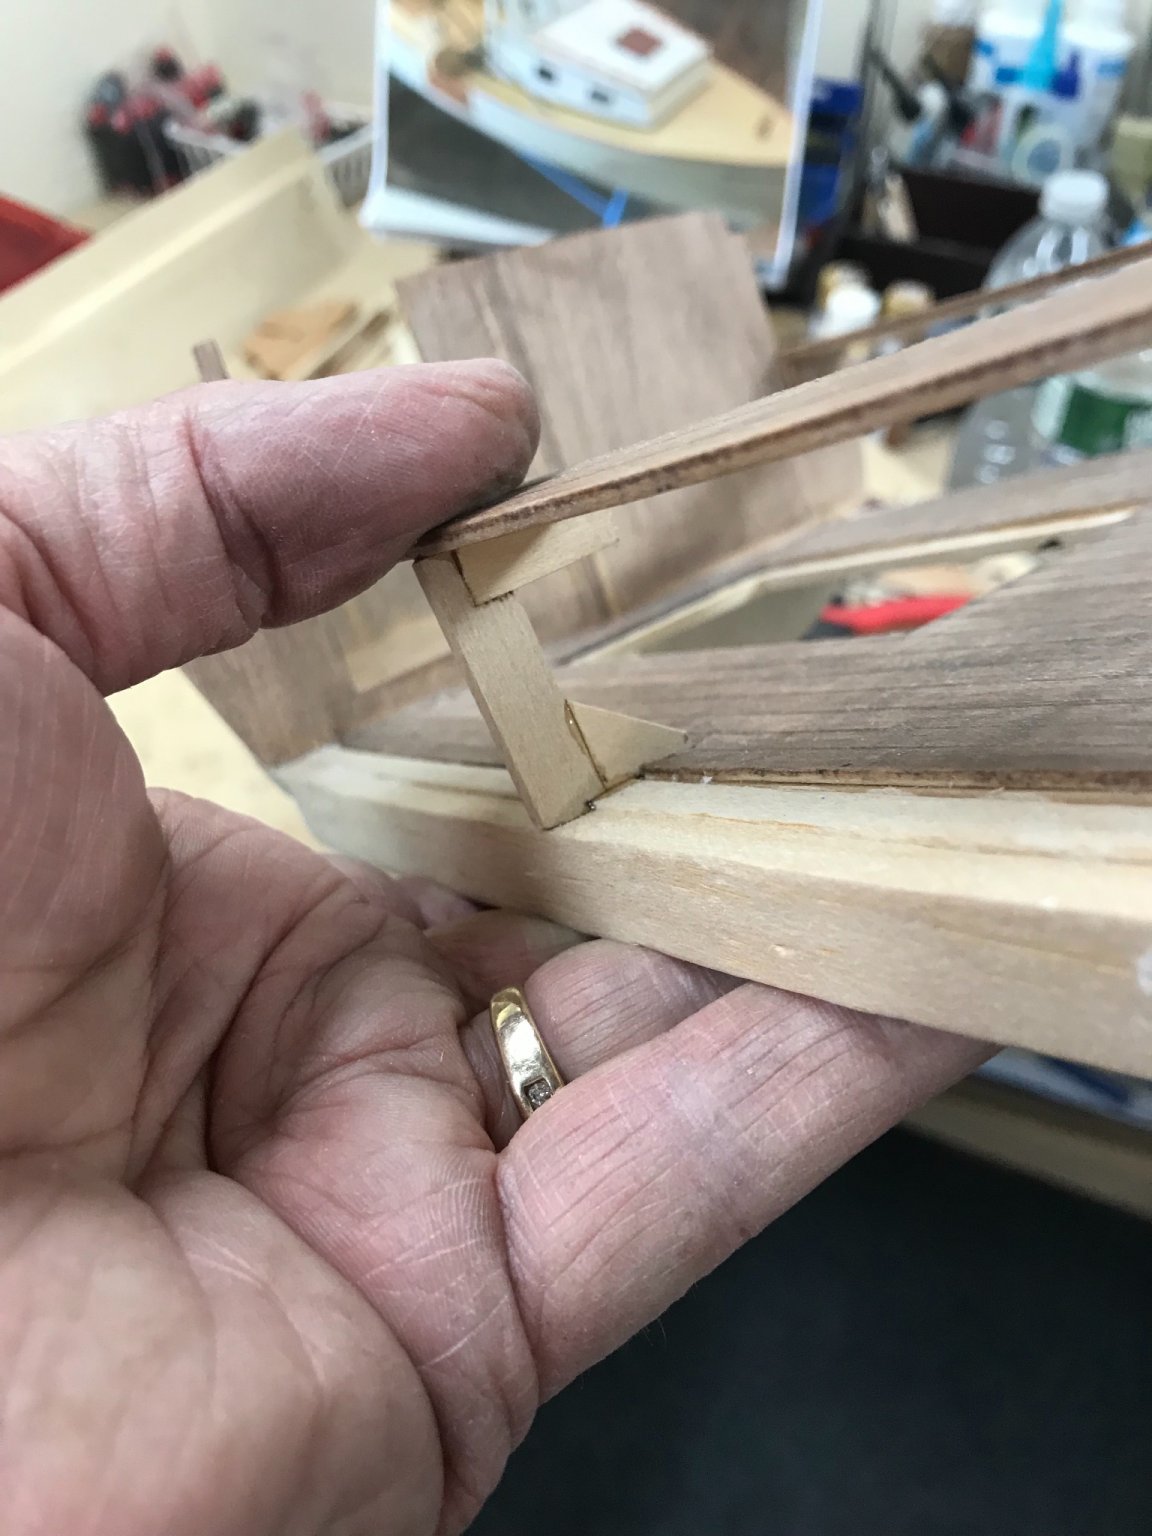
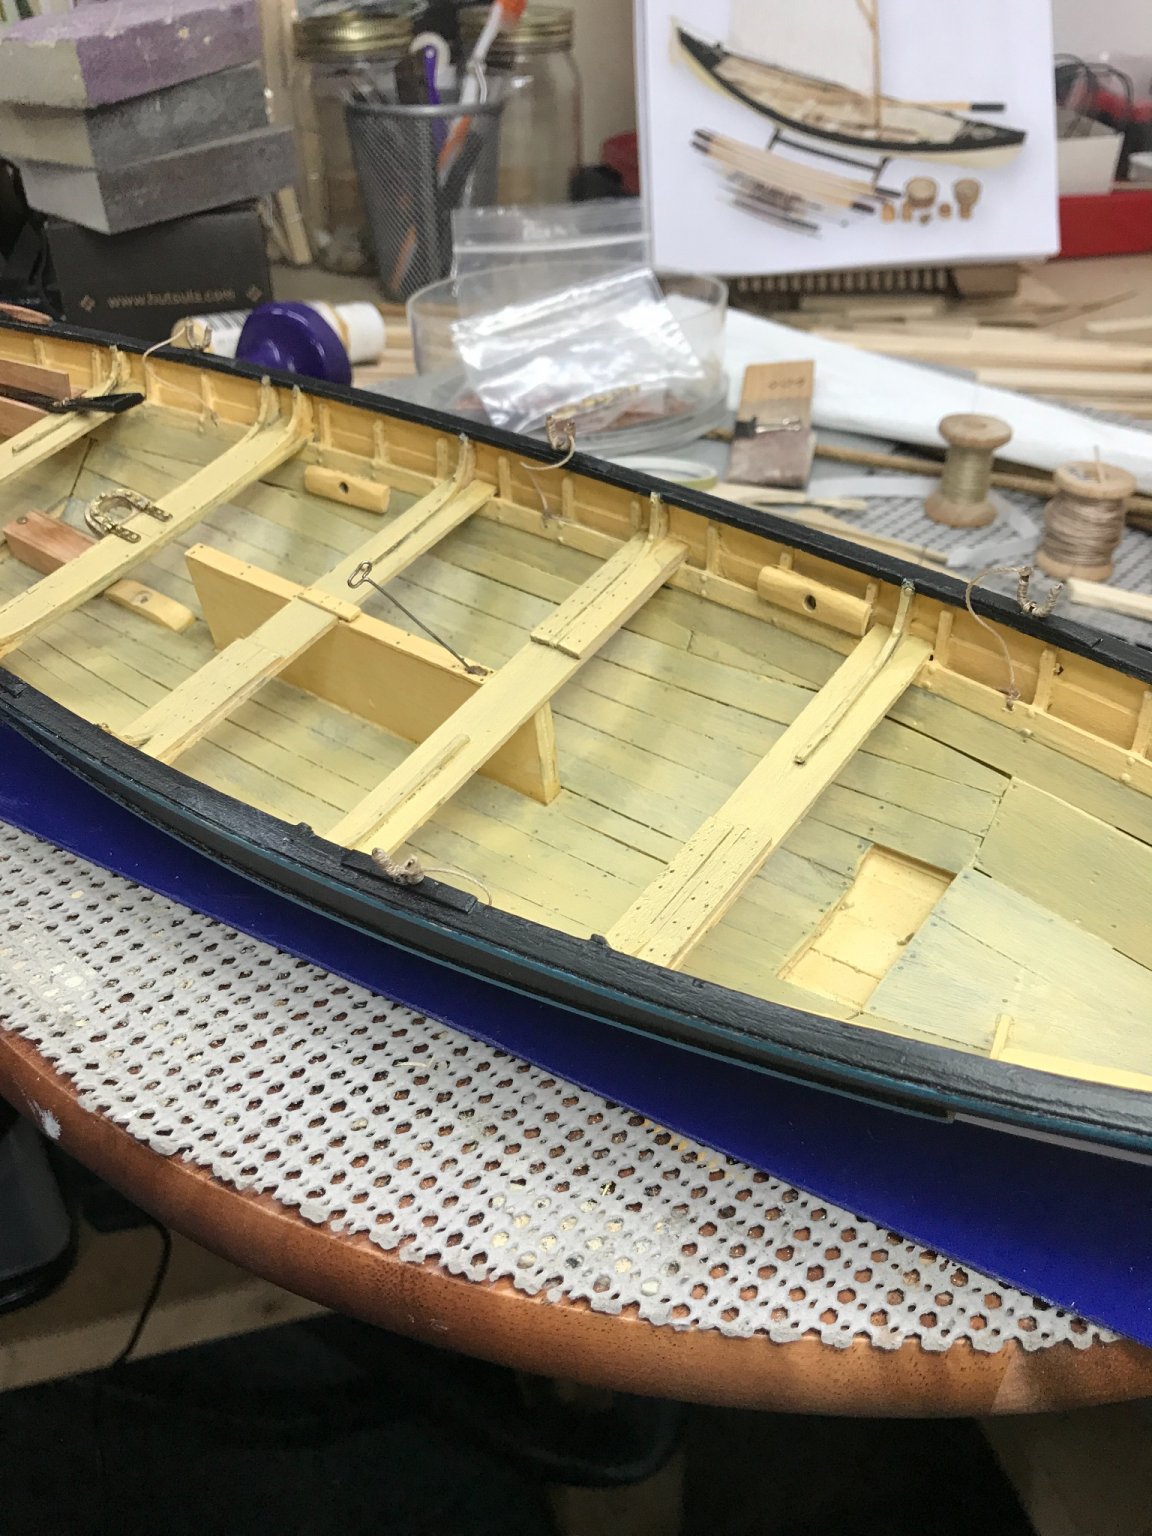
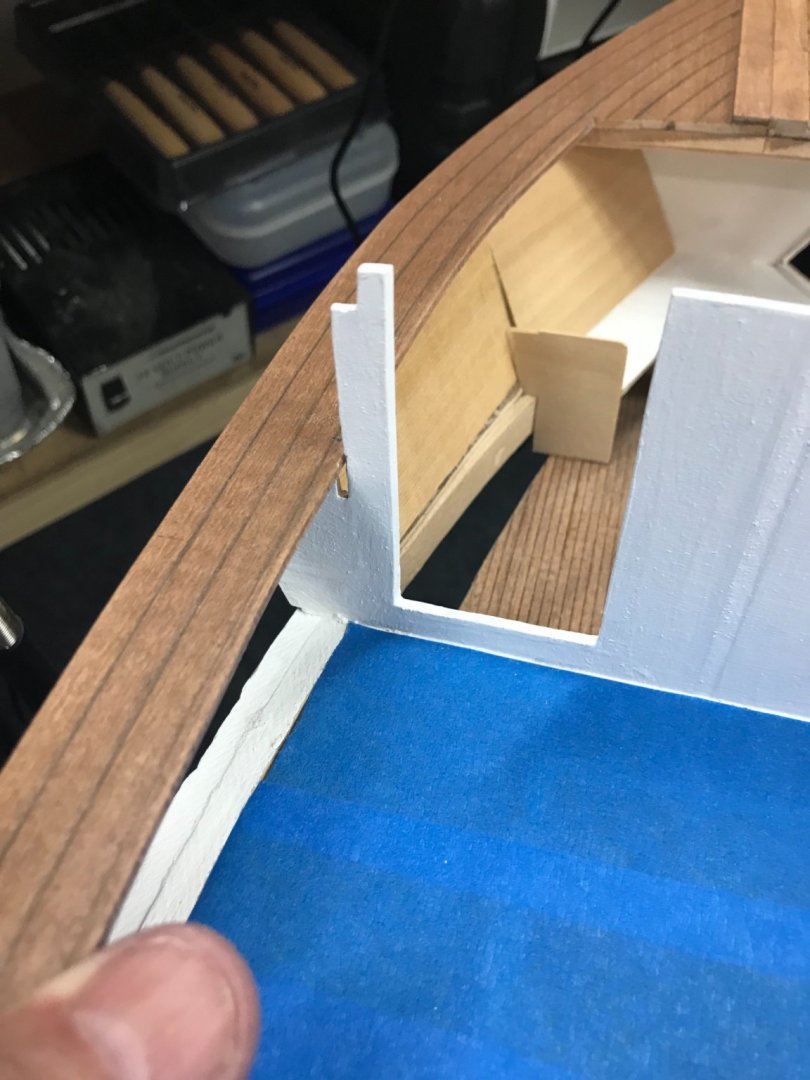
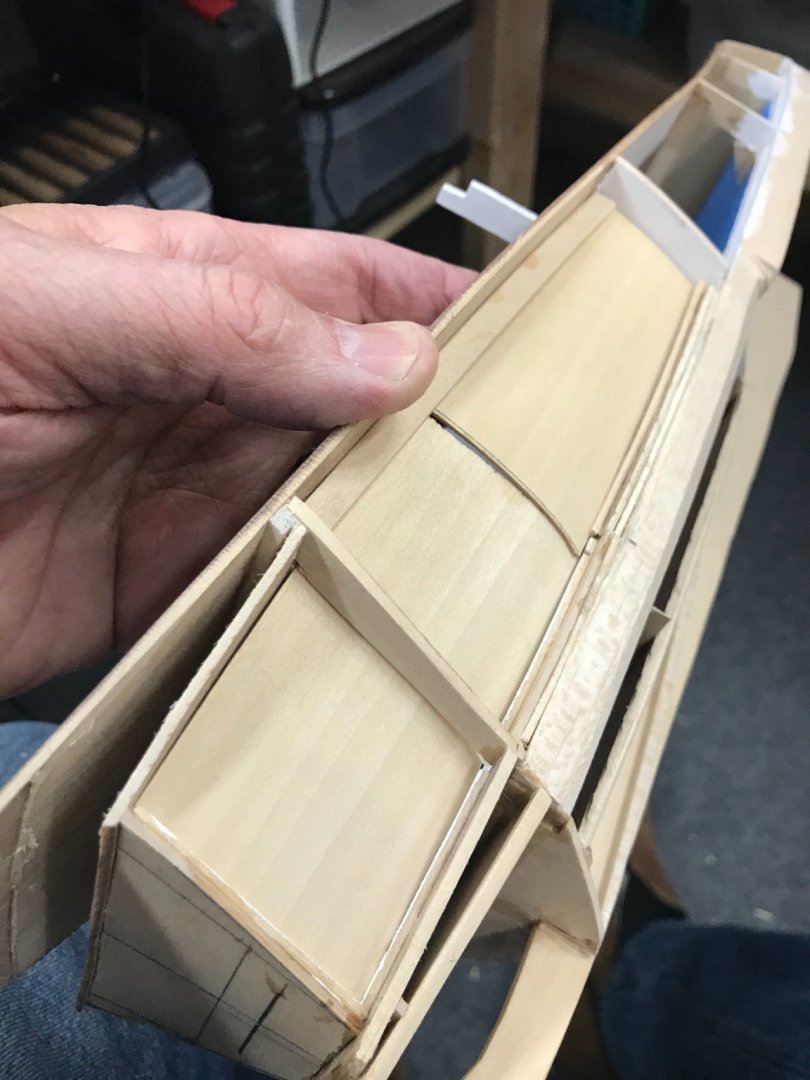
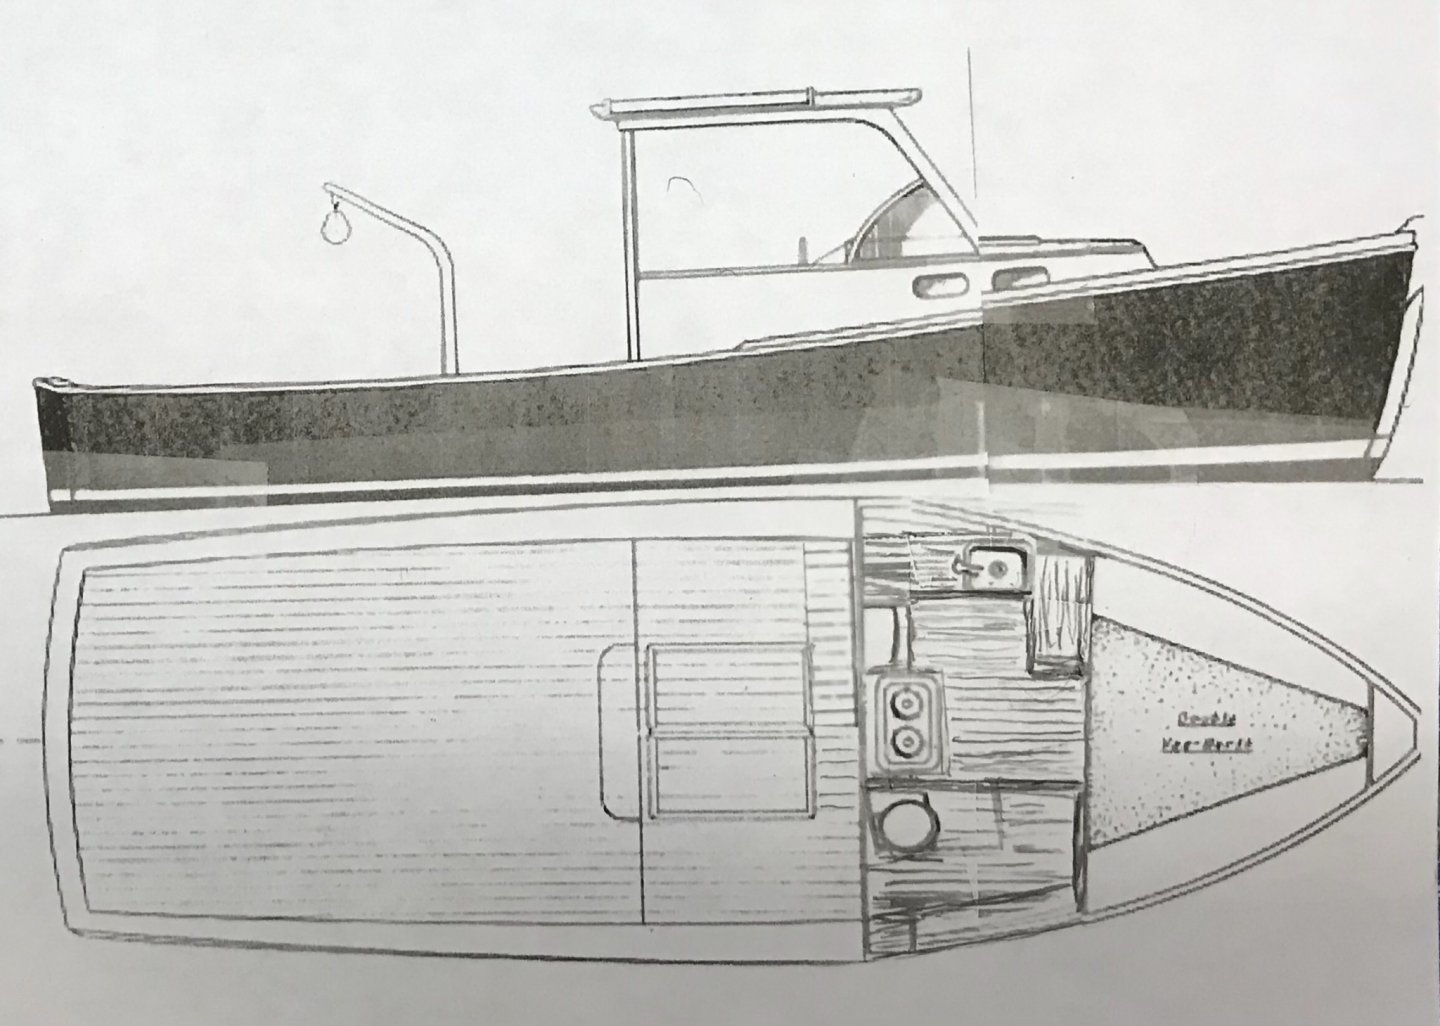
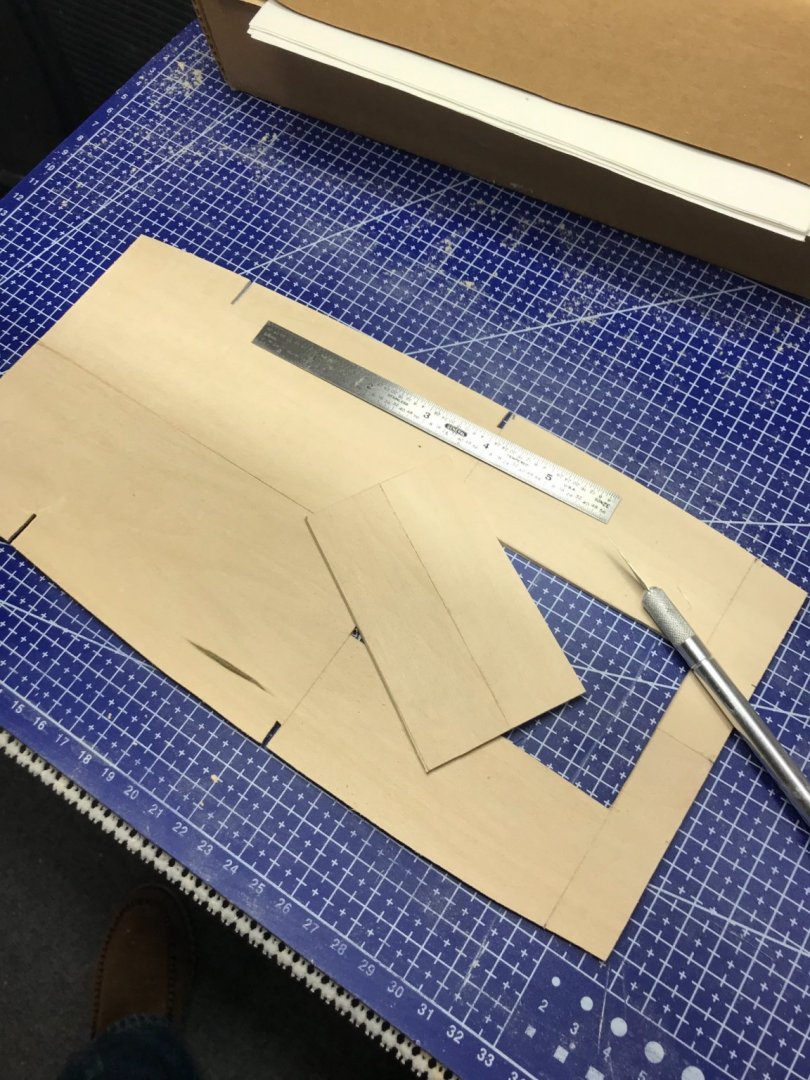
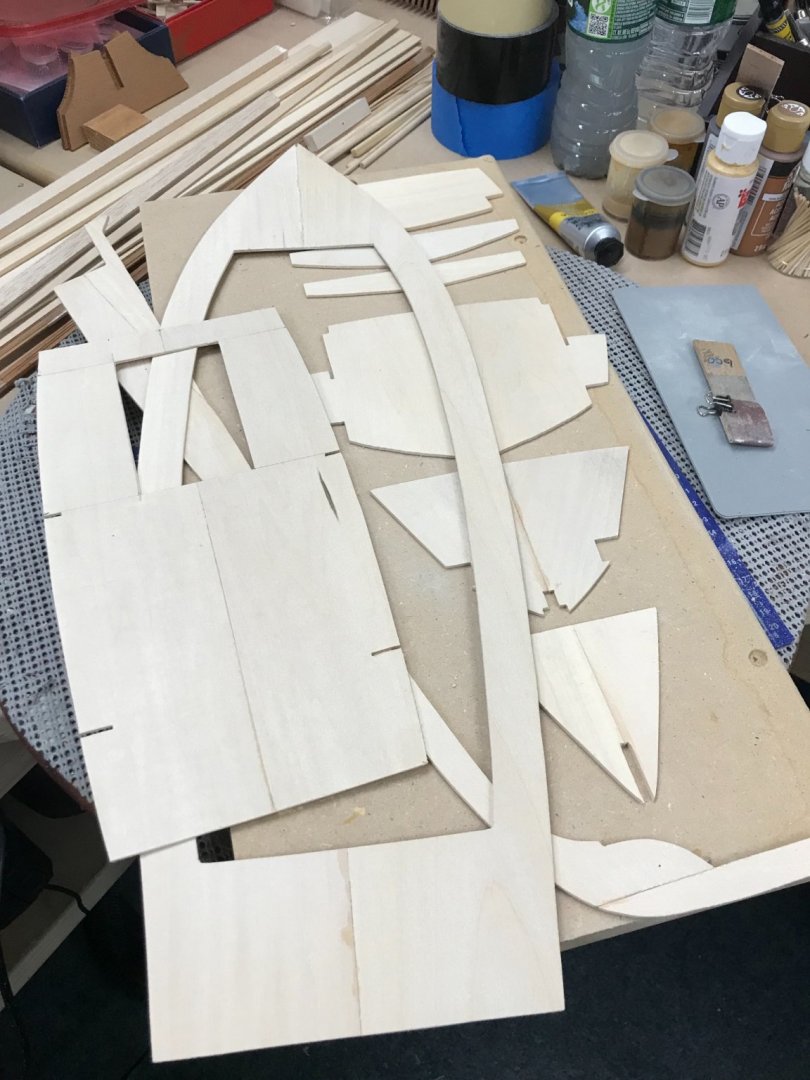
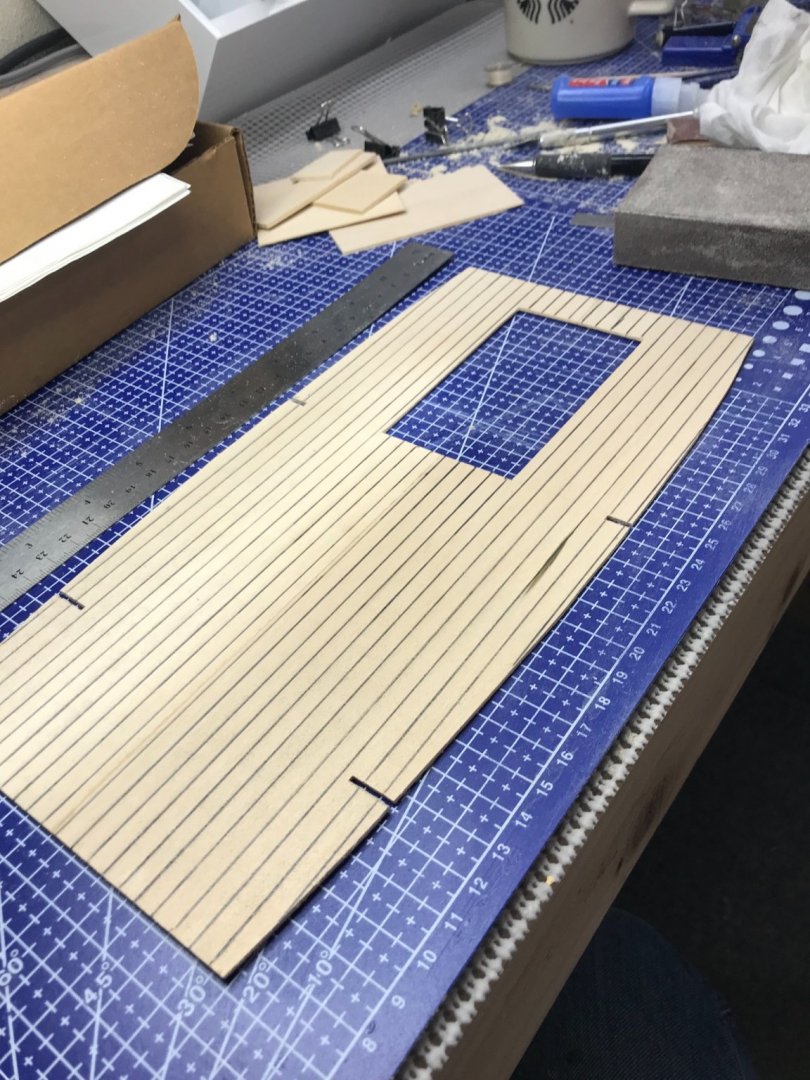
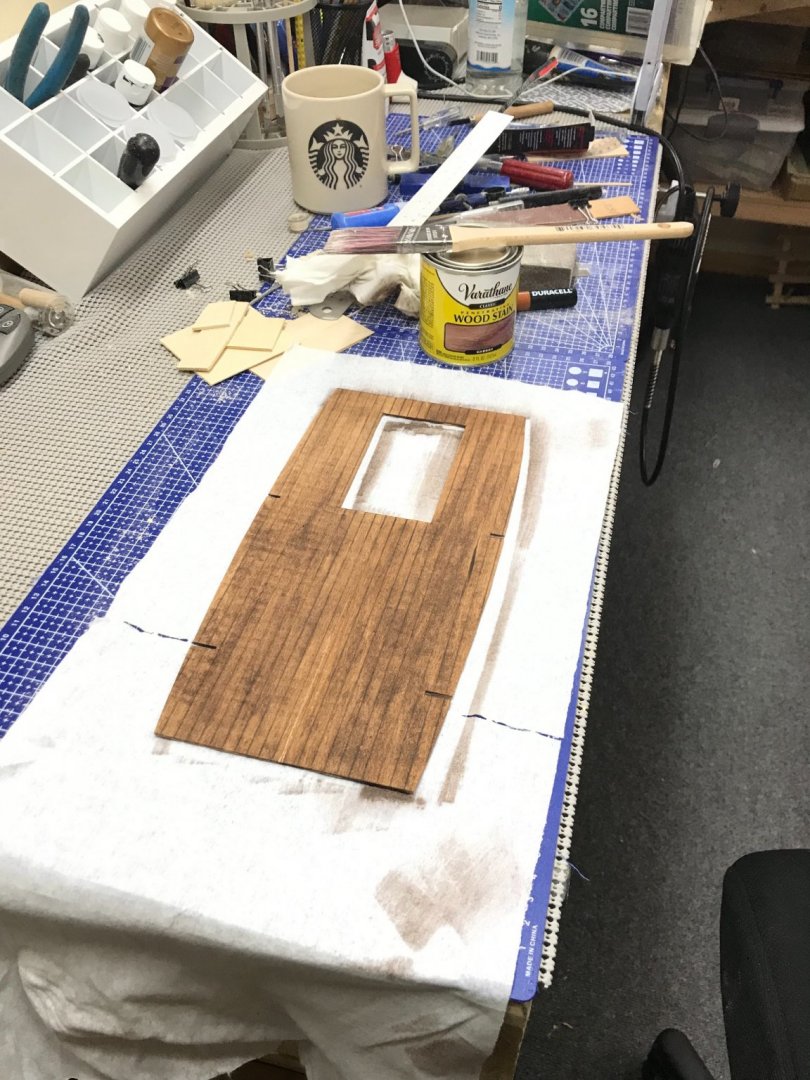
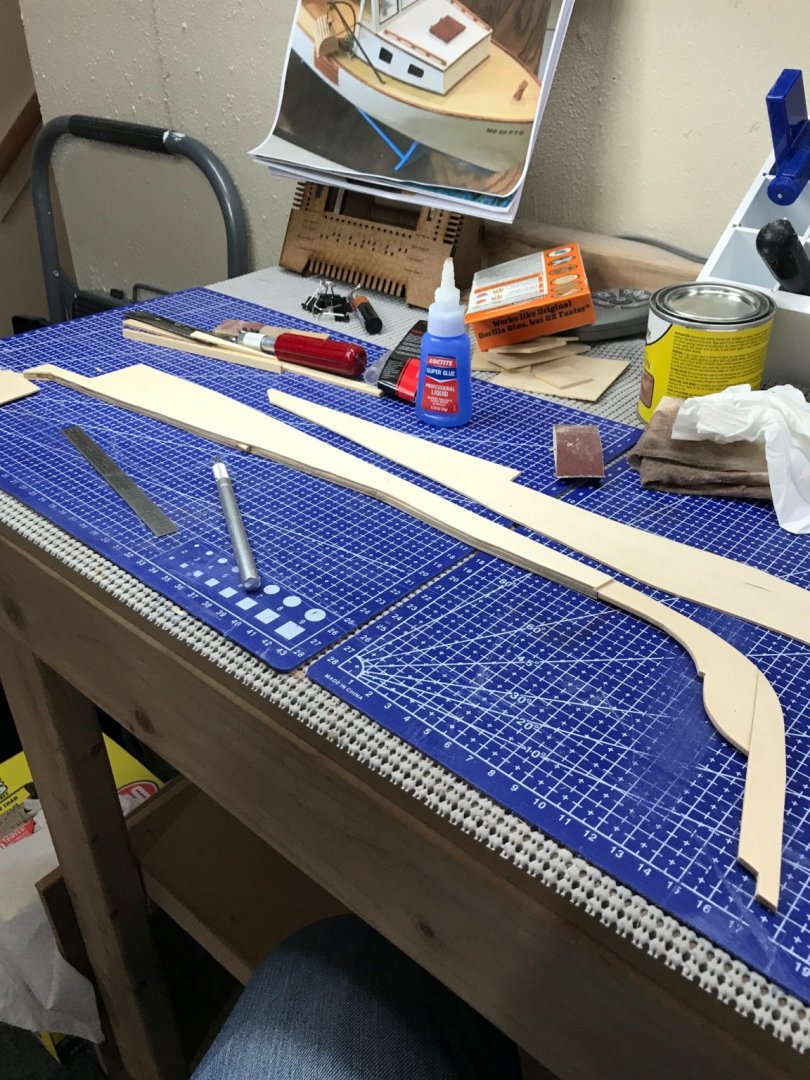
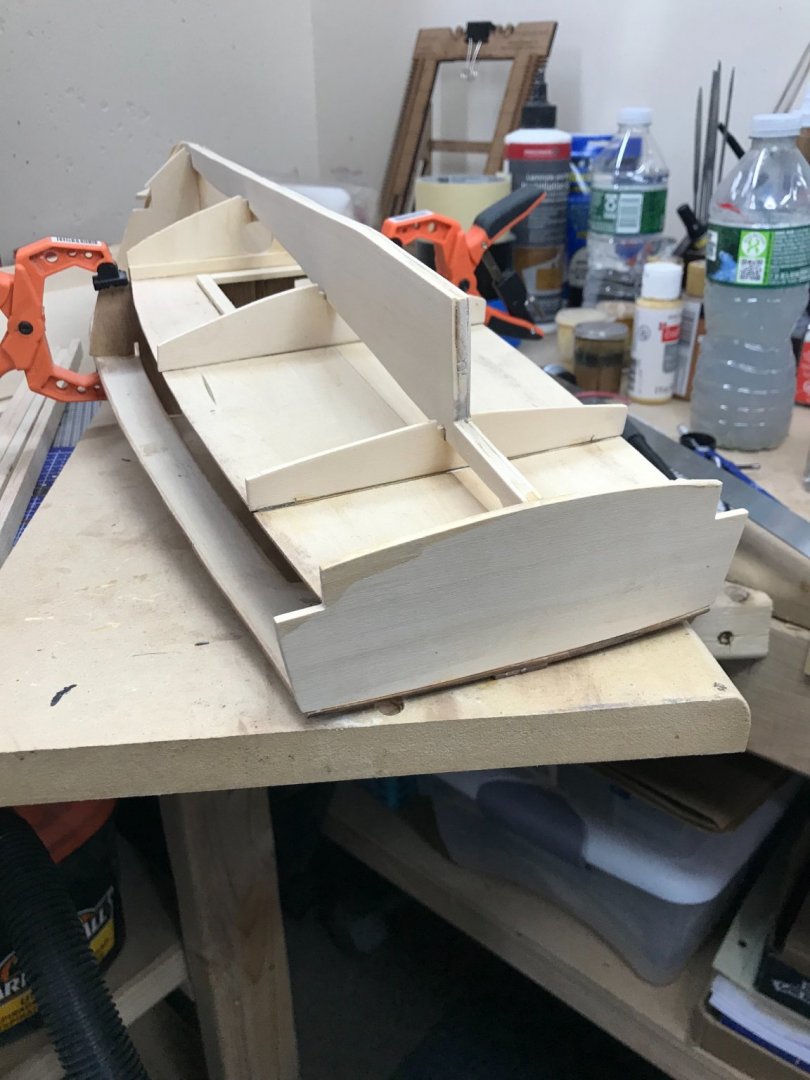
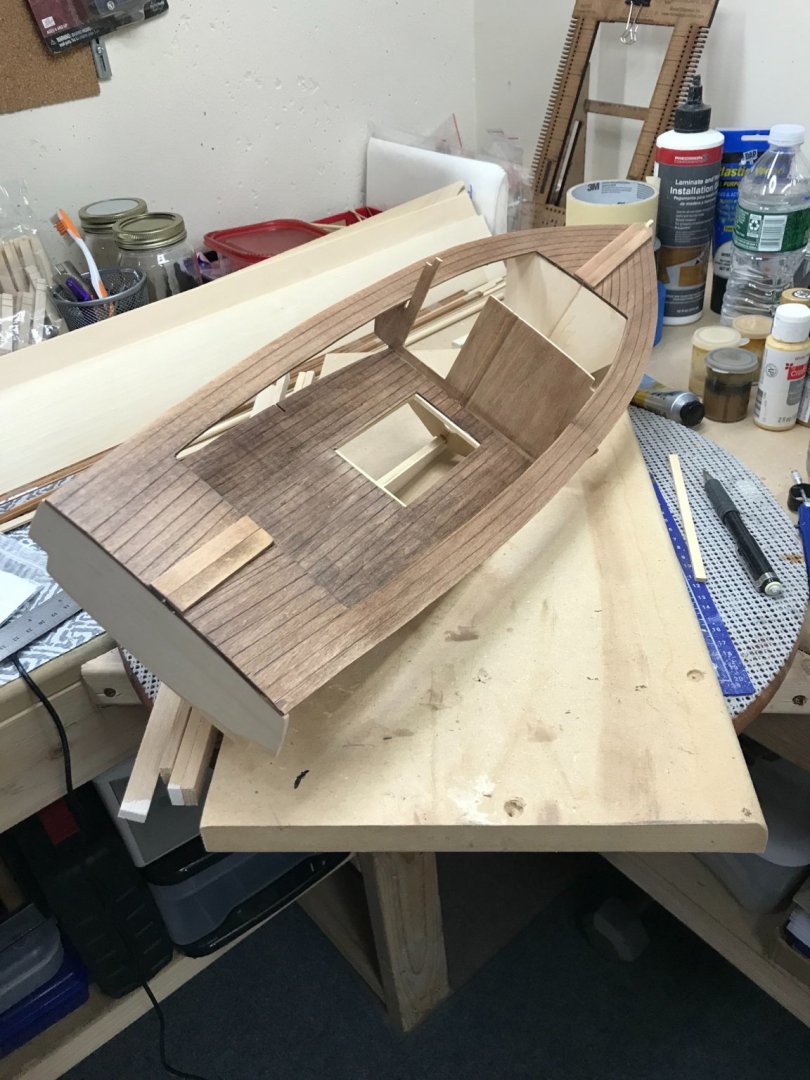
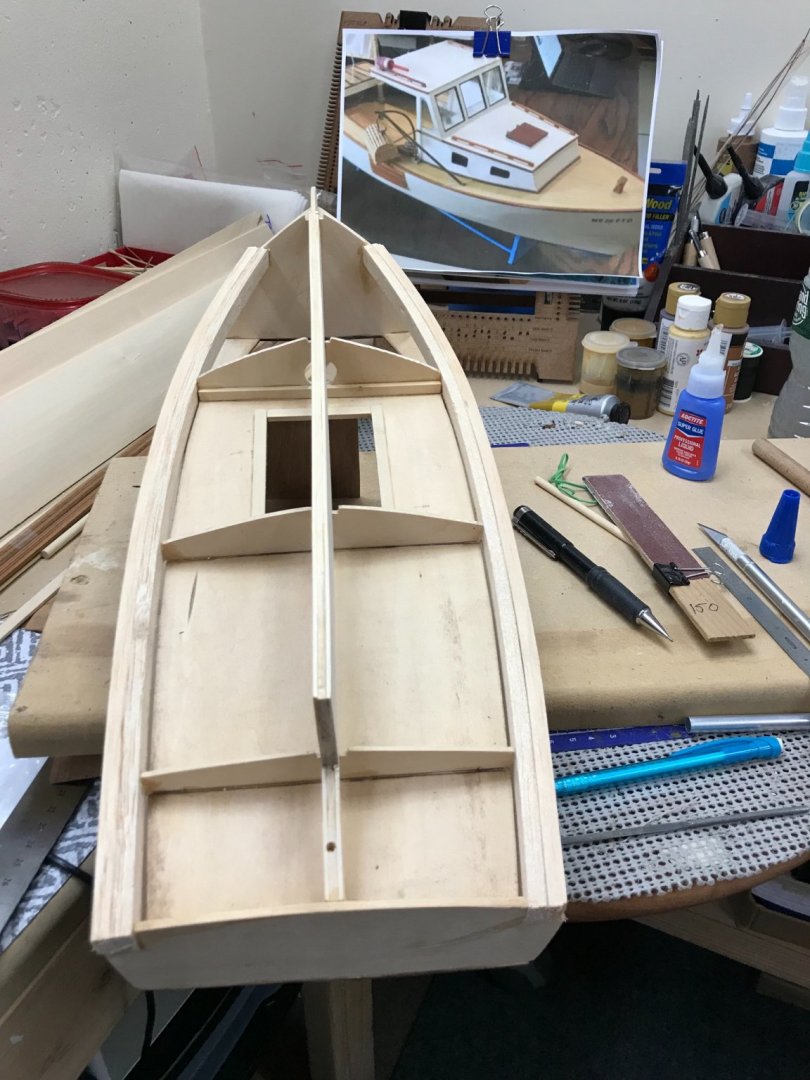
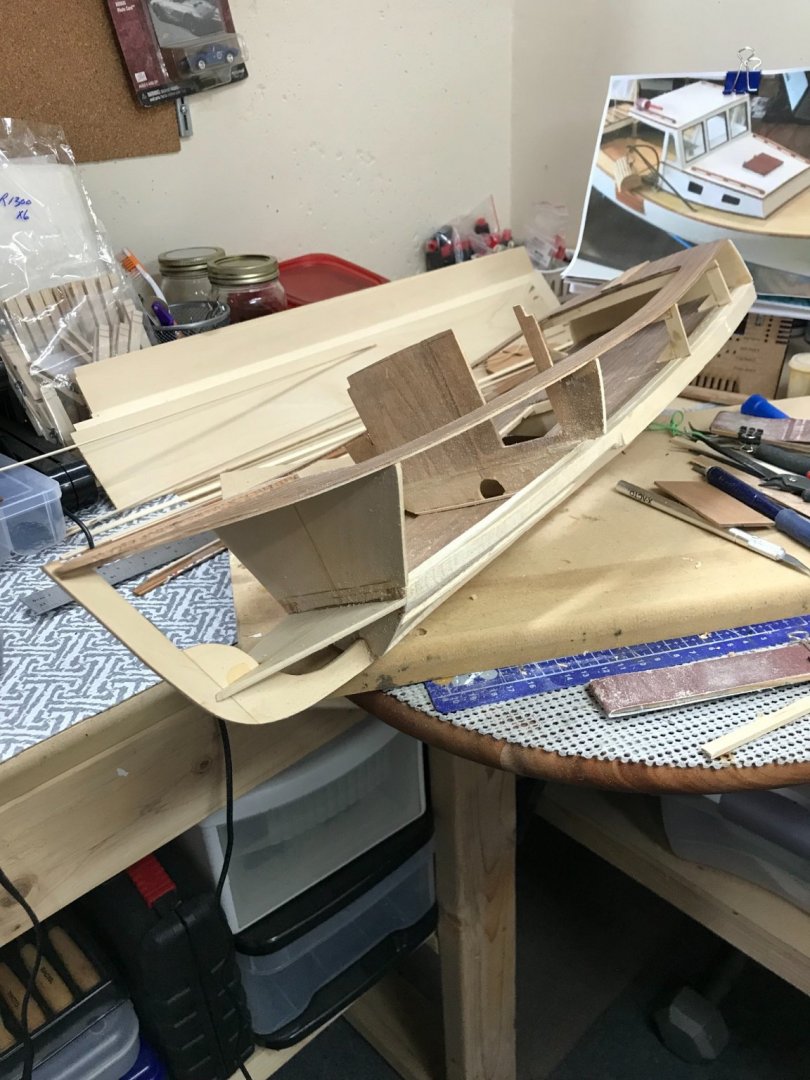
I’m Back, Finished The New Bedford Whaleboat and ready to focus on The Main Lobster Boat. Two things I intend to do differently with this kit. 1. Modify the engine compartment. 2. Build out the interior of the forward cabin. Neither of which have I seen done with these kits. My research has turned up two things I did not know Mainers built with Lobster Boats. Racing Lobster Boats and Lobster Boat Yachts. Wish me luck… Framing the Lobster Boat. No laser cut pieces in this kit. Bulk head pieces were all hand cut, back in the day. Two halves are glued together and carefully shaped to match the drawing. Cutting open a hatch is required to create a battery compartment for an RC Lobster Boat. I will be modifying this as the engine compartment as it would be on the real Lobster Boat. 😎 Ready for construction. Deck Planking created with lead pencil. Cherry Stain Applied. Penciled Planking and stain applied to upper deck. Lower deck assembly. 1/16th sheeting hand cut and added to both sides of the keel. Keel, upper and lower decks assembled. Chine Logs soaked and bent to form hull framing. These pieces are balsa. Laminated balsa wood to complete chine logs. Installed deck supports and backing for hull sheeting. Started shaping the chine logs for installation of sheeting. Installed forward cabin flooring. I will be adding furnishing in the cabin. 😎 Built and installed additional framing. More shaping to Prepare for hull sheeting. Later… 🍻


- 51 replies
-
- 7
-
-
- laughing whale
- maine lobster boat
- (and 1 more)
-
Tom, Nice job on the furled sail. Is it the same three layers of materials as the full sails. All of the sails are looking great 👍
-
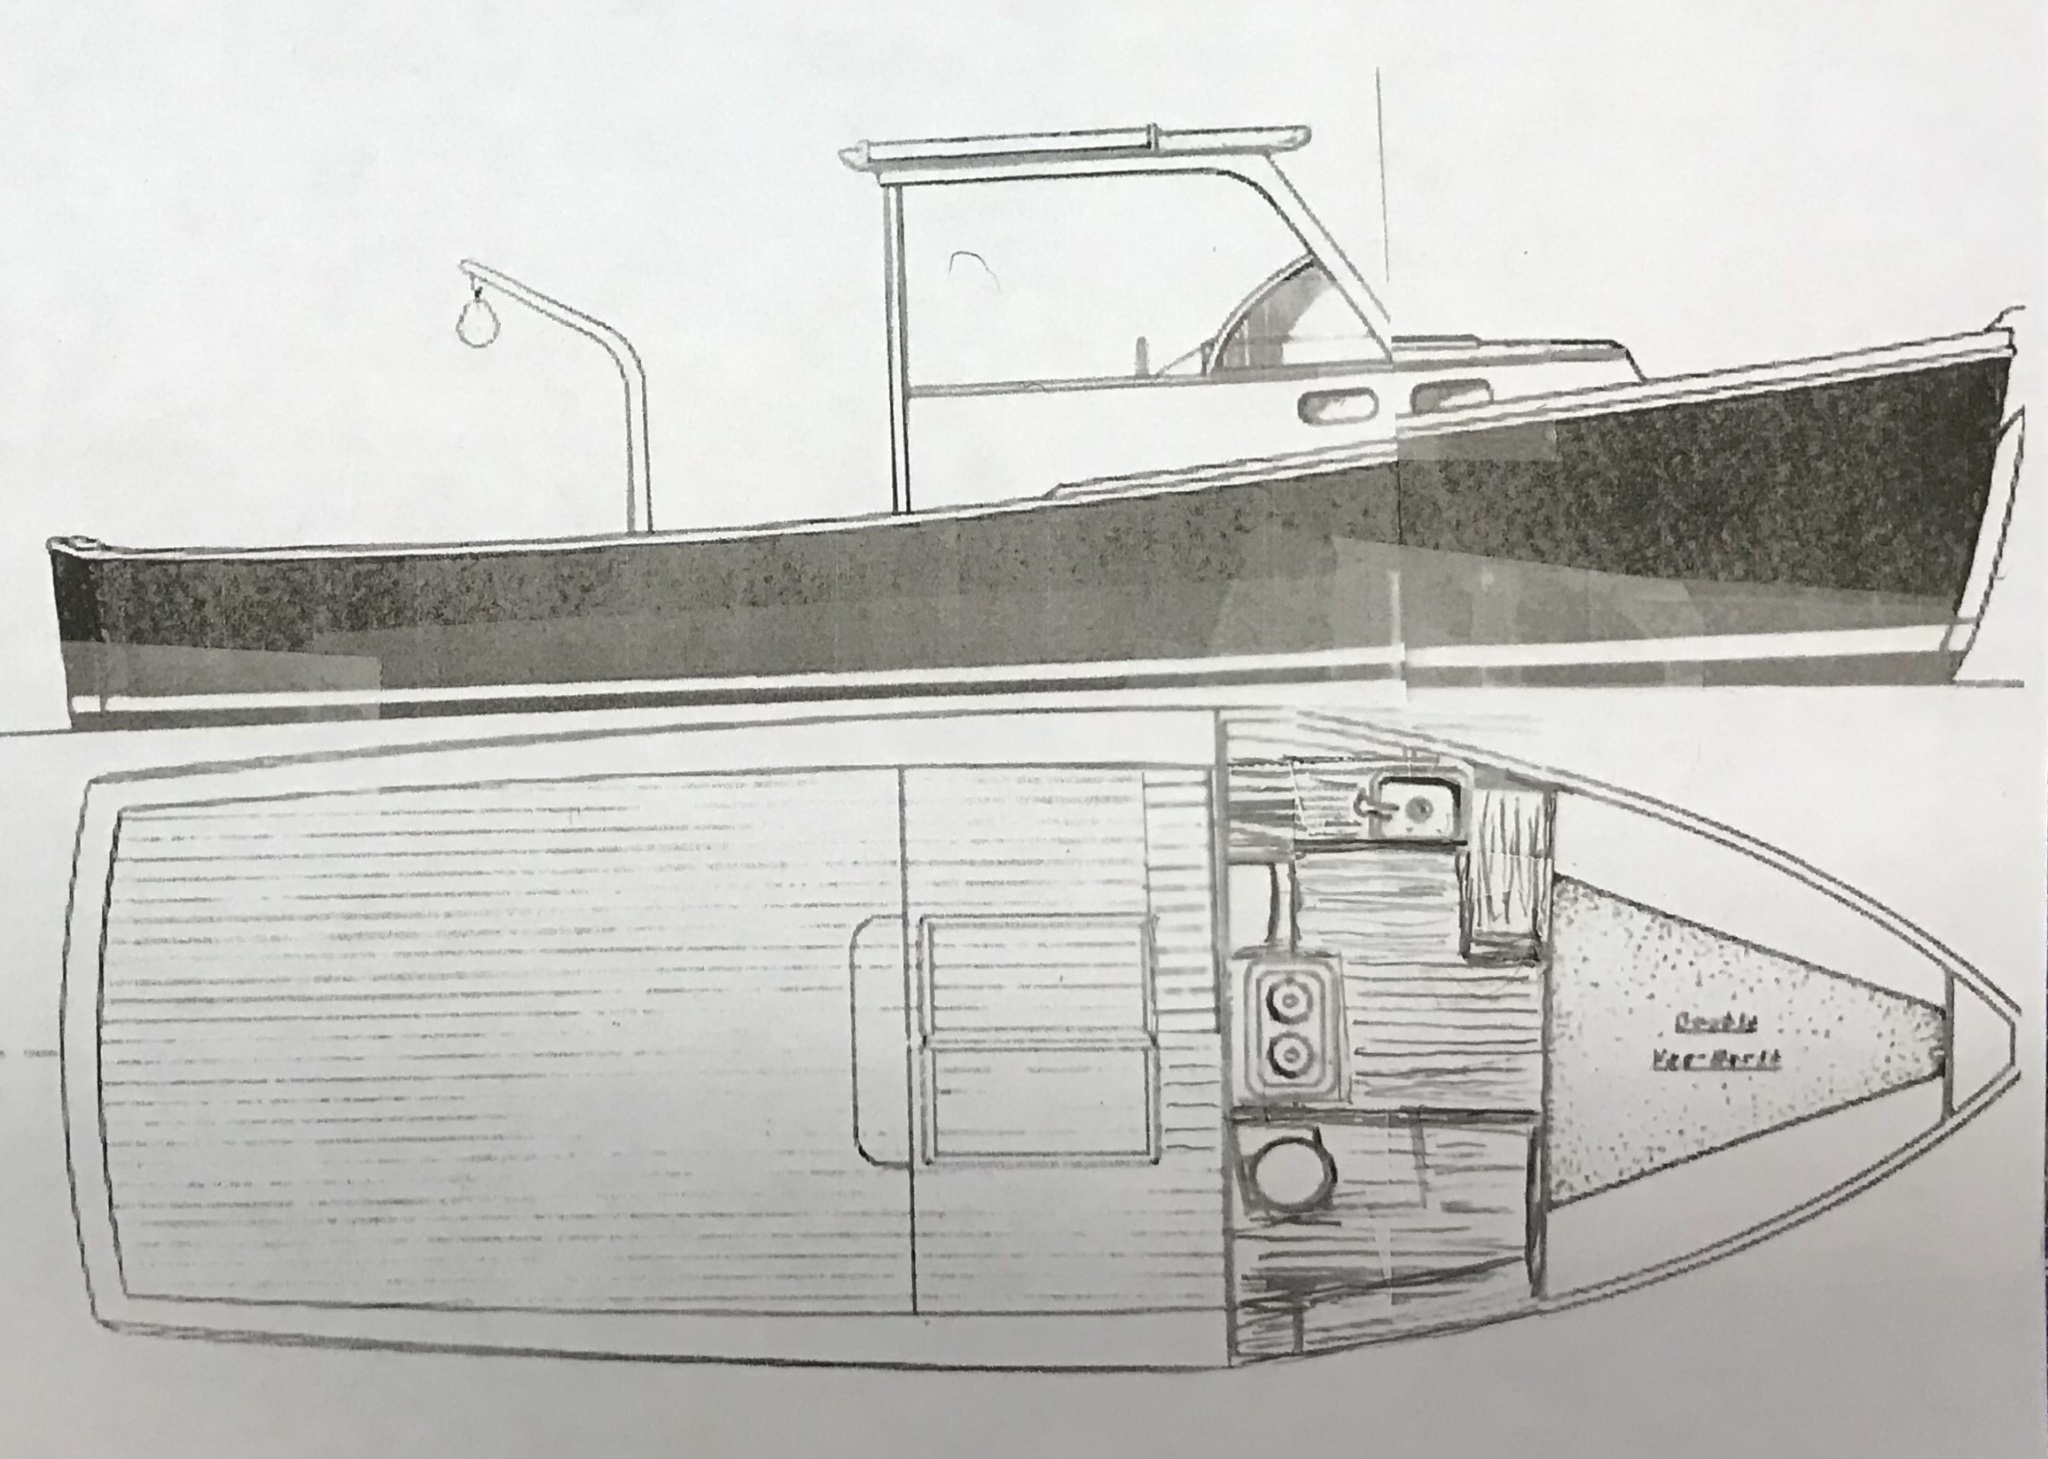
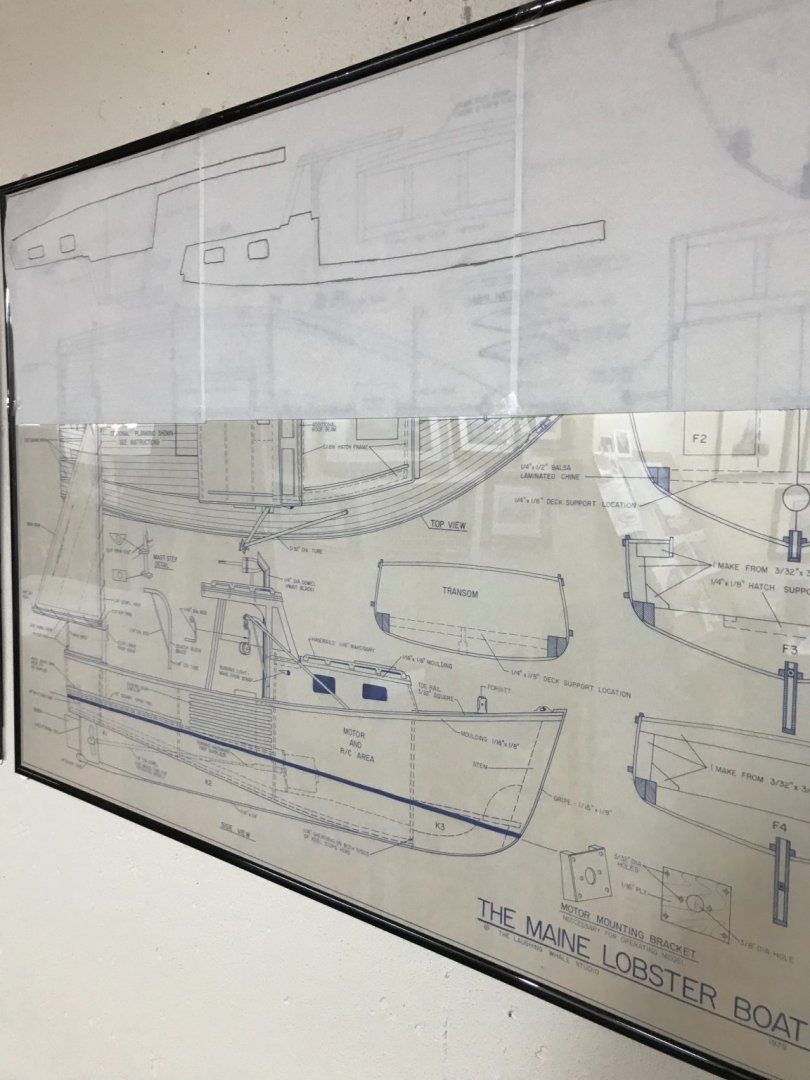
The Maine Lobster Boat. It’s a Laughing Whale Kit. Made in Maine. 😎
- 104 replies
-
- 1
-
-
- model shipways
- new bedford whaleboat
- (and 1 more)
-
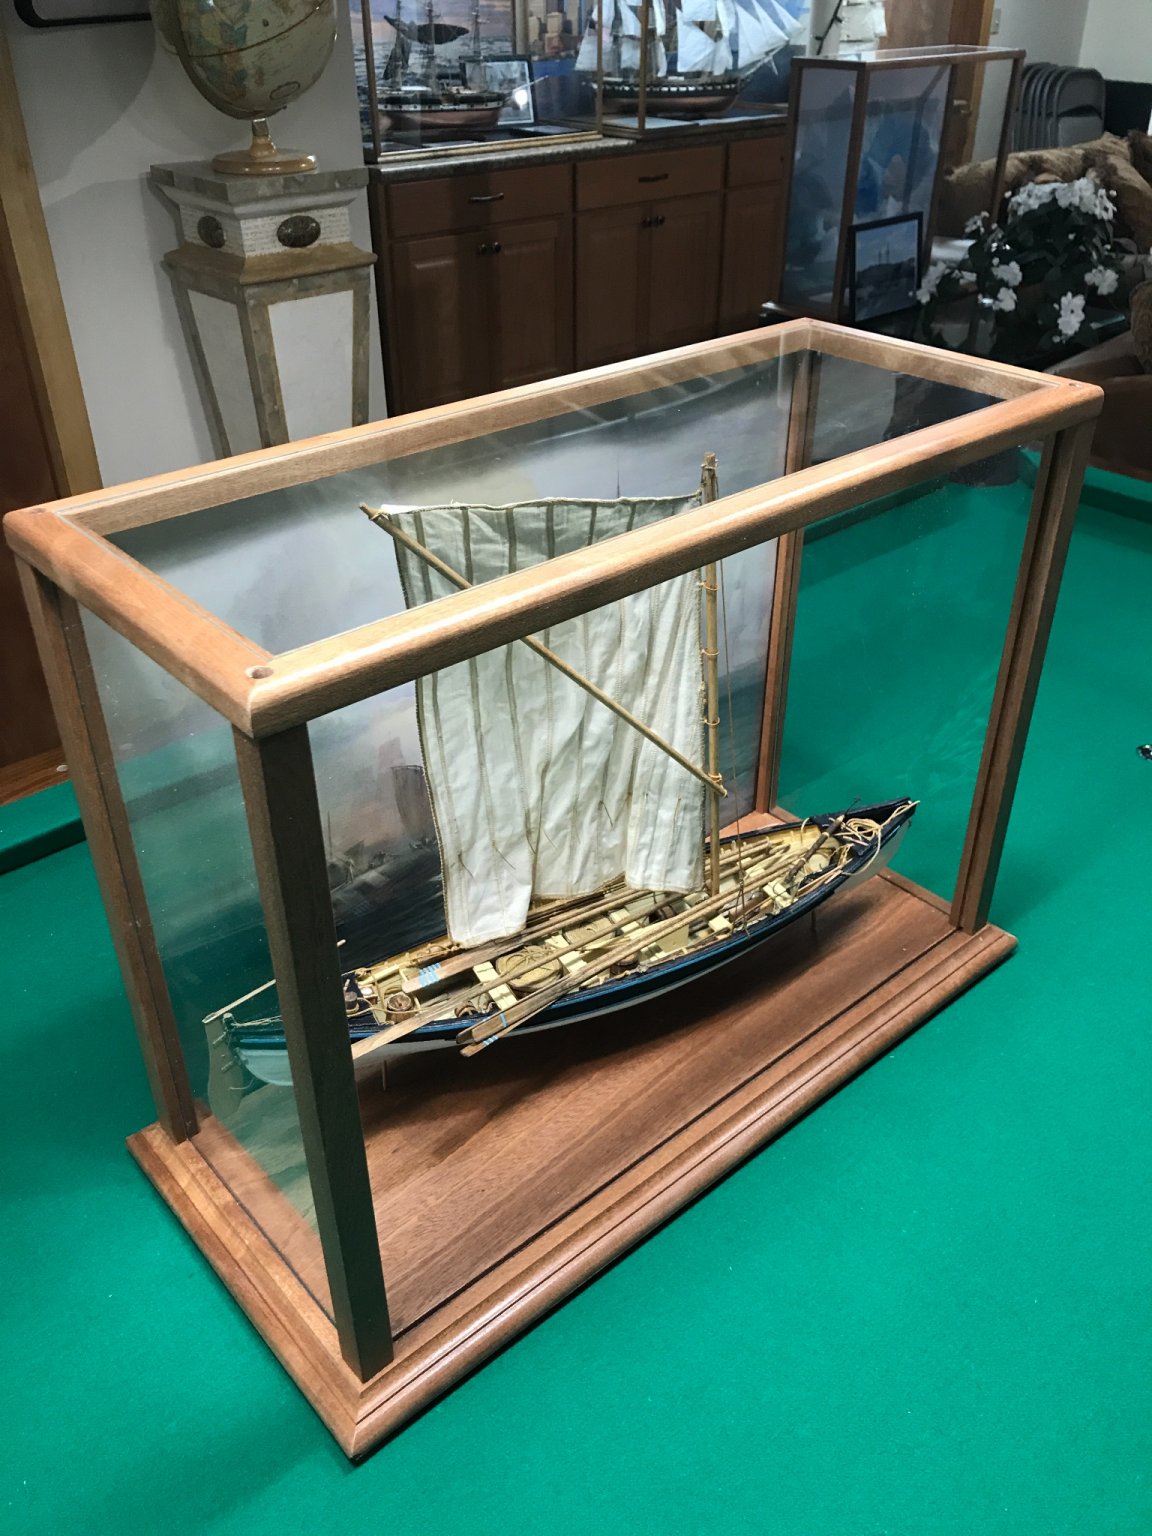
Mounted for display. Thank you all for your comments and encouragement over the past 11 months. Captains log shows 207 hours invested to completion. Onwards… 🍻

- 104 replies
-
- 16
-
-

-
- model shipways
- new bedford whaleboat
- (and 1 more)
-
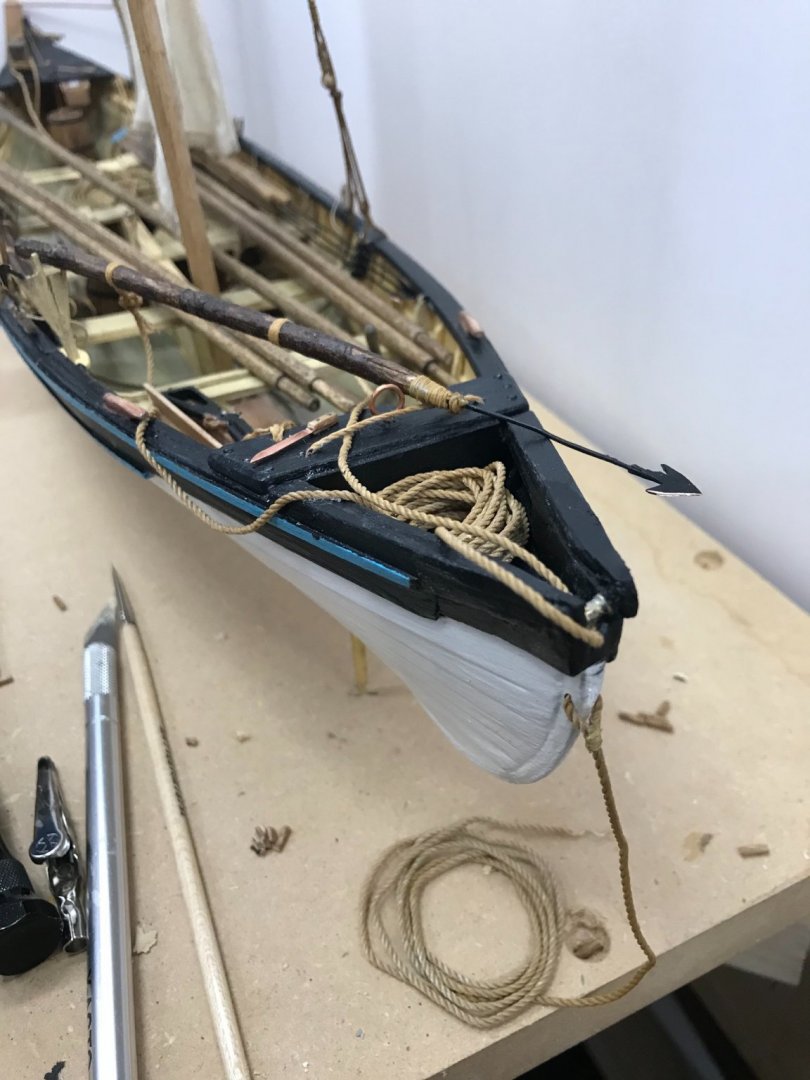
Wow! Now that’s a boat load of gear. I cannot imagine how they managed to survive, much less bring in a Sperm Whale. This Boat is Finished! This build was a lot fun, as well as challenging. I Loved the detail this kit offered and the flexibility to get as obsessed as I wanted to be. Great kit with excellent instruction. All that’s left is mounting her in a display case and enjoy. 😎


- 104 replies
-
- 15
-
-

-
- model shipways
- new bedford whaleboat
- (and 1 more)
-
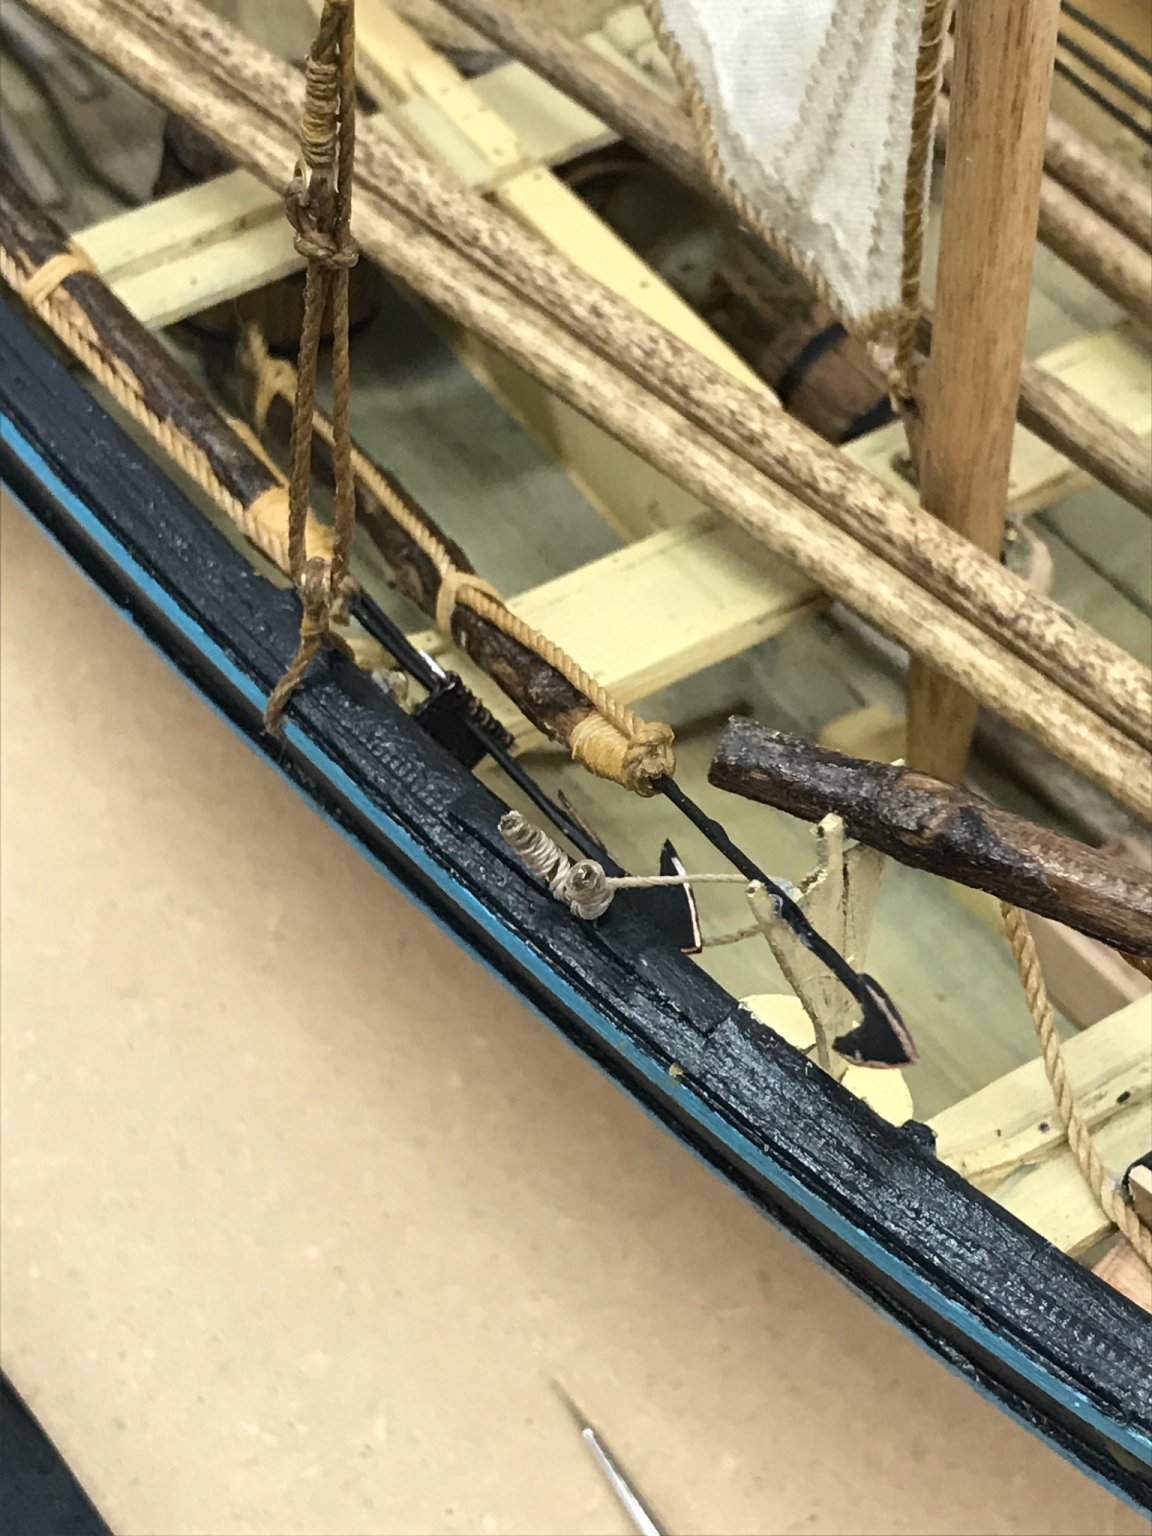
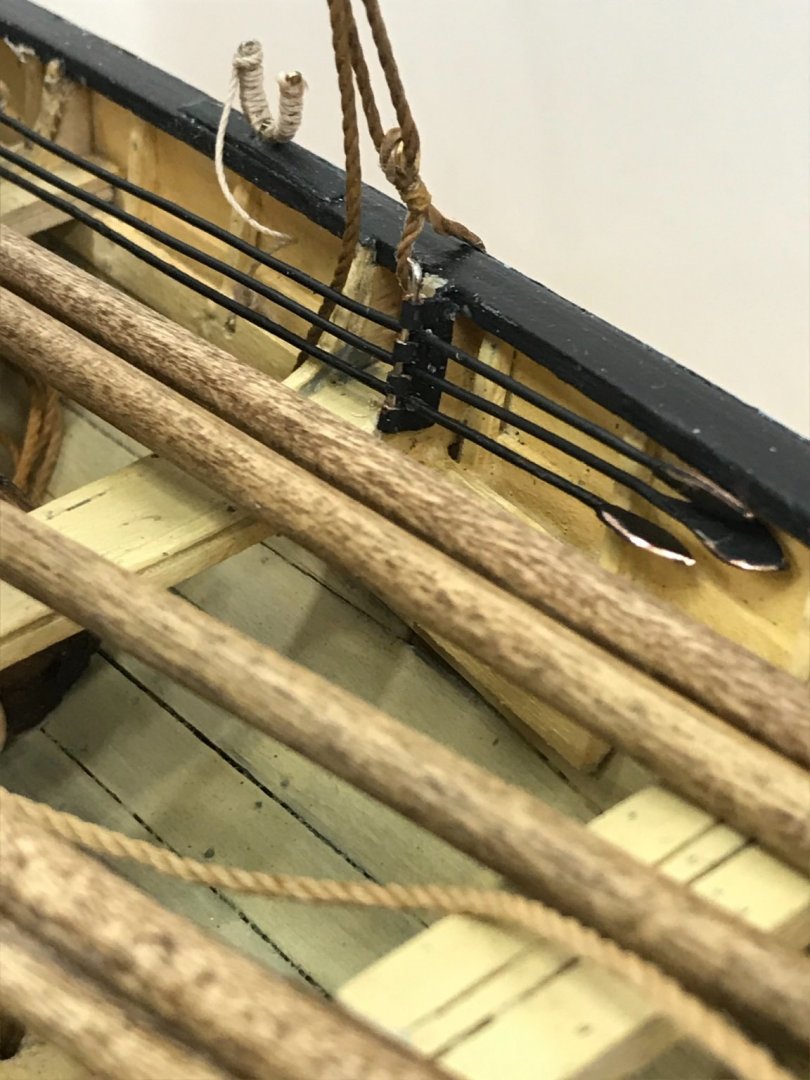
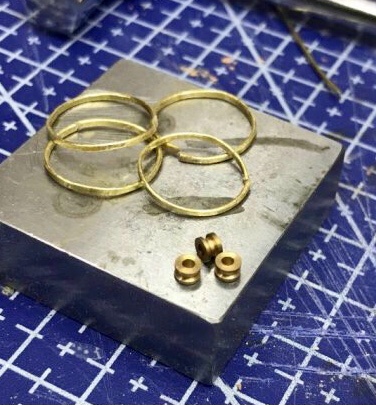
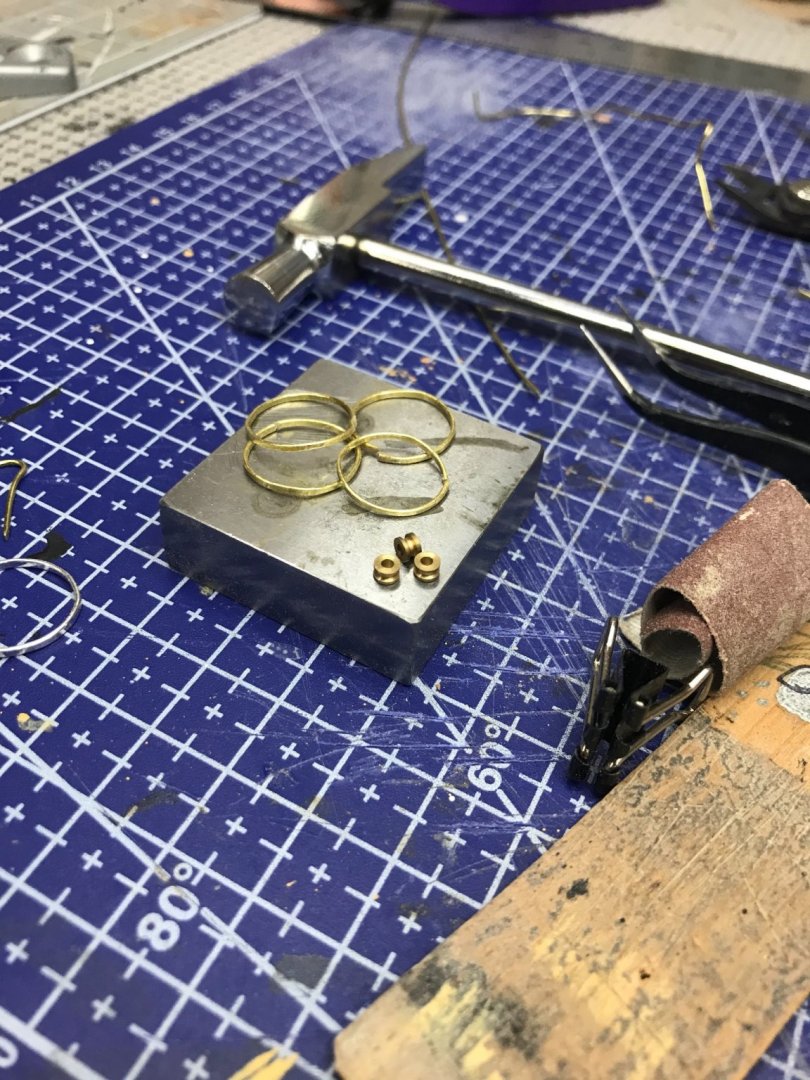
They are brass fittings supplied in the kit. Pictured here with the Mast Hoops.
- 104 replies
-
- 1
-
-
- model shipways
- new bedford whaleboat
- (and 1 more)
-
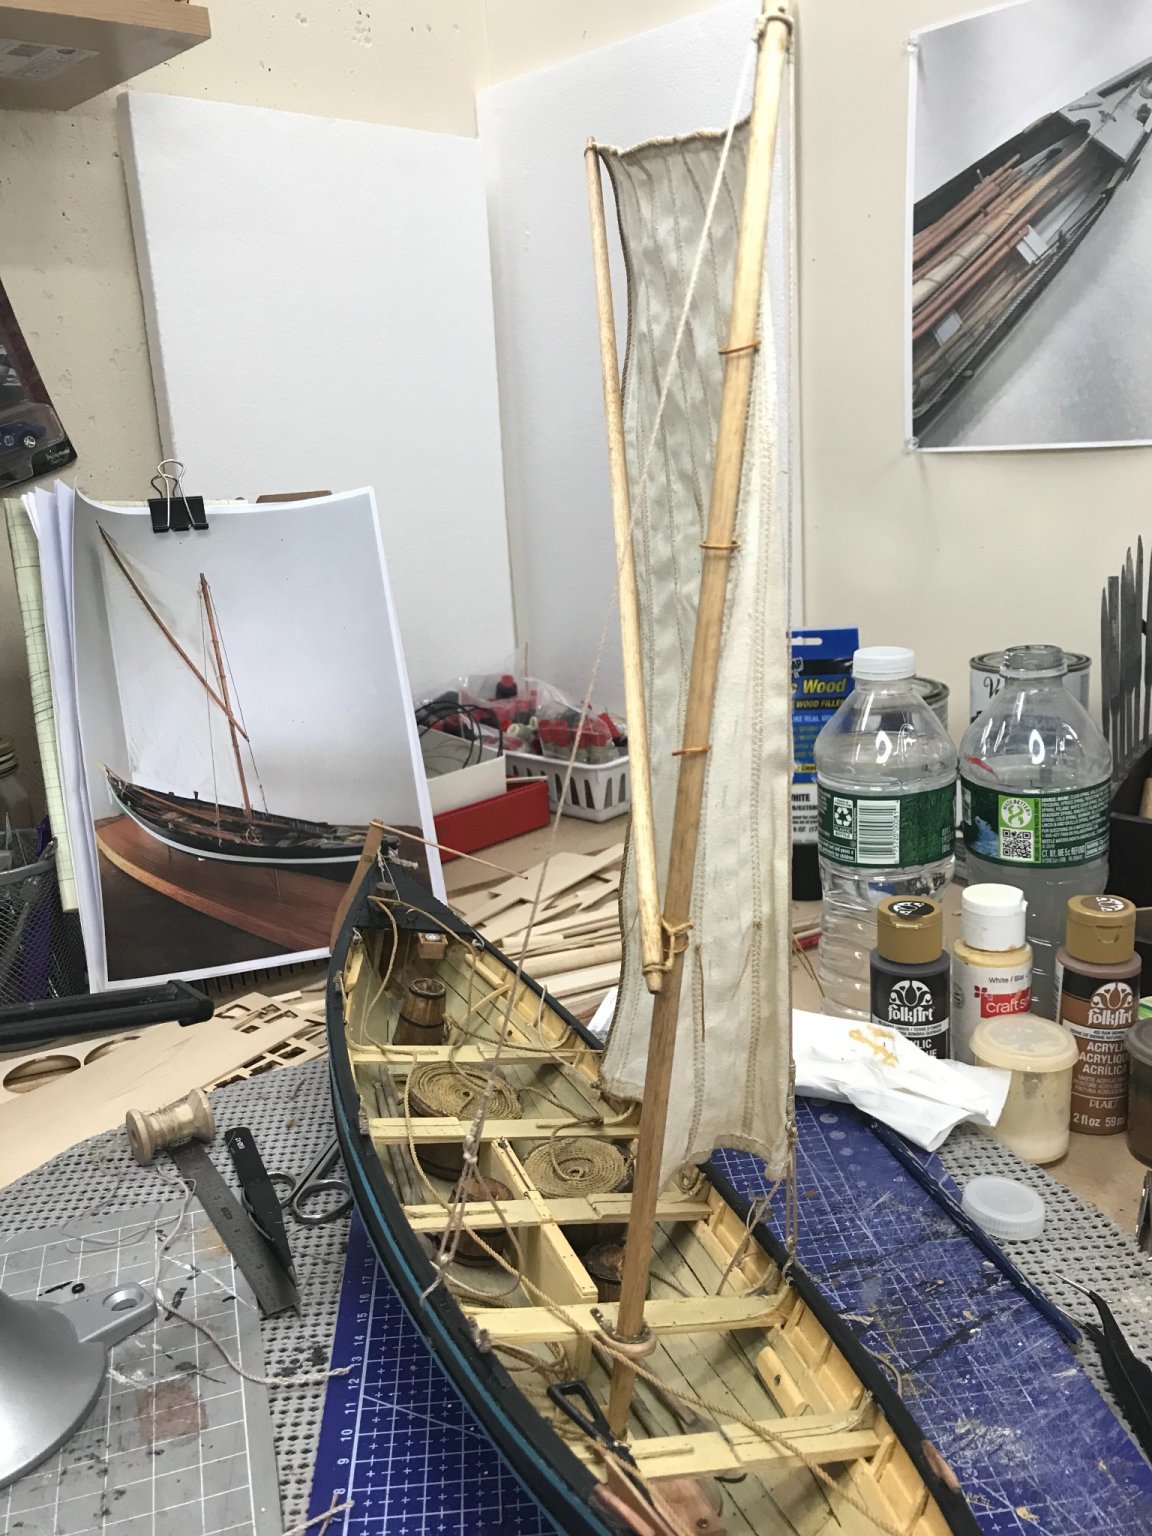
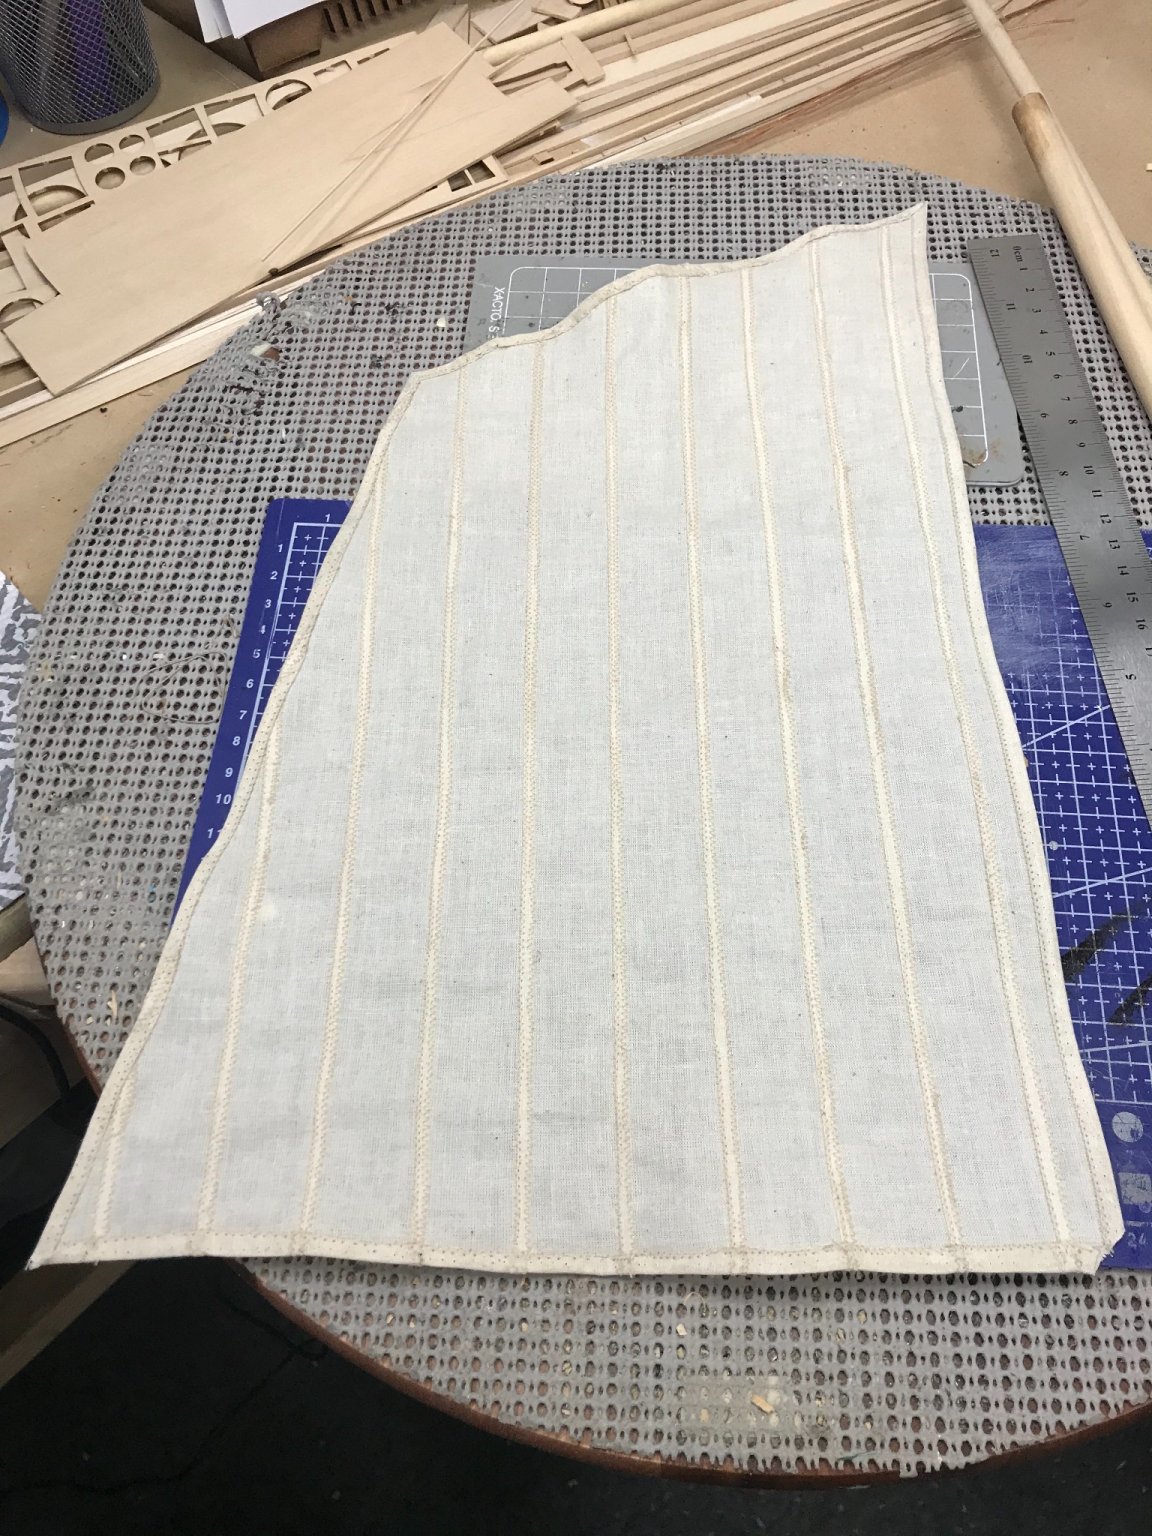
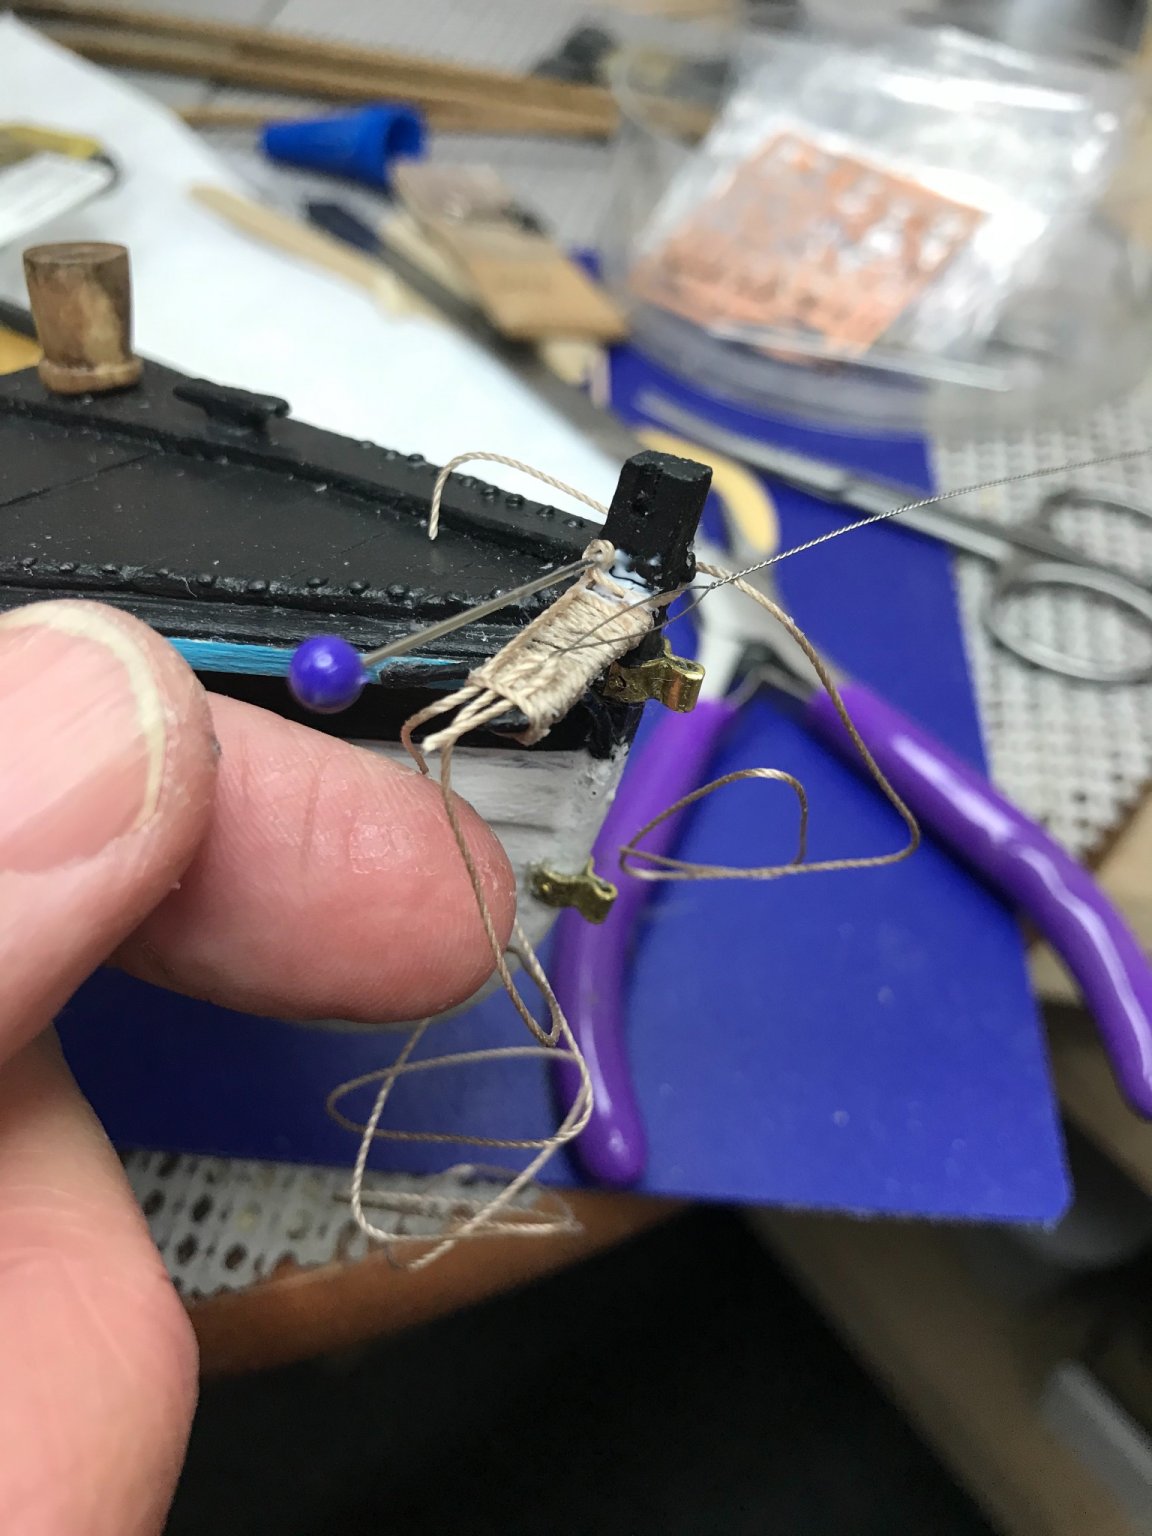
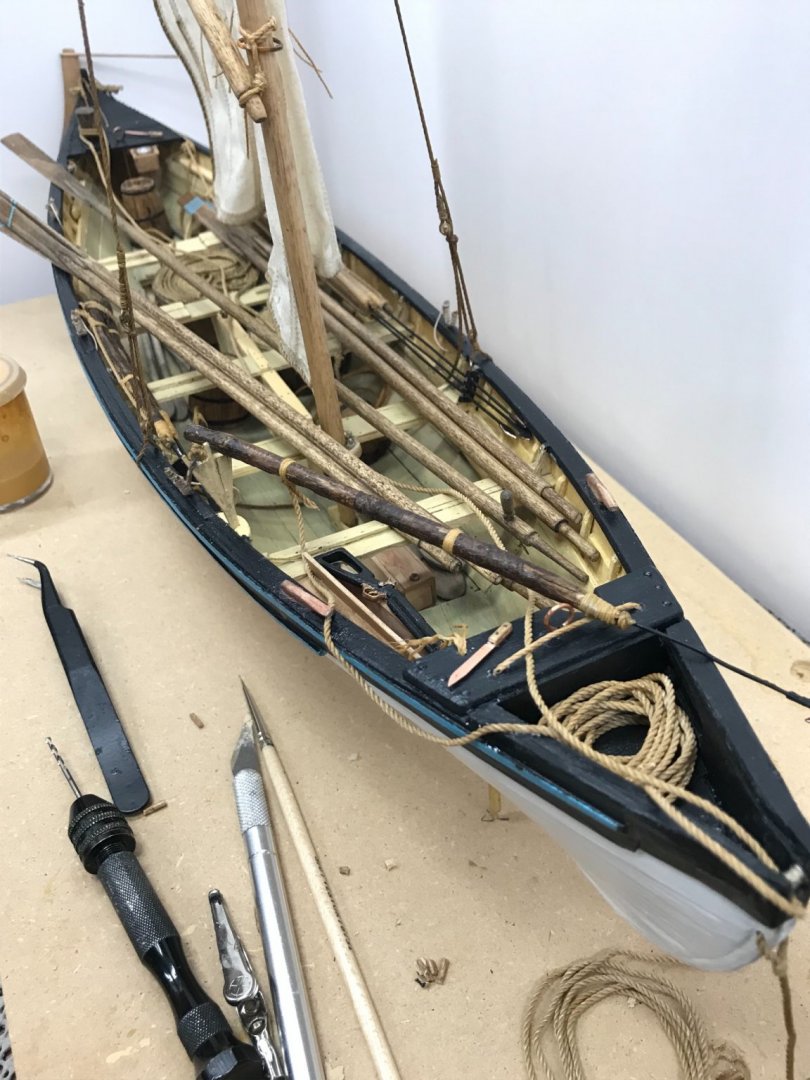
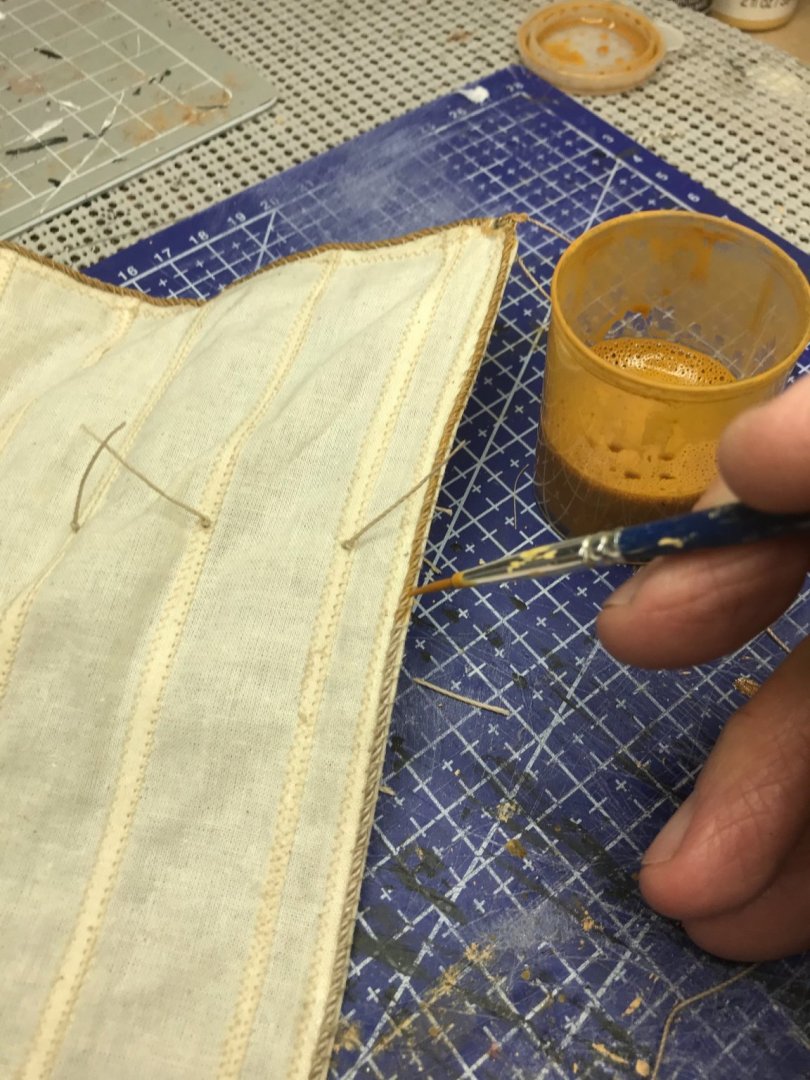
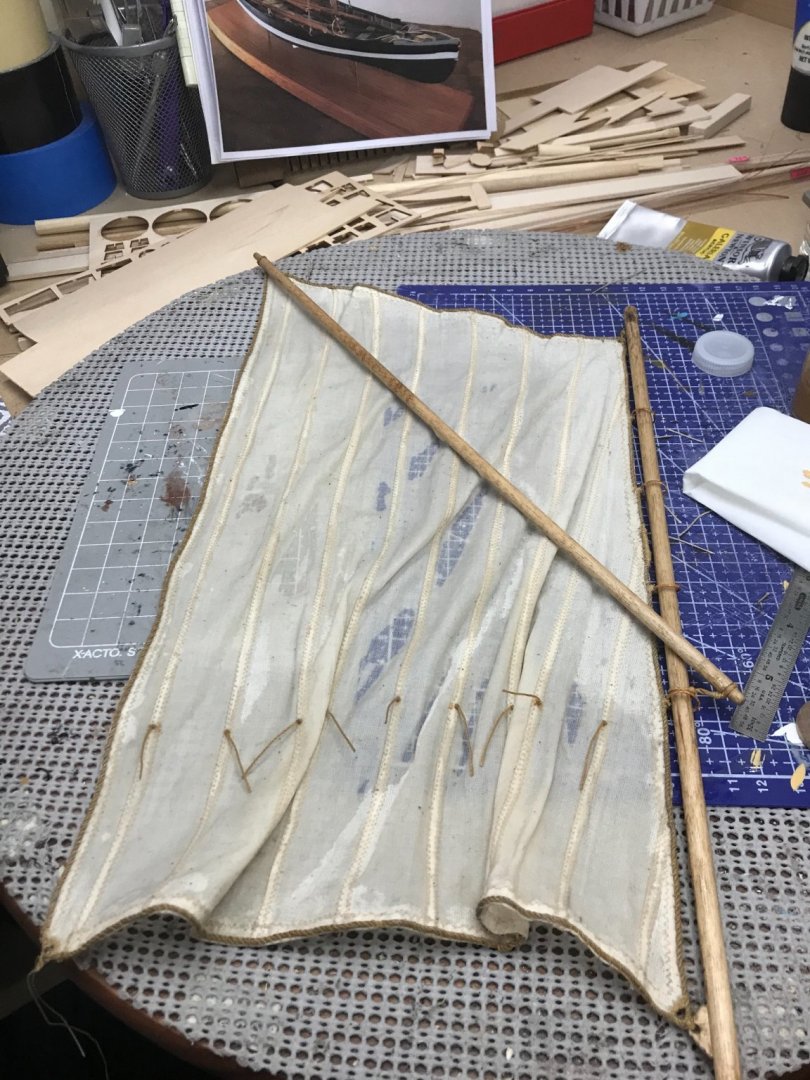
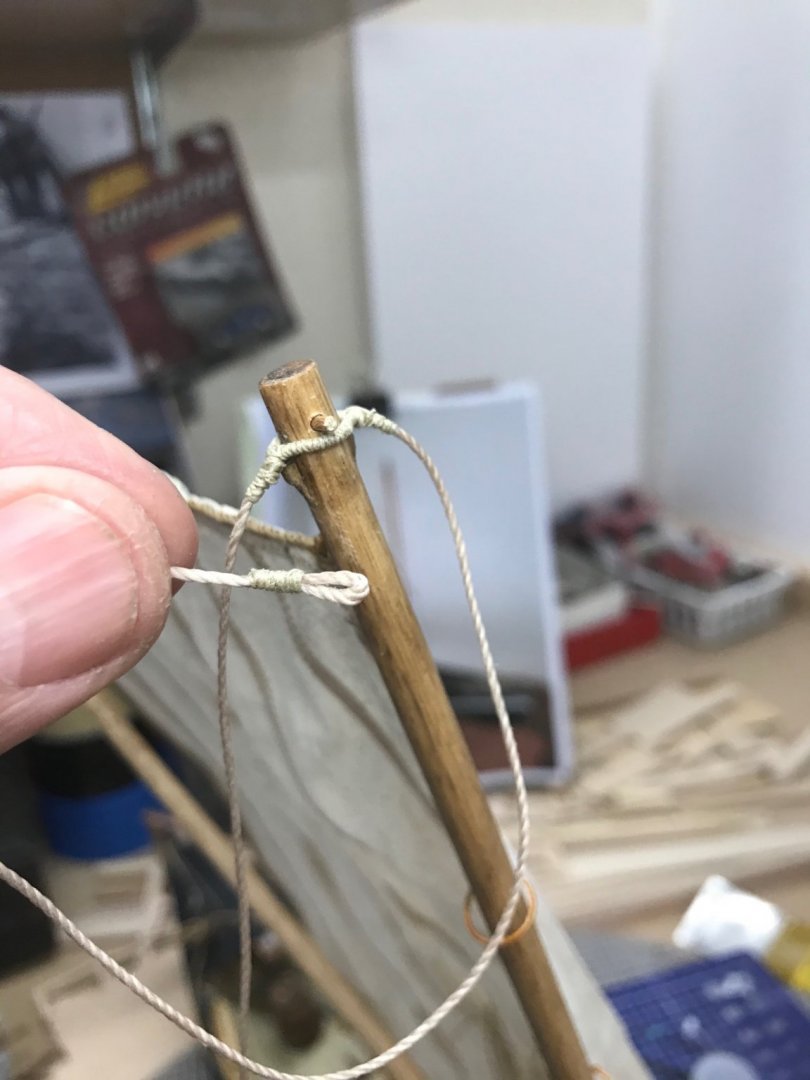
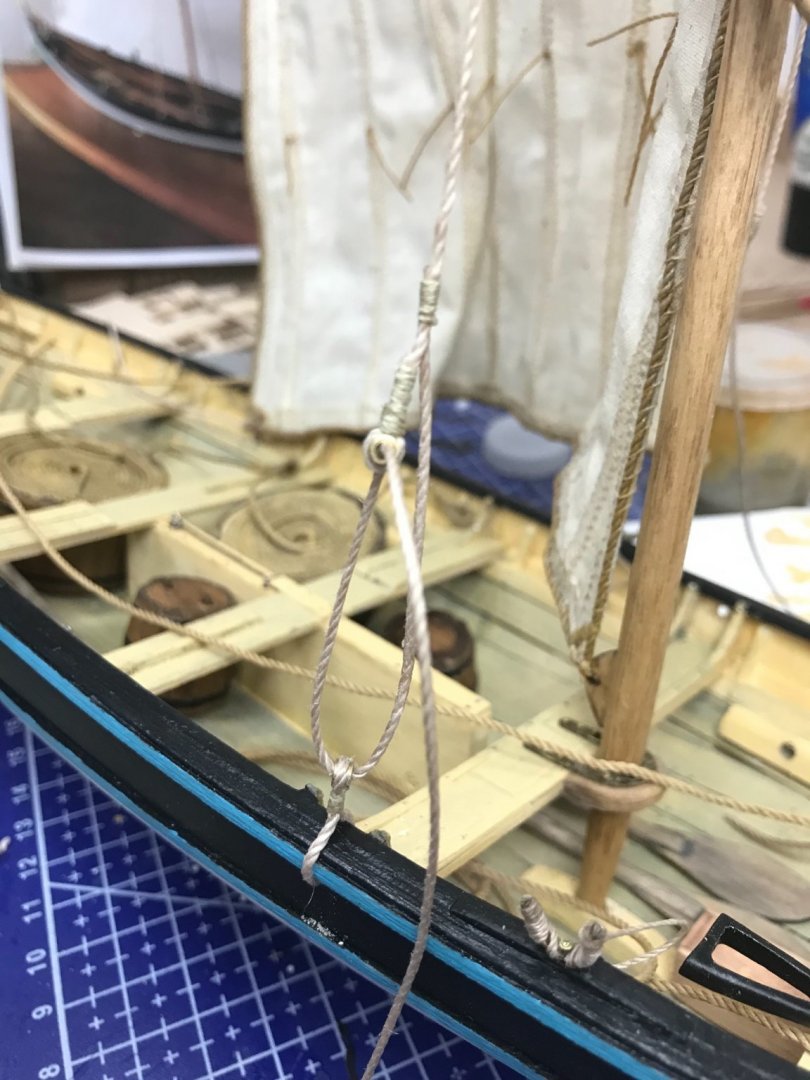
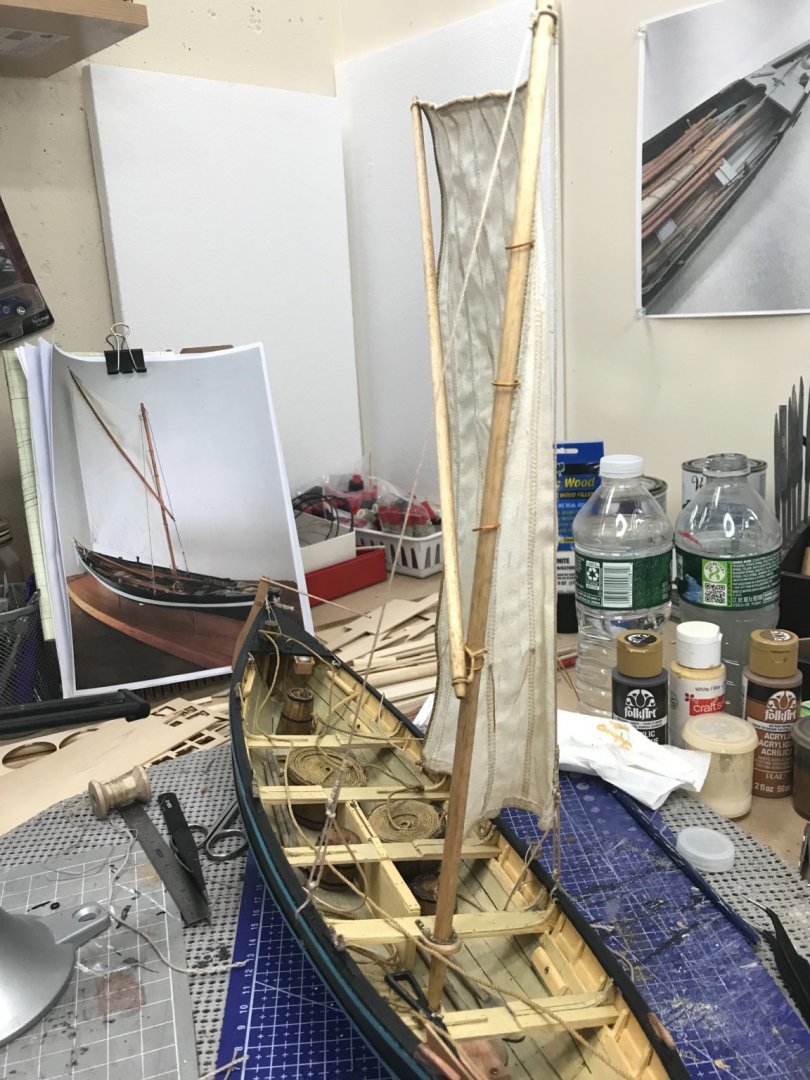
Bolt rope hand sewn to the sail. I finally found a color mix I was satisfied with. Needed a bit of yellow ochre to give it a dirty Manila Rope look. 👌 Thin enough to soak into the rope but not bleed on to the sail. Soaked the sail down a third time with fabric stiffener. Trying to drape the sail so it looks set but flapping (luffing) in to the wind. 😆 Shrouds spliced and seized at the top of the mast. Thanks Mike, got that peg in the right direction. 👍 Eyelets also seized on the ends. Lanyards seized to the shrouds. Thimbles installed and ready to set the shrouds. Mast, Sprit and Sail are all set. Need to paint some more rope. 🧐 Next up, harpoons, lances and all Manner of whaling equipment. Getting close to being ready to go fishing and catch me a whopper. 🤣 Cheers 🍻

- 104 replies
-
- 9
-
-
- model shipways
- new bedford whaleboat
- (and 1 more)
-
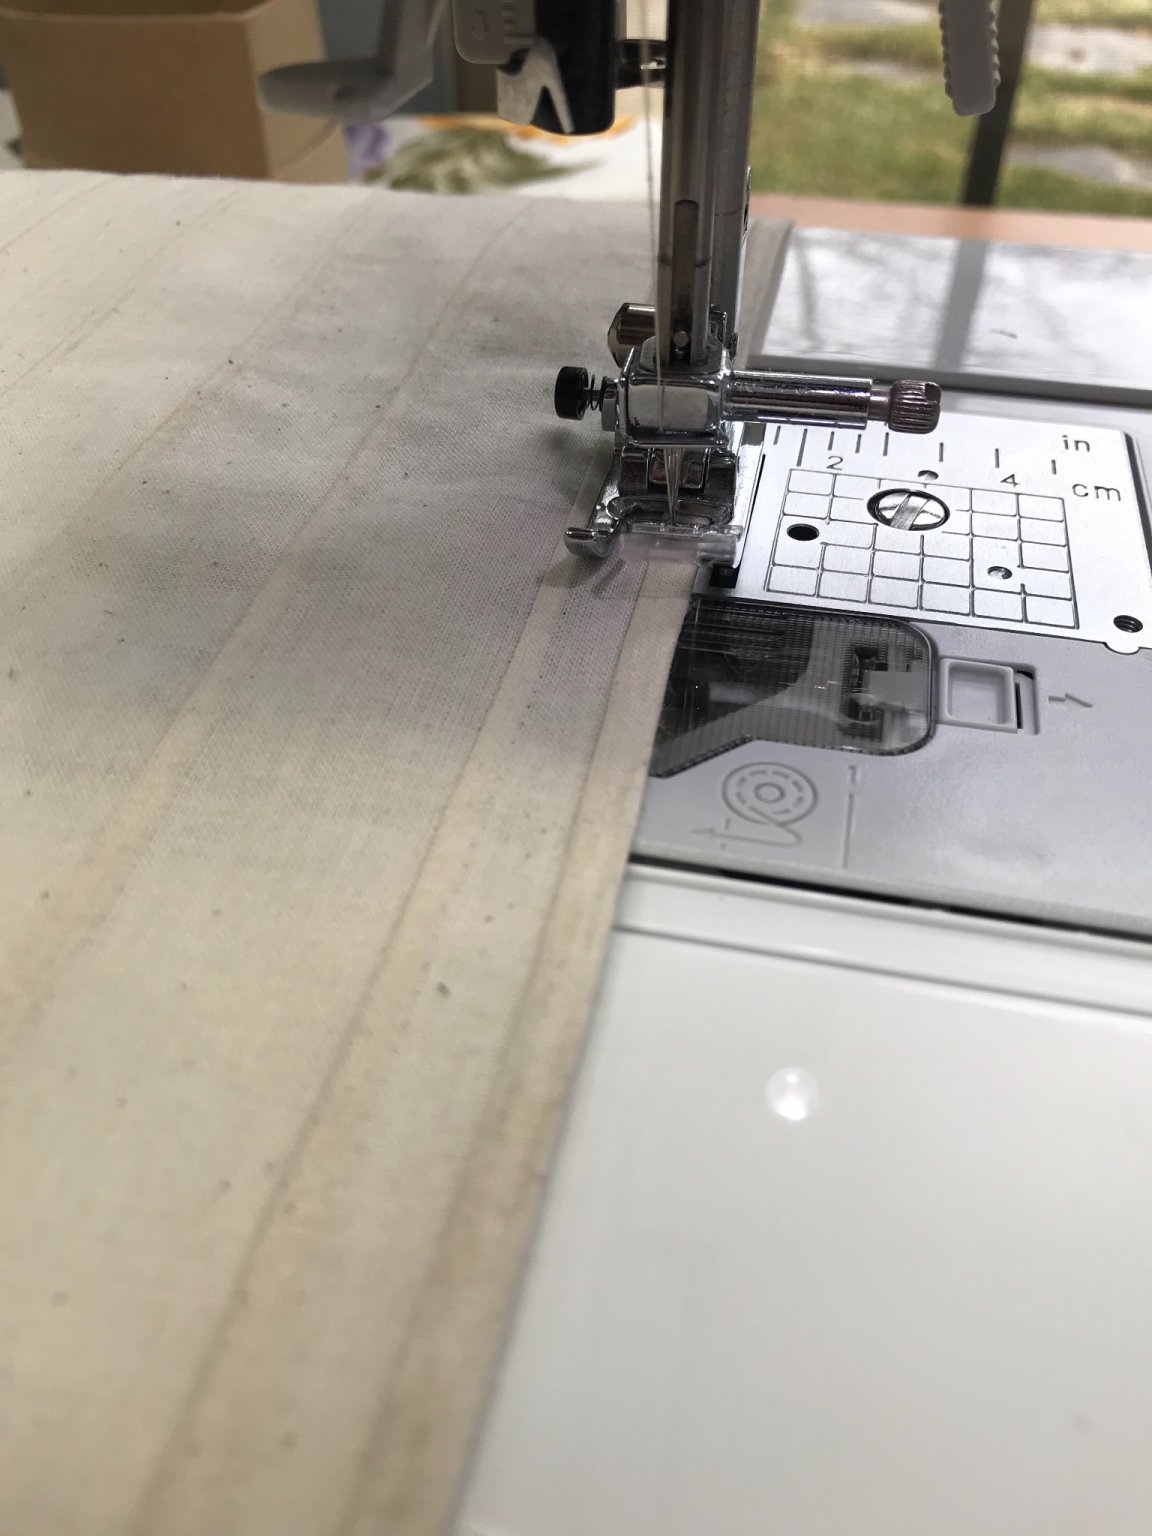
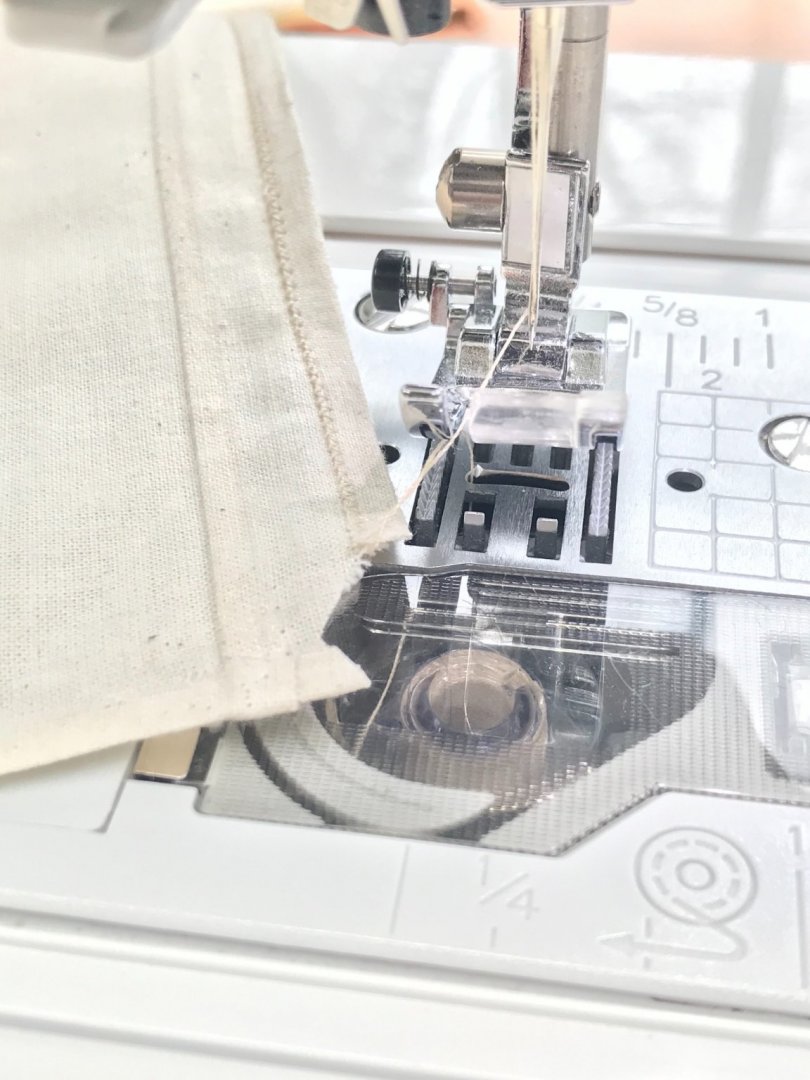
oh! Don’t think for one minute the first version is shown here. The key is lots of practice runs and Sloth 🦥 mode on the sewing machine. 😆
- 104 replies
-
- 1
-
-
- model shipways
- new bedford whaleboat
- (and 1 more)
-
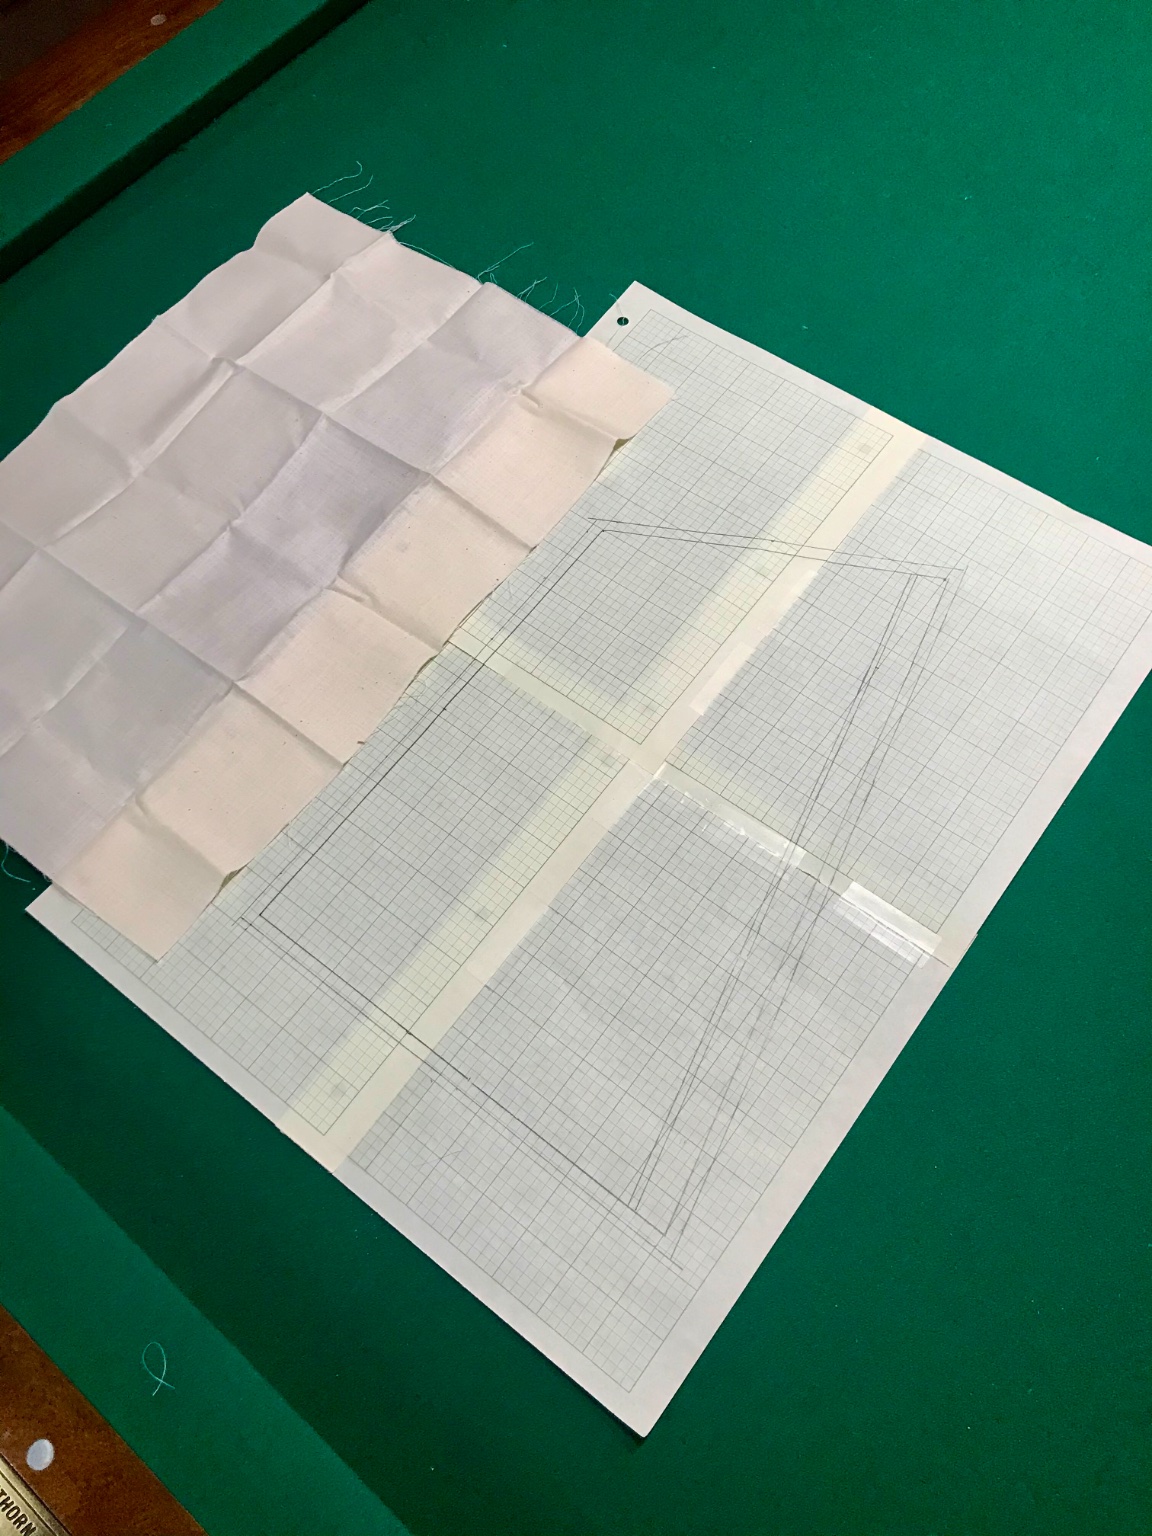
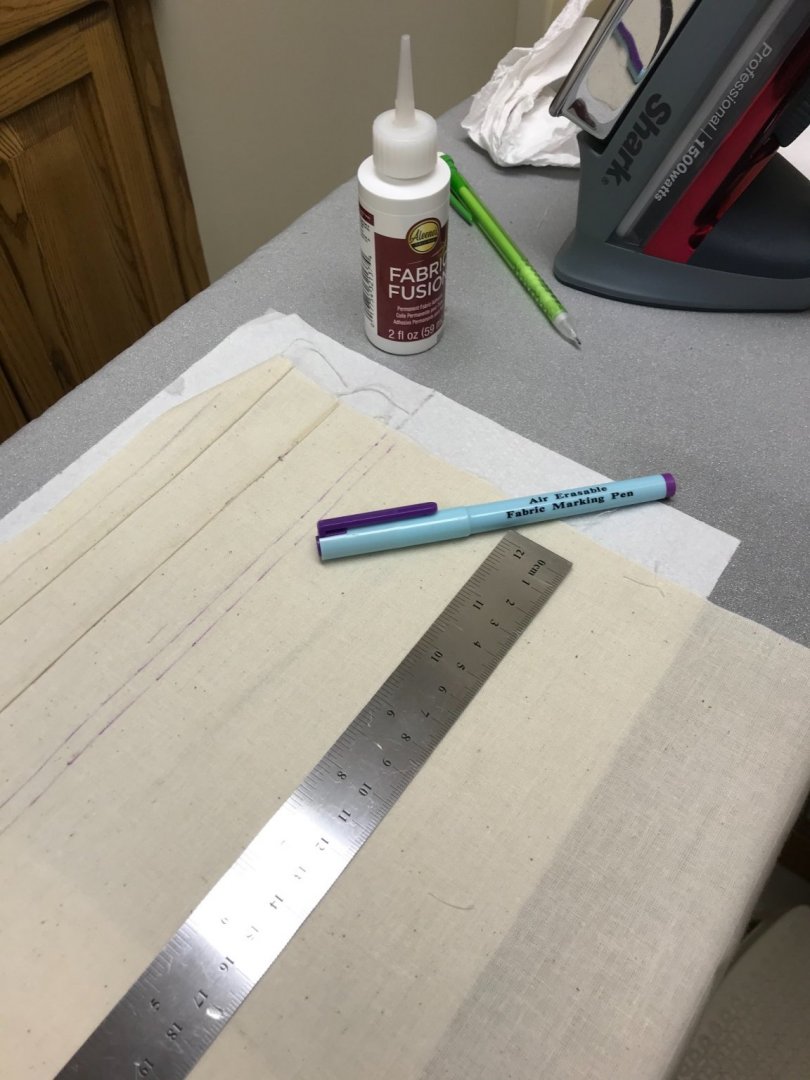
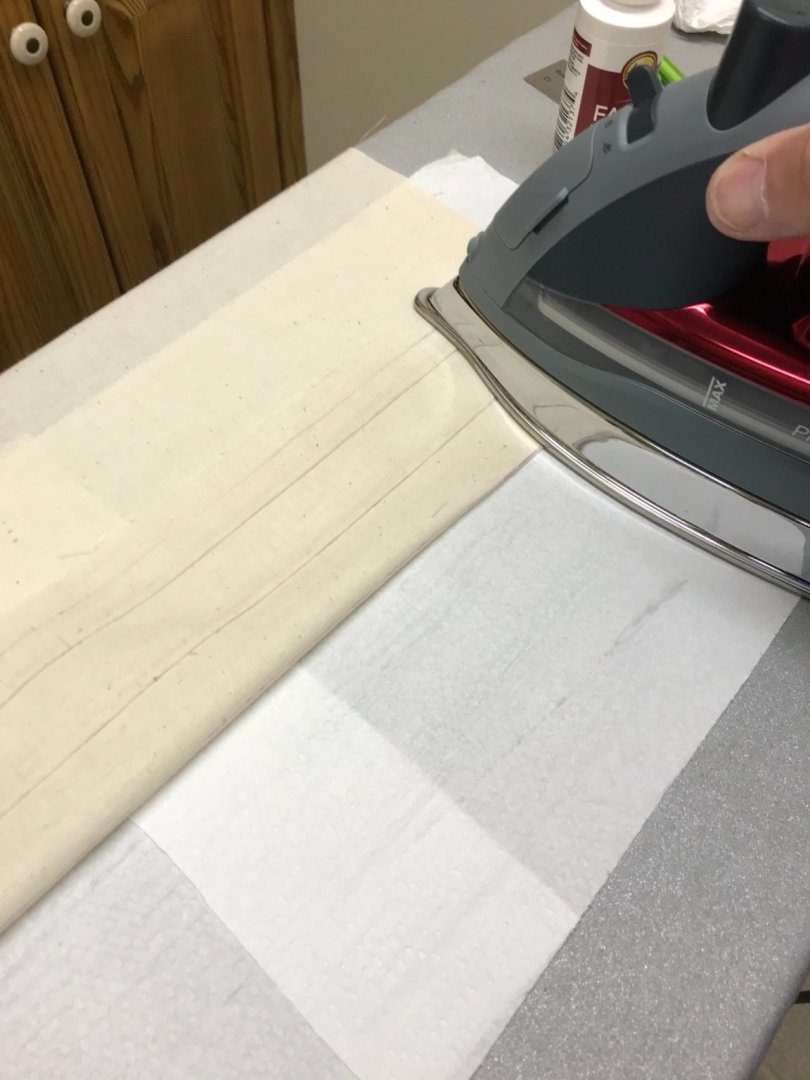
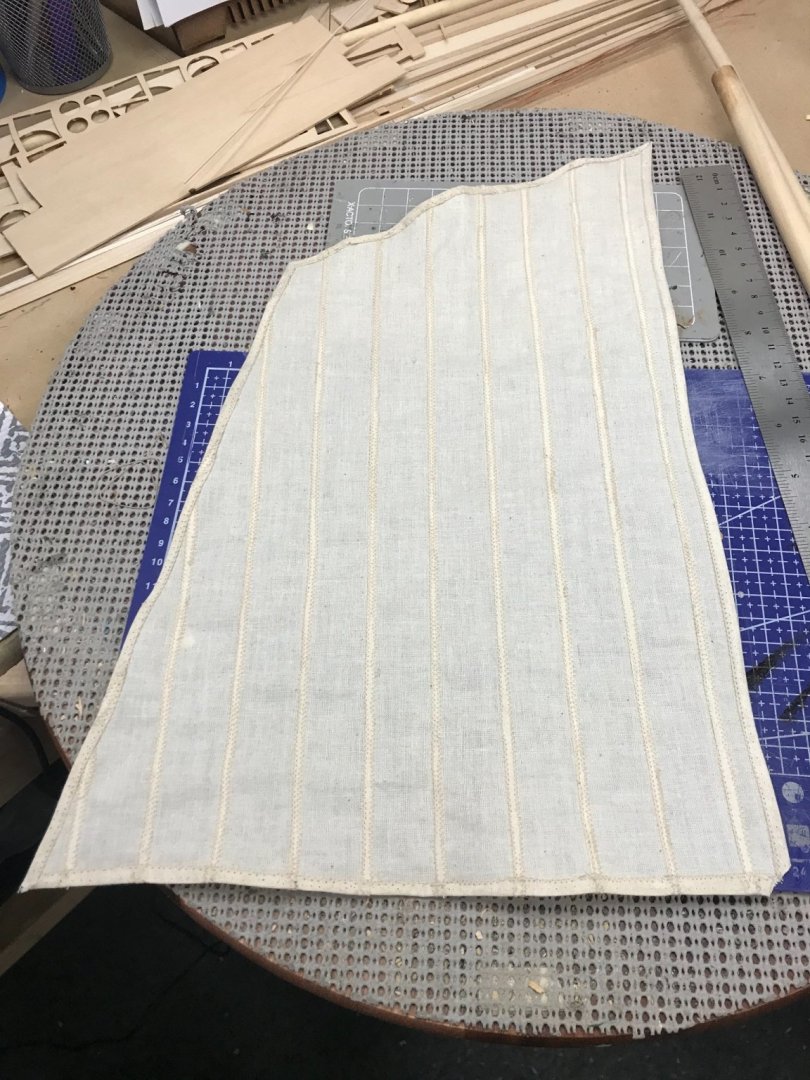
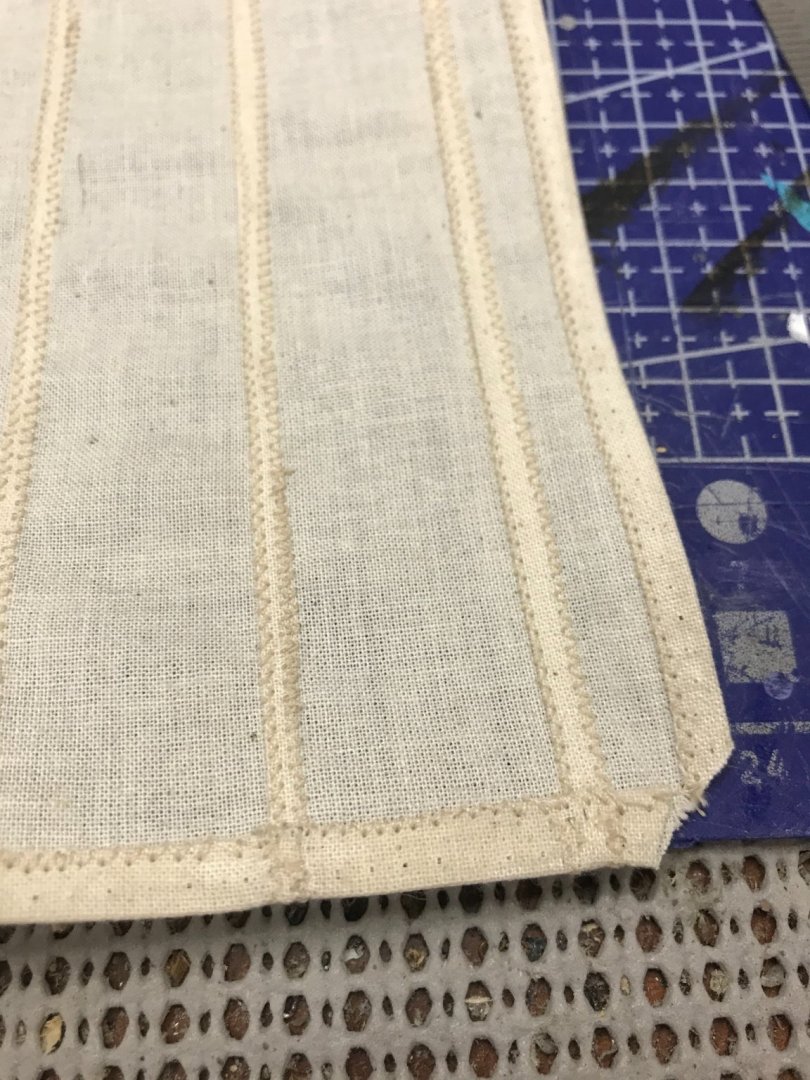
Stitching the Sail... Raided the wife’s sewing room, disappearing ink. Who knew? Ironing the seams... Gluing down the folded seam... Marking one at a time and repeat folding ironing and glueing. Set up the wife’s sewing machine for 1/16th inch Zig Zag stitch. She said WHAT? Lots of practice runs on spare material. Also needed the machine to stitch in slow-mo. 😆 YES! TEDIOUS PAINFULLY SO... Perseverance, pays off. 😎 Successful stitching of a Sail. Working on Mast hoops and thimbles. Waiting on my order of MS rope to arrive. Next up Bolt Rope, Shrouds and Rigging. Onwards 🍻


- 104 replies
-
- 10
-
-
-
- model shipways
- new bedford whaleboat
- (and 1 more)
-
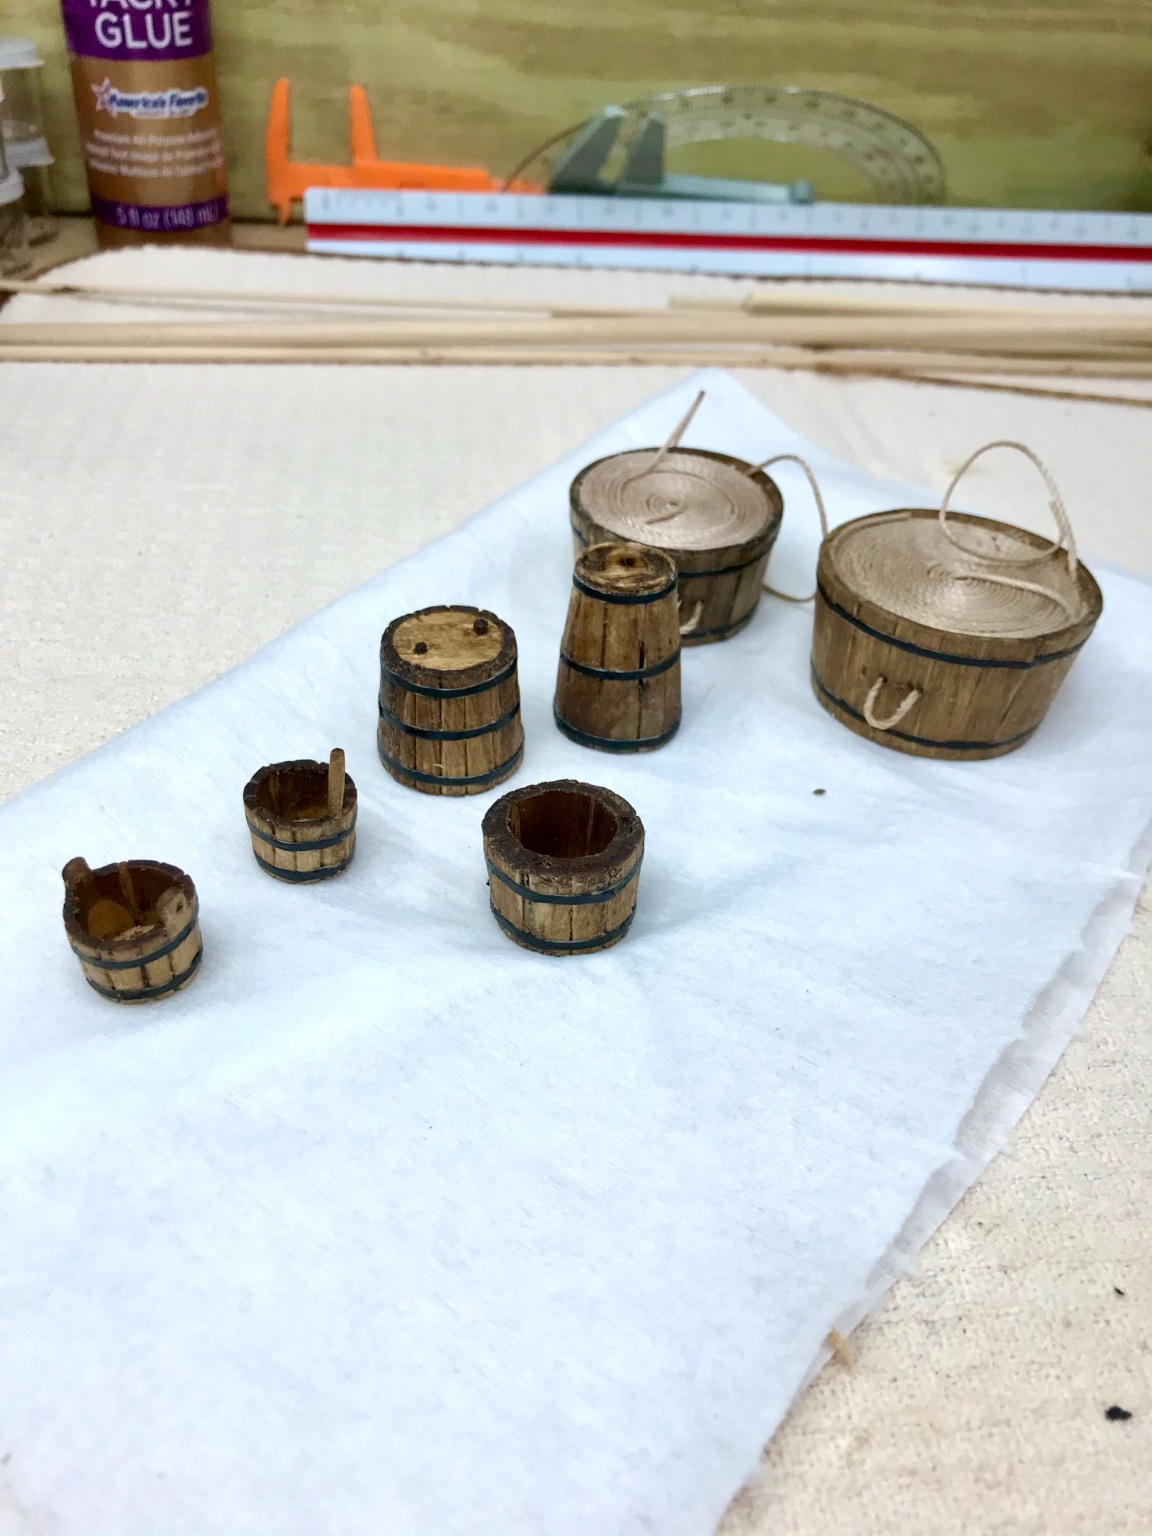
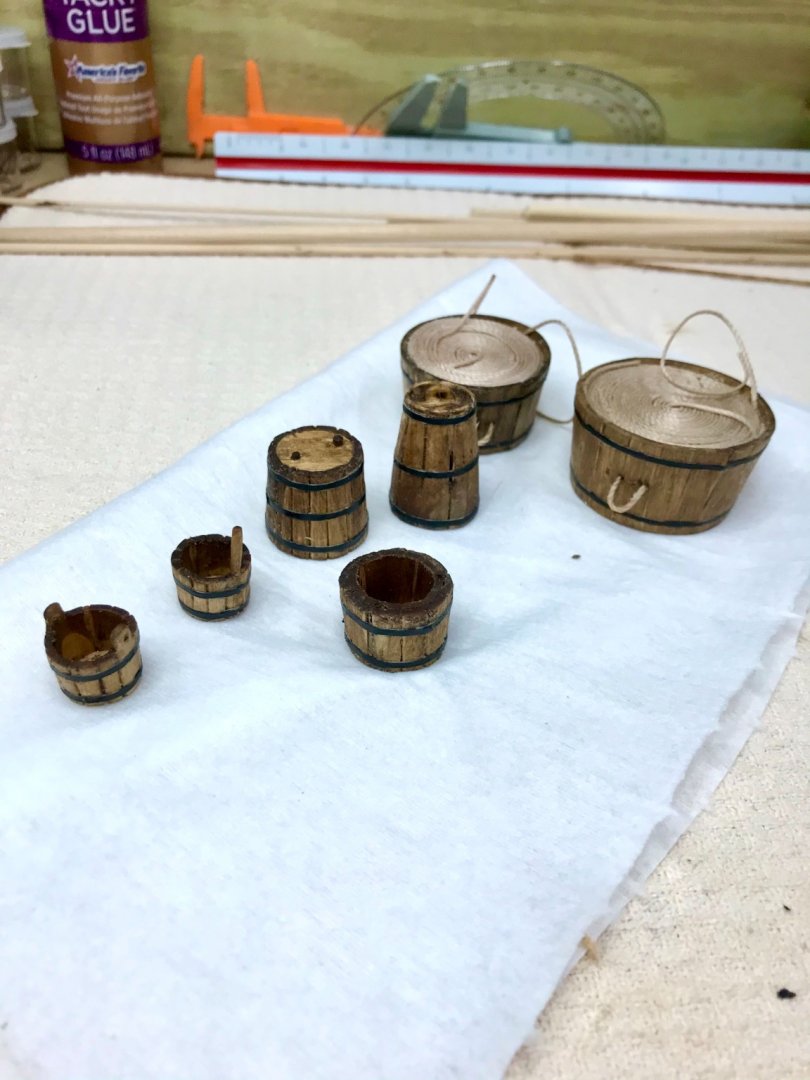
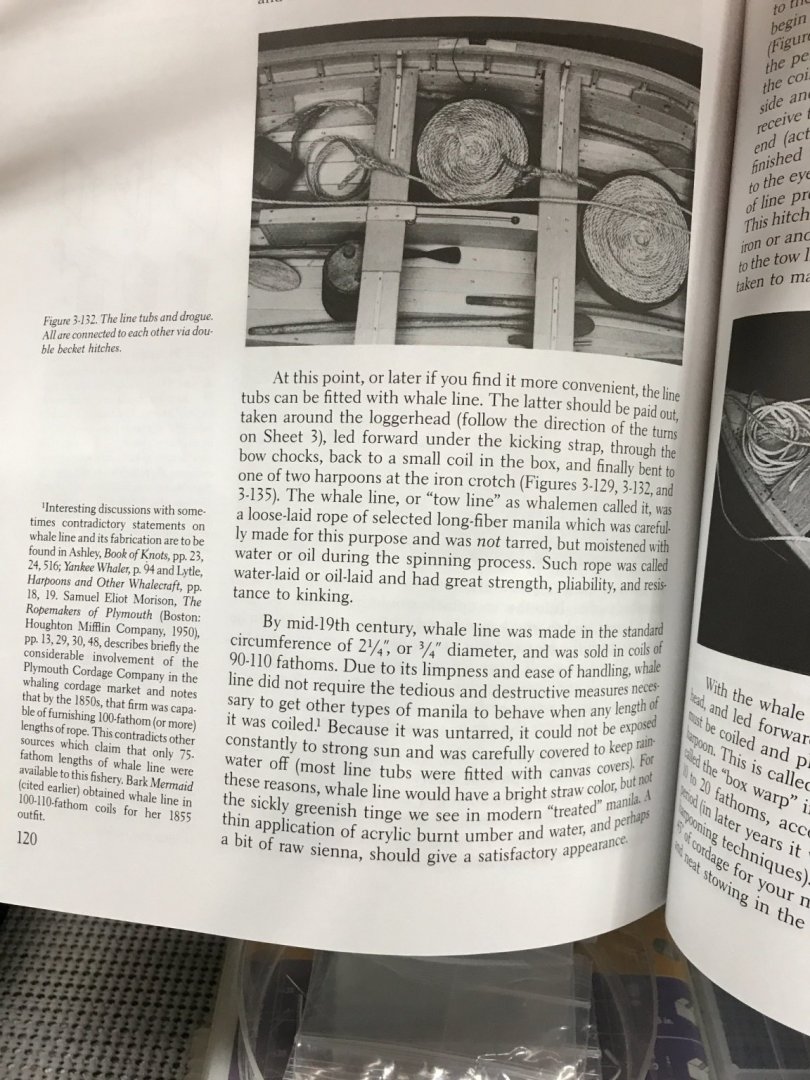
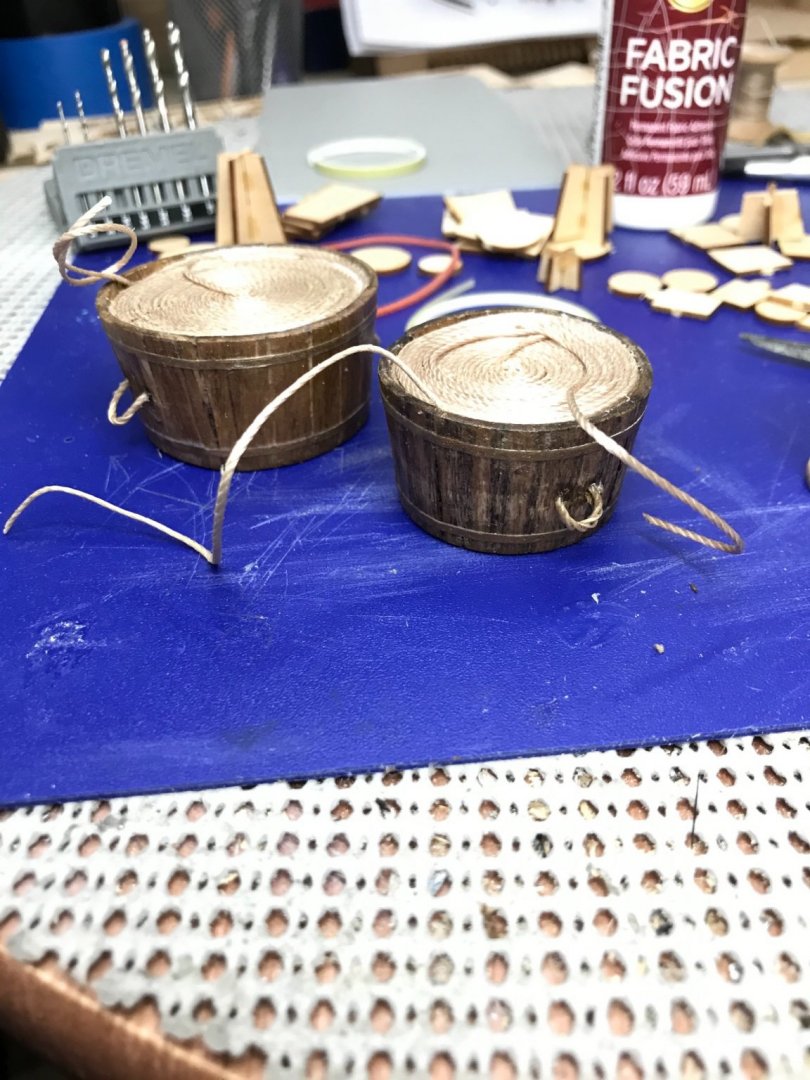
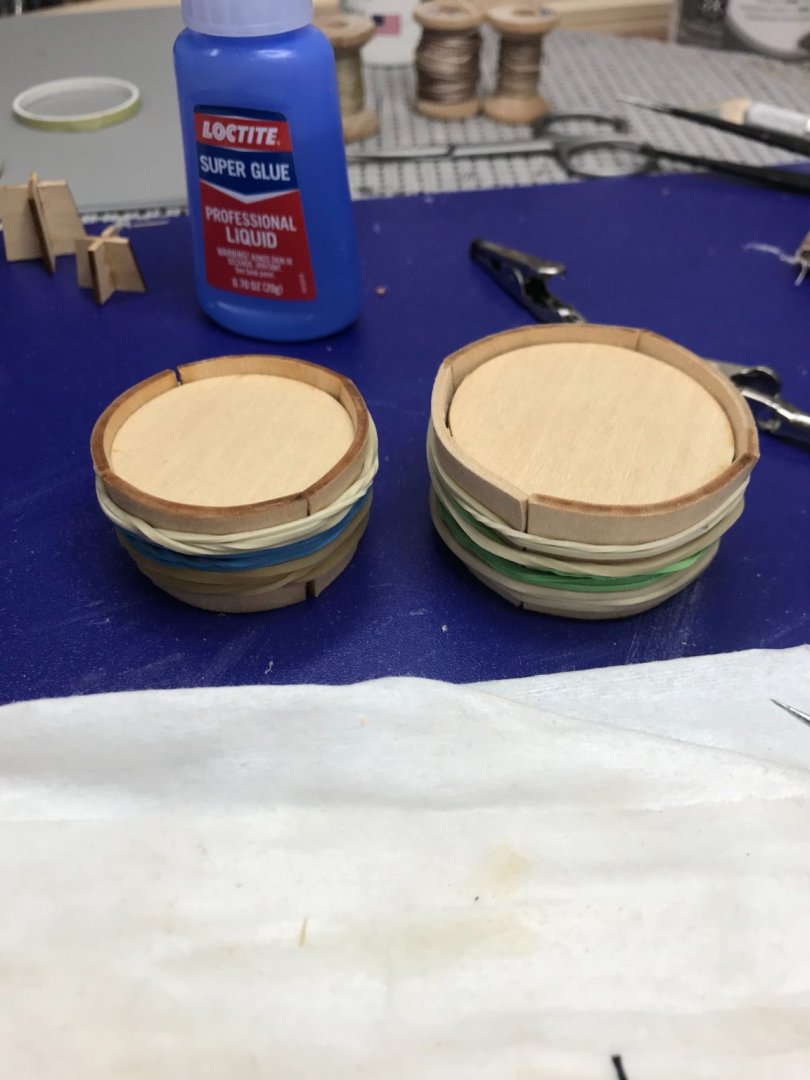
Completed all tubs, casks and buckets. Used Early American stain and a coat of Varathane Clear Satin. Used Testors Striping tape for copper bands and painted them black. cheers 🍻
- 104 replies
-
- 9
-
-
- model shipways
- new bedford whaleboat
- (and 1 more)
-
Oh yes... The book suggest Acrylic Burnt Umber and water, and perhaps a bit of raw sienna. Sounds like a recipe for for realism. 👍 I might throw in a touch of weathered look, a throw back to model railroading. 😆 BTW... Have I mentioned how great the instructions are with this kit? Onwards 😎
- 104 replies
-
- 4
-
-
- model shipways
- new bedford whaleboat
- (and 1 more)
-
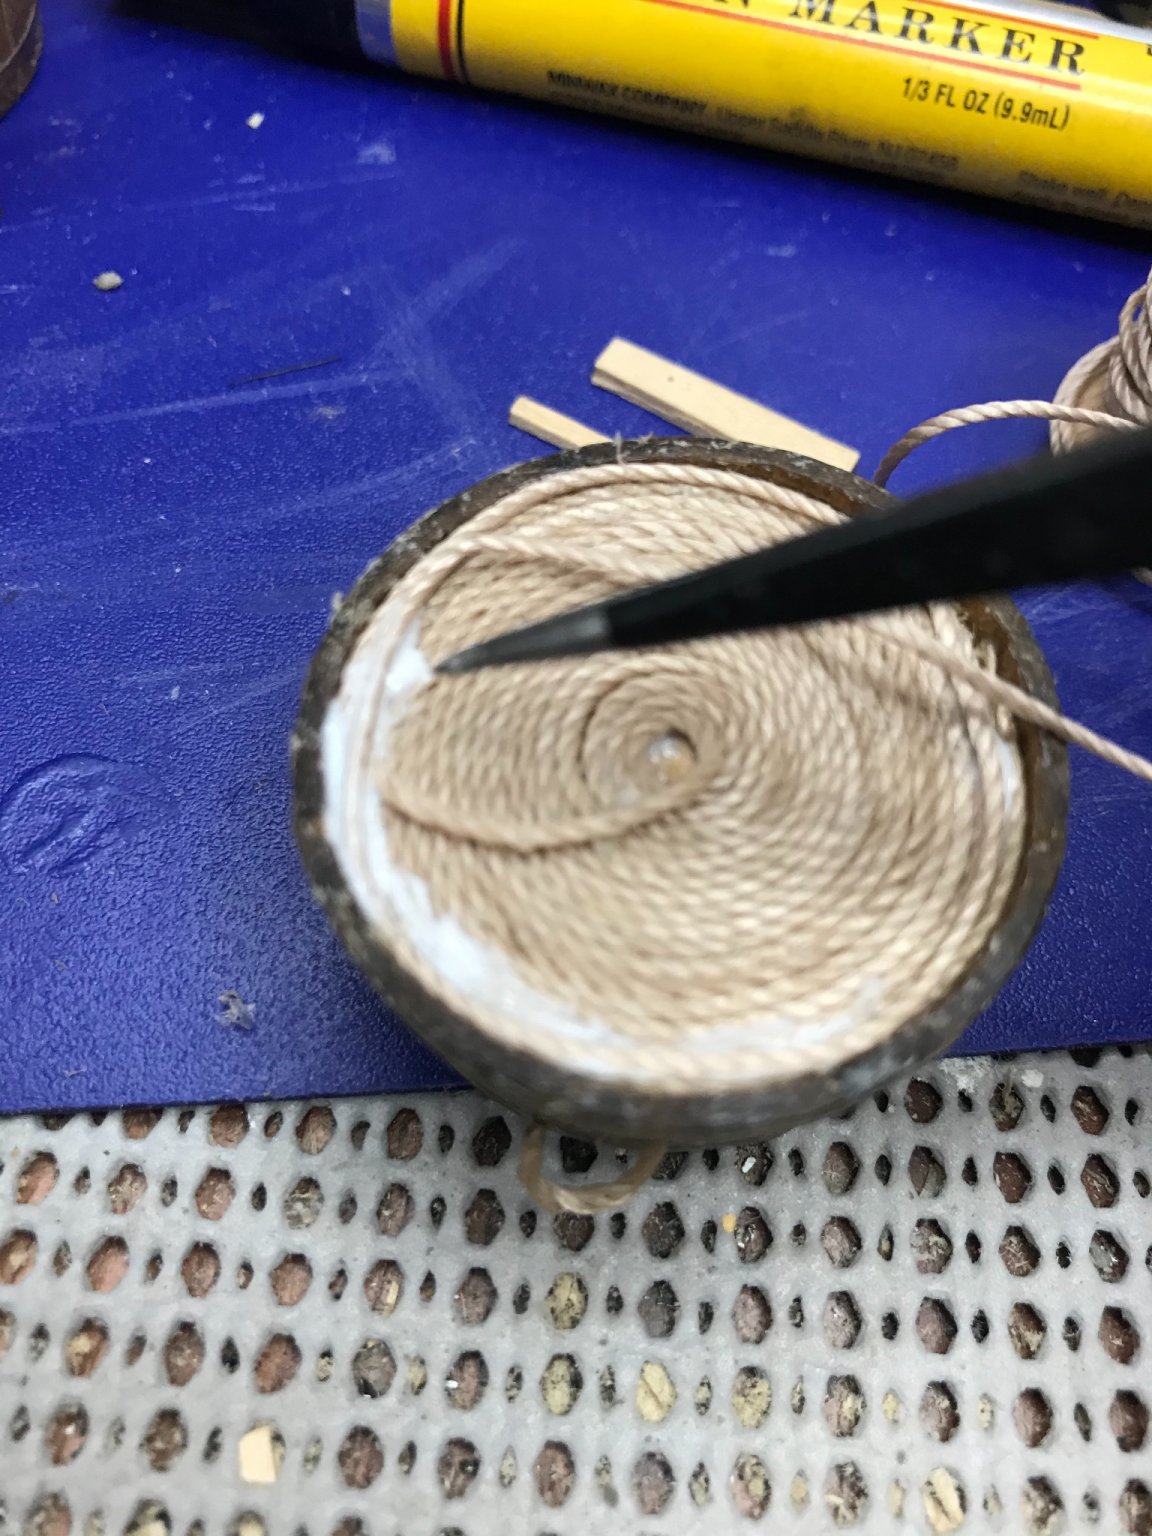
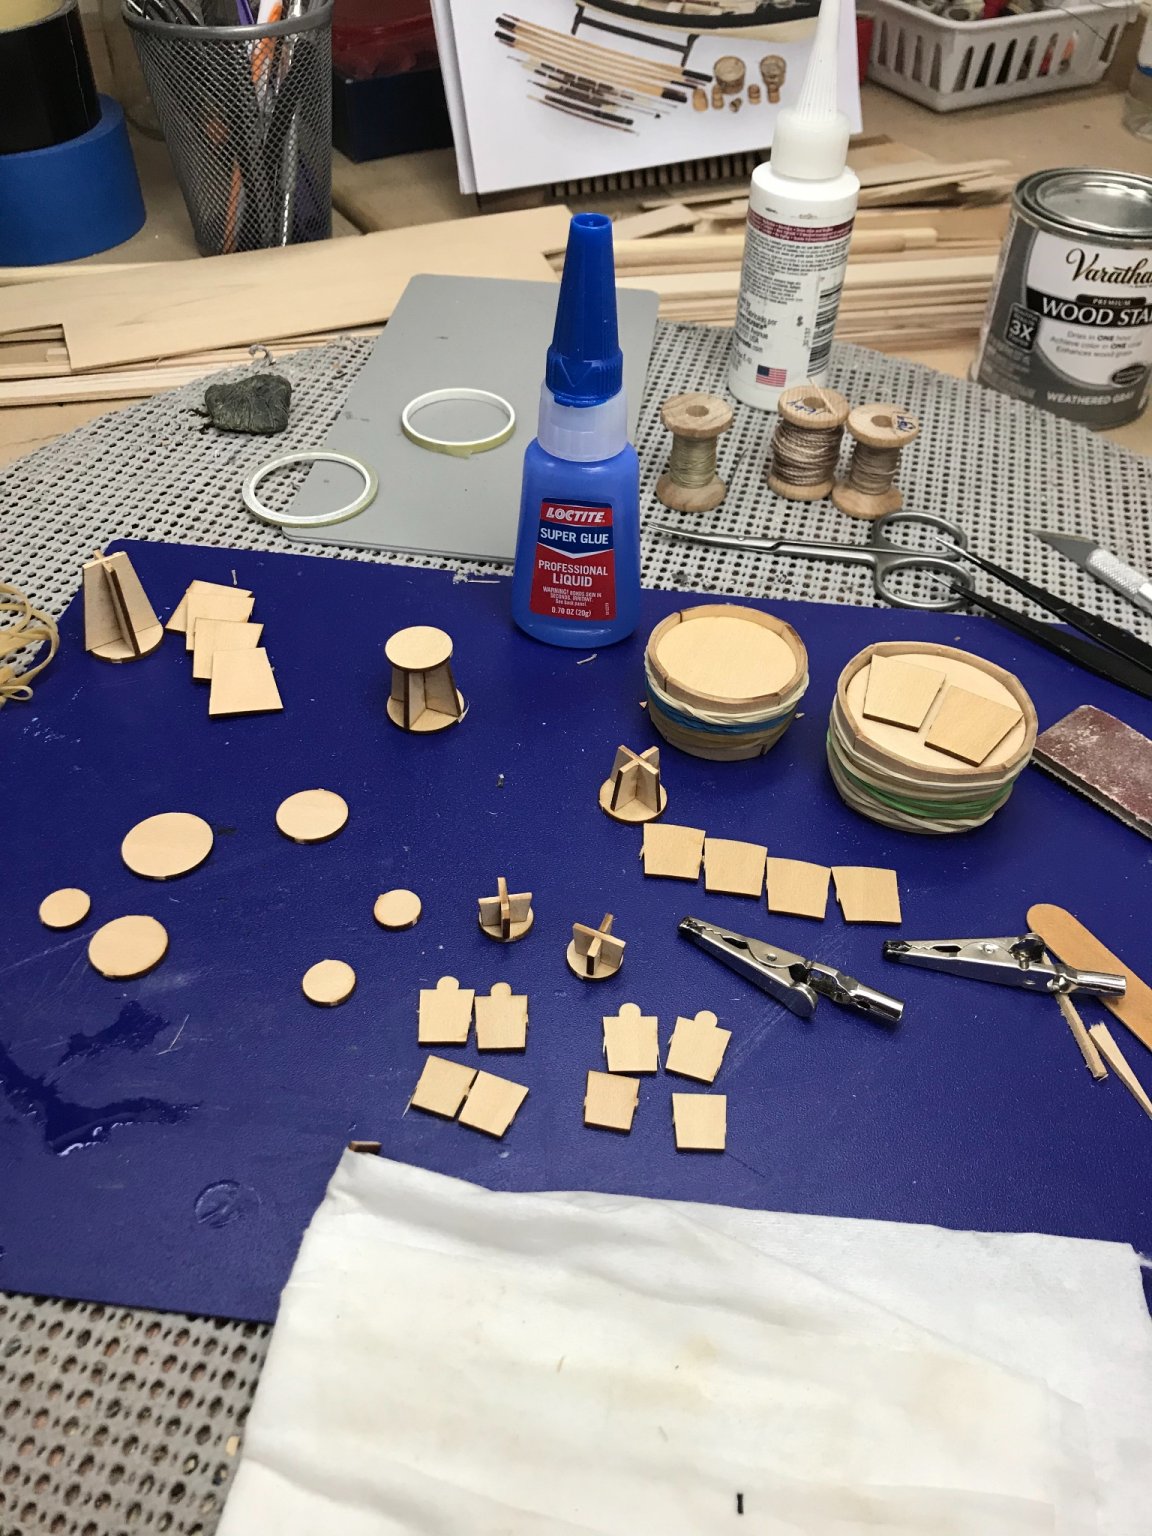
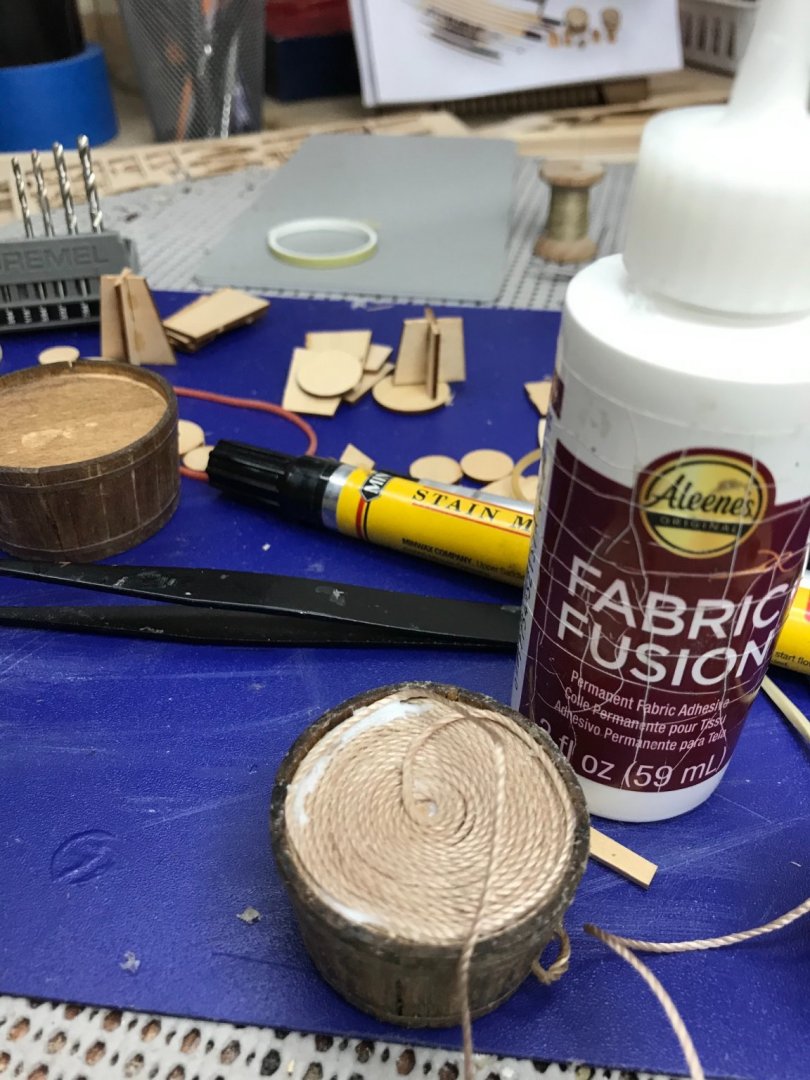
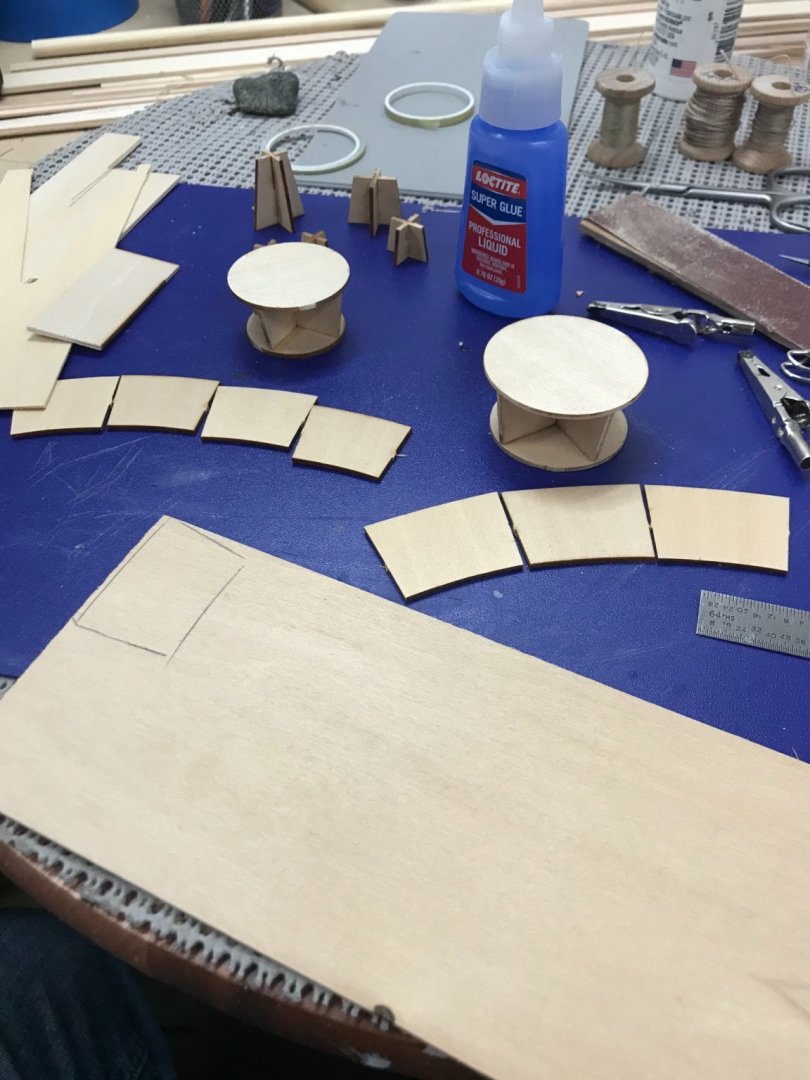
Worked on finishing the Line tubs today. After gluing on the quarter panels I used a needle file to carve the barrel stays into the sides of the line tubs. Drilled holes to install rope handles and Stained the wood... Installing whale line, I used Aleenes Tacky Fabric Glue. Fabric glue looks horrible going on but it does soak in and dries clear. Line Tubs finished. I am thinking 🤔 this rope needs to be stained. Not sure what to use, needs not be so shiny. 😎 Also ran out of line, 5 yards supplied in the kit seems to have gone fast. Fortunately, I found the line at ModelExpo online. Ordered! Went to work on the Lantern Cask. These little guys are tough. It’s taking shape... More fun tomorrow! Cheers 🍻


- 104 replies
-
- 10
-
-
-
- model shipways
- new bedford whaleboat
- (and 1 more)
-
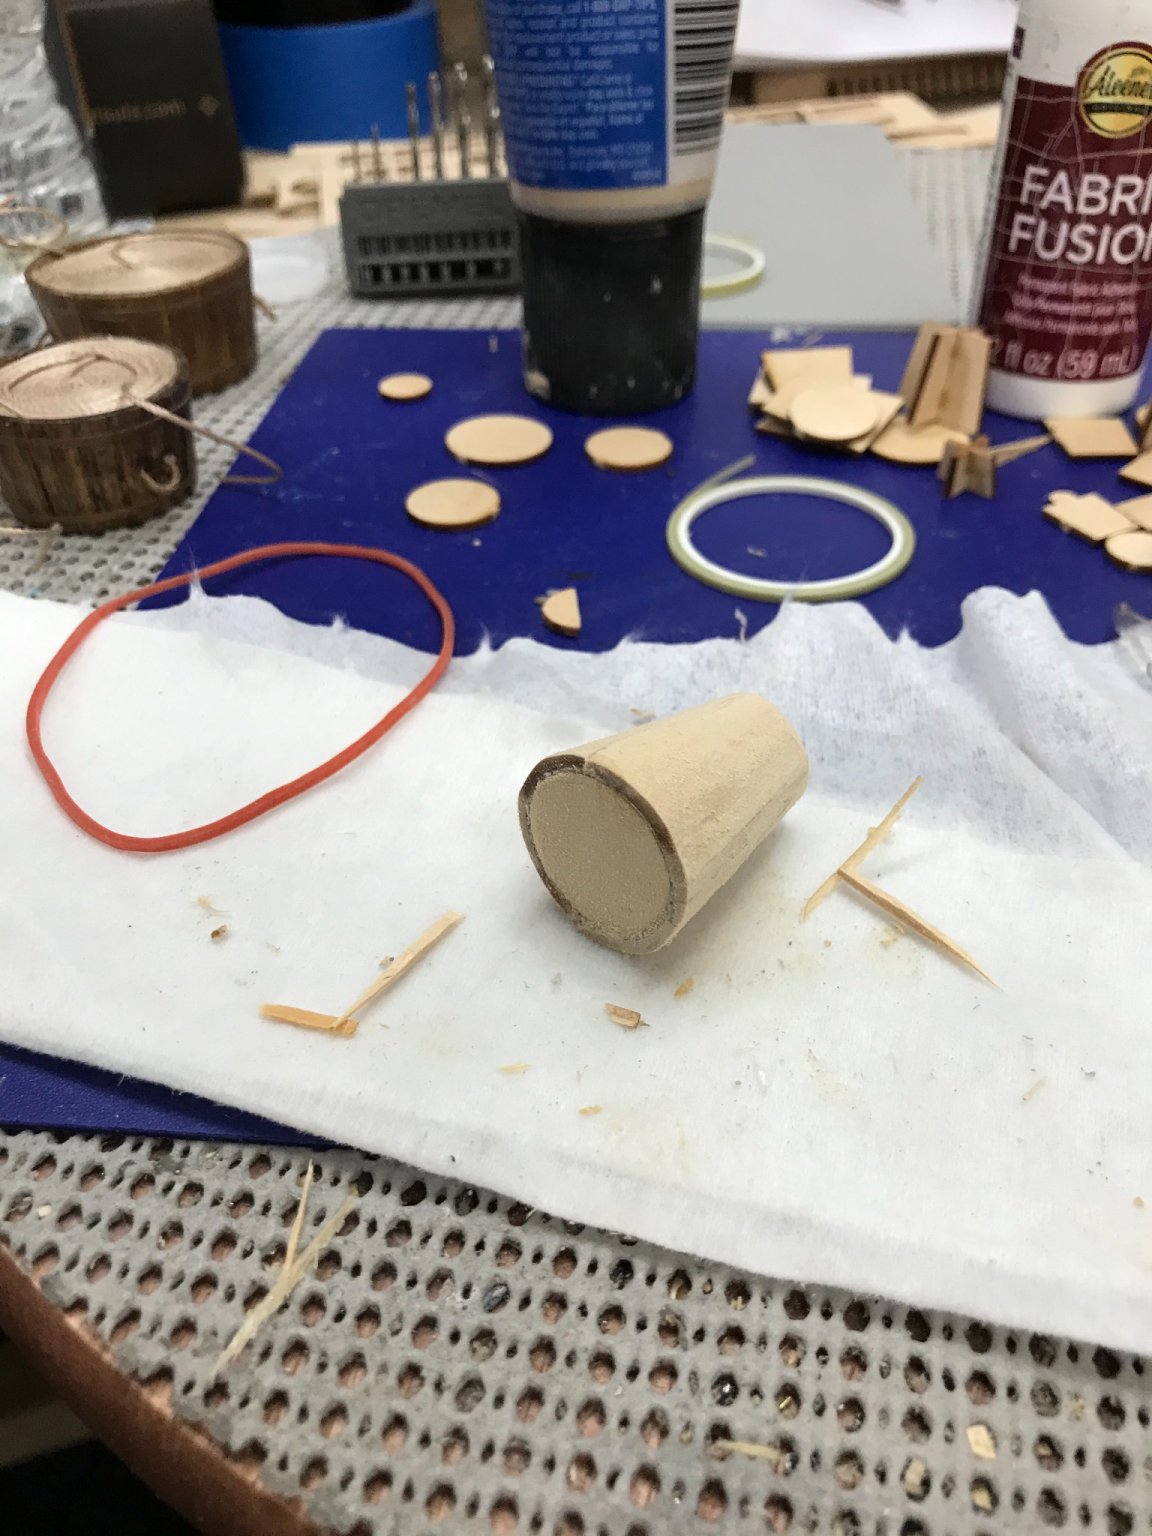
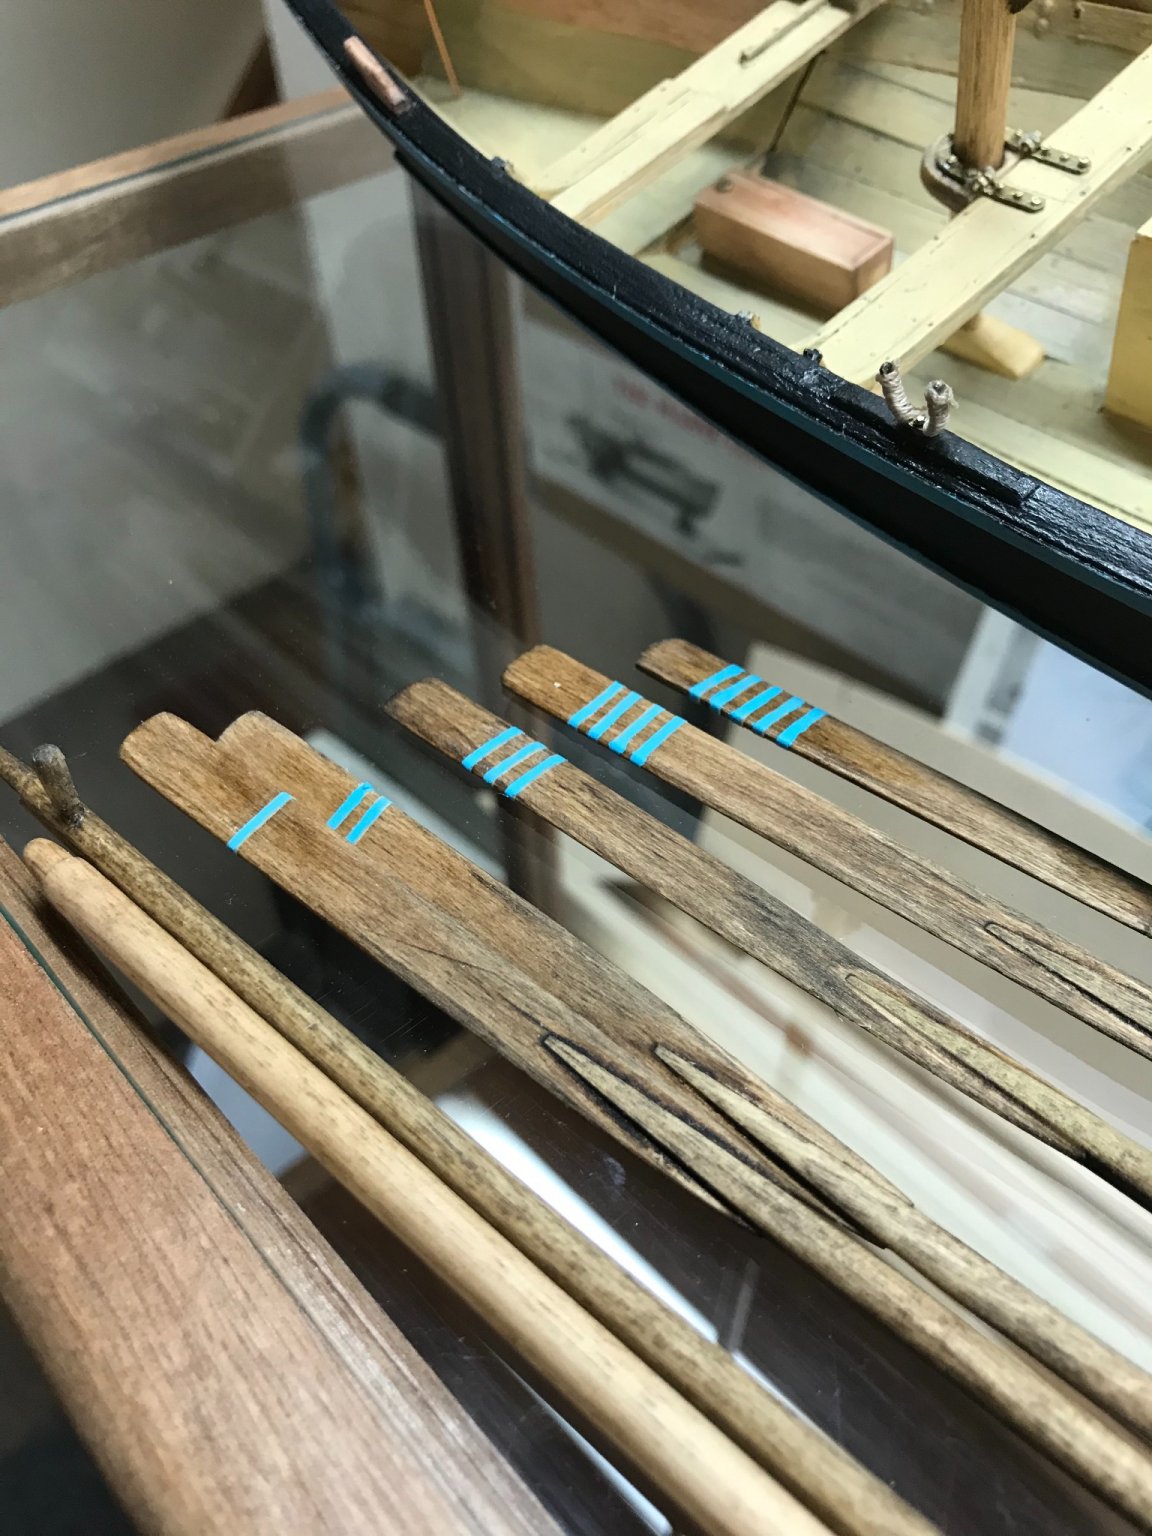
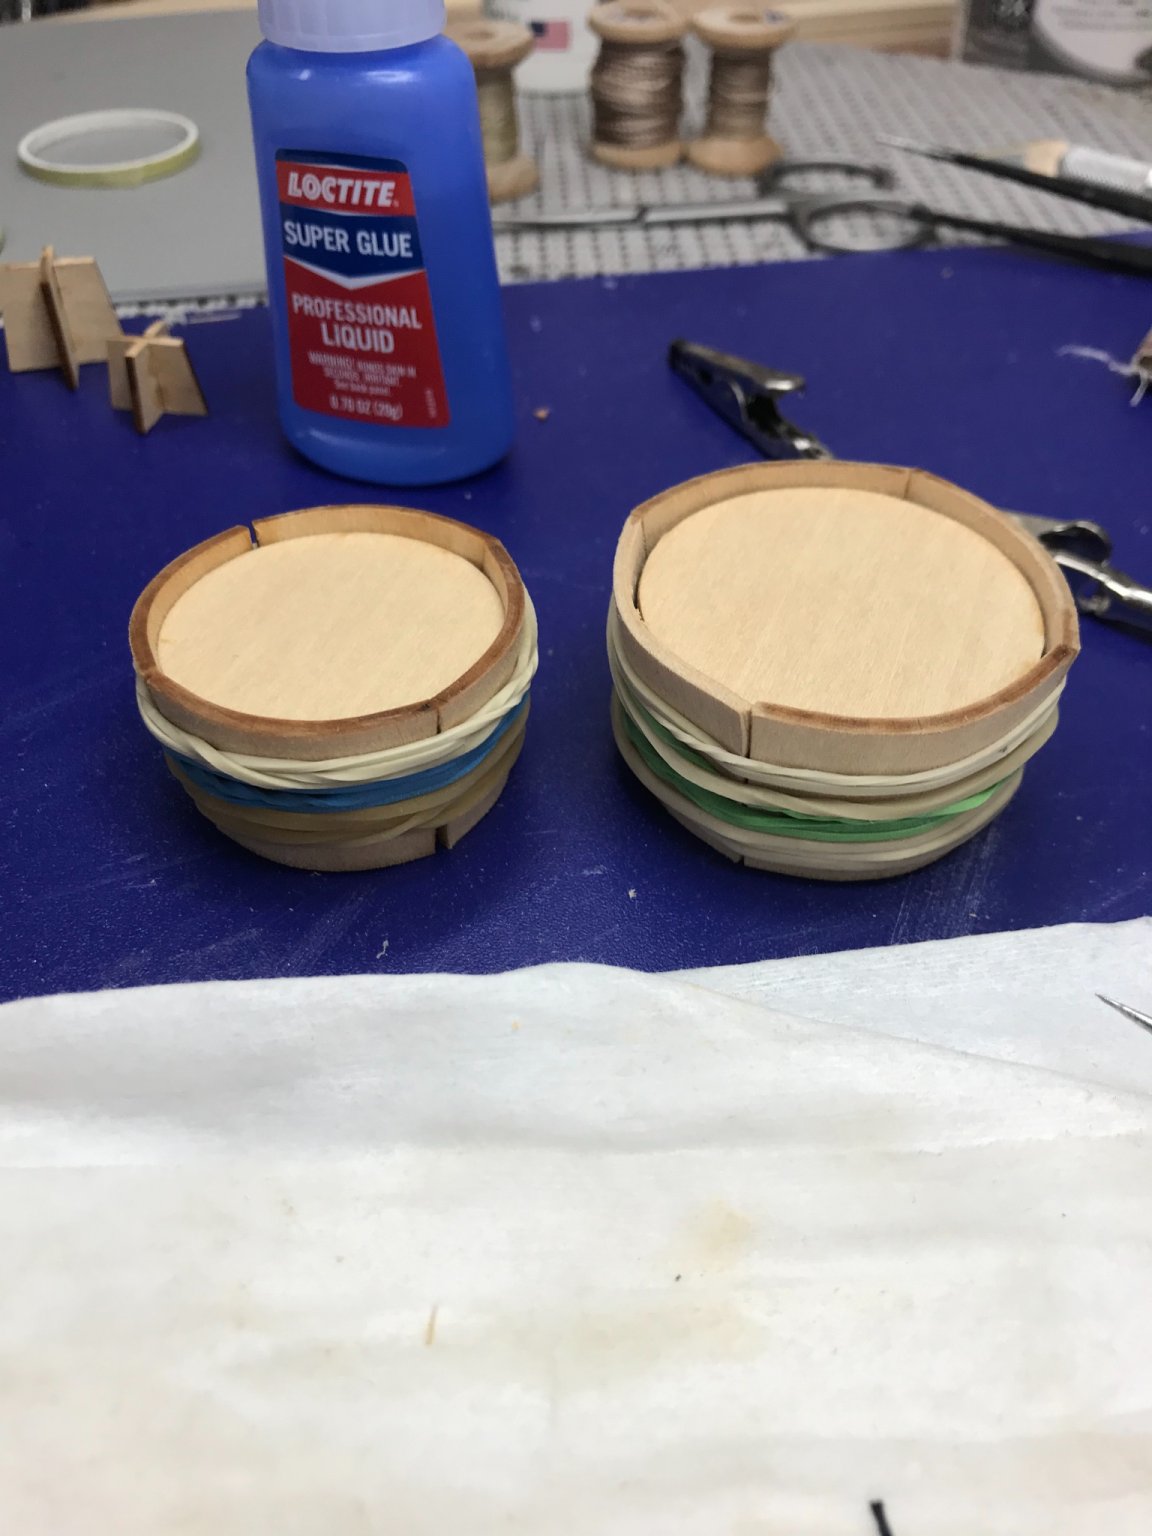
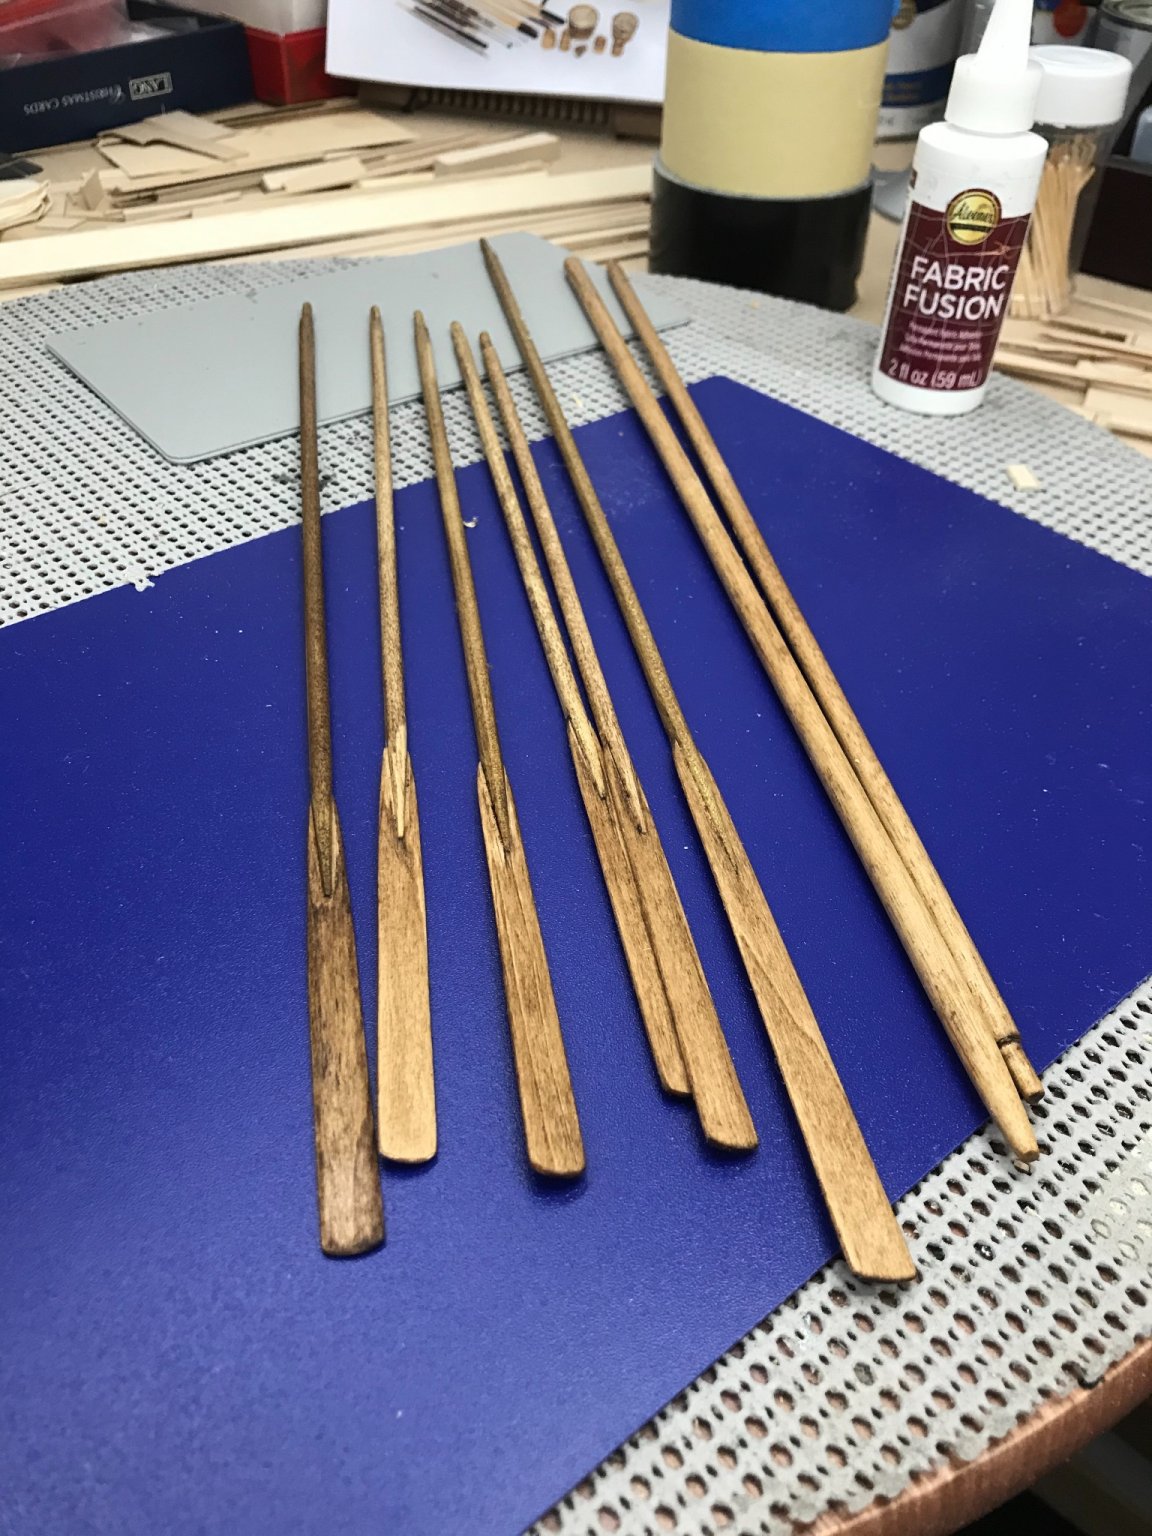
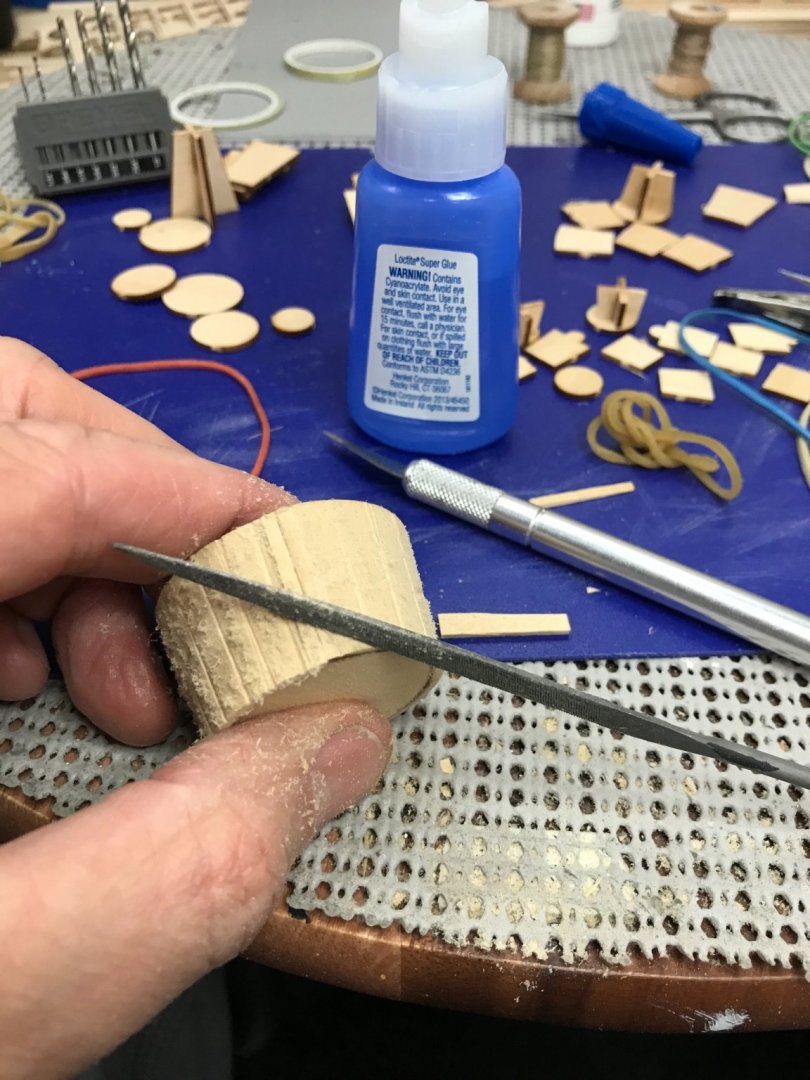
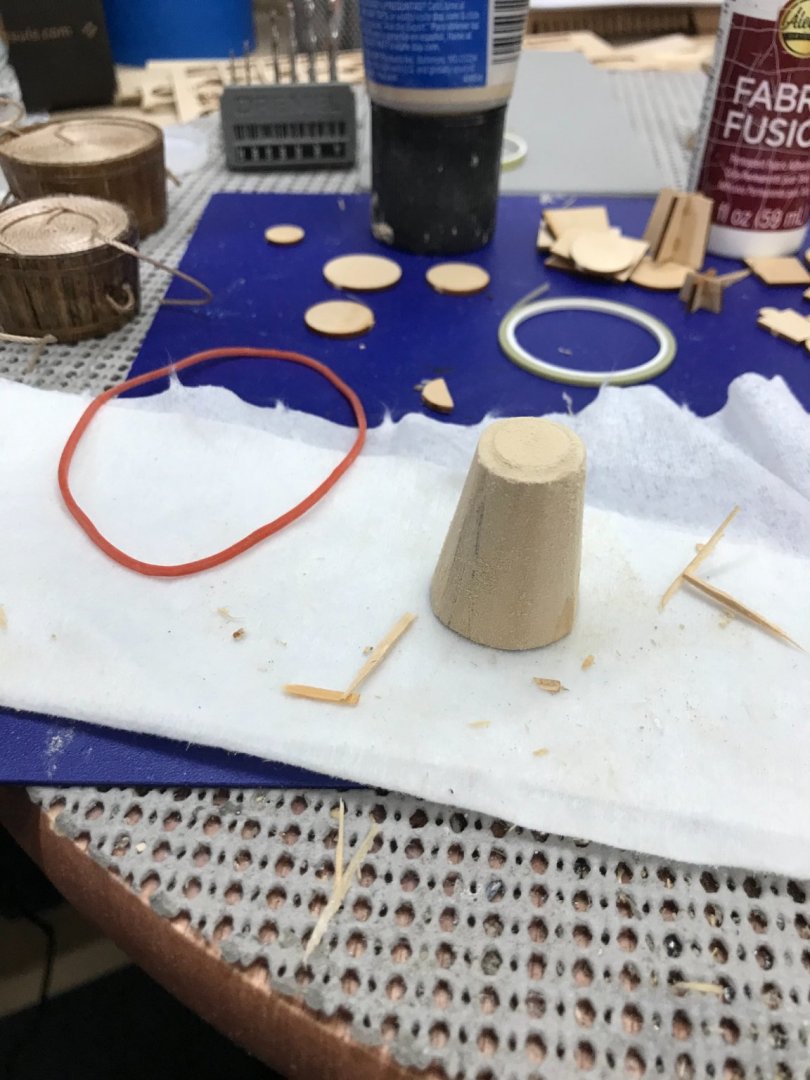
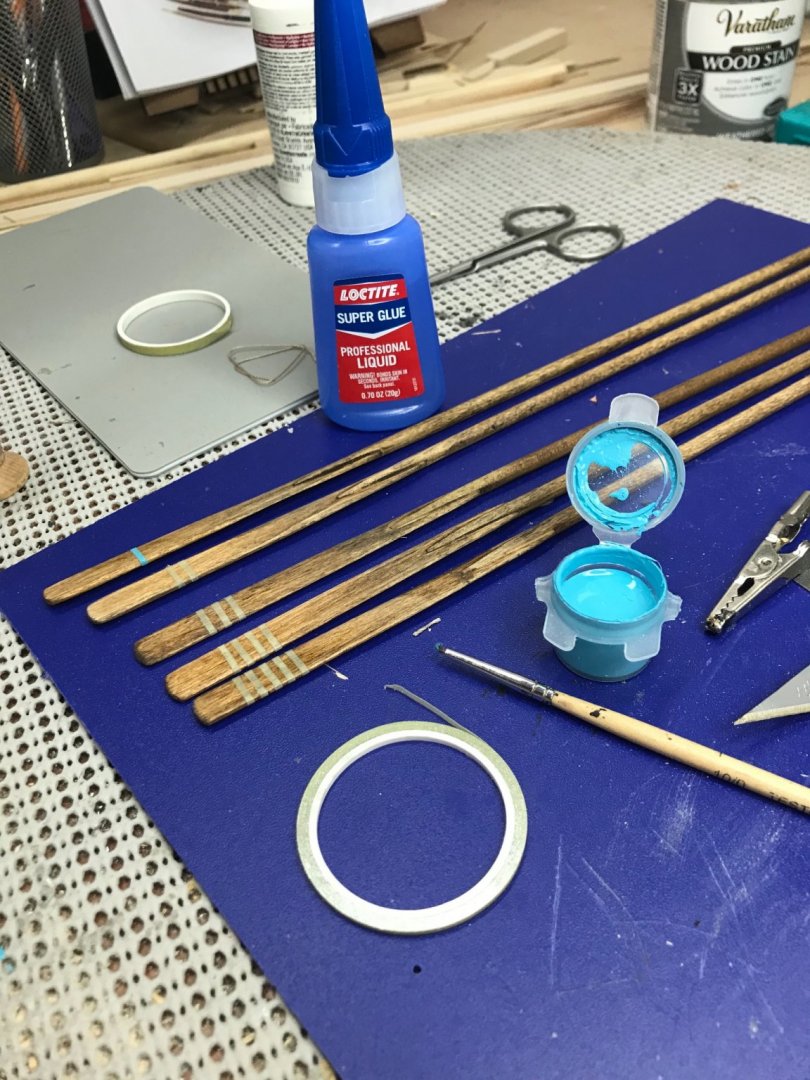
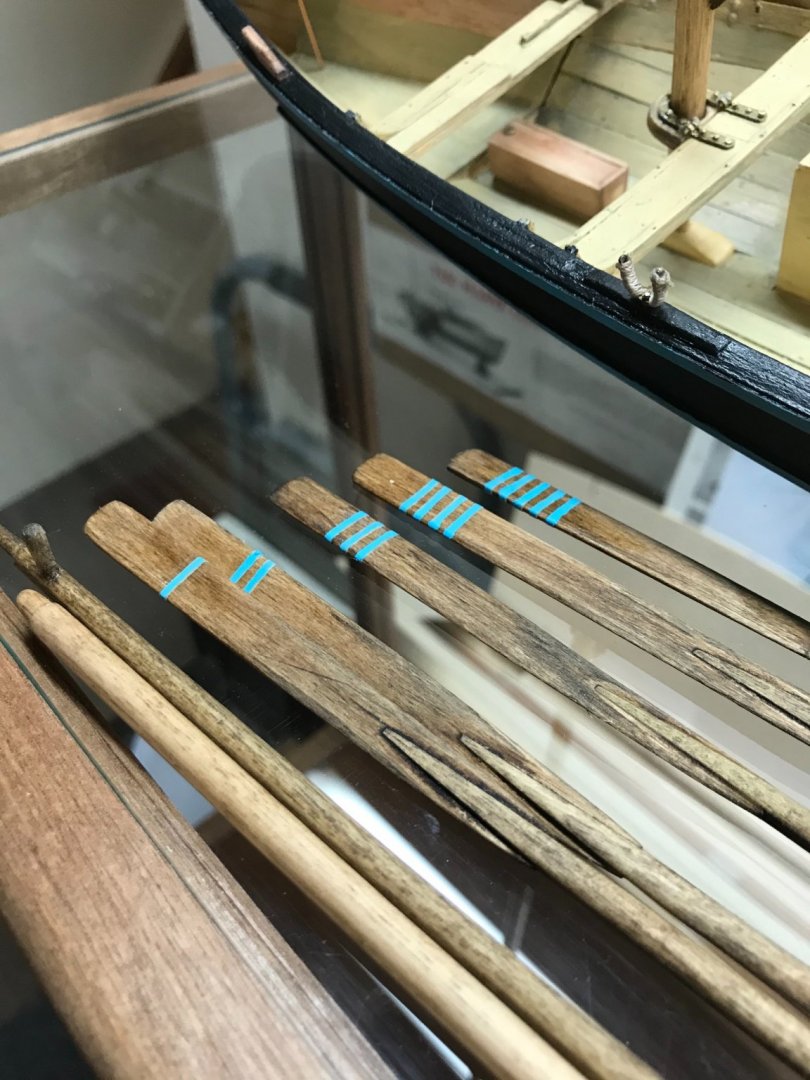
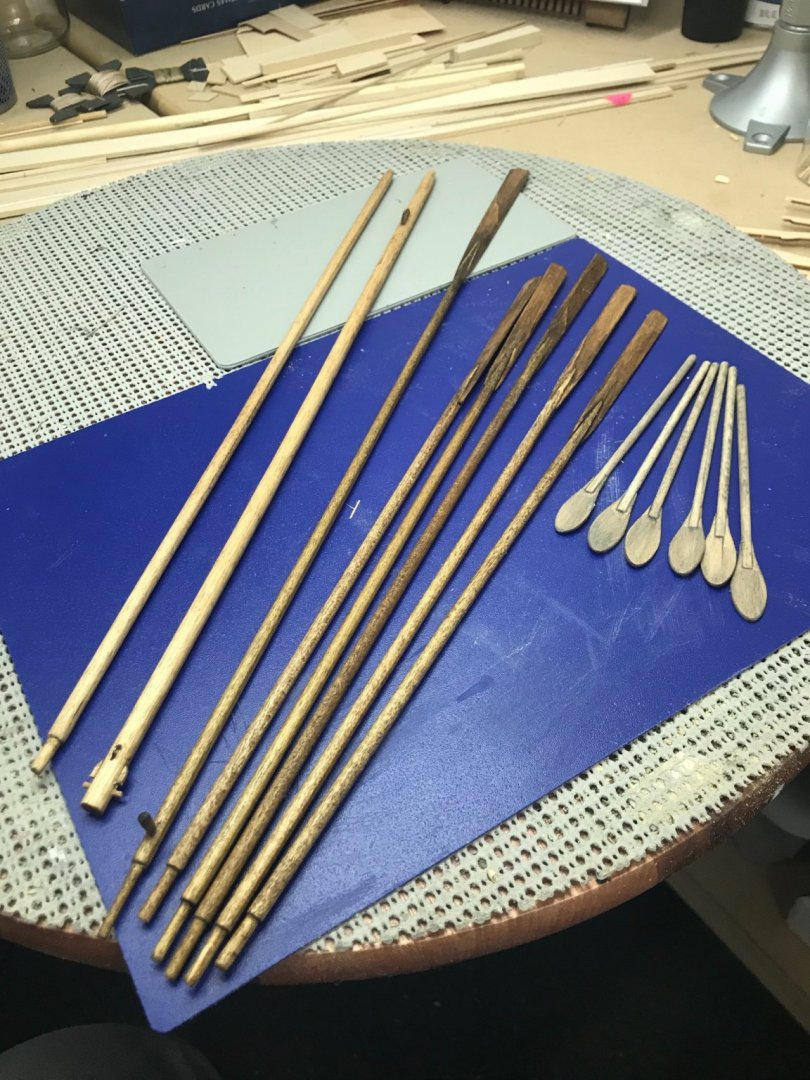
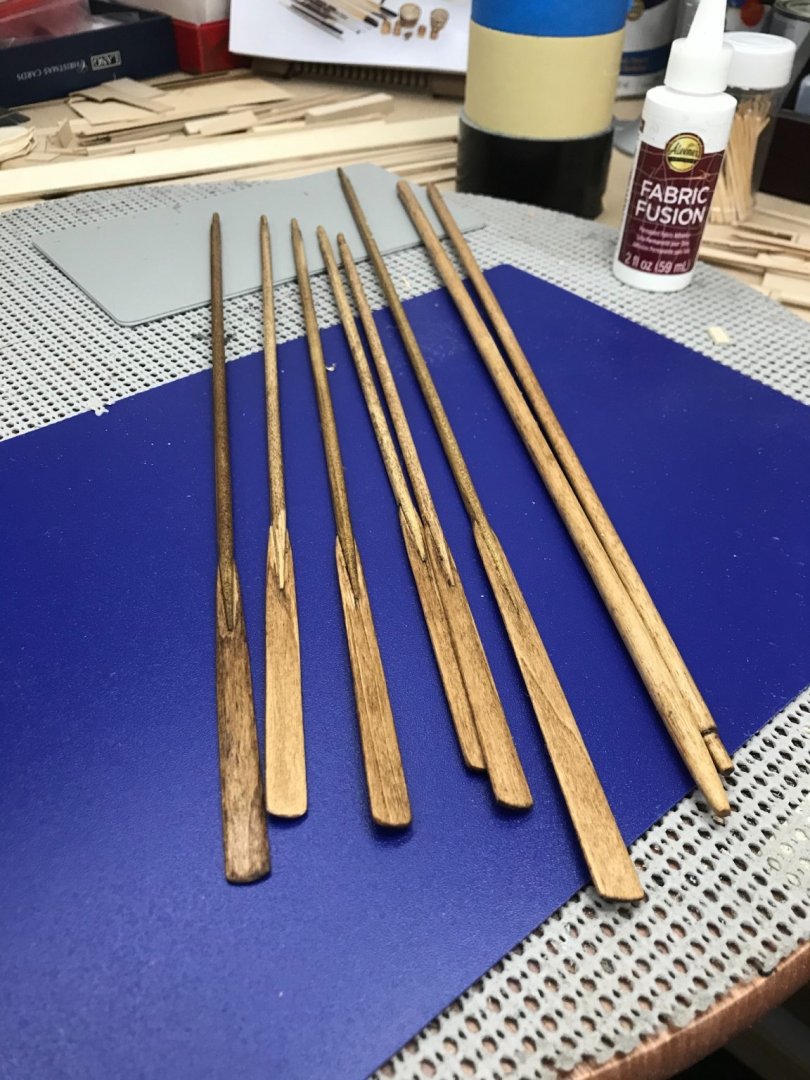
Finished up Oars today... I tried something new and used Testors striping tape sealed with CA glue to paint stripes on the oars. Works quite nicely. 😎 Started building the tubs, casks and buckets. The laser cut materials provided in the kit was short 1/4 of the large line tub stays. Fortunately, my lumber yard had some raw materials. 😆 Soaked one side of the barrel stays with water to allow them to bend. Held in place with rubber bands until set. I’ll trim up for a better fit and glue tomorrow. After drying overnight. Progress, one day at a time. Tomorrow’s another day. Really like working with this scale vs 1/96th. 😎


- 104 replies
-
- 10
-
-
-
- model shipways
- new bedford whaleboat
- (and 1 more)
-
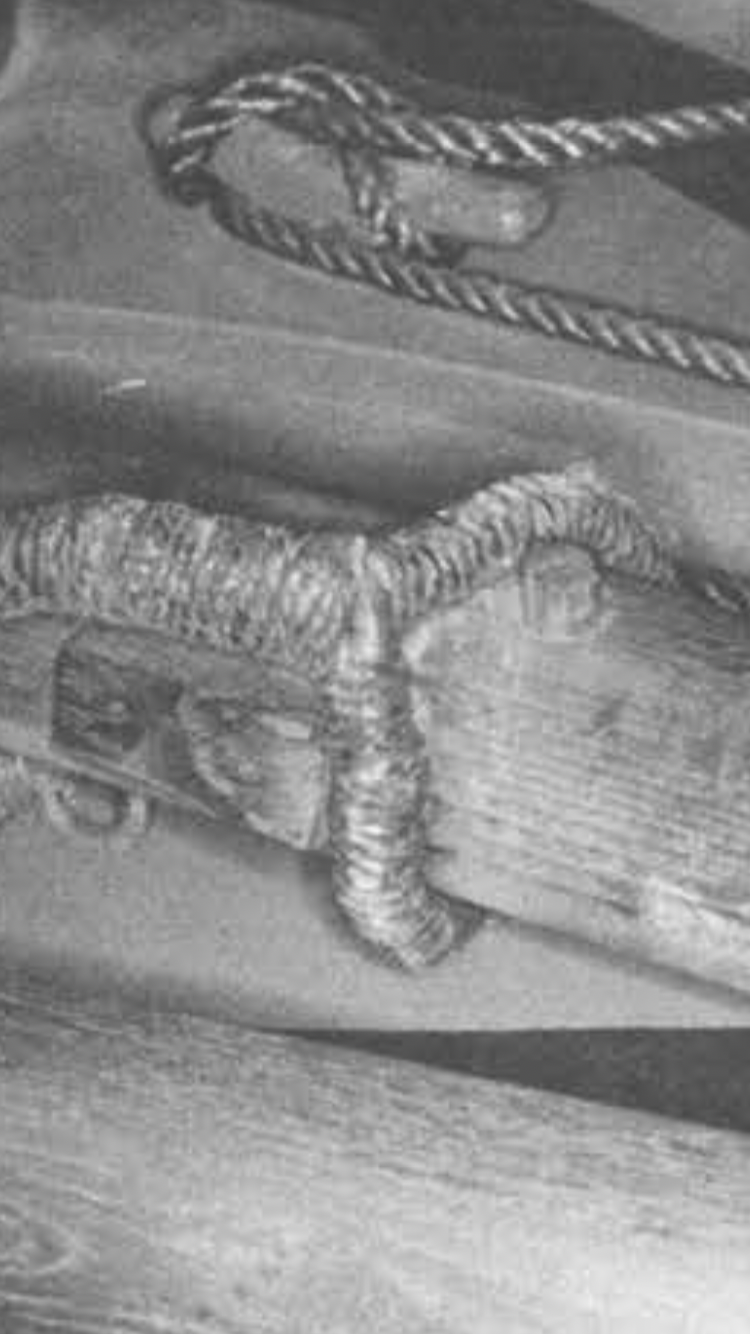
RowLocks padded and Lanyards attached. 😎 Cheers 🍻

- 104 replies
-
- 5
-
-
- model shipways
- new bedford whaleboat
- (and 1 more)
-
Yes you may... You are correct sir... I don’t know how I missed that? Heres is the photo out of the book. Glad you caught it before I was hanging shrouds, I would hate having to fix it then. 😆 Thanks also for your compliments on the Pad, that was tough and tedious. This is why I like MSW, we keep each other towing the line. 🍻cheers

- 104 replies
-
- 3
-
-
-
- model shipways
- new bedford whaleboat
- (and 1 more)
-
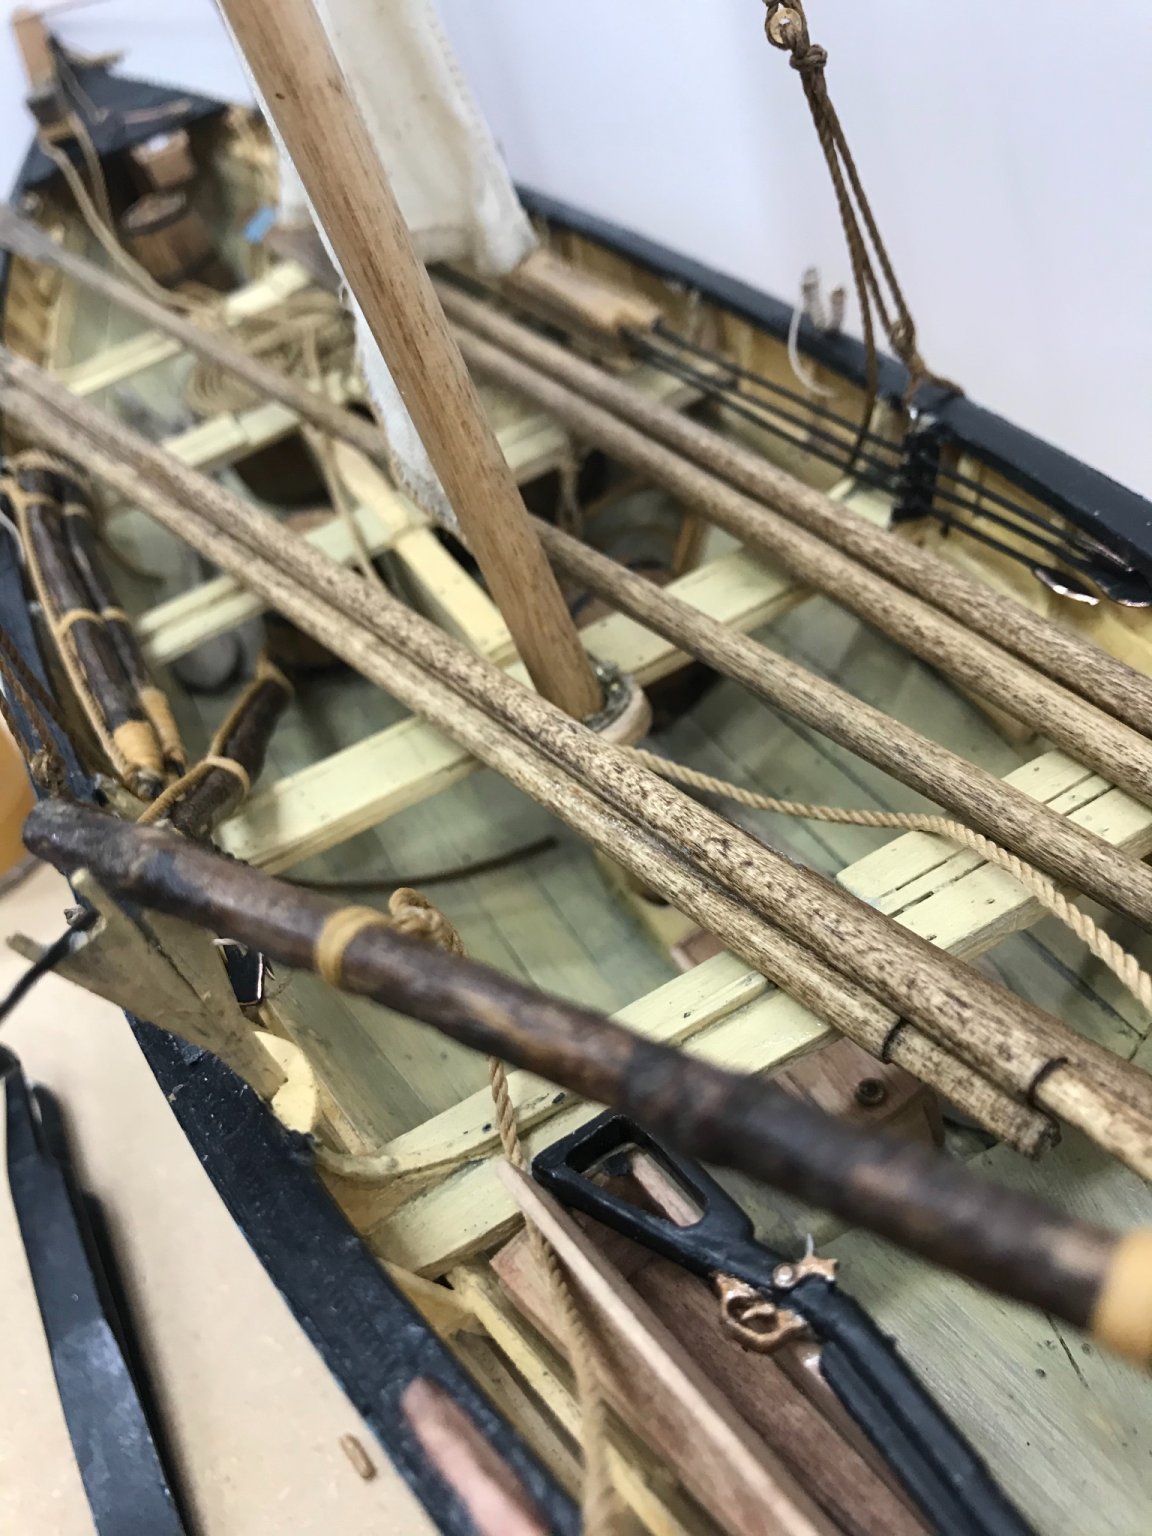
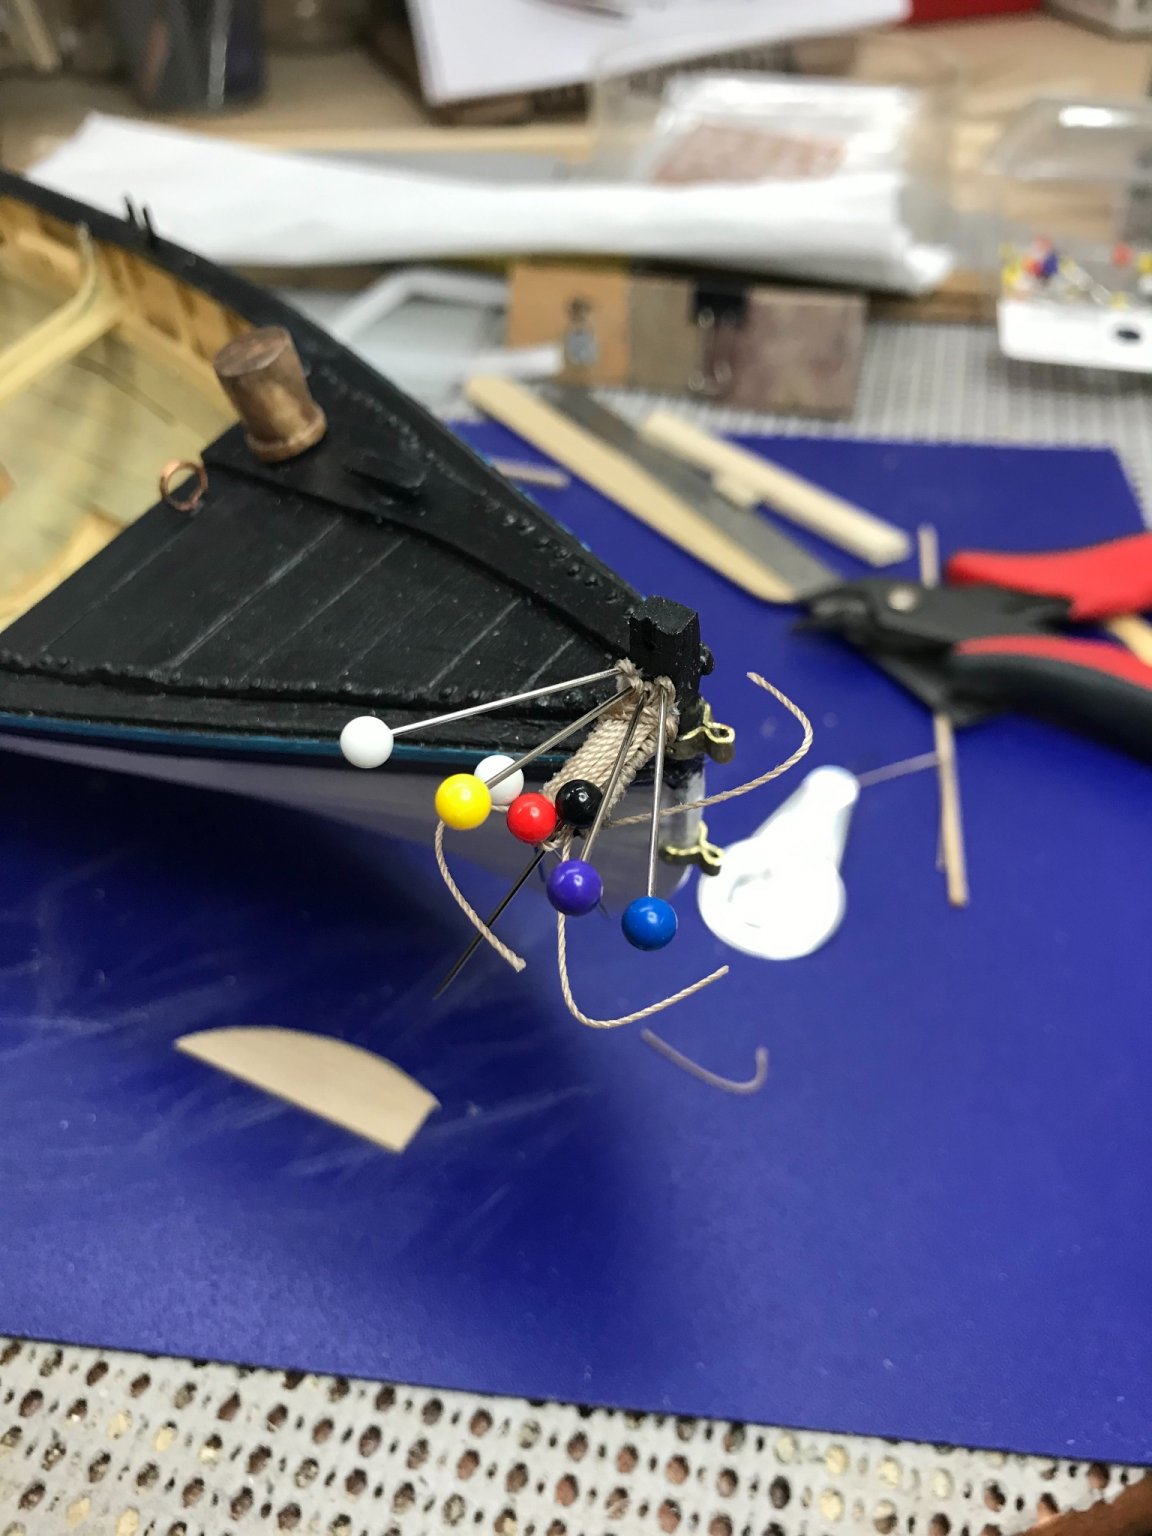
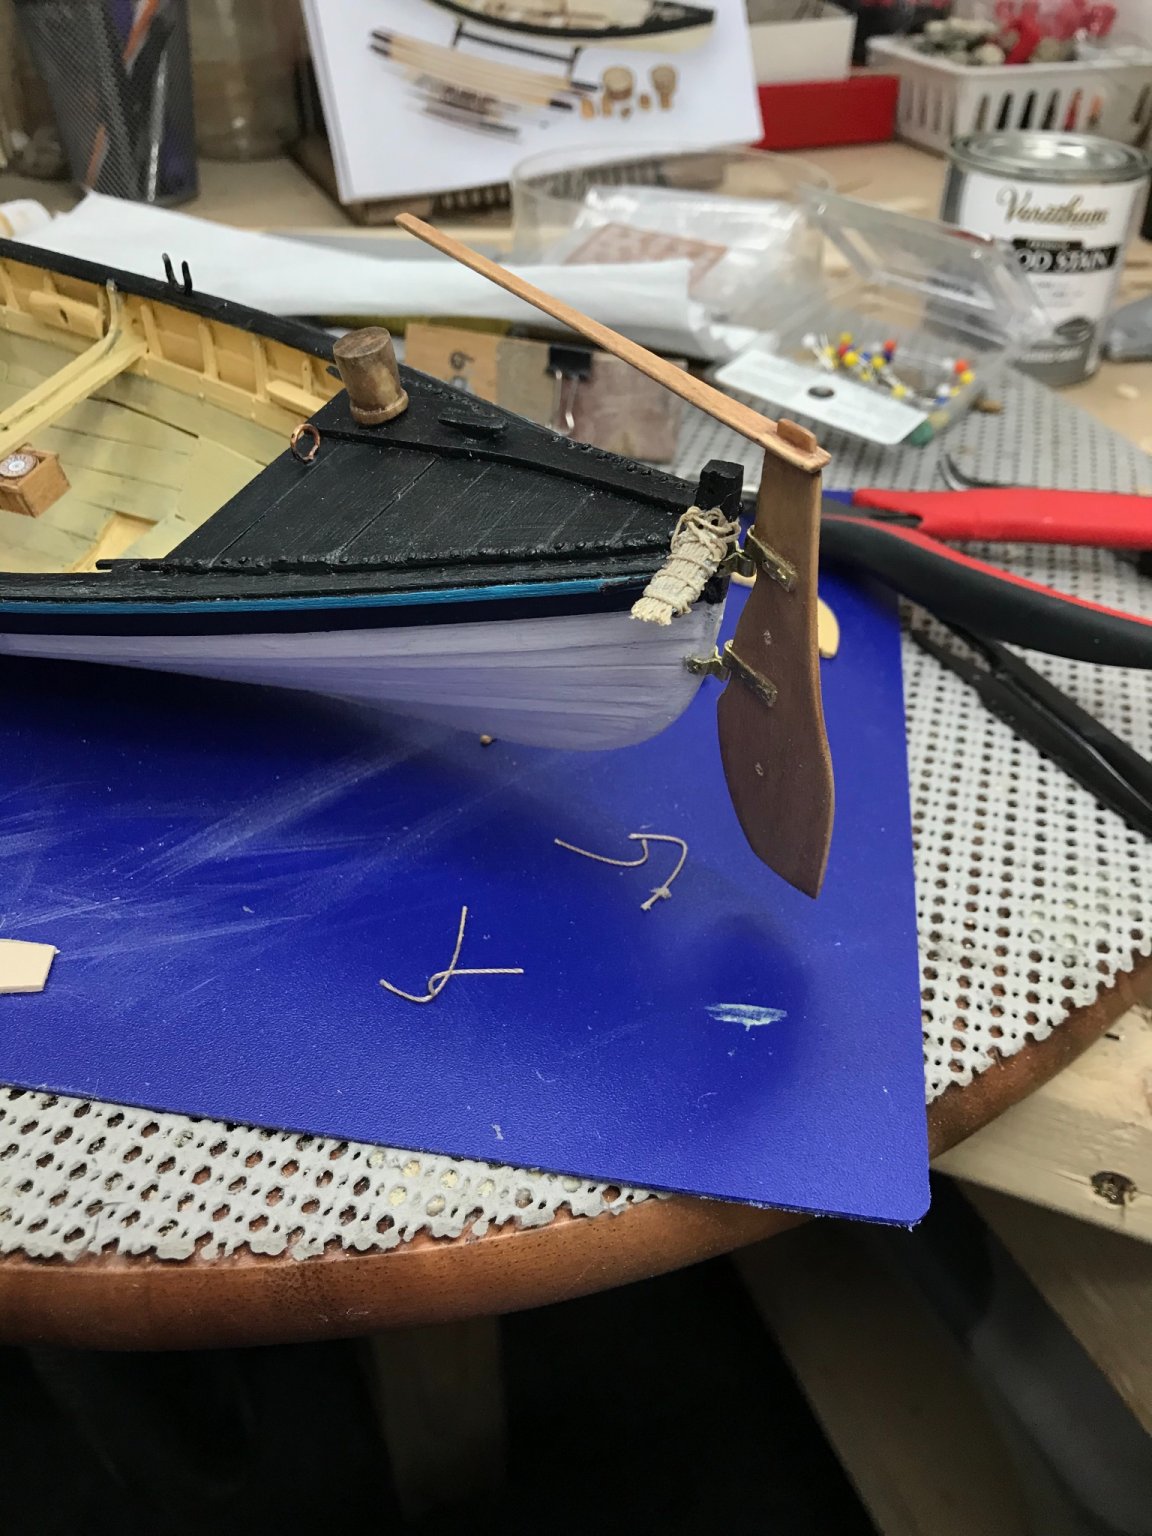
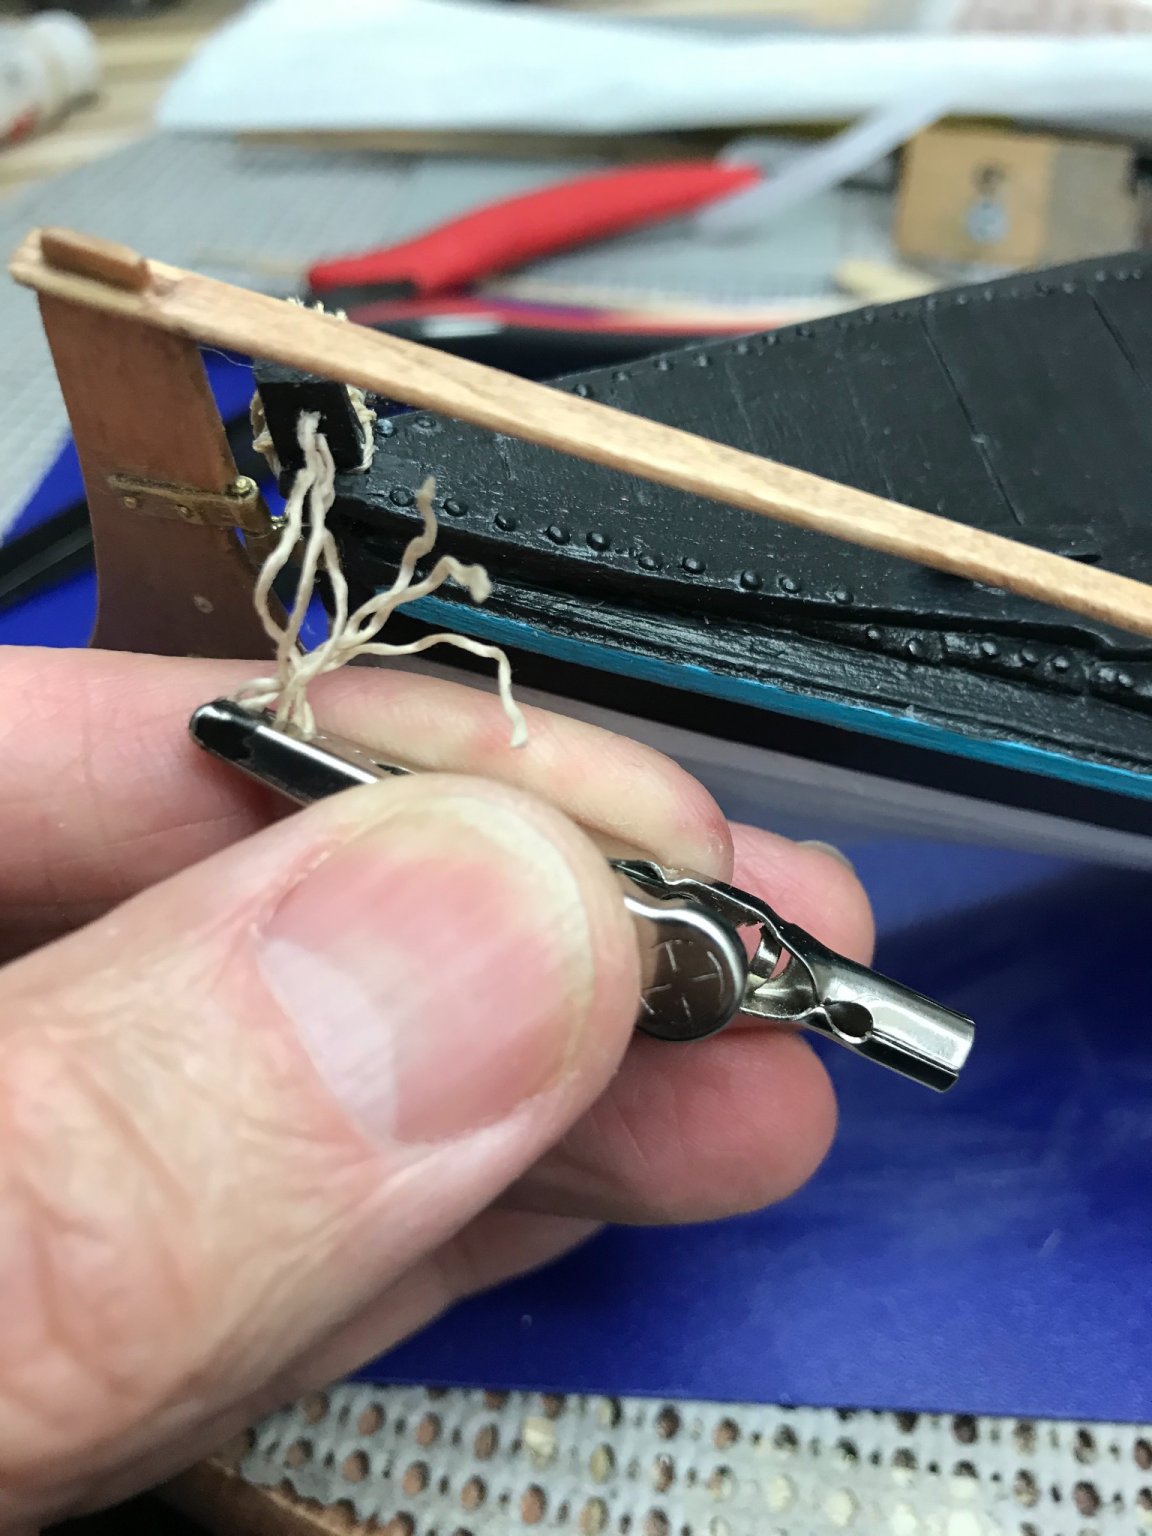
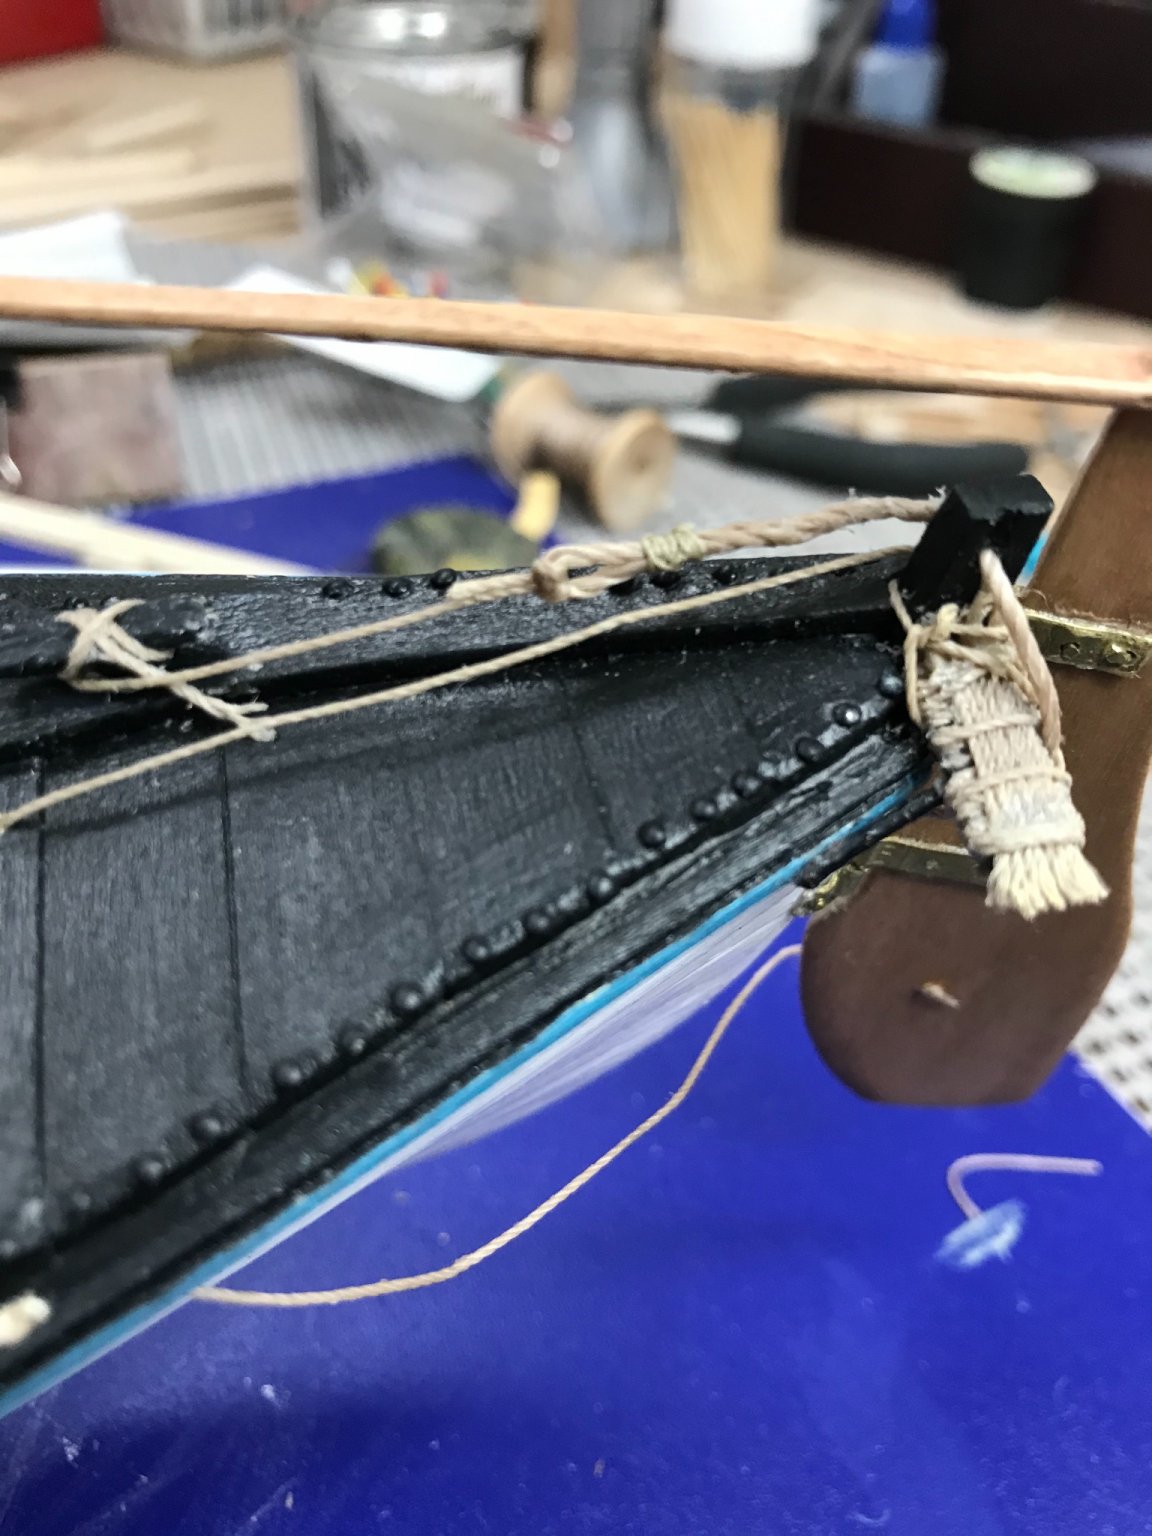
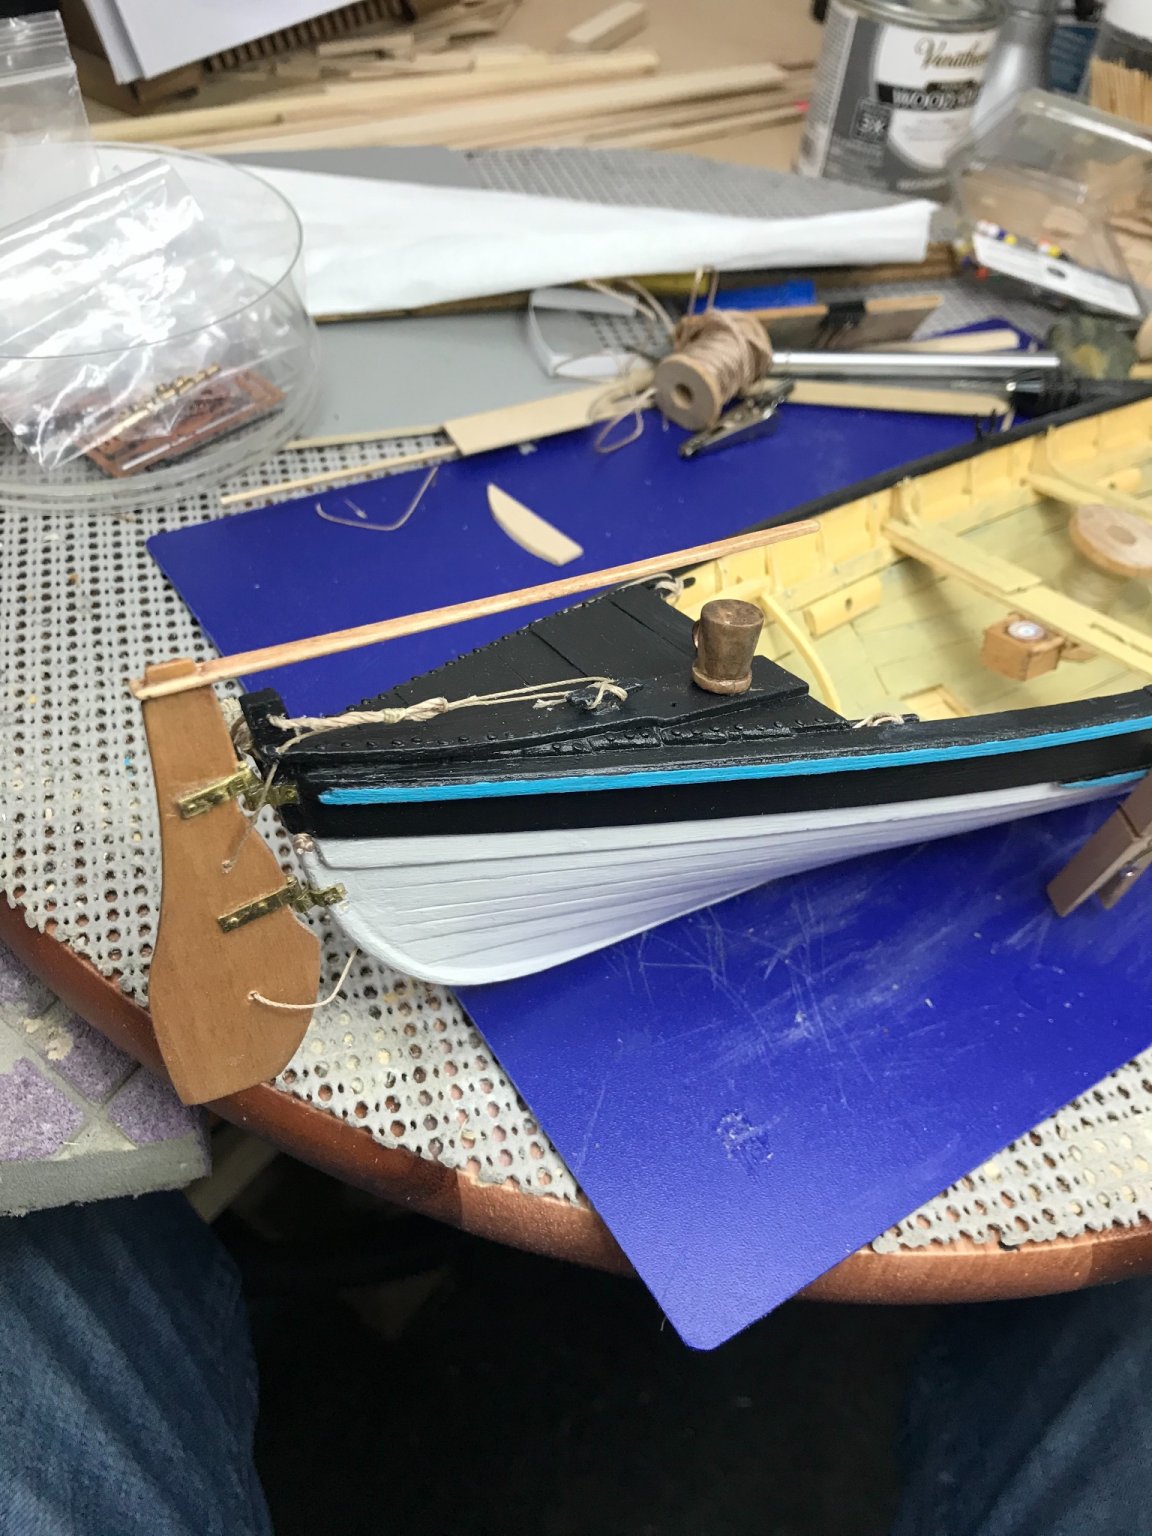
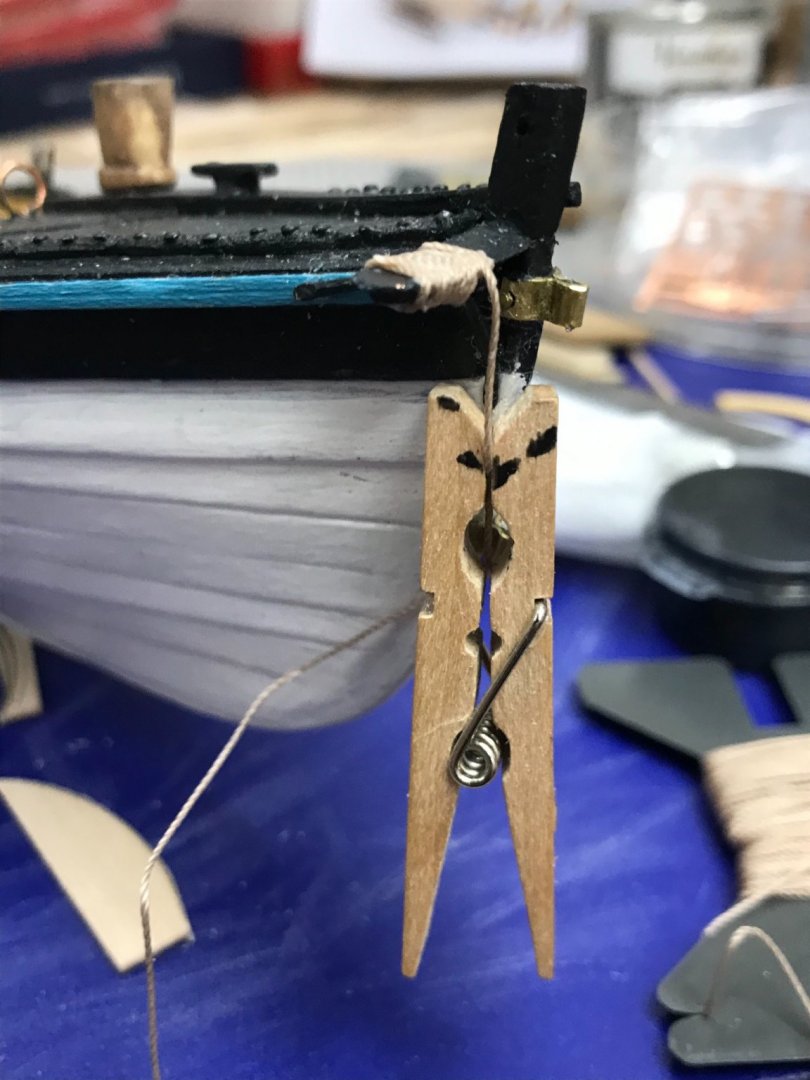
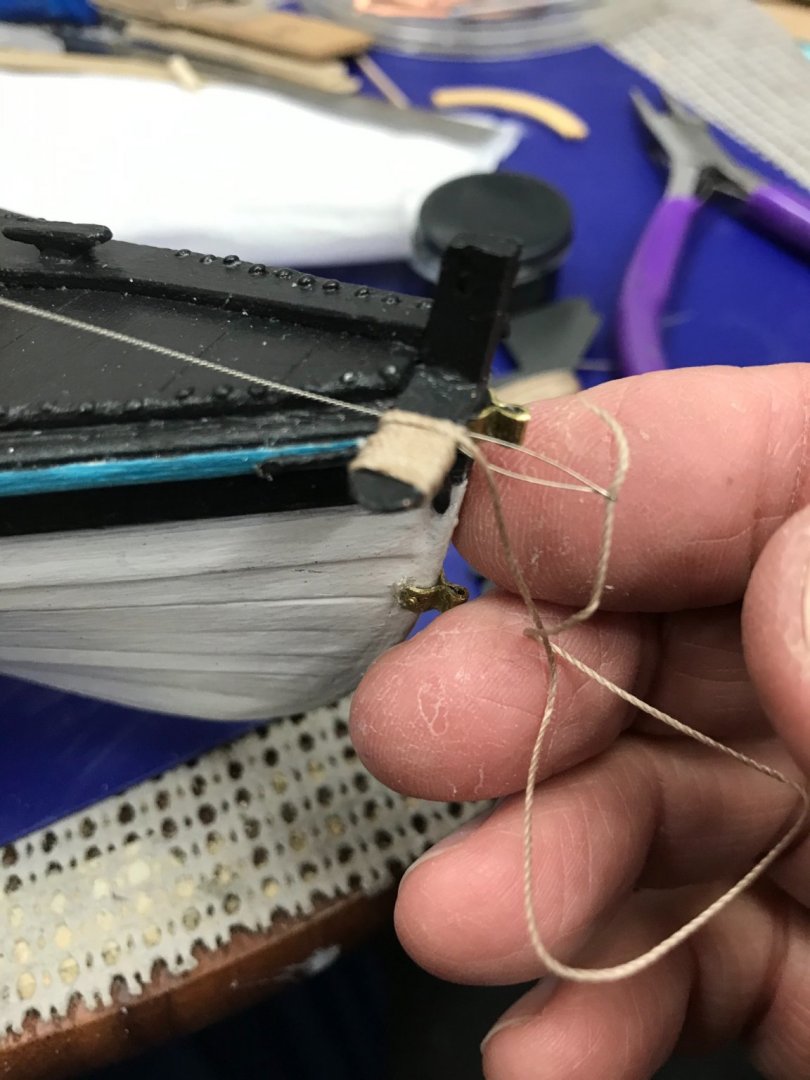
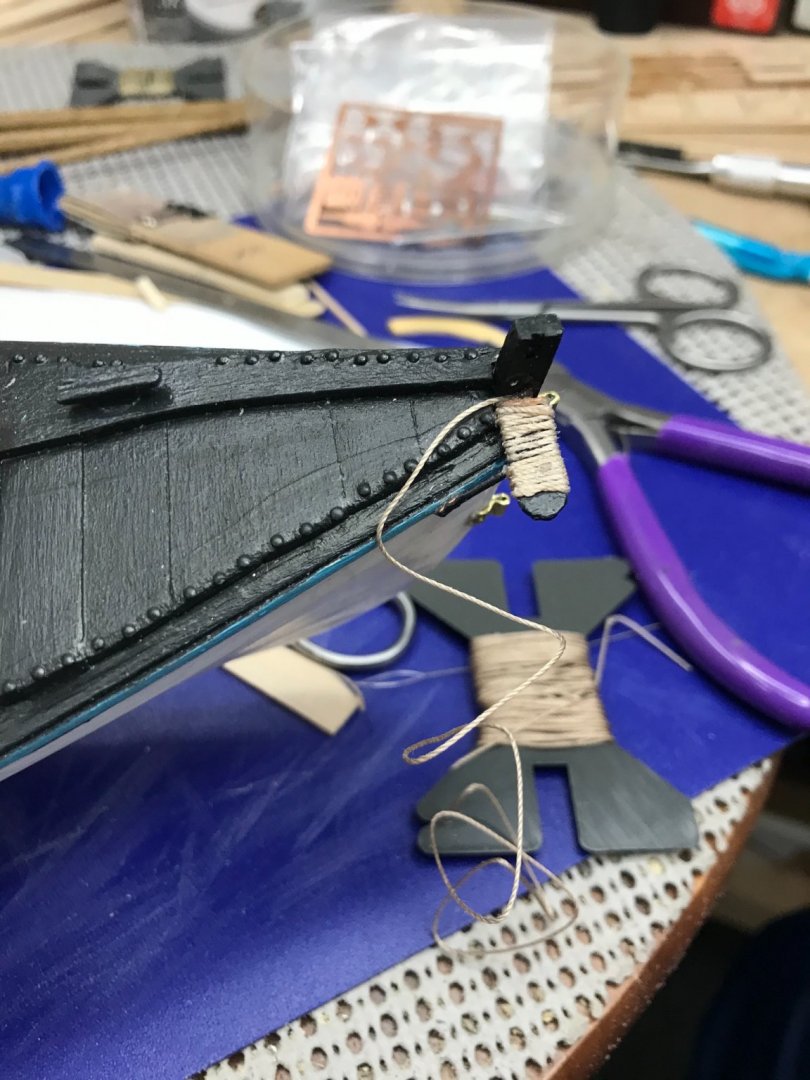
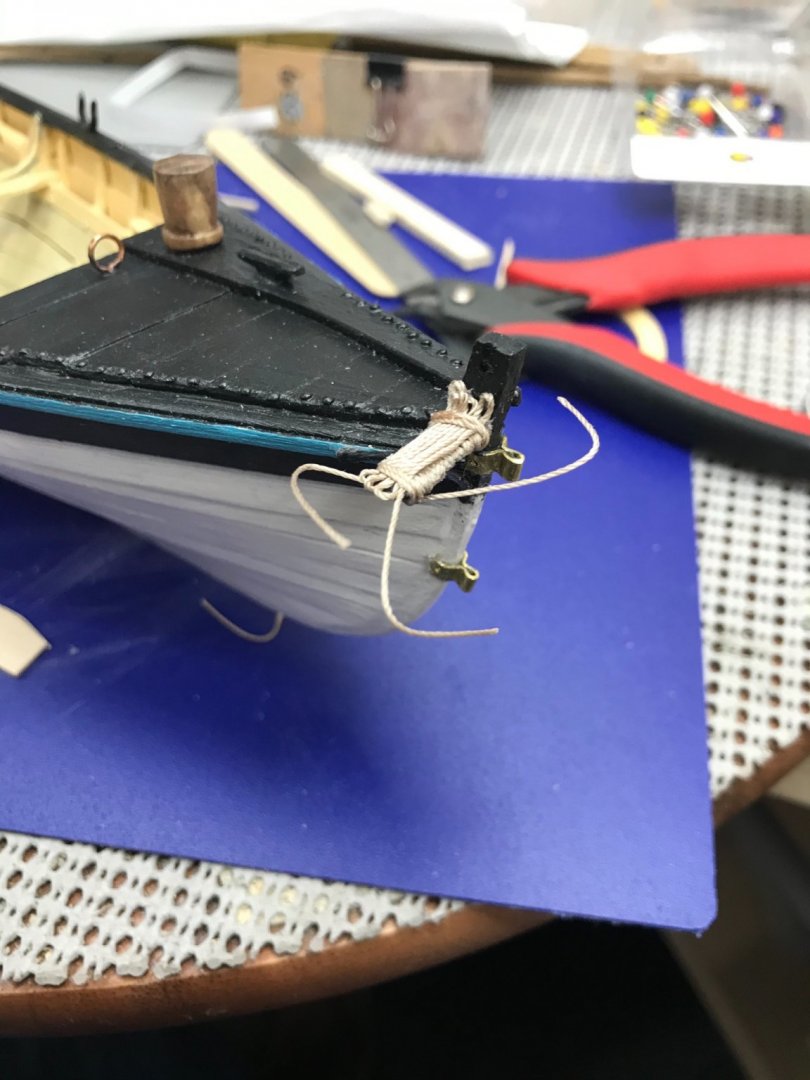
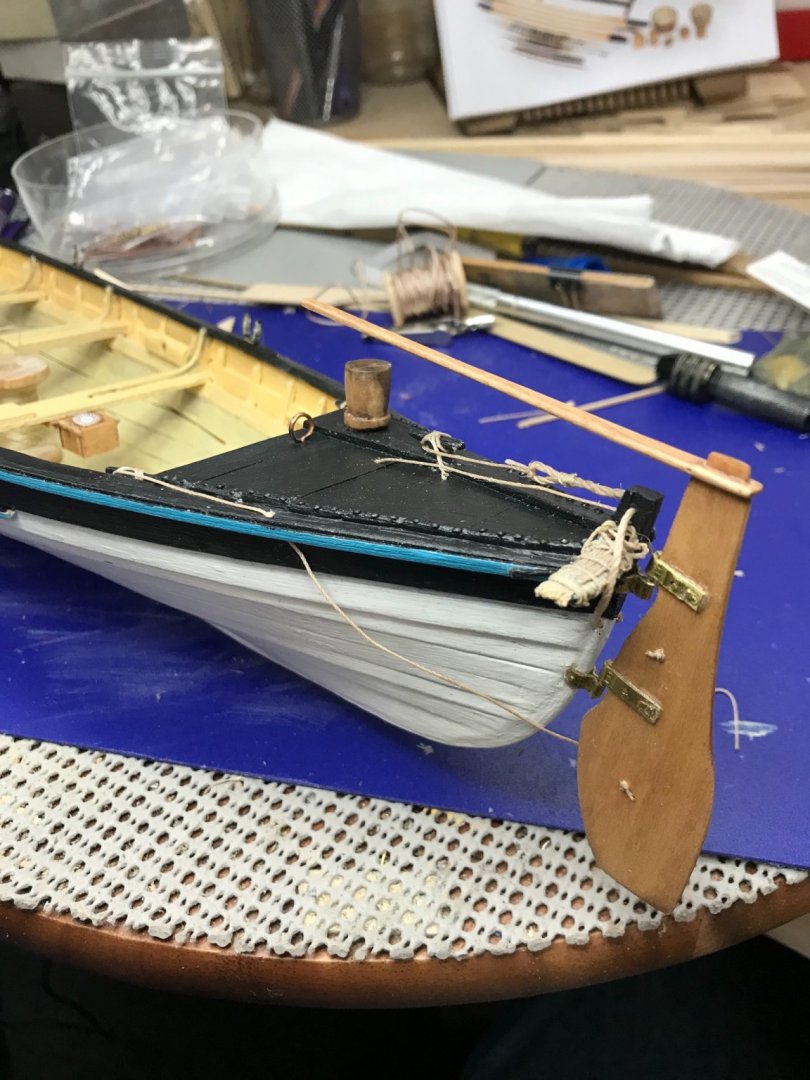
Steering Oar Brace and Stern Rigging. Installing the Steering Oar Brace Pad. Pad complete. 😎 My first attempt at looping the end of a rope. Oar Strop and Lanyard tied down to the cleat. Stern Rigging completed. Onward... 🍻


- 104 replies
-
- 10
-
-
- model shipways
- new bedford whaleboat
- (and 1 more)
-
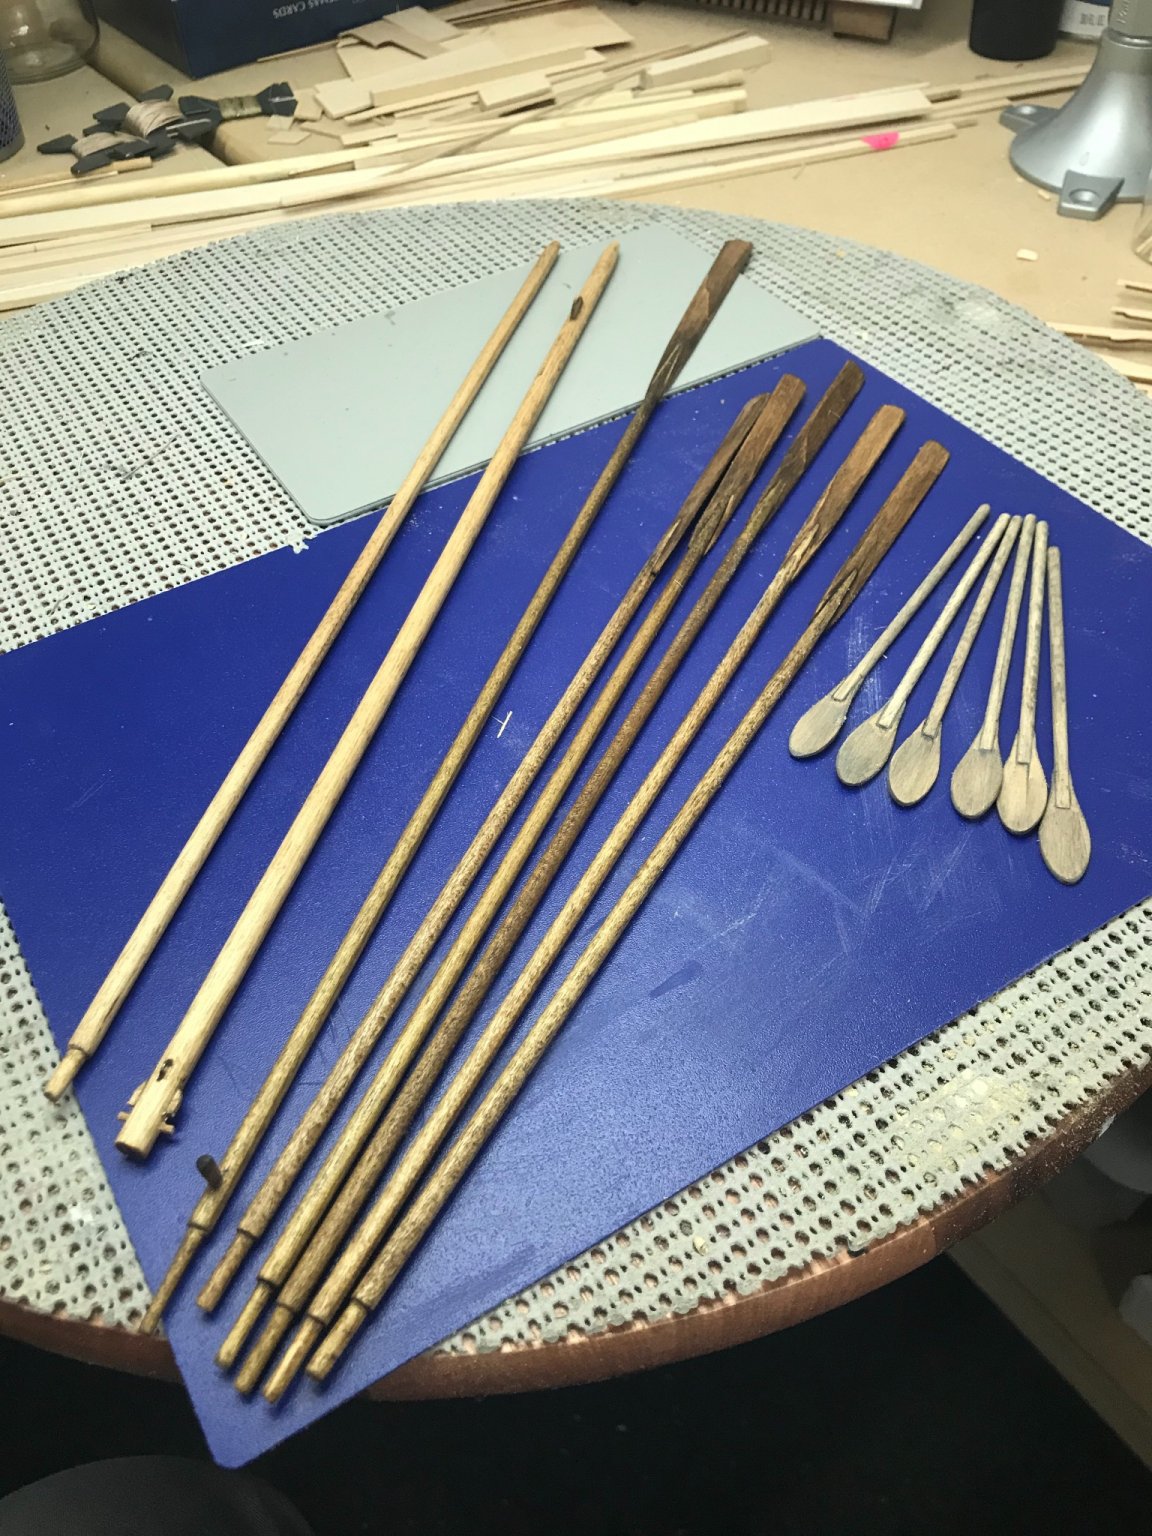
Masts, Oars and Paddles... Mast and Sprit Pole lower detail. Upper detail of Mast and Sprit Pole. Oars and Paddles completed and stained... 😎 The drawing for the sail is presented at Half Scale. 🧐 I’ll have to draw up a template to scale and borrow the wife’s sewing machine, Again... 😆 Sail cloth include in the kit. Looks like I will be borrowing the ironing board too. 🤔 It’s Friday... 🍻 Have a Great Weekend!

- 104 replies
-
- 7
-
-
- model shipways
- new bedford whaleboat
- (and 1 more)
-
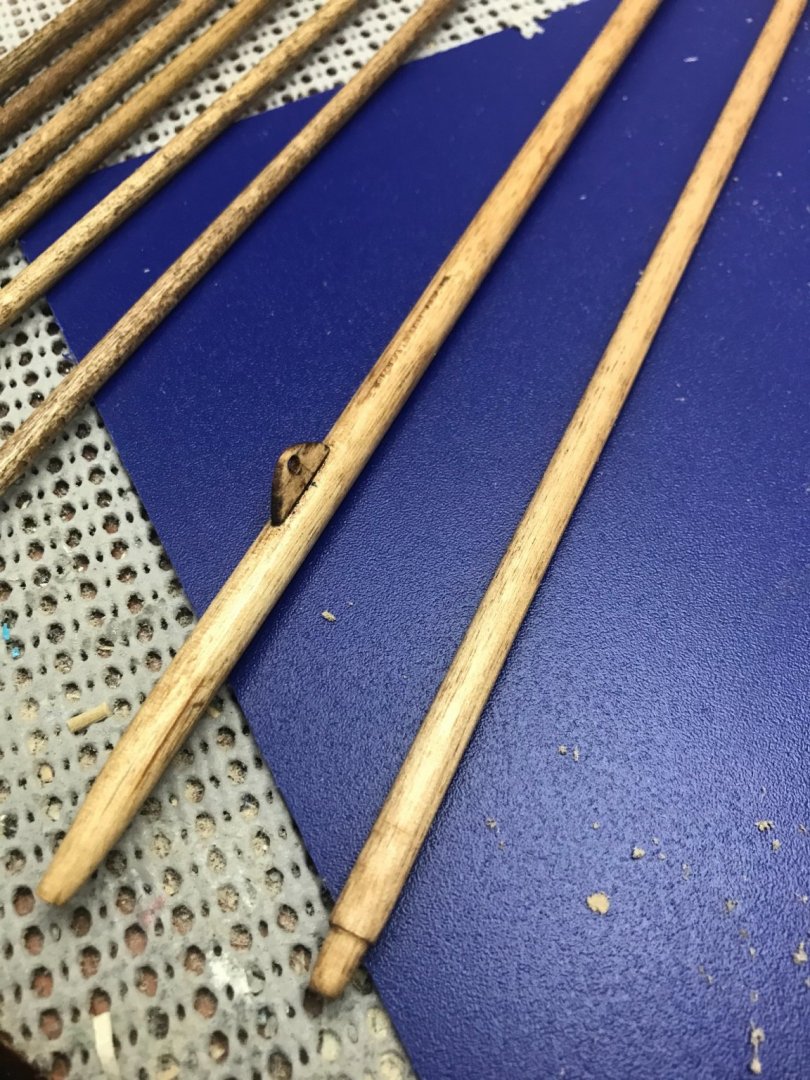
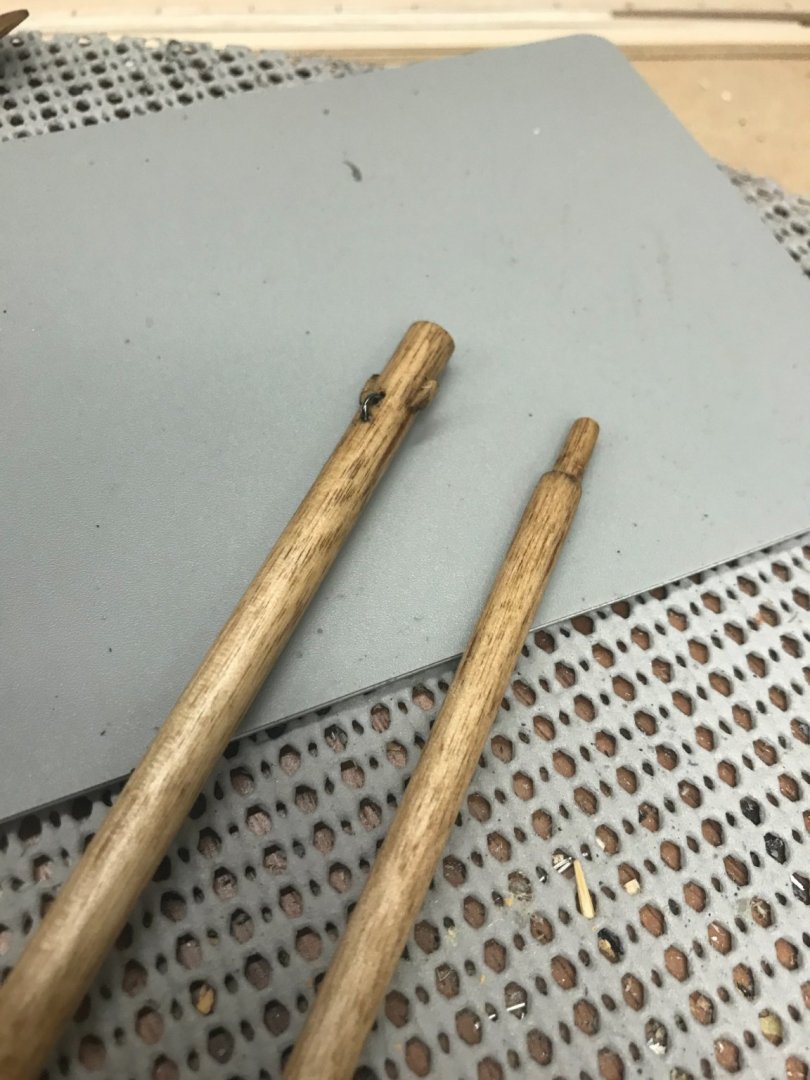
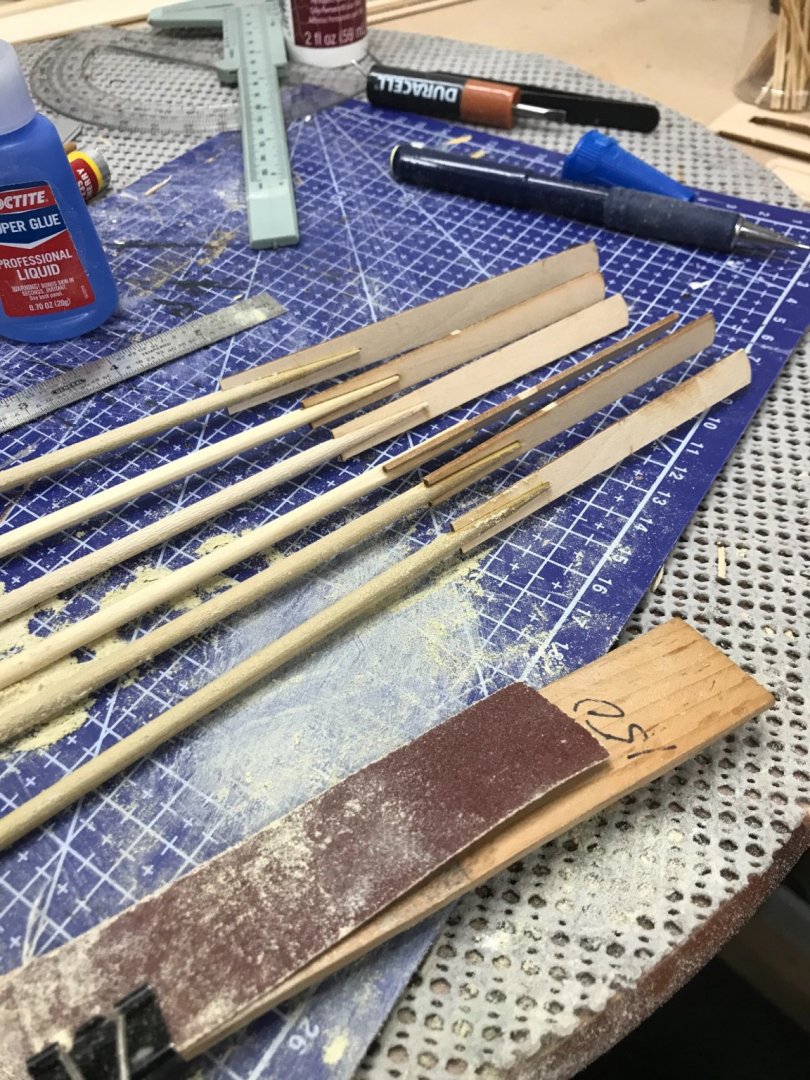
Onwards to building oars and a mast. Laser cut oar pieces added to tapered dowels. First cut at shaping the oars and masts. I’ll give it another shot at blending in the dowels after the stain sets overnight. later 😎
- 104 replies
-
- 6
-
-
- model shipways
- new bedford whaleboat
- (and 1 more)
-
You may not be doing this professionally, but your finished product will be very professional. 👍 I love the Red Flag on the end of your bow. I should have had that on my CWM. I could have avoided repairs. 😆 Sails are looking perfect. 😎
-
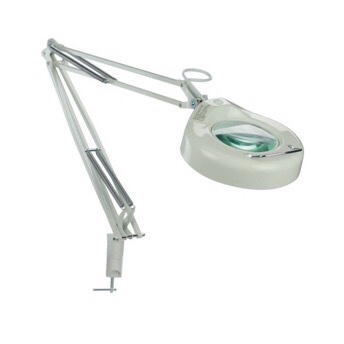
I use a fluorescent light with a 5x magnifying lens. Helps me with my OCD. 😆 Best tool I have on my bench. 👍 Eyesight? Well, that’s a good Optomitrist. 🧐
- 104 replies
-
- 2
-
-
- model shipways
- new bedford whaleboat
- (and 1 more)
-
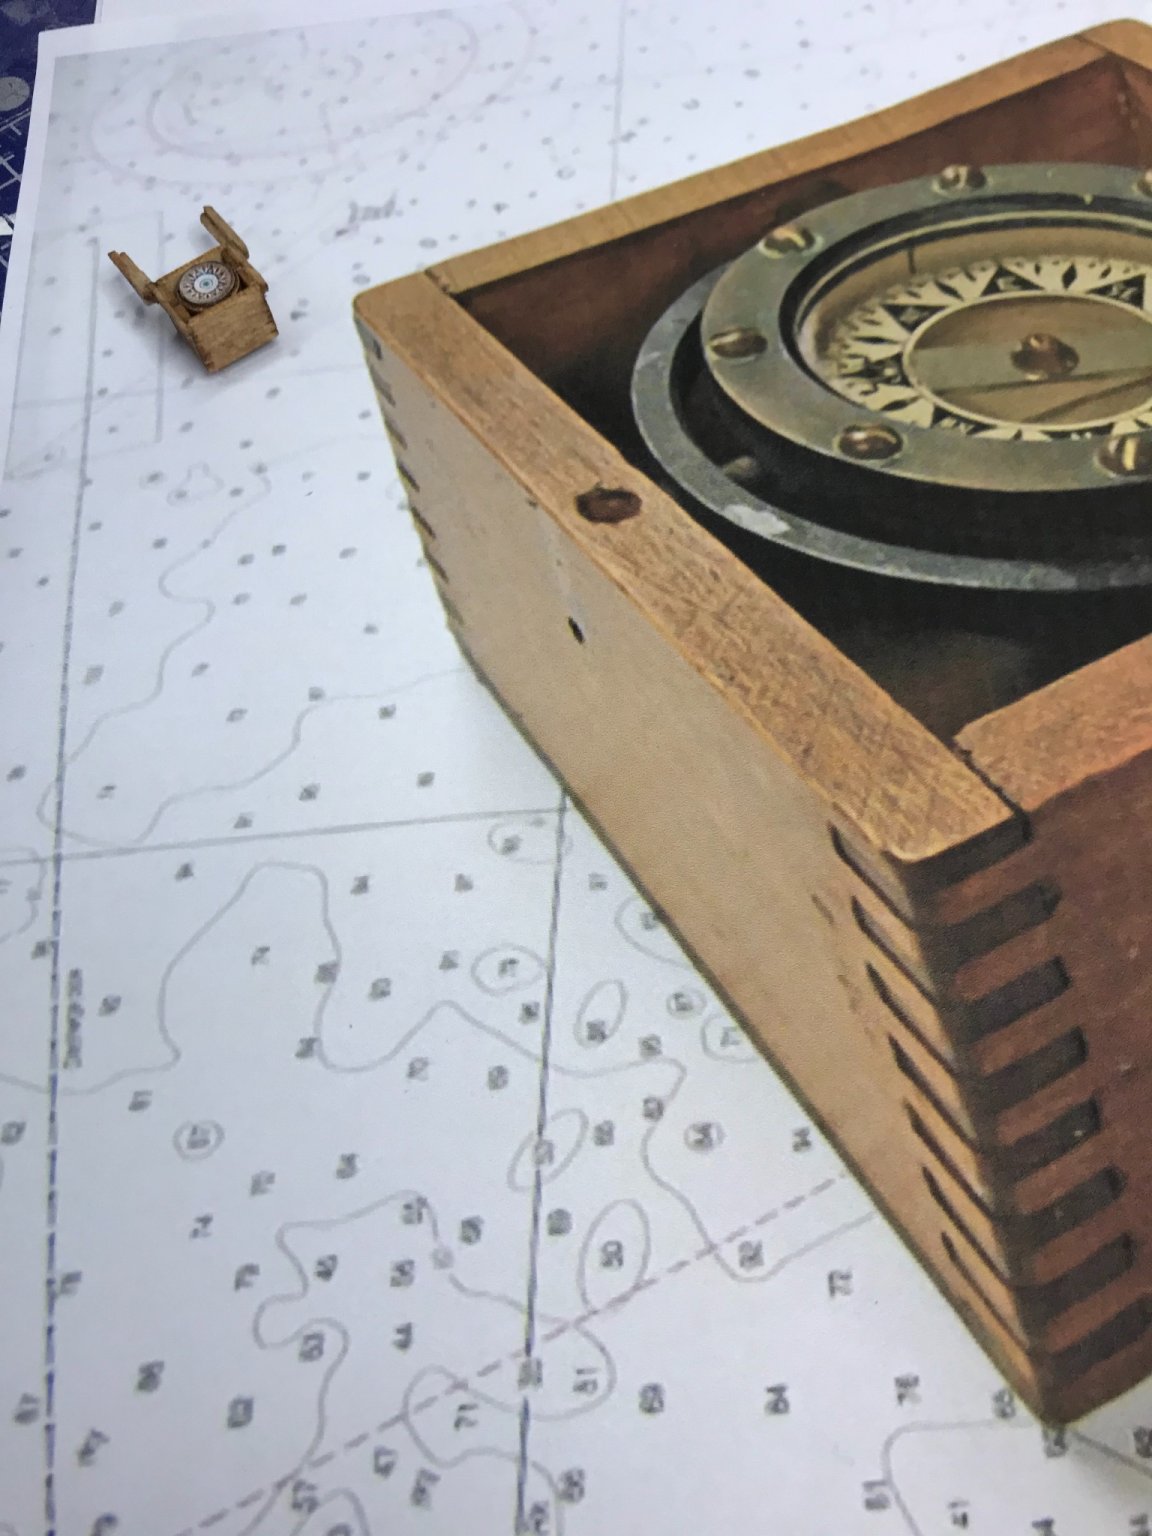
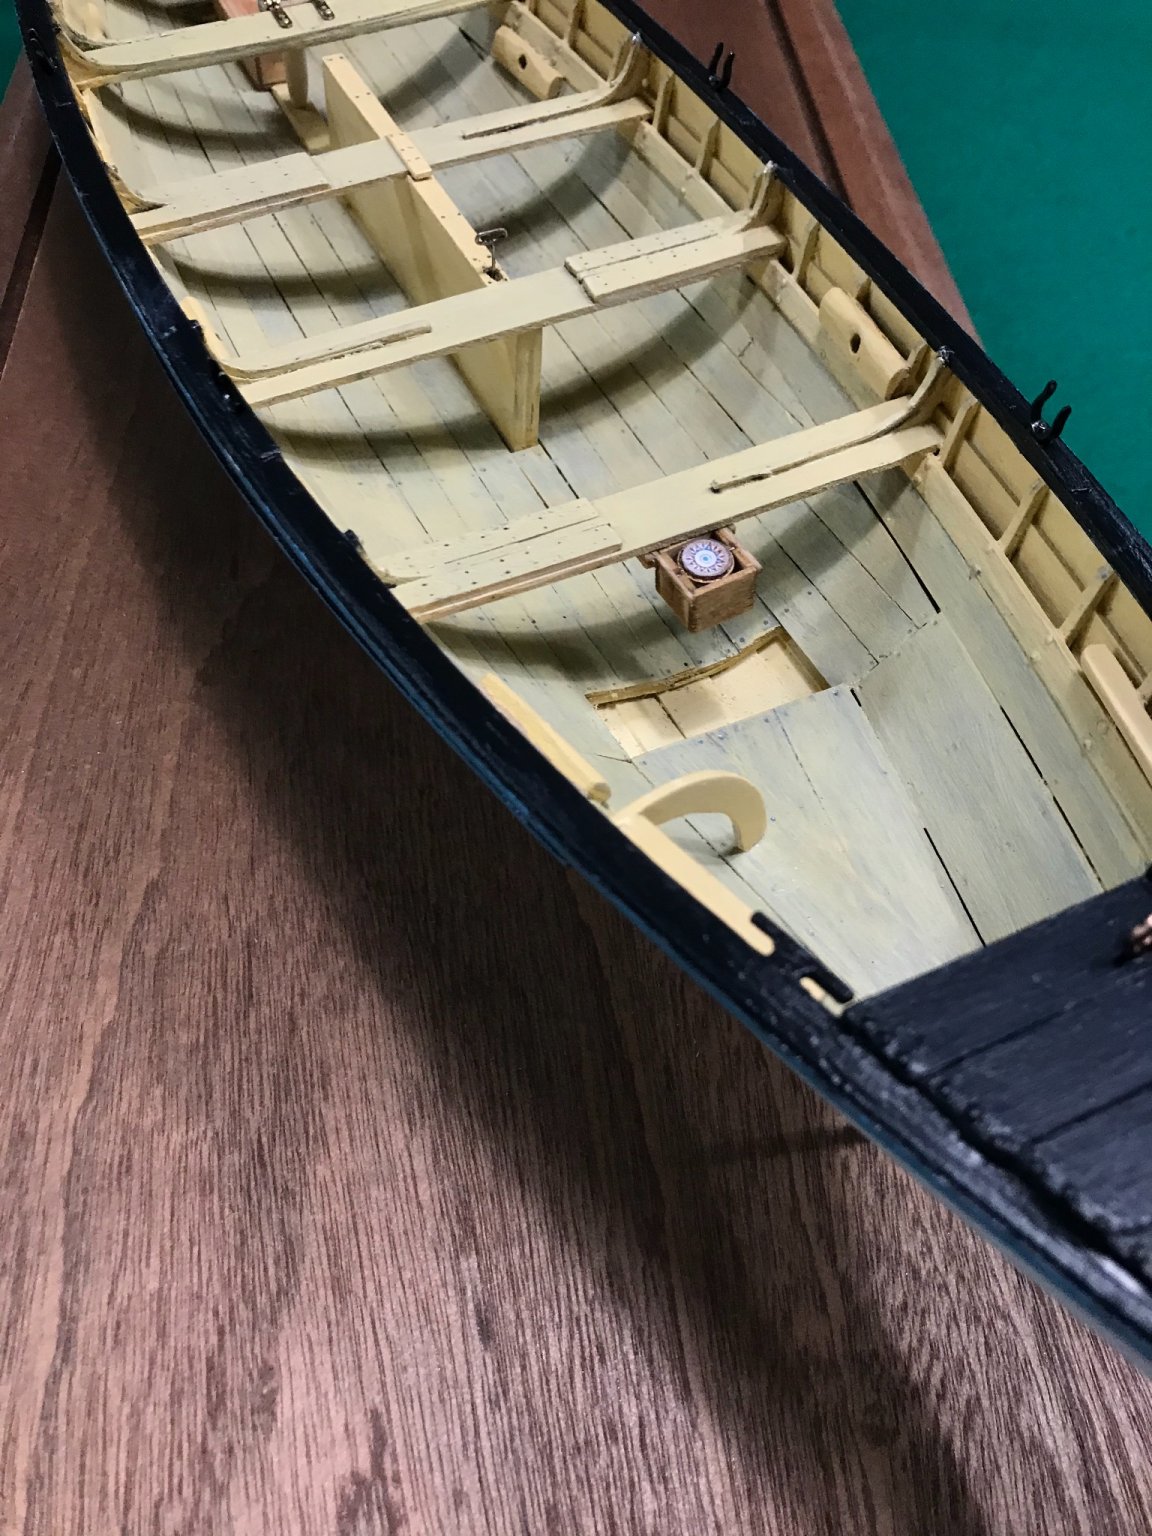
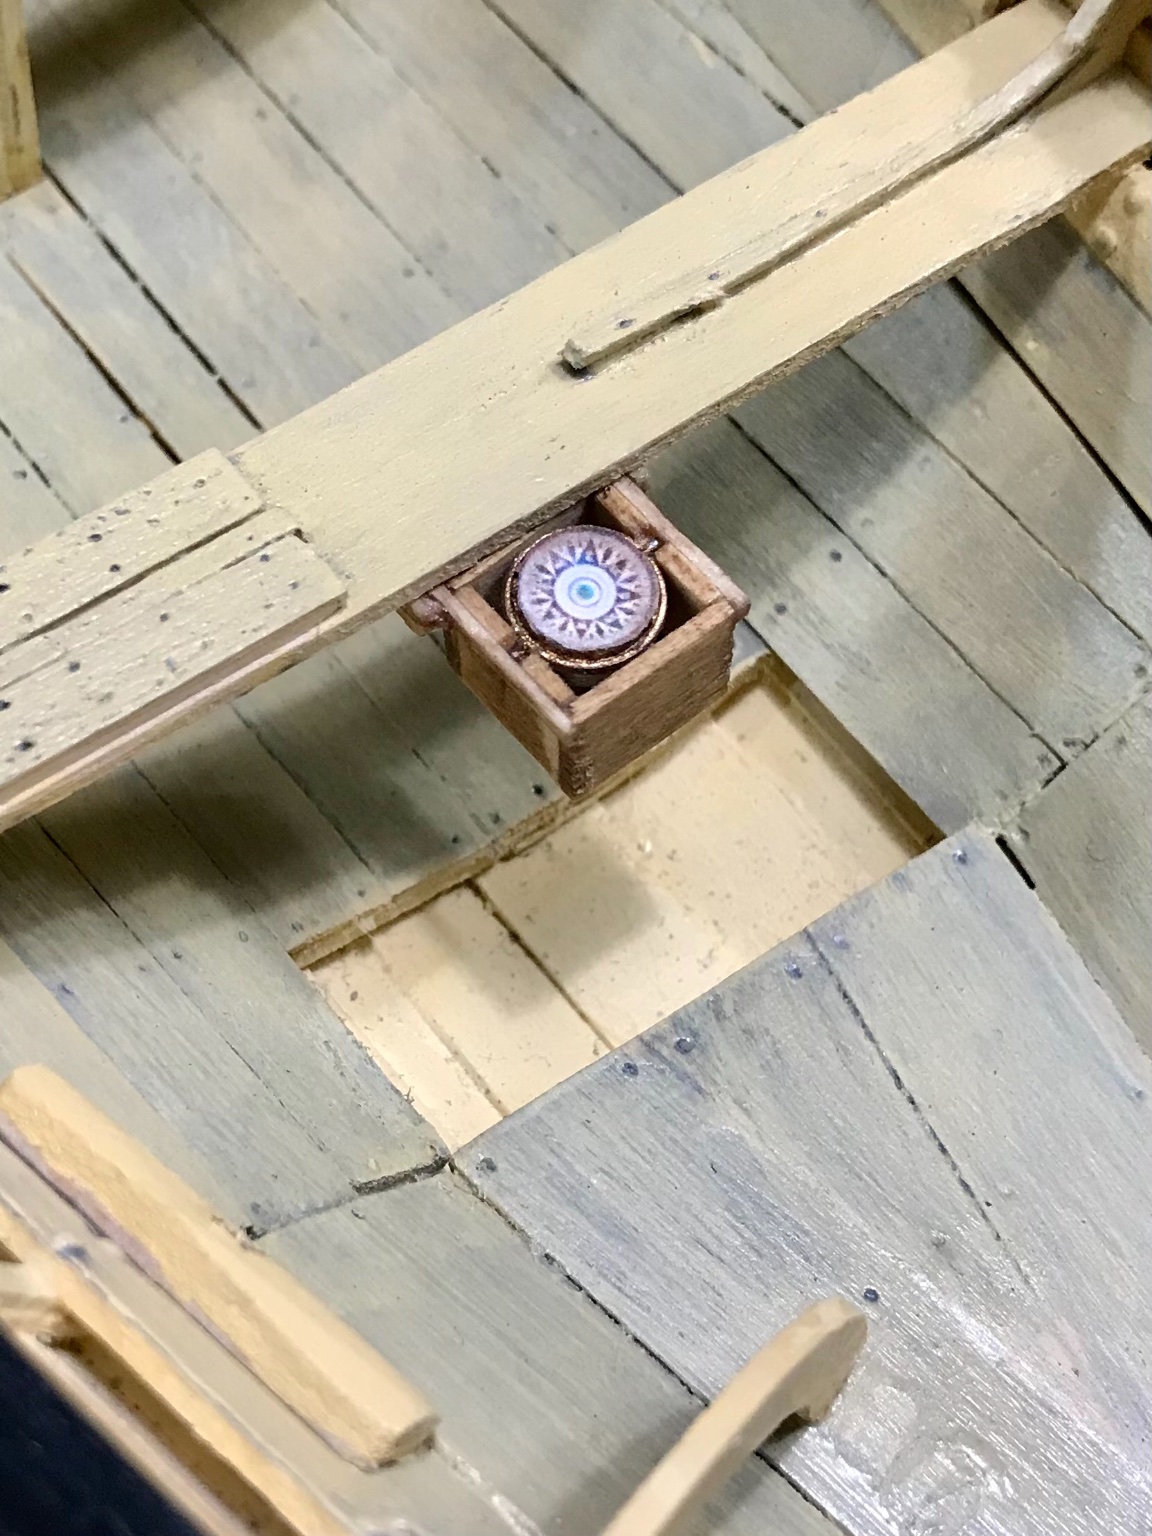
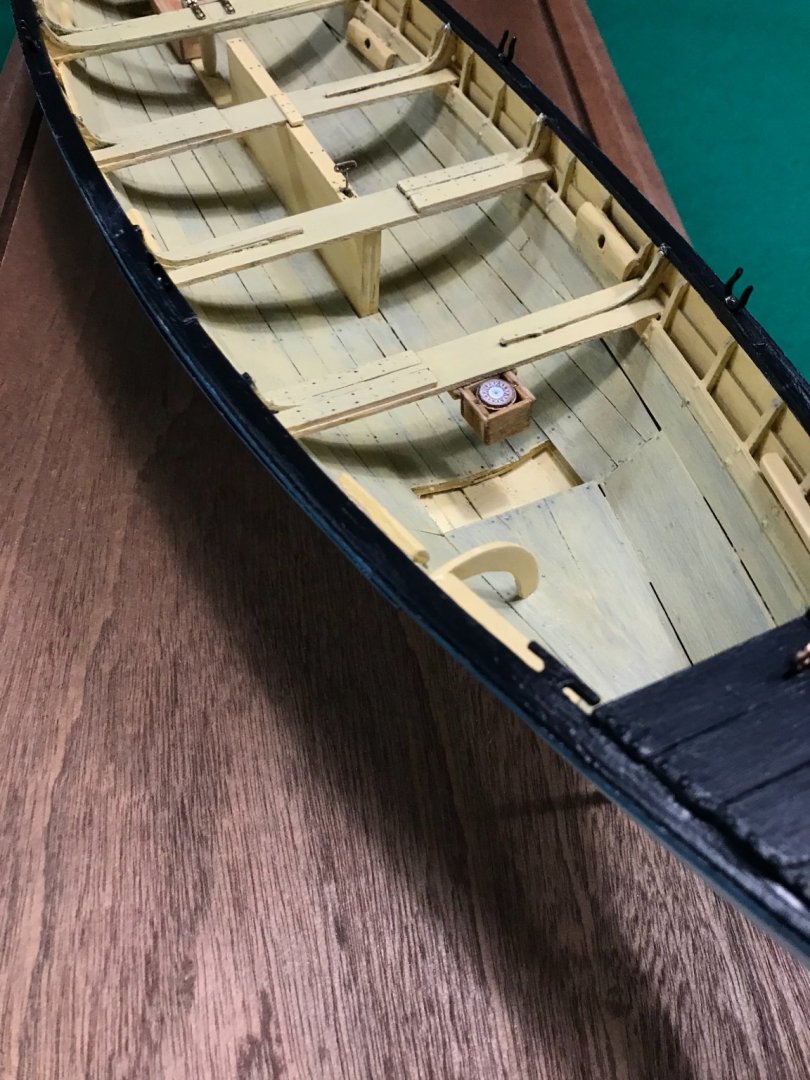
Box completed, but need to clean up the compass with a new card. Compass 2.0, next to its inspirational photo. 😆 Compass mounted.. Onwards... 😎


- 104 replies
-
- 6
-
-
- model shipways
- new bedford whaleboat
- (and 1 more)