John Ruy
-
Posts
1,585 -
Joined
-
Last visited
Content Type
Profiles
Forums
Gallery
Events
Everything posted by John Ruy
-
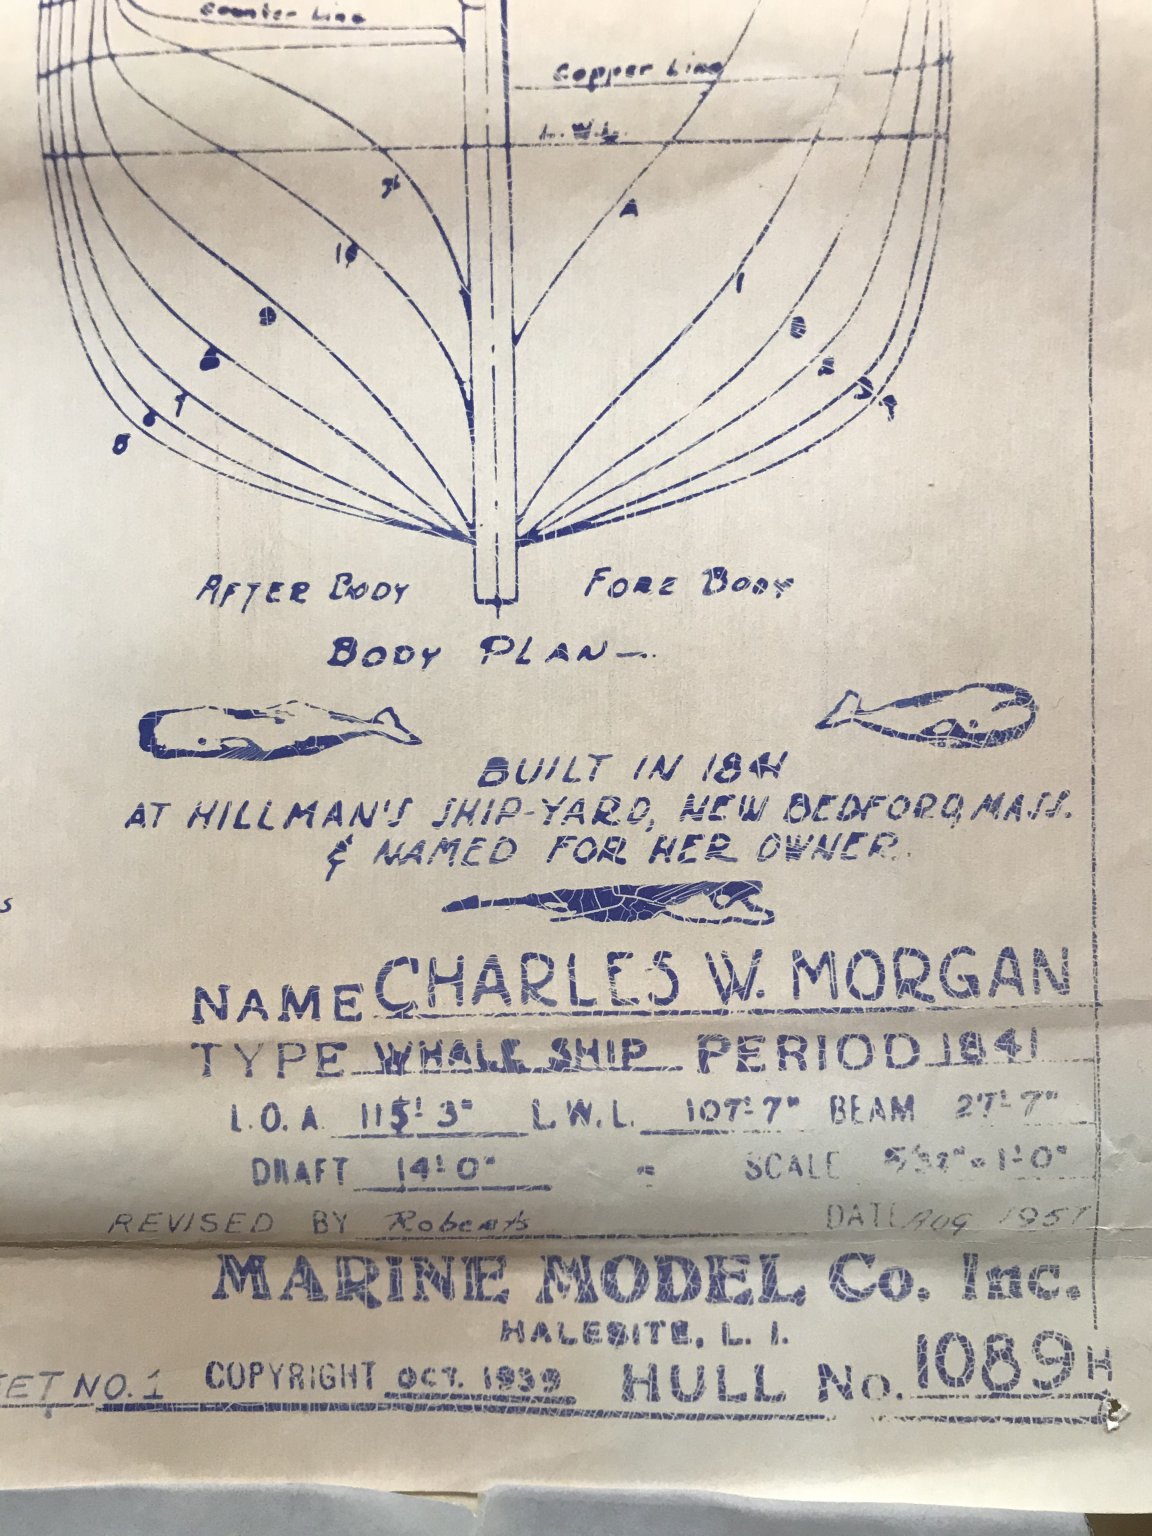
 Bob, I want to thank you for lots of great information. This is why I want to be here on MSW. 👍 I do appreciate any guidance I can get on this hobby. I do have a few questions though regarding your information. First let me clear up the scale of this model. 5/32nd = 1 foot is stated on the plans. It does appear that we have the same kit. As for the windows in the stern, she was refitted at some point due to the windows being stove in due to high seas striking the ship from the rear. I don’t recall when that occurred exactly but the information came from a book by John F Leavitt. This has been a great book to learn about her history and operation. I plan to outfit this model as she appeared during her whaling career. Again I do appreciate your insights and please do offer your advice as I continue and you follow along. I will say you have raised the bar and I feel it will probably a long ride but I will get her done. My question for you is, about the lead parts. The parts are all in very good shape and so far been very workable. Is that because the parts were still in there original packaging, or is the deterioration due to storage conditions? When you say turn to powder, how long would that be? Based on what your saying I will probably scratch build the finer pieces. Should I be concerned about the larger pieces I have already completed? The rudder, Trail boards and windlass? thanks again Bob, keep the feedback coming. It is all good stuff. John
- 204 replies
-
- 4
-

-
- marine model company
- charles w morgan
- (and 1 more)
-
Eduardo, Thank you for your comments, I had purchased the Scientific kit but opted to resell it. This Bluejacket Kit is of a bit larger scale and was a plank on frame hull that needed rescue. It has been a learning experience for me and is continuing to be good experience for developing my wood modeling skills. Thanks again, John
-
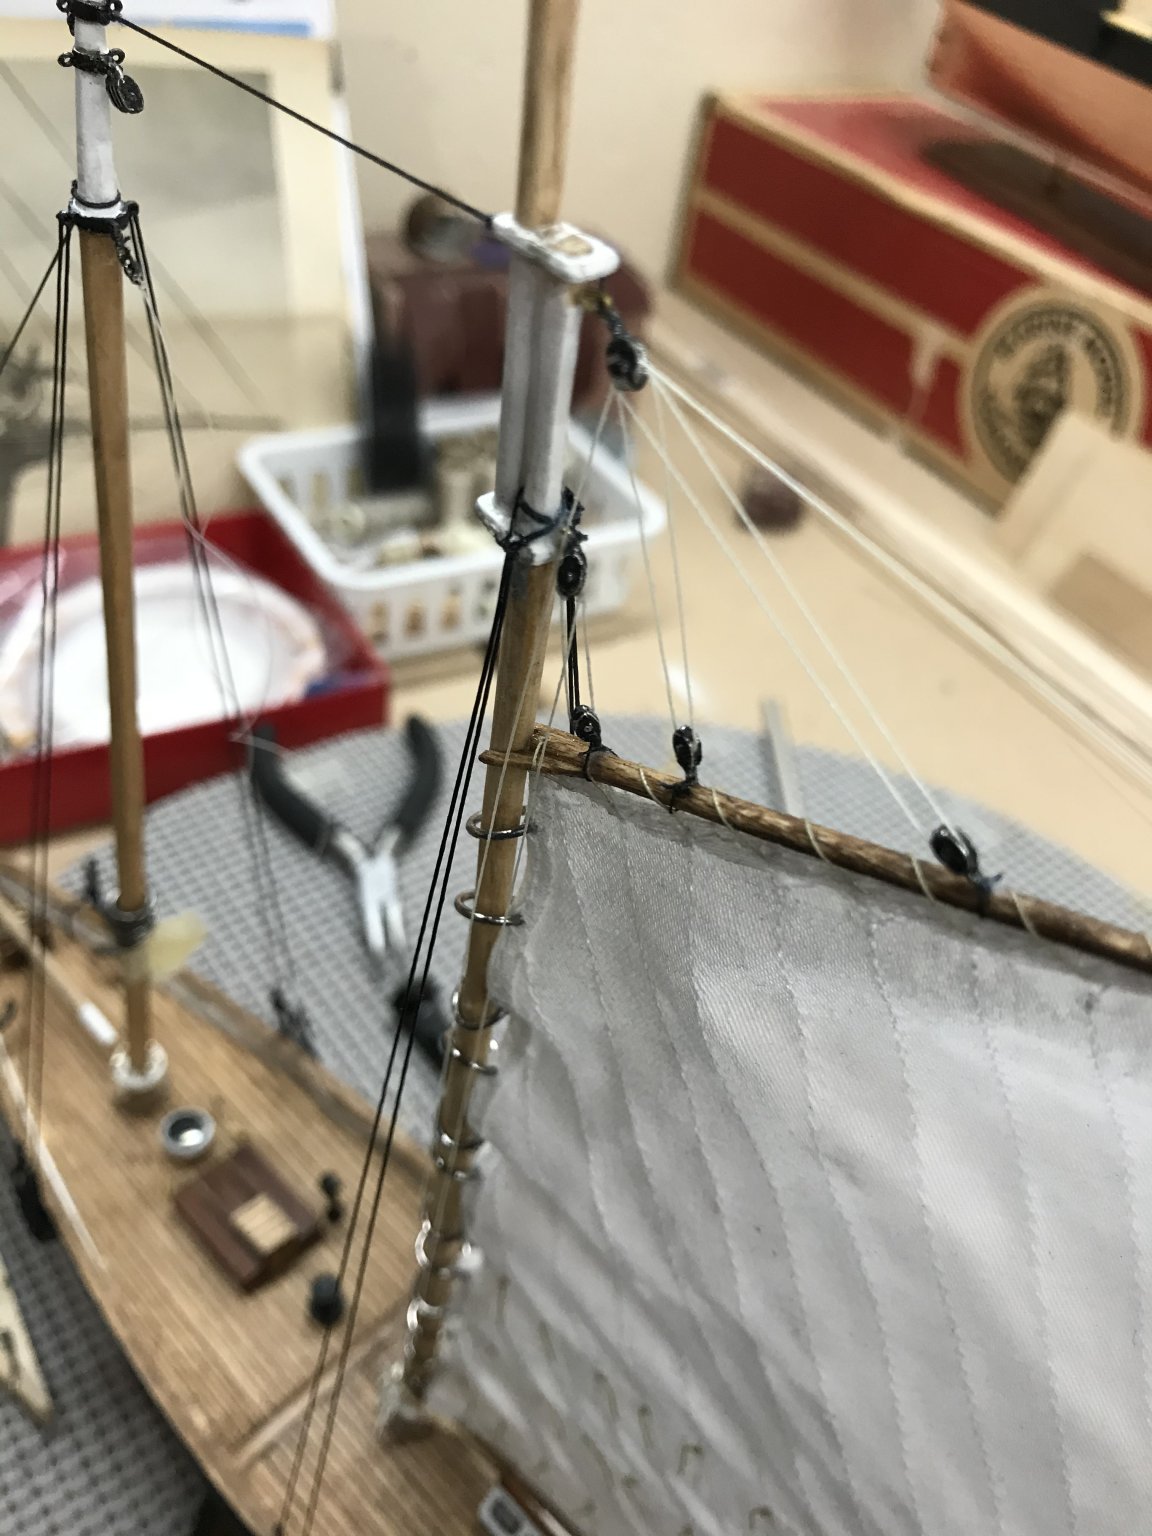
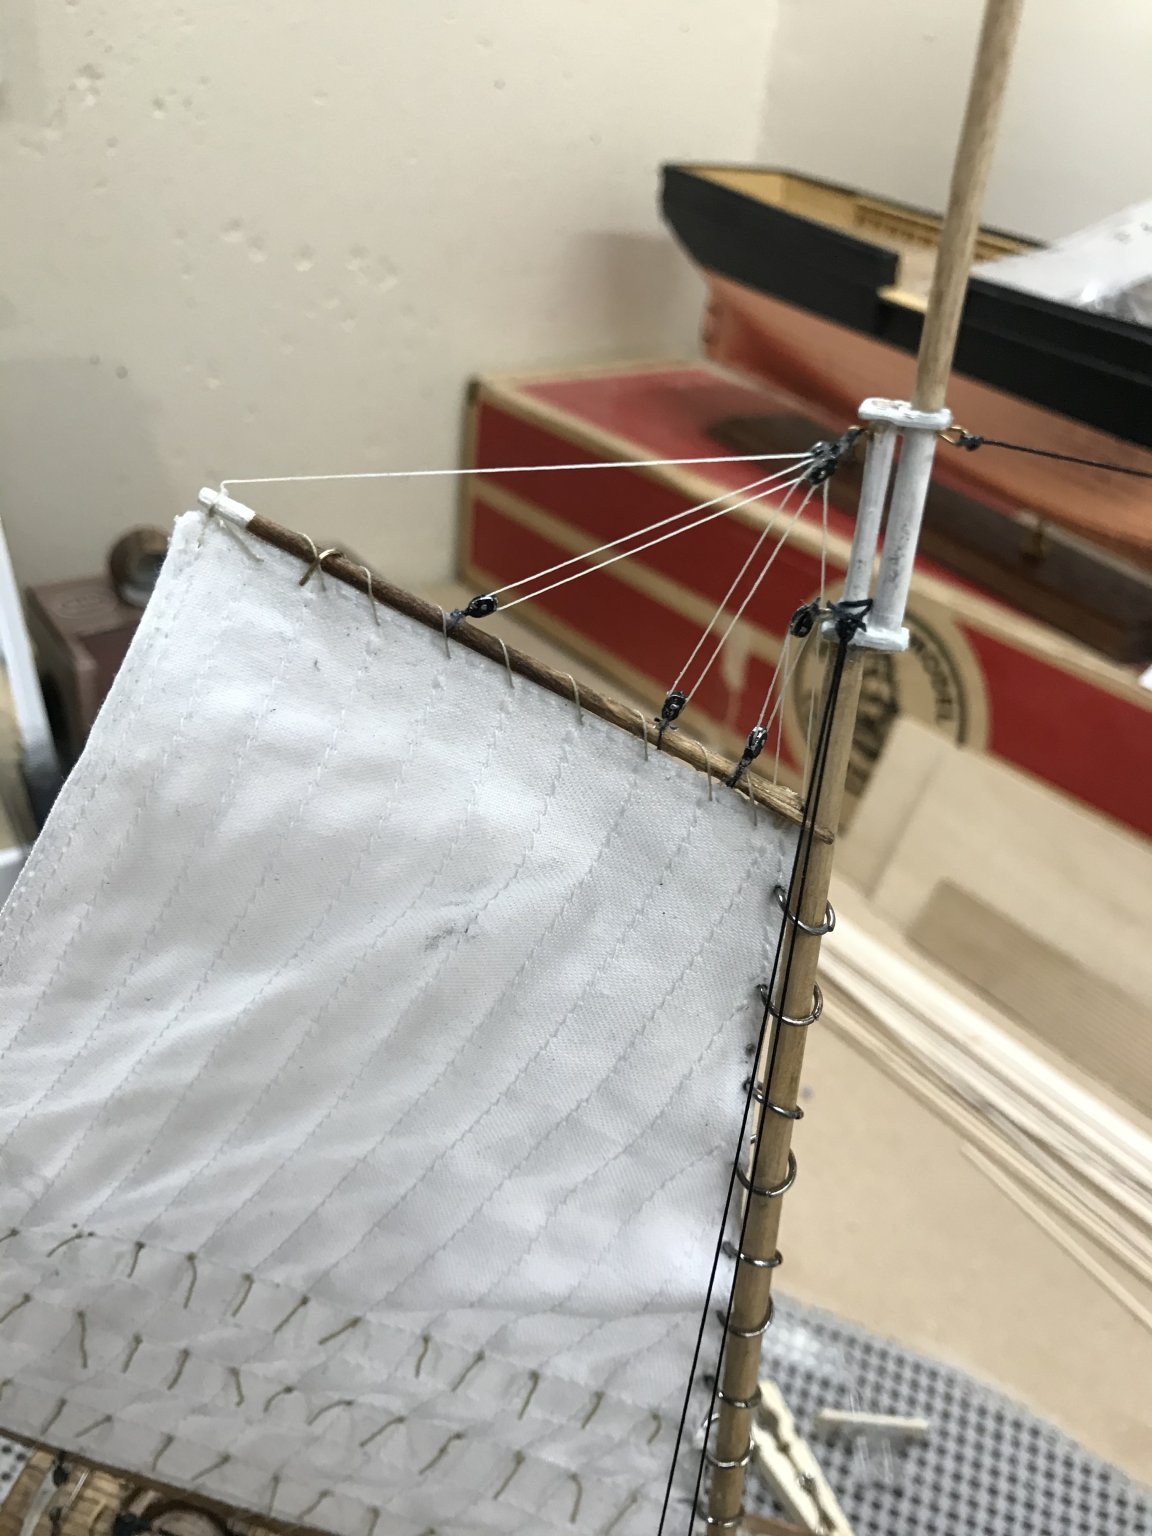
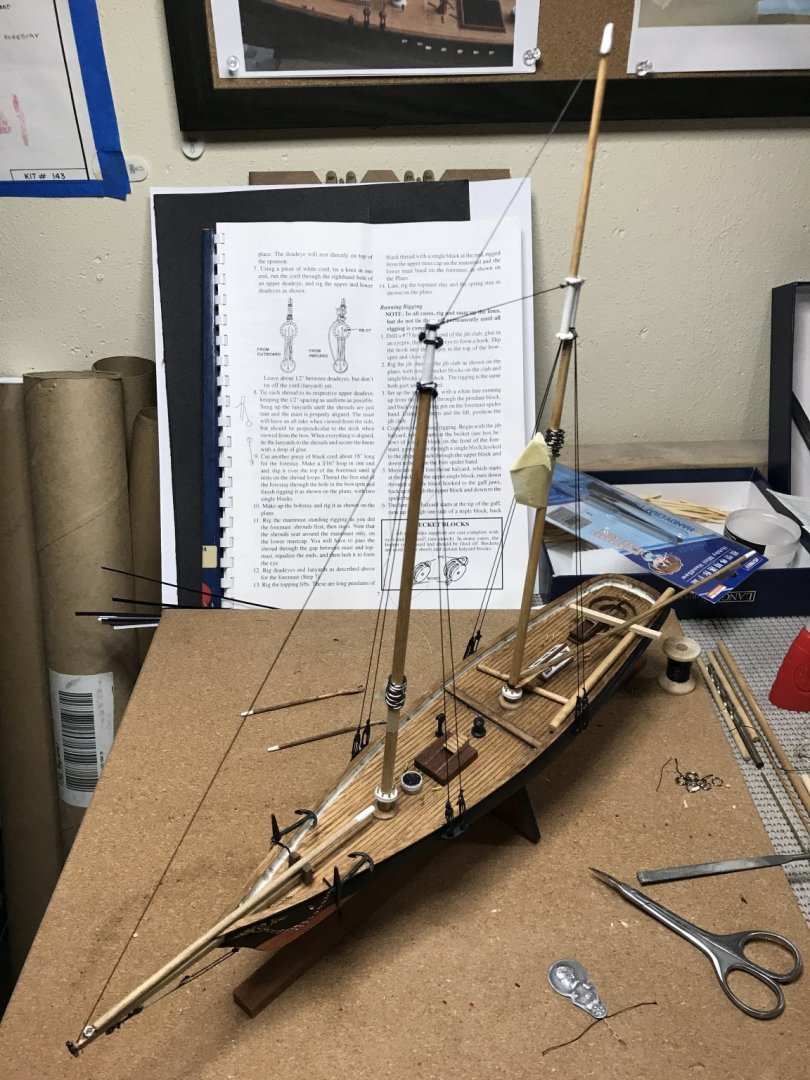
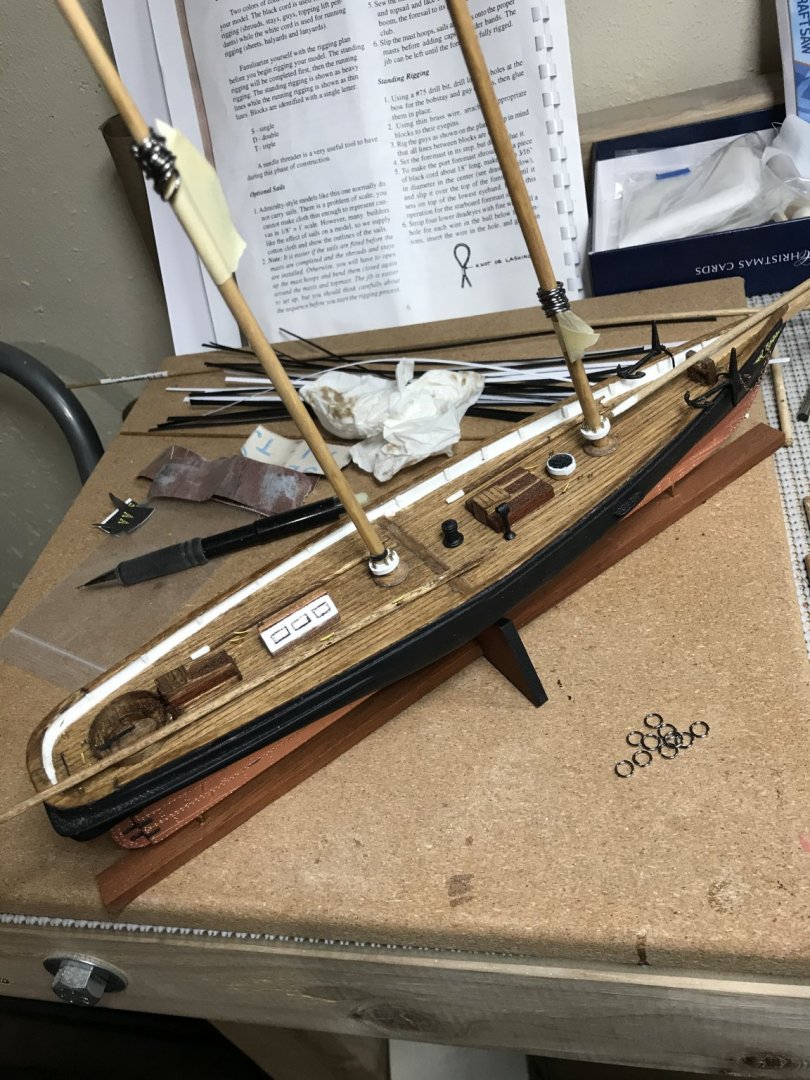
Finished the Main Throat and Peak Halyard rigging tonight.


- 21 replies
-
- 5
-
-
- America
- BlueJacket Shipcrafters
- (and 1 more)
-
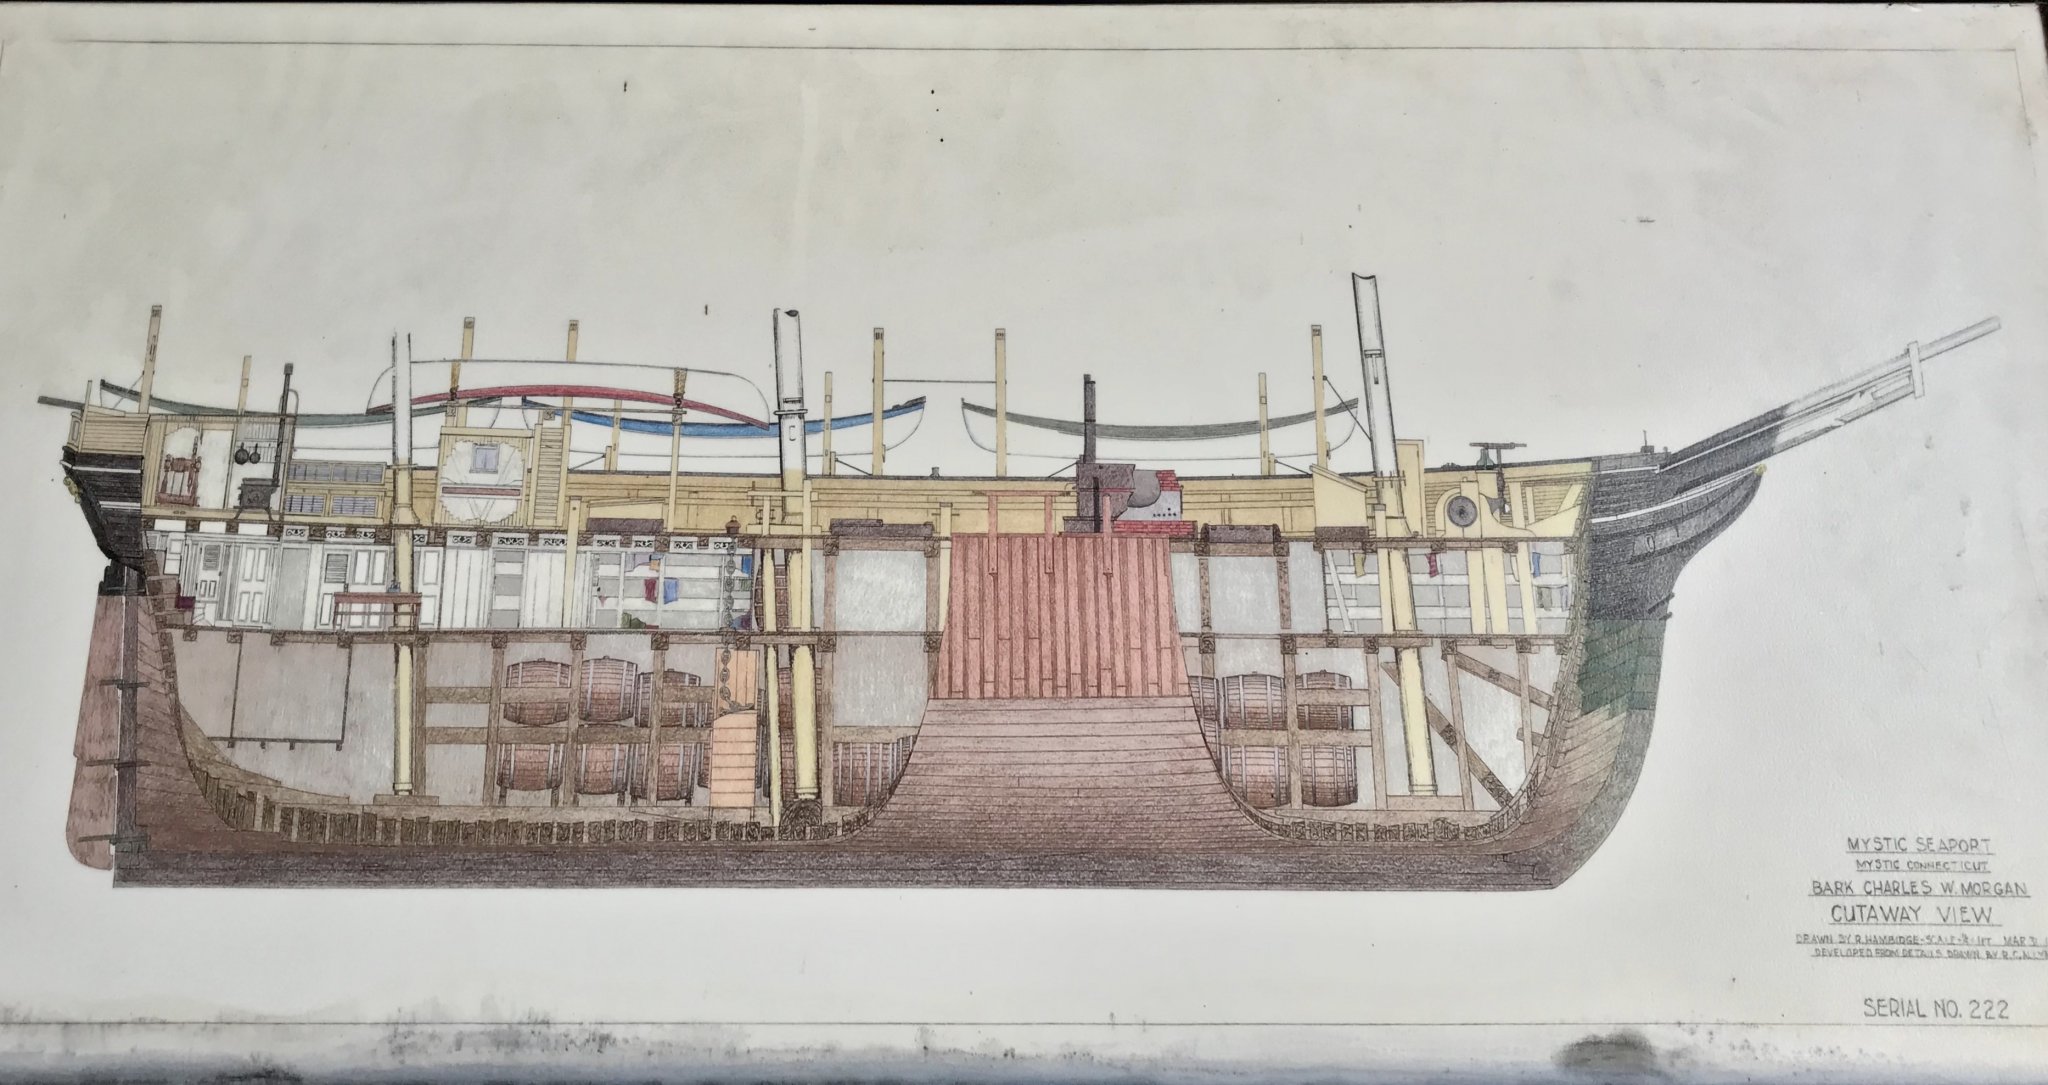
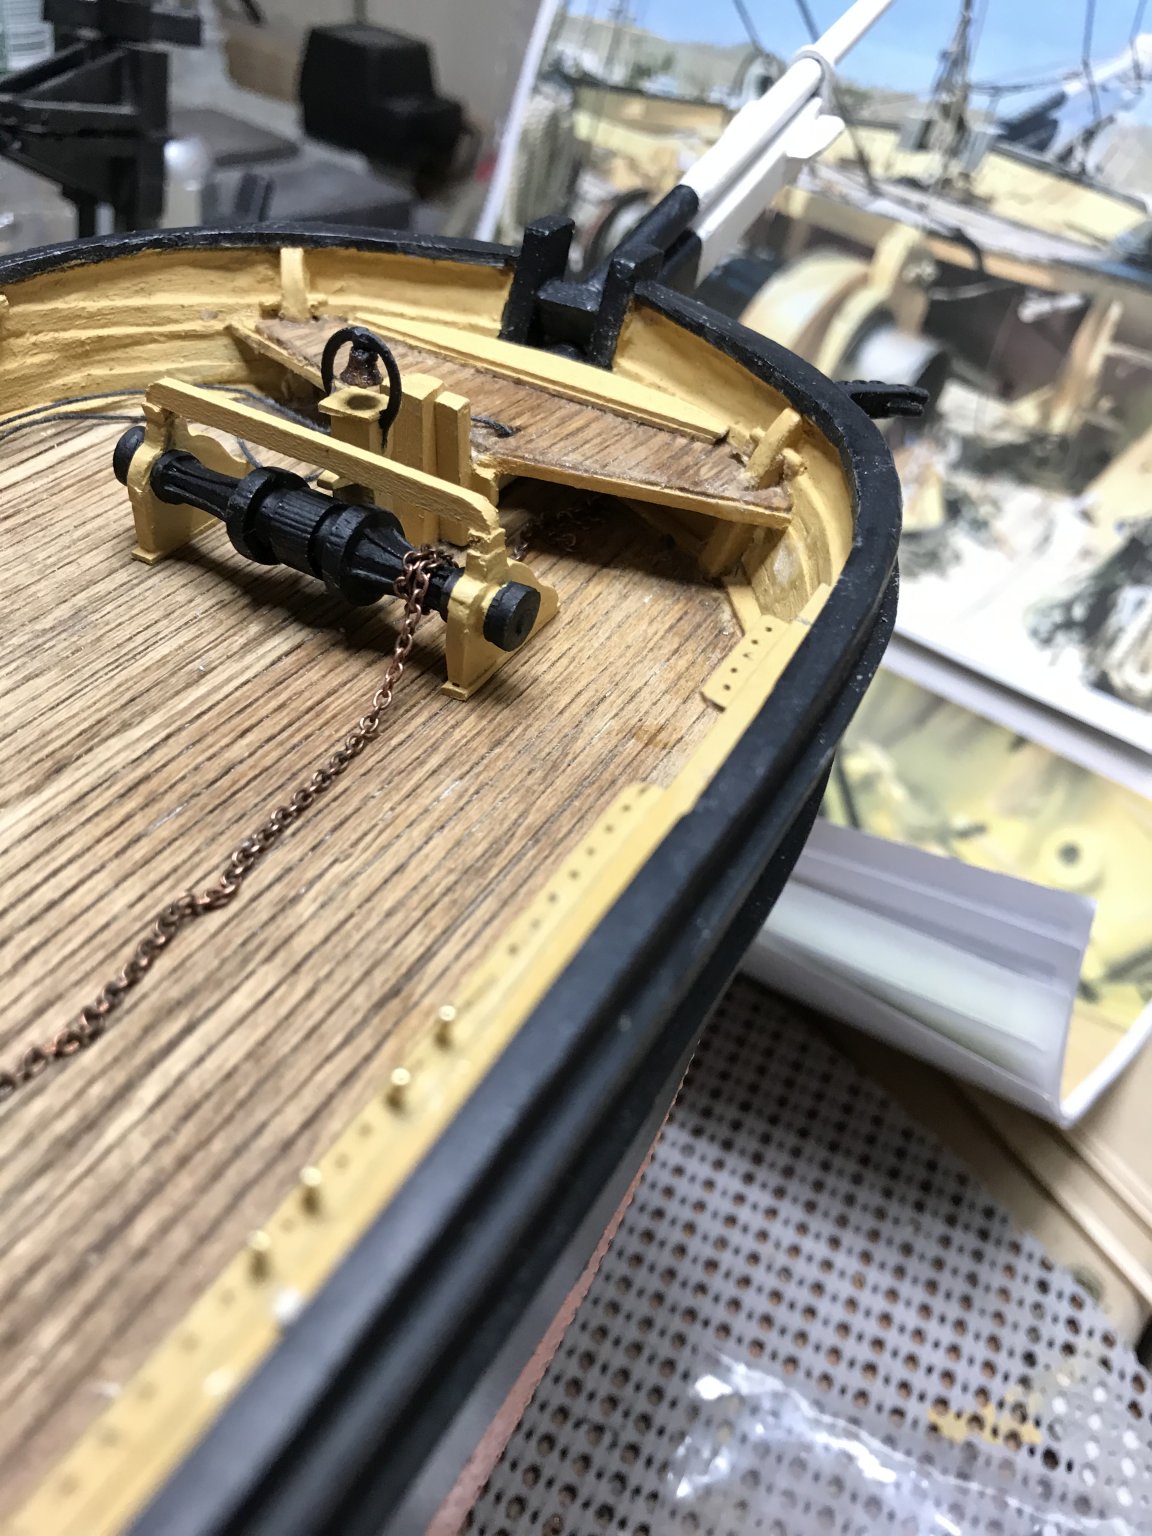
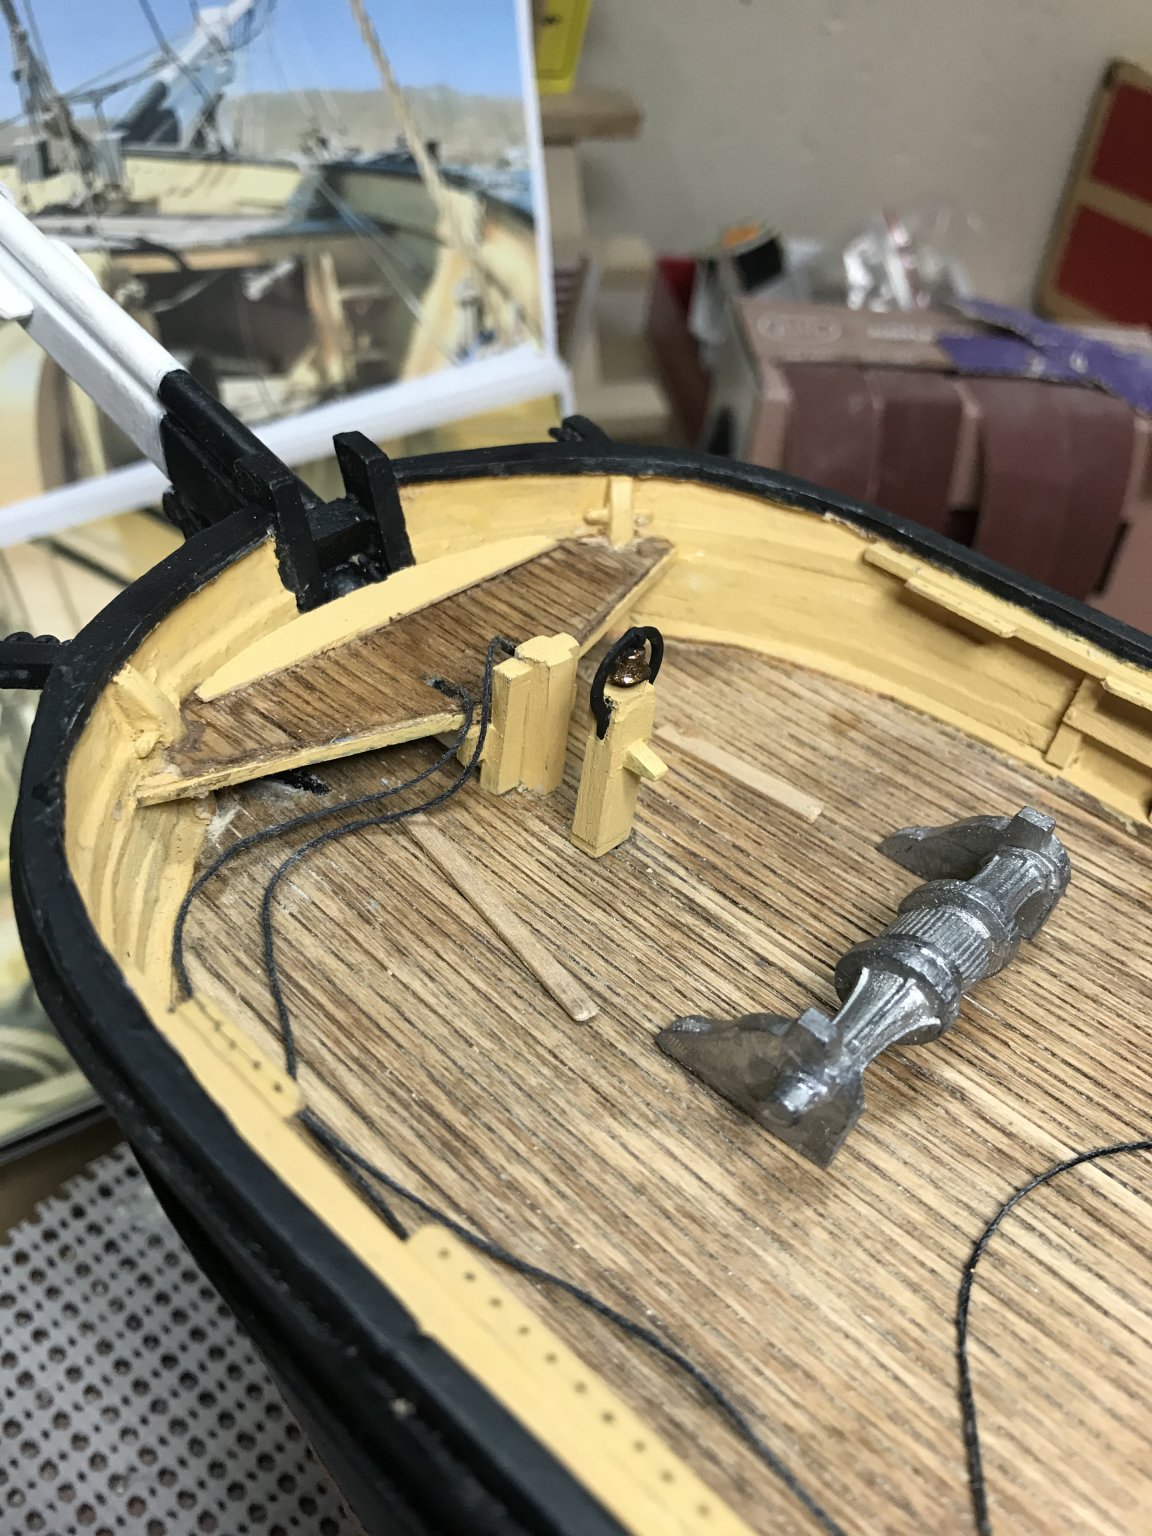
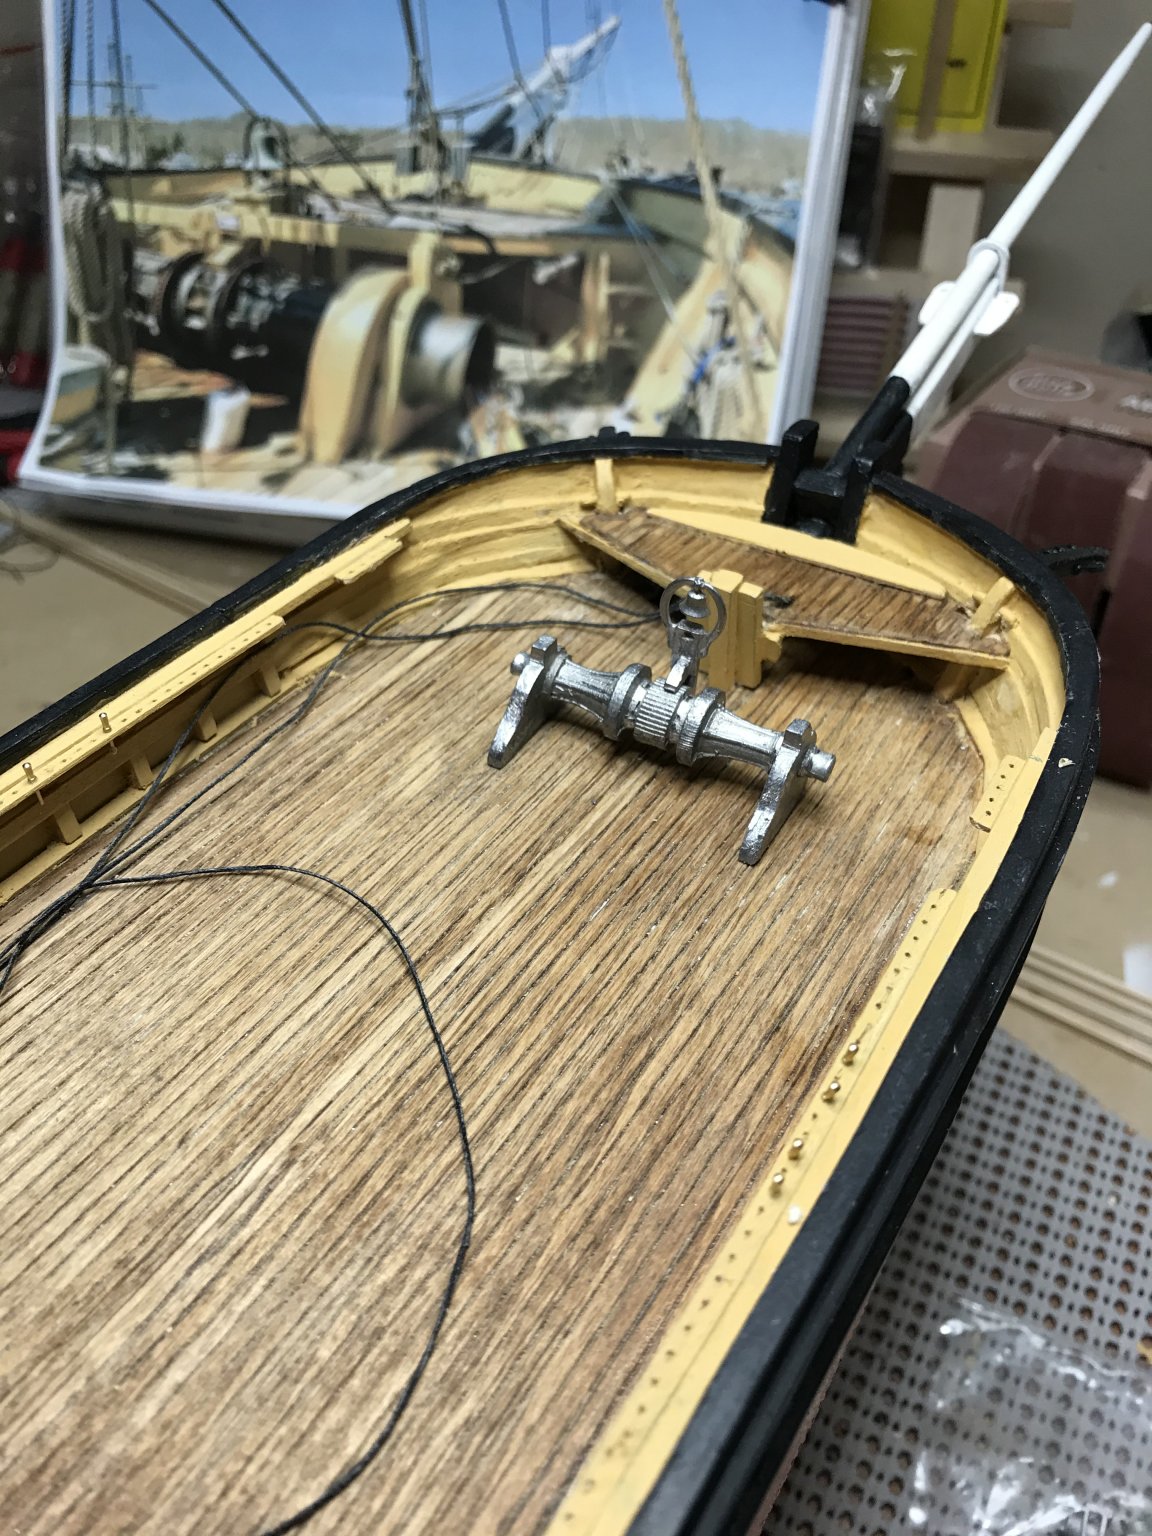
Thanks for the 👍on my build, I am really trying to bring lots of detail to this my first wood model. Did some more research on the Anchor Chain found a document on Mystic’s site regarding storage of the chain in a chain locker just aft of the main mast. Found the detail in a drawing I photographed at the museum.

- 204 replies
-
- 4
-
-
- marine model company
- charles w morgan
- (and 1 more)
-
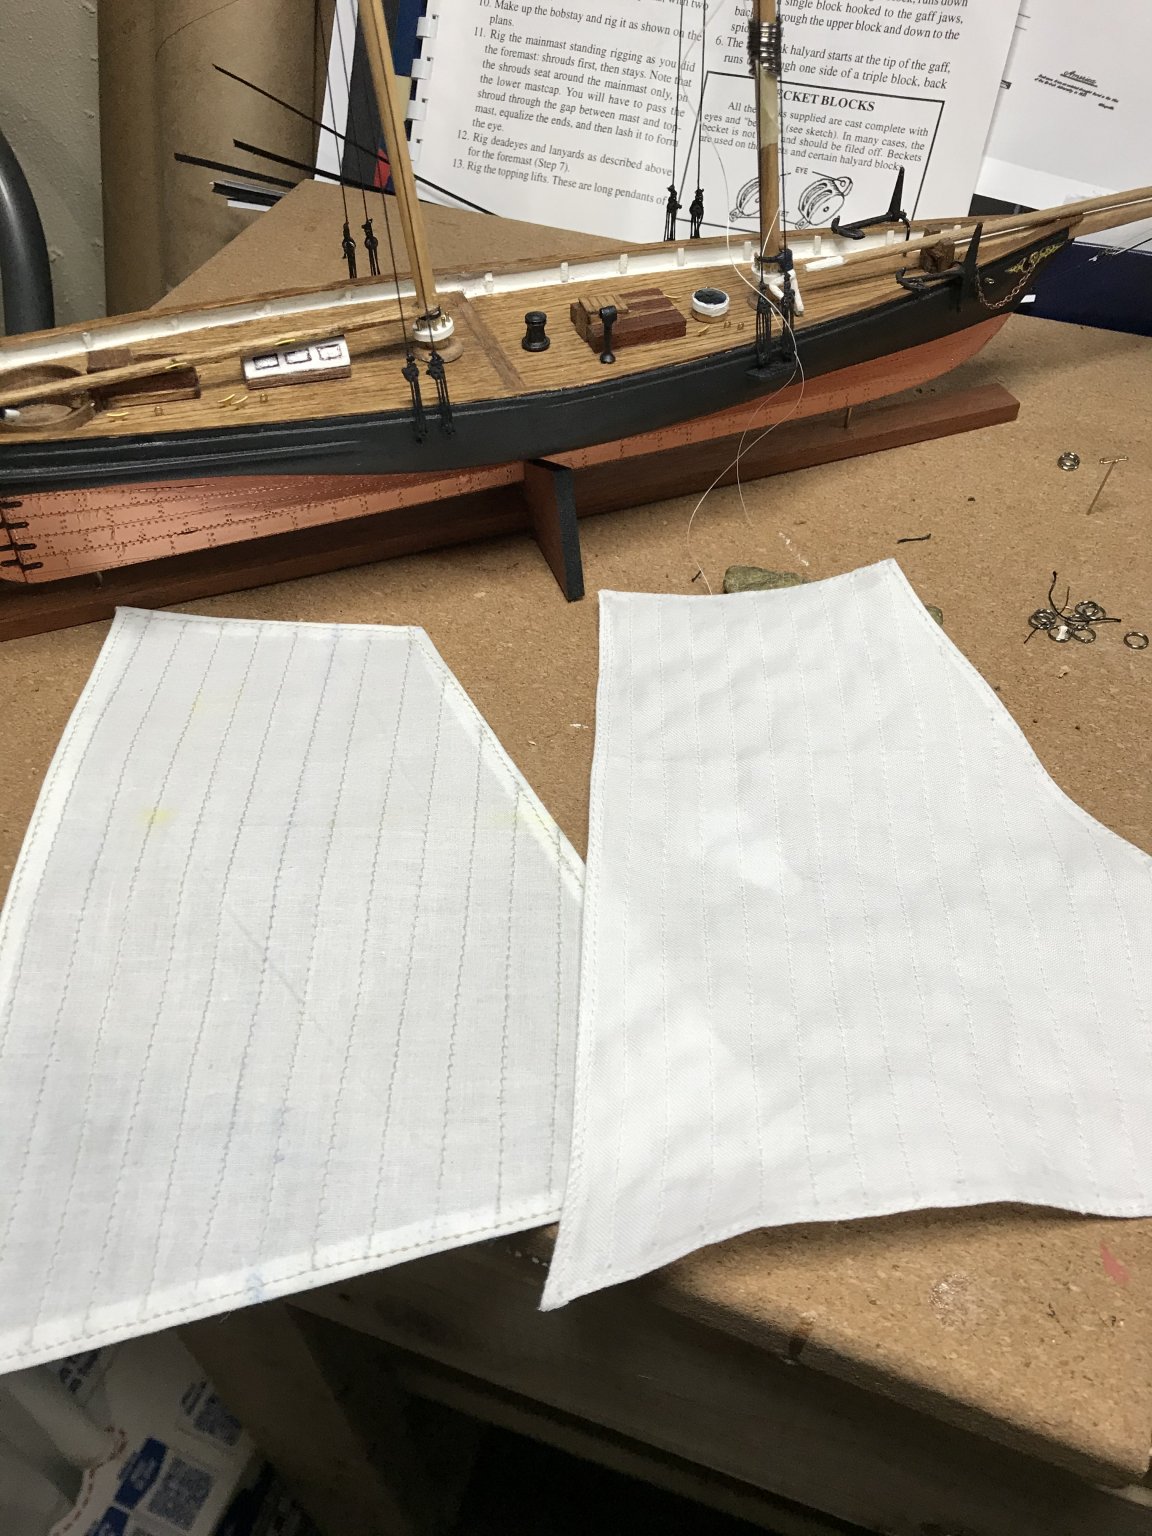
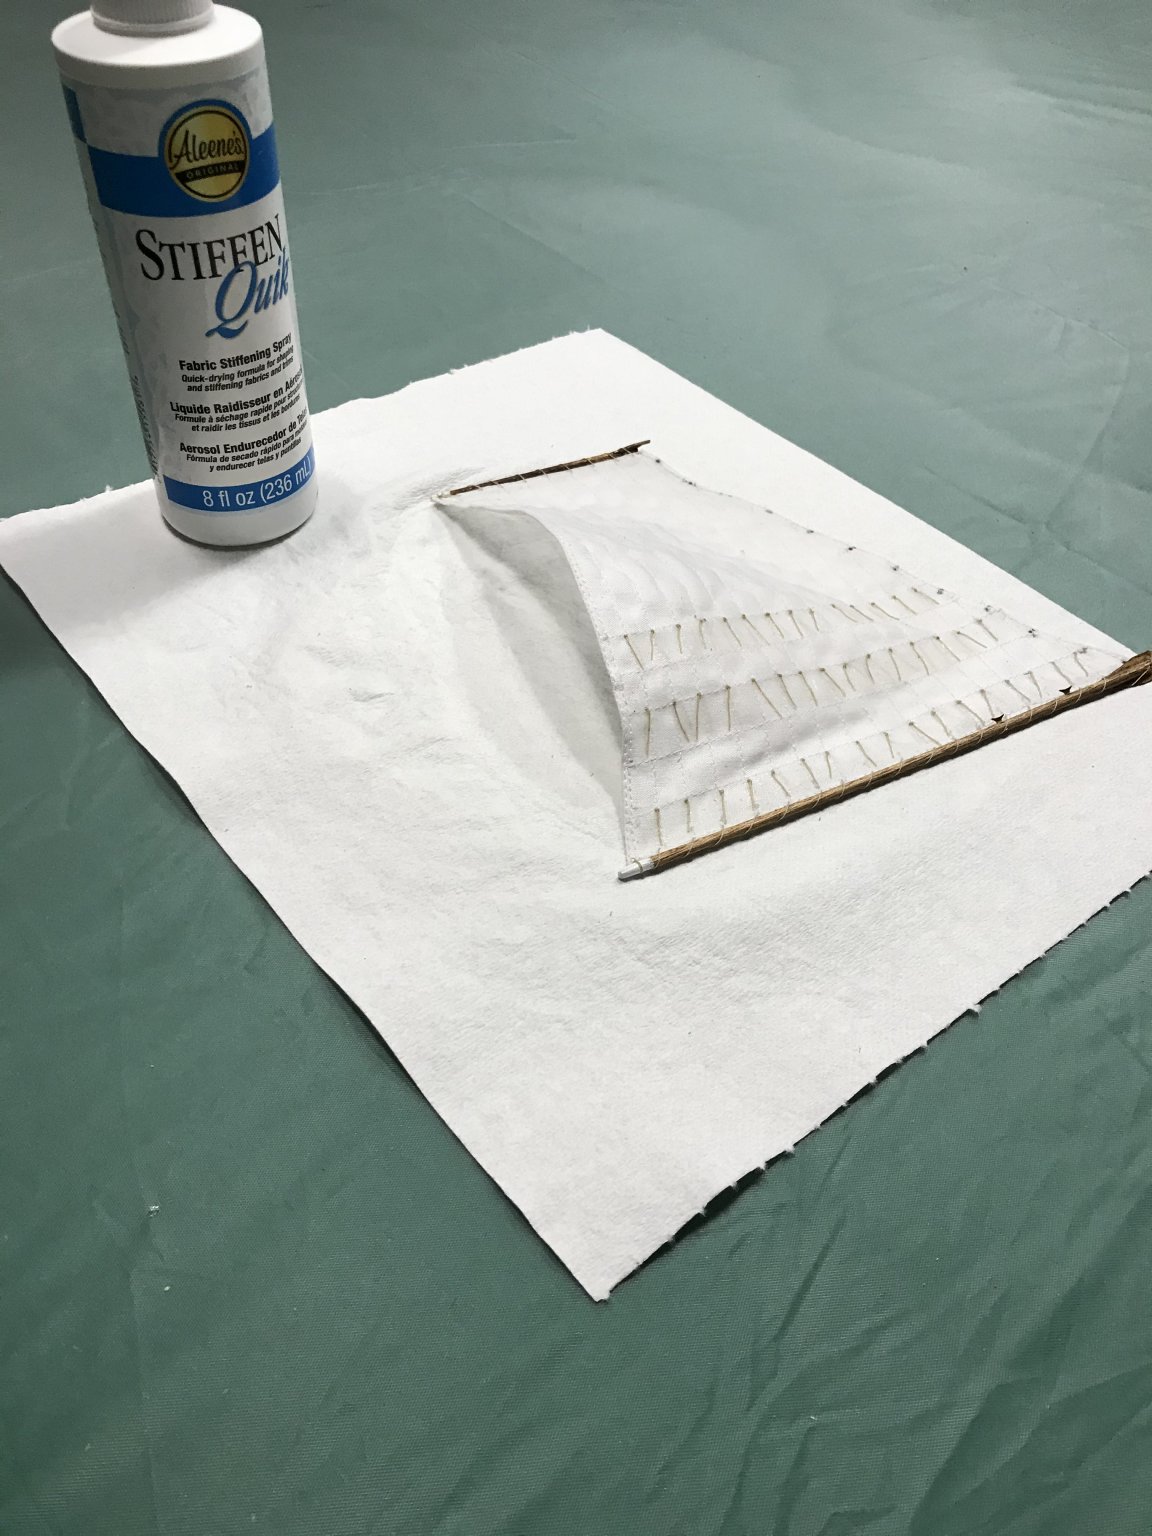
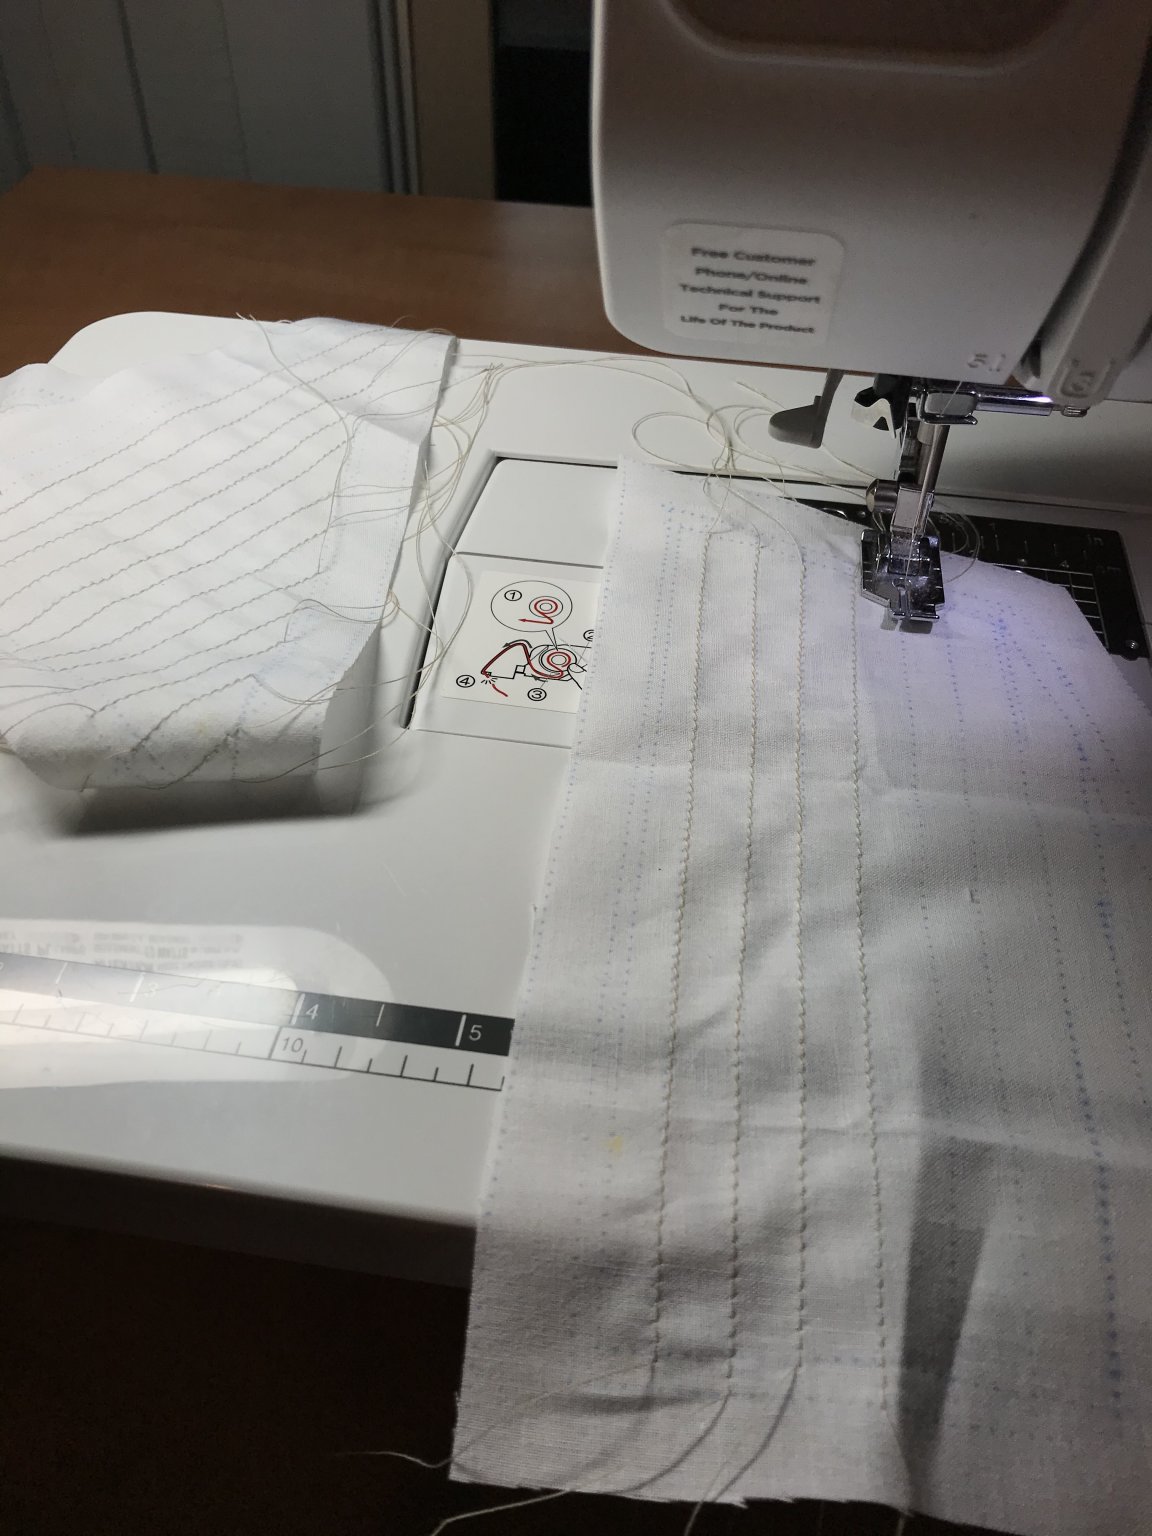
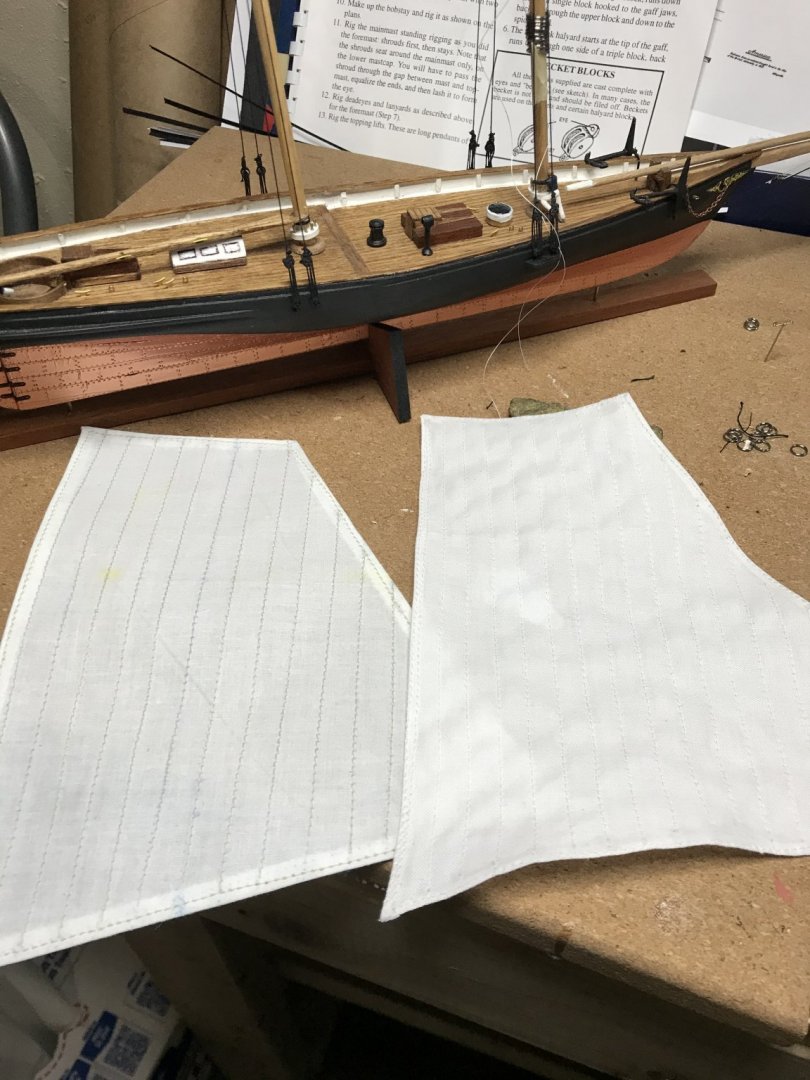
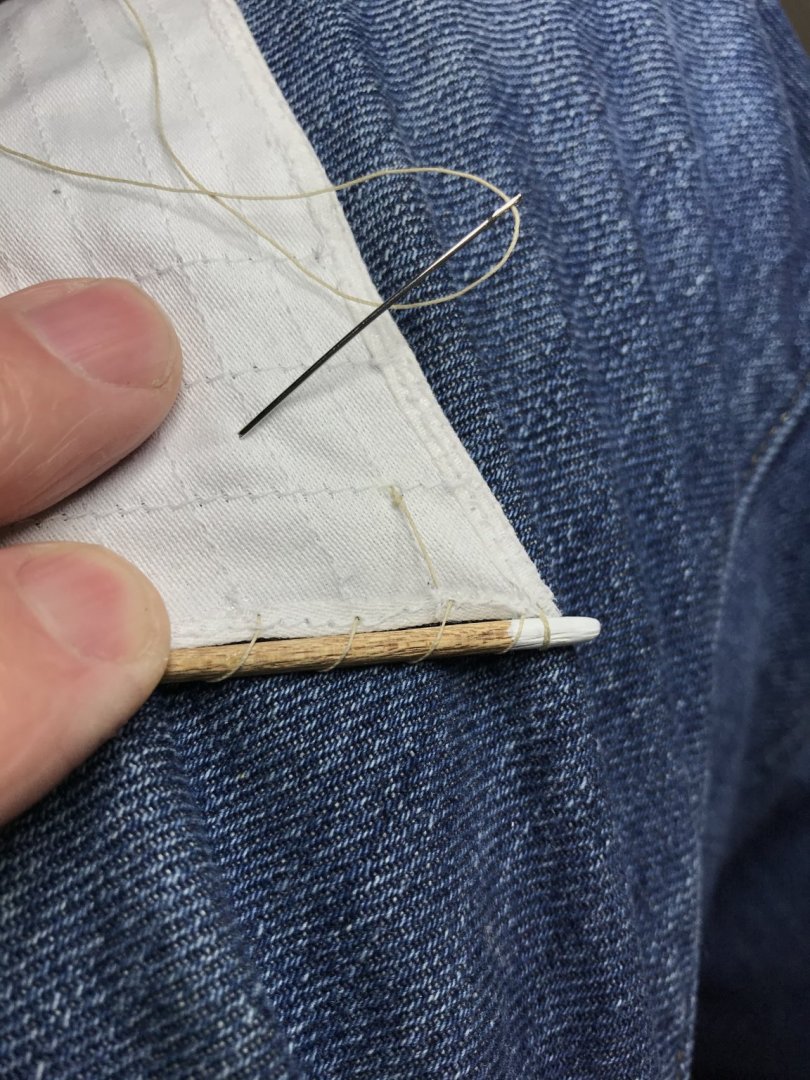
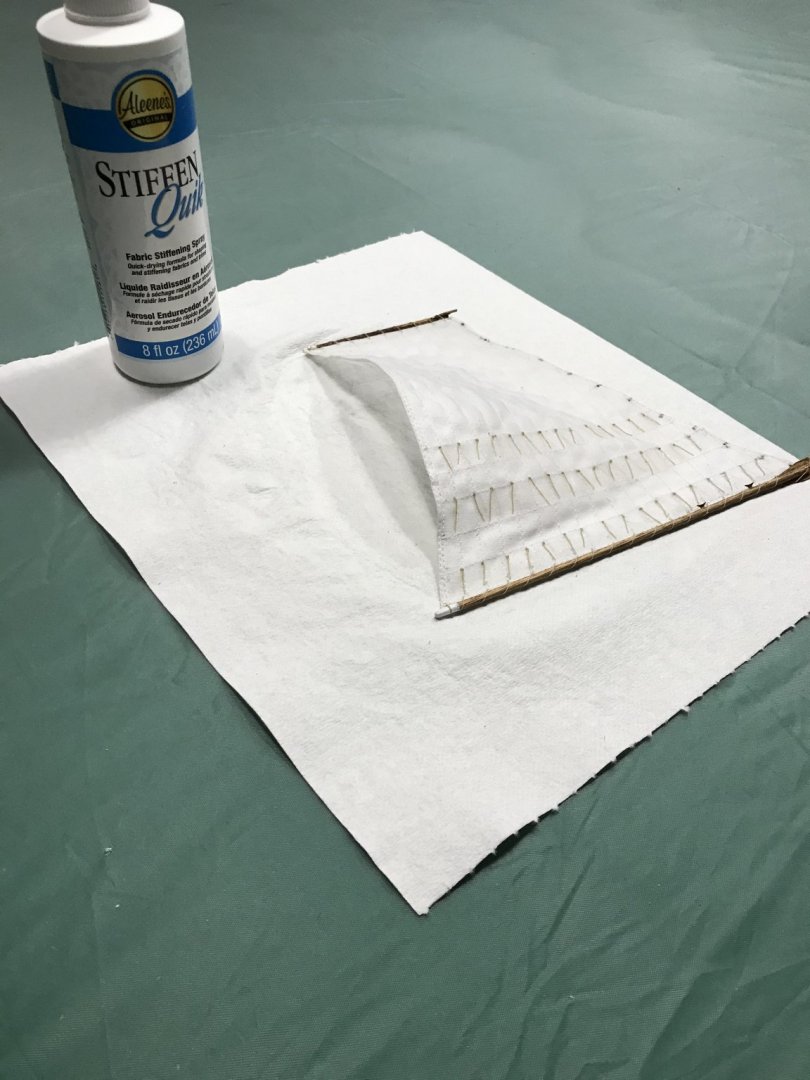
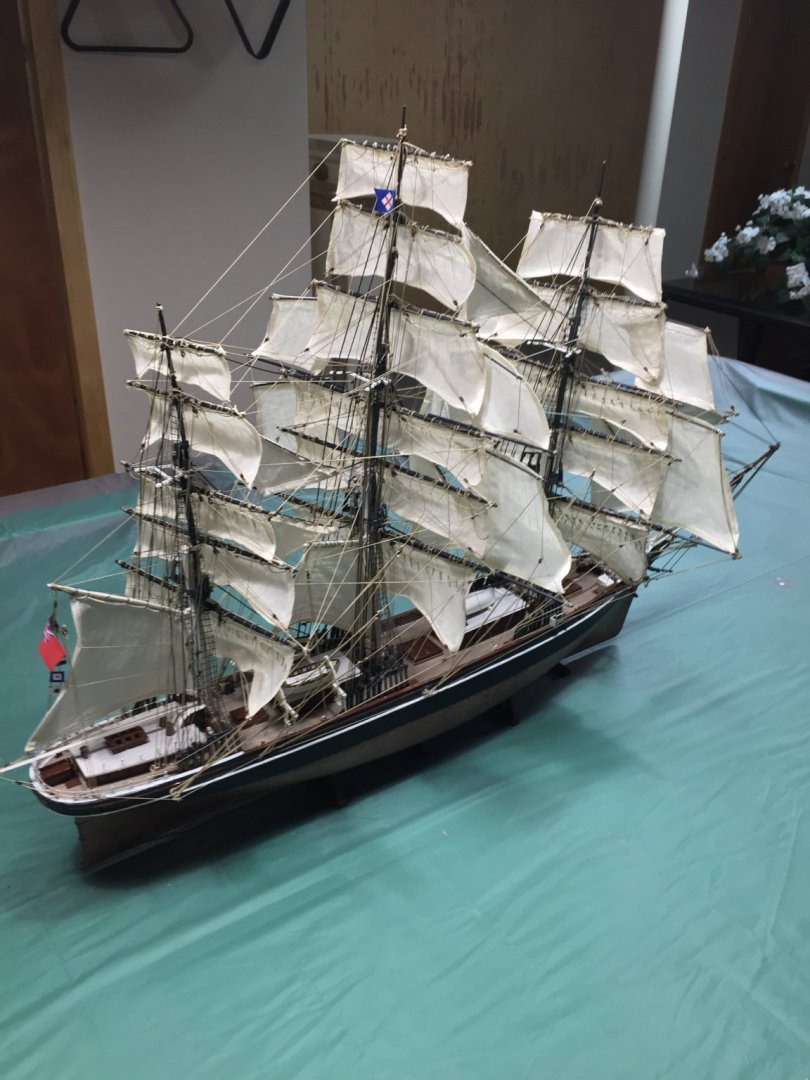
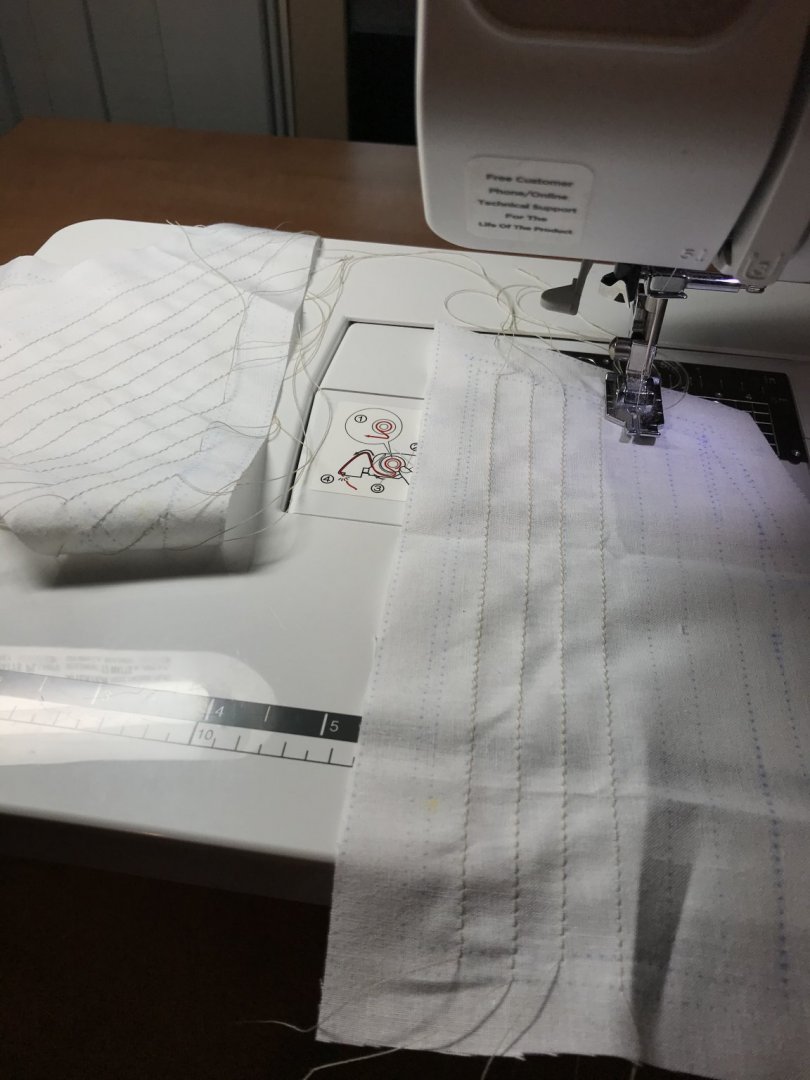
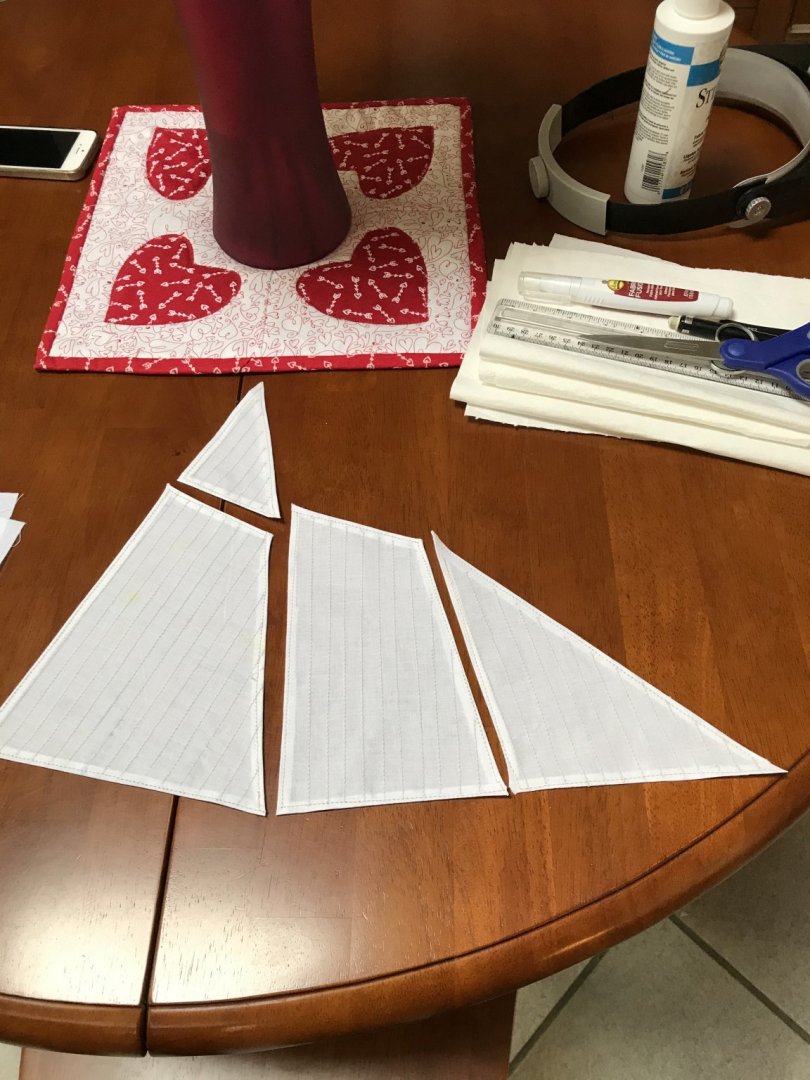
Decided to redo the sails, before placing them on the yacht. Left is the first attempt, right v2.0. Brought some 100% cotton at the fabric store. Bargained for the use of my wife’s new sewing machine. Who says you can’t sew a 1/16th inch seam. 😎 Hand sewing the reef points was tedious, to say the least. Fabric stiffener for shape and that full sail look. Three more sails and we are ready for running rigging. A whole lot simpler than the Constitution.

- 21 replies
-
- 4
-
-
- America
- BlueJacket Shipcrafters
- (and 1 more)
-
Impressive! Welcome to MSW.
-
Welcome aboard! I’m a Newbee here too. Started building just two years ago joined MSW recently. You’ll find lots of positive encouragement here. Your right, what matters is learning new skills and having fun. My first tall ship was the Cutty Sark. It was a plastic model, what drew me in was the detail rigging and sails. Sewed my own cloth sails and was hooked. Moving on to my first Vintage Wood Model Ship. Good luck on your first build. Looking forward to seeing your progress, lots of pics please. 😎
-
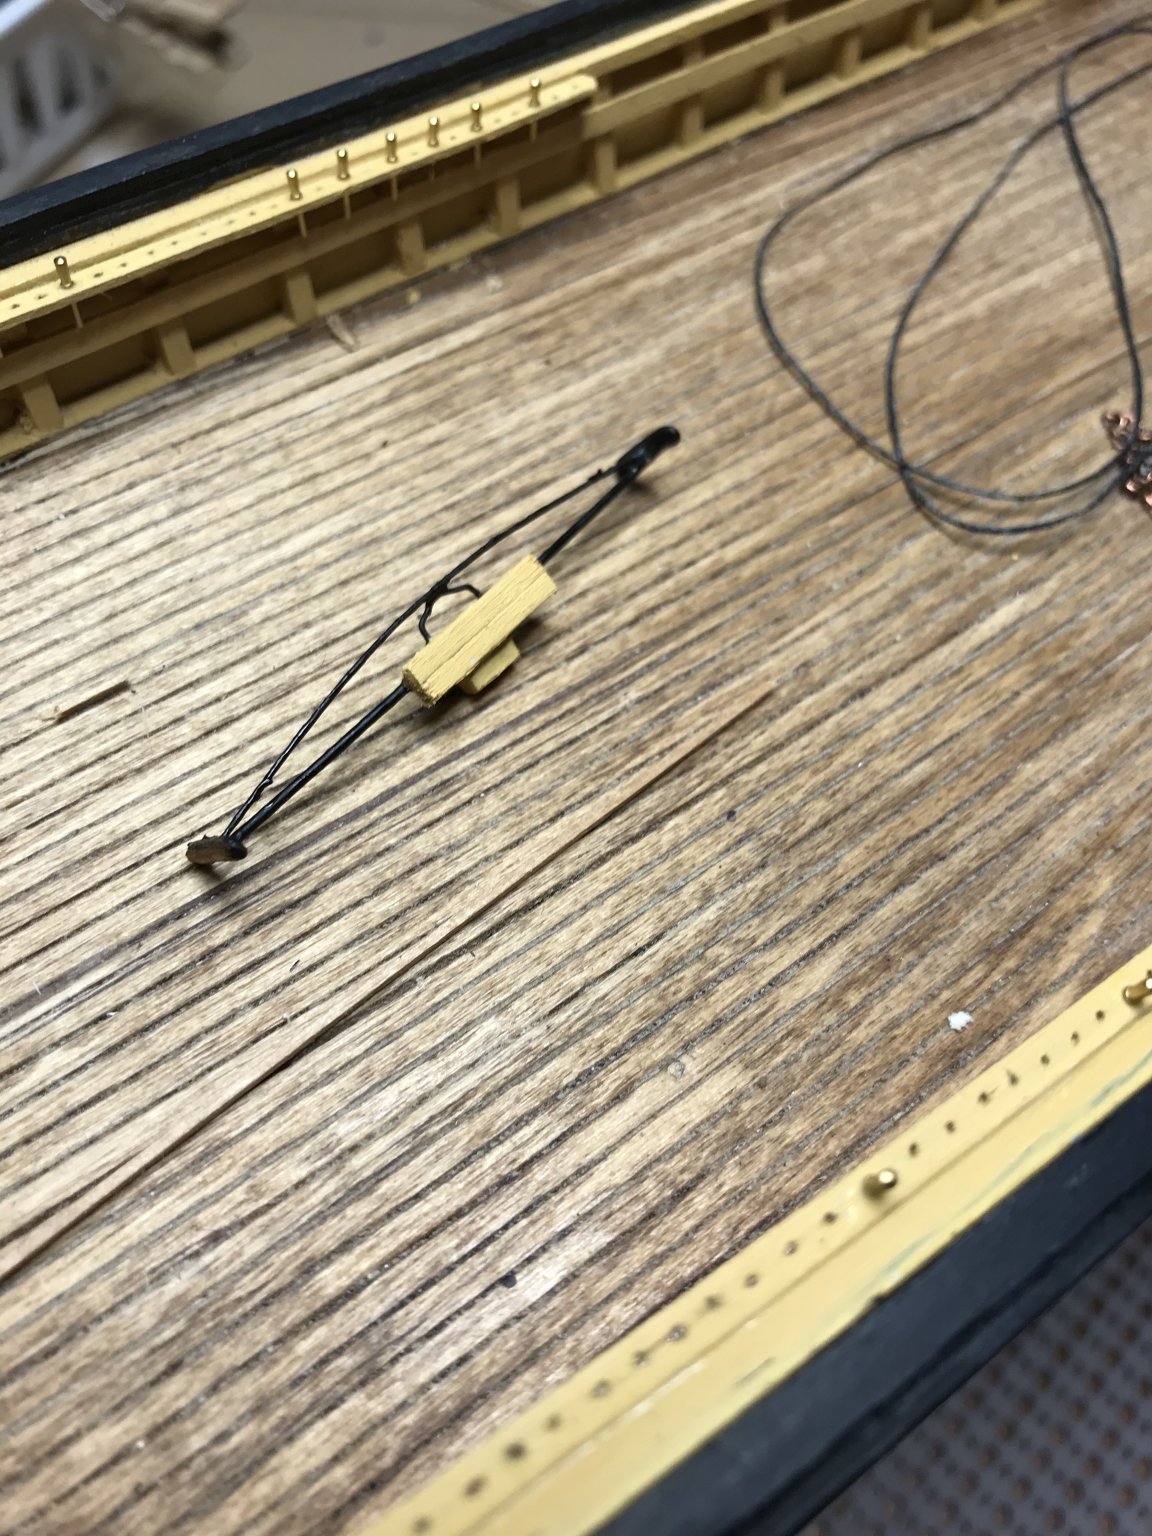
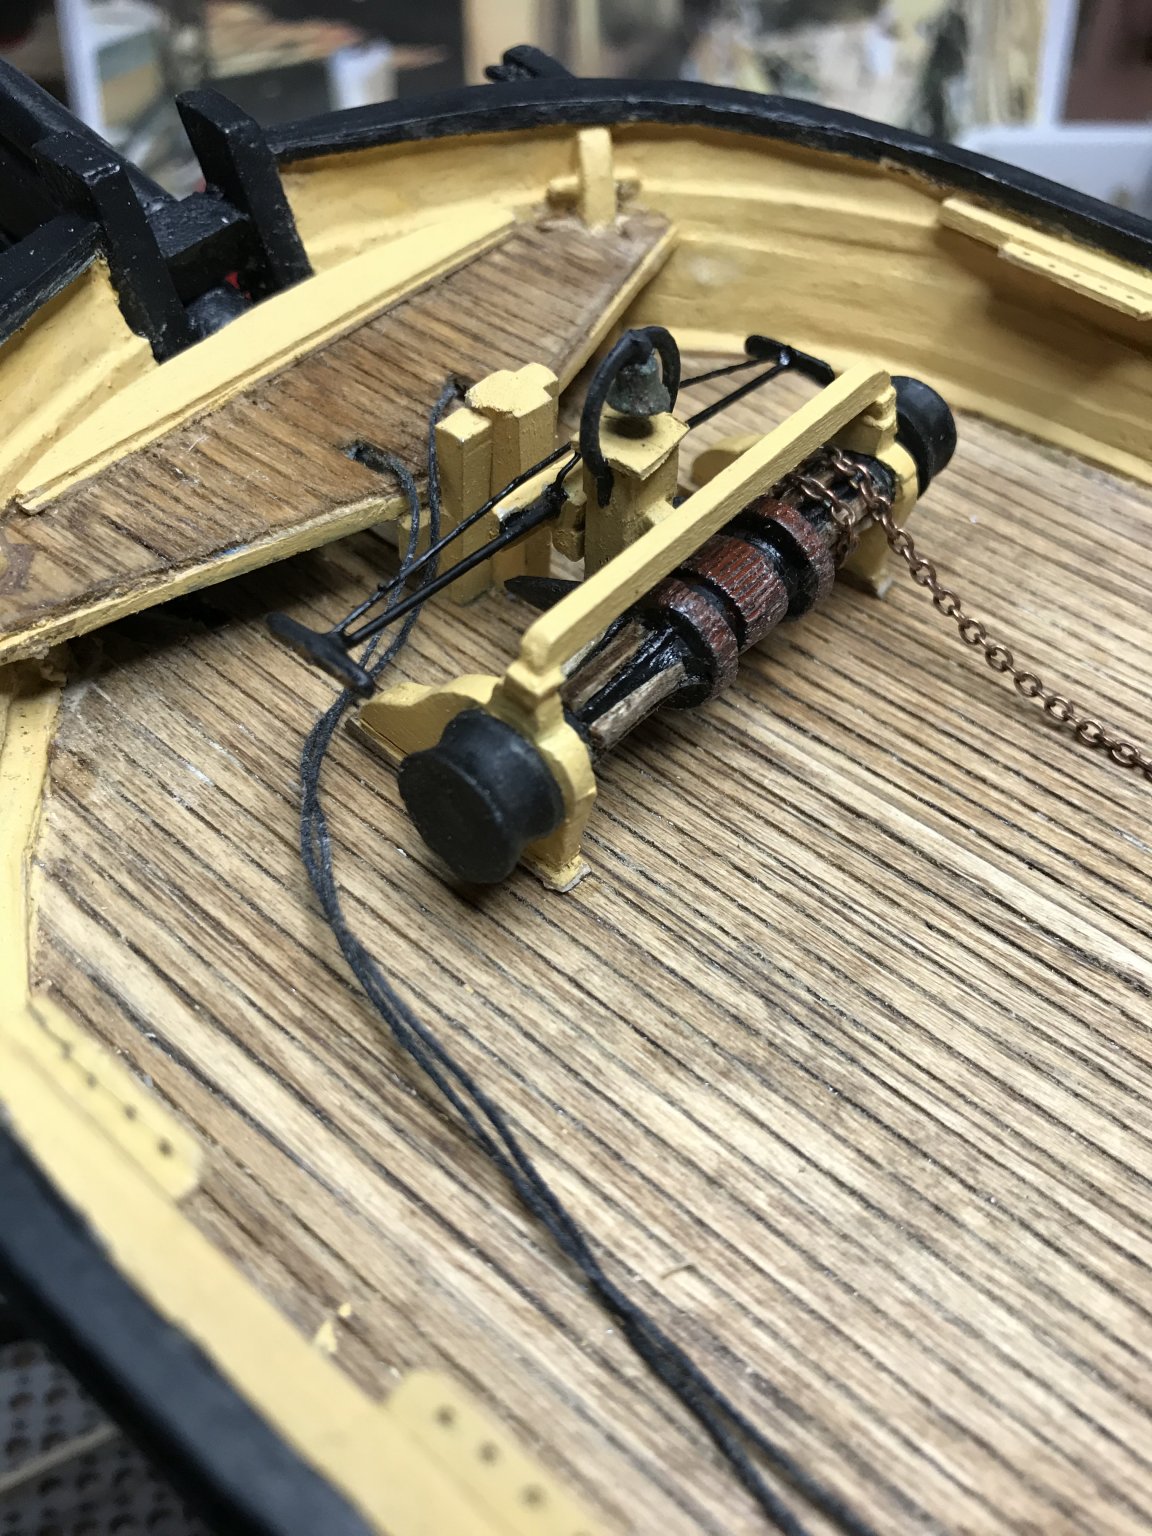
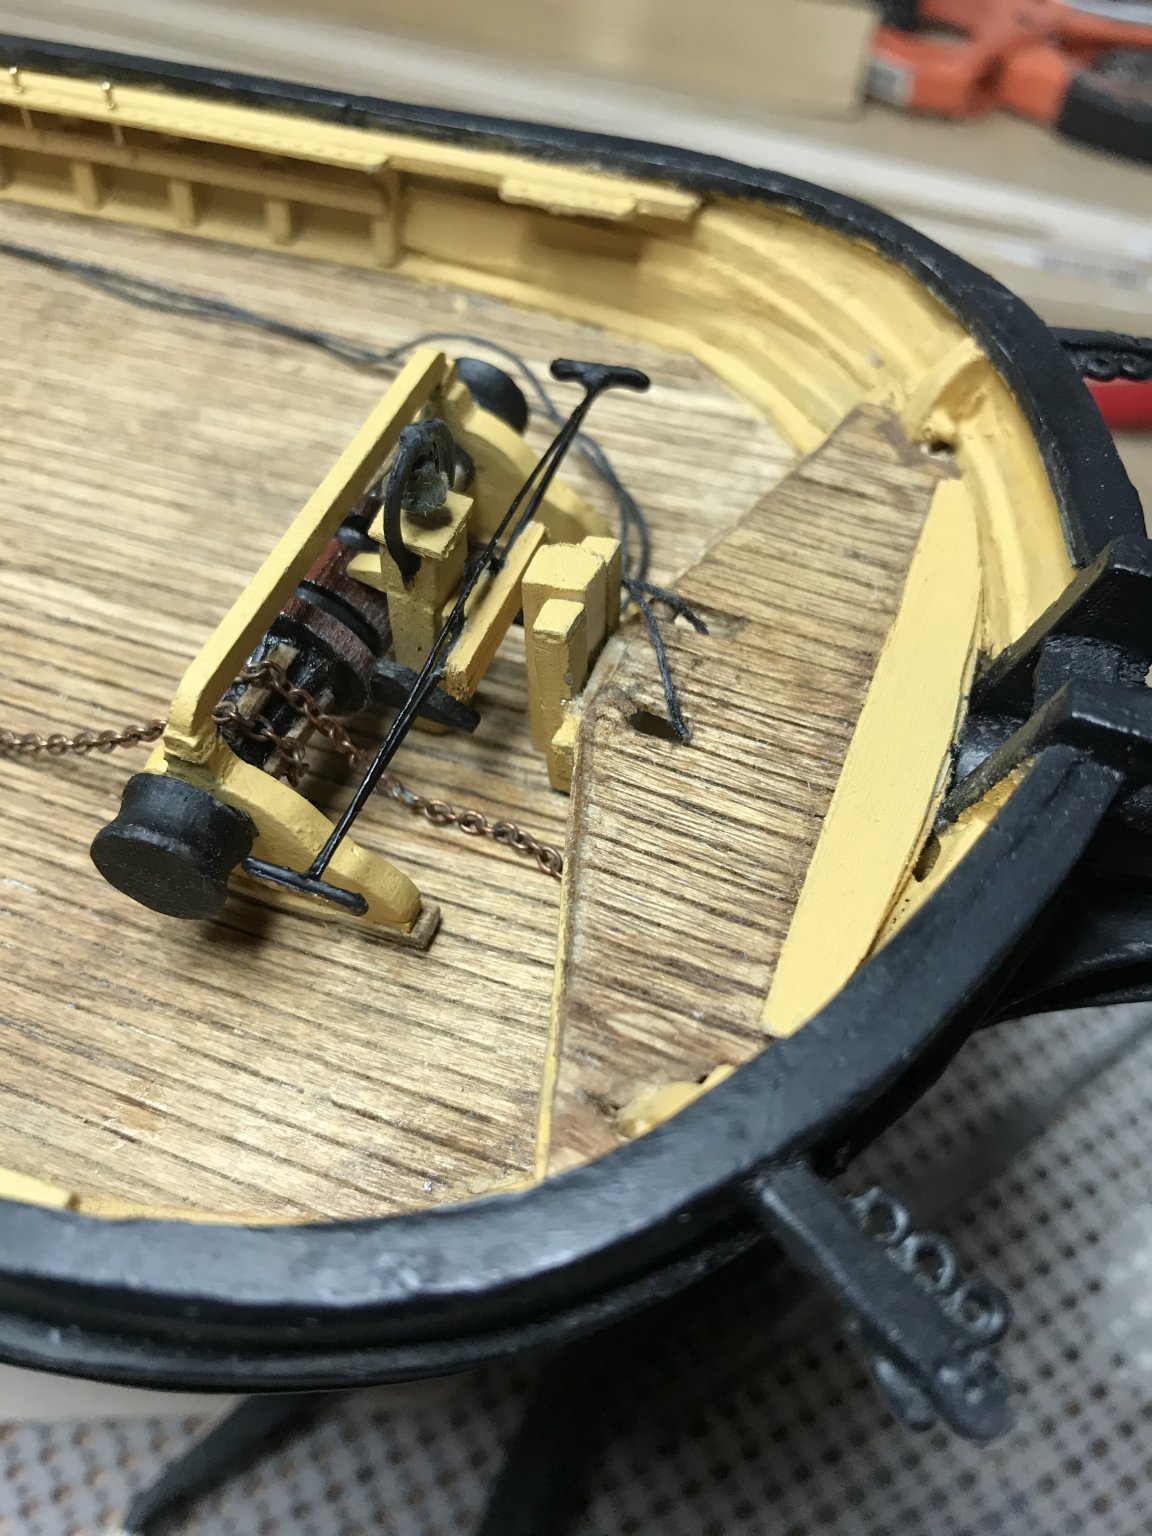
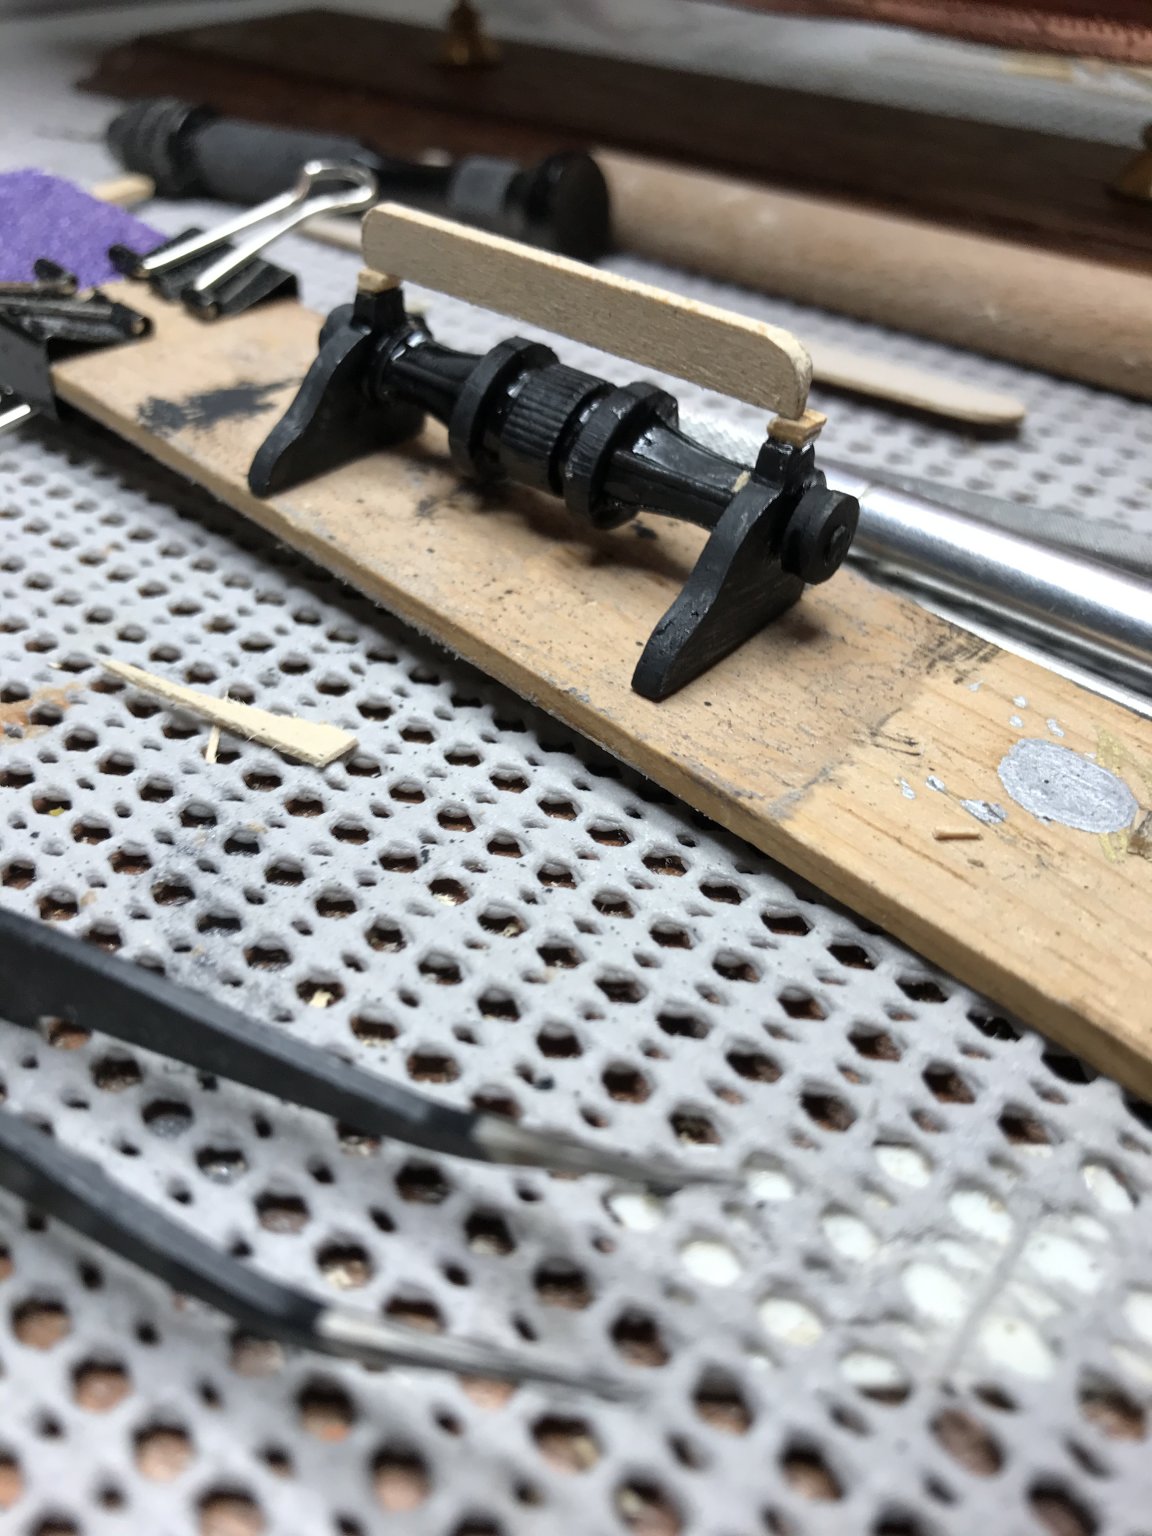
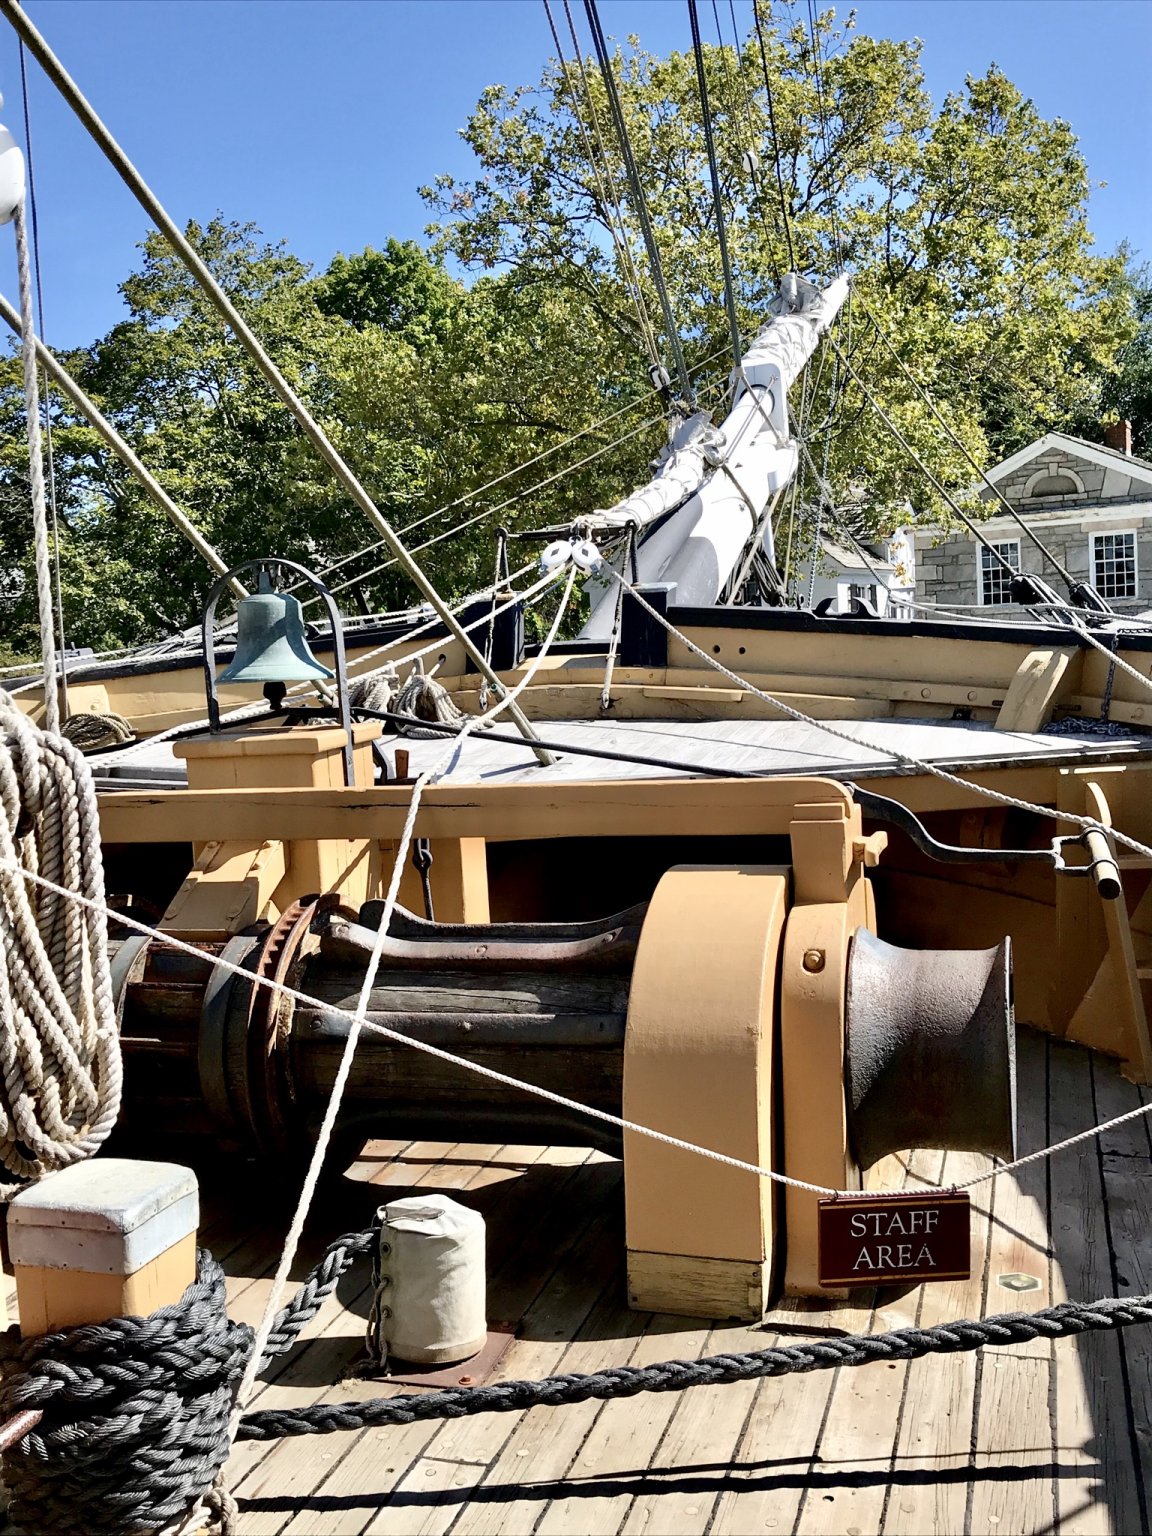
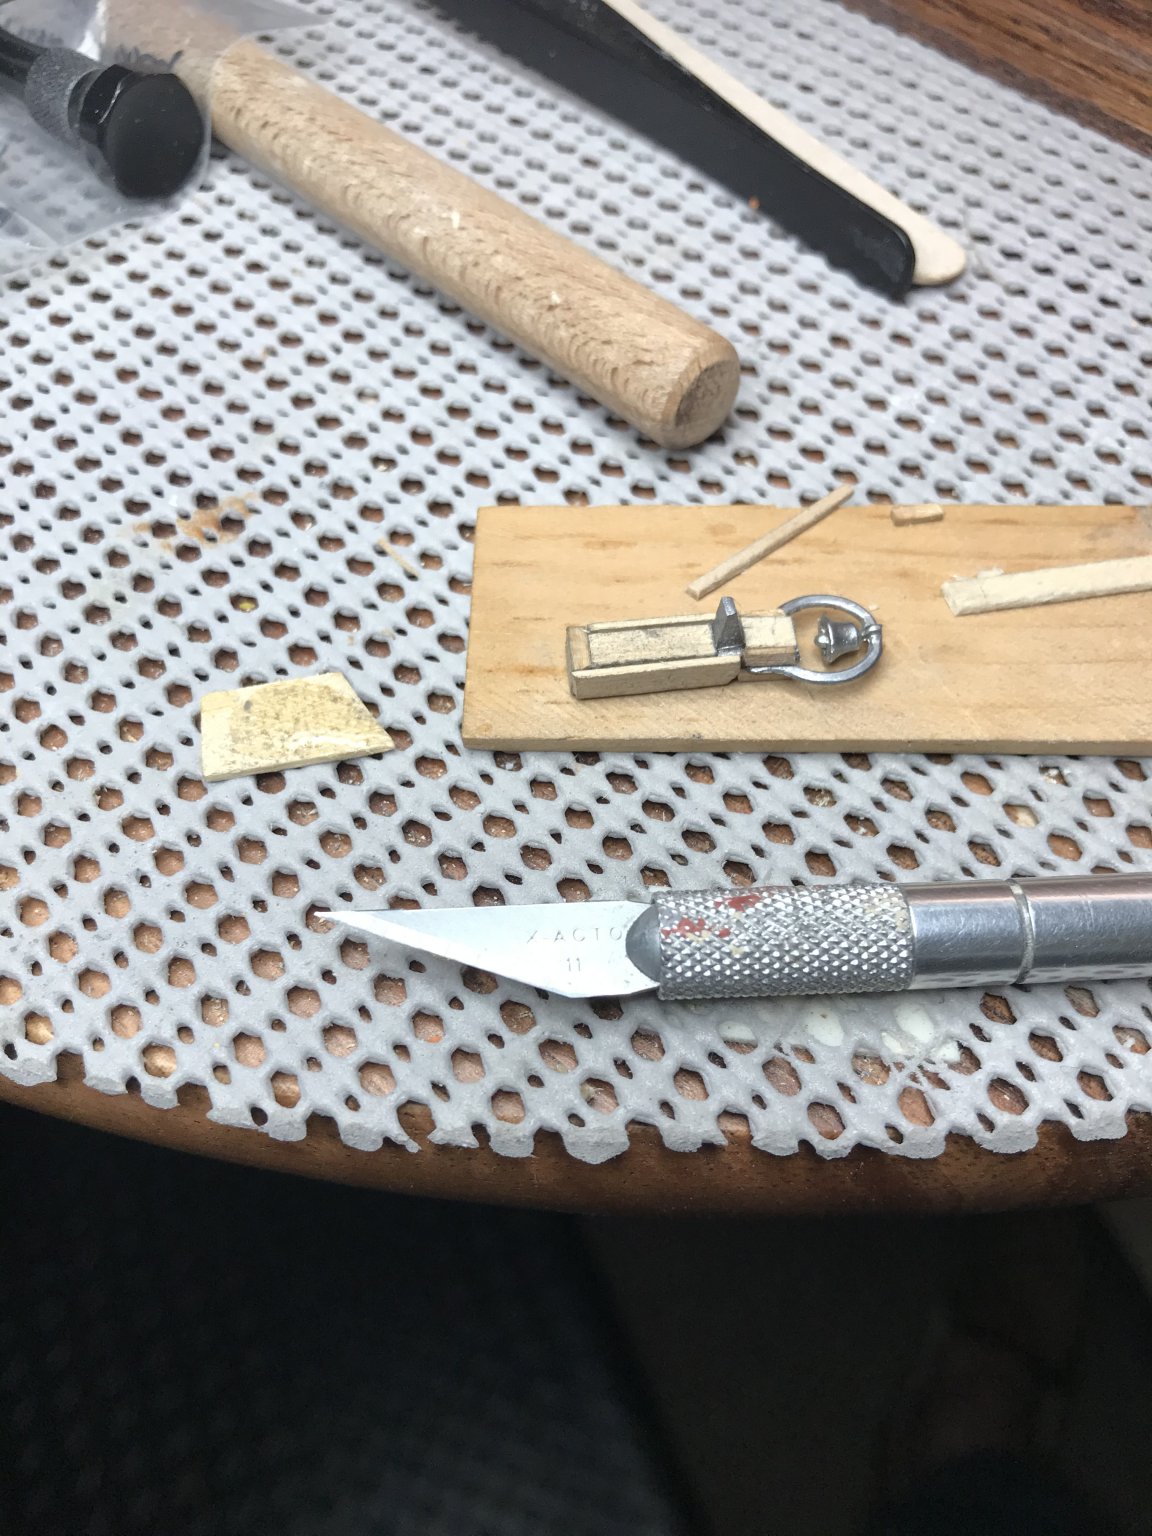
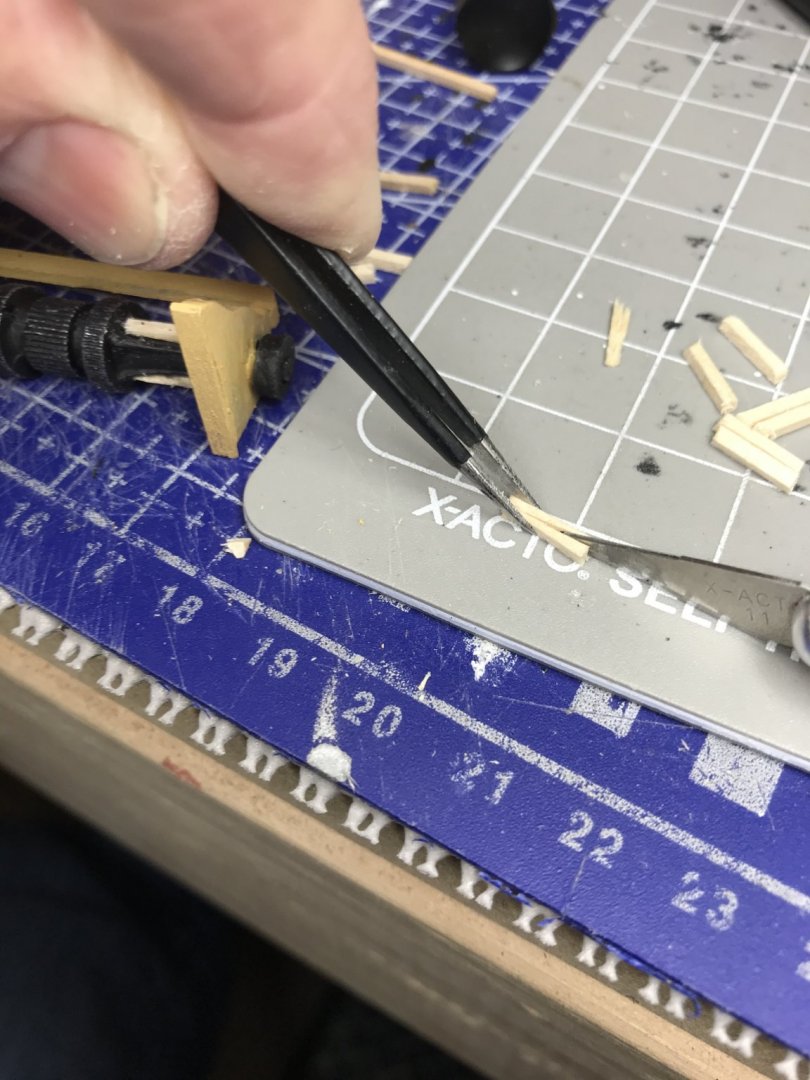
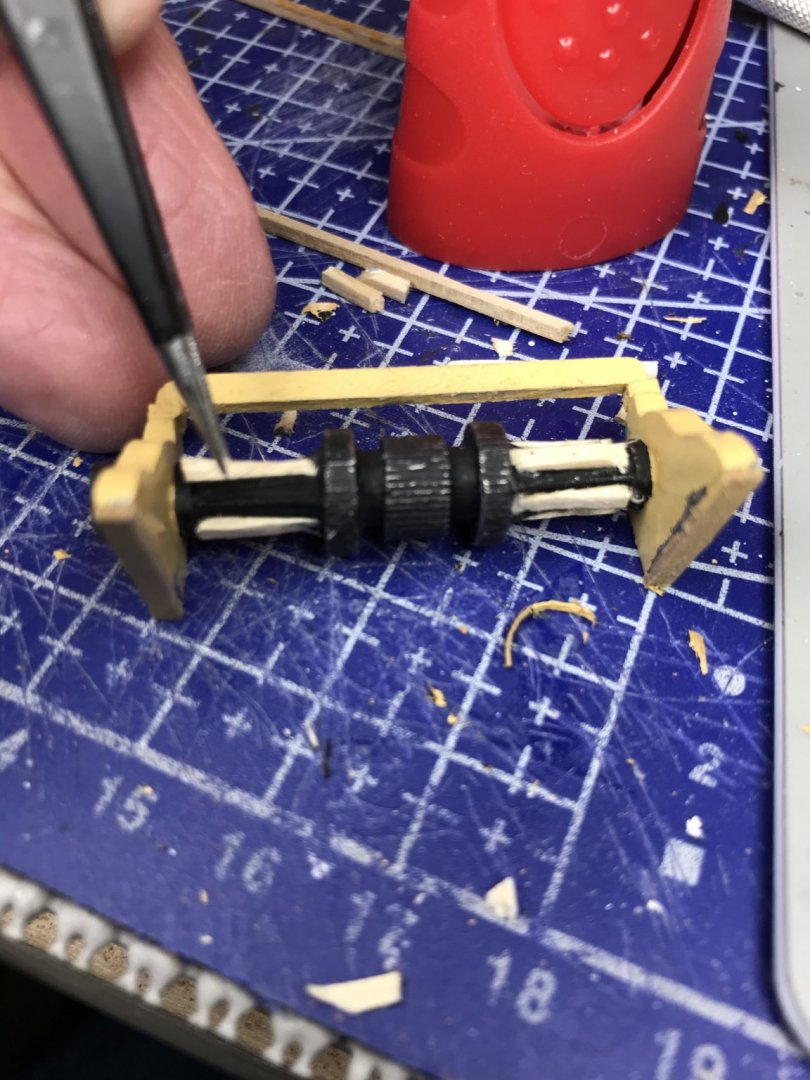
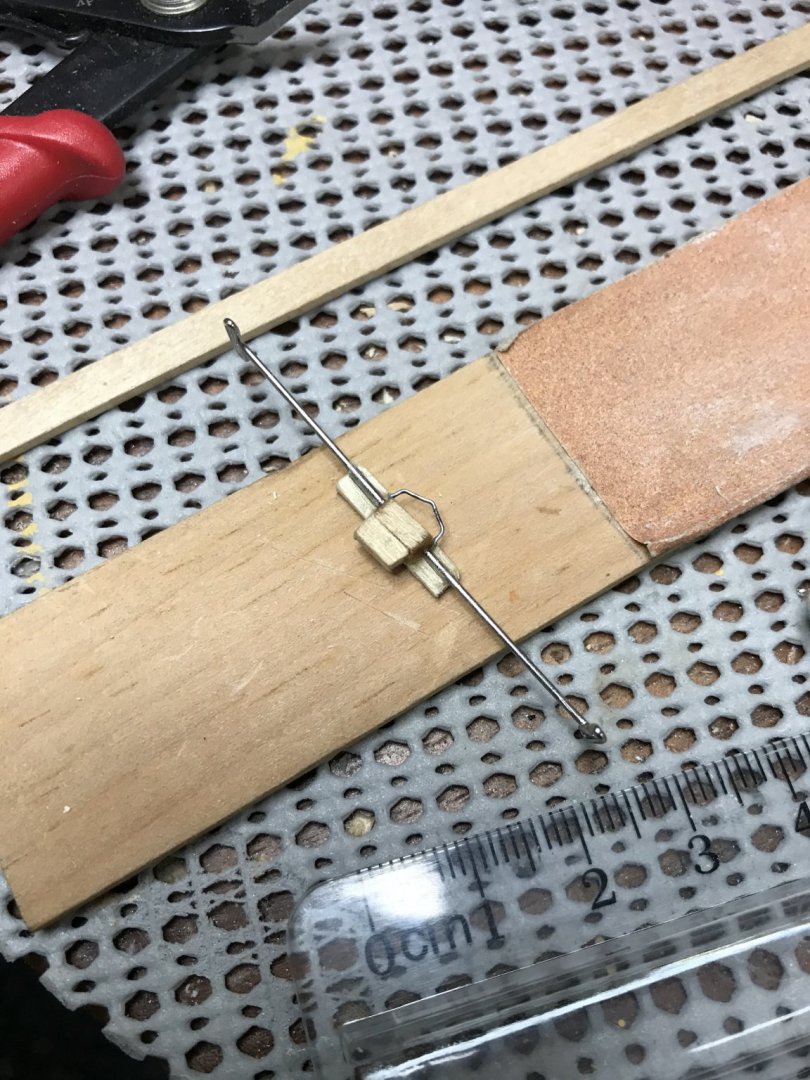
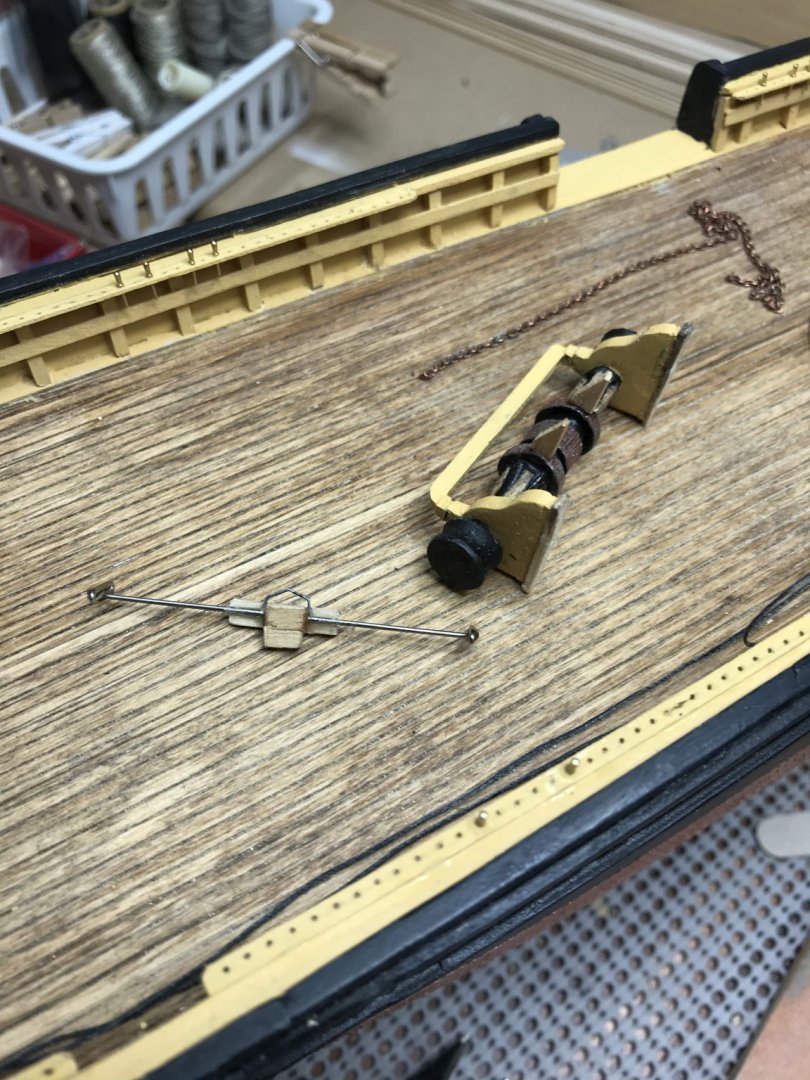
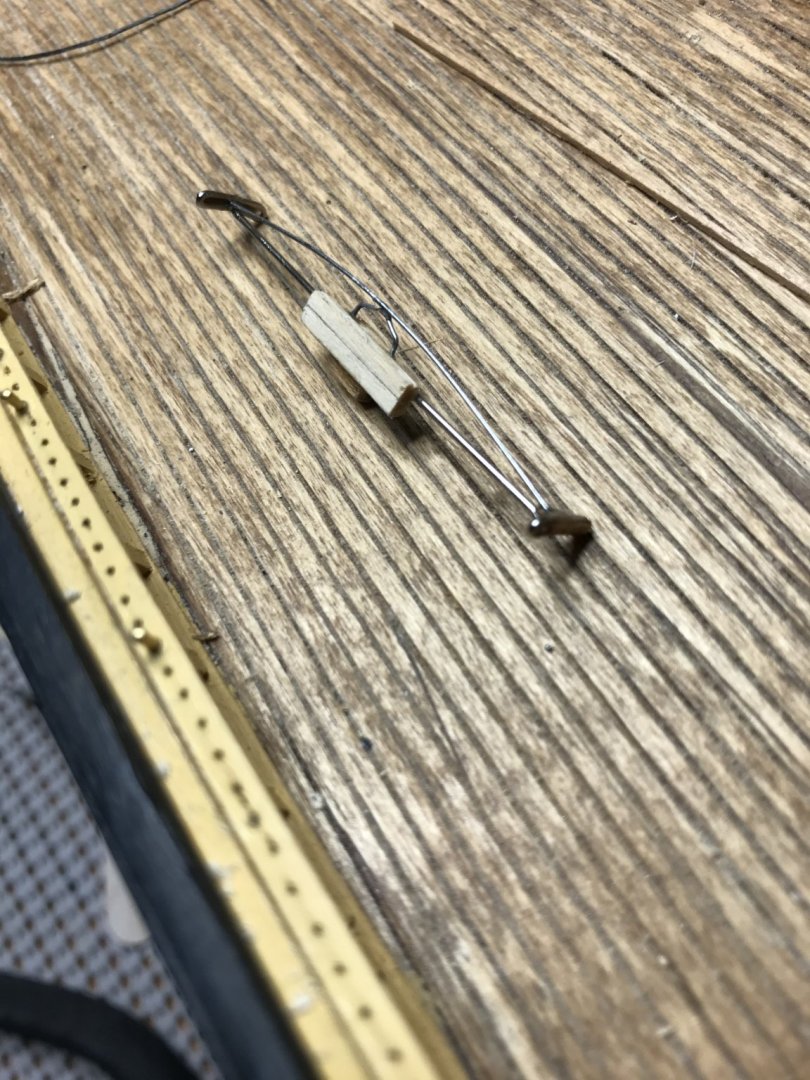
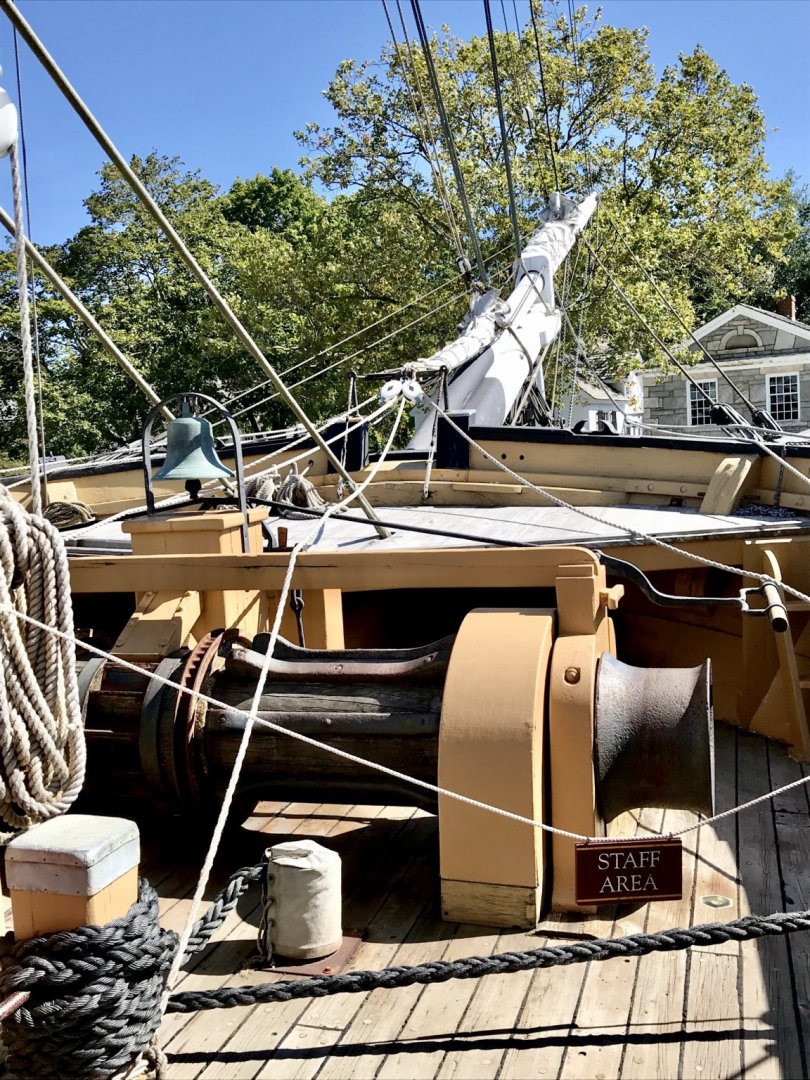
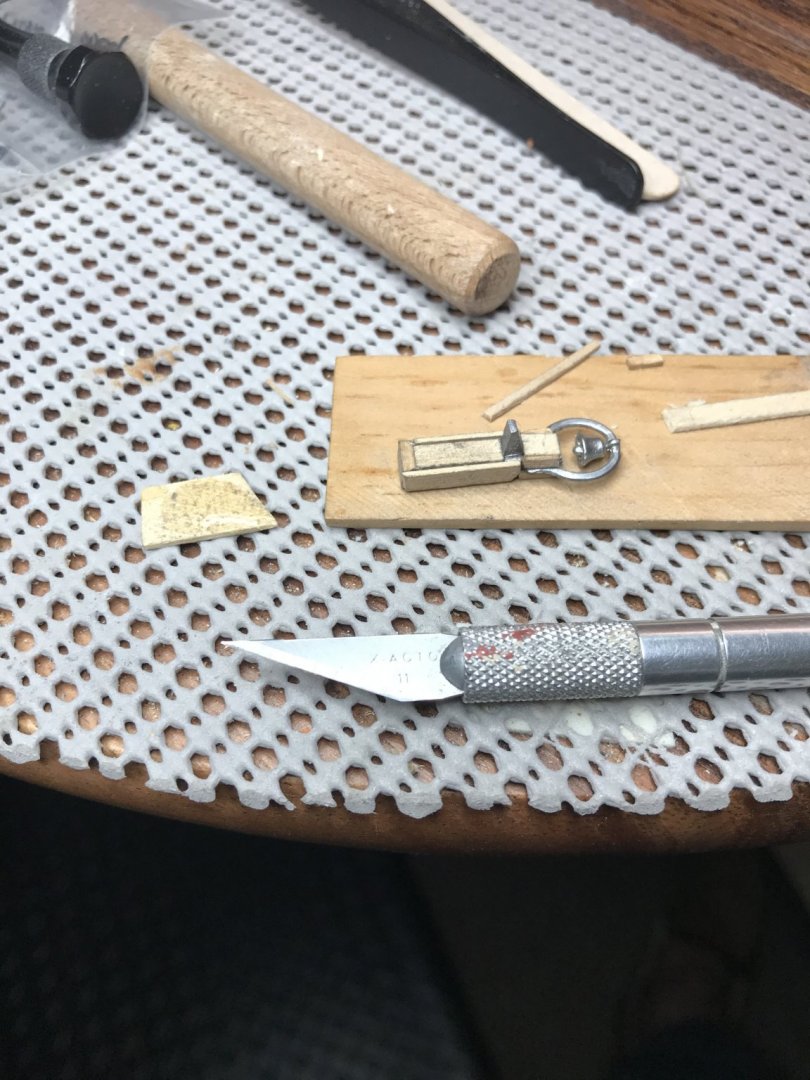
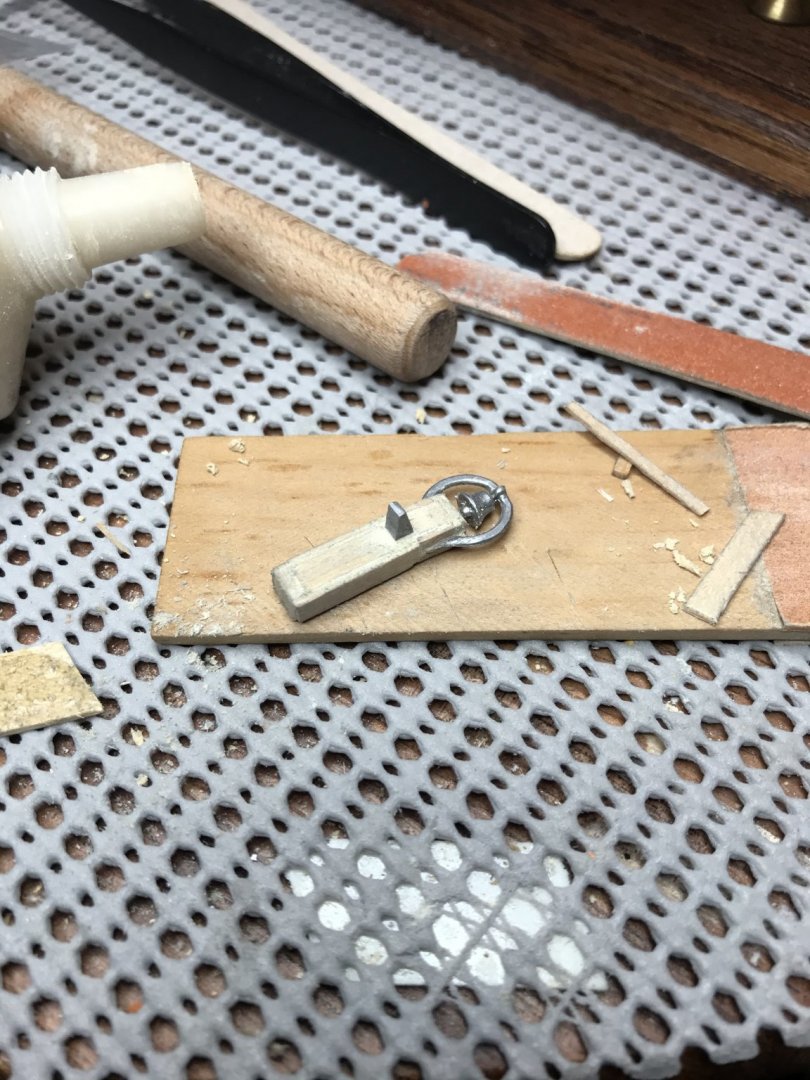
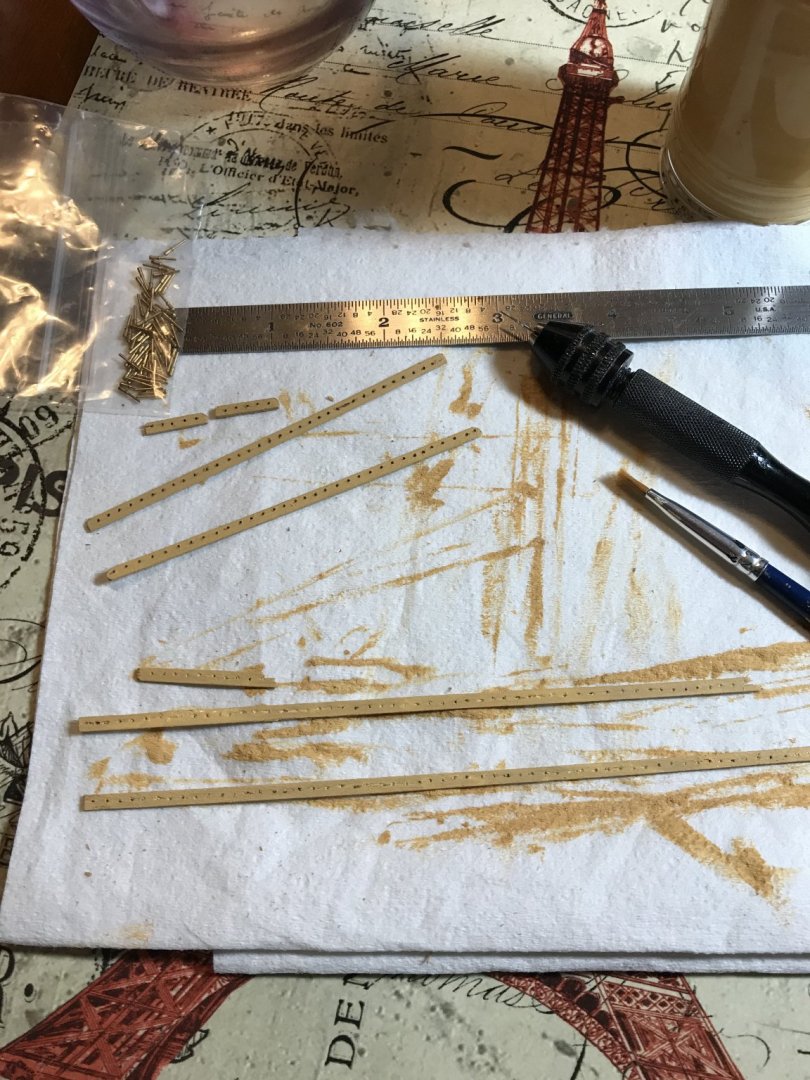
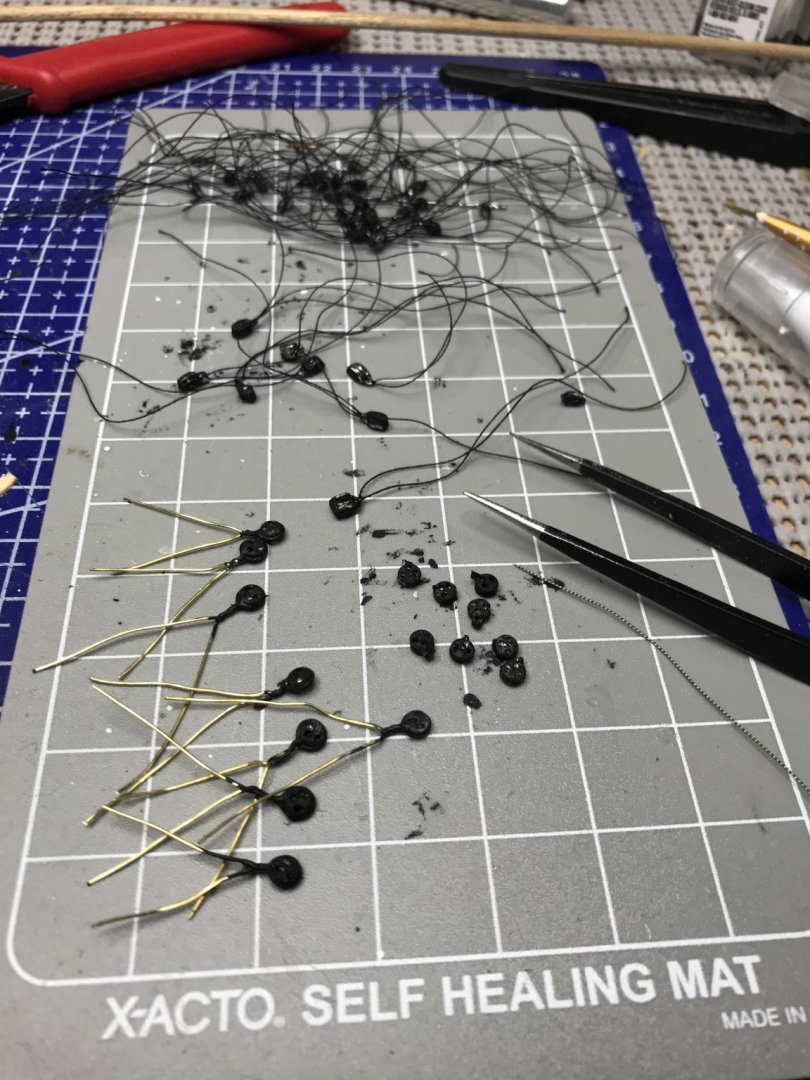
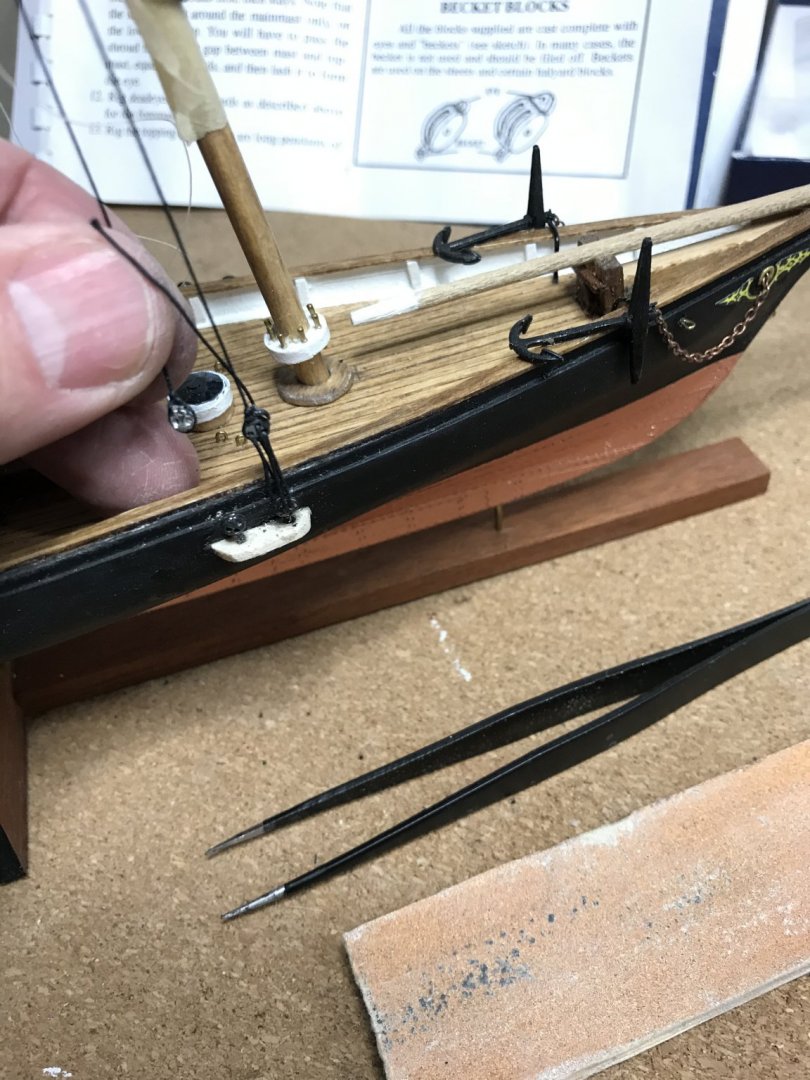
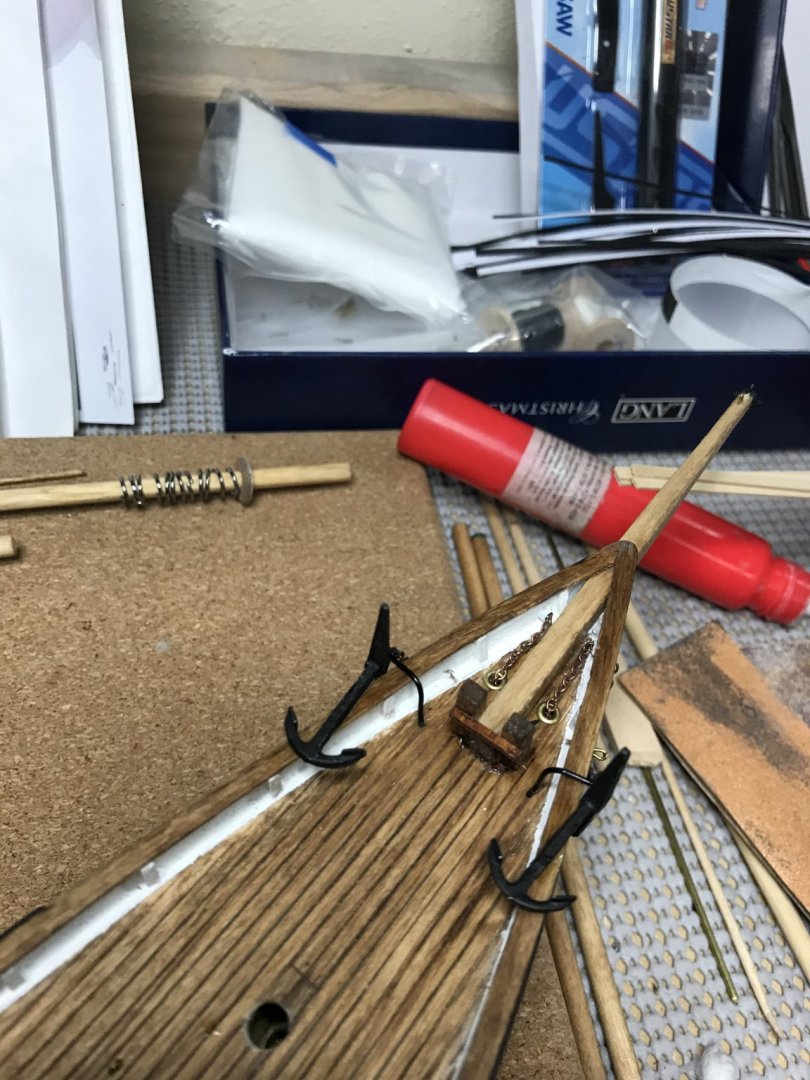
Call it “obsessive compulsive” if you will, but I love it. It’s either the HD photos or the magnifying work light, but my obsessive tendencies are being fed by this hobby. I just couldn’t move on without adding some detail to the windlass. I started with adding wood to the spindles and larger pulleys. Then came the building of the handles. T-Pins make great pump handles. I found that the CA glue works as well as solder as suggested in the instructions. A bit of wood detail on the T-Pins worked for some realist detail. Touched up the bell with some tarnish and the windlass with some rust and off to the next step. Can someone tell me how and where the Anchor chains were stored once they were brought across the windlass? I am having trouble finding that bit of detail. Thanks 😊


- 204 replies
-
- 9
-
-
- marine model company
- charles w morgan
- (and 1 more)
-
I would think just some small paint bottles strategically placed would do the trick. Rubber bands would tend to warp the shape. 👍
-
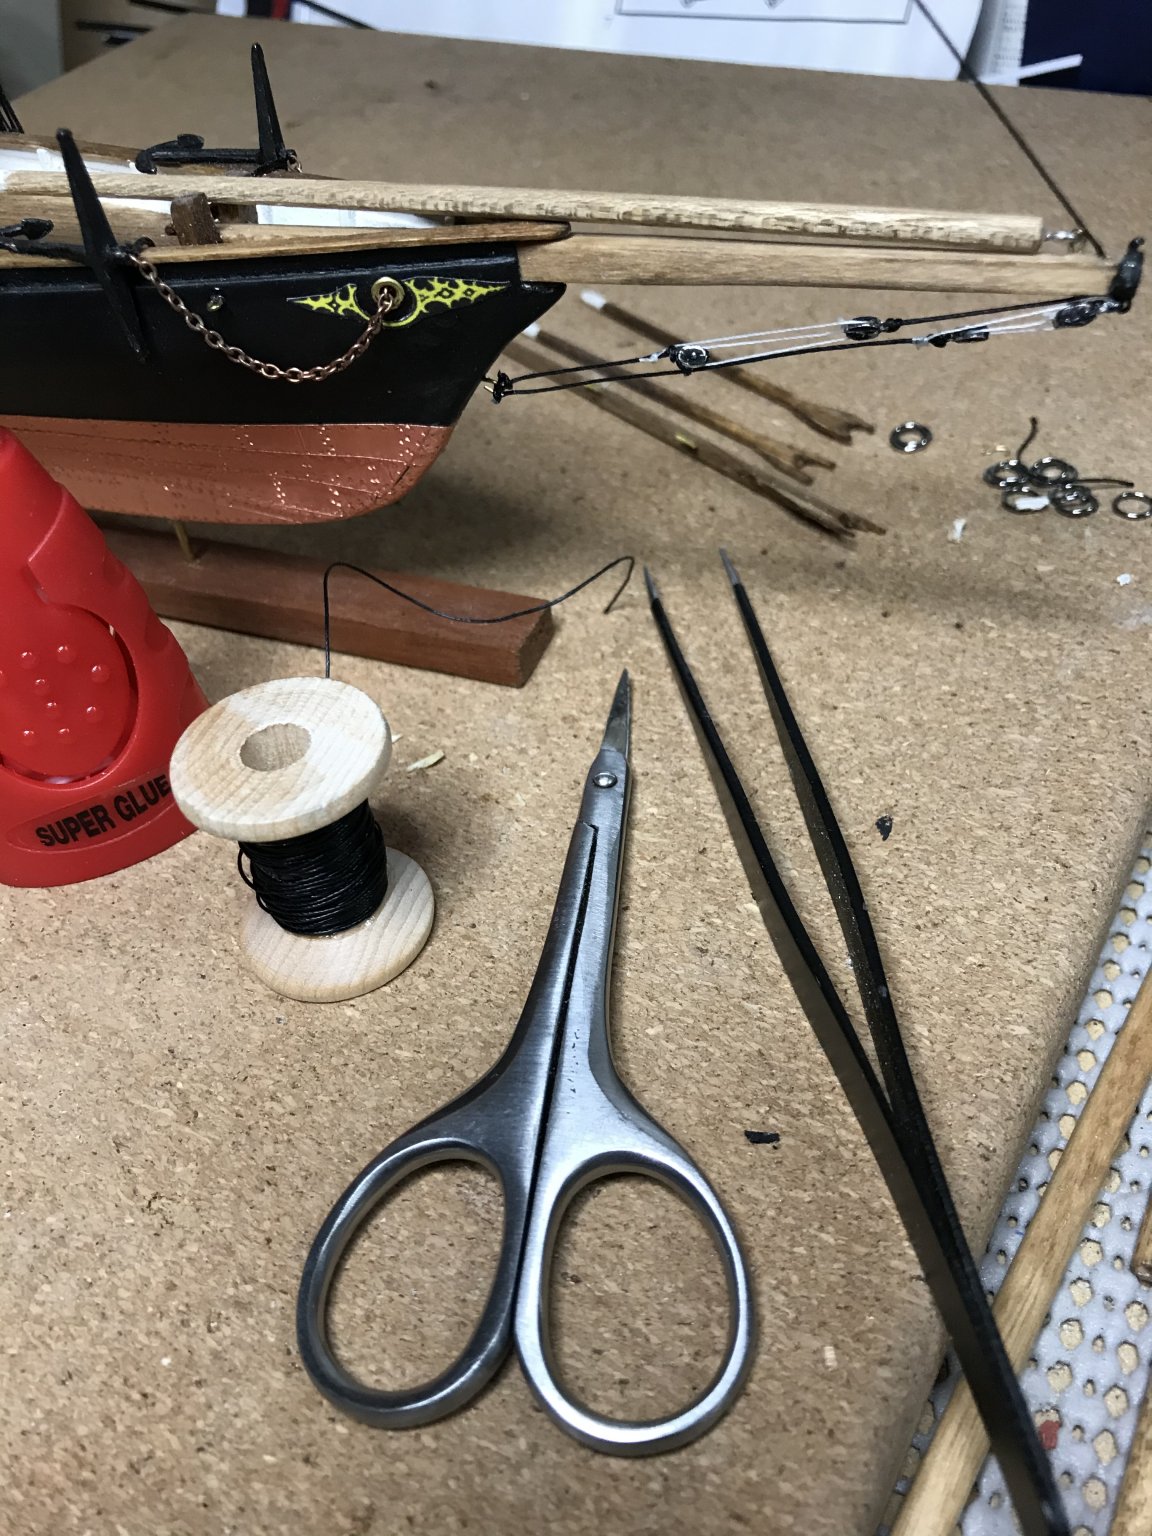
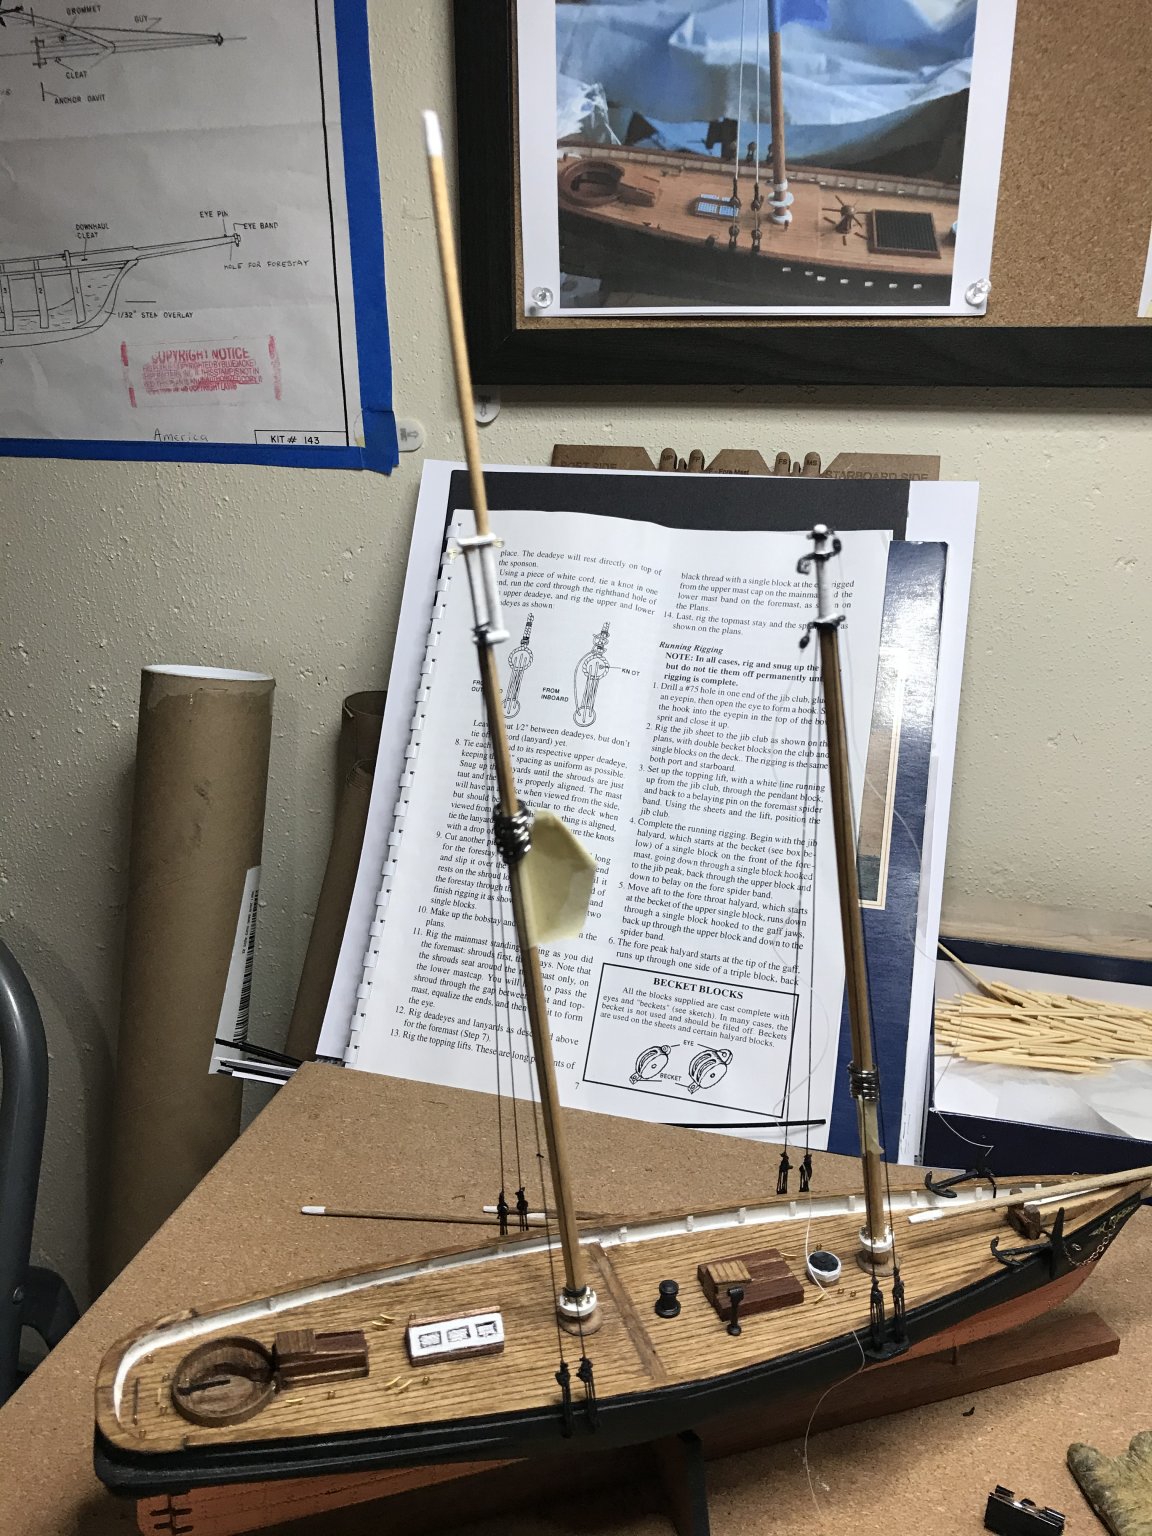
Taking a break from the CW Morgan tonight and turning my attention to Yacht America. Shrouds completed I worked on the Forestay and Bobstay Rigging. 1/96 blocks are seem to be getting a “bit” easier to work with. 😎

- 21 replies
-
- 5
-
-
- America
- BlueJacket Shipcrafters
- (and 1 more)
-
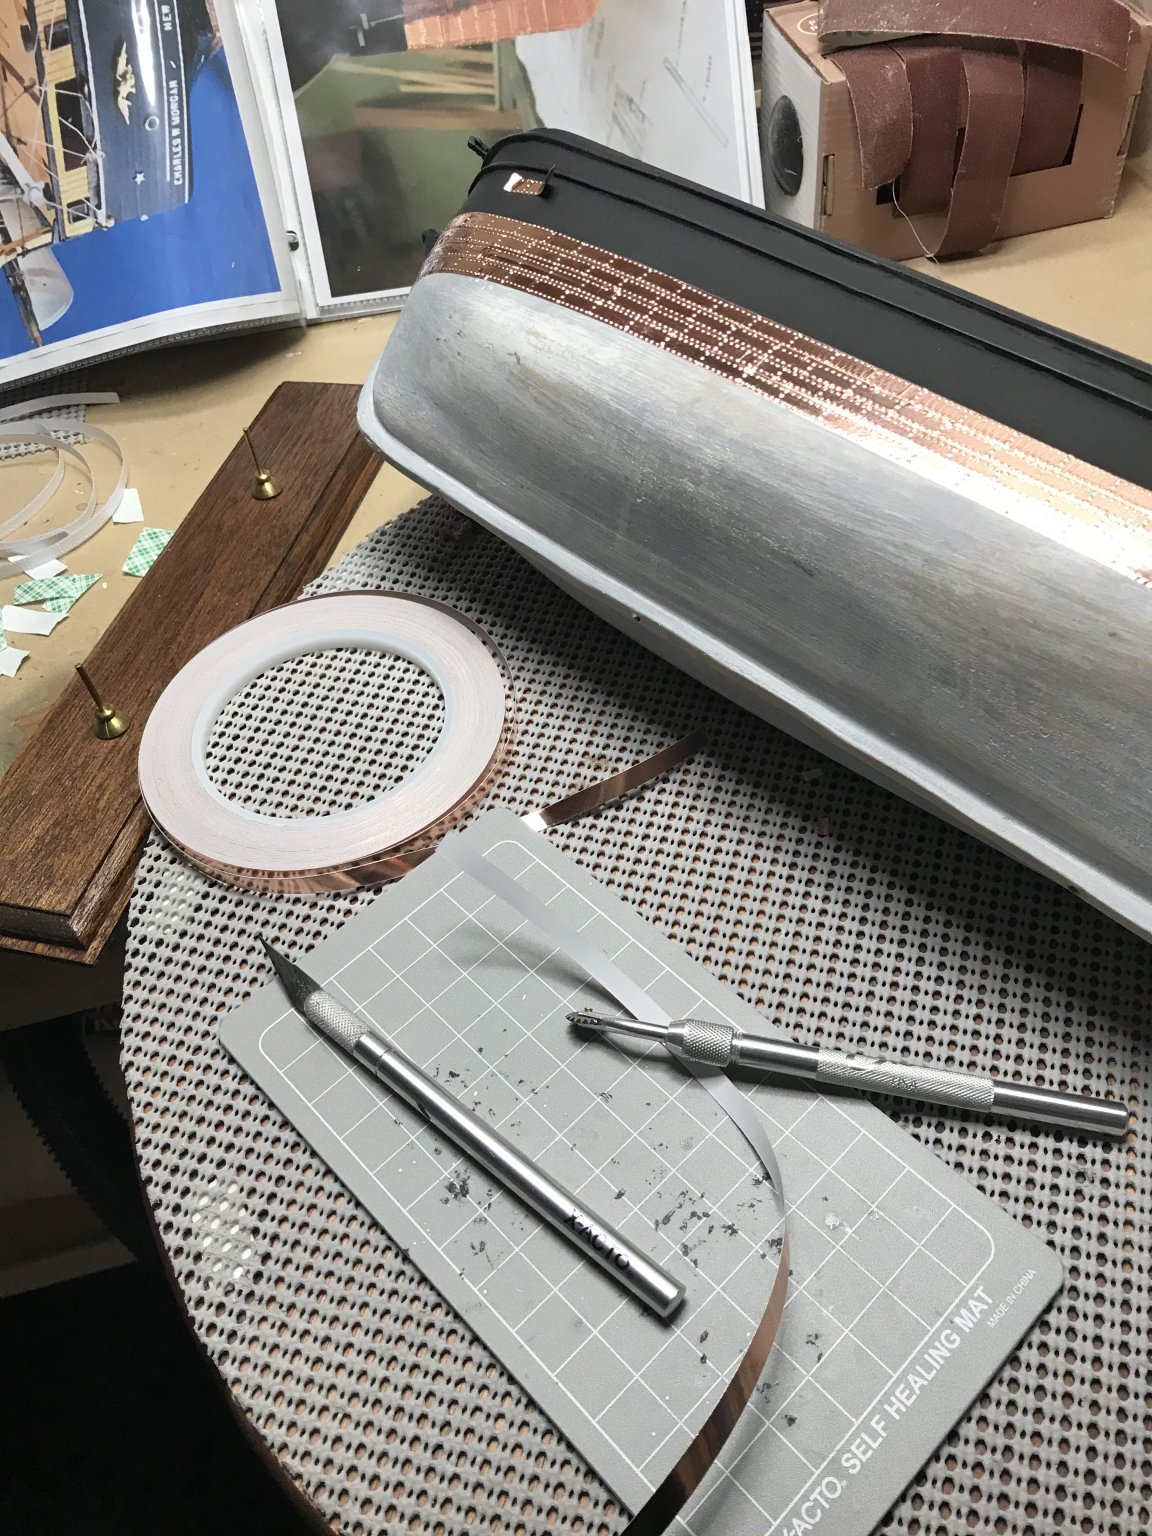
A small tracing wheel works nicely to make nail mark representations. I must say you are doing an excellent job with the tiles. My vintage kit did not come with tiles, I used copper tape in strips. Yes, the stern is difficult, this is when you find out if you got the shape right. Nice job. 👍

- 294 replies
-
- 4
-
-
- charles w morgan
- model shipways
- (and 1 more)
-
Well, I decide to redo the lid below the bell. The bell broke off in the process. So frustrating. I managed to repair it and finish the Windlass. 2 more hours of blissful modeling. 👍


- 204 replies
-
- 9
-
-
- marine model company
- charles w morgan
- (and 1 more)
-
As I build this vintage kit, I am finding the metal detail parts are lacking some detail when compared to actual photos of the Morgan as she sits in Mystic. The windlass is where I will start developing my micro carpentry skills. You have got to love plastic wood. It really works well. I think it’s almost there. Needs some molding on the top plate and some tarnish on the bell. Next the windlass its self. I am really enjoying the wood modeling detailing opportunities are endless. 😆


- 204 replies
-
- 10
-
-
- marine model company
- charles w morgan
- (and 1 more)
-
David, I want to thank you for such a great build log with lots of close up photos. Your log in particular is already my go to reference as I get started on my own CWM.
-
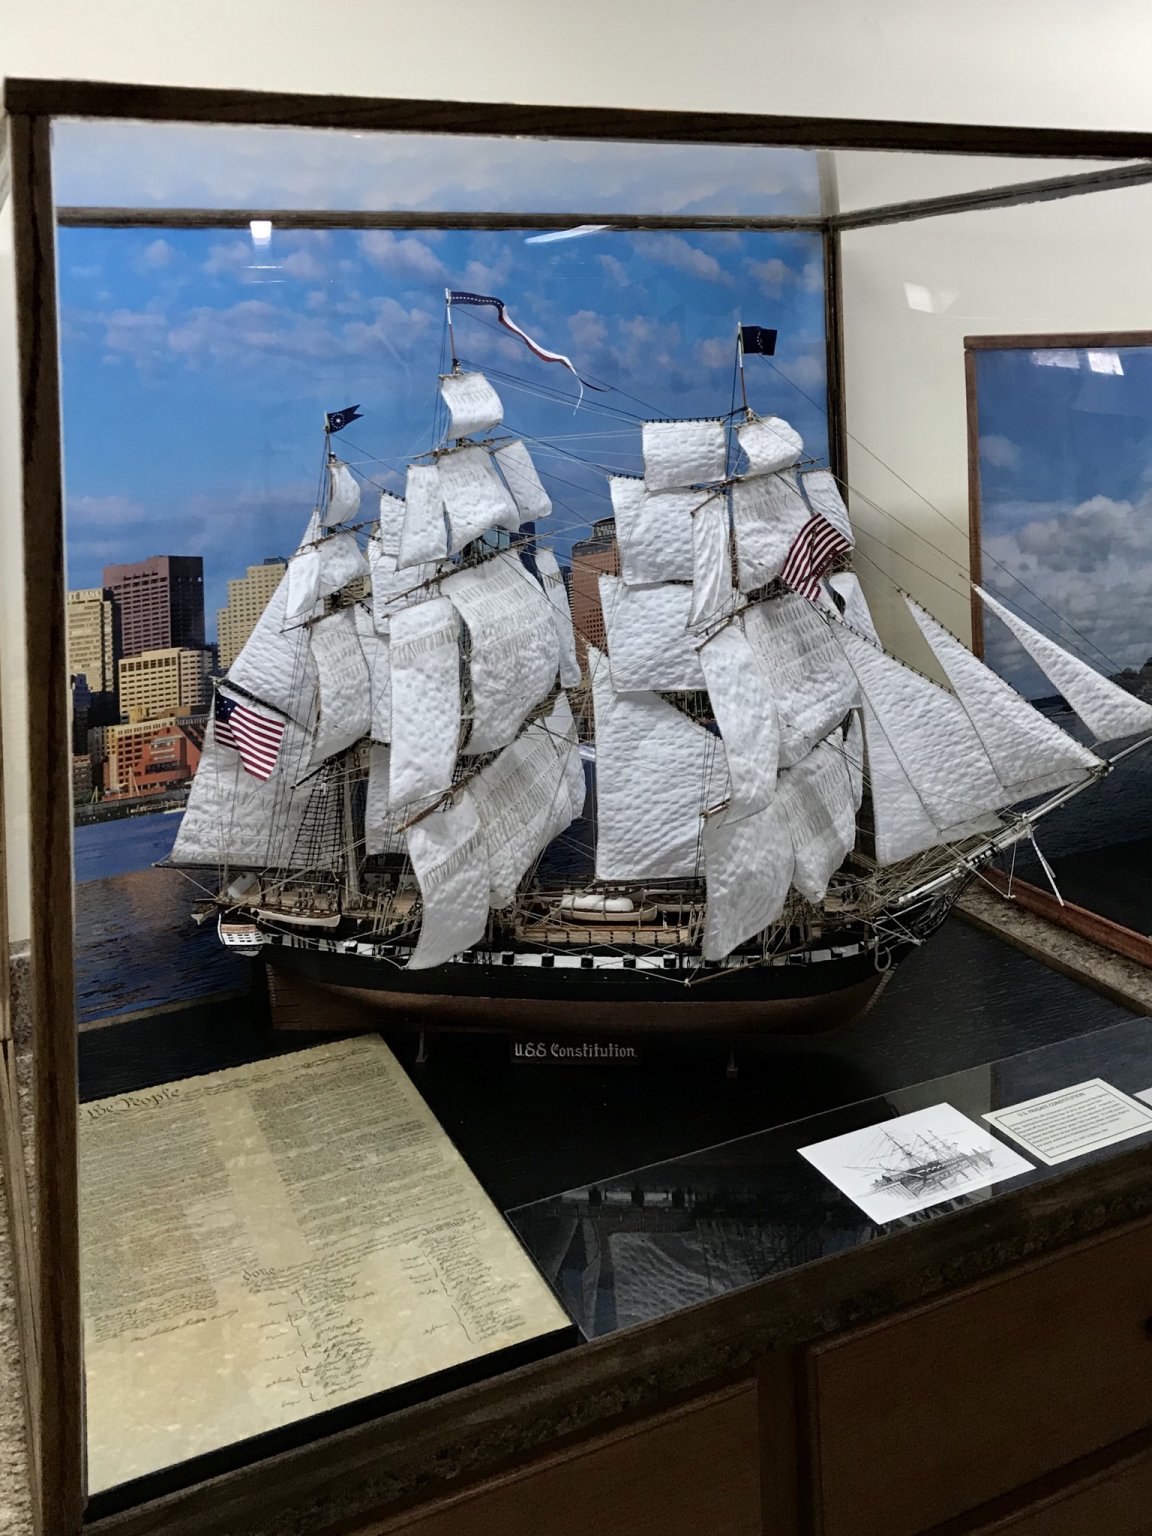
Looking good... I love your story of completing this model of your past. I also like that you are enhancing the ship with more detail. It’s like creating your own pain be dies definitely grow your skills. I just want to encourage your completion. I have a similar story, where I started a 1/96 USS Constitution in my 20’s that was never completed and was eventually thrown away. A little over a year ago I found that same model on eBay and began my journey. Very rewarding once finished. Good Luck and may your perseverance win out.

-
Progress! All be it baby steps. Talk about micro carpentry. Wow! 😎
- 204 replies
-
- 7
-
-
- marine model company
- charles w morgan
- (and 1 more)
-
Pin Rails completed today. One thing at a time right? That’s progress to be celebrated. I often ask how long do you think it will take you. My reply is always, “ Don’t know, that’s not the point. It’s about getting it right.” 😎

- 204 replies
-
- 9
-
-
- marine model company
- charles w morgan
- (and 1 more)
-
Just south of Portland. Maine has some great seaports to visit and schooner fest to attend. We love Camden. Thanks for the shout out for Maine, it’s good to be aboard and not just a voyeur. Lots of great modeling going on here. 😎
-
Yes the lazy Susan became very useful while rigging the Constitution. I like your CWM build we seem to be on parallel challenging paths.
-
Looks good I’ll be following your build. We seem to be at the same stage. My build is a solid hull which I think simplified the hull build. Your copper plating looks great.
-
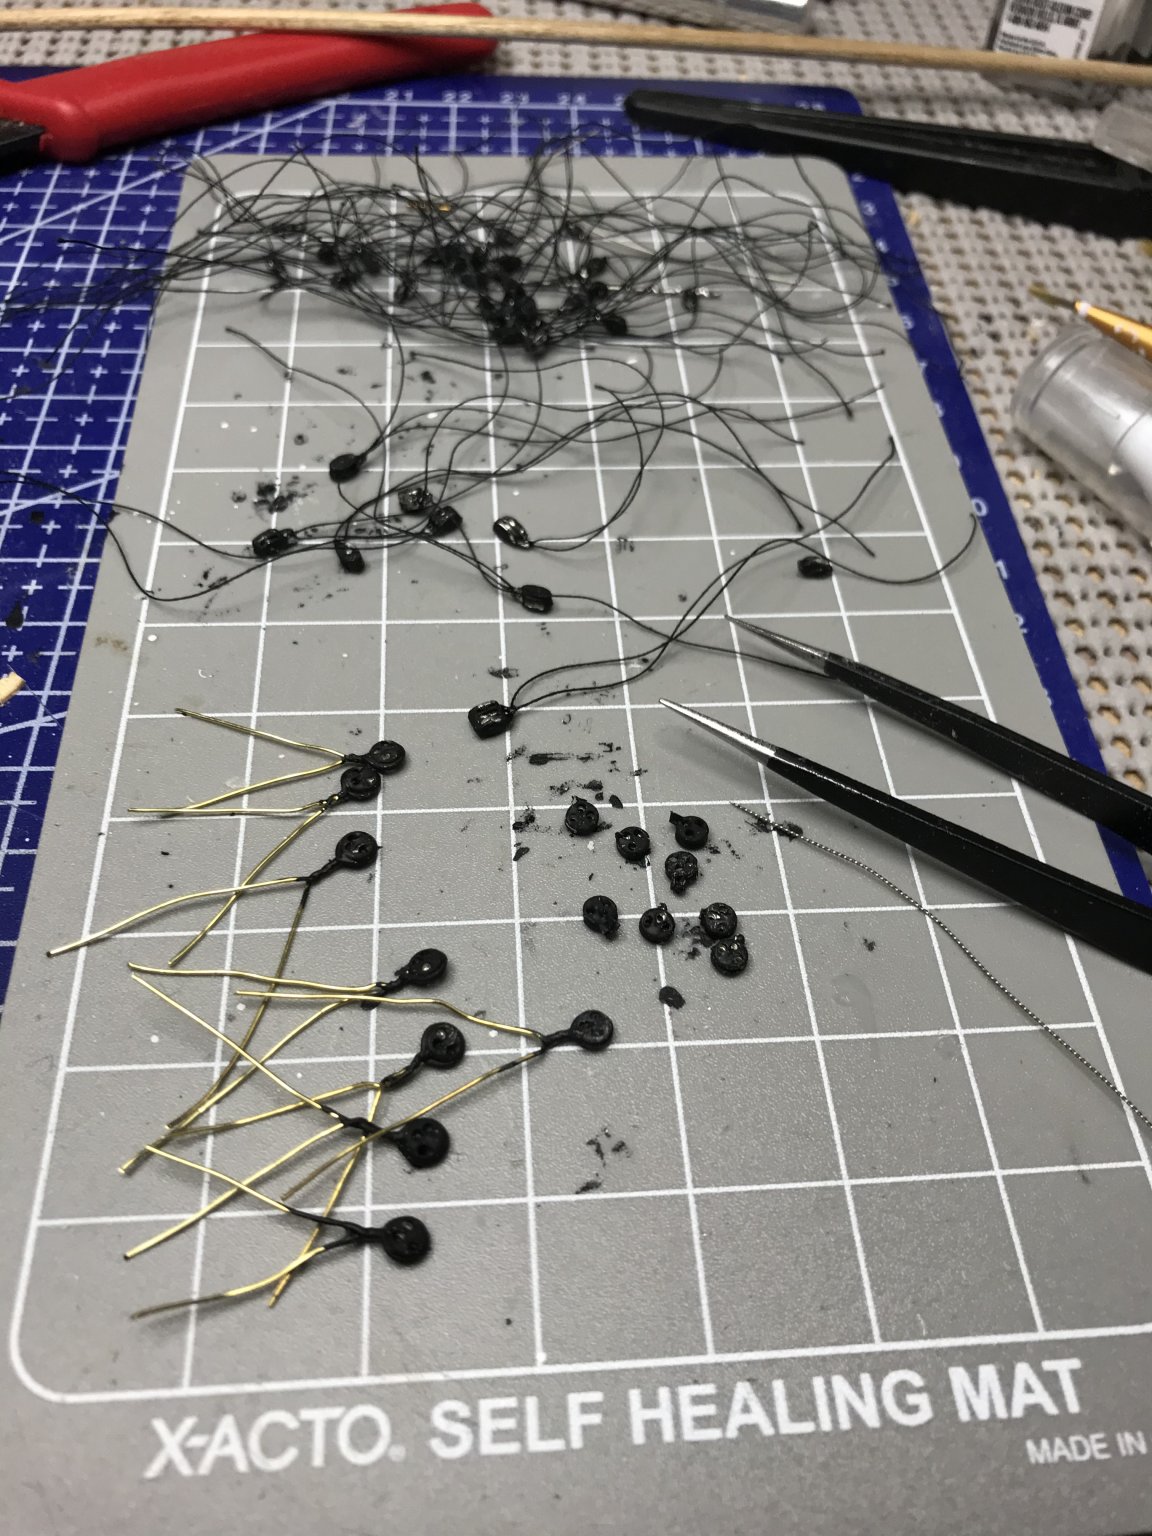
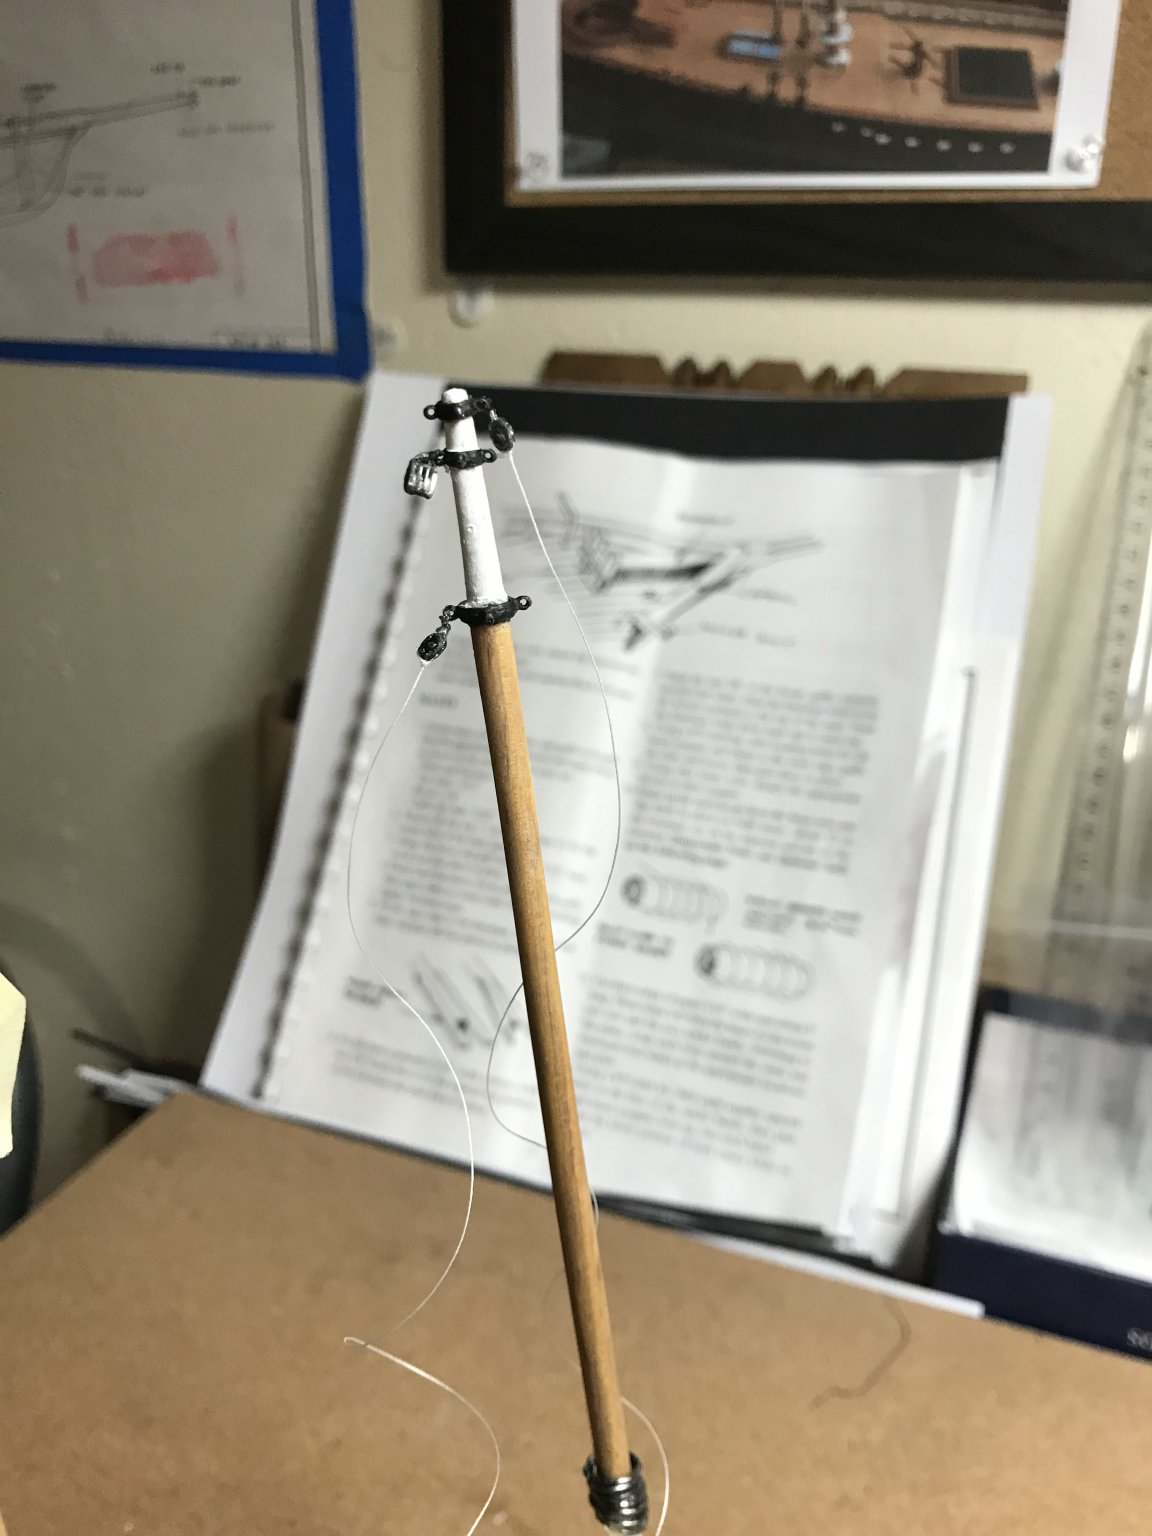
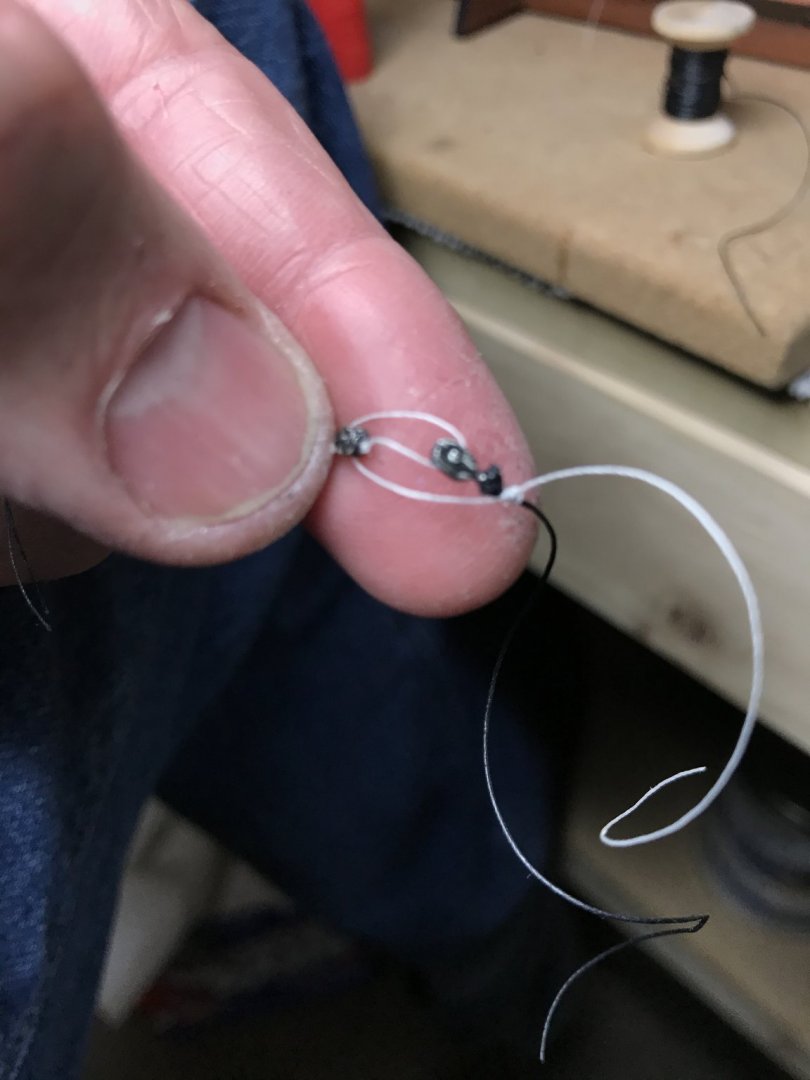
Bluejacket does supply metal blocks that are very detailed. However, they are tiny. Shrouds are completed and it’s on to the rest of the standing rigging. I will keep you all posted on my progress. I have two builds going, this one and the Charles W Morgan. So this one will get placed on the back burner until I need a change from working on the Morgan. Keeps me occupied these winter months. I’ll keep you posted. Thanks for taking a look, tips and comments are welcome.


- 21 replies
-
- 6
-
-
- America
- BlueJacket Shipcrafters
- (and 1 more)
-
Fortunately my wife has a nice sewing machine. This helps detailing out the sails.
- 21 replies
-
- 2
-
-
- America
- BlueJacket Shipcrafters
- (and 1 more)
-
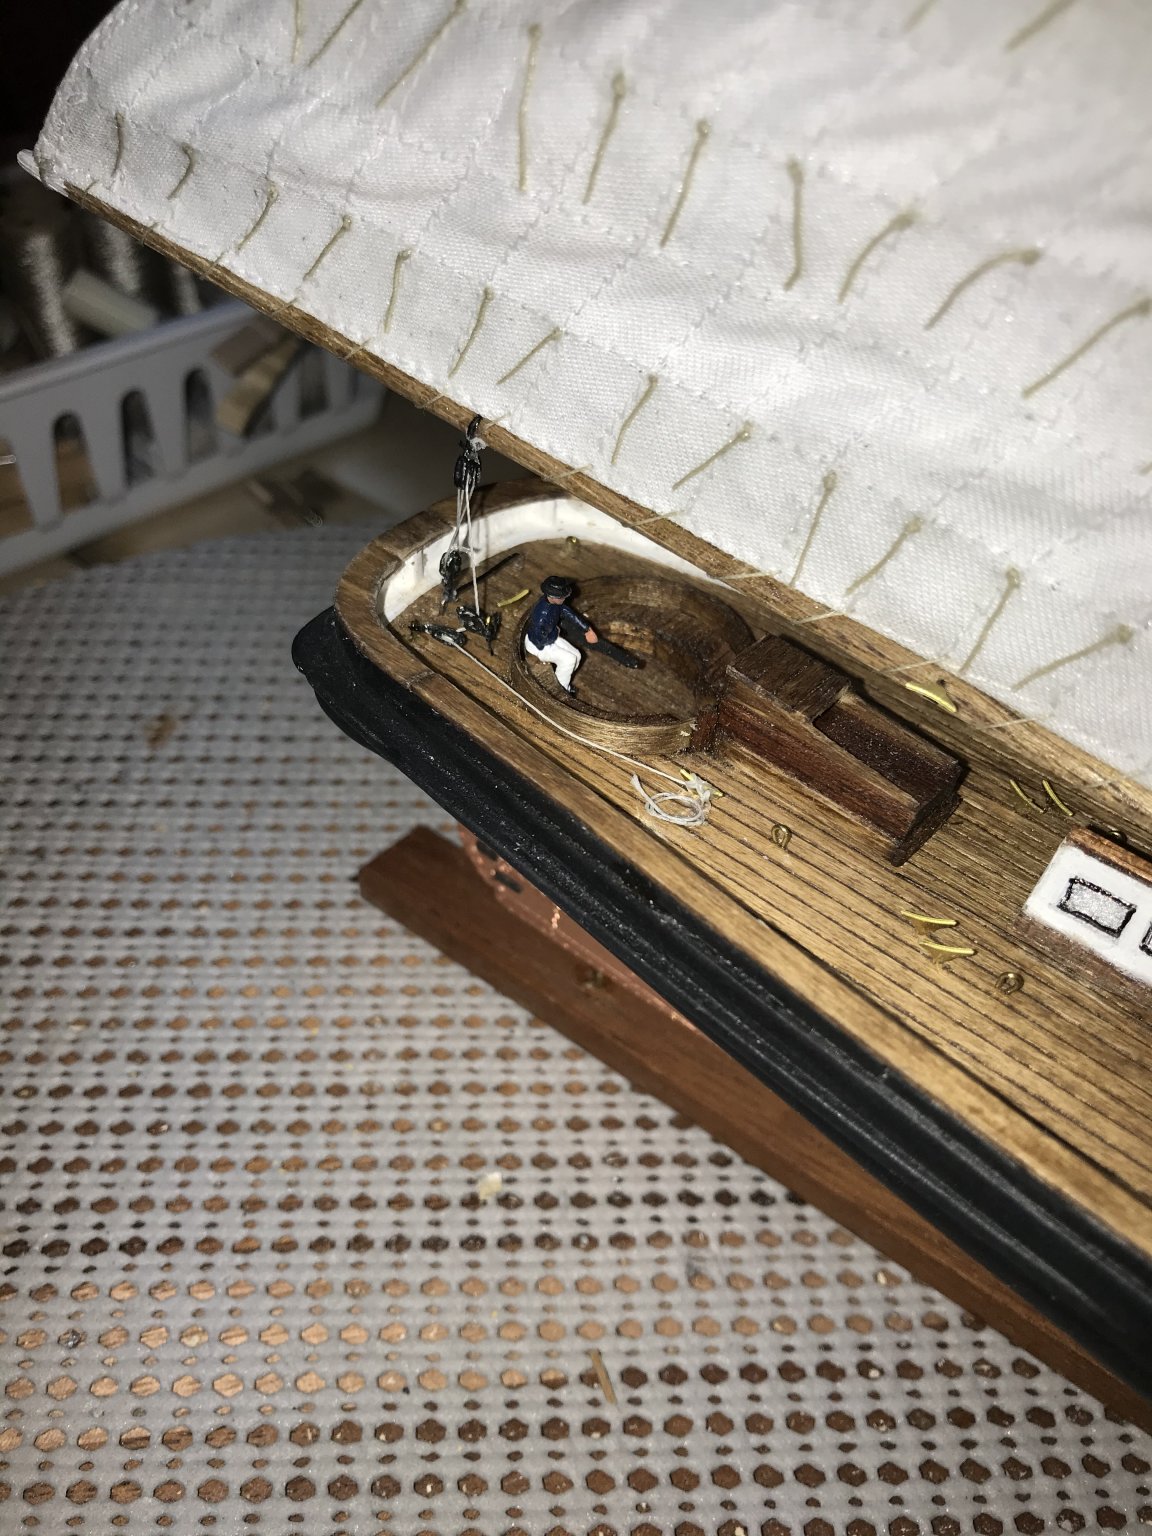
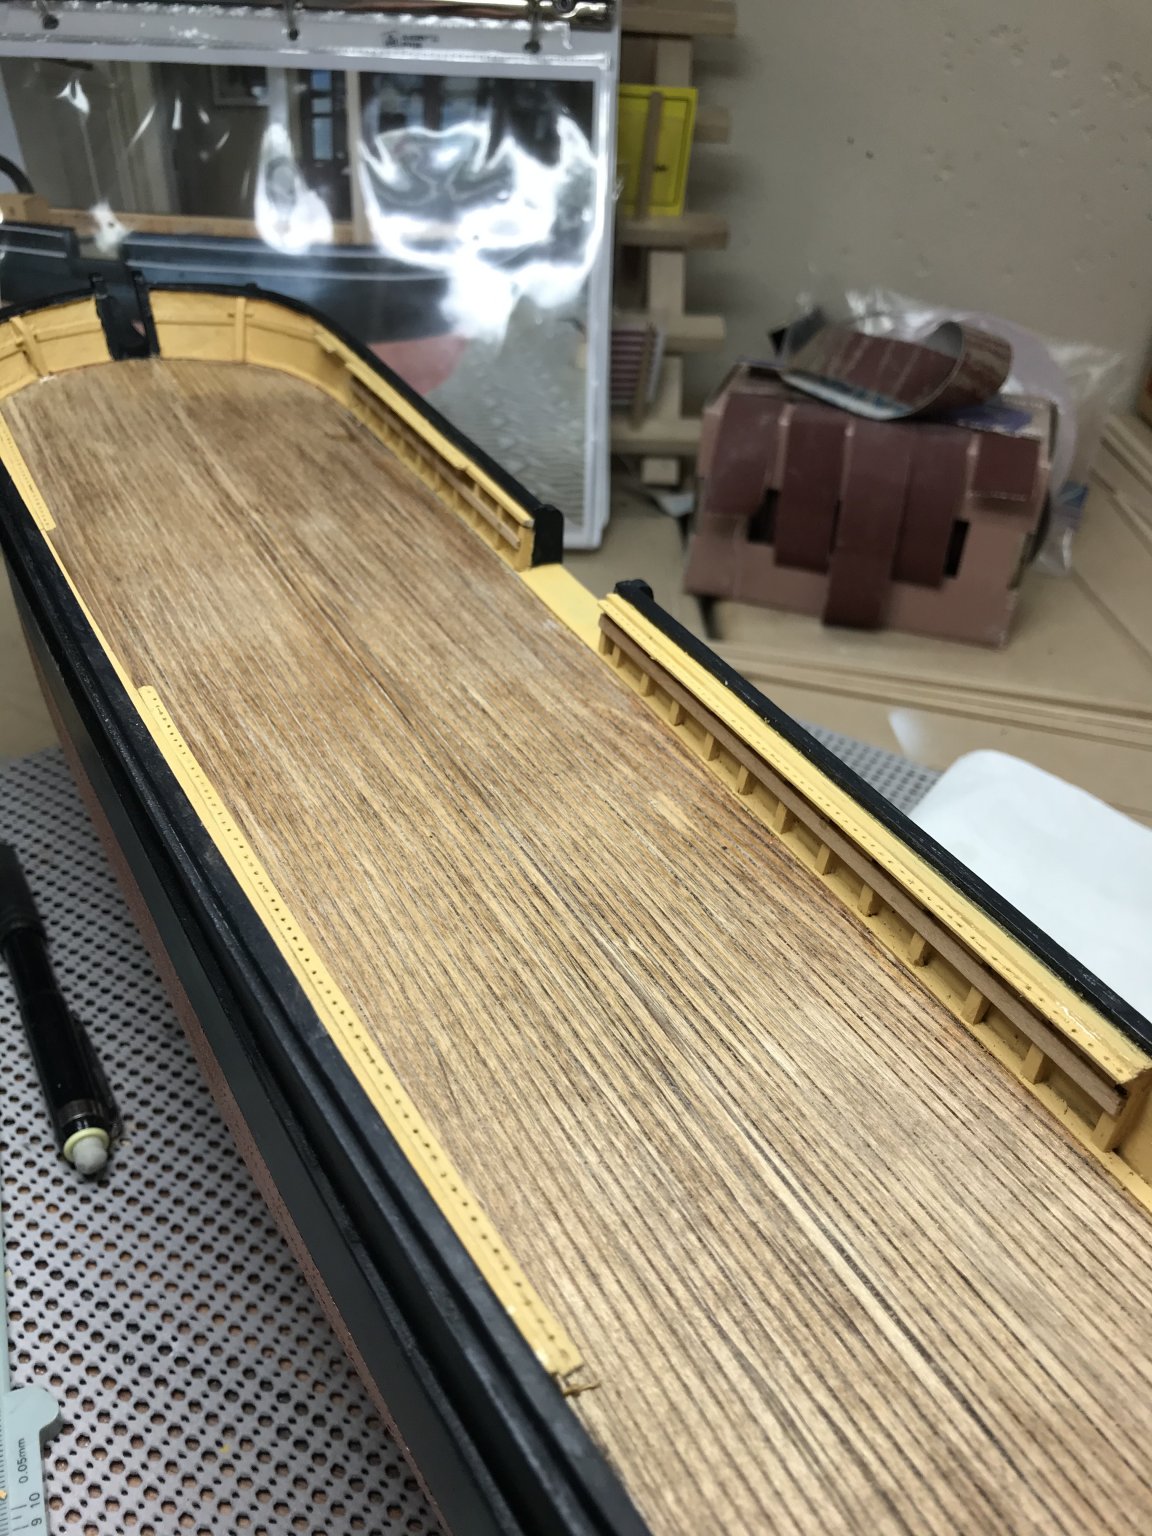
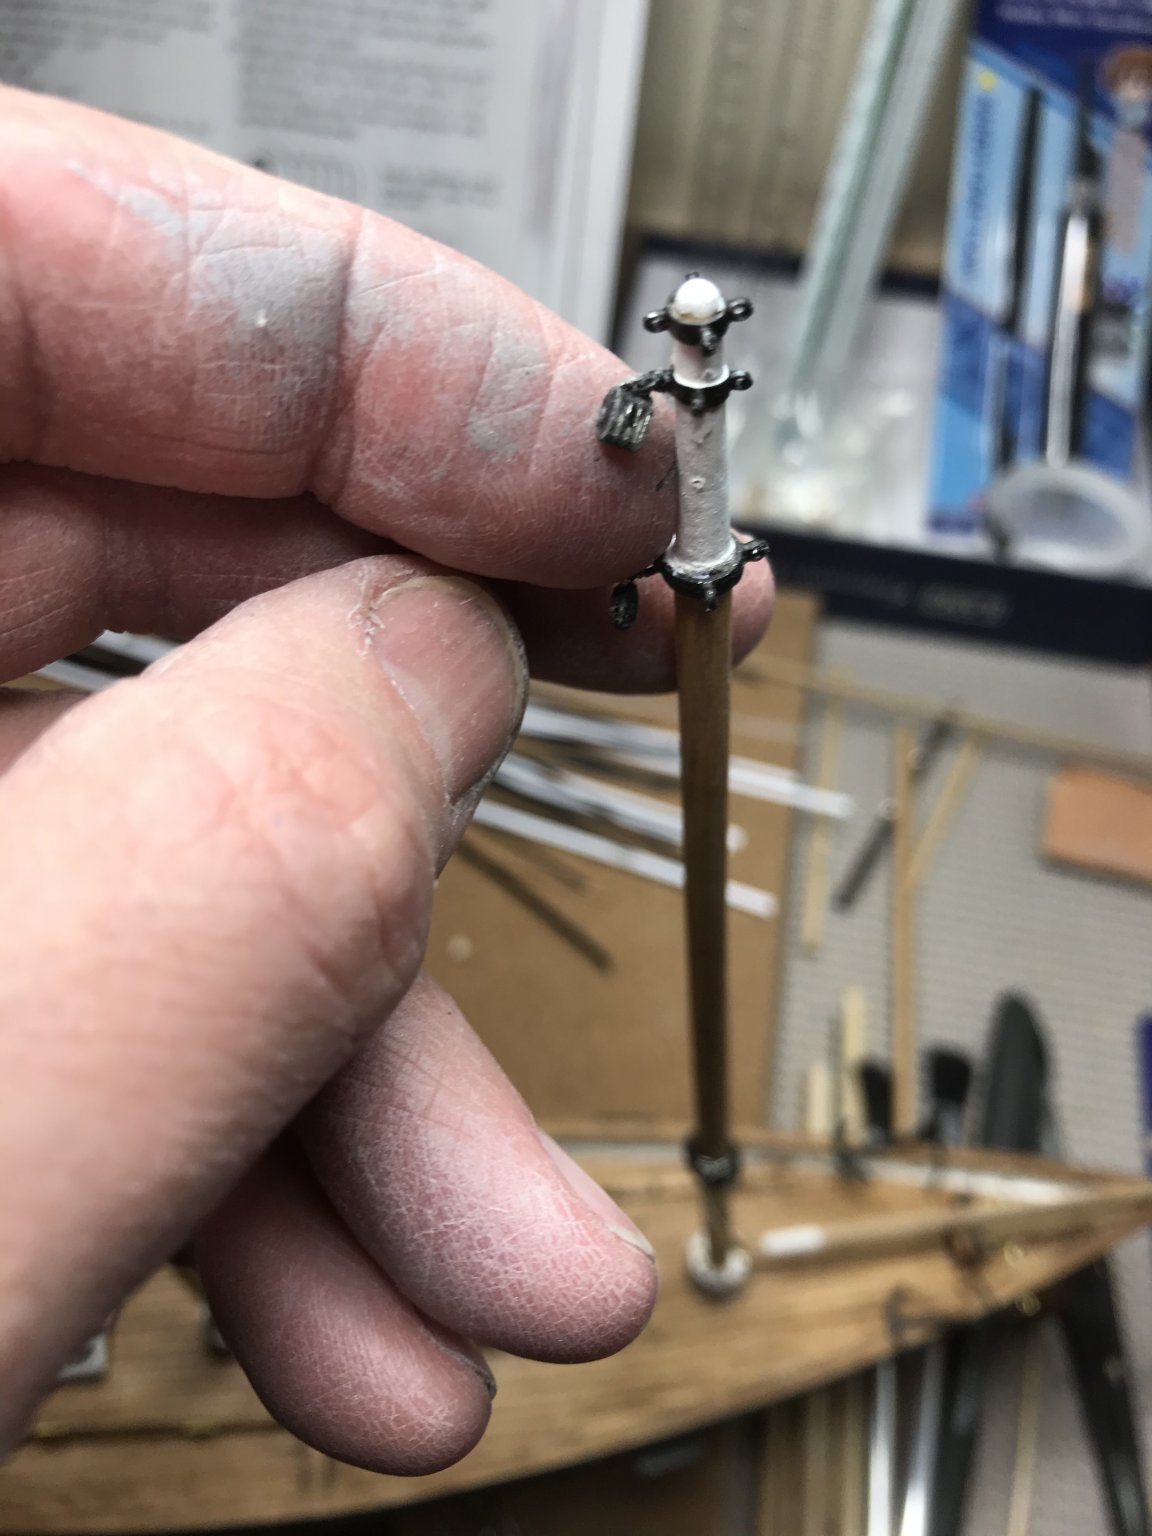
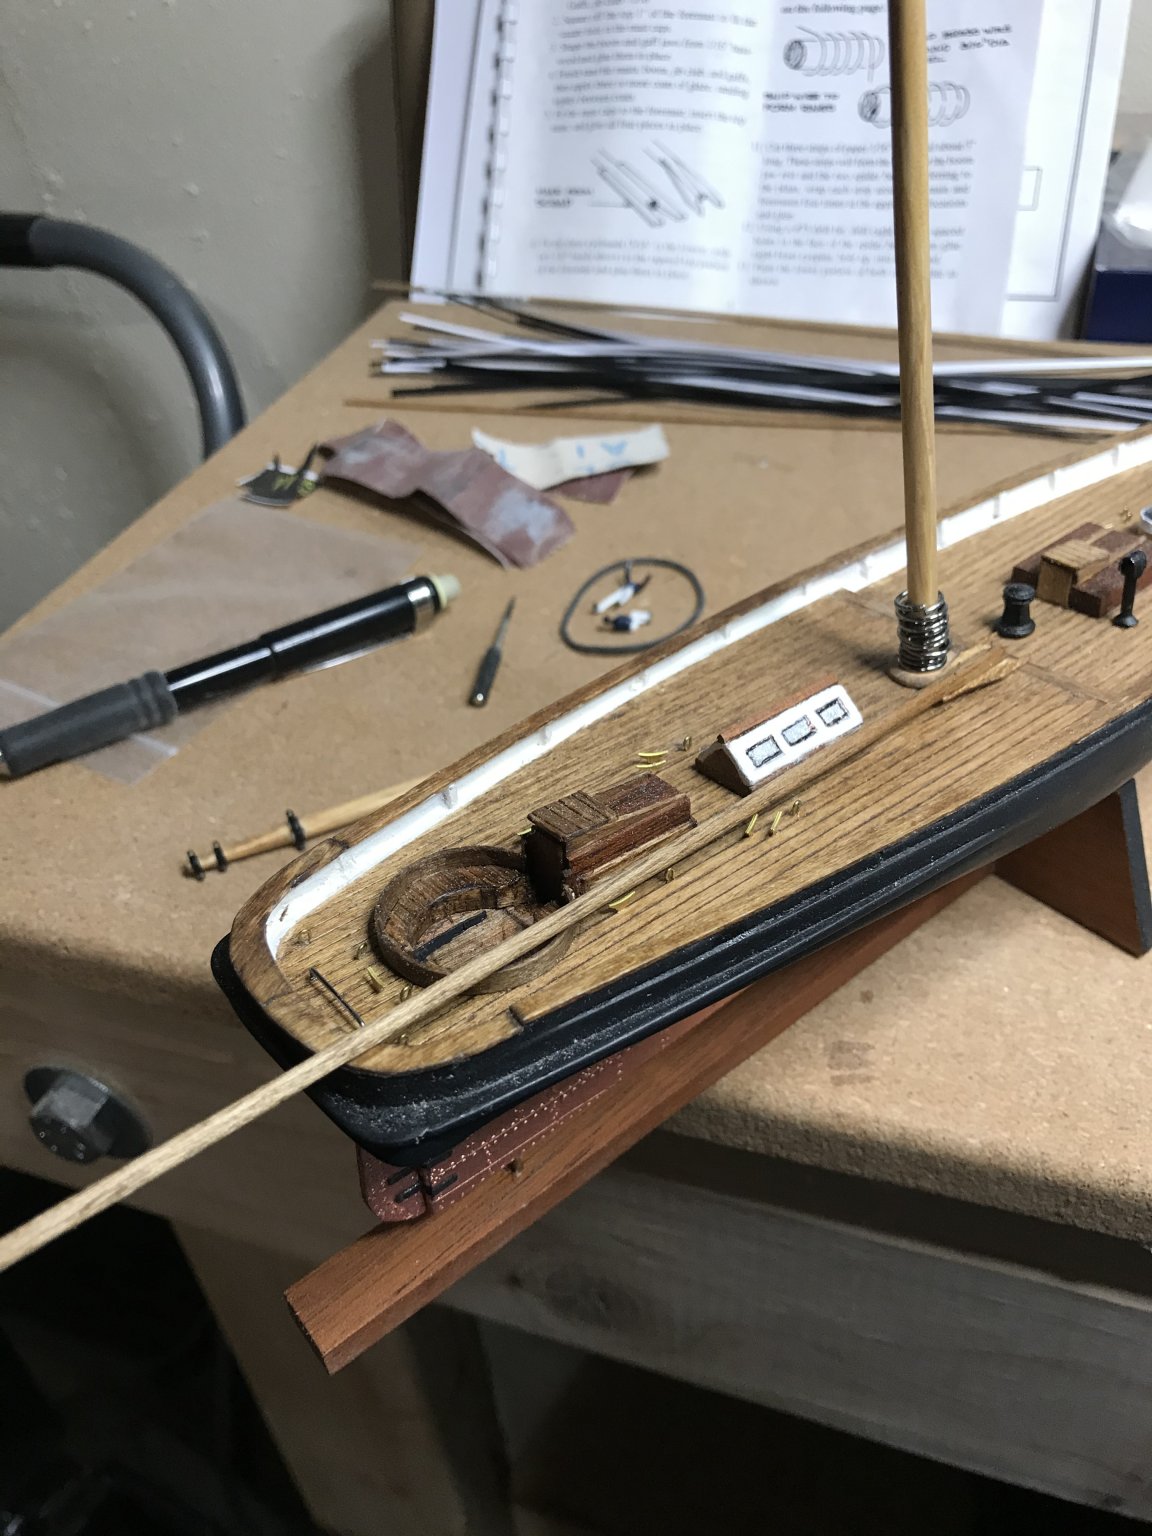
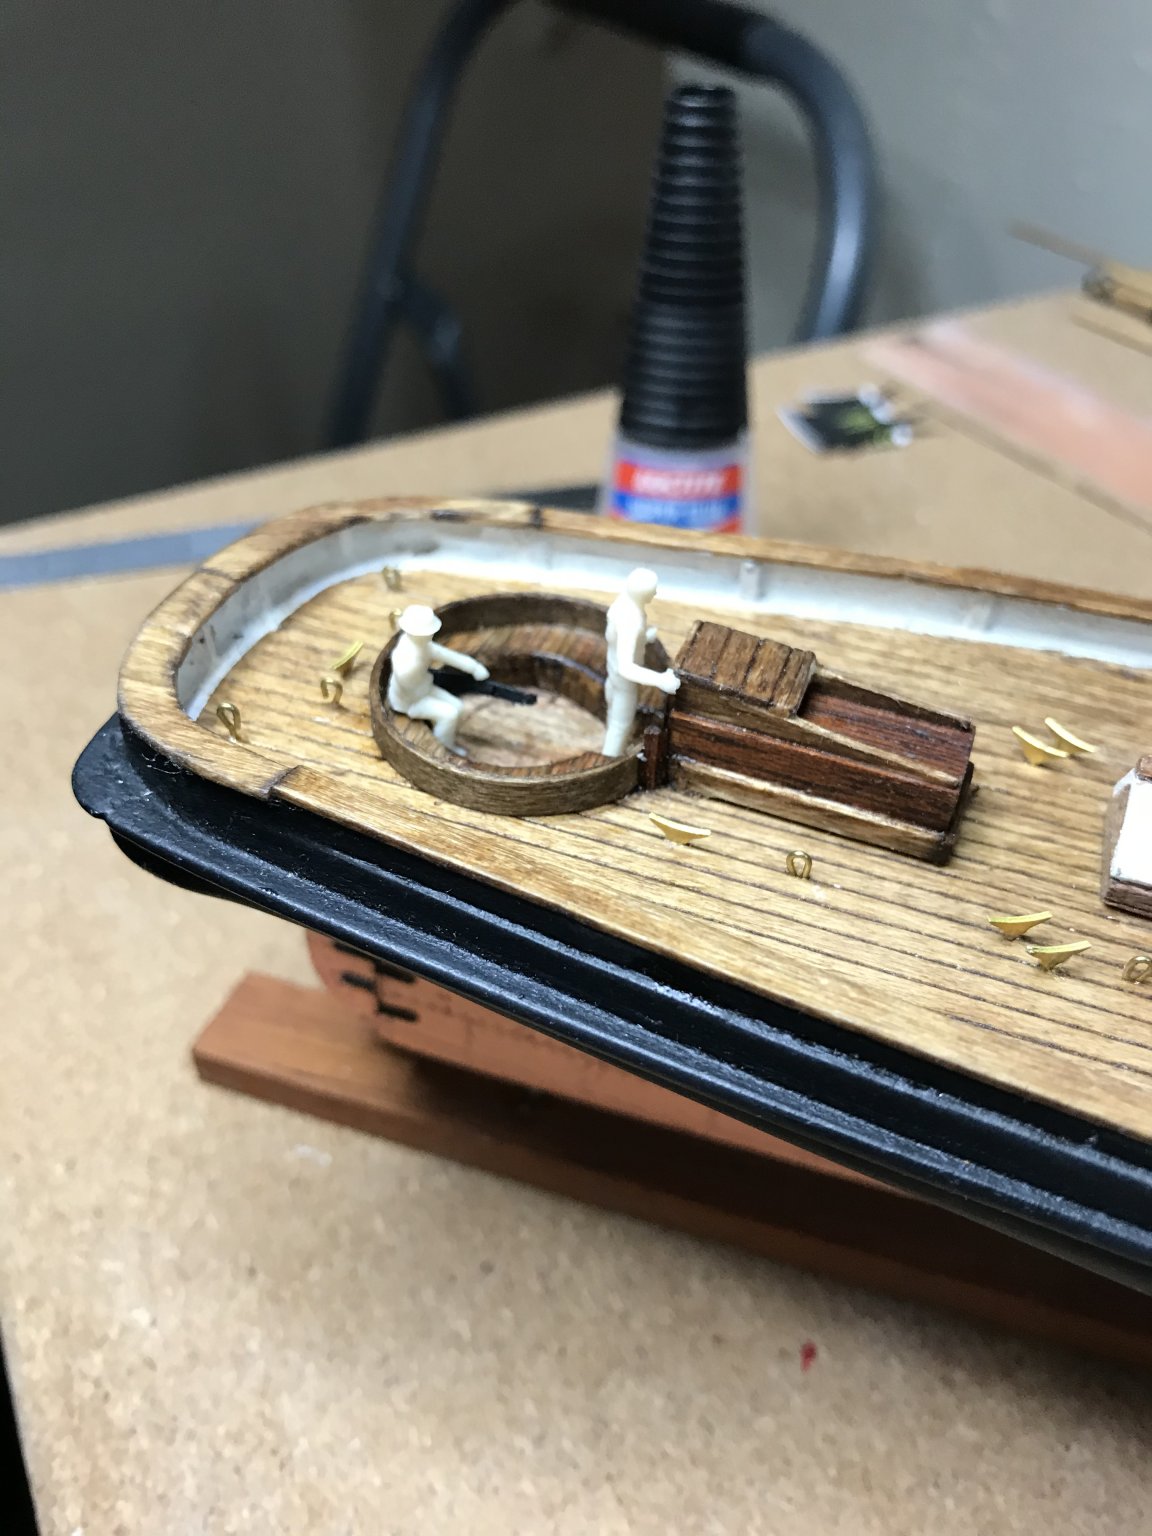
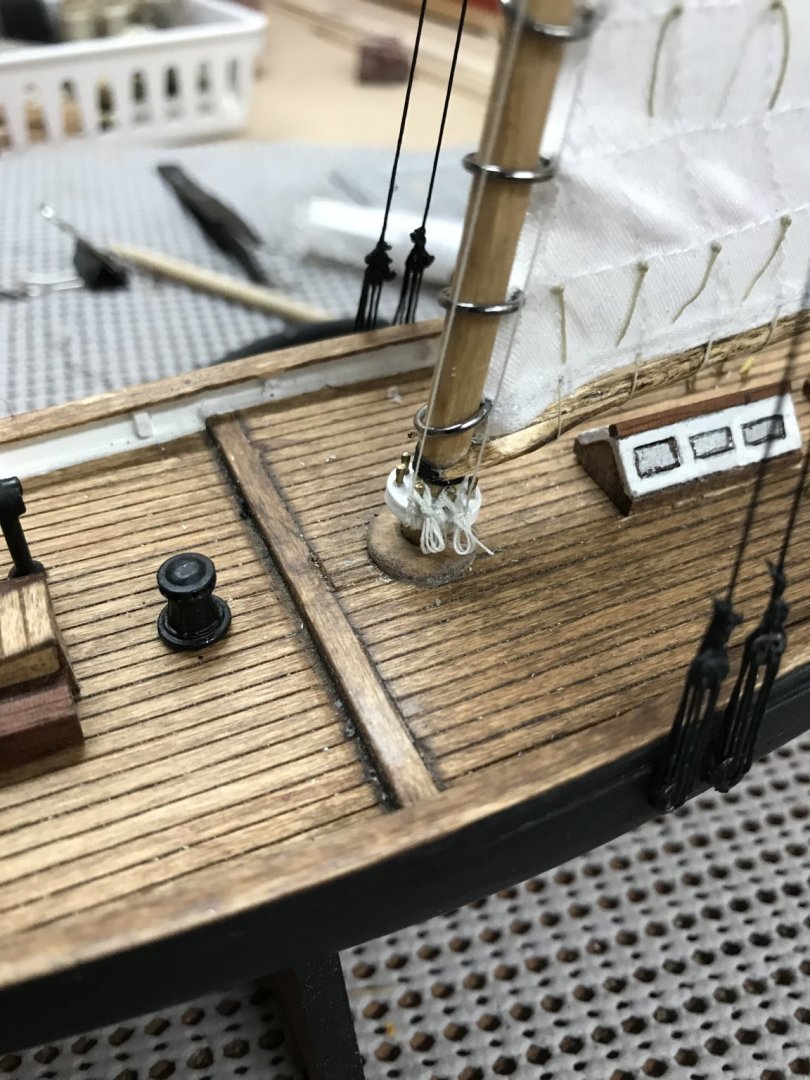
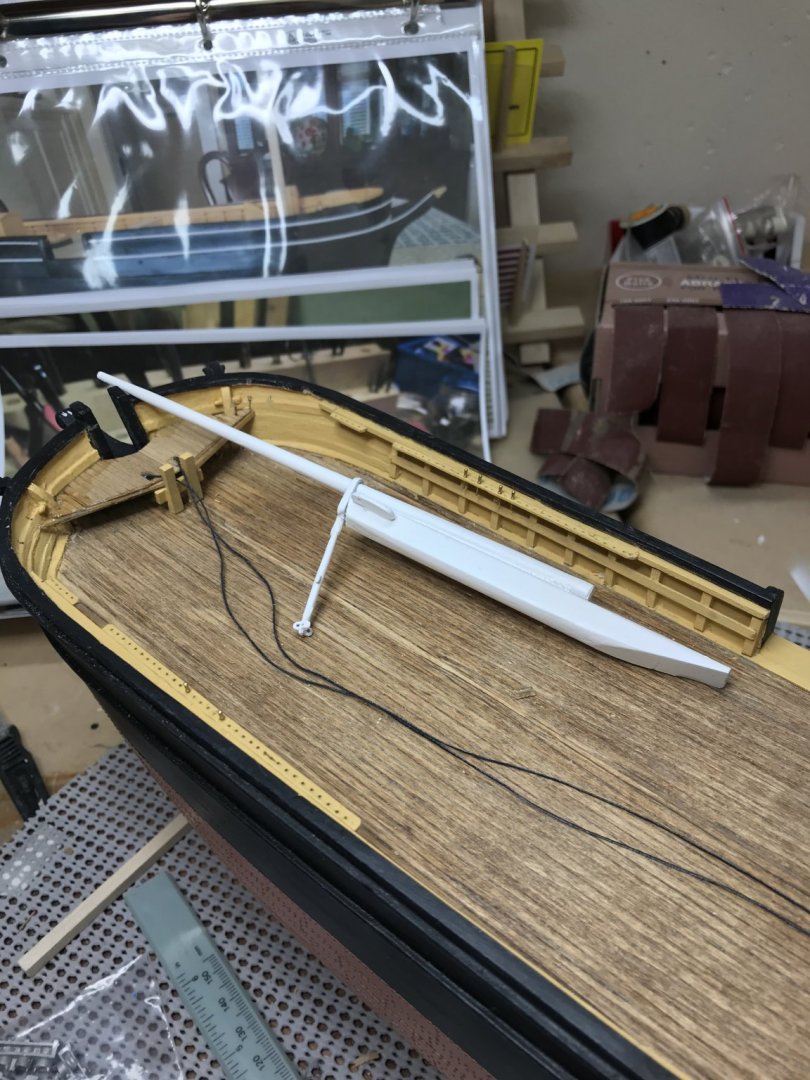
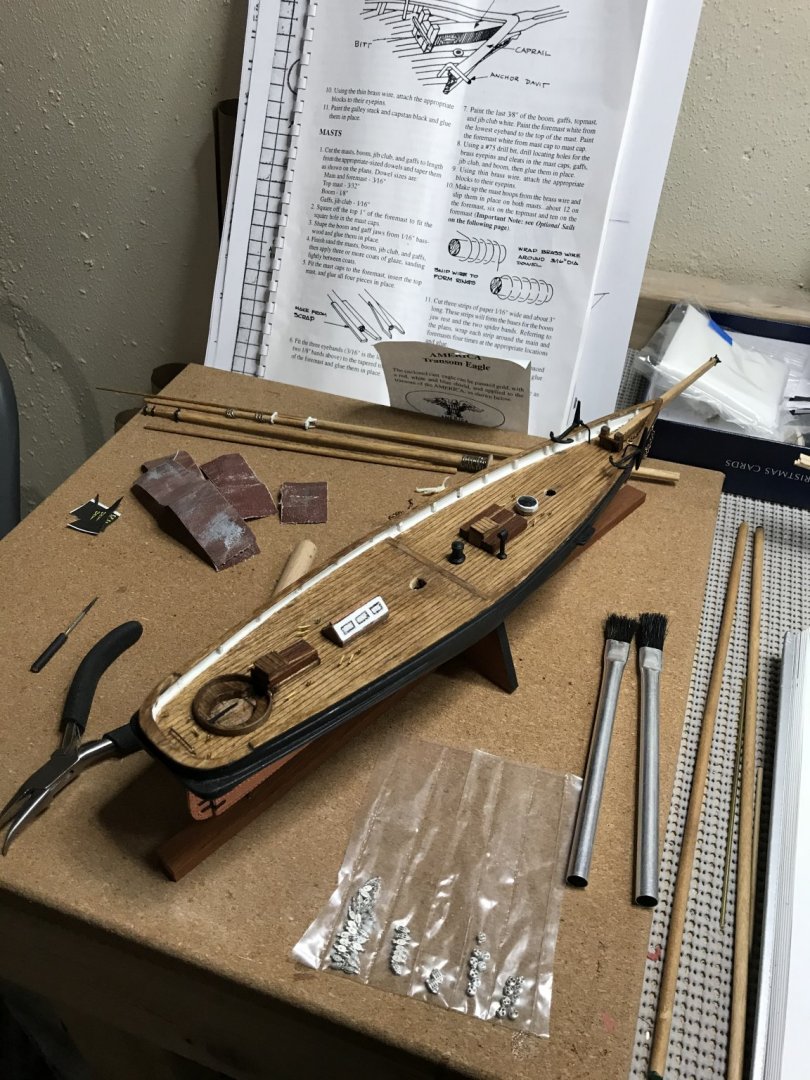
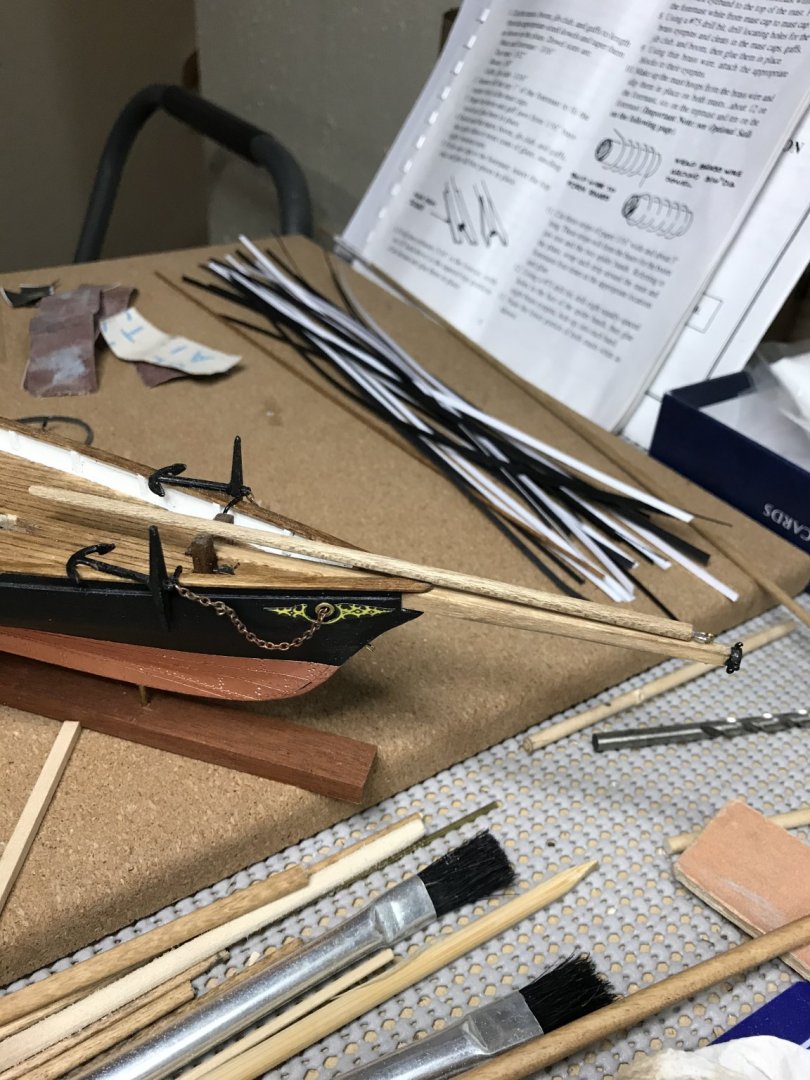
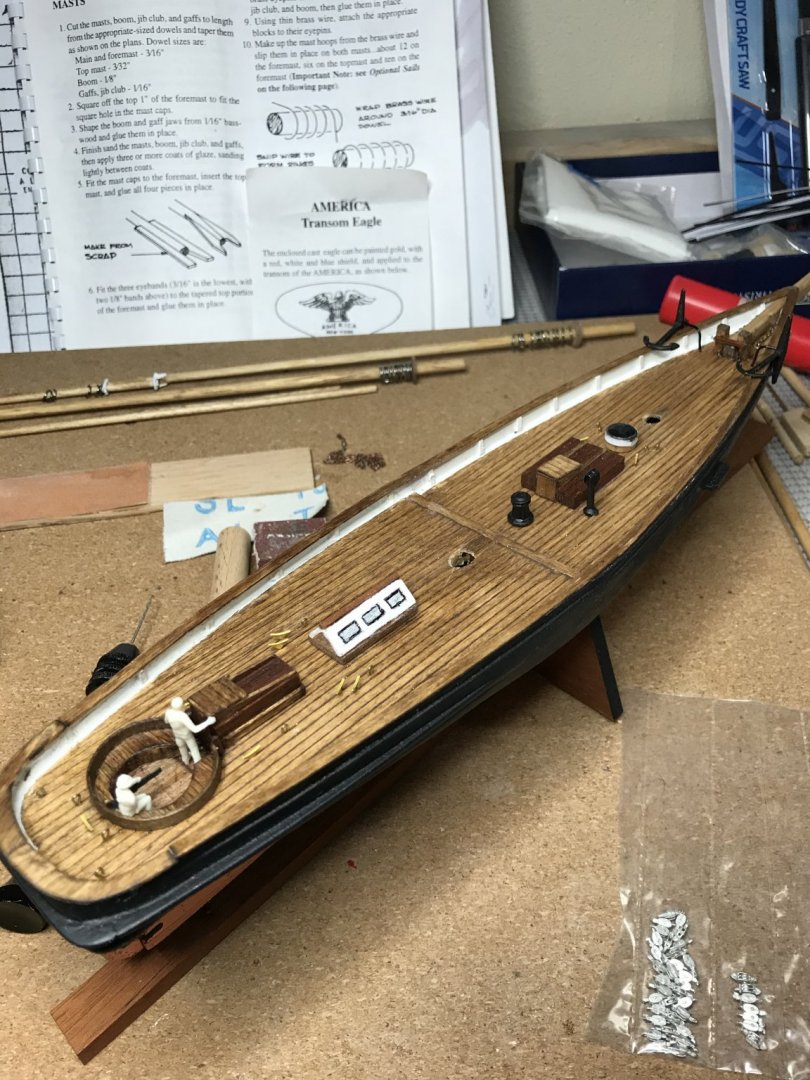
I have now completed the deck features and ready to start detailing the bowsprit and masts. Next up is preparing sails.

- 21 replies
-
- 3
-
-
- America
- BlueJacket Shipcrafters
- (and 1 more)
-
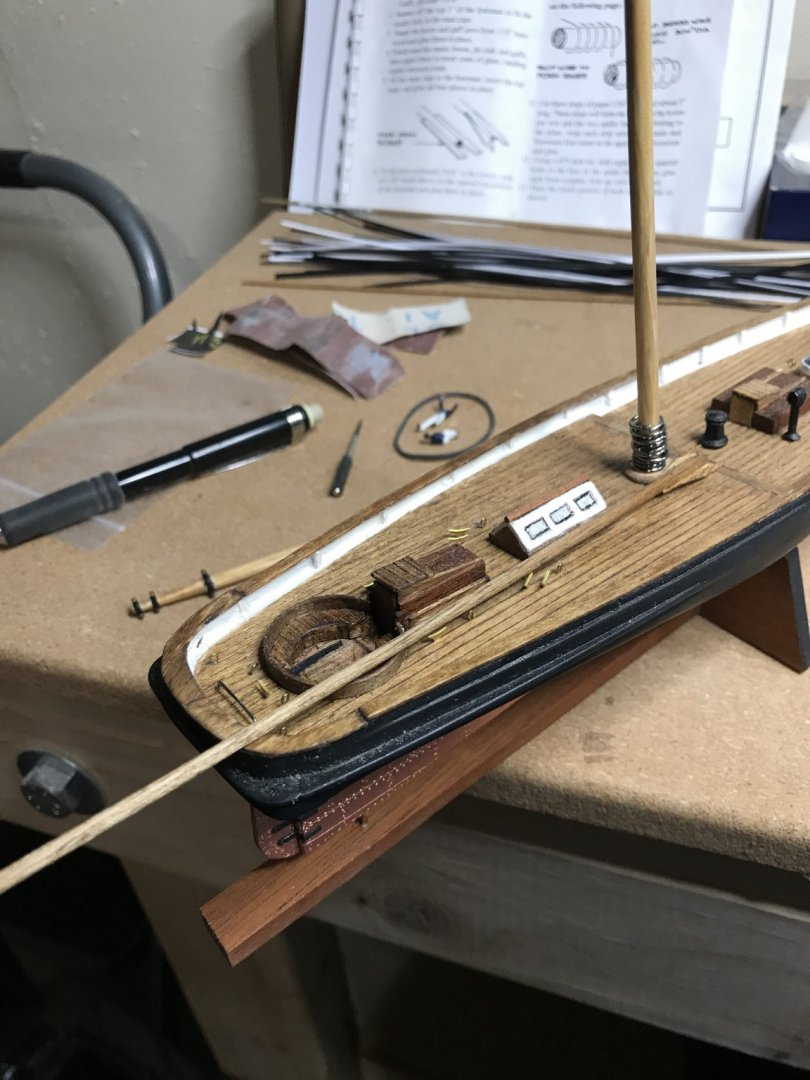
Building deck furniture from scratch is a new experience for me. Find build logs like those on this site was very helpful. Instruction are definitely lacking in details.

- 21 replies
-
- 4
-
-
- America
- BlueJacket Shipcrafters
- (and 1 more)