
HOLIDAY DONATION DRIVE - SUPPORT MSW - DO YOUR PART TO KEEP THIS GREAT FORUM GOING! (Only 75 donations so far out of 49,000 members - C'mon guys!)
×


Egilman
-
Posts
4,377 -
Joined
-
Last visited
Content Type
Profiles
Forums
Gallery
Events
Everything posted by Egilman
-
 Brother, we all flap our mouths, if we didn't we wouldn't be here..... (well in this case twinkle our finners over the board) Years of practice? been practicing since I was born.... (according to some people) And according to the war department my mind hasn't been in gear for a couple of decades..... Keep on keepin on brother, don't let anyone stop you.... (and if they try they will deal with me and I'm sure several others around here)
 -
Yeah it does especially when driving into an approaching sea like those two US battleships are doing.... what causes that bow wake is force throwing the water to the side, that is what a clipper bow is for to turn the water.... Both those ships are above 15 kts at least probably closer to 18, (the South Dakota probably even faster than that) which was normal cruising speed for the fast attack groups in the pacific..... Your ship my friend, all I can say it is looks right on in my humble opinion.... you need some swell in the water to cause a bow wave, and your water is fairly flat and calm.... Beautiful model..... Well done...
- 211 replies
-
- 4
-

-
- prince of wales
- tamiya
- (and 2 more)
-
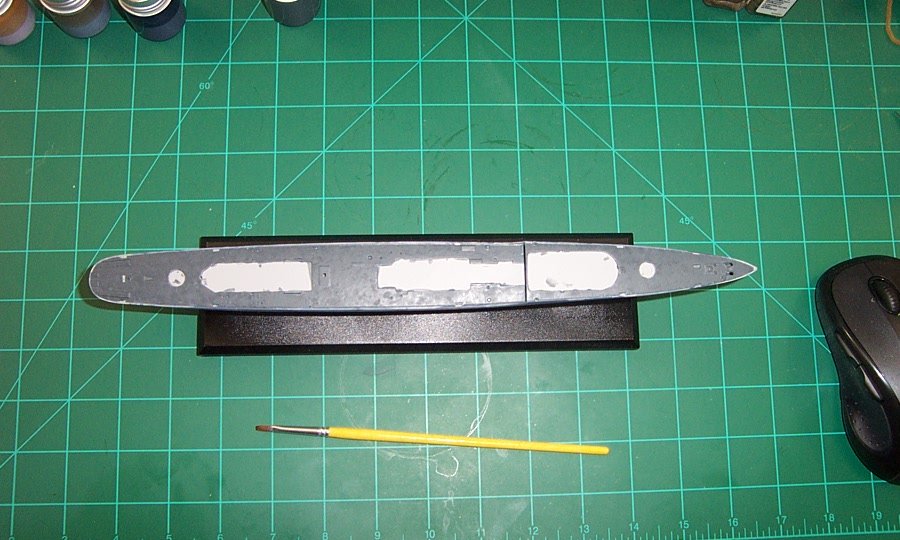
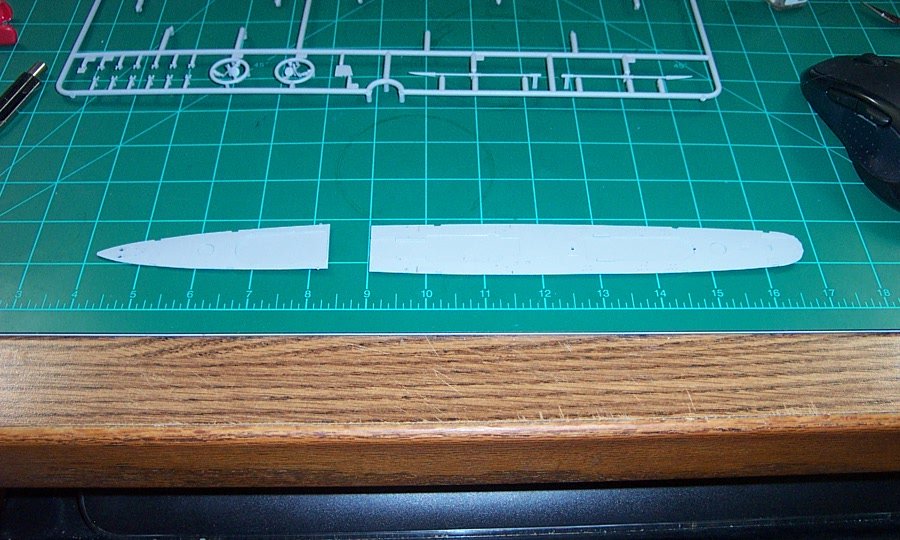
Update on the deck painting.... 20B Deck Blue was the darkest color on the ship, but when painted it was very close to 5-N Navy Blue, also, the decks took a lot of abuse and were constantly being repainted so they have a splotchy look...... Two coats.... It's actually too splotchy here so I needed to get a third coat down.... You can see from the shininess that it isn't completely cured yet, and the blotchyness is there but much subdued from the two coat stage..... Next step is to let it cure completely, put down a very thin coat of future, and install the anti-slip deck decals.... Then touch up the hull edges, assemble the deck on the hull and give it a thin dull coat..... Deck sitting on the hull... Soon I'll be superstructuring!!!! Onward...
- 285 replies
-
- 10
-
-
Of the four destroyers, two were repainted in Norfolk NS just days before they left, I don't believe the Gwin was one of those repaints... The Hornet was repainted as well, judging from the pics I would say that the paint has three month wear and tear on it..... That would be right about the time some fading and salt streaking chalkyness would start showing up.... The Gwin was taken off convoy duty about a month before joining DesDiv 22, she would have been repainted at that time..... So I think it fits what she should look like..... Thank you Lou, great minds think alike.....
-
That's what we are here for brother, my pleasure....
-
It's those subtle changes that take a model from being very good to masterpiece.....
-
#1. Yes they do.... #2. Yes, the metal is 20B deck blue and the wood Norfolk 250B flight deck stain if flying off a full sized carrier.... (flying off an escort carrier it could be either the stain or deck blue paint, check your references) #3. Depends on how much detail you want to add... they would be inset into the wood surface, and down the middle of each inset slot you would make a narrower, deeper slot to relieve the tabs so you can slip tiedowns ropes under them.... Get a good pic of the deck with a measurable known distance in it.. (like an aircraft wheel or wing so you can measure against your model) Simple math will give you the scale distance they should be apart, draw two thin lines, with the grain, representing the tie down strips across the surface equidistant apart at whatever you determine the distance between the strips should be..... Using a steel ruler and fresh sharp razor blade, cut each line, only deep enough to match the strip thickness... Now, you chip out the material between the cuts giving you an inset relief for the strip... If you want them to be functional, again using the steel ruler take a scoring tool and scrape a slot down the middle of each inset to give the clearance under the hooks for your tiedown lines.... Not hard to do, but it is some work, just remember to use fresh, sharp tools and take your time..... Final detailing would be scoring plank lines in the rest of the deck section between the strips.... That is the way I would go about it...
-
Good to see ya back at the bench brother.....
-
1/48 Italeri Hawk T.1A (On Hold)
Egilman replied to Old Collingwood's topic in Non-ship/categorised builds
I'm here brother, lurking in the corner in the back..... -
It was the 1974 Firecracker 400. Entering the final lap, Pearson was leading followed closely by Petty. Fearing that Petty would do a slingshot pass, he slowed a little, pulled his car off to the side to simulate a blown motor, and threw his hand up in the air as a motion of defeat. Petty quickly passed opening a lead of several car lengths exiting turn 2. Using the draft, Pearson closed in quickly down the backstretch and through turns 3 and 4 and drew right behind Petty. Coming out of the final corner, Pearson pulled to the inside and did a slingshot pass back to win the race by a car length... Considered one of the greatest races Nascar ever ran..... The drivers gave him the nickname "The Silver Fox" after that race.... not too many drivers could say they outraced Richard Petty for a win.... (especially during Petty's dominant period)
-
Right now given the pics you've posted she looks like she is doing 10-12 knots in the channel or over smooth seas.... the look is perfect... you don't have a ton of wake and no bow or stern wave I would say leave it the way it is.... looks to good to mess with anymore in my humble opinion....
- 211 replies
-
- 7
-
-
- prince of wales
- tamiya
- (and 2 more)
-
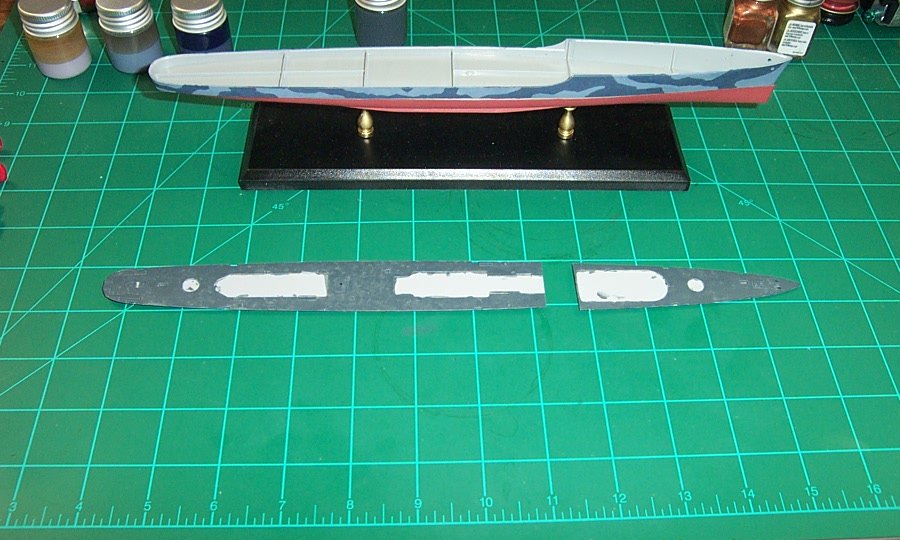
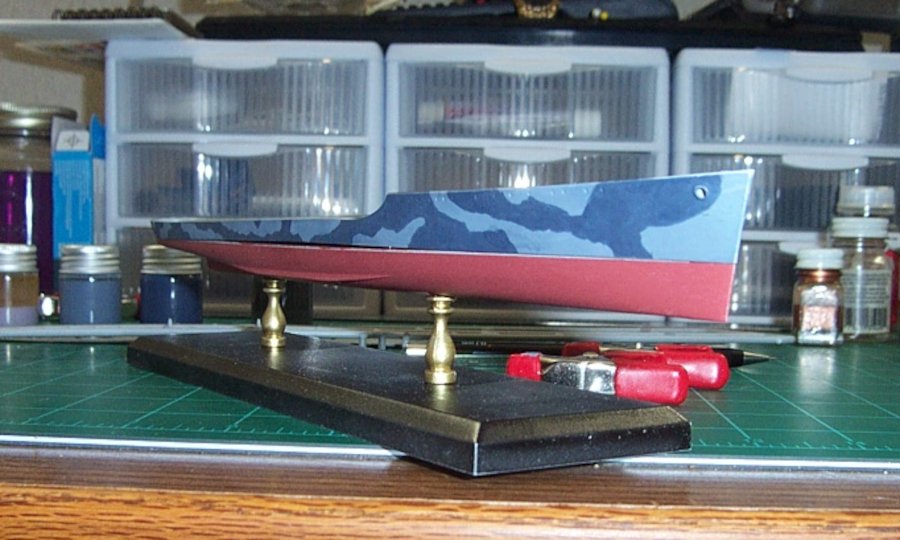
Another update..... Finished the basic camo pattern on the port side...... The stern..... And a pair of perspective views, Port & Starboard bow..... Port.... Starboard... Time to let it fully cure before overcoating it..... Meanwhile, I start on the decks...... 20B Deck Blue, looks more like a dark grey in the bottle... but first I have to fill the holes for the forward K-guns, the Gwin only carried 4 K-guns launchers two each side abreast the #3 5"-38... Making progress...
- 285 replies
-
- 11
-
-
Well the "Or Else" statement is something I avoid at all costs if possible.... Never tried it with acrylics but I imagine it would work if one figured out the techniques needed for it.... Scale here is the main issue for doing it this way, larger scale models have easier ways of doing it.... Lets see how it comes out in the end..... Well if the popcorn starts falling like rain, we will just have to break out the popcorn catchers.... (falling nuts we break out the sling shots for target practice)
-
Sorry to see this Chris, But I understand, there is a point where we have to regroup, when it stops being fun, it's time to move on....
-
Beautiful Steel finish my friend, you have a good eye for what looks good..... Good to see a little bit of American muscle car in the lineup.... Well Done!!!
-
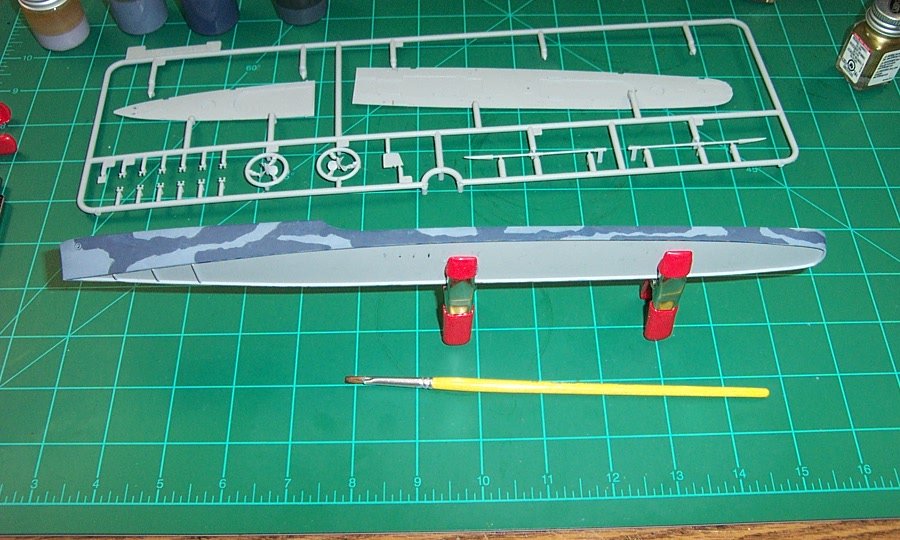
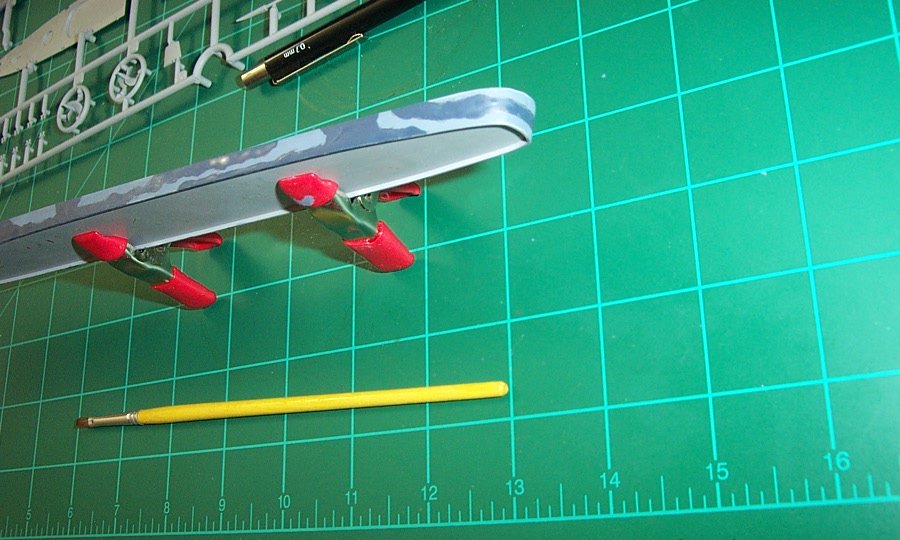
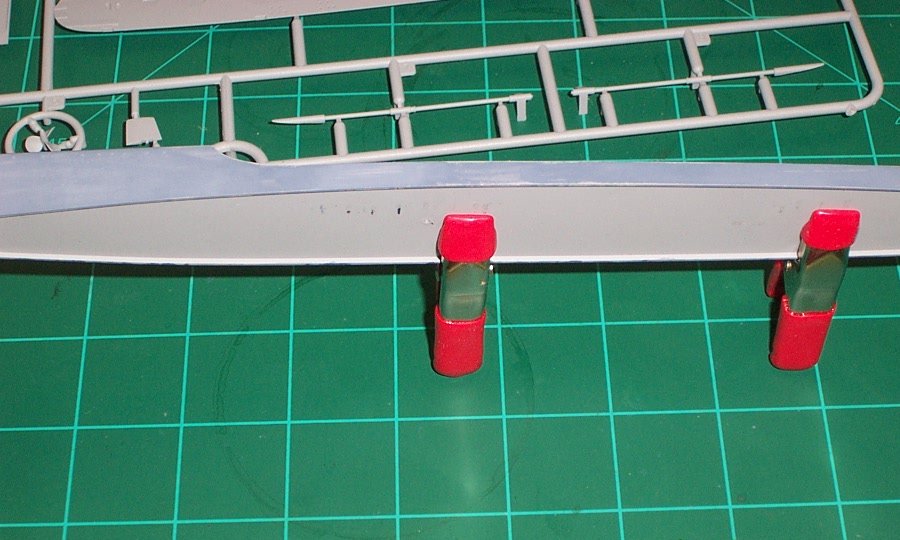
Getting ready to start the port side.... One of the things one needs to watch for when using paint this thin is handling..... it wears off VERY quickly with just a modicum of handling.... So one needs to plan the build accordingly.... Once finished, you need to put a light sealing coat over them... Here is an example of this phenomenon..... You can plainly see where the Ocean Grey has worn off... The paint layers are so thin, you have to be super careful in planning the build cause too much handling can ruin the finish.... Not that we all aren't aware of such being modelers, my point here is it happens four times faster than normal.... But this is an easy recoat fix and an hour or two to cure.... The mistake I made on the other side doubled the handling and this is the result....
-
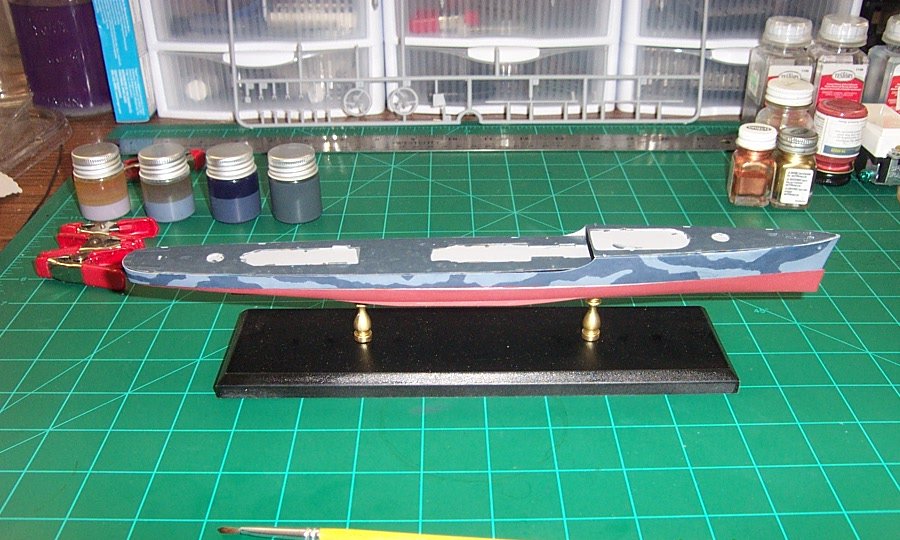
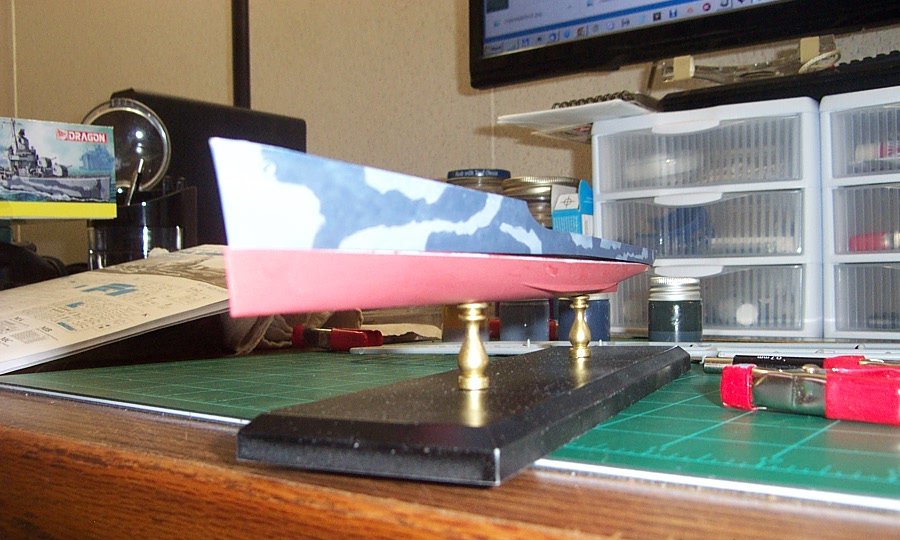
Alright, back on track..... Corrected starboard freeboard...... .......with corrected lines...... And, the navy blue now in it's appropriate places....... (paint is still fresh so it looks a bit darker than it actually is) That one section on the stern wraps around to the port side giving a navy blue stripe around the stern, so it will wait until I have the Port side laid out and painted.... That will start when the starboard side has cured....


-
Excellent my friend..... Not too many infantry dioramas made these days, this one is going to be a stunner.....
-
Well, I'll sign on, if'n the captain will have me.....
-
That's ok brothers, I tried Acrylics when they first came out and were pretty much airbrush only, they were just too thin for brush painting.... So I persisted with the old standbys, I know that over the years they have improved a great deal from the early days, but with me I've grown to trust what I know.... Same as you guys with acrylics... Since then I've learned that the medium doesn't really matter you use something long enough, learn the techniques peculiar to each and the results tell the tale.... It's the skill of the artists my friends, you guys do with acrylics stuff I can't do, so I will never disregard what you guys say.... keep on saying it my friends the wisdom and experiences are what is really valuable here..... Thanks for sharing....
-
Painting, no matter the medium, is laying down a pigment with a carrier, everyone want's a paint that covers in one coat, but that is impossible as the materials can vary greatly...... Scale add an issue you normally don't have... You not only have to cover the subject, you have to do it in scale... The only way to do this is thin the paint.... Good paint will cover, (stick to the surface) no matter how thin it is.... you may need more coats to get complete coverage but it lays down so thin the subsequent layers blend together..... I discovered this technique hand brushing Testors flat black..... It's very thin and doesn't build up on the edges when doing a large area...... I figured that I would try it on some of the other thicker paints and soon learned how... For those who don't use airbrushes, it is worth giving it a try, another tool in the box so to speak. But remember nothing beats an airbrush for thin consistent coverage of an area.... but this is a very good substitute technique for those not enamored of airbrushes... It works for flat paints, generally better with some than others is typical, and gloss paints it doesn't work... (due to the gloss carrier in the paint not being accepting of many thinners) This is my first attempt at this technique with True North paints, and to be honest, they react to it better than Testors/Model Masters do..... So far I'm very impressed with them.... EG
-
Good job brother! they look almost real.... We gonna get a look-see at the battalion eventually? Must be getting impressive.....
-
Oh yeah, now your getting to my era..... I used to own a '67 galaxie 500 way back in the day..... Mine had the 351 small block windsor engine, but the 428 was a powerful car..... Ford was heavy into racing back them, just as heavy as Chrysler..... Oh yeah, there's my comfy seat, I'm in....