Egilman
-
Posts
4,377 -
Joined
-
Last visited
Content Type
Profiles
Forums
Gallery
Events
Everything posted by Egilman
-

F-86F-30 Sabre by Egilman - Kinetic - 1/32nd scale
Egilman replied to Egilman's topic in Non-ship/categorised builds
Tell ya what, I just acquired a 141st TFS F-4E the Revell/Monogram 1/32 F-4E Phantom II Kit #85-4668.. it has the decals for the tiger painted version I'll probably do both the grey scheme and an SEA scheme for them.... (But that Euro I scheme is particularly pretty) I also have a decal set coming that has the Grey Tiger decal... -
I'm in Brother... I brush paint everything most of the time my friend and I'm sure this will look fabulous when done....
-
F-86F-30 Sabre by Egilman - Kinetic - 1/32nd scale
Egilman replied to Egilman's topic in Non-ship/categorised builds
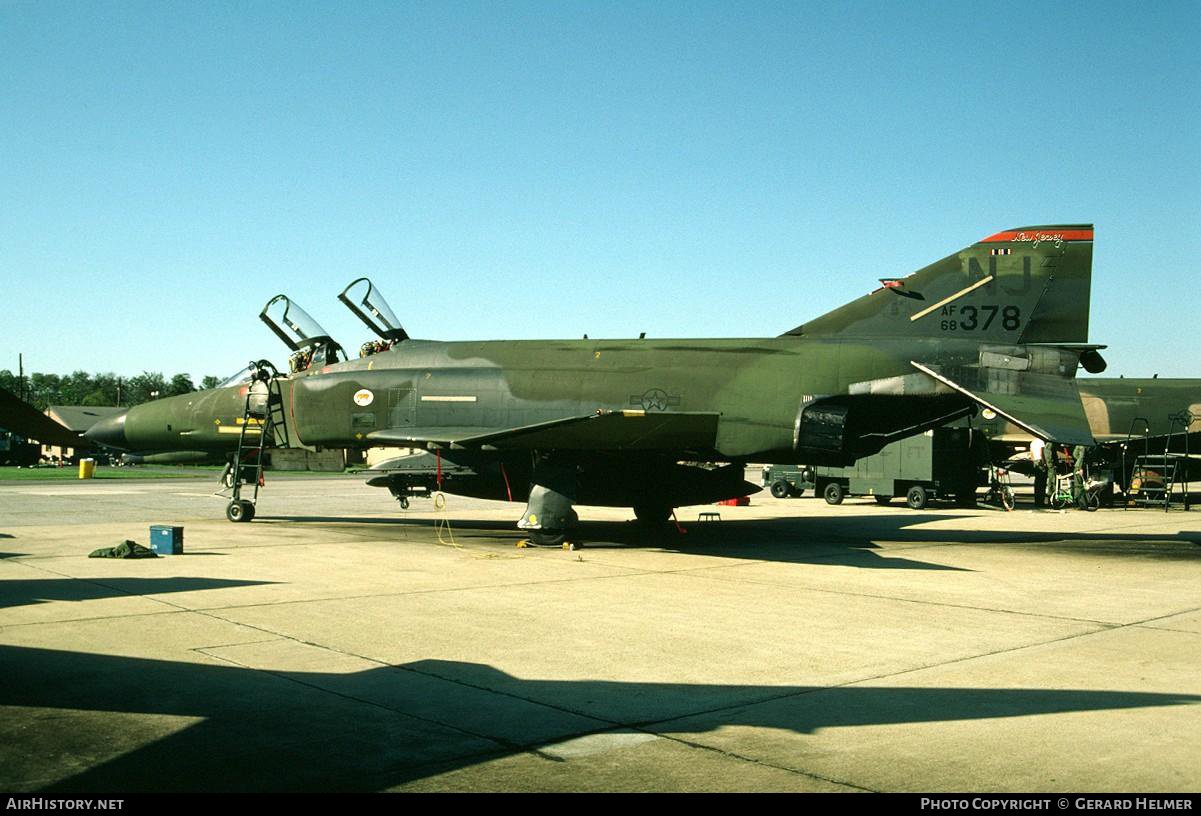
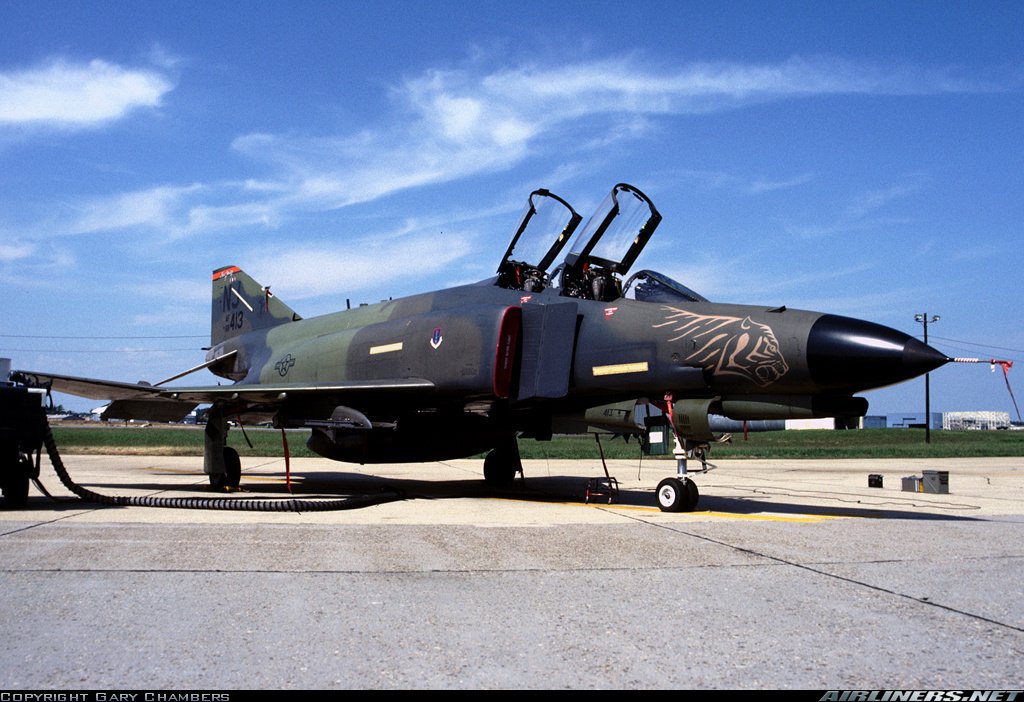
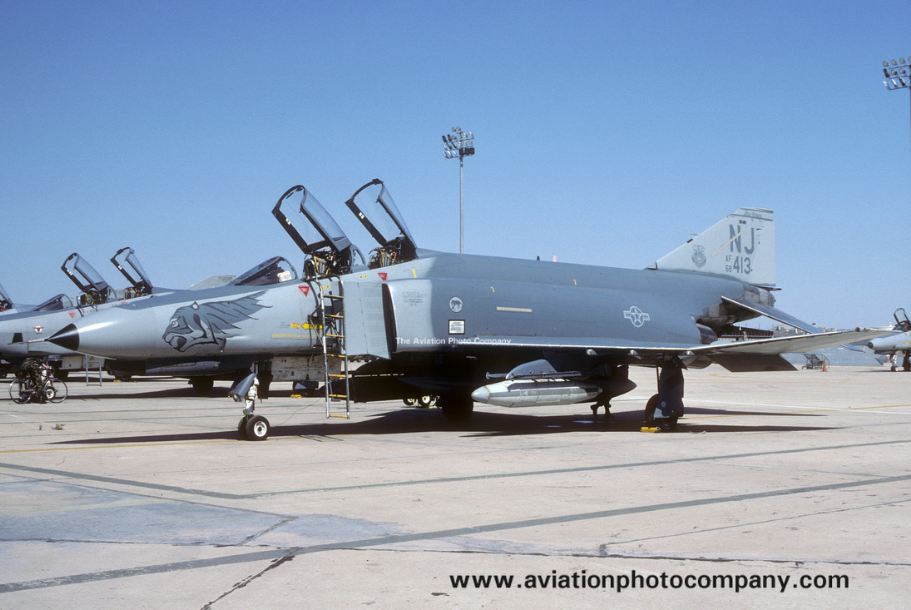
Yeah she did a stint in the Netherlands with the 313th TFS in the early 80's tail code HR... She was withdrawn from Use in late '90 and sent to AMARC... Here is a pic of her in SEA scheme while she was in the Netherlands.. I can find any of her in the 141st FS markings tail code NJ, but I did find several others in those markings while with the NJANG... (in three different schemes as well) SEA Scheme... 68-0527 68-0413... (in ghost grey scheme) :correction, Hill Grey II scheme.... 68-0378 (without the very nice Tiger marking) I believe this is the Euro II scheme of three greens) 68-0413 I believe at Macguire AFB in Euro I Scheme And finally... 68-0464 in Euro I scheme with the very best rendition of that Tiger head I've found... A very beautiful airplane my friend... Standing next to one always sent chills down my spine... (a young mans dreams of being a fighter pilot) A spectacular airplane...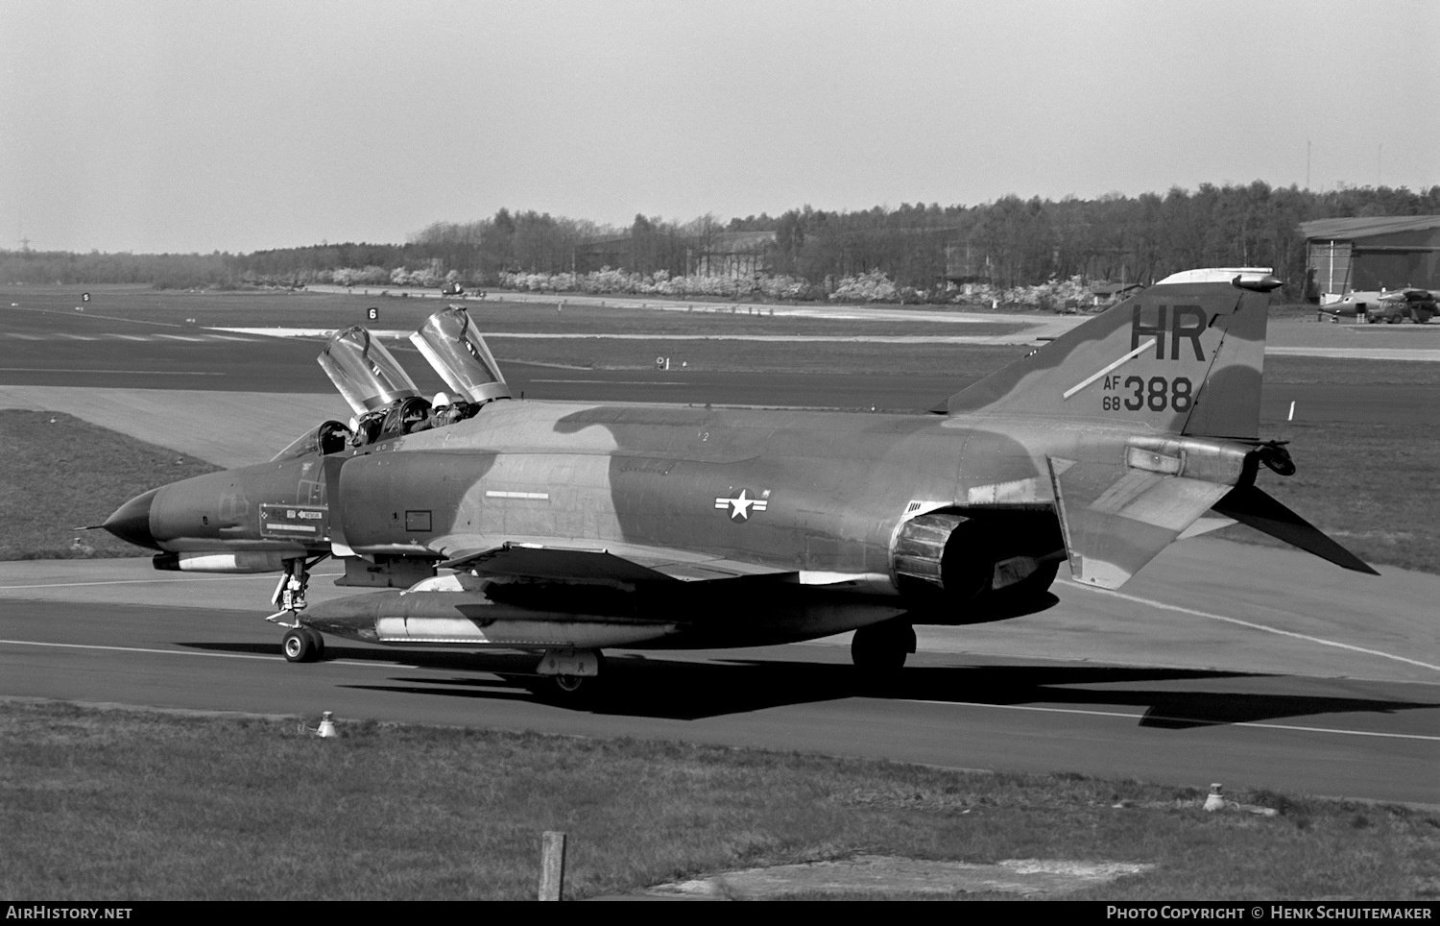
.png.6e2a5aa133e340eef86531c5062d49c8.png)
.jpg.62c00e390c8749cb512f3eb3dde41ef7.jpg)
-
F-86F-30 Sabre by Egilman - Kinetic - 1/32nd scale
Egilman replied to Egilman's topic in Non-ship/categorised builds
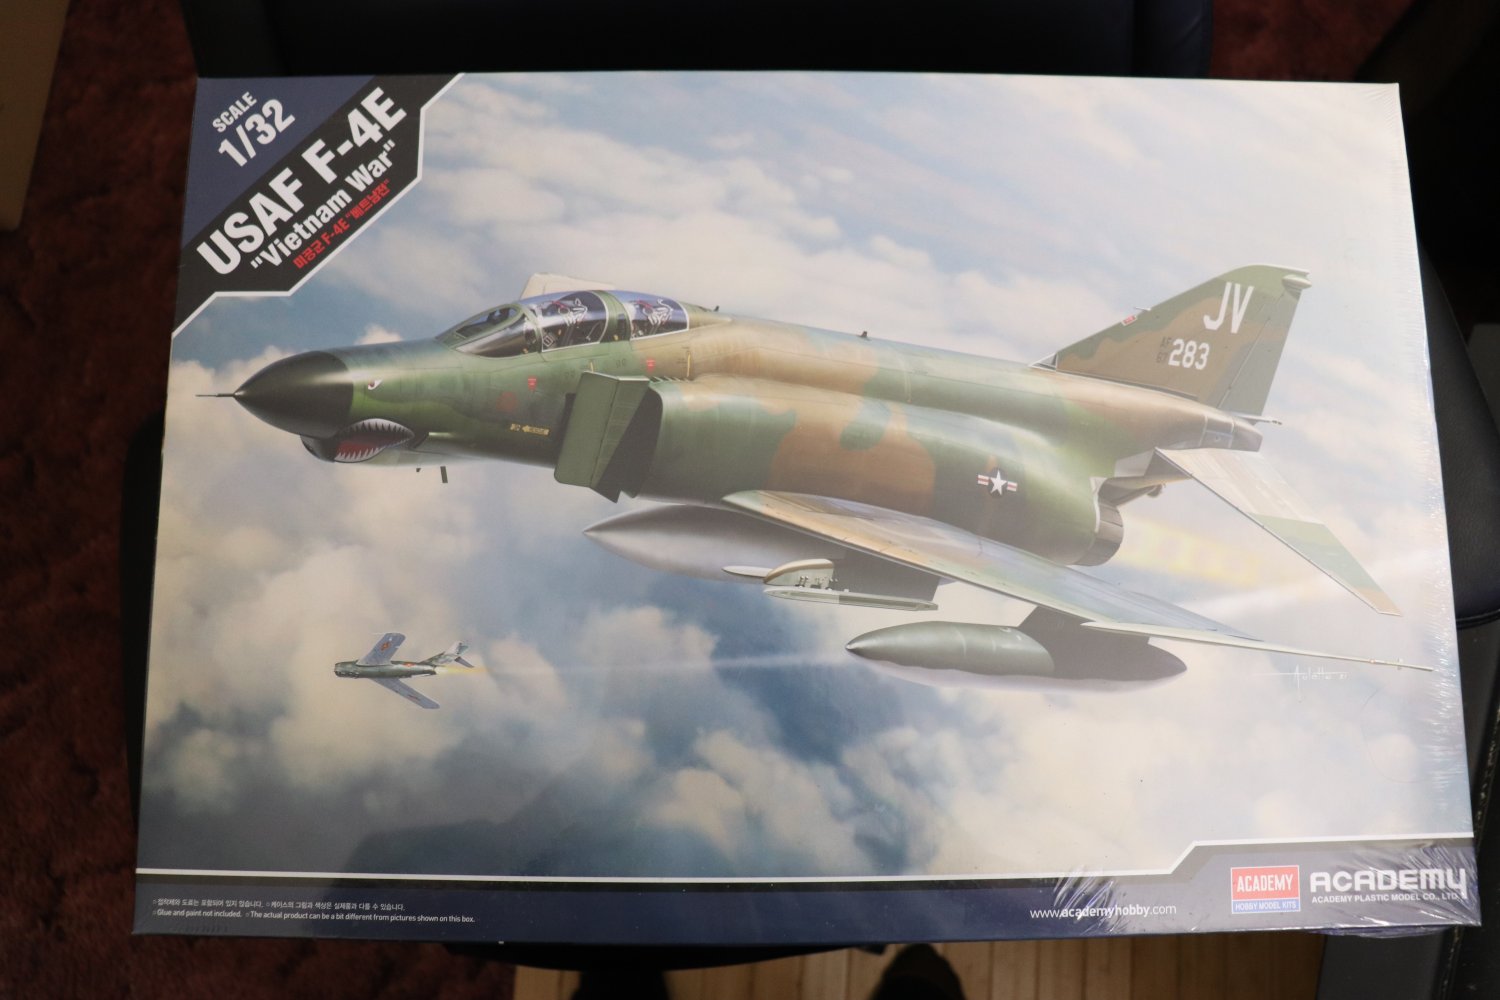
They are definitely great guys, most modelers are... Was the model in your markings? That would've been real real cool... Still got to work out the marsden matting with appropriate light brown dirt and sandbags as well... over time like all jets they mark their territory, but I've been told that an active F-86, flown every day doesn't do that... But I'll probably put some down anyway.... Now the maintenance area was a different story.... Usually on the flight line in Korea, they would have a GPU's for each aircraft and that was it, everything else was shared... Still not sure what I'm aiming at depicting... I think for this bird, the way they designed her, you almost HAVE to put the FOD covers in place, which leads to RBF flags on them as well. so I'm leaning heavily to the normal flightline versus the Alert line as I originally envisioned it... but I'm still out on that one... This is my F-4E... the Academy #12133, good reviews on this one, I'm hoping it turns out as well as my last F-4..
-
Good choice on the nail heads/holes, less is definitely more here, standoff distance just a slight hint of them, closeup, you see the pattern... Excellent work.... I think you nailed the aged coloration of the old paper window shades, that's a touch many do not add... An artist at his craft is always a great pleasure to watch...
- 333 replies
-
- 11
-

-
yep, VERY VERY light on consumption, you will not notice it's presence on the electric bill...
-
Yep LED's are quite sippy on the power for the light they produce... That's why LED's have become the light source of choice in everything today... 8 "C" batteries would drive that lamp for at least 48 hours continuous...
-
F-86F-30 Sabre by Egilman - Kinetic - 1/32nd scale
Egilman replied to Egilman's topic in Non-ship/categorised builds
I thought they might bring back some memories... I got most from Video Aviation, an Italian company that does quite a few of the flightline pieces in various scales.... A Dash-60 start cart is one of their offerings, actually an A/M32A-60 Starter Cart, it was designed specifically for the F-4 and they produce one... Not a bad price for what you get... When I do my Vietnam F-4E I'll pick one up... This is my first dio in over two decades, probably a little rusty, but we will see... -
F-86F-30 Sabre by Egilman - Kinetic - 1/32nd scale
Egilman replied to Egilman's topic in Non-ship/categorised builds
Thanks Alan, Im working towards getting it done... -
F-86F-30 Sabre by Egilman - Kinetic - 1/32nd scale
Egilman replied to Egilman's topic in Non-ship/categorised builds
Thank you brothers, it's been a while since I have posted on this, still not stable enough to do any real work but I'm hanging in... Got my final deliveries today.... (just a hint of where I'm going with this) On the left I think I've acquired the last two Squadron True Details '50's GPU's available on the net... These were the GPU's given to the forward bases where the F-80's F-84's and F-86's flew, have to have one sitting next to her... Bottom Center is the ubiquitous Clarktor Tractor If you were on a USAF airbase anywhere in the world from '43 to '81 you will recognize this... It has towed everything in the Airforce Inventory from F-80's to fully loaded B-50's Top center is a combined package a set of post Korean war GPU & Air Start Cart You boys from Vietnam should be familiar with those particular items.... And on the right is the venerable MD-1 Towbar capable of latching on and towing any USAF aircraft... This is the early version that was hand cranked, the later version had electric motors for it's moveable parts... I've also located several 3D files for Marsden Matting... The pressed steel plating used to build runways with since before the start of WWII.. None of them are very accurate but I've also located sufficient source documents to design up my own.... I think she would look nice on a proper period flight line.... Getting ready for the final push my friends.... Thanks for following and all the likes and well wishes... It's greatly appreciated... EG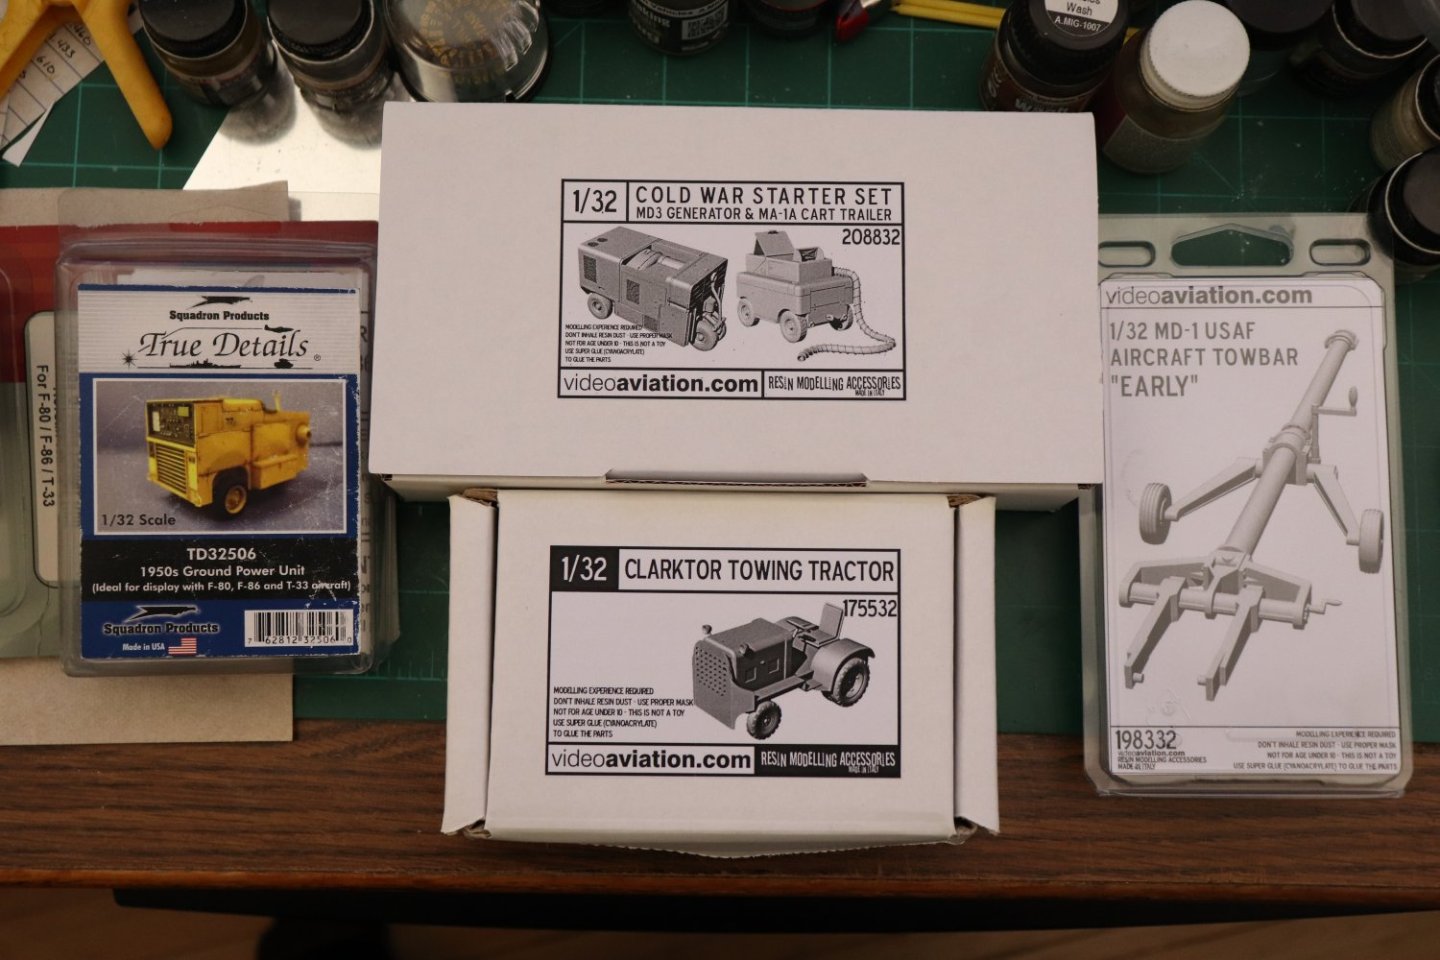
- 585 replies
-
- 14
-
-
MRAP ATV by CDW - FINISHED - Rye Field - 1:35 Scale
Egilman replied to CDW's topic in Non-ship/categorised builds
Craig, Alan, it's good to hear from you both that your ok with no major issues, thank you lord... Now praying for those not so fortunate...... -
And in wet rainy weather a lot of slurpy mud... That looks the part.... Very Very well done Alan, Excellent weathering...
-
MRAP ATV by CDW - FINISHED - Rye Field - 1:35 Scale
Egilman replied to CDW's topic in Non-ship/categorised builds
I know it not possible right now due to the weather conditions, but when you get a chance get a shot in real sunlight for the best comparison... In my opinion cell phones accentuate contrast too much.... to me they all look a bit overexposed... -
MRAP ATV by CDW - FINISHED - Rye Field - 1:35 Scale
Egilman replied to CDW's topic in Non-ship/categorised builds
Same for you brother, will be mentioning you and alan to the man in charge, I know he will be lookin out... -
MRAP ATV by CDW - FINISHED - Rye Field - 1:35 Scale
Egilman replied to CDW's topic in Non-ship/categorised builds
They always do, stay safe my friend... -
Very well done my friend, especially in that small scale... A vey nice addition to the armory....
-
MRAP ATV by CDW - FINISHED - Rye Field - 1:35 Scale
Egilman replied to CDW's topic in Non-ship/categorised builds
Keep your head down brother hurrycanes are nothing to mess with... And thanks for another chapter in the "Honey I shrunk it" book... Beautiful job, looks real.... -
You nailed it brother! That is not an easy scheme to replicate weathered like that.... Extremely impressive build....
-
Outside of Australia can take up to two months to reach the US, they are a very reliable company....
-
MRAP ATV by CDW - FINISHED - Rye Field - 1:35 Scale
Egilman replied to CDW's topic in Non-ship/categorised builds
There was a report I read a few years ago about these vehicles.... One was part of a patrol somewhere in Afghanistan, and hit an IED, a LARGE IED... It was blown into the air, flipped several times, and landed in the crater the explosion caused.. In the process it lost it's front suspension and the engine, essentially it was a pile of scrap iron sitting in a hole... The five man crew survived (all alive with serious injuries but not life threatening) and was sitting inside it in the hole inside.... The enemy drove off the rest of the patrol and for 13 hours put fire on the destroyed MRAP trying to kill the crew... The fire included at least three hits with RPG's.... None of them penetrated the MRAP... Eventually the battalion responded, counter attacked and relived the position, all the crew survived, when the attack ended as the relief force moved in the enemy was clear of the area, there were over 200 dead enemy surrounding the MRAP's position... The enemy ran out of ammunition (and troops) trying to kill the crew... This is one tough TOUGH vehicle... One of the most effective patrol vehicles ever designed... (that's why they were distributed to police forces nationwide when we pulled out of Afghanistan) -
MRAP ATV by CDW - FINISHED - Rye Field - 1:35 Scale
Egilman replied to CDW's topic in Non-ship/categorised builds
Racing car models as well, tiedowns for truck trailers, that's where I learned it from... They've been doing this for decades, long before there were AM companies and PE parts.... the only thing PE brings to the table is decently scaled latches, clasps & buckles but those could be done with fine wire and look just as good.... Excellent idea much easier in the budget as well.... -
Good choice, I use Acrobat for OCR, a bit of a learning curve but also works very well....
-
We're good brother... it just might be me getting my nose too close the the klej
-
Chris, that has those individual stubs doesn't it? lots of repetitive fuuuunnn.... (but I have faith) that was something I couldn't master, repetitive rolling of tubes in the same size.... and I could never find a way to pattern the process...
-
I did, it is also where a dapping set comes in handy when you need to pre-form a multi curved part....