HOLIDAY DONATION DRIVE - SUPPORT MSW - DO YOUR PART TO KEEP THIS GREAT FORUM GOING! (Only 36 donations so far out of 49,000 members - C'mon guys!)
×


Keith S
-
Posts
339 -
Joined
-
Last visited
Content Type
Profiles
Forums
Gallery
Events
Everything posted by Keith S
-
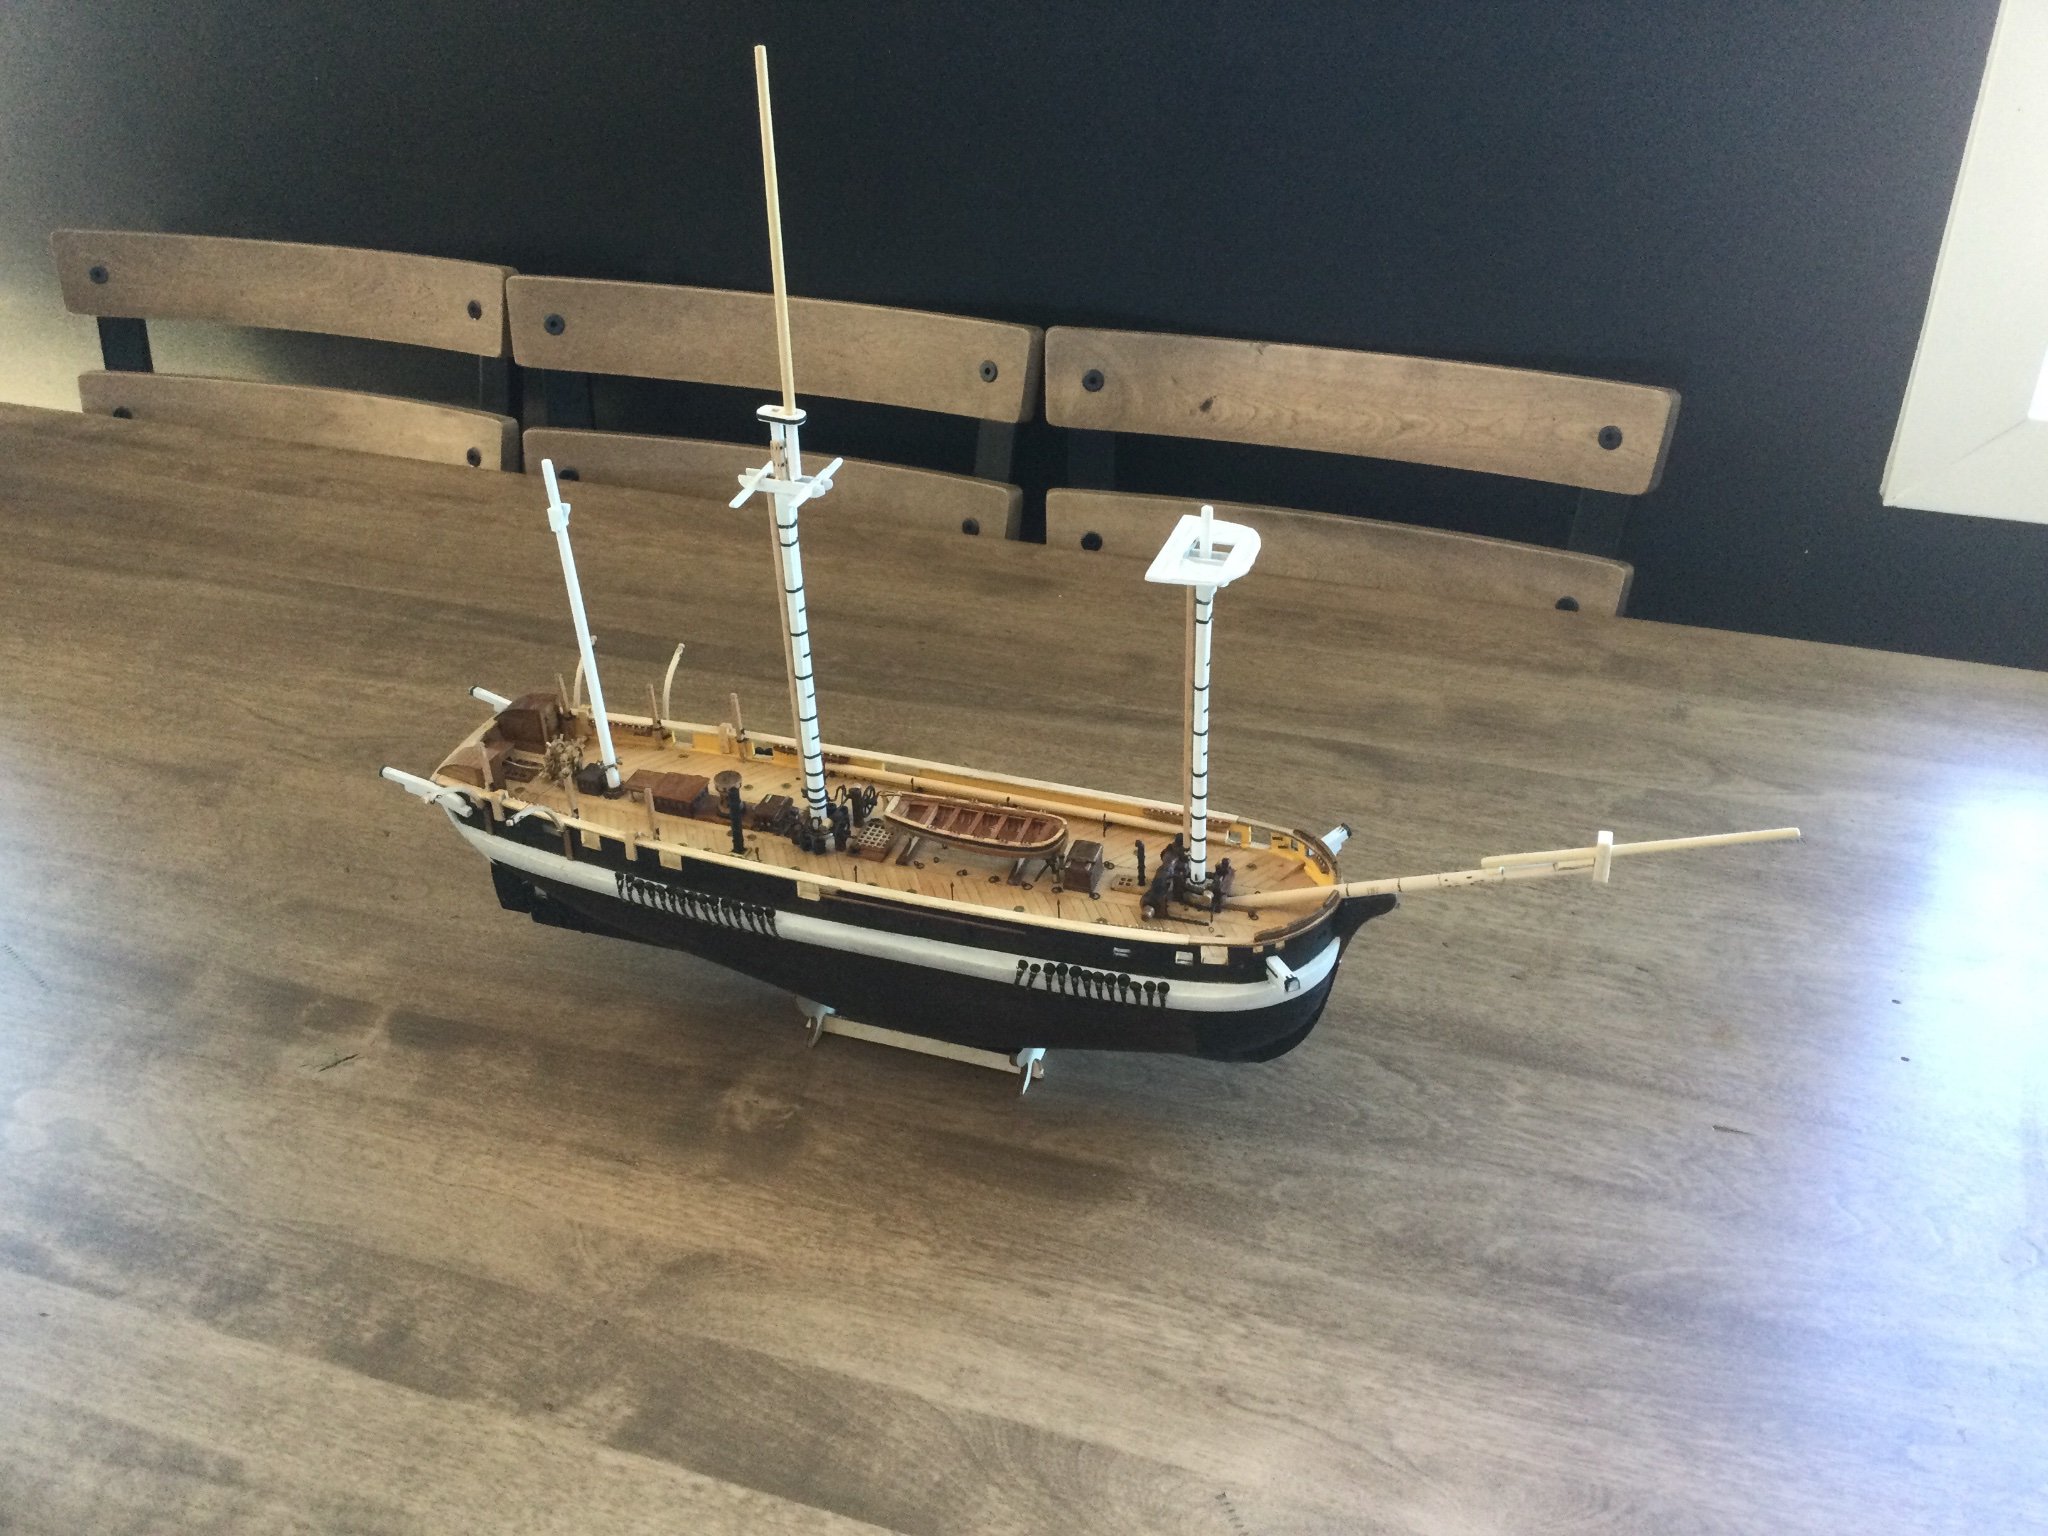
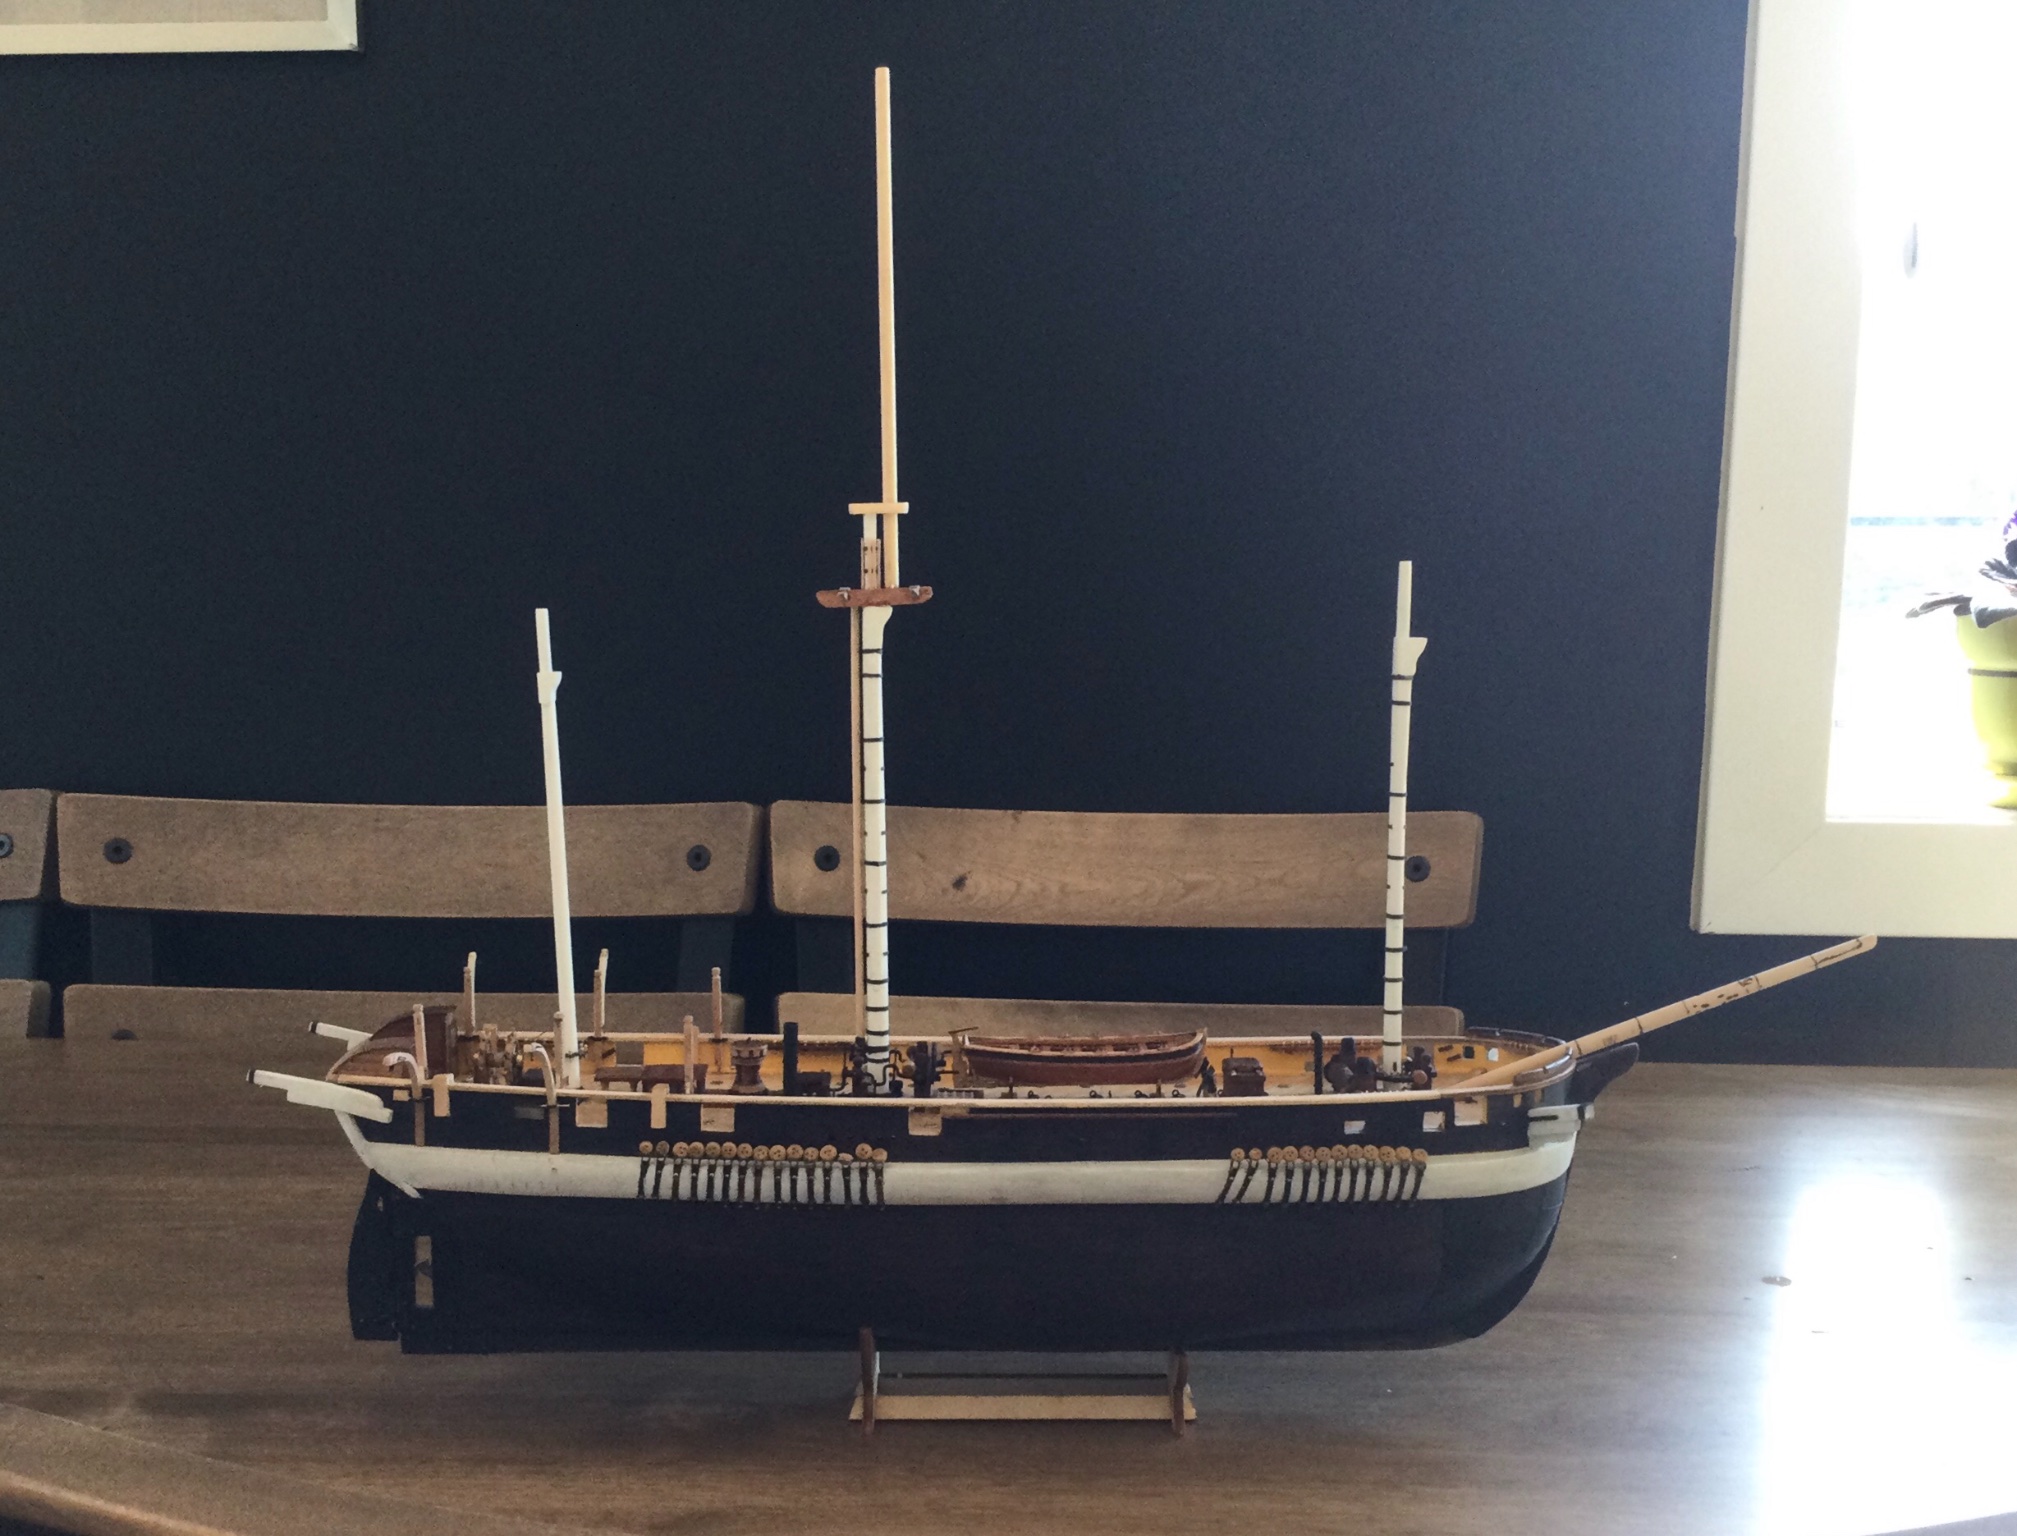
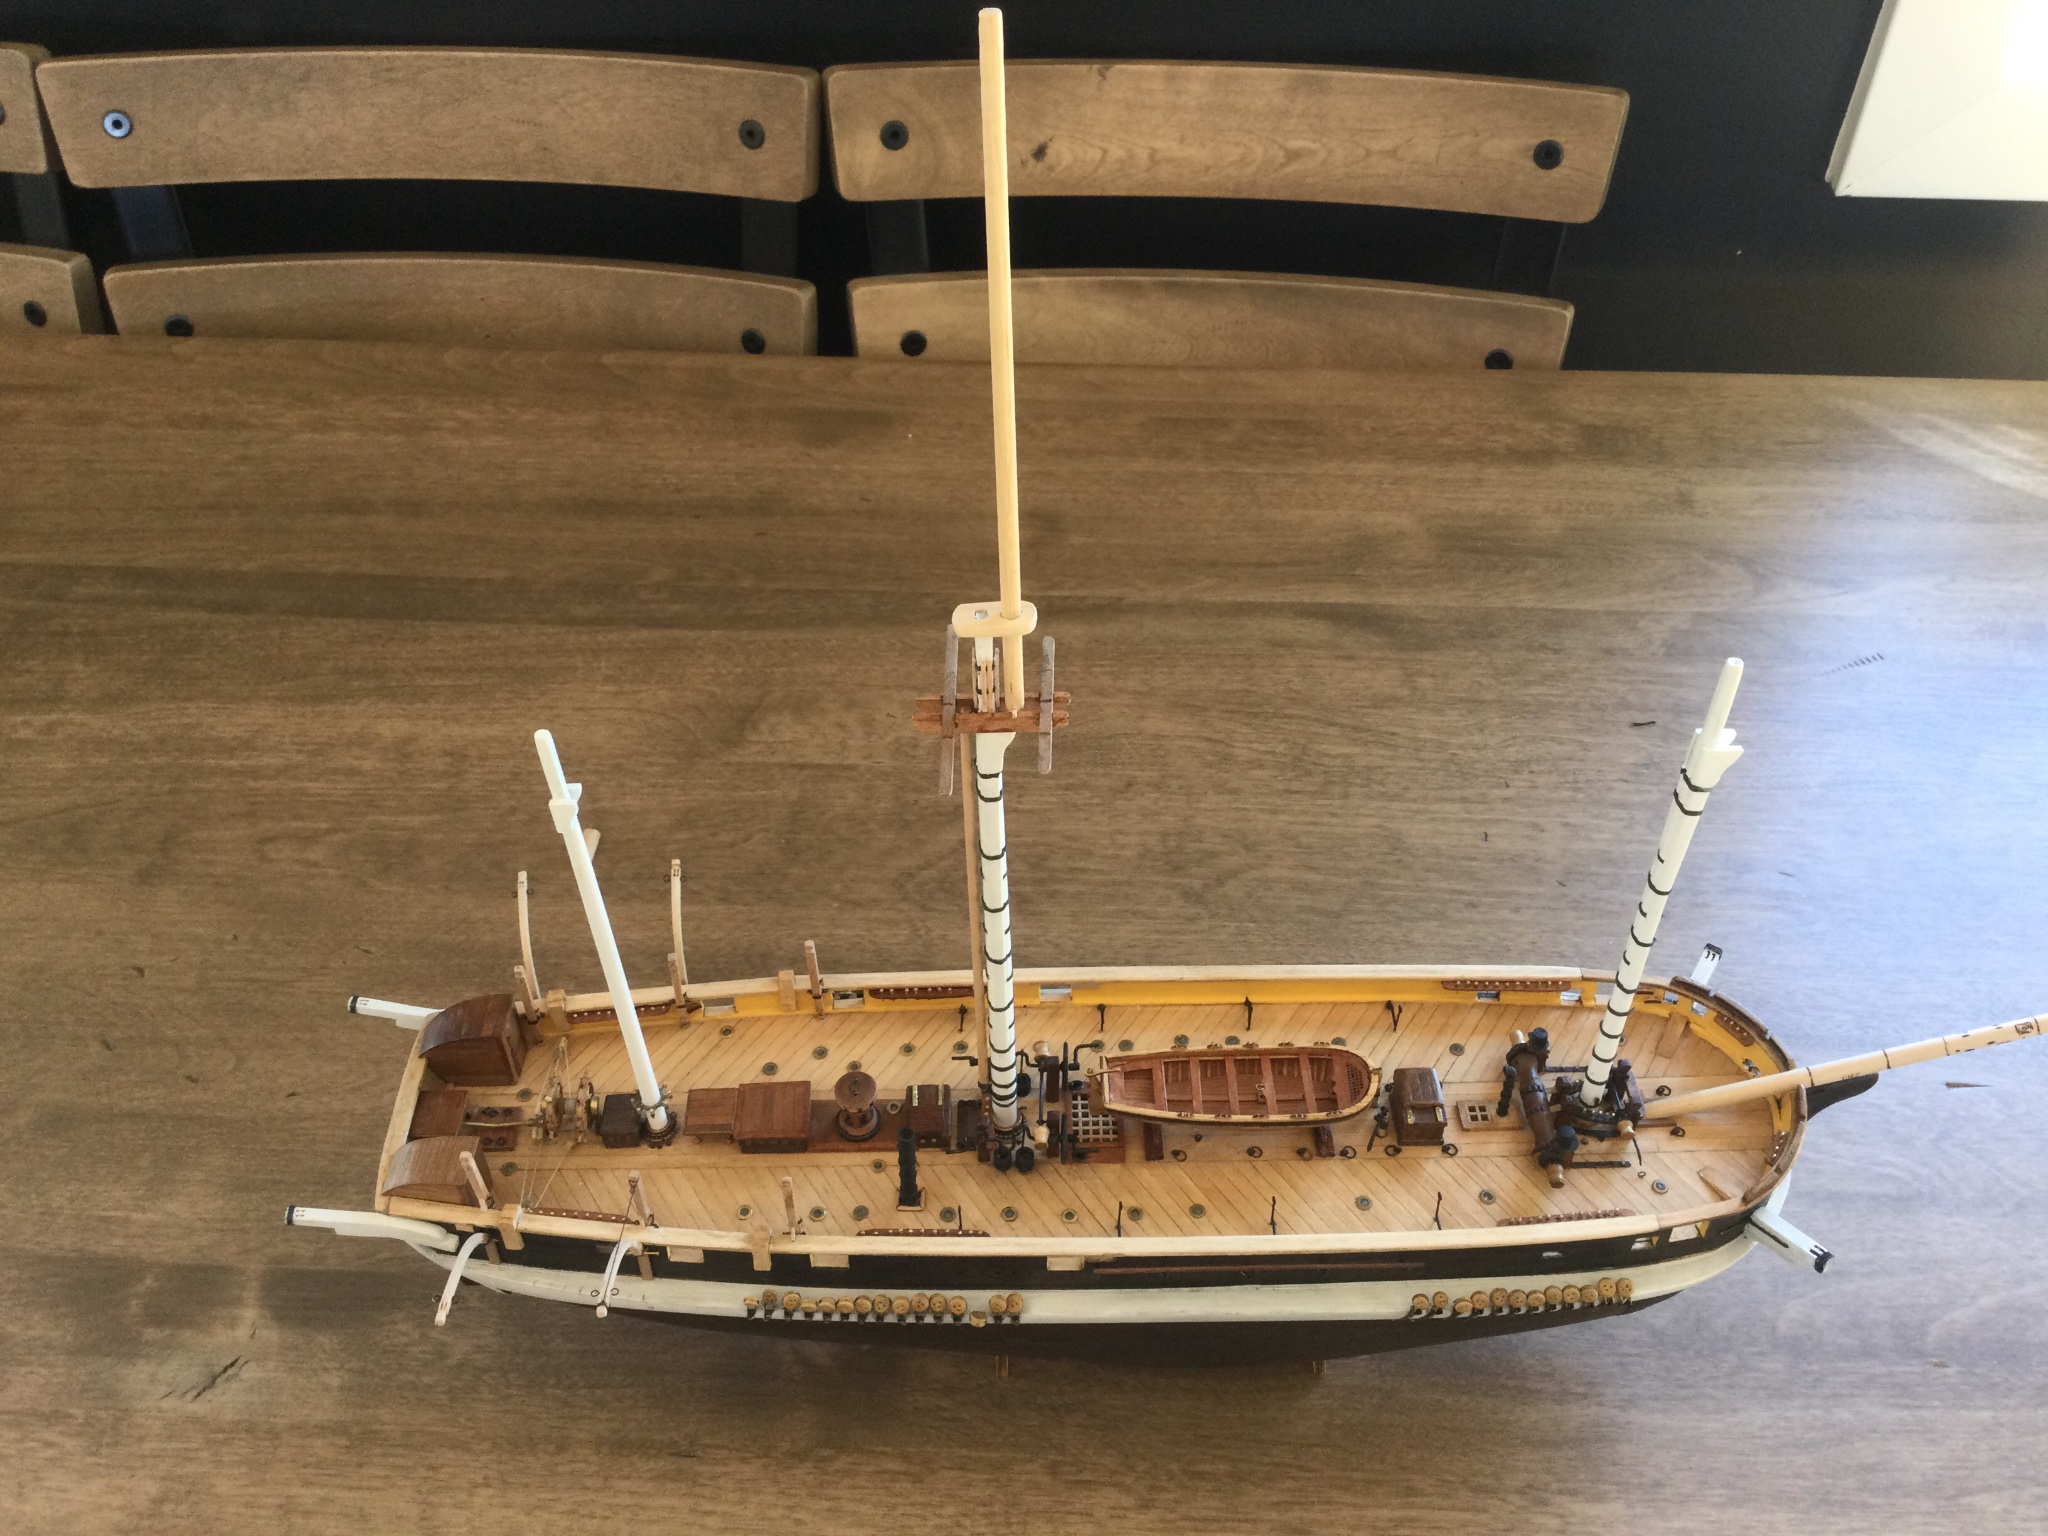
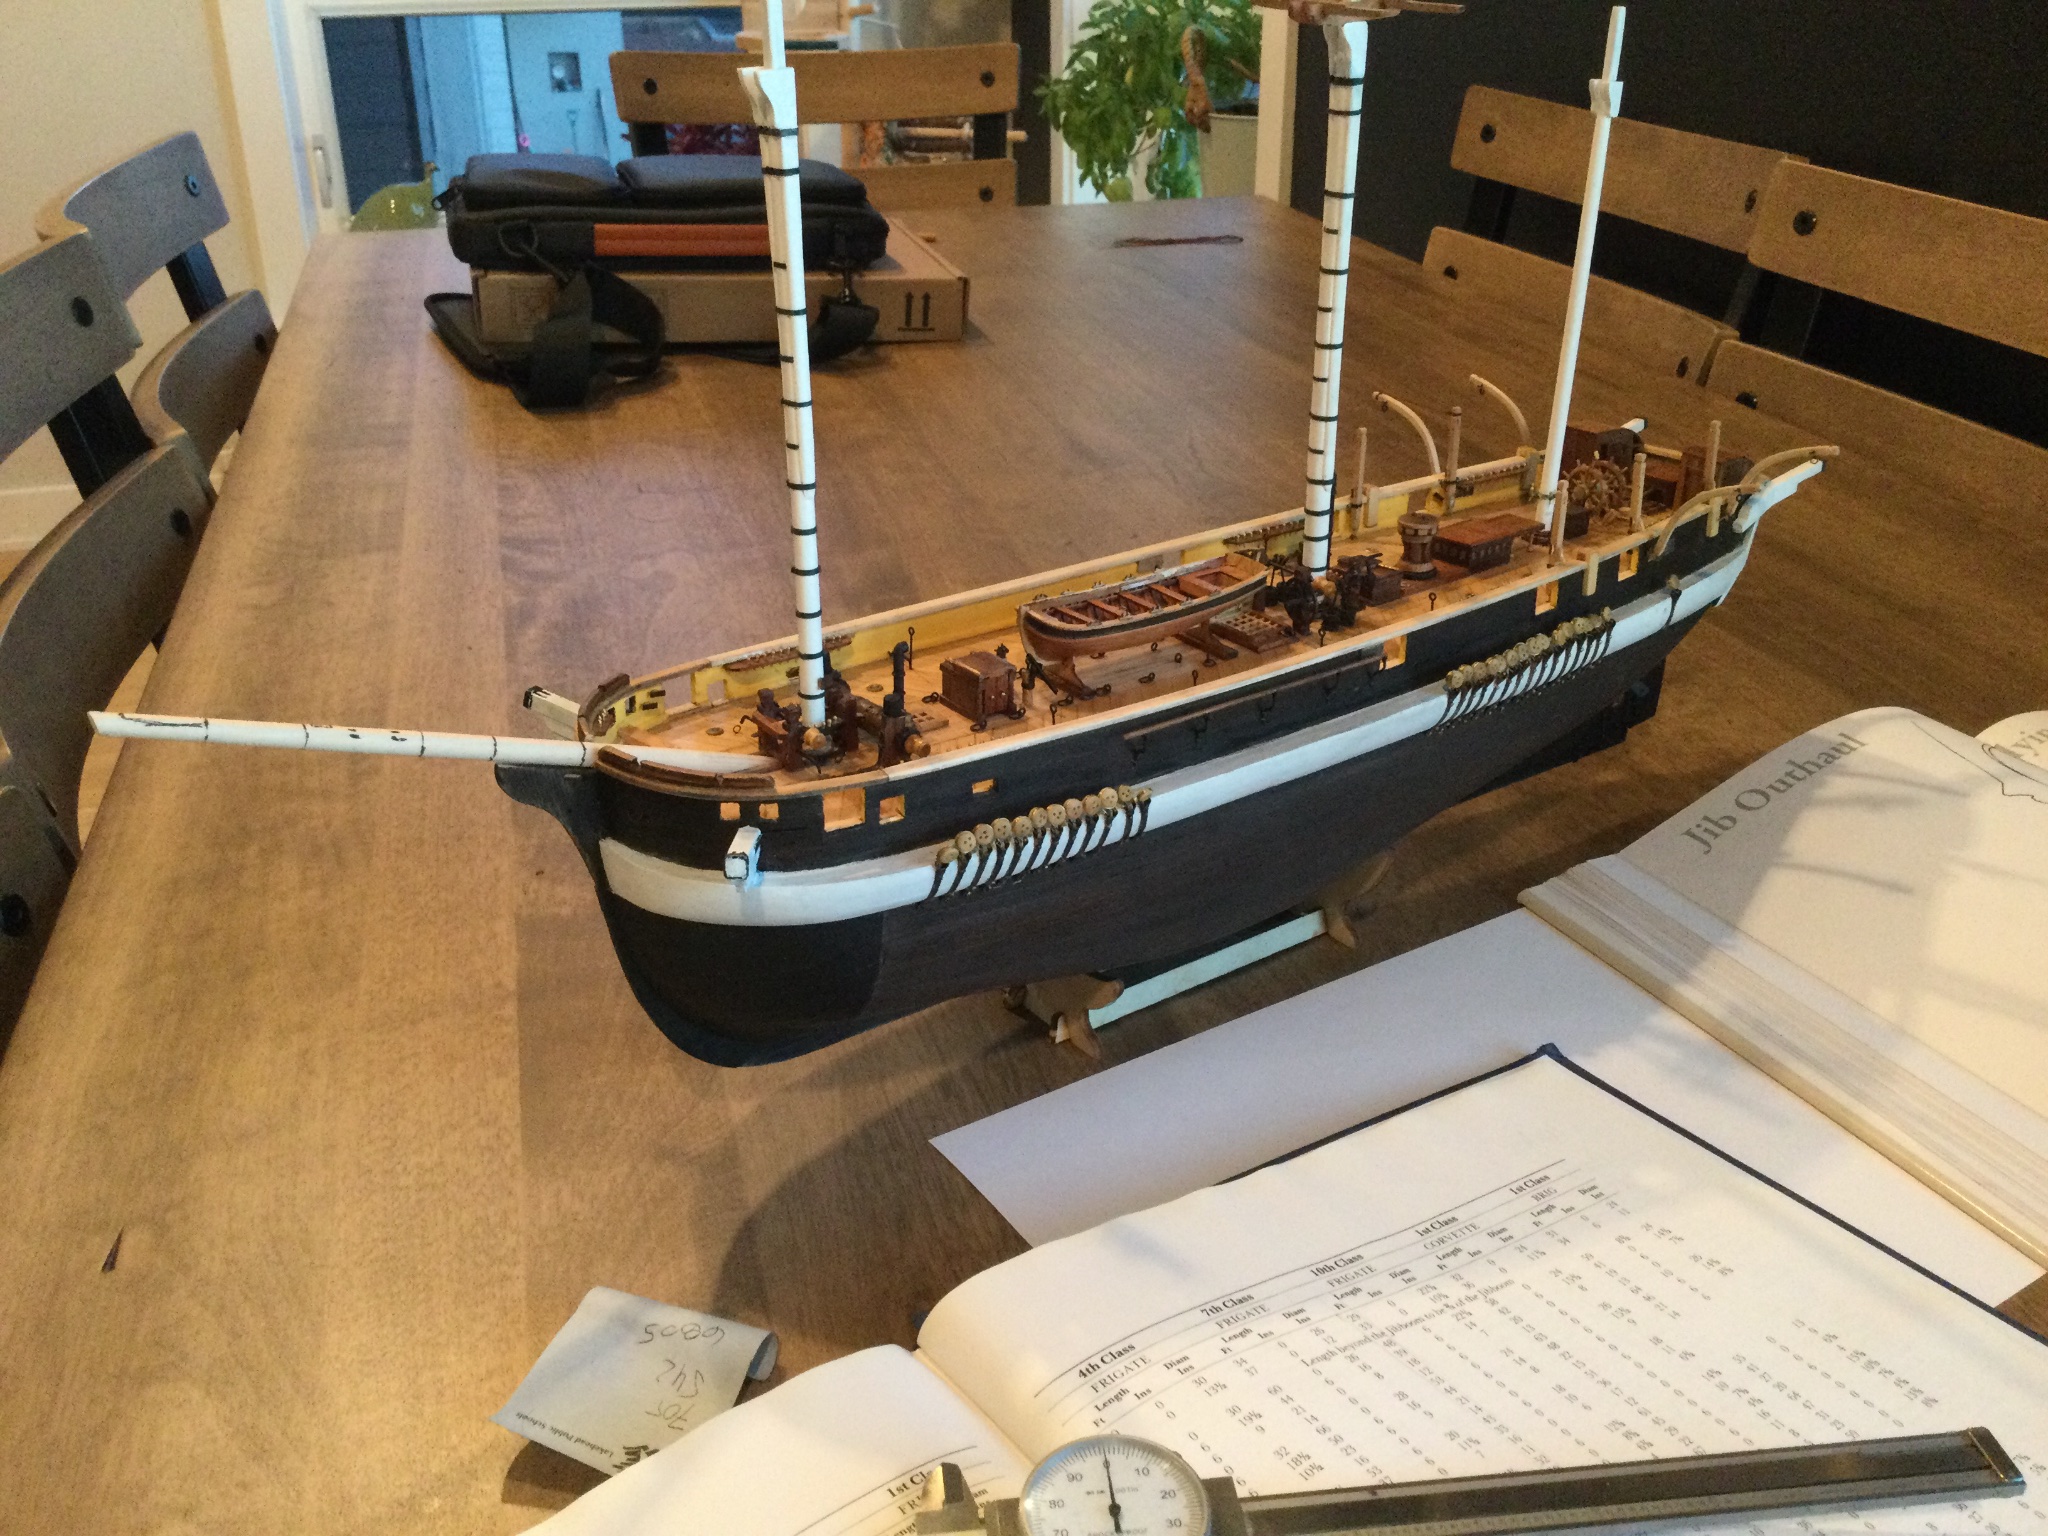
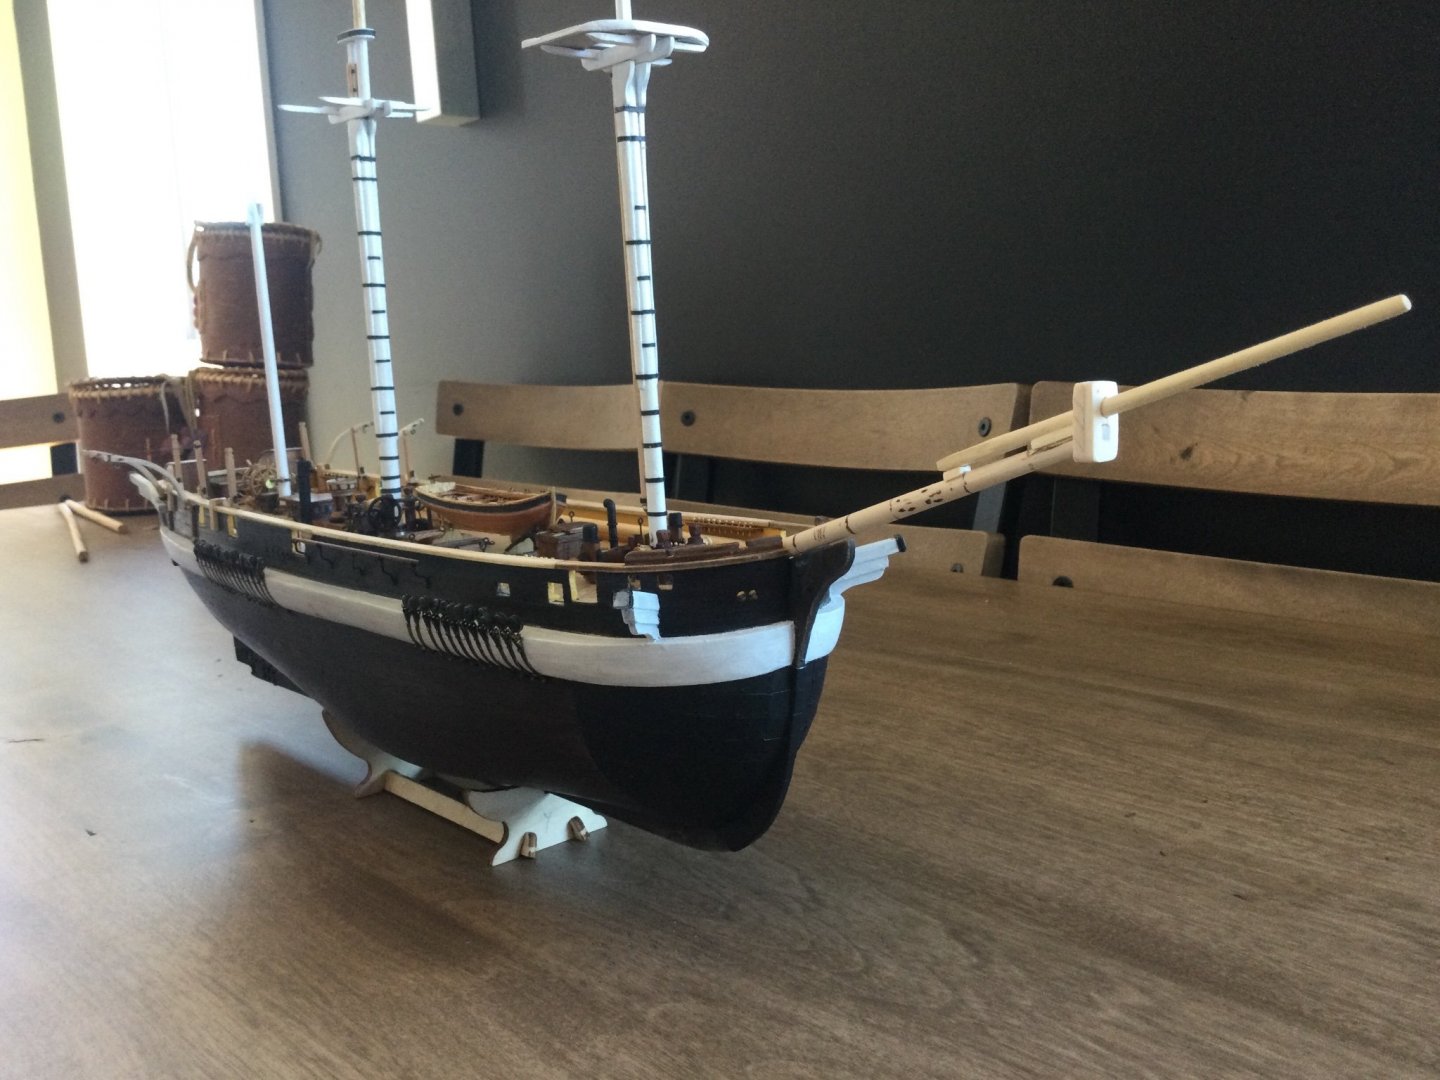
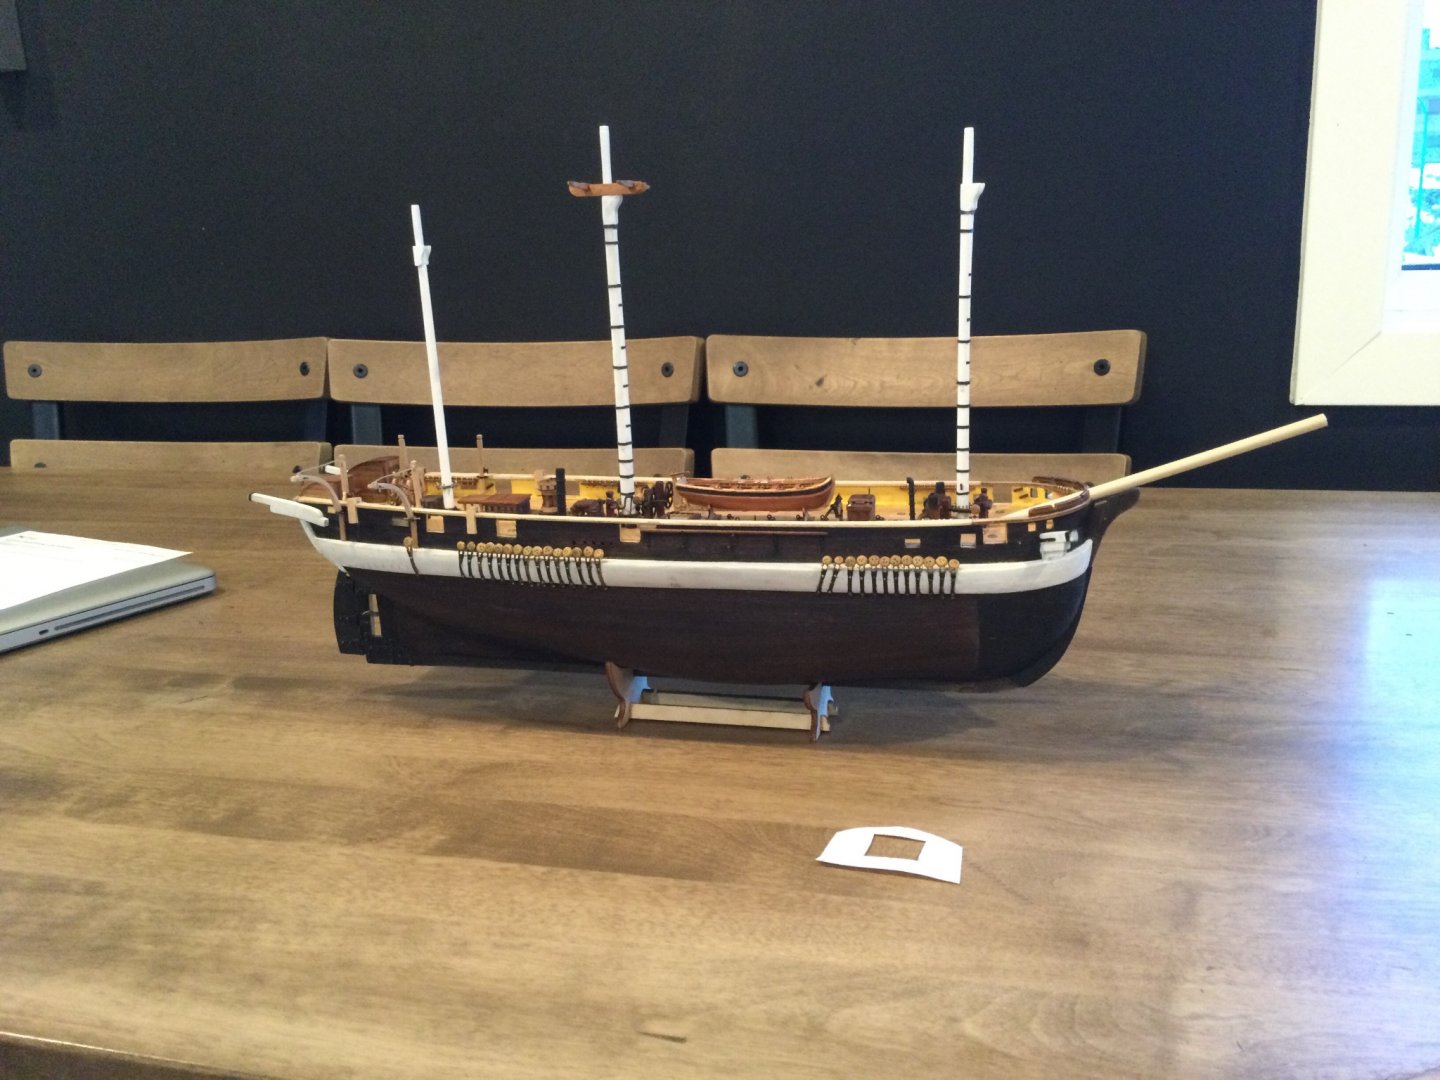
This morning I've been working on the bowsprit fittings. There is a lot of stuff in this particular spar. I had to make the cap three times before I got one I was reasonably happy with. Drilling parallel holes on an angle is not easy, particularly when one of them needs to be filed square afterwards. I also tapered and roughly shaped the jib-boom, although there is a lot left to do on that thing. I wanted it to have a square heel, so I started with an oversize dowel, and carved the butt square after tapering the rest. I think it turned out "OK". We'll see. This is a significant stage in the model for me, because now, she looks just about how the real ship looks on the ocean floor. We know from sonar images and Parks Canada's fleeting seaweedy glimpses that the ship still carries her jib-boom, and while I don't know how much of her masts remain, at one point in the last 20 years Sammy Kogvik, the Inuit sailor who led the survey ship to Terror's position, saw spars sticking out of the water. While these spars are't there anymore, it seems likely that Terror's masts stood for quite some time. I think now my model looks similar to what we might expect to see when further documentation of the wreck becomes available. Minus the kelp and sculpins. As for me, of course I will be pressing on and trying to complete the model.

-
They must have a picture of you on the wall at the forceps factory. Nice work so far.
- 47 replies
-
- 2
-

-

-
- Modellers Shipyard
- Perseverance
- (and 1 more)
-
You're right, I don't think it would be possible. Anyway, like we were talking about in the other thread, in real life, paint was used to COVER the seams. It's always going to be a toss-up whether to show off your clever woodwork or to cover it up with paint. I suppose it's not reasonable to expect both, on models this small especially.
-
Thanks Keith for the encouraging words. I think you're right, real working ships -even warships- do not look as crisp and tidy close-up. The whole point of paint in real life is to FILL the cracks, not show them off. Whenever I make something I'm not immediately proud of, I put the ship on the dinner-table and watch it for a while. Sometimes, this helps me decide whether to pull the part off, or leave it on. The foretop is starting to grow on me actually. It looks correct with the paint, and once I've included the black iron banding and rivet-heads, and futtock chains, it will probably be perfectly acceptable.

-
Here I've built up the foretrees and top. I wanted to build up the top from planks the way it's depicted in Lees' book, and it was very interesting to see it go together more or less how it would have in real life. I continue to use the ratios given for a tenth-rate frigate. So far it seems to look pretty good in terms of size. The top is bigger than the one from the kit, but it doesn't look disproportionately large. I hope. Also, I can see now it was foolish of me to glue the trees onto the main mast. That will make it more difficult to build the main top. Oh well! I was disappointed when I painted it. I was rather hoping the planking detail would show through the paint. It did not, and I don't like the effect. This is why I didn't paint the water-closets at the stern. However, I think it would look strange to have painted masts and unpainted tops, so I will press on. I really do despise paint. Whenever you're hoping to cover an error, it refuses to hide anything; but when you are hoping it WON'T cover some detail or other, it covers marvellously. I've been aboard a number of ships in my life however, and I've noticed that the paint is slobbered onto parts like this pretty liberally in real life. So maybe it's actually realistic. It's just kind of too bad the planking is hidden: it took a long time to do. But I will know it's there. Maybe it will prove a blessing when the model is old, and it doesn't warp. I also blackened the deadeyes and coated the boat-davits with wipe-on poly (I found some!!) and tapered the main topmast. It does not look very tapered in the pictures but I think that's an effect of the lens more than anything.

-
I am having the same problem with paint. I just finished building up the foretop on my model, using planks as in real life, rather than the plywood from the kit. Then I painted it, and it might as well have been the plywood from the kit. You can't see any of the planking. The only paint that will show planking detail like that is probably a very fine mist of spray paint.
-
She's looking great, Keith. Your workmanship is to a very high standard. Your approach to the running rigging is very sensible too. I like the eyebolt your driver sheet attaches to, in the transom. It's the simplest option, therefore likely the correct one.
-
Nuts, I don't have "Twitter". Well at least it's easier to pull them off than it would be to put them on once I've started on running rigging. It does cause a bit of mischief concerning where the mizzen stay will attach to the main mast. Where did you order your book from? I pre-ordered mine on "Amazon" but haven't heard anything since. At the rate I build, the book will be out before I need to worry about any of the information it will contain. The davit arms and trysail masts are easily pulled off if necessary.
-
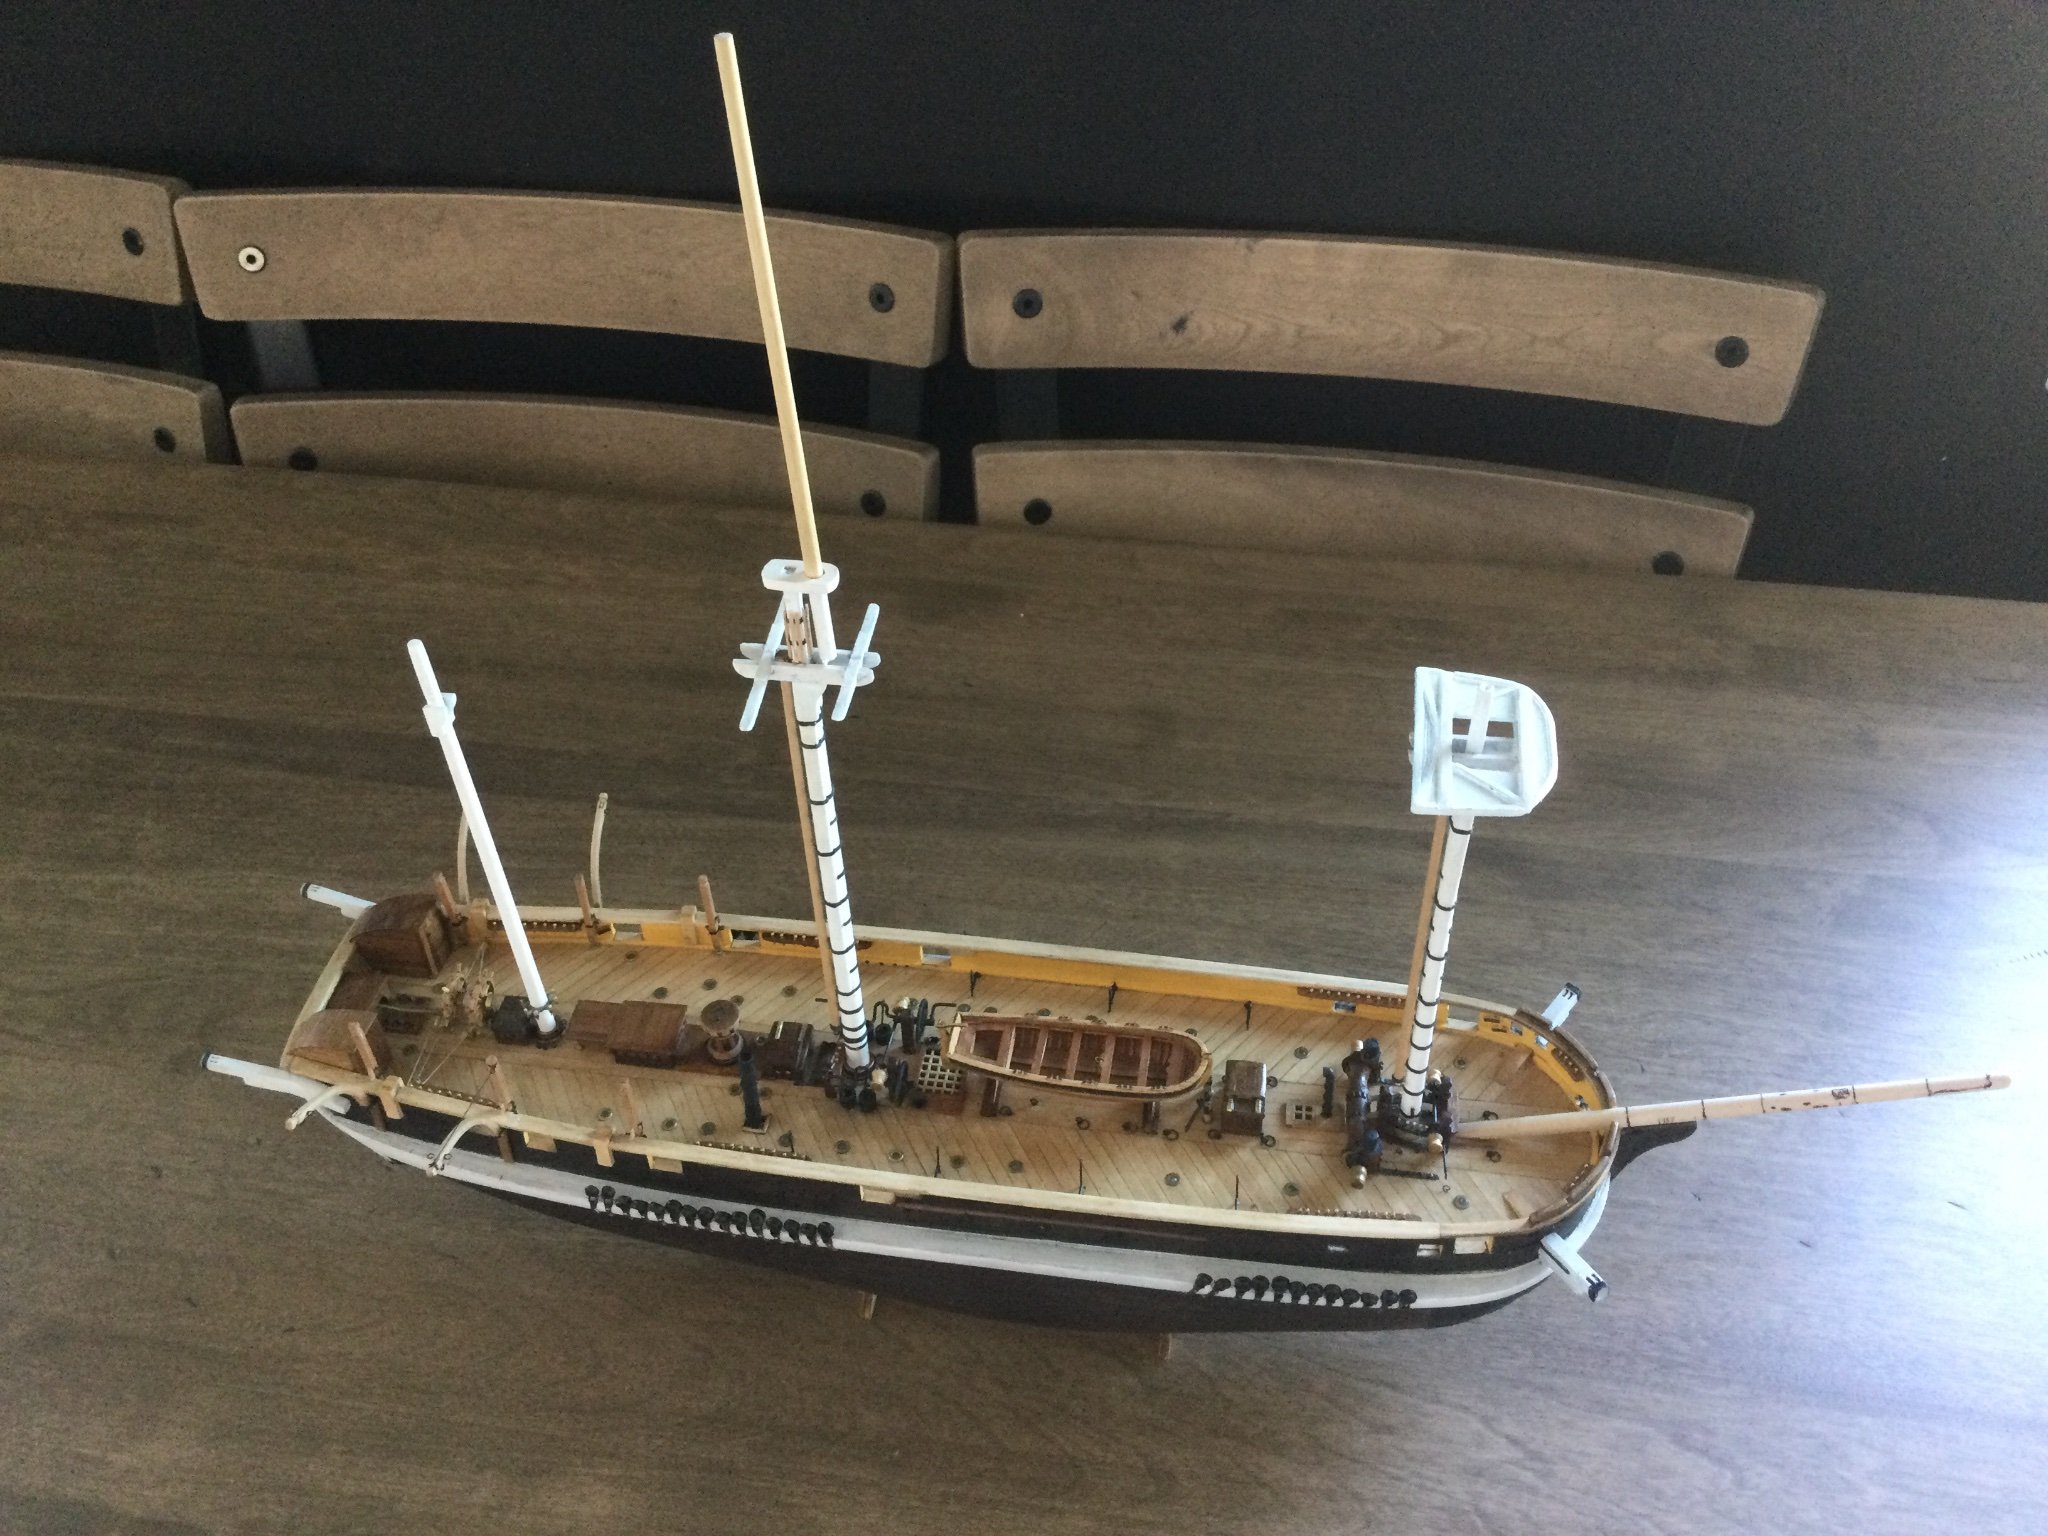
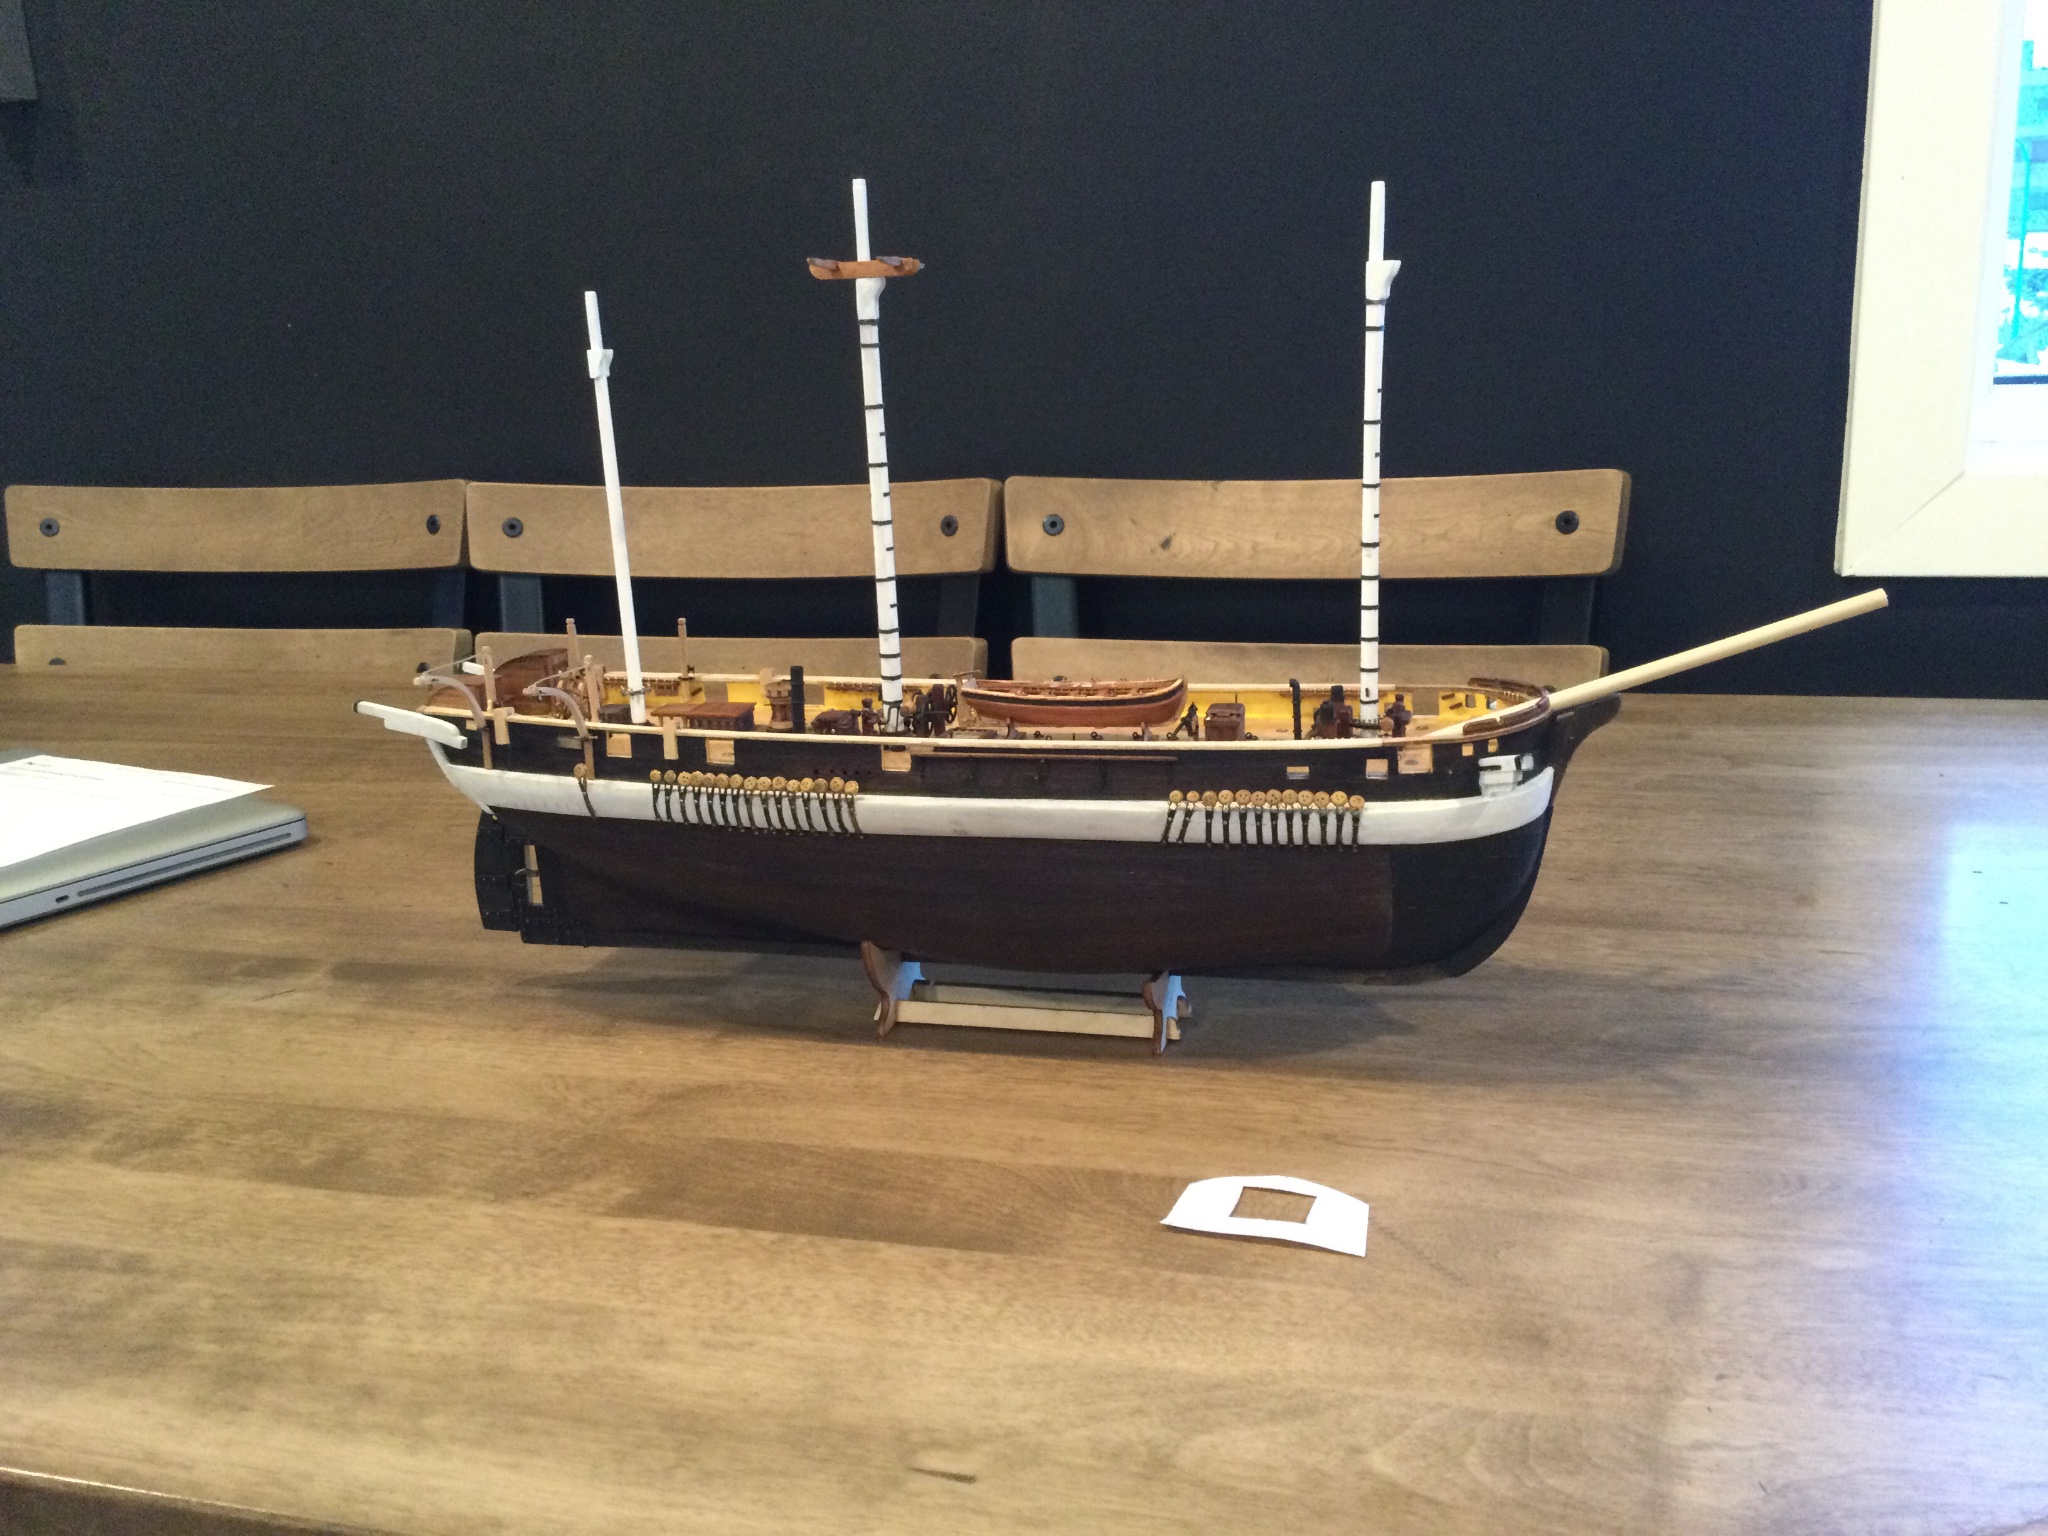
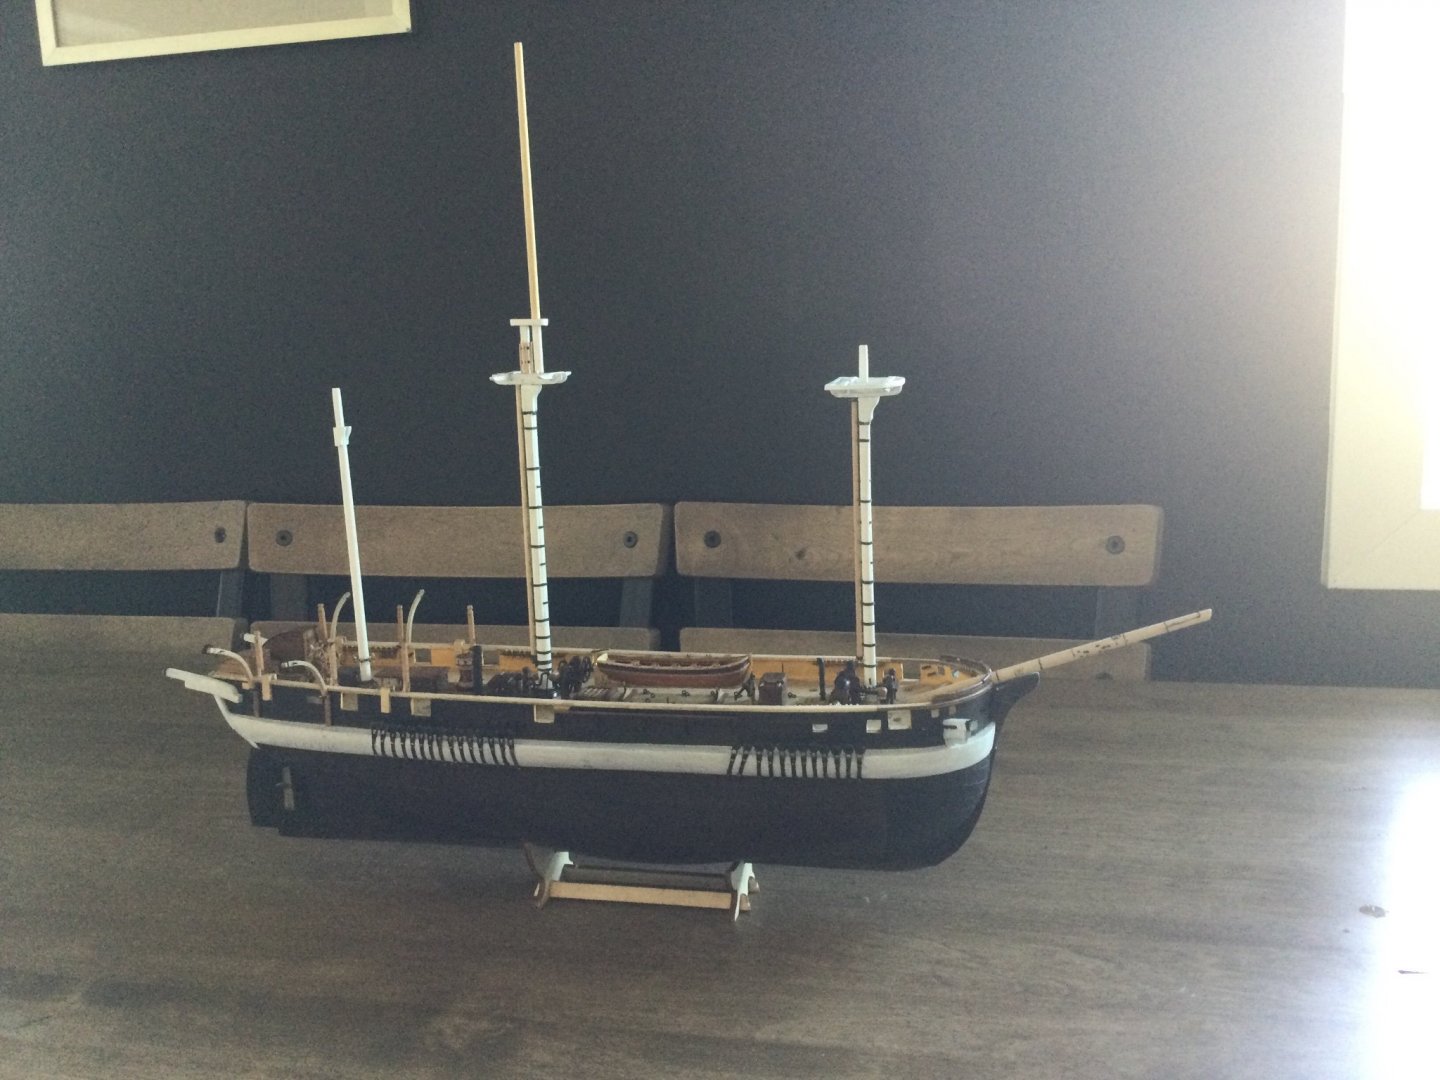
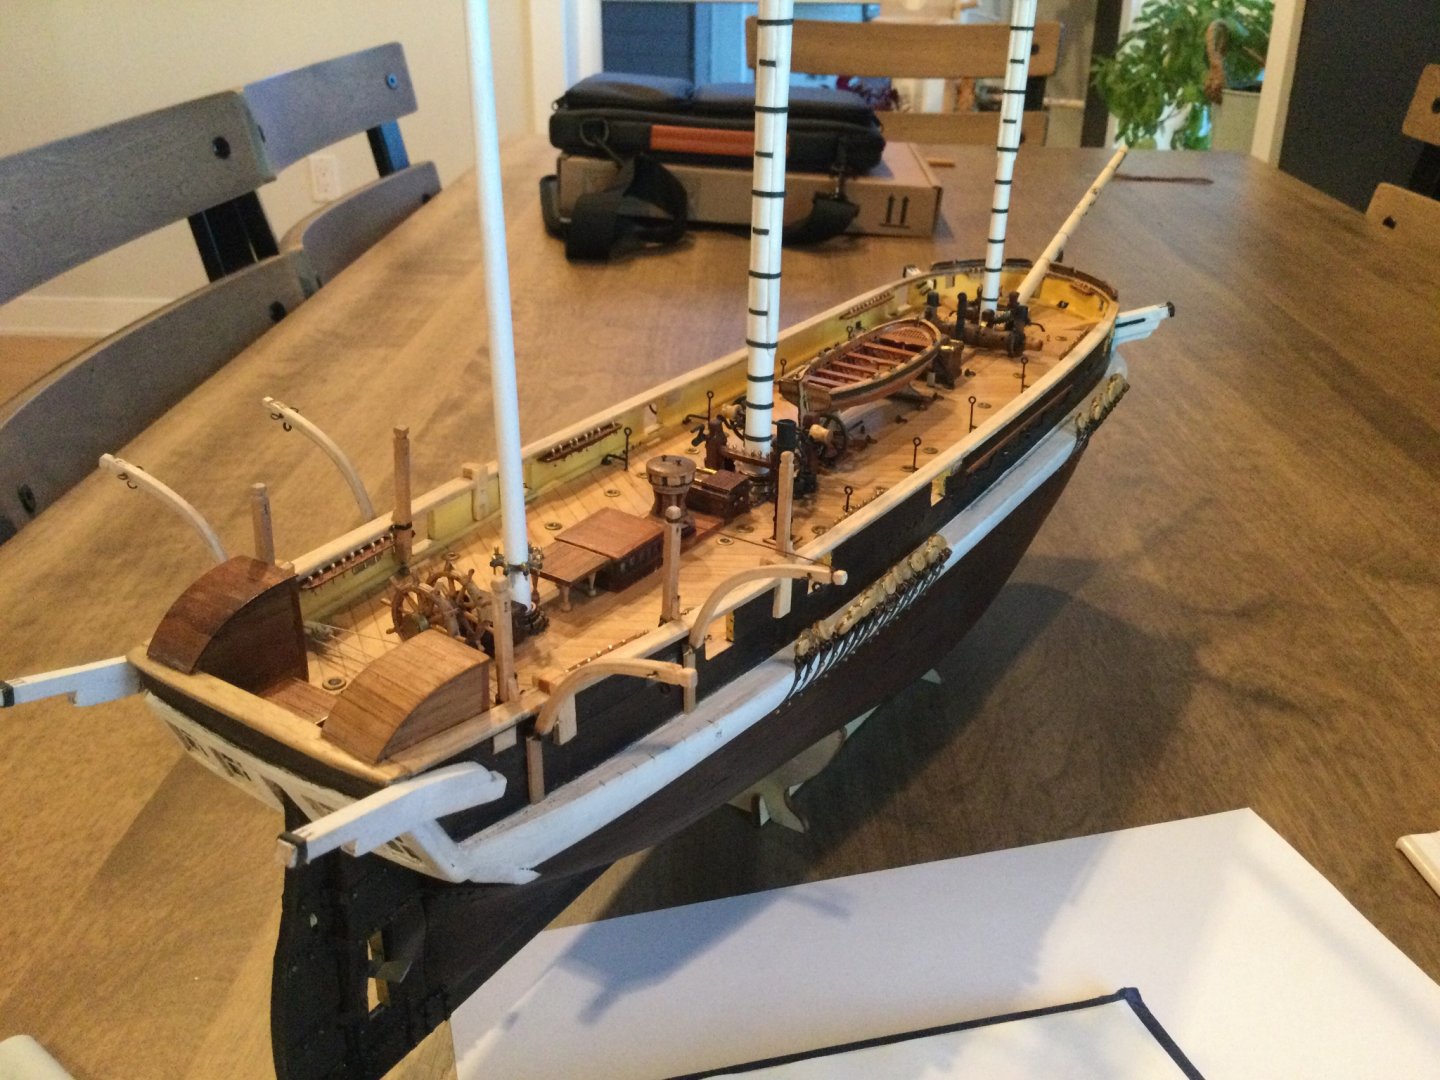
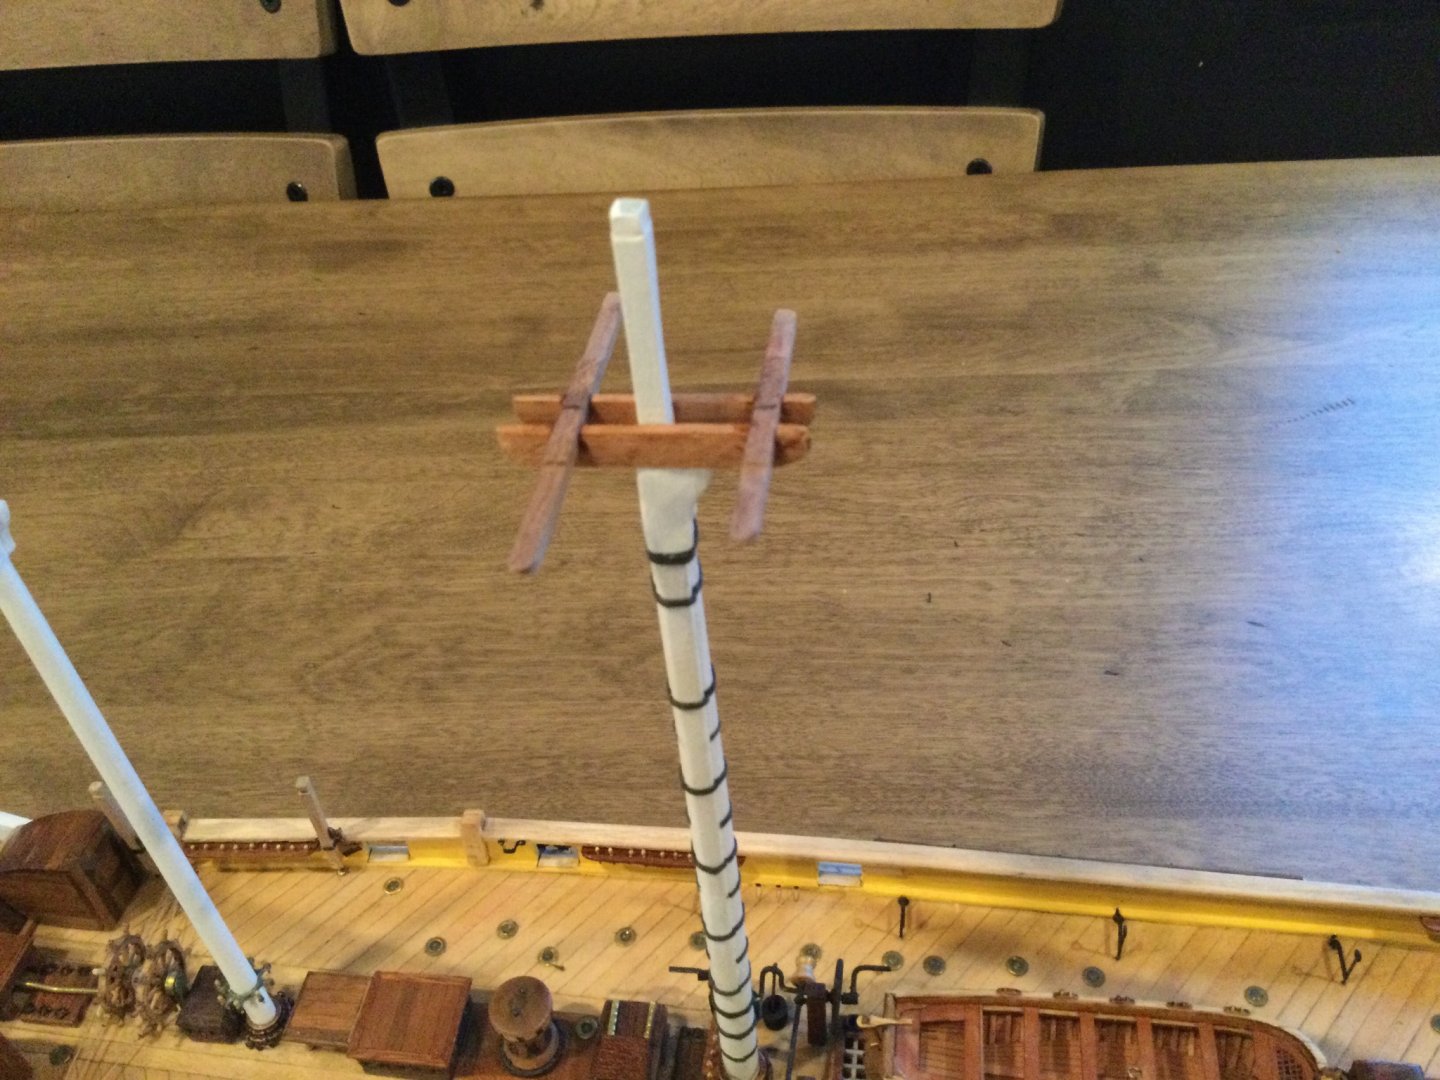
I tend to hop about a bit on this model. As I get bored or frustrated with one part, I switch to another. I went downstairs with the intention of finishing the trees for the lower masts, and ended up making the lower cap for the main mast instead. I made the battens that go above the top as well. This was frustrating as I wasn't able to cut notches in such small pieces of wood to allow the bands to pass through, so I just laid the battens over the bands, which is a bit sloppy but it's near the limit of my ability to make and manipulate small bits without destroying them in the attempt. Also, I made a decision about the rigging, which needed to be made before the trees were glued on permanently, and that's with respect to trysail masts. In many drawings of Terror, I am quite sure I see a furled trysail on a gaff behind the main and fore masts. Looking at lots of pictures and models of ships, it seems to me that trysails had replaced staysails at some point. The "Beagle" model lots of people are building has trysail masts, and Lees' has a picture of how they were mounted. I've decided to include them in my model. As usual, I'm not super thrilled with my workmanship, but also as usual, I feel like I'll get over it. I am quite pleased at the model's stature with a topmast (temporarily) mounted. She is bound to be an impressive model if I don't completely stuff up the rest of it.


-
Well, if it helps, I find that kind of plywood breaks pretty easily when you DON'T want it to. Therefore it probably won't put up much of a fight there. Just pretend you're hoping it will hold together. That pretty much guarantees it'll break.
- 62 replies
-
- 1
-
-
- lancia armata
- panart
- (and 1 more)
-
Oh yeah, I do remember seeing that. I have a pair of conures. They chew everything. They are not allowed near the ship.
-
You're doing a great job on this kit, and I'm enjoying following along. My own model has taken me two years so far; I'm so slow at building. I love the picture of Pickle. A little green budgerigar is pretty much the perfect pet. Out of all the parrot family, they are my favourite. Be sure to feed him a varied diet without too many seeds, and he will live a long time. I love those little guys.
-
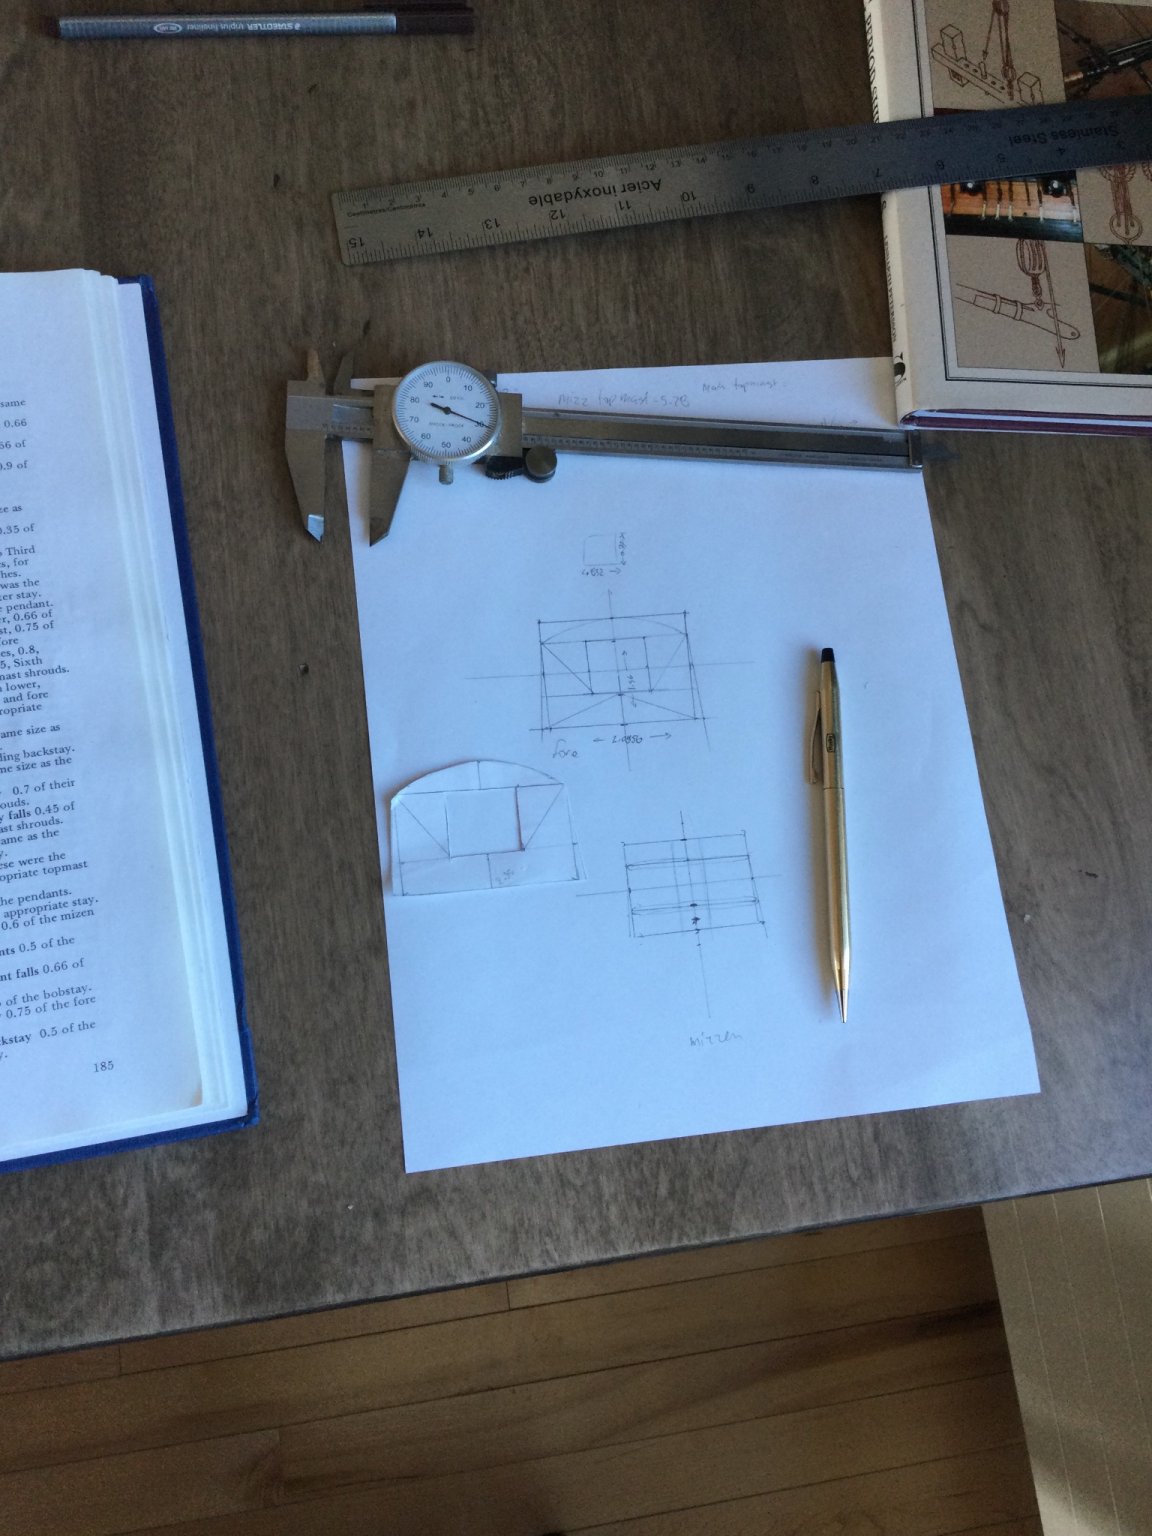
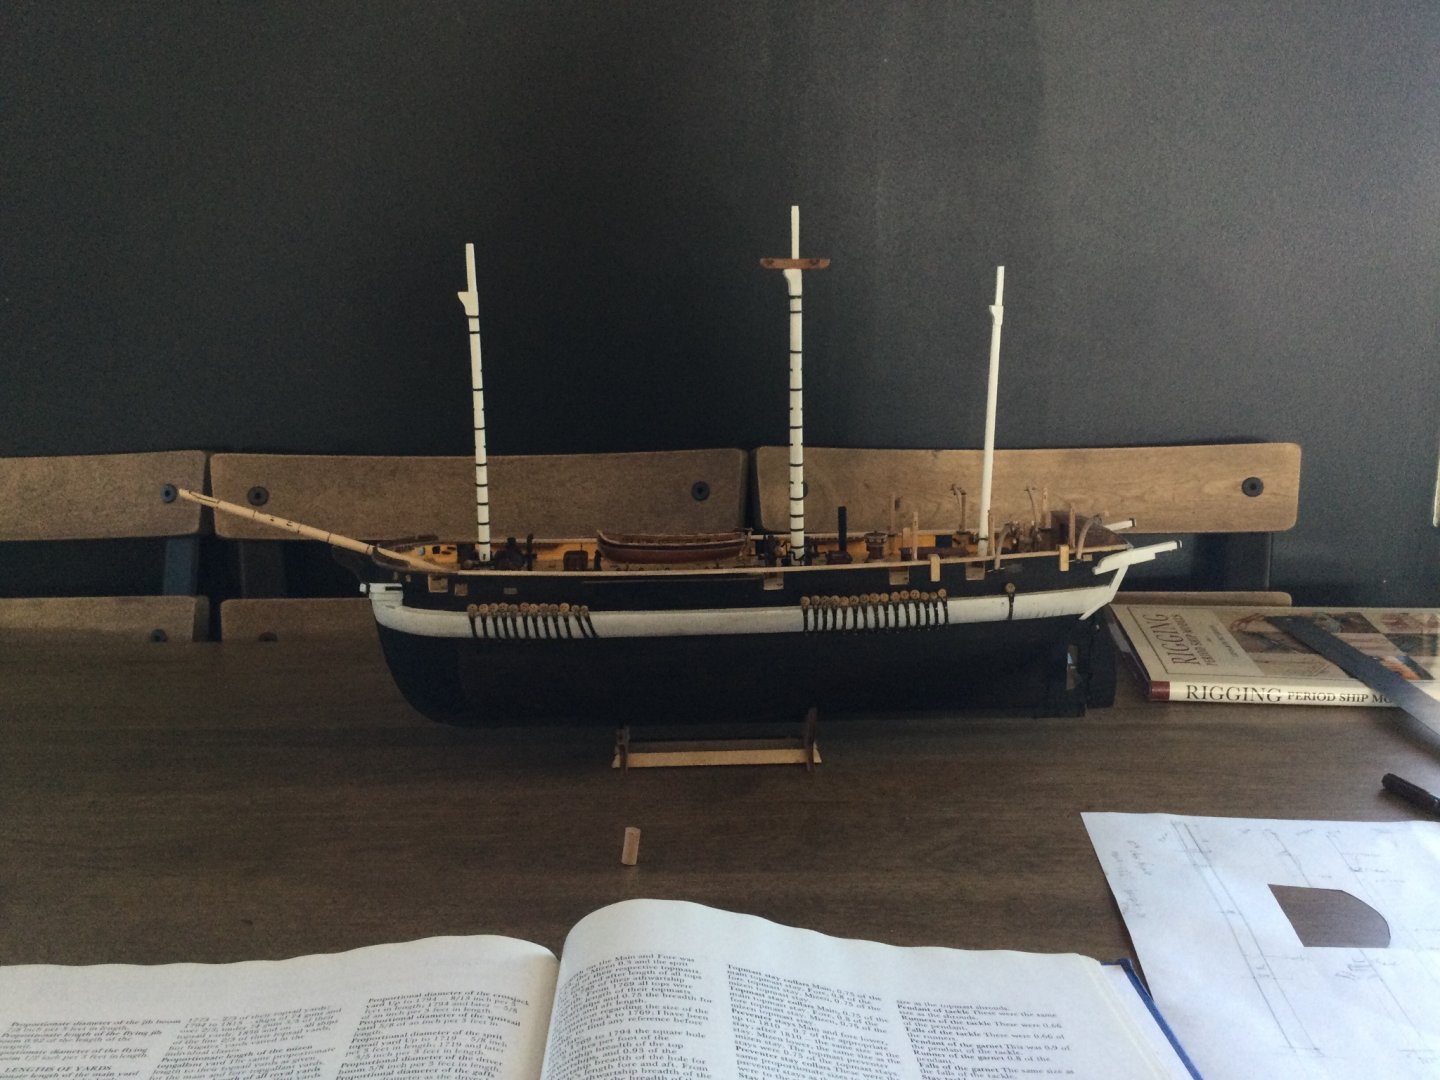
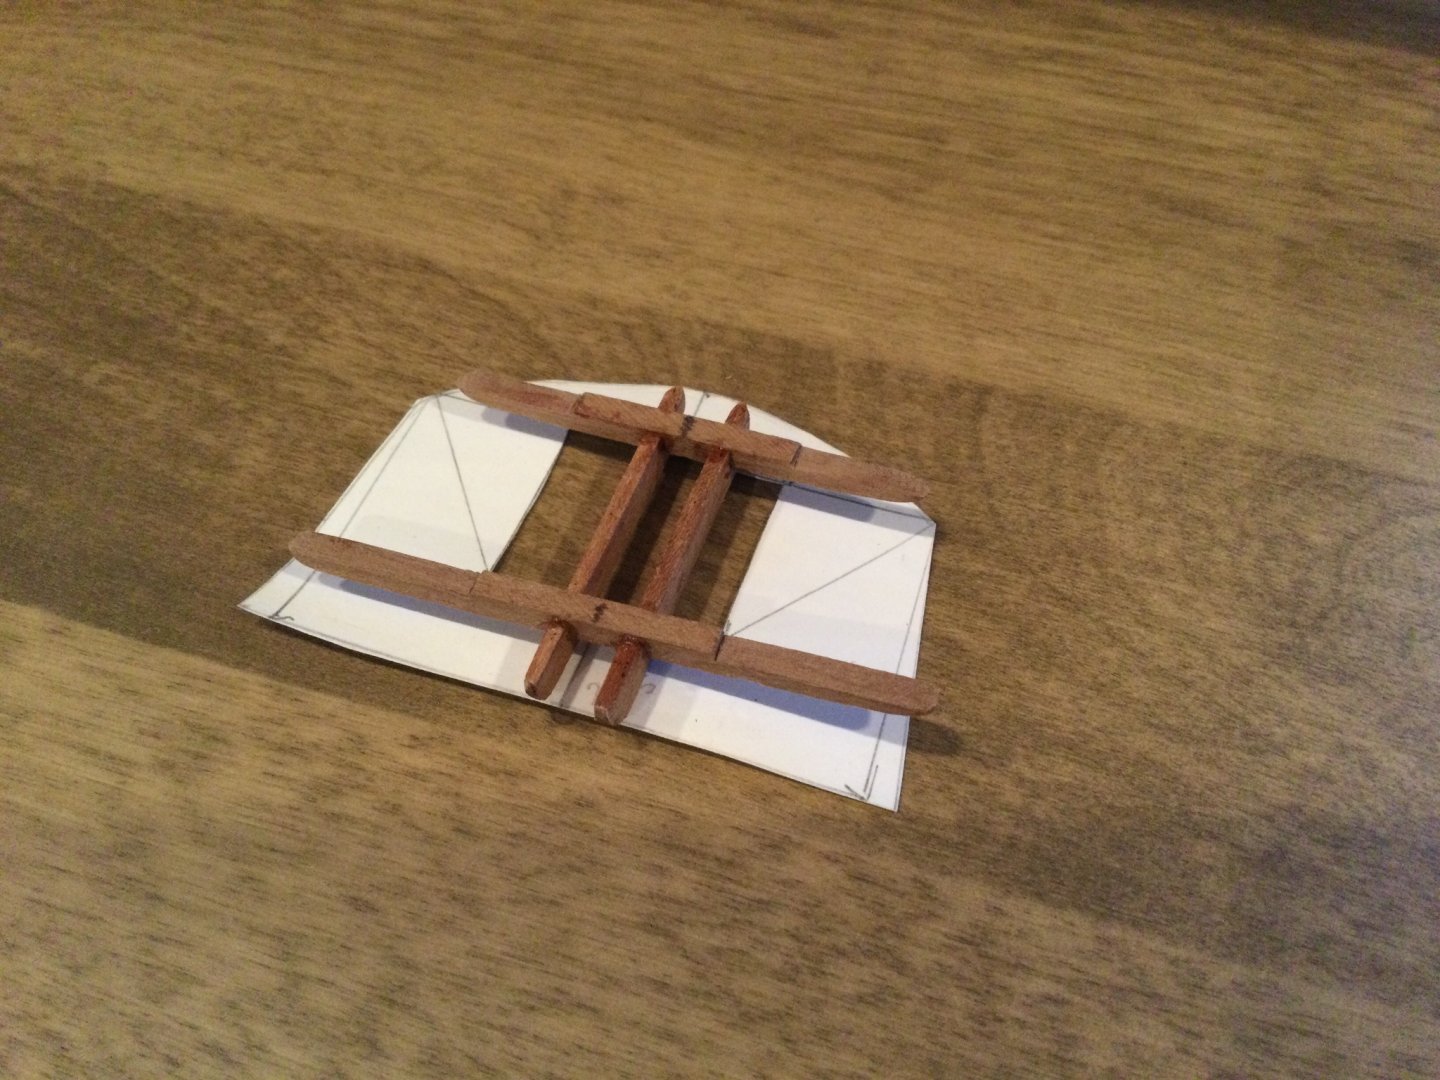
No significant building to report, but last night I was doing the tedious job of measuring drawing out the foretop and mizzen trees. Since I've decided to use the mast sizes of a Royal Navy 10th rate Frigate, this being the ship that most resembles the Terror in length that I can find in Lees', all other measurements stem from this. Lees actually provides a couple of ways to divine mast lengths from a single measurement, whether this is the length of the lower deck (I suppose this approximates waterline length?) and then a list of proportions. I have decided to use the chart at the back of the book giving sizes of all masts and spars for various ships, and like I said the 1833 definition of a "tenth class" seems to fit the best. Anyway the tops are defined as being proportionate to the length of the associated topmast. So here the foretop is 0.33x the fore topmast WIDE, and 0.75x the width in length. The hole in the middle is 0.4x the overall width of the top, and in length is 0.93x the width of the hole. The back edge of the hole is located 0.2x the width of the top forward of the back edge of the top. For the mizzen, which did not have a top or crossjack in the era we are modelling here, I drew a top anyway, just to get the dimensions of the trestle and cross-trees, which would again have been proportionate to the size of the missing top via the size of its topmast. It seems like a lot of work, but of course it's worth it when one compares all this to the plywood tops from the kit. They are a little undersize, which you know I doubt I'd notice on the completed model, but let this be a warning to anyone who opens "The Rigging and Masting of English Ships of War 1625-1860". This is the work that "scratch builders" do. Also, with great annoyance and then great relief, while measuring all this, I noticed the height of the hounds on the foremast and those on the main mast did not seem to be all that different from each other. Checking THOSE measurements, I discovered that I had made my foremast 4/16" too long! Which translates to a foot and a half on the real ship... quite noticeable. Now the offending plug has been sawn off the foremast the relative size between the two looks much more appropriate. I can't say why I didn't notice this before, but I'm glad I noticed it before I started on the shrouds!

-
Well, it will certainly be a great resource. I don't feel you've much to worry about, though. You did get your measurements from Lees after all. The thing I'm the most curious about is the "icing bridge" or "icing plank". All the period drawings I've seen depict it in dashed lines and don't have any details, other than one drawing from the 1830s that shows it side-on with some railing detail. How it was mounted, and whether it was flat or followed the camber of the deck (which our models don't have anyway) - a mystery. I'm hoping THE BOOK has details on this. It would be a very nice detail on the models.
-
..nice try, mate. You can fool the fans, but you can't fool the players. I've looked at your models.
-
Keith, I think I missed the part where you explained how you made your rope black using India ink. Is that what you've done here? Is it difficult? I much prefer the freshly-tarred look of your rope to the "brown" rope available from suppliers.
-
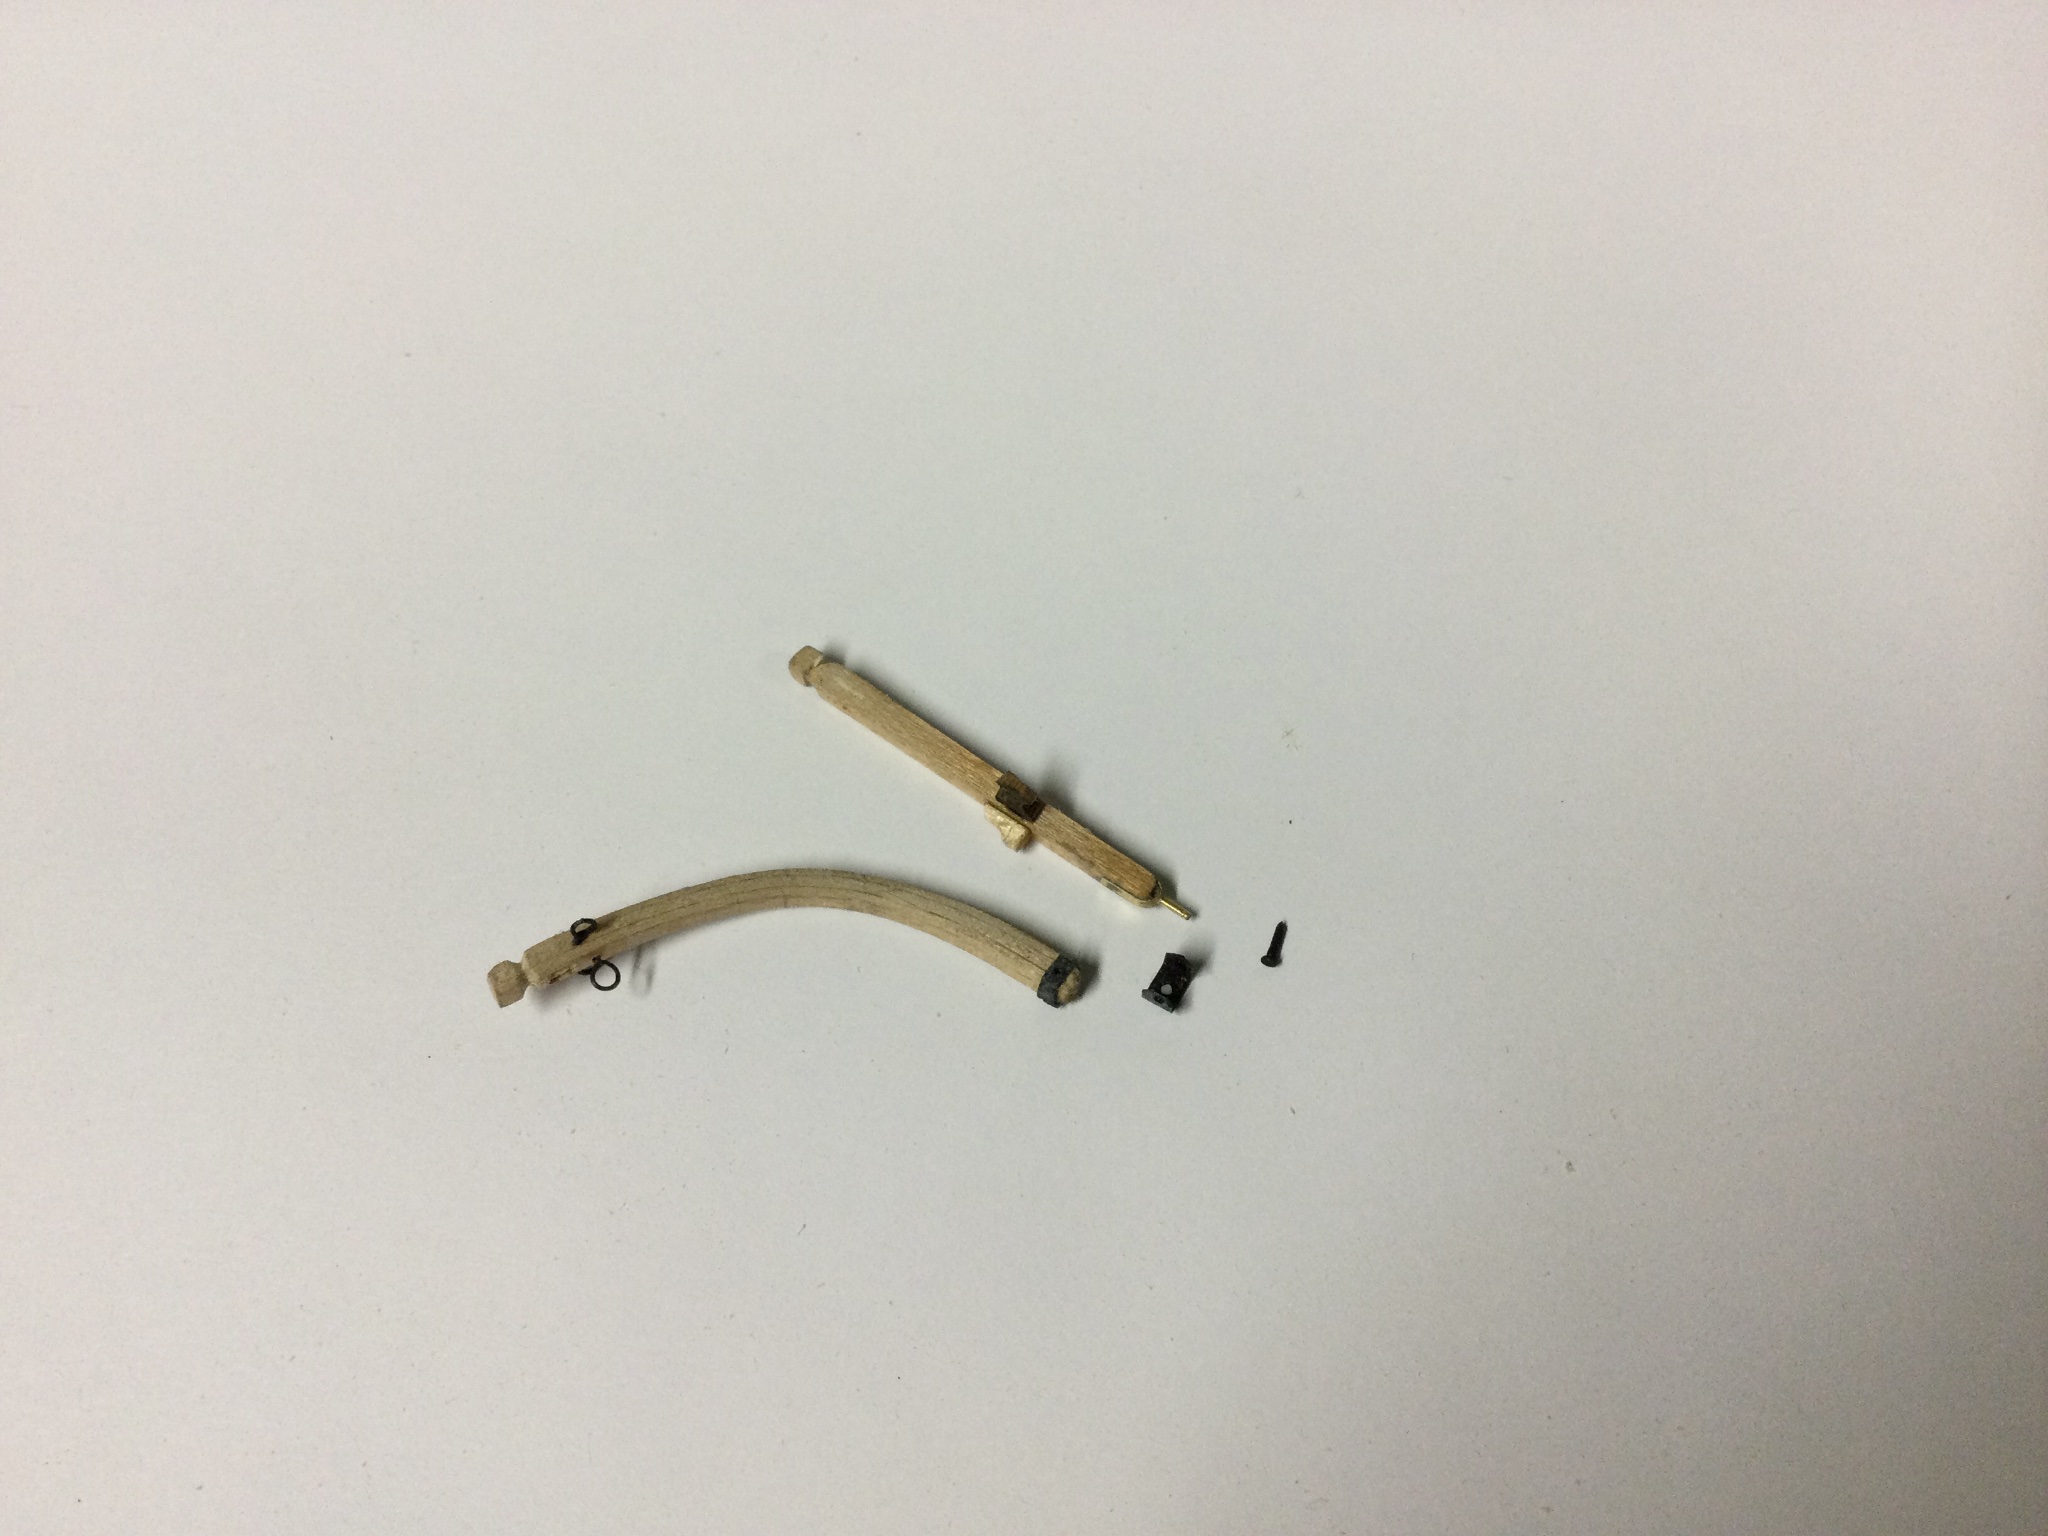
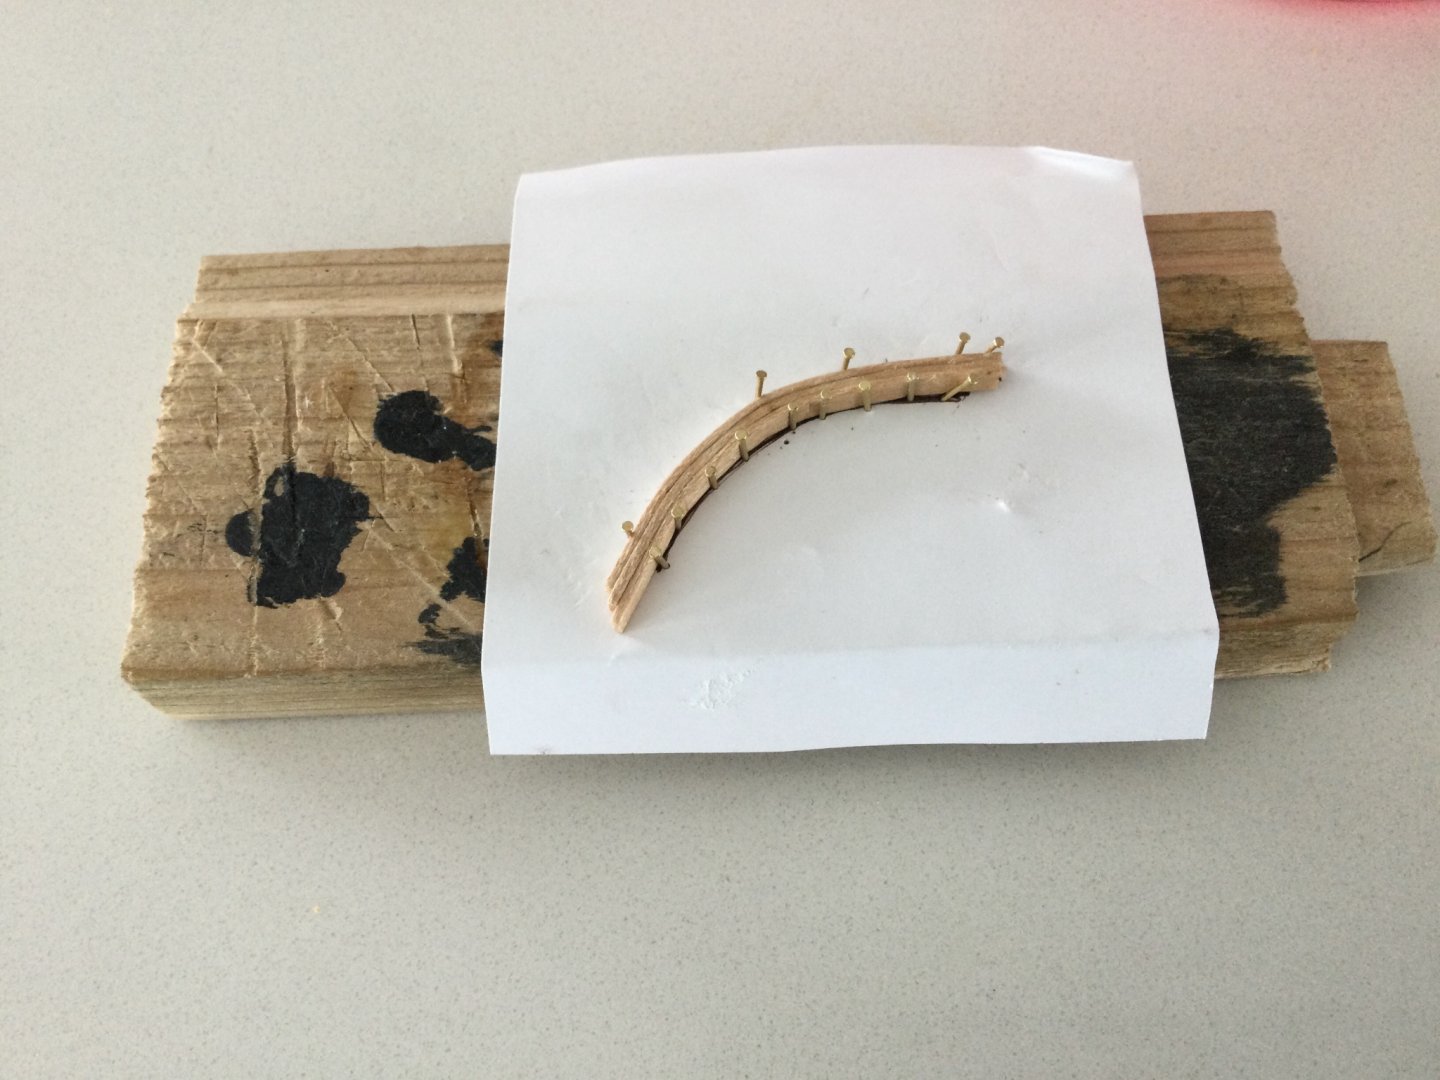
Thanks Daniel! I used an old model-aeroplane trick for laminating curved outlines for stabilizers. I steamed some 1x3mm basswood strips in the rice-cooker and then bent them around a form I made with nails: Whether or not the "Terror" actually HAD curved davits is another matter- but I strongly feel she did, based partially on first-person drawings, plus shadows on the side-scan images of the wreck.
-
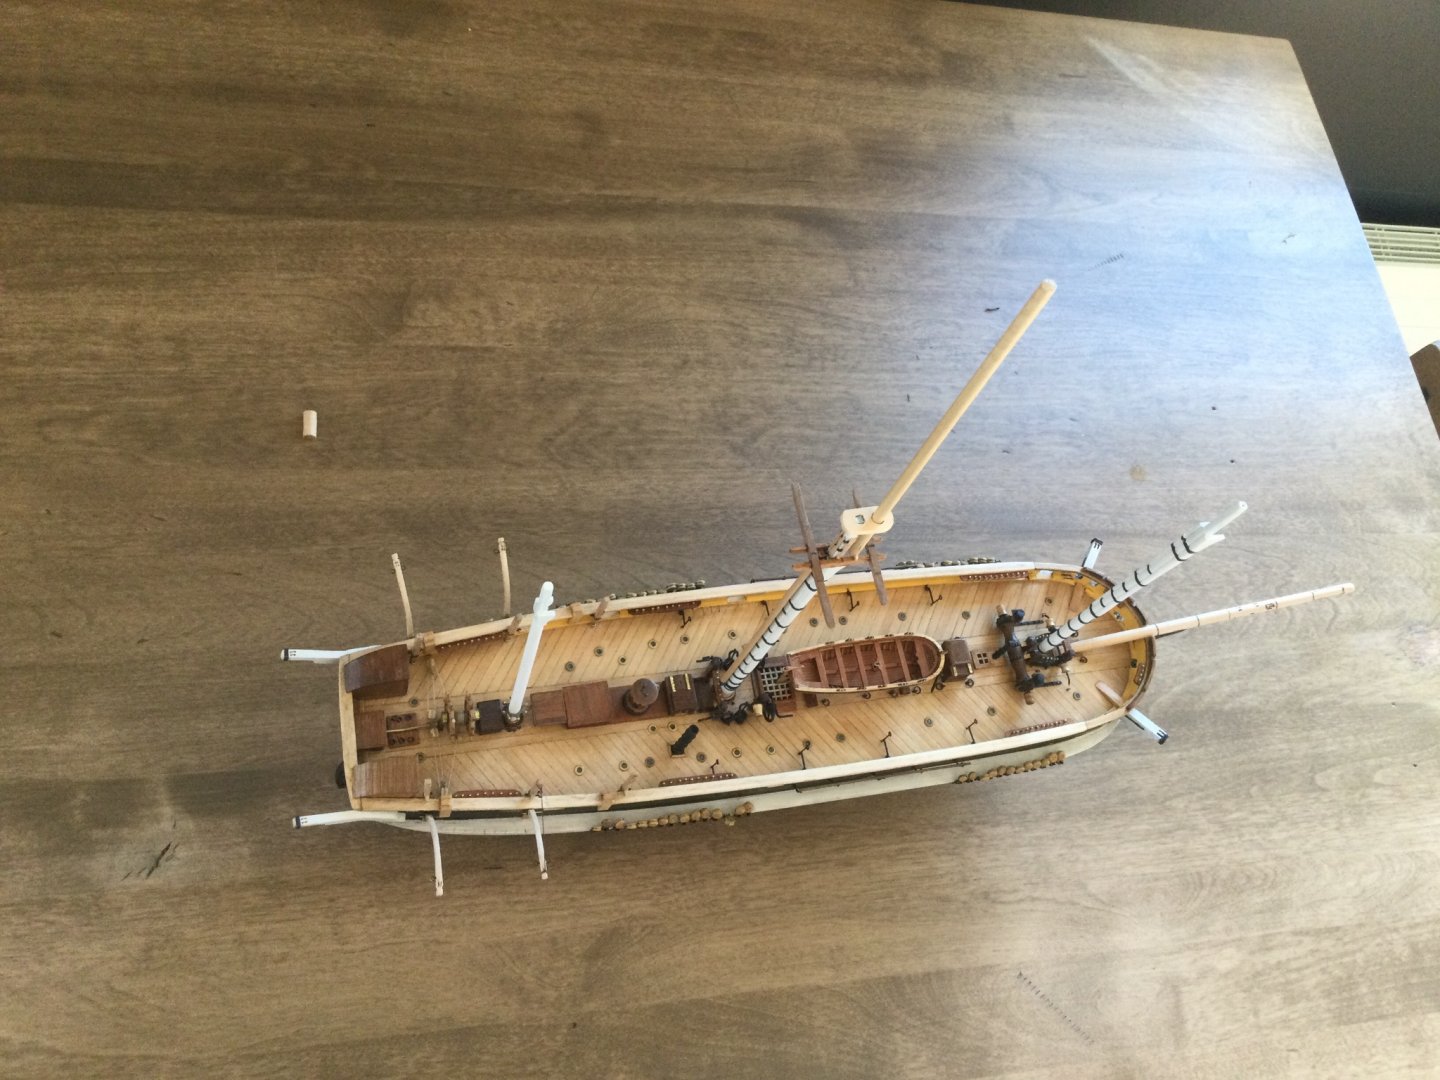
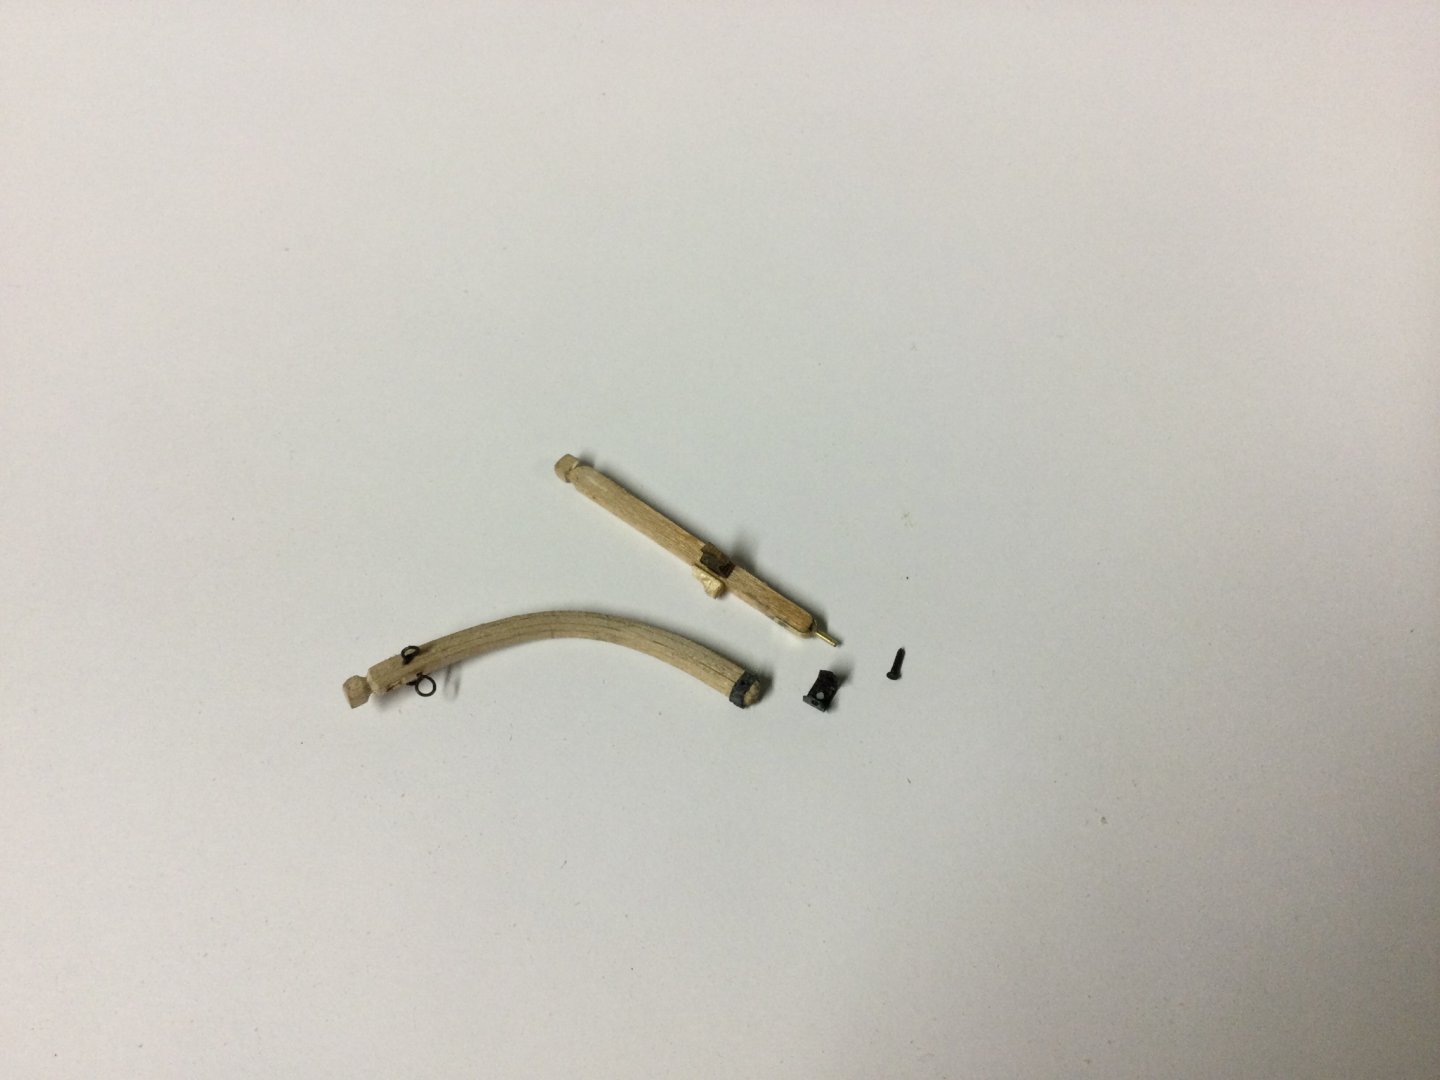
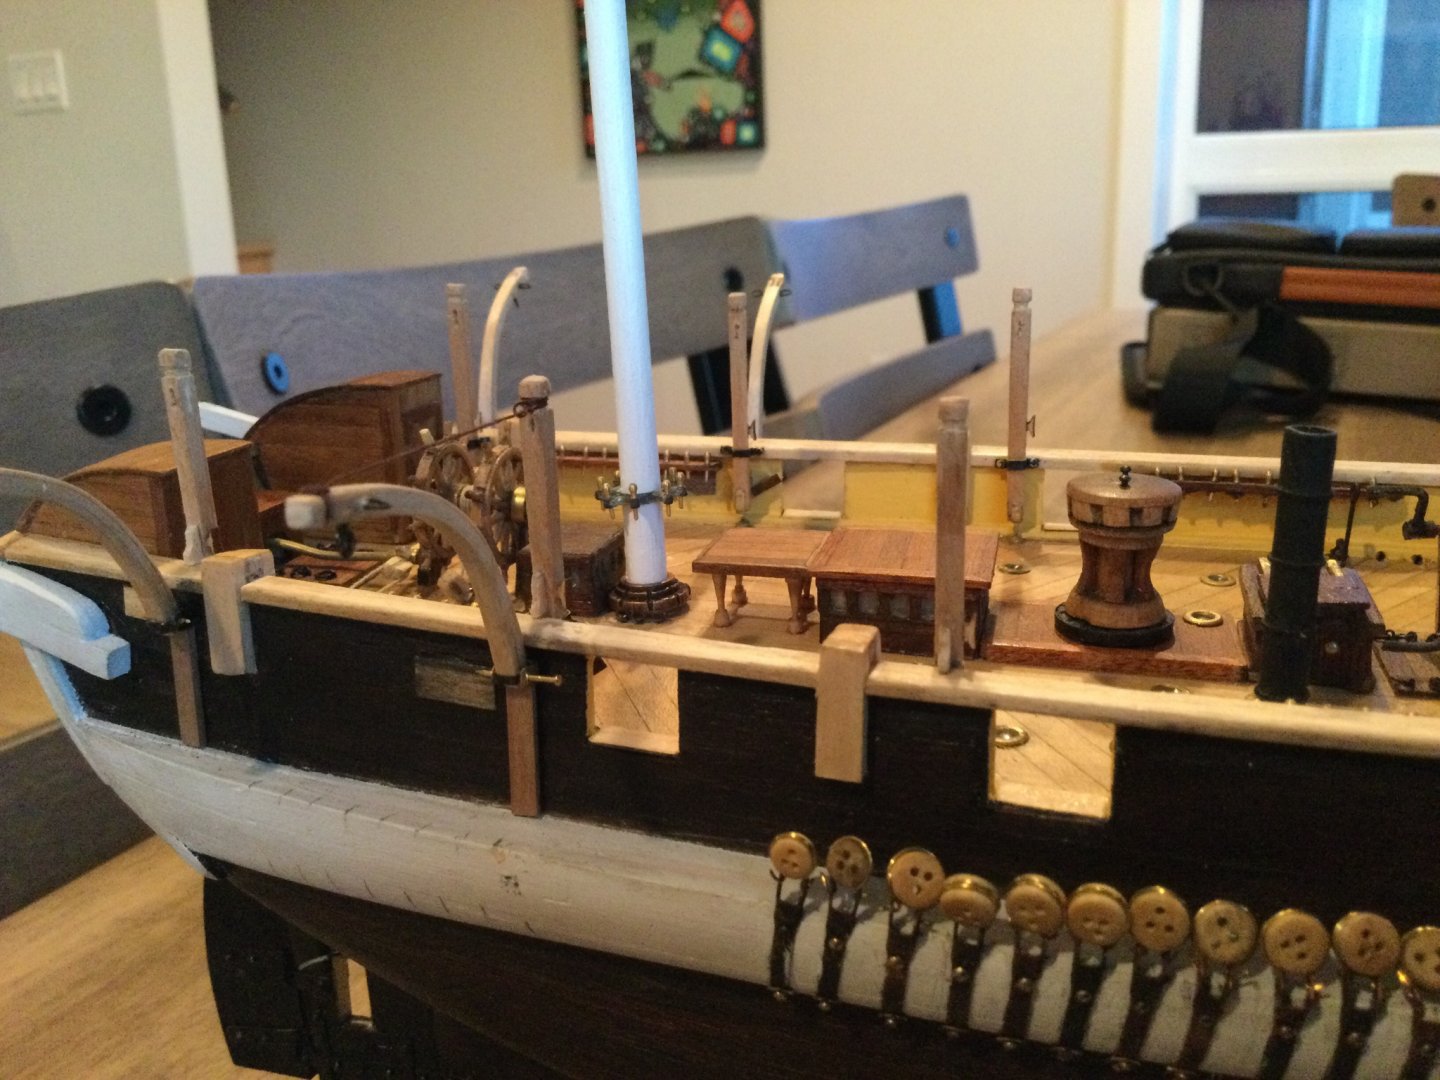
Work has been rather busy lately but finally got down to my workbench to tinker with my model. I finished making the brackets for the davit arms, and fitted the davit arms and uprights with cleats, chocks, and eyebolts for the falls, spans, and guys. They are removable the same way the real thing would have been, which will make it easier to rig the falls later. I have them pinned in place with little nails; when they are mounted permanently I will make some pins that look better. I have a feeling on the real ship these would have been painted white. I'm probably going to leave them just varnished- I am going to be sparing about what I paint, because I like the look of wood. I'm only going to paint enough parts to "suggest" the ship's paint scheme rather than try to replicate it and risk getting it wrong. I also attached some cleats inside the bulwarks, and tapered the bowsprit, using the chart from Lees, and marked it where the various fittings ought to go. Much of my "model building" time is actually spent poring through books and measuring and drawing. The bowsprit looks a mess now but it will be painted white so these markings will disappear. I have determined that I can't use any of the caps from the kit, so I'm on the lookout for some appropriate wood to make new ones.

-
Nice work, as usual! I was going to draw your attention to a drawing of Terror don by one of her lieutenants, I forget which, that shows the martingale perpendicular to the water, with reference to an earlier comment you made on the subject. But I see that's how you've modelled it so I won't bother hunting down the drawing again.
-
I'm not actually sure how it all works myself. The little dangly spar seems superfluous to me, but you see the thing it's dangling FROM slides in and out on the main yard, supported by those rings that it sits in. I definitely want to put jackstays on my model, because fairly accurate drawings of the ship show its sails furled ABOVE the mast, which is appropriate for the era, like your ship. Anyway I'm so far from being ready to mount yards on my model, I am pretty sure I have at least a year to worry about it! I do not work fast. EDIT: Actually, the information was there all along. In post #243 and 257 I see the spars I'm talking about, and I see how you've mounted them. They won't interfere with the jackstays because they're on the front of the yard rather than the top of it. I just didn't notice them at first because I didn't look closely enough.
-
Keith and Pat, I was probably using the wrong word to describe what I meant. I was talking about the part of the studding-sail apparatus that sits on top of the yard itself, in the little iron holders. It seems as though when the sail is not in use, the upper part slides inboard and lies on the yard. I was wondering how the jackstay sat with respect to this spar- whether it sits in front of it or under it. However, if the Tennessee didn't have 'em, there's something you don't need to worry about!
-
Keith, will you be putting studding-sail booms on your model? The reason I'm asking is that I want to put jackstays on the "Terror" but I also want to put stun's'l irons on her as well. I can't find any pictures of how the two interact/interfere with one another on the same yard. I'm hoping your model will have both so I can copy what you did. 😏
-
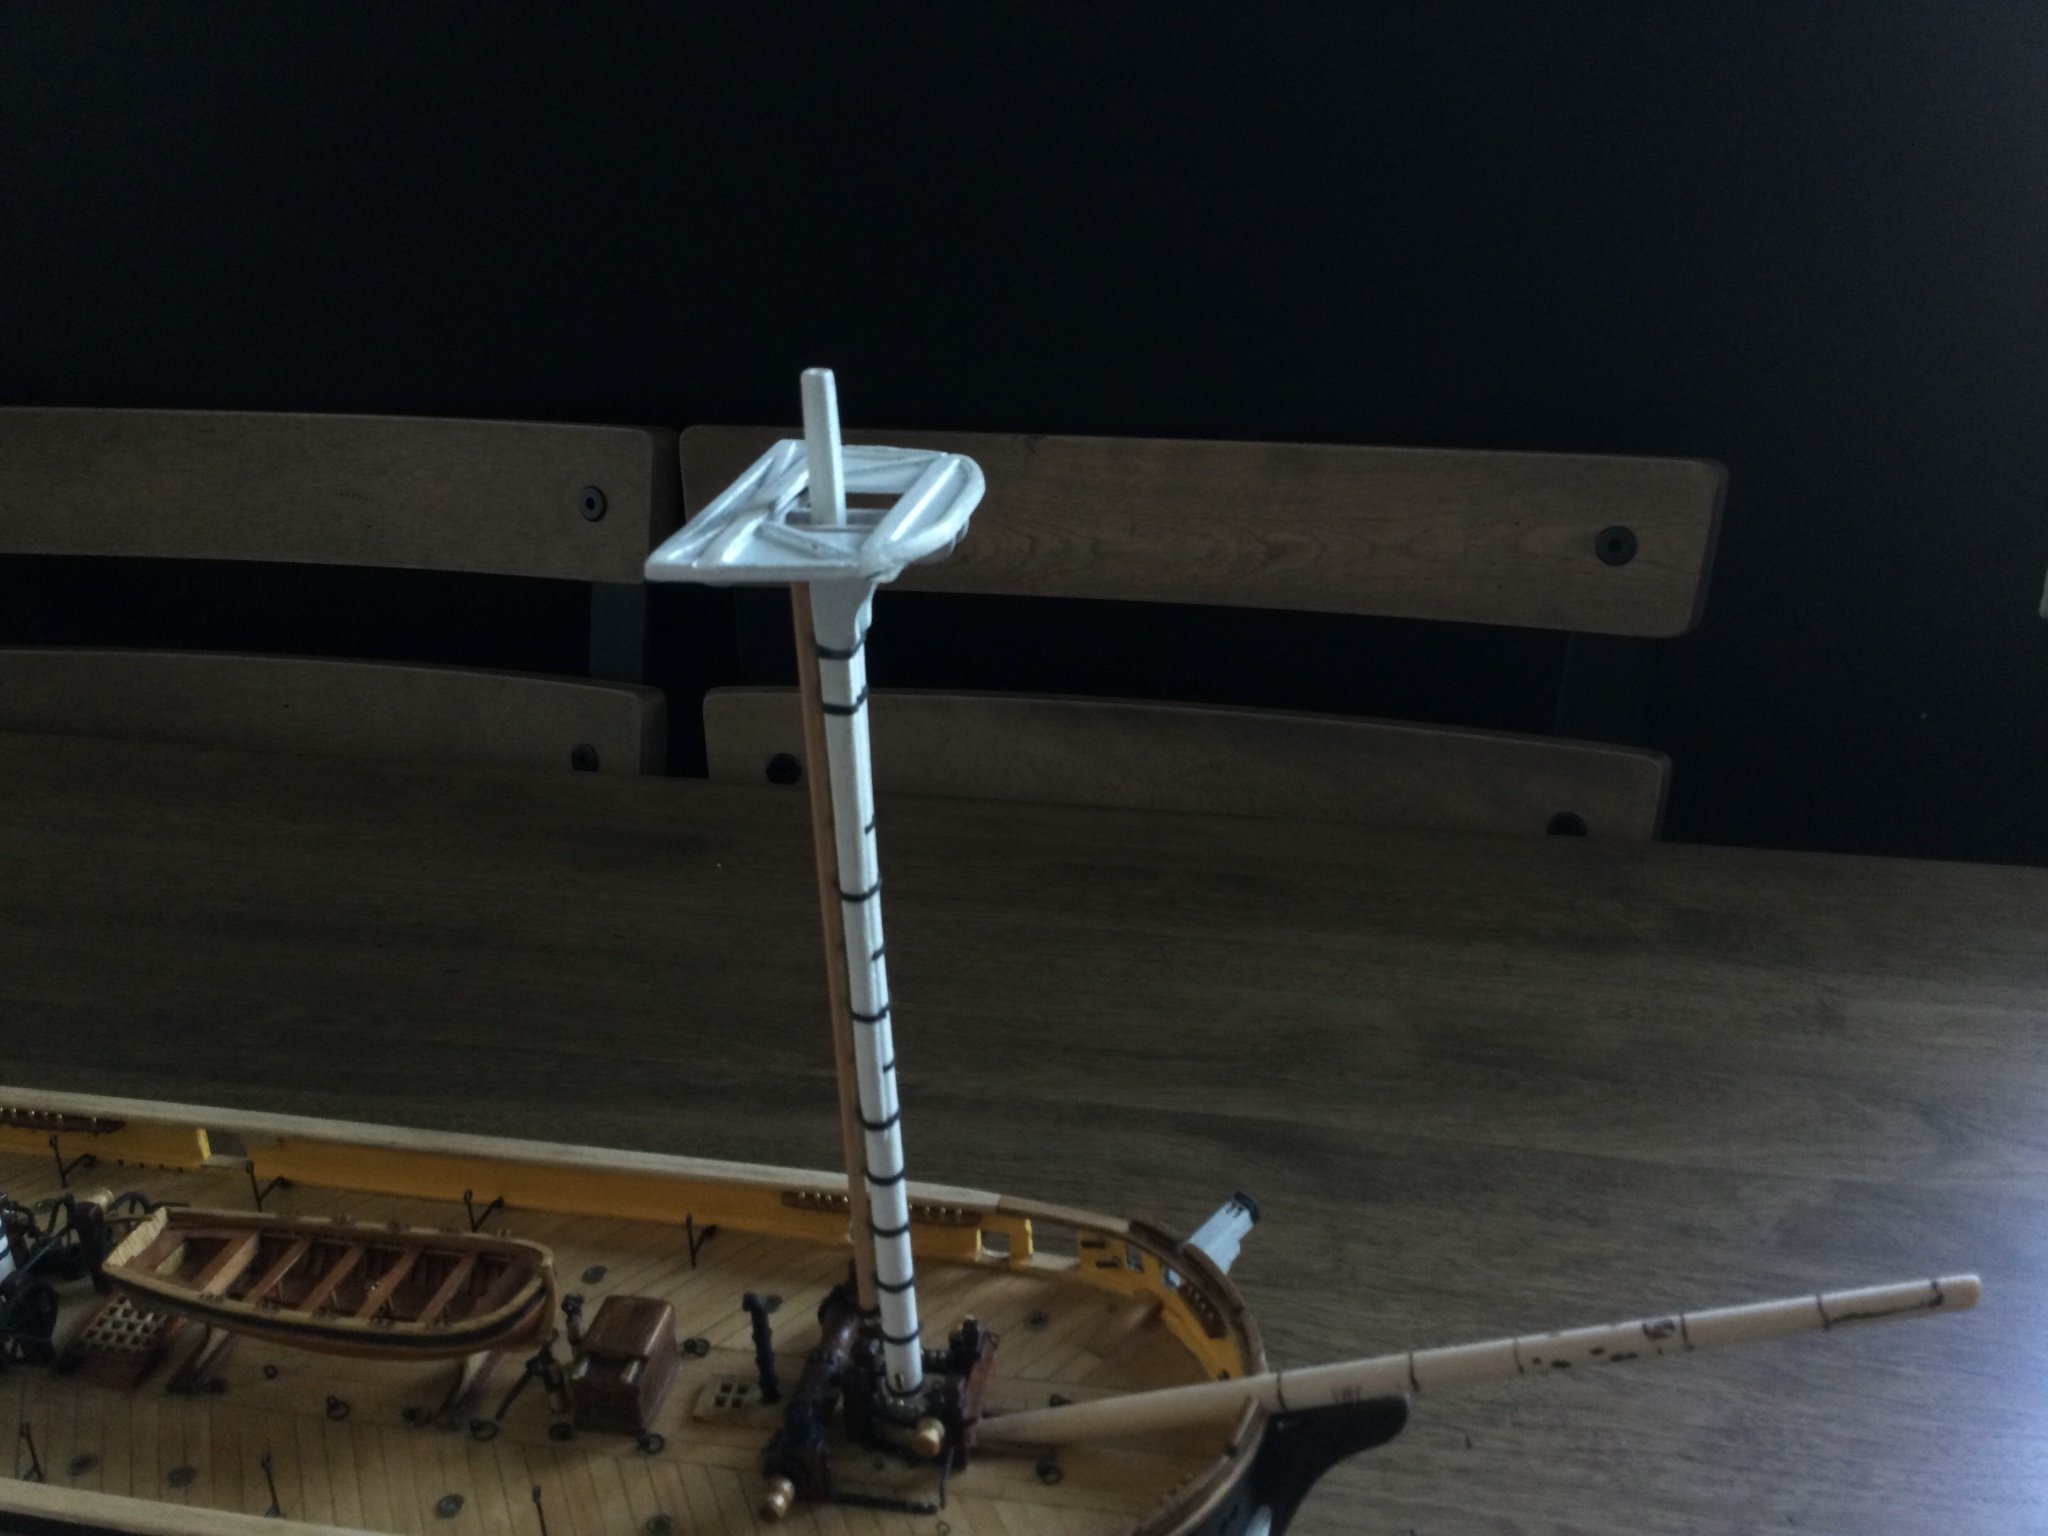
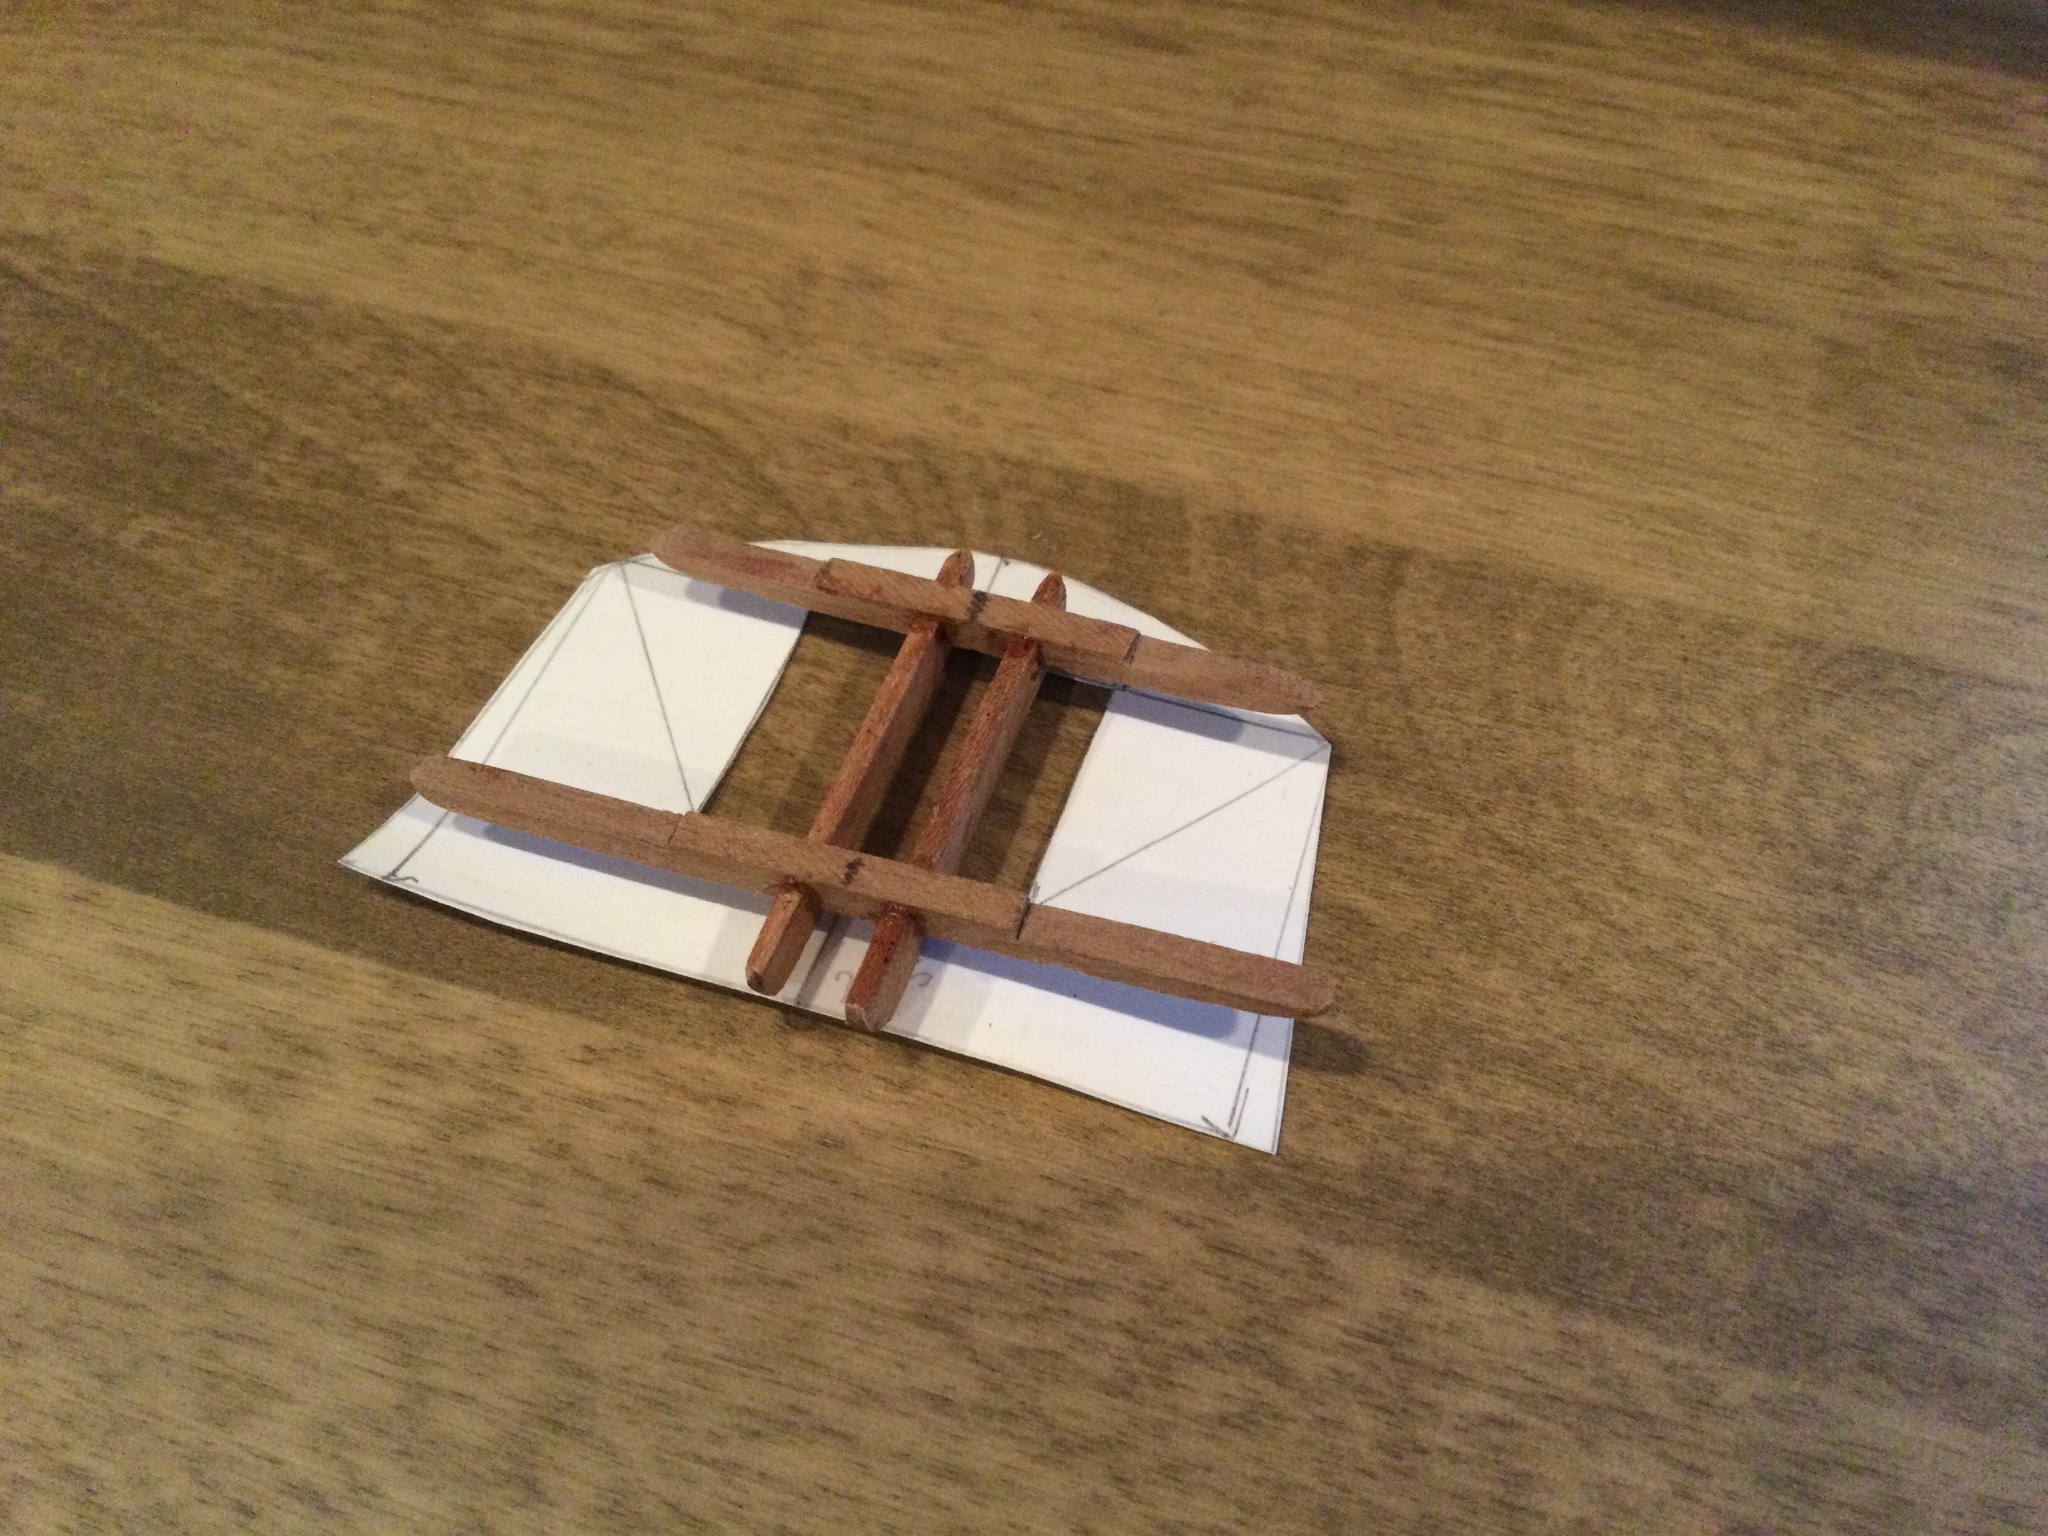
I took the plunge and started working on the main top. First I carefully studied Lees', as the book contains dimensions for these things that are proportional to some arbitrary metric, in this case percentages of topmast length if I remember correctly. I measured and drew a template of the top on paper, then based the size of the crosstrees and trestletrees on that. I carved the pieces more or less the way they are depicted for "after 1835" in Lees'. I omitted the rebate for the mast in the centre, because I feel I made the mast top a bit too narrow, so leaving out the rebate will account for that, and once I build up the mast top with battens and hoops, and stick on the bolsters, it probably won't be particularly noticeable. This is actually pretty rewarding work, to find the numbers in the historical record and then see them fit on the model. Must be how the boys in the "scratch builders" section feel, ha ha. Also, repainted the mast tops white per Other Keith's helpful suggestion.
-
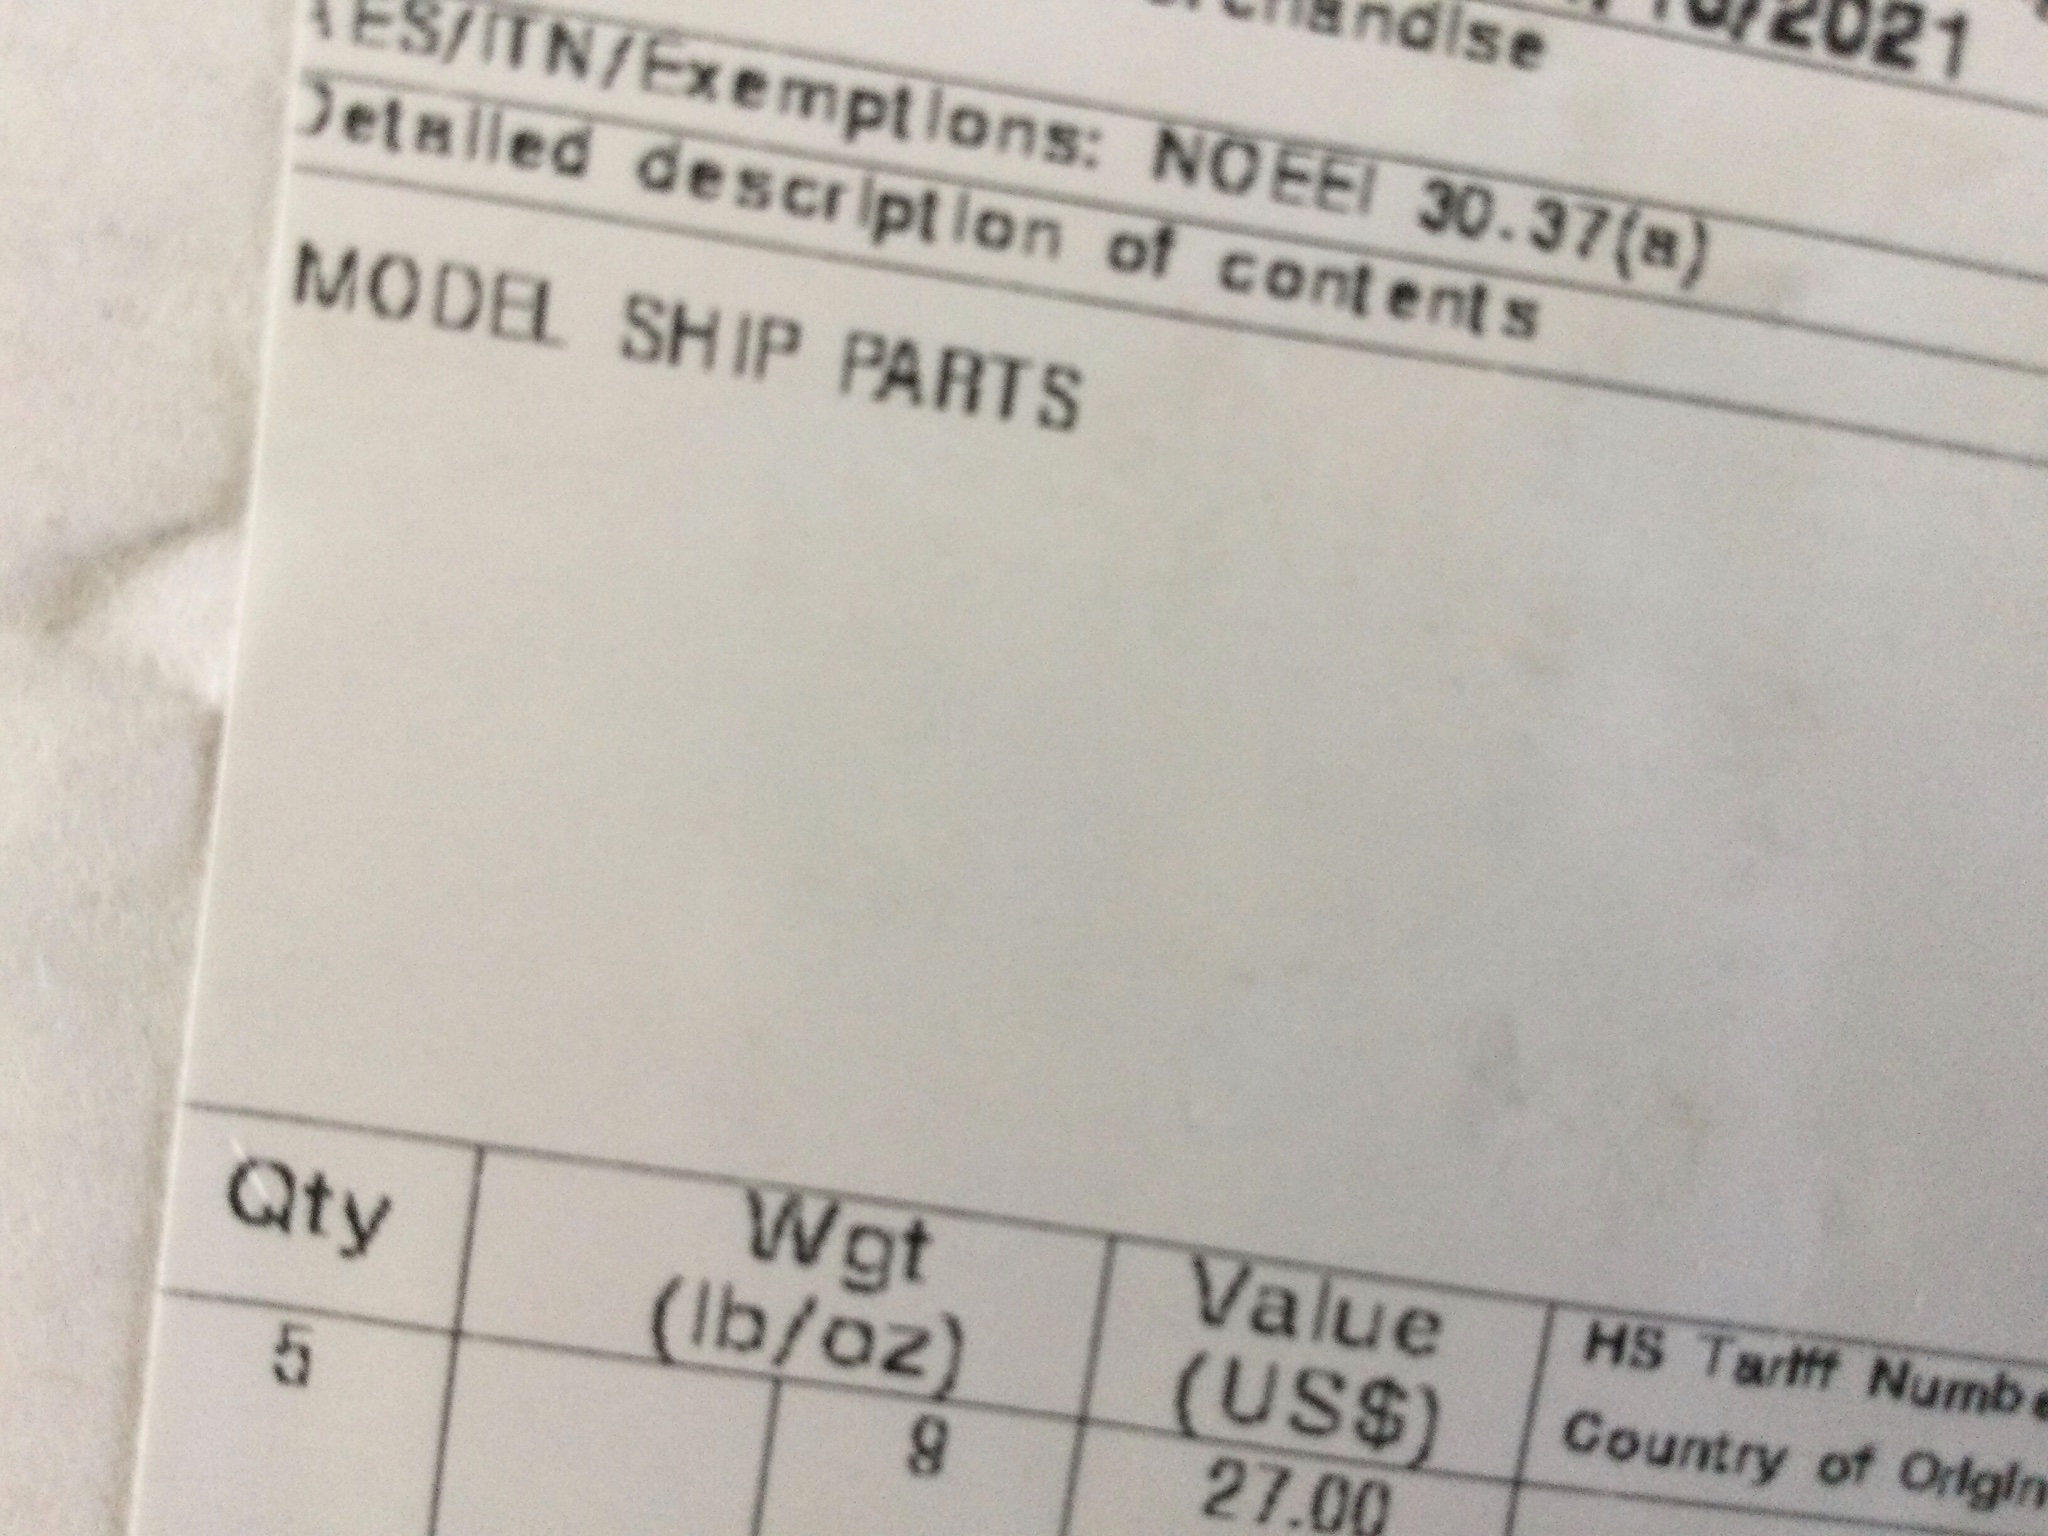
It's getting to the point now where I can never remember exactly what it is I thought I ordered.