HOLIDAY DONATION DRIVE - SUPPORT MSW - DO YOUR PART TO KEEP THIS GREAT FORUM GOING! (Only 36 donations so far out of 49,000 members - C'mon guys!)
×


Keith S
-
Posts
339 -
Joined
-
Last visited
Content Type
Profiles
Forums
Gallery
Events
Everything posted by Keith S
-
Wow! I would love to pay OCCRE a visit at their factory, and show them all the little pieces in their parts-store that would have made life easier for those building their "Terror" model. I see lots of "Beagle" parts that would be nice to have on "Terror". For example, those warping drums with the hand crank. The "Terror" is festooned with those things, but not one included in the kit. Also the windlass barrel: the "Beagle" kit has double pawls, which would have been much more correct for "Terror" also. Instead, we "Terror" folk have had to make our own by turning down bits of dowel!
-
I think the artist who drew that engraving had some serious perspective issues! Possibly a handicap using a "camera lucida" on a moving object, (if those were in common use, I have no idea) or else maybe the technique used by newspaper artists at the time was to do a quick sketch and then flesh it out later with details from another source, such as other pictures of other ships. Also, why is Erebus depicted with a beakhead? There are some things I am deliberately avoiding thinking about for the time being so I don't lose sleep needlessly. One of those things being the blocks in the bulwarks for the braces. Depending on which picture you look at, they are either behind the deckhouses, covered by barrels, boats, or davits. I can't see how the ship was actually sailed with all the crap piled up on deck. I've deferred thinking about most of it until it becomes absolutely necessary and then I guess I will try to use common sense (I do know how to sail in real life, ha ha) or hopefully "THE BOOK" will be published by then. That's how I think about it: "THE BOOK". 😬
-
It's my opinion (and only an opinion) that everything removable on the vessel would have been pretty up-to date. I feel this way because not only was the ship in ordinary before the voyage, but also I feel during the installation of the steam engine she would have been significantly dismantled. Also these ships were touted as being "state-of-the-art" at the time if the voyage, with all the "mod cons". Things like where the martingale goes, or whether the wooden knees on the windlass and catheads were changed to iron, seem kind of arbitrary, but then I think of the bell they raised from Erebus, and how it says "1845" on it. To my mind, if they troubled to replace something as symbolic yet basically functionless as a bell, what wouldn't they have replaced? (I know the bell wasn't actually "functionless", but you must admit, the one from 1813 was probably still perfectly good). Sailing rig improvements all seem quaint to us, but at the time it was considered cutting-edge science. I've decided to use Lee's dates religiously and pay little mind to the date the hull was built. I think your placement of the martingale is most likely correct, and that's where I'll be putting mine.
-
Oh, thanks Keith. I painted them because I didn't like the plywood hounds and was planning on leaving the trees, tops, bolsters et cetera in plain wood. I'm using a bit of artistic license with the paint, only painting certain parts and leaving others in bare wood. Thanks for the heads-up on the mastheads.
-
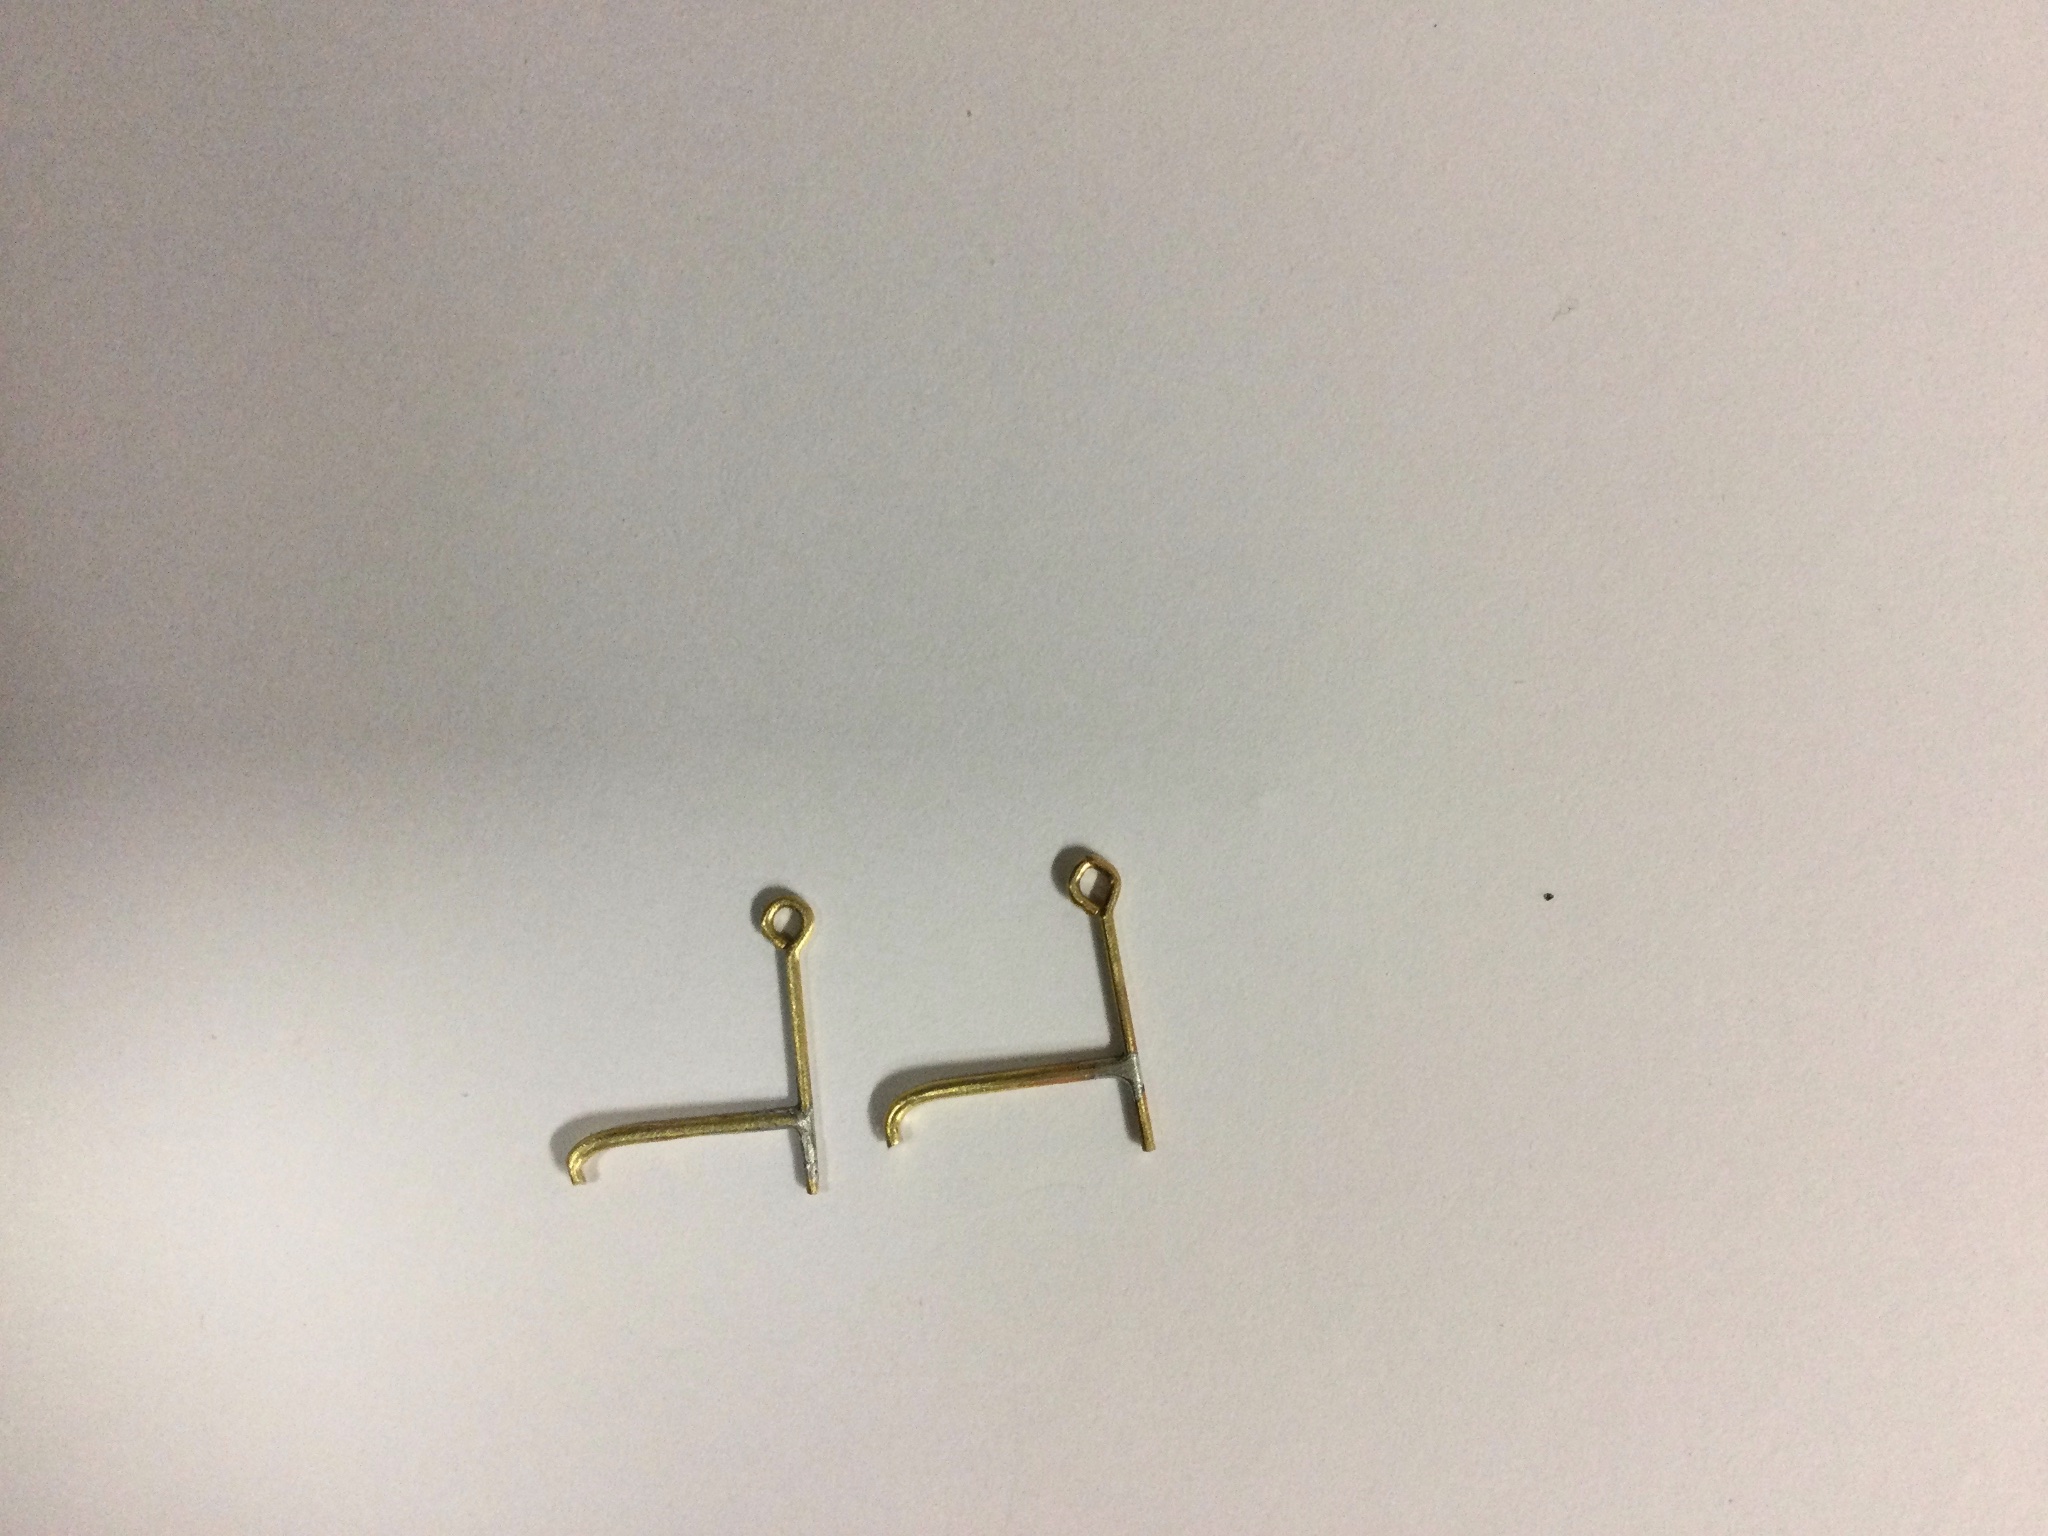
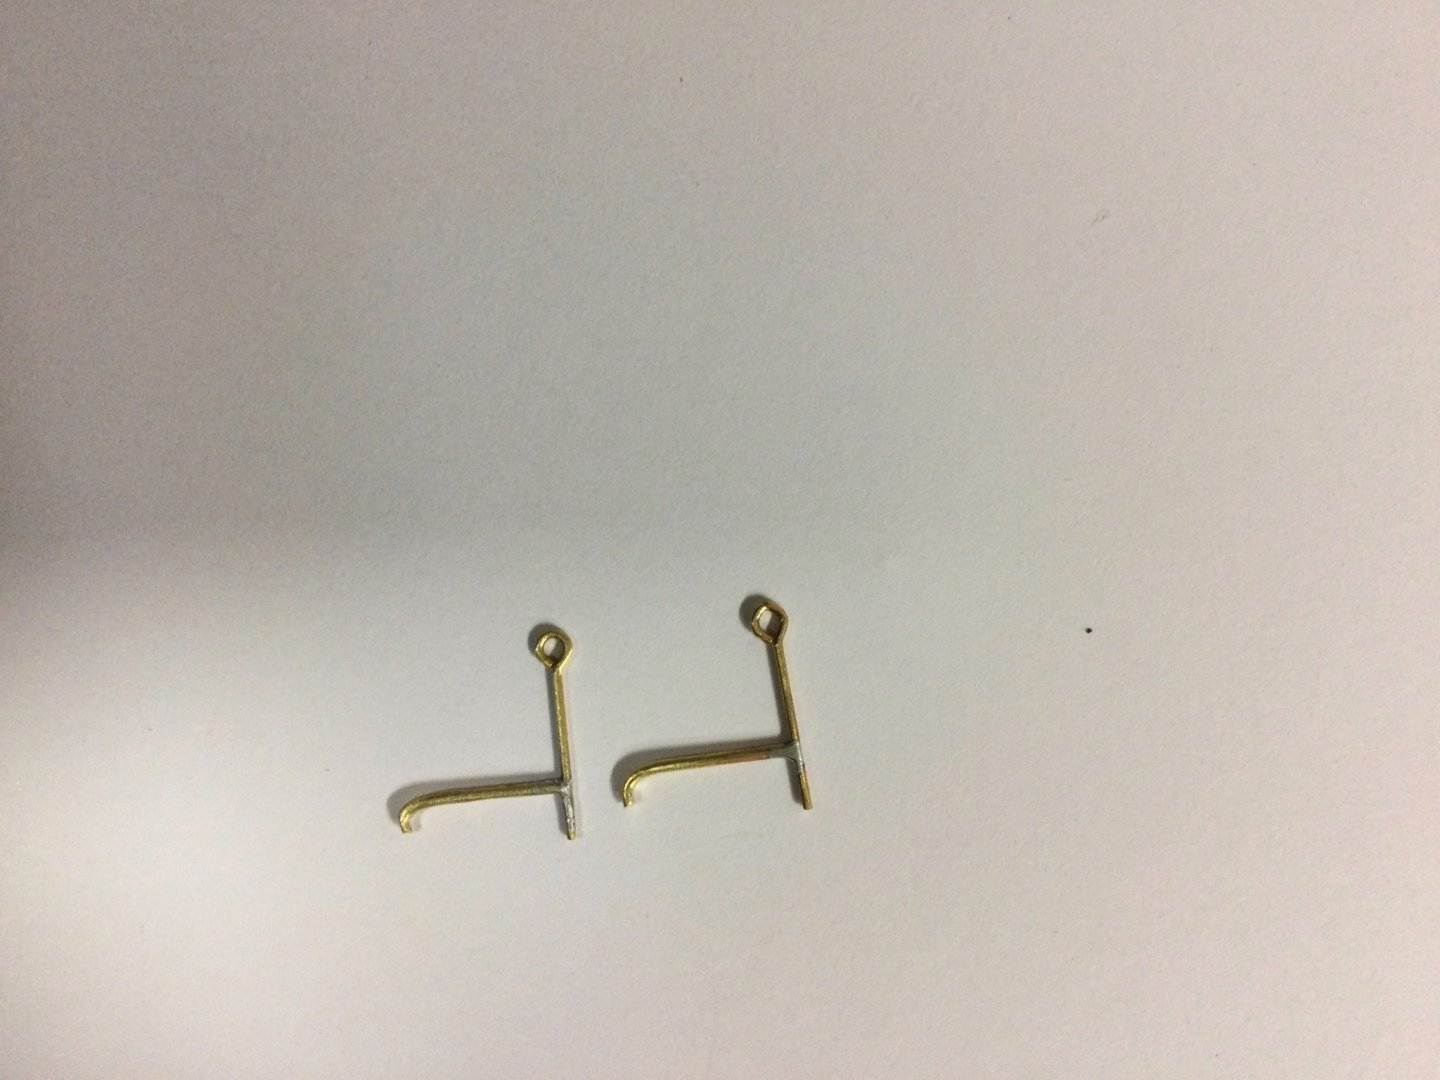
Here are the little brackets, or whatever they would be called, that form the racks on either side in which spare spars were kept on deck. These were fun to solder up, but installing them was fiddly and annoying, (as is everything in 1:75 scale). So, even though I feel there were probably more of them closer to the stern, I think I will take a page from Other Keith's book, and disguise their non-existence behind a row of barrels.
-
I find "dive" videos are all the same. Way too much footage of the divers getting ready and fannying about on their boat, and then a lot of bubbles and "glooping" sounds, a lot of seaweed, and the thing you want to see just flashes by the lens as it pans from one frond of seaweed to another, or else a super-close-up shot of a piece of oak or a grouper or something. They are universally awful.
-
You can see that timber in other photos as well; it appears to be actually sitting on the wheel between two spokes. I would be willing to wager it's a fallen piece of rigging. It looks too small to be the driver boom, (although, speaking of that, where is it?) But it could be any number of things from aloft. At least some part of the masts are still standing, but there must have been quite a windfall of stuff falling from above when the rig began to come apart.
-
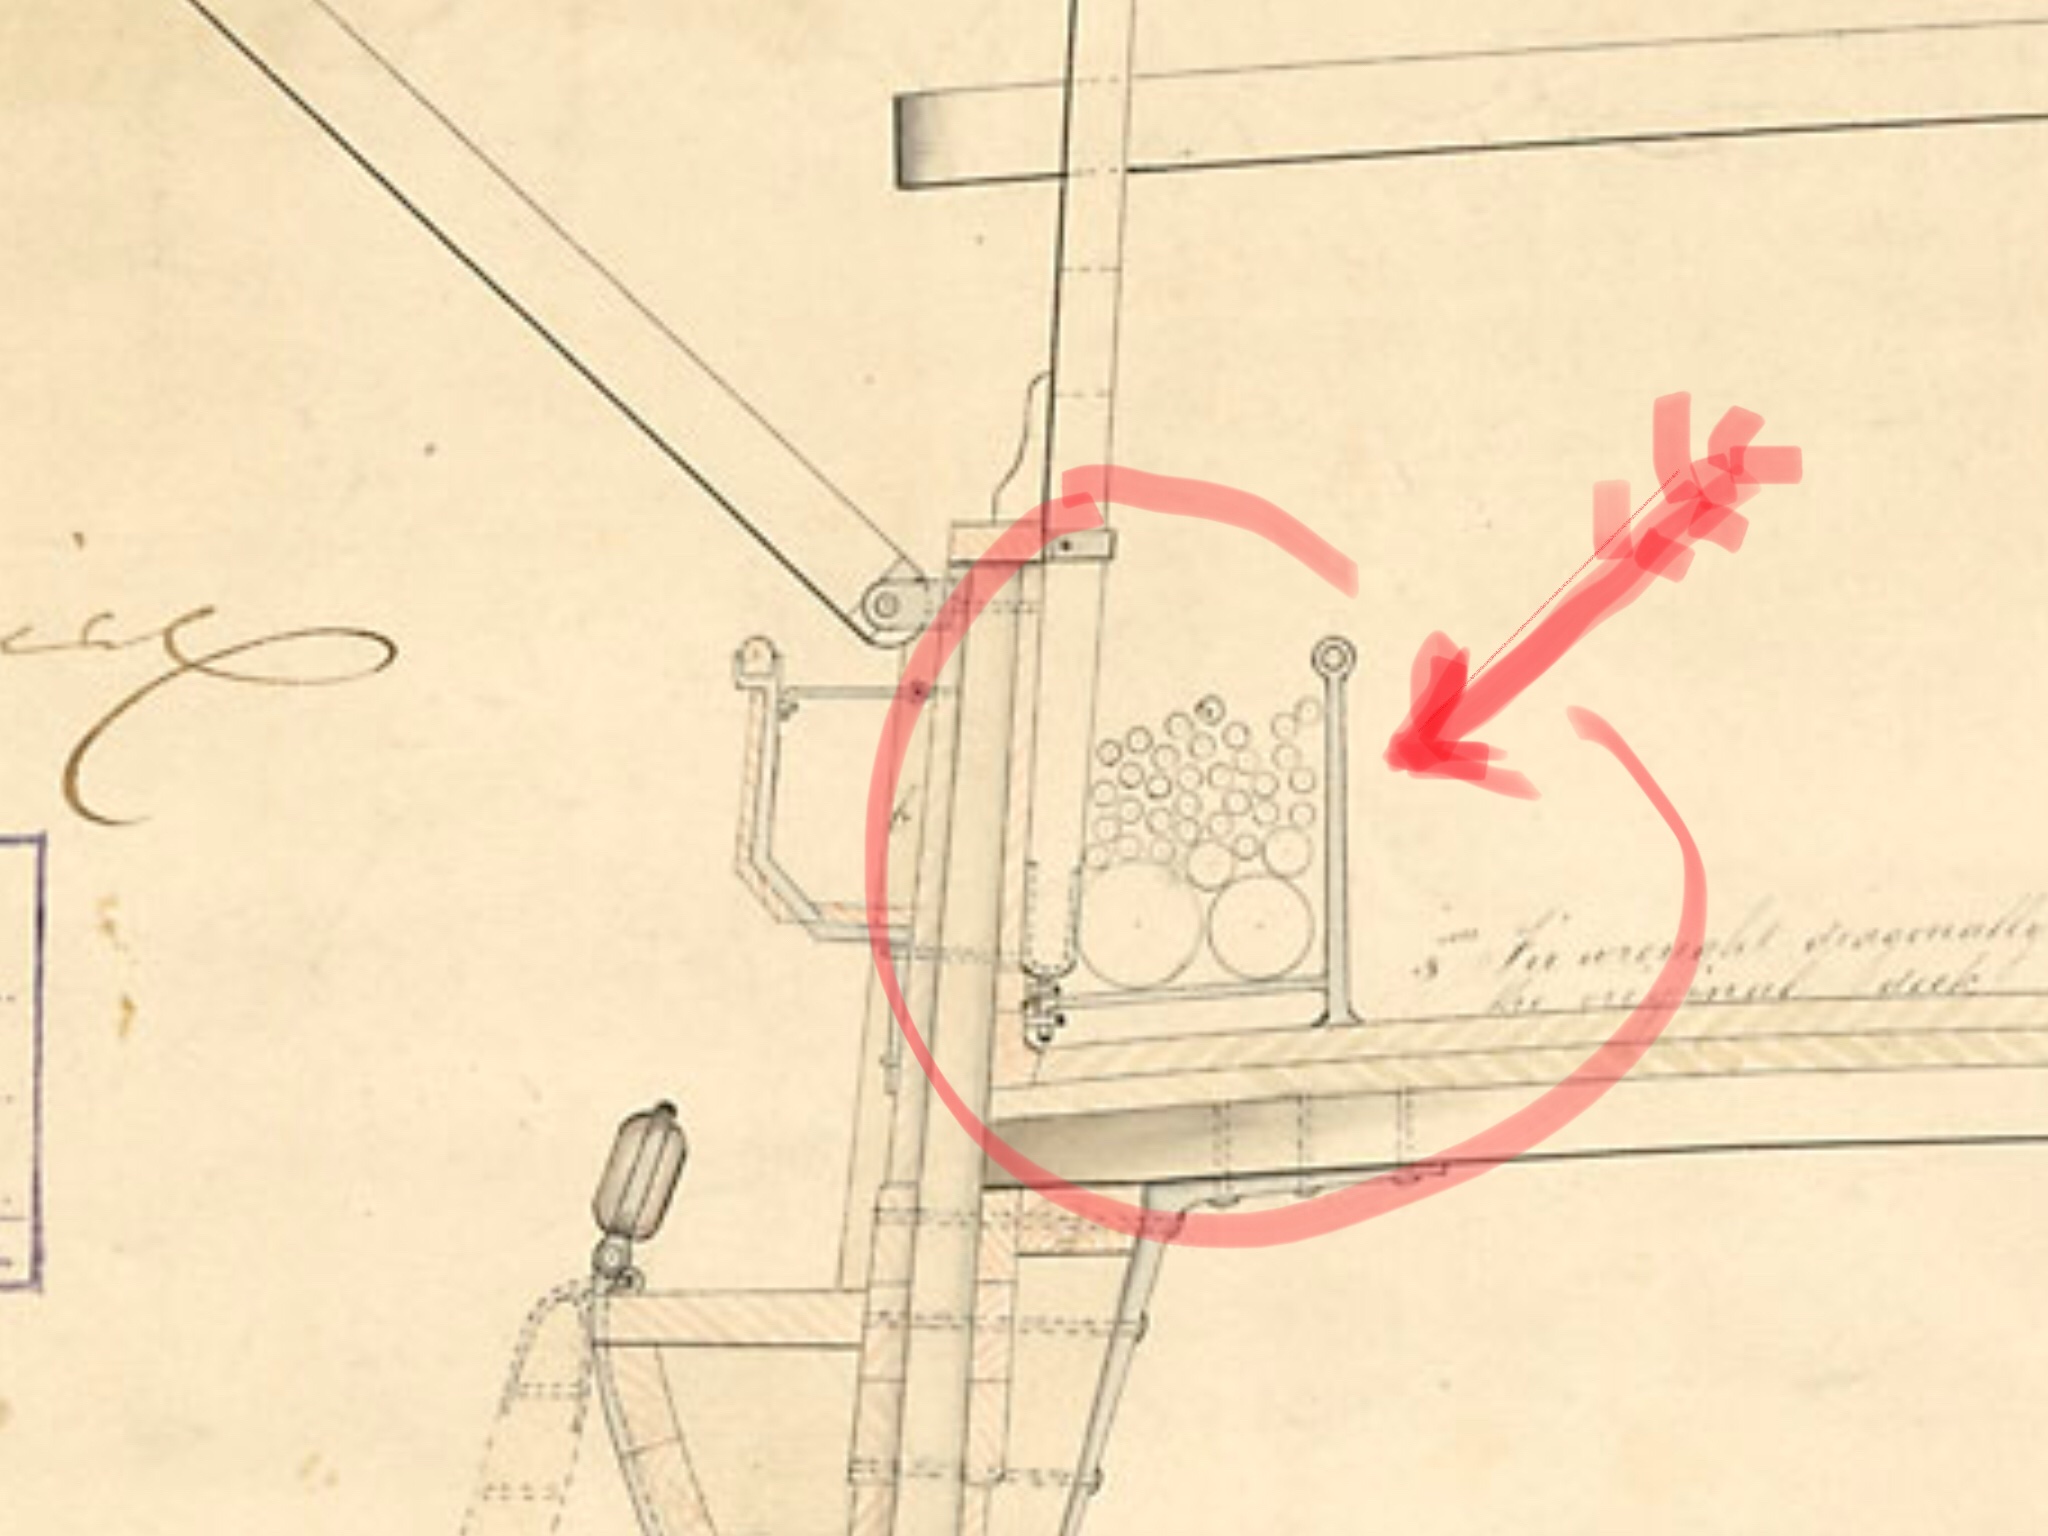
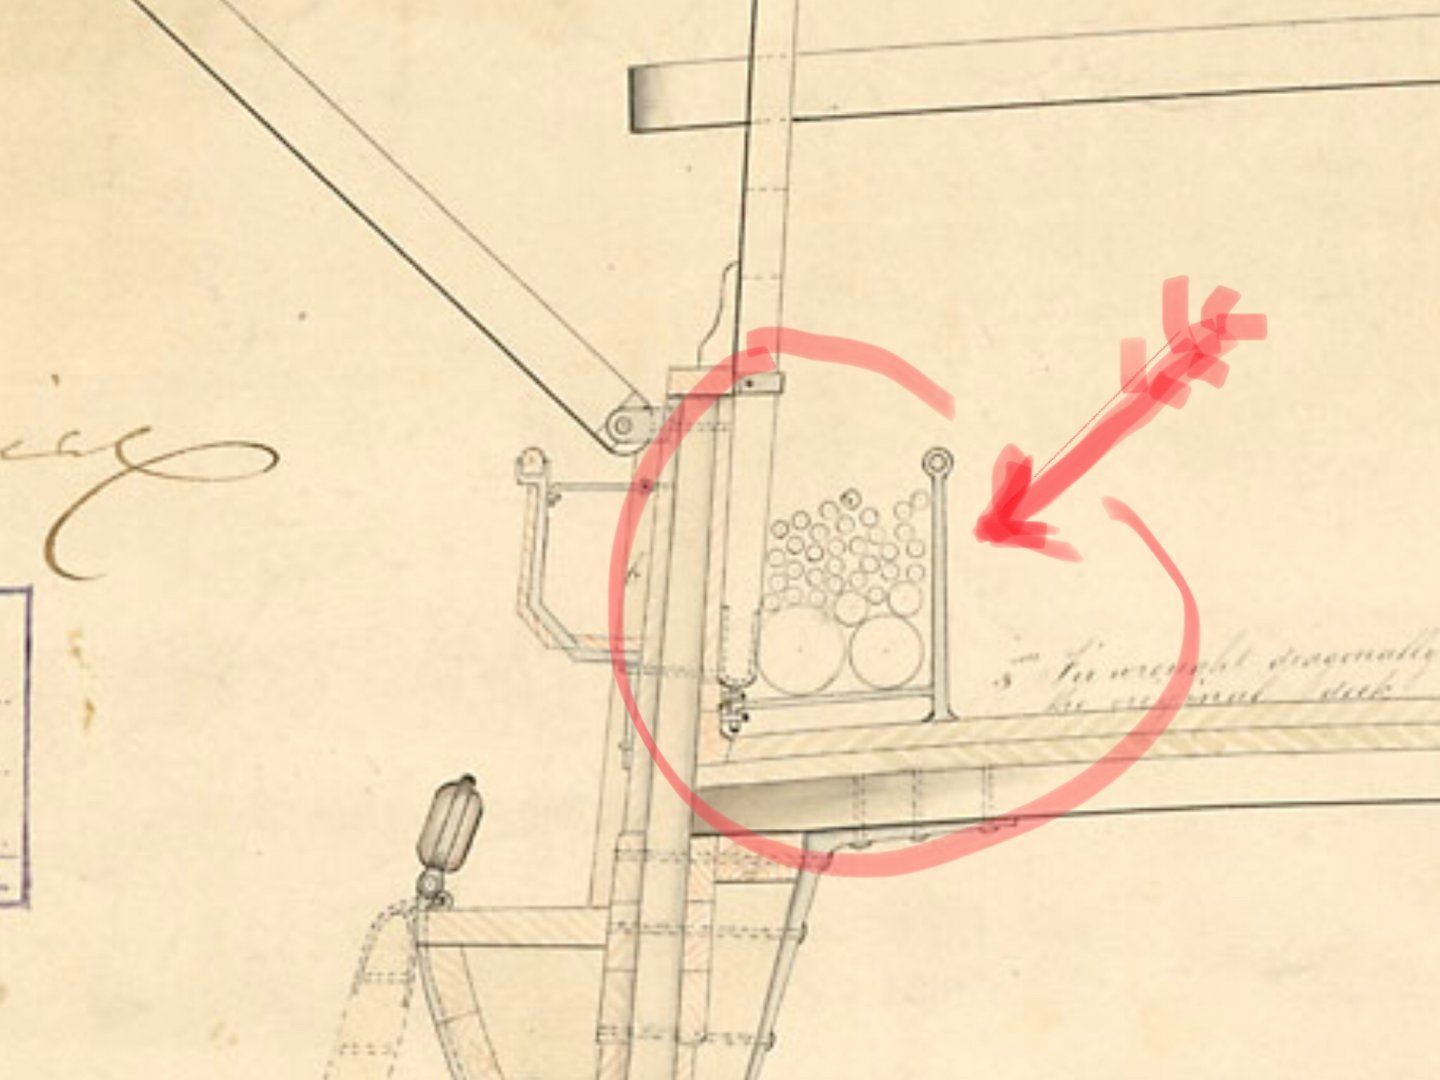
I thought they might have something to do with restraining the barrels- although in the plan view the rope or chain that is doing that isn't depicted interacting with them. More mystery.
-
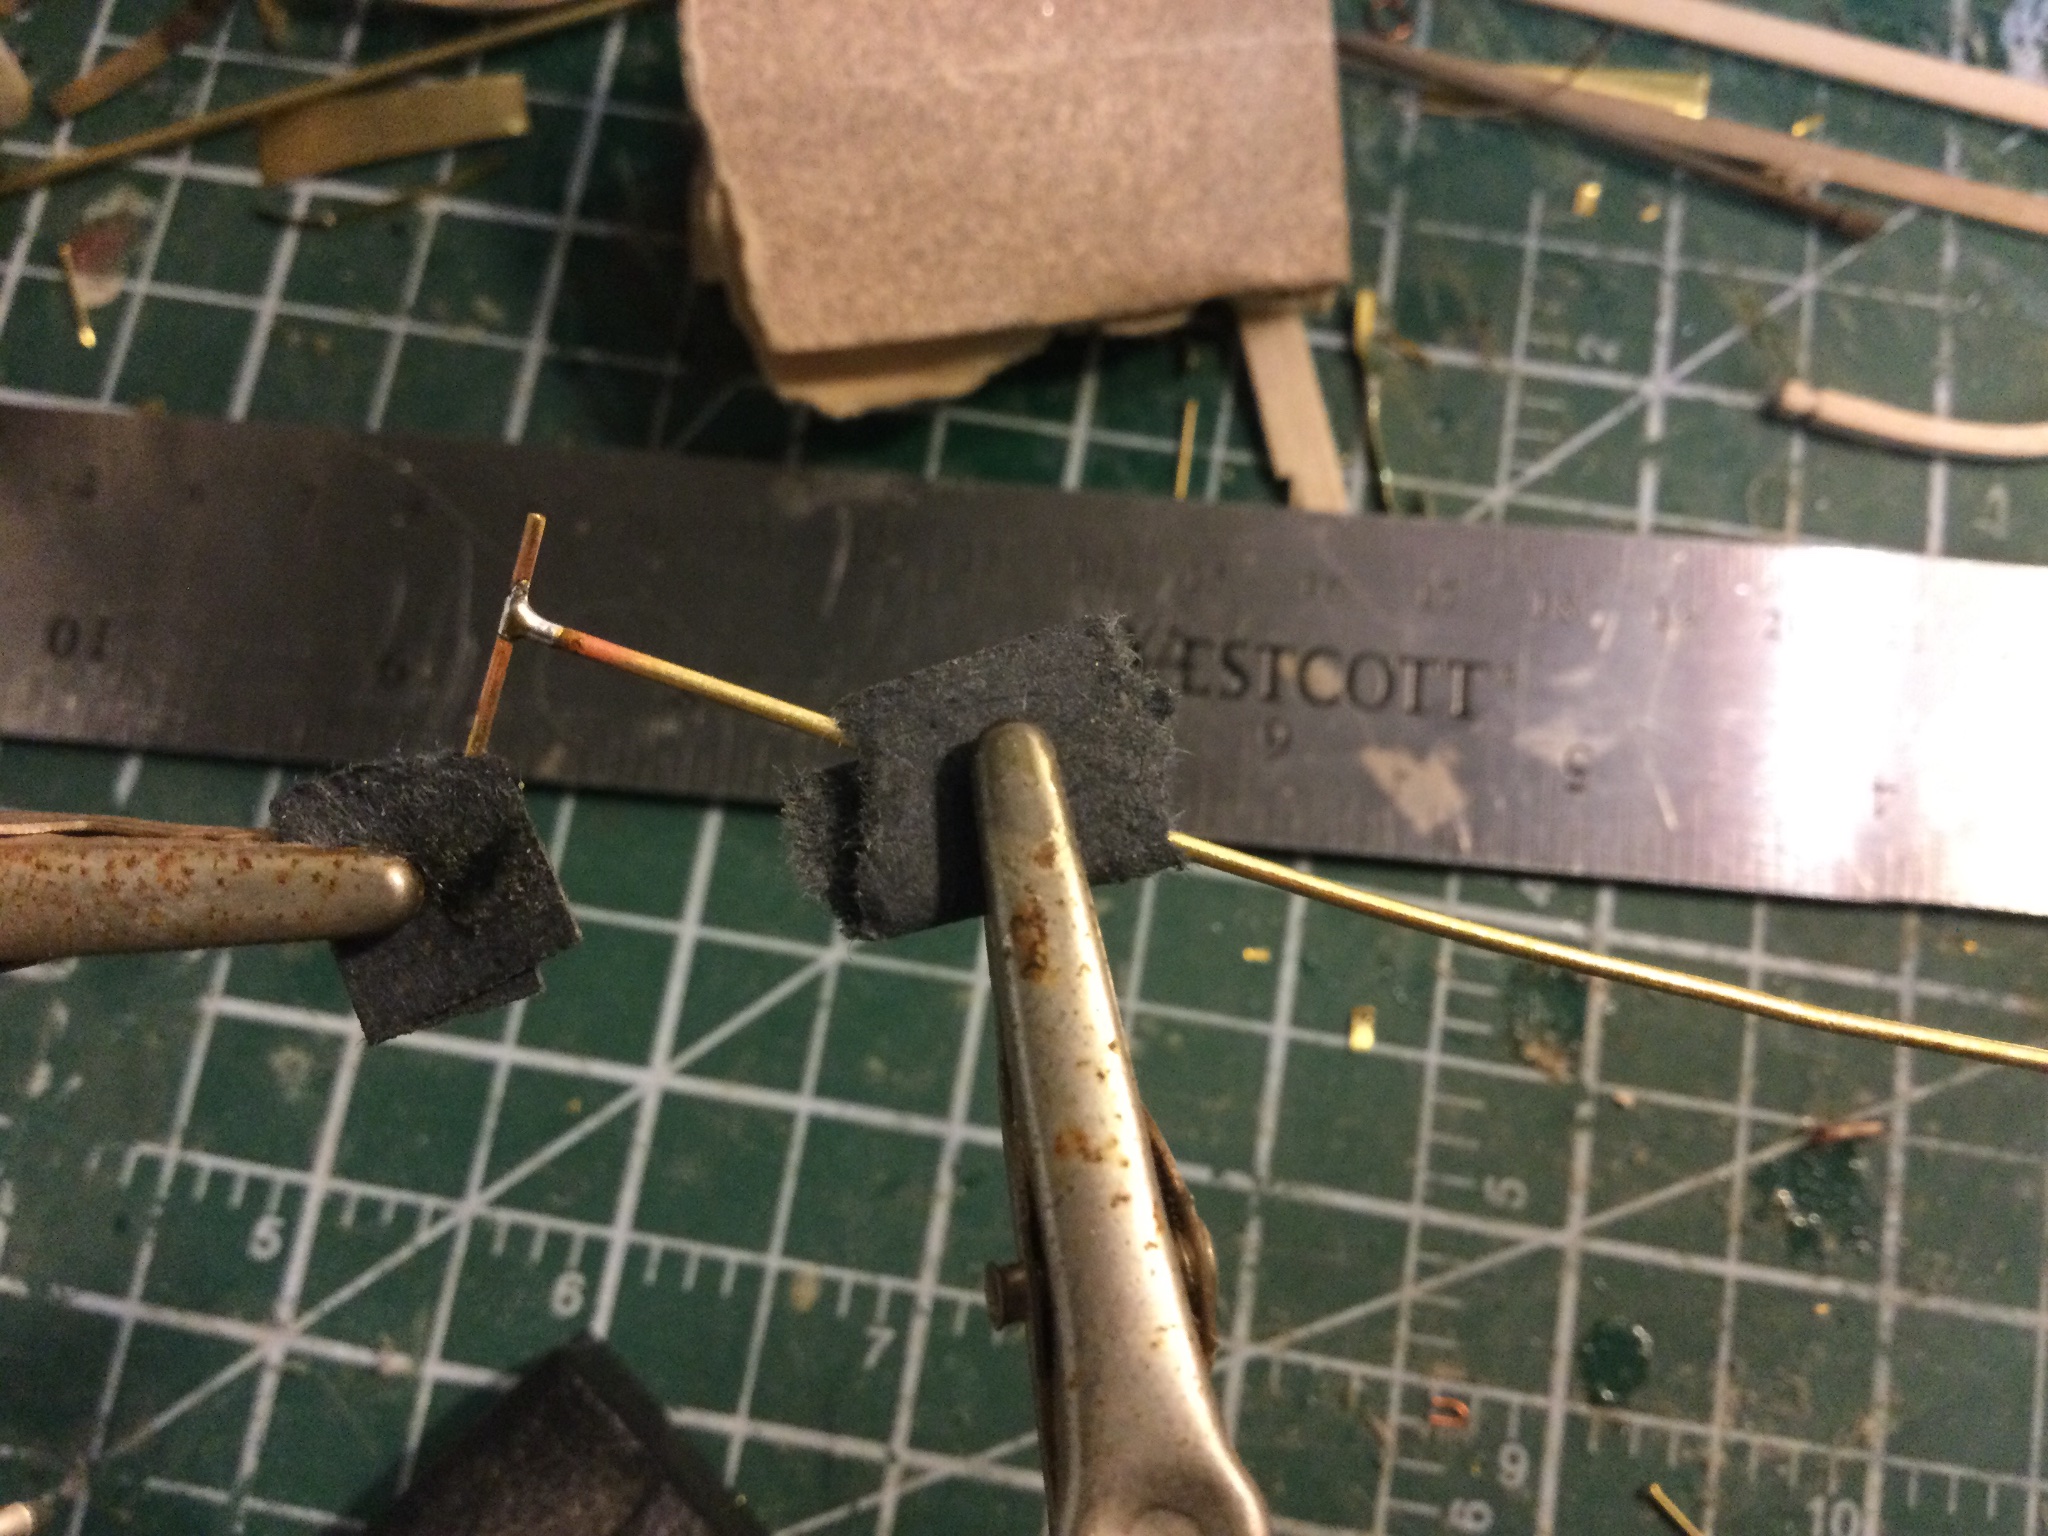
Today I tried making a couple of the little stanchions that stand in a line parallel to the rail and form a rack on which spare spars and timbers were stored on deck. Of course, I am jumping around a bit- I've only completed one out of the eight boat-davits- (although I may only make four)- but I find myself worrying about "HOW" I'm going to make something, so I often try one or two so that when the time comes to make the rest of them, I've already worked out how to do it. Therefore, I soldered up a pair just to see if my plan would work. I think they are OK, the trick will be to make them all the same. I need at least ten of them, and if I'm reading the drawings right, maybe as many as 16! They turned out a little short, but comparing them to the model, if I made them much longer they would be higher than the bulwark, which would definitely not do. I may shorten the horizontal bits, after I double-check with the scale rule.

-
OK, this is the best thing on the internet today, for several reasons. Being in Canada, I have some of the same frustrations finding items that are common in America, like blackening solution. It's probably more common here, but still not all that common. So, I order mine from "E bay". After seeing this, whenever I start feeling a bit sorry for myself because my model ship is giving me some difficulty, I will remind myself of the Australian lad who MADE HIS OWN blackening solution. Also, picking up the project nine years after it was abandoned and finishing it: also a great message for the rest of us in these dissipated times. I am more than impressed, and I hope this model gets pride of place in your house. Edit: also, NOT a beginner's kit, in my book. Extra points for the planking job and soldering your own gudgeons and pintles.
-
I was just reading in one of my "rigging" books that they did that exact thing, often to free up a pin for something more temporary, like studding-sails for instance.
-
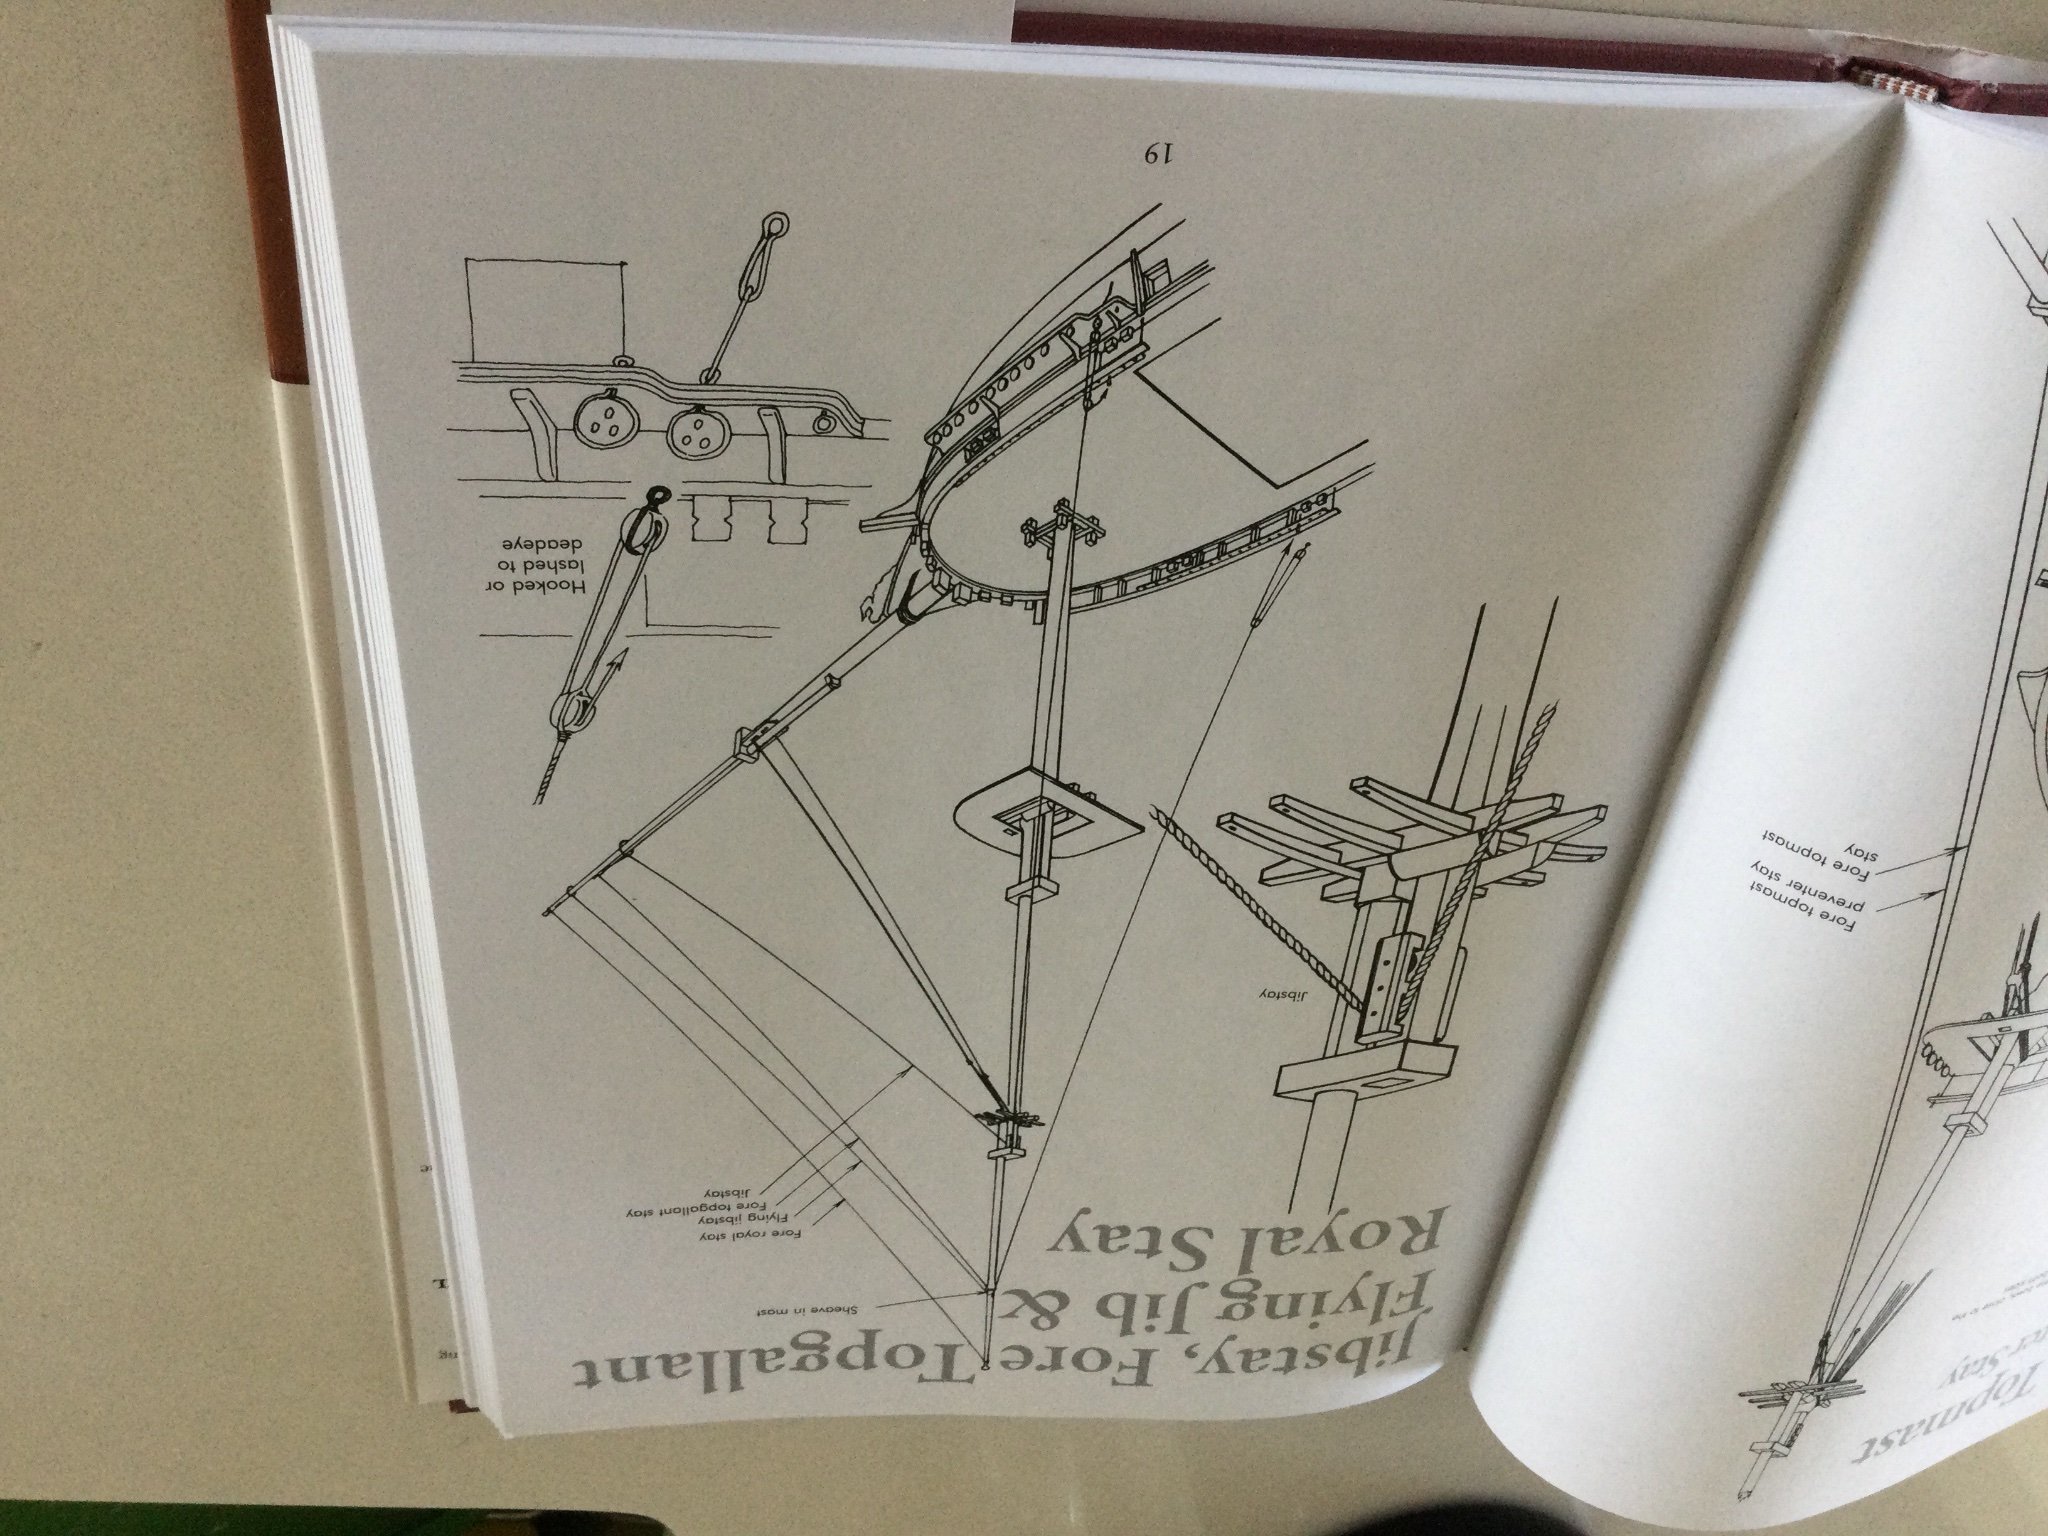
I had a hard time deciding what to do about them, but this picture and others show something curved pretty plainly. It even looks in the sonar image like they might be curved. However, this drawing (which looks a lot like a "camera lucida" drawing) also seems to show the davit arms being supported by a bridle off the mizzen, rather than dedicated uprights. Luckily, it's all pretty removable if it turns out to be incorrect when we know more. Many models and drawings of other ships from the early 1800s show the quarter-davits being curved and being supported by ropes to the mizzen. But then we can see from other drawings that the beams supporting the extra boats and ice- plank are supported by the davit uprights, so they must have been there. The thing I am most curious about is that ice-bridge or ice-plank or whatever it's called. It's depicted in almost every drawing, but not in any detail whatsoever. Was it permanently installed? Was it removable? The other thing I am curious about in this drawing is a lower yard on the foresail. I've seen this before as well in other drawings. I always assumed all the courses were loose-footed, but sometimes in drawings you see a yard or boom on the bottom of the fore course.

-
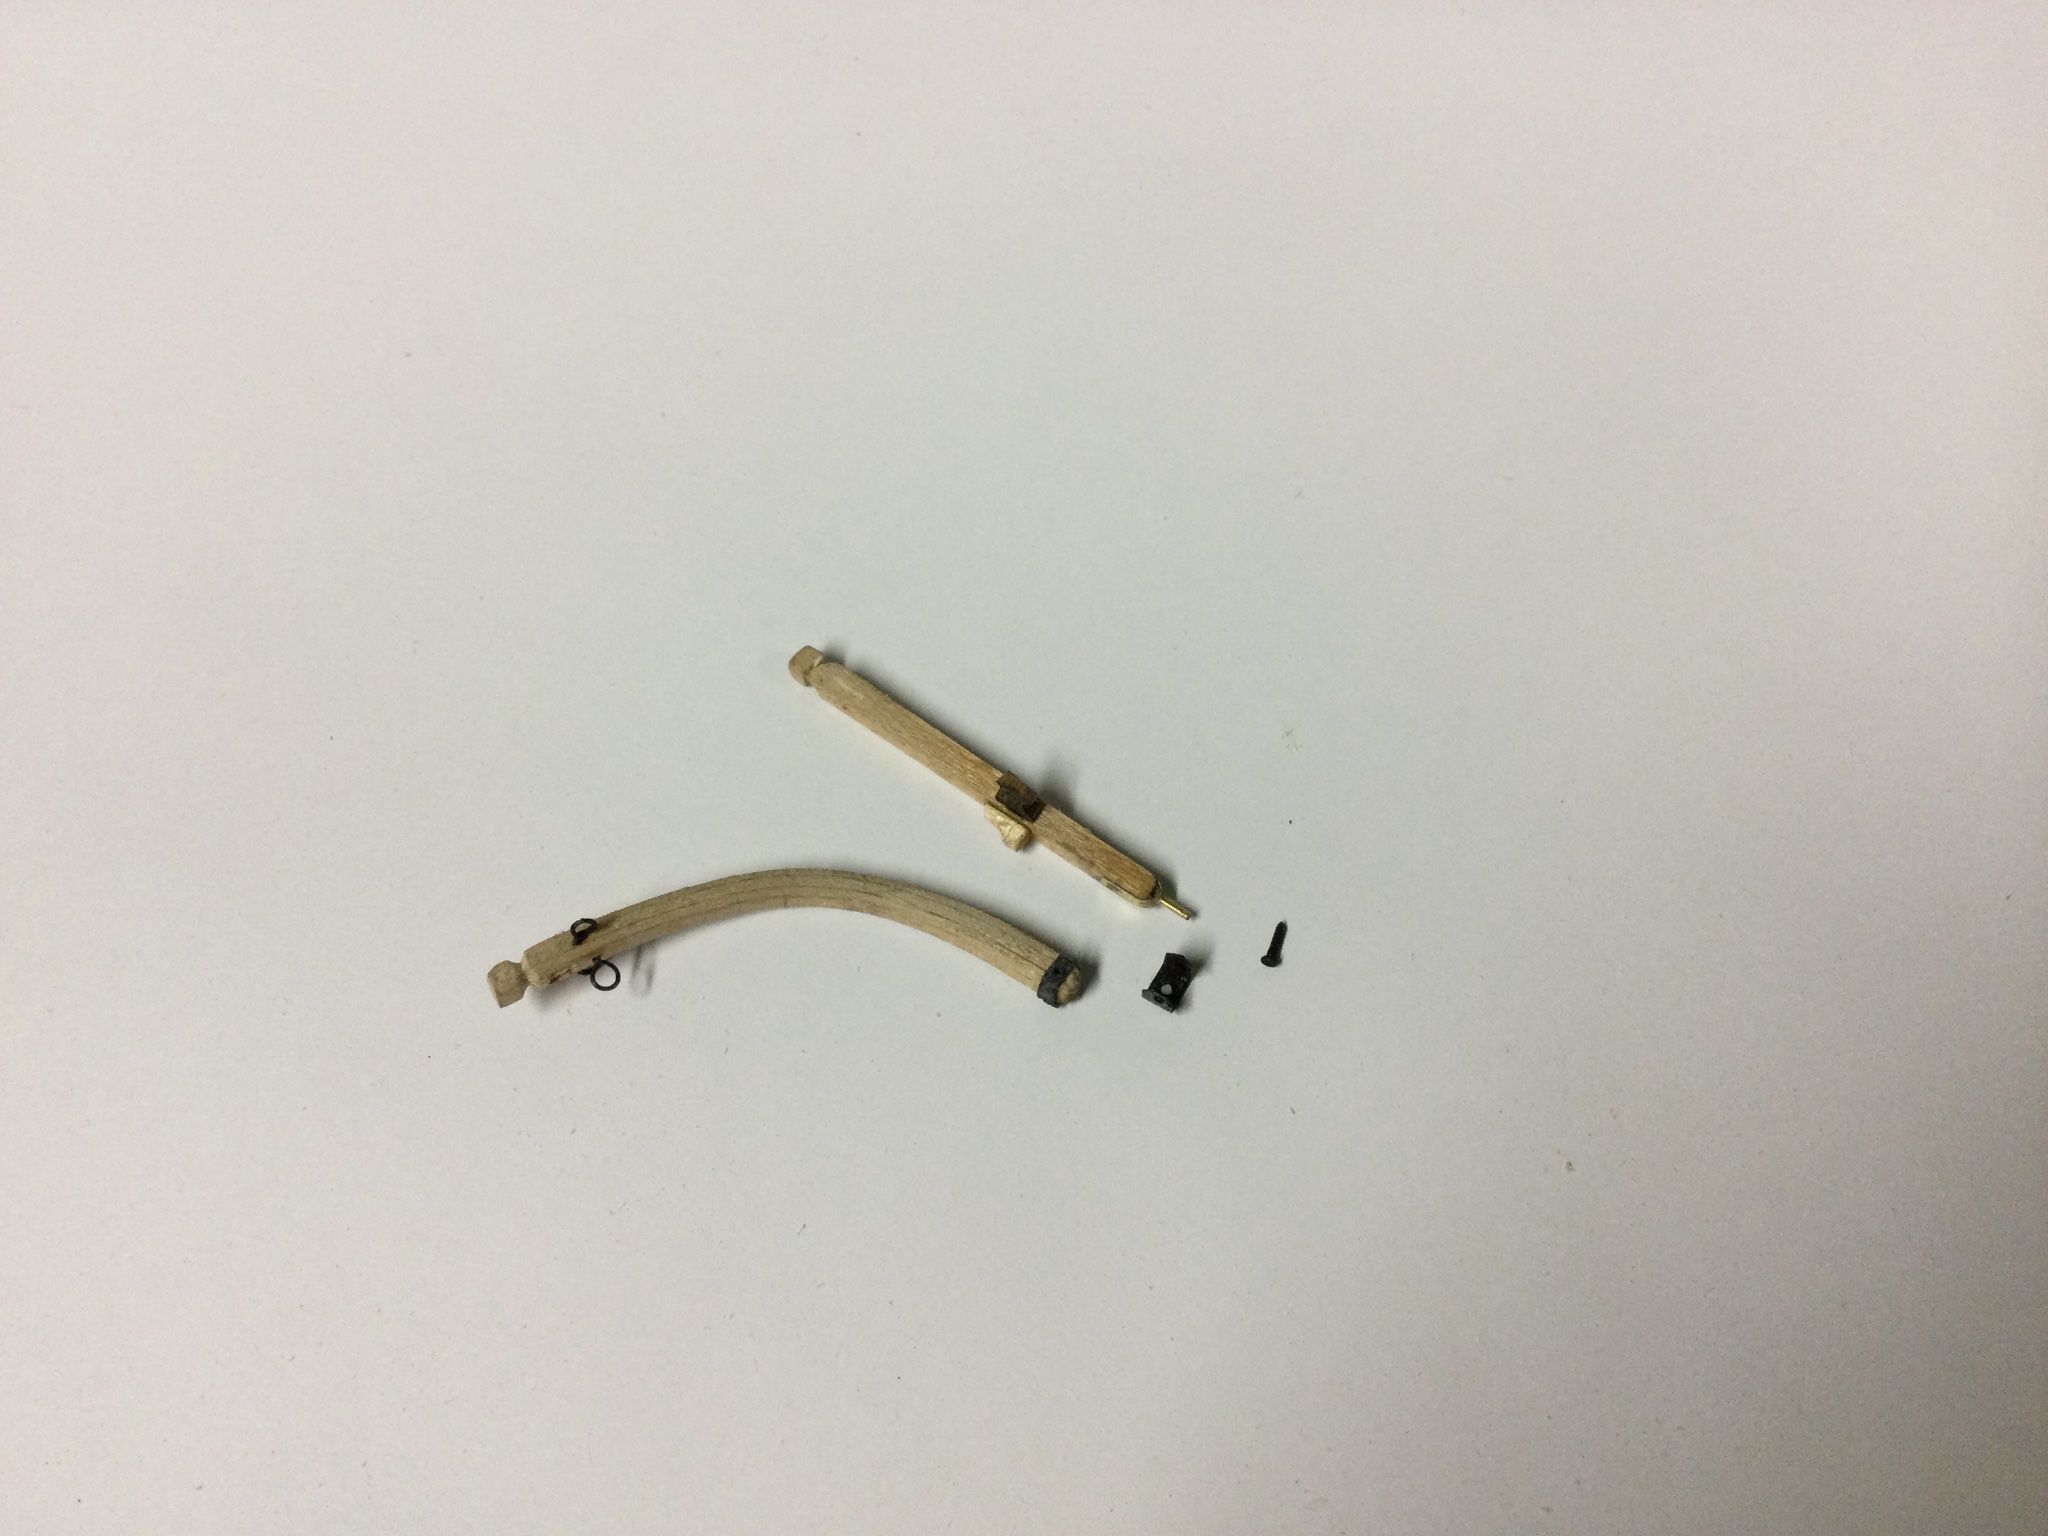
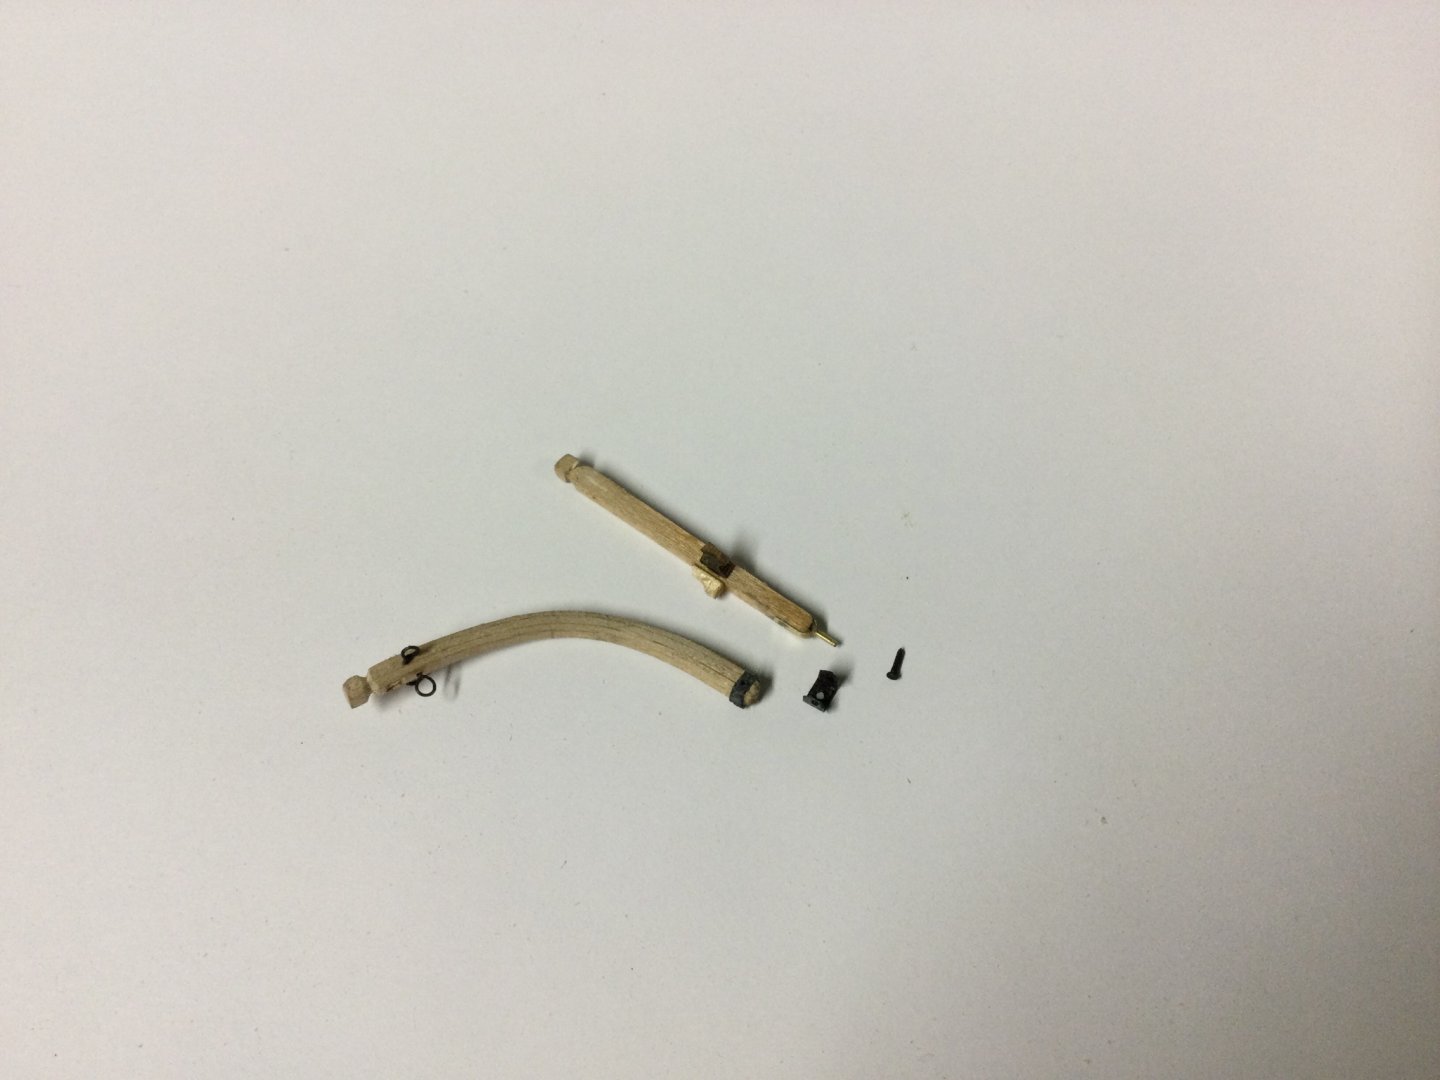
Today I worked on banding the foremast, which I tapered and painted yesterday. While I was doing that and waiting for paint to dry, I worked on the quarter-davits. I've steamed strips of wood in my wife's rice steamer and laminated four davit arms on a jig. Today I tried to make the hull fitting for one of the arms. It's so small it took me four tries to make one without destroying it, but finally succeeded. It took me about three hours. The next ones should go quicker, now I've worked out how to drill all the little holes without bending the brass till it snaps. The little brass pin on the davit arm will pull out so I can remove them in prototypical fashion. That way they won't get damaged when I am working on the mizzen rigging. Finished tapering and banding the masts, too. I still have to make rubbing paunches and then onto making the tops, I suppose.
-
That is an excellent planking job.
-
The super-beginners guide to stropping and whipping blocks.
Keith S replied to JRB9019's topic in Masting, rigging and sails
Clever. Thanks for doing this. -
Yes, no doubt he will! I see in the side-scan sonar image, if you look at the shadow especially, you can see the sprit and jibboom are still there, as well as parts of the masts and I'm pretty sure the boat davits are all there too. And if they don't go down and explore/photograph the engine-room, I'm going to go down there MYSELF.
-
I think you'll find it will be very useful indeed. If I was just starting my model now, I would probably not bother doing anything above deck-level until the book comes out. The other book I have besides Lees' is one called "Rigging period ship models" by Lennarth Petersson. This book is very specifically about the rigging of the 18th-century HMS Melampus, and the authour cautions modelbuilders that, obviously, it might not be correct for models of other ships or other periods. The reason I bought this particular book is that it helps me understand what the names of various things are, and it gives me a starting-point and sensible "order of operations" to begin with. I am hoping to make era-specific corrections to the information from Petersson's book by referring to Lees'.. which does give era-specific information but presupposes a high degree of existing knowledge on the part of the model-builder. I am hoping that with the help of both books, I should be able to create something believeable. Here is an example of a page from Petersson's book, showing how he uses little arrows to illustrate the run of the line in question. Basically there is a page for each different rope in the running rigging.

-
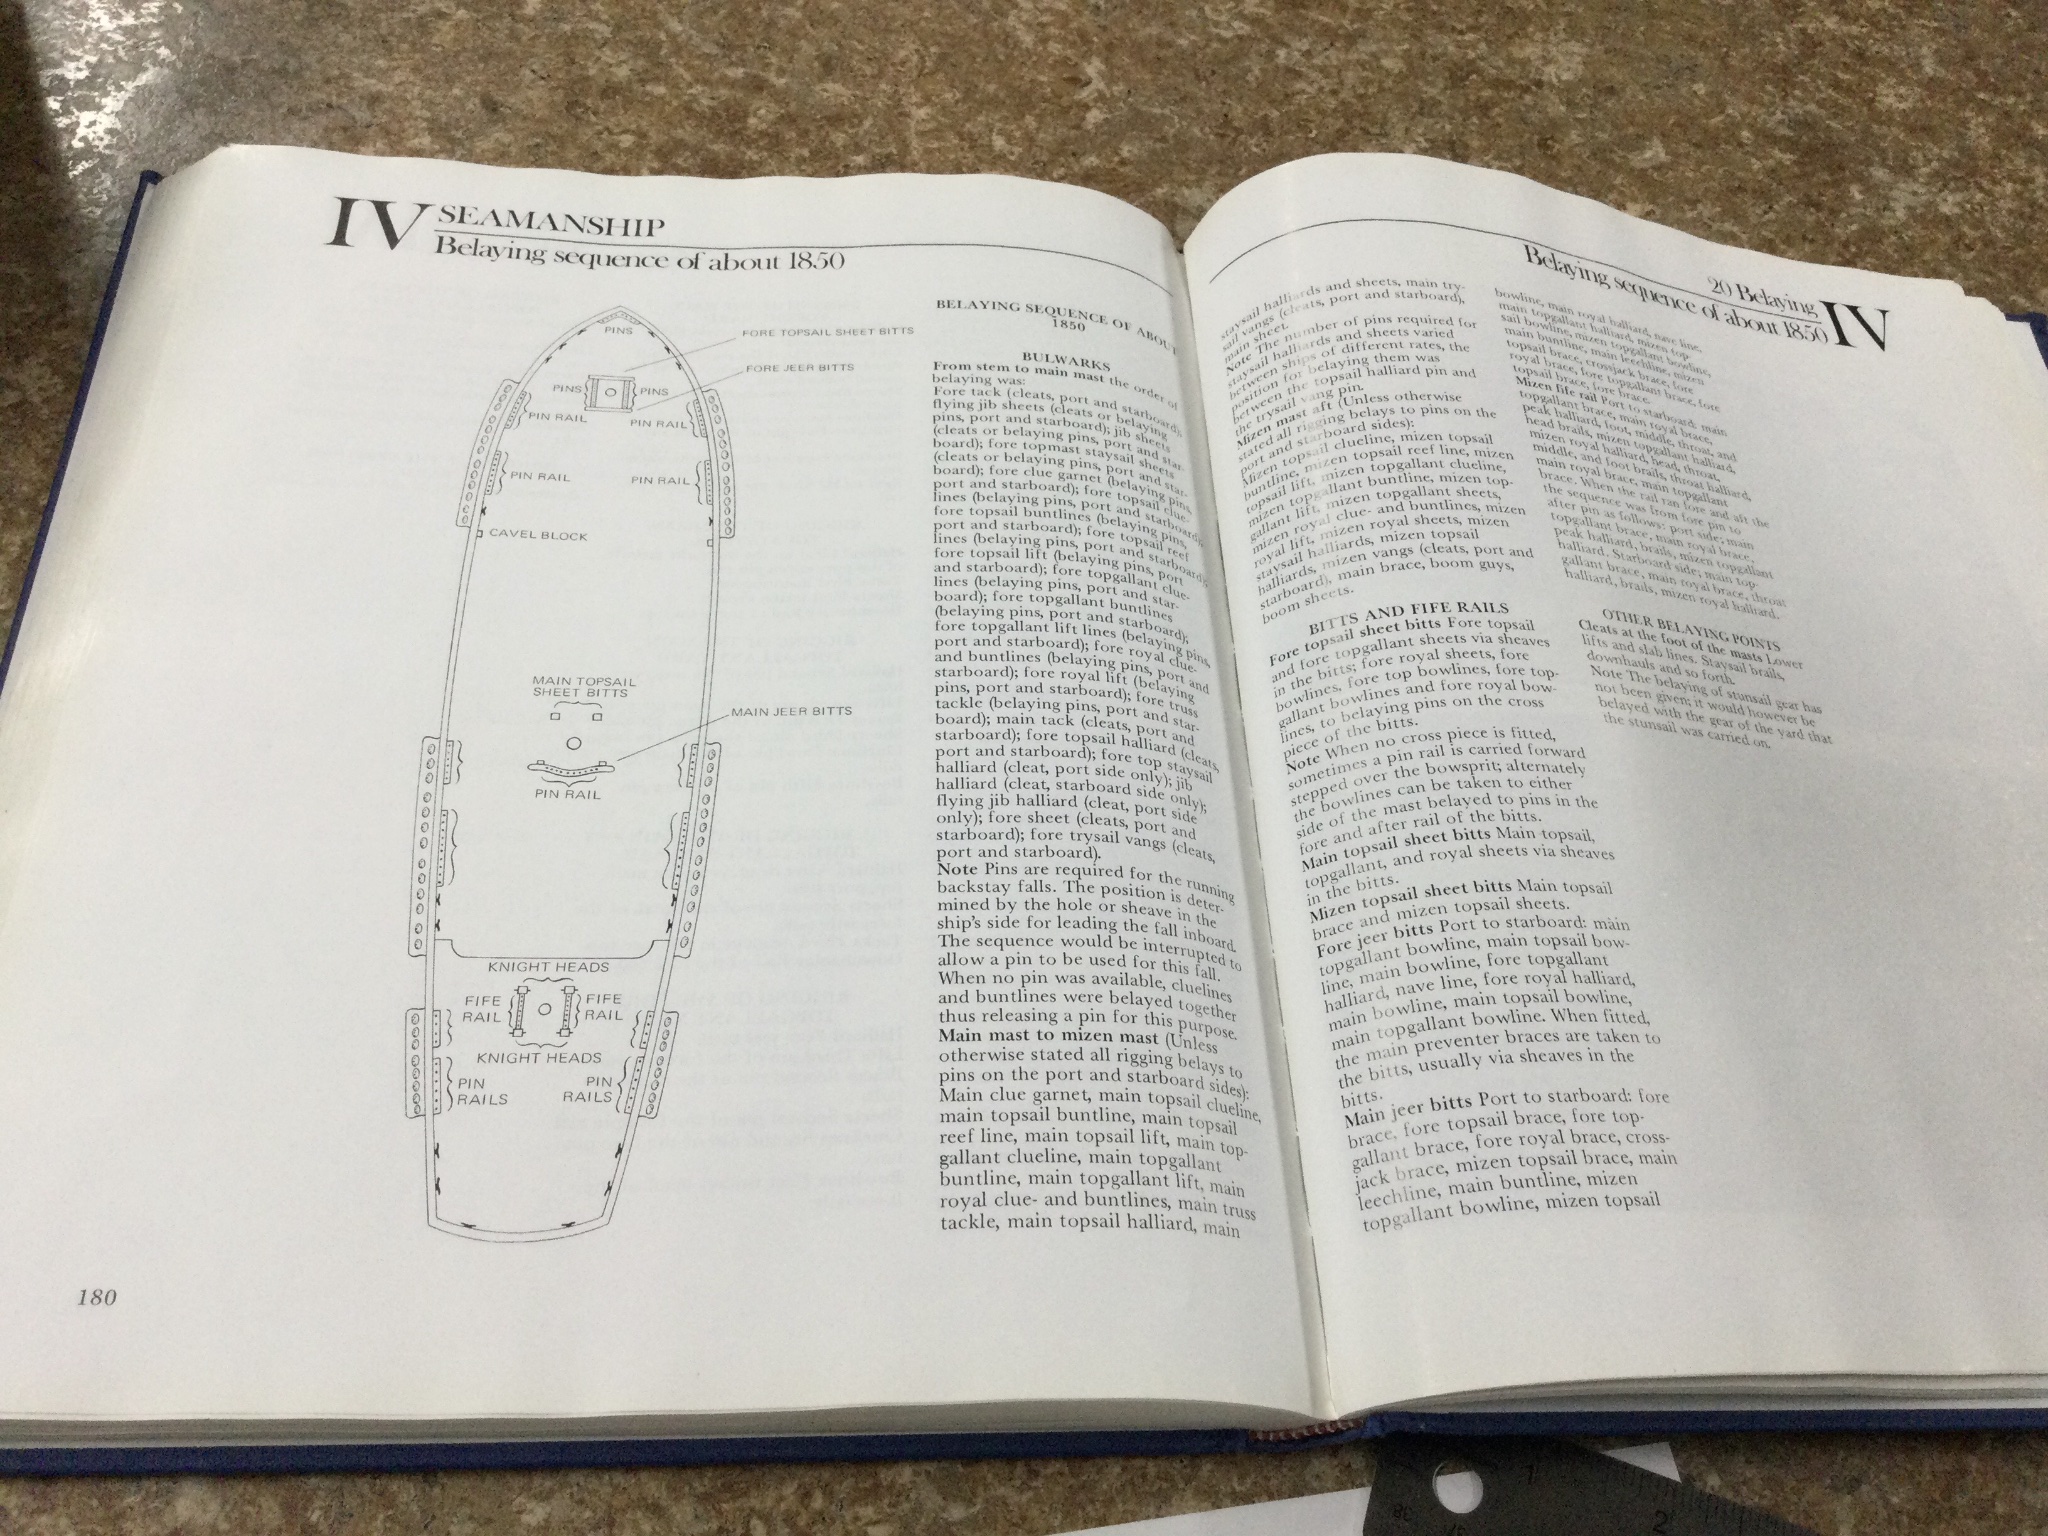
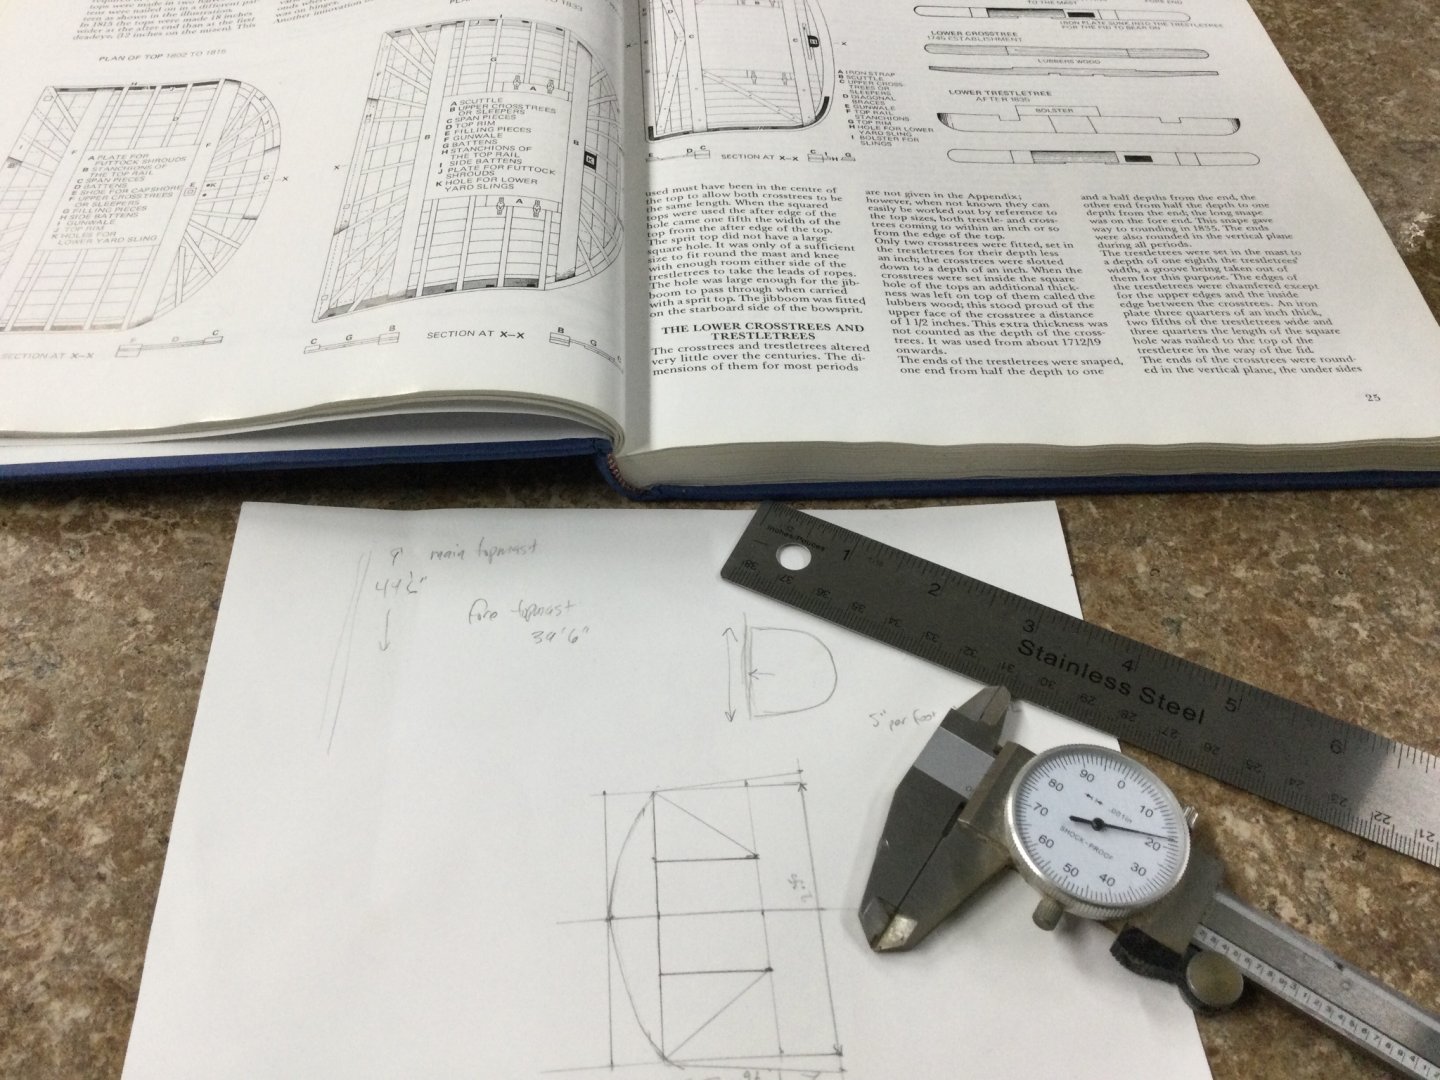
Well, that is a good question! I have a copy of Lees' "Masting and Rigging &c." in which there are some belaying schemes in the appendix. I also have another useful book, the title of which escapes me, which shows the complete rigging of a late 18th century frigate model in a paint-by-numbers series of drawings. I plan on making reference to both, along with some of the tutorials available on this forum, when the time comes. Also you can try to "Google" something like "Barque belaying scheme" and see what you find: like this guy's site: http://www.jans-sajt.se/contents/Navigation/Modelling/Themes_Belayings.htm I have basically stopped referring to the Occre plans for anything from the deck up. For me, and a couple of other guys like Clearway (Keith) and Dan D, this has become more of a scratch-build than a kit at this point. "Terror" was a highly modified ship, and information about how she was rigged at the end is a little sparse. I assume we're all doing what we can here by scrutinizing period drawings and lithographs, making assumptions and semi-educated guesses based on experience with other models (in other Keith's case) or observing other similarly rigged models (any barque-rigged turn-of-the-19th century flush-decked ship should be broadly similar) discussion and hopefully a bit of common sense. As for me, I'm using dimensions from Lees' for the "class 10 Frigate", and I haven't really started thinking about the belaying pattern. I am hoping a lot of it becomes self-evident as I go along! I am finding lately that this part of the model is a lot of maths, and relatively little actual woodwork. Here is an example of a belaying diagram from Lees', which I think is the one that has the most similarity to how Terror may have been rigged. The trouble with it is, in order to interpret it you need to understand what things like a "garnet", "clueline", "buntline" or "vang" are, because he describes everything verbally.

-
I pop in now and again to see how this fascinating model is coming along. Wow! There is so much interesting detail to look at. I appreciate all the research that goes into even the slightest detail. Sometimes my model "Terror" gets overwhelming. Similar to the "Tenessee", it was an unusual ship at a transitional time in history. "What did this part look like?" ...failing that, "What did the same part look like on a similar ship?".. failing that, "What did a similar part look like on ANY ship from that era?" .. failing that, "What was Naval practice at that time"? and finally "OK does anyone here have an opinion on what this part may have looked like, where it was mounted, what colour it was, or EVEN IF IT WAS THERE AT ALL?" Your tenacious pursuit of detail is inspiring. Also, the "Tennessee" was a beautiful ship.
-
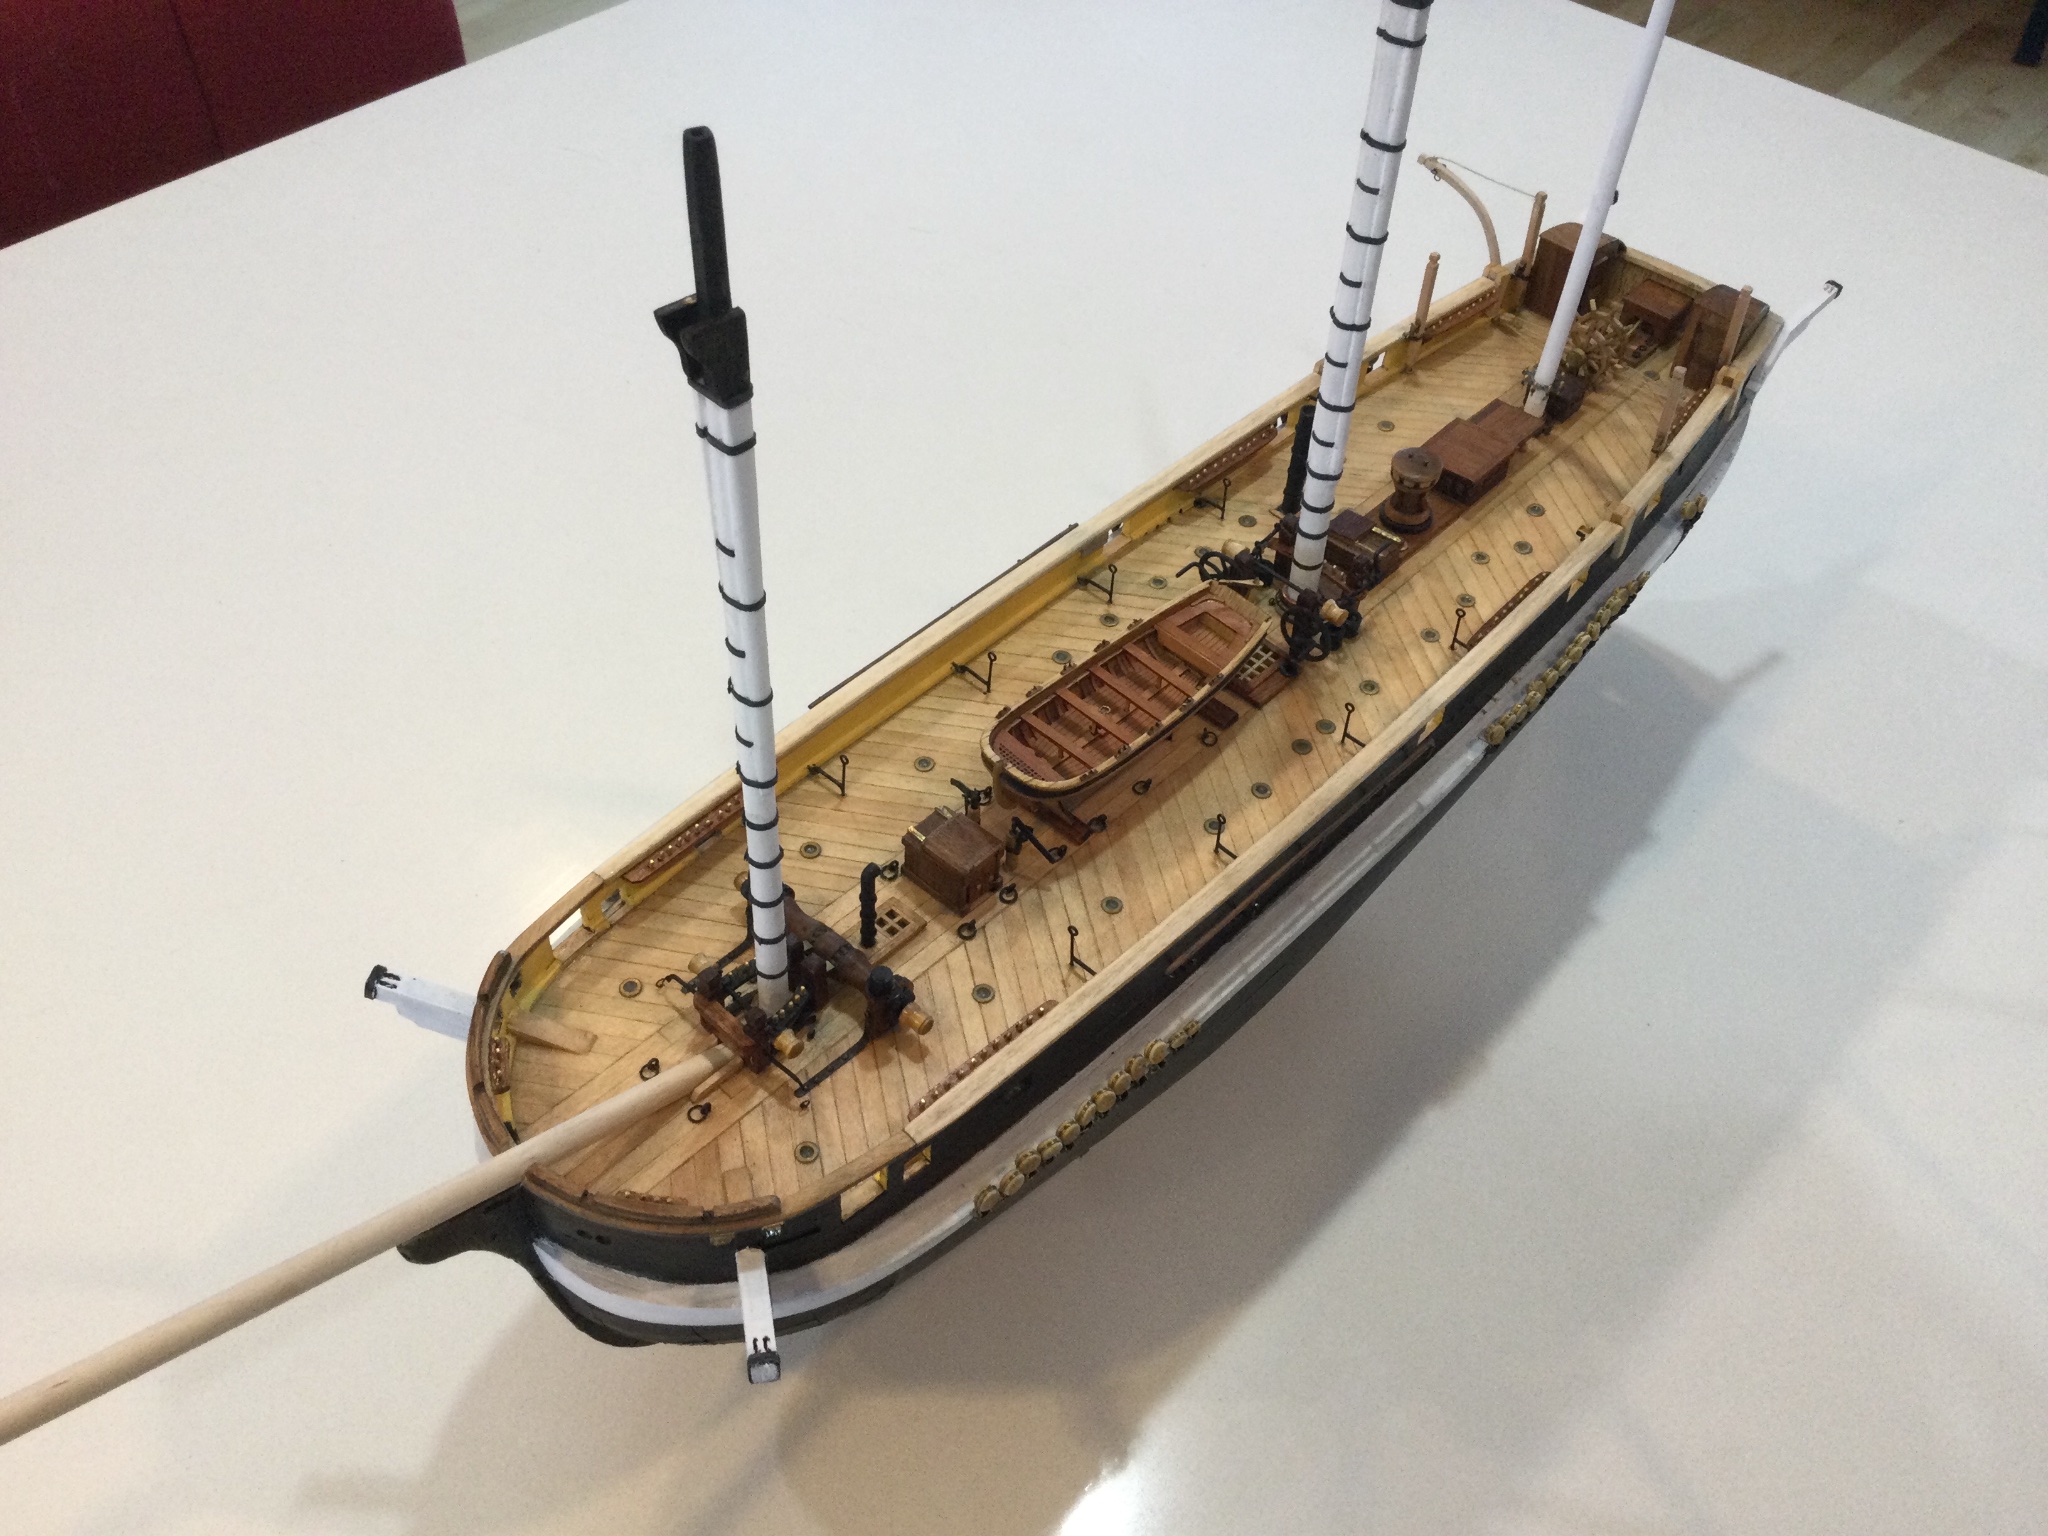
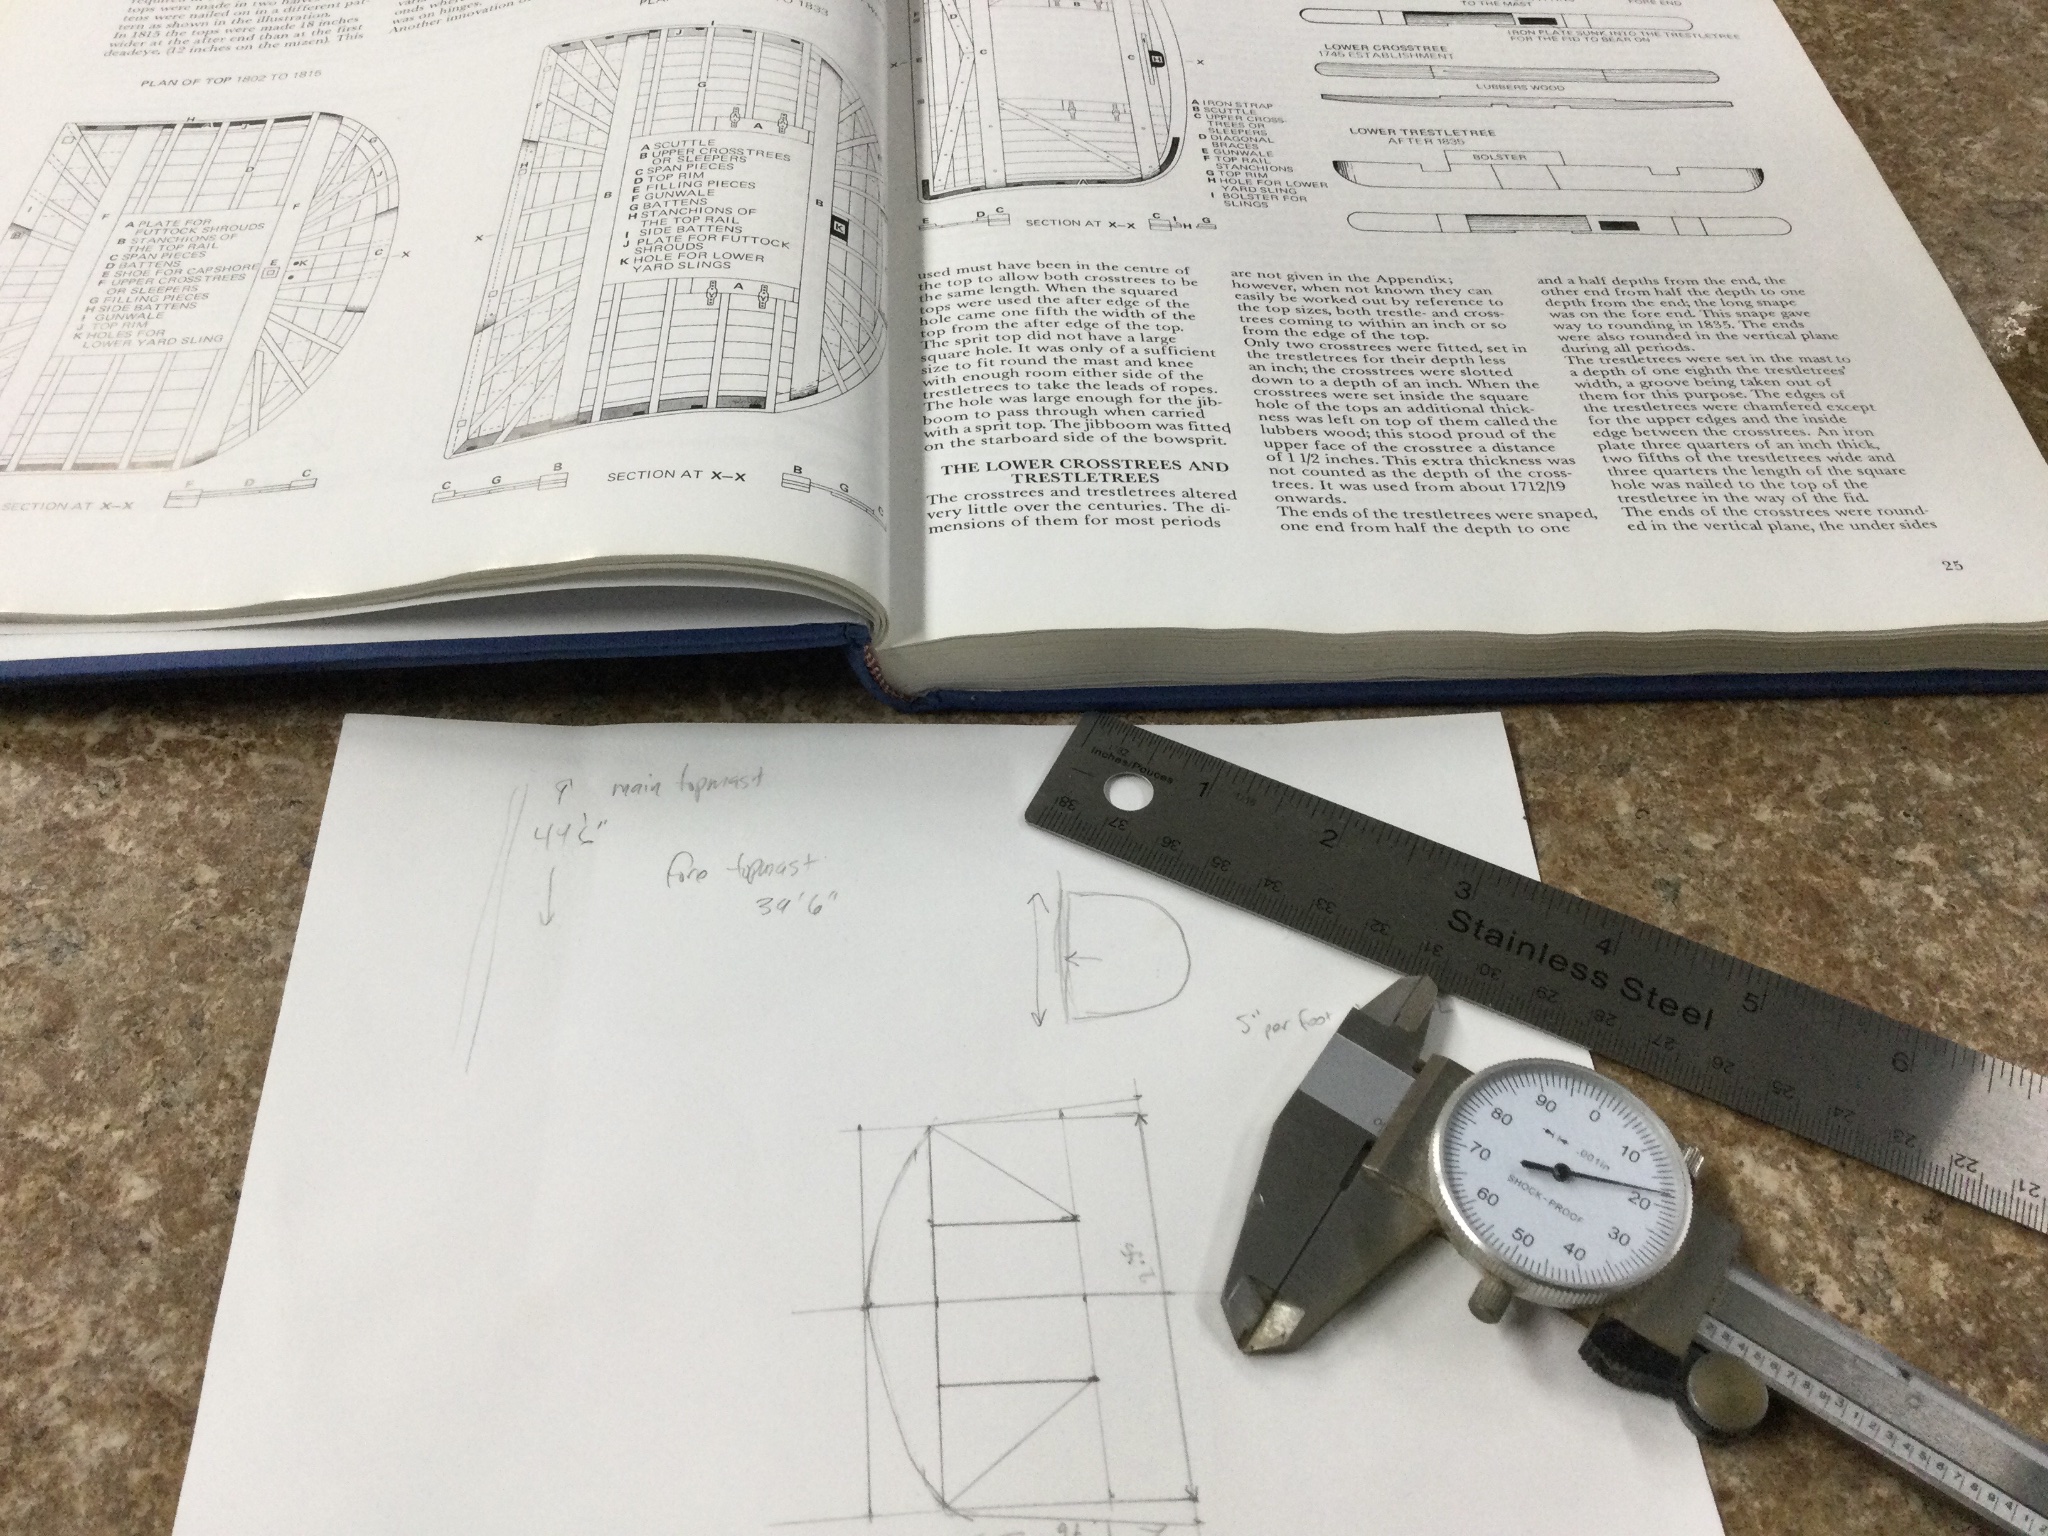
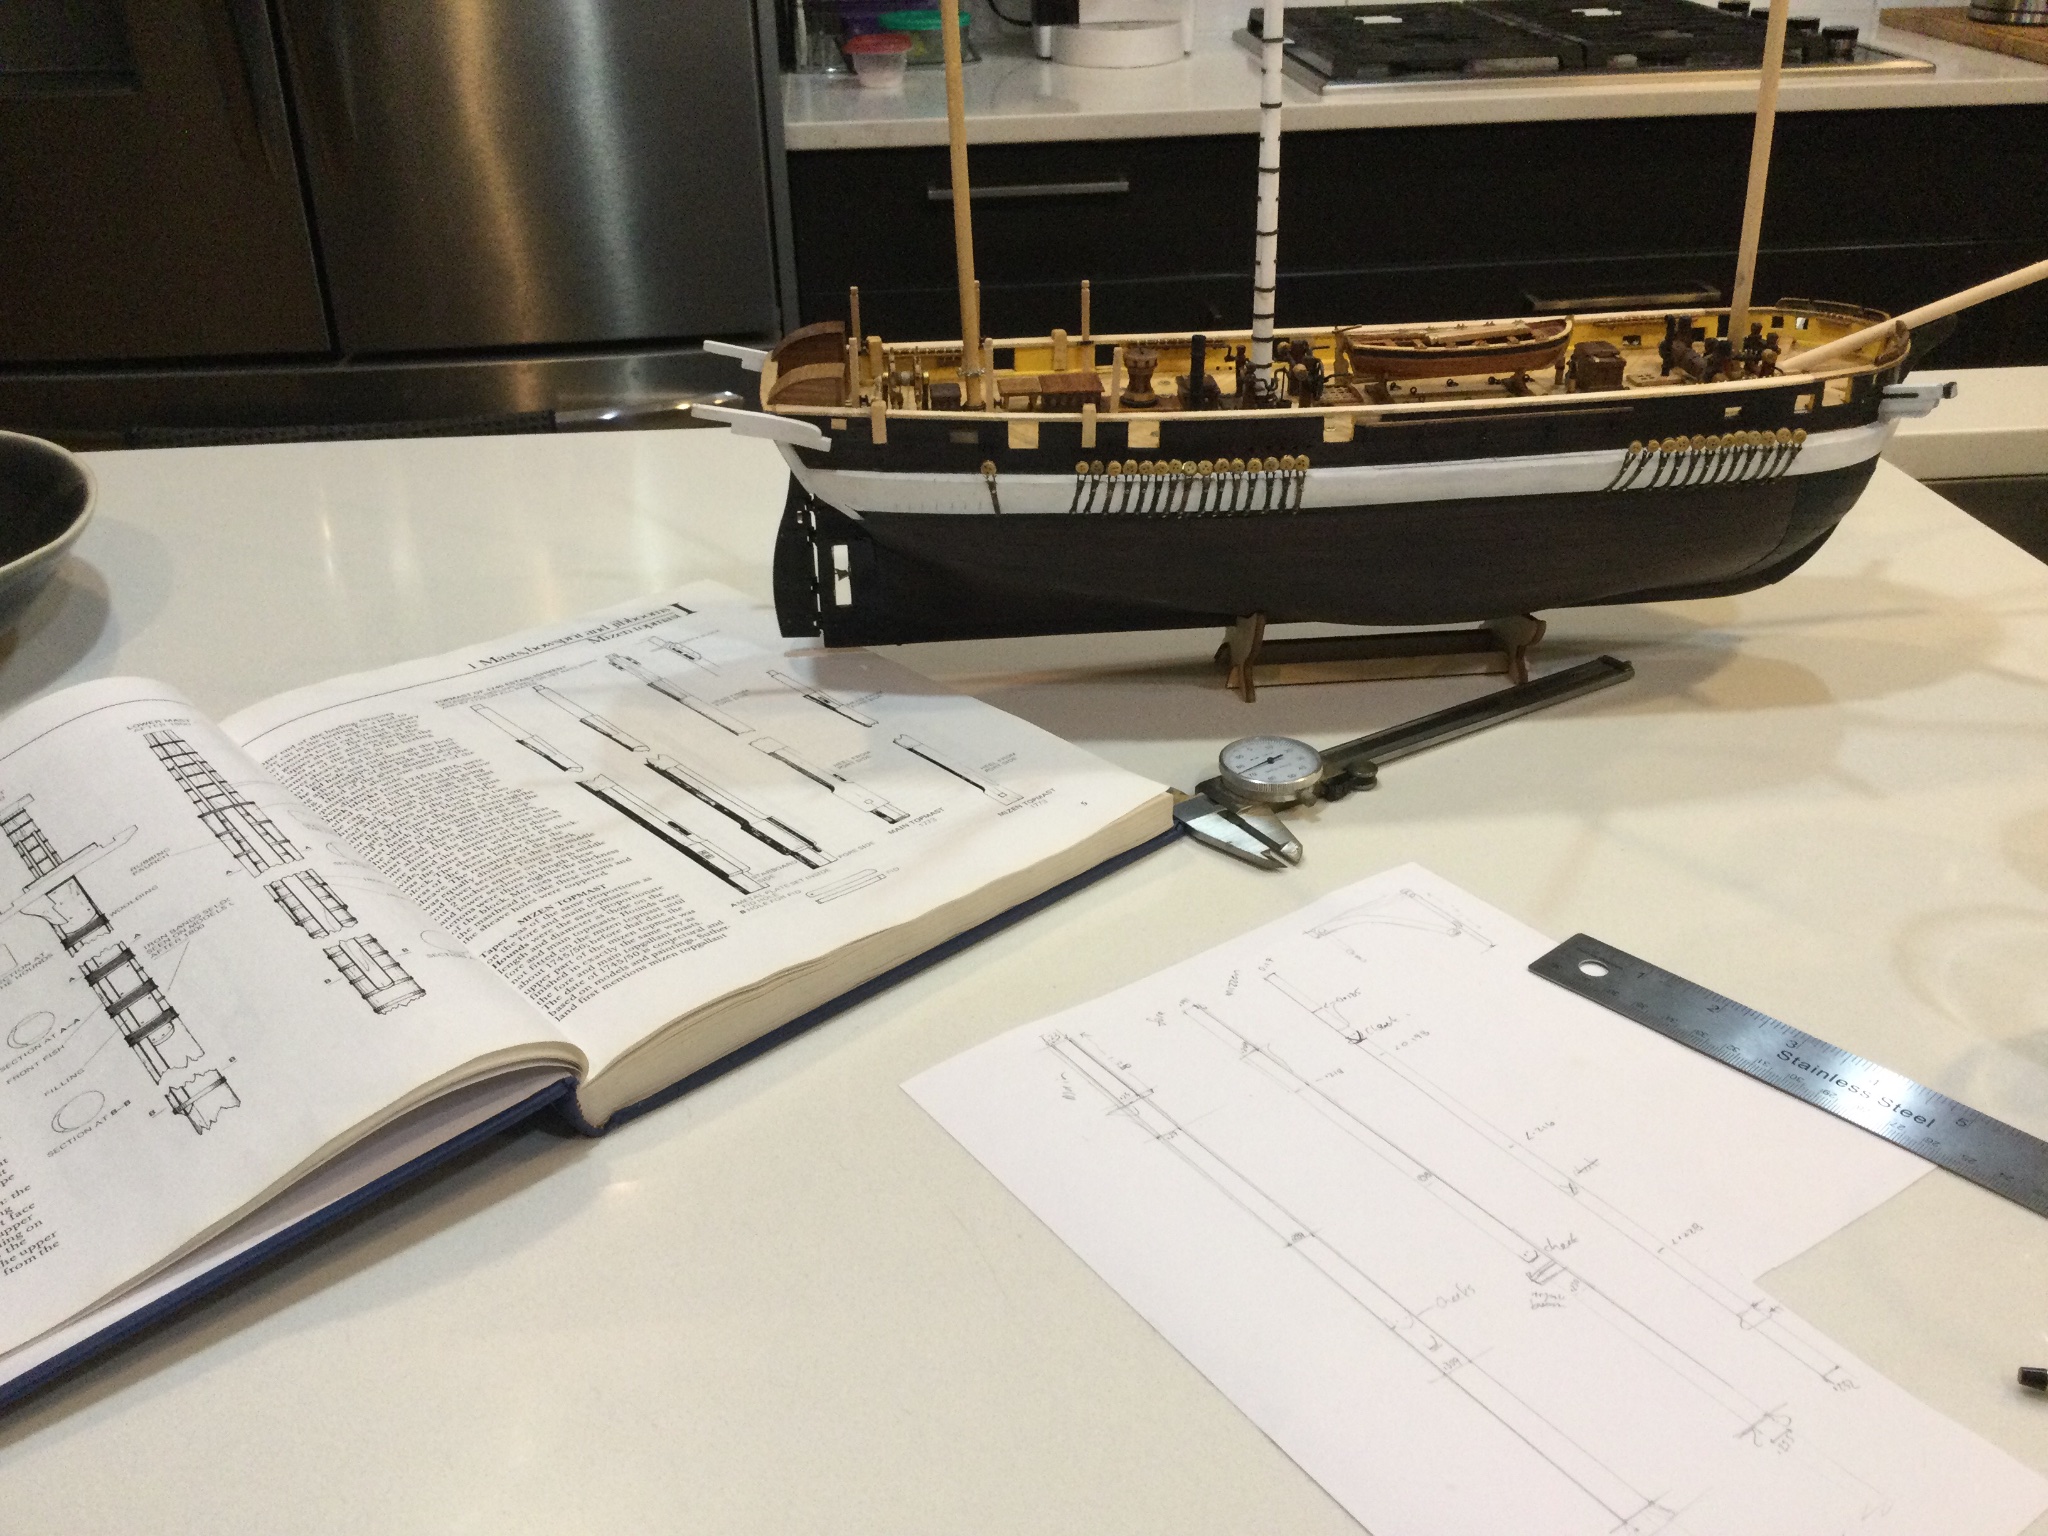
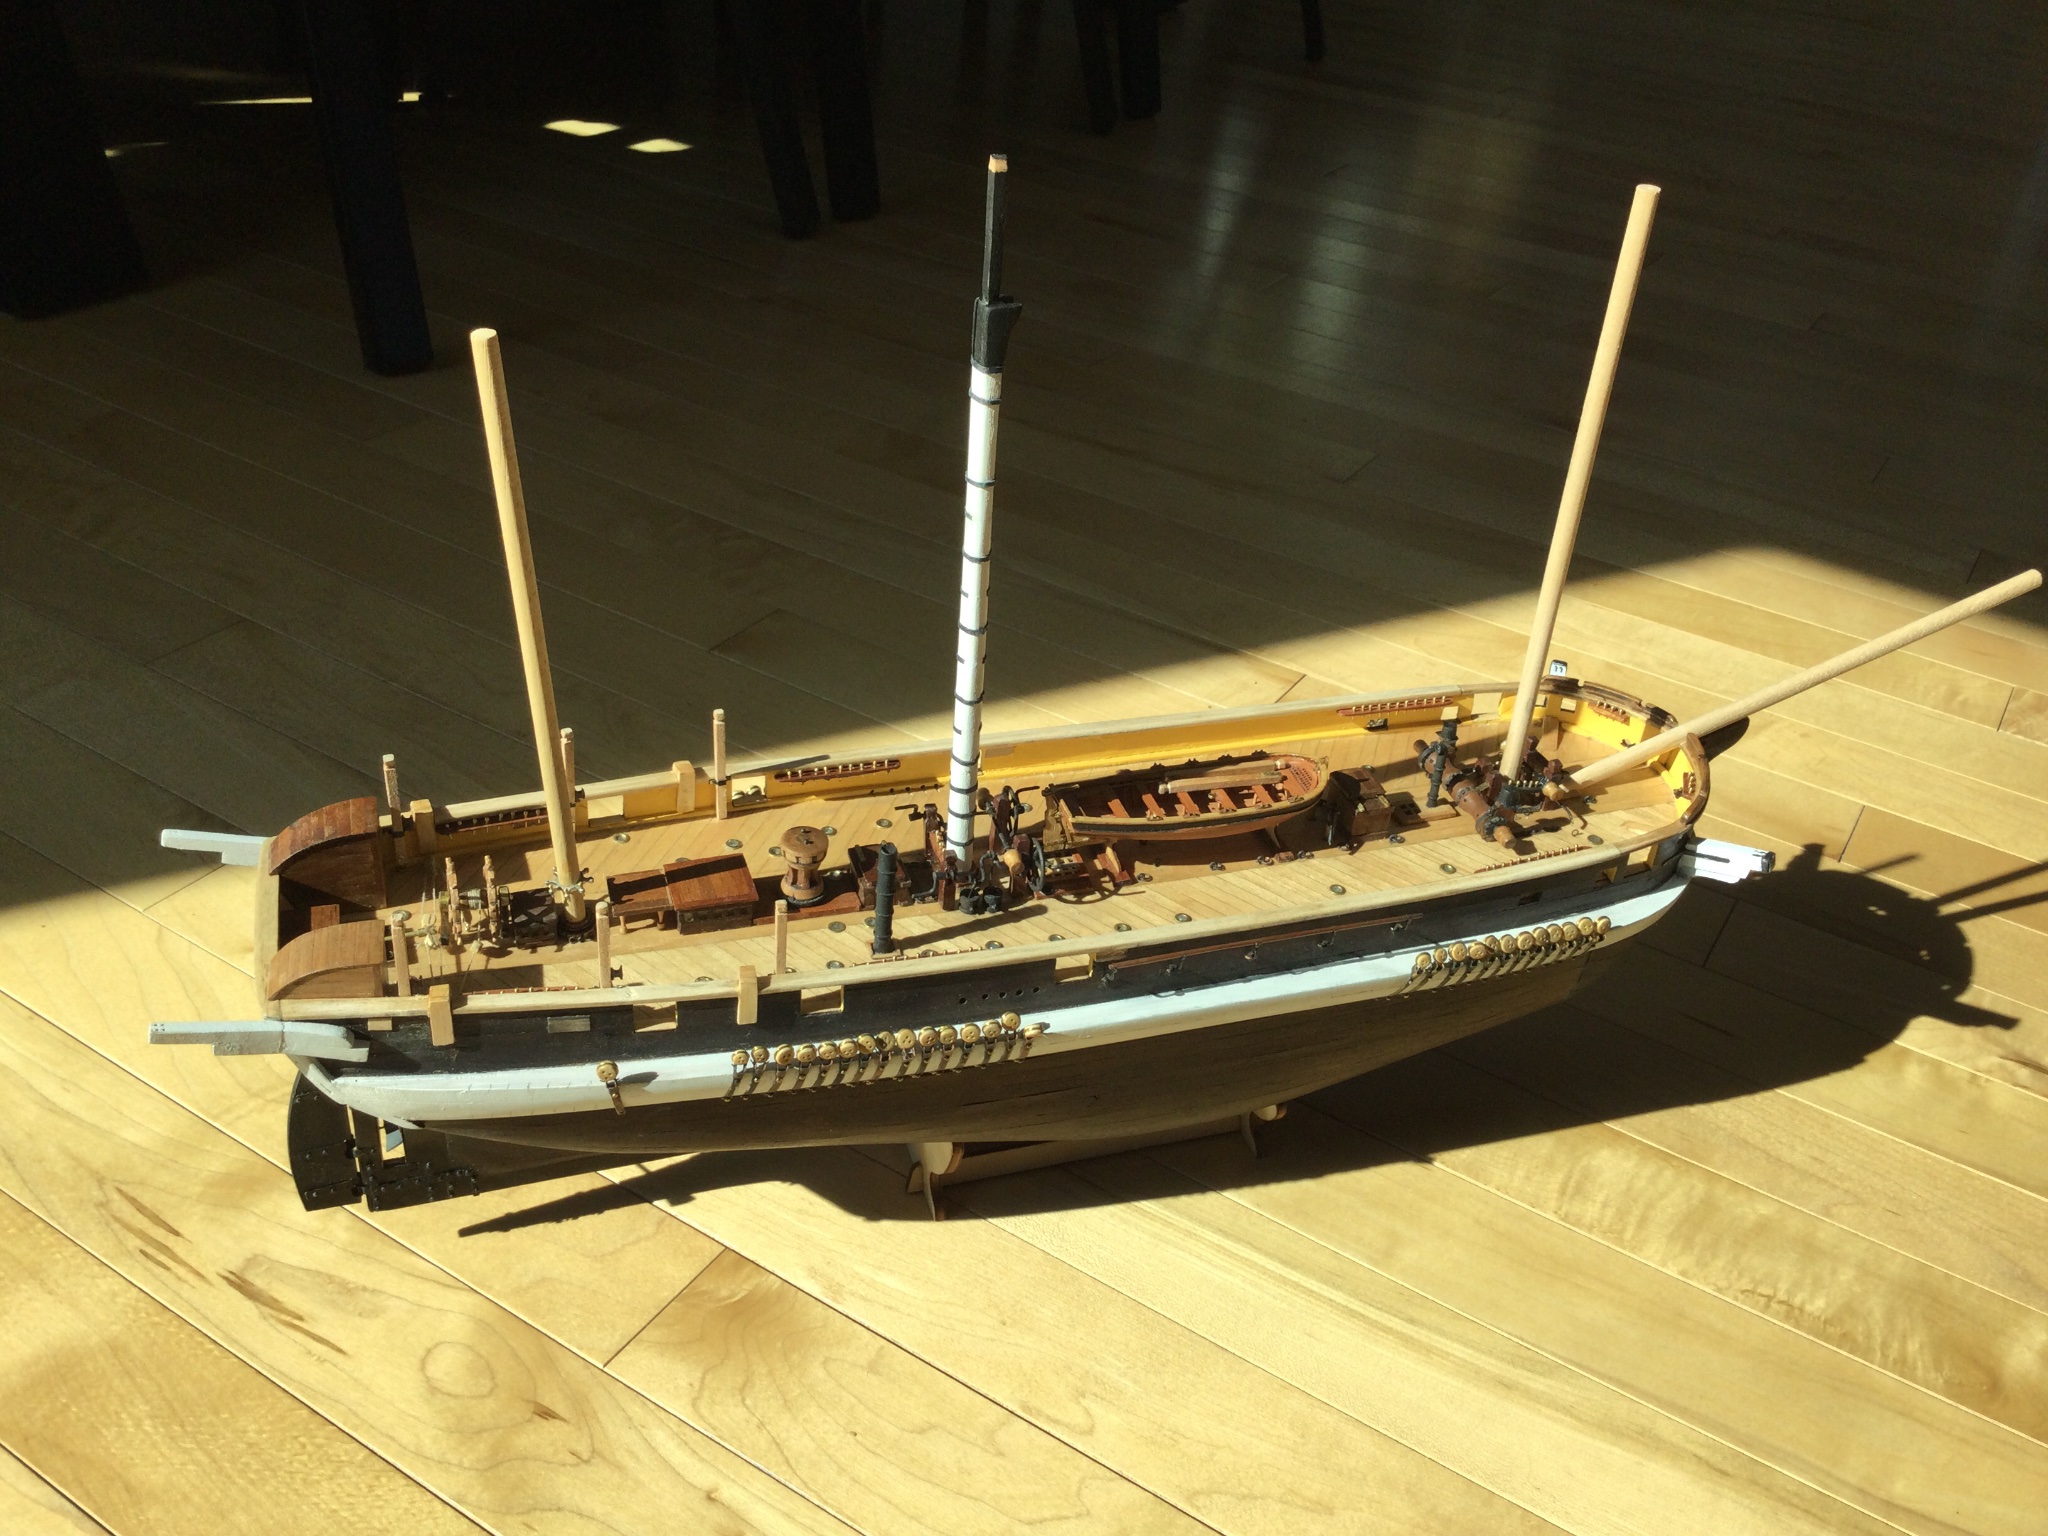
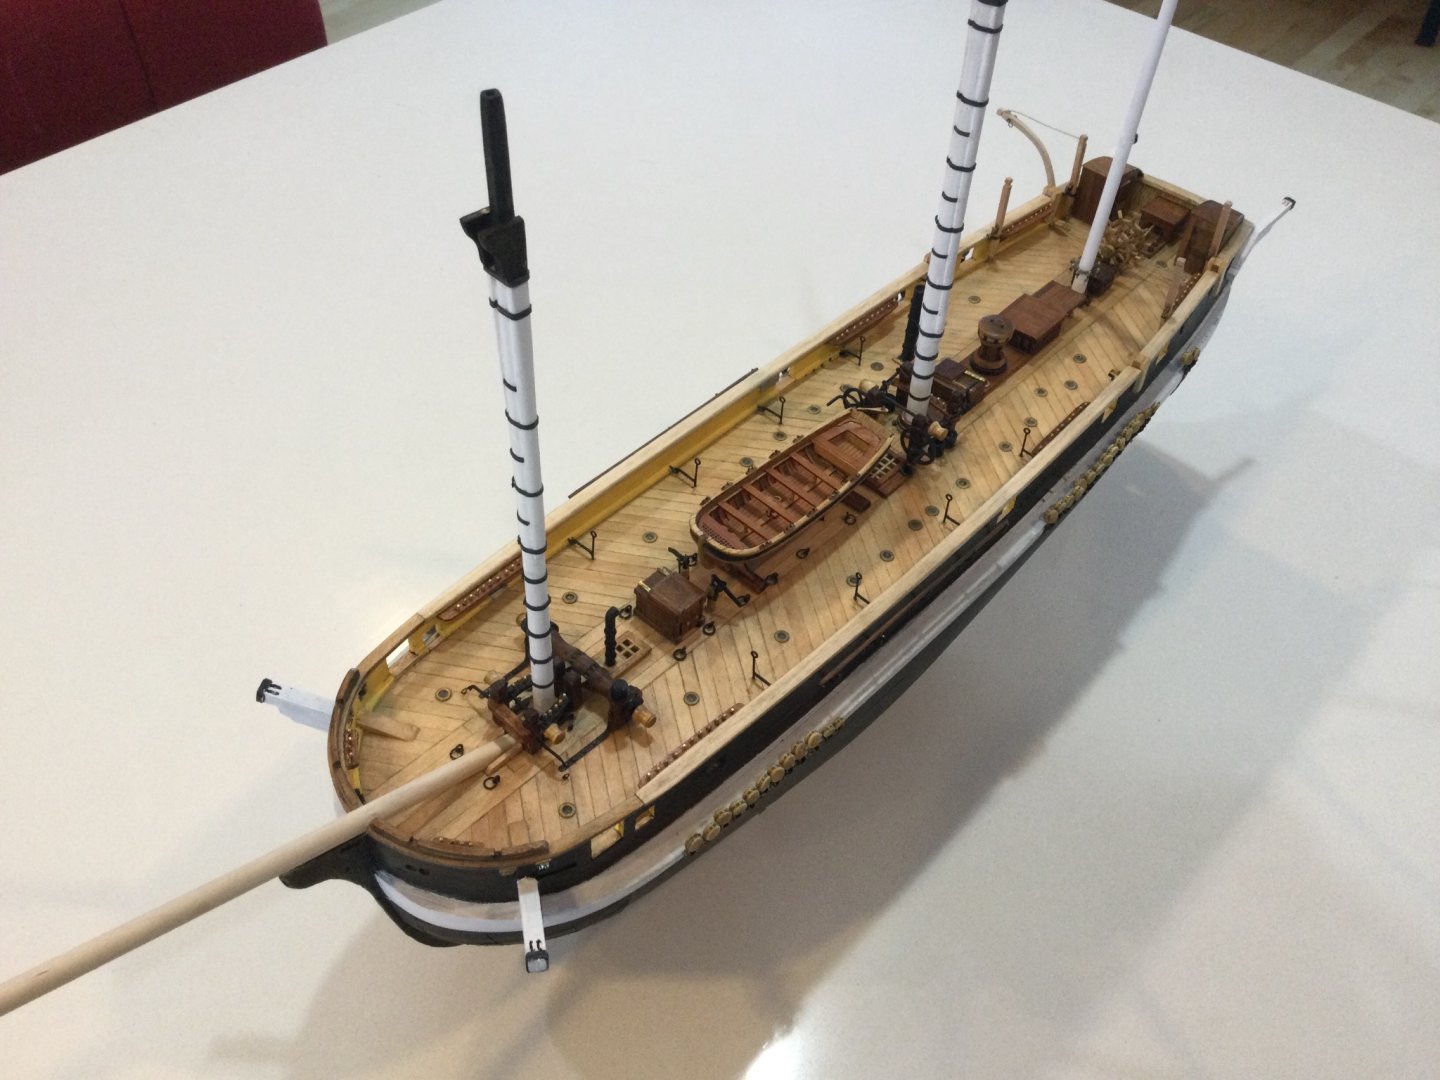
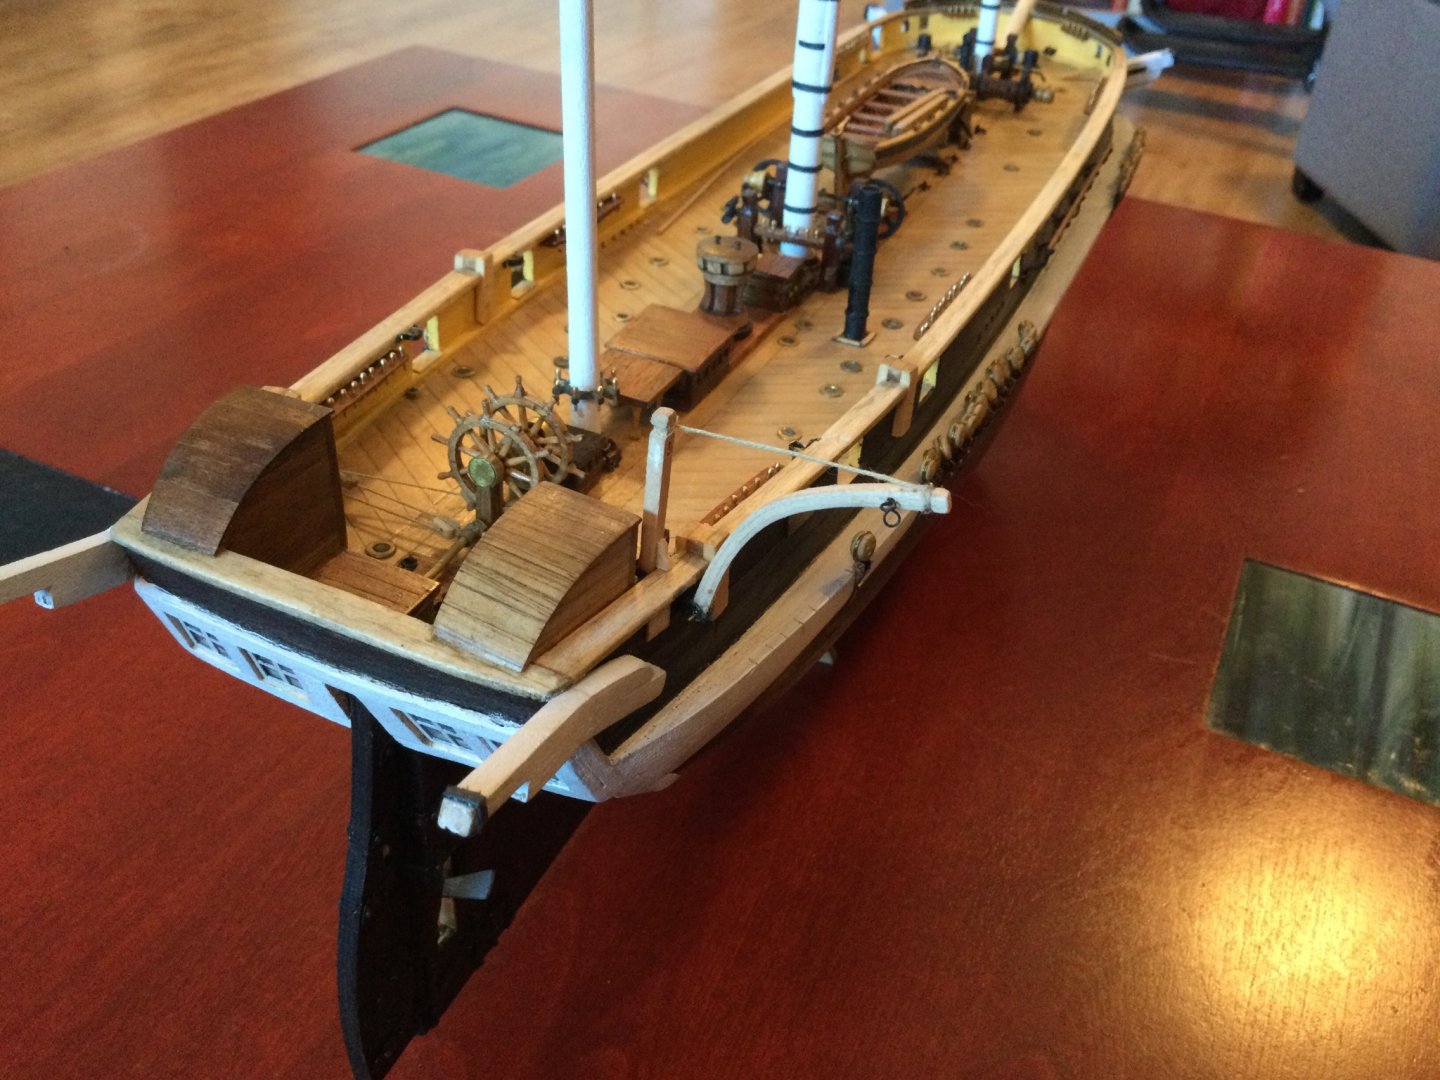
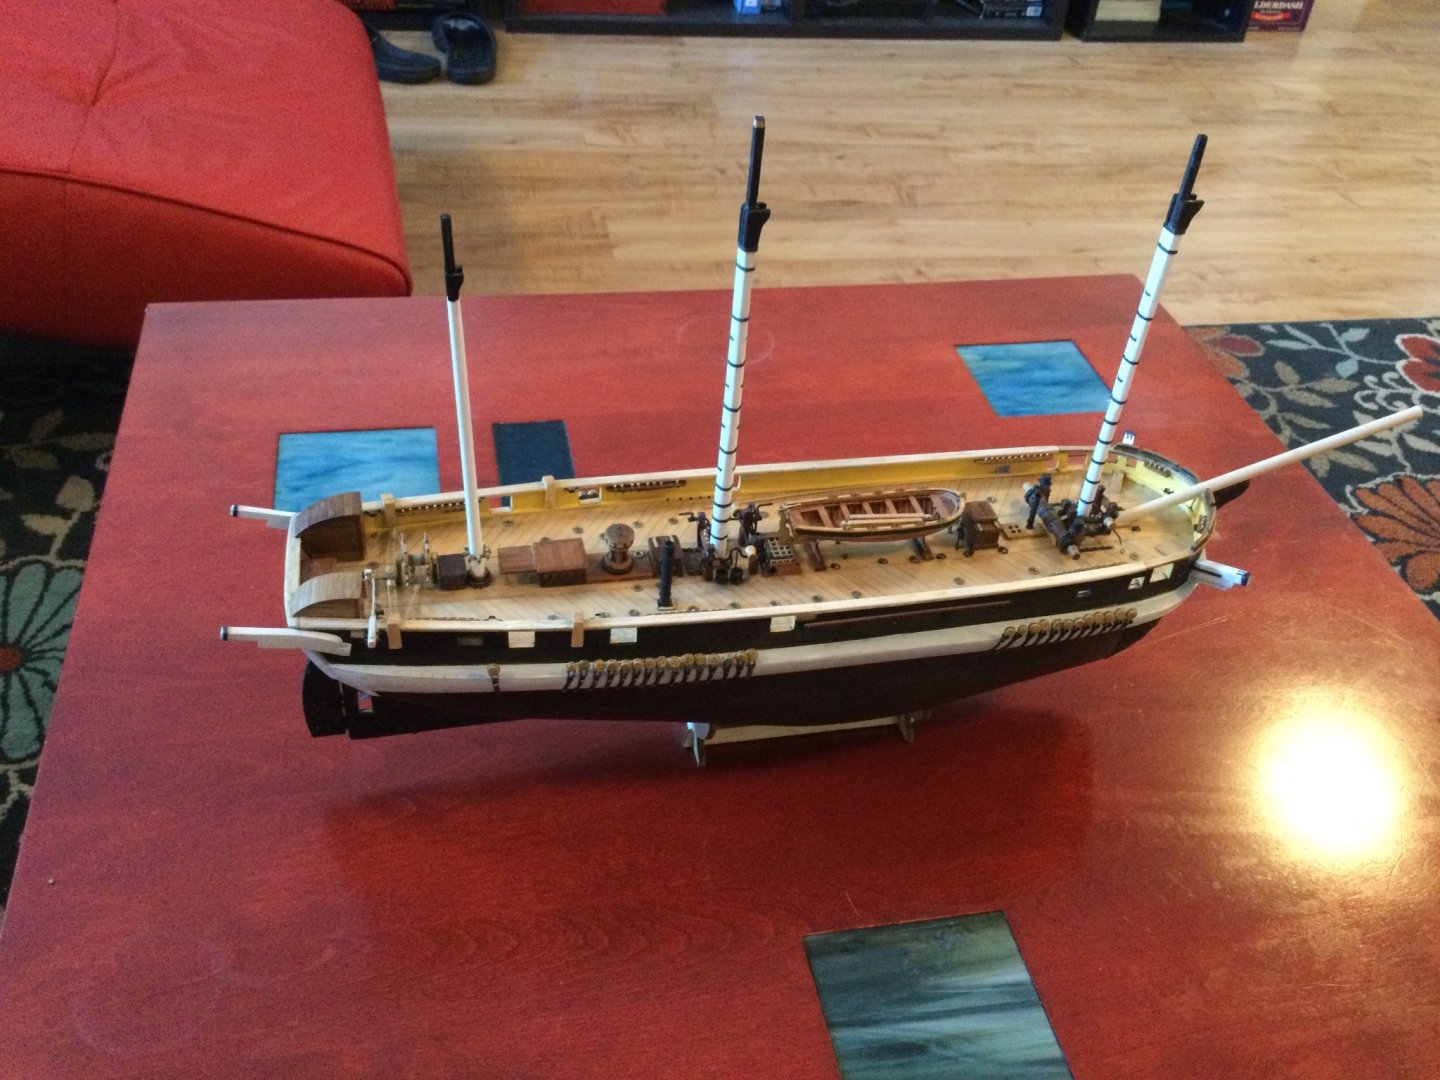
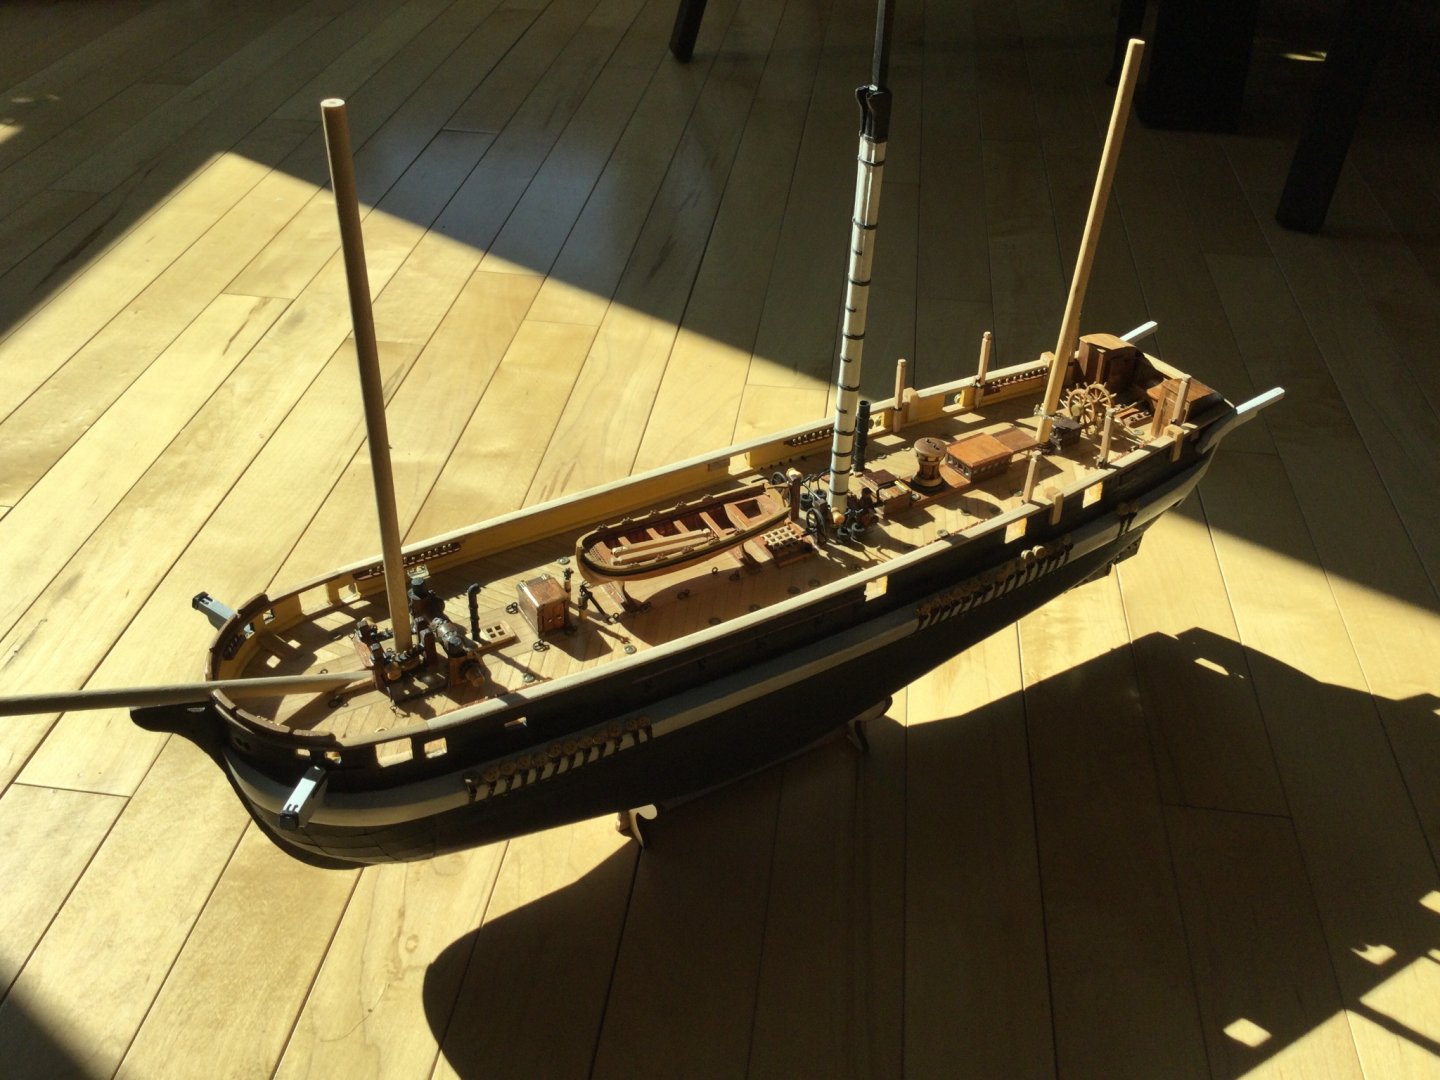
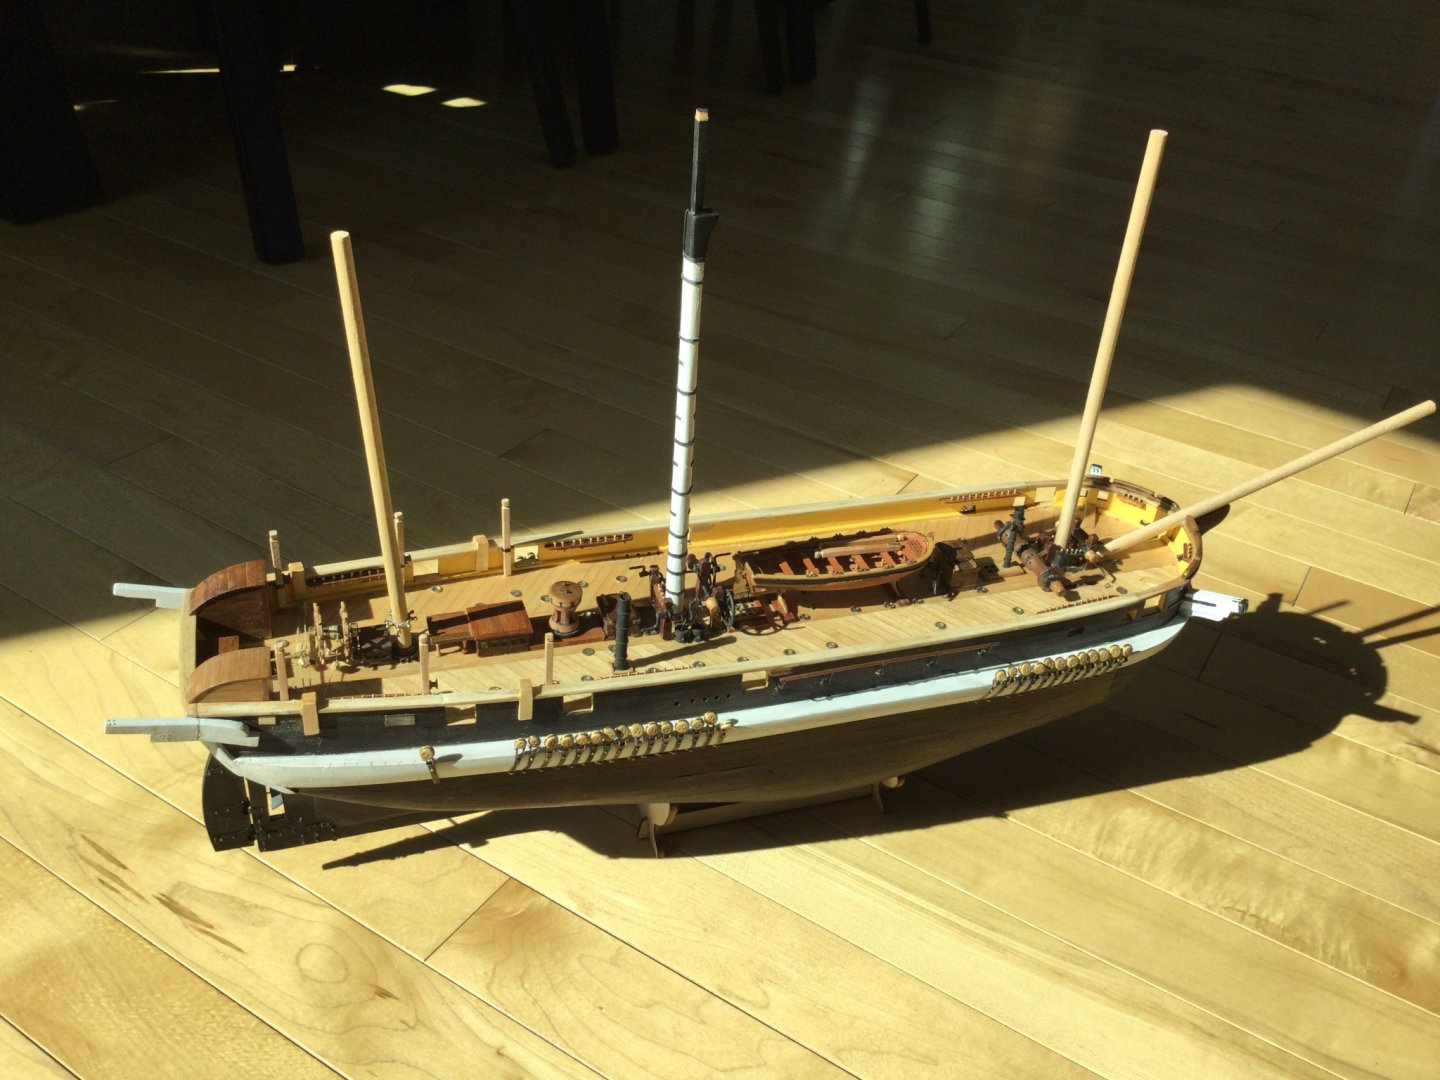
I haven't been making a whole lot of progress on my model, but I thought I'd post what has been done so people don't think I've given up. Lately I've been working on the boat davits: They are highly-detailed little pieces and I've run out of the 3mm square light-coloured wood so I have only made eight out of twelve of the vertical posts. They fit into little sockets I have made from slices of brass tube, and brackets on the rail made of brass strip. I've also made the actual davit arms, which I bent after steaming them in the rice-cooker and laminated, but I'm leaving them off for the time being because I still need to make the brackets they fit into. Using "Lee's" book, I worked out the taper ratio for the lower masts, and tried it out on the main mast first. I thought it turned out OK so I proceeded to apply the hounds and cheeks, and paint, hoops, and bands. It think it looks pretty good so I will proceed with the other two. I don't have a lot of time for model-building lately, because of work, but I spend a lot of time reading Lee's and thinking about how I want to depict certain parts. I like photographing the model in the sunbeam through the kitchen window, now that it's early spring and the sun has come back.
-
Ships vs Boats
Keith S replied to Mike from Aus's topic in Using the MSW forum - **NO MODELING CONTENT IN THIS SUB-FORUM**
Next debate: Is a Jeep a big car, or a small truck?