HOLIDAY DONATION DRIVE - SUPPORT MSW - DO YOUR PART TO KEEP THIS GREAT FORUM GOING! (Only 36 donations so far out of 49,000 members - C'mon guys!)
×


Keith S
-
Posts
339 -
Joined
-
Last visited
Content Type
Profiles
Forums
Gallery
Events
Everything posted by Keith S
-
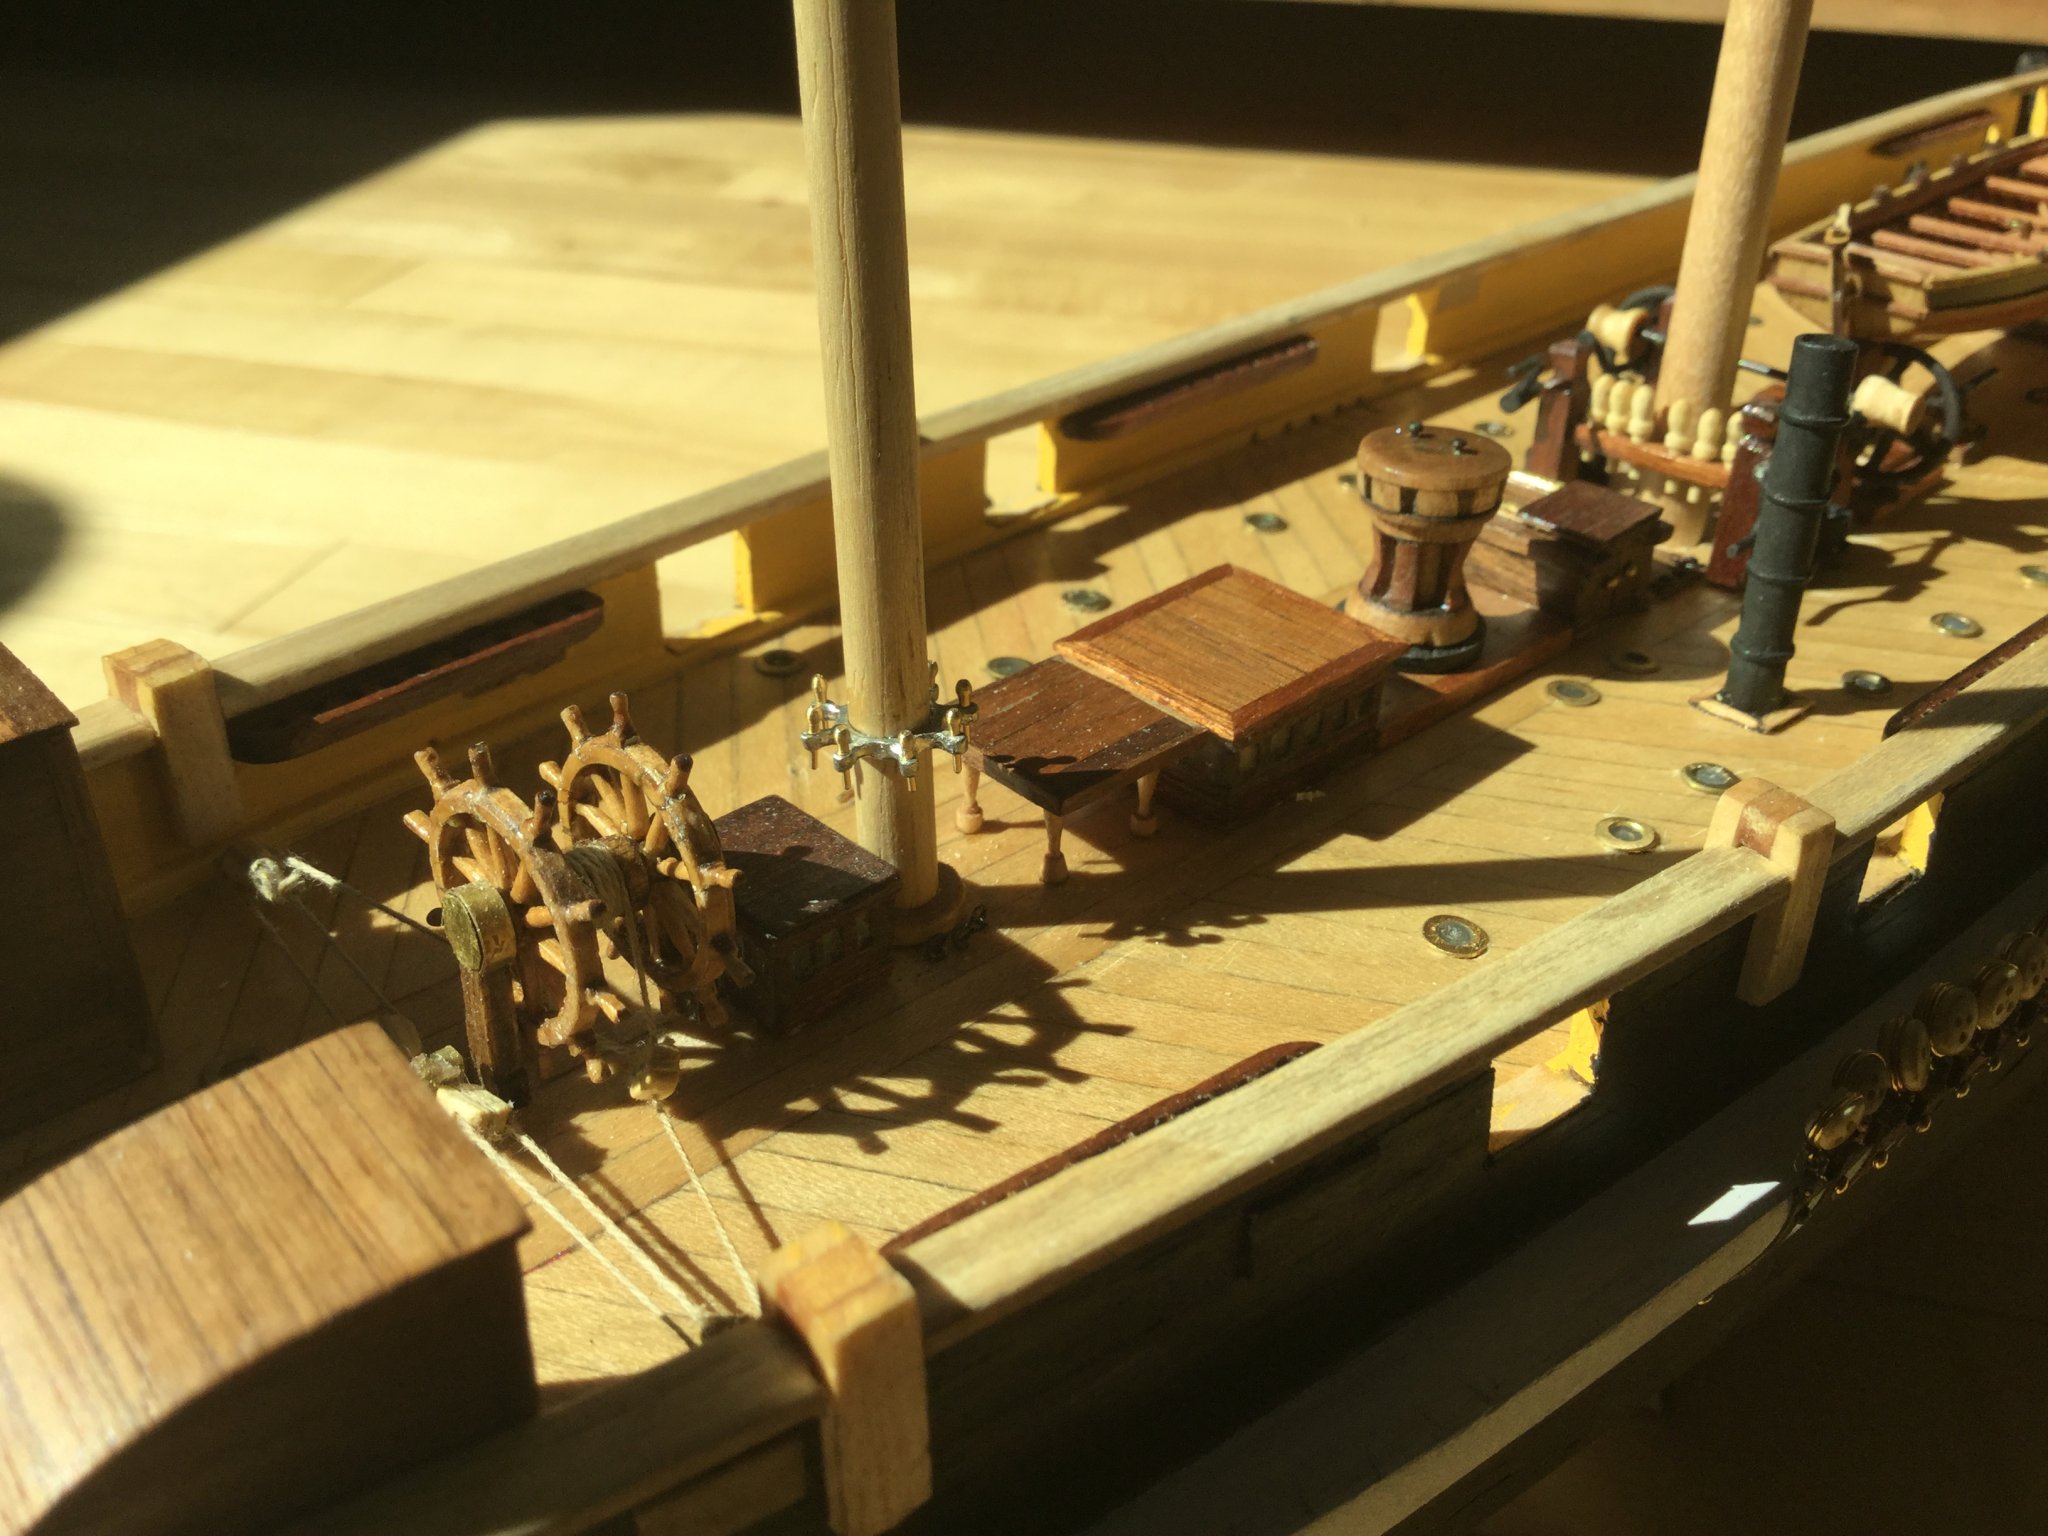
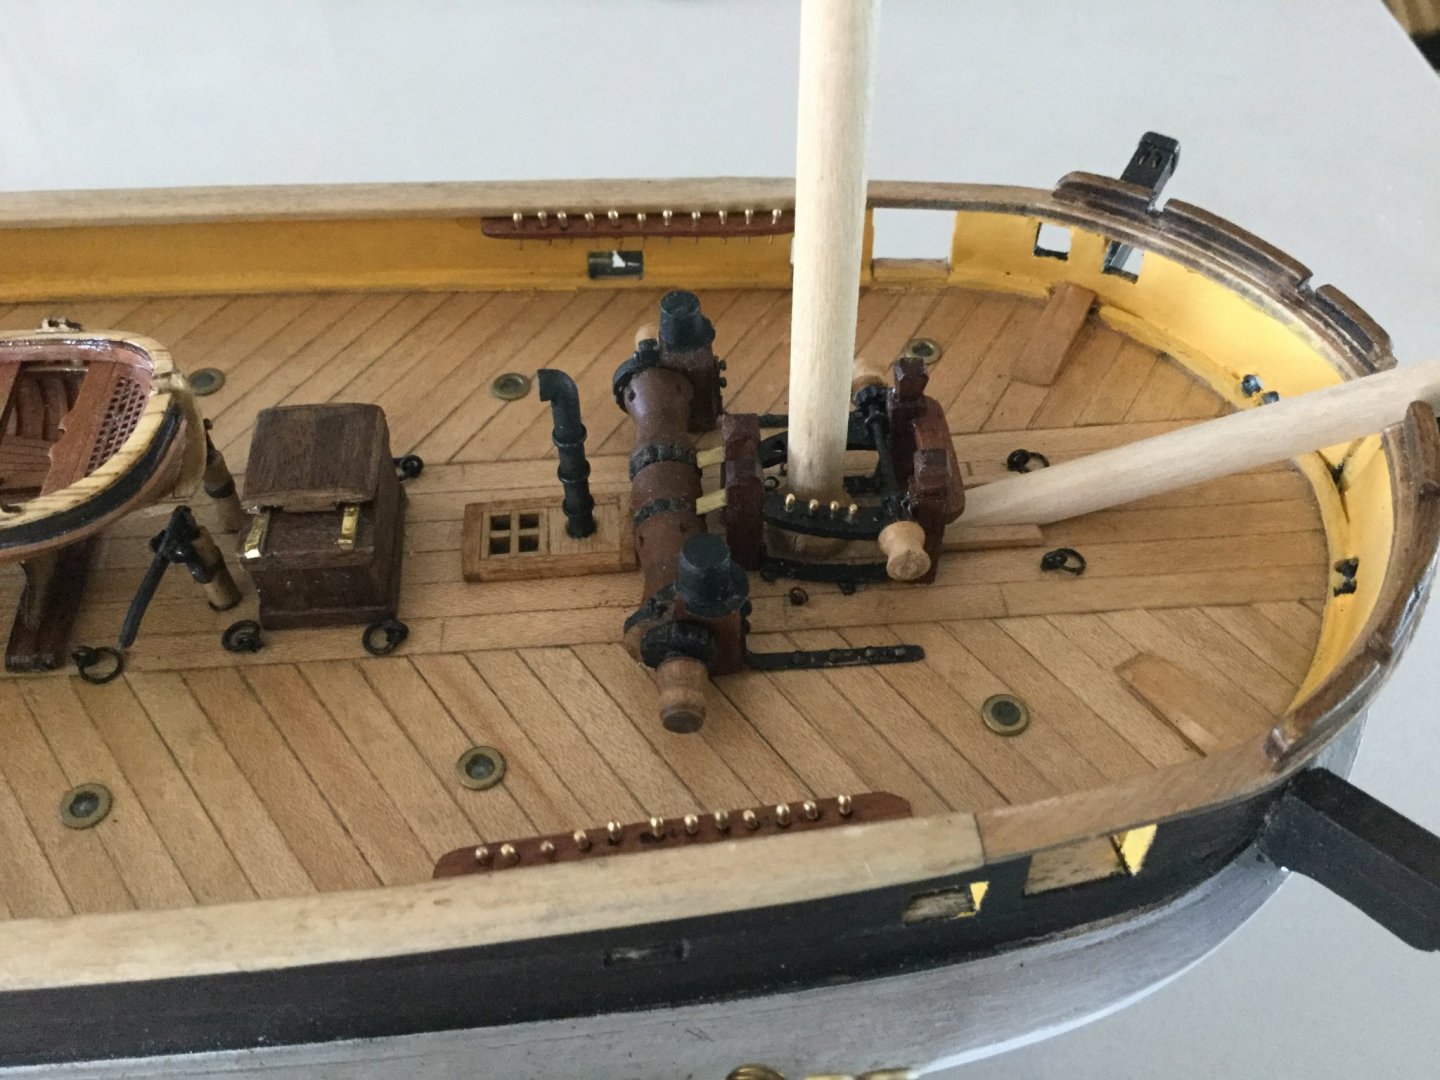
The reason I'm worried about the book is that so far Canada Post has been doing quite well; everything else has arrived surprisingly early. I don't like ply either. There are a lot of ply parts around the bow, such as the bulwark tops and the wooden fairleads on either side of the bowsprit. As I get better at building, I become more fussy about my early work, which leads to a lot of tearing-off and re-do-ing. I have resolved to leave the bulwark tops alone however as this would be a level of tearing off that would be pretty heartbreaking. Speaking of which I am in the process of tearing off all the fife-rails and pin racks, because the holes in the previous ones are so big, the 5mm belaying-pins fall right through them. I've done the more difficult ones: the main-mast fife-rail was the worst because I had to rip off the pump shaft supports, re-make a new pair, and reinstall with the new fife-rail. The foremast ones are an integral part of the windlass assembly, so in this case I cut little plugs out of the old pins, used them to fill the holes, and painted over them. I think it looks quite good. Among other things there is now more room for tweezers between the pins, whereas before they were crammed into place with no room between them. In 1/75 scale, the belaying pins provided in the kit would be the size of a man's leg in real life, so this is worth doing. Here are some pictures. One must bear in mind that in 1/75 scale, where a grain of dust is the size of a snowball, there are going to be a lot of imperfections that aren't visible to the naked eye. It would be very impolite to press uour eyeball this close to a person's model in real life. This doesn't seem like a huge step forward, but I am now fairly confident that my model comes close to the real ship in terms of location and number of belaying-pins.
-
Most excellent and much appreciated Keith-thanks! I am in the midst of tracking down my rigging book. I am not going to let Canada Post get away with losing my stuff. It was sent from an American bookstore, and they used Federal Express, with a tracking number and the whole thing, but it handed over to the Post Office at the border and disappeared into thin air. I have documentation from the American side proving FedEx did their job. Now it's on to Canada Post. I hate them. Worst part of being Canadian. Other than the weather.
-
Thanks guys for your encouragement. The spider band is just friction- fit on there for now. I'm planning on trying to yellow it a bit with a felt pen and then varnishing it, which hopefully will make it look bronze. As for squaring the tops- I this is especially necessary now, not just for appearance, but because the kit's fittings won't fit the larger diameter spars unless I do. It would be a lot easier to know what to do if the post-office hadn't lost my book.
-
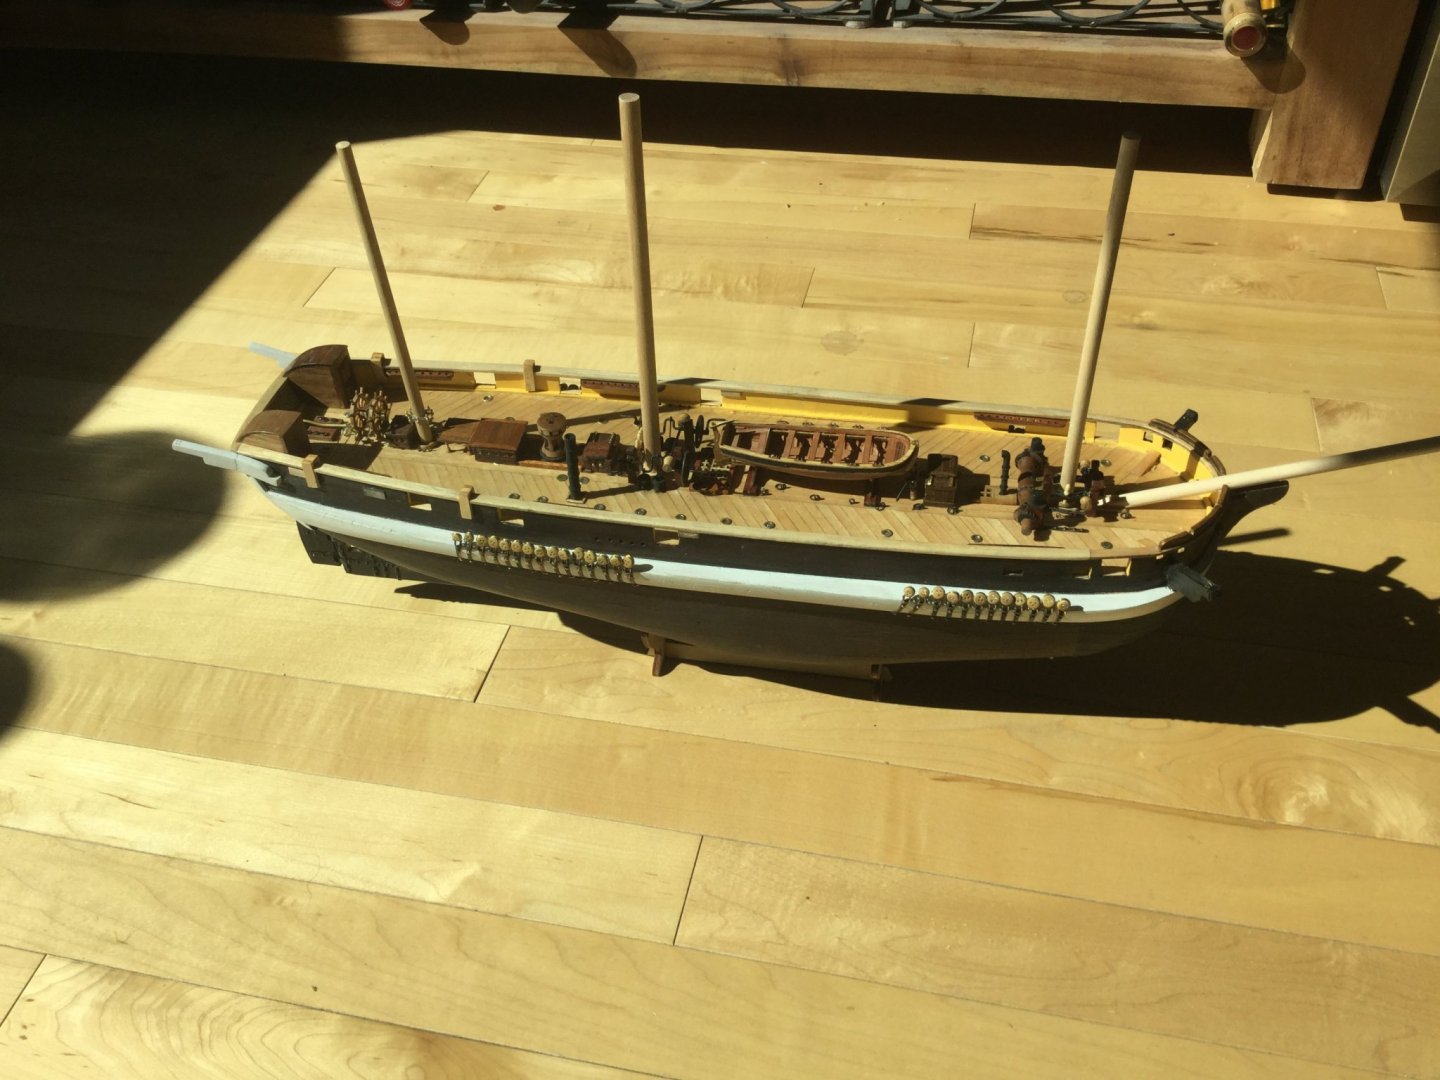
Wow, well after all my melodramatic whingeing yesterday, I actually found myself in the basement today looking at the dowels I ordered to replace the spars on mini-Terror. Right then! It turns out the model LOOKS much better with the proper-sized masts. I've replaced the bowsprit, fore, and main. The main is 8mm and the fore&sprit are 6mm. The mizzen is the same 5mm dowel that was provided in the kit. I addition, I took some needle files to the rather chunky-looking spider band and put proper-sized belaying pins in it. What a difference. The model is transformed with these improvements. I guess I never realized how much I hated my home-made over-sized spider band. Now the aft skylight looks much more like the real thing.

-
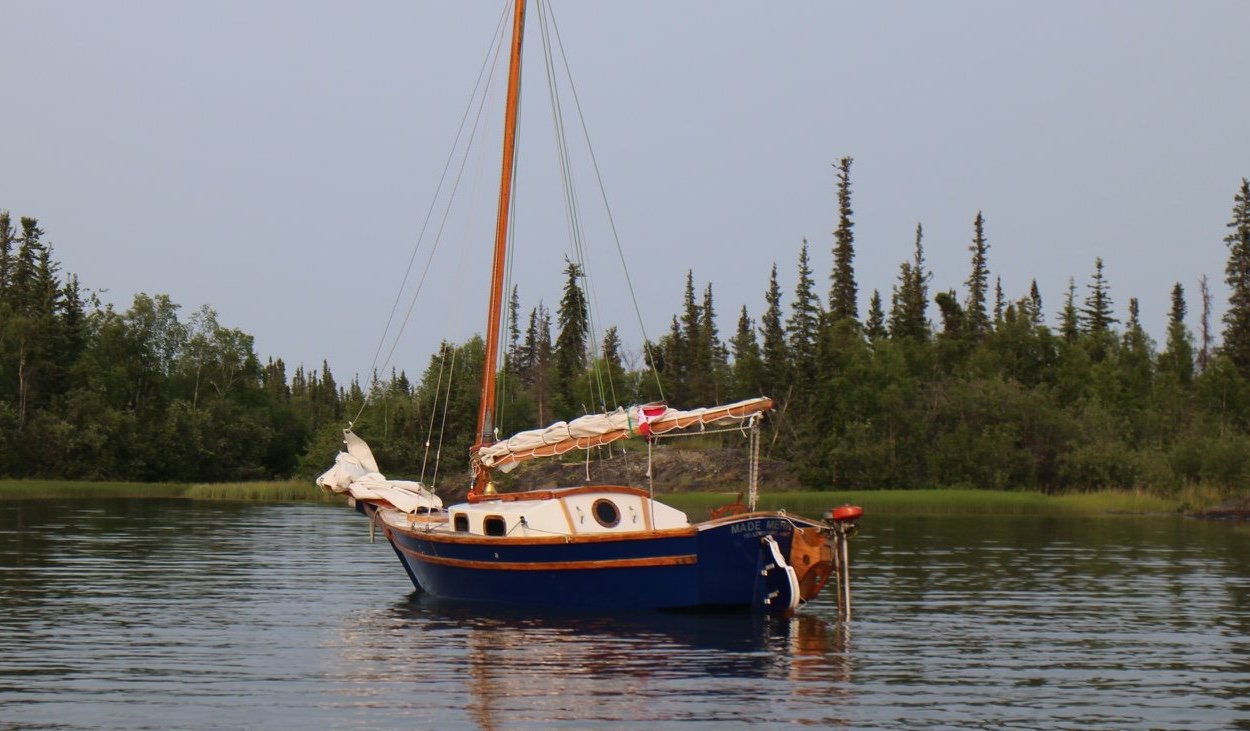
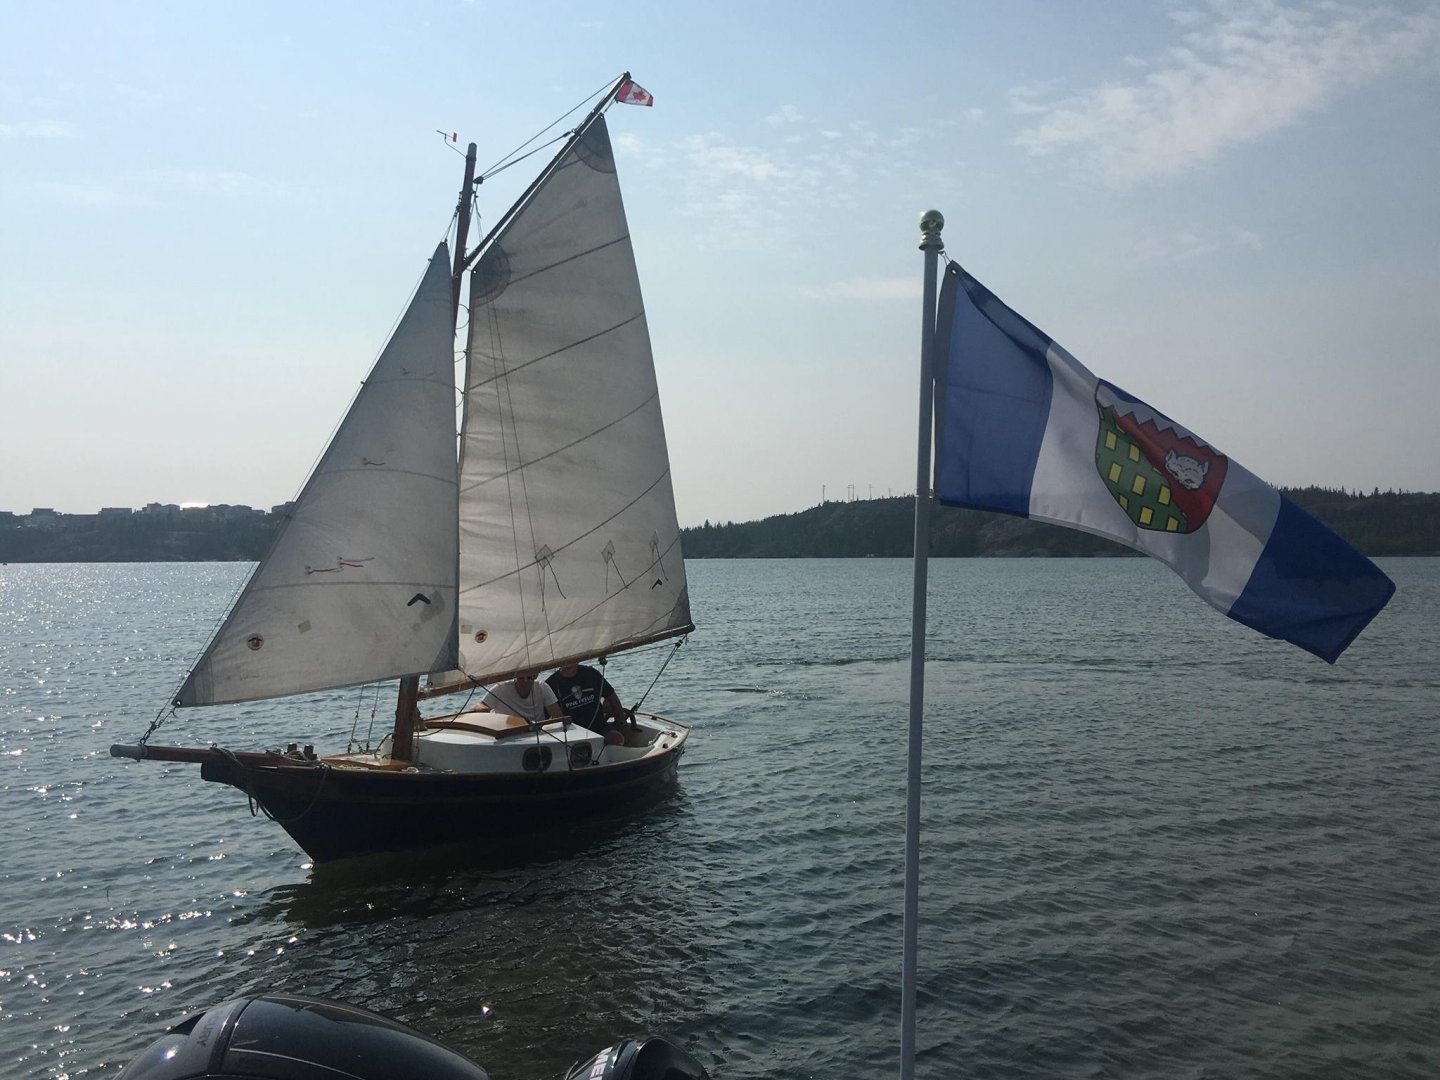
Hi Keith, I'm just doing a bit of spring maintenance on my little "Weekender" which is a small amateur-built from American plans with a flat bottom and hard chines rather like a decked-over dory. She has a four-sided mainsail with a gaff and a small foresail. I've modified it from the original design with a deeper fin-type keel, like a fixed centre-board. It was designed to be easy to build and easy to sail and isn't a very impressive boat really but I've had her for 18 years now and I like her well enough. I've stuck an old "Neptune" 1.7hp motor, built in the 1940s, on it for a bit of fun. Right now I'm just scraping and varnishing in preparation for the summer. These boats are roundly disparaged by fans of "proper" wooden boats, but I've always had a lot of fun with her. I stay out of deep water (usually) and just poke around the islands near shore. I'm probably not going to wait too long before working on Terror again. I just received a lot of the extra details I ordered at once, and NOT the book about rigging, and was feeling a bit snowed-under.
-
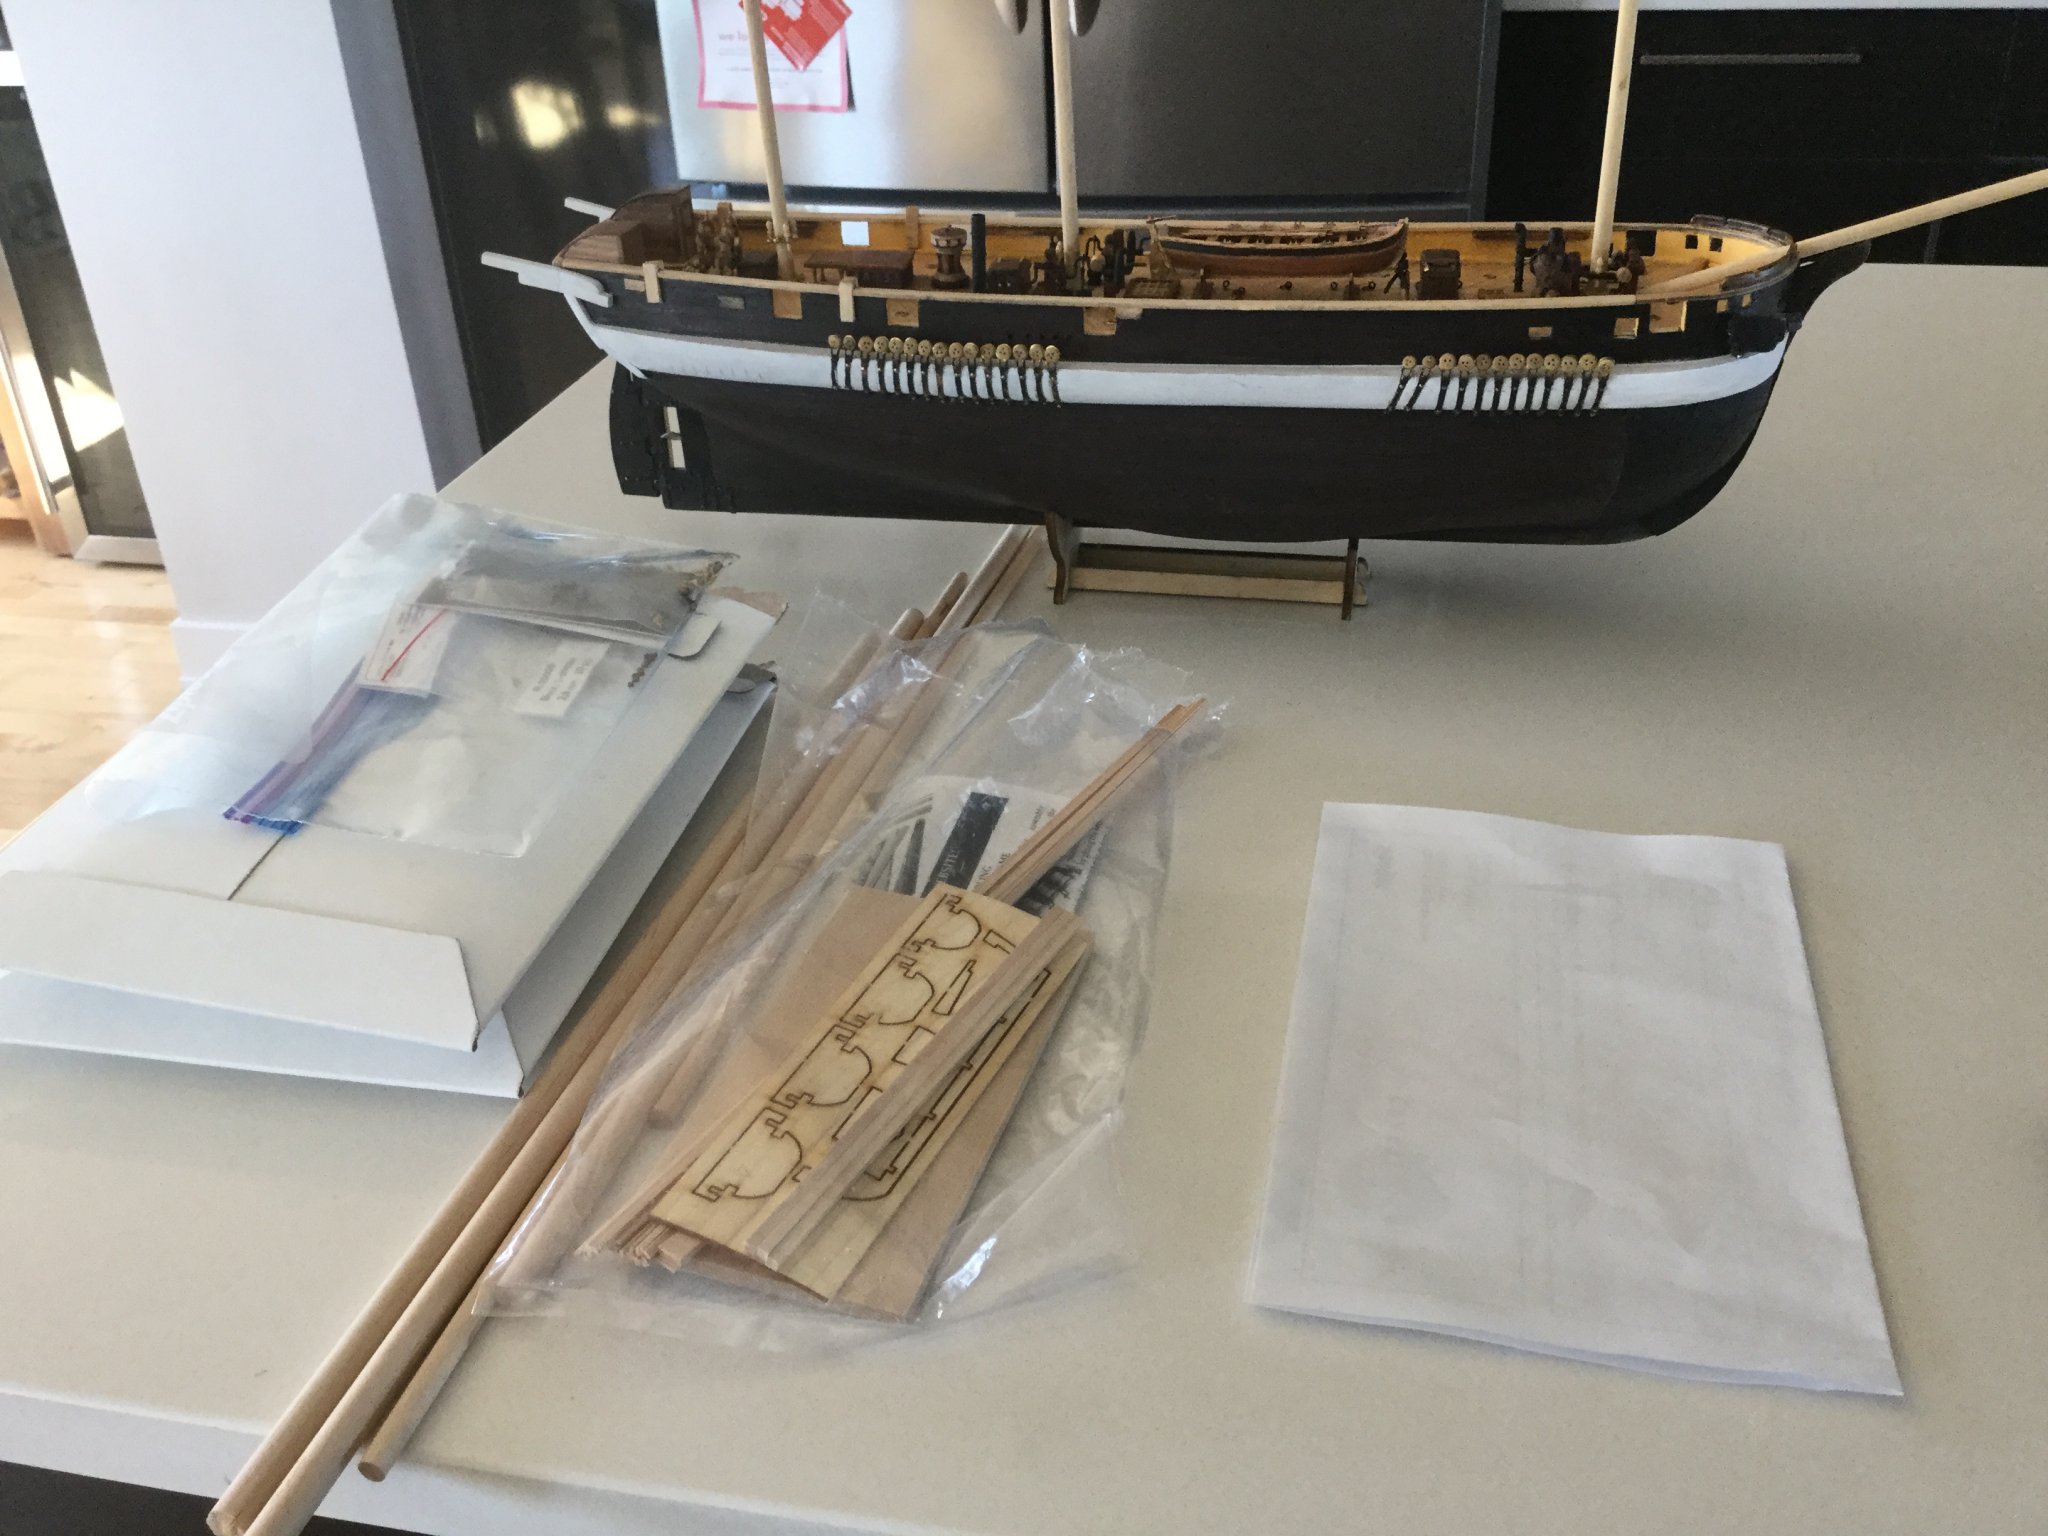
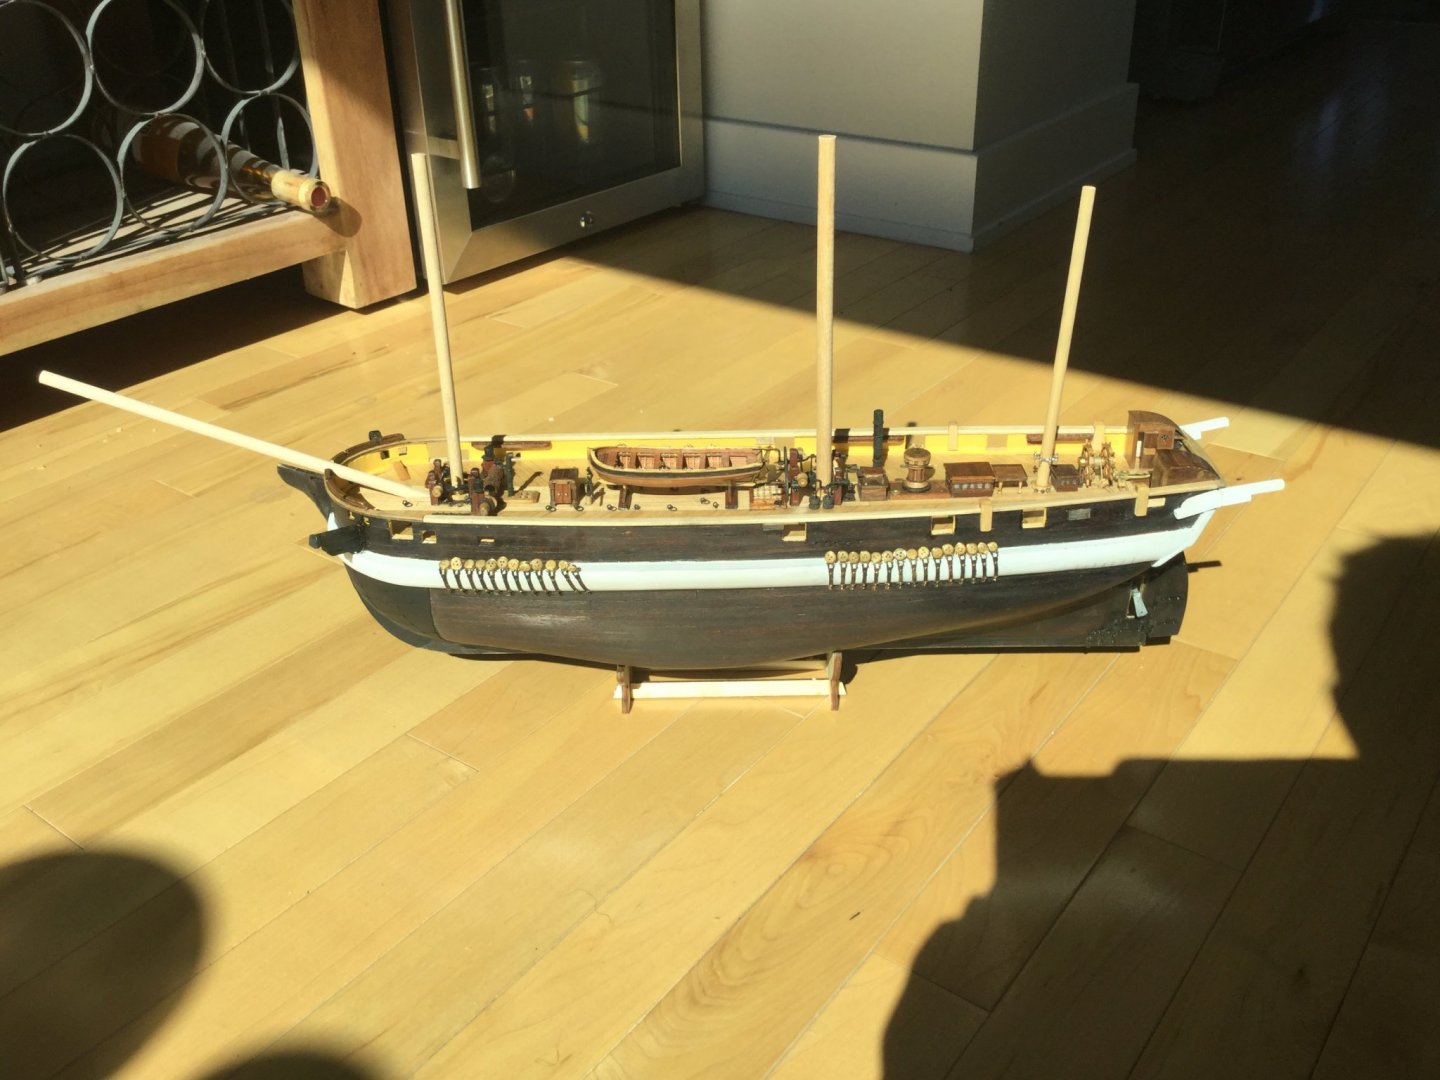
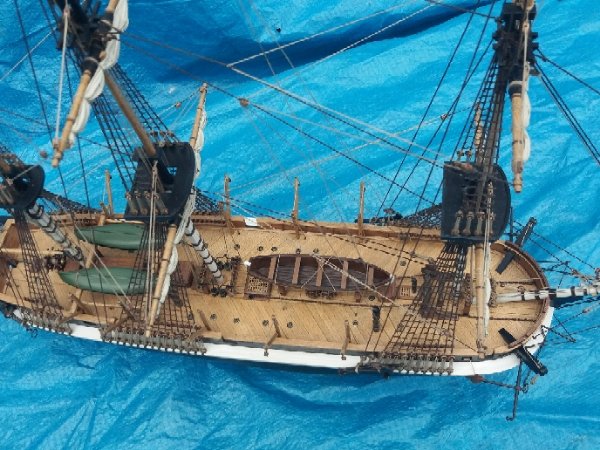
It think I'm going to take a bit of a break from building this kit. For one thing, it's now Summer and that season only lasts a couple of months here in the subarctic. For another, I feel like I need to step away from the model because I've become a bit neurotic about it. I have become very particular about the accuracy of the model, and I've learned a lot about the real ship. I've just received all this crap in the post, and it's proper-sized masts, proper-sized belaying pins, proper-sized blocks, all of which will require a lot of work to remove from the model and replace with the correct ones. The block and tackle I built to tie down the boat turns out to look very over-scale, and in fact a 5mm block, which is what size they seem to be in the kit, would be about 15 inches in real life, which is pretty big for little tie-downs. Also the rings on deck they've used to tie down the boats in the kit are not there for that purpose on the real ship. I believe that line of rings along the deck on either side are for tying little "snubbers" to the anchor chain. I have two more Master Korabel and one Model Shipways boat to build to replace the metal ones The holes the masts are stepped in will need to be enlarged on the fore and main, All the pin-rails and fife-rails will need to be pulled off and re-made for the smaller pins AND it seems the book I ordered on rigging has been lost by Canada Post, seemingly. Altogether, it looks like doing a proper job on this kit is going to stretch into years of fiddly building. I intend to finish her, but right now I need to step away and re-align my expectations. If anyone is planning on building this kit, I think it's a fine little model for what it is, maybe a beginner's boat, but if you are looking at the "Victory" by Billings, or one of the little Revenue-cutter kits that seem popular on this website, and you think your "Terror" would look nice with THAT level of detail, you're going to be scratch-building everything from the deck up. I'm beginning to feel a bit exhausted by it, and a bit frustrated by the nature of the research that went into the production of this kit. Between the missing parts, oversized hardware, undersized masts, wrong assumptions, and shortcuts, I am feeling a bit overwhelmed trying to work out what measurements to trust and what not to trust. How do we REALLY know how TALL the masts were? They got the diameter wrong. What else don't we know? How much more research will be required to find out? When I first started this model, I thought it would be easy to simply build it like it says on the tin, with a couple of minor corrections from Mr. Betts' research. Well it turns out this is more like scratch- building a model ship, and I'm starting to understand why there aren't very many scratch-built Erebuses and Terrors: It's because it's a "Master's Thesis" level of rooting around (in the British AND Australian sense of the word) and squinting through a magnifying glass at some dockyard matey's scrawly 19th-century handwriting on a shipyard draught to find out anything like the mast heights or the hardware installed or how many boats there were, or what colour the captain's hanky was...&c. Sorry this turning into a bit of a rant. I'm still going to finish it, but I'm going to go outside now and work on my real boat, and this will give the various other Keiths who are also working on this model a chance to catch up. I think maybe spending several years getting it right, and only working on it on rainy days, is better than spending only one or two years trying to finish it "on schedule" which is meaningless for a hobby anyway.
-
HMS Terror by Major - OcCre
Keith S replied to Major's topic in - Kit build logs for subjects built from 1801 - 1850
The ones in my kit were wood, too. I did replace the boats with little wooden ones. -
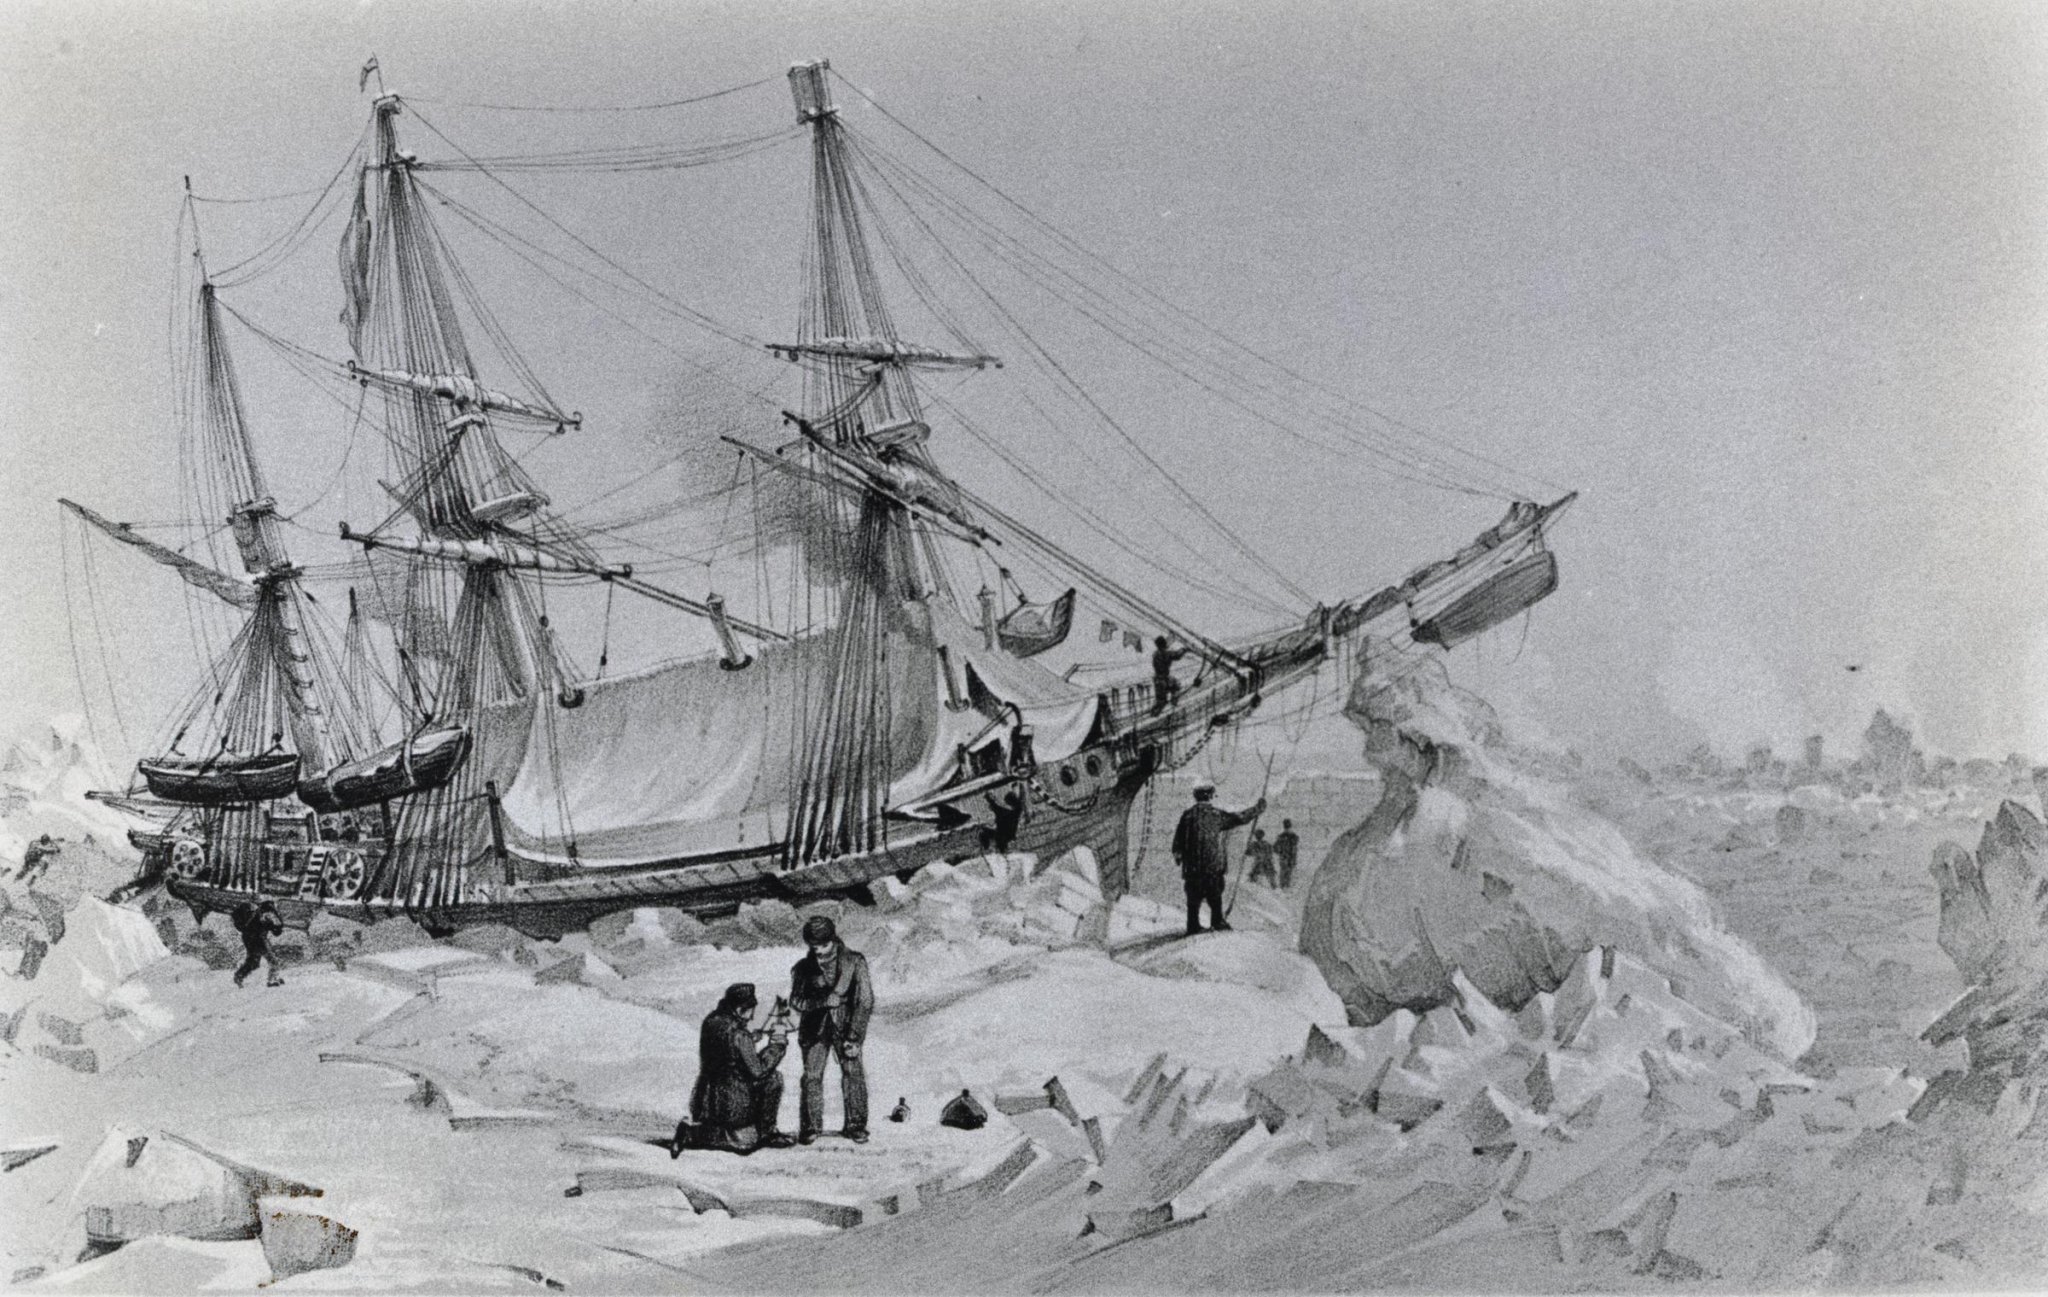
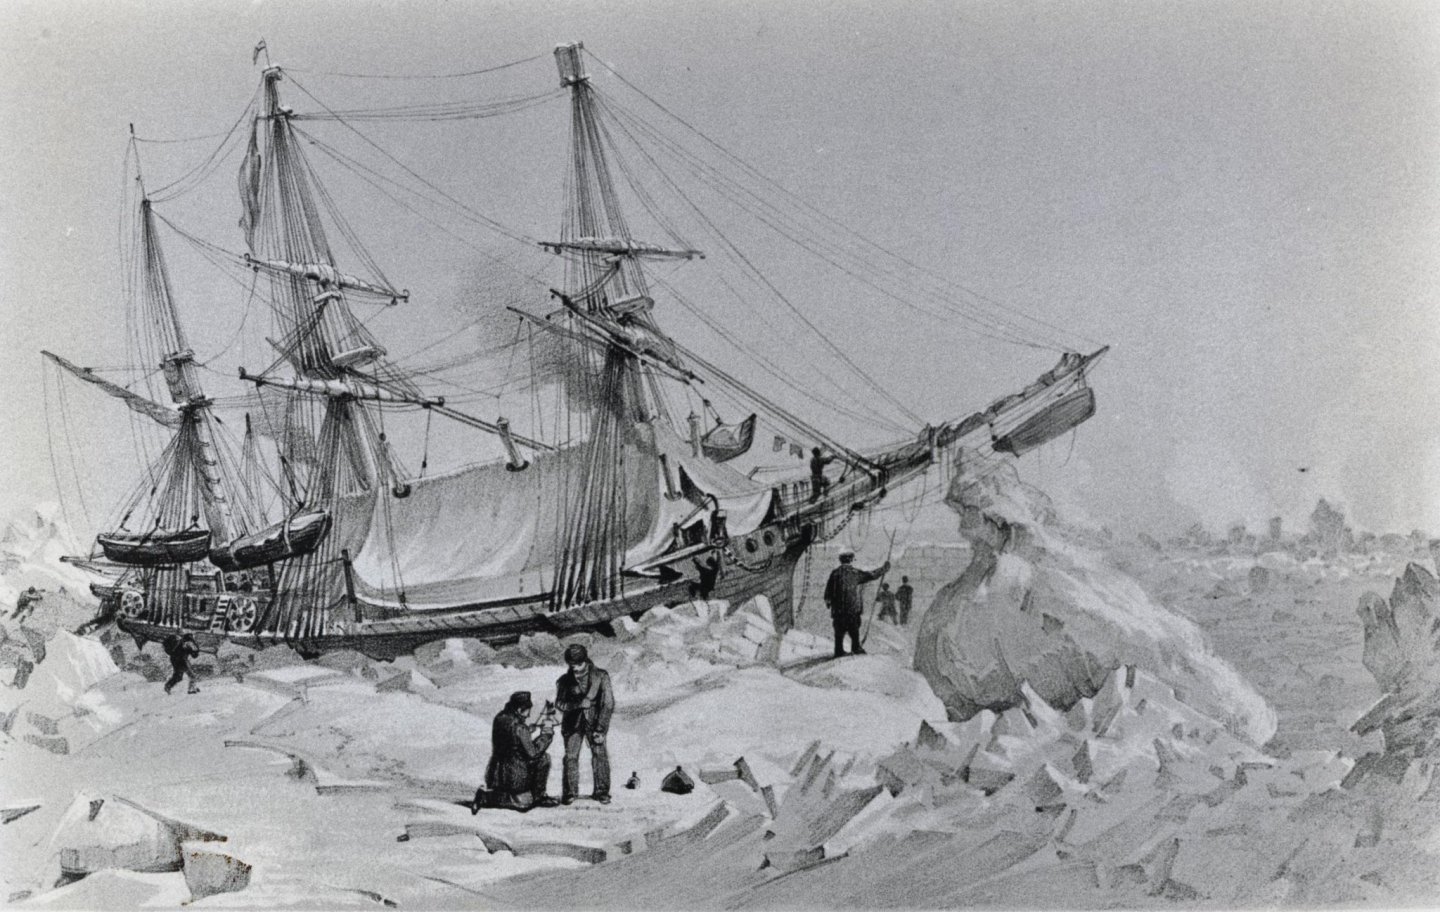
I suspect you're right. Period drawings of the Erebus & Terror seem to depict the furled sails ABOVE the yards. Pictures from the television programme show them BELOW the yards, but they also show the yards at an incorrect height, I think. I will bend my sails to the jackstays. A sketch of Terror on George Back's expedition clearly shows the sails the way you've described. Seems tidier to do it that way anyway. Here's a screen shot from the T.V. show, which I think is incorrect, and a sketch done from the period, which I believe is accurate, especially given what you say about ships from that time-frame. One would expect the expedition ships to have had the most modern rigging. Even their bells had "1845" stamped on them. I think a lot of these old sketches were drawn using a "camera lucida" so they can be quite accurate even though they are hand-drawn.

-
I haven't totally made up my mind. The reason I wanted to do sails furled is because of the steam-engine. It's my impression that the funnel and propeller on Erebus and Terror would have spent most of the time stowed- there is evidence the funnel was removeable and it's a certainty the propeller was. I was hoping to depict the ship in some kind of intermediate state. "Down funnel; up sail"!
-
I'll have to check it out then. I bought some silkspan already for sails. Here is the technique I was considering: https://youtu.be/g_m_VWzk4w8
-
Is it the one using silkspan, latex paint, and water? That's what I was keen to try. I saw a guy do it on his model Terror when I did a search online for "Terror Model" once.
-
I can't tell you why they didn't, but I can tell you why I didn't... I spent a lot of time wondering whether I should be building in bulwark stanchions or planking, and I decided at the time that since I was going to be painting the inside of the bulwarks anyway, it wouldn't improve them to plank and THEN paint, as the planks in the kit are 5mm wide and therefore rather bigger than scale for that part anyway. I also looked at pictures of other ships, like the Trincomalee, and decided that just painting would be better than planking then painting. You can barely make out the individual ceiling planks on the Trincomalee, at least in photographs, with the layers of paint on them. Since I made that decision, however, I have acquired some 3mm walnut planks, which would have been lovely on my model, even under the paint, and I am giving it some serious though now because I am thinking of pulling off the pin-rails and re-doing them anyway. Well, I'm not telling the exact truth: actually I'm only now thinking about doing it because you mentioned it. Edit: now I've decided NOT to do it. Maybe on the next model.
-
I didn't know they did that. I was thinking about ships with the sails bent on, but furled. That's how I'm going to do mine. I didn't even notice the yards were "hoisted" on your Victory. My attention has been on all the different ropes with salty names
-
Also a very common error I see on models is the location of the yards. Where they are on the mast depends on whether the sails are flying or not. I often see models without sails but with the yards hanging where they would be if the sails were flying. The proper position for the topsail and topgallant yards if you're not flying sails is down close to the base of their respective masts. Except the lowermost one; that stays up at the top of the lower mast. I think this is true at any rate. Better check with someone else before you do anything. Disregard if you're planning on having the sails flying.
-
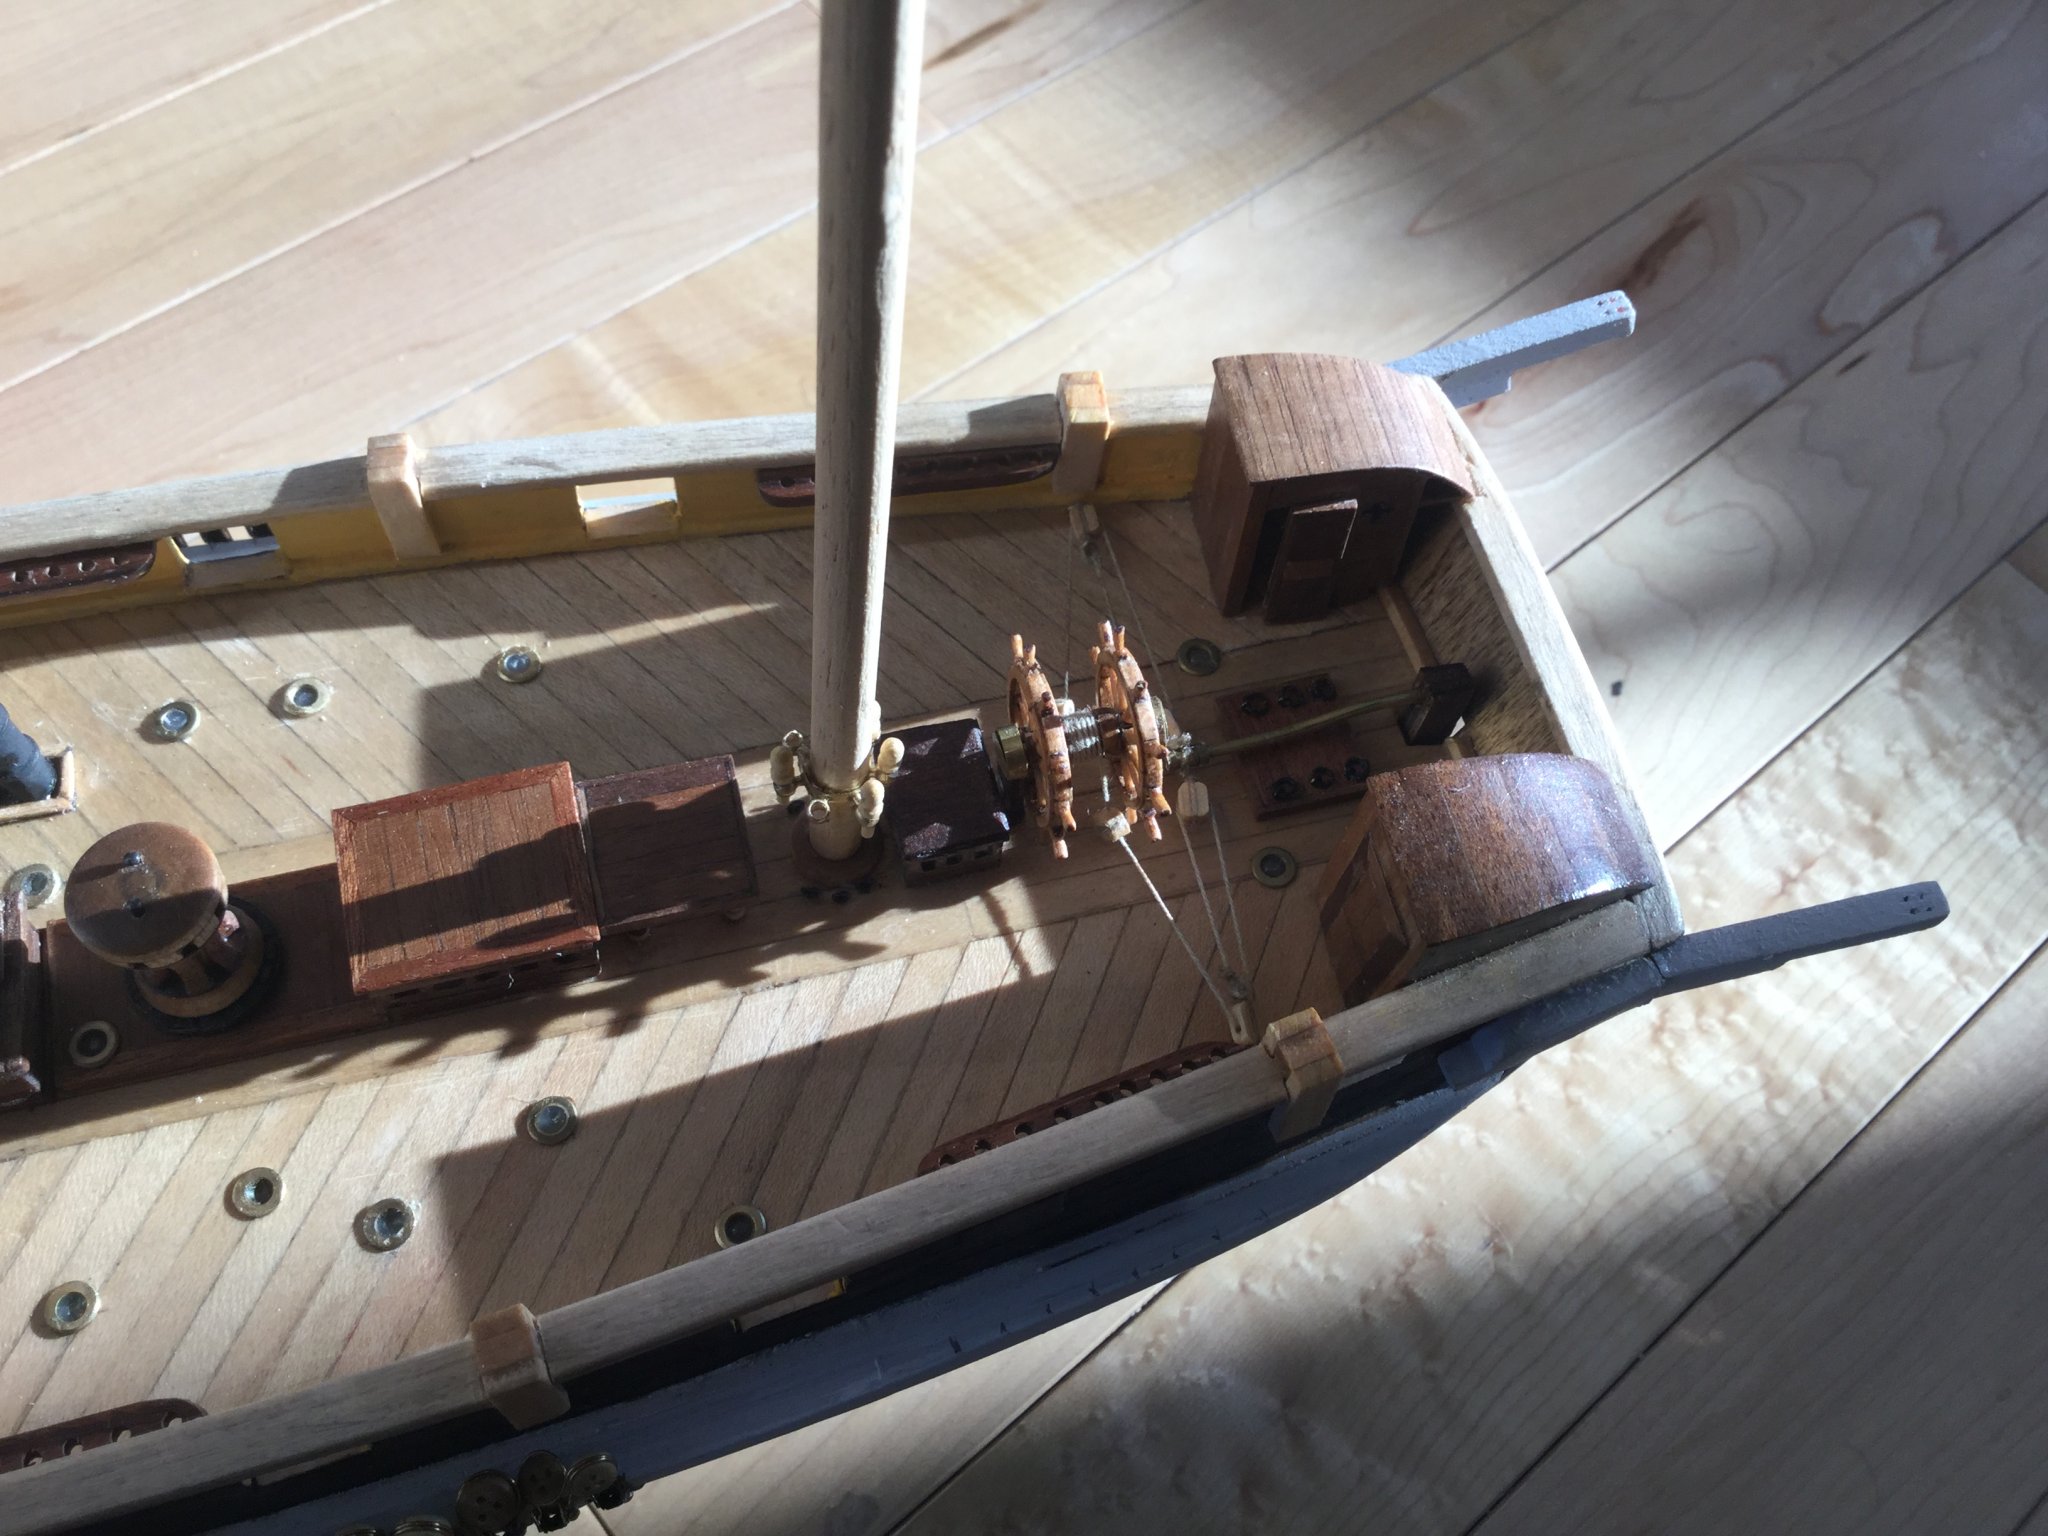
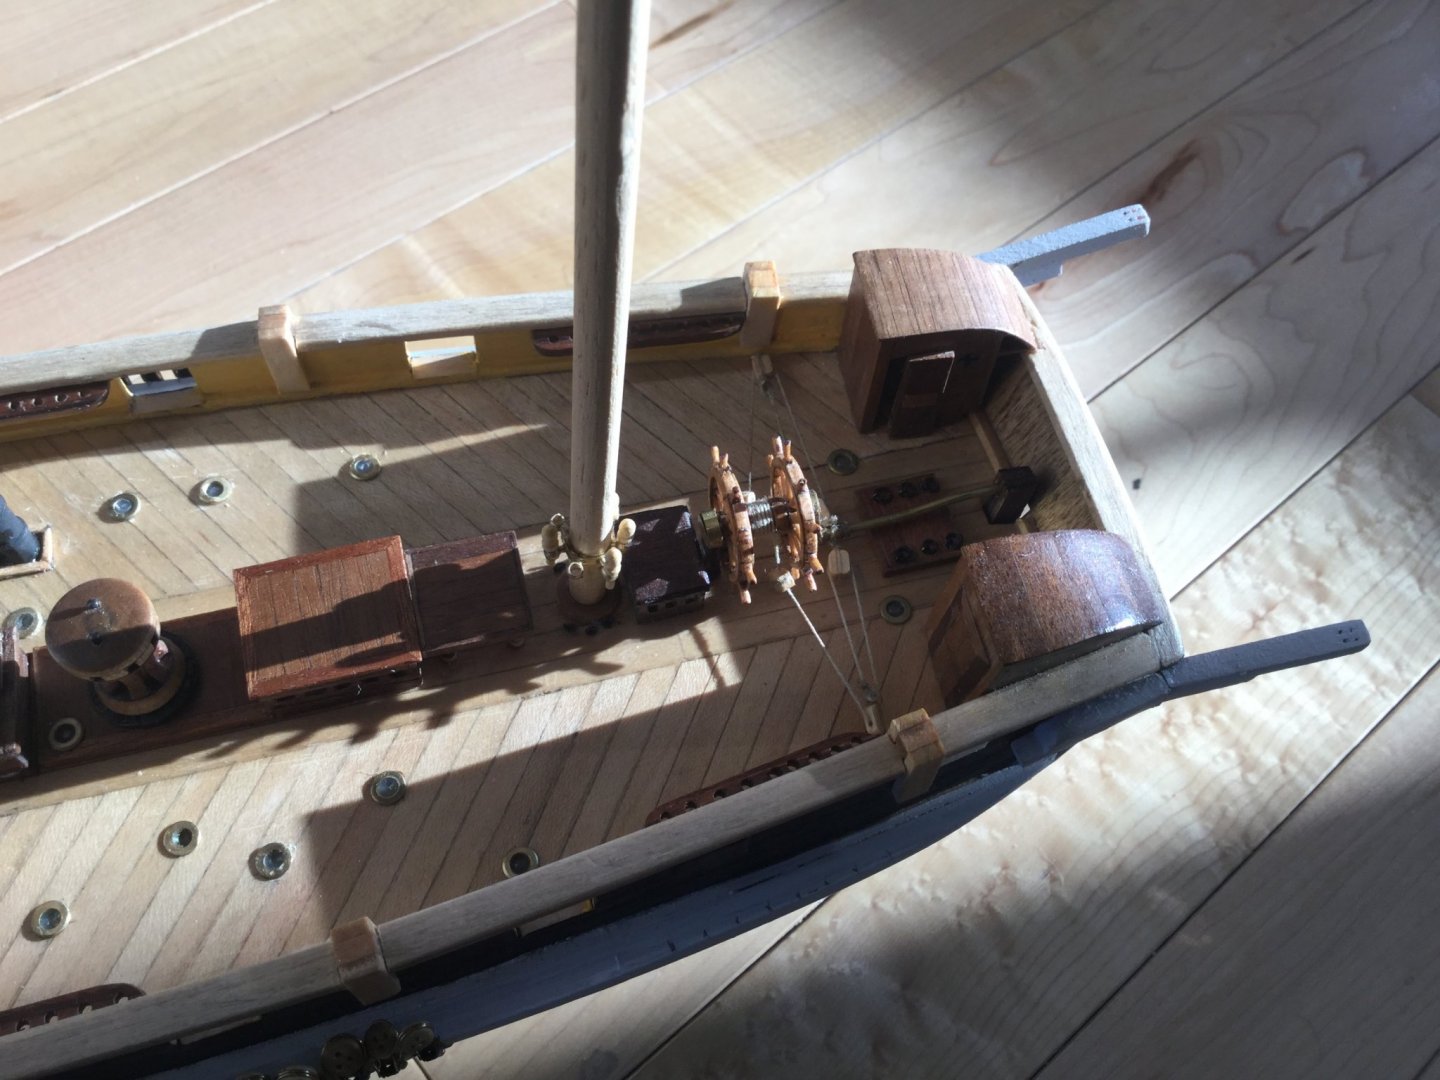
Faced with myriad equally unimportant detailing tasks, I decided to rig the steering lines from the wheel to the tiller. I still need to make the cover over the rudder head. I'm trying to leave the masts alone until I get the book I ordered about rigging and masting. The kit instructions do not include these, but I attached two blocks to the deck under the wheel assembly, which act as fairleads and keep the the cable from fouling itself around the drum. Surprisingly, this all actually works and the rudder will move when the wheel is turned. However, there is a lot of friction because of course the little blocks aren't proper ones with sheaves in them. I put six turns of the cable around the drum, because I seem to recall reading somewhere this was the minimum standard. I'm a tiny bit disappointed with how it looks because I made little beckets on the outboard blocks to terminate the lines, but when I applied a drop of glue to secure them, it took on the appearance of a blob rather than the carefully tied little knots I thought I was doing. It's too small a thing to be bothered fixing though, and probably wouldn't turn out any different a second time anyway. It's an interesting detail.
-
I wish we were neighbours, so we could just talk about ships over the garden wall. Surprise, no surprise. I'm sure Occre just stuck a simplified and generic barque rig on her. I have a feeling the extent of their "research" for this model was a superficial glance at Matthew Betts' blog... and since Matthew hasn't masted or rigged his model yet... Oh well. The research and discussion is proving to be the most rewarding part of building this model.
-
I'm really hoping all this salty terminology will be explained once I get my copy of James Lee's book!
-
Very nice; that looks perfect from here. I have a feeling your model will be the queen of the "Little Terrors" when she's finished. I'm proud of myself for coining that term for the flock of Vesuvius-class ships on Model ship world at the moment... "Little Terrors" ha ha ha. I can't help thinking you've made extra work for yourself by planking the deck AFTER installing the bulwarks, but you know what you're doing. Probably all part of a clever plan that will cause me to cast an even more jaundiced eye on my own model than I already am. I didn't realize that book was out already. Is it worth ordering? Does it have pictures of anything we haven't already seen on the news? I'm a bit cynical about the reporting we've seen to date. It seems like the archaeologists are interested in completely different things than I am. I want to see the engine-room! That's bound to be utterly FASCINATING but no-one seems to even consider that it might be of interest to someone. I do tend to be impatient.
-
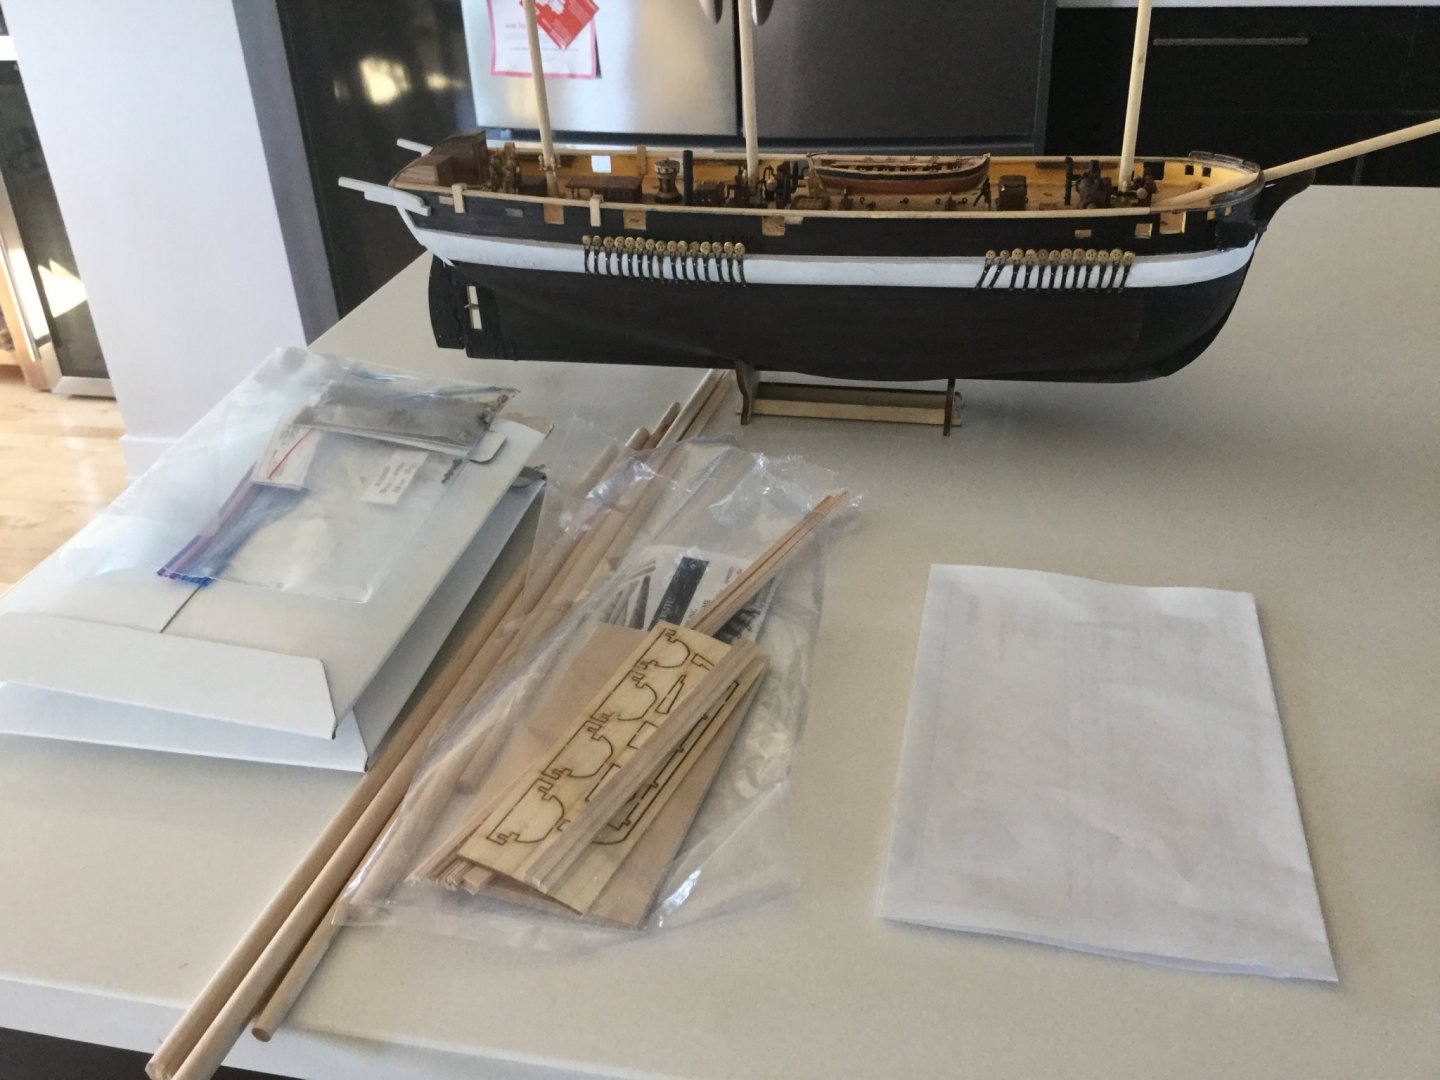
In my kit there was the photos, a view of the deck from above in 1:1 scale, and some rigging diagrams. There was another booklet containing a materials list and some instructions. There were no blueprints. The blueprints I have been using are a copy of the real ones, which I ordered from the British National Maritime Museum. On their website, they offer a service with which you can choose a document from their collection and they will copy and print it for you. They have a few blueprints of "Terror", but you have to be aware that "Terror" was very modified from her original version that no complete blueprints exist of exactly how she looked at the end. However, some of them are very close. The best resource you can use is this blog by a Canadian archaeologist: http://buildingterror.blogspot.com This blog was created by a model builder named Matthew Betts, who is building a large 1:48 scale of Terror. He has done all the research and he has drawn new blueprints of how the ship looked in 1845, which you can look at on his blog. His research is what Occre used to make their model, and also he helped design the full-sized models used on the television programme called "The Terror". I hope this helps! Your work so far looks very tidy, and the brown colour you have used looks fine!
-
I'm envious of the shape of the stern under the counter of your model. You'll still have your work cut out for you blending the rudder trunk into the outer planking, but it looks a lot better than the stock model with its square transom. I wish I'd thought of doing that. Your planking job in general is superb. I can't believe you did it using 5mm planks and no drop strakes.
-
I've seen the finished models online with and without the correct measurement- it doesn't make much difference, you'd never notice it really. I only noticed it because I was concerned about how the catheads carry through the bulwarks and noticed they were at a different height on some peoples' models. Thanks for the intel on the mizzen top. I had actually thought that was an unusually small mast to carry a full fighting-top.
-
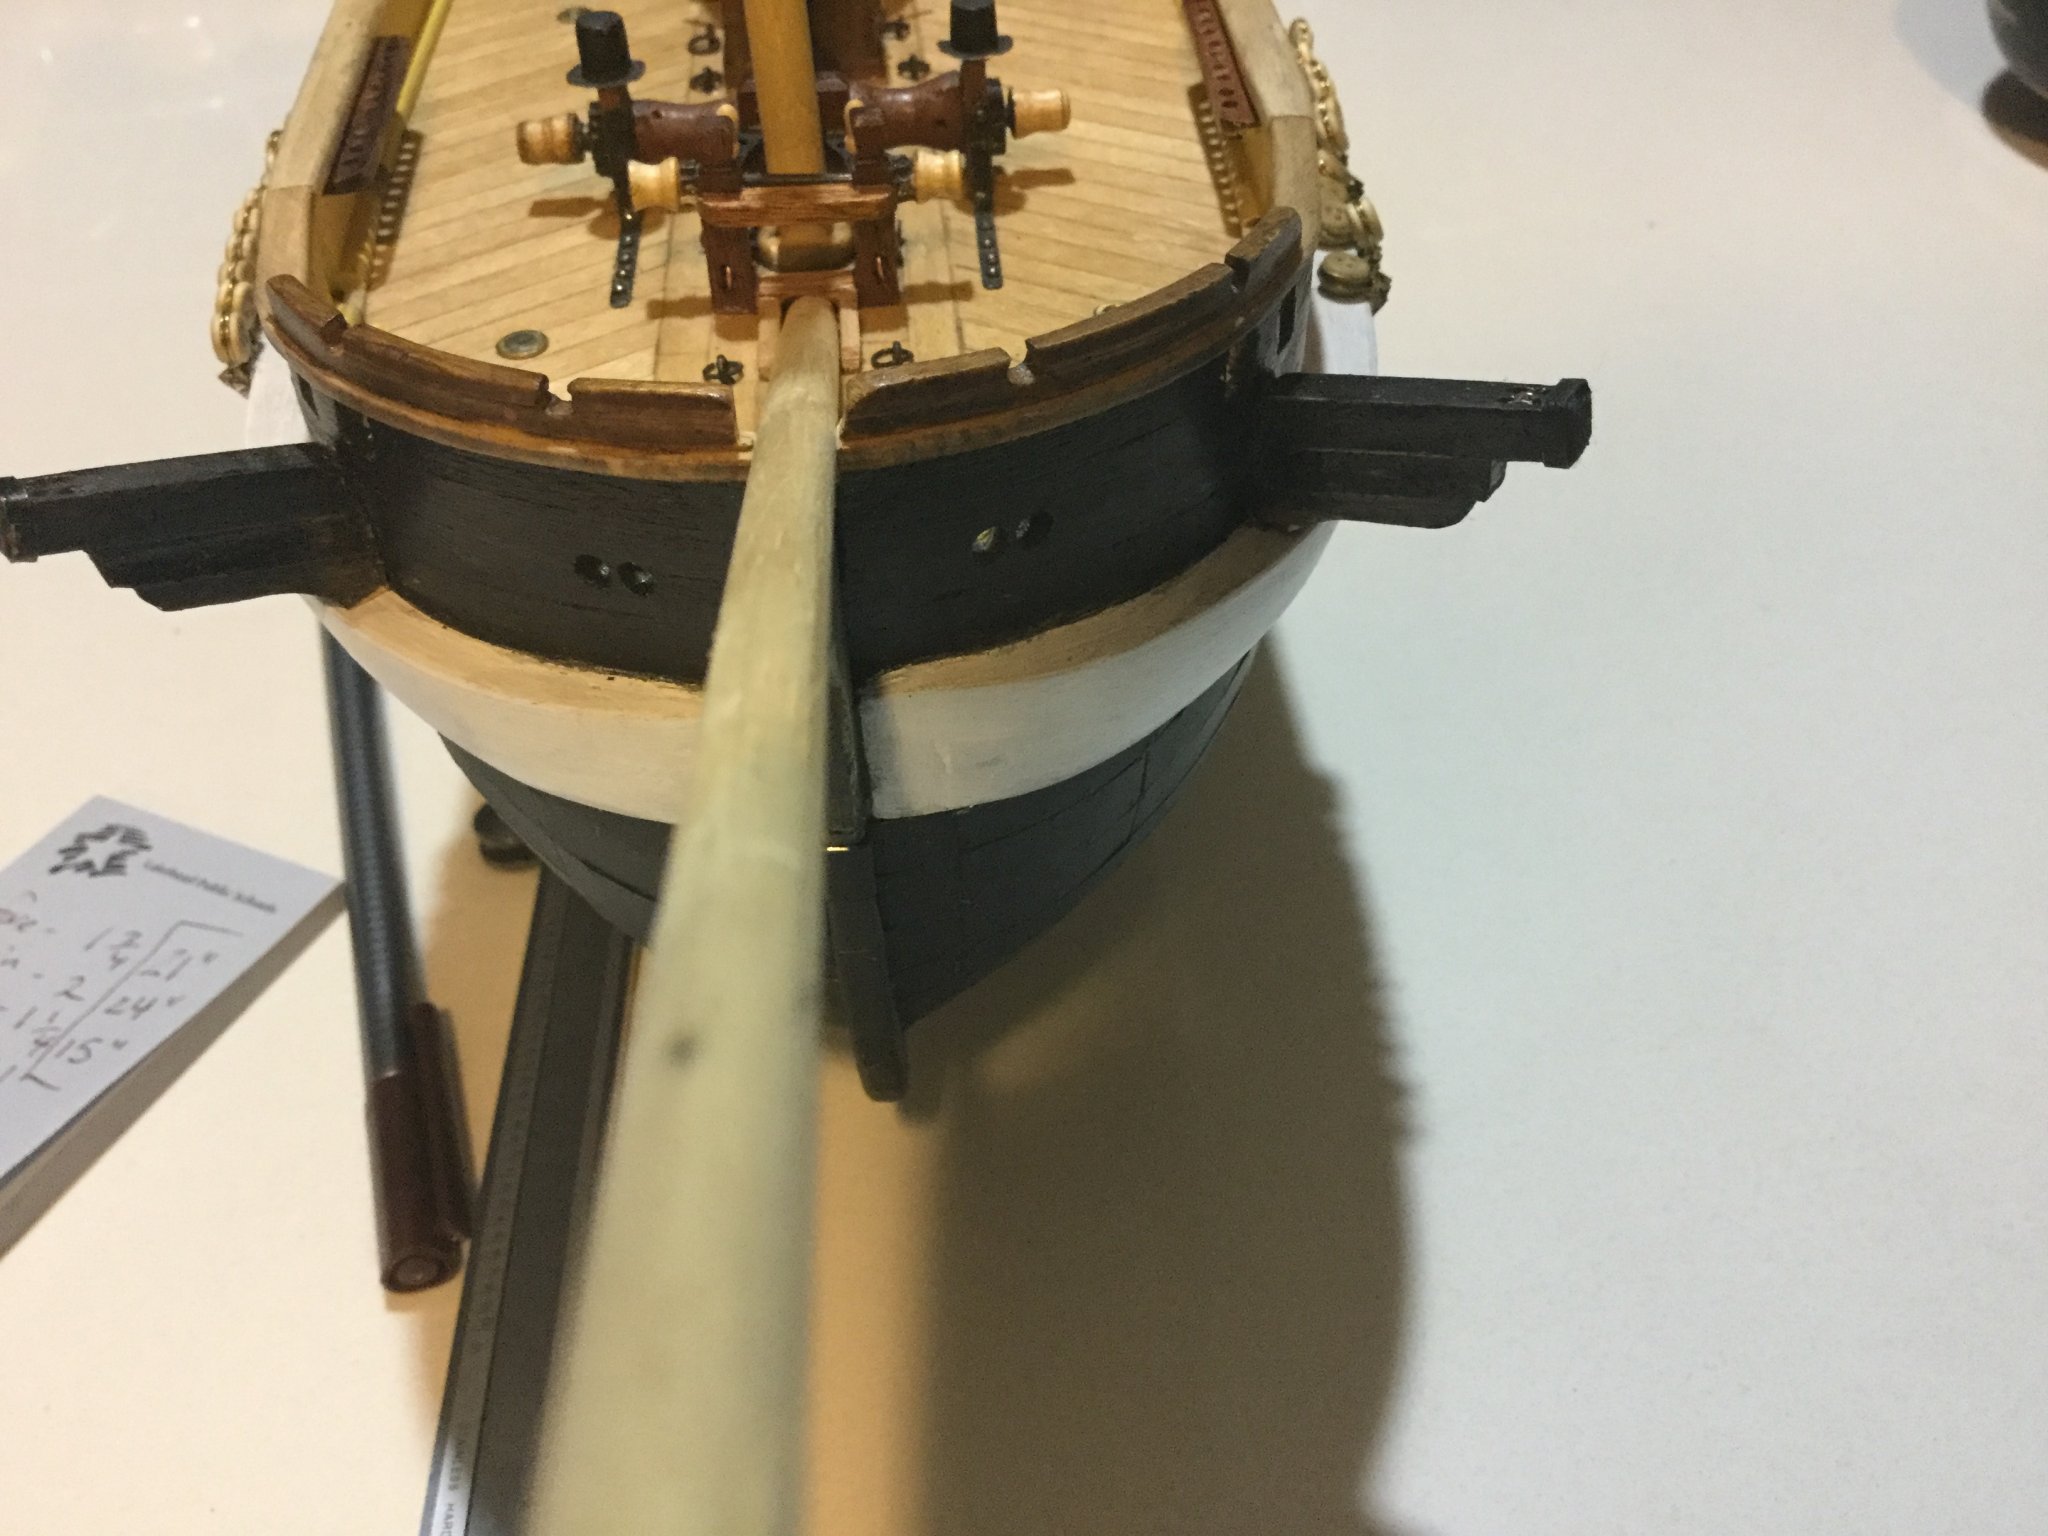
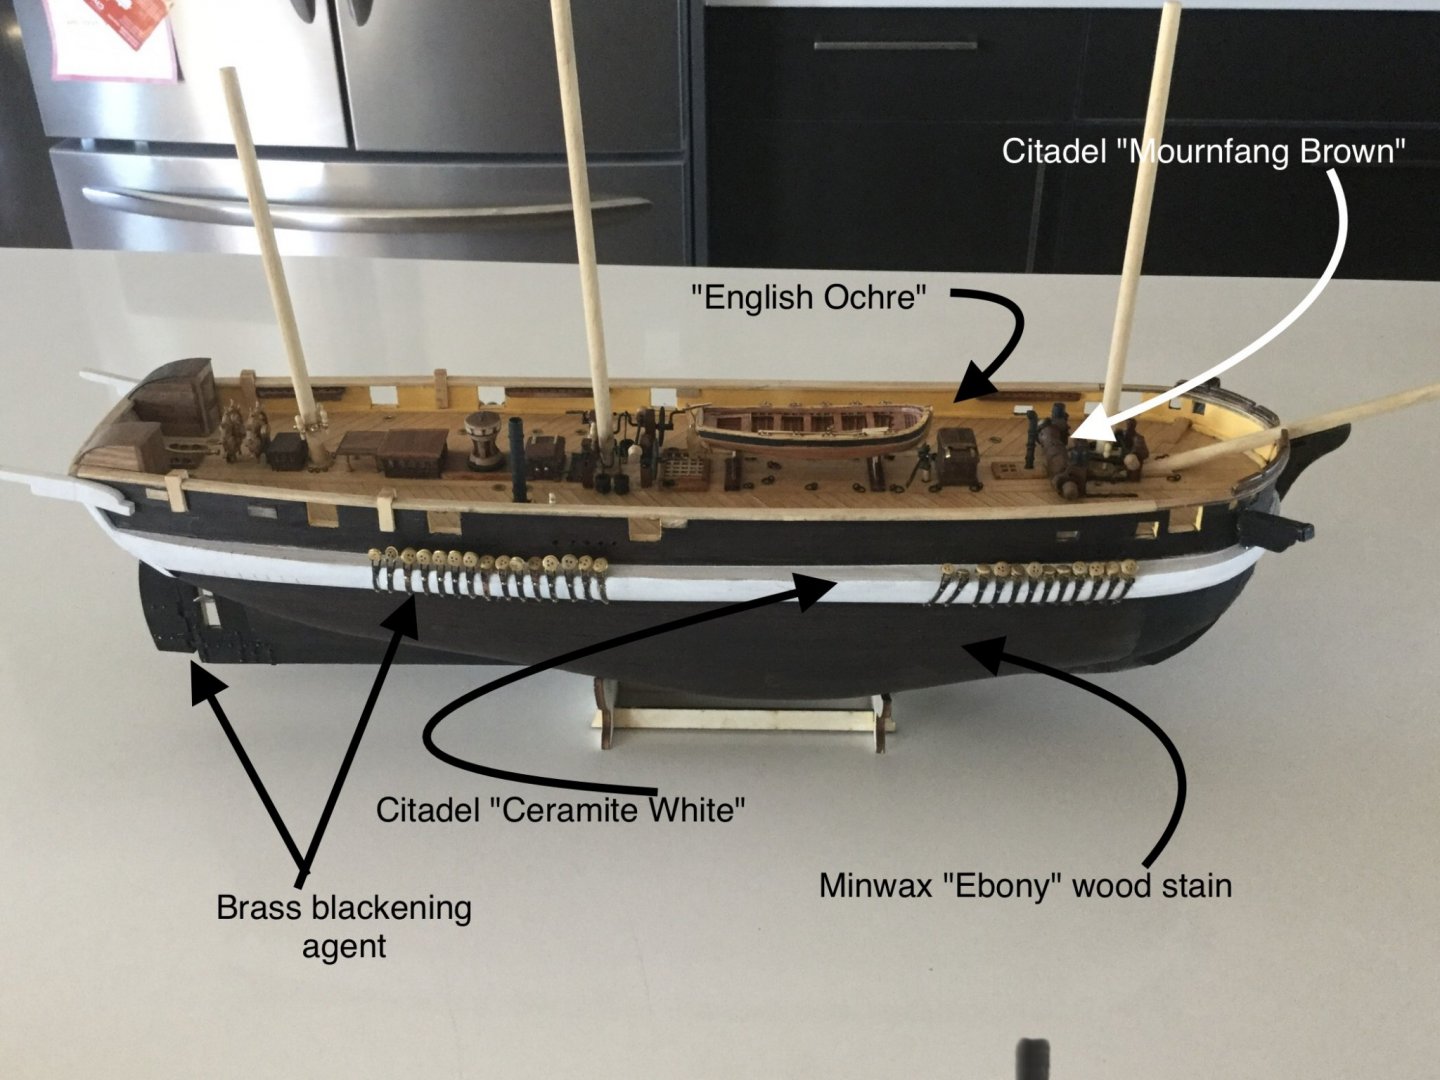
Thank you for looking at my model, Geowulf, and I will try to answer your questions. I have used several kinds of paint. I would advise you not go forward with paint that you don't like. If the paint is no good, you will not have a good time building your model. For the white parts I used a type of paint called "Citadel" which is made in the U.K. There is a store in my town in Canada that sells products for an adventure game that people play on the table with little figures and models. I do not play this game, but I find the paints and brushes they sell are excellent. They have a lot of pigment and cover wood, white metal and plastic beautifully, and don't show brush-marks. Because they are meant for adventure-gaming, they have silly names- for instance, the brown colour I used on the windlass is called "Mournfang Brown" and the white I used is called "Ceramite White" but they are excellent paints! Unfortunately the little store is closed because of Covid-19. I hope they come back. Also, there is a model ship supply shop in Canada called "Cast Your Anchor" and they sell things online. They provide a set of paints for various ships. They are also pretty good, and they have common Admiralty colours. The yellow on my ship is called "English Ochre". Of course these shops are in Canada. But I'm sure there are equivalent shops in almost every country, and the "Citadel" paints are almost certainly available on Ebay. The black hull on my model is not painted. My wife liked the bare wood, but I wanted it to look black. I made a compromise and used a wood-colour "Ebony" stain, which is like a thin varnish with pigments in it. It took about three coats to darken the wood to an "ebony" colour, which looks black from a distance but close-up you can see the wood grain. (so my wife is pleased and maybe she will let me display the model in the lounge when it is done) For the rest of the black parts, I'm simply using "Testors" matte black paint for model aeroplanes. The white "bumper" (called a "chock-channel") is not modified! The only change I made was to move it 5mm lower, from the 15mm shown in the plans to 20 mm below the bulwark tops. I sent an E-mail to Occre with this correction, and they responded and said I was correct and the instructions contain an error. You're right, it uses a LOT of wood to build it up, but it is very easy to carve to shape afterwards. I hope this helps!

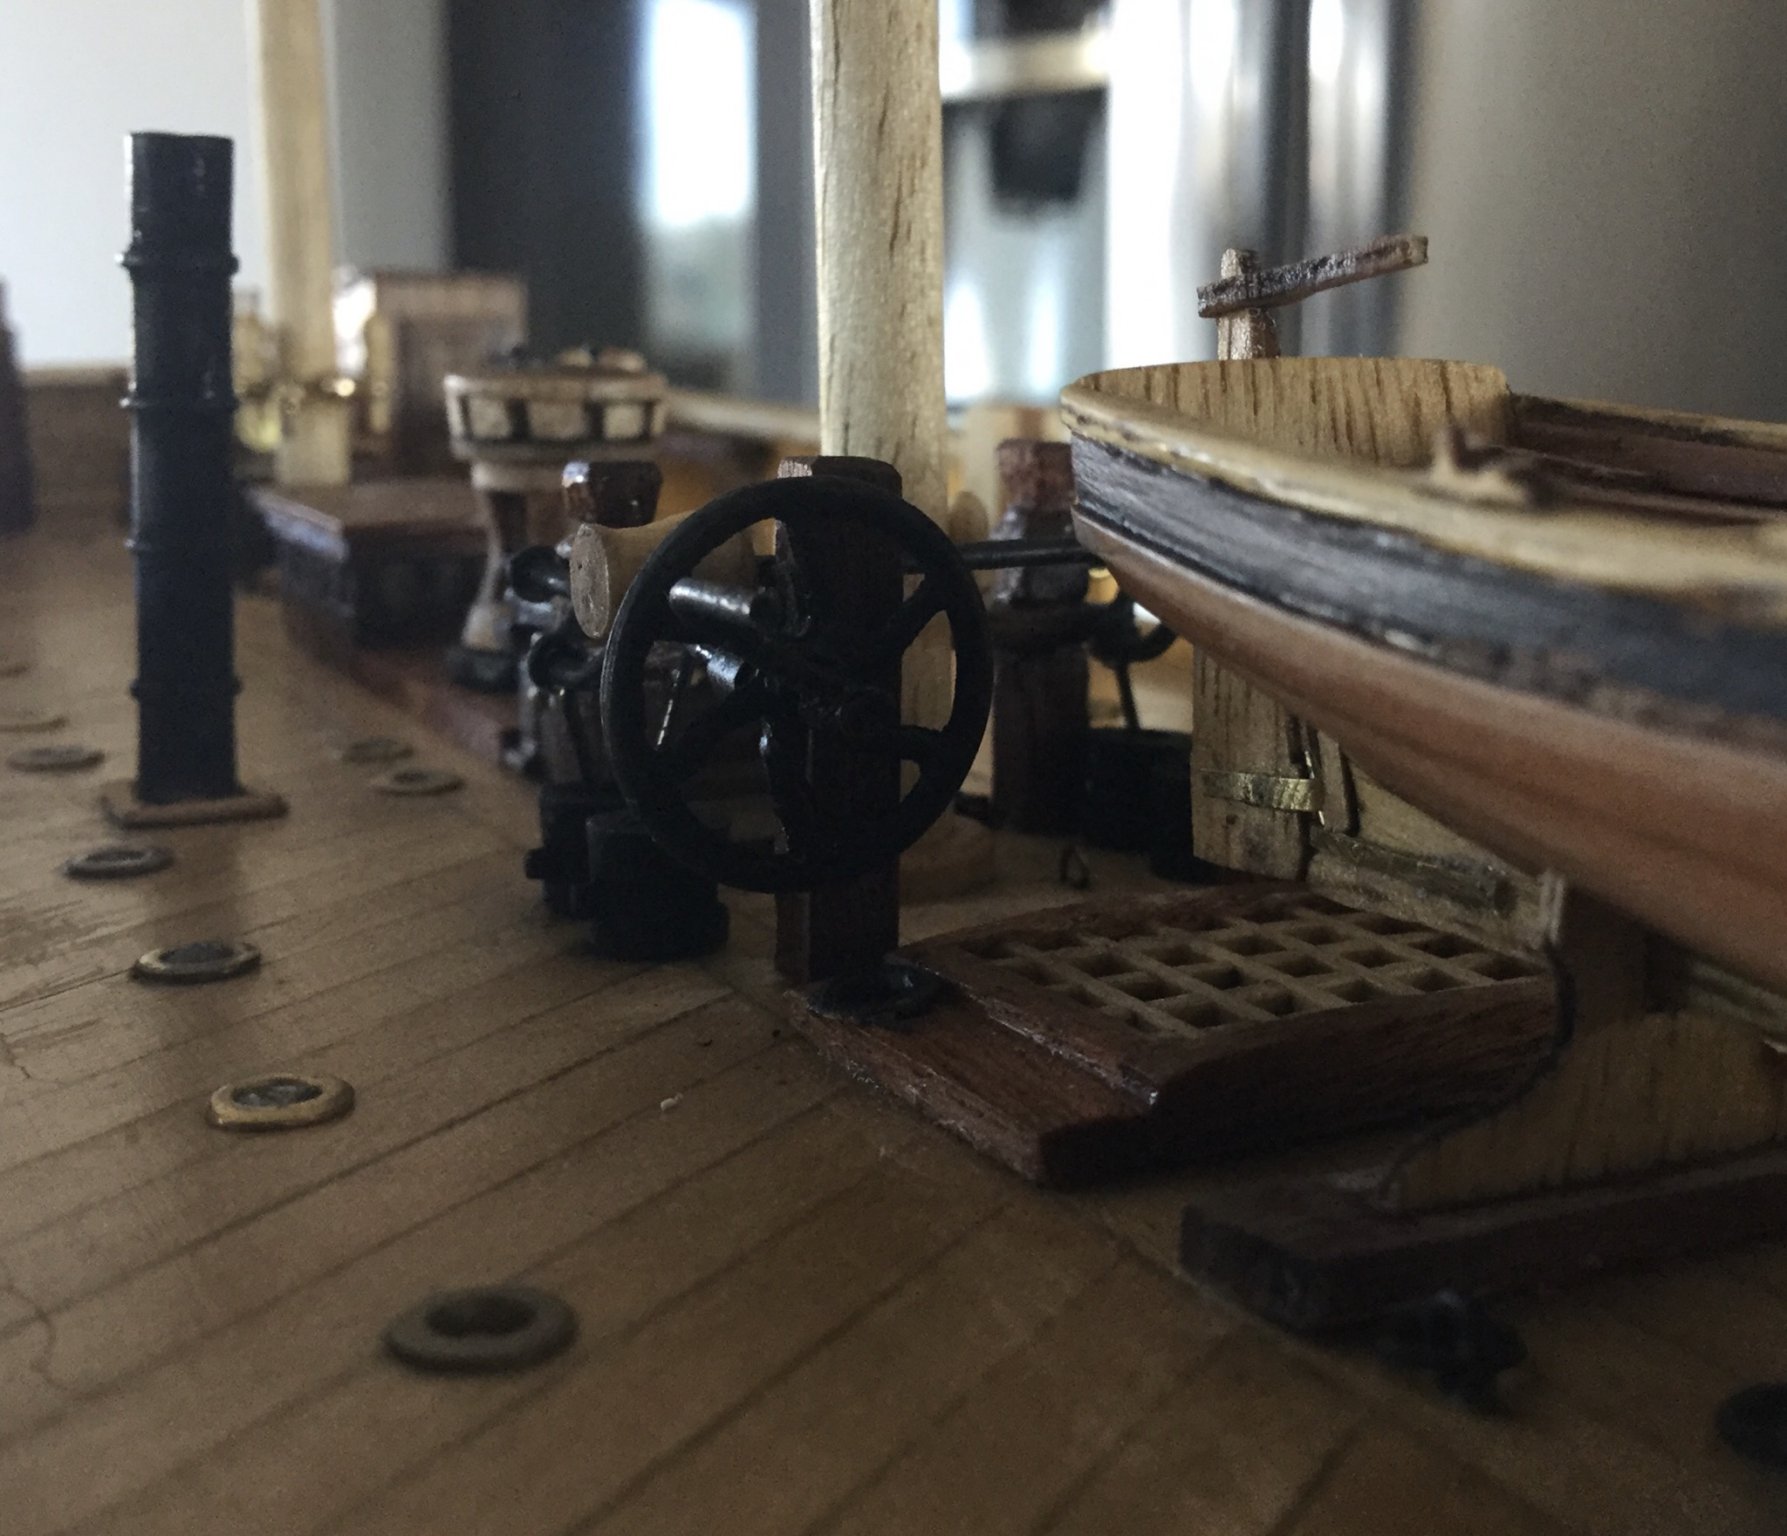
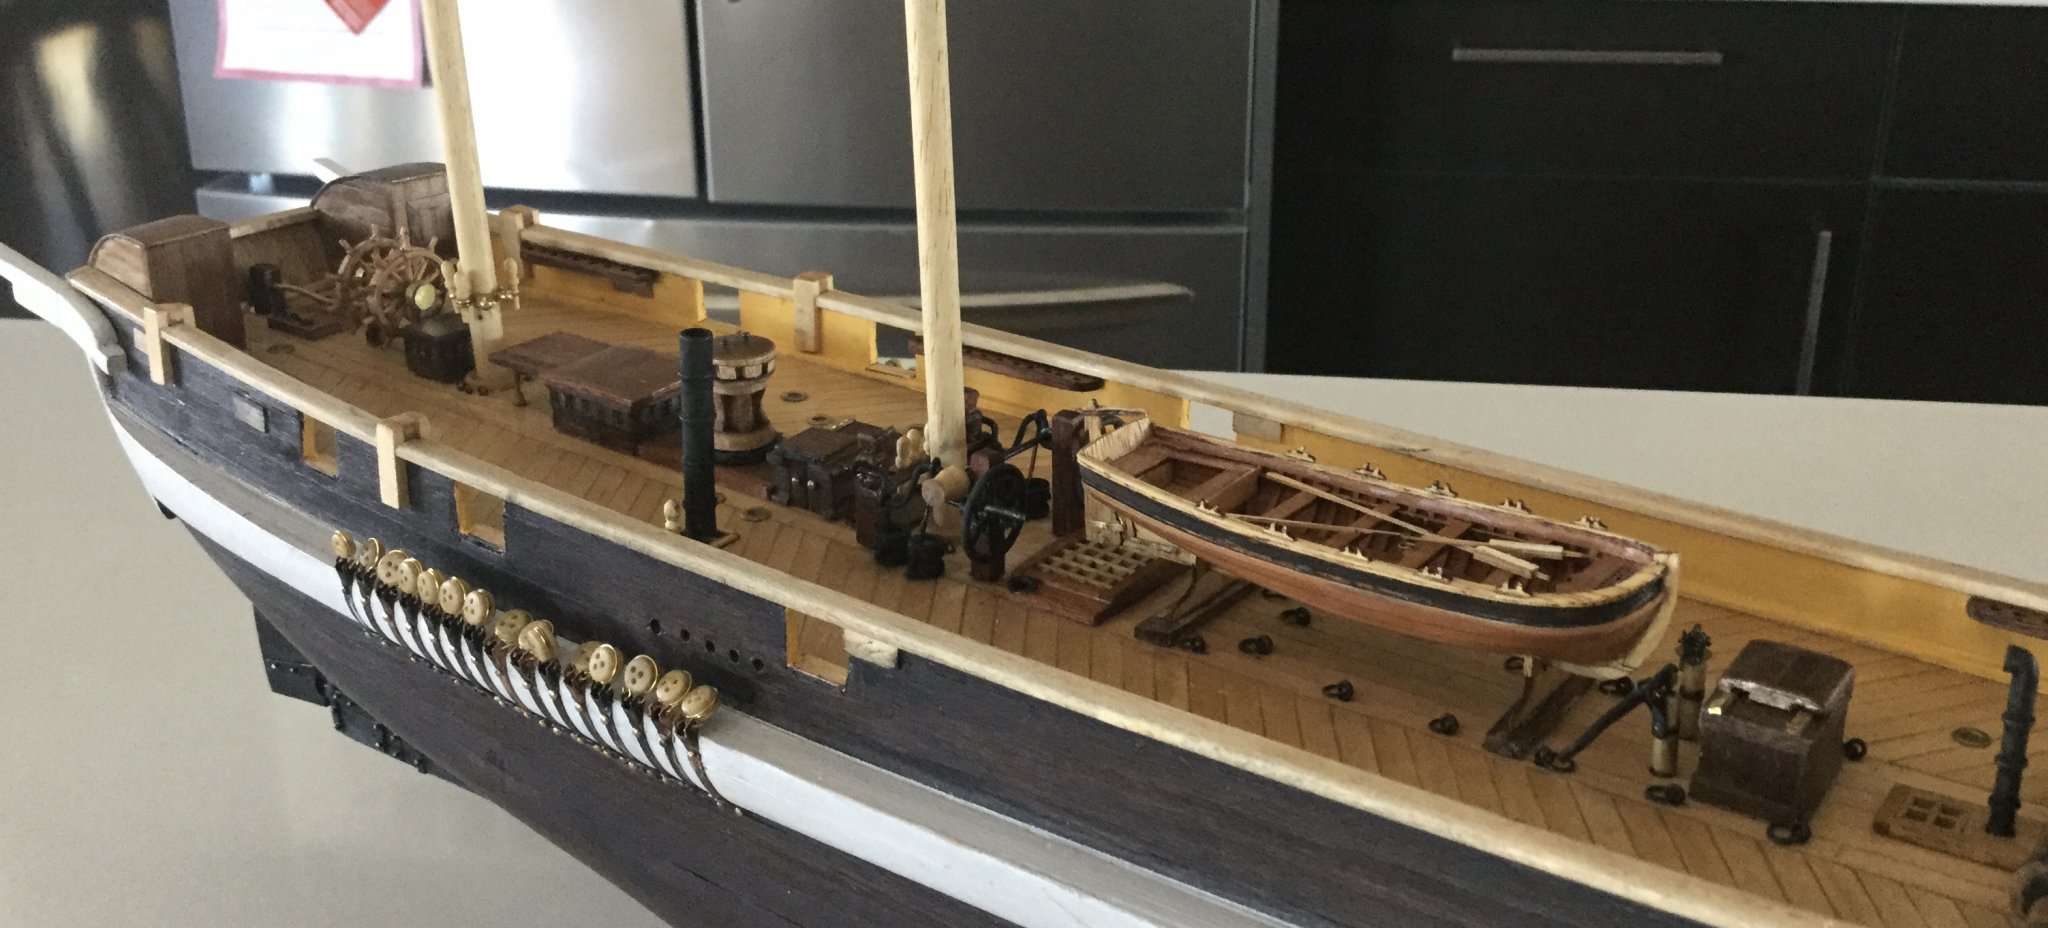
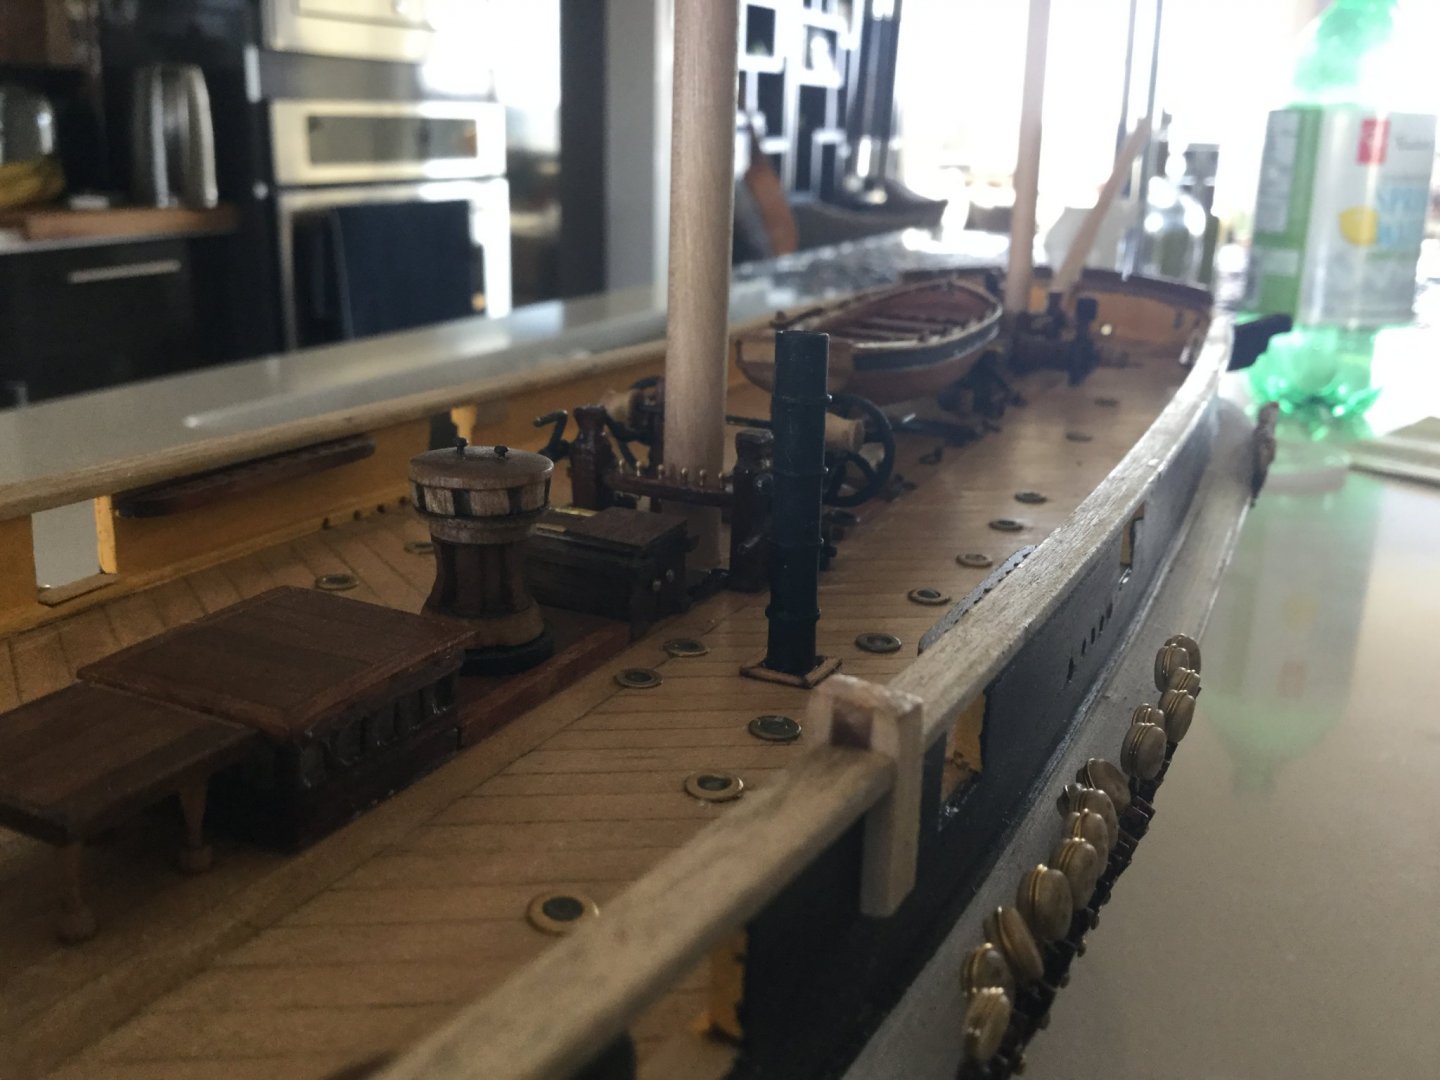
-
Today I did some work on the main pumps that sit on either side of the mainmast. On his blog, Mr. Betts' research indicates that the pumps were a "flywheel" type. The flywheels have curly spokes and are not a feature of the kit. I tried to make some by soldering some brass wire but I lacked the skill to do a good job, especially on something so small. Then I remembered that some trains have metal wheels to apply hand-brakes. And what's more, some old-fashioned ones had handwheels with curly spokes. So I went to a website that sells details for garden-scale model trains, and behold, the handbrake wheel for a 1:20 scale American railway wagon is just about exactly the same size as a 1:75 Massey pump flywheel! Some good luck there. I can see in the close-up photo that I need to touch up the black stripe on the boat!