HOLIDAY DONATION DRIVE - SUPPORT MSW - DO YOUR PART TO KEEP THIS GREAT FORUM GOING! (Only 36 donations so far out of 49,000 members - C'mon guys!)
×


Keith S
-
Posts
339 -
Joined
-
Last visited
Content Type
Profiles
Forums
Gallery
Events
Everything posted by Keith S
-
That little filler piece will be virtually un-noticeable on the finished ship. I forget the boaty word for that strip of wood you're talking about, but it's there to allow water to run onto the deck instead of standing in the joint between deck and bulwark. I think it's called a "waterway" now that I think about it. Anyway the 2x2 strip should be bendy enough to take the curve without too much trouble. I just stood the strips in a cup of hot water with the end that was to go at the bow would be a little more flexible.
-
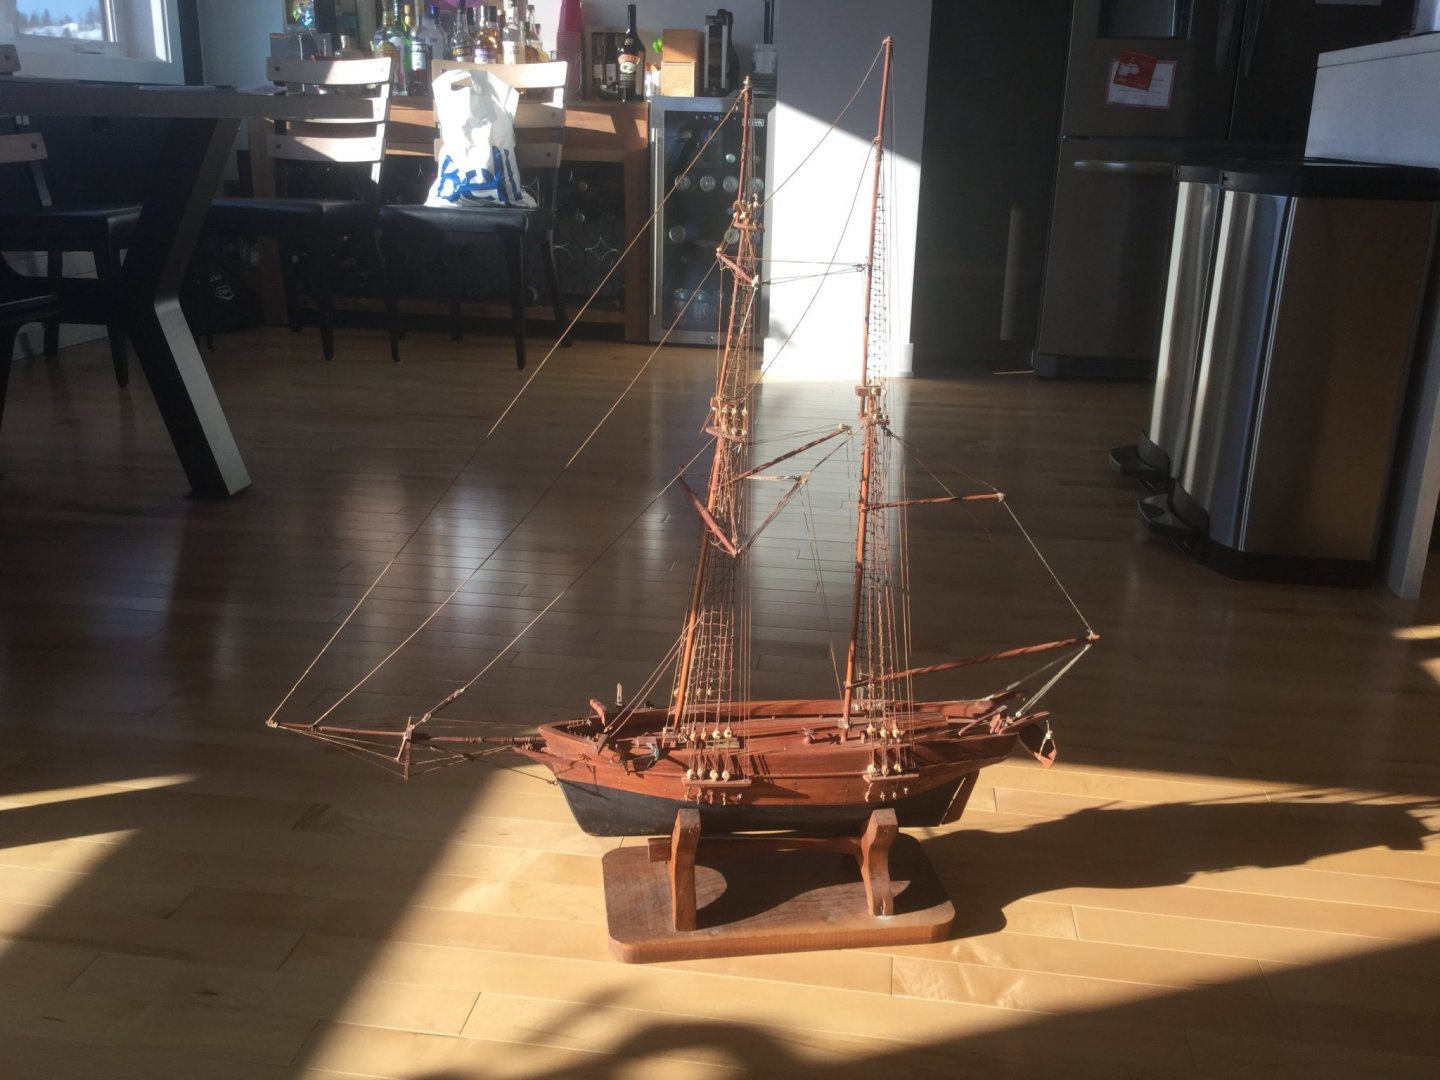
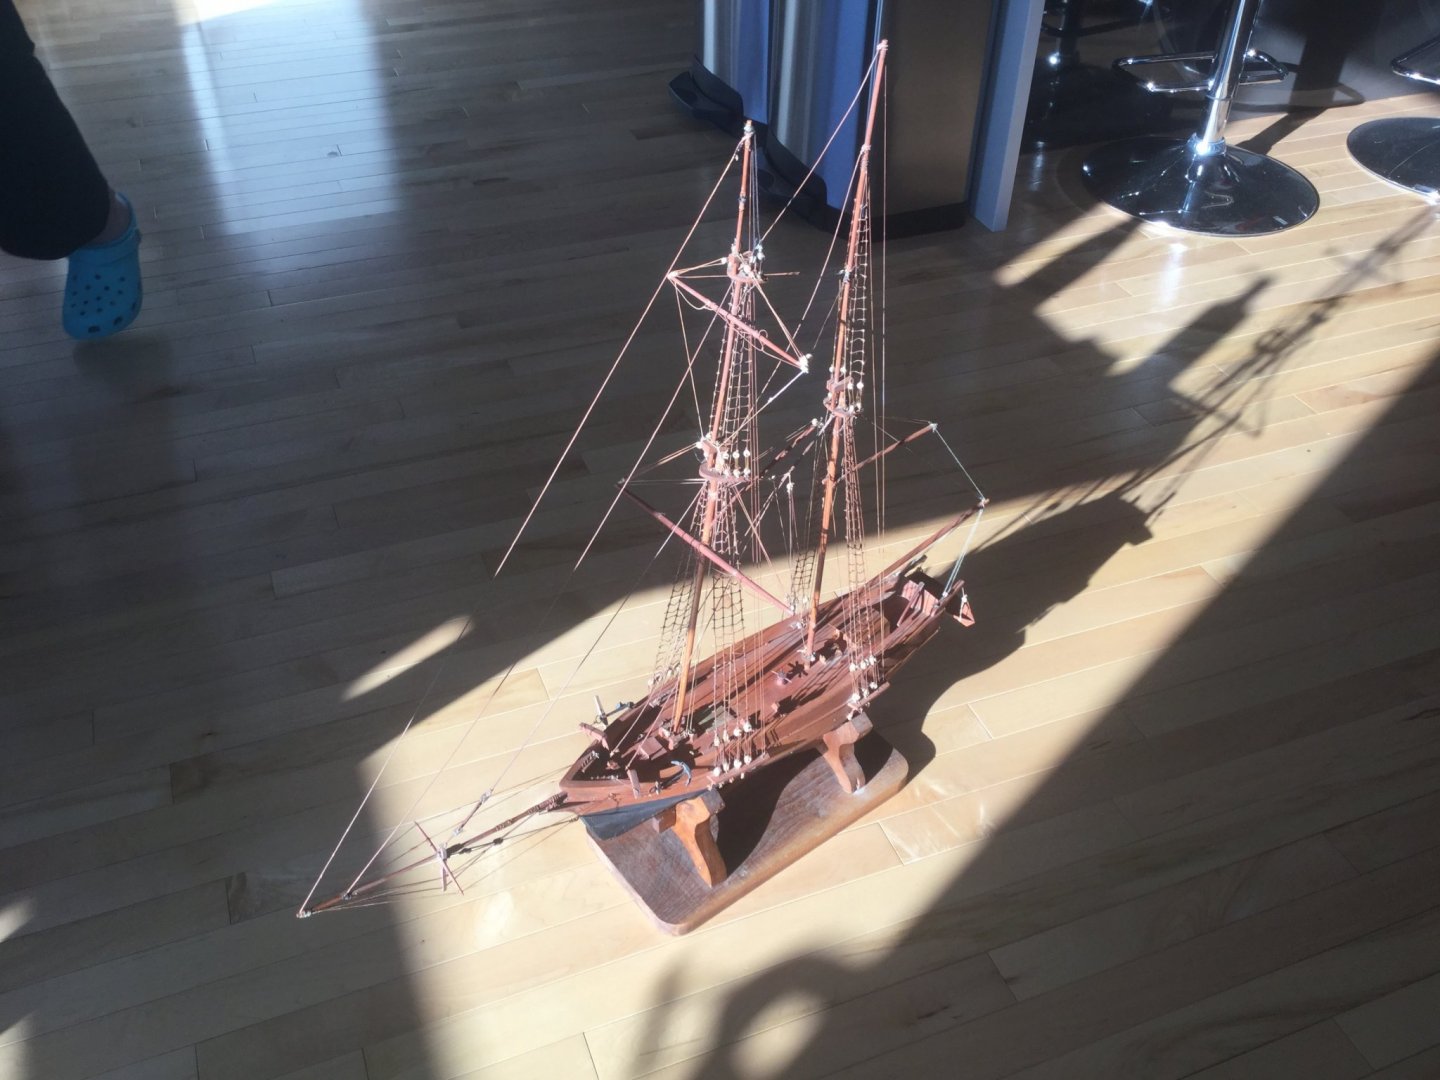
Wow! Sorry to barge into your build log, but this is kind of funny. One of my friends has had a model ship in his house for as long as I've known him. Over the years it's become a bit knocked-about, having its bowsprit broken and items of its rigging snapped and ripped off, as well as a coating of dust that made it look like a dandelion seed. I never paid much attention to it if I'm honest. Anyway a couple of weeks ago he showed up at my doorstep with it (left it on the front step because we're in quarantine of course) and explained on the phone that his father had been given the ship years ago, and had in turn given it to him. When his father saw how poorly he had looked after it, he was very disappointed. So my friend was hoping I could clean and repair it. Well of course I said yes, and it actually wasn't in such bad shape under all the dust. I fished the bowsprit and fixed the rigging. Anyway the reason I'm telling this story is that I had assumed it was a scratch-build or something. Now I see, it's the same ship you're building!
- 211 replies
-
- 7
-

-
- agilis
- steingraeber
- (and 1 more)
-
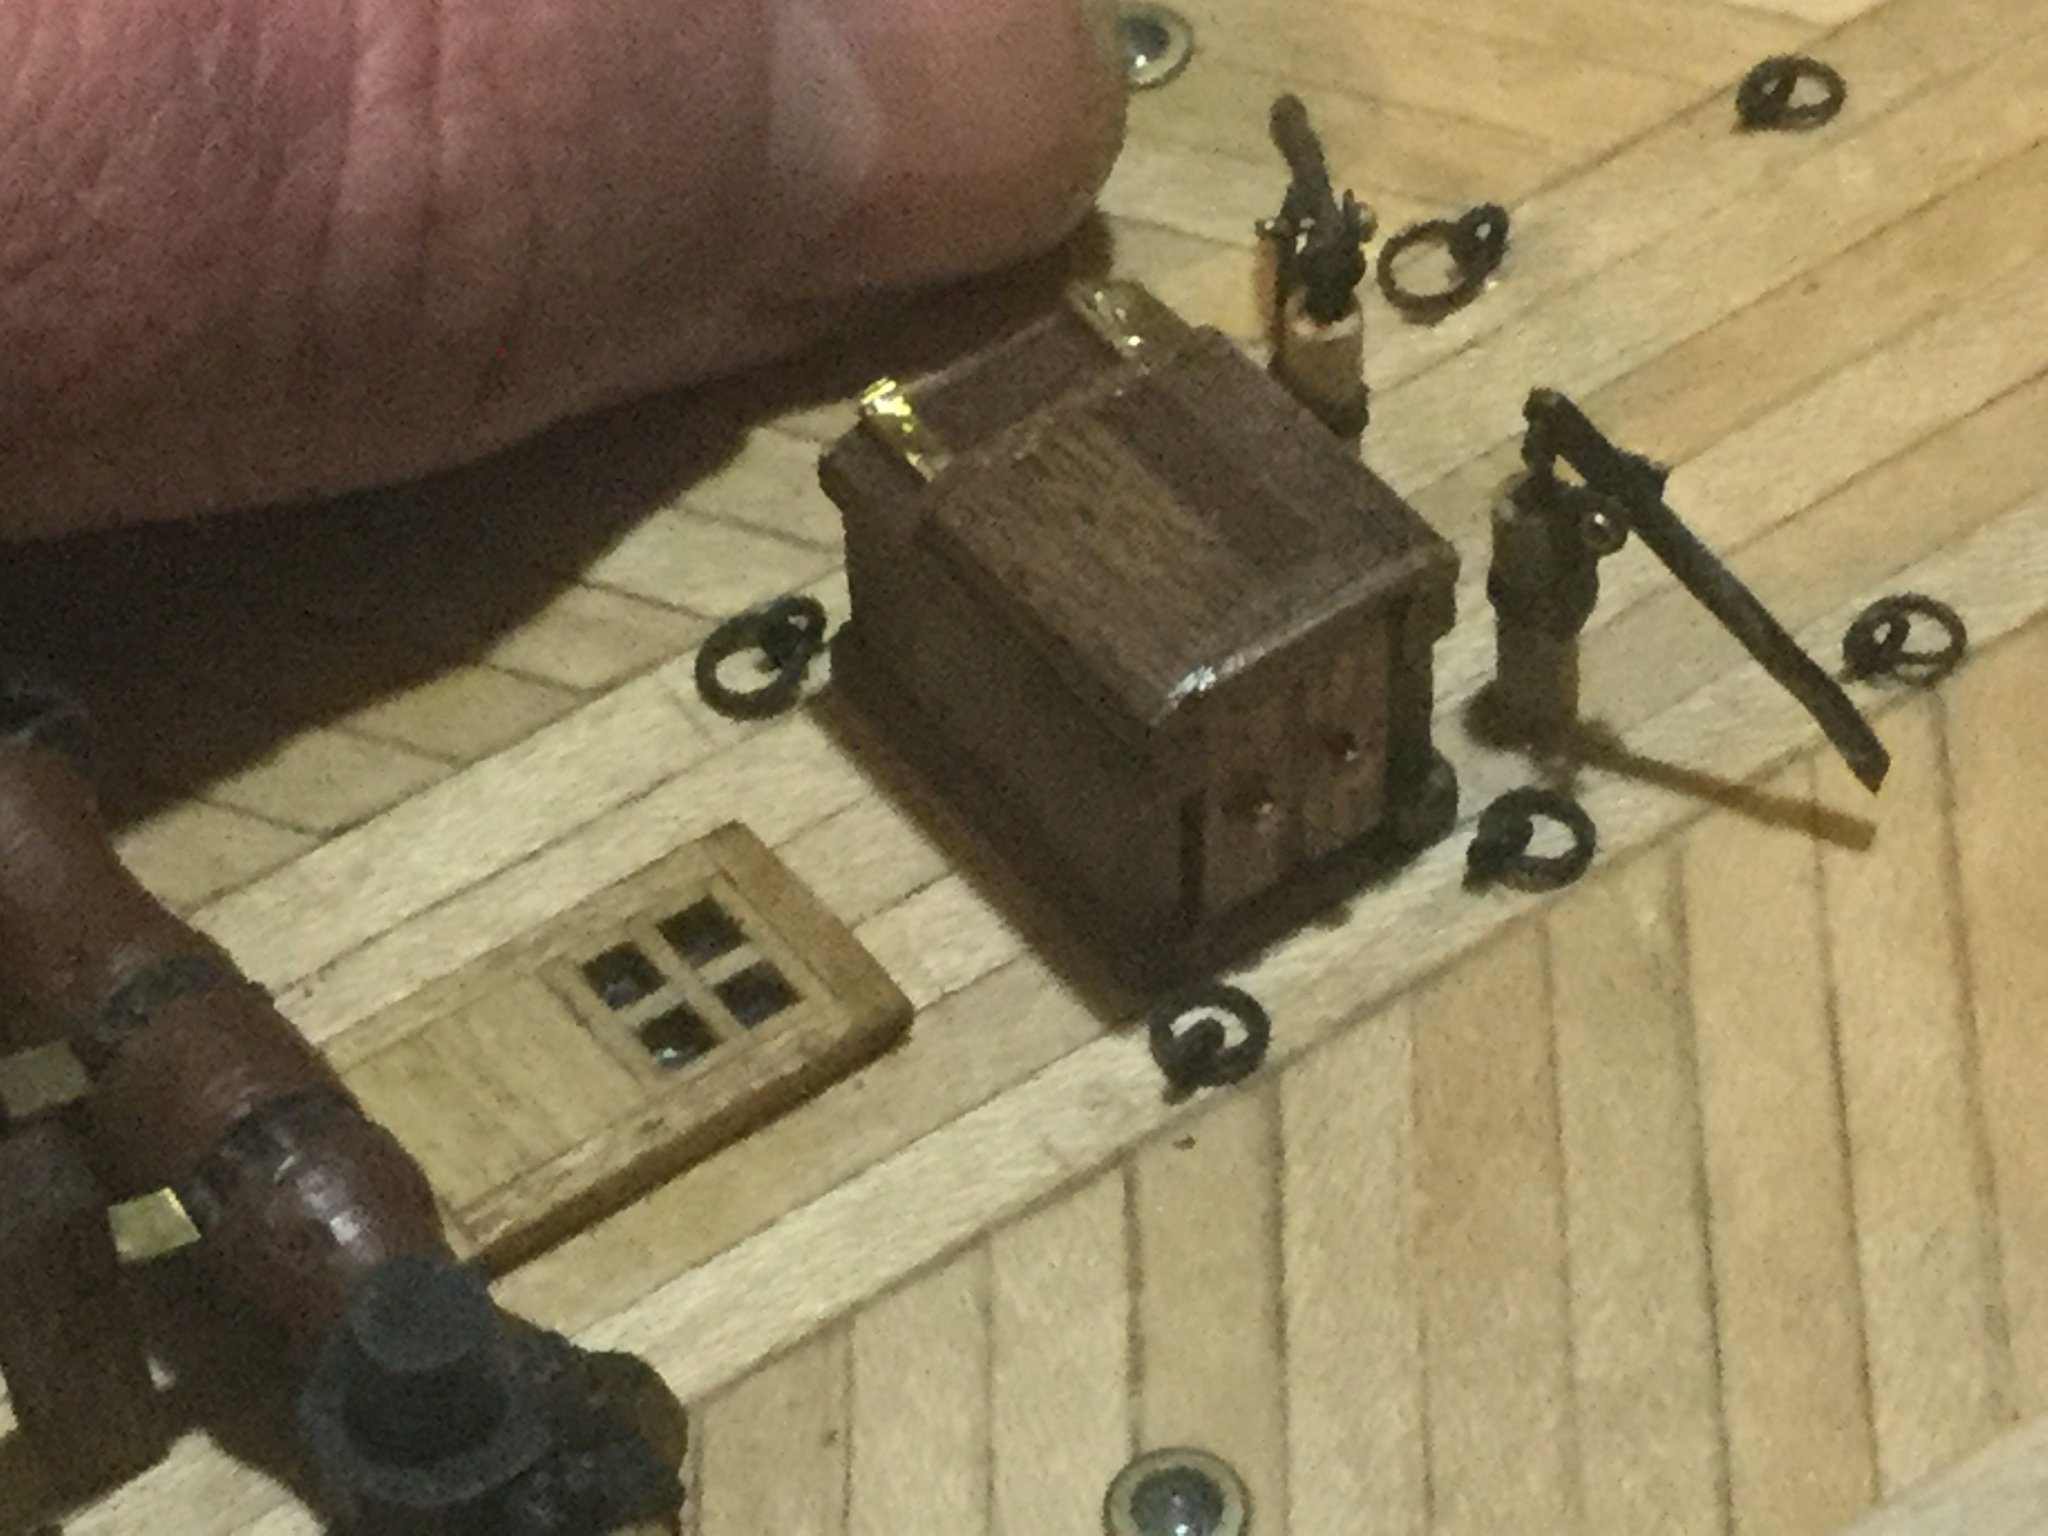
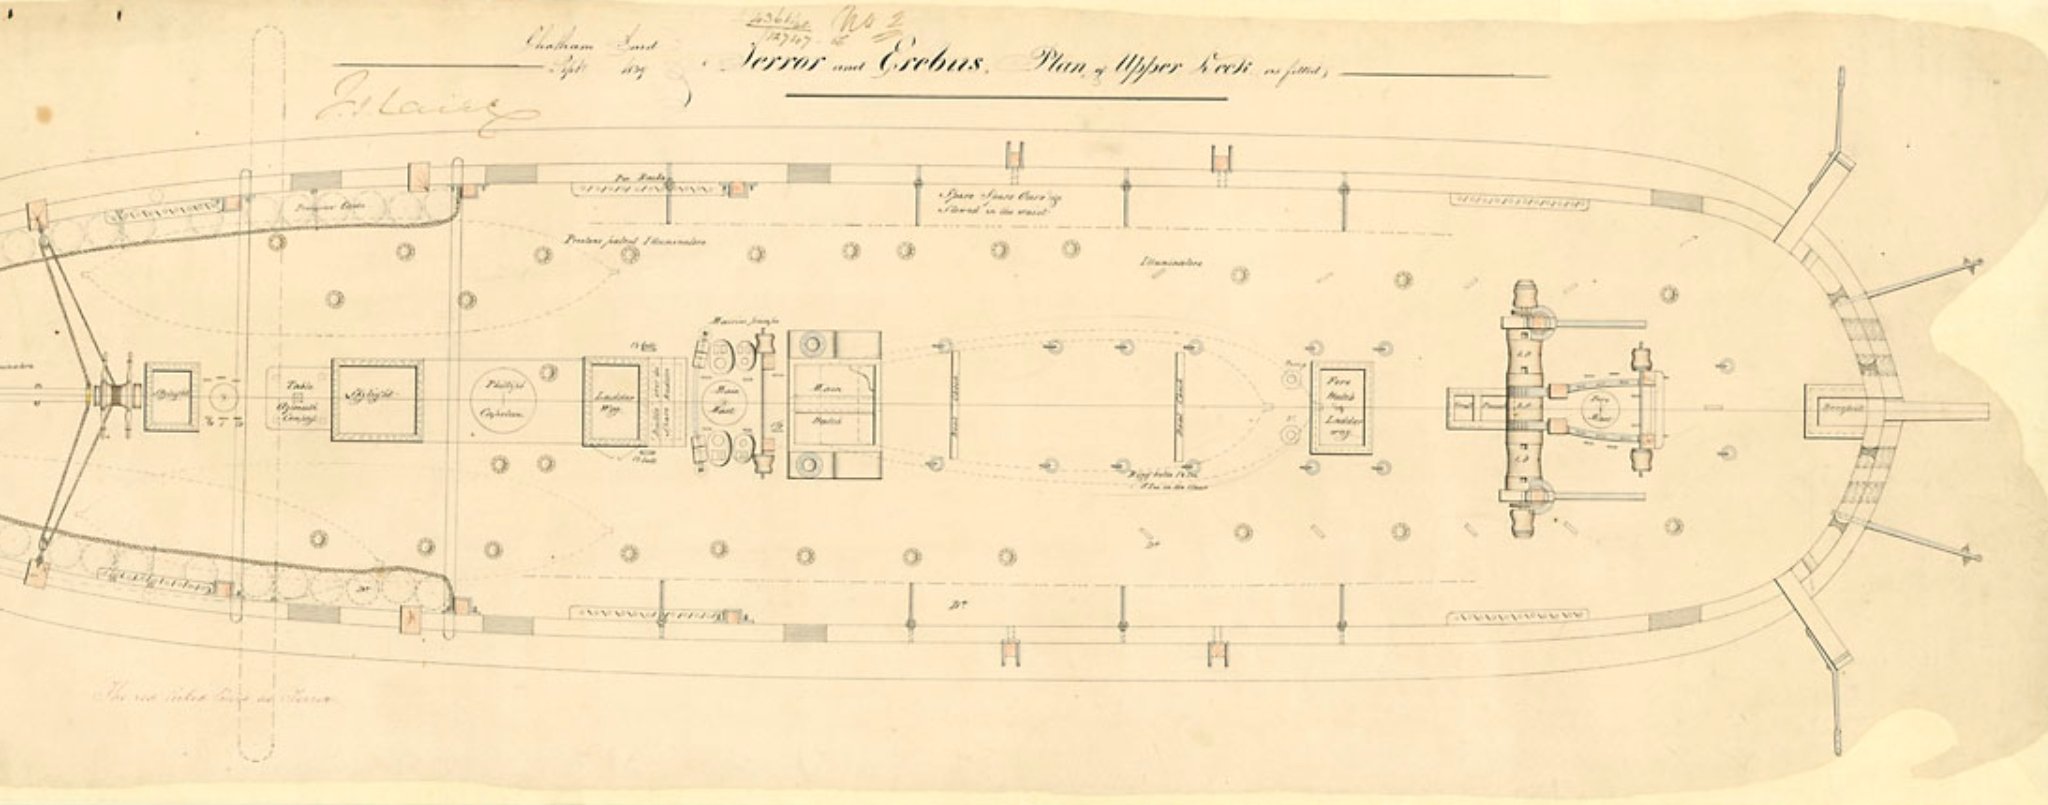
Thanks for the advice Keith. I've been putting off the bow plating because the aluminium looked hard to work with. Now I feel a bit more confident. Tonight I built some tiny little elm-tree pumps. In the kit, there's a pair of circles in the plan view that show a pair of illuminators behind the companionway. A look at the navy diagram shows these circles actually depict a pair of elm-tree pumps. I used some bits of brass and dowel to make them. They are very small in this scale. I photographed them with my thumb for scale. They look a bit toy-ish when you zoom in this close but from normal viewing distance they actually look quite reasonable. I also made all the deck rings by wrapping copper wire around a piece of coat-hanger and snipping it into rings.

-
Thanks Keith! I will definitely try that. I've been using acrylic paint from a little store here in Yellowknife that sells adventure-game stuff. I don't know what the game is called, but the little paints they use to colour their figures and little war machines are excellent, water-based and they are silky smooth and very pigment-dense. I don't suppose they're open anymore though with this isolation order in effect, so I might have to resort to spray-paint. We'll see how it turns out.
-
Thanks! Yeah the research is keeping me busy during all this down-time. I am going to do the plates on the bow, in fact I was thinking about doing it today. I'm procrastinating a bit because I am still thinking about the best way to paint them- they're aluminium, which is hard to paint. I have some brass sheet here but using it on the bow will use it allmup and I'm not confident I have enough. So I guess I'll use the aluminium. Definitely going to do it at some point soon though. Maybe today!
-
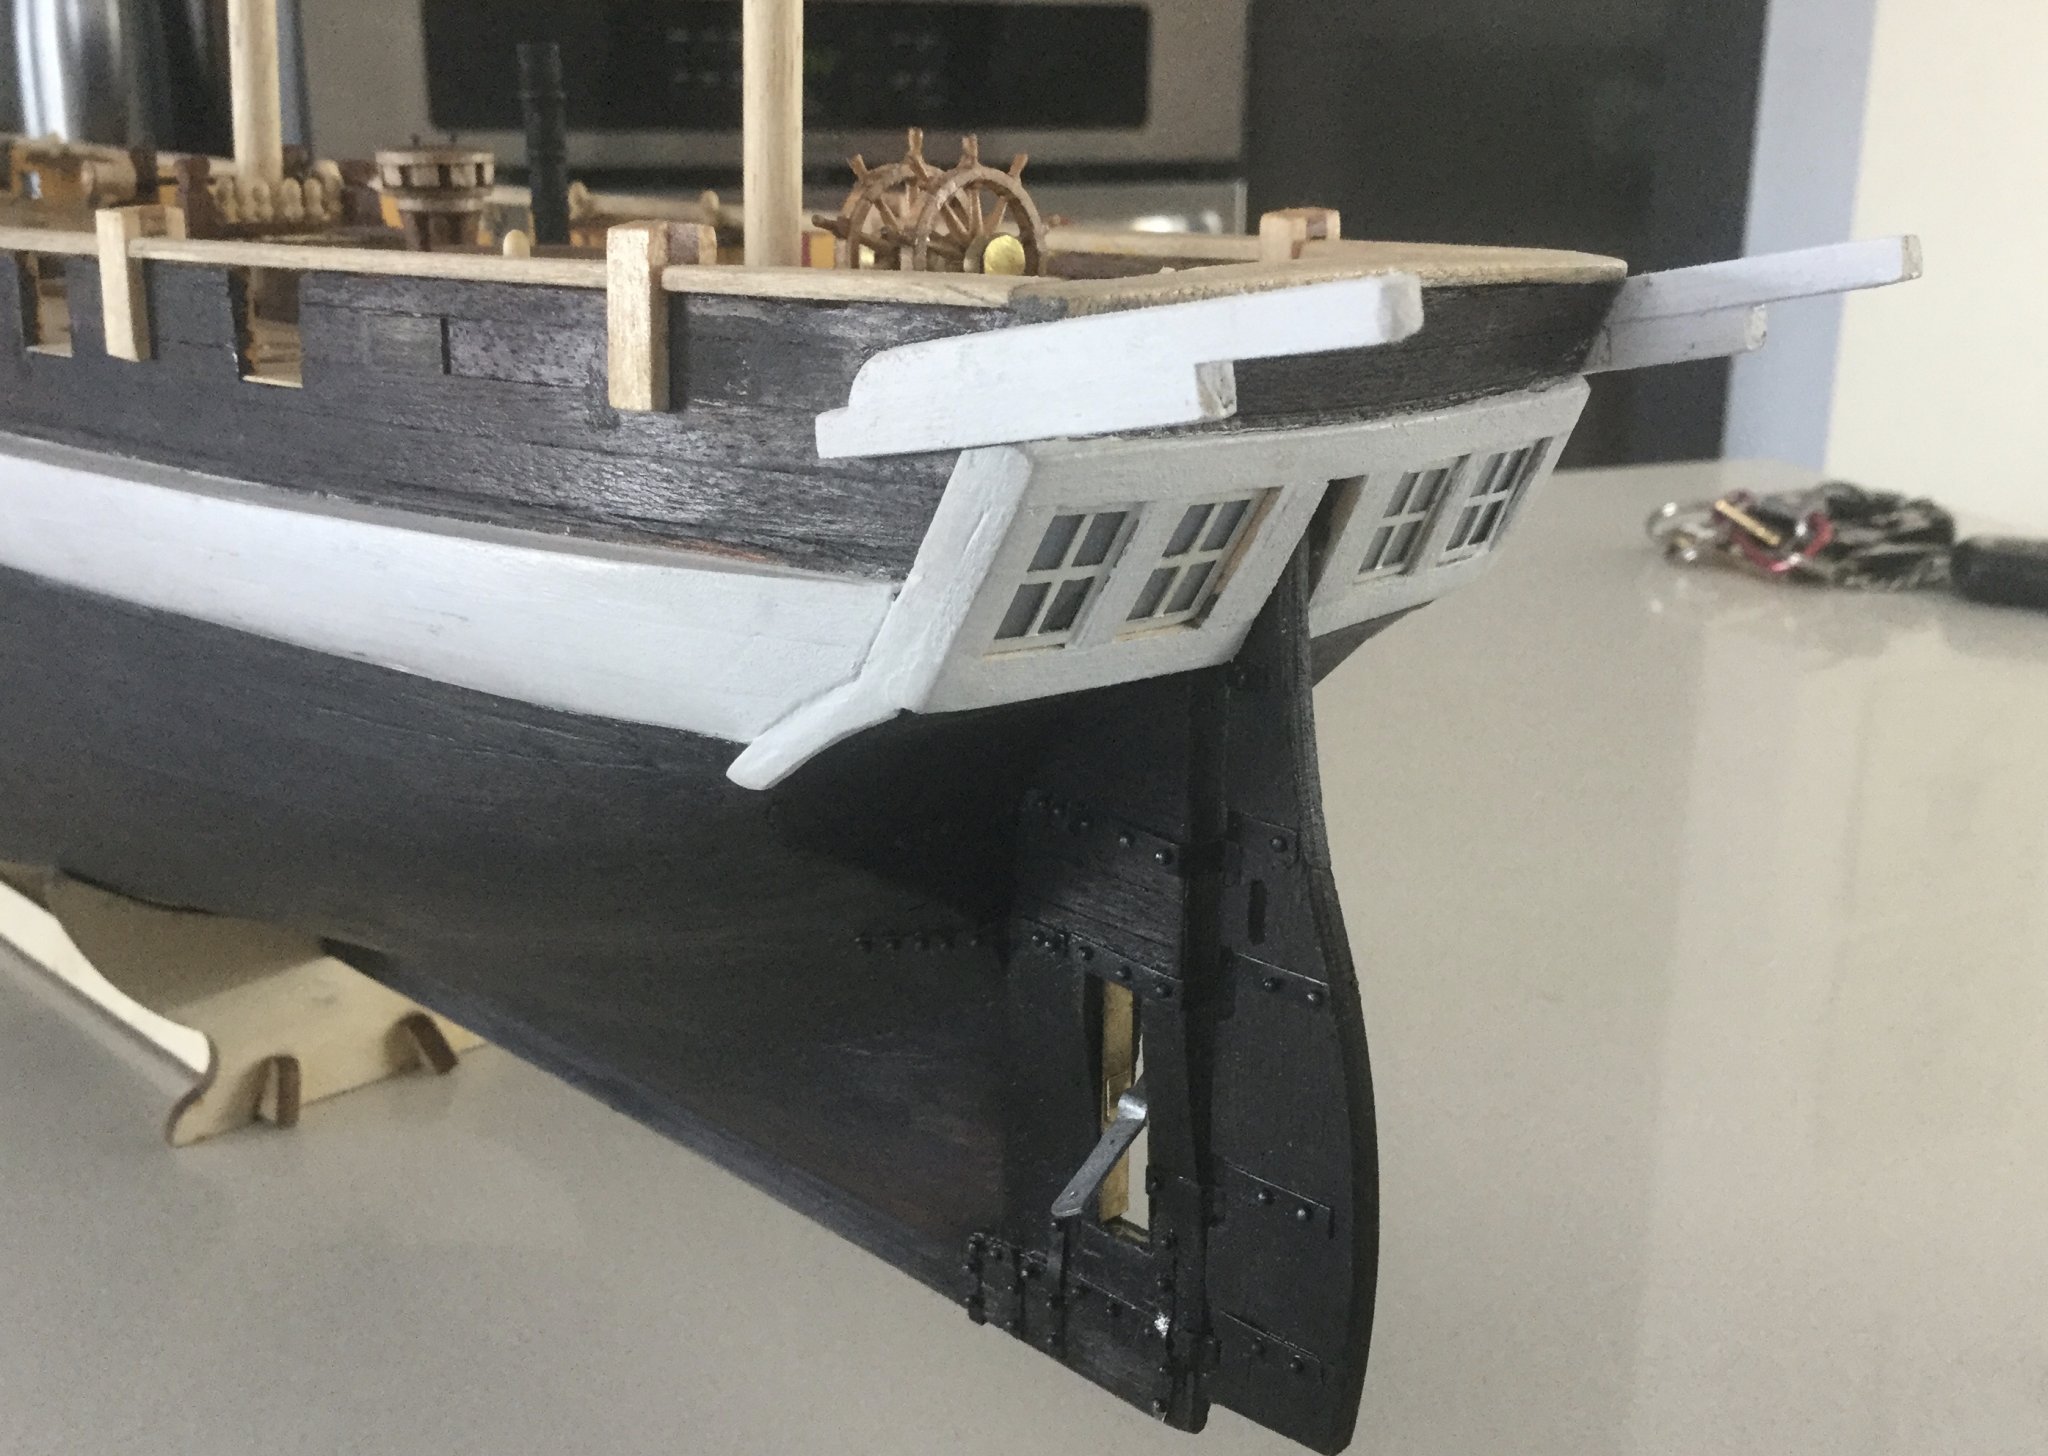
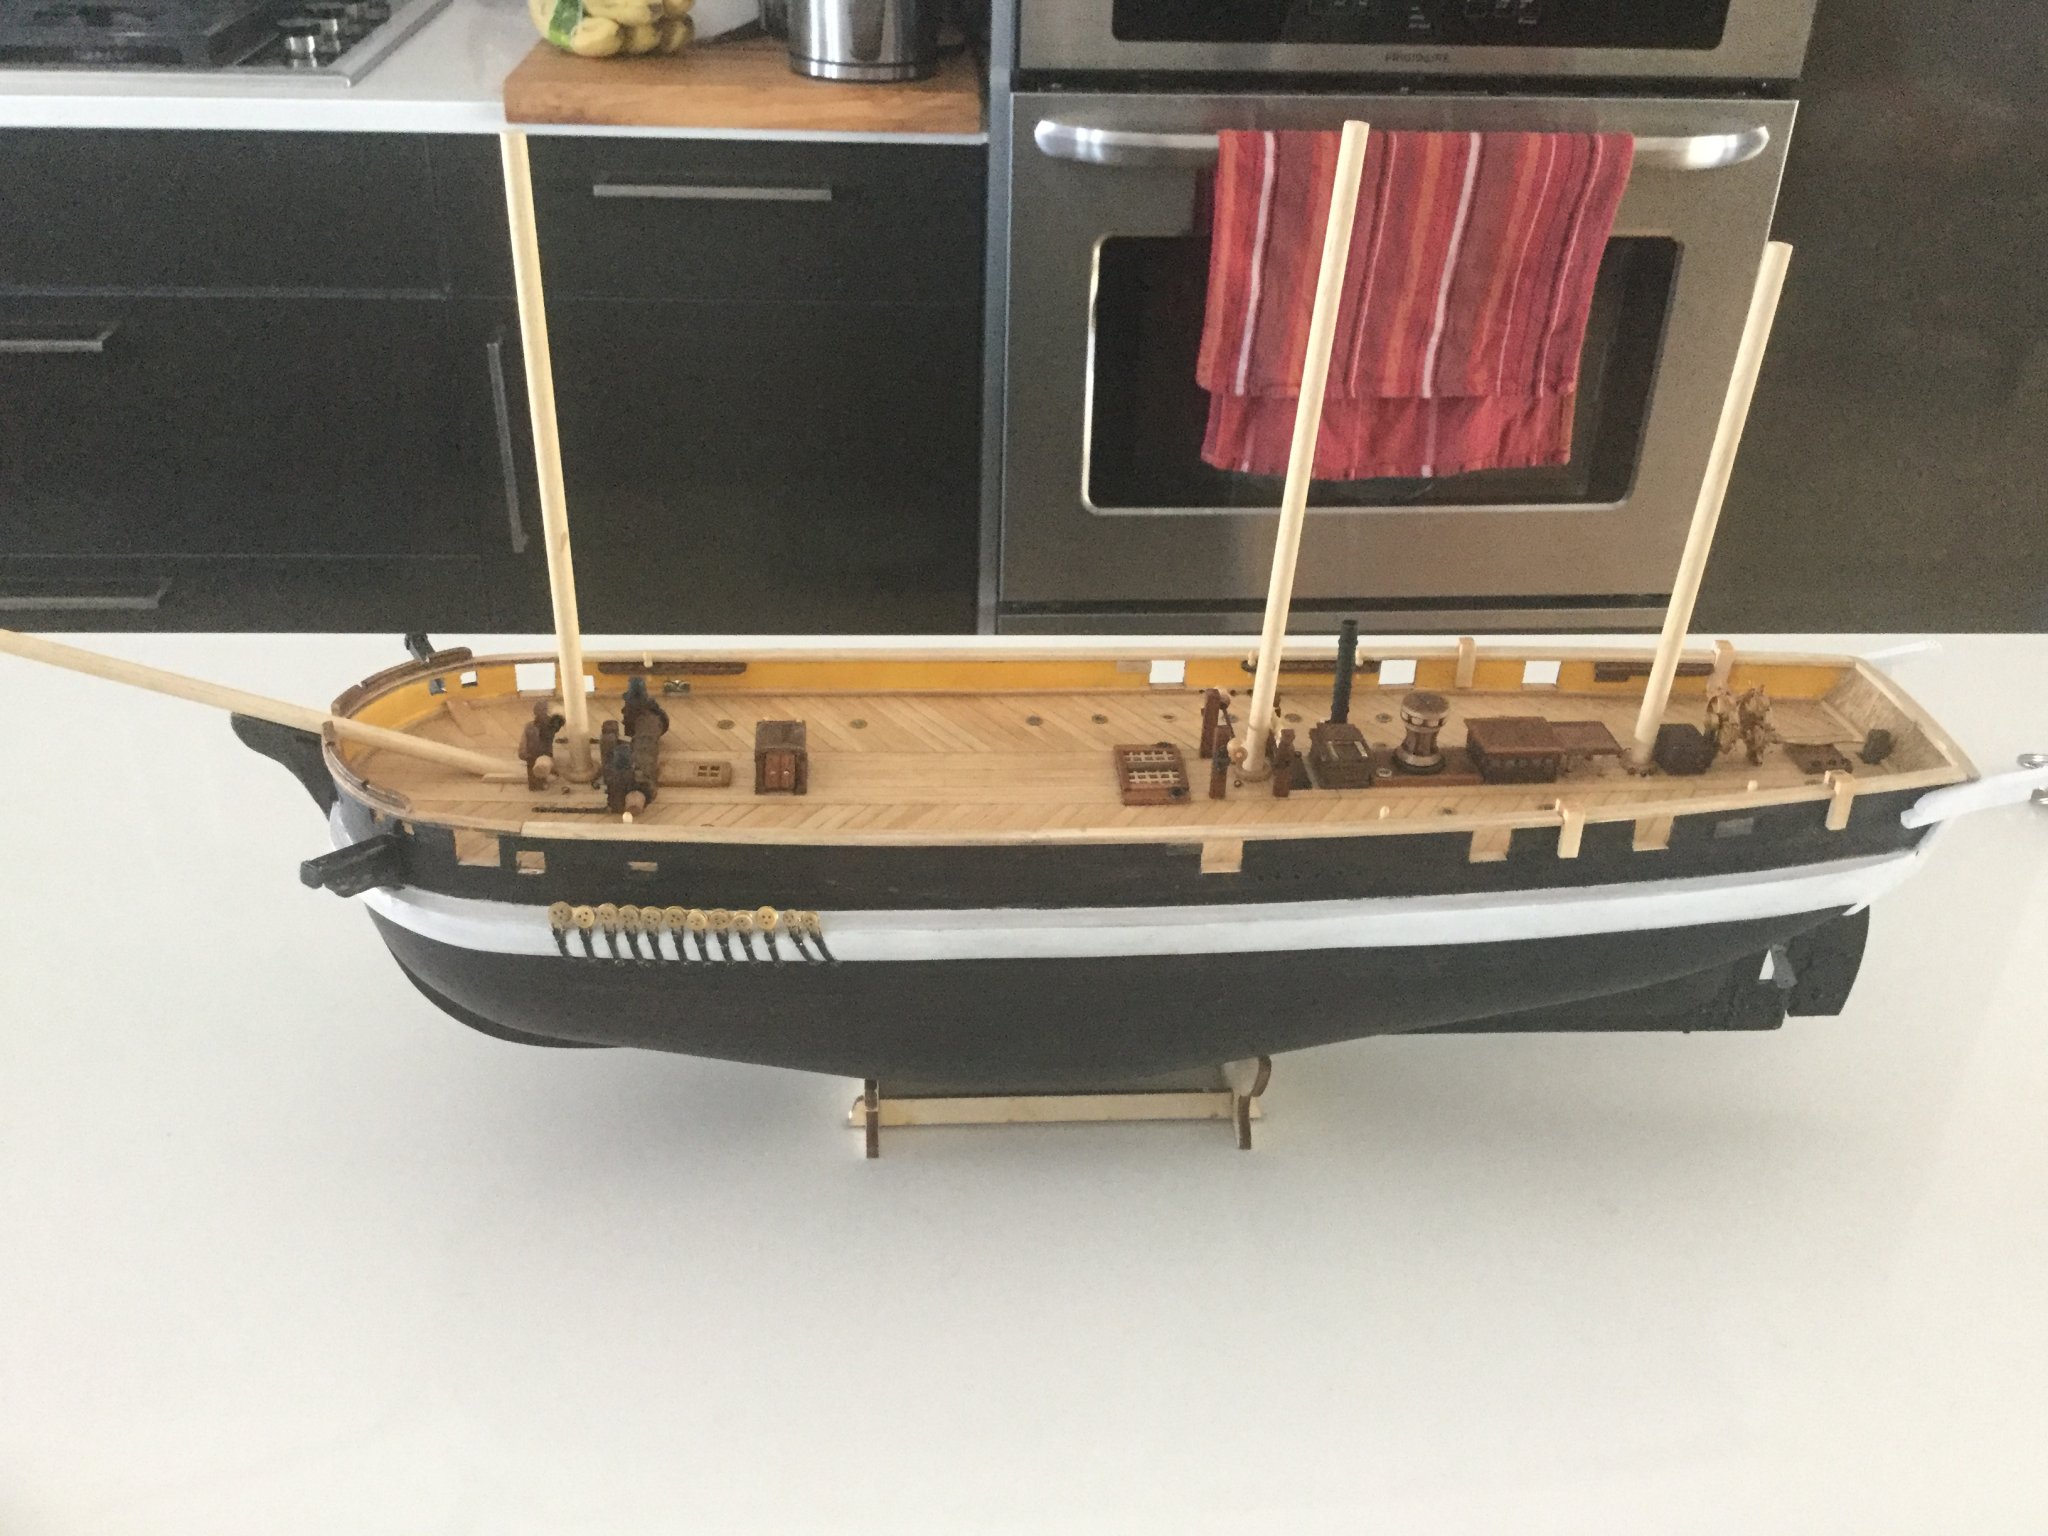
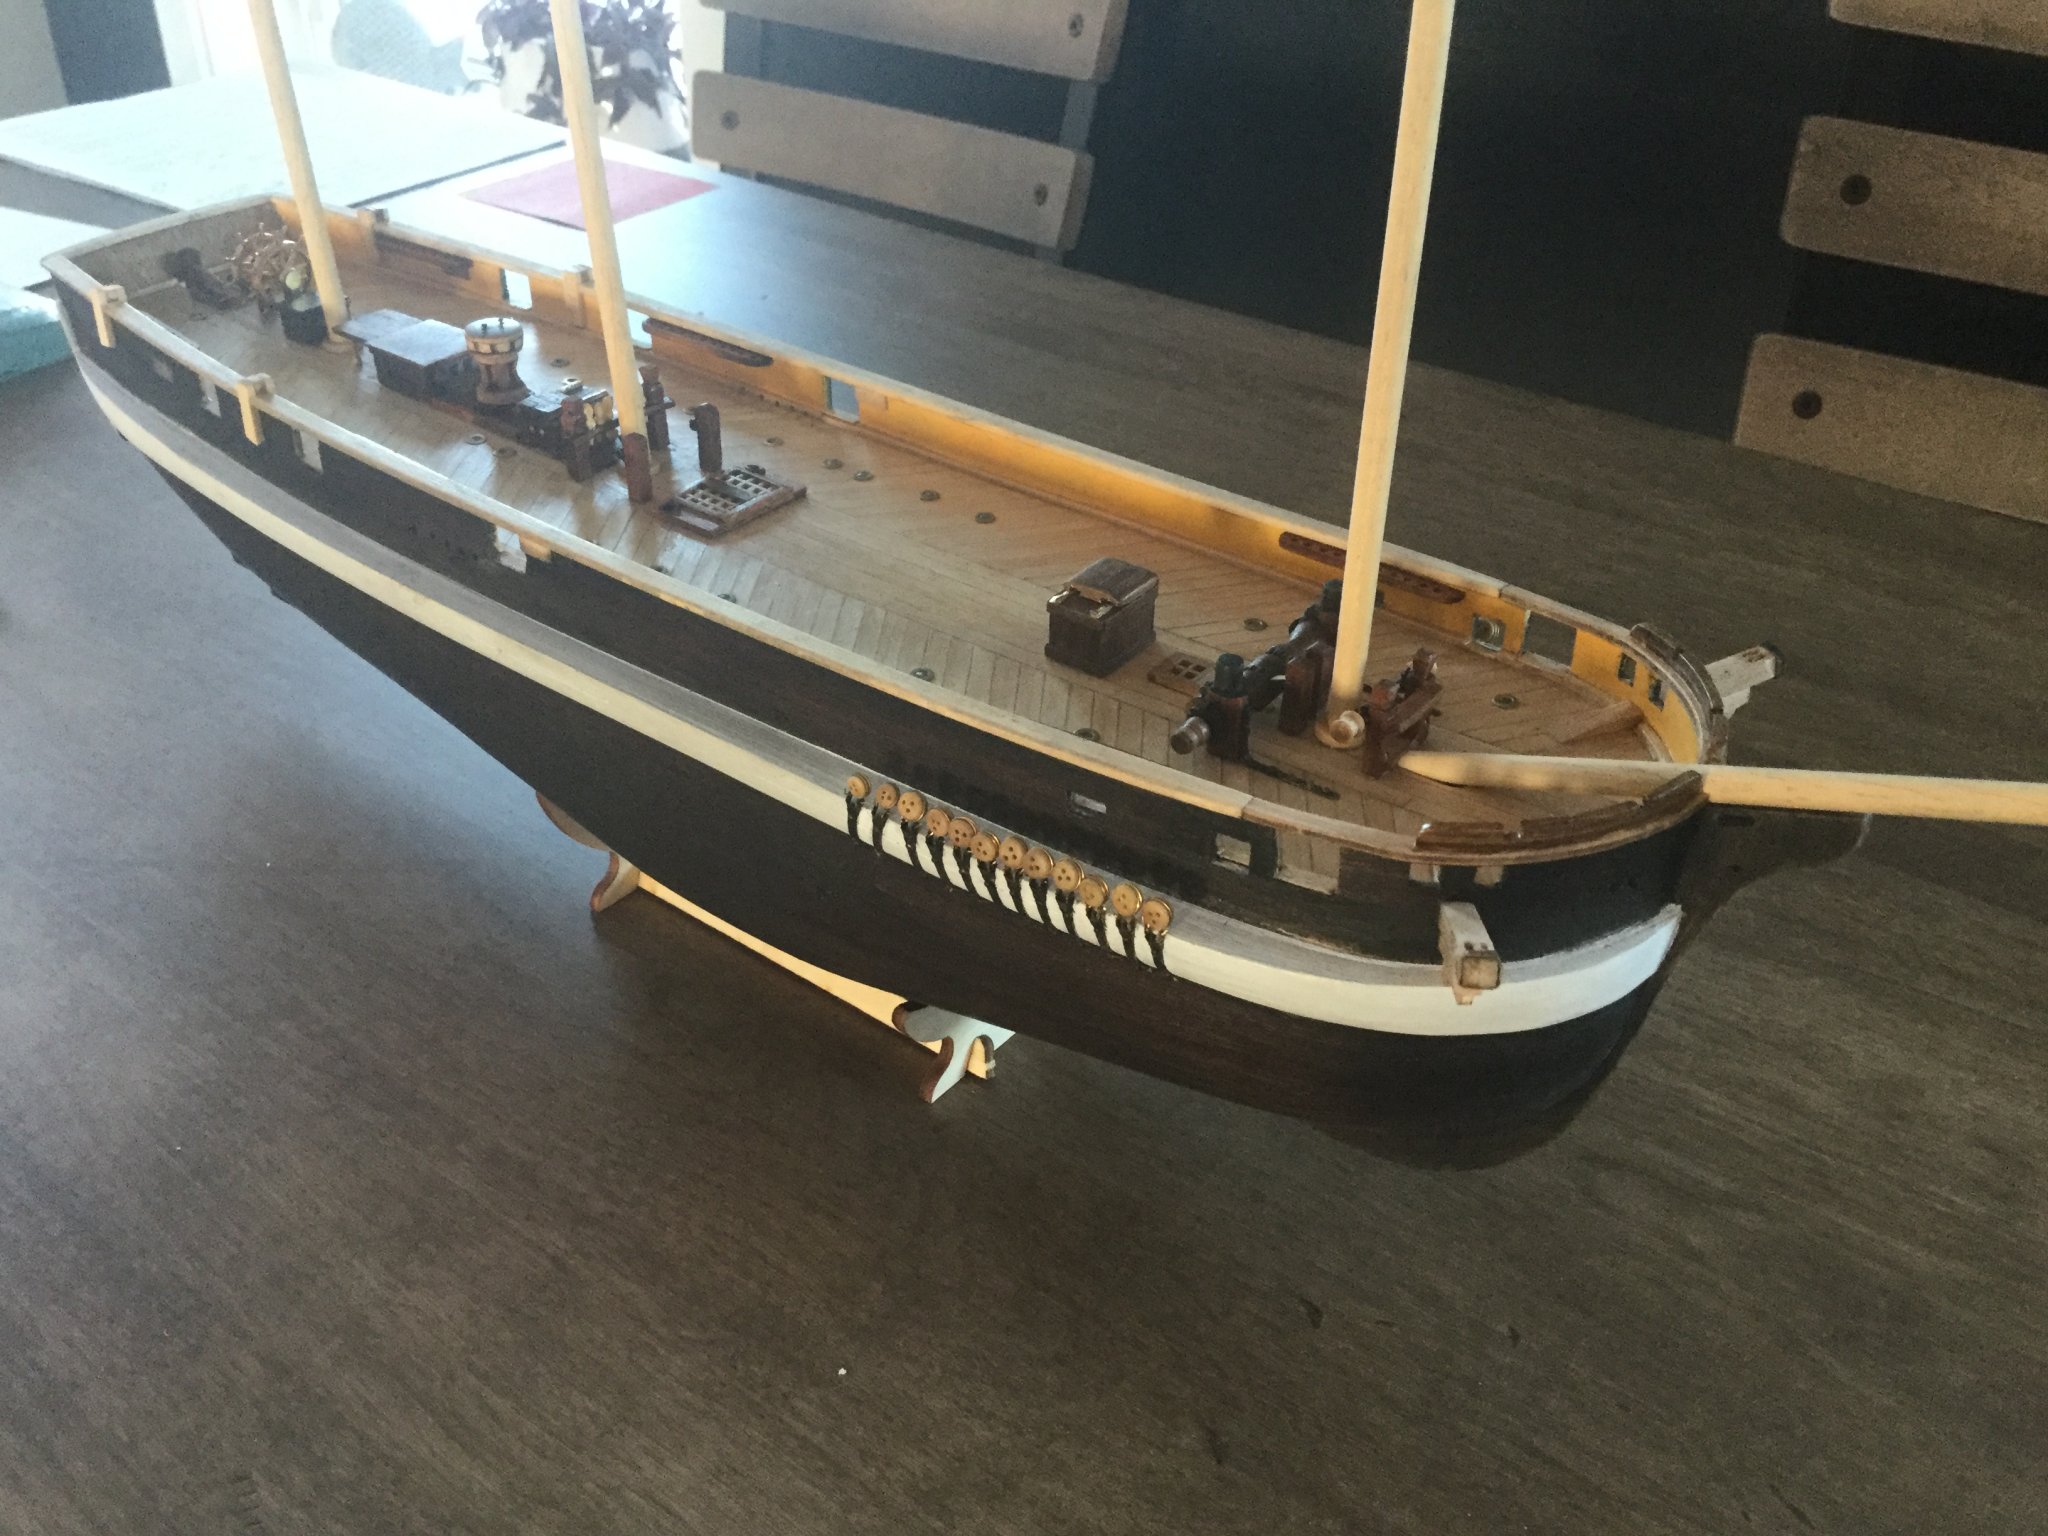
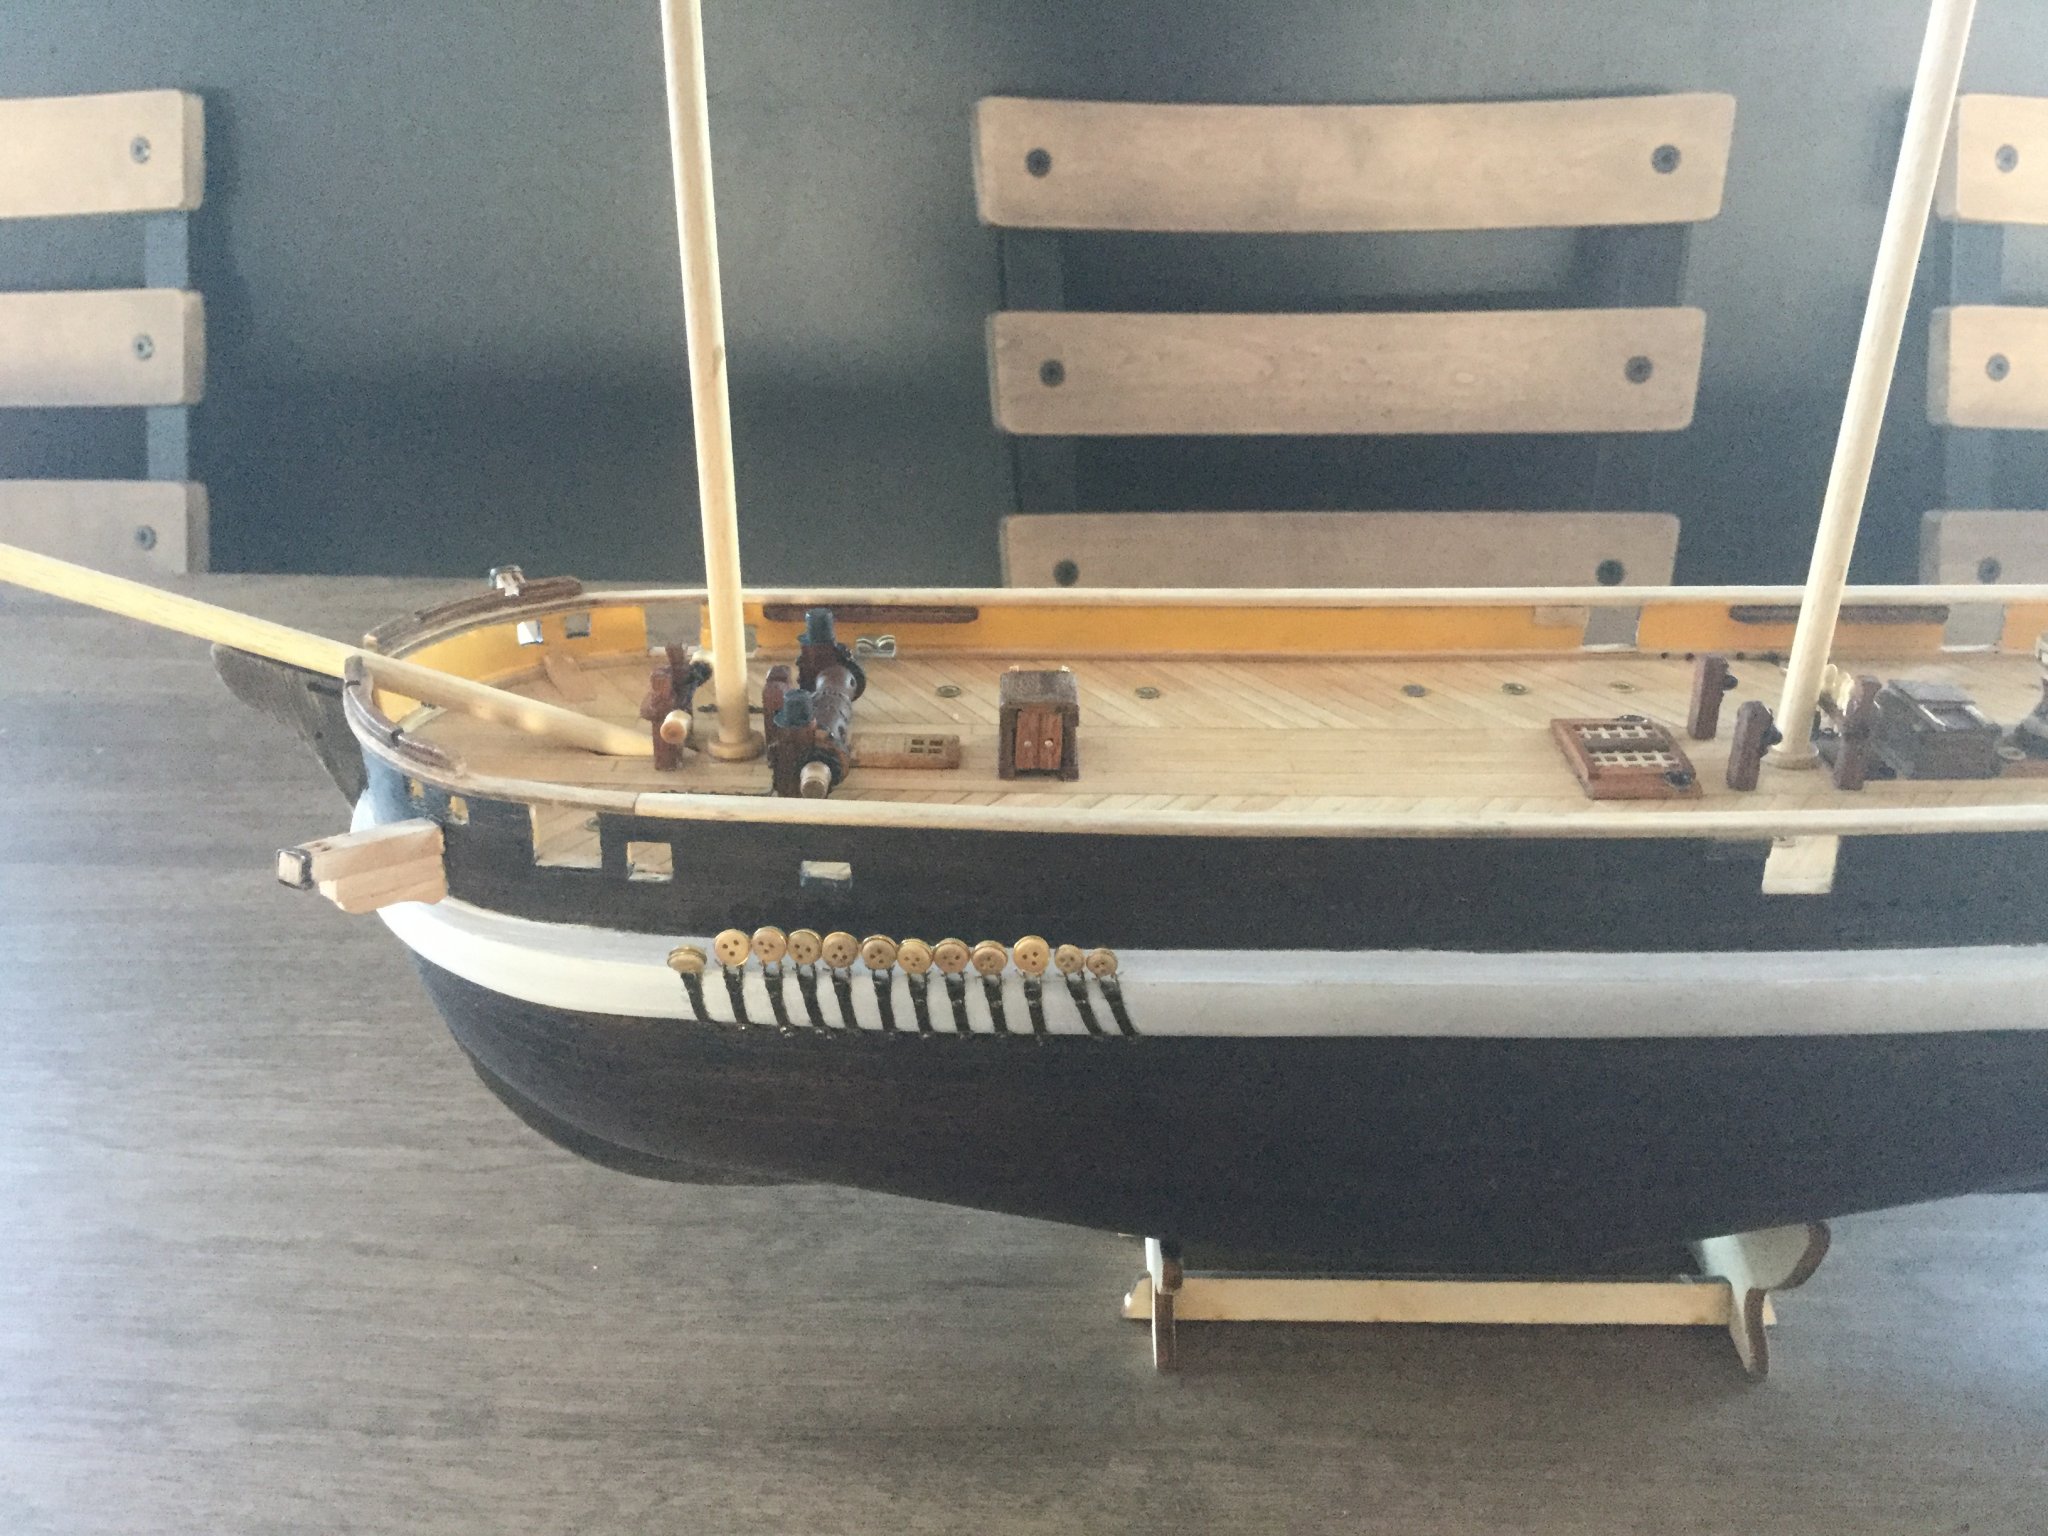
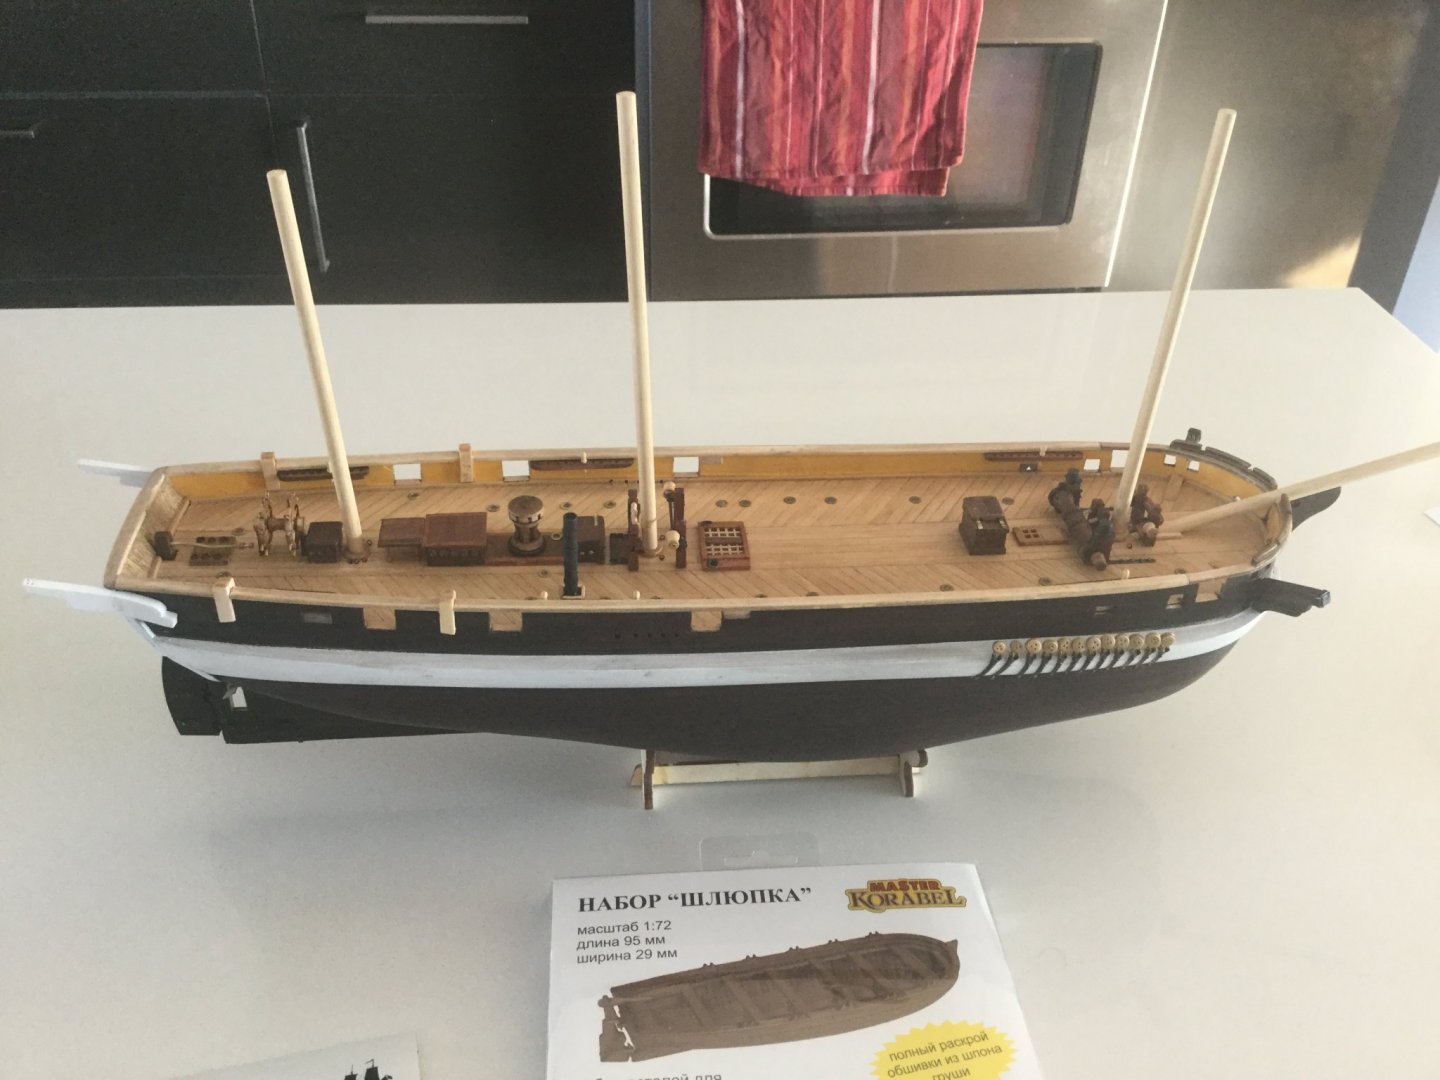
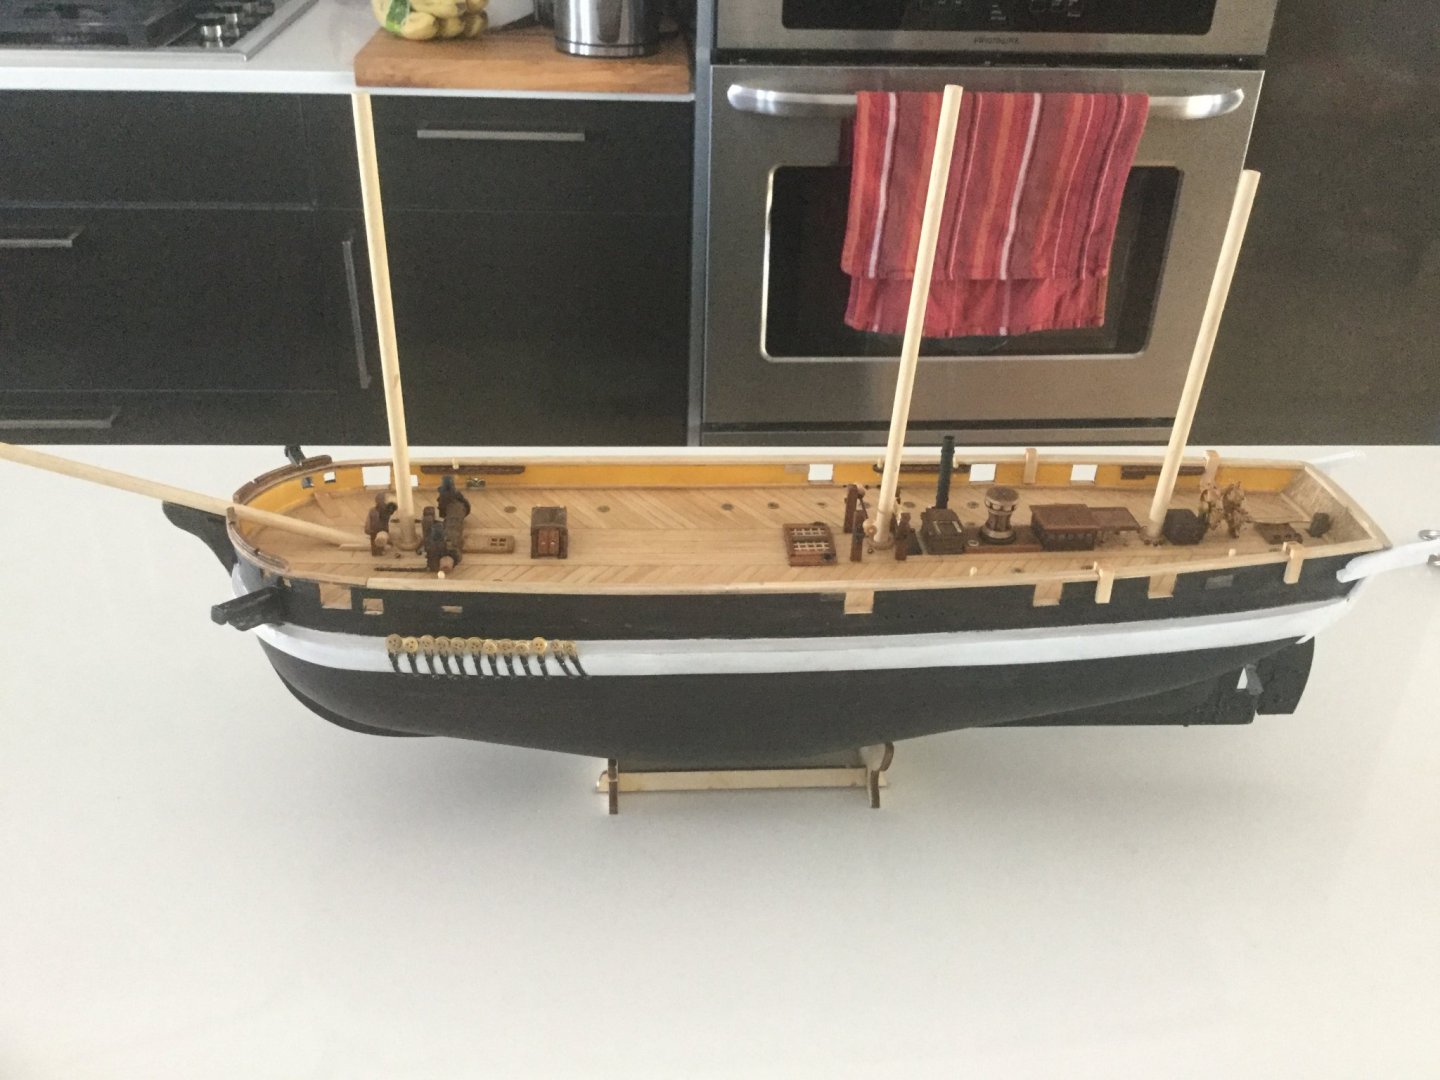
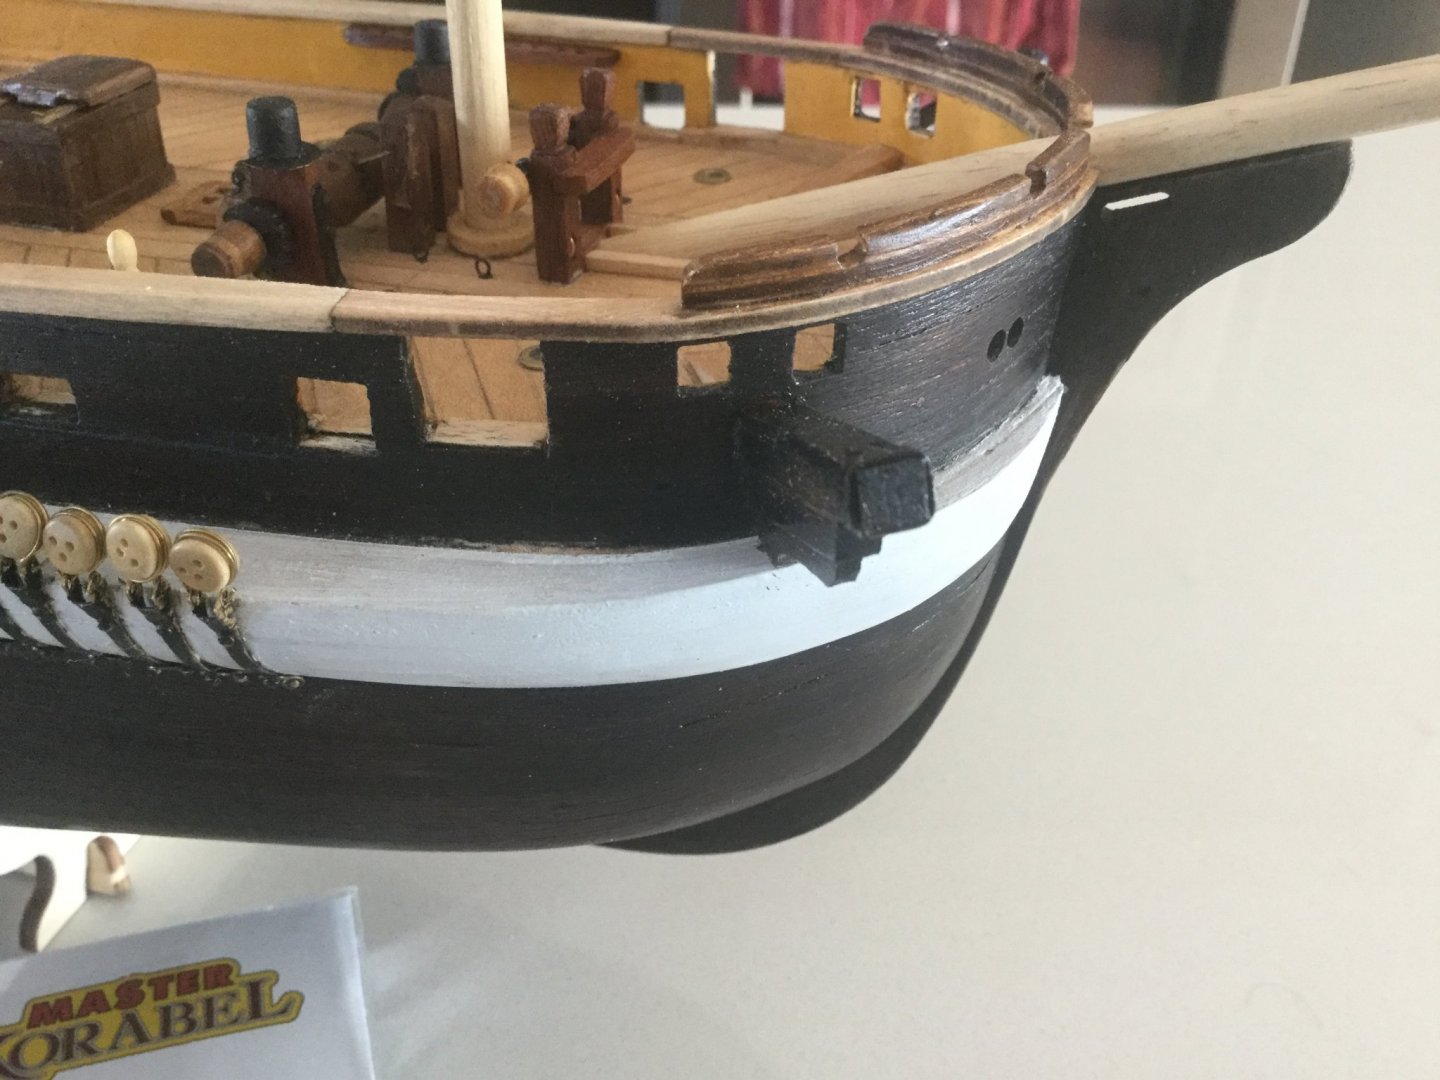
Well I've reached a bit of a turning-point with this model. I have more or less used or replaced all the deck fittings provided by OCCRE, other than the boat-davits and the frame midships where the boat will be. I don't wish to be critical but I think, from reading the build log for the scratch-built Terror in 1:48 scale, as well as poring over the research and diagrams in Mr. Bett's blog and studying the shipyard plans available on the NMG website, that I can make a theory about how this kit came into existence. I think when the T.V. show came out, OCCRE recognized this would be a very popular ship, temporarily. They needed to get a kit out as quickly as possible, so their research consisted almost entirely of visually reproducing what they could see in photographs of Mr. Betts' model. Now to give them their due, they do give his plans credit for being the basis of their version. However, In comparing their plan-view of the model with Navy drawings I can see some differences, such as placement of the deck illuminators. The thing is, Mr. Betts' model is at present not complete. He has paused in his building while the model is at the "shipwright" stage, which shows hull design and a limited number of fittings. My theory is that OCCRE used what they could from this source, but then proceeded to rig the model using standard parts from the parts-bin, and rigging based on practices from other ships. Therefore, I feel there are some errors, which for me need fixed in order to be fully satisfied with the model. I have to admit some of the changes are also going to be based on speculation on my part as well. But from here on out, I am going to be taking the kit's instructions with a grain of salt and double-checking their work before proceeding. Some of the things I am concerned with (or have already changed): 1) the wheel. Erebus and Terror had ten-spoked wheels. The kit one has eight, therefore I ordered and built a pair of Syren ones. They come in a mini-kit with a jig and it's a great addition 2) the windlass. The kit one is a generic "windlass" with only one ratchet, even though there are two pawl-bitts that support the belfry. I made a new one based on drawings of the real ship and Mr. Betts' blog. There is some debate among experts whether the Terror would have had her original windlass with wooden knees, or whether she would have been updated with a windlass similar to Erebus with iron knees. Mr. Betts in his blog seems to believe the latter, and also updated navy plans have the heading "Erebus AND Terror" and seem to depict both ships having this updated windlass. So I tried to modify the kit one, but ended up just scratch-building one from bits of dowel, brass plate, and walnut beams. 3) Likewise, along with the windlass, the manufacturer seems to have peppered the ship with fife-rails and pin-rails that may or may not have been on the real ship. I suspect this was because it's pretty hard to work out where they were in real life. I know from shipyard plans where the pin-racks were on the bulwarks, and they show a row of pins between the mainmast jeer-bitts. Wreck photographs show a spider-band on the mizzen, but this is not depicted in the plans, nor are any spider-bands, fife-rails or otherwise shown in conjunction with the foremast at all. I don't blame OCCRE for simply sticking two pin-racks astride the bowsprit, but they weren't there on the real ship and this is causing me some stress because there must have been something there, I just can't work out what. Also I reconfigured the arrangement at the base of the mainmast to include warp drums and put rings in the deck at all three masts to rig purchase blocks for lifts and halyards. 4) The capstan. The one in the kit looks silly. I made my own. 5) mast woolding. The kit depicts this as being rope, but I gather from reading others' build-logs that by the early-mid 1800s it was more likely they would have been iron. I haven't made up my mind about this. I think OCCRE just went with a simplified generic barque rig with this model, and I'd like to reevaluate some of their conjecture. Of course I don't know what I'm talking about so this is where some research is in order. 6) Rudder head cover and "seats of ease" . Diagrams show that there were probably little deckhouses at the taffrail containing sheltered "facilities" for the men. I have identified in wreck photographs what I think is a photograph of one of these structures, and also Mr. Betts depicts them on his blog. I'm going to try to build a representation of these little houses. 7) the beams at the stern. The ones in the kit have a peculiar angle that must be cut into the four beams that make up these structures. I don't actually know what these are called but they are sort of like the cat-heads except they are at the stern. Usually they are depicted with a boat hanging from them. Anyway the kit shows a complex angle here and I was frustrated trying to cut it accurately. I checked out the navy drawings, old paintings and Mr. Betts' model, and it looks like OCCRE got this wrong. There is one photograph of Mr. Betts' model in which it looks like the beams are at this funny angle, but I believe this is an illusion due to the angle the photo was taken. I built mine with them straight, and I think it's much more likely they were straight on the real ship. They angle outwards so they are parallel with the centreline, but why would they also angle downwards? Doesn't make sense so I didn't include it. Also I treated myself to one of those great little "Master Korabel" boats, that's like a whole other ship with its microscopic clinker hull. It's not exactly the same as the cast-metal one it will replace, but I think its presence will enhance the whole model. I'll still use the two cast-metal ones upside-down on their racks at the stern. Of course if anyone here manages to read all the way through this and has any suggestions about some of the things I am concerned about, please provide commentary!

-
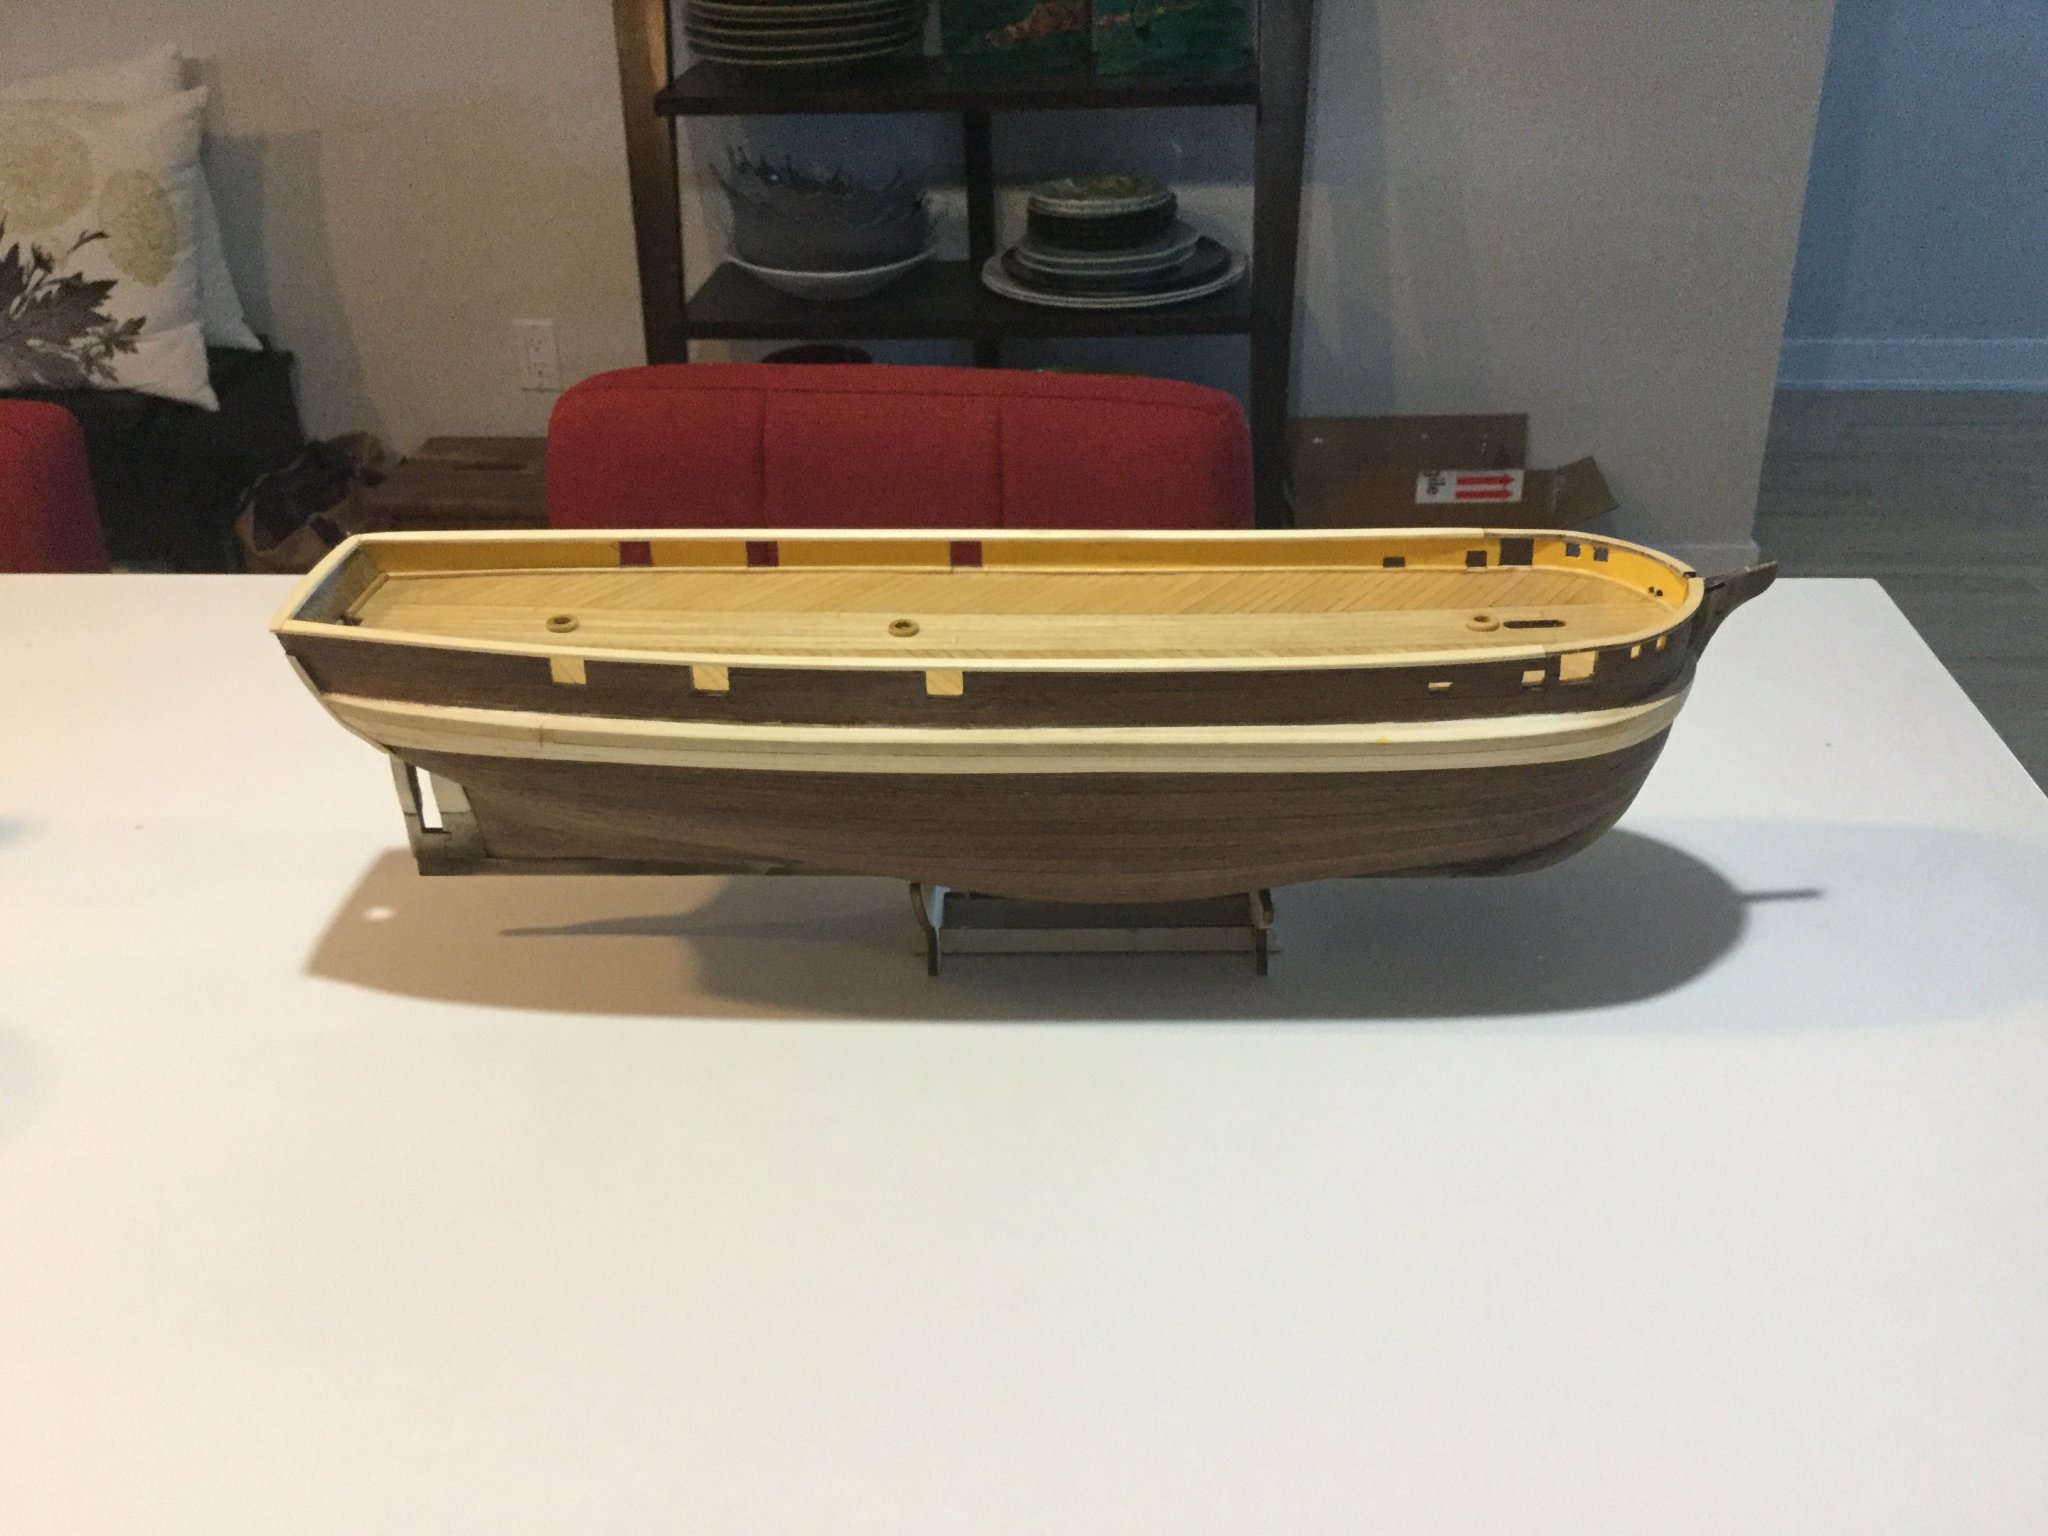
My goodness. Is that what the plank bender did? I think what I would do here is take some very thin CA -the kind with very low viscosity that can wick into the wood fibres. This will "petrify" the wood so it will not continue to splinter as you sand it. Then sand it carefully and use wood filler to smooth out any cracks. Sand first, then apply wood filler and sand again. Also, in this area the channel chocks begin to narrow quite a bit towards the bow. You may be able to sand all this away anyway. The damage on yours is right in the area where I sanded right through the first layer of planks to begin tapering them. I'll try to find a picture. Additionally if you don't mind a bit of advice, in my opinion you should taper the chocks more at the stern. Where they join onto the "fashion piece" it looks nicer if they are thinned down to about the same thickness. Mine is far from perfect but I the shape conforms to what we can see in historical plans.

-
I'm new to the forum and only just spotted this log. It's a pity the era of screw driven steamers with full sailing rig was so transient, because I consider them to be the most beautiful of all ships. I like the details you're creating for this one. With respect to that large white bullet-shaped object, is it possible it was a fire extinguisher? Had they invented those yet by this time? It's the same size and shape as the ones you still see around small airports, although they are painted red and have big spoked wheels on them. Also with respect to the white tub with handles you see in the pictures, could it have been the grog butt? Did American sailors do that? If they had a grog tub it was probably their favourite thing in the whole world. Maybe they liked having their pictures taken with it! (I'm being cheeky) Another thing I'm curious about are the funnels. Were they retractable for some reason? In every photograph of this ship, they seem to be a different height!
-
HMS Terror by Mish - OcCre - 1:65
Keith S replied to Mish's topic in - Kit build logs for subjects built from 1801 - 1850
Cutting them back one or two frames will work perfectly and not be too much trouble. Staggering the joints will help keep it smooth too. -
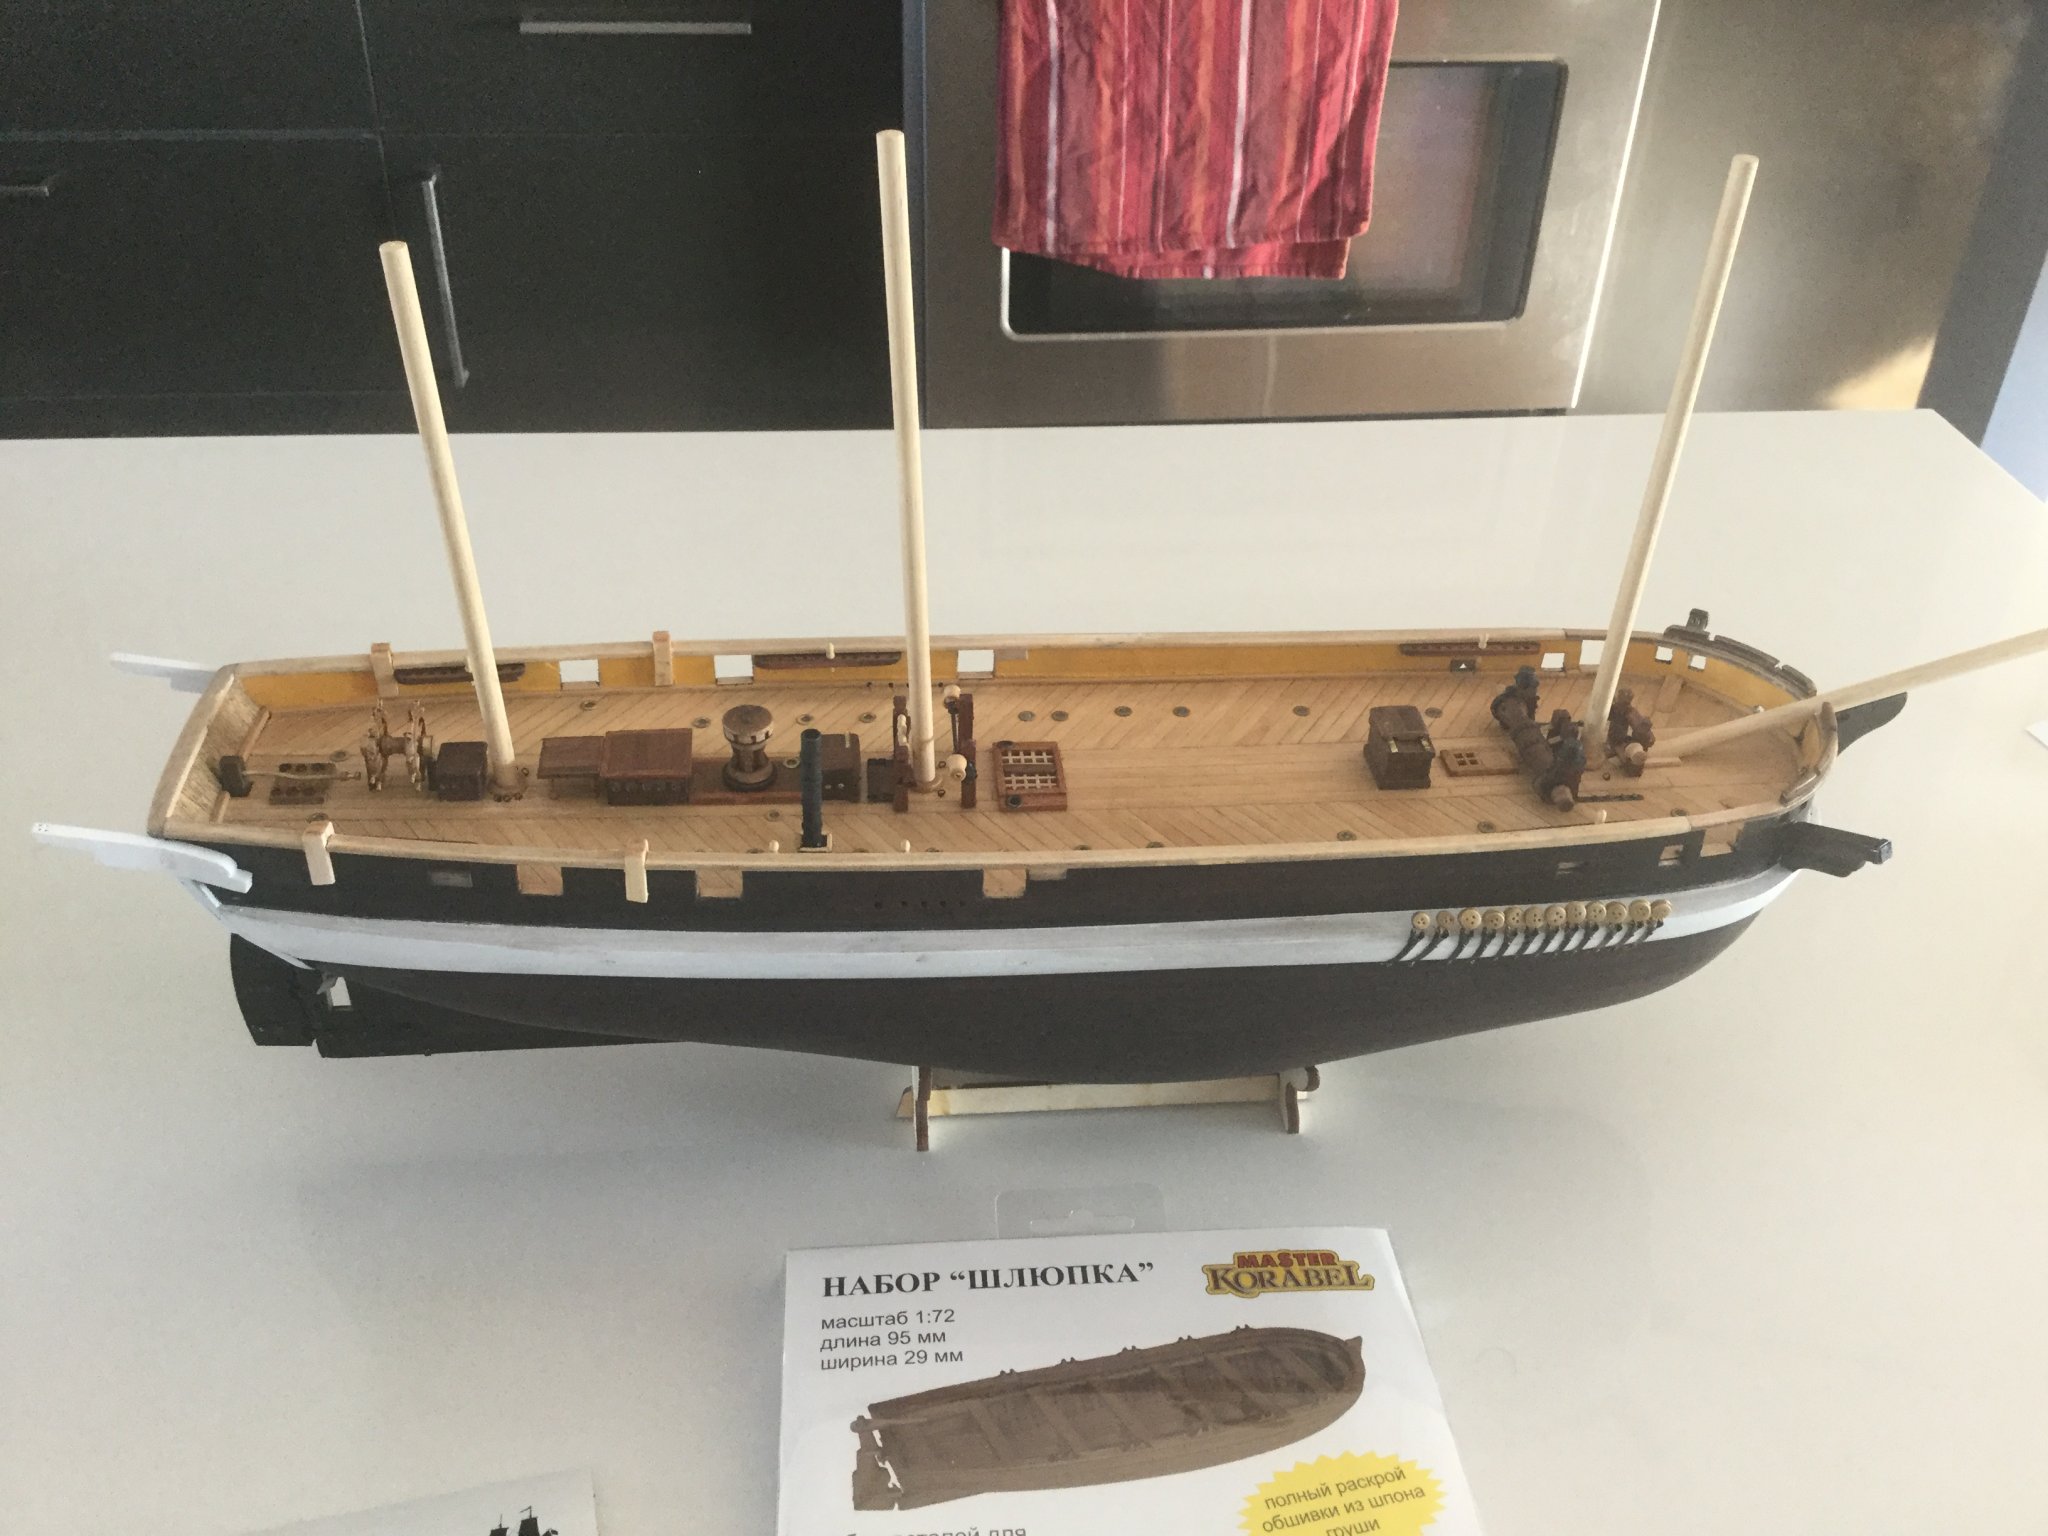
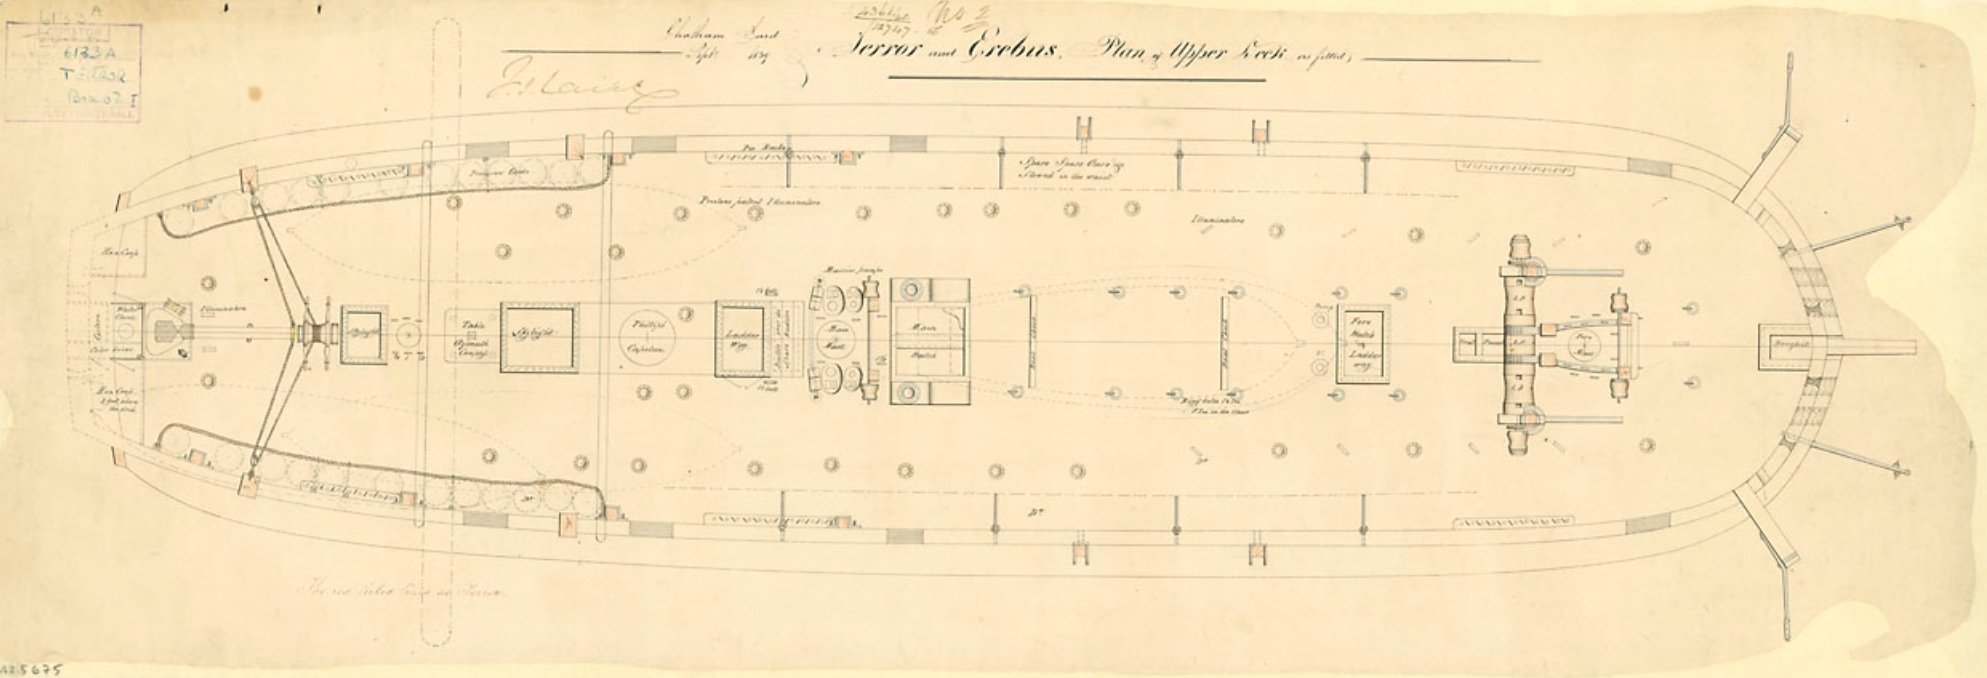
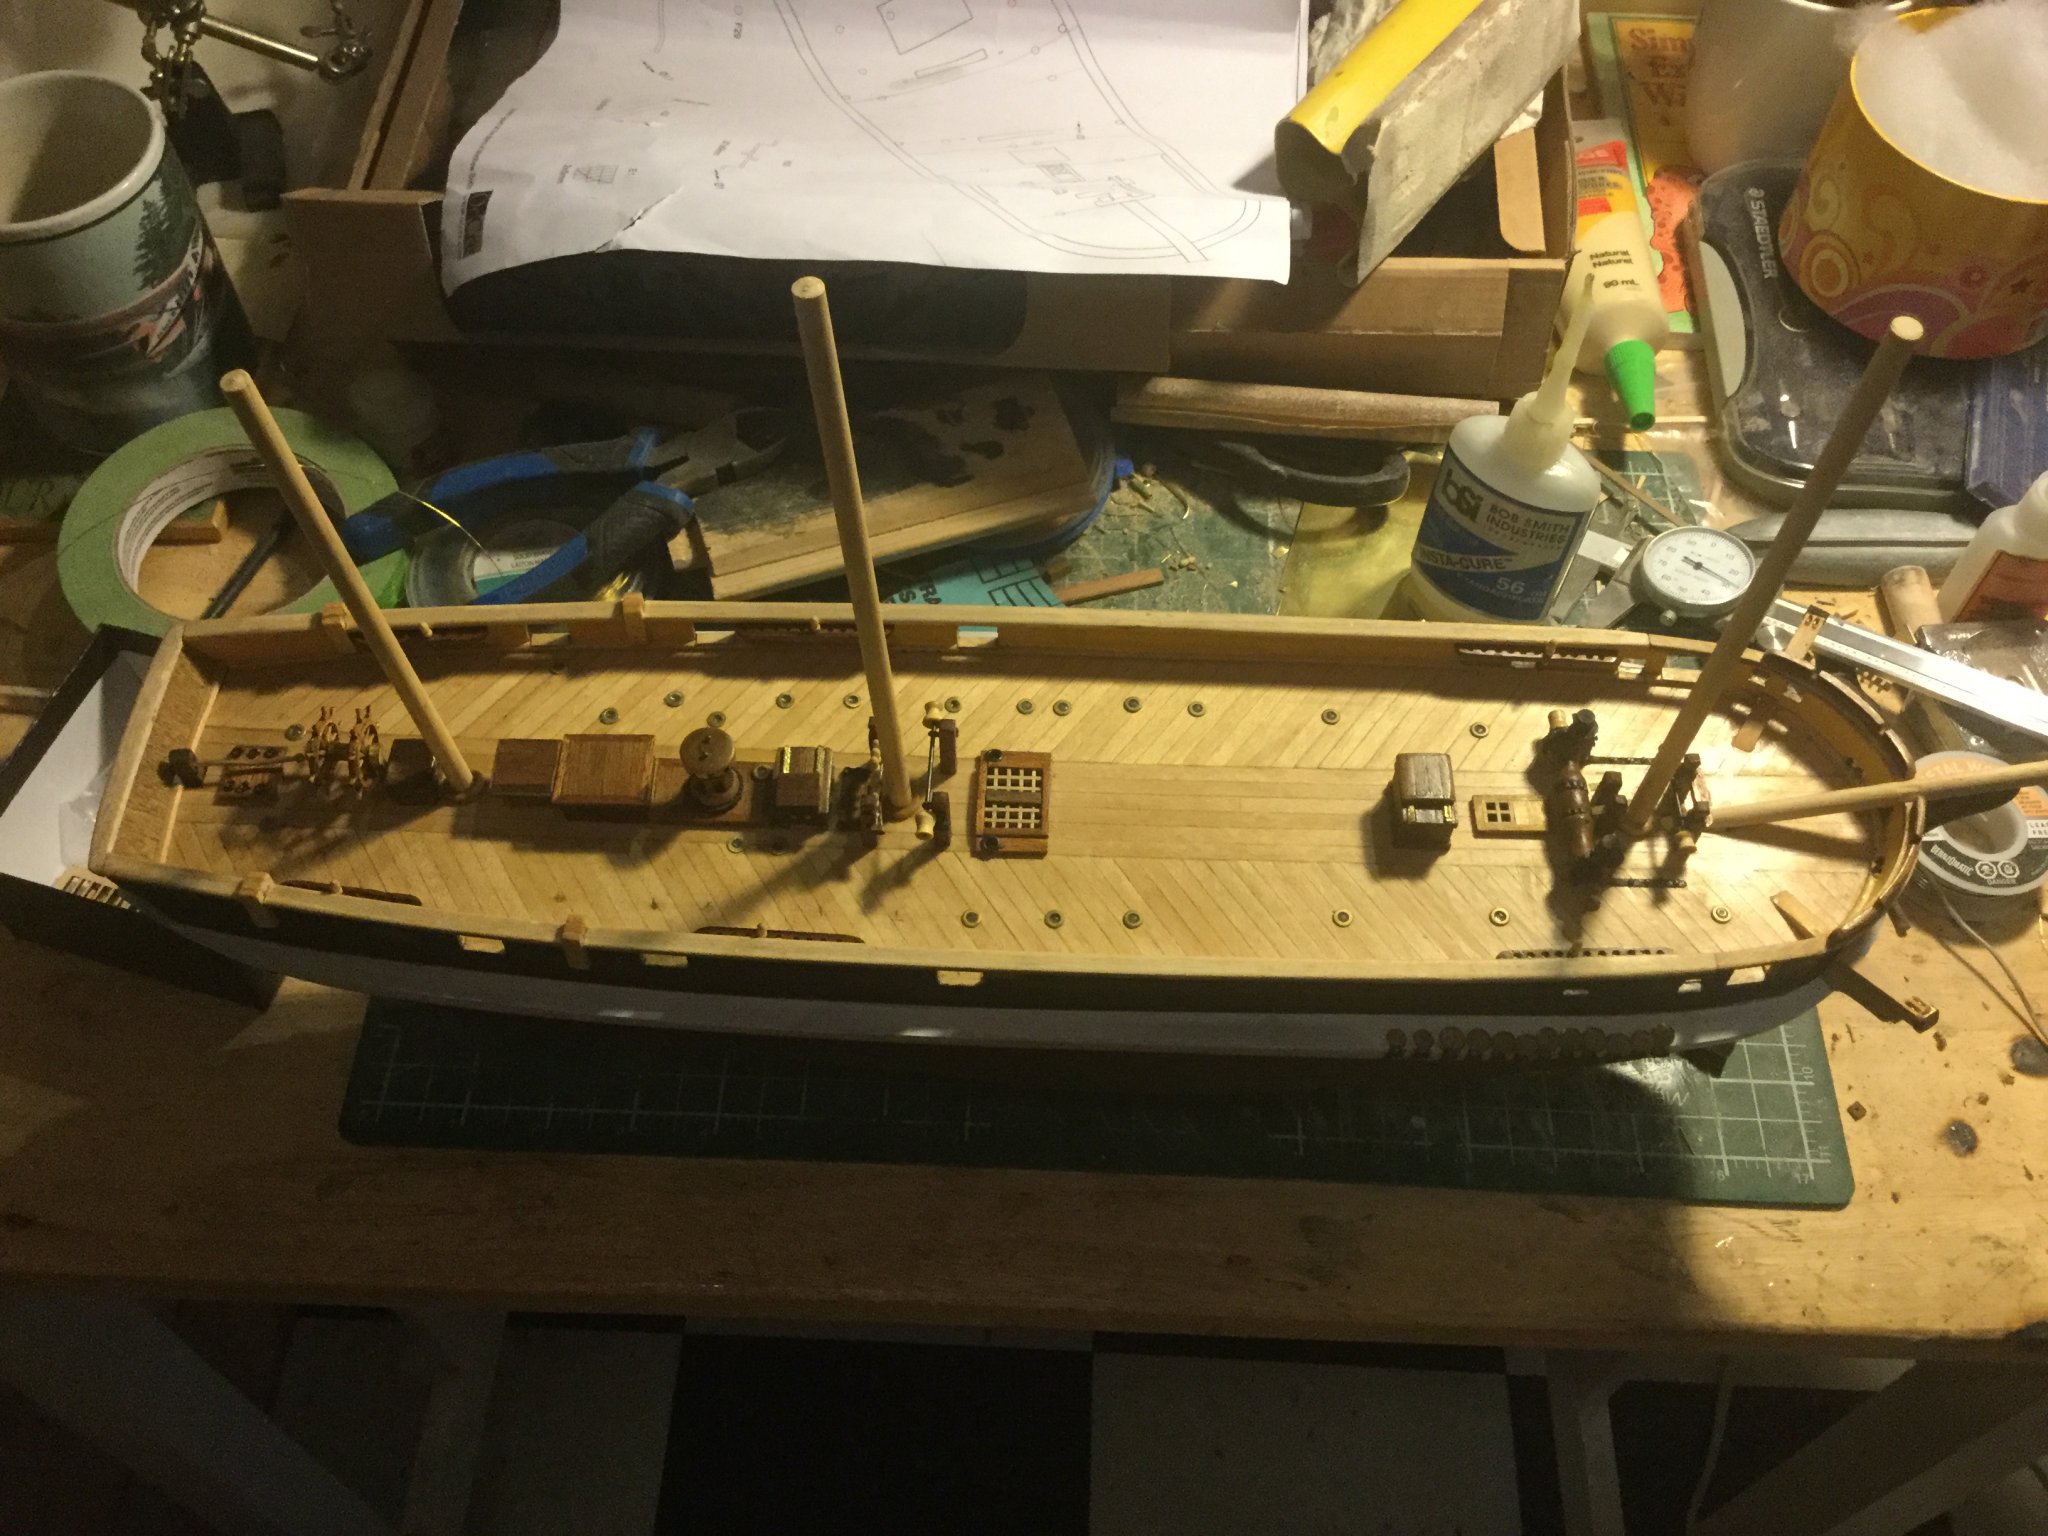
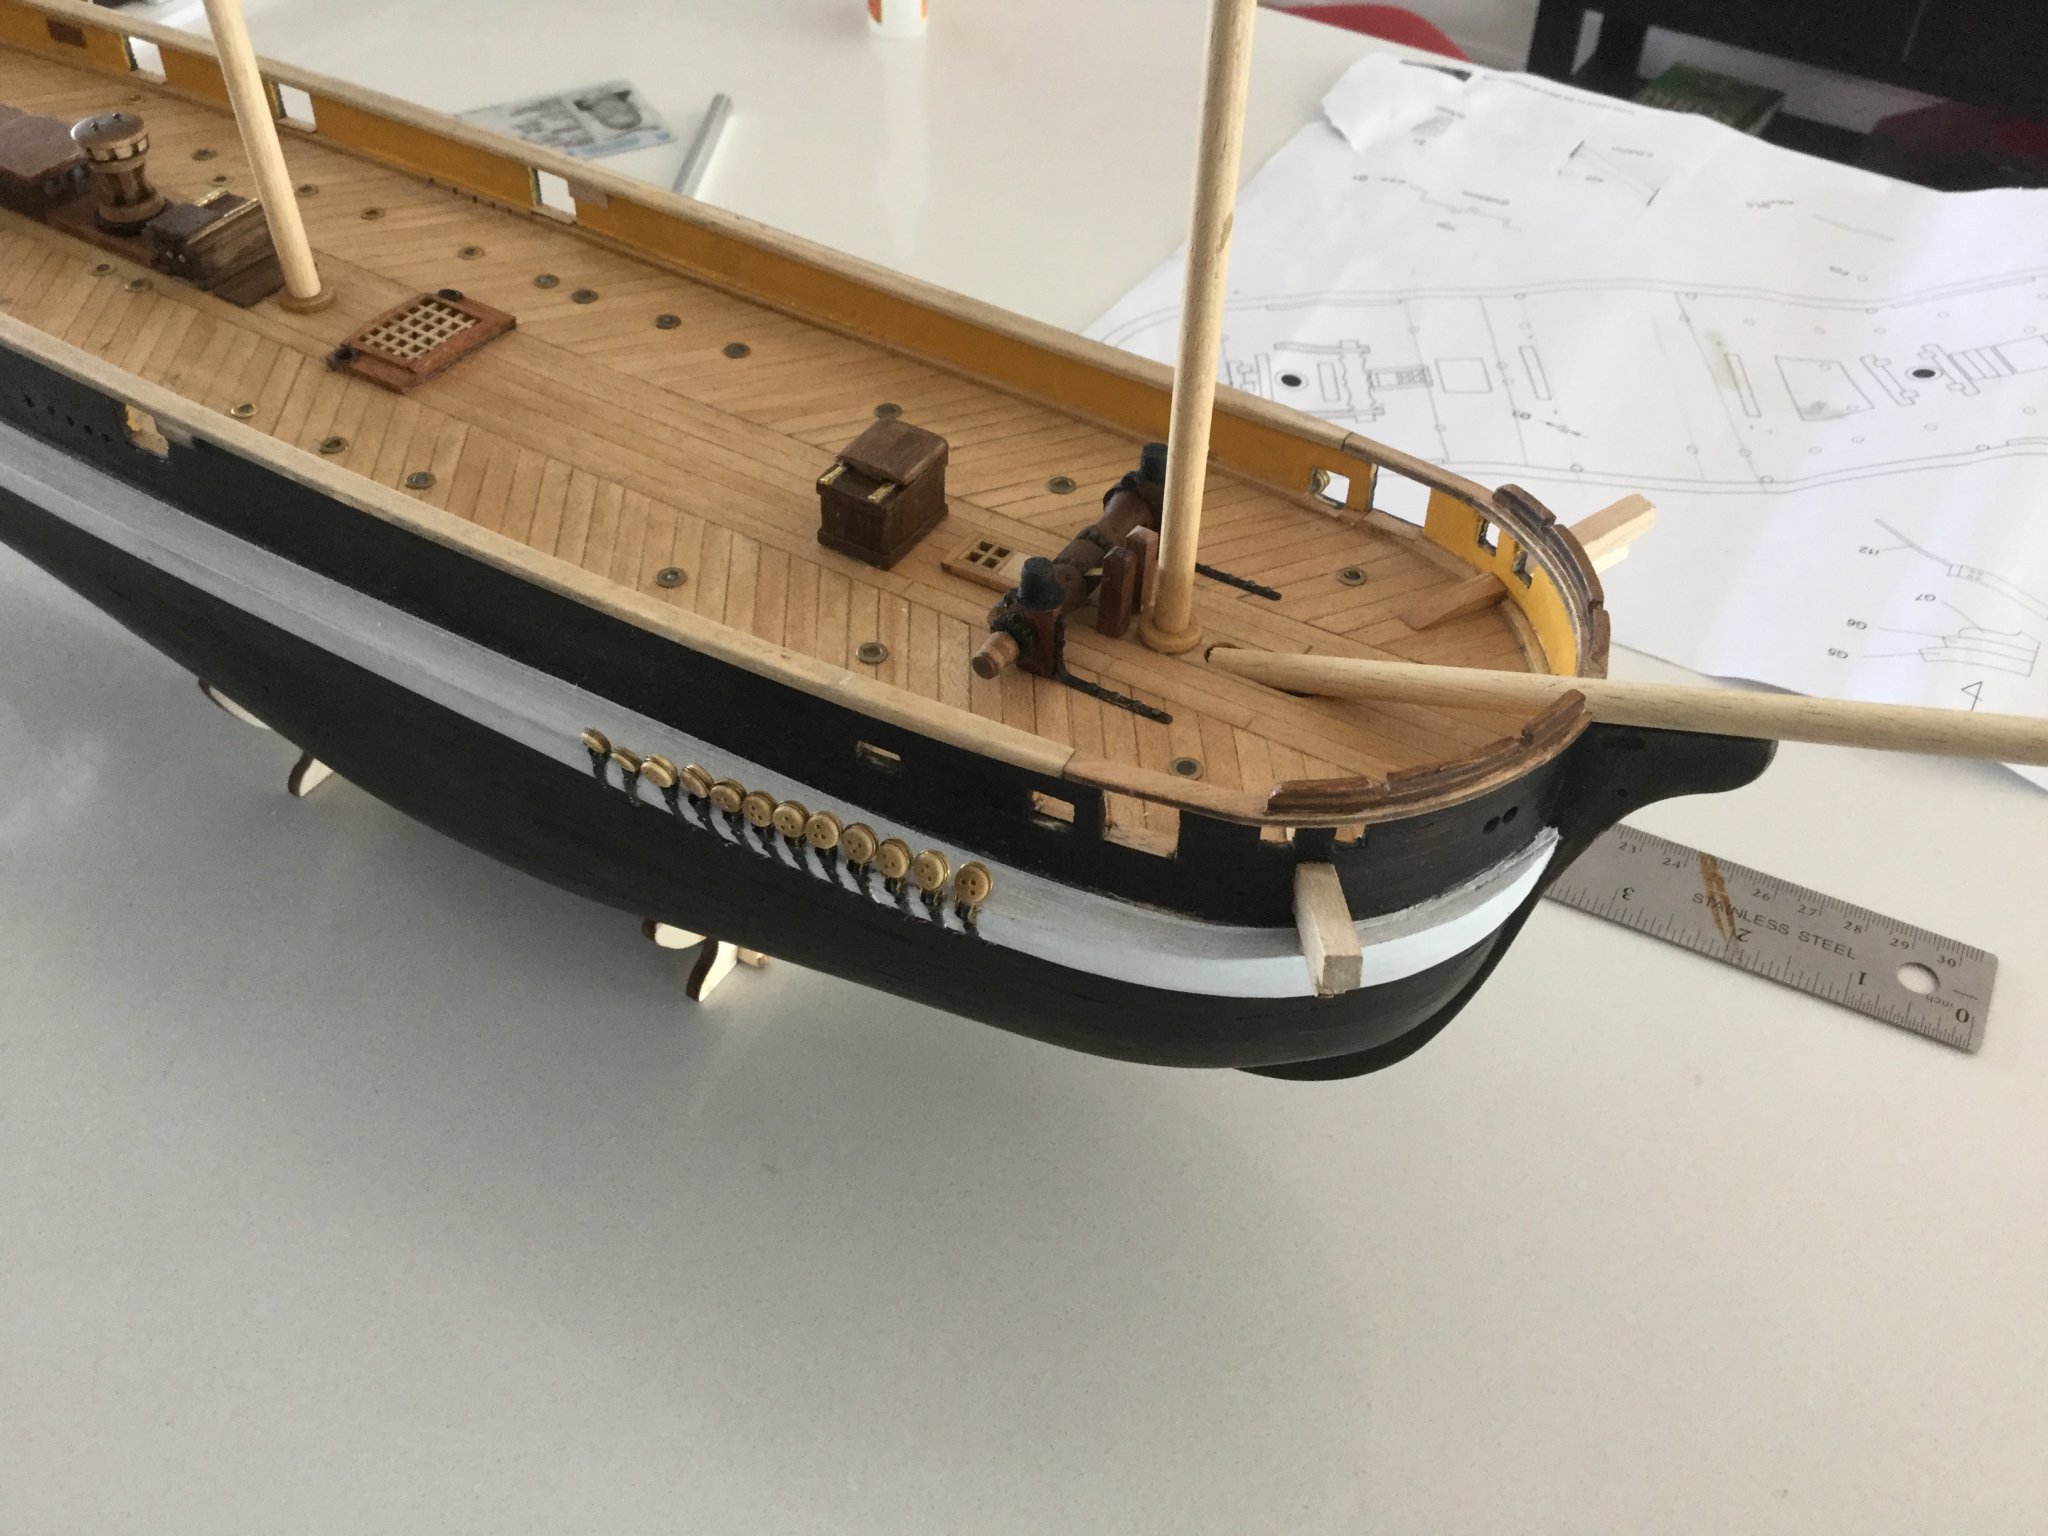
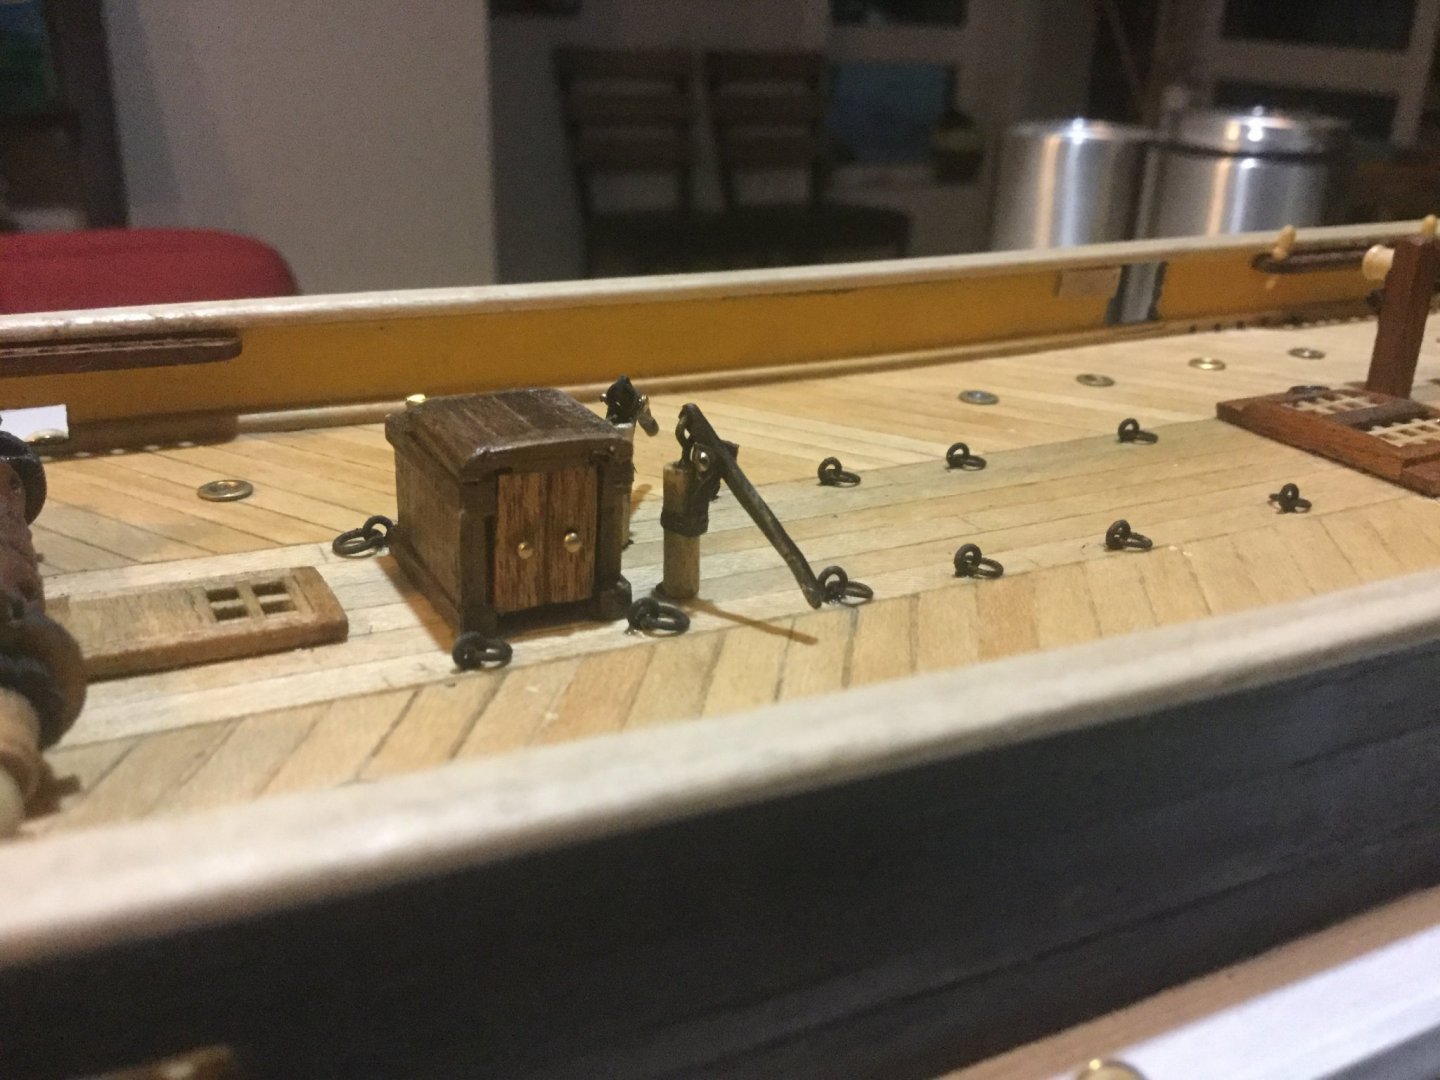
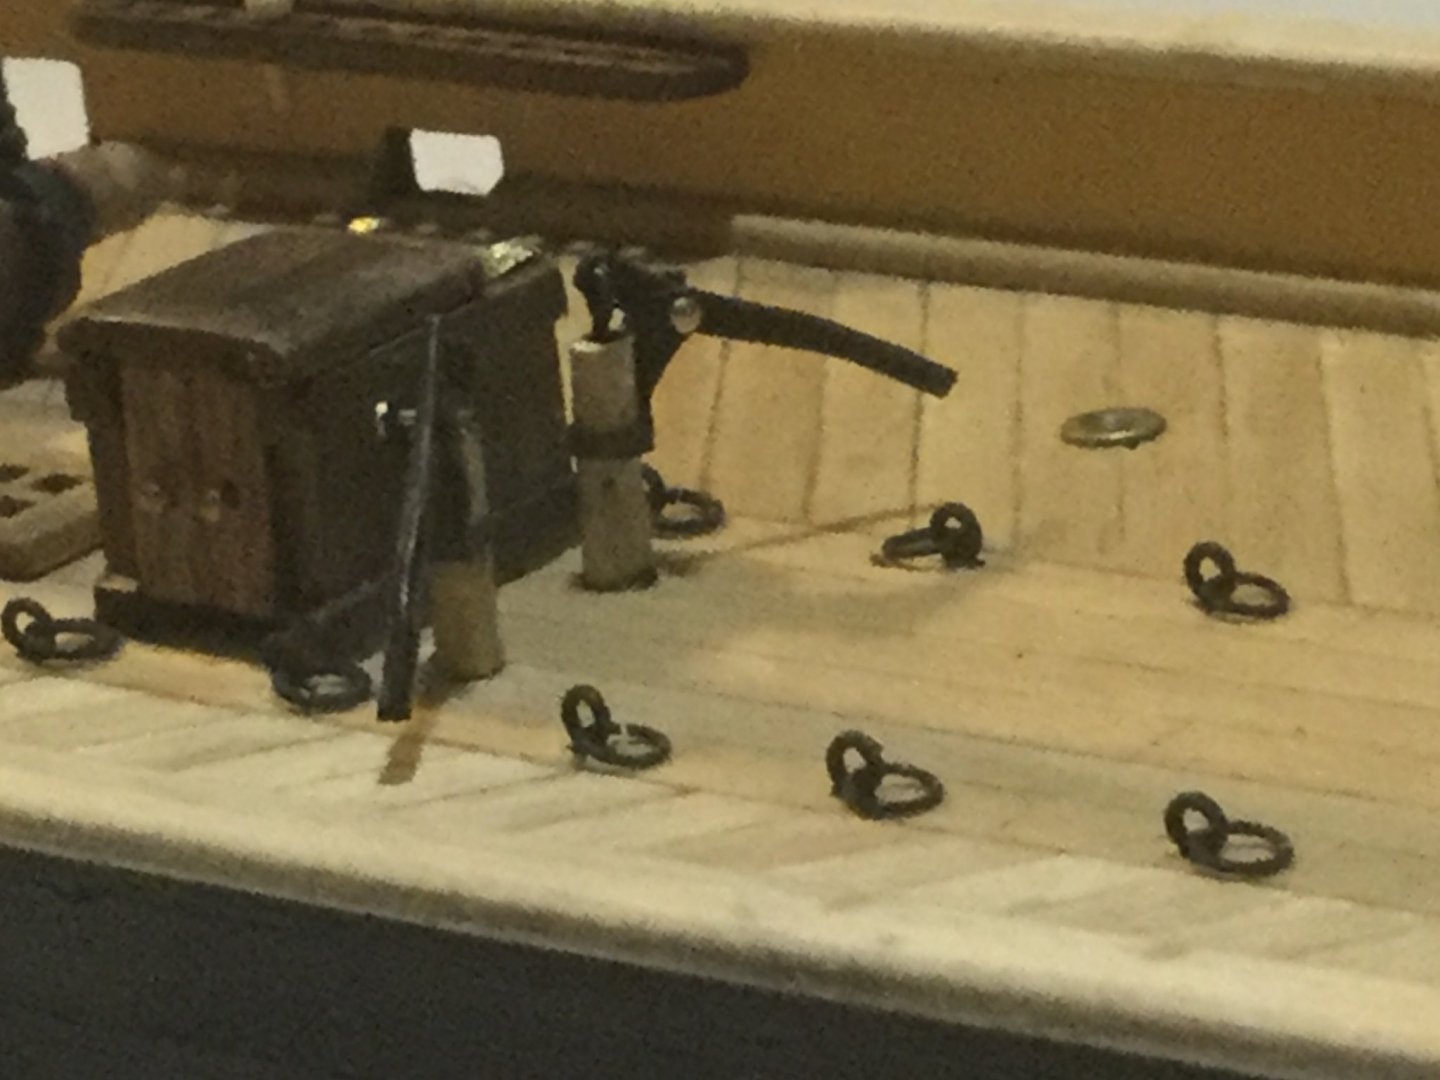
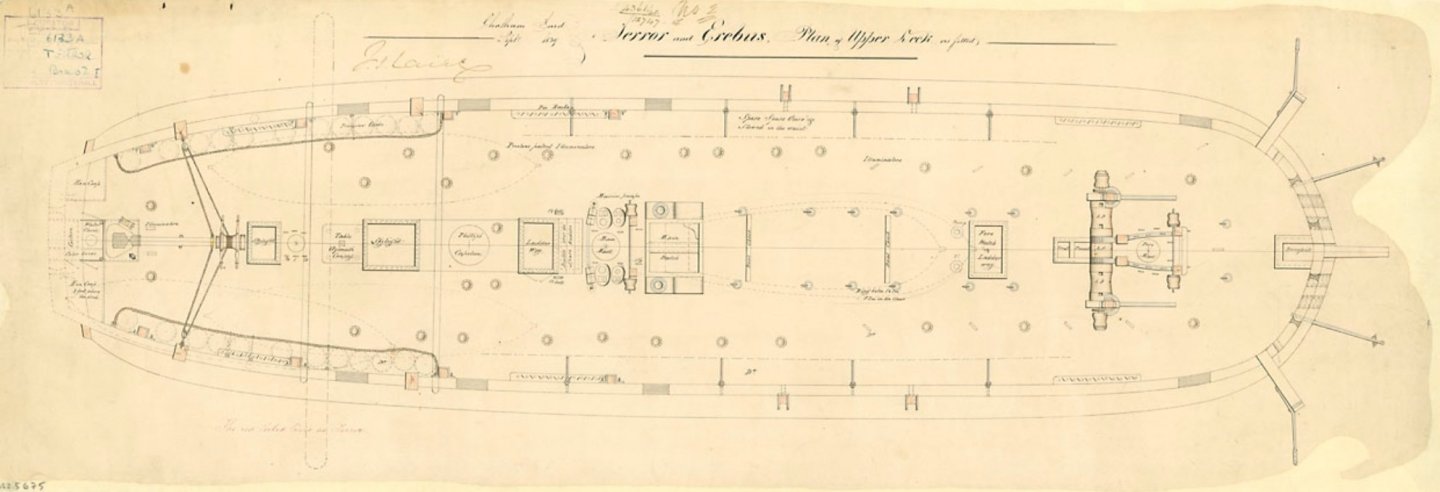
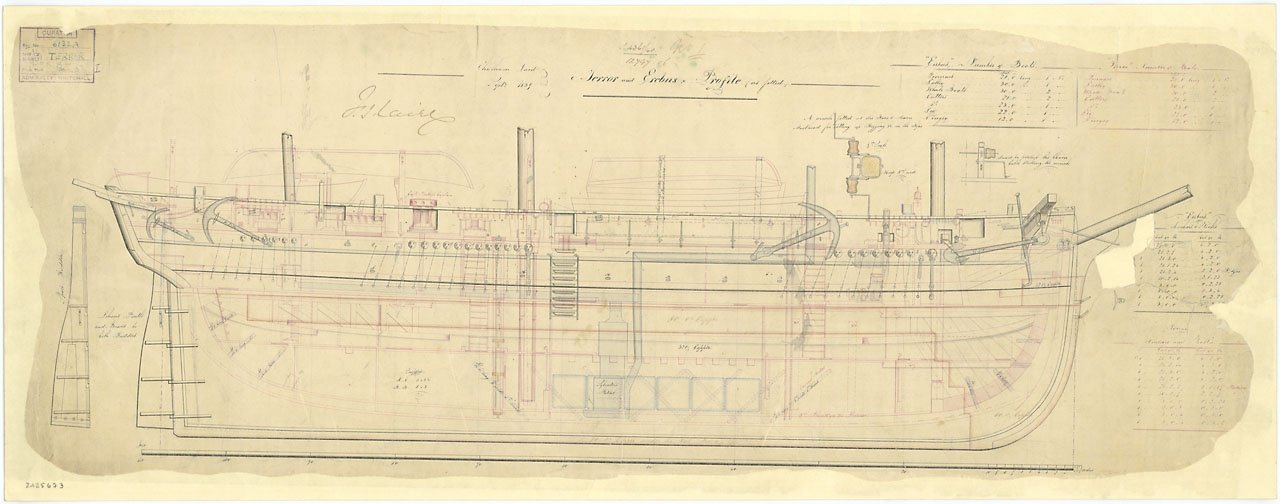
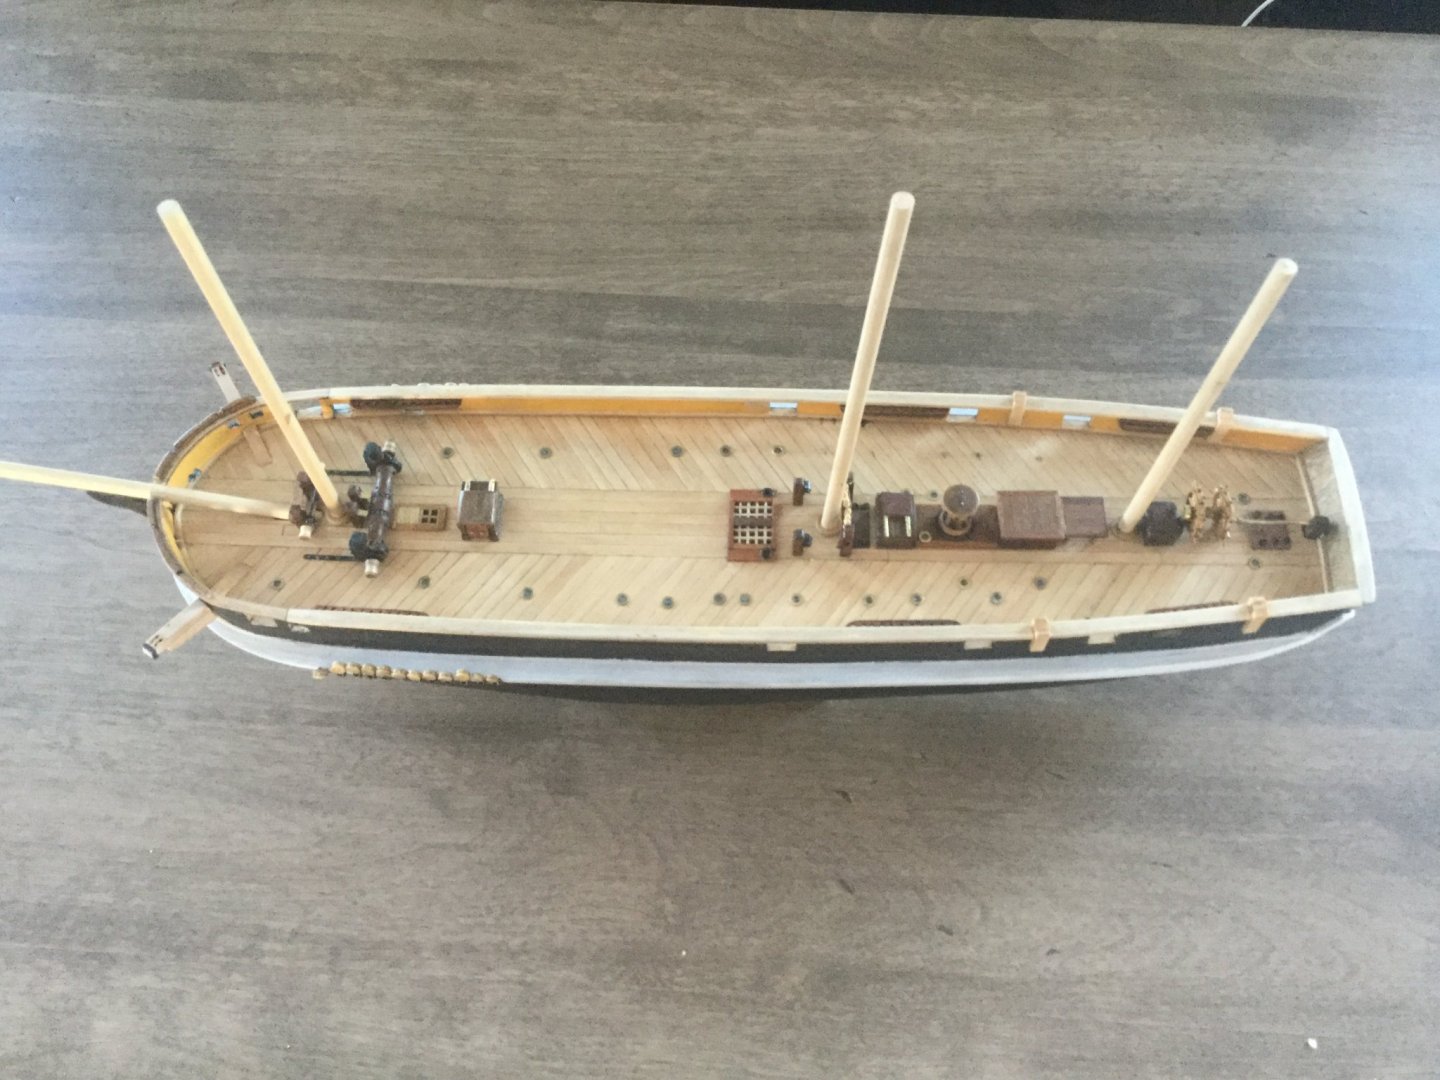
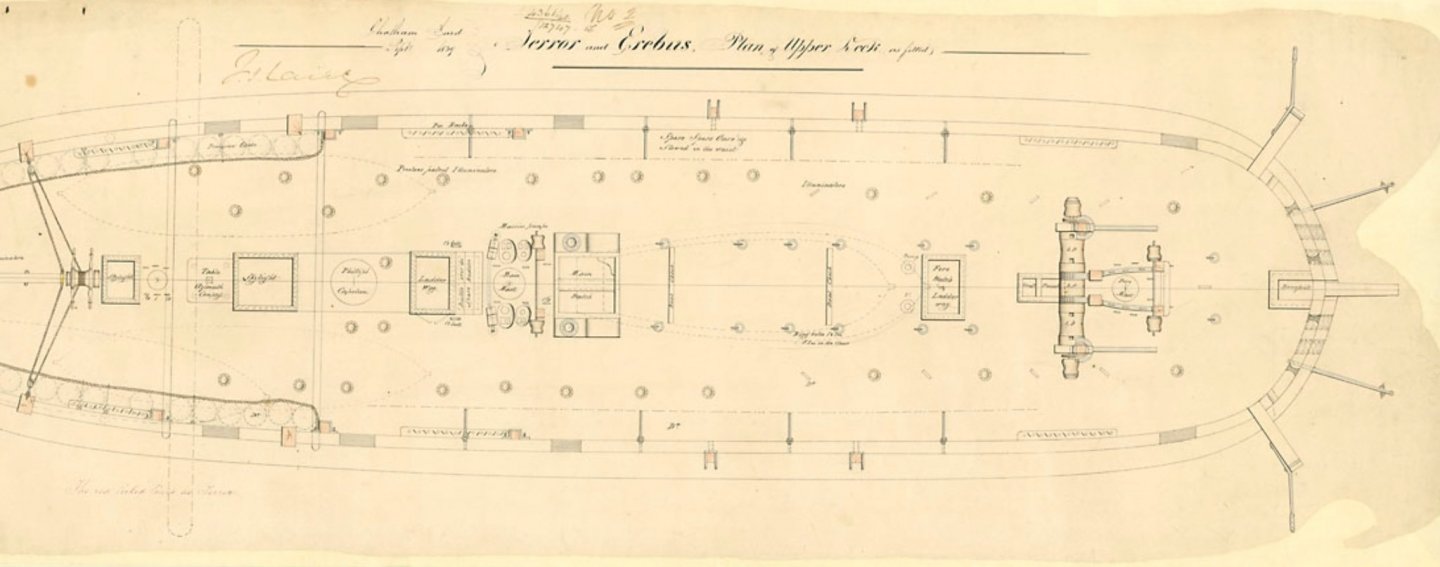
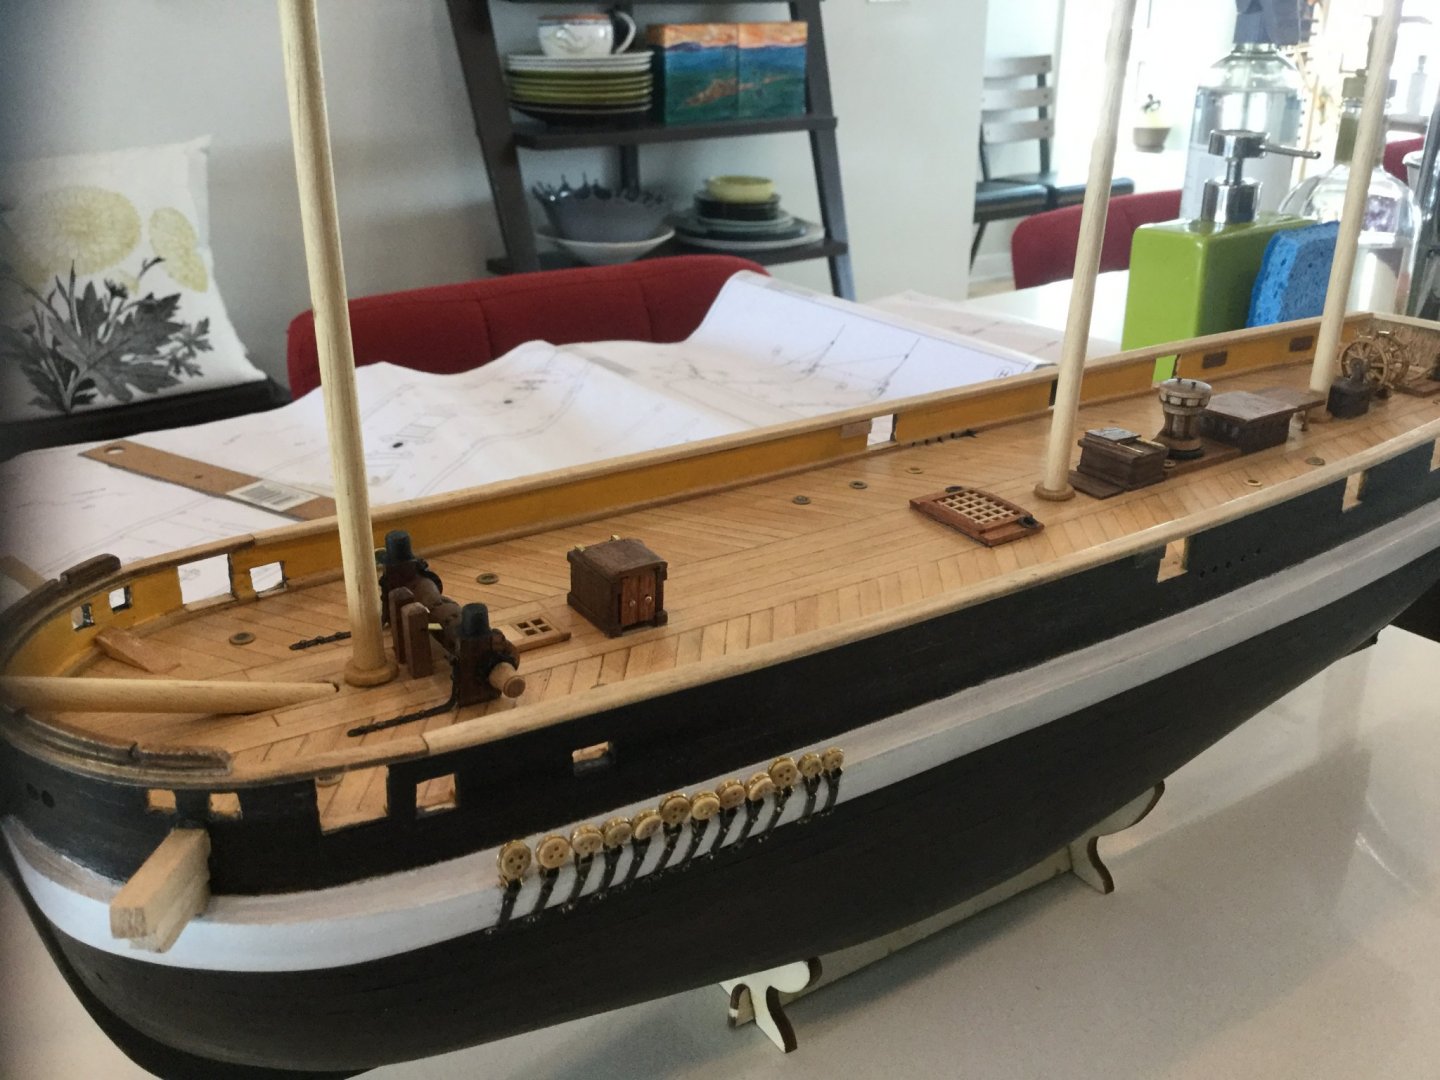
Here are a couple more pictures of the deck arrangement with the new pieces. I pulled out the stanchions forward of the main mast and made longer ones that put the warping heads at the height depicted in shipyard plans. The warping heads are made by turning down a dowel in my dremel and the "iron" fittings are made with brass sheet and pins blackened in "jax" solution. I've included the picture I pinched from the NMG collections website. I hope this is OK, someone let me know if it's not. It shows some of these details that are not included in the kit. Although these depict the ship in her pre-1845 engineless configuration as she would have appeared on the Antarctic expeditions. Also, I've noticed in looking through all the build logs on this site, how clean everyones' work-benches are. I take perverse pride in what a knavish shambles mine is at present.

-
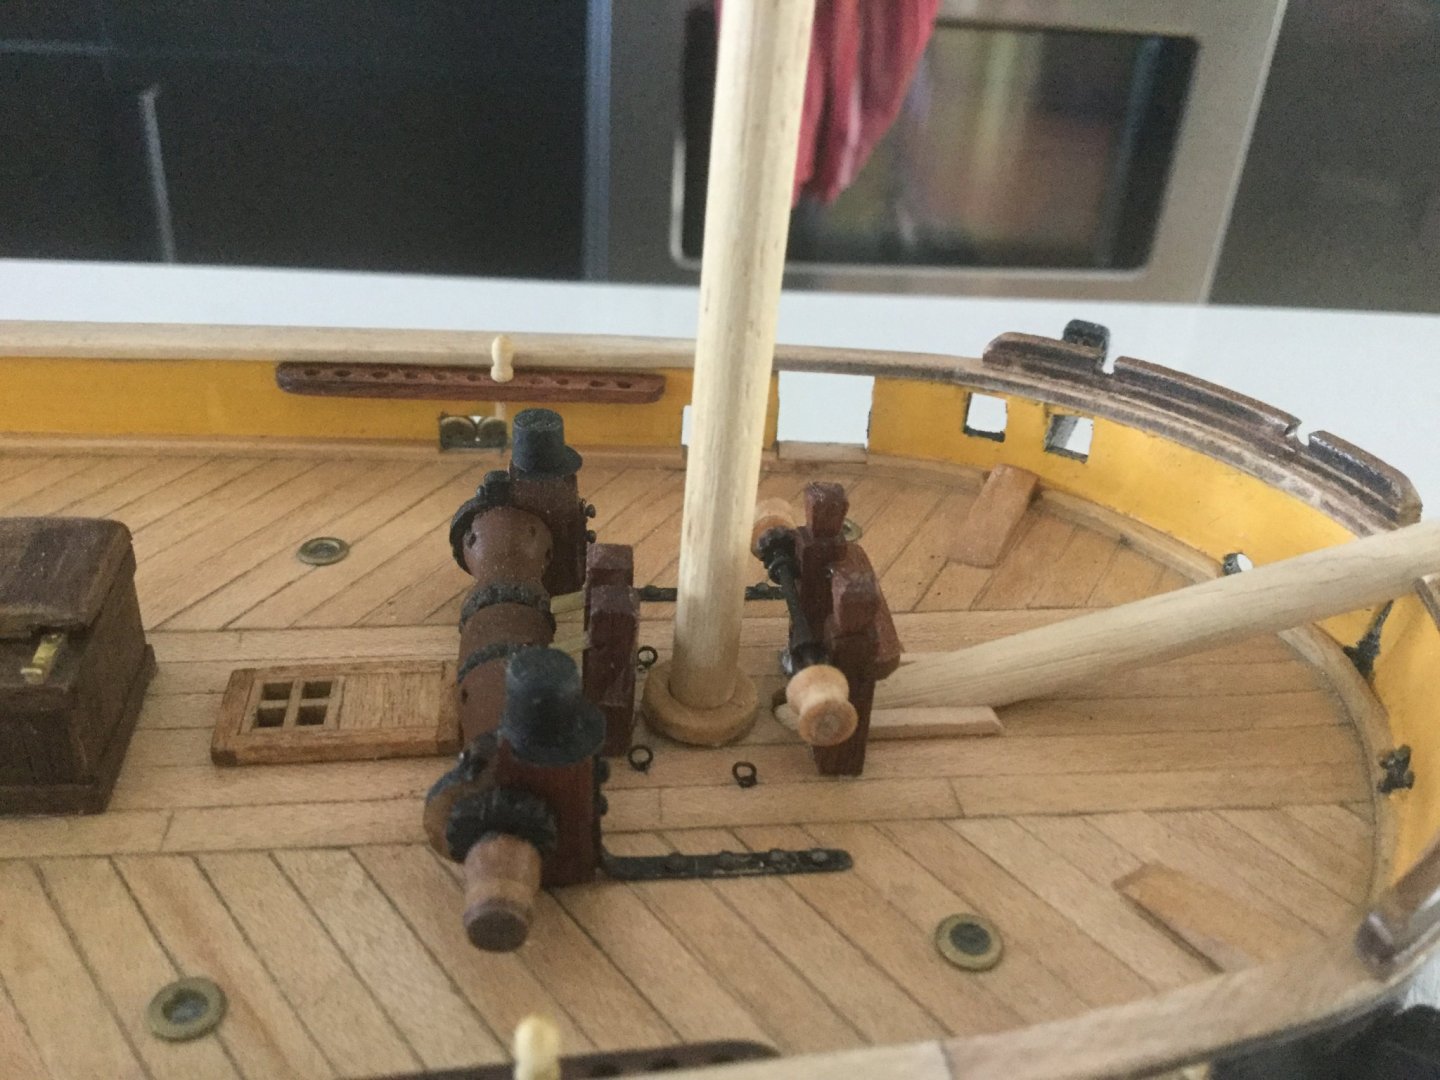
Here's some more progress on the Terror. At this point I've deviated from the kit enough that I am mostly scratch-building everything using Mr.Bett's blog and diagrams from the museum in Greenwich. I made a curved fife-rail and jeer-bitts aft of the mainmast and the posts forward that support the bearings for the pump cranks and the bearings for something called a "jeer bitt warp-end" which, I have to admit, I don't know what that does so if anyone else here knows I would appreciate an explanation! They seem to be horizontal drums- I kind of assume they are meant to carry a messenger-cable forward from the capstan. Or maybe to use the capstan to help hoist the main yard? Anyway, moving forward I've made the jeer bitts for the foremast which are also depicted as having one of these "warp ends" which I have completed. I think it looks pretty good, but I am just following drawings now and I wish I had more information, because the drawings do not depict a fife-rail for the mainmast and bowsprit running rigging, only these jeer bitts. Maybe there's a spider-band or something. I will have to sort this before I can rig the ship. The kit depicts a pair of pin-rails straddling the bowsprit, but I don't think this is accurate so I've left them off, although you can see I left room for some belaying-pins on the jeer bitt stanchions. Ps I have no idea if I'm even using terms like "warp ends" and "jeer bitts" correctly. I am in way over my head with this model.


-
I'm looking for some opinions about the likely location of fife-rails on the HMS Terror. I'm in the process of building deck fittings around the foremast on my model. I already know that the OCCRE model has some inaccuracies in this area, and have scratch-built a windlass and bell tabernacle. I'm running into some confusion pertaining to a seeming scarcity of belaying pins at the foremast in all the drawings I can find of this ship's actual configuration. The model kit has bitts straddling the bowsprit where it enters the deck, with pin racks between them, but these are not depicted in any drawings of the actual ship I can find. The thing is, these drawings DO show pin-racks on the port and starboard rails, as well as a fife-rail aft of the mainmast. Again, The drawings do not depict any spider-bands or pin-racks at the base of the foremast or the mizzenmast. Adding to my frustration, photographs from the wreck herself clearly show a spider-band on the mizzen. I'm unable to find any rigging information on the Terror or the Erebus, so I'm reduced to making educated guesses, only I'm NOT educated. I'm wondering if anyone here can volunteer an opinion about what might be missing, if anything, from the drawings of the foremast. It's either a spider-band, a fife-rail, or maybe the running rigging of the foremast simply all terminated at the side pin-racks?
-
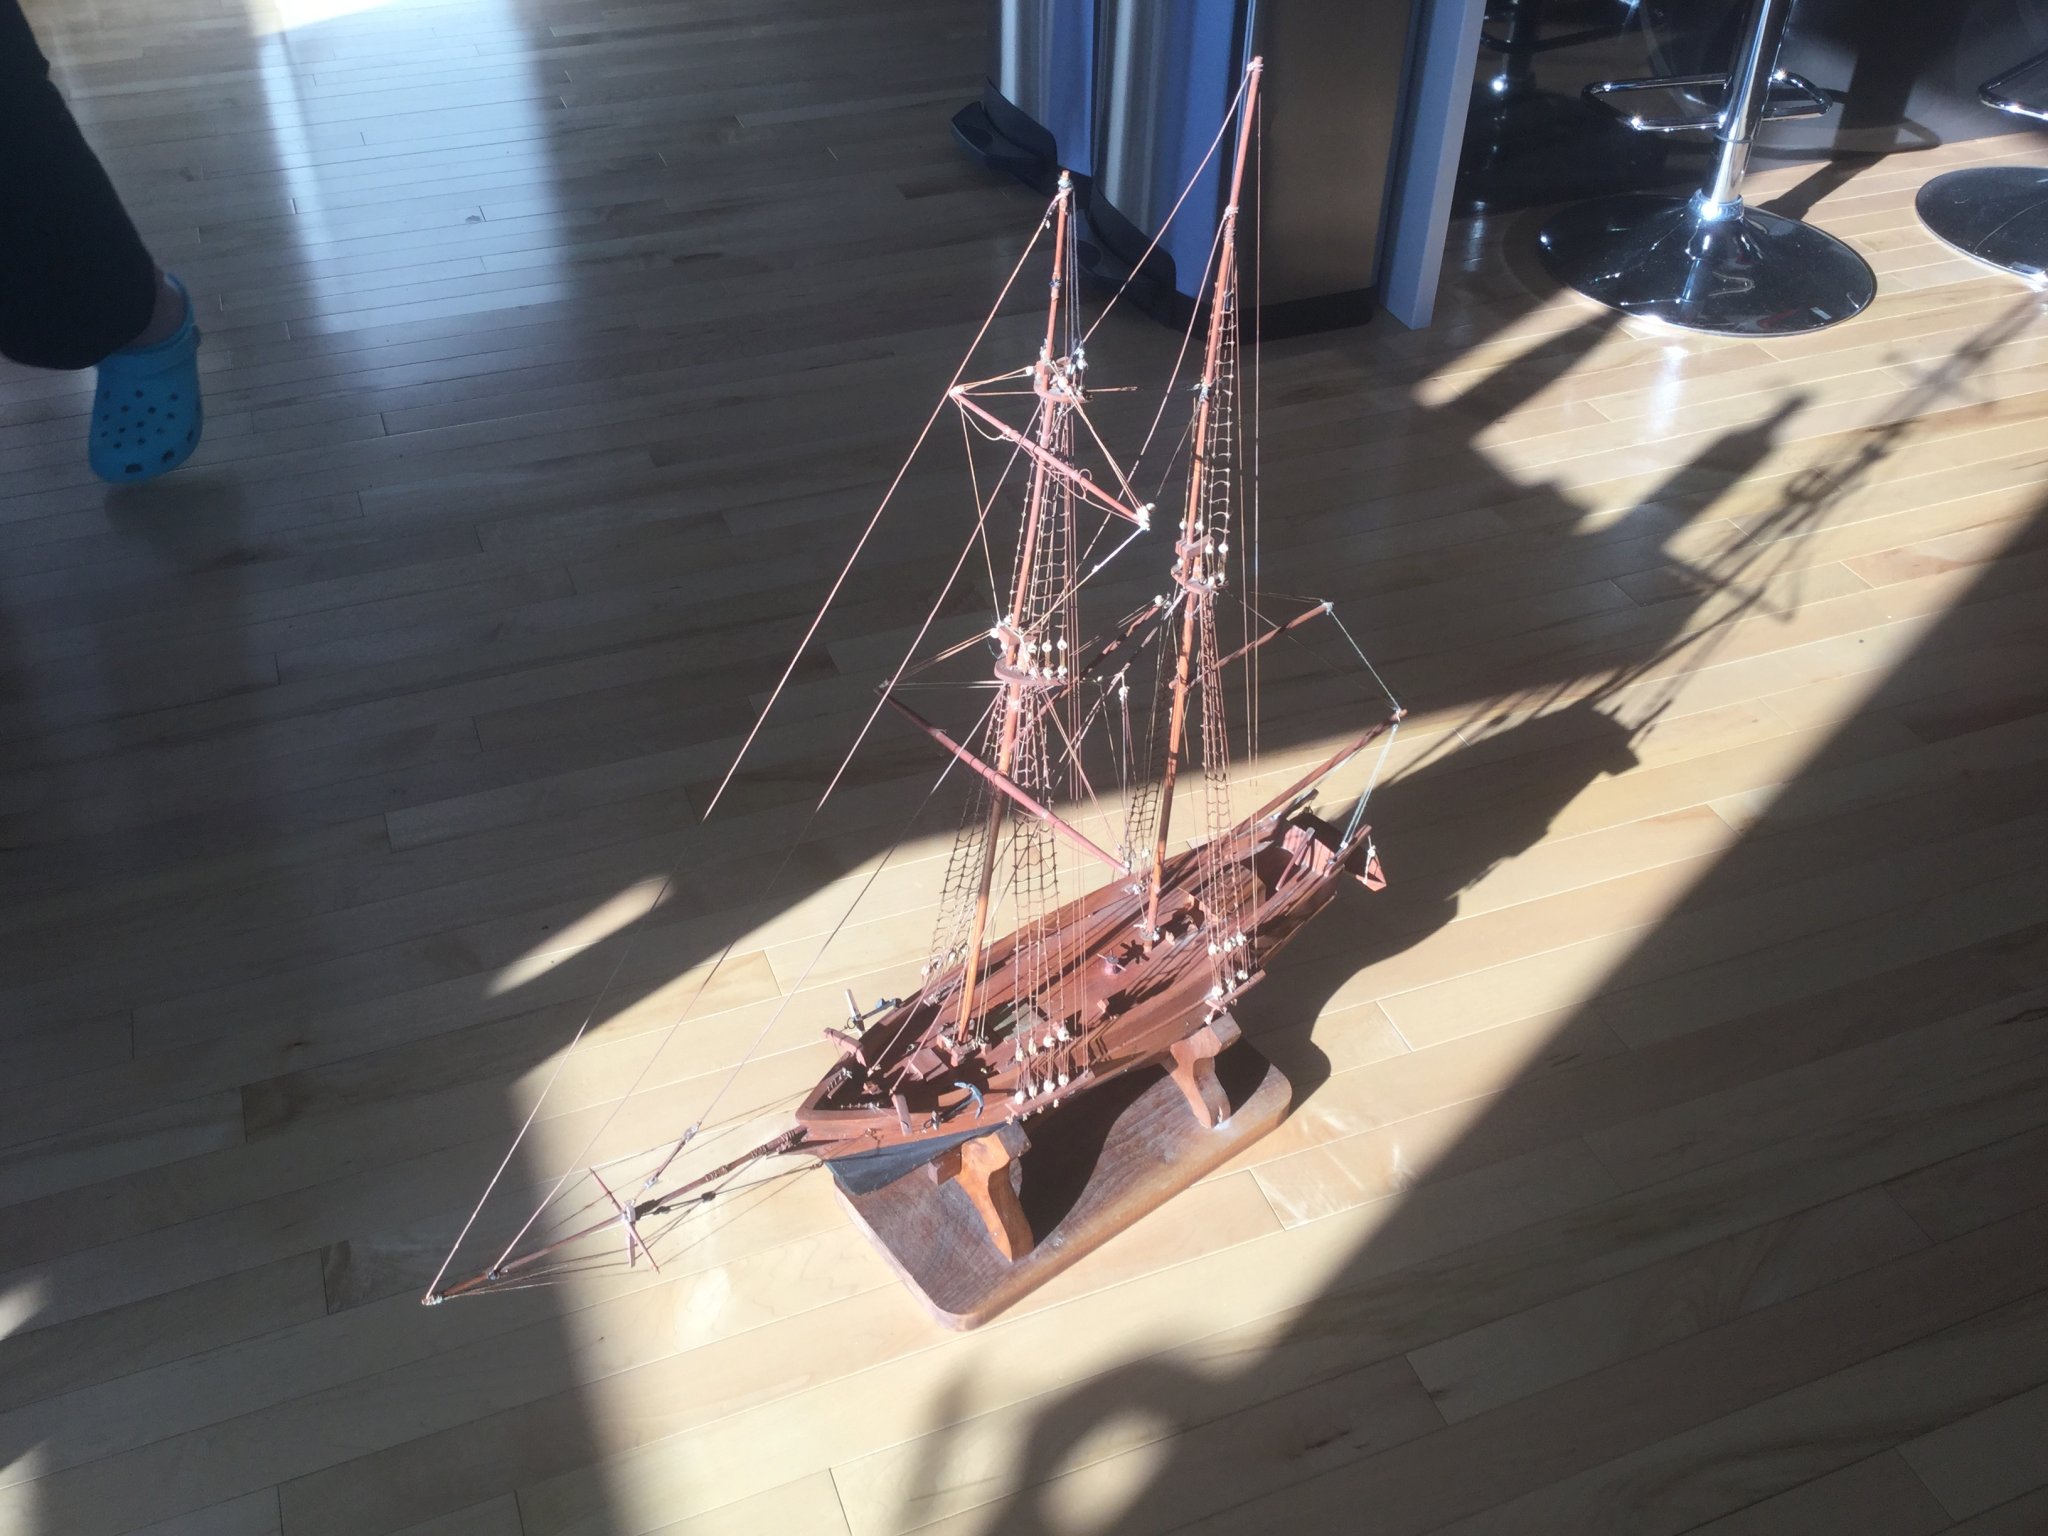
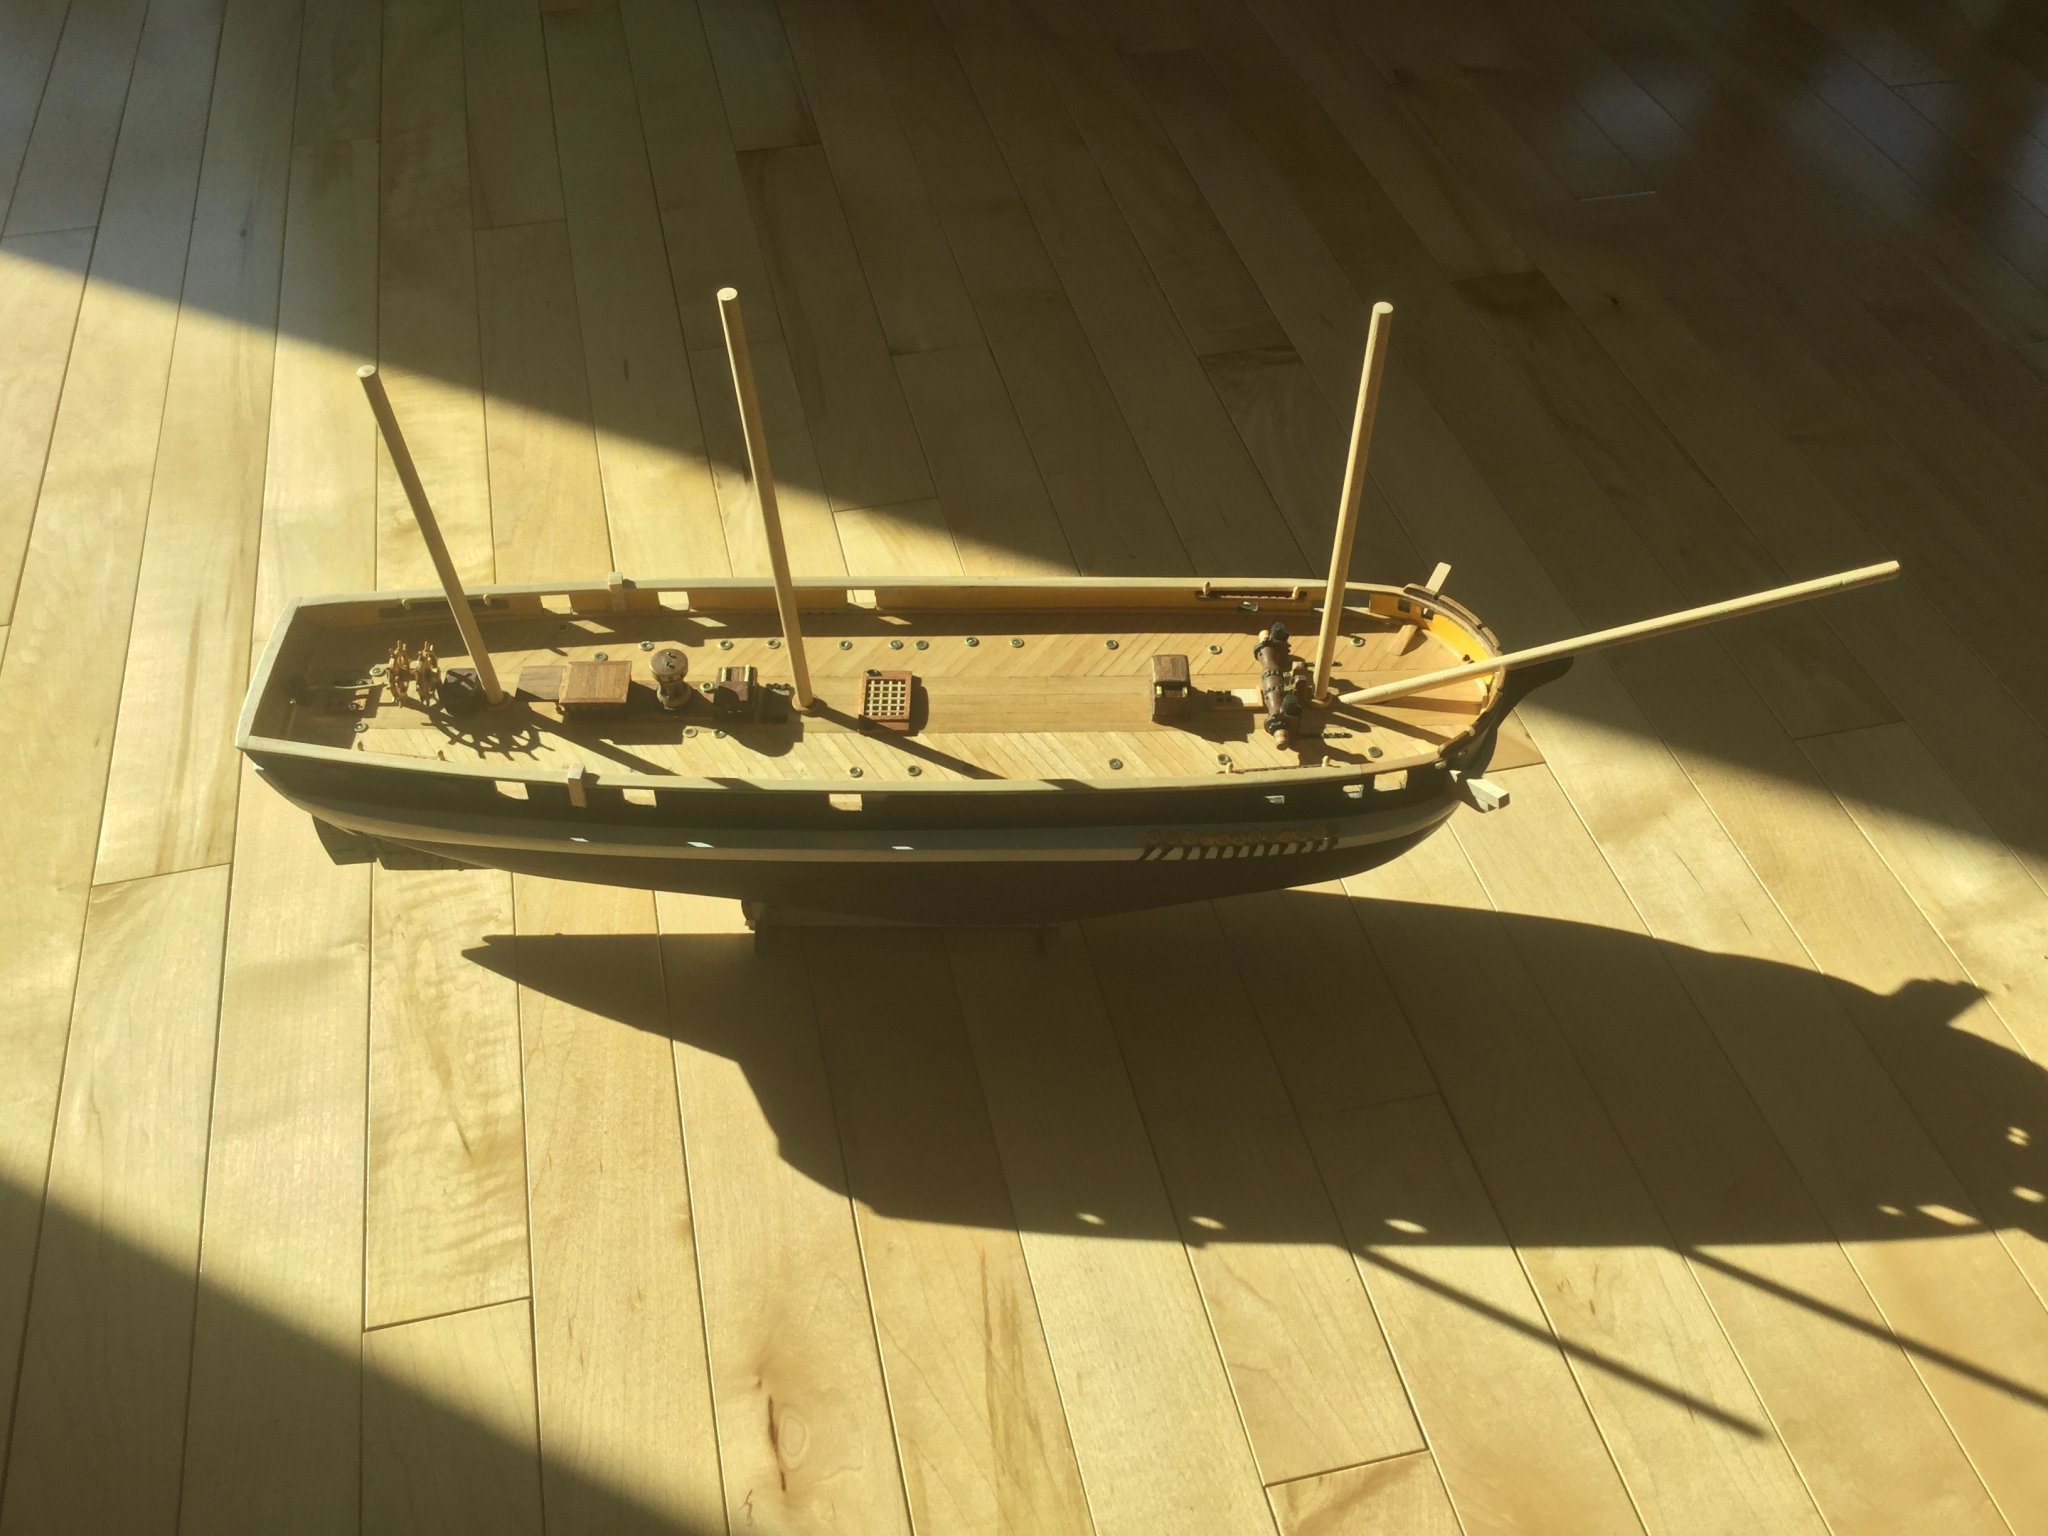
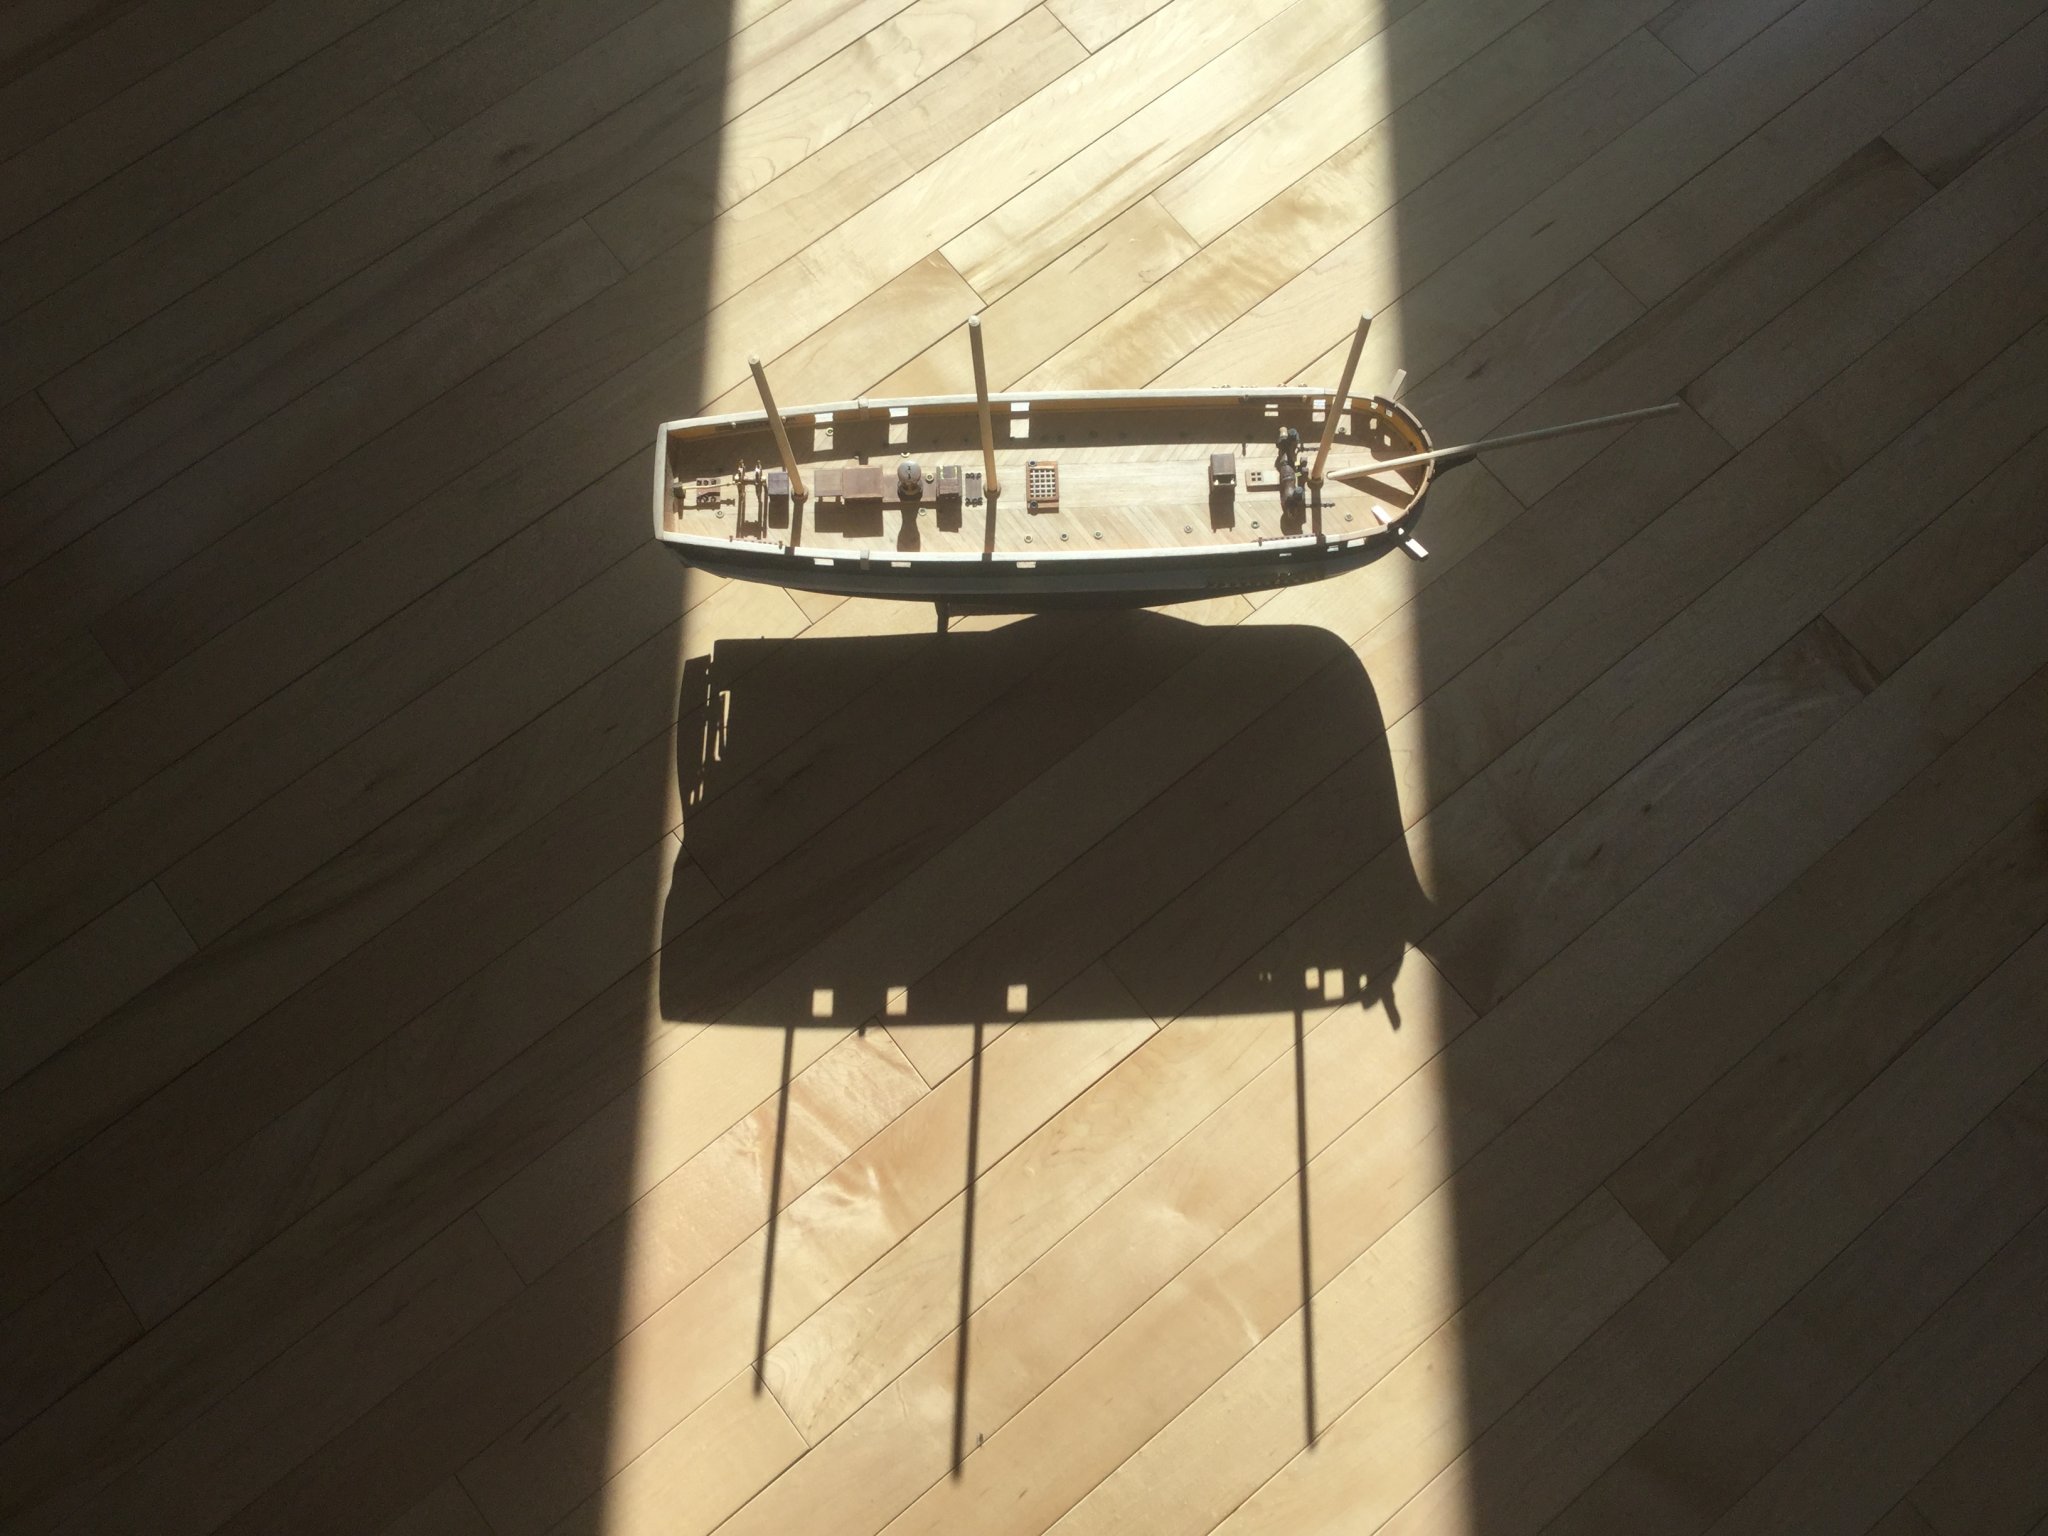
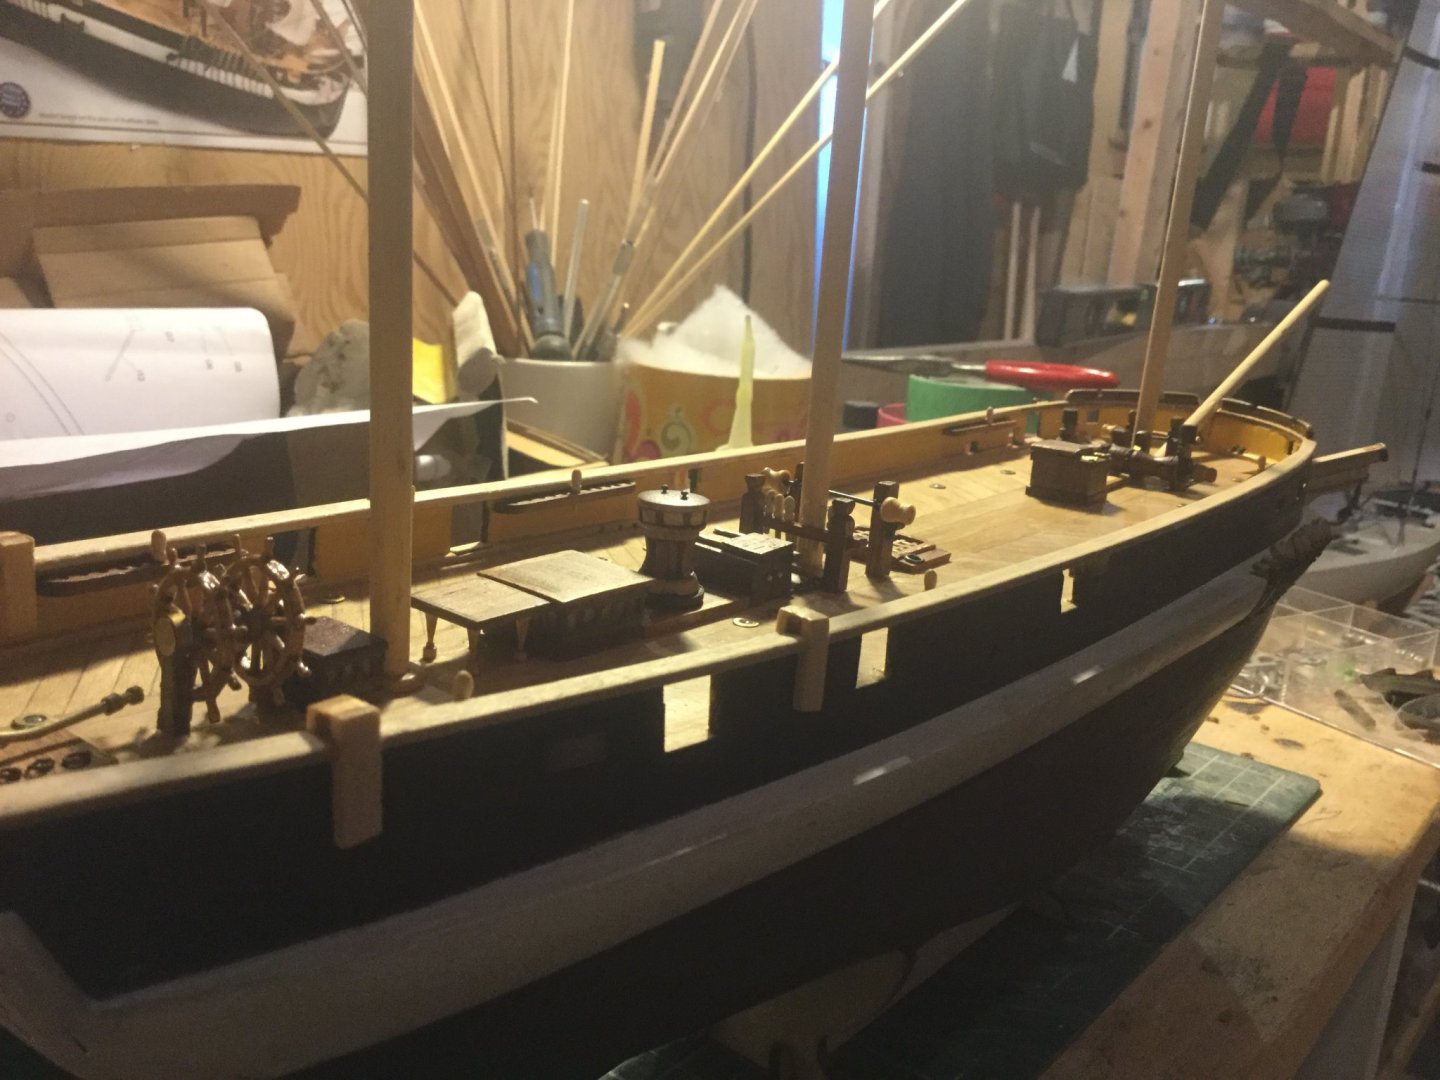
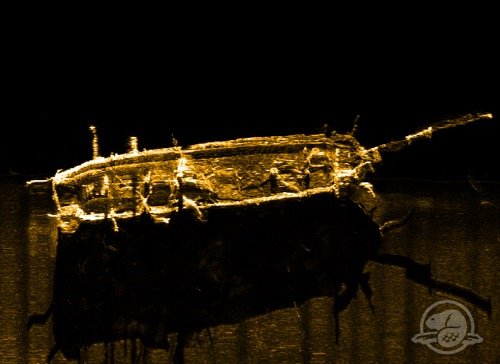
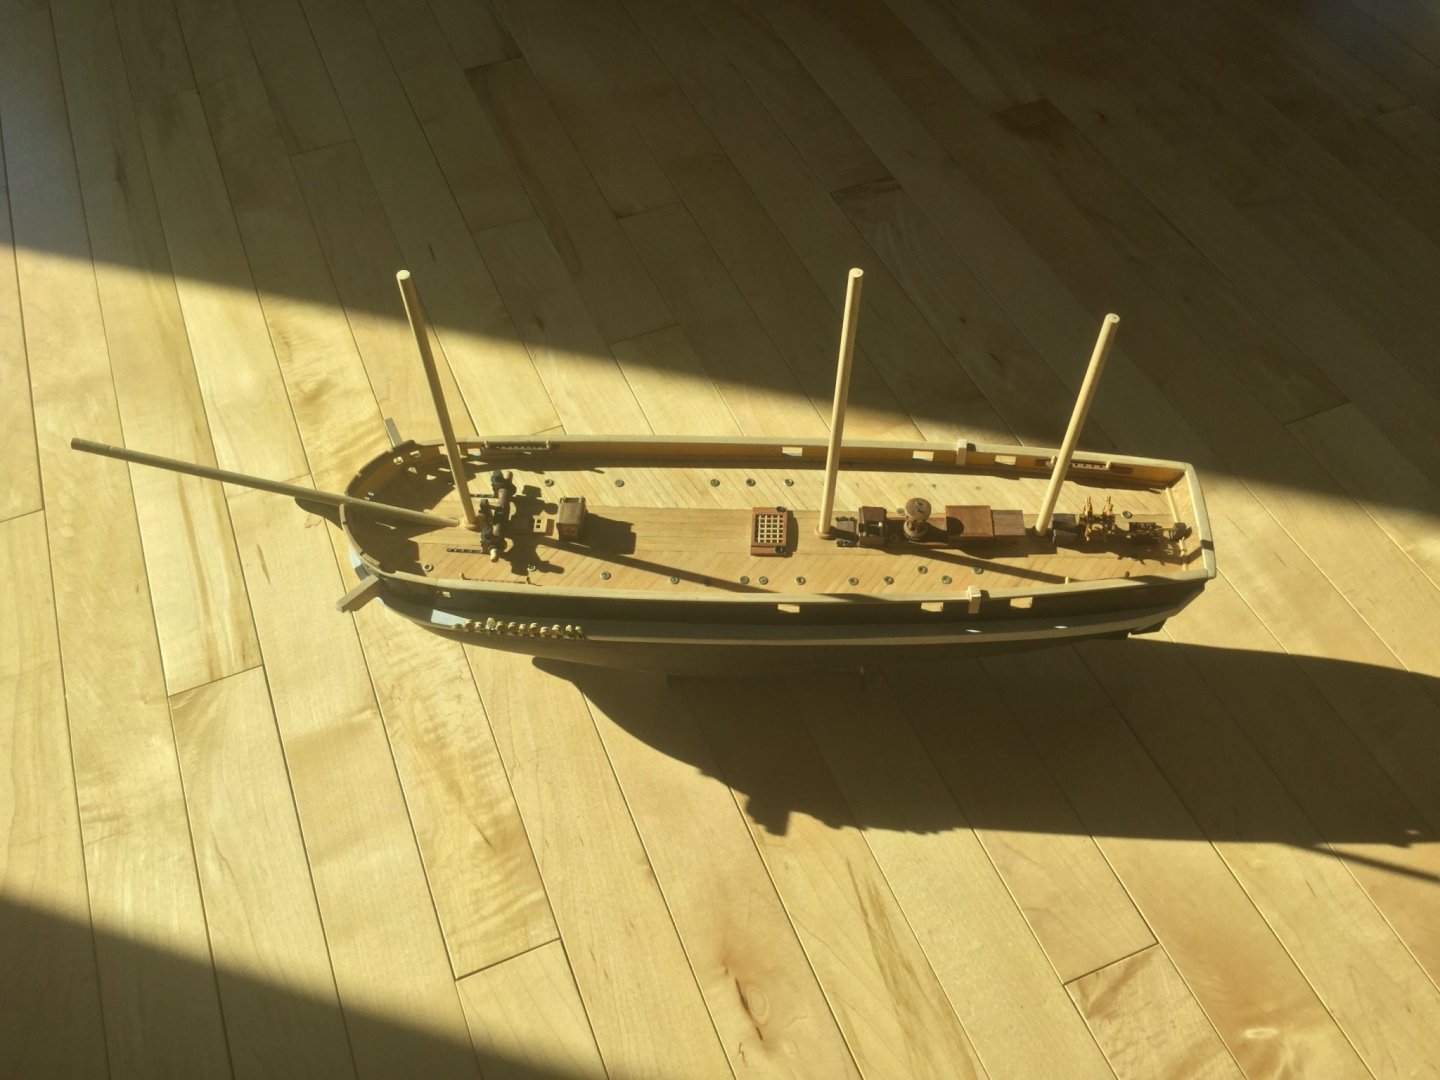
Here is not so much a progress report as some entertaining pictures to look at. I was bumbling about my house today and noticed a sunbeam someone had left on the floor. The angle it made to the floor planks reminded me of the Terror's deck, and then the beam itself reminded me of a sidescan sonar image. So I got the model and put her in the sunbeam to make my own "side scan" images. As for progress, I have done a couple of belaying pin racks, but most of my time has been taken up making iron rings for the propeller-well cover and the hatch just aft of the mainmast. It's a lot of work for not much difference, but I am not in too much of a hurry to complete this model. For once in my life I'm enjoying the process and not worrying too much about the result!


-
Eggs! Well I'll be darned. Never heard that before. I only just started reading this build. The weathering and detail are incredible. You're using some of the same techniques as guys who build 16mm scale live-steam powered garden railway stuff. That's 1:19 scale, the metal work and wood weathering are very similar. I never knew about this kind of boat before. I'm off to do some Sunday reading about the "Philadelphia".
-
What a first-class job on this model. I am unable to see any part of it, however small, that I would have done differently. I am building my first wooden model right now and I already can see that it will not be even close to how nice this one is. It looks like you've been building these for your whole life! Also the subject model is a very pretty little ship. I like models like this, not the big famous principle ships from a historical event but the smaller more obscure ones. I can imagine being the young Lieutenant with his first command, accompanied by a couple of warrant officers and a few men, speeding on their way with despatches from the fleet. I very much enjoyed reading about this build. Thanks!
-
Wow,I'm amazed at what a good material card is for models. I never thought about it before. This has given me an idea for how I might make some details on my "Terror" model that I previously thought would be too small to include!
-
I joined this forum to see ships, and now I'm in love with a canoe. What a work of art this is turning out to be. I can't wait to see it once the varnish coat goes on.
- 84 replies
-
- 2
-
-
- peterboro canoe
- Finished
- (and 1 more)
-
I think you're doing an excellent job of work on this model. Everything looks like it's in the right place to me.
-
What a pretty little boat. I'd say she's more of a "dory" than a "dinghy". You've done a great job. Makes me want to go for a boat ride, maybe jig for a nice fish for tea.
-
Did a bit more work last night on Terror. I made the little ratchet thingies on the windlass (don't know the nautical term) that also will support the bell when I install that. Altogether this part of the windlass is now complete. I also made the forward companionway on which I tried to make a better hatch and finer planking than the aft one, but this is all so darn small that the differences between the two are hard to spot. Unfortunately in this tiny scale if you zoom in too close it doesn't look so great. A grain of dust looks like a rock. Anyway here is the windlass- I think it's pretty close to the real thing.

-
I've ordered the largest one -3.75"- it's a bit small but marginally so. I will enjoy the model more with its high degree of detail. Unfortunately the other two ship's boats on Terror are canoe-stern ones so I can only do the big one but I will enjoy it. Thanks lads for your suggestions.
-
Thanks Chris, I just found them online sold separately. Just got the ruler out now, to see if one would fit my model!
-
Did the ship's boat kit come as part of the ship kit, or did you buy them separately? I'd love to replace the cast-metal boats in my "Terror" kit with some nice wooden ones!