HOLIDAY DONATION DRIVE - SUPPORT MSW - DO YOUR PART TO KEEP THIS GREAT FORUM GOING! (Only 66 donations so far out of 49,000 members - Can we at least get100? C'mon guys!)
×


Keith S
-
Posts
339 -
Joined
-
Last visited
Content Type
Profiles
Forums
Gallery
Events
Everything posted by Keith S
-
HMS Terror by DaJH - OcCre - 1:75
Keith S replied to DaJH's topic in - Kit build logs for subjects built from 1801 - 1850
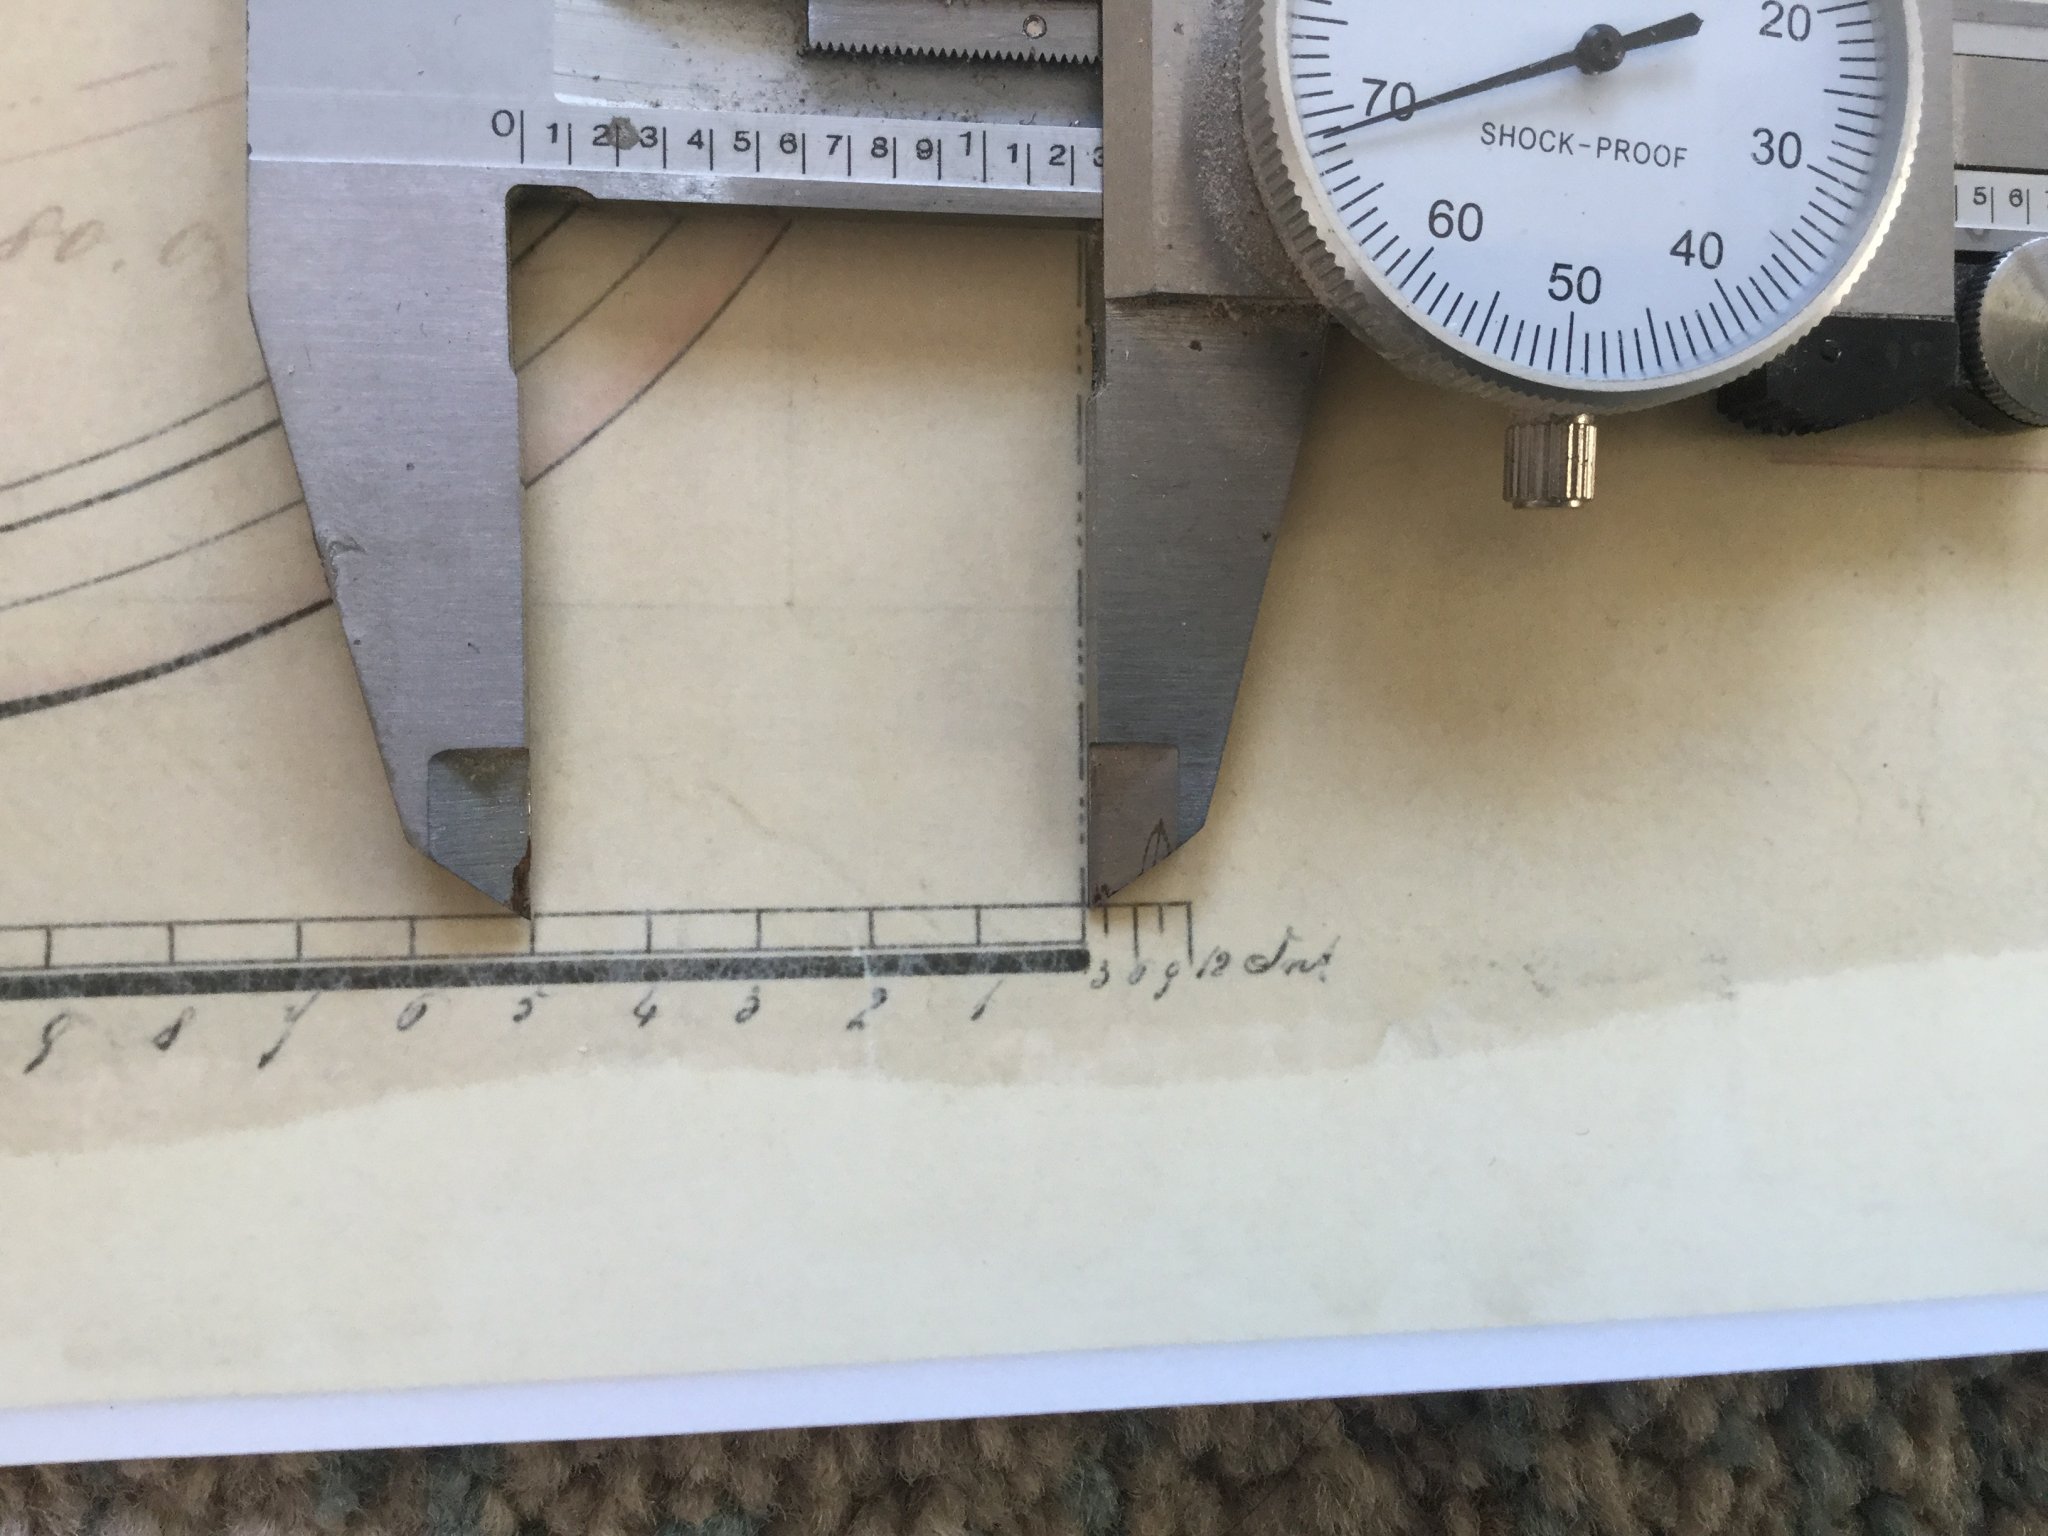
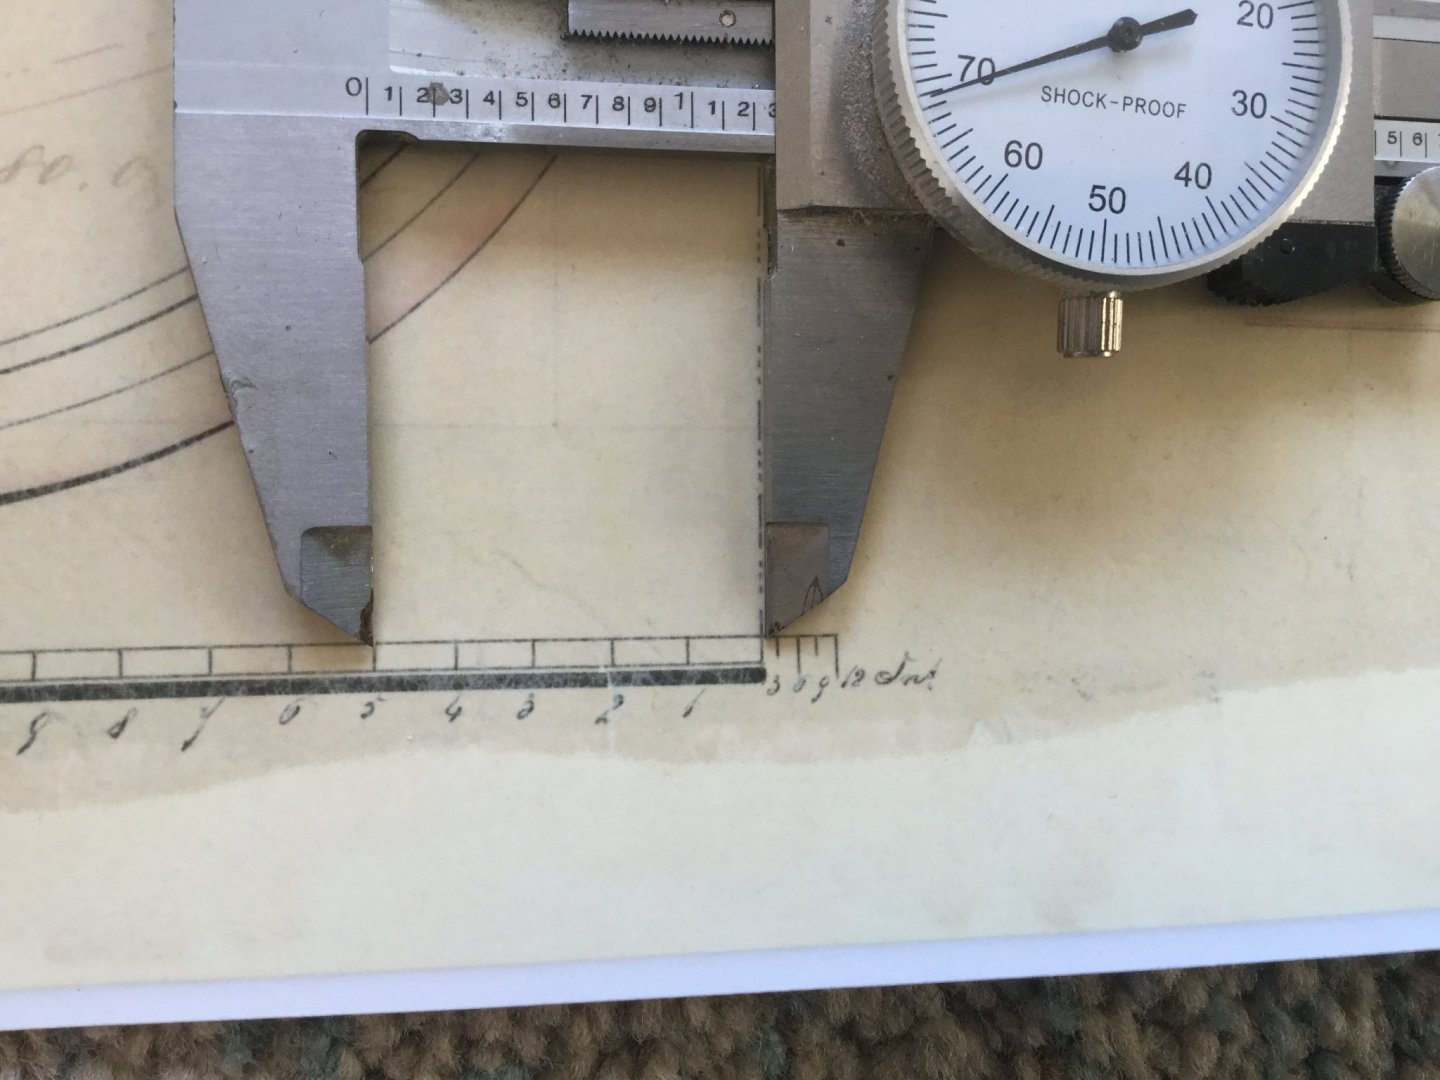
You are correct. They should be 20mm below the top of the bulwark. Also, they do not turn upward at the bow. They are parallel to the top of the bulwark all around. Here is the measurement from the real ship: you can see it's exactly five feet, which corresponds to 20mm in 1:75 scale.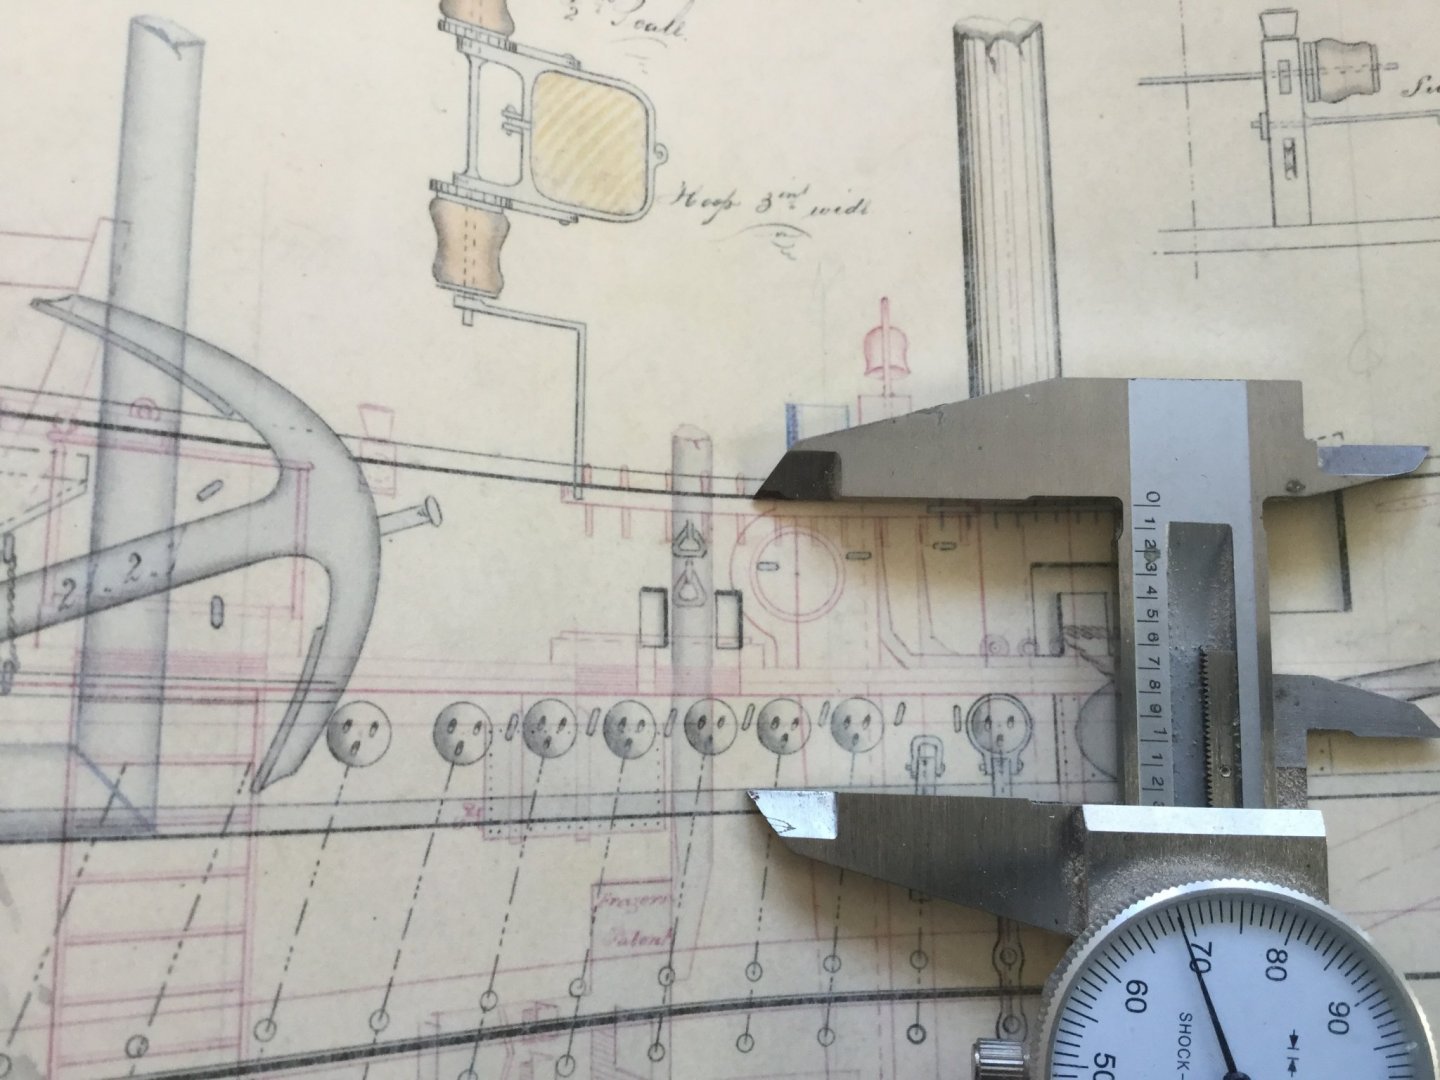
-
I'll have to wait until my copy of the book arrives: I don't know what a "mouse" is! But I'll be sure not to put one on my stays! Ha ha.
-
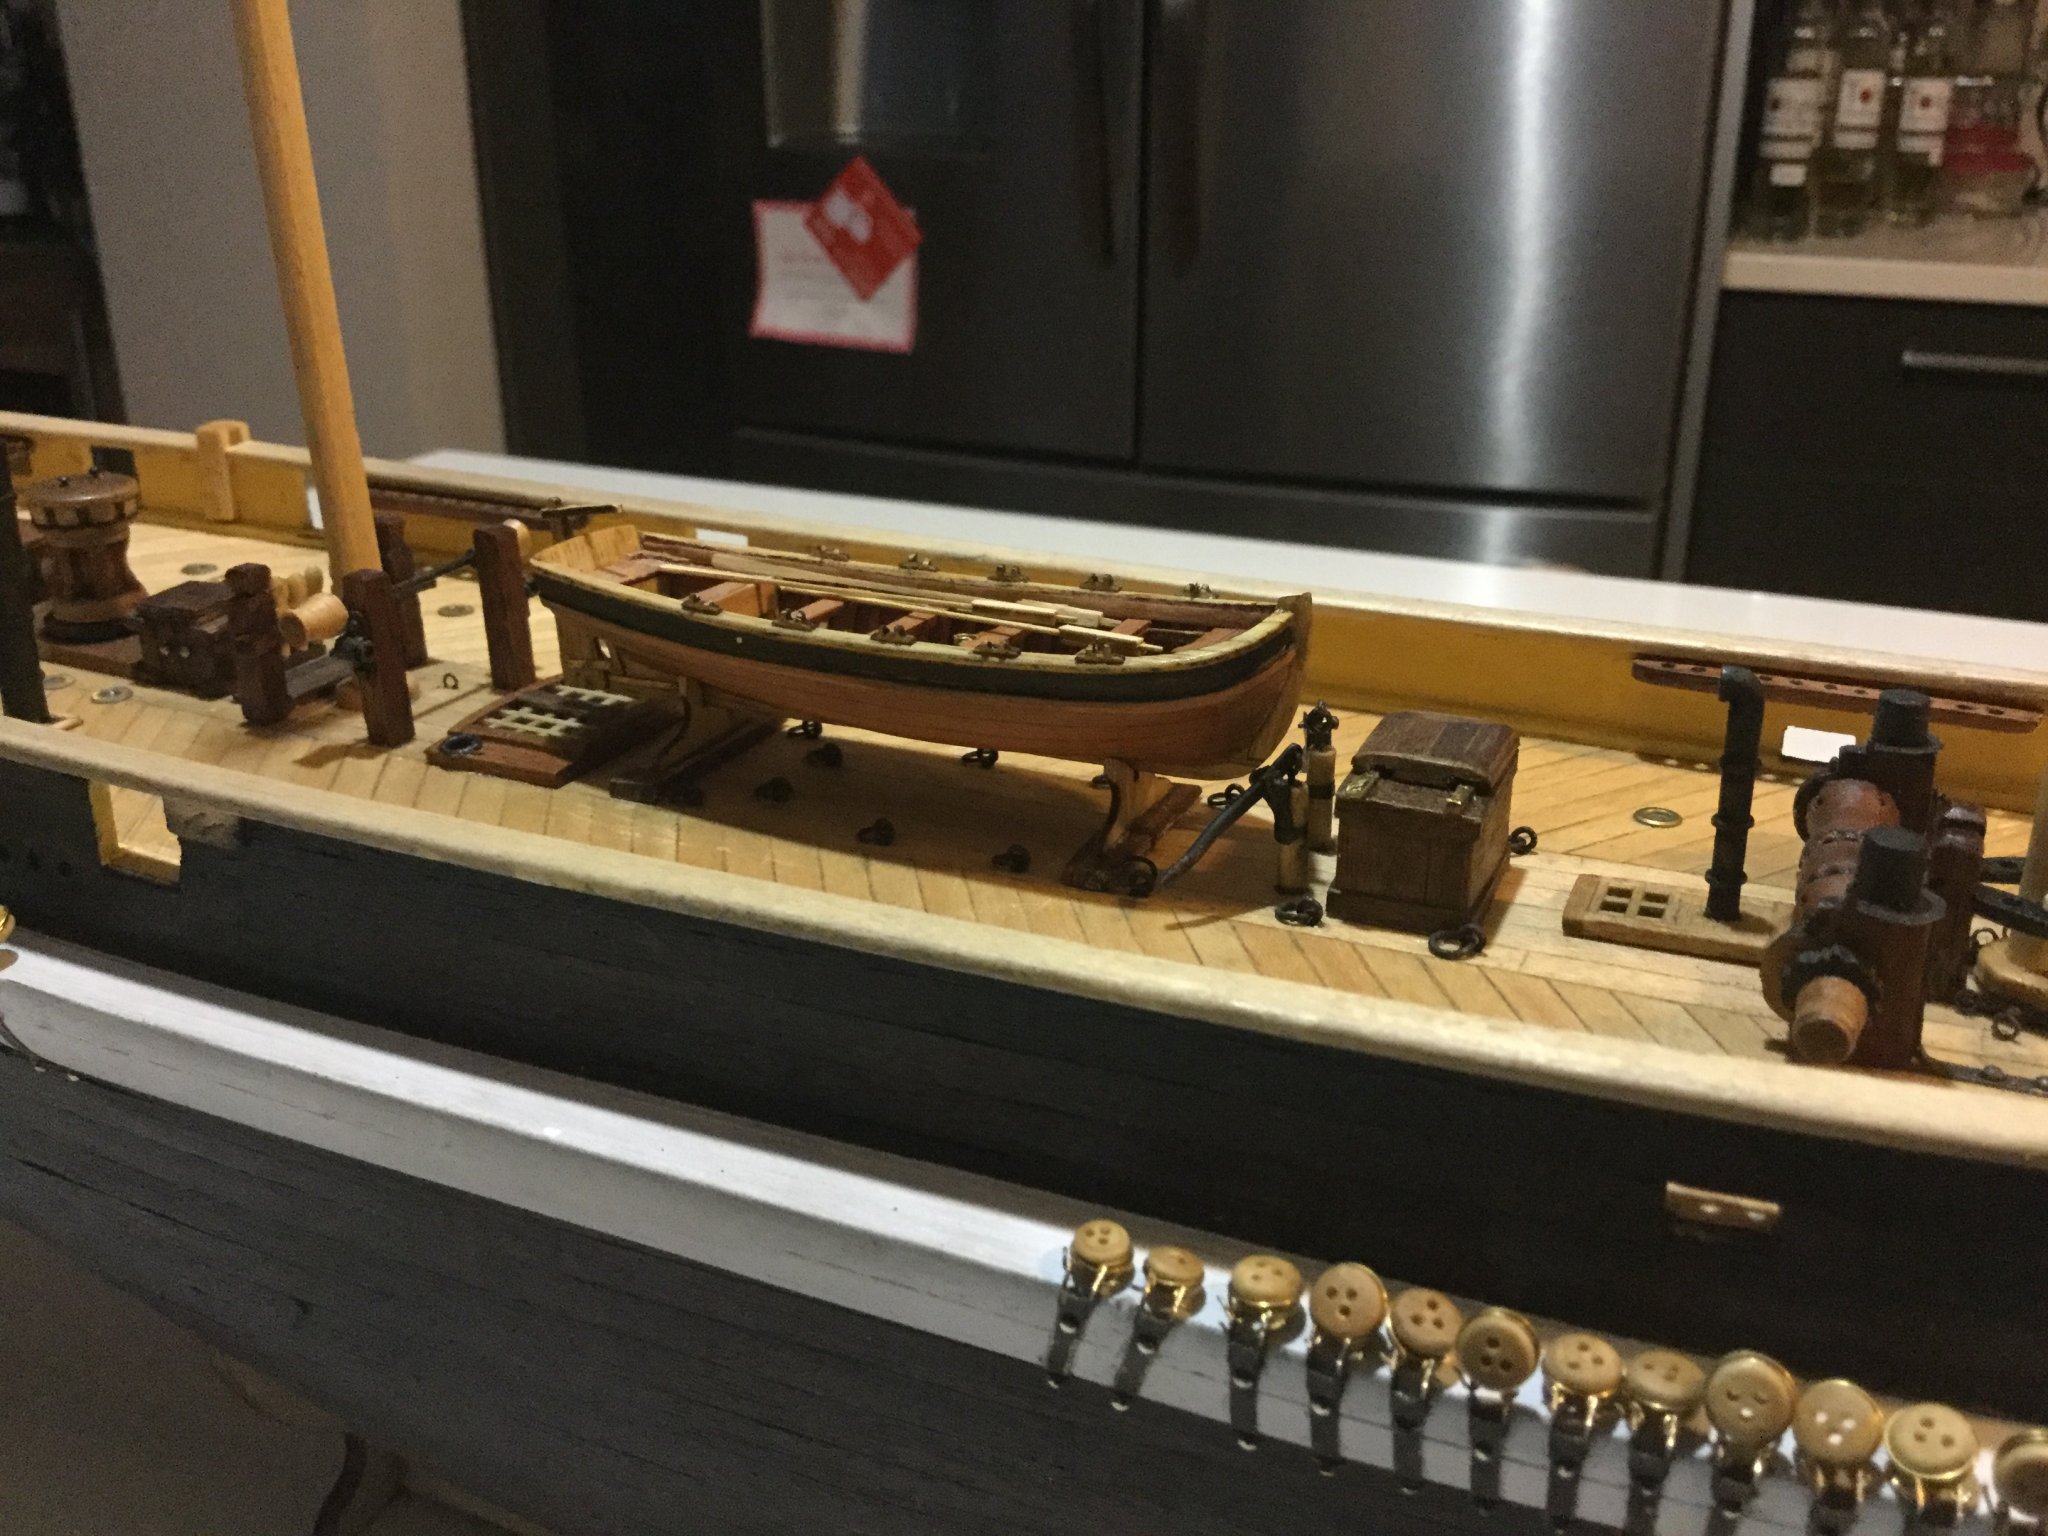
I have to admit, I've been a bit sneaky with the boat cradle. I glued it onto the deck using white glue, without preparing the surface first. The glue doesn't stick permanently to the varnish, so while it's secure enough for now, if you or Mr. Betts end up encountering a better plan, I can easily knock mine off without damaging the ship and steal your ideas! If you look carefully at the side-view in the admiralty draughts, the big pile-o' boats are represented by faint outlines, and the bottom outline isn't so much boat-shaped as a big, flat, pan-like thing with a pointy front. You may well be correct that it's a sledge of some kind! I suppose the thing to find out, which may be recorded somewhere, is whether the sledges were made on the scene by the crew from ship's timbers, or whether they were equipped with them from the outset. As an aside, I sent an e-mail to the National Maritime Museum inquiring about whether they have any diagrams showing the sail plans or rigging for the exploration ships. I was very surprised and pleased that I got a response within three days (!) from a curator. He said it was very rare to have the sail plans for any particular ship and in this case they hadn't got any. But what impressed me particularly was that he did include the results of some online searching he did himself, and he finished with a suggestion that I check out Mr. Betts' blog! Also he confirmed that the ships were "barques" and wished me good luck with my model. While I didn't learn anything new, I was very pleased and gratified that someone would take the time to make such a polite and detailed response.
-
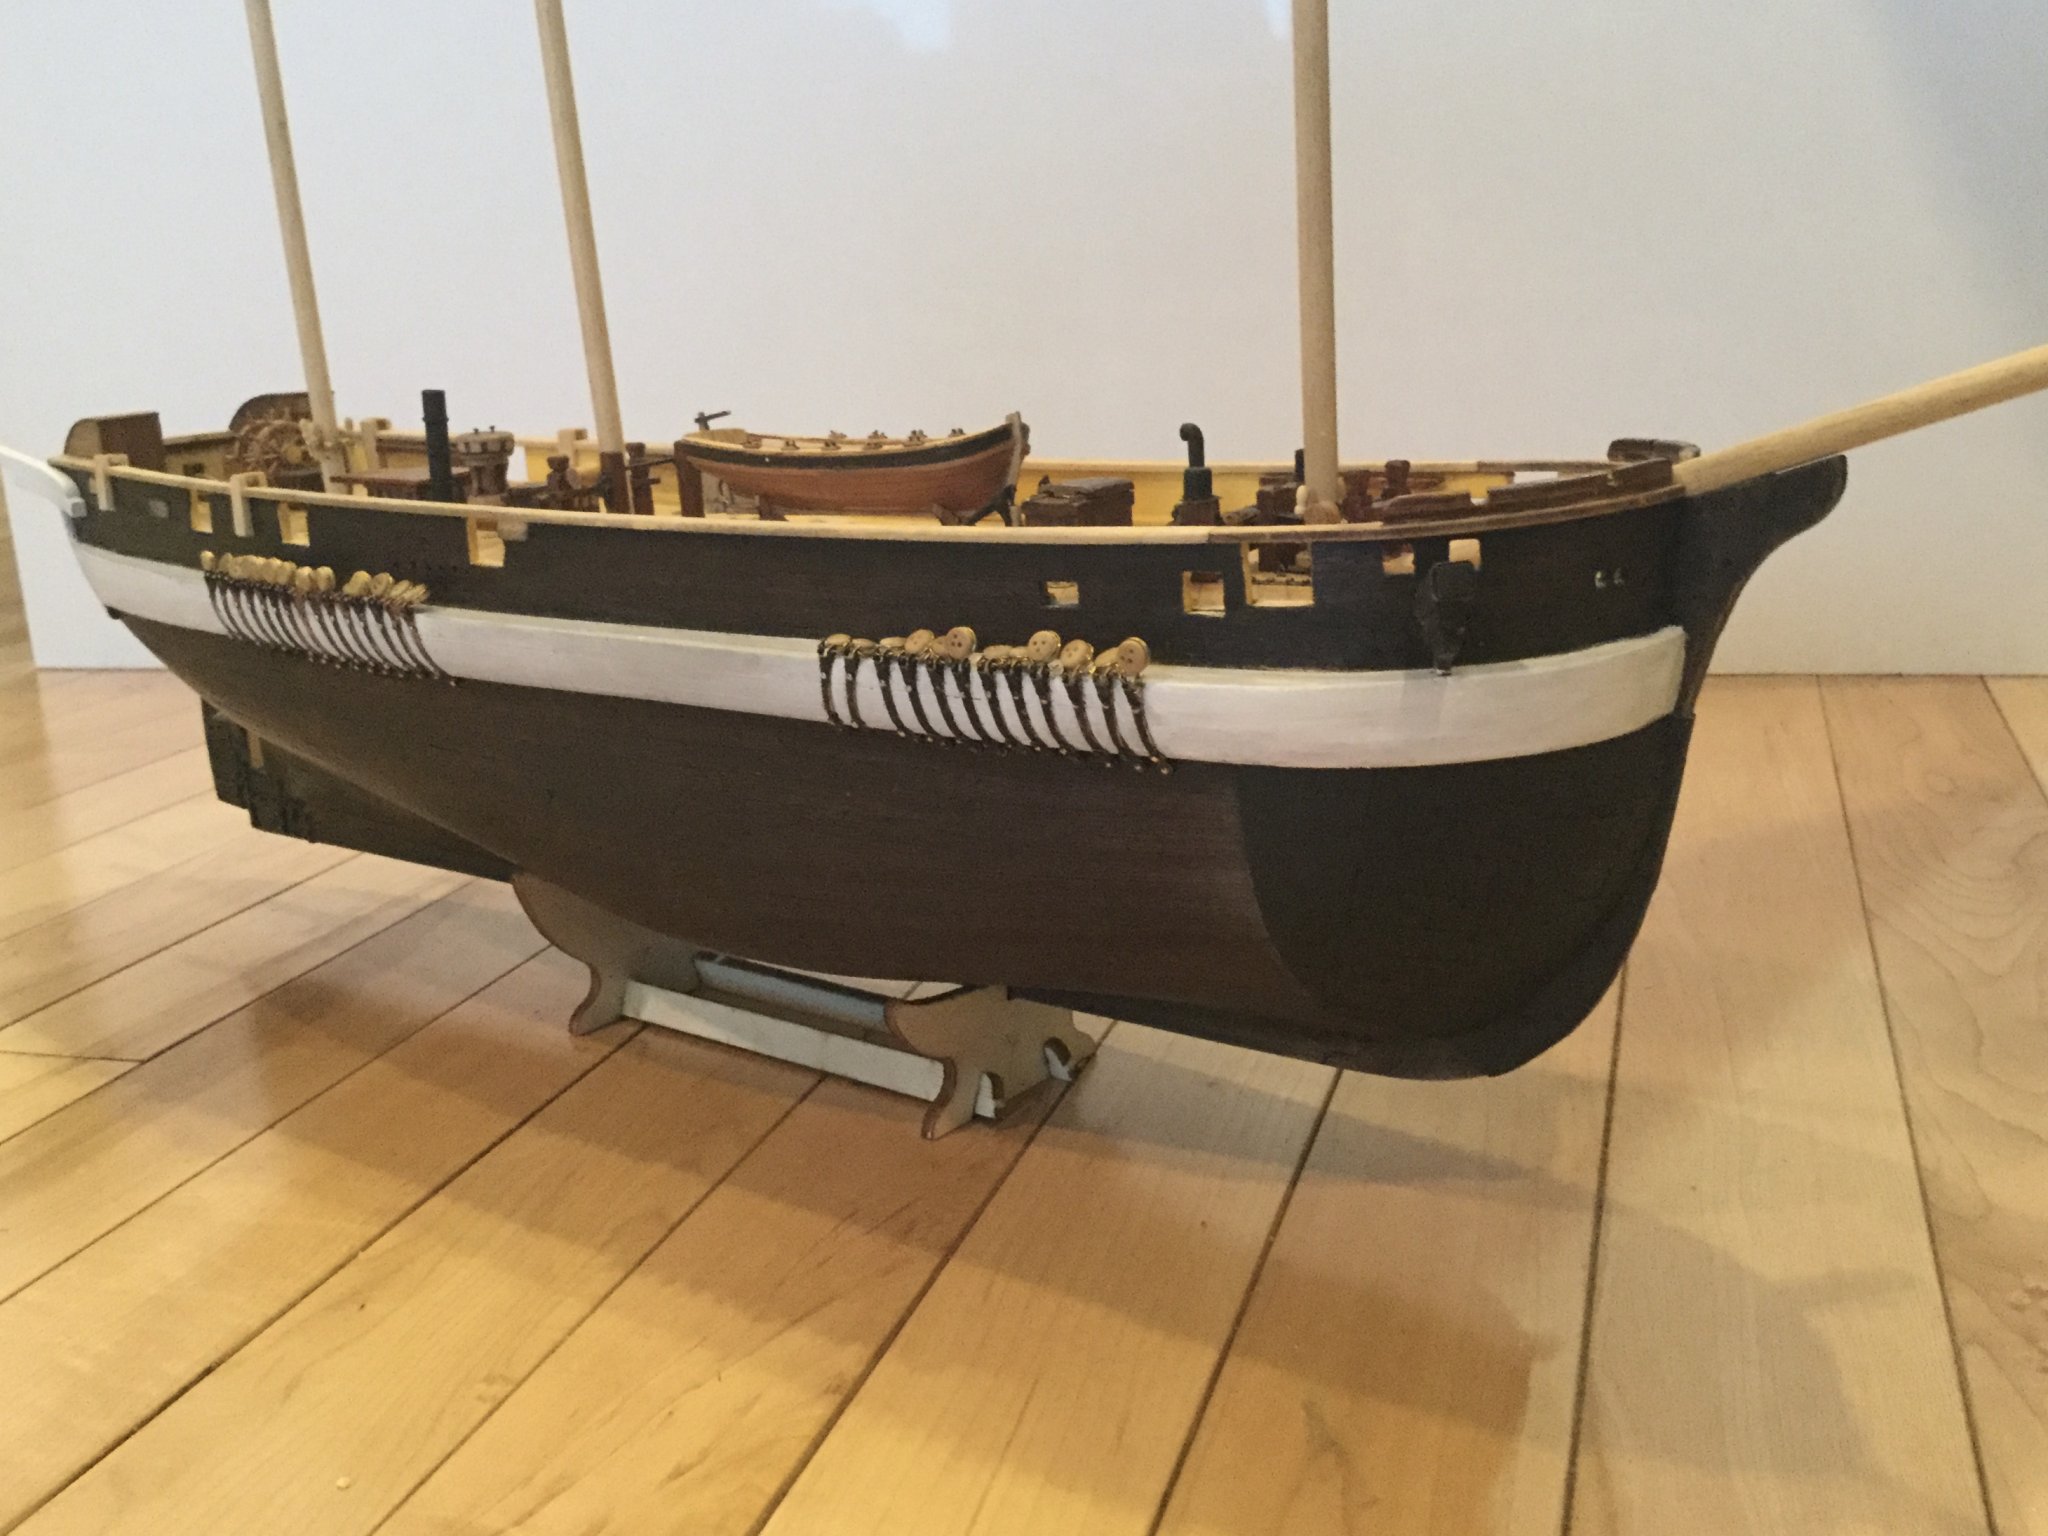
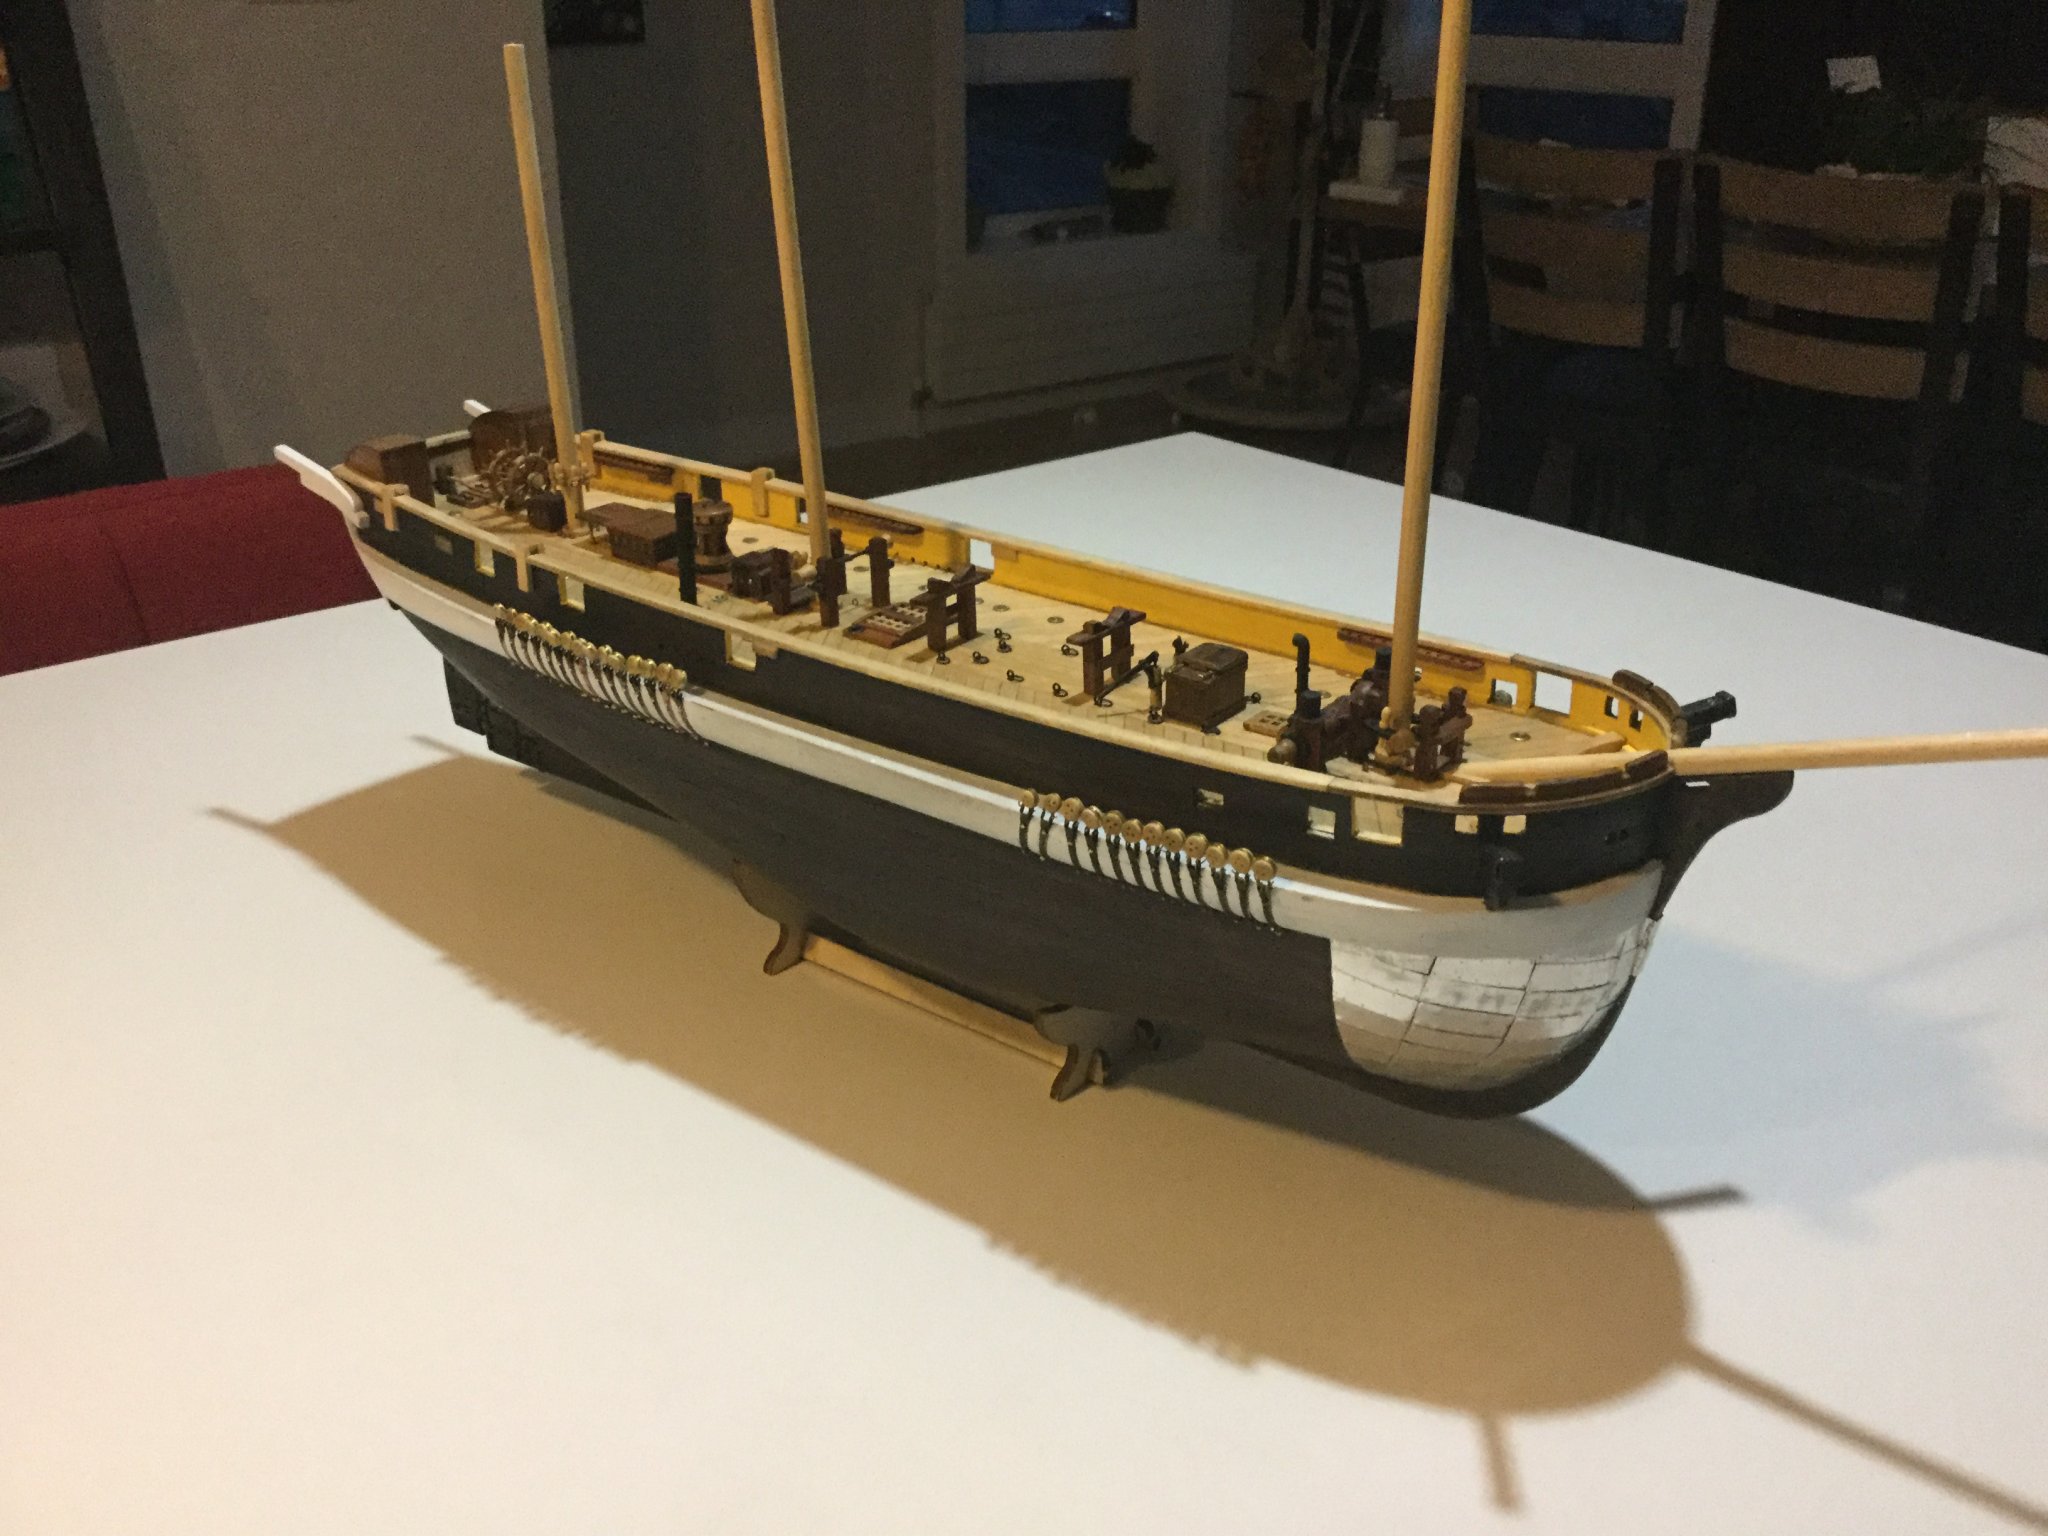
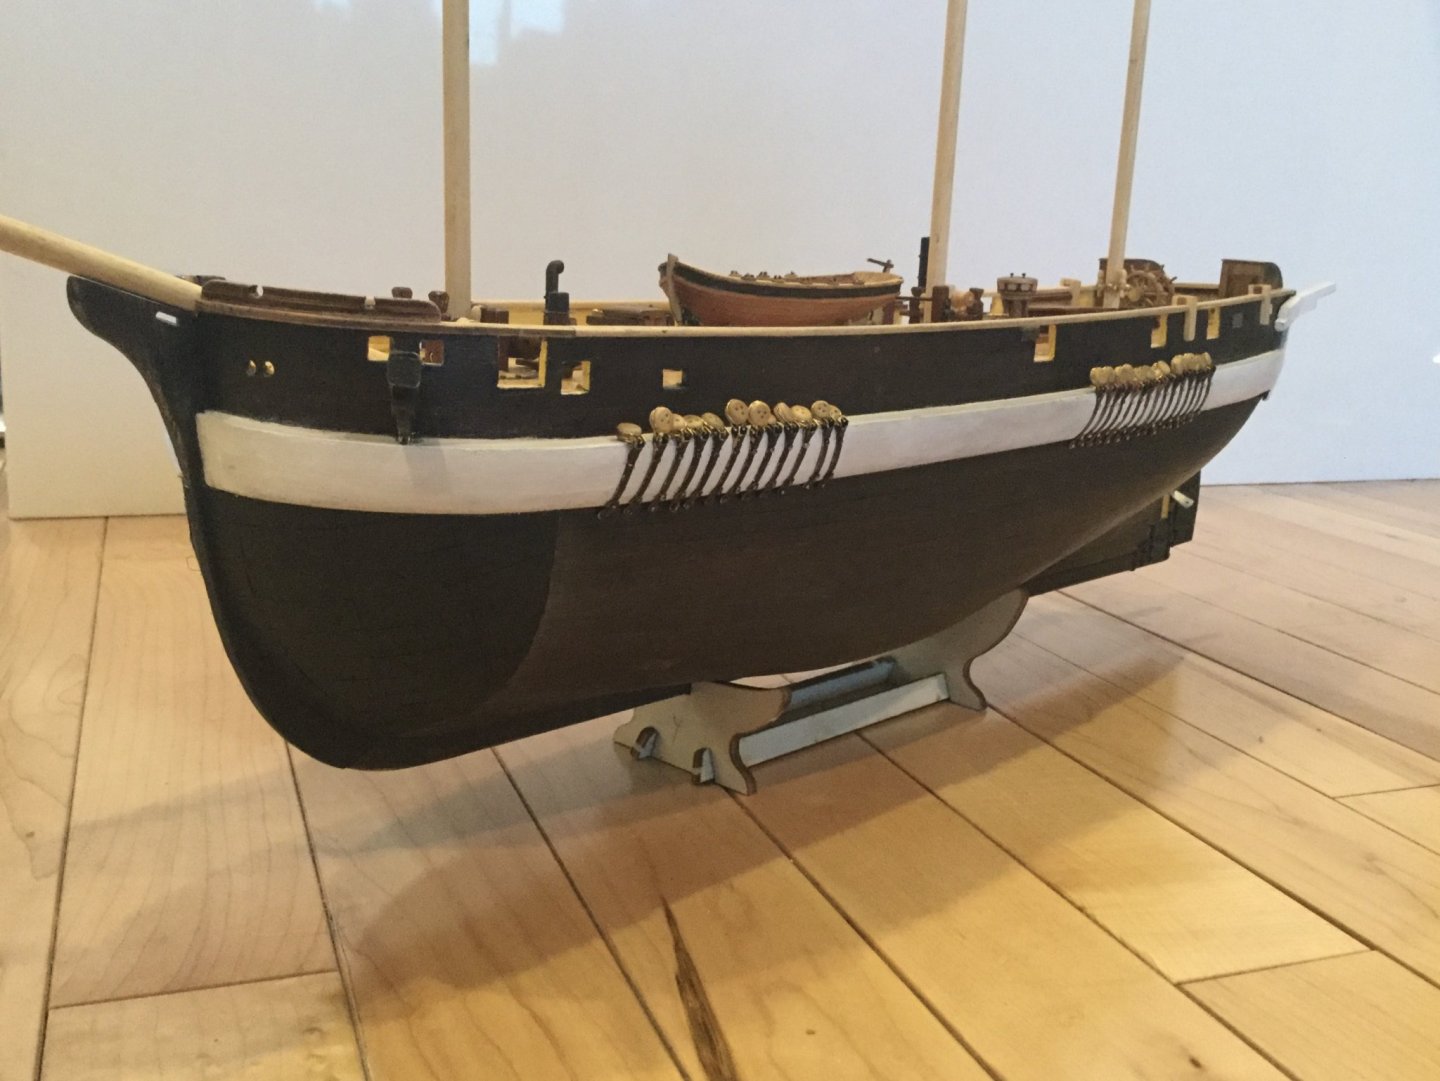
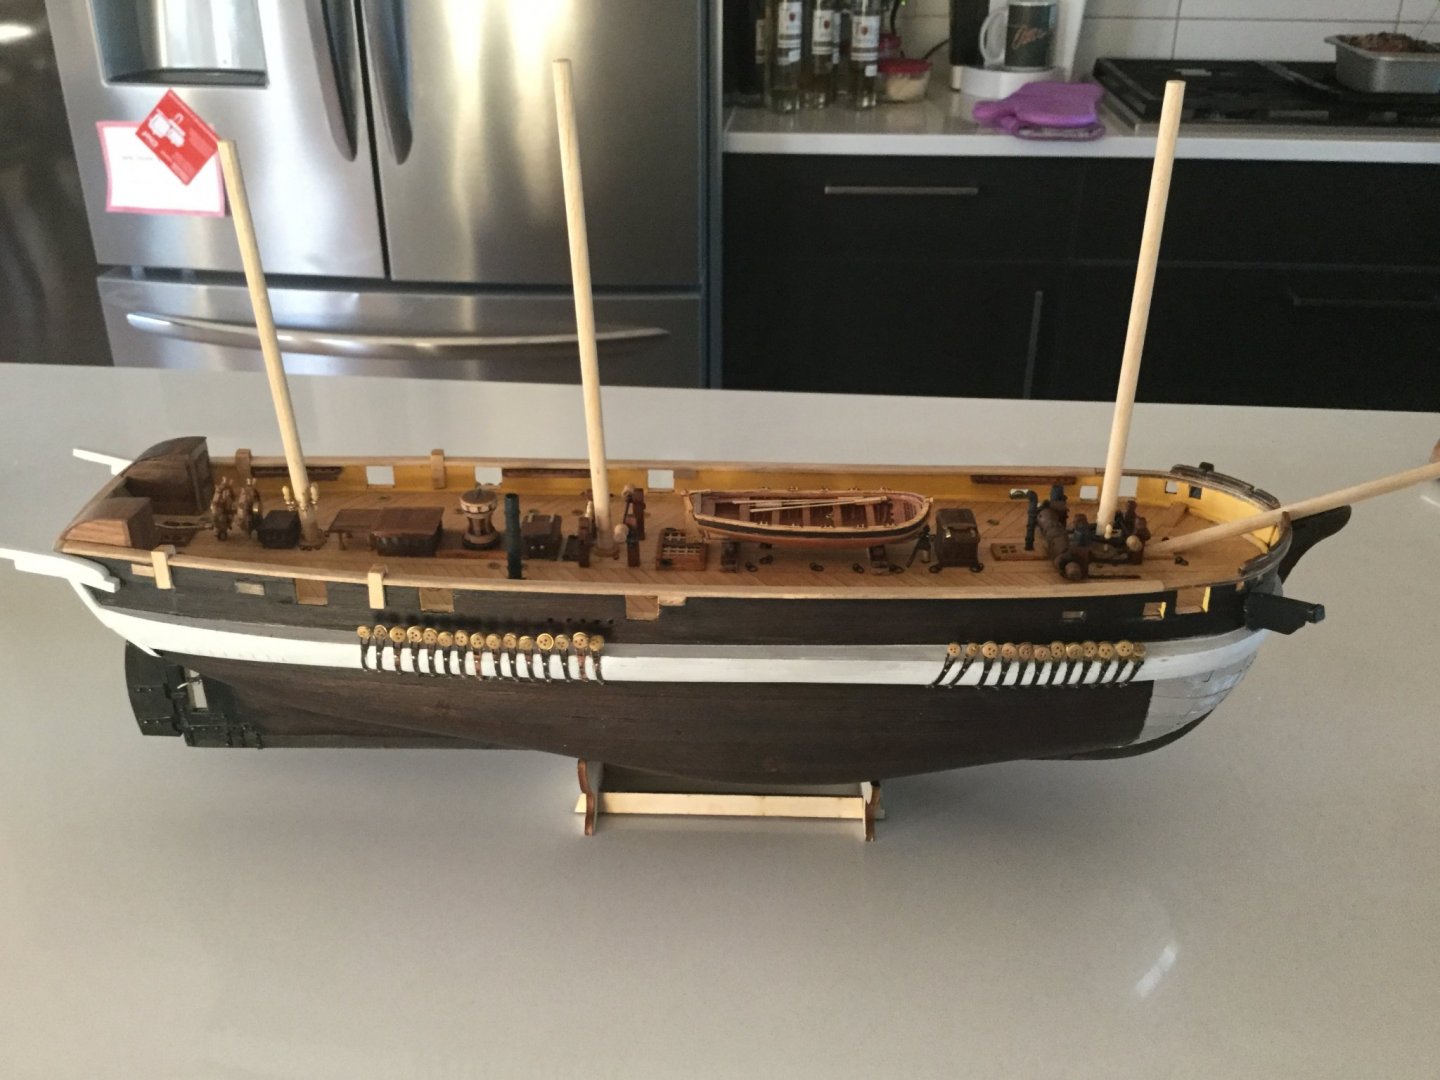
Here's the latest work on Mini-HMS Terror: I'm fairly pleased how the plating turned out on the bow. I carefully de-greased everything and scuffed it up before applying an etching primer followed by matte black spray. It's turned out quite well if I do say so, and it's a big relief to have this part finished. It's one of those parts of the model that if done poorly, can really be an eyesore. I've also finished playing about with boats. I've decided not to use the long boat from the kit, and simply display my "Master Korabel" boat on the cradle that came with the boat kit. The chocks on the deck were too low and the "stilts" in the kit were too high, and the little cradle looks just right to me. I mounted them where there are depicted two transverse planks in the admiralty draughts, so it's pretty realistic anyway and places the boat at what looks to me to be the hight it is supposed to be. In real life, it's quite believable perhaps the boats were sitting on the sledge, but in the absence of confirmation in the admiralty drawings I've chosen to take the easy way and stop trying to speculate: To quote Keith Black: "My rules have been, that if I couldn't make it look close to what an element actually looked like, don't make it. Don't make an element if you can't verify it was actually part of the ship (don't make up history,accurately portray history to the best of your ability) Don't make an element if it's going to look cheesy, better to not make it at all." (thanks Keith, sorry for stealing that) Also for this reason I also omitted the part of the armour where it flares up and covers part of the chock channel: the complex curves were difficult, and I felt that a poor job here would detract from the model more than their absence. In my opinion it is barely noticeable in this scale.


-
I'm very impressed how you managed to run your planking clear to the bow without any drop strakes. I managed to do this with my second layer, but still had to use both drop strakes and stealers on the complex shape of the stern. I'm not too fussed about it but I was disappointed that my best work on the planks has disappeared under the metal armour! *edit: actually, it turns out I was lying. I had to insert a single drop plank near the bow at the turn of the bilge. I am impressed you didn't find it necessary to do this.
-
HMS Terror by Mish - OcCre - 1:65
Keith S replied to Mish's topic in - Kit build logs for subjects built from 1801 - 1850
There are a lot of "Little Terrors" going together at the minute. Including yours, I think there's six of 'em! Lots of inspiration. -
OK so I've made a change to the model, which I hope makes sense. I've got rid of those legs the boat-chocks were sitting on. The kit has the large boat sitting on stilts because it is too long to fit between the forward ladderway and the pump cranks (I haven't built these yet). It overhangs the sliding hatch on the ladderway. The thing is, I am starting to wonder if this large boat is just a boat from the generic boat-bin at Occre, or whether its size and shape are based on any actual historical records. The draught I have ordered from the National Maritime Museum depicts a big pile of boats sitting right on the deck with the prow of the lower one between the pumps and just slightly overhanging the hatch due to the rake of the stem. The other boats are depicted stacked inside this one. Therefore, I have decided to mount my "Master Korabel" boat in chocks right on the deck, and I've decided not to use the large cast-metal boat provided. This is the largest 1:72 scale (close enough)small boat that they provide, and it's only about a scale foot shorter than the largest boat whose silhouette can be made out in the shipyard draughts. If anyone thinks I've made a mistake here, please let me know. I see there's a lot of hand-wringing, squinting at plans, and second-guessing that goes on when trying to build a model ship.
-
Ha ha, I wish it was warm enough for bugs! Summer is about two weeks behind schedule here! It's awful.
-
Believe it or not Keith, I couldn't find any wipe-on poly around here. I live in a crummy little town in the Arctic and if it's not at "Canadian Tire" (and it generally won't be, no matter what "it" is) it's not gonna be anywhere else. I had some "regular" polyurethane varnish and I tried that on a scrap piece. My acrylic black model paint didn't like it and turned out kind of streaky. I'm going to try spraying it. Painting is my least favourite thing. I always seem to screw it up somehow!
-
Thanks Keith, I tried emery paper but the little "rivet heads" made that tricky. The abrasive rubber is a good idea, and immediately before the etch primer I'm going to scrub it with some aggressive scotch-brite I nicked from the airframes shop at work.
-
Thanks! I don't see any advantage to doing anything with the plating before the second layer of planking is on, but I WOULD do it as soon as possible after installing the keel and stem. I don't know if the paint you choose for the hull will stick properly to the aluminium. I'm planning on masking it and painting with etch-primer and matte black spray. I wish I had done the armour plating earlier because The ship is harder to handle now it's got all those little details on it. So far, I've only managed to knock off a cathead.
-
The bow plating is coming along. I now have both sides done; all I need to do now is make the little pieces that cover the stem and the ones that overlap the ice channels. I wouldn't say I'm exactly "proud" of the job I've done, but I feel it is acceptable, especially because it will be painted matte black to match the hull. Besides, I have a feeling the bow armour on the real ship was a rather brutish-looking affair, probably rusty after being at sea for a while and especially after bashing some ice.

-
HMS Terror by DaJH - OcCre - 1:75
Keith S replied to DaJH's topic in - Kit build logs for subjects built from 1801 - 1850
Your hull looks nice and smooth so far. I used contact glue for the second layer, and it was a messy process. I agree with you that white glue is better. It probably makes a neater job because there's more time to set the planking perfectly, and it dries clear and can be sanded. Yours looks great so far. -
Plasticard never even crossed my mind, until now! Oh well, I'm most of the way through the plating and I've already bought the etch primer and matte black paint for it. I feel you are right about the boats. In paintings, like "They forged the last link with their lives" the boats are depicted as being green and black. In other paintings they seem to be white with a dark-coloured topside stripe. I really haven't made up my mind about the boats. The whale-boats stowed astern will be either upside-down or hanging from davits. If they are on the davits, I'm considering making canvas covers for them. The longboat and jolly-boat midships will be right-side-up. In all probability the smaller one would have been upside-down but I'm going to mount it right-side-up to show the interior detail. My intention is to display the ship as she would have been under steam in an open lead, with the sails hastily furled. I imagine in this scenario she would have had at least one boat on the davits rather than fully stowed.
-
I've been beavering away at the armour plating on the bow. I can't work out why, but I am finding this part of the model extremely tedious. I suppose I'd better learn to be patient before I begin the rigging! Each little aluminium plate needs to be individually crafted. The instructions depict the plates being cut to a certain size, and then stuck on one after the other as easy as you please. But in reality, other than the first five or six plates, the curvature of the ship's spoon-bow makes it necessary to taper and adjust each corner till it fits against its neighbour. There isn't a right angle in sight. I've done the starboard side and I'm about 2/3 through the port side. They are probably not going to be perfectly symmetrical, but that will not be noticeable, especially once they are painted black. I've put little dimples in the plates to represent rivets. I've no idea if this is true to scale, but it stands to reason there would be rivets or something holding the plates on.

-
What an accomplishment! She deserves a place of honour in your home! Let's see some more pictures with the boats!
-
I used contact glue on mine, and did not enjoy it. Besides being rather messy, I keep finding planks that are trying to spring free, which I then have to use CA to make fast again. If I were to do this ship over again, I would be patient and use white glue.
-
I was annoyed the planks weren't full length at this stage too. And I am a bit annoyed that the aluminium pieces they supply for the bow armour all need to be cut into quarters. I feel like this could have been done beforehand. I know, it's a "kit" but honestly if every one of them needs to be cut into quarters it wouldn't be any less fun to build if this was already done for you.
-
Very exciting to watch this phase of your model. Aha! I can see how you've used one of those "kevels" we were talking about! I can't wait till the book you suggested arrives.
-
Considering how particular I've been about the rest of the ship, I'm beginning to wish I'd been brave enough to attempt to correct this part of the hull. I have to remind myself however, this is my first ship and I found the planking to be challenging enough without changing the frames too much.
-
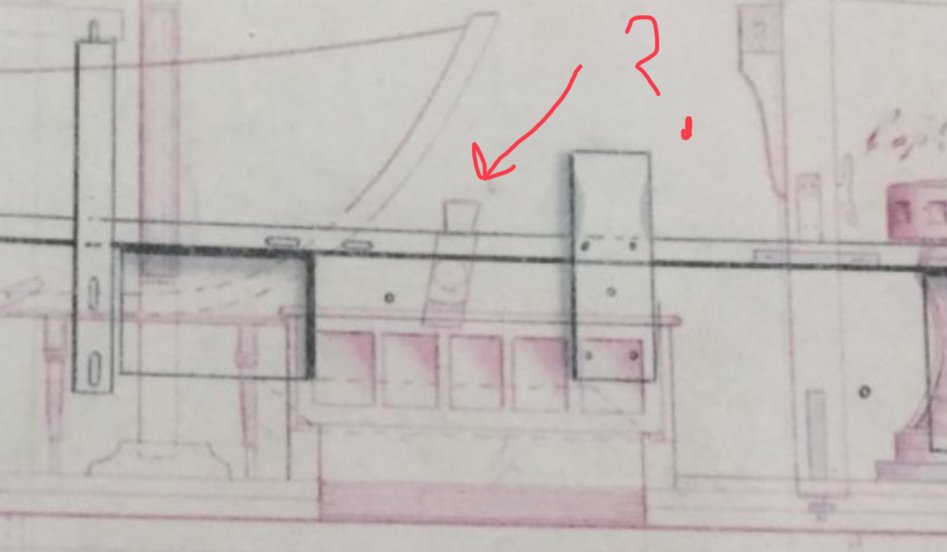
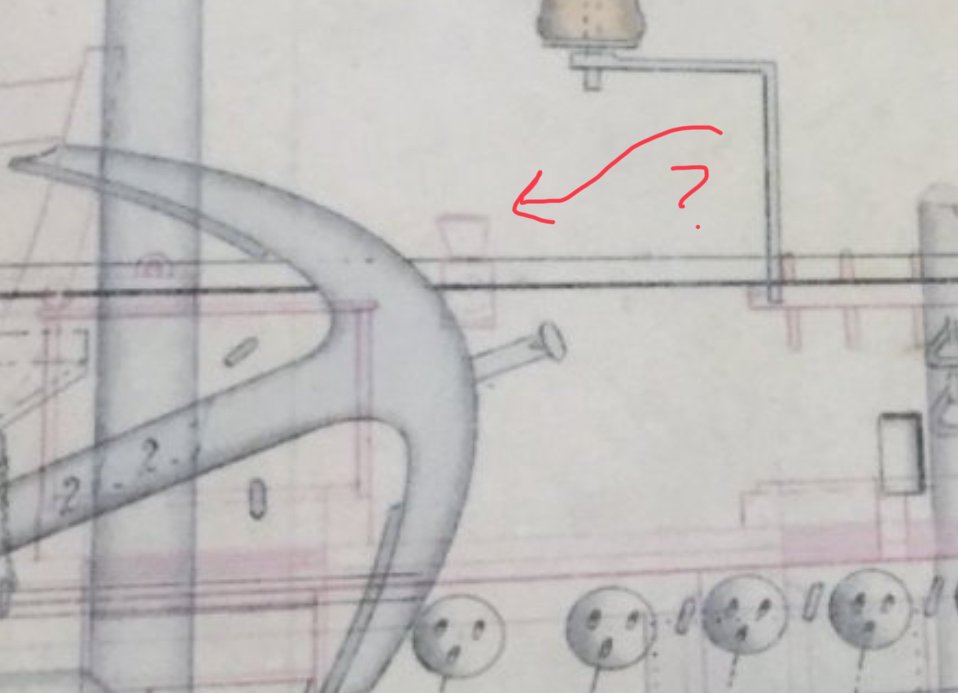
I think I know the ones you mean. They aren't depicted in the plan-view, and in the side-view they just appear to be floating there. One looks like it might have a sheave in it? No idea what they are. I thought maybe chesstrees, but they aren't really in the right place for that. I've half a mind to shelf my model and wait for you to catch up, so we can brainstorm some of the finer points together!
-
I'm really enjoying this build because this little ship has a very similar barque rig to HMS Terror, which is what I am building. Your work is excellent and I'm sure to benefit from your research. Well done for mounting the yards in the correct position. I see a great many ships, built without sails, that depict the upper yards in the position they would be in if the sails were flying, rather than down where they ought to be. A small detail, but once you notice it, it's hard to un-notice! I admire uour work and I'm looking forward to shamelessly copying your rigging!
- 800 replies
-
- 2
-

-
- snake
- caldercraft
- (and 1 more)
-
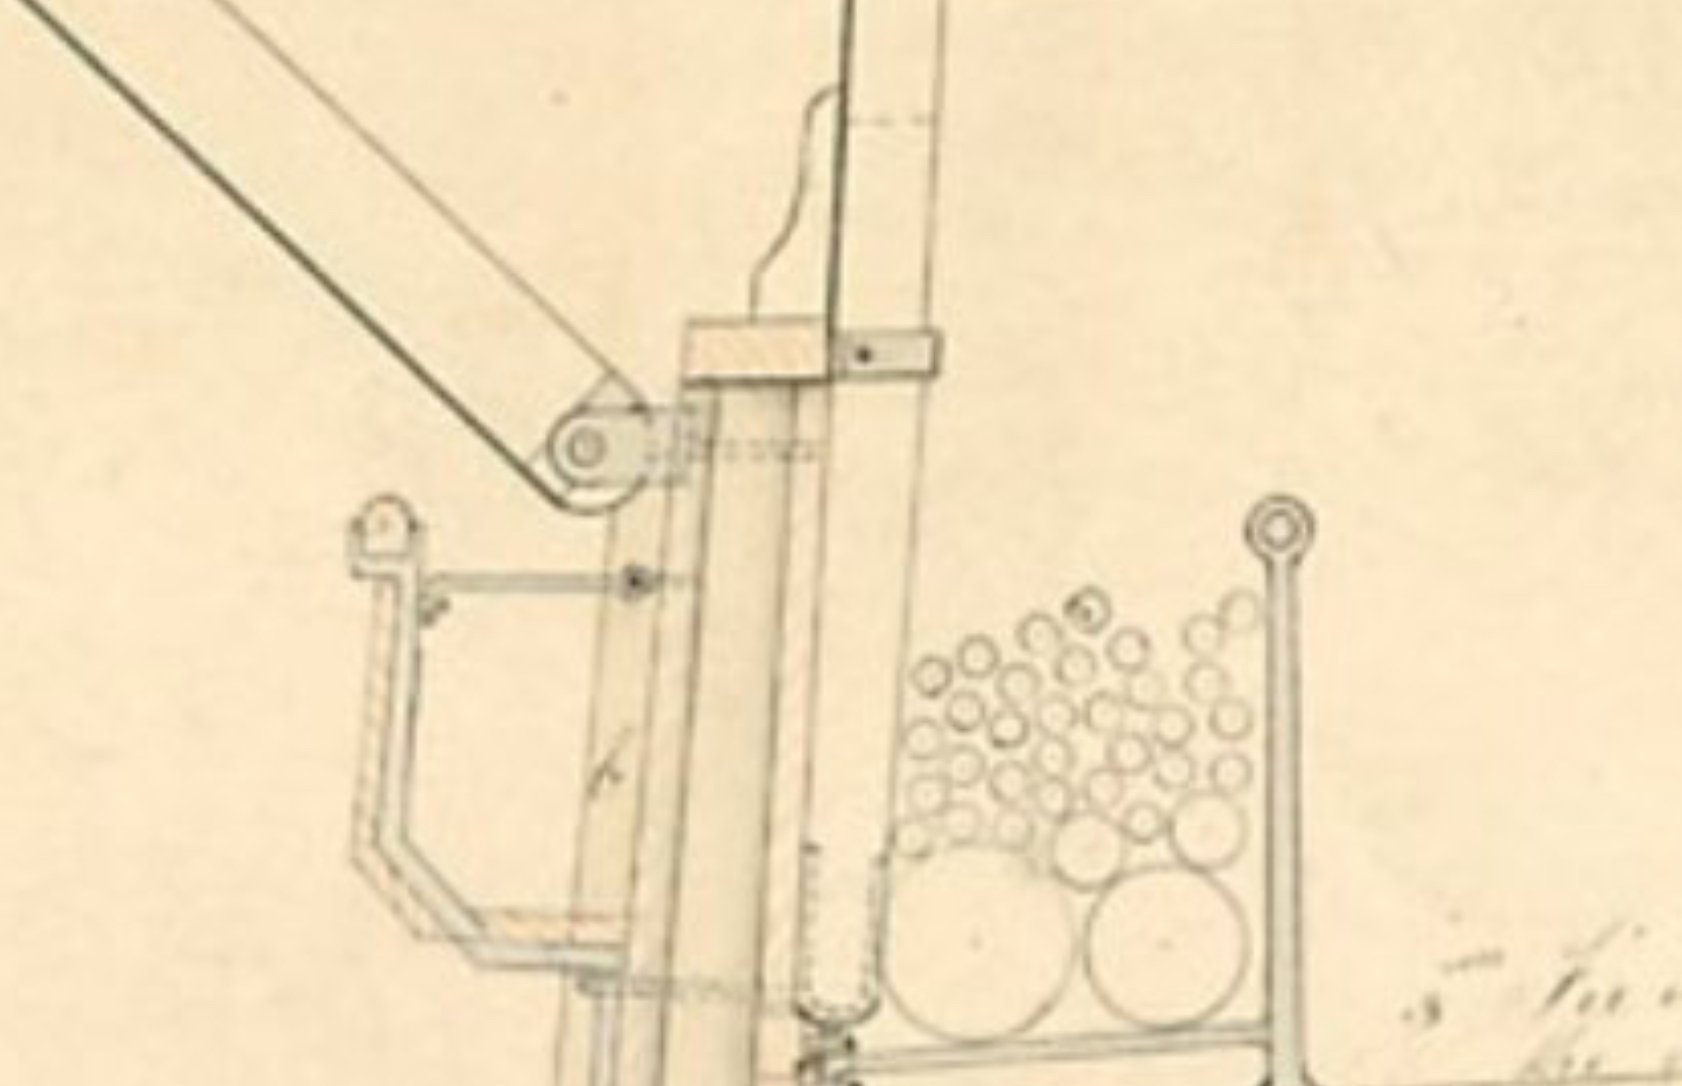
It seems in this picture as though at least some of the cranes were attached right to the side of the ship, rather than the posts, and also that the posts were mounted on a pin in a socket at the bottom, with an iron bracket right at the top of the bulwark. It's well confusing- as well as that ice-bridge. I read somewhere it was to help con the ship in open leads and thin ice, but it seems odd that it doesn't have safety-ropes or anything... was the ice-master expected to just stand balancing on an open plank over the water? I don't think that sounds correct.

-
Nice work Grandpa Phil. I especially like your use of card to make the skylights. I wish I had thought of that on my Terror model. I used veneer, which split and cracked maddeningly. I'd like to see more pictures of your work on the binnacle as you go along. I can't find any mention of a binnacle in any of the research I've done on Terror, but I'm sure there must have been one. In the fictional TV show, which was in fact very extensively researched, there is a binnacle sitting on the aft skylight, which would be a sensible place to put it as the wheel is right behind it. I've been trying to work out how to make one. I'm going to copy what you do, if you'll be so kind as to document the process!