HOLIDAY DONATION DRIVE - SUPPORT MSW - DO YOUR PART TO KEEP THIS GREAT FORUM GOING! (Only 36 donations so far out of 49,000 members - C'mon guys!)
×


acaron41120
-
Posts
257 -
Joined
-
Last visited
Content Type
Profiles
Forums
Gallery
Events
Everything posted by acaron41120
-

Deck or Hull
acaron41120 replied to acaron41120's topic in Building, Framing, Planking and plating a ships hull and deck
Thanks for all your comments. The main reason I asked is because like most of us I plank the hull before planking the deck. But in my Mayflower kit the plans, photos and instructions show planking the decks first. First time I have ever seen it done that way and was just wondering if it made things easier or not. Phil, I like the way you did your waterways and margin planks. I'm going to have to give that a try. -
When planking is it best to plank the decks or the hull first? Just wondering.
-
Ratline Making Tools
acaron41120 replied to acaron41120's topic in Modeling tools and Workshop Equipment
Thanks for the replies. I was wondering if it made it easier than the traced card and line that I've always used. I guess I'll stick to my older wats. Sometimes the old ways are better. -
I have a catalogue from Micro-Mark. They have a lot of nice hand tools for model ship building. I have a couple of them. But I have never used (I've thought about it though) any of their ratline making tools. Has anyone tried one?
-
The thickness of my planks are 1.8mm per the assembly sheet but I figure them as 2mm. I'm going to stick with the 8mm wide Wale and use the 5mm planks for the rest of the hull. I understand that in practice the Wale was actually thicker than the rest of the hull planks bur my kit instructions don't mention any thicker planks. In my signature block I list the ships I have built. But for this build and going forward, I'm going to try and do the planking the correct way. Thank you everyone for your comments and advice.
-
I've read the planking tutorials on the site and they are great. So...in marking off for my planking, I'm wondering if I can use a slightly wider plank for the Wale. My kit has 5mm wide planks for the hull. I'm using an 10mm wide plank for the Garboard and if I use the 5mm planks for the rest of the hull I end up with needing to shave one of the planks down to 3mm. Using the 8mm plank for the Wale makes it work out without shaving any planks. Just need to verify that its okay to do this or will it lead to more difficulties.
-
Dan and Bolin. Thanks for your replies. I know about adding filler blocks but haven't tried it yet. It does seem as if there is less cutting with filler blocks than separate frames and trying to position them correctly. As the false decks are in place to supply some form of support for the sanding effort, I can remove the false decks and fit the filler blocks more easily. Great food for thought.
-
Faring the Frames
acaron41120 replied to acaron41120's topic in Building, Framing, Planking and plating a ships hull and deck
Jaager. Thanks for your information. Perhaps the best way to say it is just call it faring. In any event my intent was to let those even more novice than I to not be discouraged if "faring" takes more effort than they anticipated. -
One of the things I do when I assemble kits is to trace the bulkheads and frames on a graph paper in case something drastic happens. So far so good but reading some of the NRG and MSW articles along with the model building books, is that more frames are better. So...with that in mind, and because I have the pattern for the frames, I'm thinking of adding another frame between frames 3 through 10 (numbered from front to back). These frames will only go from false keel to main deck and not be seen. Still have to ponder this idea and I like the idea of having frames spaced closer together but it is it really necessary?
-
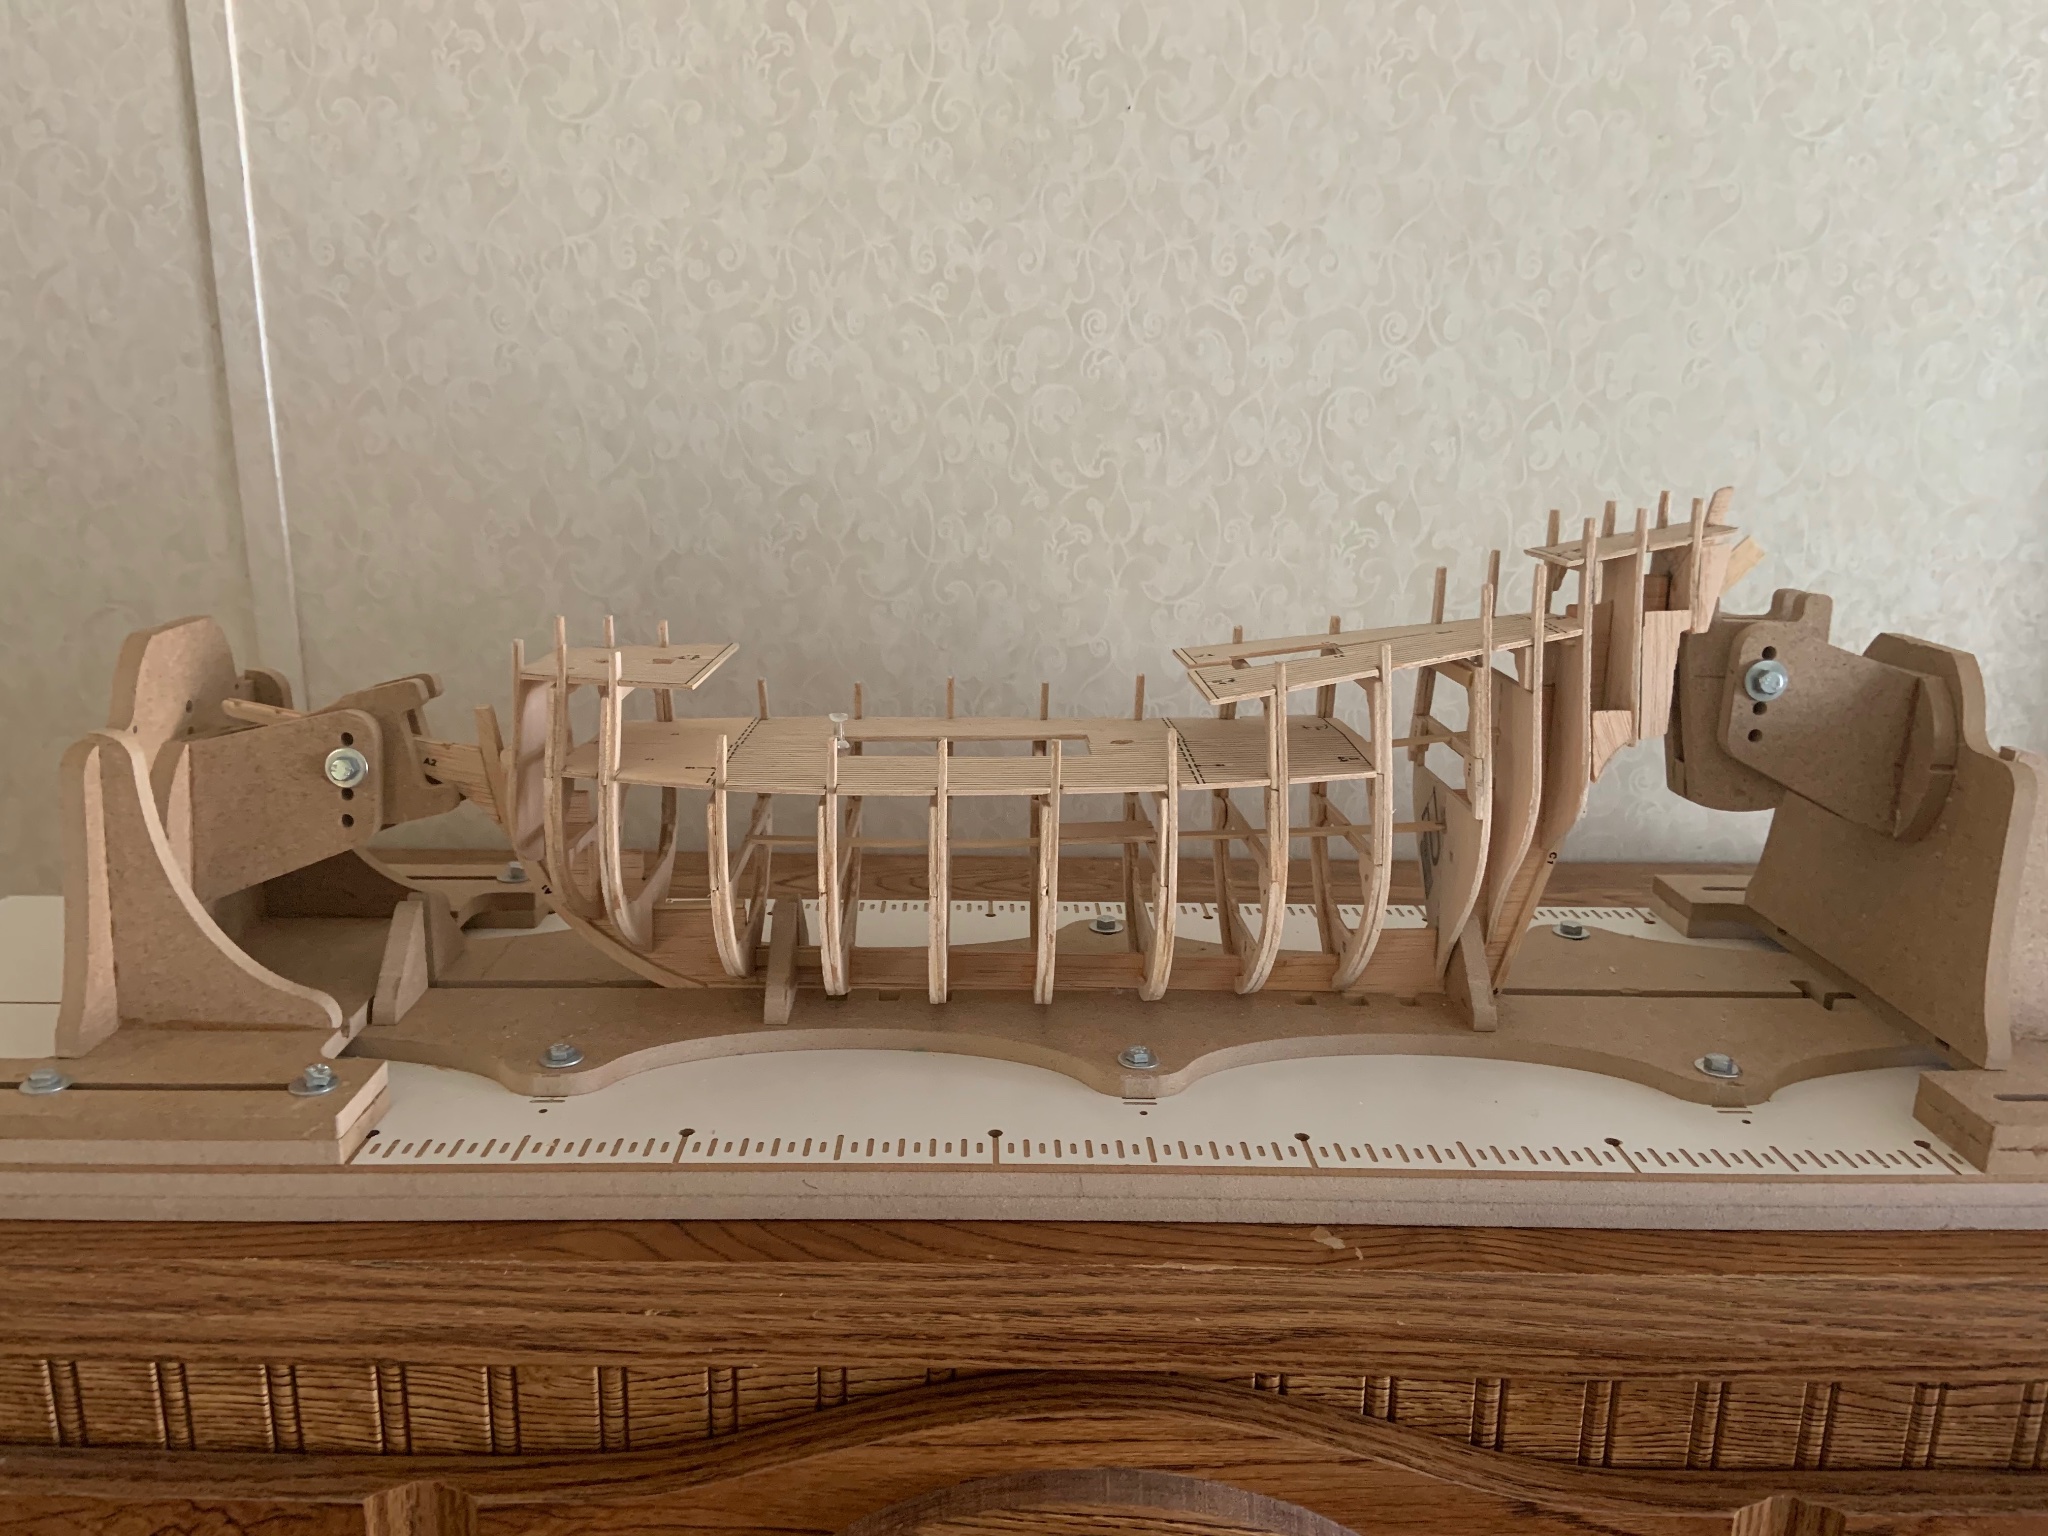
Just wanted to post this for anyone new to the model ship building hobby. I'm Building my Mayflower by Billing Boats and I spent 2 hours yesterday faring frames on the port side of the hull. I still have a little more work to do at the stern before I start faring the starboard side. For those just starting ship model building this step may seem boring and although a lengthy process, it is very necessary. Remember it is always better to sand a little at a time and check the faring a ton as you go. This step will give you a great fit of your hull planks without ridges and valleys. More to come soon with photos in my build log.
-
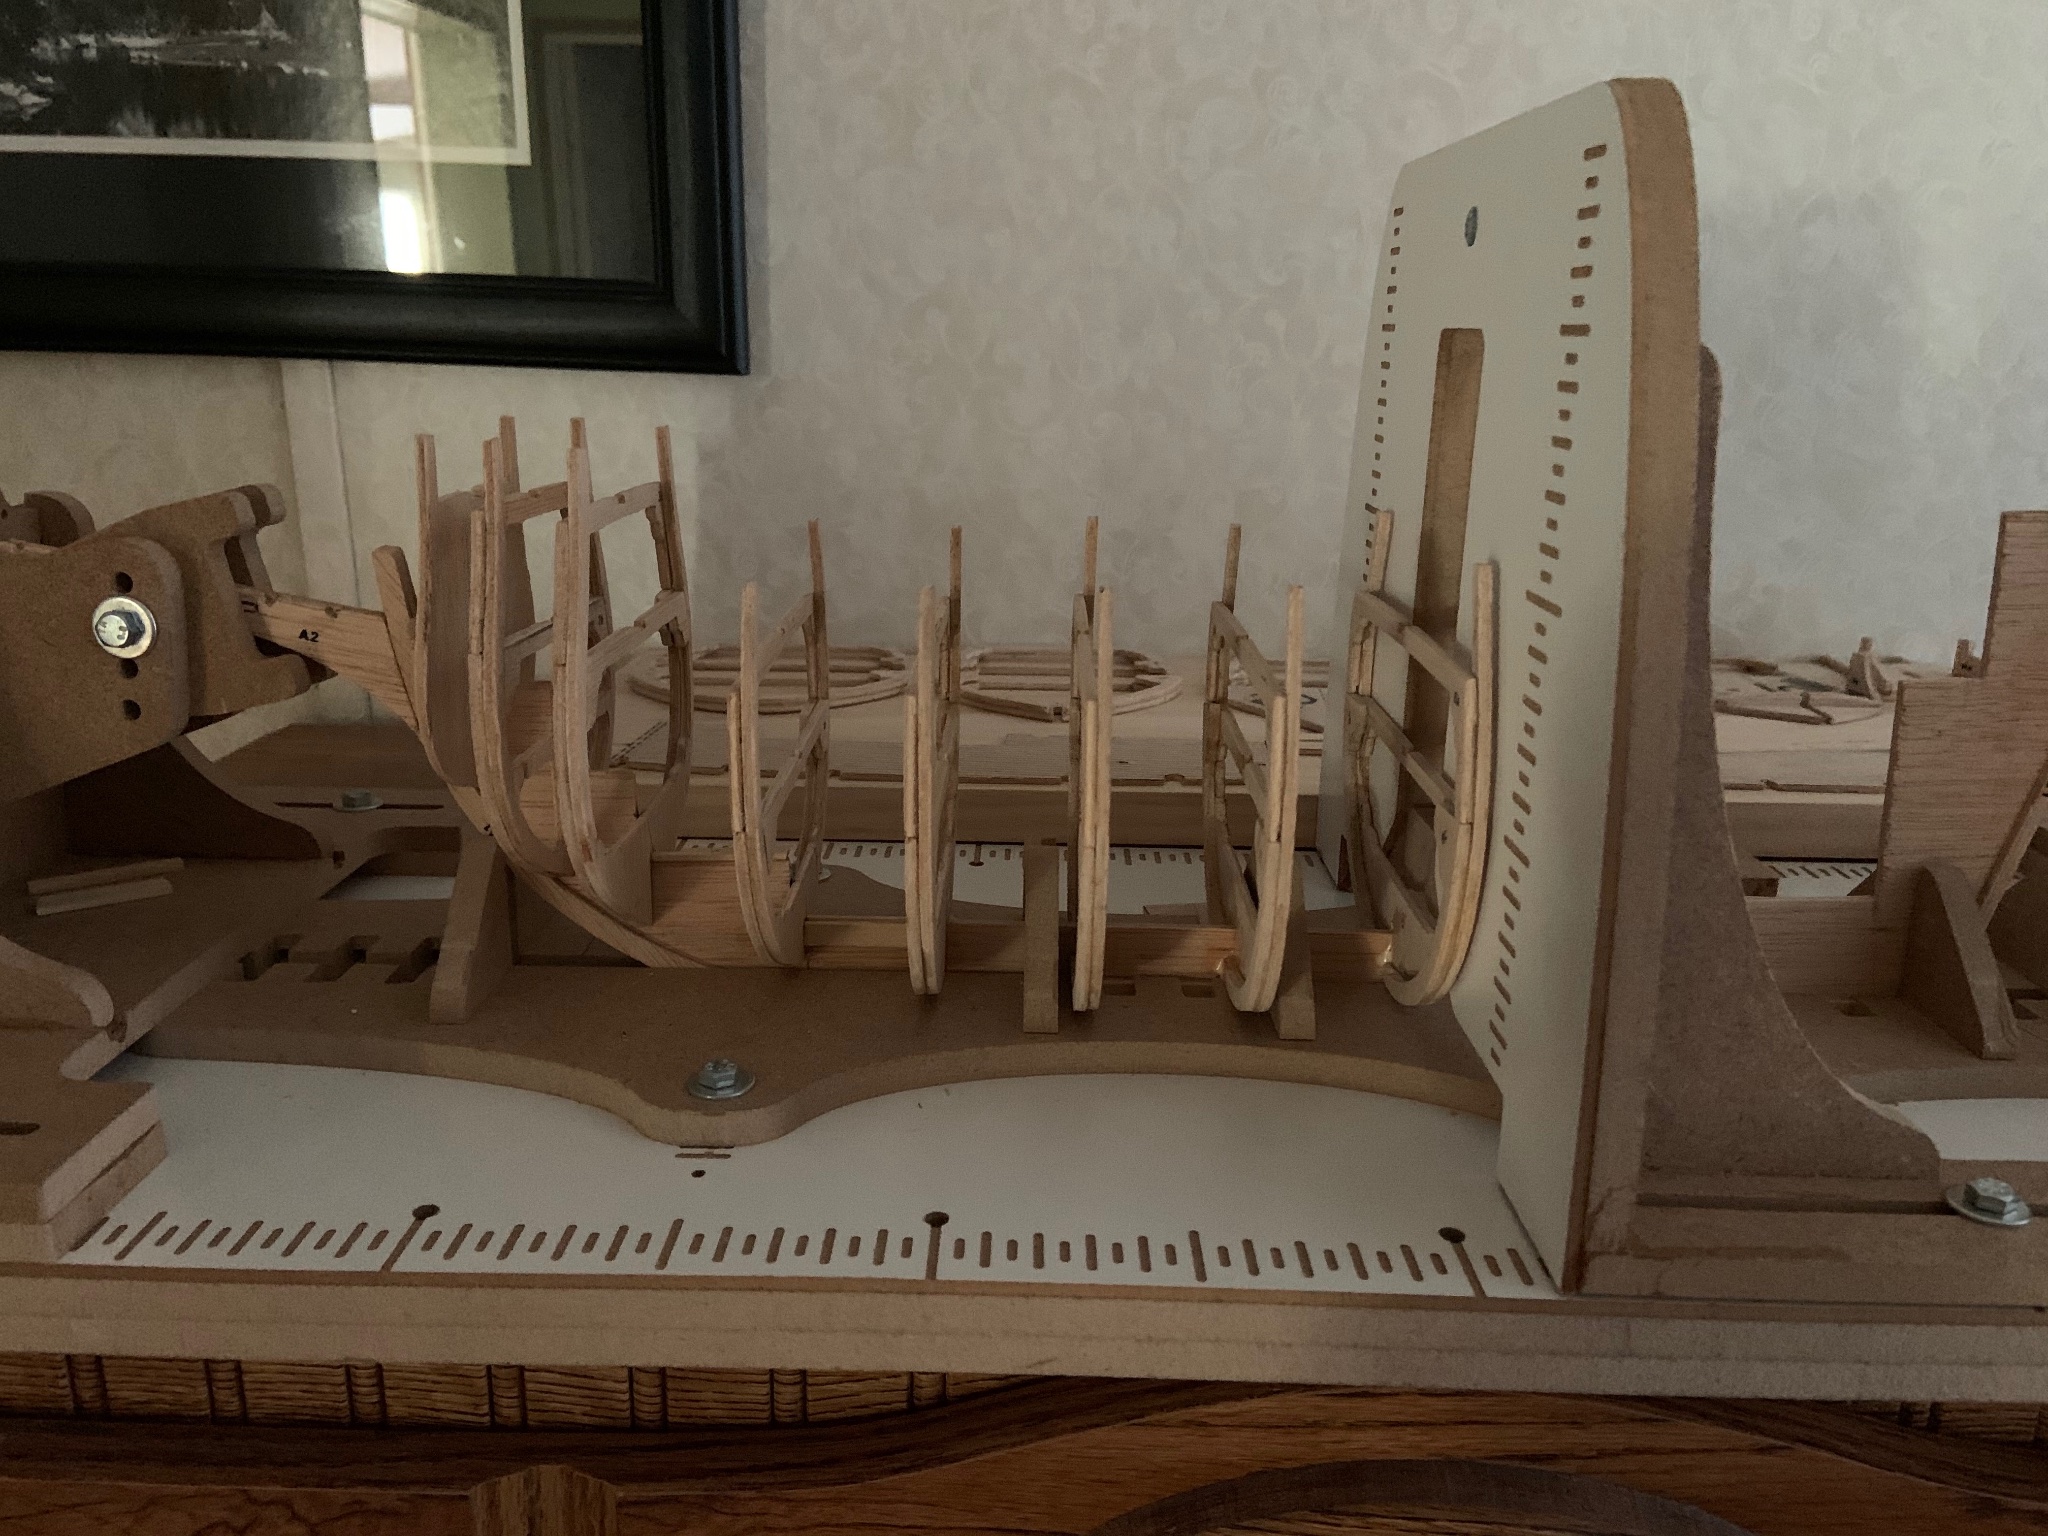
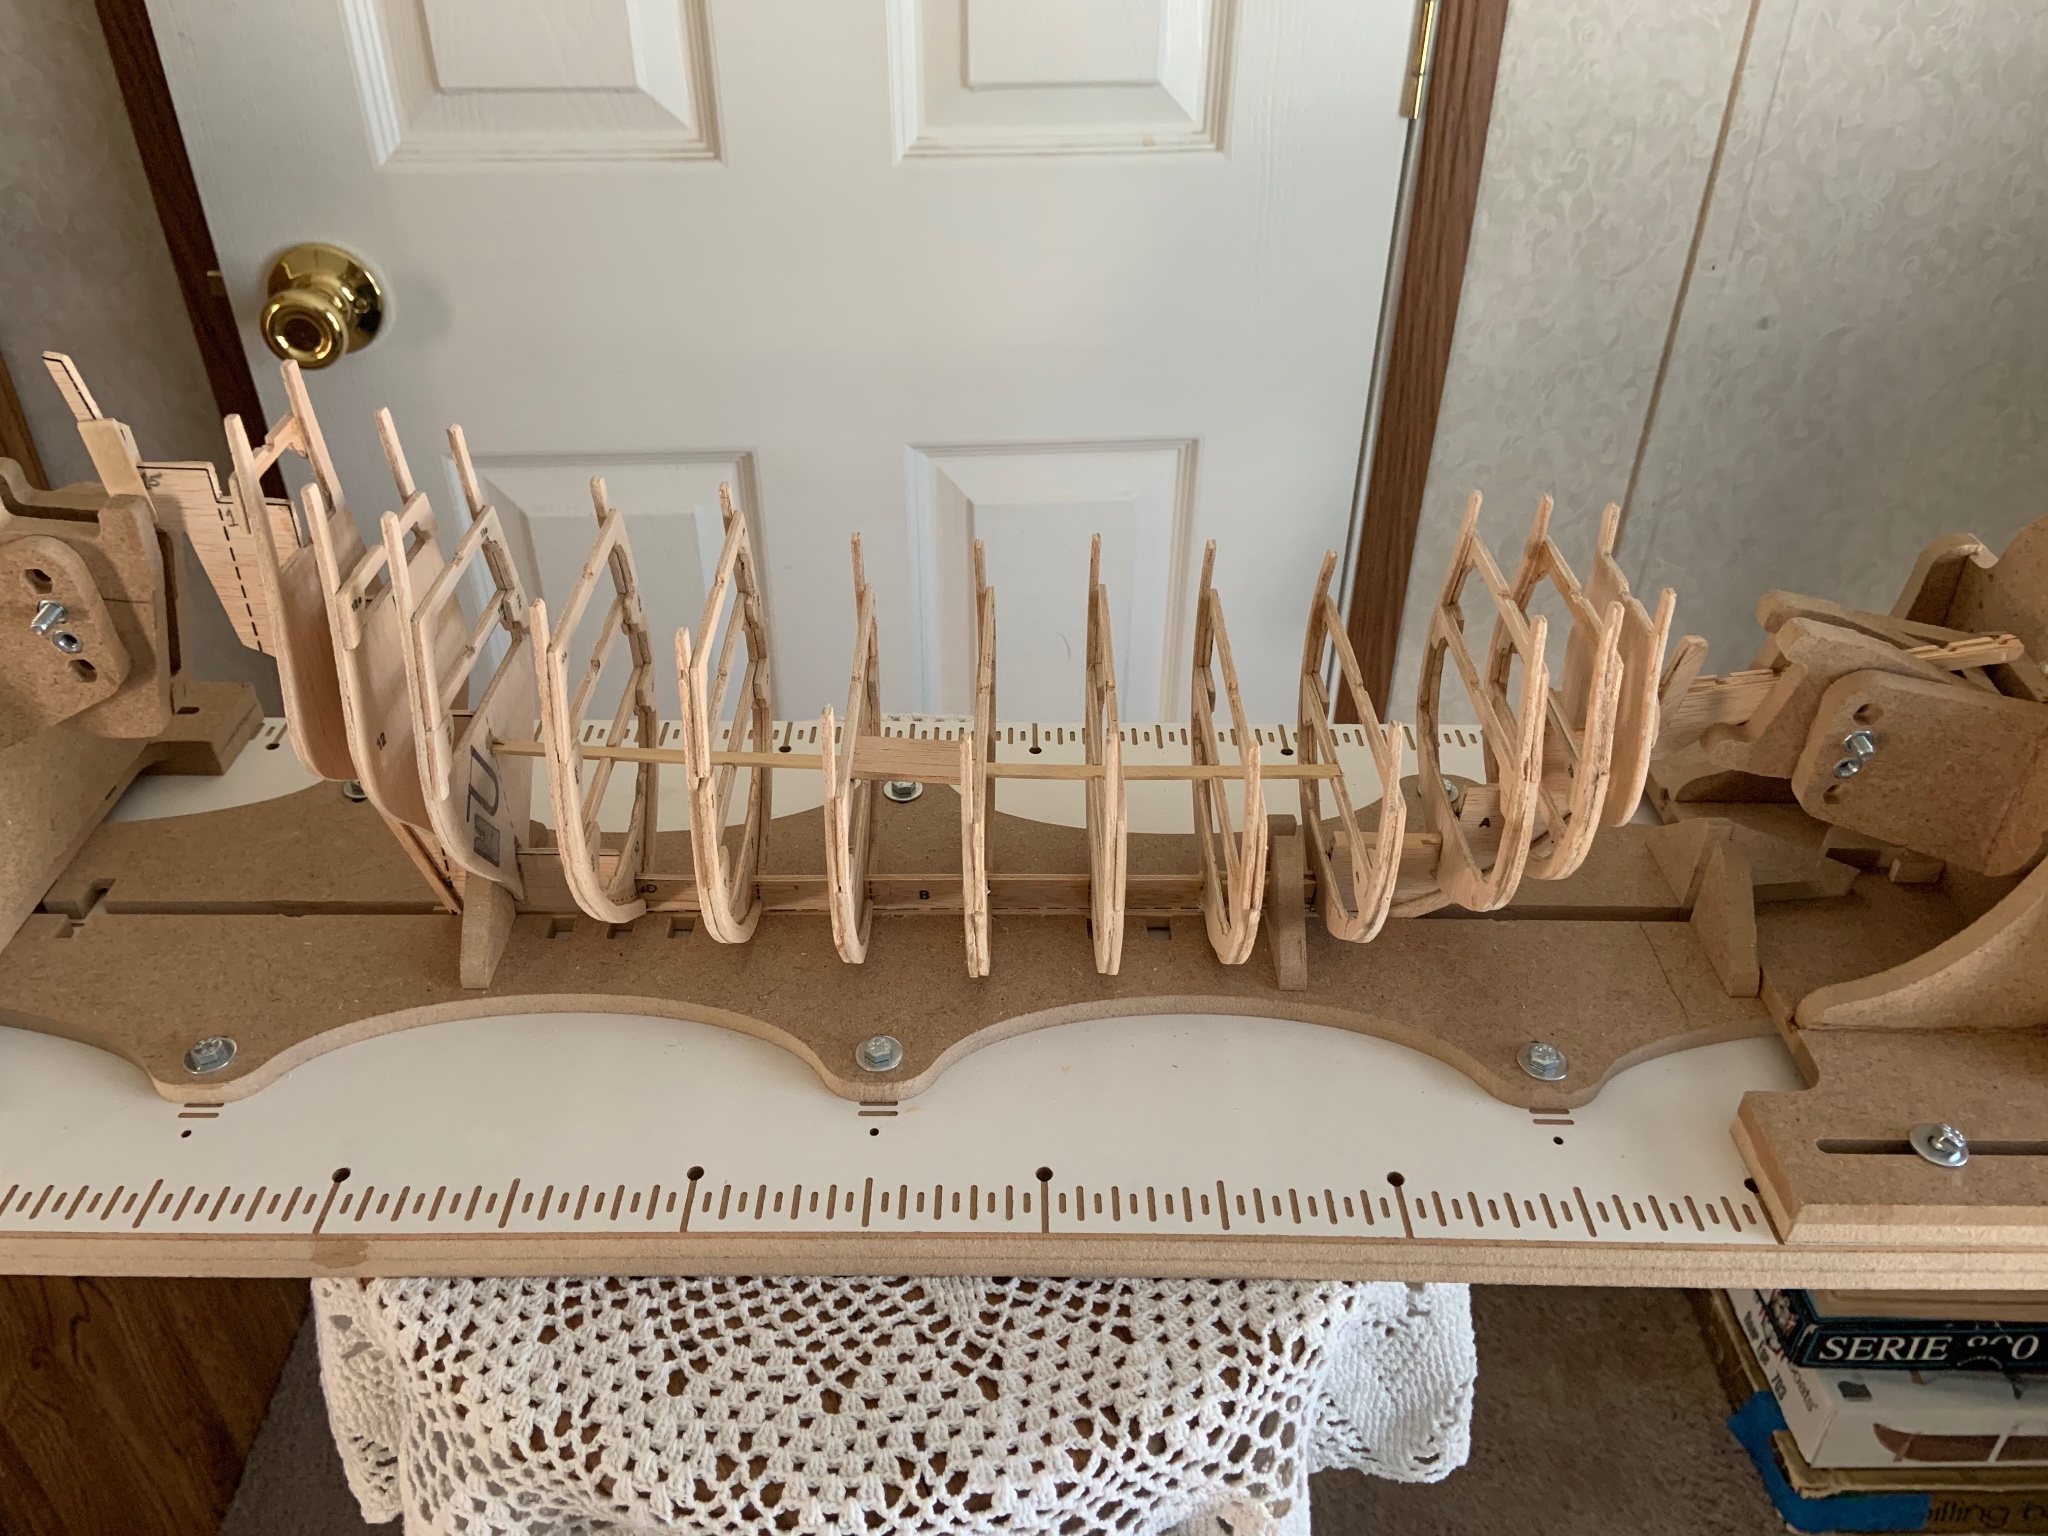
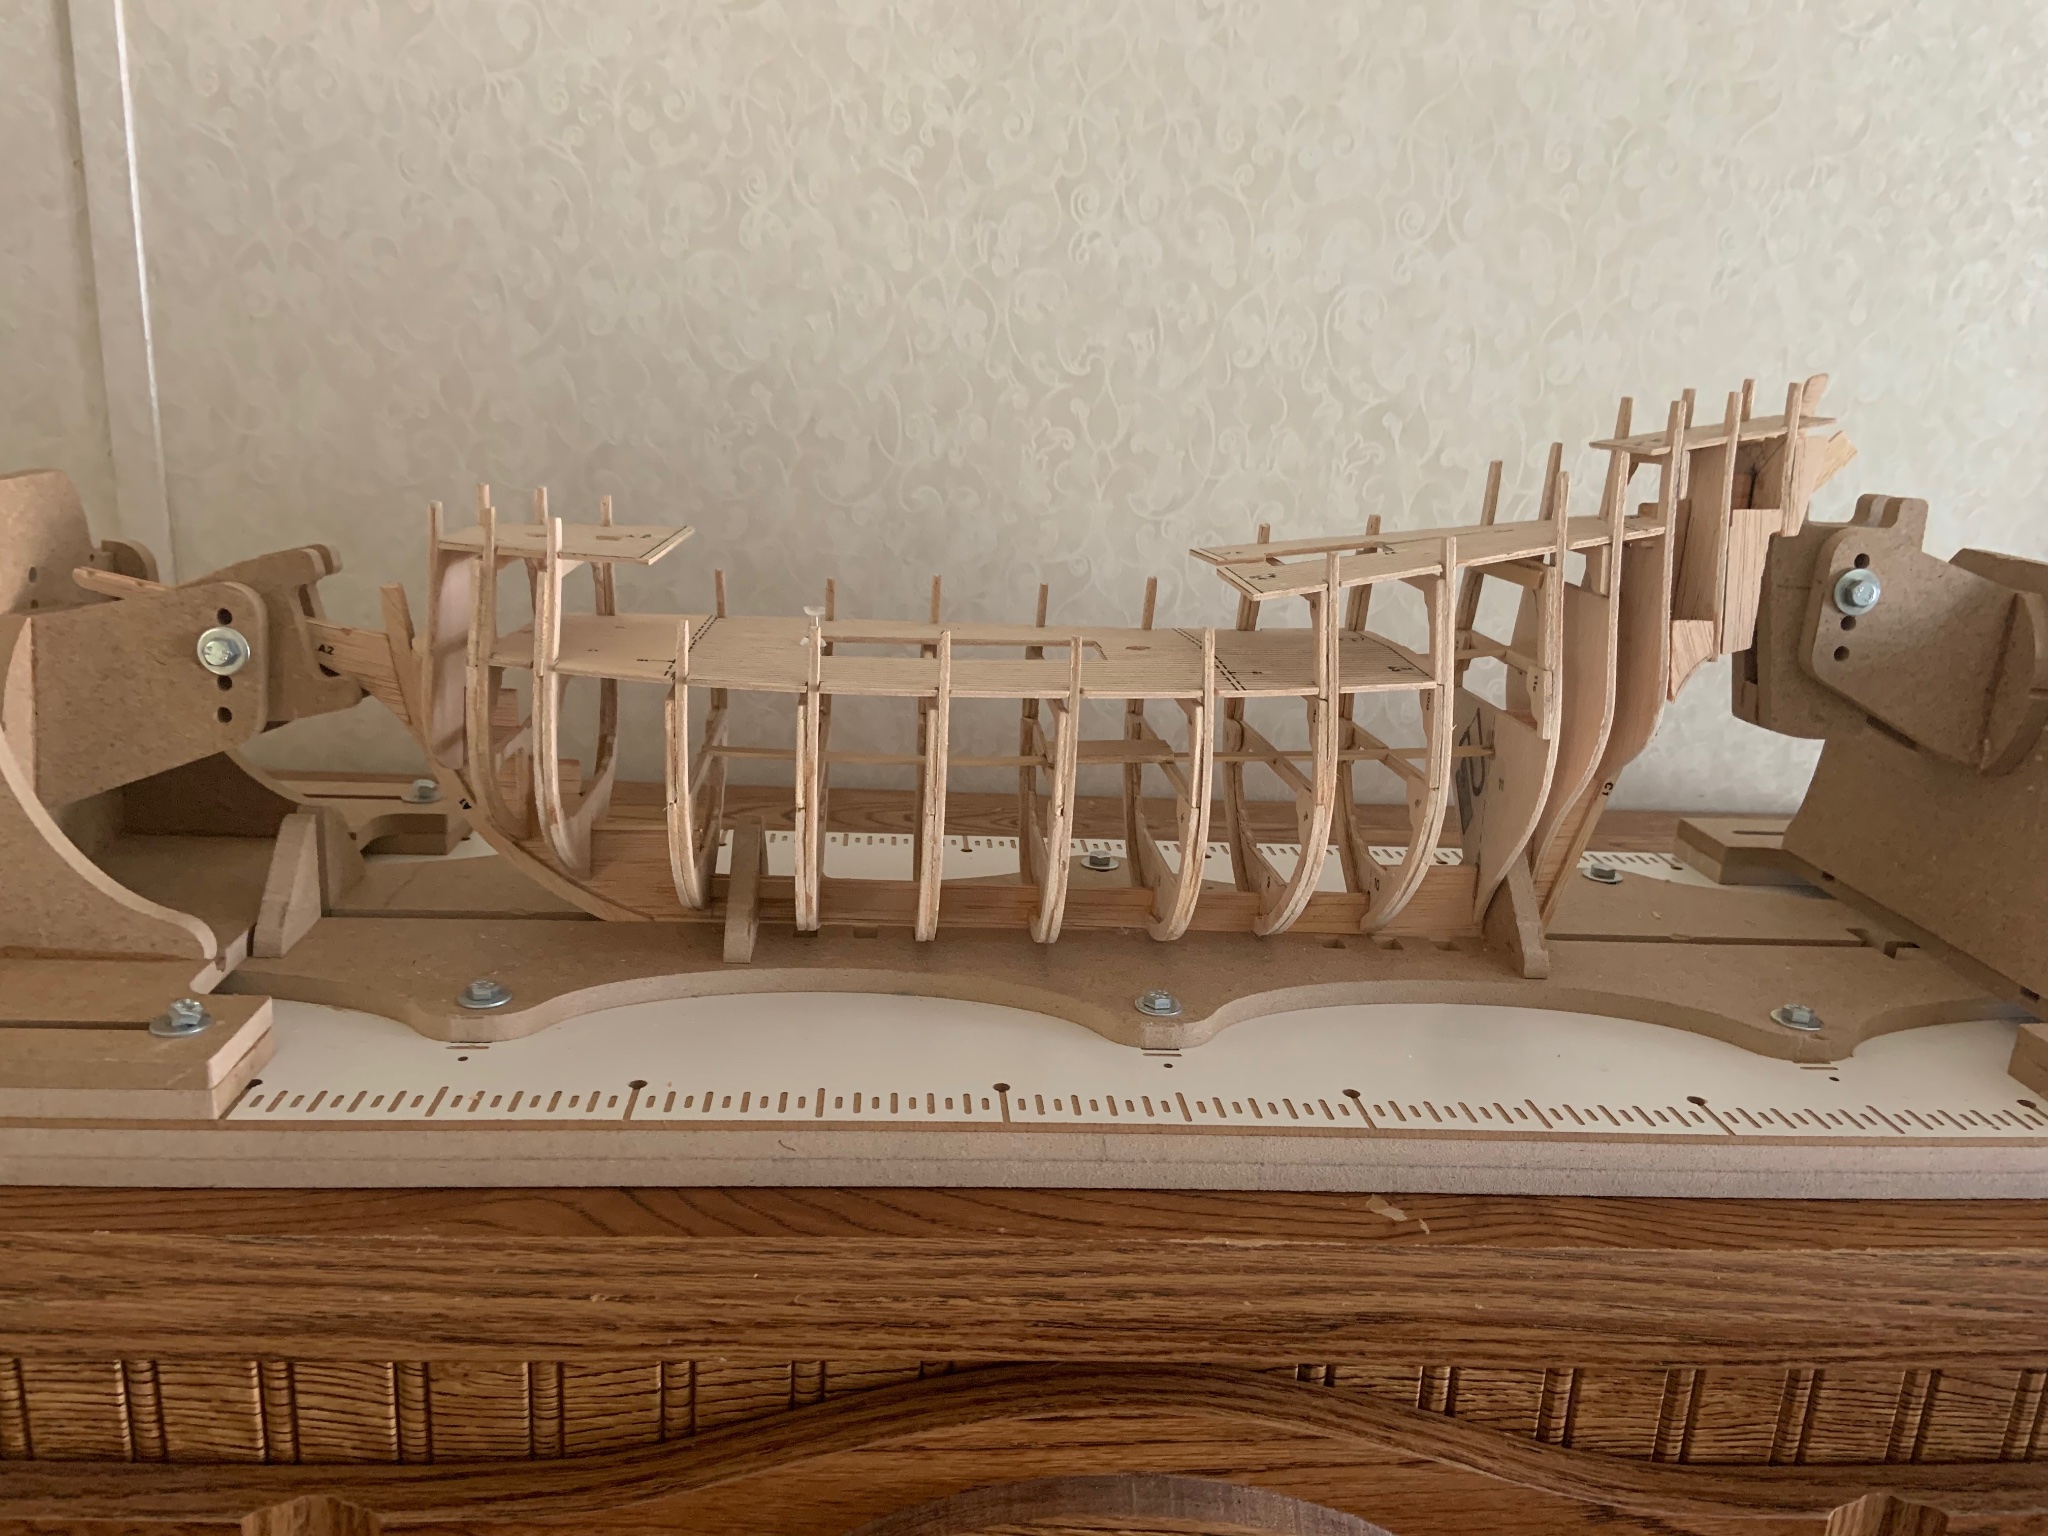
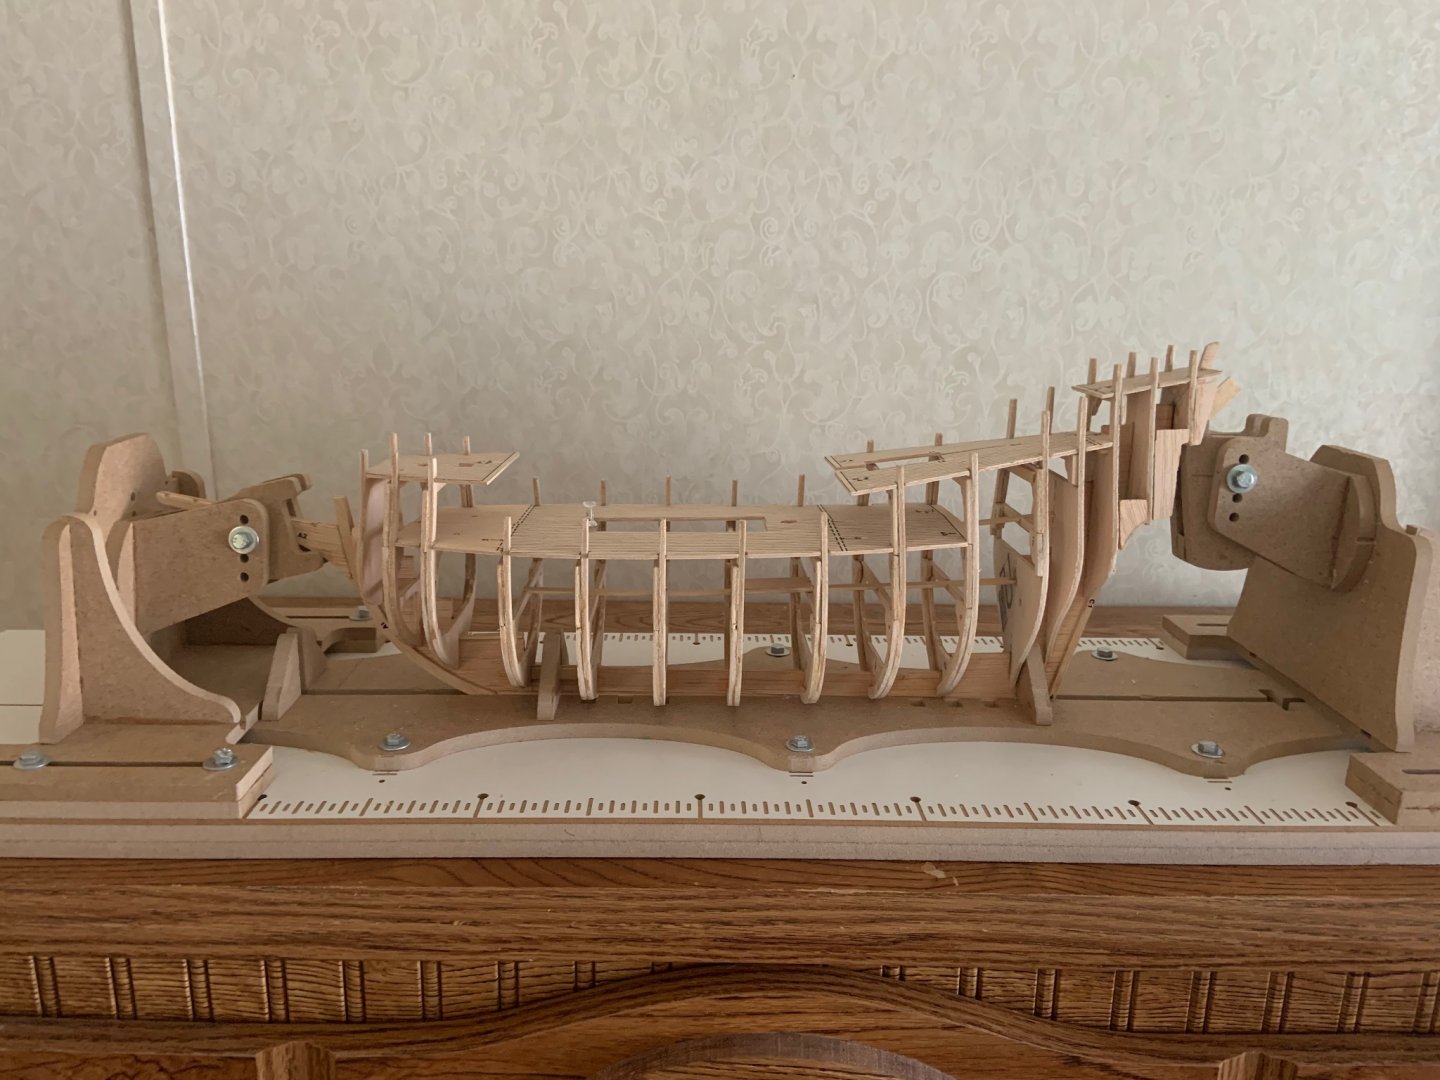
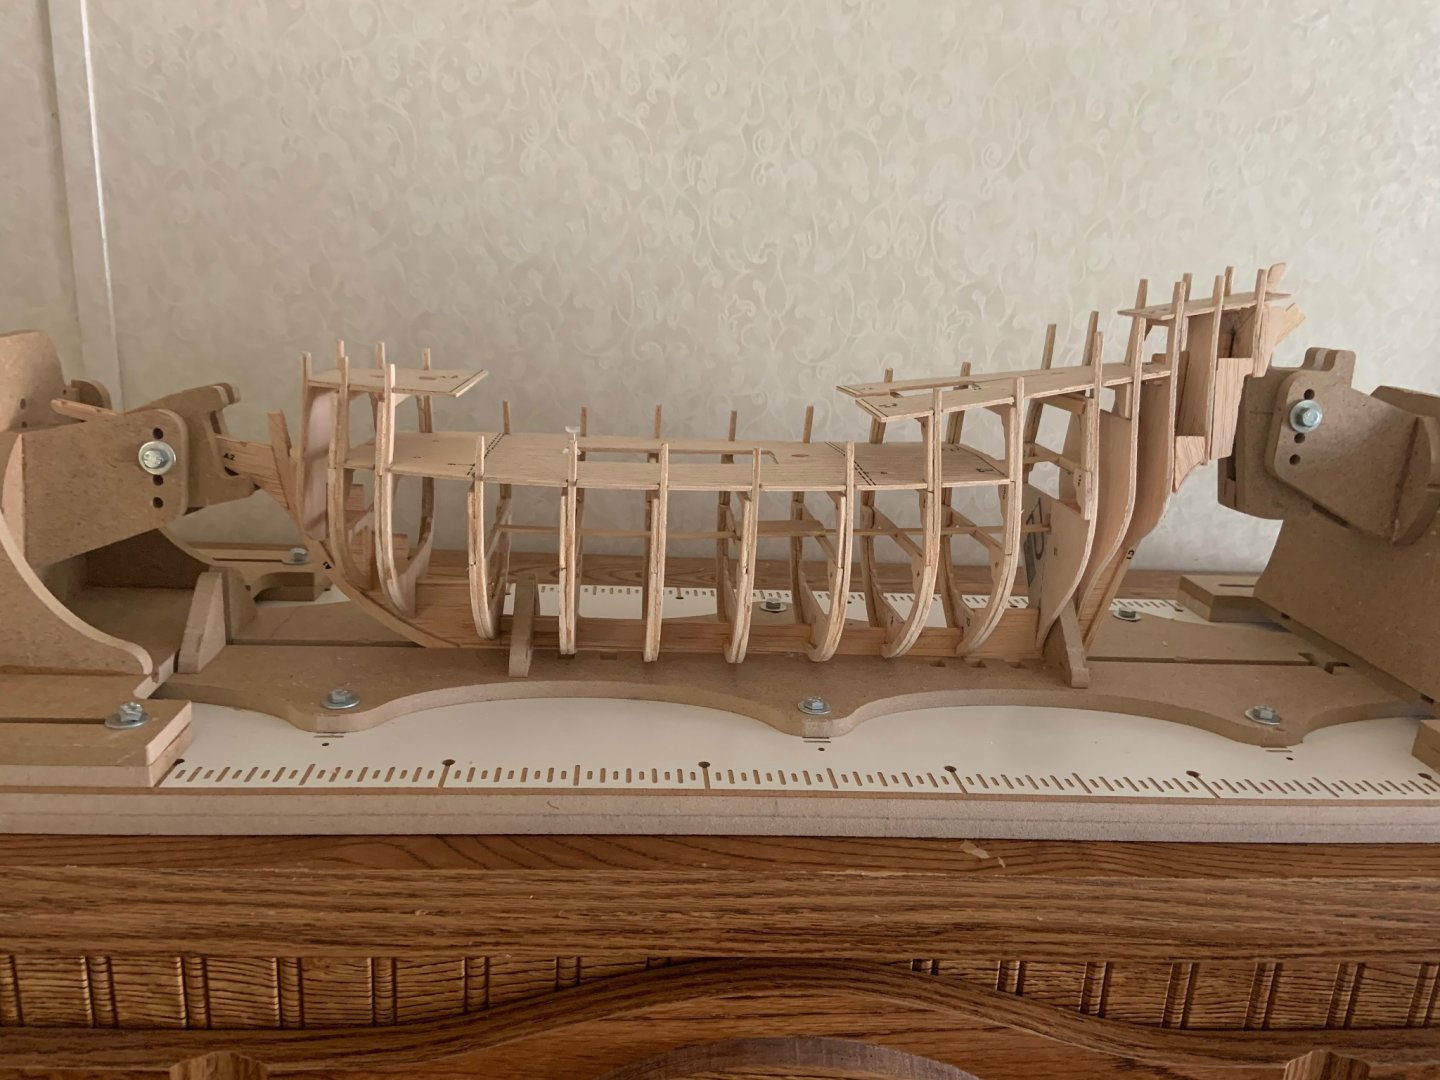
Continuing on with the build log. This is my build stand with frames 1 through 8 installed. The build stand really helps getting this aligned. This took two days to accomplish as it takes me about an hour to dry fit and get the frames installed. I only have 4 hours every other day to work on her due to my volunteer work and other duties. Frames 9 through 13 and the mast step are installed. Frames 14 and 15 (at the aft) will take some extra work. Typical of some kits, not all the pre-drawn parts are quite right. There are some side pieces for frames 13, 14 and 15 that I'll have to make from pieces of scrap from the left over wood sheets that I saved. The originals were a little too short. Frames 14 and 15 installed and the side pieces for frames 13, 14 and 15 were cut and dry fitted and then glued in place. Then I dry fit the false decks. This took some time as I had to file the false deck notches to fit the frames. But got it done. I'll leave the false decks in place to assist with the faring the frames; then my plan is to install the wale on each side before progressing on with the planking.


-
I've printed out the tutorials. I'm sure a full reading and examination of them will help me a lot. Thanks for the reminder.
-
I'm about ready to attach the first hull plank at main deck level. On my model the main deck curves up slightly at the bow. Should I sand the deck beams slightly to make the deck lay flat and follow the deck line with the plank? I understand that the next plank down from the first plank should be straight. Am I misunderstanding something? Any help appreciated.
-
Just got my carving blanks in the mail today. Thanks Chuck.
-
Dan. Thanks for the encouragement. Although both Dans have a different Mayflower kit than mine, by comparing the progress of our ships via the build logs, it can help with various building techniques and perhaps add details to our ships.
- 42 replies
-
- 2
-

-
- first build
- artesania latina
- (and 1 more)
-
Thanks Roger. I'll check out the National Research Journals in the NRG office.
-
Building the Mayflower by Billing Boats. Neither kit 801 (which I have) or the newer one have much plans detail and very little furnishings on the deck (water pump, windlass ect.). It also doesn't have nor show where the Capstan is located or if it has one. Would any of you builders of the Mayflower from other kits have one? Does anyone know if it had one or where it was located? I'm guessing the forward part of the main deck. Thanks for any assistance.
-
Stoves/Ovens on ships in the 1600s and Onward
acaron41120 replied to acaron41120's topic in Nautical/Naval History
Bruce. Thanks for the references. I'll check them out tomorrow. I spoke with a friend of mine who knows I'd rather read and turn pages than check on line but still told me to look it up on line. So I did and found an article entitled "A Meal Onboard Ship in the 16th Century." It seems to be a good answer. There are probably many more. -
I have read a number of books about historical ships like the Santa Maria, Half Moon, Golden Hind, Mayflower etc. I've never read anything about cooking aboard ships of the 1600s and onward. As an example; the Mayflower had many settlers aboard. Did these settlers cook their meals aboard ship or did they eat "hardtack" and cold meals? If they cooked meals aboard ship, what was used to cook them and where were they located aboard ship?
-
Thanks Chuck. Just ordered mine from the link you posted. It's a great way to learn to carve and will help me carve the flower on the stern of my Mayflower build.
-
Chuck. Just read your Carving build log. Is the carving group still active. If so how is one able to get the carving banks you mentioned? I went to the NRG store but couldn't locate them.
-
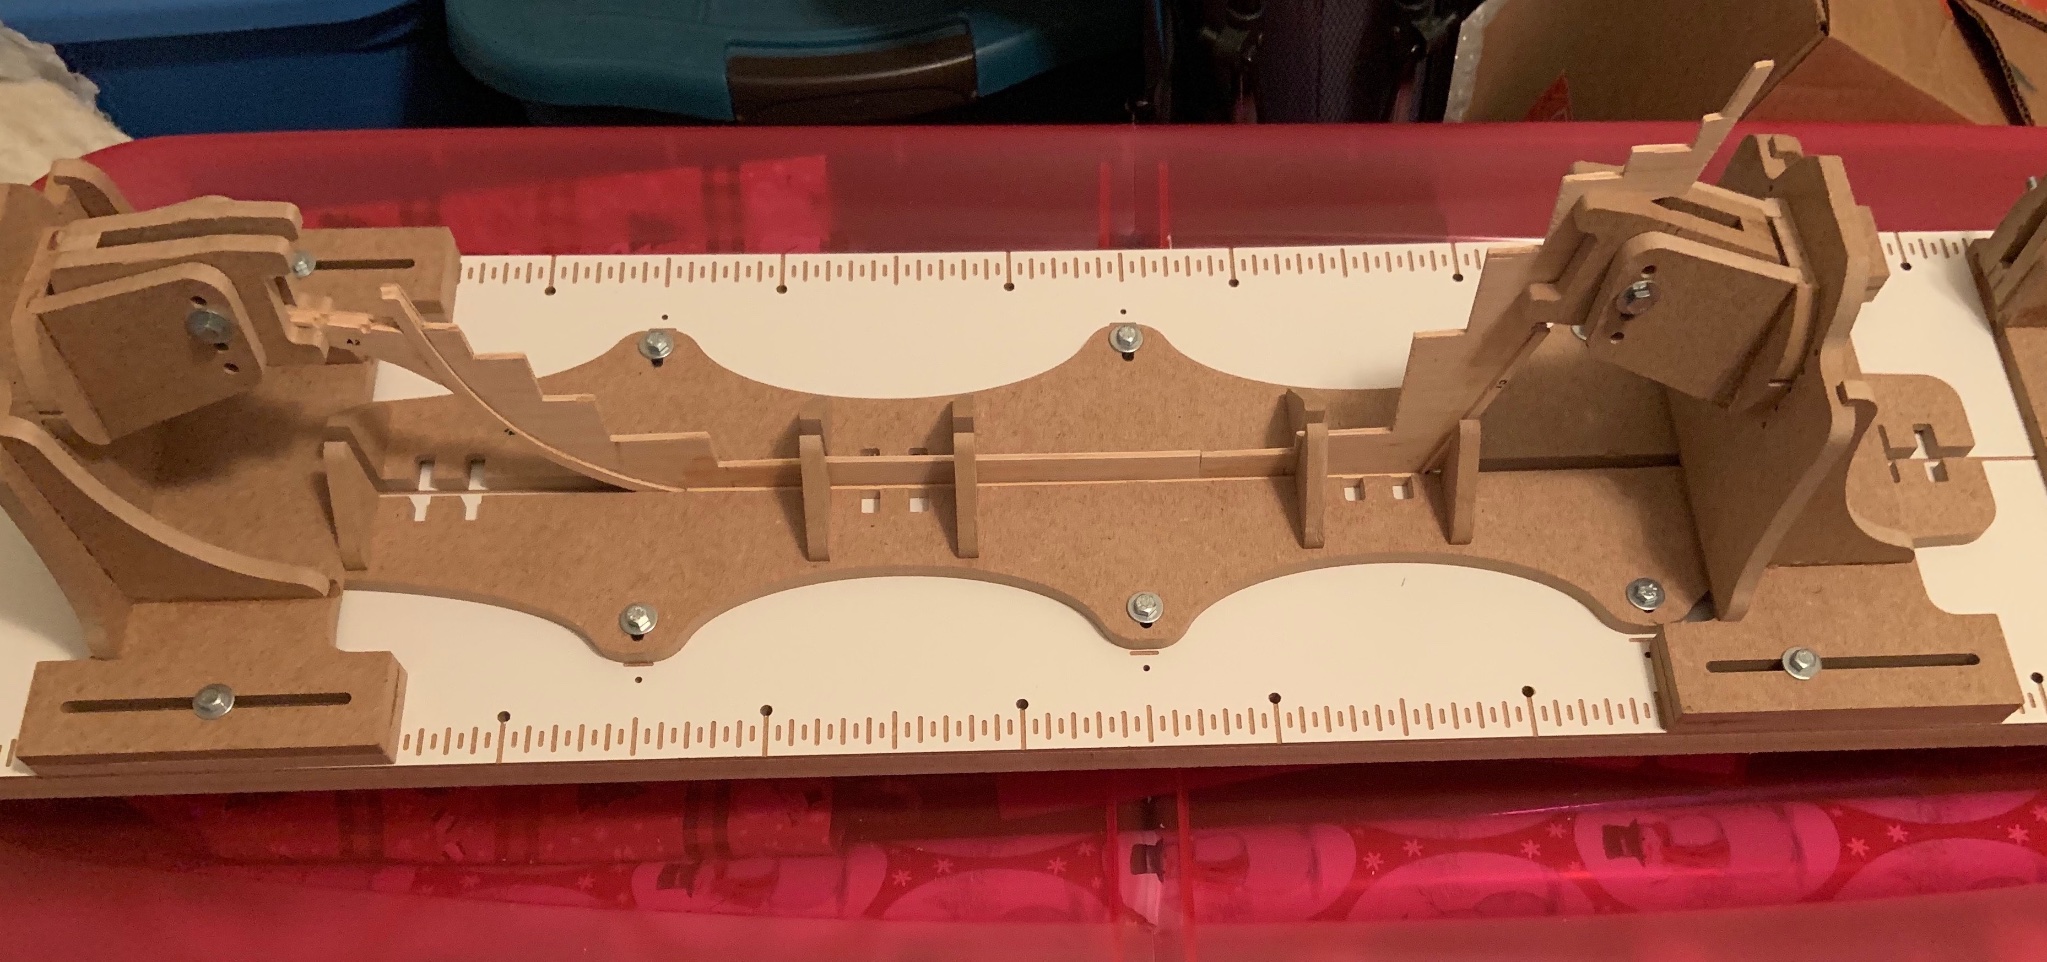
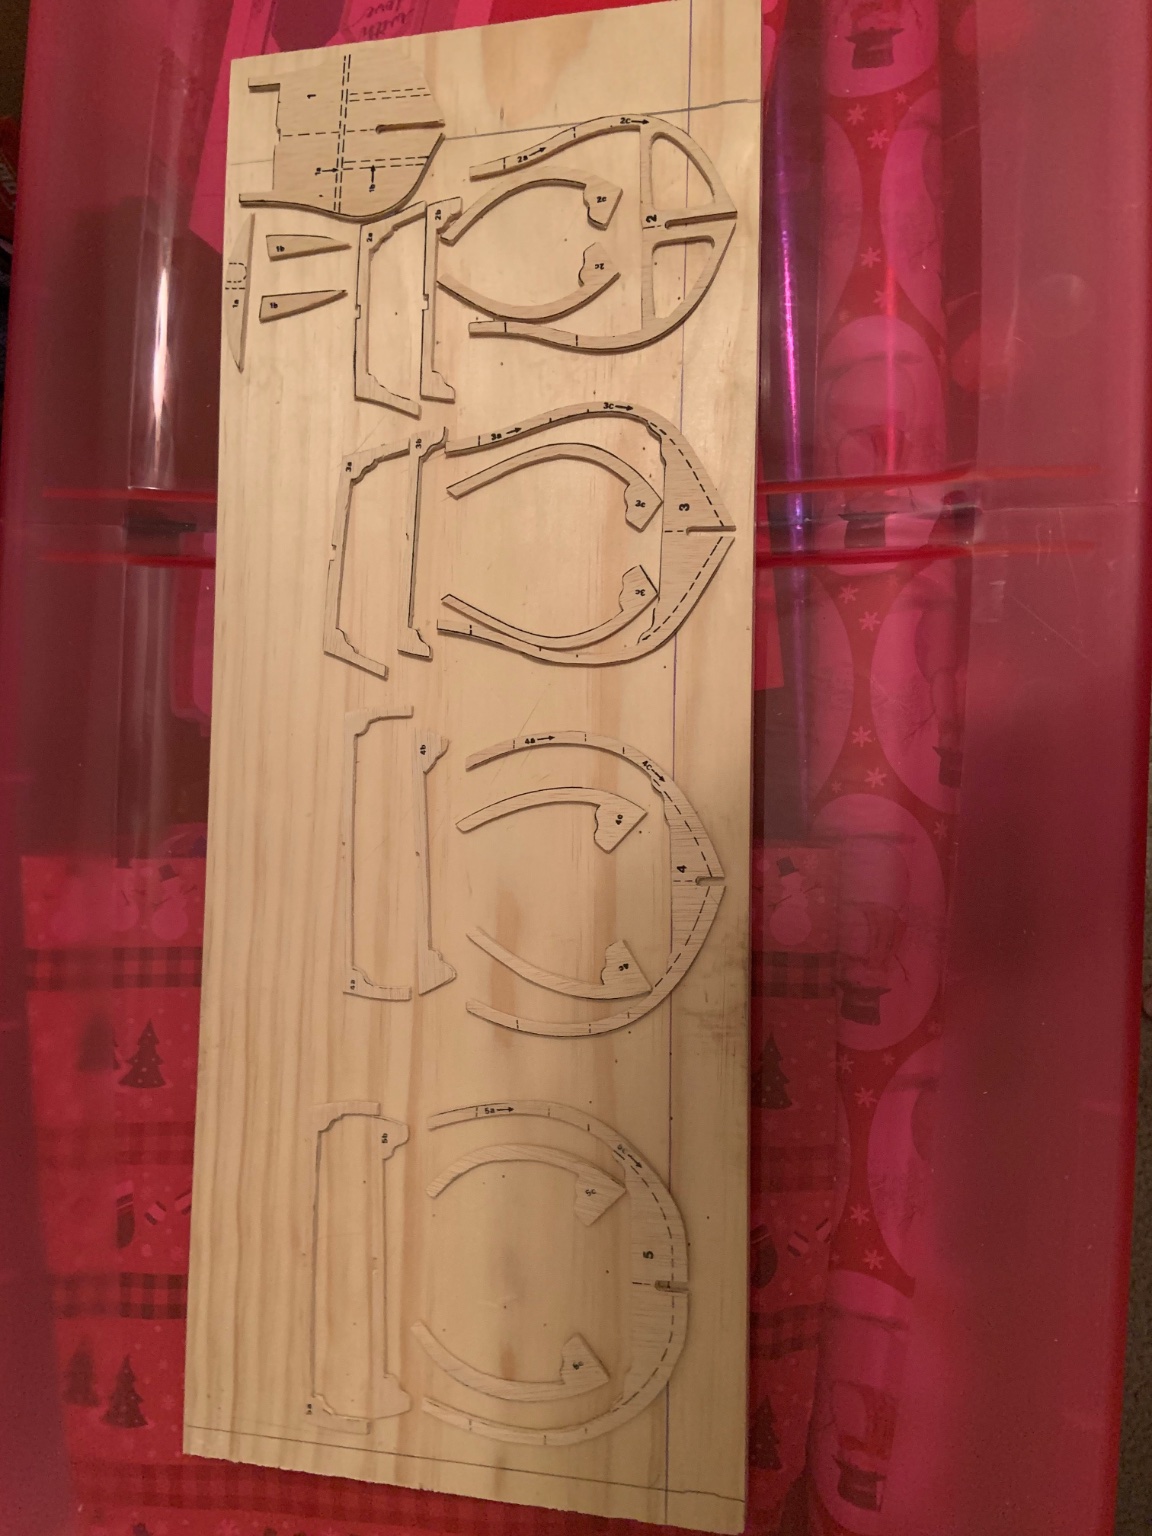
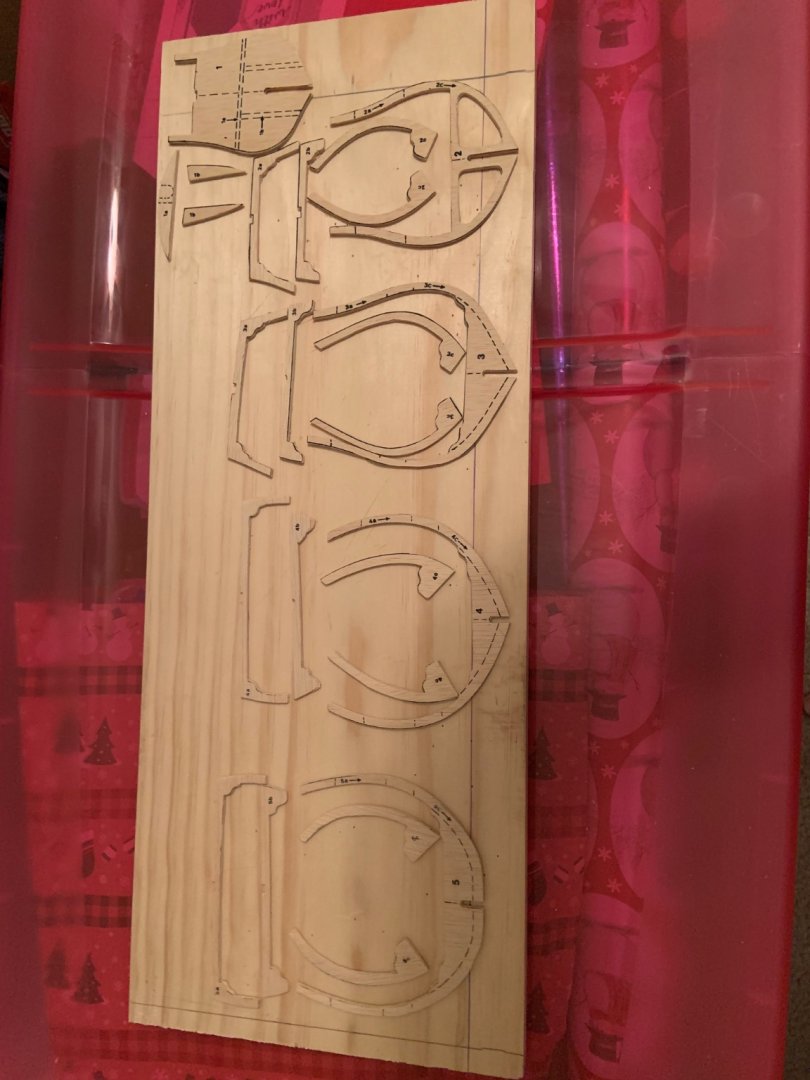
Stepped away from building to assemble the Professional Building Slip from Hobby Zone of England. The slip is a tad bit longer than I need at the moment but looks as if its going to work fine. This is the keel assembly installed in the slip. Frames and Bulkheads. Going slow on this part. Now it's back to cutting the frames/bulkheads from the wood sheet. There are a total of 15 and I'm about to start cutting from frame 9. Takes about 1-1/2 hour of very careful cutting per frame as I'm cutting them from the wood sheet using Exacto three different knives. I'm going to have to get a mini saw for my next ship. Any recommendations for a mini table band or jig saw are welcome.

-
Magnificent job Glenn. I look forward to following your Robert E Lee build. 👍
- 64 replies
-
- 2
-
-
- yamato
- deagostini
- (and 2 more)
-
James. Thanks for the clarification. Its working fine for me. Interesting thing, all the modelers in Georgia are like all the members of my MGTD replica club. All about 1-1/2 to 2 hours away. Oh! For the record I miss living in Felixstowe. Lived there for 3 years in the late 70's.
-
Hobby Zone Organizers and Ship Building Slip
acaron41120 replied to Osmosis's topic in Modeling tools and Workshop Equipment
Osmosis. Are the two organizers MDF or wood? They appear to be wood.