HOLIDAY DONATION DRIVE - SUPPORT MSW - DO YOUR PART TO KEEP THIS GREAT FORUM GOING! (Only 44 donations so far out of 49,000 members - C'mon guys!)
×


acaron41120
-
Posts
257 -
Joined
-
Last visited
Content Type
Profiles
Forums
Gallery
Events
Everything posted by acaron41120
-

Hobby Zone Organizers and Ship Building Slip
acaron41120 replied to Osmosis's topic in Modeling tools and Workshop Equipment
I just finished building my HobbyZone Building Slip yesterday. I found the plans lacking as for instructions. I too like the idea of shortening the slip as its way to large and heavy. Shortening it will work for my Mayflower and Golden Hind builds. -
Tried to Zoom out but it seems to not work. Is there another location of the map besides the one in this post?
-
How do you get the map to the US, Canada or Austrailia, etc.?
-
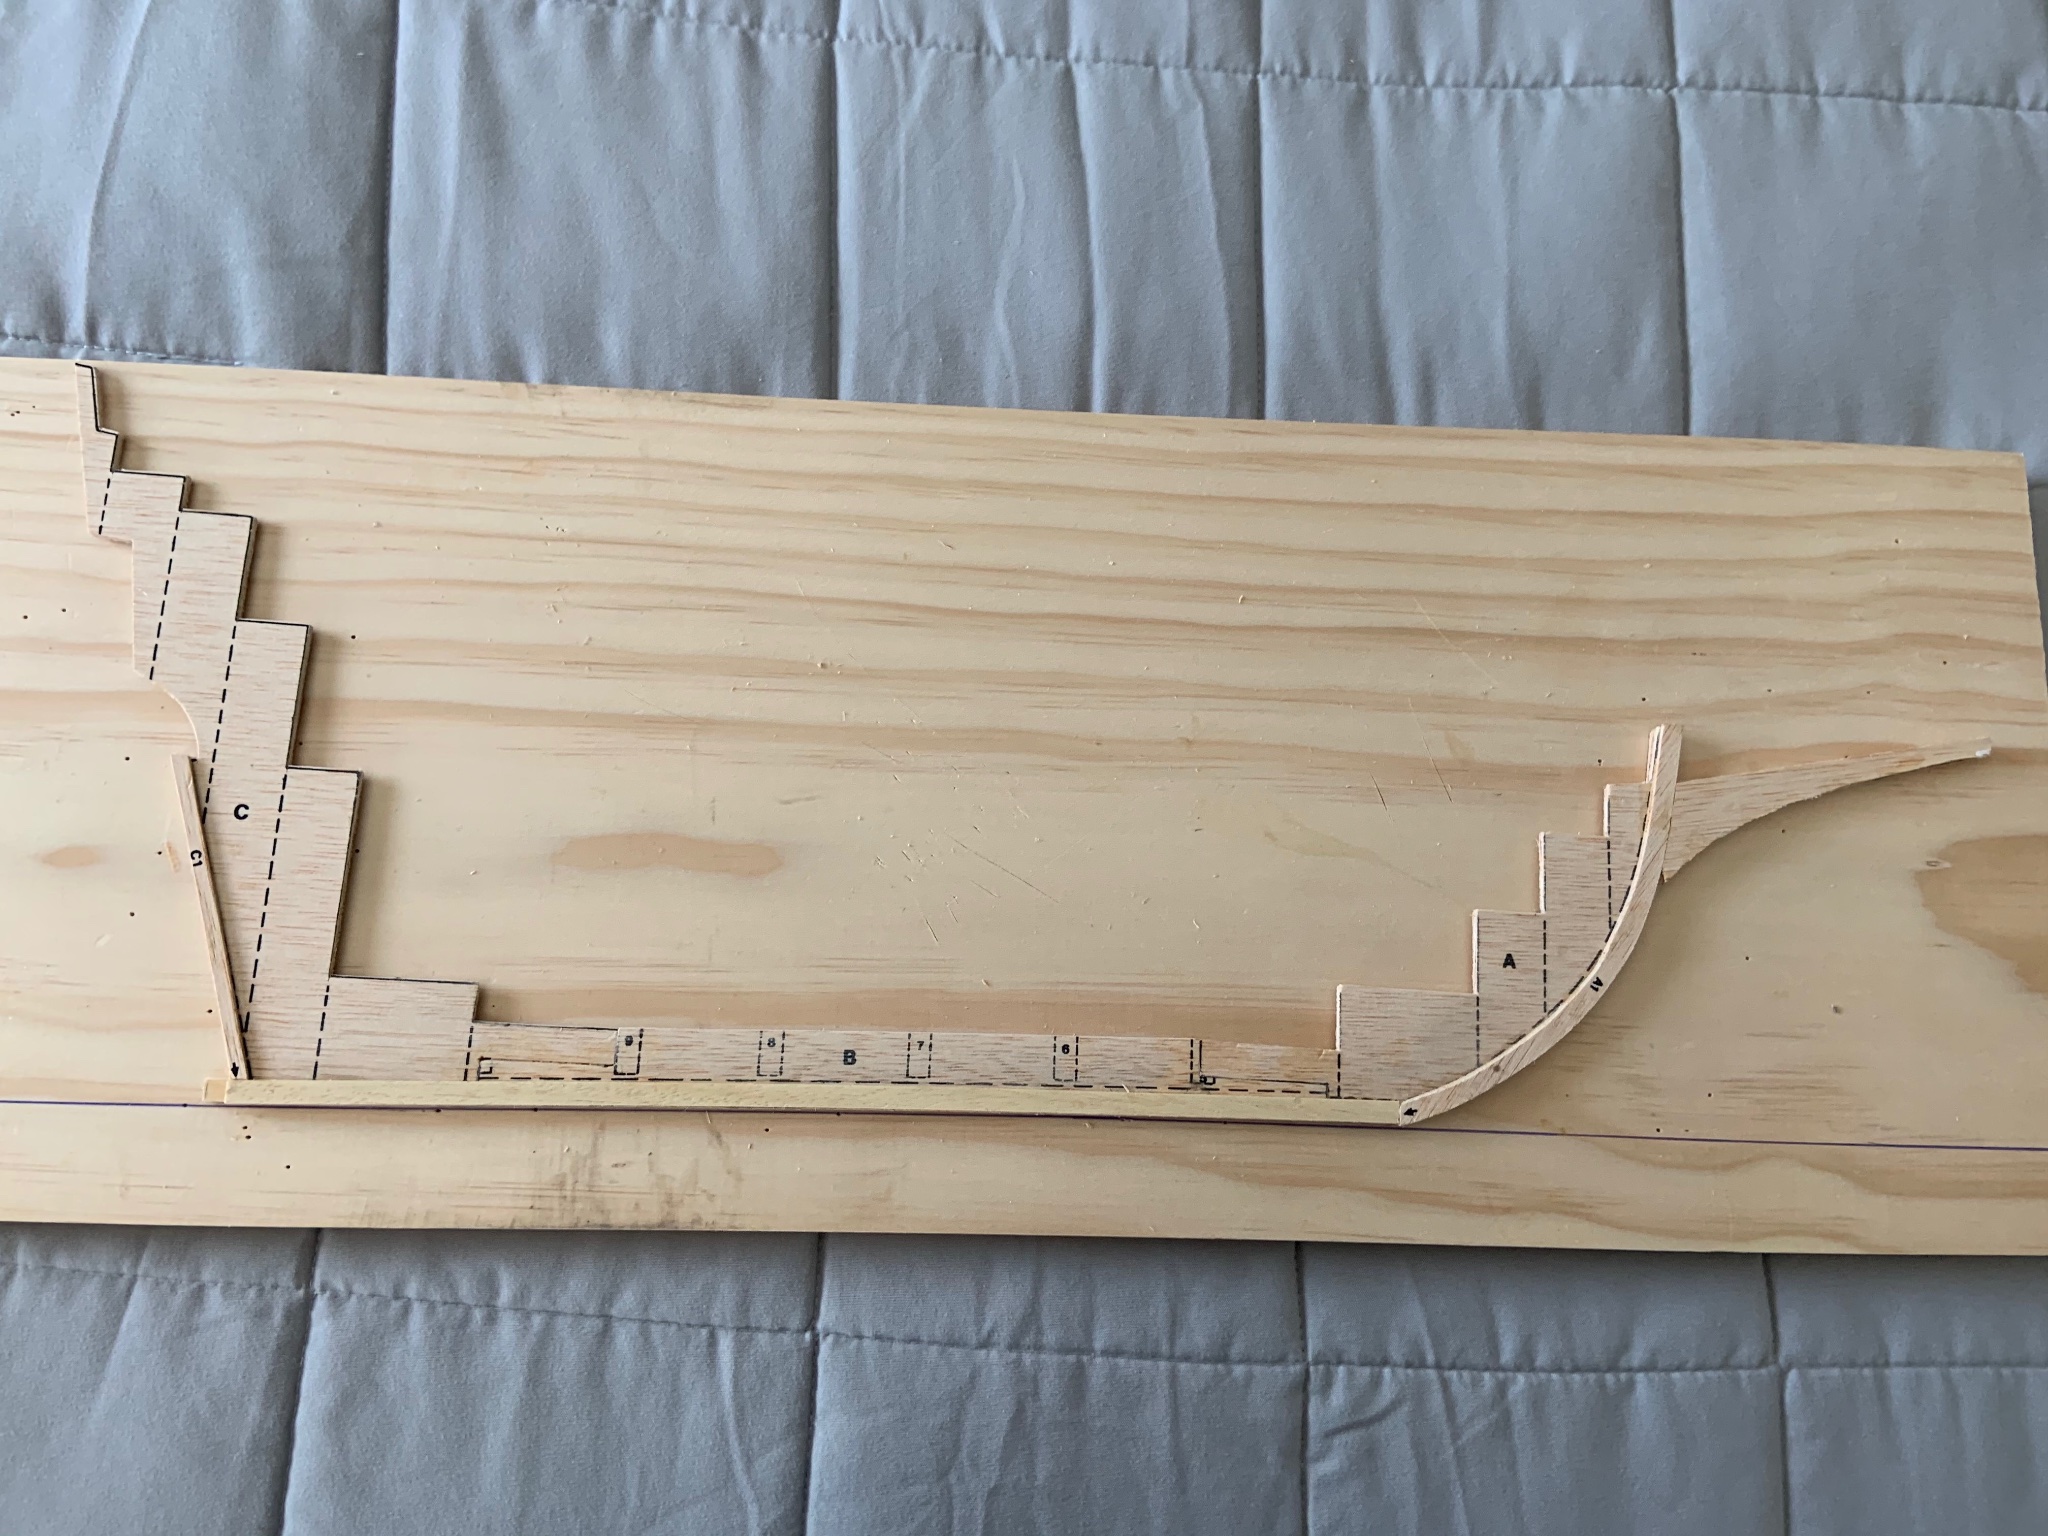
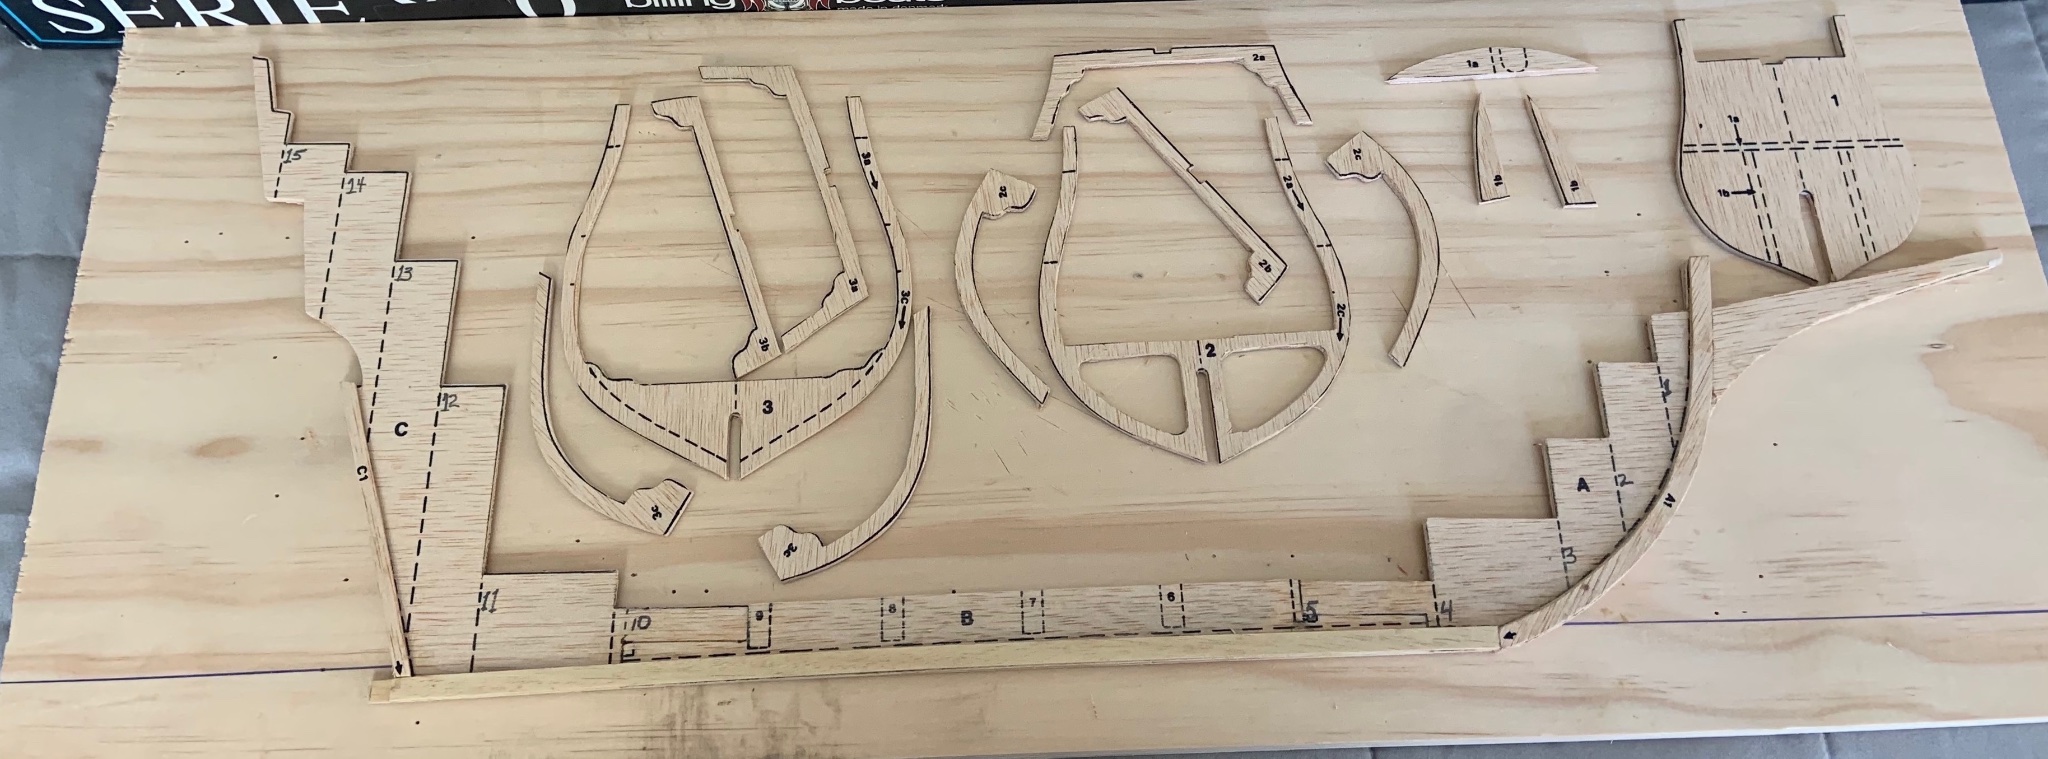
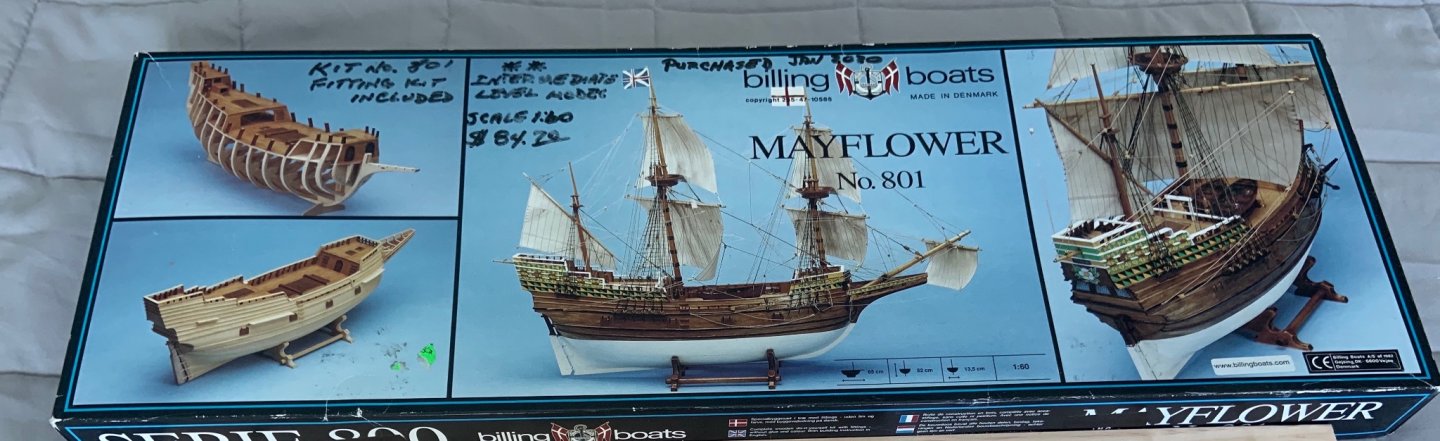
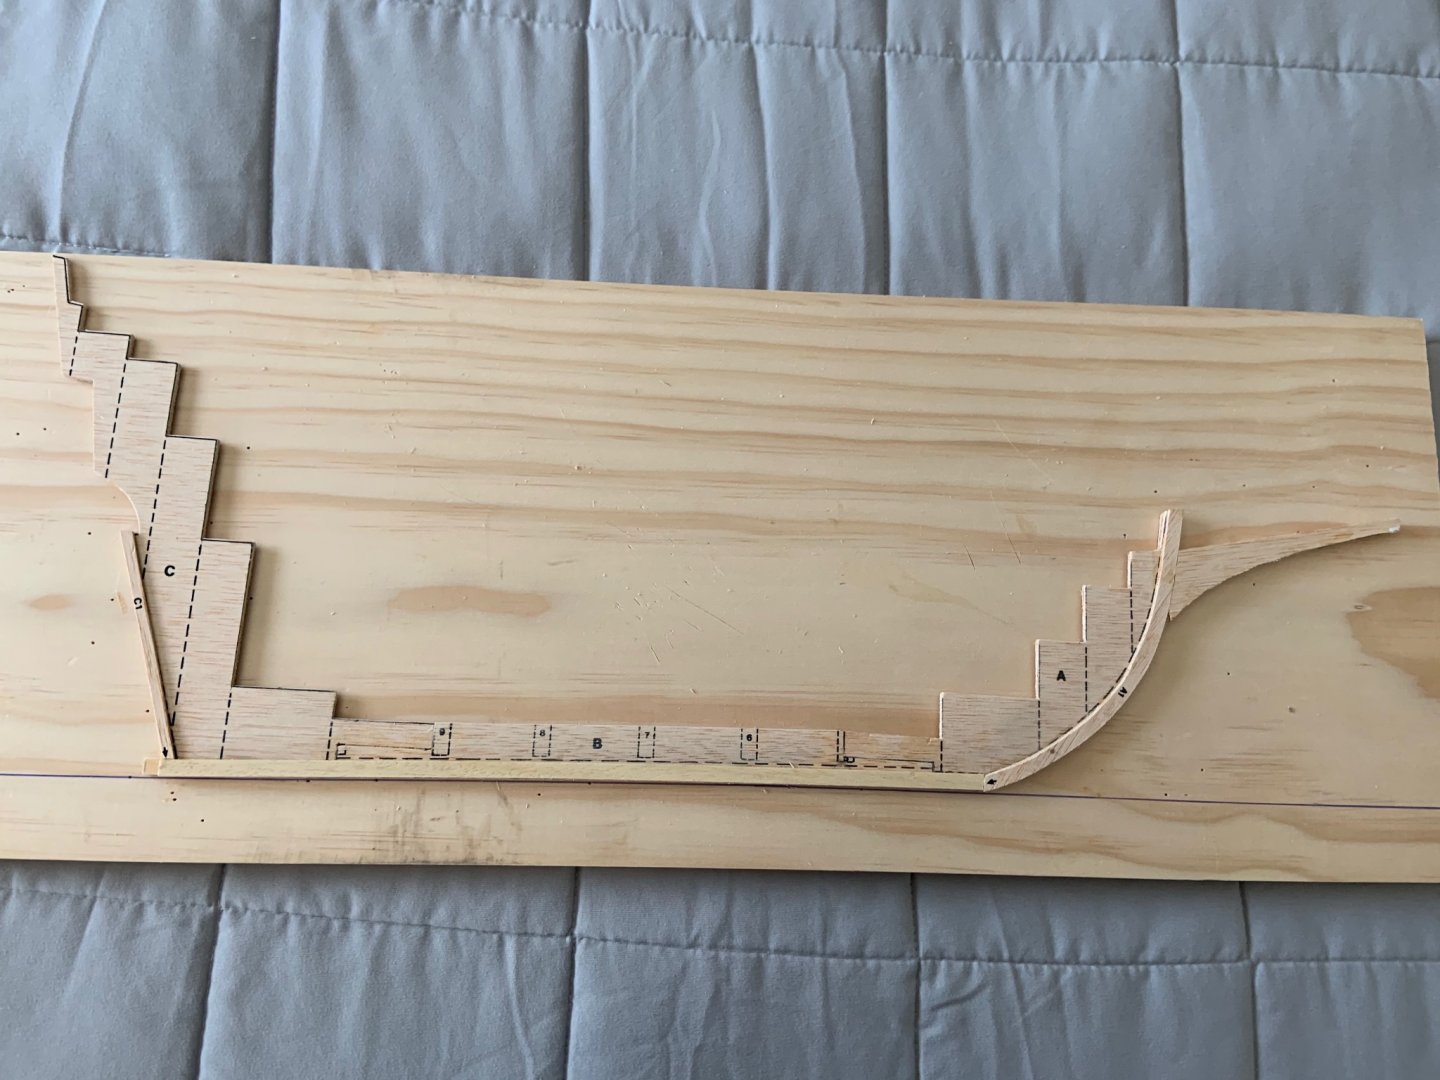
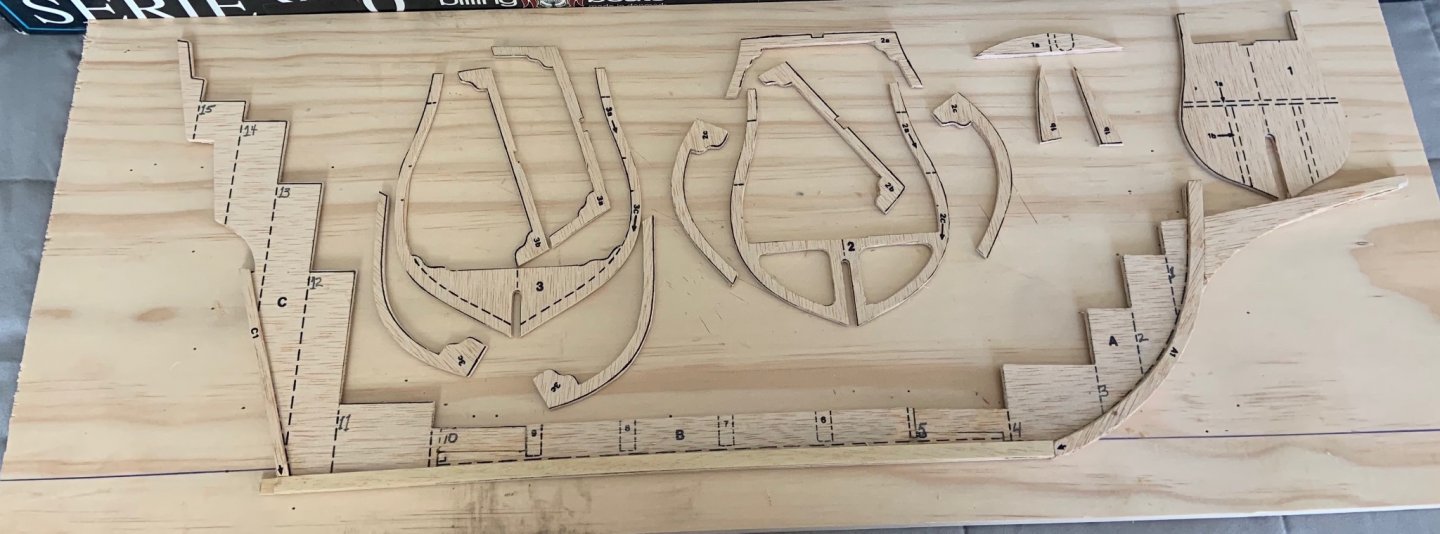
Started my new build, the Mayflower by Billing Boats. I will try to follow a better format with this build log. Below are the first photos of my build. In the bottom, photo, are items #2 and #3 bulkheads or a frames? They appear to be frames while #1 is a bulkhead. Am I missing something???
-
Excellent work. Keep it up. What are the dimensions of this model?
- 64 replies
-
- 3
-

-
- yamato
- deagostini
- (and 2 more)
-
I have planked many hulls and have always started from the main deck and downward four rows. Then the garboard up for four rows and then the middle. On my model of the Mayflower, the plans show planking from the main deck upwards. The excellent build completed by Sherry (of MSW) was planked the same way. I plan on following that method for my build. I'm just wondering why it was done in that manner? My theory is it is to protect from snapping off the tops of the frames.
-
Jewelers Saw Blade Teeth
acaron41120 replied to acaron41120's topic in Modeling tools and Workshop Equipment
druxey. Thanks. That's good information to know. -
I have Jeweler's Vice which is a "V" slotted piece of wood mounted with a clamp. I have a Jeweler's/Coping saw. What is the best number of teeth per inch for the saw blades to cut the pieces from the wood sheets in my kit? Thanks.
-
Got through all your build photos. Most excellent work. In the Admiral/Captain quarters, where did you get the material for the rugs and the picture in the frame?
-
Glad you're dusting off your San Filipe!
-
News! I had the main deck of the Santa Maria planked and my son asked if he could finish it for me and add it to his little collection (he has the Nina and Pinta wood models.) So I boxed her up and shipped it to him over the weekend. So now I'll have to start the next build in the hopper which is the Mayflower. And I expect to ask a lot of questions because this looks to be a plank on frame kit. I've never seen bulkheads like these.
-
Looks like a straight forward build but we know its not. But Artenesia Latina (AL) is a good kit. Have fun with it.
-
And I thought my Santa Maria build was big. Wow! Yamato dwarfs that. You're doing a great job.
- 64 replies
-
- 2
-
-
- yamato
- deagostini
- (and 2 more)
-
Okay. So as I now understand it better...check the plans for the location of the Wale and after installing the Wale then start the measuring, tick marks etc for the planking. That seems to make more sense. This is a new method of planking for me. With all other ships, I just planked from the deck down to the keel and didn't worry about trimming the planks etc. Thanks for bringing my rudder back to amid ship!
-
Chuck. Billing Boats HAD a Santa Maria (Kit number 488) but it has been since discontinued. I lucked out and found this one AND Billing Boats Golden Hind on eBay. Also found the Mayflower there as well. I'm used to Billing's kits is all. Wefalck. I am fabricating new stem and stern post pieces to keep from having to hack away at both posts. Original piece was 1/16 inch thick veneer and I'm making mine out of 3/16 inch Obeeche (sp) planking thats about 10mm wide. That should hold the planks really well. Do you suggest I make a couple for the keel as well?
-
I didn't cut a rabbet on the stem post because the kit uses a very thin piece on the stem and stern posts. But it's way to thin. I think I'll file a triangle groove along of the edge of the thin piece on the stem post and then fabricate a thicker piece for the stem post at the forward edge of the rabbet. 1/4 inch thick should do it.
-
I have read a number of articles and books about planking the hull and that's probably what is causing me to be confused. When planking the hull, is the first plank installed with the top of the plank aligned with the top of the Main deck? OR is the first plank installed the Wale. And just what does the top of the wale align with...top of main deck or where? And don't ask Google or Bing. Neither of them can give a simple answer to a simple question.
-
I have built a few ships but this is my first with a, how to say it, a blunt bow. I can get the plank to fit at the deck line and all the bulkheads are fared. What I don't know how to do is how/to what to secure the plank to the stem post. Do I use a clamp, push pin or what? All my other ships had a pointed bow and securing the planks to the bow was not an issue. So far the blunt bow is being a bear! Any suggestions would be greatly appreciated. Oh! Wood glue or super glue the plank to the steepest as well
-
I have several books about ships that discuss various areas of ship building, be it model or otherwise. The problem I encounter is I have to look through several different books to find the definition of what I want (Rigging is in one book, Sails another, etc. etc. etc.) I have found "The Modelers Glossary" on a members only website in Canada. I prefer holding a book in my hand to read rather than searching various sites on a computer all day. Is there any one source book like this that anyone knows of? It would be greatly appreciated.
- 1 reply
-
- 1
-
-
I have seen a number of holes in the decks for the masts. What supports the deck planks underneath the hole? Is something added under the false deck for support or is the false deck strong enough? Thanks.
-
My Santa Maria bulkheads are spaced out as well and I didn't feel like adding more false bulkheads. When you did you deck planking, did you start with the center )King) plank out or from the edge (Margin) planks out?
-
Great work so far. Keep it up. I'll be ofllowing your build as my ship is just a wee bit behind yours. I do have one question on your deck planking. Did you have a false deck below the planks that you planked over? Or did apply the planking on top of all the bulkheads?
- 29 replies
-
- 1
-
-
- constructo
- prince
- (and 1 more)
-
Thanks everyone. May see about finding a kit similar to this.